|
|
|
|
|
|
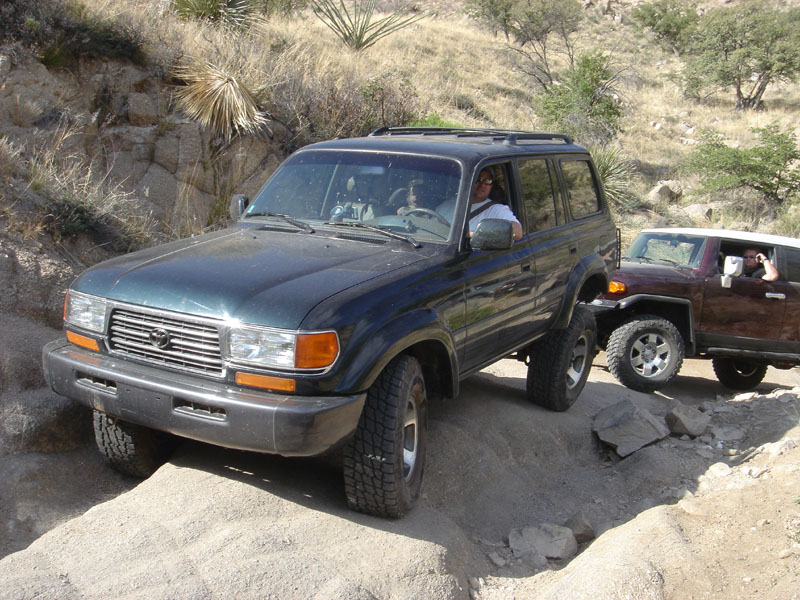
Here's an old pic of Eric on the Charouleau Gap Trail north of Tucson, Arizona. The stock 4.5L inline 6 with auto powers stock 410 gears and 33" tires. These super strong 488 gears that I'm setting for Eric will work nicely with his recently upgraded 35 inch tires(315/75-R16 BFG KM2 on stock aluminum wheels). |
|
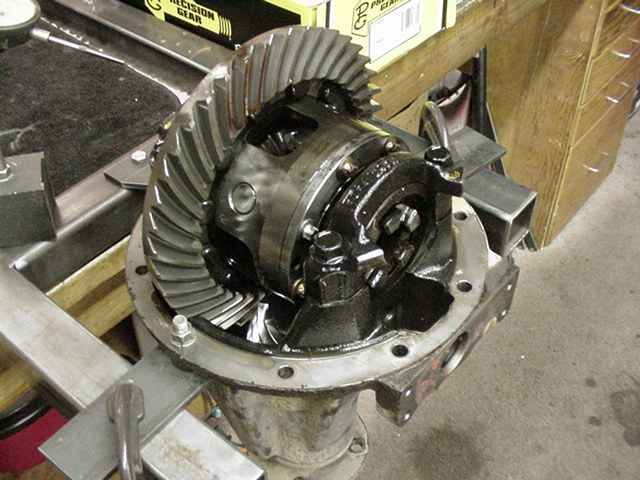
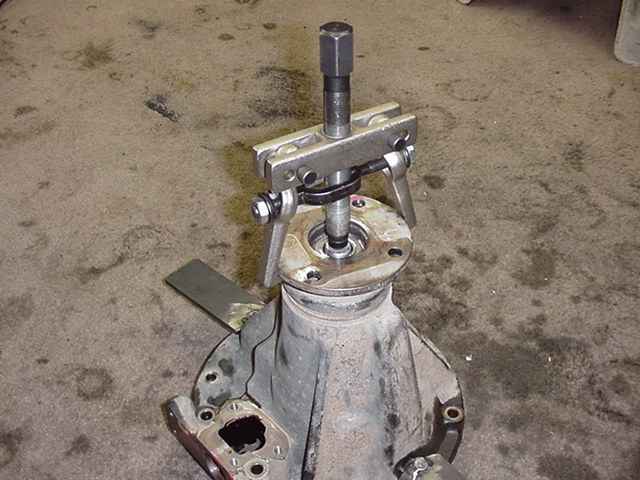
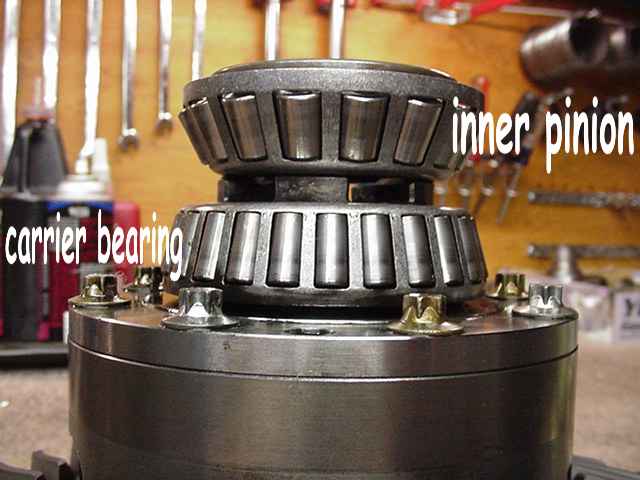
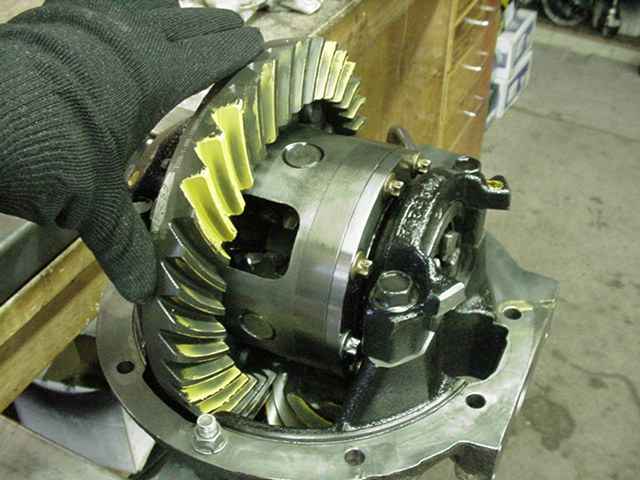
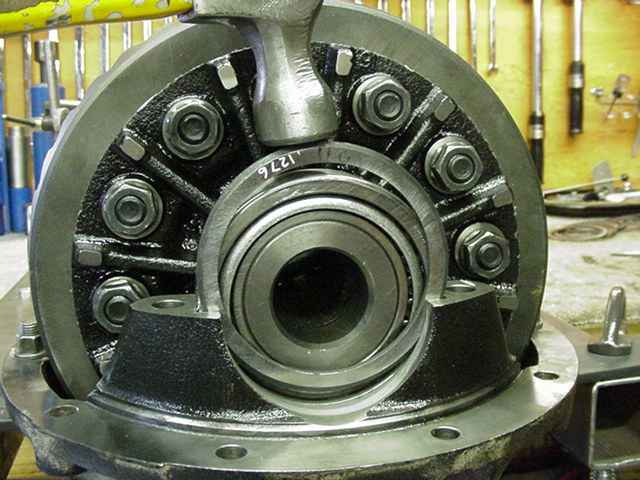
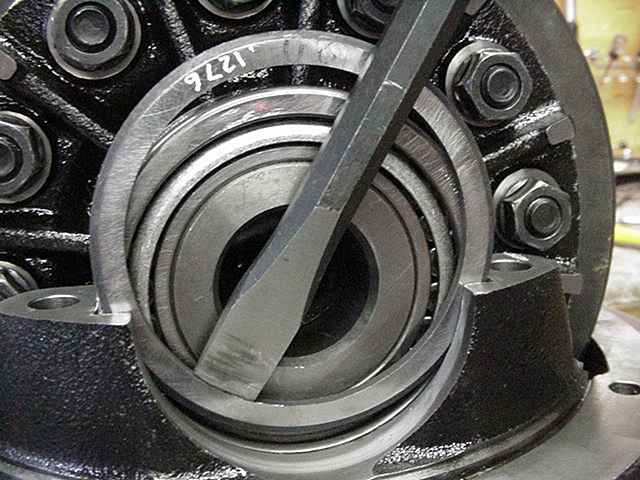
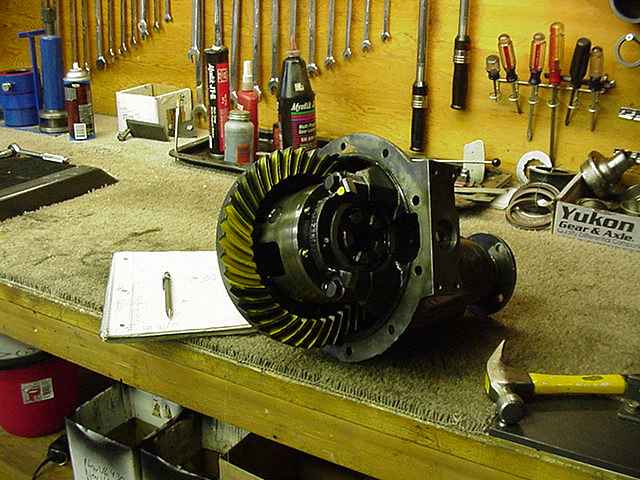
This is the large rear factory 9.5" E-Locker. Eric removed the e-locker motor stuff before he delivered it to me. Anybody sending me a similar 9.5 EL should probably do the same...that motor assembly stuff sticks out a long ways and could get damaged in transit. These monster units, as seen above, have no spanner adjusters to set carrier bearing pre-load and BL. They make use of the oem thick washer plates. |
|
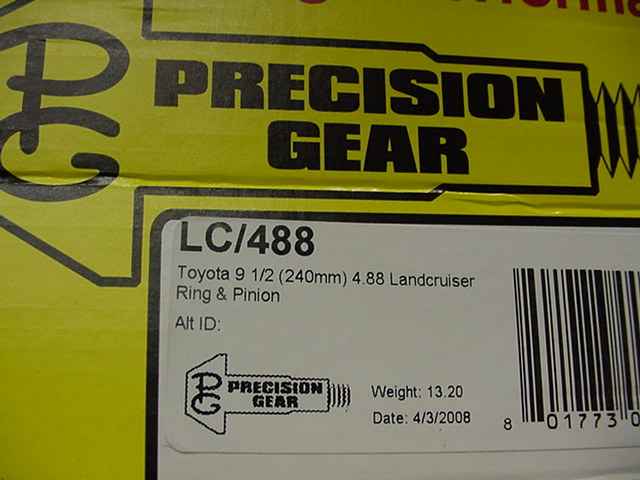
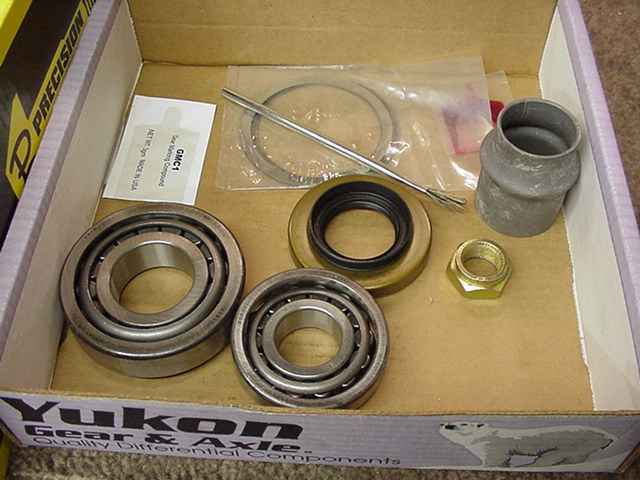
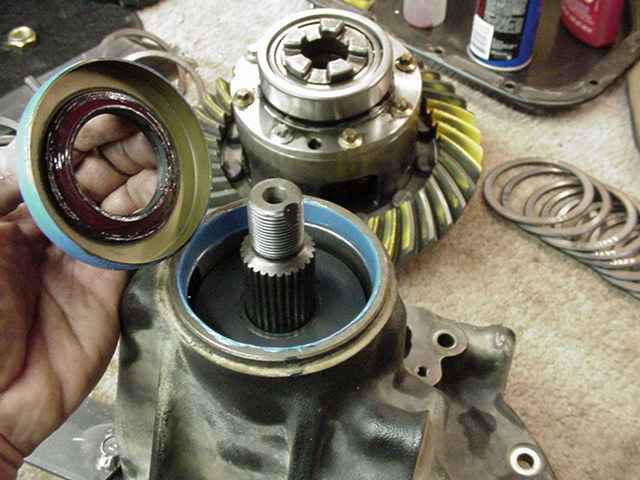
Eric ordered up the master install kits and the high quality Precision gears from JT's (ringpinion.biz). |
|
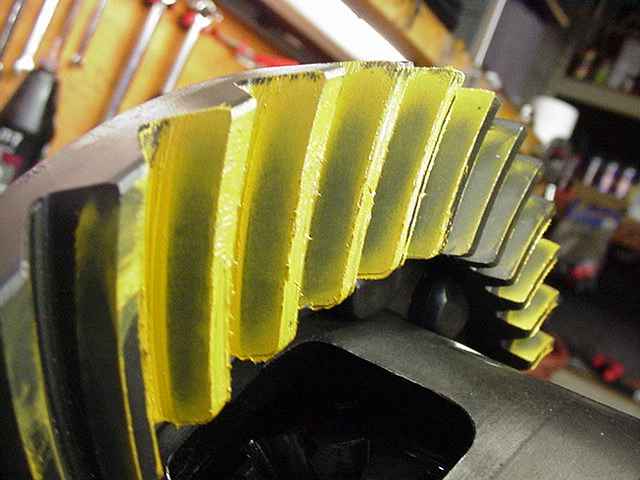
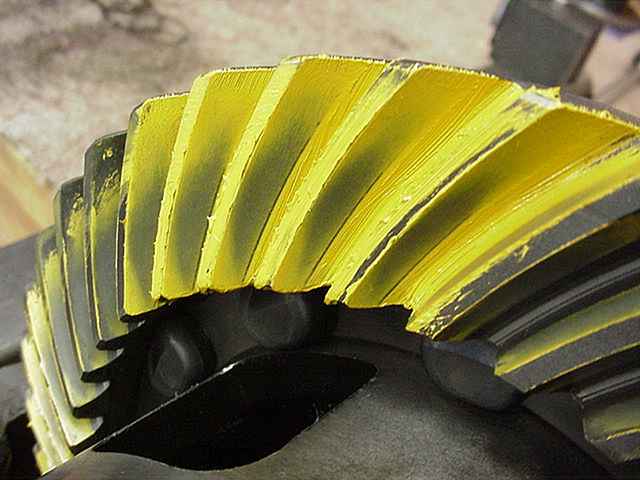
Markings found on these particular Precisions. |

|
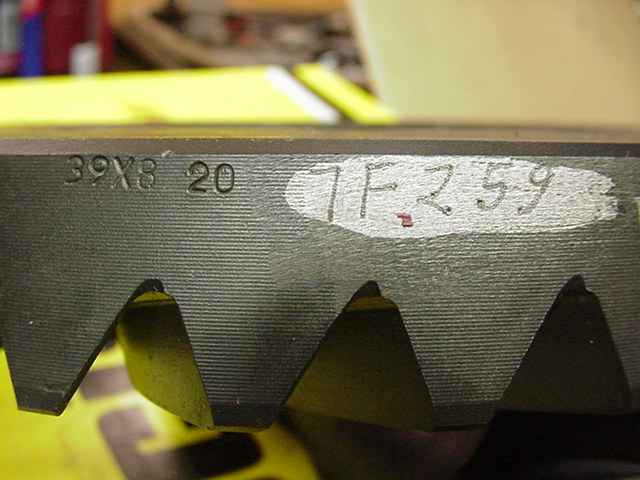
...an Arizona friend feeling the silky gear cuts.... These markings look the same as Motives....what that really means is this particular gear manufacturer puts out Motives and Precisions and probably a few others and then they get boxed and labeled as needed. |

|
These gears have the look of quality and that's what counts. There appears to be no short cuts in the making of these gears. |
|
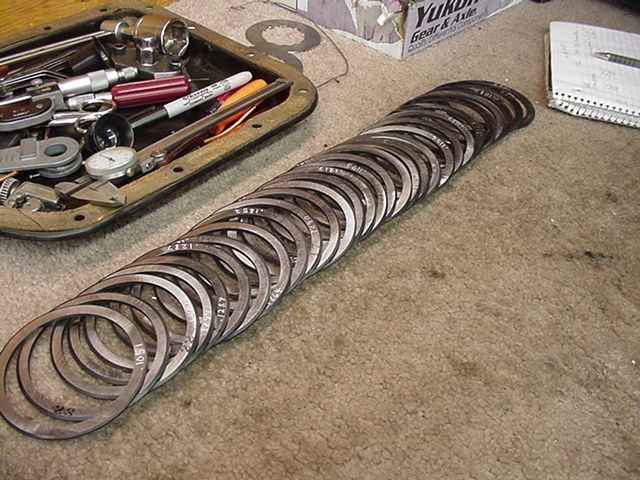
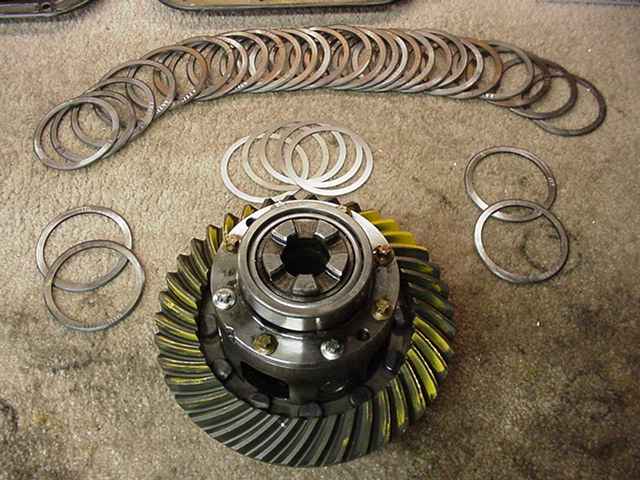
Here's the master install kit...nobody includes the carrier bearings which are very expensive and hard to get I understand. |
|
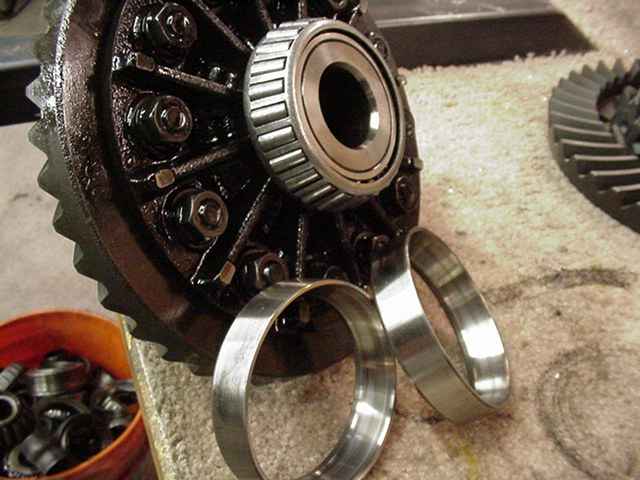
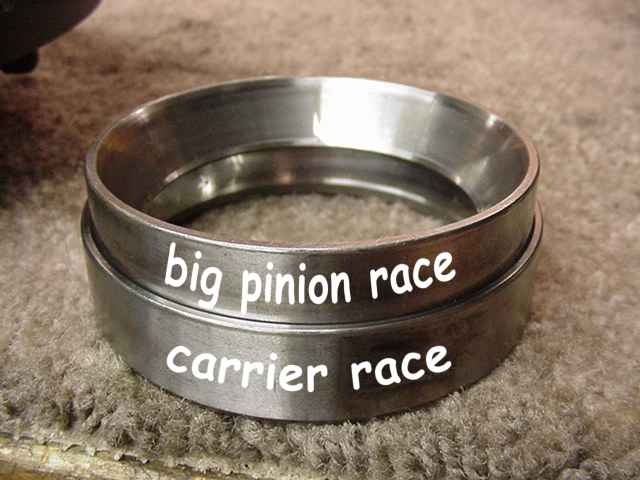
The carrier bearings will be re-used...this is a common procedure with these particular massive bearings. I have already marked one of the races shown so that it does not get mixed up with the other side. |
|
Both surfaces are filed to remove any potential high spots. |
|
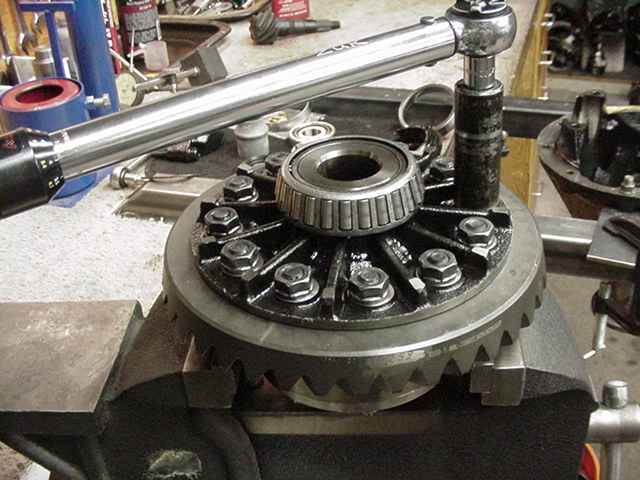
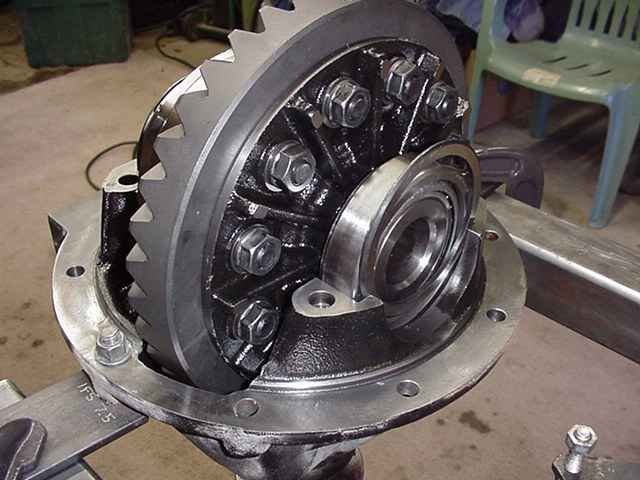
These are very high quality thick fine threaded ring gear bolts...12 of them. I cleaned and applied red Loctite and then torque them at 100 ft/lbs. |
|
The pinion flange was a snug fit on the pinion splines...the carrier bearing puller works nicely to ease the flange off. |
|
The old pinion and bearings have no value to me but I want to re-use the oem pinion shim as the starter. |
|
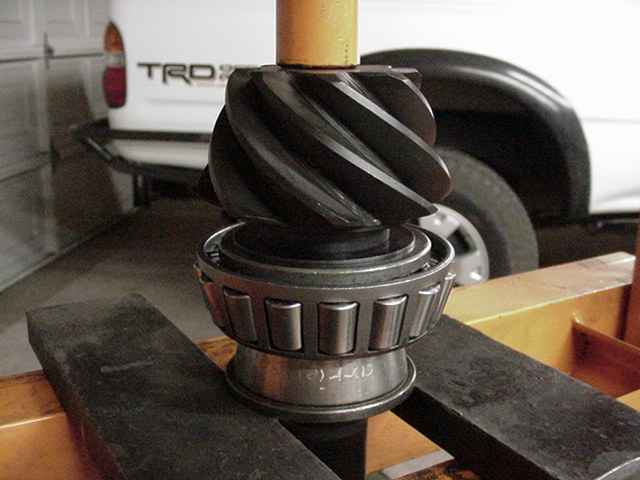
The oem .0475" shim and new bearing is pressed on... |
|
Everything is installed without the crush sleeve and PPL is set to about 10 in/lb. The crush sleeve will go in at the end after proper pinion depth is established. |
|
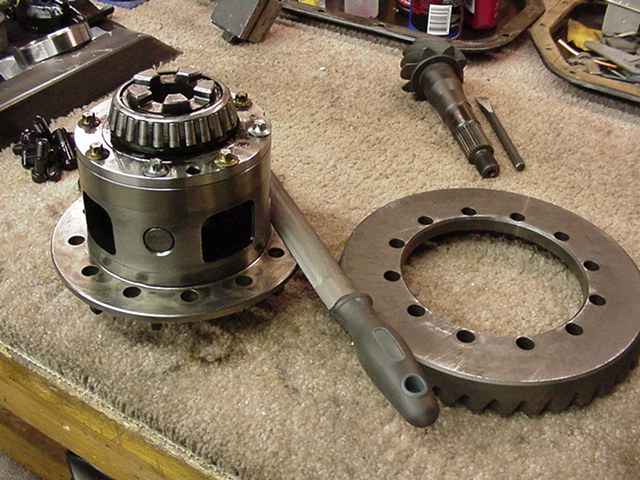
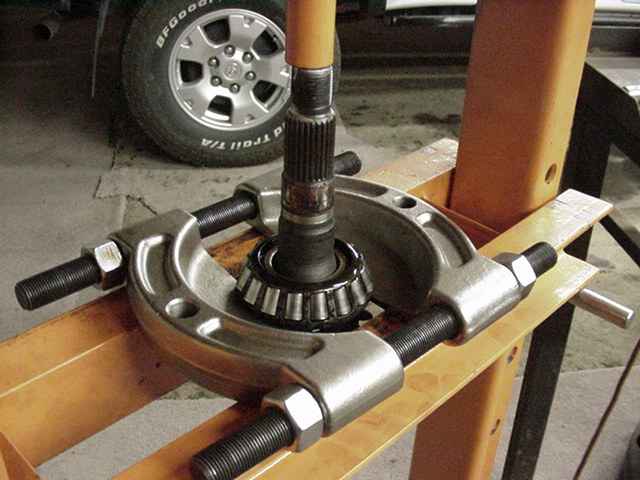
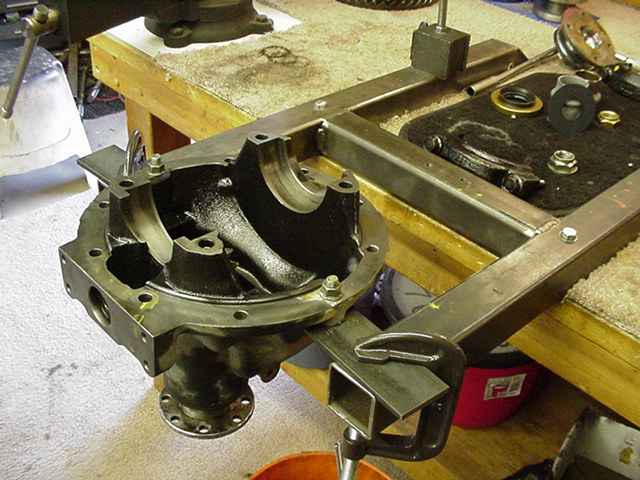
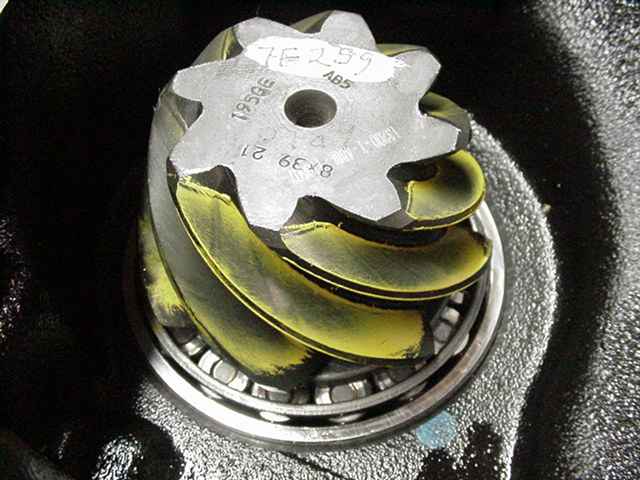
Earlier, I had mentioned how massive the carrier bearings are. Take note that it is even bigger than the big pinion bearing. This massive carrier bearing only exists on the 9.5" elocker version. The non-elocker version with the open case uses a smaller carrier bearing...the same bearing that the early model mini-trucks use with the 8" ring gear. |
|
The old pinion race fits inside the carrier race! |
|
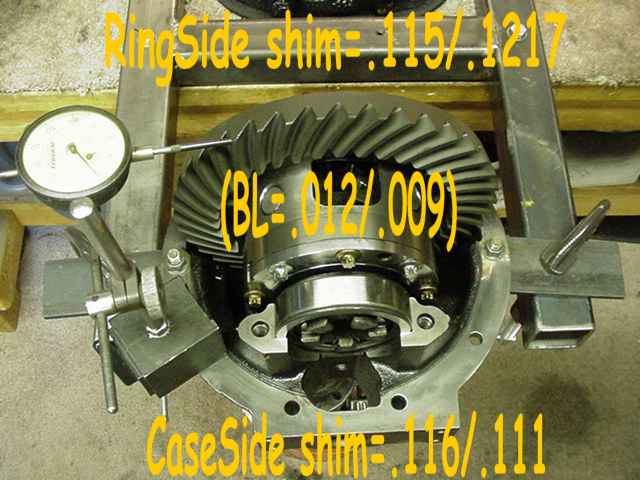
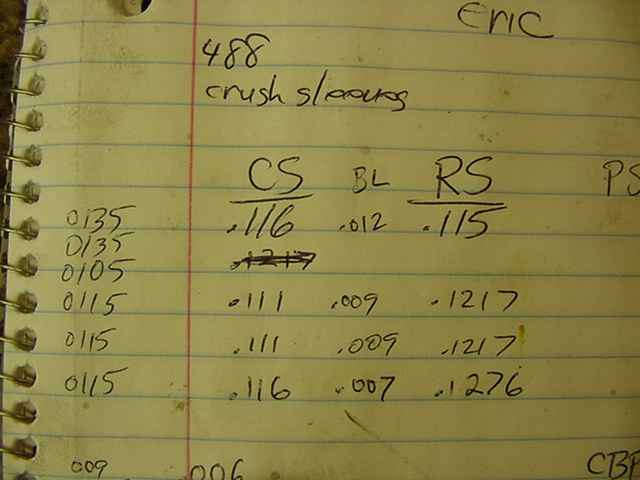
Same case...same bearings...same shims means same original carrier bearing pre-load(CBPL) but possibly a different BL because we haved changed to a new ring and pinion that has different manufacturing specs. In this case, I had .012" BL and that was too much for a pattern check so, as shown below, I lightened the shim on one side and thickened the shim on the other and the BL shifted to a reasonable .009". |
|
To maintain the same approximate CBPL and, at the same time, tighten up the BL a few thou, I subtracted 5 thou
from the Case-side and added 6.7 thou to the other ring-side....this has the effect of pushing the
ring gear closer to the pinion. Effectively, I moved the ring .0058" closer while adding only slightly to the CBPL
(carrier bearing tensions)...if that makes any sense :)
|
|
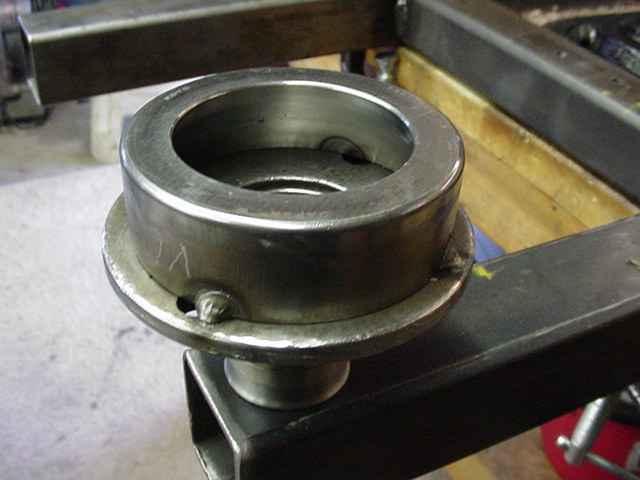
Here's a full set of "washer plates" for the 9.5" application and here's the part numbers. I get
them at wholesale from here... 1sttoyotaparts.com
|
|
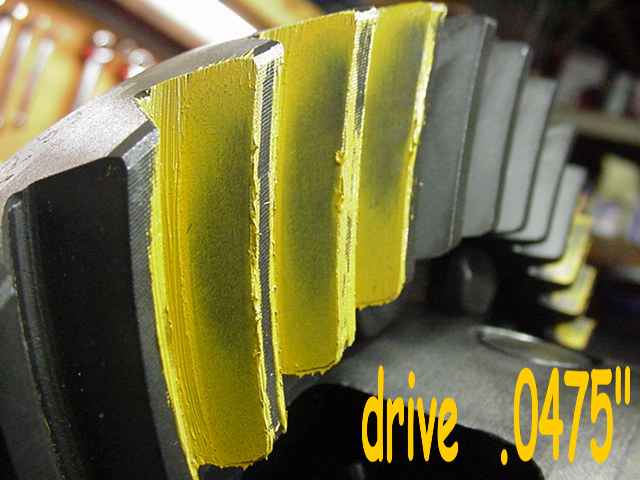
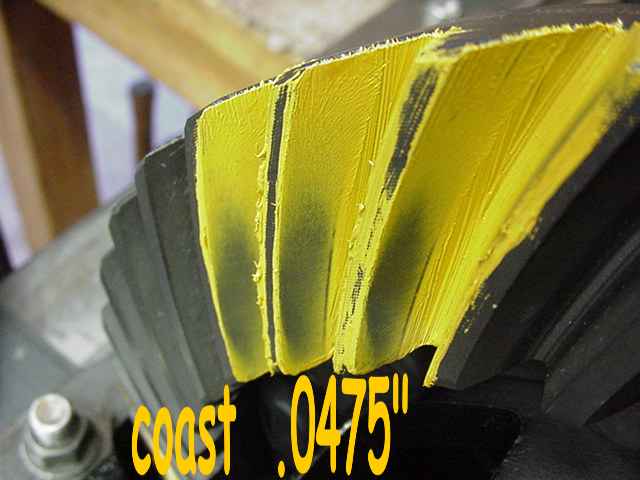
With BL set at a reasonable 009, I can now run a pattern...too shallow. |
|
coast |
|
The diff was then torn down and 5 thou added to the pinion shim stack....still a bit shallow. |
|
... |
|
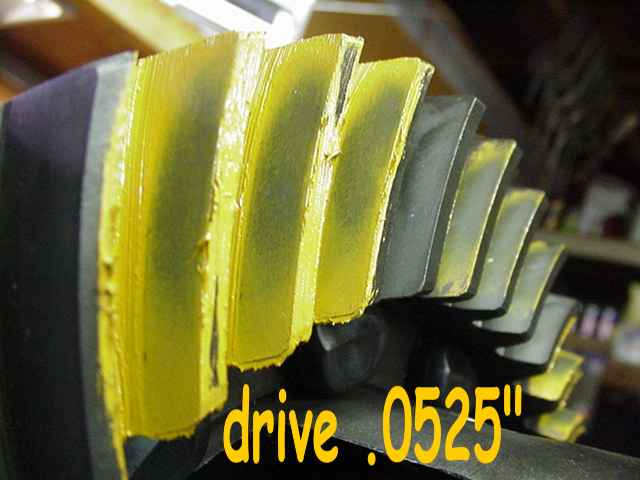
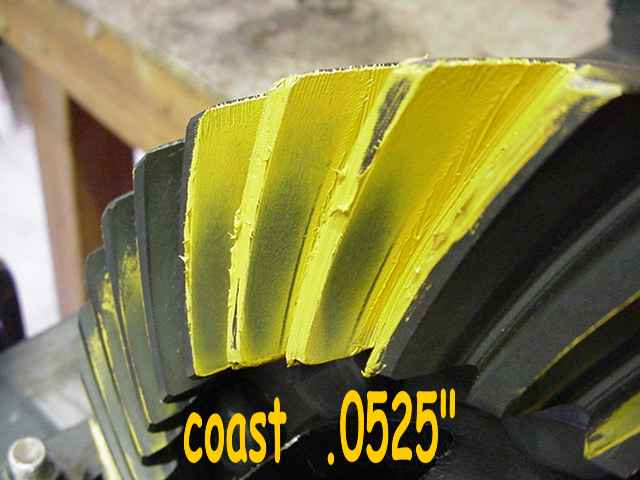
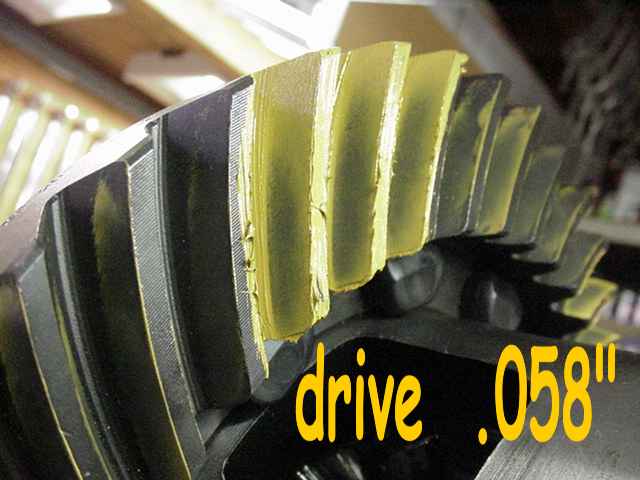
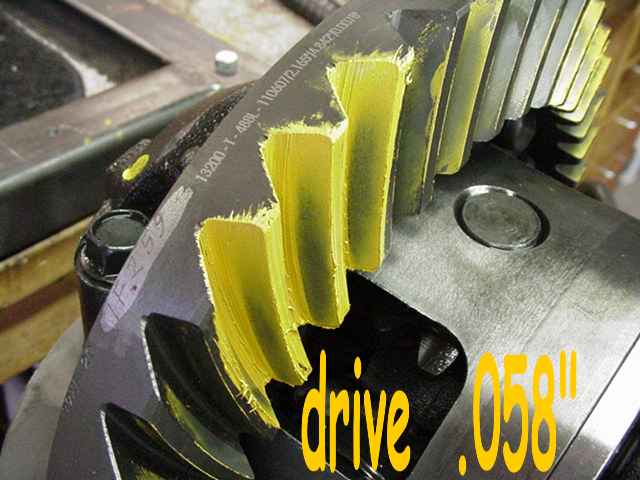
.0055" more added to the pinion stack making a total of .058" and the depth is possibly slightly deep which is perfect in the ZUK book. |
|
Drive side as seen from a slightly different angle. |
|
coast |
|
With pinion depth established, now I can tear it down once more to install the new crush sleeve. In the pic, I'm noticing how loose the CBPL is. It's not really bad but, by my standards, I would need to add an equal amount of shim to both sides...but since the BL is a bit on the large side, I will likely shim the ring gear side a little heavier and aim for a BL of 007. |
|
As I have mentioned before...this differential fixture is my favorite design....it is all about the KISS principle.... Keep It Simple and Stupid. |
|
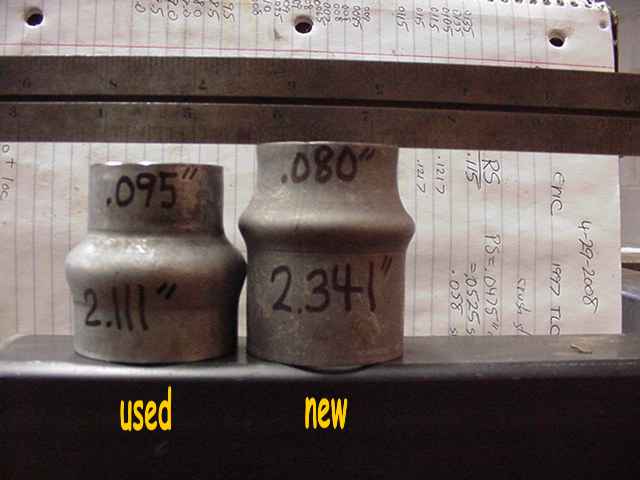
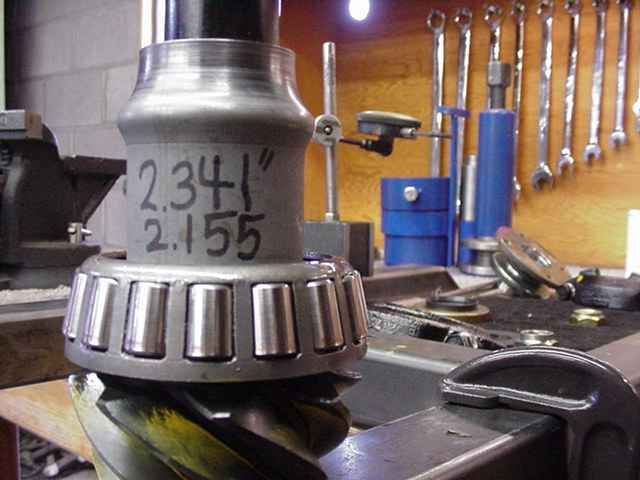
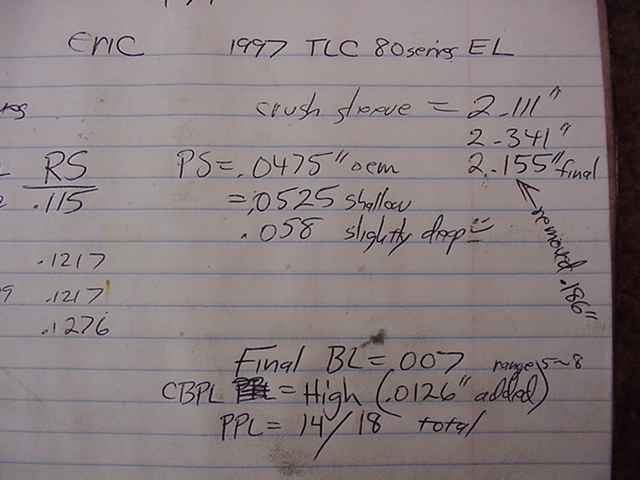
The original factory OEM sleeve on the left had a crushed length of 2.111" while the new uncrushed after-market one was a bit excessive at 2.341"....that means the new sleeve has to crush for about .230" and that's a lot of crushing. Other crush sleeves typically are designed to crush less than .080". |
|
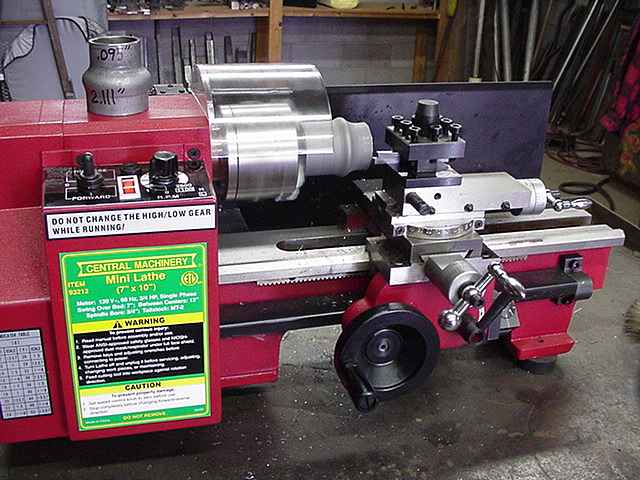
This Harbor Freight mini-lathe is perfect for trimming crush sleeves down. Not a top priority tool for gear installs but it sure is nice to remove the run-out on the "quickly machined" solid collars and such. |
|
I turned it down to 2.155" which means it will crush for about .040" which is perfectly adequate. For the records, the pinion nut crushed it for 180 degrees of rotation (about a half turn). |
|
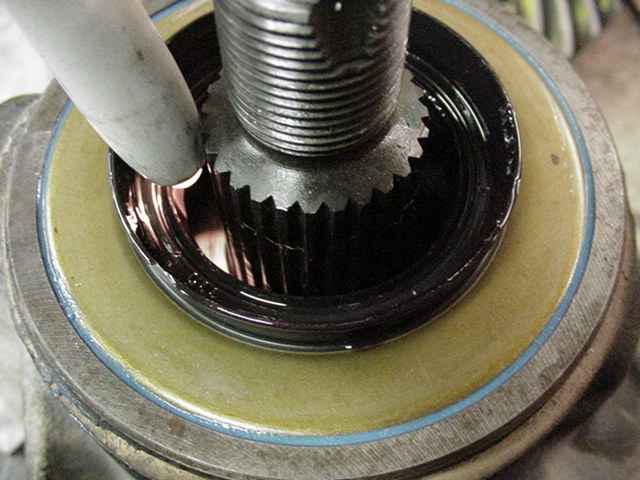
RTV is applied to the seal and thick grease is packed around the lip where the tiny compression spring is. |

|
My seal insertion tool is a simple one.... |
|
...just an old V6 race and beat up pinion flange tack welded together. It's very effective. |
|
A quick look with the penlight to make sure the coiled spring did not pop loose...all is good. |
|
The new shortened sleeve is crushed down...only a half turn required....to reach 14 in/lb of PPL. |
|
With the pinion end taken care off, now we turn our attention to the case and the shim math. |
|
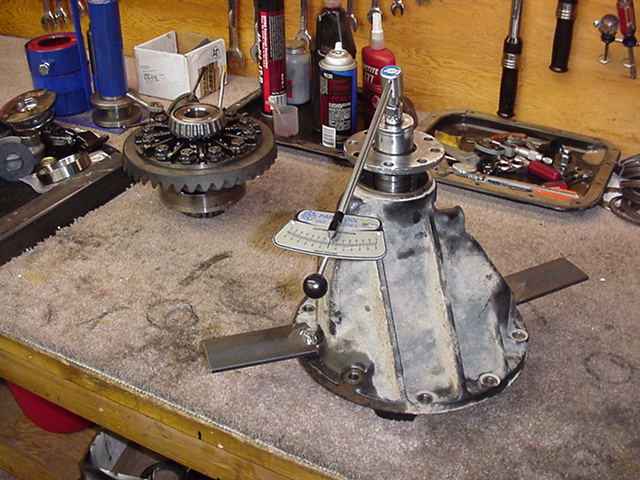
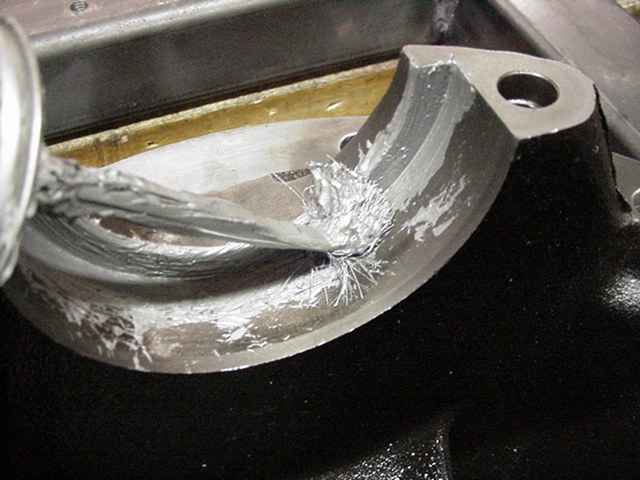
Just a quick look at the painted pinion before the case goes in...a very nice pattern showing proper depth . |
|
The single thick shim on the ring side will be tapped in with considerable resistance so some anti-seize is a good idea. |
|
As mentioned earlier, a little extra shim was added to the ring side to lessen the .009 BL down to about .007. The light tapping from the hammer was starting to deform the washer plate so a formed chisel is used as shown below. |
|
The chisel edges are curved and rounded to minimize nicks to the shim. |
|
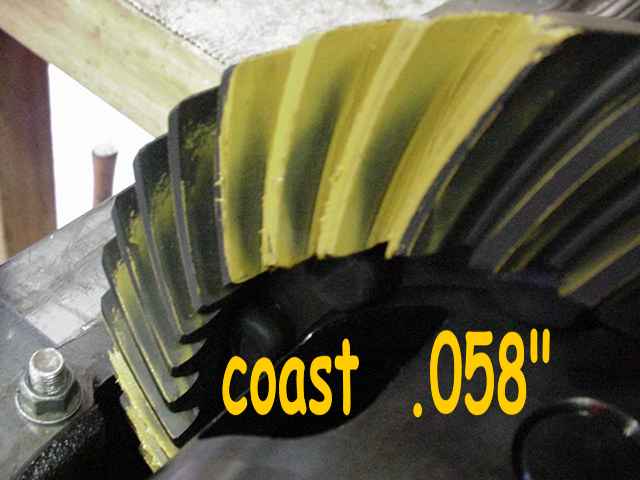
Backlash did tighten up to 007 and one more pattern check shows that this ring and pinion will be very dependable and strong. A good pattern like this is certainly an indicator of strength....but it all goes out the window if the CBPL is weak or non-existent. On this install, I have high CBPL so the bases are covered. |
|
Nice coast. |
|
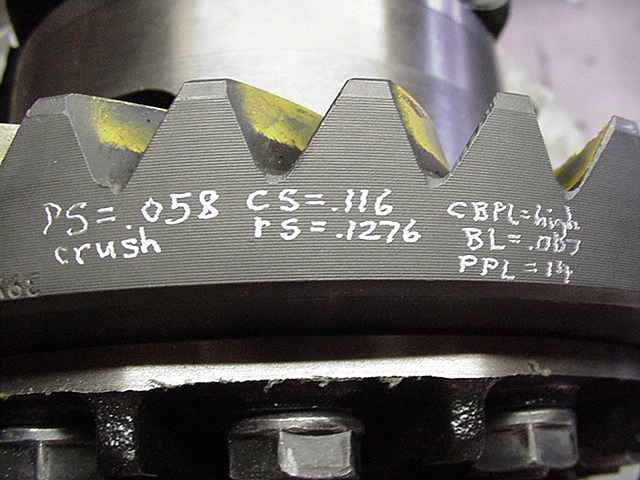
Specs are engraved with a dremel mini-grinder and diamond tip bit. The date code is engraved off to the right just out of the pic. |
|
Notes I keep of the install. |
|
As far as the CBPL goes, note that the case-side washer stayed the same from beginning to end at .116" while the ring-side increased from .115" to .1276". Effectively, this means the CBPL increased .0126 (12.6 thou) from the way I received it which is excellent. |
|
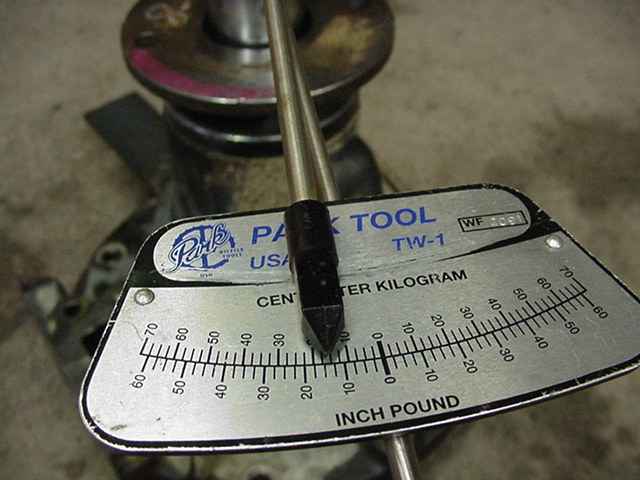
Final backlash measurements are taken all the way around the ring on every other tooth....about 21 measurements. |
|
I'm just guessing but others might be able to do a gear install in 2 hours or less....whereas I might spend about 4 or
5 like this one but I also receive a certain satisfaction knowing that Eric won't likely bust his ring and pinion out
in the middle of the trail. The only way to make a quality gear install stronger is to improve the already good quality
of the metals....that means cryo....cryo ring/pinion and cryo bearings. This process is unnecessary for Eric because of
the his modest 35" tires and the cushion of the automatic. Click on the link below for Eric's front install.
|
|
|

|