| Rear 9.5" Harrop elocker and 410 Nitro Gears on a custom build by Rekon 4x4 in Spicewood, Texas. |
|---|
| (68 BIG pics loading) |
|---|
| NOV 26 2017 |
|---|

|
This link is about the REAR Harrop equipped diff build.
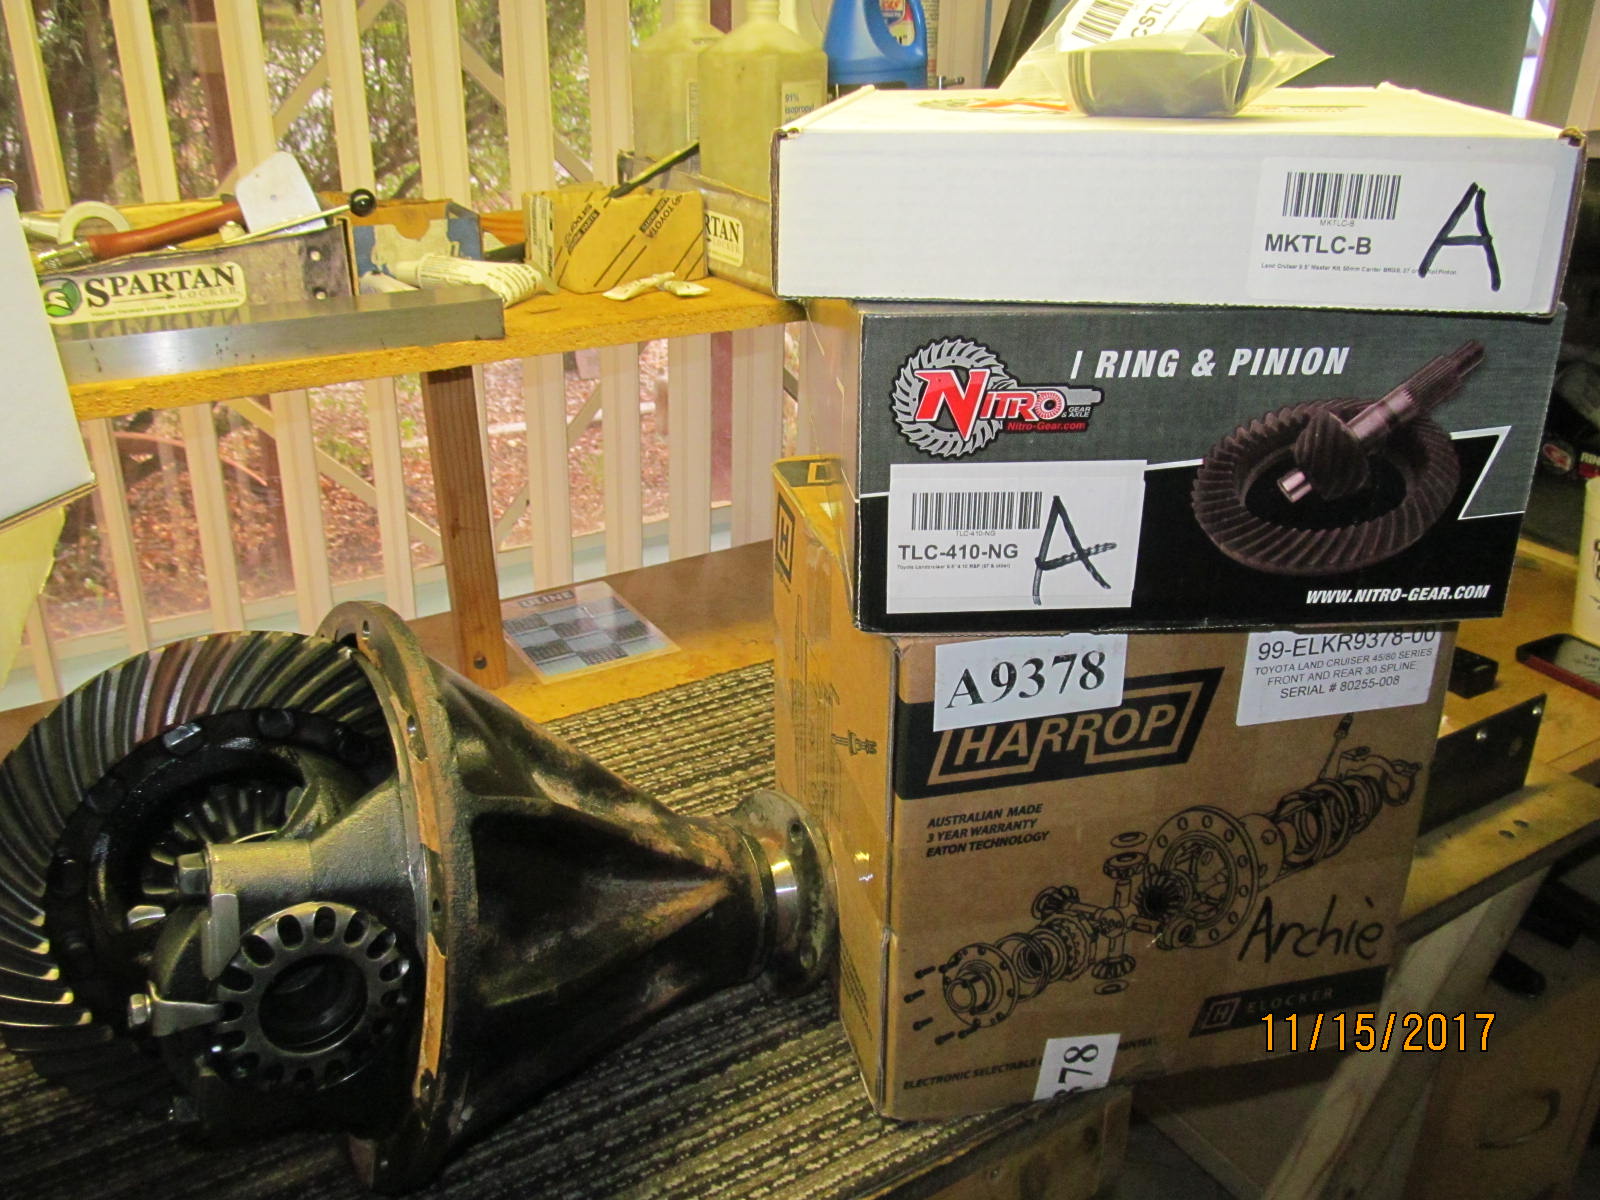
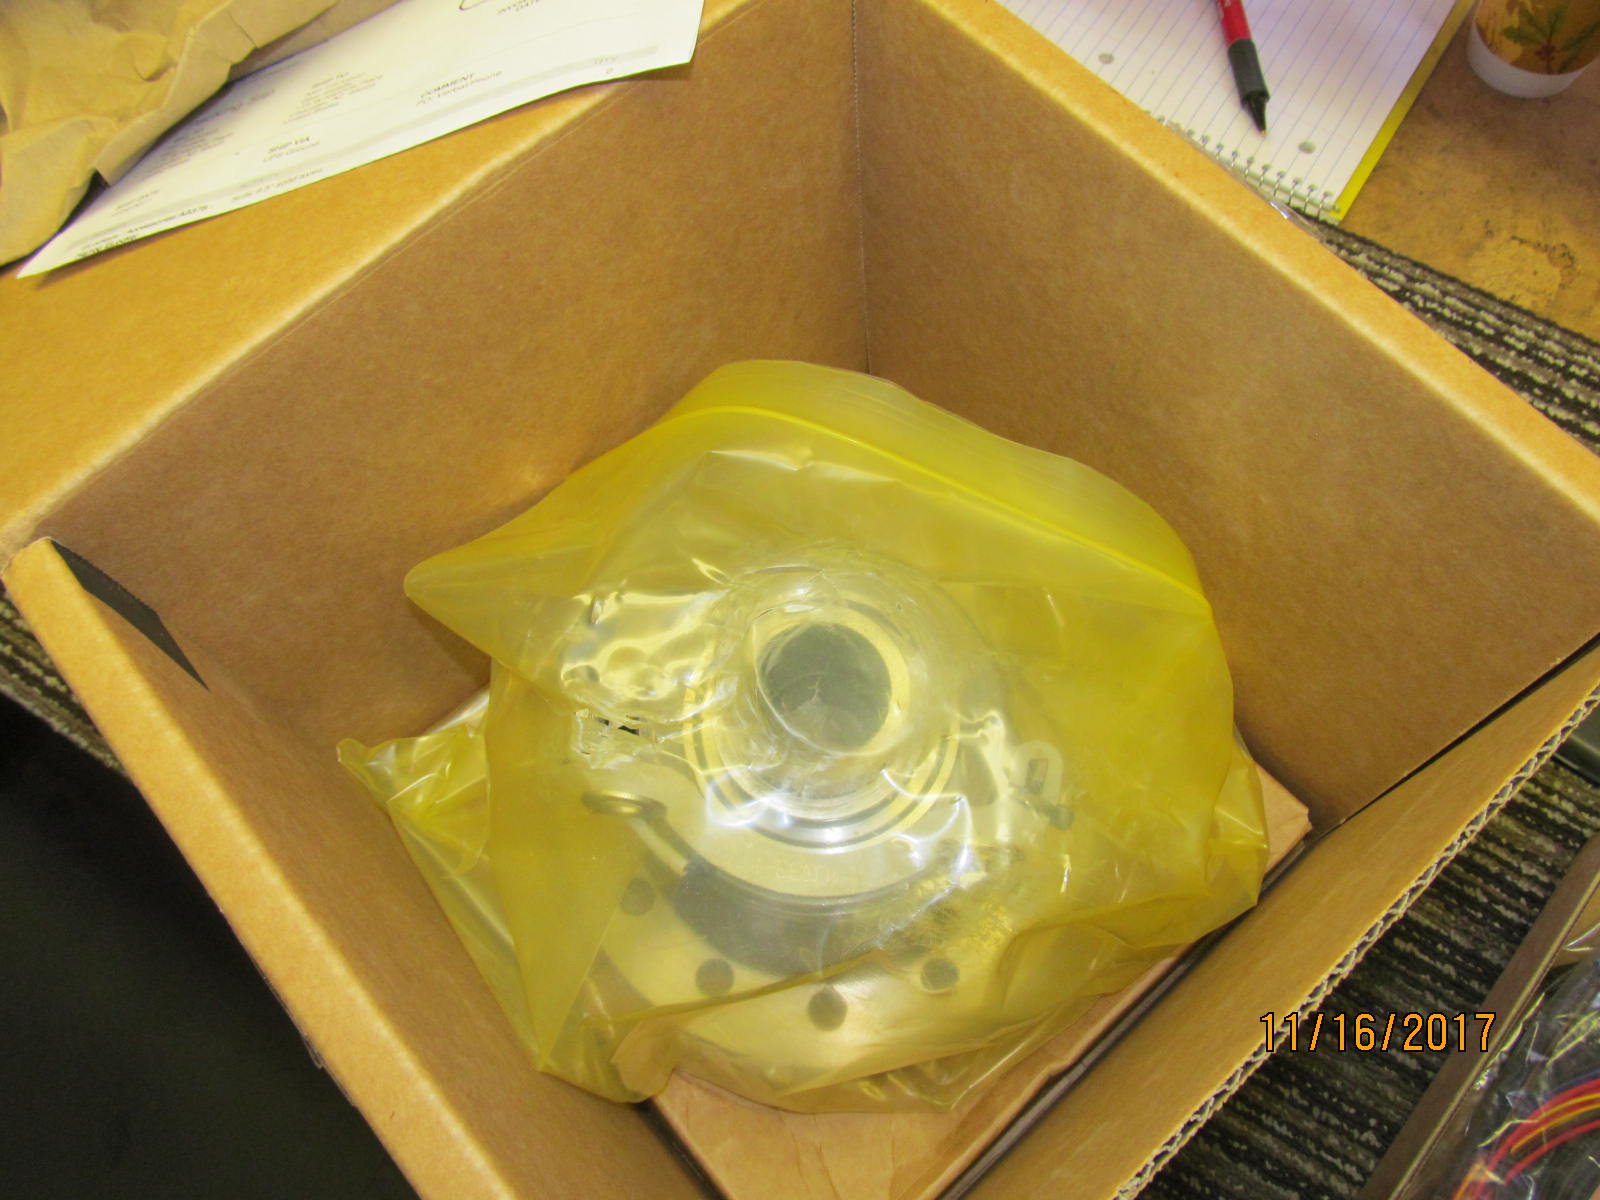
Product received for the build. The Nitro Gear package consisted of 410 Nitro gears, master install kits, a new 29 spline front flange,
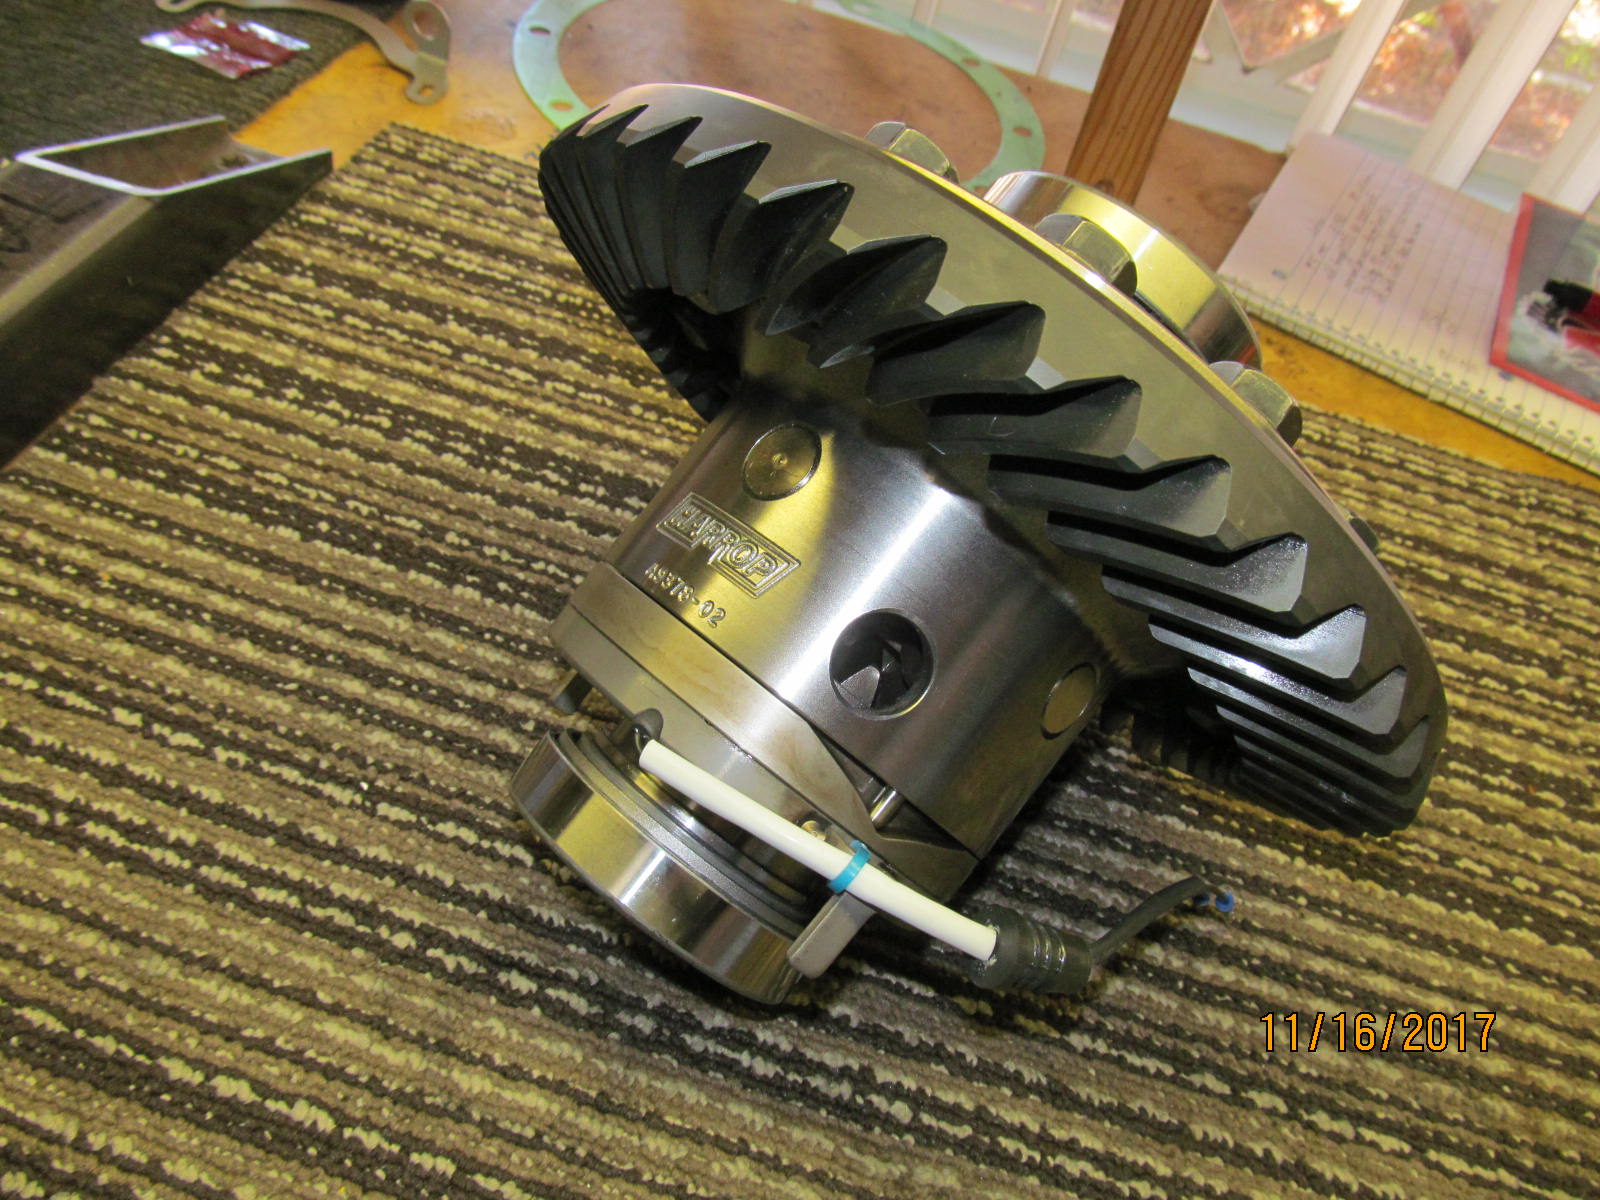
and solid collars. The 913A612 Truetrac will go in the front 3rd on the left....and the #9378 Harrop elocker will go
in the big 9.5" rear diff.
Here is a link to the front Truetrac with Nitro 410 install....CLICK HERE |
|---|
|
|
The desired gear ratio was discussed with Rekon 4x4 shop owner Archie Contreras and because the Chevy LS2 crate motor(430 HP) runs
happier in a lower rpm zone, 410 gears just seemed to make more sense. Going slow offroad will not be a problem.
The 4L65-E is mated to a Landcruiser transfercase.
The tcase has a low gear set from Marks4wd.com.
Installed is also a part-time conversion kit as well so all the stuff up front is not spinning all the time. |
|---|
|
|
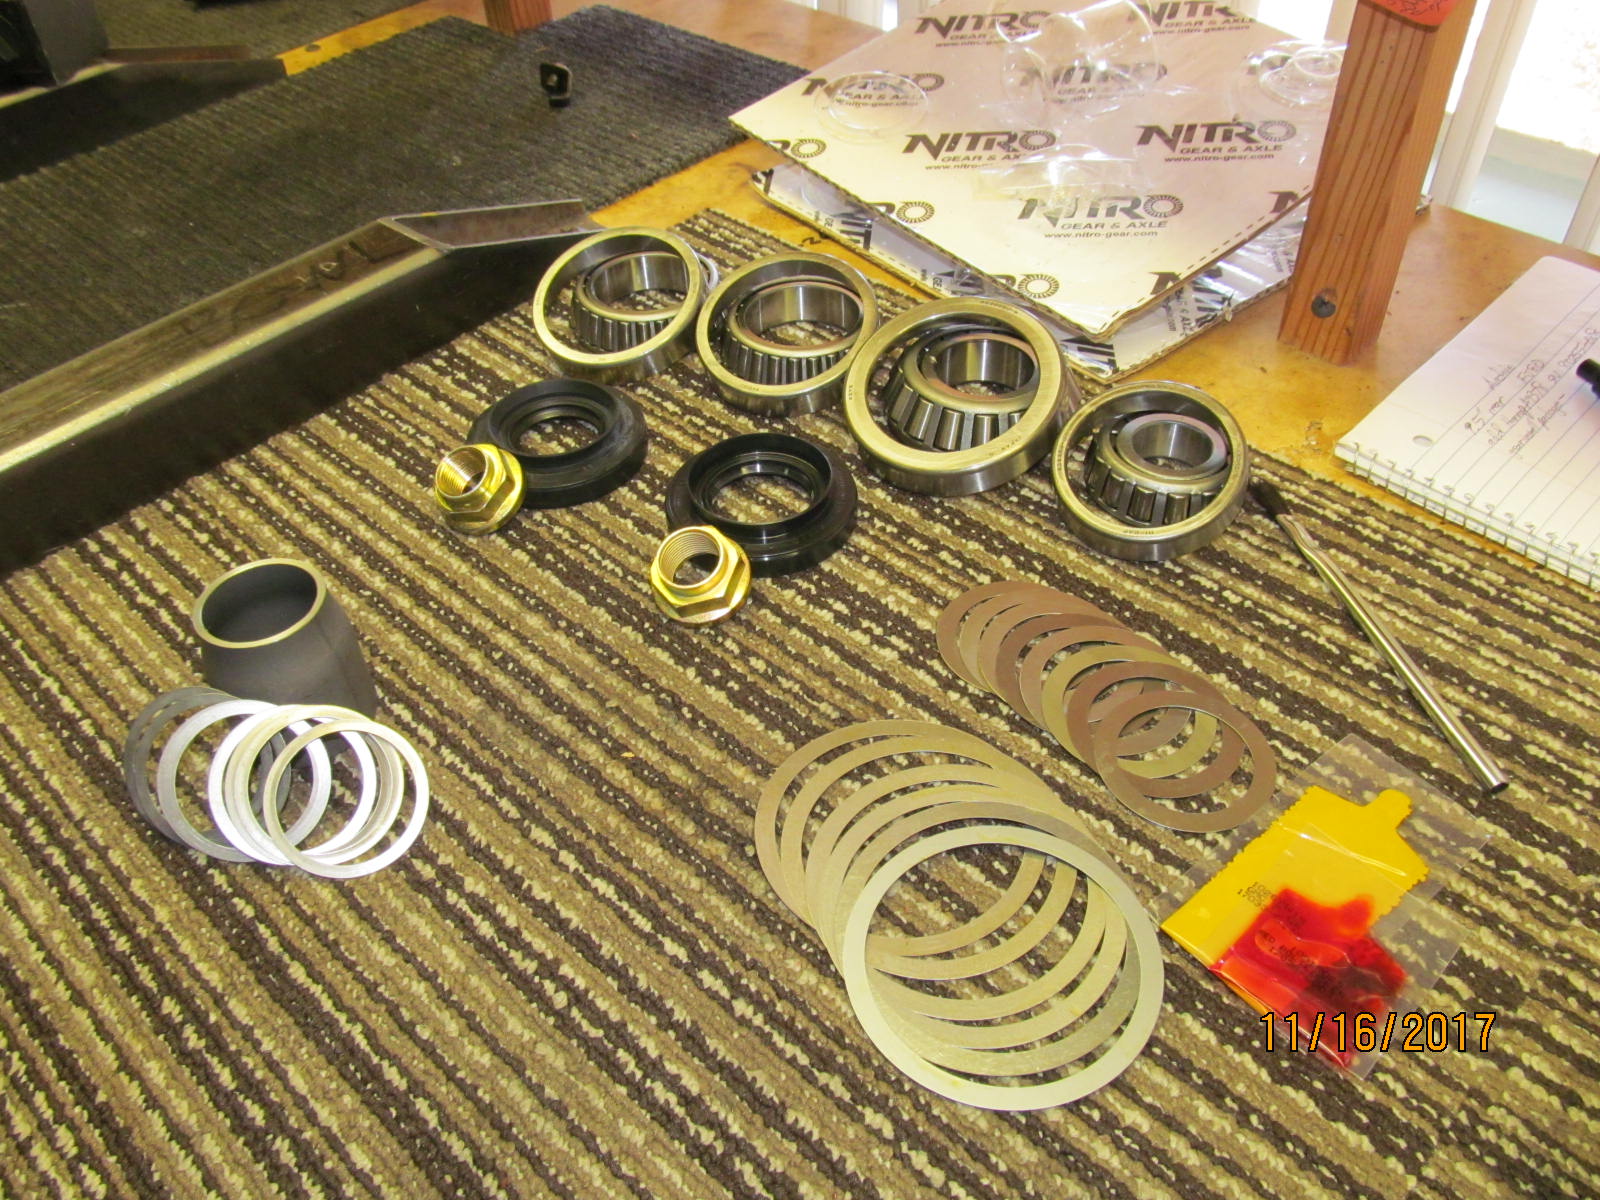
| Parts are organized.....solid collar...seals...bearings...shims. |
|---|
|
|
| ,,,,,,,,,,,,,,,,,,, |
|---|
|
|
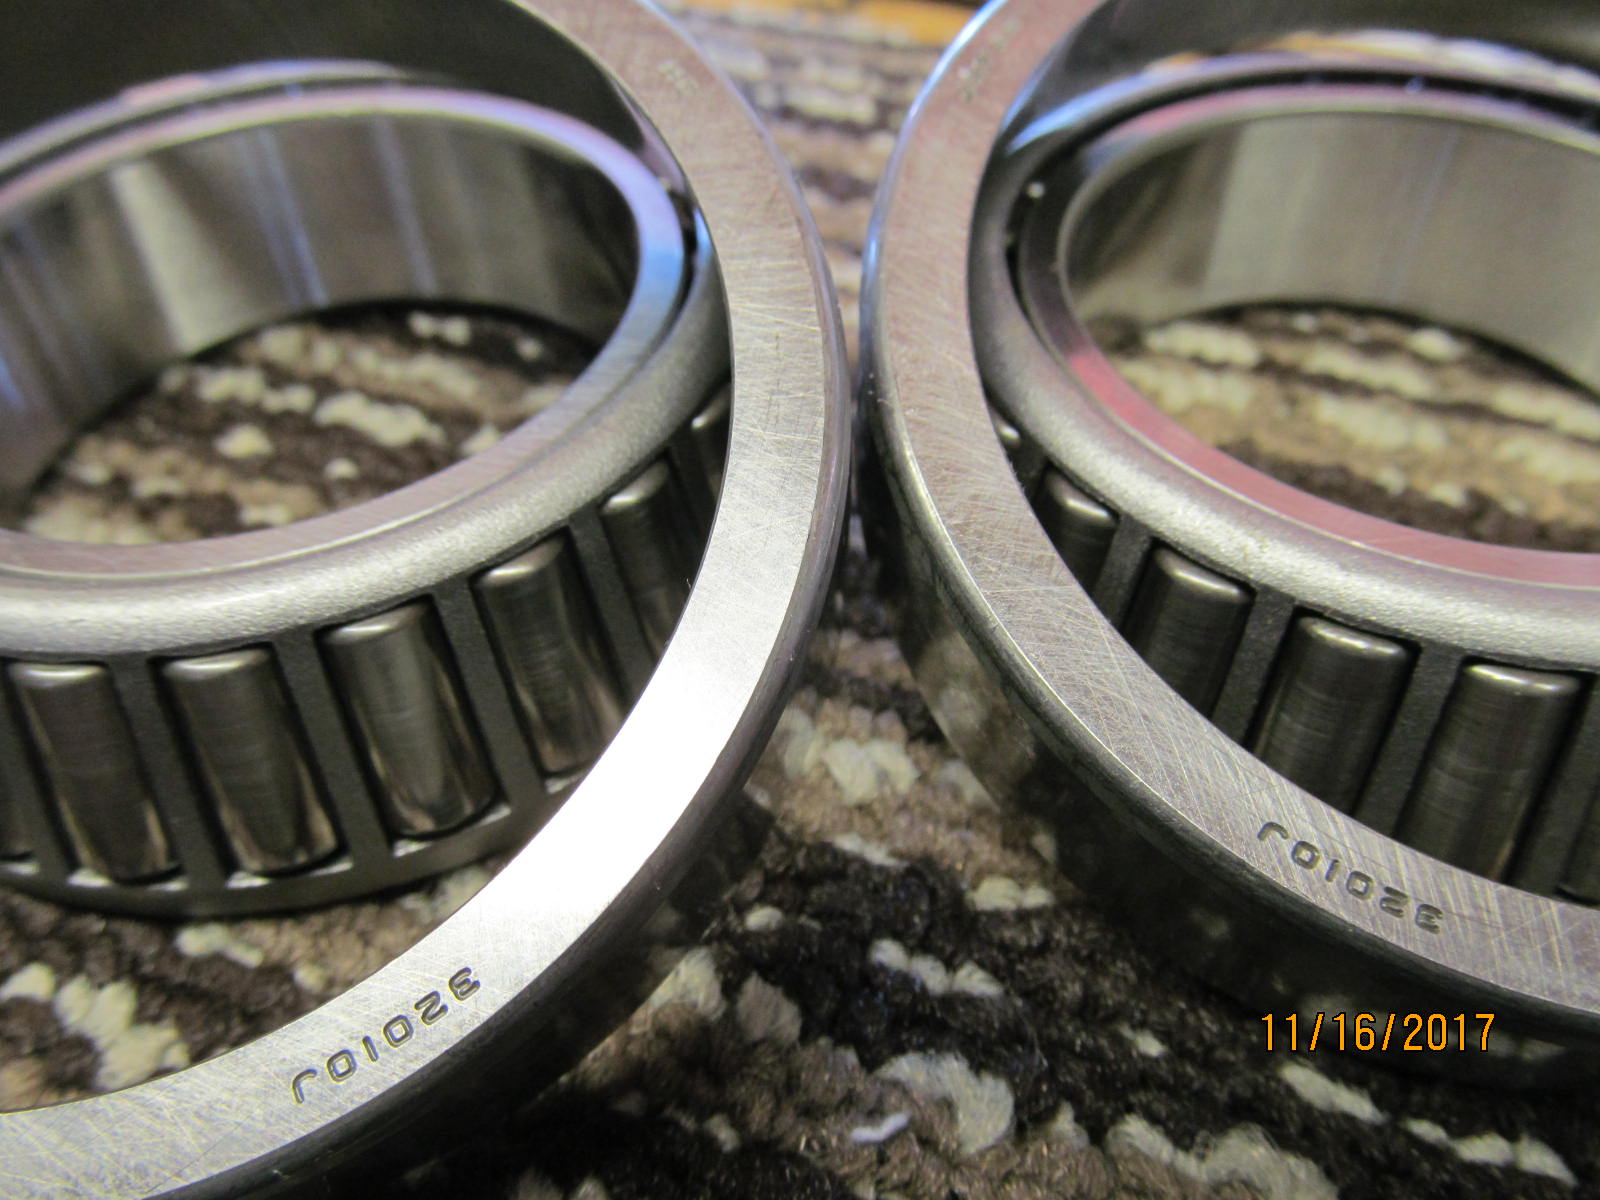
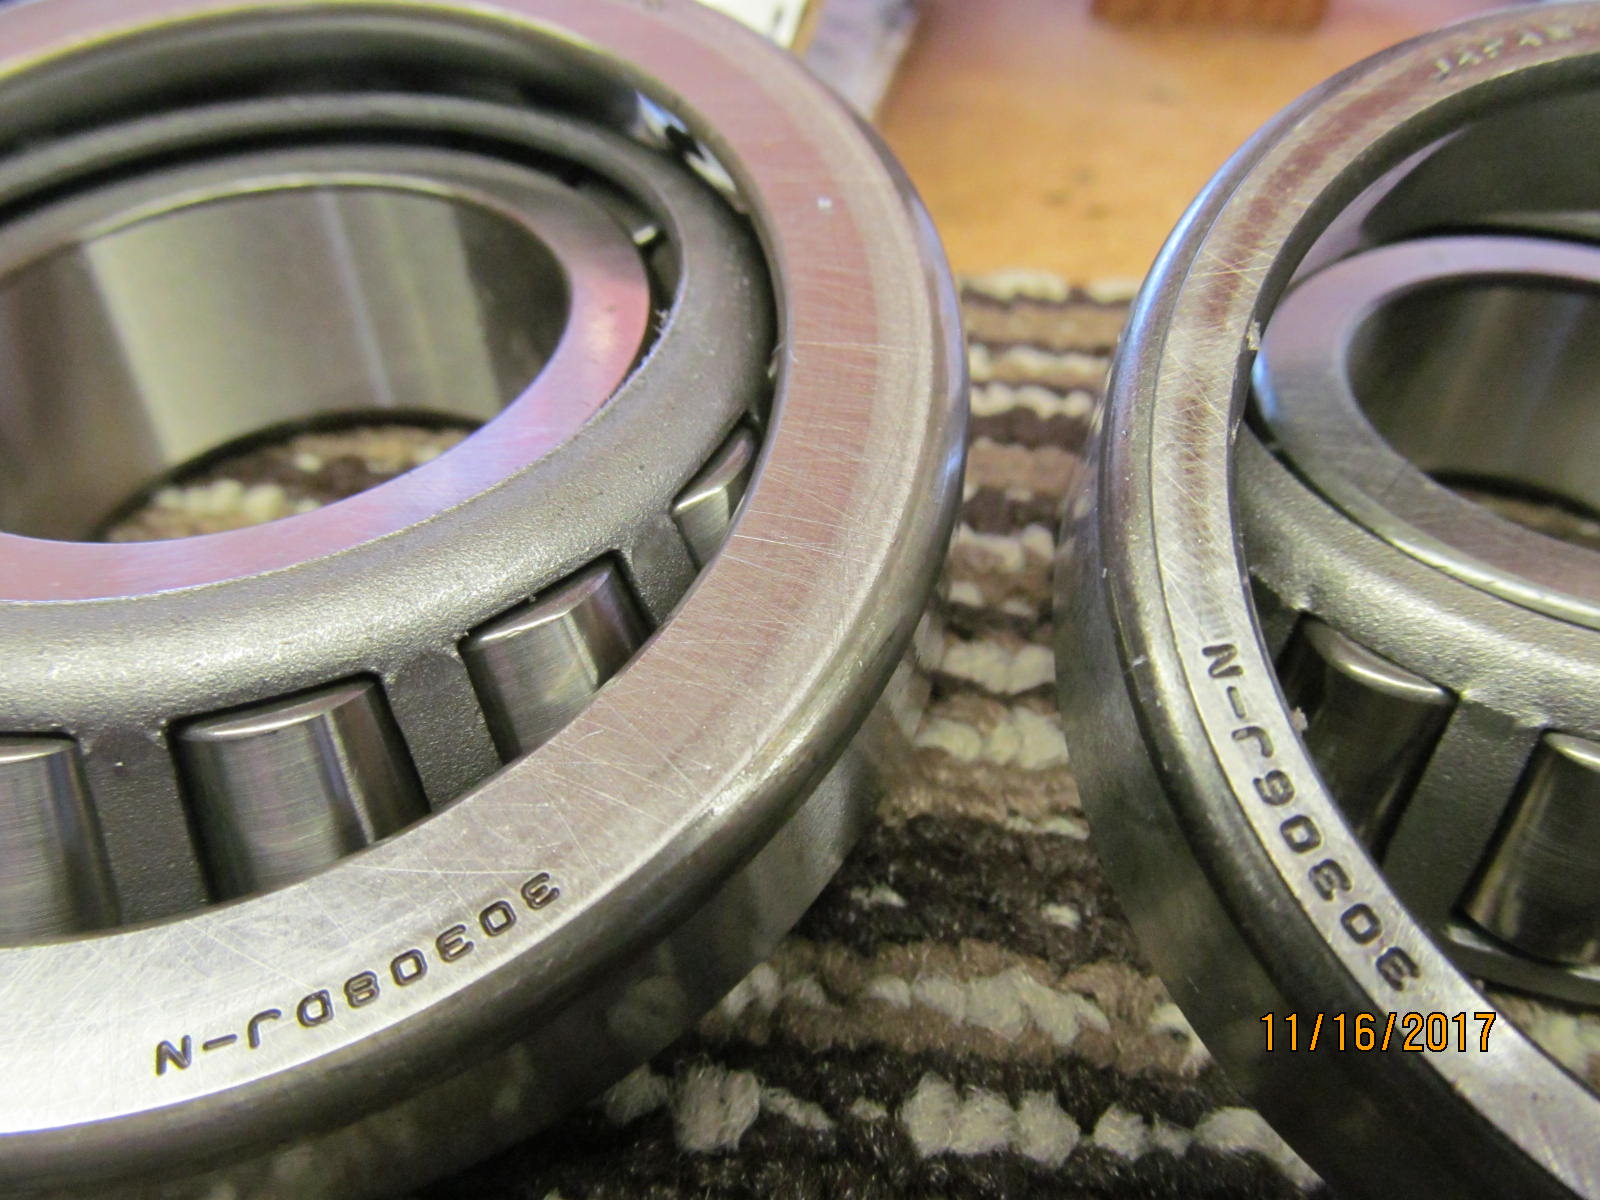
| Koyo 32010J "conversion bearings" that are sometimes used on 50mm journals. |
|---|
|
|
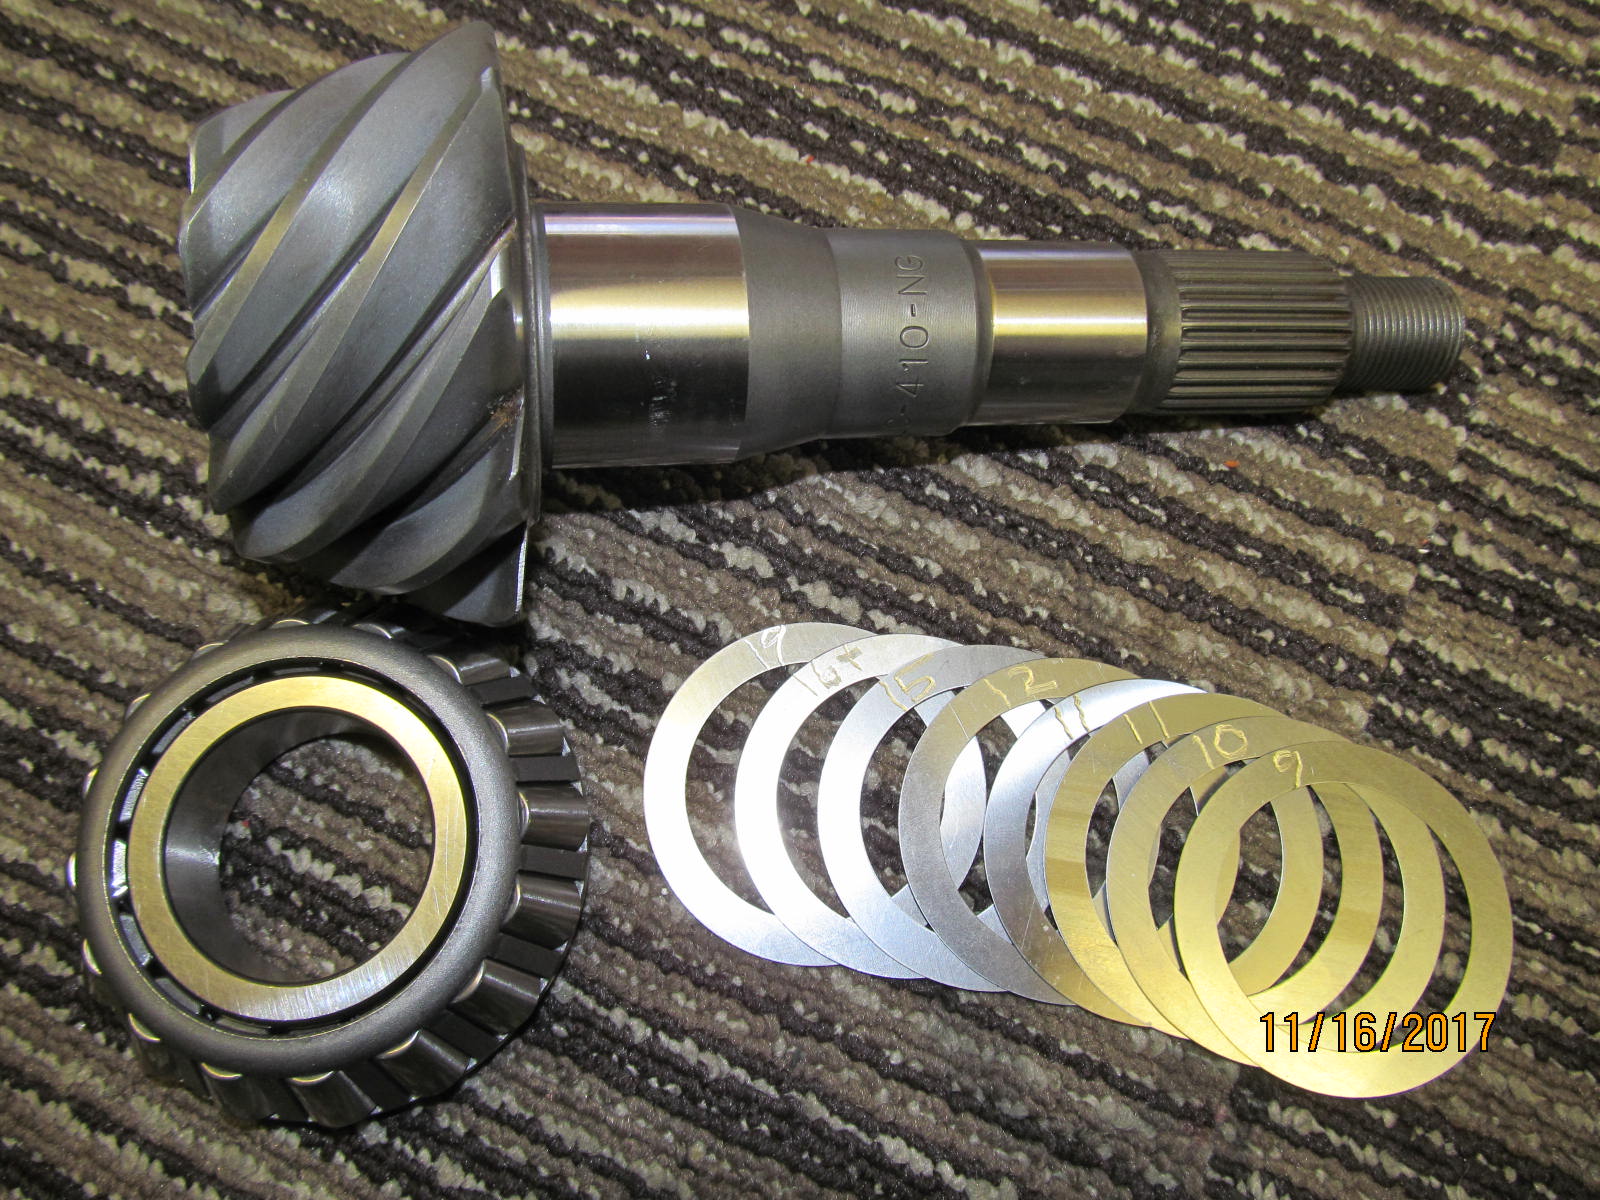
| The large inner pinion bearing on the left.....small outer pinion bearing on the right. |
|---|
|
|
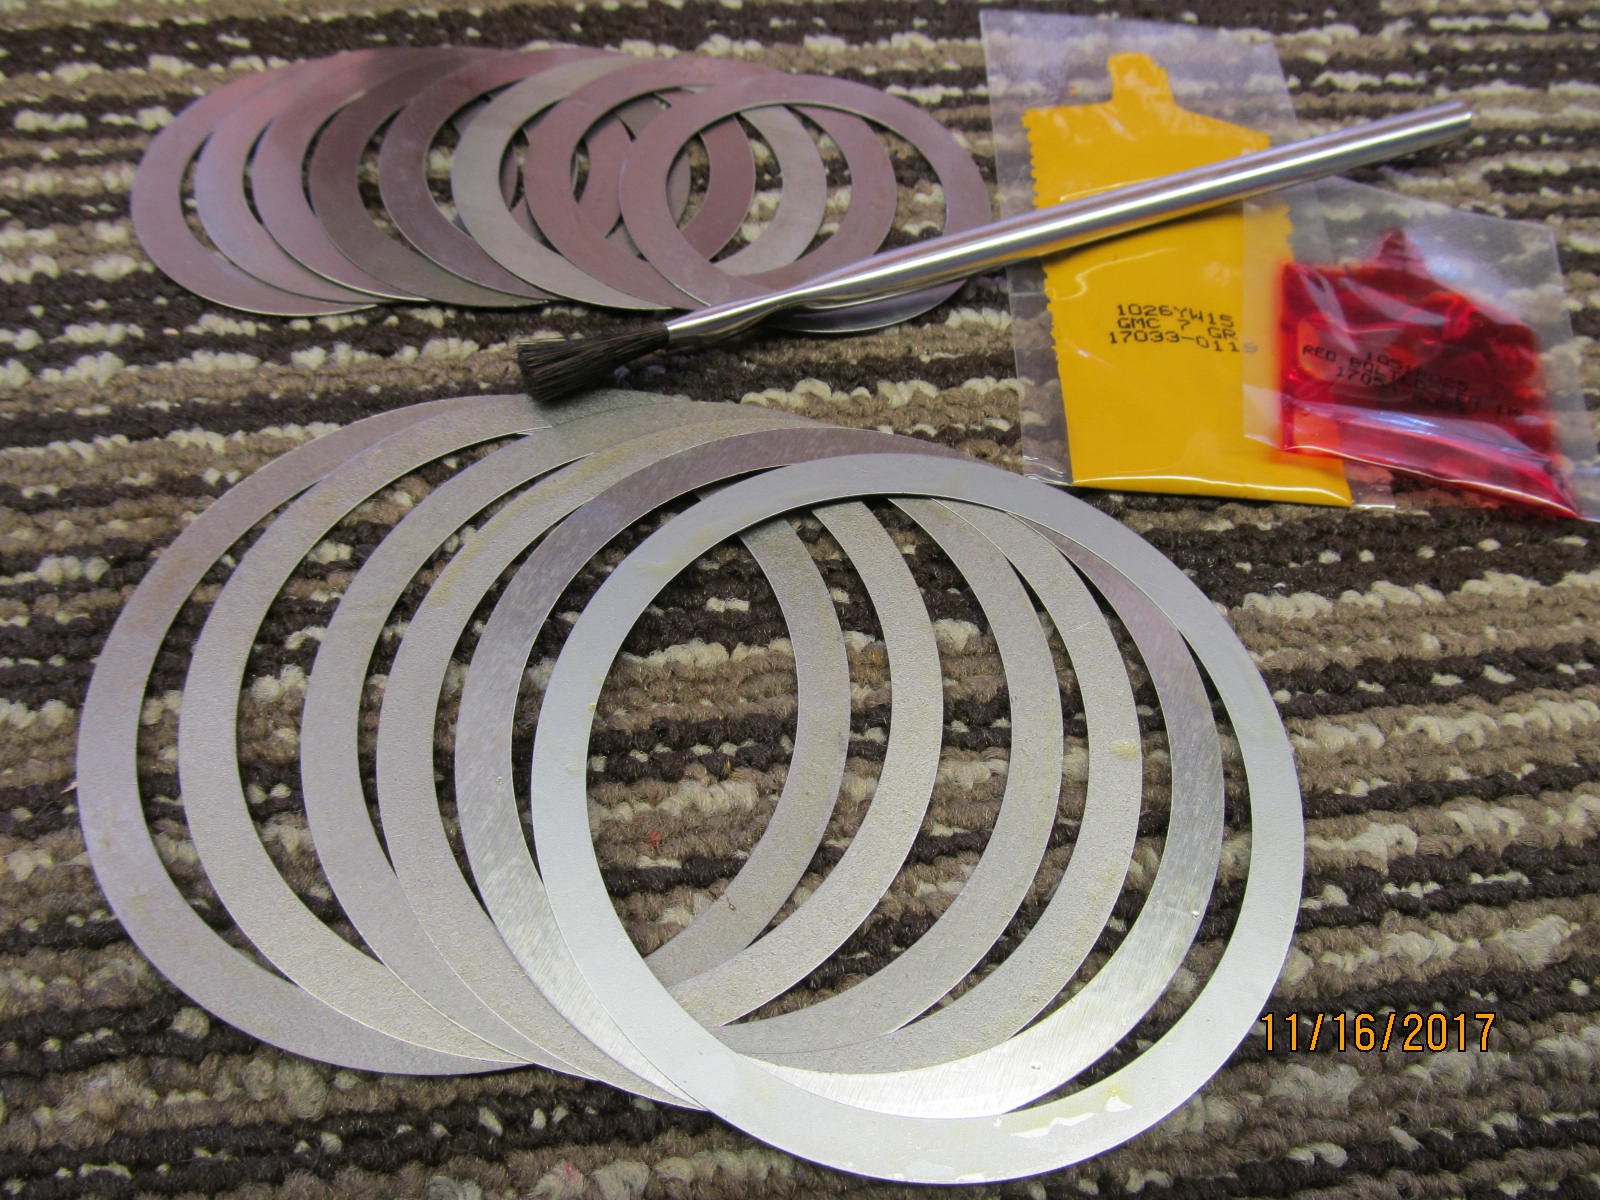
| Nice shim selection with the Nitro kits. |
|---|
|

|
| For the power involved, the solid collar is the way to go. |
|---|
|
|
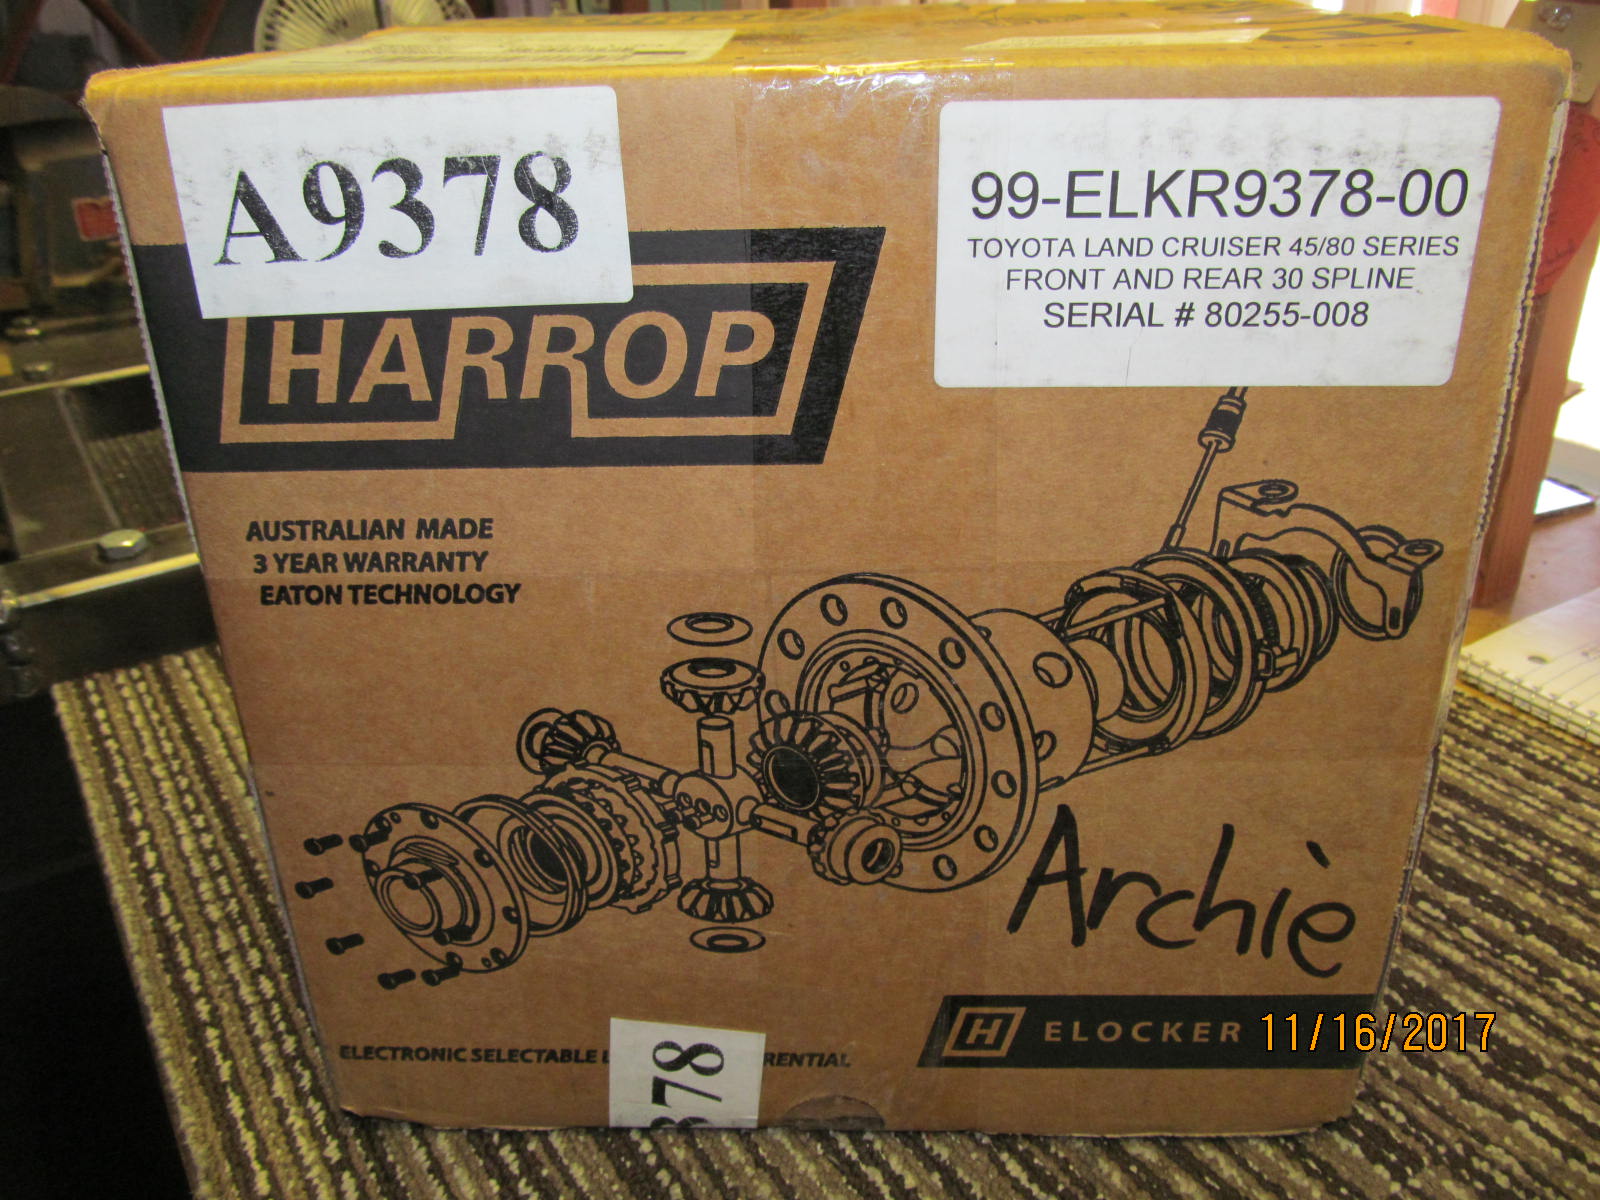
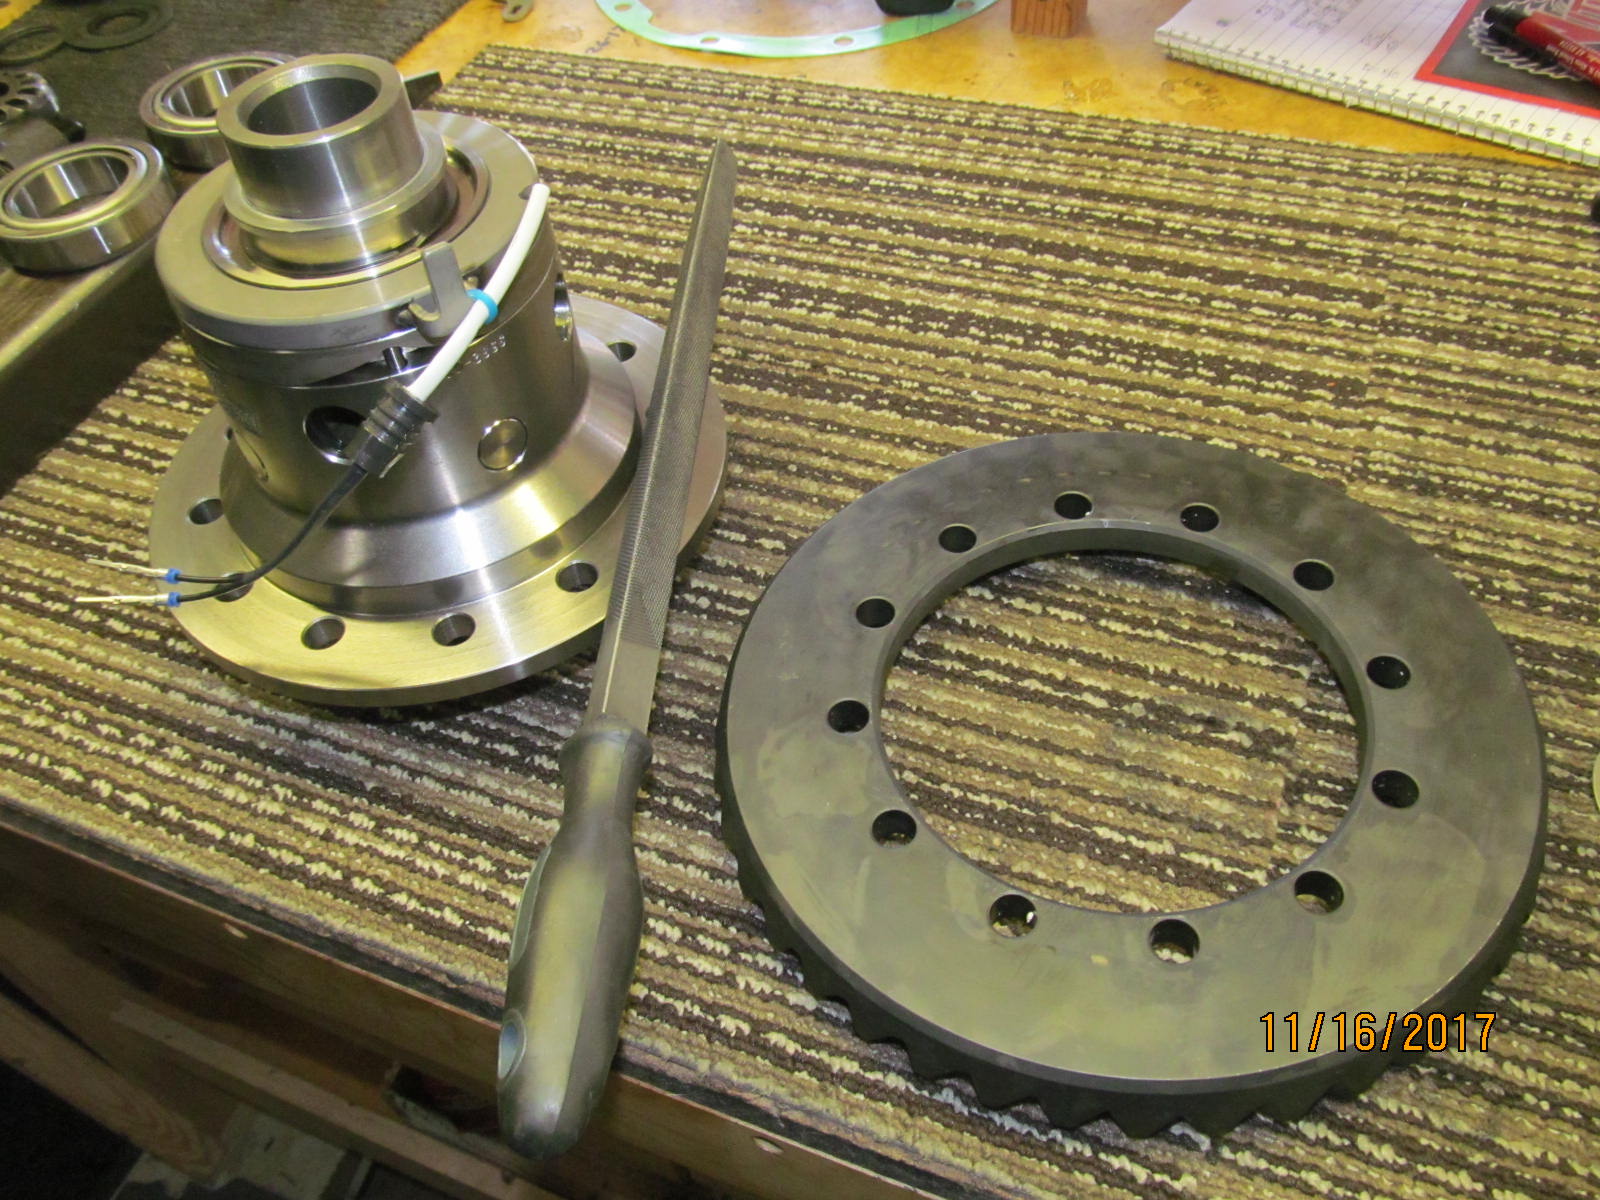
| The Harrop elocker..... |
|---|
|
|
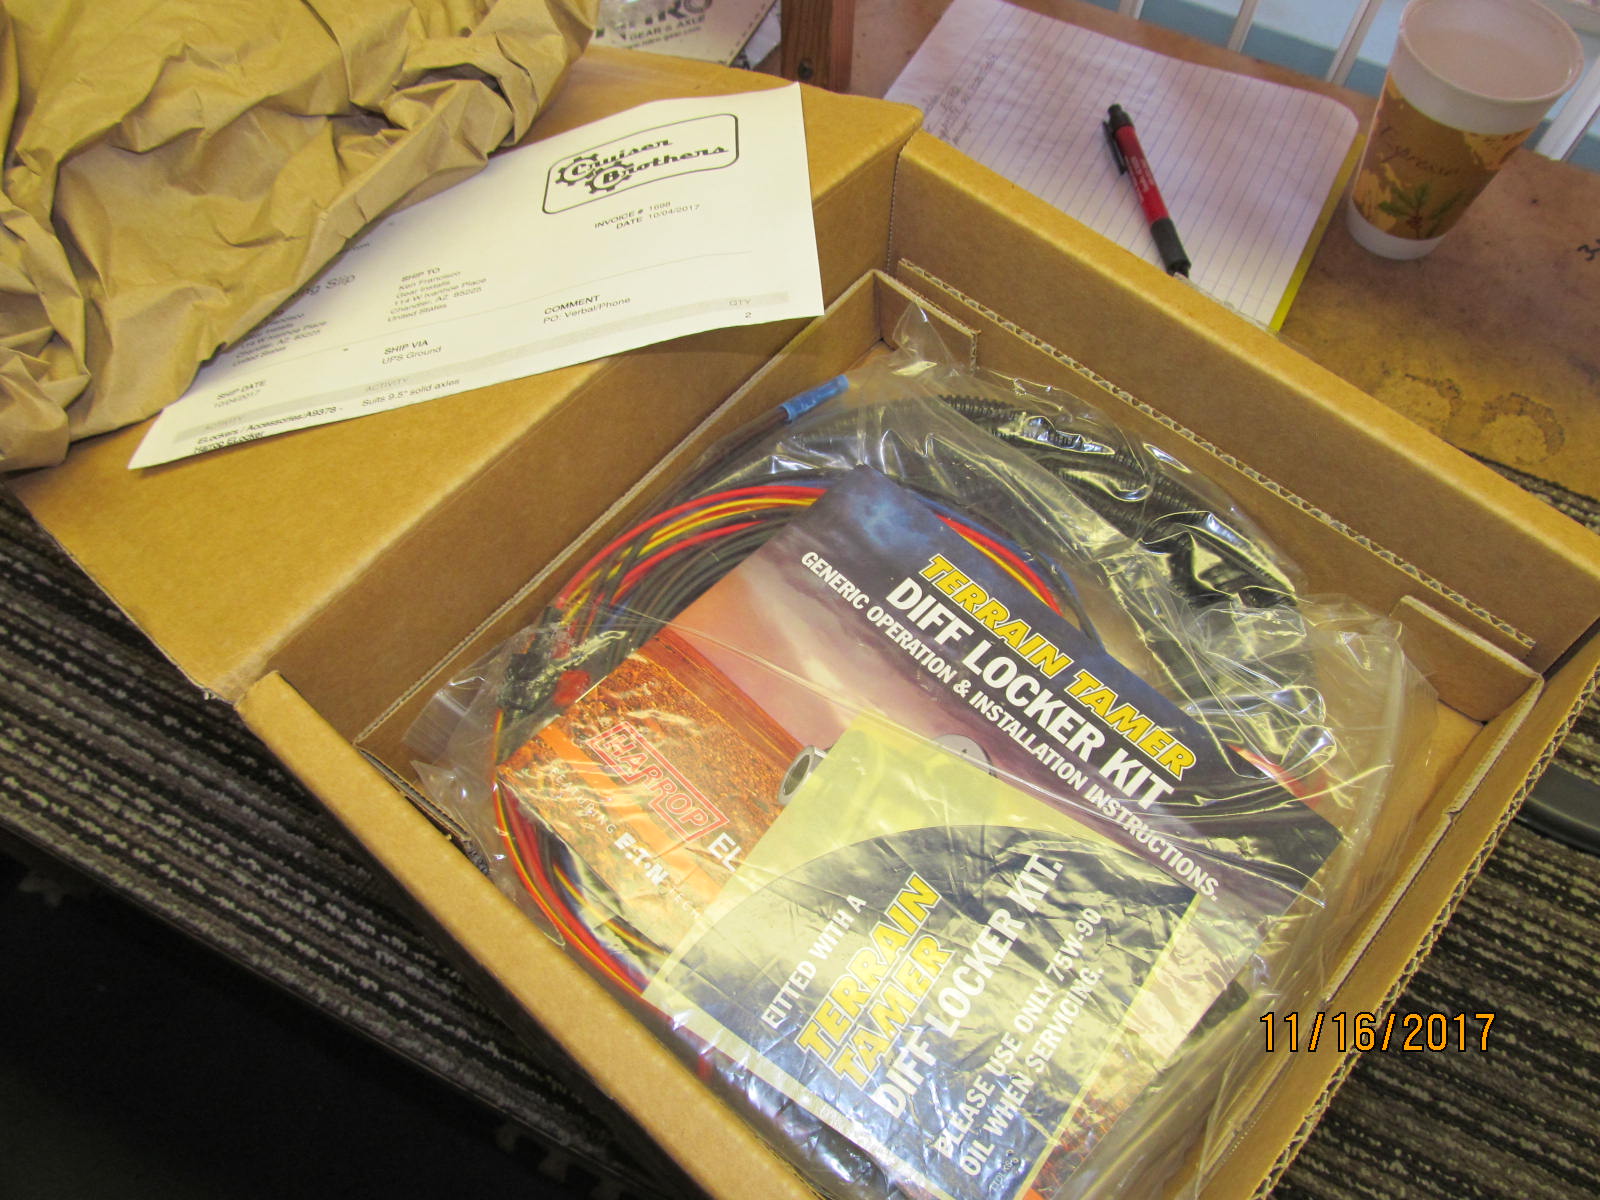
| Instructions and the wiring harness. |
|---|
|
|
| ,,,,,,,,,,,,,,,,,,,, |
|---|
|

|
| No polarity for the 2 wires....both are black so hook them up either way and it works. |
|---|
|
|
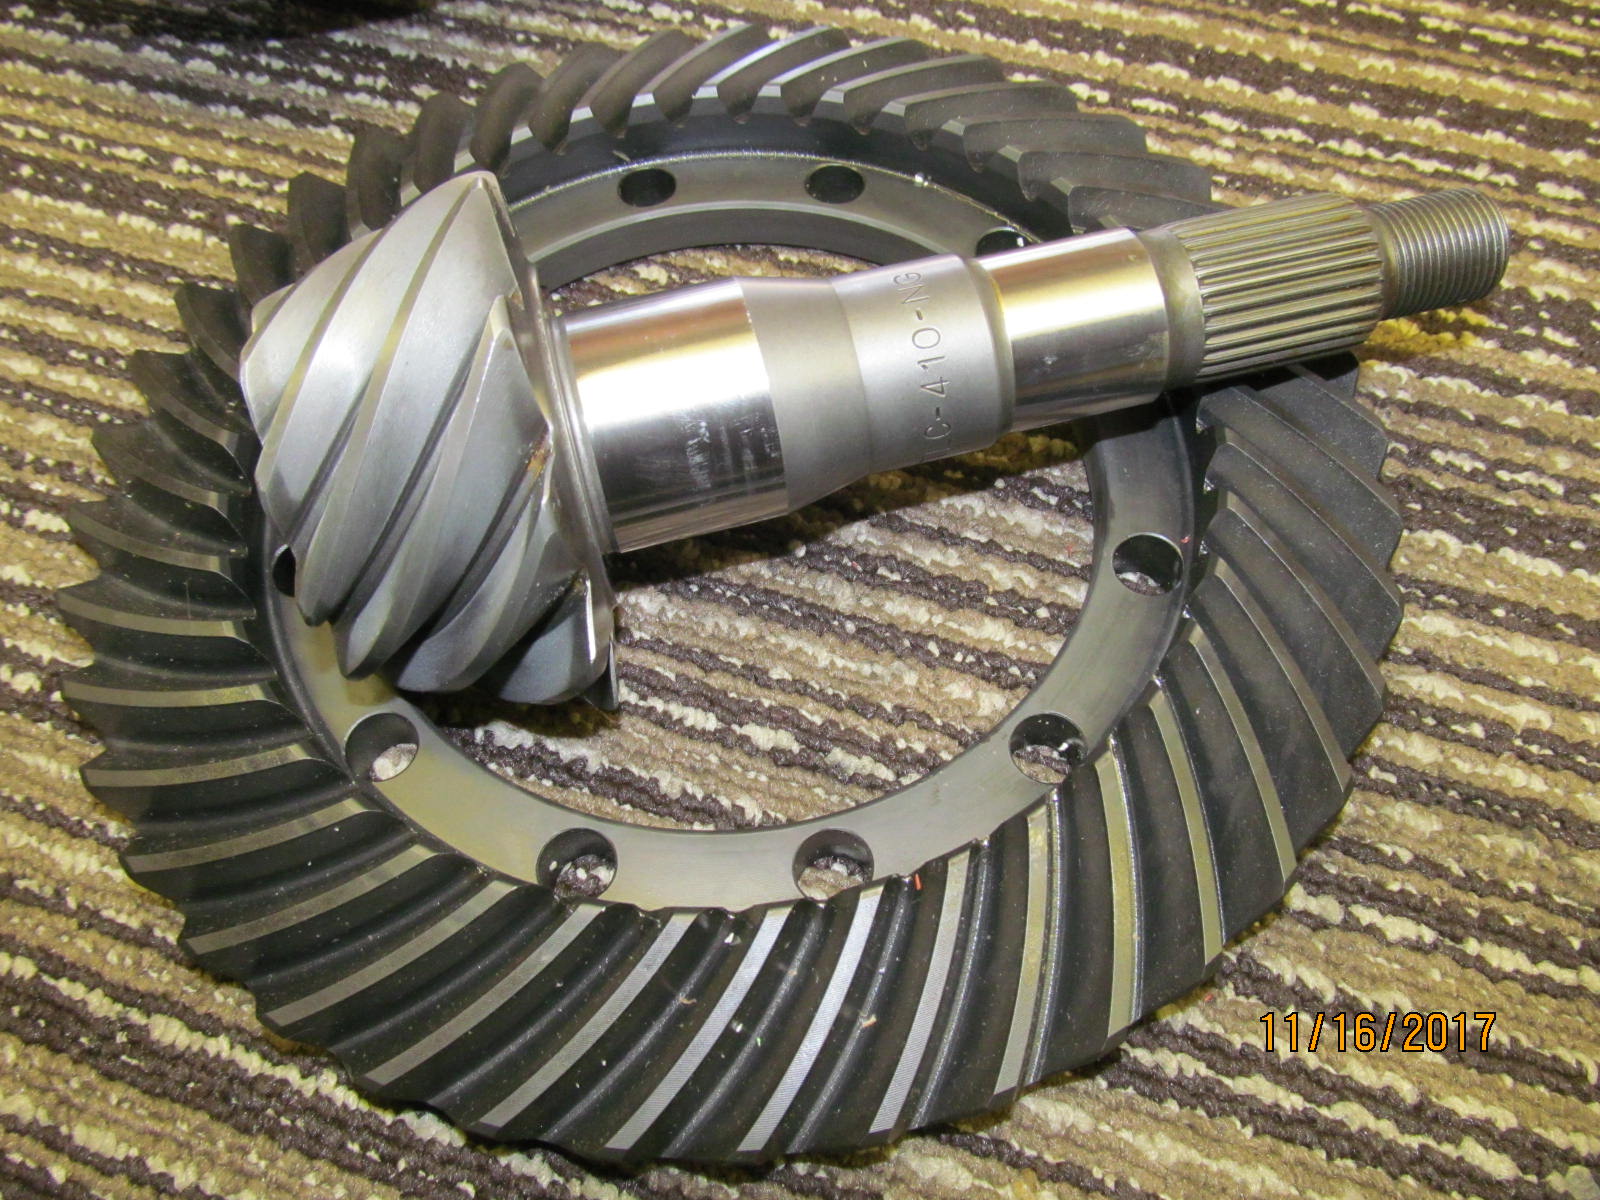
| Nitro 410 gear set......from JustDifferentials.com. |
|---|
|
|
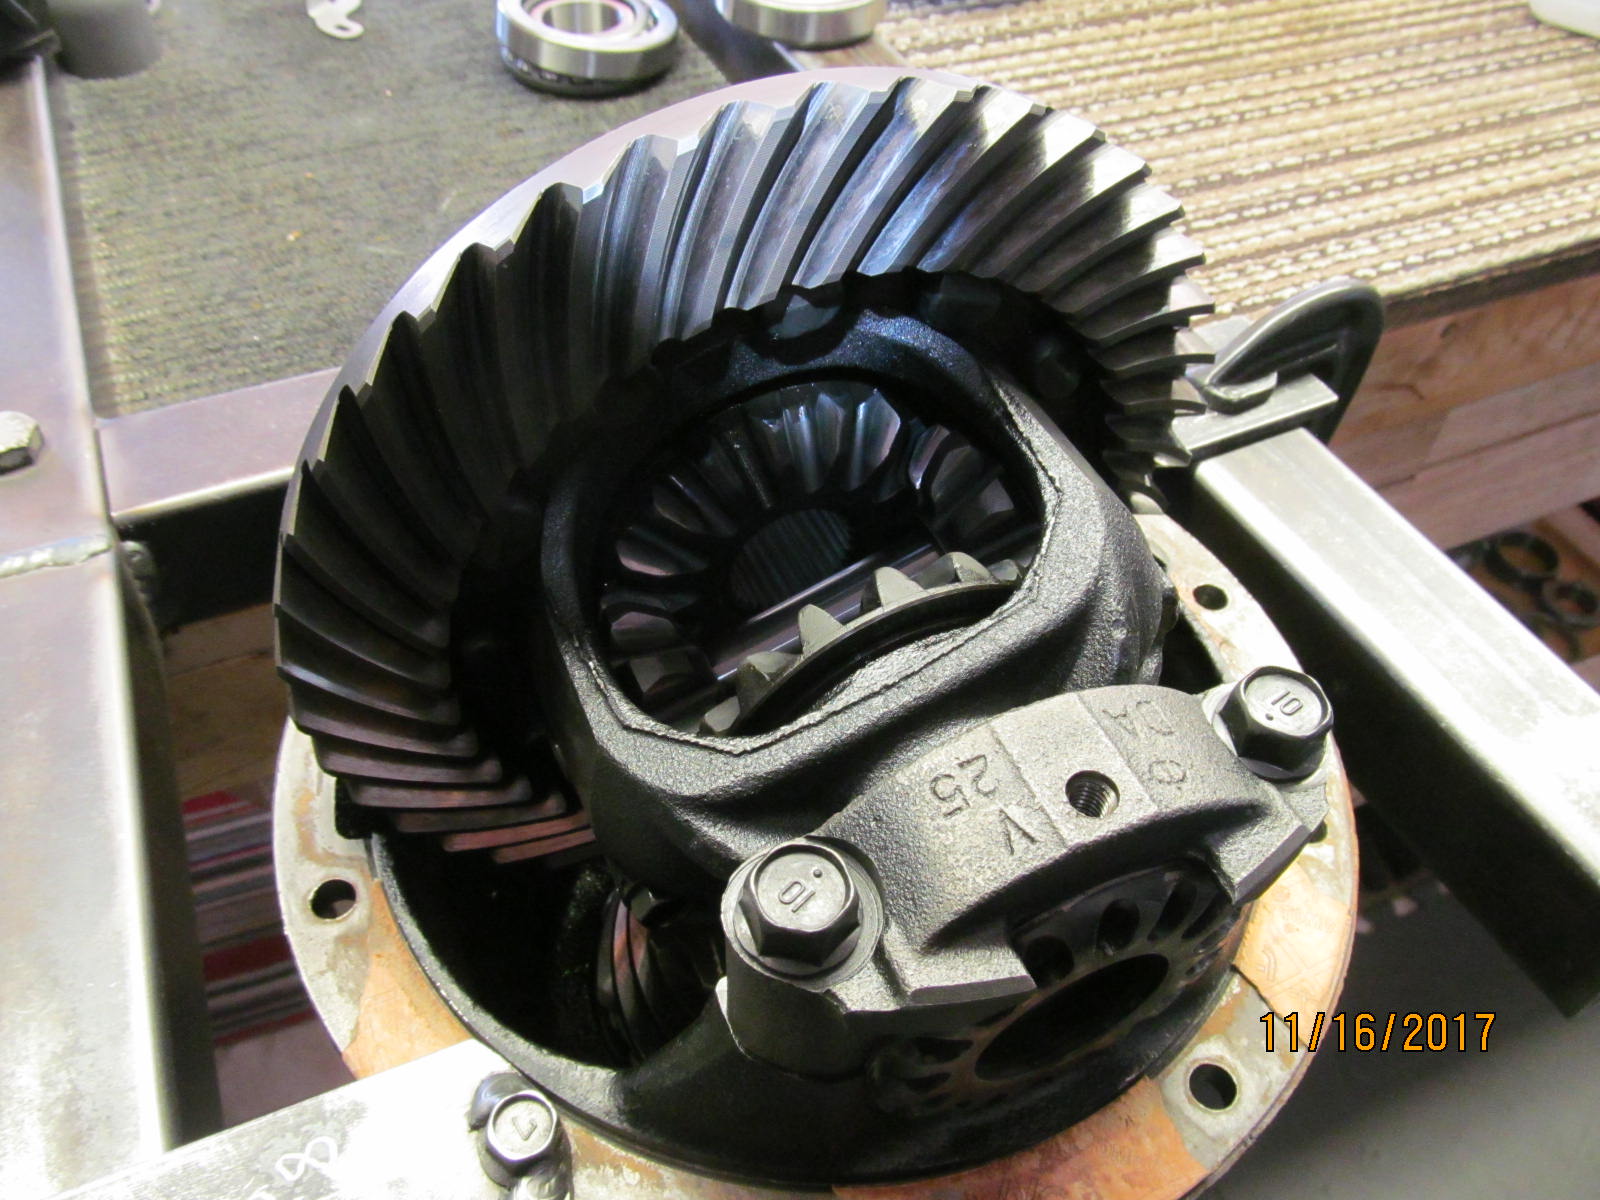
| Here's the 410 ring that was on the diff that Rekon4x4 sent me.....they are all scuffed up. Unusable. |
|---|
|
|
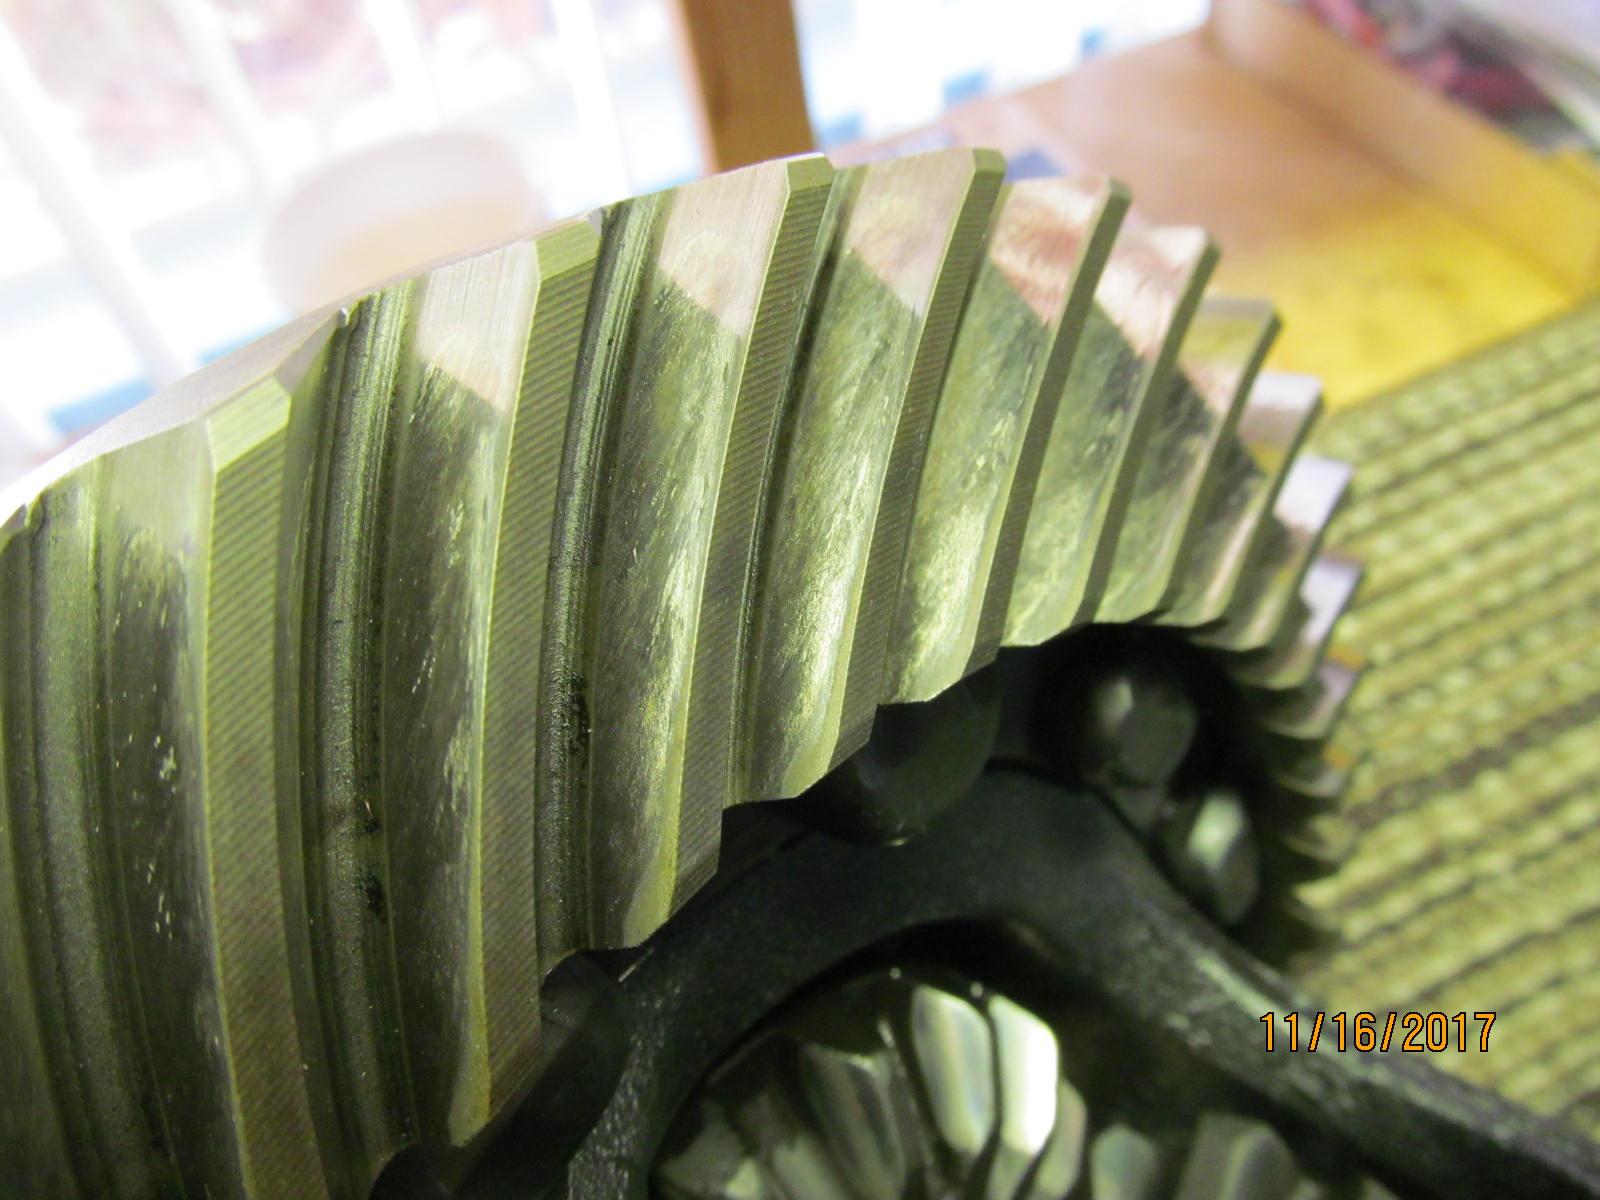
| Tooth surface is far too compromised. This kind of scuffing can be caused by extremely low oil. |
|---|
|
|
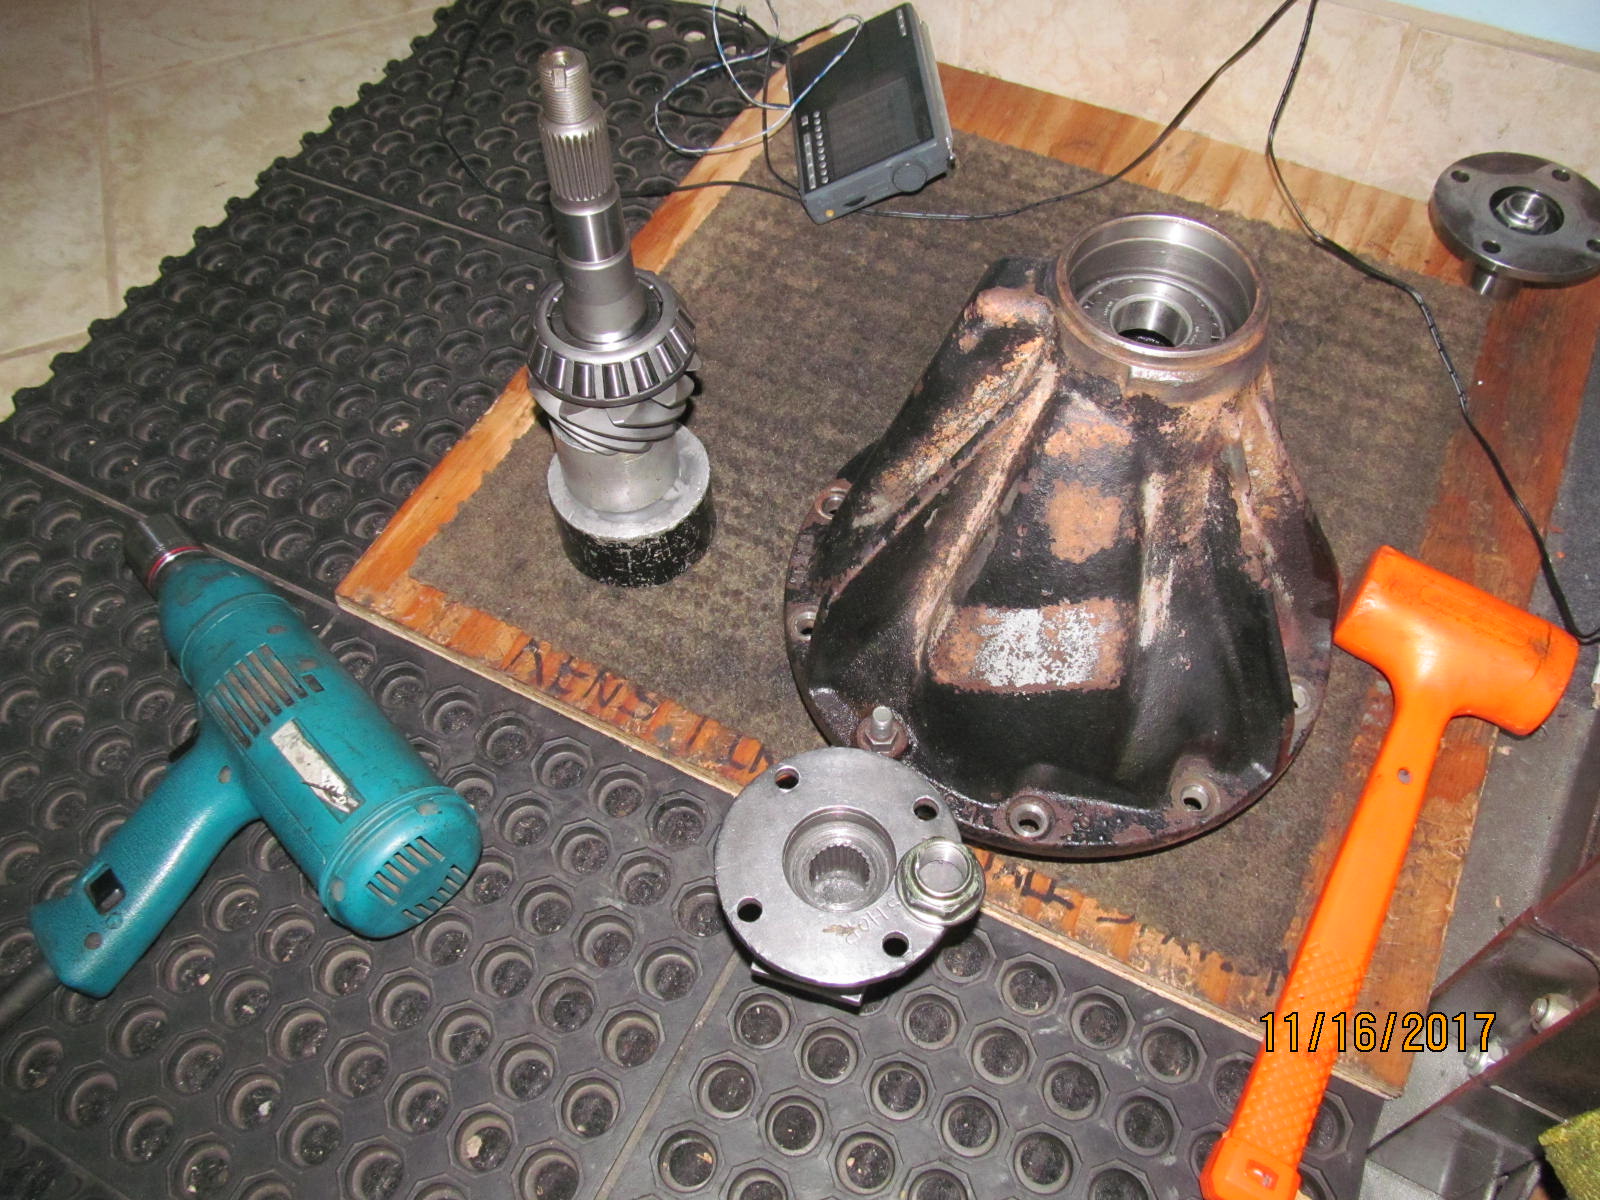
| Now to start disassembly....DING! the bearing cap. |
|---|
|
|
| All 4 bearing cap bolts are whizzed off. |
|---|
|
|
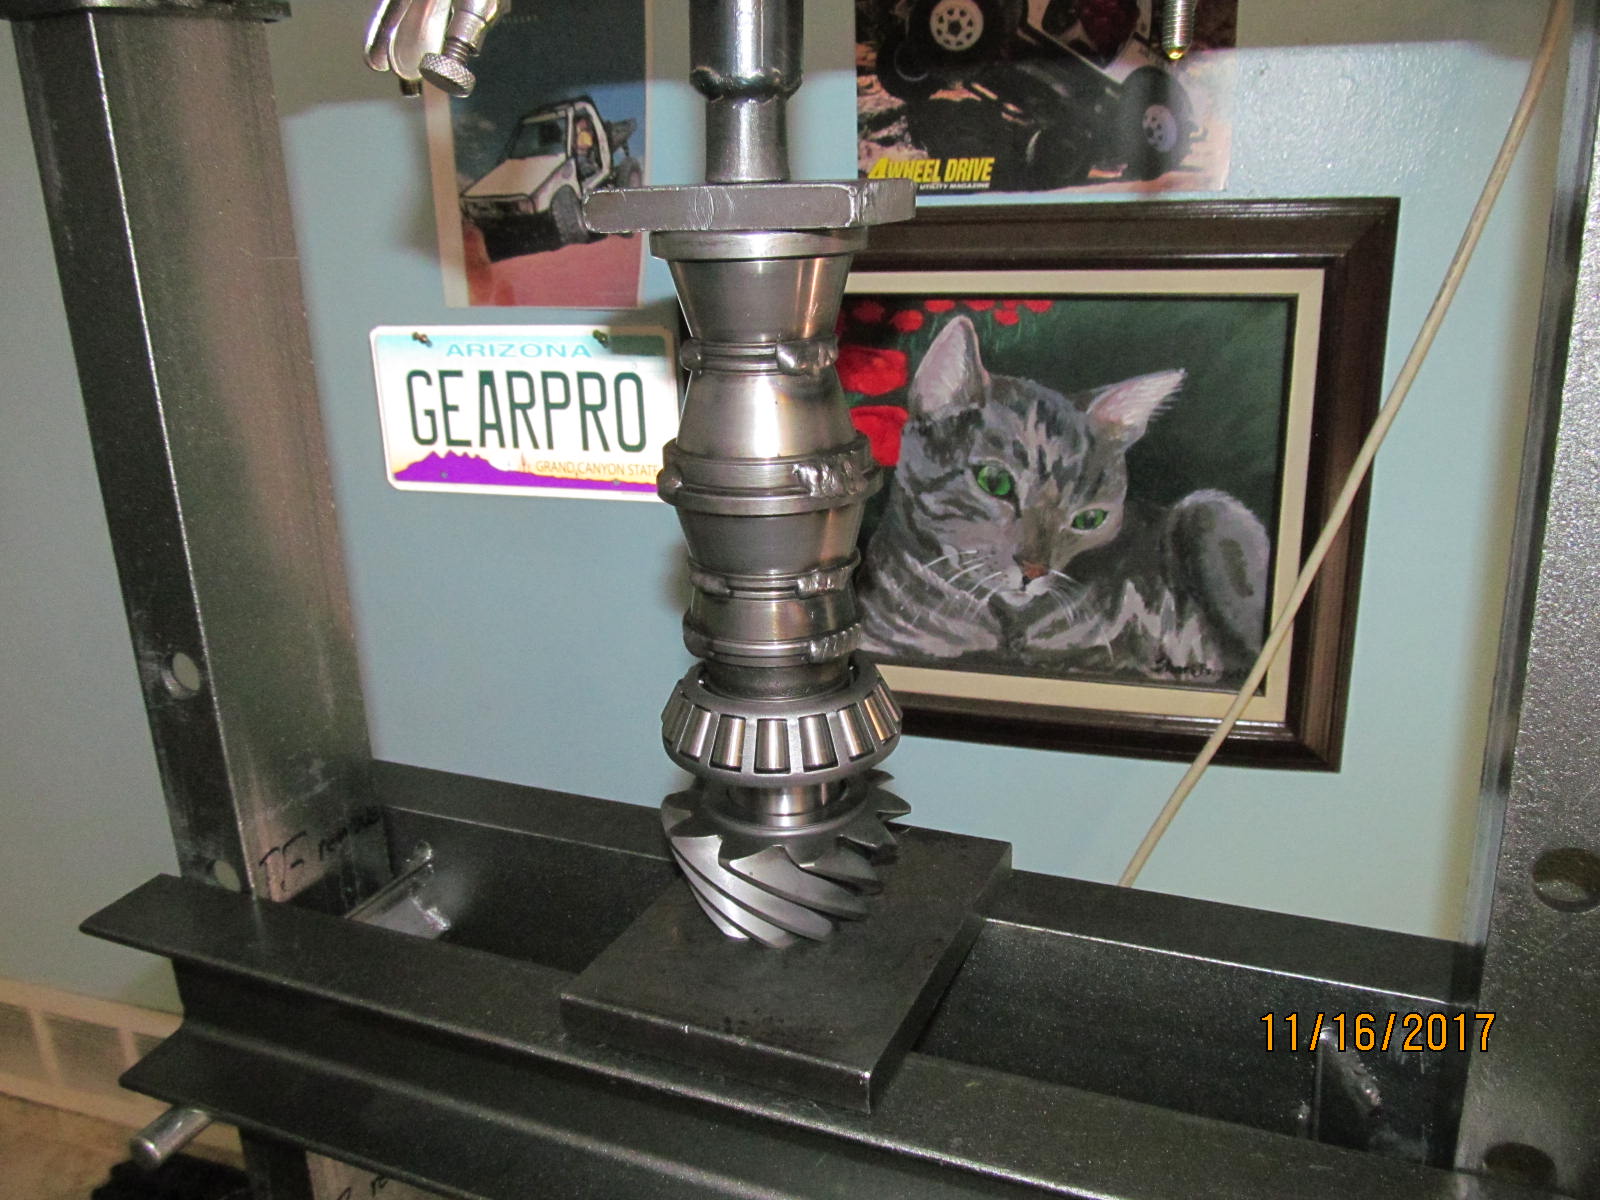
| That poor pinion..... |
|---|
|
|
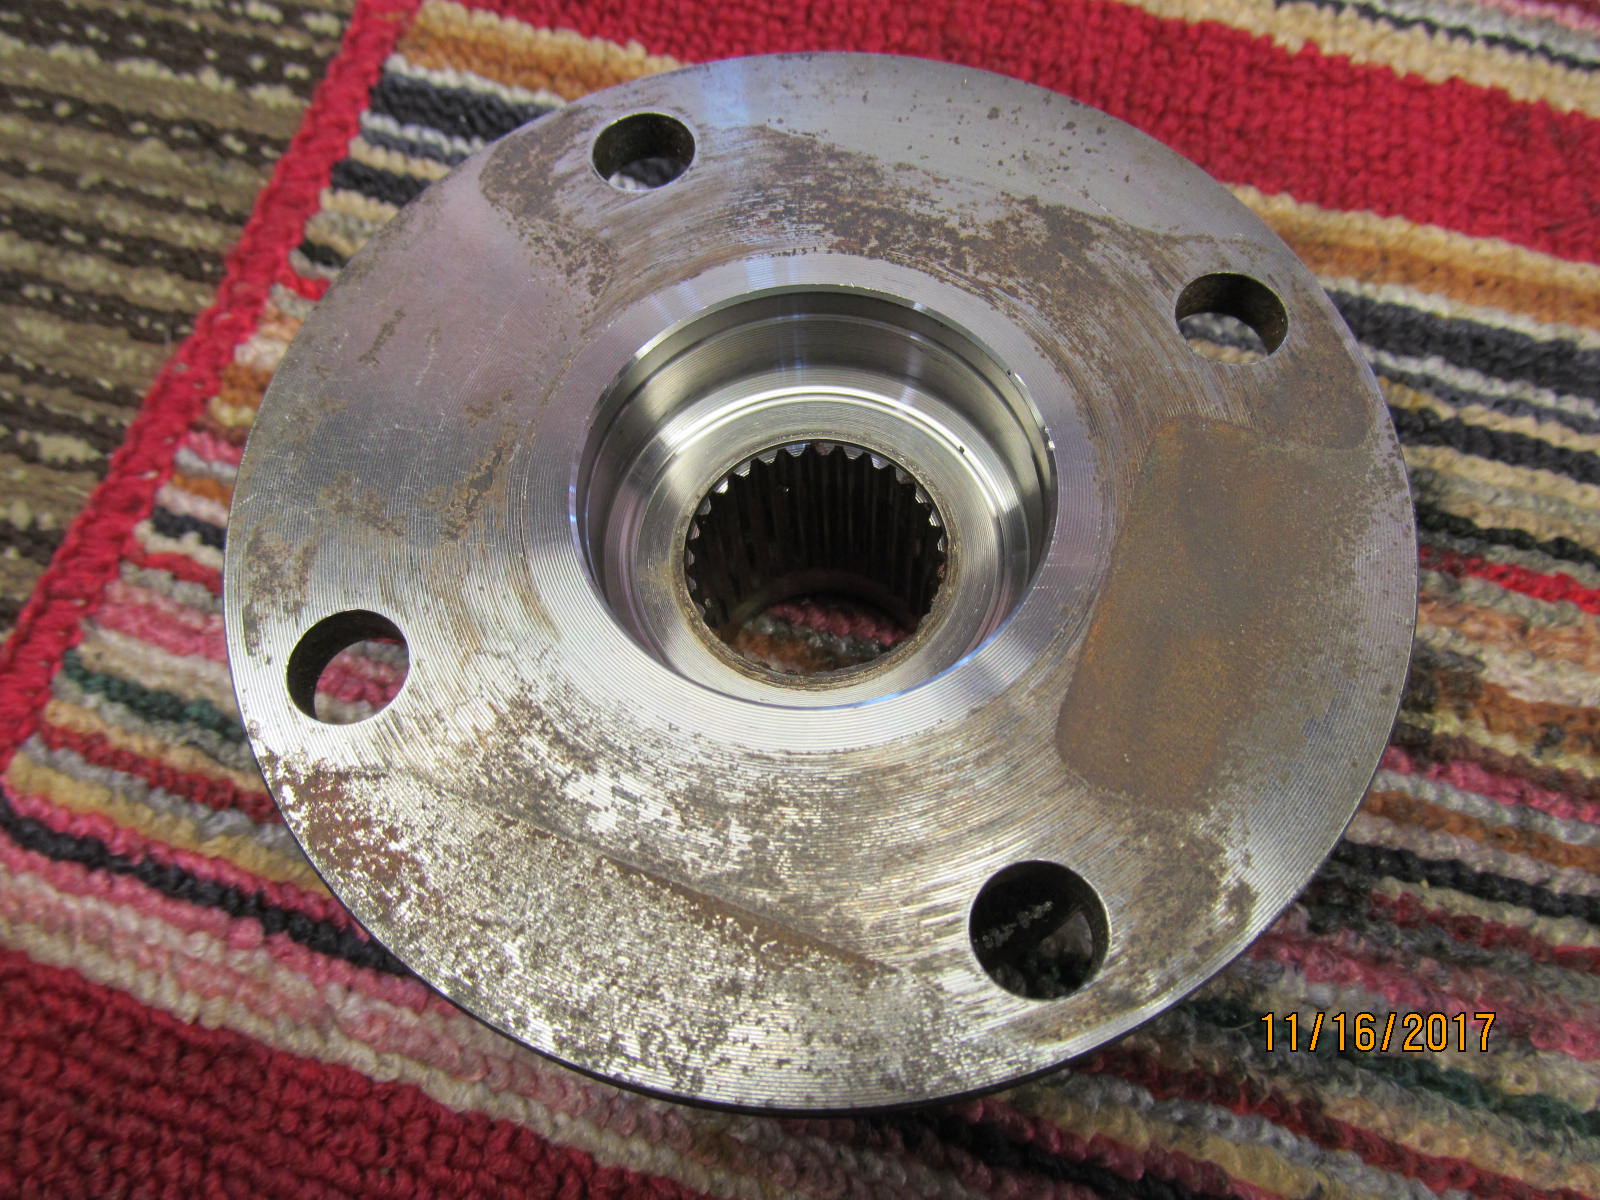
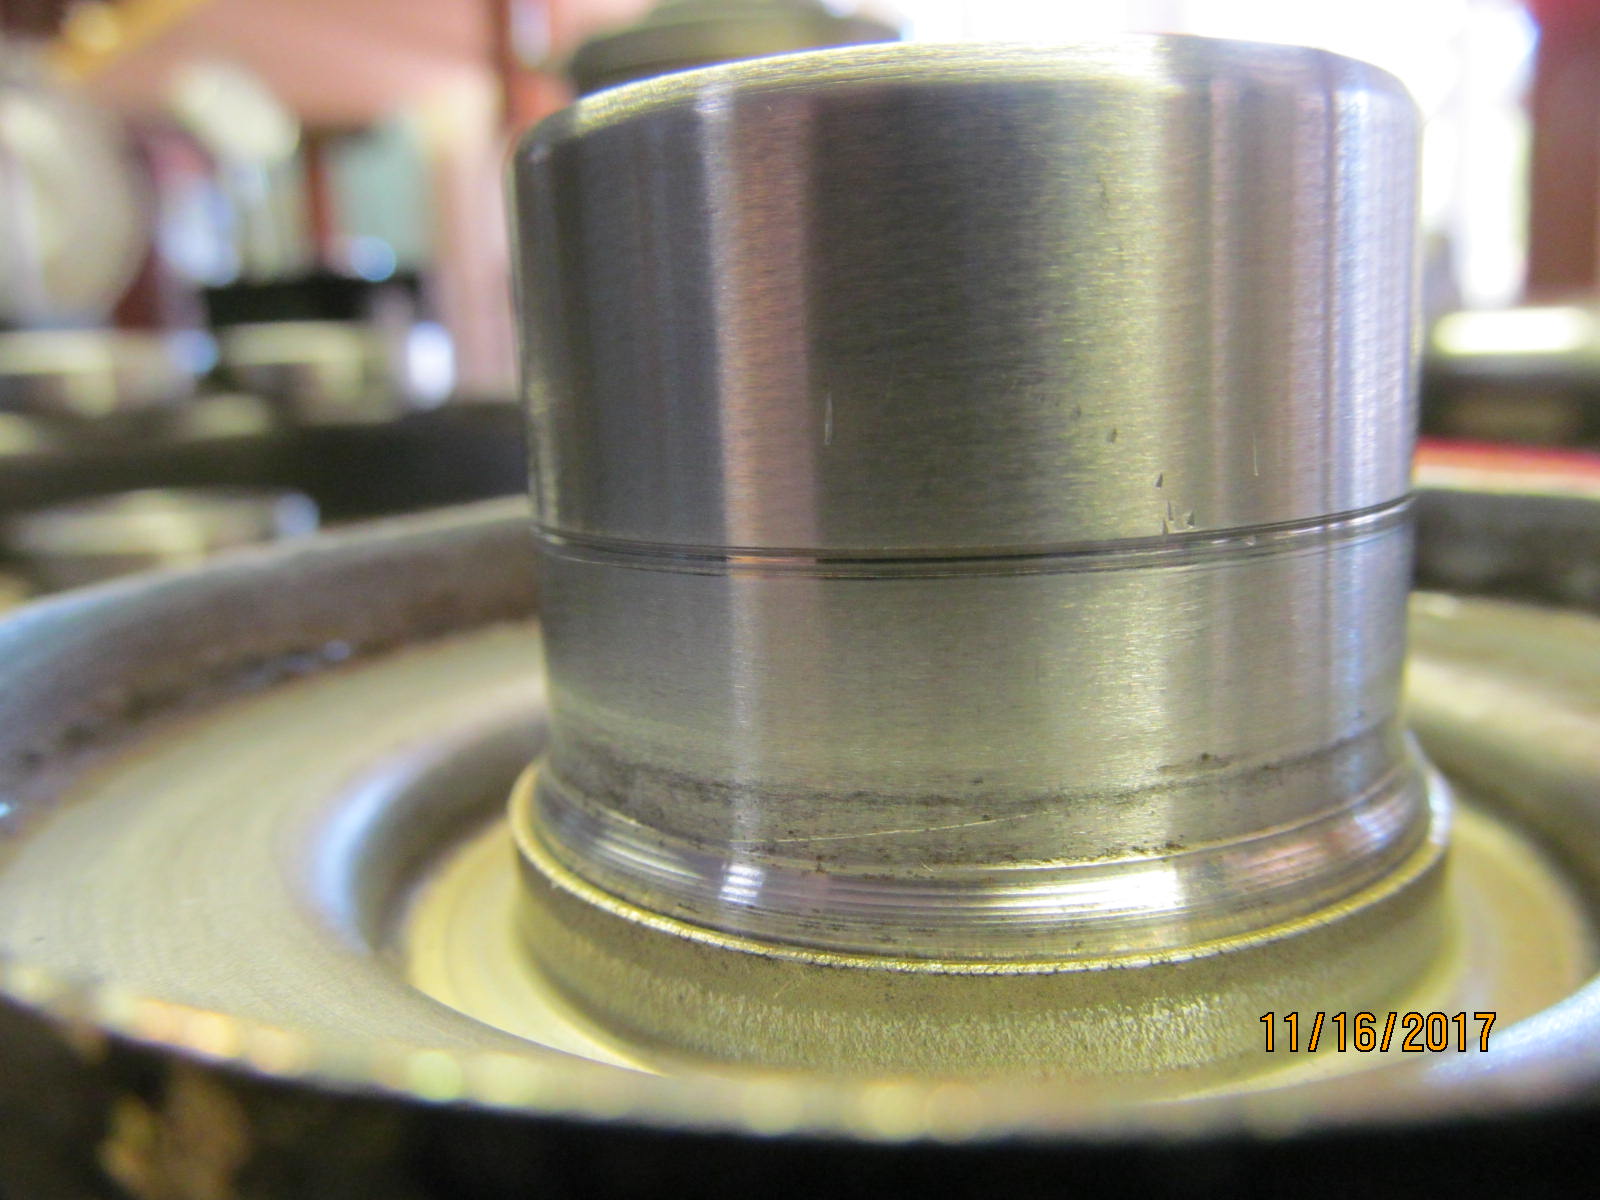
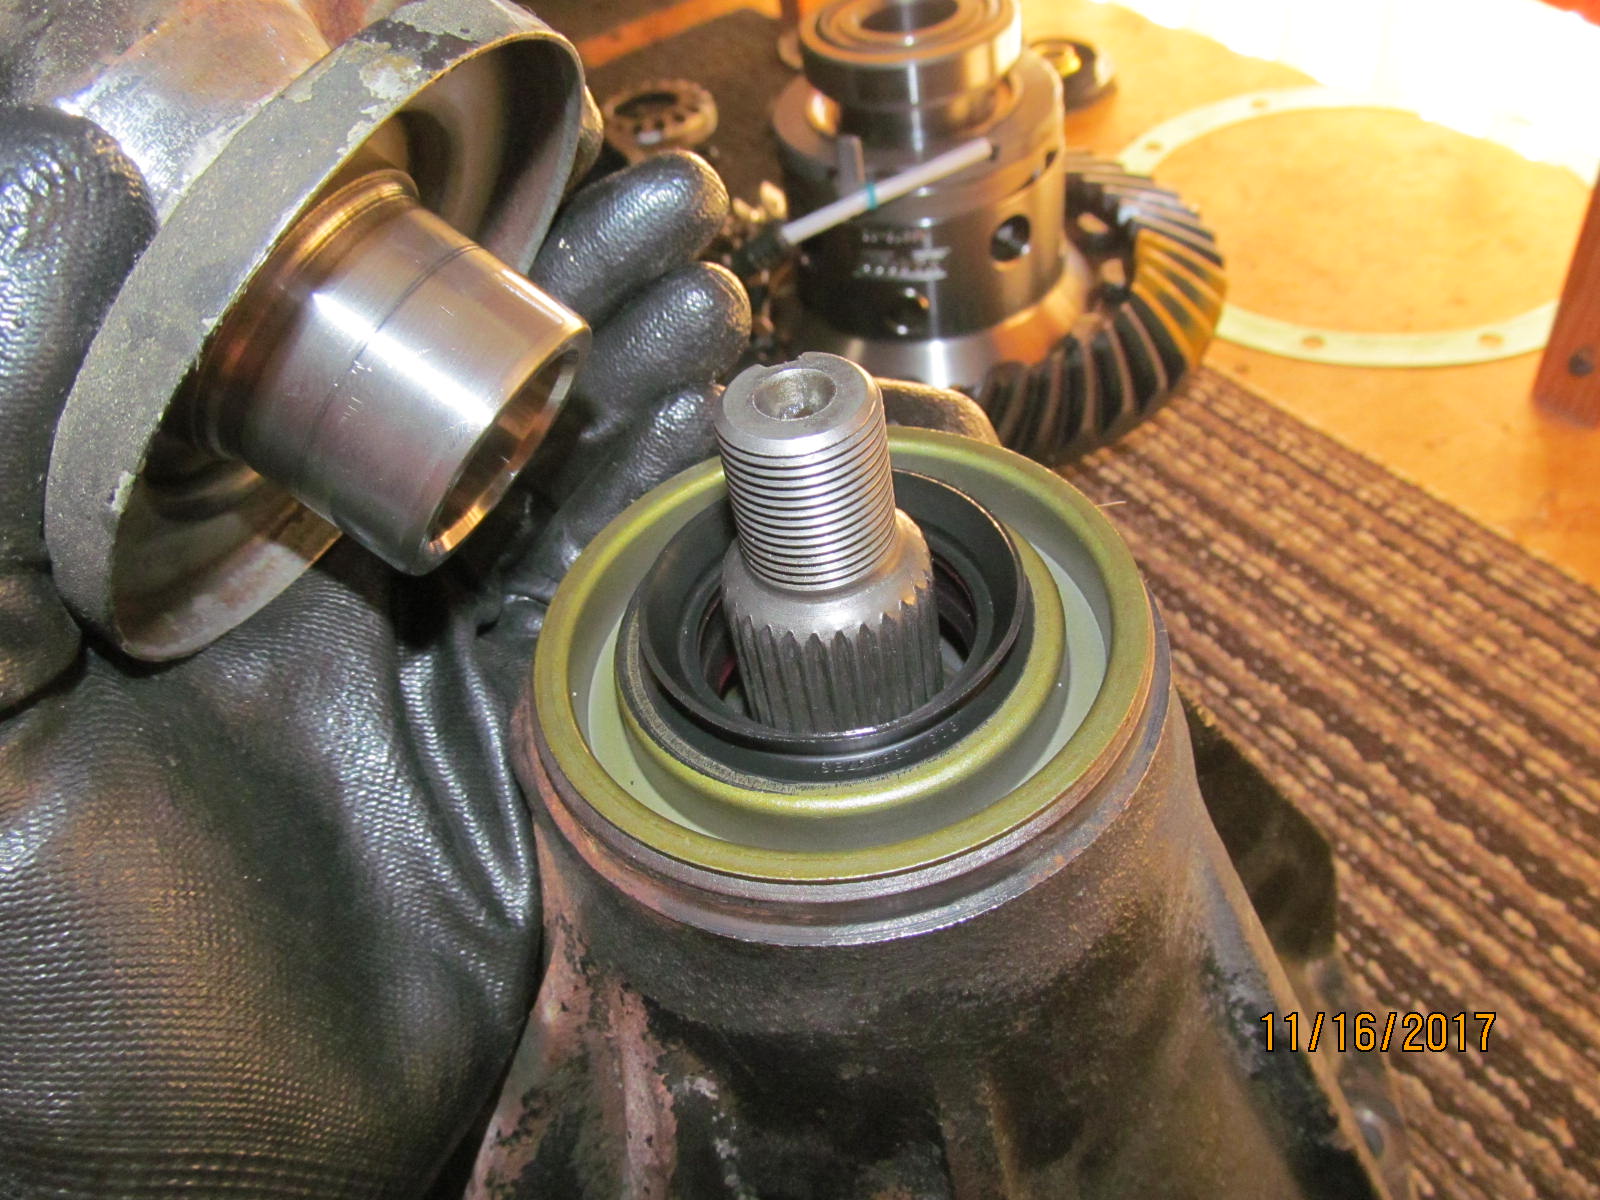
| The original pinion flange looks good on this side.... |
|---|
|

|
....and really looks good on the bottom side where the seal lives. That tiny groove is no issue at all....
especially since I will be using a Marlin "eco" seal that will move the seal contact zone almost .300" higher based on the picture above. . |
|---|
|
|
| ,,,,,,,,,,,,,,,,,,,,,,,, |
|---|
|
|
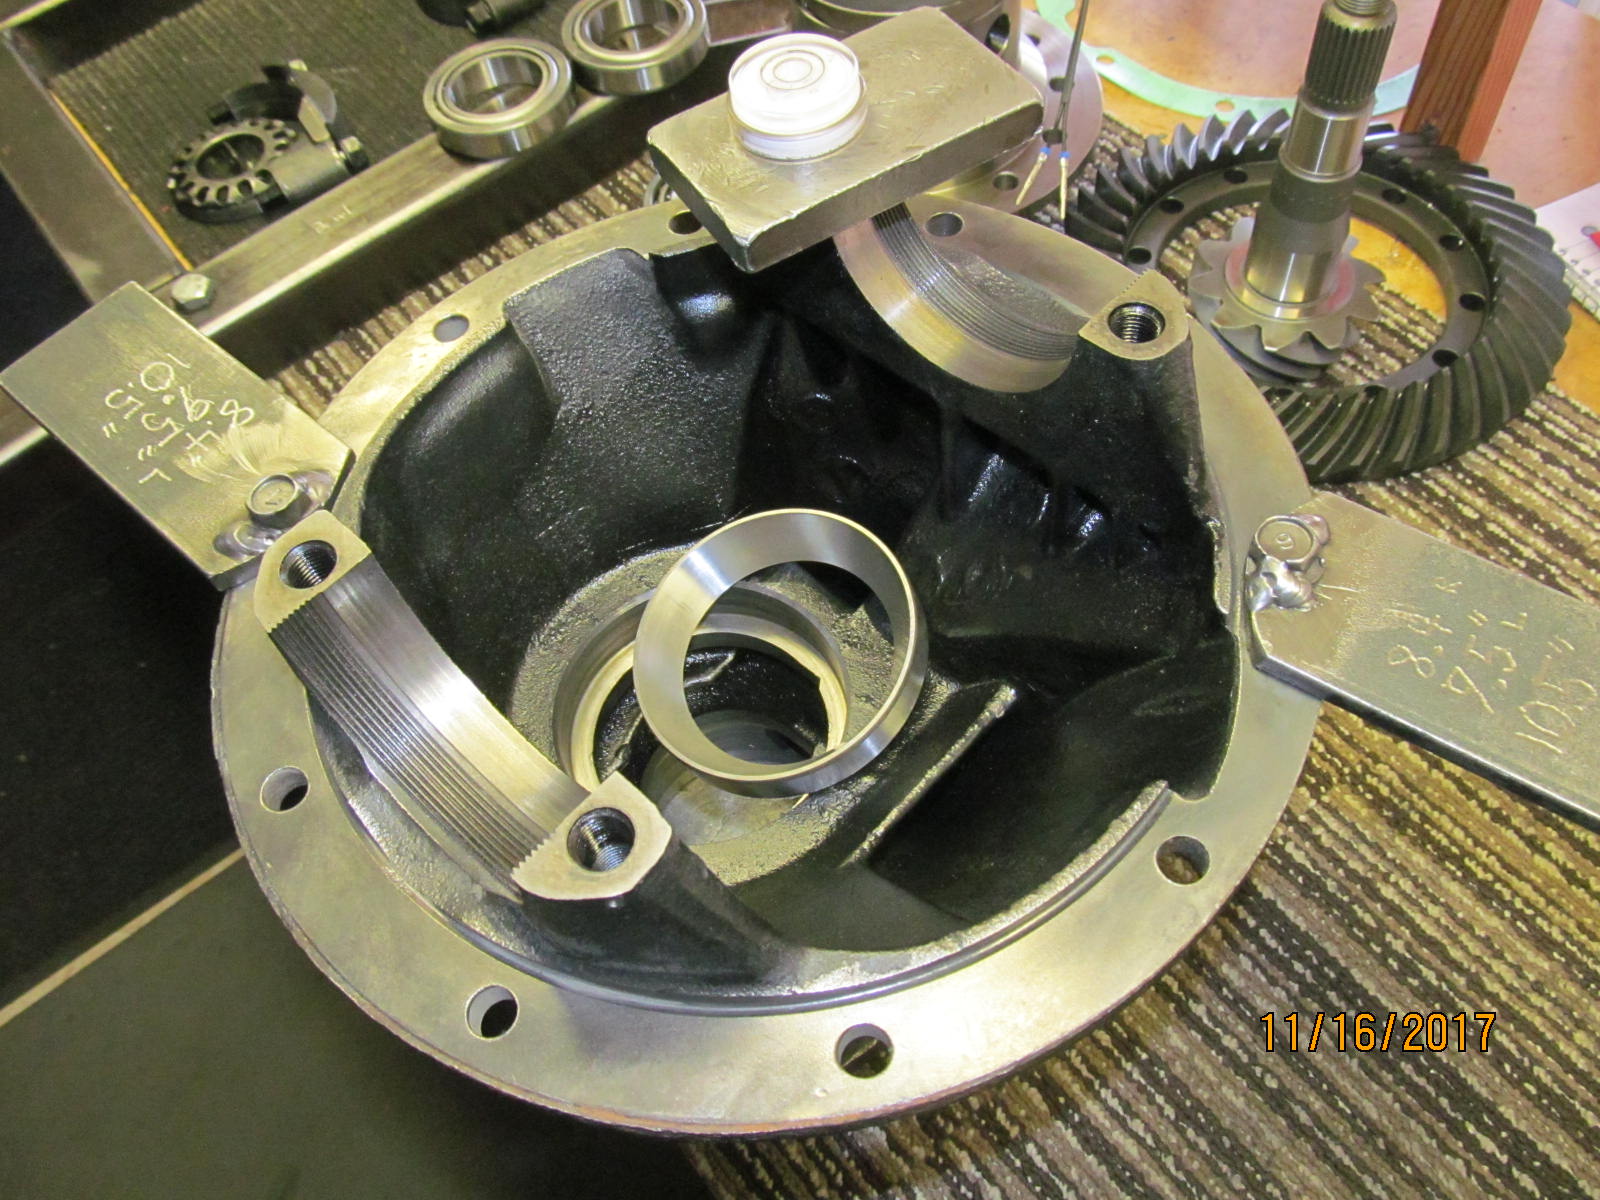
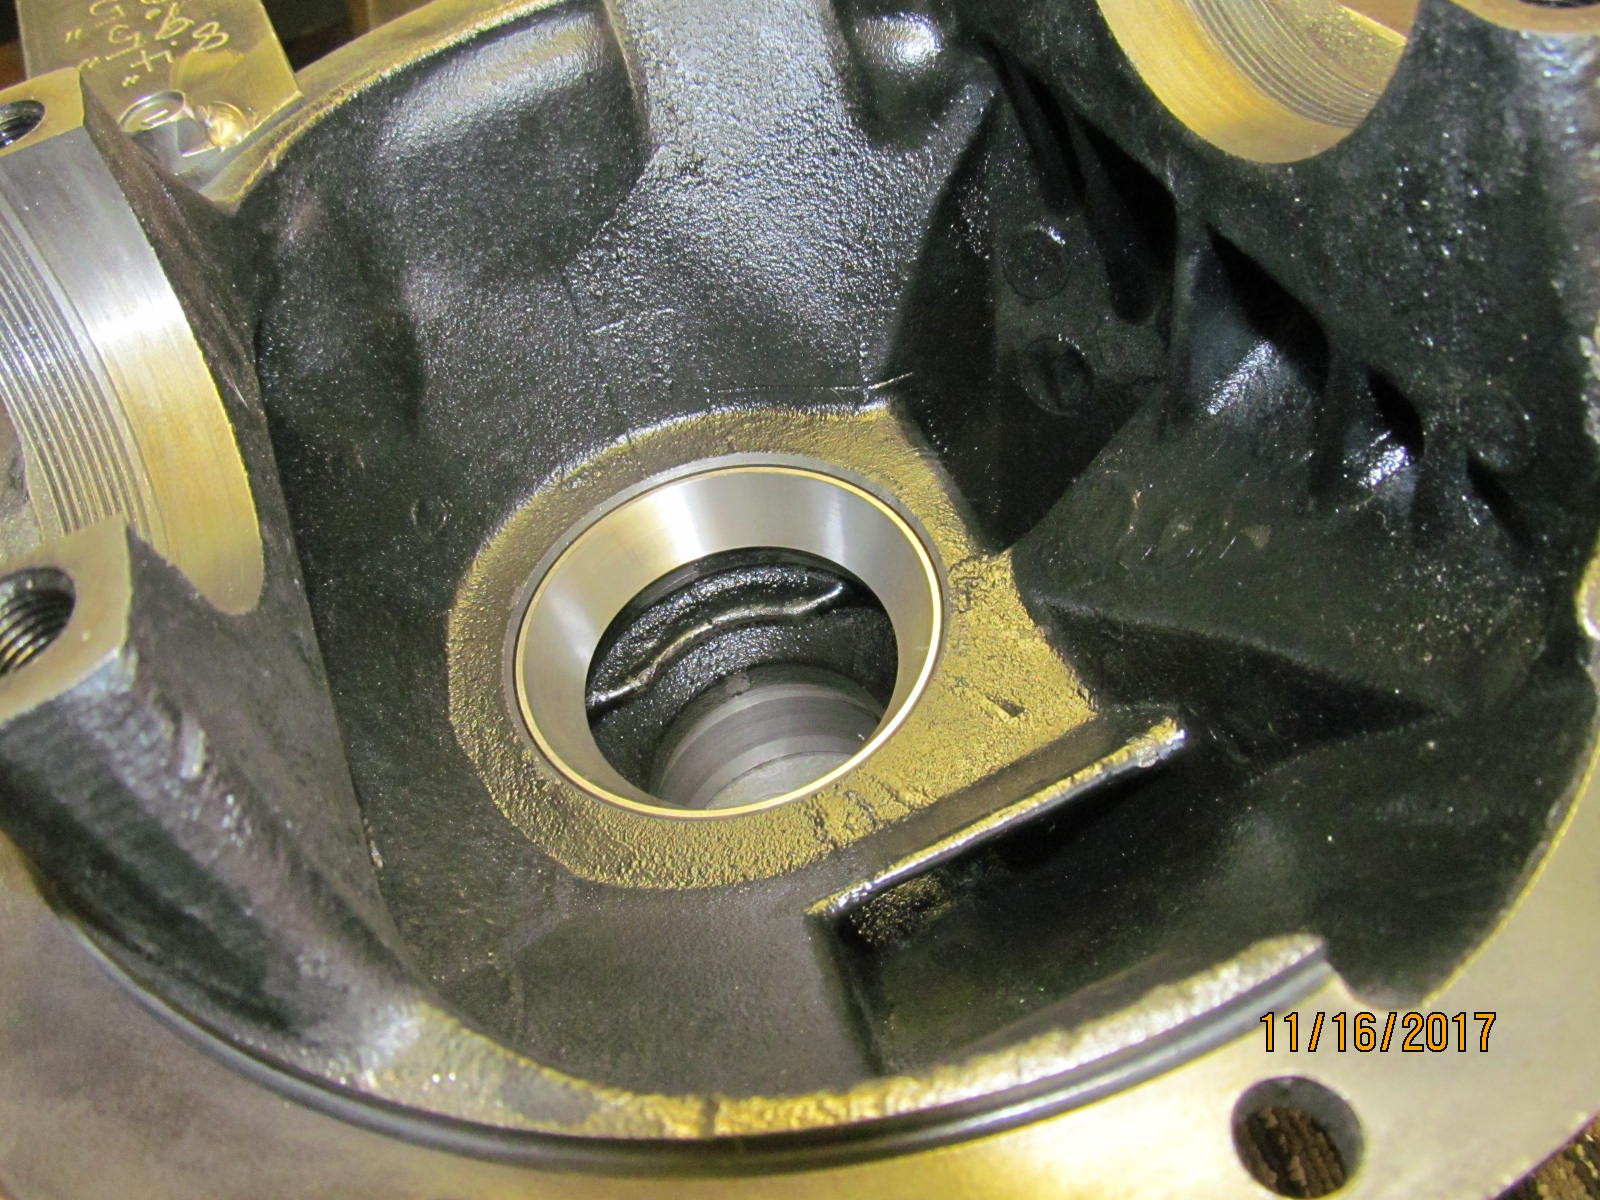
| The bare 3rd housing has been cleaned up. The new race is now installed. |
|---|
|
|
| Going down smoothly. |
|---|
|
|
| An old race will guarantee that the new race is 100% seated. |
|---|
|
|
| ....................... |
|---|
|
|
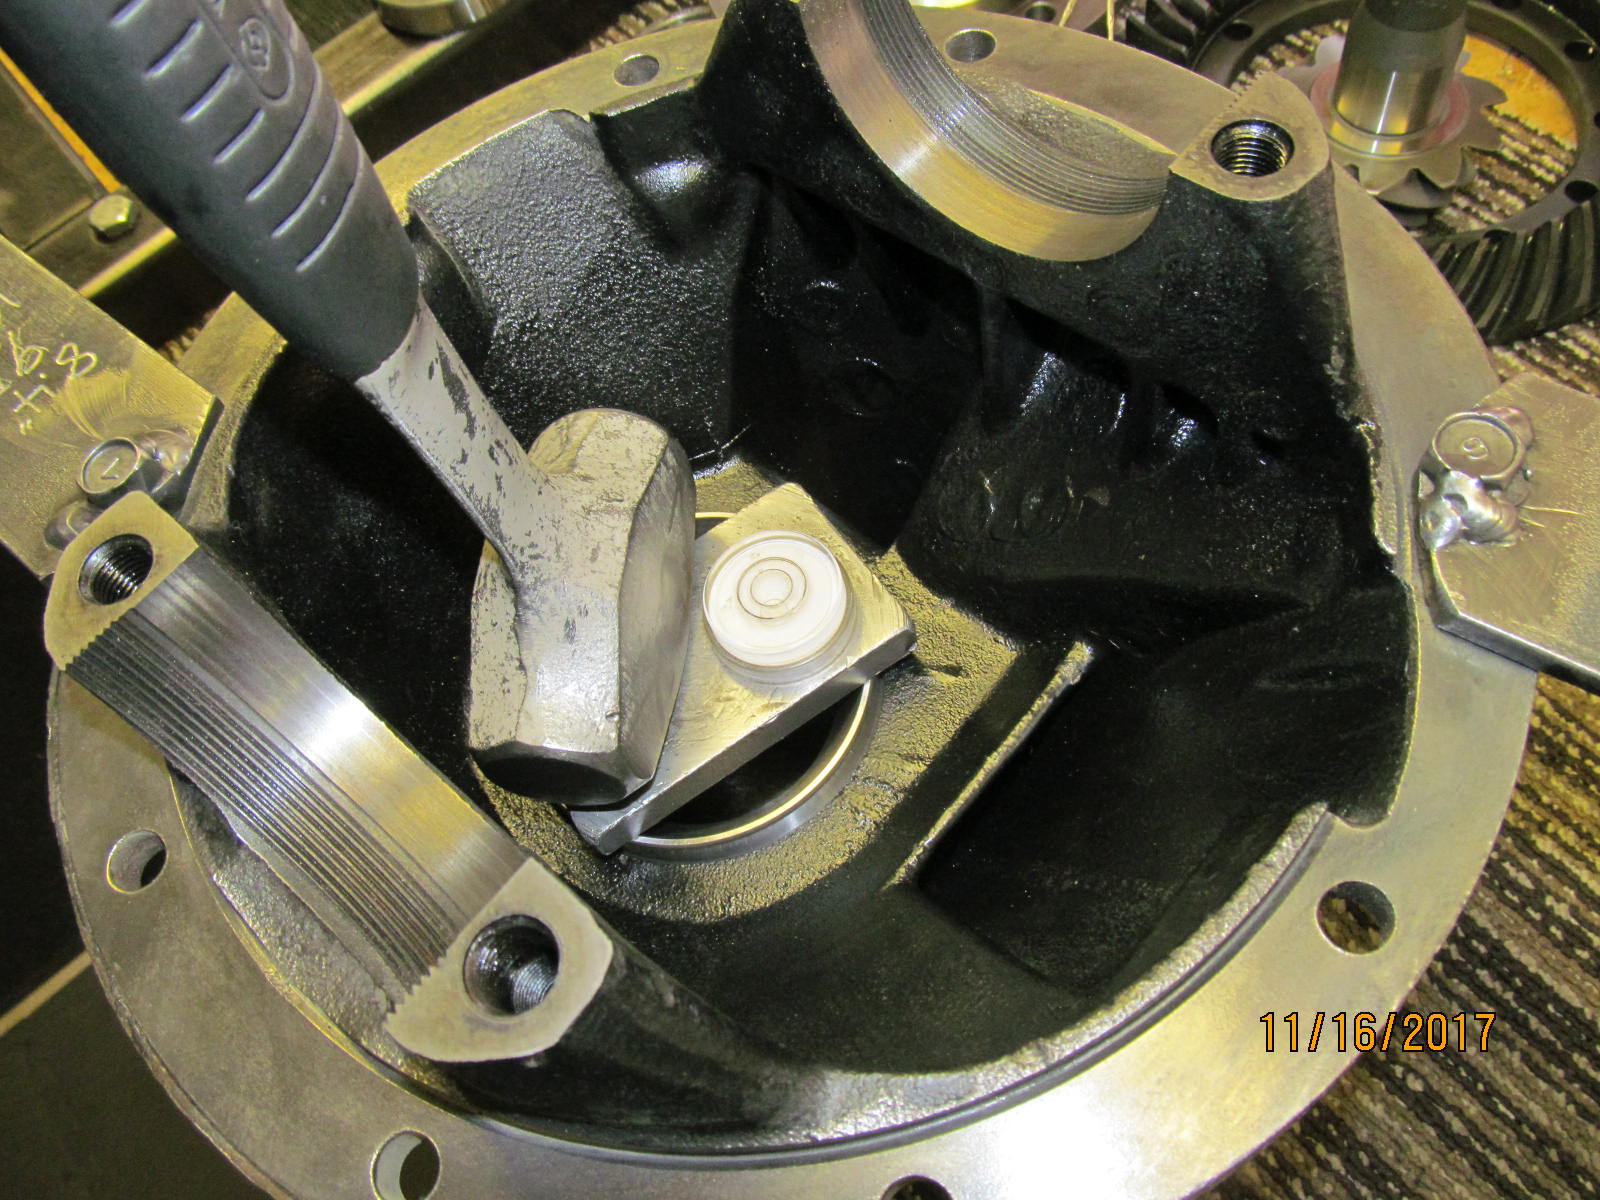
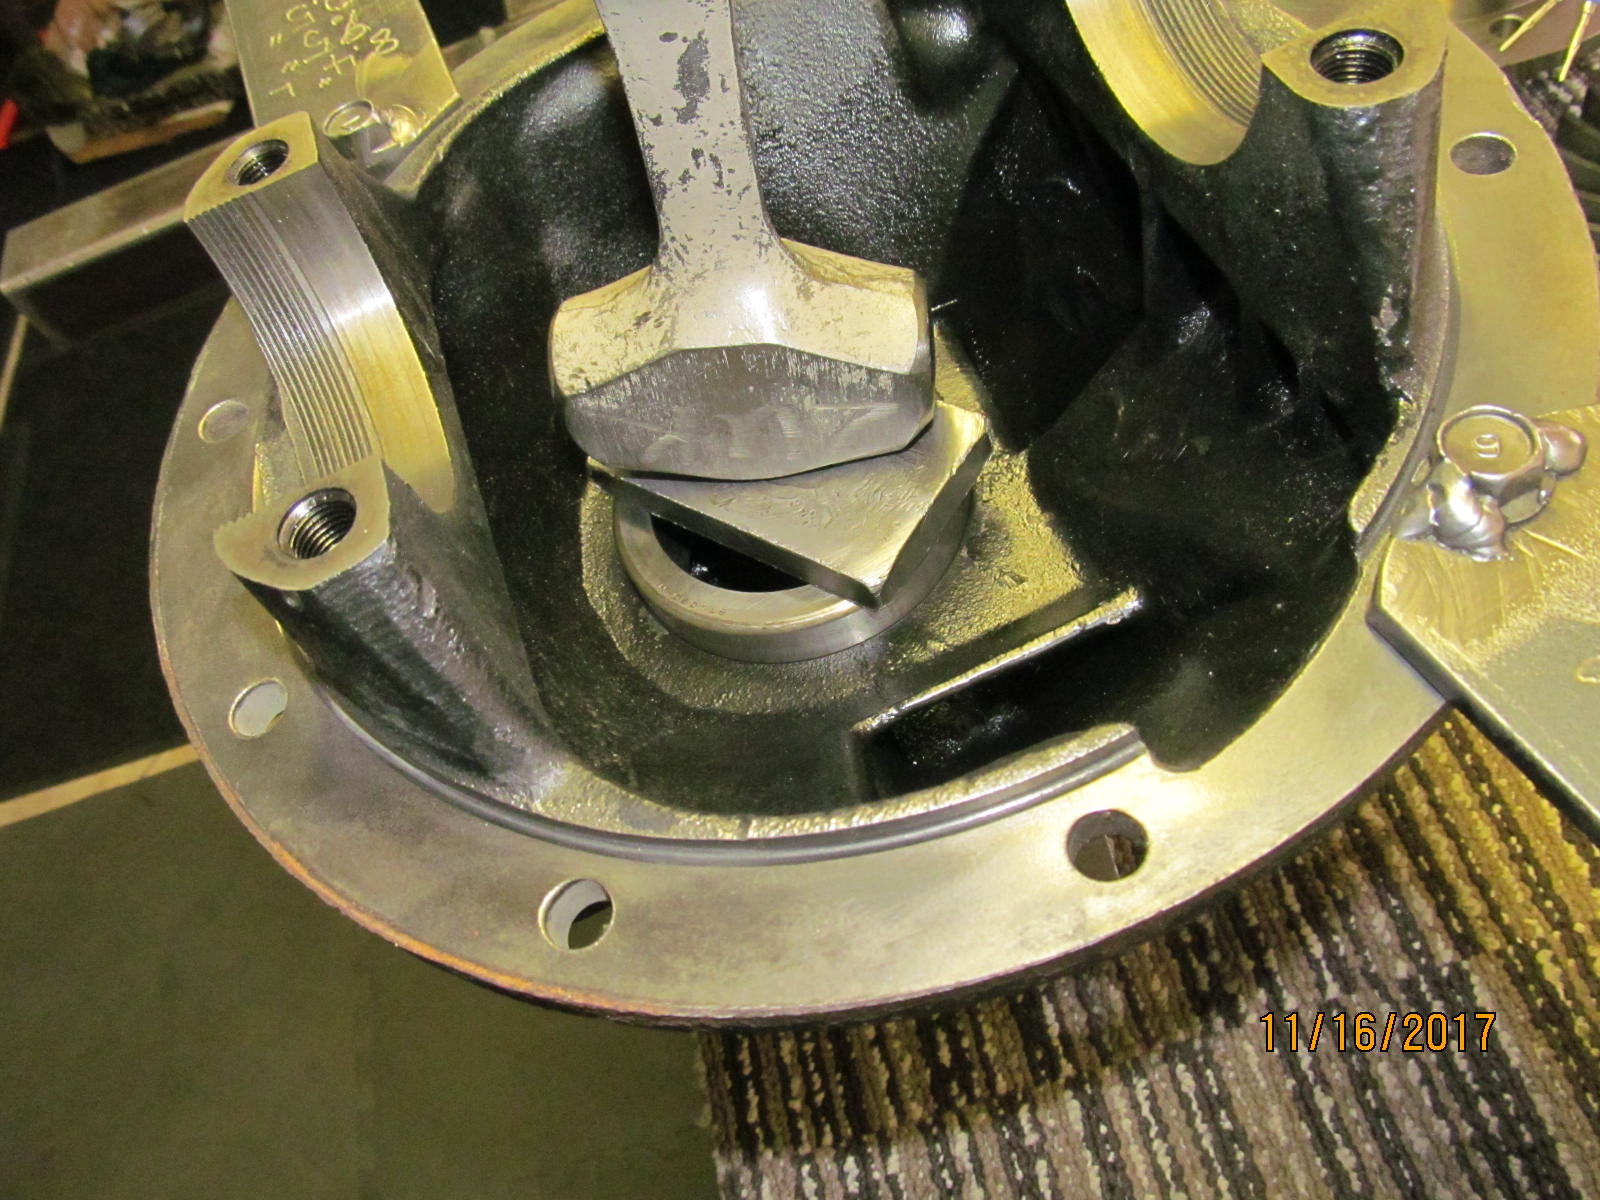
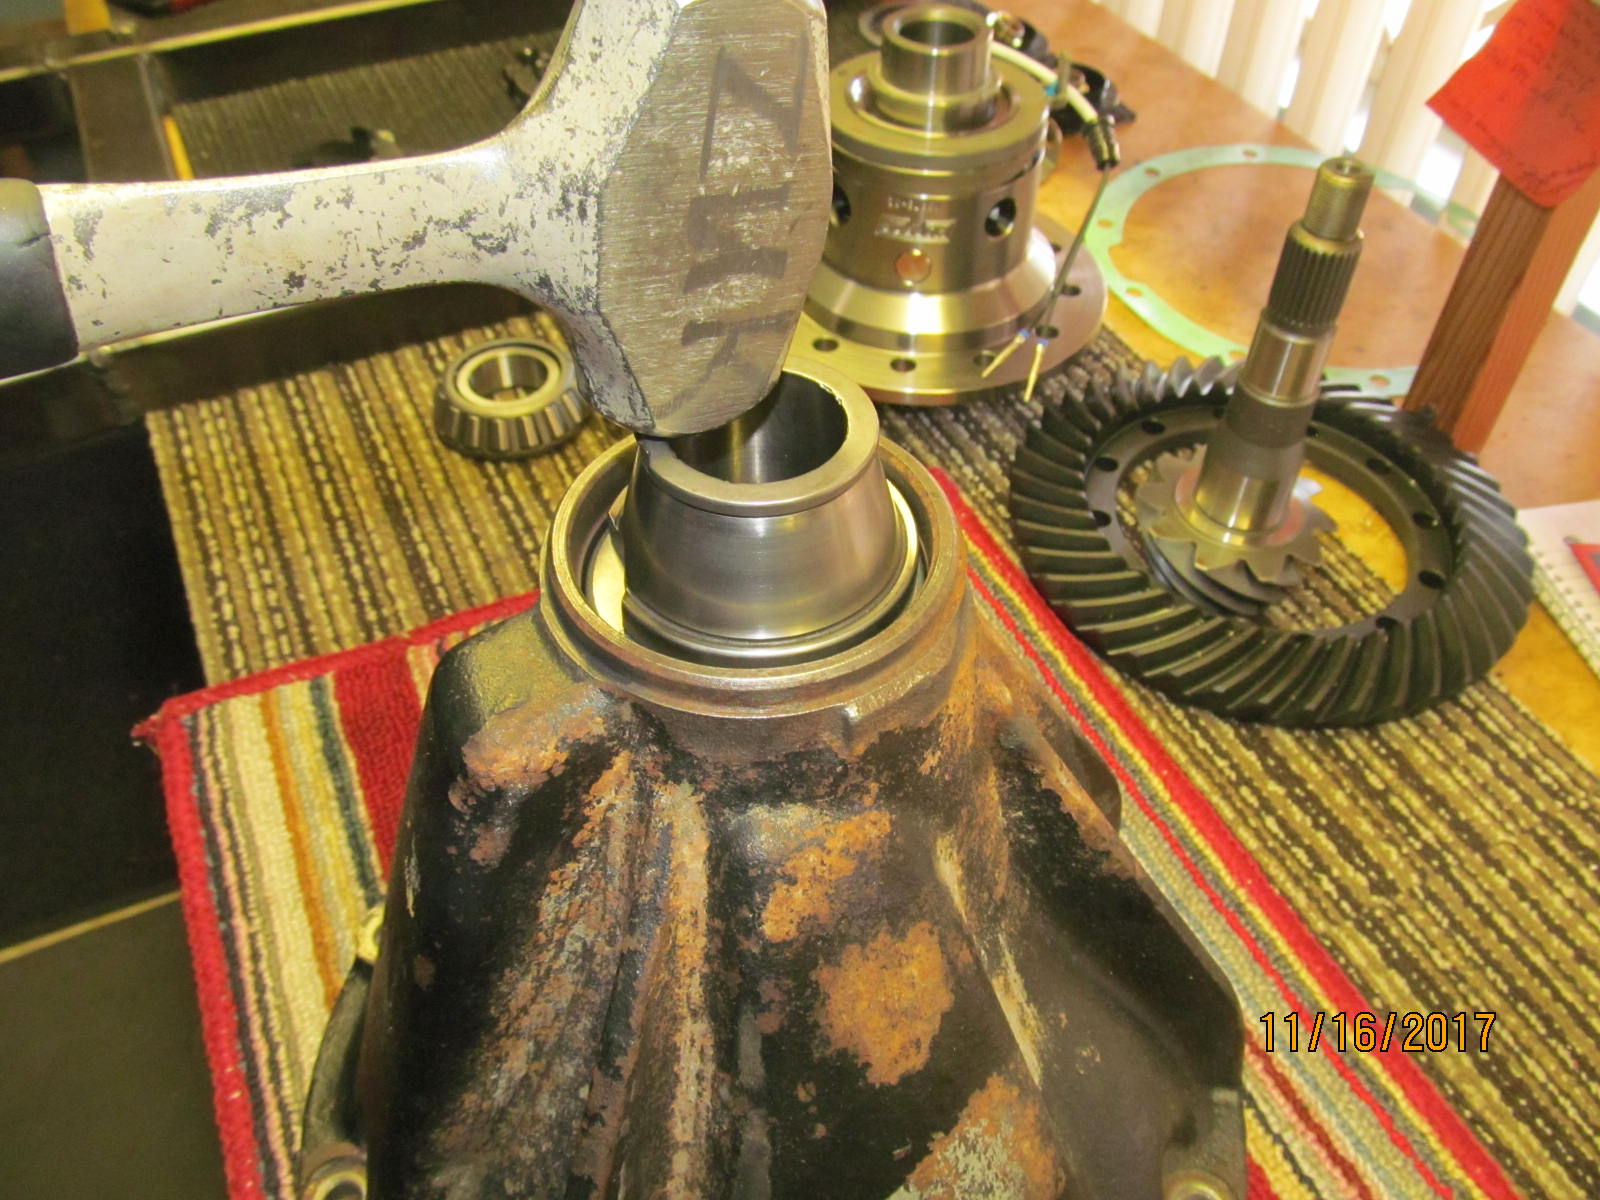
| Tapping the small outer race in. |
|---|
|
|
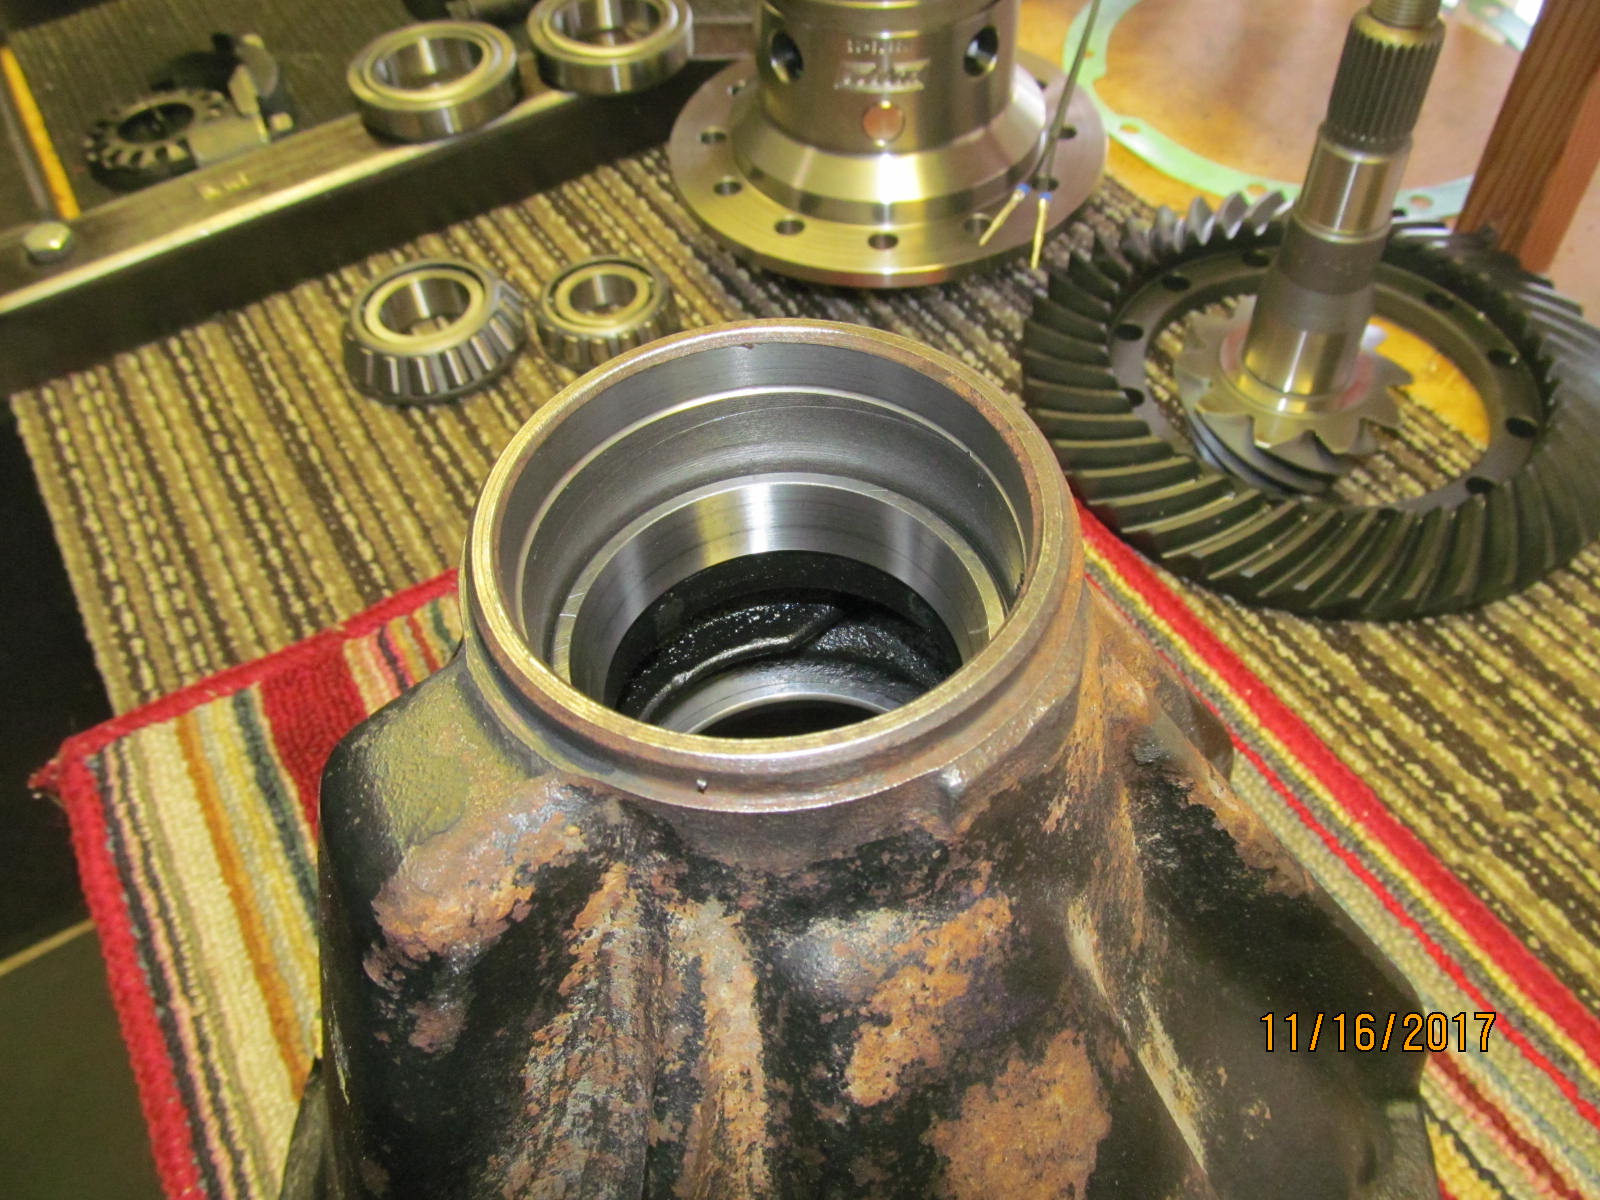
| Looks good. |
|---|
|
|
| I would like to try .050" for the first pinion depth guess. |
|---|
|
|
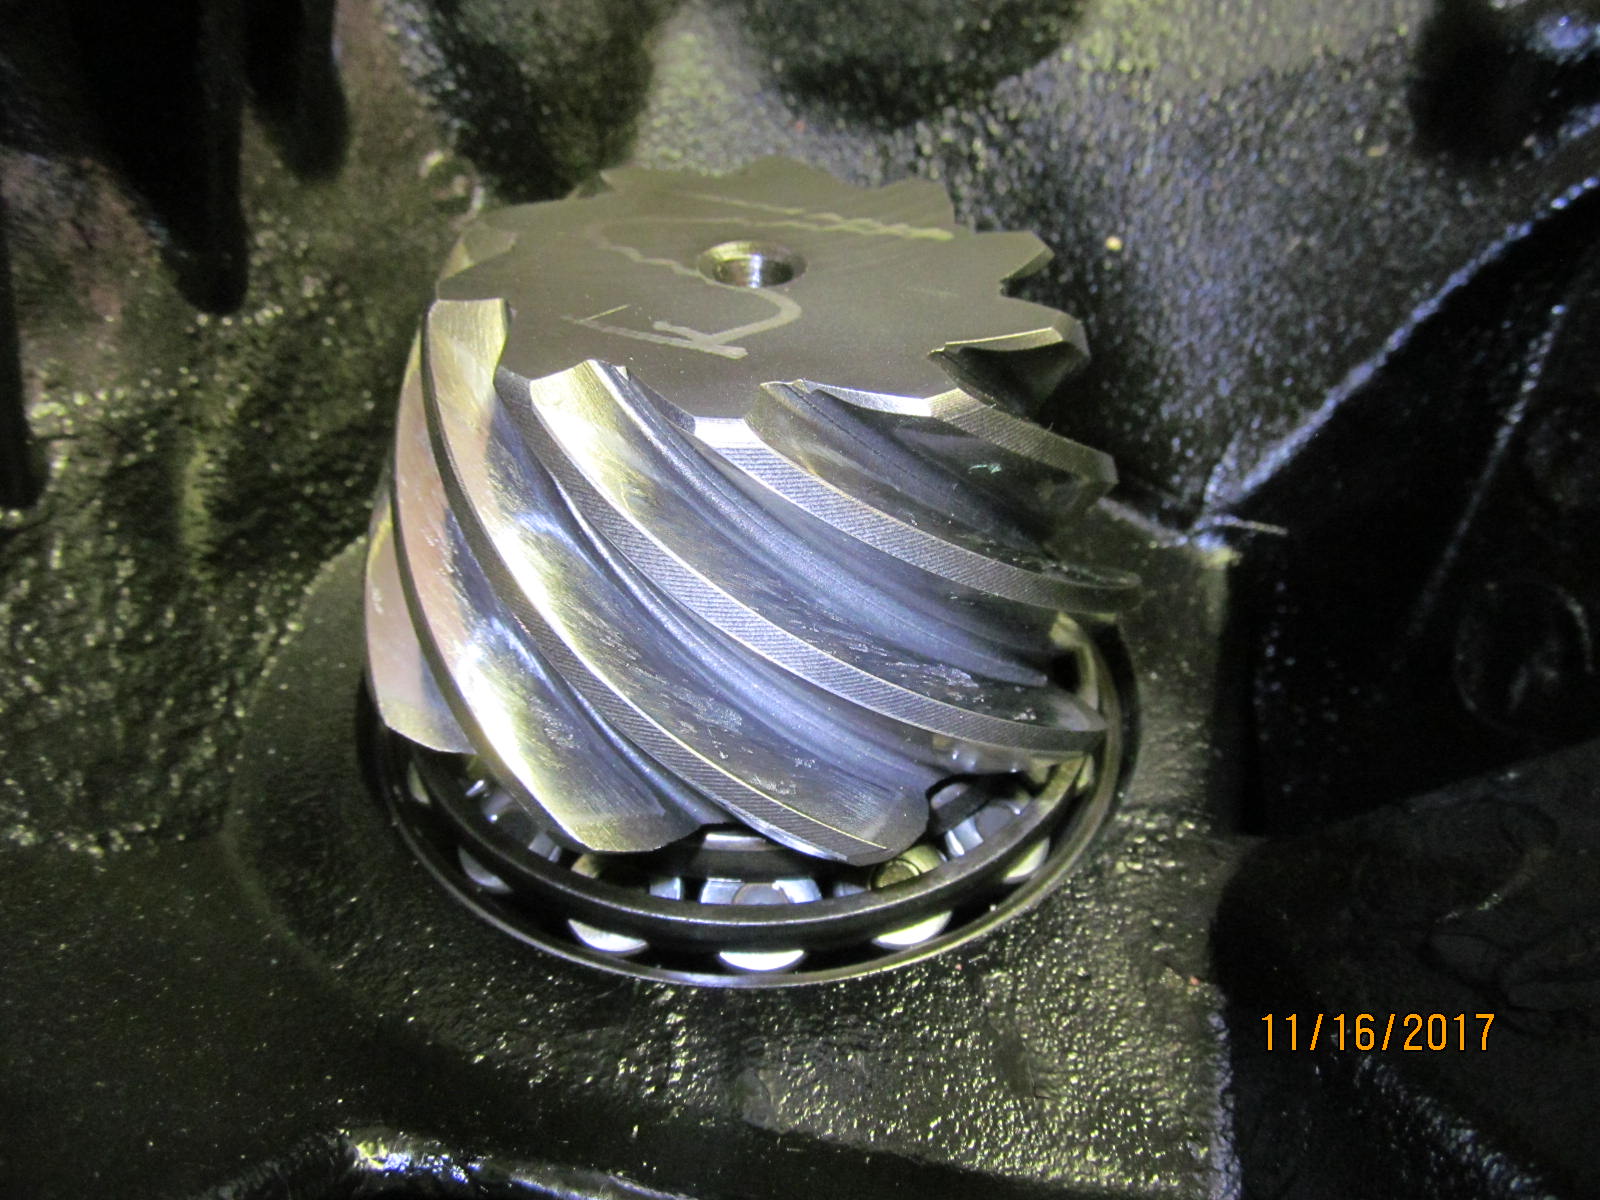
| Pressing the new bearing on with the .050" shim. |
|---|
|
|
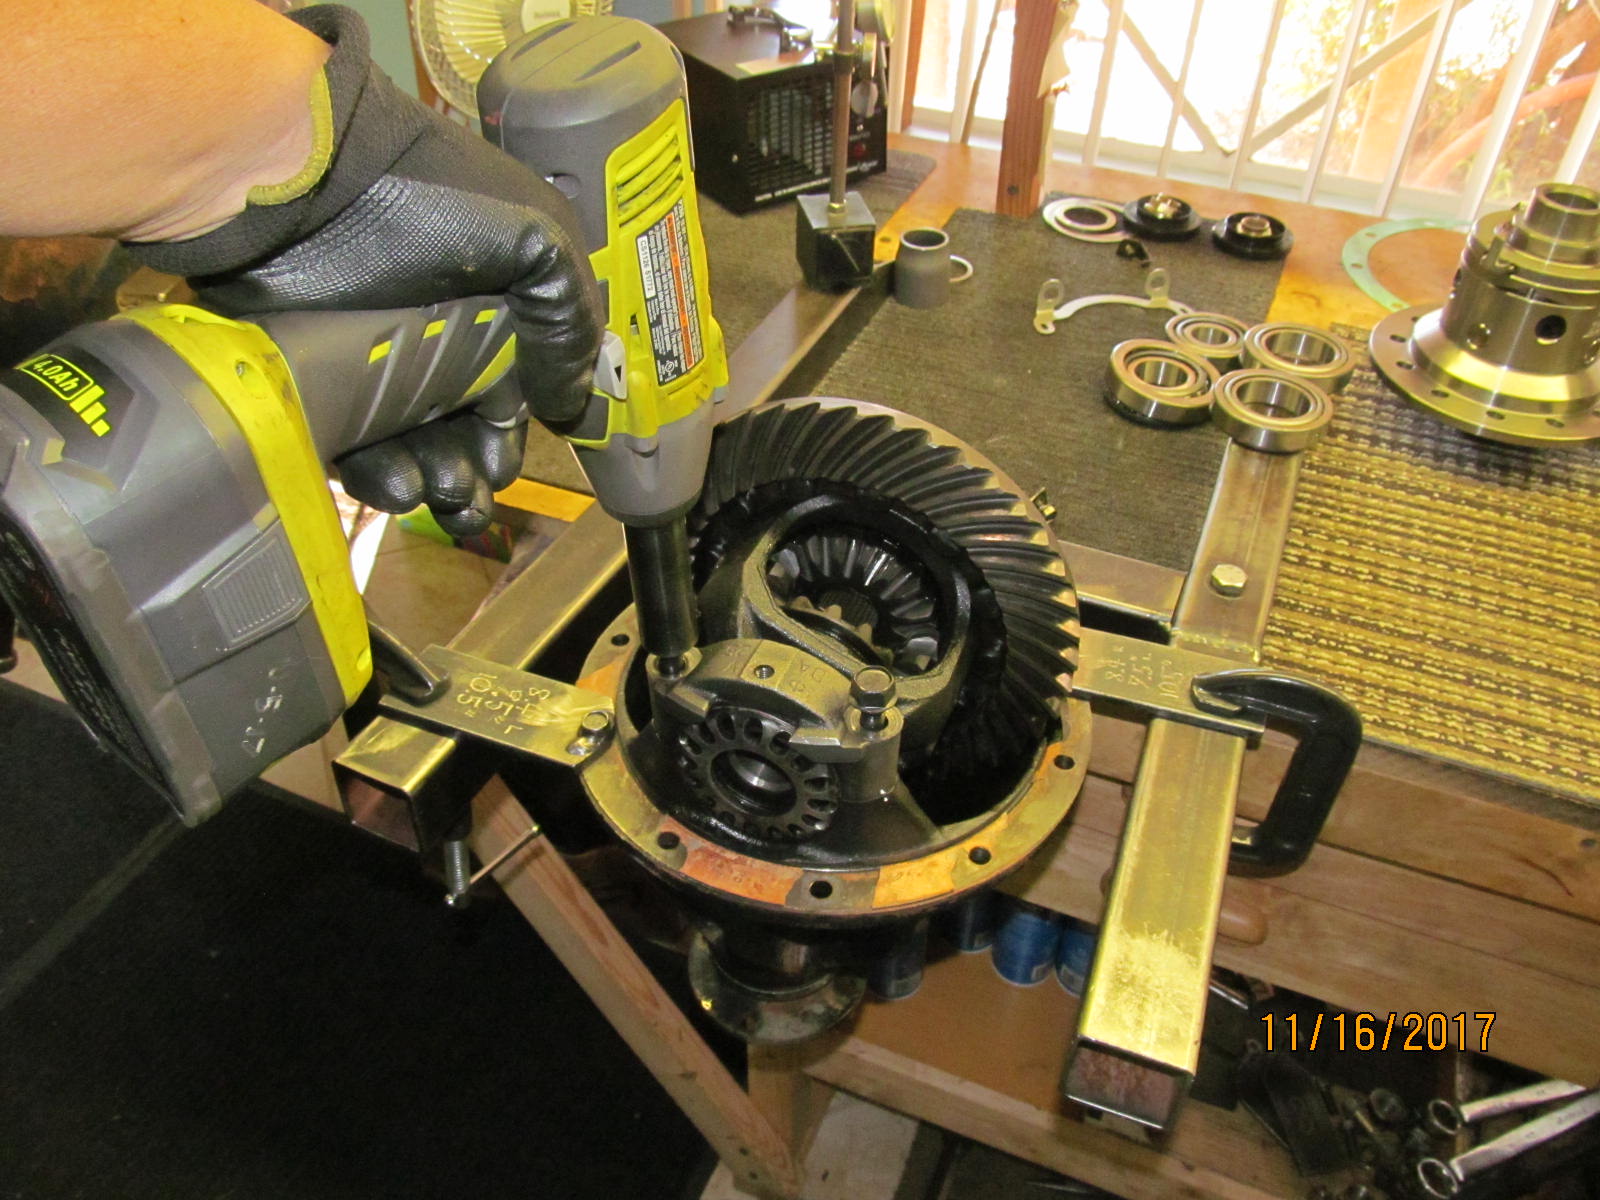
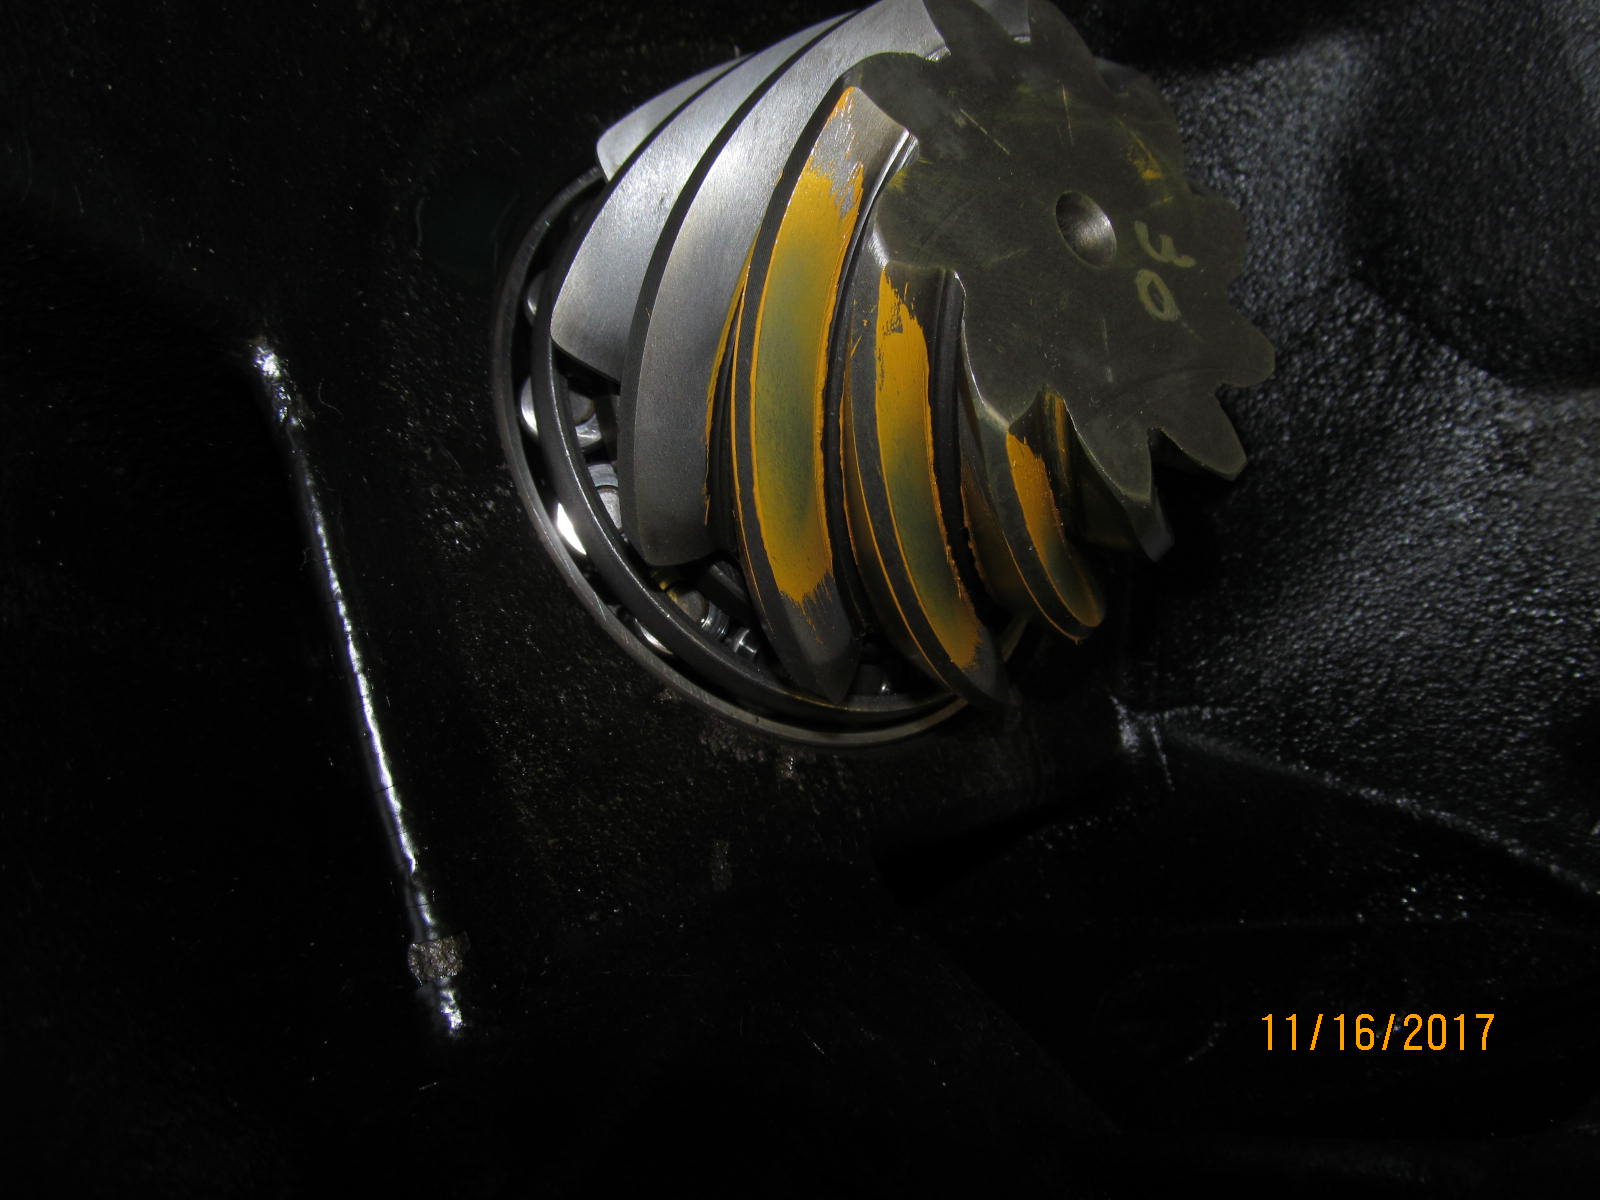
Now to mount the 3rd over the pinion shaft. Only tighten the pinion nut enough to have some pinion bearing preload.
This is only a paint check so whether it has 5 in/lb or 20 in/lb is not a big deal to the paint. |
|---|
|
|
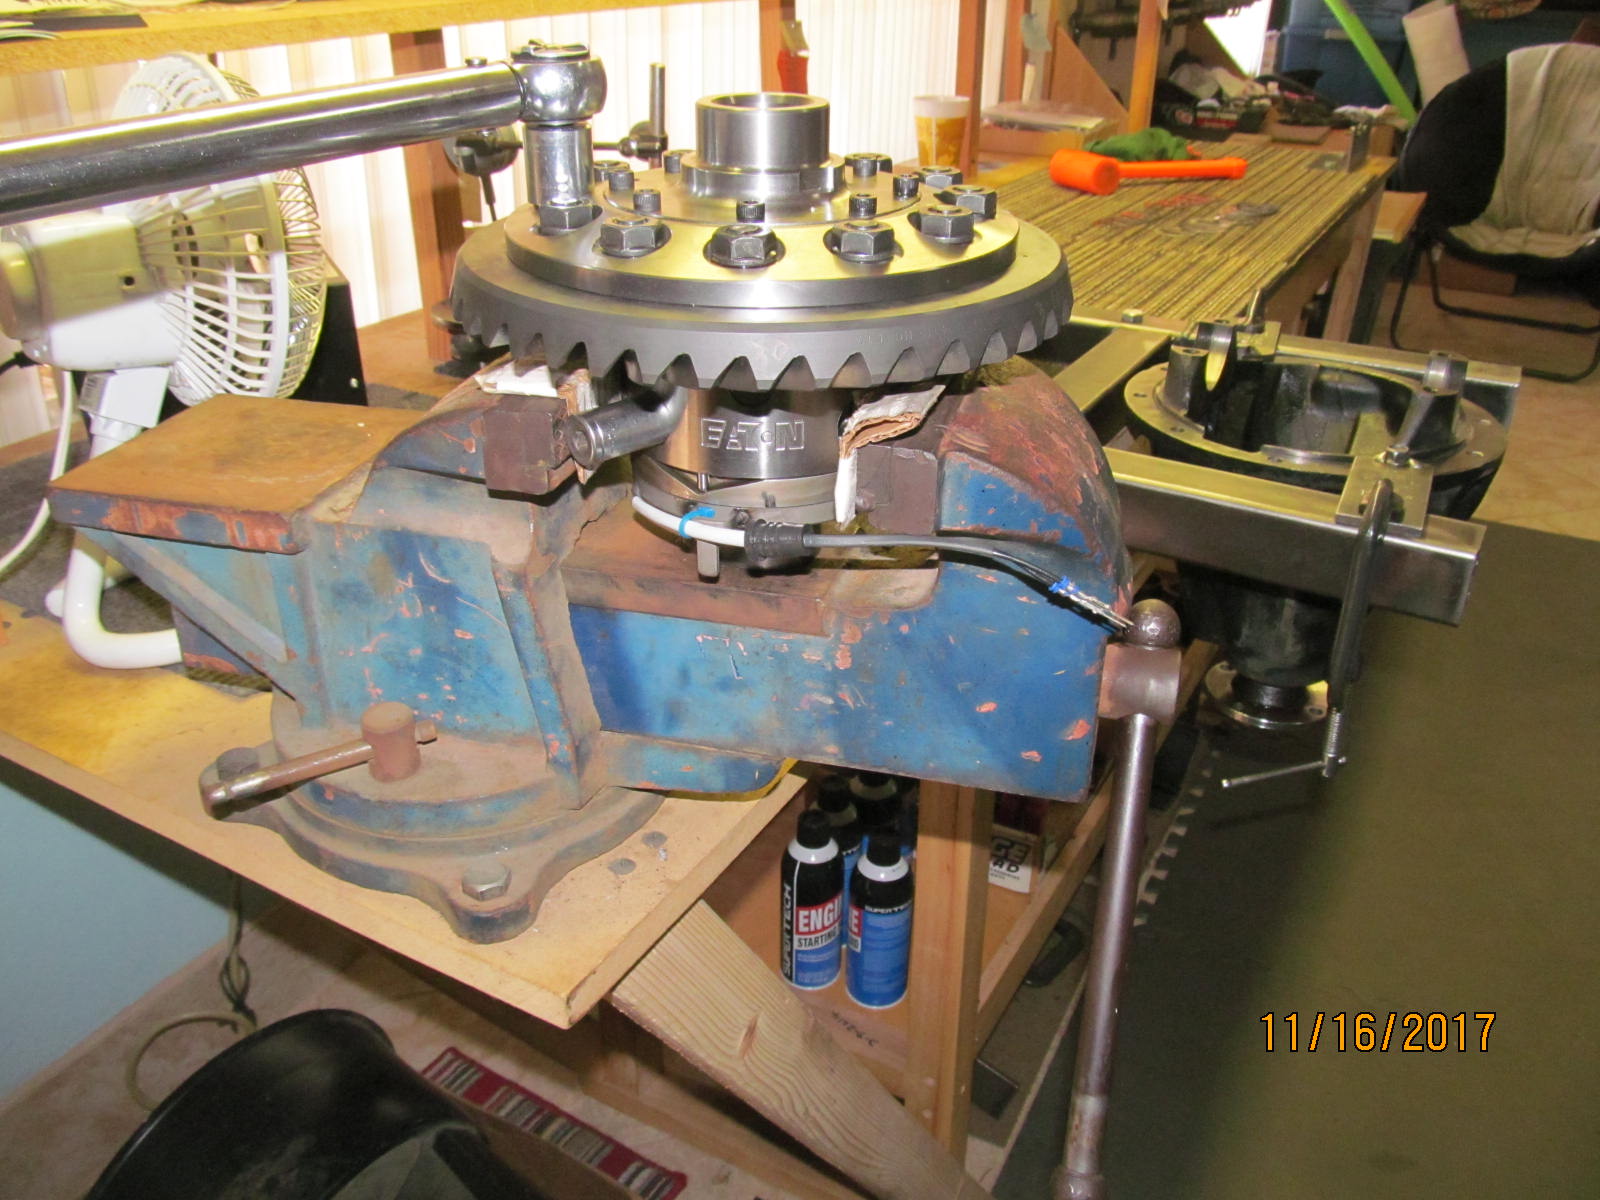
| To prep the Harrop elocker we need to mount the ring and the bearings.....but first to do a file check and both surfaces have no rough spots. |
|---|
|
|
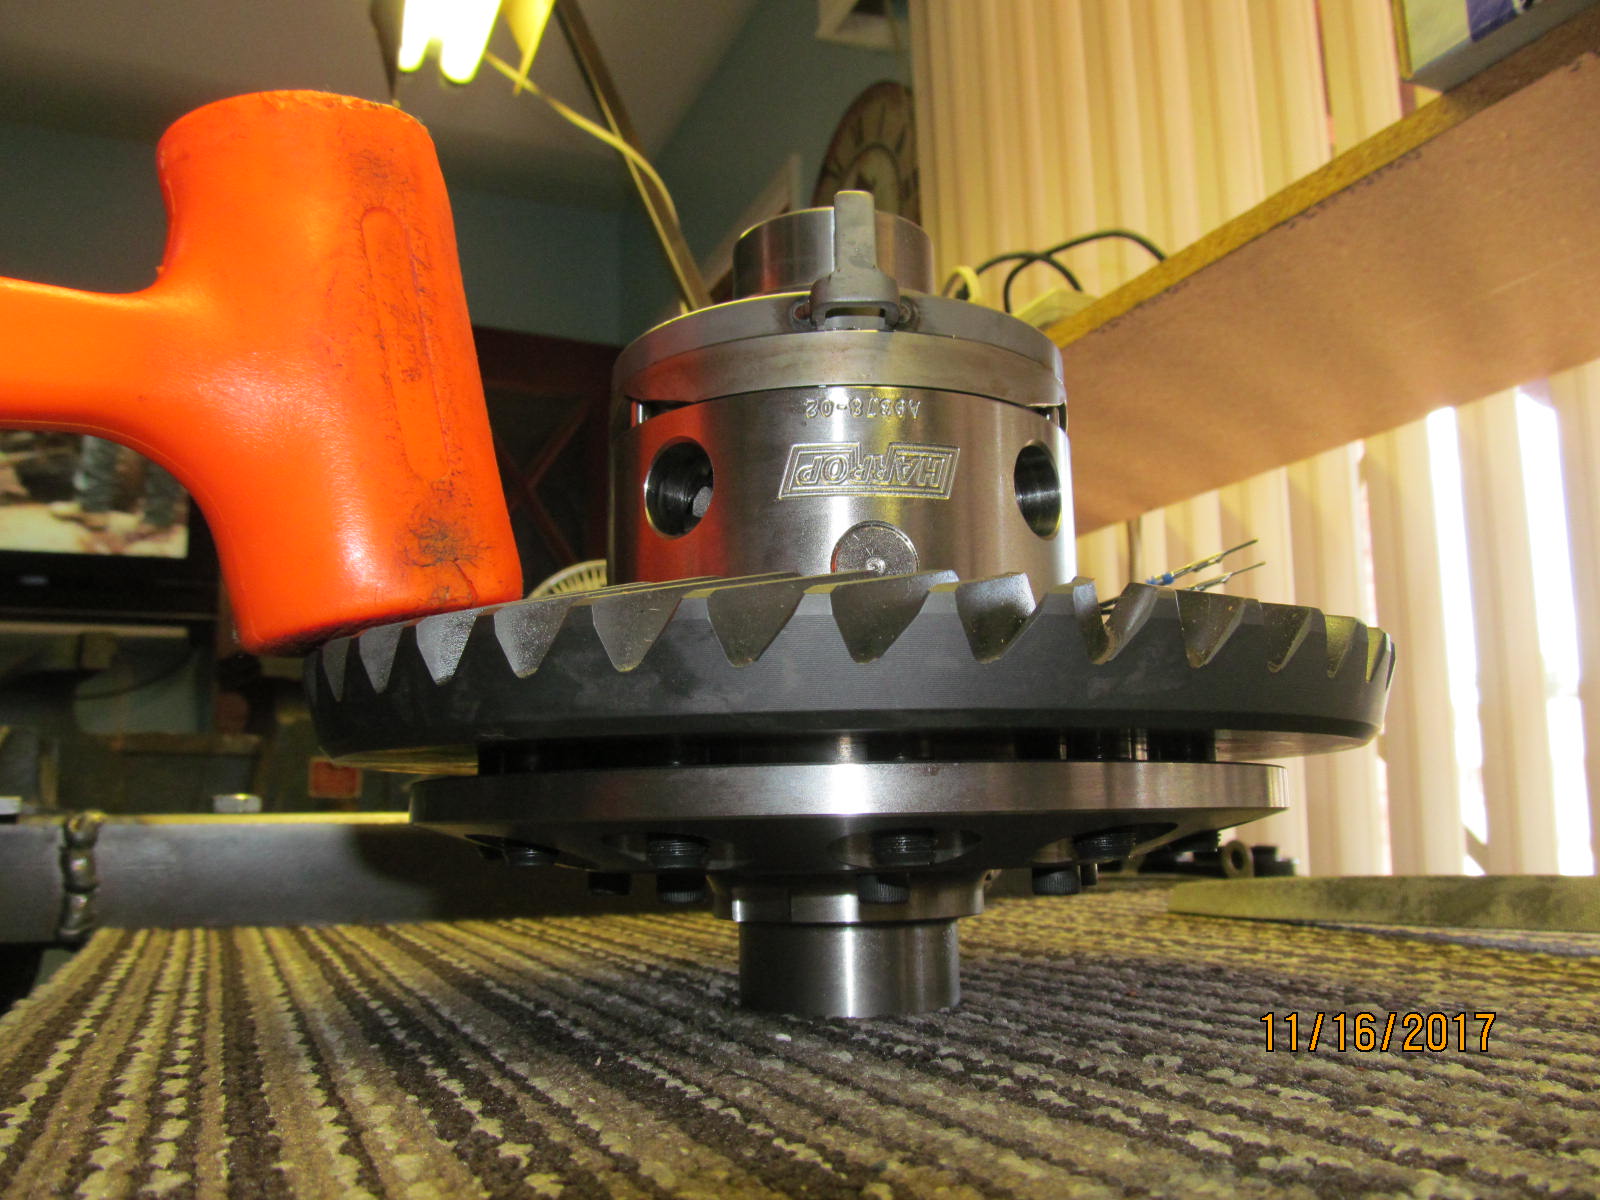
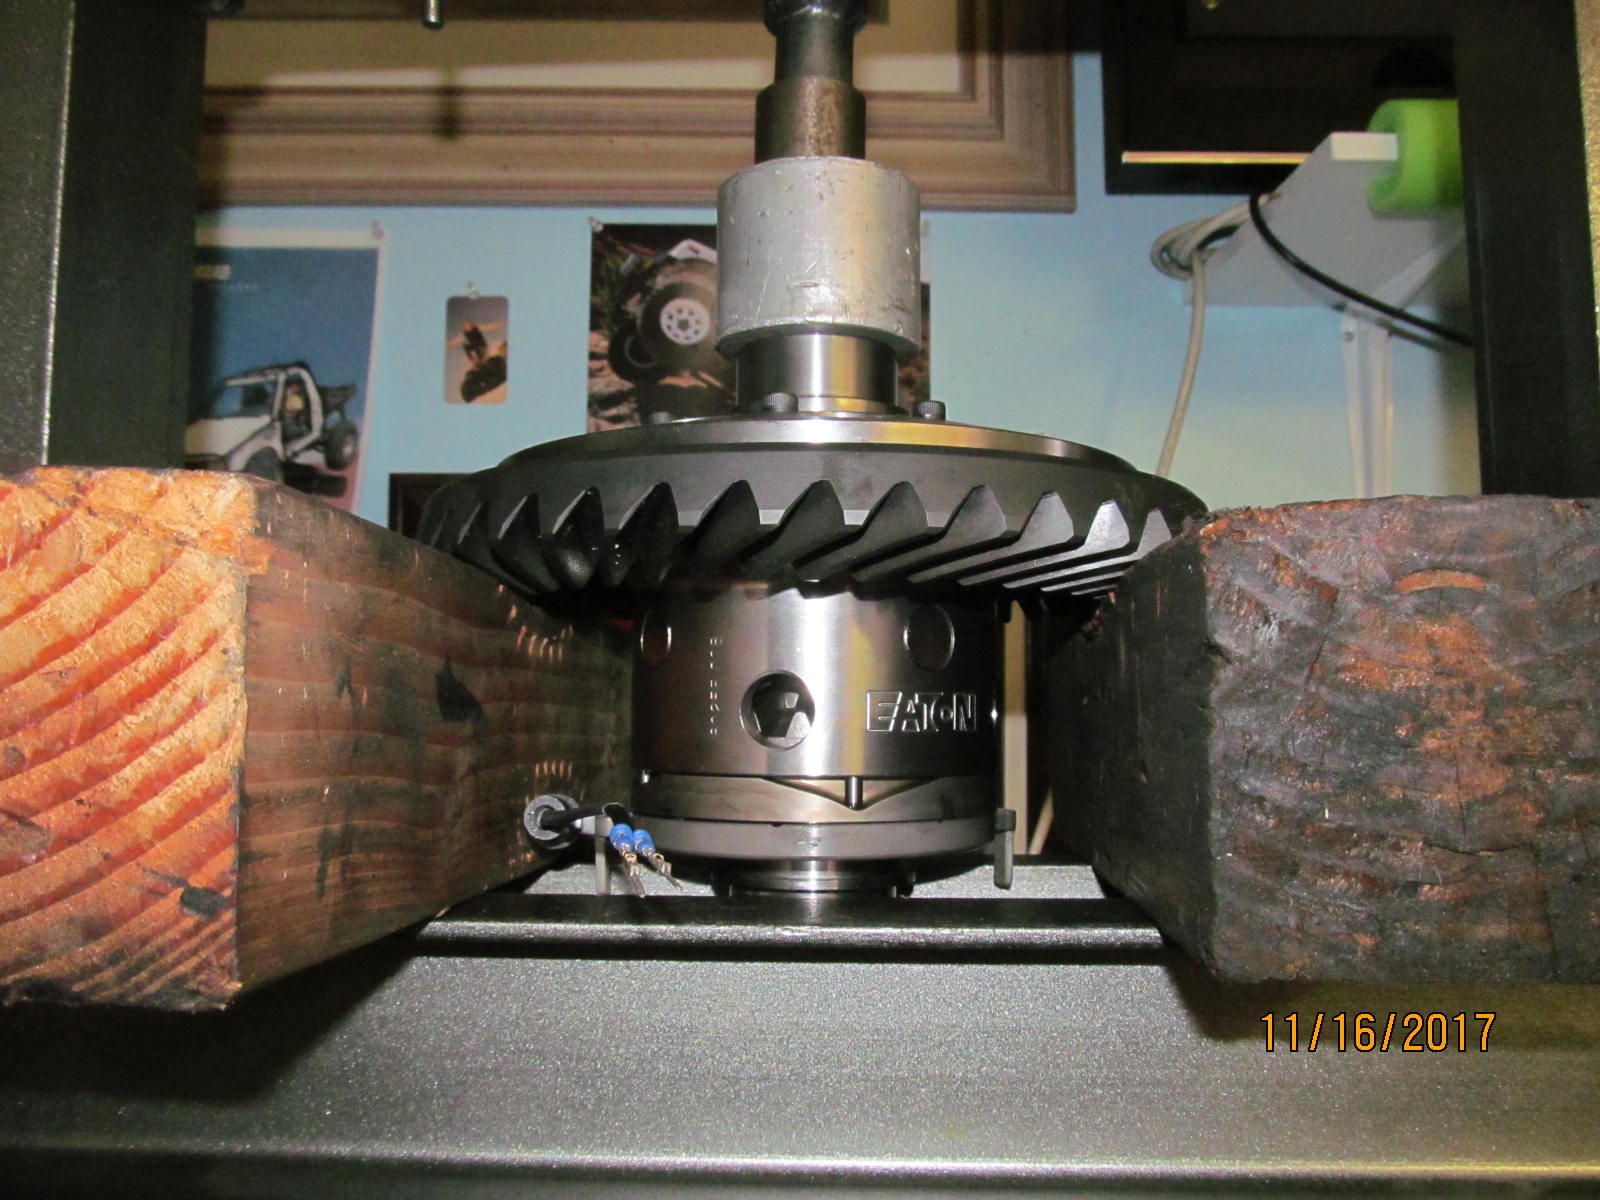
| The plastic hammer got it started but this one was a really tight fit..... |
|---|
|
|
....so the press made it look so easy. Easy to damage the stop-tabs and that's the reason my fingers were in constant contact with them making
sure they never made contact with the press's steel beam. |
|---|
|
|
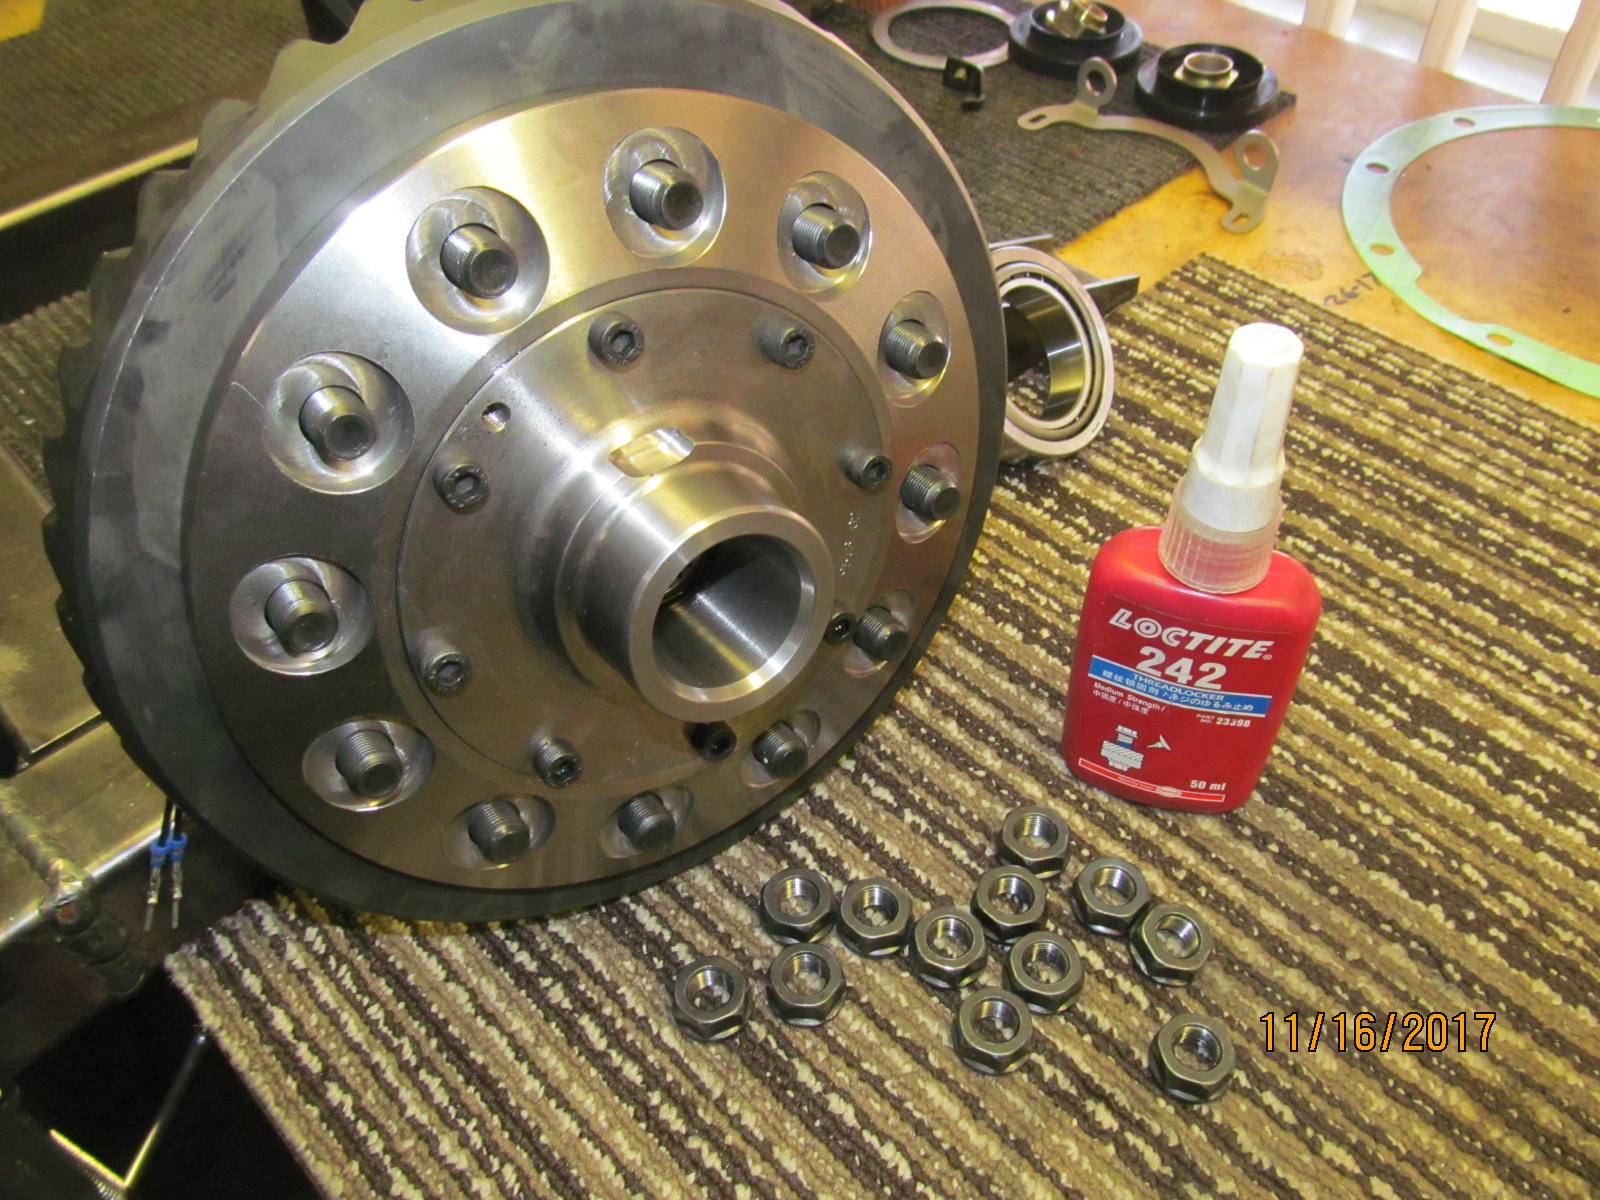
You had better have a good eye to make sure the 12 bolt holes are perfectly aligned because the tight fit here meant it would be very hard to
move it over even a couple thou. I got lucky again and had perfect alignment :) |
|---|
|
|
| Blue Loctite and 81 ft/lb. |
|---|
|
|
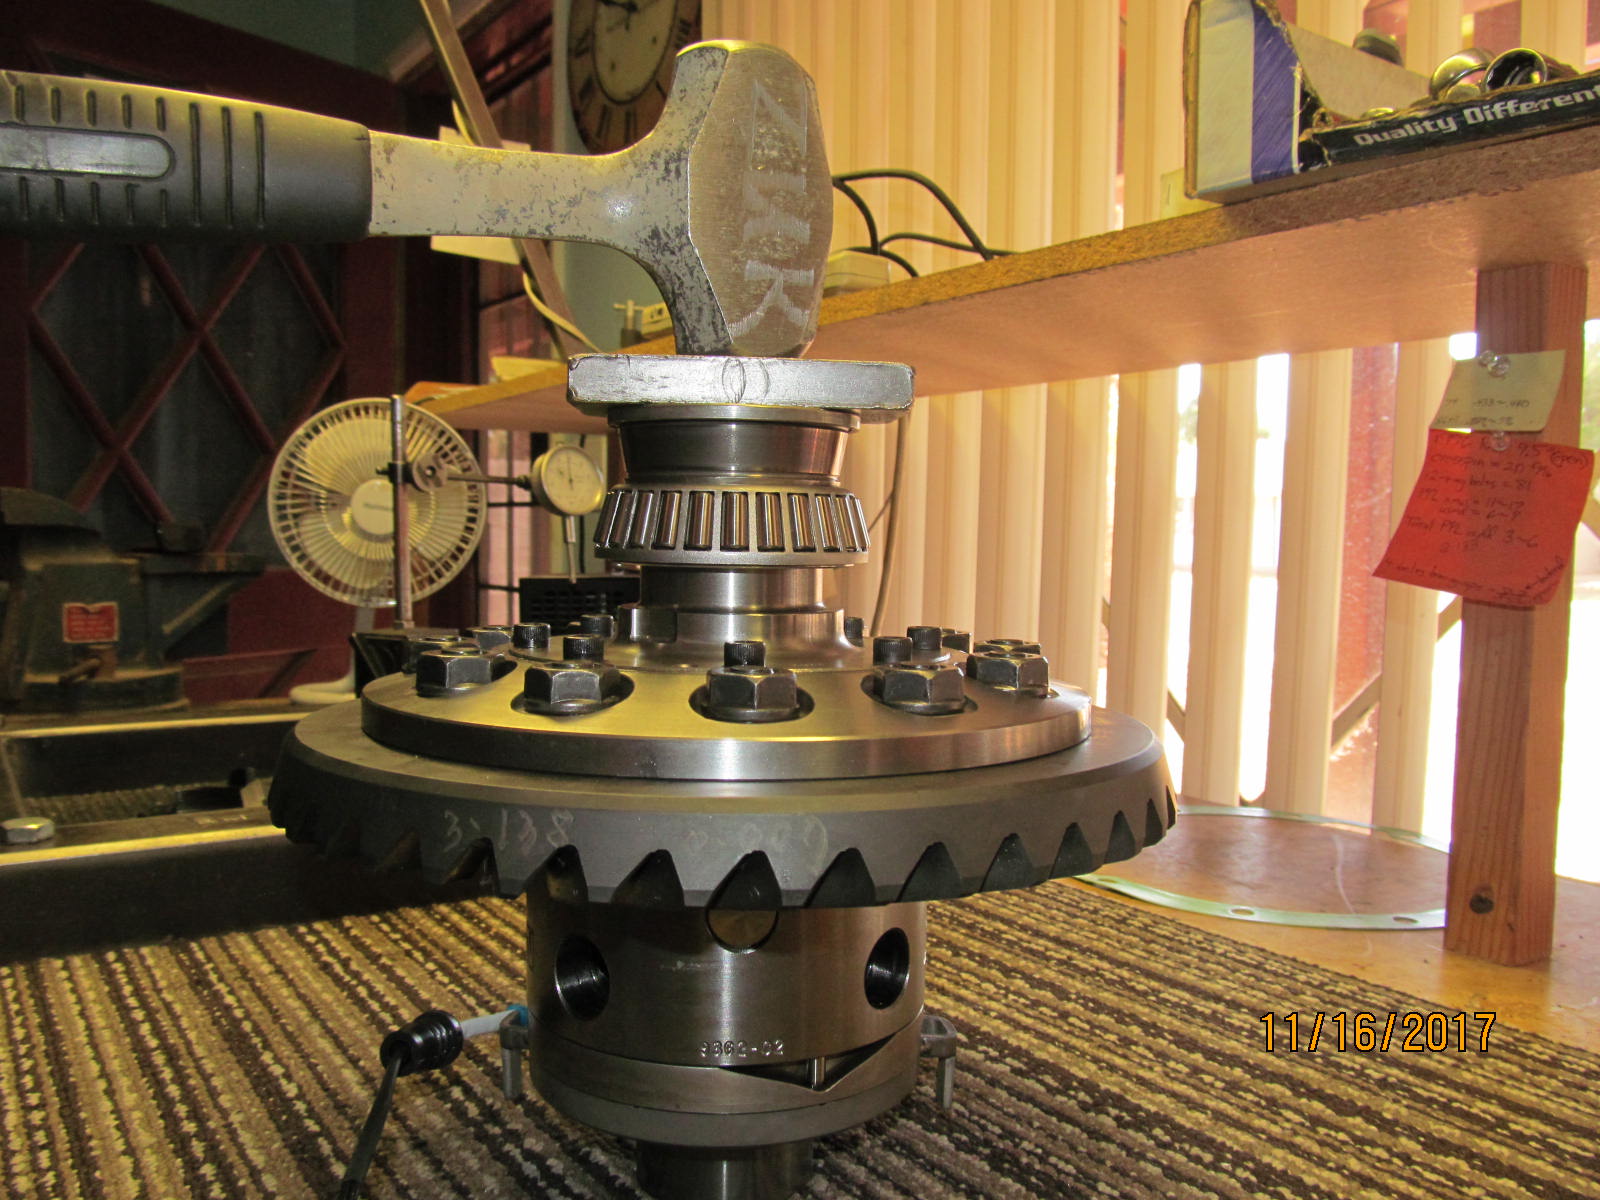
| The new Koyo bearings were also a very tight fit. |
|---|
|
|
| All ready here. |
|---|
|
|
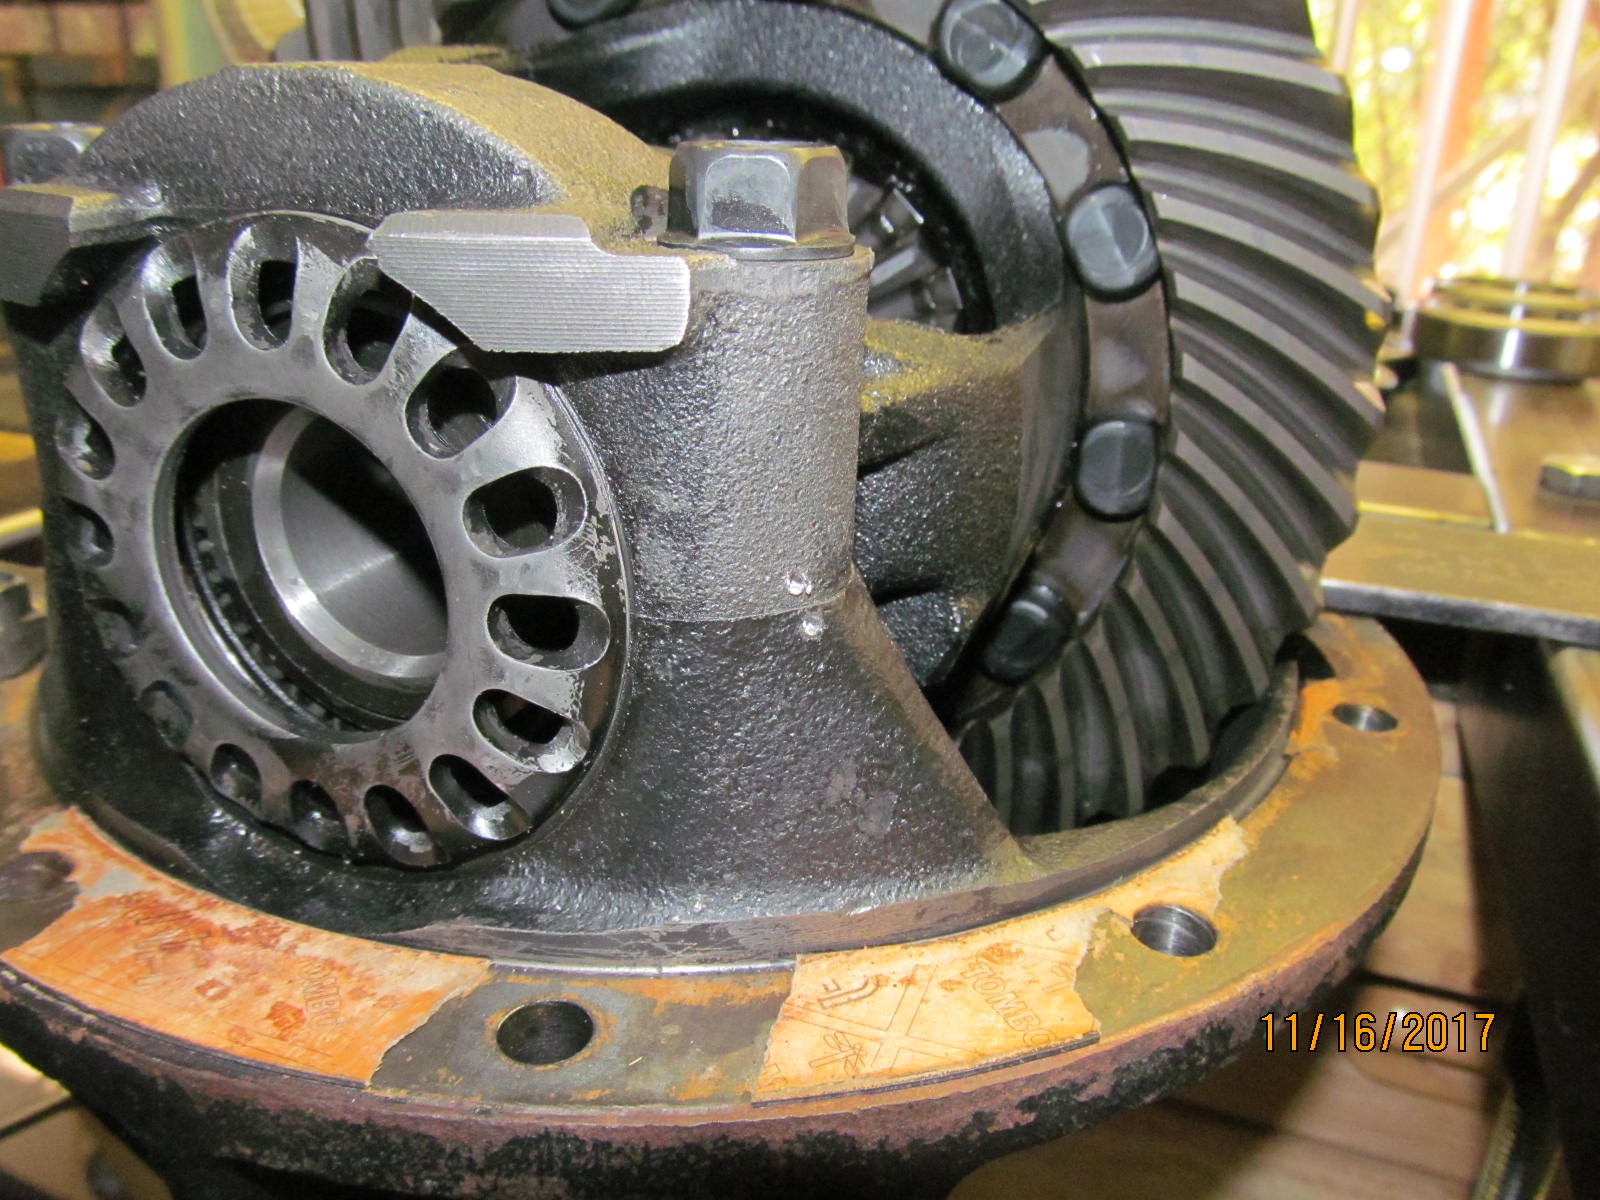
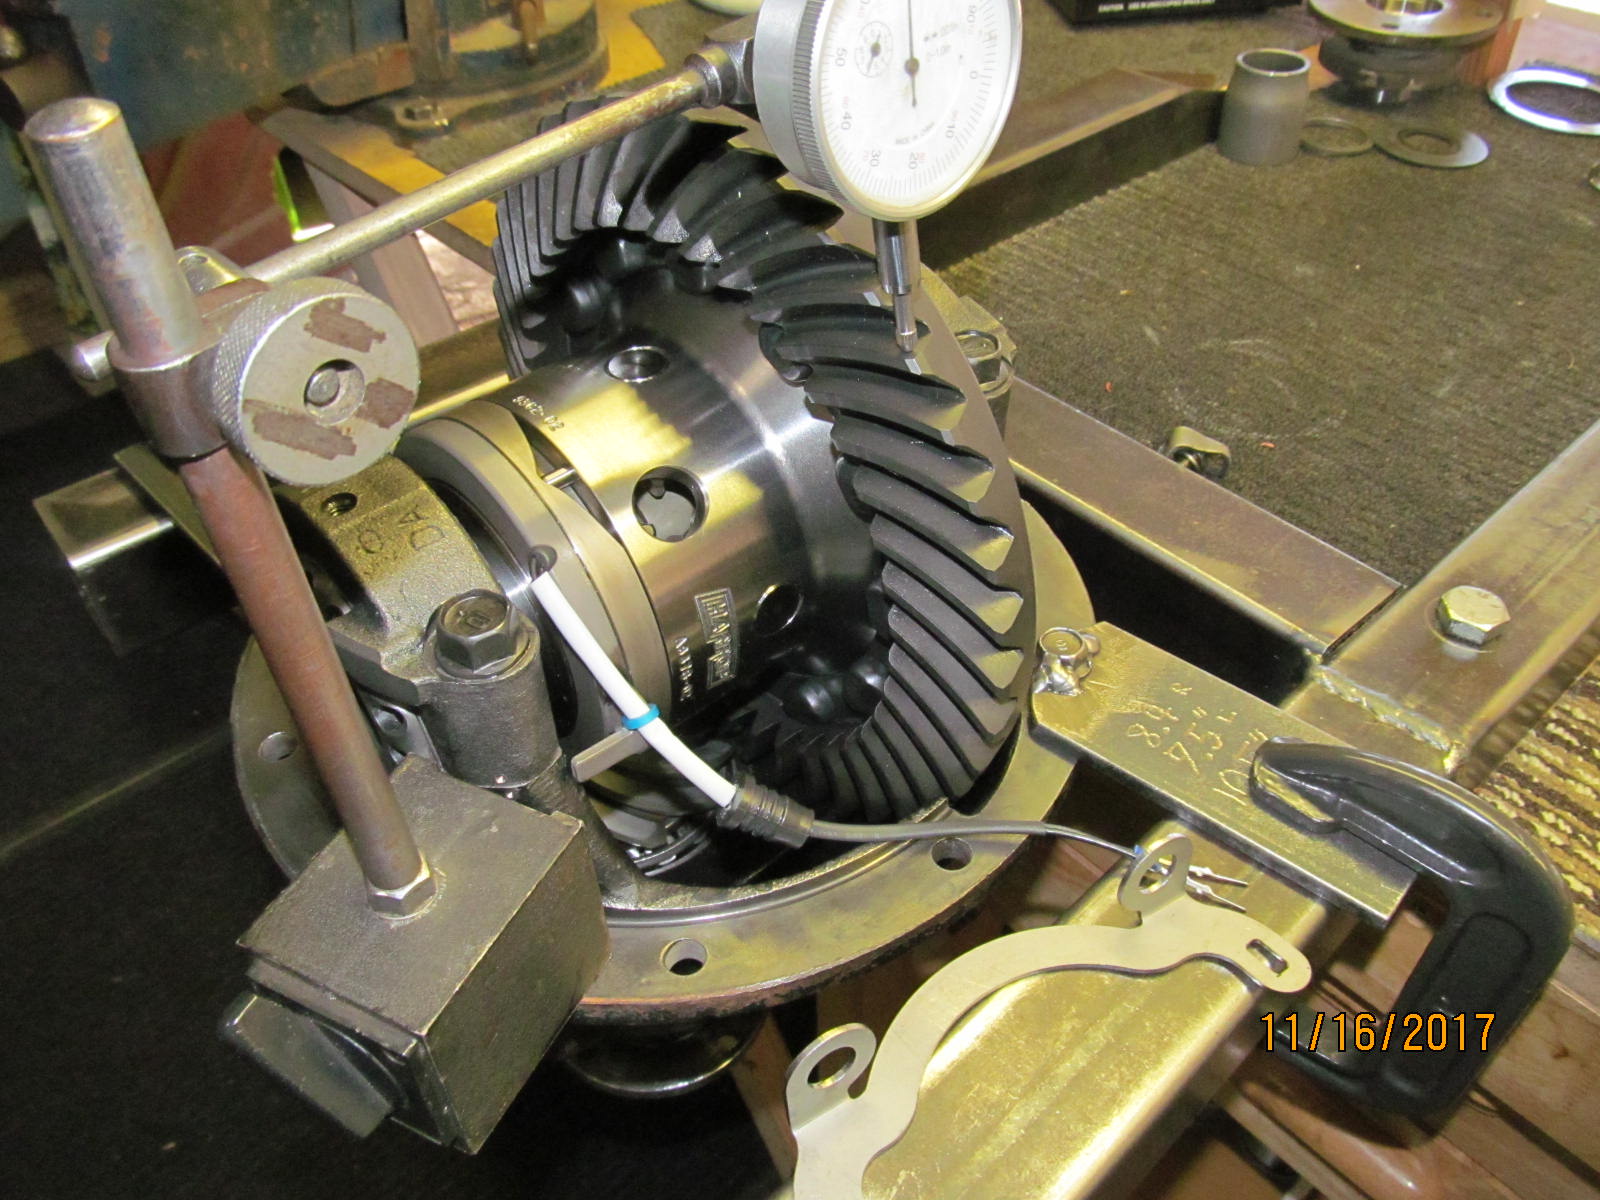
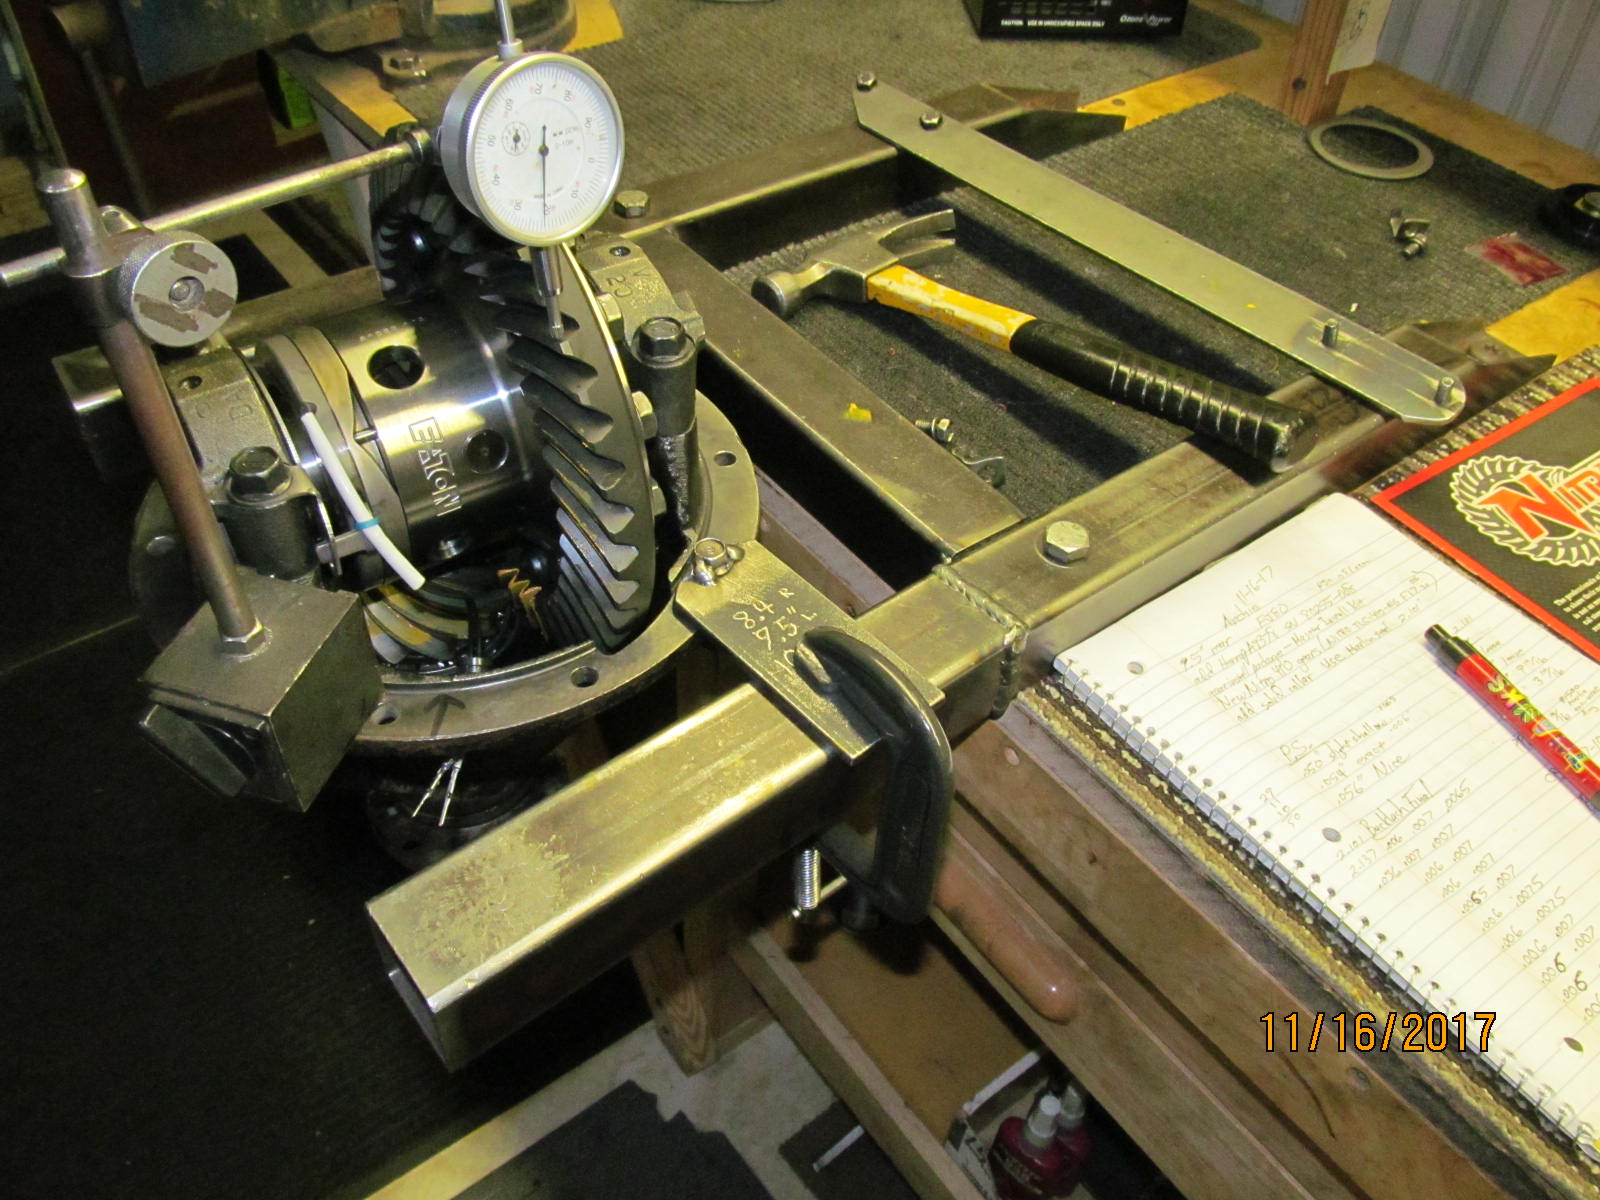
| Harrop case is installed and some bearing preload with the proper backlash of about .007" |
|---|
|

|
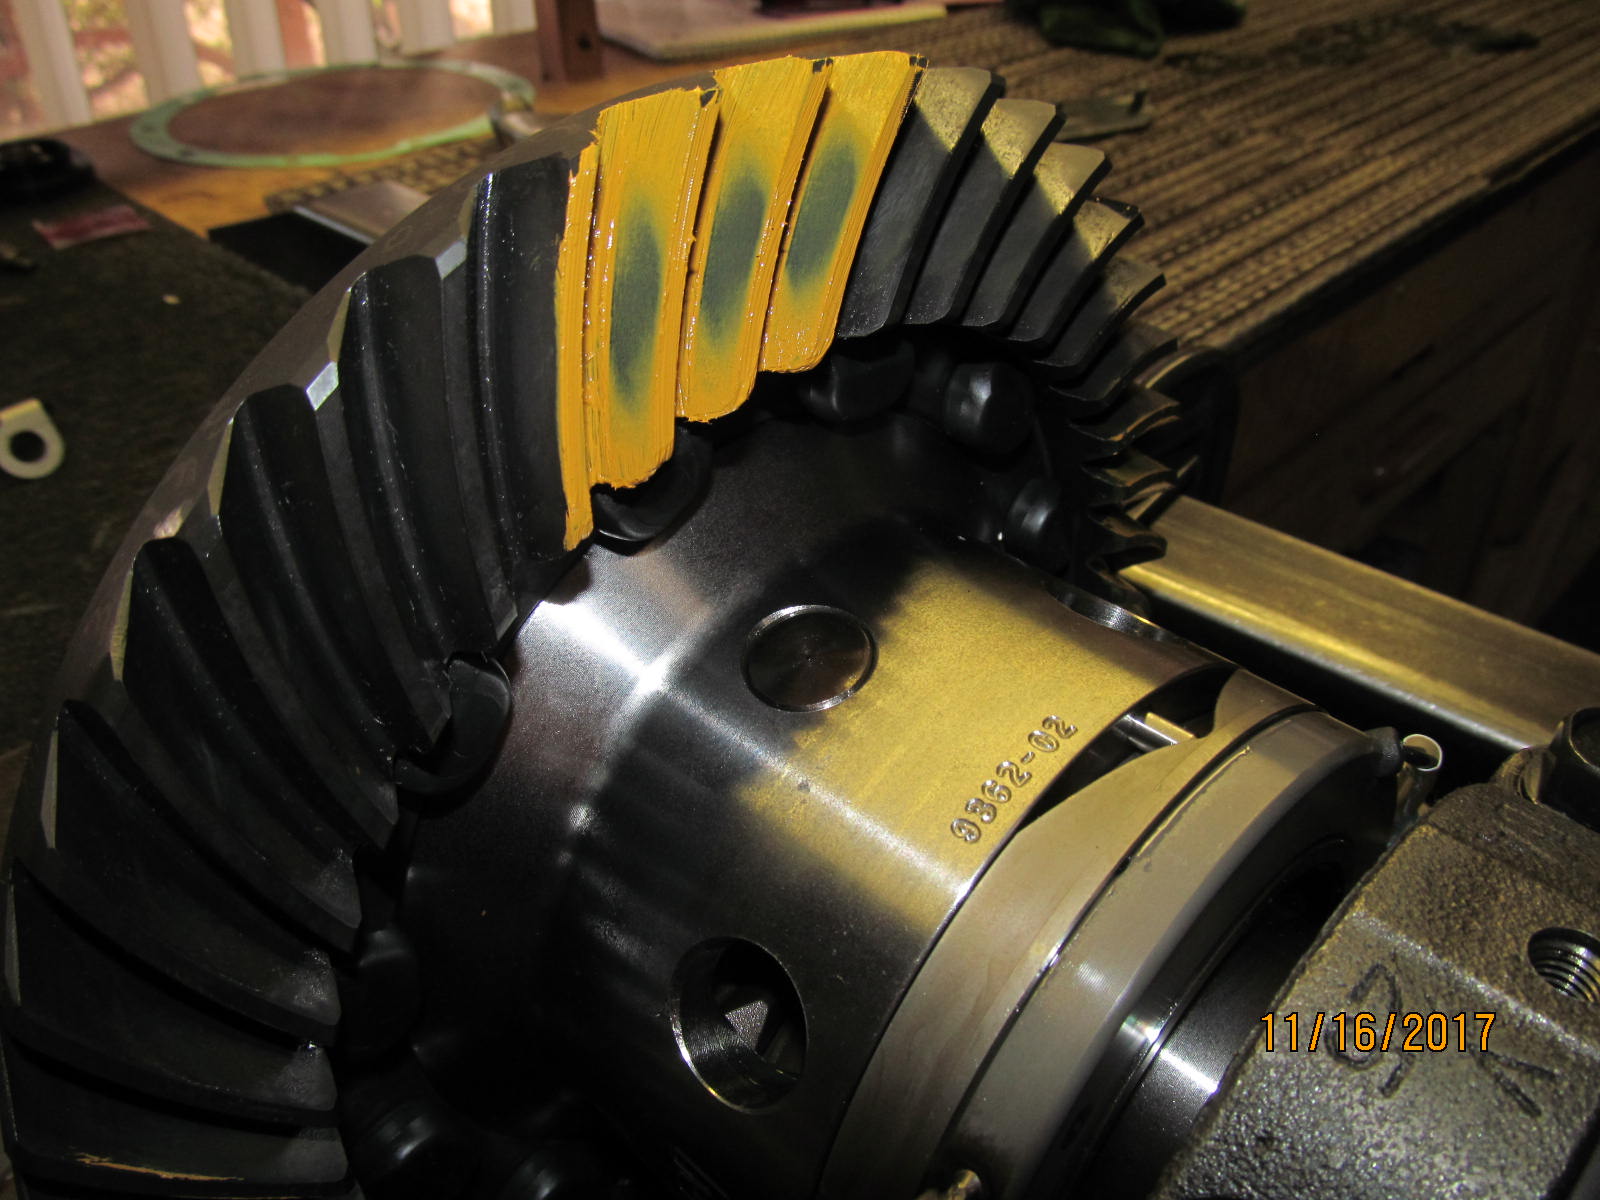
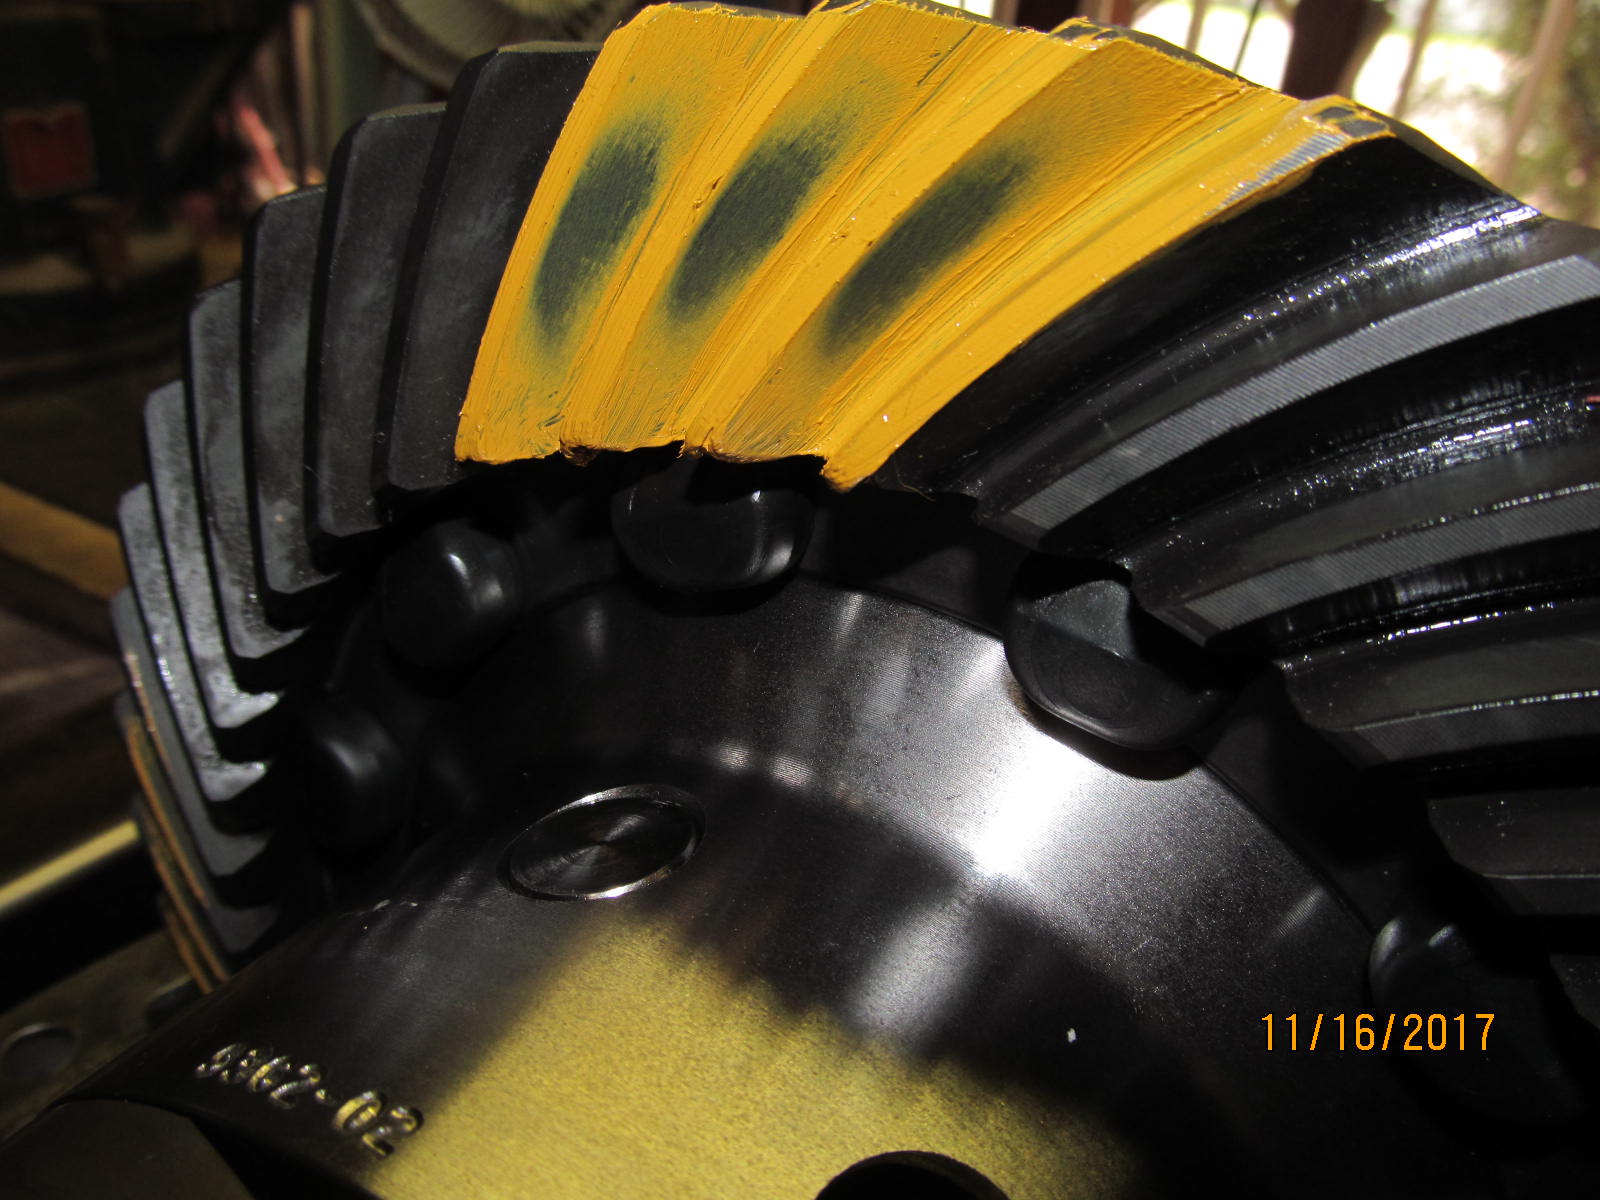
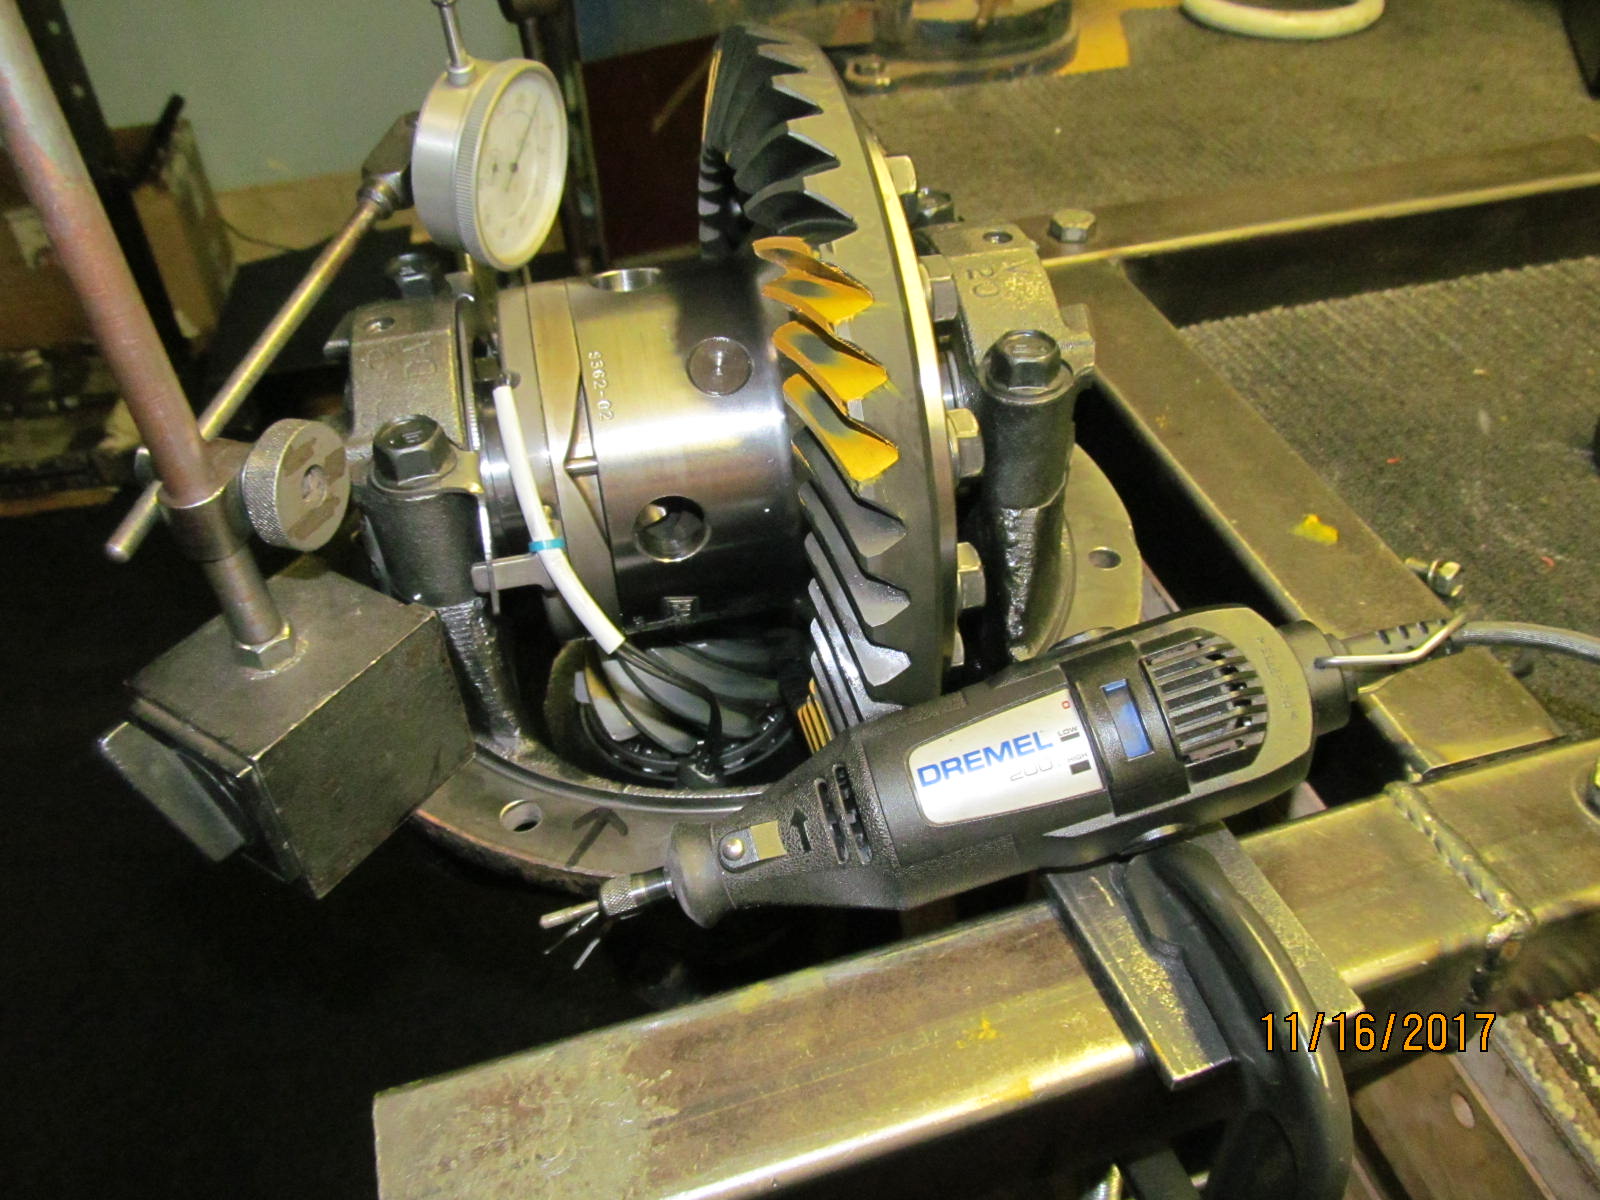
| Painted 3 teeth and this drive side looks shallow. |
|---|
|
|
| Coast is also shallow. |
|---|
|

|
| Comet tail is tucked into the root too deep so we could go thicker on the pinion shim. |
|---|
|
|
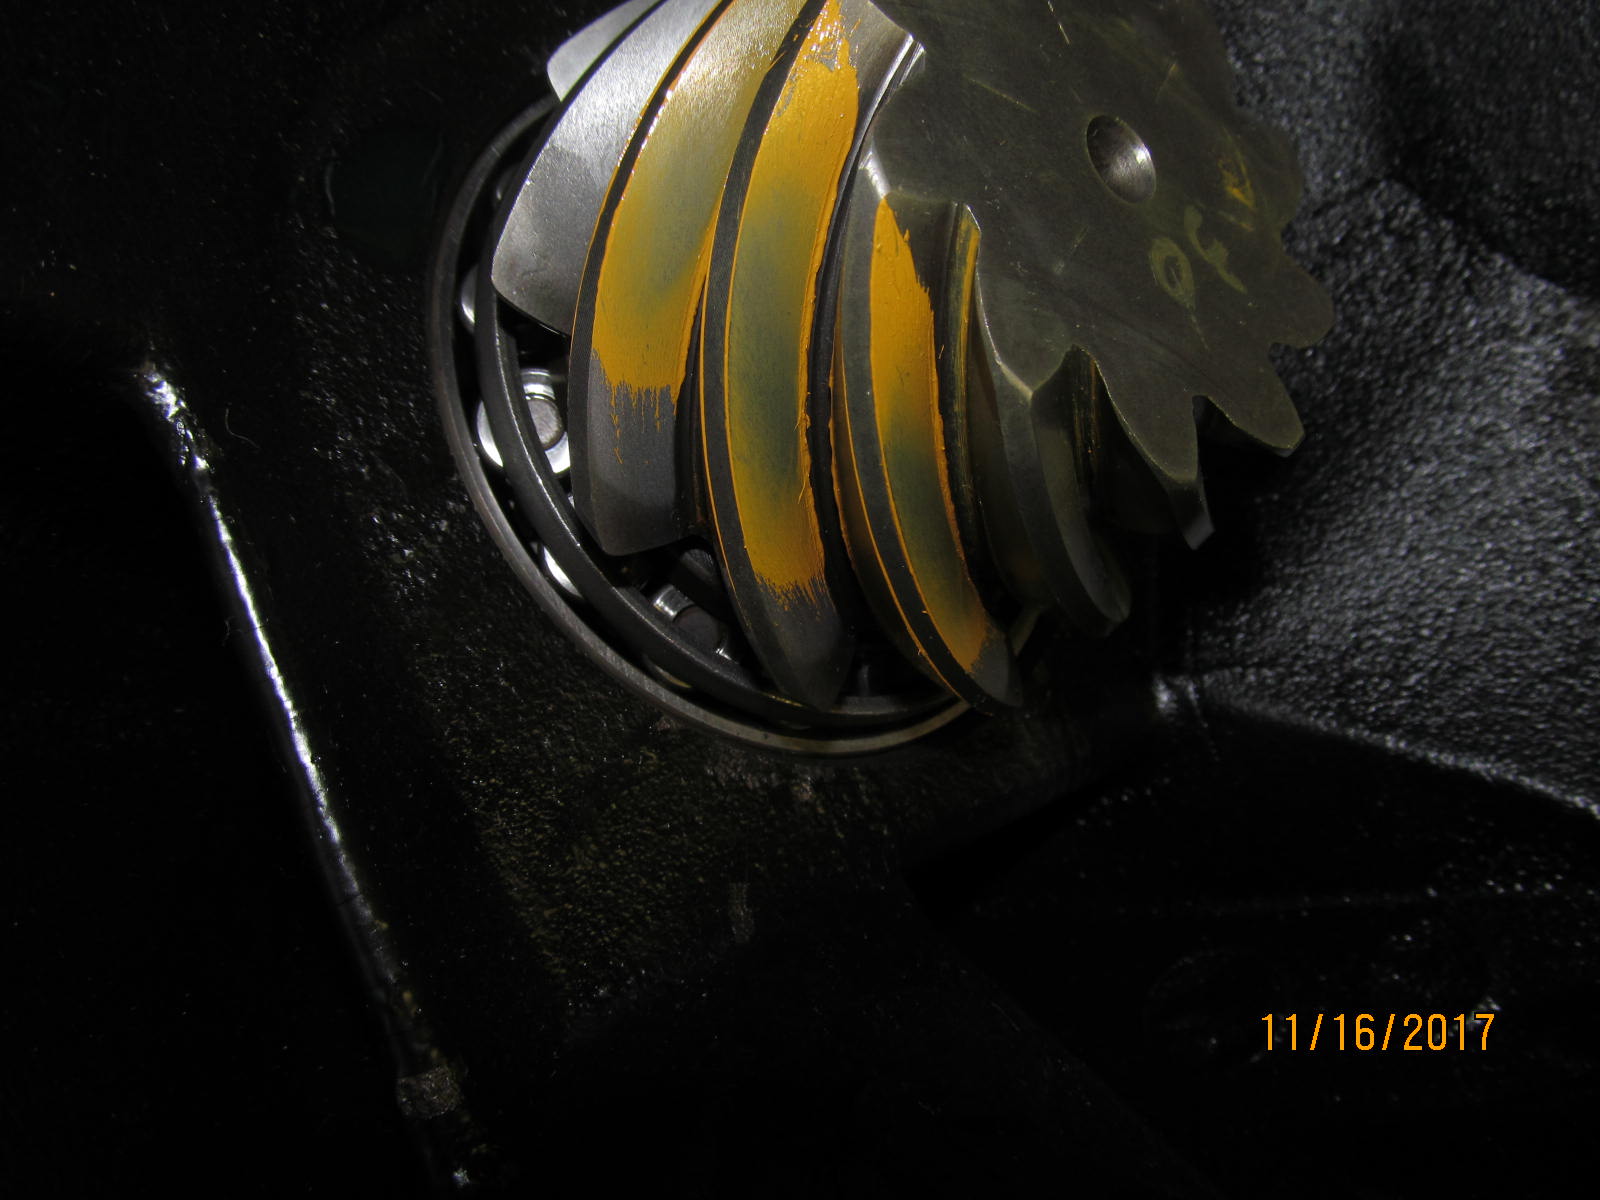
| Skipped some pics and re-shimmed the pinion to .054"(4 thou deeper). This drive pattern is now "exact" depth but we could go a tinge deeper and will. |
|---|
|
|
| Coast side....looks exact. |
|---|
|
|
| ,,,,,,,,,,,,,,,,,, |
|---|
|
|
| The comet tail appears to tell me that the depth is just about right....it's fluffing out to the center a little. |
|---|
|

|
| So the pinion depth will be tweaked only .002" deeper and now the solid collar can be installed. |
|---|
|
|
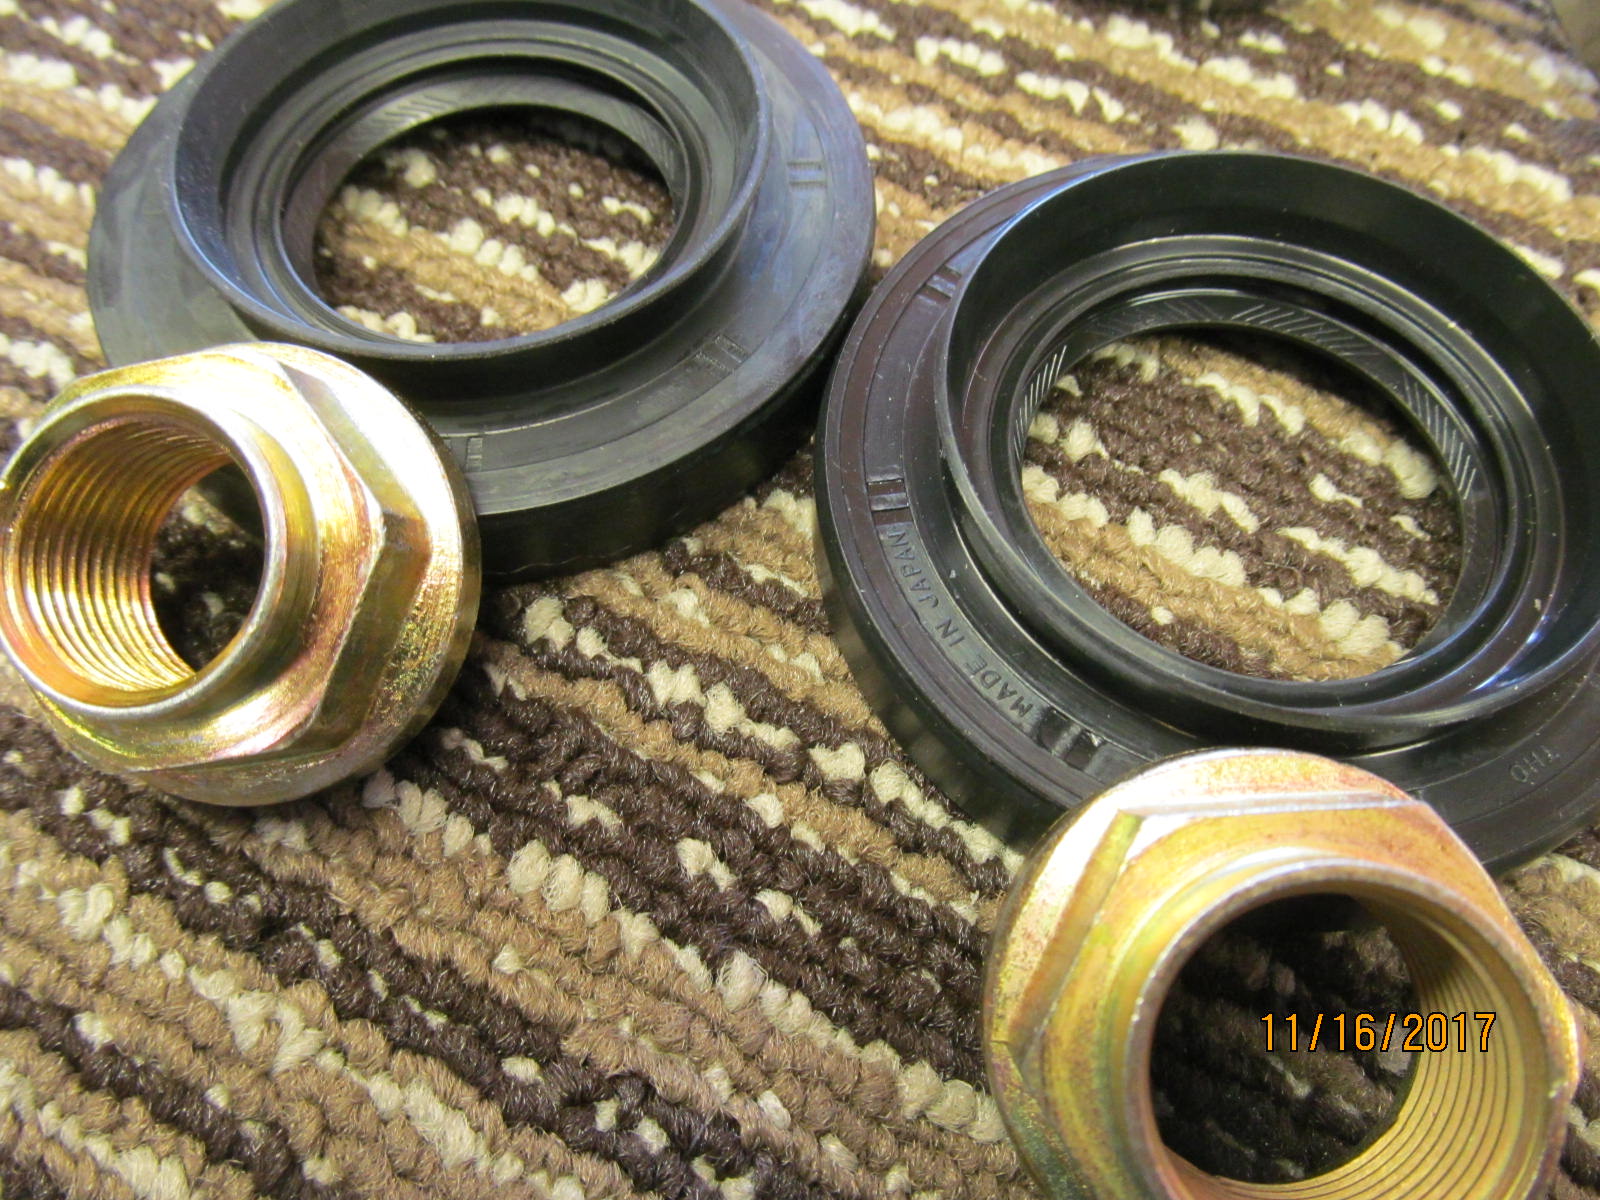
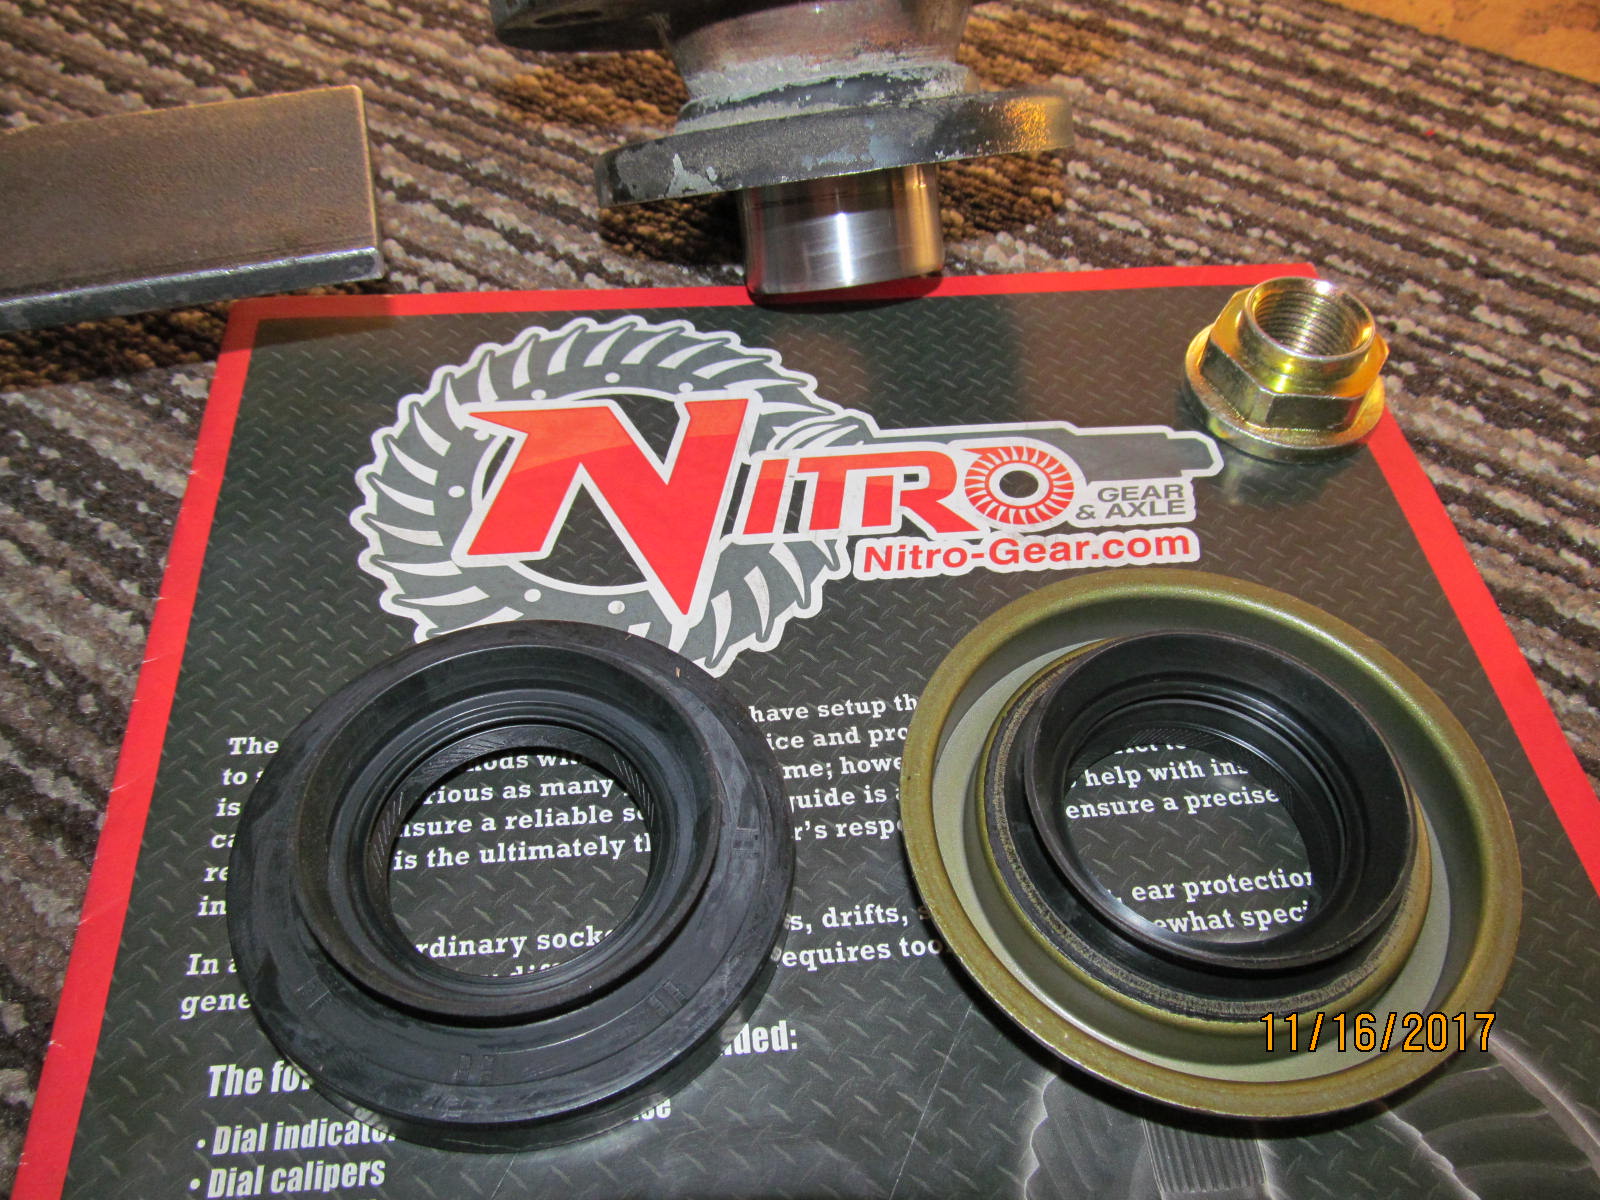
The 27 spline generic seal on the left(in the kit) and the awesome Marlin seal on the right.
Gonna use the Marlin for Archie's build. |
|---|
|
|
On the 4th try, the solid collar was properly shimmed. Marlin seal is then tapped in place.
Some pictures were skipped but basically then installed the original pinion flange and cranked on the nut til 10 in/lb was measured.
DING the new nut and the pinion end is complete. |
|---|
|
|
| I opened up the grooves for the stop tabs just a little and that did the trick. |
|---|
|
|
| I now measure 2.5mm of free play. |
|---|
|
|
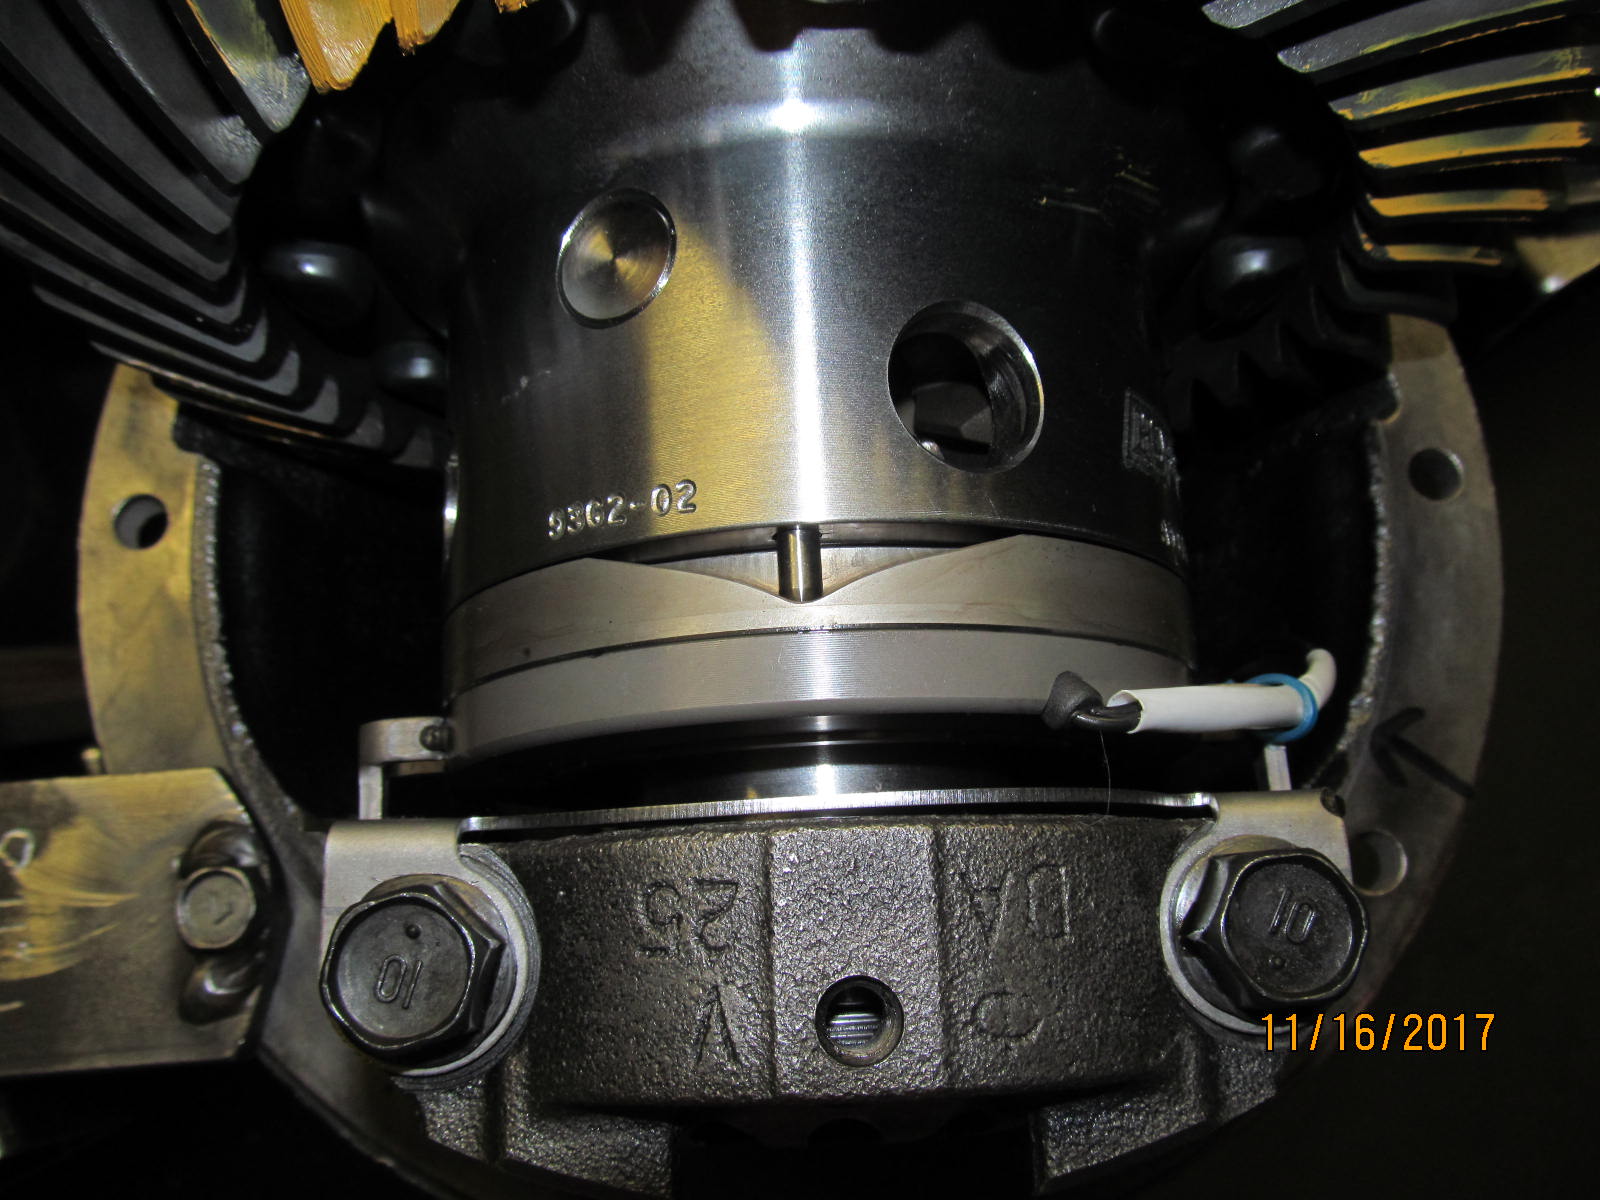
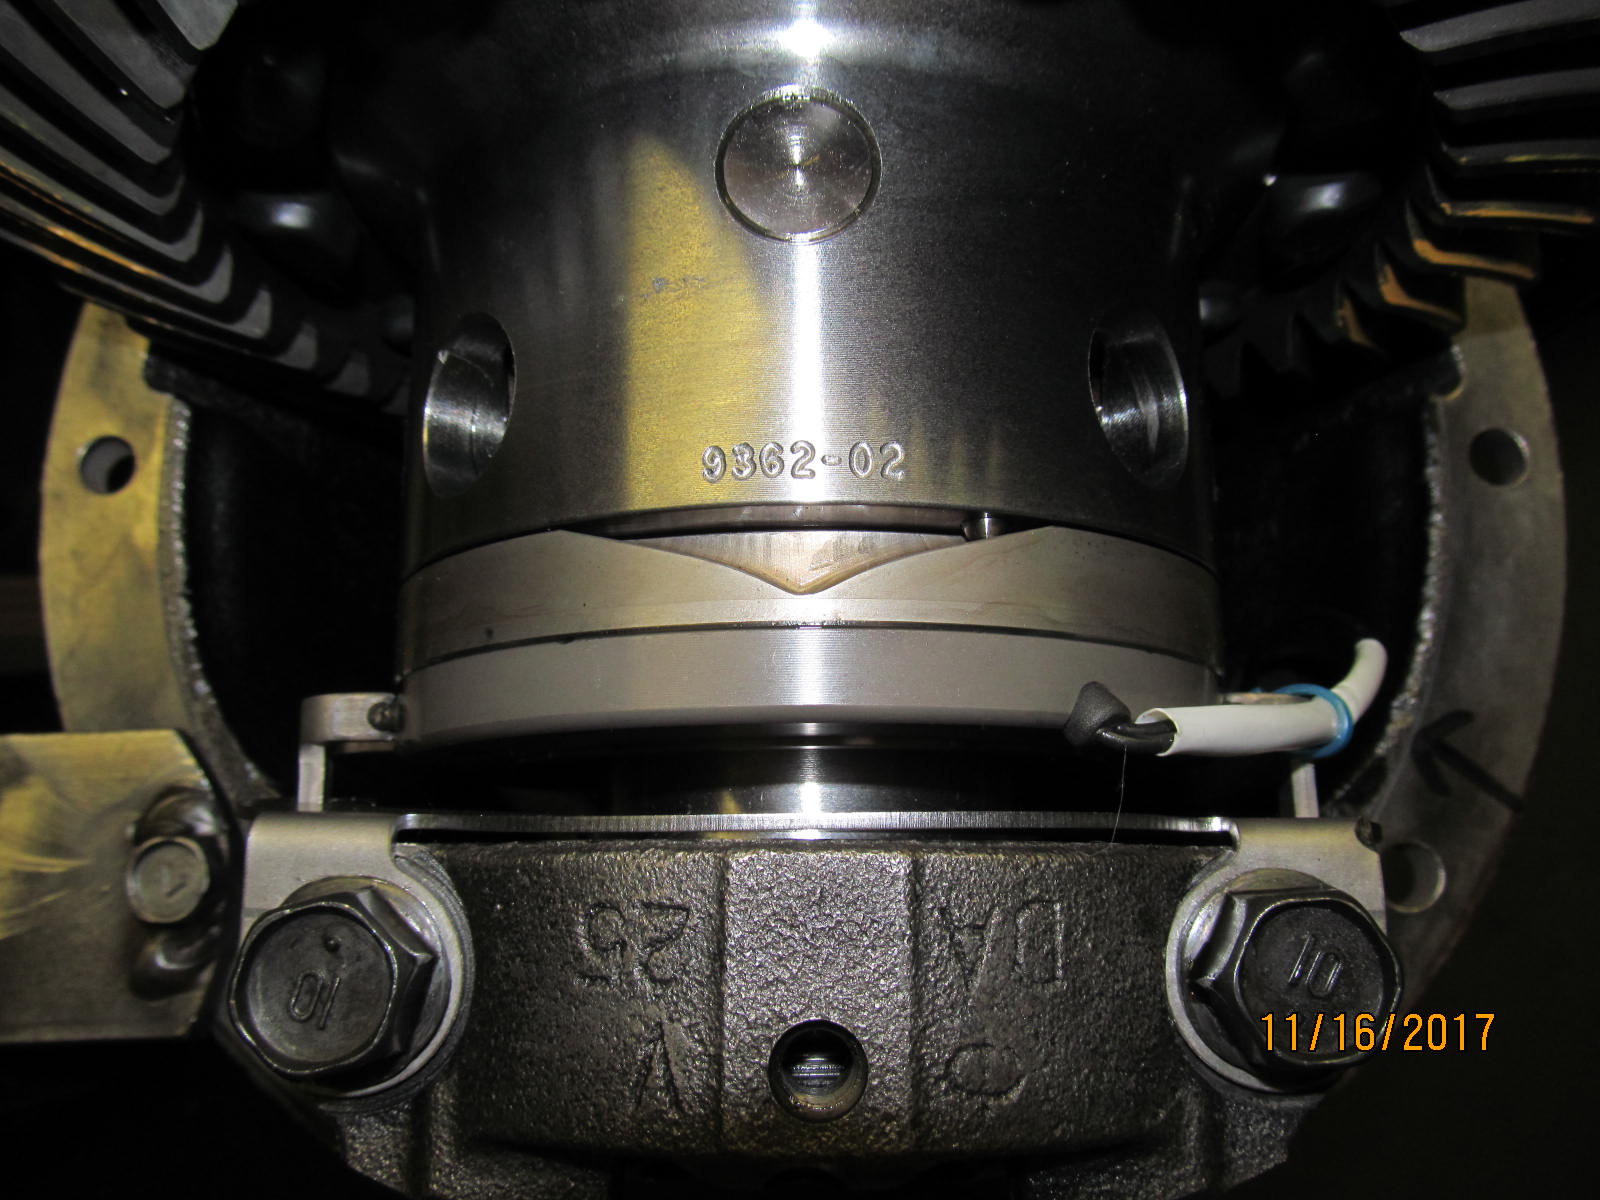
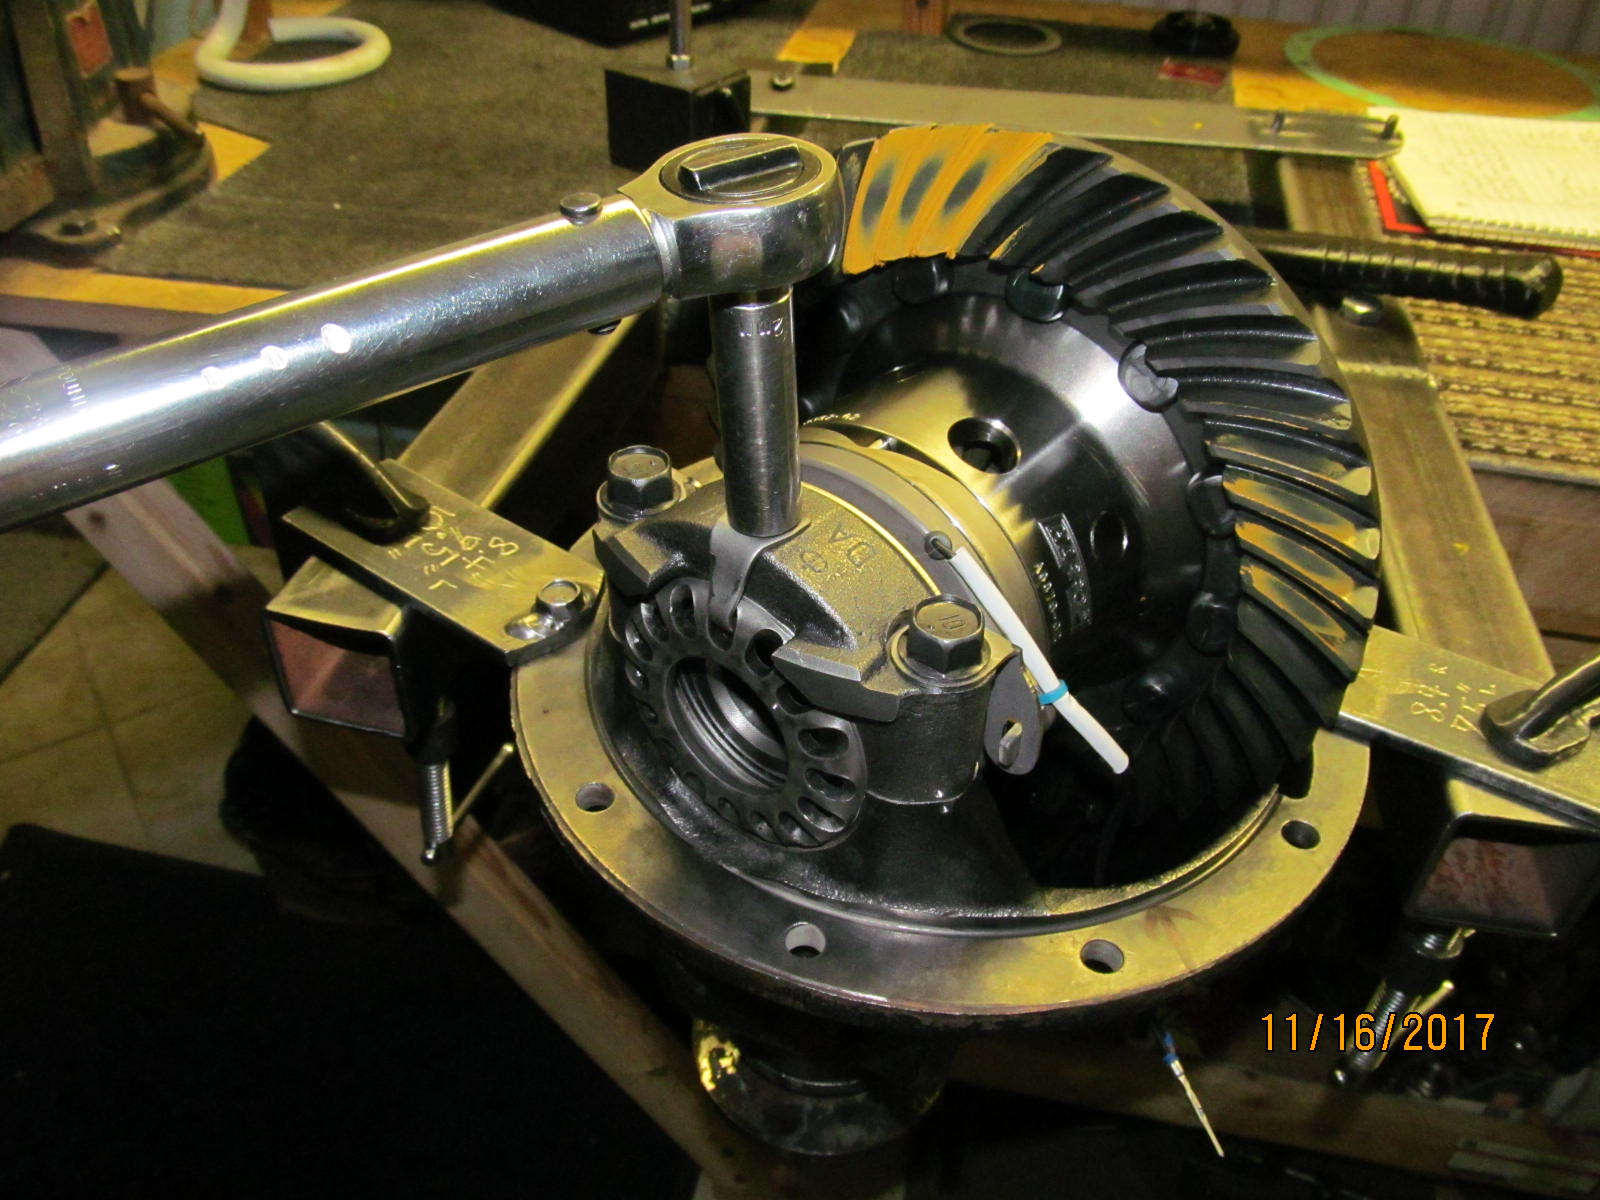
| The 4 bearing caps are verified to have 70 ft/lb. |
|---|
|
|
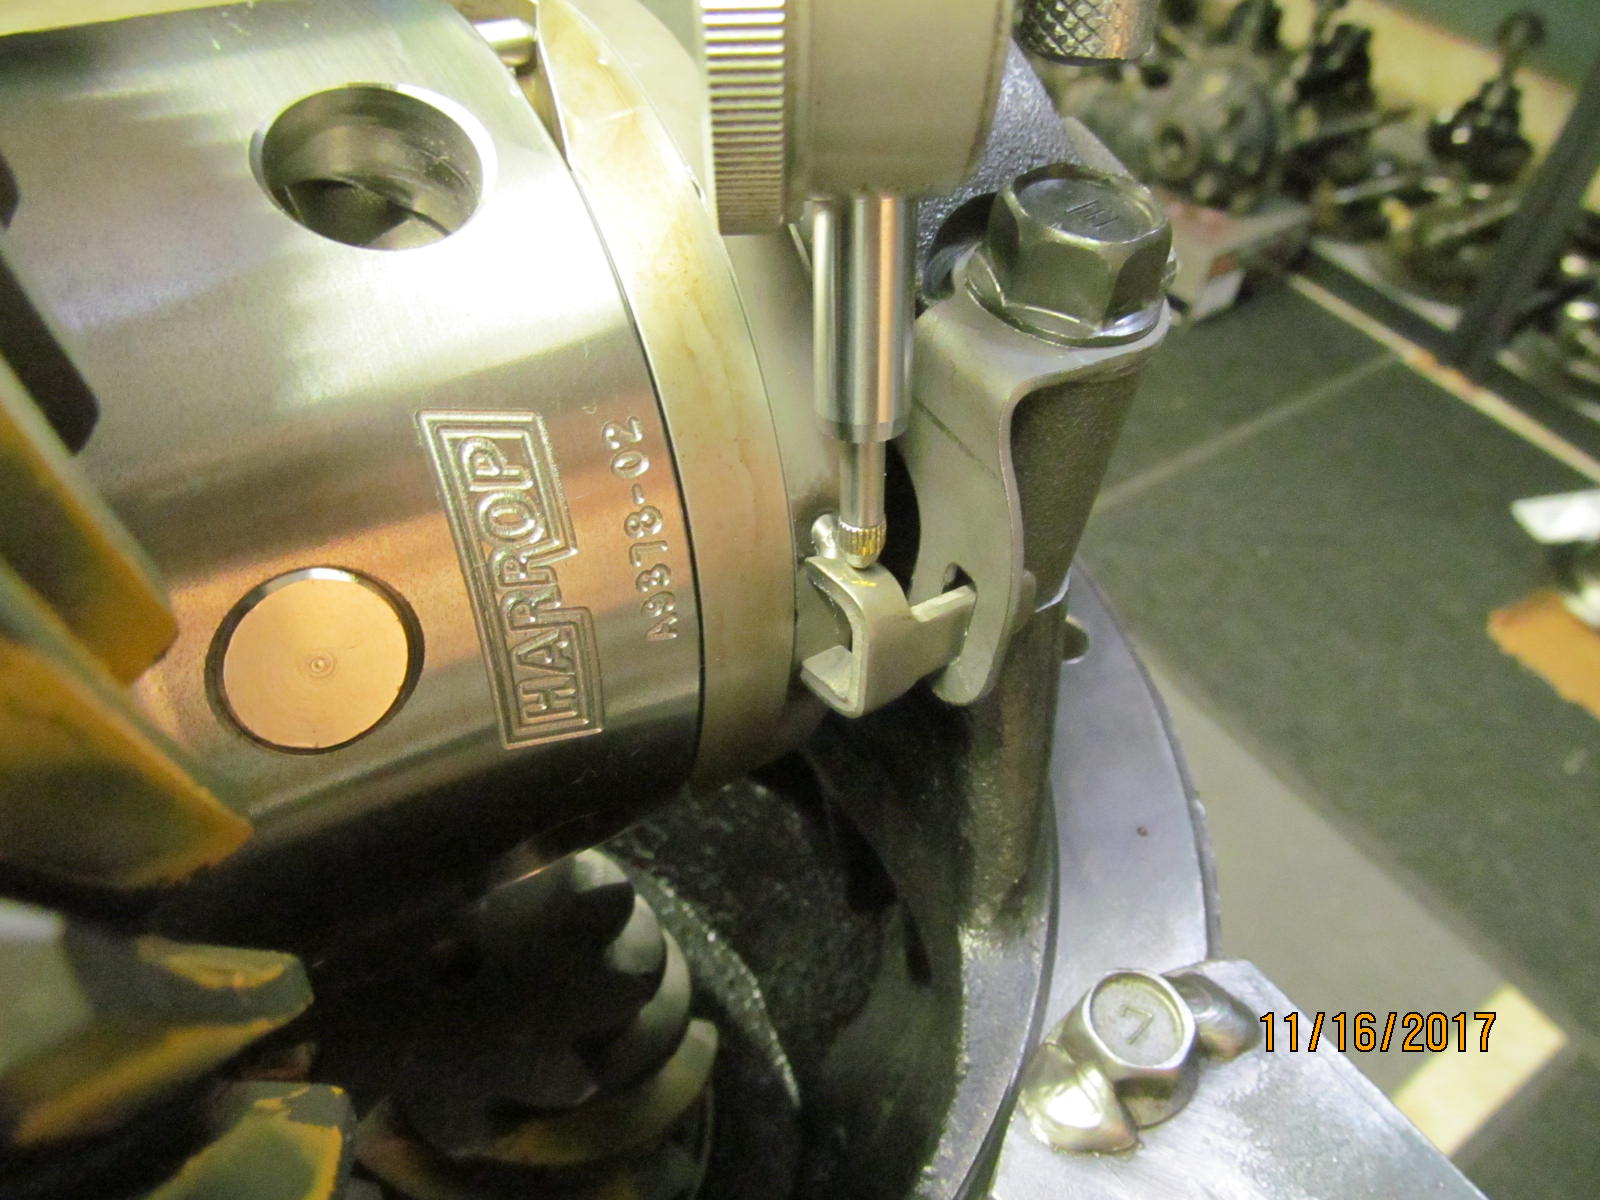
| Backlash is measured and recorded from every other tooth. |
|---|
|

|
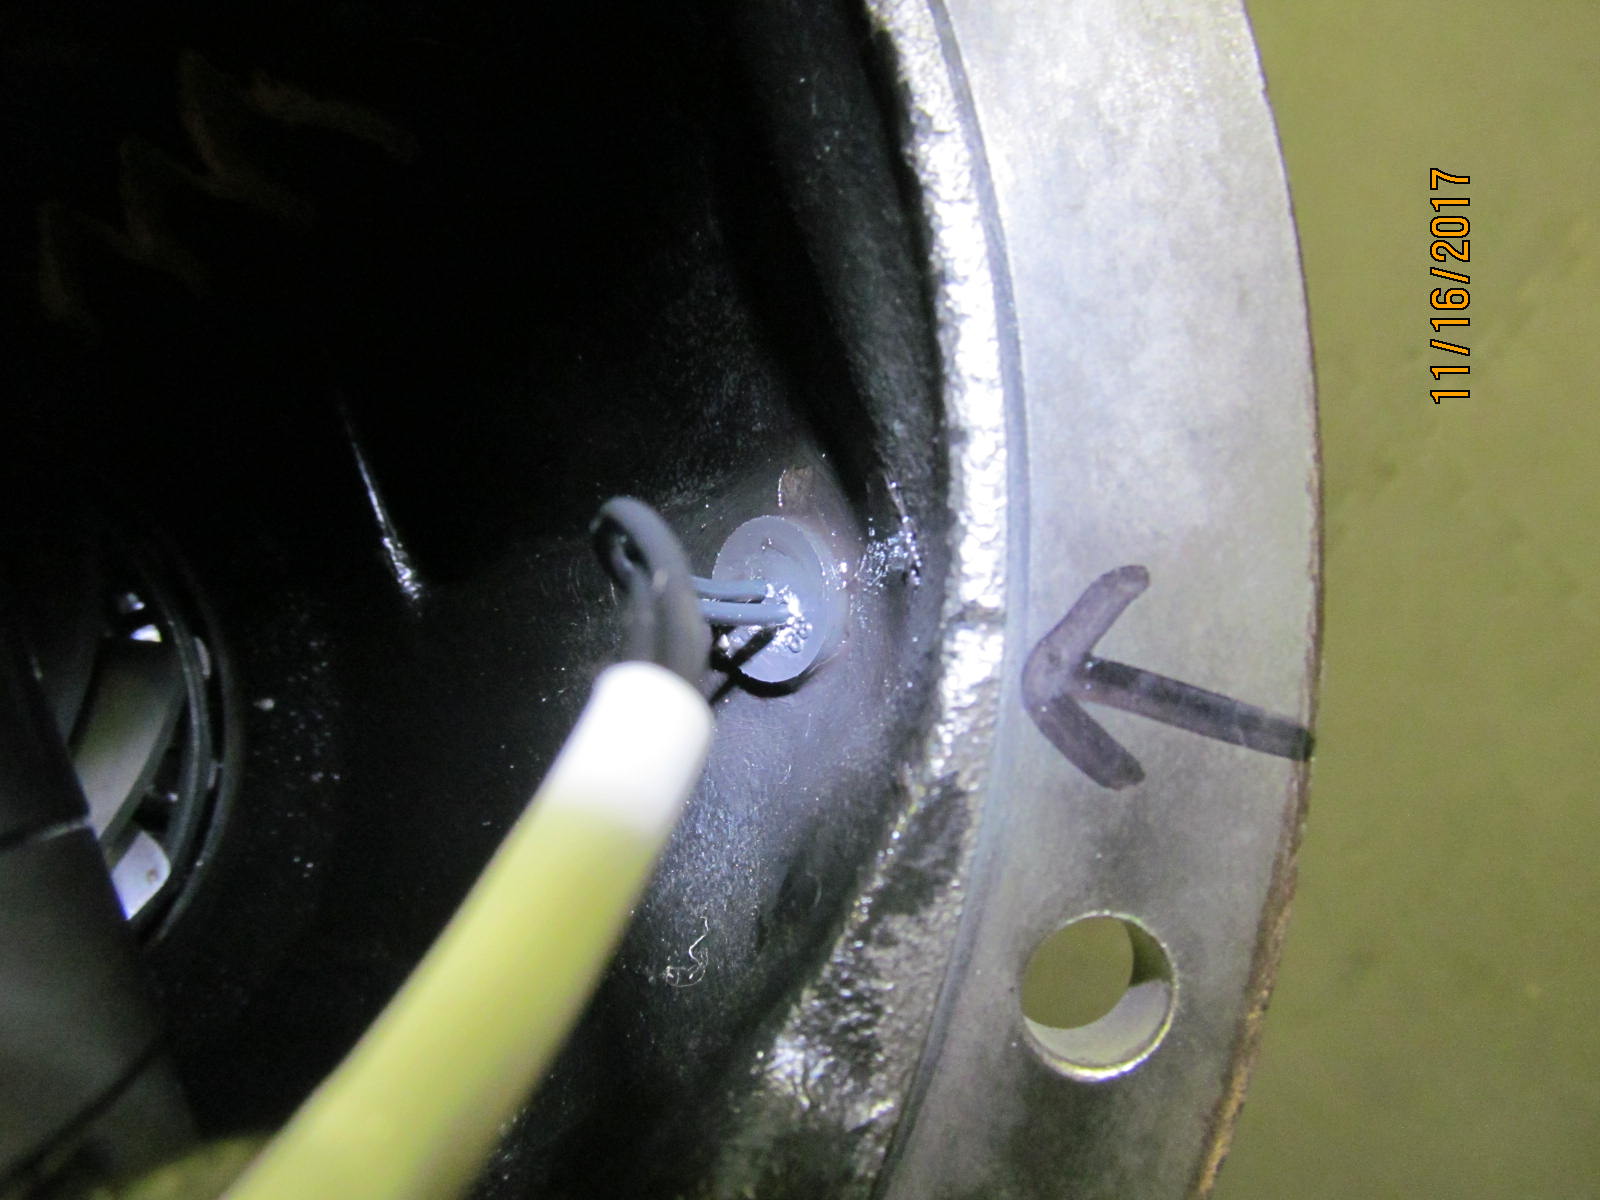
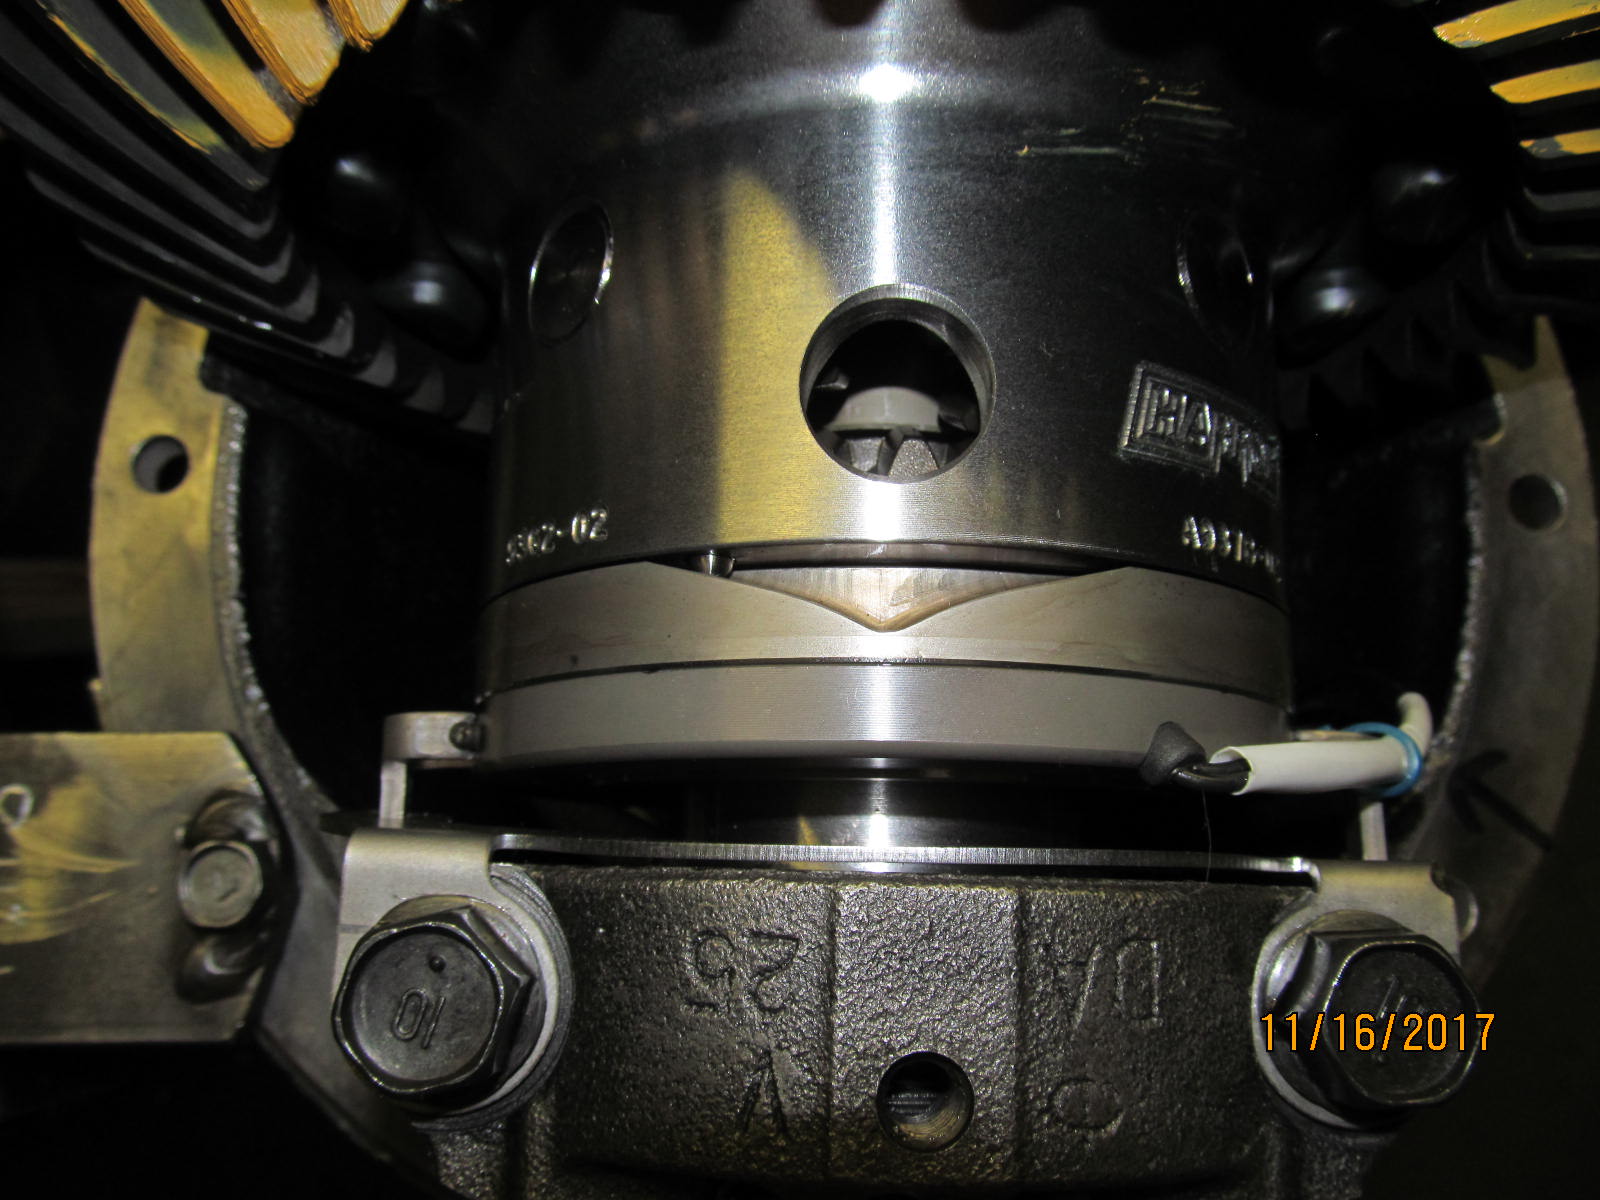
| Now to pass the rubber grommet thru the hole. |
|---|
|
|
| RTV helped seal the rubber grommet more effectively. |
|---|
|
|
| Looks good on the outside. |
|---|
|
|
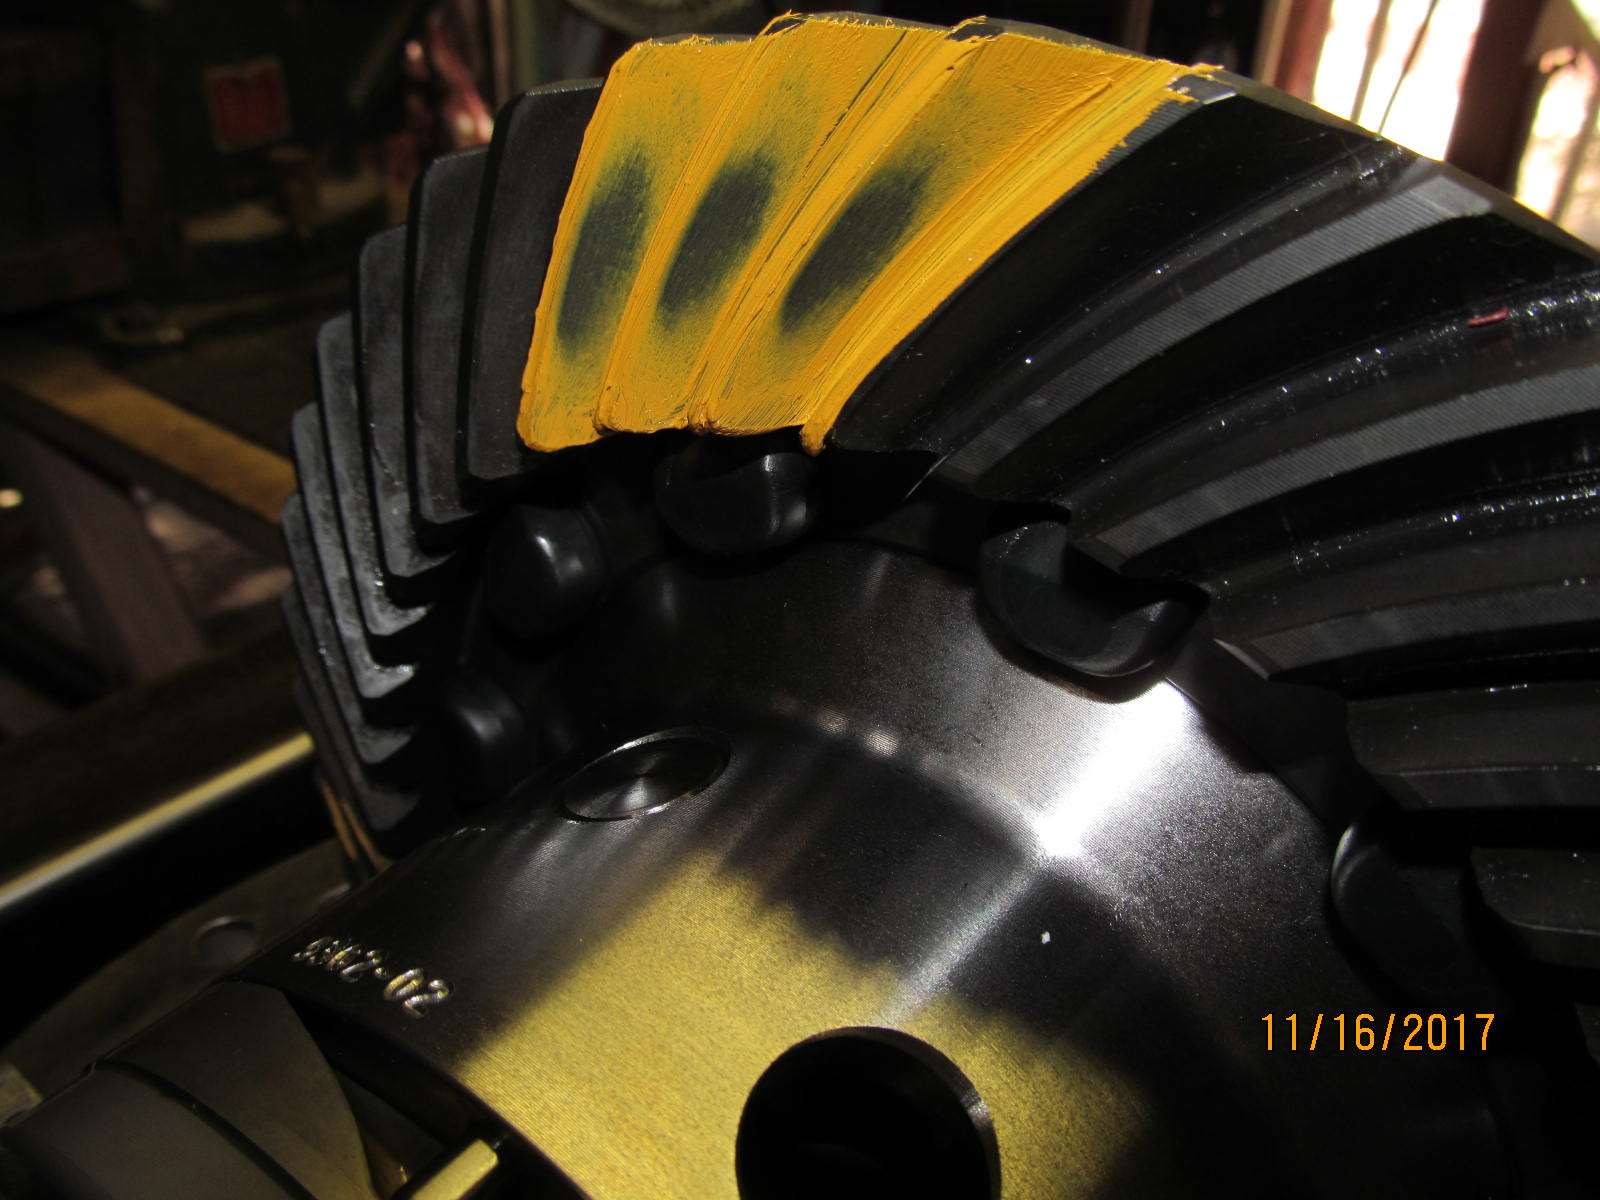
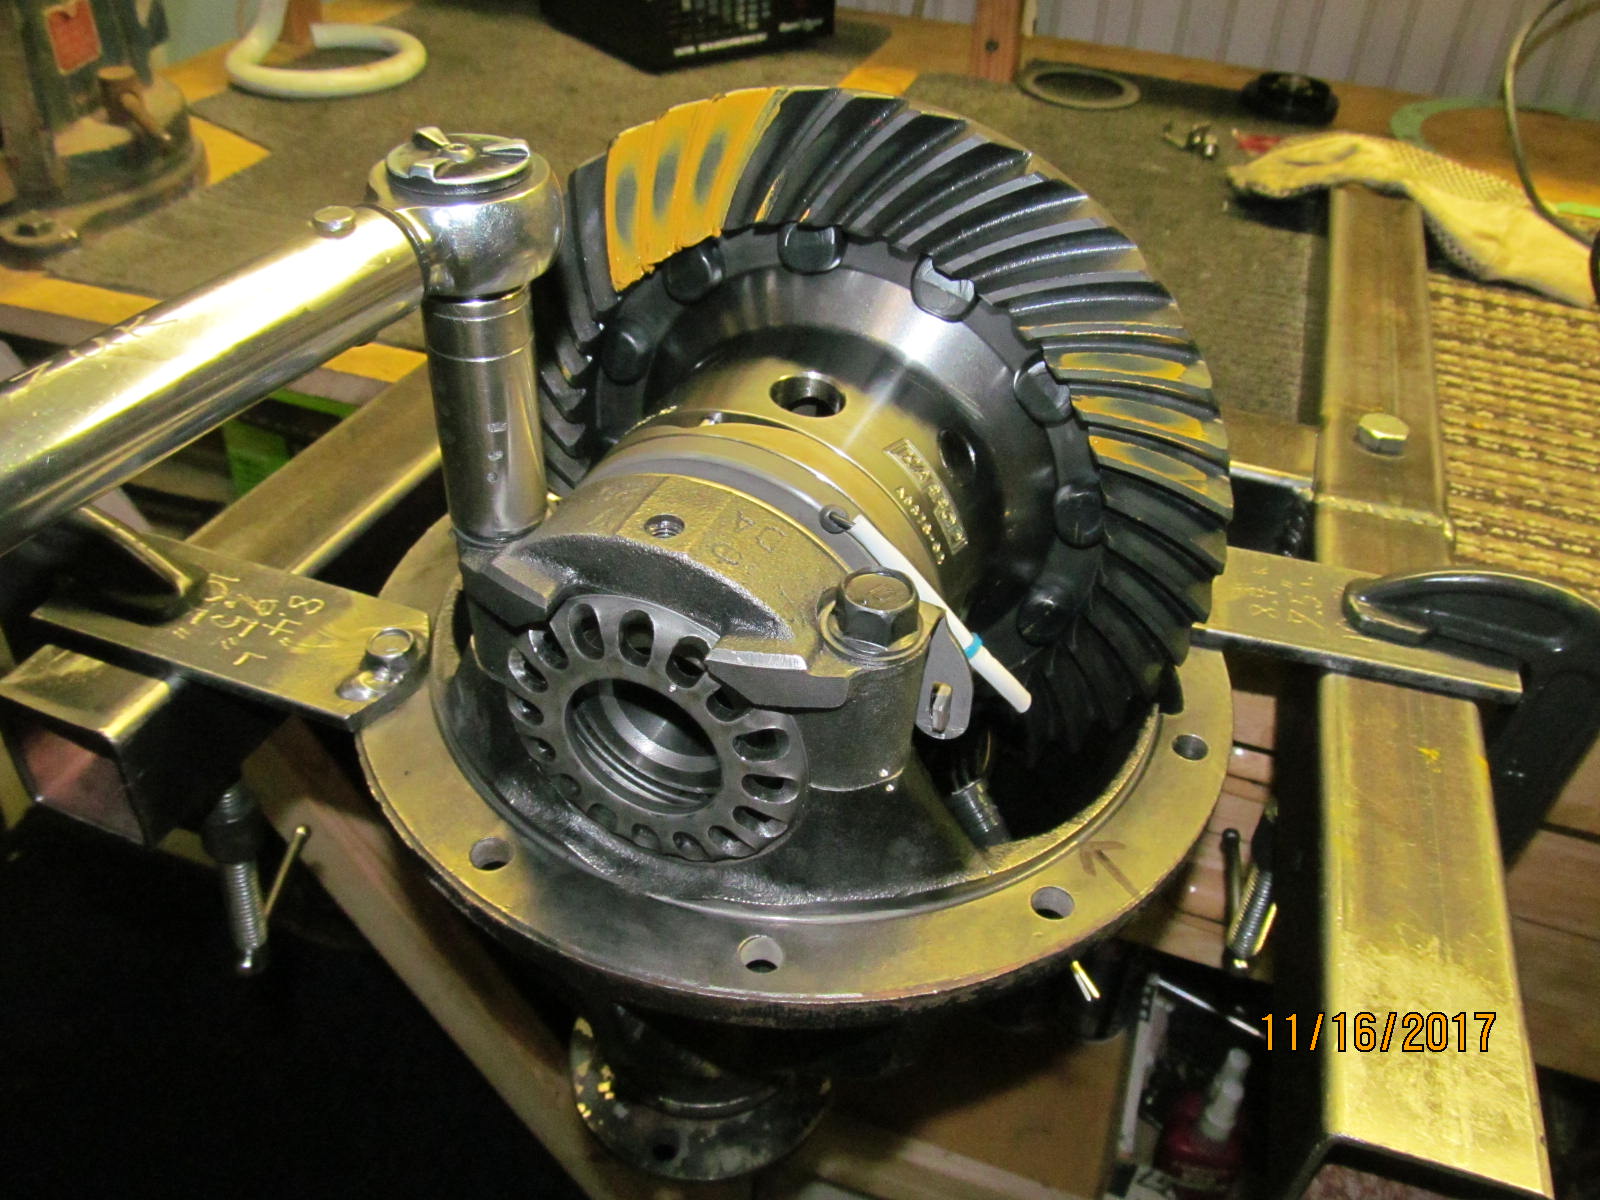
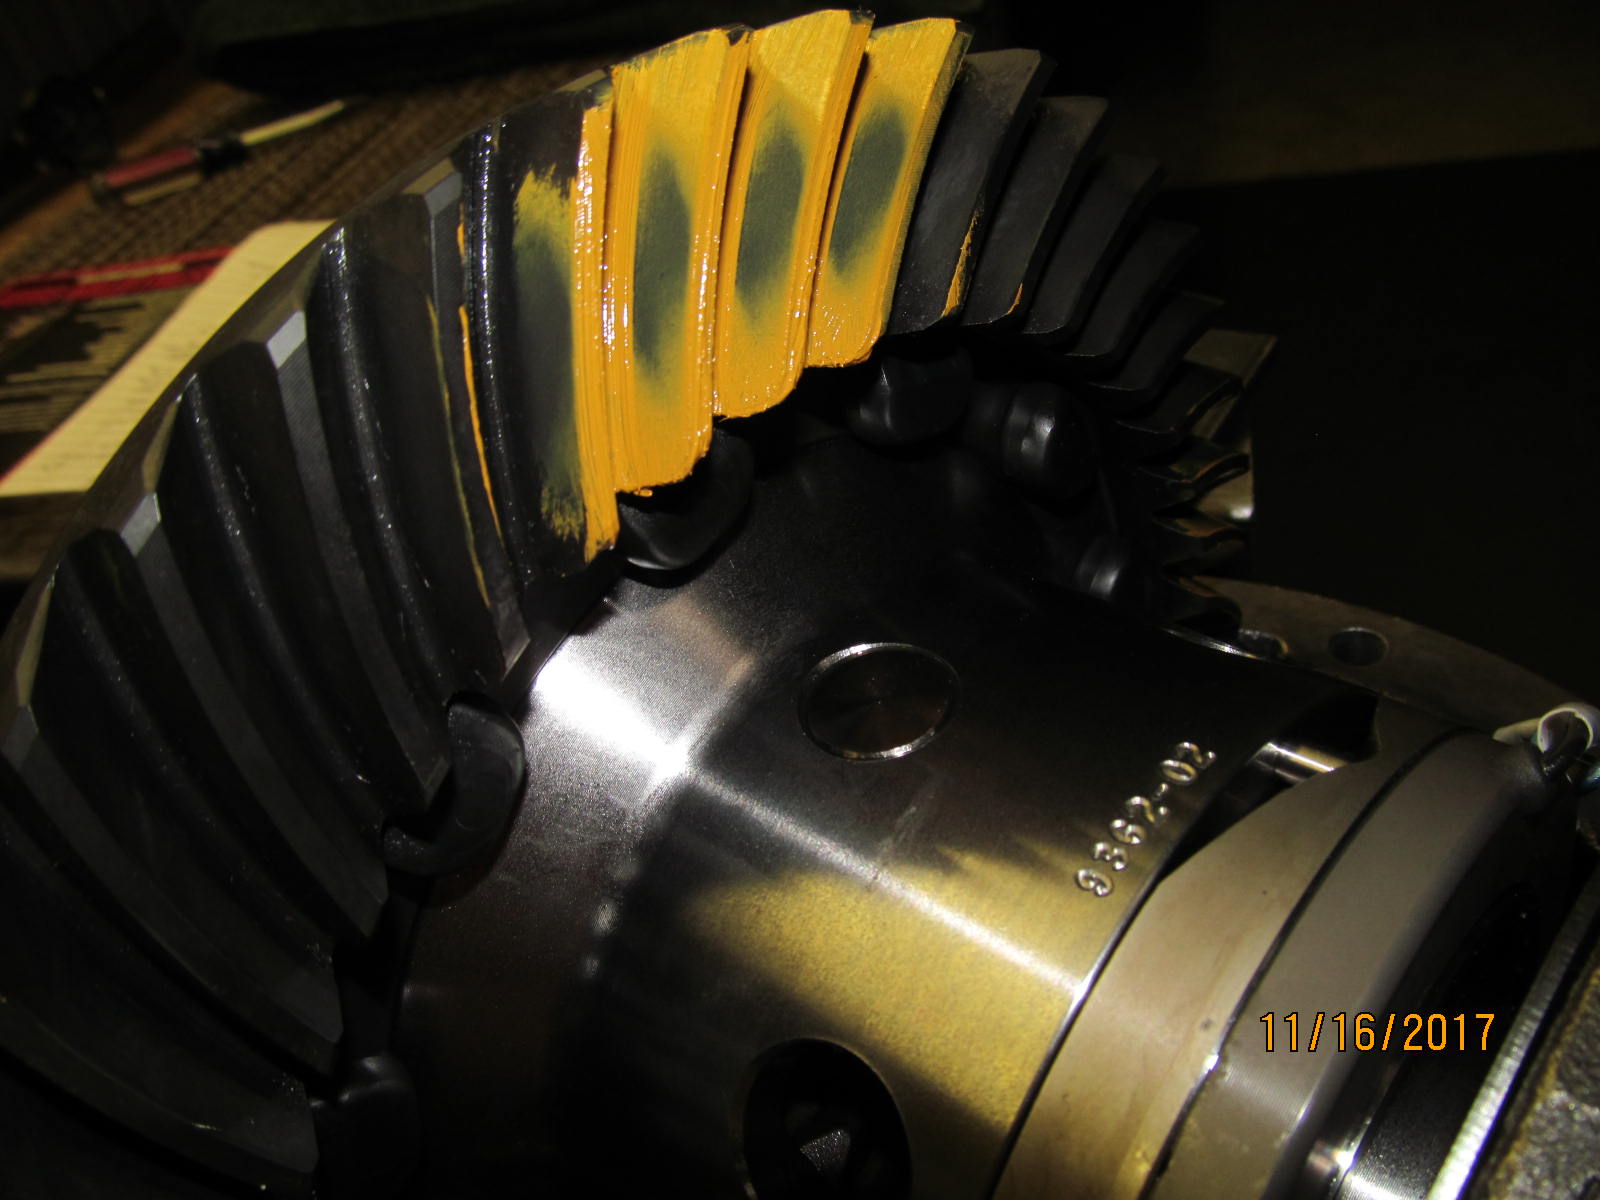
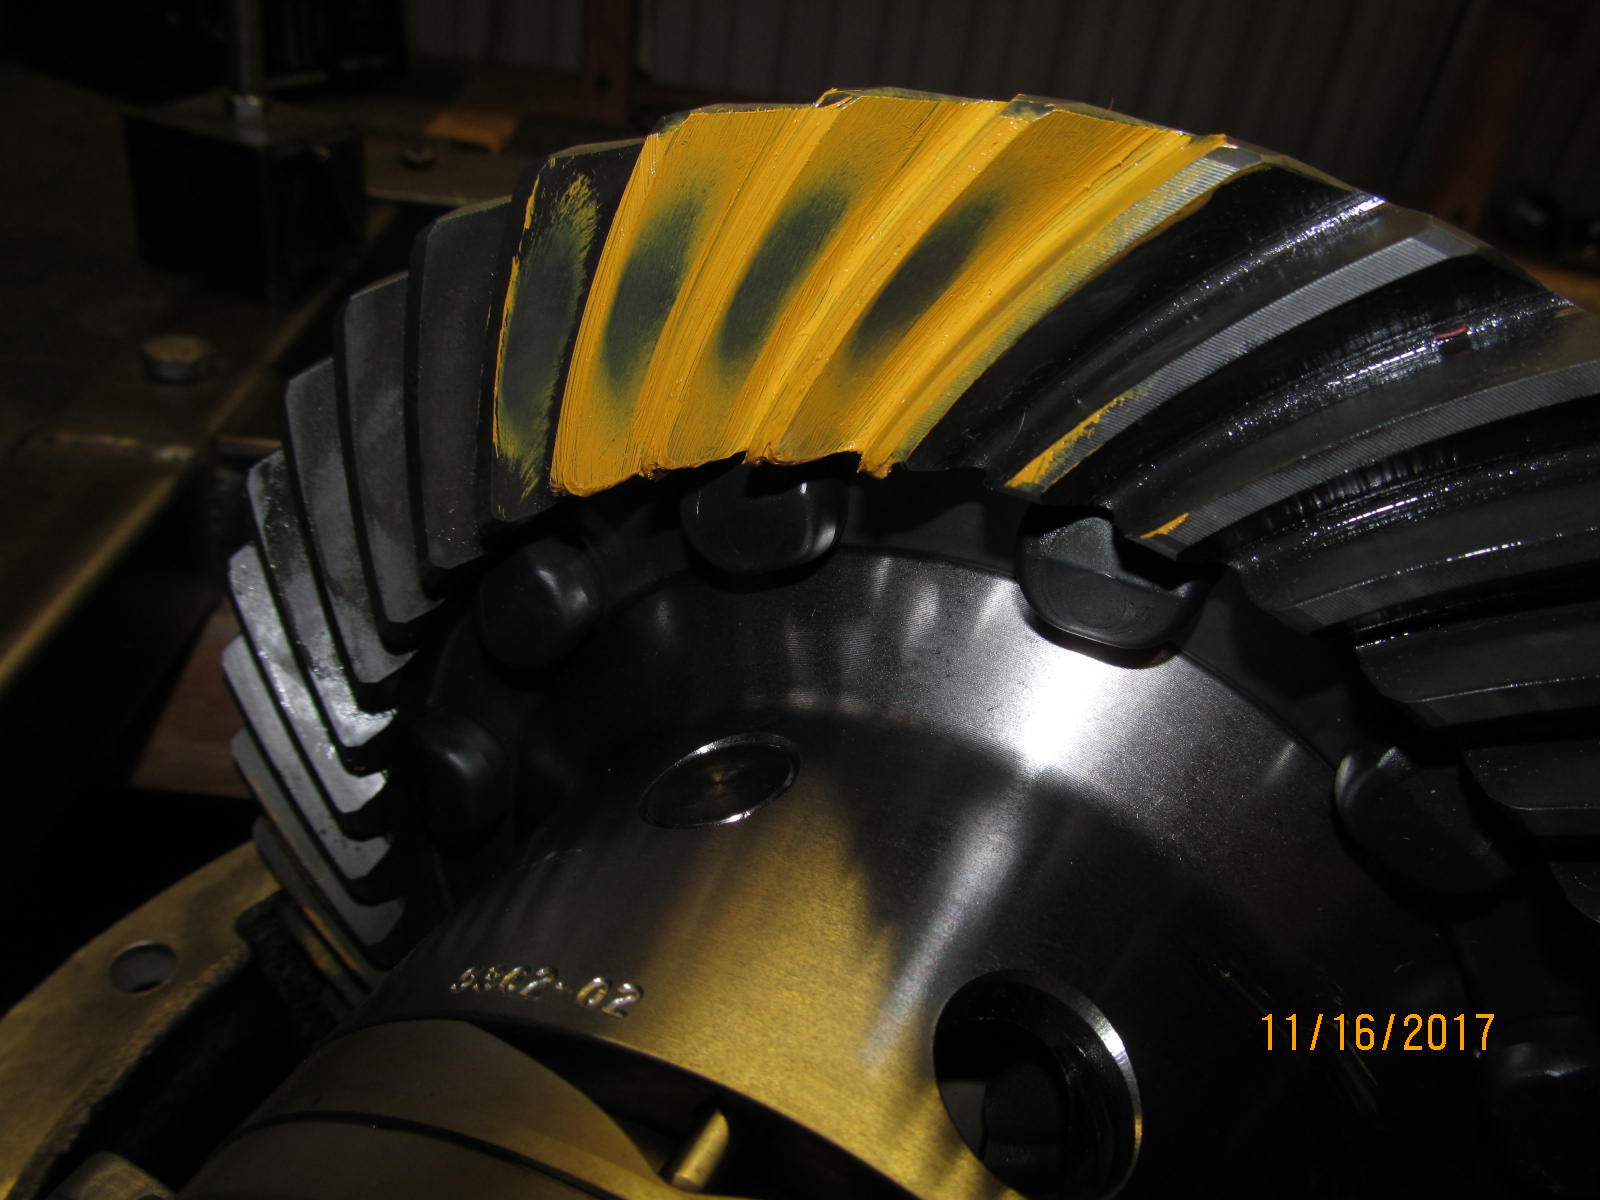
| Final drive pattern....looks wonderful. |
|---|
|
|
| Coast is beautiful. |
|---|
|
|
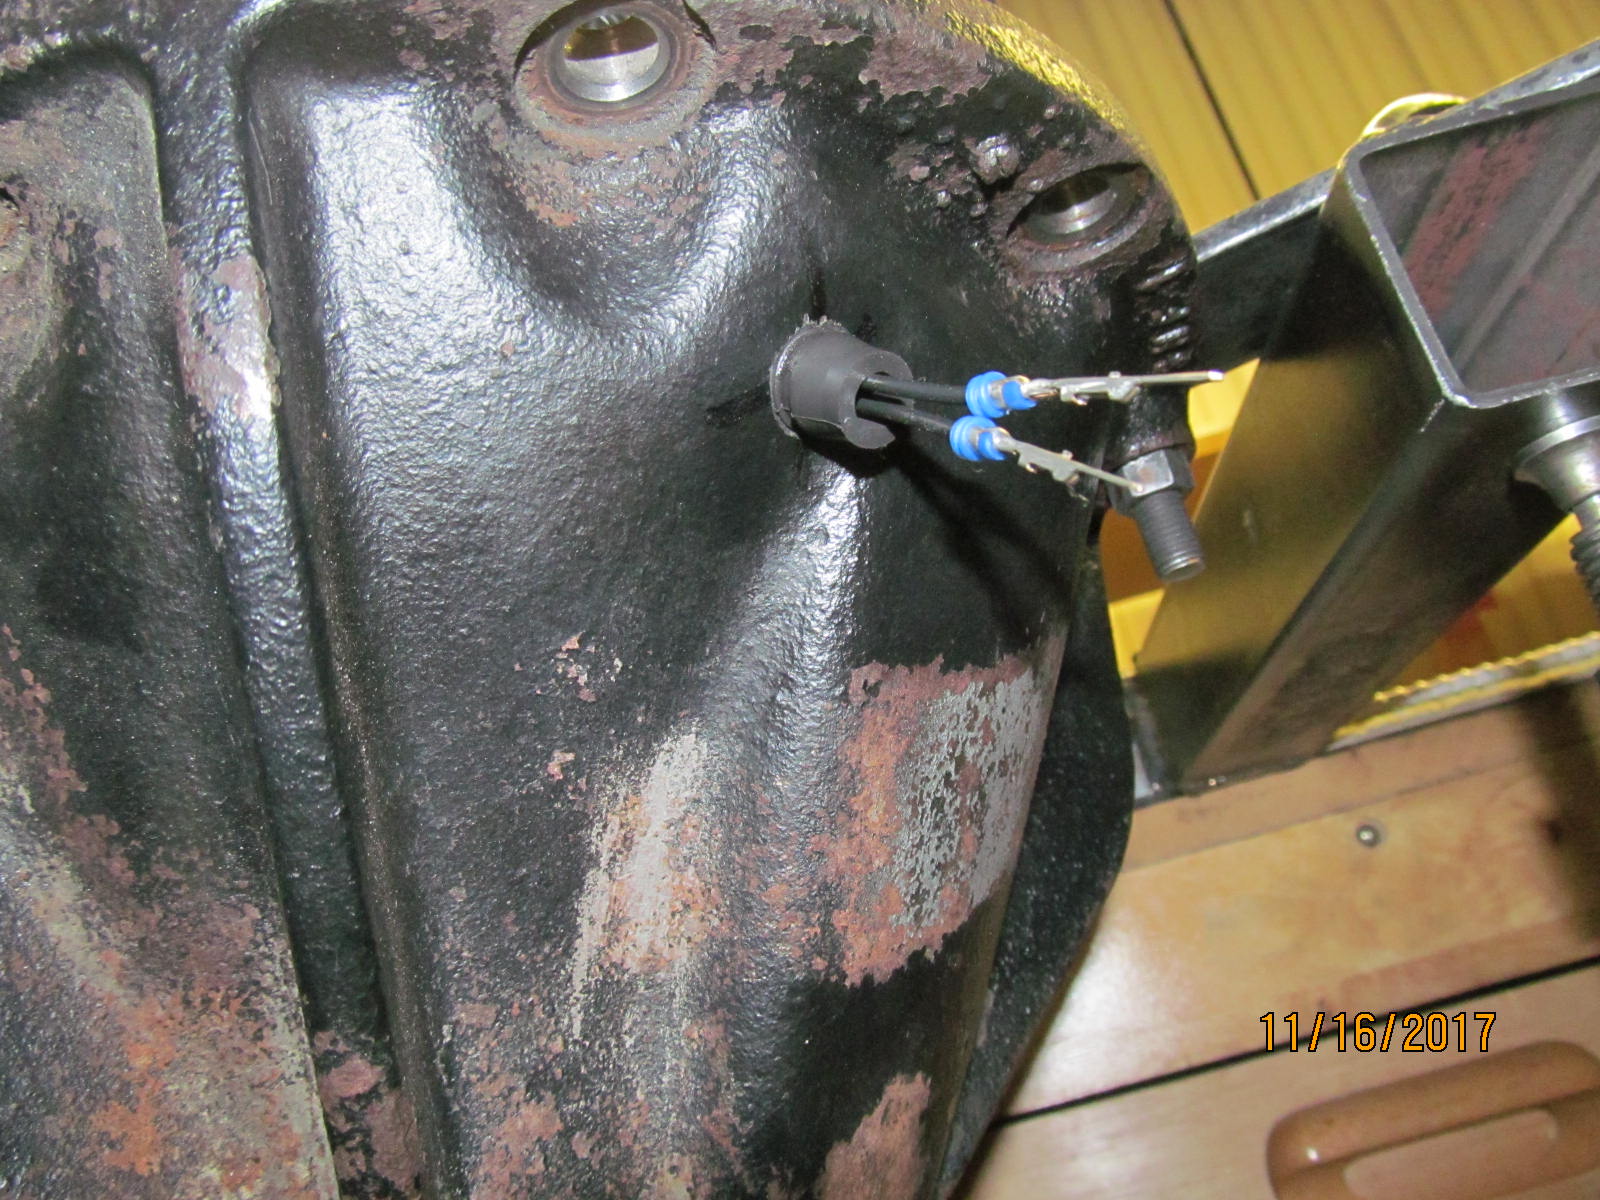
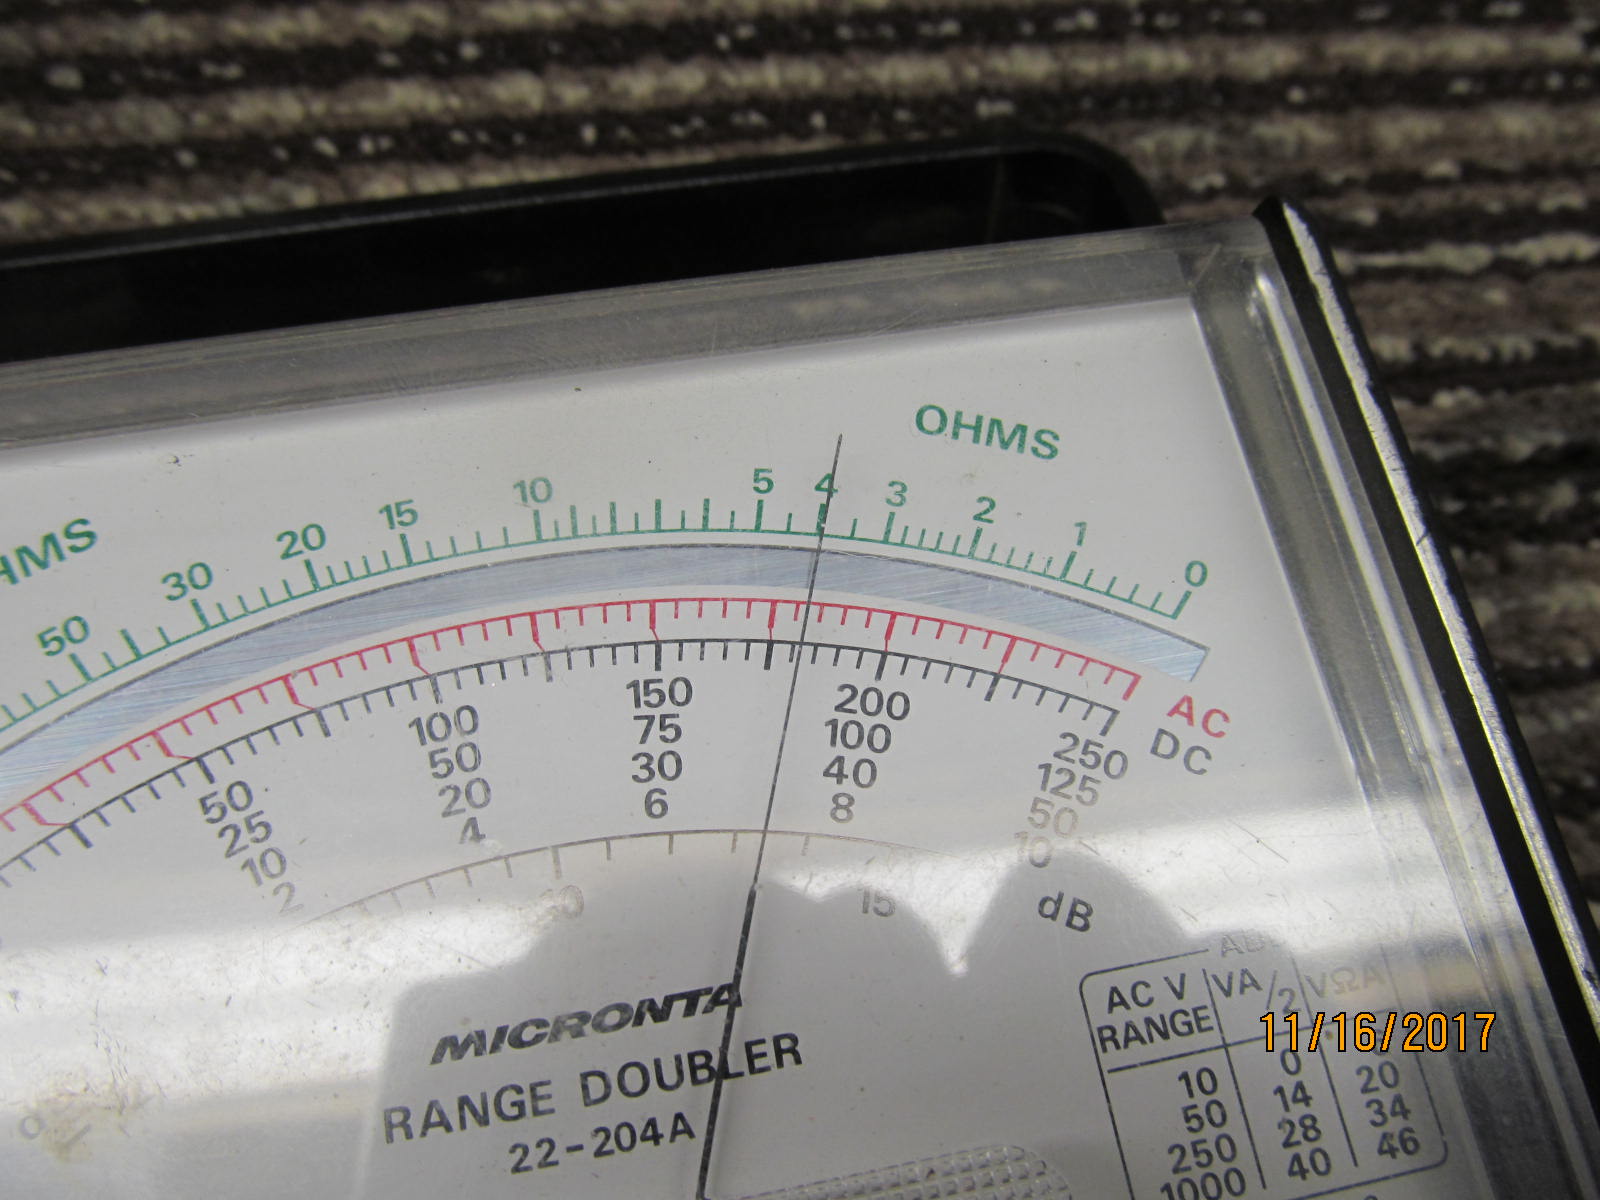
| Resistance of the magnetic coil checks in at about 4 ohms. |
|---|
|
|
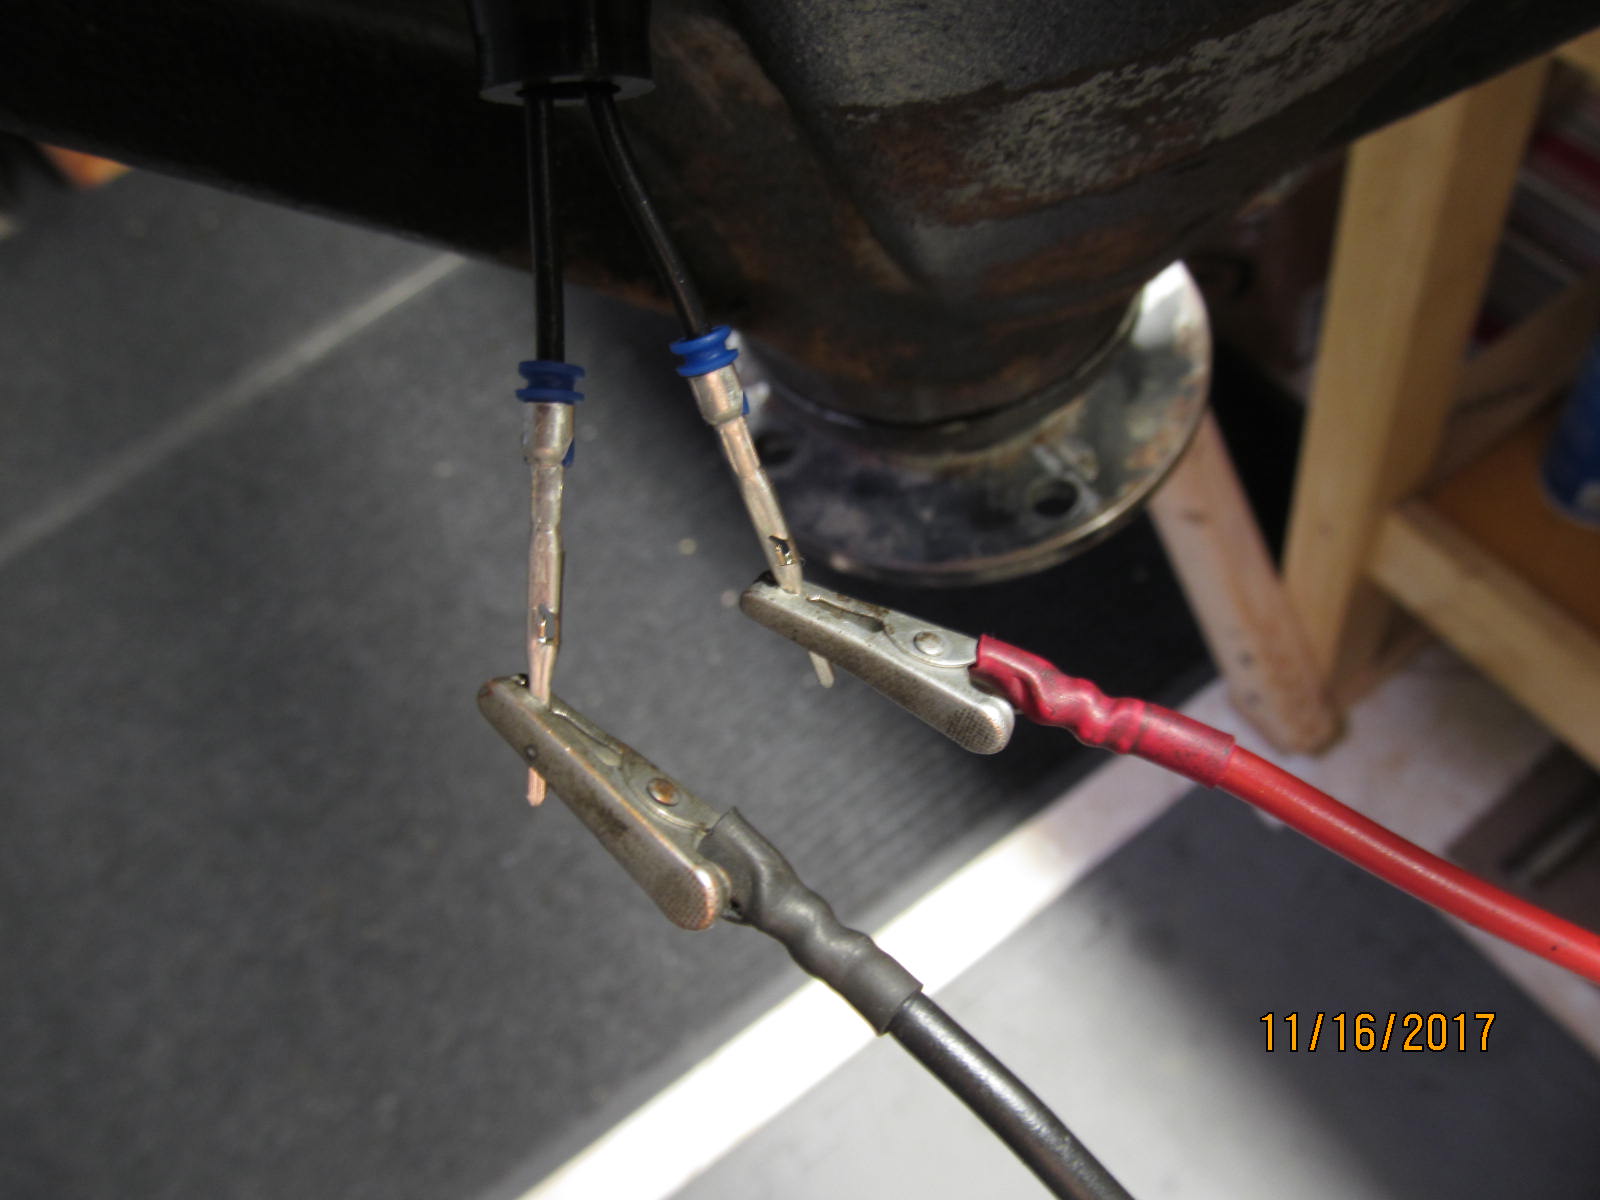
| 12 volt power is applied to the elocker wires. |
|---|
|
|
| Turning the ring gear now will cause the 3 steel pins to push into the case. |
|---|
|
|
| The pins are pushing a locking ring in place.....the locker is engaged. |
|---|
|
|
| Turning the ring gear in the opposite direction ramps the pin up the other side. |
|---|
|
|
| The 2 tabs can now be tightened to 10+ ft/lb. |
|---|
|
|
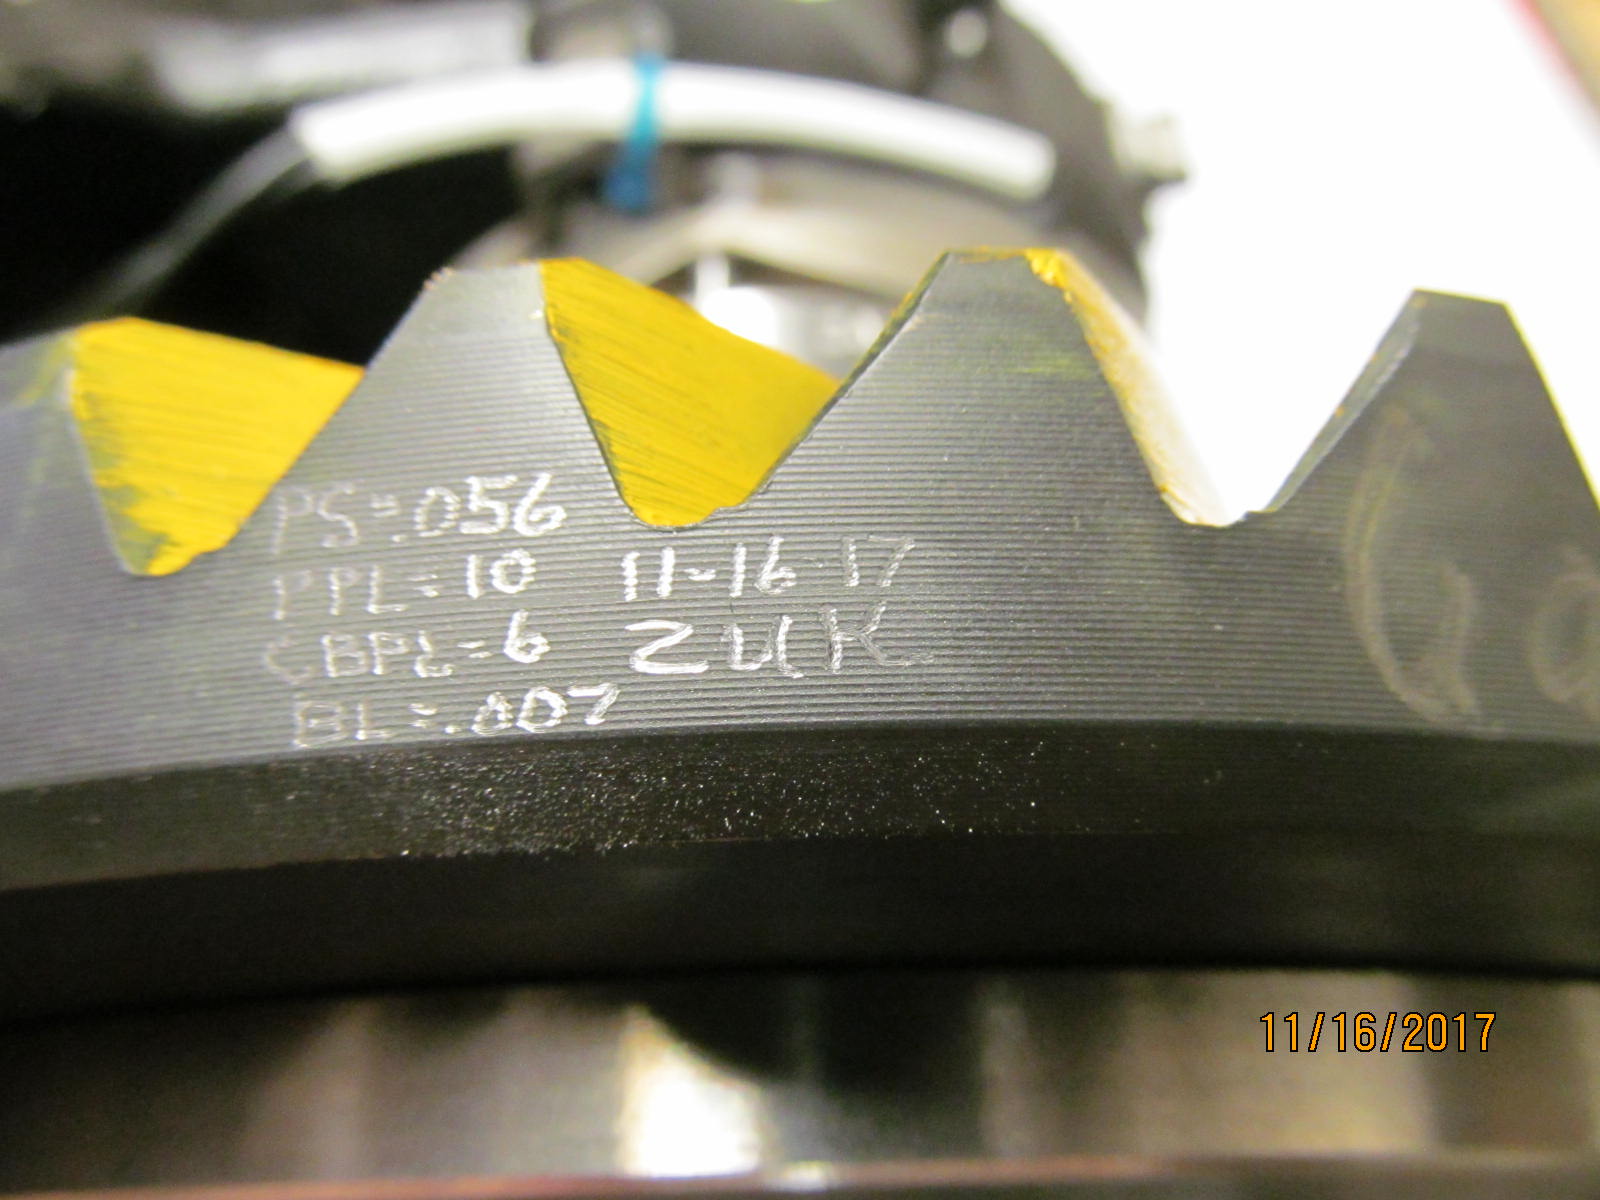
| The basics are engraved on the ring. |
|---|
|
|
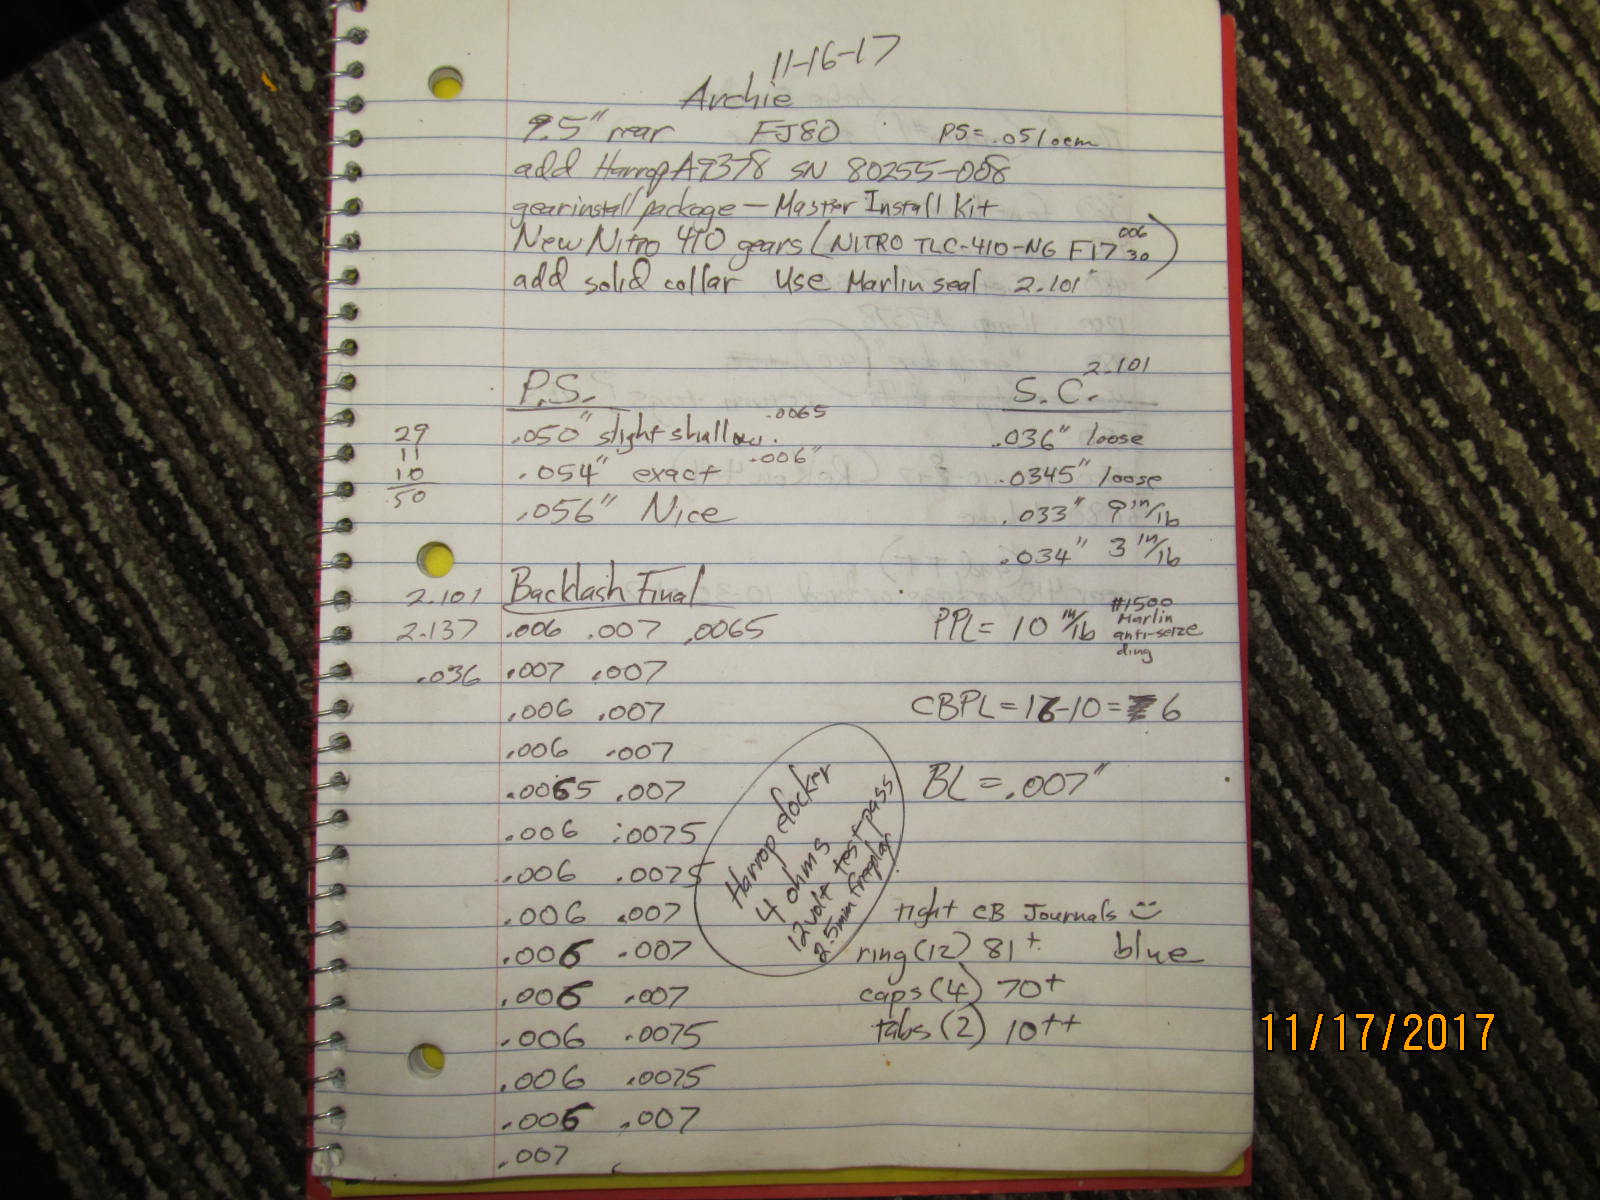
| A snapshot of the notes. |
|---|
|
|

|