|
|
|
|
|
|
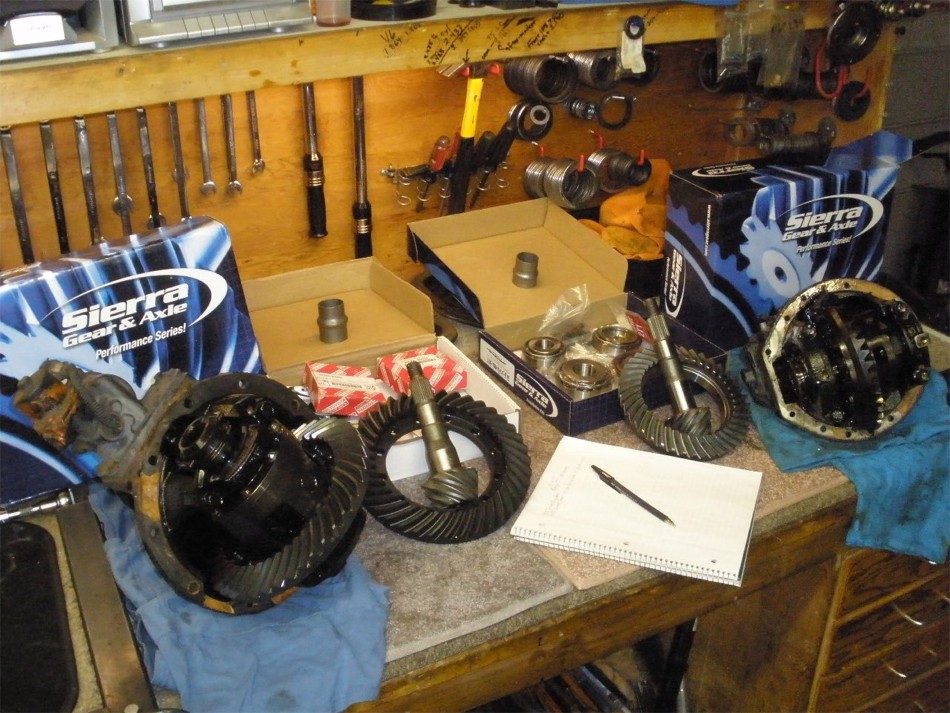
Kerry is local to me and brought over both the rear and front 3rds from an 80 series Cruiser. This page is for the rear 9.5" install of the 488 Sierra Gears. The front install has a link at the very end of this page. |
|
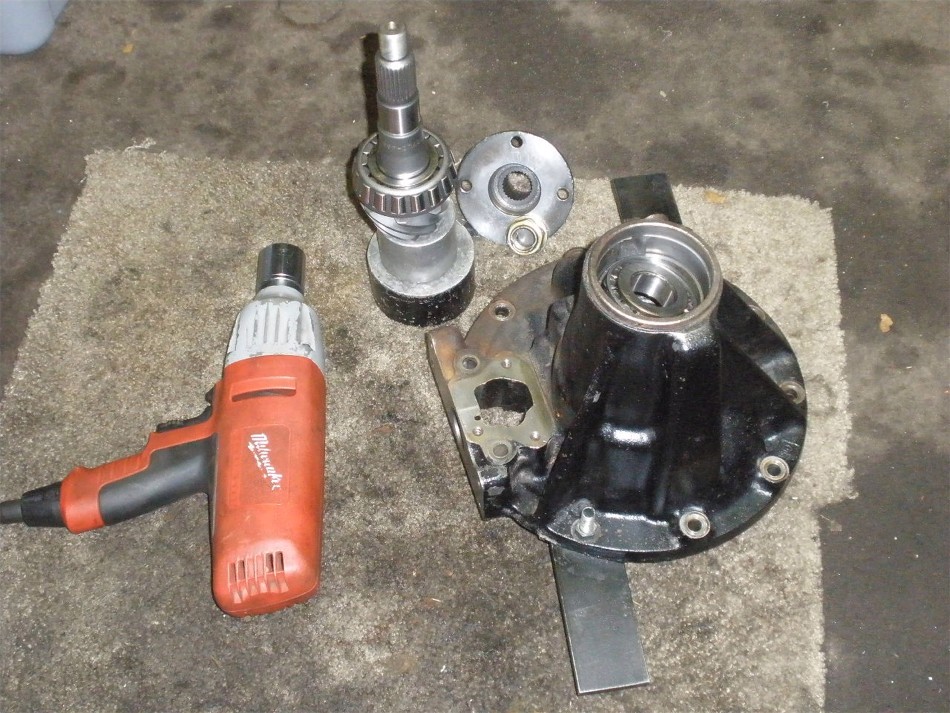
Here's the front high pinion. The box that says "Sierra Gears" on it had "Circle K" gears inside. They do set up very well, by the way. I believe they are out of Korea. |
|
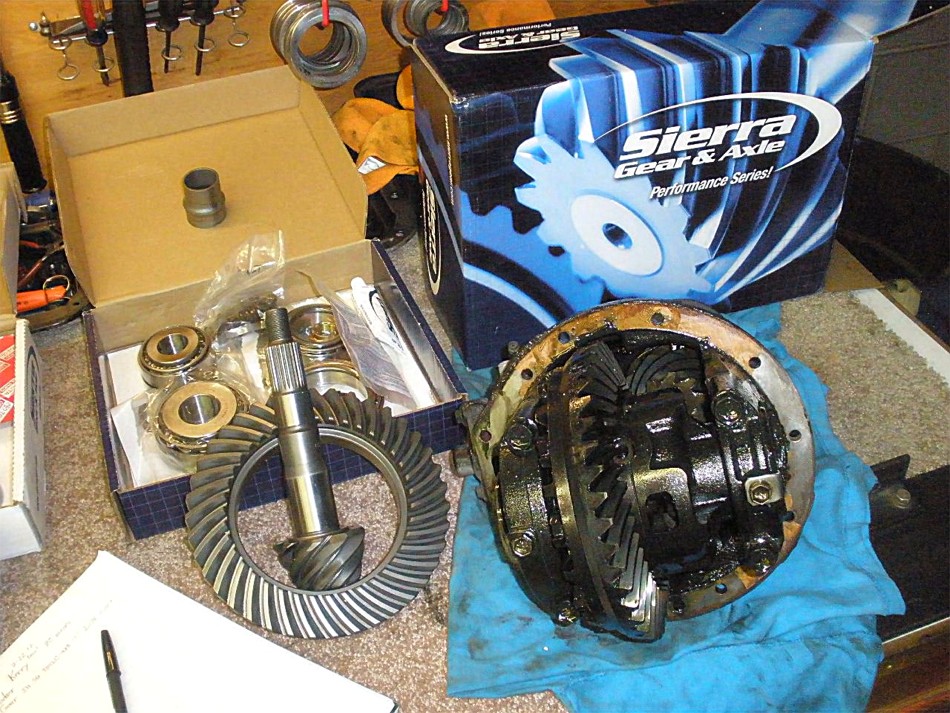
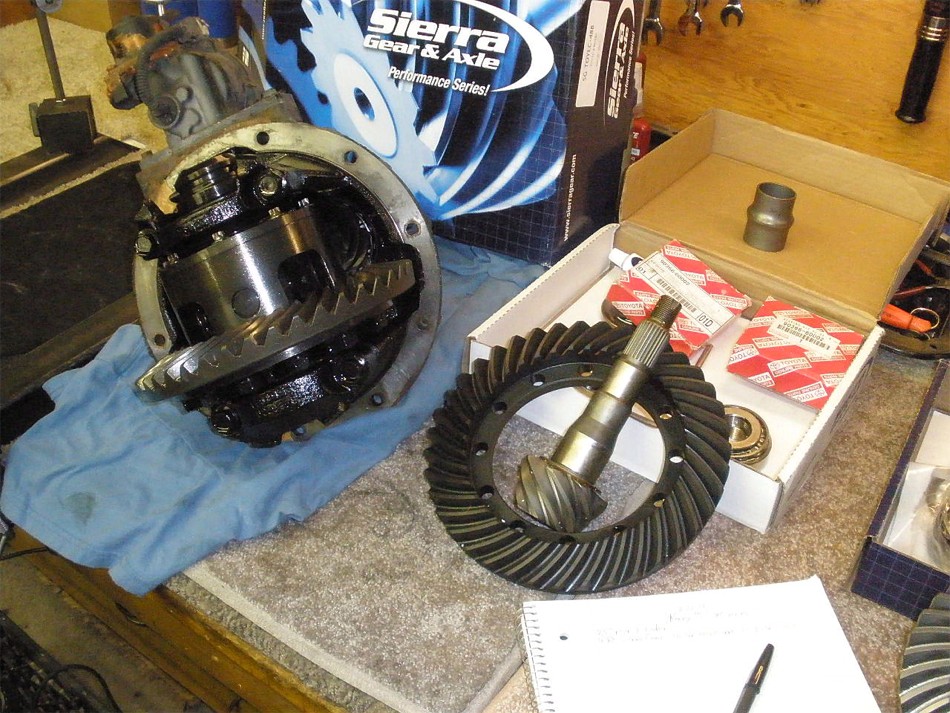
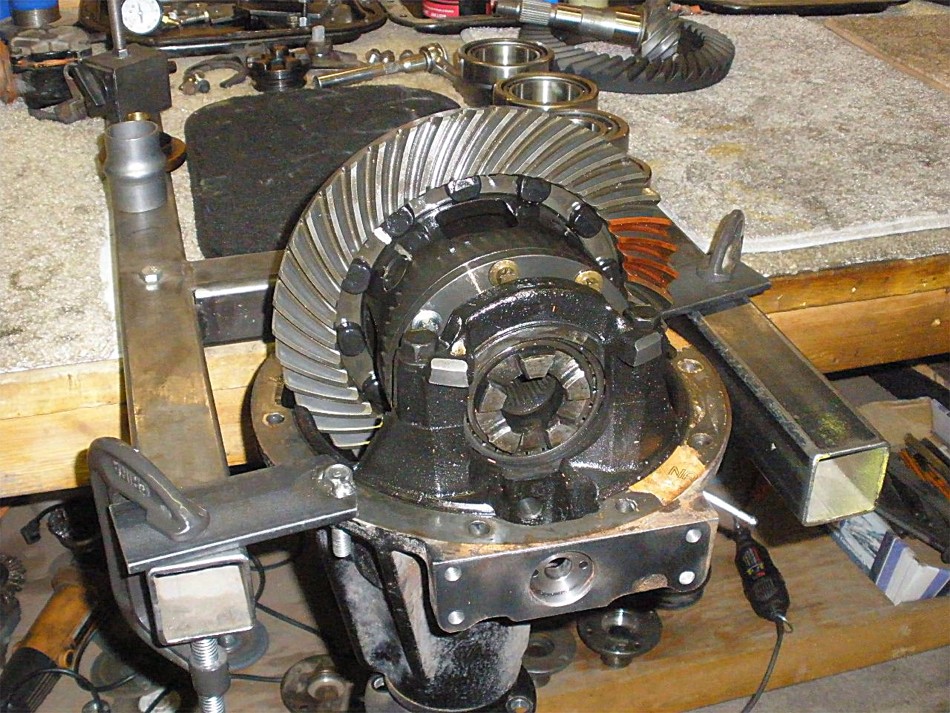
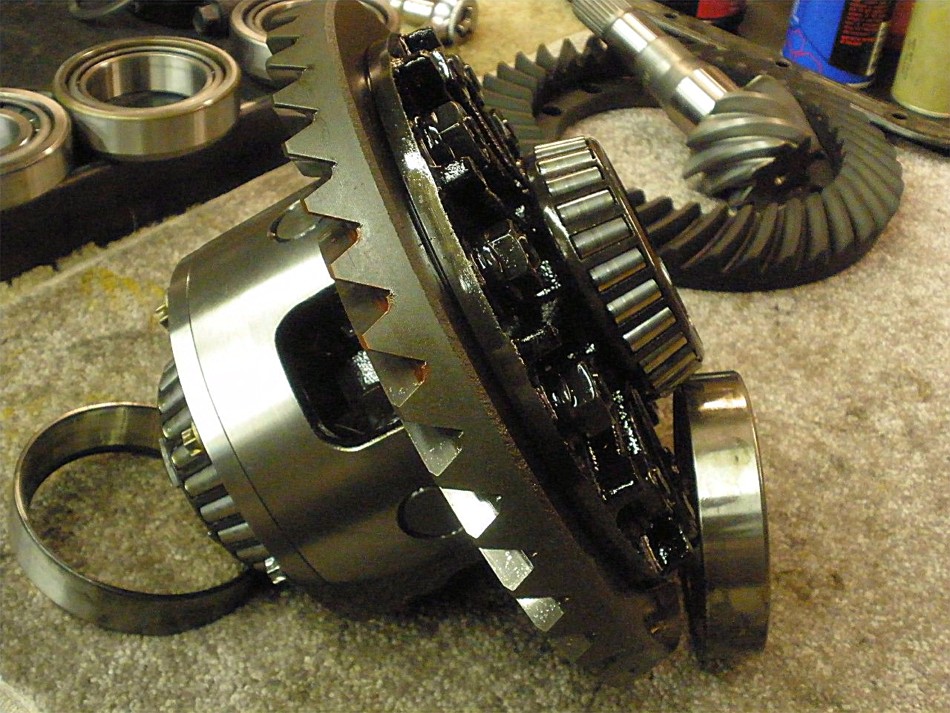
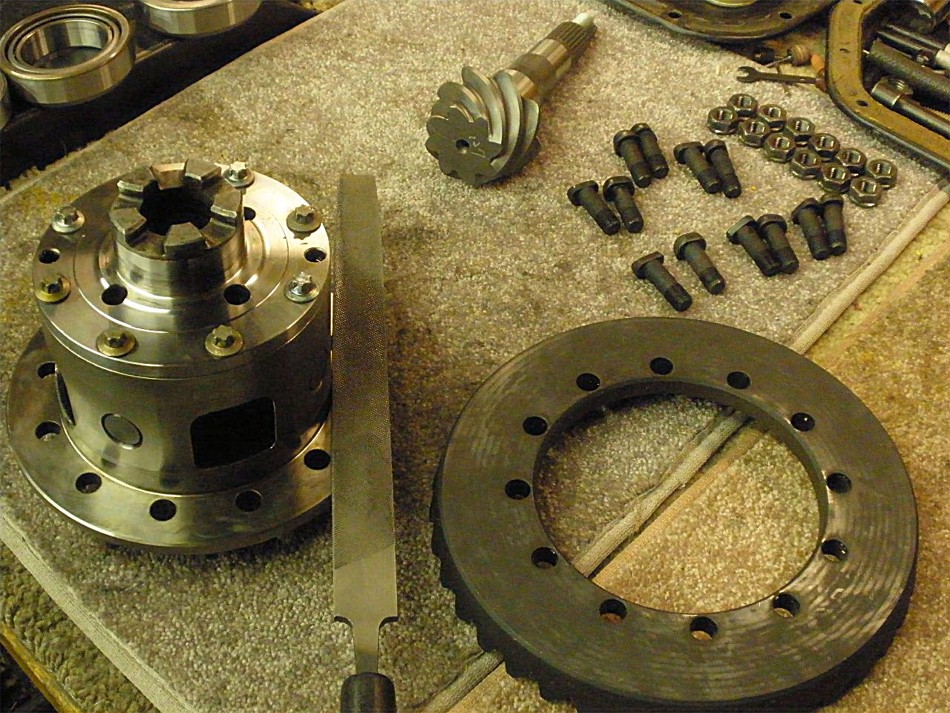
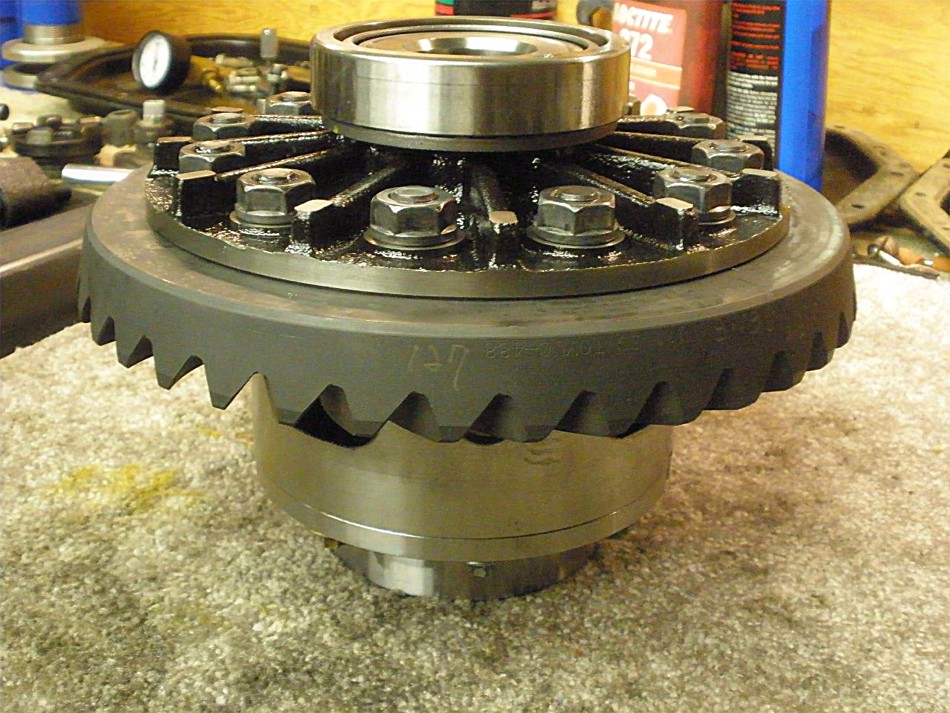
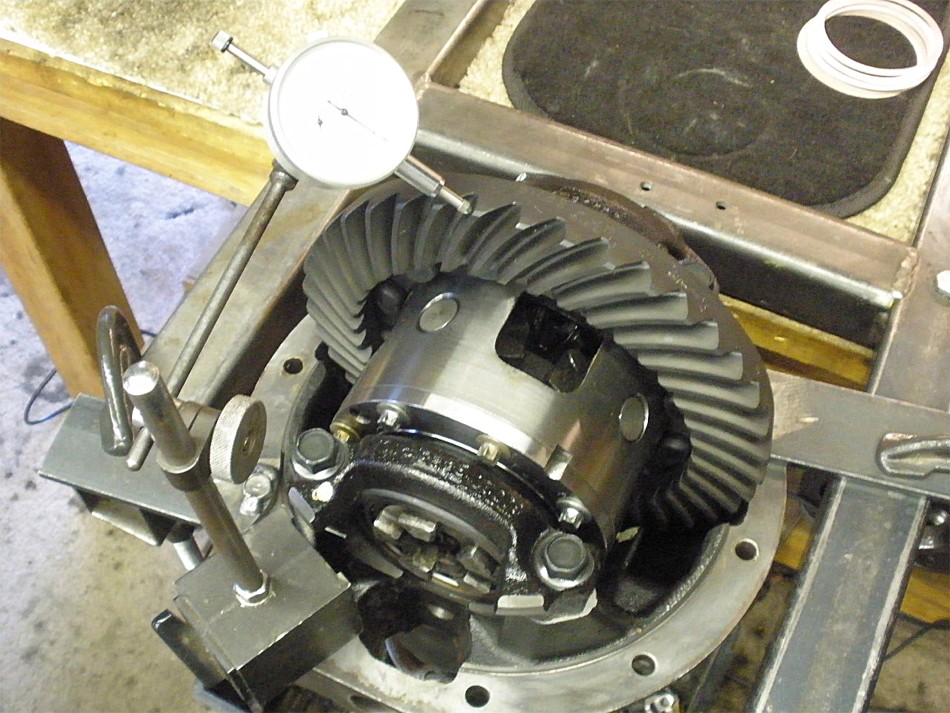
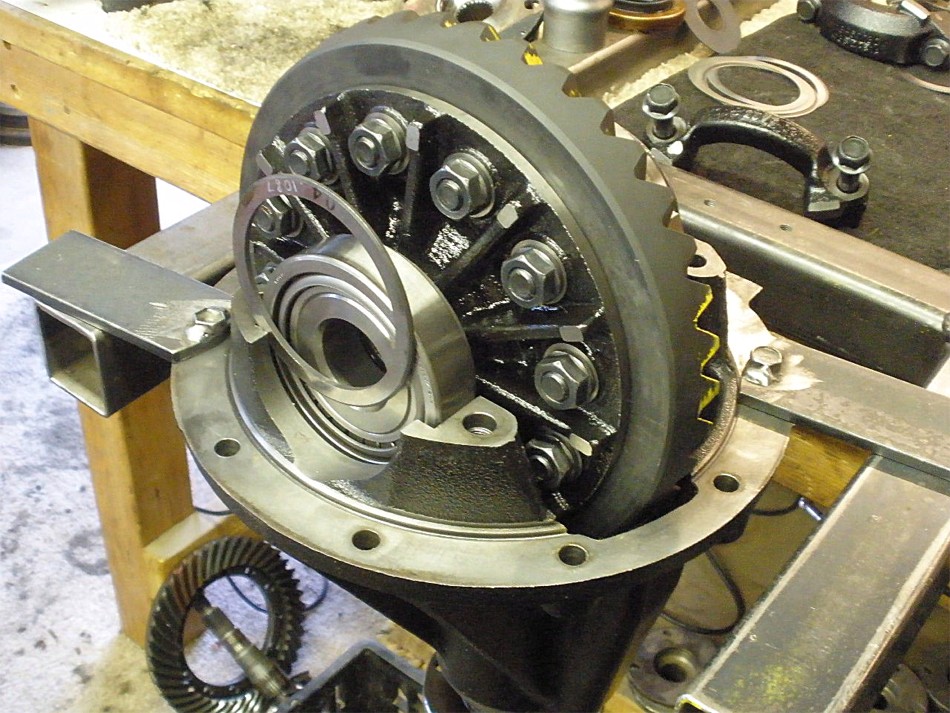
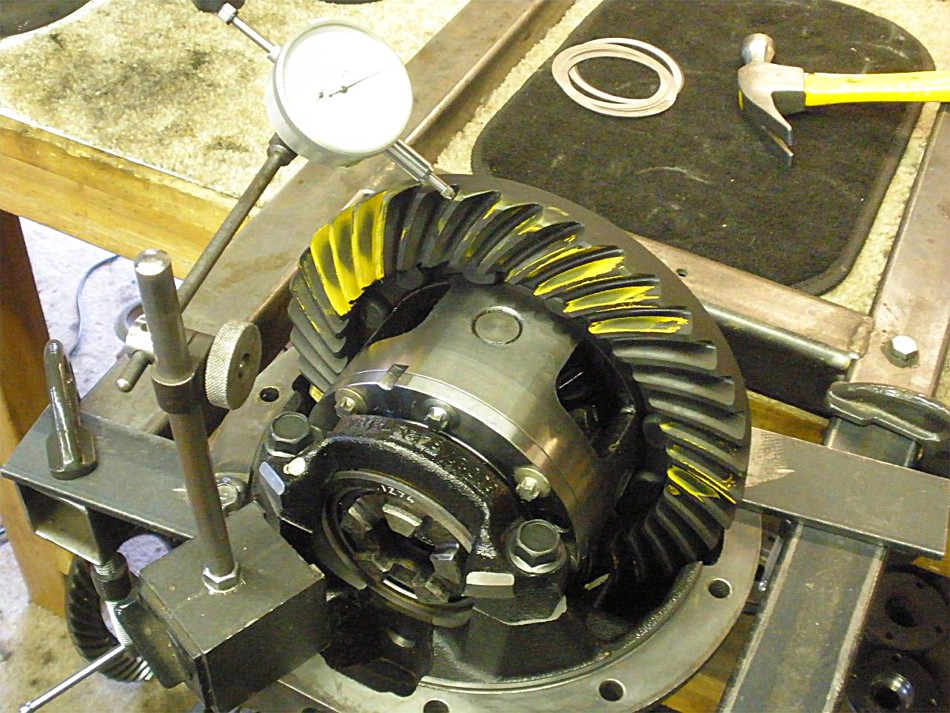
Now onto business...The rear E-locker 9.5" massive 3rd is getting 488 Sierra Gears. The only stampings on the ring were "J11 SG TOYLC-488" and these gears look very high quality. |
|
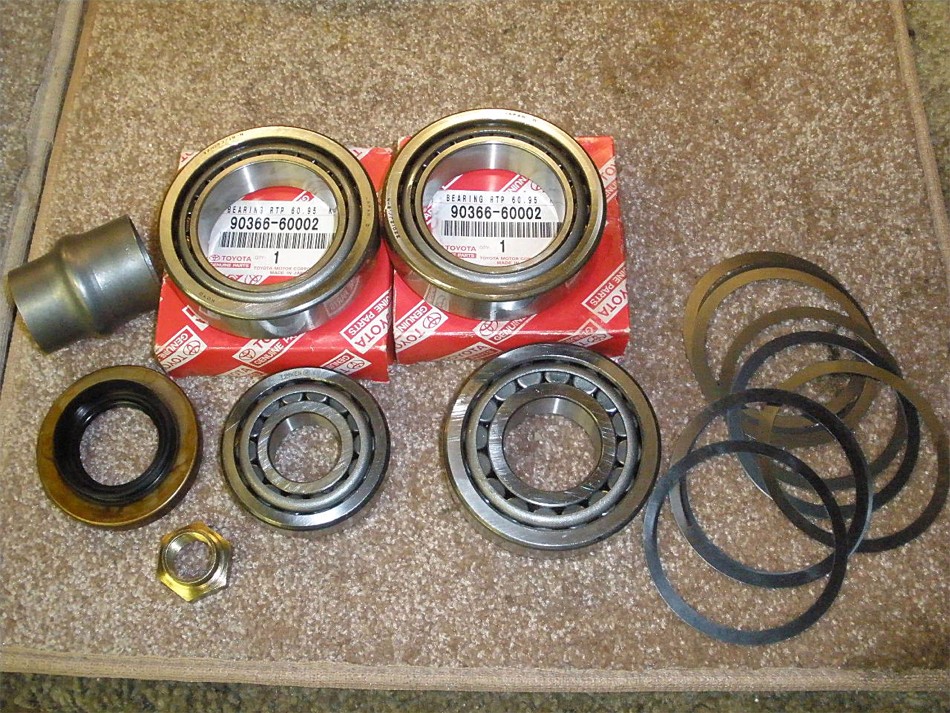
A full master kit and this one has the brand new, massive carrier bearings pn 90366-60002. Those carrier bearings are unbelievably pricey, also. |
|
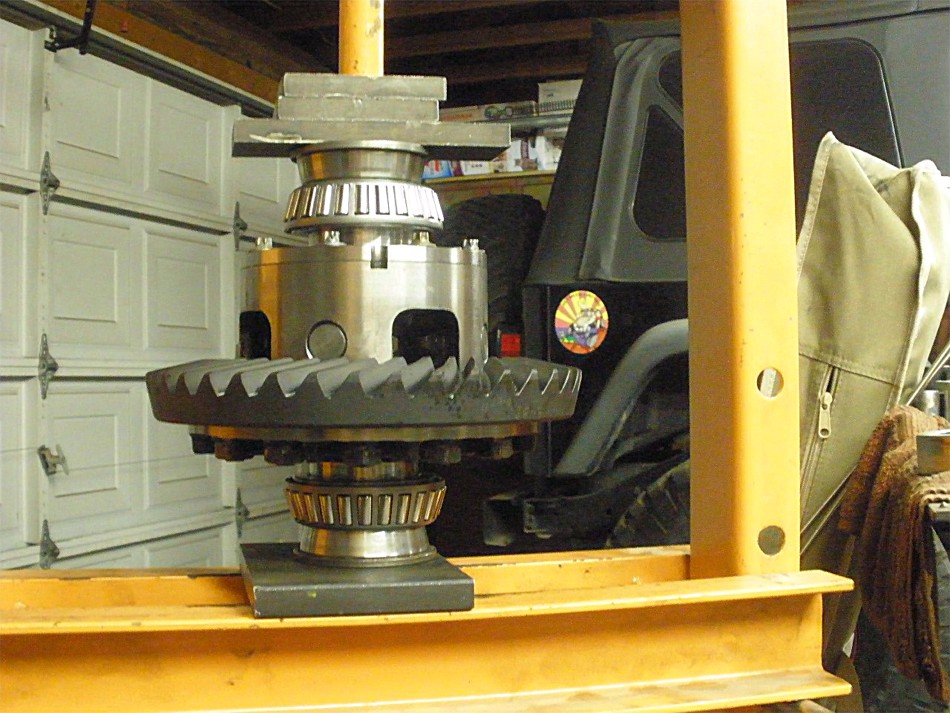
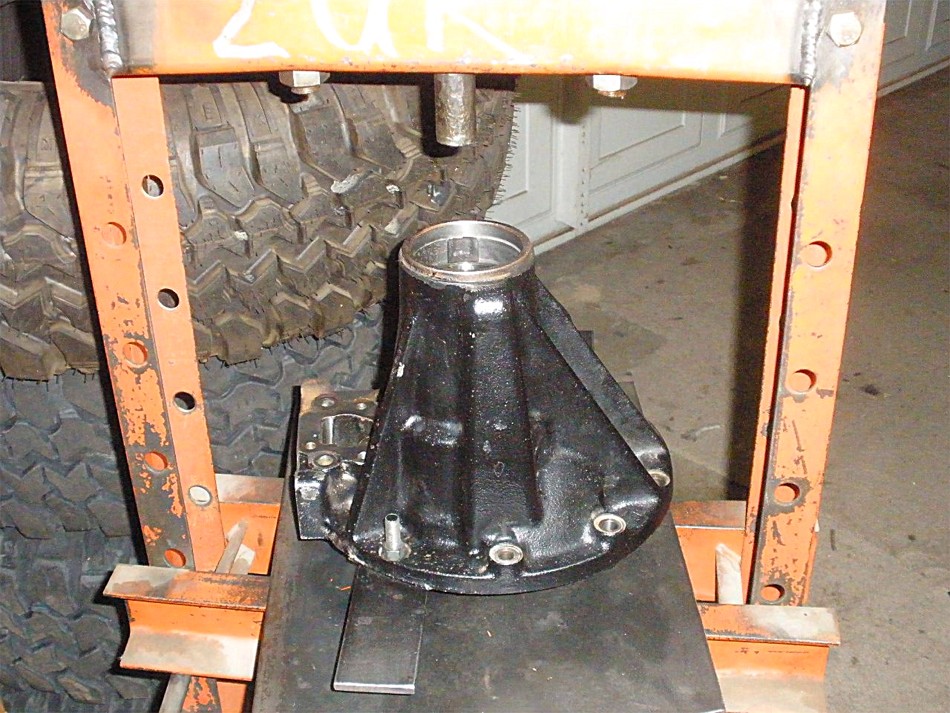
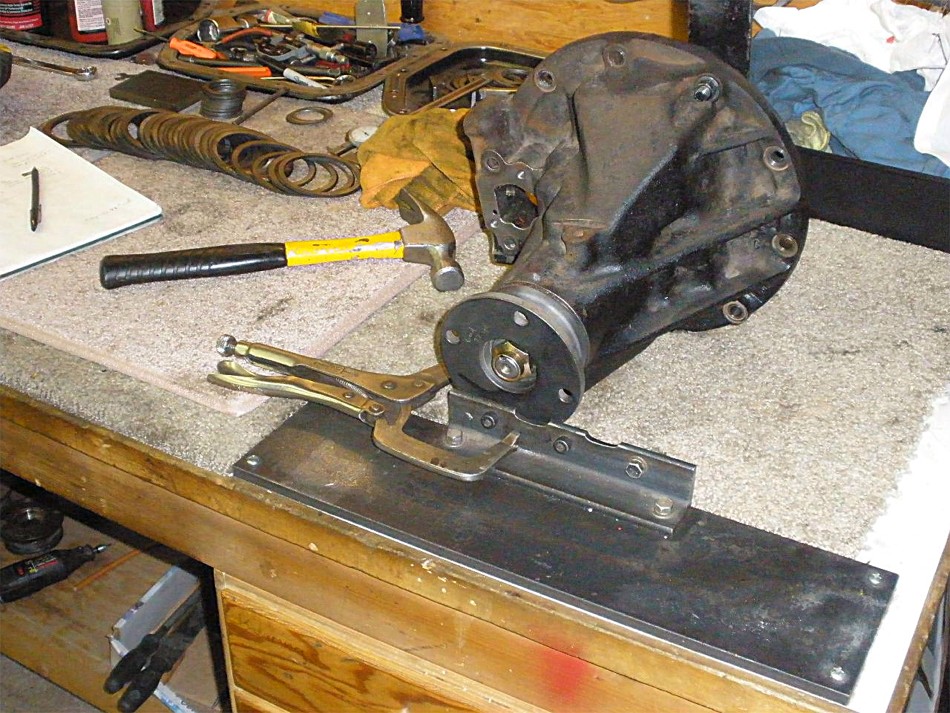
The 3rd is secured to the fixture. The e-motor was removed to prevent any damage while working on this 3rd. |
|
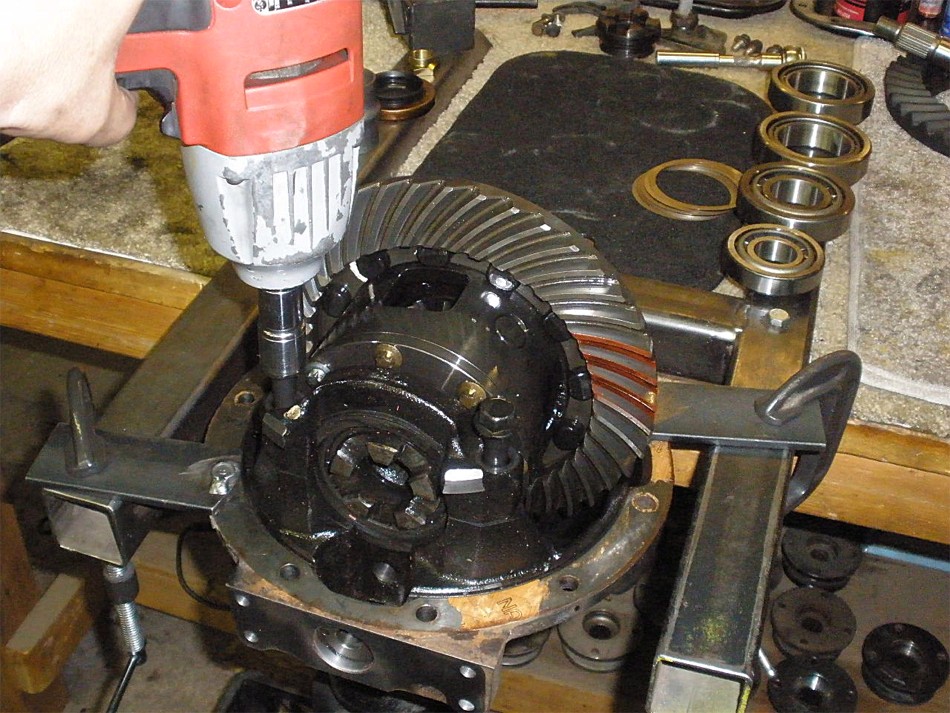
The electric impact whizzes the 17mm bearing cap bolts off. |
|
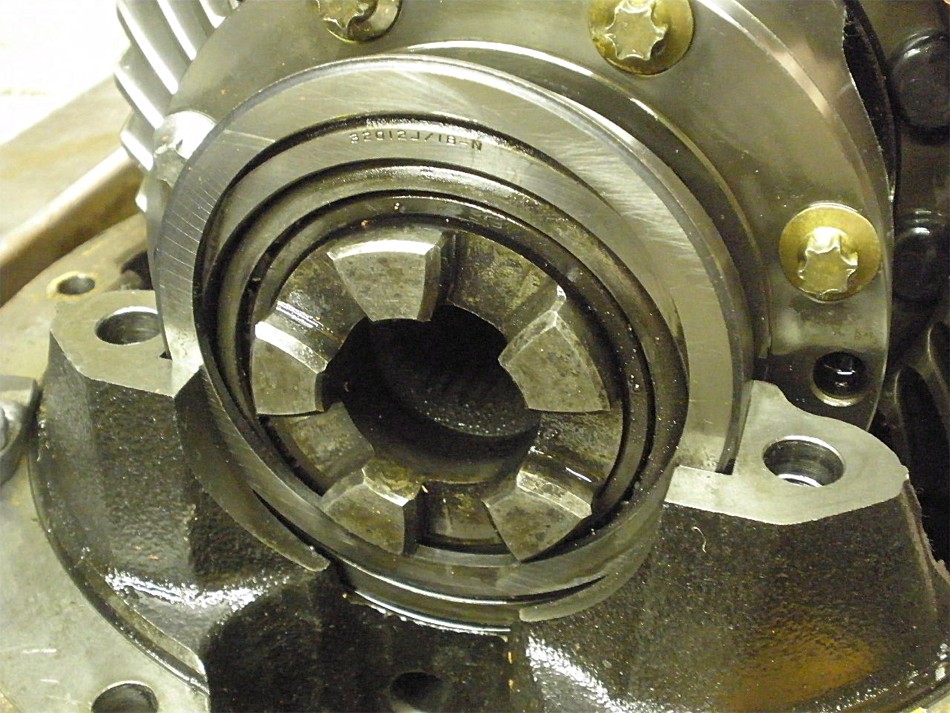
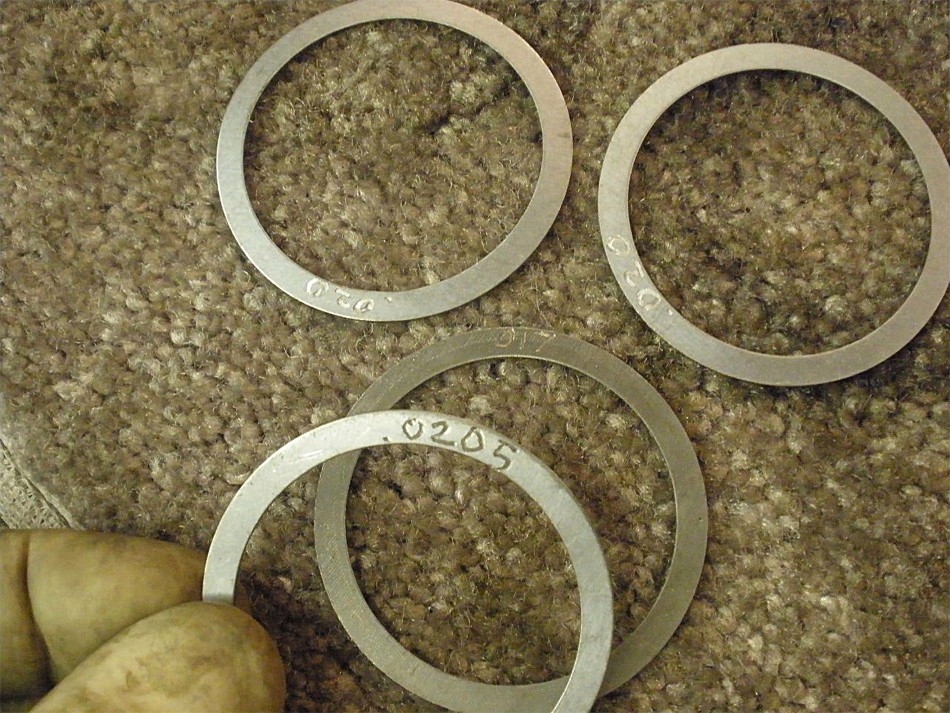
Each side has a thick "washer plate" like this. These plates determine both backlash(BL) and carrier bearing pre-load(CBPL). |
|
.... |
|
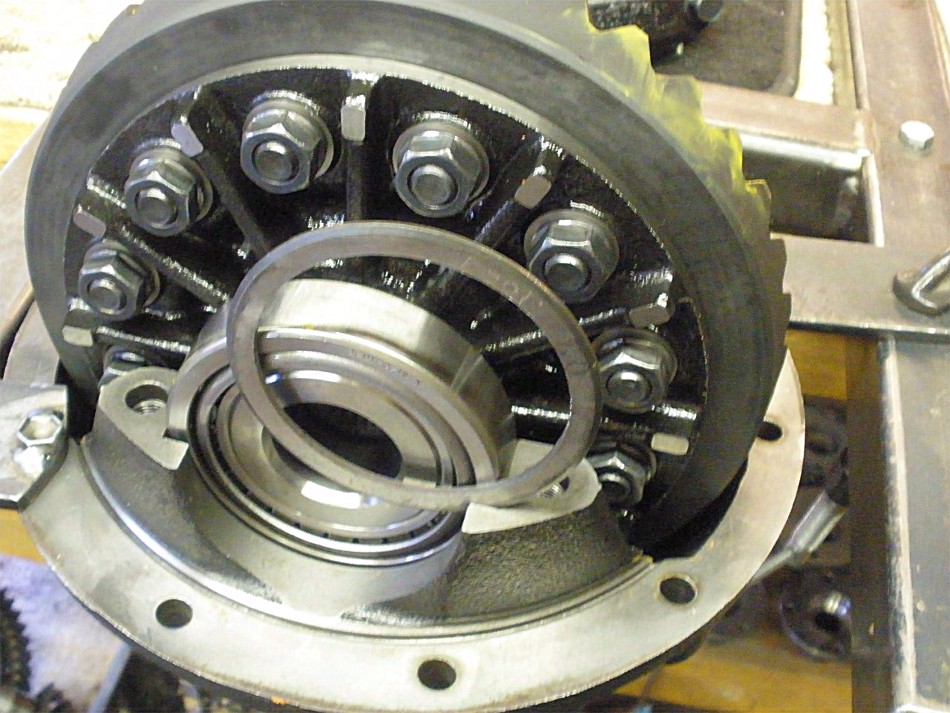
Bearings and the ring gear will now be removed. |
|
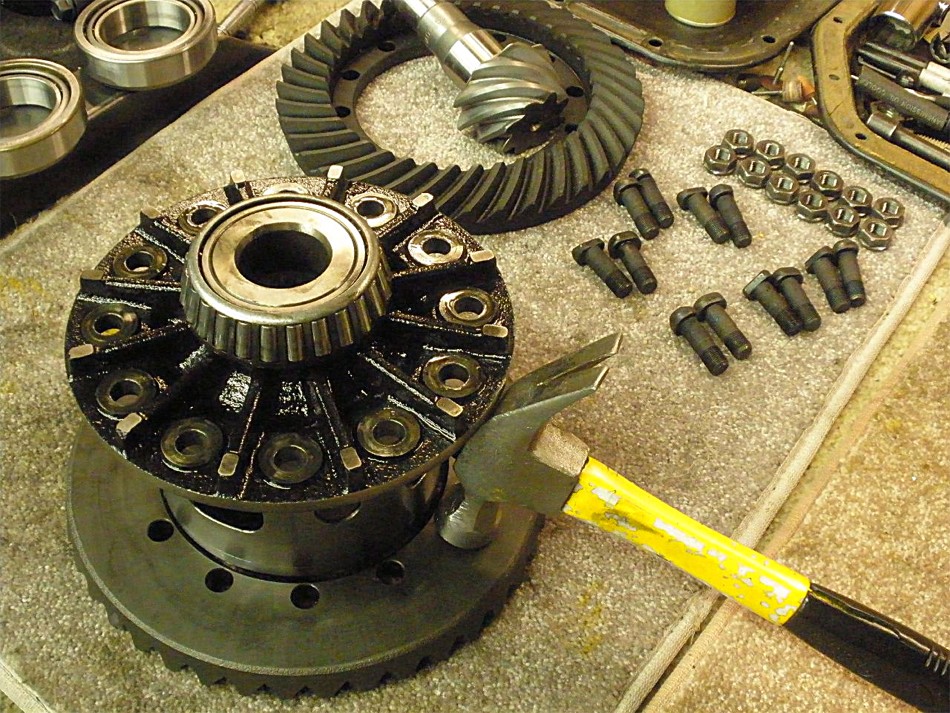
The ring gear has plenty of surface area to tap it off with a hammer directly. The 12 bolts and nuts have already been cleaned. |
|
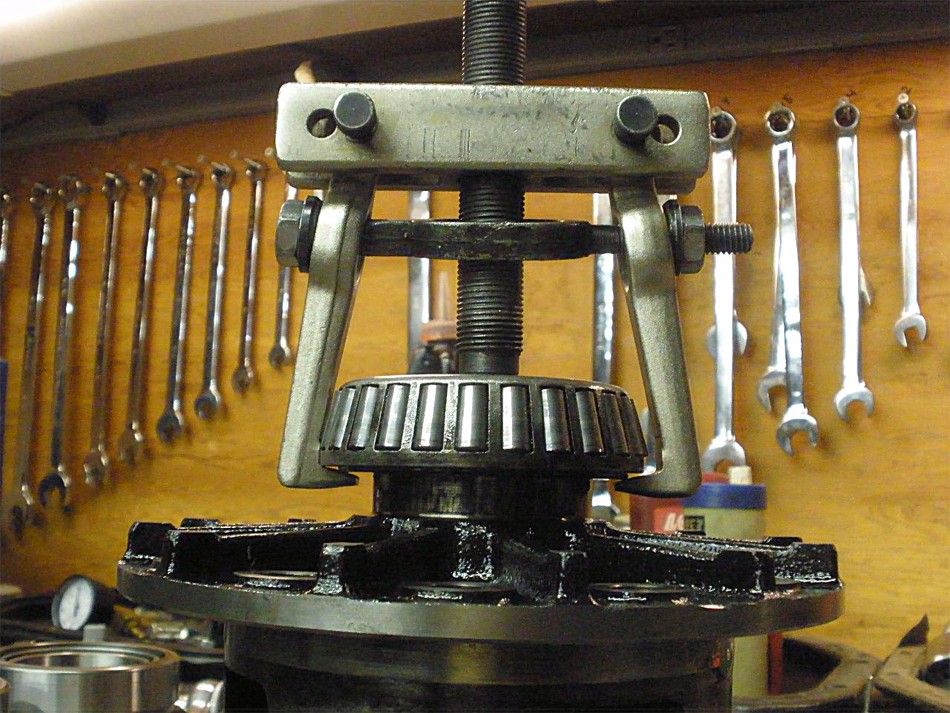
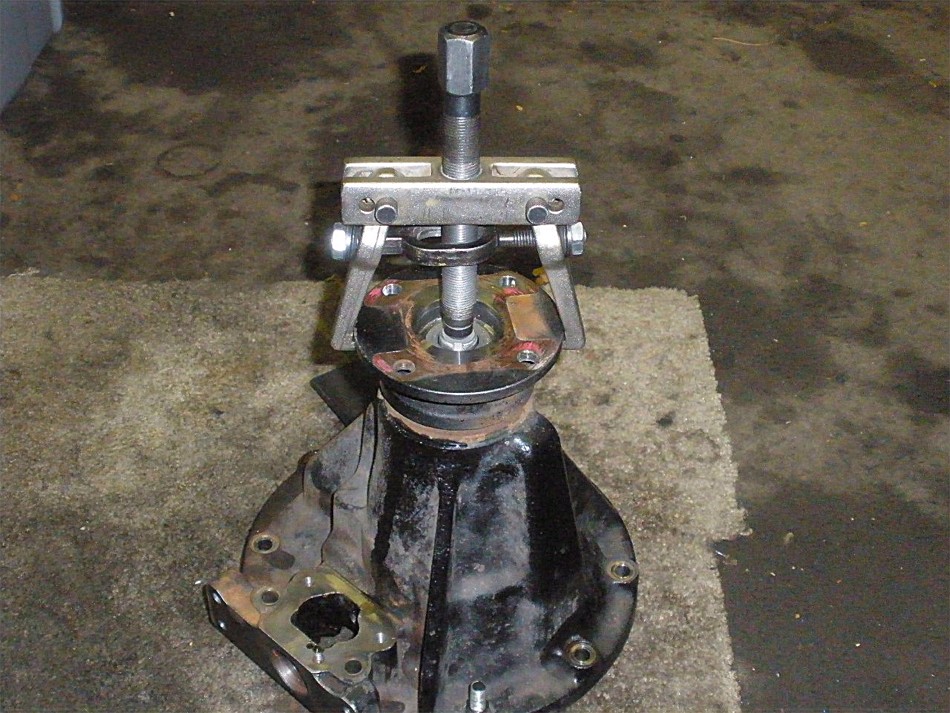
This ring-side bearing is easy to fully remove with this puller. |
|
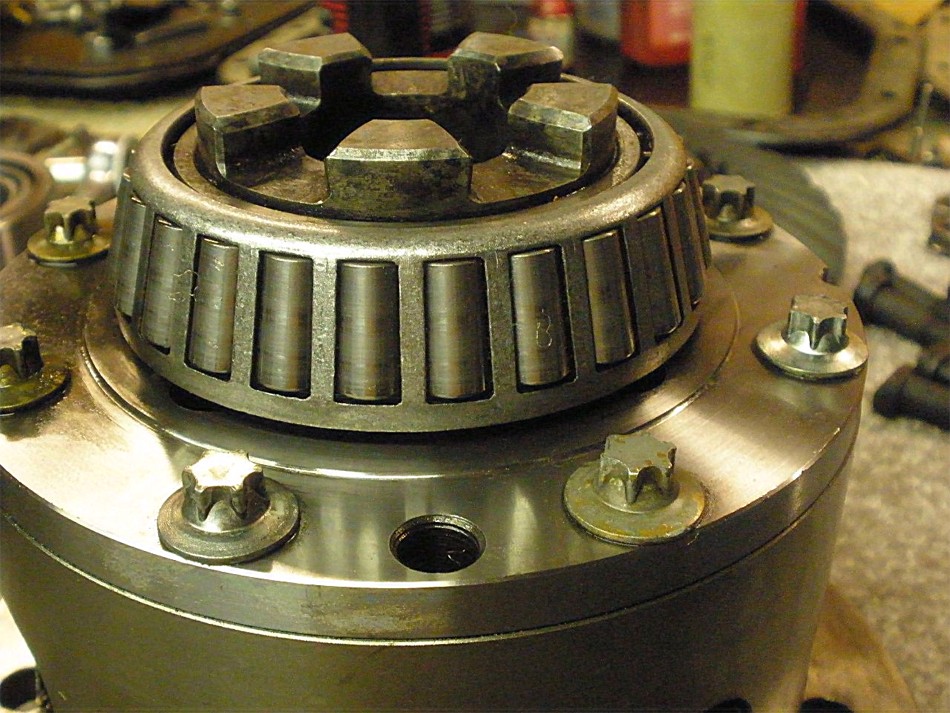
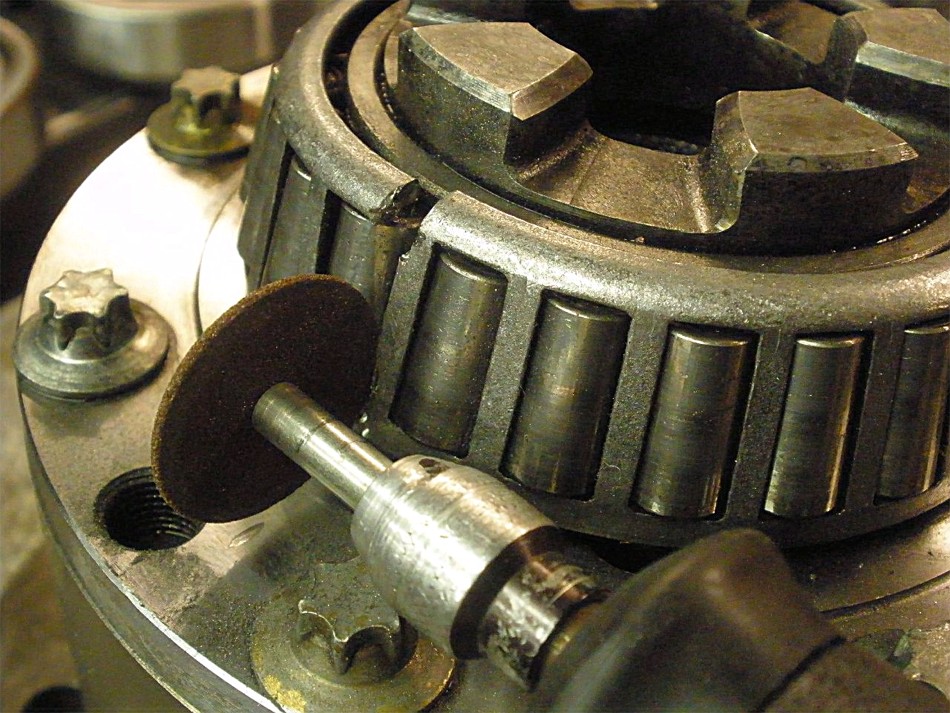
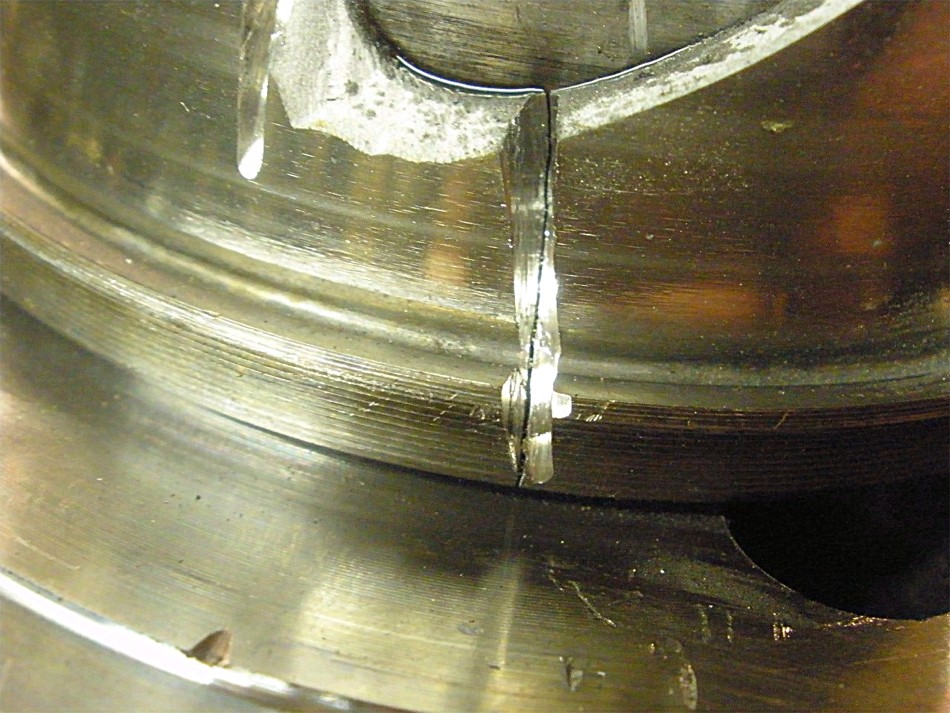
The case-side bearing is a different story. There is no room to grab under the bearing cage. |
|
Out comes the dremel tool... |

|
Cut the cage....spread it and the rollers are all over. |
|
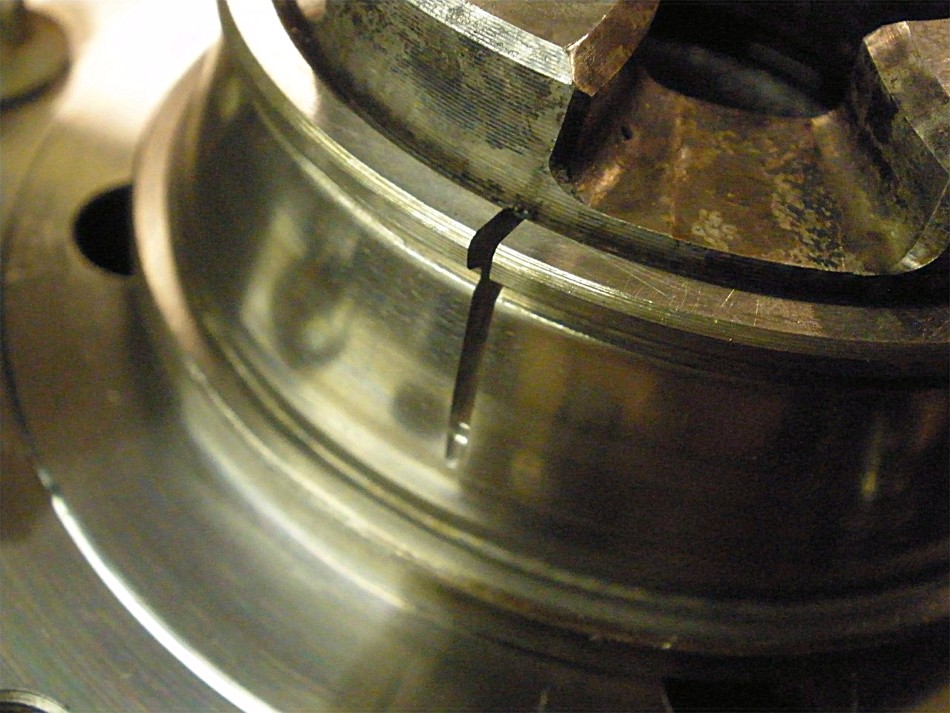
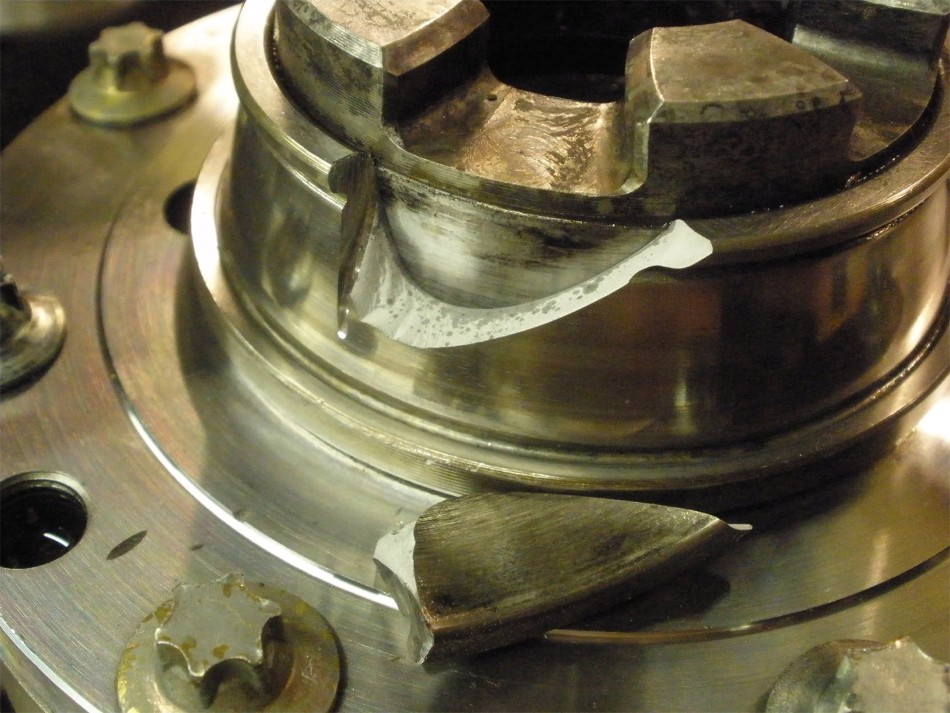
Run a line down the race with the dremel wheel....place a small chisel or screwdriver in the crack and tap it with a hammer. Sometimes it will crack all the way down.... |
|
...and sometimes it breaks a big piece off. |
|
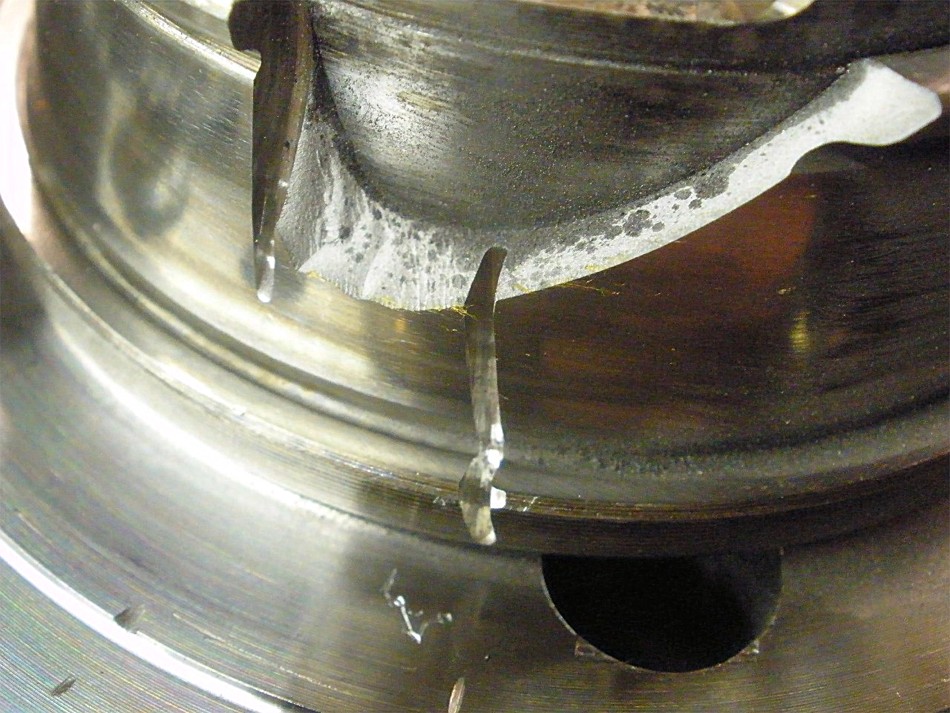
Start a new cut... |
|
...and a small slotted screwdriver tapped in with a small hammer will crack it open. |

|
``` |
|
Surfaces are first cleaned and checked for burrs/high spots with a file. All was good. |

|
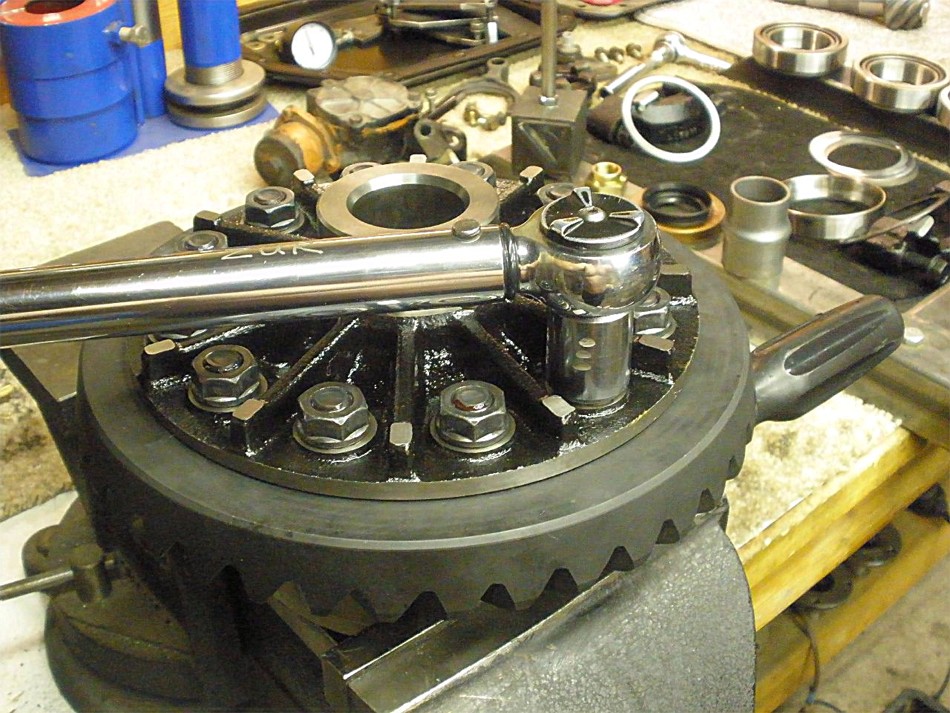
Red loctite on the 12 ring bolts. |
|
90 ft/lb on the bolts. |
|
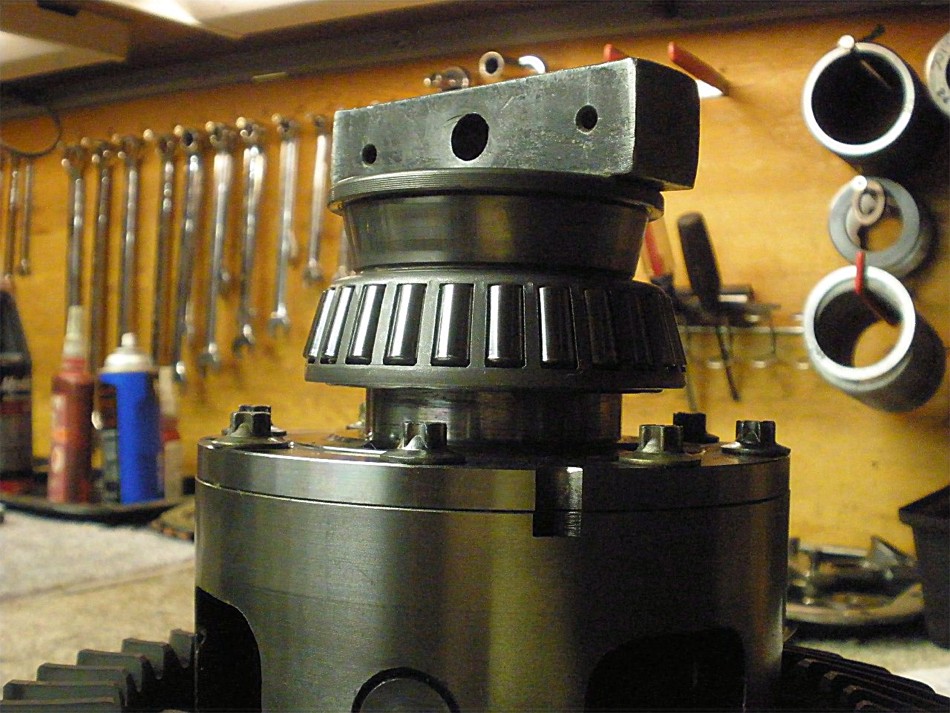
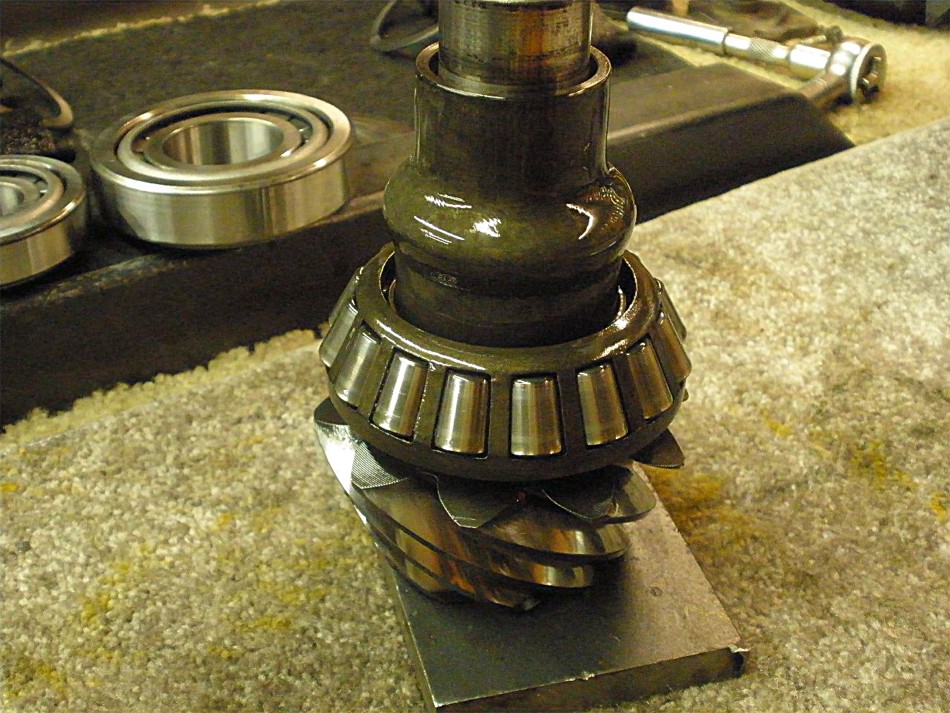
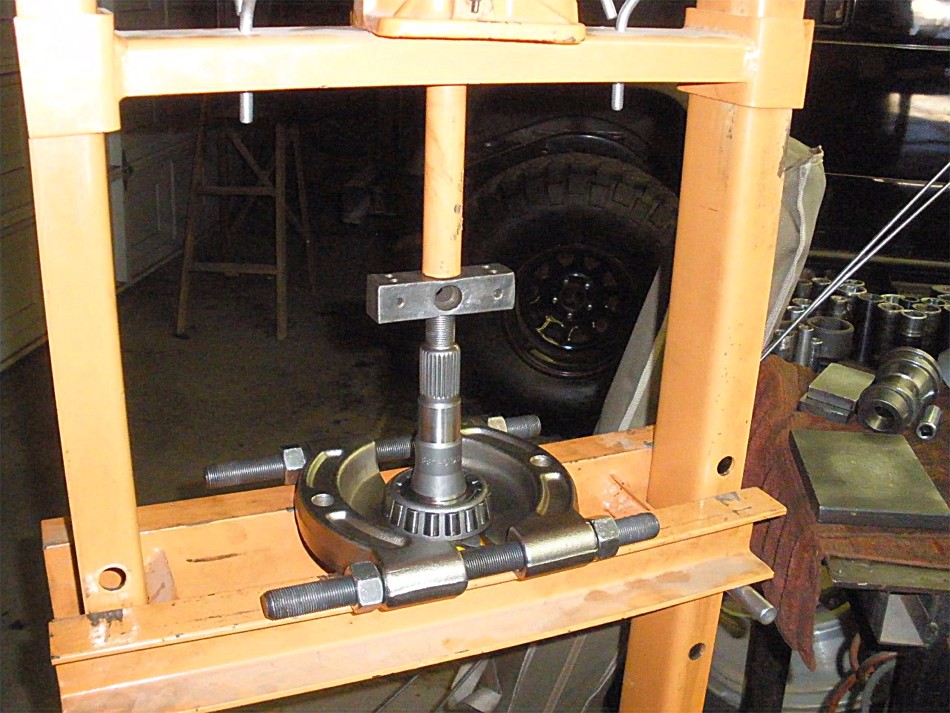
The new massive carrier bearings are started with a hammer.... |
|
...the bottom one was also started in the same way. |
|
I then let the press finish pressing both on at the same time. |
|
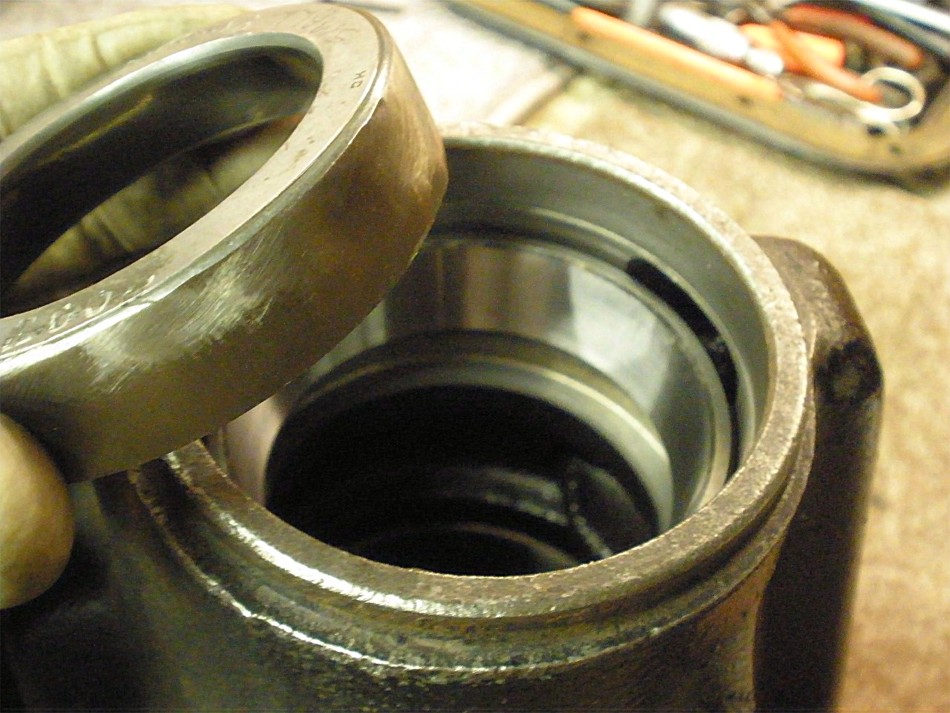
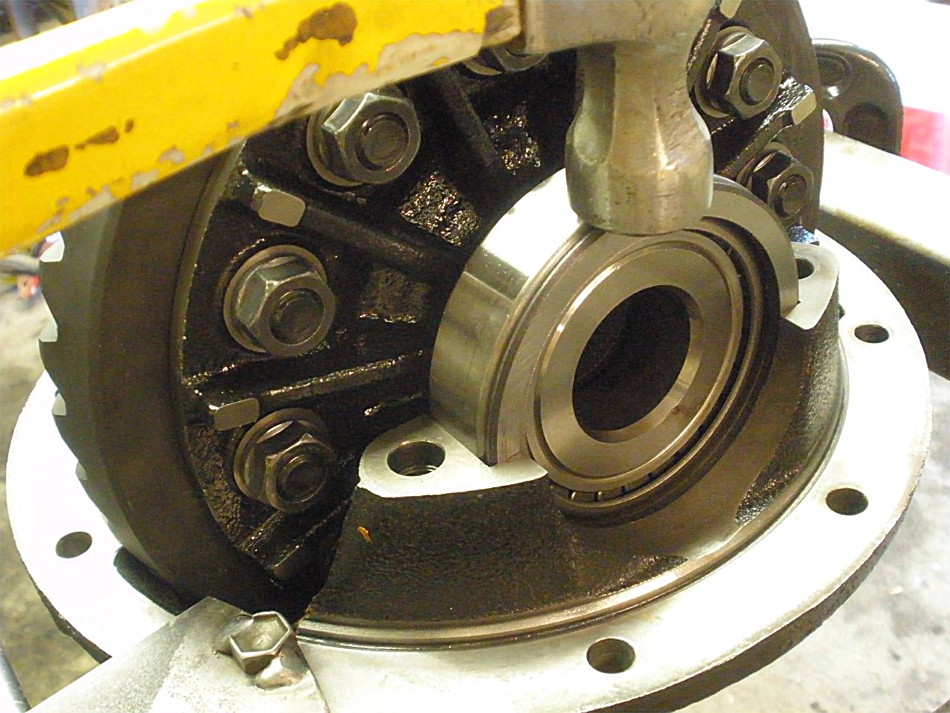
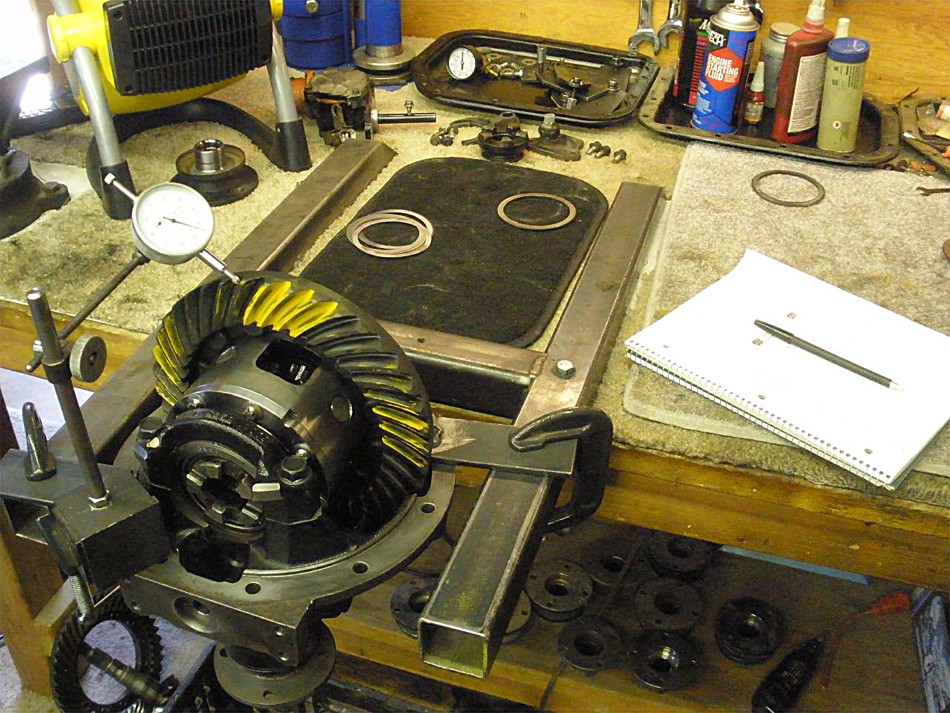
This assembly is now ready. |
|
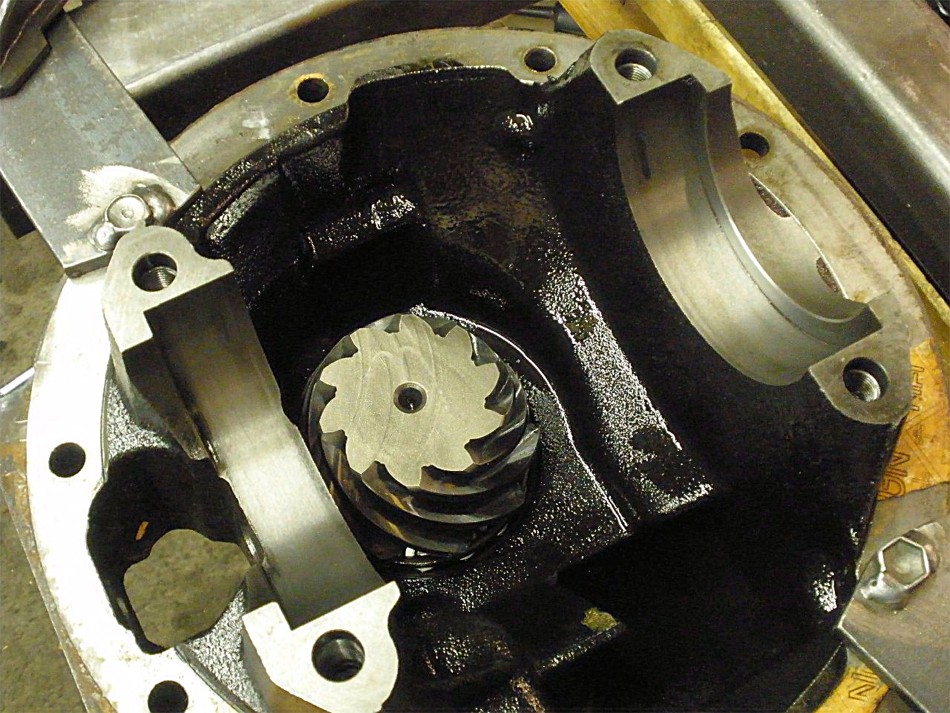
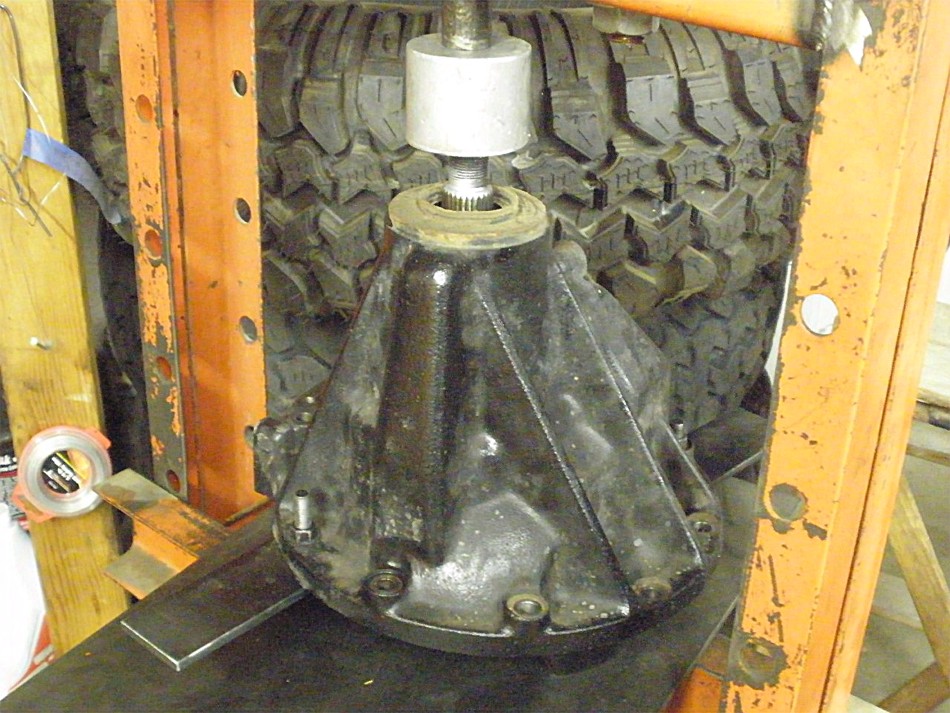
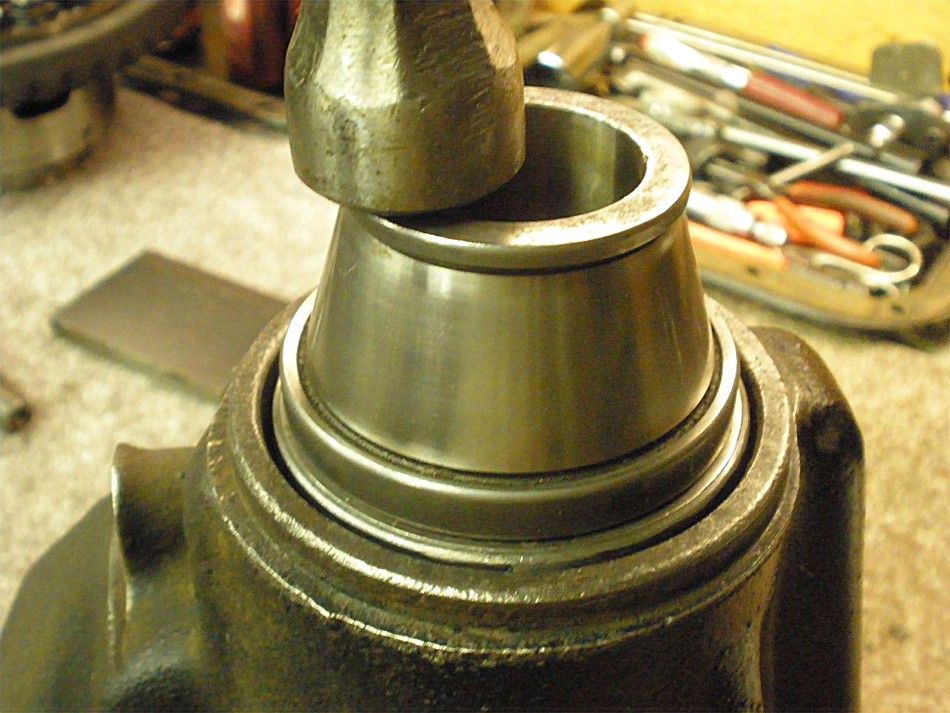
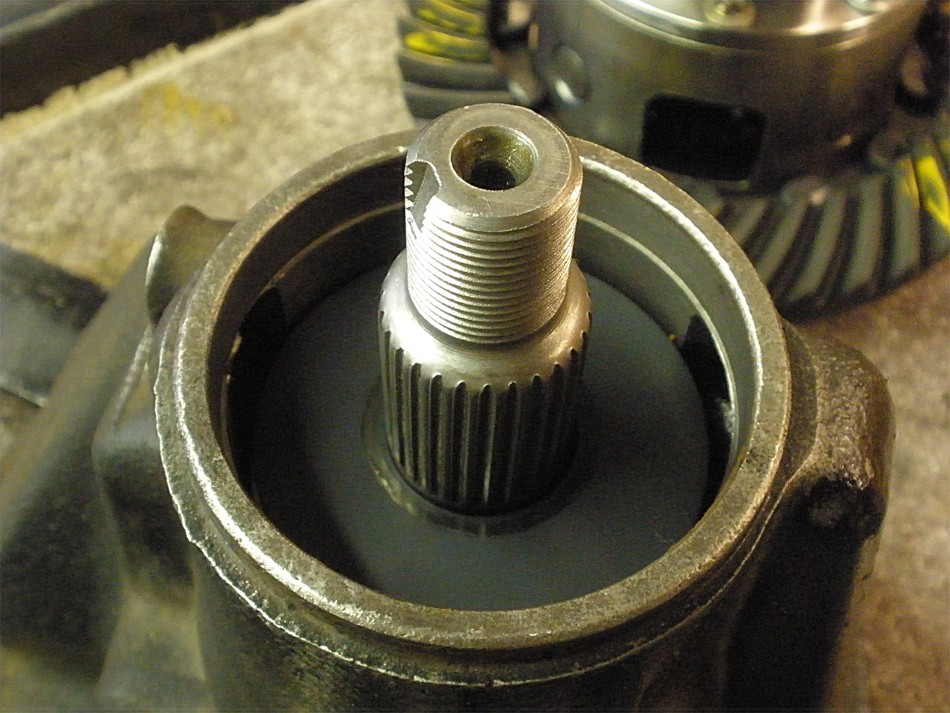
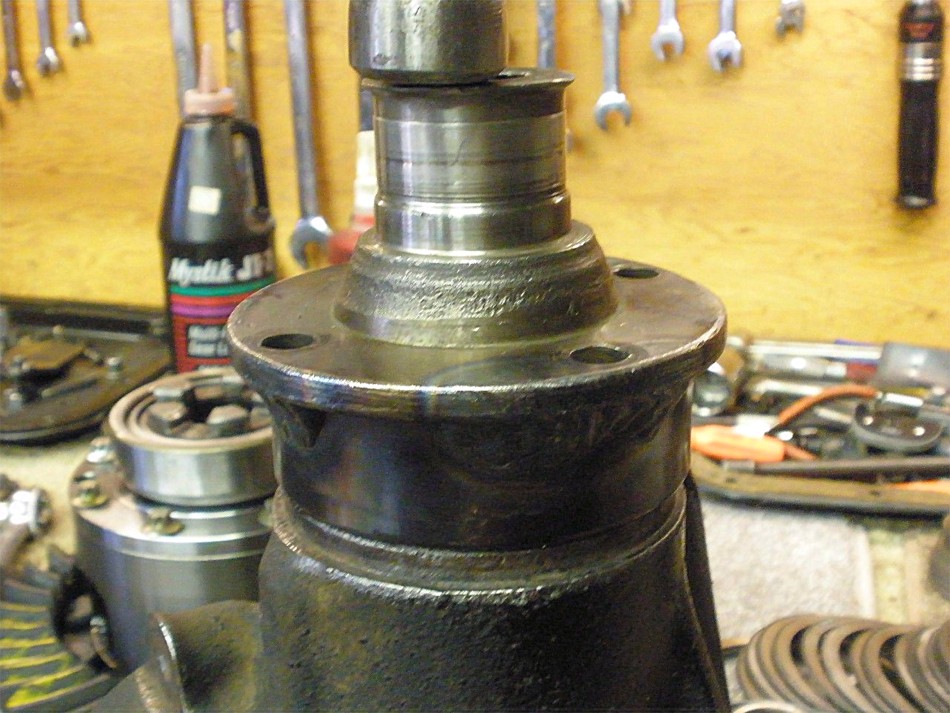
Now to remove the pinion. |
|
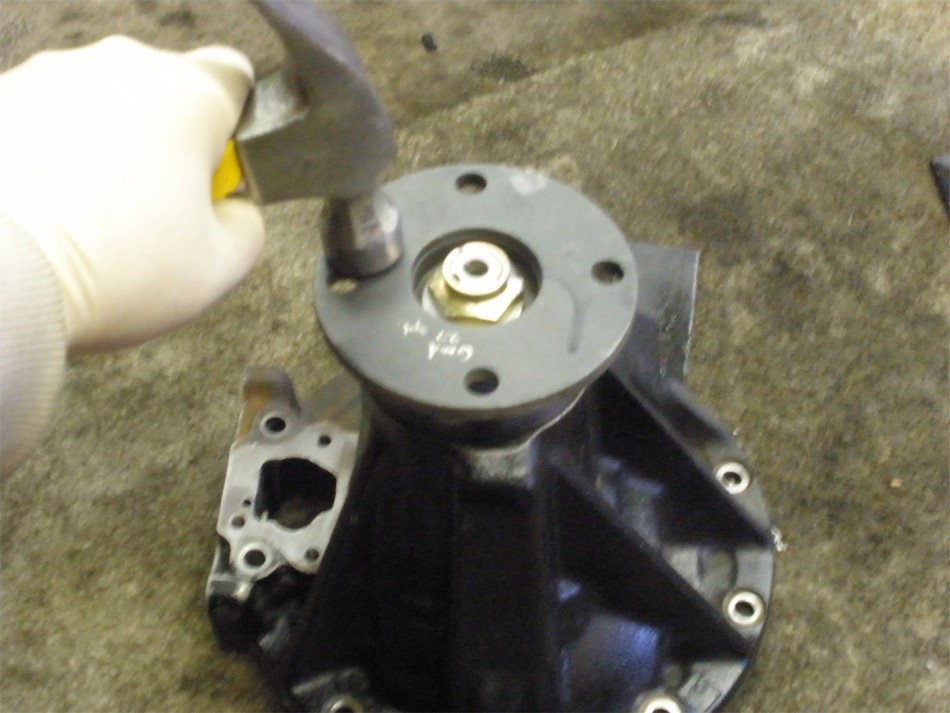
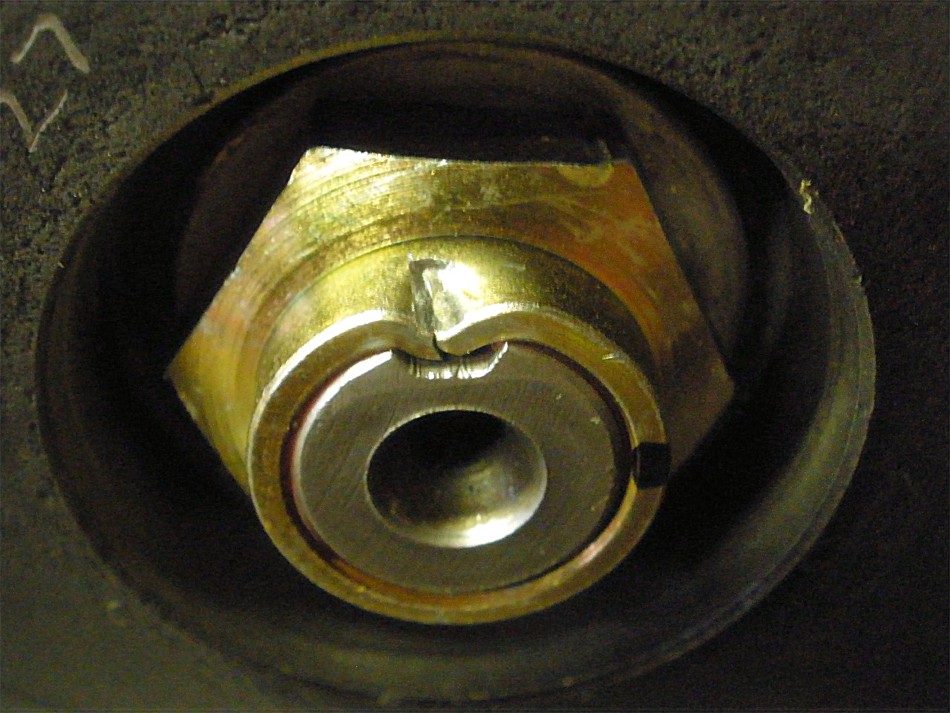
The flange was a very tight fit and I find I have to do this alot with rear Landcruiser 3rds. |
|
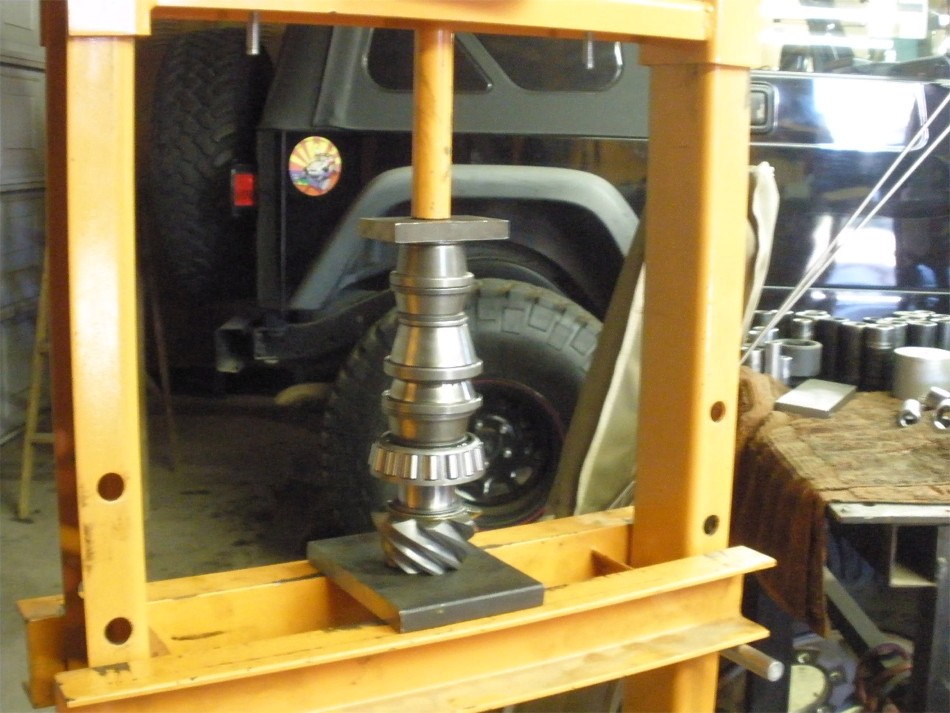
Press the old pinion out. |
|
There's not much to save here.... |
|
...but I will press the bearing off and save the shim for future use. |
|
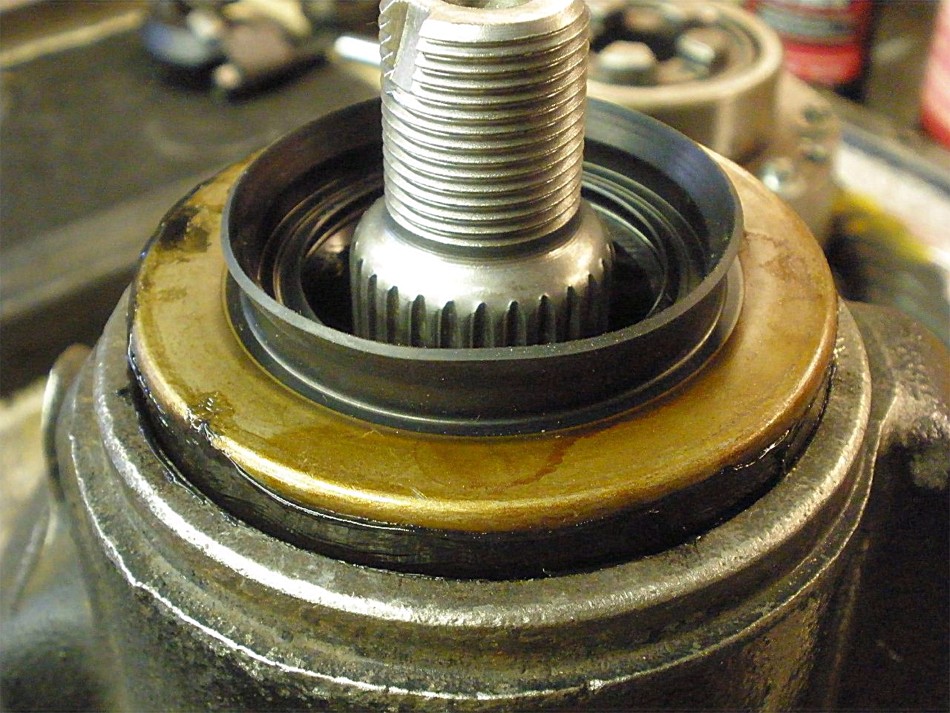
The grungy seal submits to the chisel and hammer. |
|
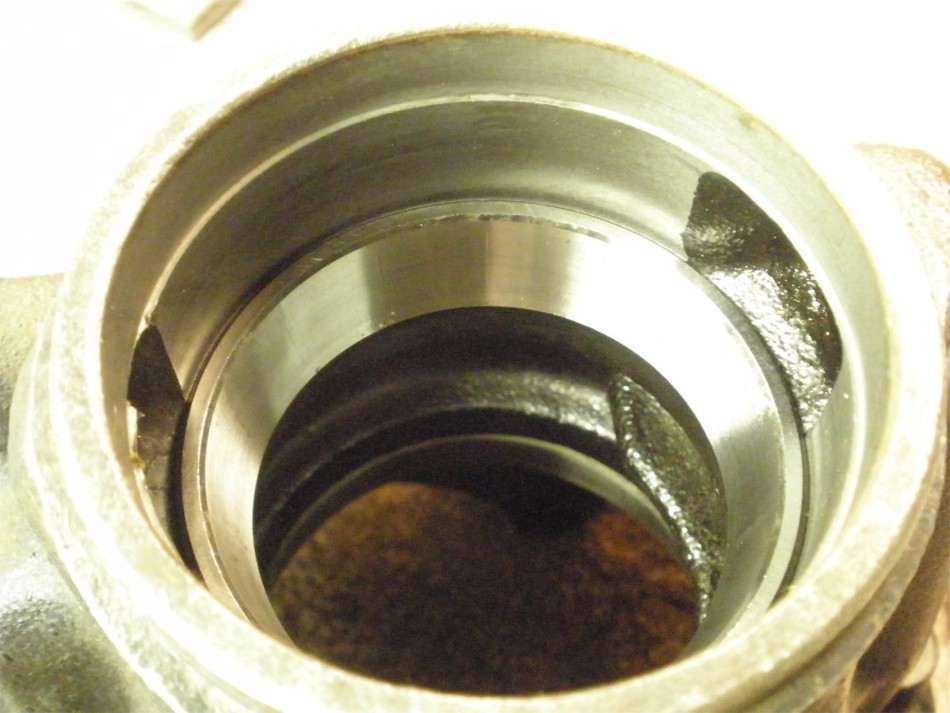
Old races are tapped out. |
|
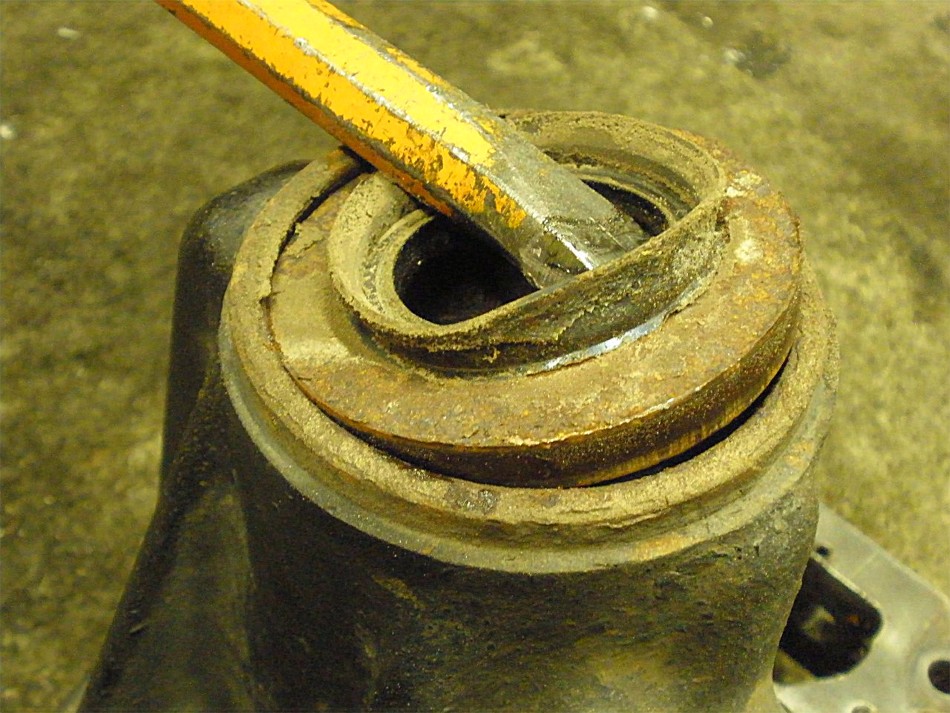
If the large inner race is not level then it will bind up right away. But, if it is started level then it will slide all the way down very smoothly. This one started to bind just a little but quickly centered itself and the rest was smooth sailing 'til it fully bottomed. |
|
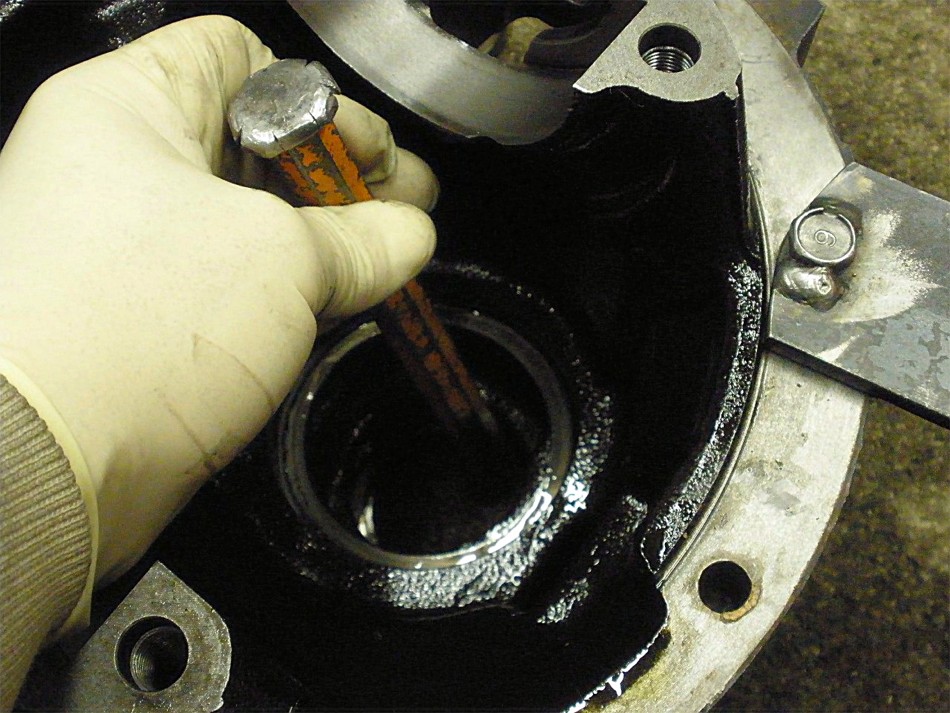
The small outer race is easier.... |
|
I use some old bearing left-over pieces and tap it down all the way. |
|
``` |
|
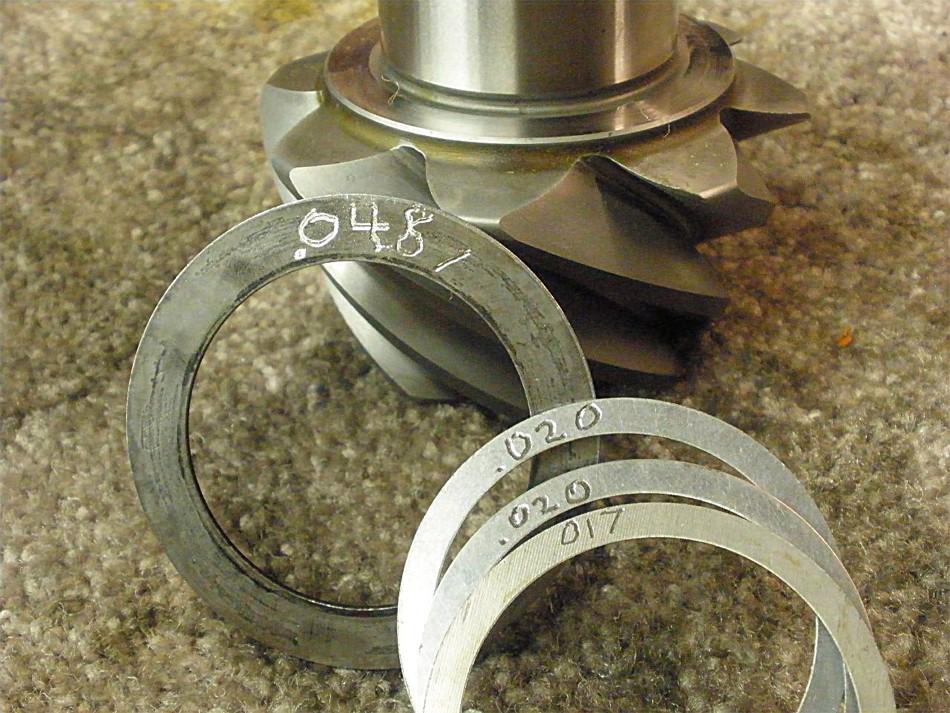
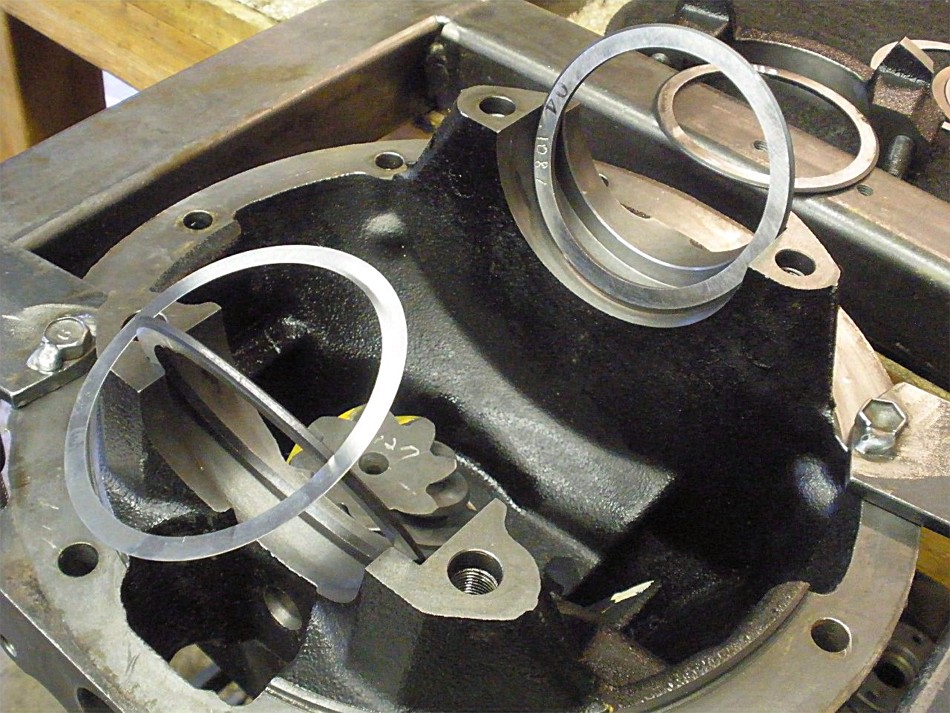
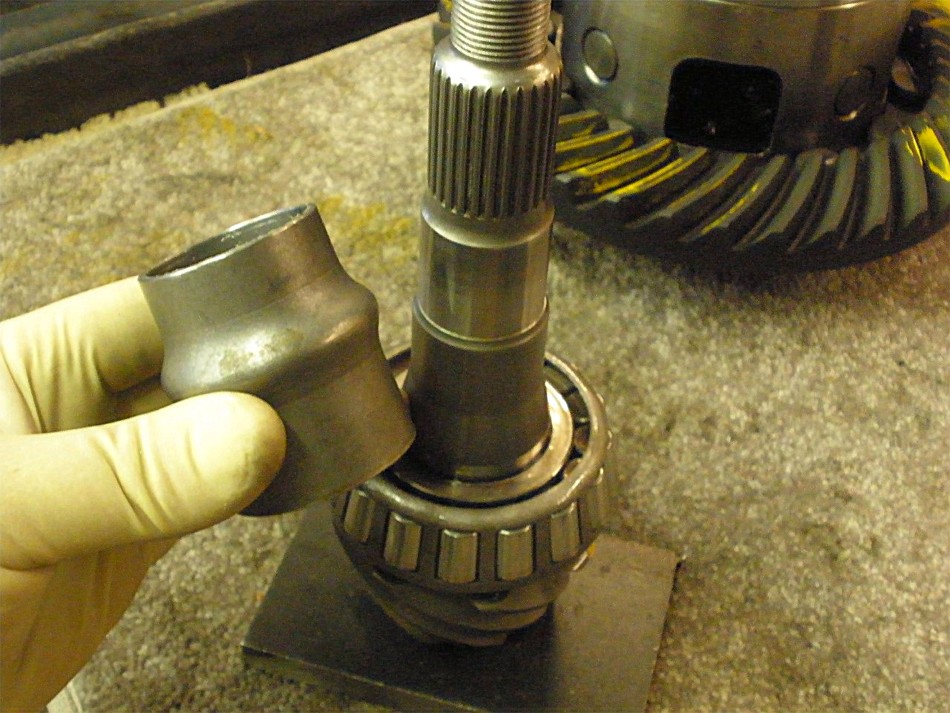
The factory .0487" shim would likely be too shallow from experience so I chose to try .057" |

|
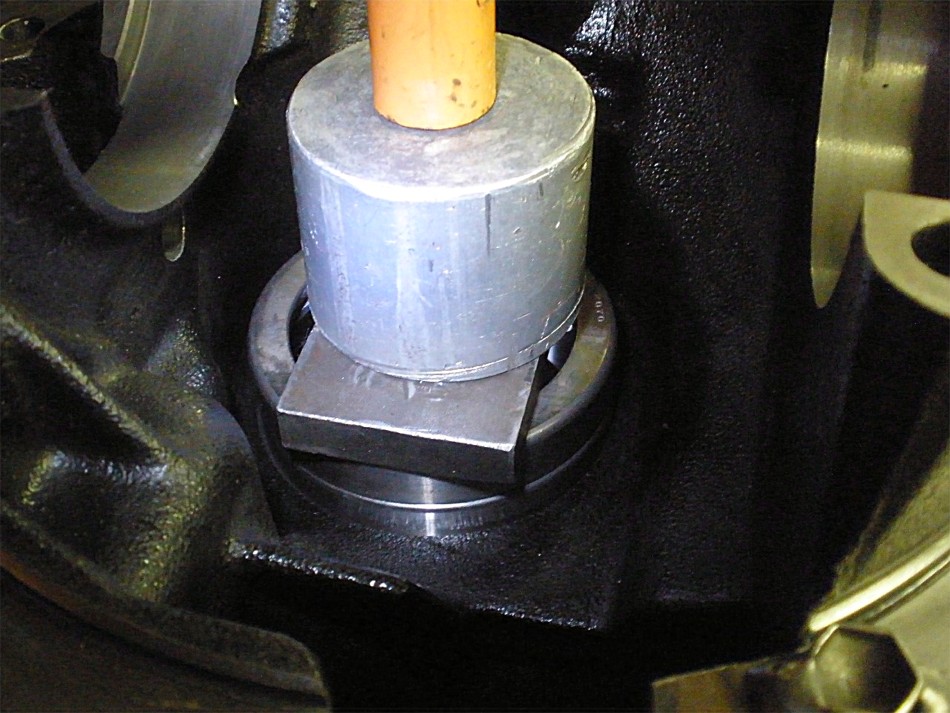
This is one way to press the shim plus bearing on |
|
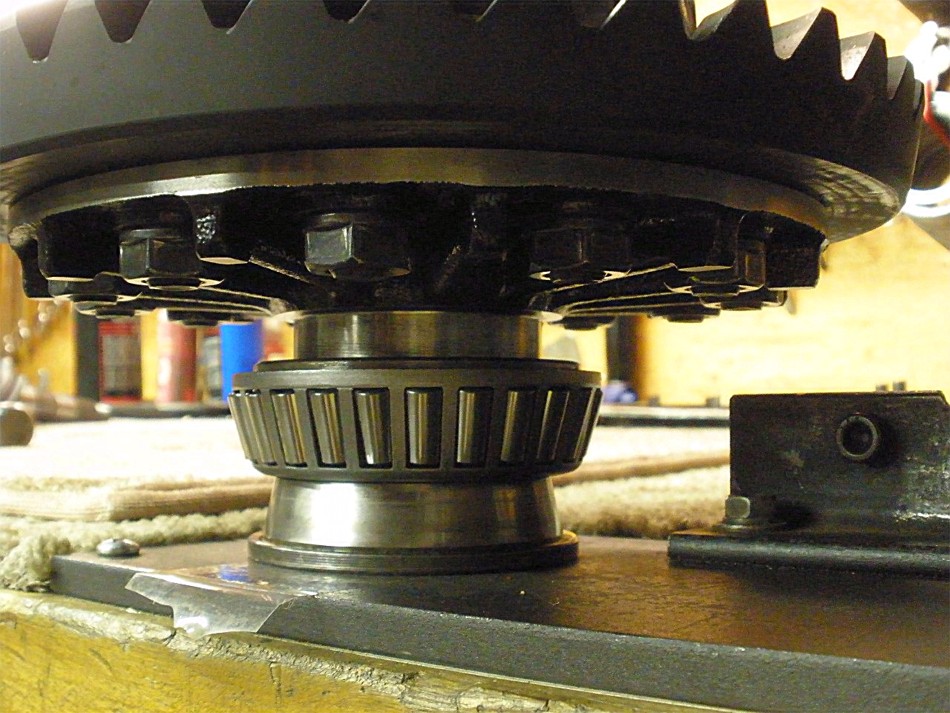
Just need to insert the pinion and pre-load it to about 10 in/lb for a pattern depth check. The crush sleeve waits til the end. |
|
Ready... |
|
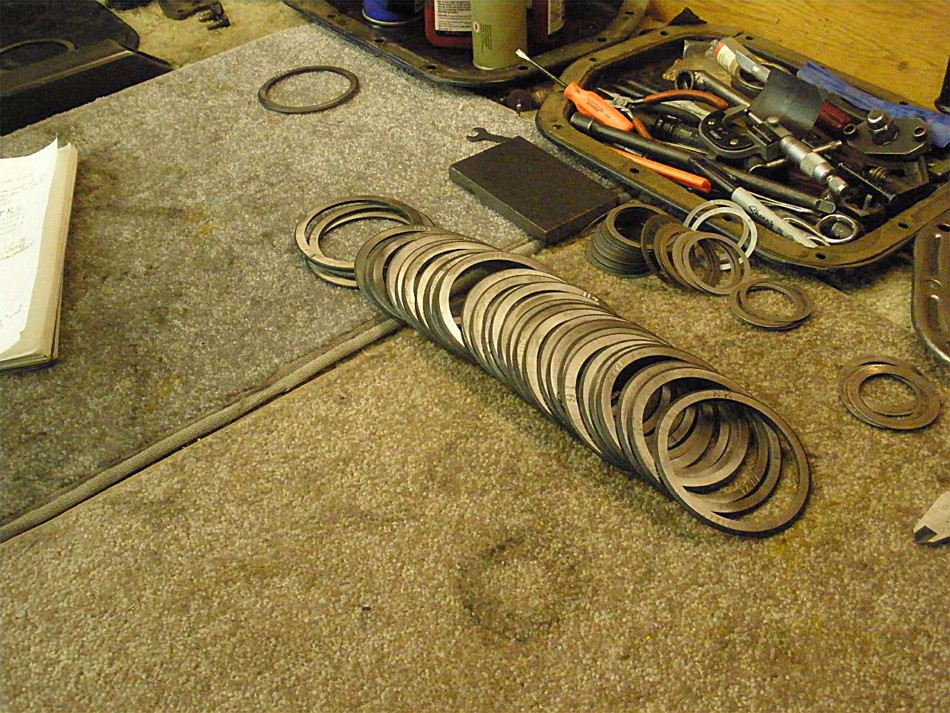
I have a good selection of factory washer plates so I started with .120 on this side.... |
|
...this side I dropped it down to .108 |
|
It was a good snug fit and the hammer tapped it in place without deforming the washer plate. |
|
A quick BL check showed it to be in the .004 to .006 range. A touch tight but good enough for a depth check. |
|
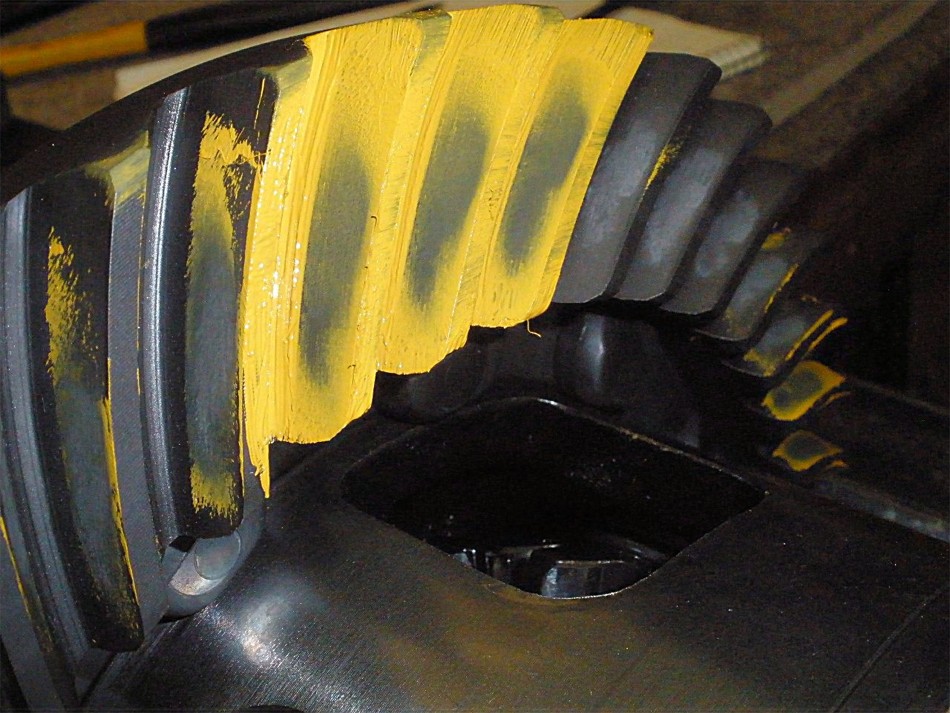
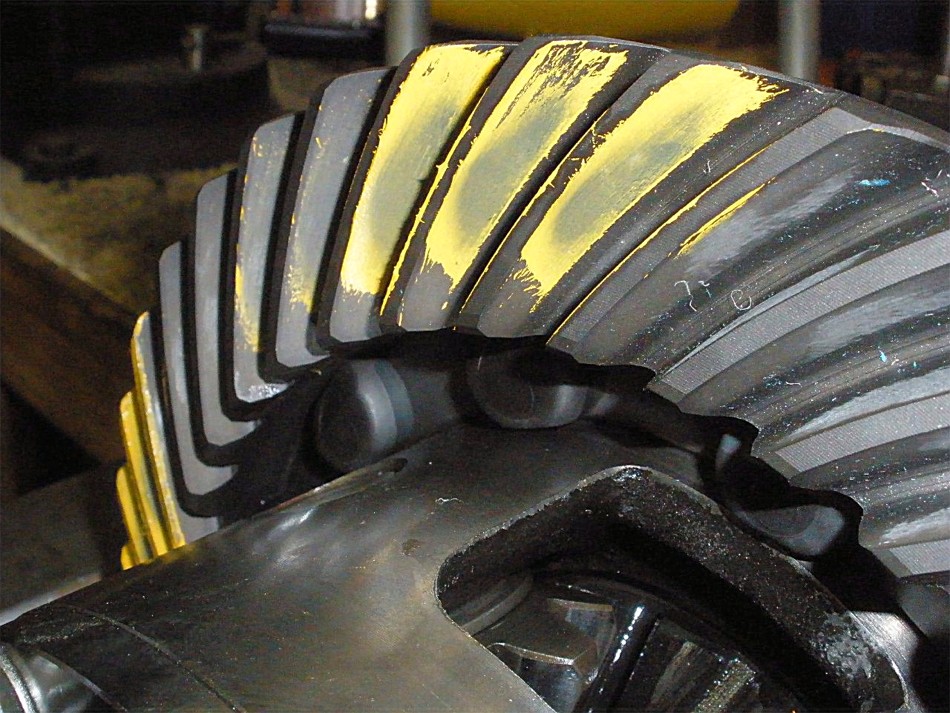
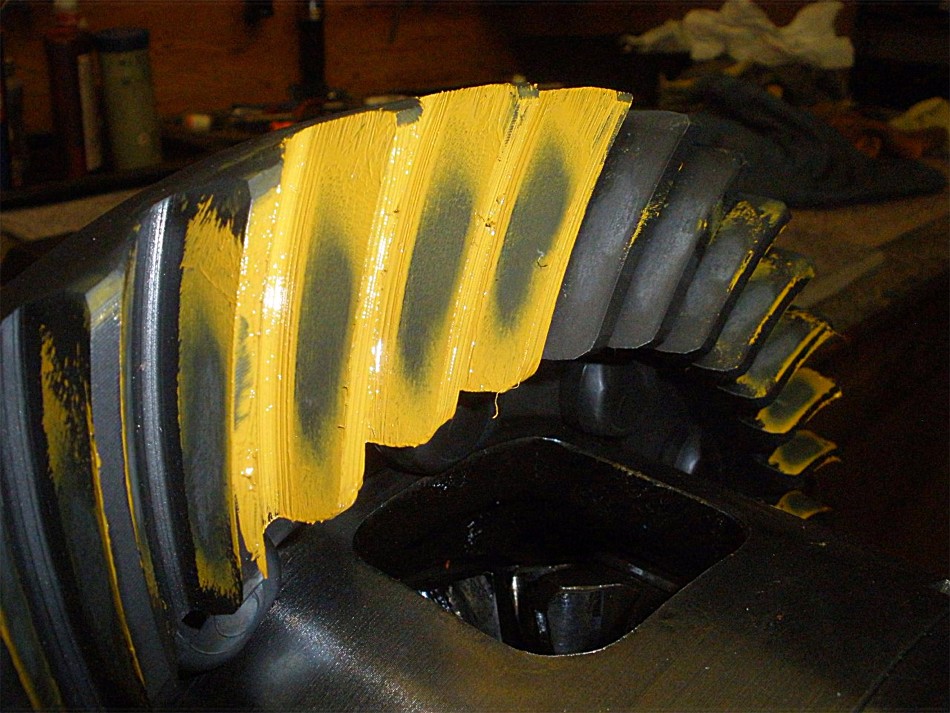
DRIVE----Not bad....slight shallow. |
|
COAST----ok |
|
pinion driveside----seems to show slight deep which confirms the slight shallow on the ring...equal and opposite. |
|
DRIVE---reverse paint |
|
Coast----reverse paint |
|
Now that I know it's a touch shallow I can press the pinion out.... |
|
...and then press the pinion bearing off. |
|
I'm substituting this .0205 shim for the .017 shim(0035" deeper is probably what it needs). |
|
One of these days, I will find that "just right diameter" pipe so I don't have to piece this together. |
|
Fine tune with some shims. |
|
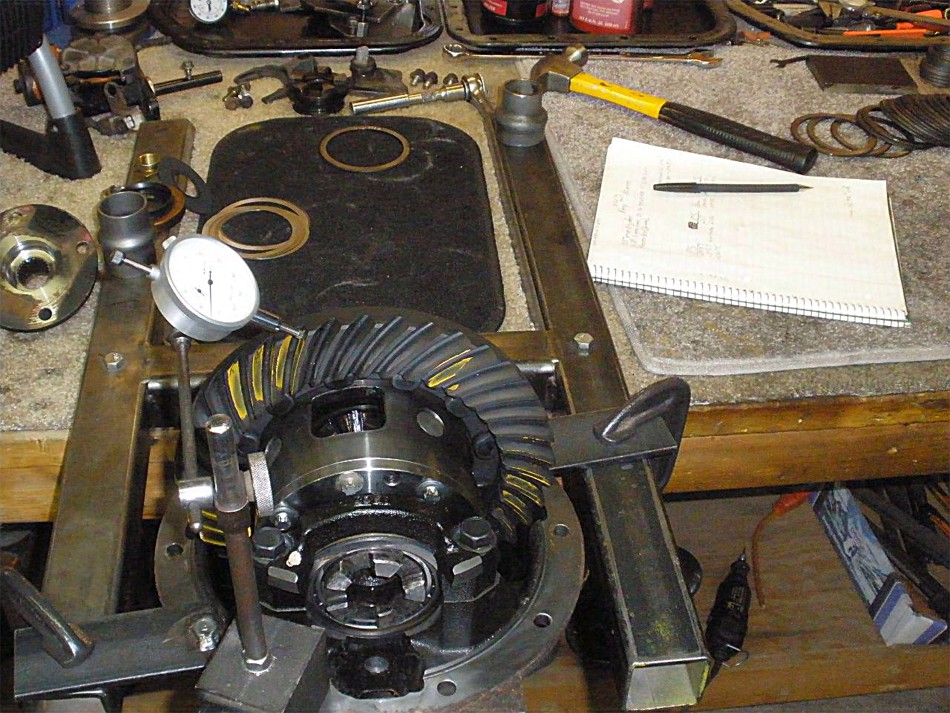
Backlash is checked. It measured about .005". Good enough for a pattern check. |
|
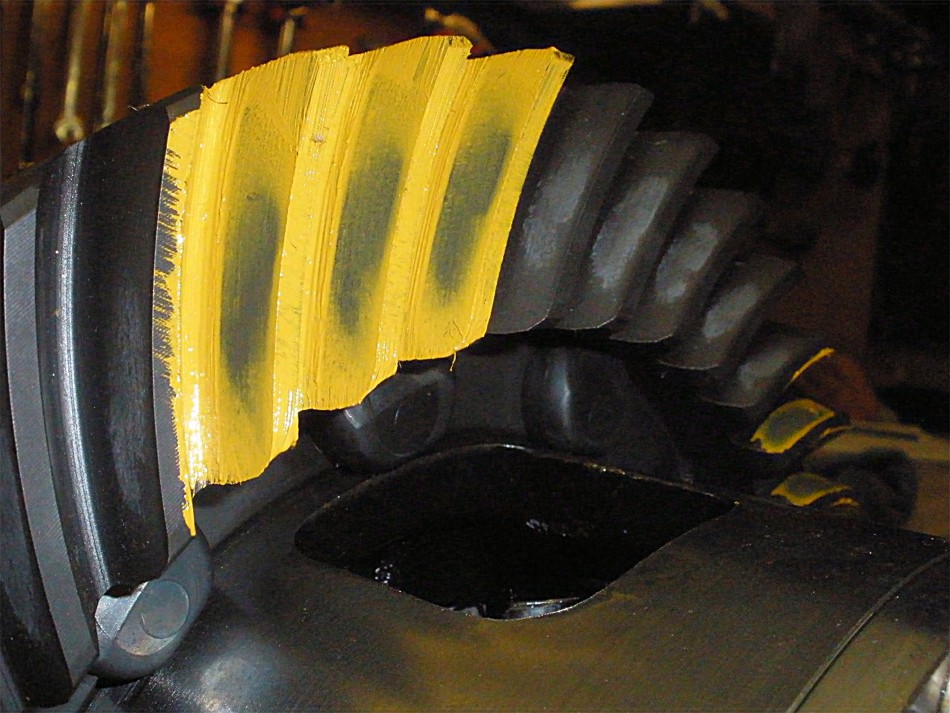
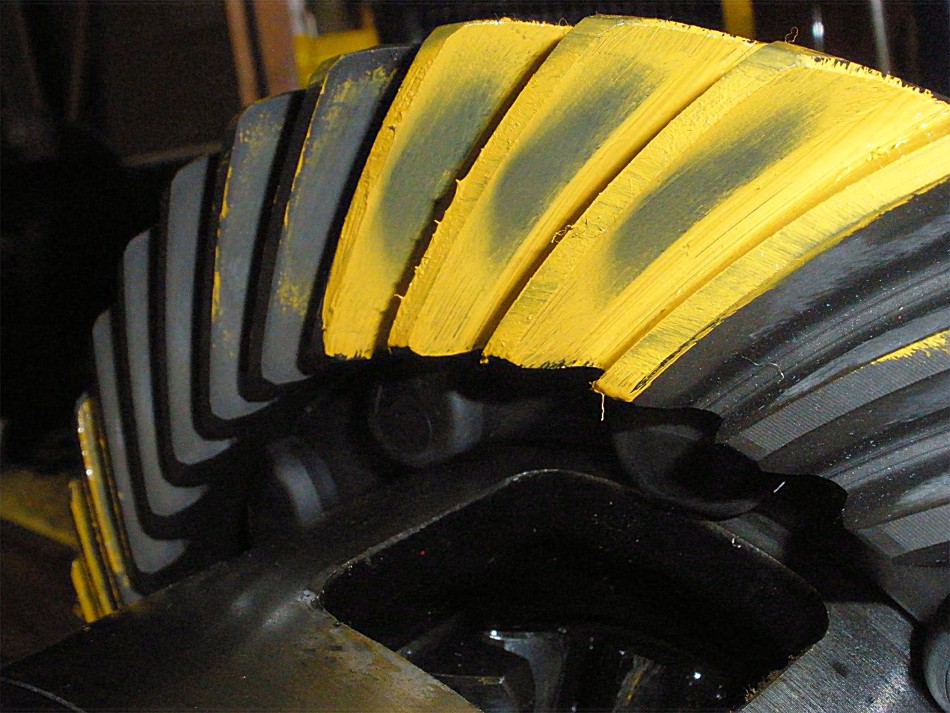
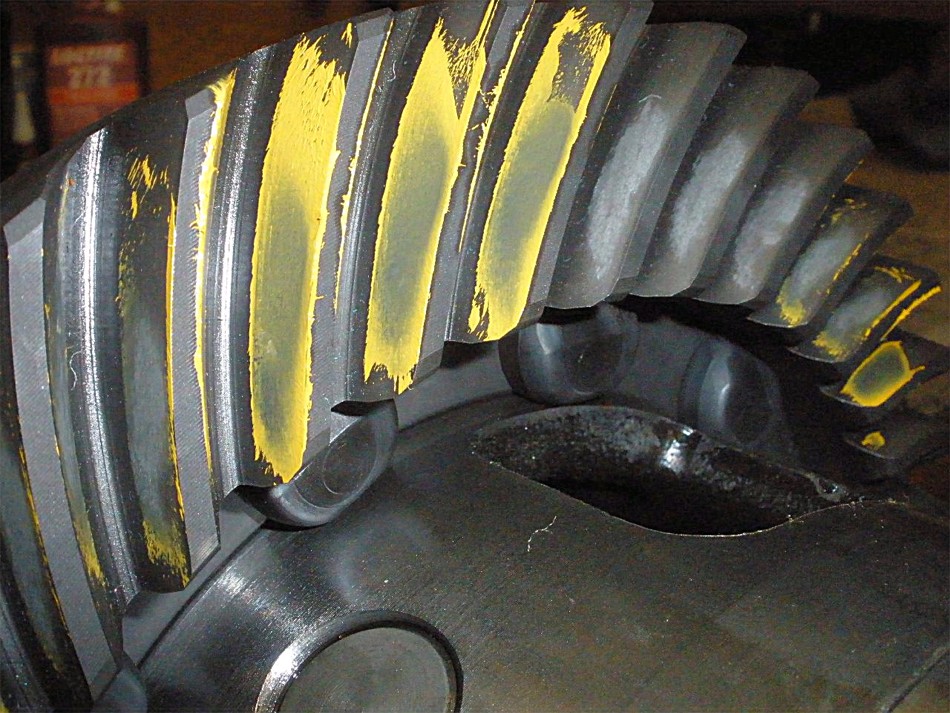
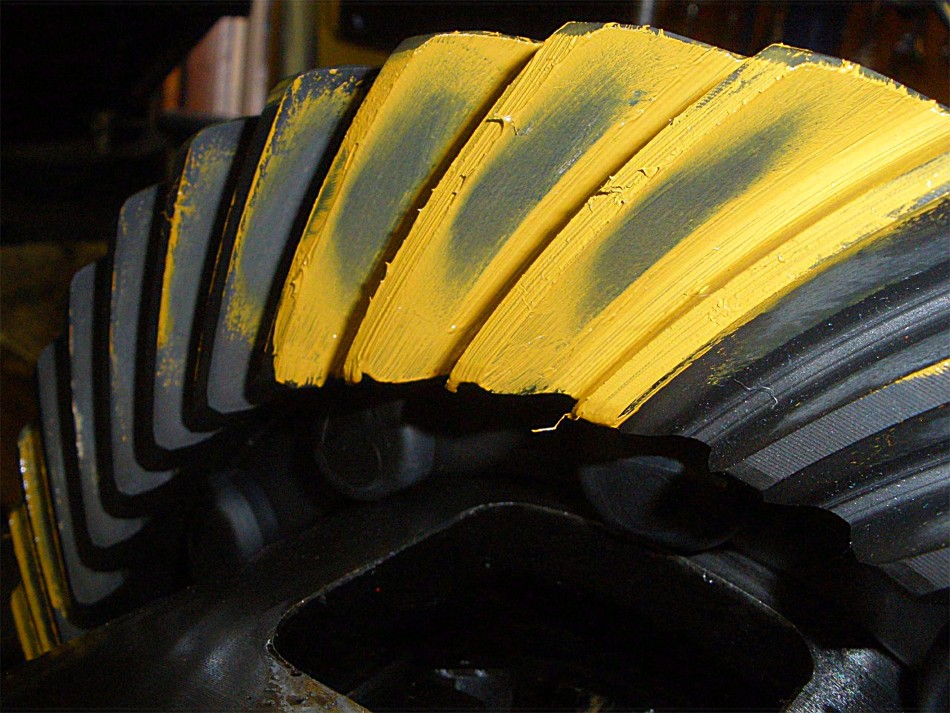
DRIVE--- perfect depth. |
|
Coast is good. |
|
Pinion paint is good. |
|
... |
|
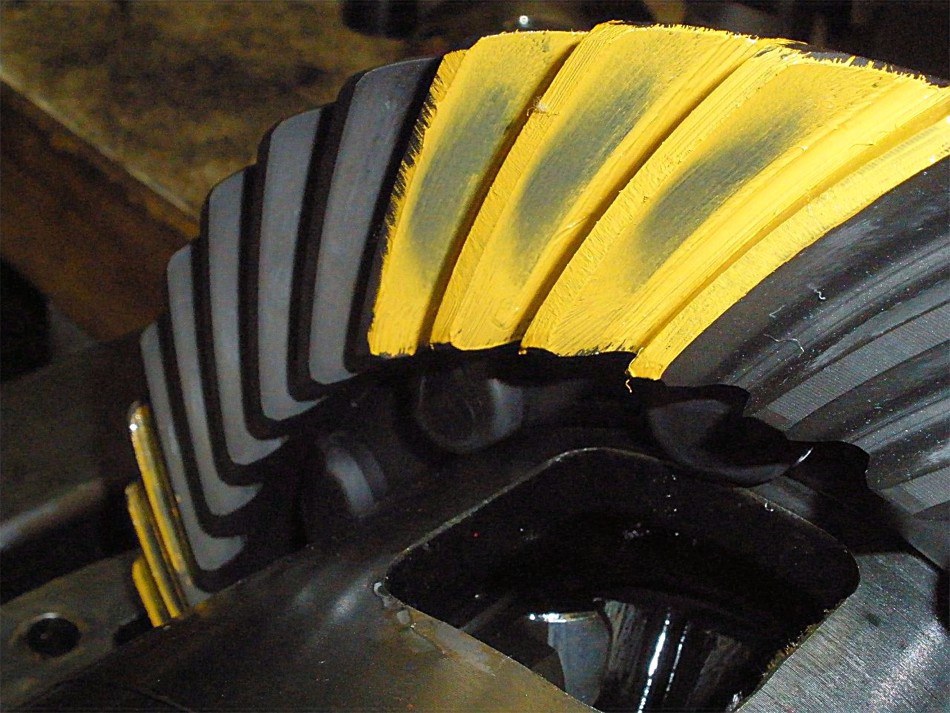
Drive---reverse paint looks great. |
|
Coast. |
|
Now to tear it down and add the crush sleeve...then fine tune the BL and CBPL with a final washer plate selection. |

|
Push the pinion out. |
|
Add the crush... |
|
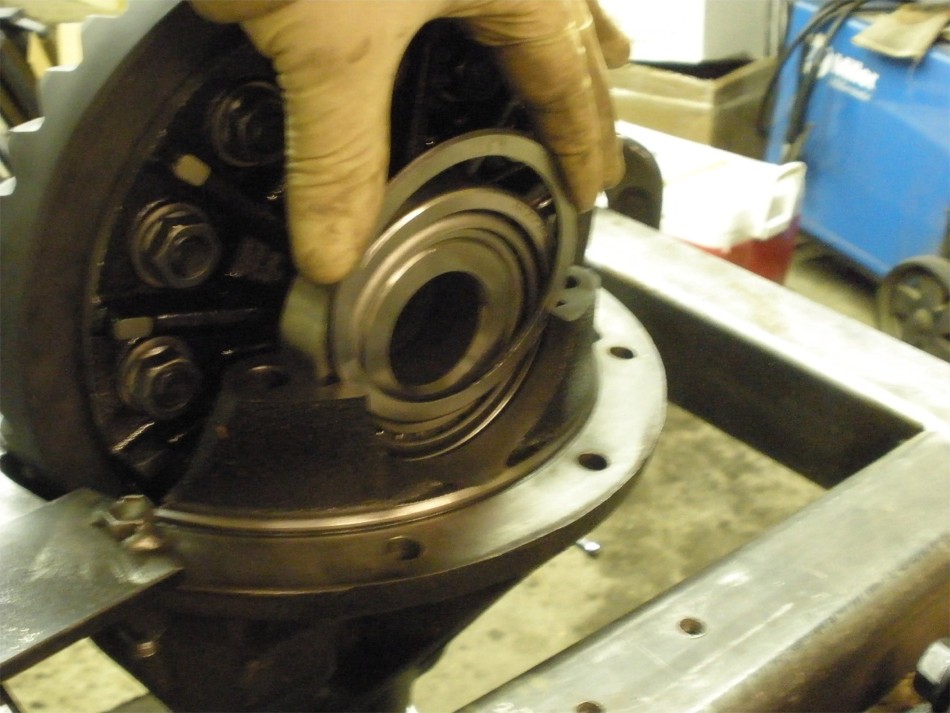
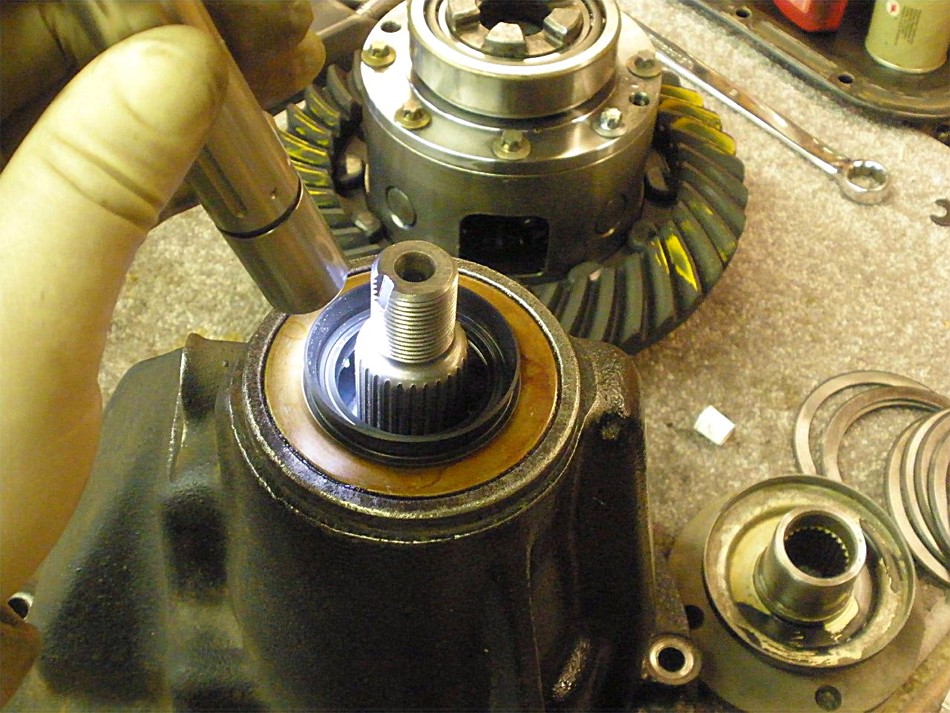
Place pinion back in the hole...tap outer bearing in place....drop the splashguard in place. |
|
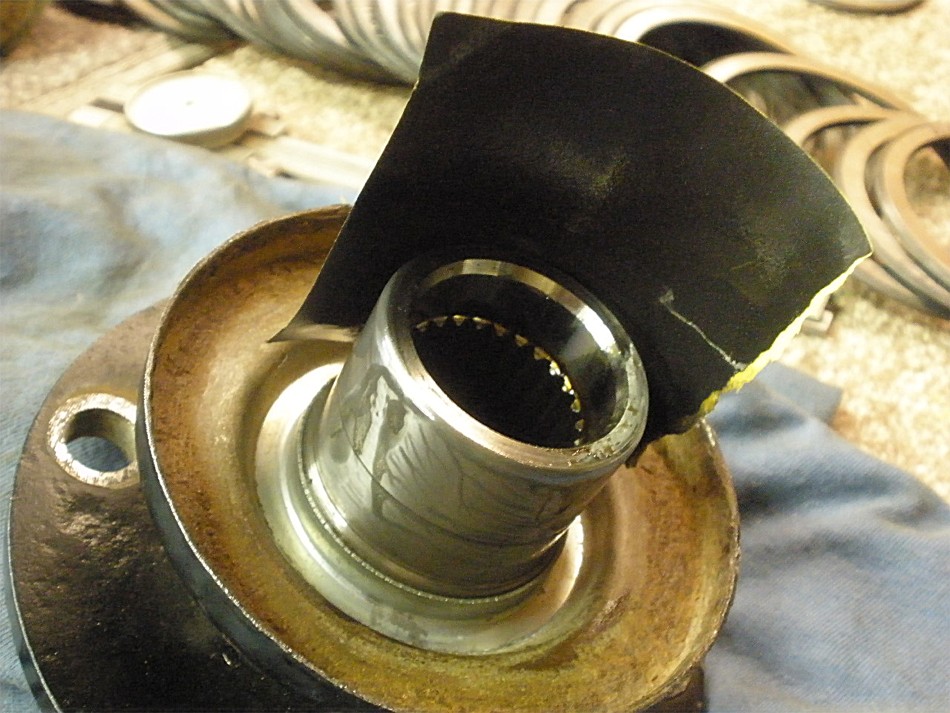
1000 grit sandpaper and WD40 removes any imperfections. |
|
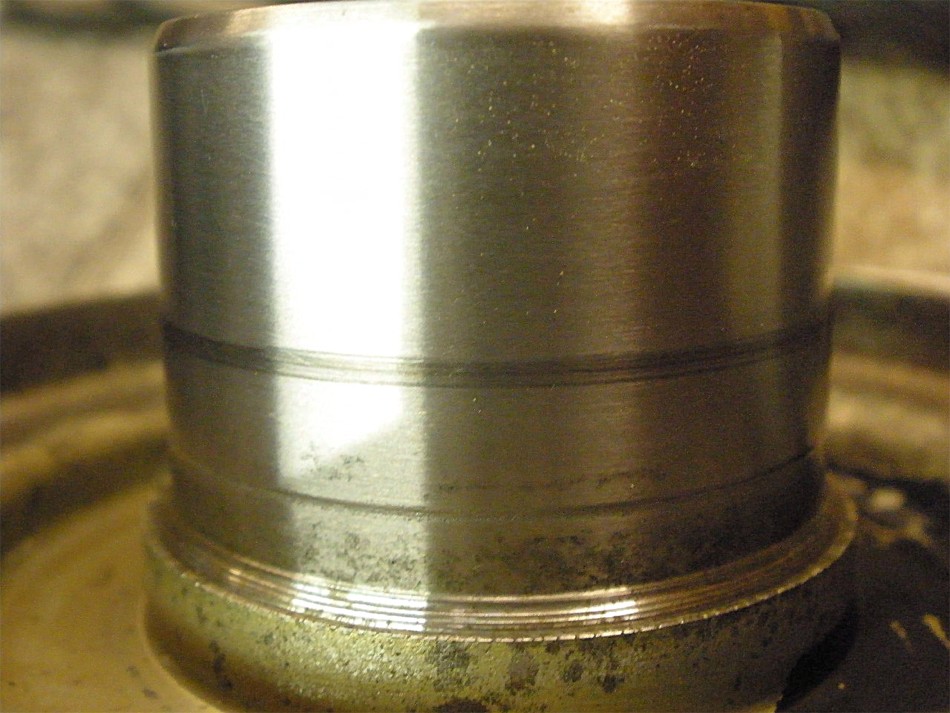
Slight groove from the old seal. |
|
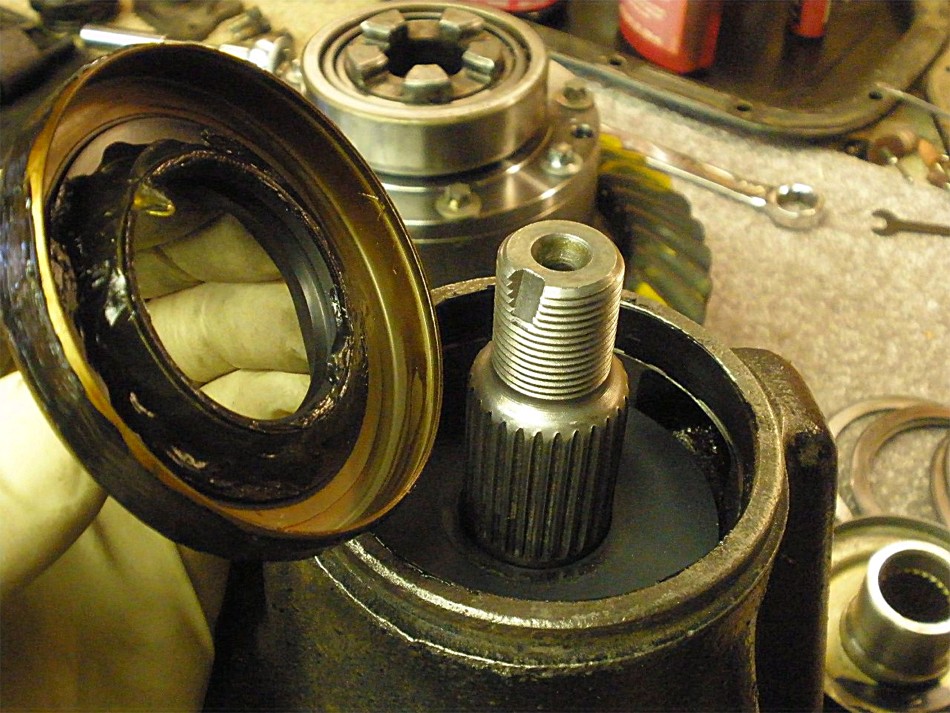
A thick grease keeps the tension spring from popping off during installation. RTV on the metal sides certainly helps it tap on easier and might prevent a leak on the outer perimeter. |
|
.... |
|
My own homemade "seal tapper-onner" |
|
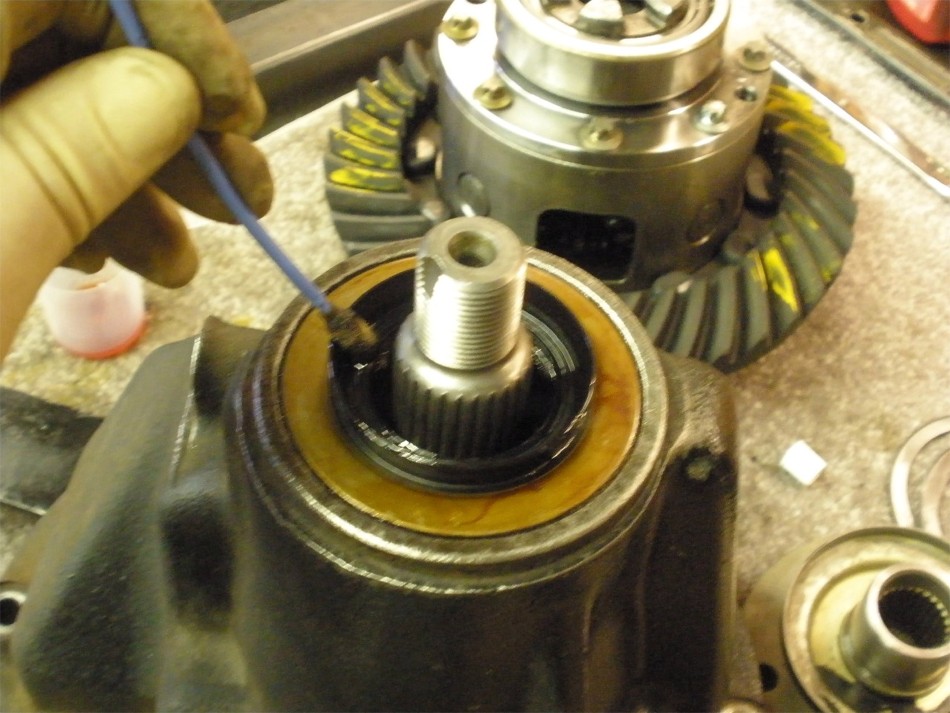
The flashlight verifies that the tension spring didn't drop off. |
|
A thin coating of gear oil is applied to all surfaces of the seal. |
|
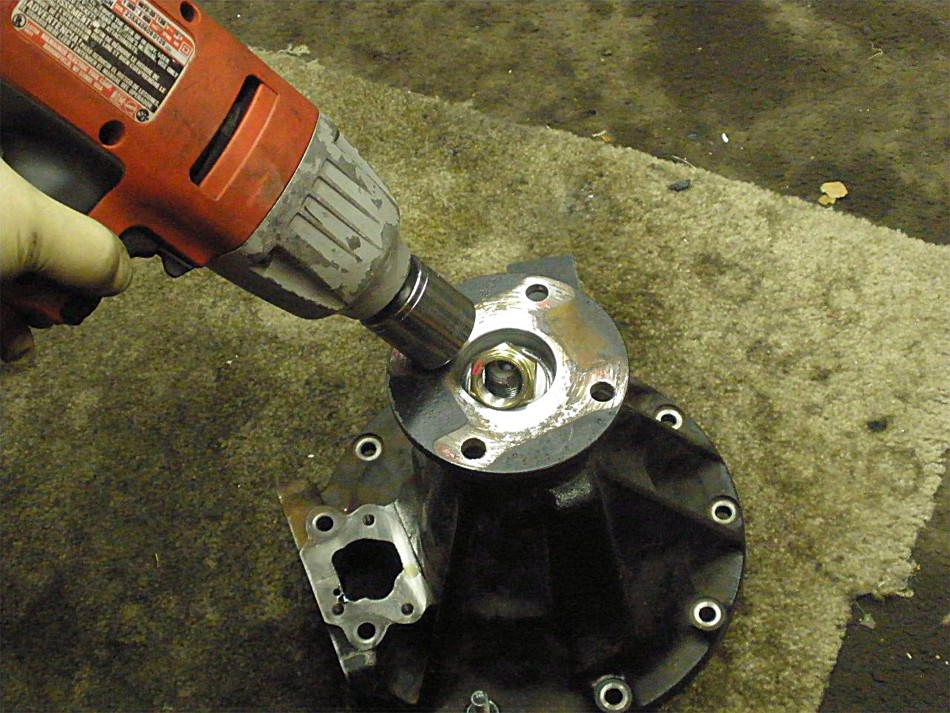
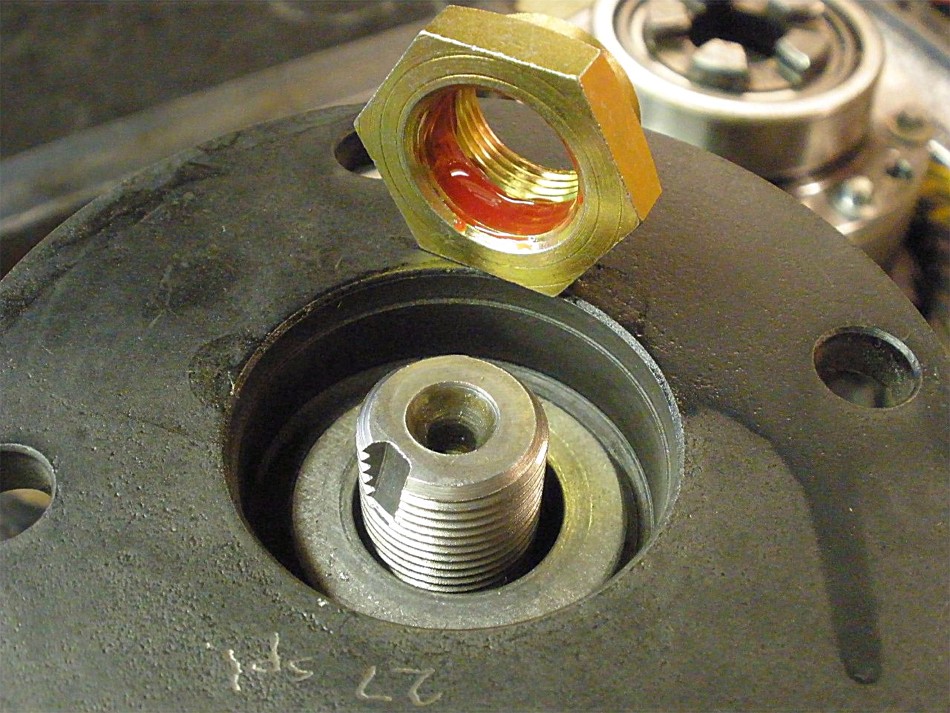
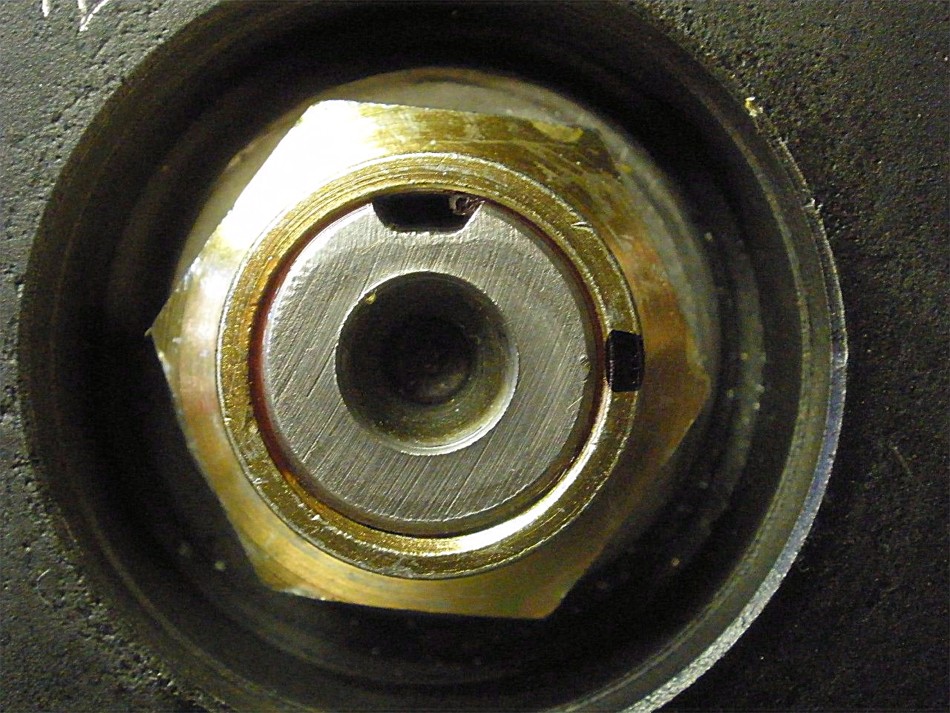
Red loctite on the pinion nut. |

|
The electric impact will only tighten it so much....not enough to crush the sleeve. |
|
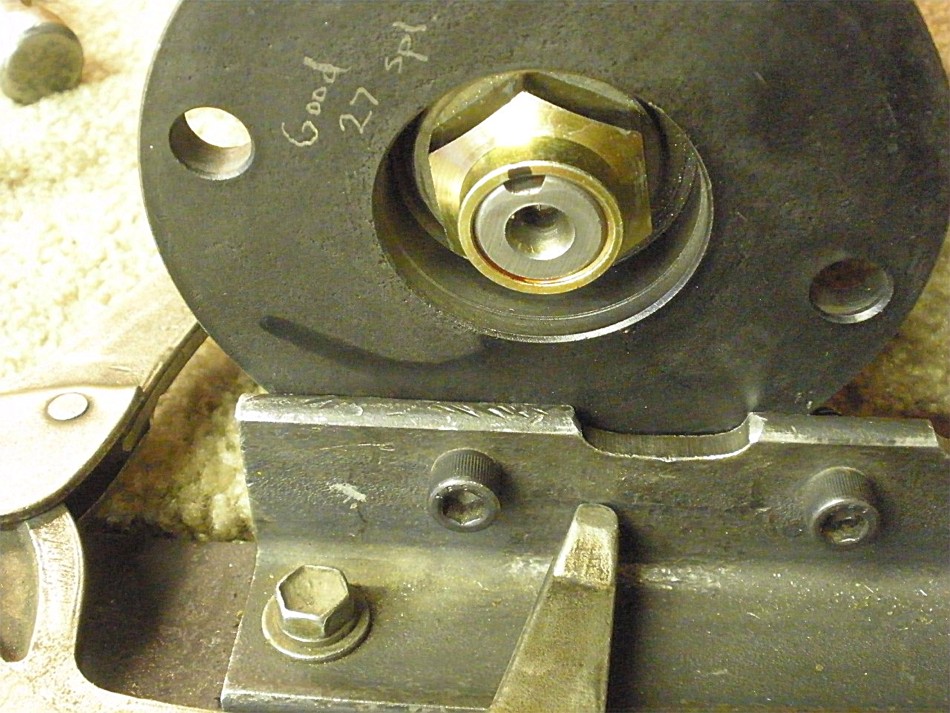
This set-up is designed to easily crush the sleeve. |
|
I often trim the crush sleeve length using my mini-lathe such that only about .020" remains to be crushed. Saves on thread damage. |
|
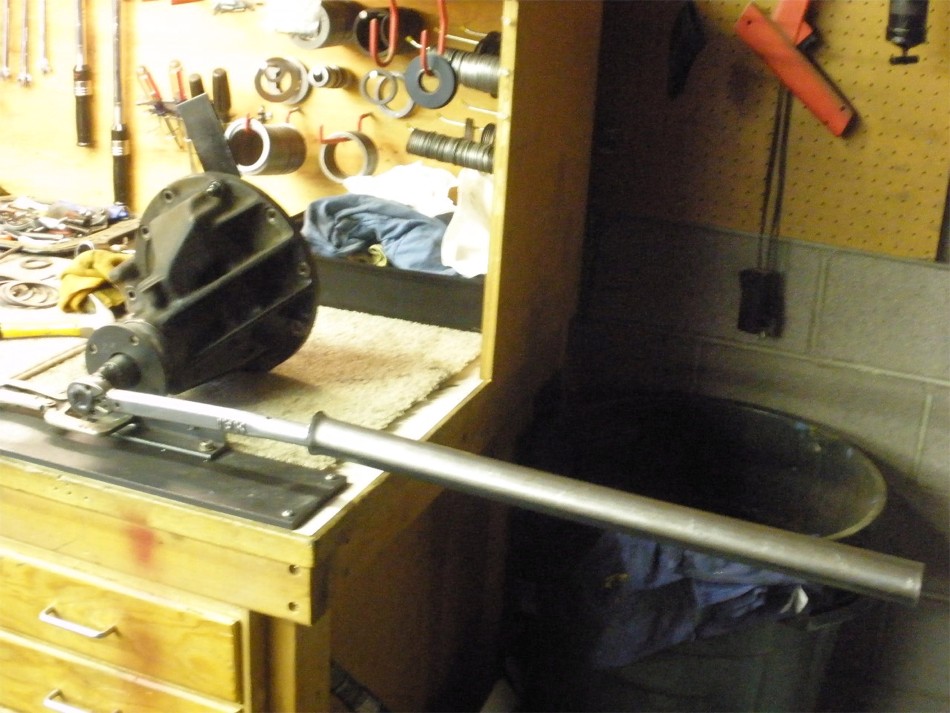
A 4 foot cheater bar is about right. |
|
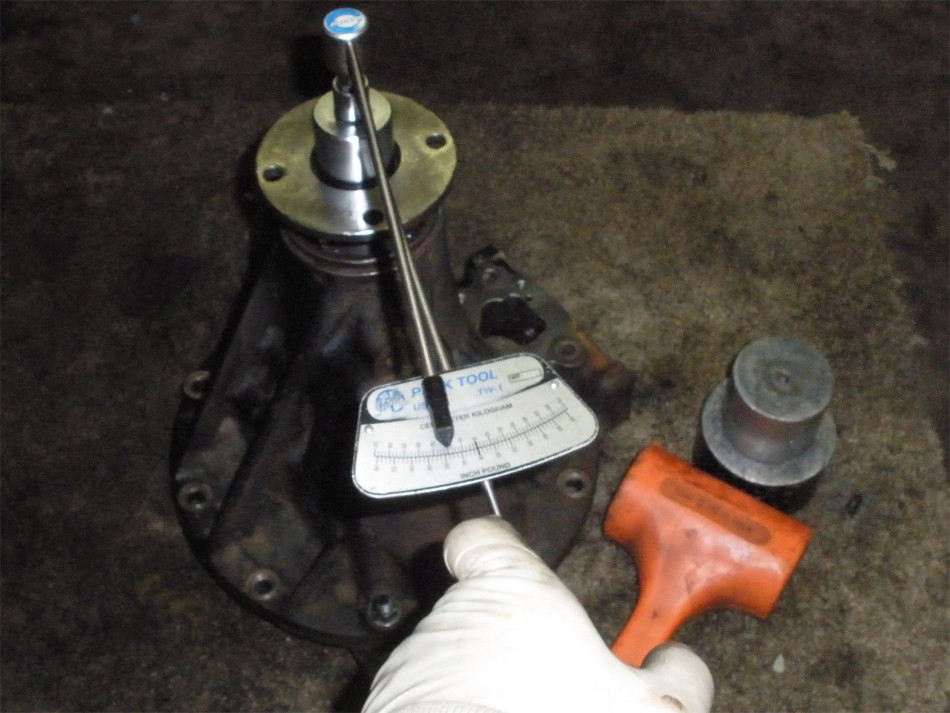
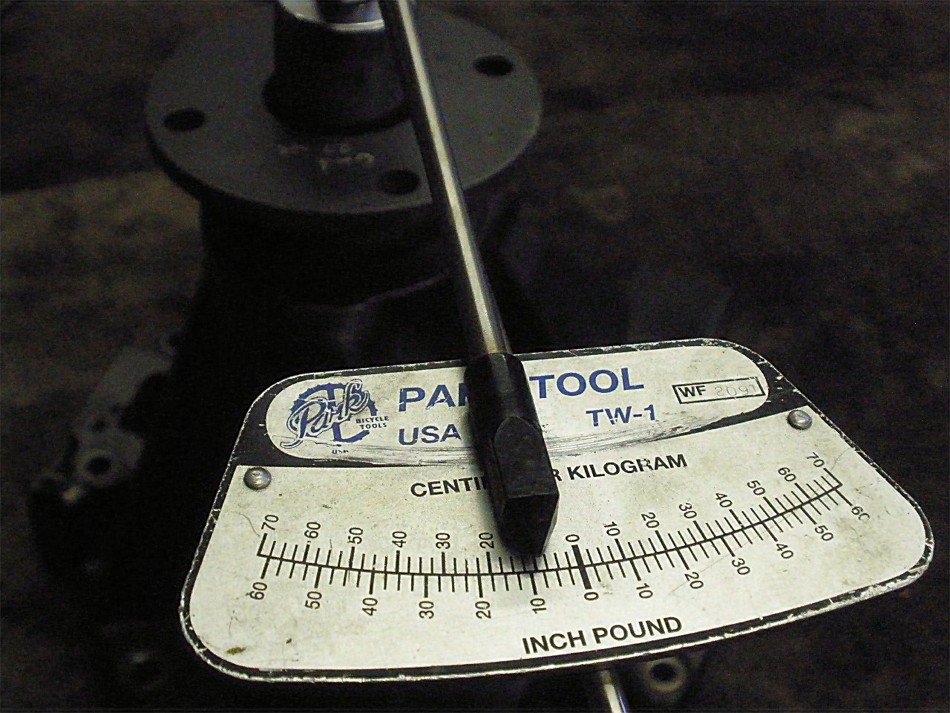
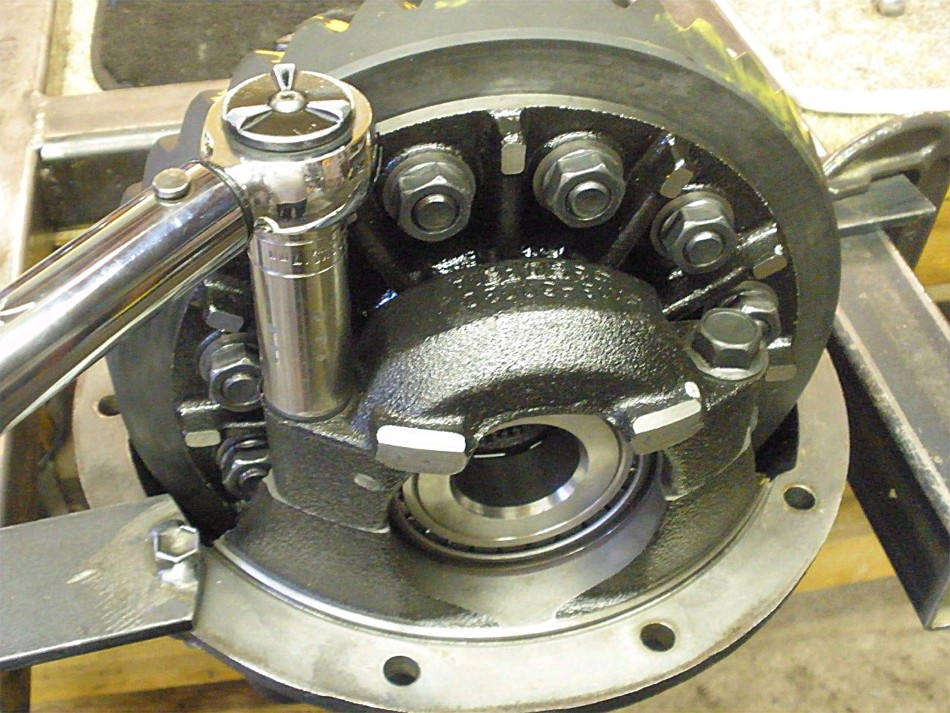
A light tap-tap-tap while rotating the flange makes sure the rollers are all equalized... |
|
...and the PPL readings are meaningful. I usually turn the torque wrench at a rate of 1 full turn per second for my readings. |
|
Taking up the slop took only 1/4 turn. That's the way I like it. |
|
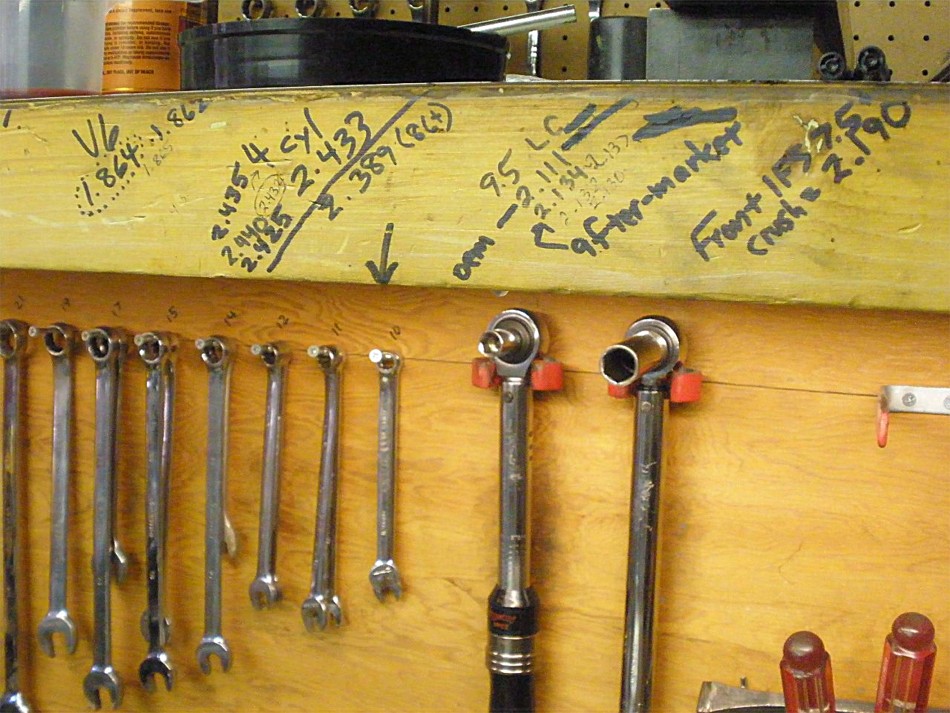
Here's my on-board cheat sheet for final average crush sleeve lengths. Knowing that the aftermarket pinion bearings for the 9.5" LC's result in a crush length of about 2.134" means that I factor in another 20 or 30 thou and trim the crush collar to about 2.160. |
|
Ding and this end is done. I only had to crush it 1/4 turn as opposed to 3 full turns sometimes. |
|
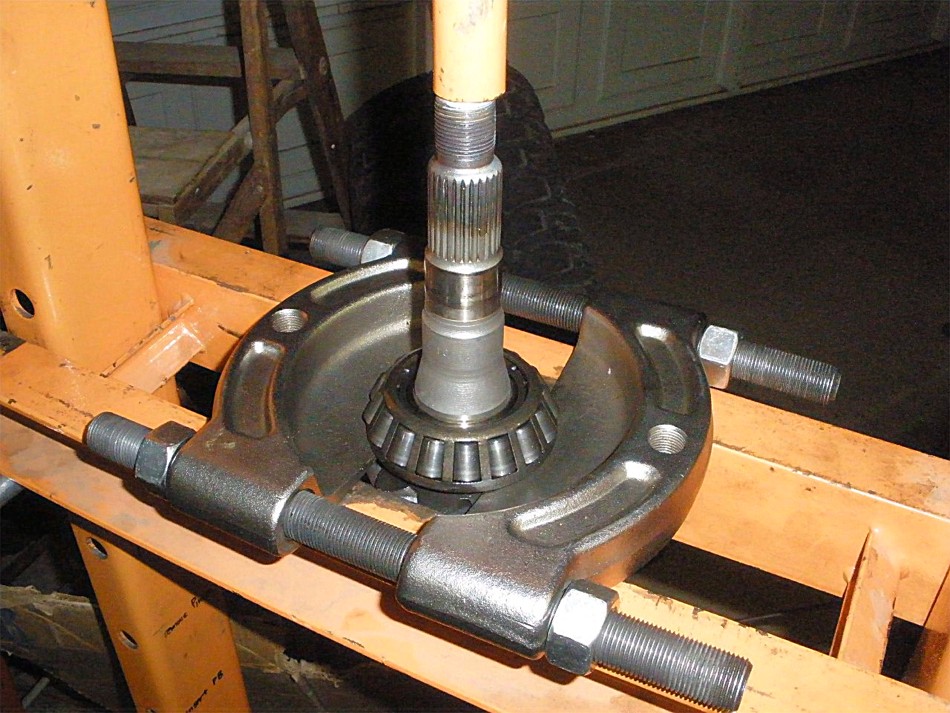
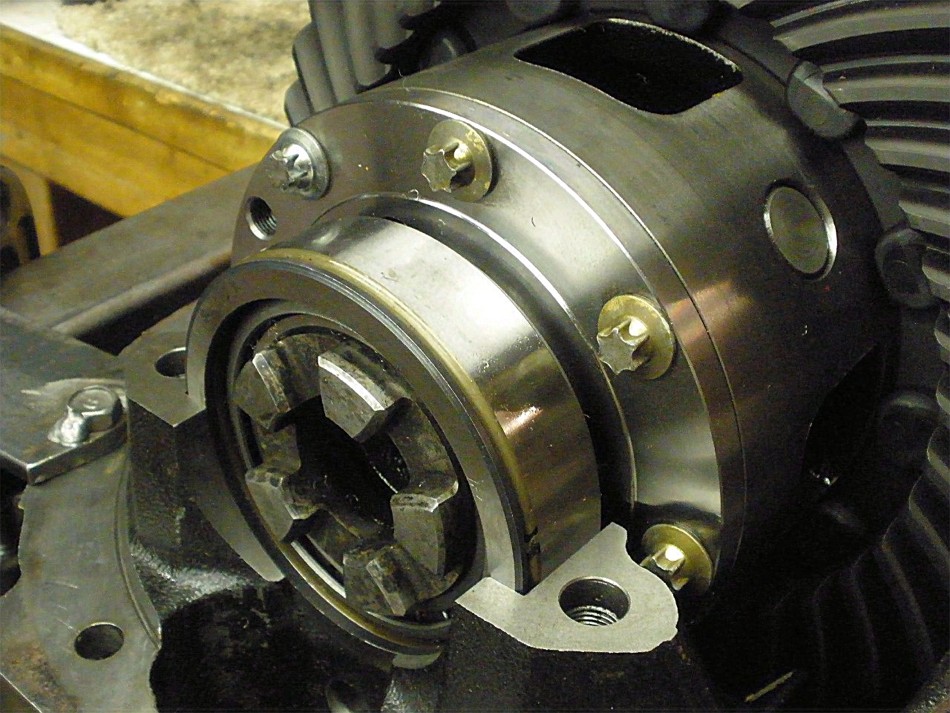
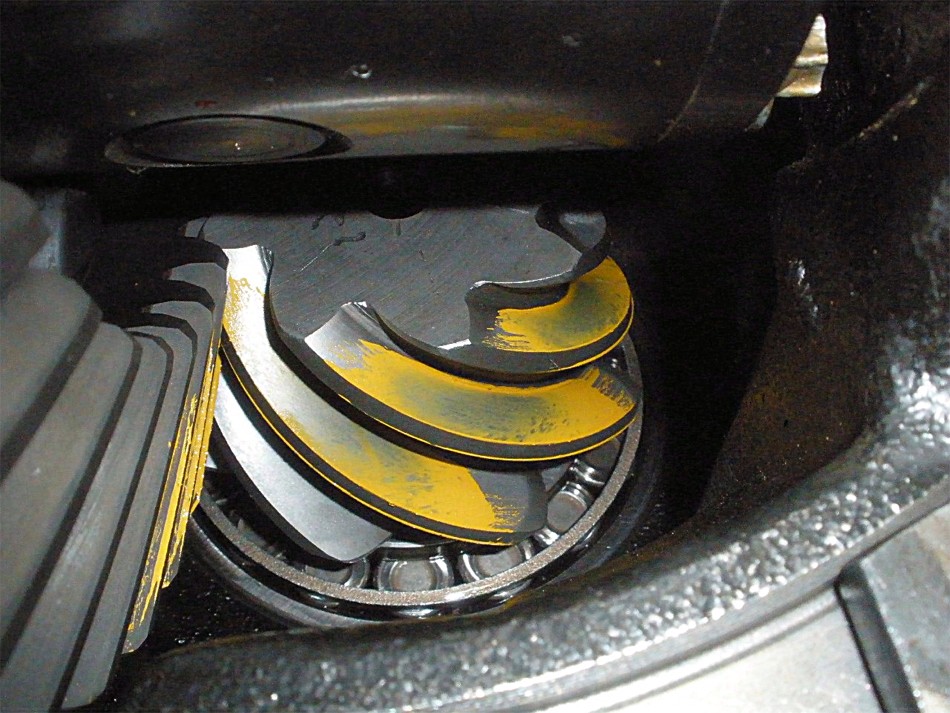
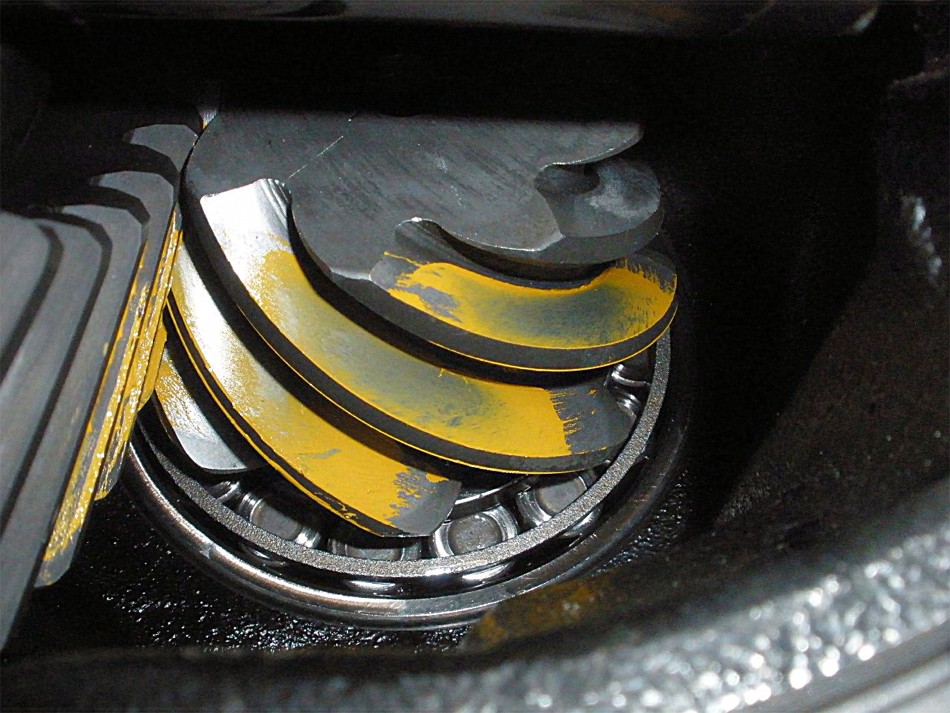
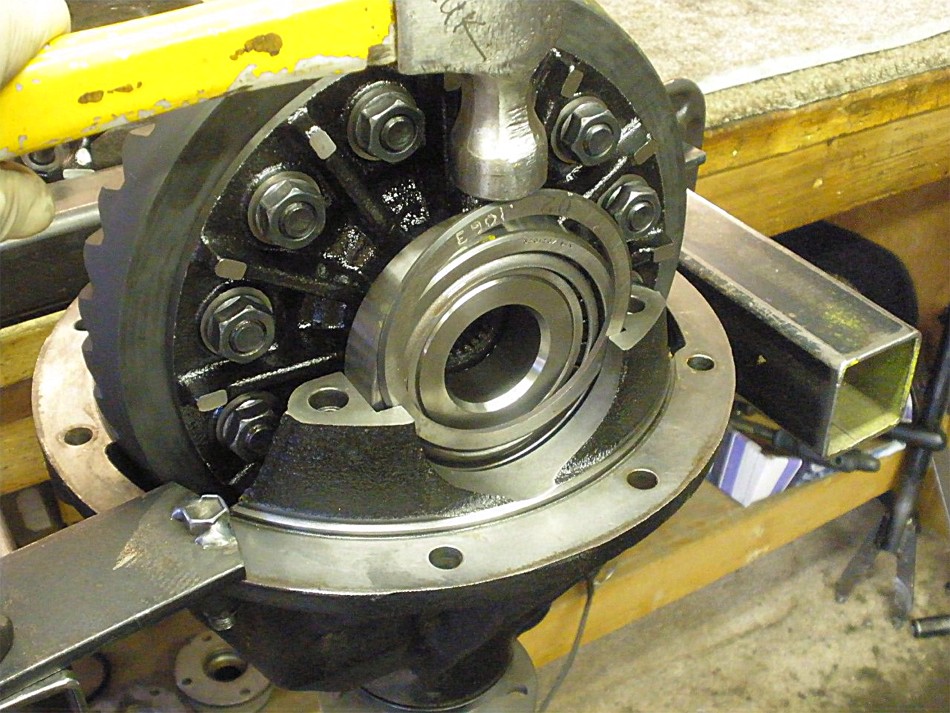
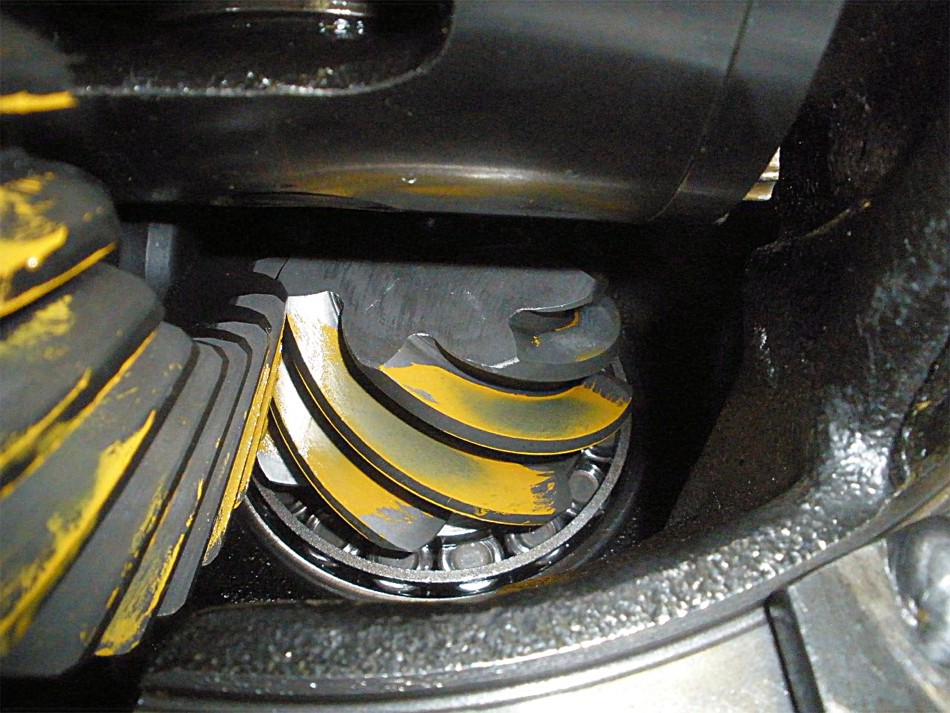
Case is inserted and another round of fine tuning the washer plates. I'm shooting for .007 BL and really tight CBPL. The hammer was able to tap it in this far before it couldn't go any farther. |
|
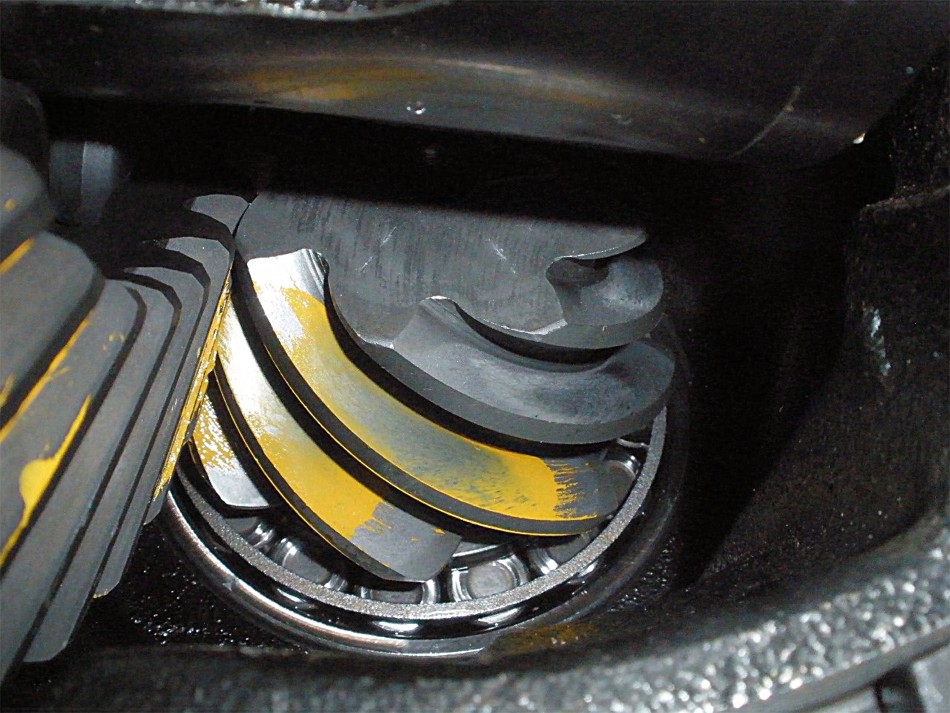
It took my chisel to get it in the rest of the way. This is strong CBPL and is desired. |
|
Bearing cap bolts are tightened up. |
|
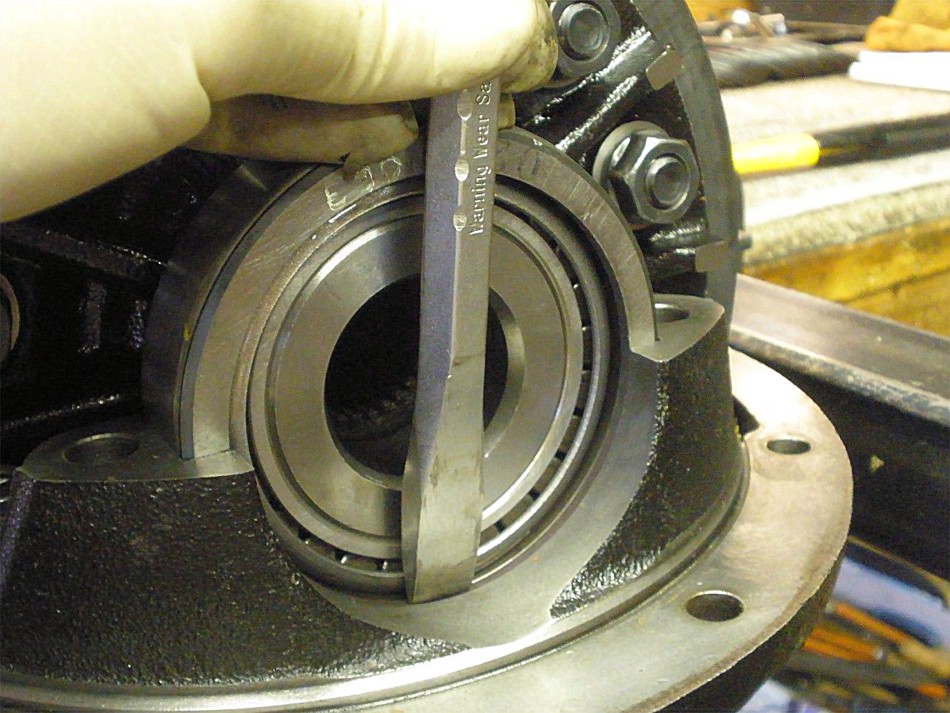
Backlash check shows it to be too wide at .010"...too wide. |
|
I added .003" to 1 side and subtracted .003" from the other. |
|
Final backlash check and all was good. |
|
... |
|
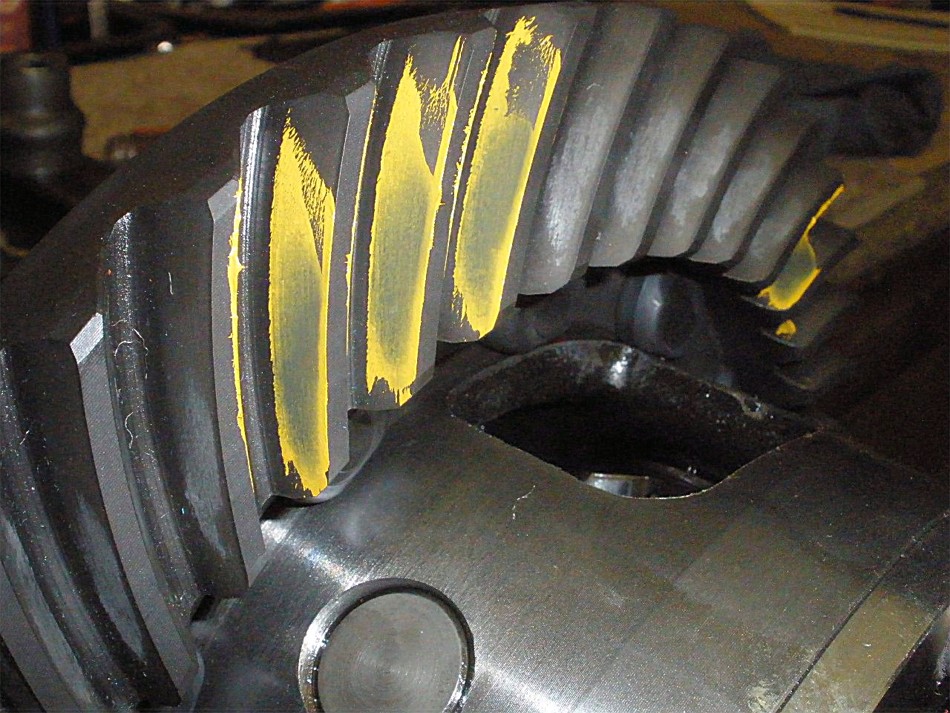
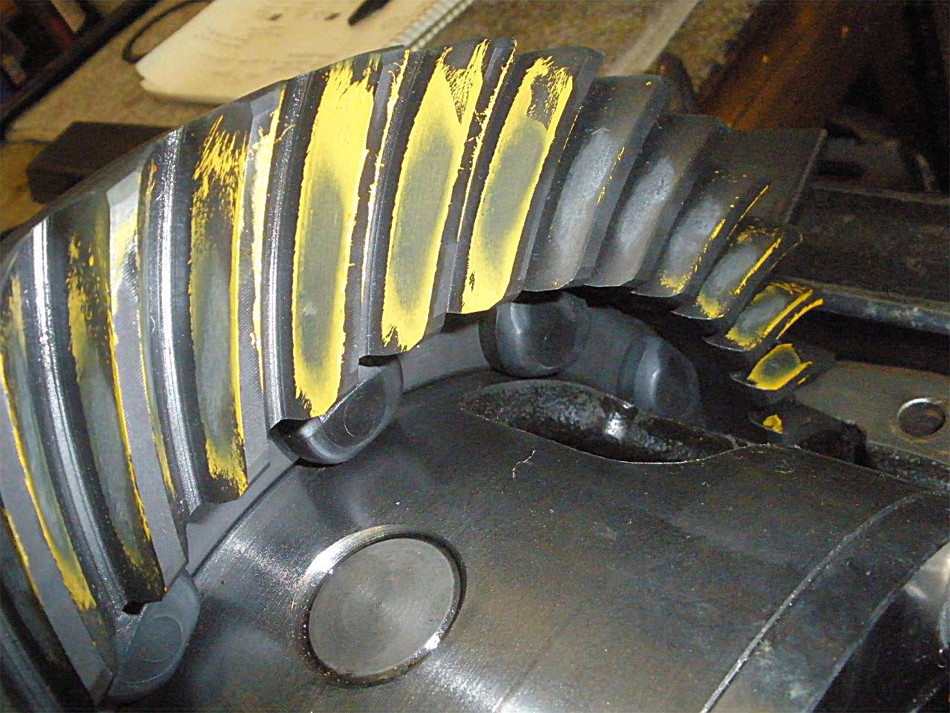
DRIVE...target depth |
|
COAST---good |
|
Drive on the pinion- nice |
|
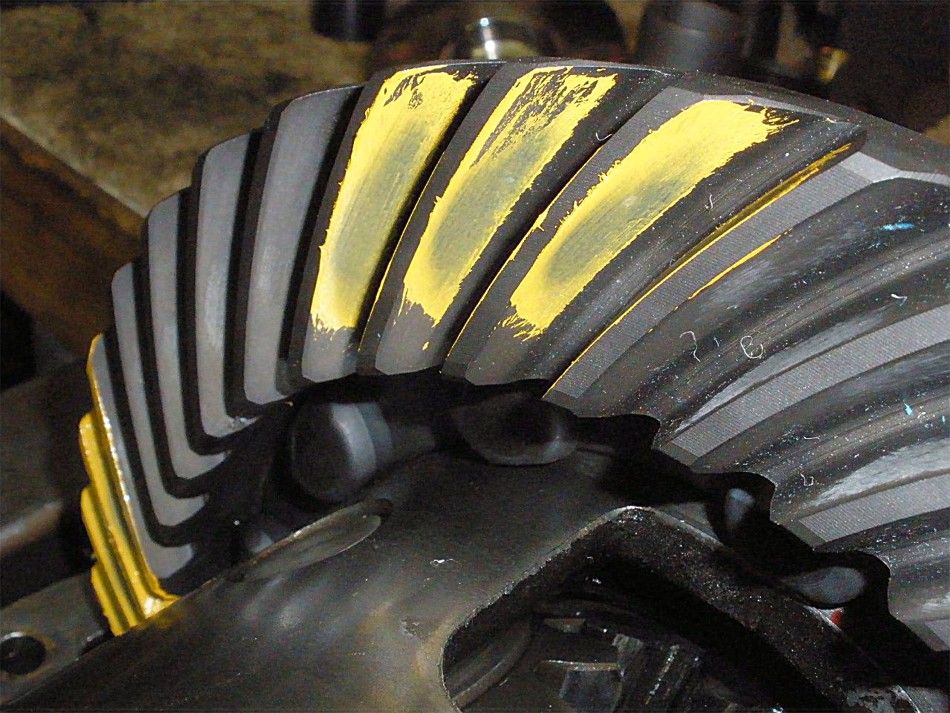
drive---reverse paint is nice |
|
Coast----reverse paint nice again. |
|
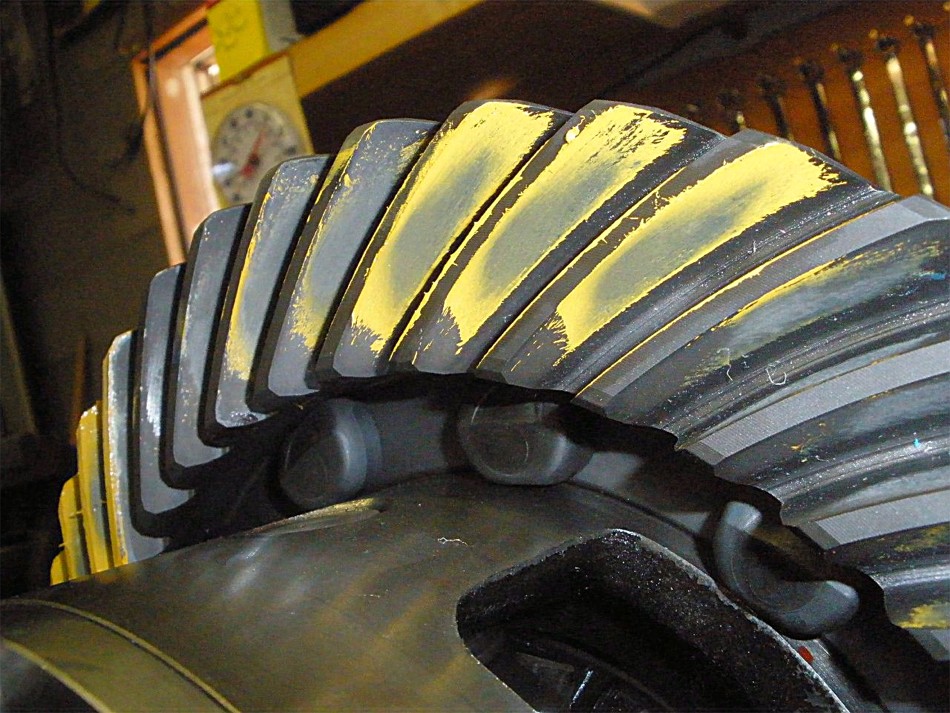
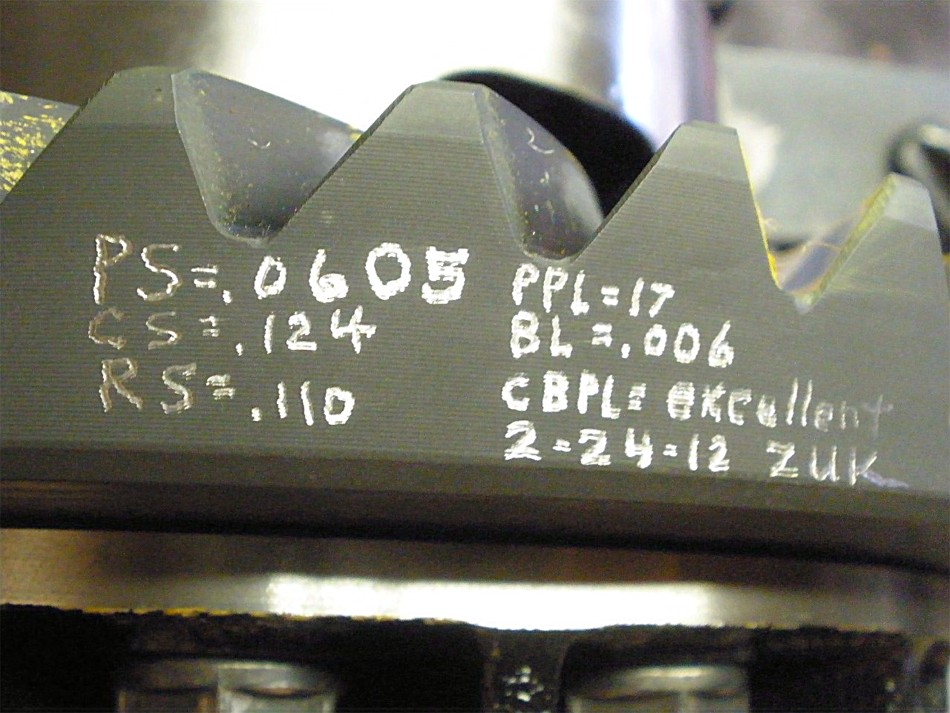
Important info is scribed on the ring. |

|
My install notes... |
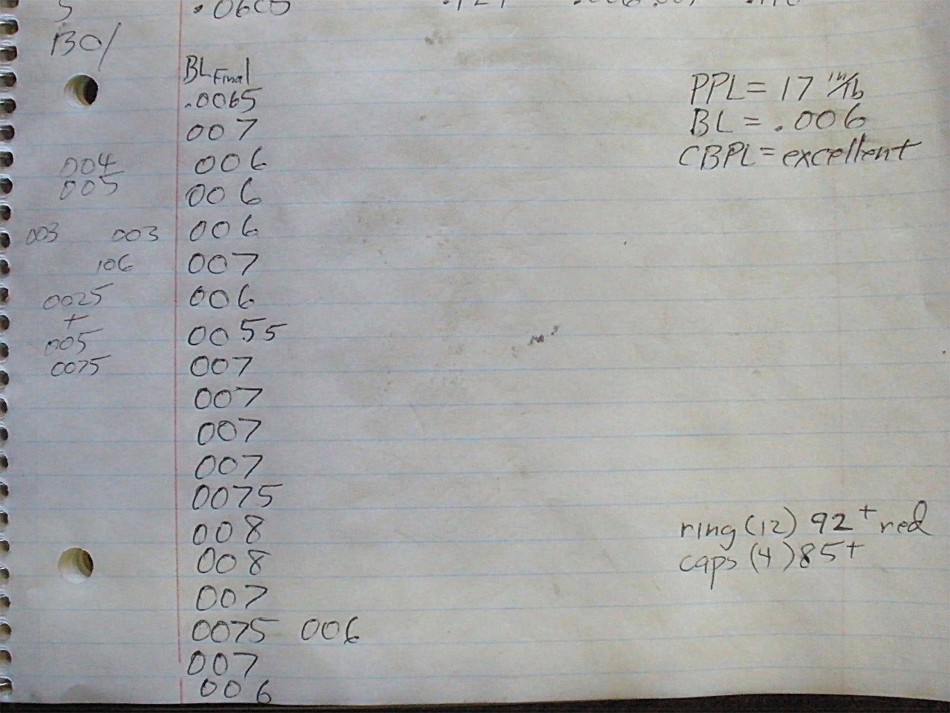
|

|
