|
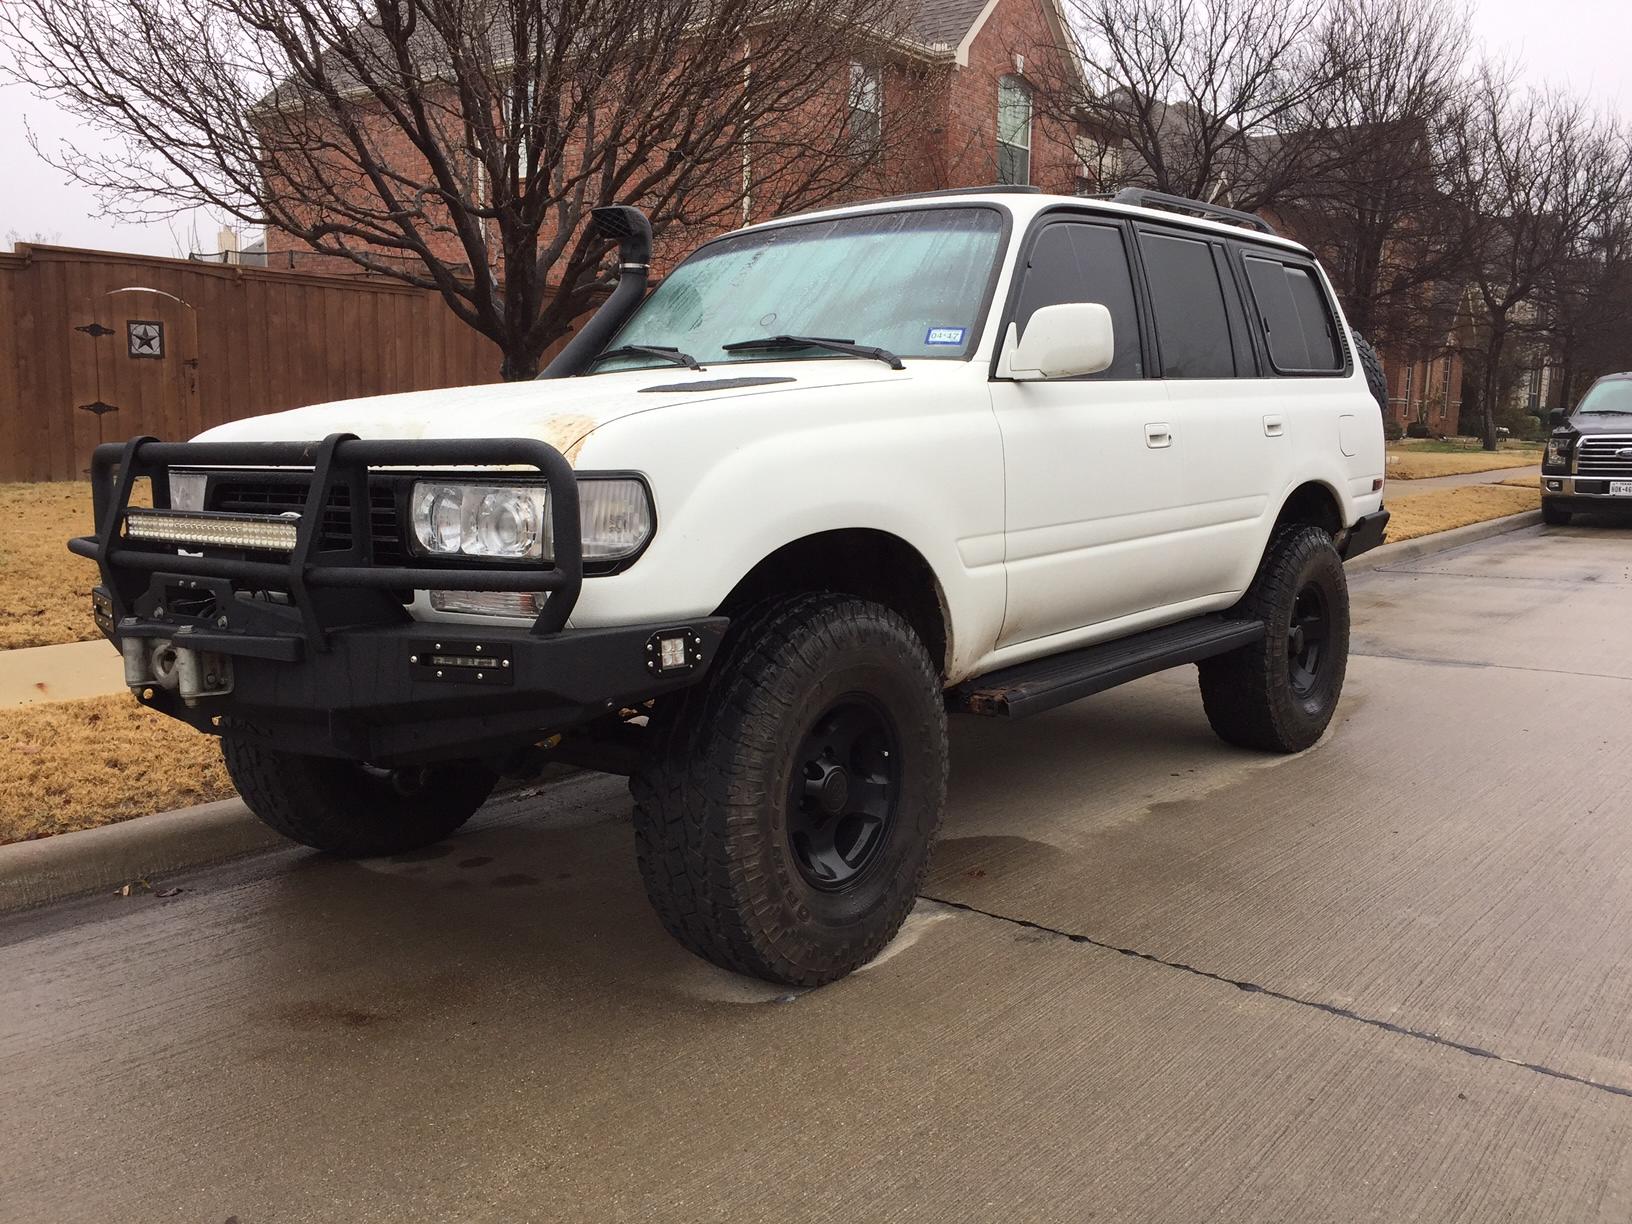
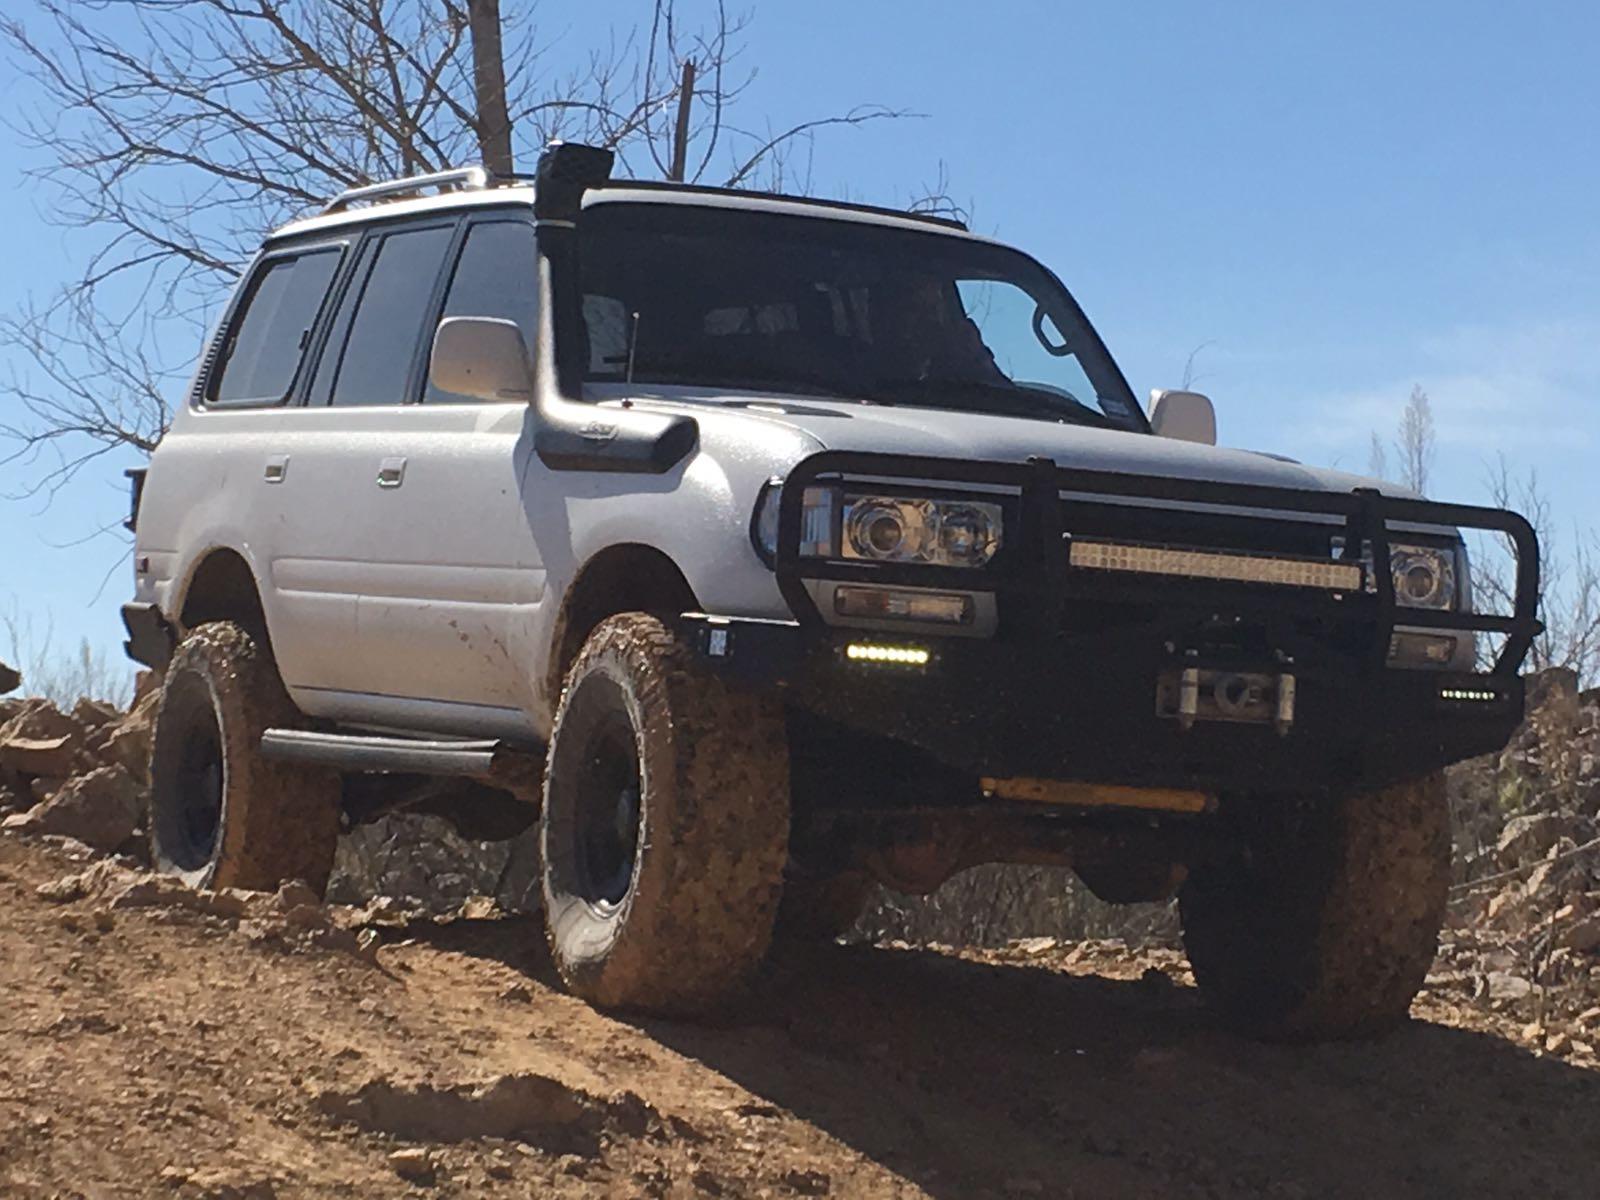
Tree Stump Wins....BANG!! from Humbertos front 8" ring gear 1997 Landcruiser
|
|
(52 BIG pics loading)
|
|
MAR 28 2017
|
|
|
Humberto was over at a friend's house some 3 hours away helping with some tree stump cleanup. The winch cable was secured to
the stump but it was soon discovered that the winch was not working properly. So, in Humberto's own words......"At that
moment , in all my wisdom , I decided to pull in reverse, engage 4Low, triple locked, in flat dry concrete surface and that
is when I blew it. All I did was a slow reverse gently pushing on the gas pedal, and like in 2 seconds into the operation
is when it broke."
|
|
|
|
|
Humberto has owned the Landcruiser for 10 years. It has 275,000 miles now. 35" tires.
|
|
|
|
|
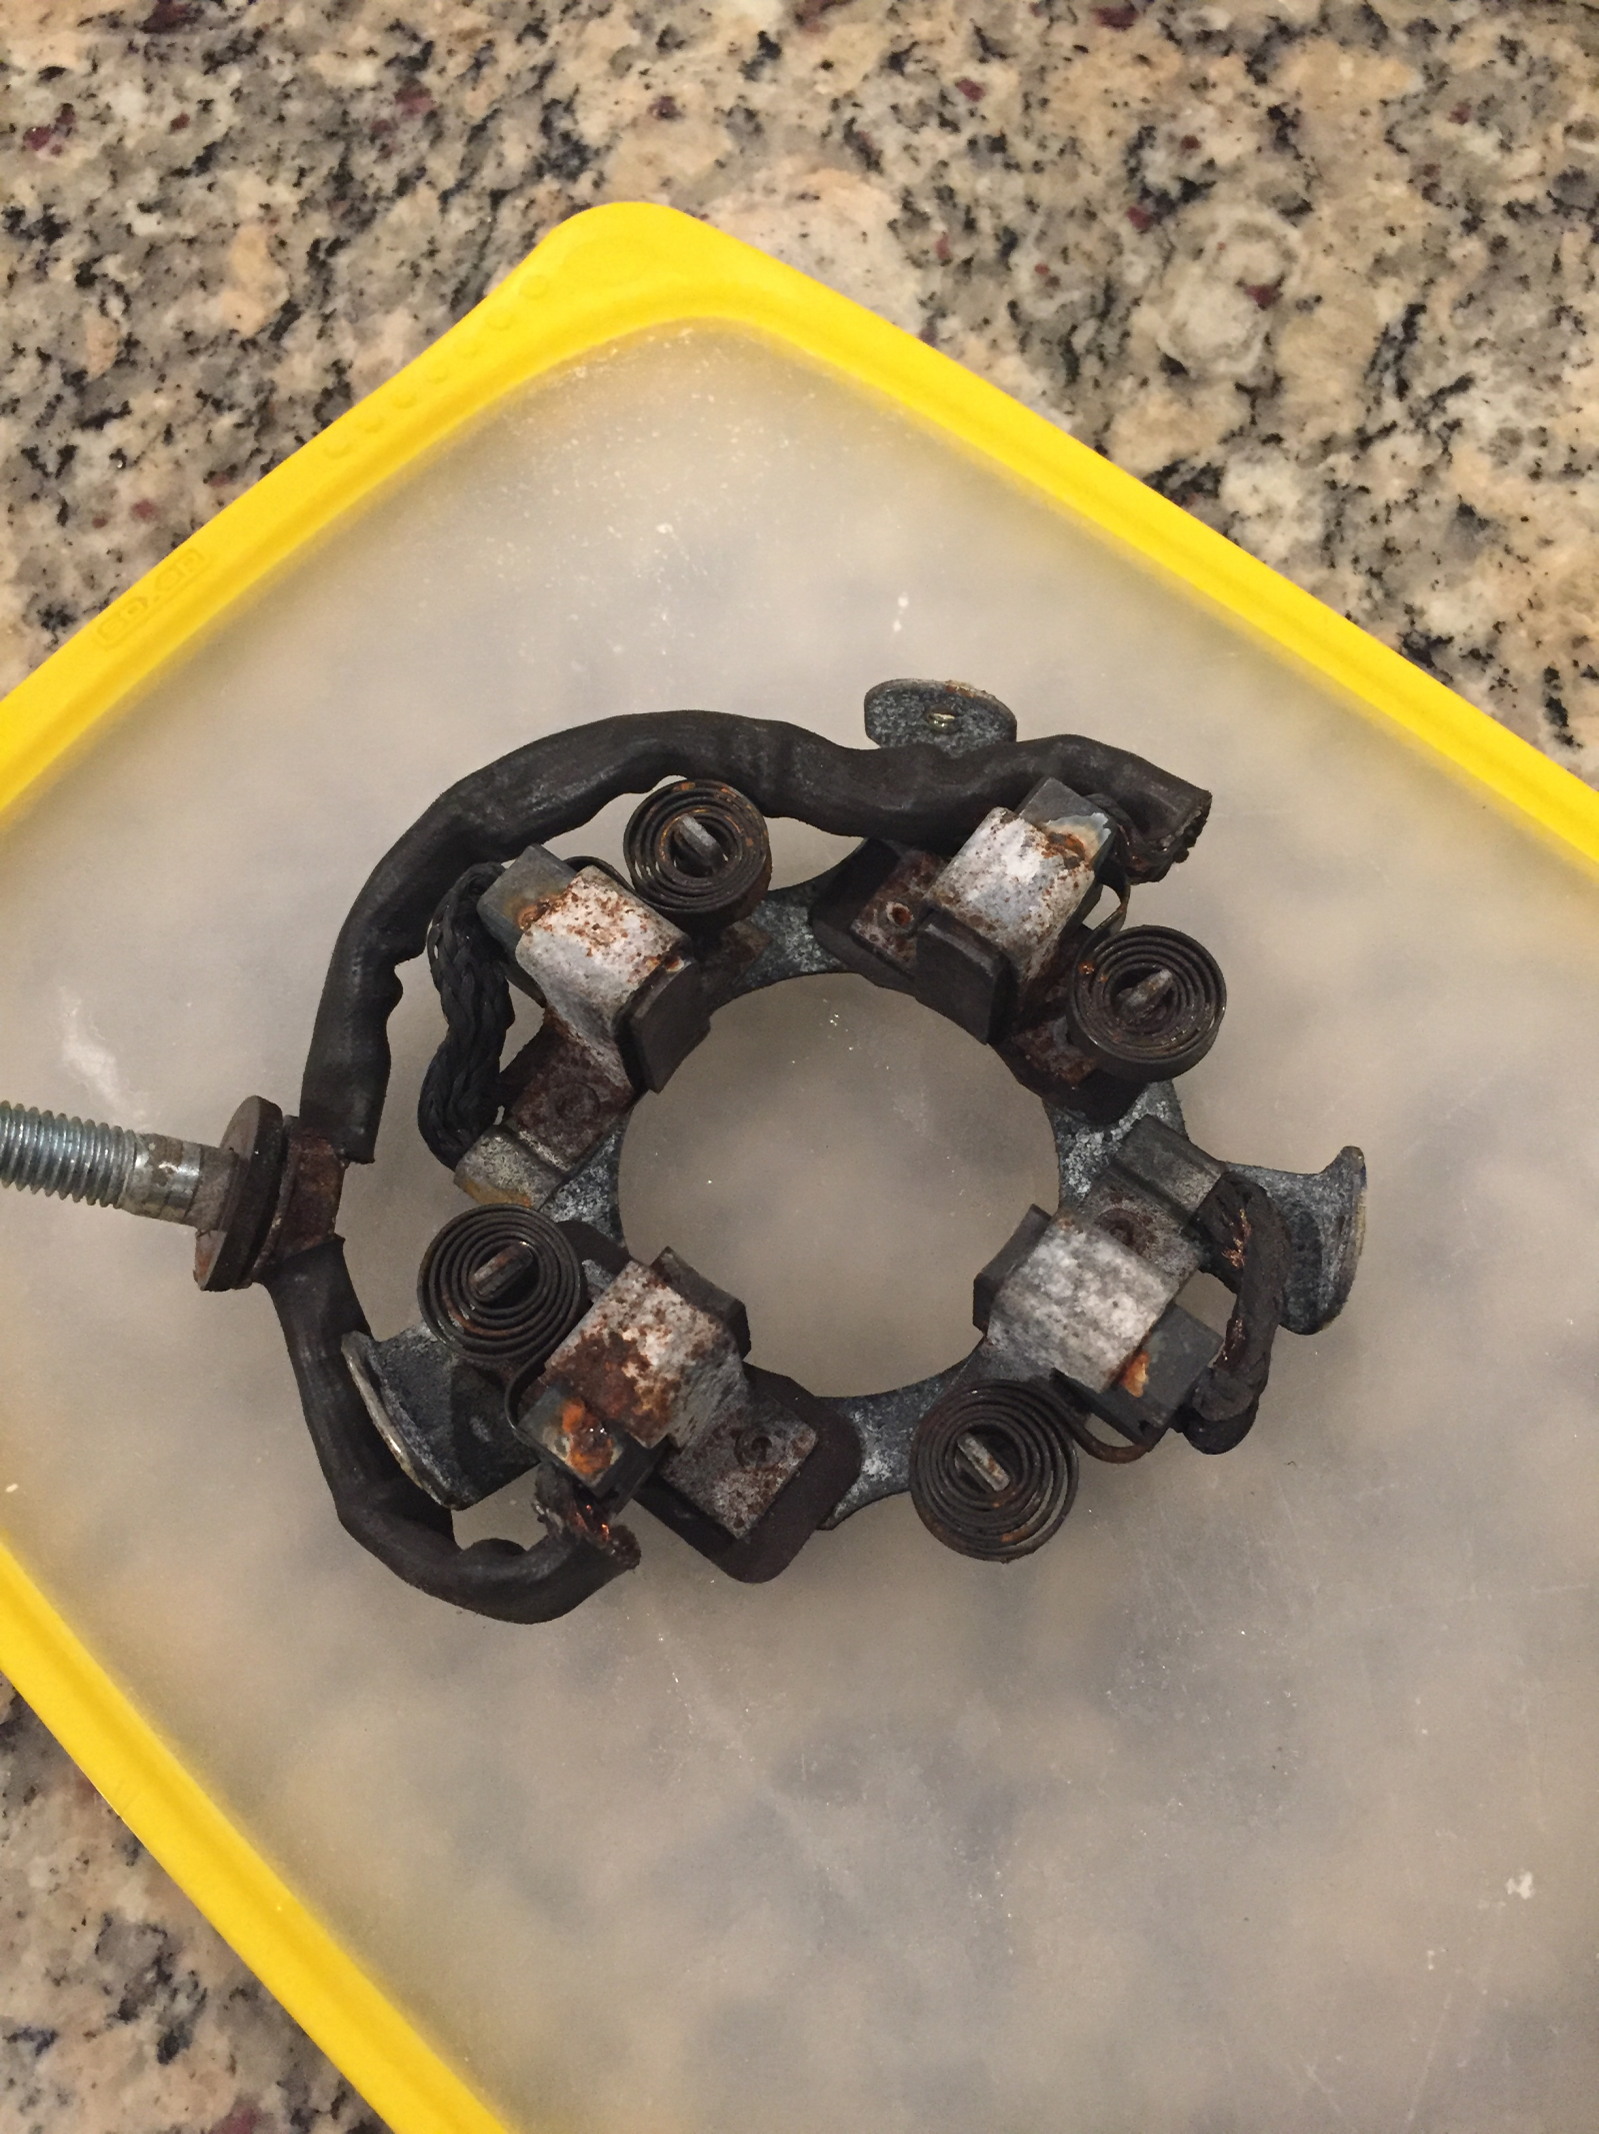
Why the winch wouldn't work.....water damage to the motor brushes.
|
|
|
|
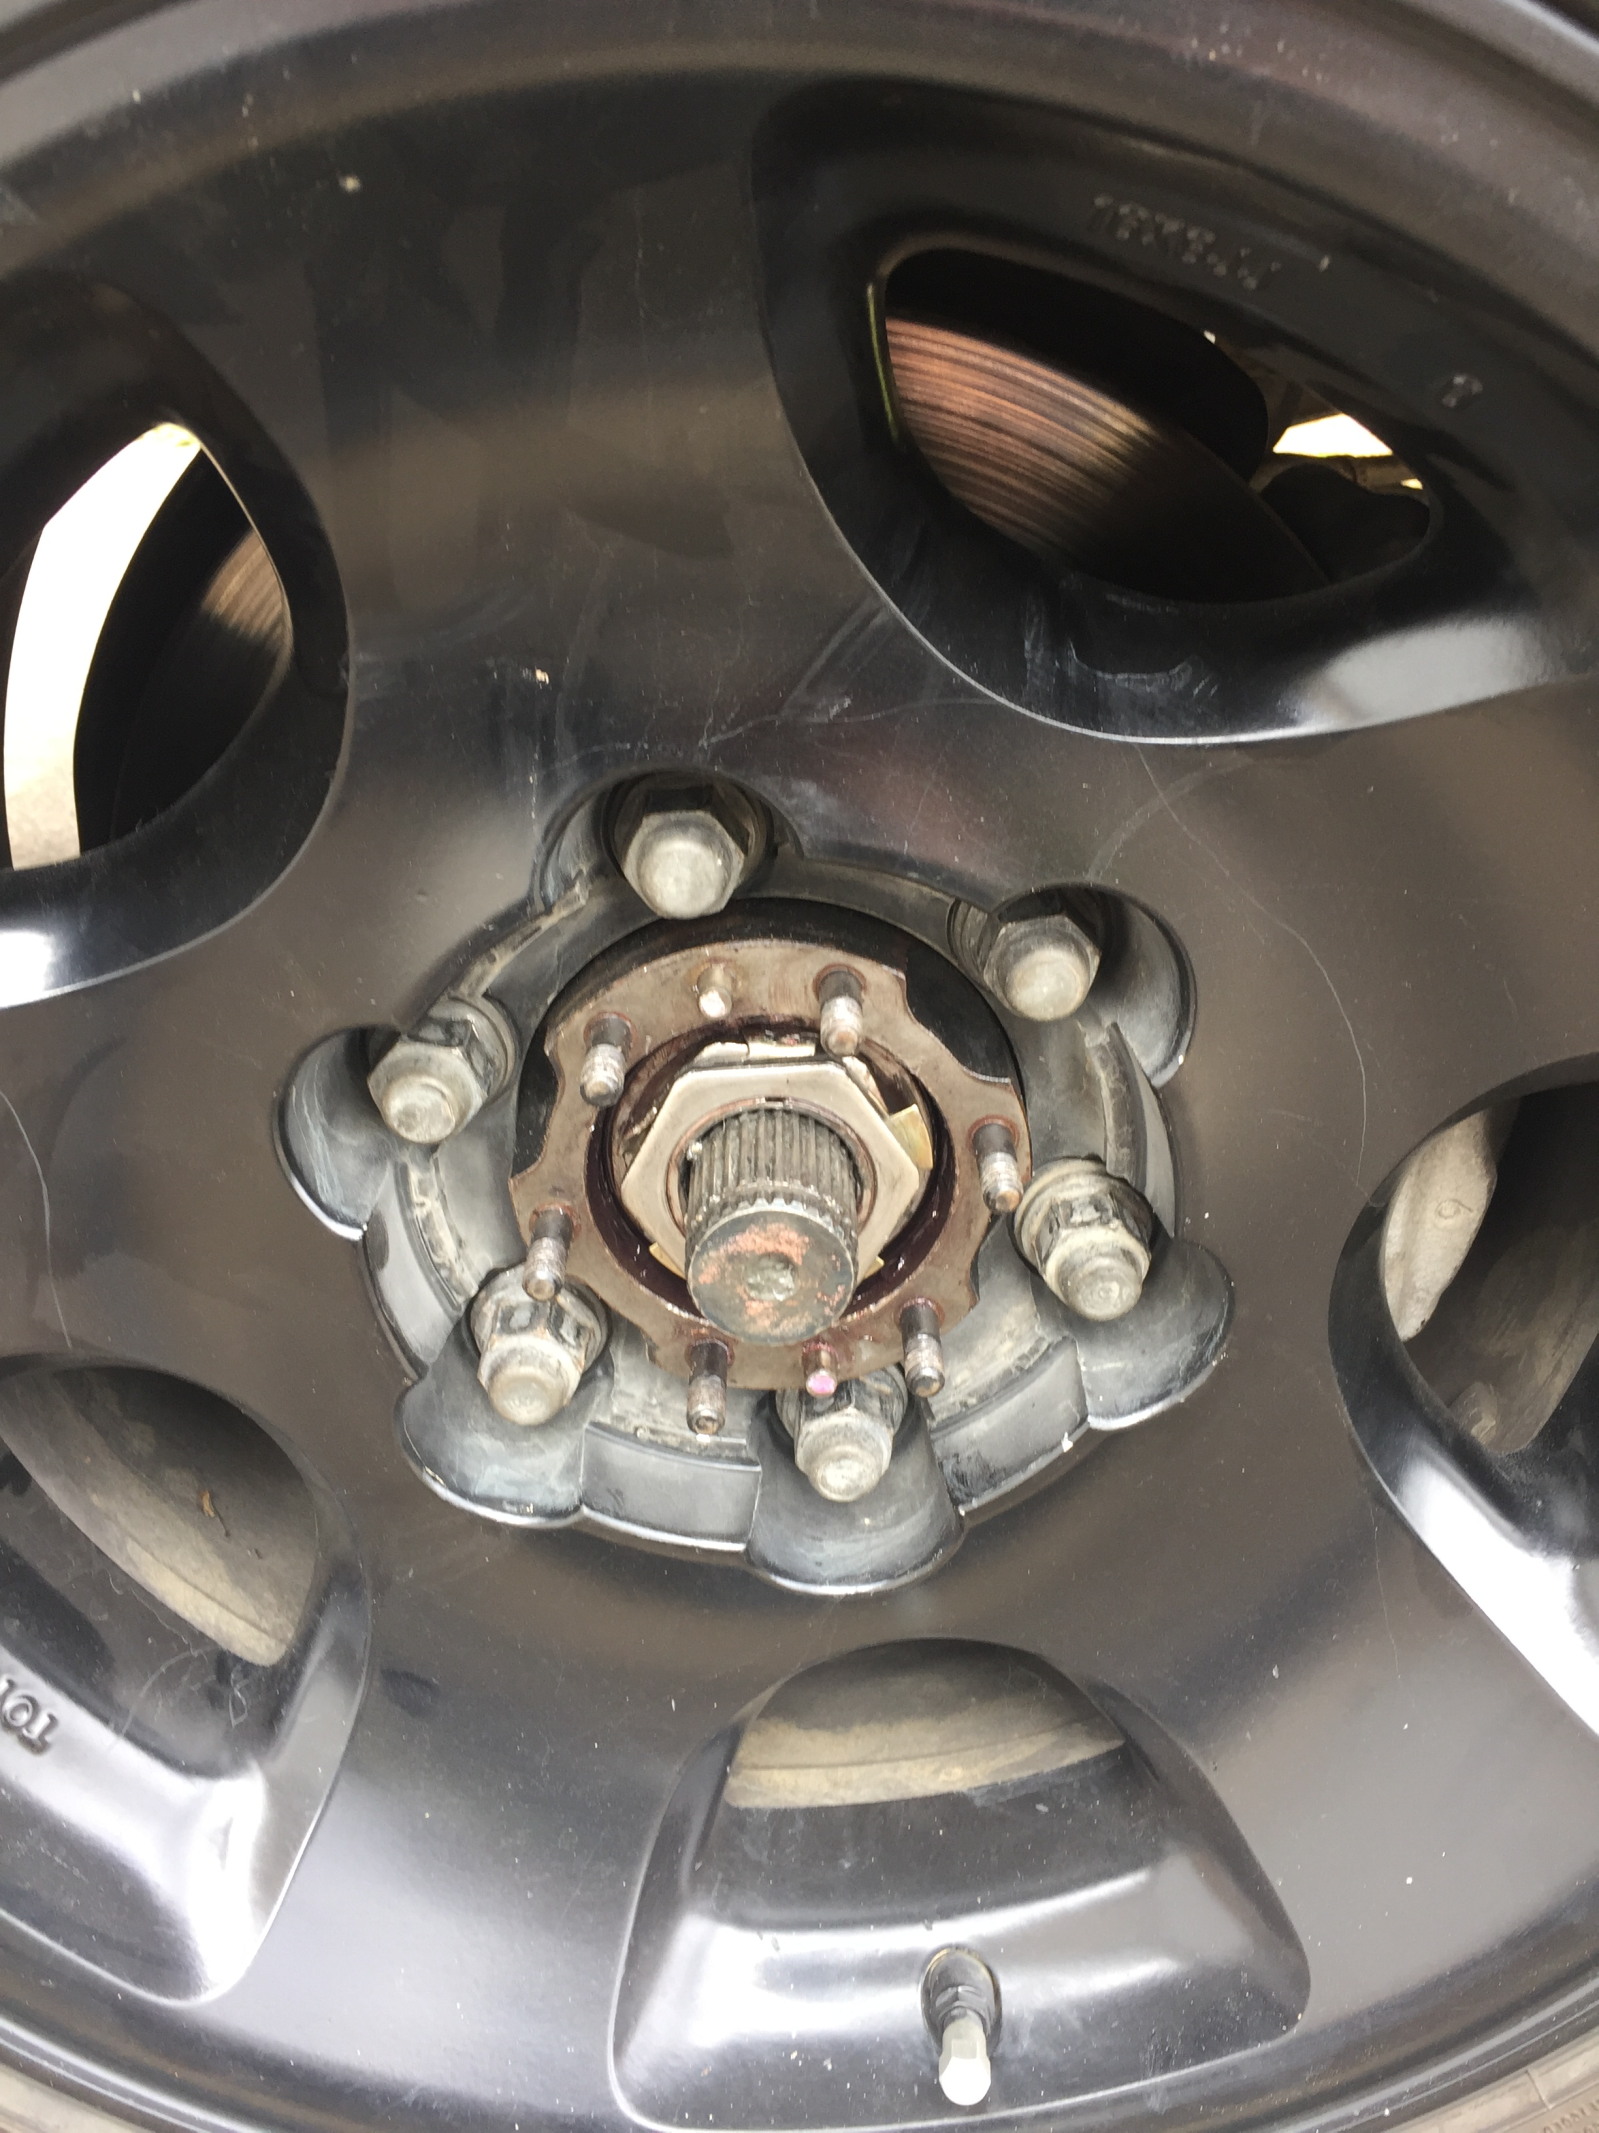
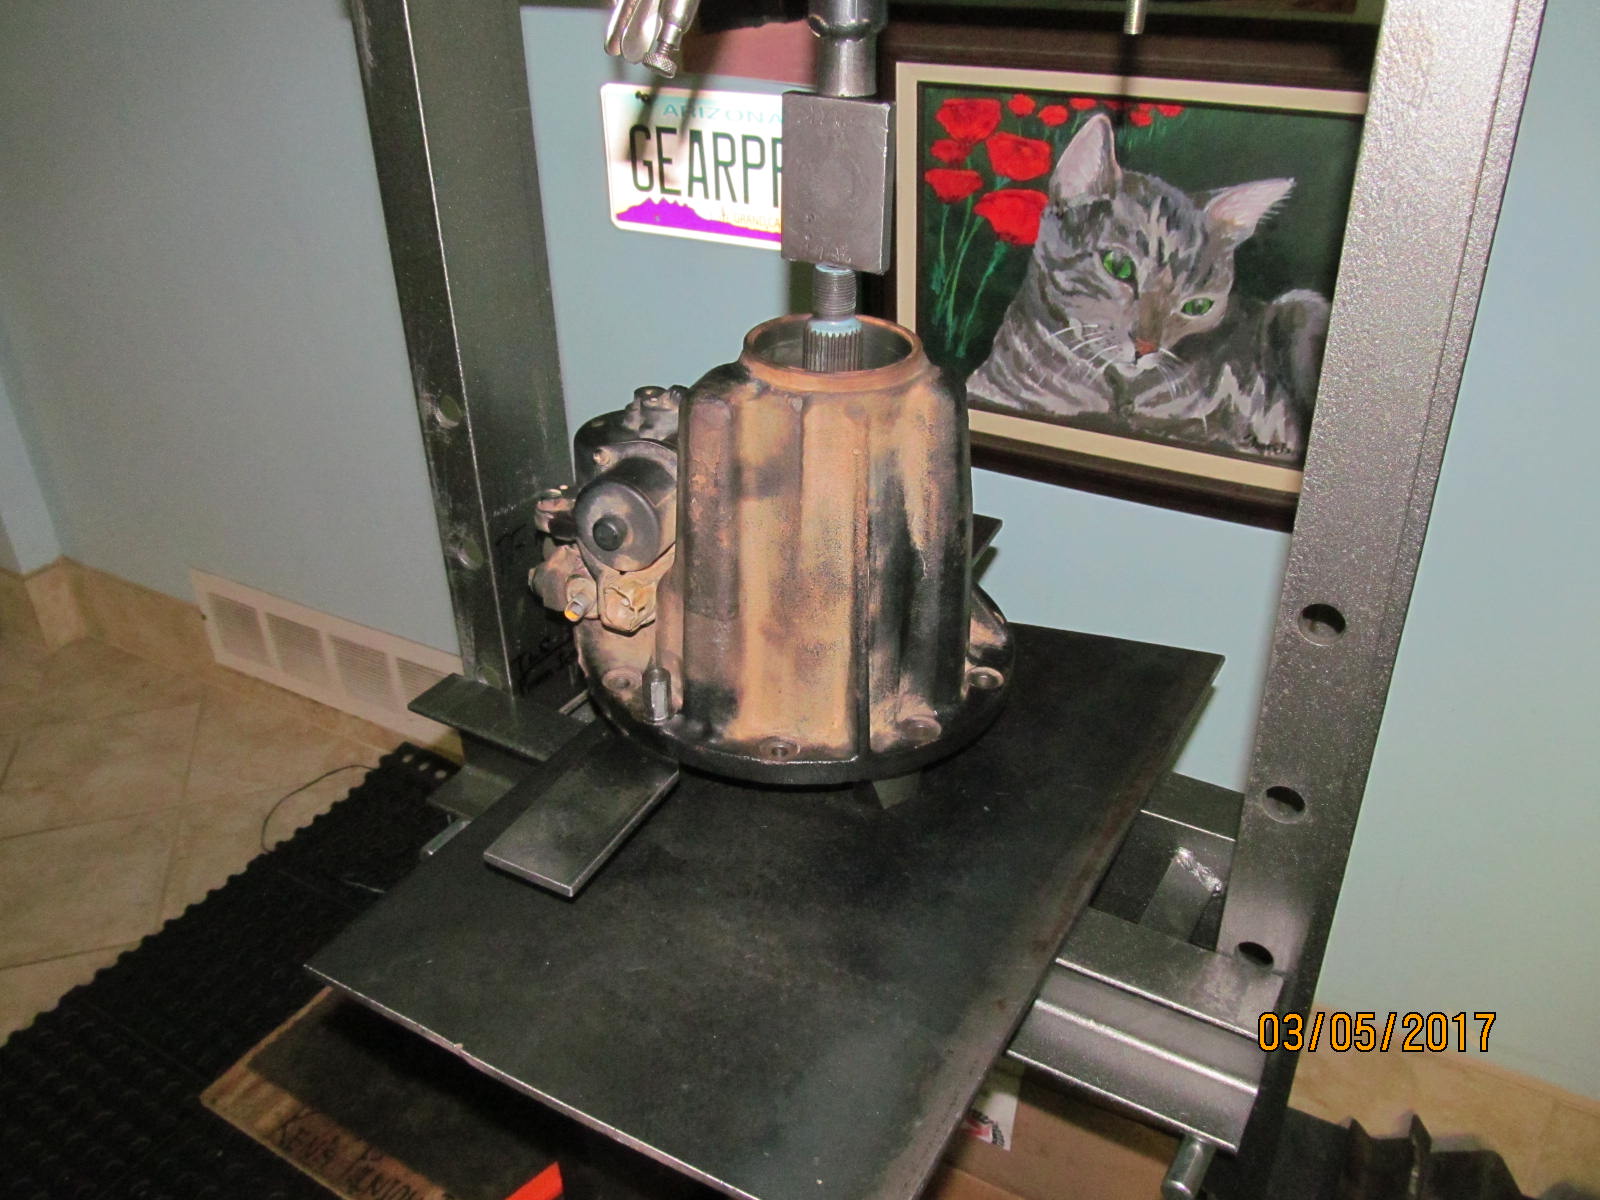
Can't drive a full time 4WD Landcruiser on the road with a busted front ring/pinion....At a loss of what to do other than call a tow truck which
would have been expensive, Humberto sought help from the IH8MUD community so they told him of a trick to remove
the solid flanges(hubs) and the front driveshaft and that allows the landcruiser to go home in rear 2WD safely with no crunching noises.
|
|
|
|
|
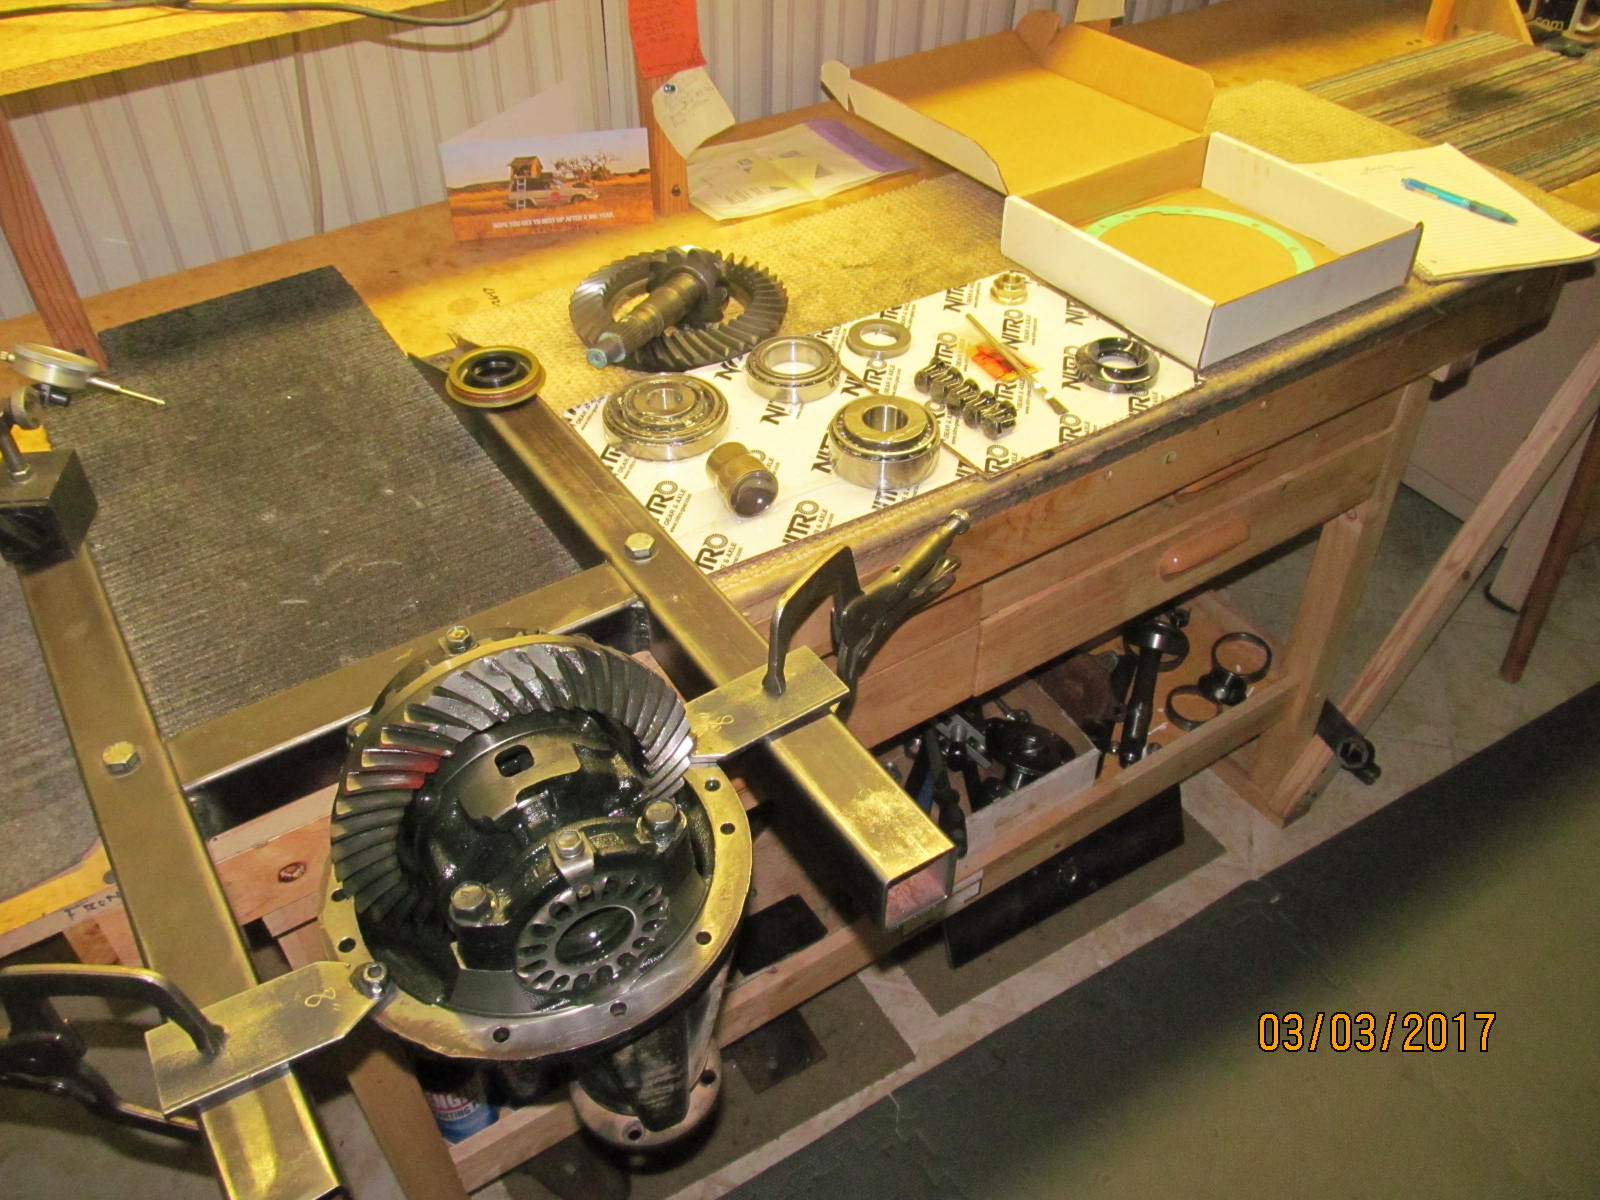
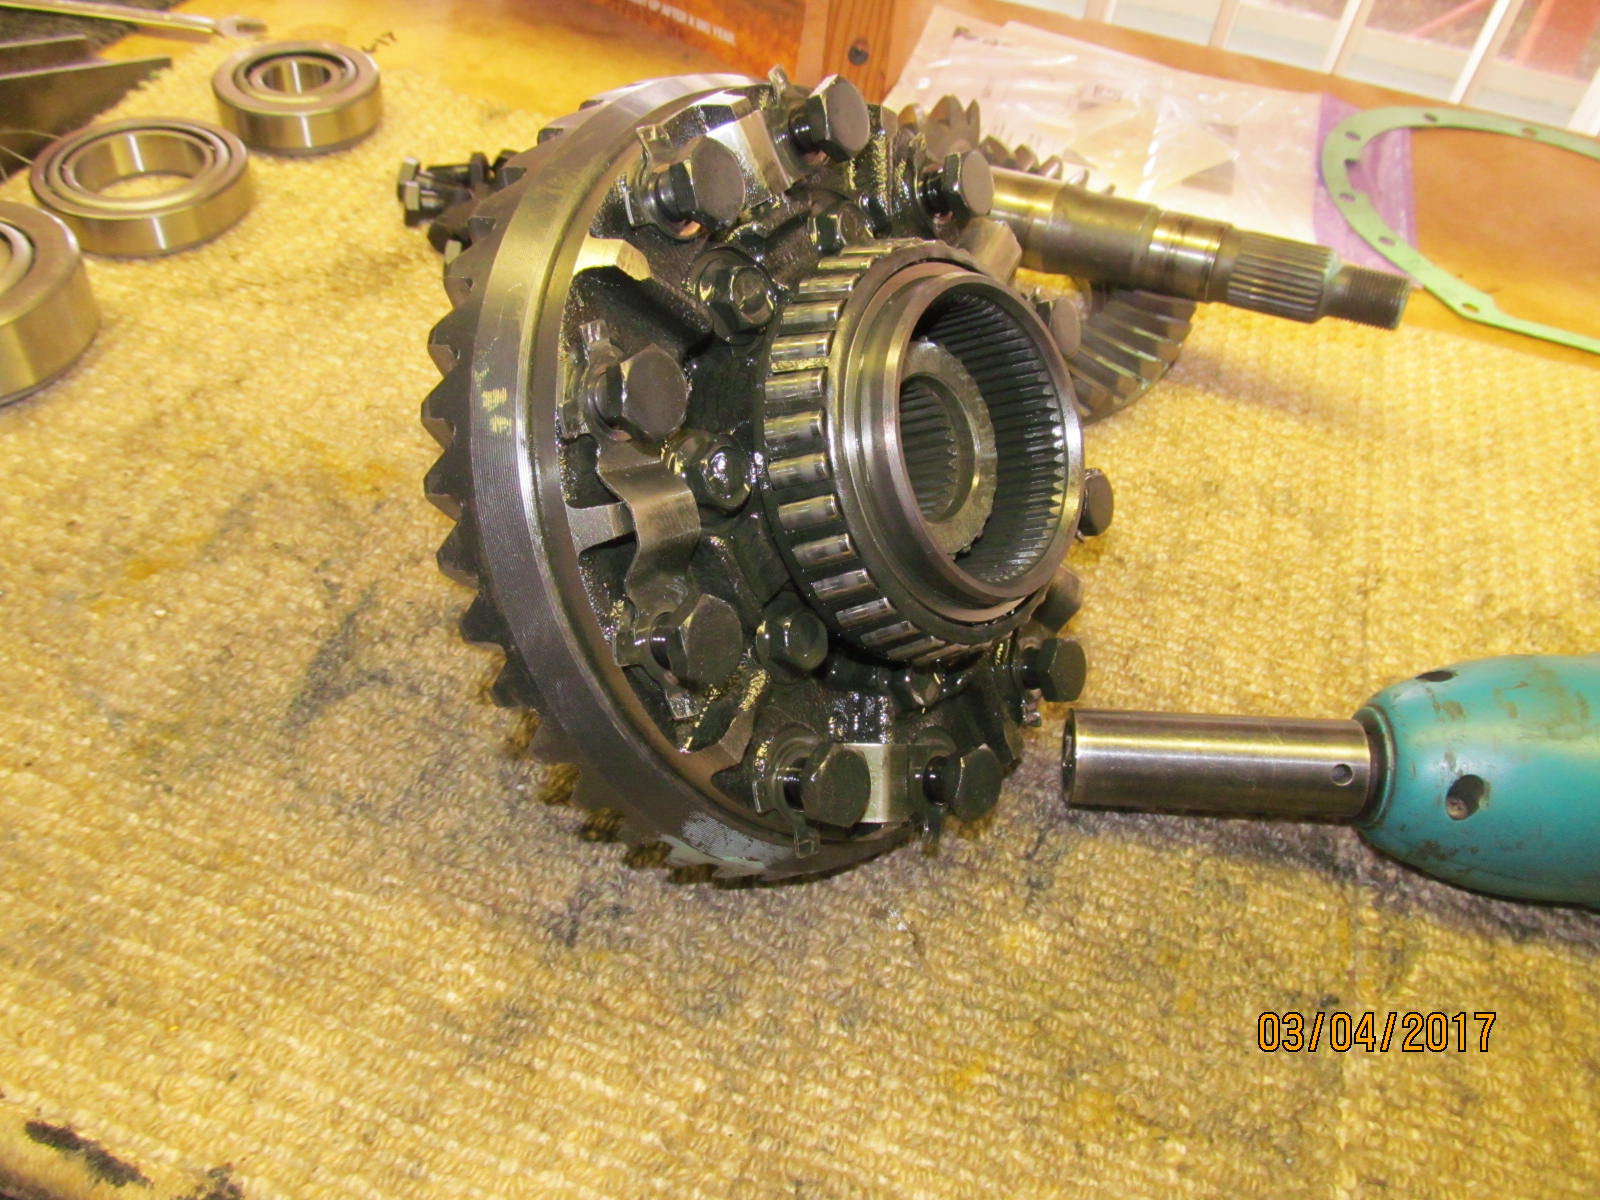
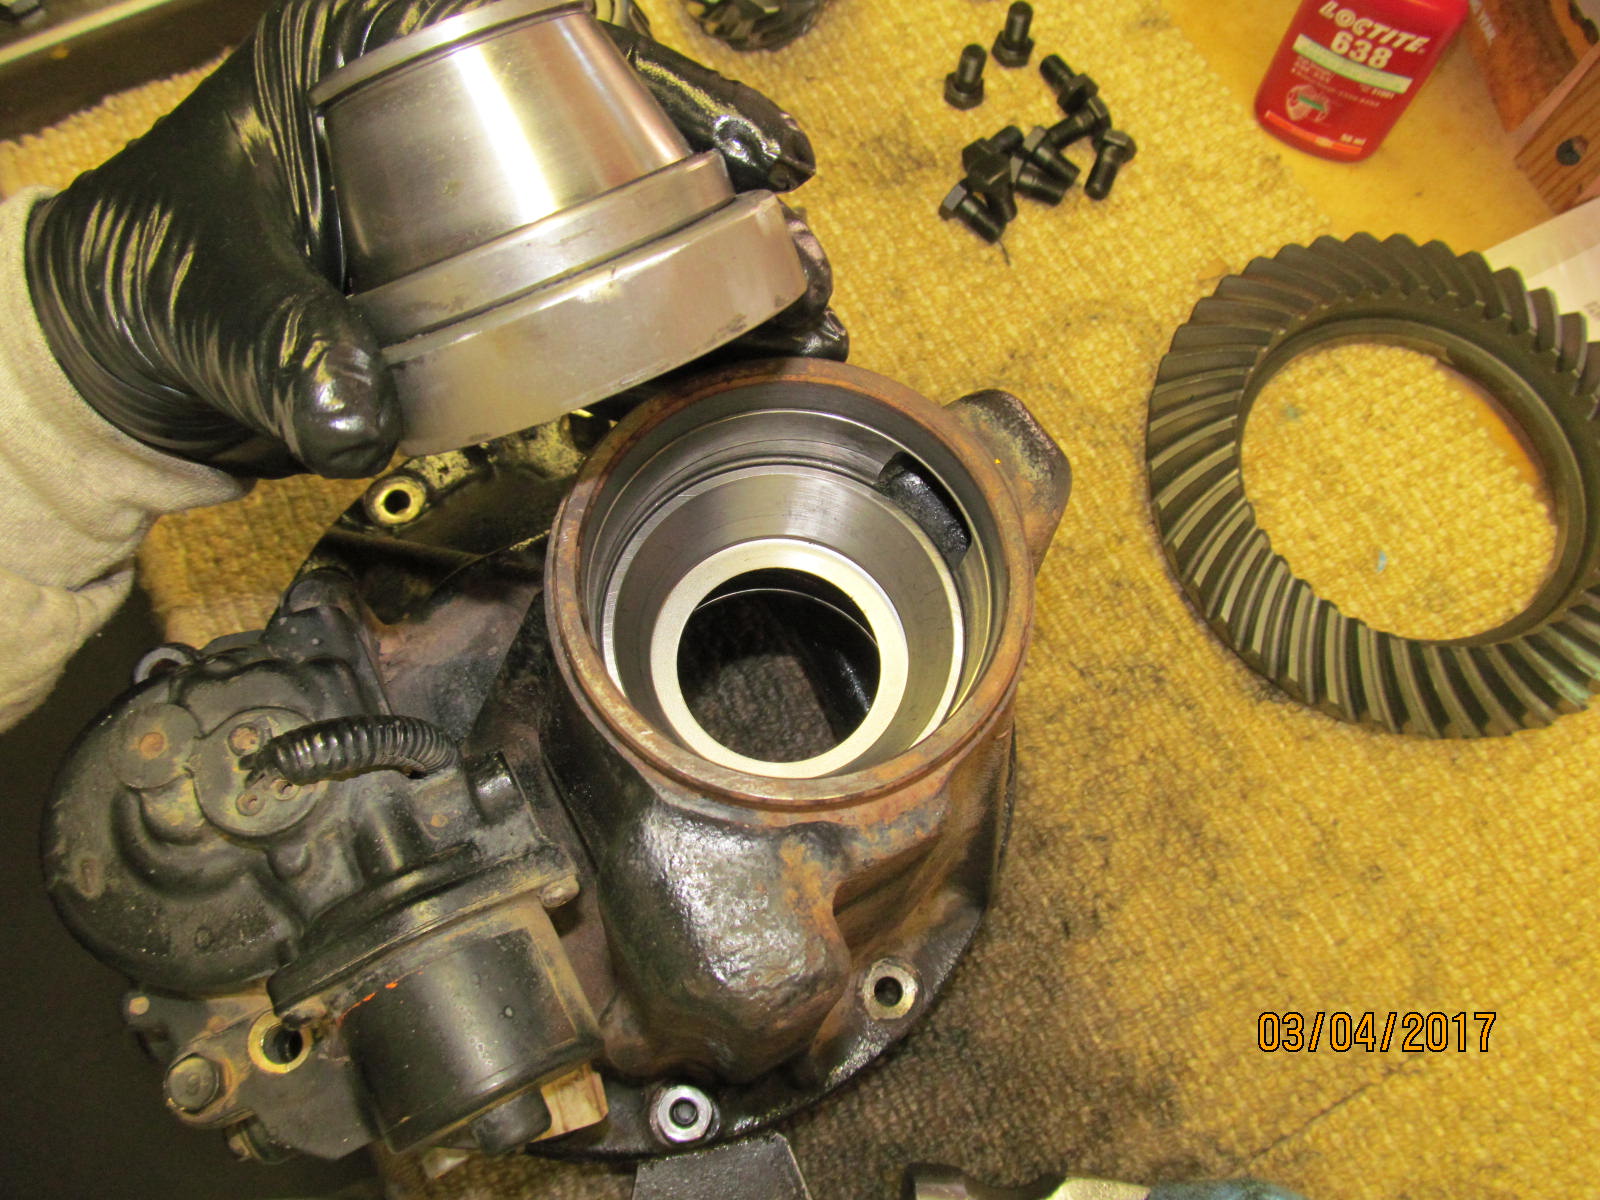
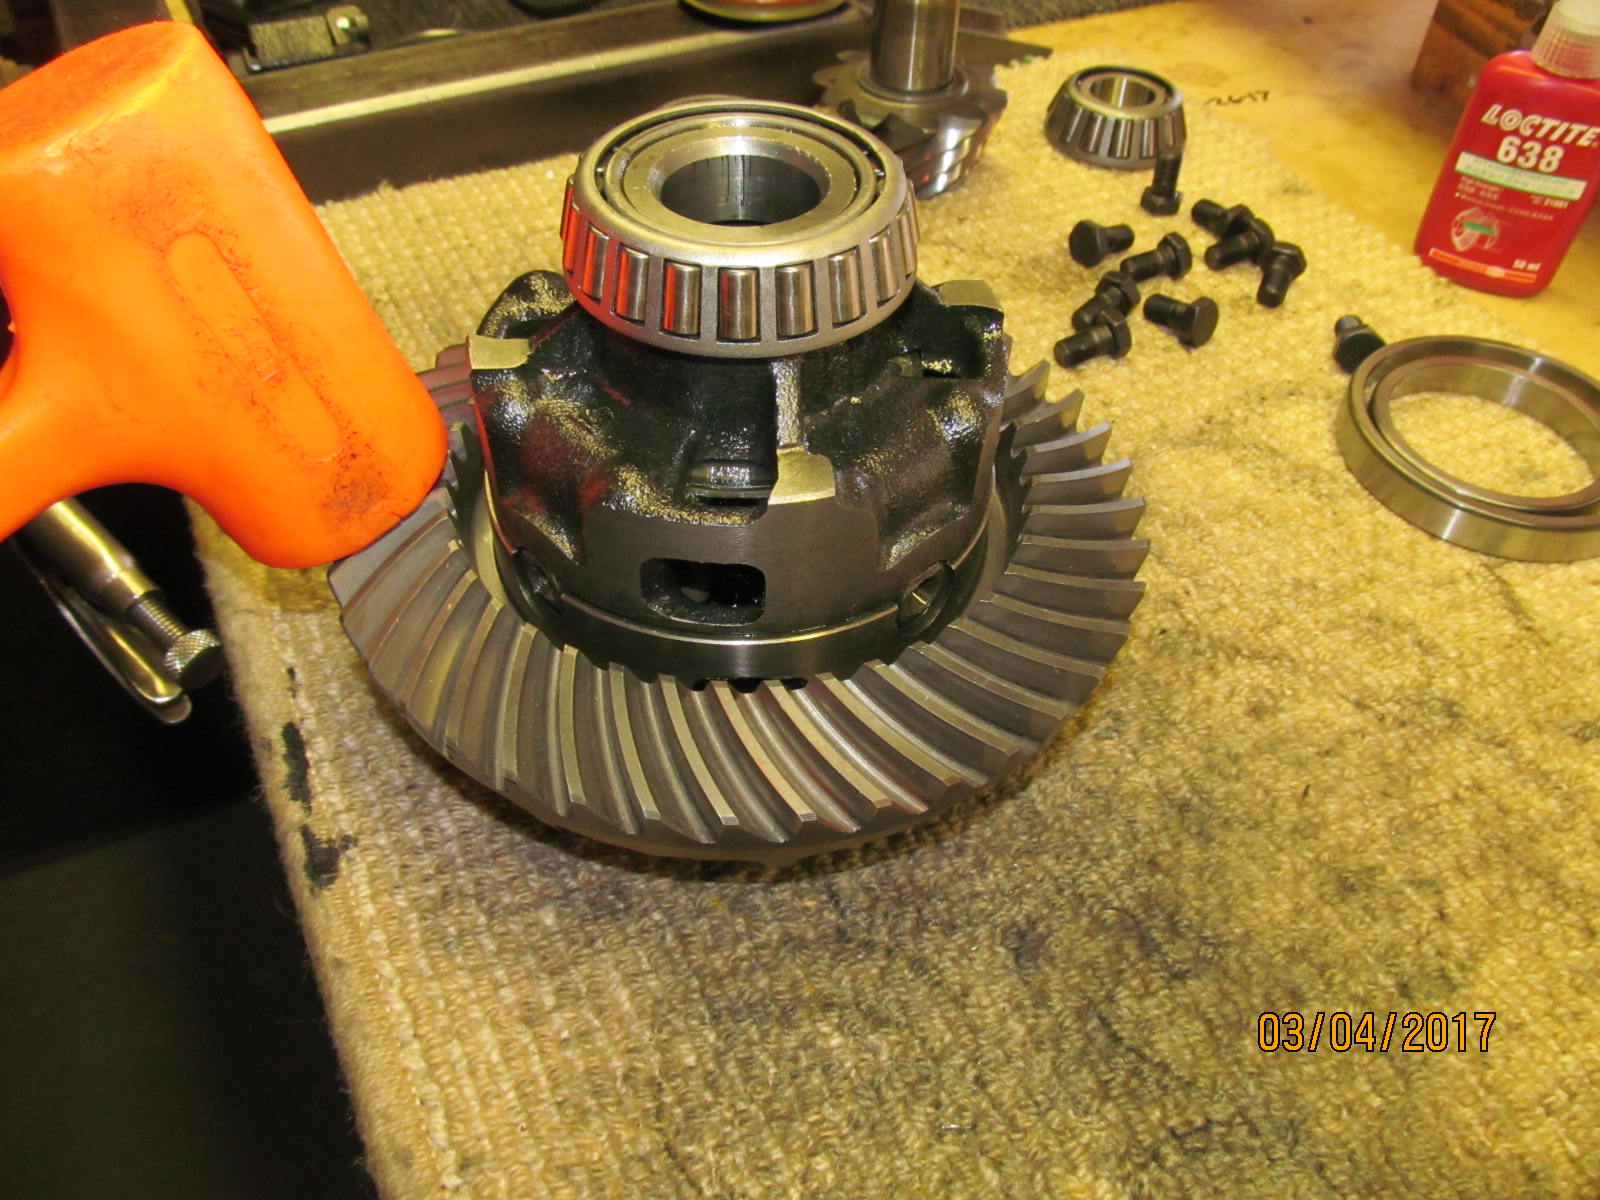
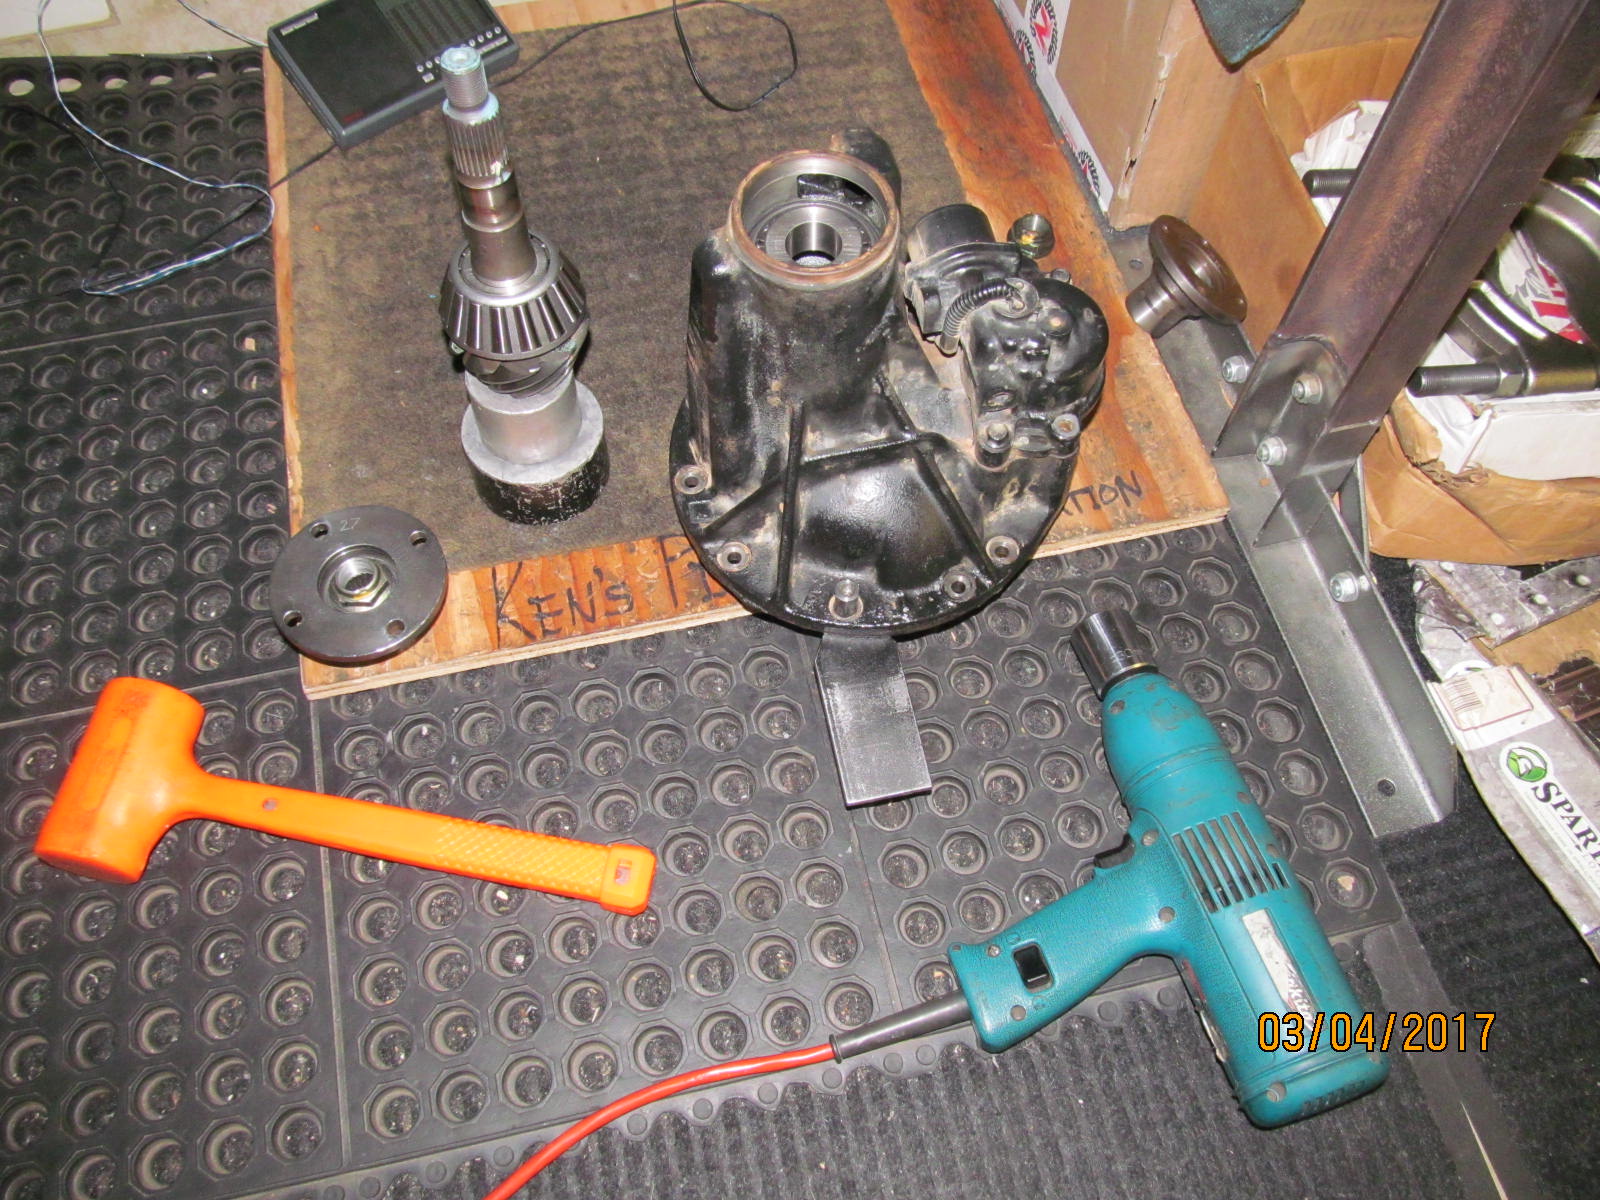
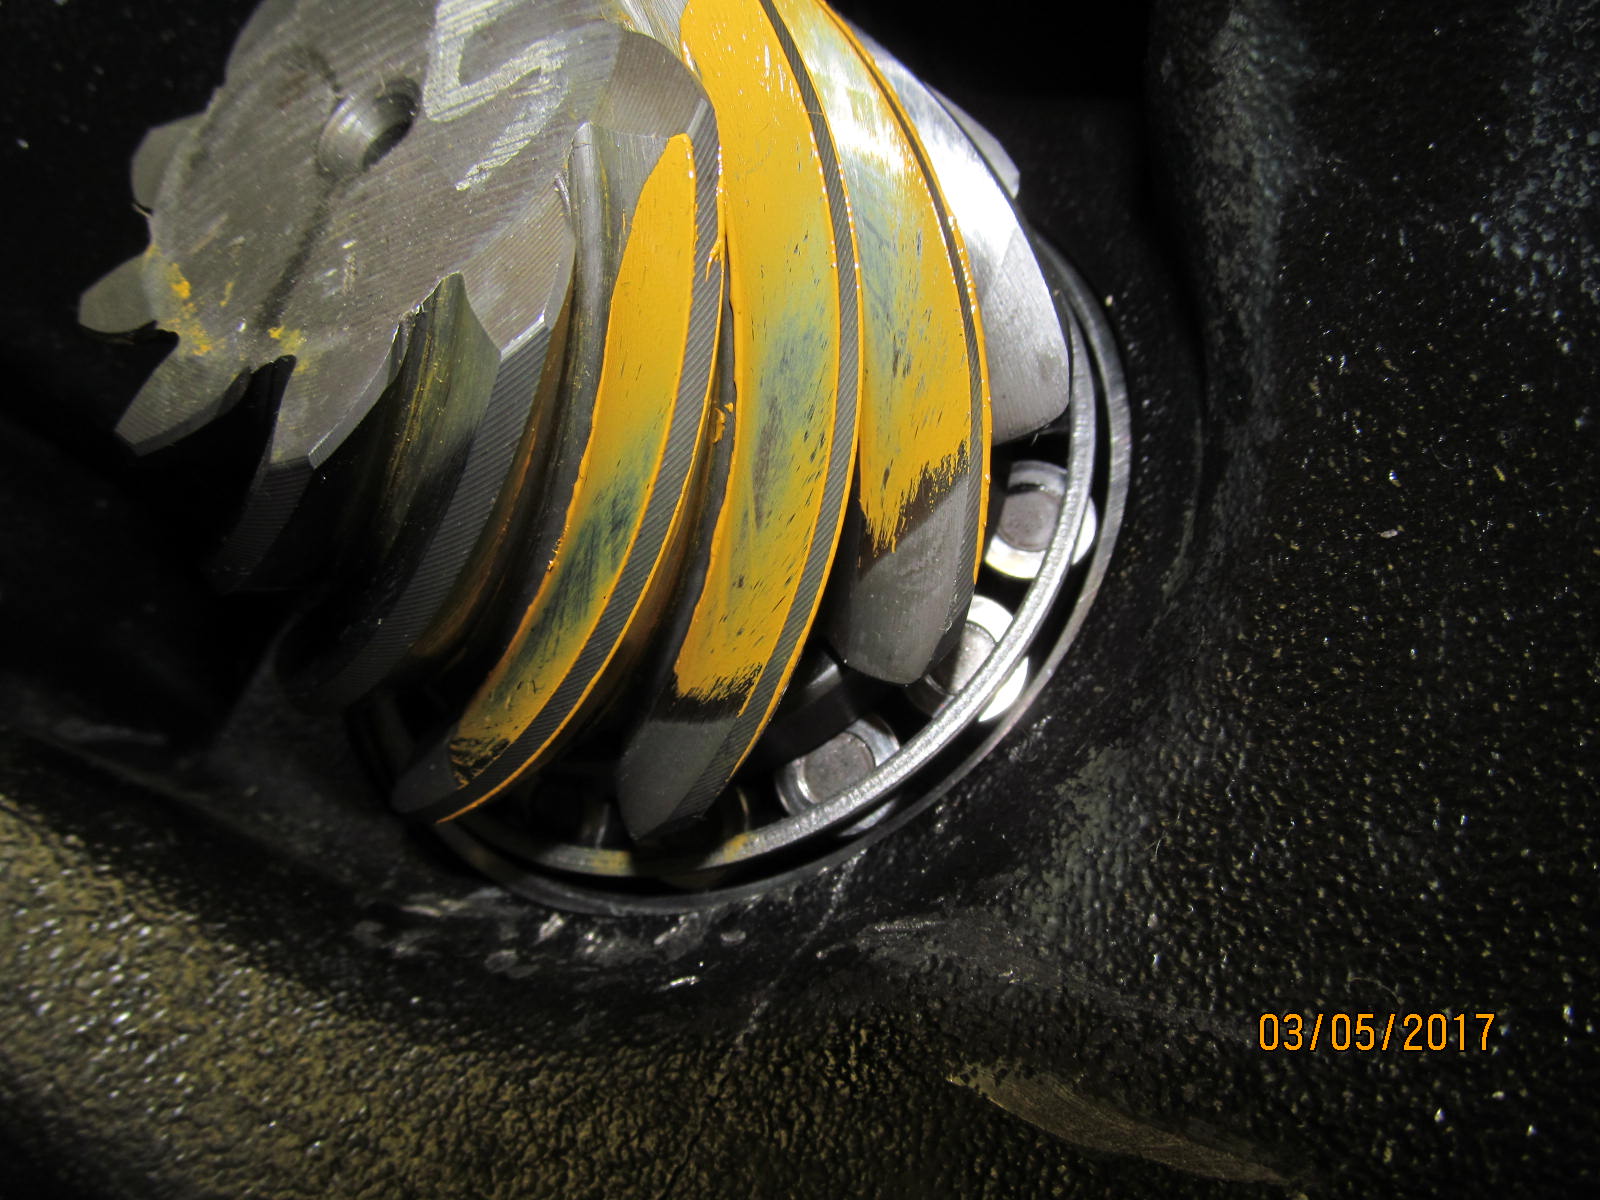
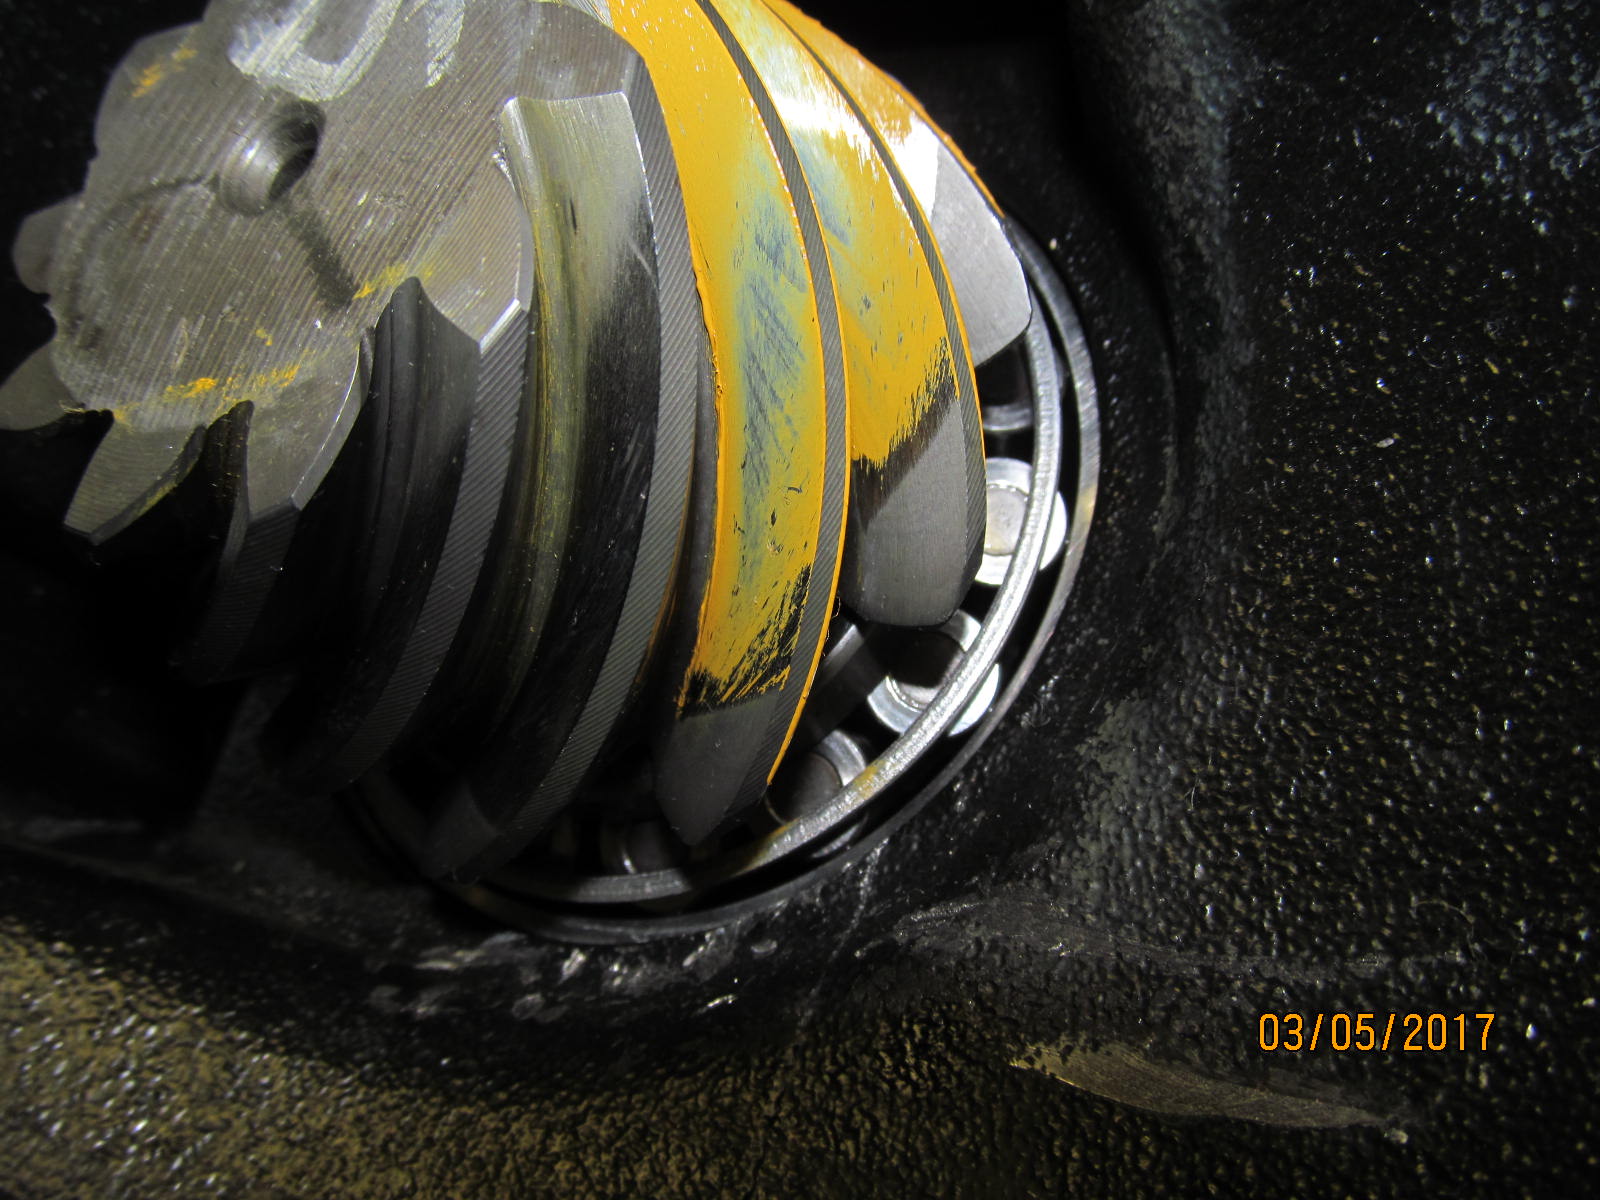
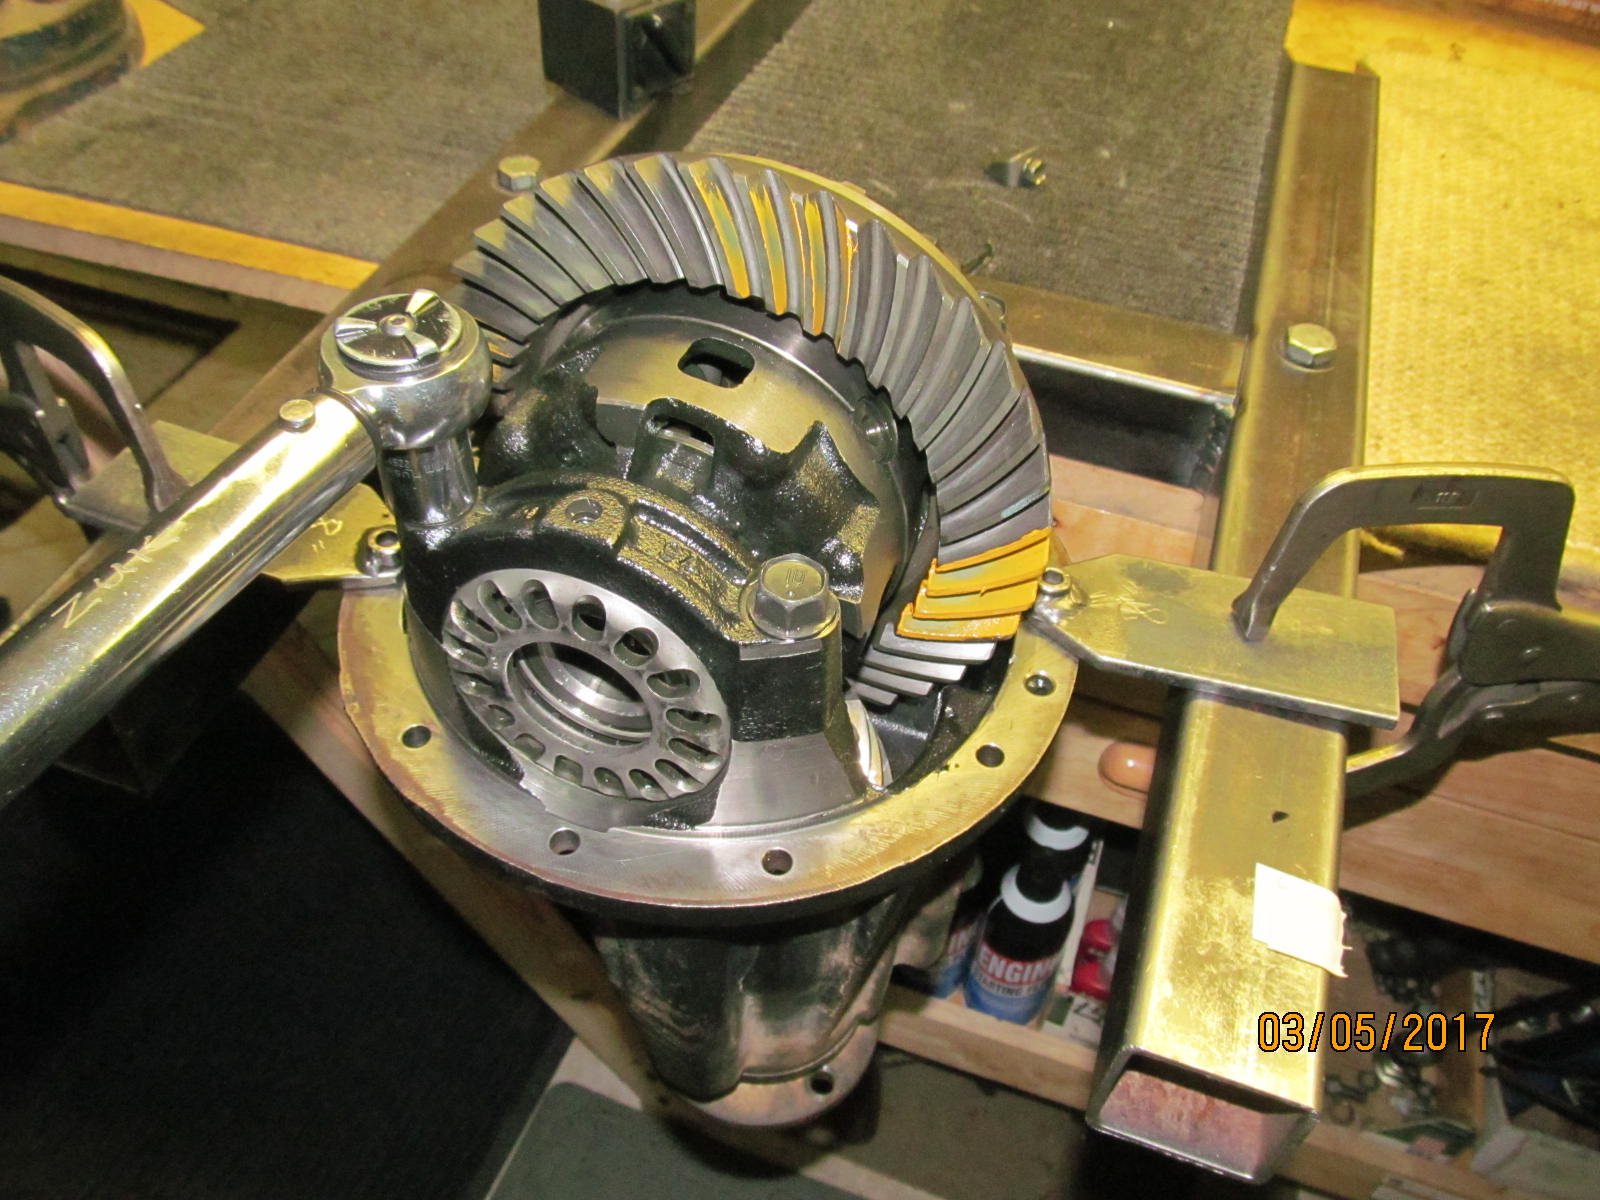
Took out 6 or 7 teeth in a row. Shown in the background, is the Nitro bearing kit, the 410 take-offs, and the Marlin eco seal.
|
|
|
|
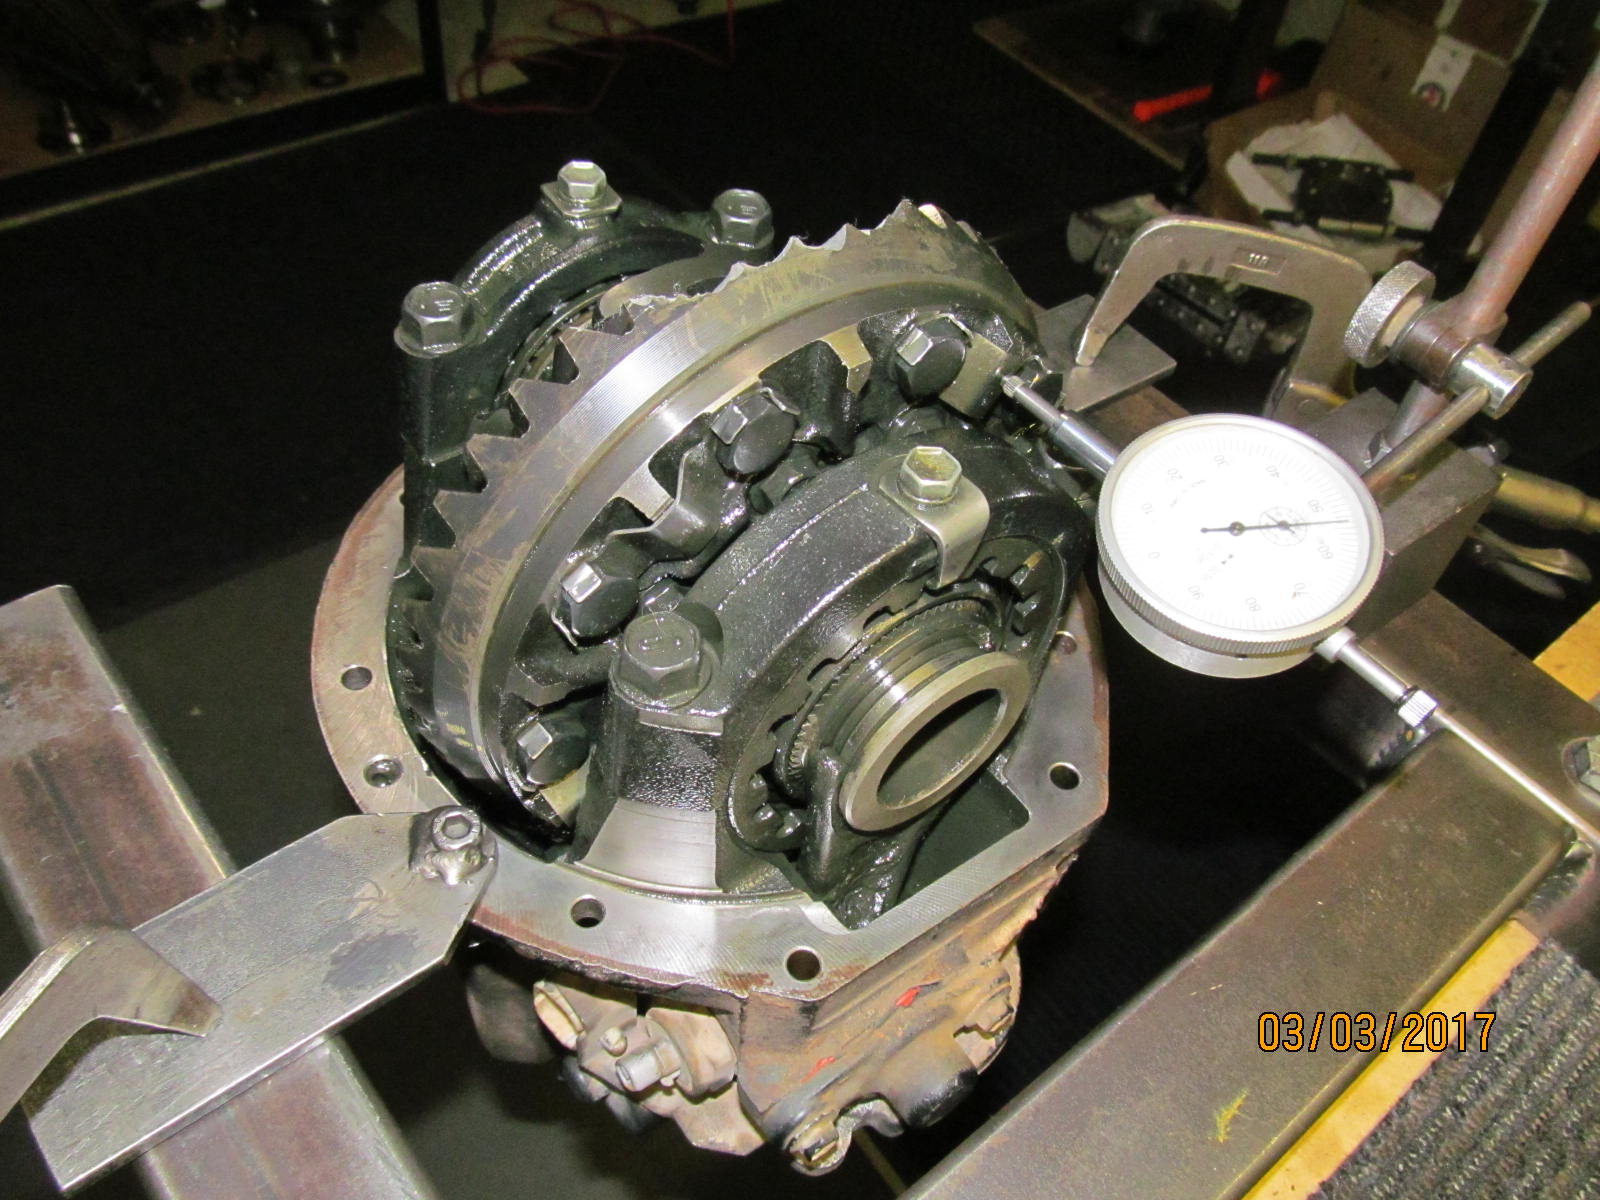
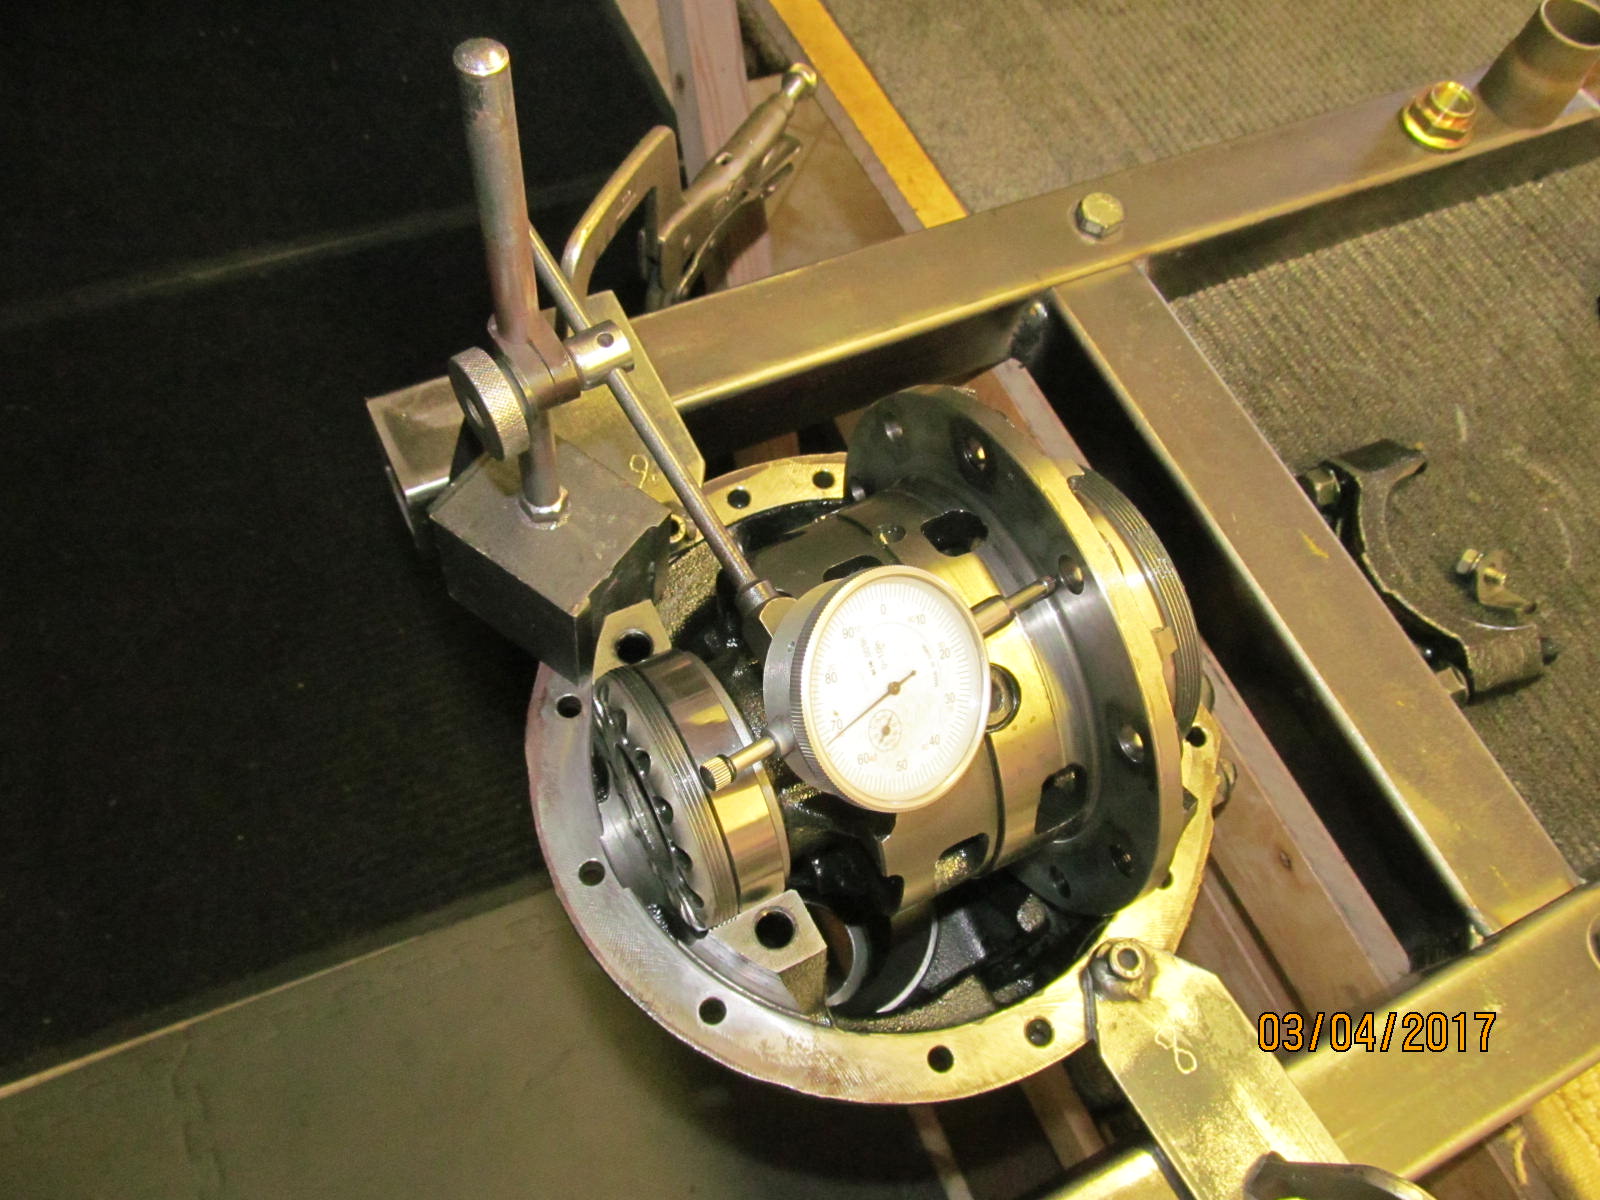
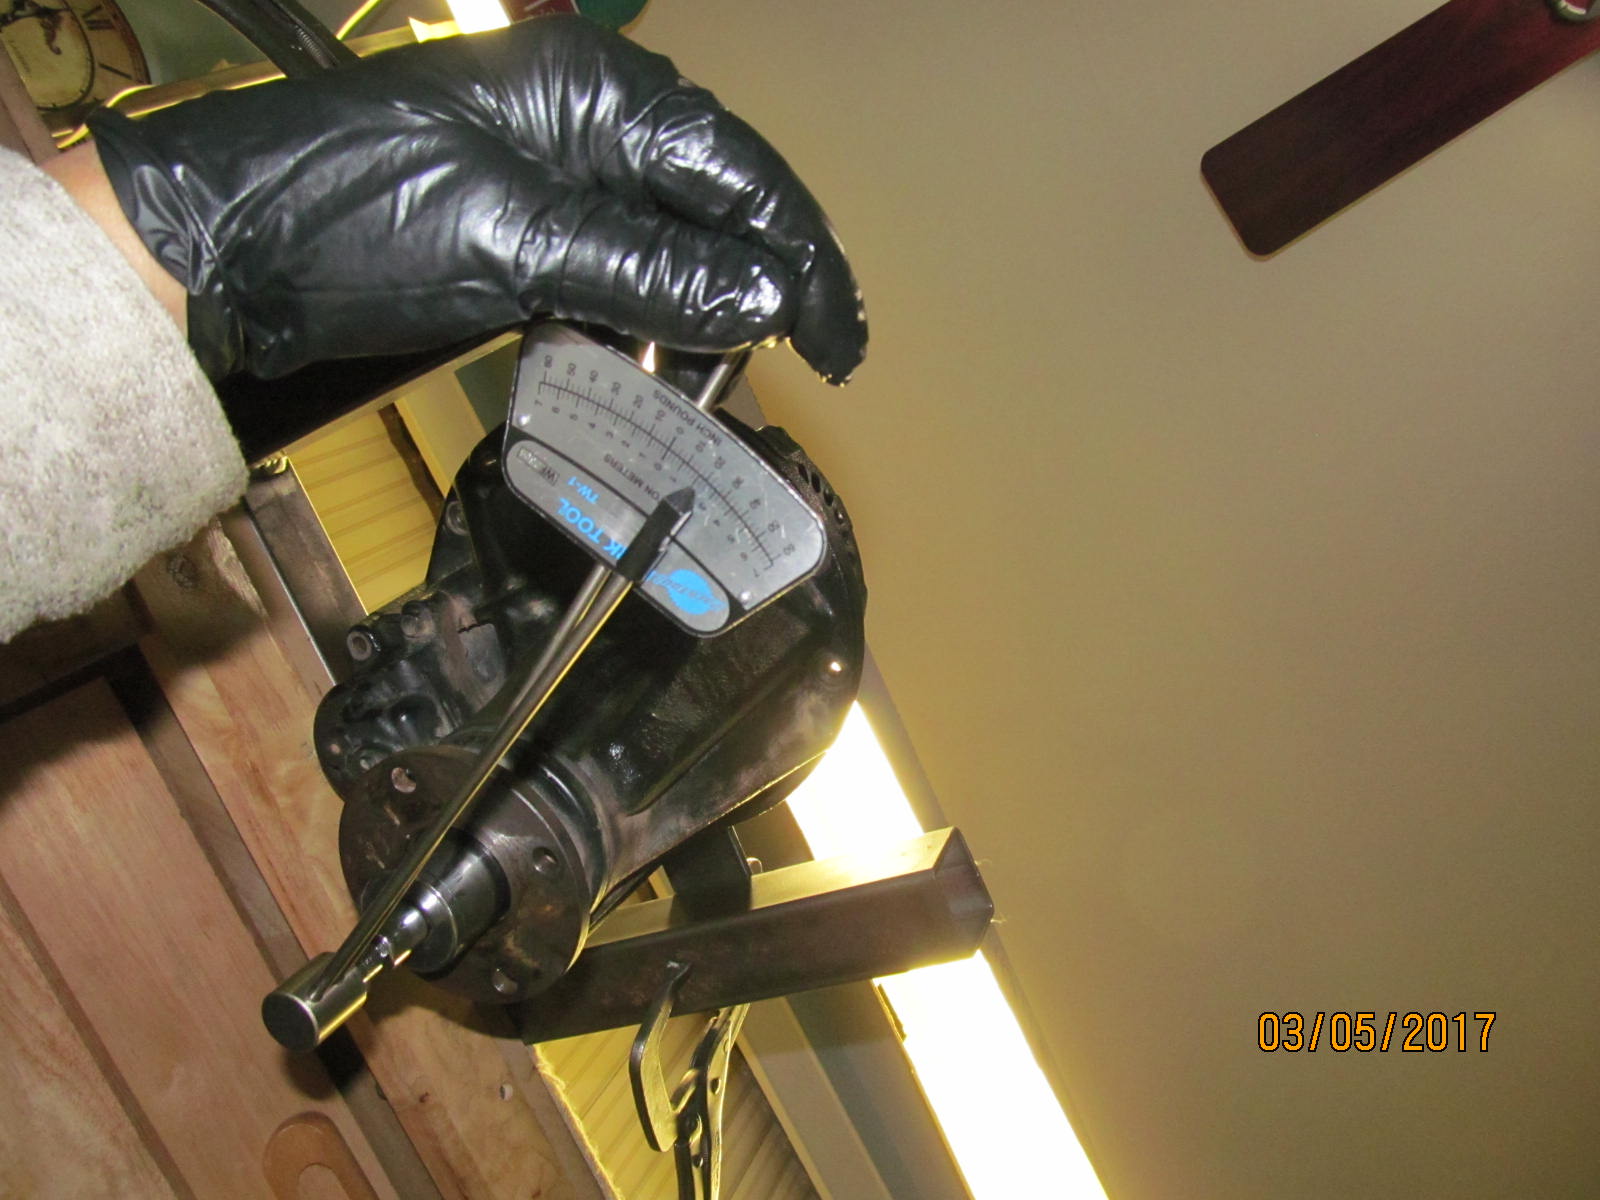
This is interesting...measuring about .005" of play in the axial direction which is almost unheard of. No wonder the ring gear
busted. Nothing could survive under any kind of load with that kind of "wobble". Probably a good thing that Humberto
busted the ring gear where he did instead of someplace far out on the trail.
|
|
|
|
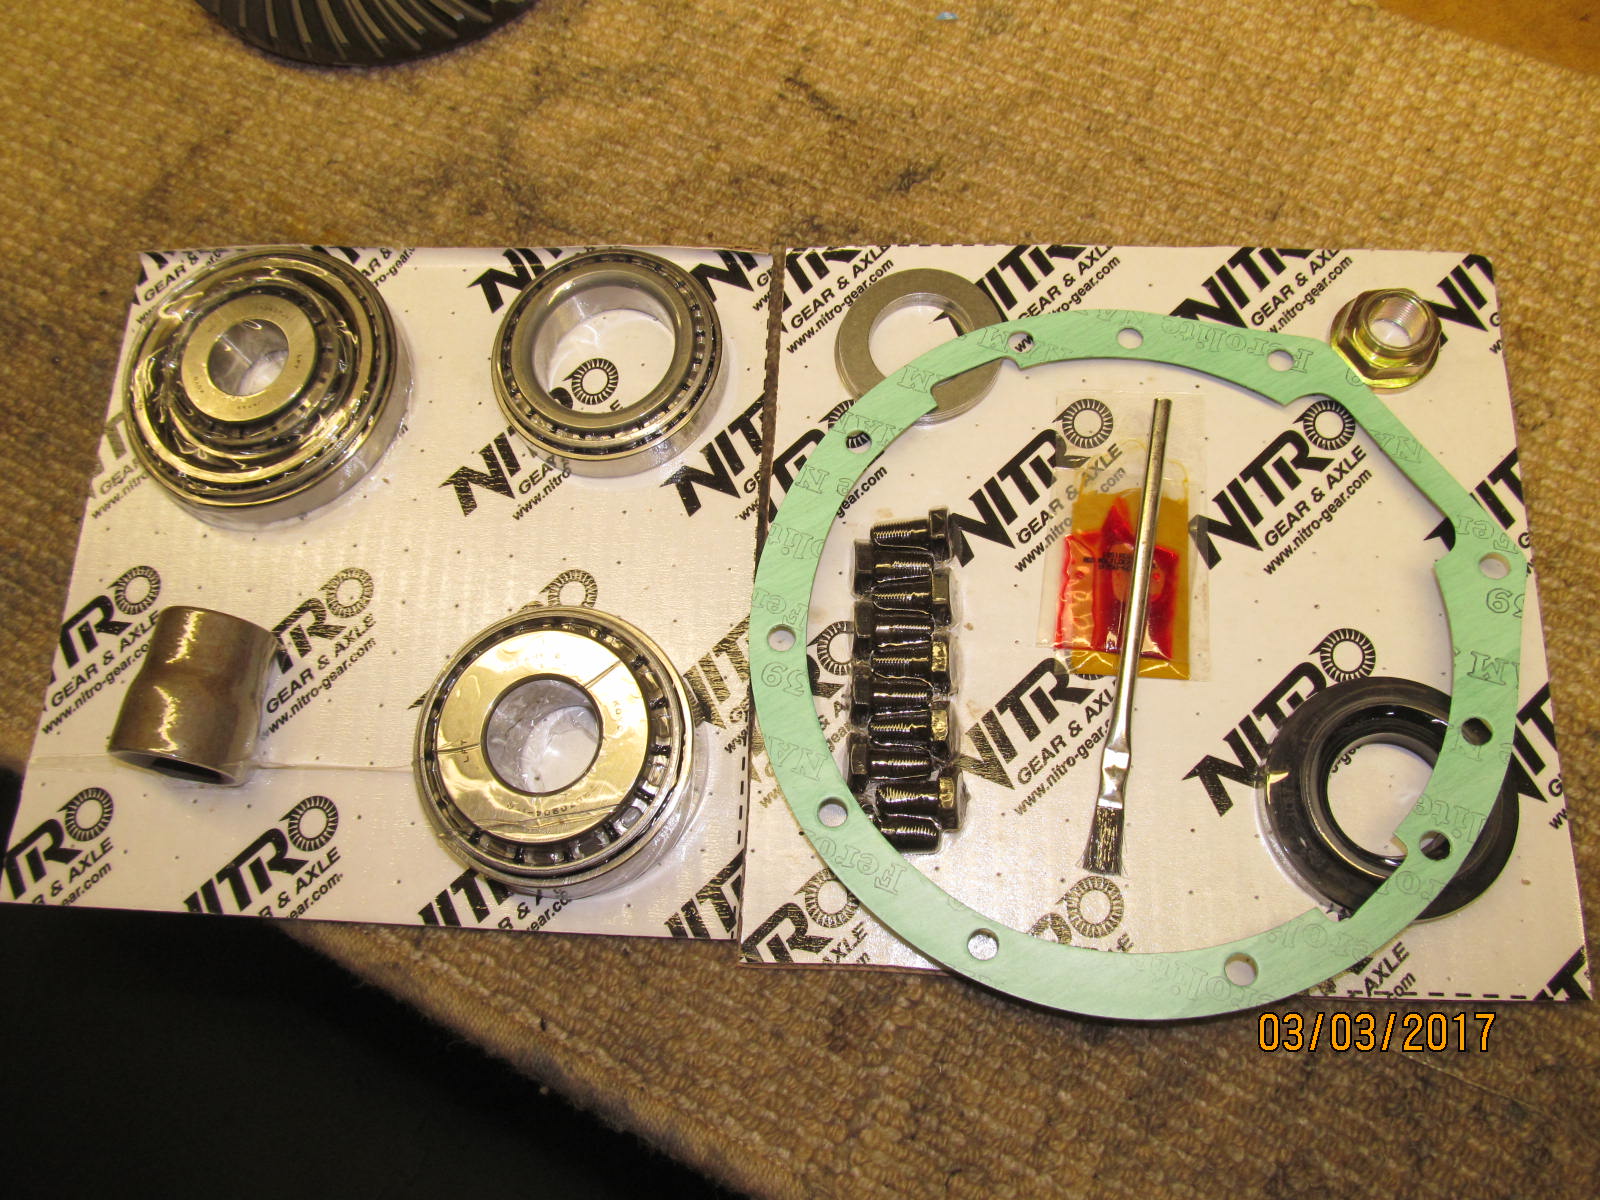
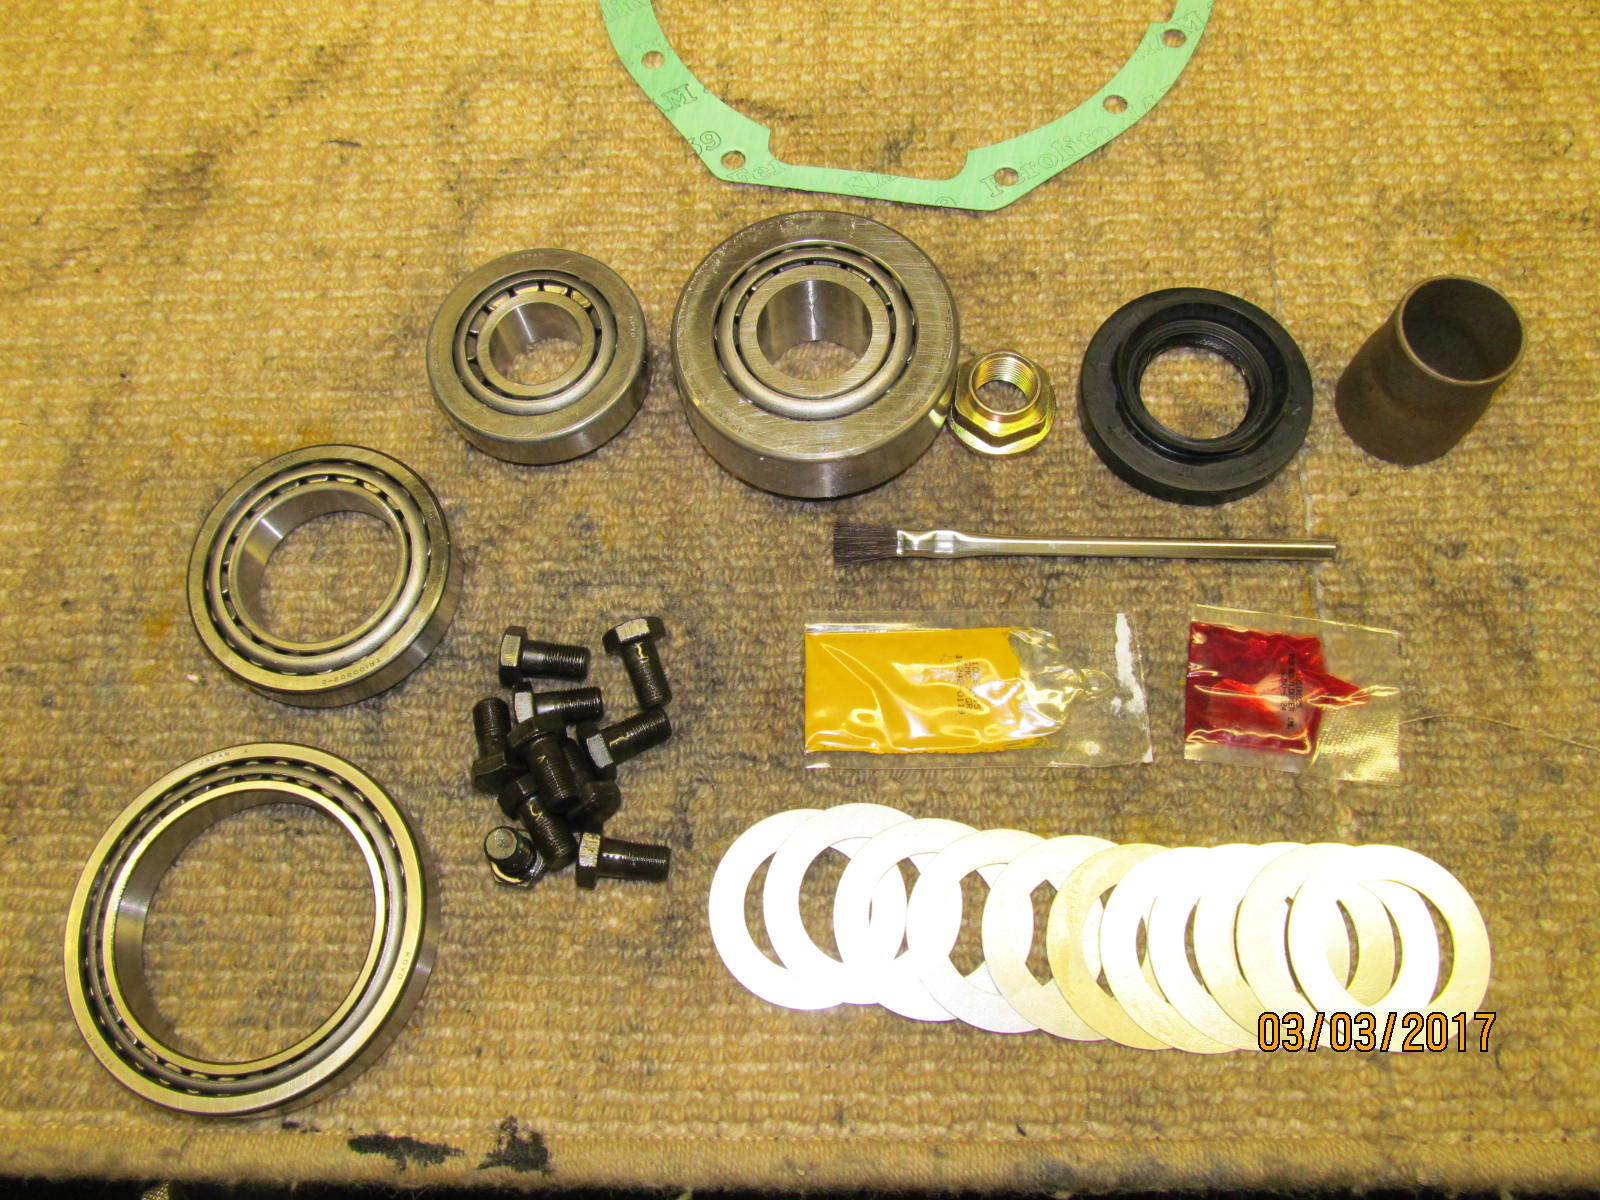
The Nitro kits have good Koyo bearings. The pinion nut is the preferred meaty flange style nut. As for the seal....I upgrade
that to a Genuine Toyota part number.... or a Marlin eco seal if it fits.
|
|
|
|
|
.......................
|
|
|
|
|
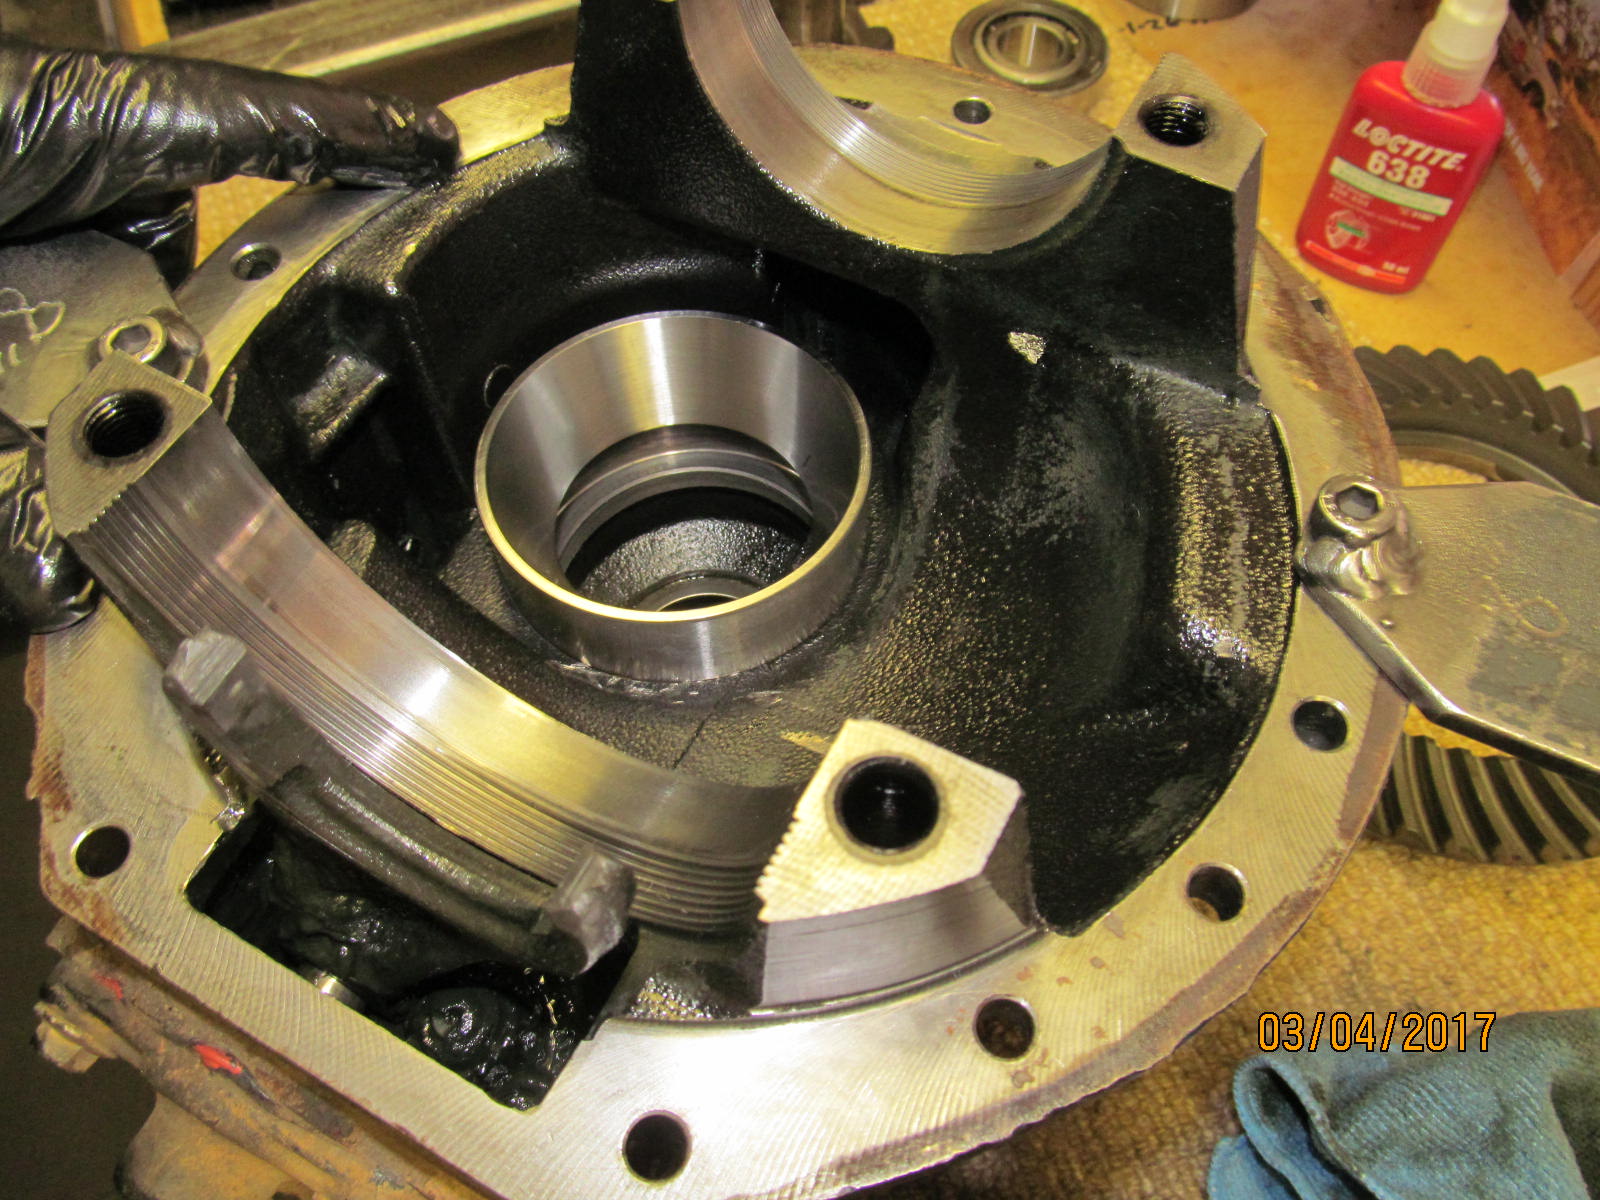
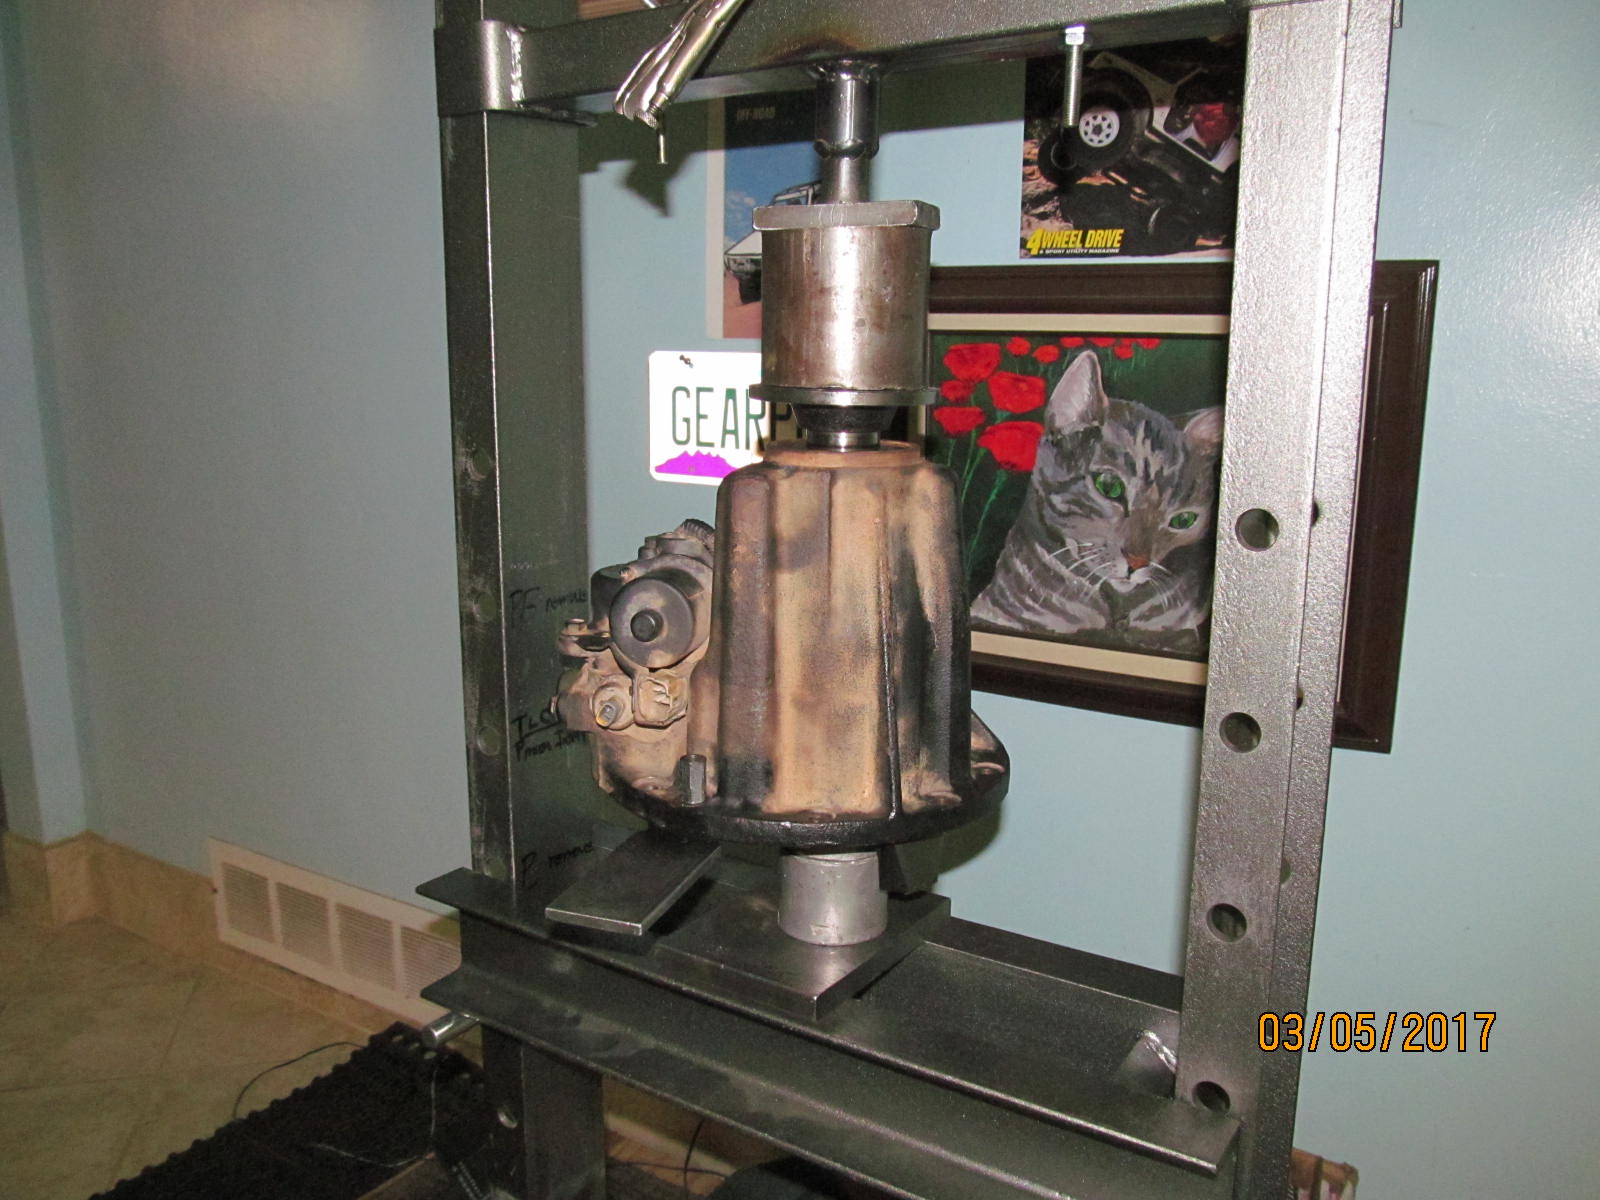
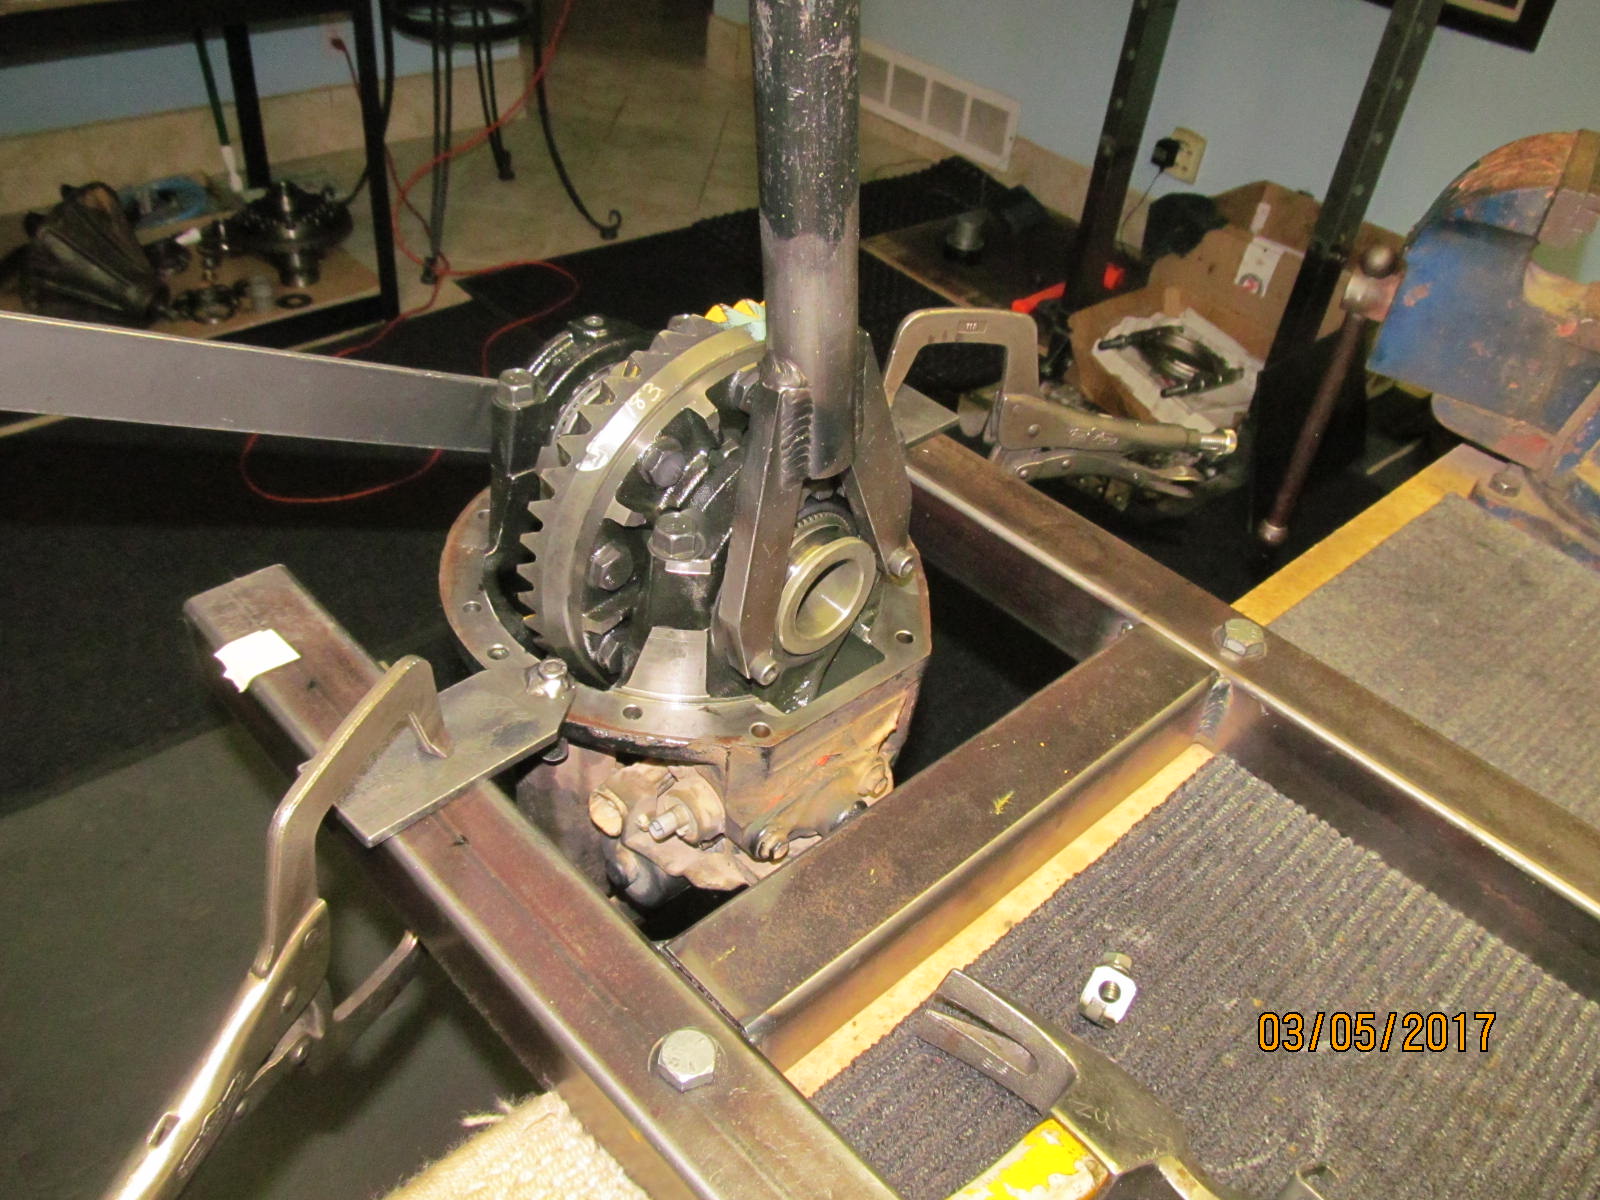
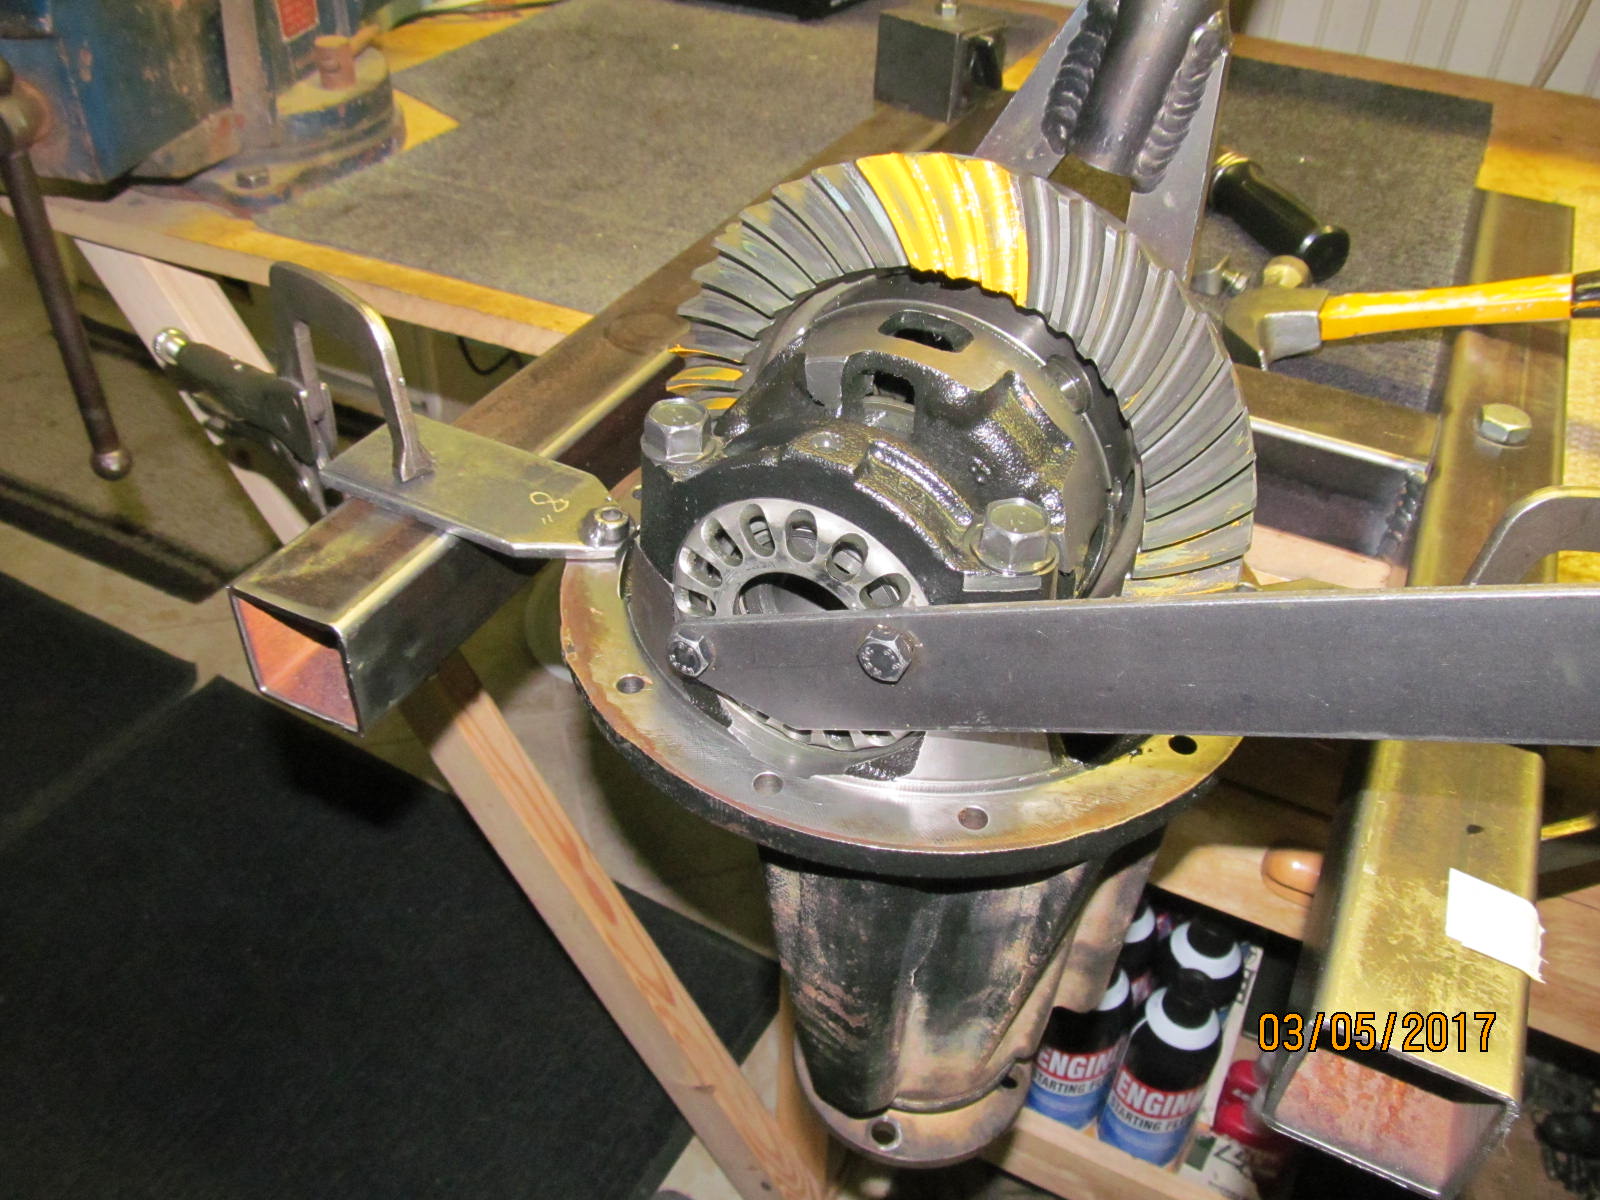
Teardown begins. The diff case is removed from the diff carrier and the ring gear bolts are wizzed off with the impact wrench.
|
|
|
|
|
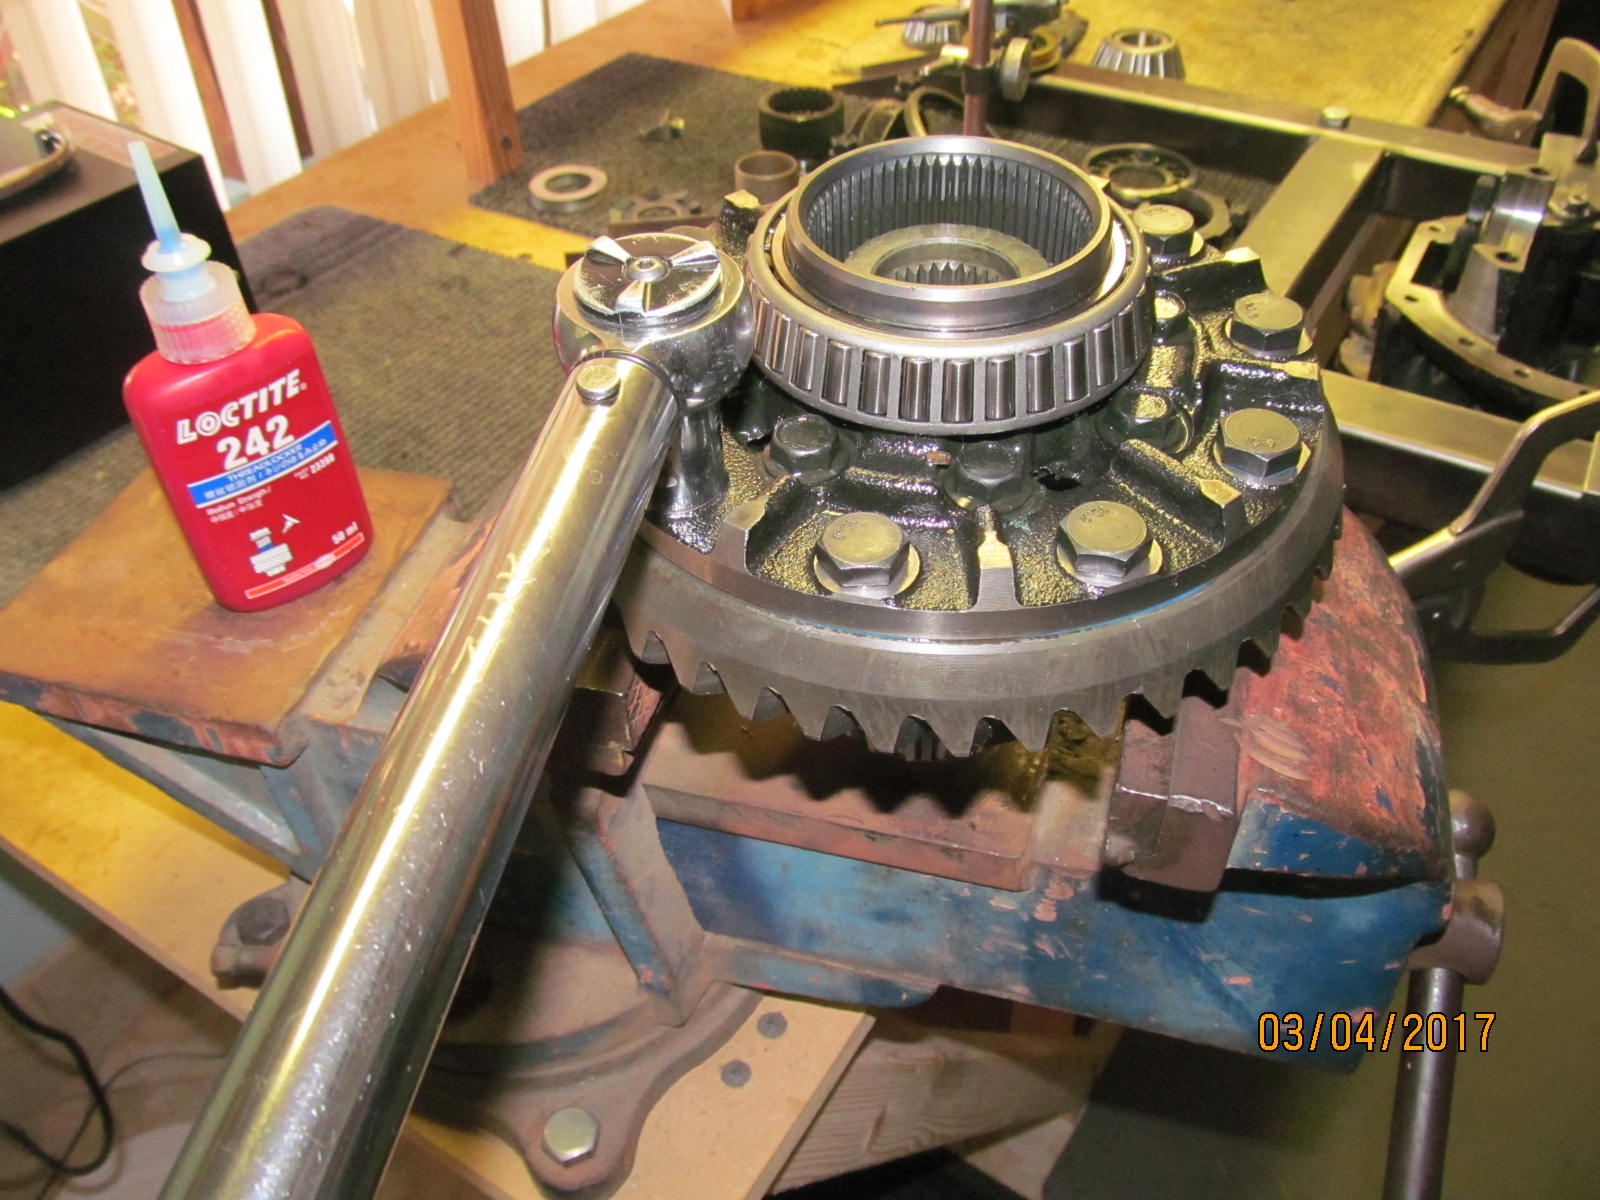
Never hurts to check the 8 case bolts....they were verified all good and tight at about 45 ft/lbs.
|
|
|
|
|
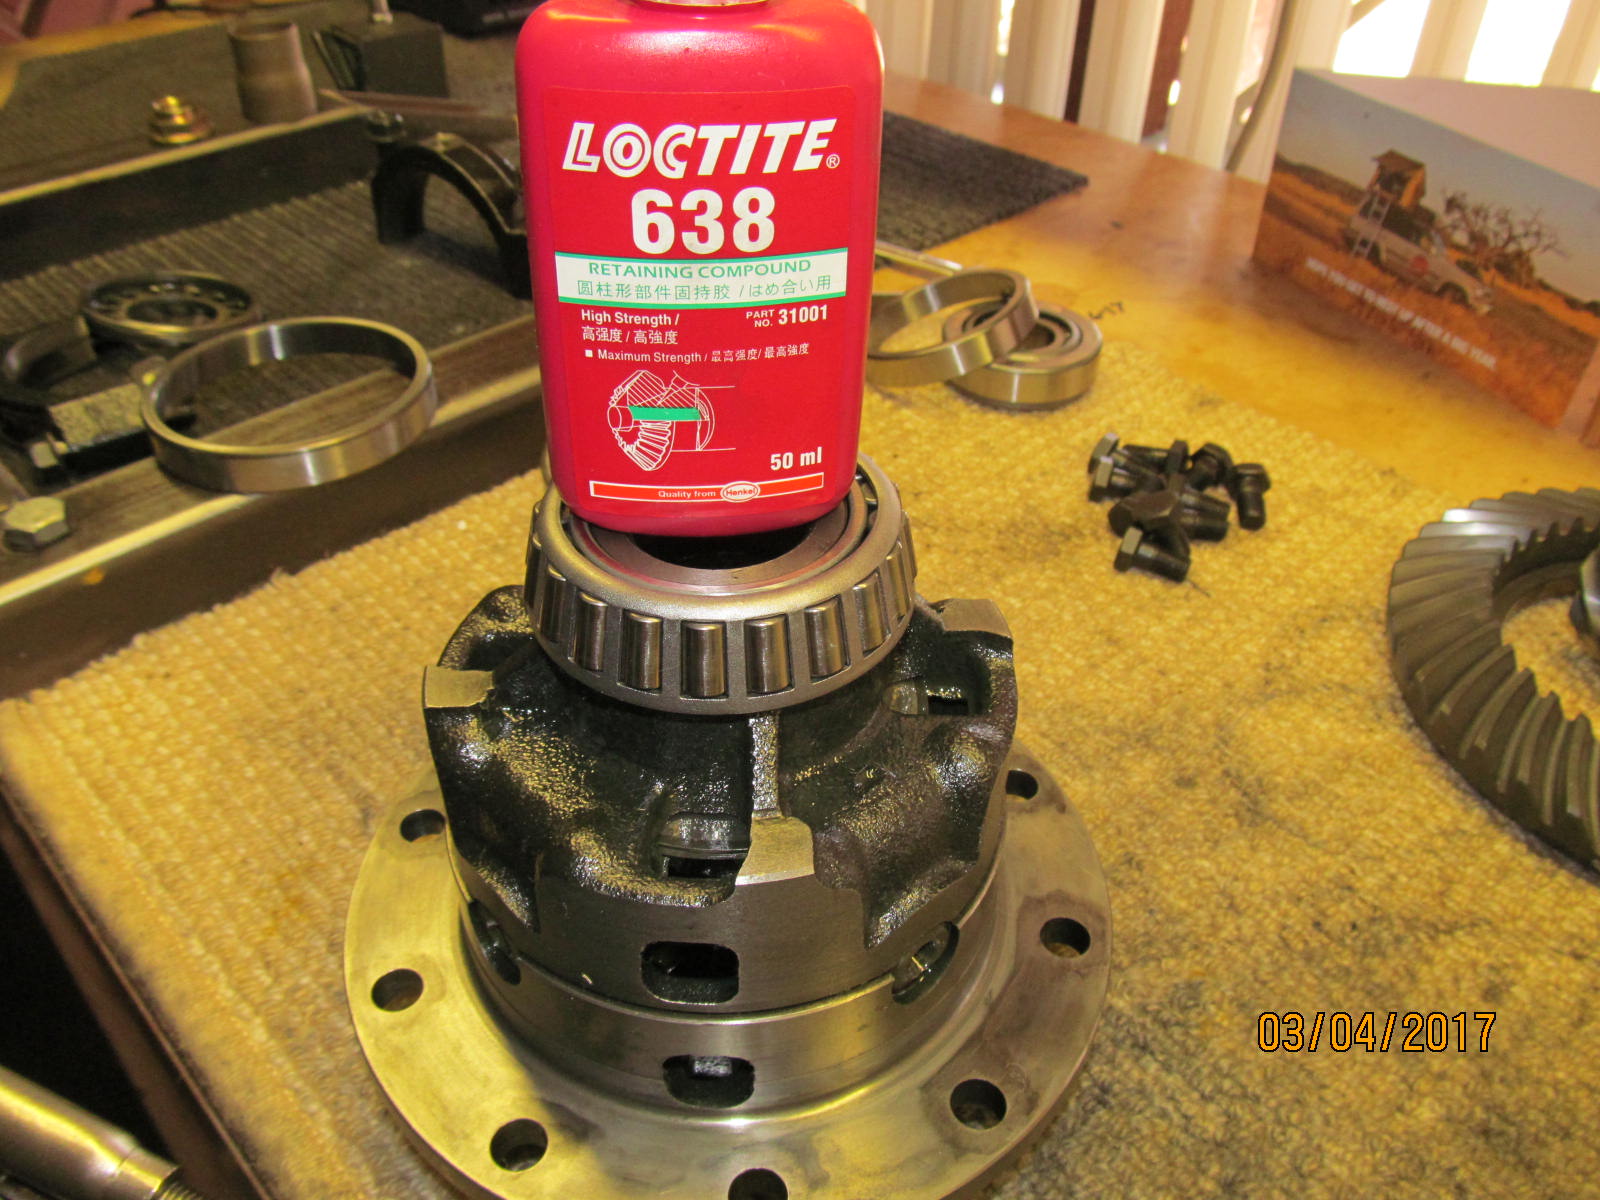
The new koyo carrier bearings(both) were not pressing on as tight as they should have so #638 will lock them in place.
|
|
|
|
|
Removing the old pinion...
|
|
|
|
|
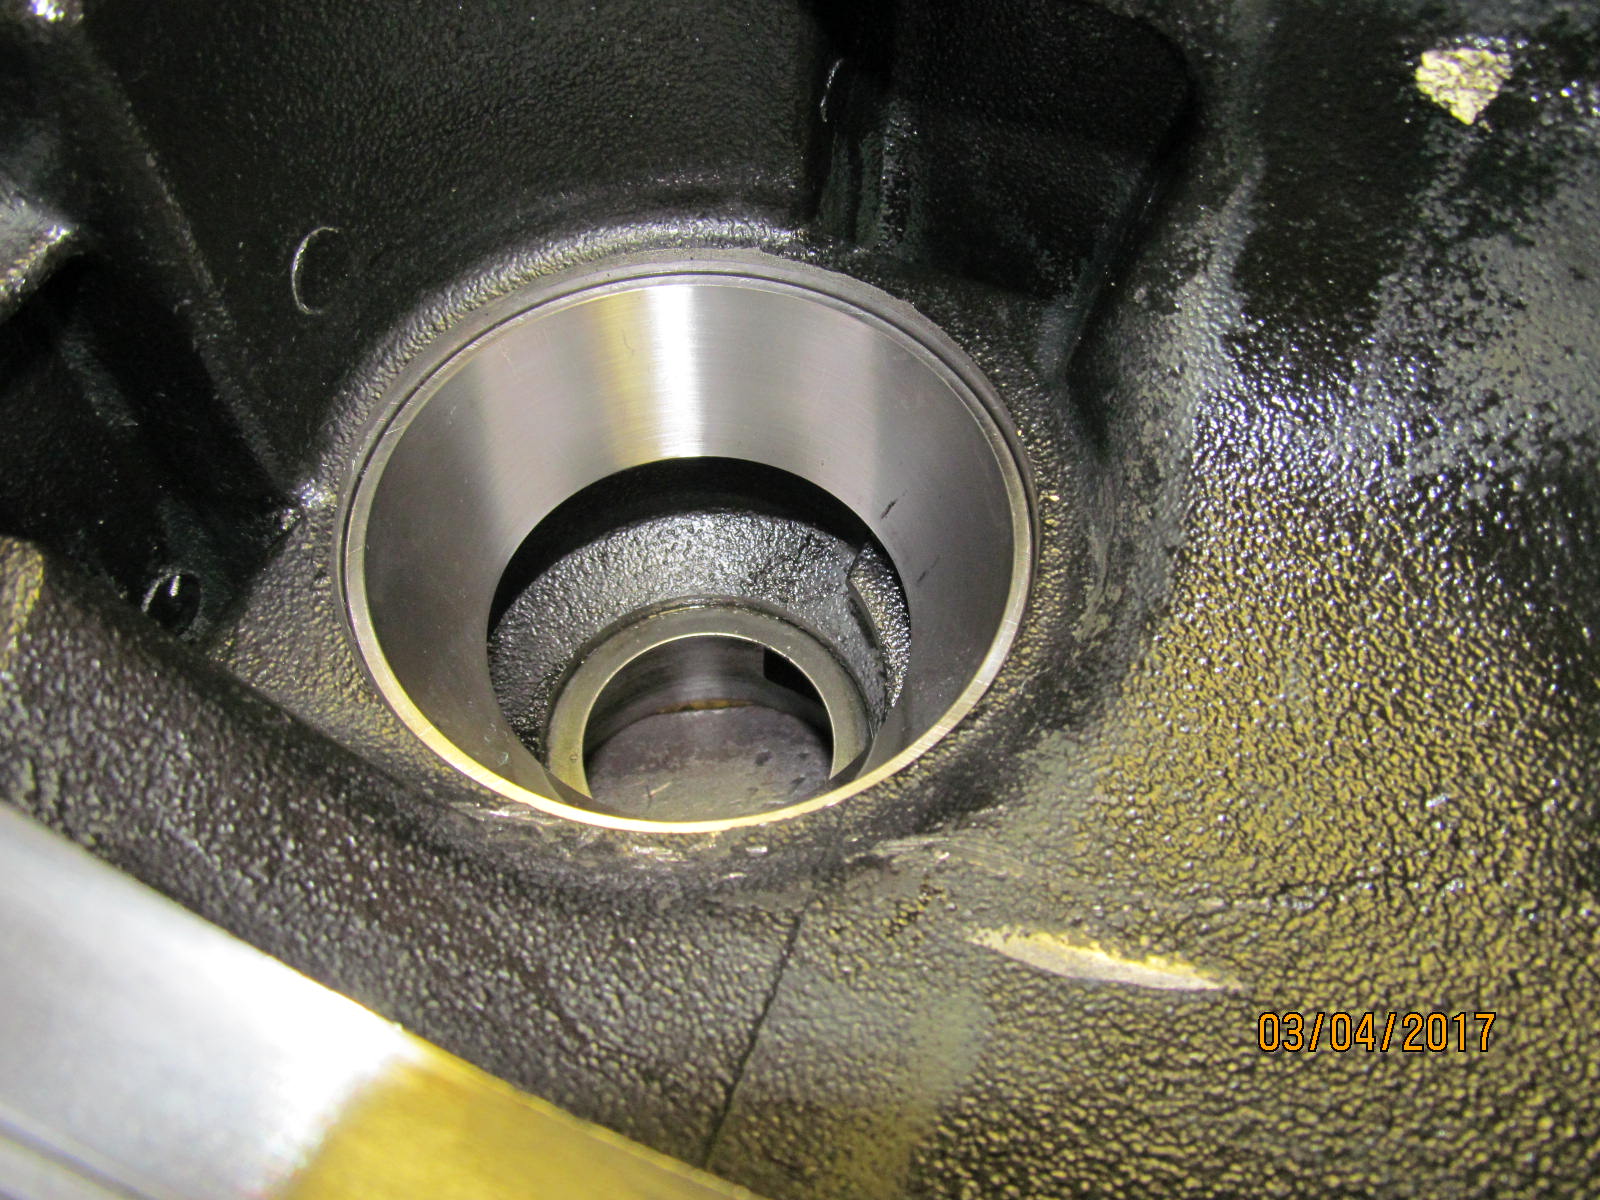
Diff carrier was cleaned up and new pinion races are going in.
|
|
|
|
|
Verified 100% seated down fully.
|
|
|
|
|
Same with the outer pinion race.
|
|
|
|
|
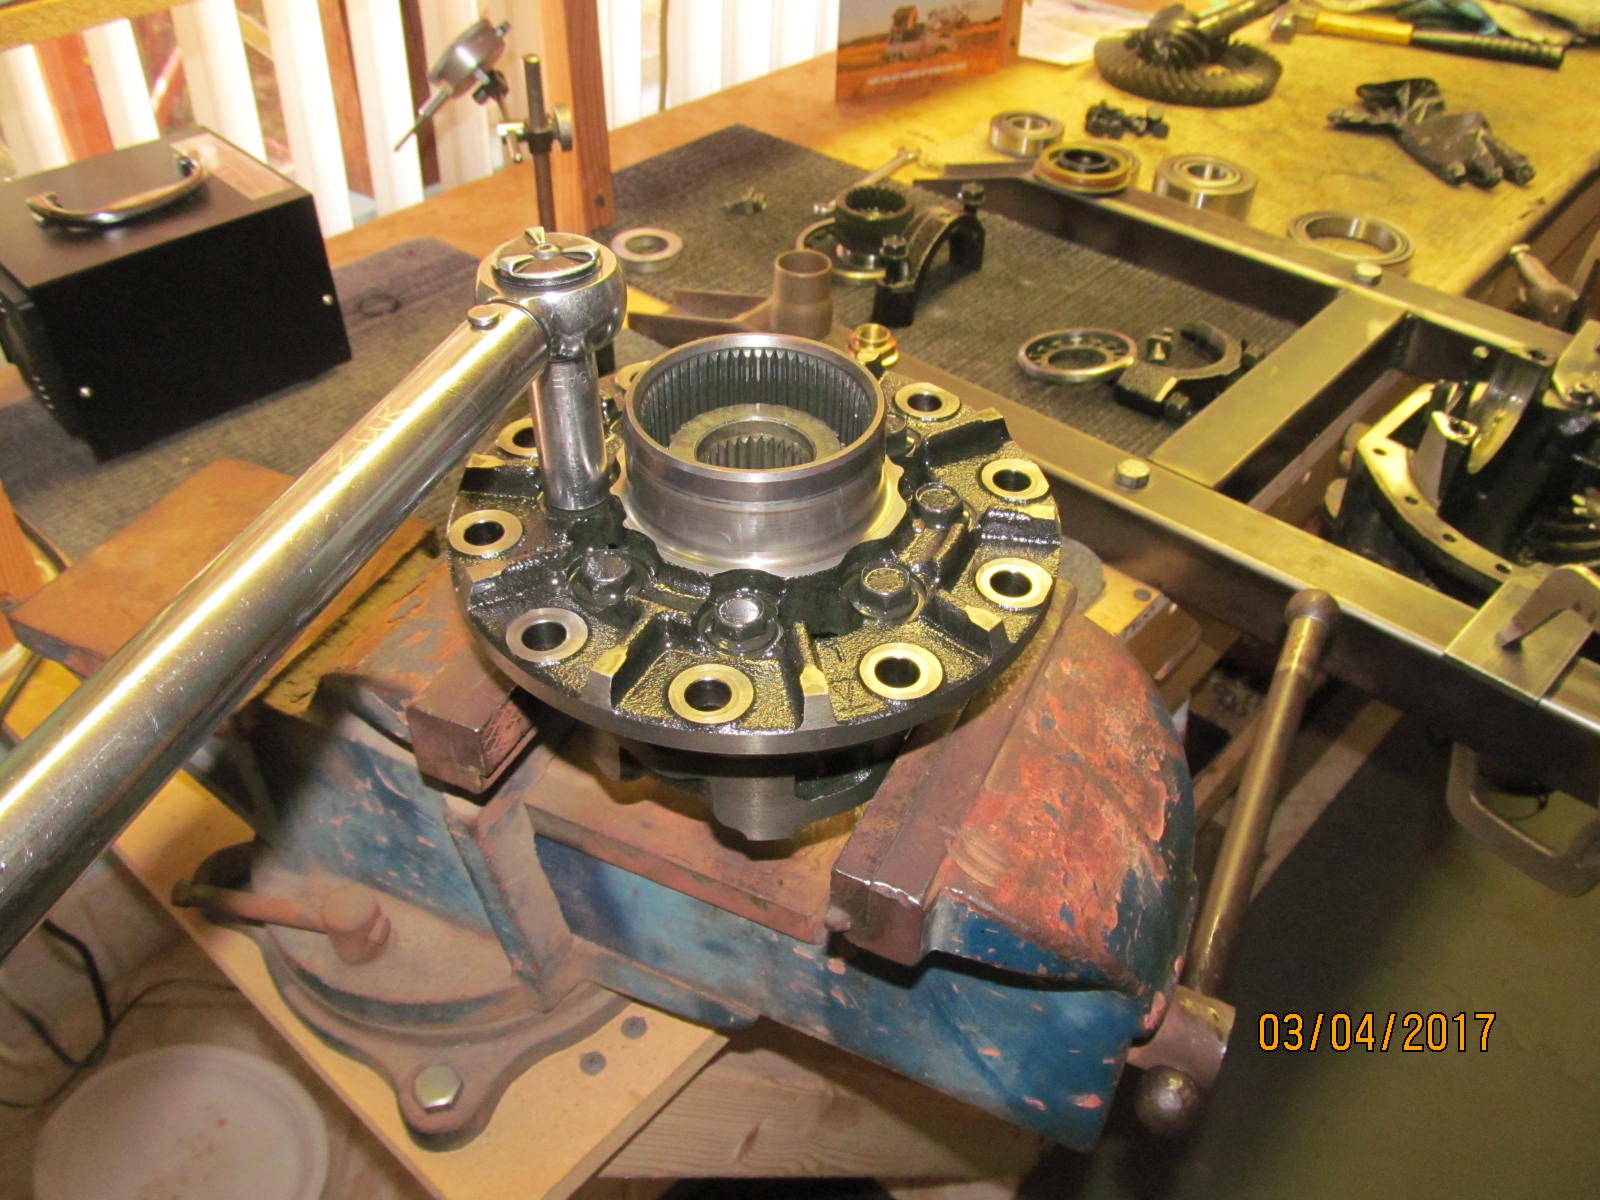
Anytime teeth fall off the ring, it's a good idea to double check the case run-out and all is very good here...less than 1.5 thou of run-out.
|
|
|
|
|
The replacement ring gear is tapped in place.
|
|
|
|
|
Blue Loctite and 70 ft/lb.
|
|
|
|
|
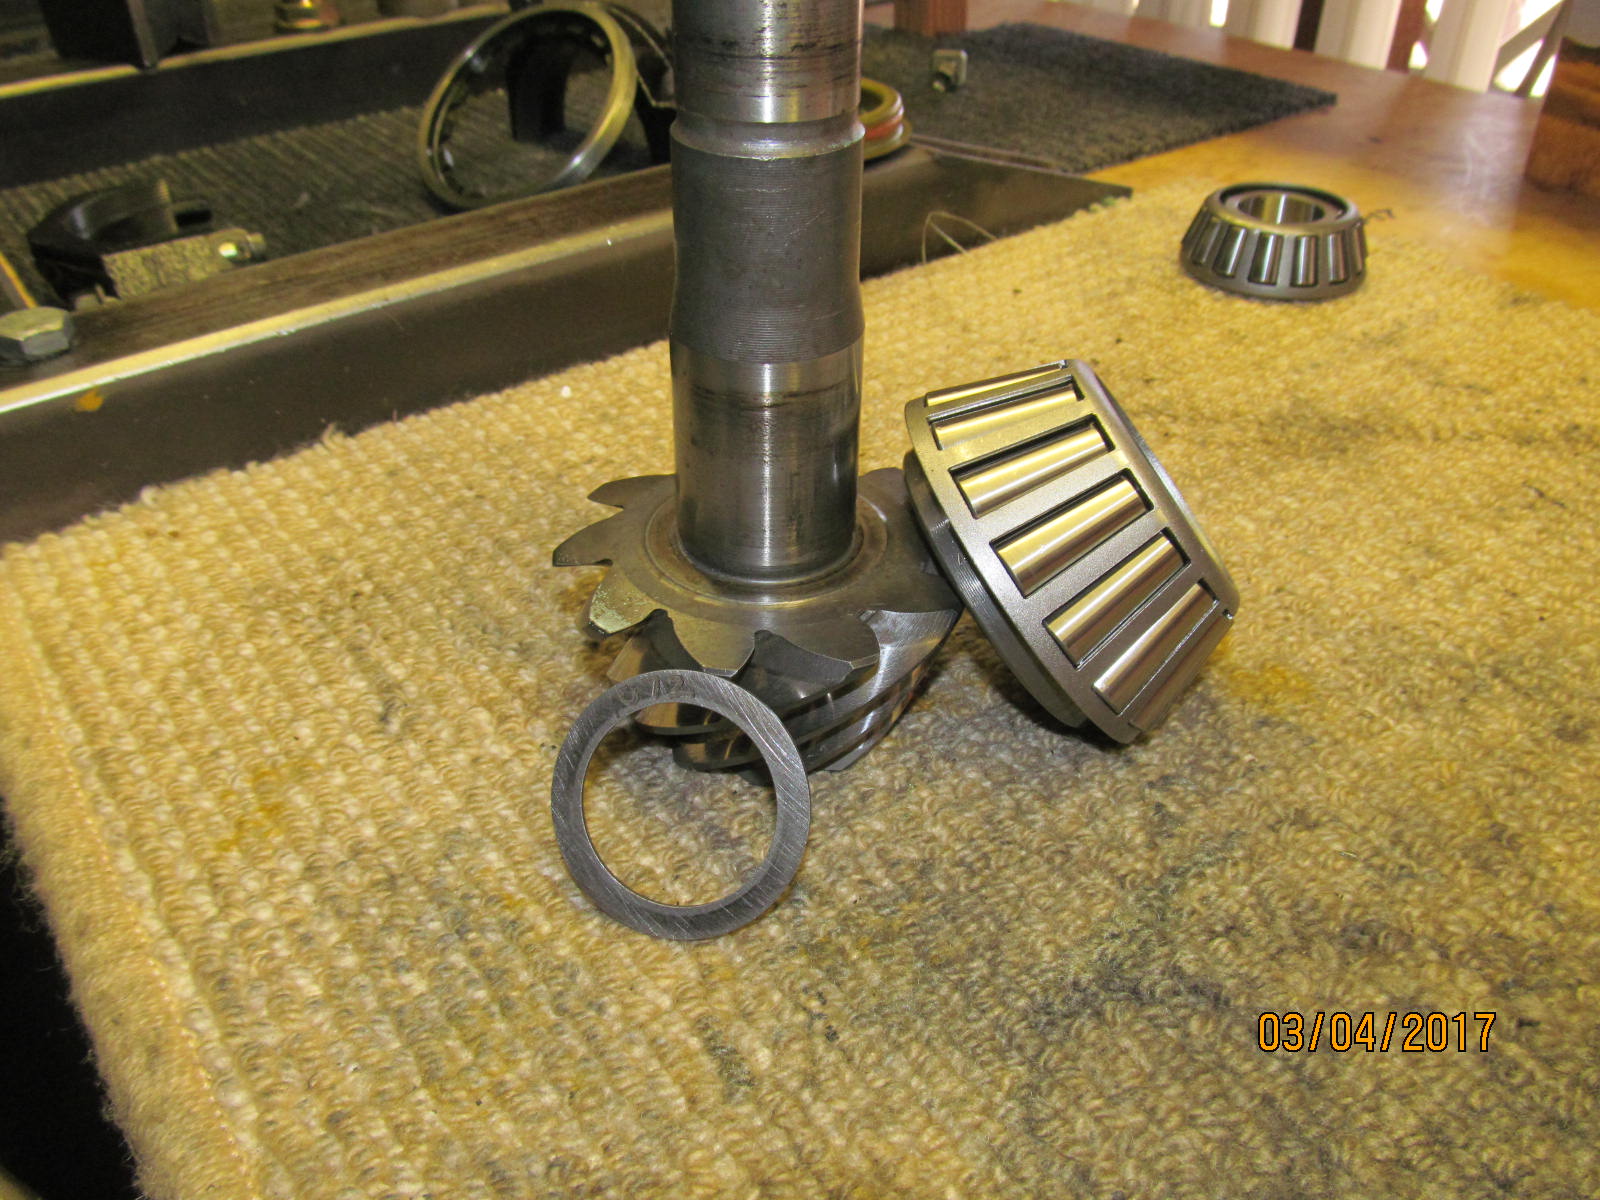
The replacement pinion shown with the starter shim of .072" and new inner bearing.
|
|
|
|
|
Nice tight press on...
|
|
|
|
|
Now the pinion can be mounted in the carrier.
|
|
|

|
|
Only have to tighten the used pinion nut just enough to develope about 10 in/lb of bearing drag. Very easy to do the electric impact wrenches.
|
|
|
|
|
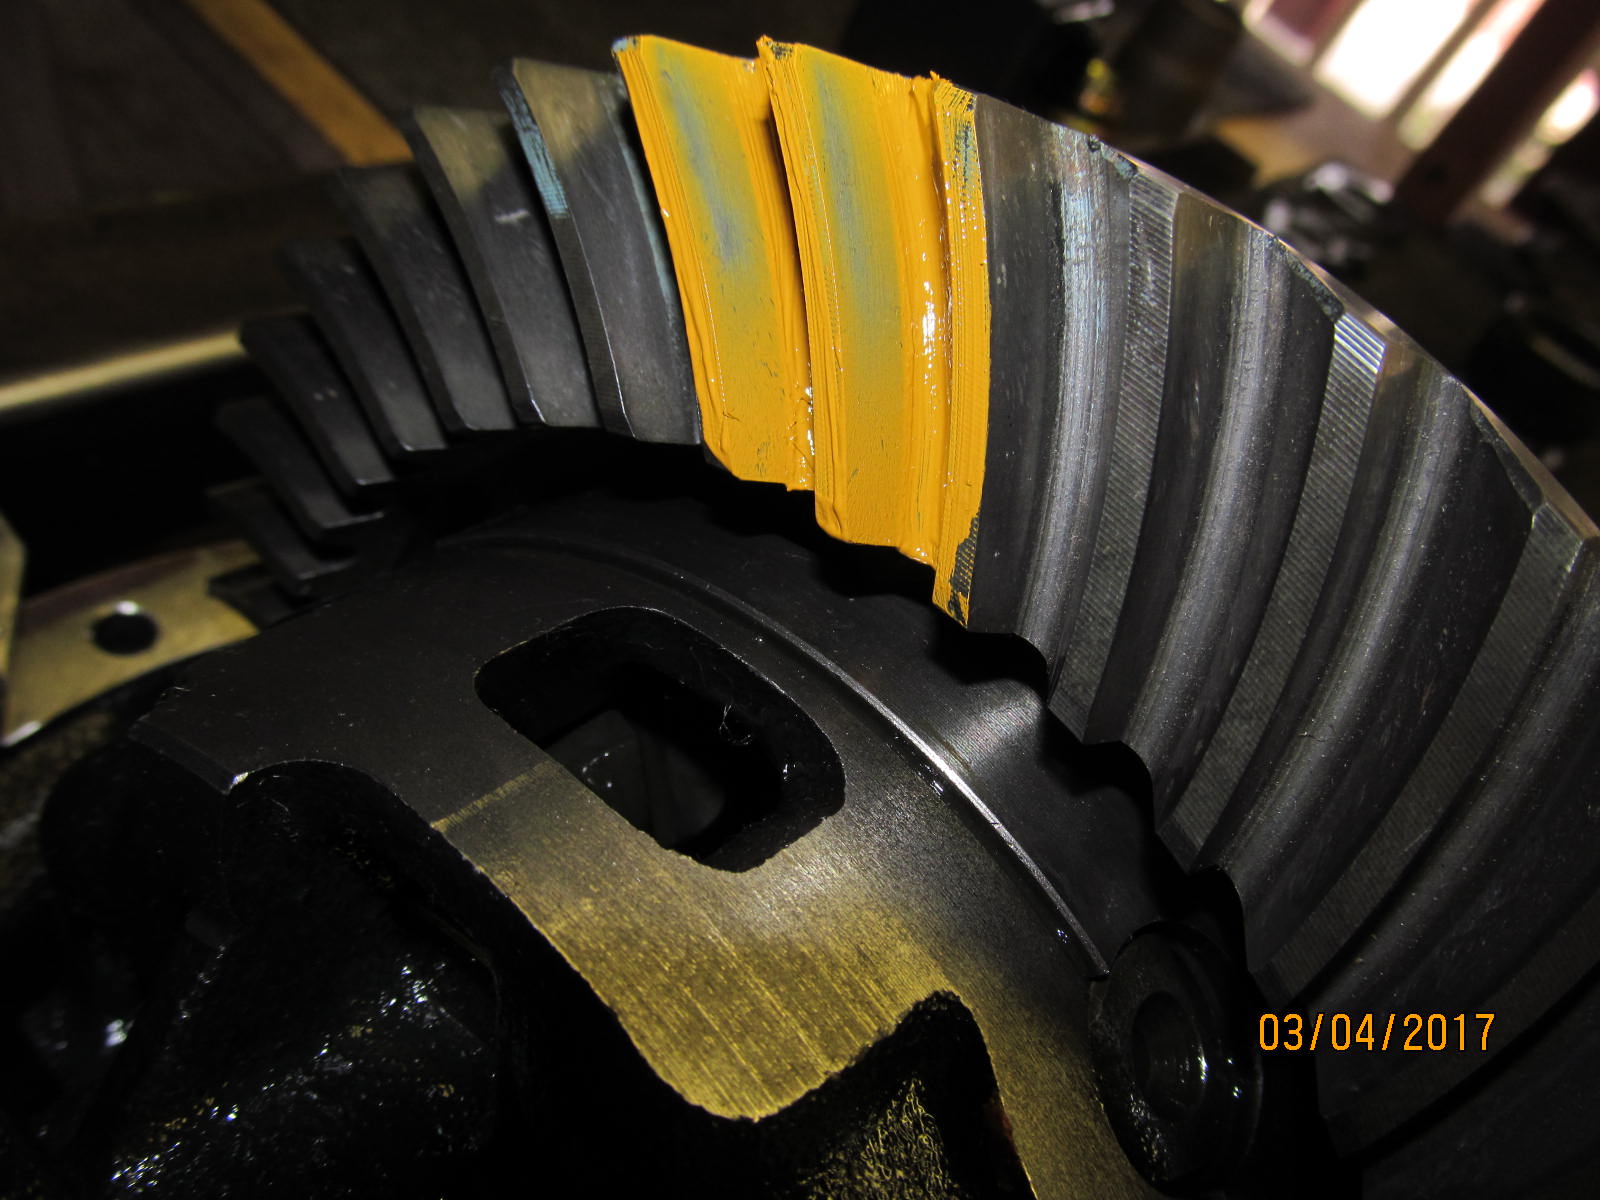
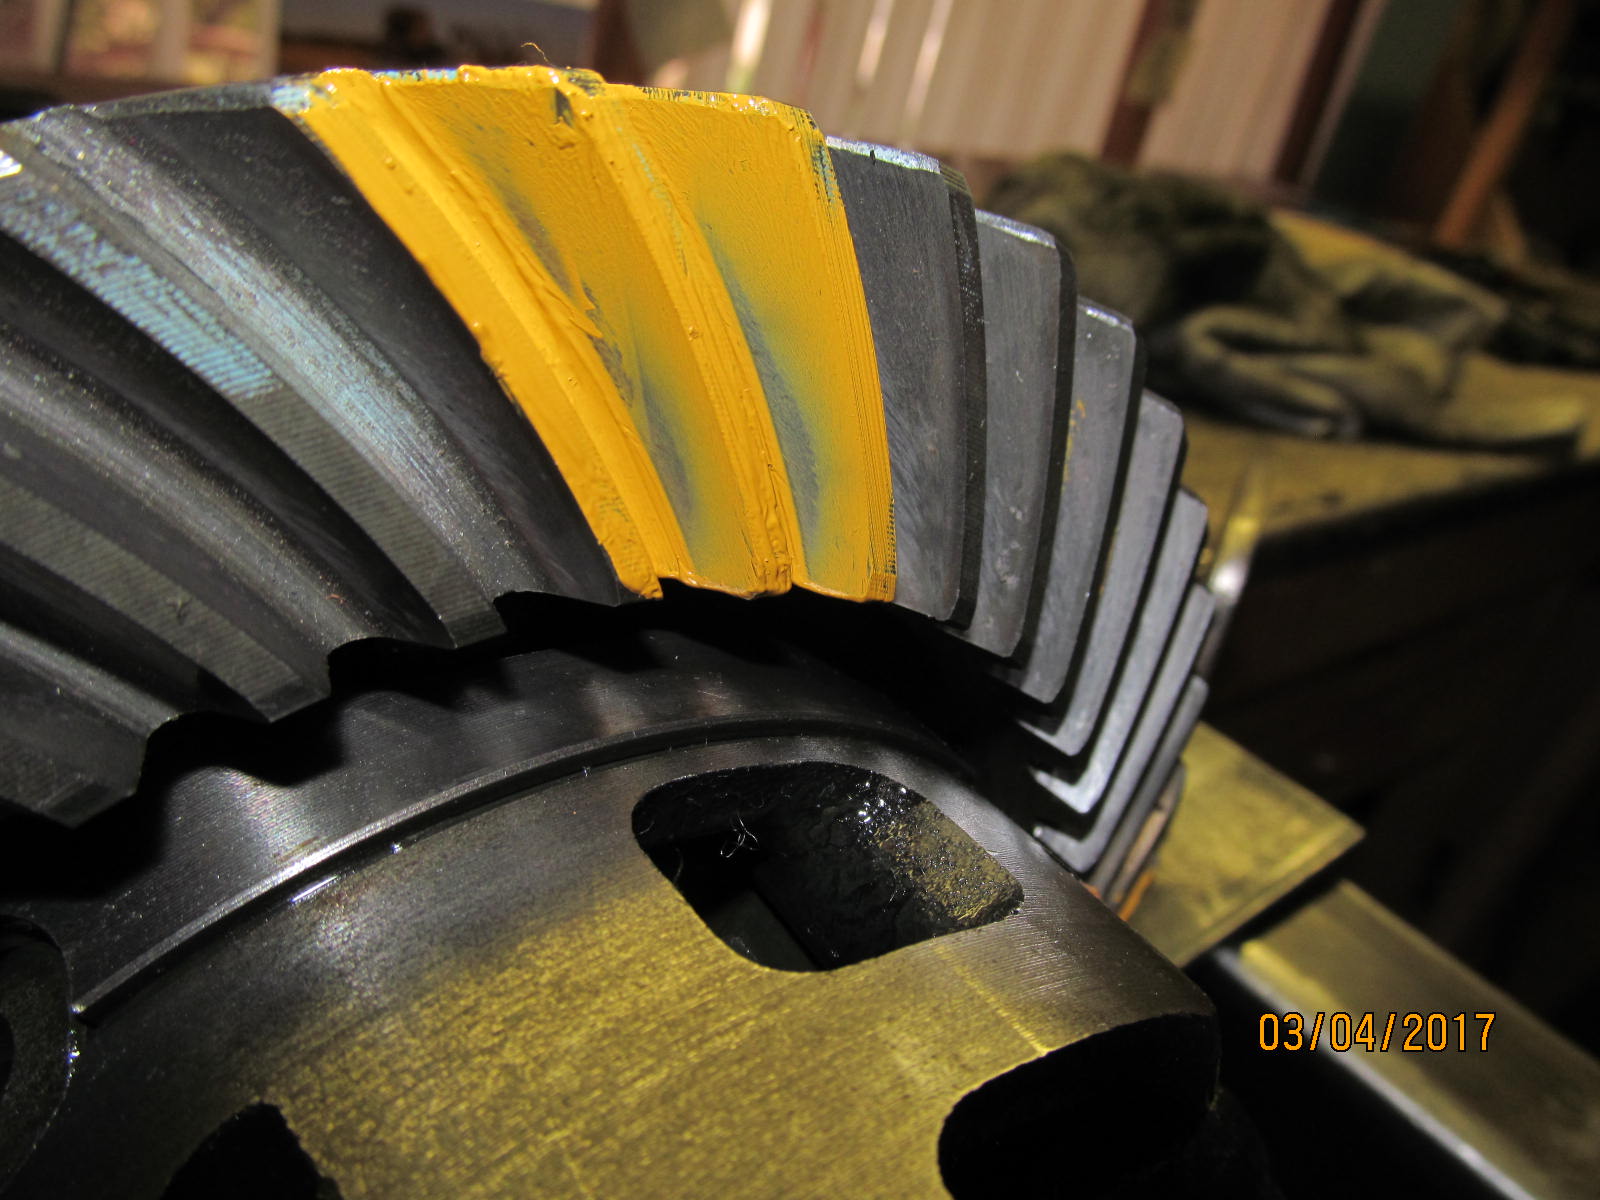
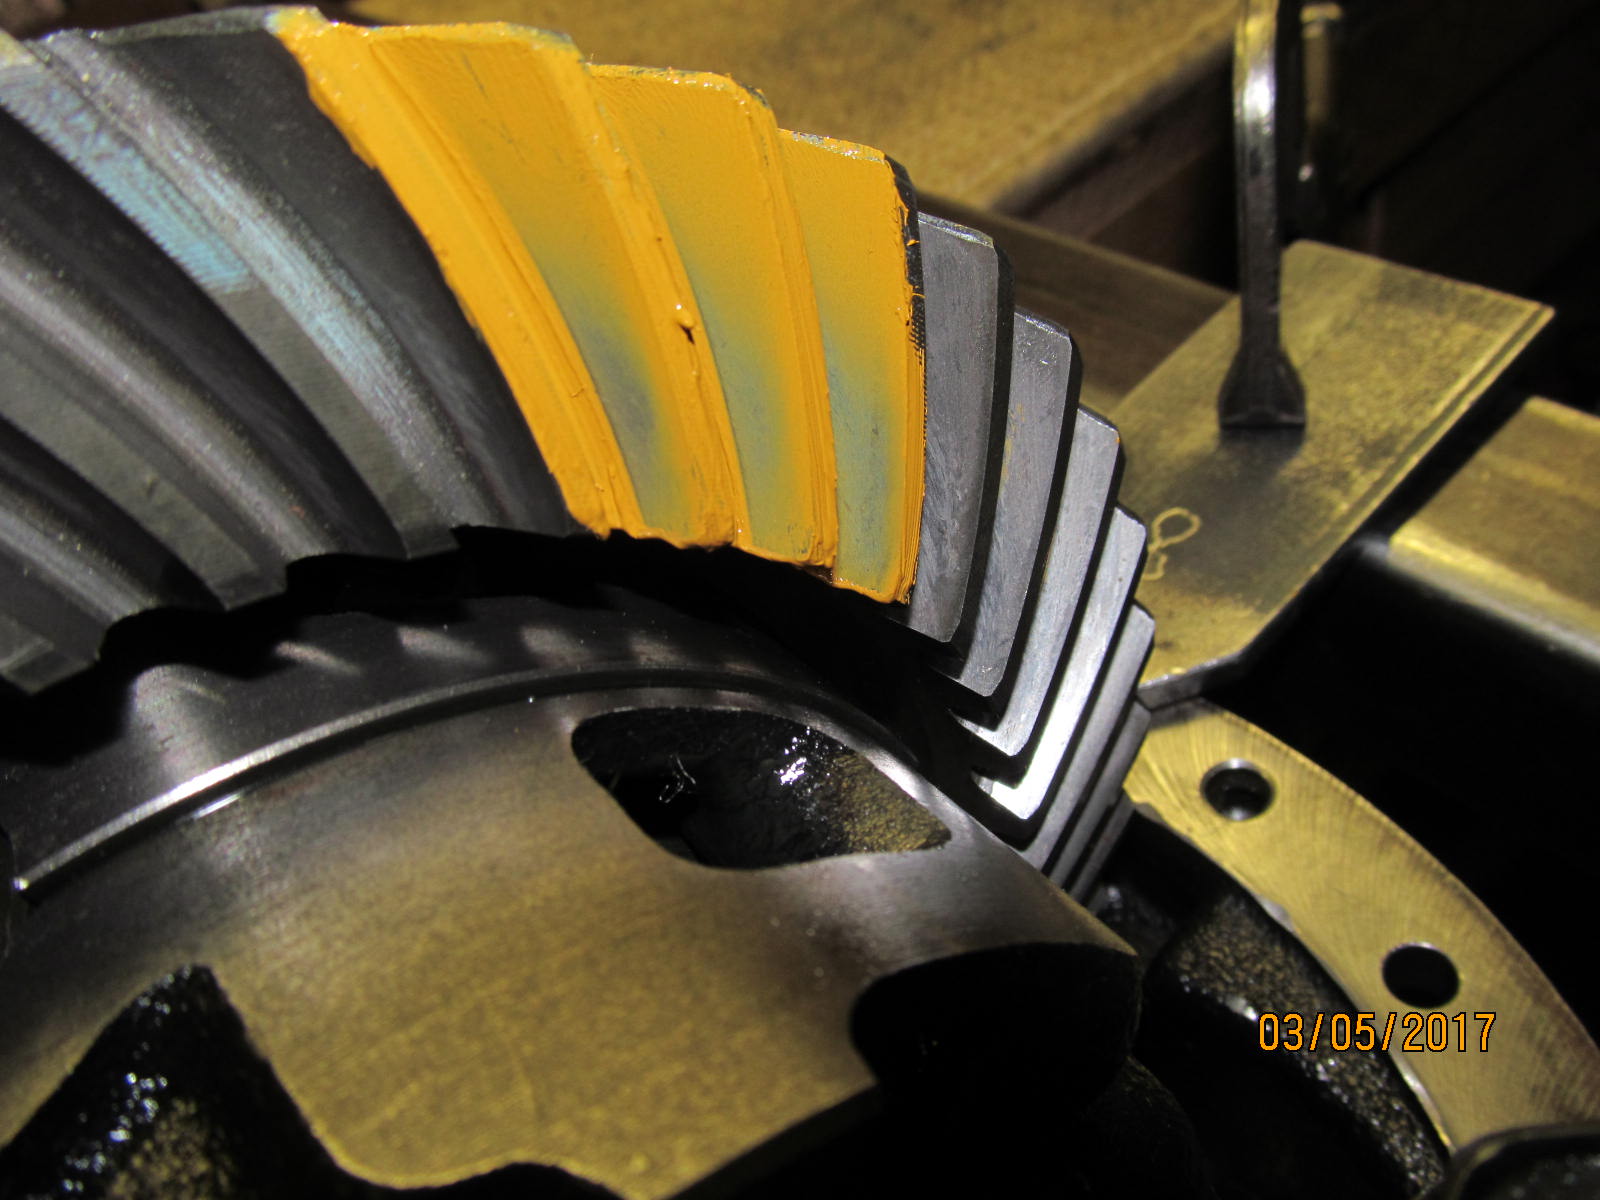
Drive side. Looks shallow. Favors the heel end and somewhat high.
|
|
|
|
|
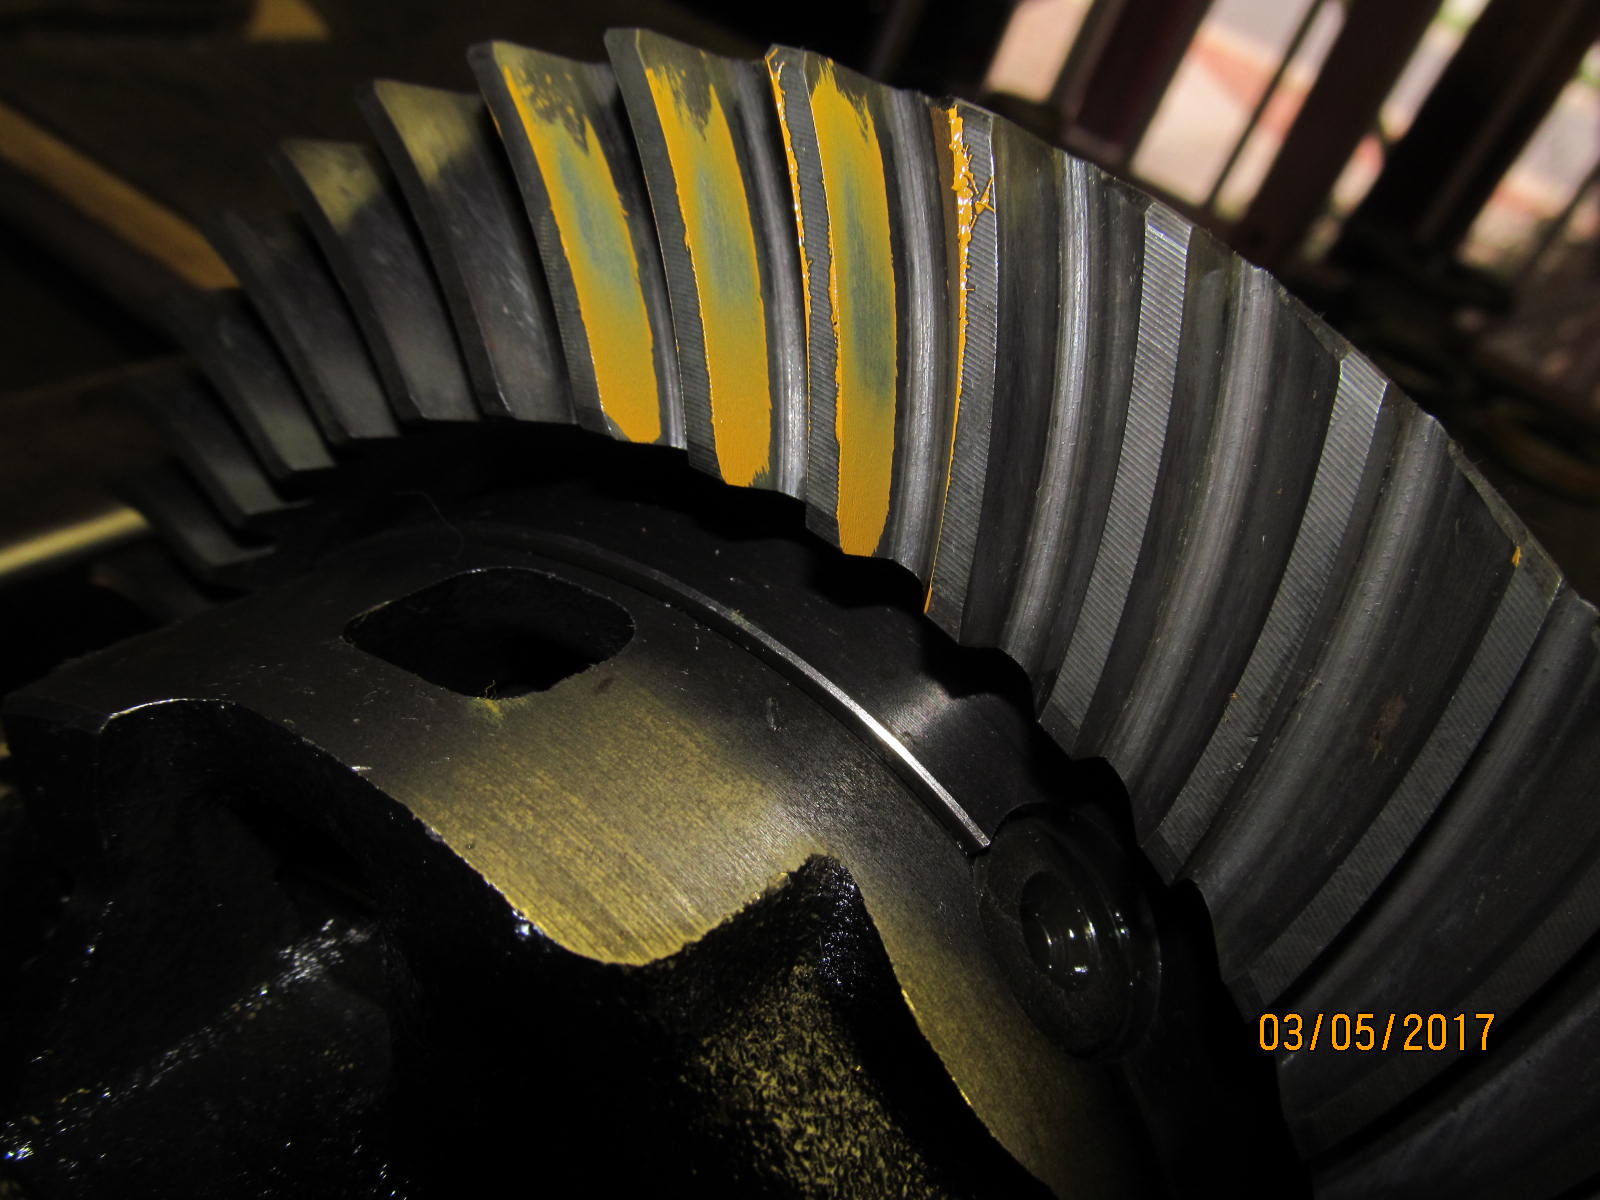
Coast side....equal and opposite....hard into the toe end and looks high.
|
|
|
|
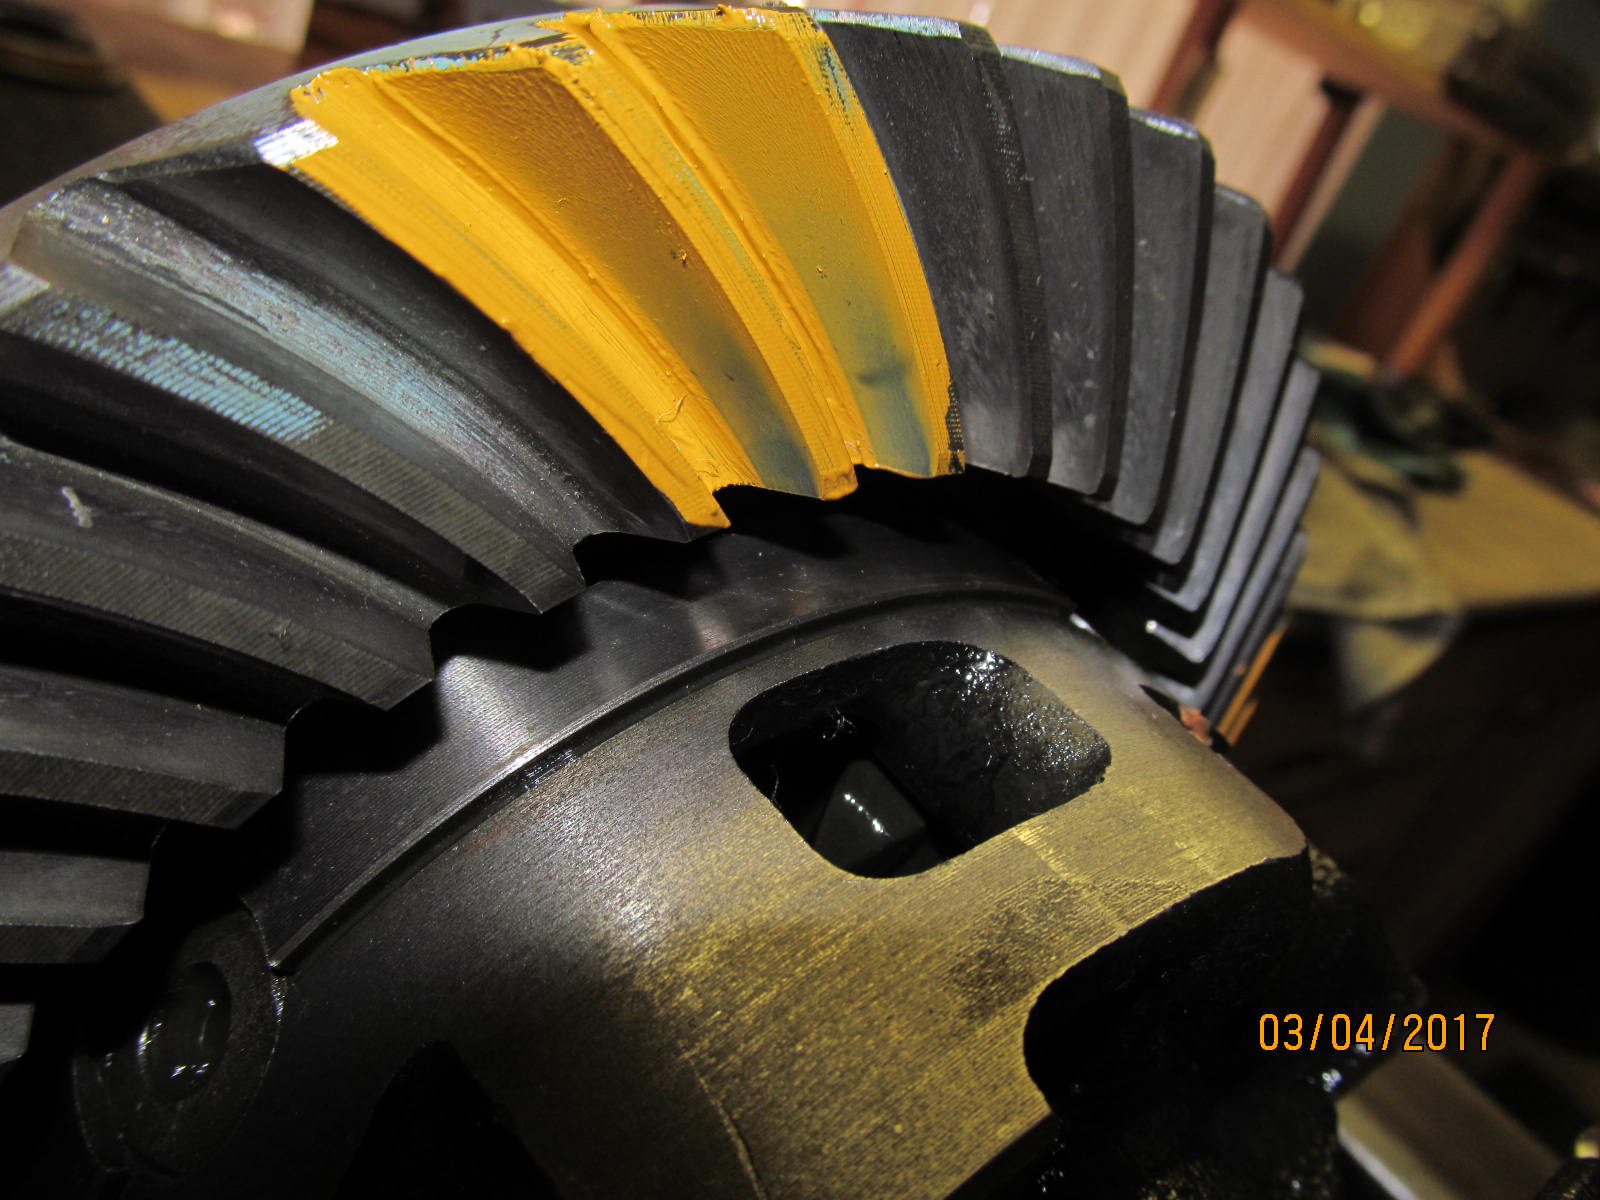
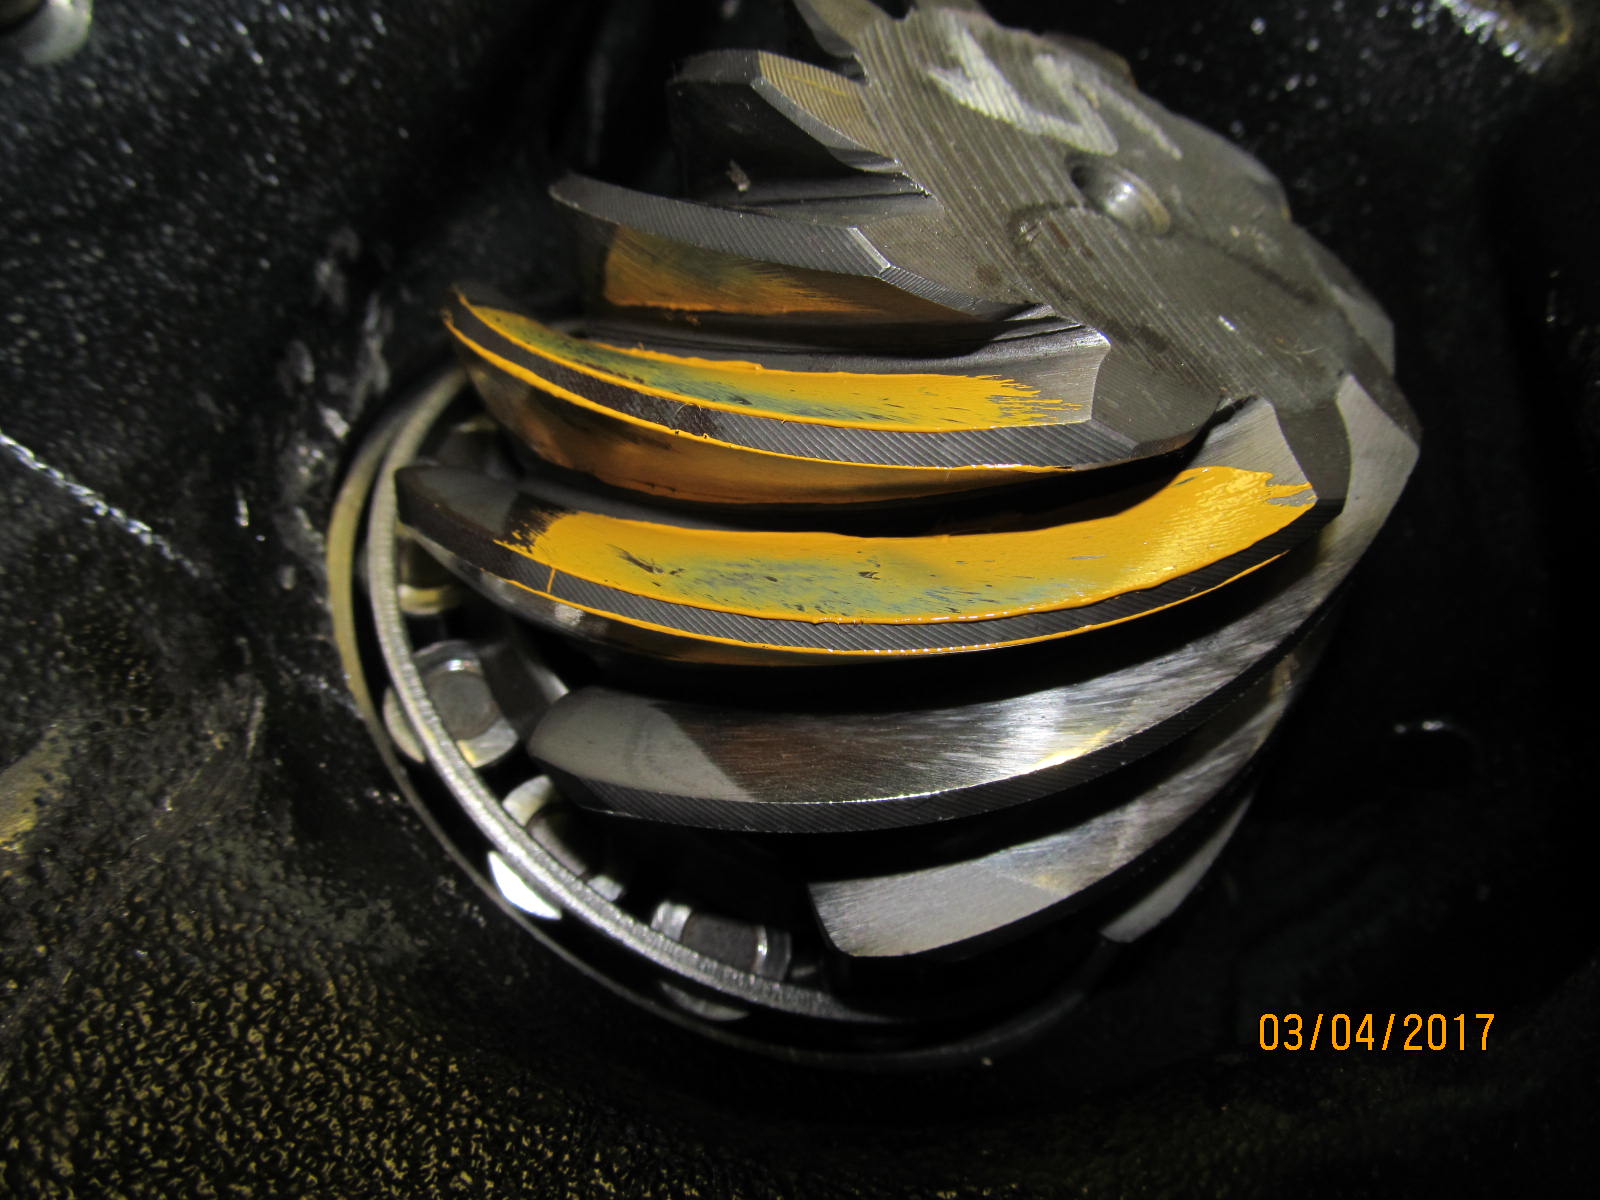
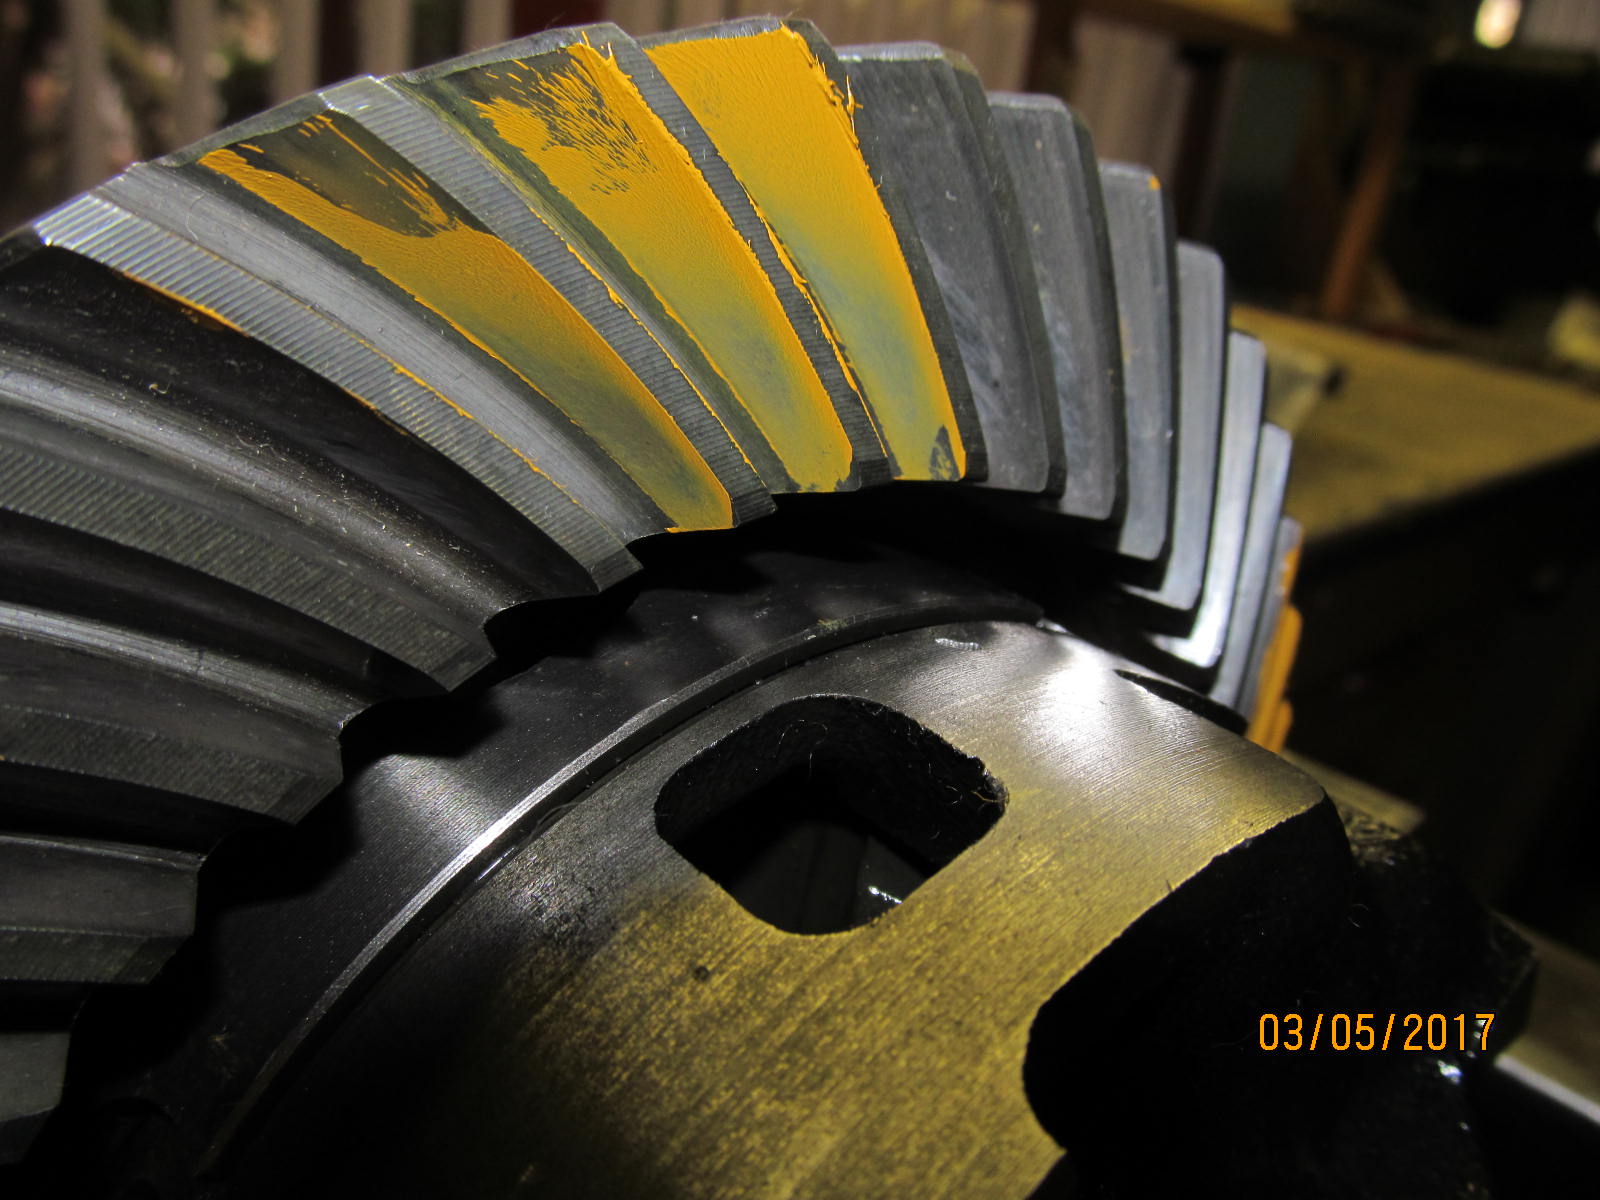
Then I tore it down and replaced the 072 with 082 pinion depth shim. Drive side.....Looks too deep. Kinda looks centered but that does
not mean a thing with how harsh and how deep it is in the root of the tooth.
|
|
|
|
|
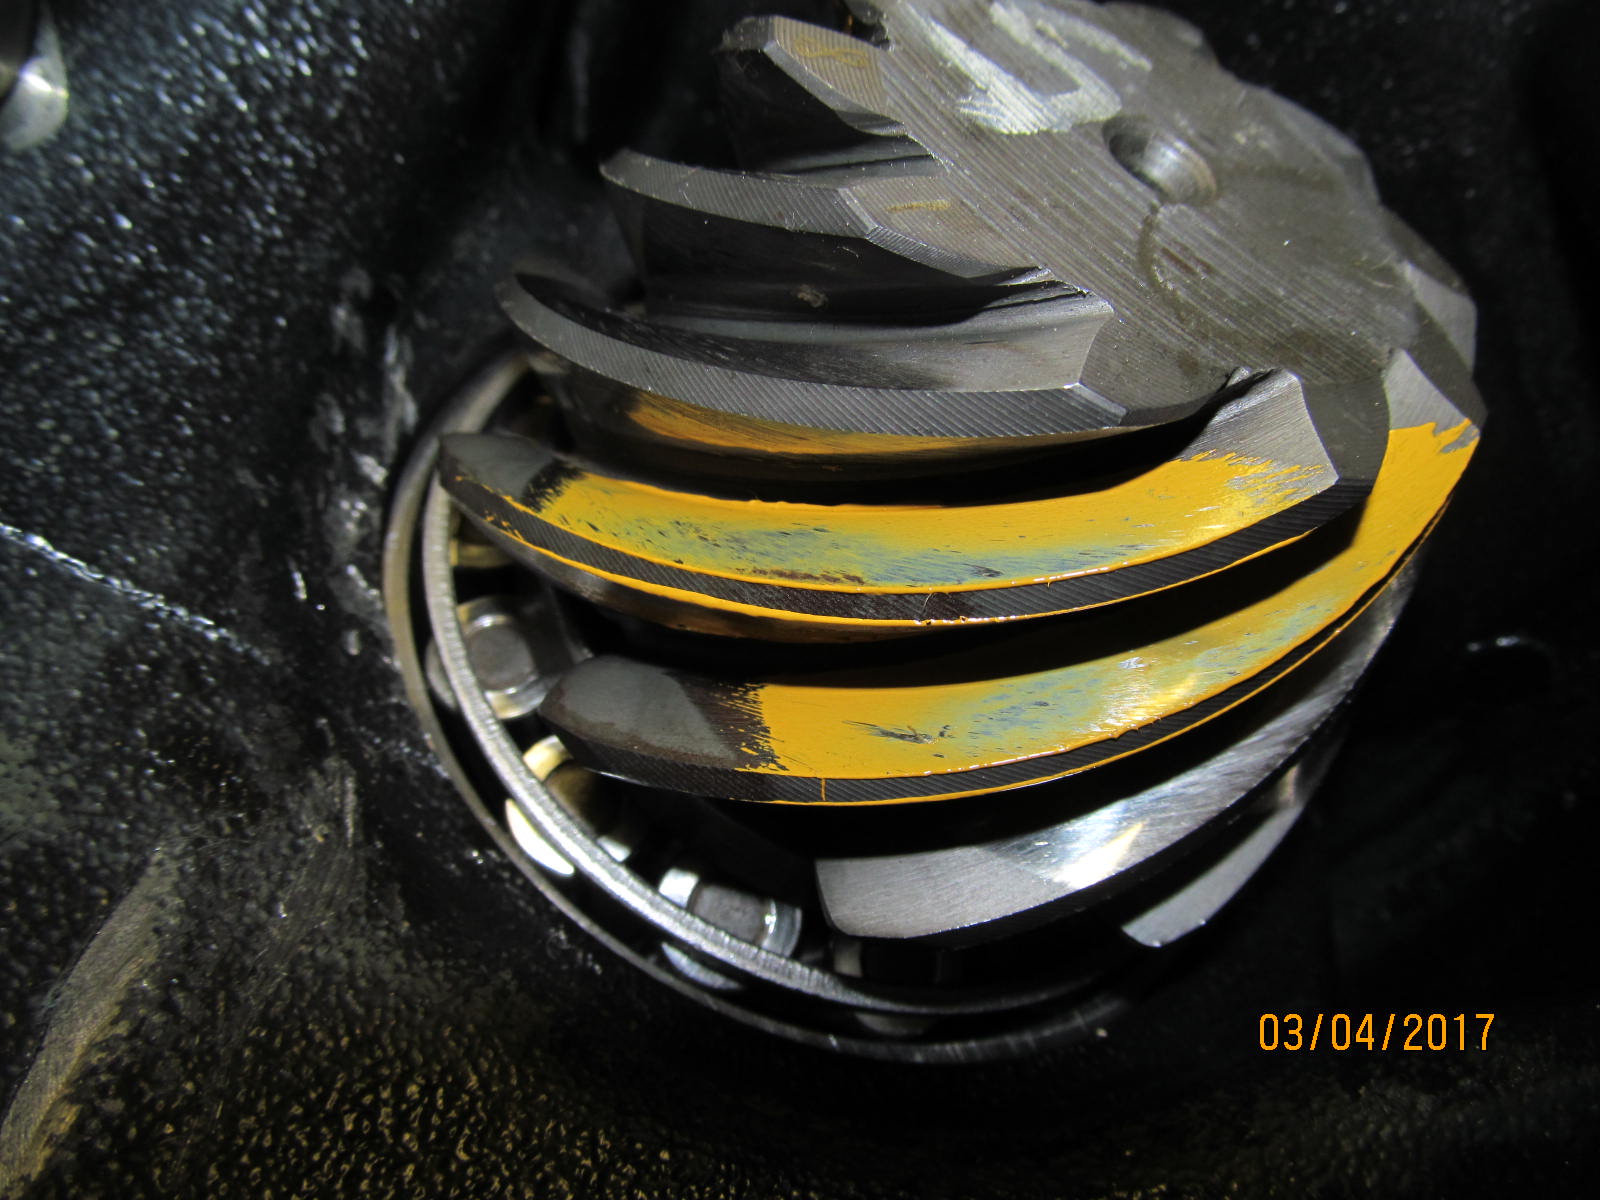
Coast side...too deep. Very deep into the root.
|
|
|
|
|
.....................
|
|
|
|
|
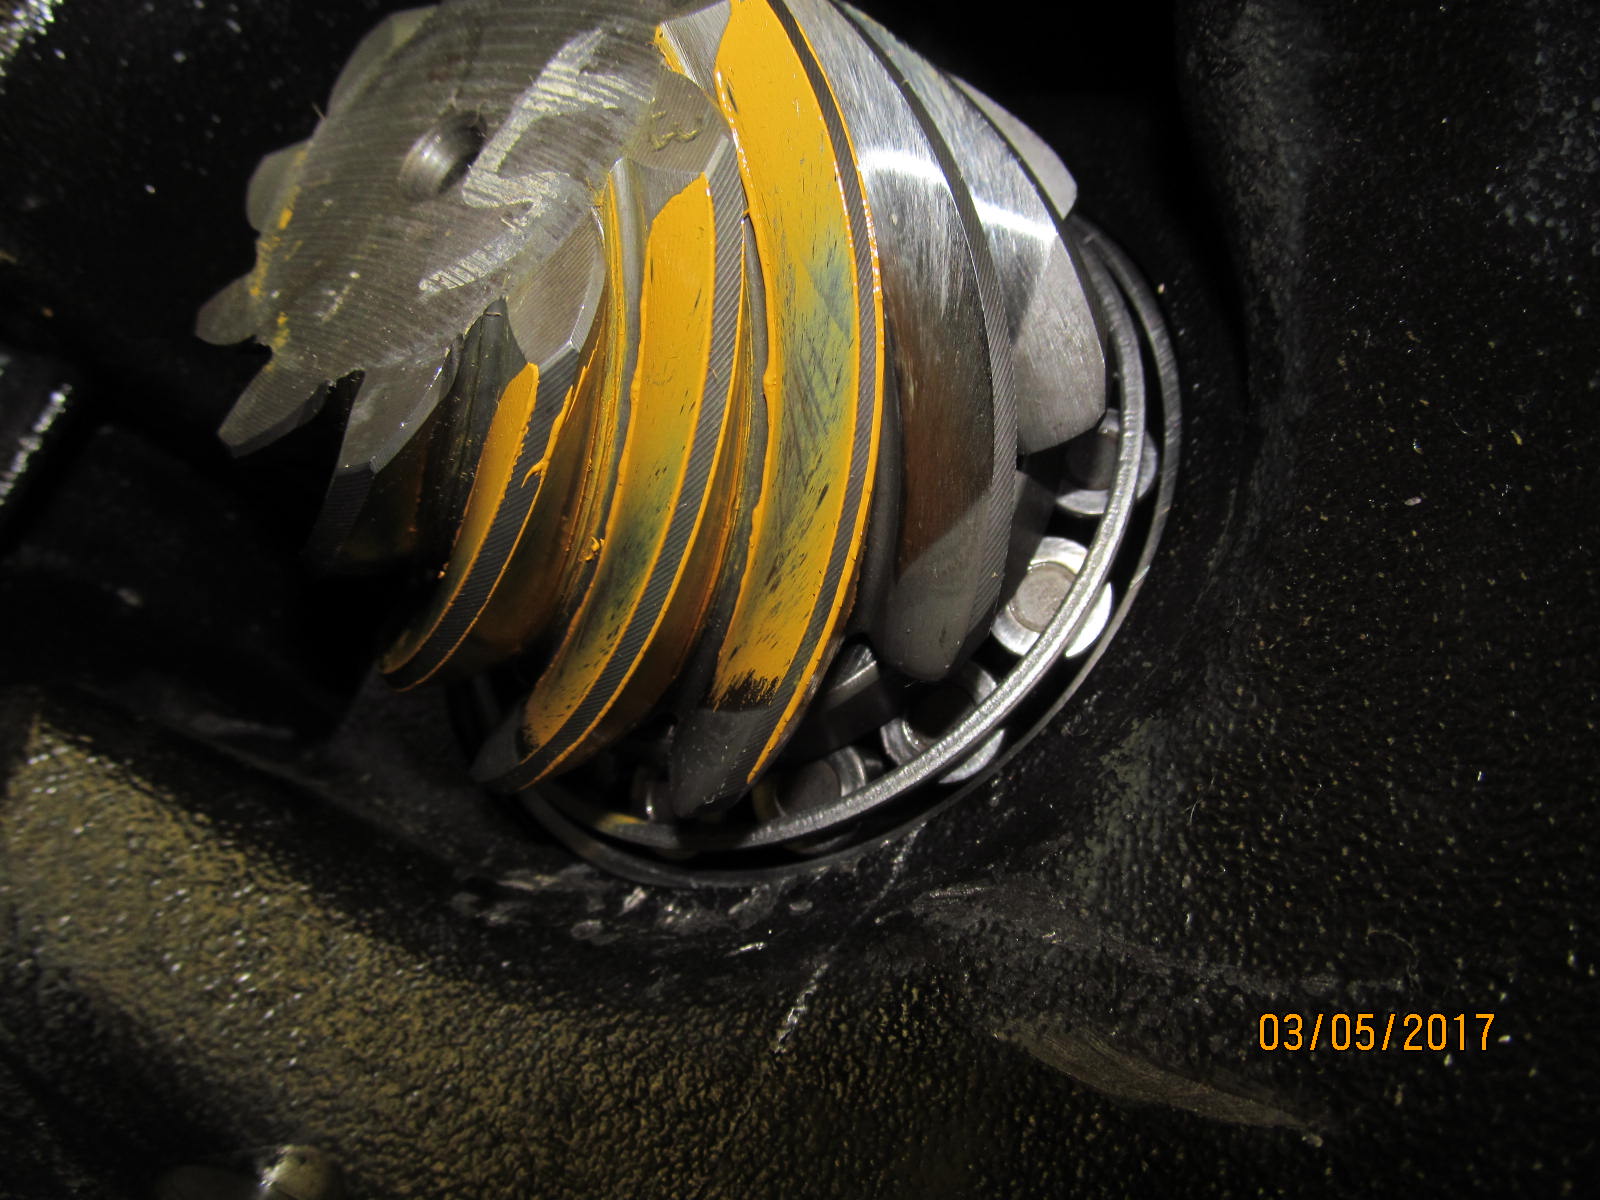
The pinion tooth confirms it's way too deep as indicated by the comet tail on the left and how it's towards the outside or tip of the tooth.
|
|
|
|
|
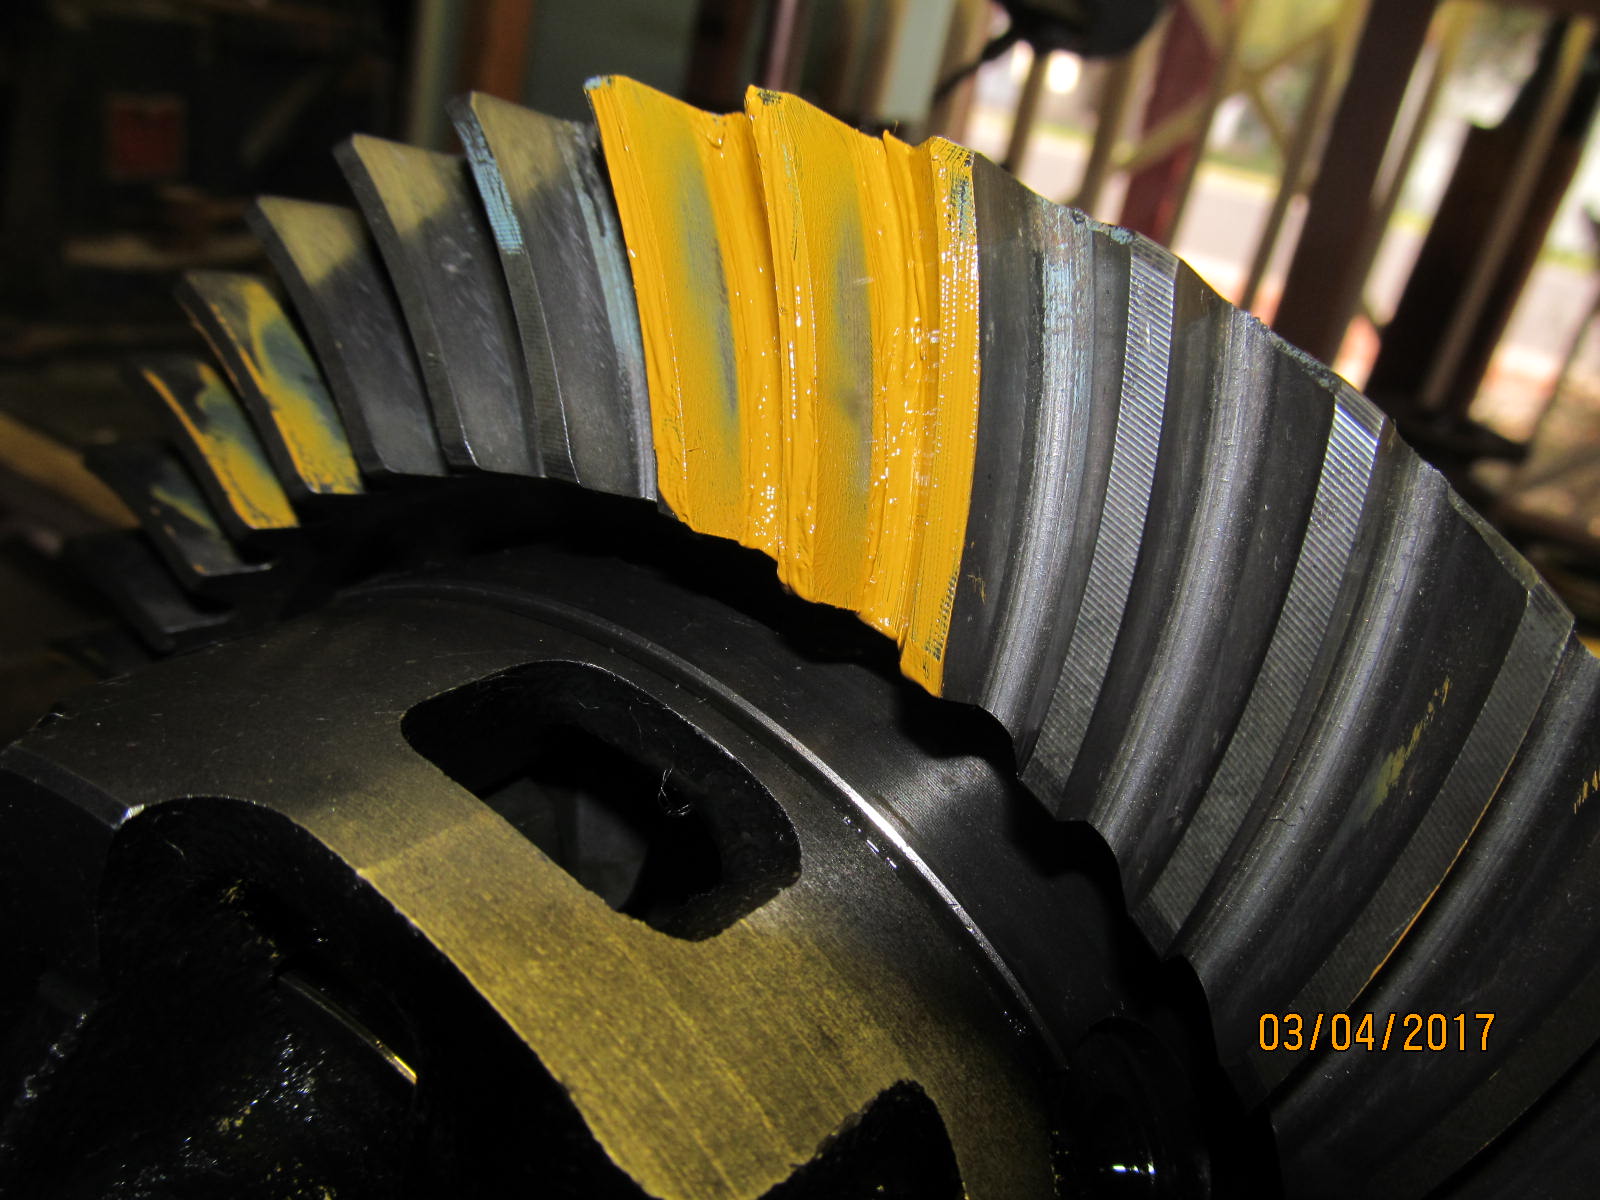
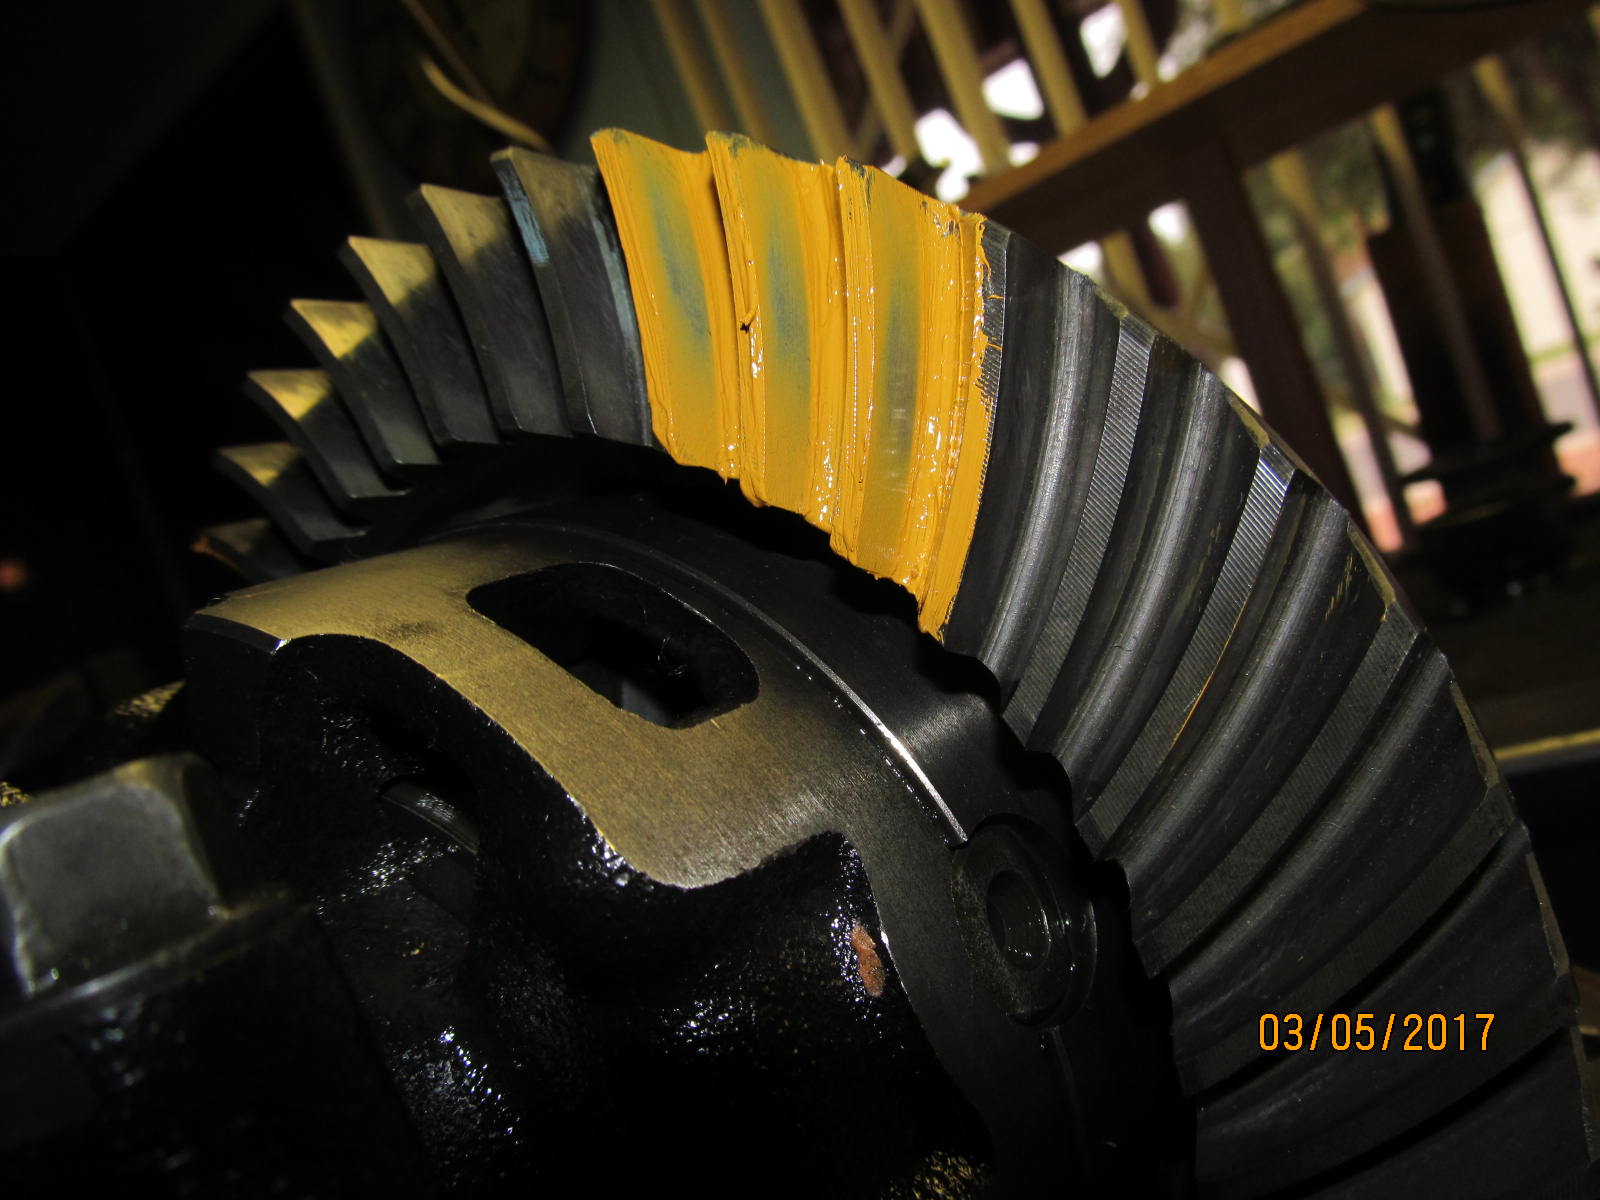
Teardown again and replace the 082 shim with 077 (in the middle range of 072 and 082). Now this looks much better.
|
|
|
|
|
Coast side. Good.
|
|
|
|
|
Drive side...reverse painted....looks ideal depth.
|
|
|
|
|
Coast...reverse painted...nice.
|
|
|
|
|
driveside of the pinion....comet tail on left is favoring the root but not harshly tucked into the tooth.
|
|
|
|
|
...................
|
|
|
|
|
The comet tail is in the center of the tooth or perhaps slightly to the inside near the root. Very good.
|
|
|
|
|
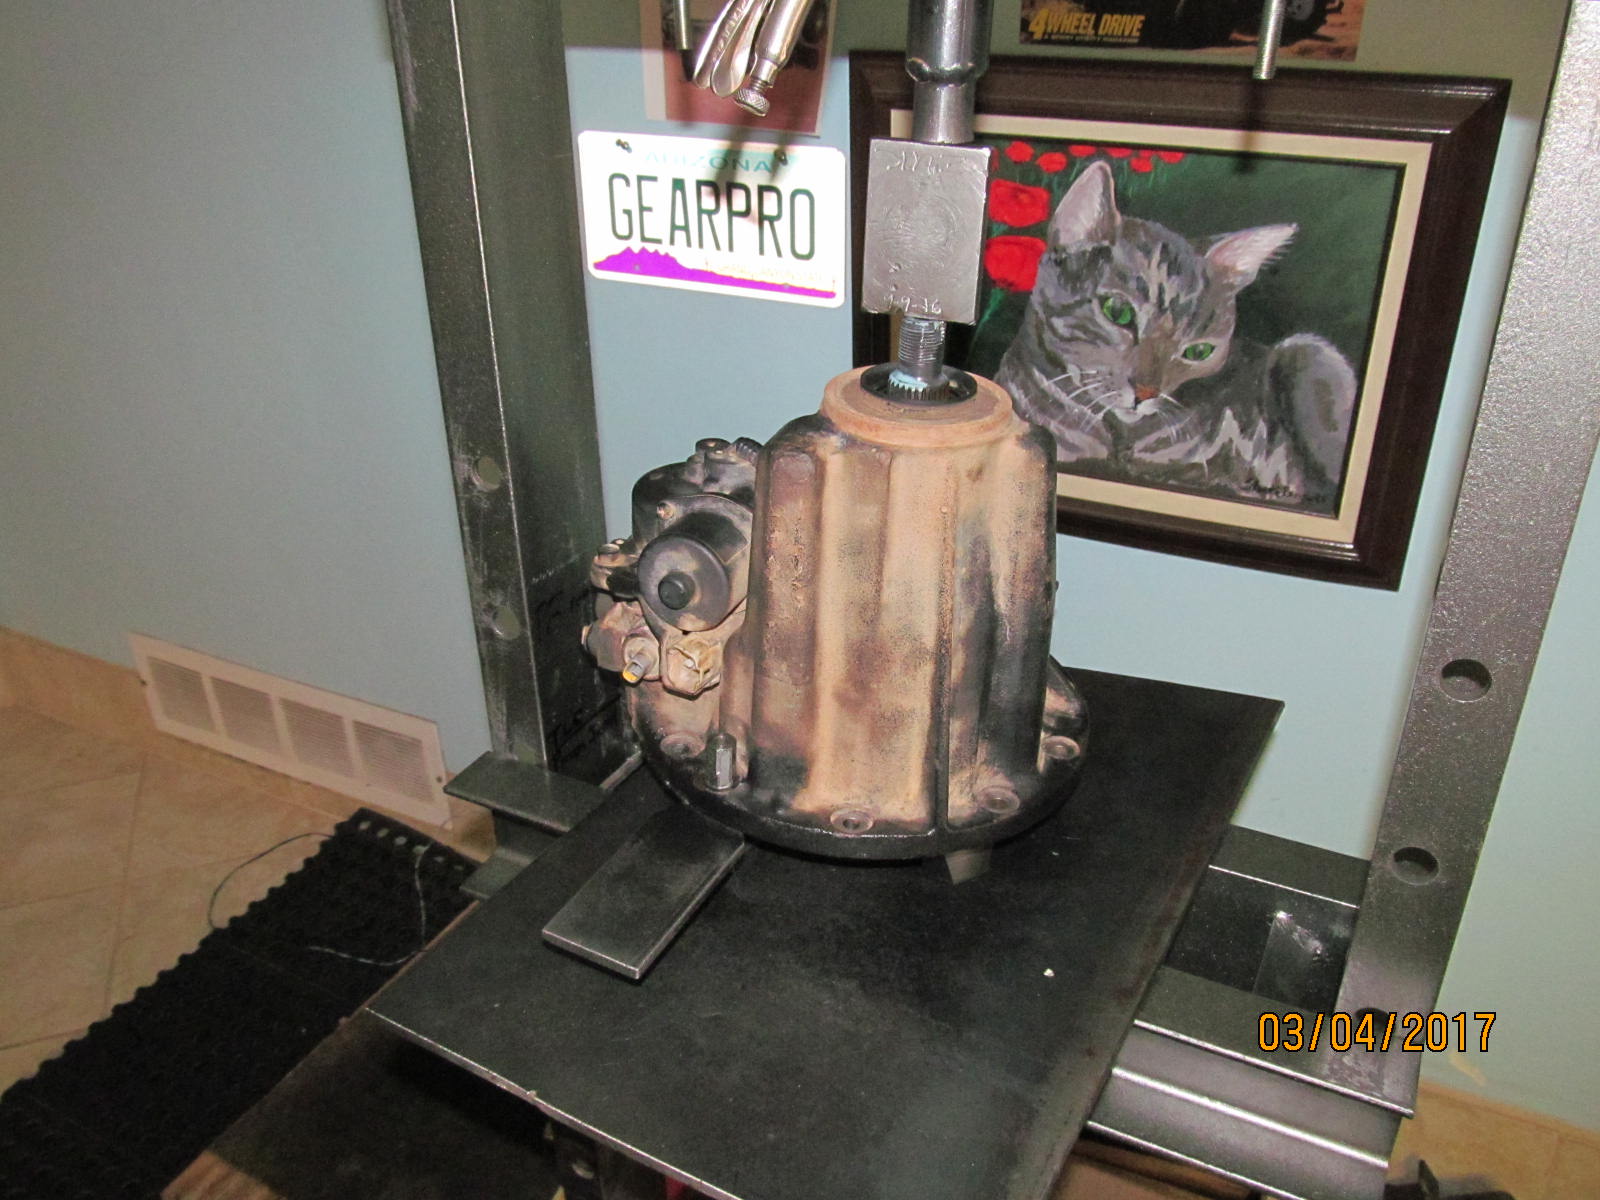
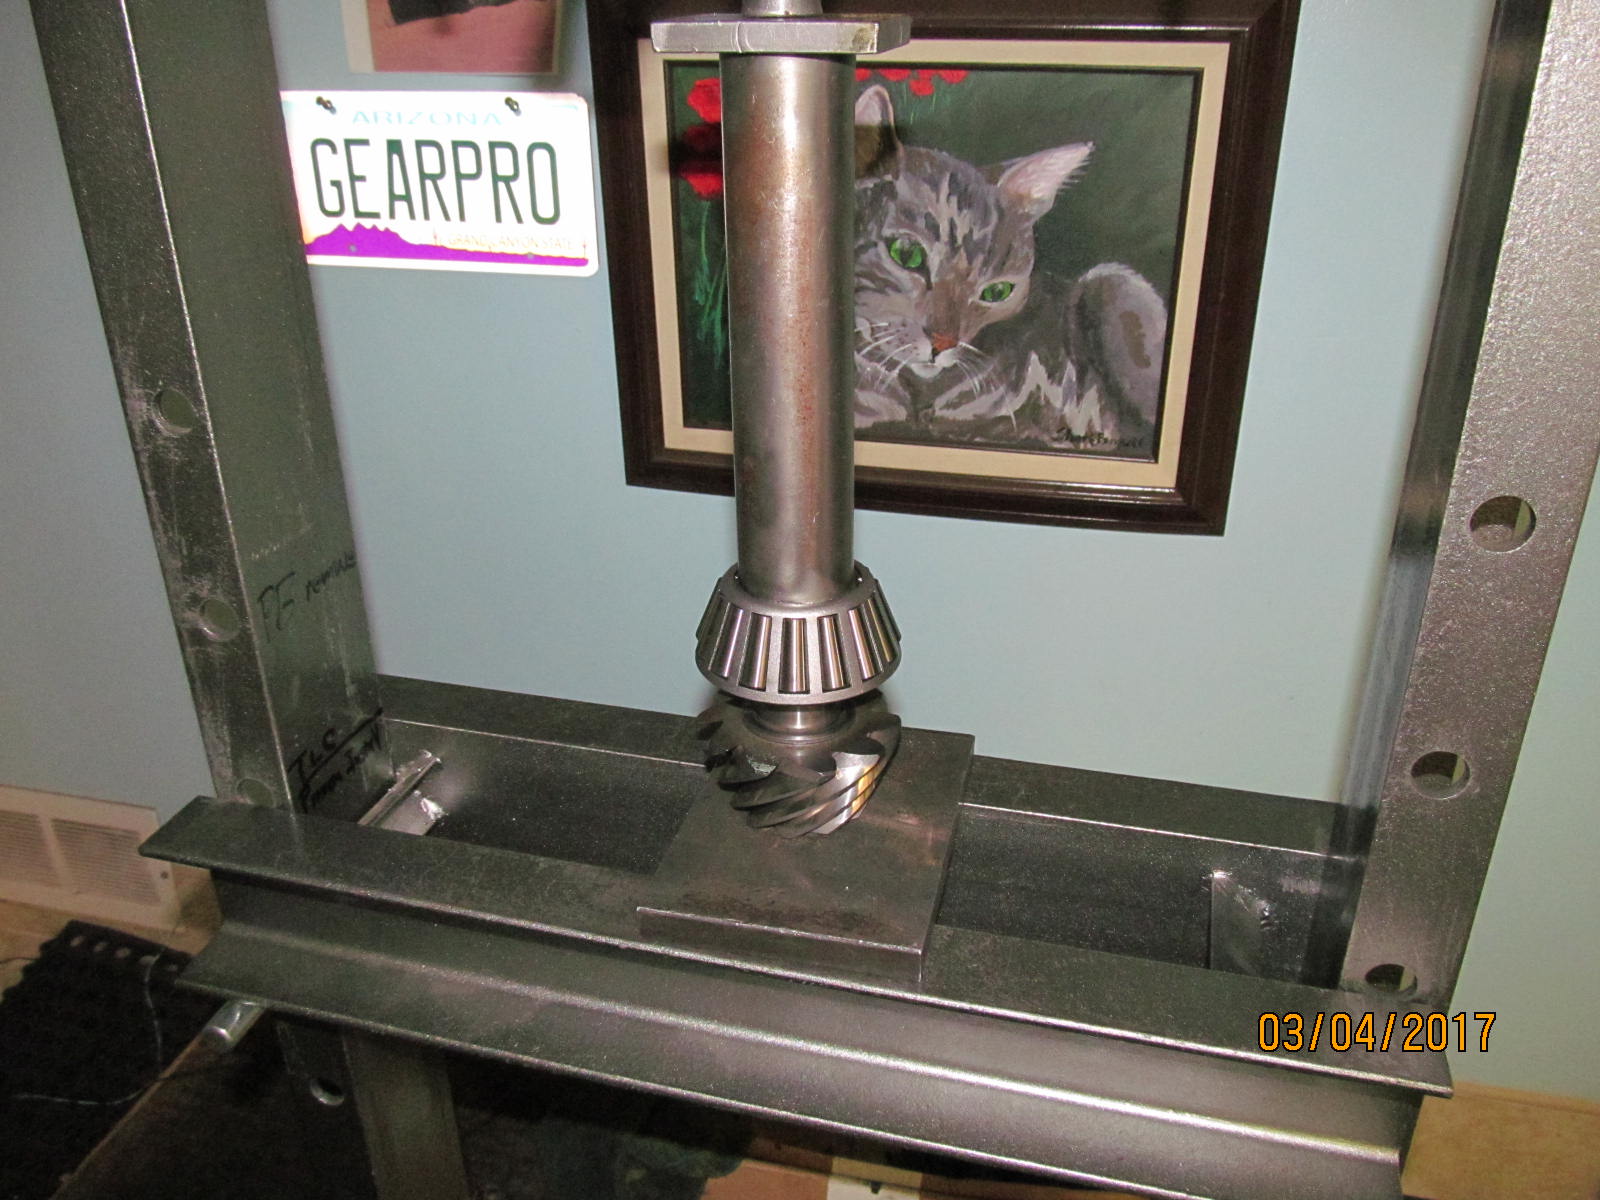
Last time the pinion is being pressed out. Just have to mount the new crush sleeve in place....
|
|
|
|
....A little trick I sometimes do. I support the pinion head below with aluminum blocks(complements of SkyJacker Suspension)
and pre-crush the collar 95% of the way. Saves on wear and tear of the threads.
|
|
|
|
|
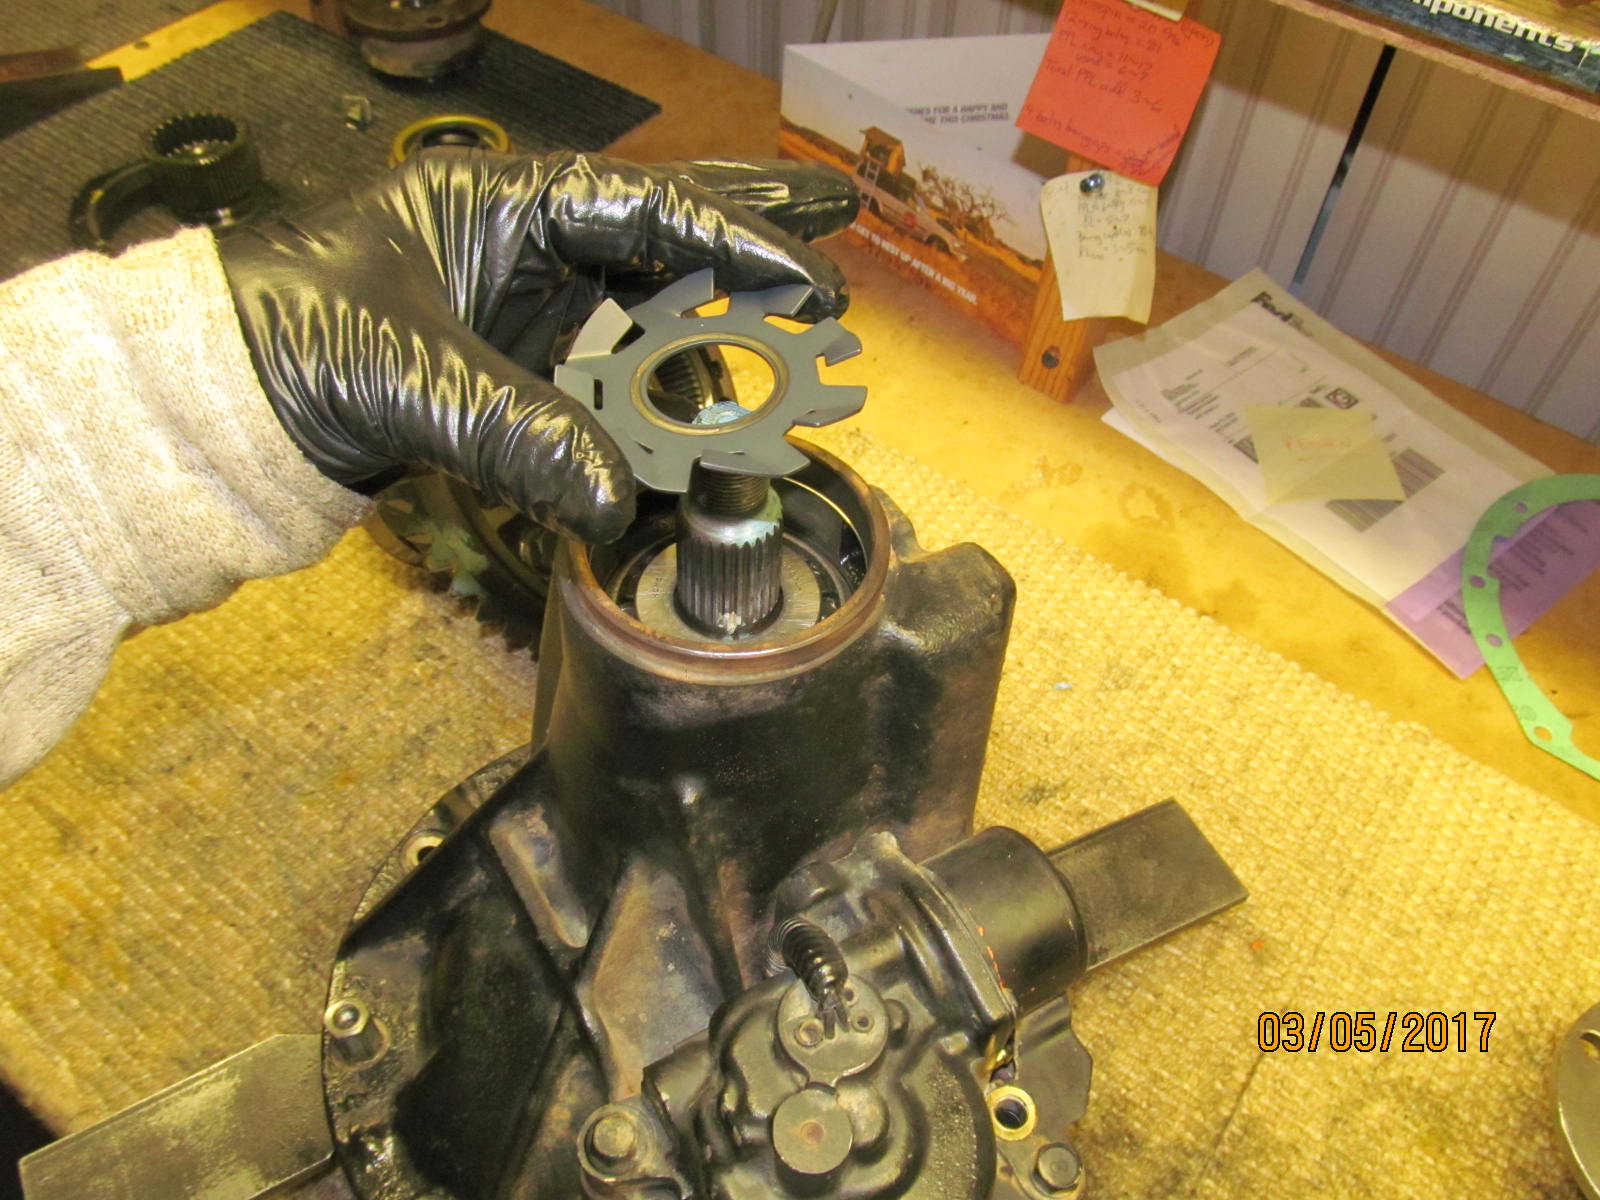
Last chance to pour gear oil on the bearings. Then the splashguard goes in place.
|
|
|
|
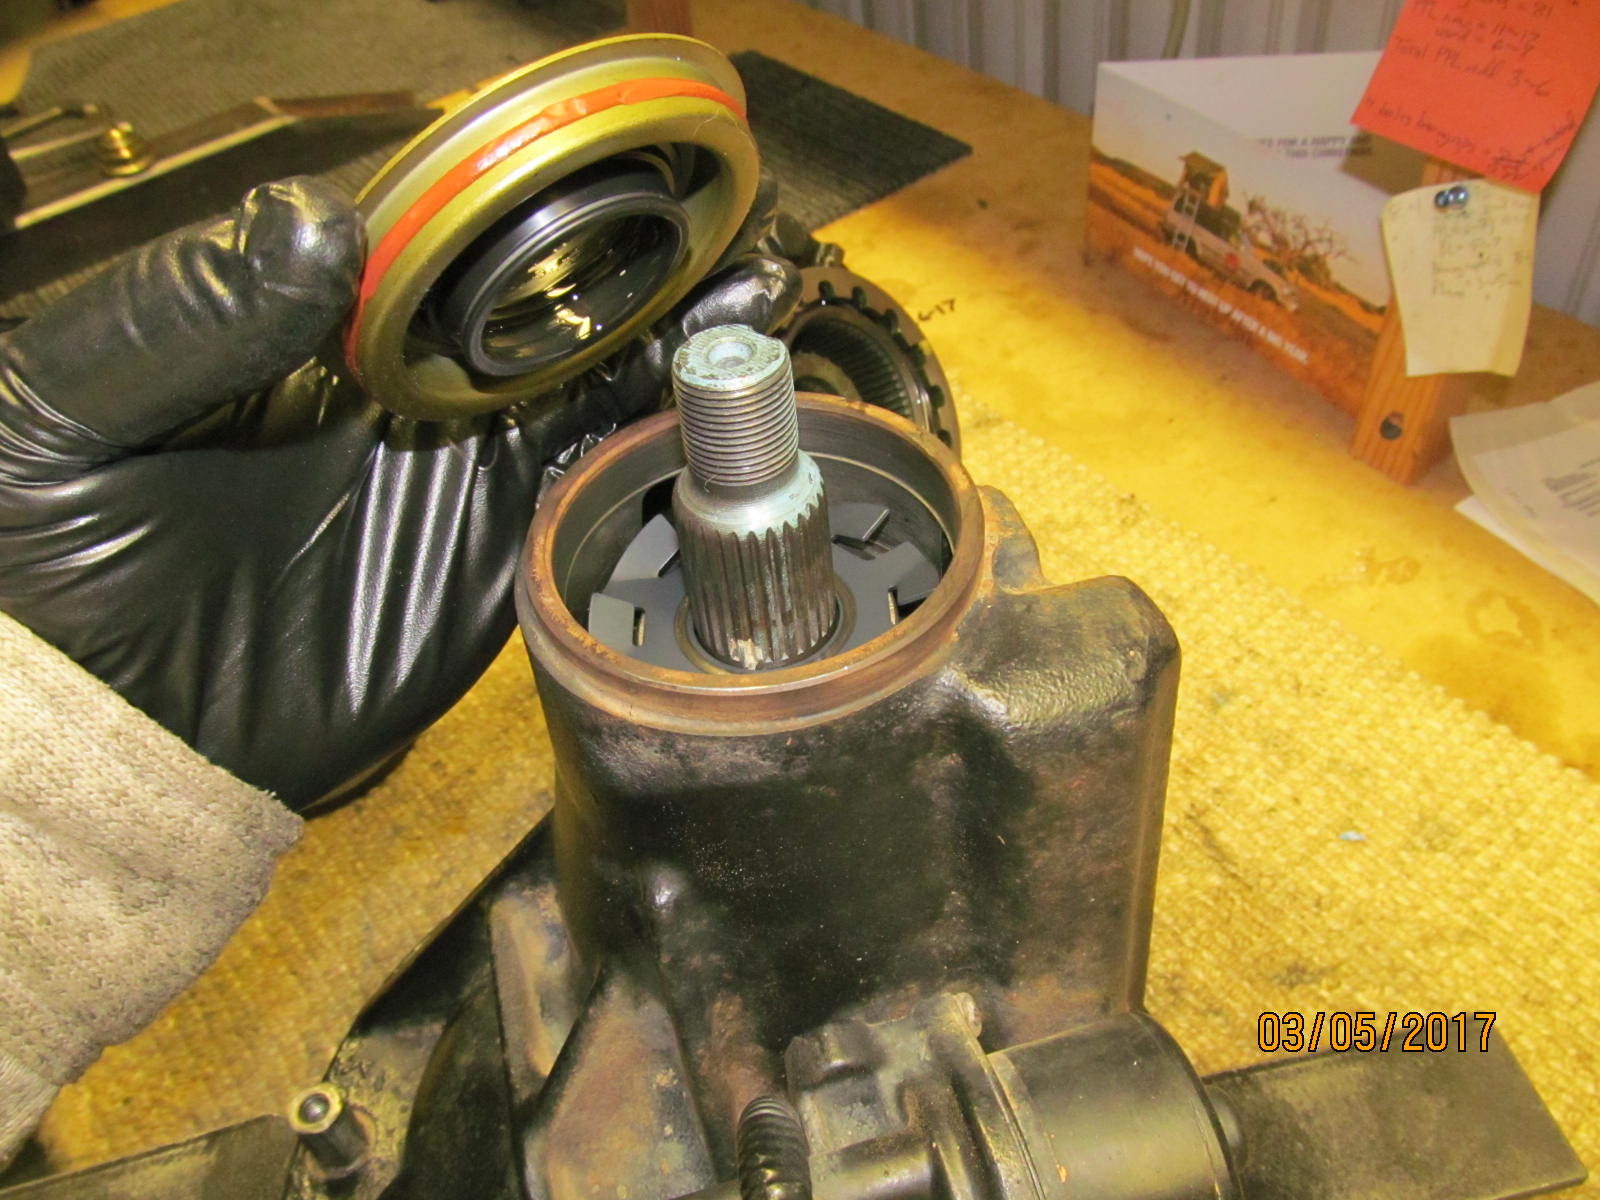
Marlin eco seal is a preferred seal for me. Amazingly flexible seal lip surface. Only fits on the 27 spline flanges though.
I wish they would come out with a 29 spliner version.
|
|
|
|
|
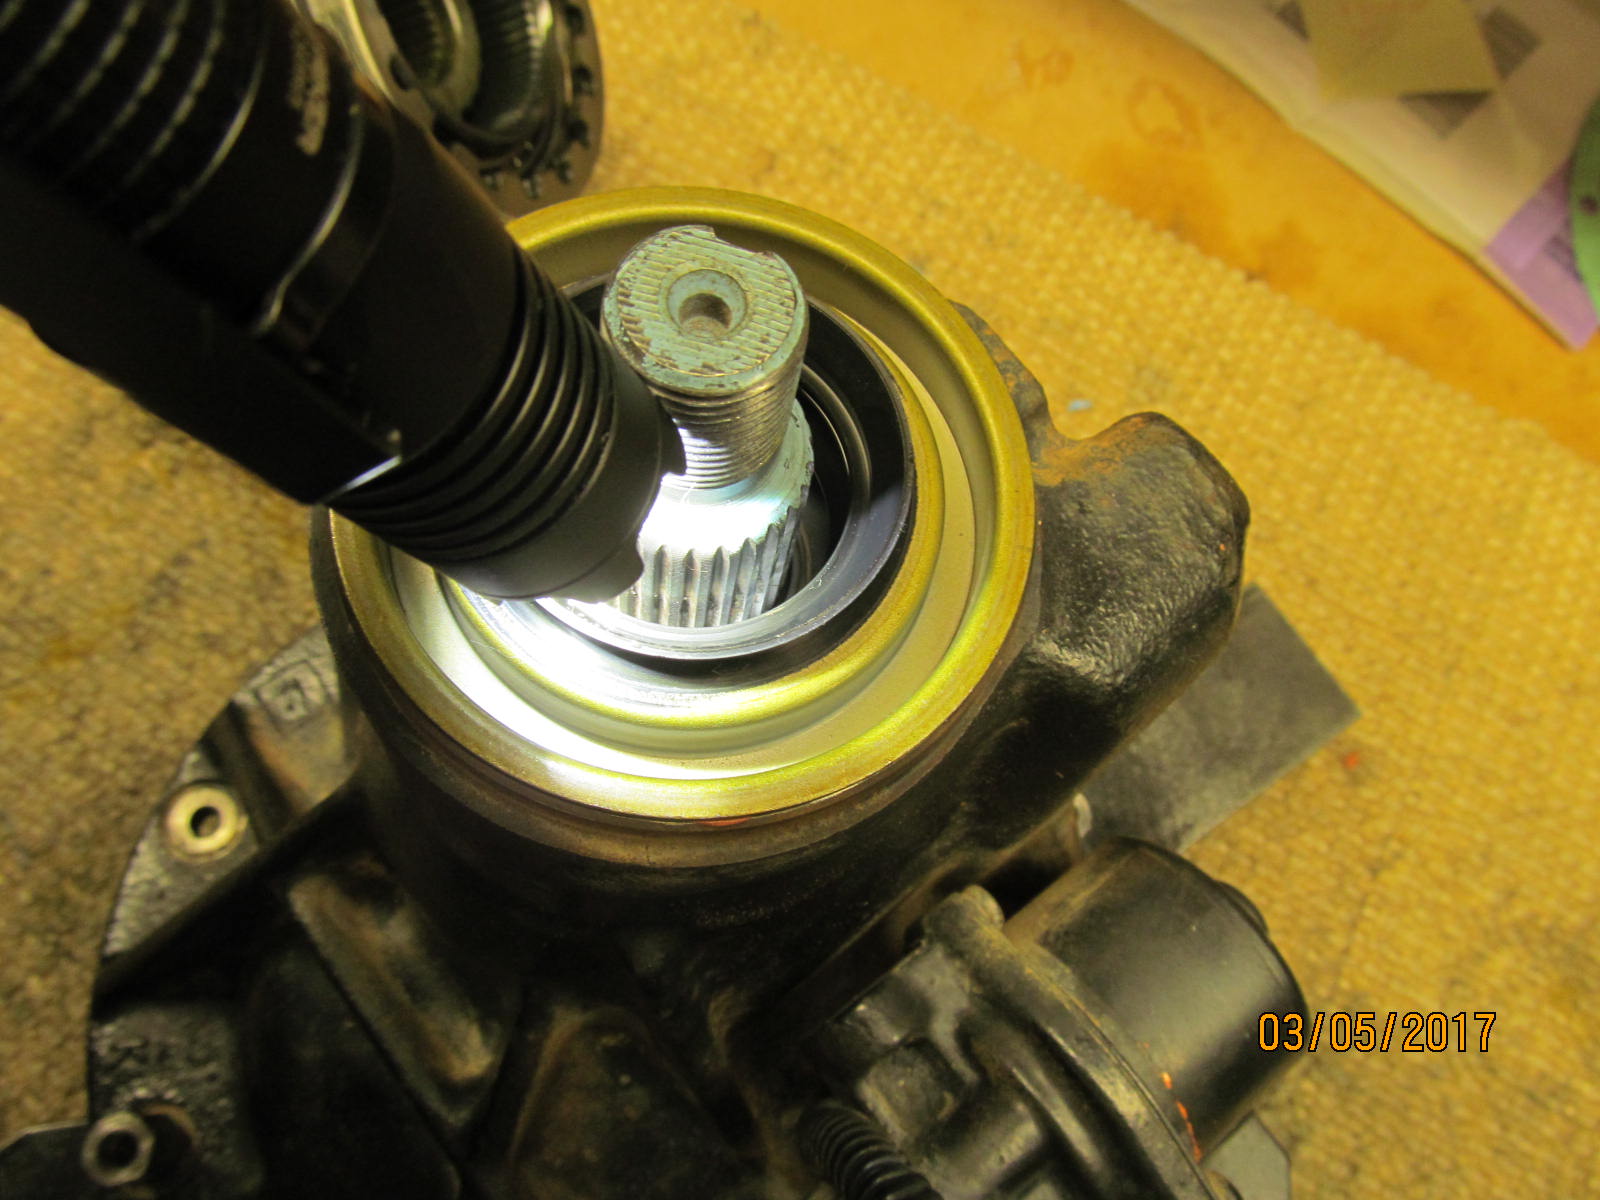
A quick check to make sure the garter wire did not somehow pop off....all looks great.
|
|
|
|
|
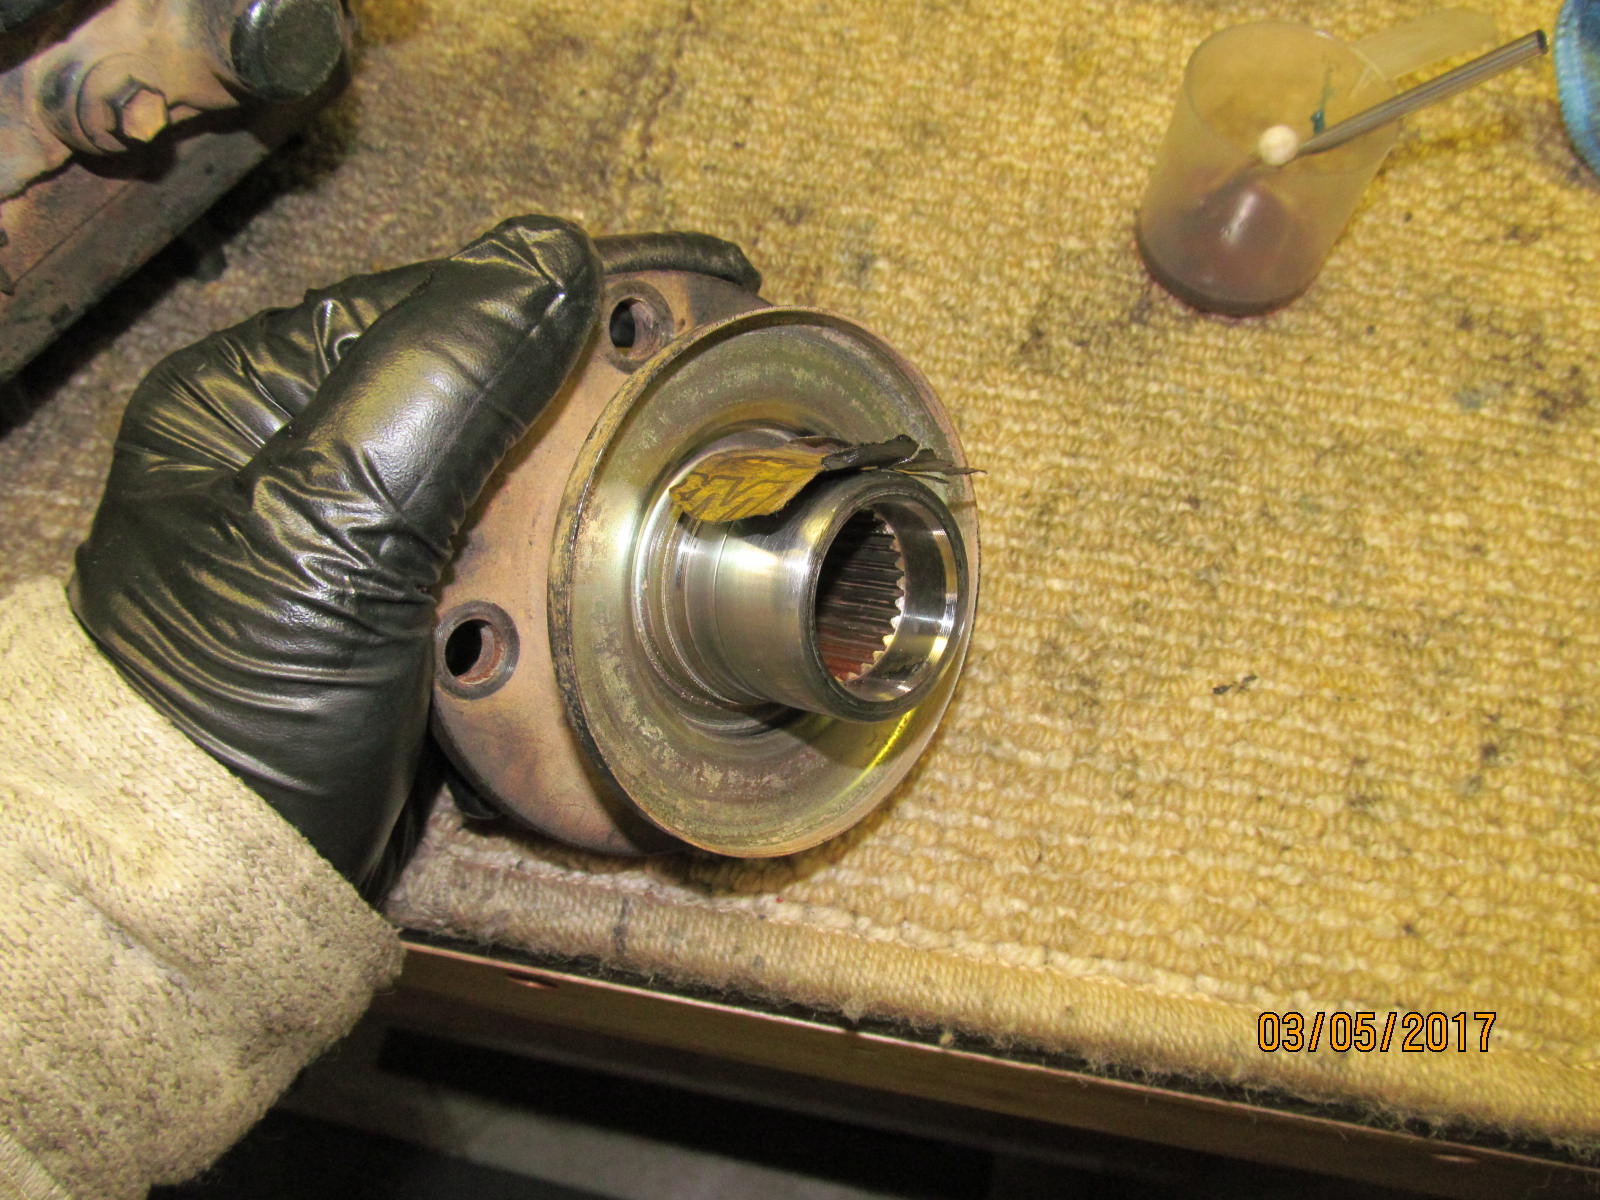
Wet/dry sandpaper to smooth out the surface.
|
|
|
|
|
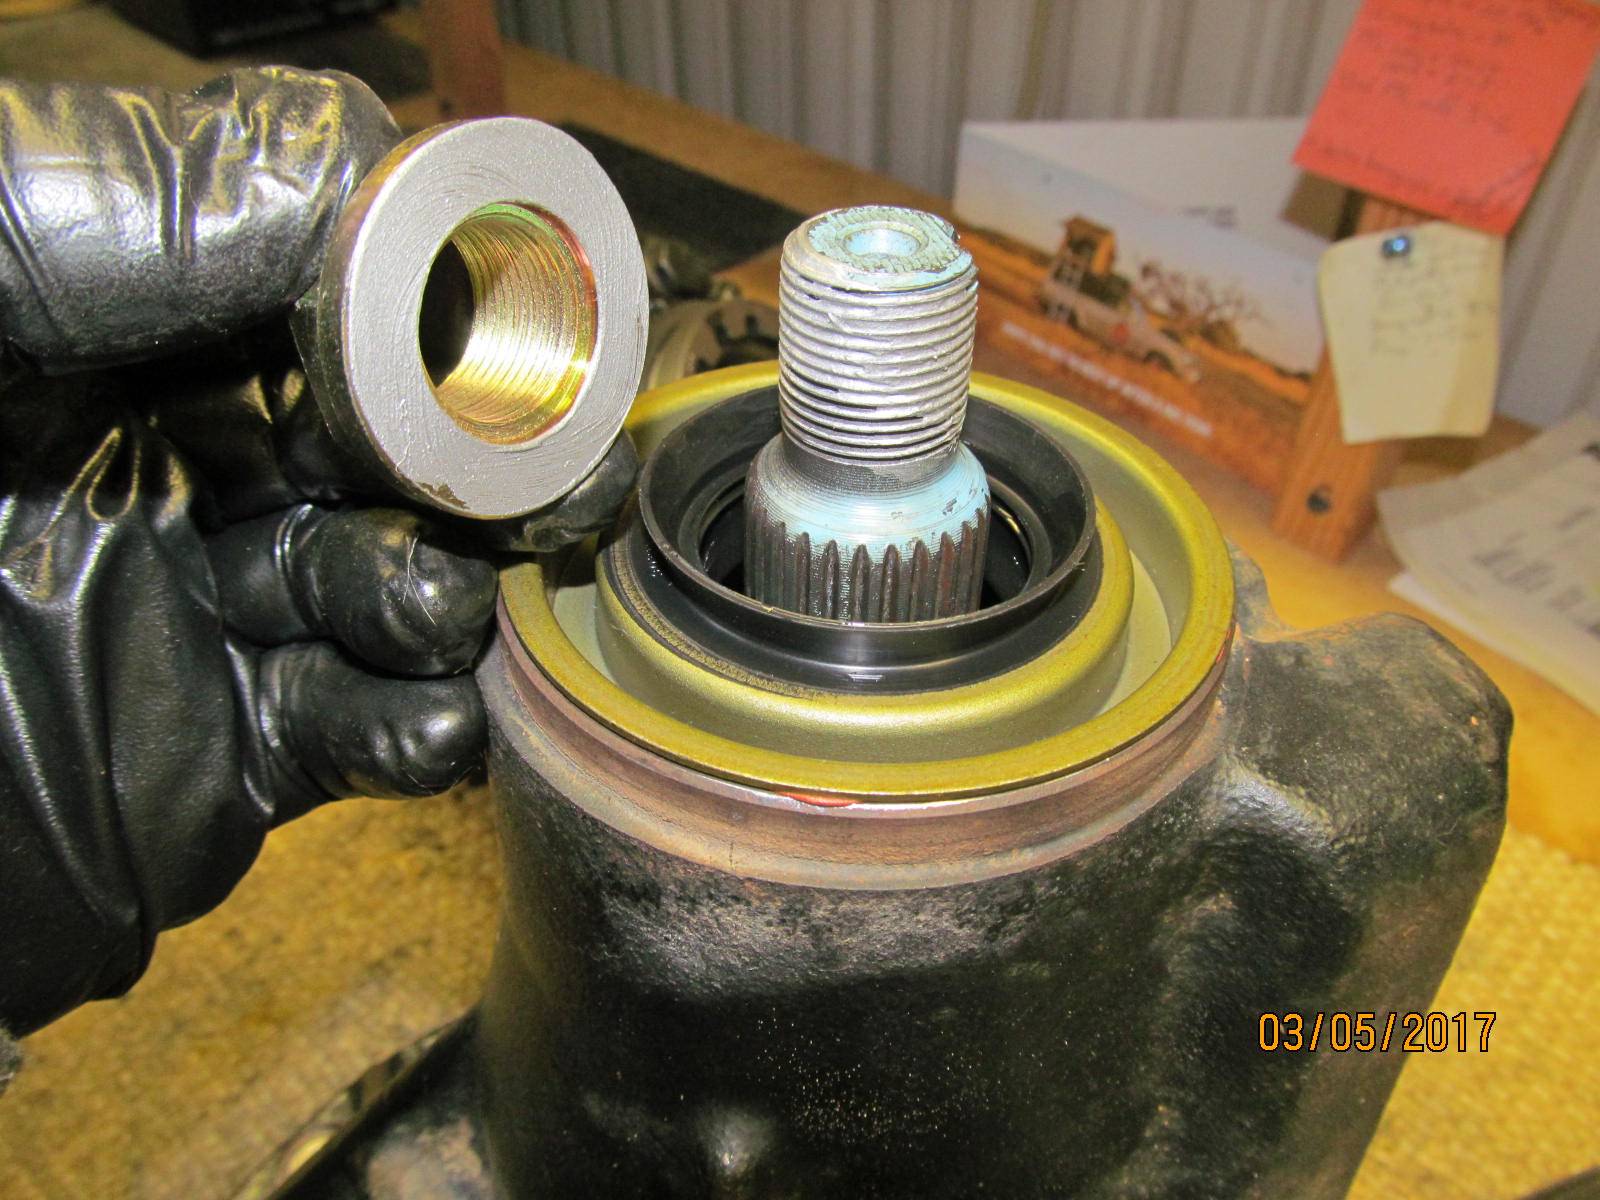
Before the flange is loaded up, a little aluminum based anti-seize helps.
|
|
|
|
|
.......................
|
|
|
|
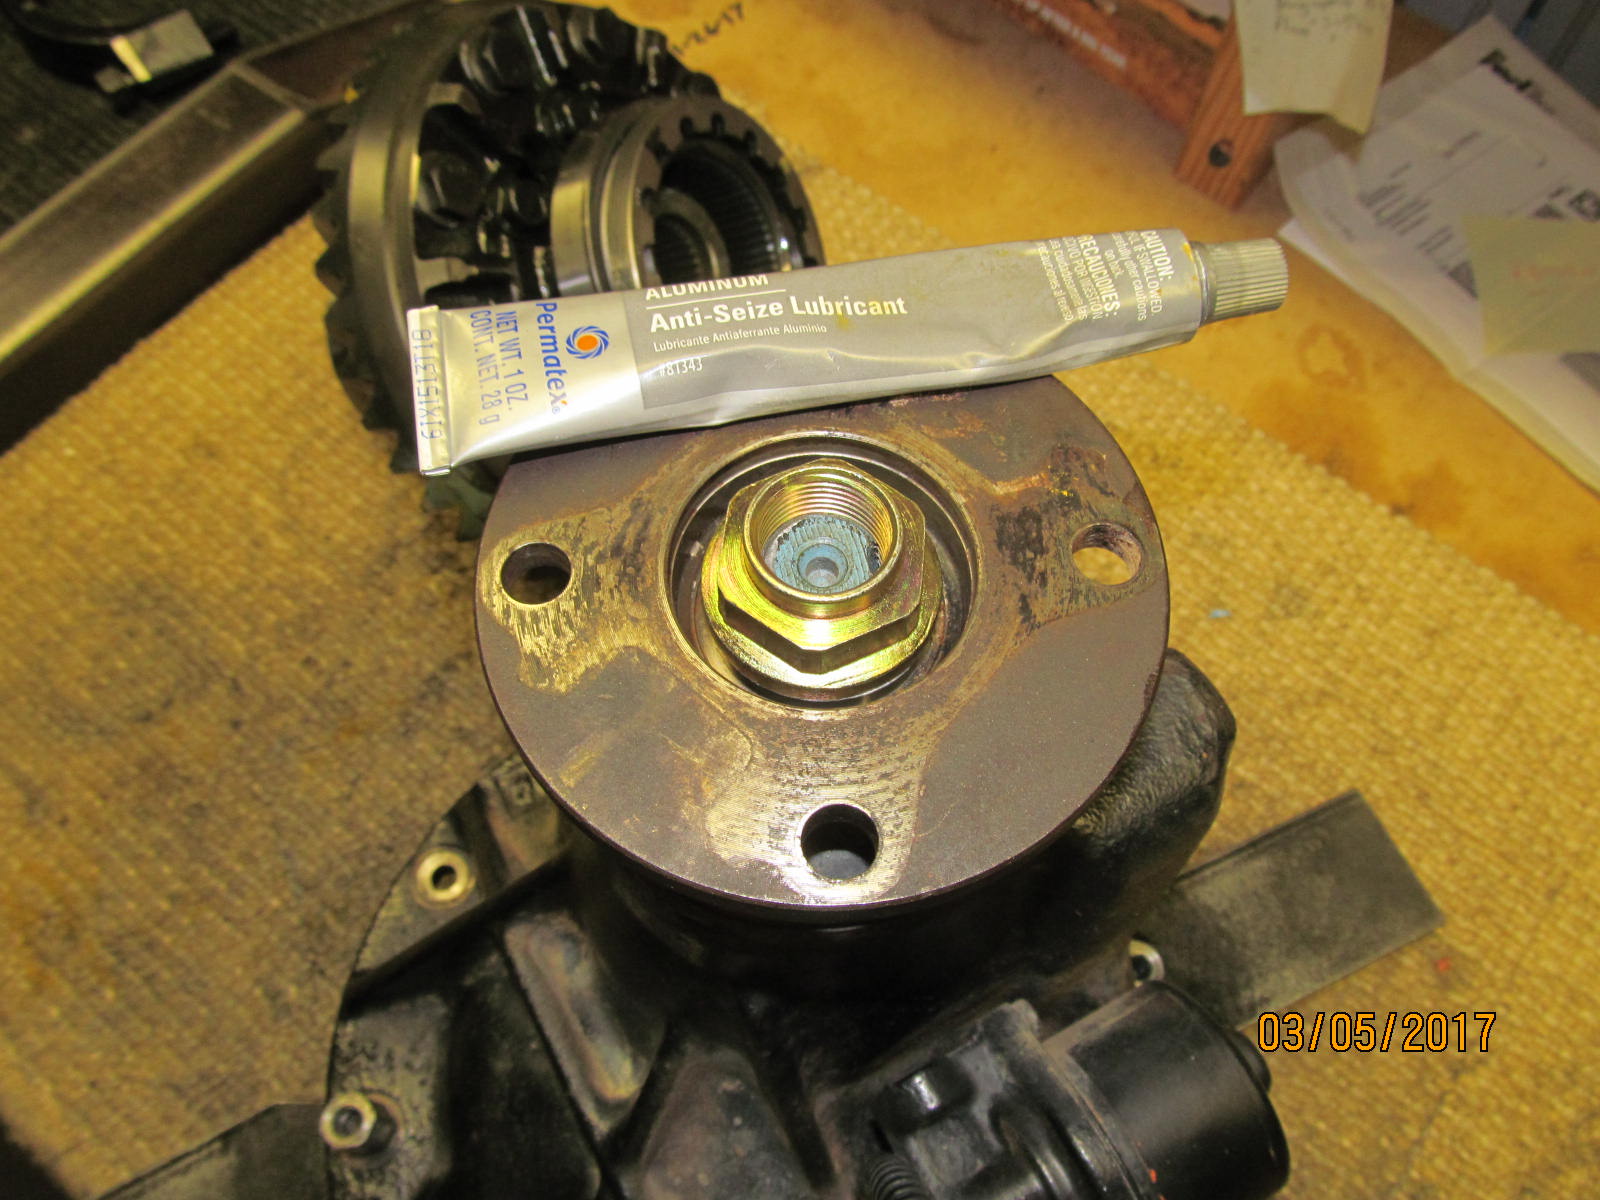
Because of all the extra gear oil on the bearings we can crank down on the pinion nut until we get a solid 10 in/lb of bearing drag.
Ding the pinion nut and this end is done.
|
|
|
|
|
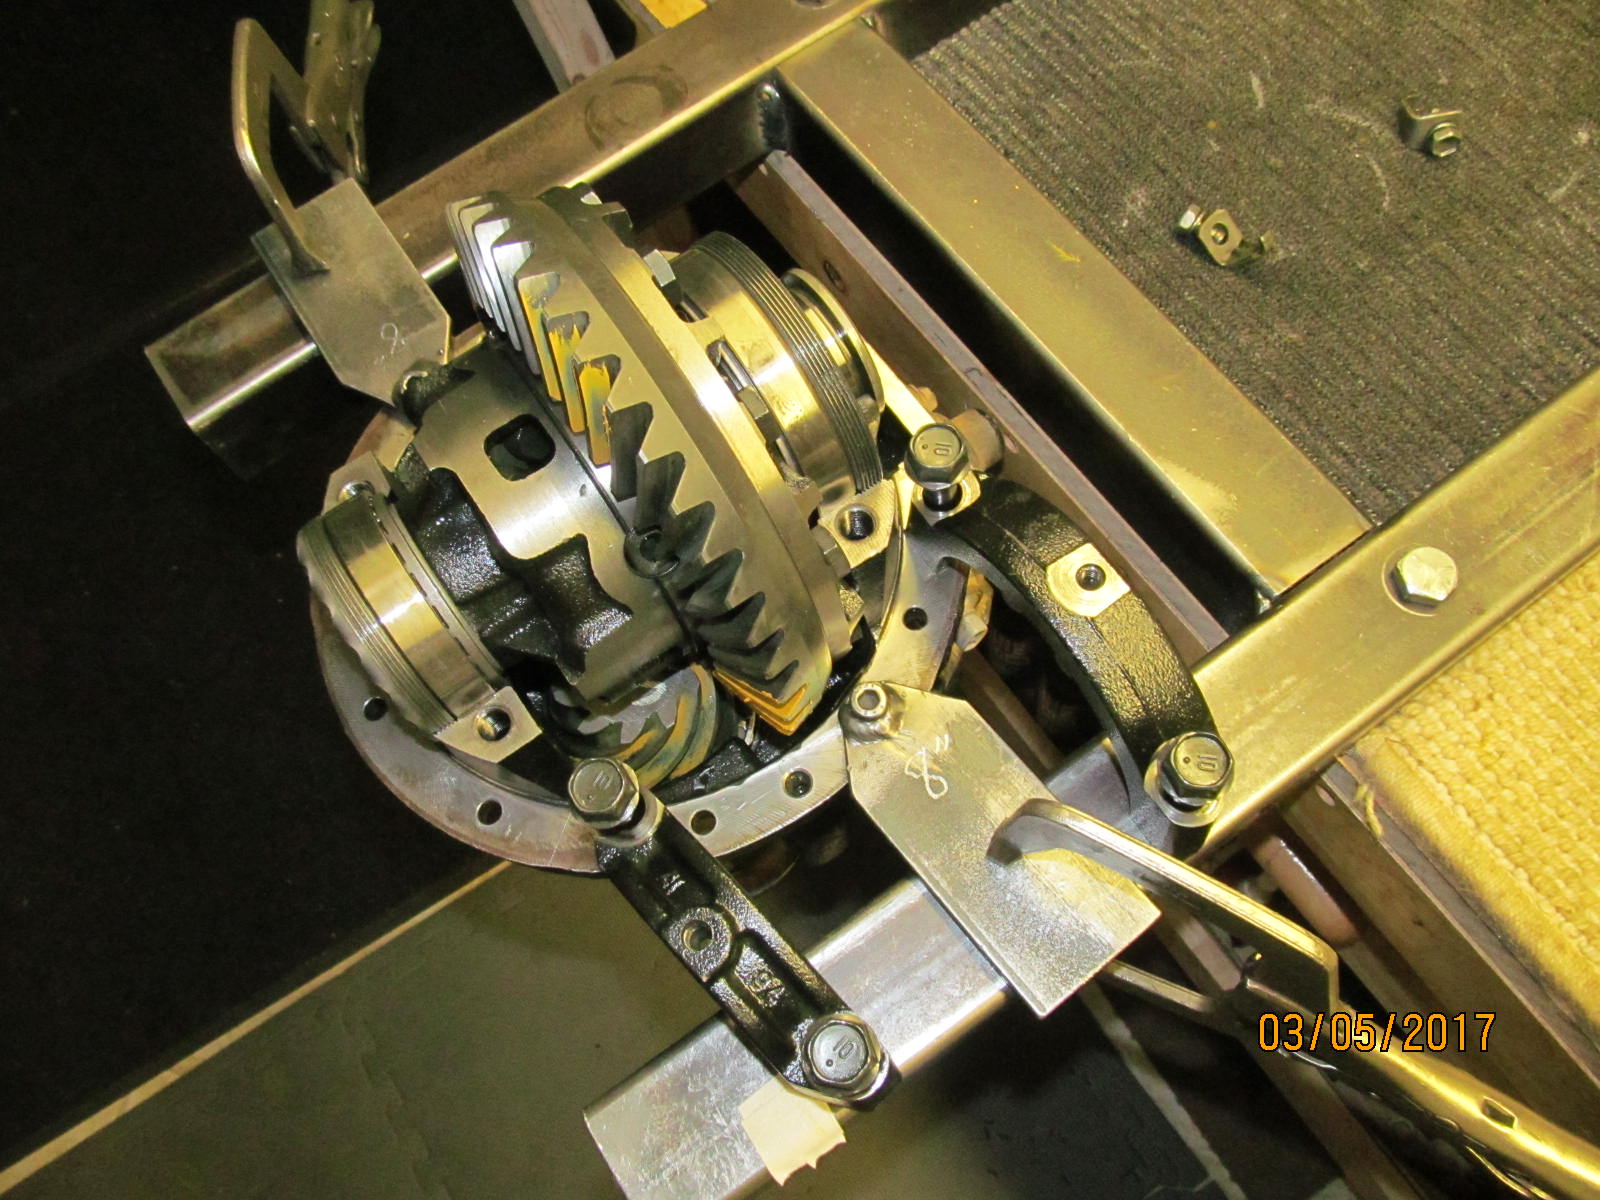
Now to finish up and load the diff case in place. Adjuster wheels are snugged up.
|
|
|
|
|
Bearing caps are in place and the 4 long bearing cap bolts are torqued to 70 ft/lb.
|
|
|
|
|
Wheels are tightened and tweaked until the backlash falls in the oem range of .0055 to .0070".
|
|
|
|
|
.......................
|
|
|
|
|
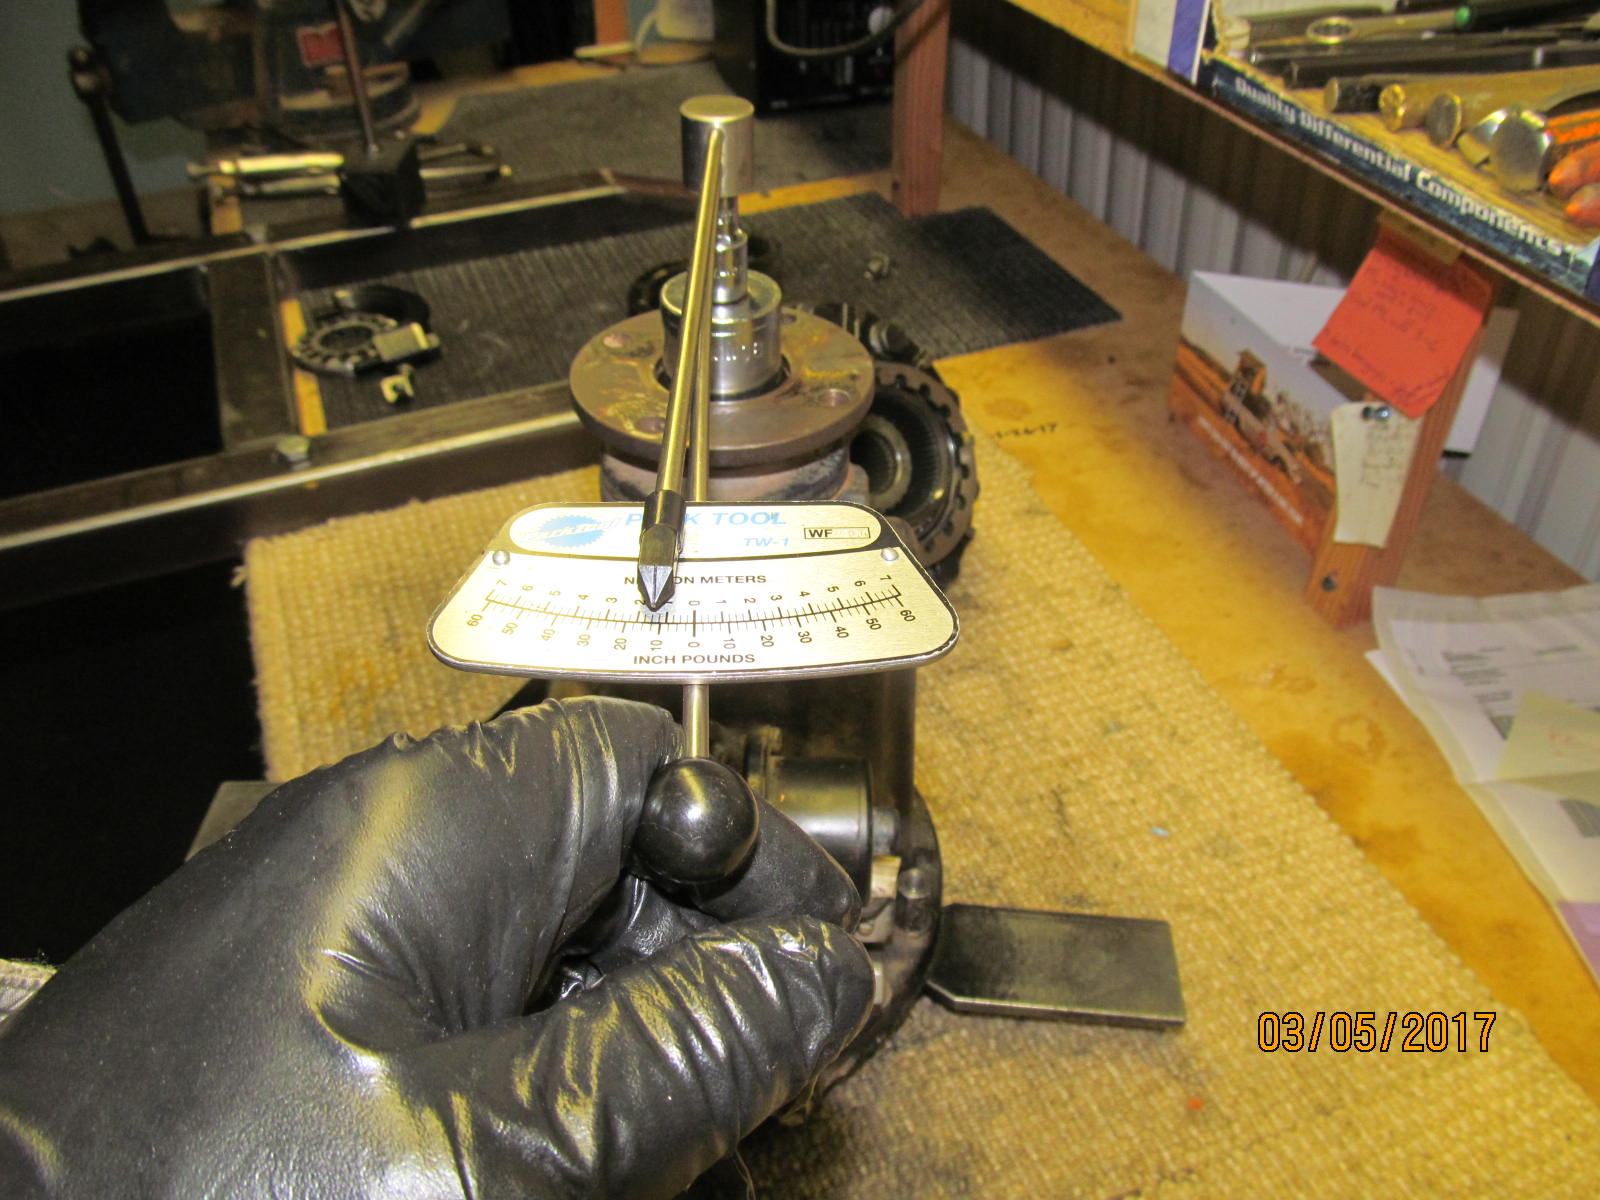
Total combined bearing preload measured right at 17 in/lb start torque. That's the force required to START turning the pinion and carrier bearings.
|
|
|

|
|
Backlash is recorded from every other tooth.....21 readings.
|
|
|

|
|
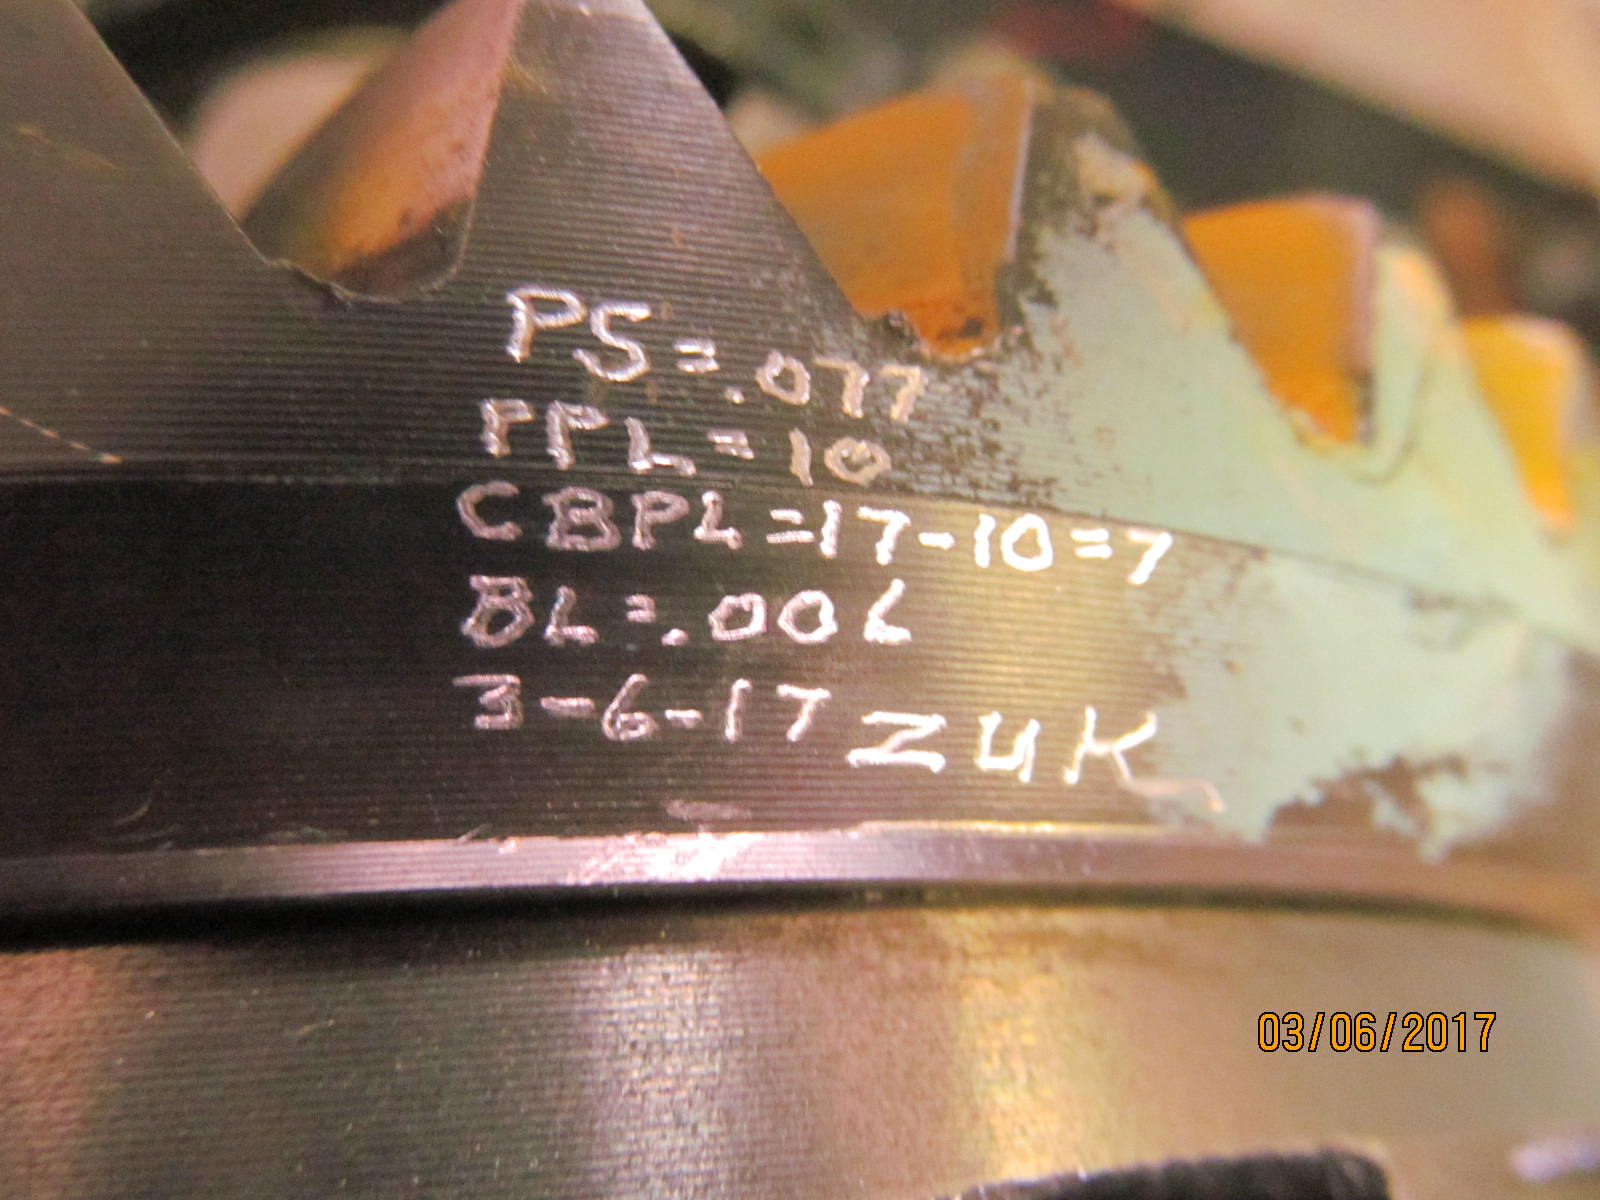
Satisfied with BL and CBPL, now the lock tab 12mm bolts are torqued to 10+ ft/lb with some blue loctite.
|
|
|
|
|
Recording the measured quantities.
|
|
|

|
|
A snap shot of my notes during Humberto's used 410 gear install
|
|
|
|
|
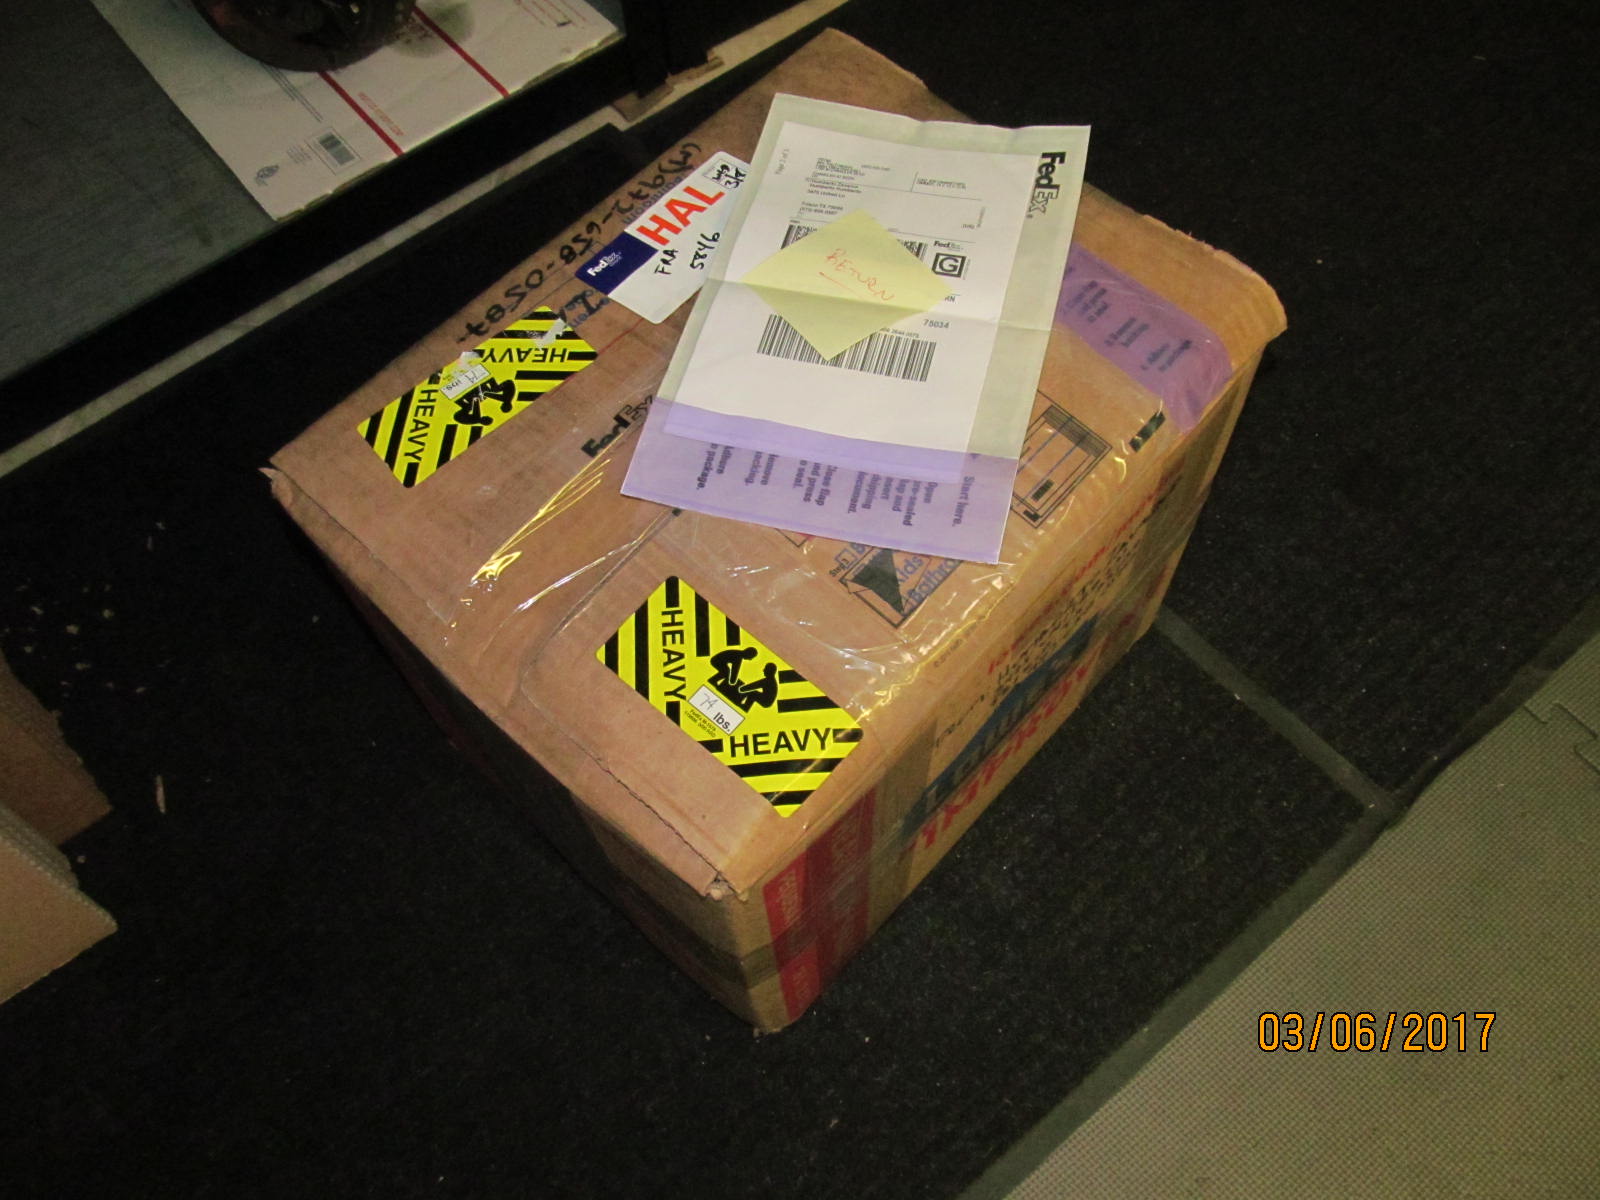
Back to Frisco,TX.
|
|
|

|