|
|
|
|
|
|
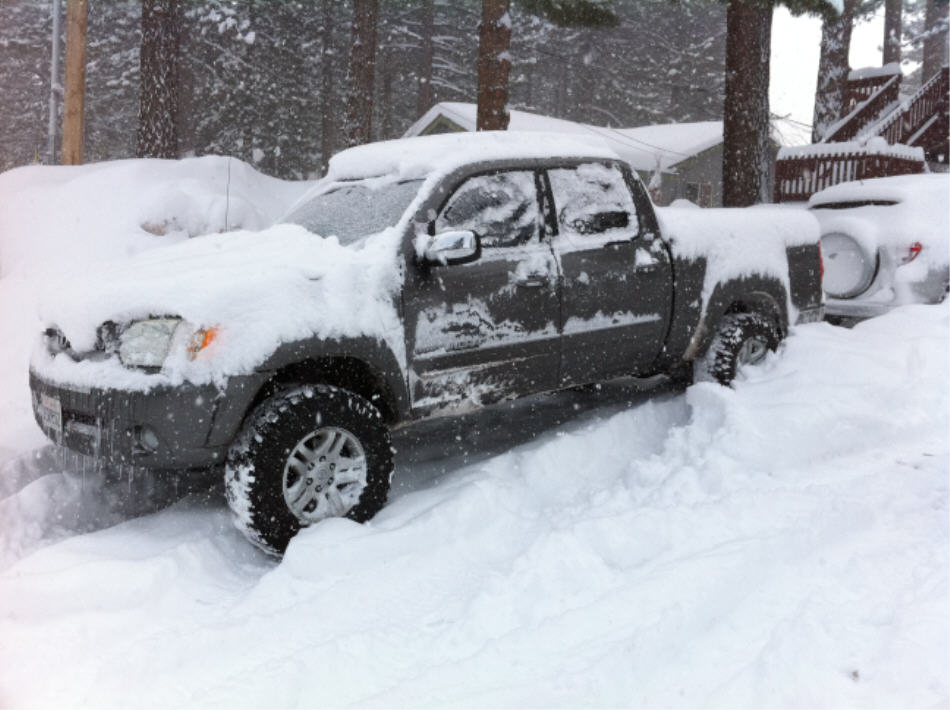
Nam's 2006 Tundra chilling out at the lodge in North Lake Tahoe March of 2011. |
|
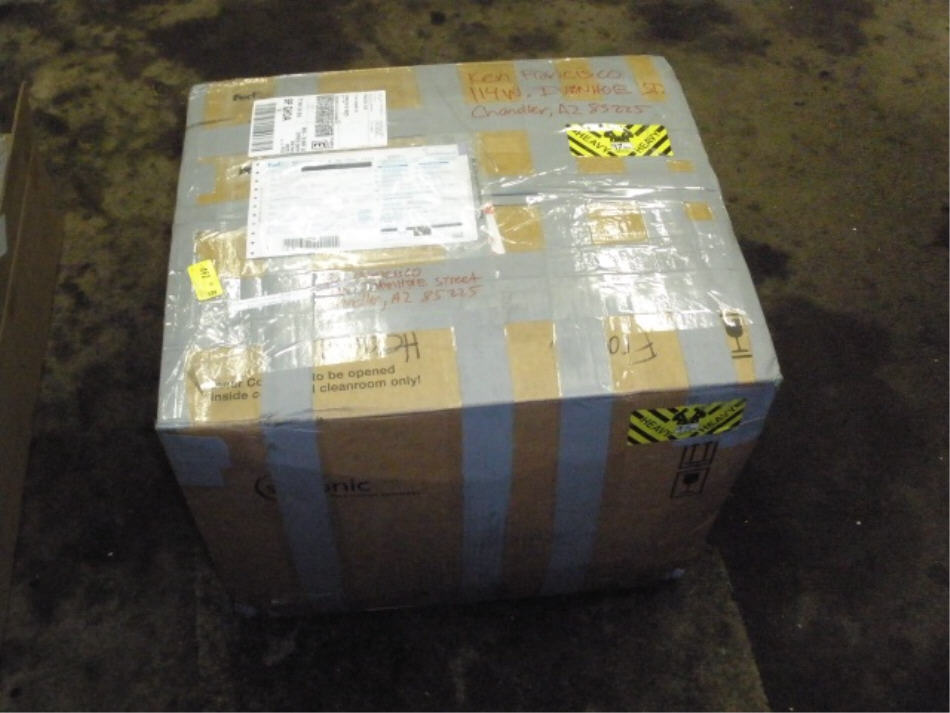
Nam, from San Jose CA, sent me his rear 8.4" 3rd for a 488 re-gear. This one weighed about 97 pounds due to the master kit and new gears being in the same box which made it a bit more expensive to send out. |
|
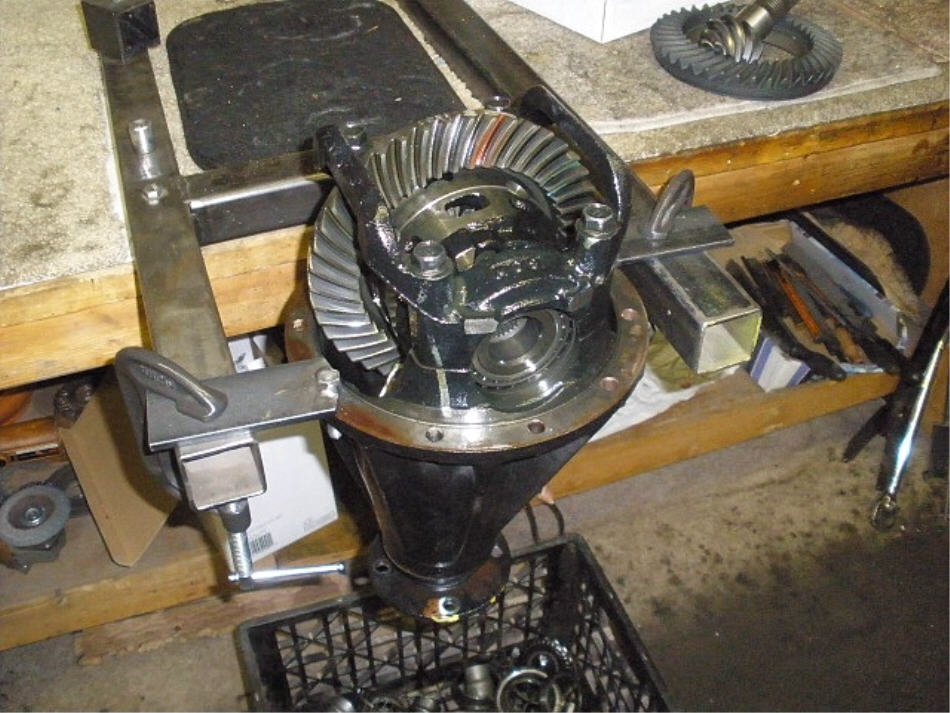
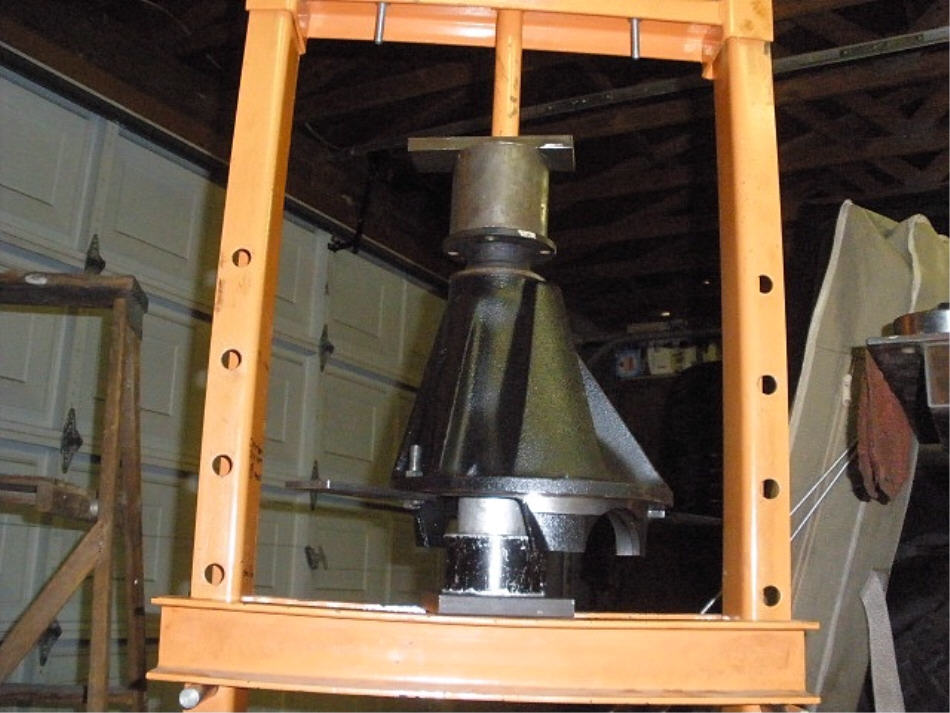
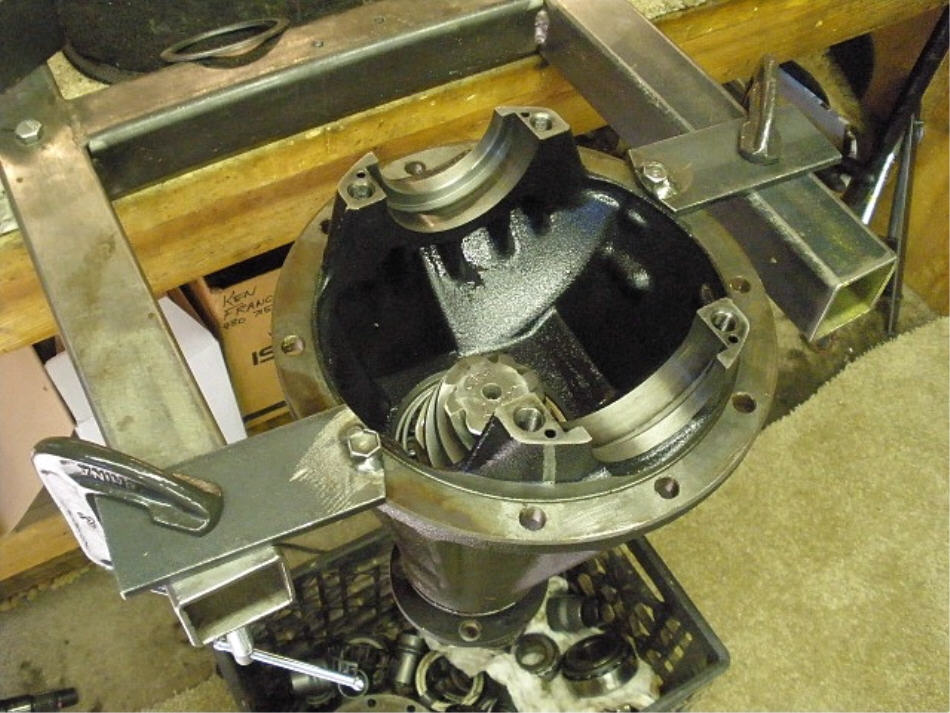
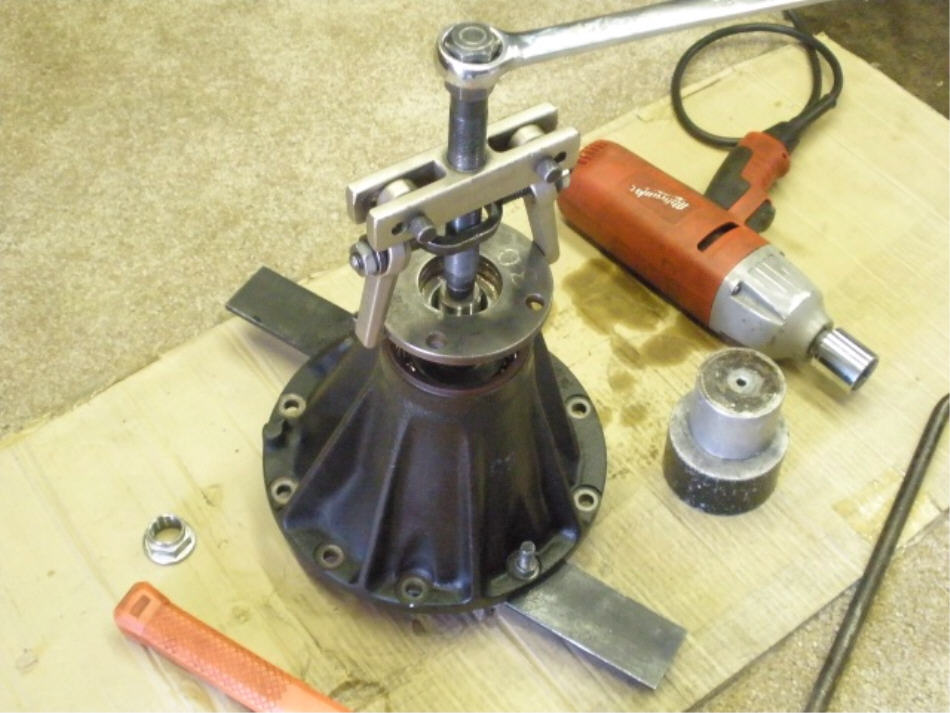
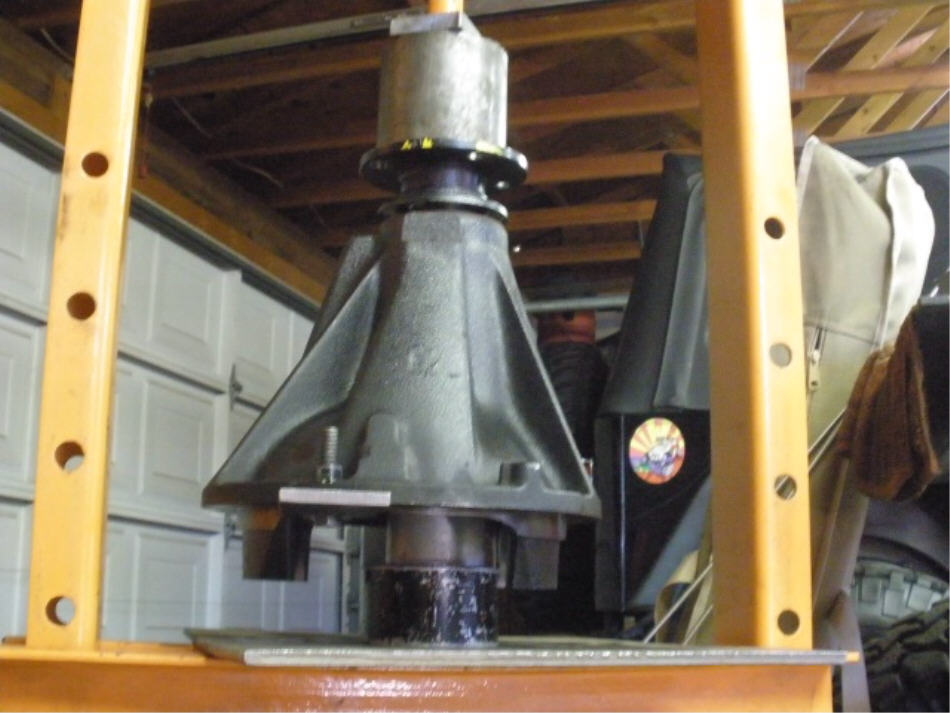
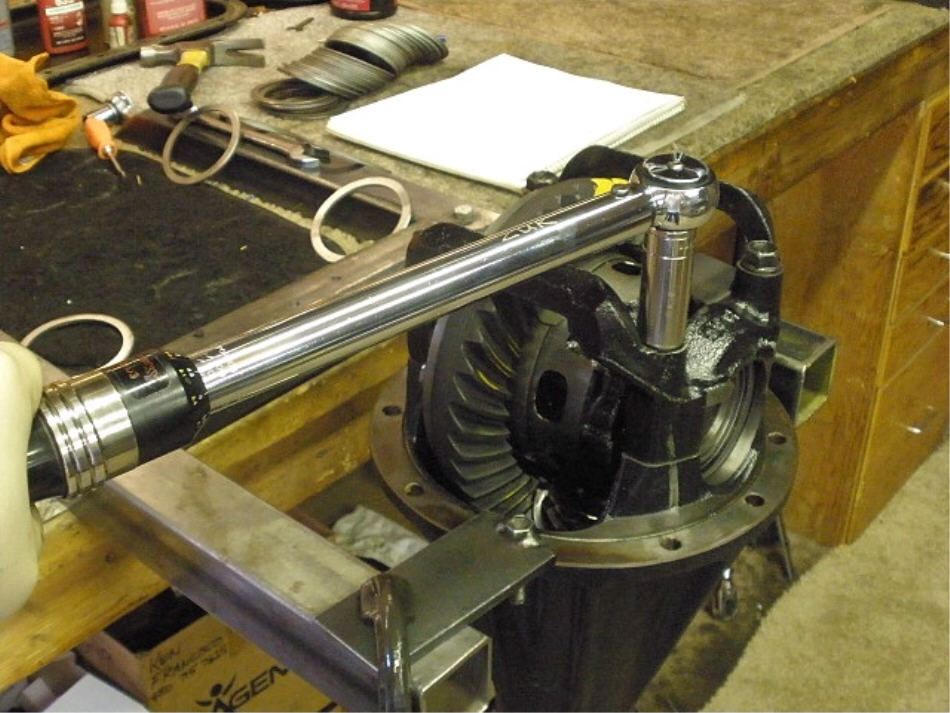
The 8.4 is bolted to my fixture. |
|
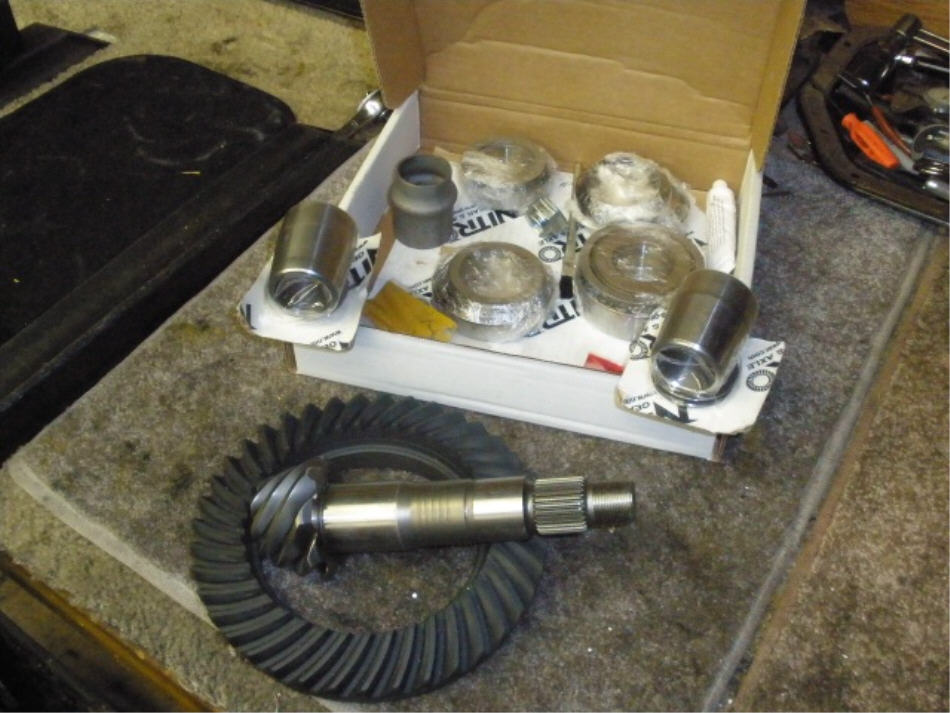
The 488 and master kit came from JT's I believe. Nitro Gears are the preferred gear and it looks like 2 solid collars were sent for an unknown reason so I will be sending one back to Nam. |
|
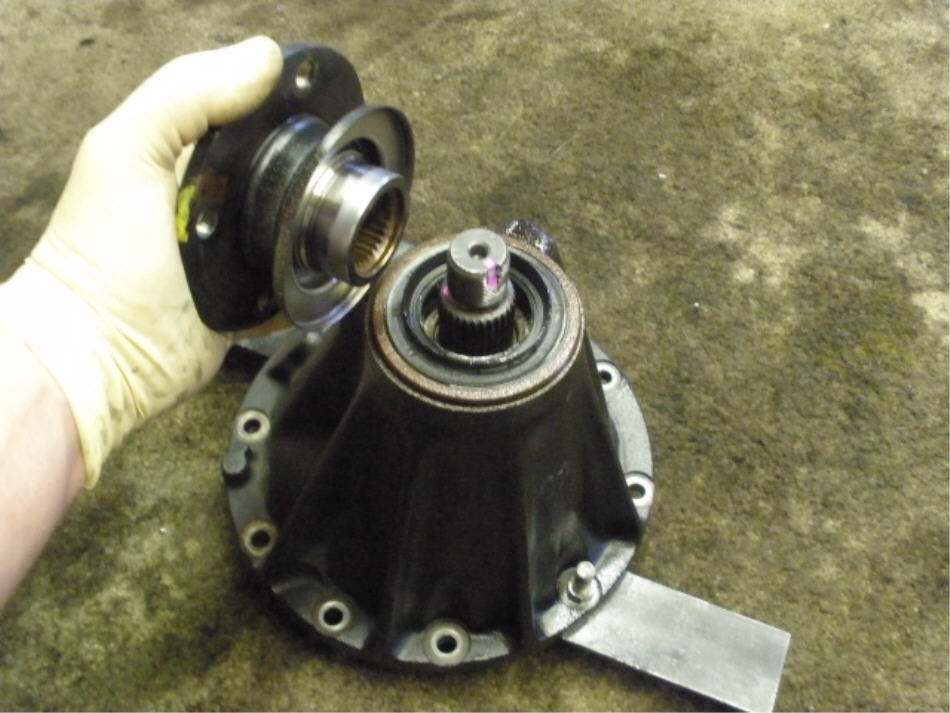
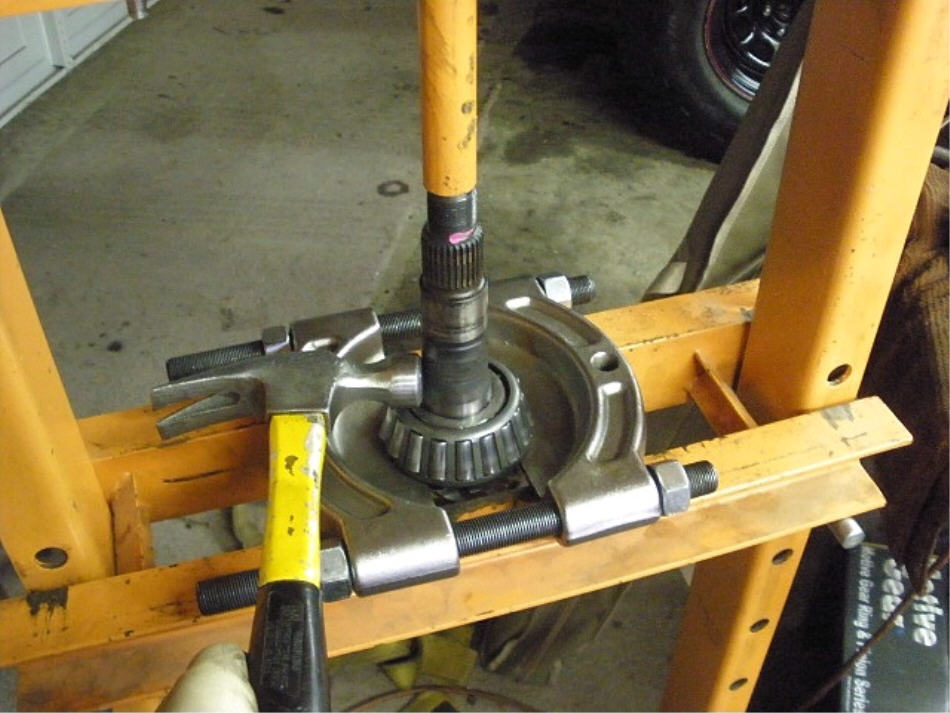
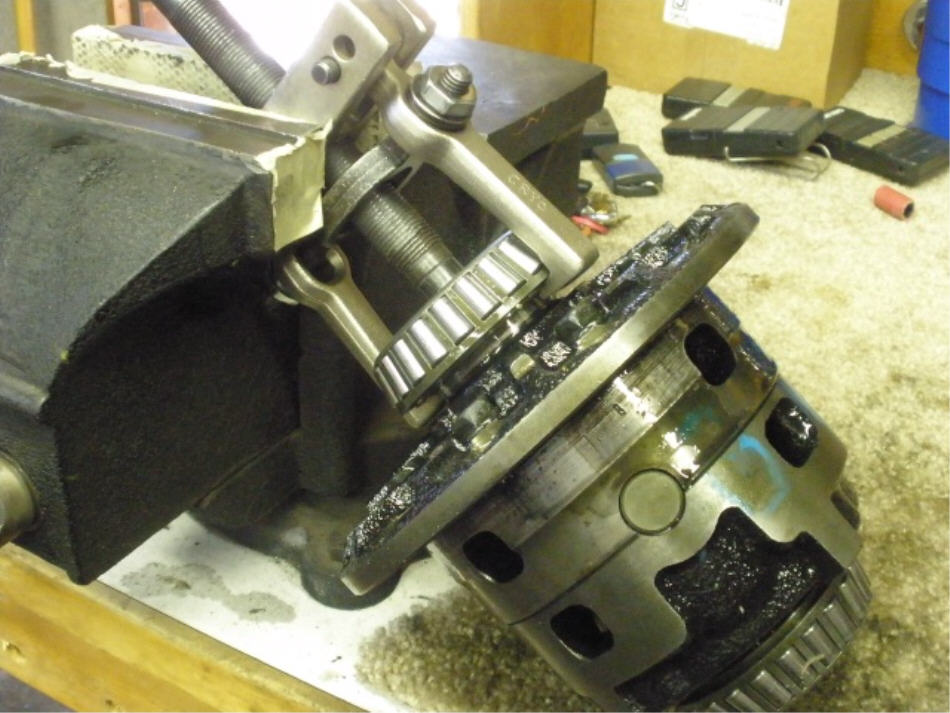
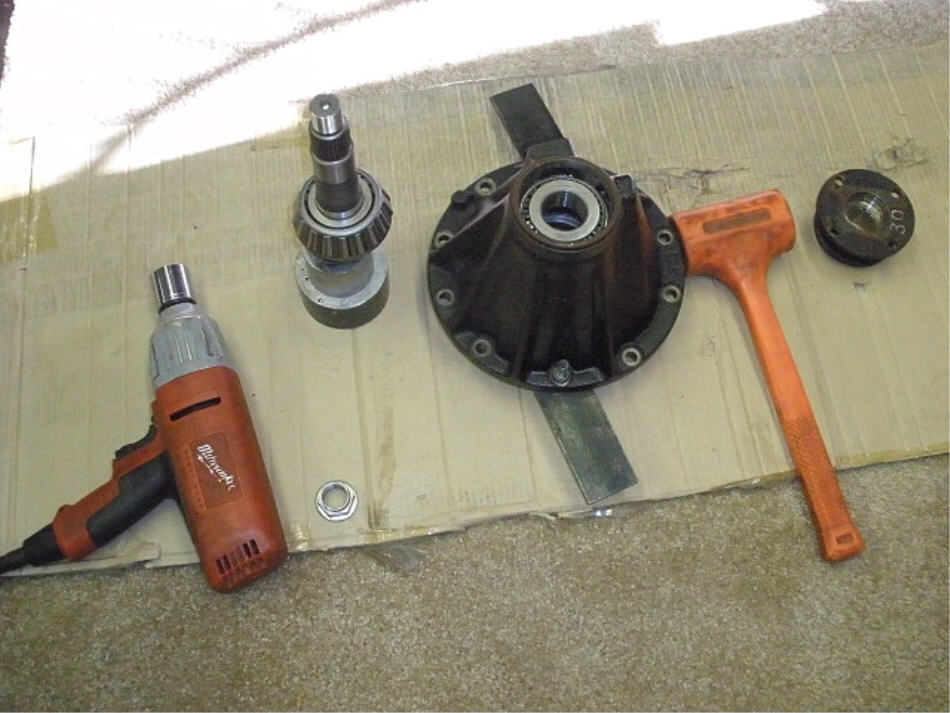
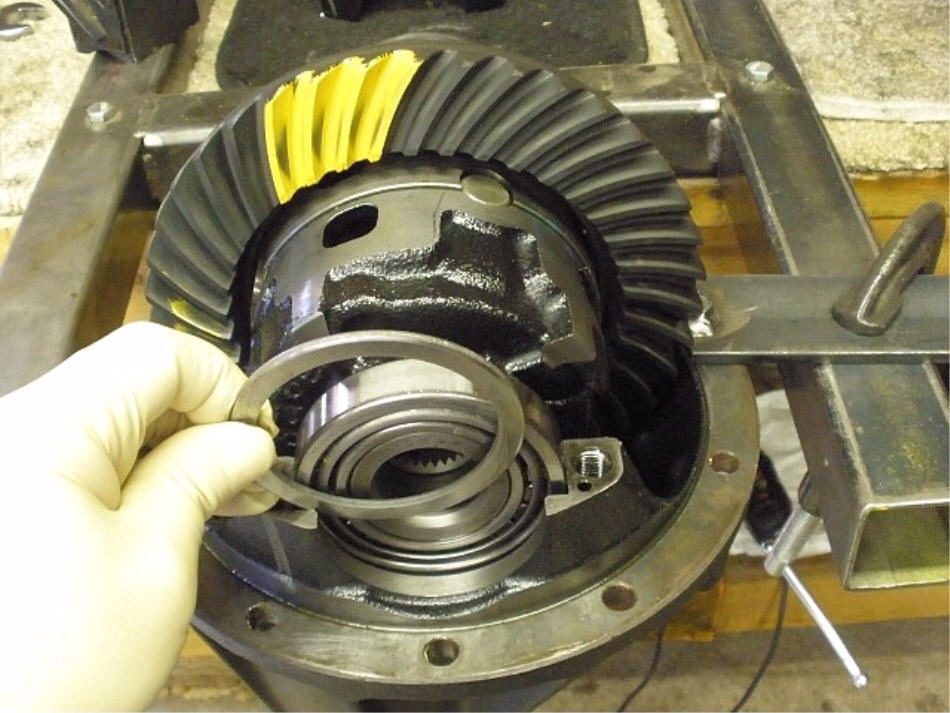
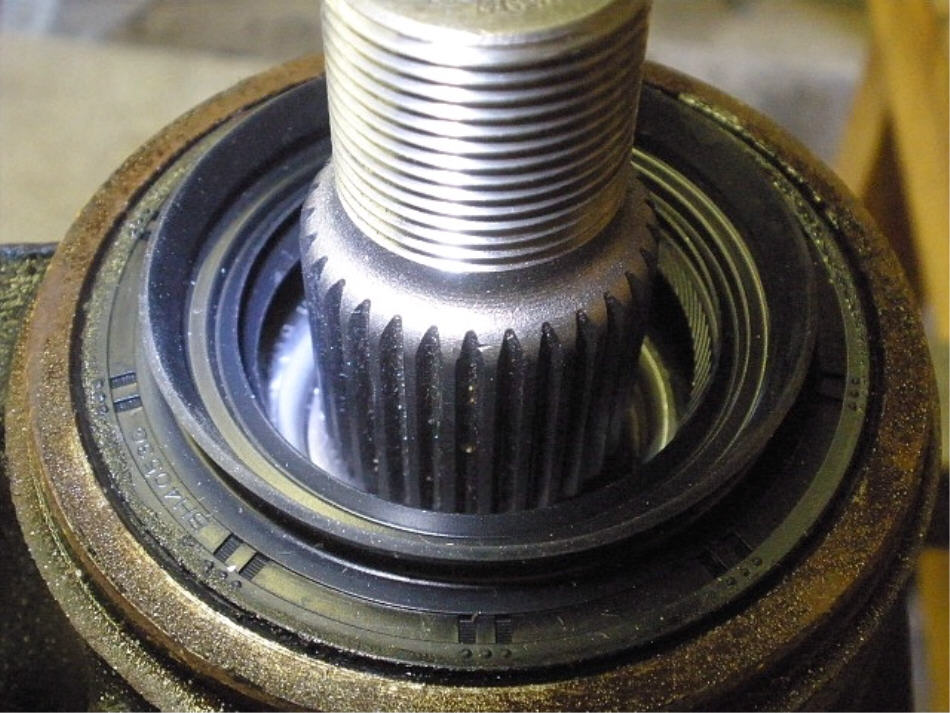
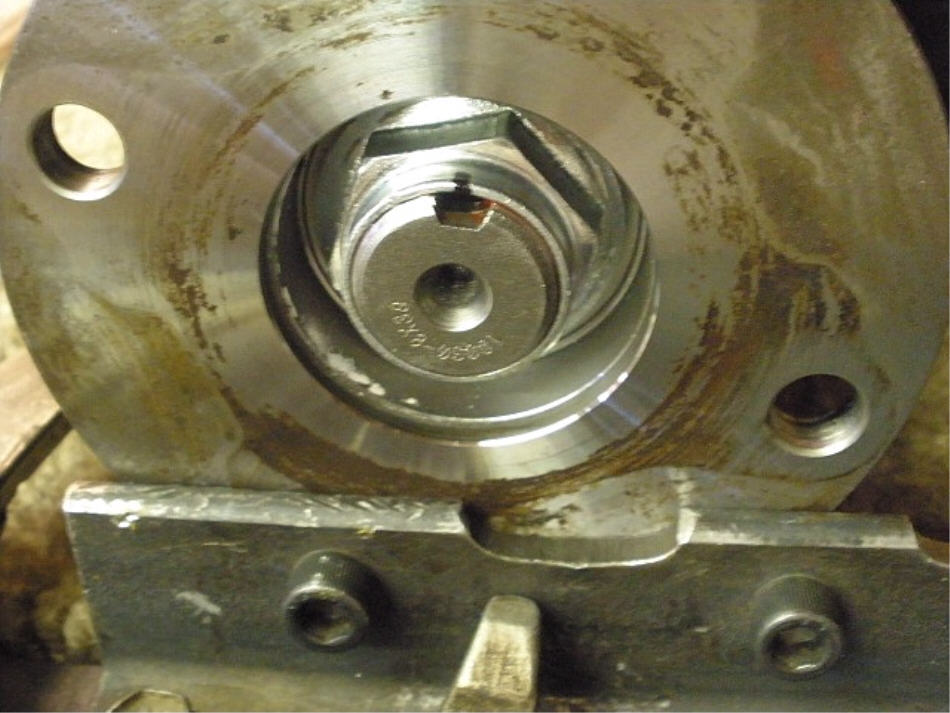
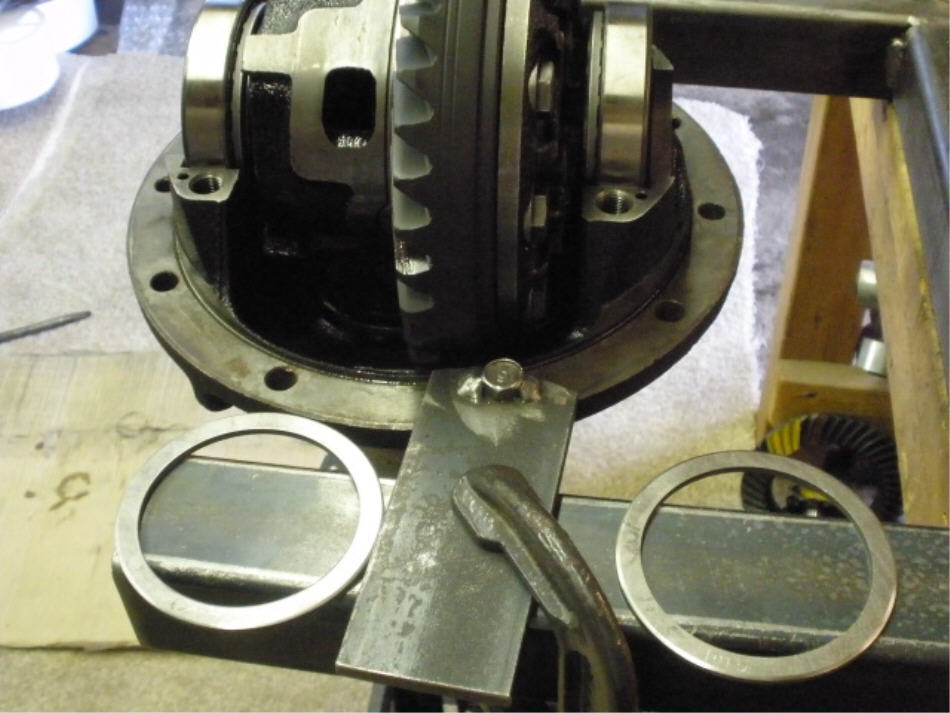
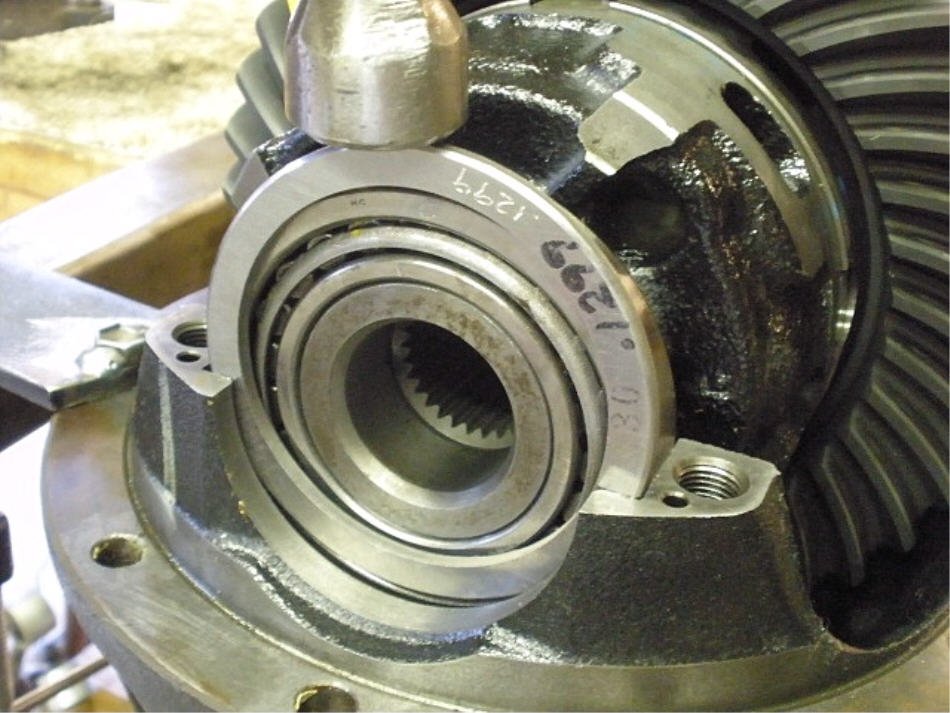
Step one is teardown of the diff....I've already removed the reinforcement girdle and pulled the case/w ring out. Shown above is the removal of the flange end. The 2-jawed puller had to be used to remove it. The spline engagement was very tight. |
|
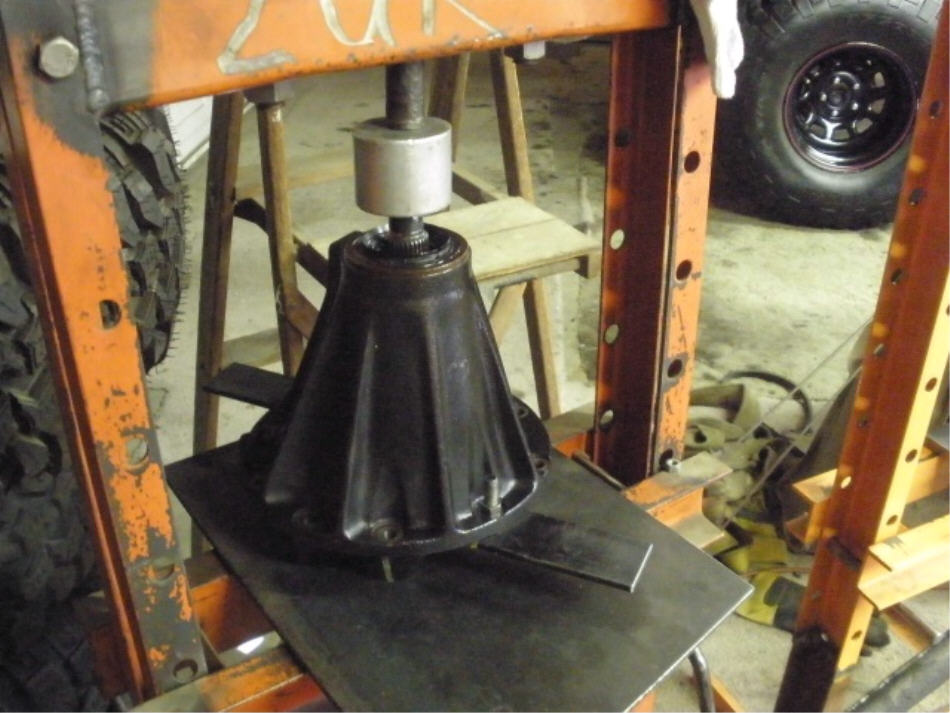
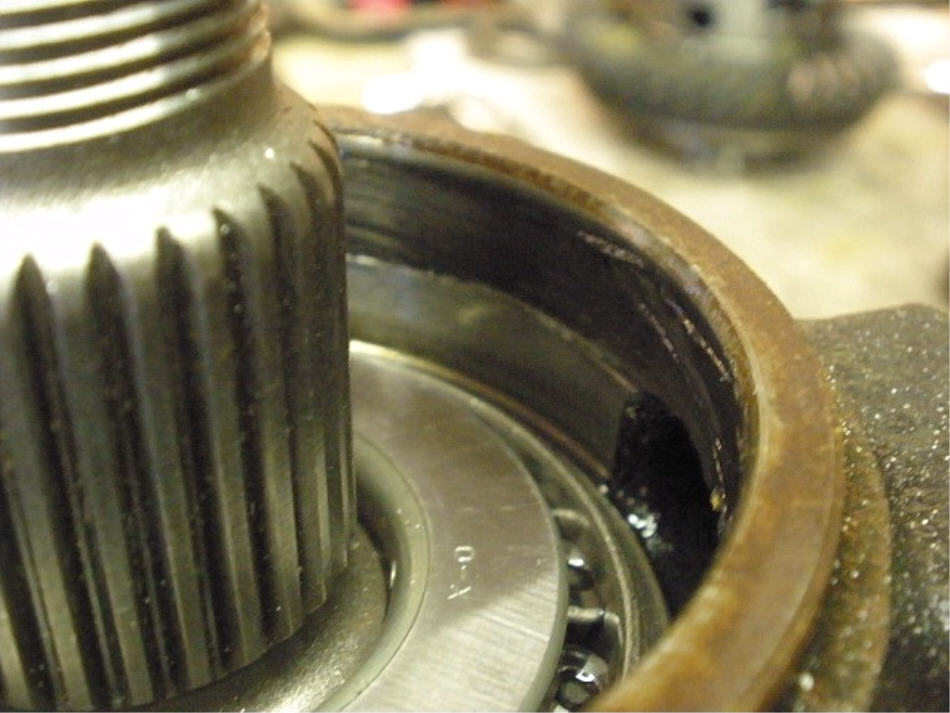
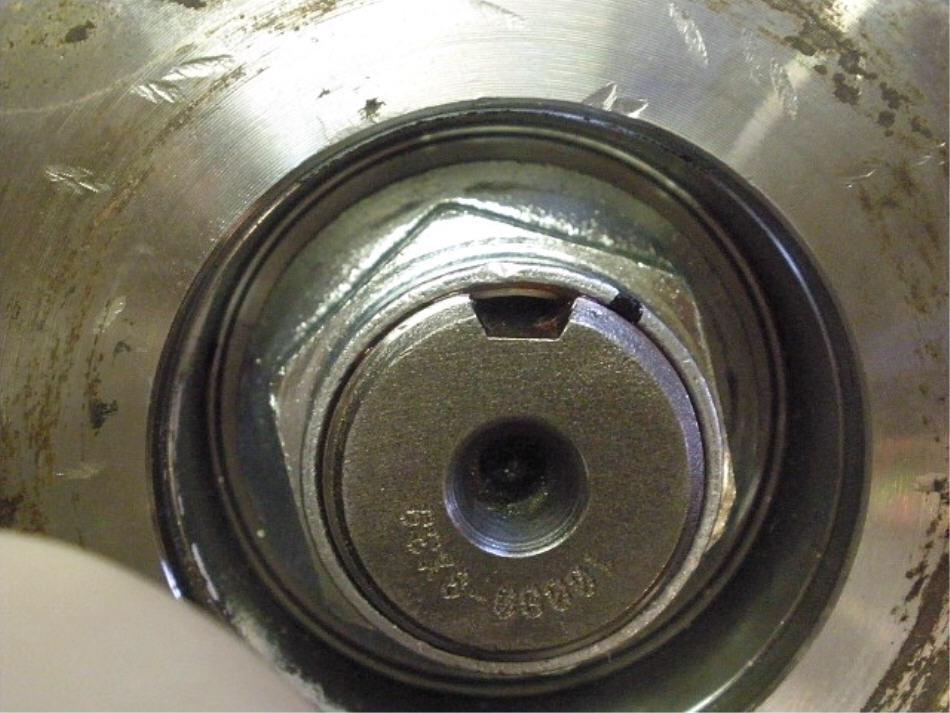
The outer pinion bearing was tight also. The press had to use a ton or 2 to get it to move. |
|
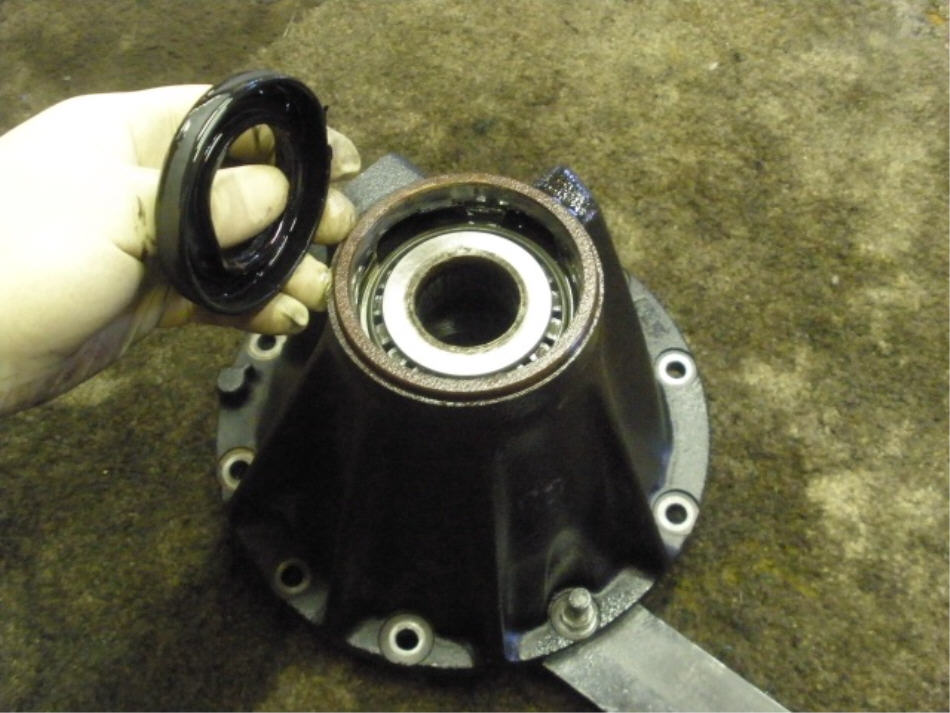
The rubberized seal pops off and exposes the bearing. |
|
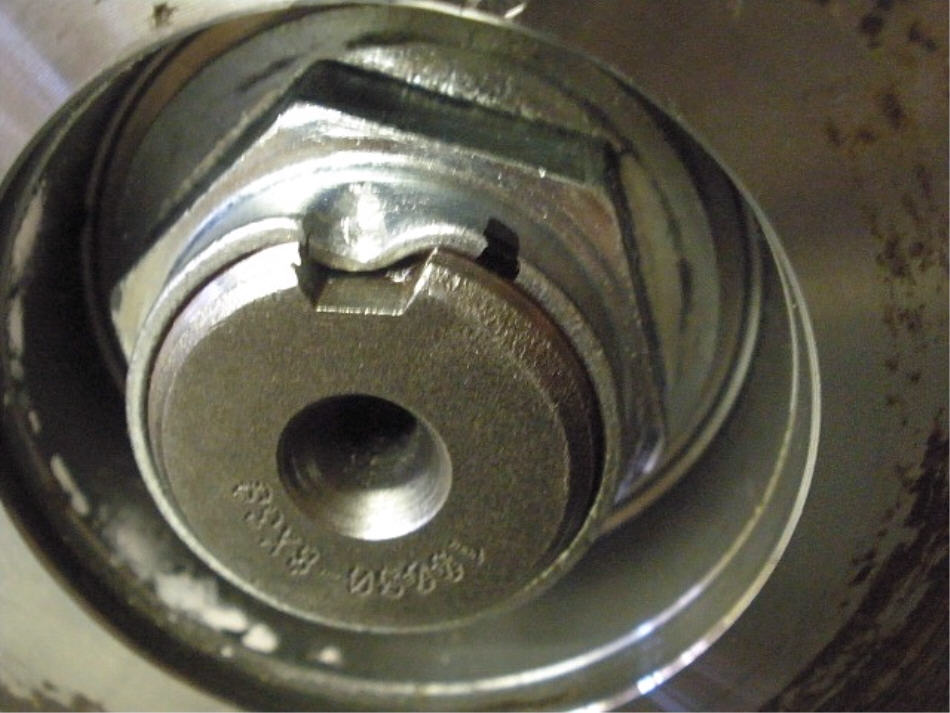
Toyota uses two .032" shim washers on the top portion of the crush sleeve. |
|
The large inner pinion bearing was being very stubborn. Any more pressure and I would be a little worried about damaging my bearing separator so a trick I sometimes use is to bang the pinion in a safe spot and the shockwave combined with the constant pressure causes the bearing to slip with a loud BANG! No damage to the pinion or my clamshell. |
|
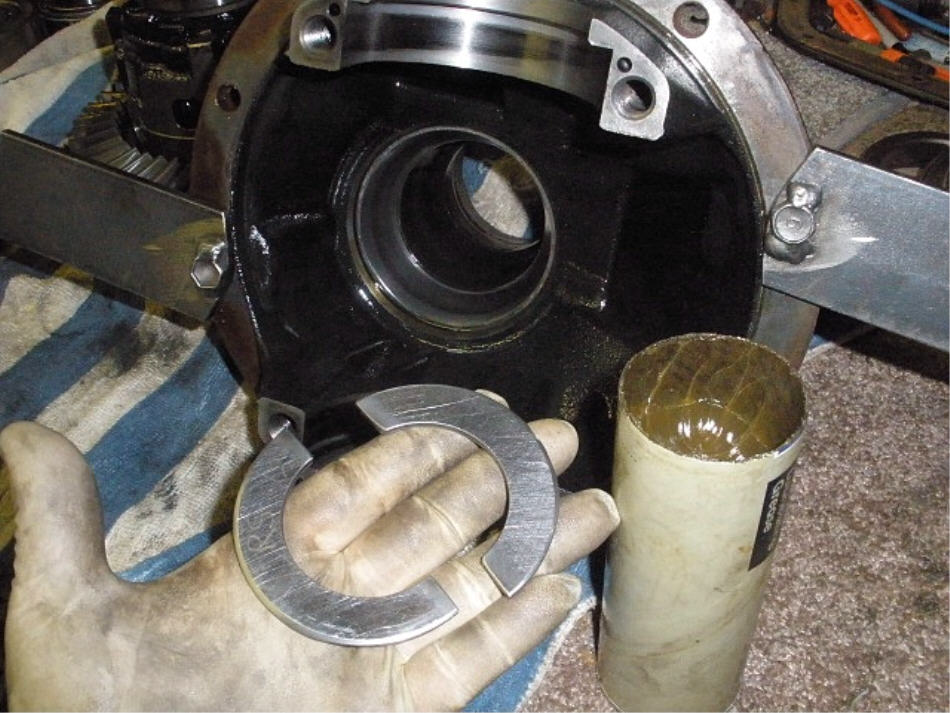
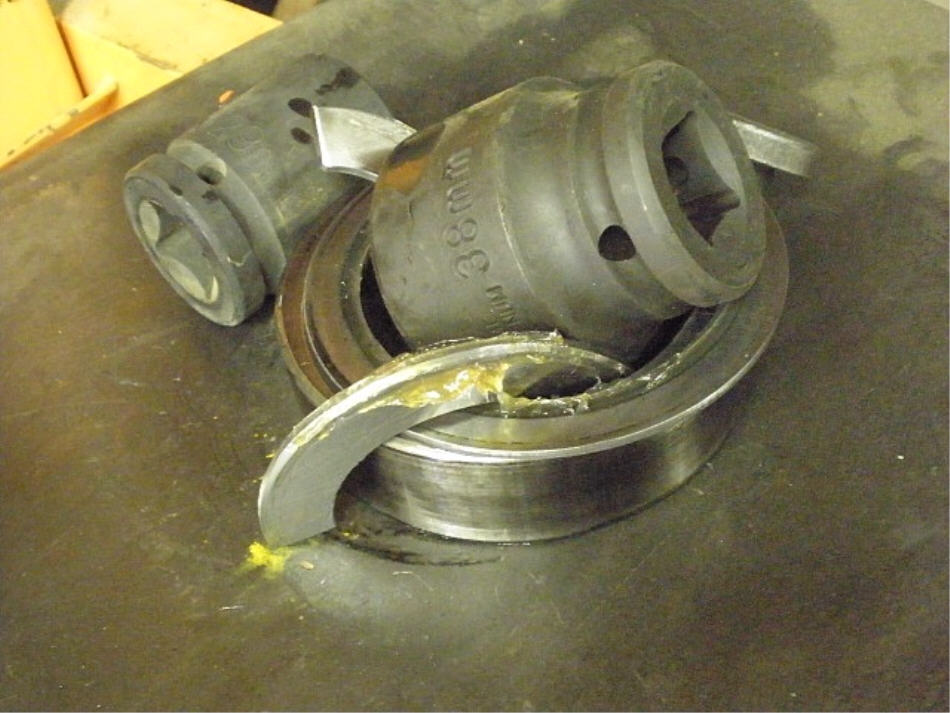
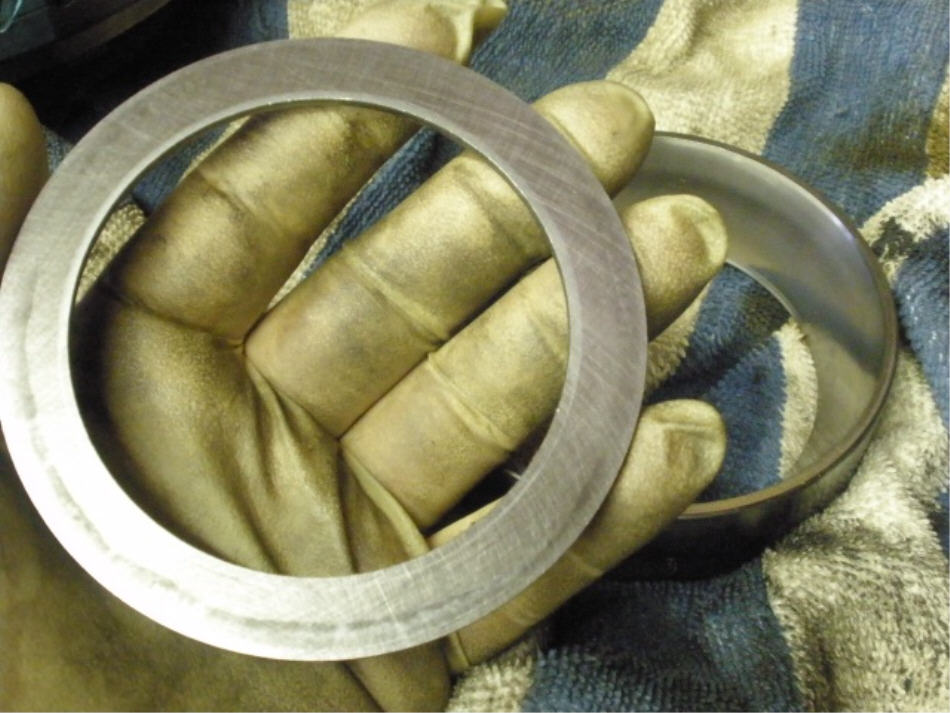
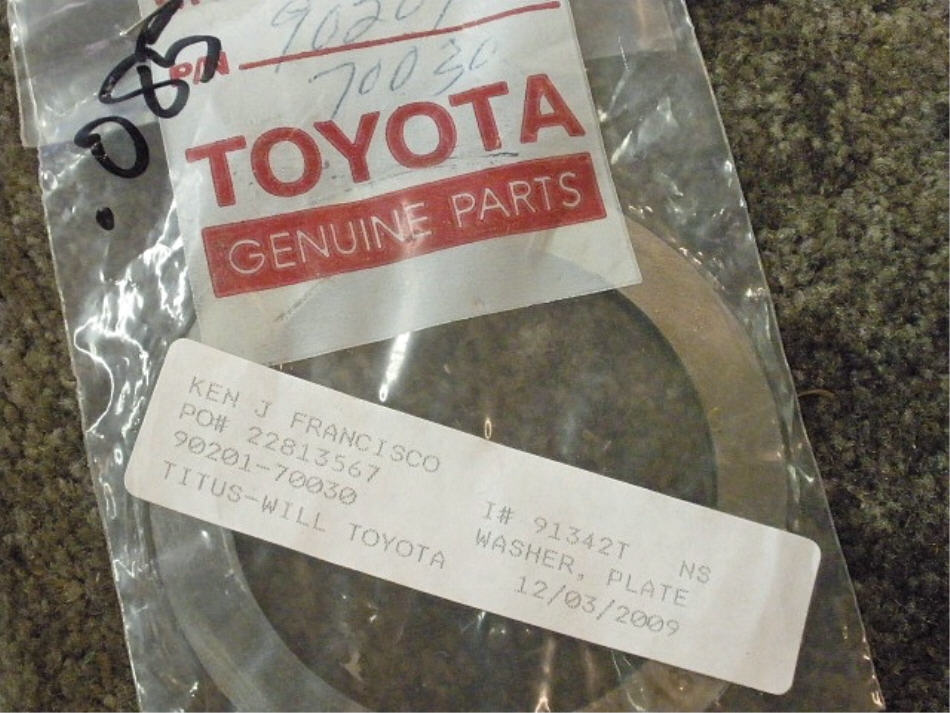
The inner race has a large washer plate behind it that is used to set the pinion depth. The problem with using a chisel and hammer to remove the race is that the washer plate suffers severe cosmetic damage. I have a solution to that....shown above is a "washer plate" that is used for the 1986 thru 95ish V6 front IFS differentials.....the carrier bearings on those have washer plates to set Backlash and carrier bearing pre-load. They just happen to be the right OD(~3.050") for this task. This zero damage race removal tool deserves full credit from Scott Szymanski from the town of Marana near Tucson, AZ. Basically, just place these halves on the race and use a press to push the race/shim out with zero damage. |
|
I use a dab of grease to hold the plate in place... |
|
Dab of grease on the other side and position the other half in place. Picture taken from the inside looking "up"...ring-gear point of view. Grease prevents the washer plates from falling out. |

|
Plates stay in place when I flip it around for the press. |
|
To space it properly for the press, I have 2 large sockets in place and a short spacer on that. |
|
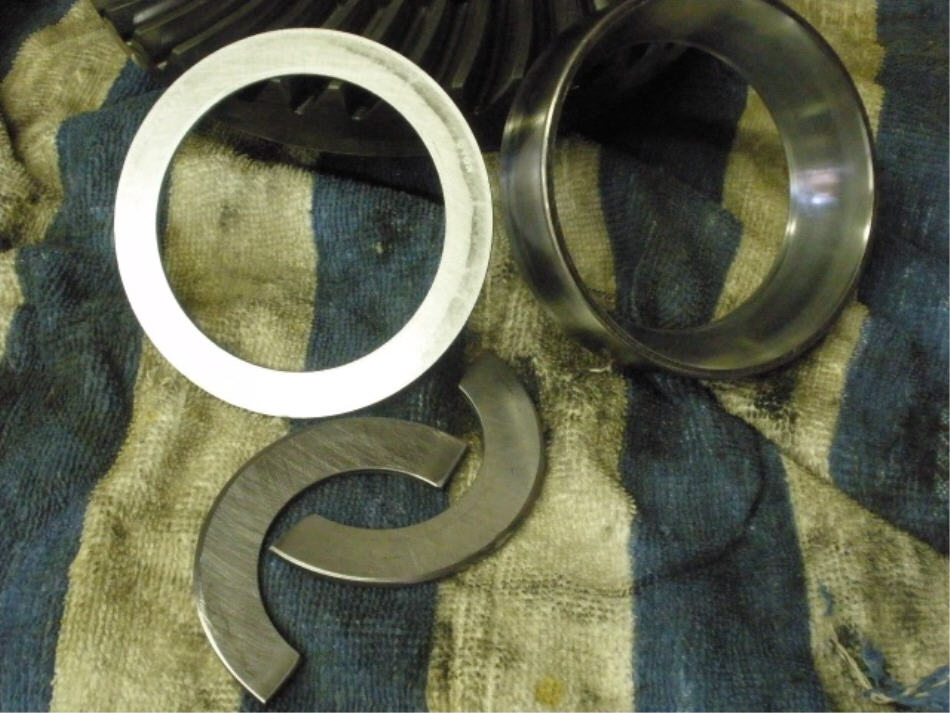
7 or 8 pulls of the lever and this is what fell out the bottom. |
|
No damage at all to the OEM washer plate. Thank you, Scott. |
|
... |
|
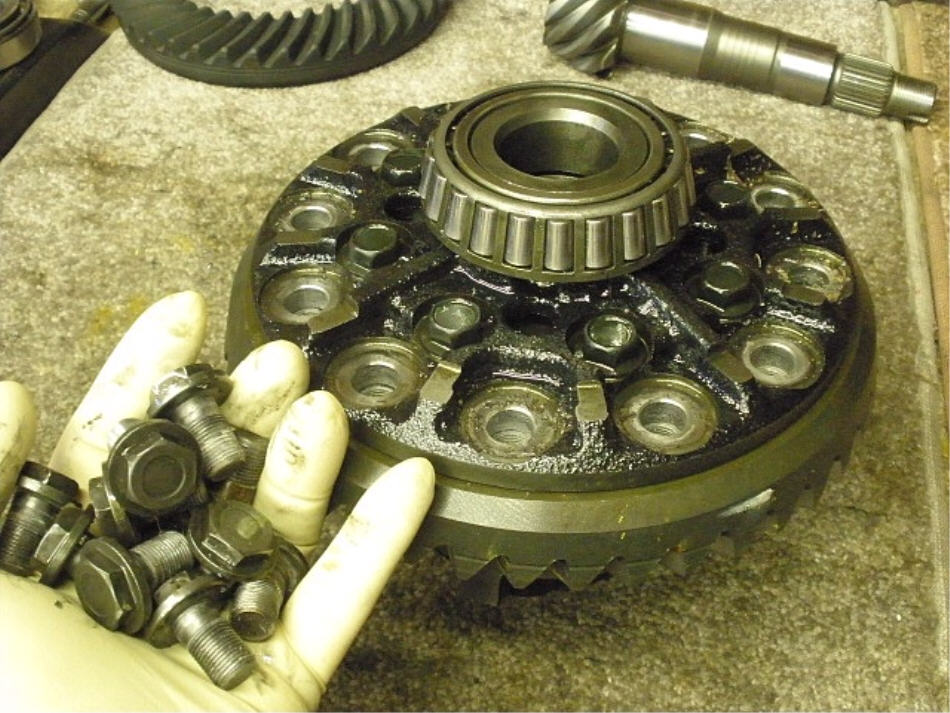
Now onto the ring gear....the 12 high quality flange bolts have been removed. The good grade of factory loctite makes that a challenge I might mention. Make sure you have a 17mm socket that has an excellent fit on the limited surface area of the bolt heads. |
|
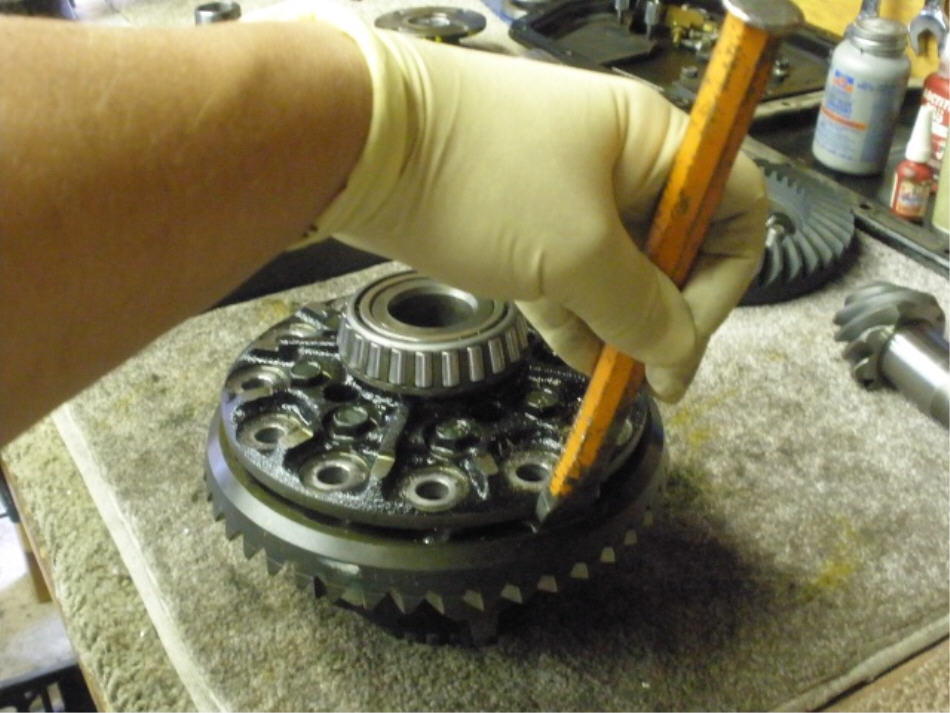
Alternate from one side to the other about 30 times and the ring will drop. |
|
The old carrier bearings came off using the 2 jaw puller. They were on very tight. I wish this was the case for the many 8" 79~95 trucks but seems like 30% of them have at least one carrier bearing that will pull off with just my fingers. |
|
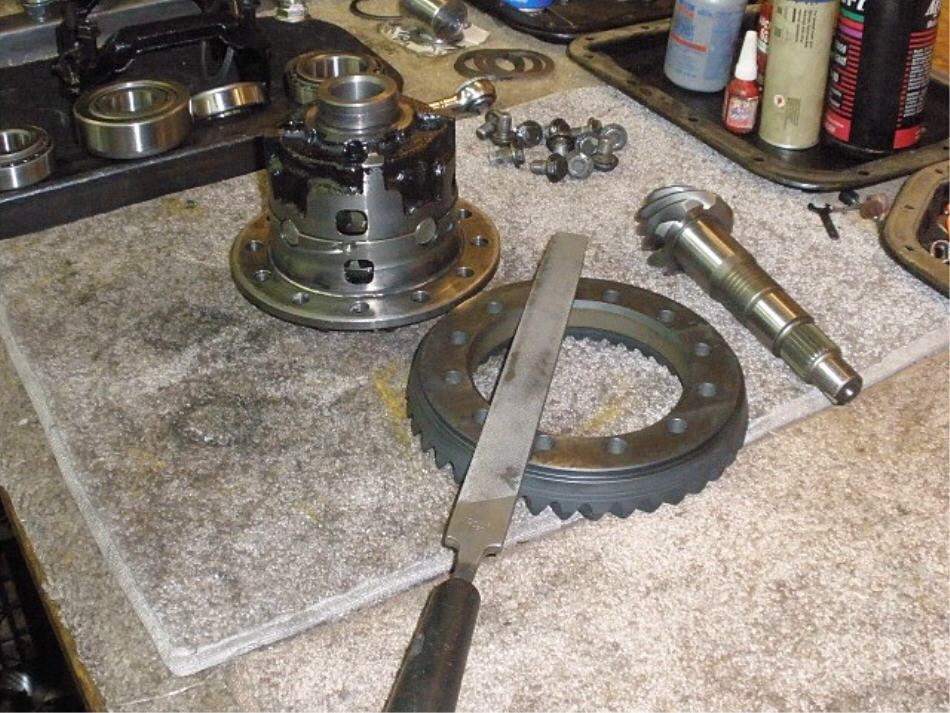
I file both ring gear surfaces to check for any unusual high spots. I haven't run into this yet but if I ever do get a "green ring" that somehow skipped the heat treat/hardening process then I am sure to catch it with my file. |
|
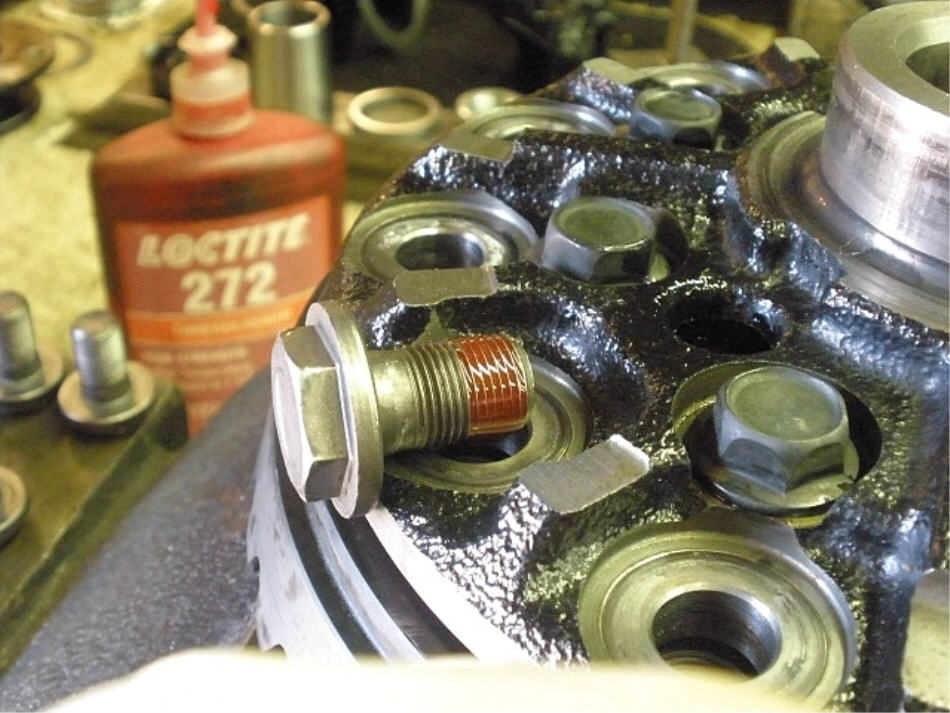
The new ring went on nice....no boiling water has ever been needed in the 12 years of doing this. There are "other methods" and those might involve the light touch of a flapper wheel....or a press. Bolts are cleaned with starting fluid(I wear gloves and don't smoke). Red Loctite is applied to the lower threads. |
|
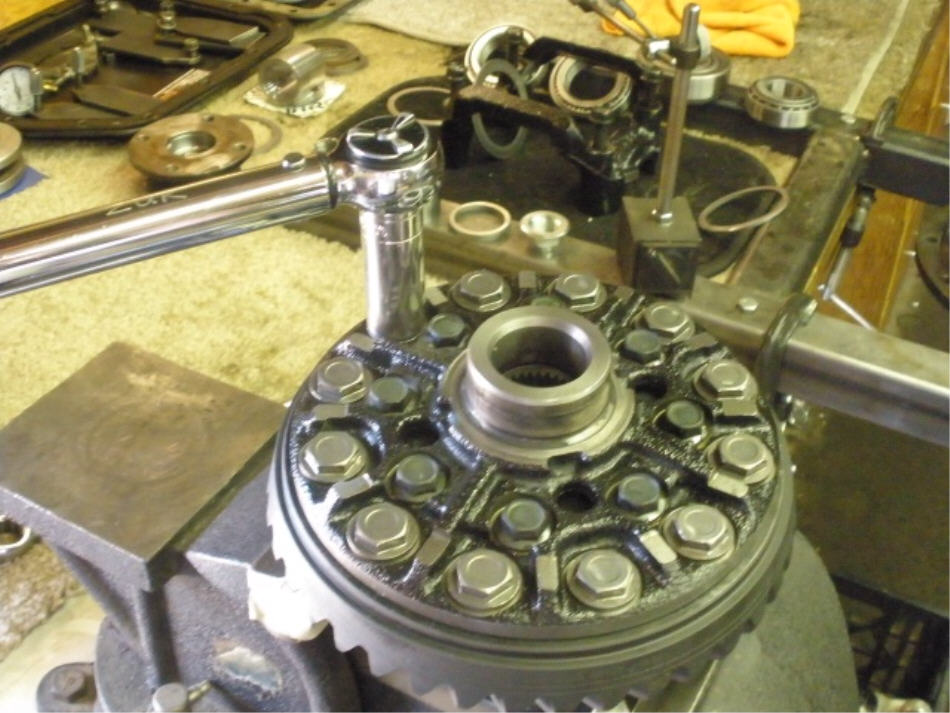
These are cross-tightened and 75 ft/lb. |
|
New KOYO carrier bearings are pressed on. They were a very tight fit. |
|
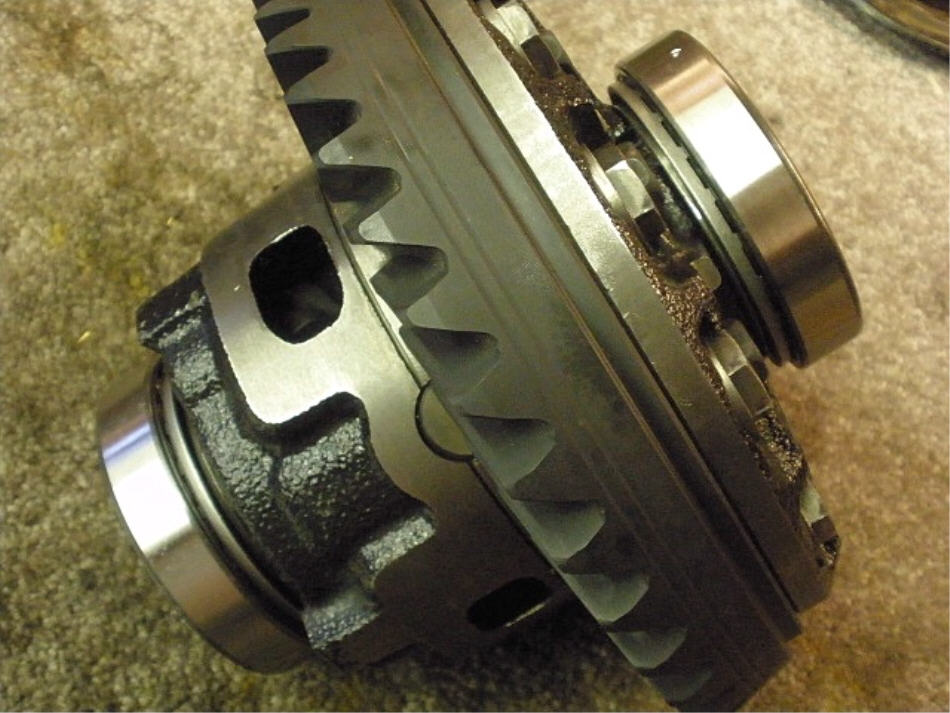
This end is done. It's not obvious from the shape of the case but this is the oem lsd version. |
|
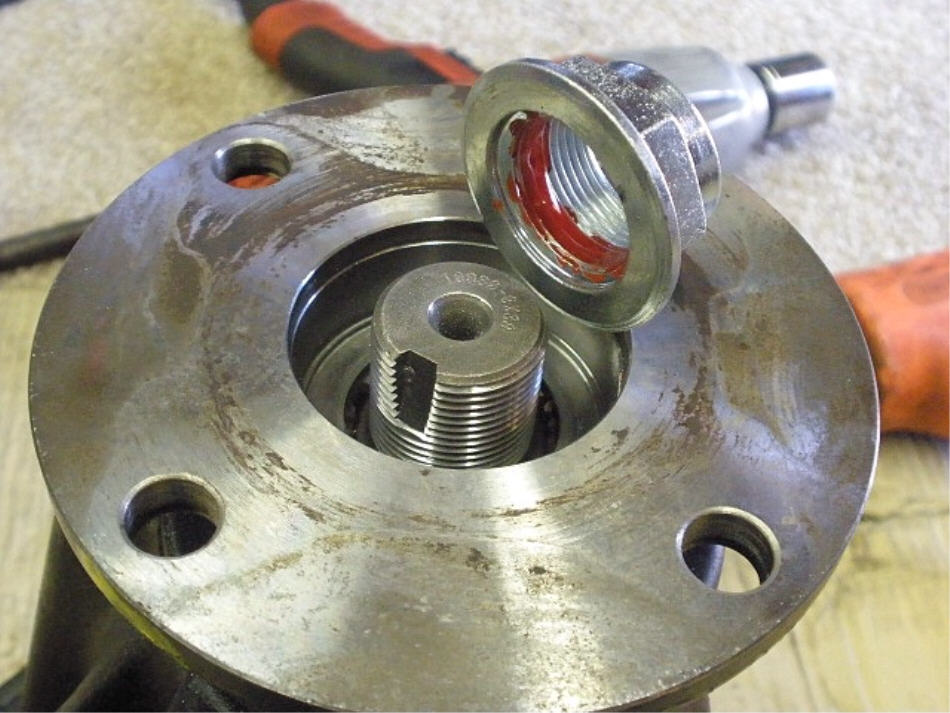
This is an oem pinion shim that I will install behind the inner race like the factory does. |
|
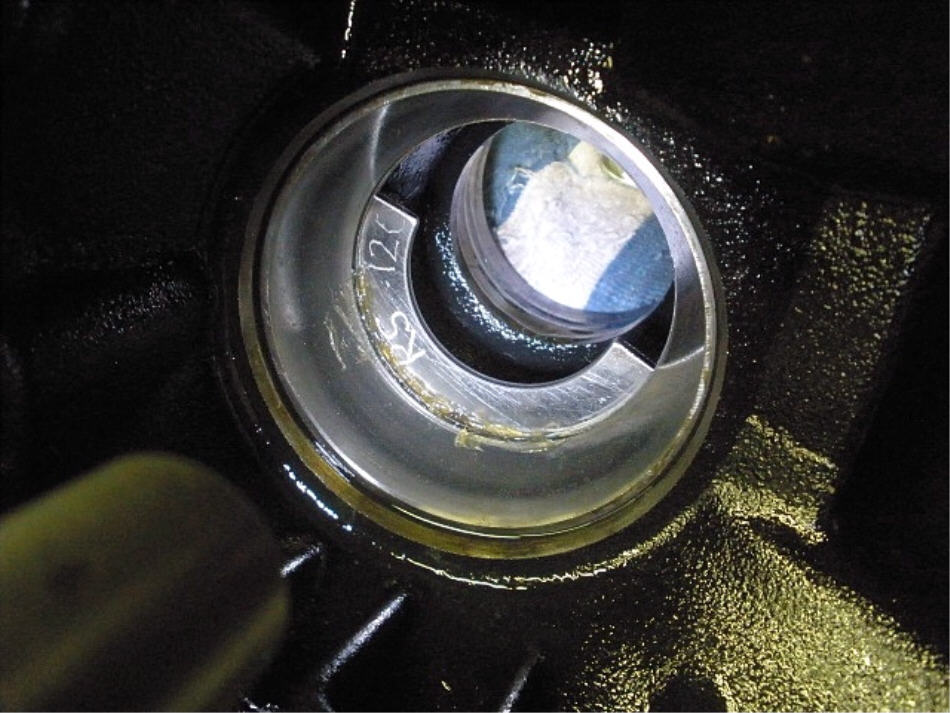
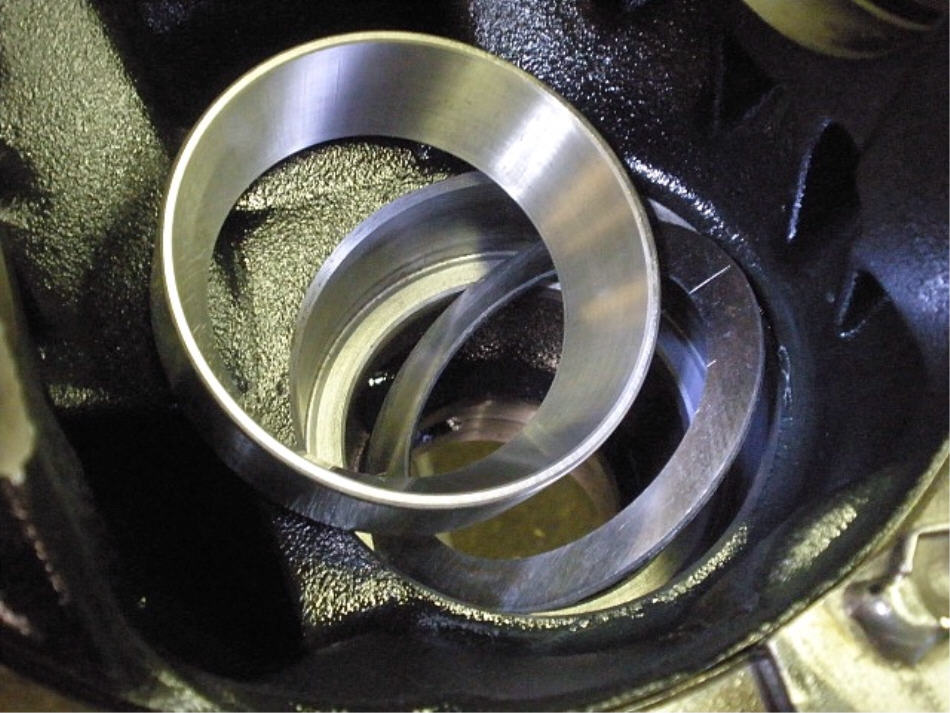
Looking in the hole, the .085" washer plate is followed by the big race. |
|
If the race can be started evenly then it will press into the bore with no issues....but start it slightly crooked and it will wedge sideways and lock-up. |
|
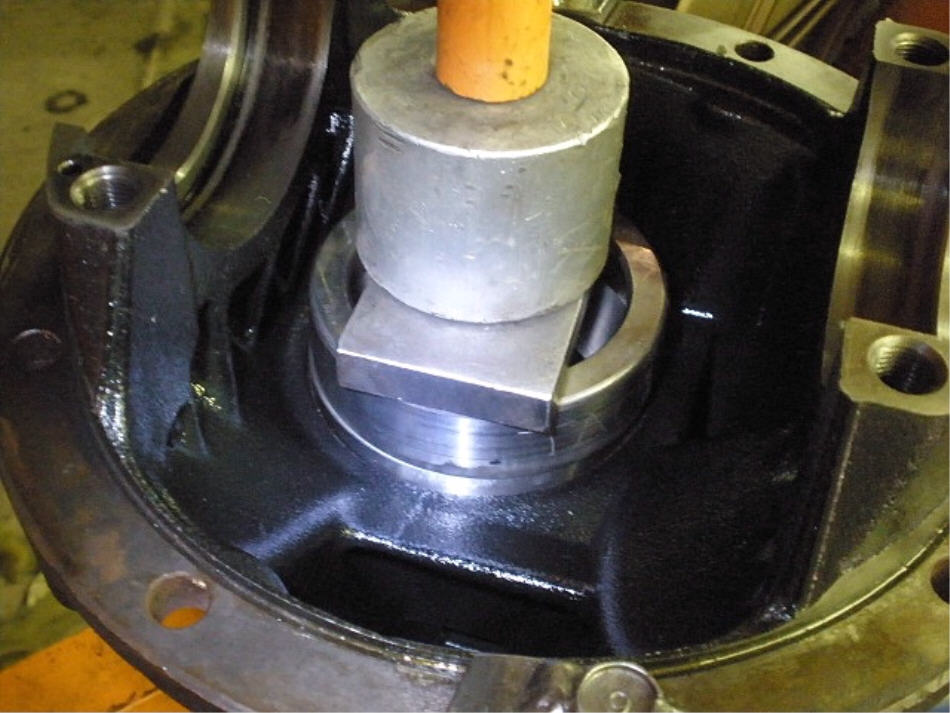
I got lucky again and it went right in. I try to stay away from banging the race in with a soft chisel as I am concerned about the possibility of some deformation of the roller surface. |
|
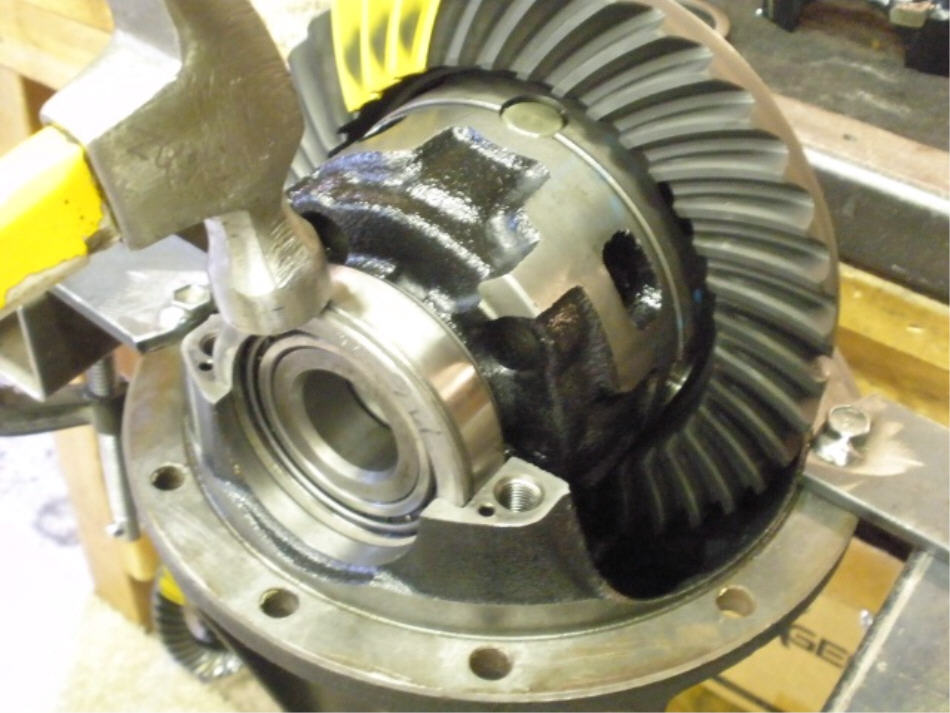
The smaller outer race can be love-tapped in place as shown here. |

|
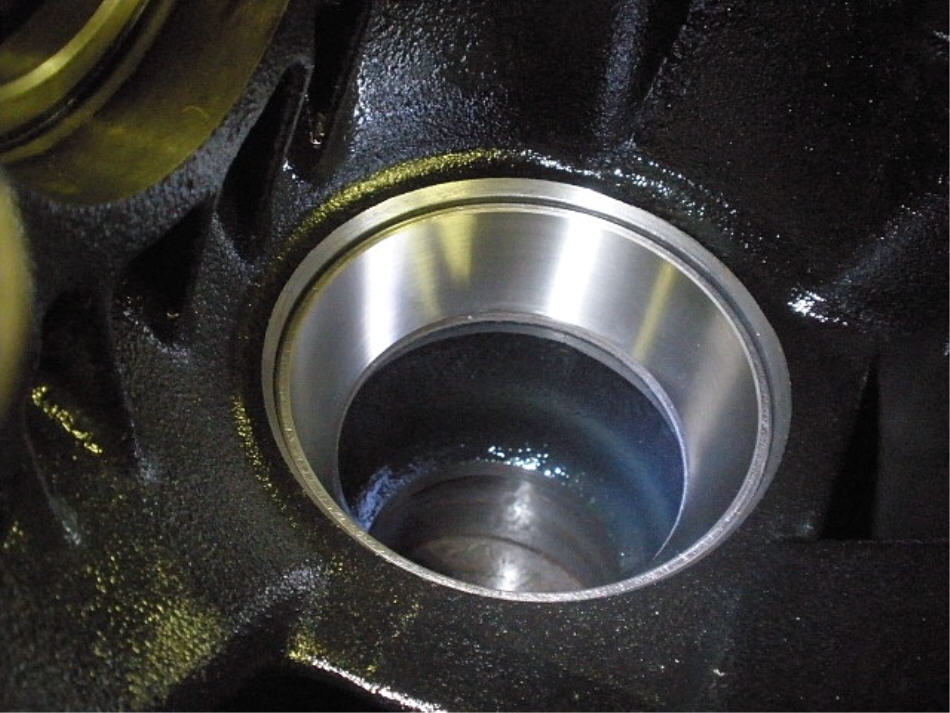
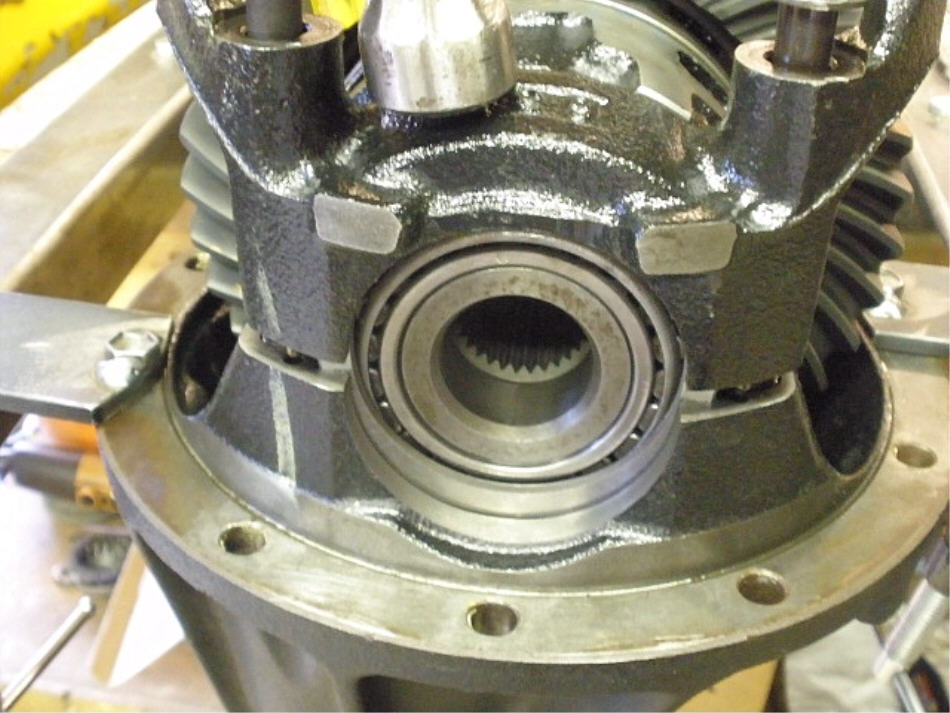
Races are in and nothing left to do on this piece. |
|
Just a few adapters and the pinion bearing can be pressed on. Another very tight fit. |
|
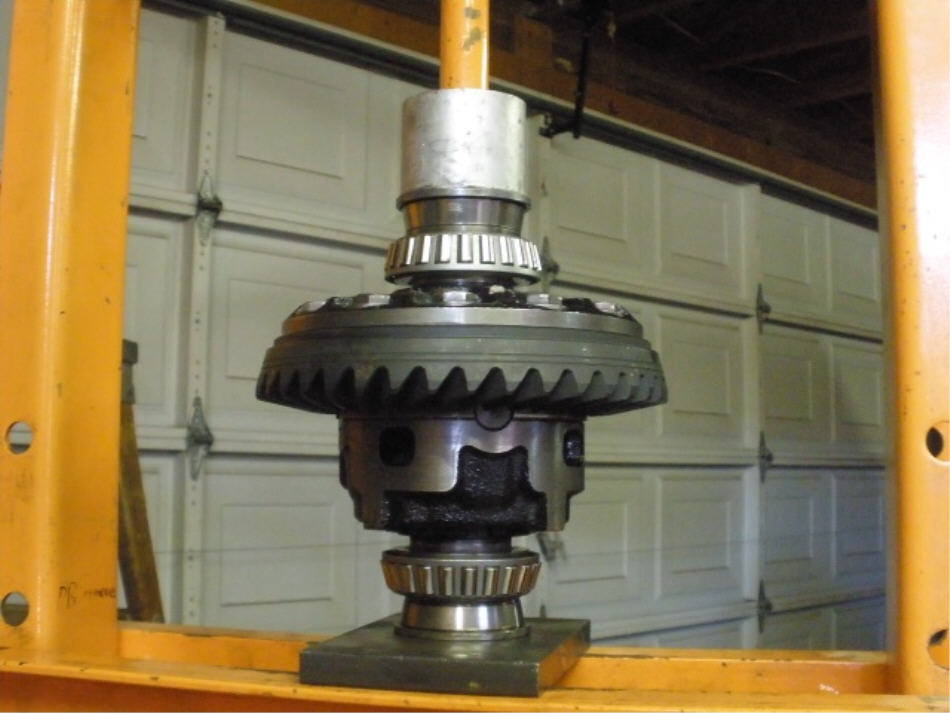
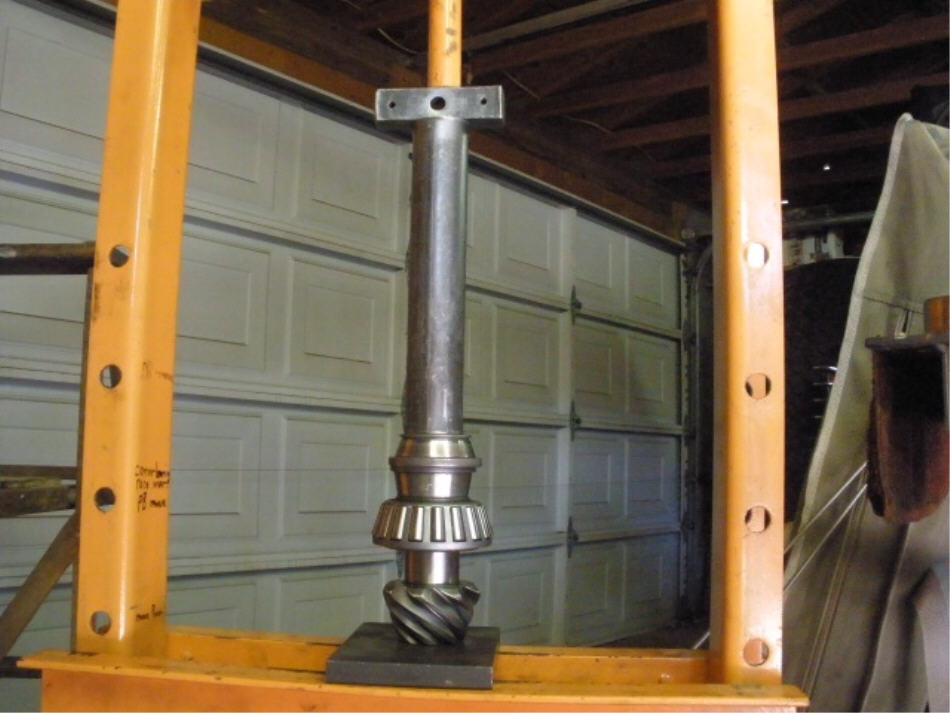
This is my set-up for loading up the pinion. |
|
This is with my shop 30 spline flange and even though I have "relieved" the spline edges it was still a very tight fit onto the pinion and it was basically mandatory to press it on like this. |
|
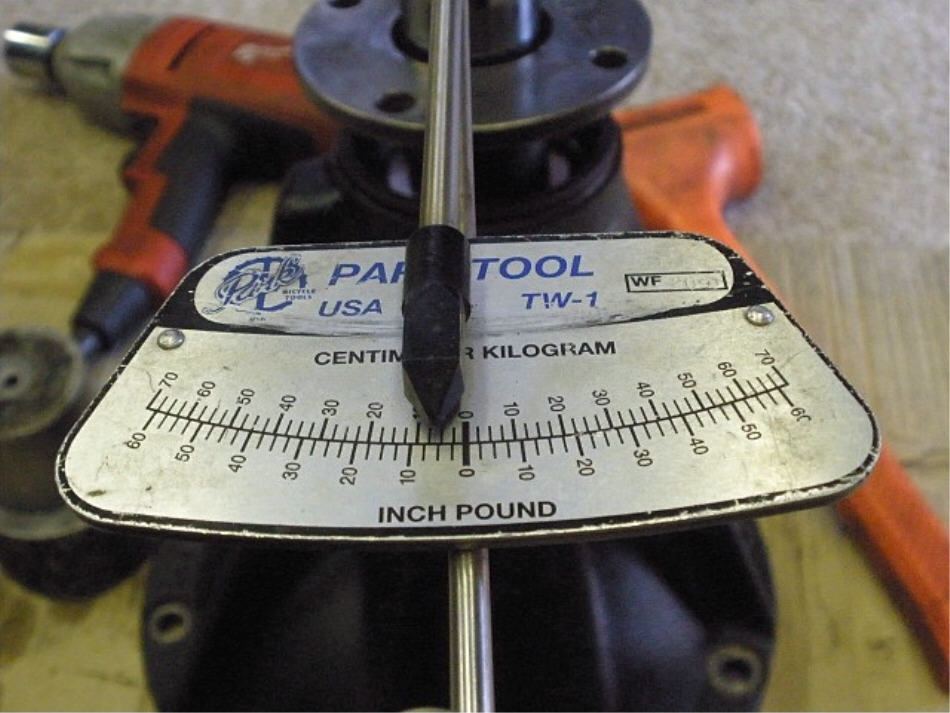
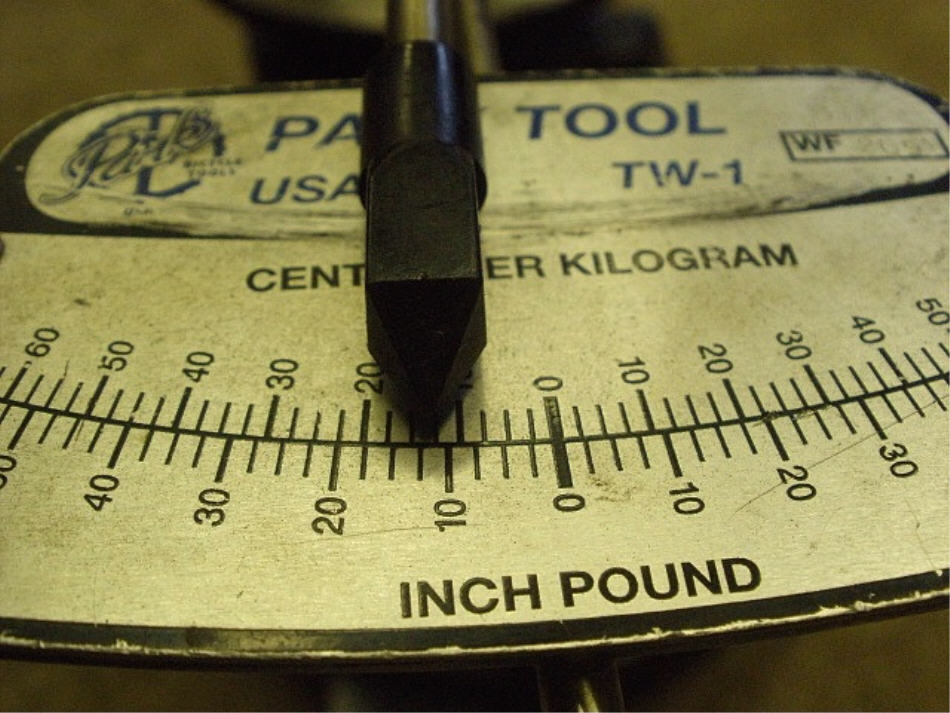
After verifying that I have a pinion preload in the range of 10~15 inch/pounds, I then clamped the assembly to the fixture. |
|
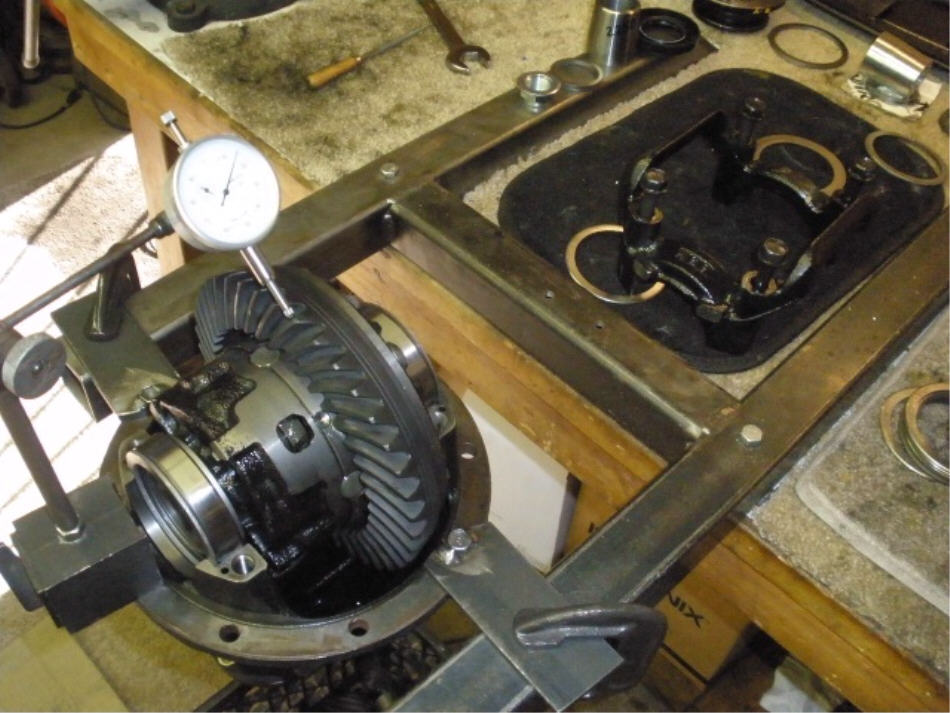
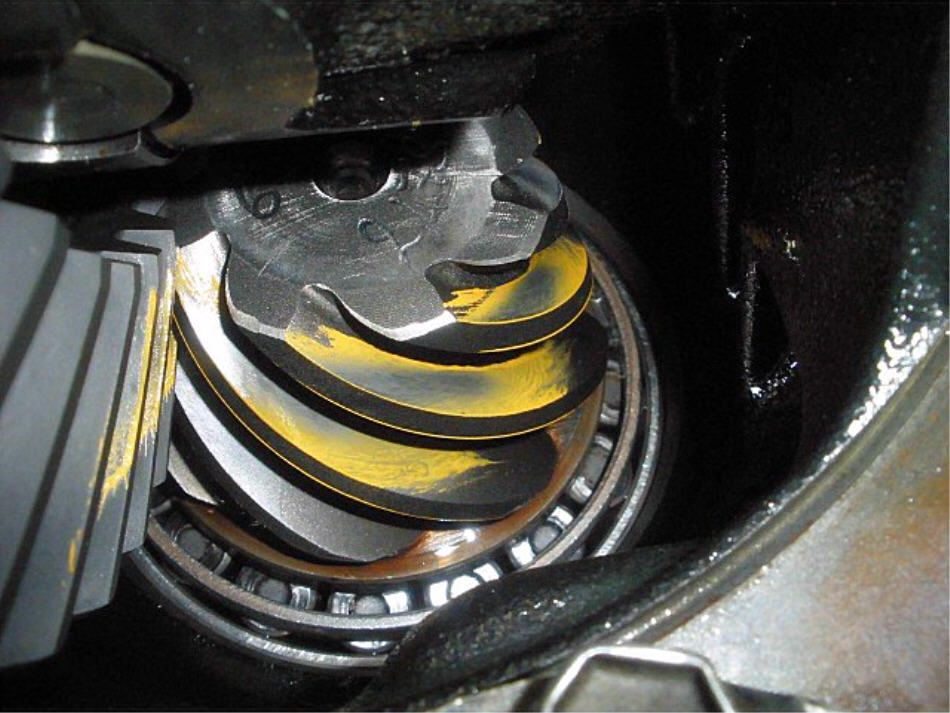
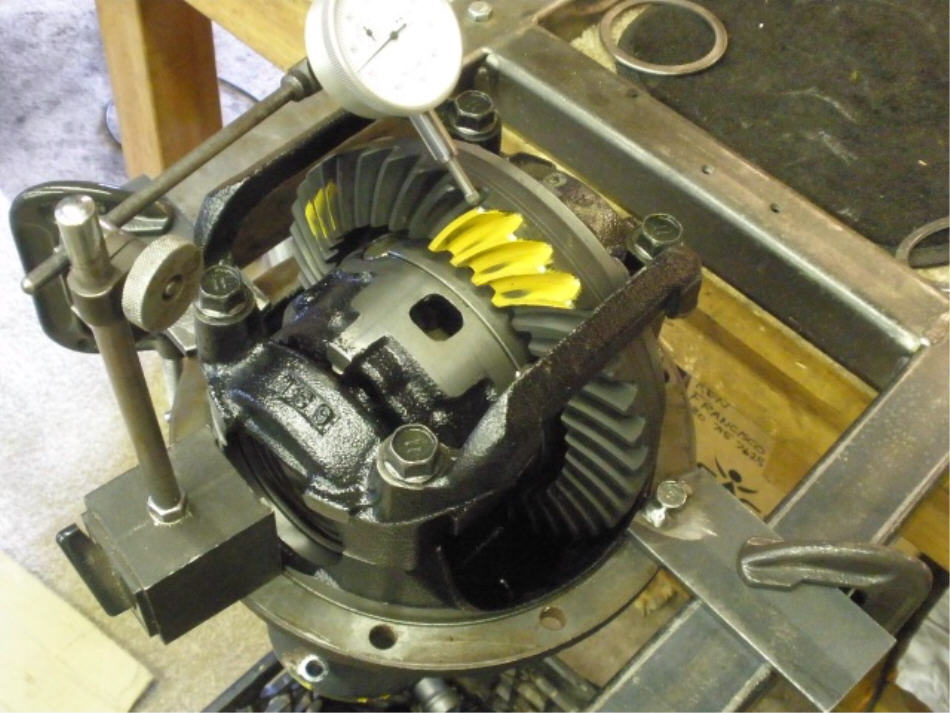
The case/ring is dropped in place and washer plates are tapped in place....looking for about .007" backlash for a first-time paint. |
|
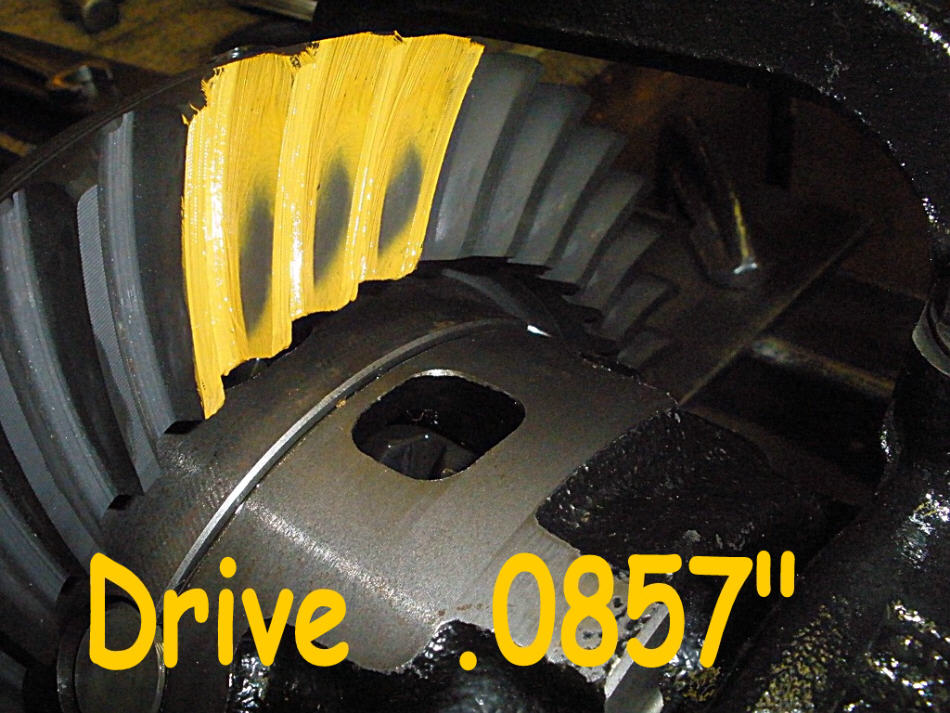
Nice. Looks to be exact depth. |
|
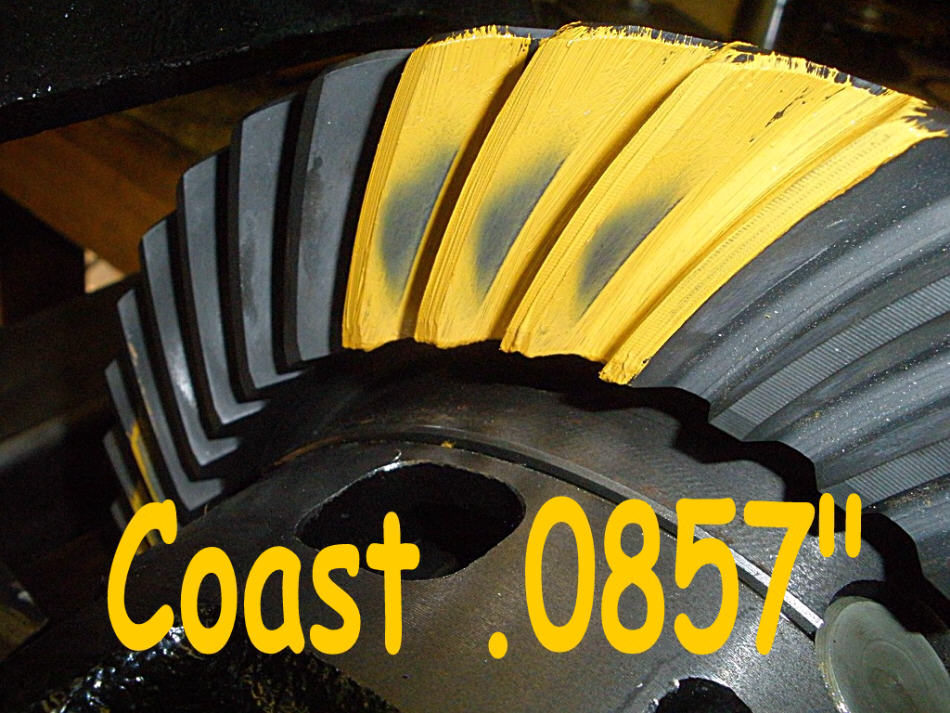
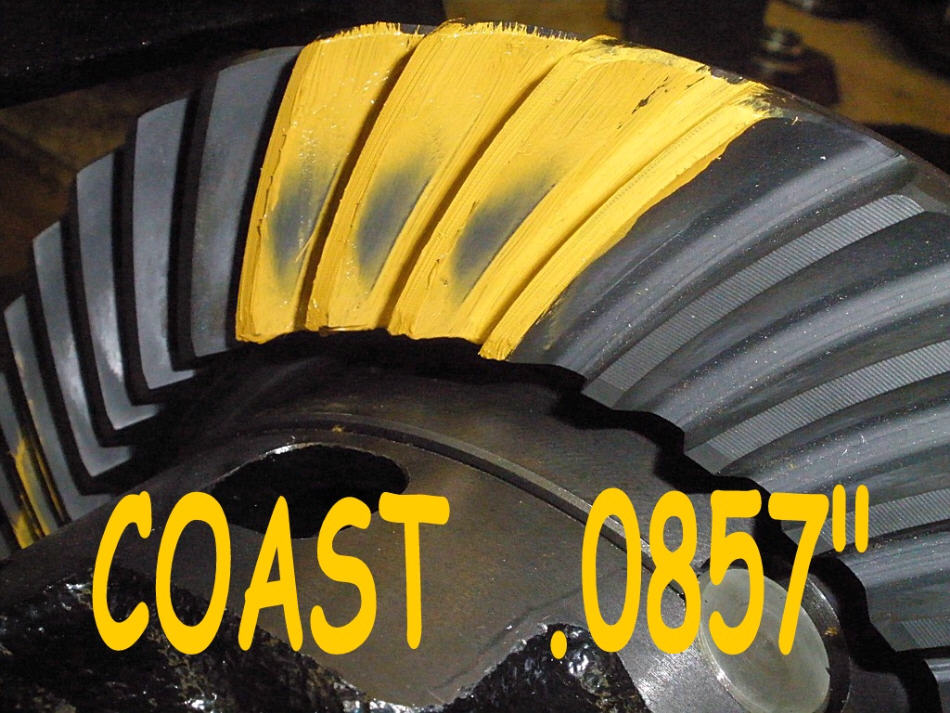
Coast is excellent. I especially like it that it favors the toe(inside) a bit. |
|
... |
|
Satisfied with the pinion depth, it's time to tear it down and set the solid collar up. |
|
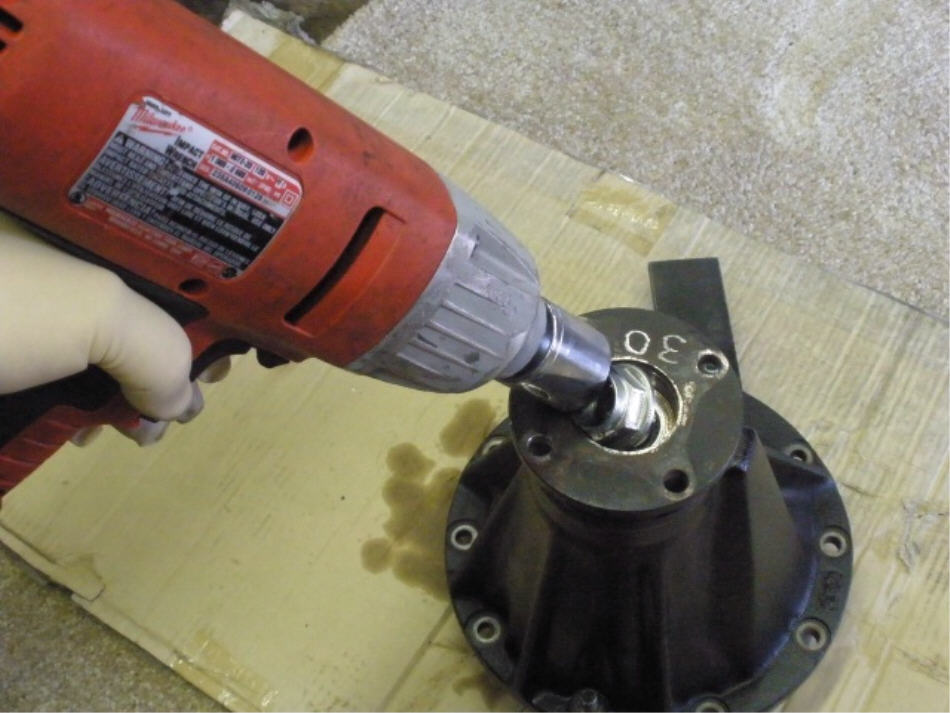
Wizz the pinion nut off with the electric impact. |
|
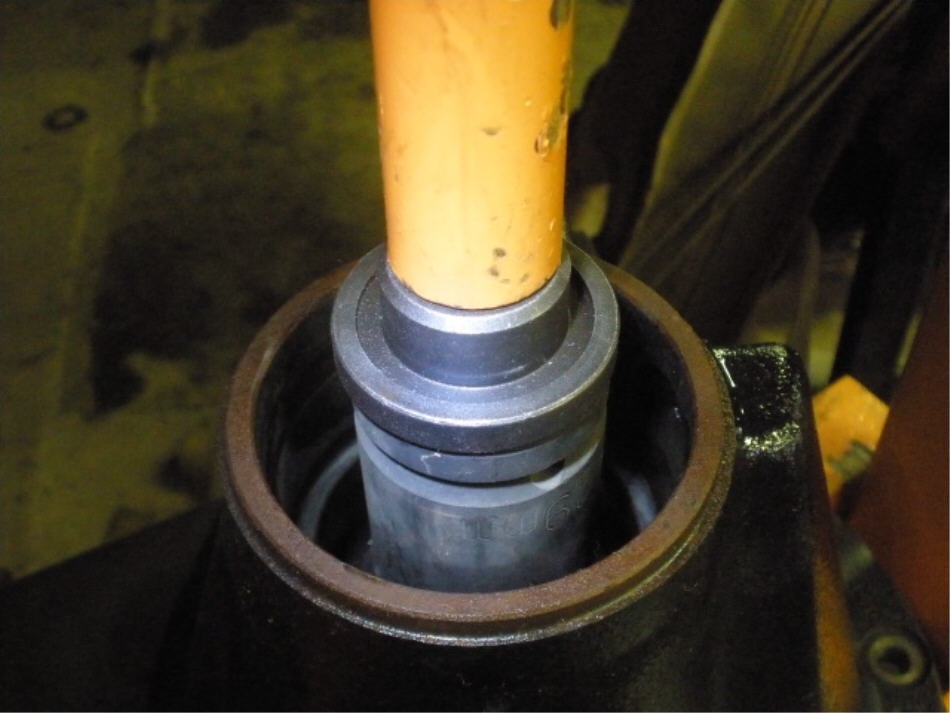
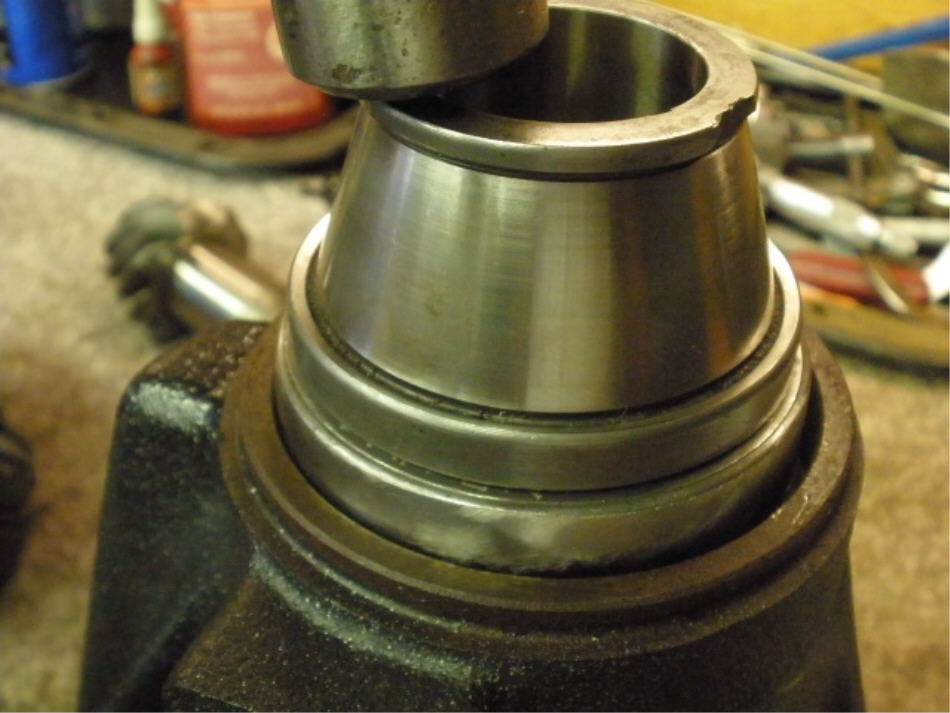
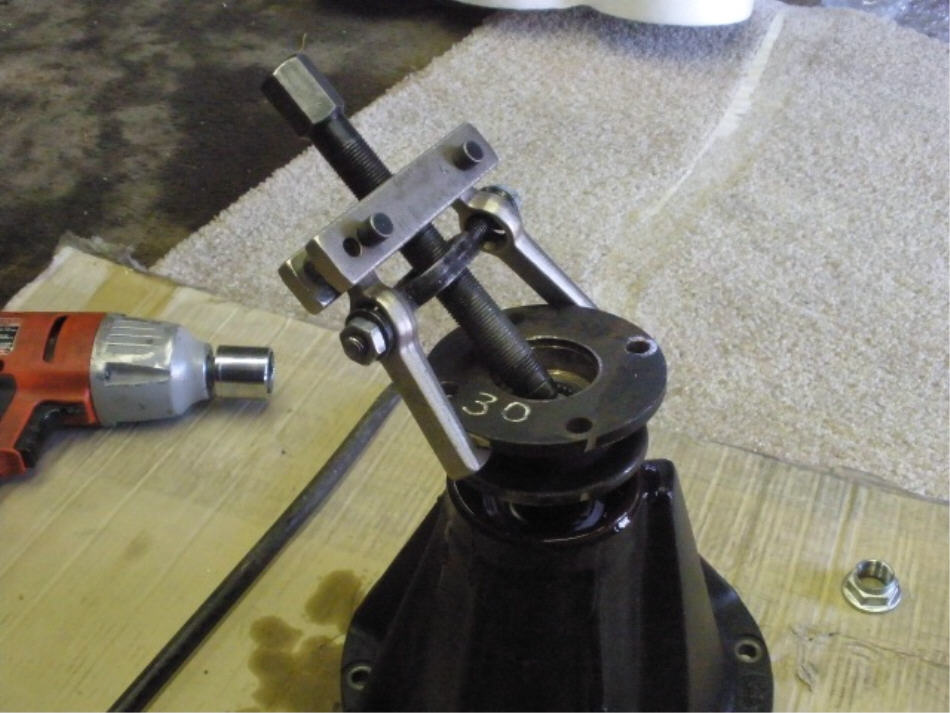
Super tight fit so the 2-jaw puller makes it look easy. |
|
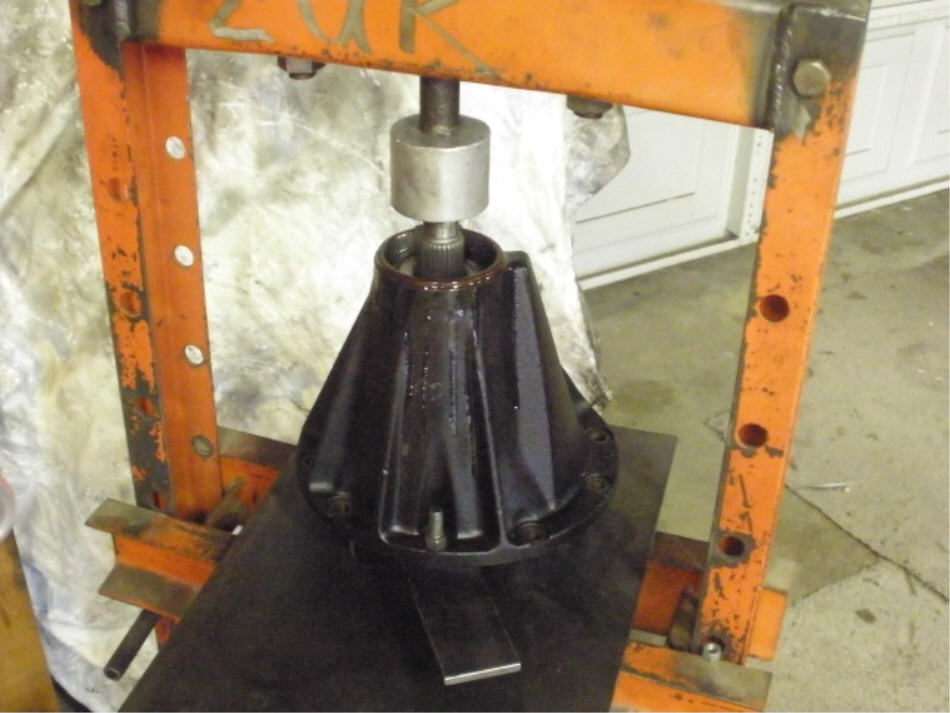
Press the pinion out.... |
|
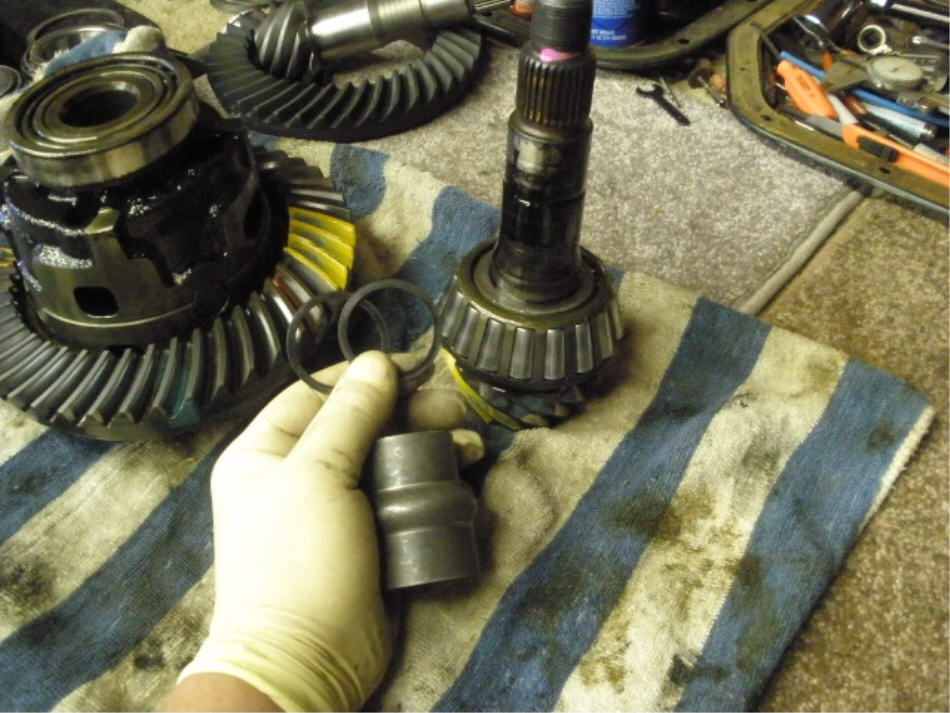
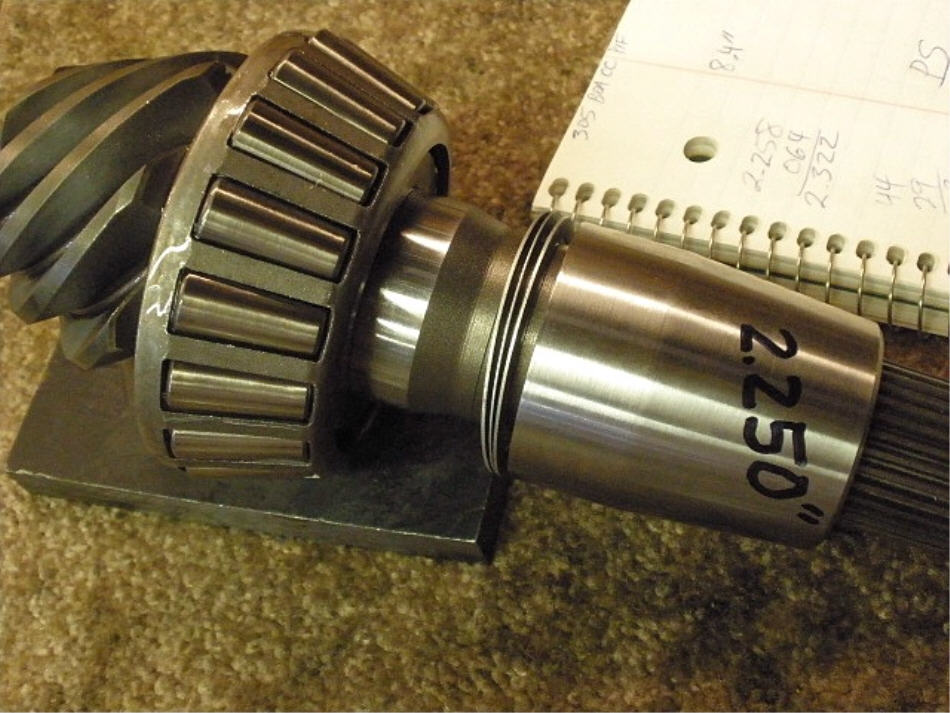
This is a very sleek design.....measuring at 2 1/4" long and having a nice taper to it. |
|
Nice machining on the topside. |
|
... |
|
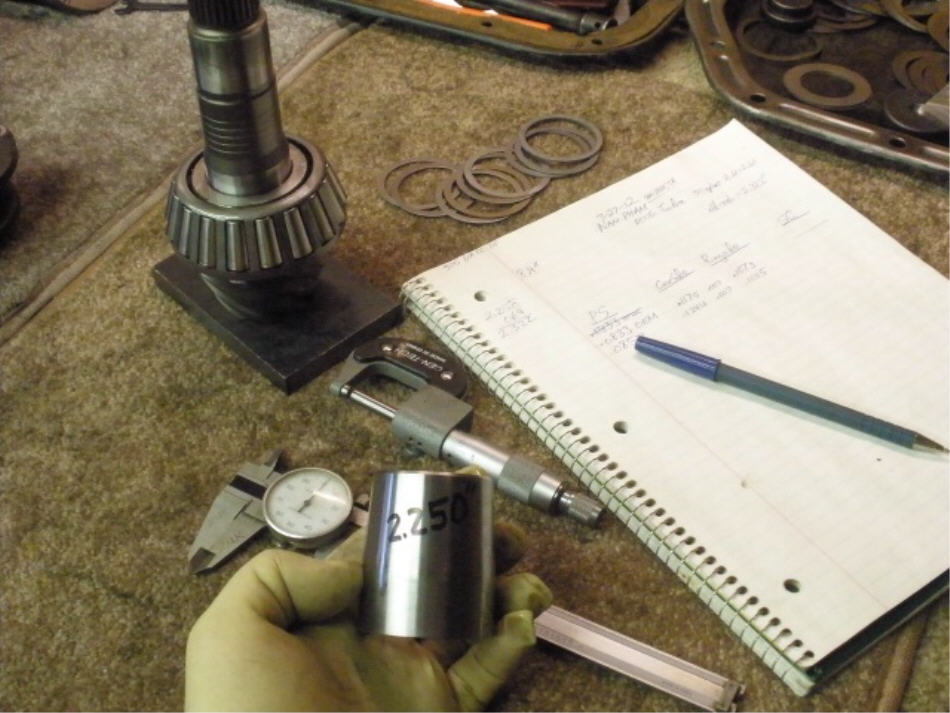
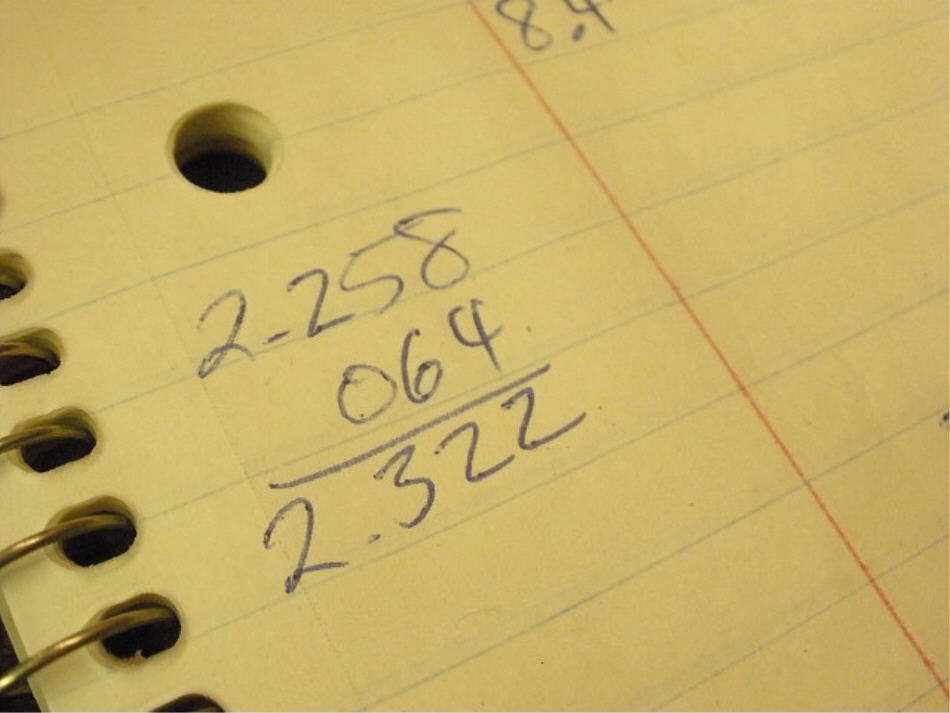
The original crush I measured it at 2.258 and coupled with the 2 shims(.032" each) gives a final desired length close to 2.322"...... |

|
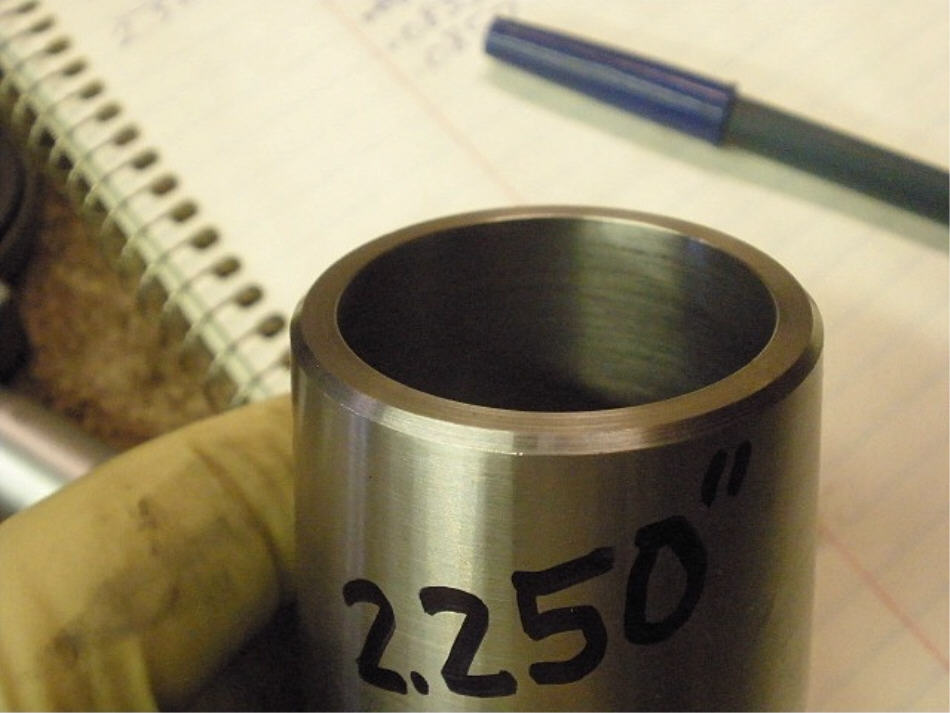
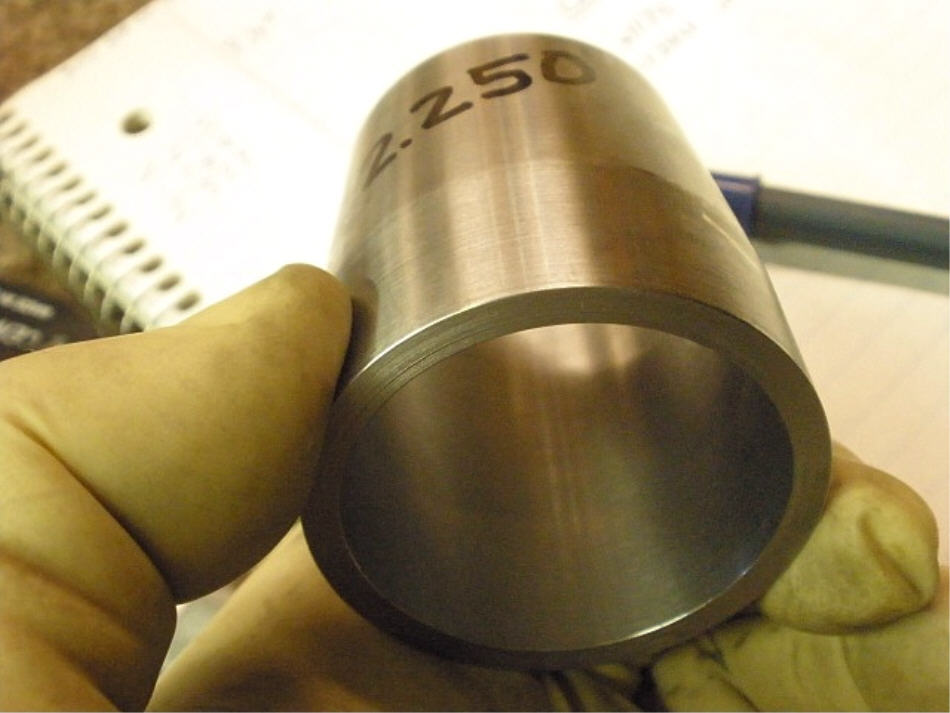
My solid collar is 2.250" so that means I need a shim thickness of about .072" maybe slightly more. |
|
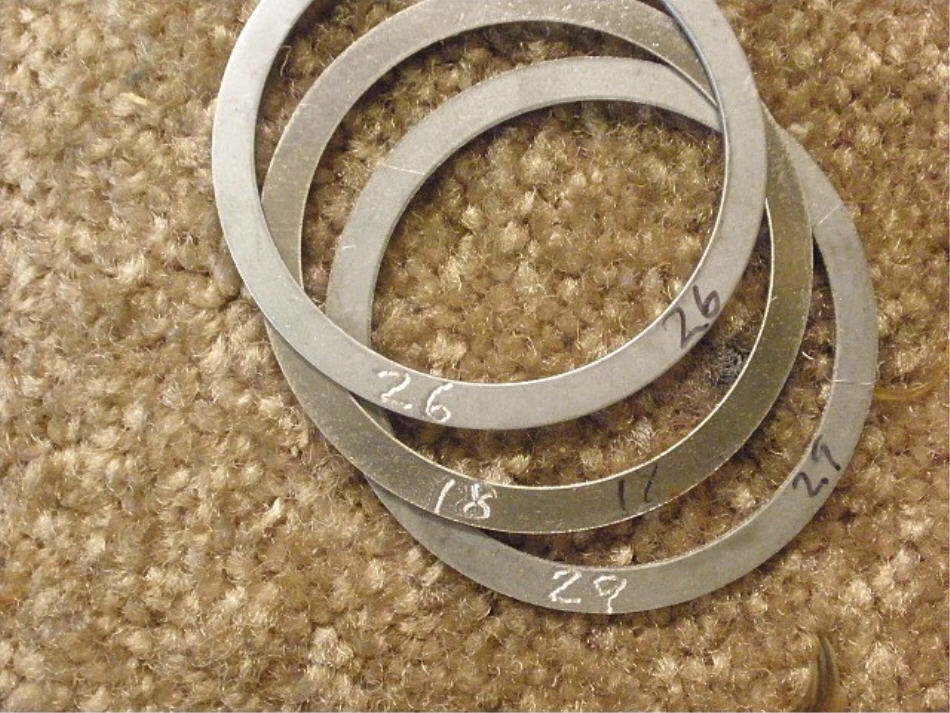
These 3 add up to .073" so that might be pretty close. |
|
Shims and collar are installed... |
|
...pinion is loaded in place and the nut is cautiously tightened with the impact. The electric impacts are "more precise" and easier to tighten up in small increments than the air versions. The pre-load feels good....not too tight and still a bit on the loose side. |
|
Even though the "moving torque"(turning at about 1 rev/sec) is about 5 or 6 inch/pounds here, I can still dial in extra pre-load by using my 4 foot cheater bar. The electric impact does not make the 200 ft/lb number in the way I use it....the cheater bar lets me dial in the desired PPL pretty much where I want it. |
|
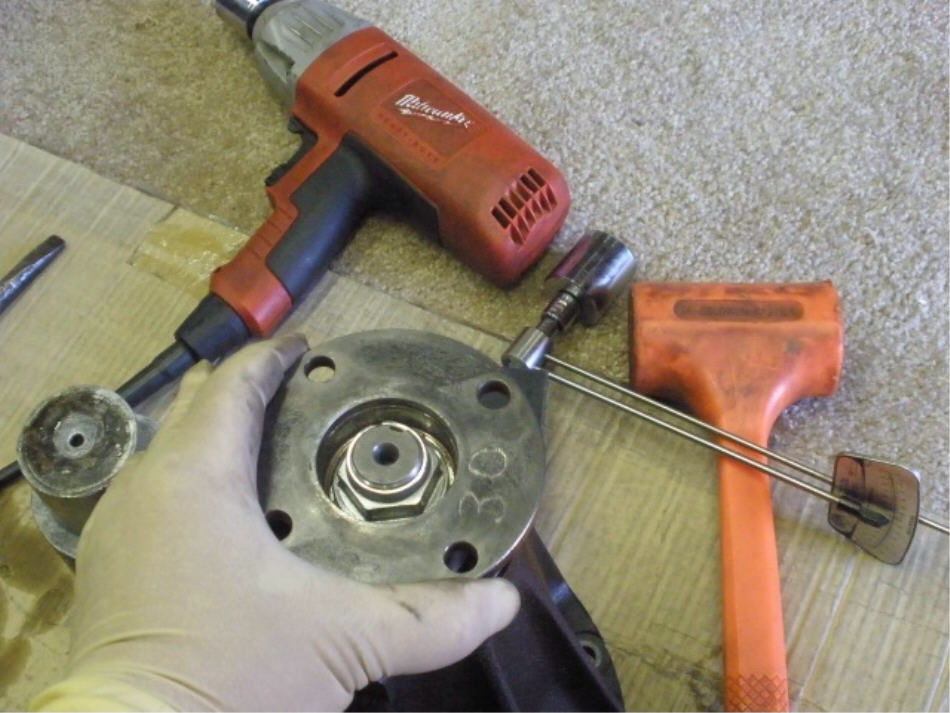
Now that I have the solid collar shimmed properly, I can now remove the shop flange and install the new seal and original flange. |
|
Black rtv is smeared on the surface that the rubberized outer surface of the seal will encounter. |
|
More love taps to help the seal make up its mind... |
|
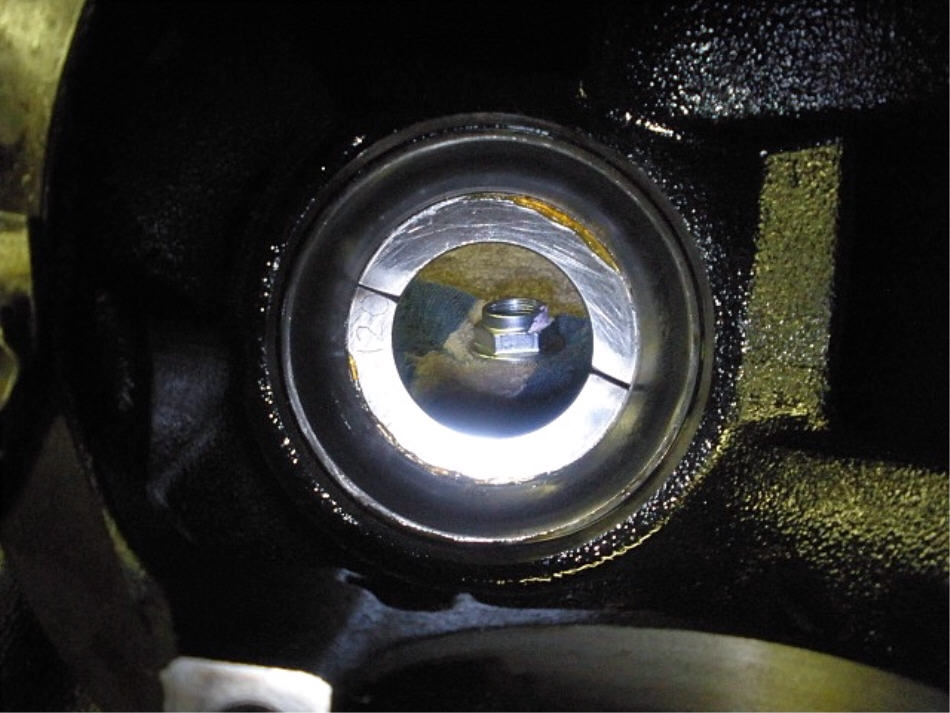
I did not use the thick grease on the seals inside where the tiny coil is so I can use my penlight and peak in to visually verify that nothing fell out. All is good as usual. |
|
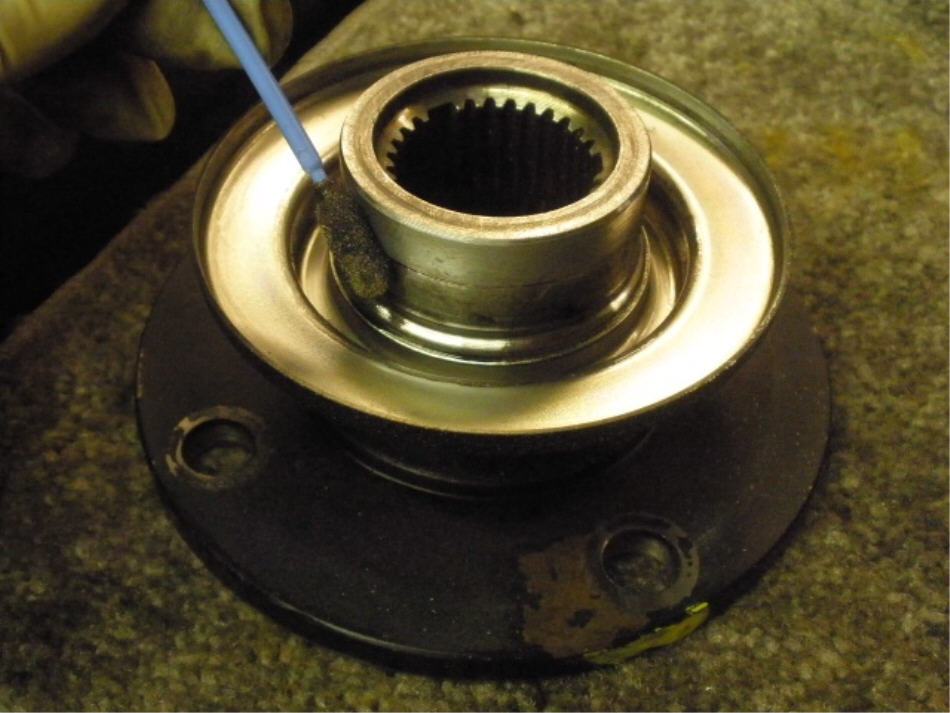
Surfaces are cleaned and touched up with emery. There is always a small groove of some sort on a used flange and I generally like to recommend using a new flange to guard against any kind of gear oil leak. These 30 spline flanges are not cheap....somewhere's around $100 from the dealer and I don't think the after-market has these 30 spliners yet. As shown above, a light coating of gear oil to the main surface and to the other surface where the rubber lip might make contact. |
|
The pinion flanges for the 8.4's is such a tight fit....not an issue as long as a humble 12 ton press is around. |
|
Red Loctite is applied to the new 30mm flange nut. |
|
Before the final tightening with the cheater bar, a mark is applied to the nut for reference. |
|
... |
|
Using the cheater bar has increased the PPL to about 12 in/lb. |
|
DING and this side is done. |
|
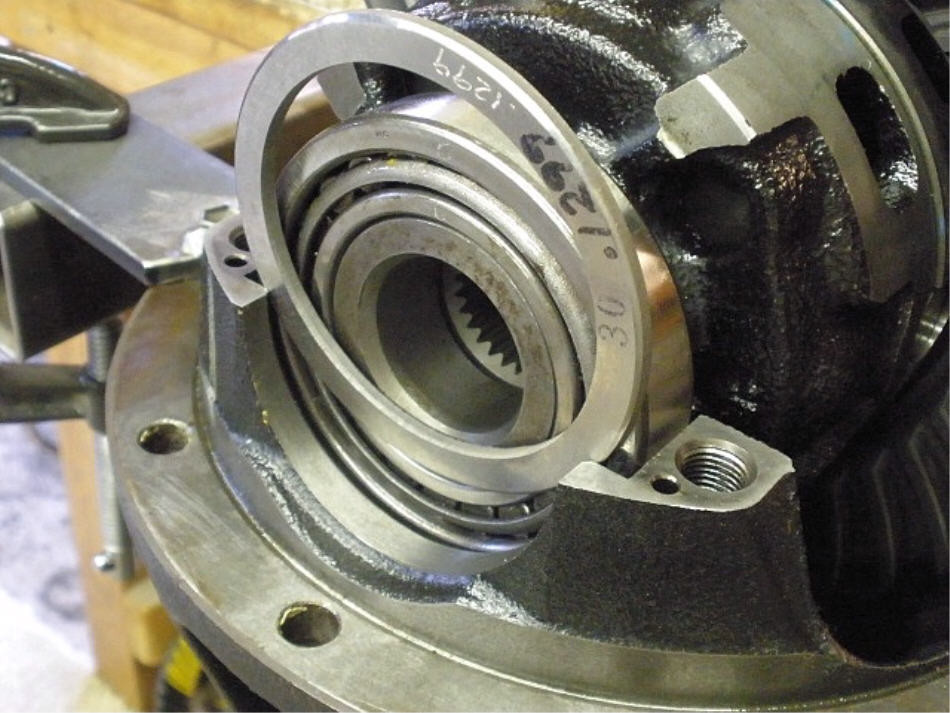
I added about .002" to each side such that the new washer plate on the left is .1264" and .1031" on the right. |
|
I was still able to tap it in with a hammer....just barely. |
|
The ring was not turning tight enough. Within the backlash range, it still moved too easy for me. |
|
Another 3.5 thou was added to each side... |
|
The hammer could not tap it in fully without deforming or breaking the washer plate. |
|
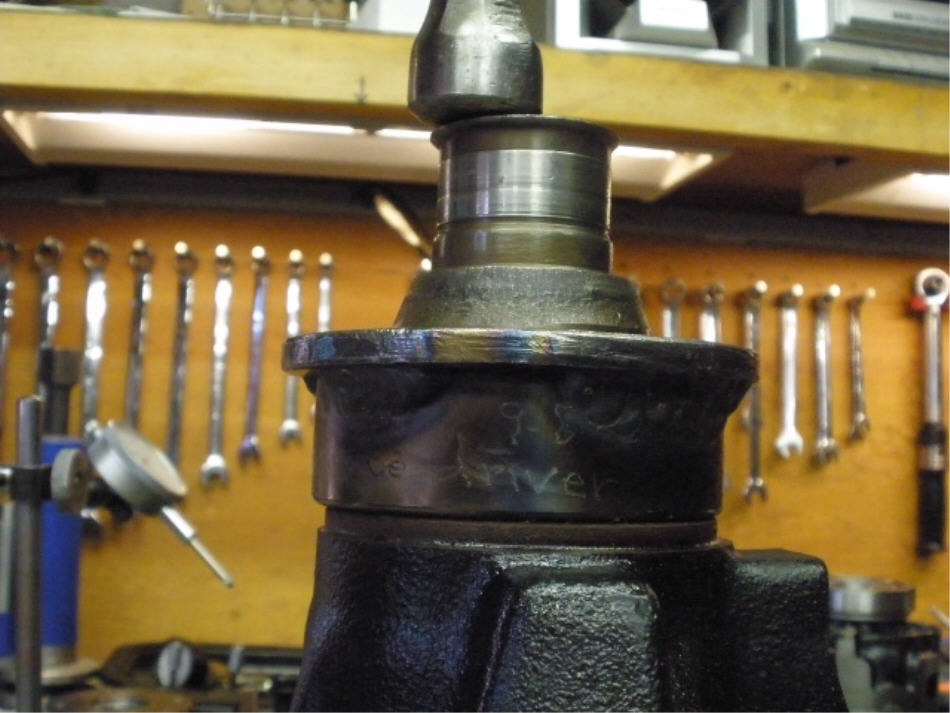
I could have used my rounded chisel to tap it in the final distance but it makes more sense to place the girdle on and tap it in place with zero damage to the plates. |
|
Now I feel the pre-load. |
|
Backlash has been recorded on every other tooth. Backlash is .006" |
|
The 4 bolts are verified to be 85 ft/lbs. |
|
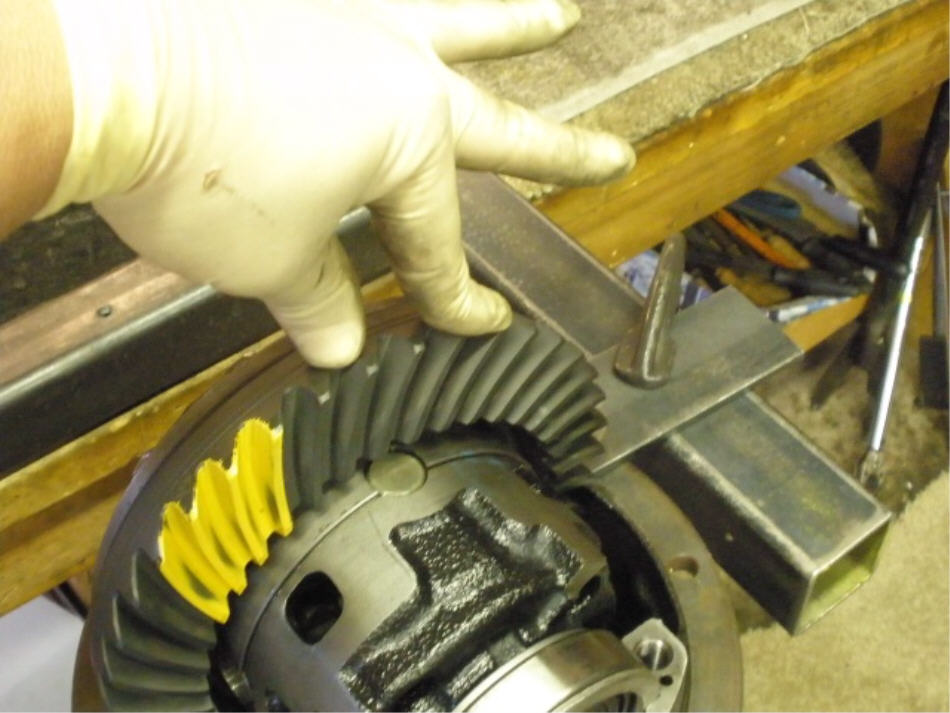
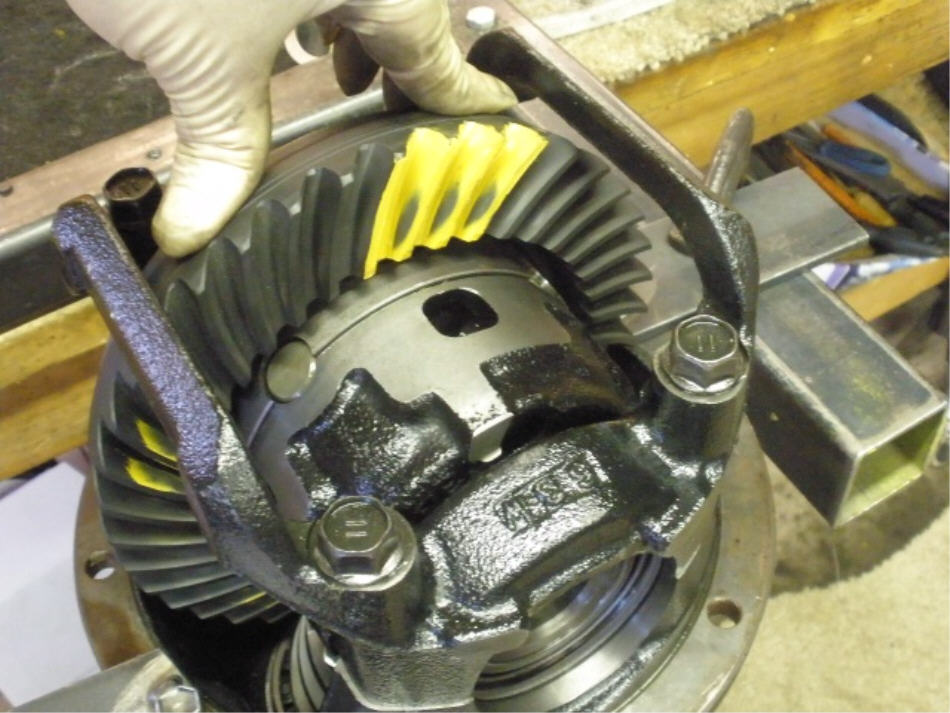
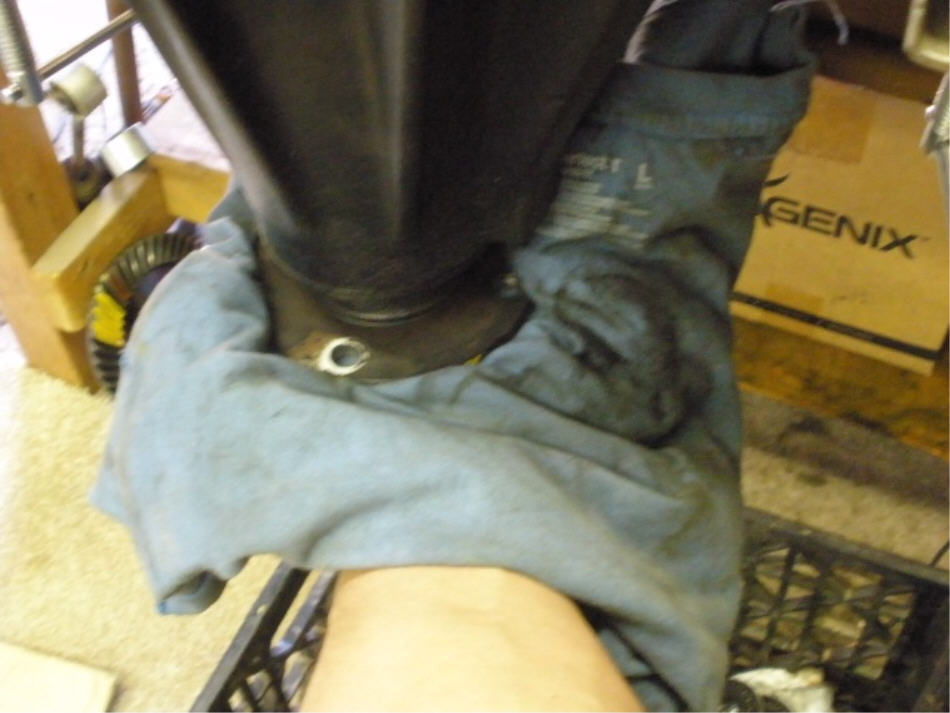
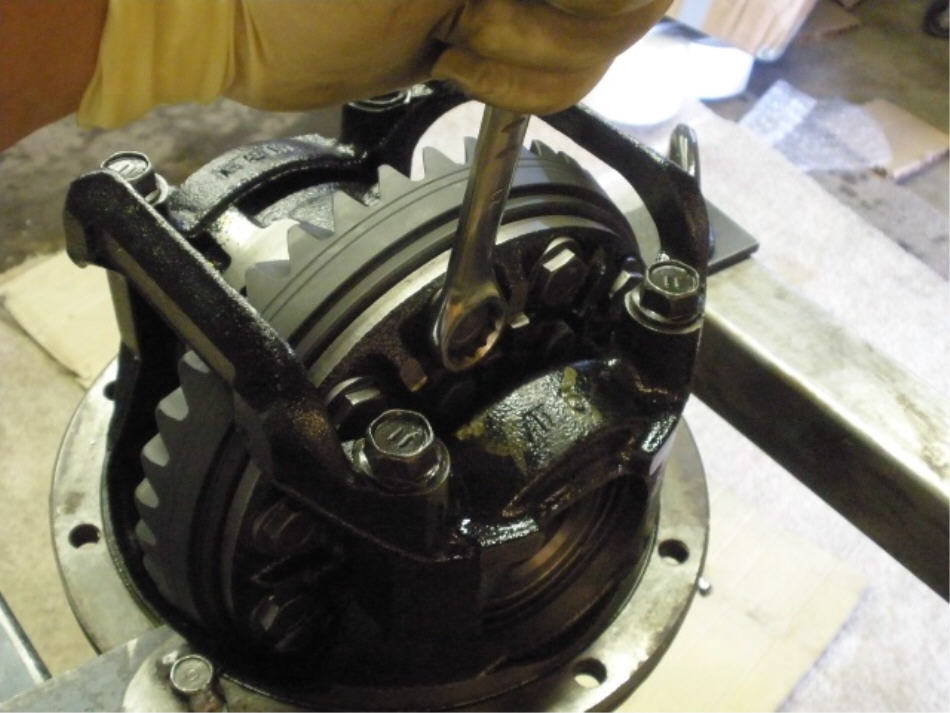
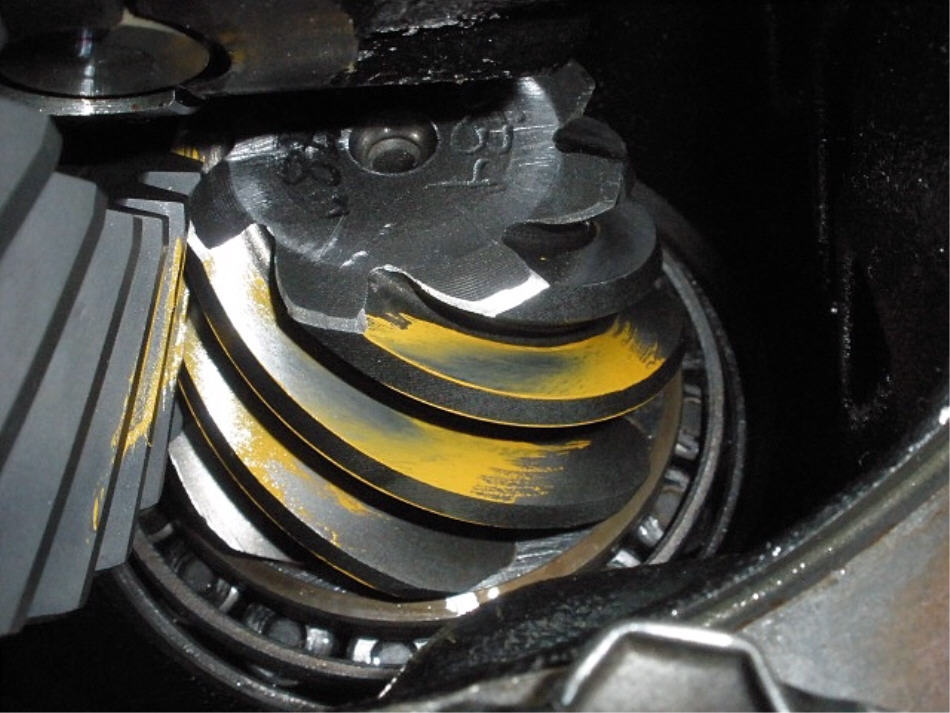
One more final pattern check. An old rag is used to offer some resistance.... |
|
....while a 17mm wrench rotates the ring gear back and forth in the limited amount of space available....just enough space to paint the 3 teeth needed to check the pattern. |
|
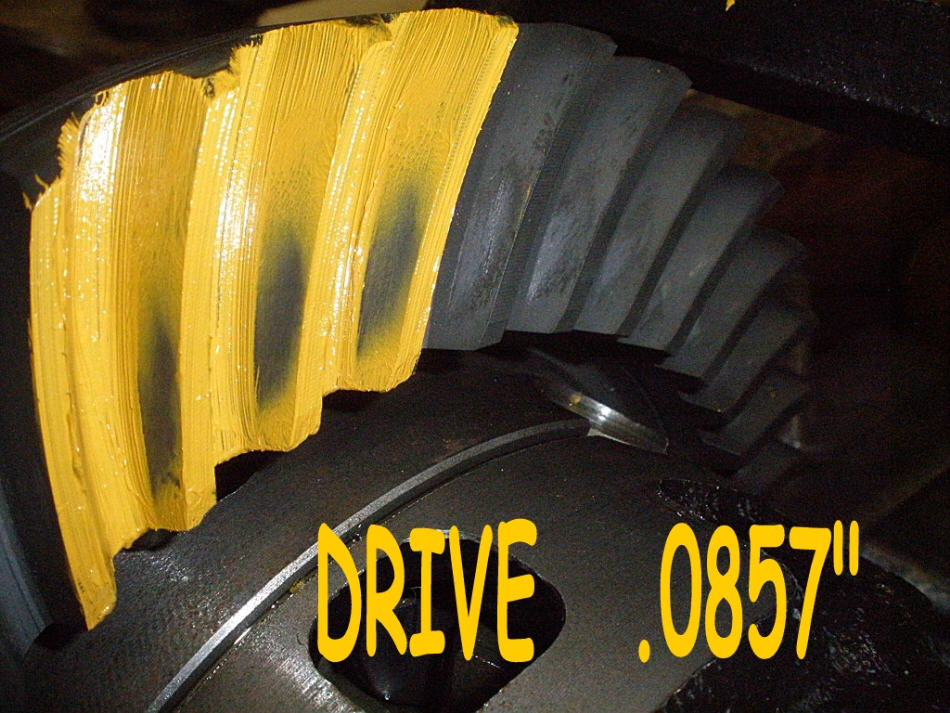
Excellent...favors the toe a little. |
|
Coast...favors toe also for excellent balance with the drive side. |
|
A quick look at the drive side of the pinion. |

|
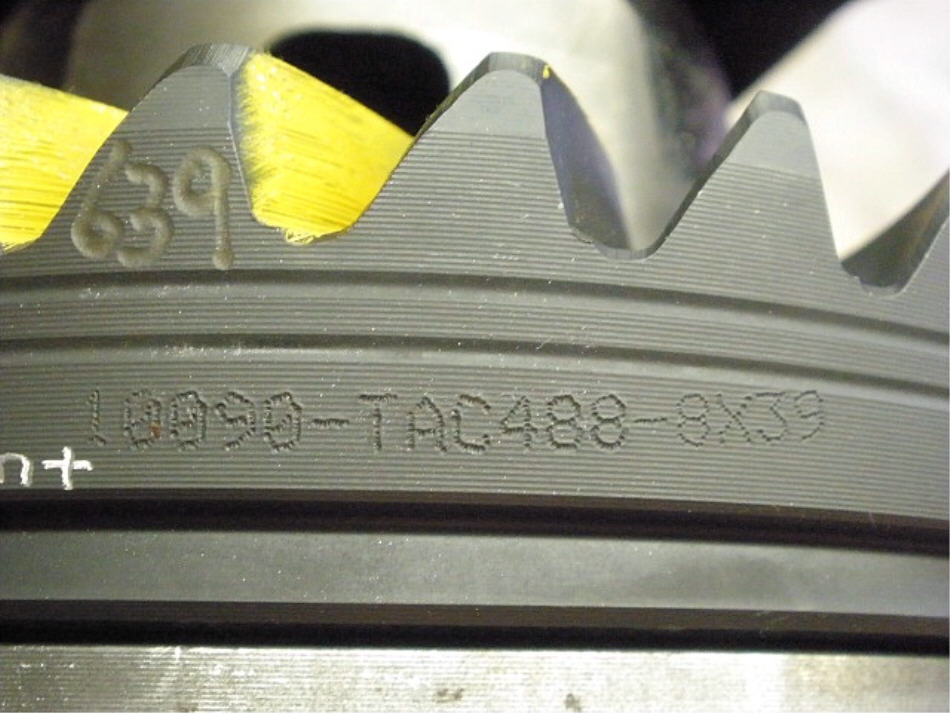
Date-coded. |
|
Came in a Nitro Gear box. It appears to be a good quality Motive brand gear. |
|
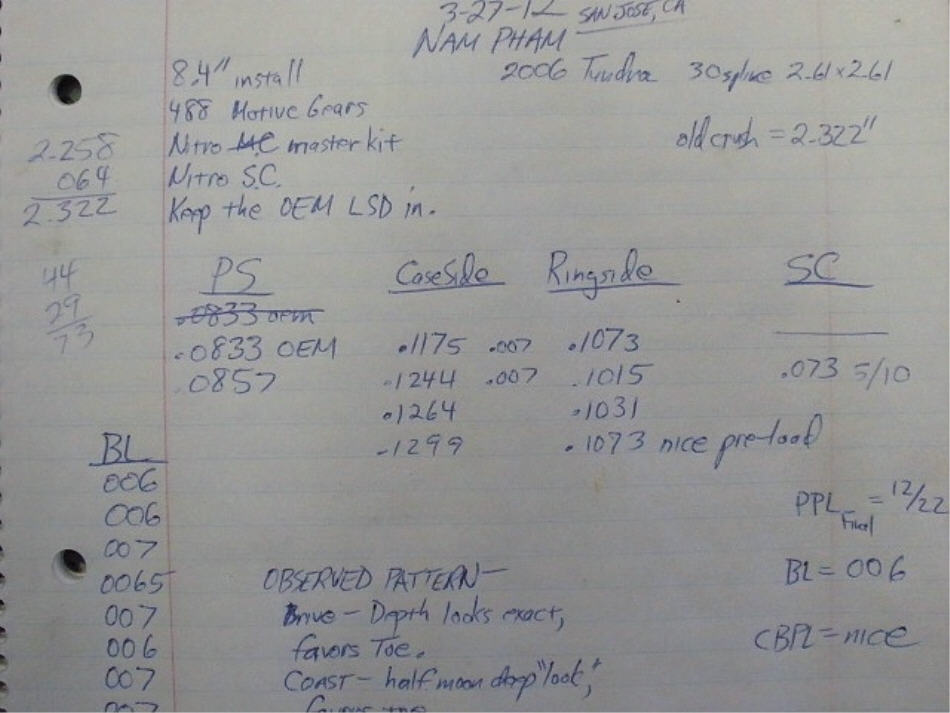
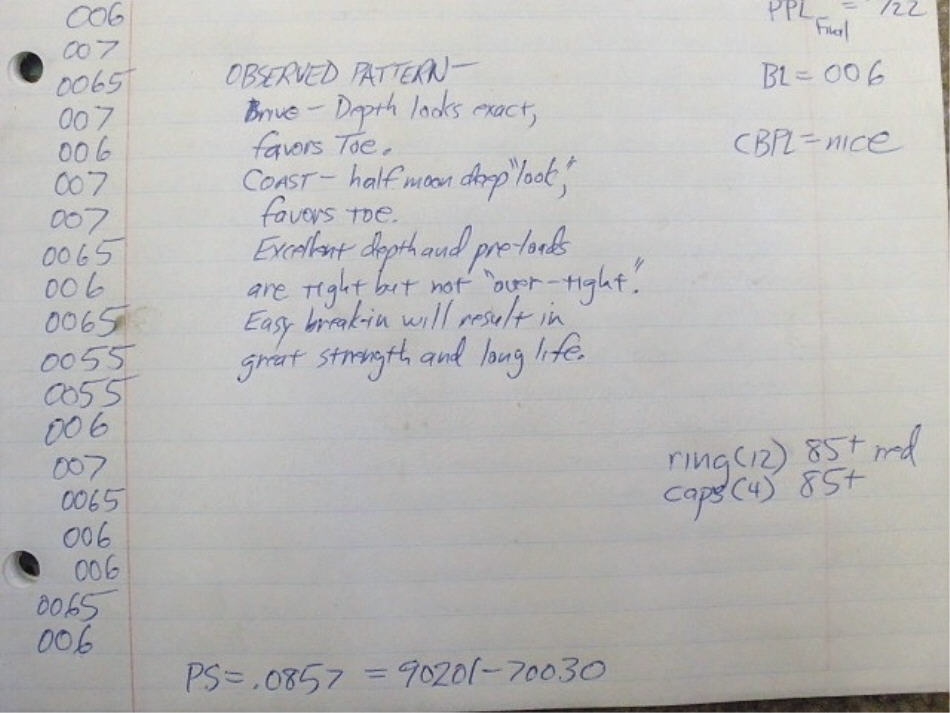
Notes from the install. |
|
|

|
