| Local NC Landcruiser install goes bad fast...."ZUK, can you dissect the install and give it a proper set up?" |
|---|
| (87 BIG pics loading) |
|---|
| AUGUST 20 2018 |
|---|

|
Nick, out of North Carolina, had "a friend of a friend of a friend" do his front FJ80 install. Only 20 miles of easy break-in and the 3rd
starts making a loud noise. A few emails and 5 days later, I receive the box. |
|---|
|

|
| A nice job of cushioning the 3rd in all planes. |
|---|
|

|
| Initial inspection shows too much thread exposed. This basic style of nut requires a thick hardened washer and that was missing. |
|---|
|

|
| Some damage to the bottom of the nut and the once new triple drilled flange. |
|---|
|

|
There were no paint marks from the original install so not sure how anybody can even call that a gear install but I did paint the teeth
here and this drive side shows wayyyyyyyyyy deep. The pinion shim is much too thick and not casually so. |
|---|
|

|
| Coast side....terribly deep also. |
|---|
|

|
Backlash was actually in spec though.
Nothing too special to say about the bearing preloads....they were not wobbly and seemed normal. |
|---|
|

|
| Pinion tooth has the contact on the extreme tip/edges. |
|---|
|

|
| ;;;;;;;;;;;;;;;;;;;;;;;;;;;;;; |
|---|
|

|
| Guess I won't be re-using that nut again. |
|---|
|

|
| The flange's sealing surface looks almost perfect. |
|---|
|

|
| No hardened washer and this is the result. In this case, it's mostly cosmetic damage. |
|---|
|

|
| This was a new 27 spline Yukon seal. |
|---|
|

|
| This bearing and the race look older than the 60 miles put on them and that could be the result of excessive metal debri in the new oil. |
|---|
|

|
| A crush sleeve was used. |
|---|
|

|
| The shim value used was .079" which is a very typical shim. |
|---|
|

|
| A closer look at the small outer pinion bearing/race. |
|---|
|

|
| The large inner race has damage consistent with metal particles in the oil (contamination damage). |
|---|
|

|
| Damage comparisons of the inner and outer pinion bearings. |
|---|
|

|
| ;;;;;;;;;;;;;;;;;;;;;;;;;;; |
|---|
|

|
| ::::::::::::::::::::::::::::: |
|---|
|

|
| The carrier bearings are turning about 5 times slower but have similar damage to the race and bearing rollers. |
|---|
|

|
| ;;;;;;;;;;;;;;;;;;;;;;;;;;;;; |
|---|
|

|
| ::::::::::::::::::::::::::::: |
|---|
|

|
| Out with the old and in with the new.....time for new Koyo bearings from the Nitro kit. |
|---|
|

|
| There was damage to the pinion threads but I had the fix. |
|---|
|

|
| The new nut would now spin on effortlessly. |
|---|
|

|
| New inner koyo race tapped in with 360 degree support. |
|---|
|

|
| Same with the smaller outer race. |
|---|
|

|
| Going to try a much thinner .061" pinion shim now. |
|---|
|

|
| The pinion assembly station...... |
|---|
|

|
| Just tight enough to develope about 20 inch/pounds of pinion start torque. |
|---|
|

|
| The design of the journals and surrounding area is such that a puller cannot reach in there and get the bearing off. |
|---|
|

|
| A dremel with a grinding wheel can do it in 5 minutes. |
|---|
|

|
| Bingo! |
|---|
|

|
| Easy peasy. |
|---|
|

|
| To the garbage can. |
|---|
|

|
The fine metal mush that the electro-magnet attracted to it in the previous weeks is visible on the inside edge of the grey ring.
I will have to dis-assemble the magnetic body and clean it. |
|---|
|

|
| The cage is removed... |
|---|
|

|
| The inner race is also removed. |
|---|
|

|
| A screwdriver and that "just right" roll pin punch allows the pressed on ring to slowly be worked up. |
|---|
|

|
| A slightly larger roll pin punch allows the sleeve to work up farther.... |
|---|
|

|
| ....until it is free and clear. |
|---|
|

|
| That's not my mess....that's what the electro-magnet attracted to it while the ring/pinion were meshing terribly together. |
|---|
|

|
| 2 small screwdrivers and the coiled clip can be worked loose. Kind of like taking a tire bead off a wheel. |
|---|
|

|
| It's free. |
|---|
|

|
| Yucko....this is why I had to take it apart and clean it. |
|---|
|

|
| Everything is totally undamaged and the particles will be blasted off thoroughly with my favorite sauce.....pressurized starting fluid. |
|---|
|

|
| This needle bearing might be considered the wear item with all that debri in there....but it will be squeaky clean when I get done. |
|---|
|

|
| This "ramp ring" gets cleaned also. |
|---|
|

|
| cleaned and oiled up. |
|---|
|

|
| /////////////////////// |
|---|
|

|
| Coiled spring is easy to reseat it.....start here and work 2 screwdrivers around. |
|---|
|

|
| Lastly, the sleeve retainer. |
|---|
|

|
| I found that just right bearing "widget" and lightly tapped the sleeve down til it was seated 100%. |
|---|
|

|
| 100% down. |
|---|
|

|
| Now the new Koyo TR100802-2 bearing is tapped on. A nice, tight fit at that. |
|---|
|

|
| This section is now complete. Now to load this Harrop into the 3rd and paint a few teeth. |
|---|
|
|
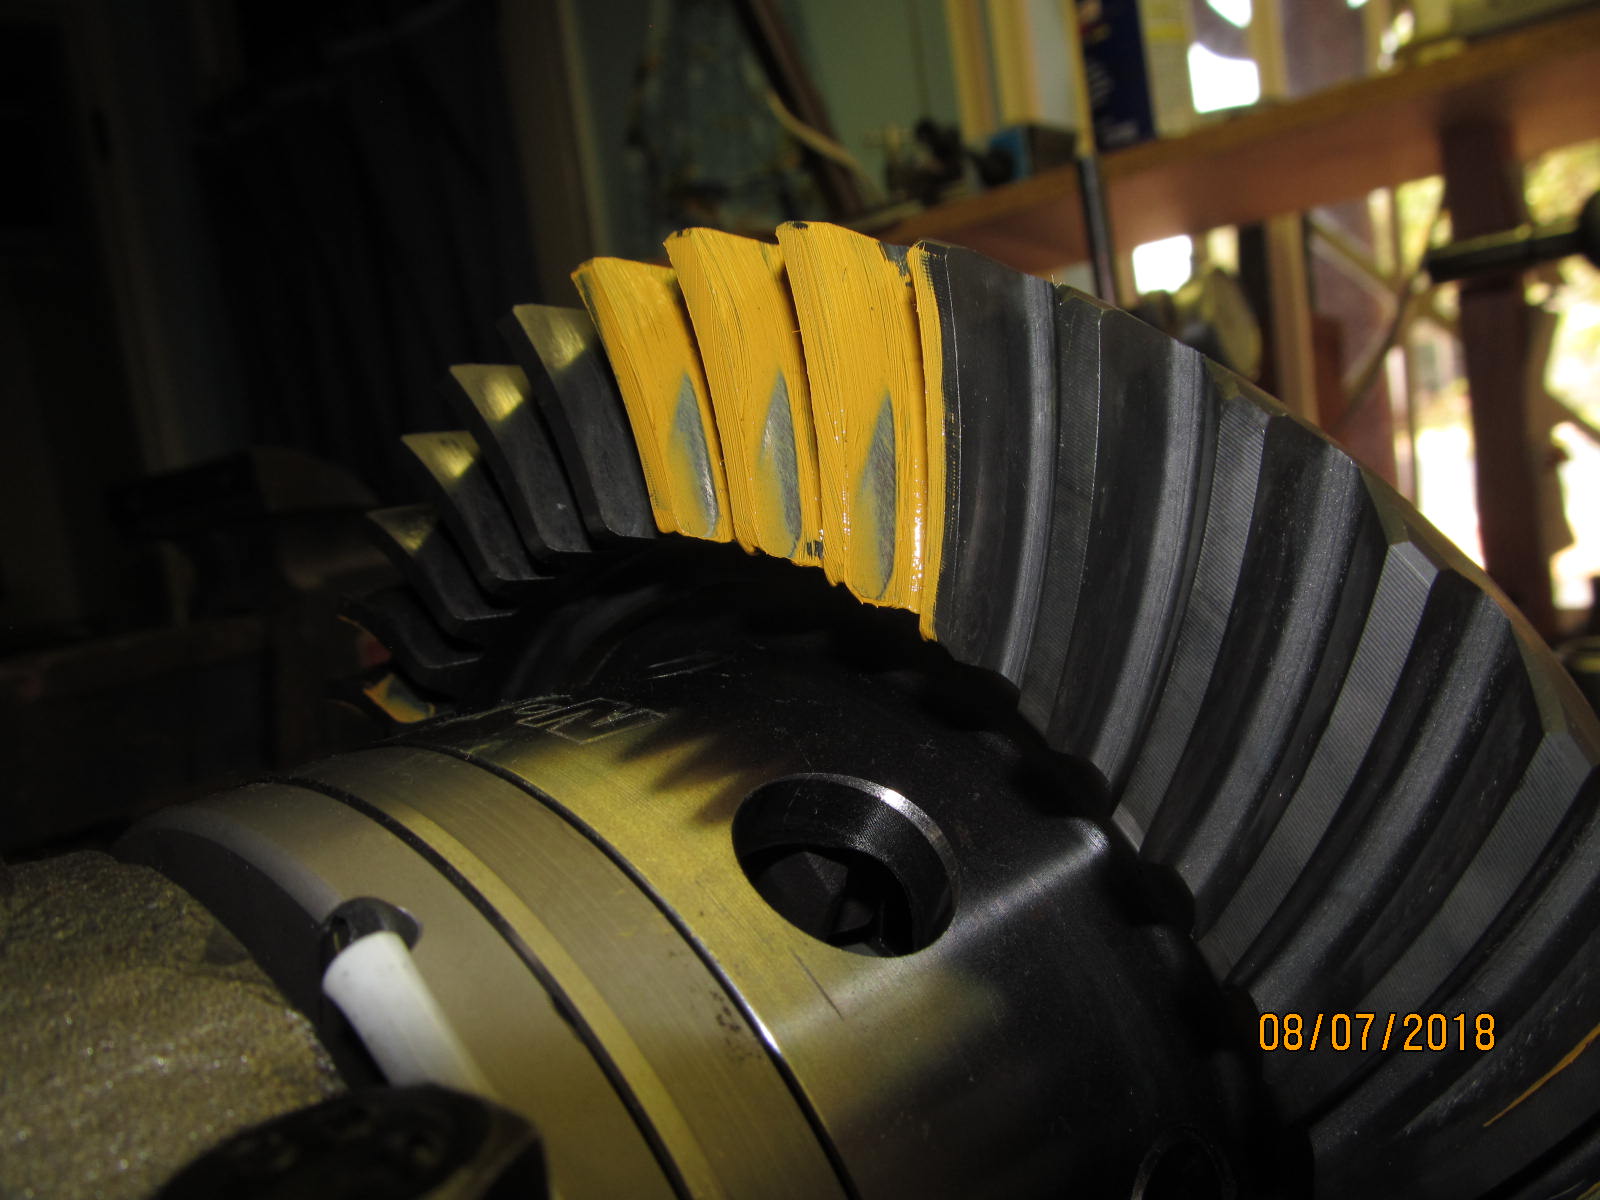
| Drive side 061..........Even with a much thinner .061" pinion shim the contact is still too deep. |
|---|
|

|
| Coast 061....way deep still. |
|---|
|
|
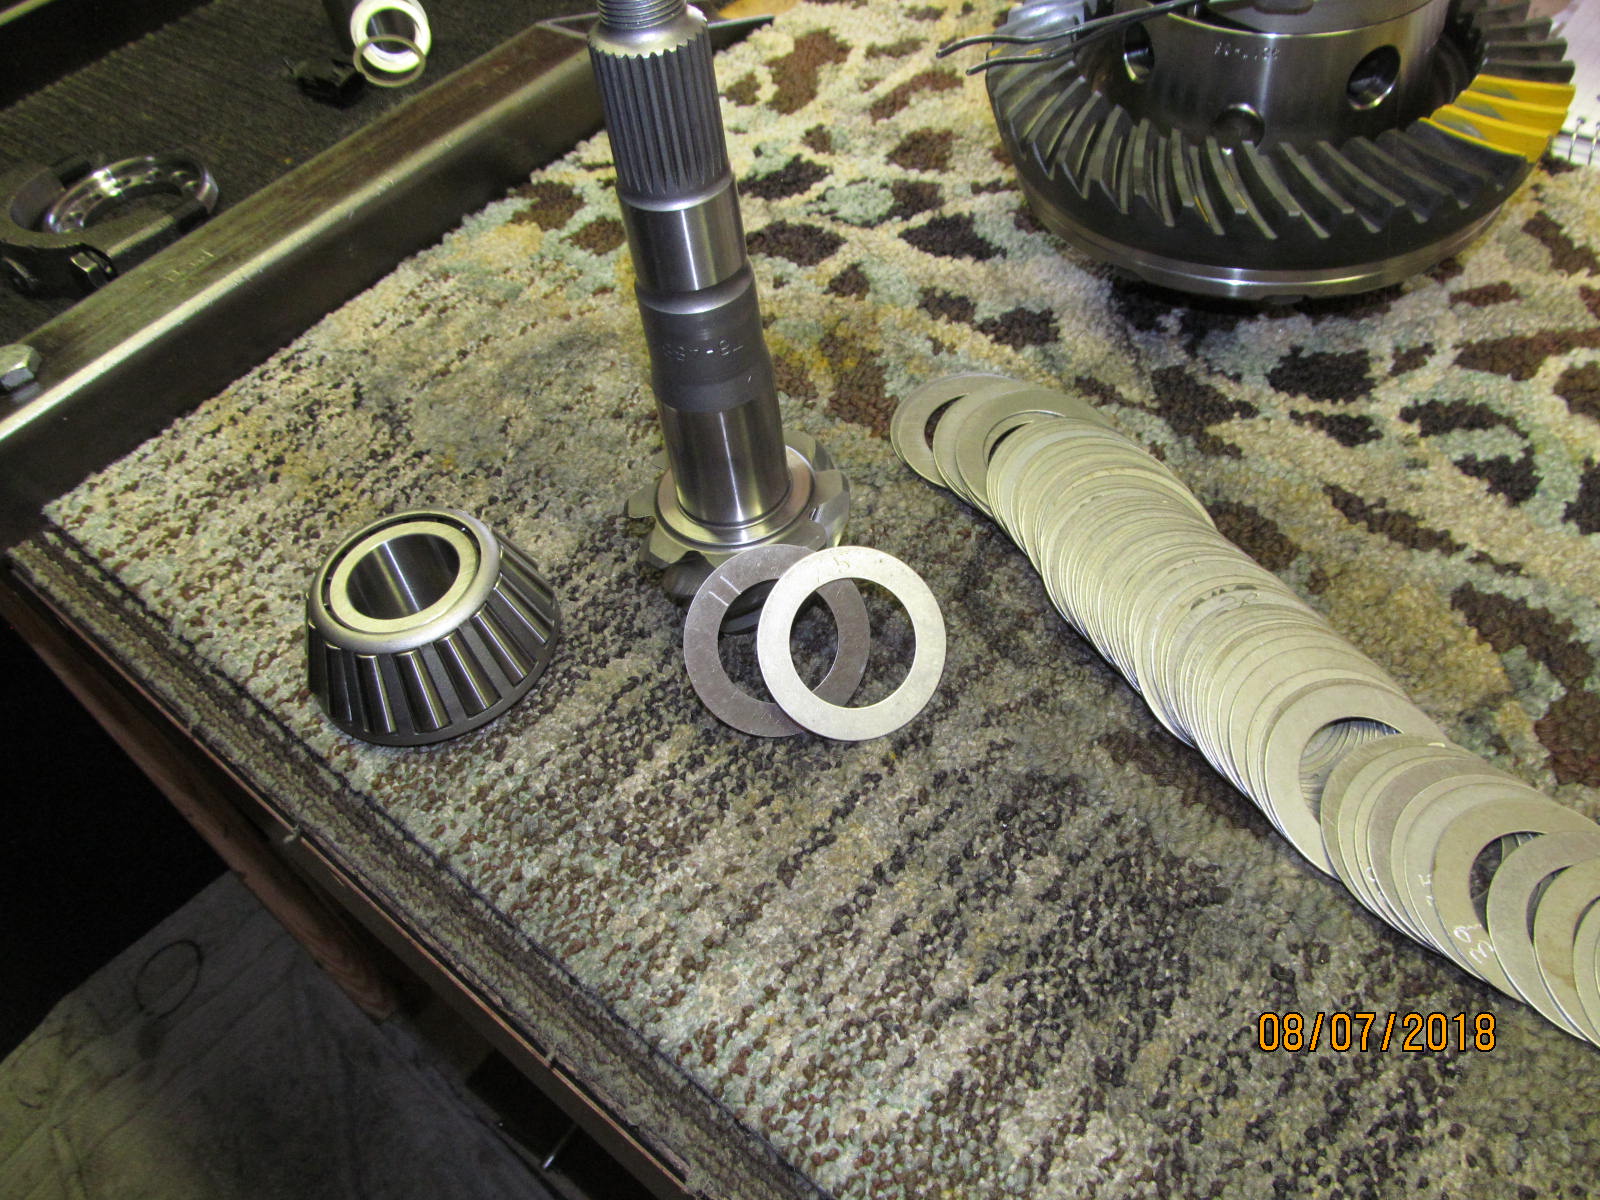
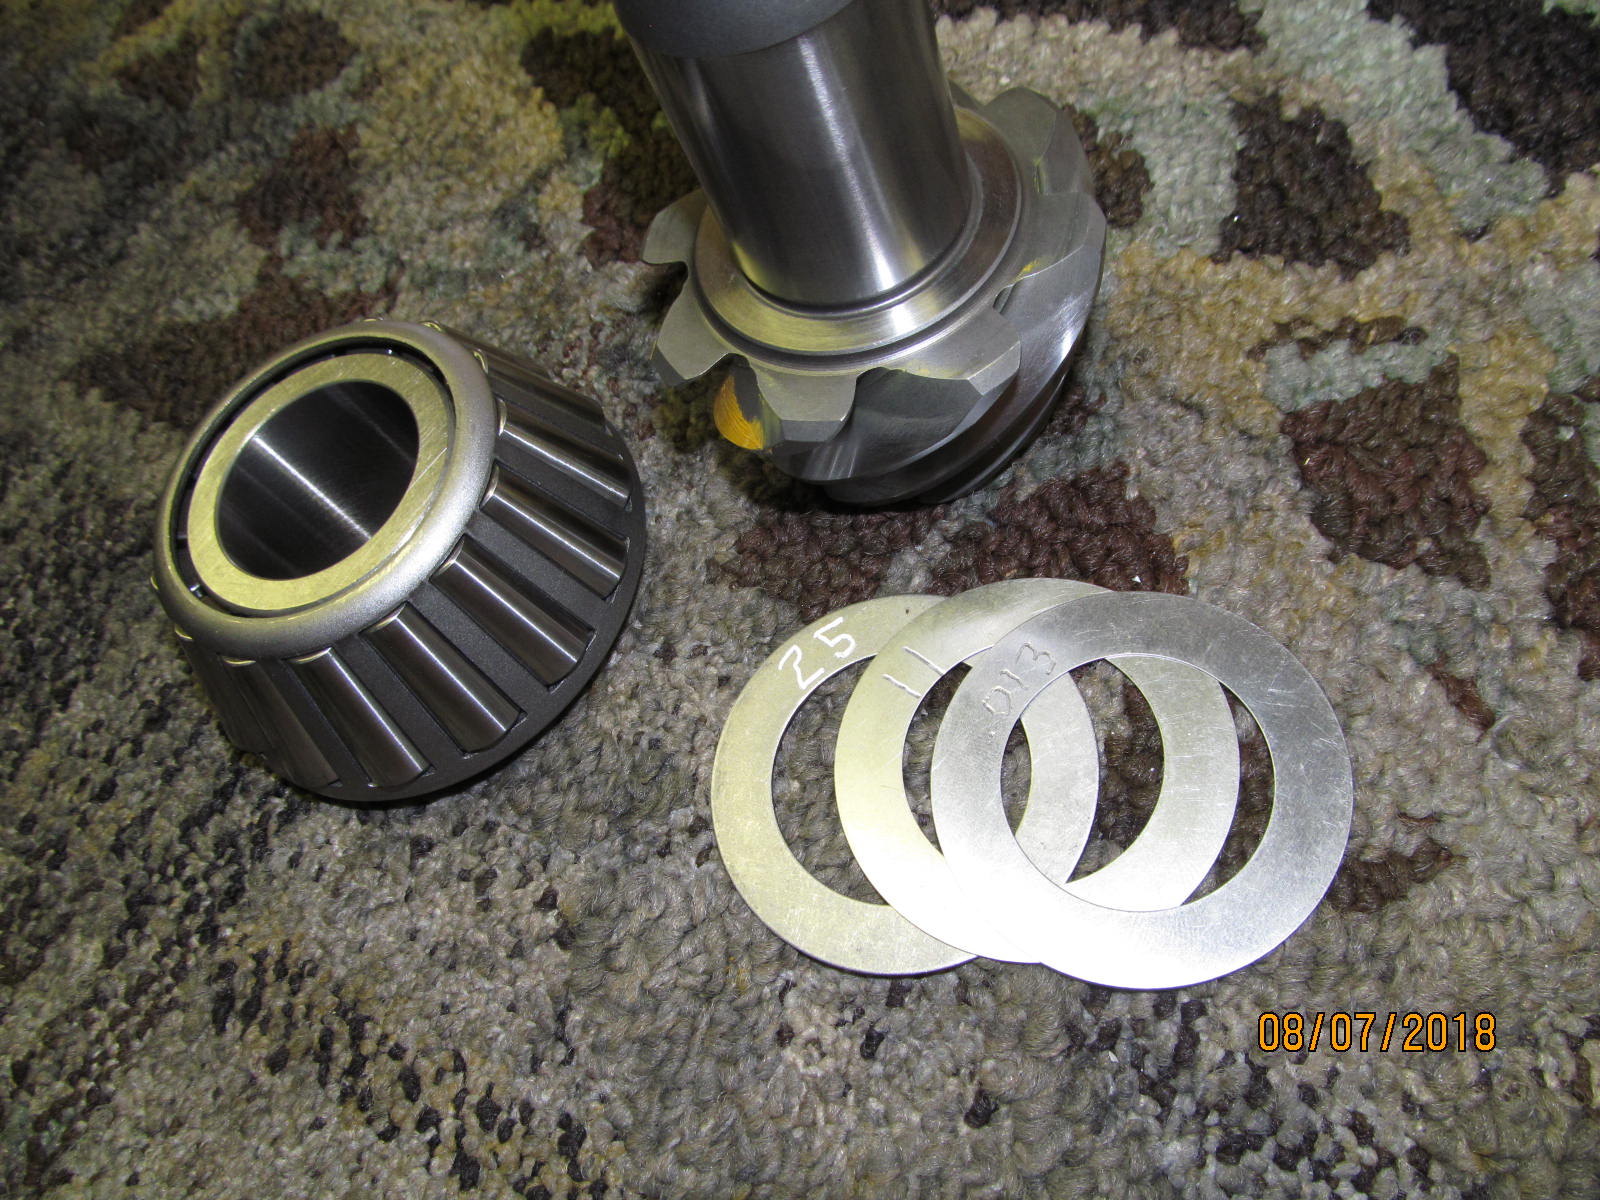
| Now to really, really go thin.....25 and 11 makes 36 so let's try .036" shim. |
|---|
|
|
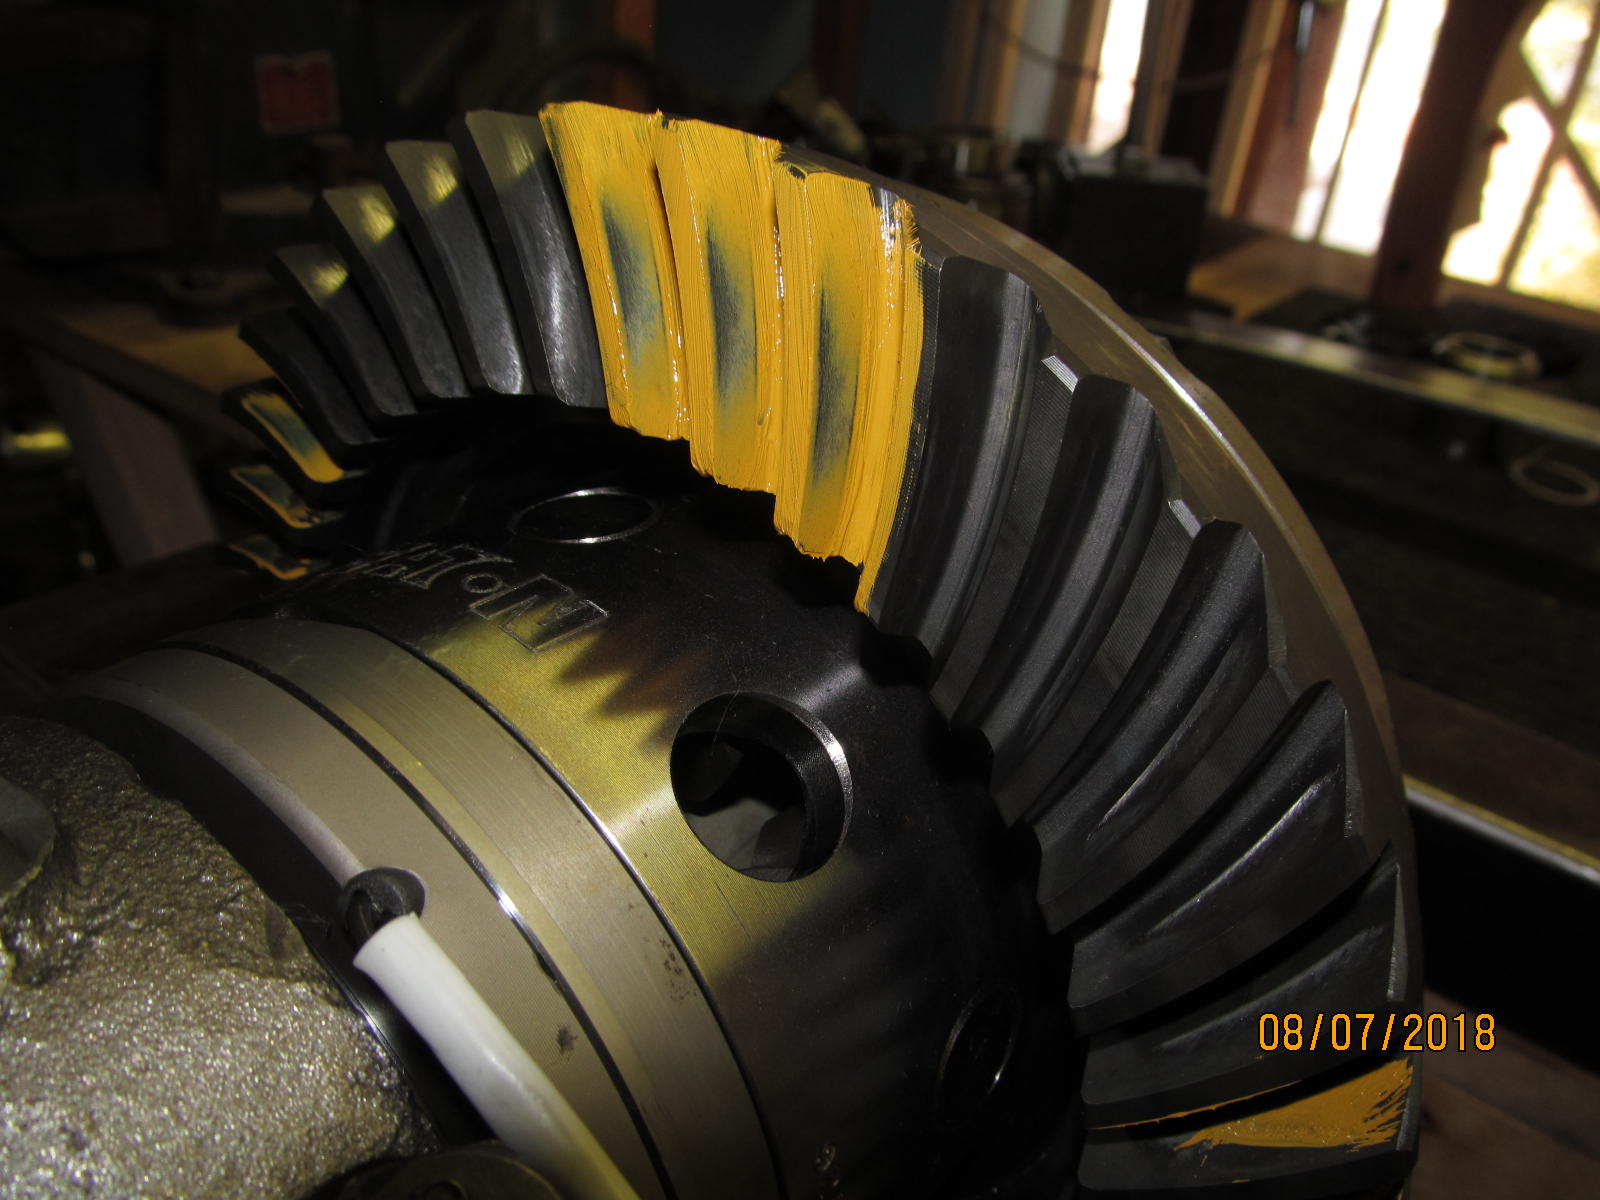
| Drive side 036.....We just overshot it by a little....now shallow. |
|---|
|
|
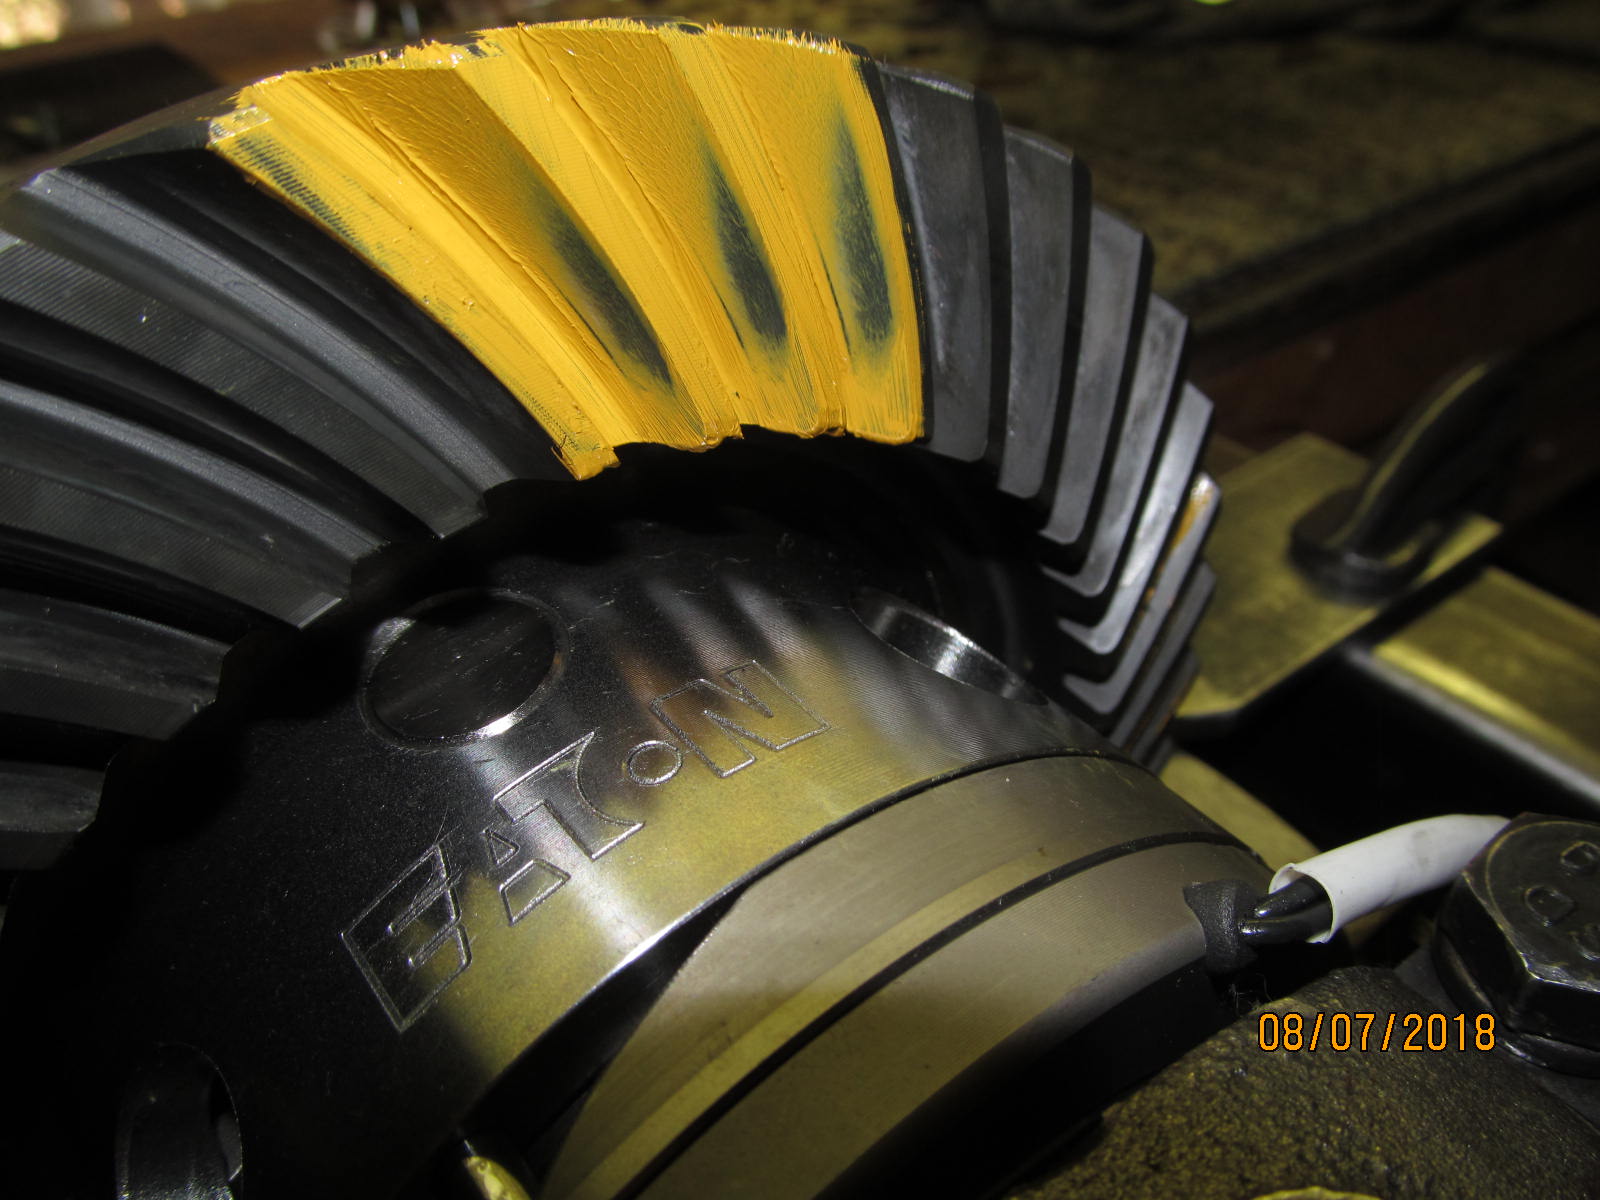
| Coast 036....shallow. |
|---|
|
|
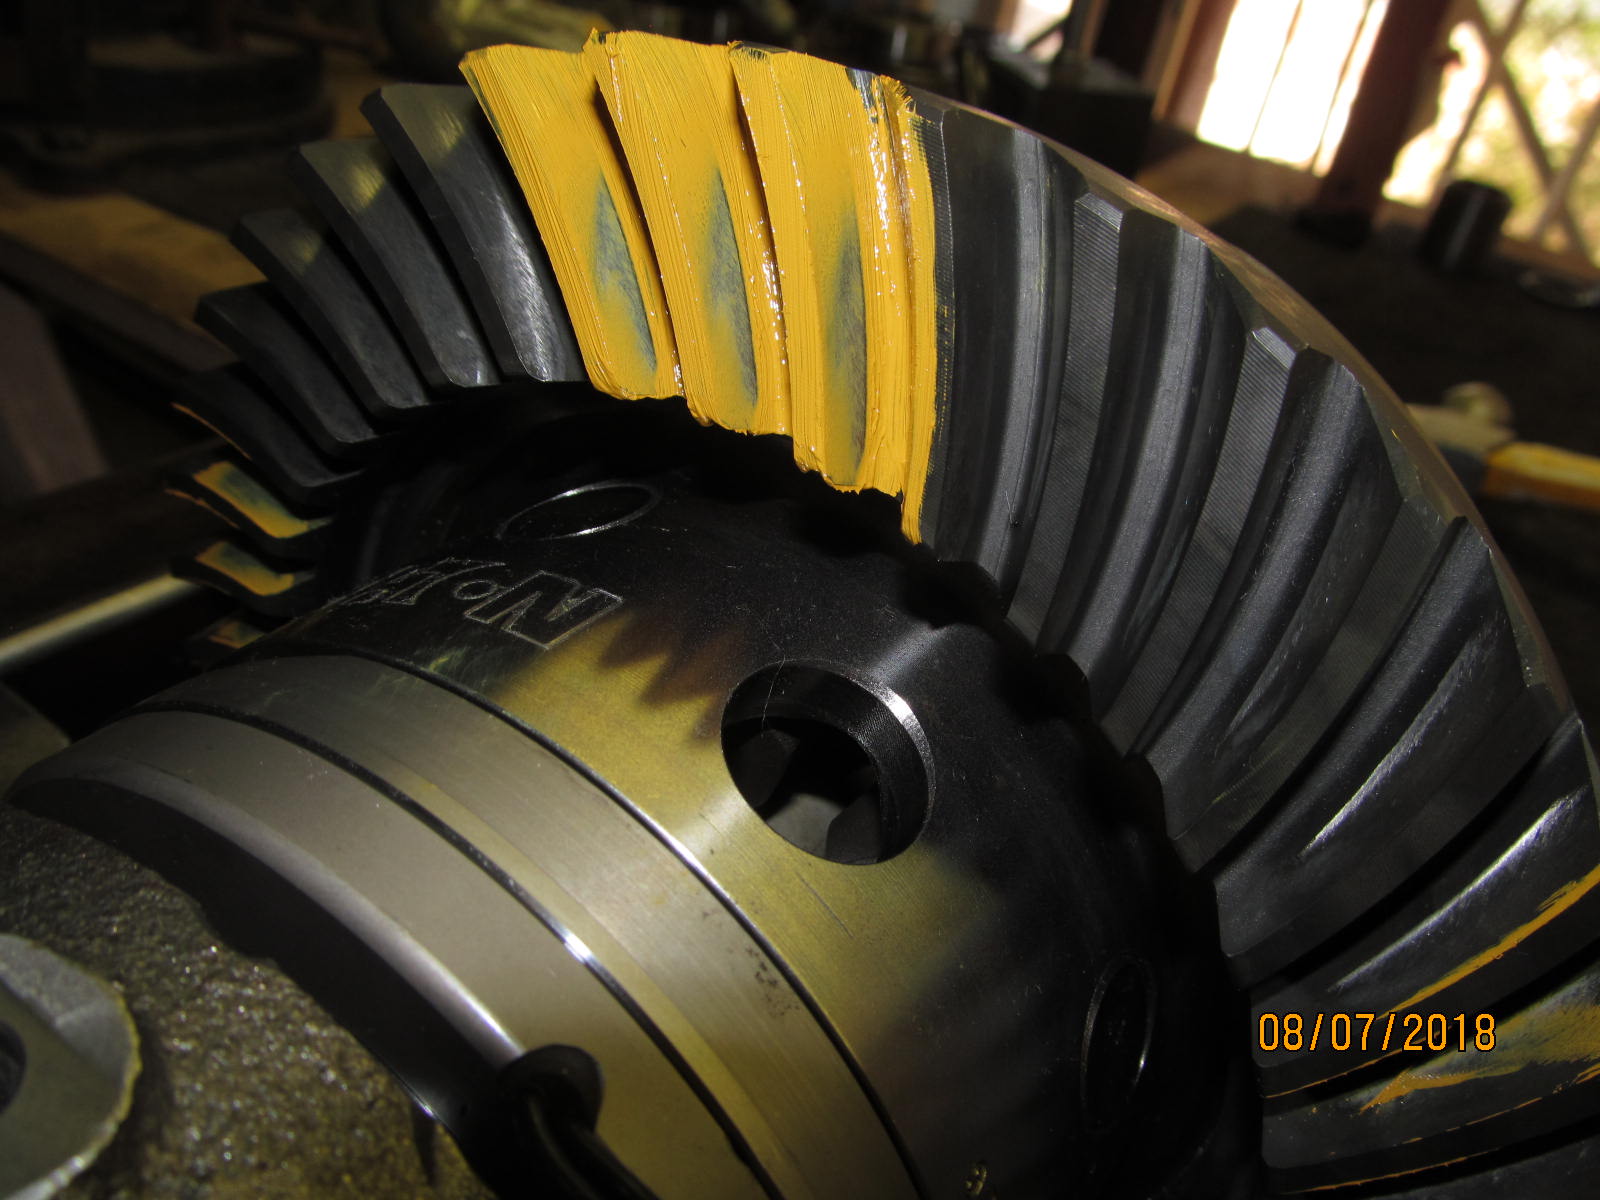
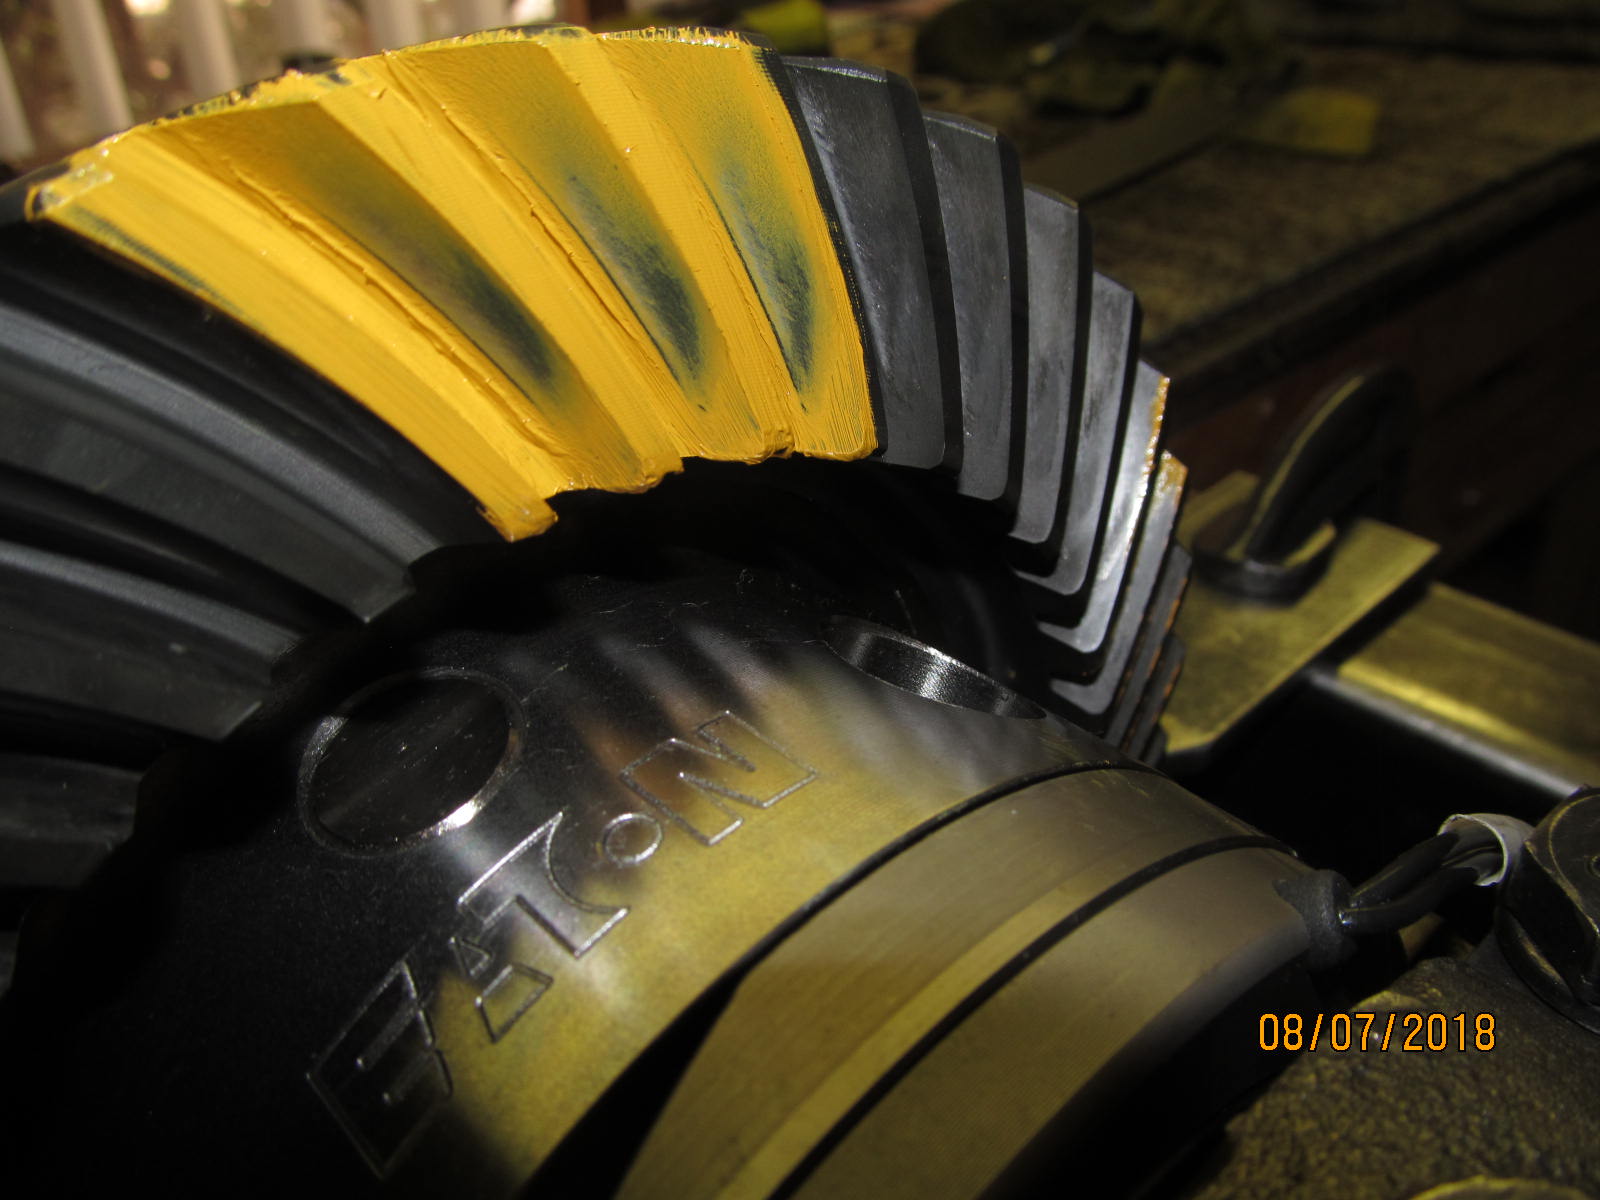
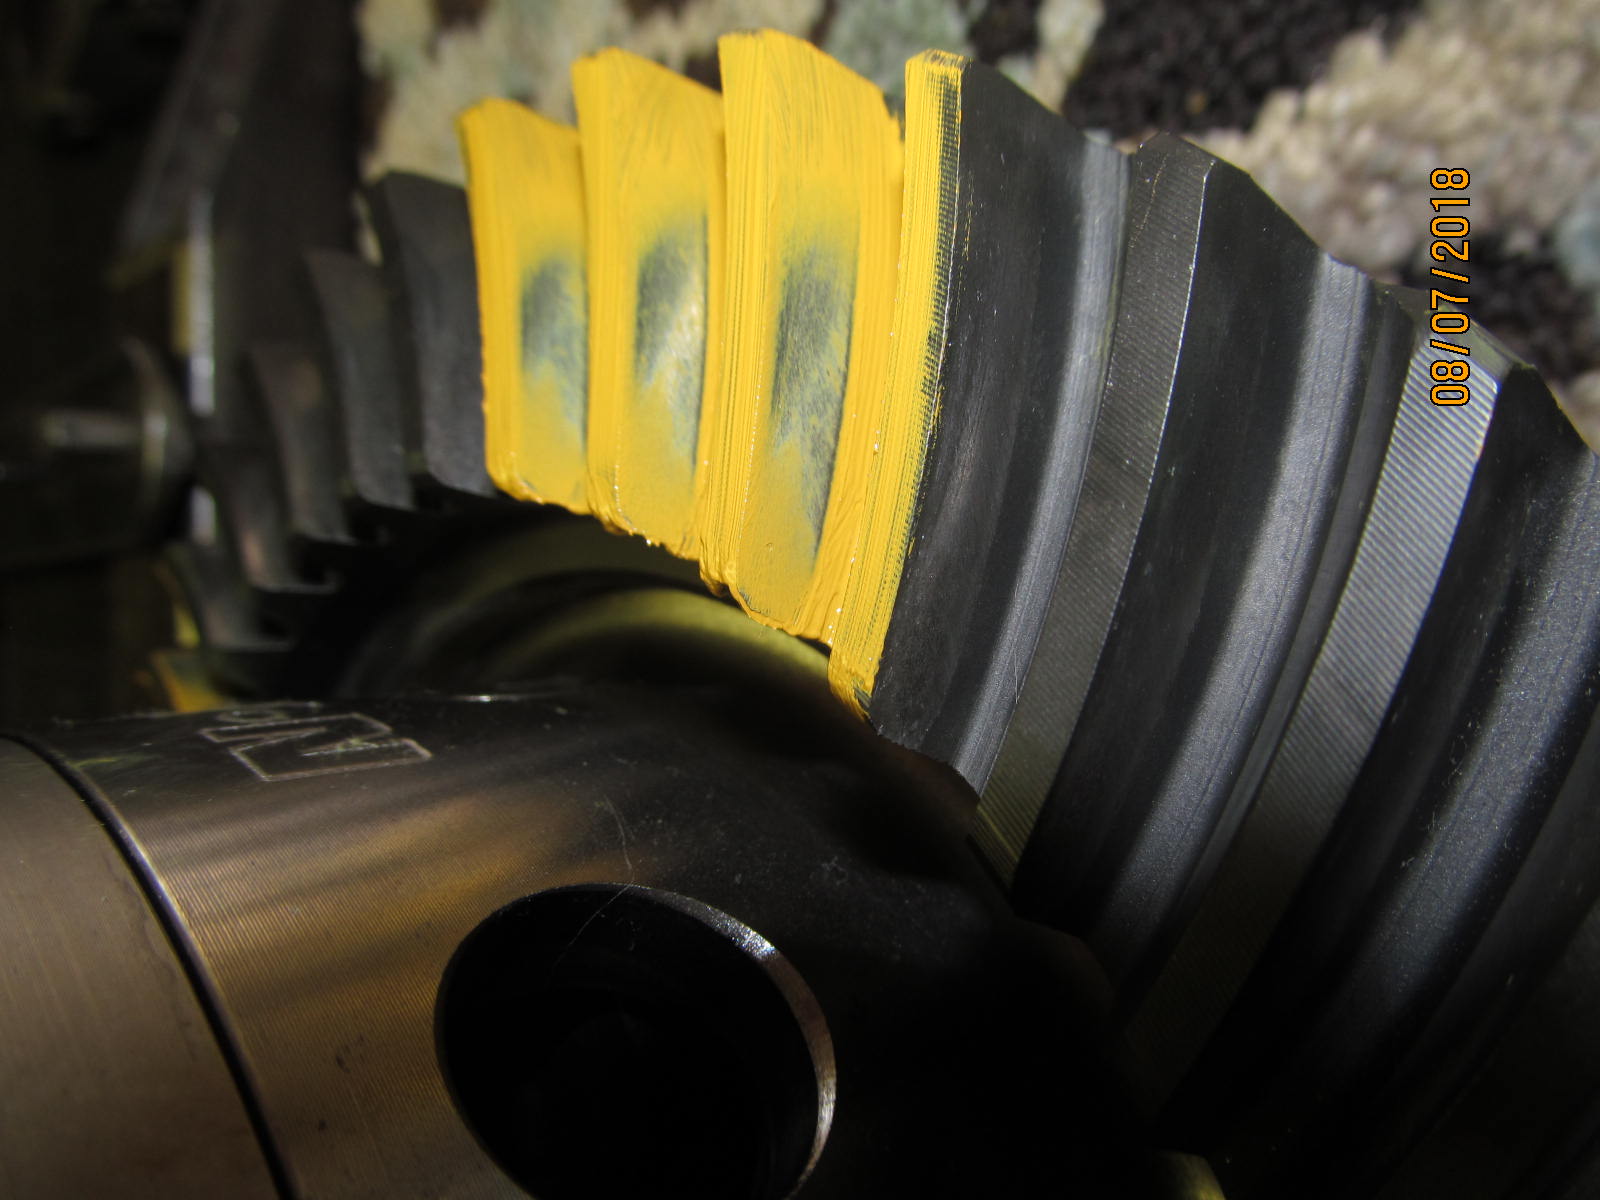
| Now trying .049" |
|---|
|
|
| Drive side 049....deep now. |
|---|
|
|
| Coast 049....too deep. |
|---|
|
|
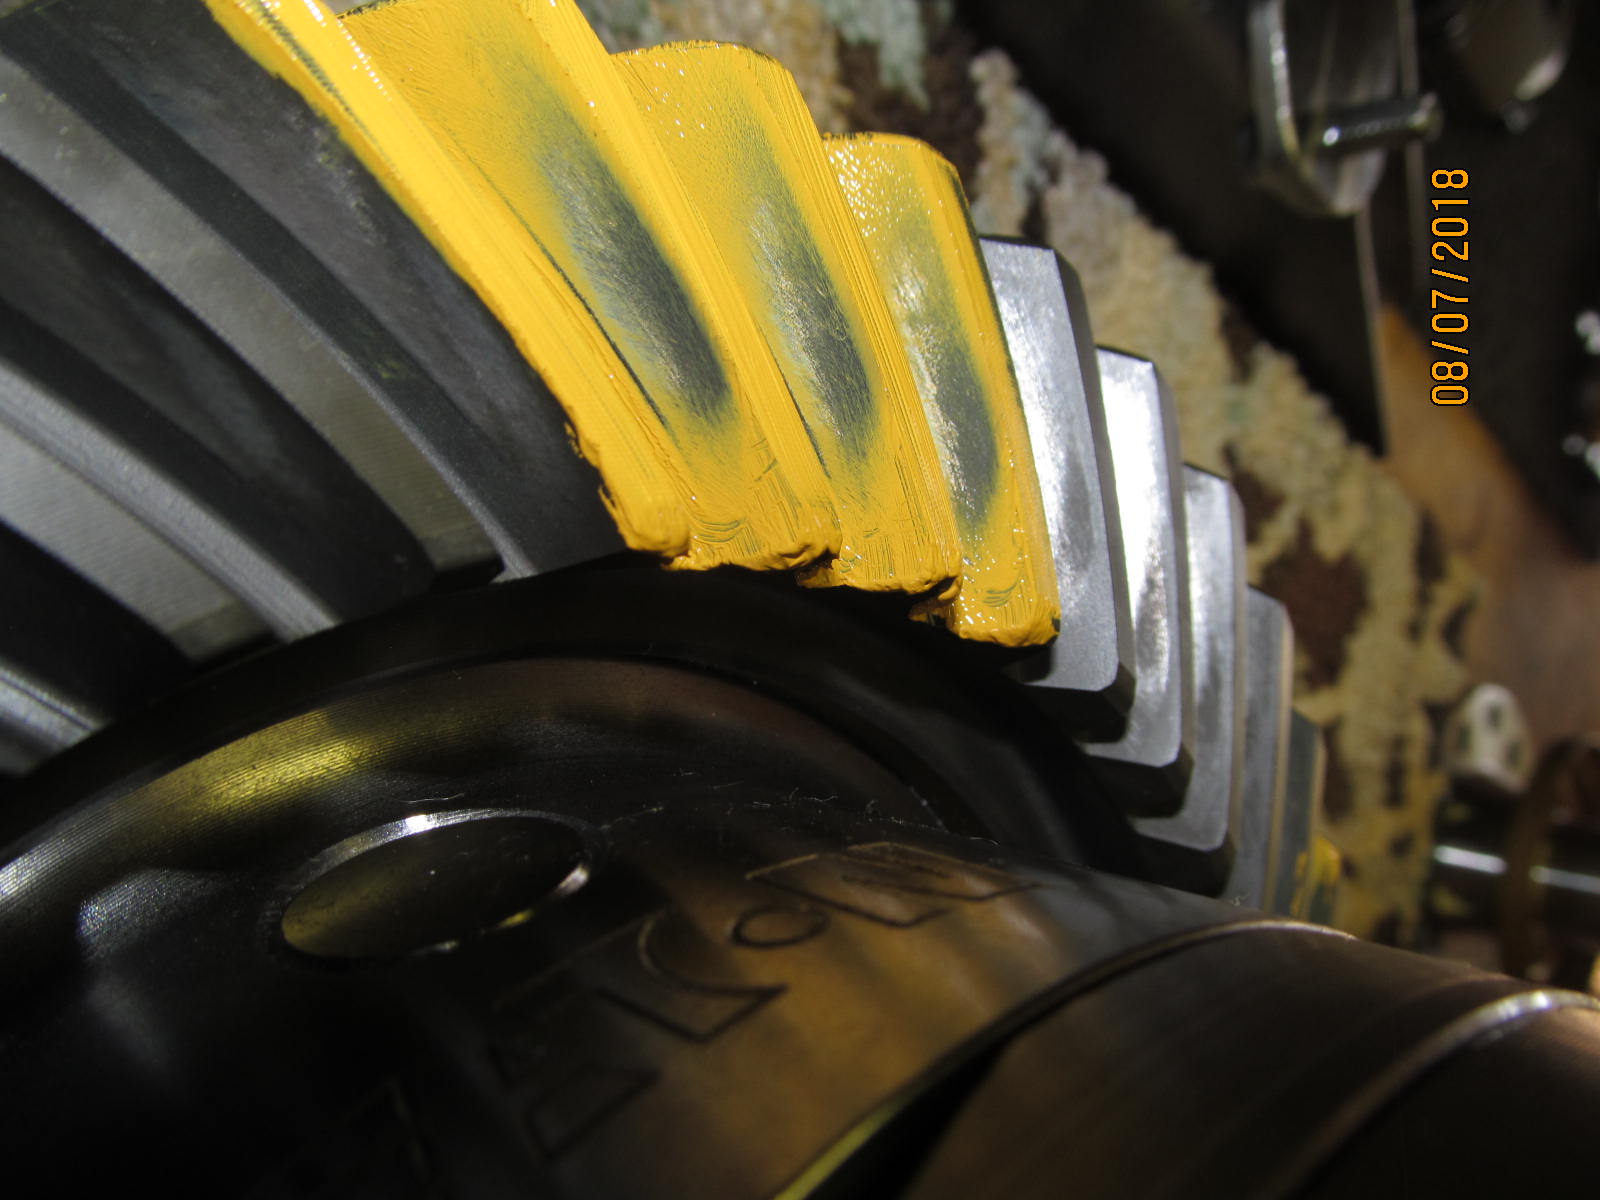
| Zero'ing in on it....Driveside with .042" and this is perfect. |
|---|
|
|
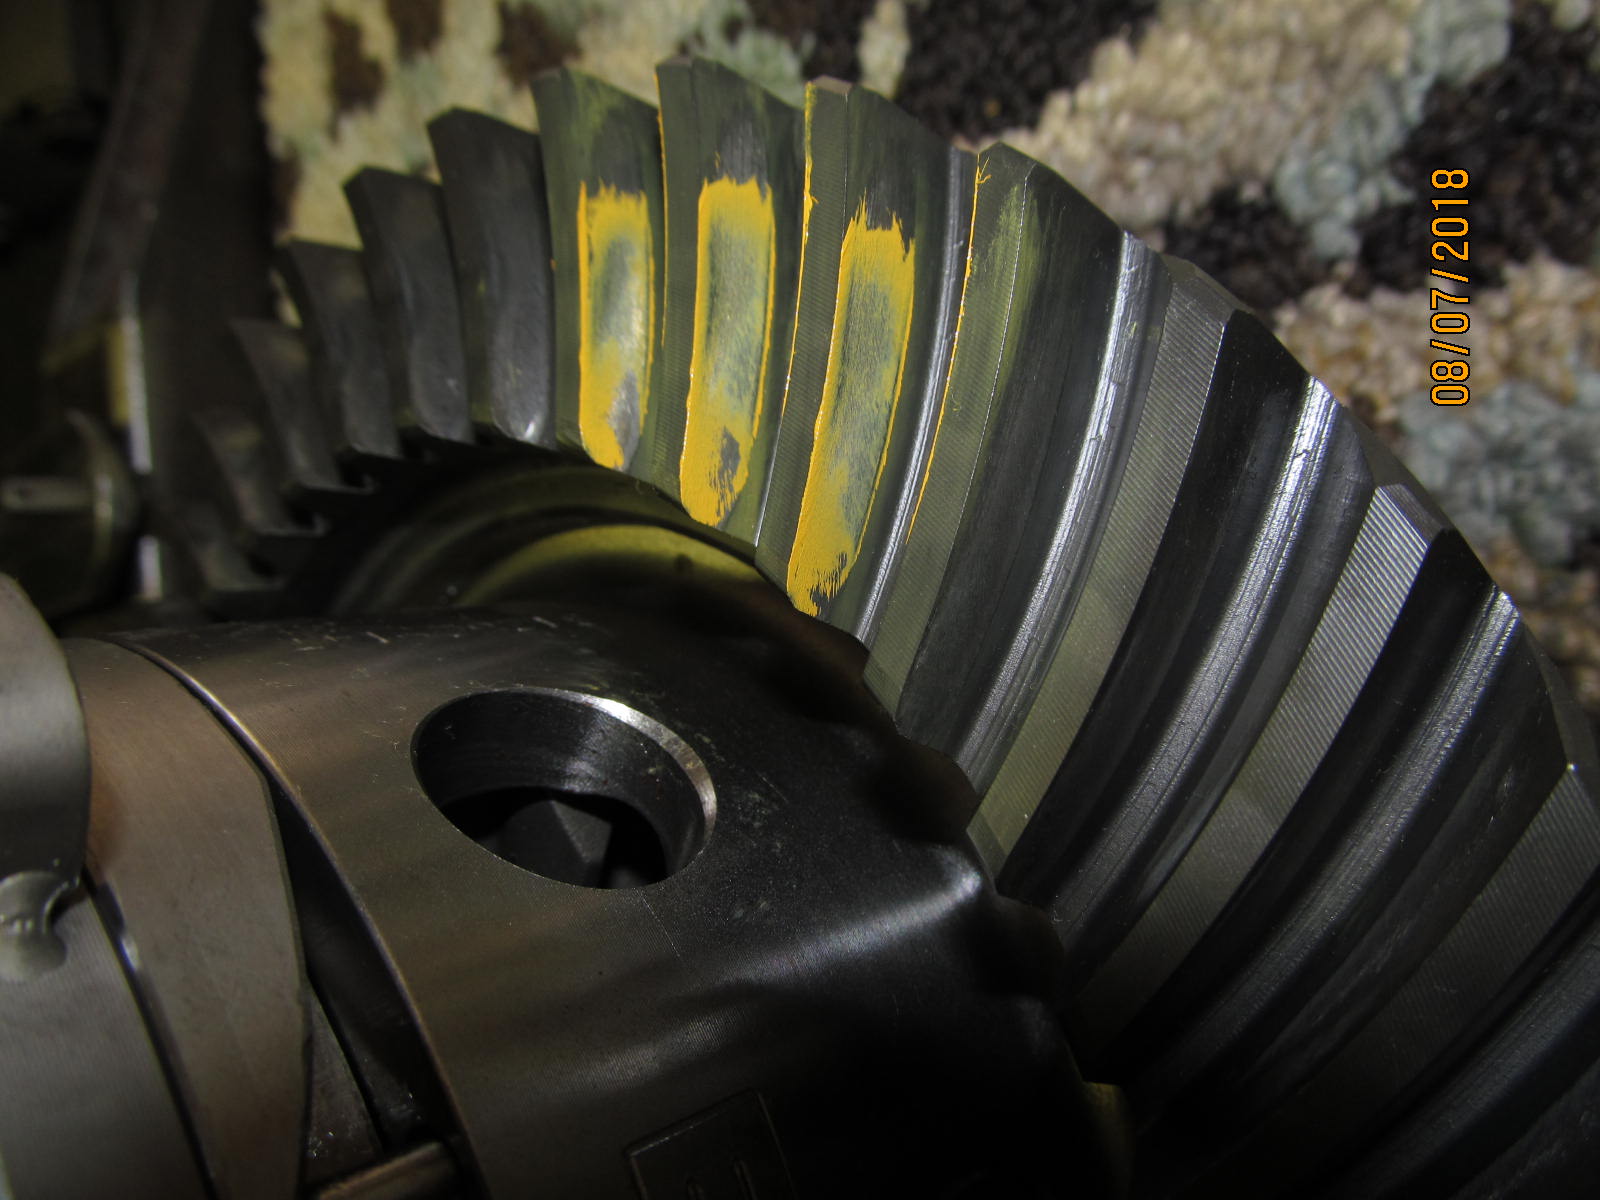
| Coast with 042 and it's very nice. A keeper. |
|---|
|
|
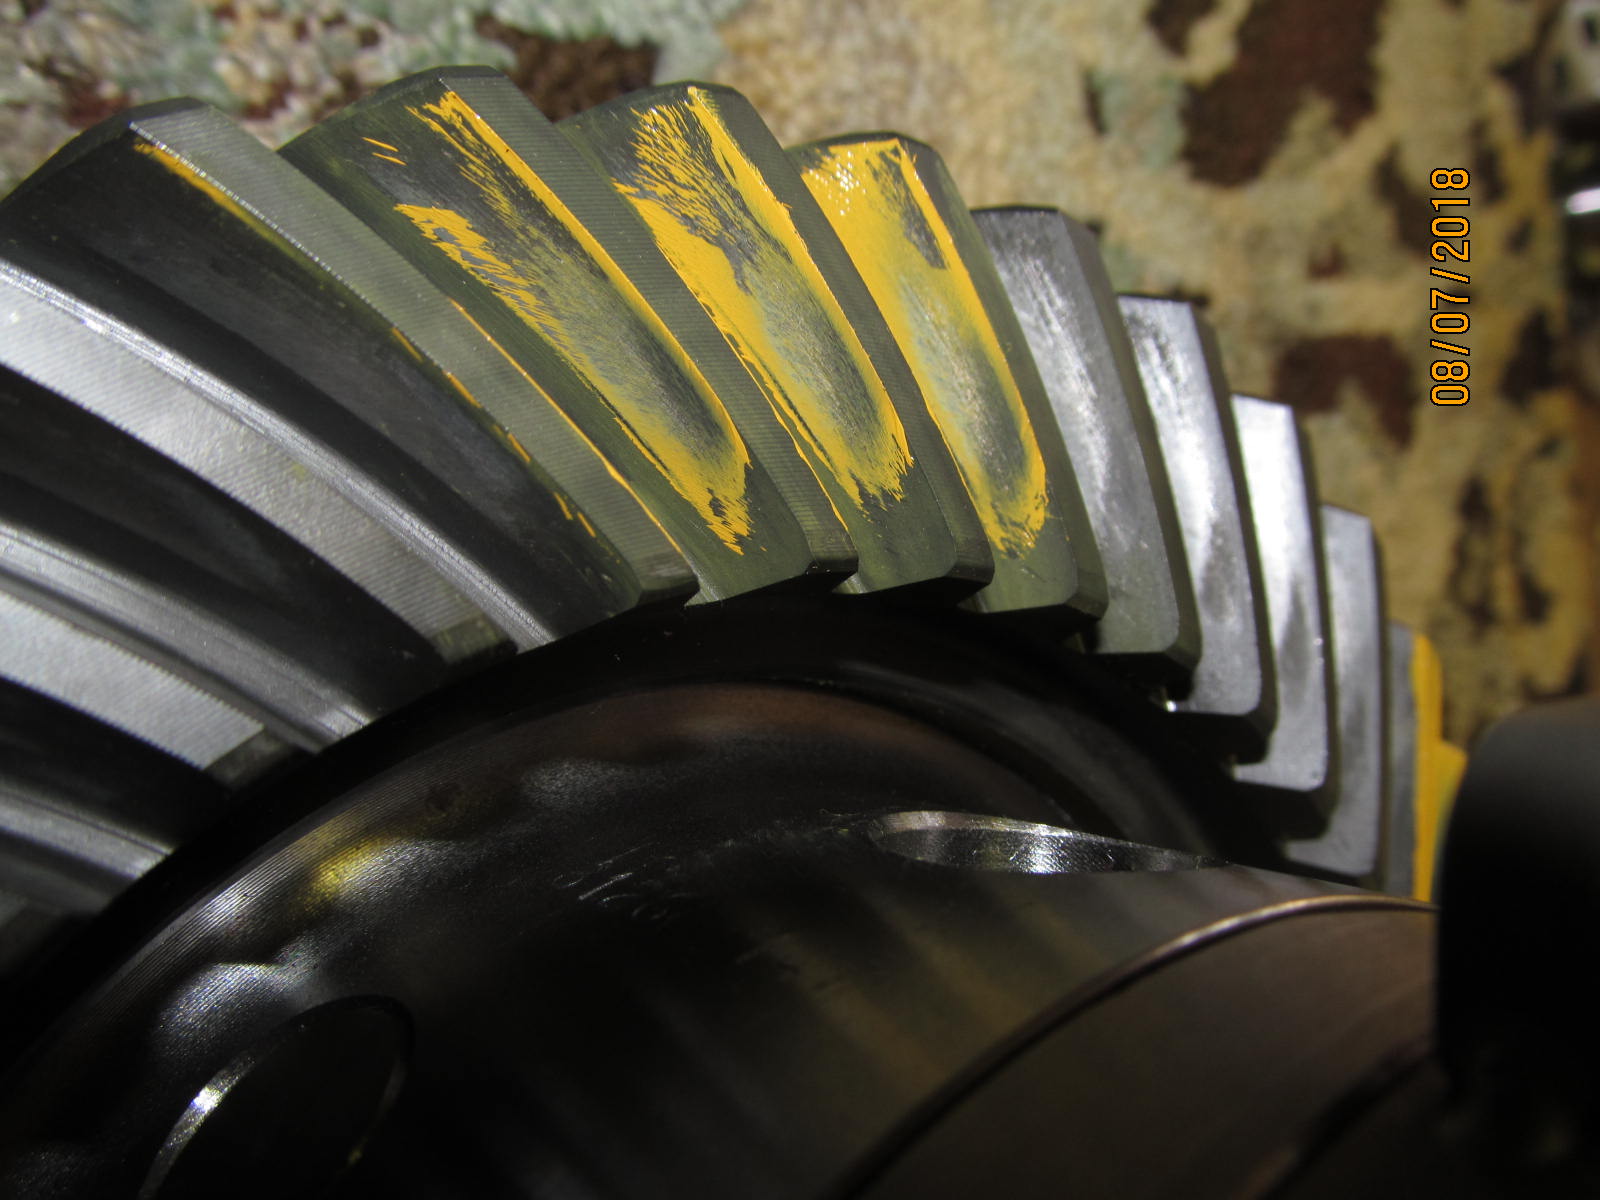
| Drive side reverse painted. |
|---|
|
|
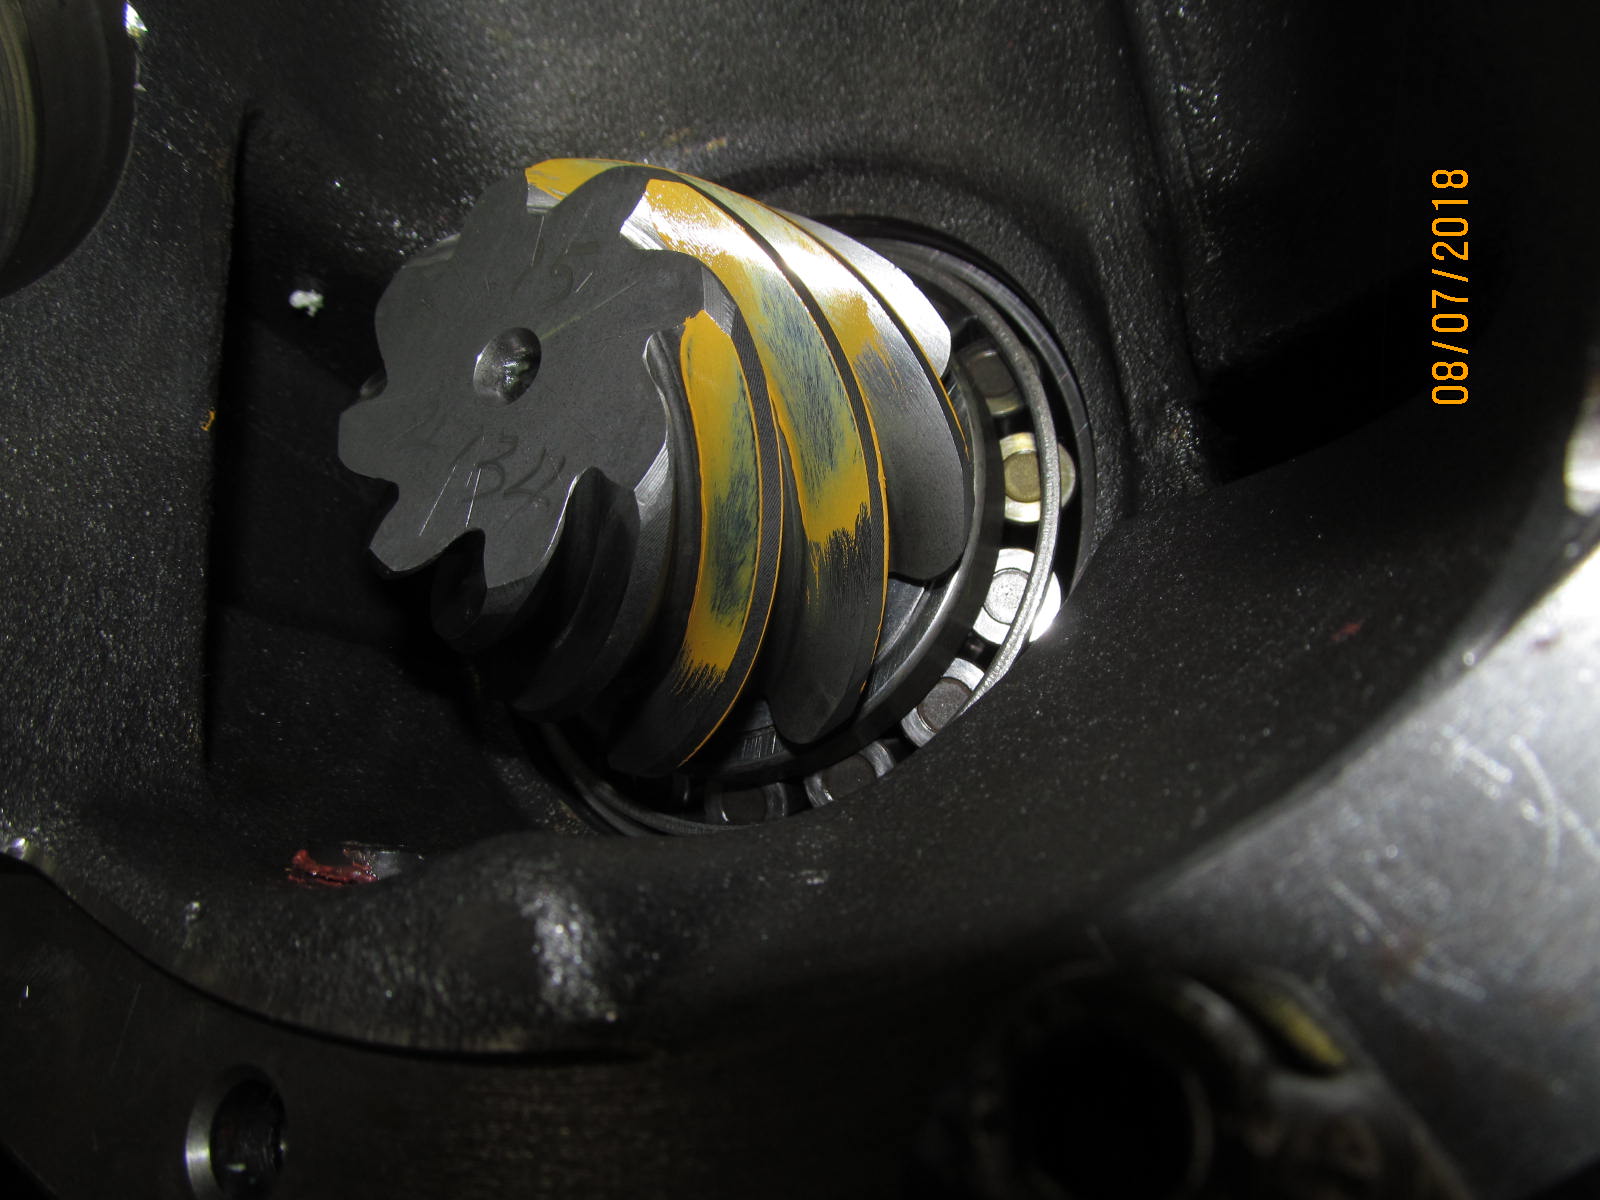
| Coast reverse painted. |
|---|
|
|
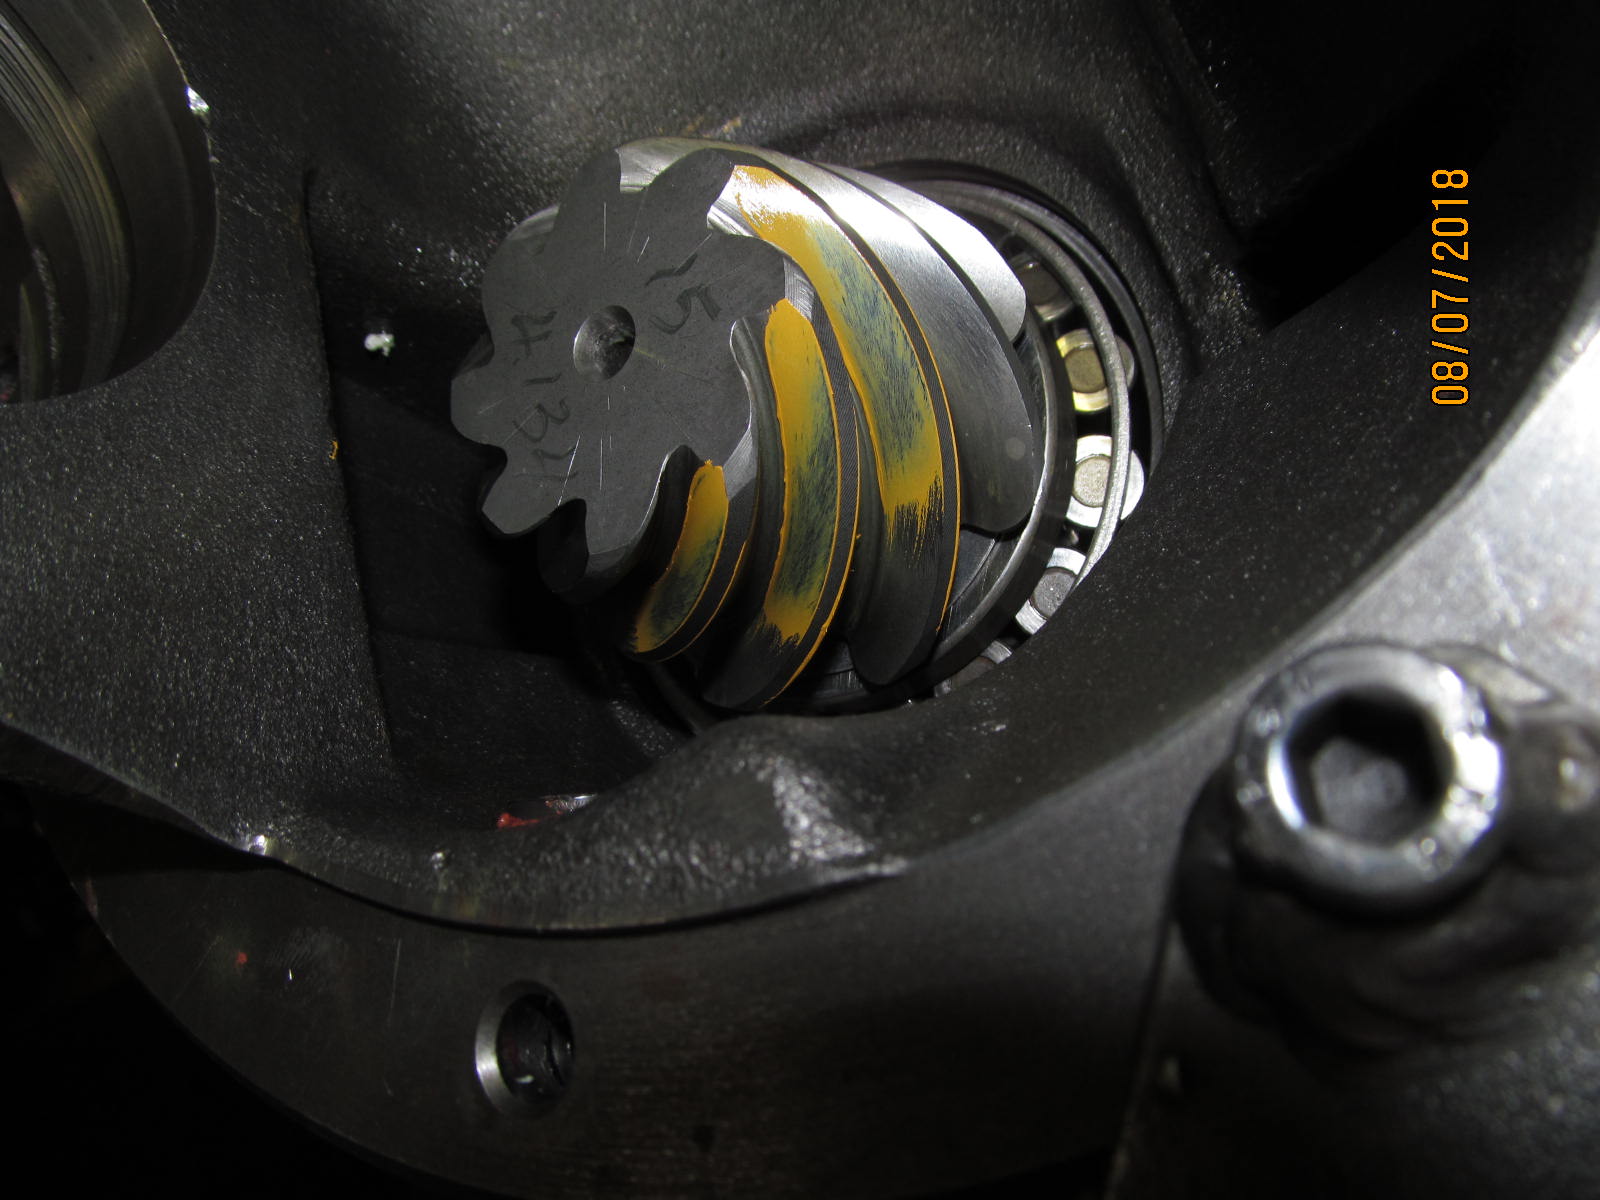
| Drive side of pinion tooth....comet tail is feathering towards the center(from the root) so it's perfect. |
|---|
|
|
| ;;;;;;;;;;;;;;;;;;;;;;;;;;;;;;;; |
|---|
|
|
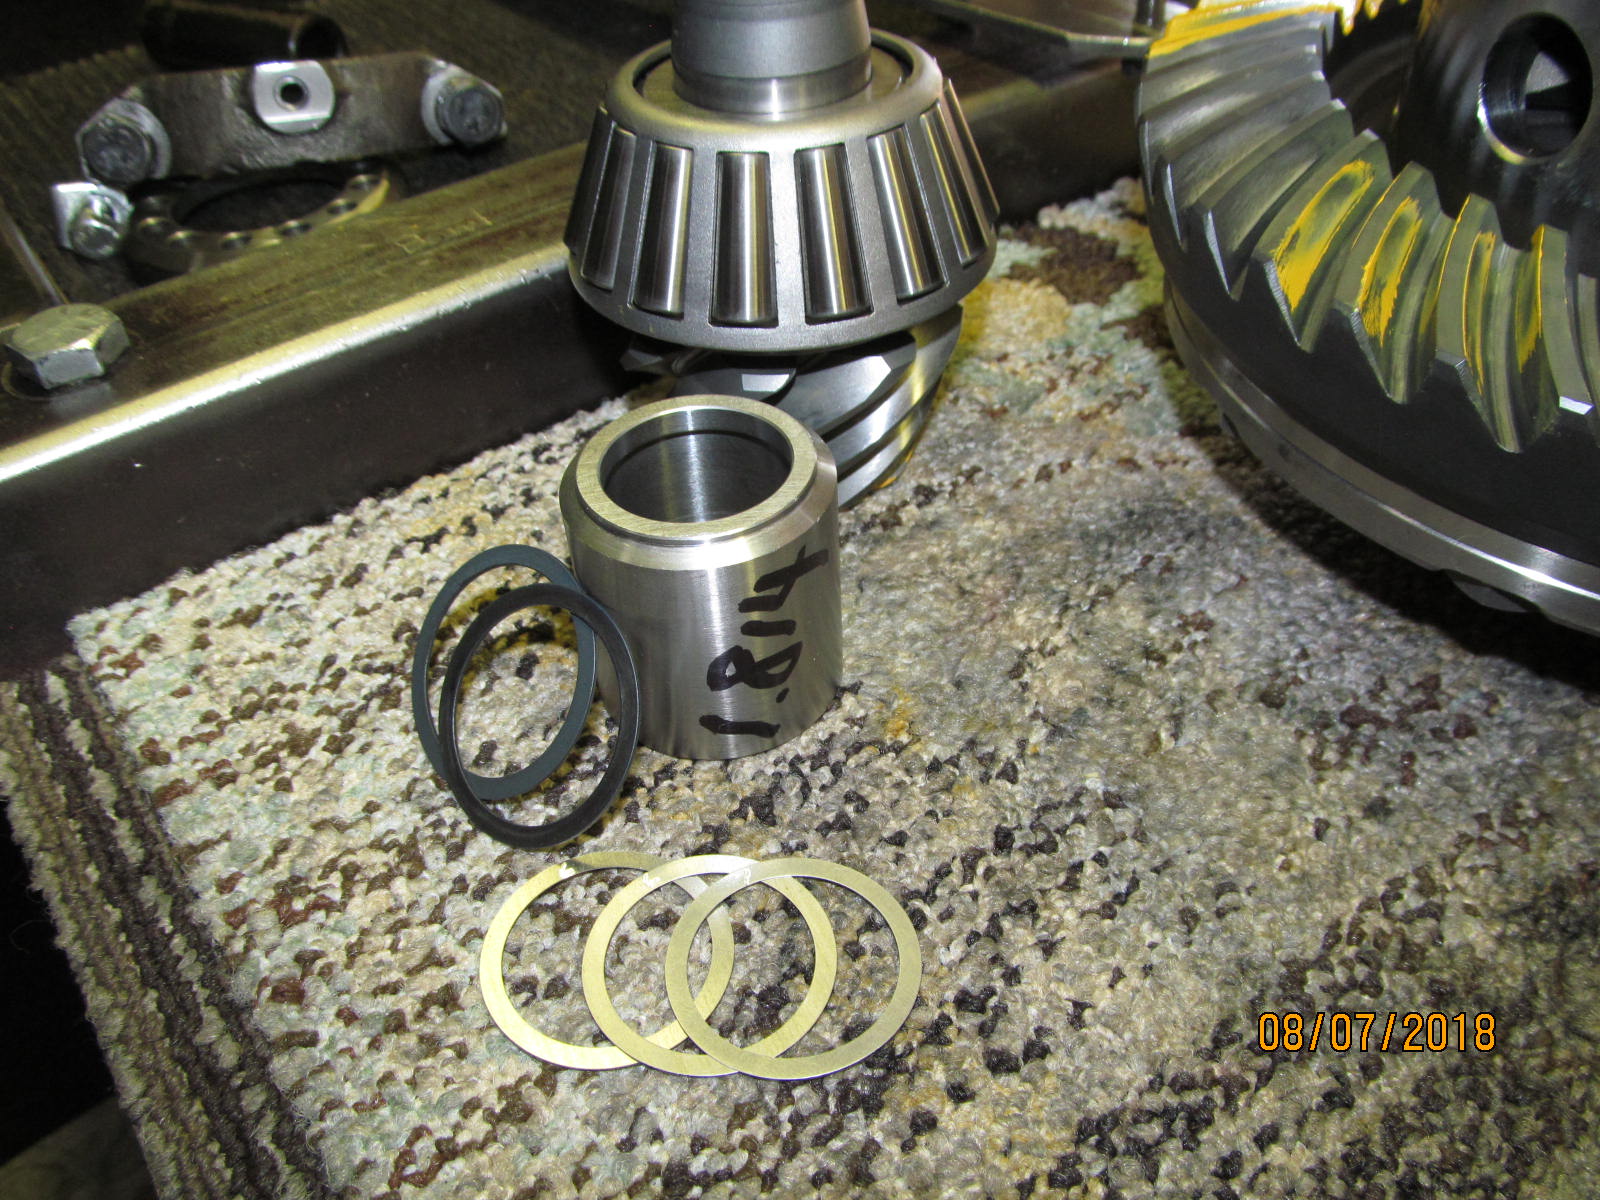
| Solid collar time. |
|---|
|
|
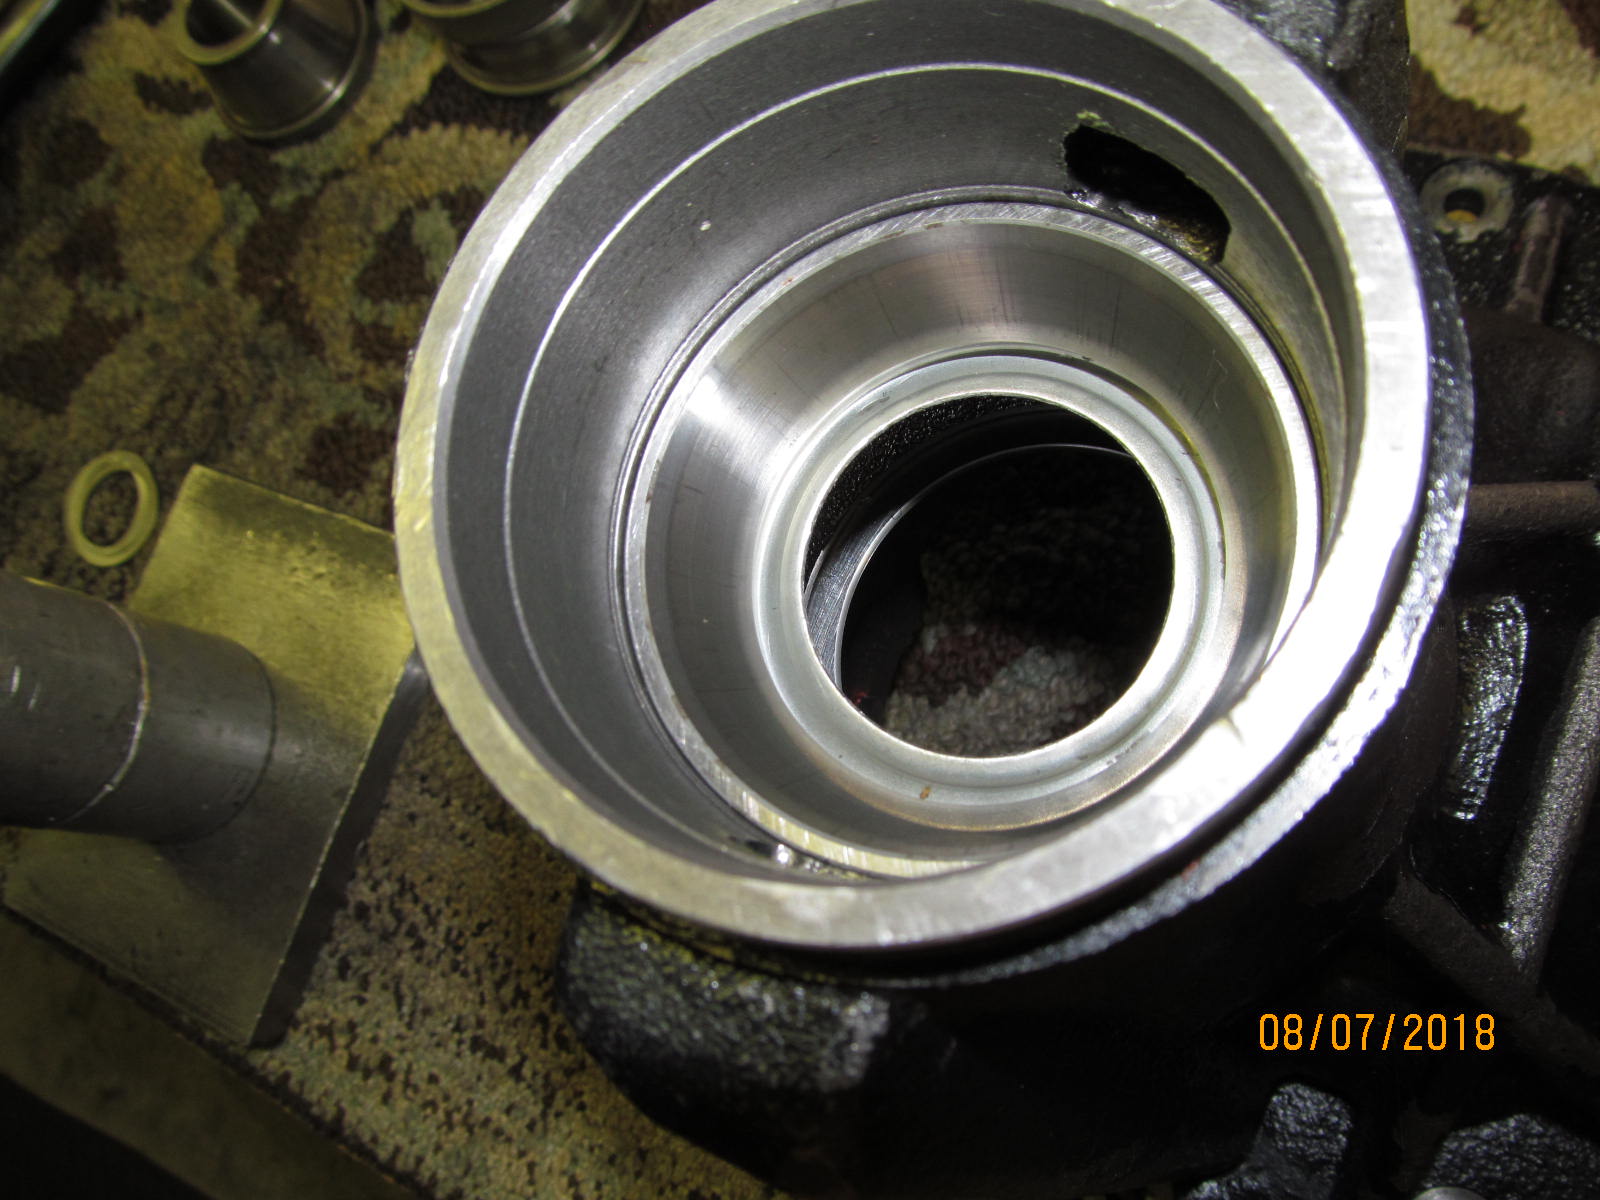
| Most of the time the oil retainer hits the edges of the solid collar. |
|---|
|
|
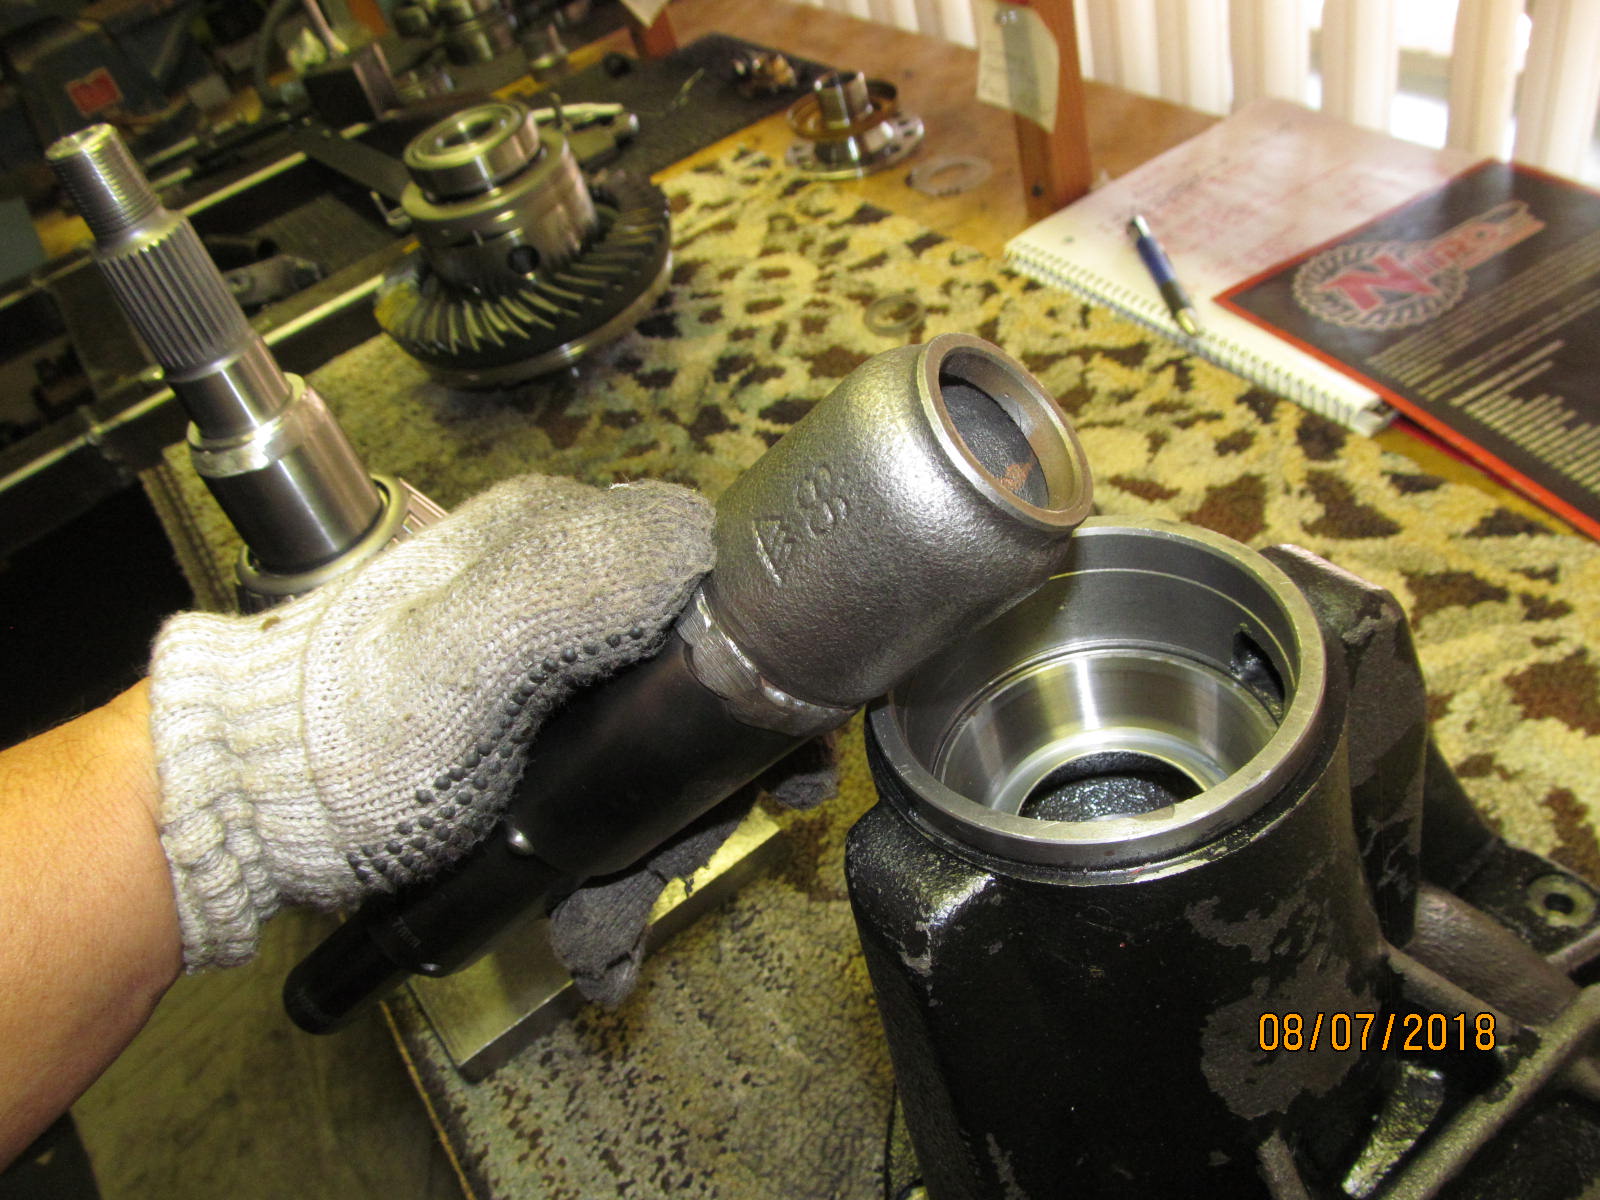
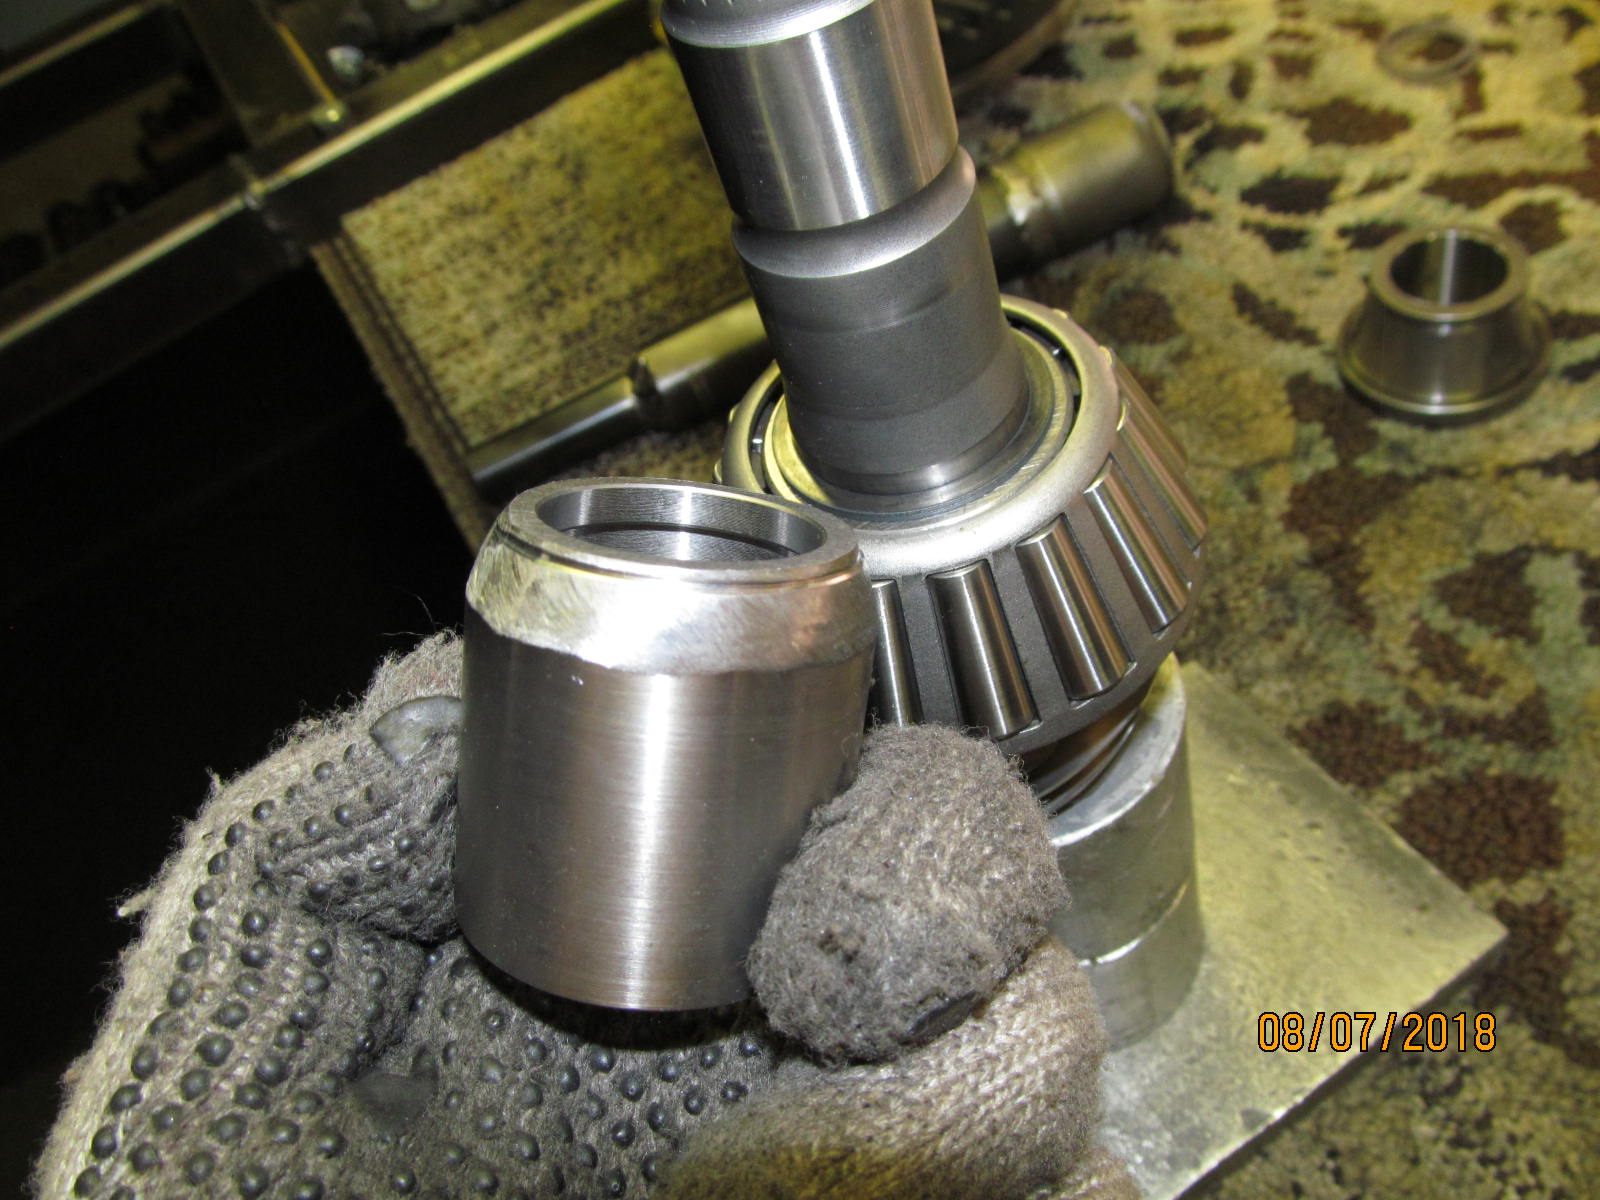
Leaving out the oil retainer is one way to avoid contact but one could also flare the retainer up a little with this tool.
Looking closely, you can see that the retainer has been flared up by using this tool on the bottomside. |
|---|
|
|
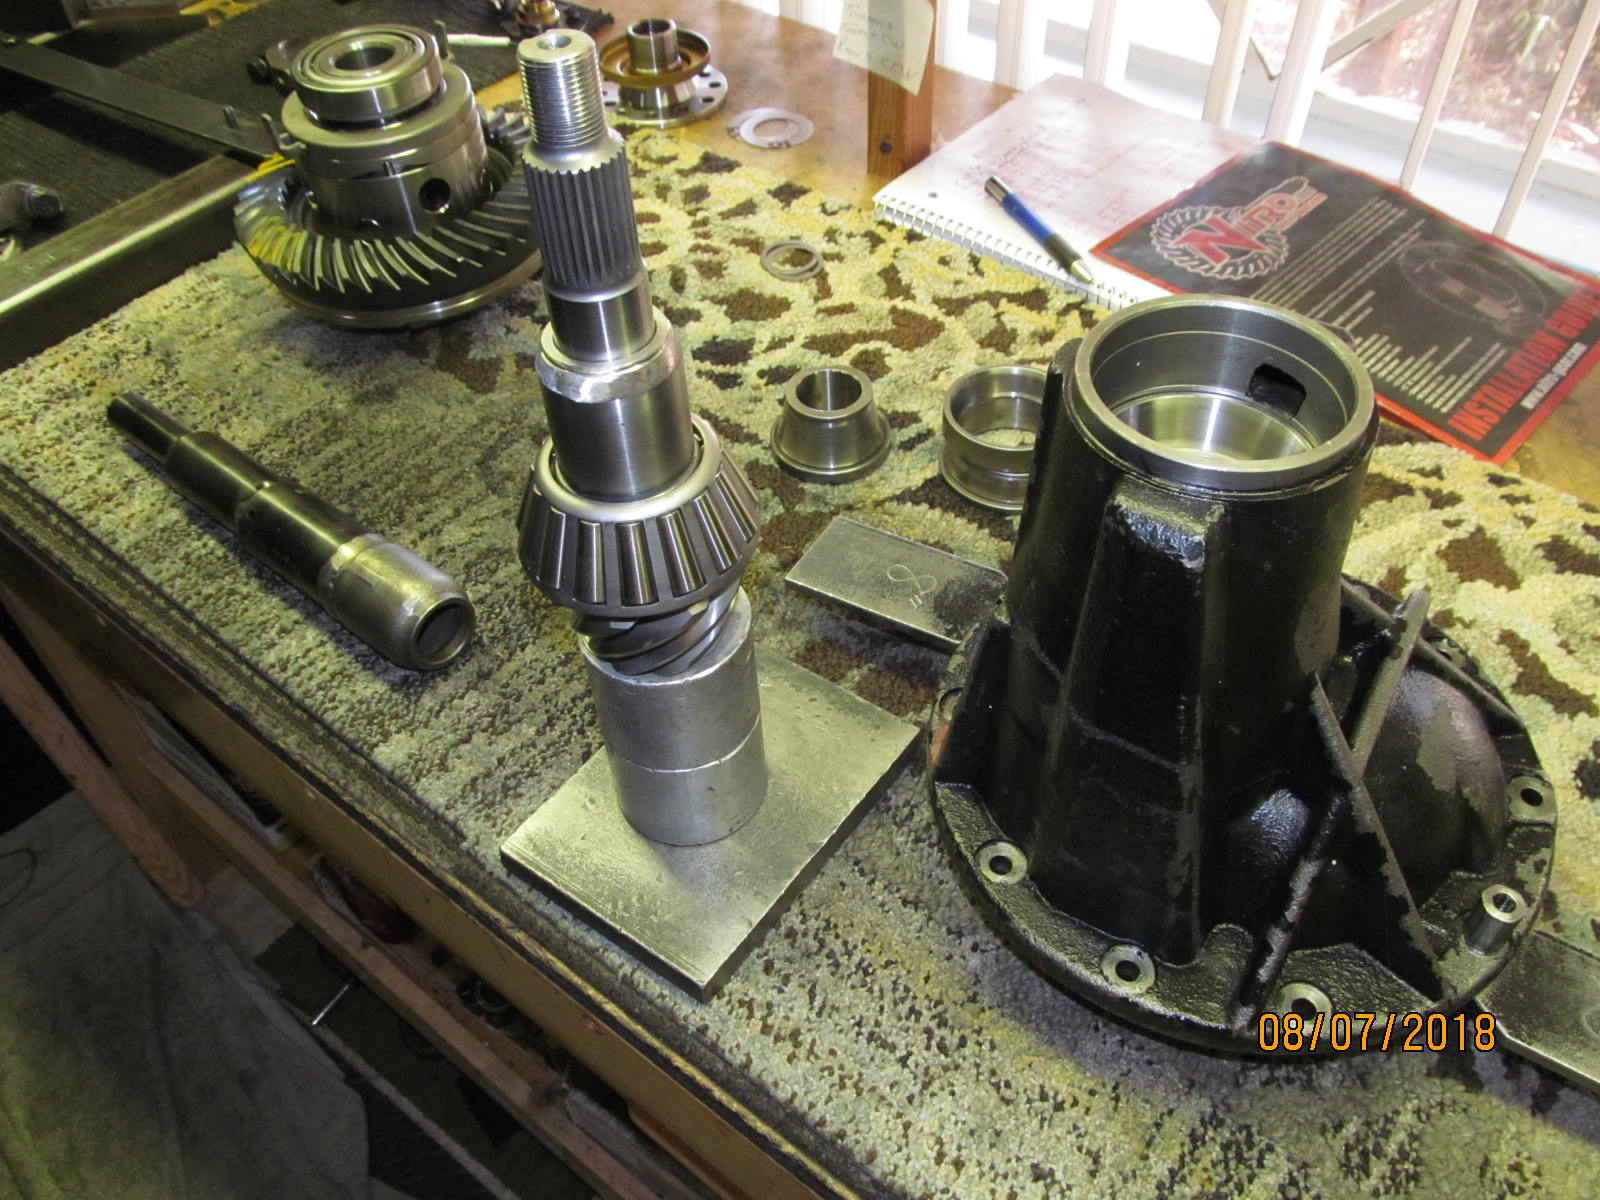
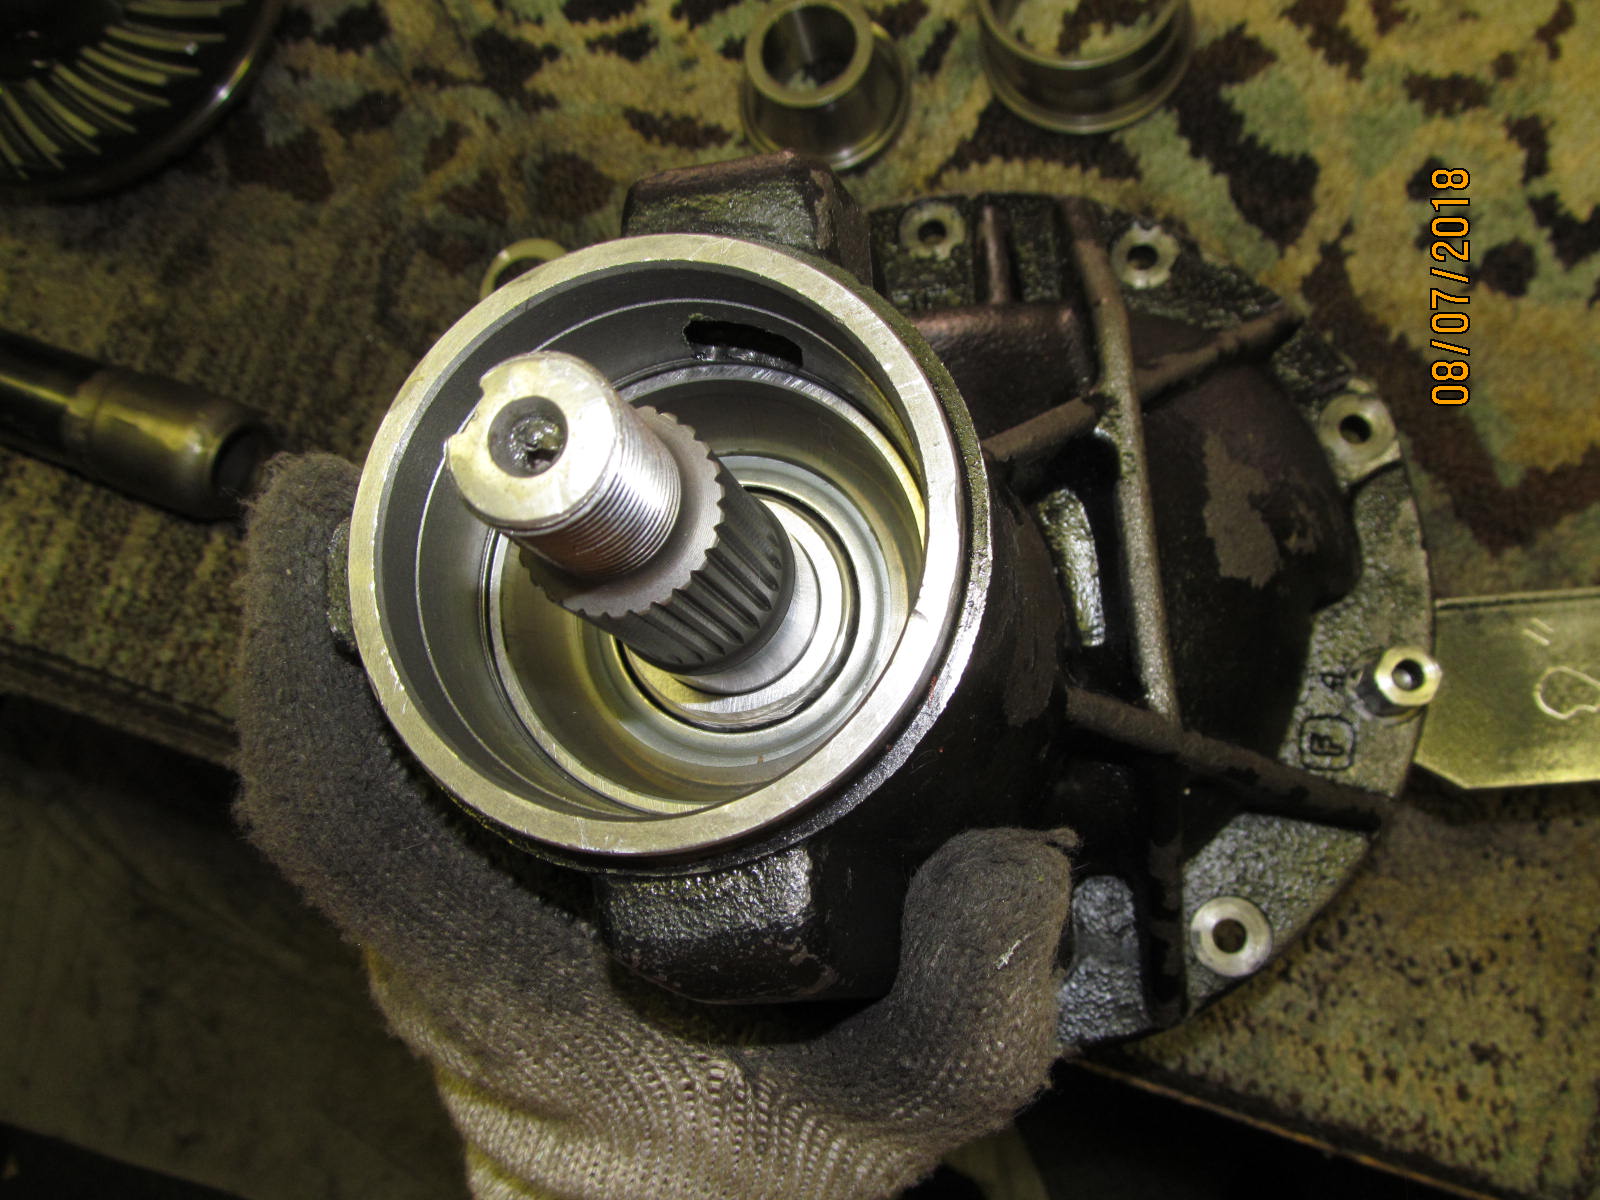
| That, in combination with some relief on these abrupt edges, allows for plenty of clearance. |
|---|
|
|
| //////////////////////////// |
|---|
|
|
| I got lucky, it only took 2 tries to get the collar shimmed correctly. |
|---|
|
|
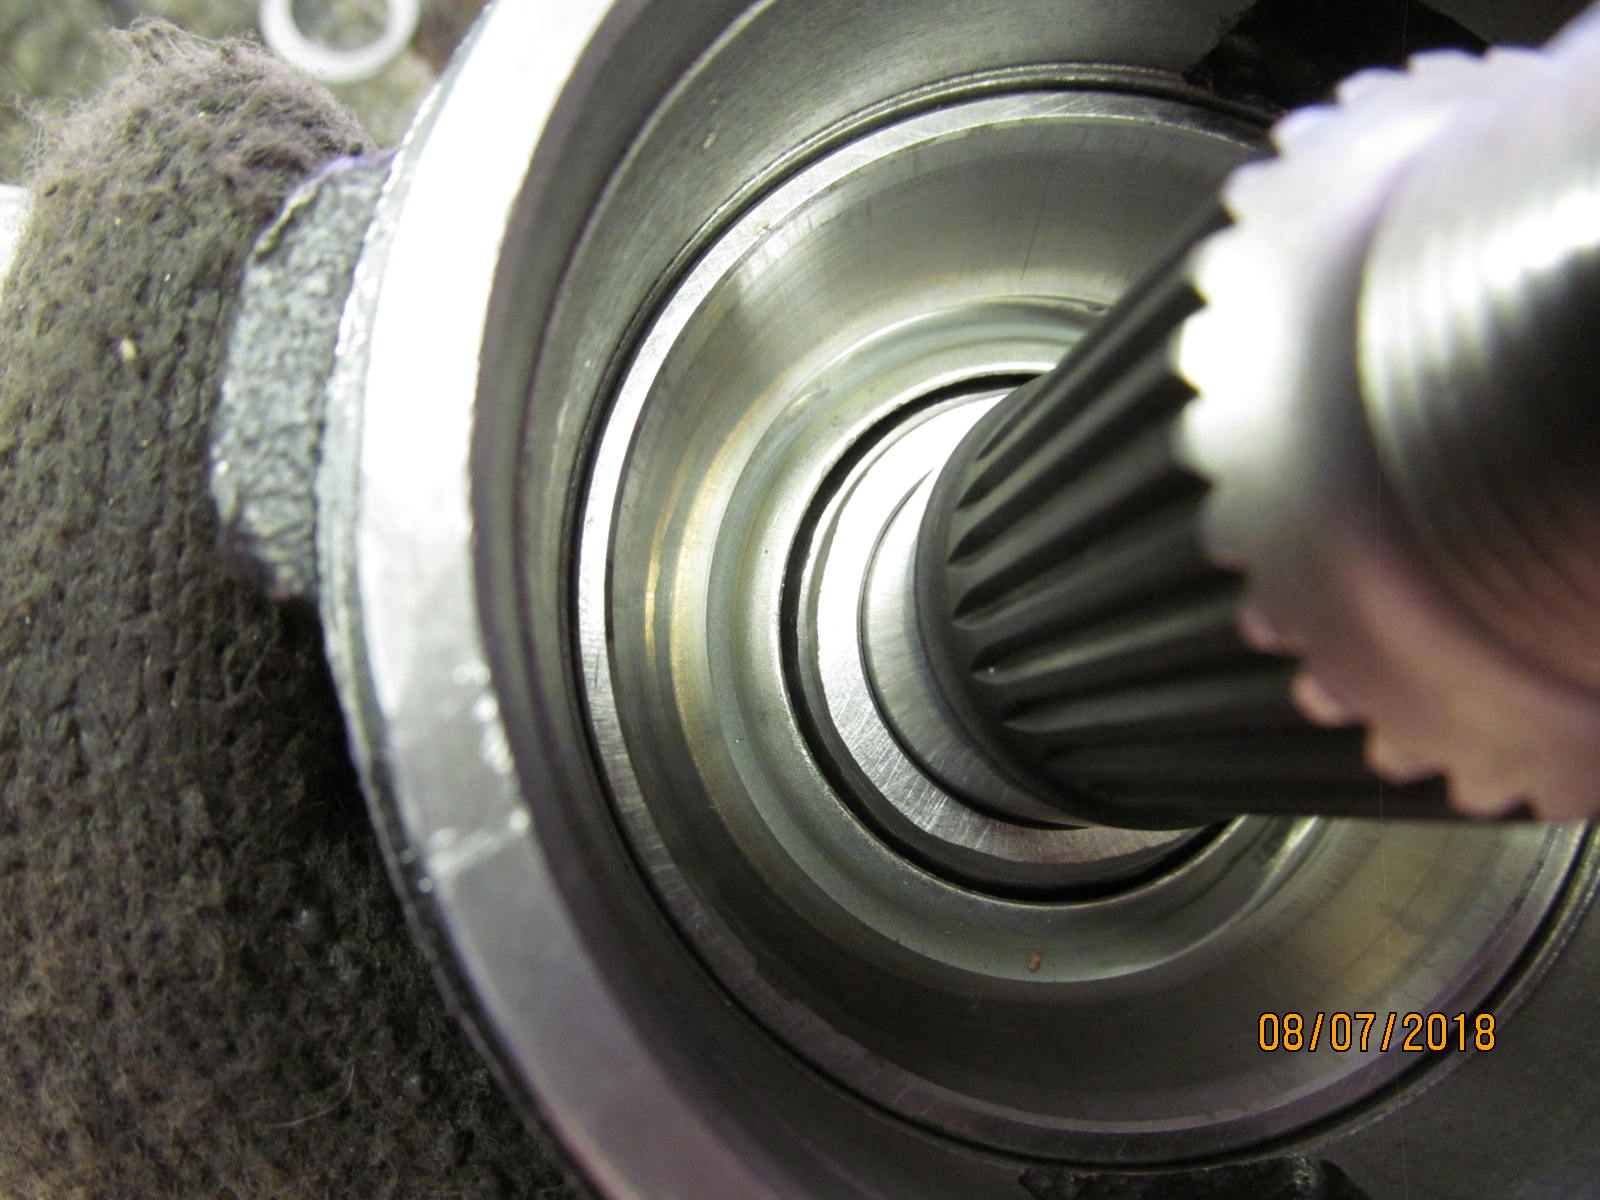
| The collar is also clearancing the oil retainer just fine as shown. |
|---|
|
|
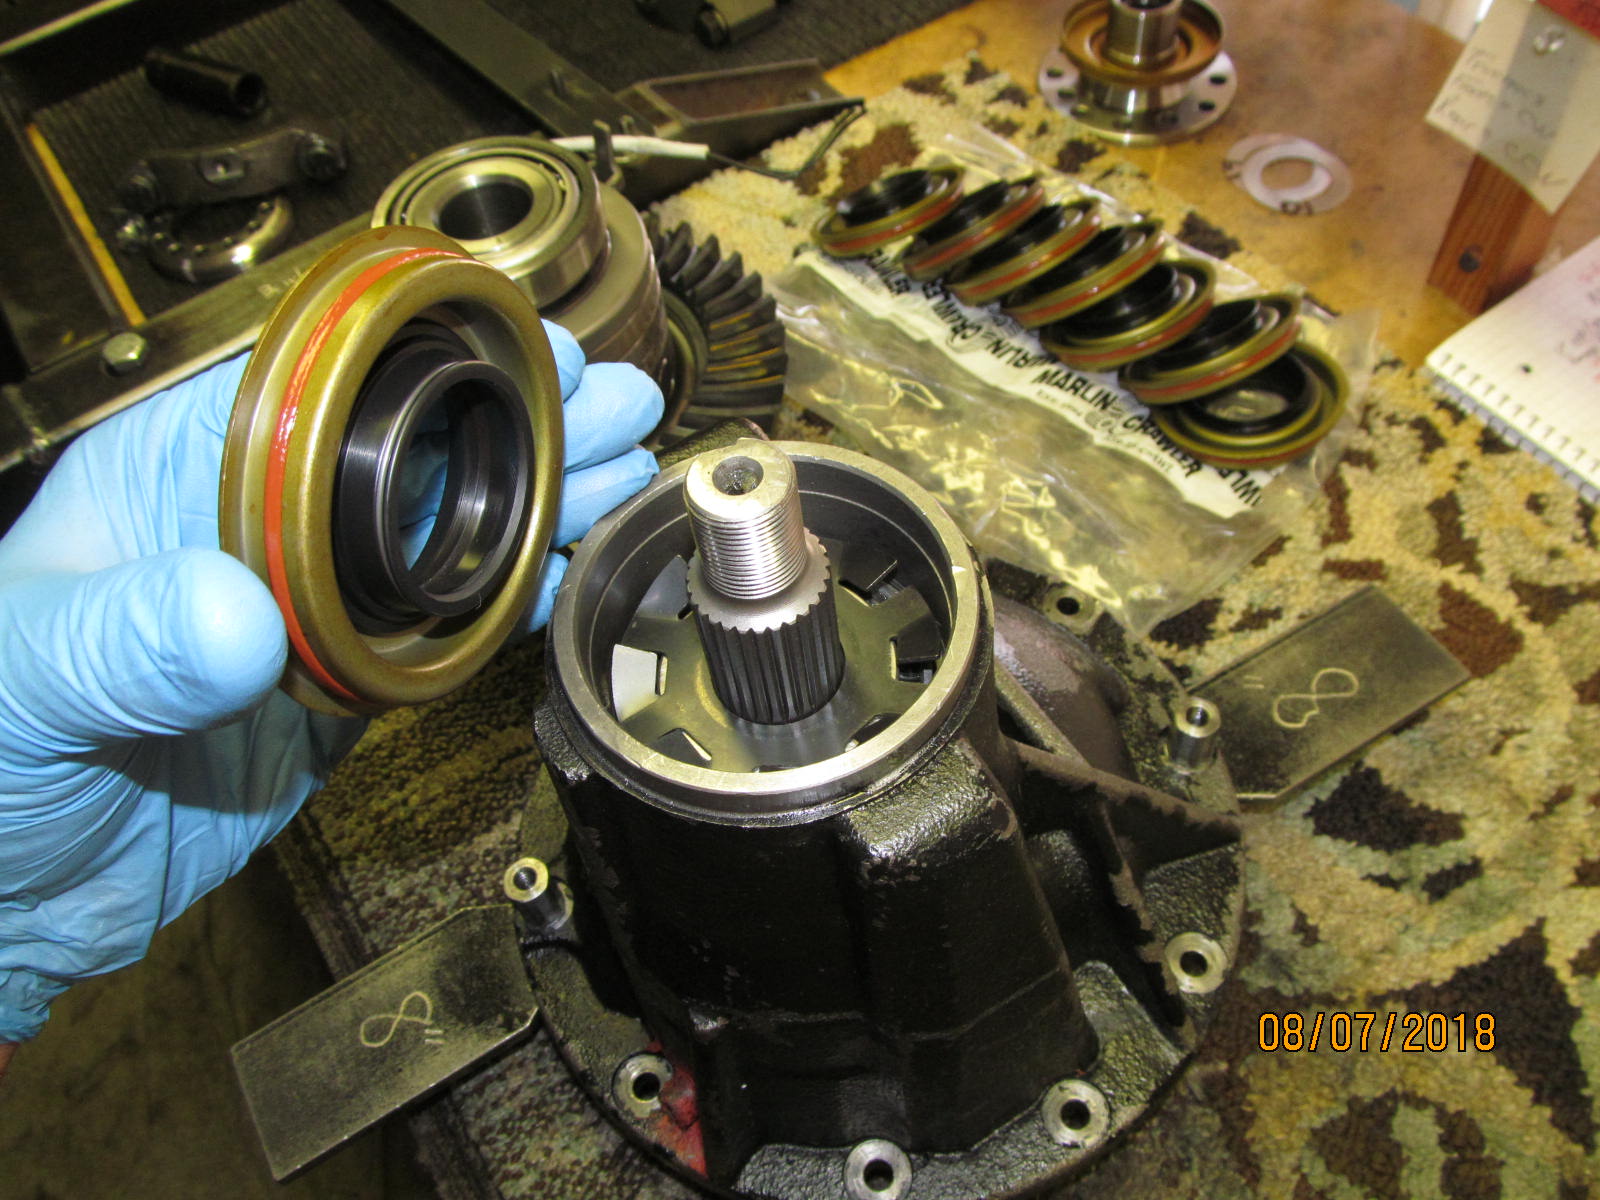
| Fan-blade slinger and Marlin Crawler seal time. |
|---|
|
|
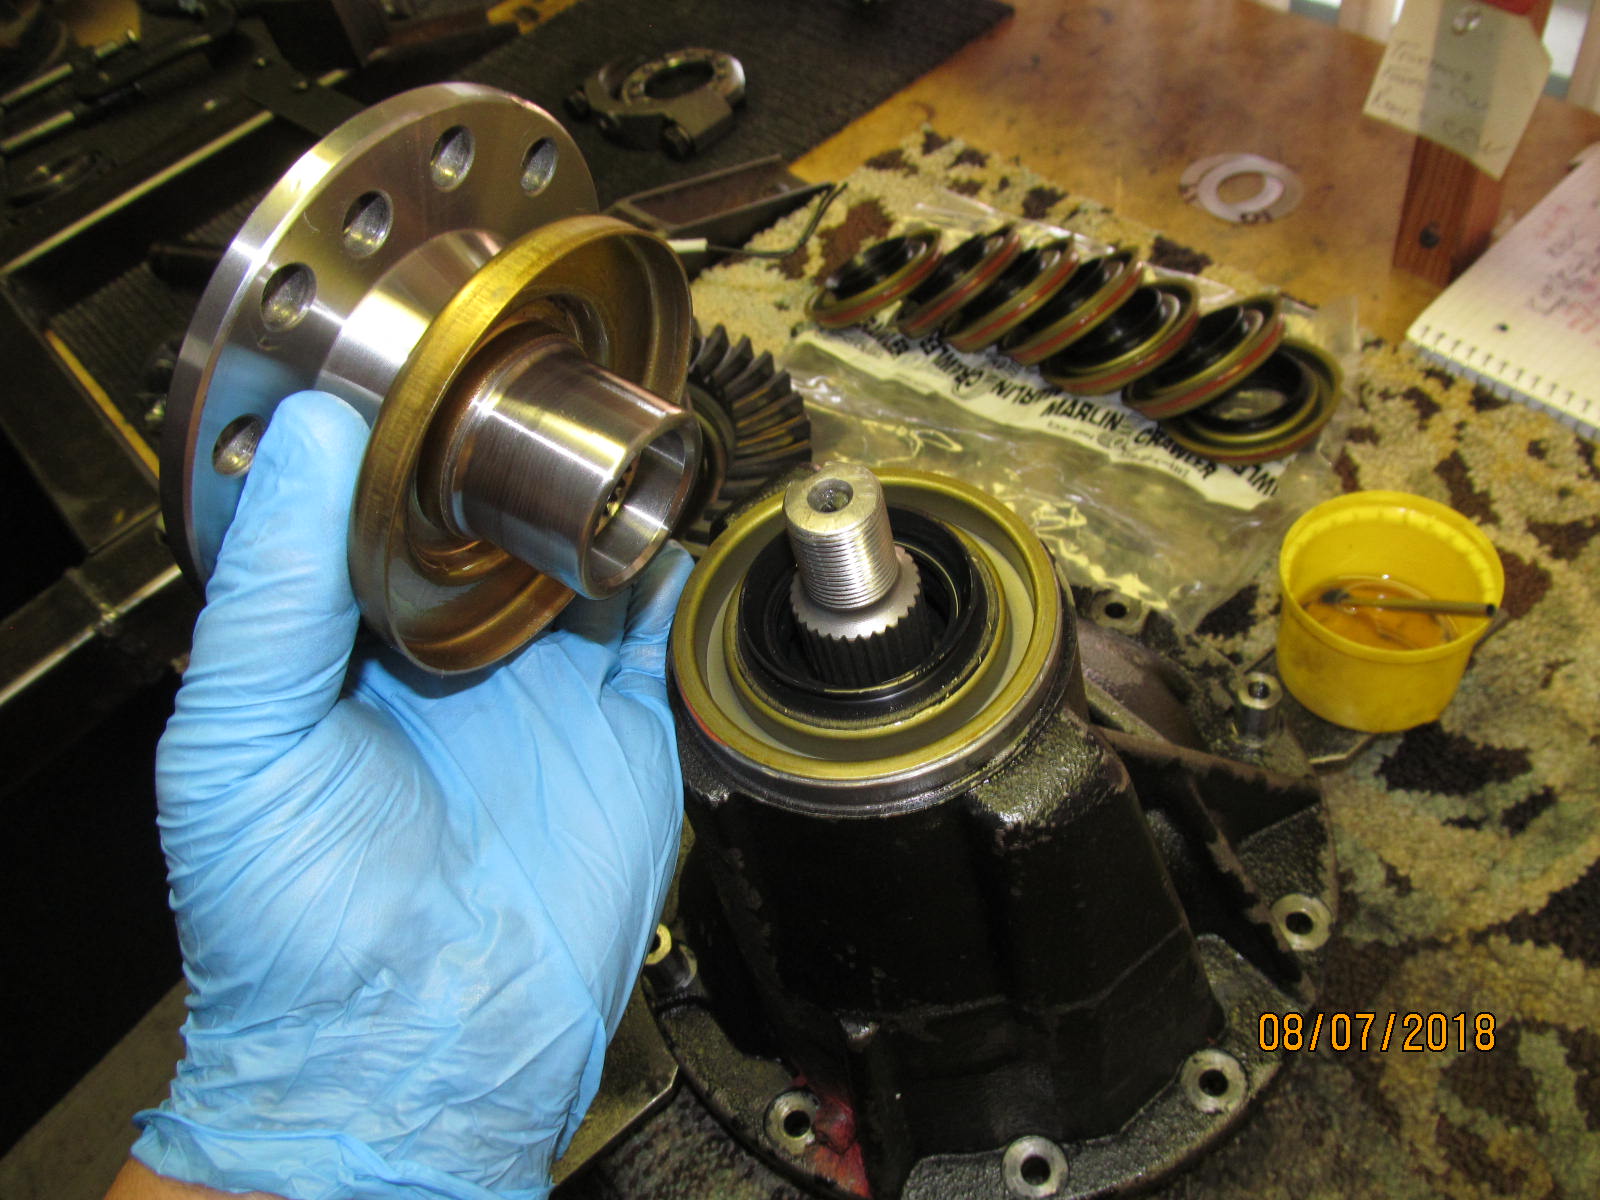
| The Marlin seal is the seal of choice for the 27 spline rear Landcruiser 3rds. Oil is applied to the rubber and flange goes on. |
|---|
|
|
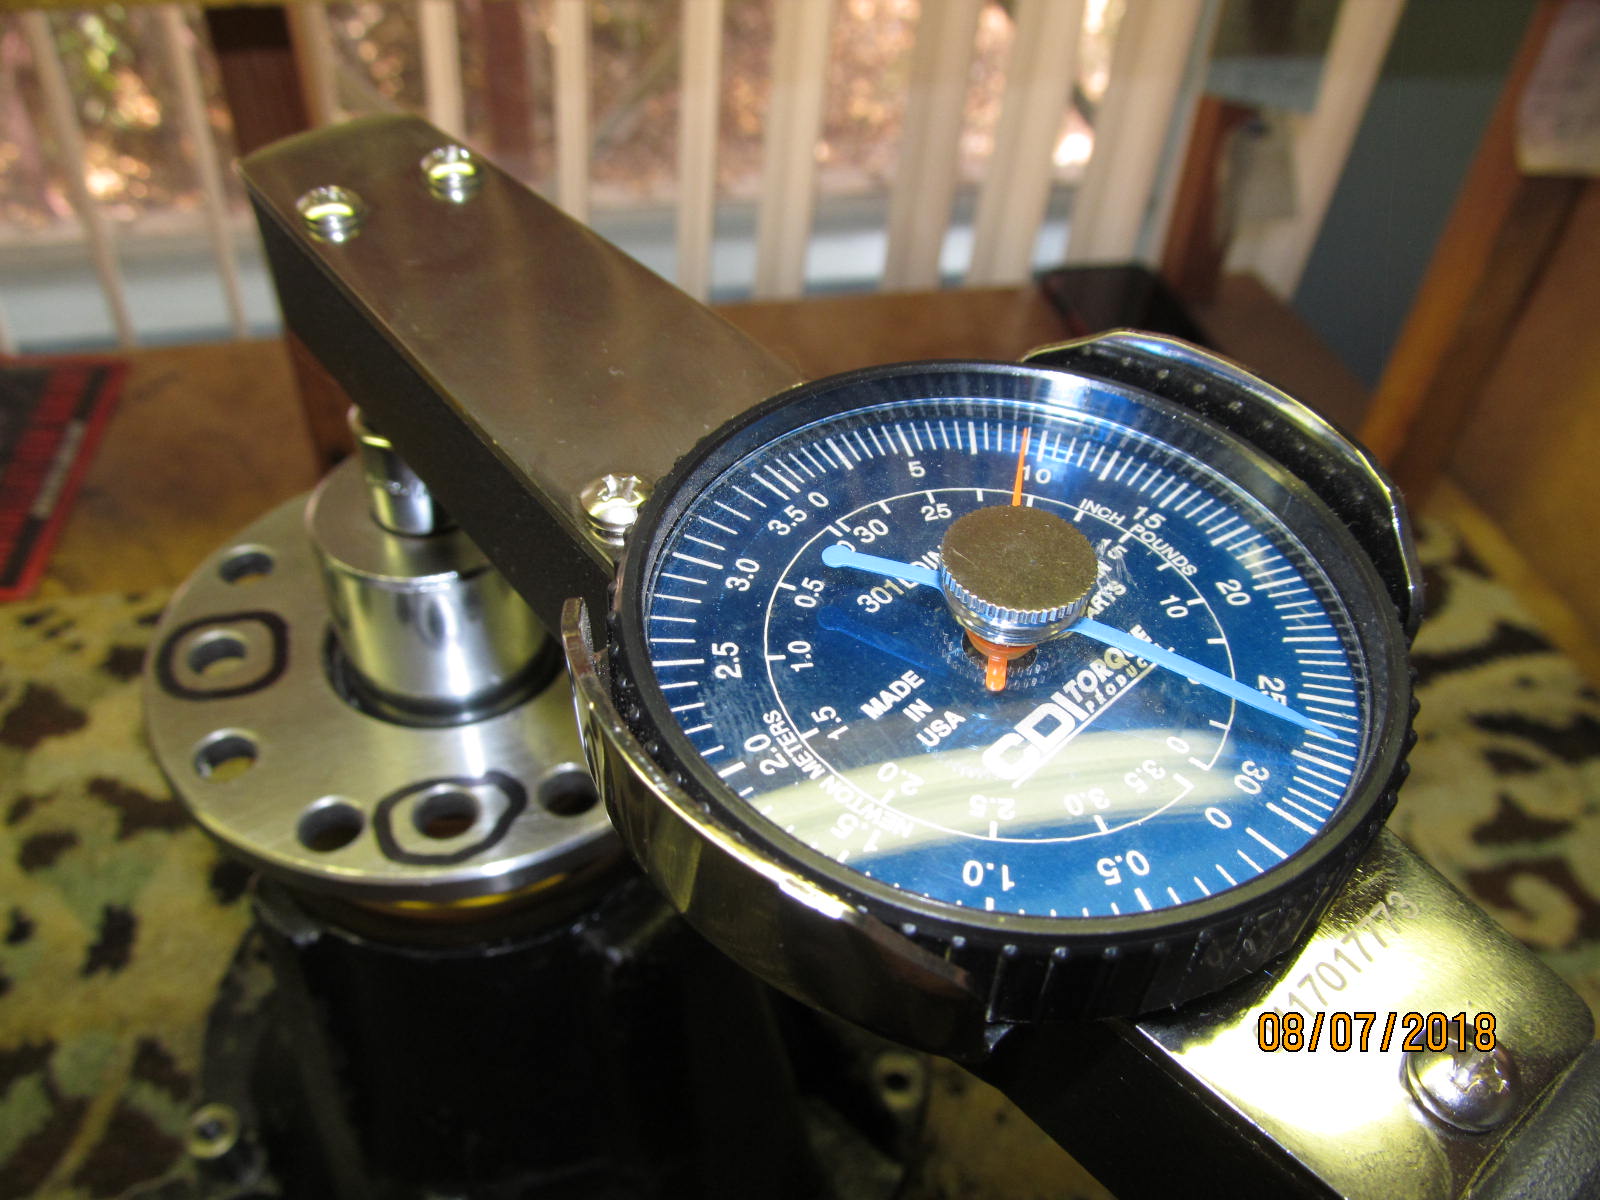
| Even with all the lubricating anti-seized used, it still took about 190 ft/lb on the nut to get the desired 10 inch/pounds of pinion bearing start torque. |
|---|
|

|
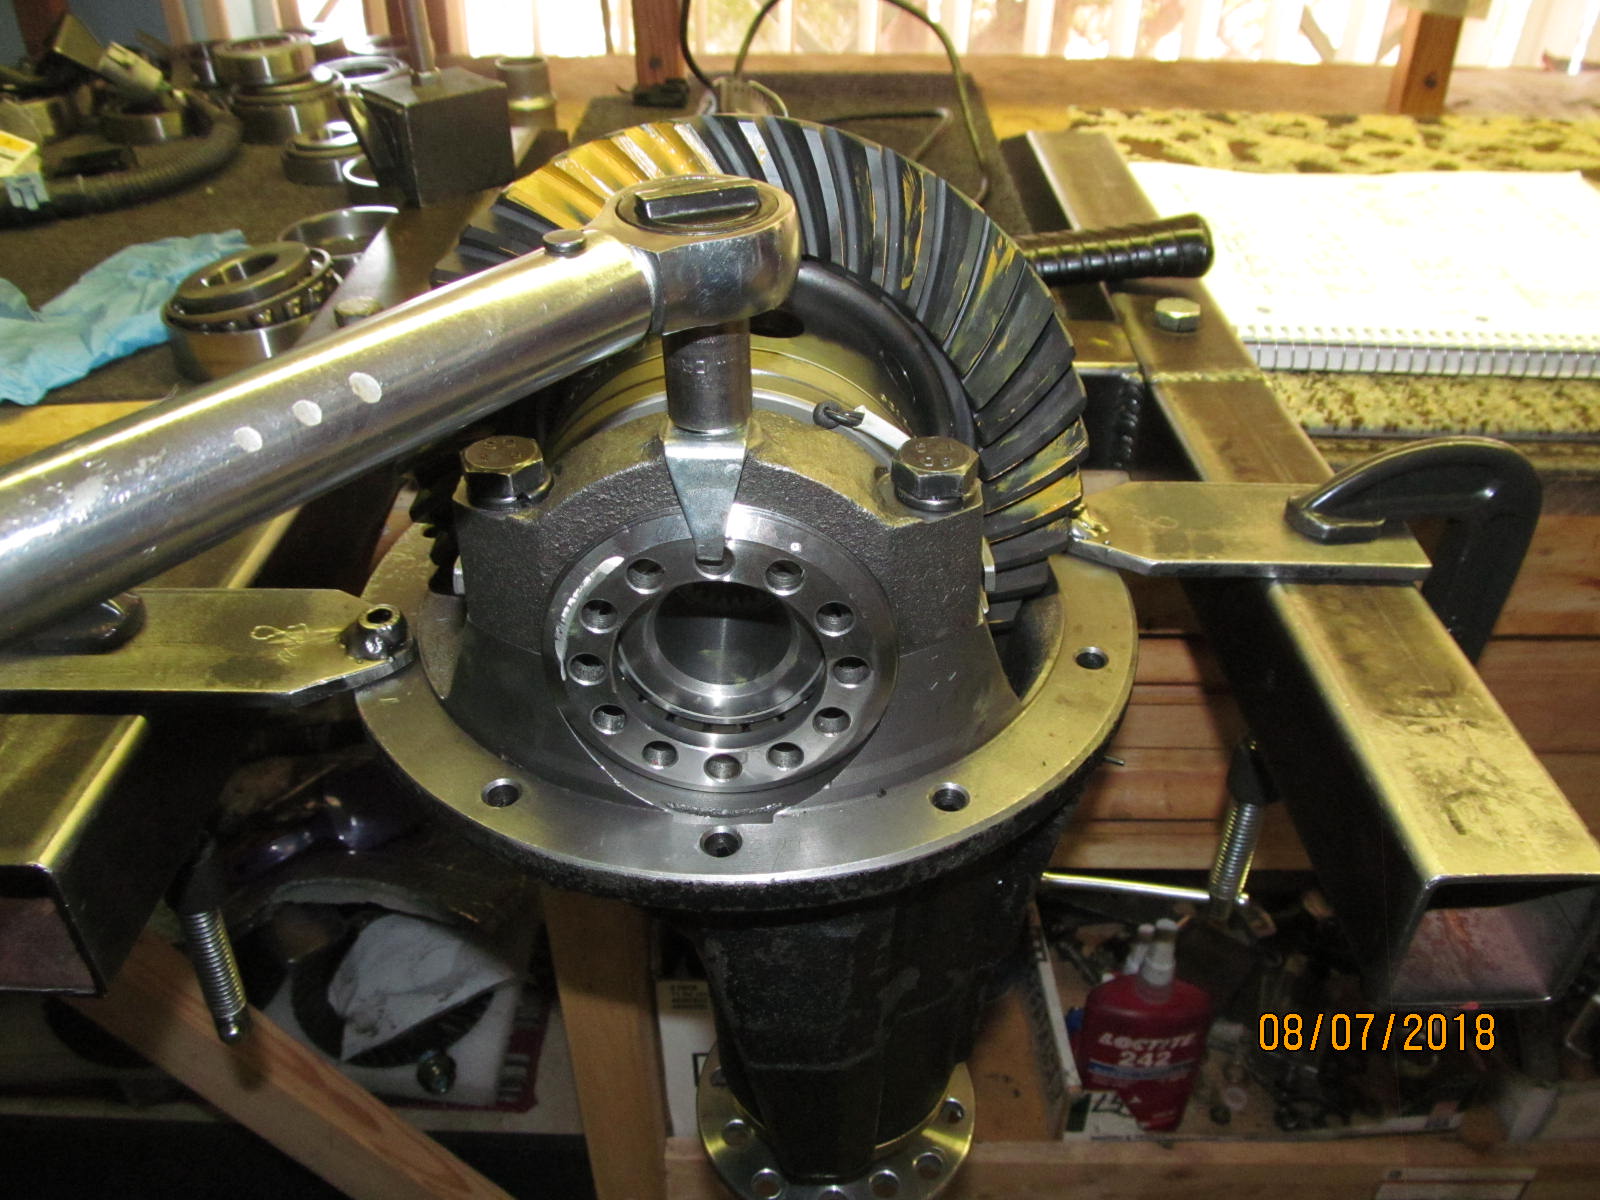
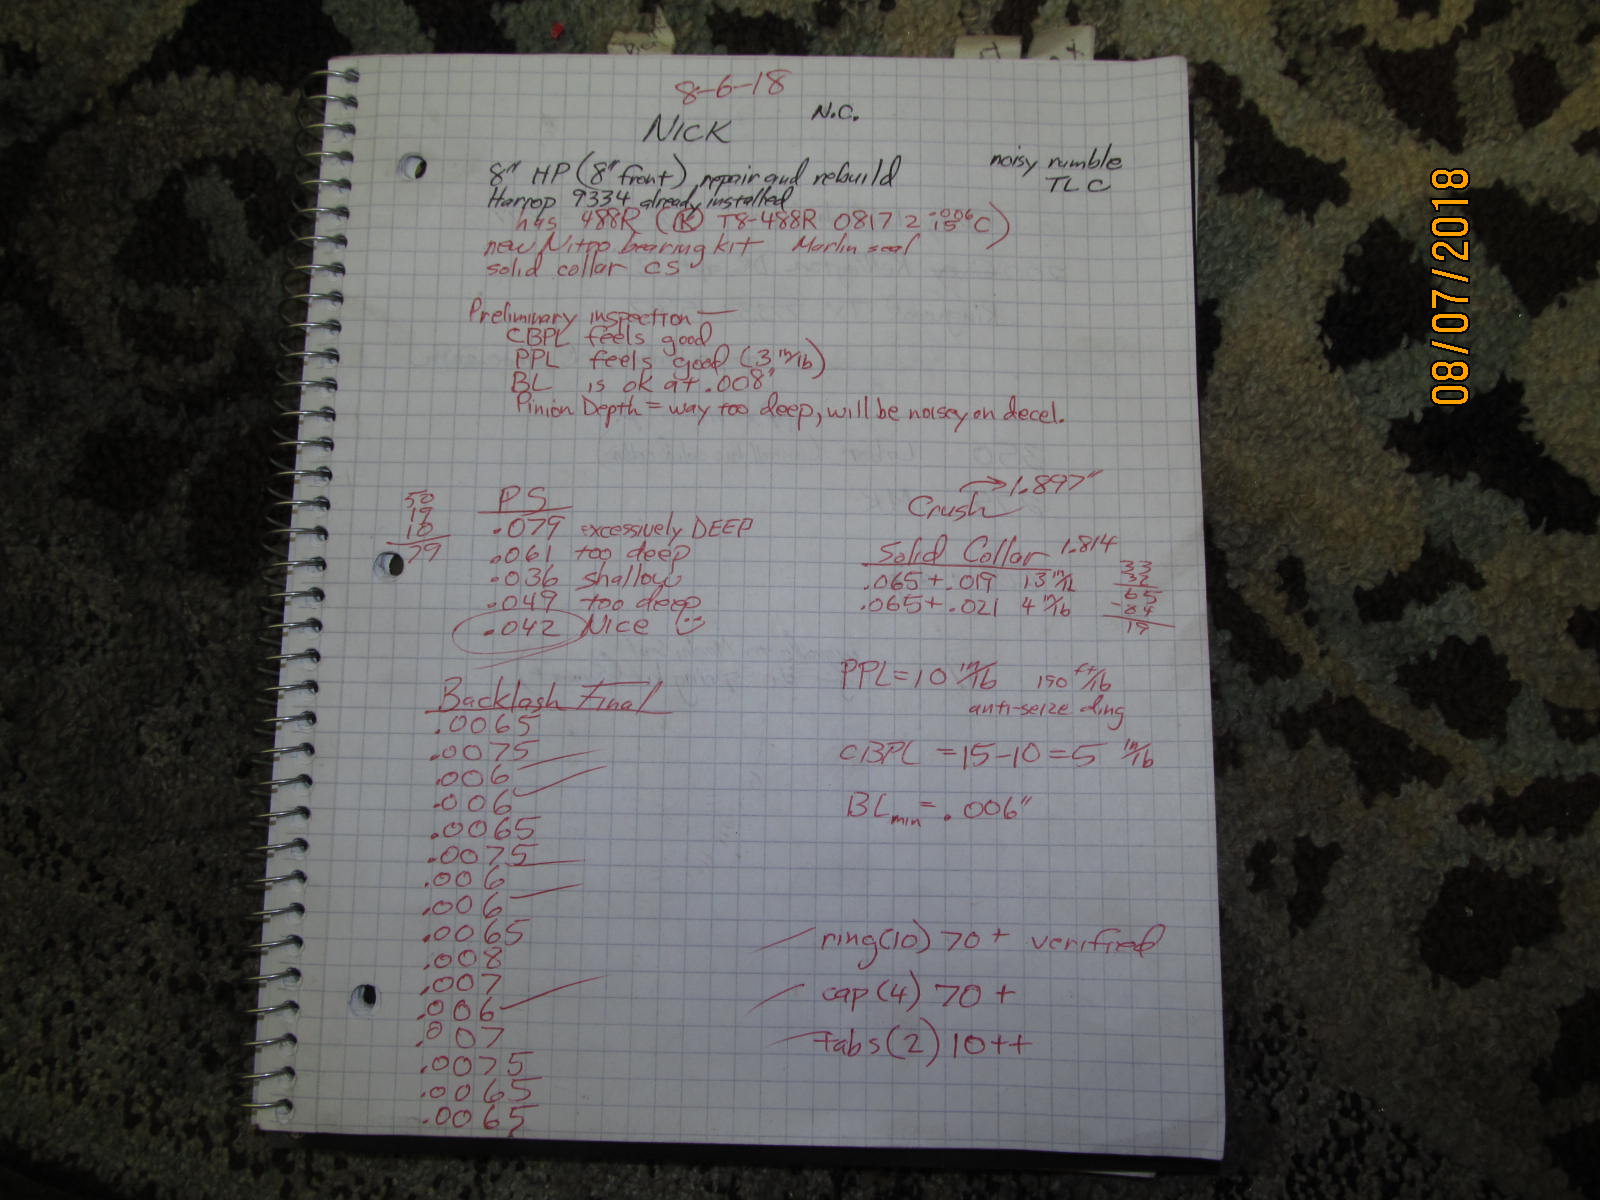
| Bearing caps are torqued to 70 ft/lb, wheel adjuster are set for carrier bearing preload, and backlash is then recorded on every other tooth. |
|---|
|
|
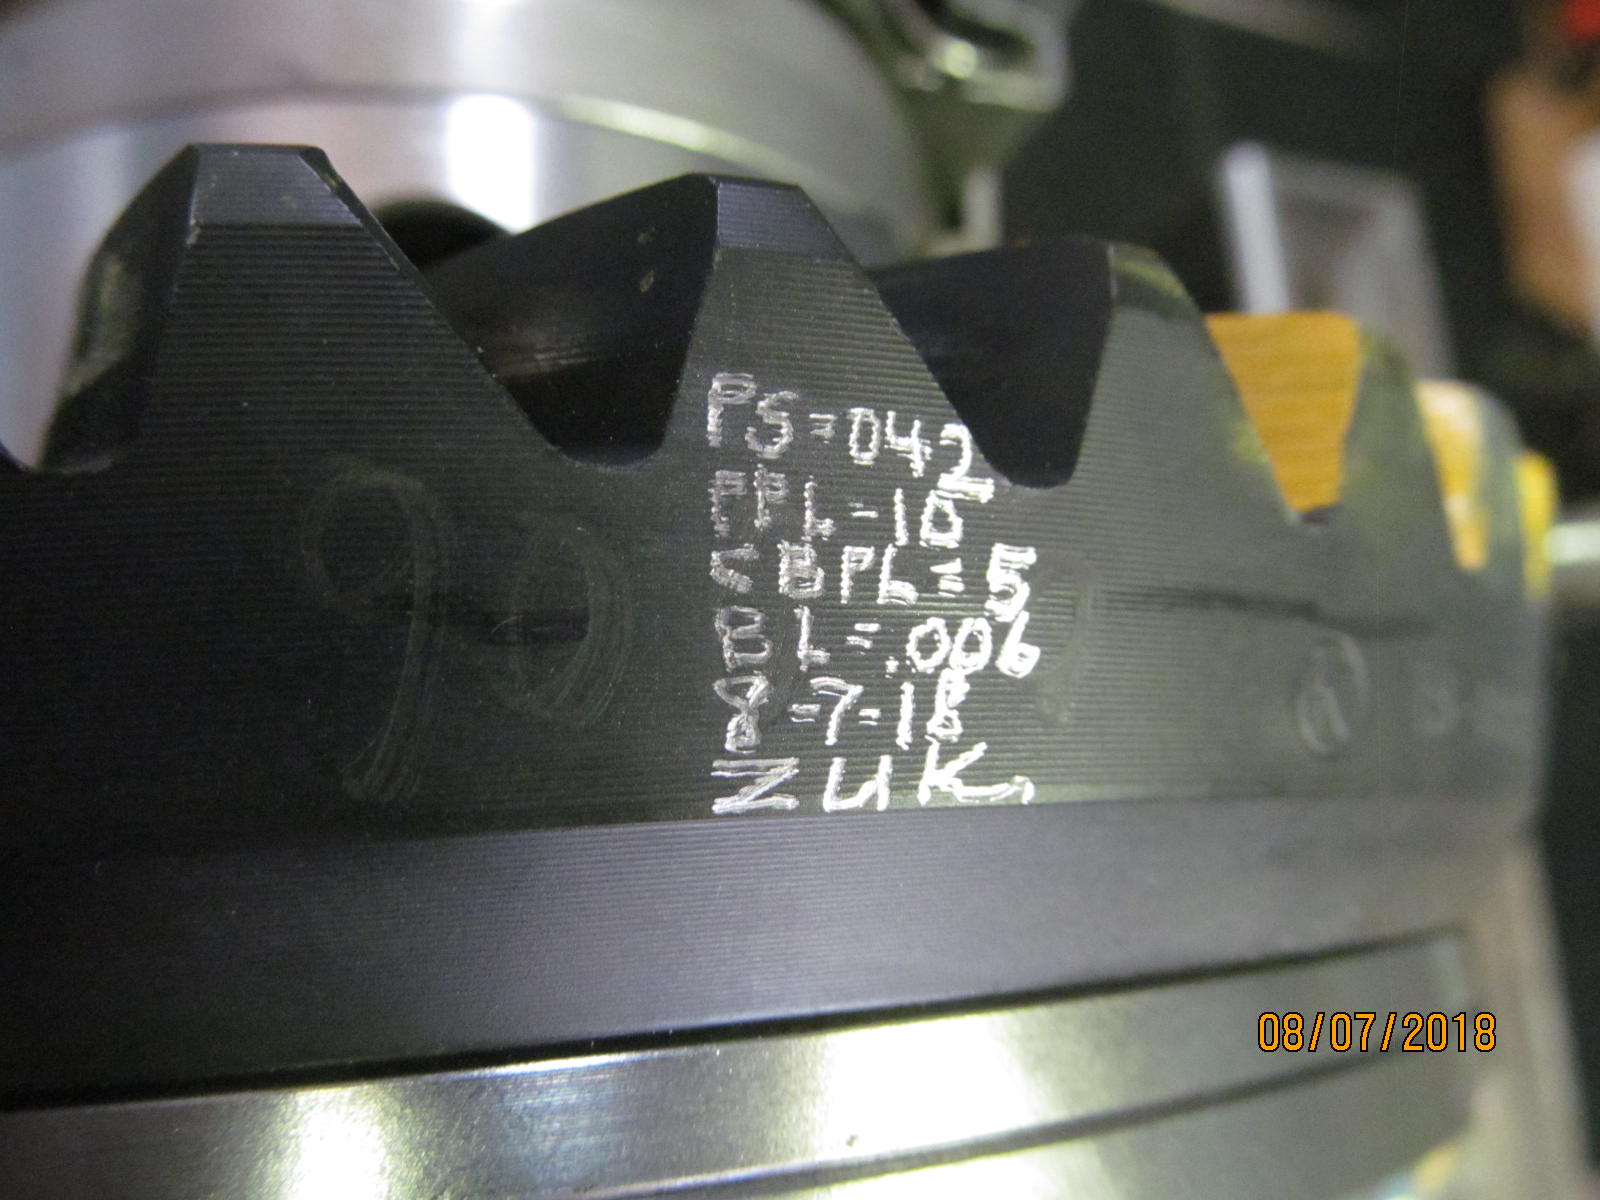
| Some specs are inscribed. |
|---|
|
|
| Lastly, the tabs are torqued to 10 ft/lb |
|---|
|
|
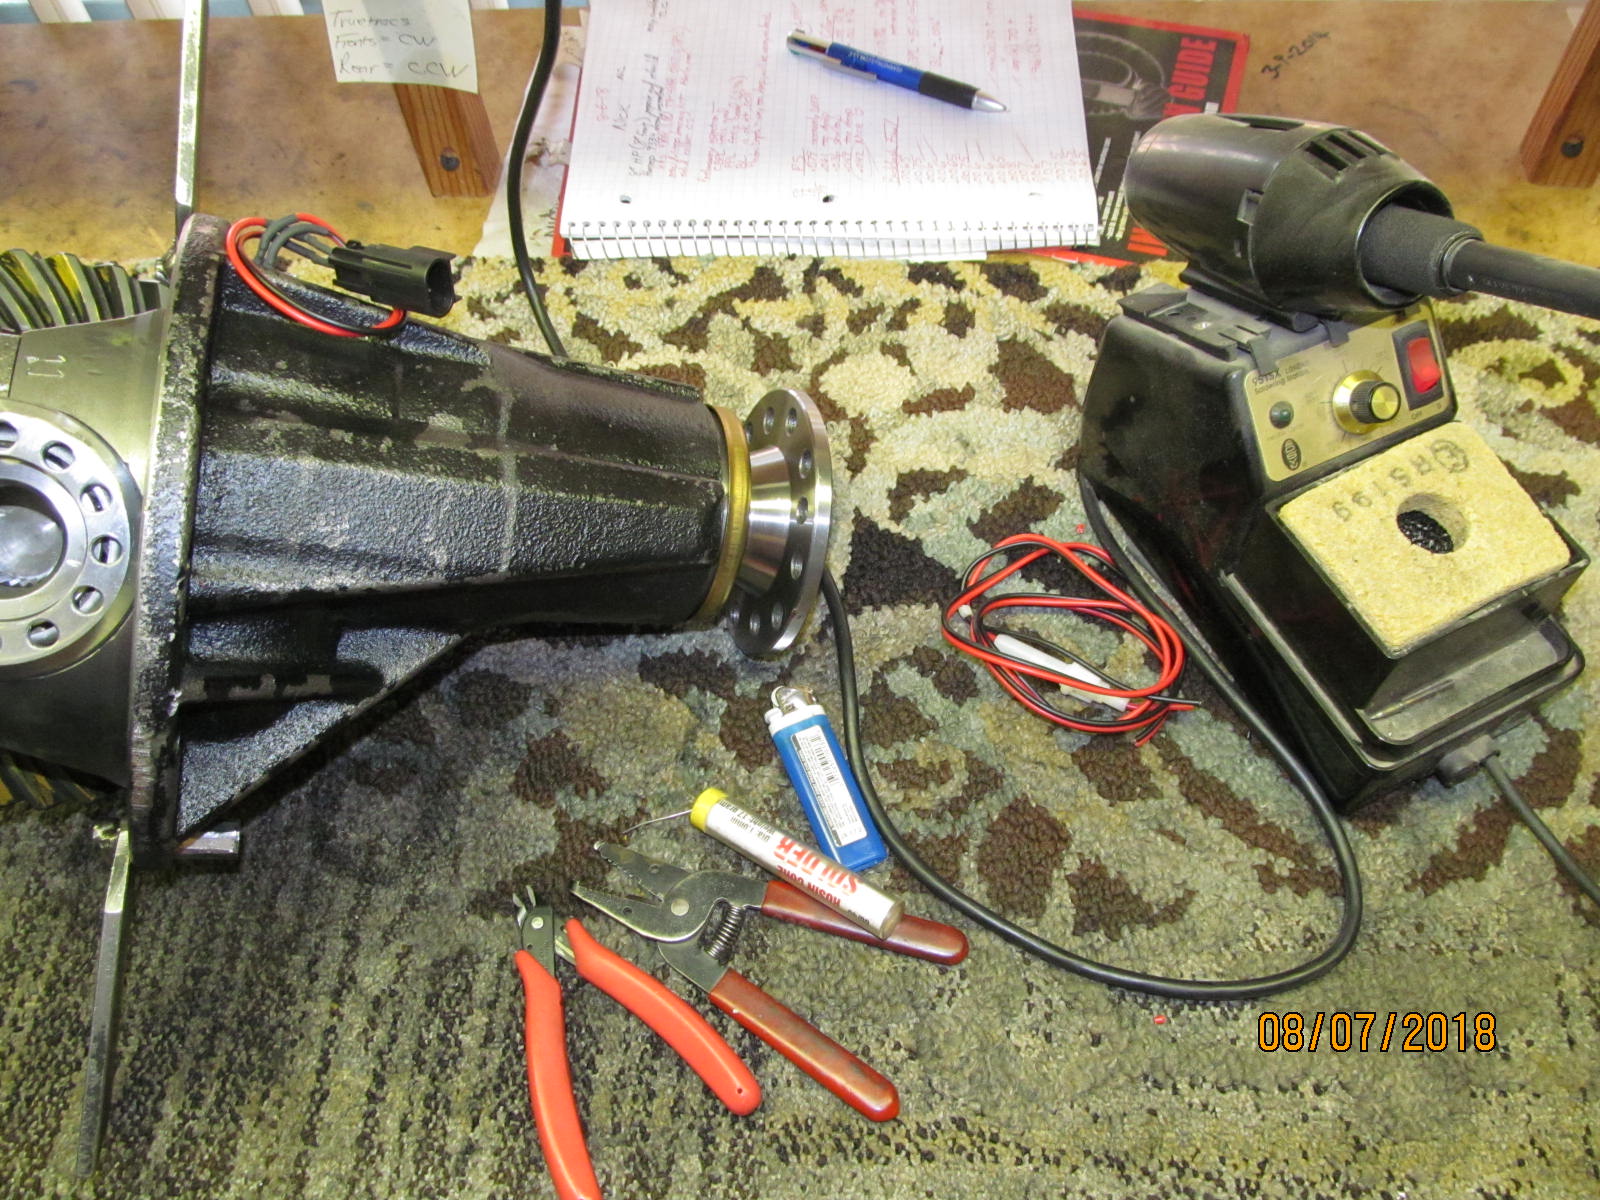
The wiring was a little short so I offered to extend them about 6 inches.
I have 2 solder certs from Hughes Aircraft Company Tucson AZ so I put that skill to use ;)
mil-std-2000 |
|---|
|
|
| |
|---|
|
|

|
