|
|
|
|
|
|
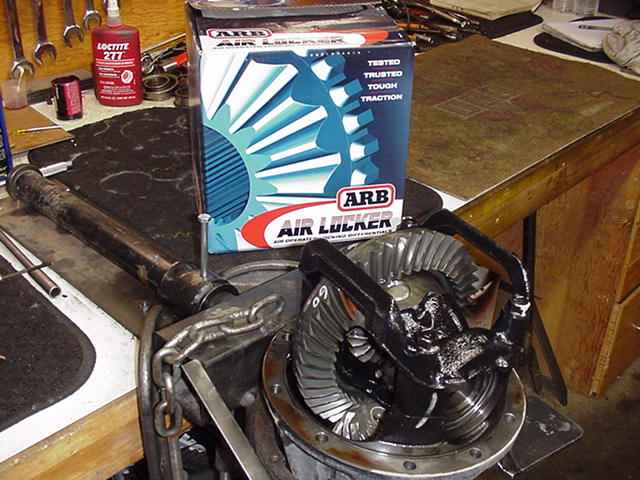
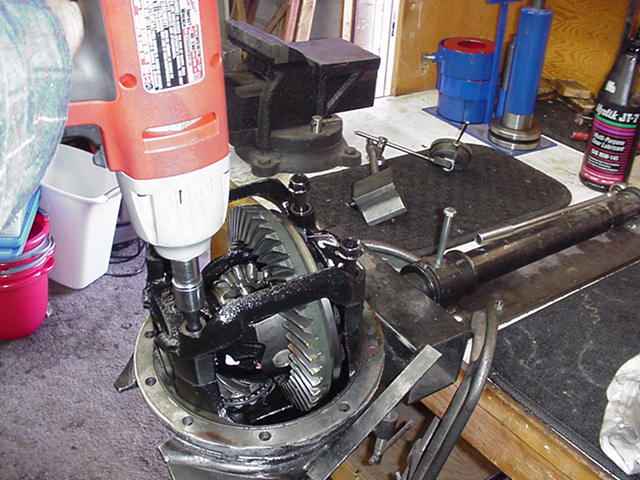
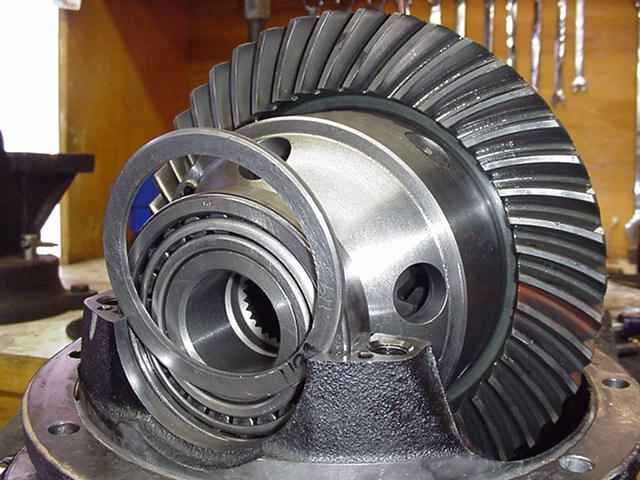
George has a 2001 Tundra with the "non-TRD" rear 3rd (210mm). It's his daily driver and he wanted to maintain the on-road ride yet have better traction offroad so an ARB was the natural choice. |
|
... |
|
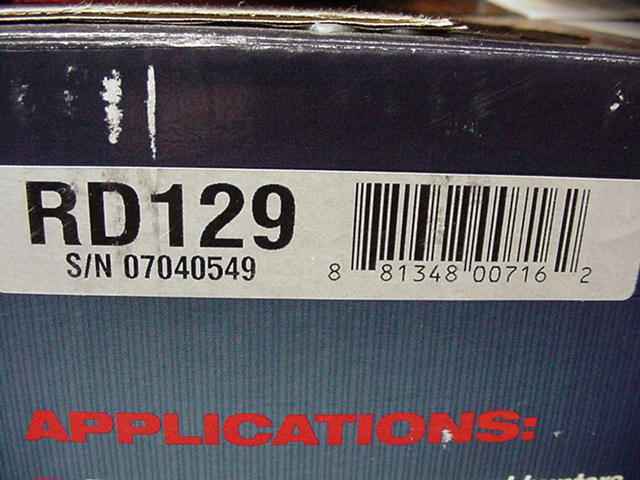
This is the newer design and does not have the split case. |

|
Before dis-assembly, it's important to mark the reinforced bearing bridge....they only really fit perfectly in this one orientation. This one already had a white brush mark so I didn't have to mark it anymore than that. |
|
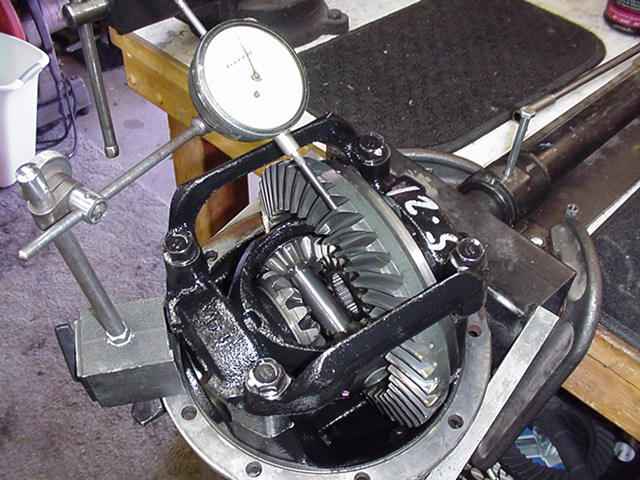
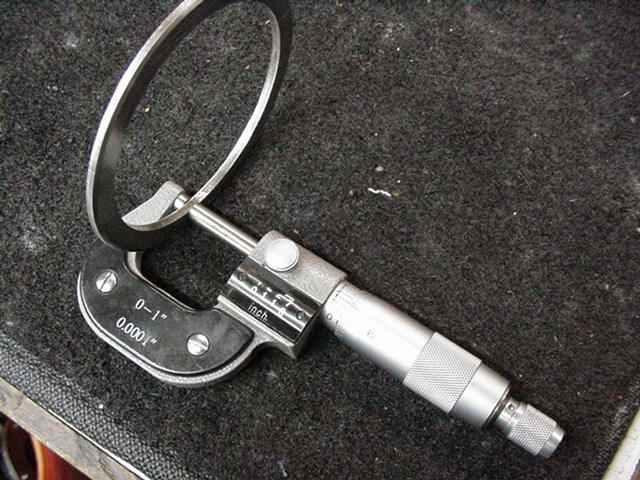
The backlash must be measured. A dial indicator with a magnetic base is preferred. I noted a backlash value of 5~6 thousandths so I will duplicate that when it's re-assembled. |
|
An electric impact makes a gear/locker change so much easier...after some searching, AbsoluteHome is where I found my impact. |
|
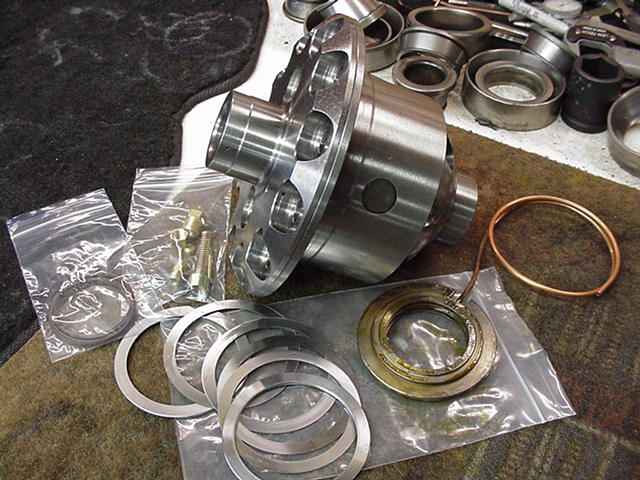
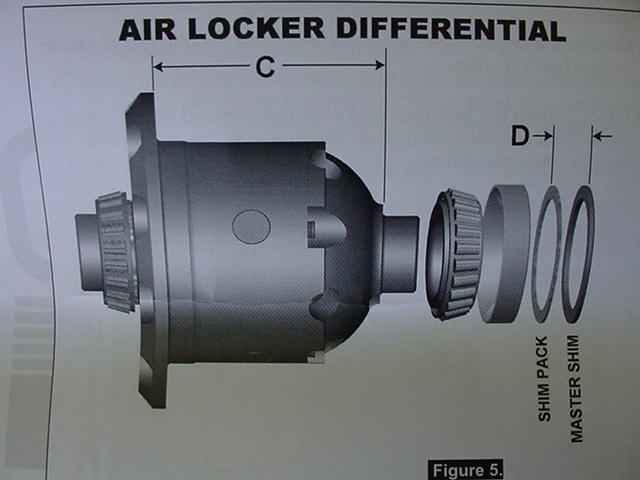
I mic'd the factory carrier bearing shims....caseside was .116" and the ringside one was .1115". |

|
The ring needs to move over to the ARB case. The factory used a good quality threadlock, nevertheless, the electric impact whizzed the 12 bolts off fairly easy. |
|
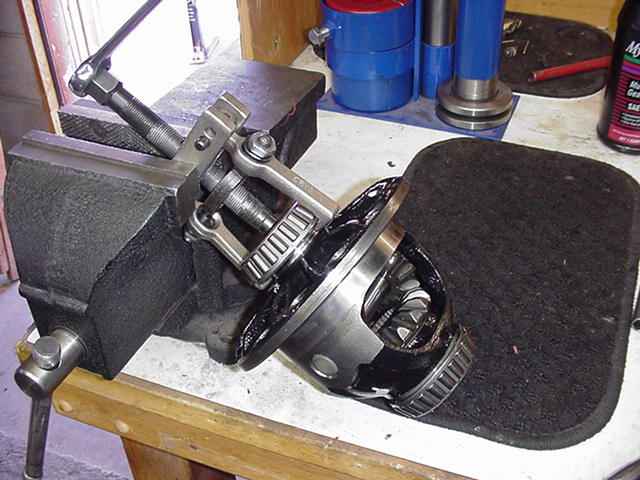
The carrier bearings were on very tight also. This OTC 4520 Differential Side Carrier Bearing Puller has served me very well. These are priced at about $55 on ebay.com...a must have for carrier bearings. |
|
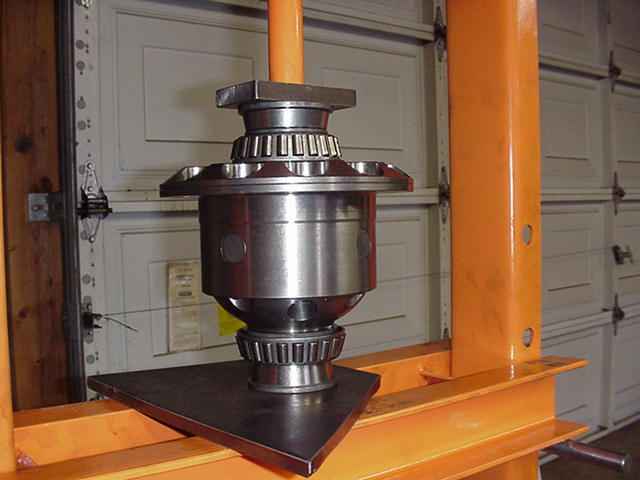
Bearings are pressed on the new ARB case. |
|
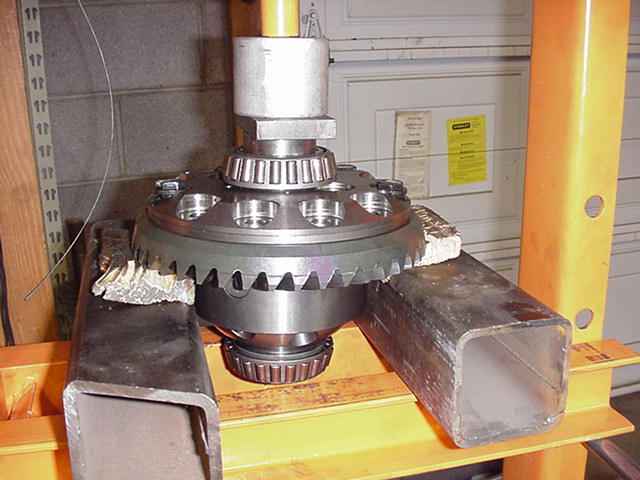
As is always the case with ARB cases, the ring gear takes a real effort to install and had to be carefully aligned and pressed on. |
|
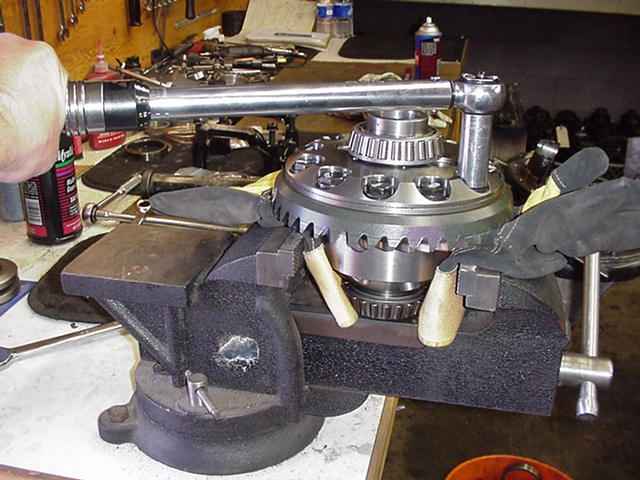
Red Loctite and 80 ft/lbs. |
|
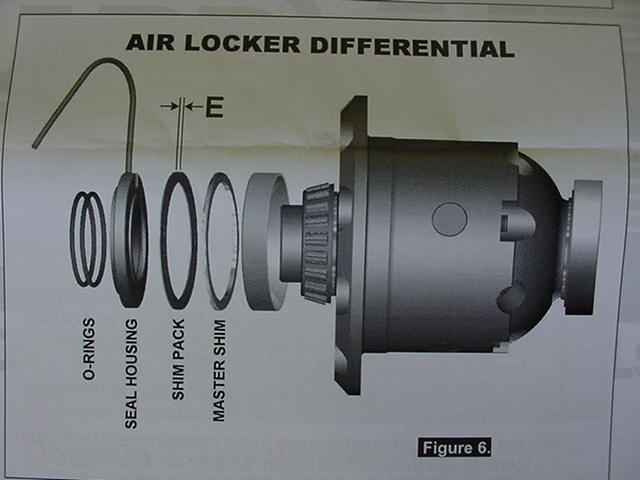
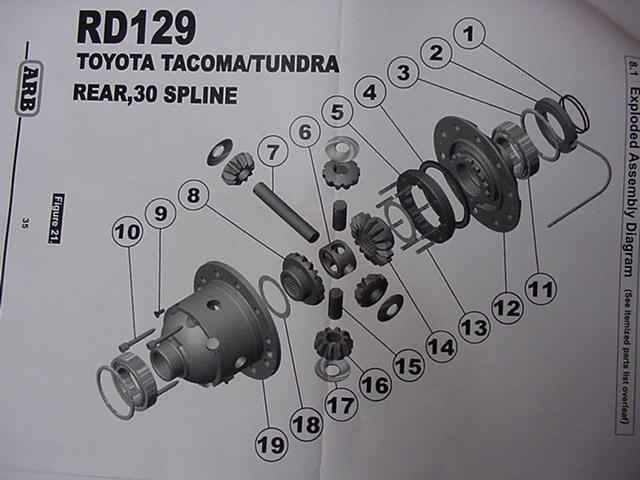
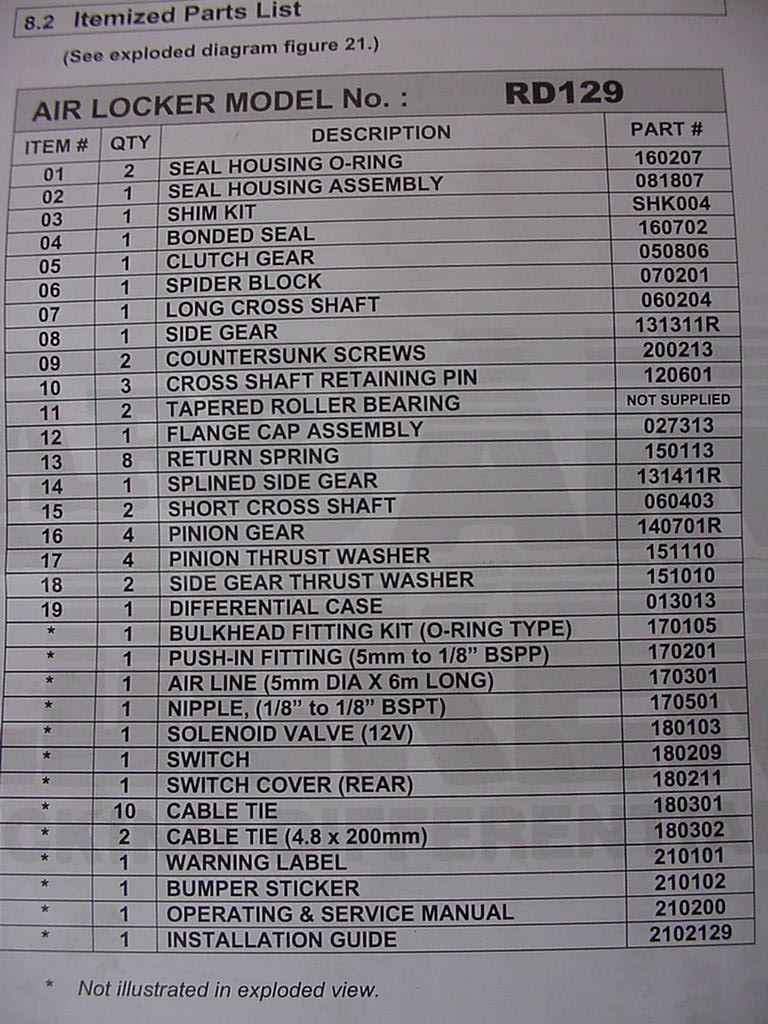
Some pics from the installation manual... |
|
... |
|
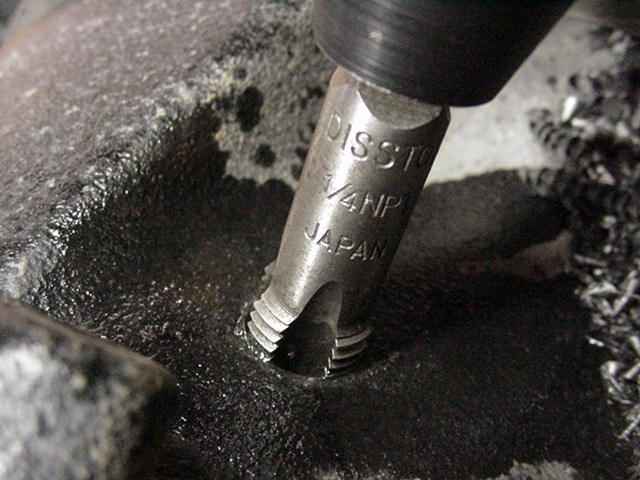
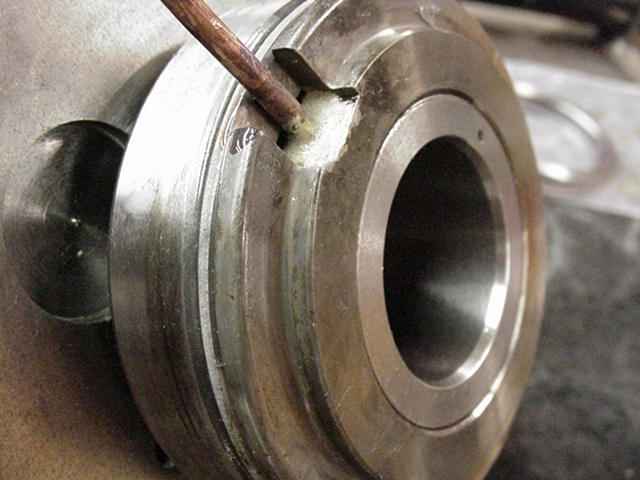
This is where I will drill the 7/16" hole and thread it with a 1/4 NPT tap. |
|
Then a .250" hole is drilled here... |

|
... |
|
... |
|
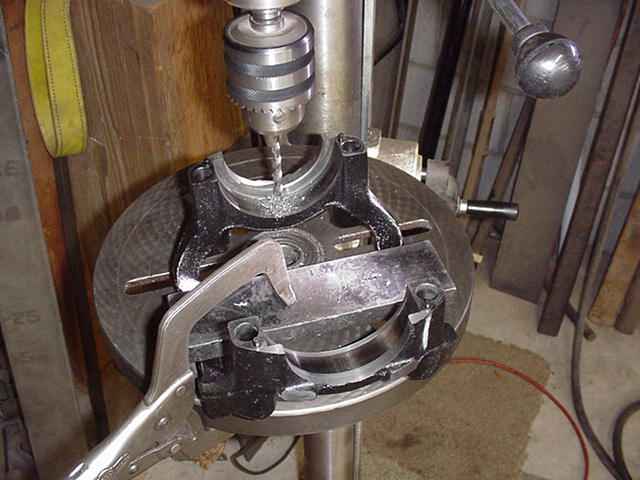
The instructions show a drill press being used...I used a drill press...but after examining the hole and the way the copper line feeds thru it, I concluded that a hand-drill could do the same job. |
|
This is the CASESIDE shim.....I used a thicker one (.005"thicker) to maintain the target backlash and to help renew the CBPL. The shim on the ring gear side stayed the same at .1115". |
|
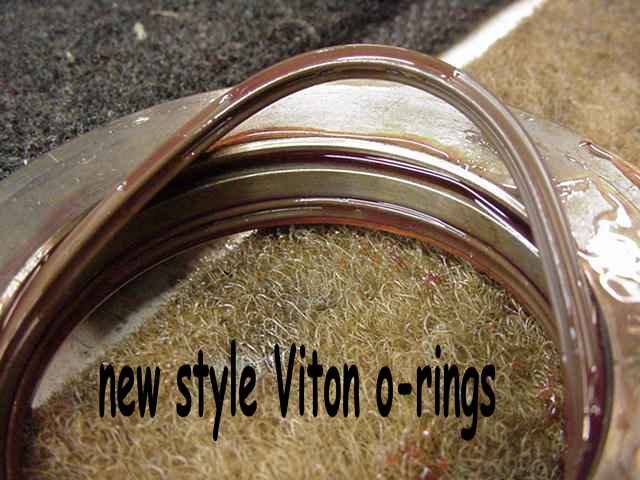
These relatively new Viton o-rings probably seal the air much better and will last for years longer than the previous round o-rings. Here, I have lubed them liberally with gear oil and loaded them up. |
|
Carefully twist and wiggle the seal housing assembly in place. This prevents damage to the rubber o-rings. |
|
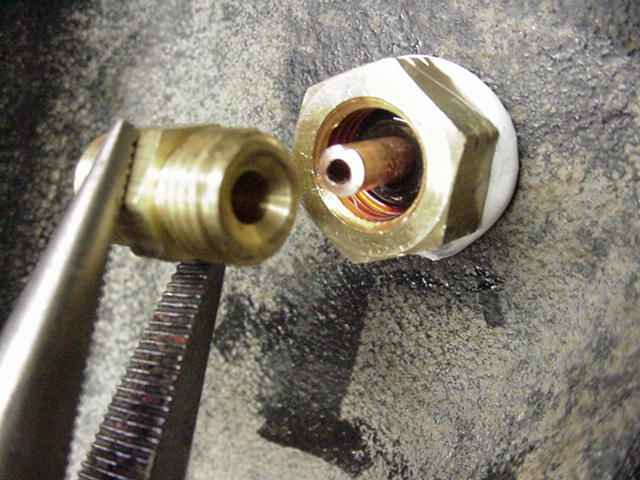
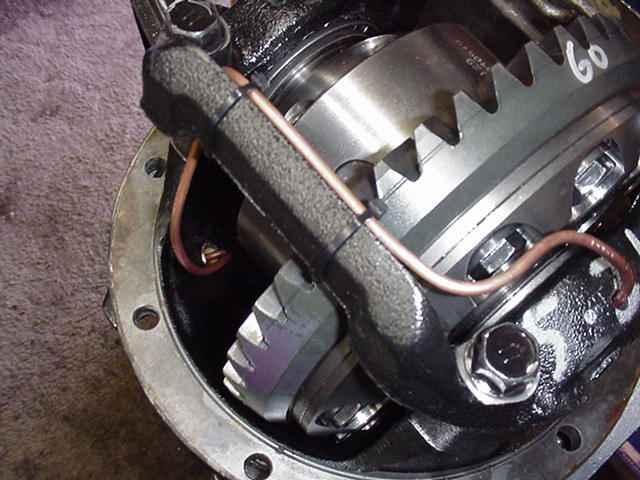
The copper line is very soft so it's relatively easy to bend and form with little trouble. |
|
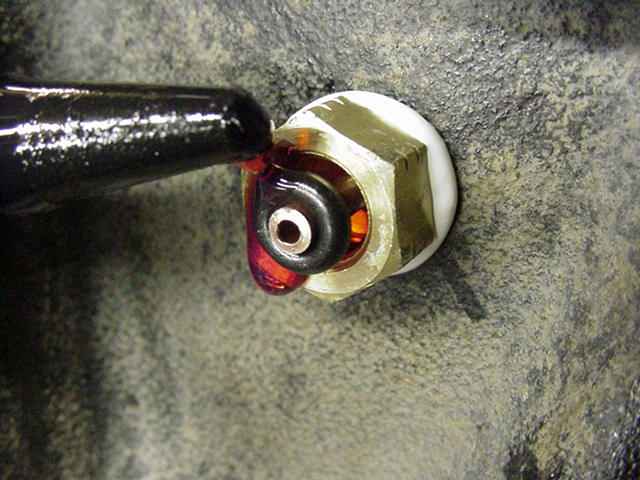
The copper was cut to the right length and the tiny fat o-ring was splashed with large amounts of gear oil. |
|
The o-ring is carefully pushed deep in the hole and the brass coupler goes on only one way....actually, it does go on
the "other way" but doing so might cause air leaks. Talking about air leaks, the fastest way to ruin the fat o-ring is to
over-tighten the brass coupler. Also, the soft copper tubing could pinch itself shut under excessive tightening and compression
of the o-ring(the copper tube starts to "hourglass" itself).
|
|
After I am sure that I have 5~6 thou for BL(backlash) and the CBPL(carrier bearing pre-load) is good and snug, it's time to torque the bearing cap bolts in place. |
|
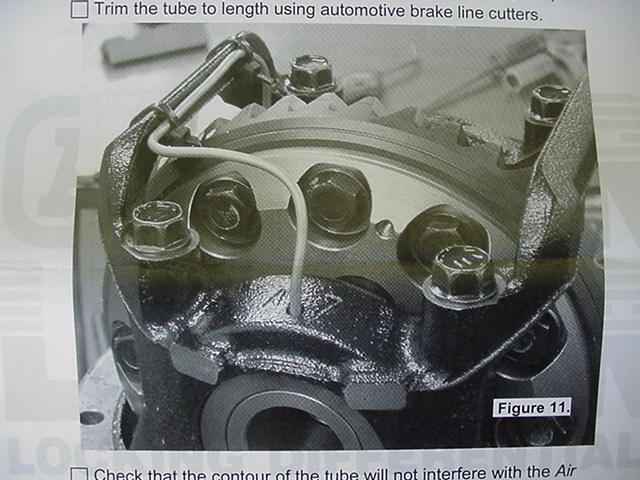
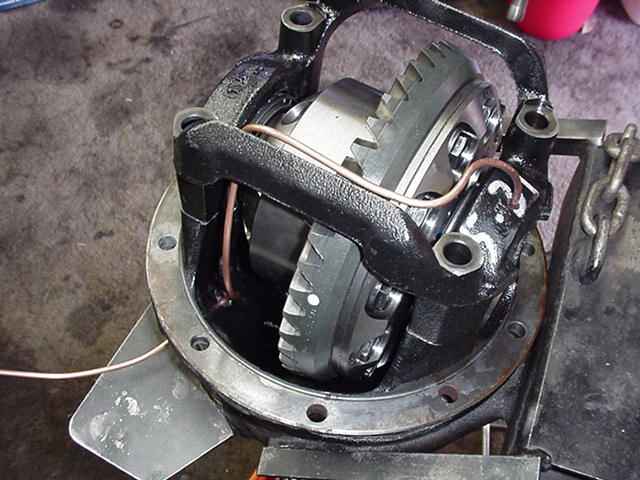
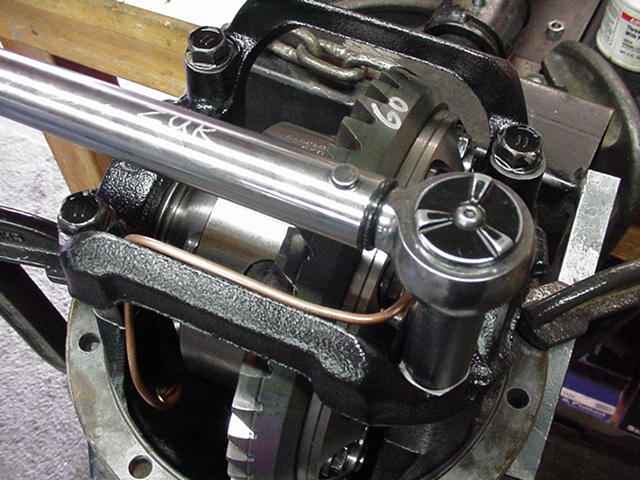
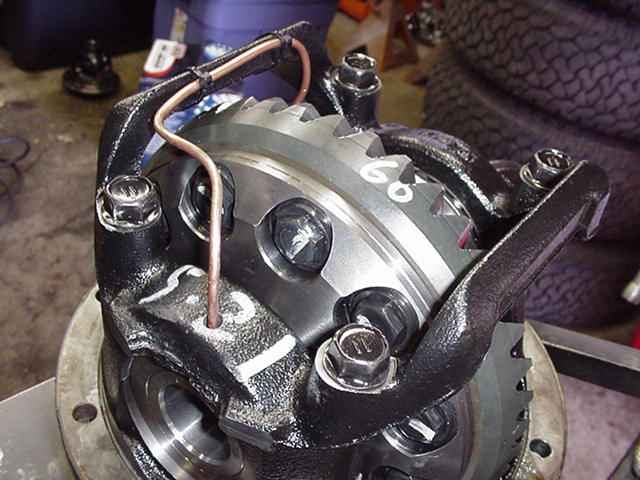
A snapshot of the copper routing... |
|
another... |
|
These 2 pics from the installation manual could be useful. |
|
It's nice to know the names of the parts and their part numbers. |
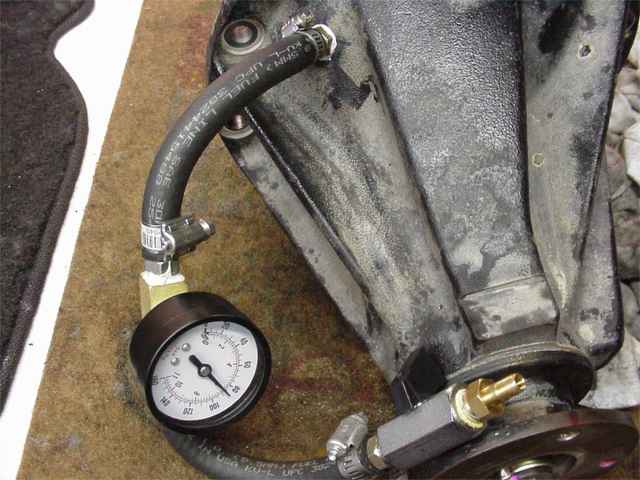 |
The last check is for air leaks although on a new ARB there is little chance of that happening. This one was just fine. |

|