|
|
|
|
|
|
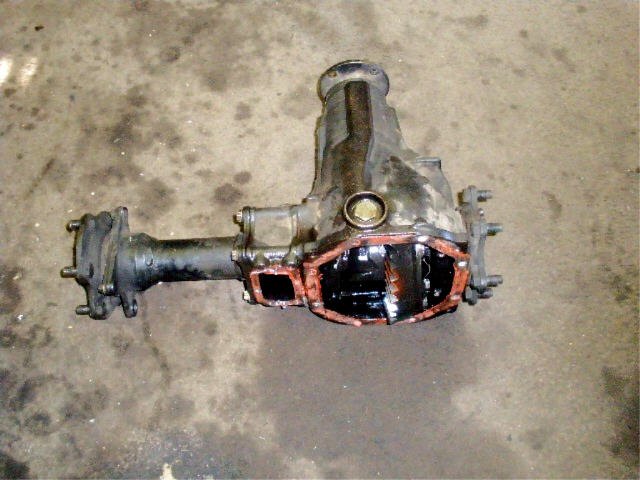
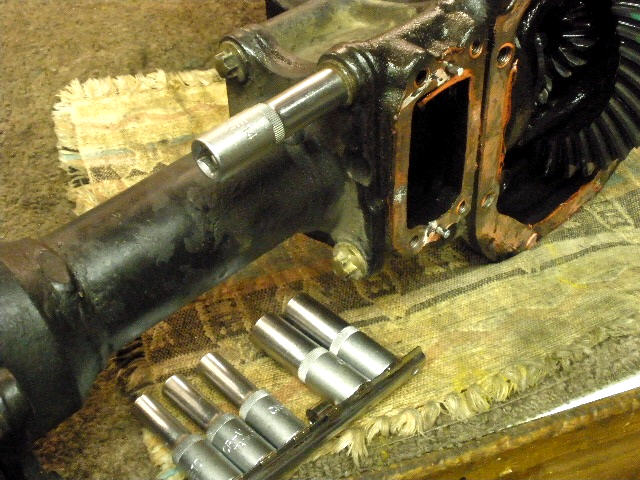
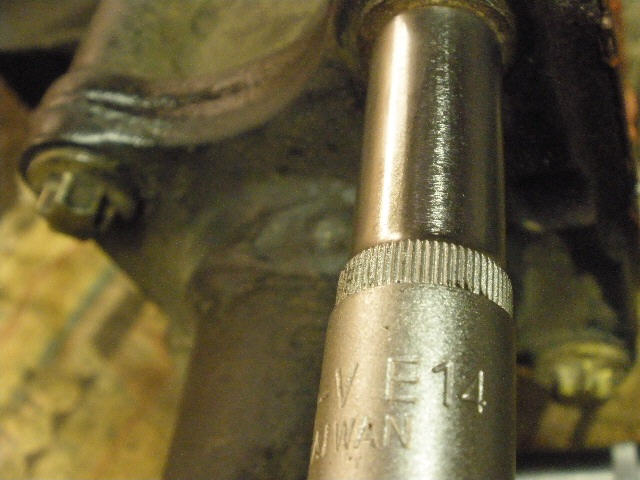
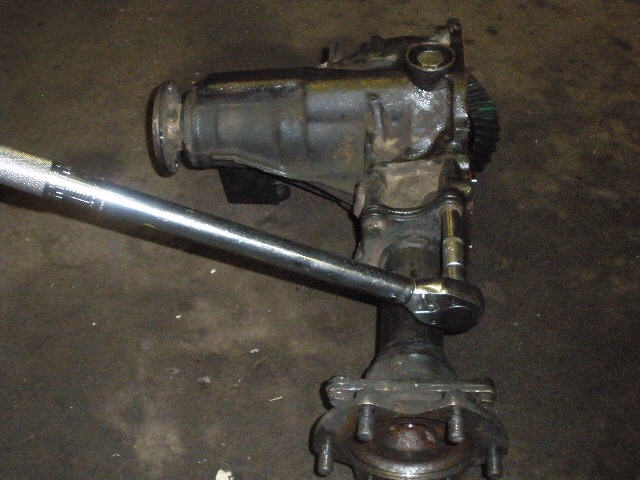
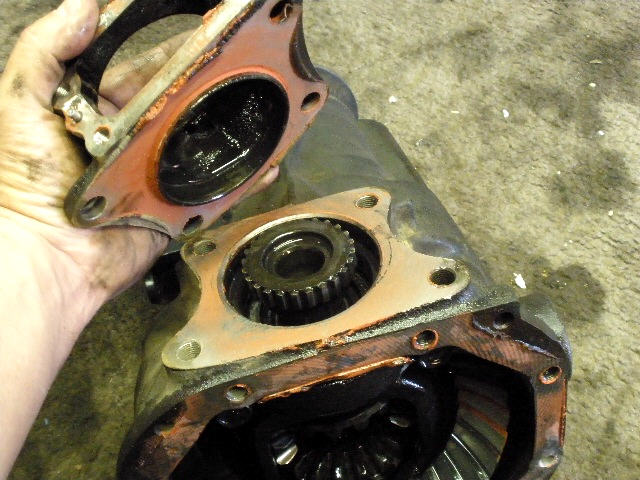
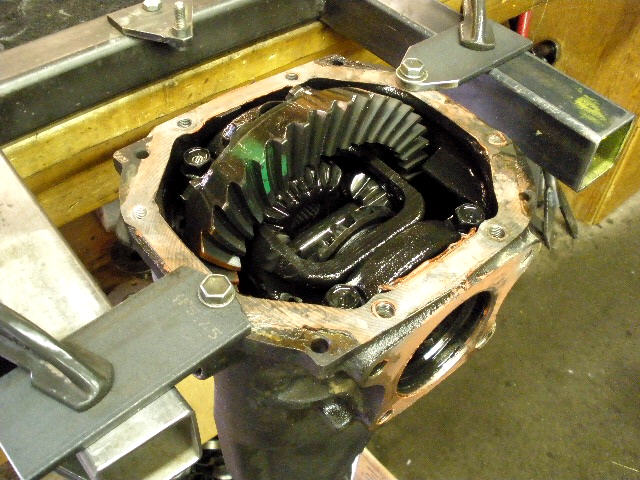
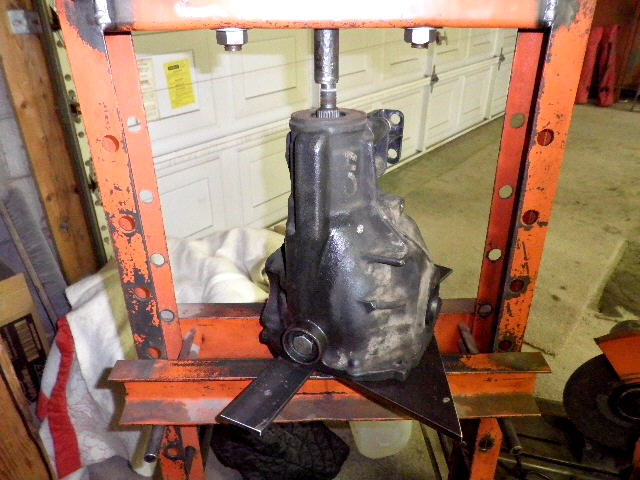
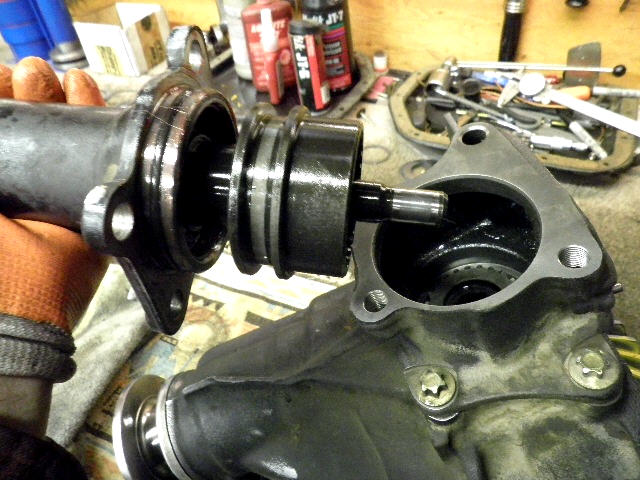
This is Billy's 7.5" low pinion IFS front. This has the factory 488 gears and, unlike the rear 3rd, there is nothing unique about the carrier which means after-market gears will drop in with no issues. Before work can begin on the actual 571 install or before sending the 3rd to your favorite gear installer, the short axle stubs have to be removed from both ends. The right side, shown in the above pic, is super easy. The left side involves an E14 socket and a good arm. |
|
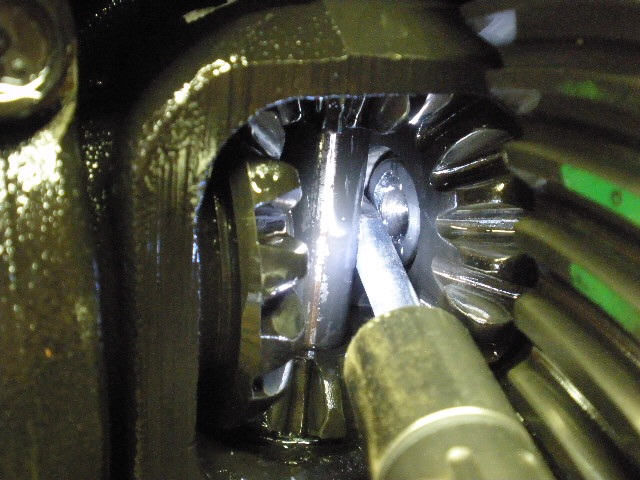
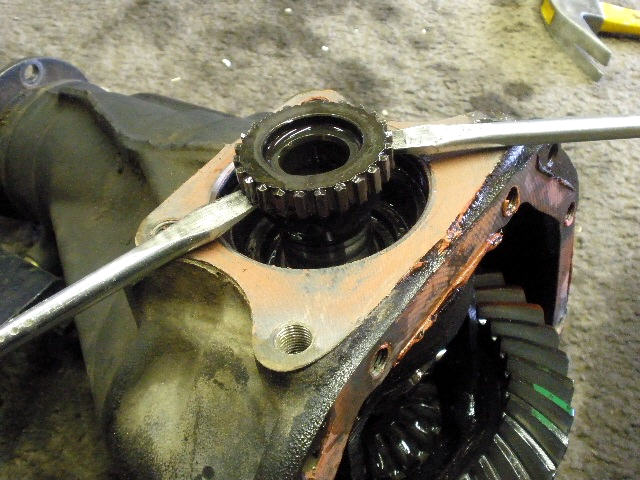
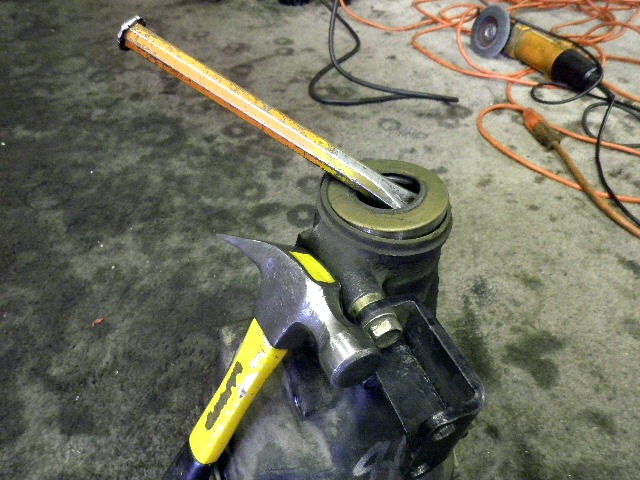
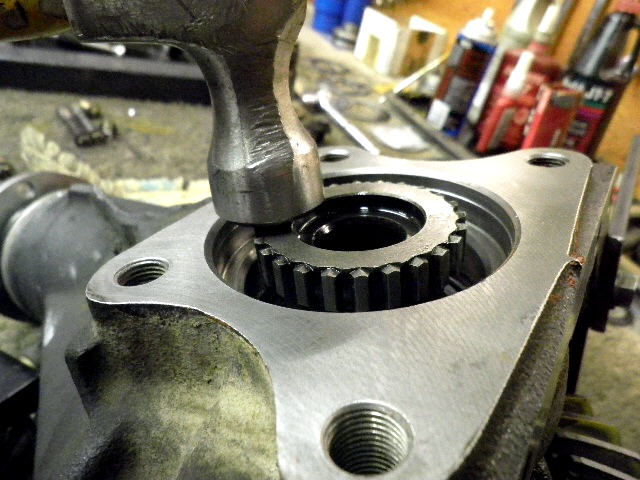
For the right side, just place the biggest screwdriver you have in between the cross-pin and the axle stub and force the axle outwards with some hammer love taps. That's a flashlight I'm using in the pic to illuminate the area of interest. The axle stub has been pushed out about 1/4" and it should almost fall out at this point. |
|
``` |
|
There's a sturdy half-clip in the groove and they are usually re-useable. |

|
The ADD models come with the needle bearings. The non-ADD's have the steel bushing surface and end up wearing quite deep resulting in a wobbly stub axle and gear oil then leaking out the seal on to your custom driveway. |
|
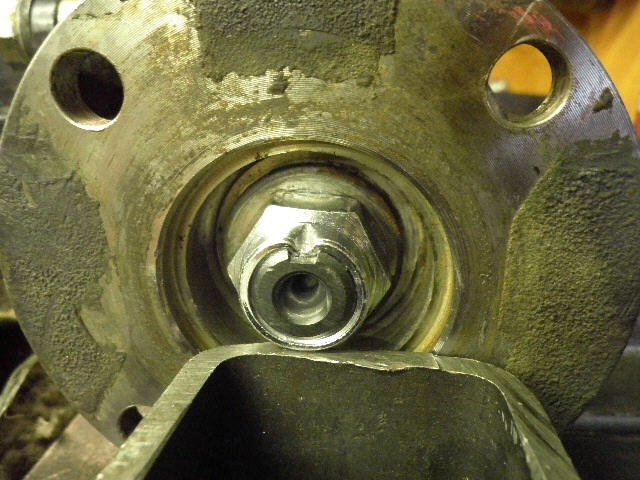
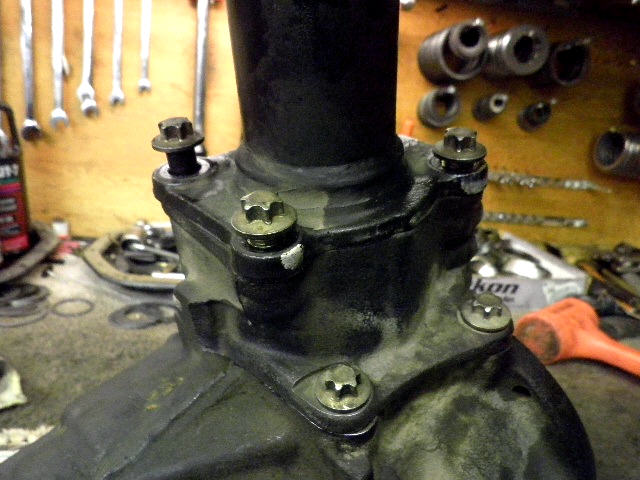
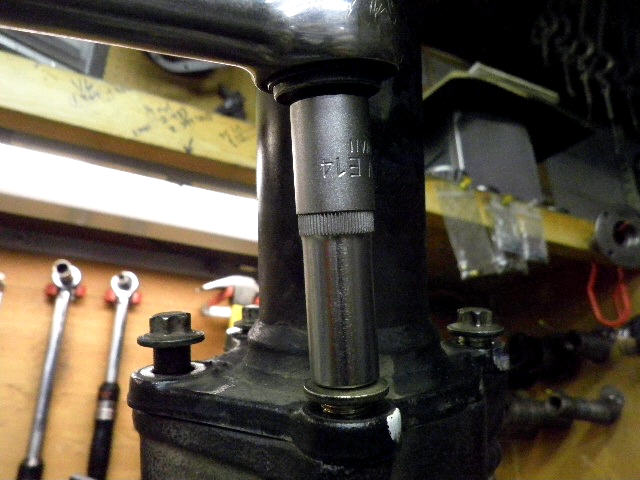
These E socket style bolts are in there tight. You might get lucky snapping the bolts loose with the right 12 point normal socket but it might also round off the head of the bolt, too. I got the right E-socket from Harborfreight.com ...only $8.99. I'm fortunate enough to have a Harborfreight outlet 4 miles down the road :) |
|
The right socket for the right job |
|
With the 4 main bolts out, the long chunk of axle tube might separate.... |
|
...if not, then tap the big screwdriver in... |
|
...and it should pop that axle tube out far enough where it will fall apart. |
|
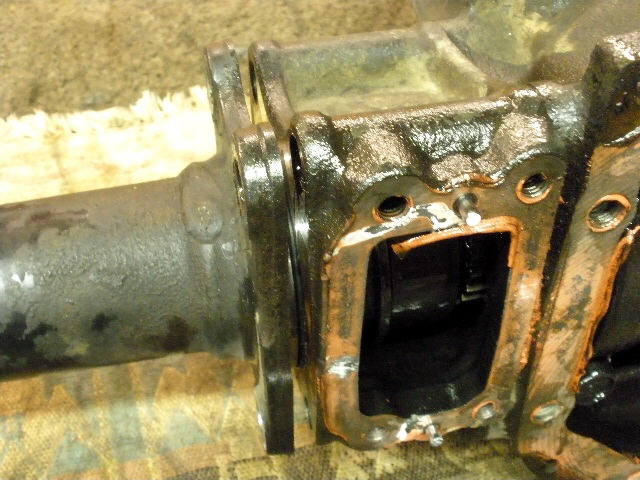
That's the sliding collar responsible for locking the axle shafts together. |
|
The flat seal surface does not make use of RTV because the black o-ring does the job. |
|
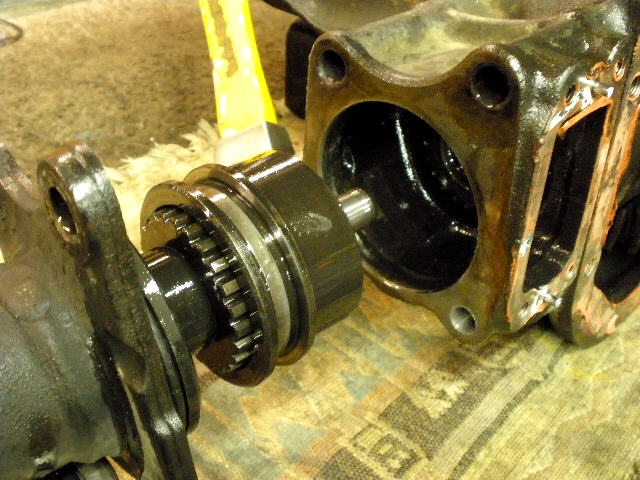
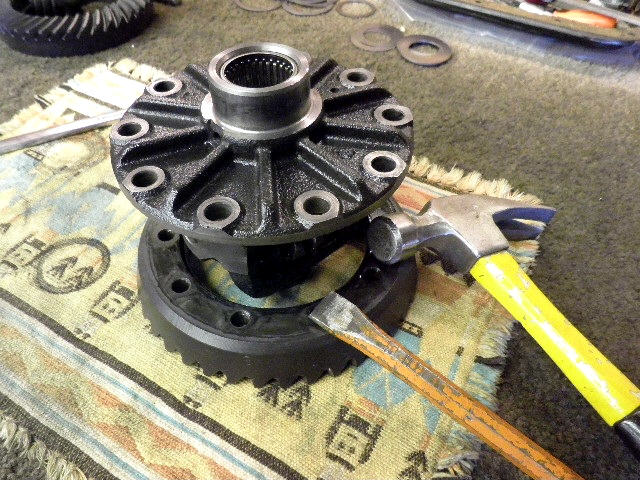
These other 2 bolts can be removed and a hammer will gently tap off the steel assembly. |
|
They did use some rtv from the factory on this surface so we will do the same upon re-assembly. |
|
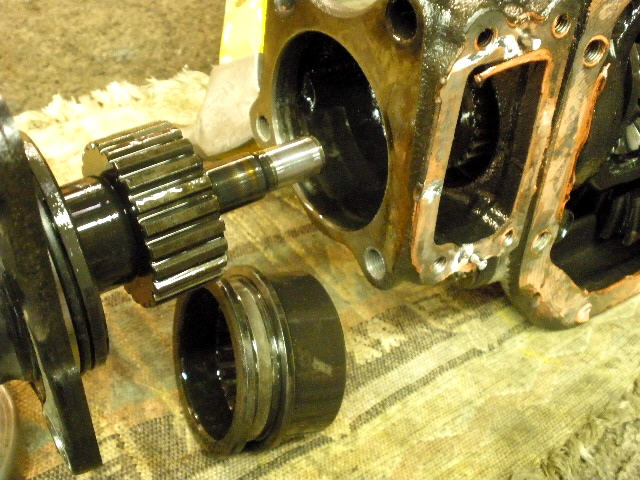
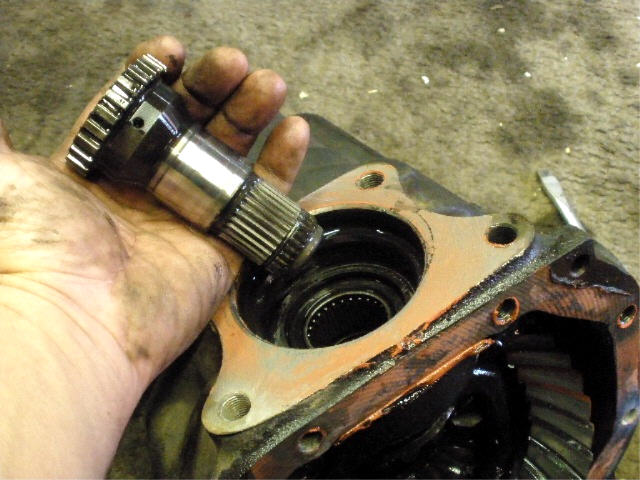
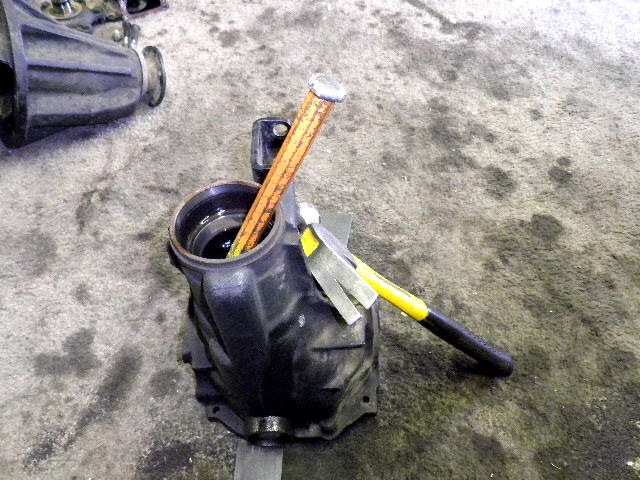
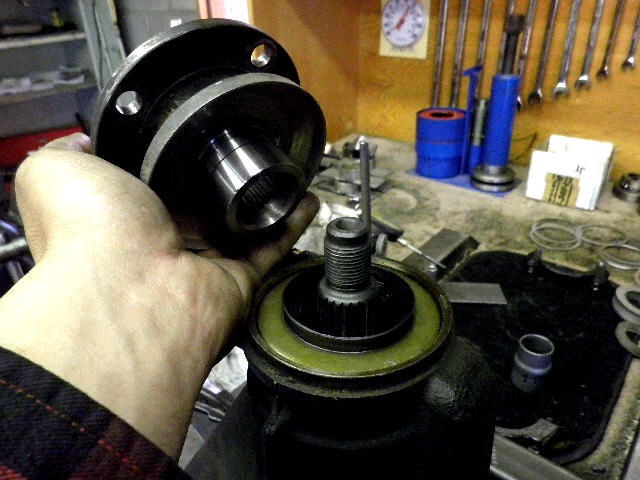
I already tapped it loose from the inside so this axle stub will now pop out easy. |
|
``` |
|
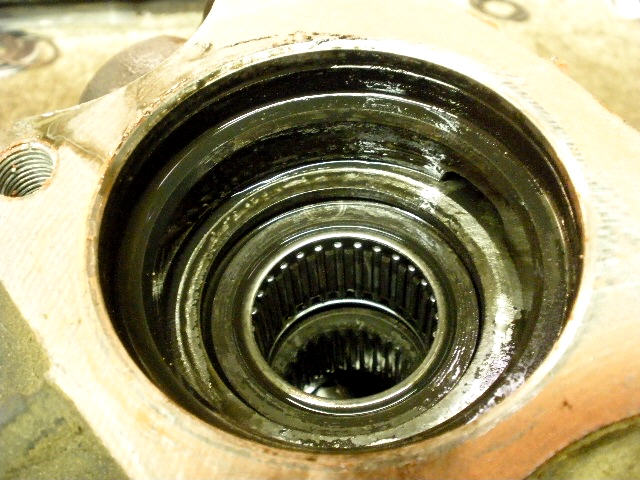
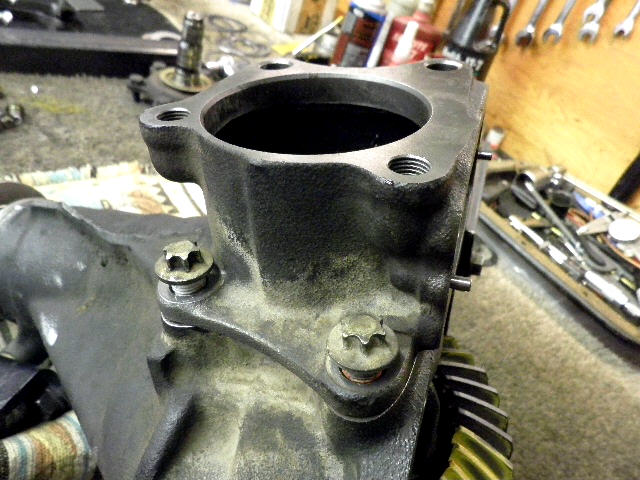
No removable seal like the other side has. |
|
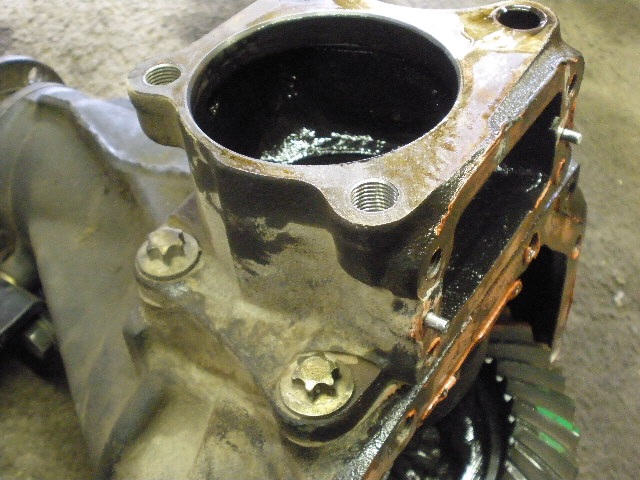
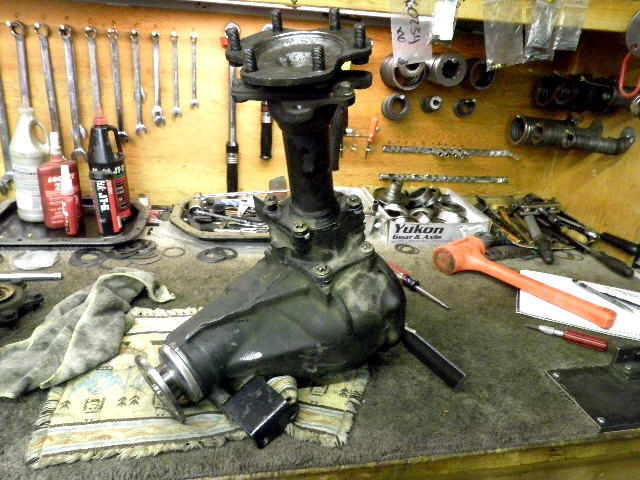
Now the gear install can proceed. |
|
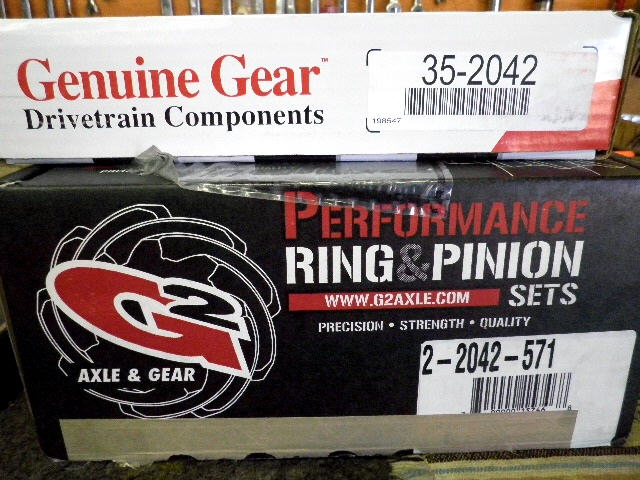
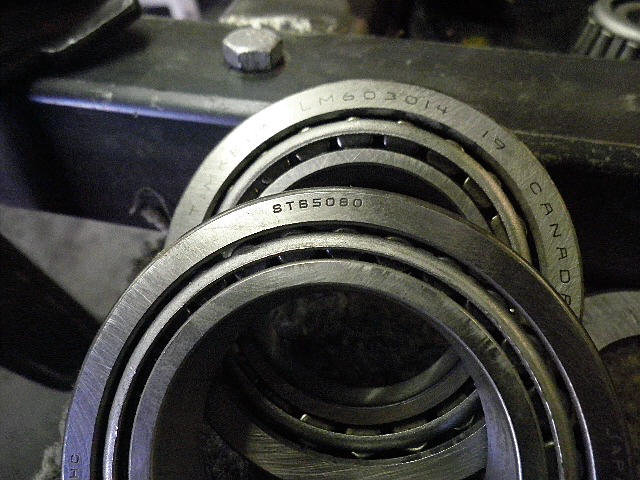
The part numbers for the master kit and ring/pinion. Actually, as I found out farther into this install, this is the wrong master install kit for this V6 carrier. This kit here has 45mm "4 cyl" carrier bearings....we need 50mm V6 bearings. |
|
``` |

|
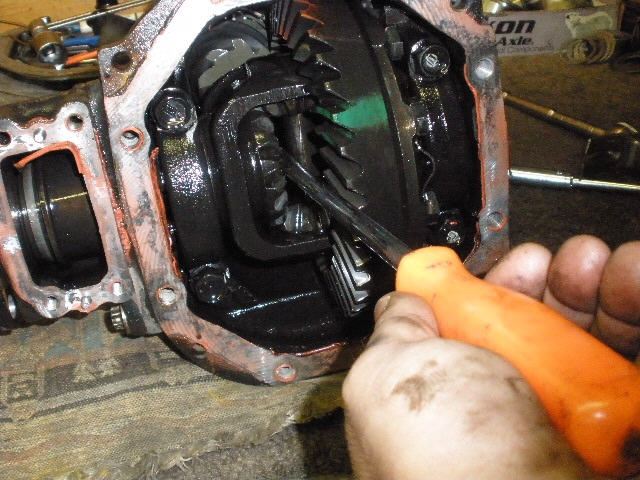
Using a punch, the bearing caps are uniquely marked so they go back in the exact same orientation. Caps can then be removed. |

|
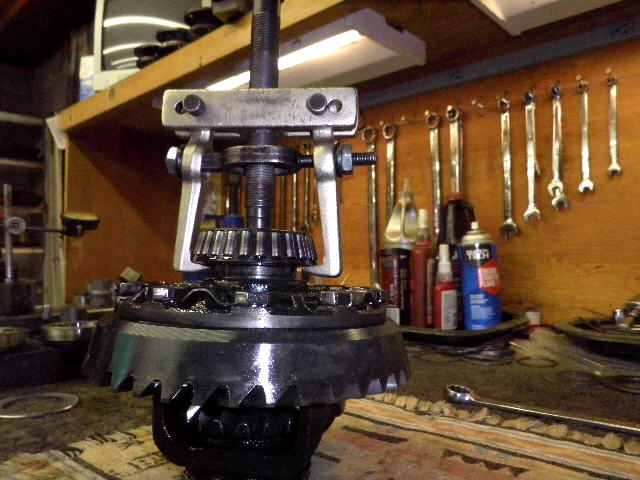
The open case can now be pryed out....your choice of pipe. |
|
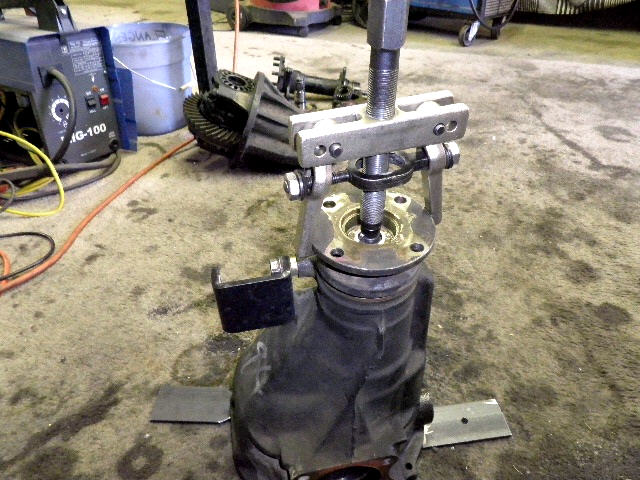
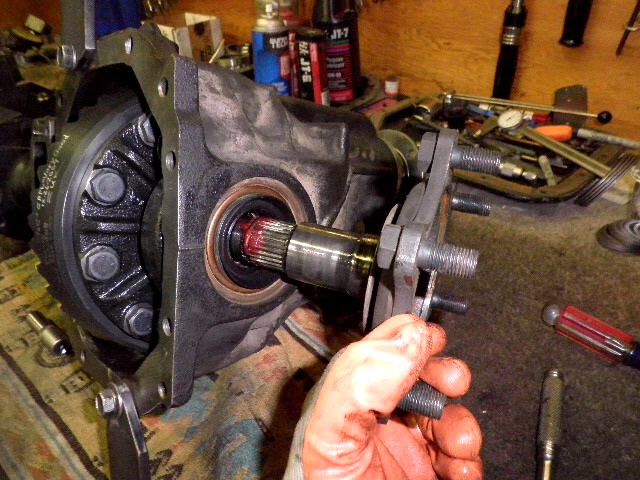
The flange was a good tight fit on the pinion splines so this bearing puller made quick work of it. |
|
Push the pinion out. |
|
Remove the old seal. |
|
Tap the old races out. |
|
The new races are pressed in at the same time. |
|
The old carrier bearings come off easily with the right puller. |
|
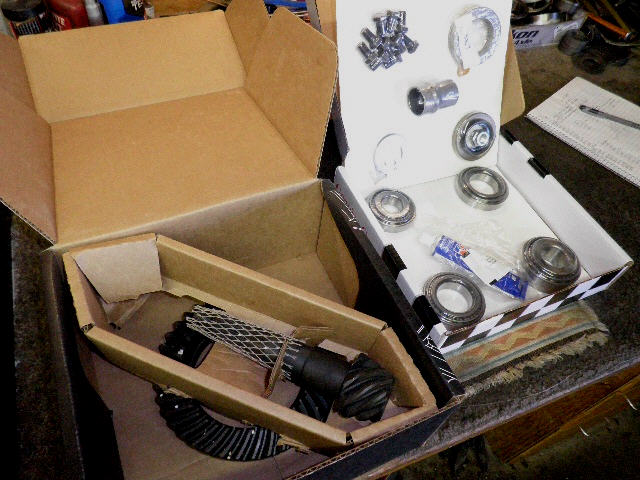
Then an issue came up...the supplied bearings were LM603014 and have an I.D. of 45mm. They are for the 4 cylinder models with the smaller journals. But the V6 case journals are 50mm. Fortunately, I had a new spare set of V6 bearings that fitted perfectly. |
|
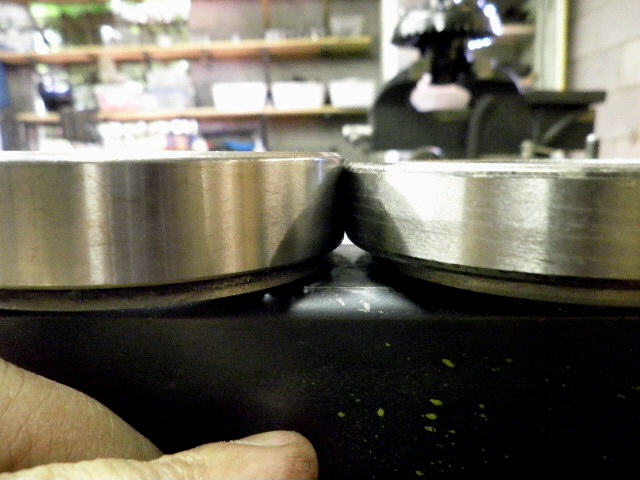
Another minor pain is some of the master kits supply carrier bearings that have the wrong vertical offset as shown above. The bearings I substituted in had 0 offset so the stock factory washer plates ended up being very close. I have noted in the past that justdifferentials.com has the correct bearings with 0 offset. |
|
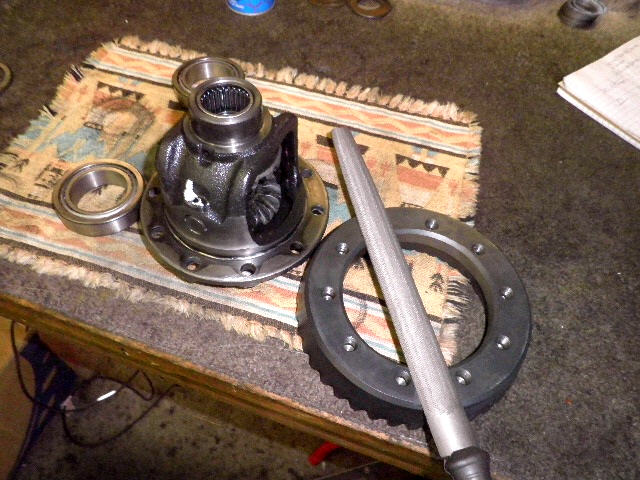
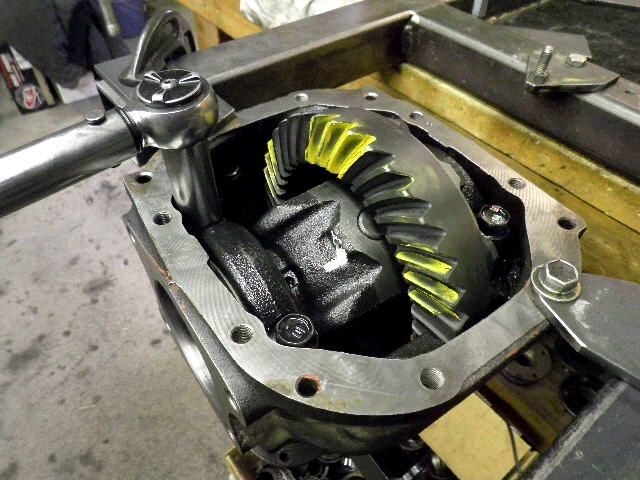
Remove the factory 488 ring gear. |
|
Both surfaces are verified to be burr free with no unusual high spots. |

|
The new 571 ring is installed using red loctite and 75 ft/lbs. |
|
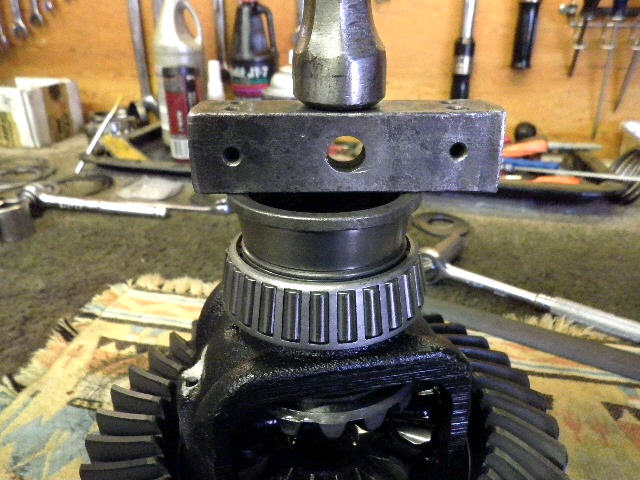
The proper bearings are mounted. They were a tight fit and using this hammer method is acceptable. |
|
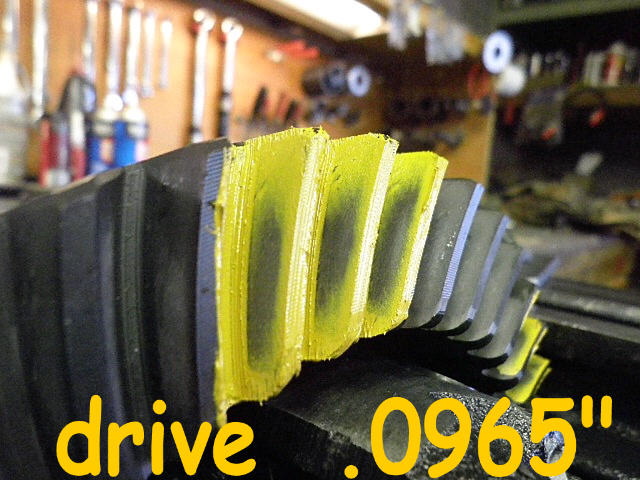
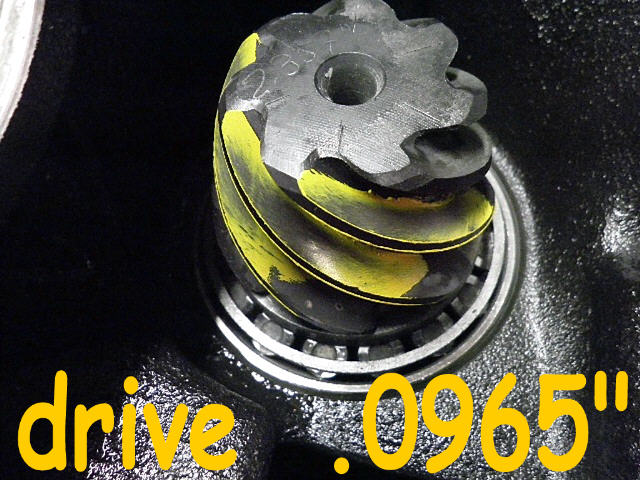
Now the pinion end can be prepared. The original .0965" pinion shim is pressed on with the new bearing. |
|
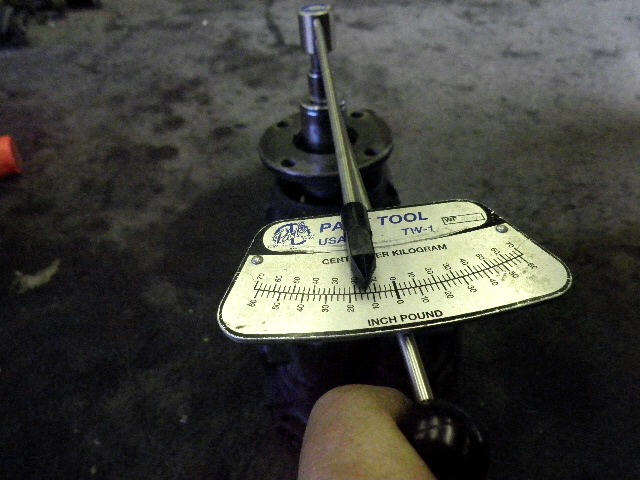
I've assembled the top end with no crush sleeve and oiled up both pinion bearings. The pinion nut is tightened until about 15 inch/pounds is measured. |
|
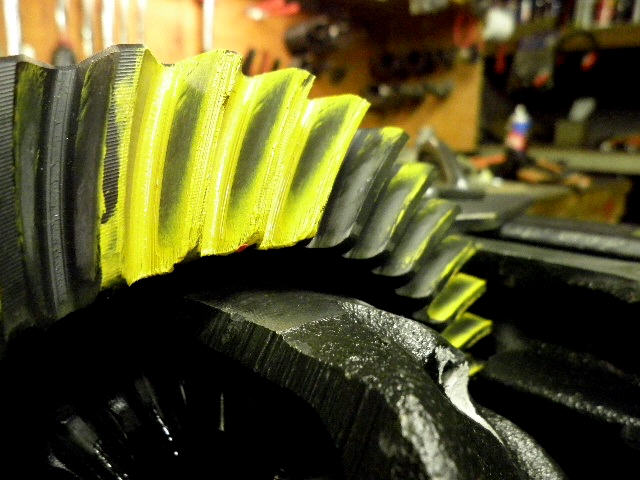
The ring gear was so thick that it actually rubbed near the tooth edge...the solution is to file it...or use a small grinder like I did and clearance it some. I think I took off about .080" but no pic here to show it. |
|
Looks good. |
|
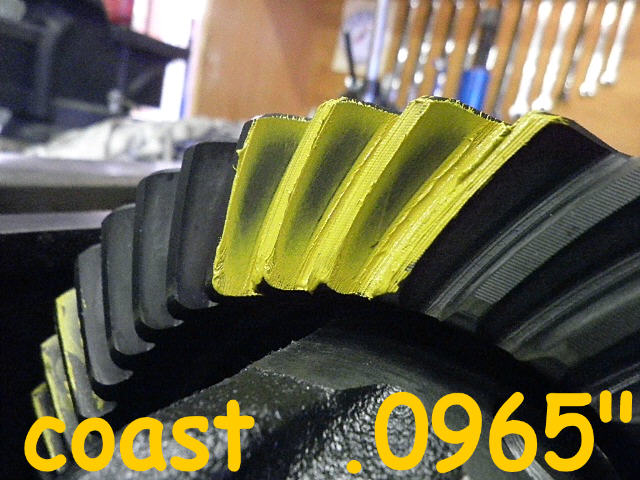
Coast look good also. |
|
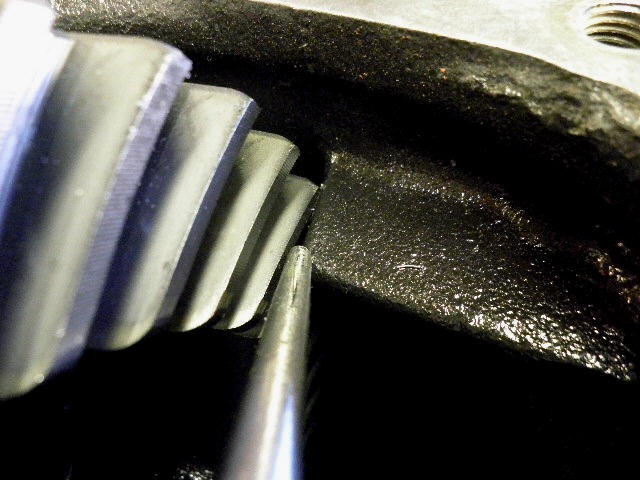
I'm very interested in what the pinion says because I was thinking of adding a minor amount (.002") but the pattern here looks just fine so I will run with this one. |
|
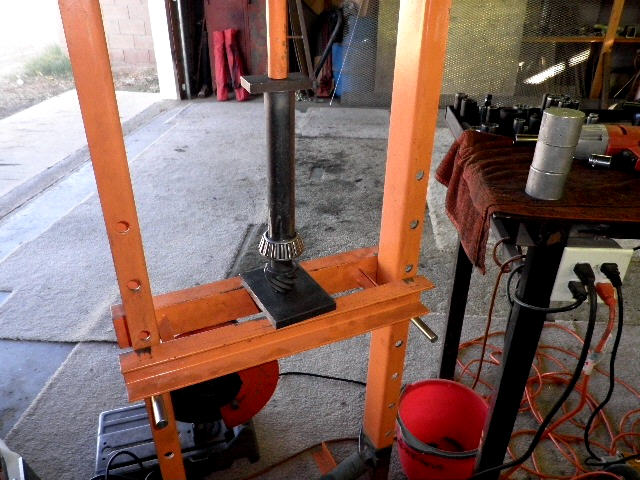
The pinion was dropped out and the new after-market crush sleeve was installed. The seal is installed followed by the flange. |

|
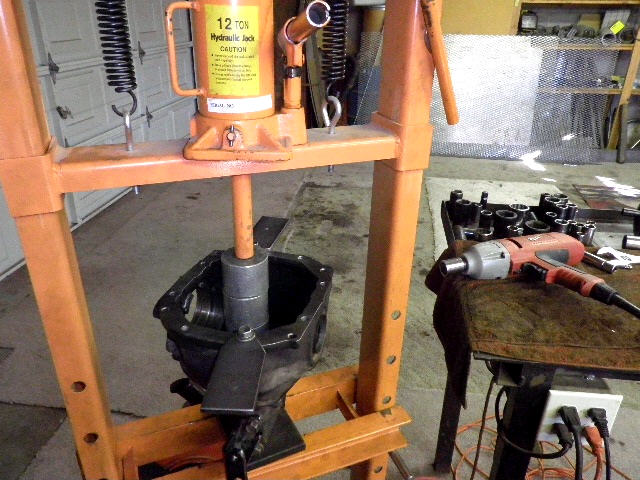
Now, I really try to stay away from the after-market crush sleeves(for the IFS fronts only). The reason is the after-market ones are so thick and hard to crush that the smaller 24mm pinion nut gets stripped of all its threads. The solution is to use factory thin sleeves(I was out of them)...or pre-crush the thicker ones almost the full amount and then let the pinion nut do the last little bit. Done correctly, the sleeve will have plenty of compression acting on it. I have found that my 12 ton press has just barely enough 'umph' to get the job done. It's not obvious in the above pic but the pinion head is being supported by 2 aluminum pucks to make this operation possible.. |
|
With 15 inch/pounds and red loctite on the threads, the nut can now be dinged. This end is now done. |
|
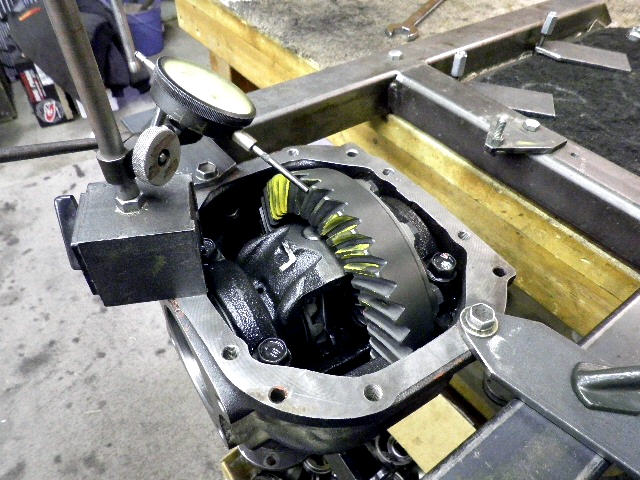
I knew the backlash I had the last go around...so now is a good time to fine tune the backlash and add in the the proper amount of carrier bearing pre-load. I installed the case with the new washer plates on both sides. The cap bolts are tightened to 75 ft/lbs. |
|
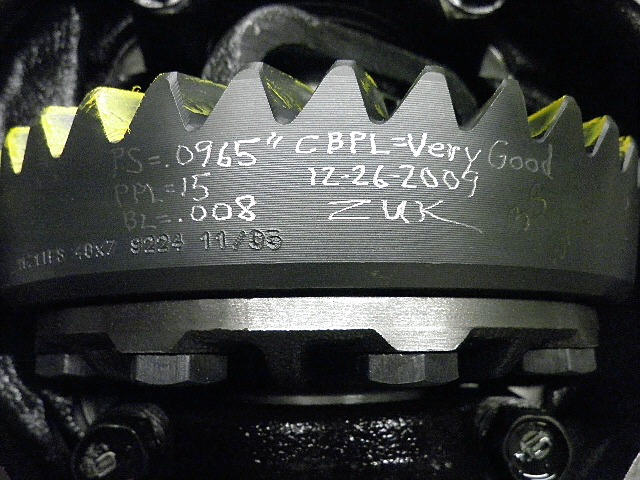
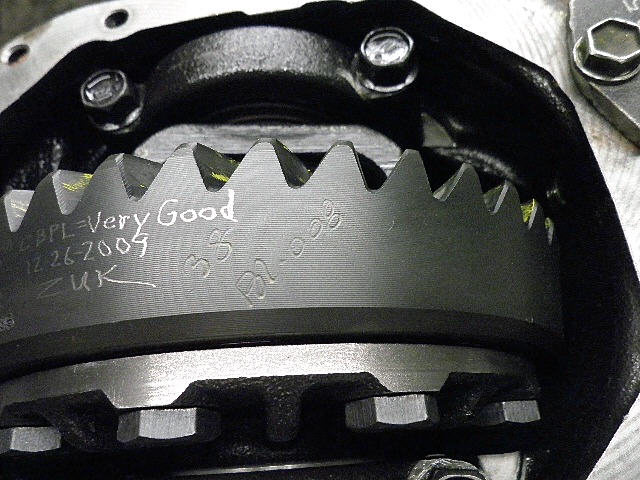
I noted that the BL measured in at the target .008" and the CBPL was tight as it should be. |
|
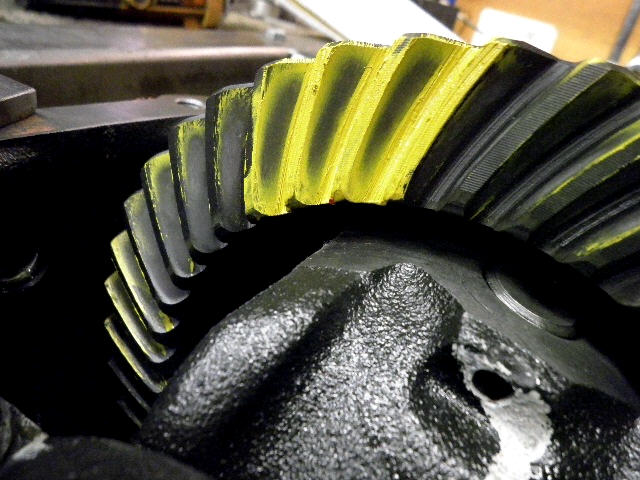
The final pattern check is good. |
|
The coast side looks very broad. The coast side is used when going forward. |

|
Data is scribed on the ring gear. |
|
``` |
|
``` |
|
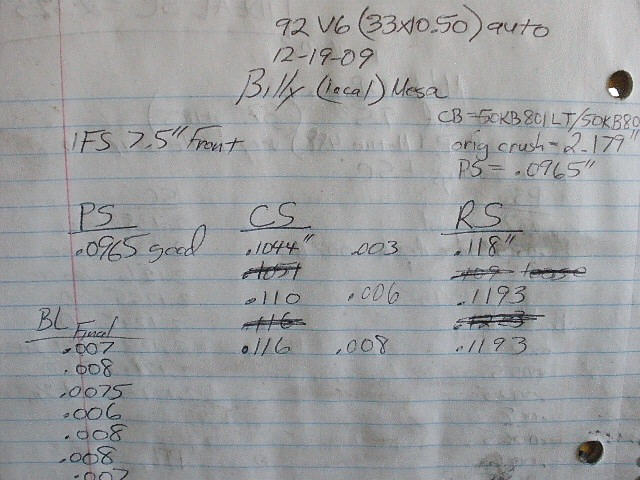
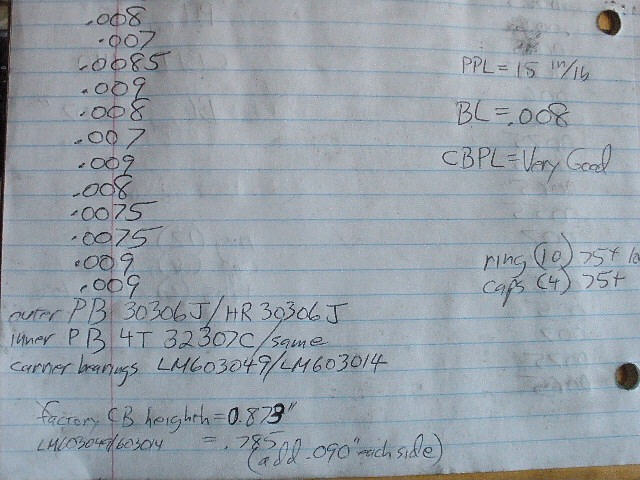
Here are the notes I took. |
|
``` |

|
Now to re-assemble the axles stuff. Grease up the c-clip... |
|
...and gently tap it in. It helps to push with constant pressure and it will tap in that much easier. |
|
I applied some black rtv between the clean surfaces and start the 2 bolts. |
|
Then I slid the entire assembly in place. |
|
The 4 remaining bolts are threaded in place. |
|
```` |
|
All 6 bolts are of large diameter and fine threaded. I chose to tighten them all to 70 ft/lb. |
|
The other side was the easiest...just grease the clip and tap it in. Done. |

|
