Bob's 488 gear install with Aussie
(22 low res pics loading)
NOV 23 2004
HOMEAs delivered by Bob....with new bearings and all items were very clean possibly hot-tanked.
Everything is organized on the work-bench.
The new ring and pinion is the higher quality Yukon from Randys but this is all there was on the ring for actual manufacturer ID.
Same thing on the pinion......
Even though the ring gear was already on the carrier when received, I removed it, file the carrier for high spots and locktited the ring gear bolts to 70 ft/lbs.
When Bob delivered the gear basket, I looked at the Aussie install and said that "something doesn't quite look right but I couldn't put my finger on it" but now I can.......it's missing the .062" thick sidegear thrust washers! See the air gap.
....so I dis-assembled the Aussie which was easy and found some thrust washers in my collection.
The open design of the Yota 2-pinion case allows for a check for fit....just making sure that the gap does not exceed .020" between the center pin and the Aussie ring and we were ok here.....I checked both sides but only 1 shown here.
Partially assembled Aussie.....using my scribe here to point at the thrust washer that gets re-used during the install. I wonder how many Aussies get run without them? They must make a heck of a popping noise before they self-destruct......Don't forget the thrust washers :)
Putting the Aussie back together requires some thumbing to get everything to stay in place while inserting the cross-pin but it's doable.
cross-pin in....dowel gets tapped in.
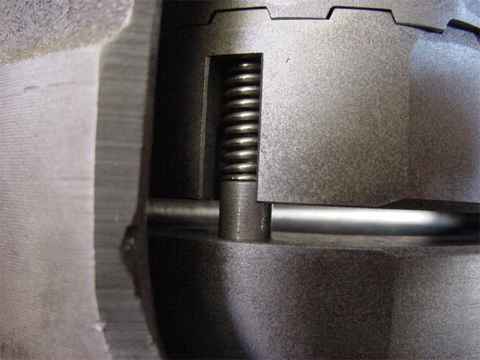
Last step is to push the 4 remaining springs in....I used a small slotted screwdriver and a pick to work them in.
Back to the work-bench.....gotta get the pinion in the 3rd.....and record all the shim values.
For starter values, I chose a pinion shim of .084". I used the factory solid collar that Bob supplied and had to remove the pinion about 4 times before I had the pre-load dialed in to about 10 in/lb. For pinion pre-load, I ended up with .060".
Just showing the cheapie 10 ton Harbor Freight press I have been using for 10 years now. Almost any shape of metal can be used for simple press jobs....
Skipped a few steps here but basically I was getting ready to paint the 1st pattern and found the backlash varied about 5 thou....way too much...and the painted pattern did show too shallow..... so removed the ring gear (again) and did this simple check for run-out and found the carrier was all warped-out with about 5 thou run-out. Beware of re-using carriers that came out of trucks that had 'burned to the ground'.
I dug thru my stash again and found a spare carrier. I noticed the new carrier bearings did not fit that tight so I used Loctite "sleeve retainer" to fix things. Similar to hi-strength red Loctite but this stuff is a cool green and designed for non-threaded surfaces.
With the pinion shim changed to .094" on the 2nd try, it was "pitch perfect" as the gear engineers might say.
Coast side painted excellent also.
So I skipped ahead a little.....got the pattern right on so just a matter of tightening the carrier bearing adjusters to 75 ft-lb and then torque the bearing caps(70 ft-lb). Since I was using a solid collar, the pinion did not have to be removed again and it was just a matter of basically flipping the 3rd/install the seal and run the nut as tight as it gets with the electric impact(200 ft/lbs) ....blue Loctite, of course.
Another date-code. Done deal.