|
|
|
|
|
|
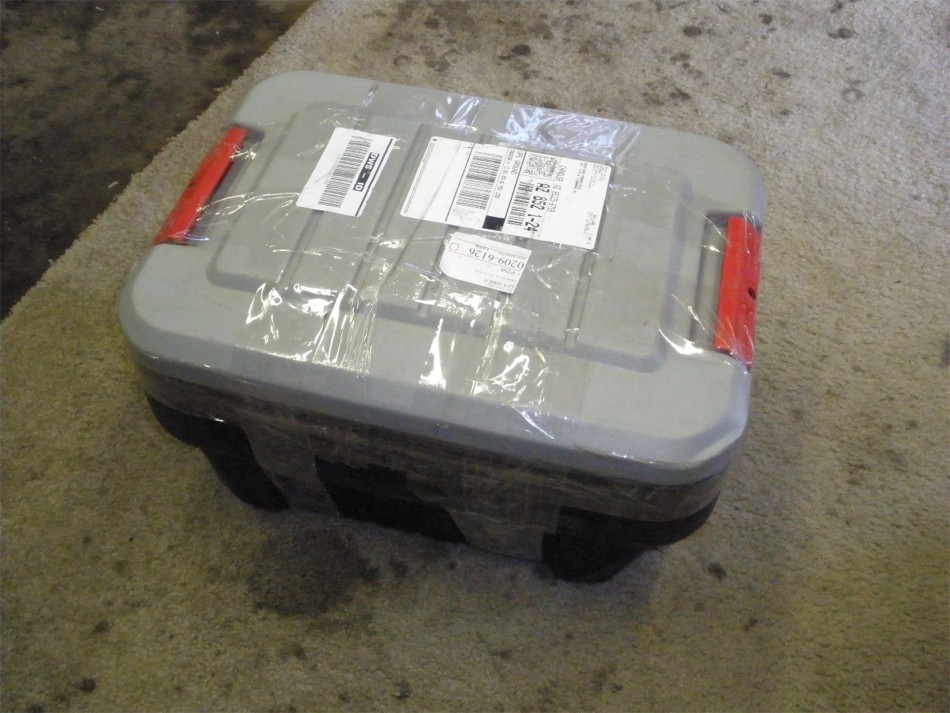
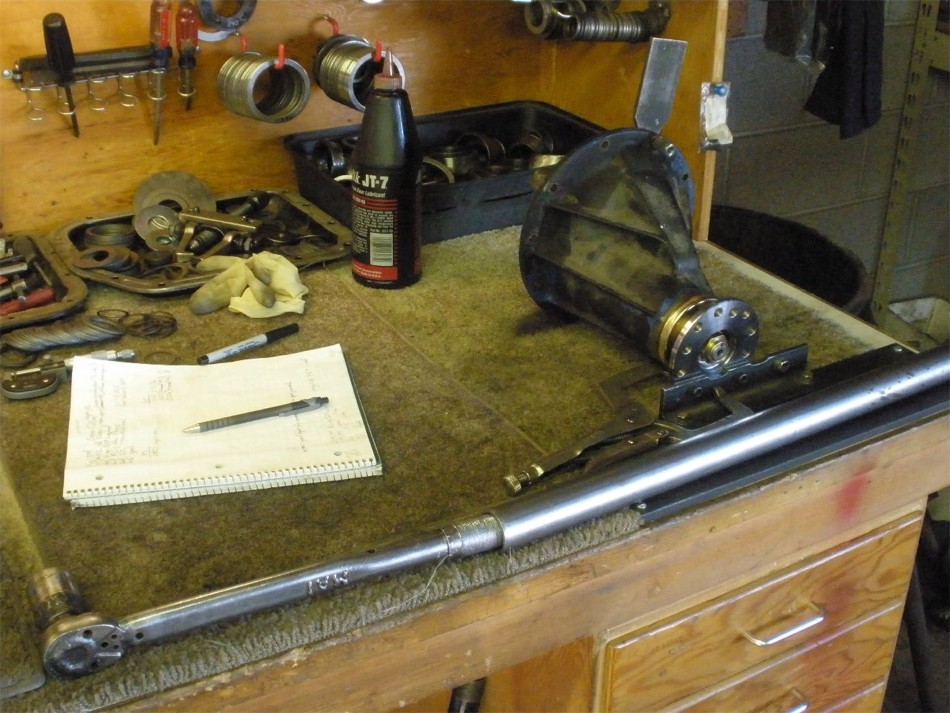
Brian, from Naples Florida, sent me this tote. |
|
It was burrito wrapped pretty good. |
|
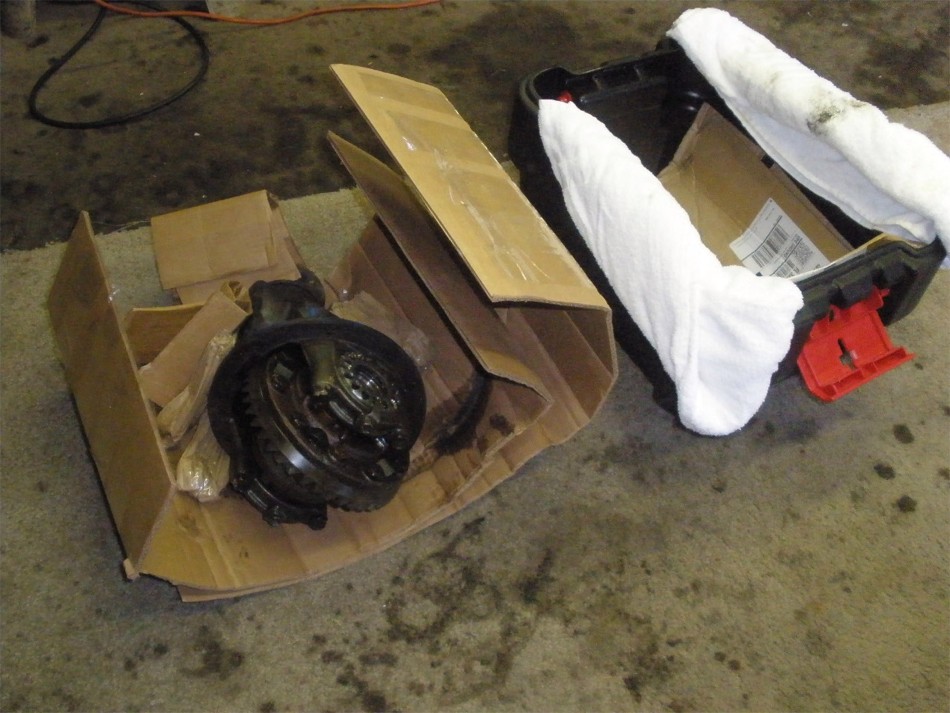
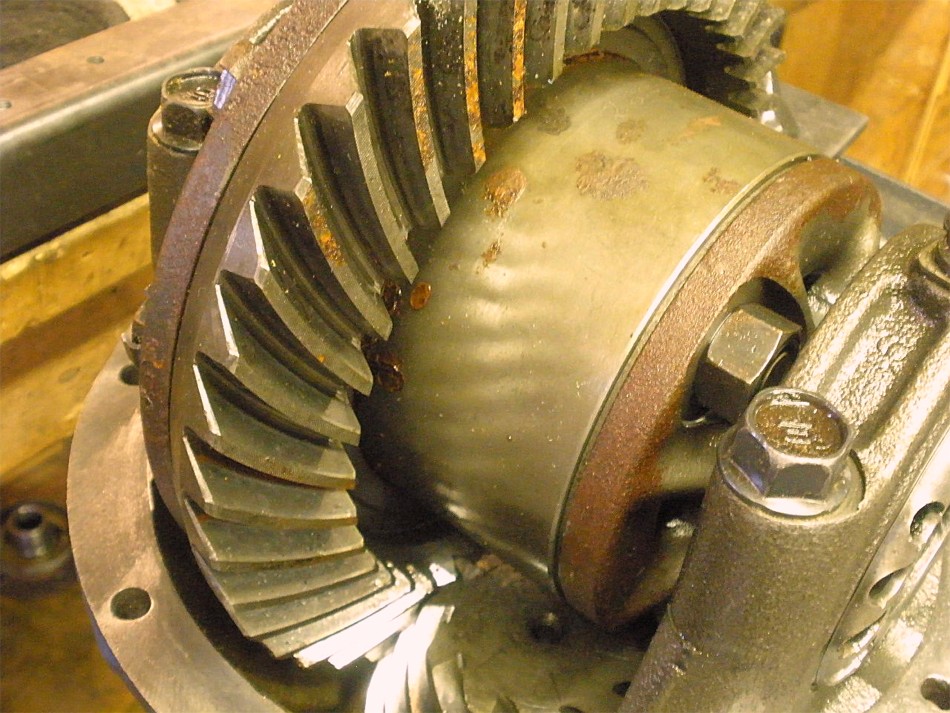
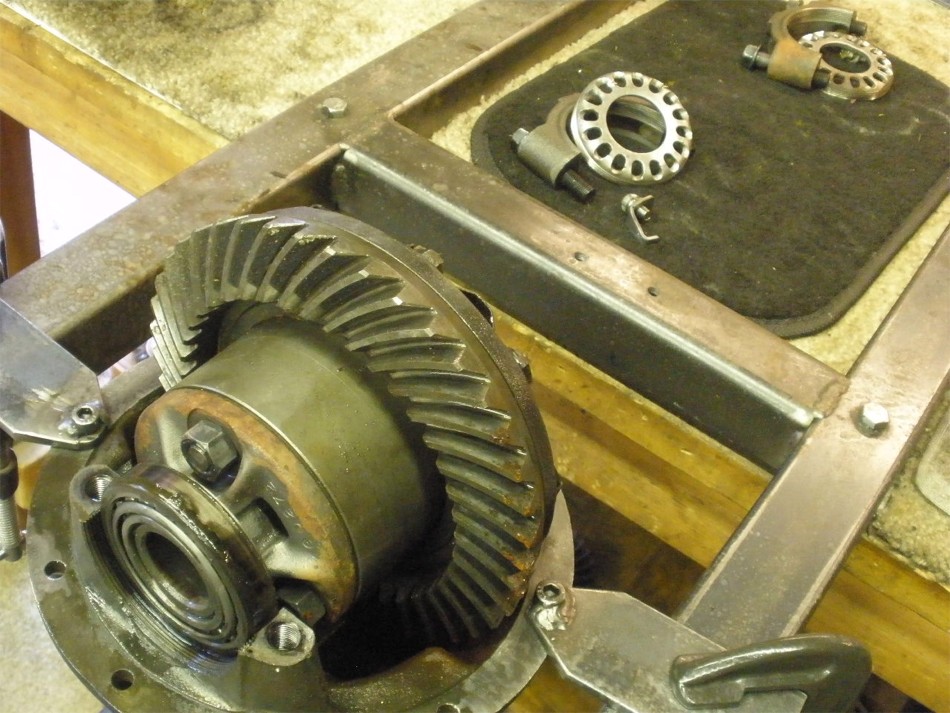
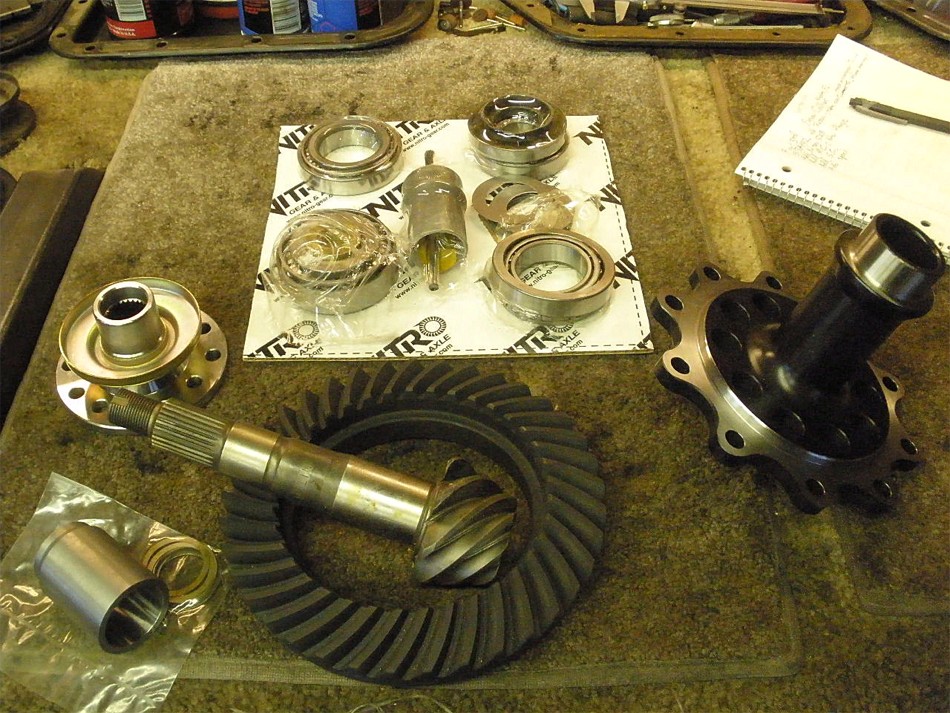
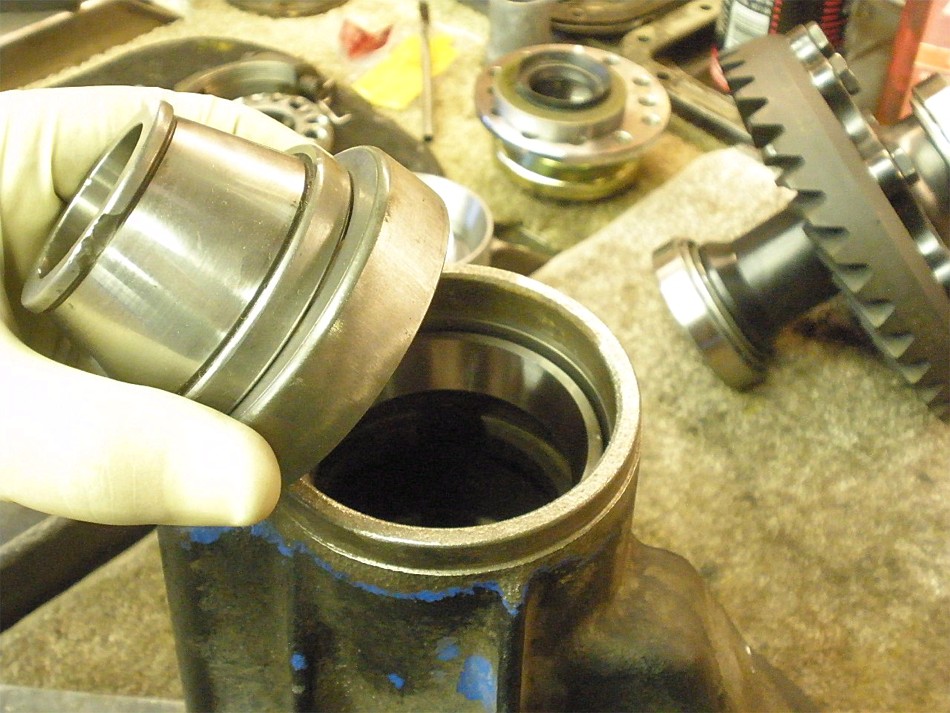
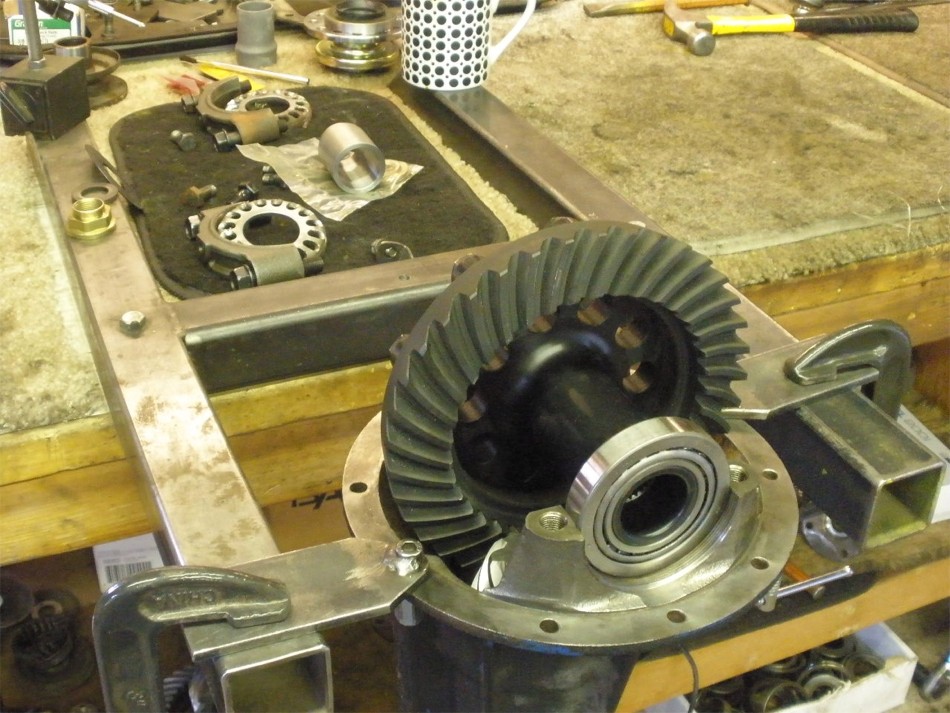
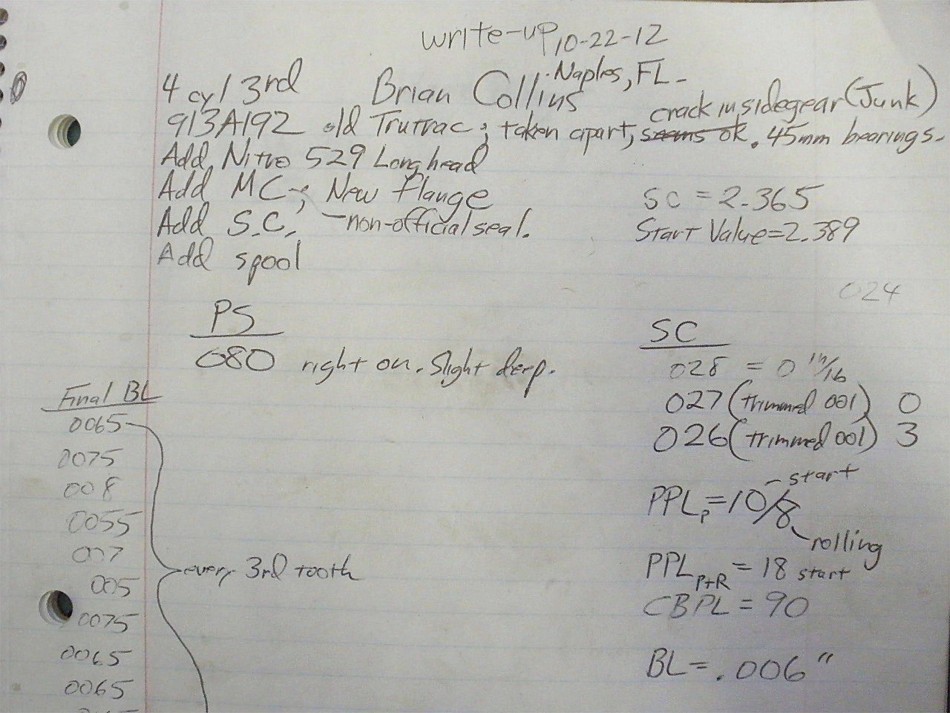
The plan is to pretty much take everything out which would be the old style Trutrac, the rusty factory ratio gears and bearings...and then replace with a spool with Nitro Gear 529's, a solid collar, and new KOYO bearings from LowRangeOffRoad. |
|
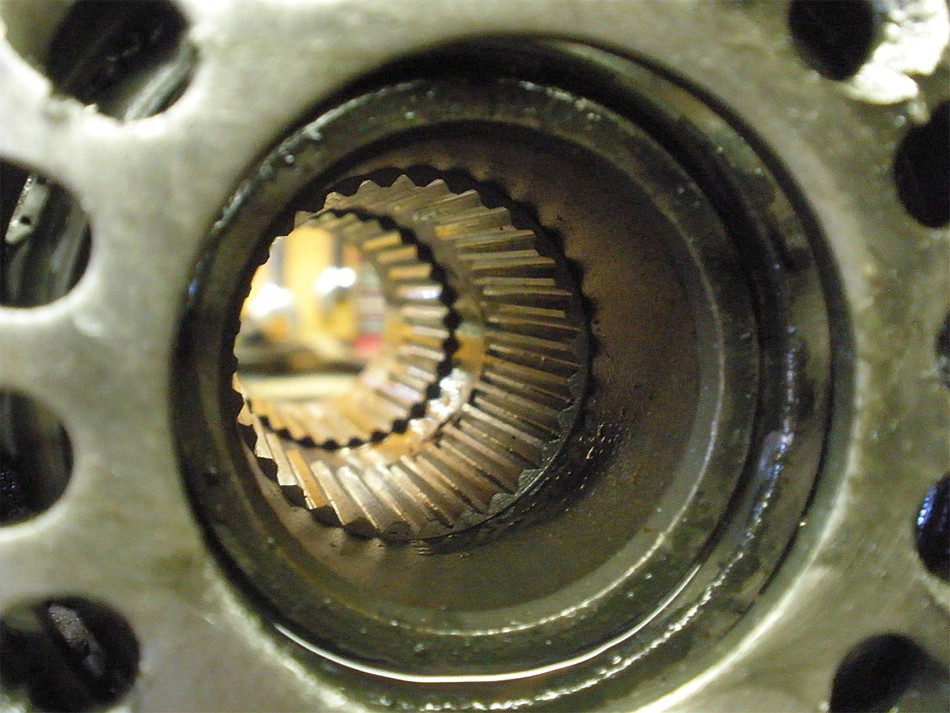
The center of the Trutrac shows you can see right through it. |
|
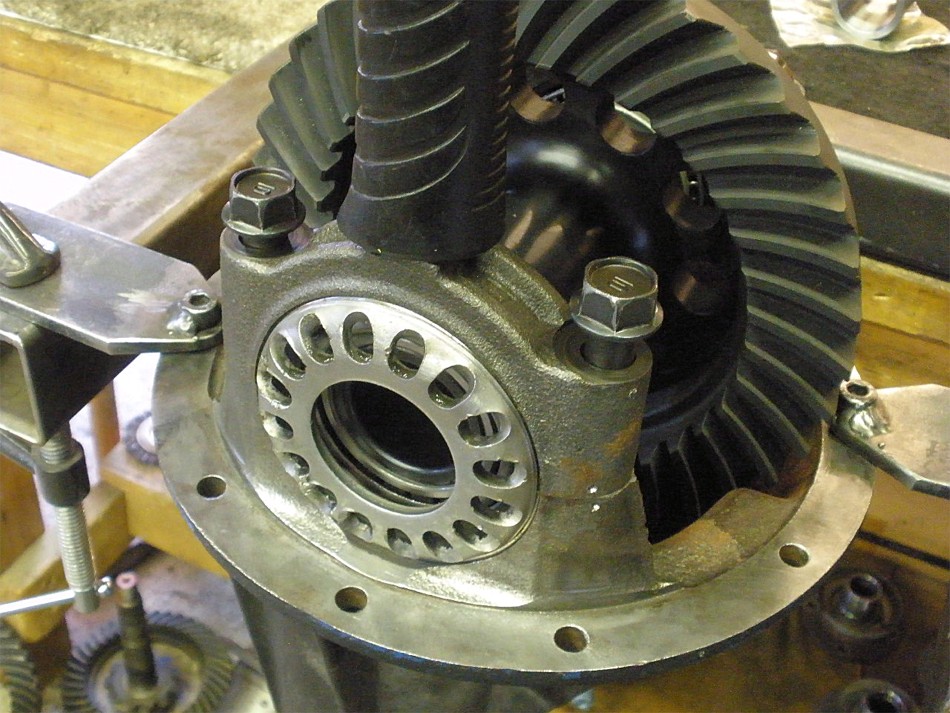
The teardown begins. Maybe the Trutrac is still good? We will see. Bearing caps are removed first. |
|
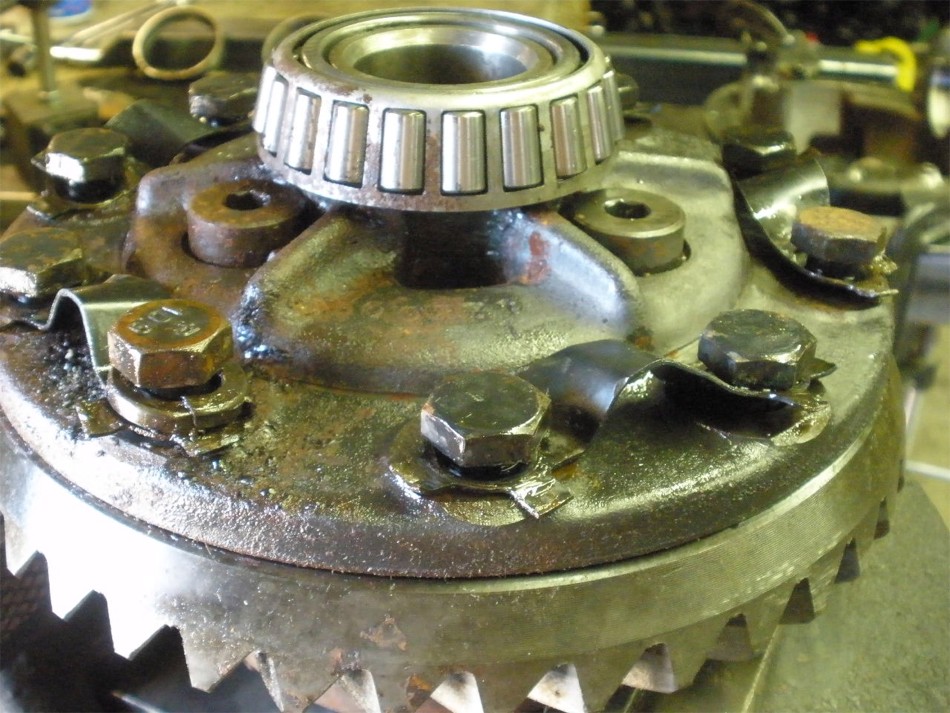
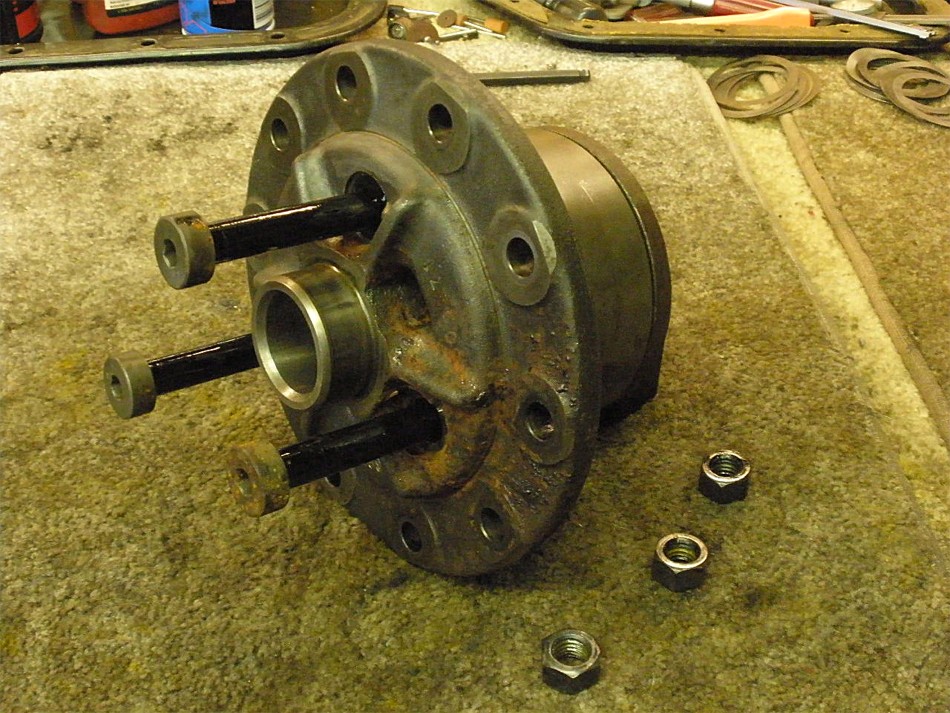
Remove the 10 ring gear bolts.... |
|
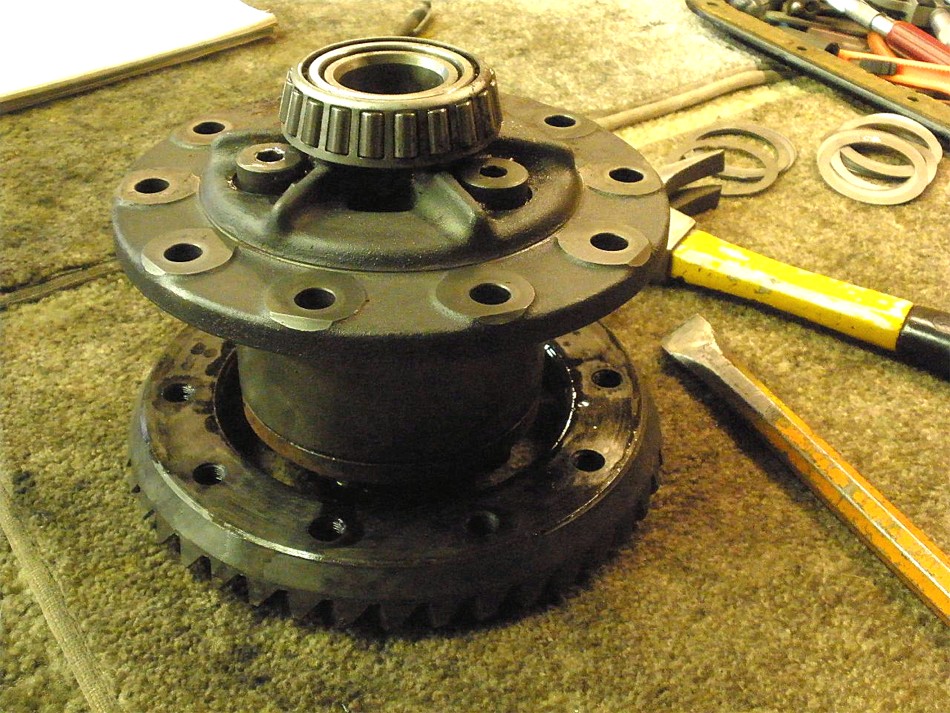
Tap the rusty ring out. |
|
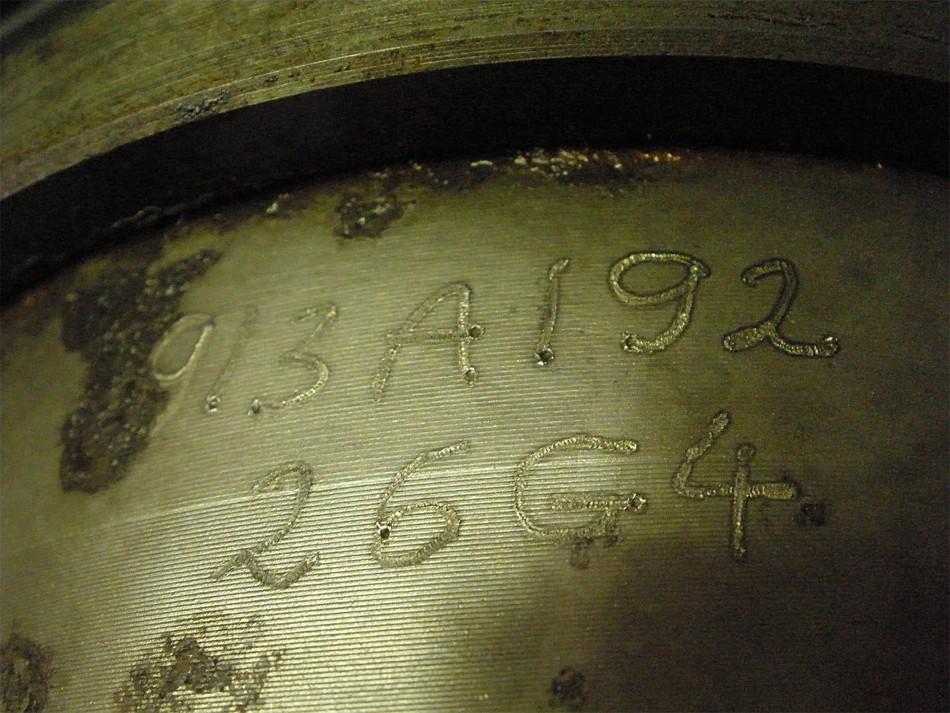
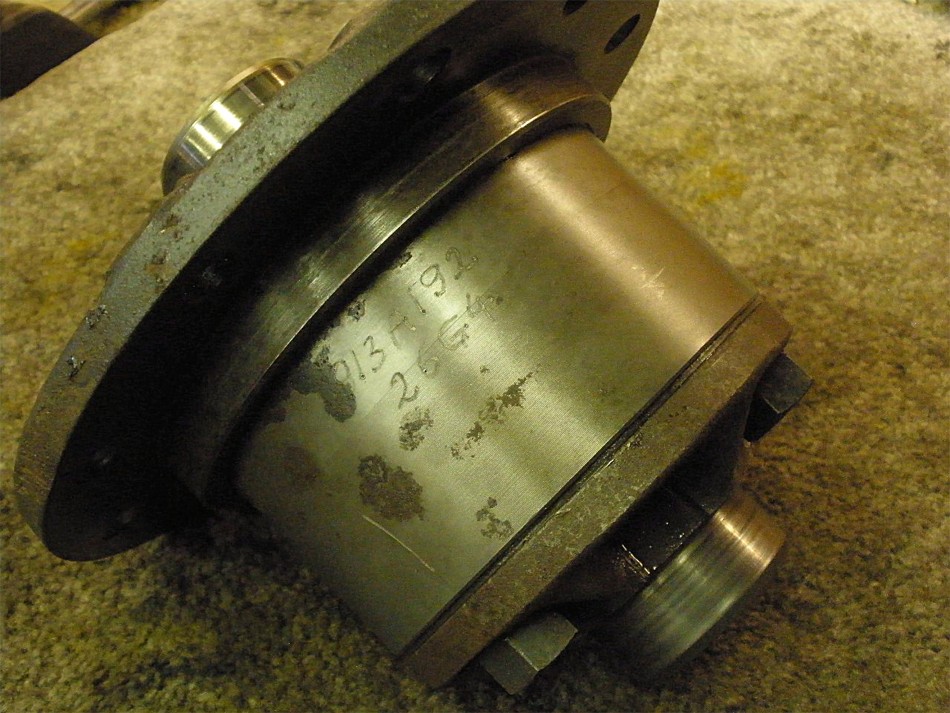
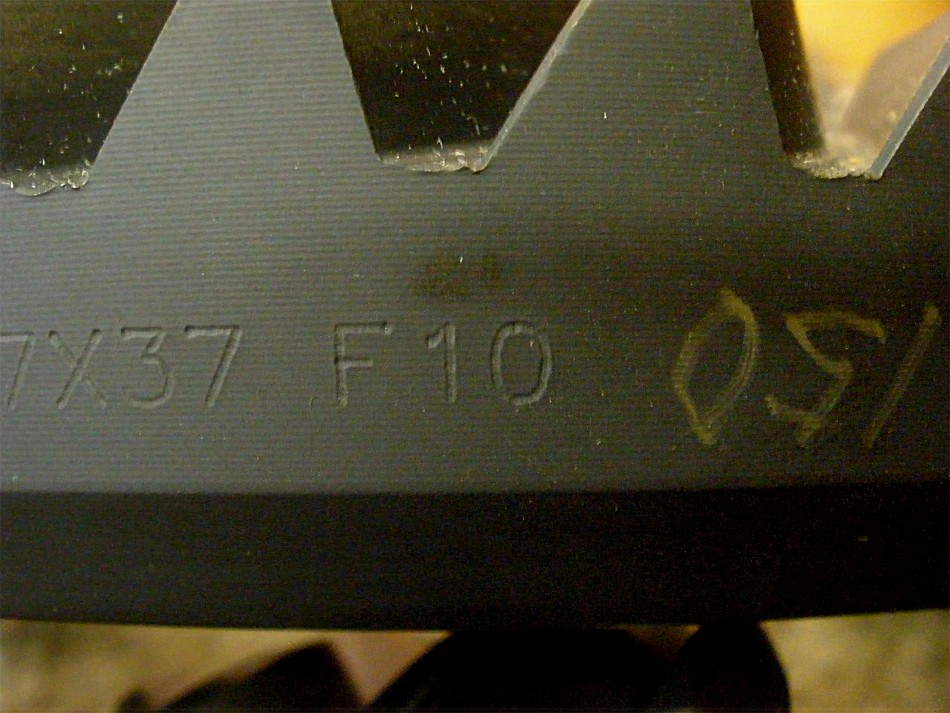
Here's the part number I found on the TT case. 913A192 |
|
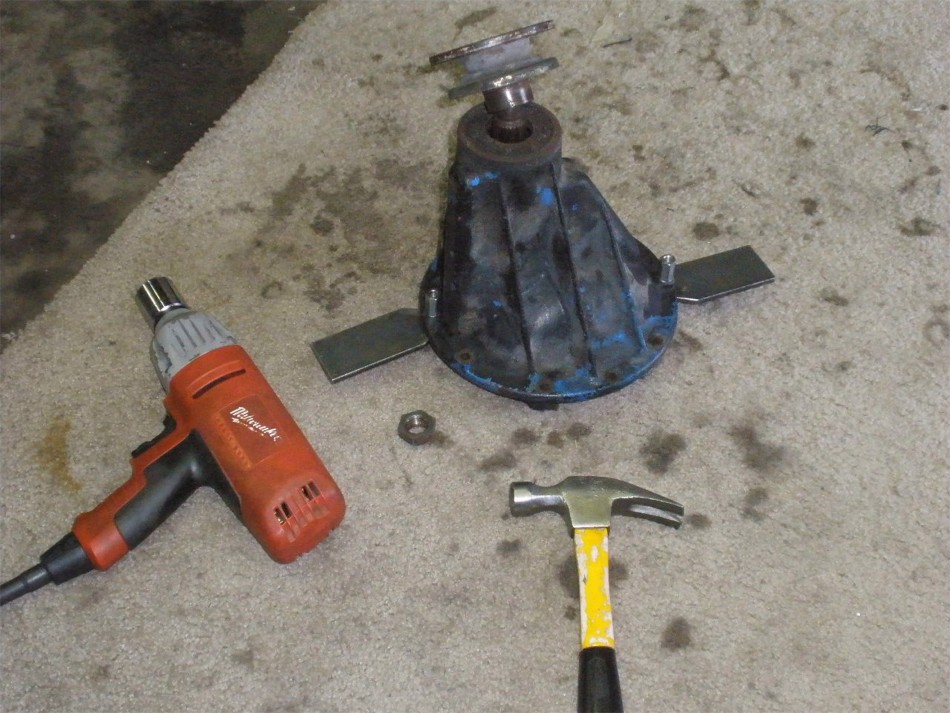
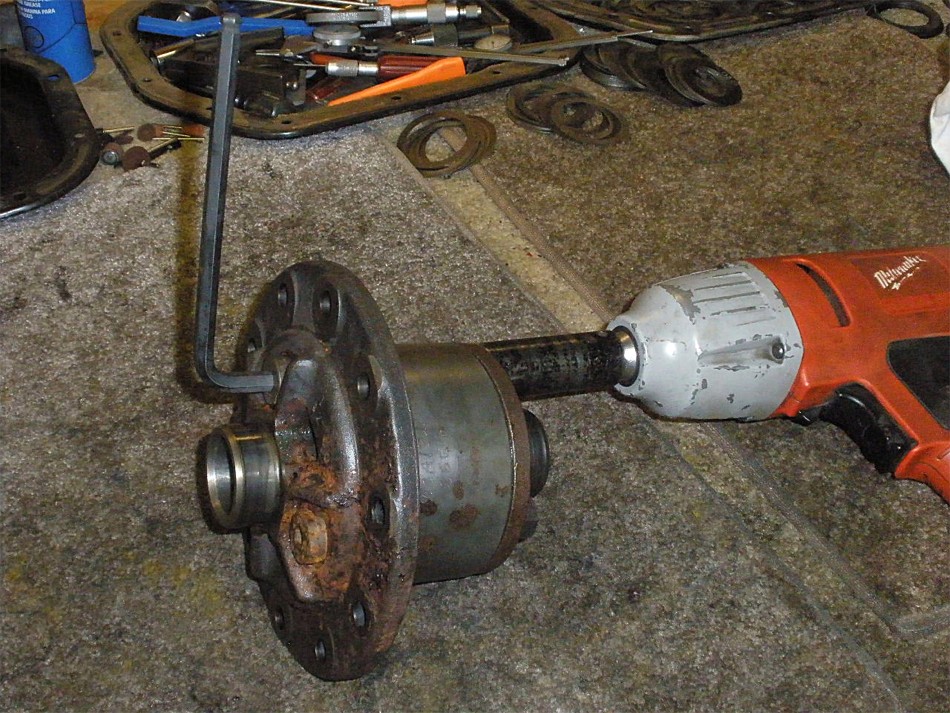
Time now to tear down the pinion end of things...The electric impact easily removes the nut and the flange is off. |
|
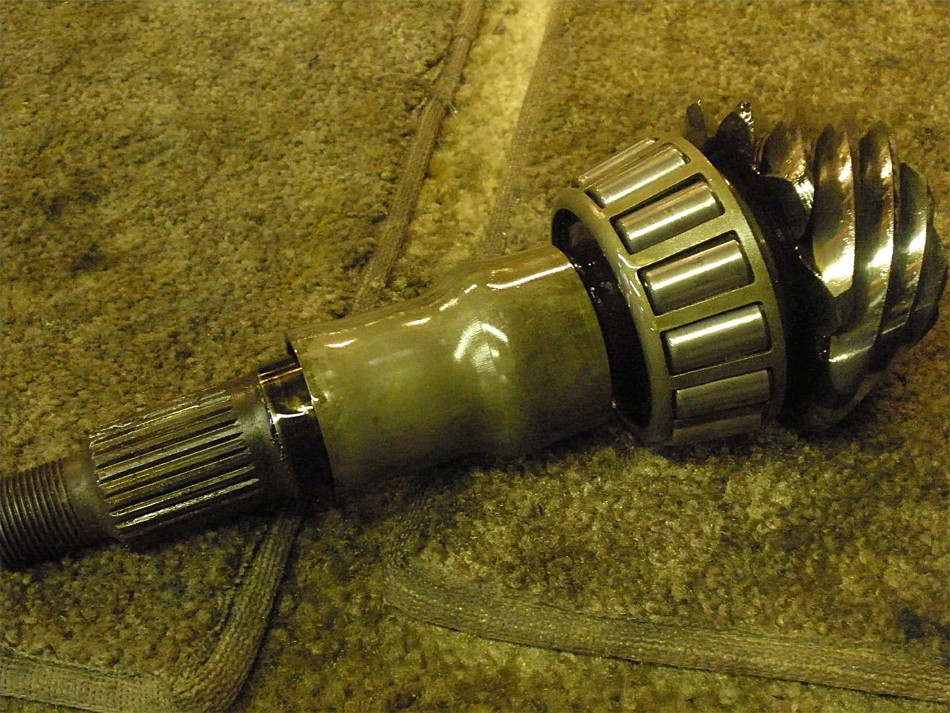
The well used pinion dropped out with little effort. Nothing is being re-used here so these are in the dumpster. |
|
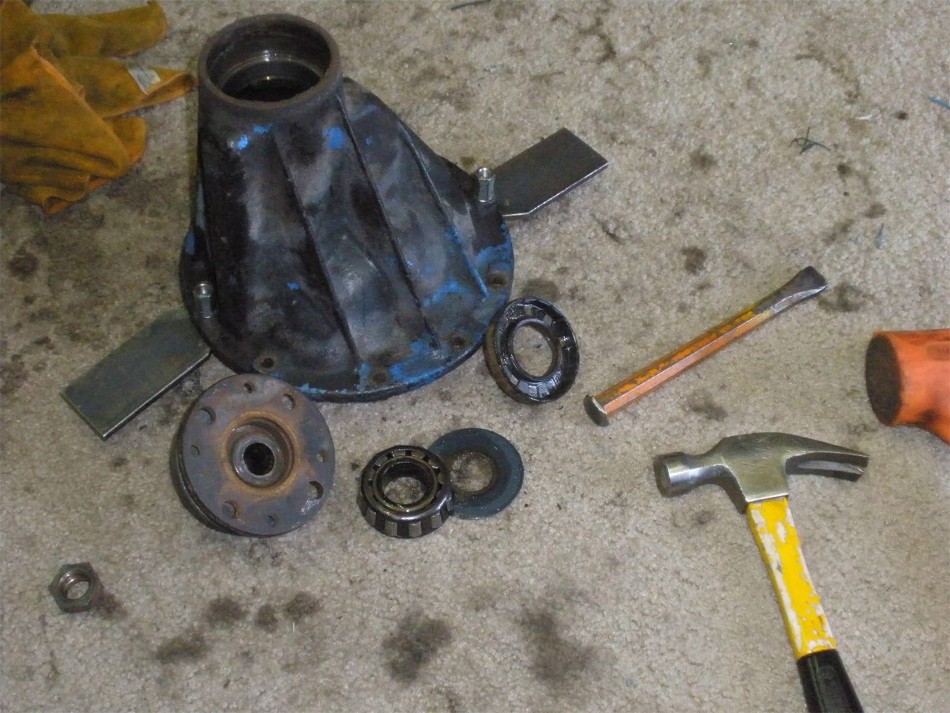
Using my seal removal tool (side of a big chisel and hammer) we now can throw away the small outer pinion bearing but keep the splashguard plate. |
|
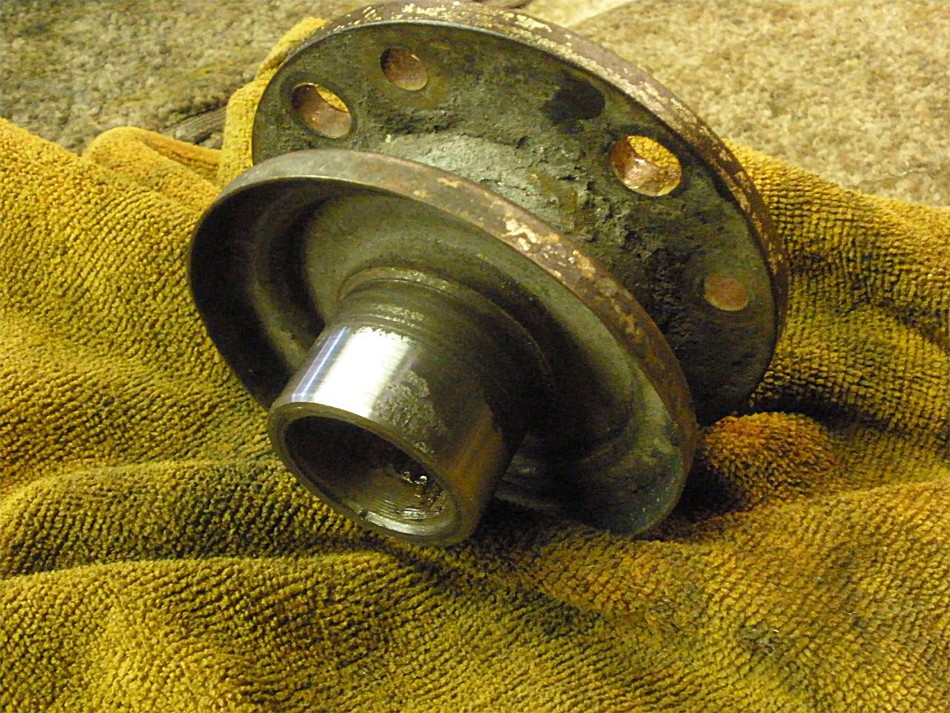
The old flange has seen better days. |
|
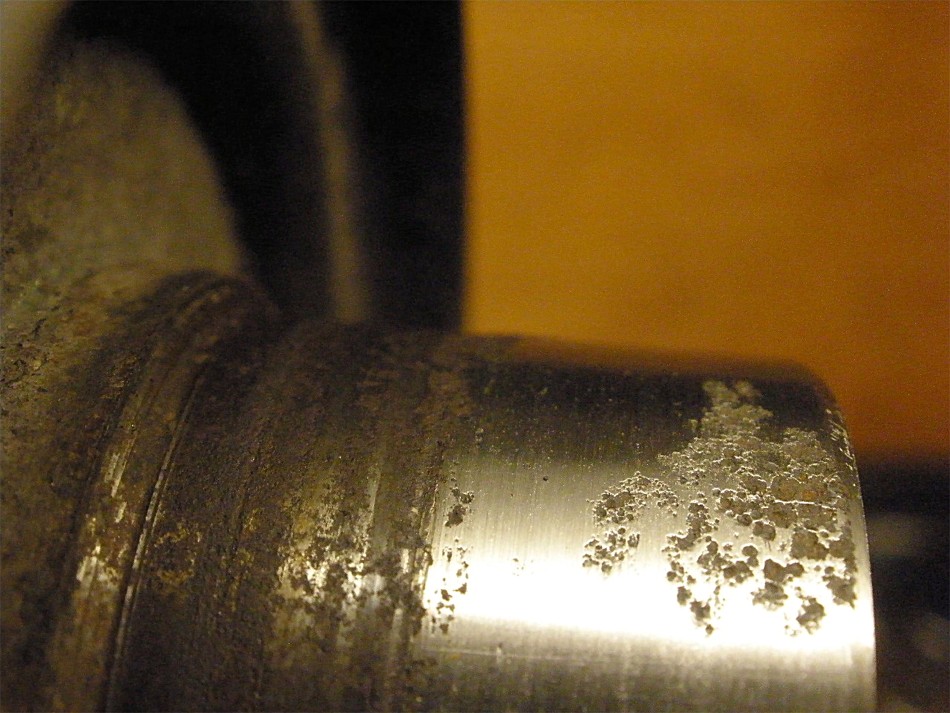
The water and resultant rust have made this seal surface useless....in the dumpster. |
|
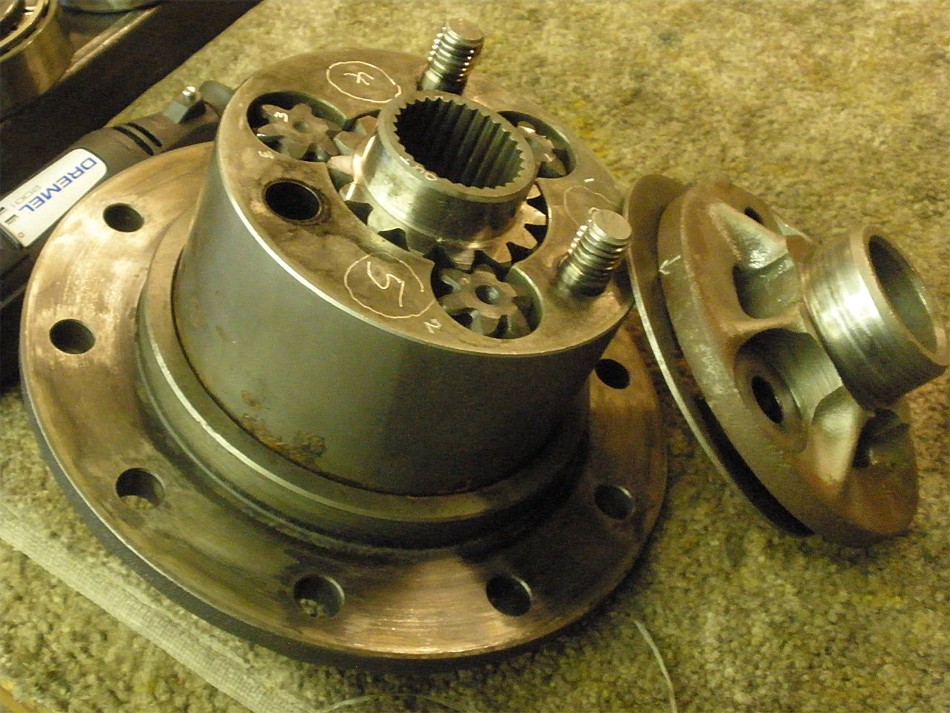
Time to open up this Trutrac now. |
|
The 3 alan style bolts were on very tight. |
|
... |
|
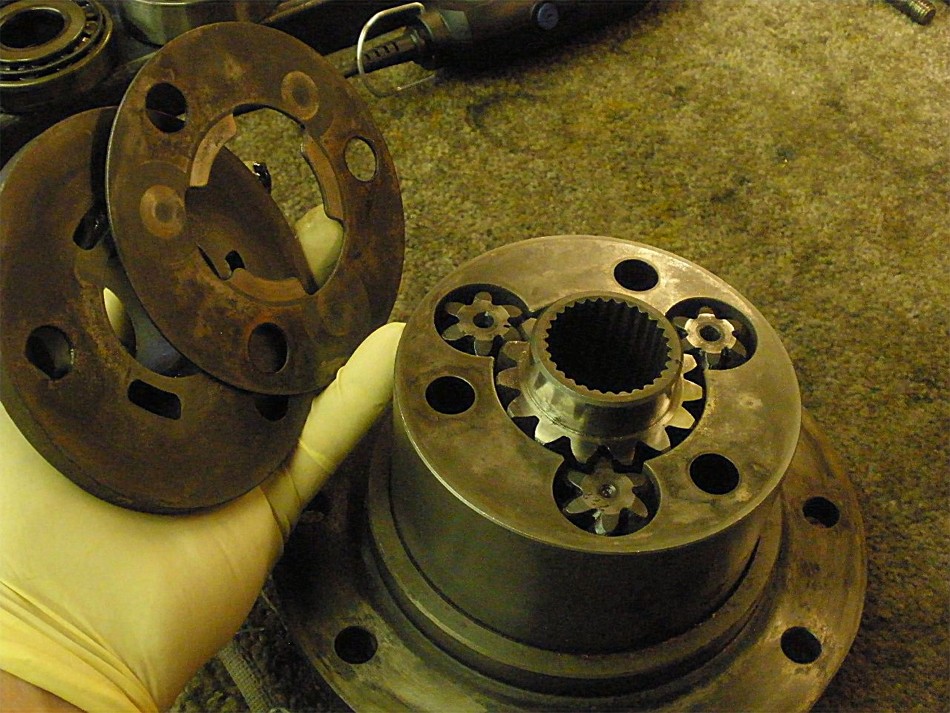
Remove the lid first... |
|
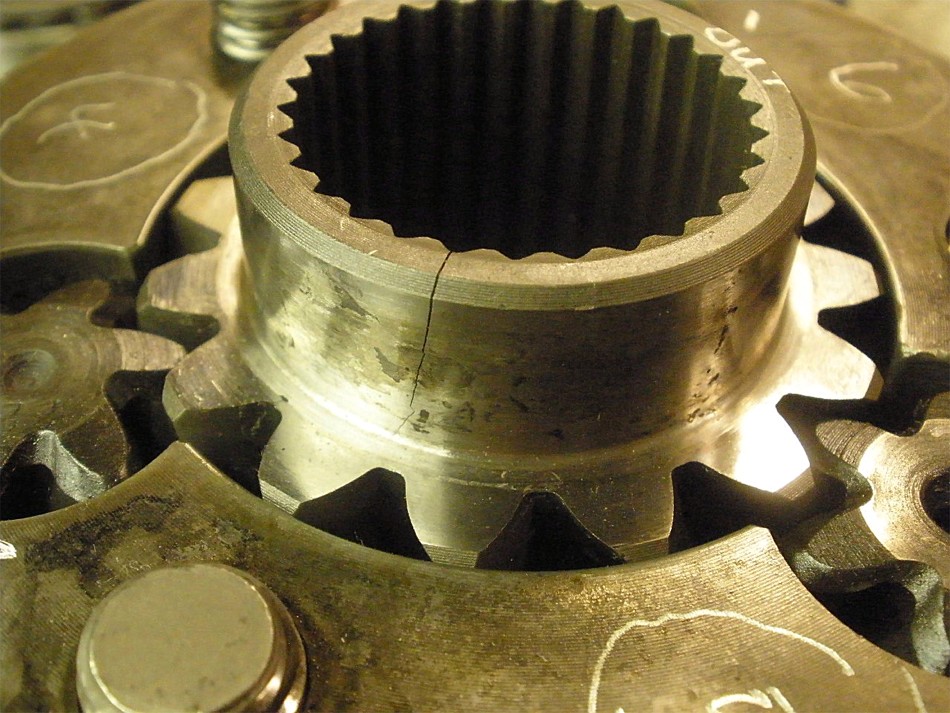
I used my dremel tool to mark all gears just to make sure it goes back together exactly the same way. |
|
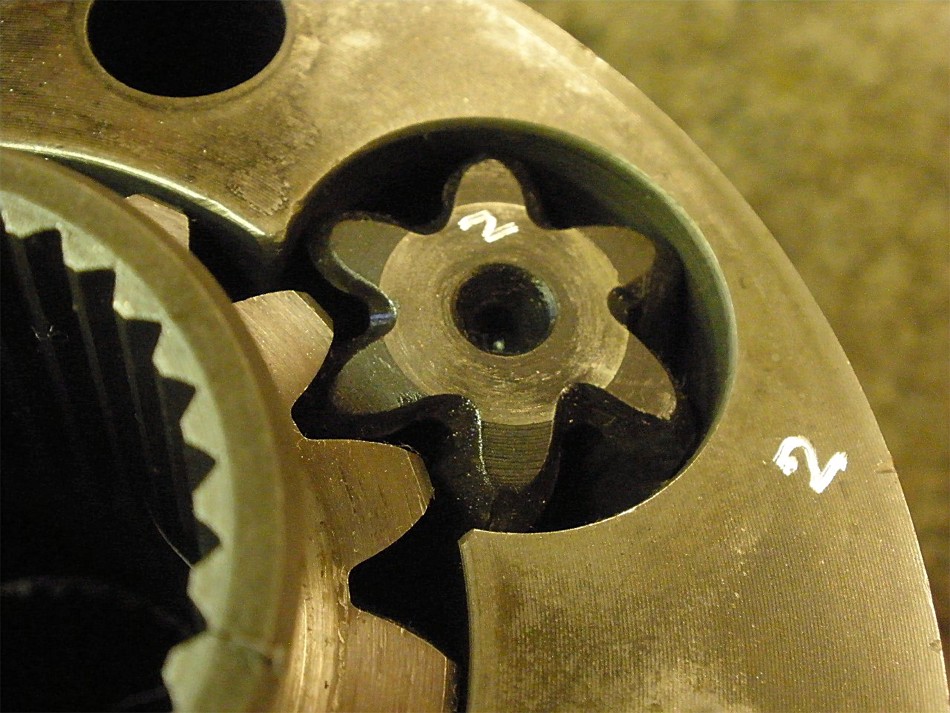
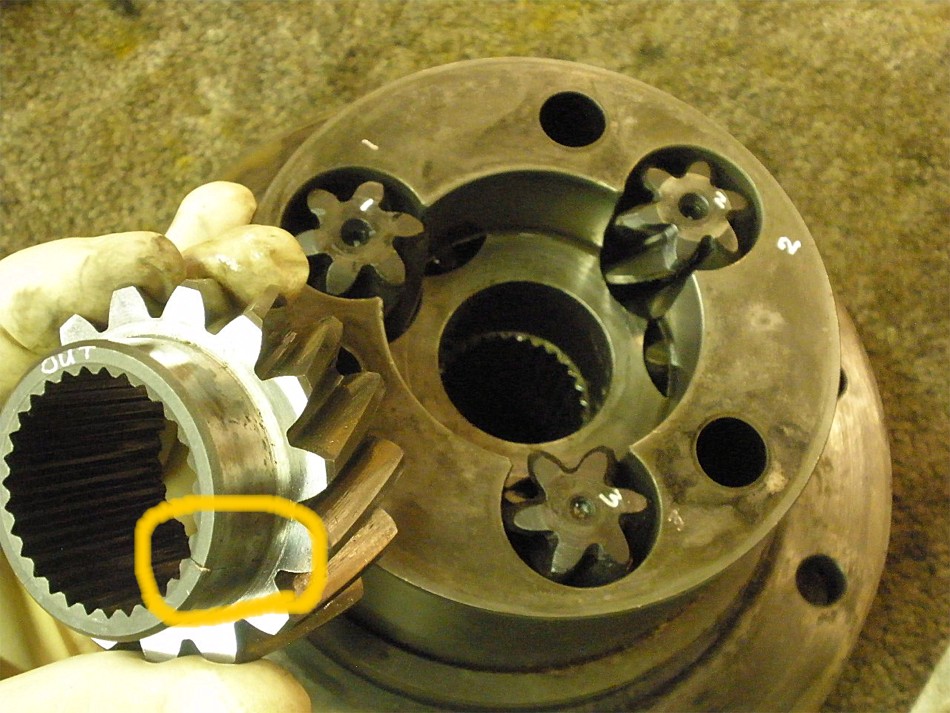
OOPS....looks like a cracked sidegear. This TT is about useless now. |
|
............ |
|
Another close-up shot of the crack. |
|
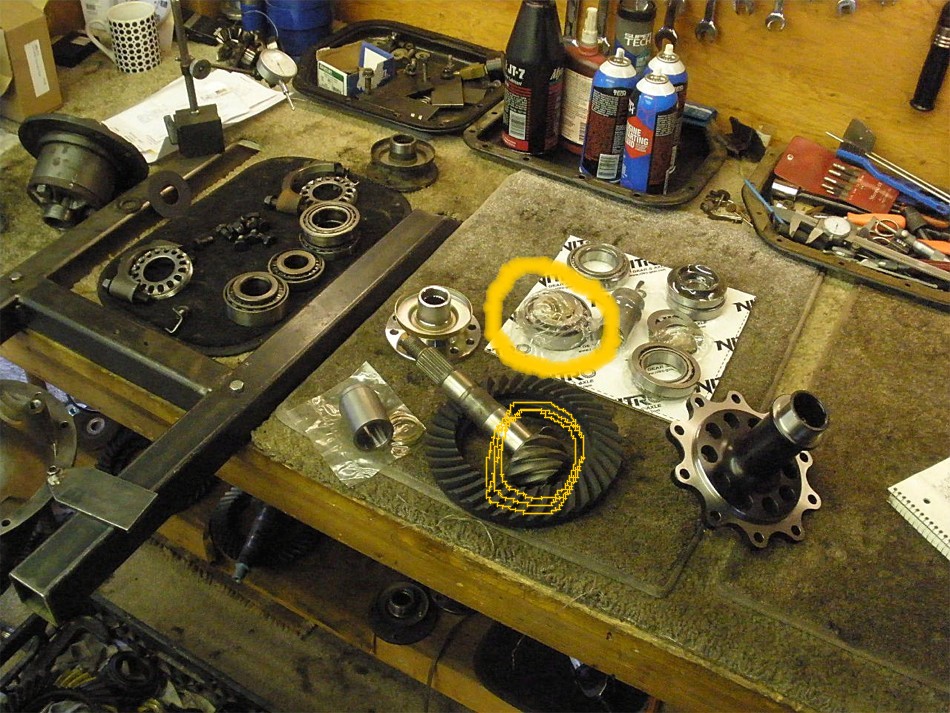
The 529 Nitro Gear is a "V6" pinion meaning the pinion head is about .145" longer than the old style 1979~1985 short pinions.... |
|
...so, to use a V6 pinion in a "4 cyl third" would require a skinny lower profile inner pinion bearing that would let the pinion head sink into the bore hole by about the same .145". Toyota part number 90366-35028-77 does exactly this. |
|
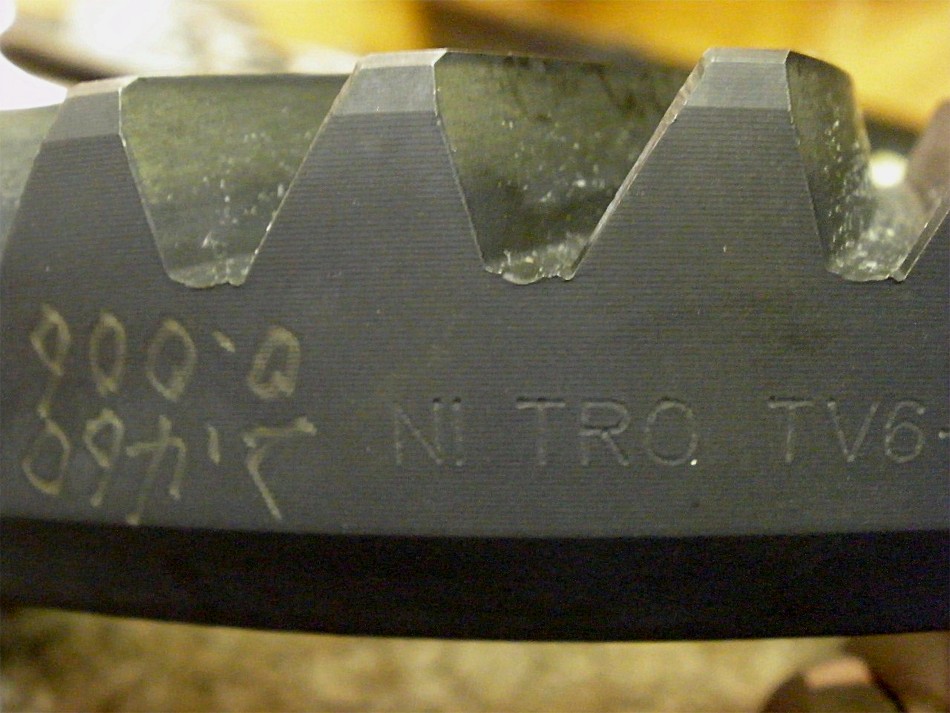
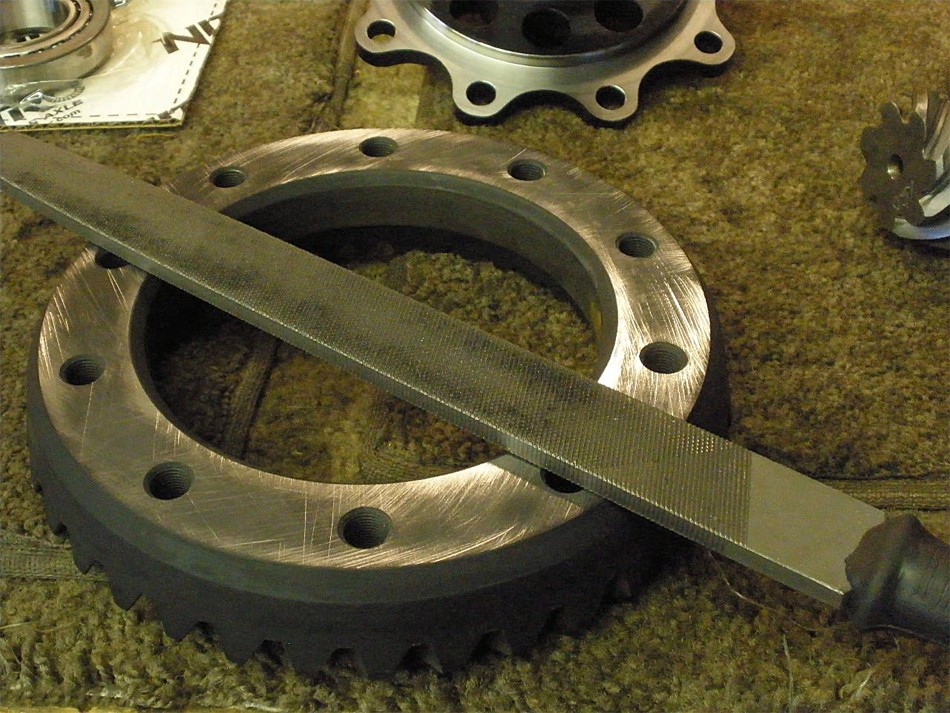
Here's the markings on the Nitro ring gear... |

|
... |
|
... |
|
Surfaces are checked for burrs and all is good here. |
|
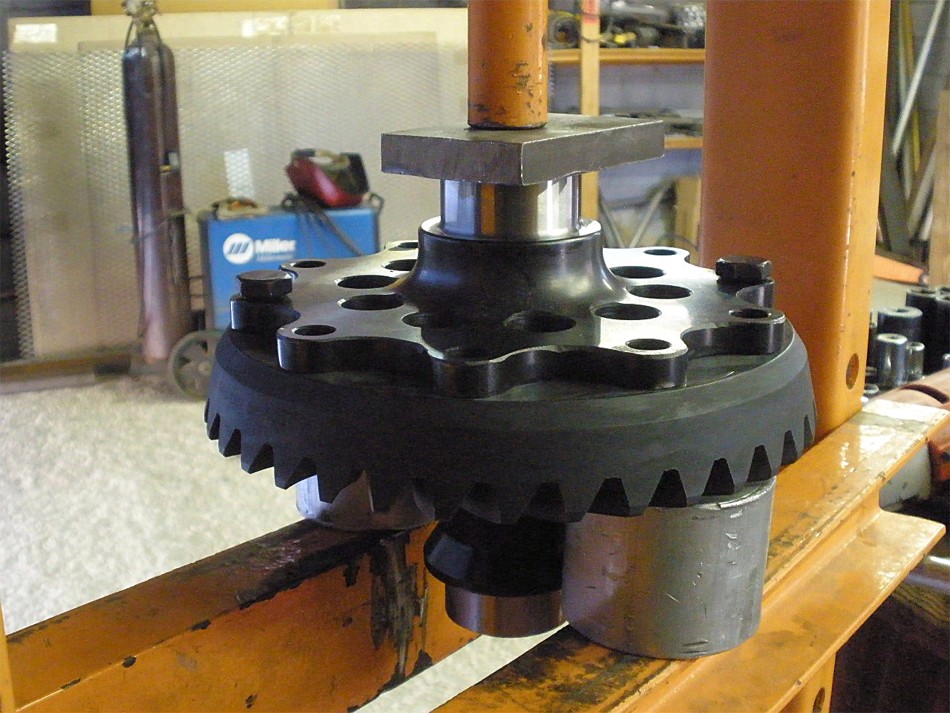
Every ring gear that I have installed on spools has always pressed on really tight. This was no exception. |
|
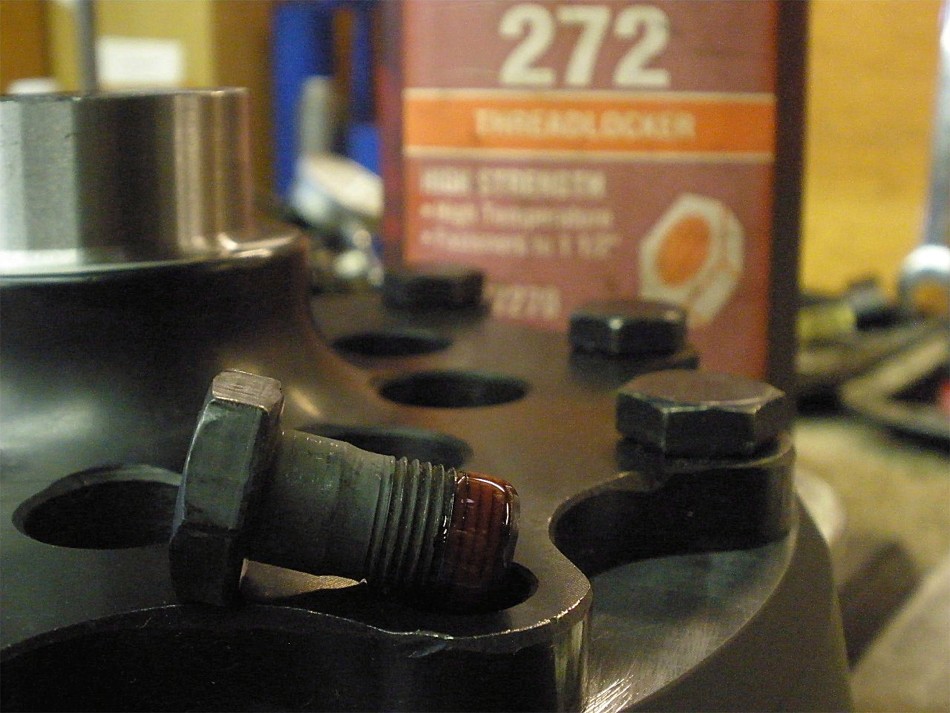
Red loctite is the norm for me... |
|
...and 75 ft/lb. I'm using some work gloves to cushion the clamping of the spool to keep that "new spool look". |
|
The new KOYO carrier bearings went on very tight and re-using the old bearing materials like I am in the above pic sure makes the job easier. |
|
This end is done... |
|
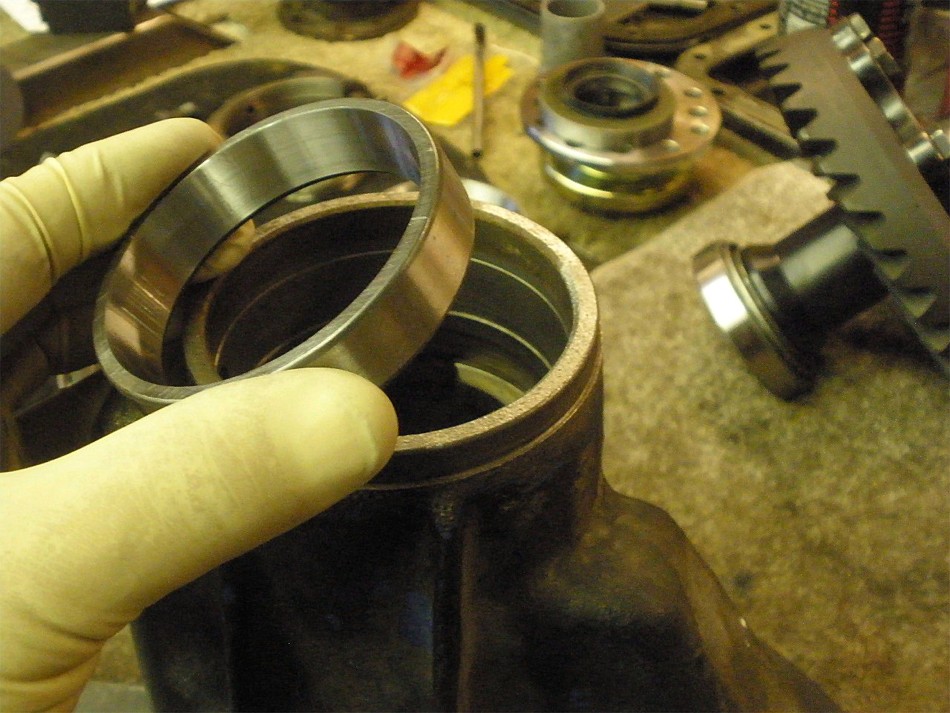
...now to put the new pinion races in. |
|
Again, a couple of old bearing parts sure makes this easy. No chance of damage to the new race with a full 360 degrees of contact... |
|
...while tapping the outer race in. |
|
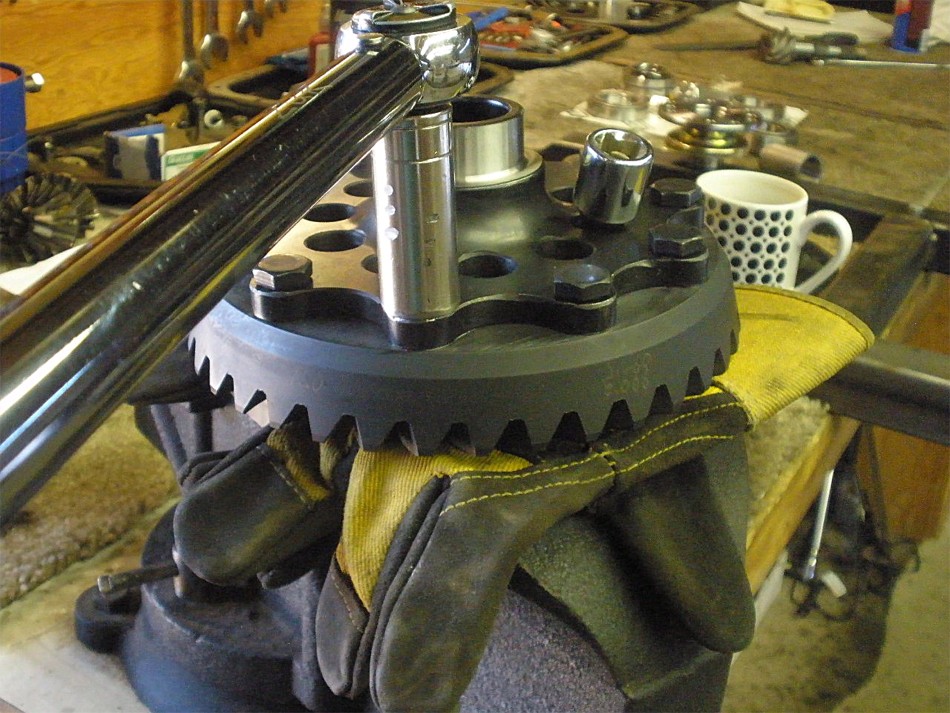
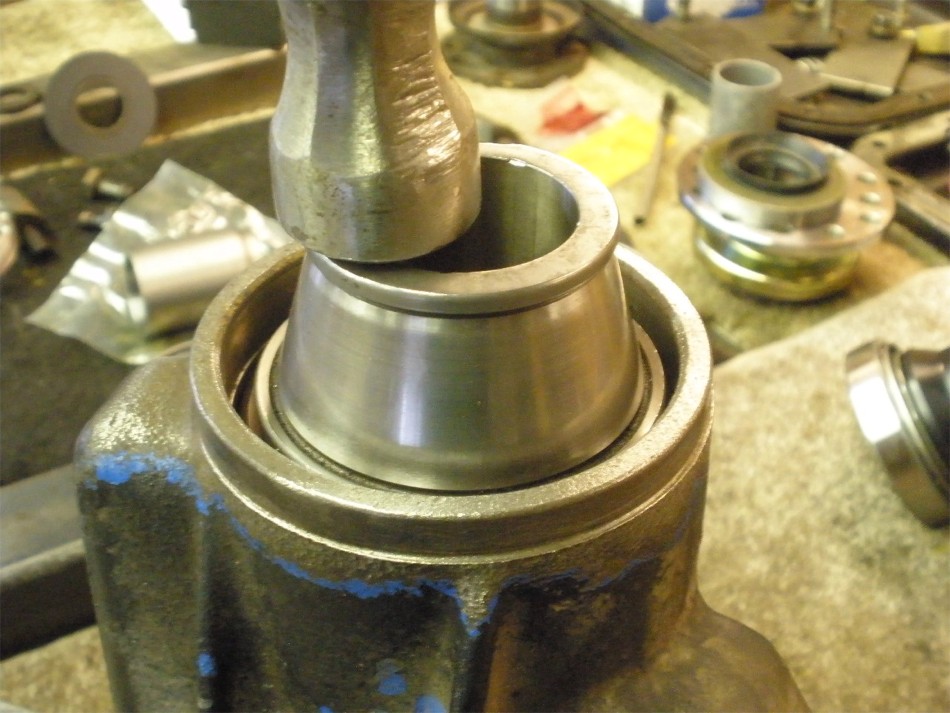
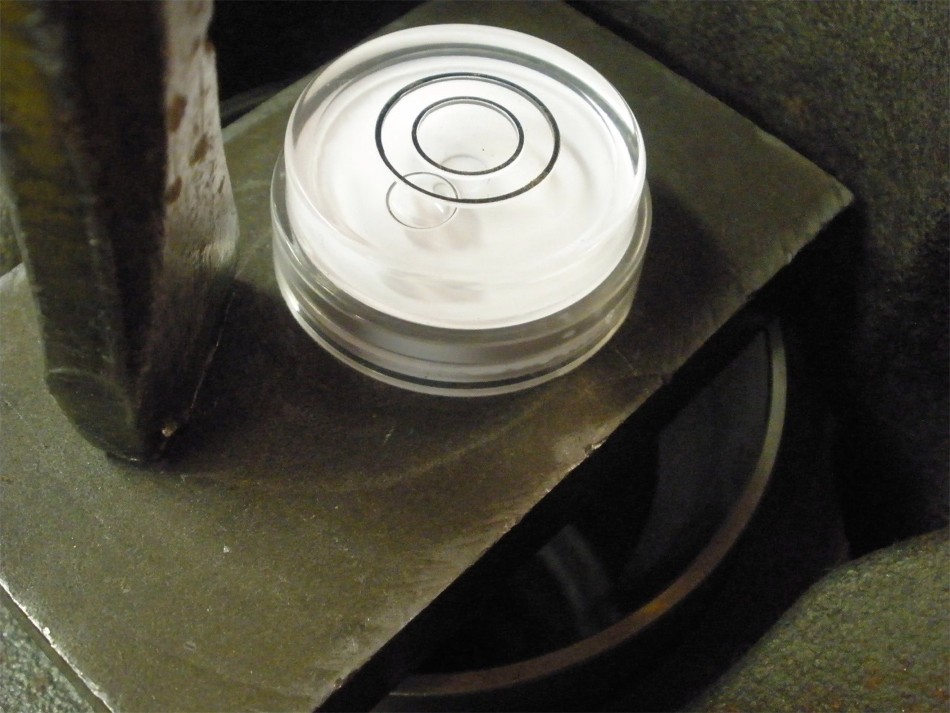
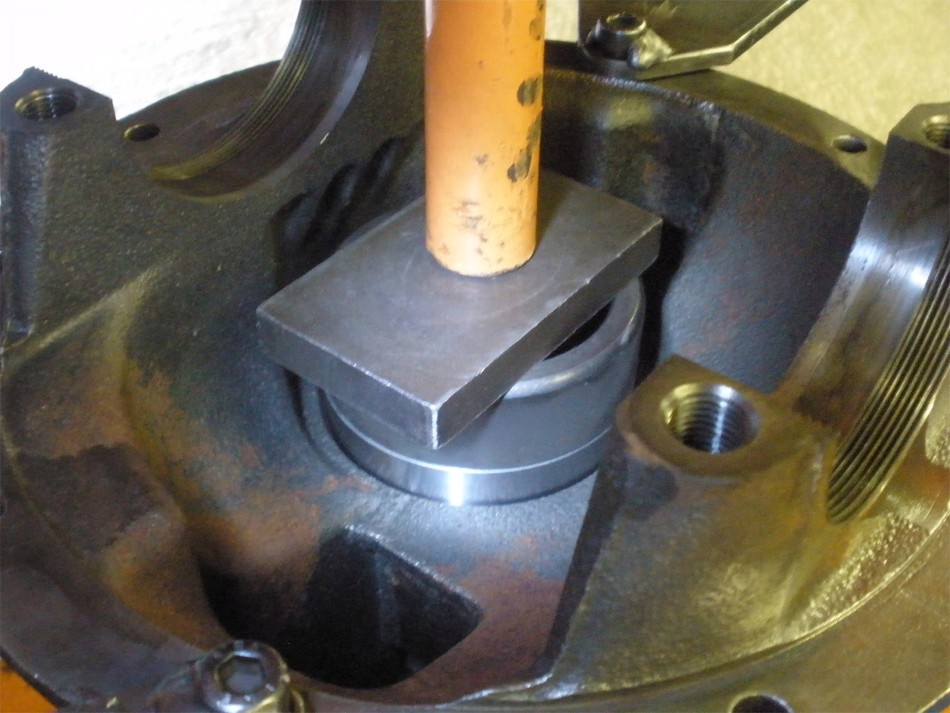
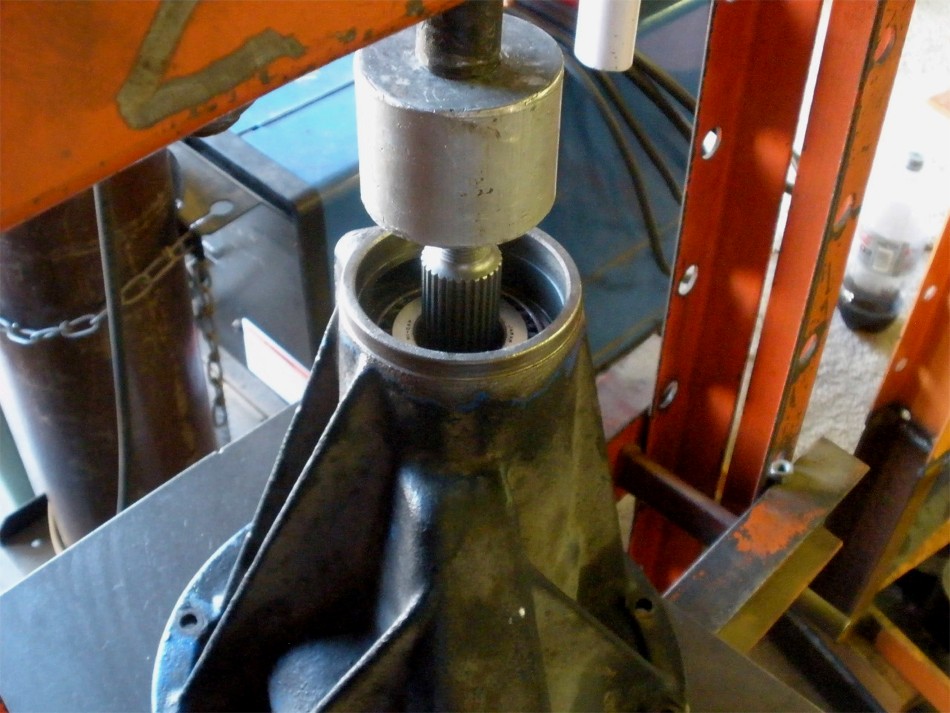
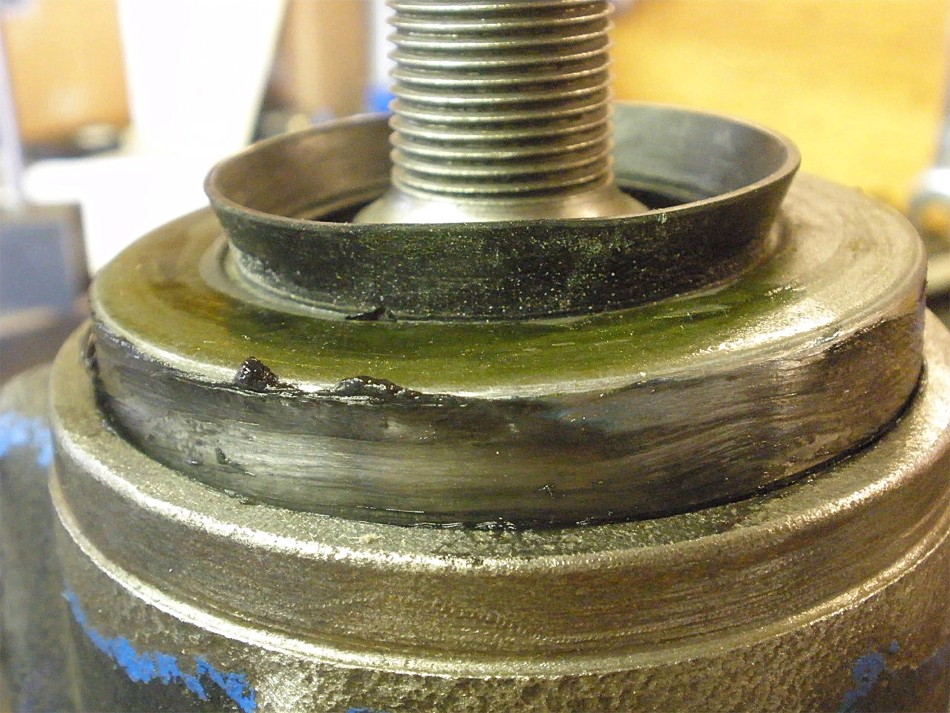
I used to tap the large inner race in with a soft chisel/hammer but I now feel that a nice insertion with the power of the press is the best way to go. I have to establish a horizontal reference as shown above.....the bubble is in the 7 o'clock position.... |
|
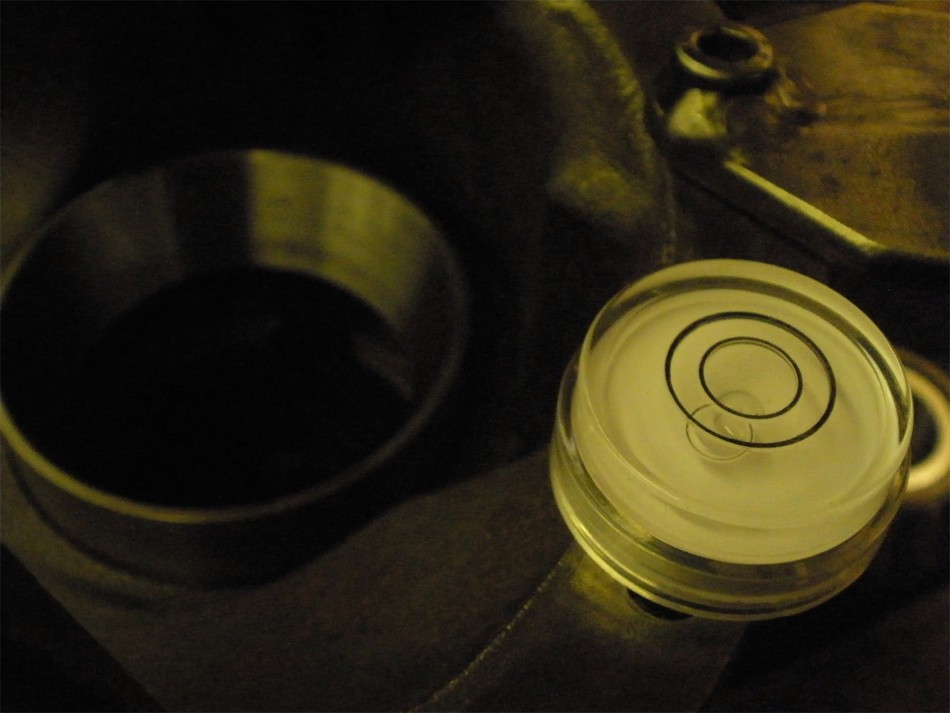
....I then place the bubble on the race and taptap until it's about in the same position. |
|
Now I know for sure that the race is started in the bore hole straight and won't likely get wedged sideways as I apply the press. |
|
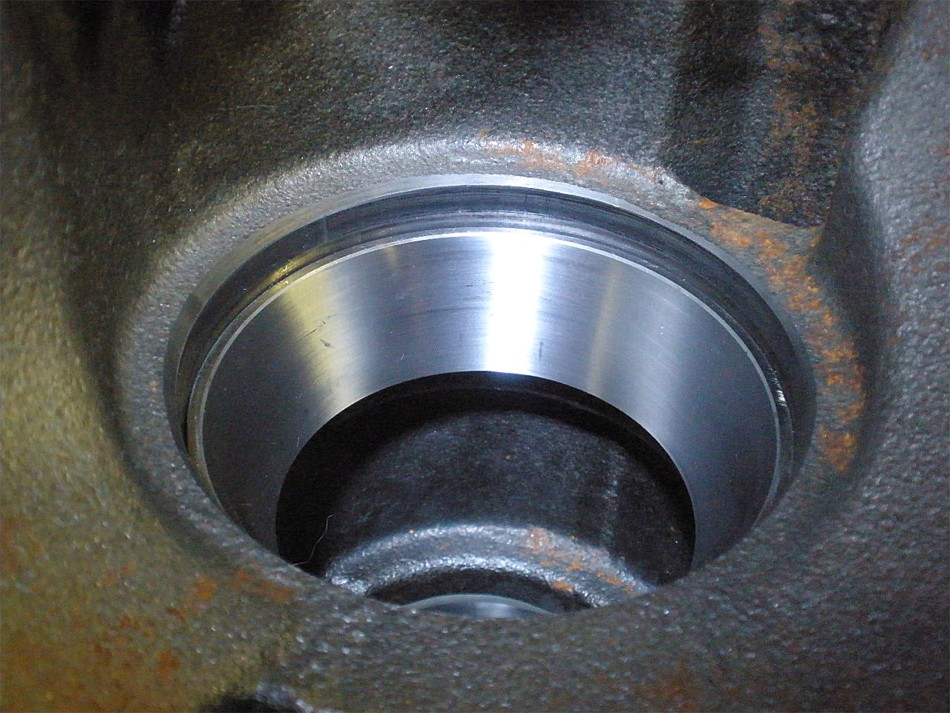
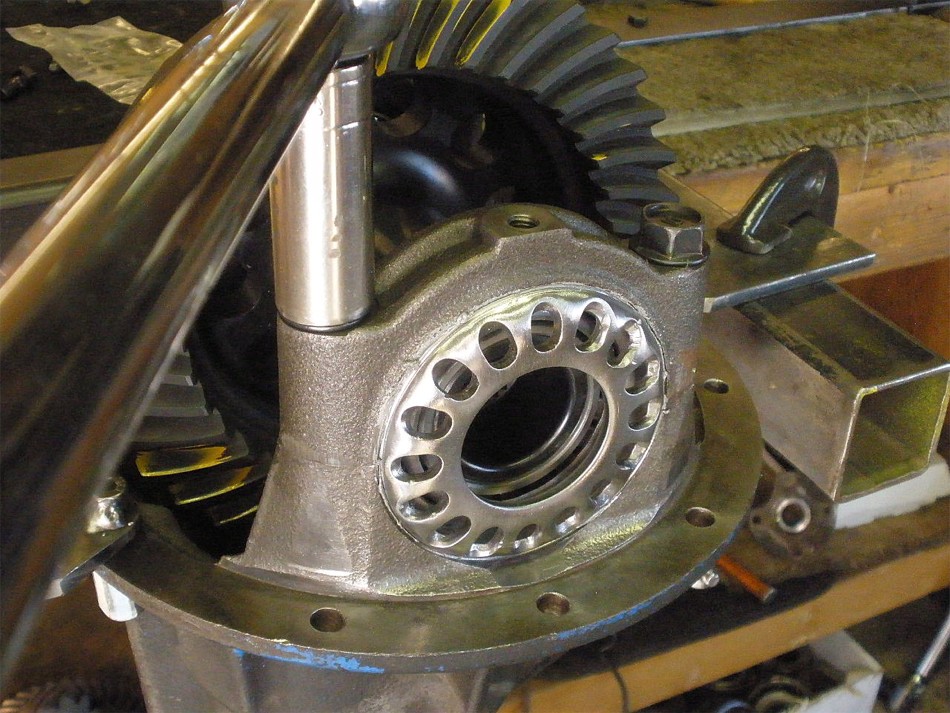
The low profile race presses goes deep into the hole and bottoms out. The 3rd member is done.... |

|
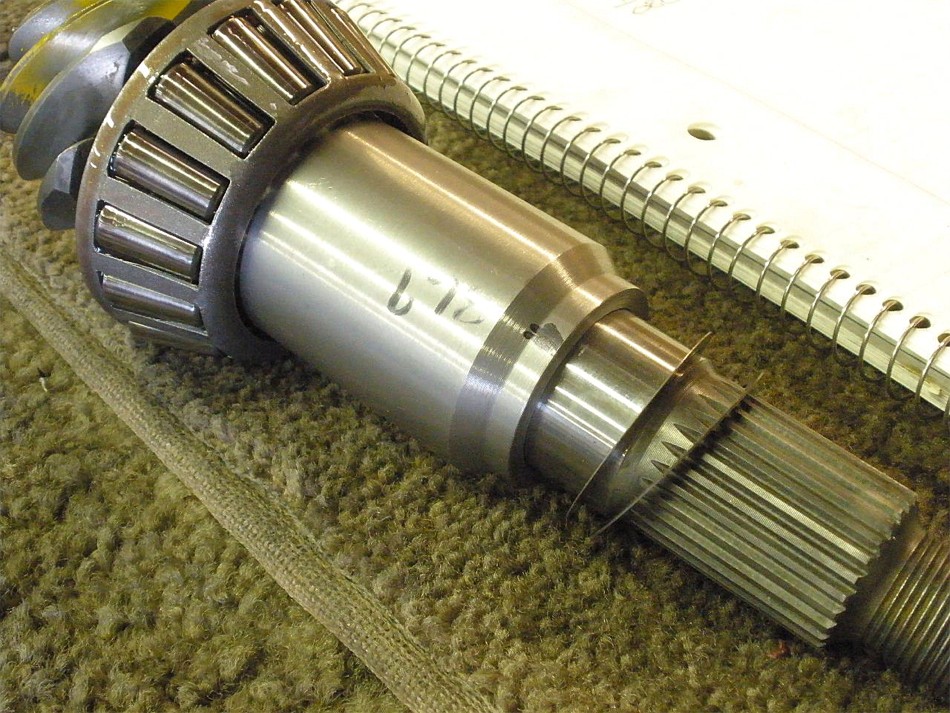
...and now on to the pinion end. The starter 080 shim is pressed on with the low profile bearing. |
|
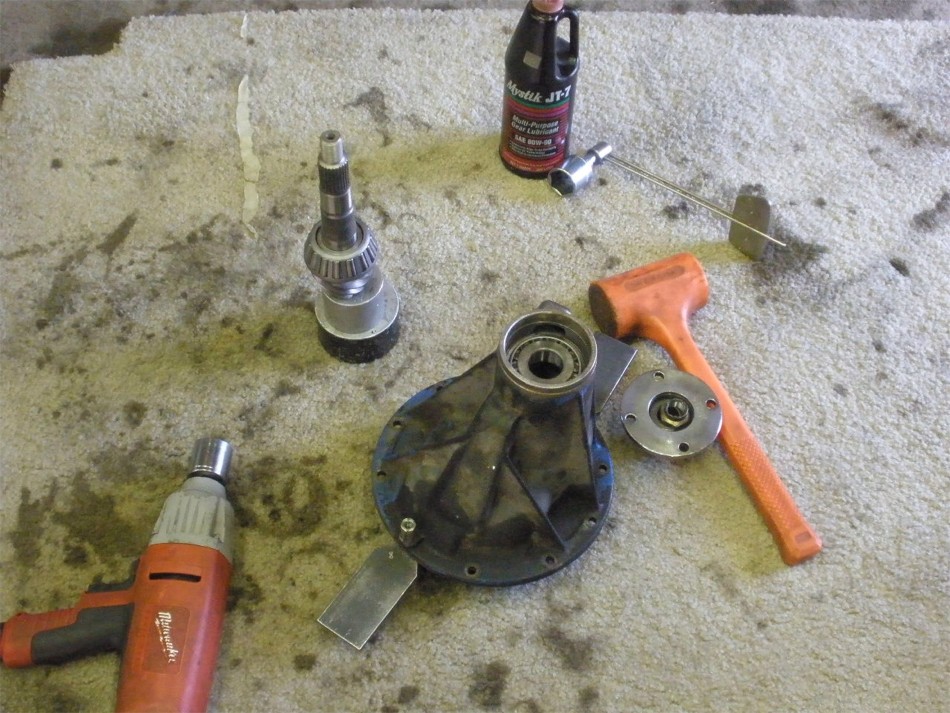
Here's everything I need to mount the pinion. We will not be installing the solid collar until we have established that the correct pinion depth has been discovered. A paint check will tell us the whole story. |

|
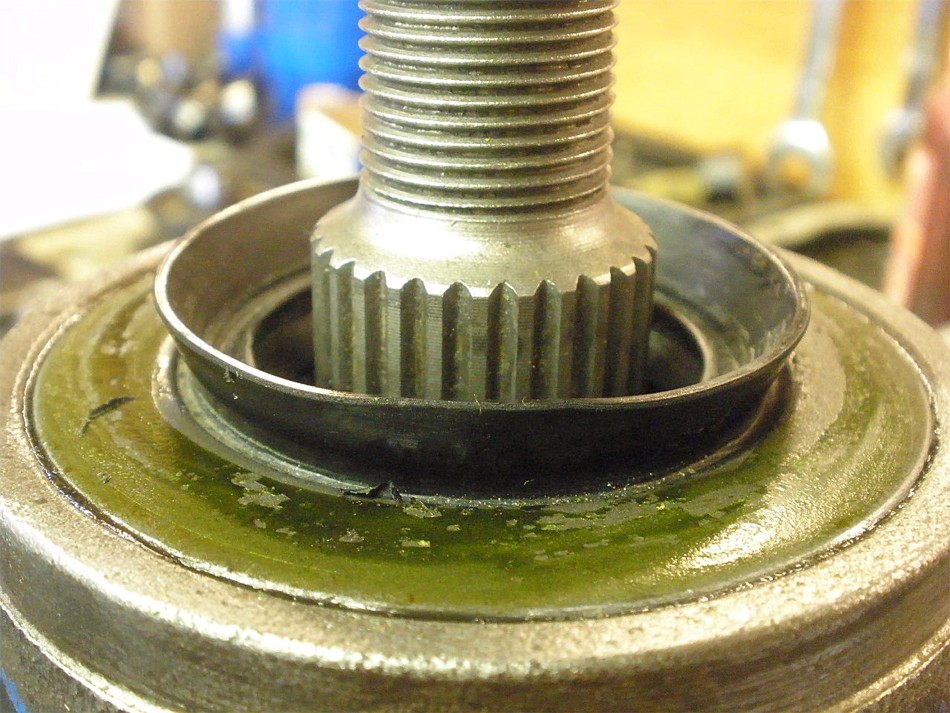
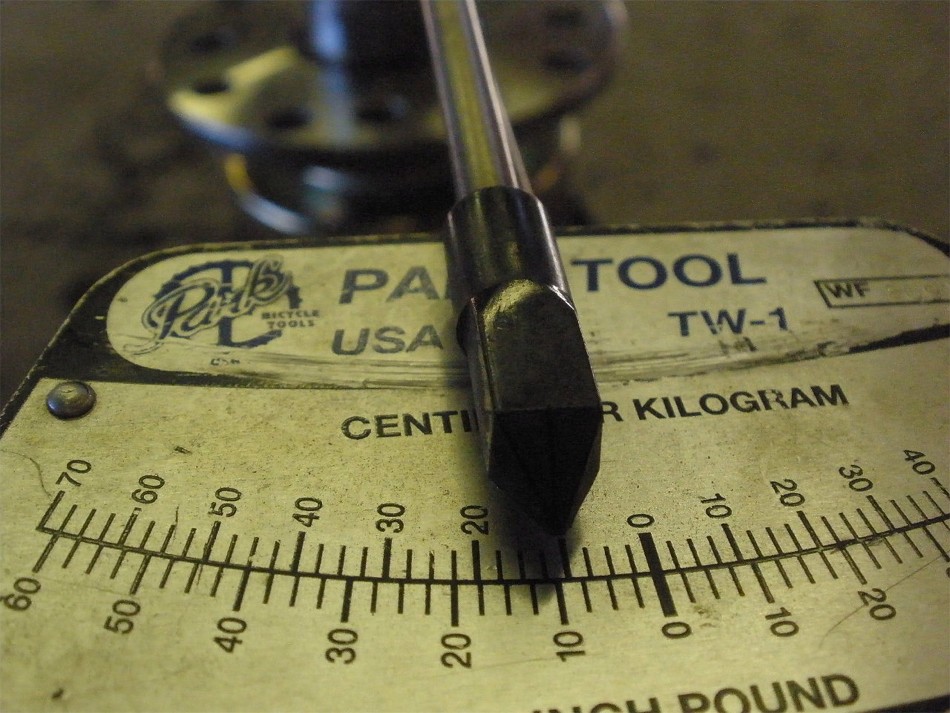
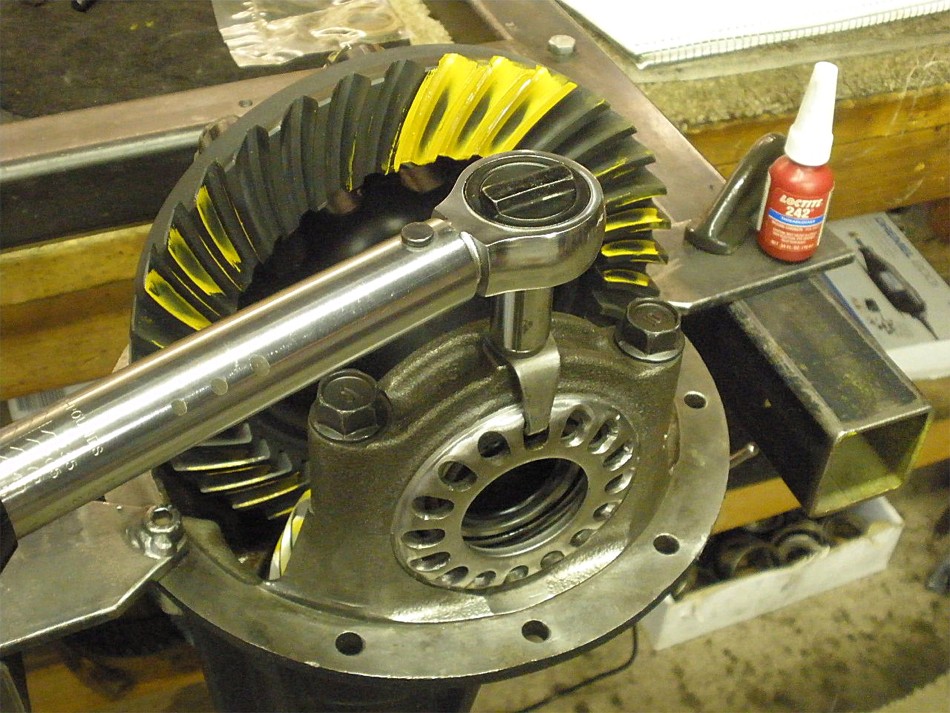
The electric impact is forgiving enough to allow me to snug the pinion nut a touch at a time. This feels about right for a basic paint check.... turns very firm but not overly so. Gear oil has been applied to both bearings to keep it smooth. |
|
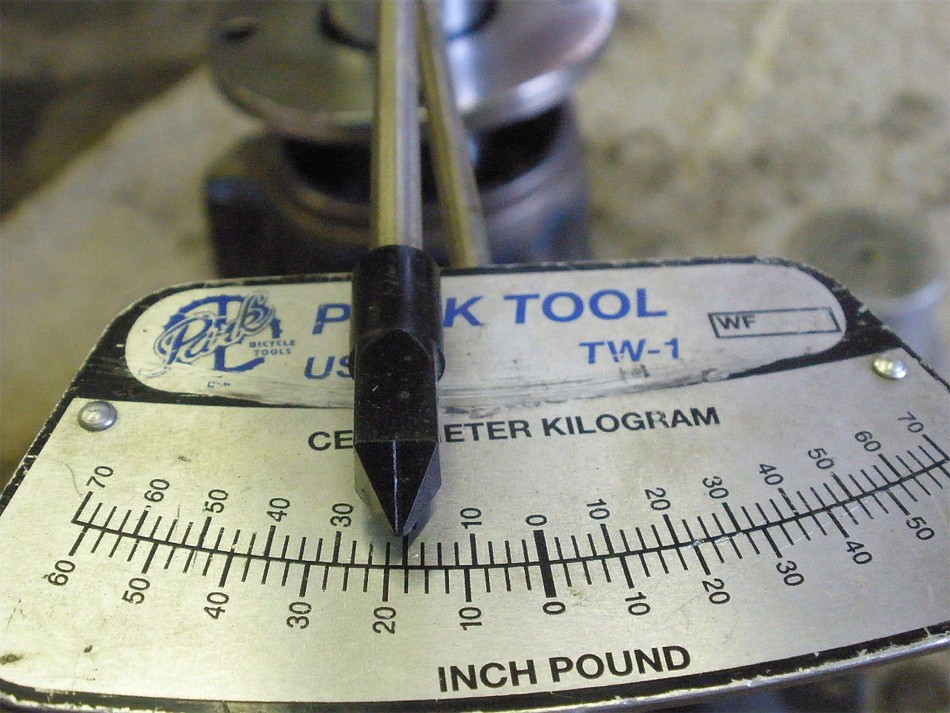
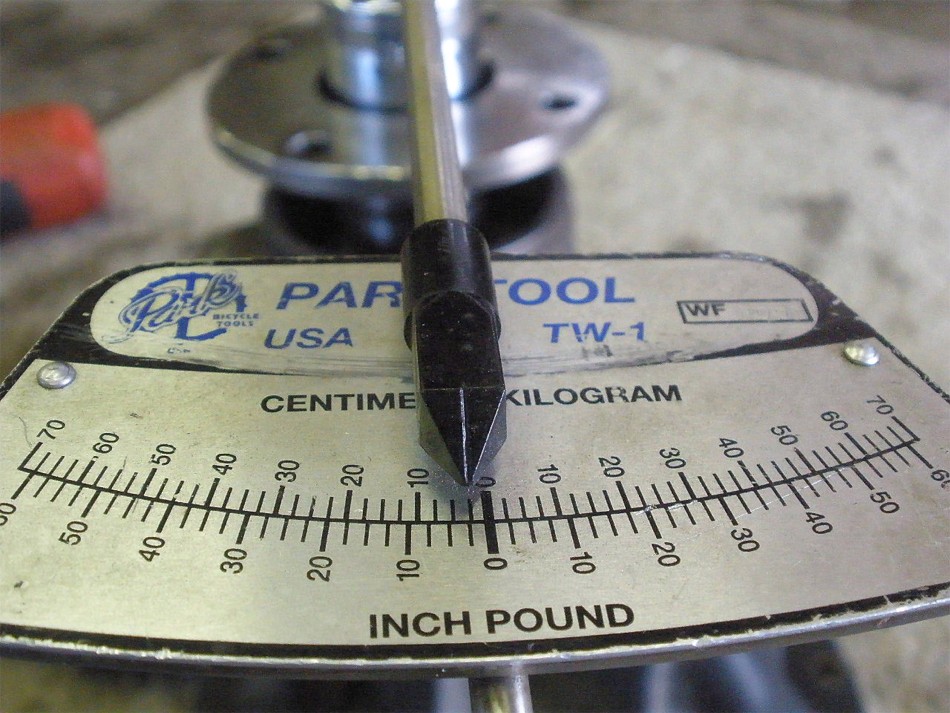
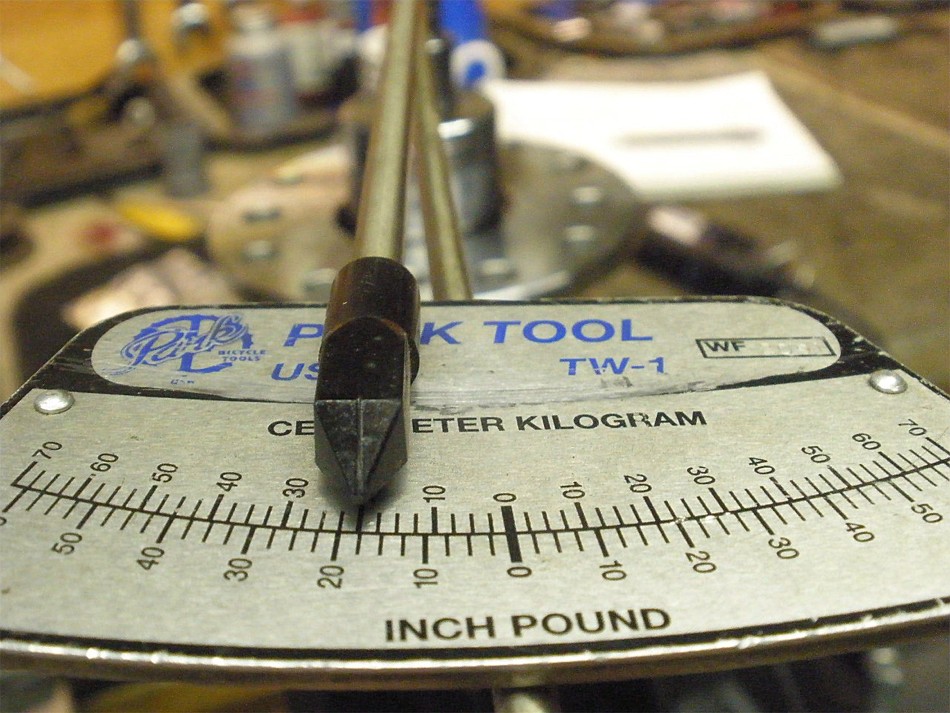
A quick check with the torque wrench shows I'm good....19 inch/pounds (start torque). Anywhere's from 10~25 would suffice for a paint check fyi. |
|
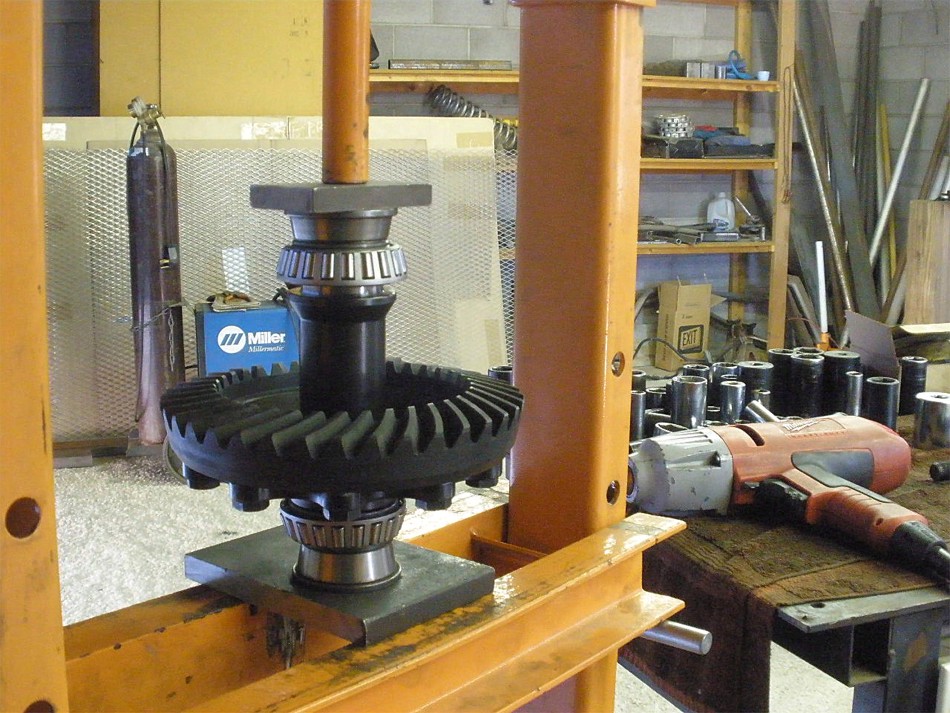
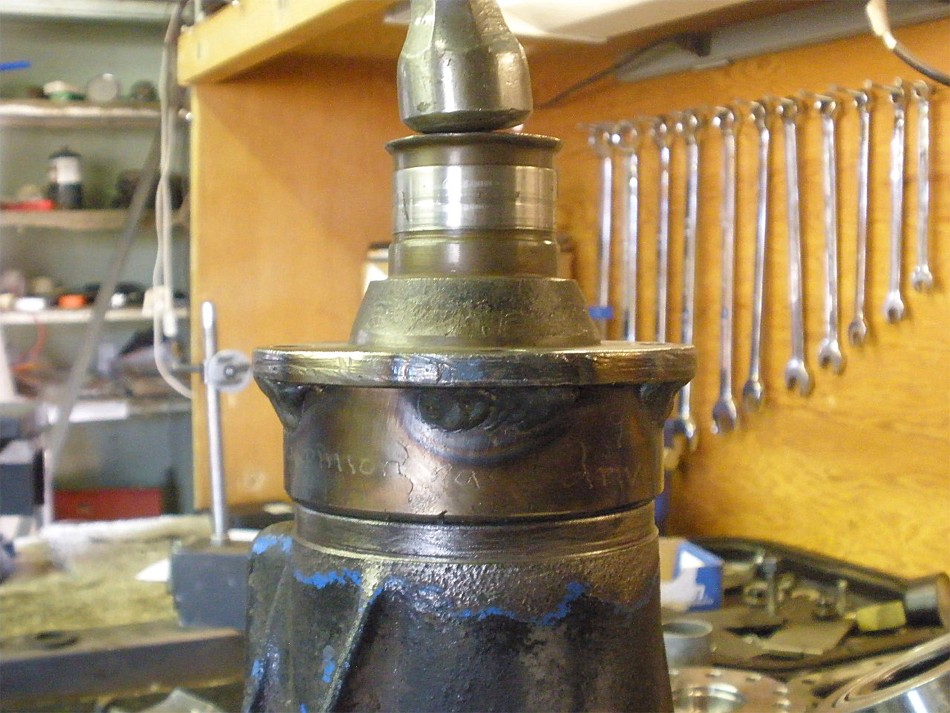
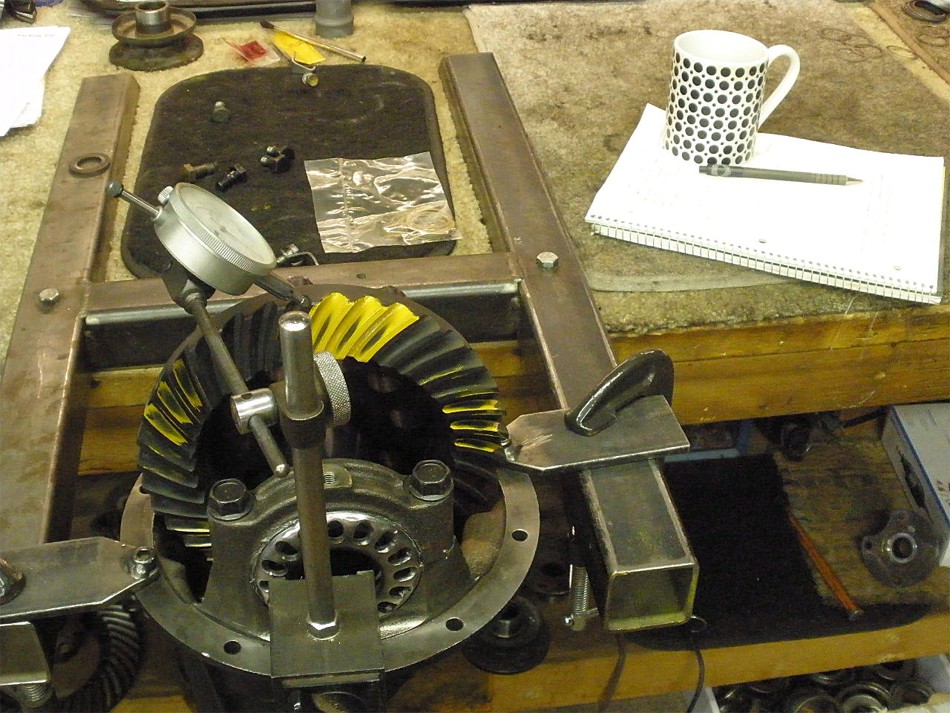
Secure the 3rd to the fixture and mount the spool case.... |
|
...and get the threads all lined up correctly. A solid tap from the rubber end of the hammer makes a solid SNAP sound as the bearing towers meet. So many installs get messrd up here and cross thread the adjuster wheels and sometimes damage the threads on the 3rd itself. |
|
I tighten the 4 main bearing cap bolts fully and, if done right, the adjuster wheels will turn with just your fingers. I don't have to be exact when setting the BL and CBPL....I do make sure there is is some carrier bearing pre-load and roughly .008" for the backlash. This is just a yellow paint check. |
|
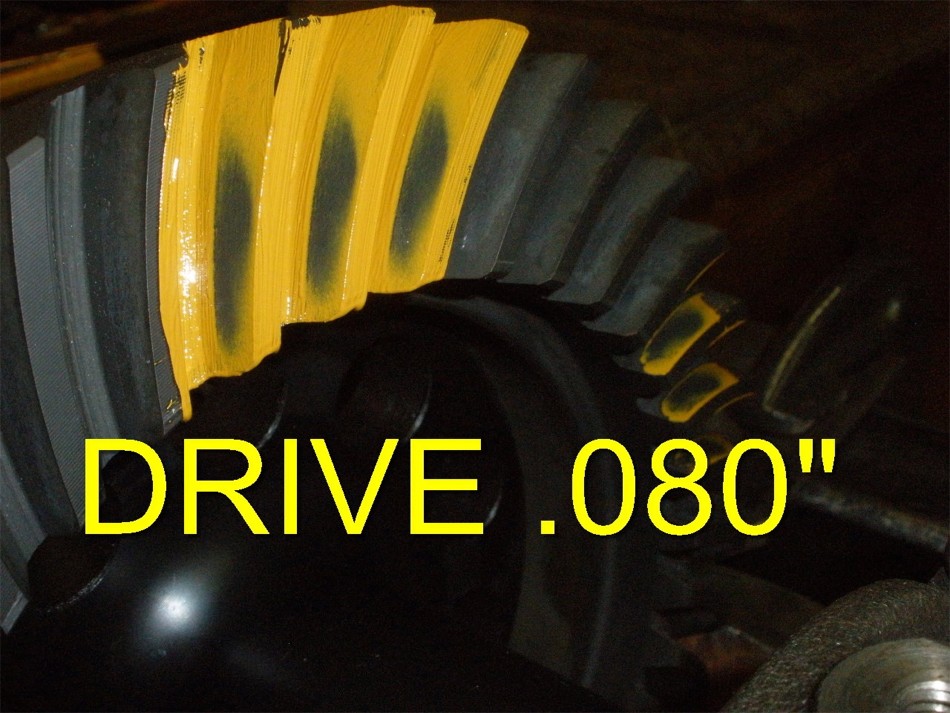
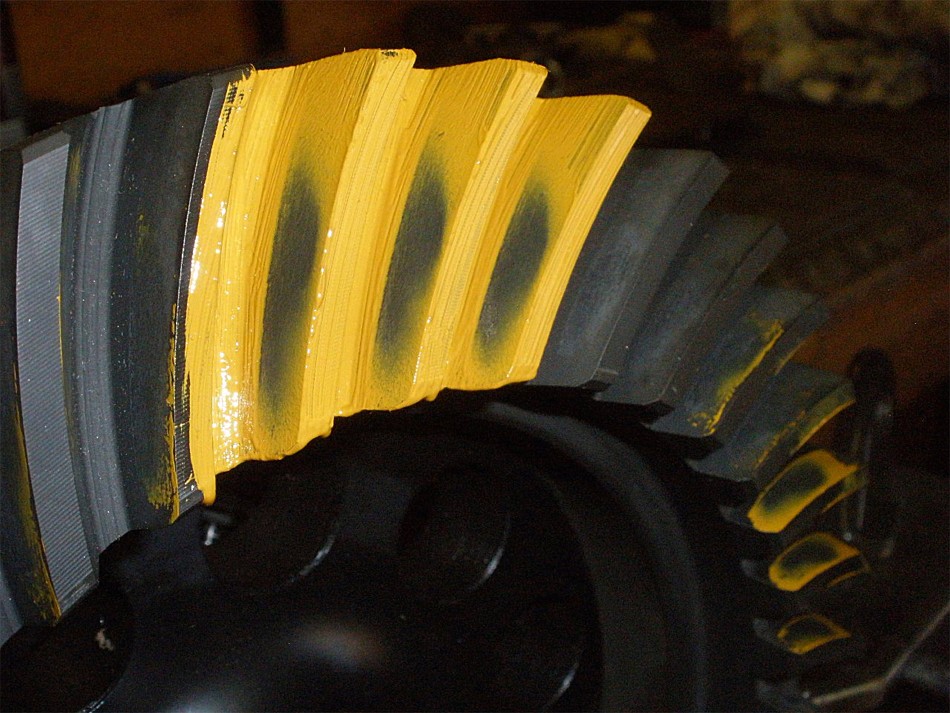
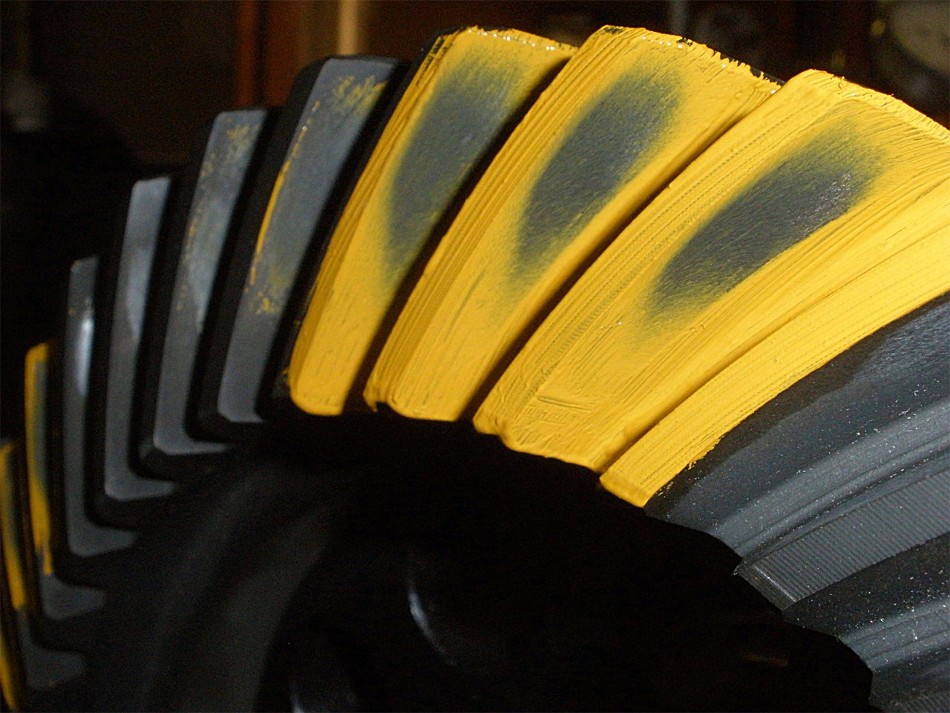
Paint is applied and I rotate the ring gear back and forth about 3 times with the 17mm wrench. Some additional drag is generally applied with a rag on the pinion flange(companion flange). |
|
Drive side....beautiful. Slight toe end and it appears slightly deep. This is what I shoot for. |
|
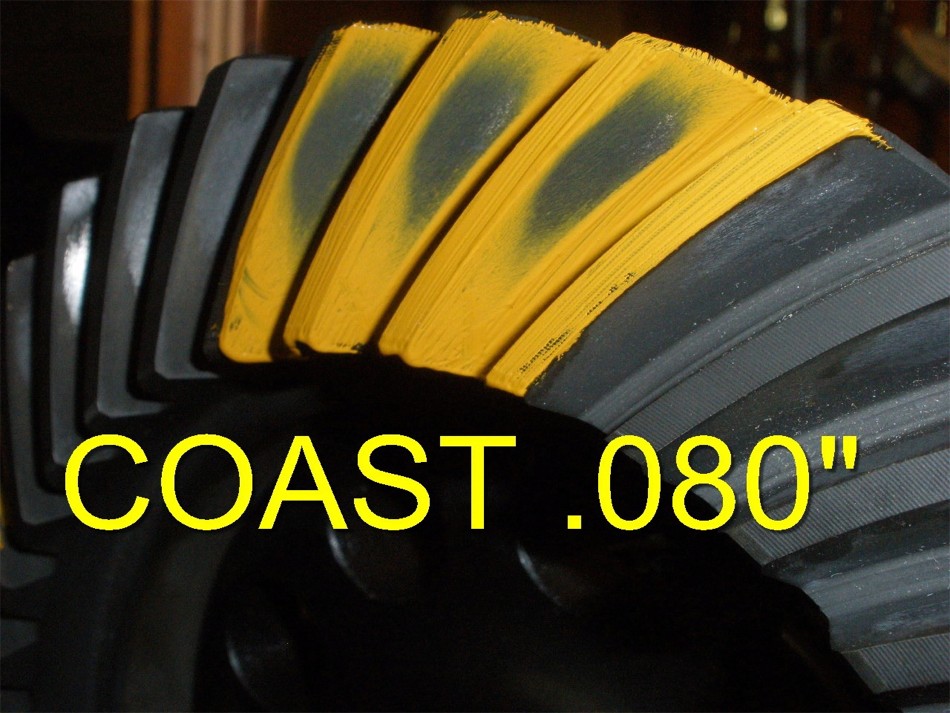
Coast side....it is favoring the heel end some but this is what it is. If I open up the BL more it might move closer to center but there is very little adjustment range left so it is what it is. The drive side is the important one here and that one is dead on. |
|
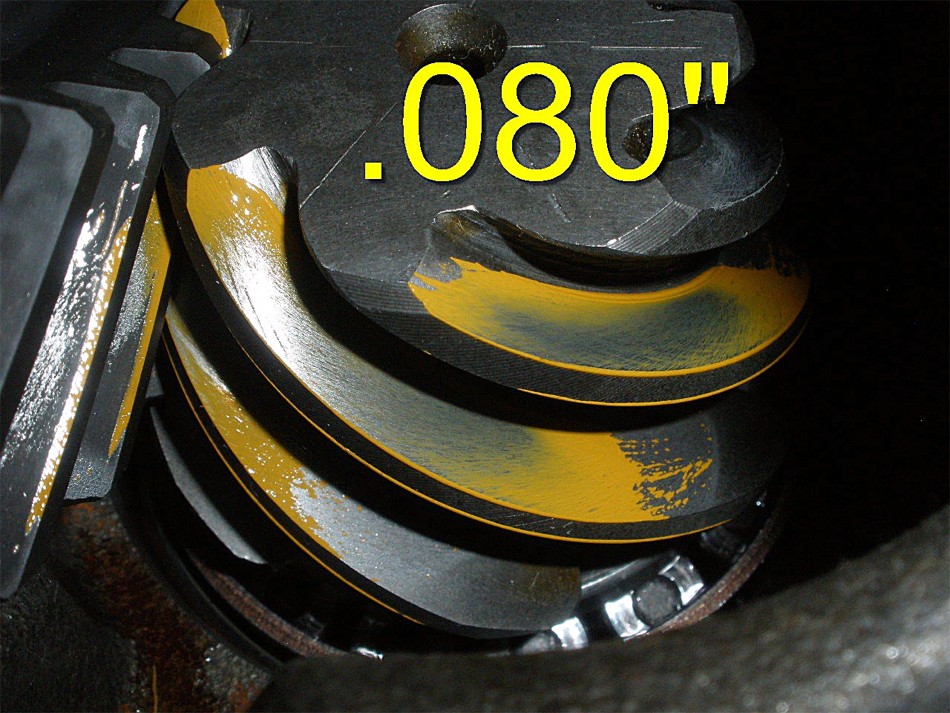
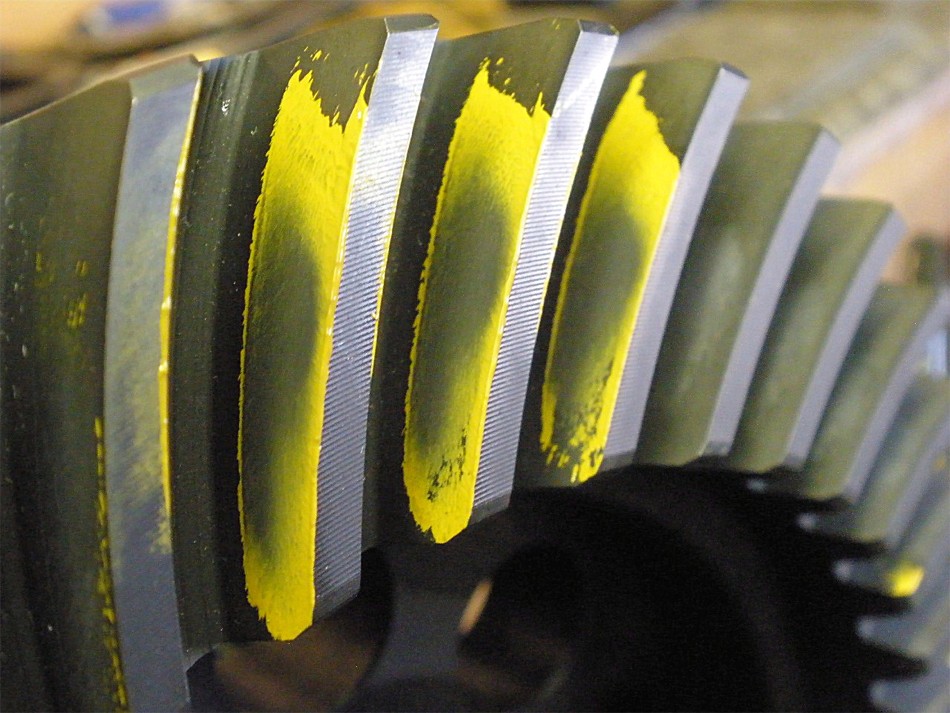
pinion drive side...looks good. |

|
A couple teeth farther around the ring shows these reverse painted teeth and theis drive side looks good. |
|
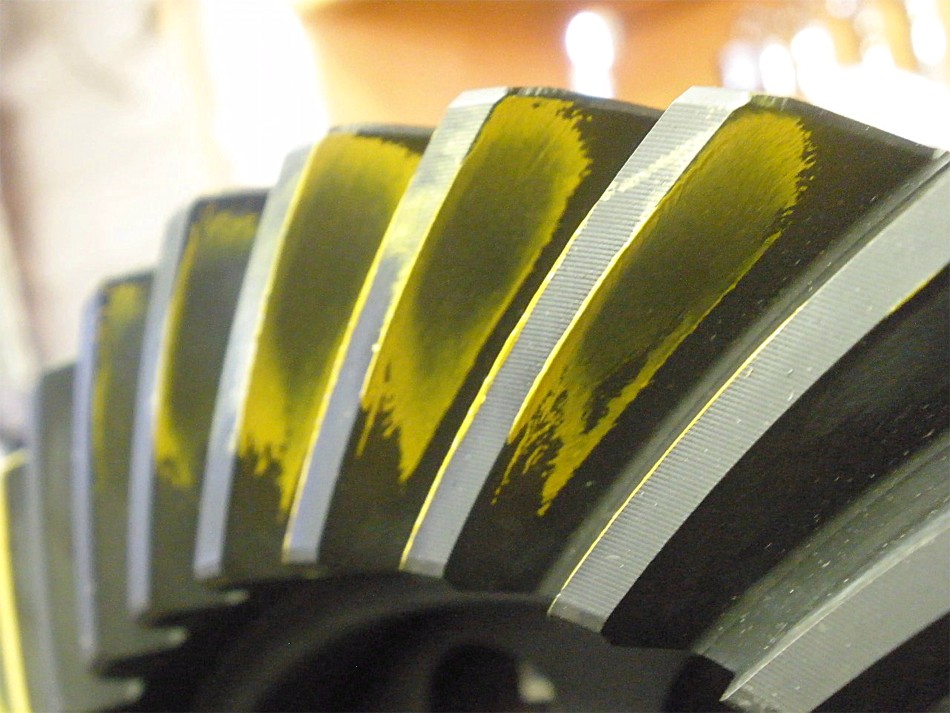
Coast...reverse painted. Ok. |
|
Now getting close to the home stretch...just have to put the solid collar in and assemble. |
|
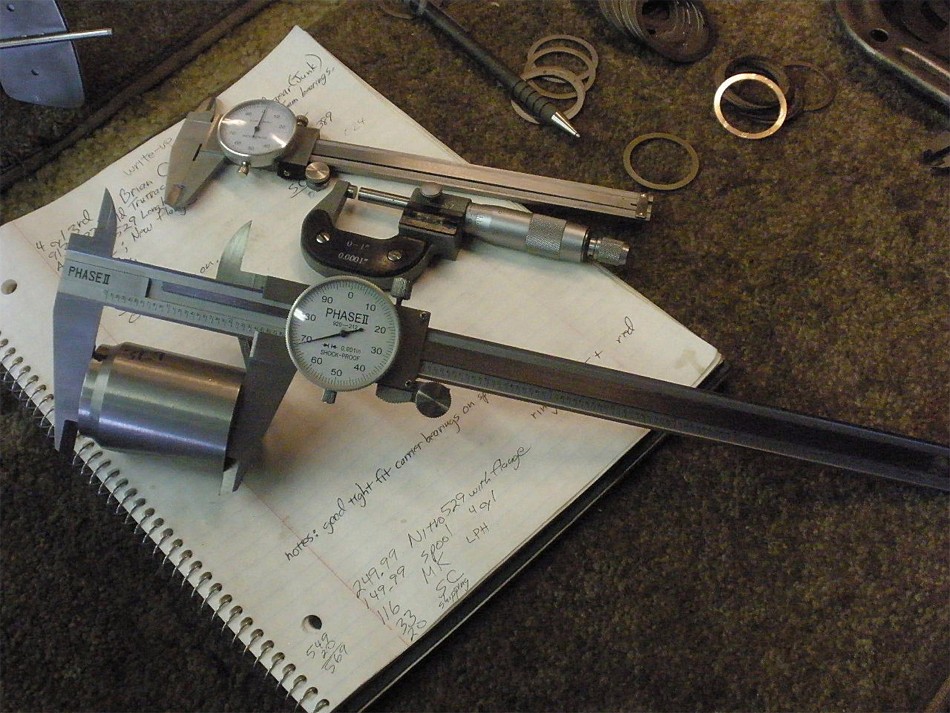
This 12 inch dial caliper makes it easier to get a repeatable measurement on the collar. I check it all the way around in about 6 places and all measurements were the same indicating this collar was machined true. I have seen 2 or 3 thou variation in the past. |
|
On these 4 cylinders 3rds with the low profile inner pinion bearing, the approximate collar plus shim value is 2.389". |
|
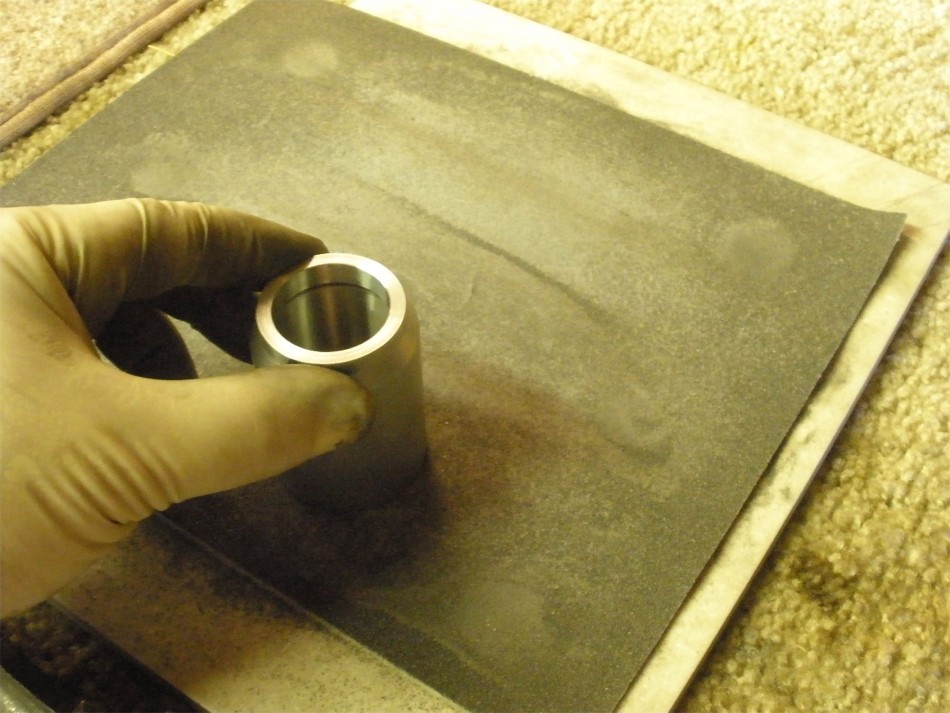
After about 3 adjustments and some fine tuning with 100 grit sandpaper.... |
|
....I had achieved what I was looking for. Cranking it down about as tight as the electric would allow(~200 ft/lb) gives me about 3 inch/pounds of start torque pre-load. I know that when I use the 4 foot cheater bar that I can up that 3 by another 10 inch/pounds. |

|
So, off comes my old shop flange and time to put the seal in. Oil splashguard goes in first.... |
|
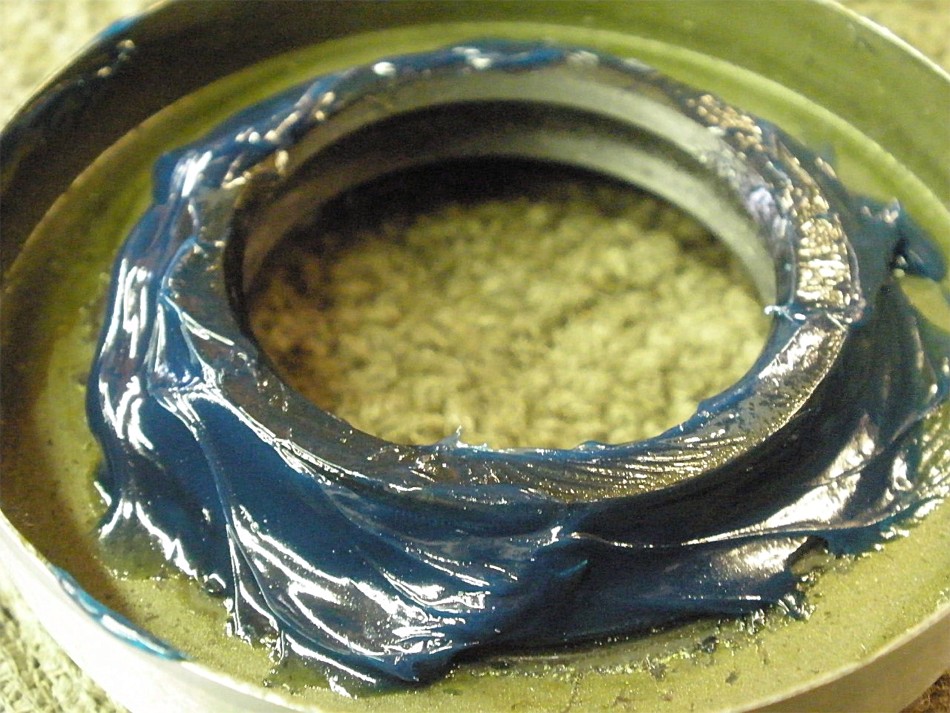
...a thick grease is applied to the inside of the new seal. This will prevent that tiny tension coil from popping out during install. |
|
The seal is next. Some rtv is often applied to the outside to help seal the metal/metal contact better. |
|
I welded a V6 race onto an old pinion flange and that is my seal install tool. What would I do without my Millermatic 185?..... |
|
Some gear oil will be applied to the dry rubber to prevent a possible pre-mature groove during the first few miles. |
|
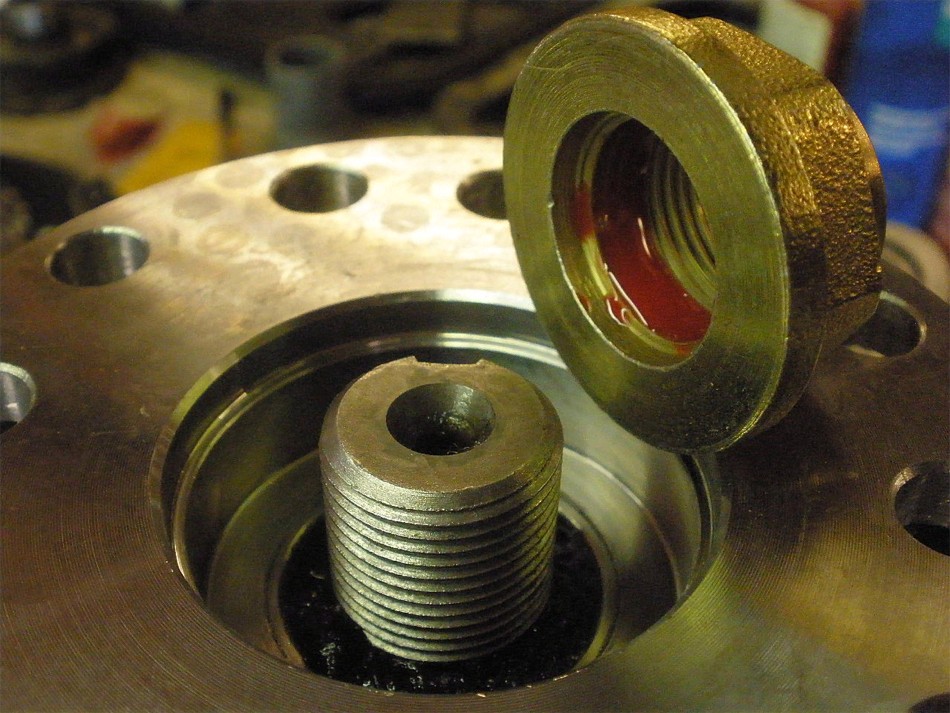
The new triple drilled flange is in place.....red Loctite on the pinion nut. The nut has a built-in washer surface already....flange style nut. |

|
So, the electric impact has imparted about 200 ft/lb on the nut.....I'm still measuring only about 3 in/lb of pinion pre-load at this point. I then added these 2 black marks for reference when I apply the cheater. |
|
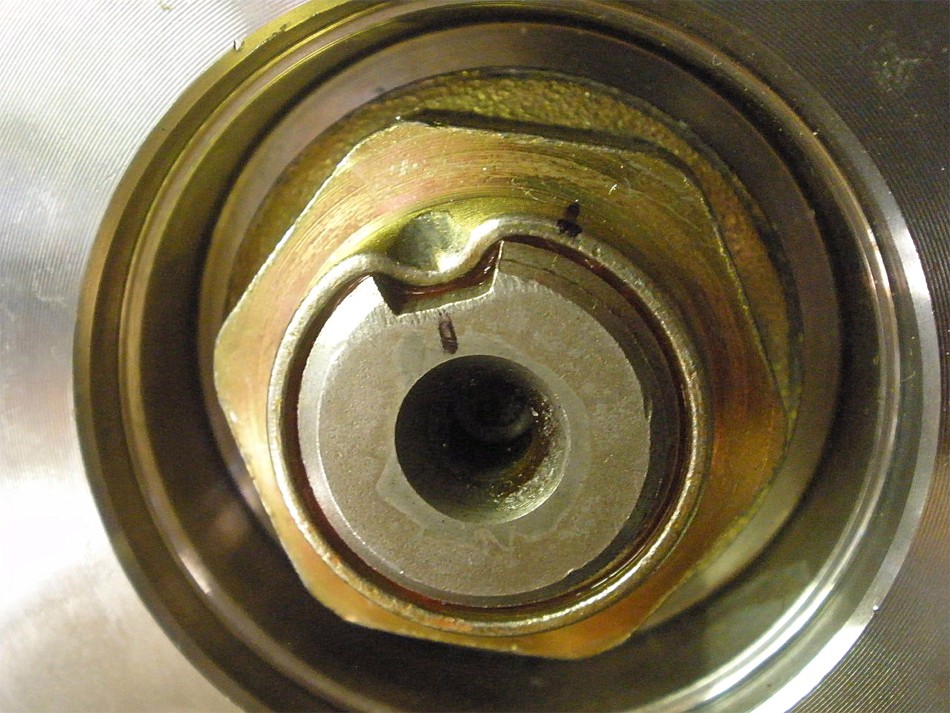
My little mini-jig to stabilize the flange while I persuade the pinion nut with a cheater bar. |
|
The cheater bar moved the nut this much extra... |
|
...and now I have 10 in/lb of PPL start torque. |
|
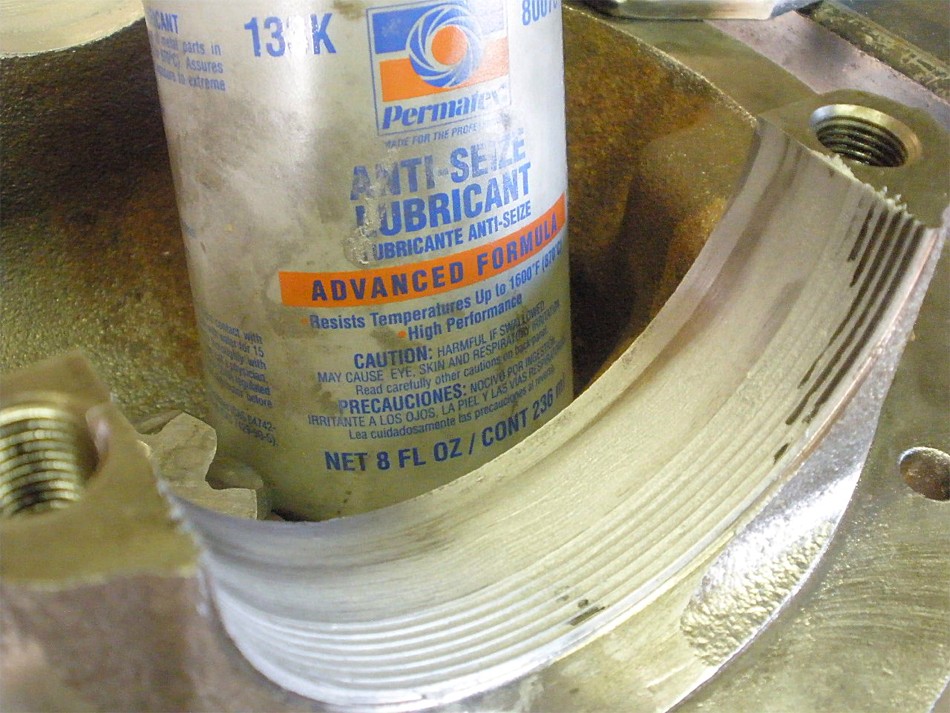
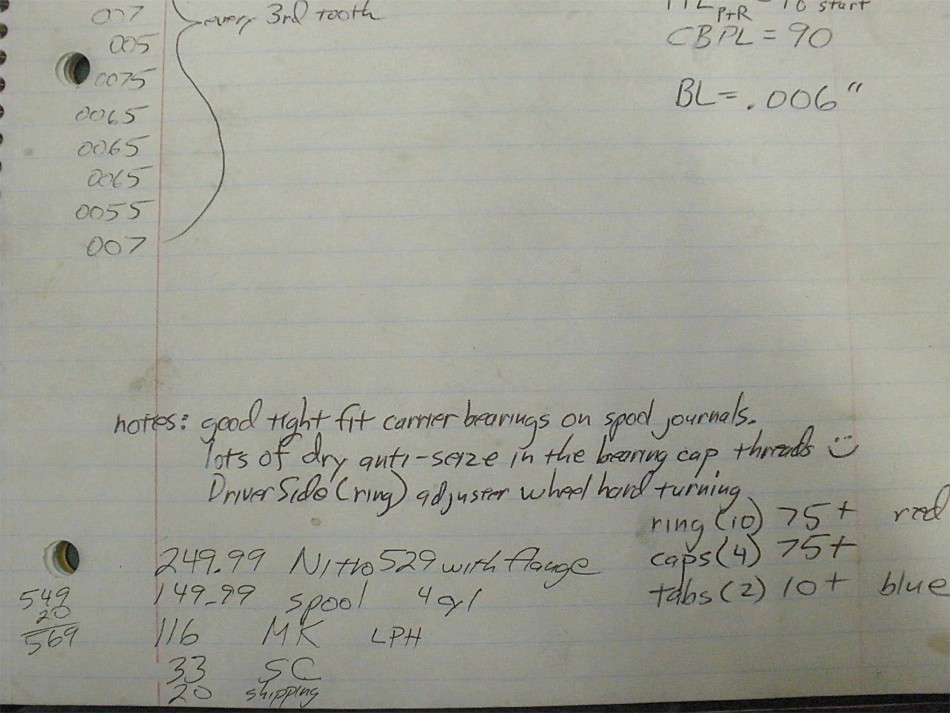
These threads felt a bit rough to me so I used a heavy application of aluminum based anti-seize. |
|
Bearing caps are carefully lined up and bolts torqued to 75 ft/lb. If the bearing adjusters look extra shiny it's because they were chingered up quite a bit from the last installer using a hammer and chisel. I used a flapper wheel and a high speed wire brush to clean/shine them up. |
|
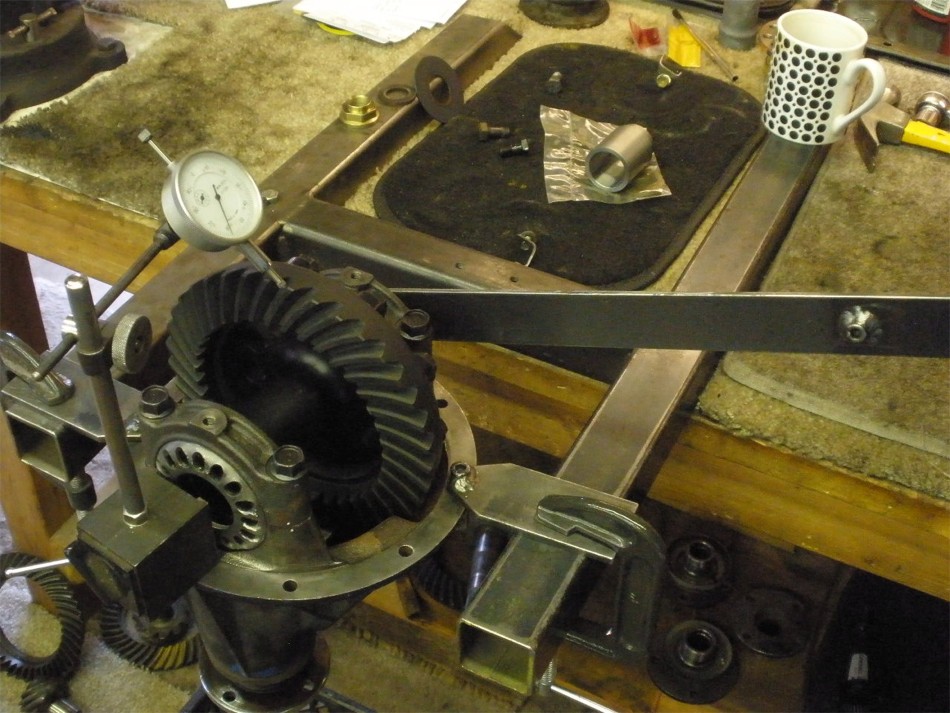
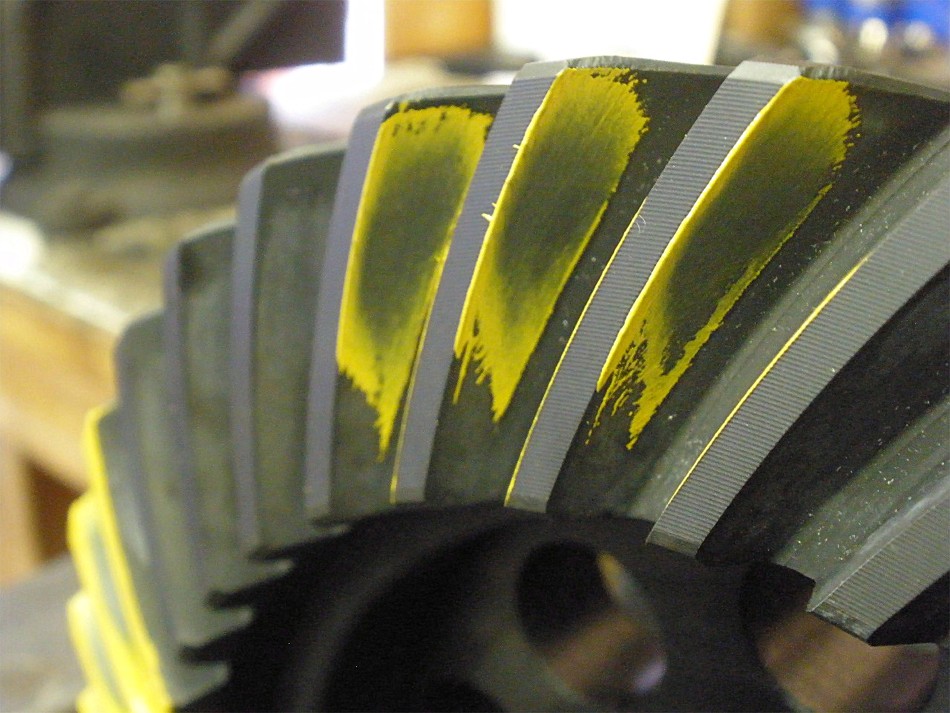
CBPL set to about 90 ft/lb(on the wheel adjusters) and backlash verified at .006". This final check on the drive side looks great. |
|
Coast side. |

|
pinion drive tooth. |
|
Drive side of a reverse painted tooth. |
|
coast side reverse painted. |
|
I measured every 3rd tooth and recorded it. |
|
Satisfied with the BL and CBPL, I can now install both locktab bolts....blue Loctite and 10 ft/lb. |
|
I can now measure the combined pre-loads of both pinion and ring gear....18 in/lb. |
|
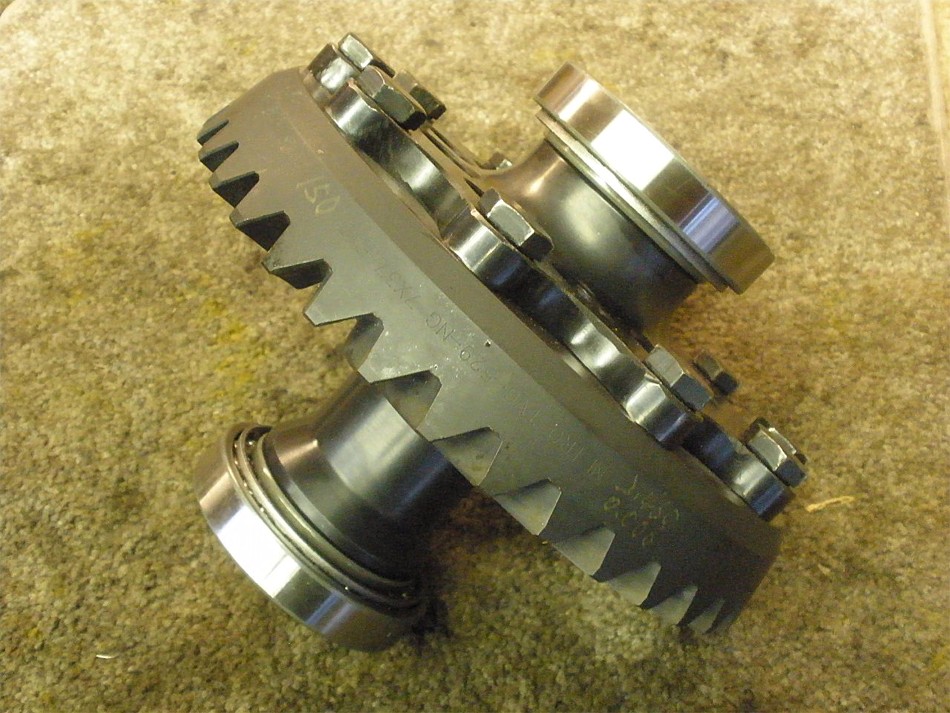
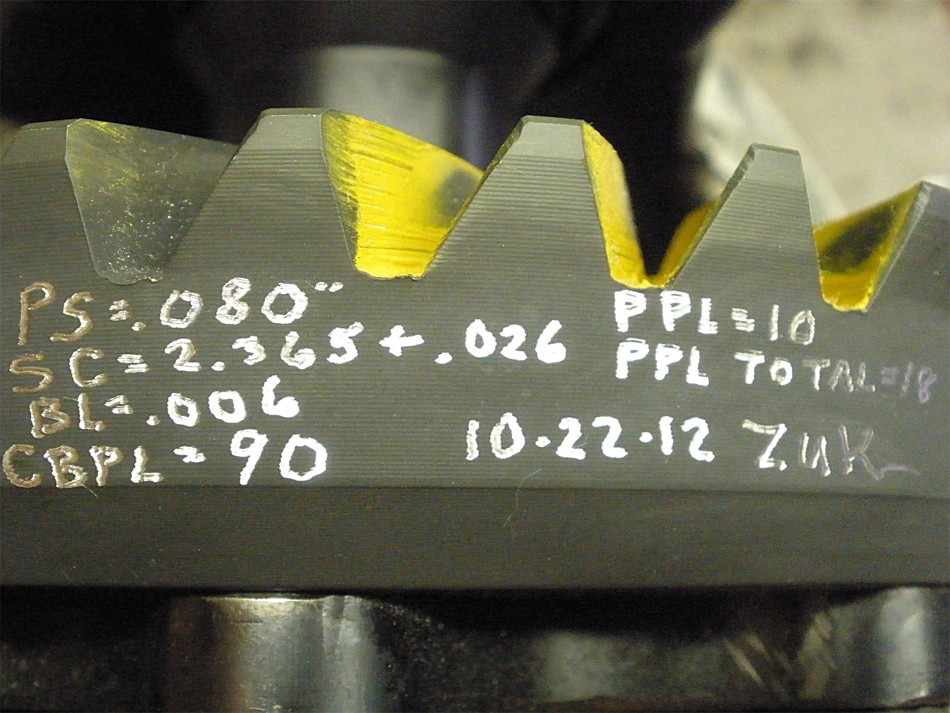
The dremel tool easily marks the specs on the ring and date coded. |
|
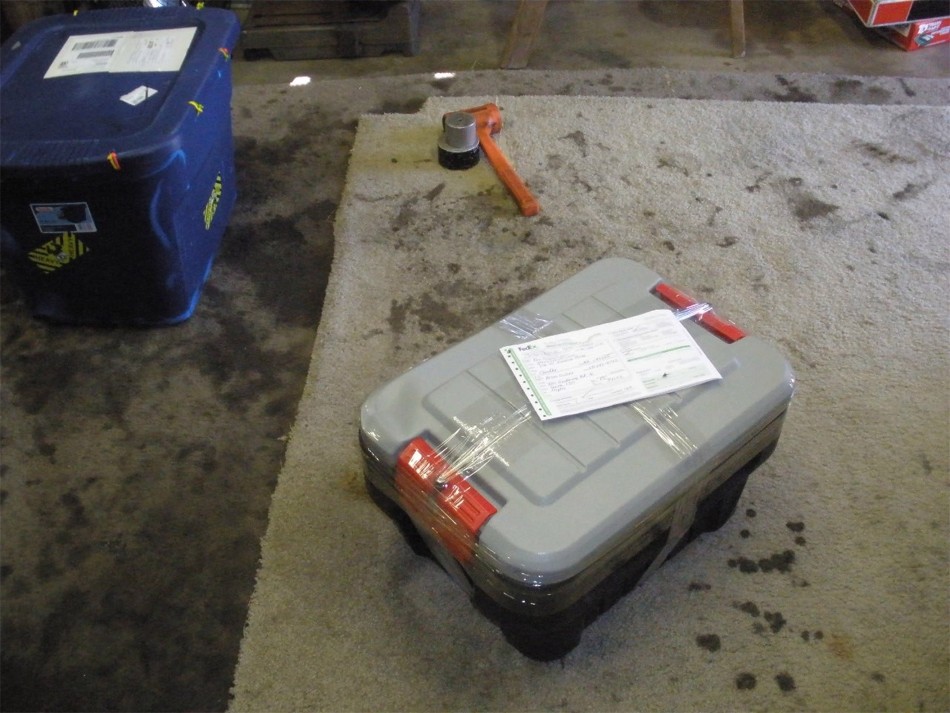
I can't use the tie-raps on this style of tote so lots of clear packing tape. Ready to go back to Florida. |
|
... |
|
... |

|