|
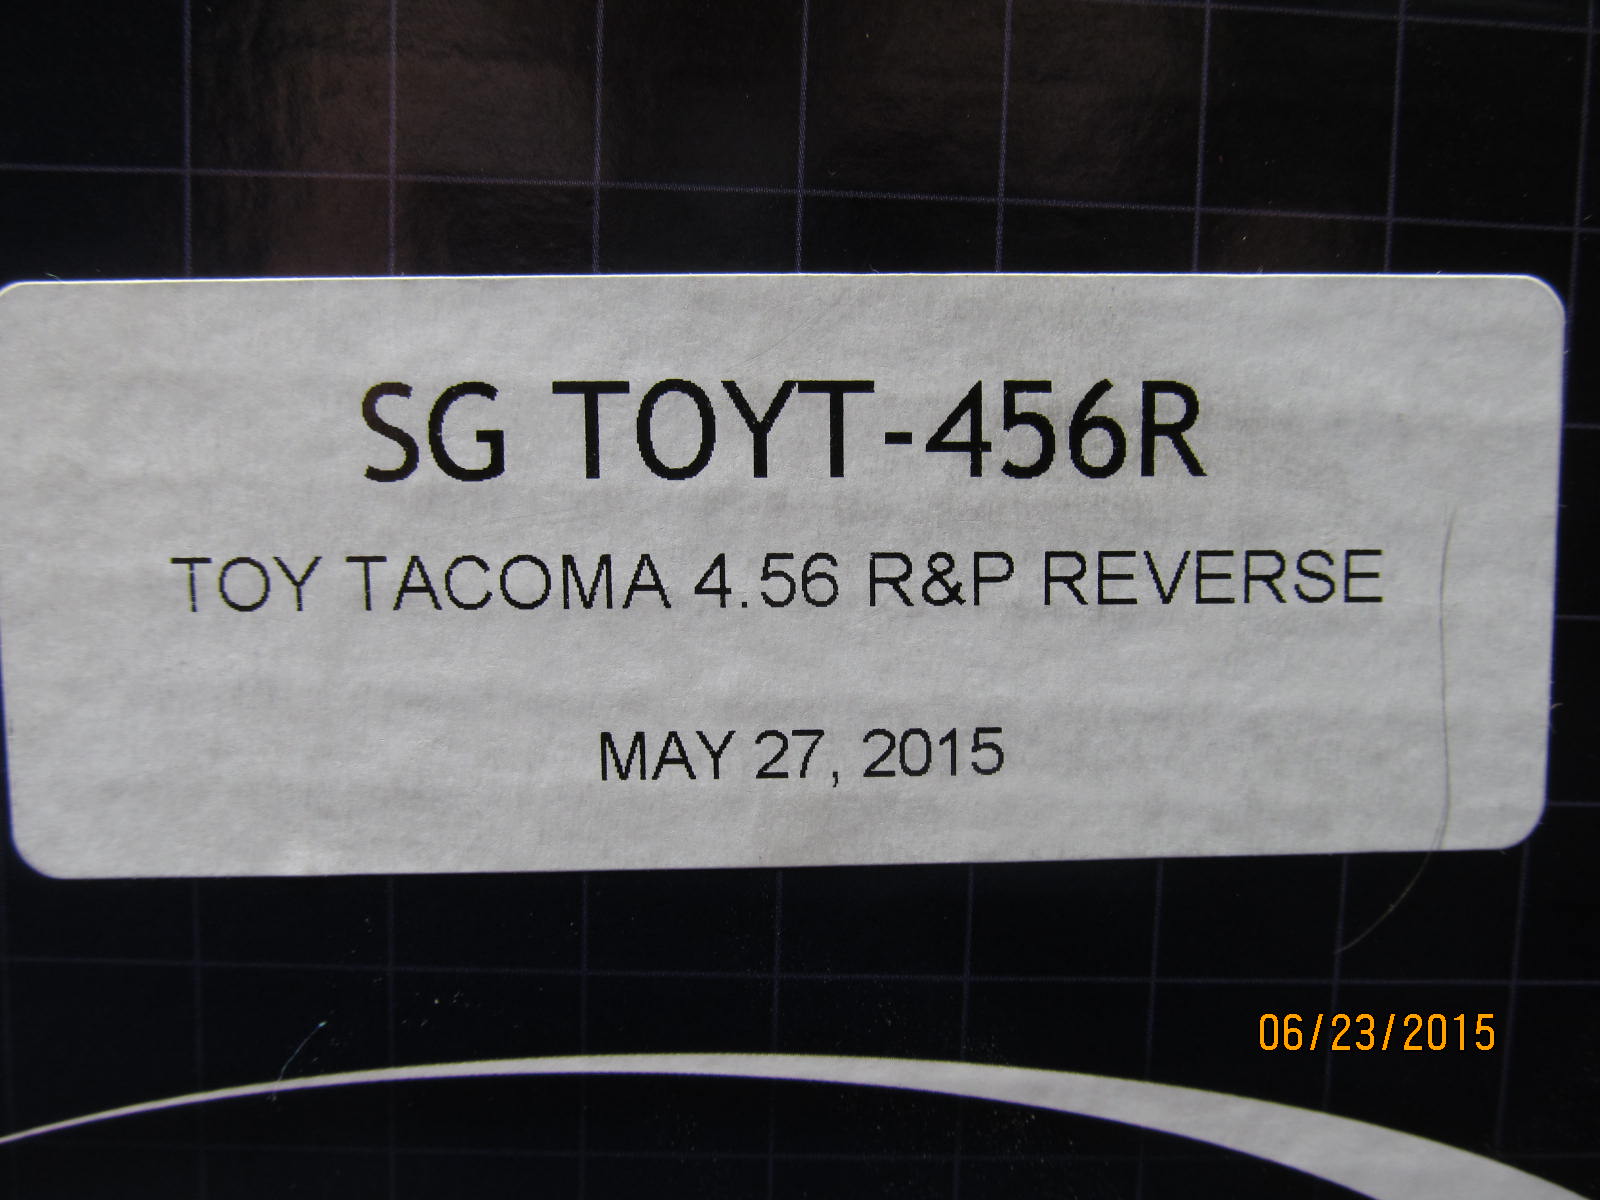
Clam Regear of Joe's 2002 Tacoma with 456 Sierra Gears and ARB
|
|
(200 BIG pics loading)
|
|
JULY 20 2015
|
|
200 pics loading. Please expect a bit of a wait. Lots of info here.
|
|
|
|
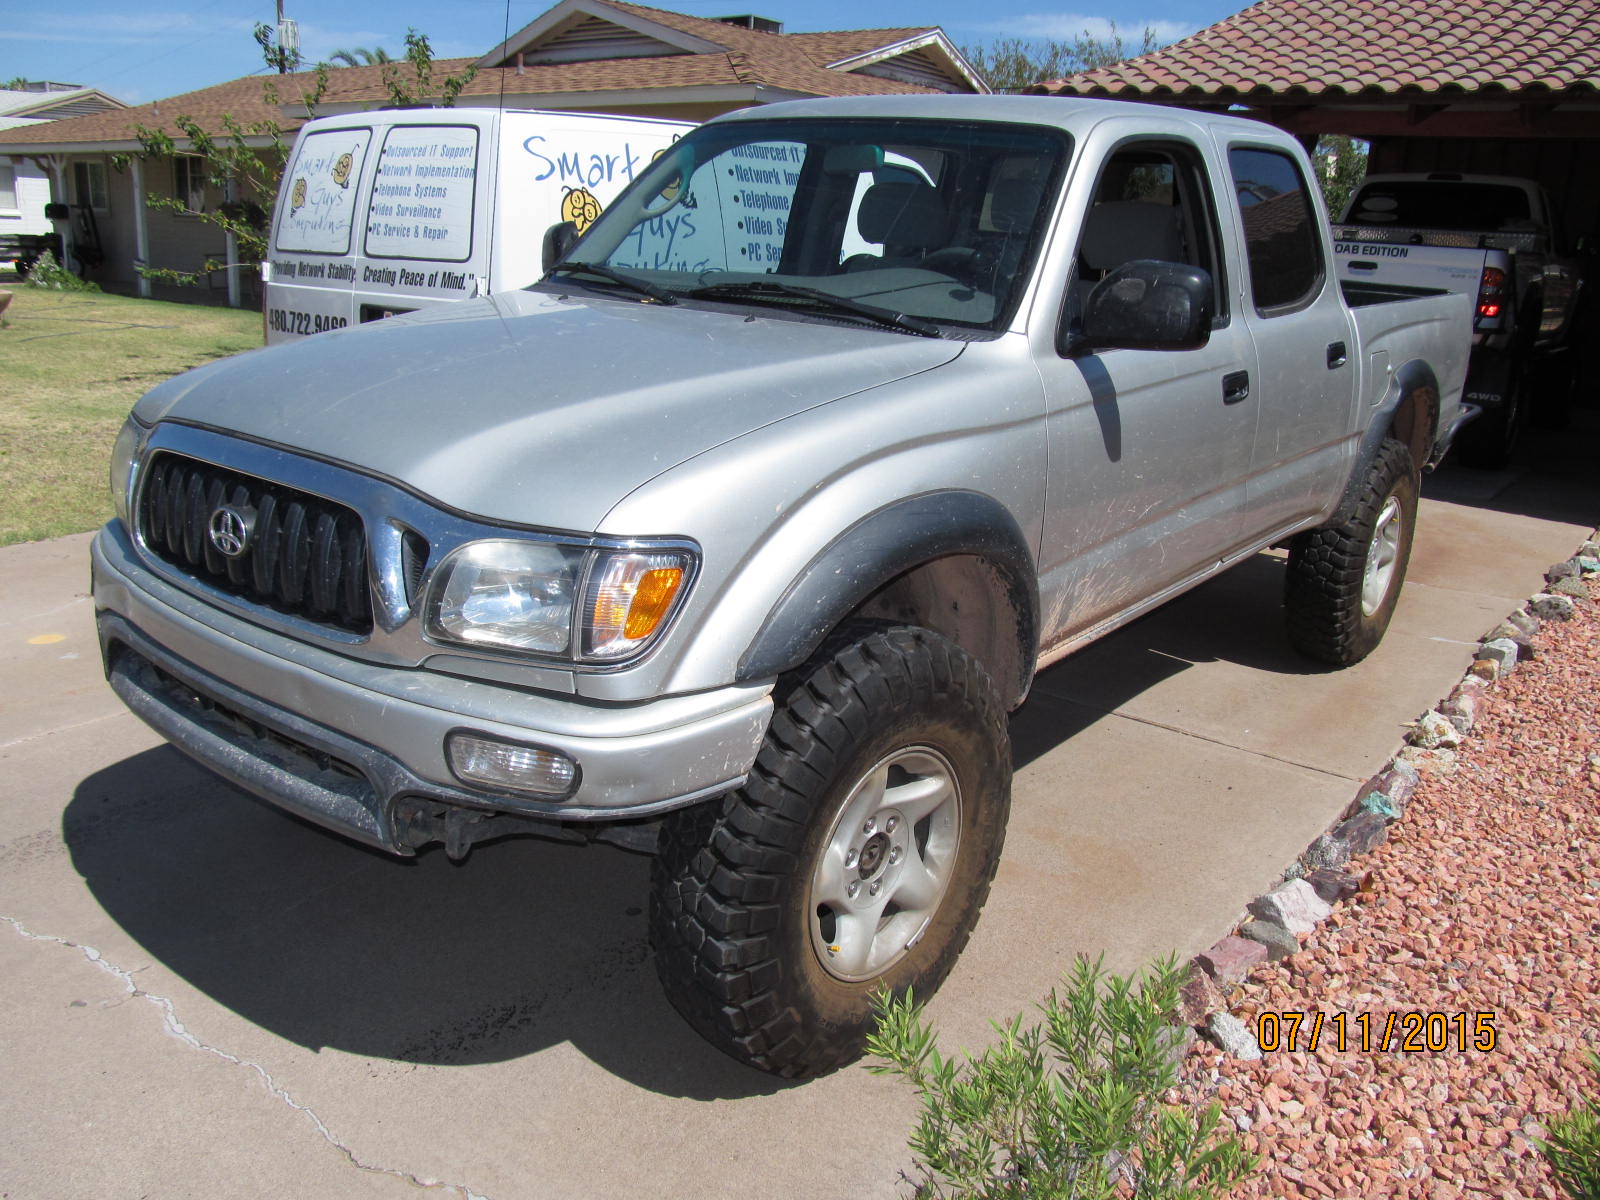
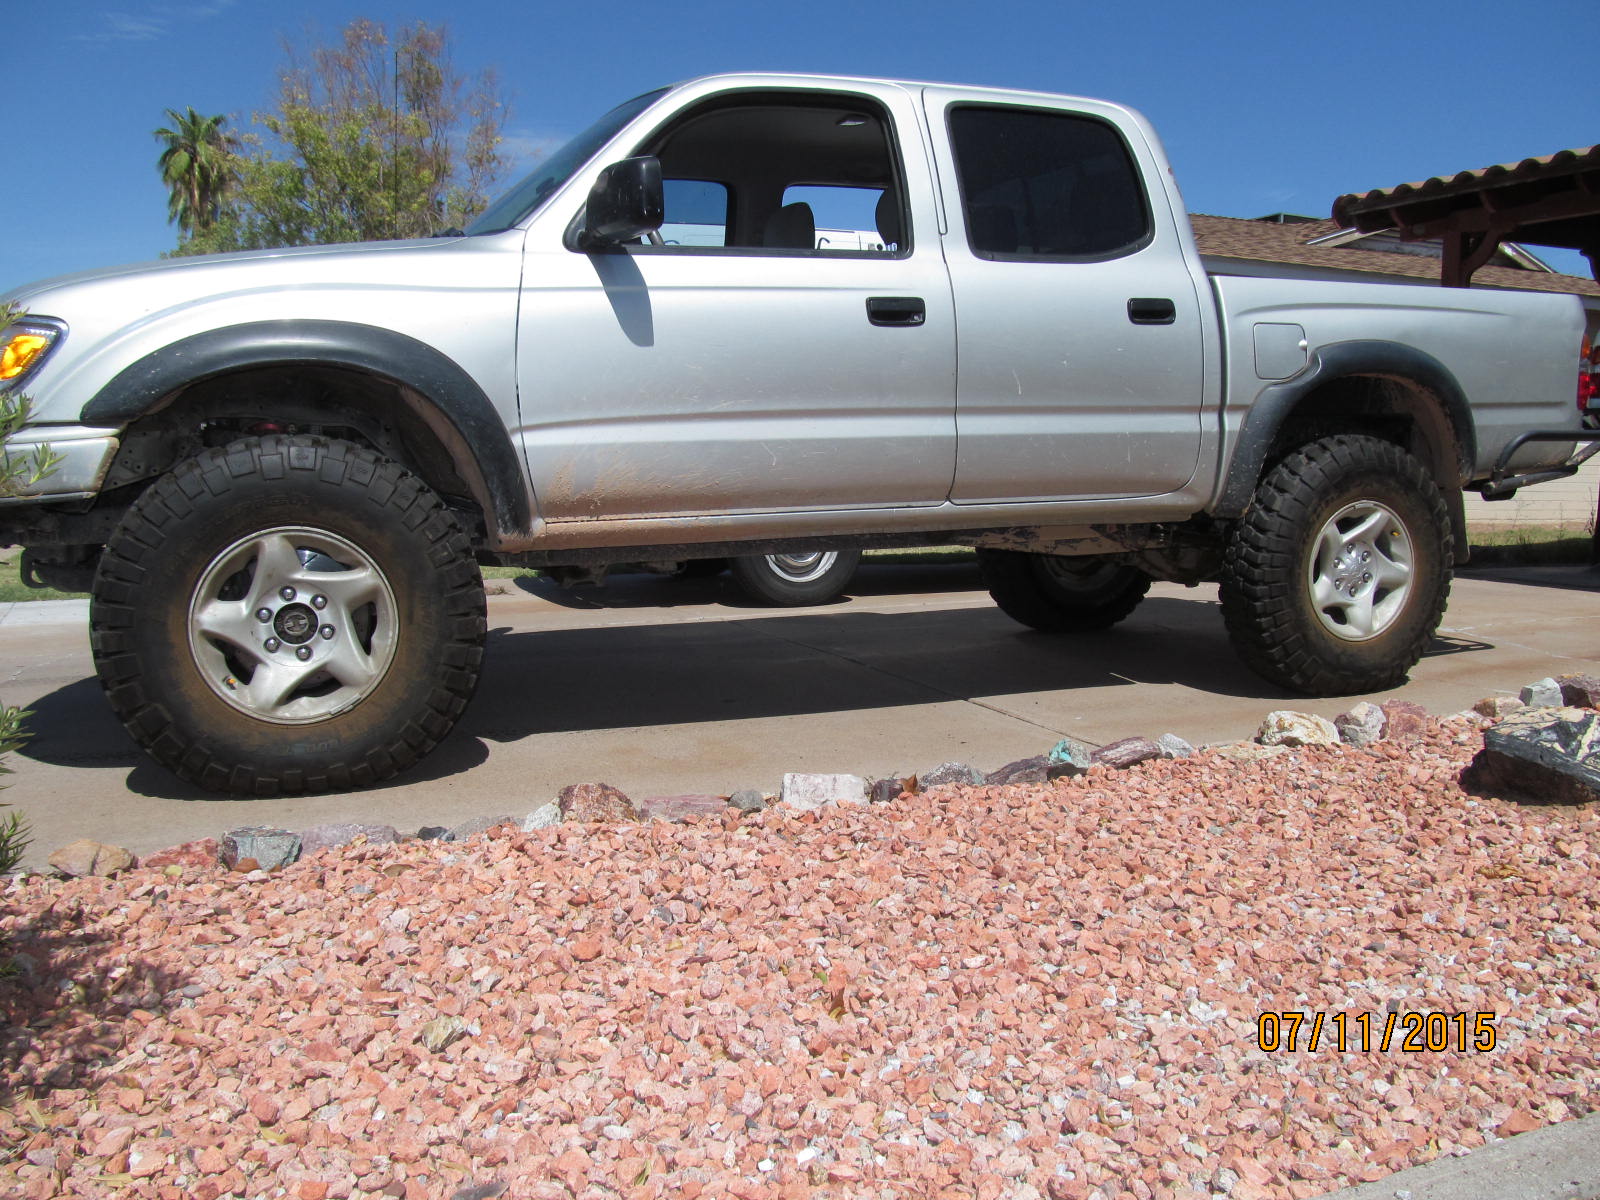
Joe is local to me and this is his 2002 Tacoma 4 door DoubleCab.
|
|
|

|
|
Gearing is stock 410 at the moment but will soon be 456 with an ARB in the front clam.
|
|
|
|
|
The mods are coming slowly but surely. Joe has a set of sliders to be welded on soon.
|
|
|

|
Already has the Allpro rear tubular bumper. Below it is a trailor hitch receiver that is quite unique
in that it has 2 additional hitch ports designed for a removable winch assembly.
|
|
|

|
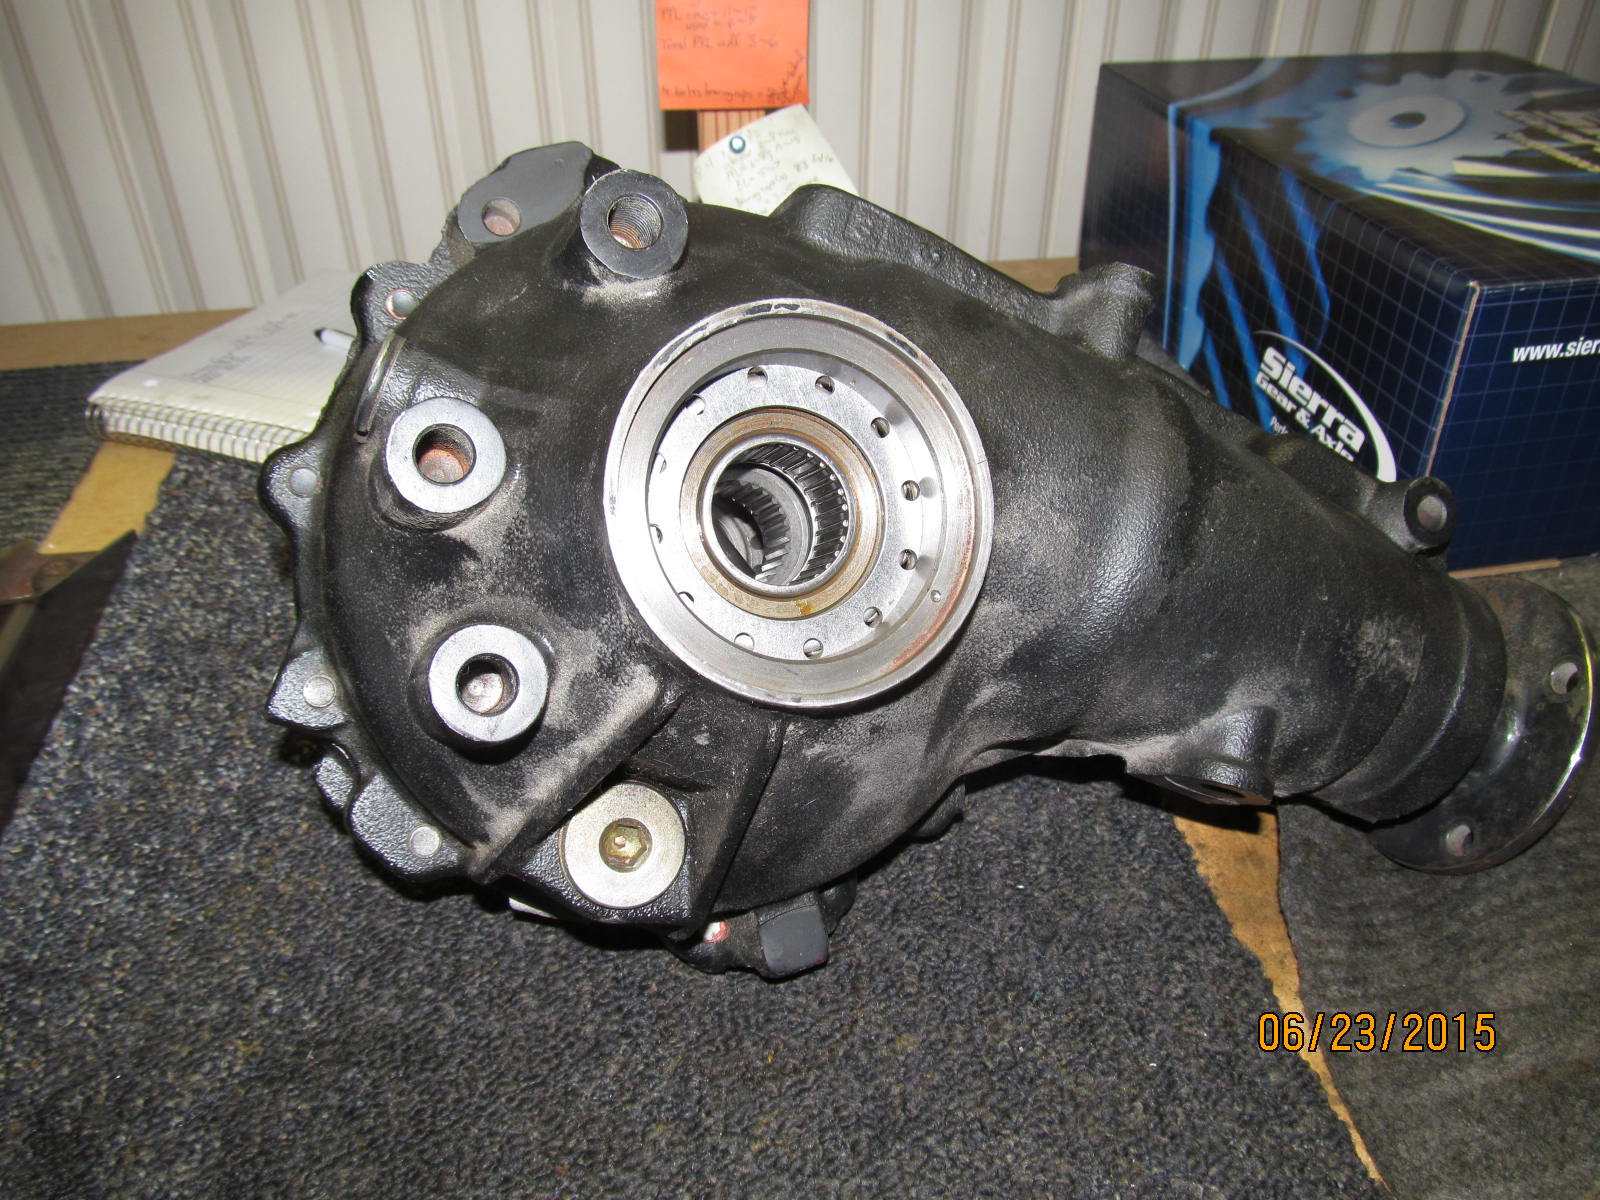
It wasn't necessary for Joe to remove his own stock 410 clam as he found a very clean one on Craigslist
and that way, downtime was minimized.
|
|
|
|
|
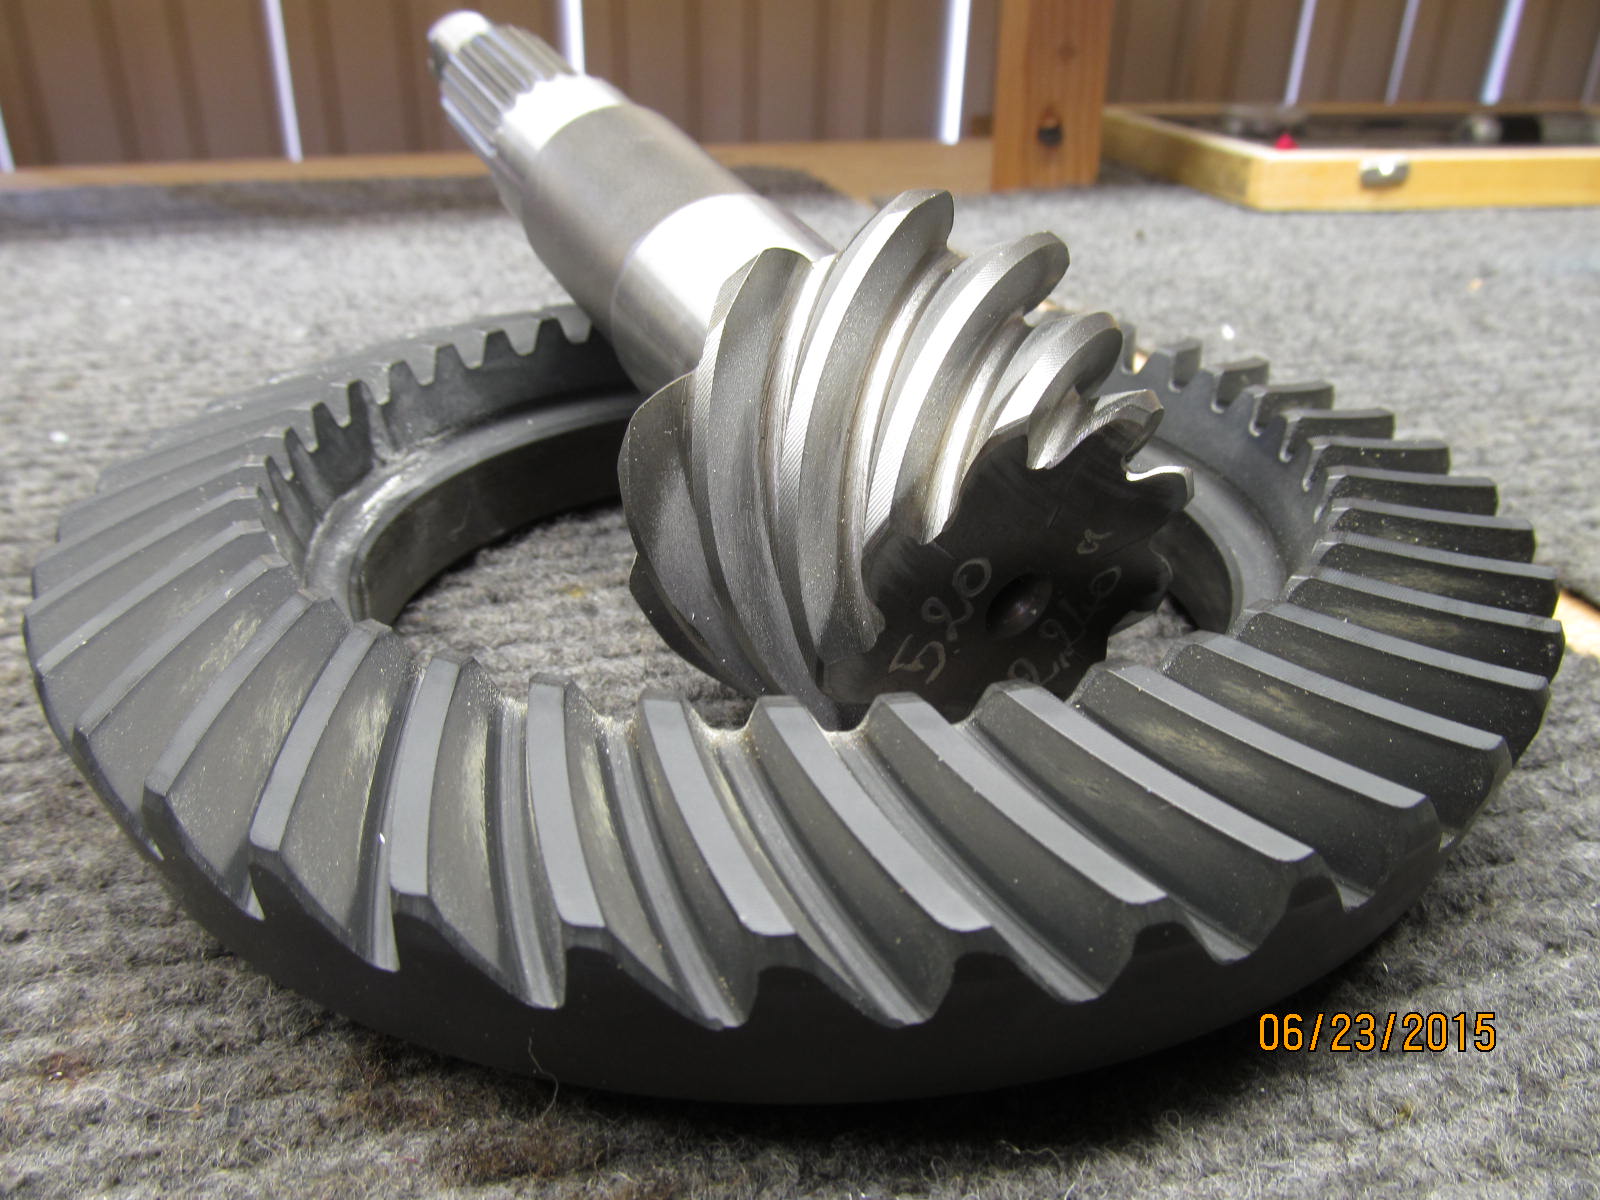
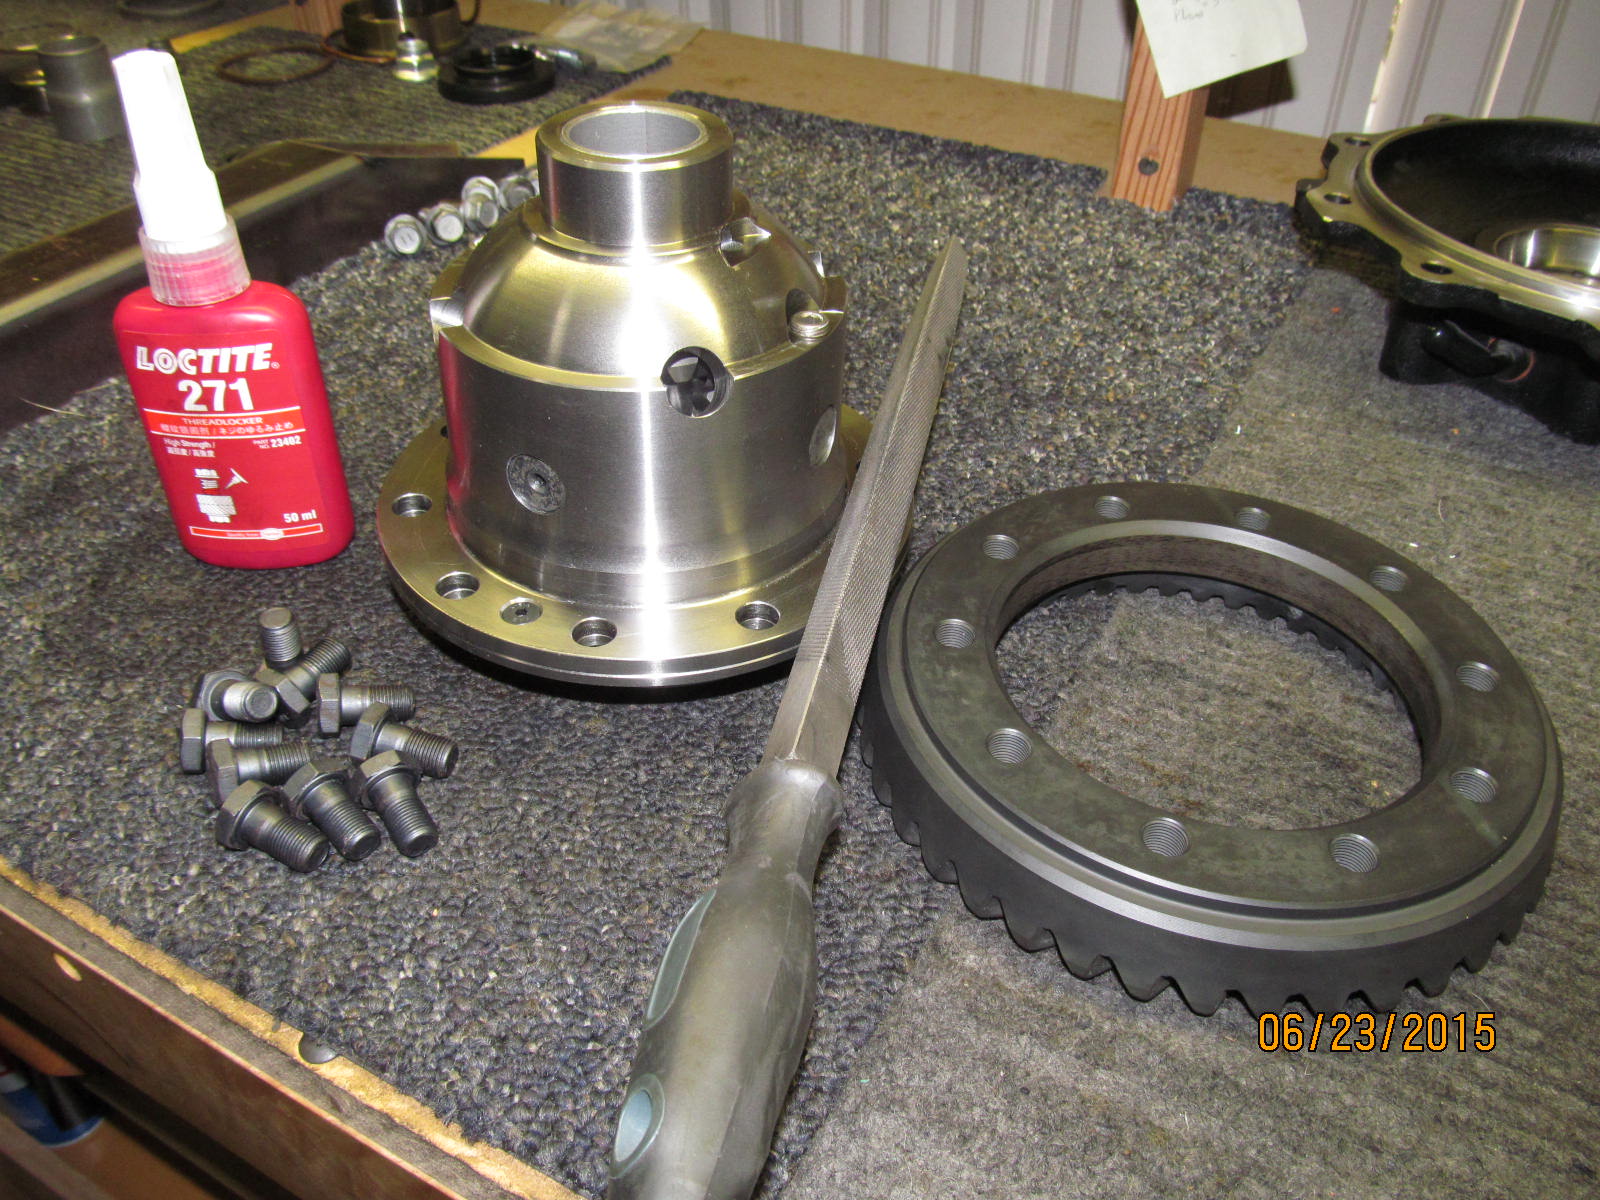
Sierra Gear 456 7.5" reverse cut ring and pinion
|
|
|
|
|
Being reverse cut means it's a high pinion and this is the drivers side.
|
|
|
|
|
Here's the other side...passenger side.
|
|
|
|
|
A close up of the 456 Sierra Gear. The ring teeth have quality cuts and no sharp edges at all.
|
|
|
|
|
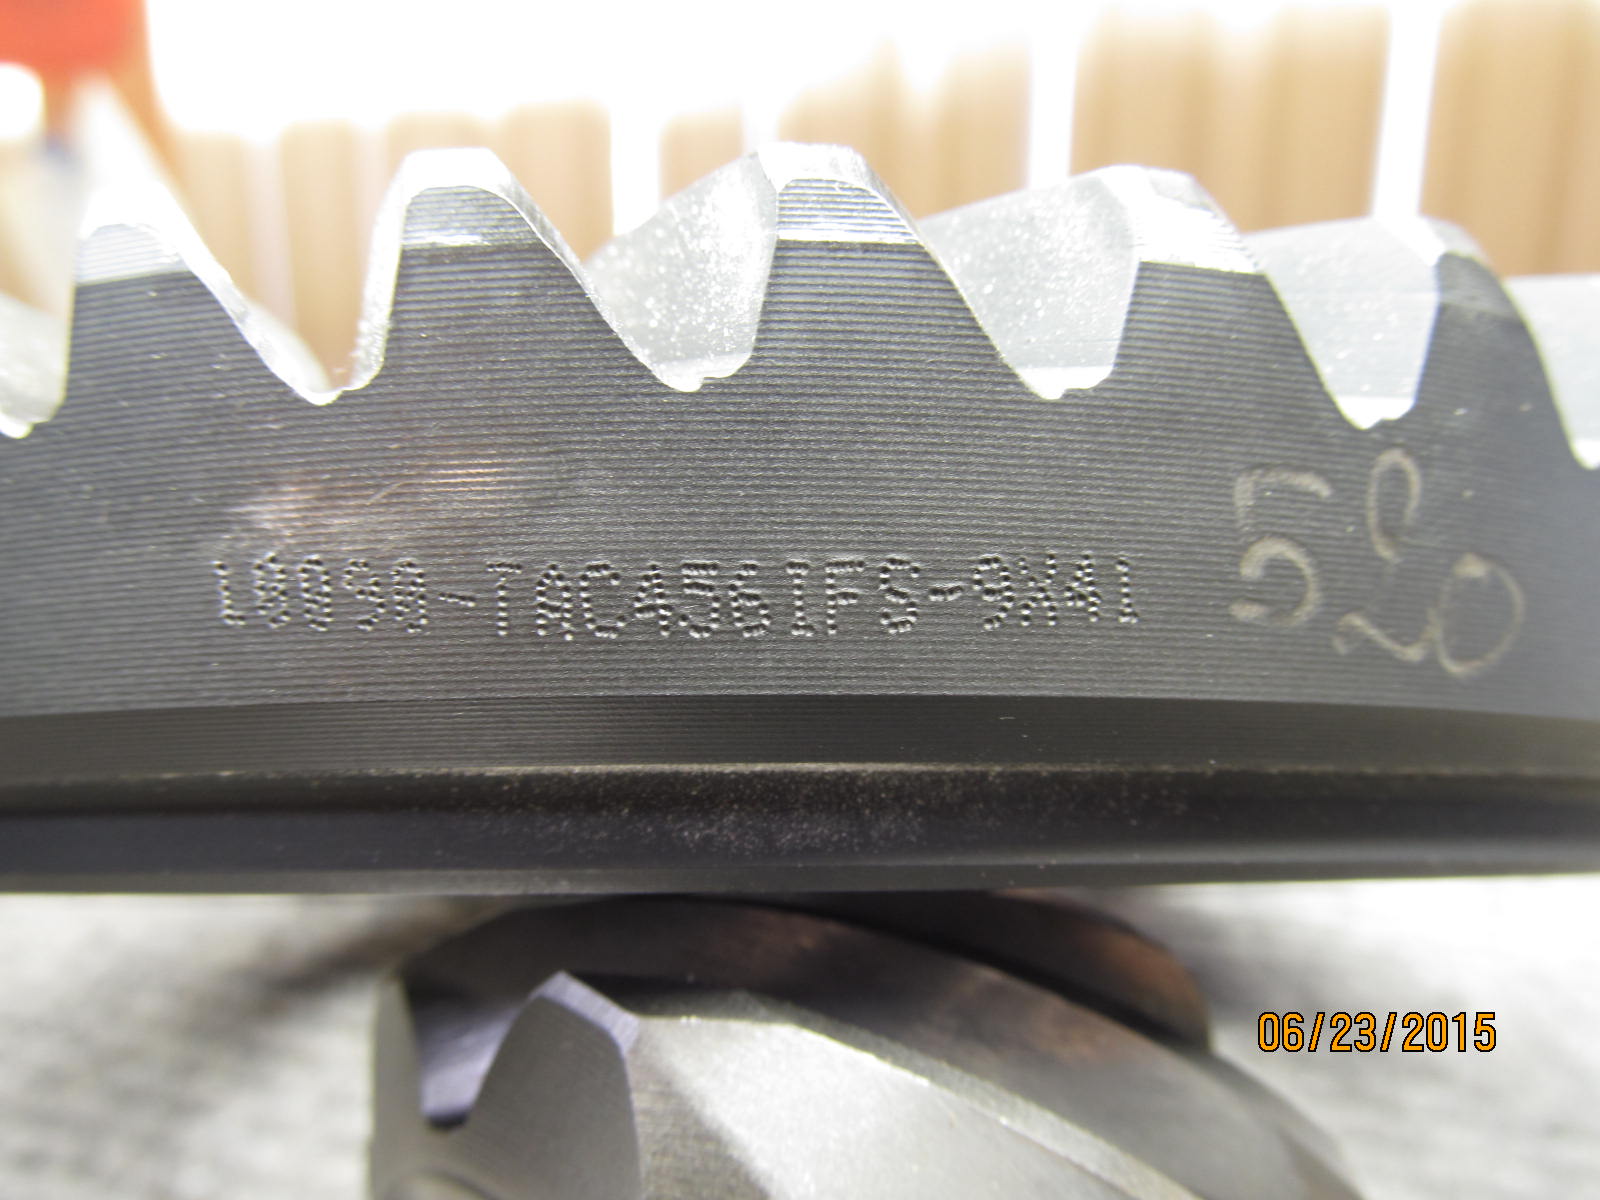
The scriber method they use makes it hard to say for sure what is saying...looks like L8898-TAC456IFS-9X41
|
|
|
|
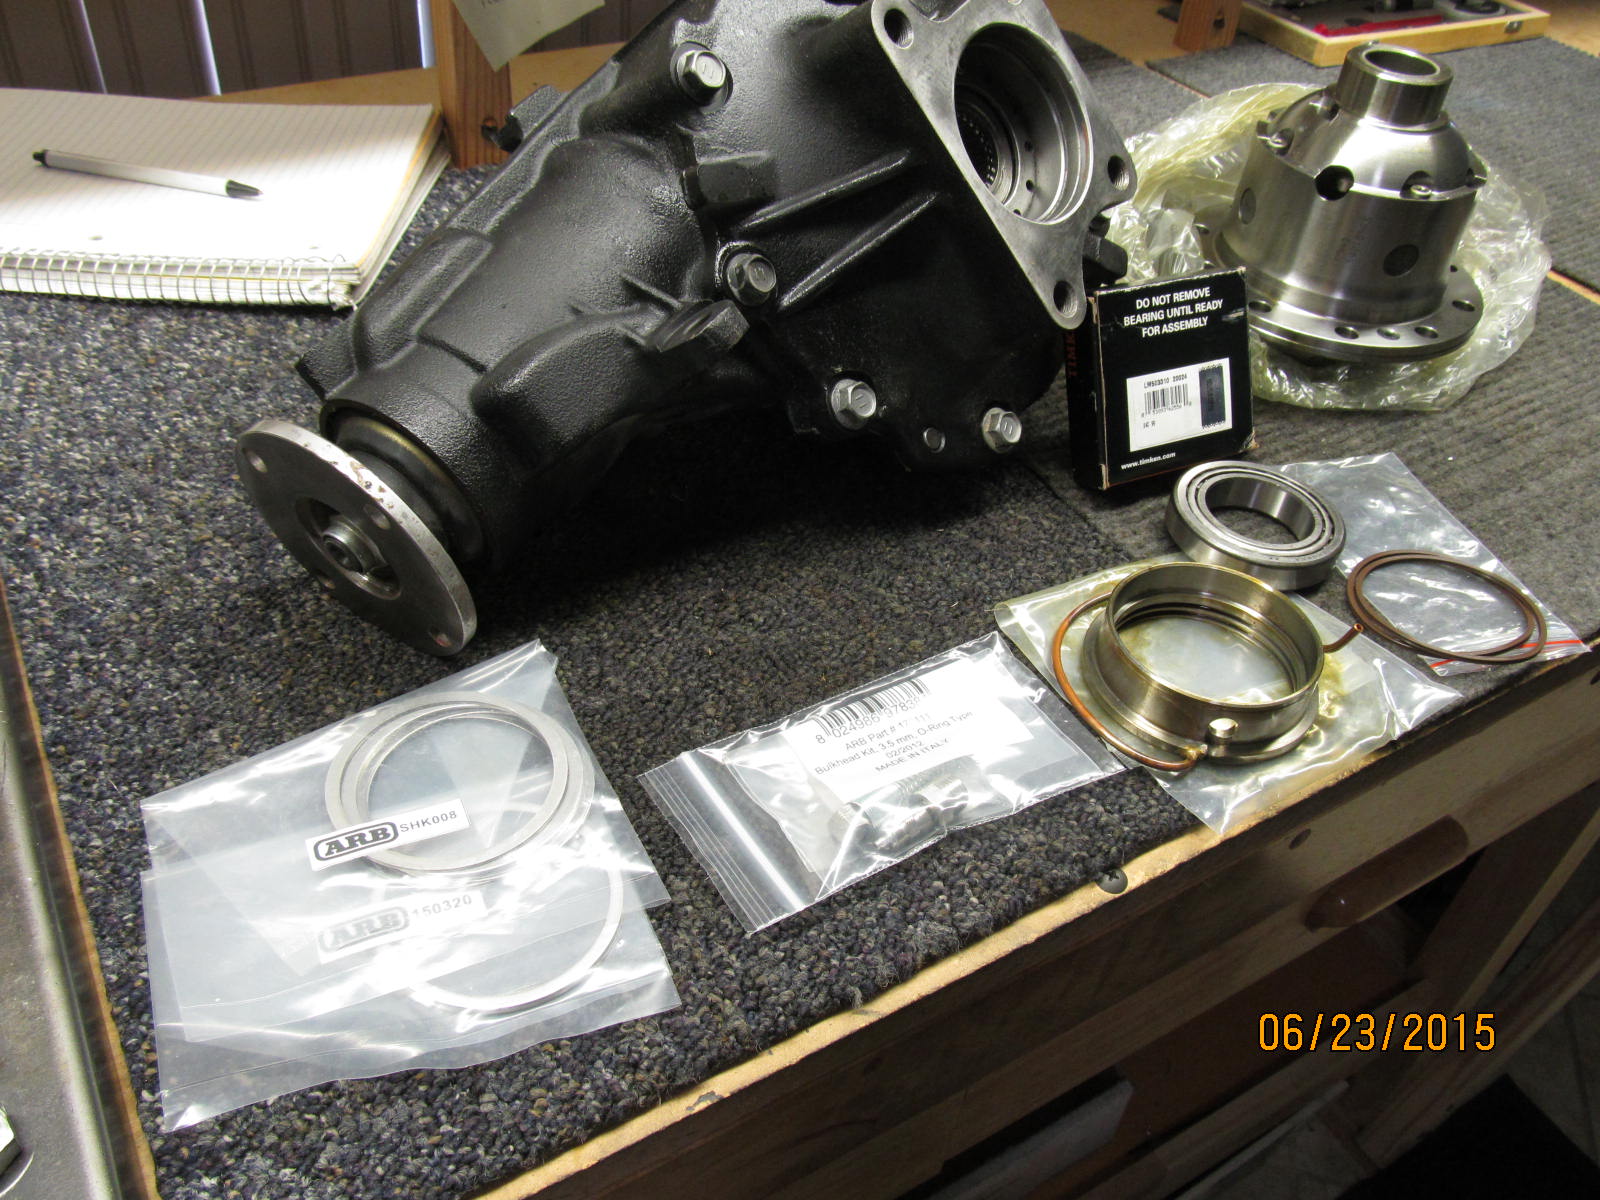
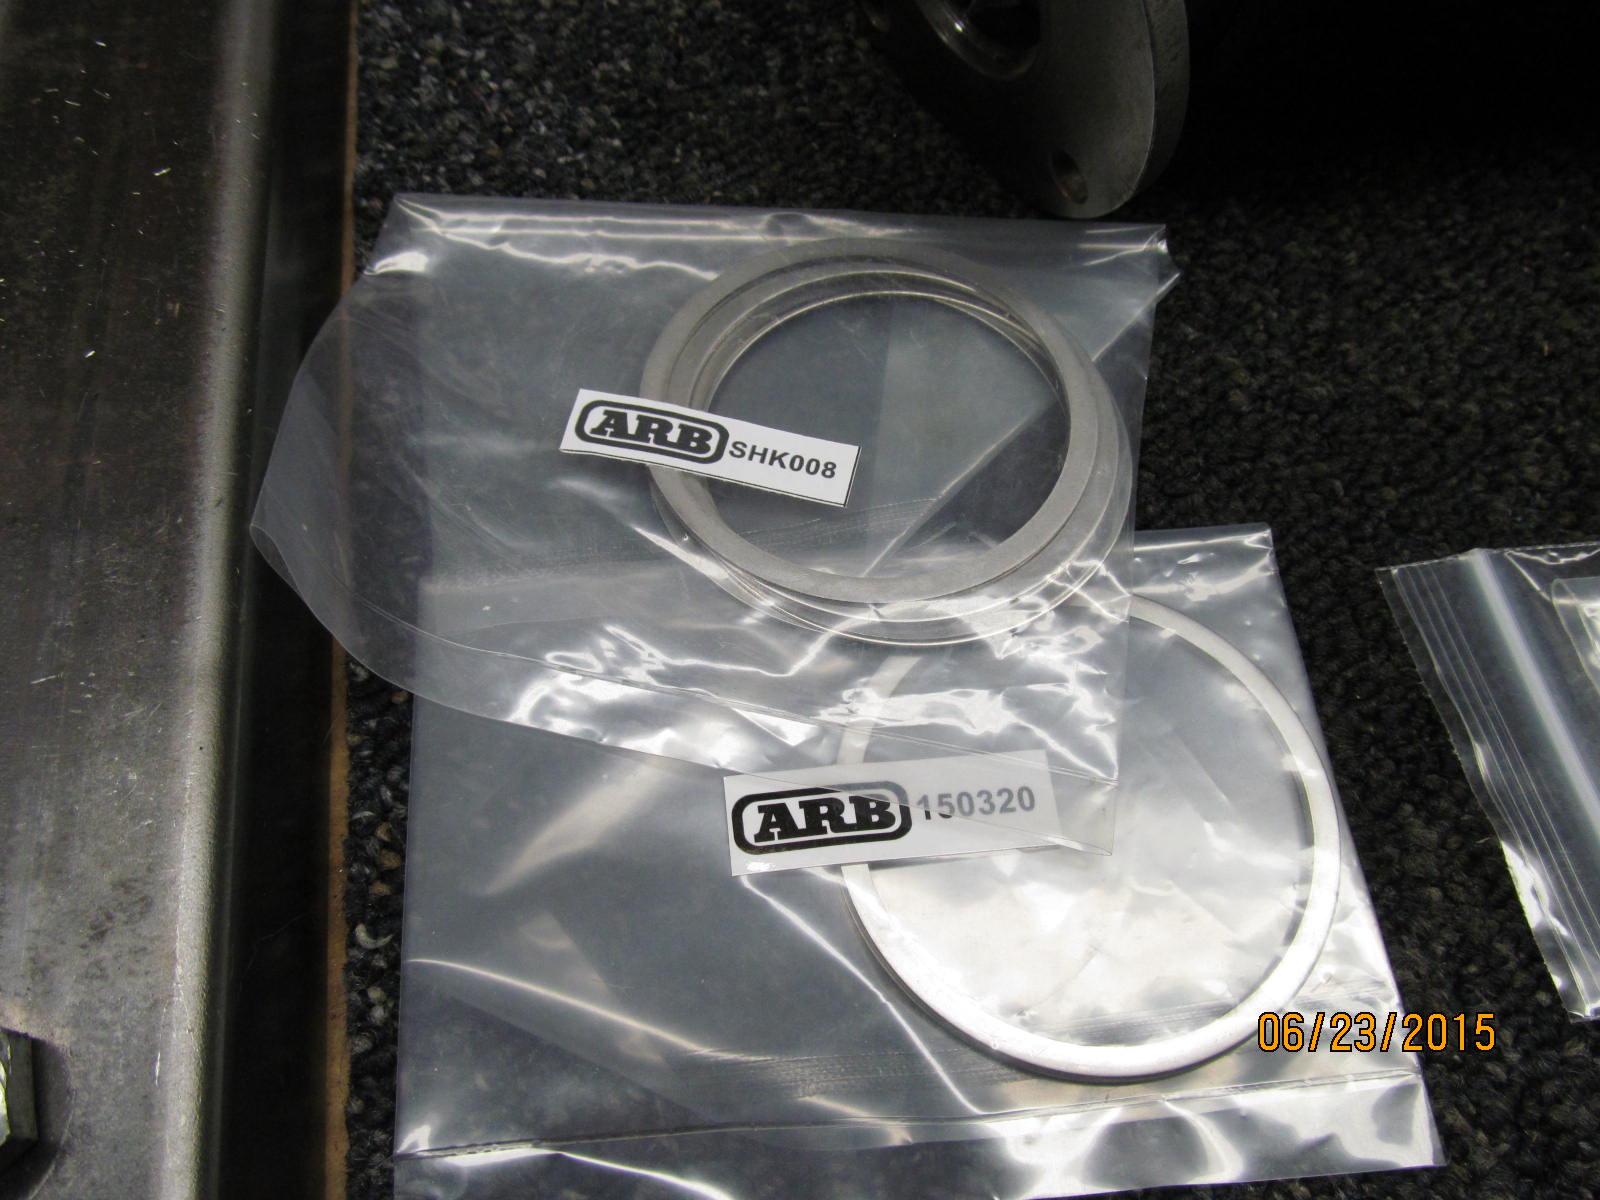
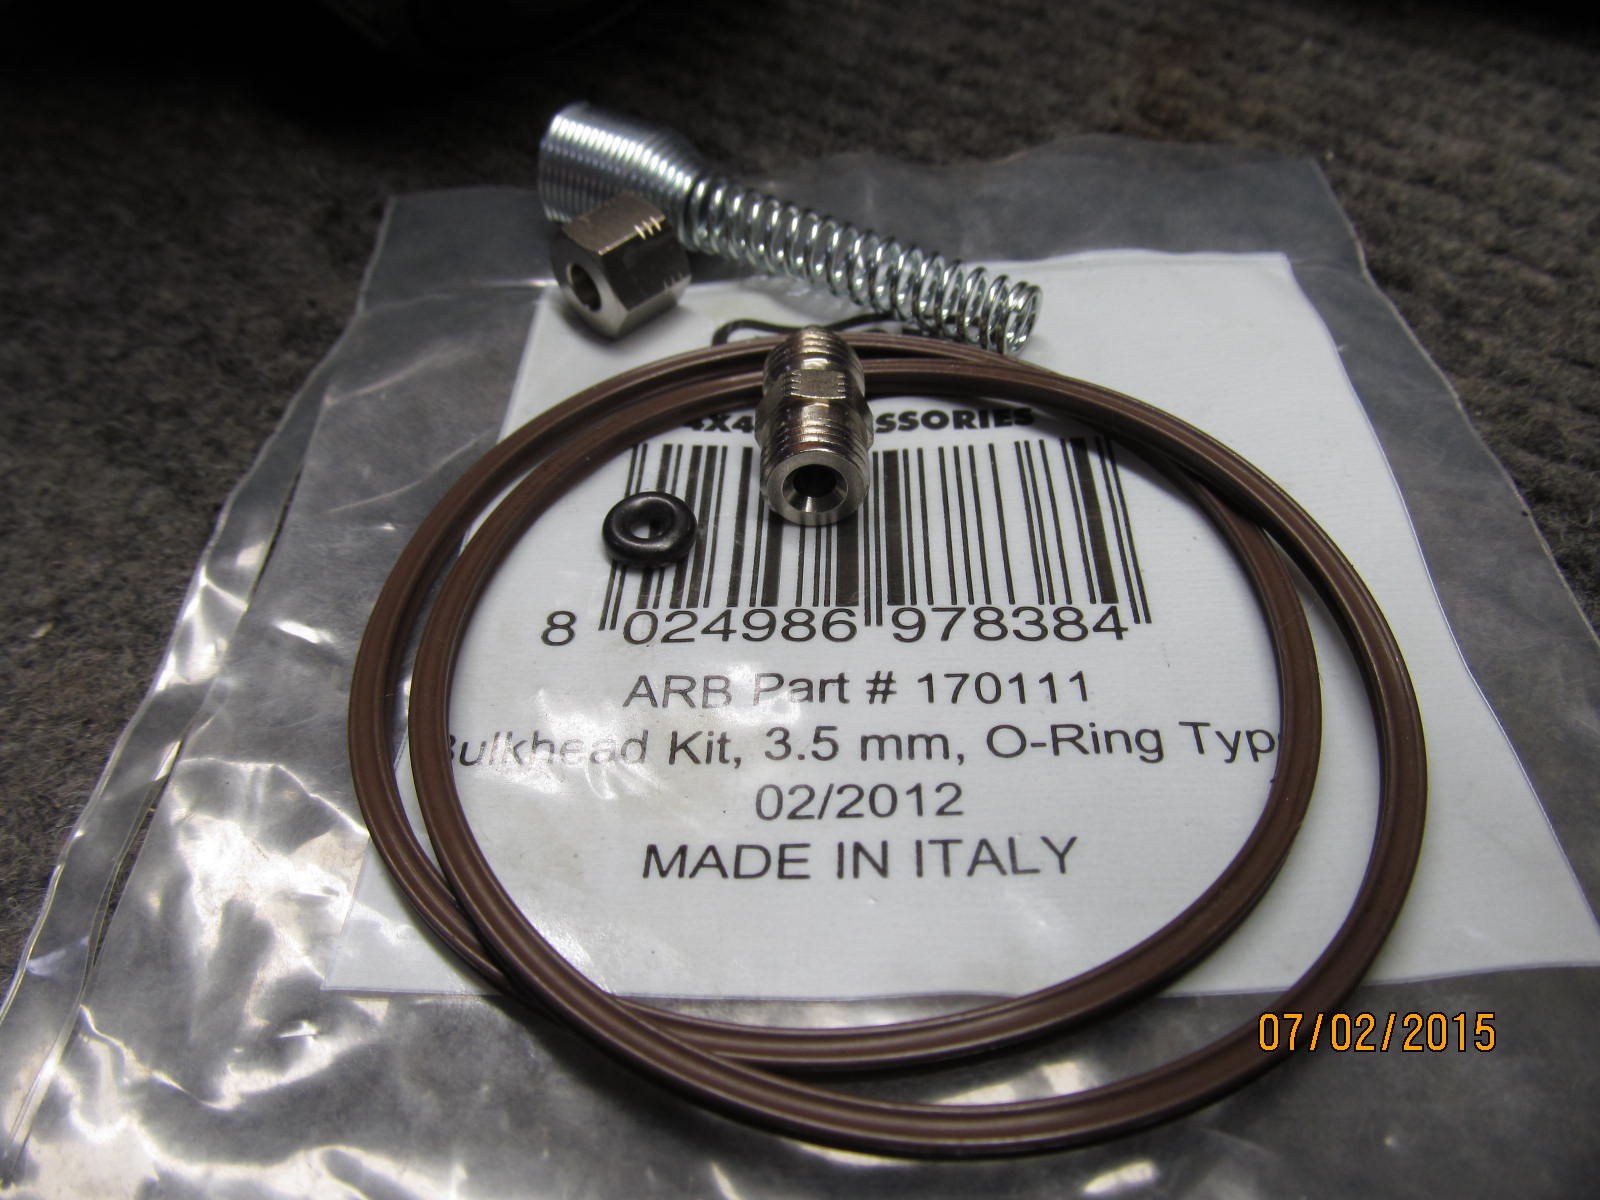
Shown is the RD90 ARB with the key items....a new bearing(supplied from ARB), 2 x-rings, seal housing with
pre-formed copper tube, bulkhead body kit, and shims directly from ARB.
|
|
|
|
|
I think I only used one .030" shim for the entire install.
|
|
|
|
|
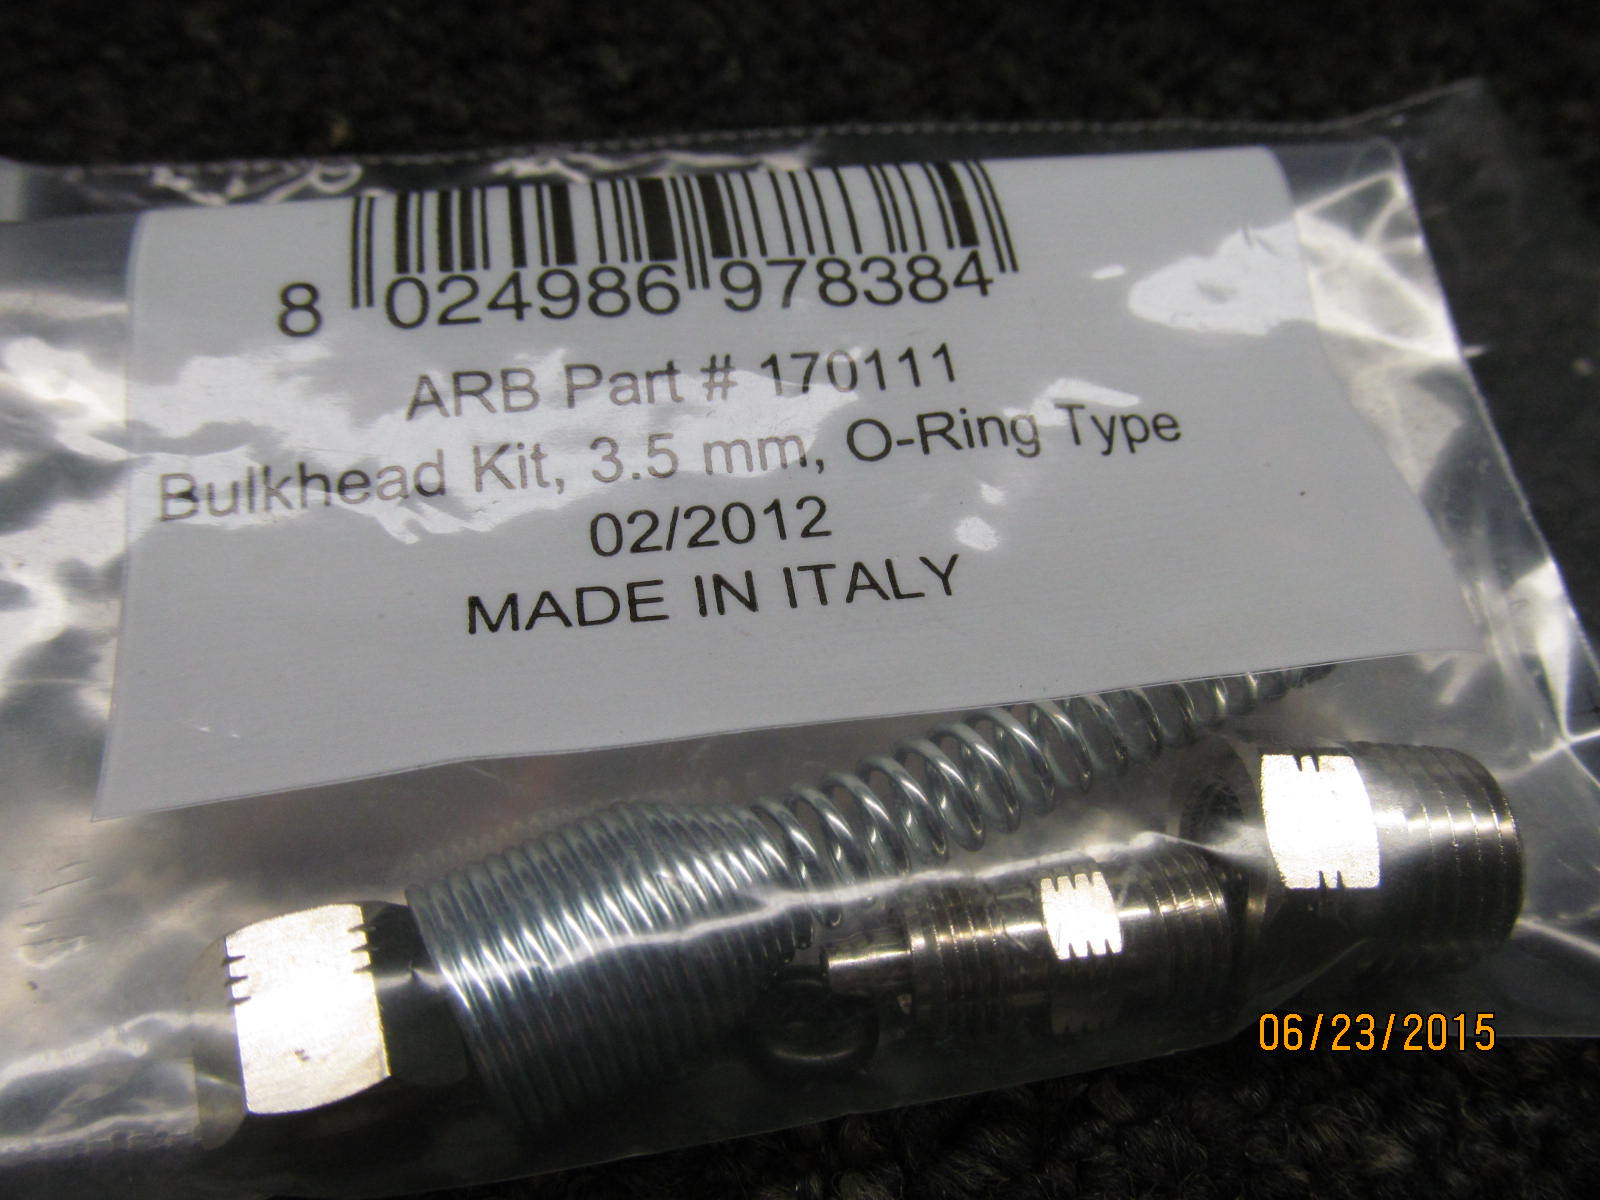
Bulkhead body kit
|
|
|
|
|
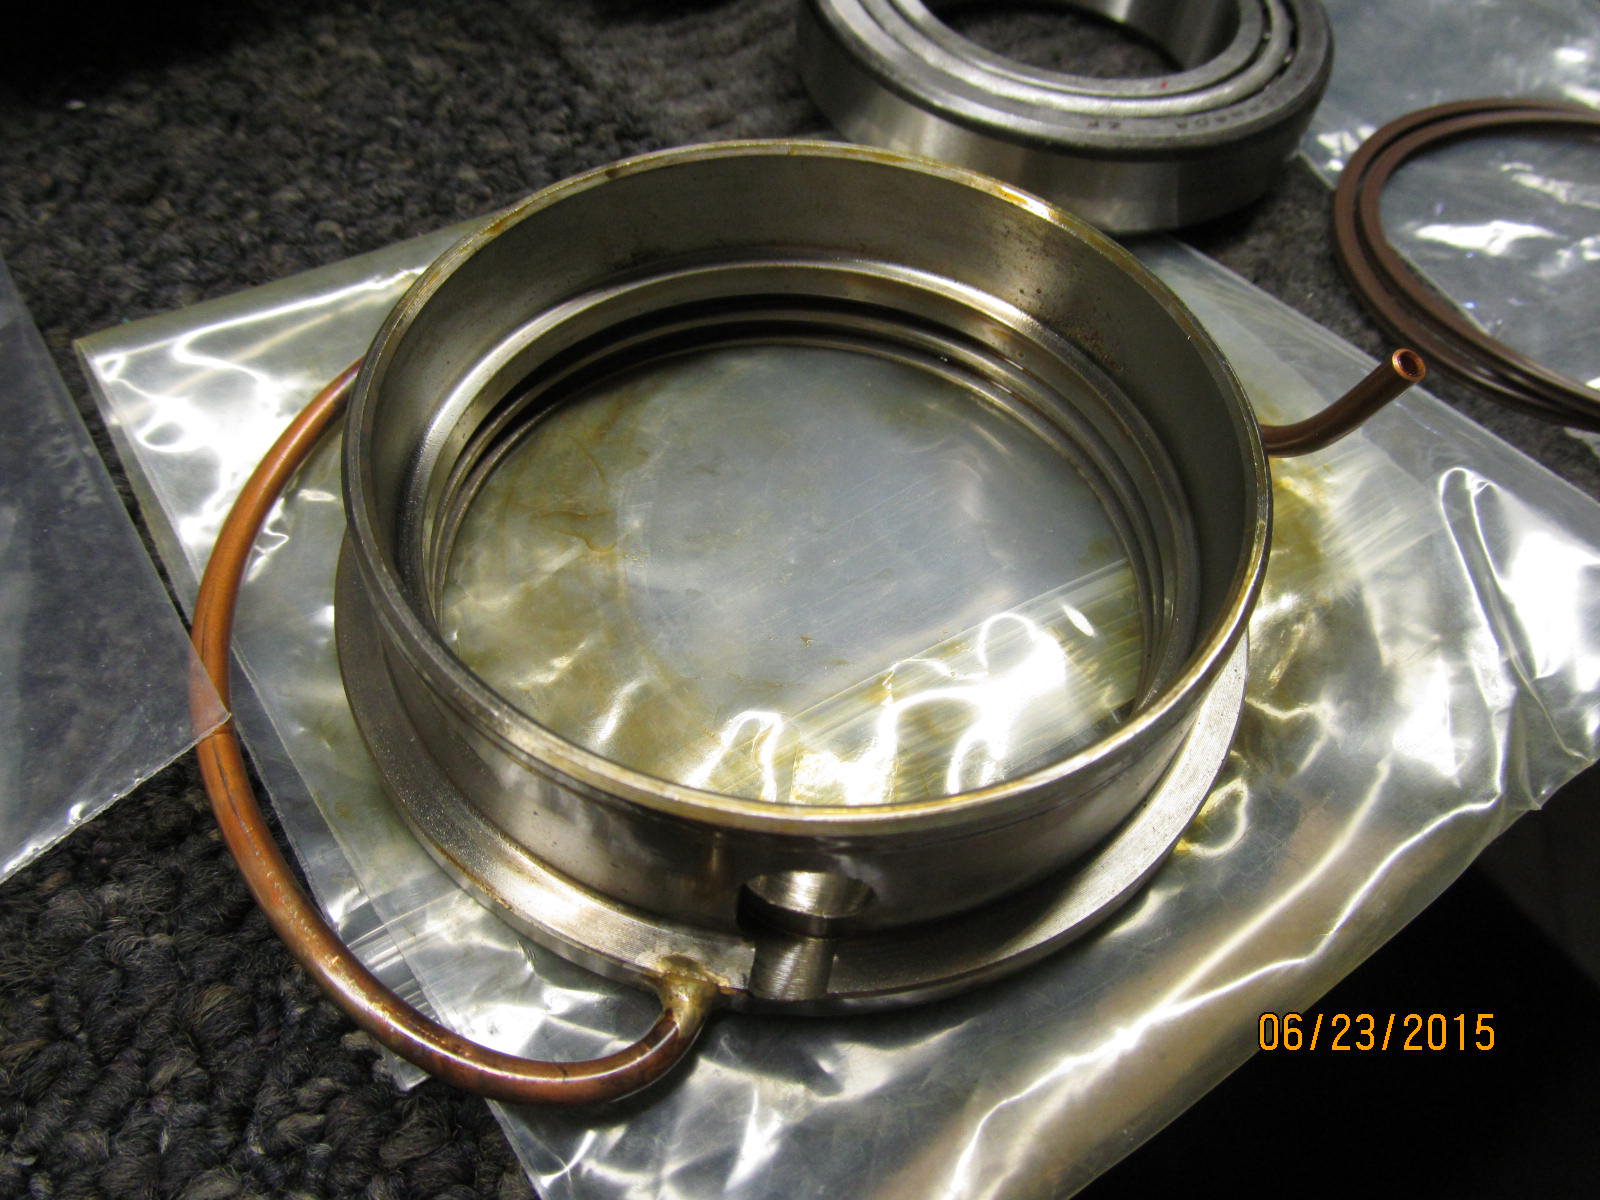
Seal housing
|
|
|
|
|
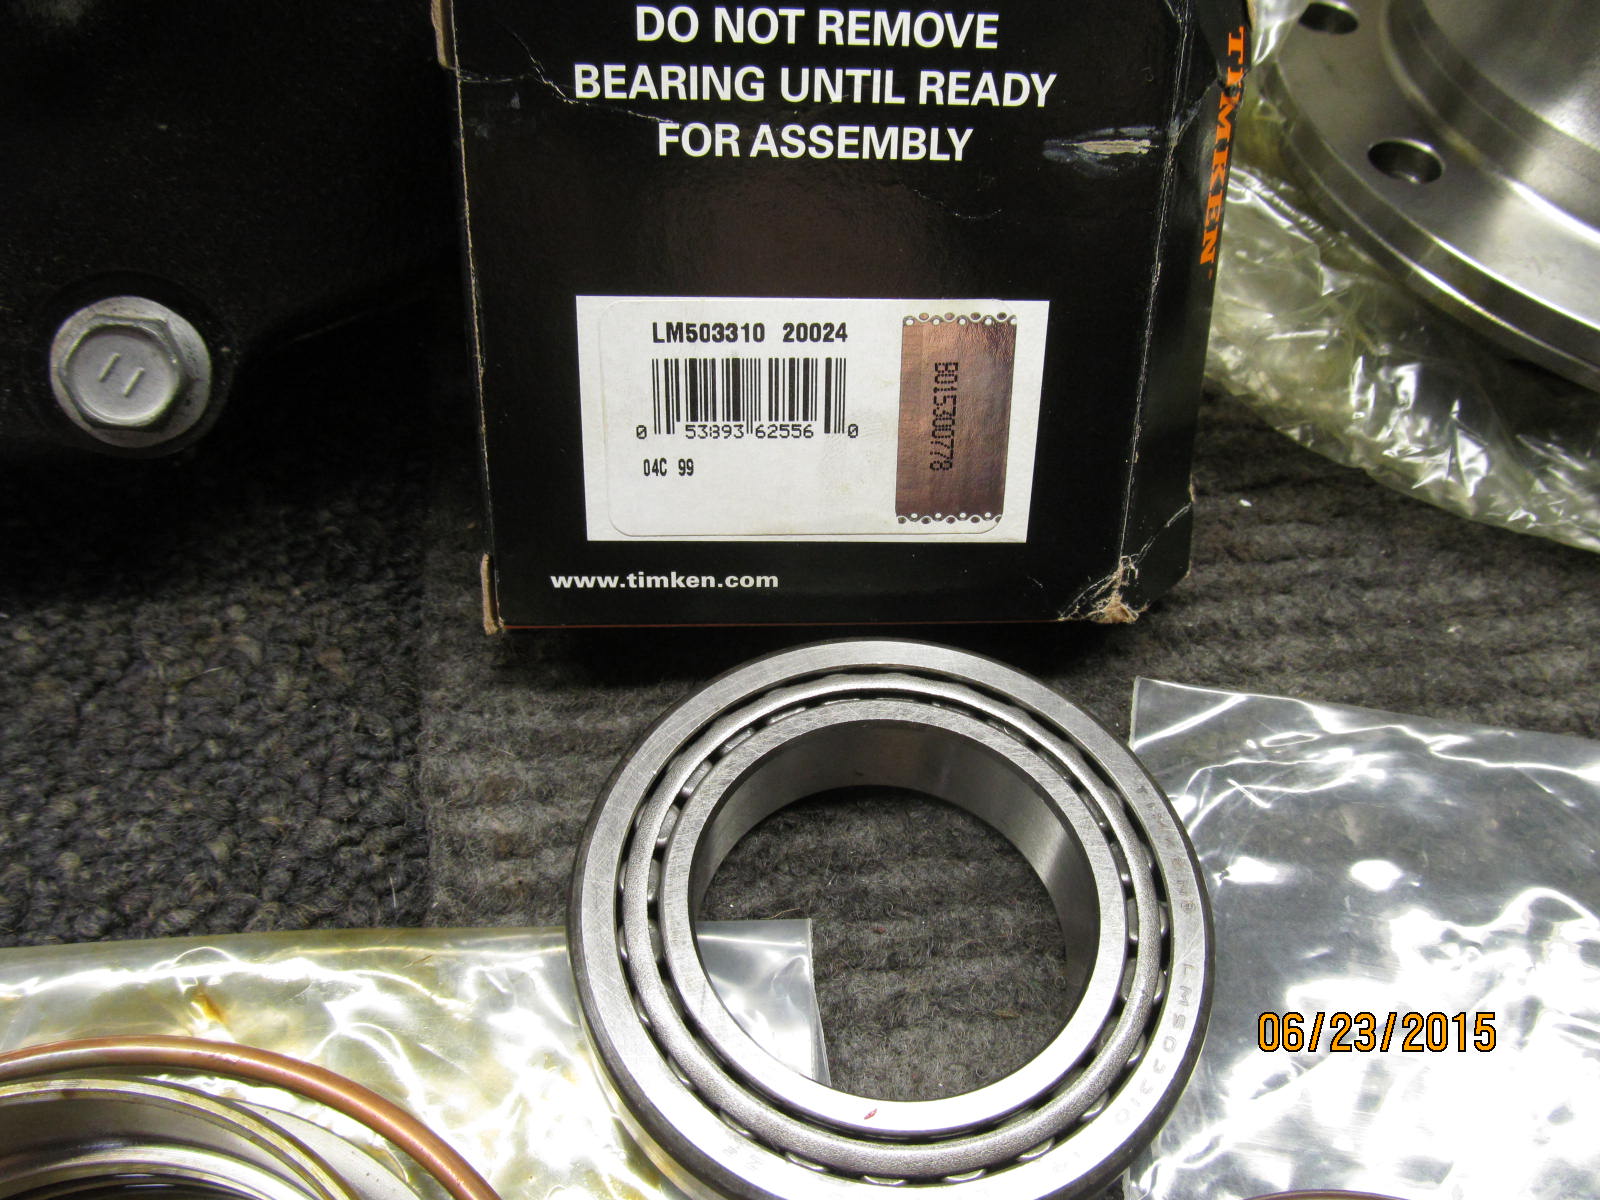
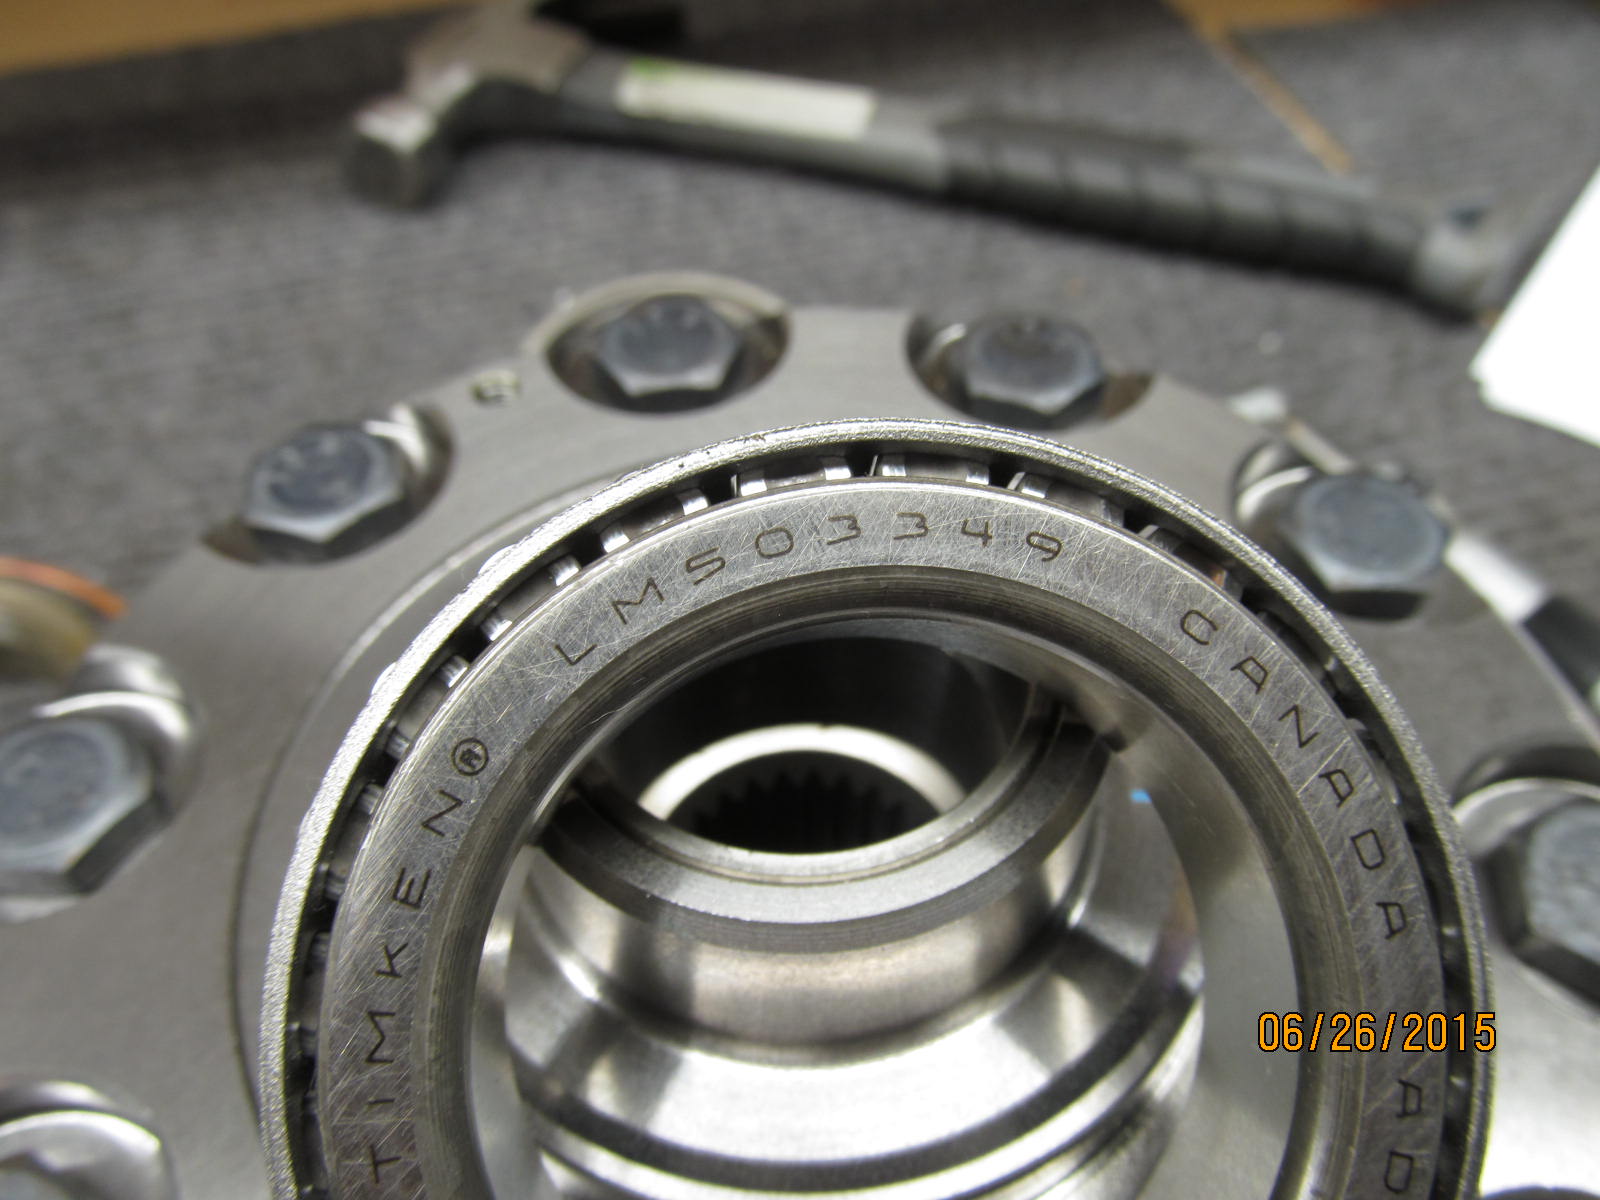
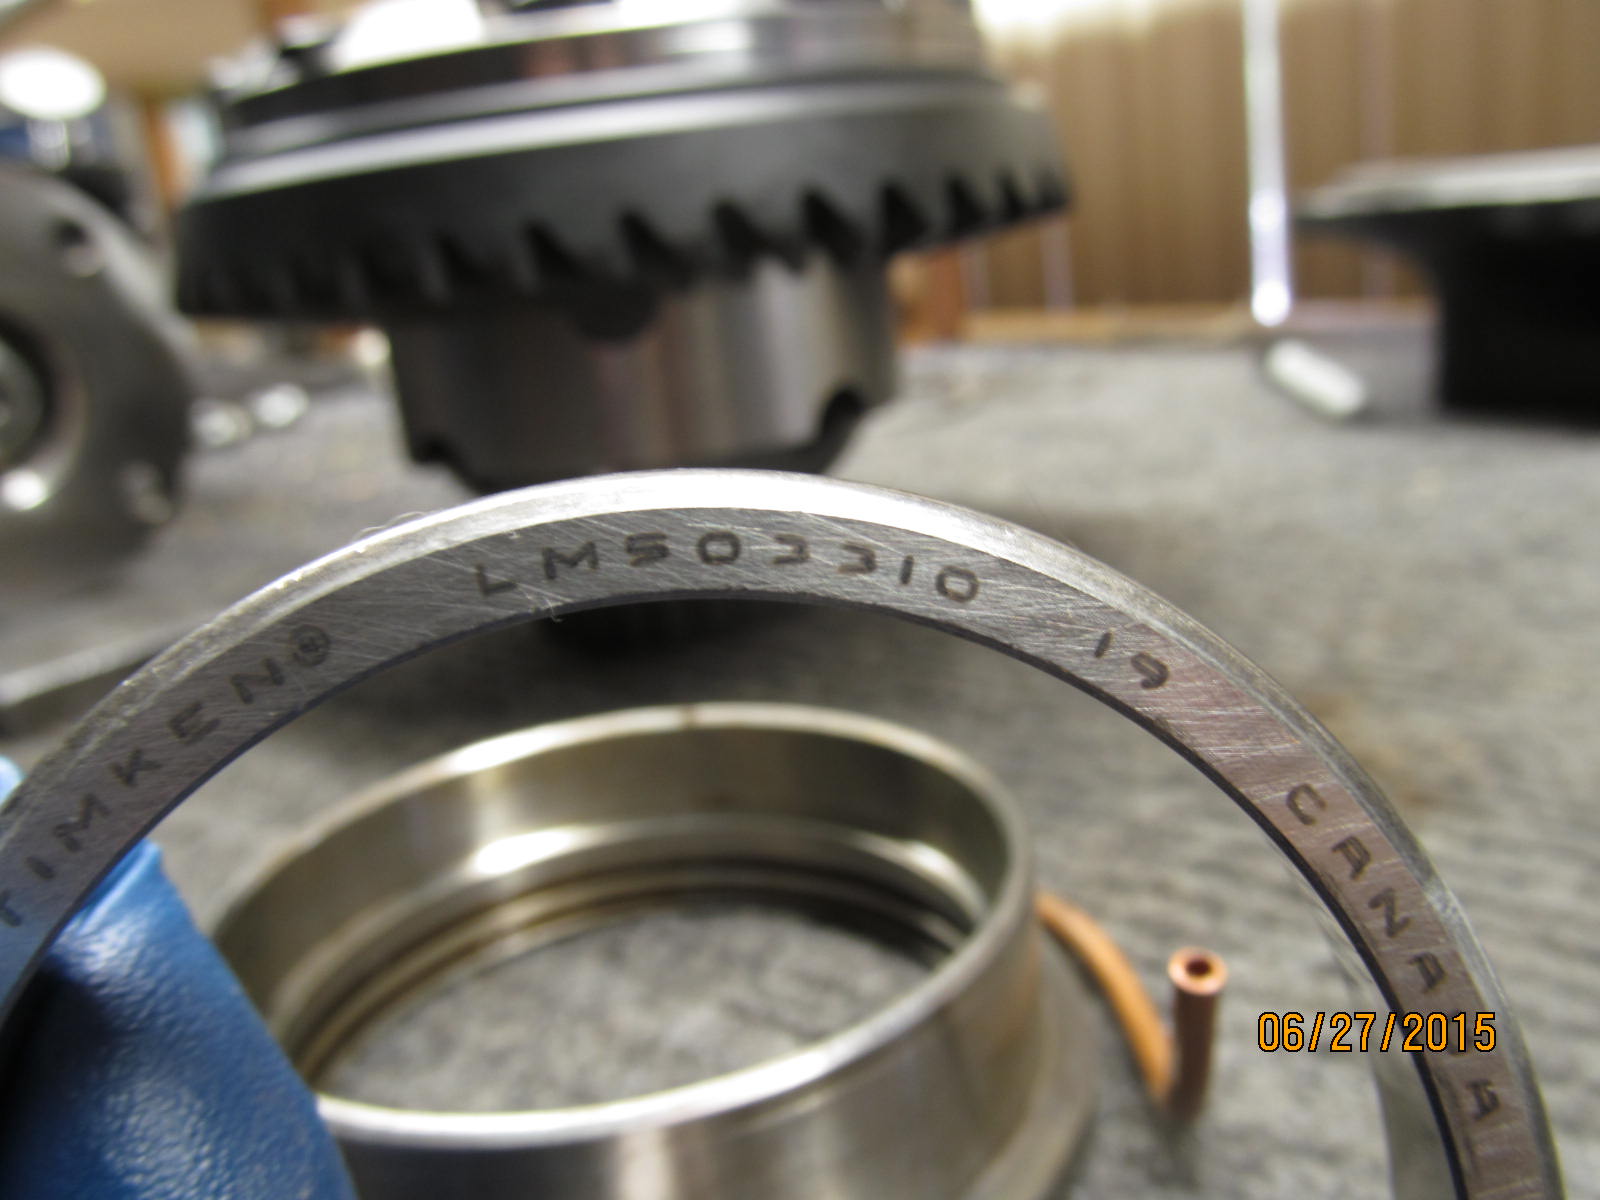
ARB supplied the LM503310 bearing that will be pressed into the seal housing.
|
|
|
|
|
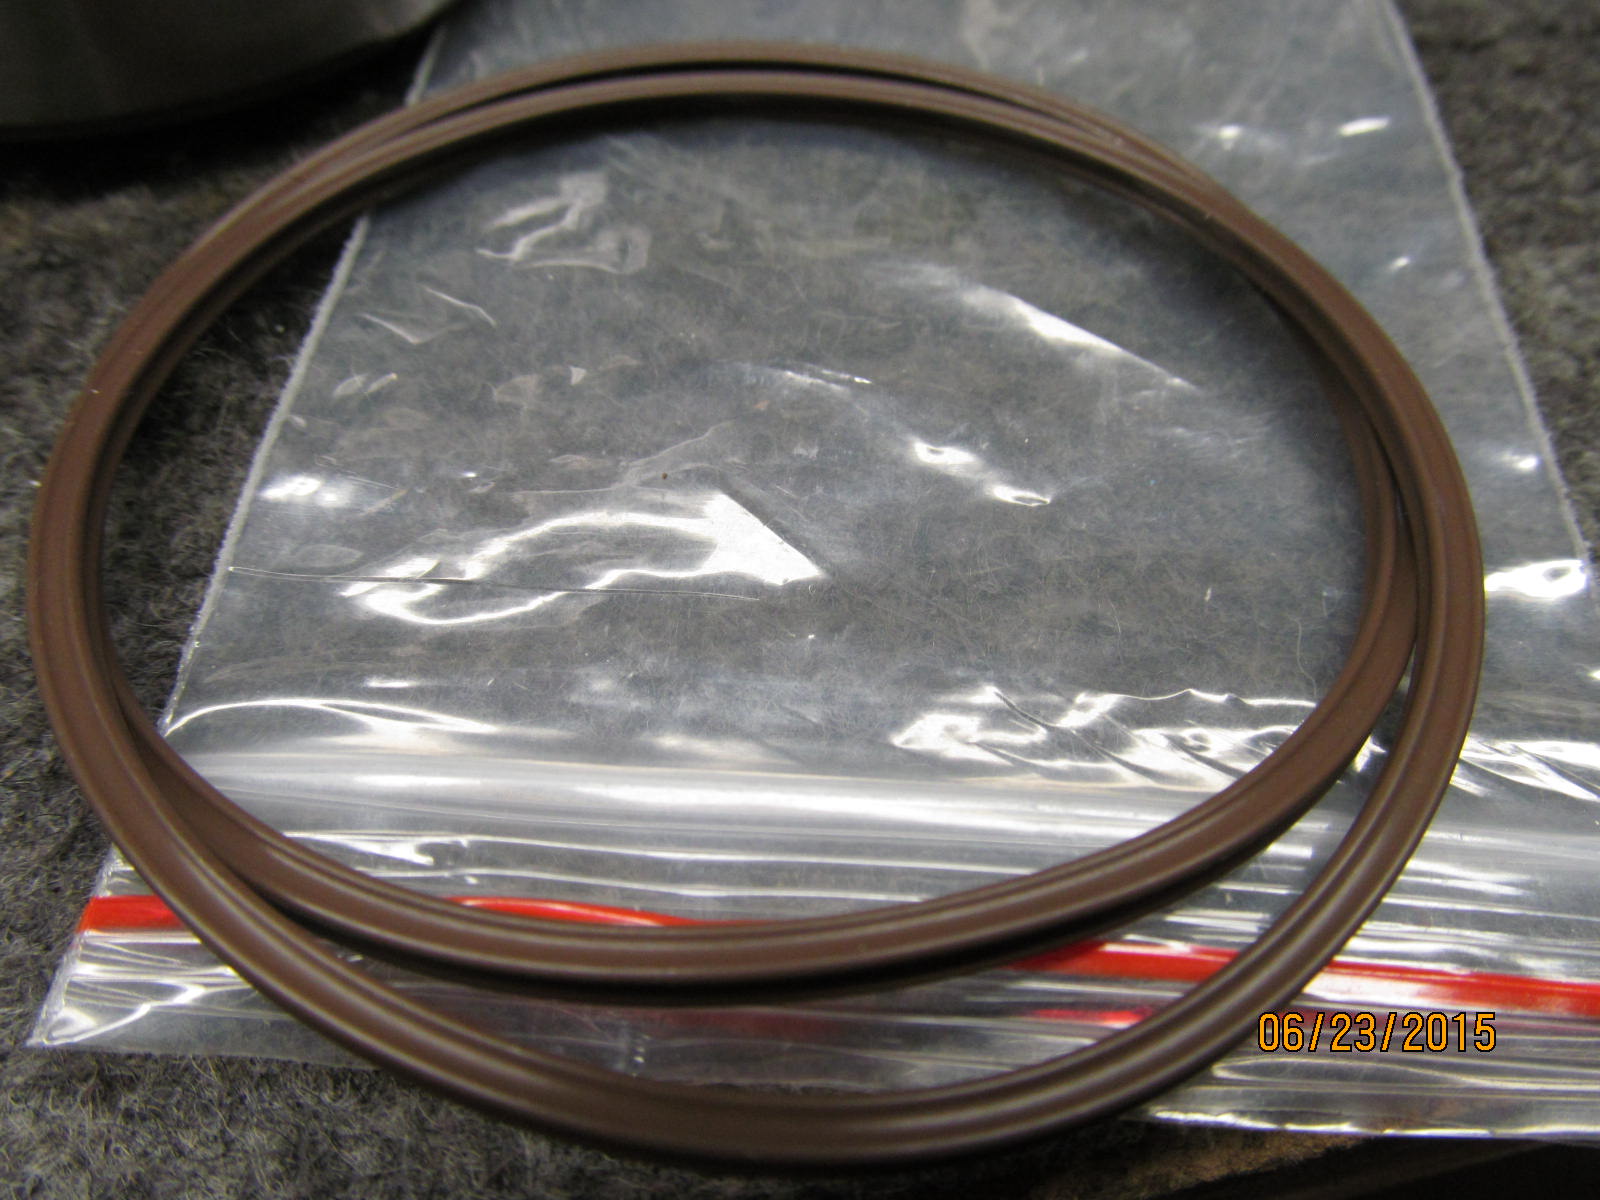
These x-rings are an improvement over the old o-rings.
|
|
|
|
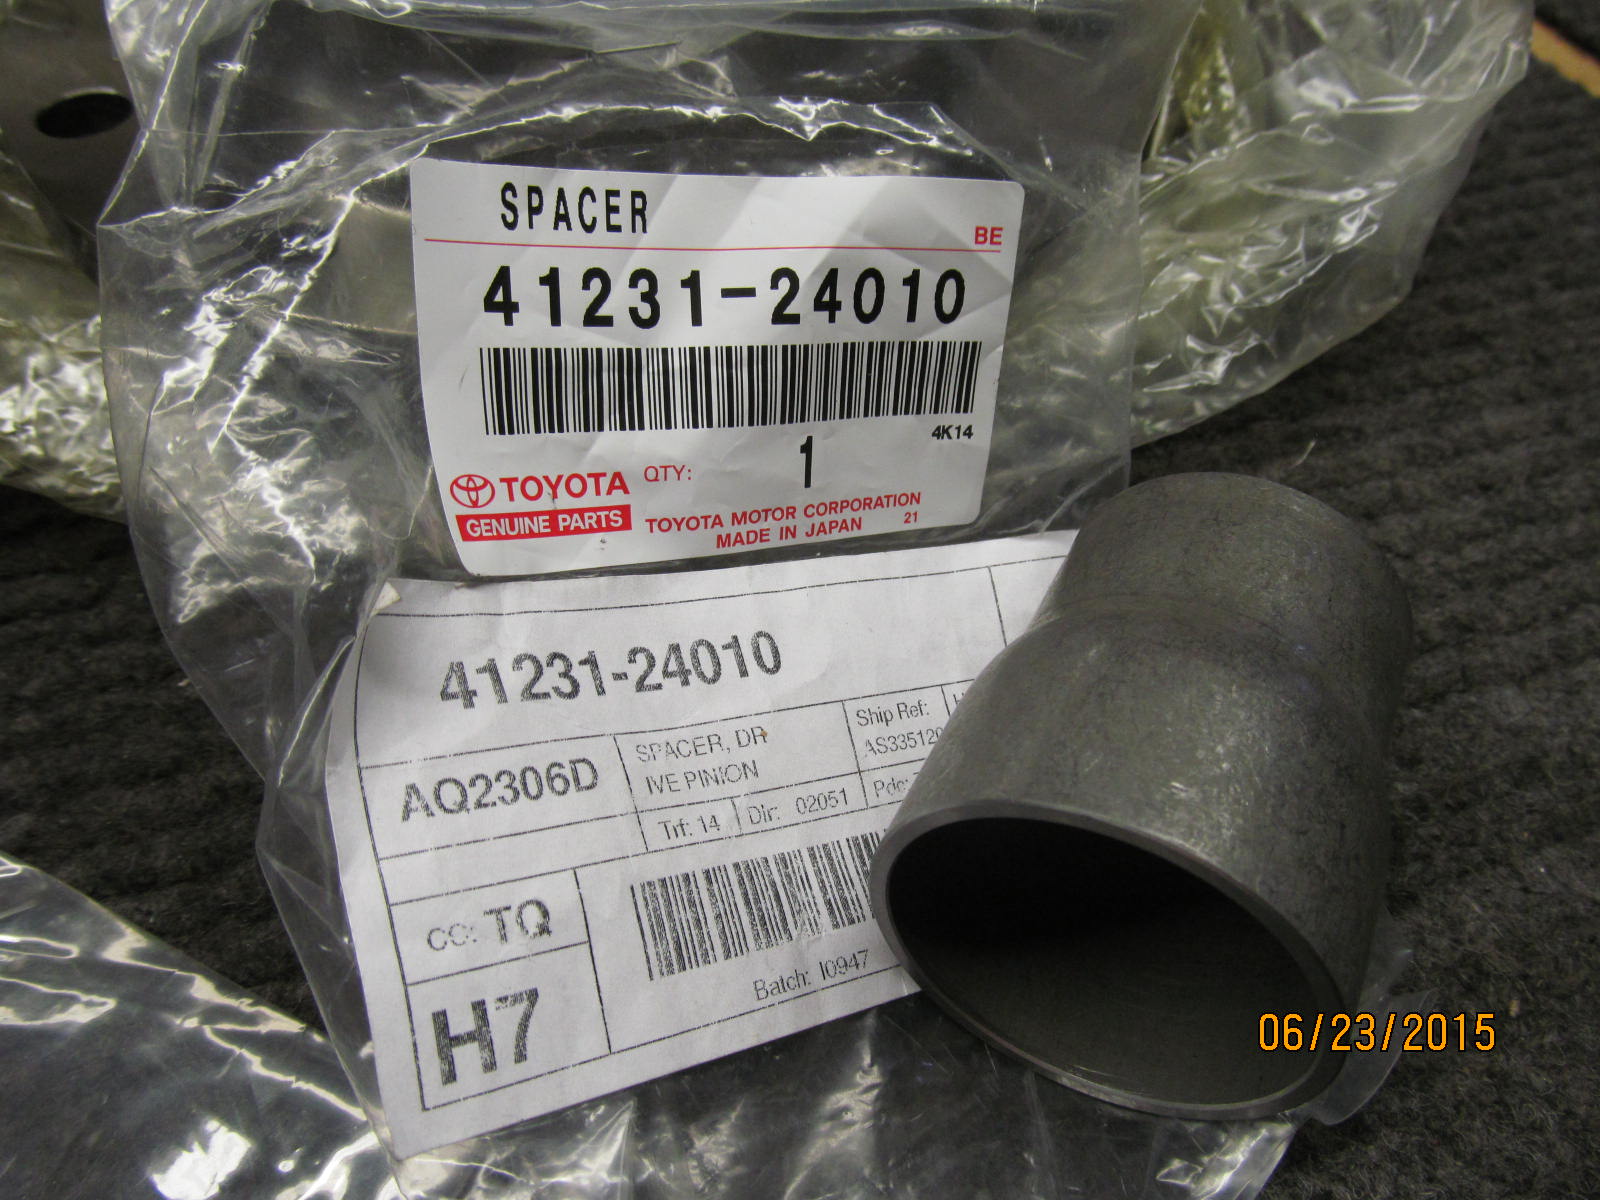
Here's what's supposed to be the oem crush sleeve but the partsman might have been a little dylexic because the
correct part number is 41231-22010.
|
|
|
|
|
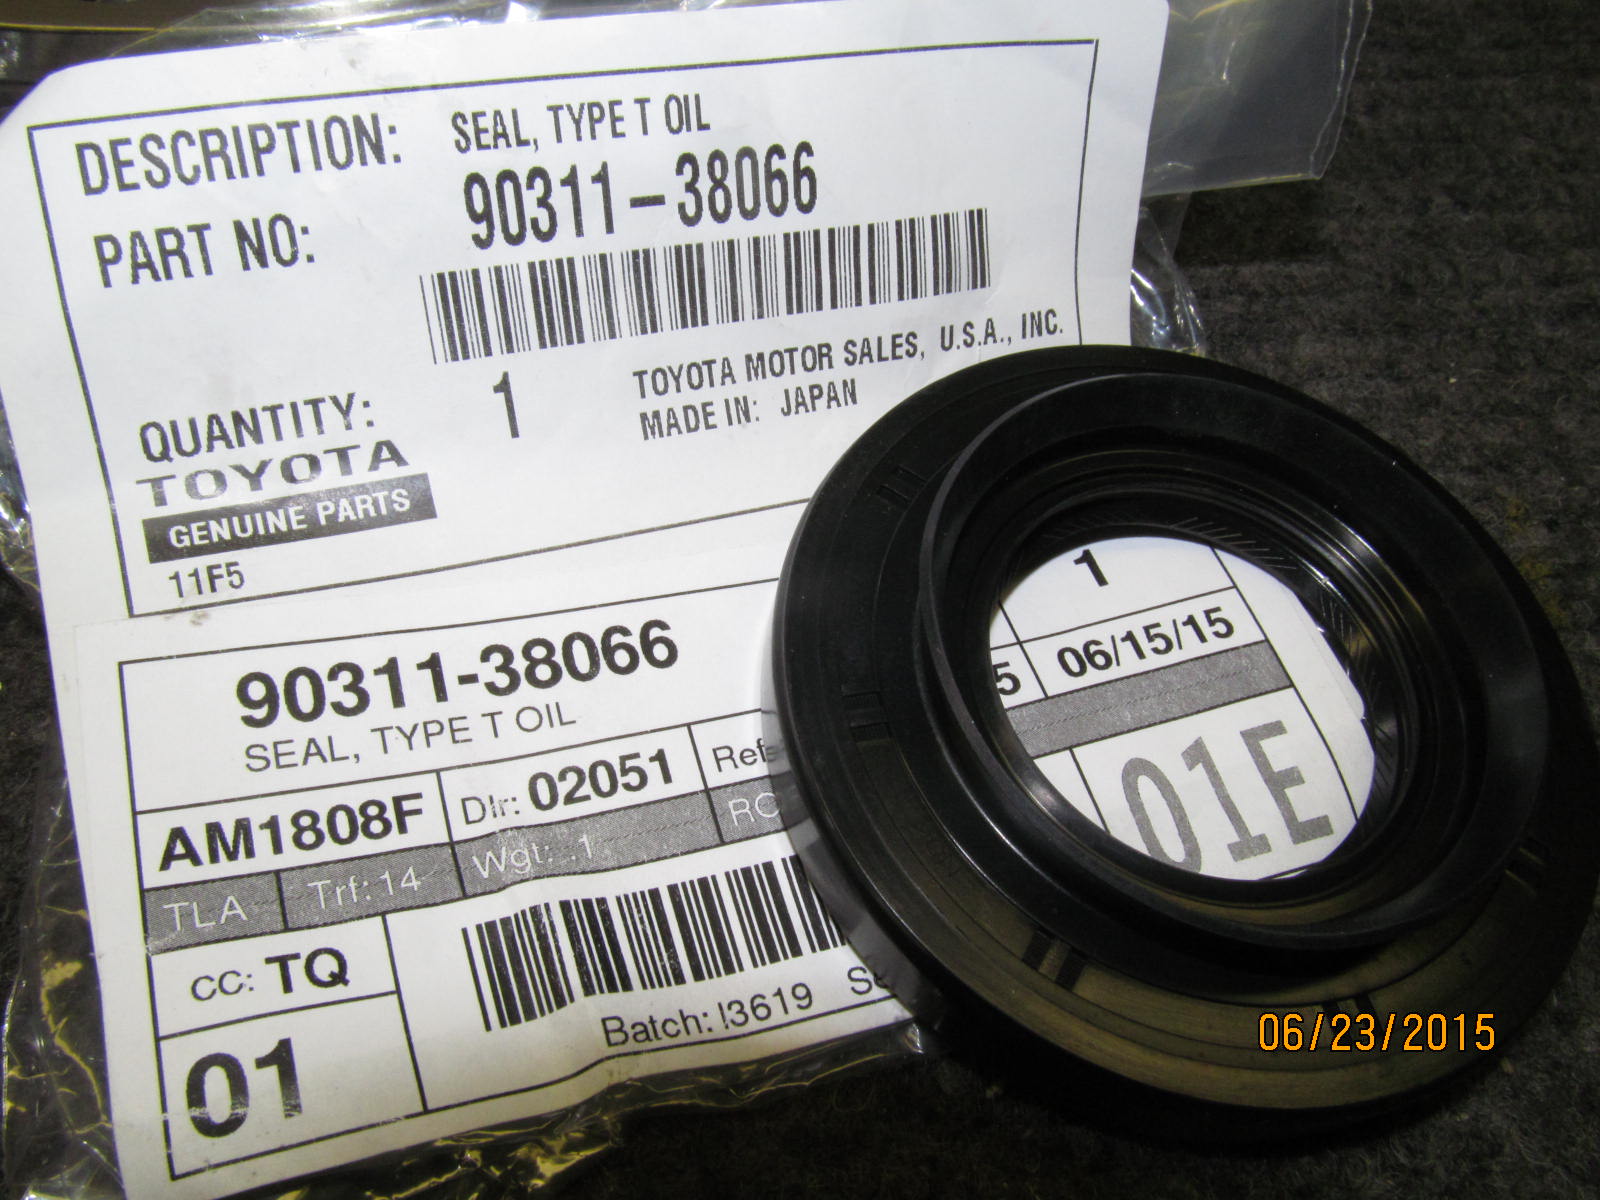
This is the correct seal 90311-38066
|
|
|

|
|
Markings found on the oem seal.
|
|
|
|
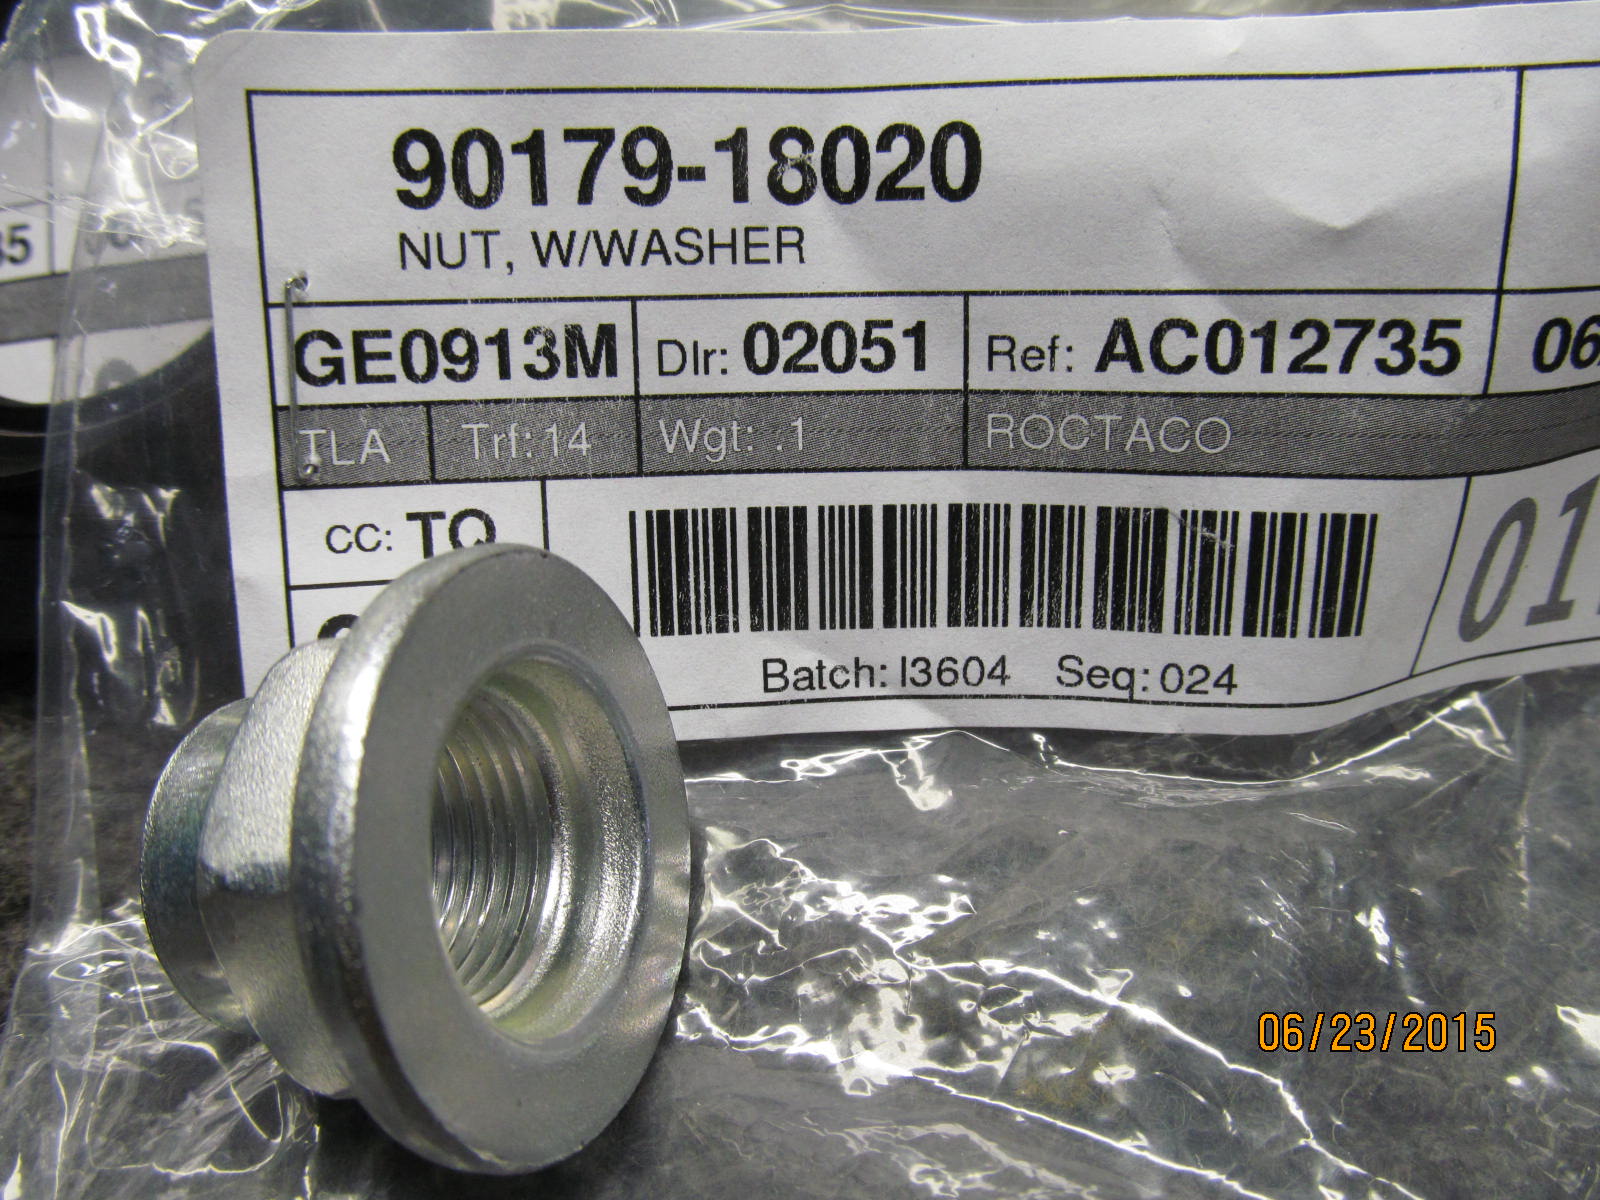
These flange style pinion nuts are the preferred way to go. 90179-18020 These nuts also work perfectly fine
on the earlier model front 7.5" low pinion IFS units from the 1986~1995 era.
|
|
|
|
|
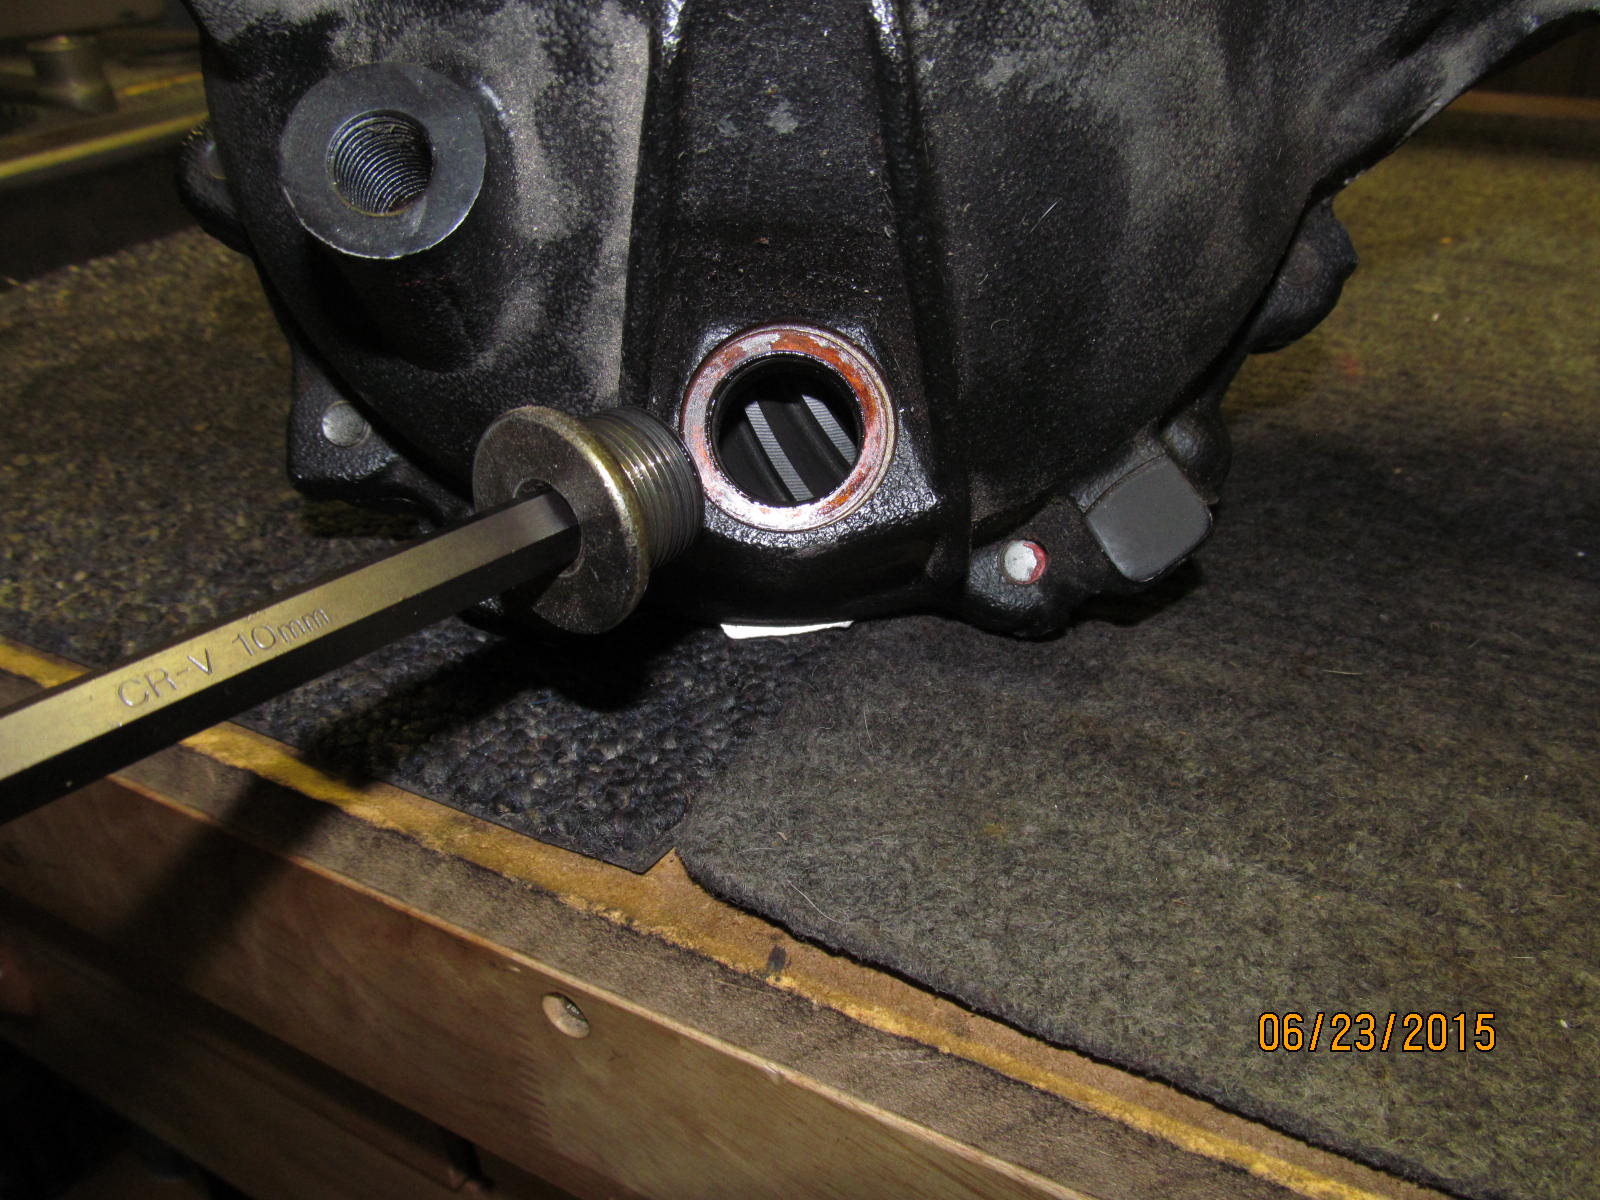
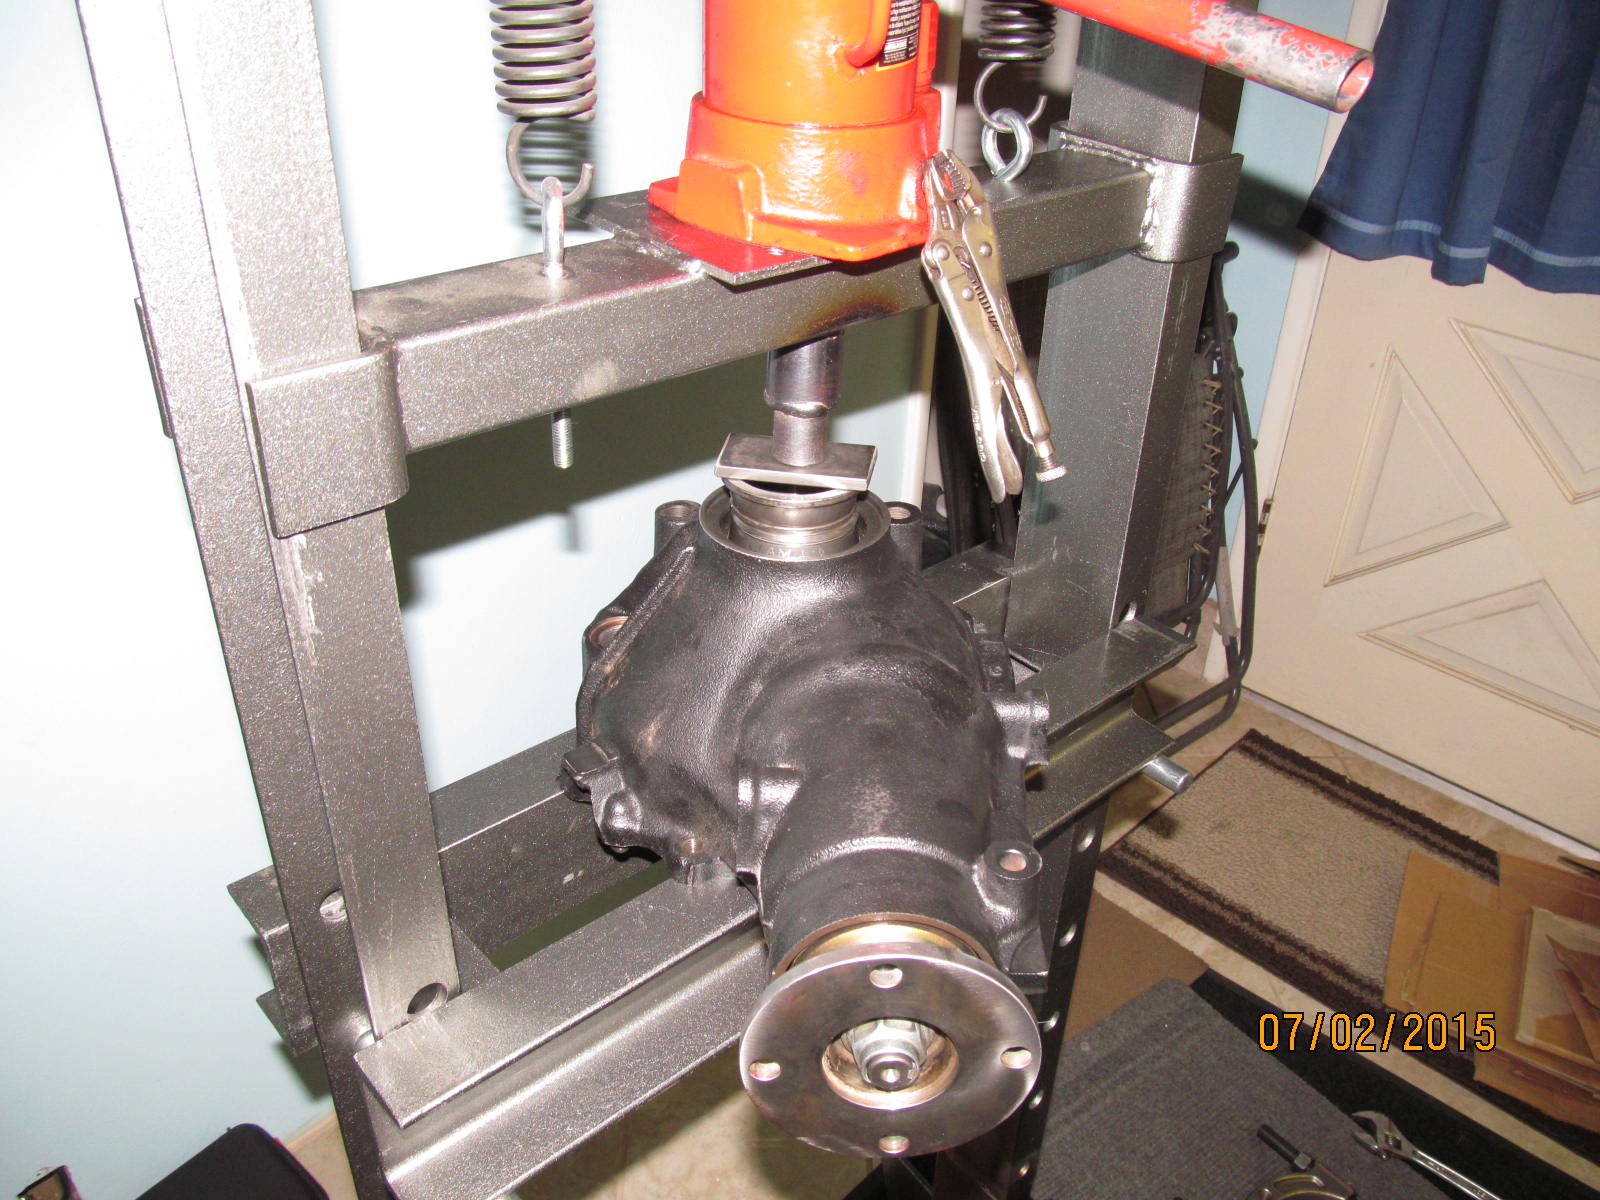
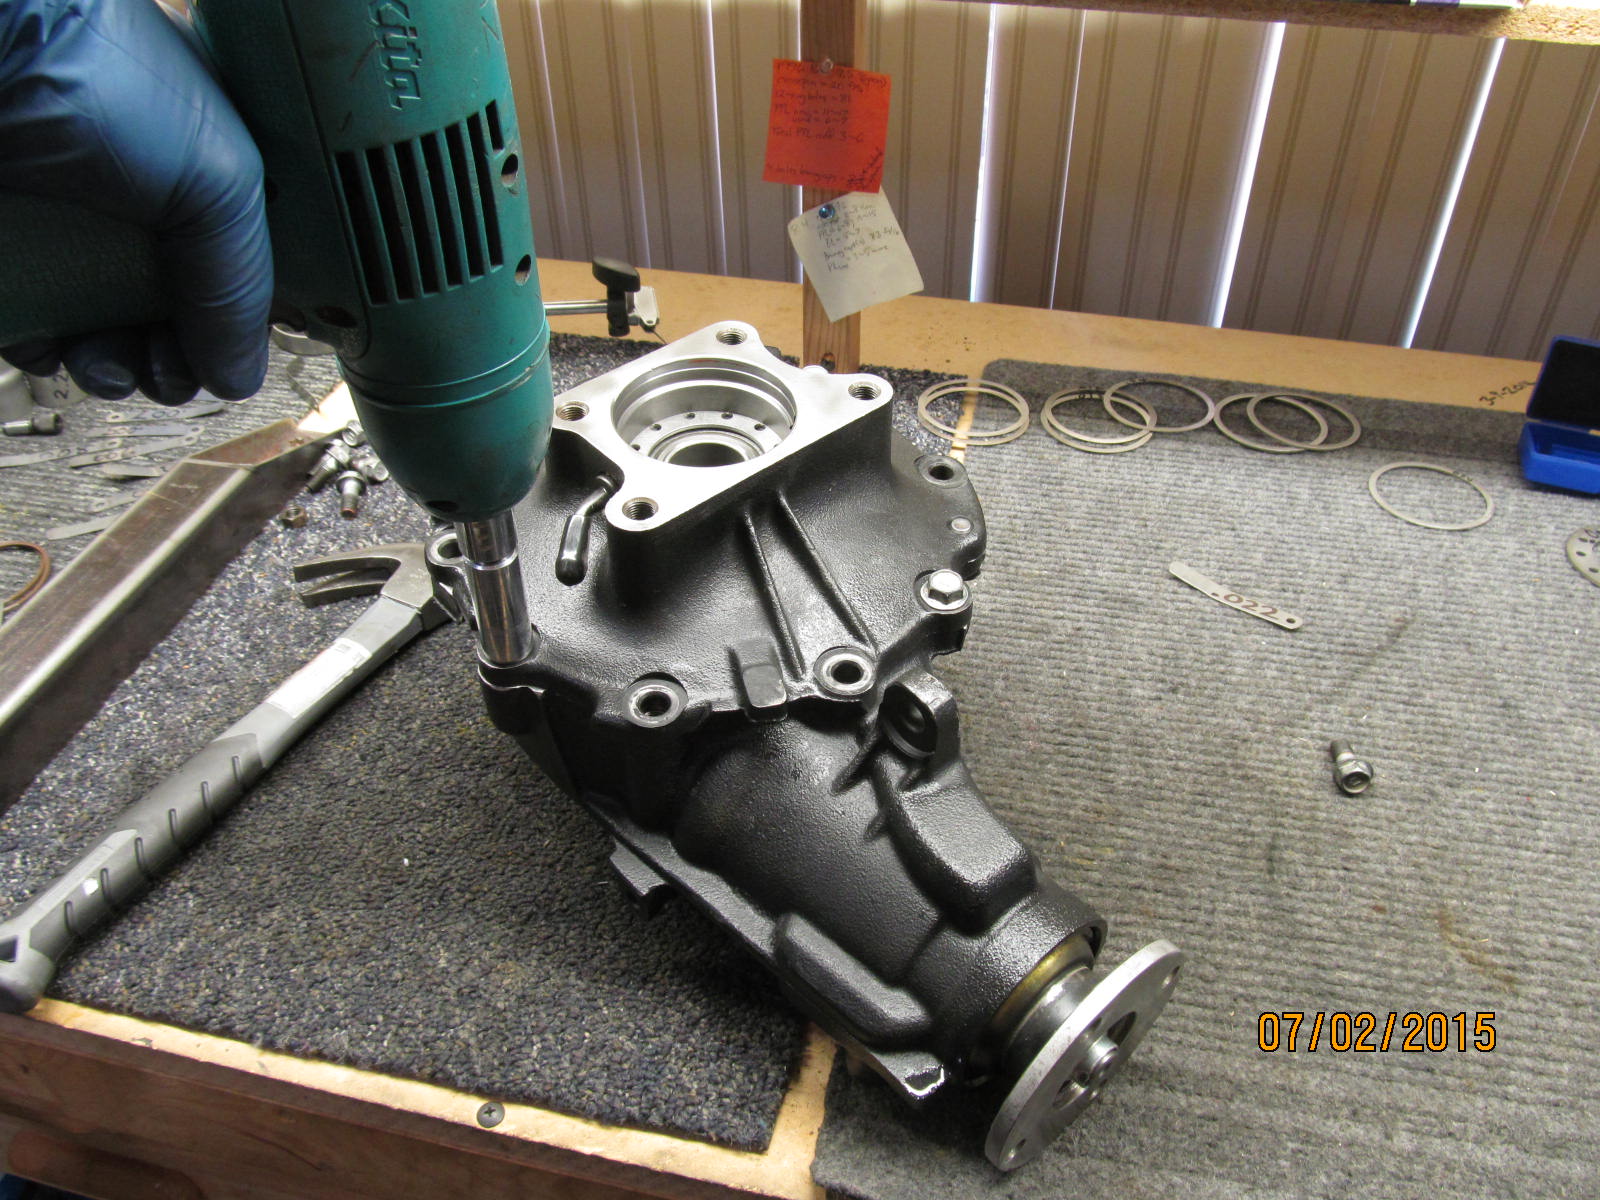
The drain plug is removed with a 10mm alan wrench giving us the only access to the ring gear.
|
|
|
|
|
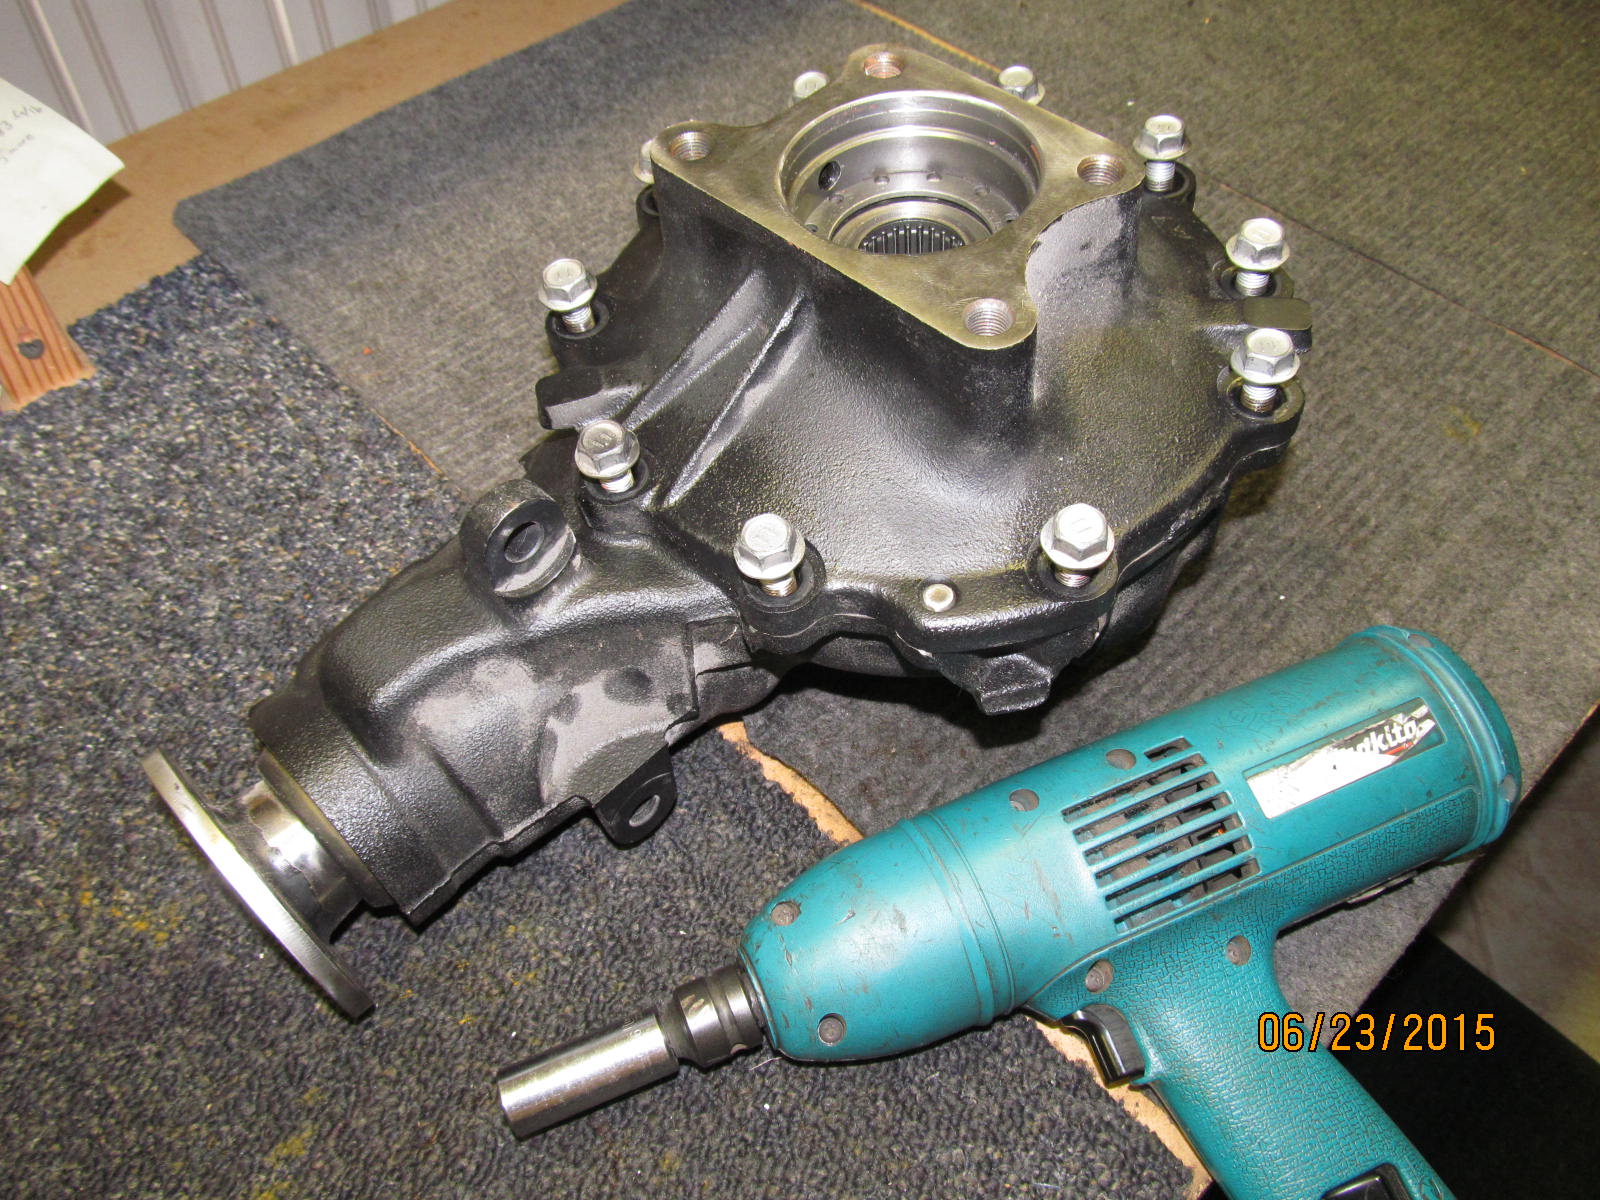
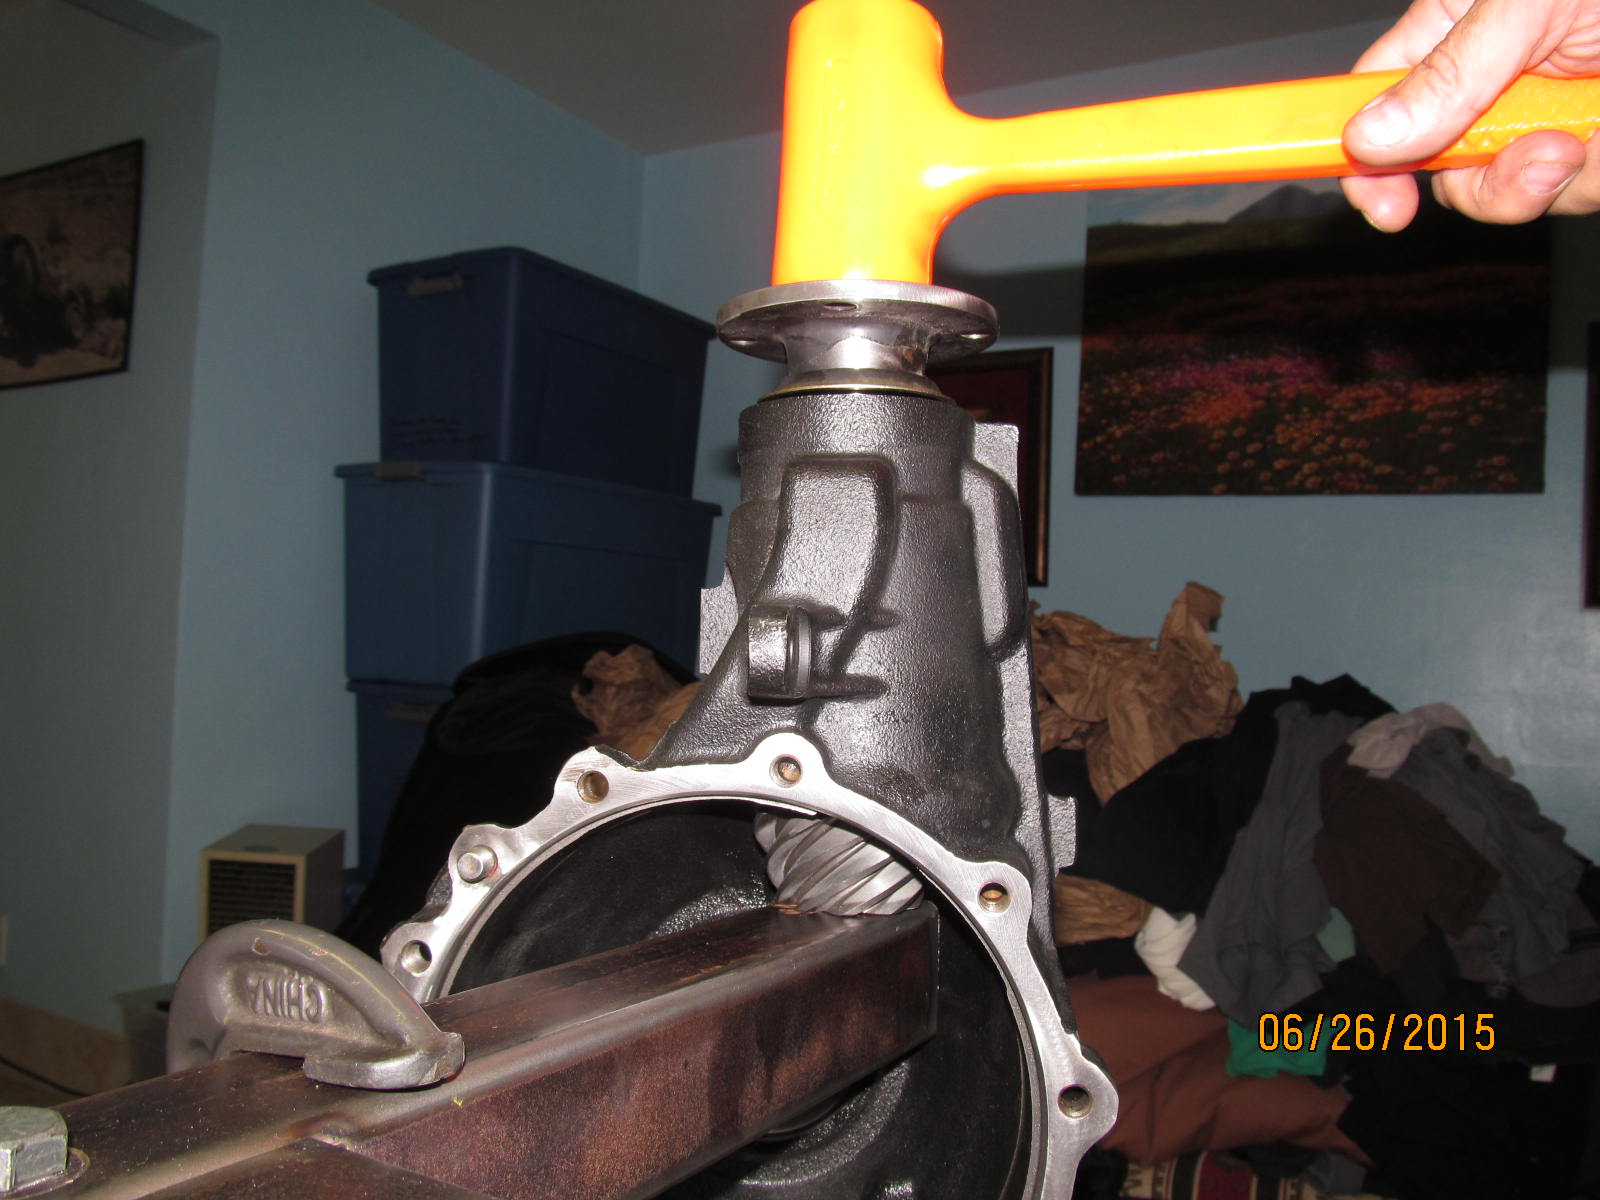
The electric impact easily wizzes off the ten 14mm bolts that hold the cover on.
|
|
|
|
|
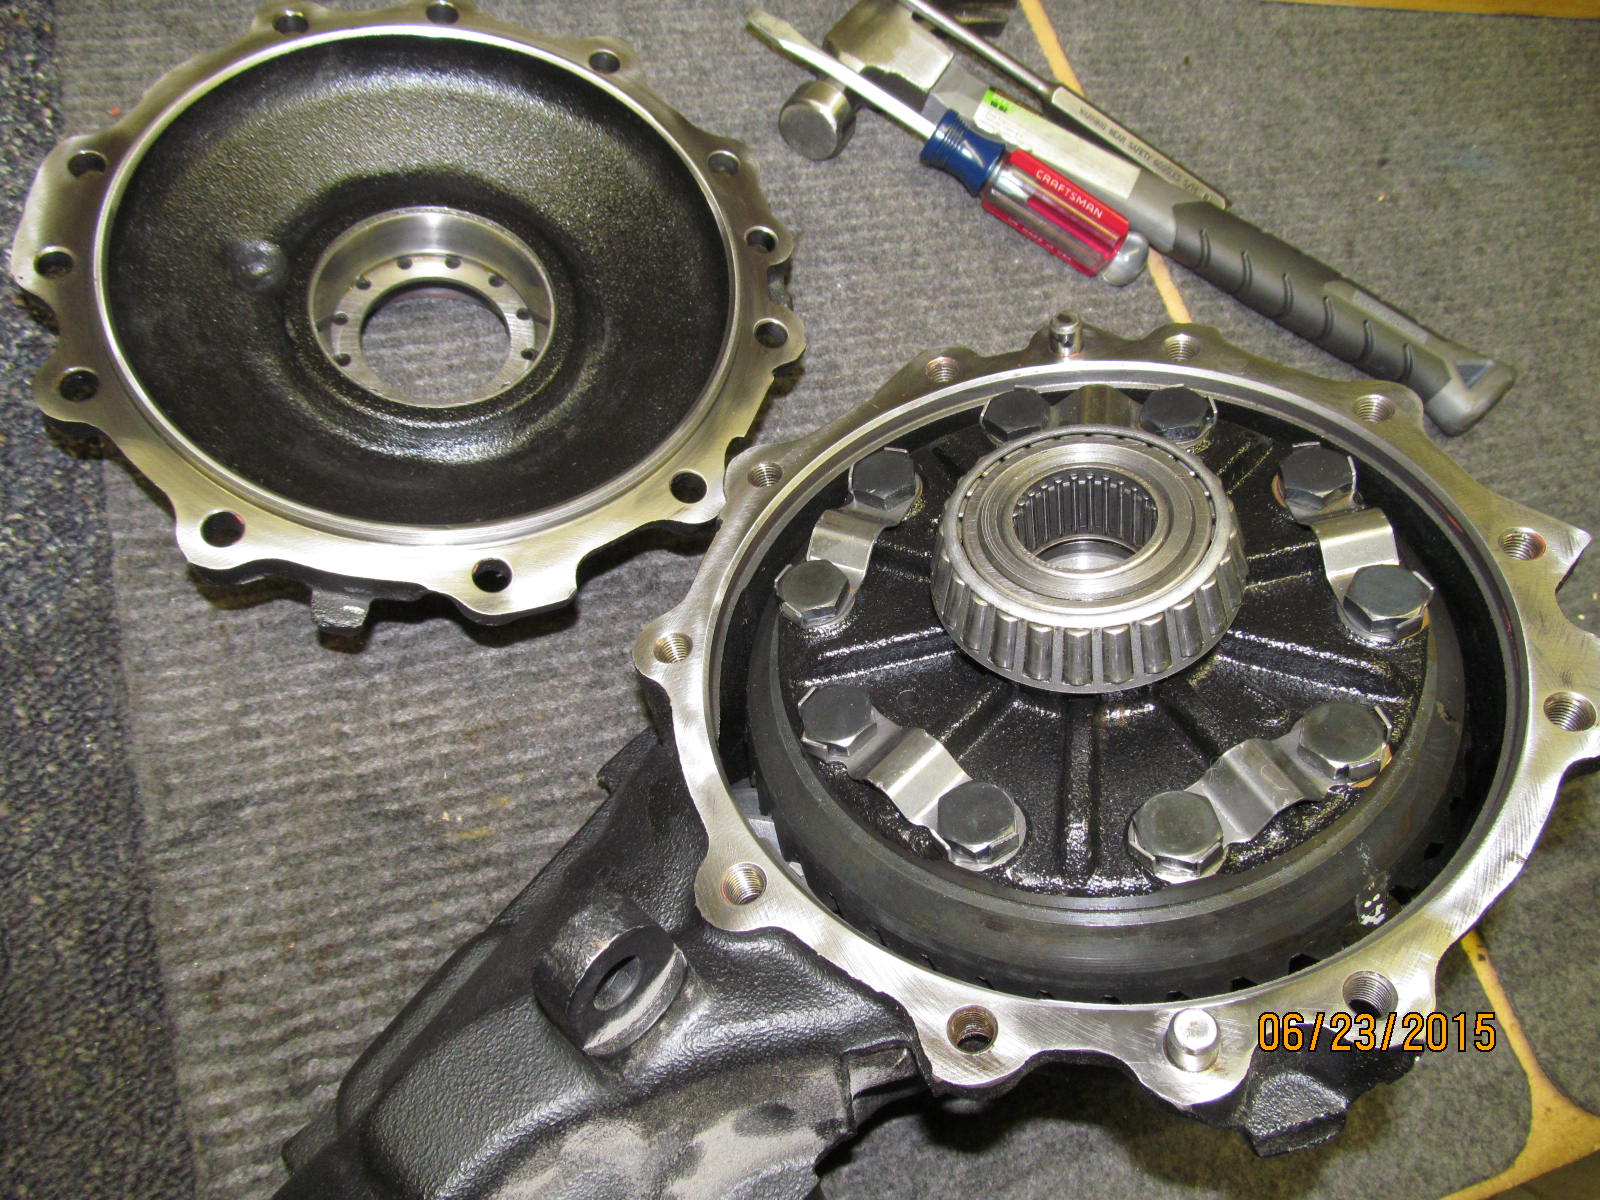
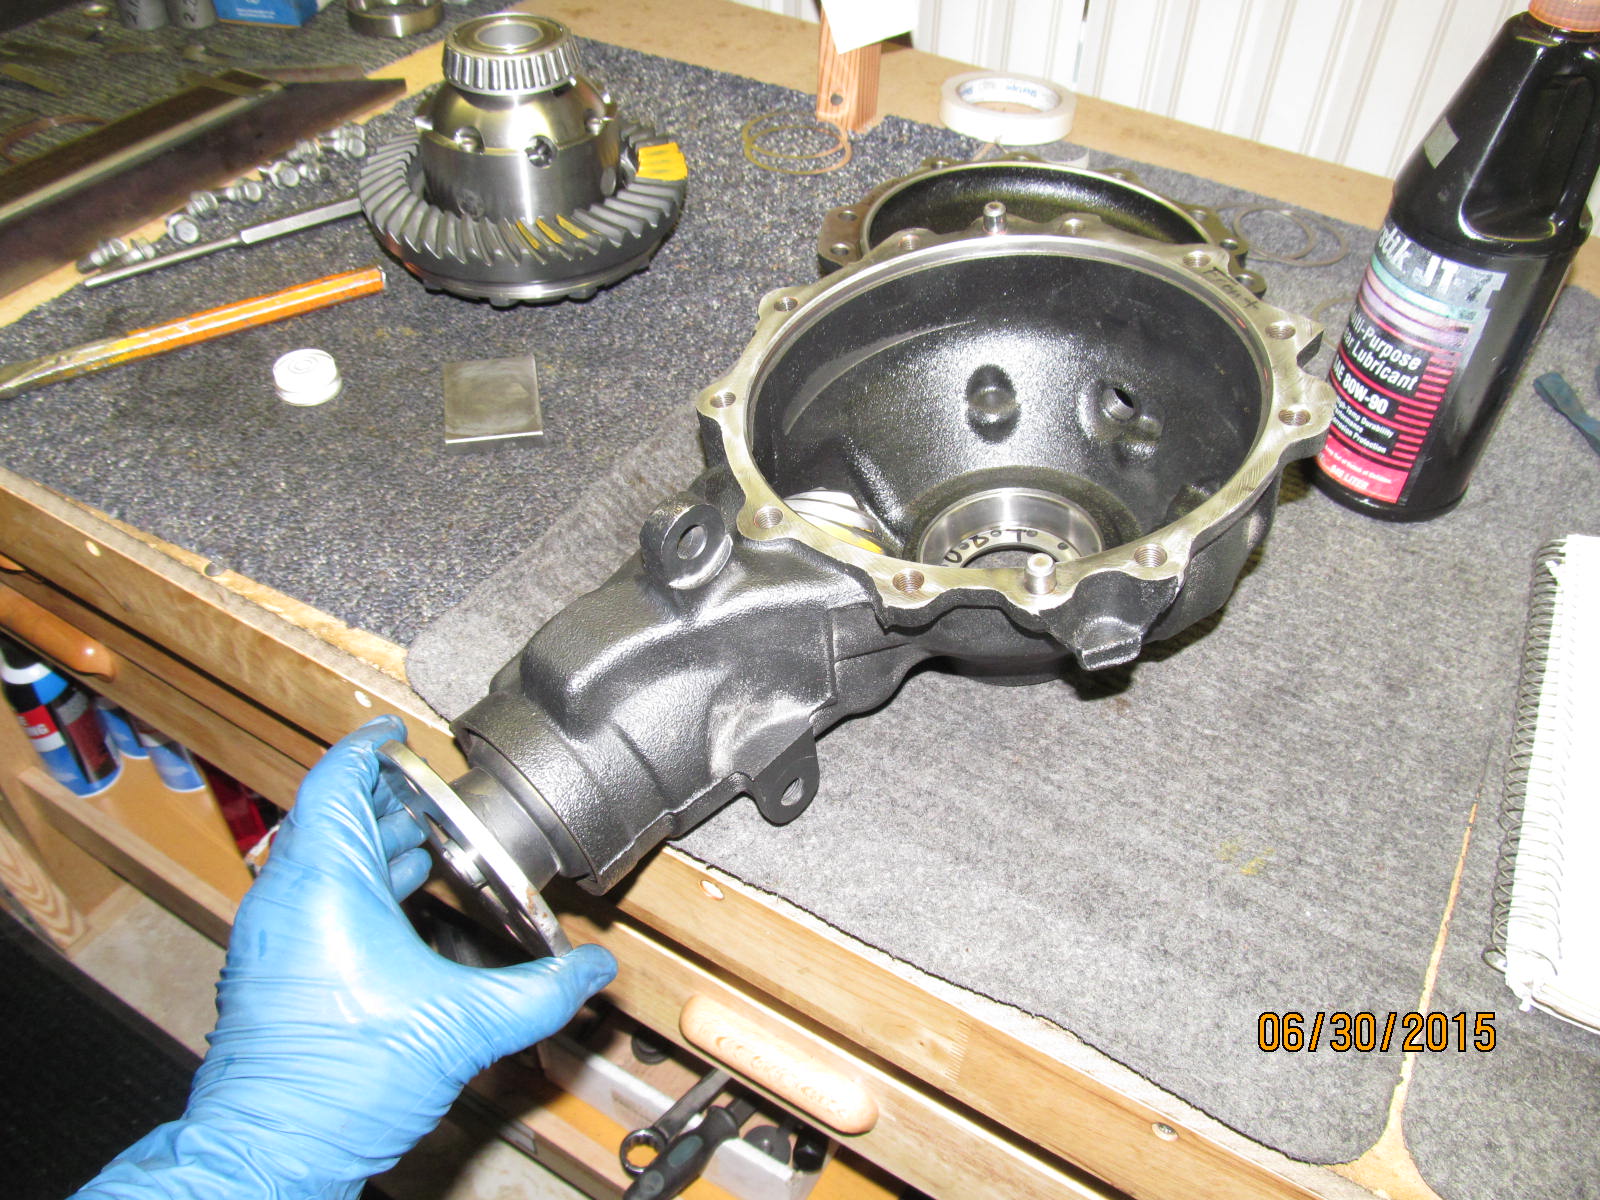
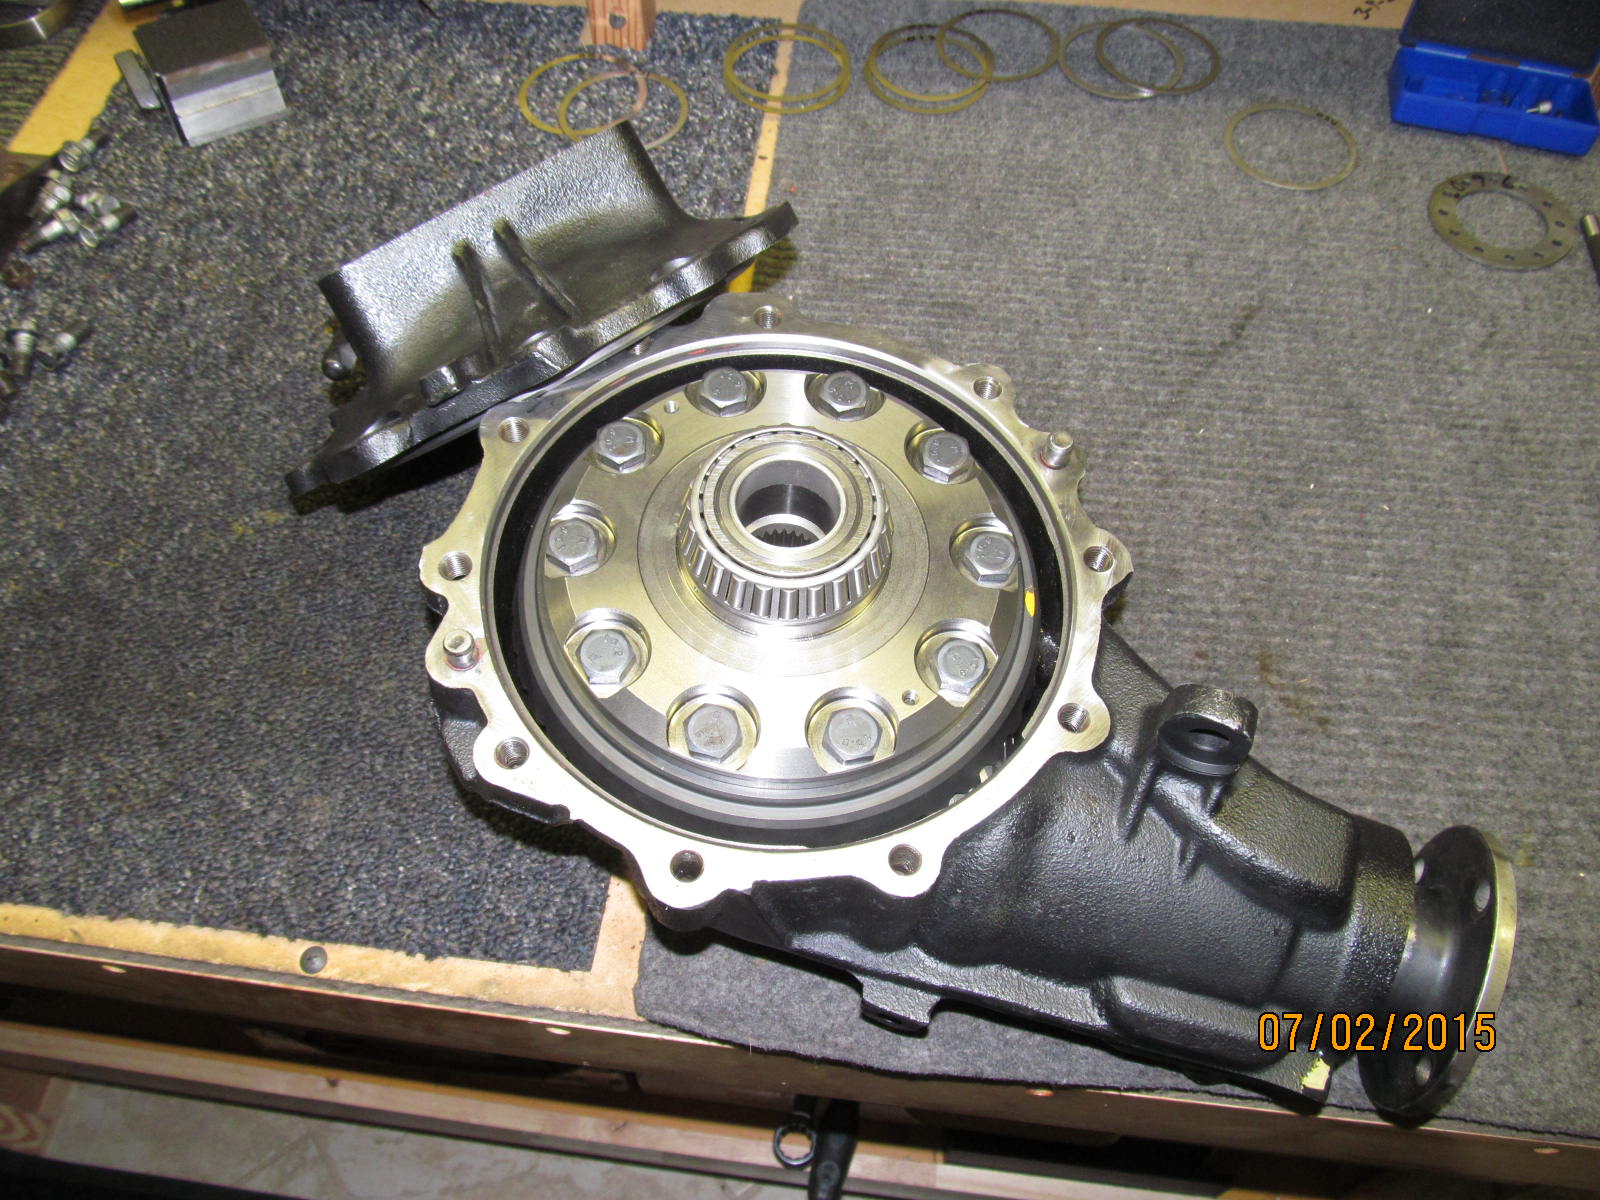
Carefully tap off the cover.
|
|
|

|
|
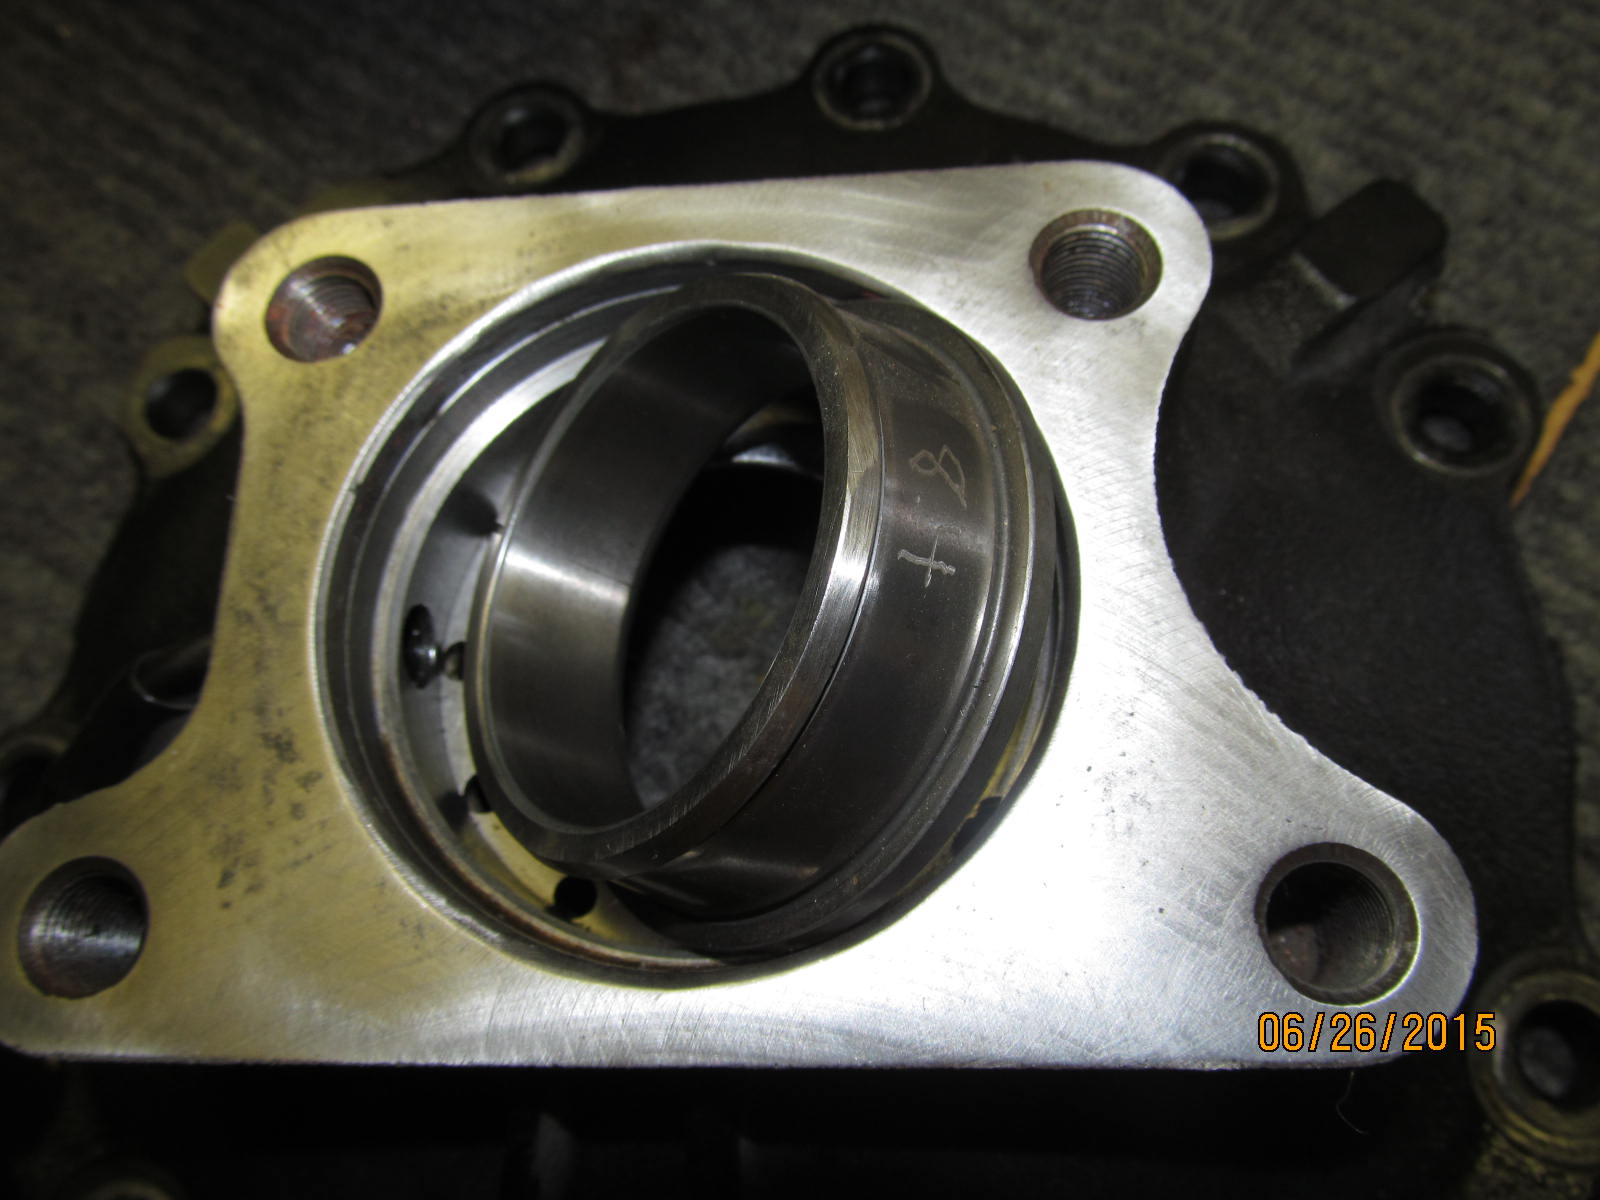
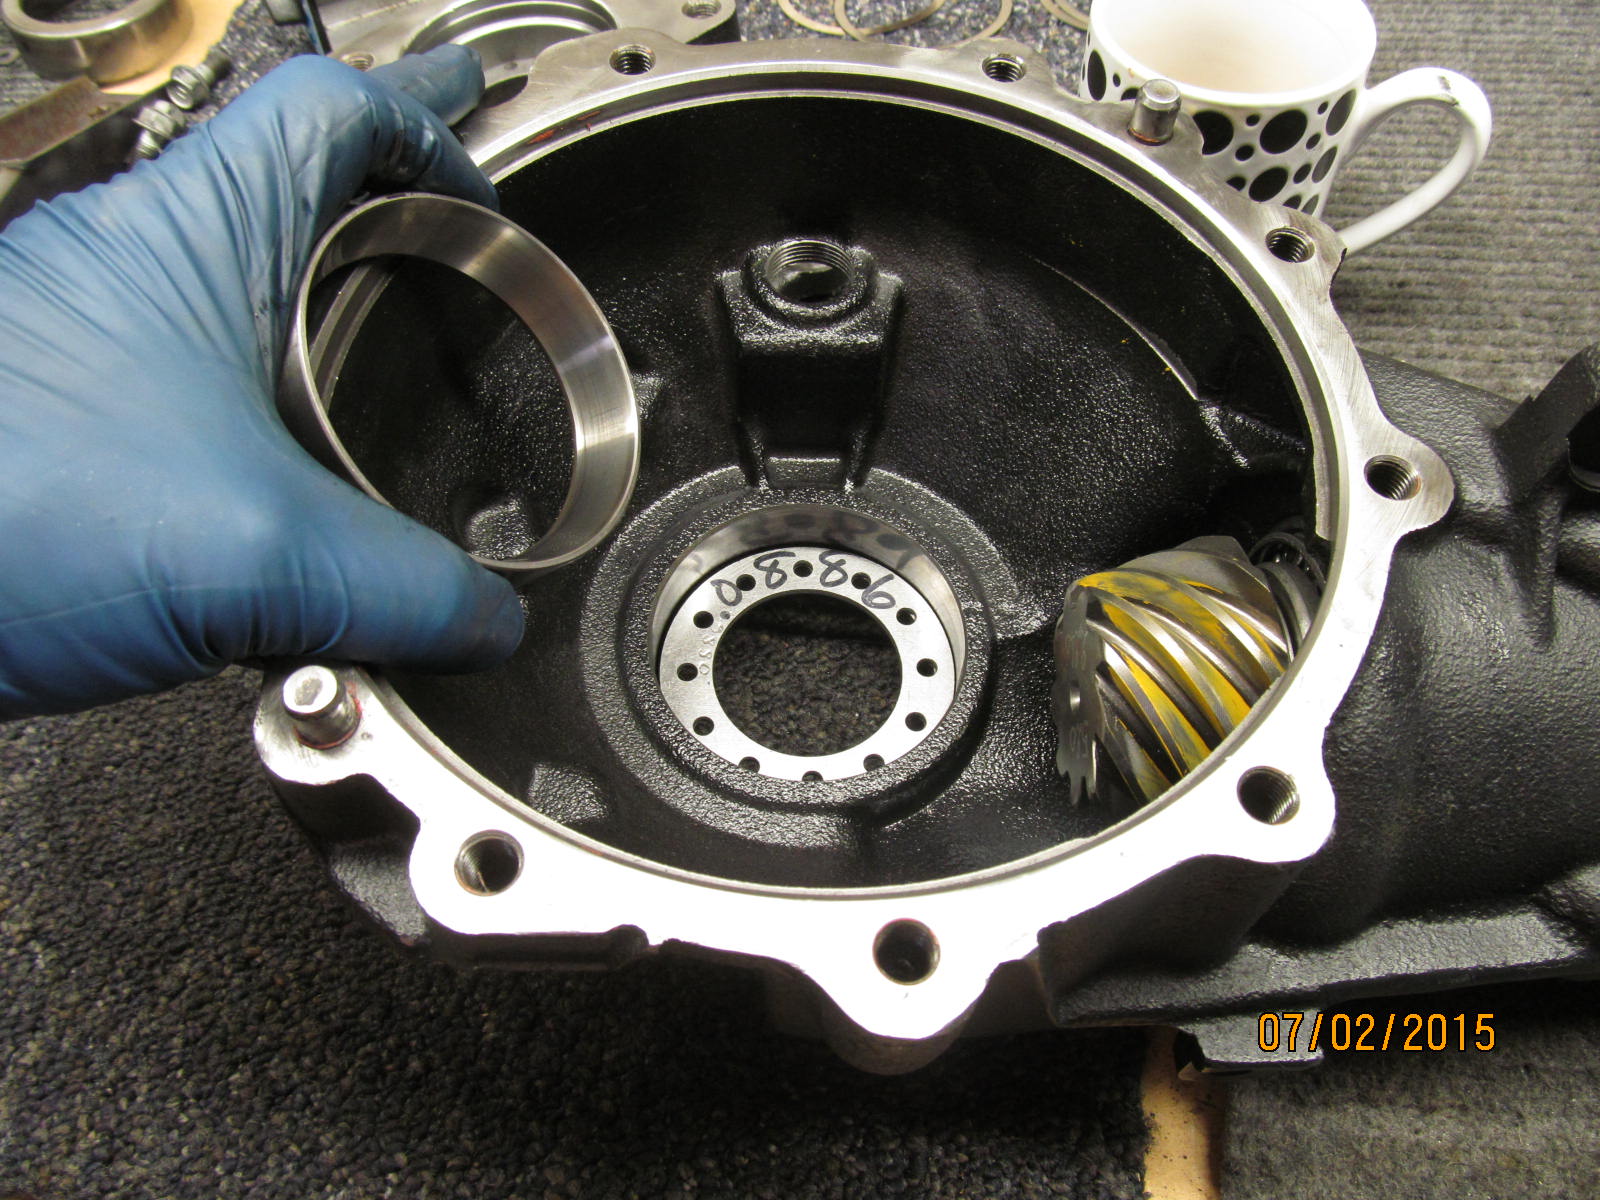
This ARB supplied bearing will eventually replace this one on the cover end.
|
|
|
|
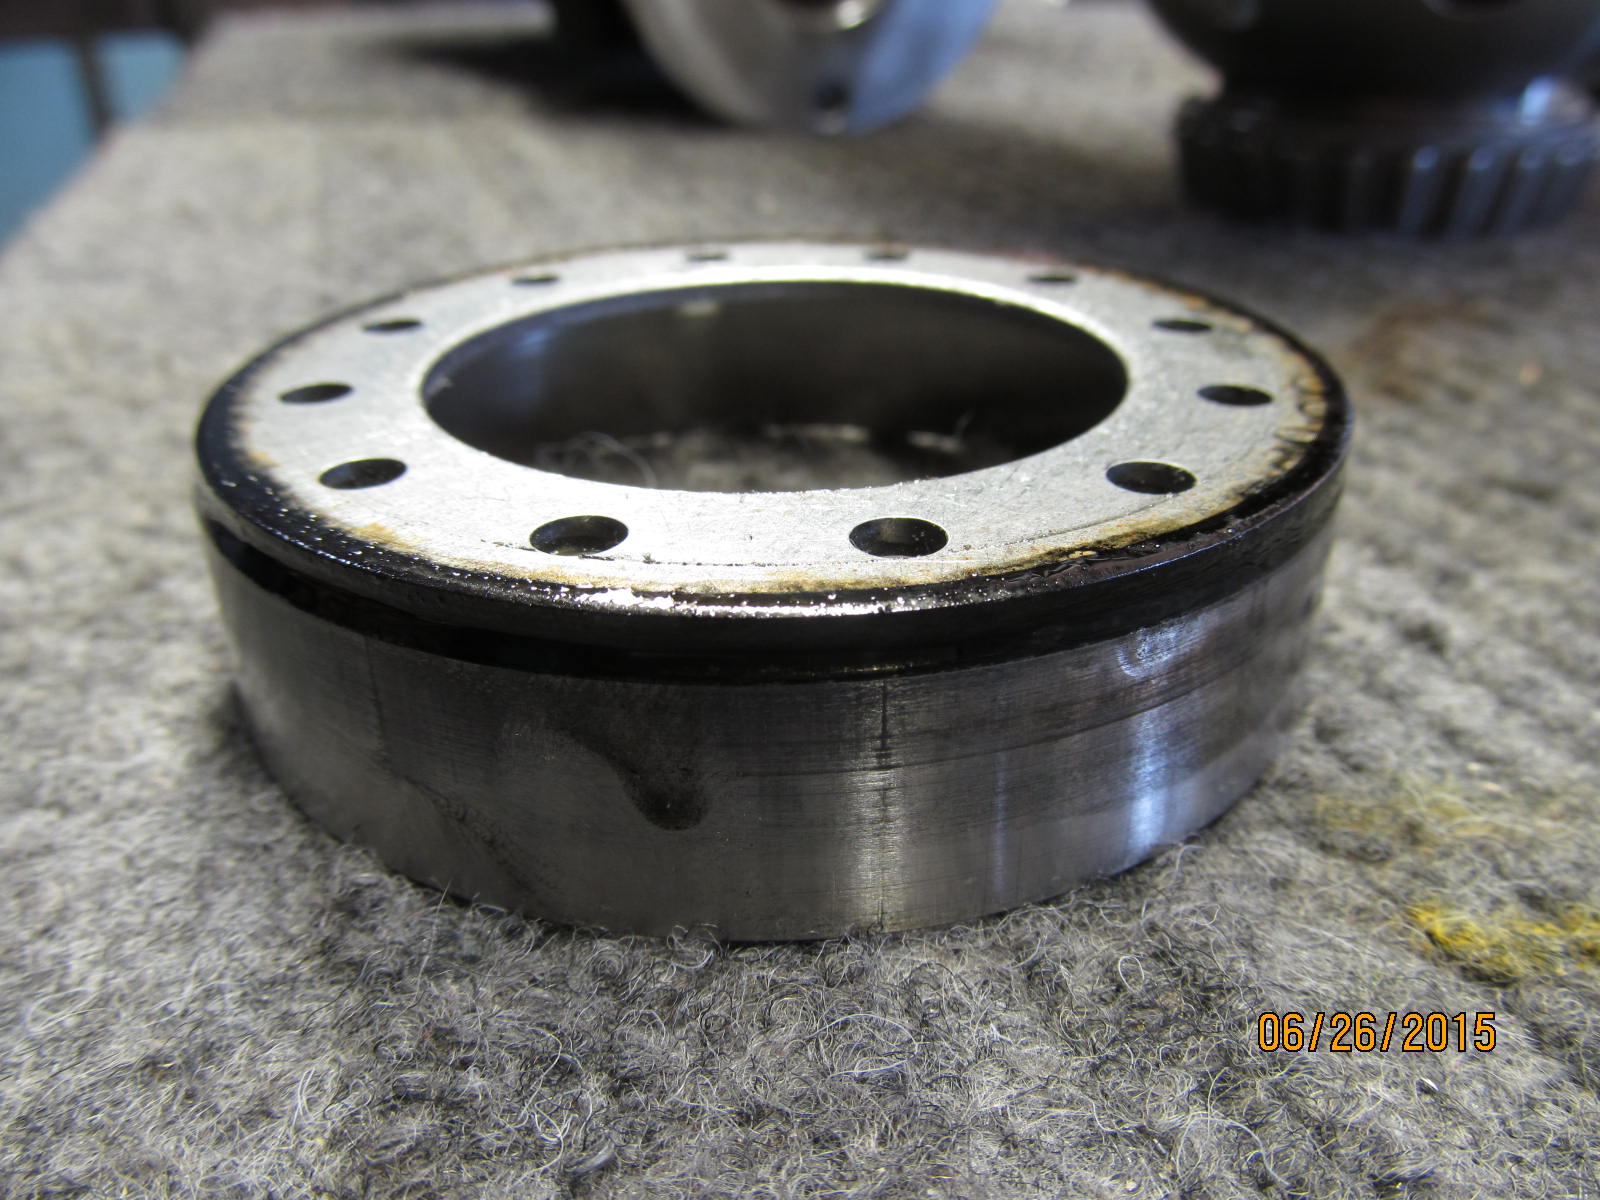
Joe put in manual hubs a long time ago so these all 4 clam bearings have very little mileage or useage on them.
These bearings are in very good shape and this carrier bearing will be transferred over to the ARB case.
|
|
|
|
|
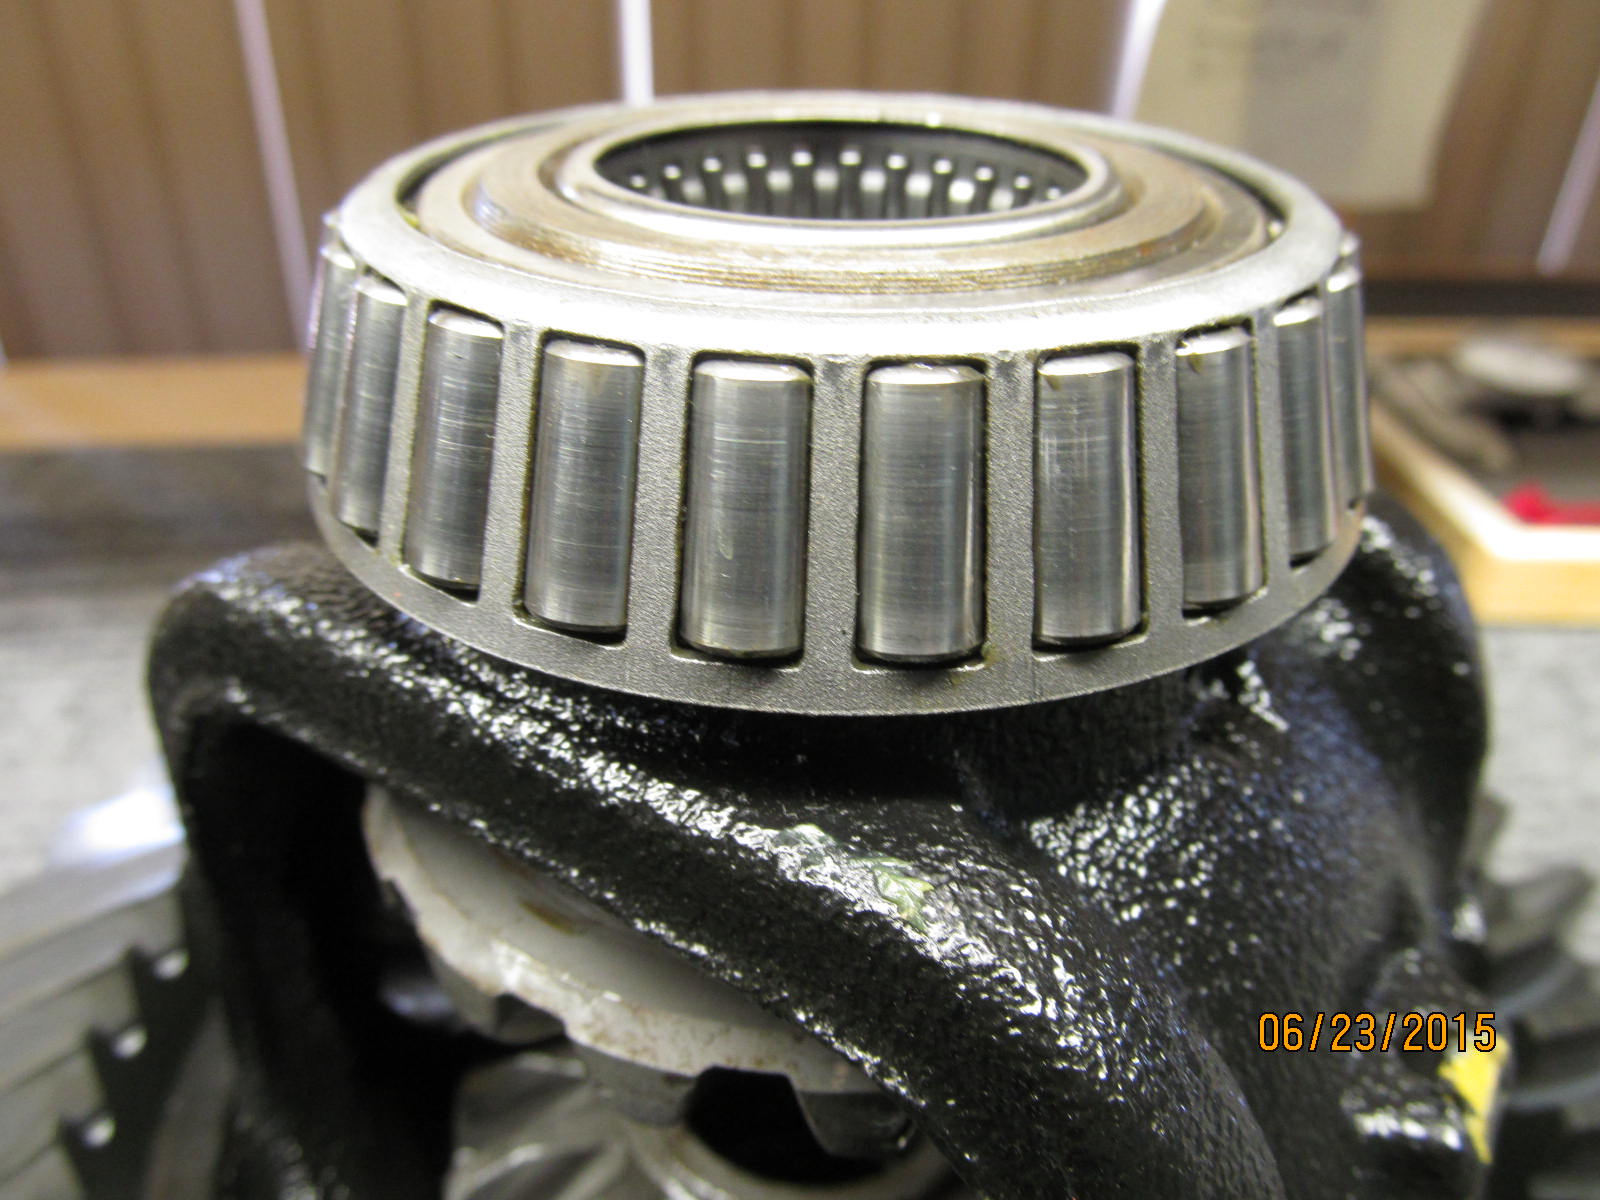
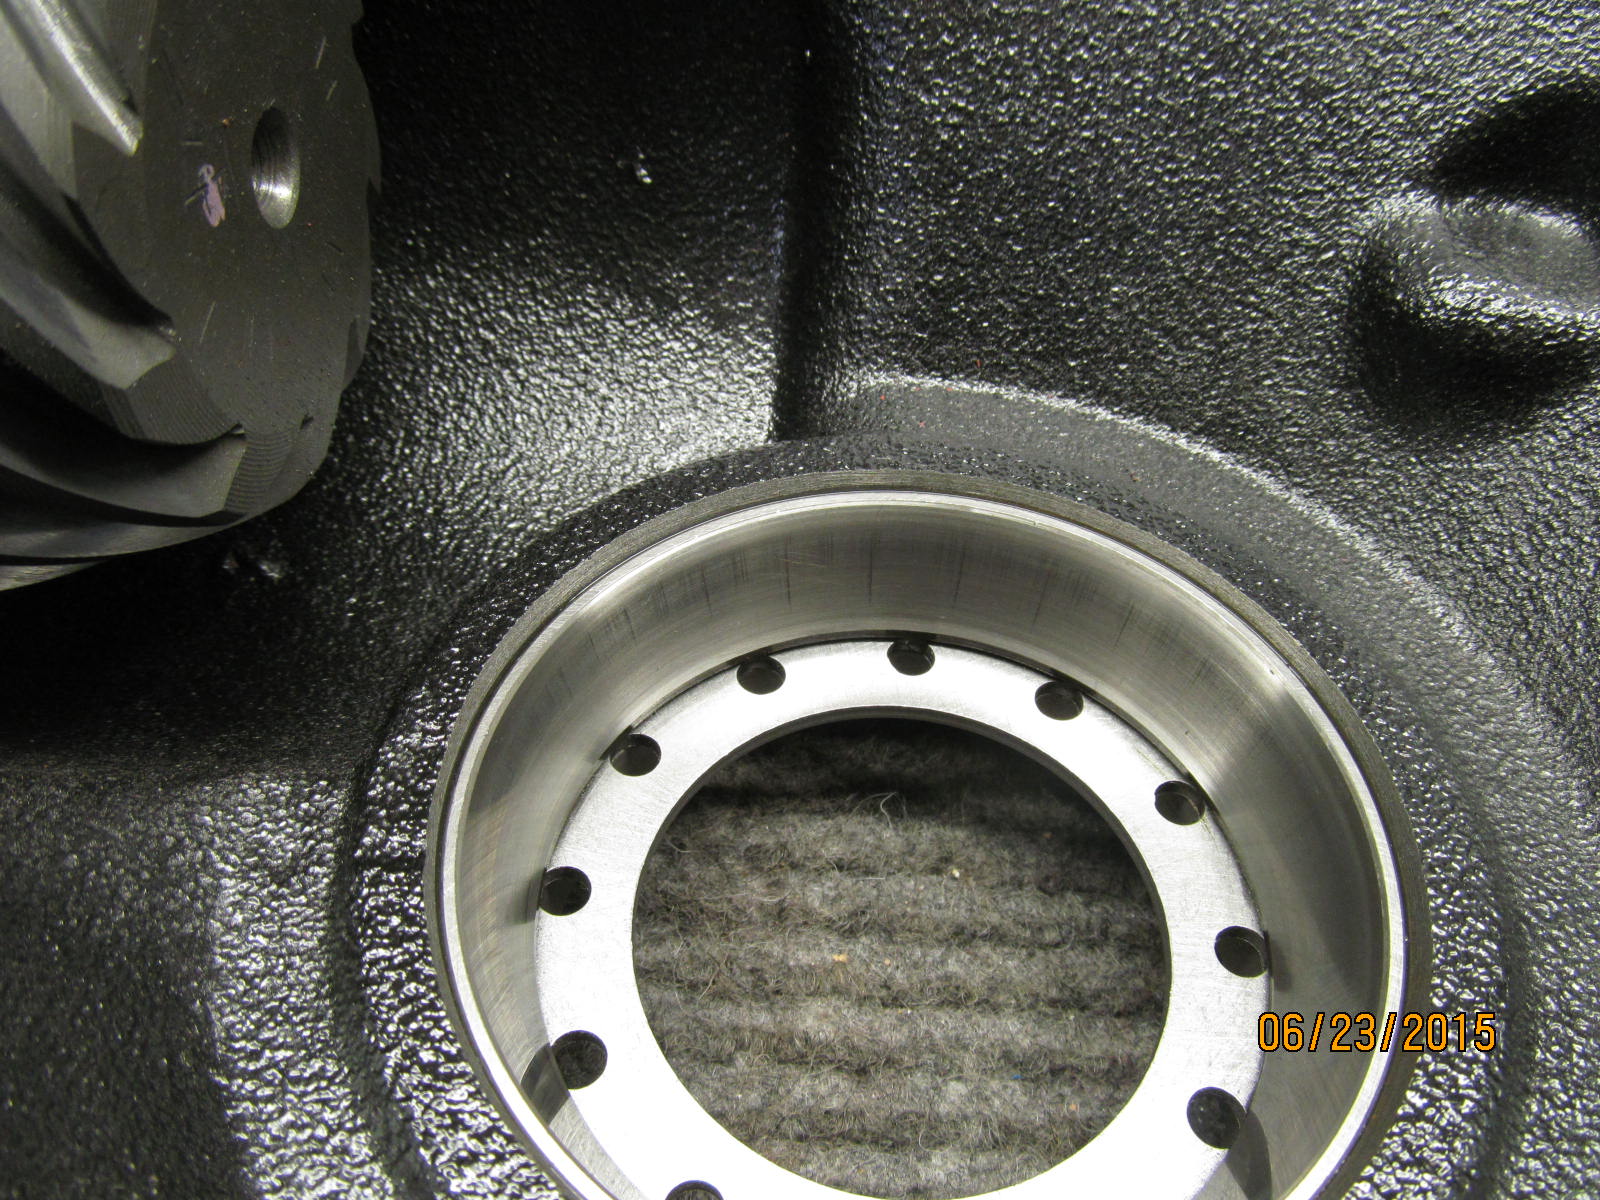
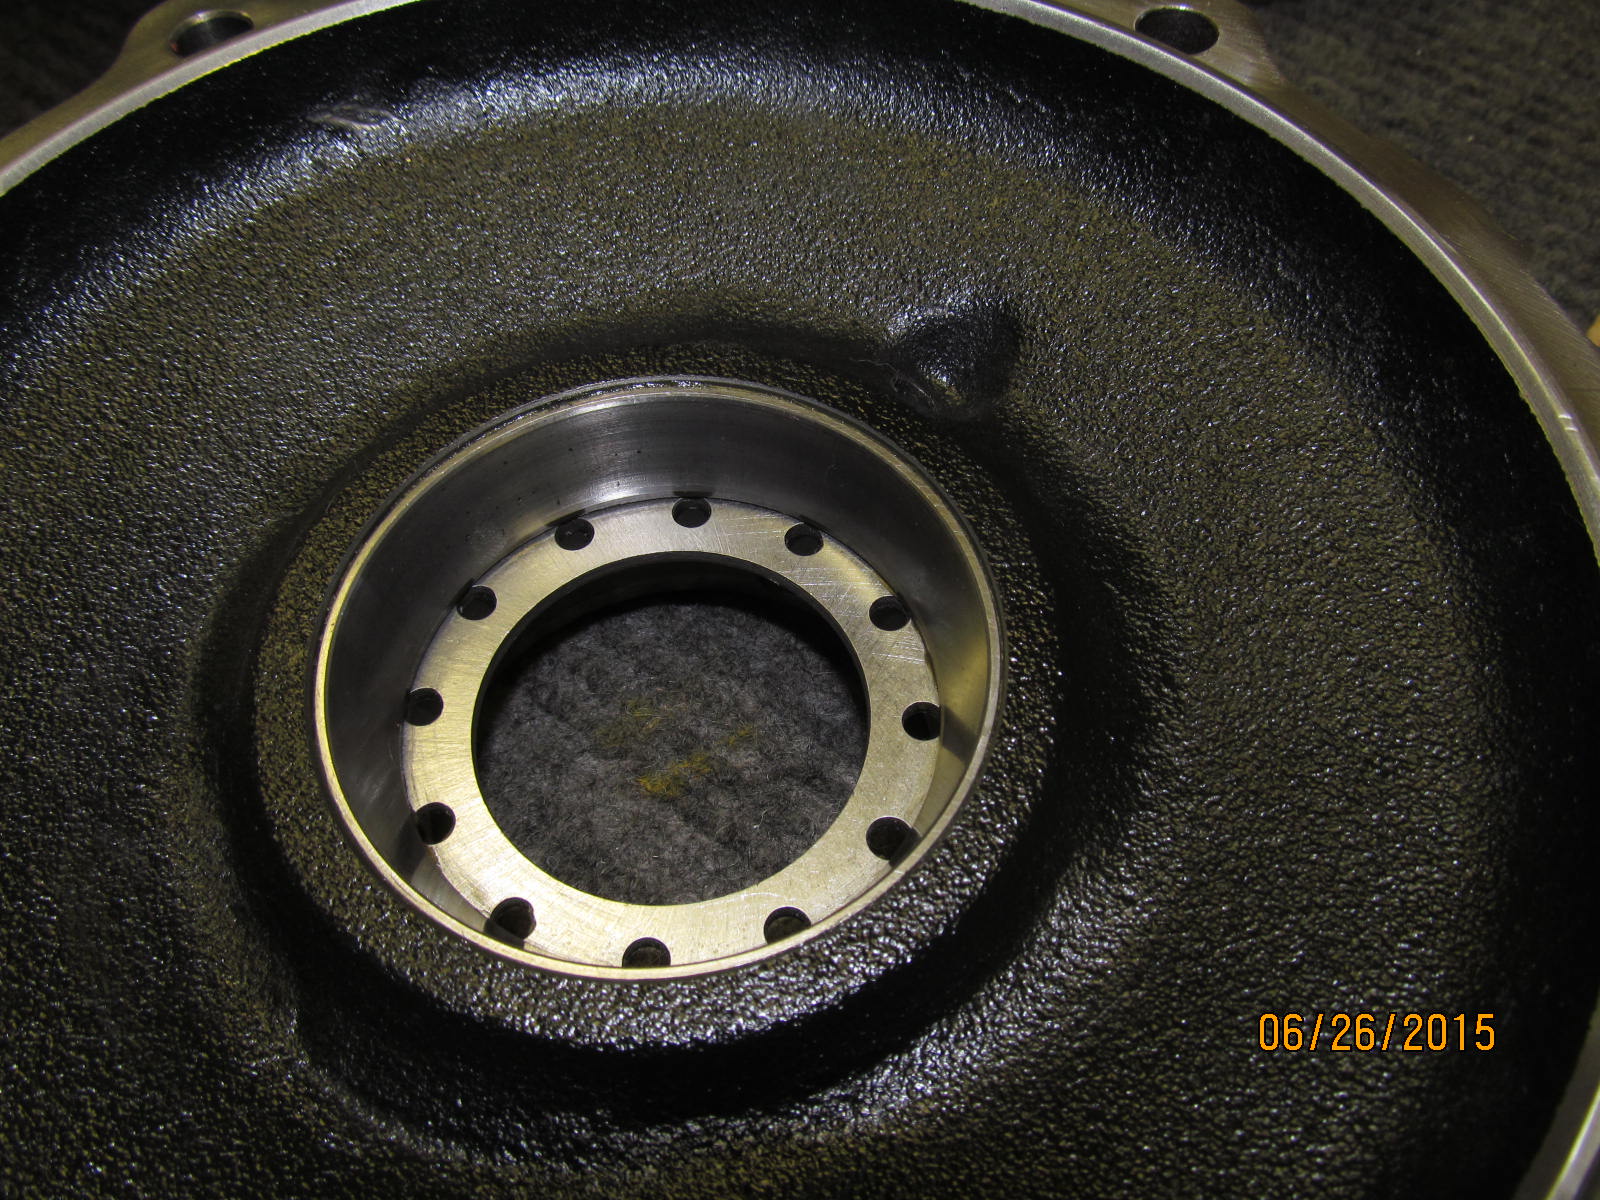
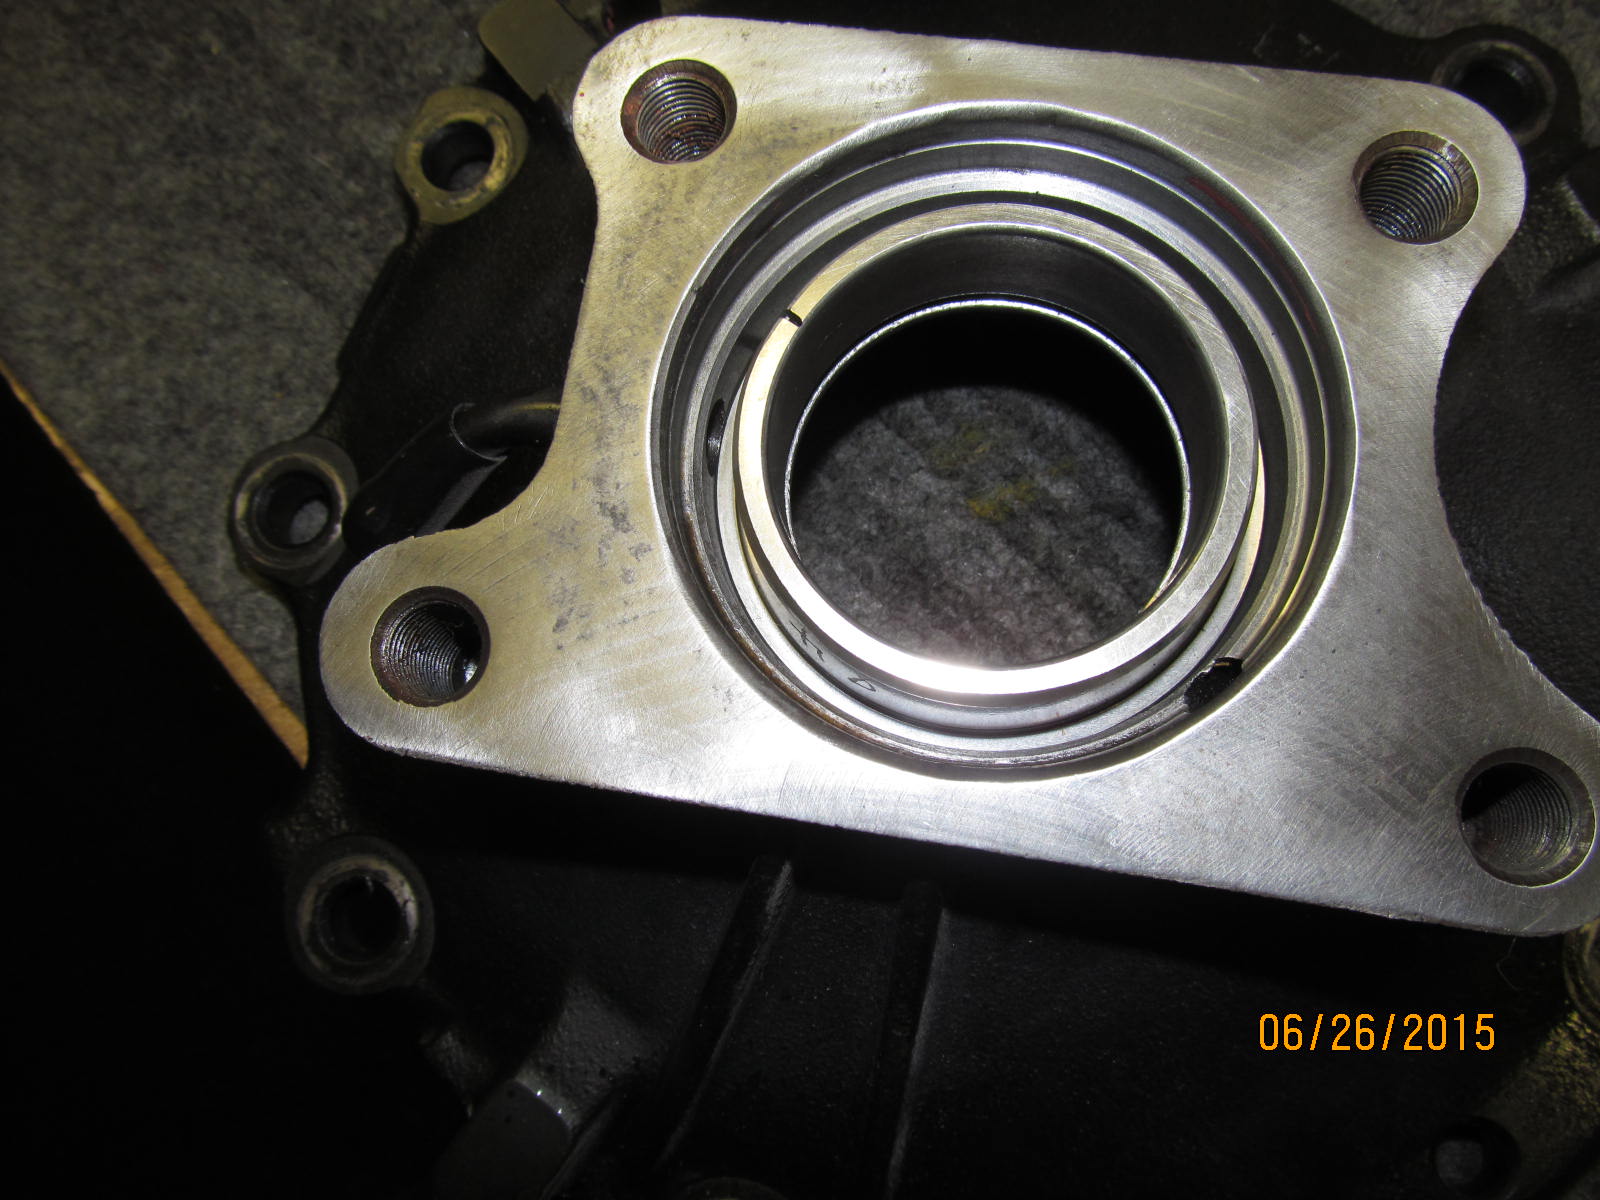
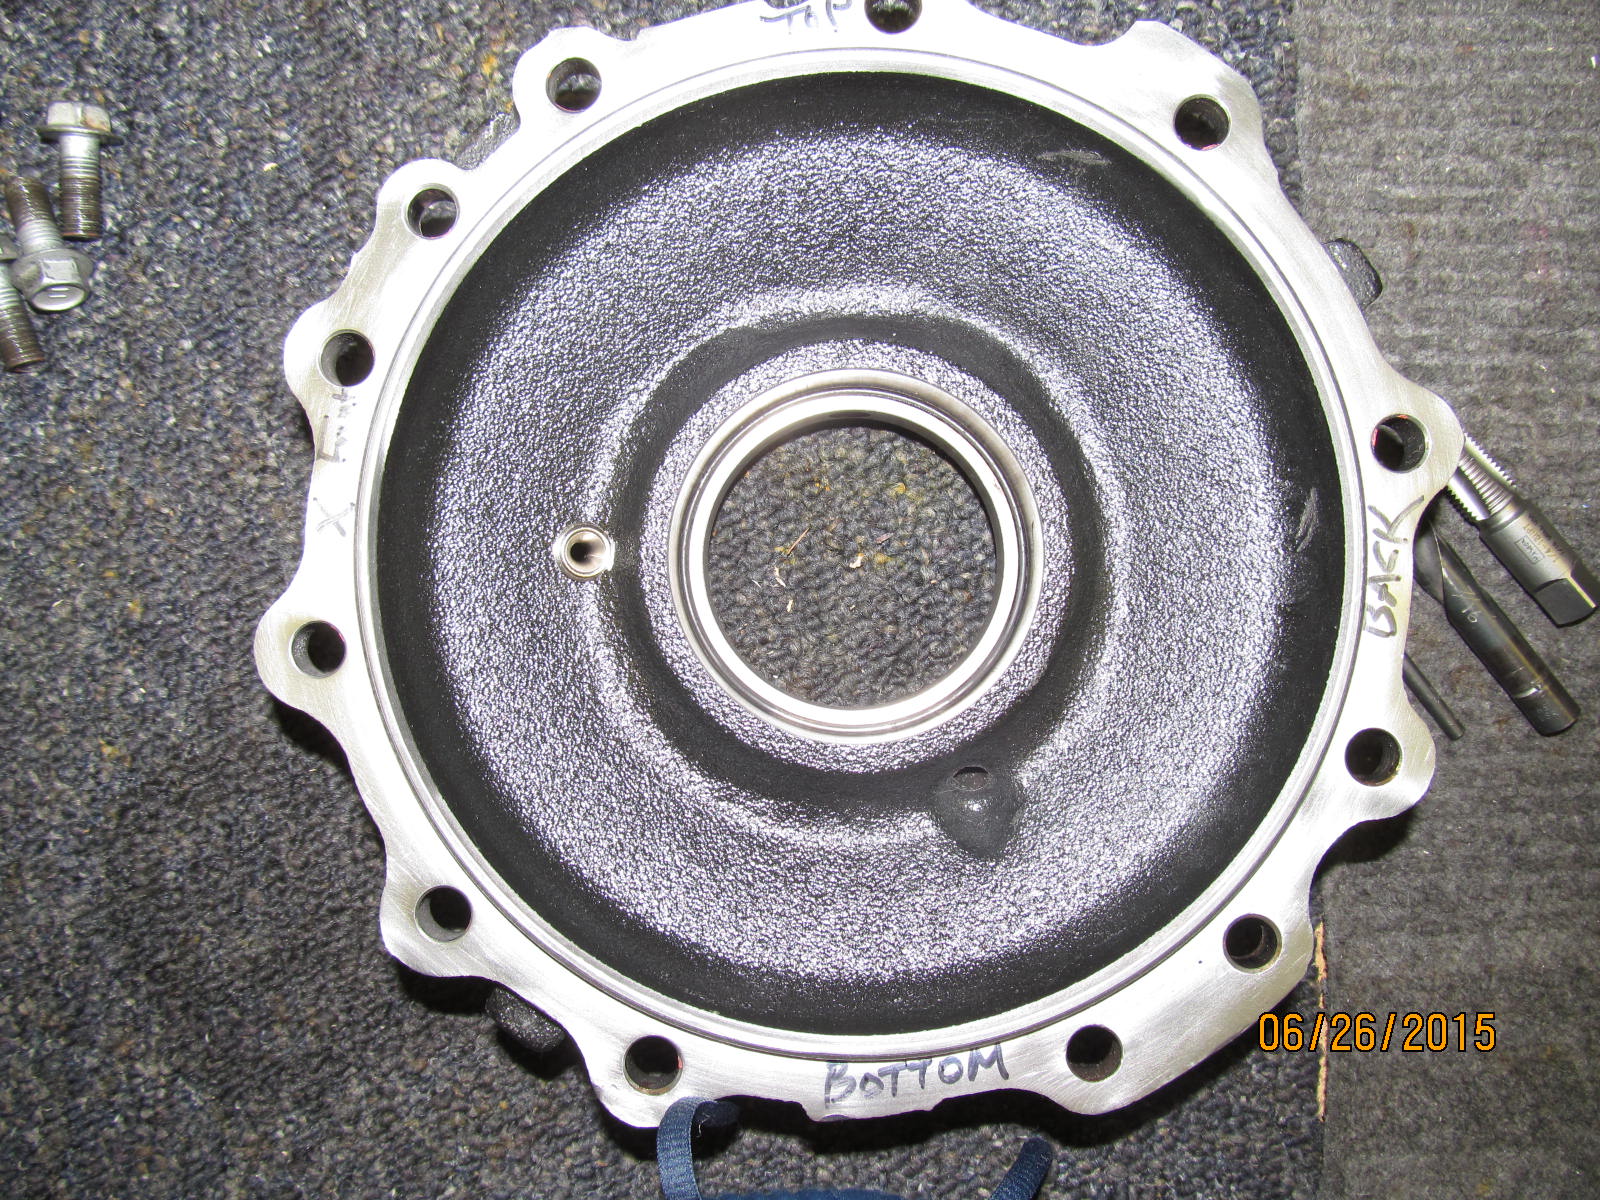
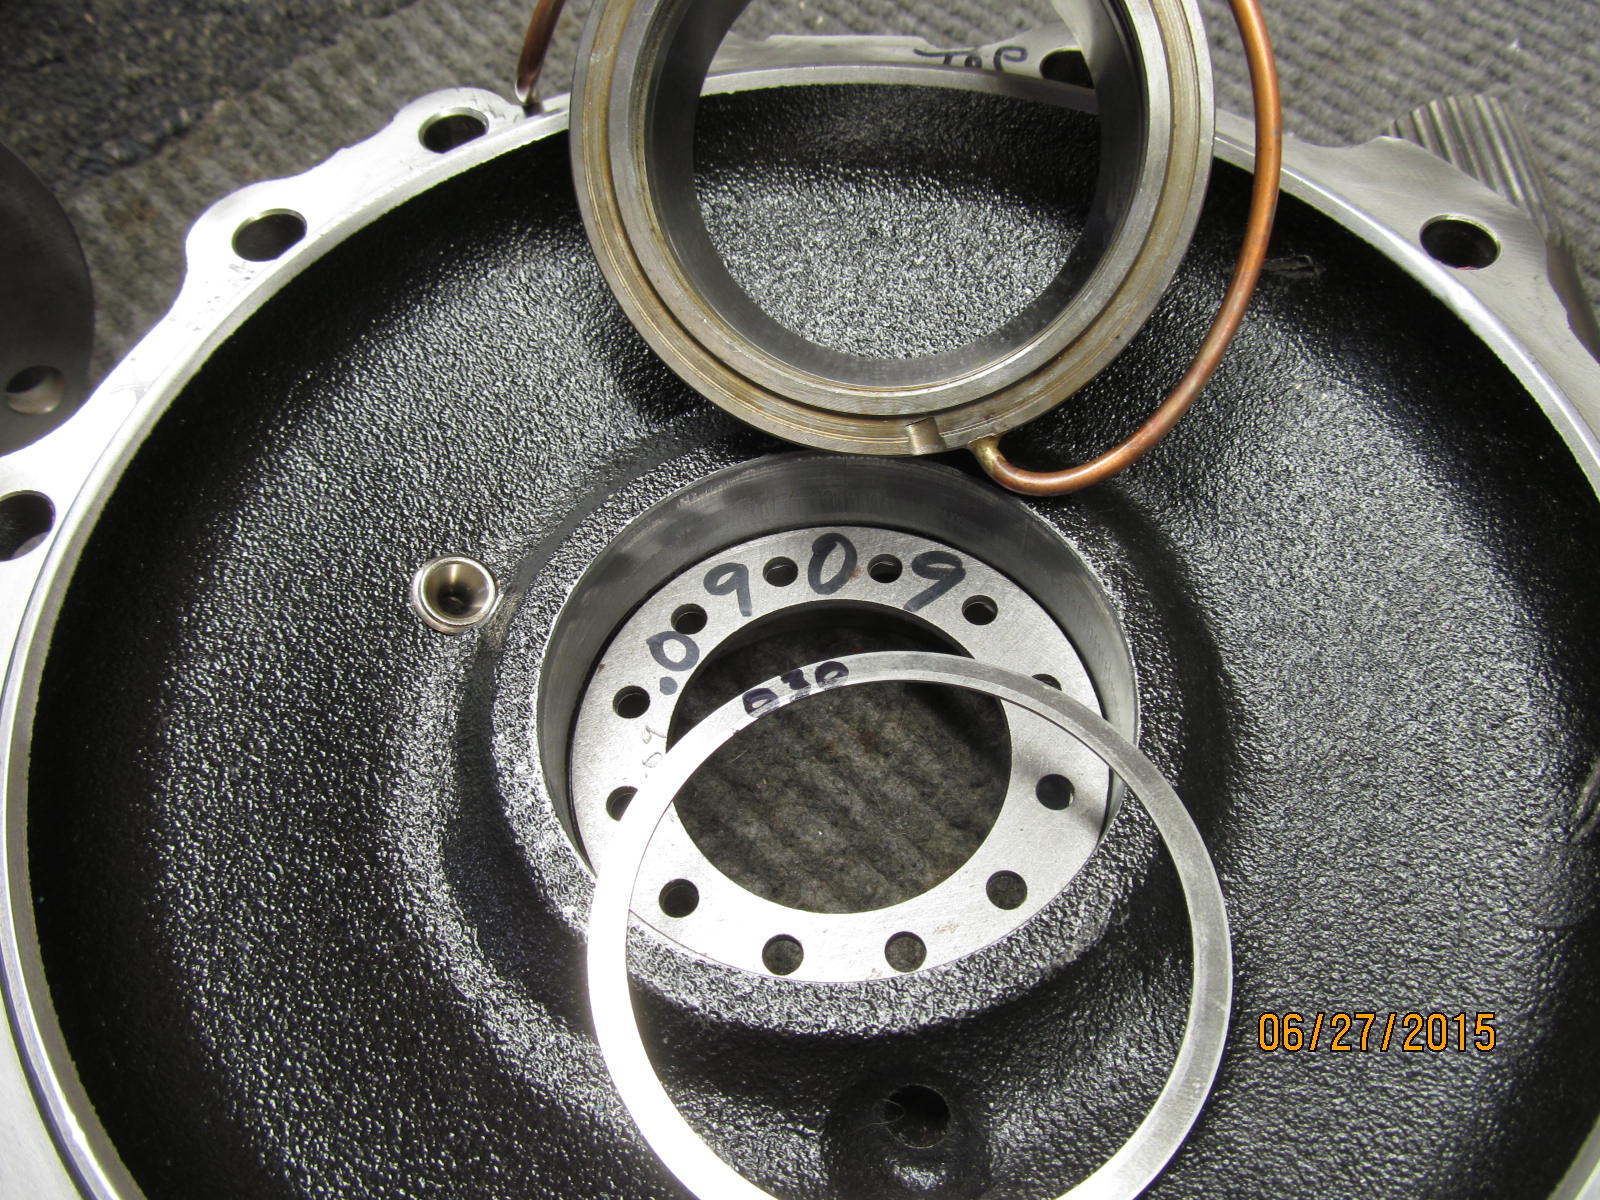
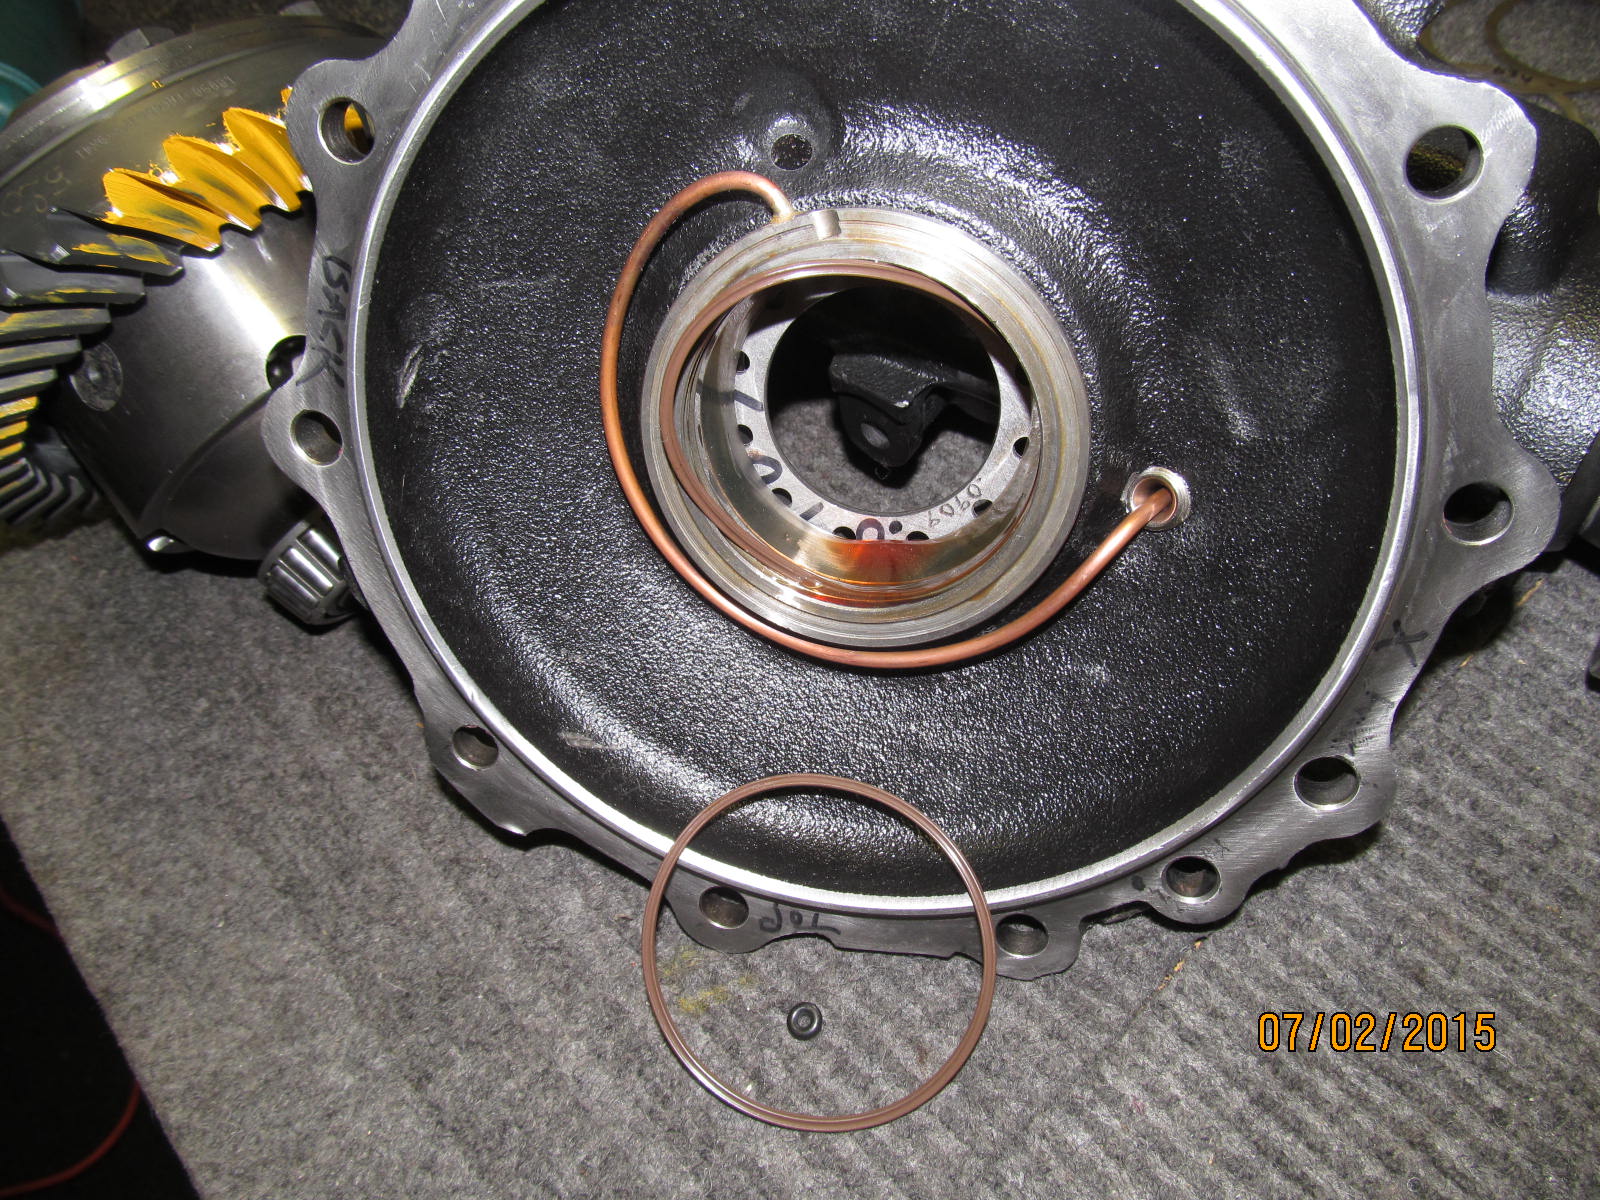
Inside the "deep dish" this race will be replaced with the new ARB supplied race/seal housing.
|
|
|
|
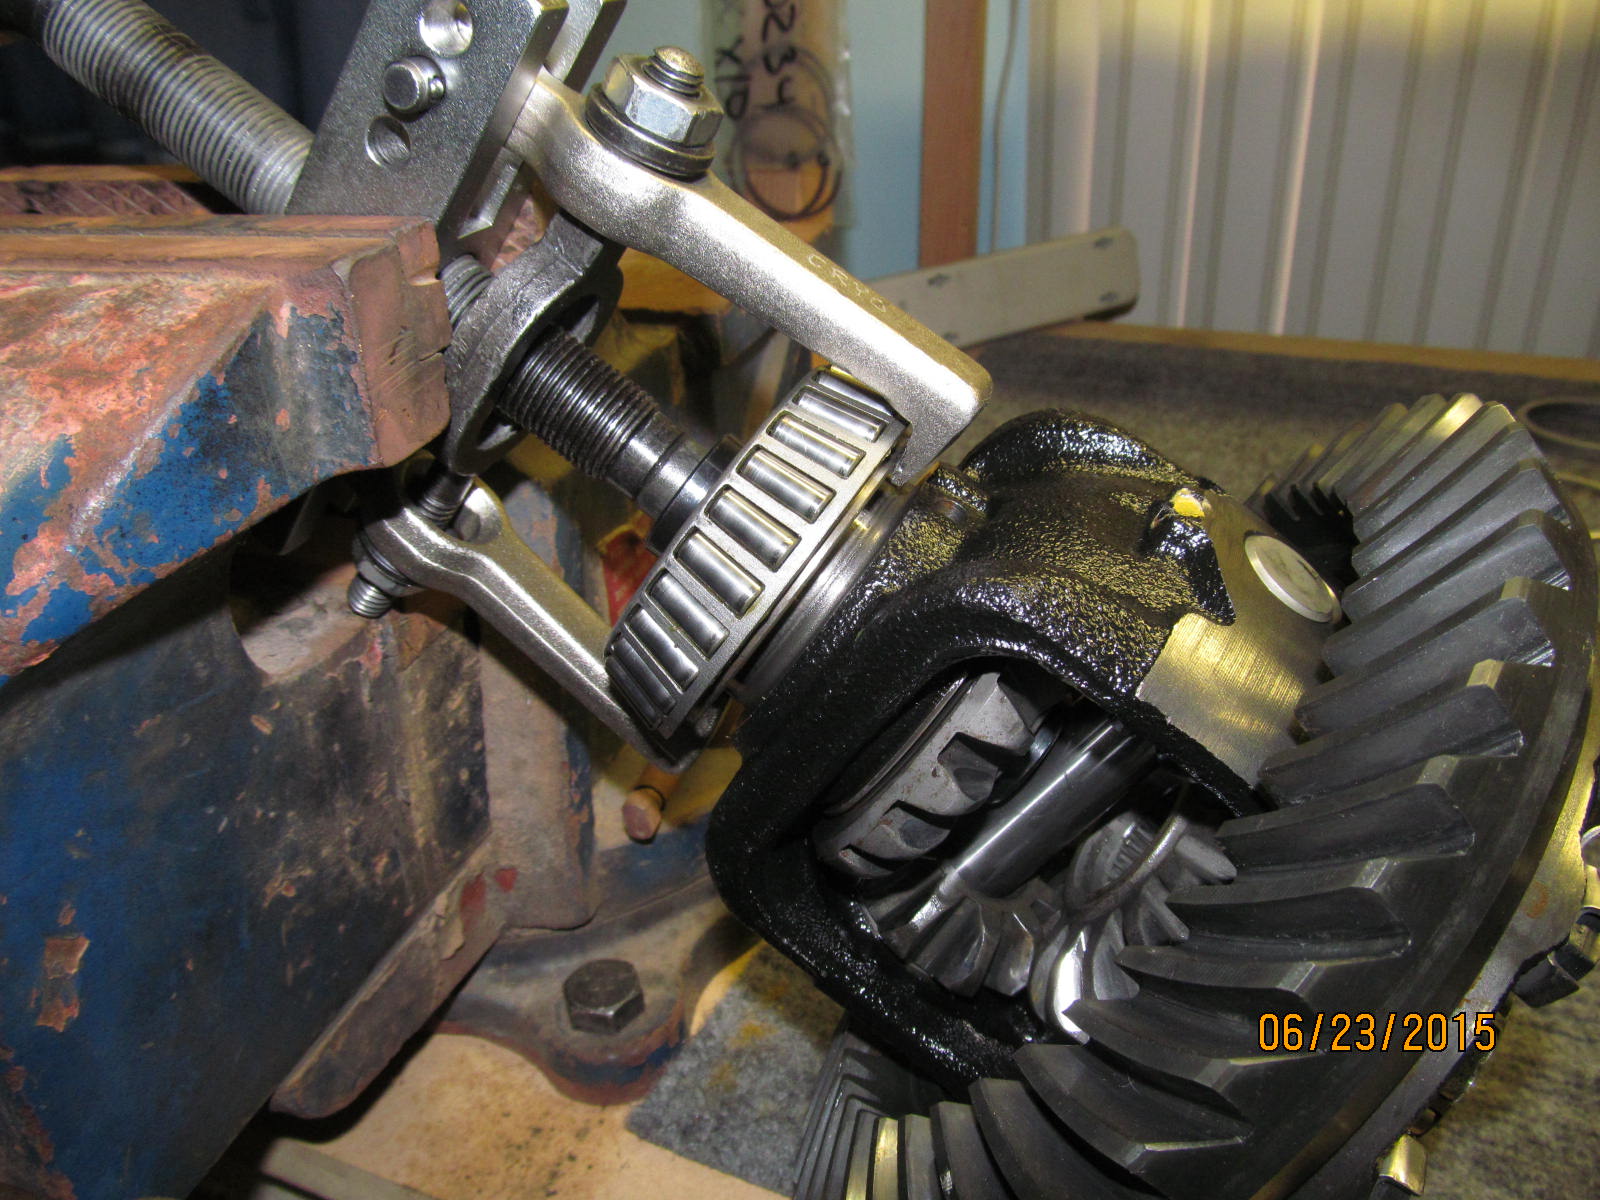
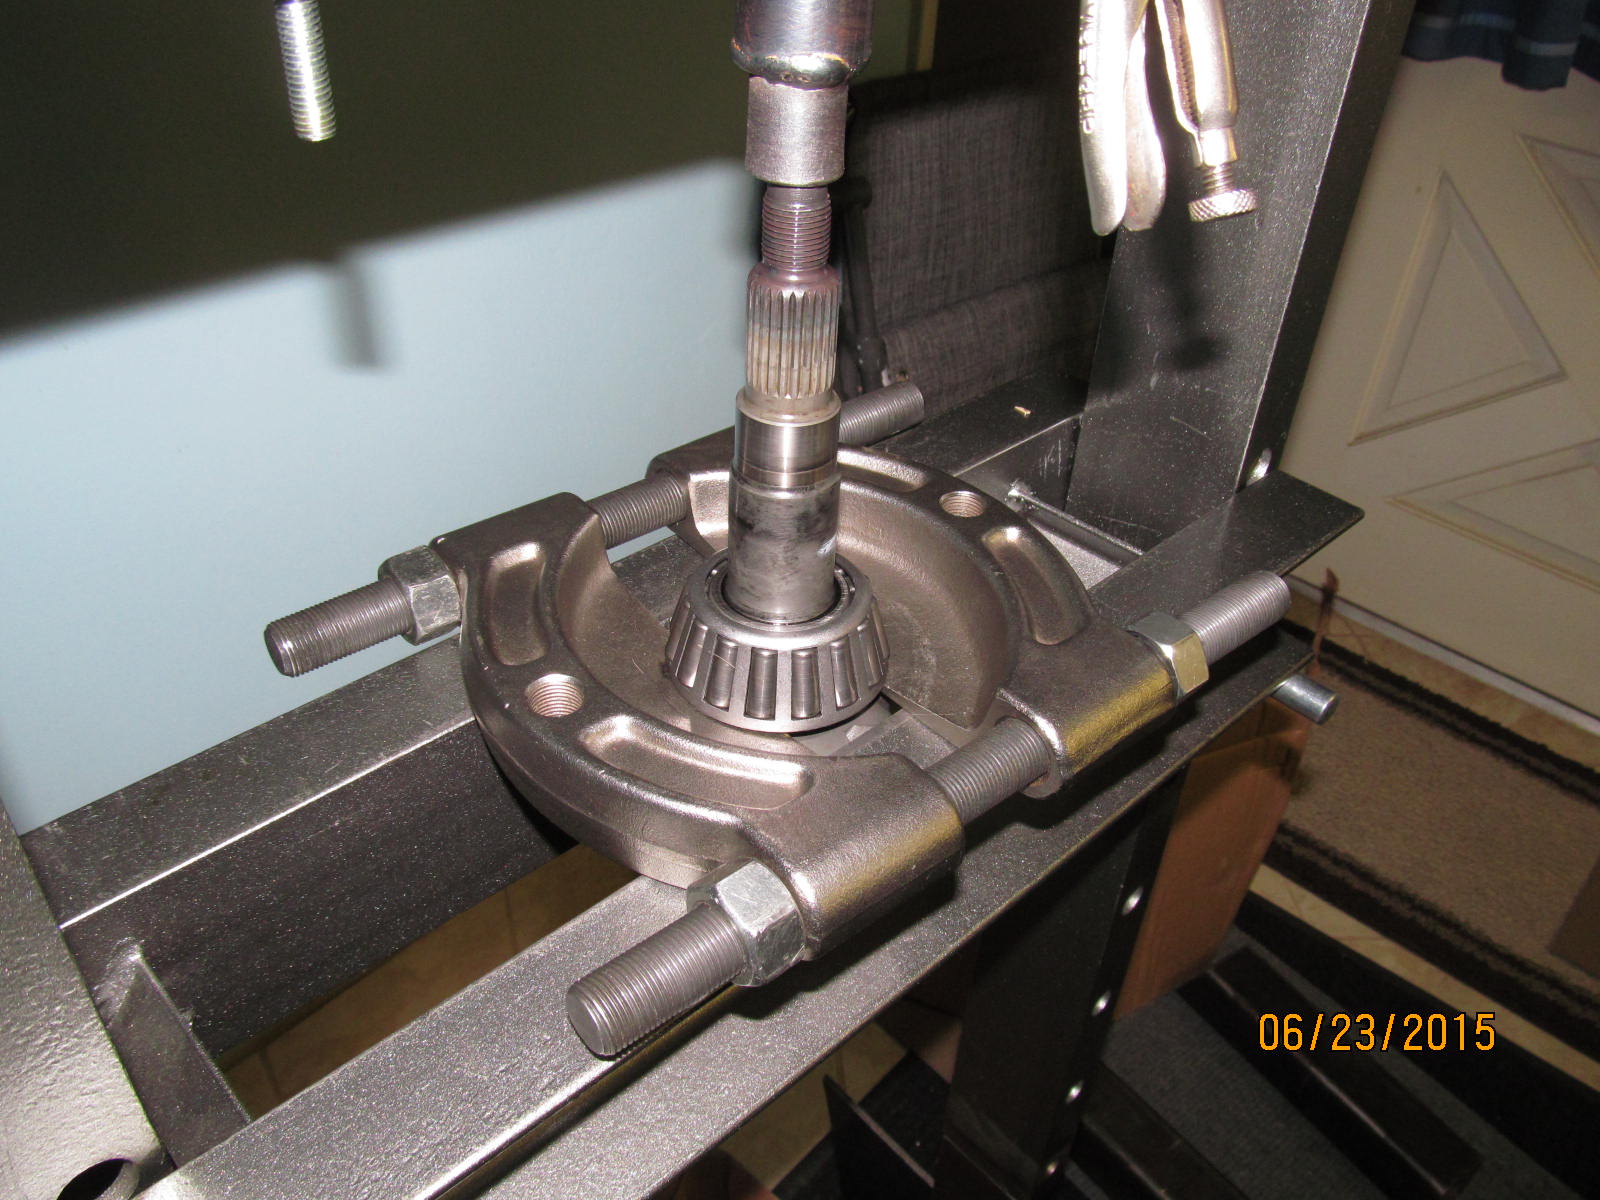
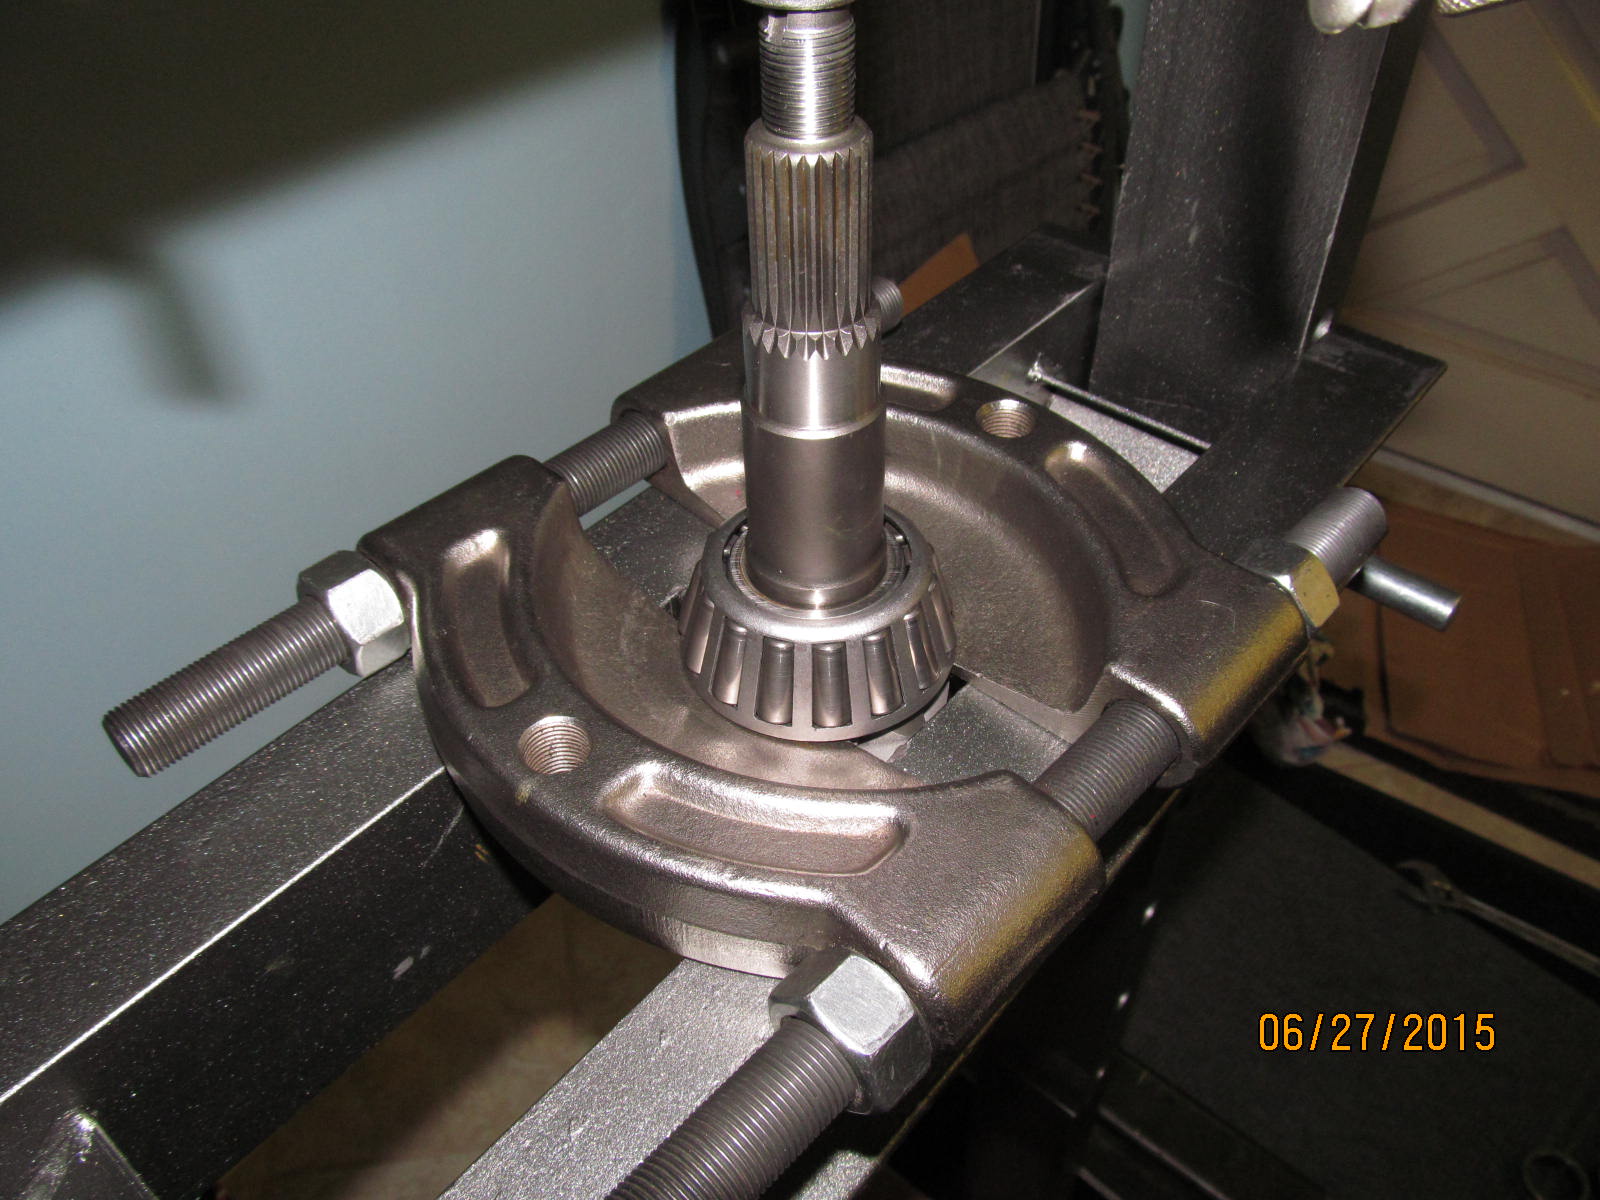
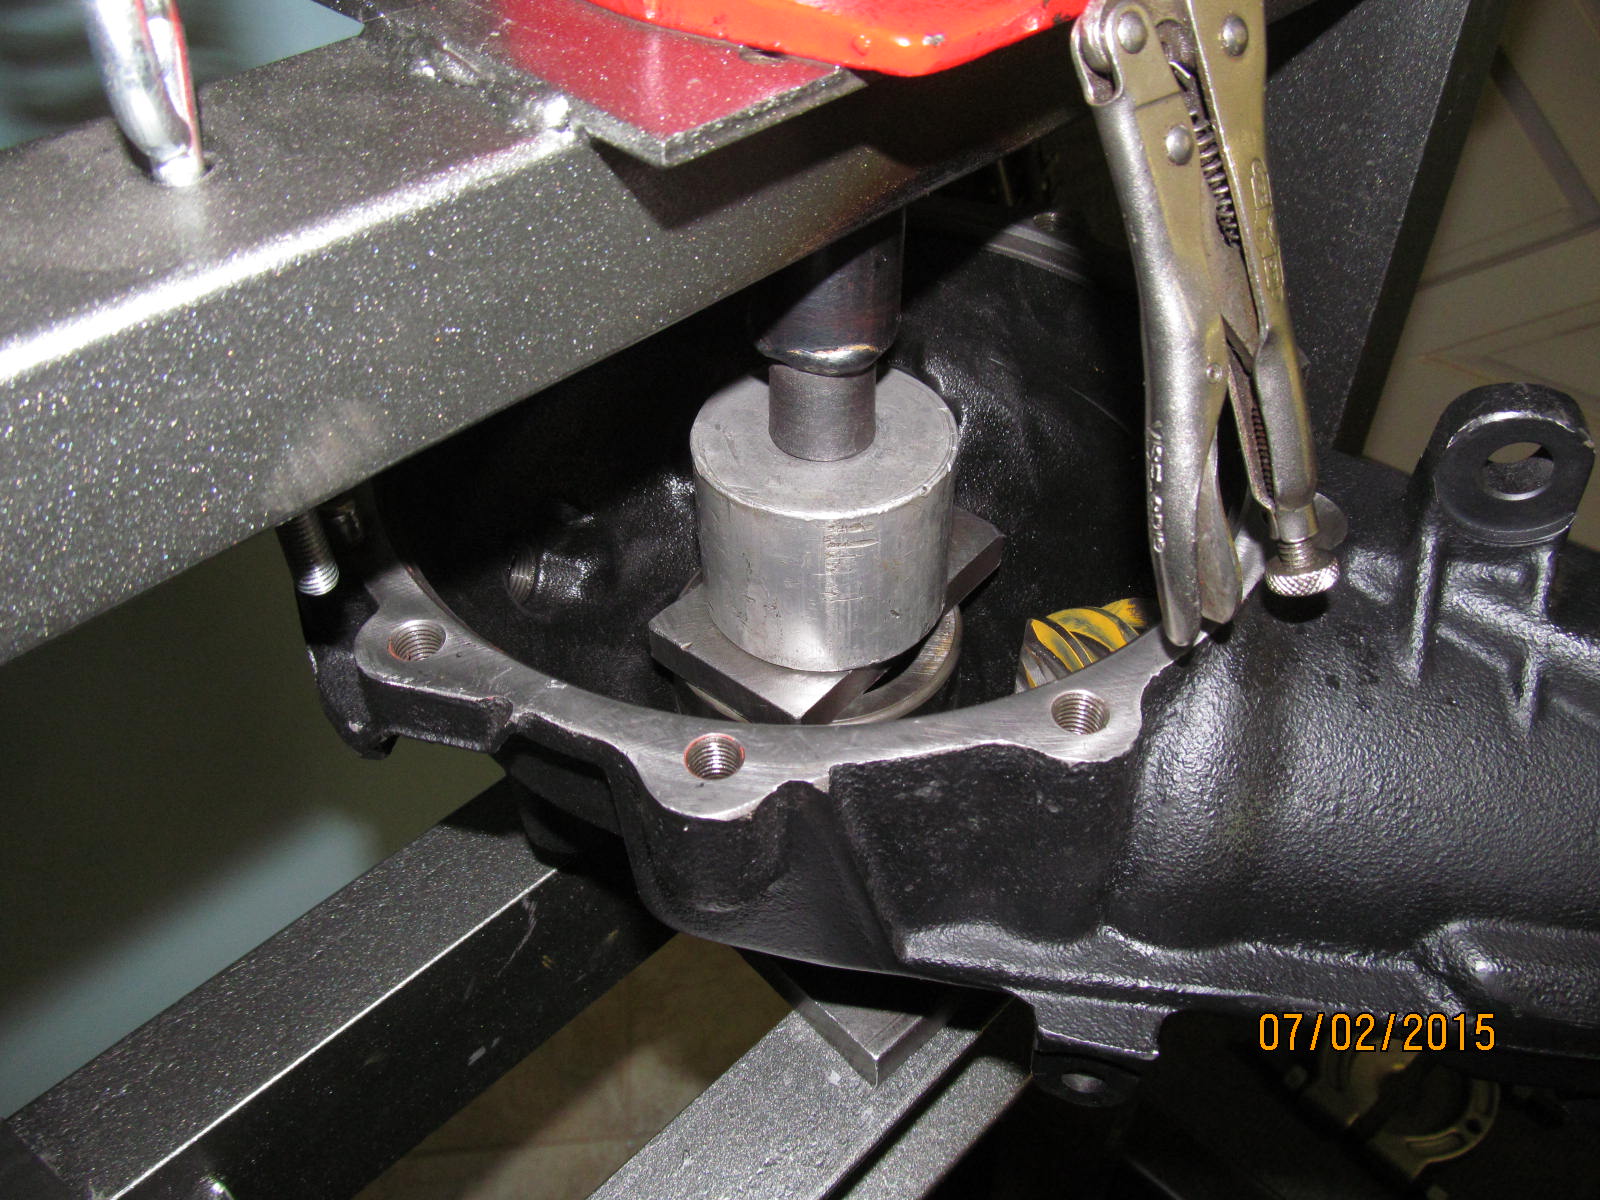
First, to take this carrier bearing off with the OTC-4520 side bearing puller. This is the bearing that will
be re-used on the ARB.
|
|
|
|
|
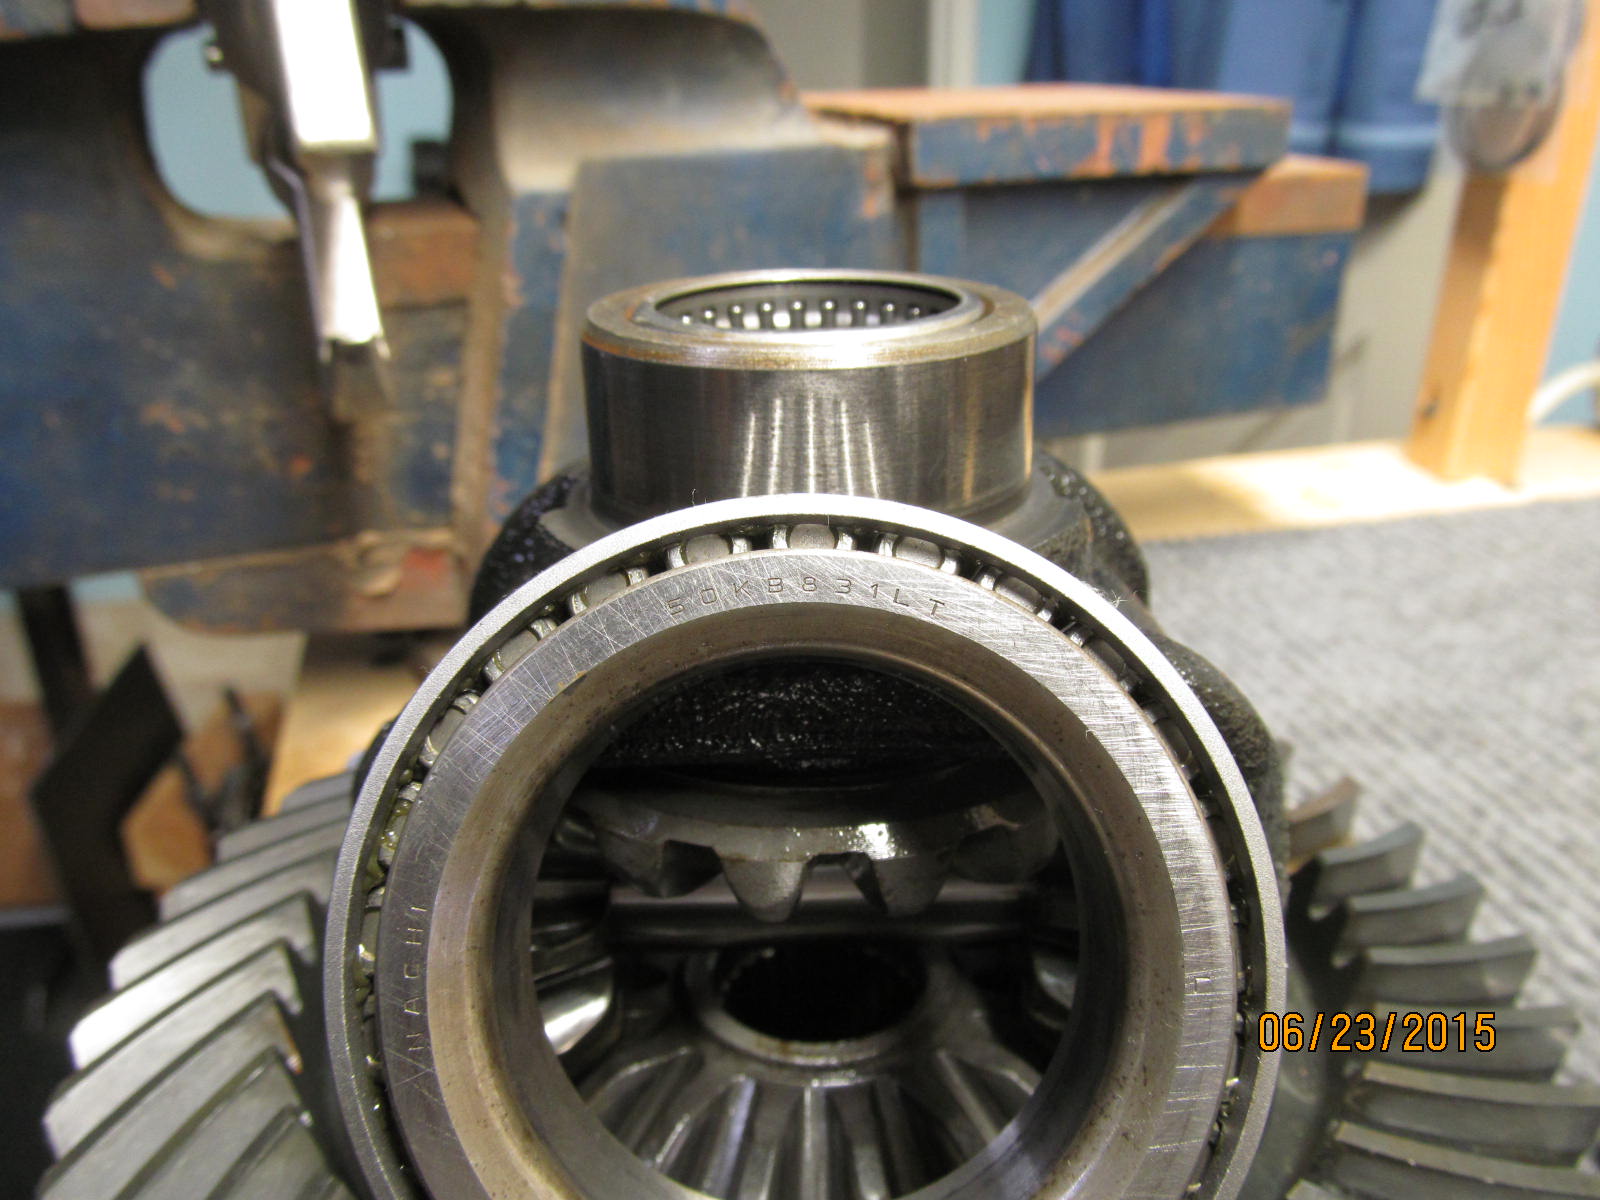
Factory supplied Nachi carrier bearing number.
|
|
|
|
|
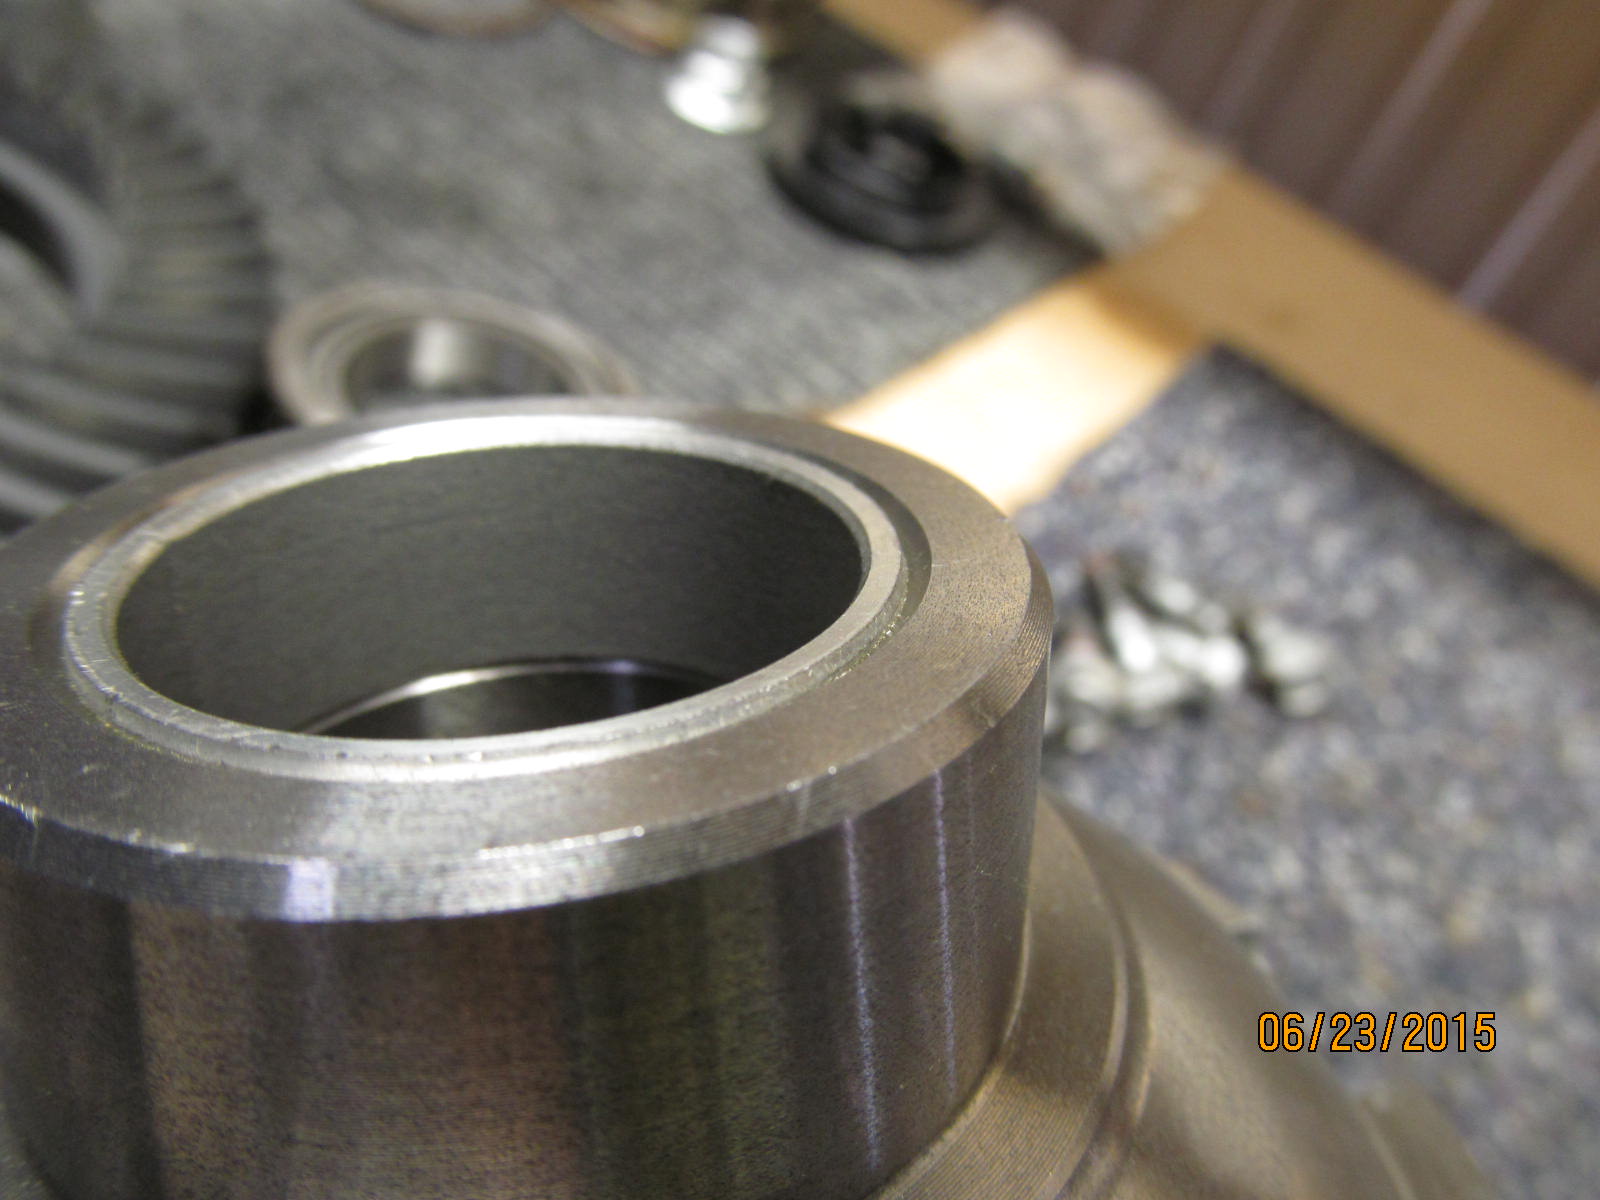
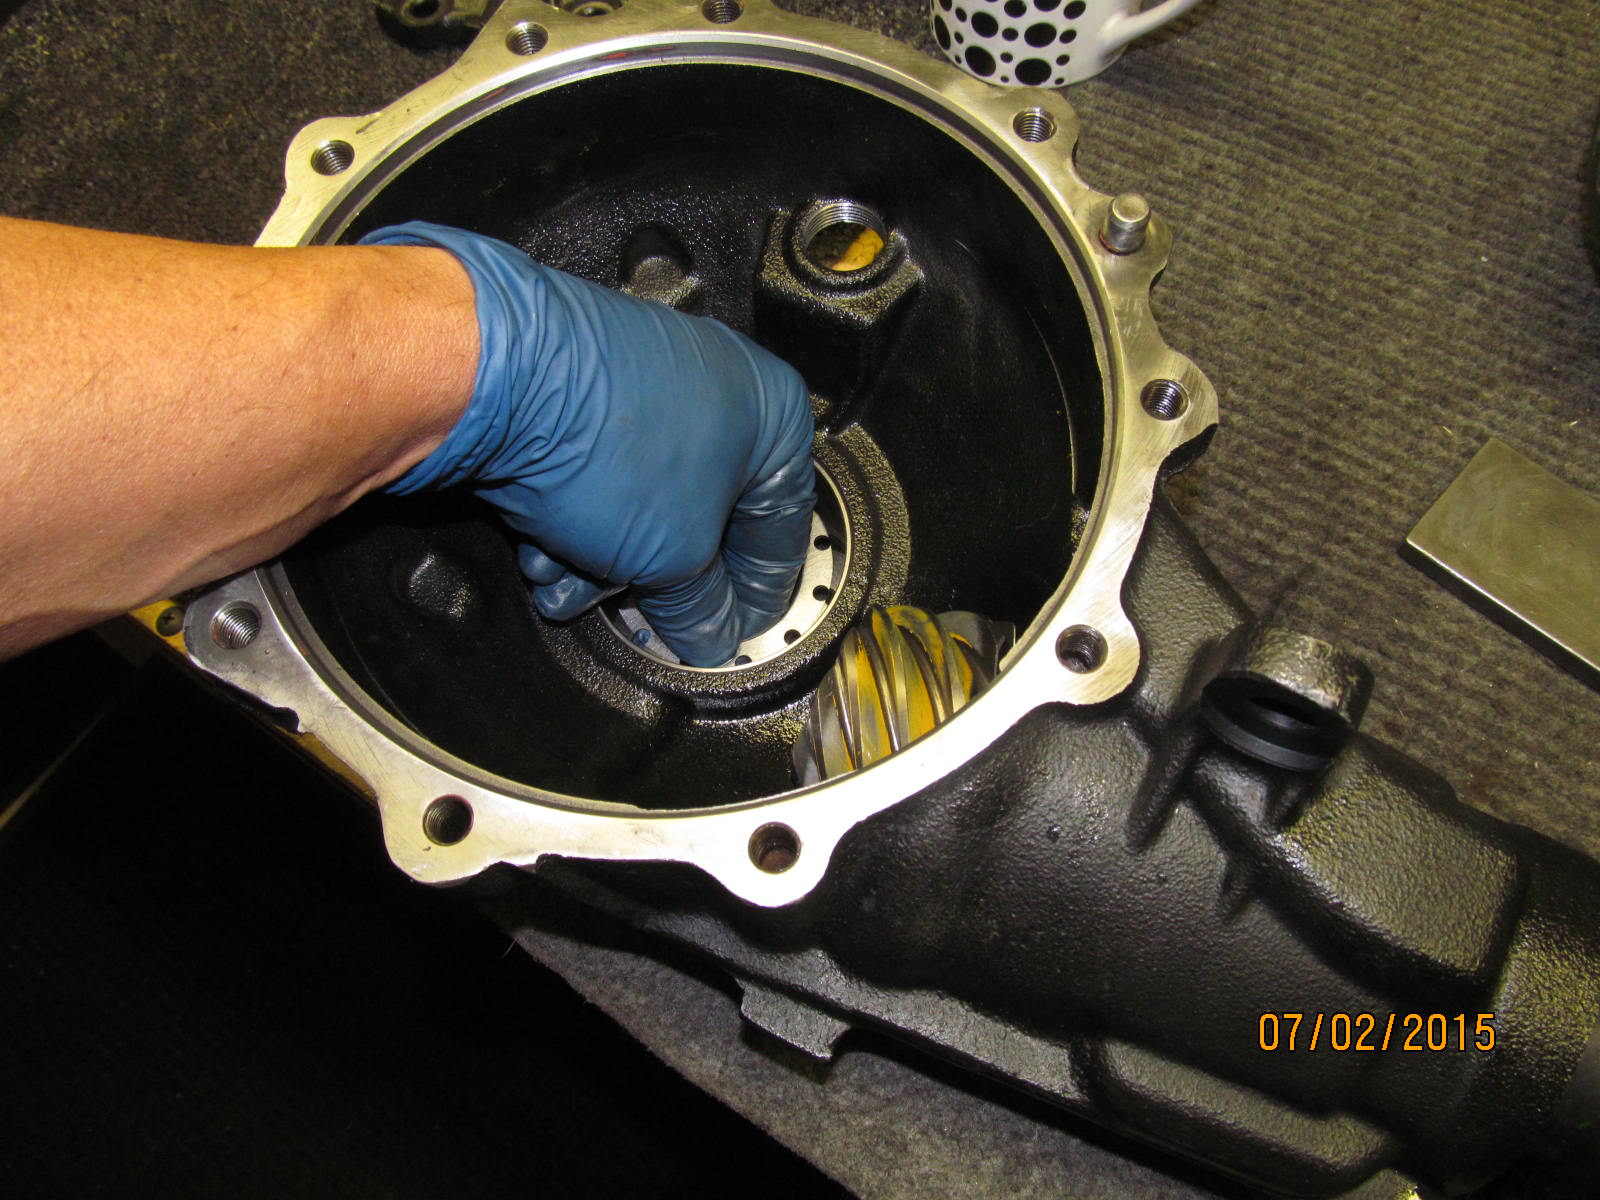
That bearing will go here but more on that in a moment.
|
|
|
|
Surfaces are checked for burrs and high spots and none are found. The ring gear is also checked....it
was good also.
|
|
|

|
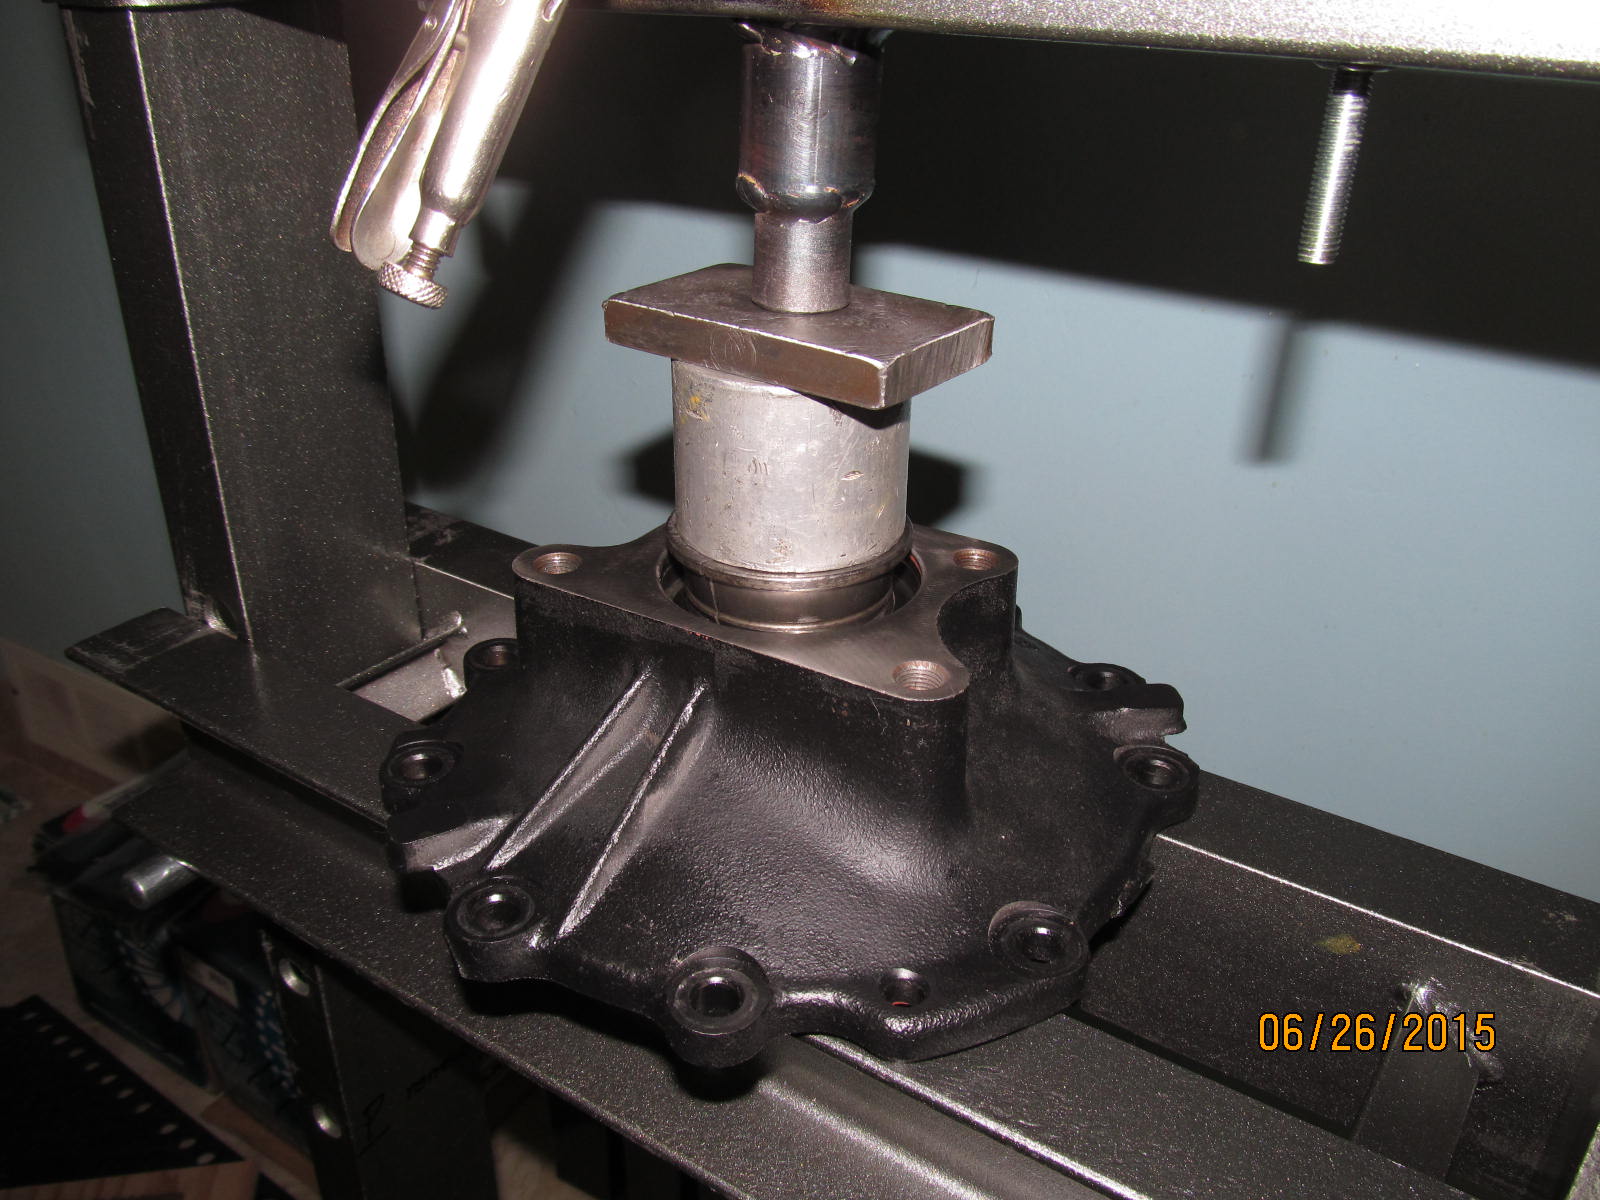
|
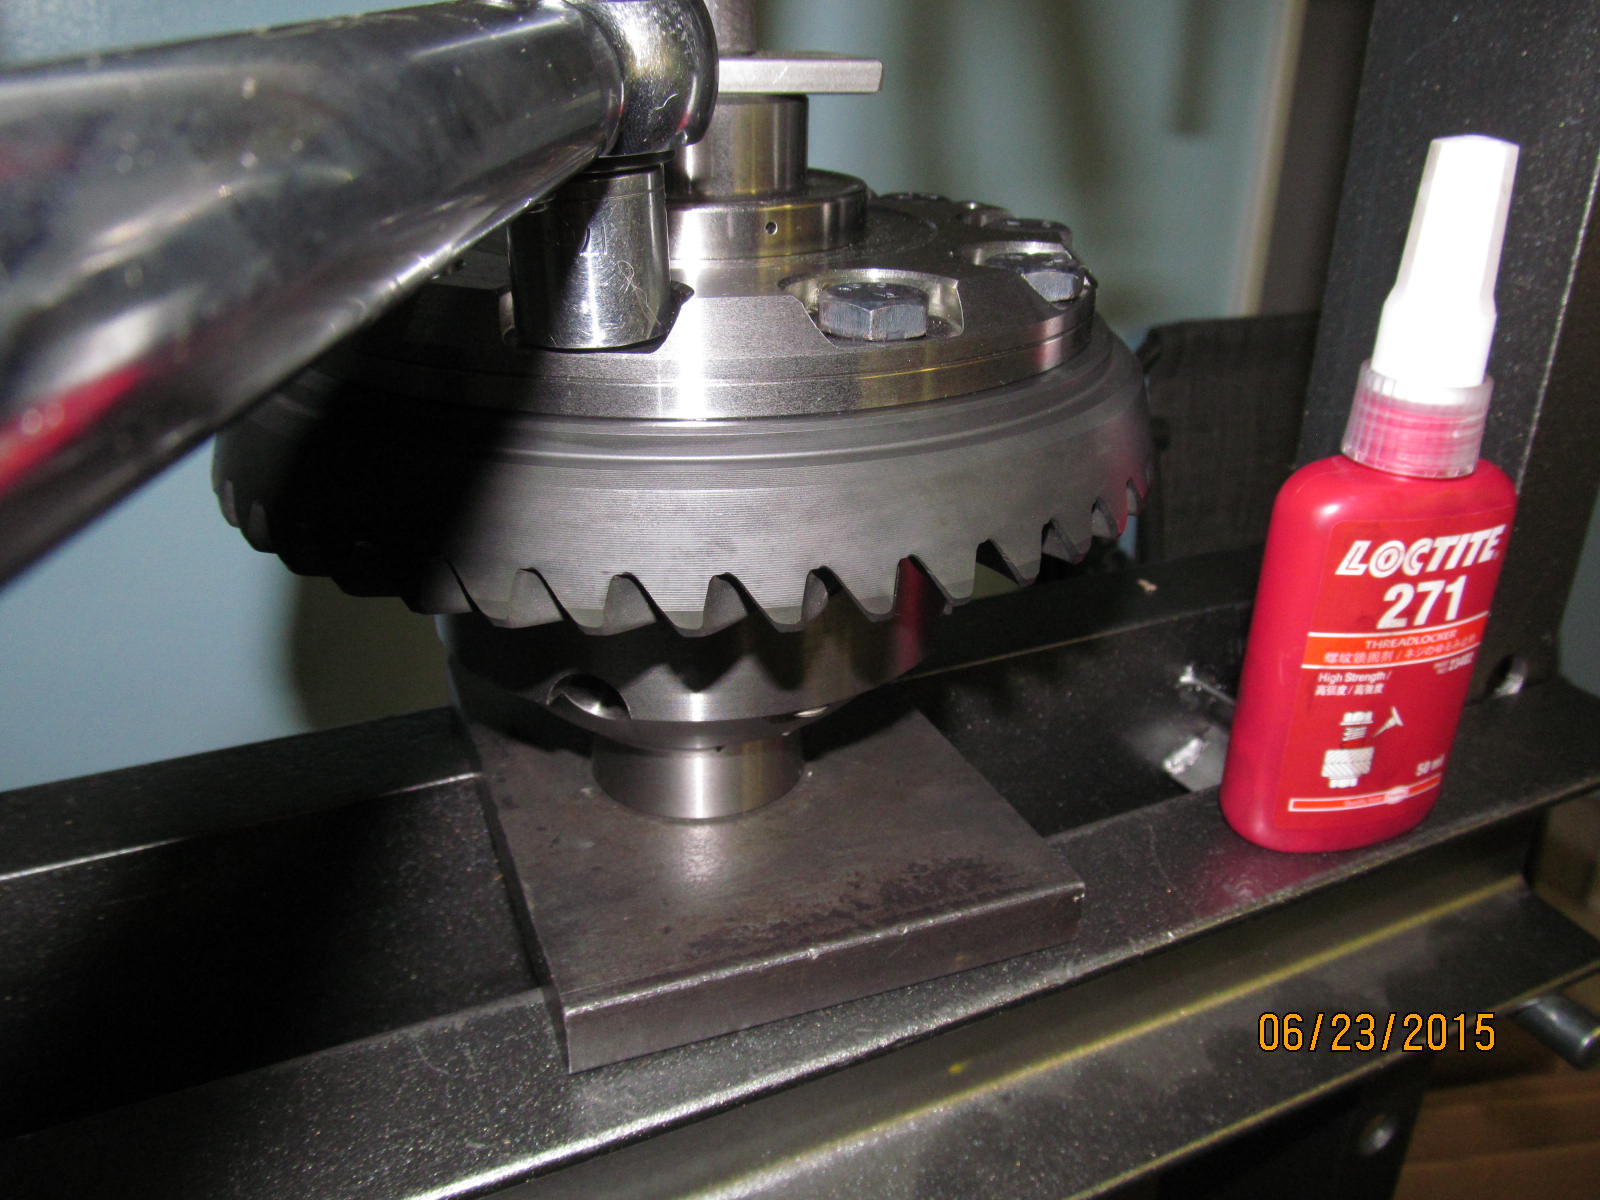
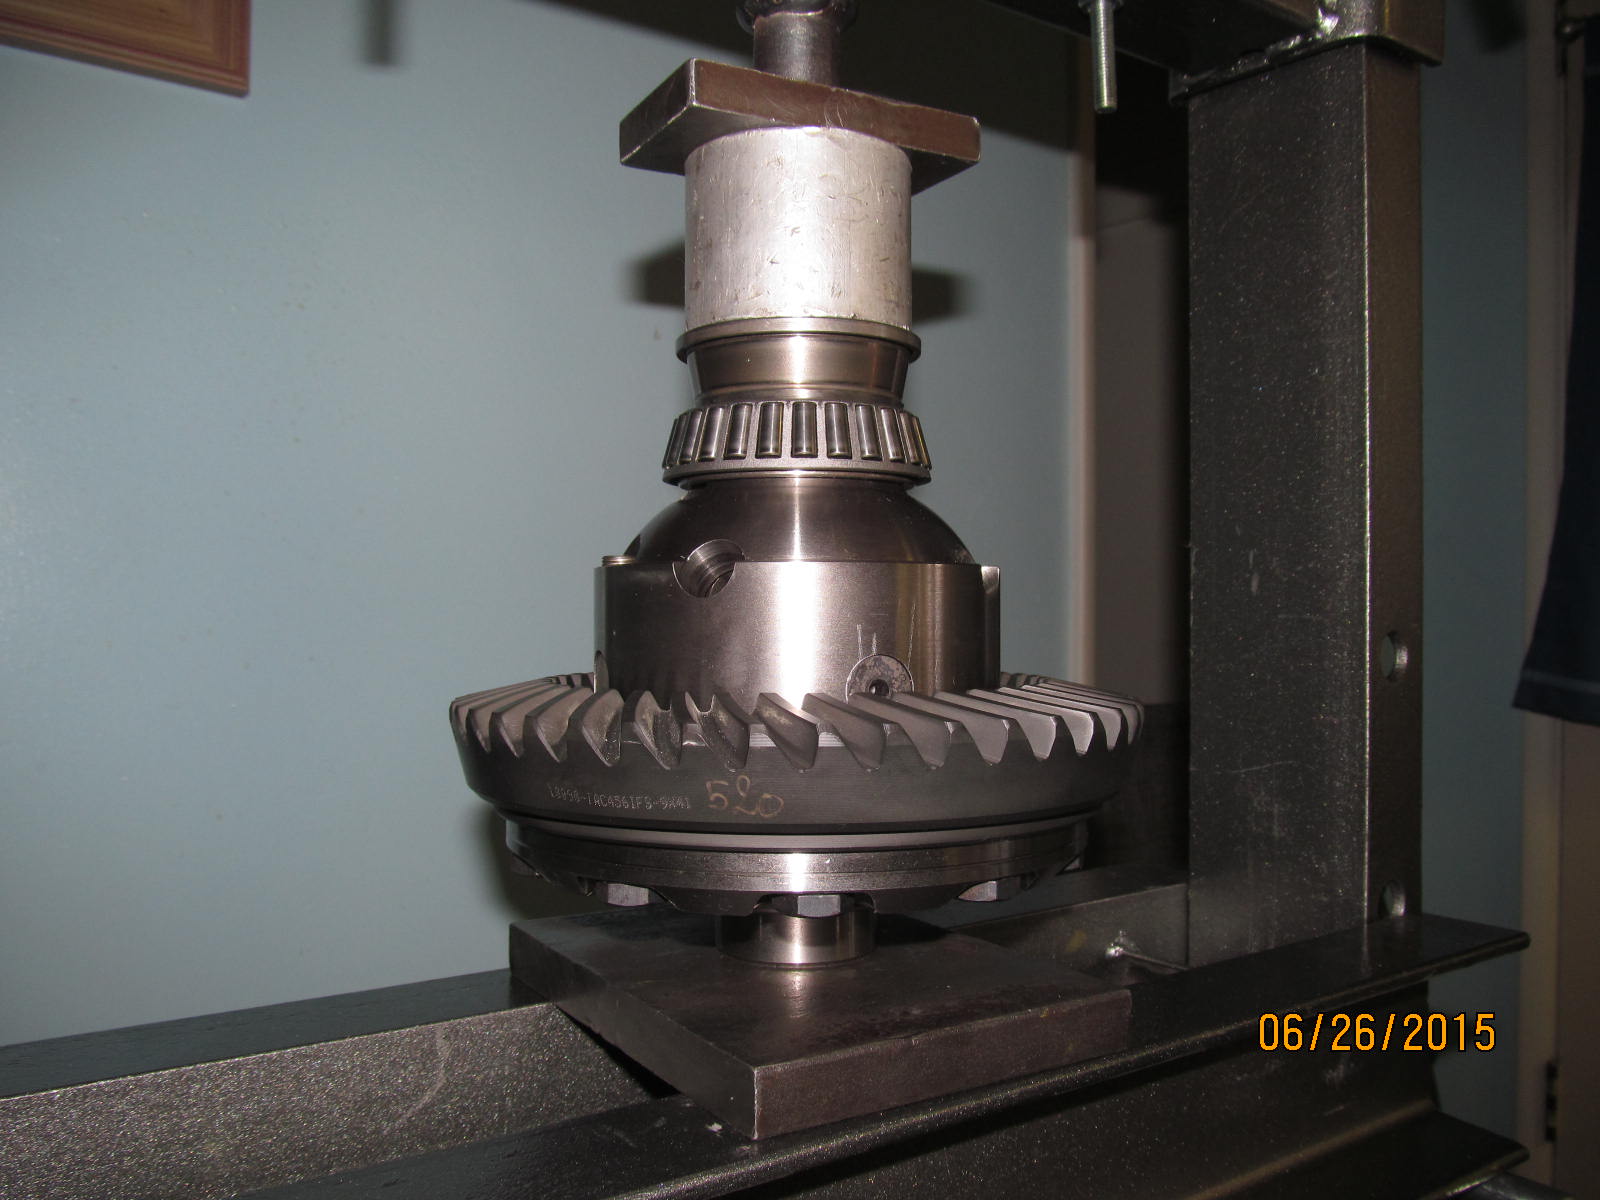
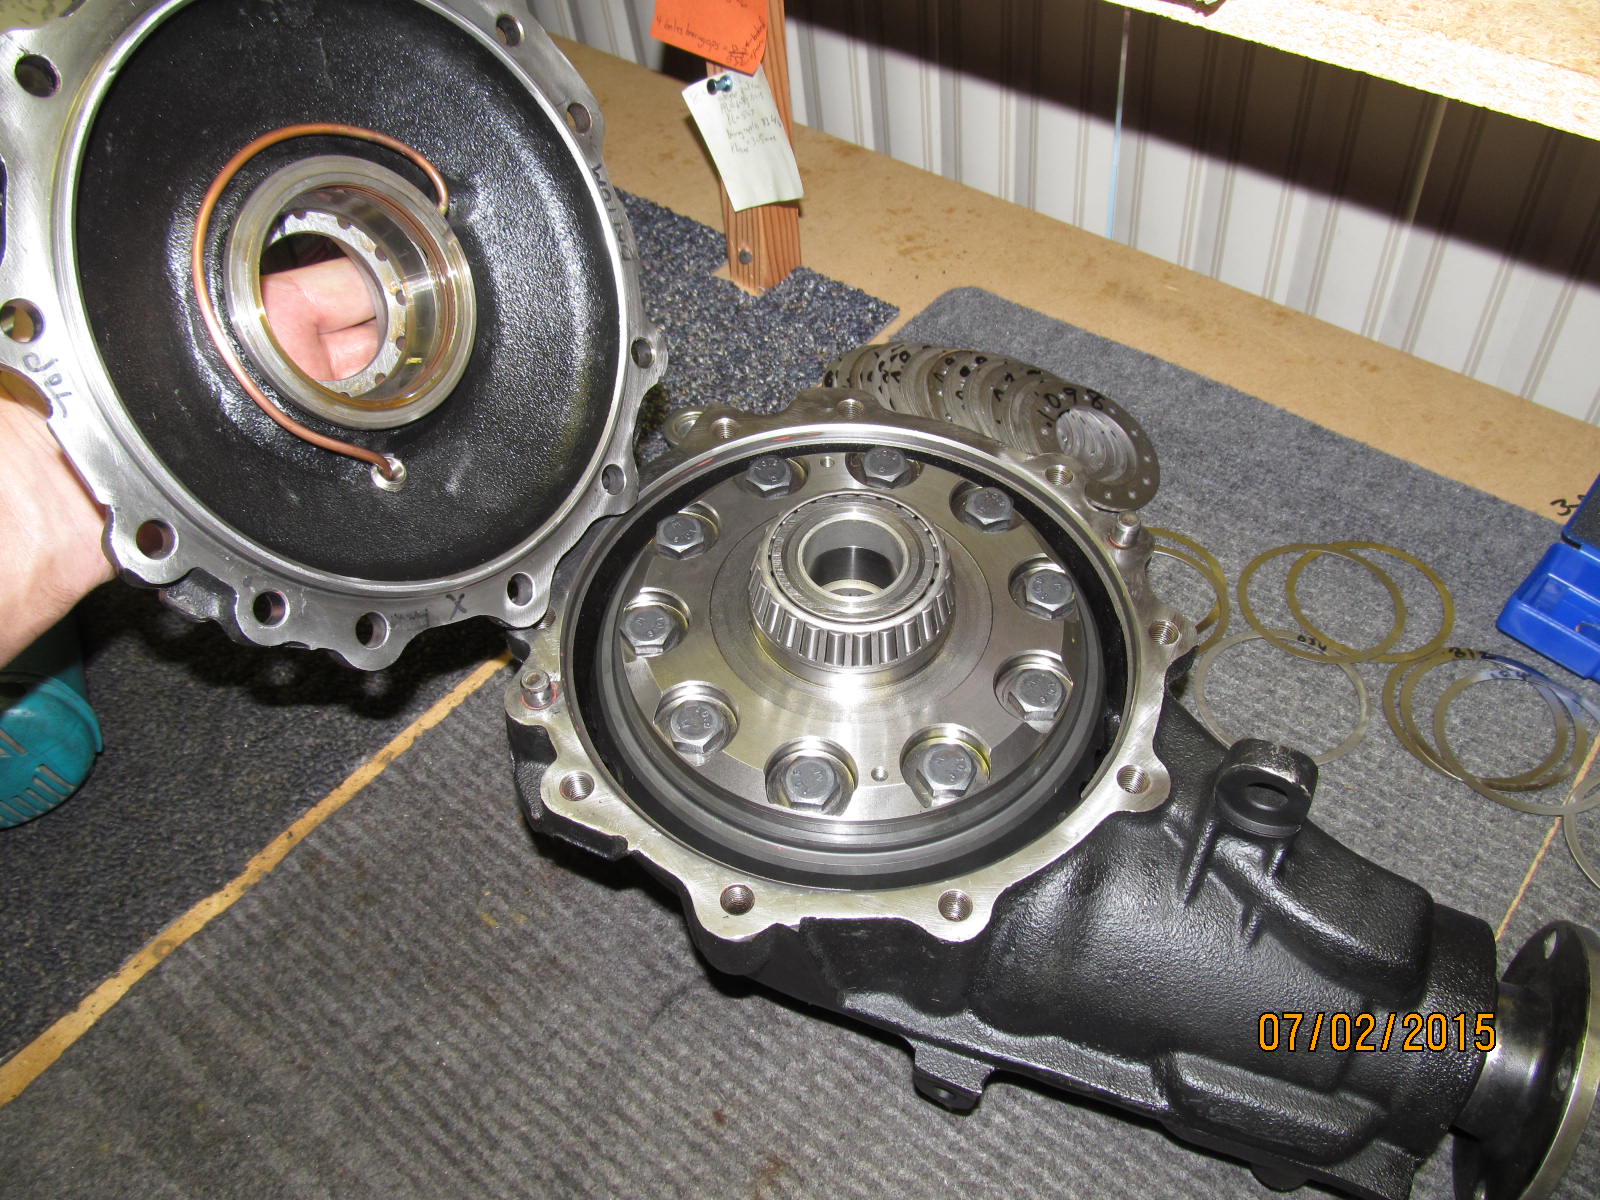
The ring was a tight fit onto the ARB. Easy job with an estimated 1/2 ton of casual pressure.
|
|
|
|
|
Using the pressure of the press to lock the case in place, 70 ft/lbs is applied to the 10 bolts with red Loctite.
|
|
|
|
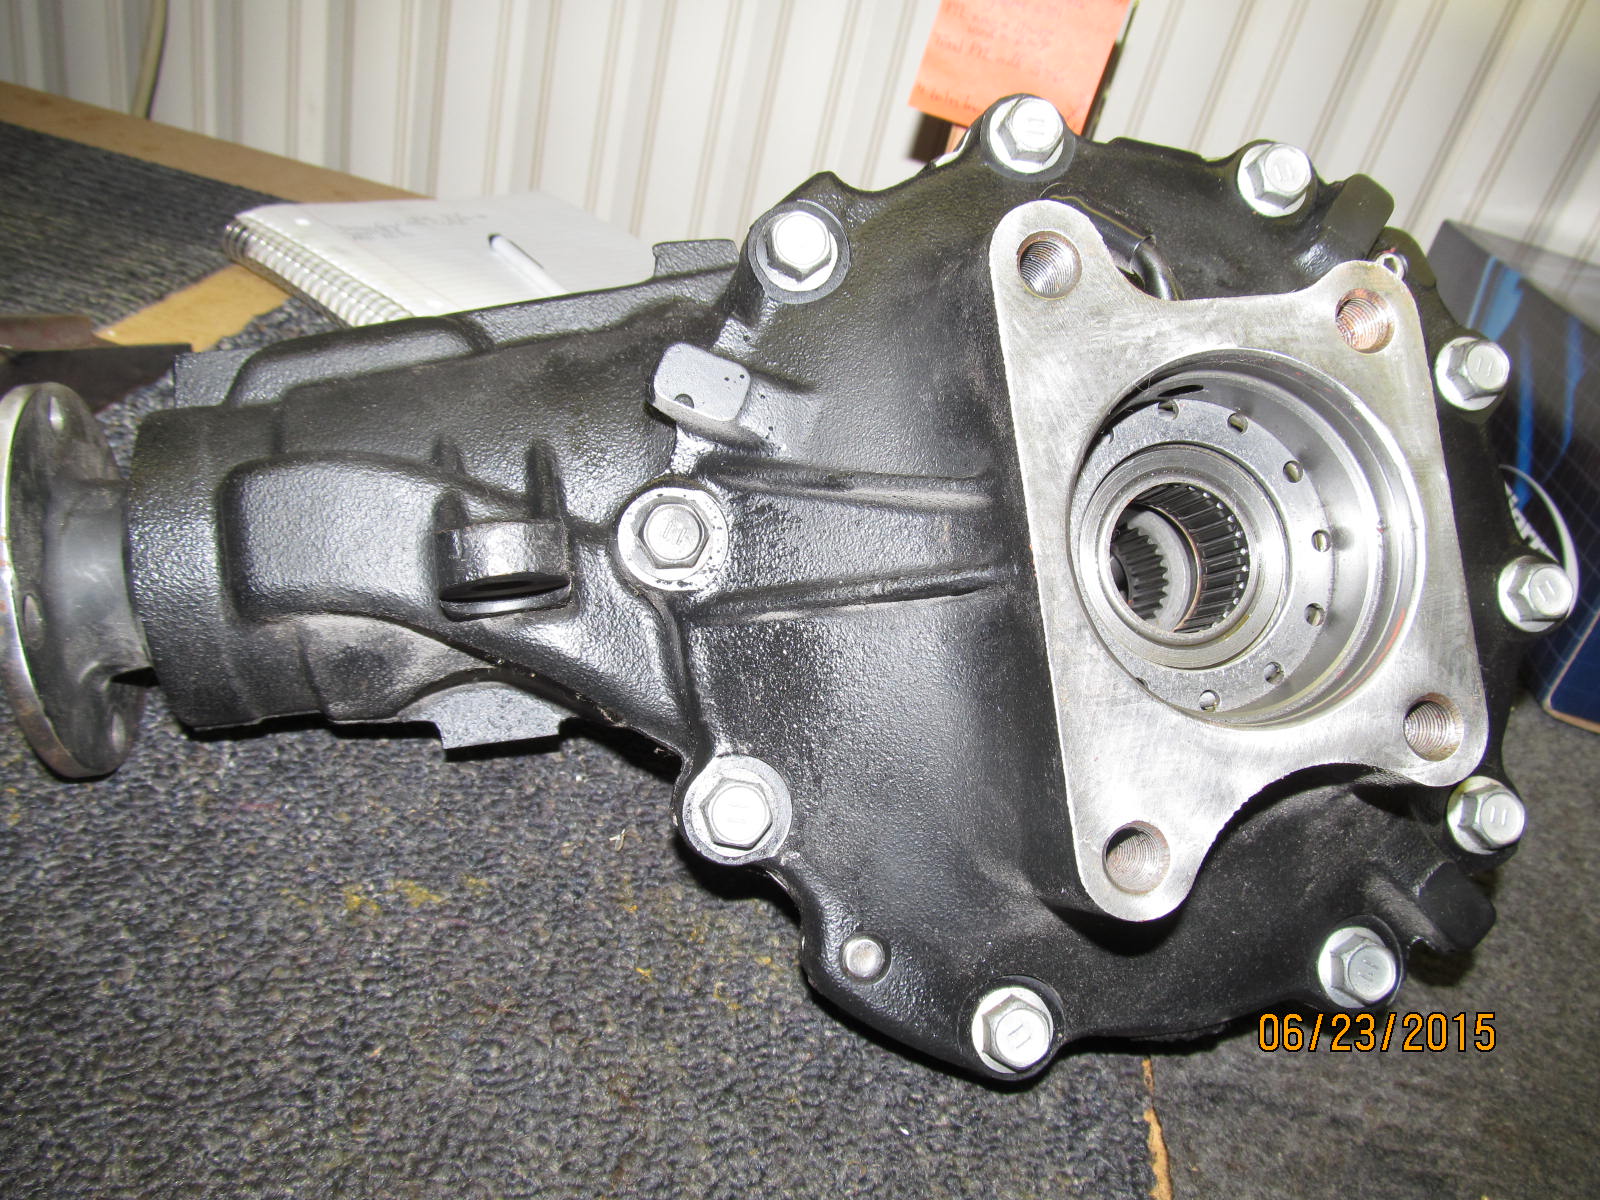
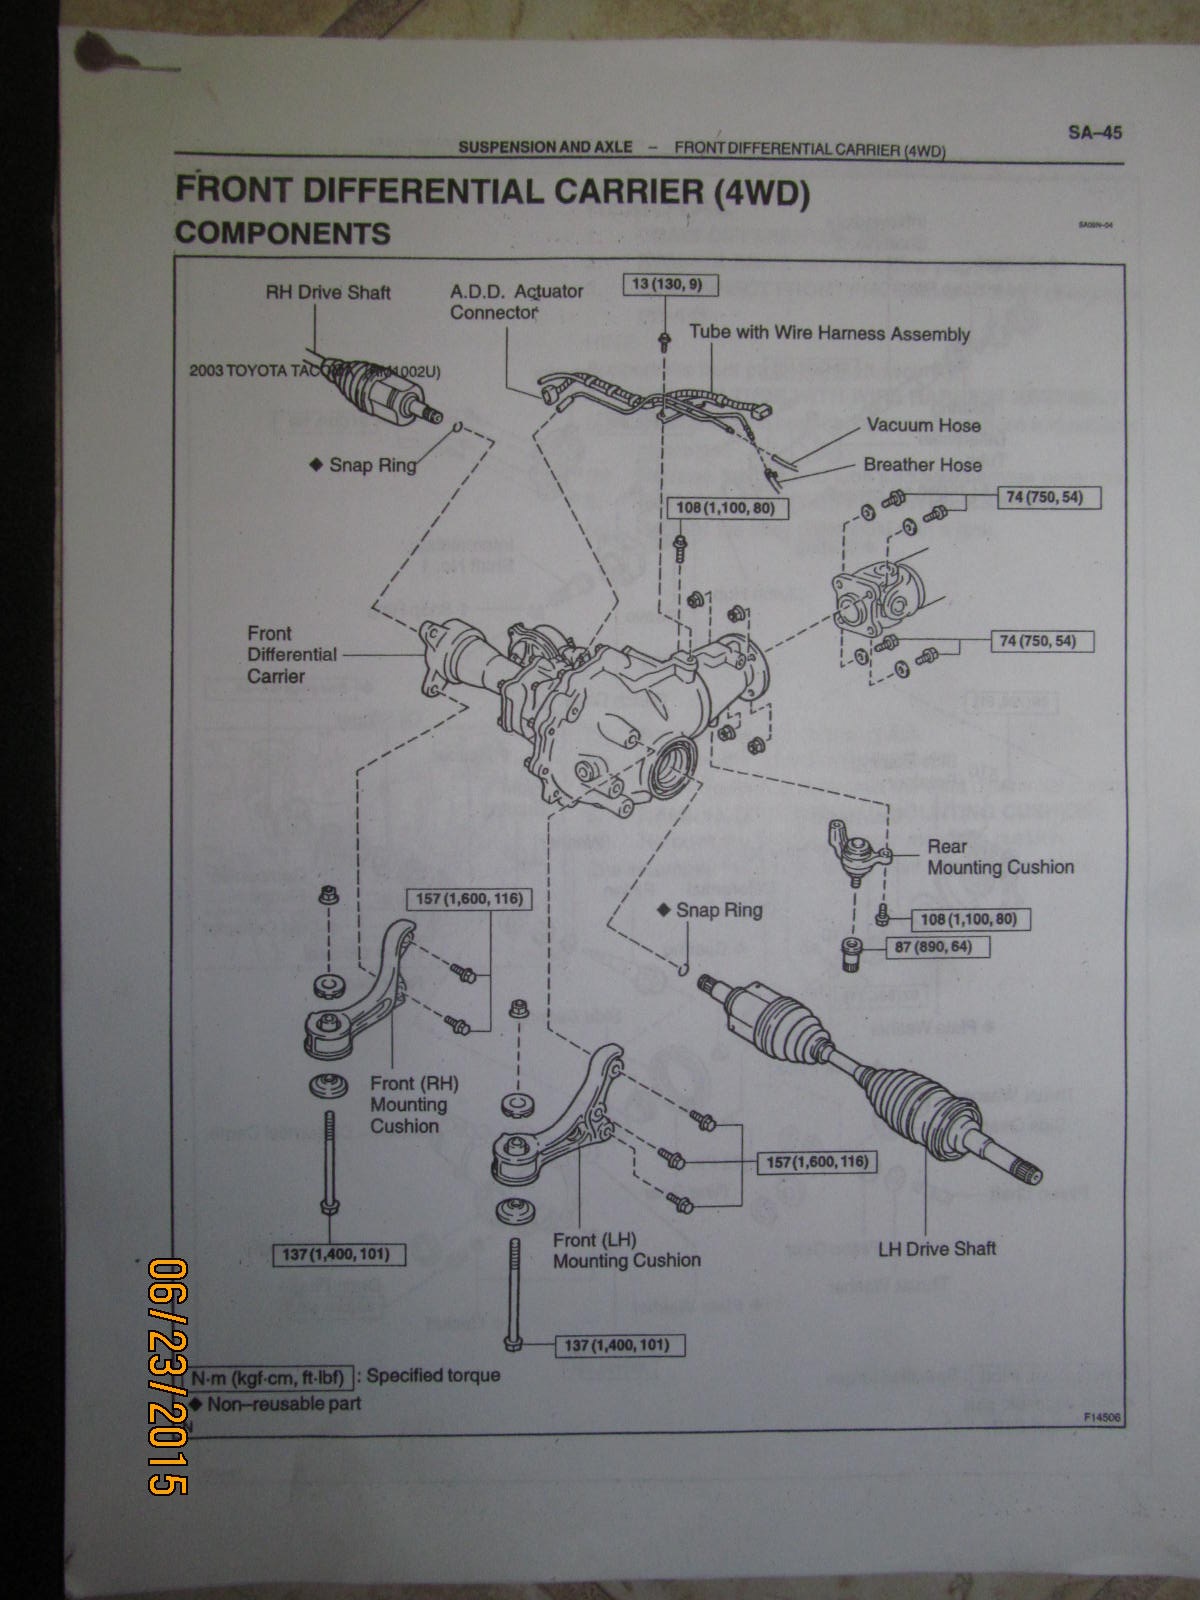
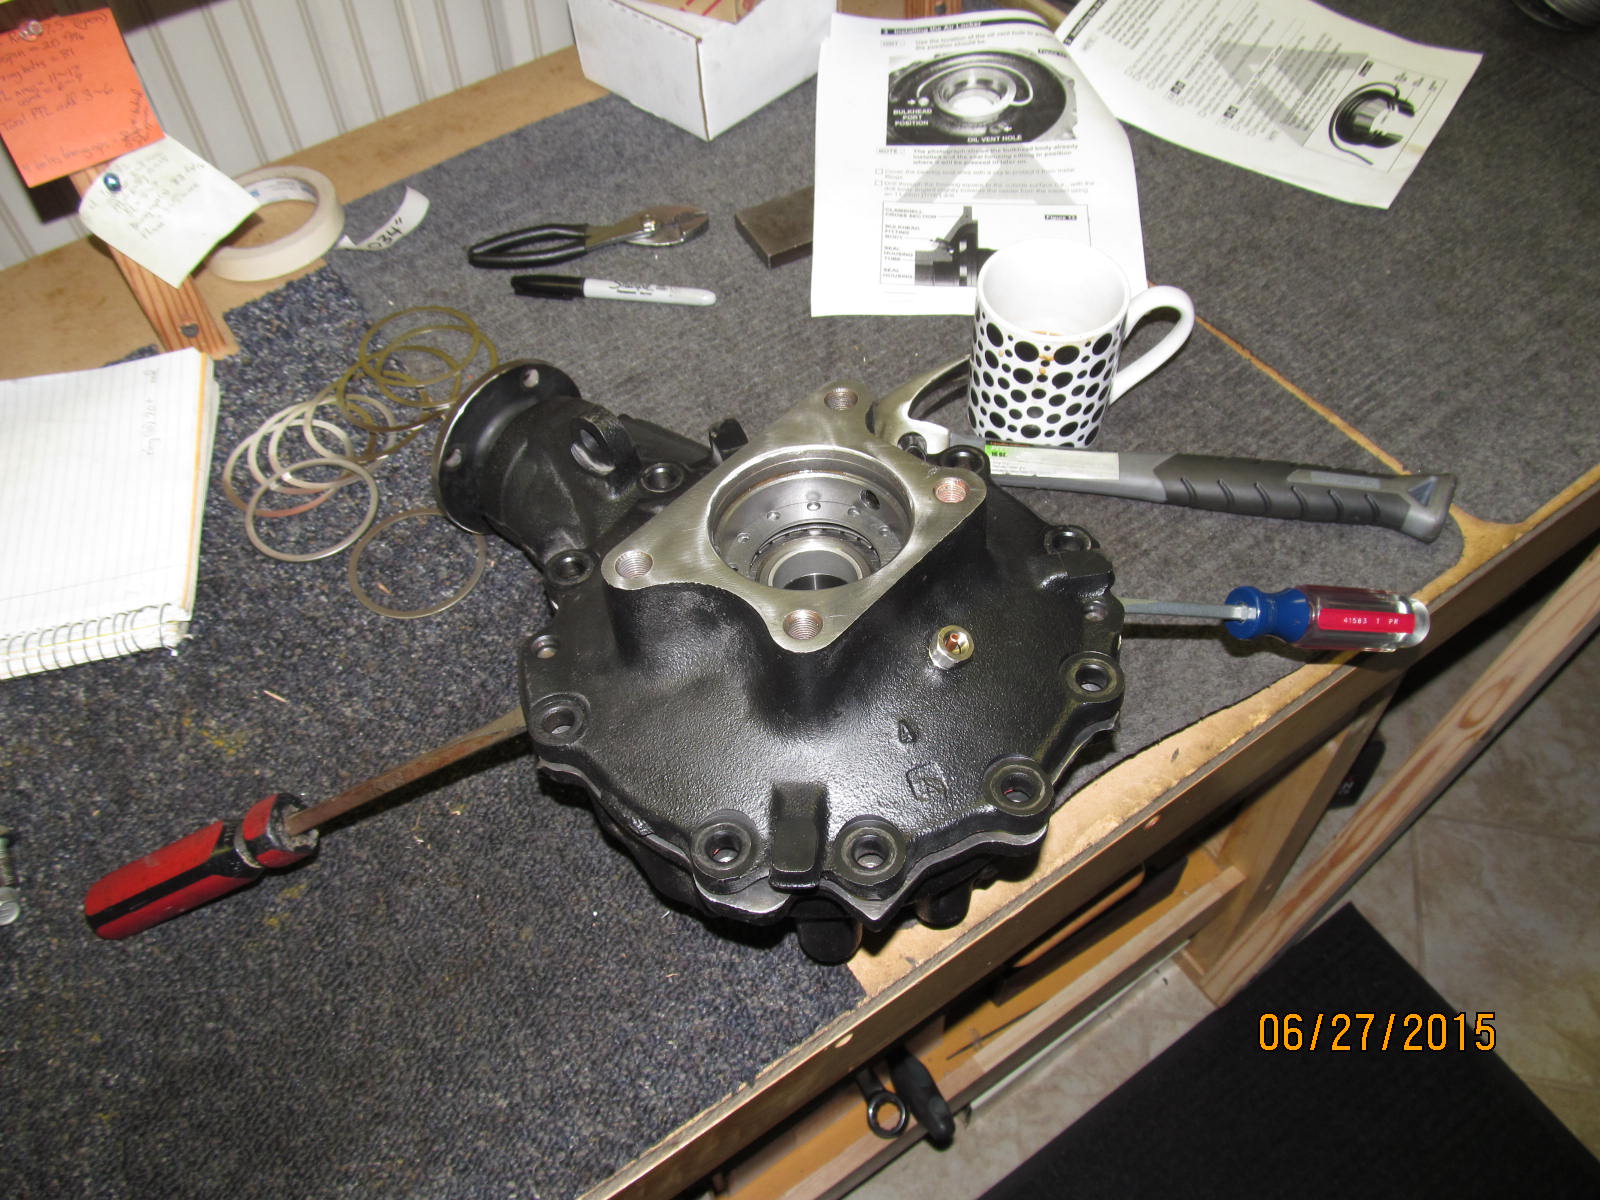
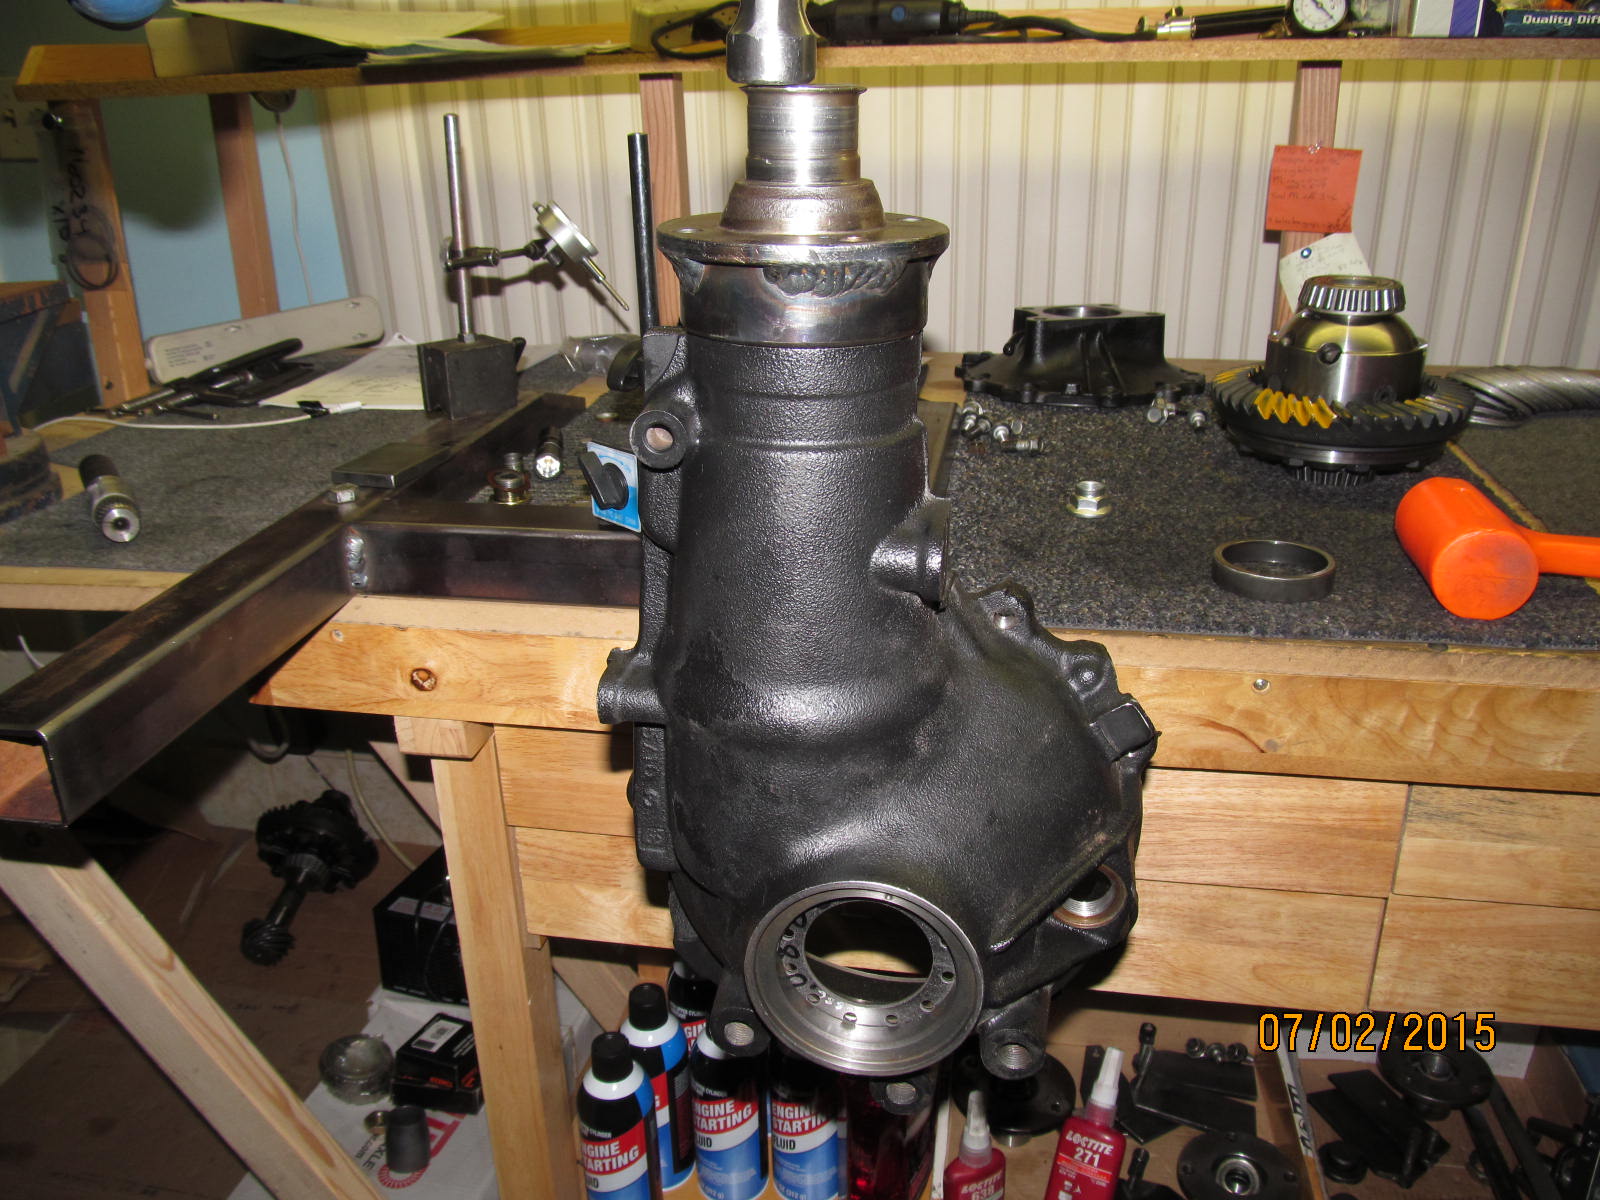
44 pictures of useful documents and info....FSM details and ARB notes.
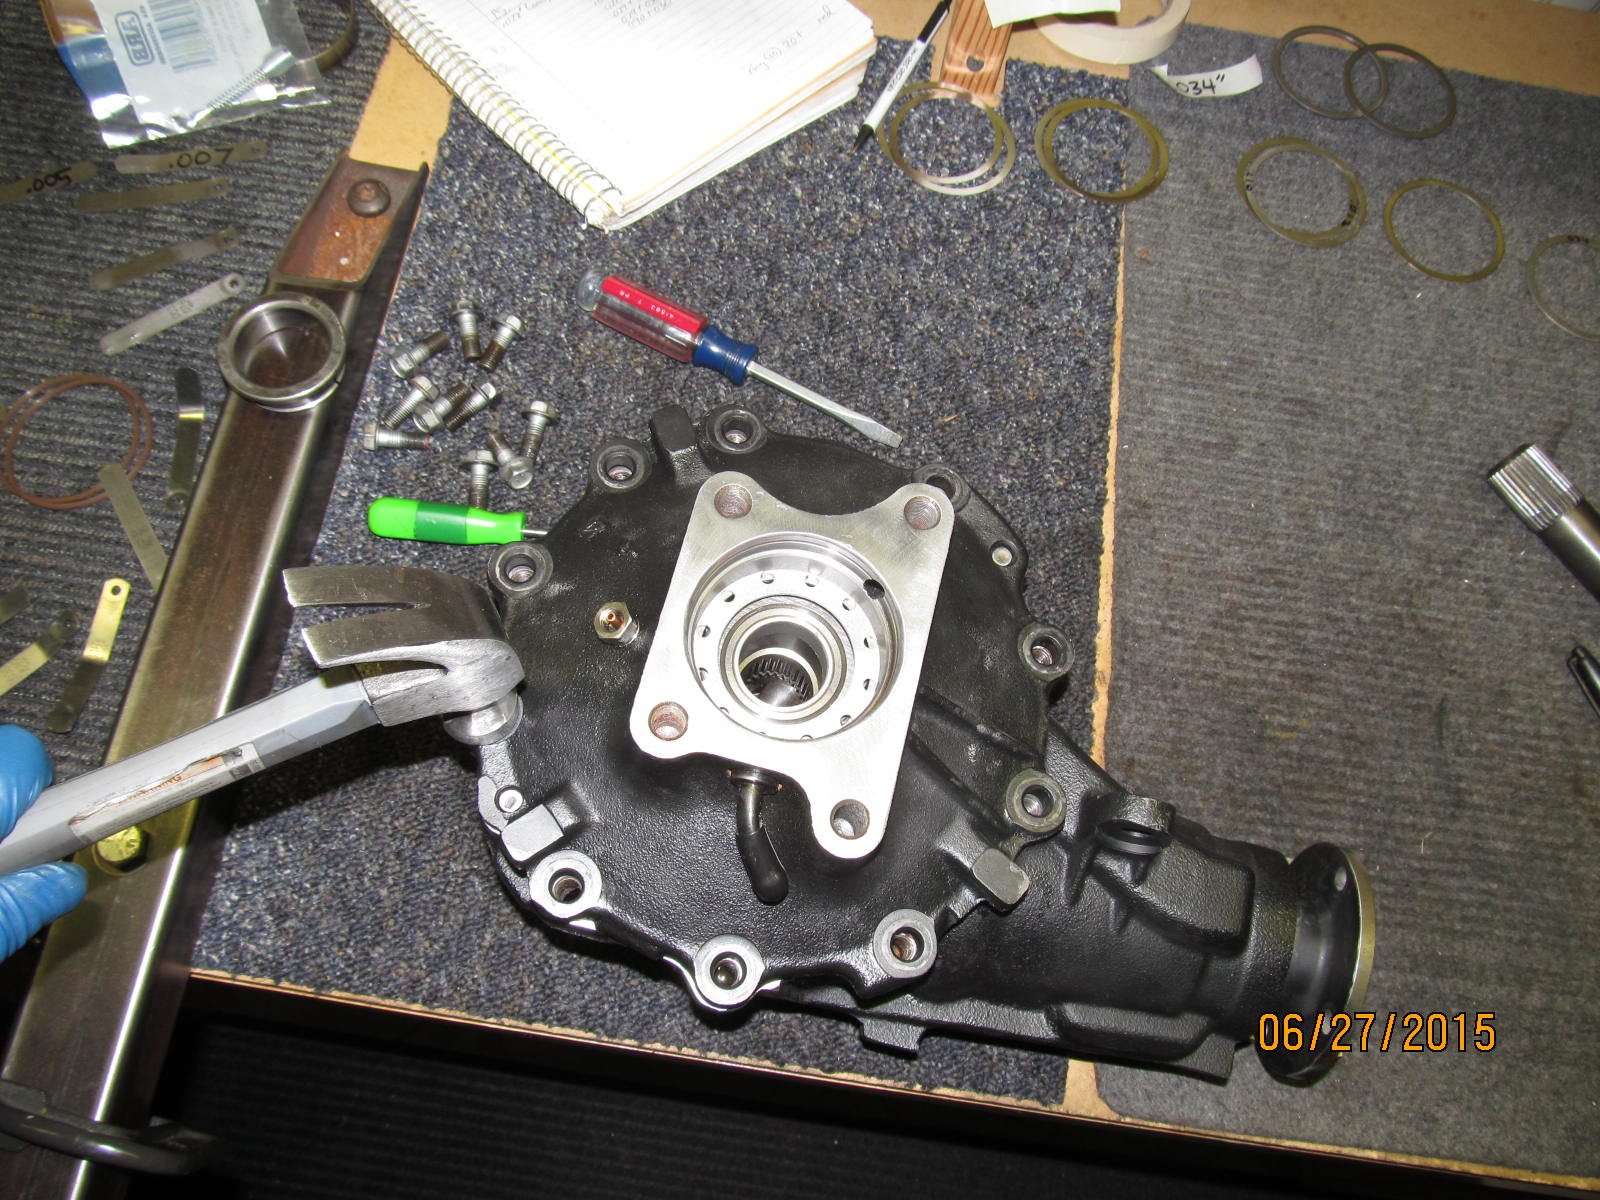
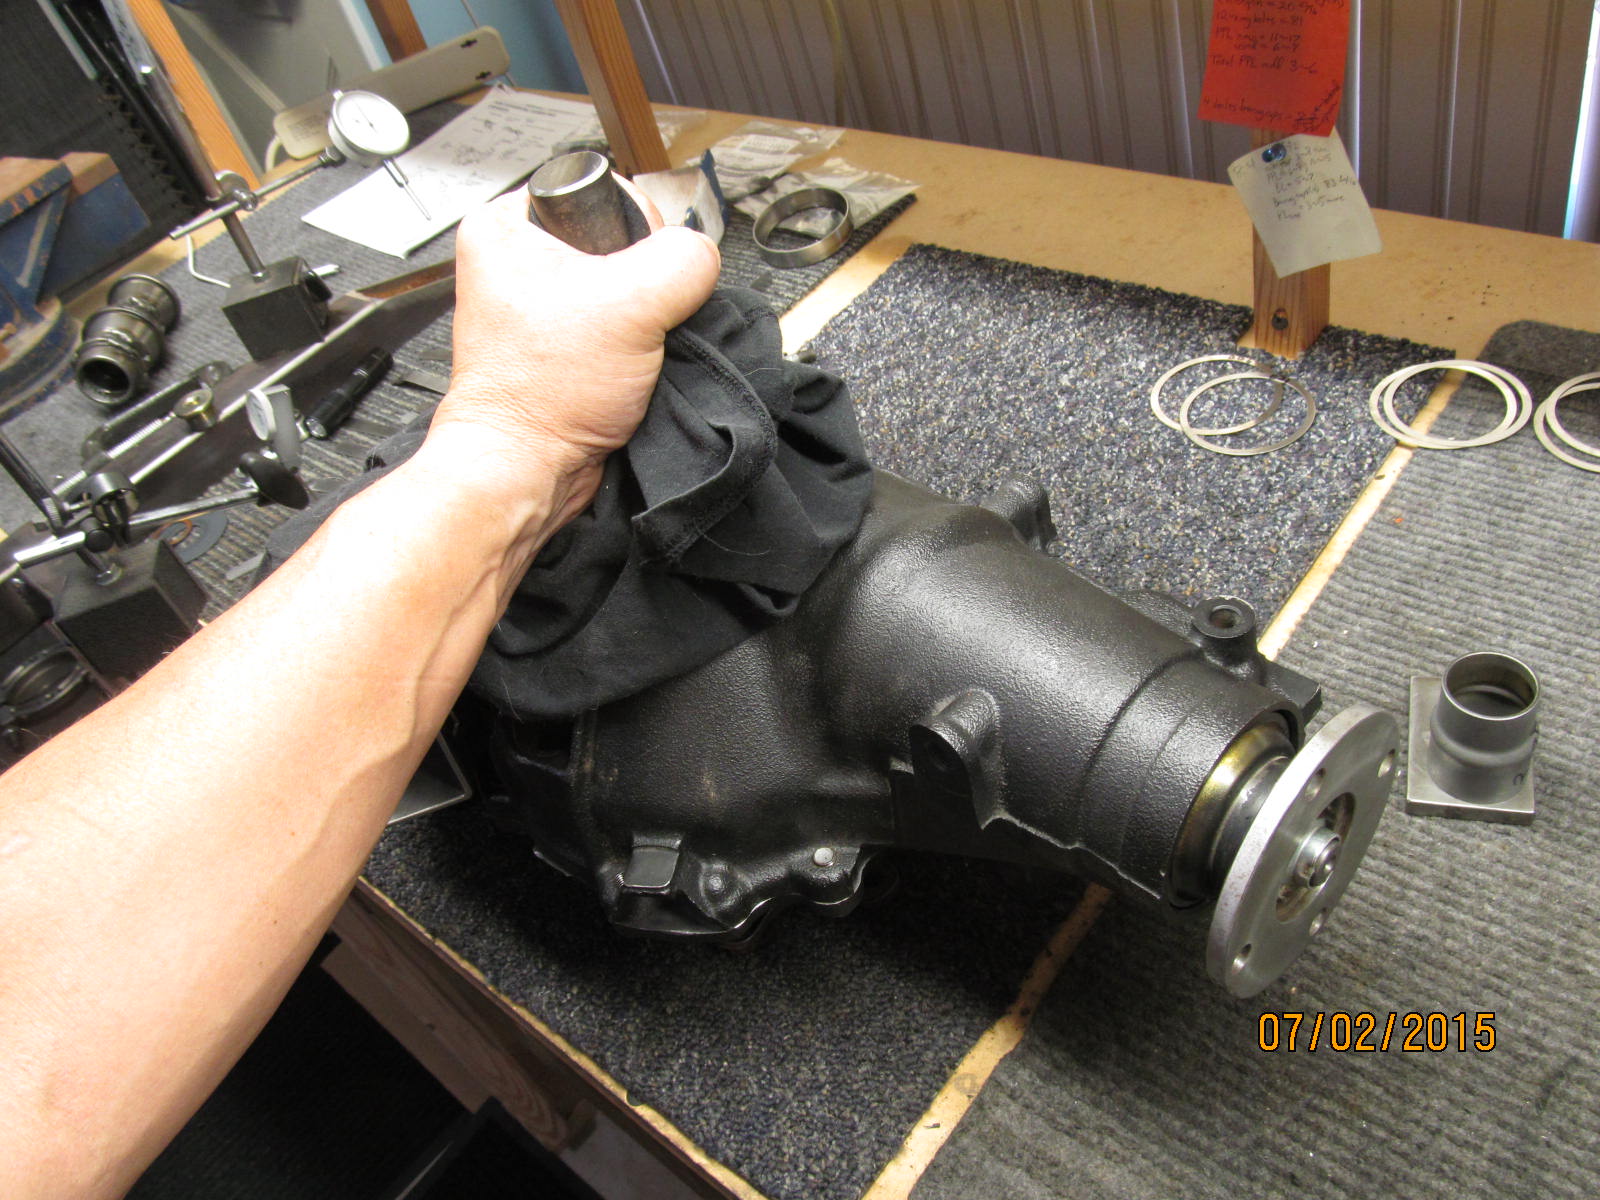
Above pic shows the clam and the mounting hardware external.
|
|
|
|
|
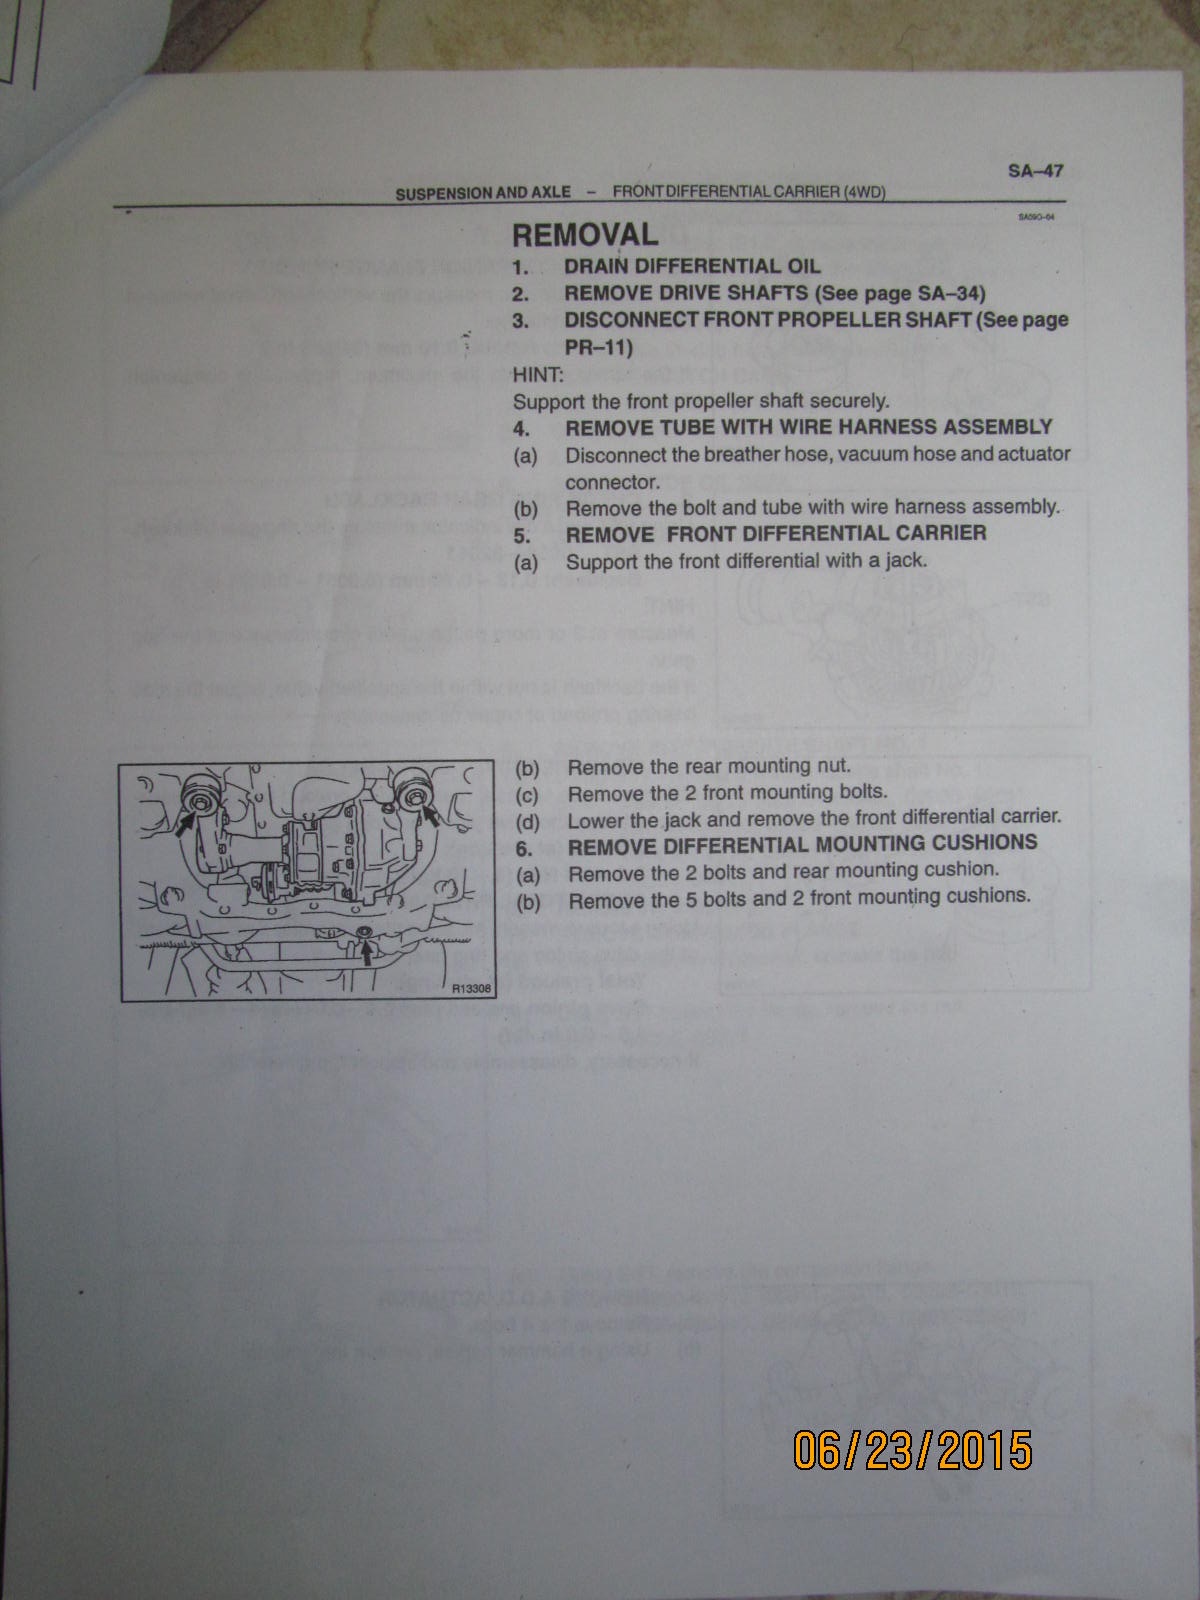
Removal of the clam starting with the 2 mounting cushions.
|
|
|
|
|
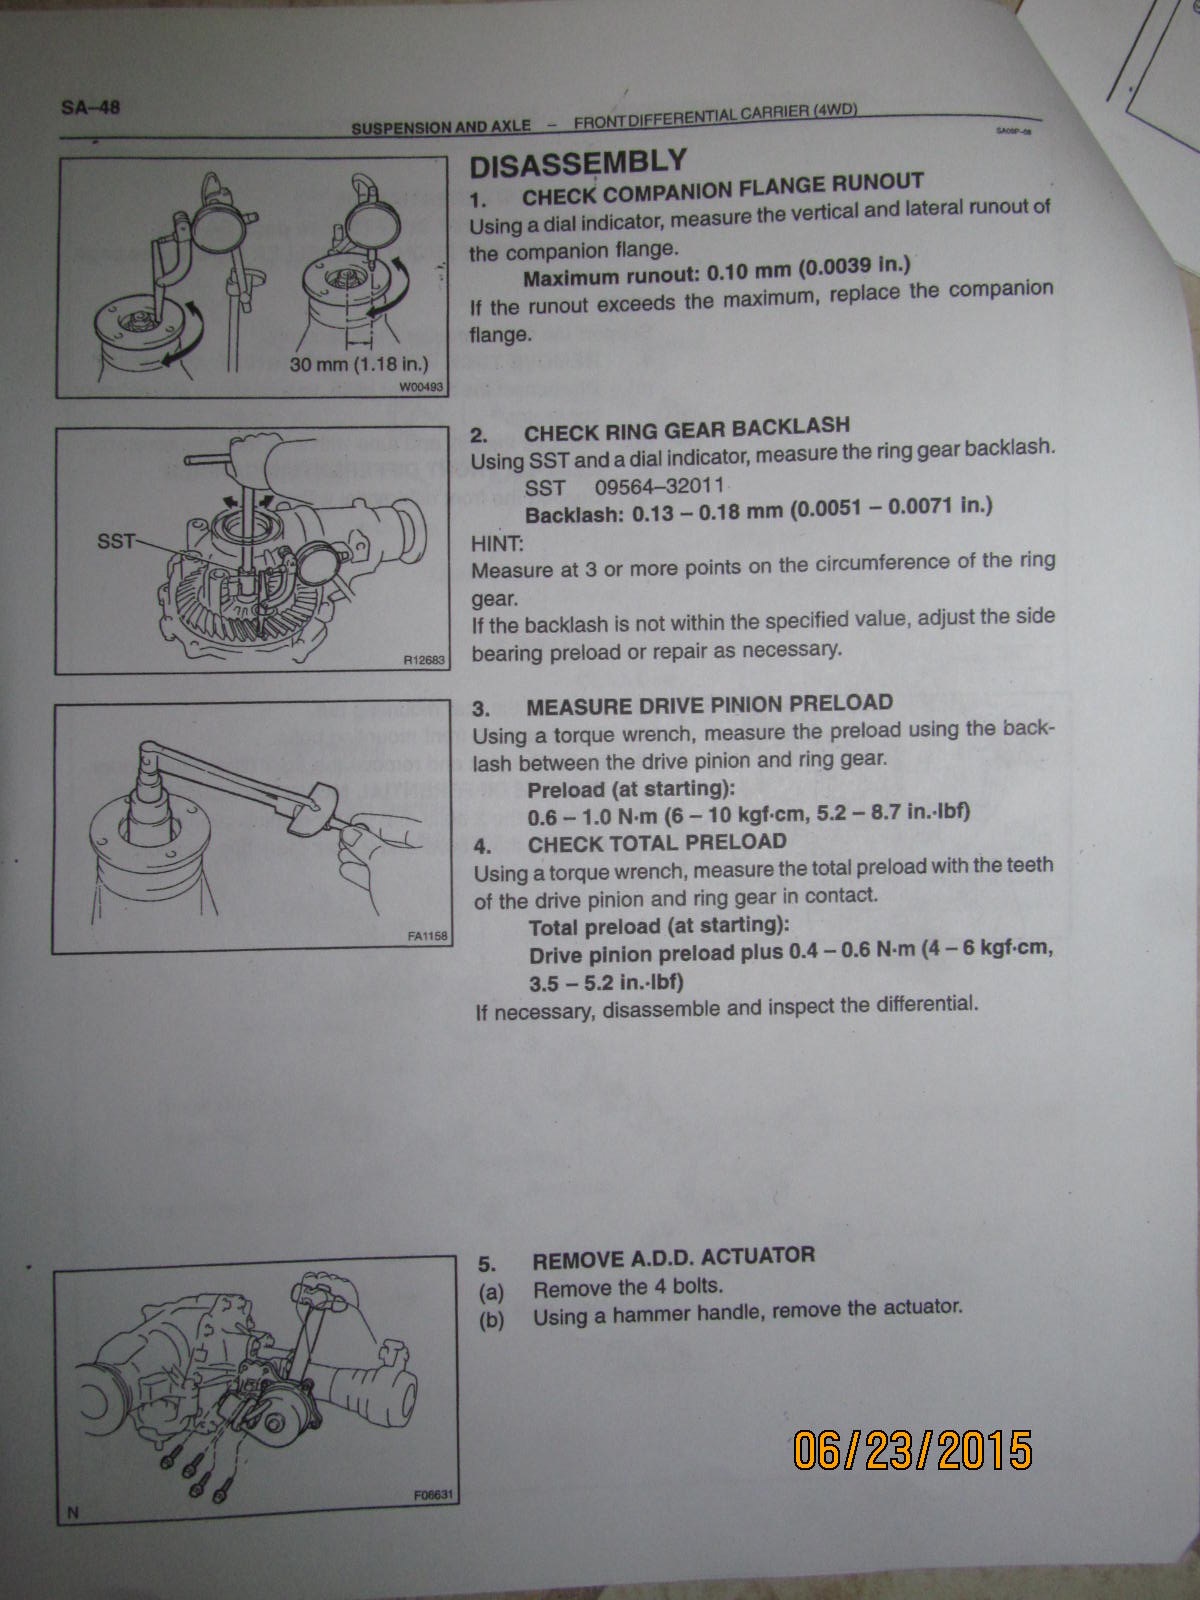
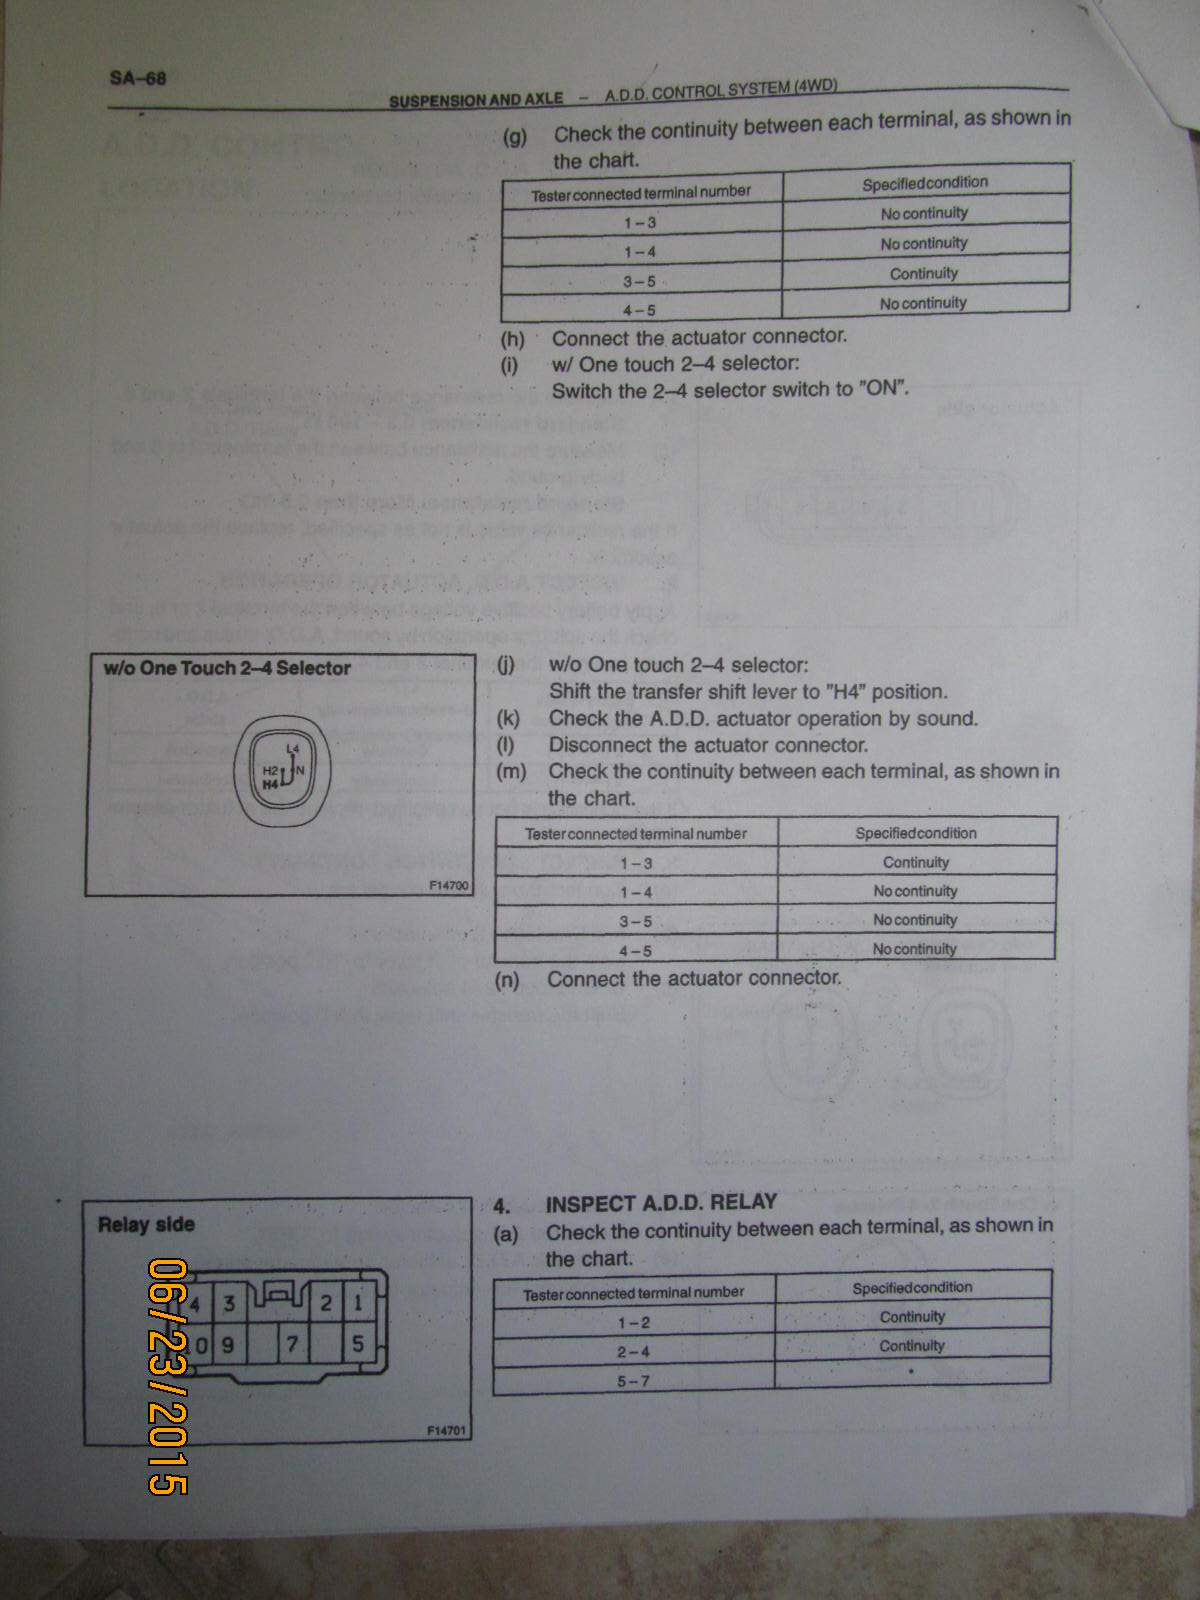
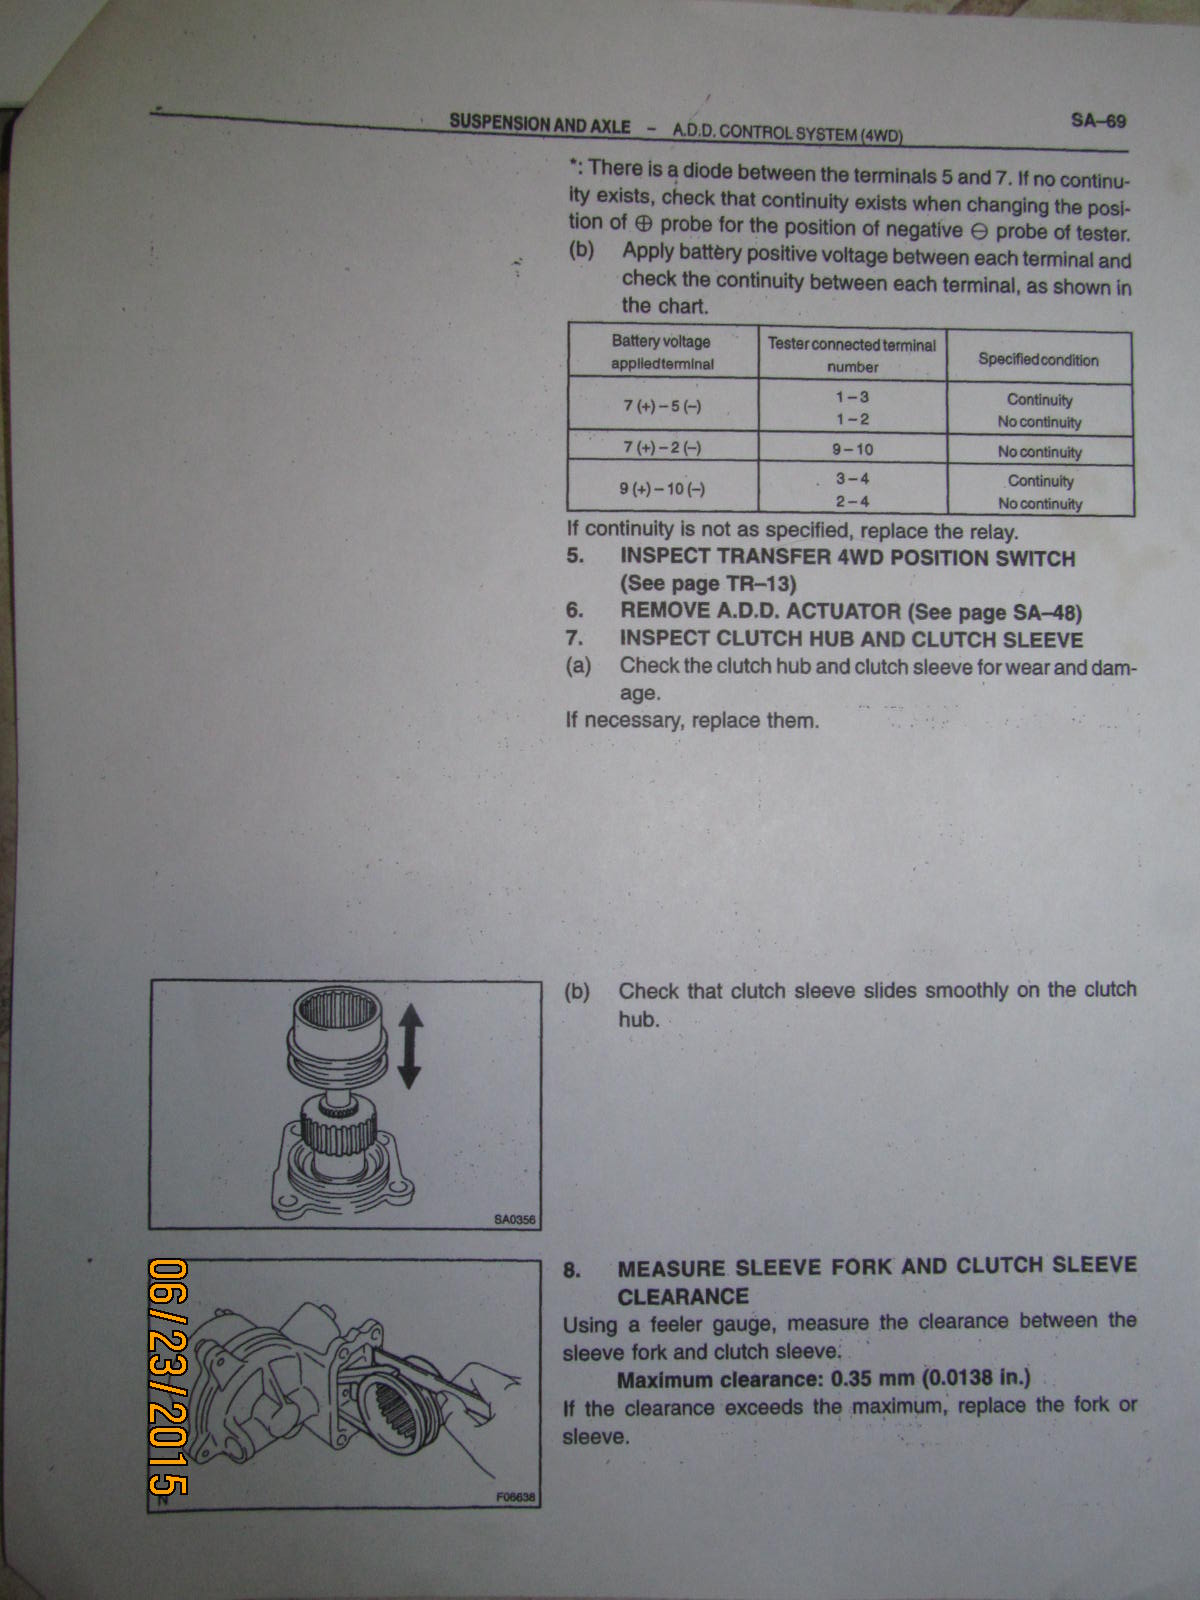
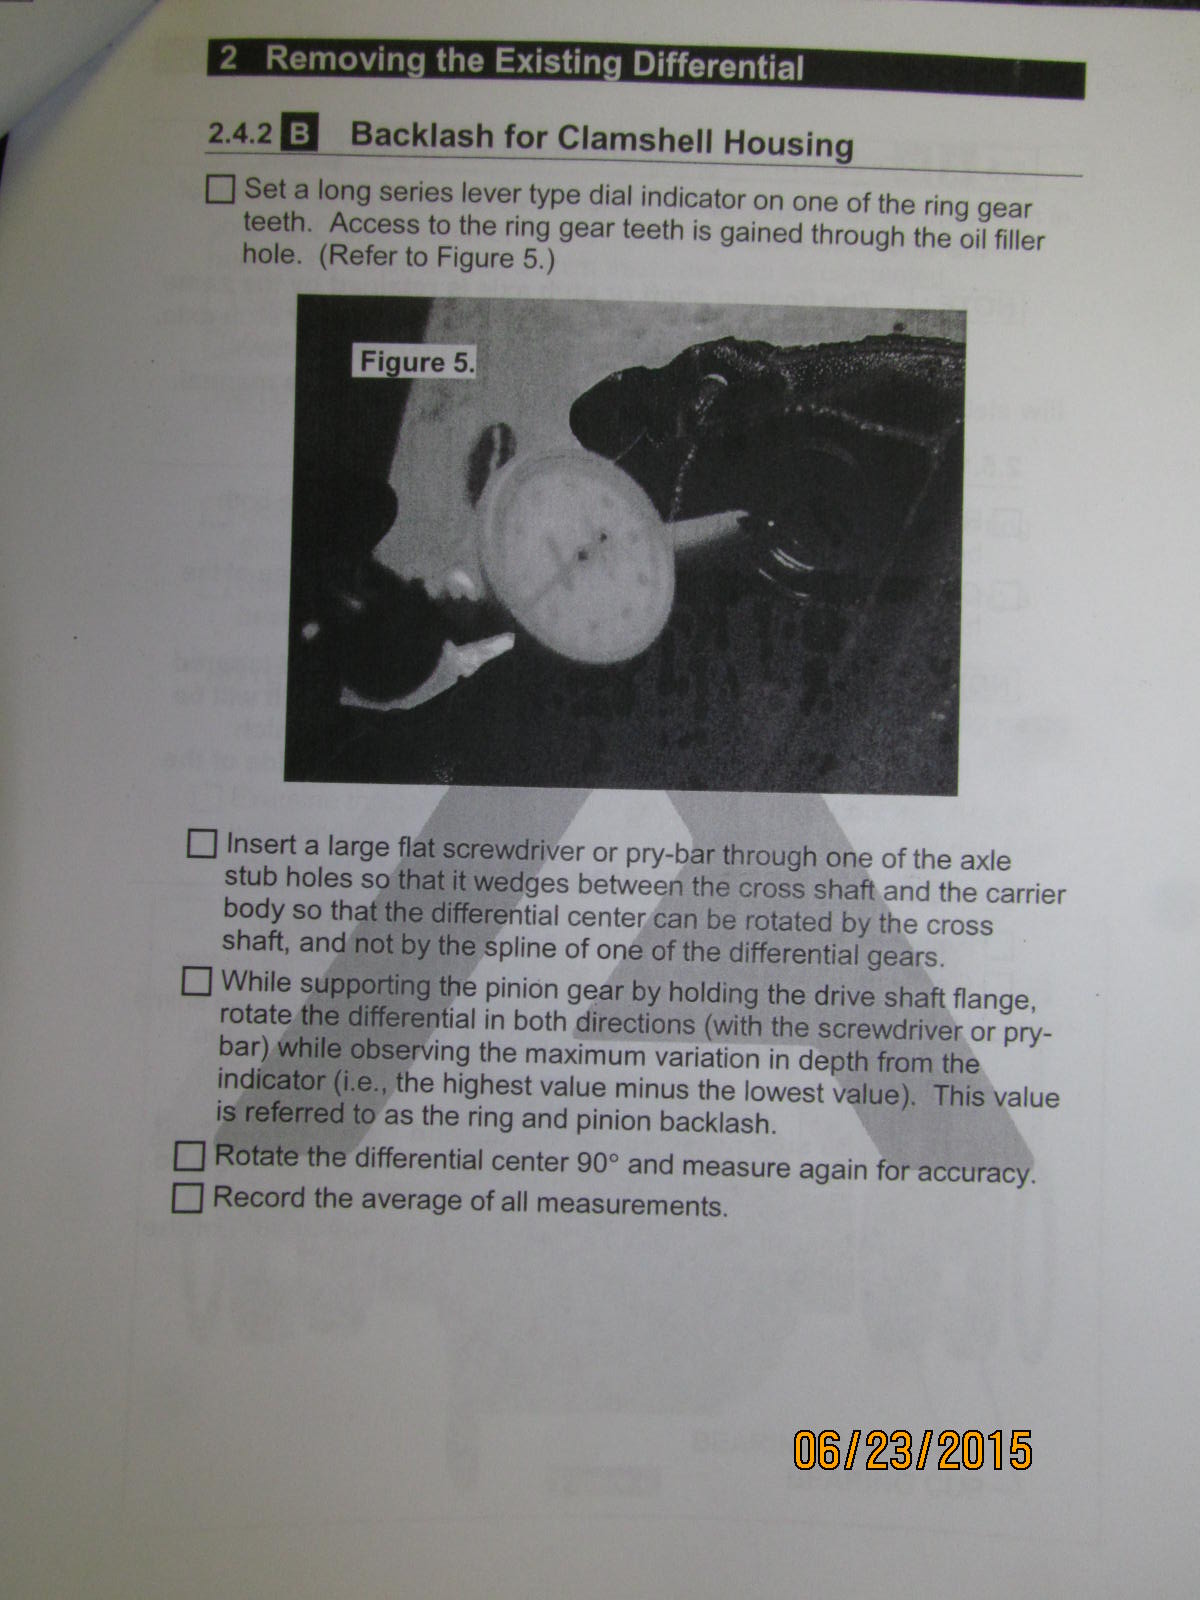
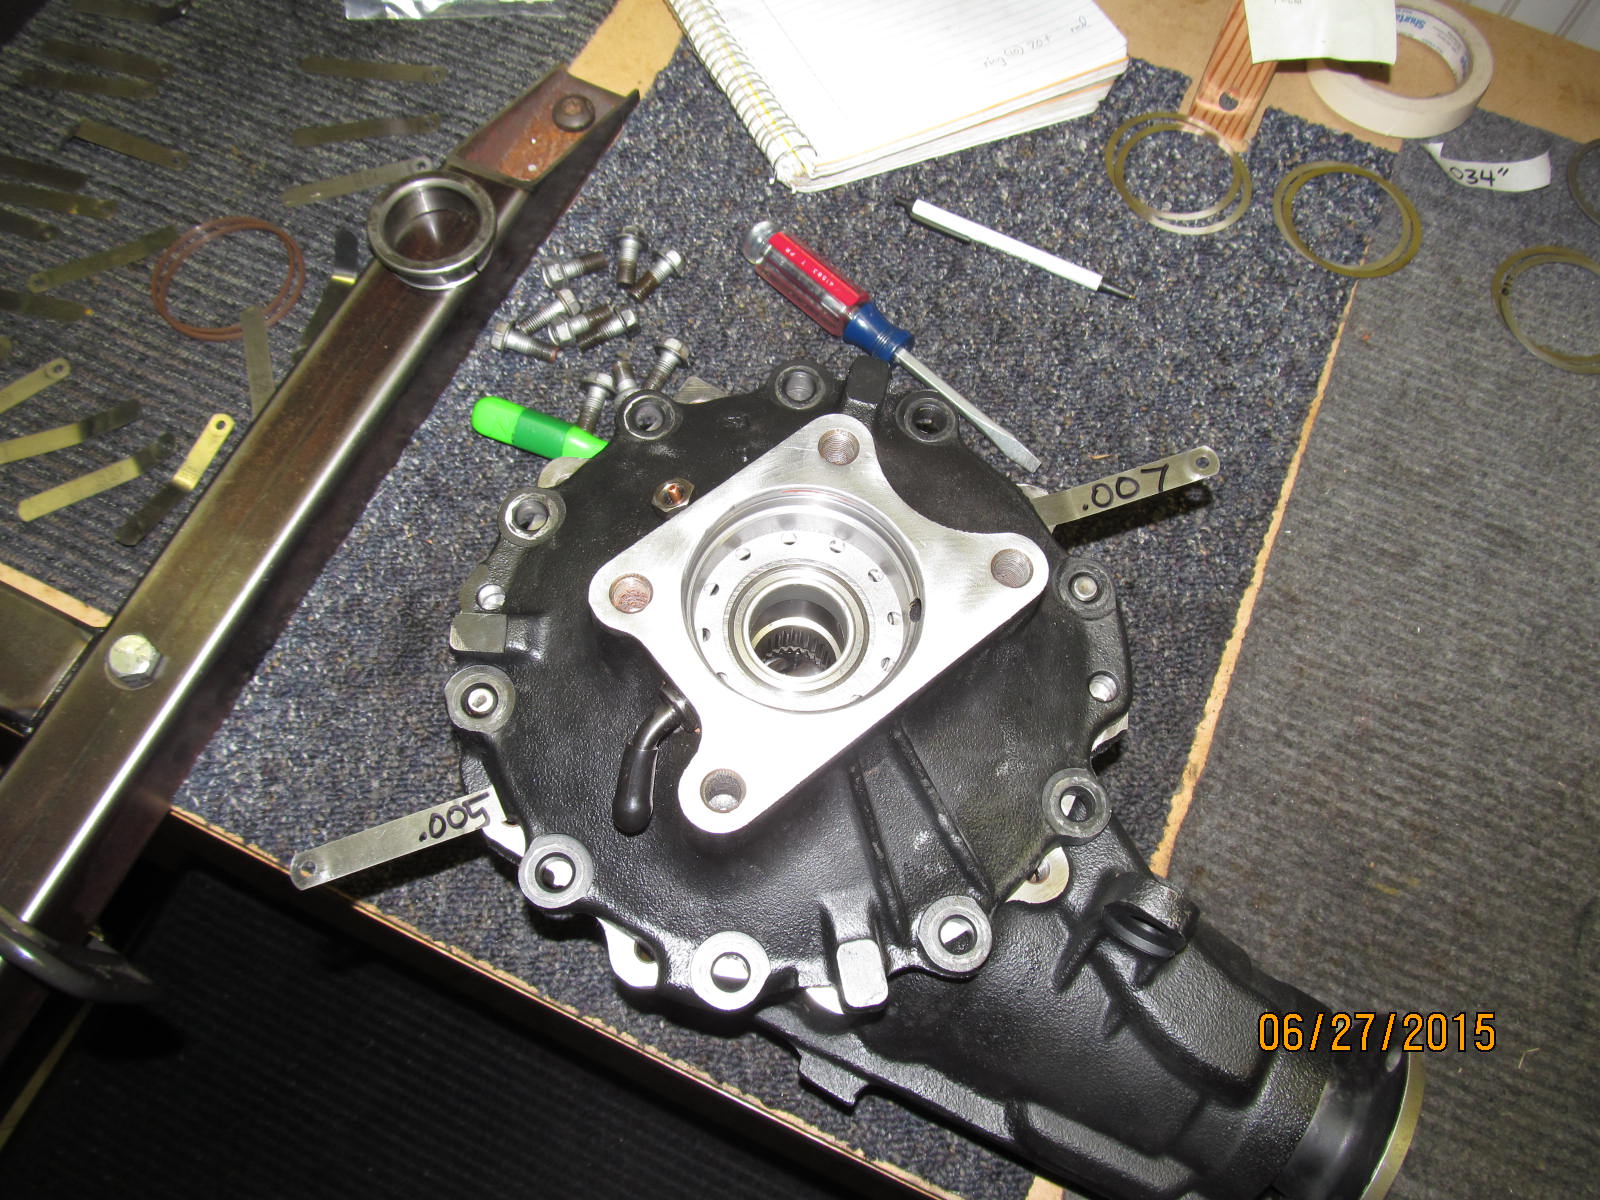
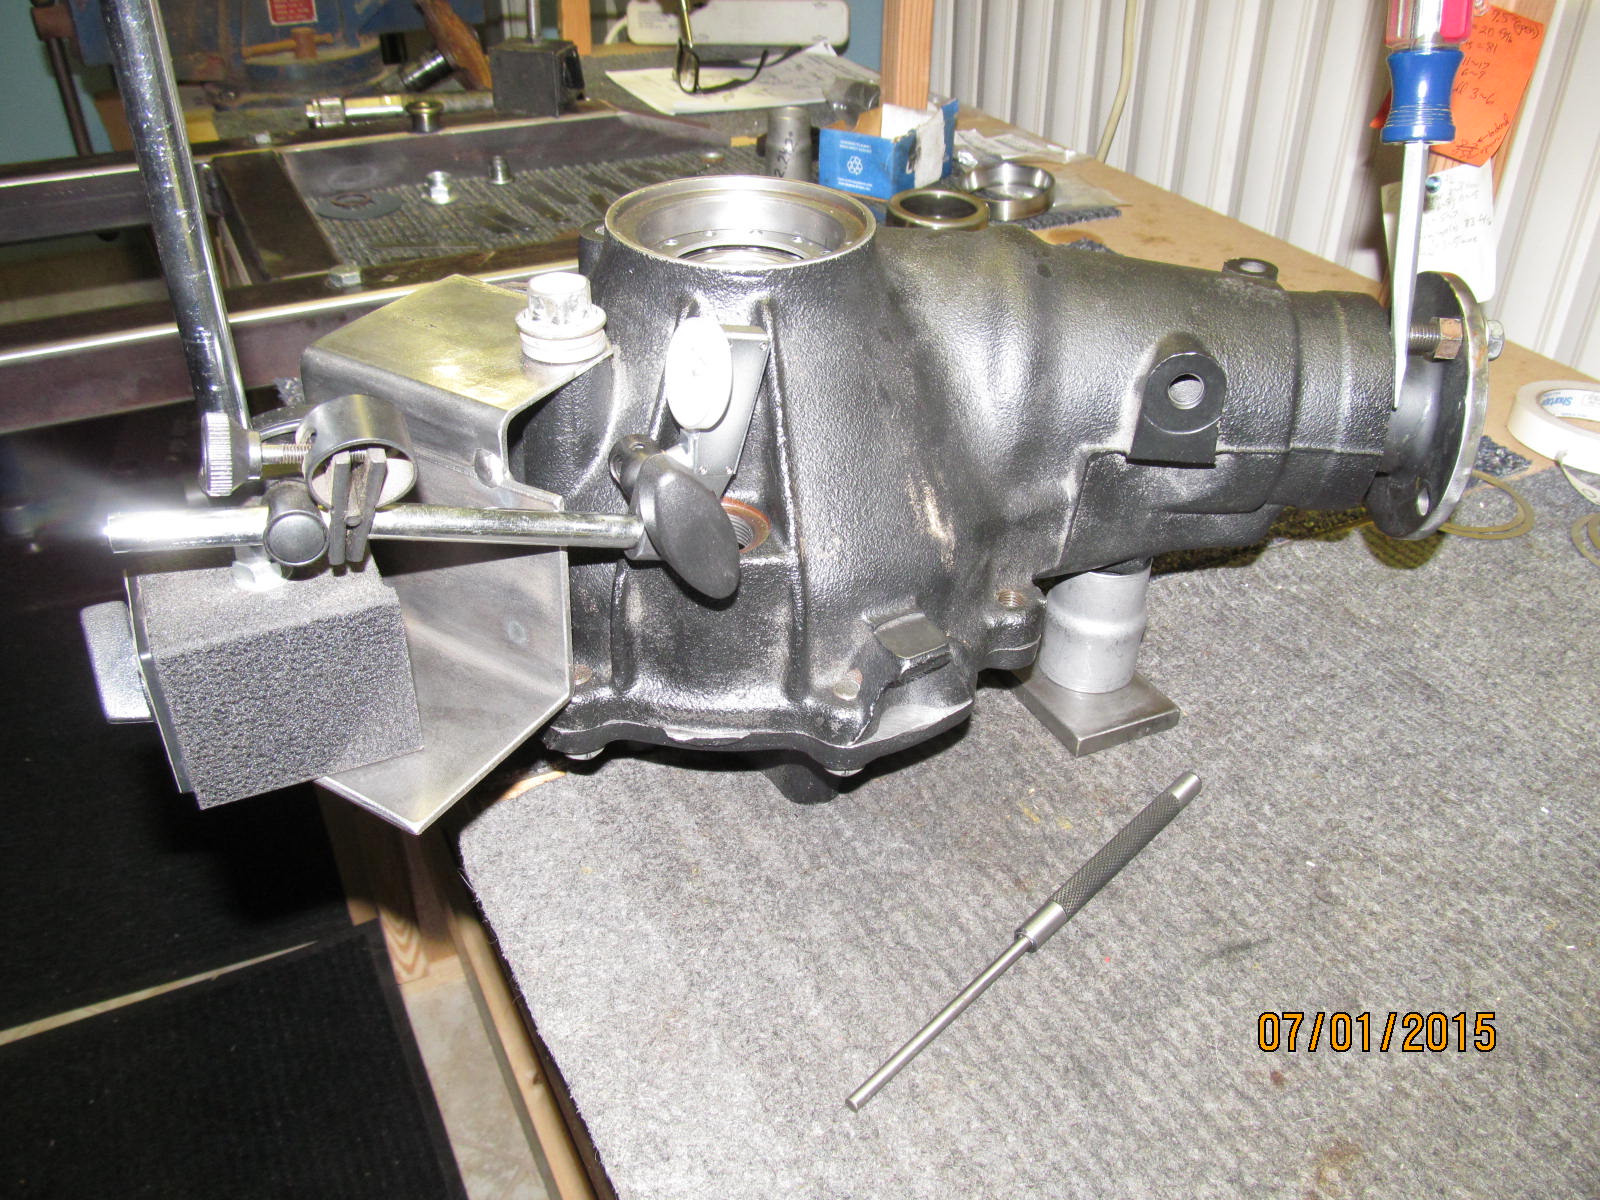
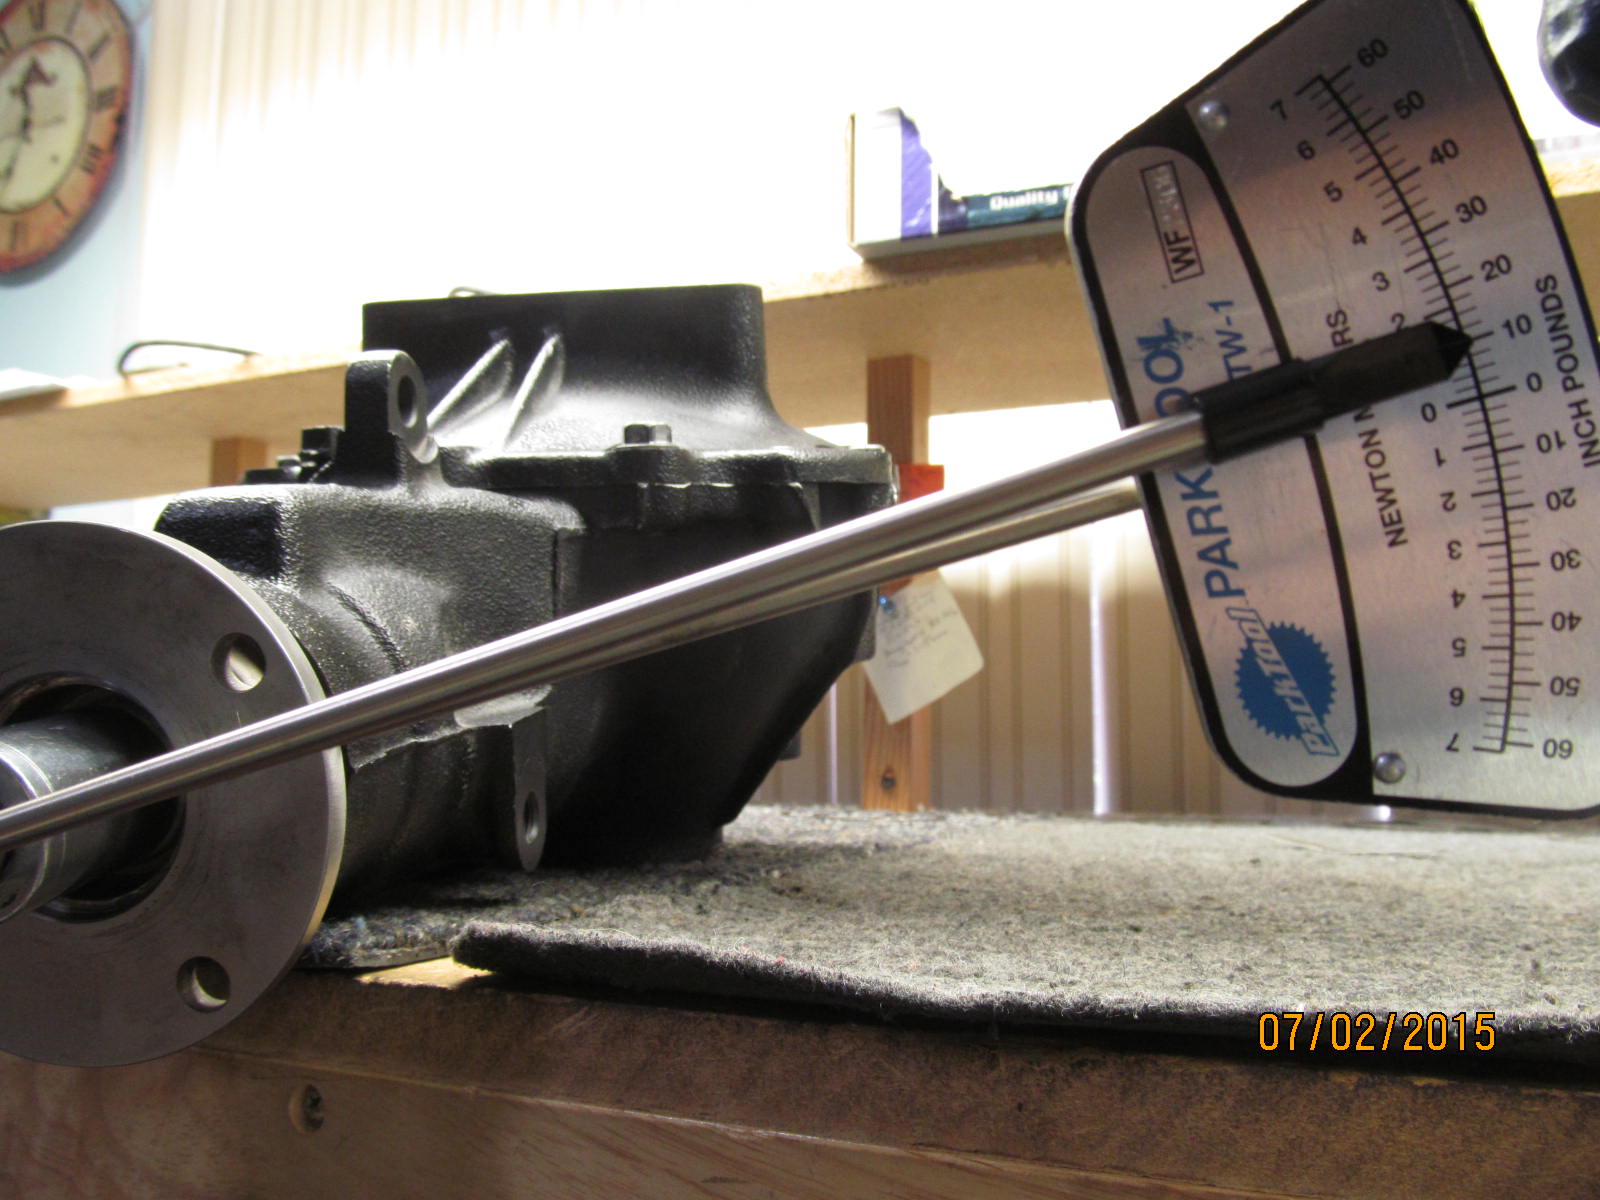
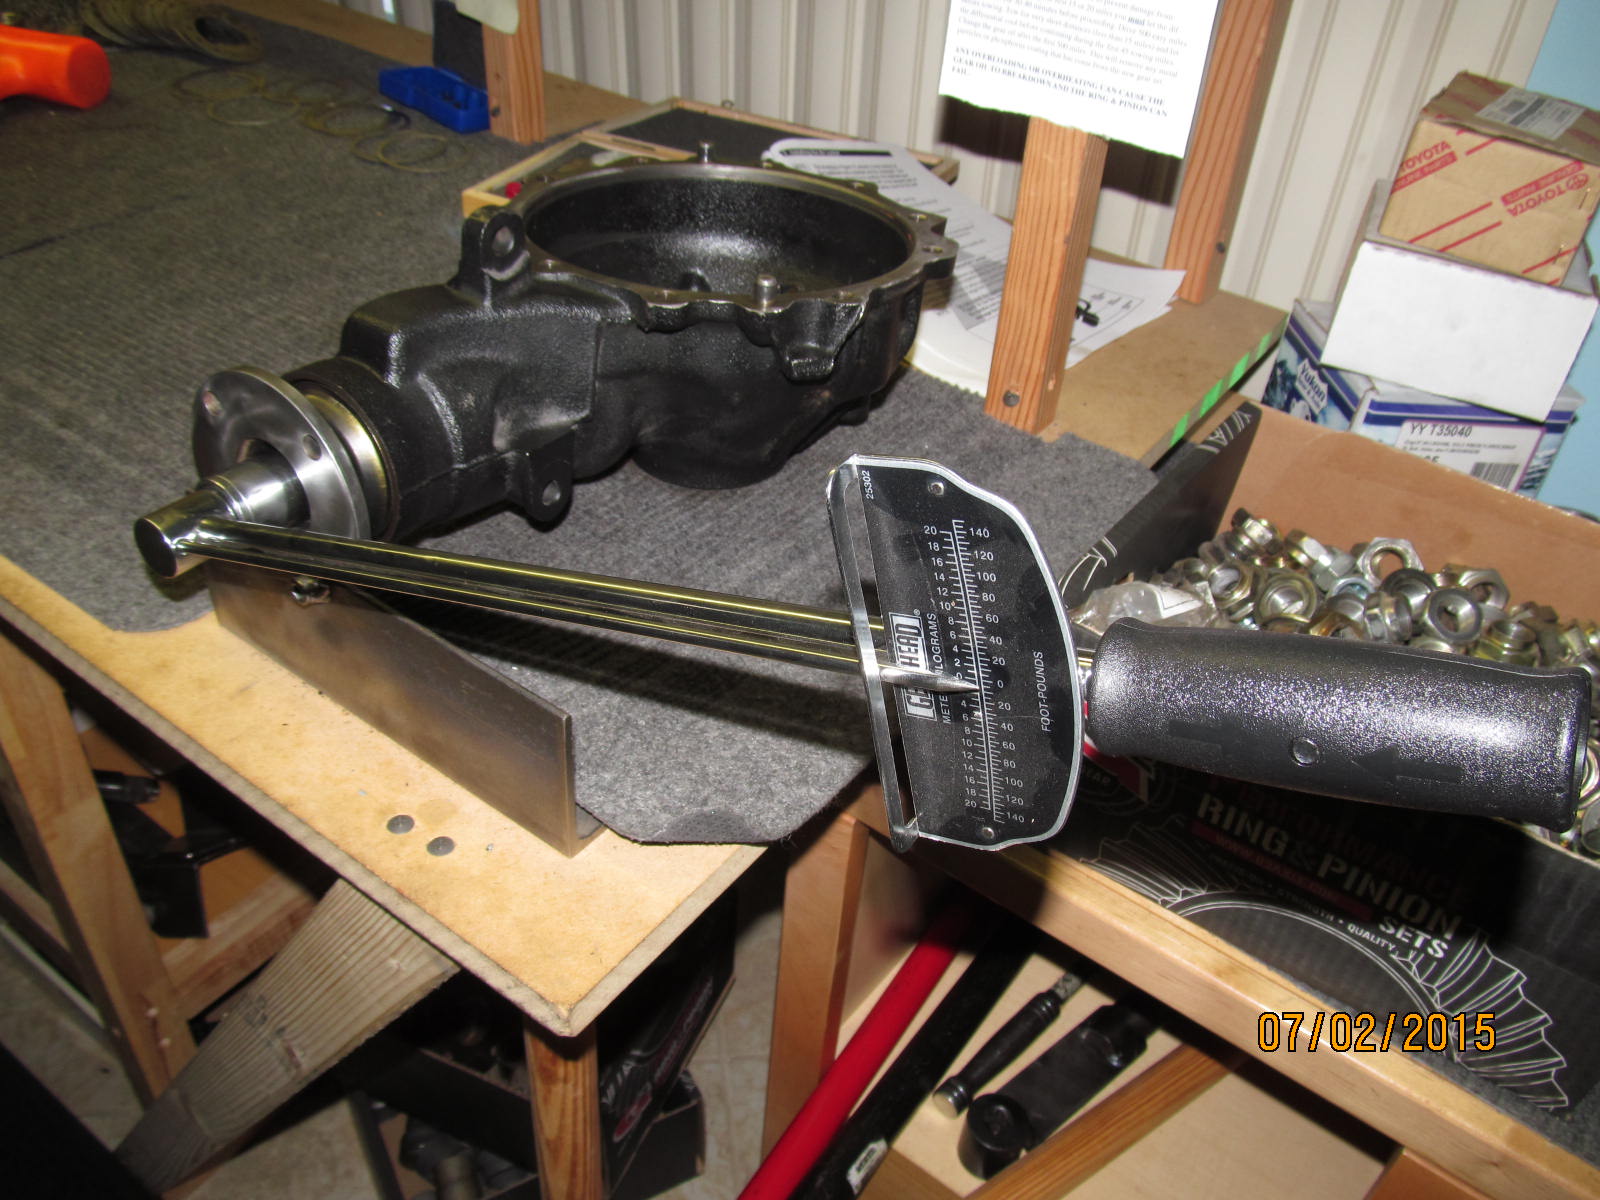
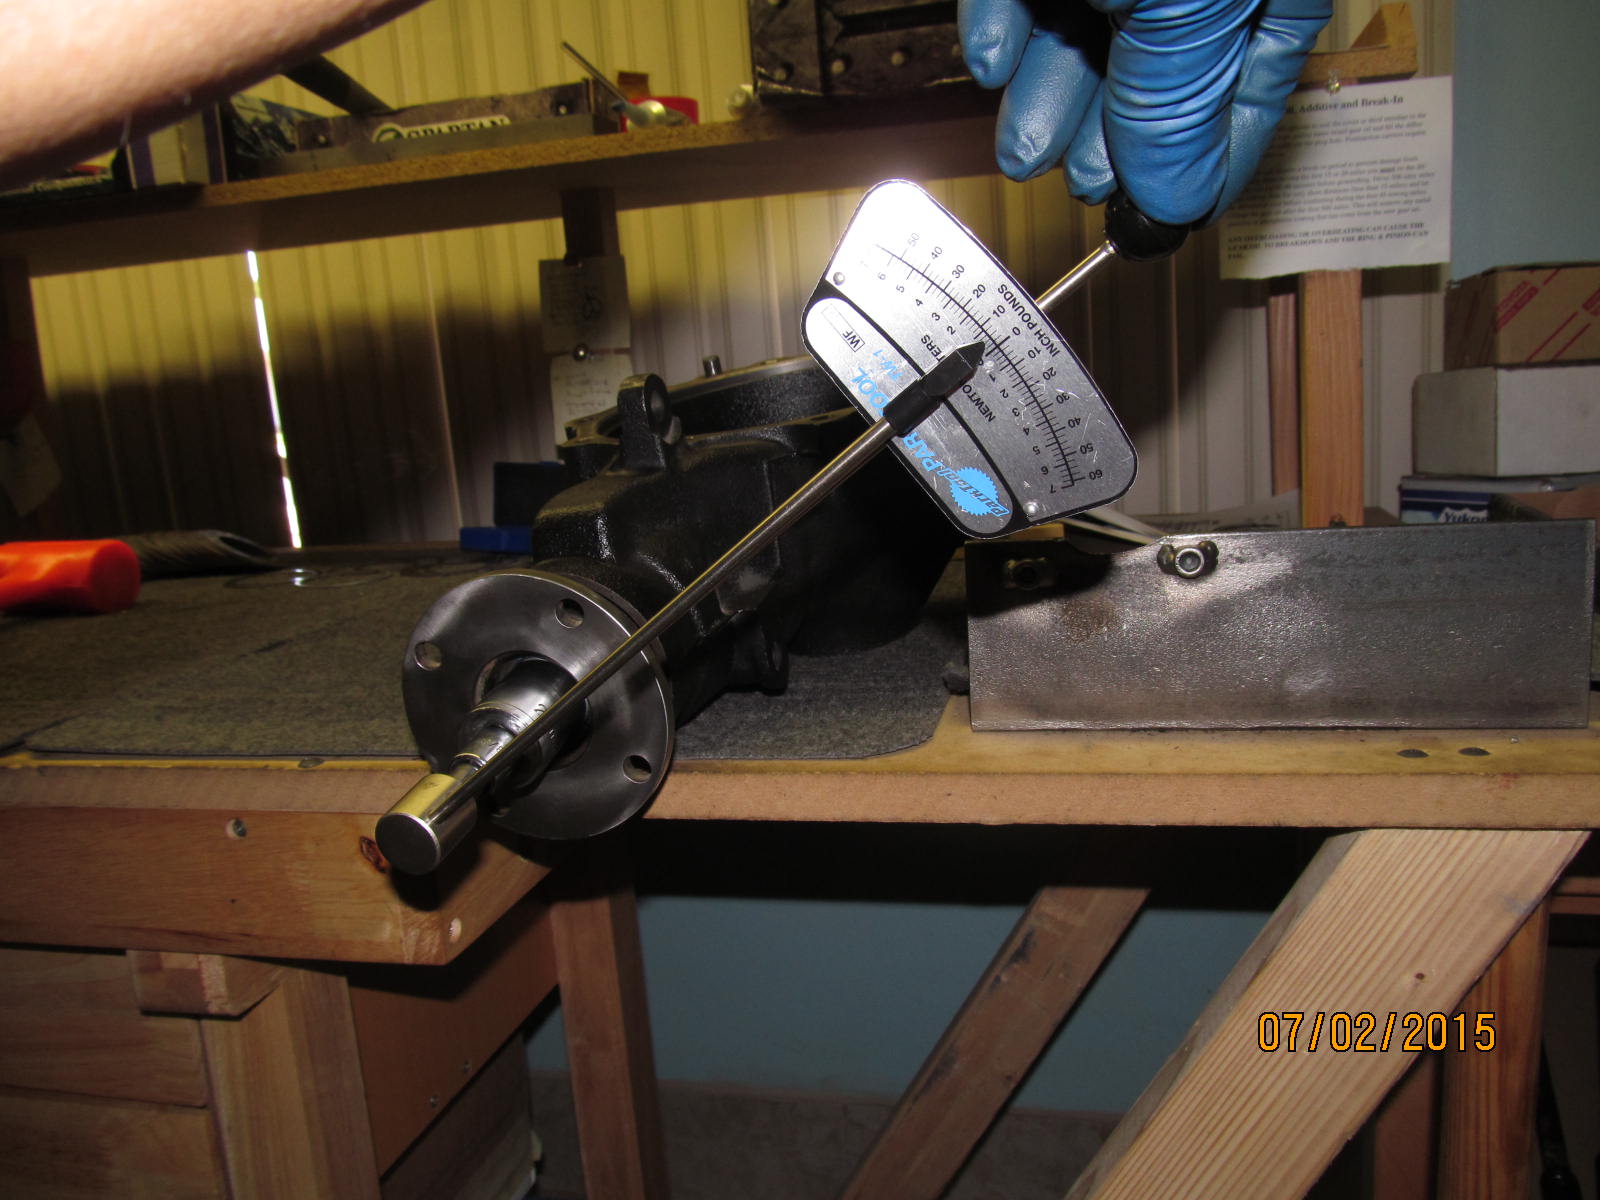
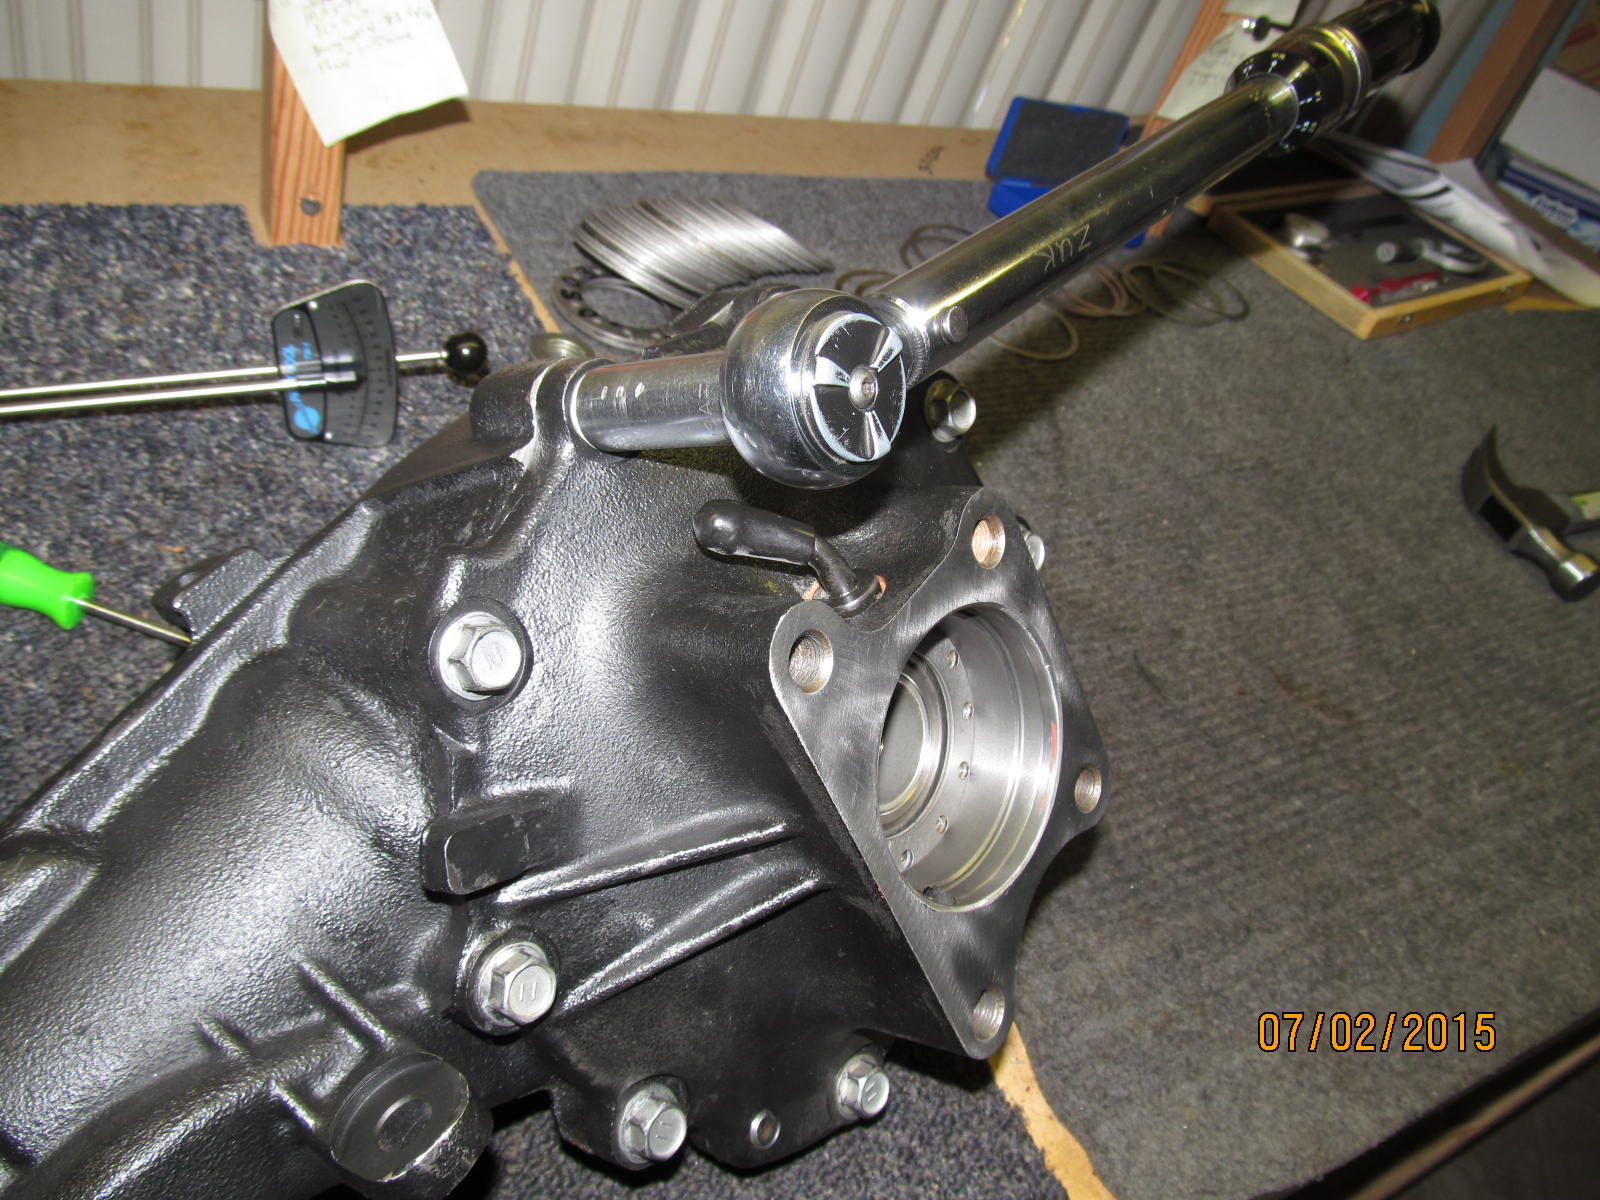
Checking run-out, backlash, and Pinion preload.
|
|
|
|
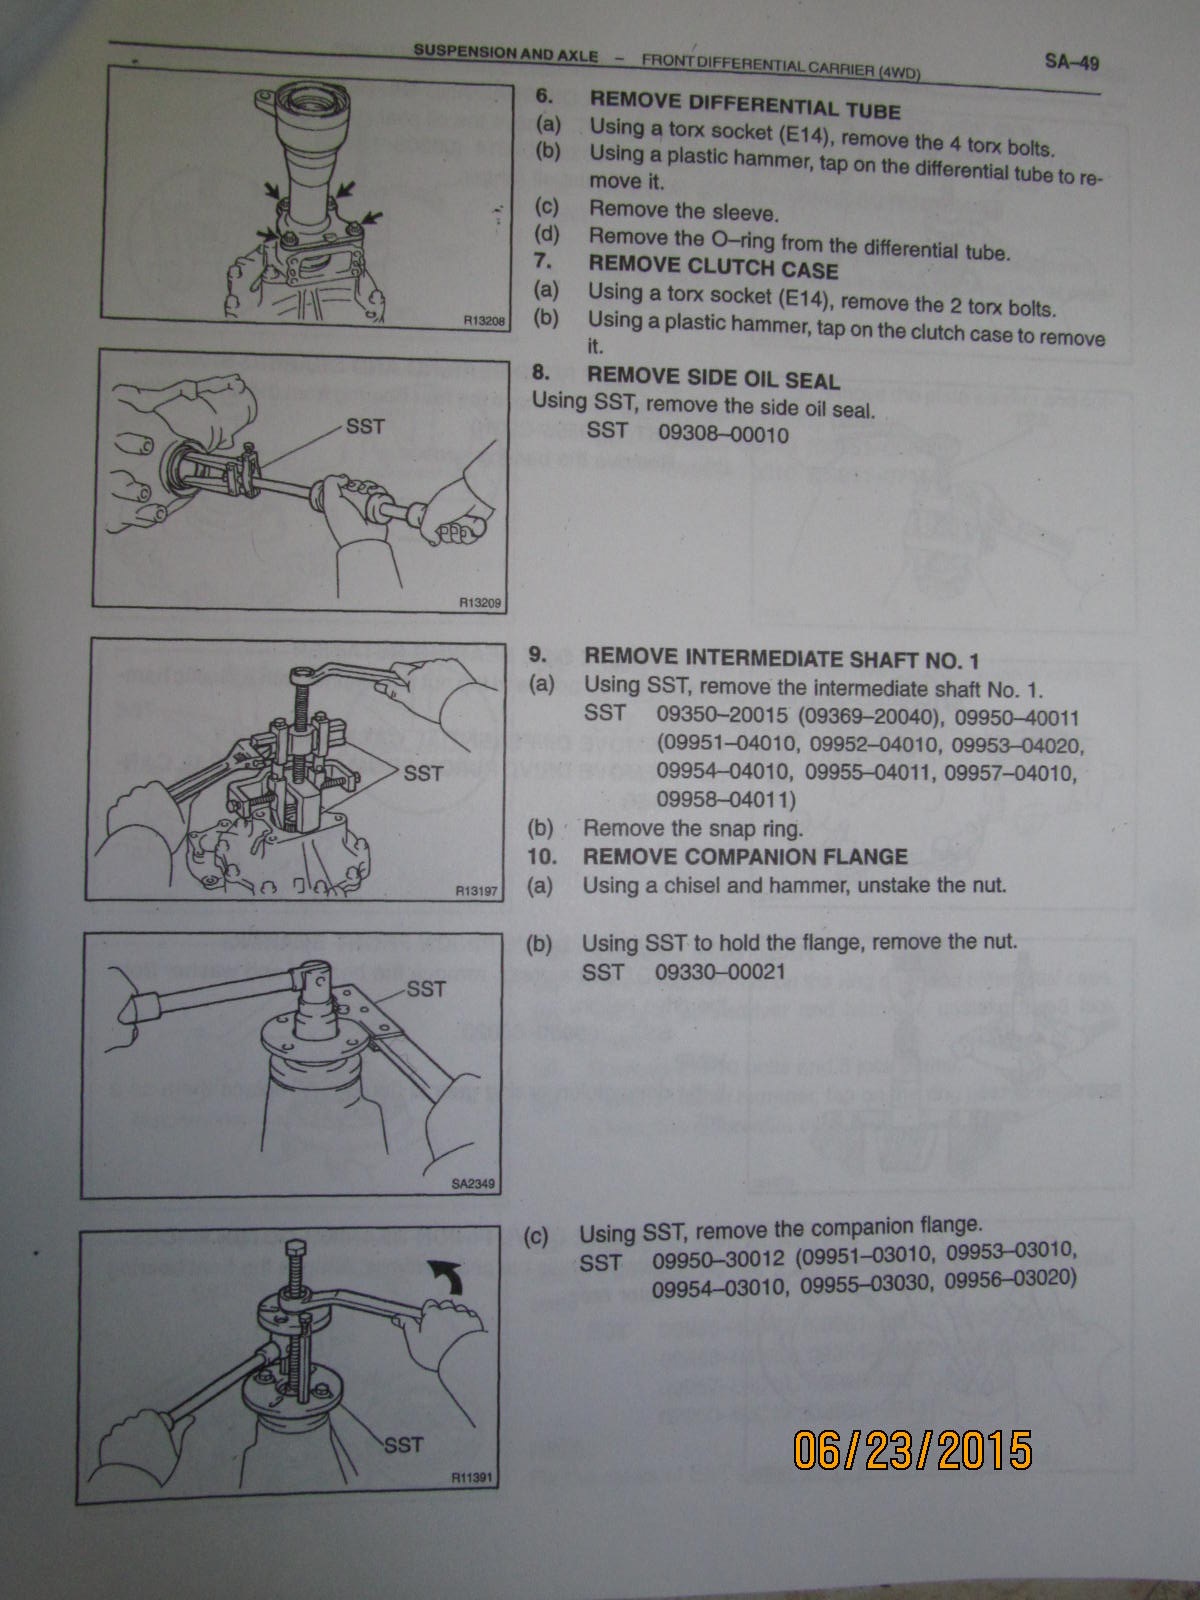
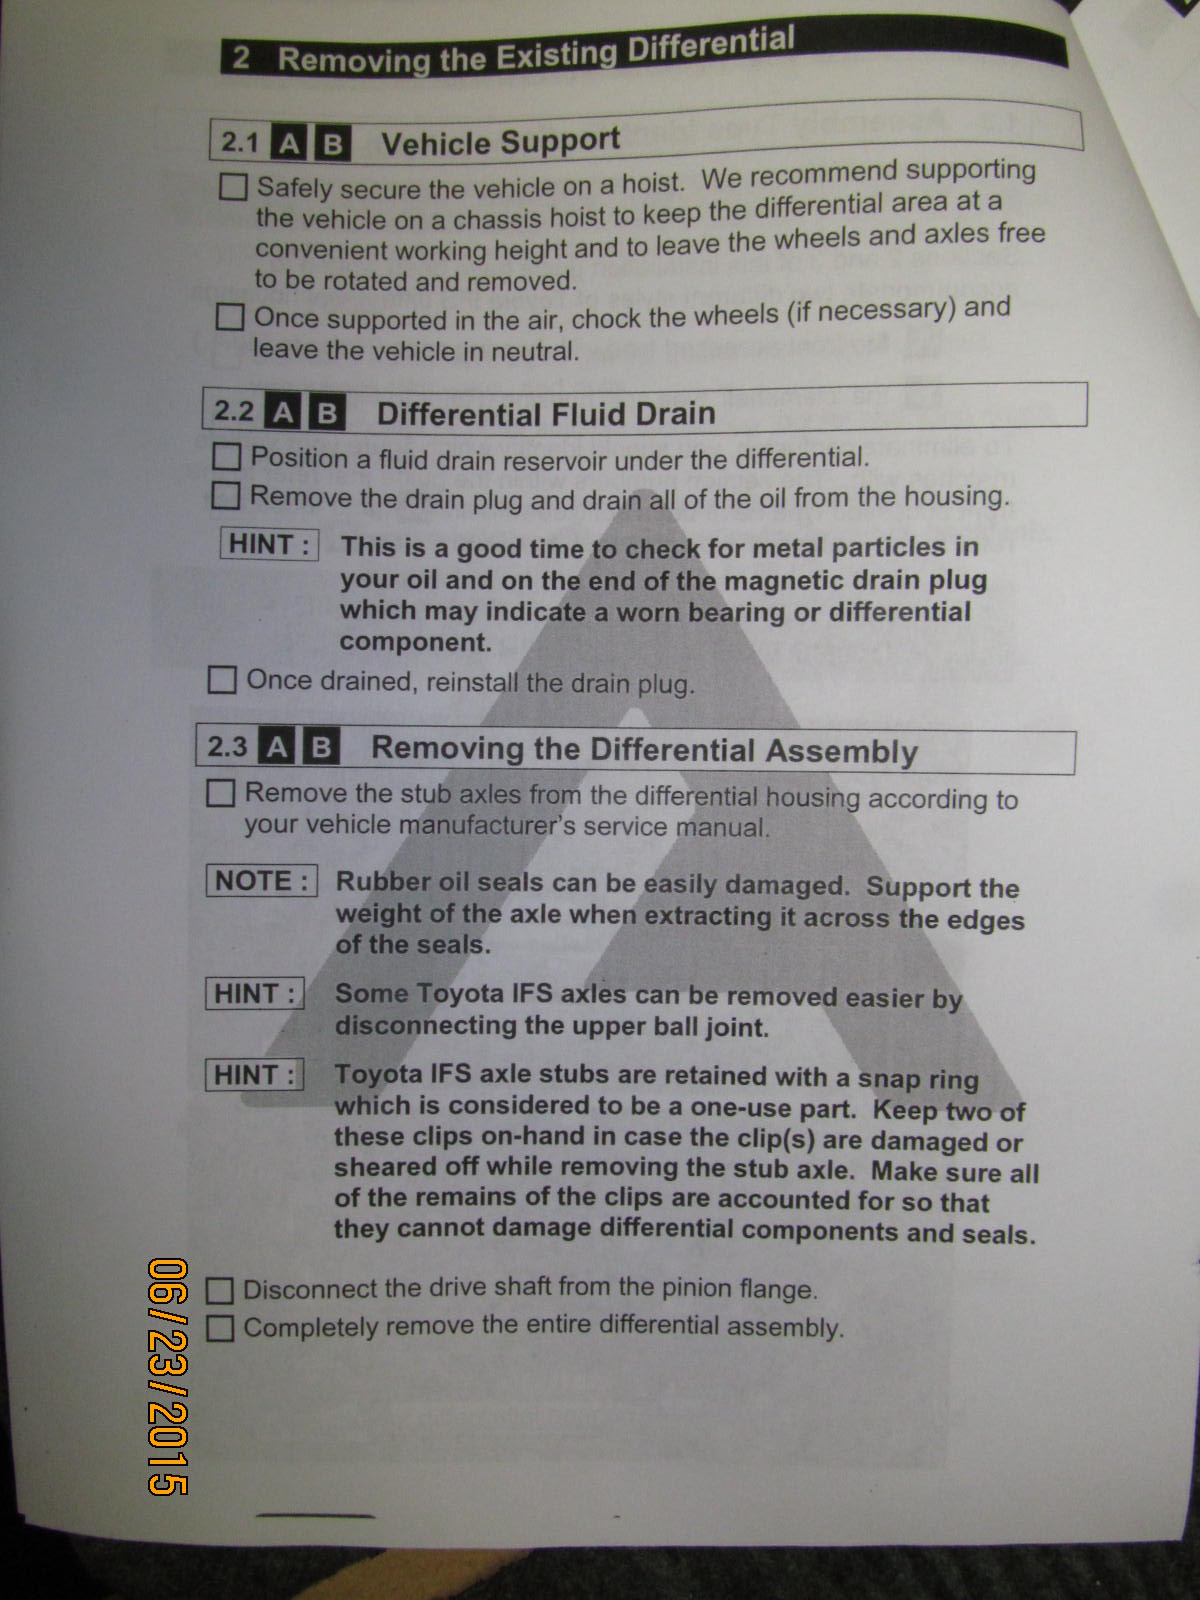
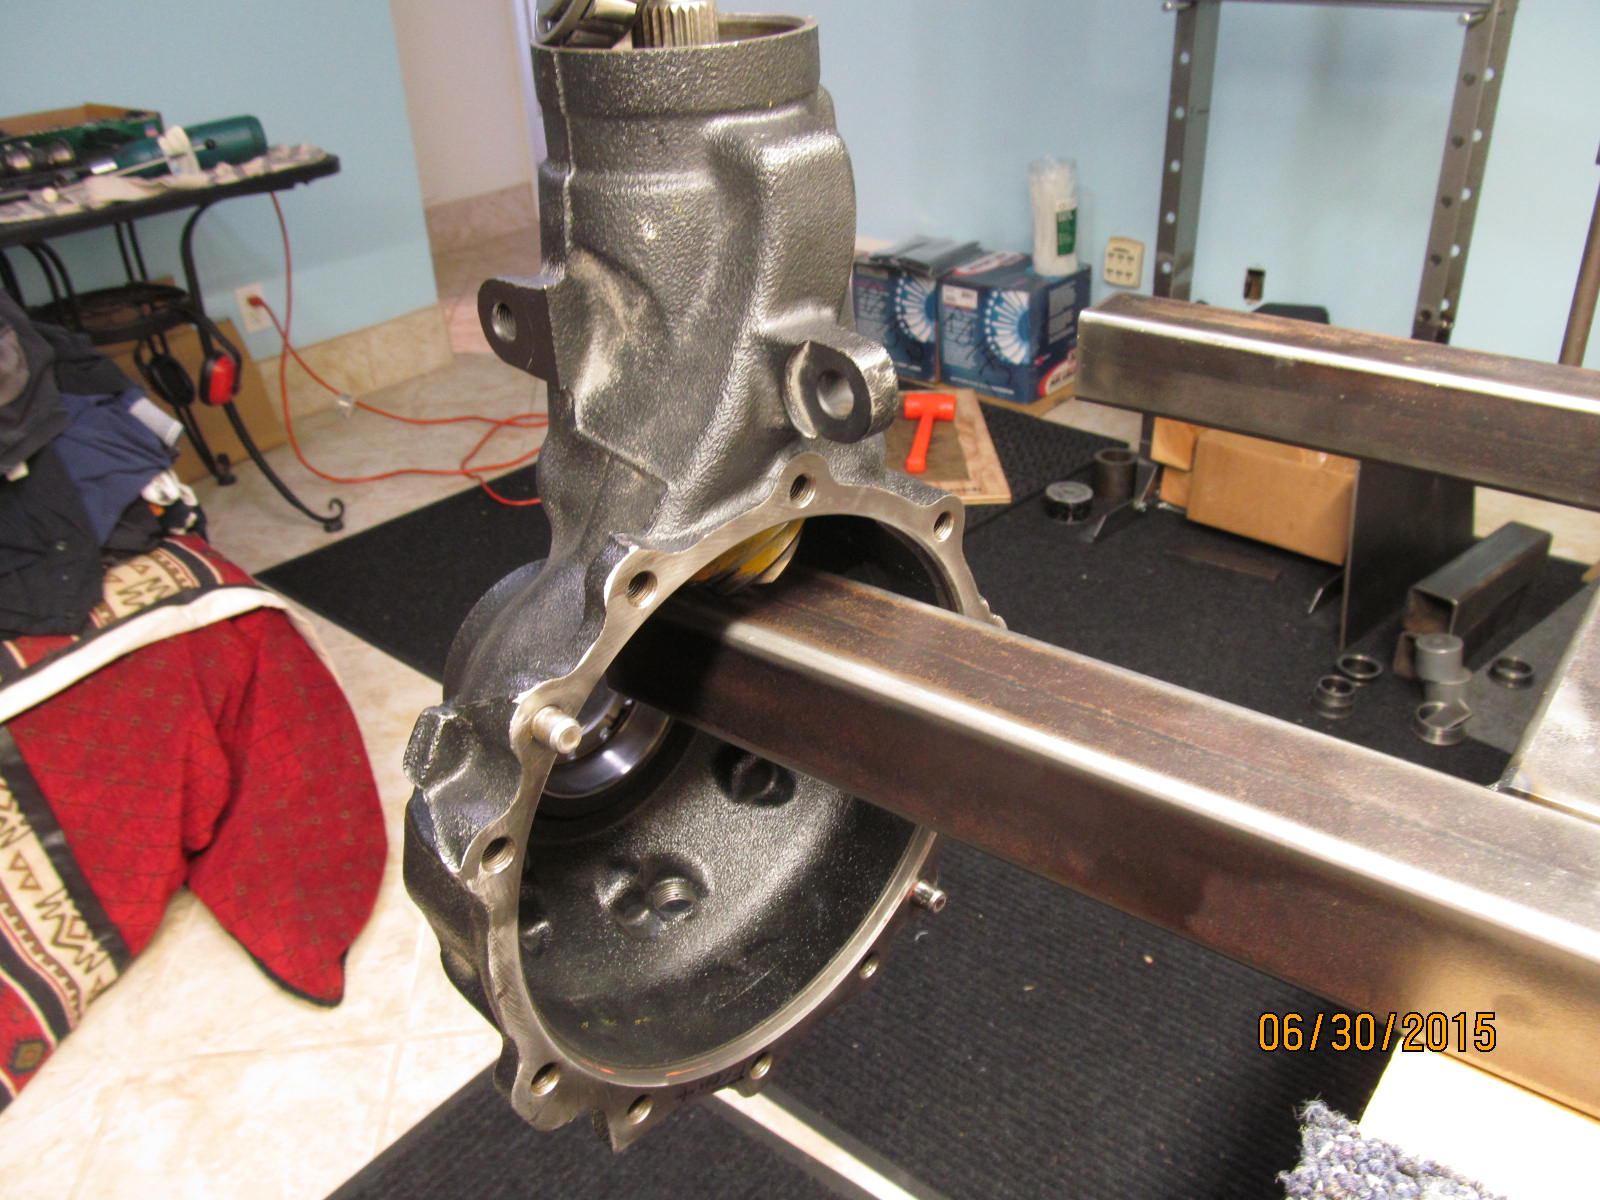
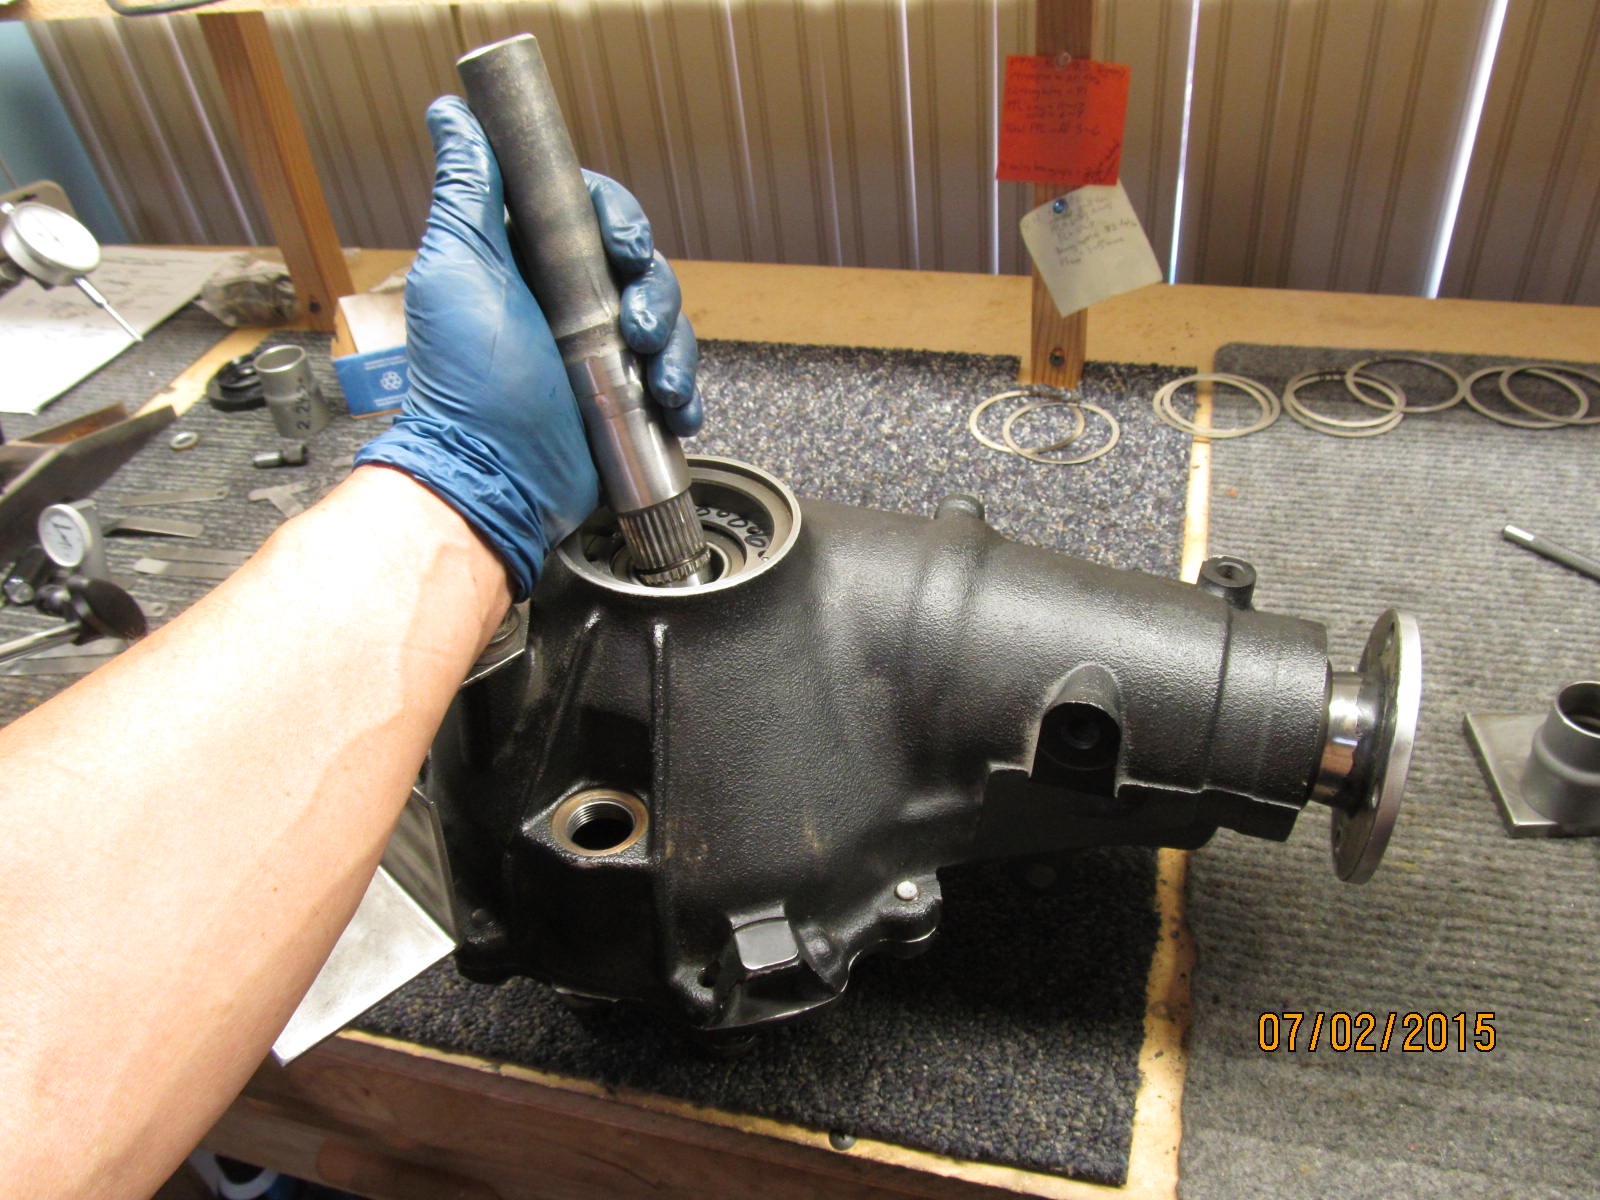
Removing the "differential tube"....this should be done for anybody
sending their clam to me.
|
|
|
|
|
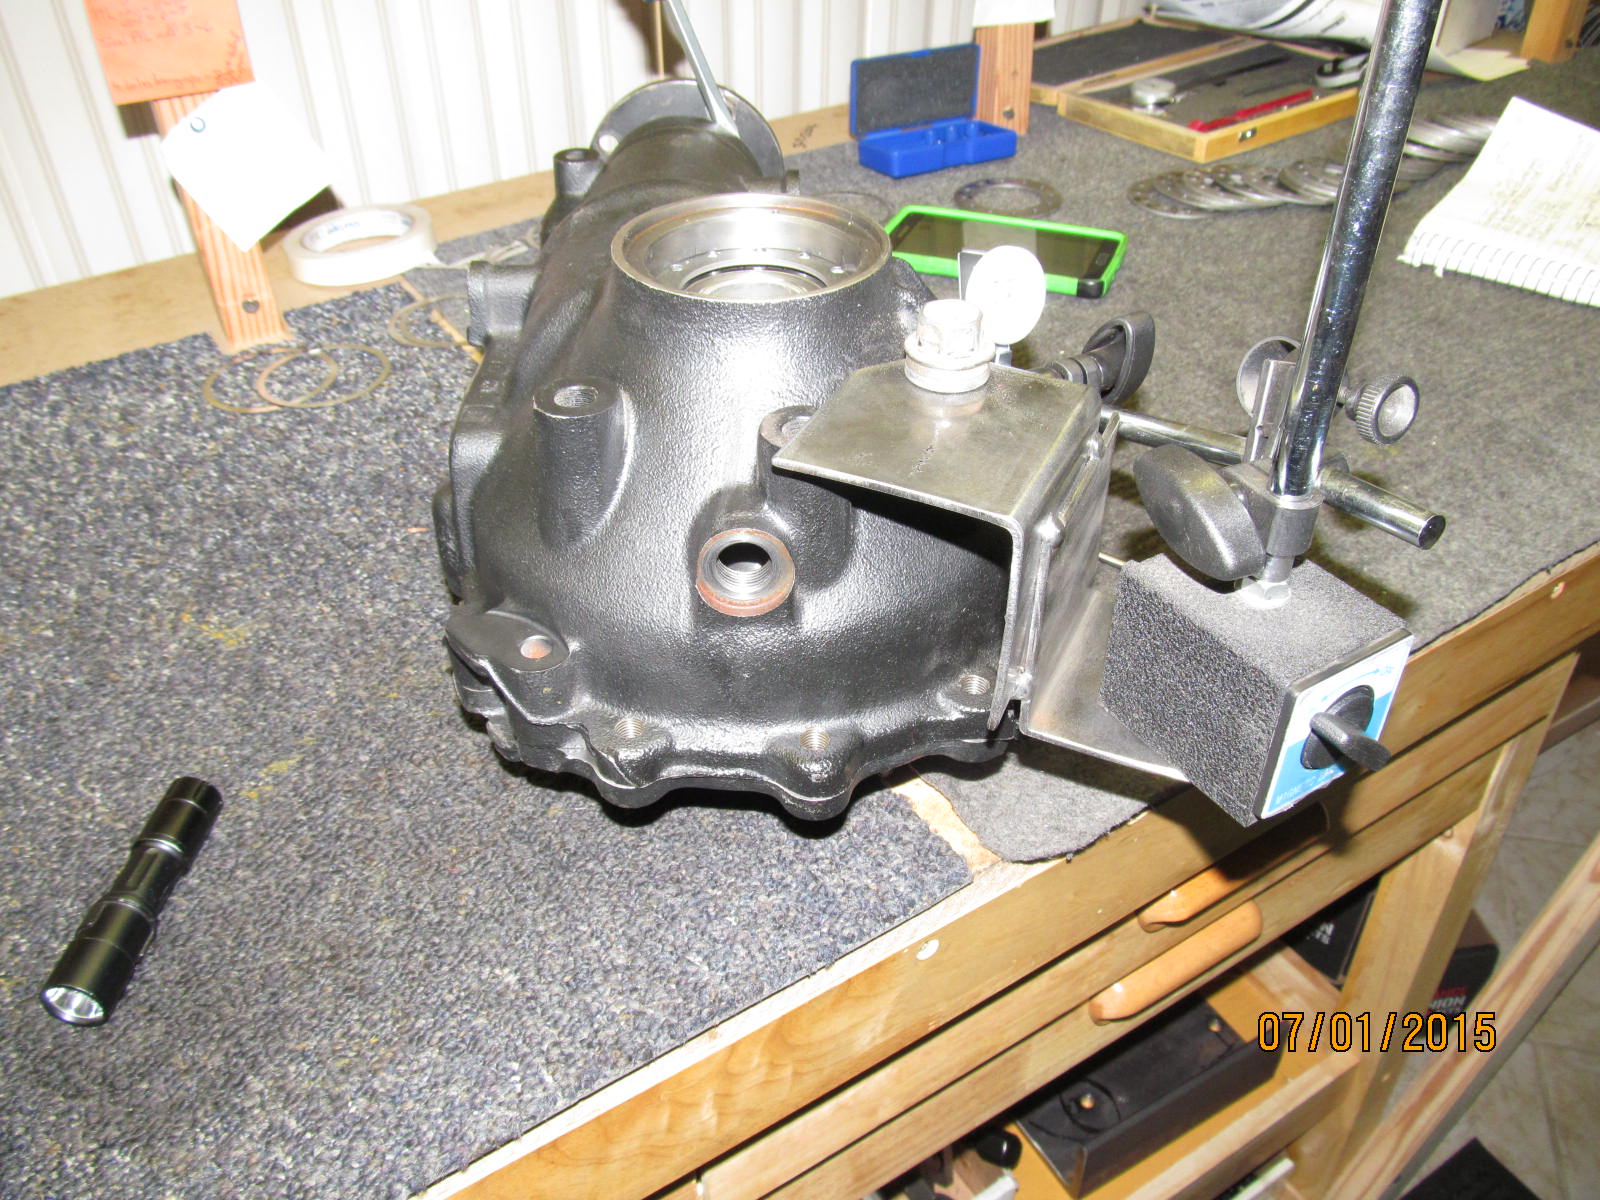
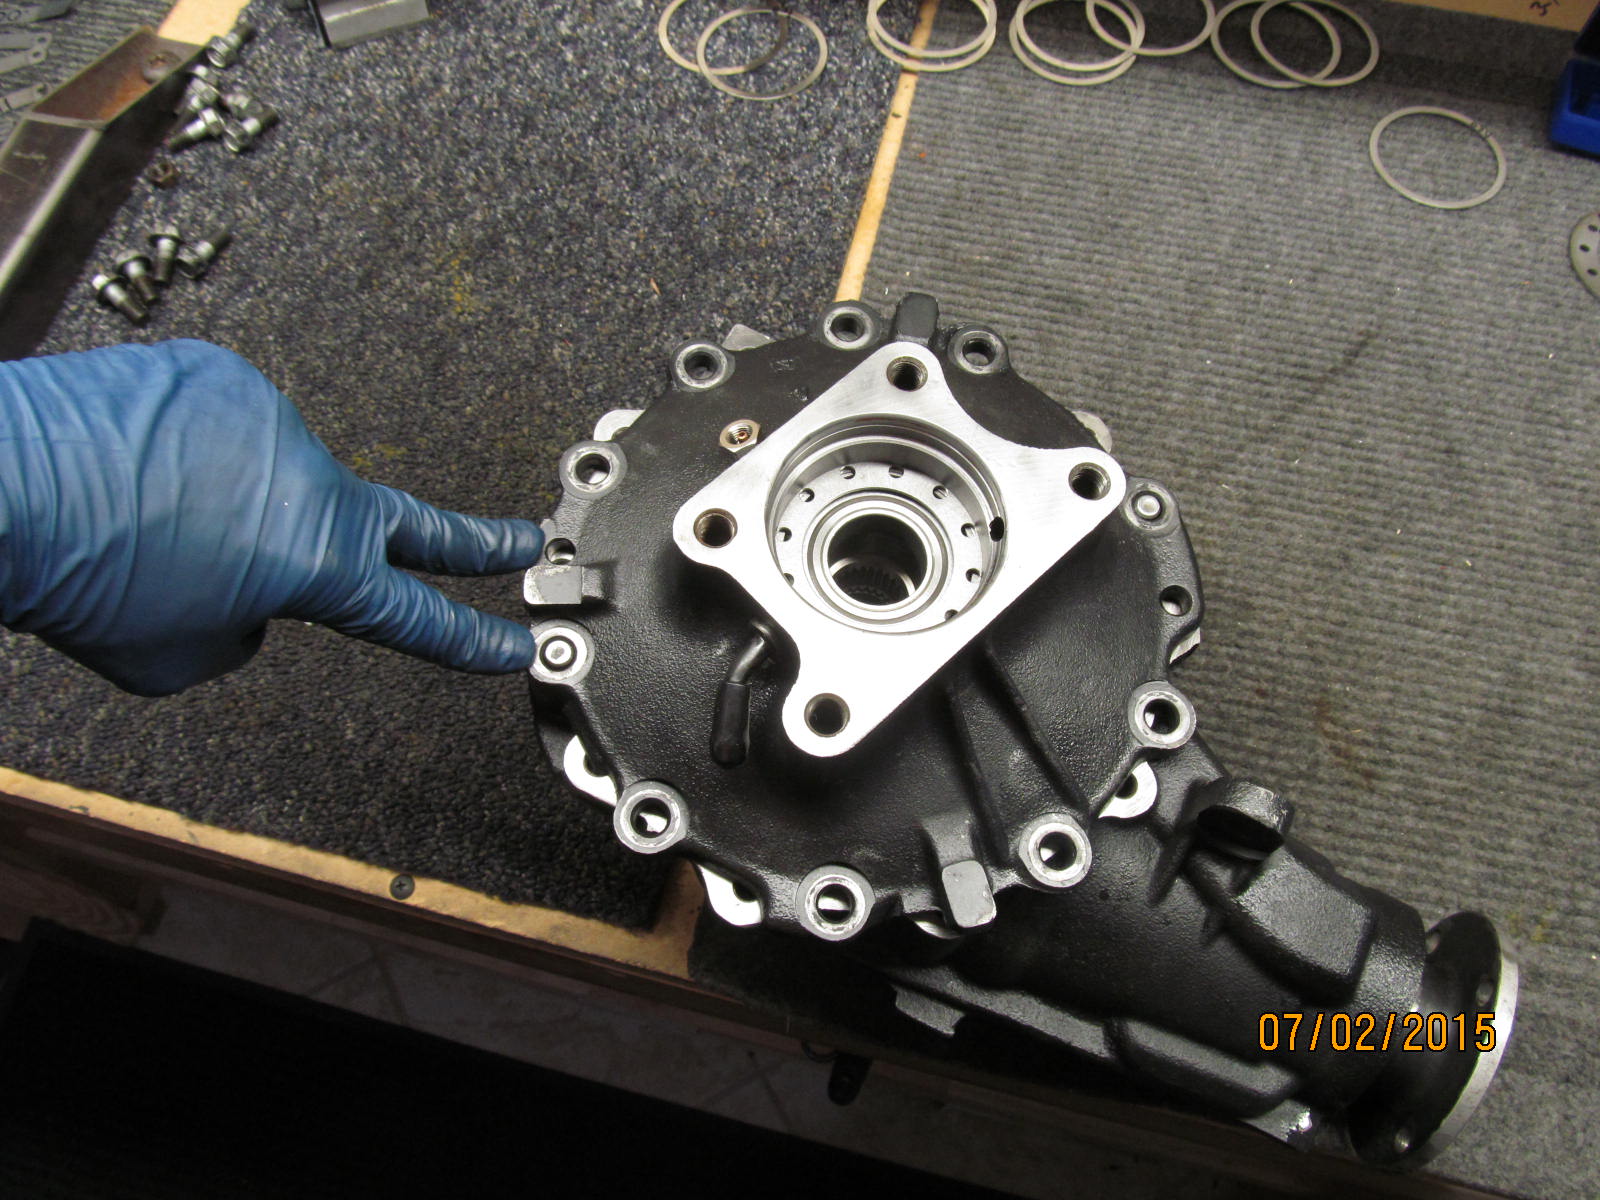
removing the cover...
|
|
|
|
|
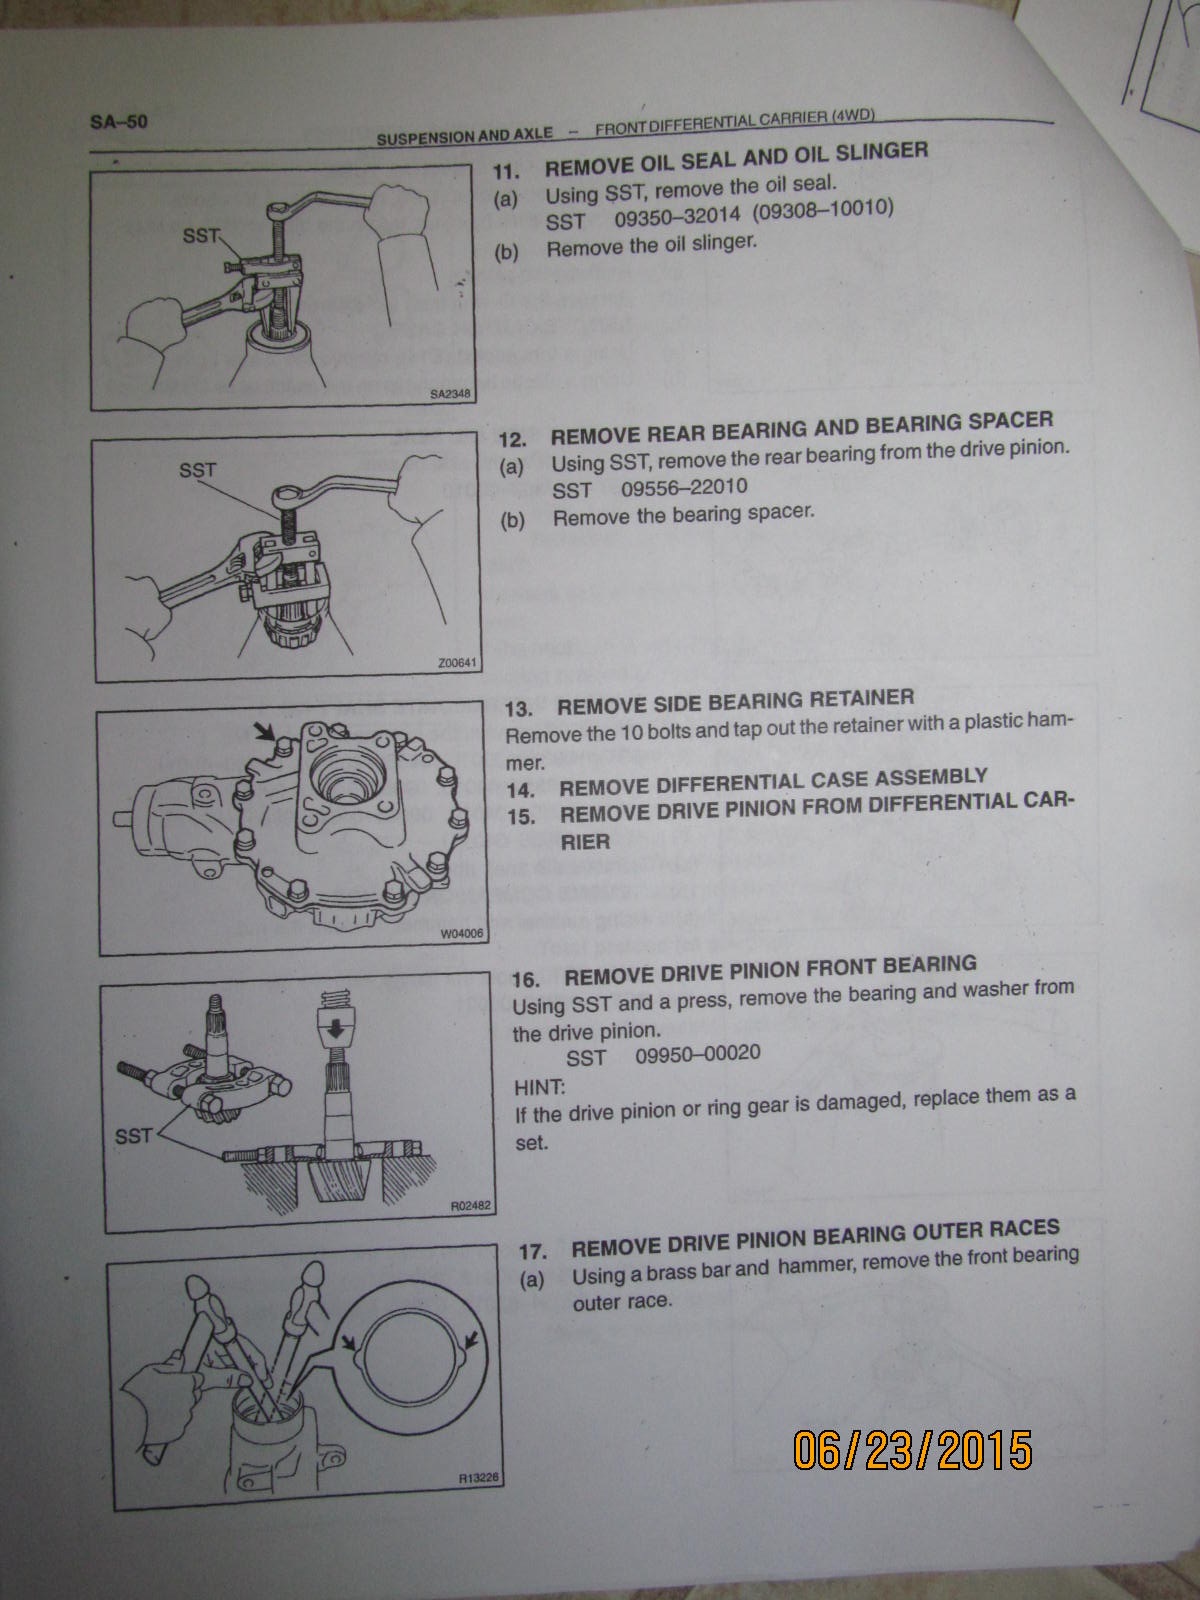
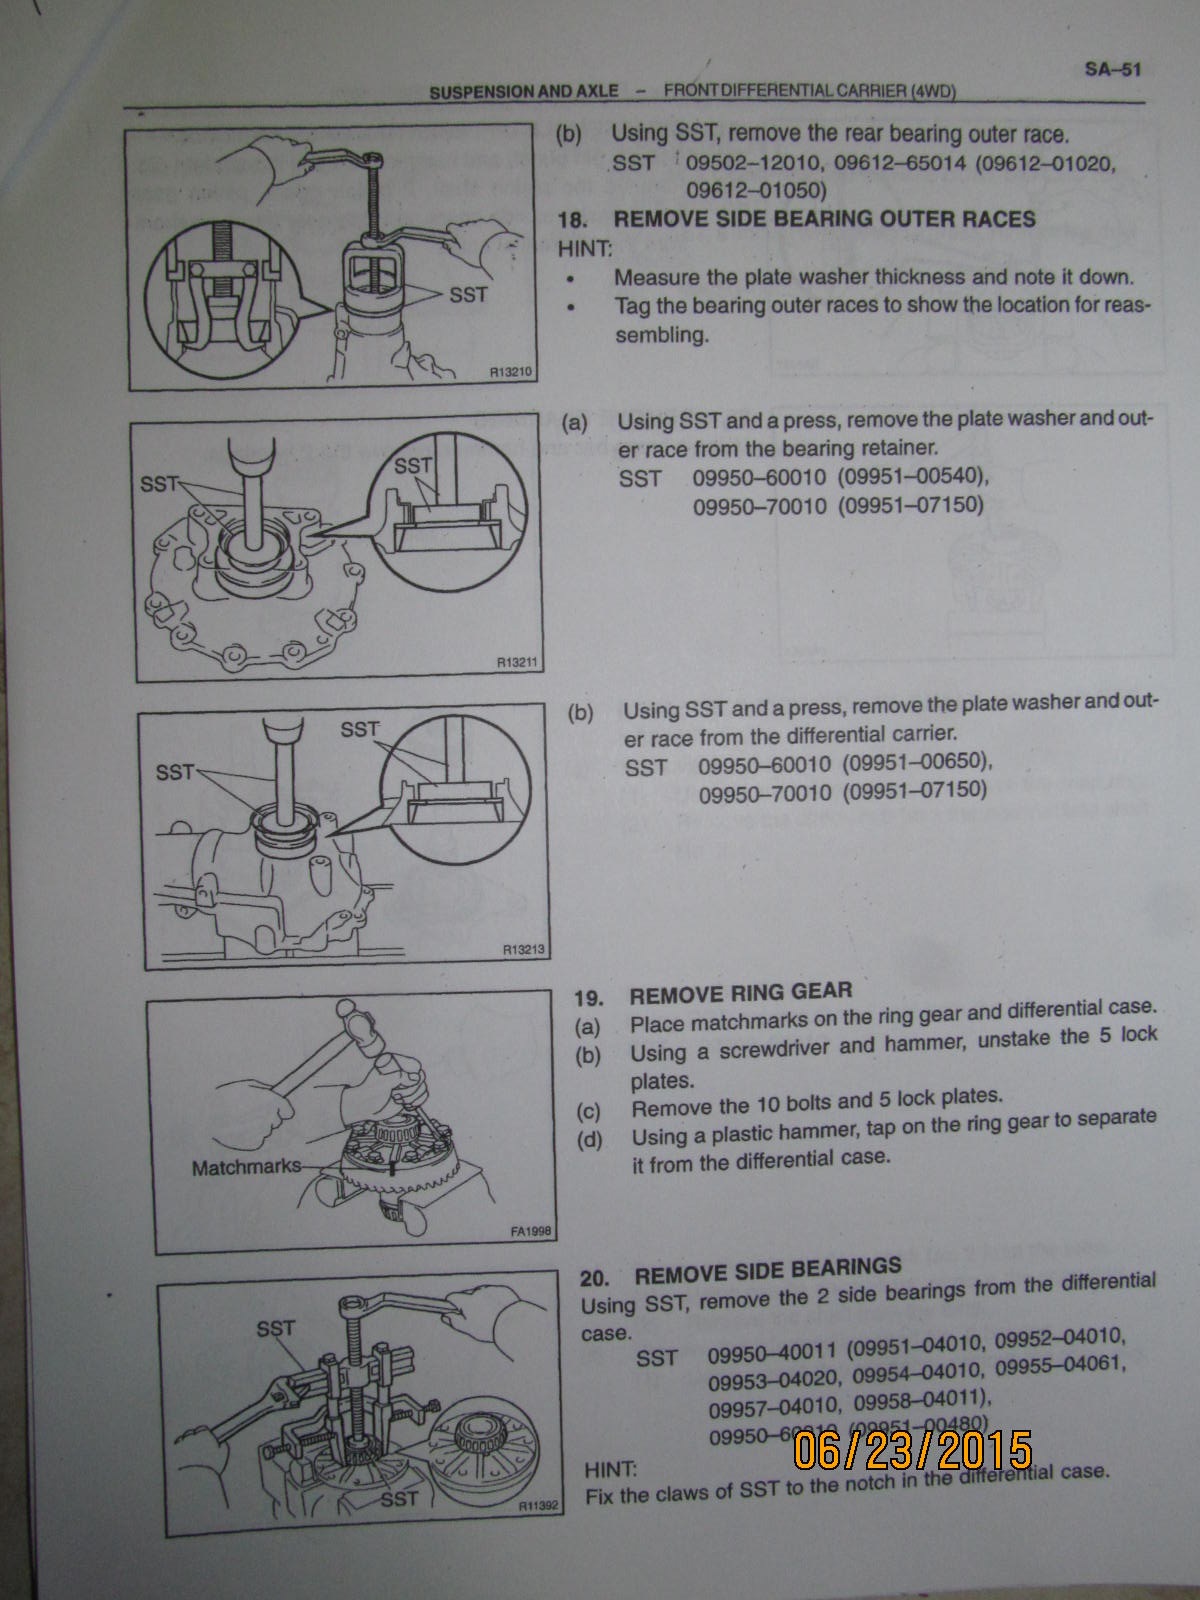
removing side bearings...
|
|
|
|
|
Taking apart the actual differential case...
|
|
|
|
|
...................
|
|
|
|
|
........................
|
|
|
|
|
Sidegear backlash on these clams is all the way down to zero and .008" max.
|
|
|
|
|
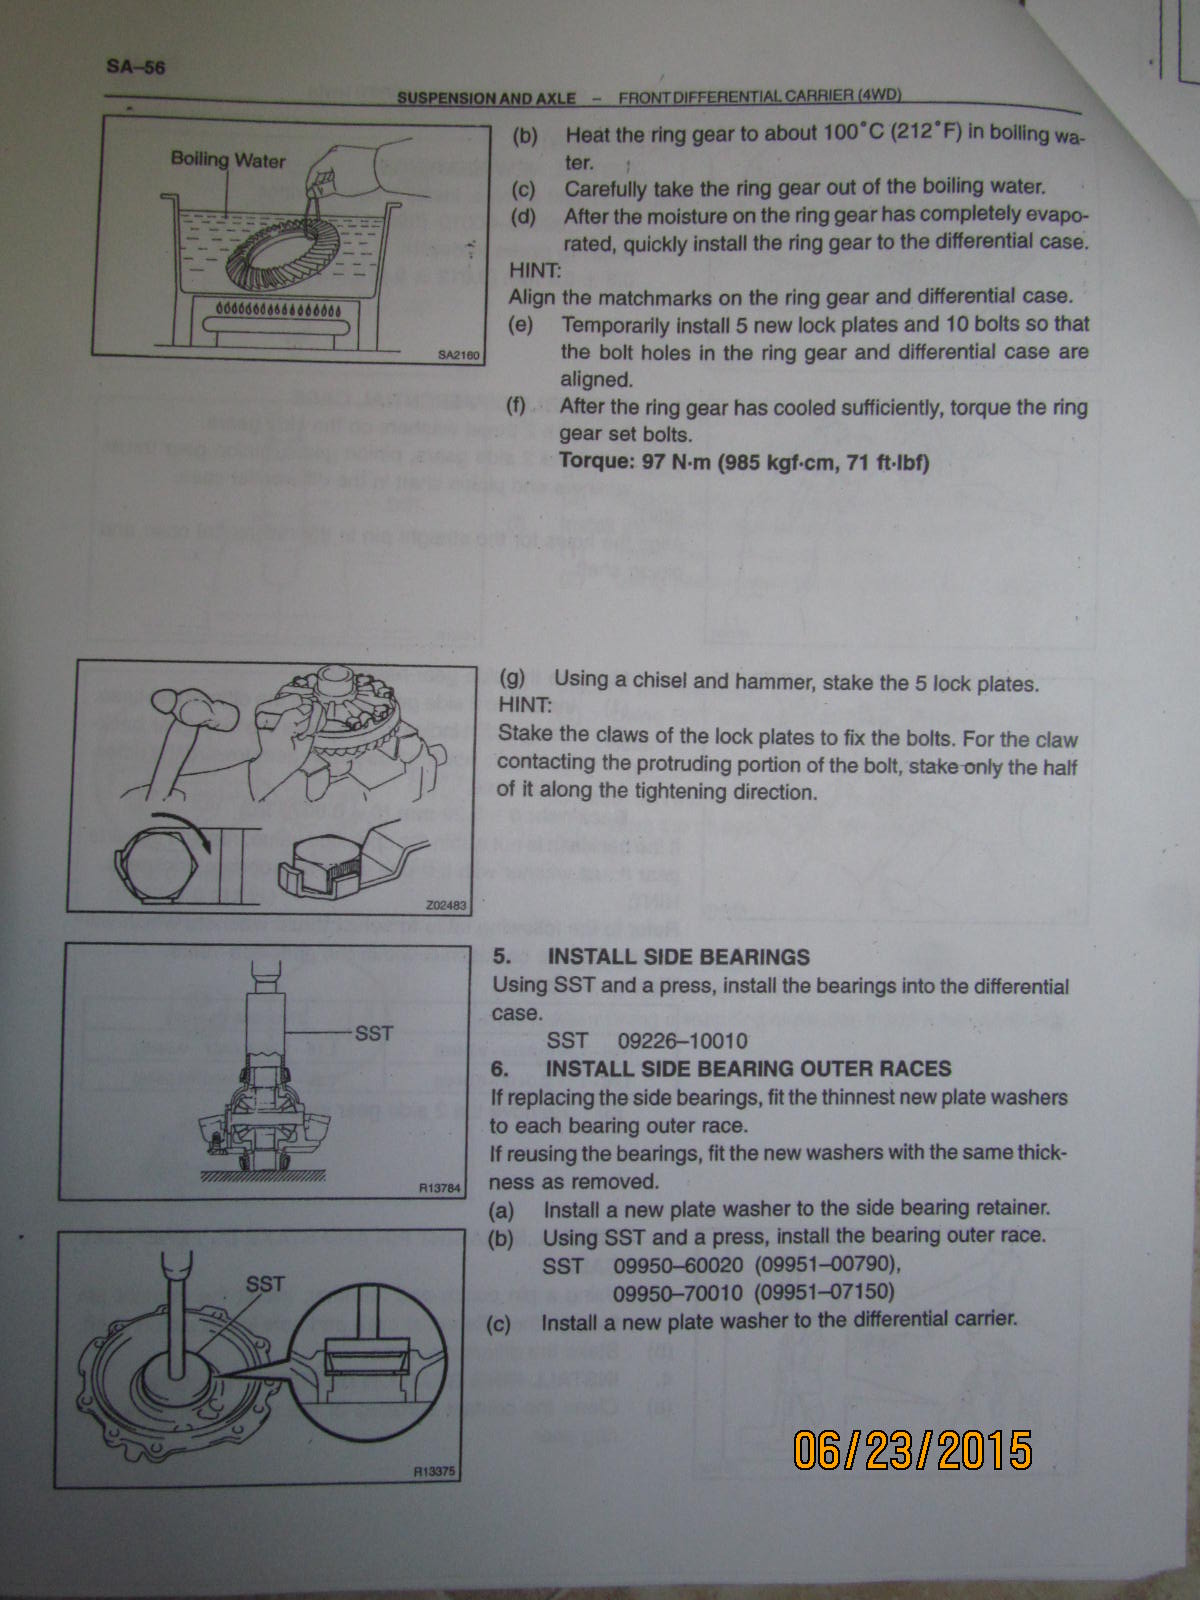
71 ft/lb on these ring gear bolts....glad to see they raised the bar.
|
|
|
|
An SST tool(for new race instllation) that I can make up using
all-thread and 2 old races...
|
|
|
|
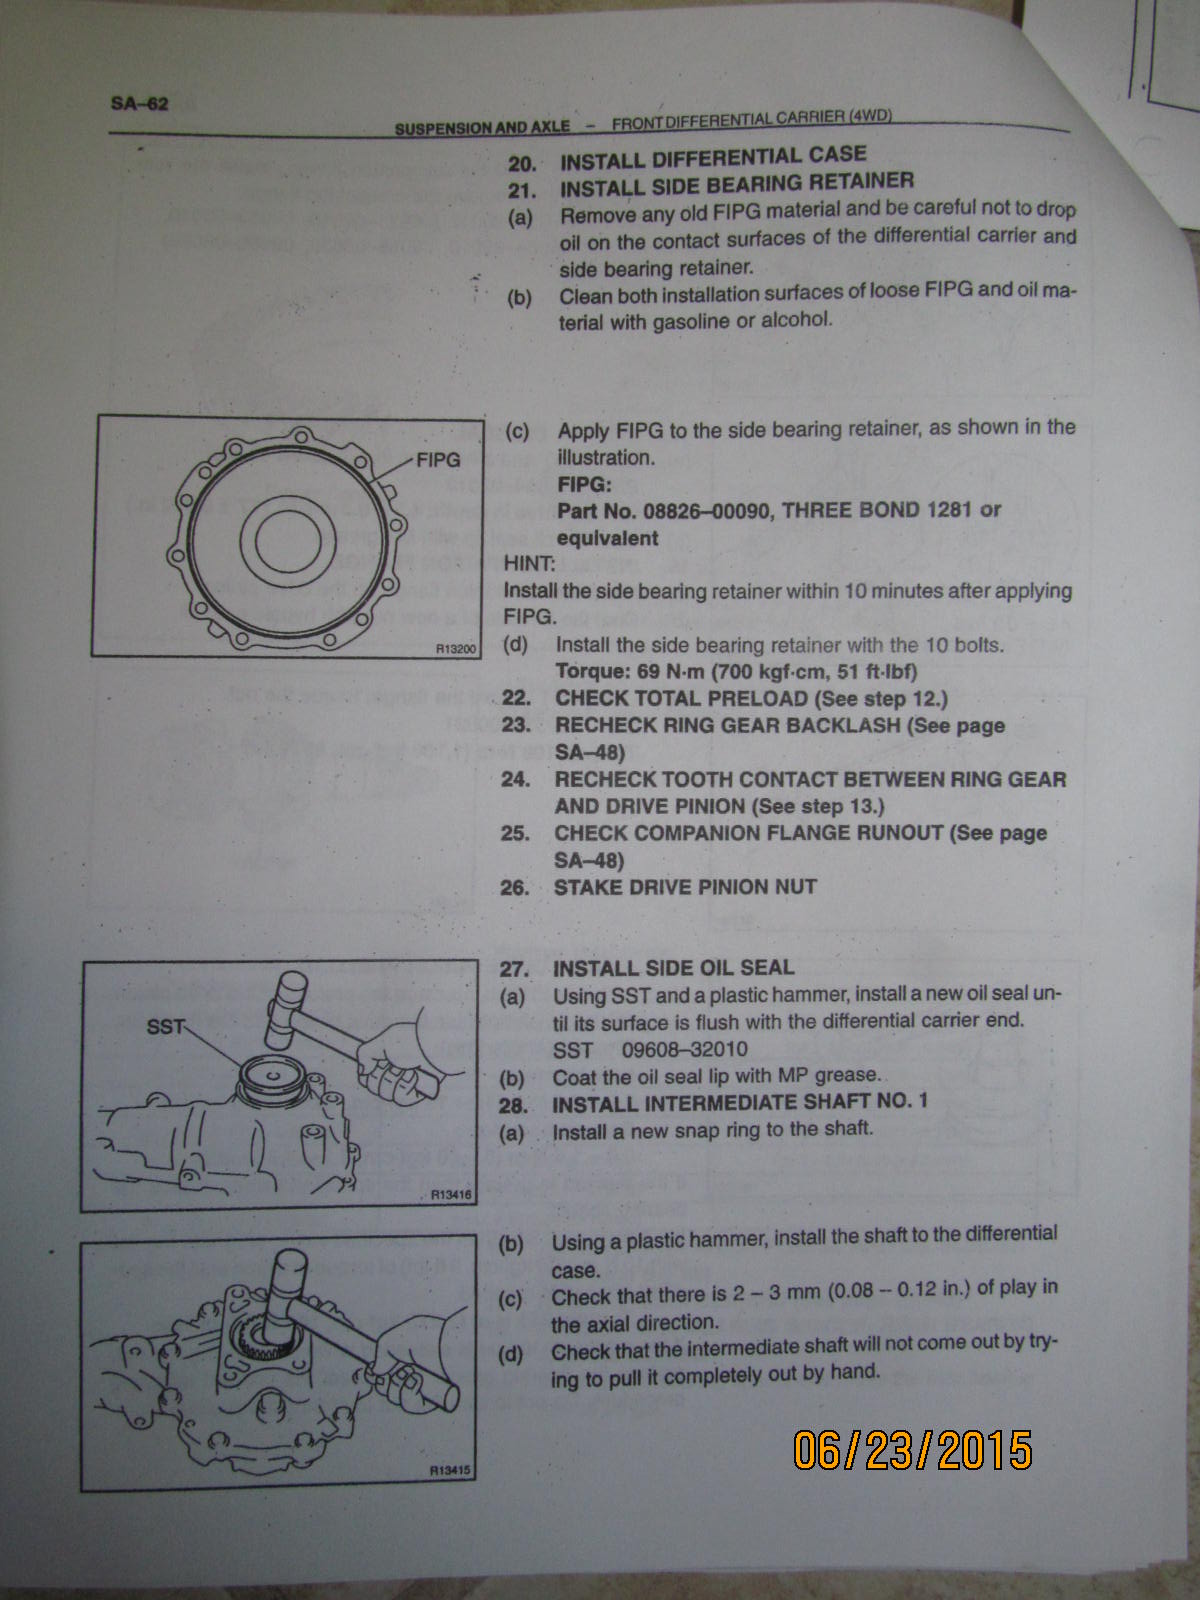
They call it a "side bearing retainer" and I just call it a cover.
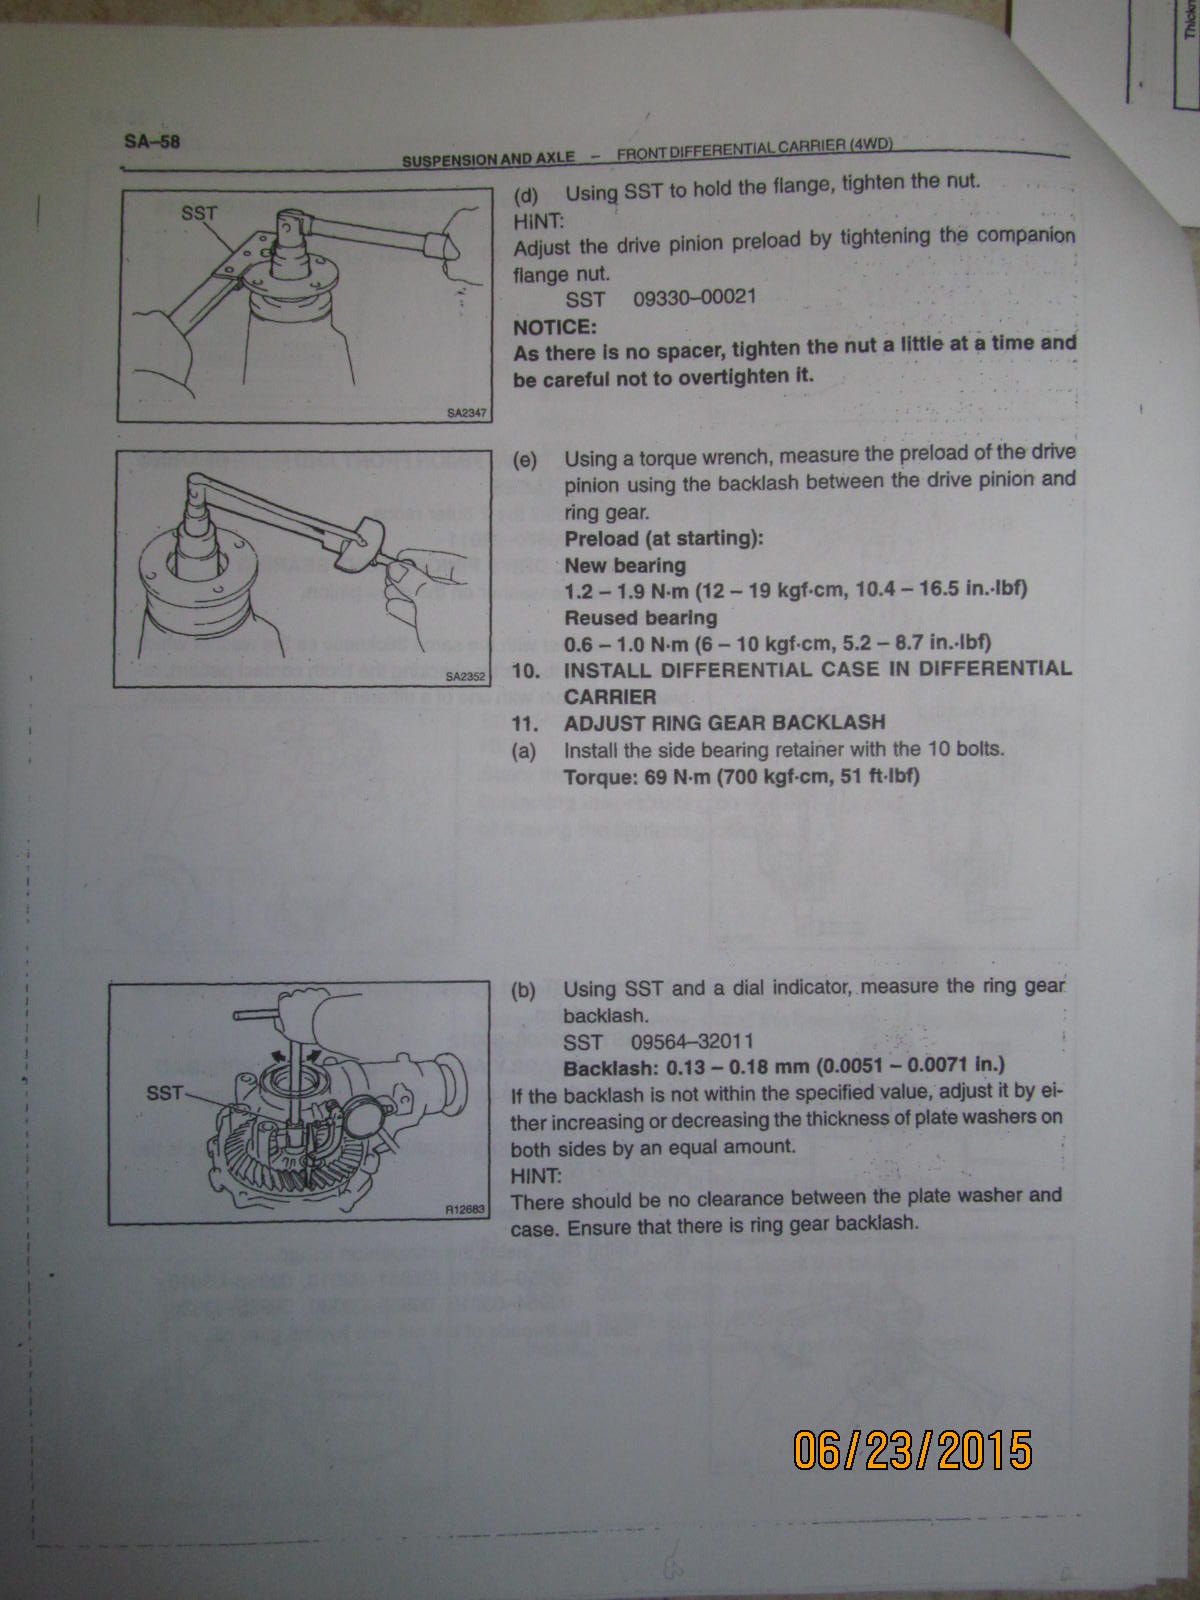
51 ft/lb on those 10 bolts is good to know.
|
|
|
|
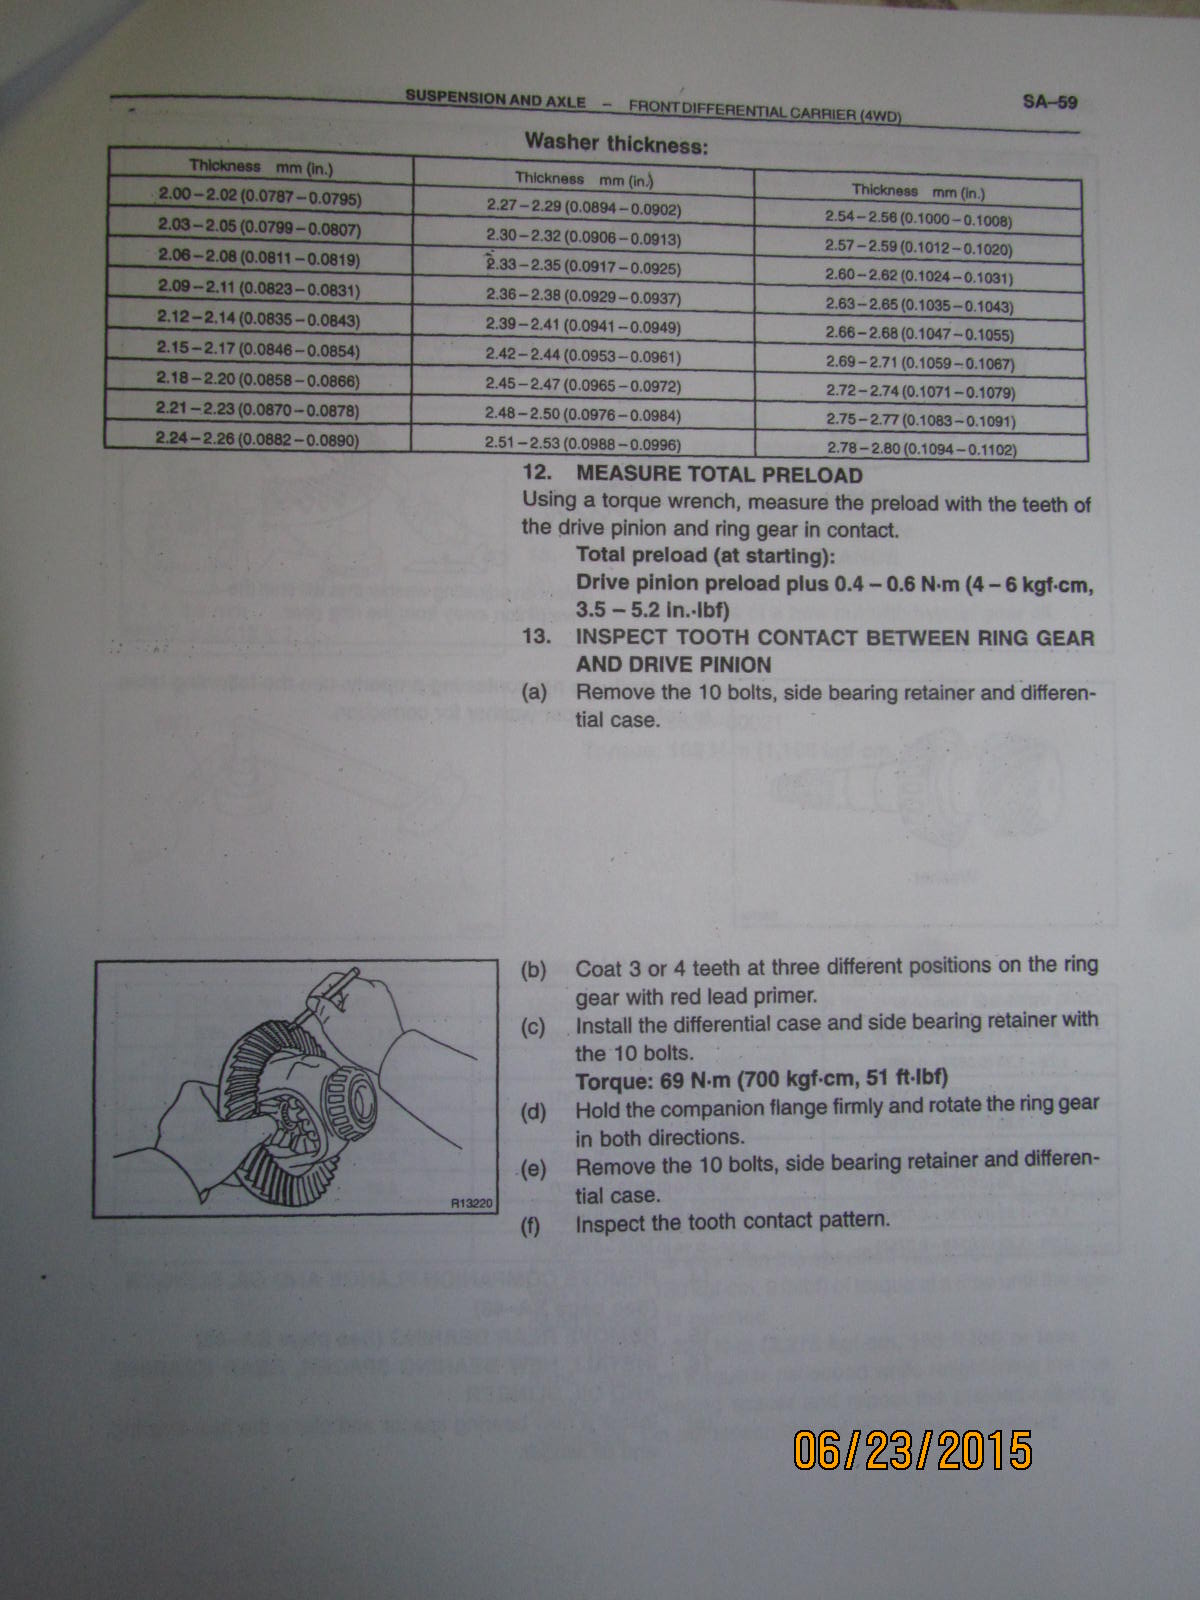
It's good to have all 27 washer plates on hand. They are used to
adjust Backlash and also Carrier Bearing preload.
|
|
|
|
|
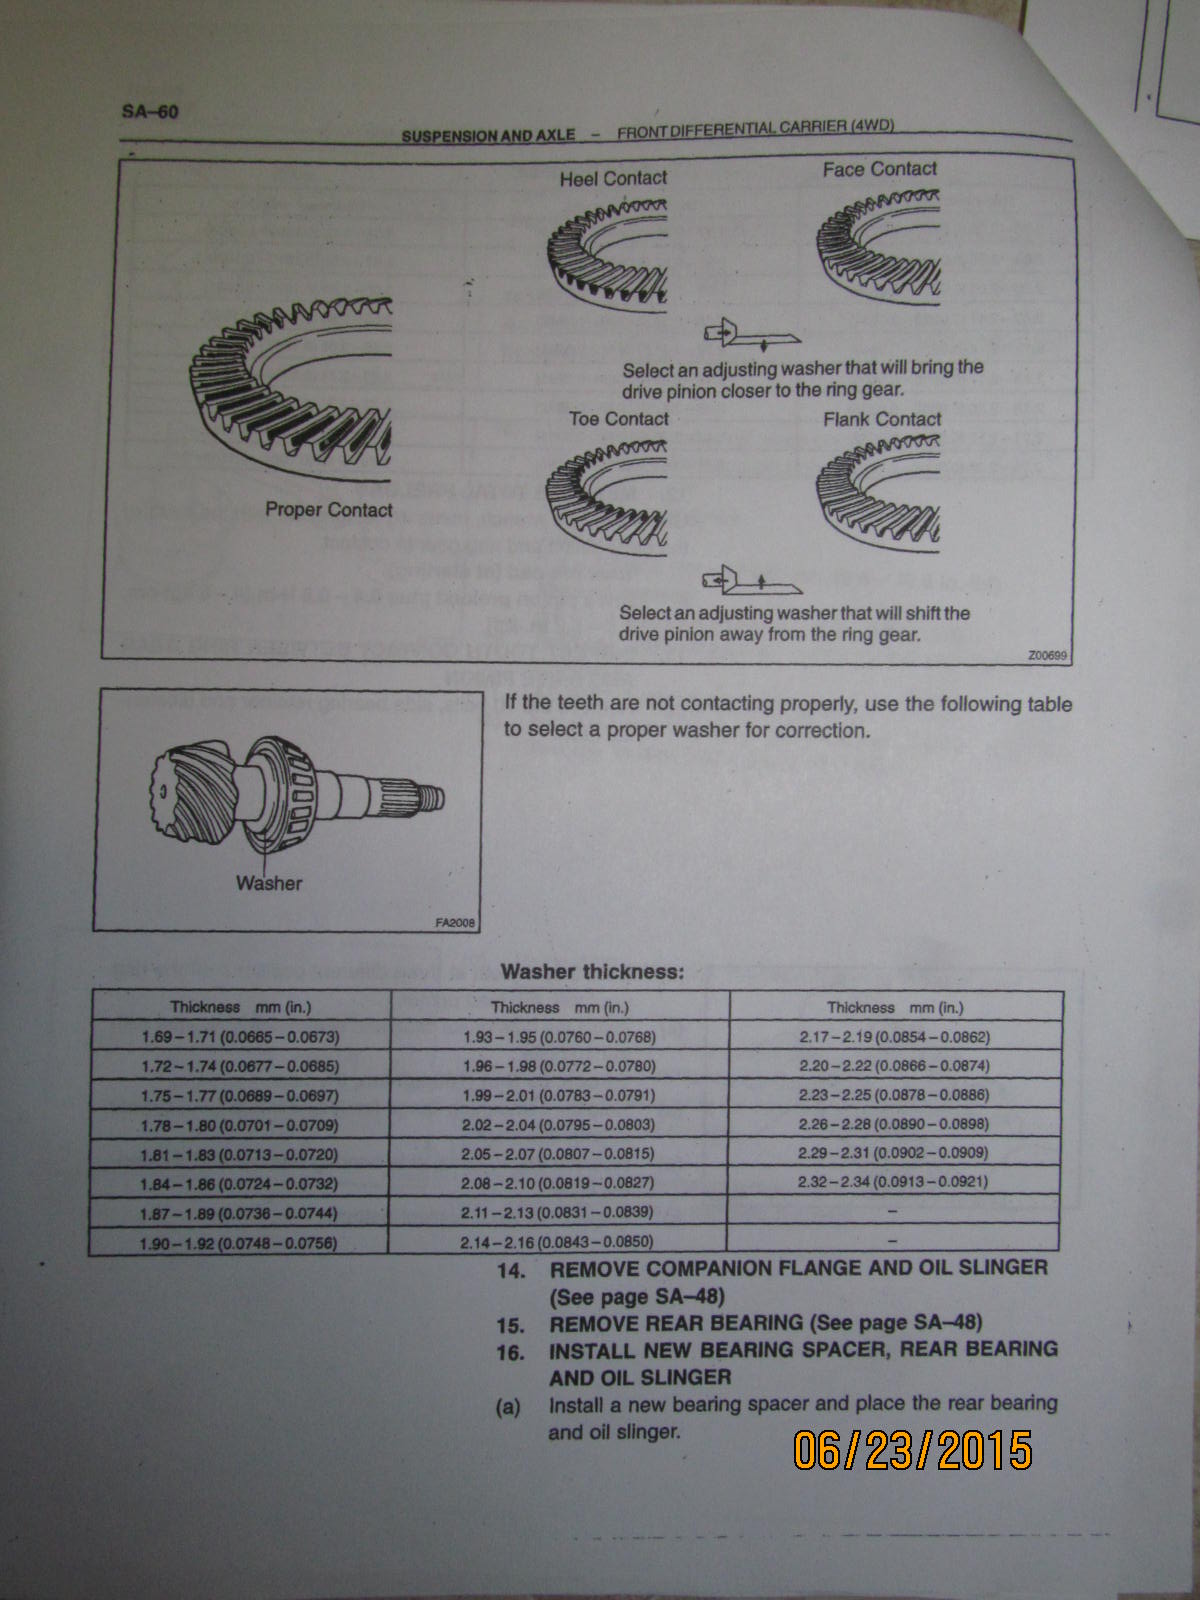
Pinion depth washers.....
|
|
|
|
|
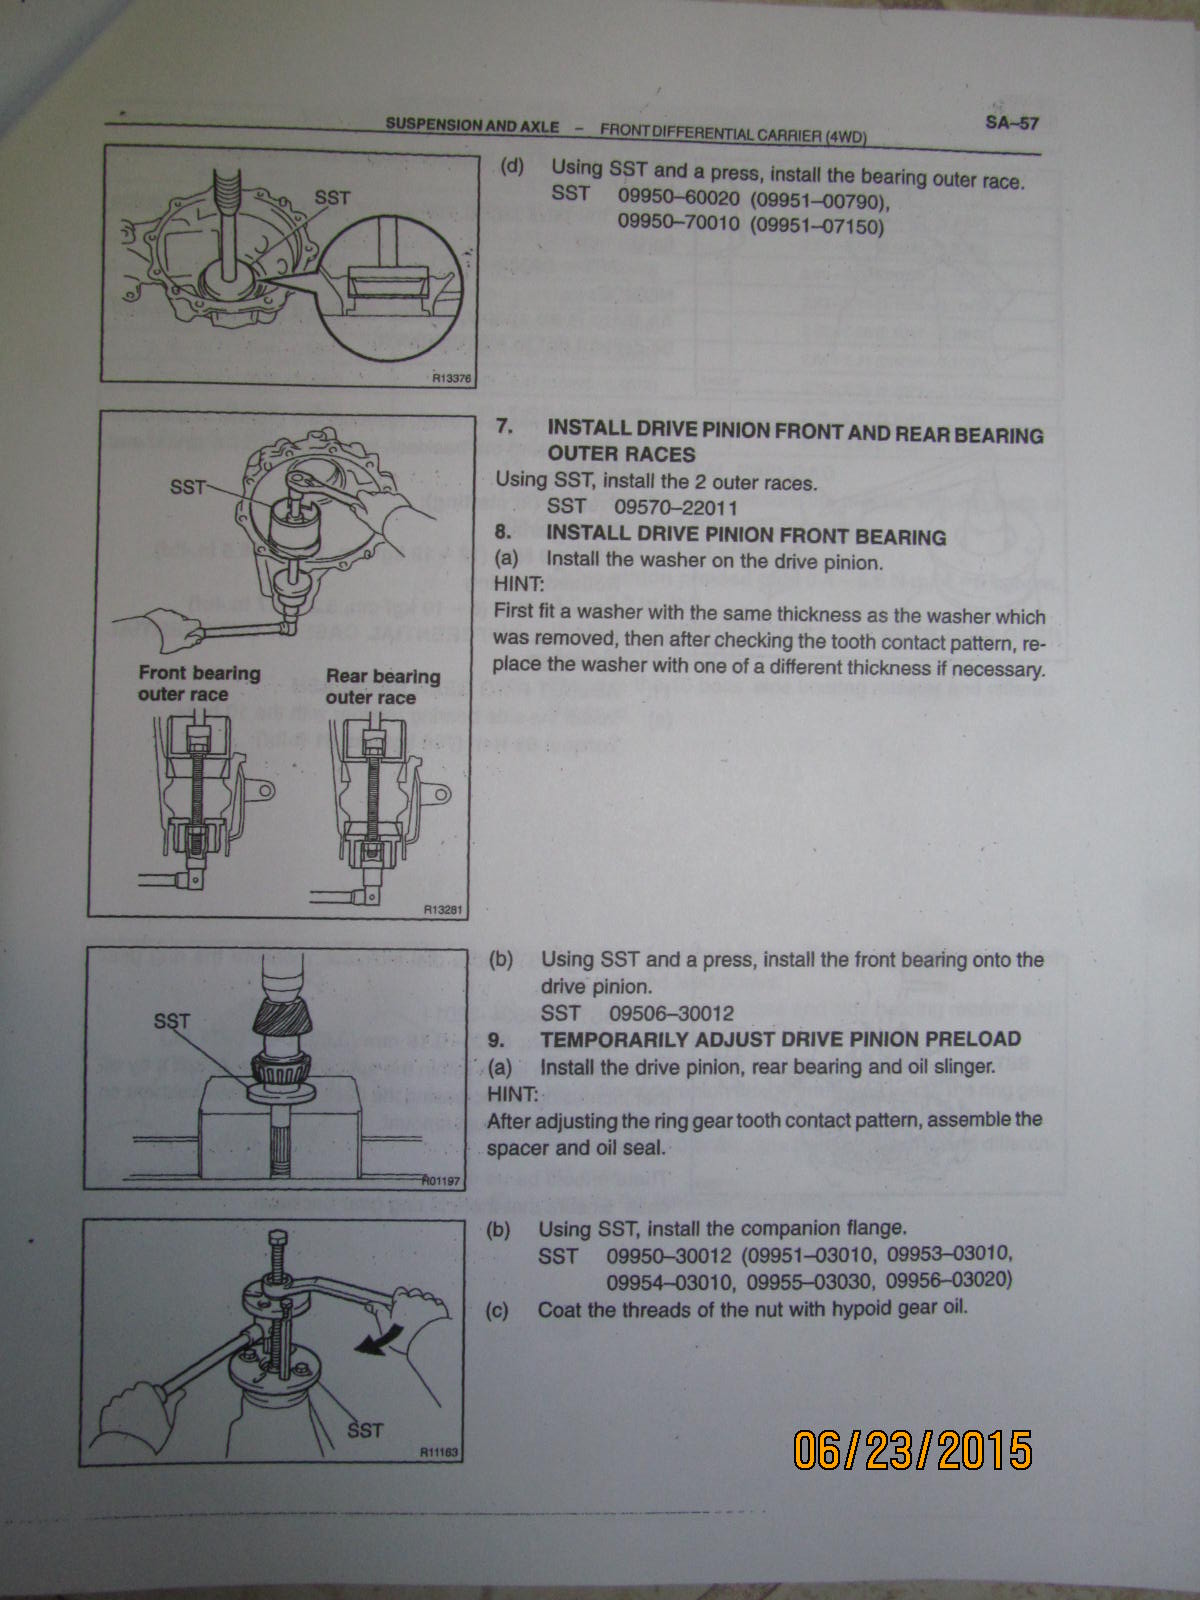
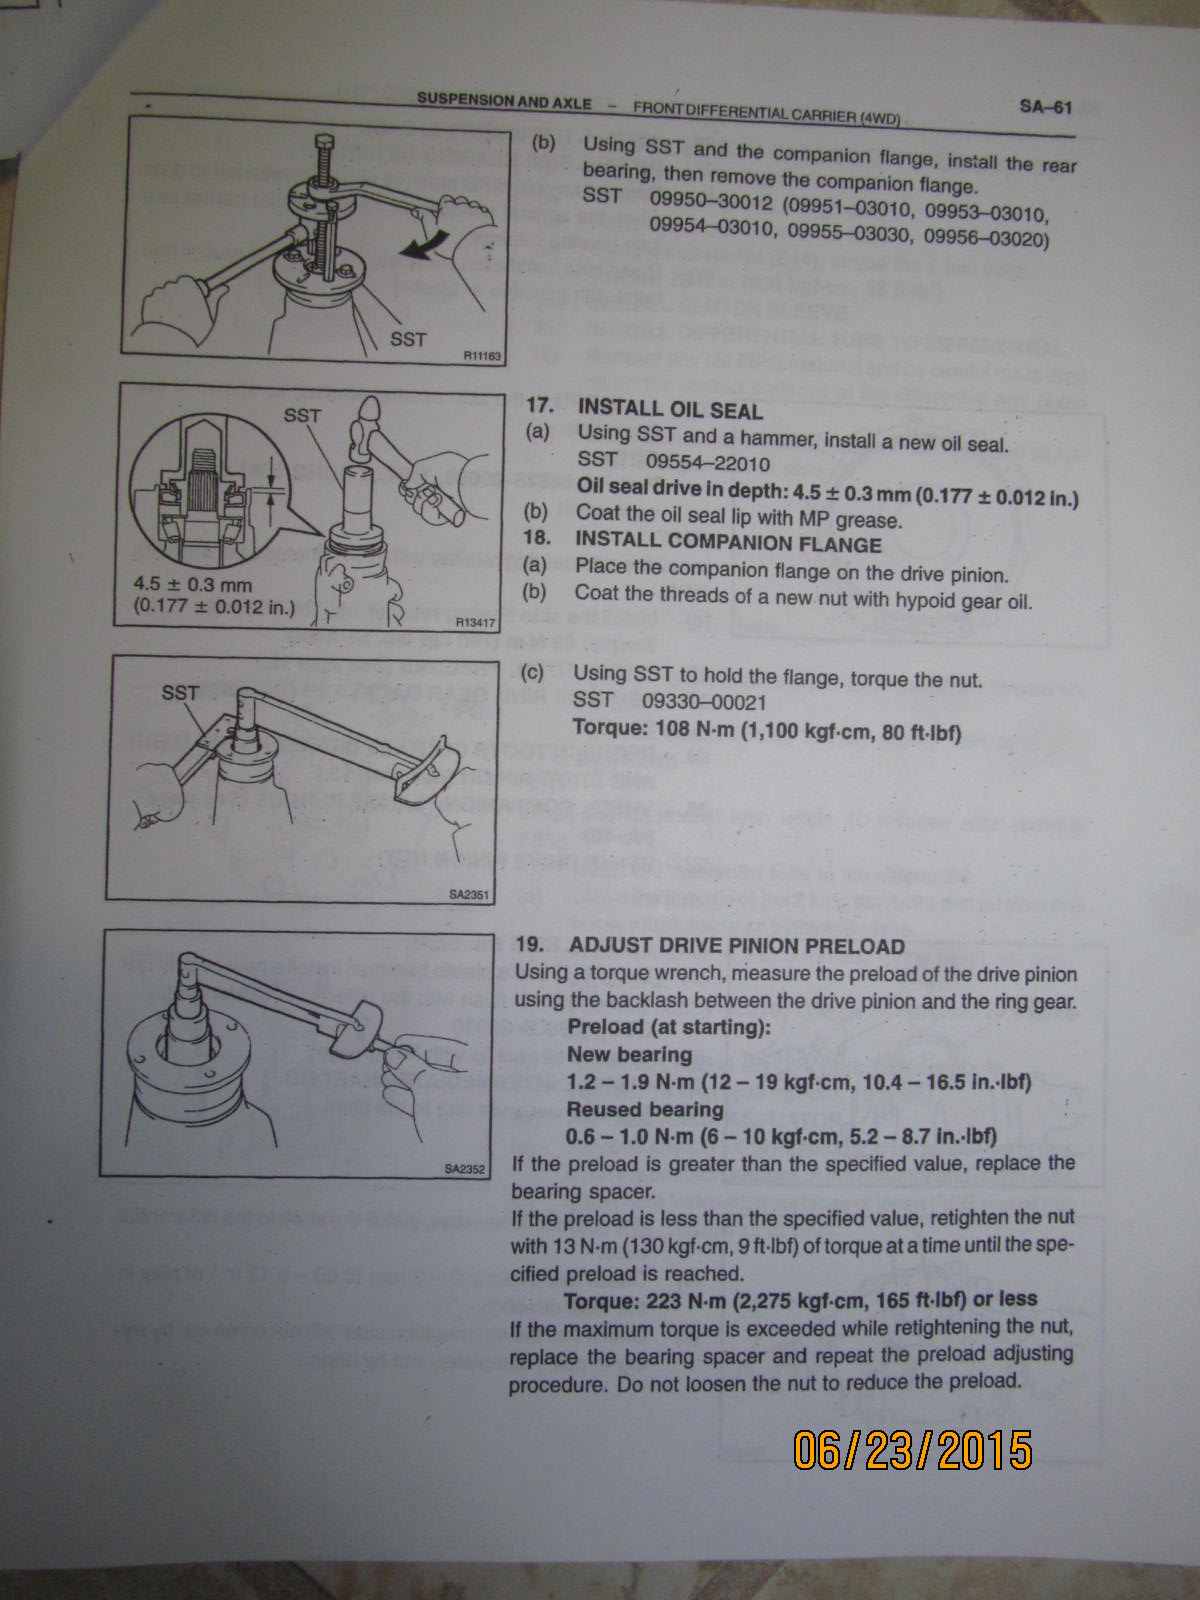
165 ft/lb maximum torque on these smaller pinion nuts.
|
|
|
|
|
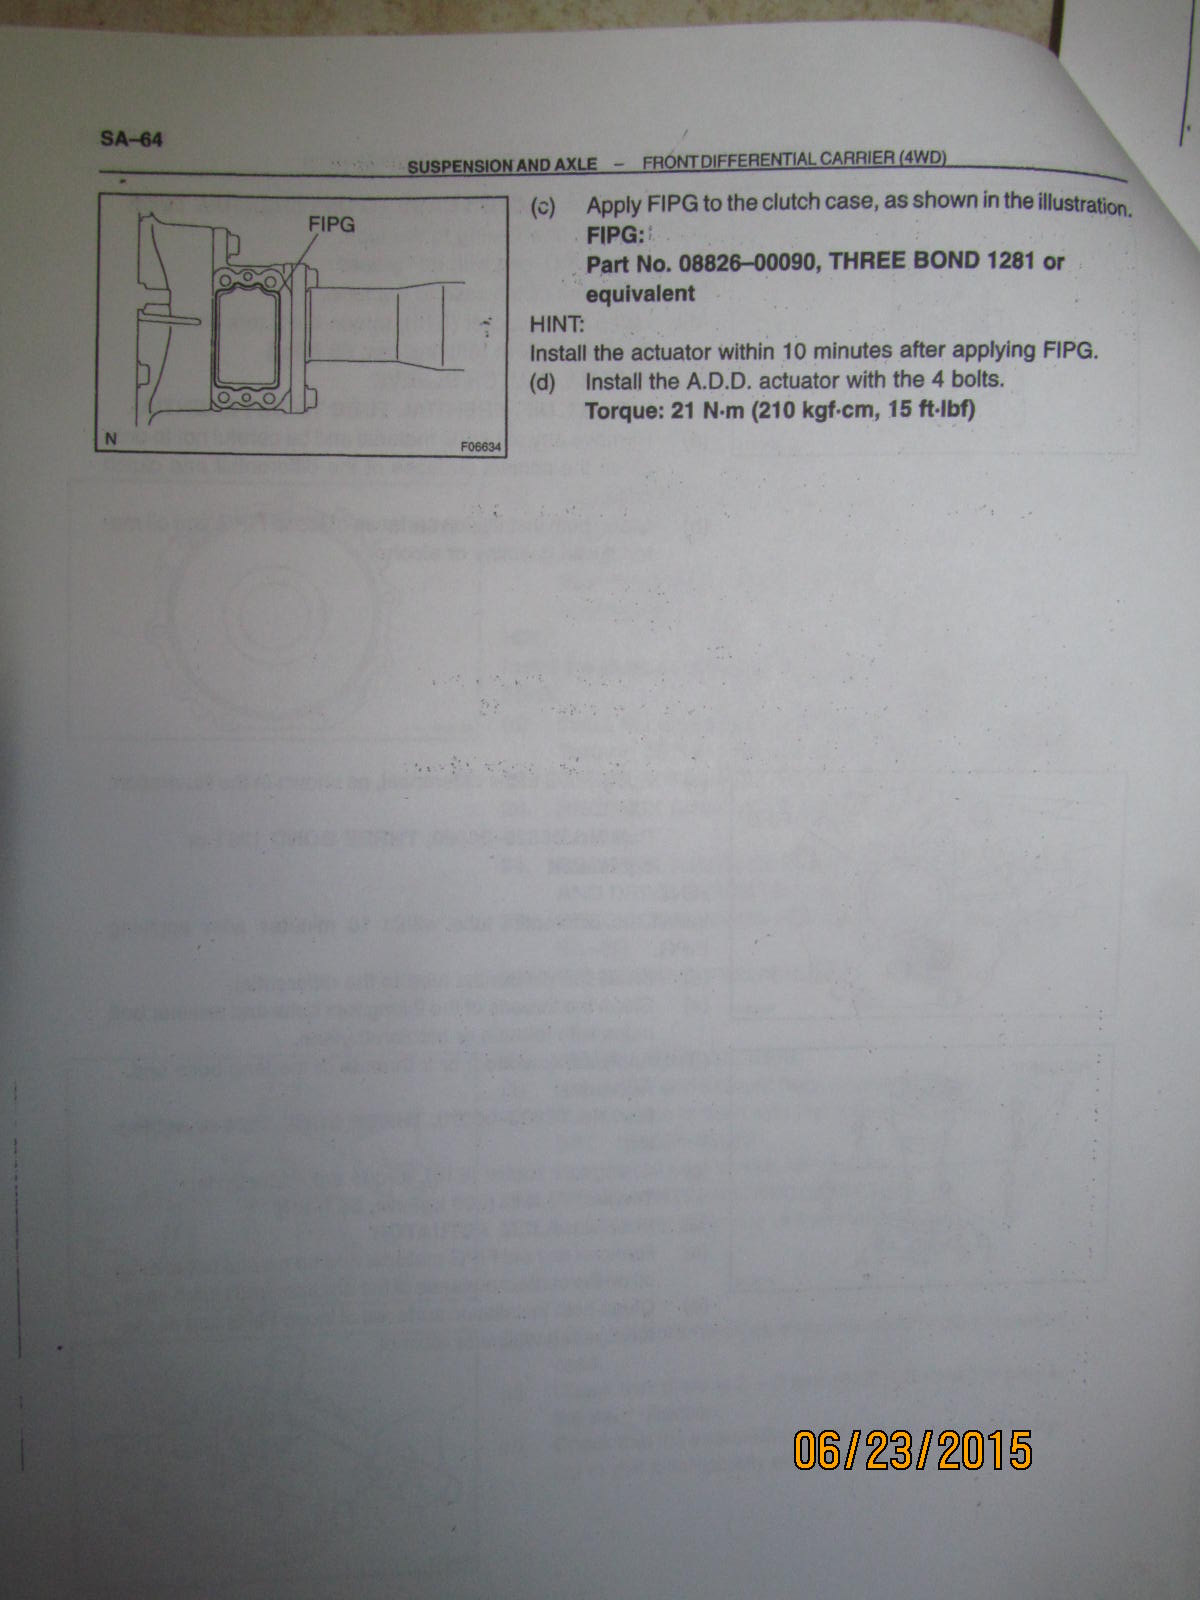
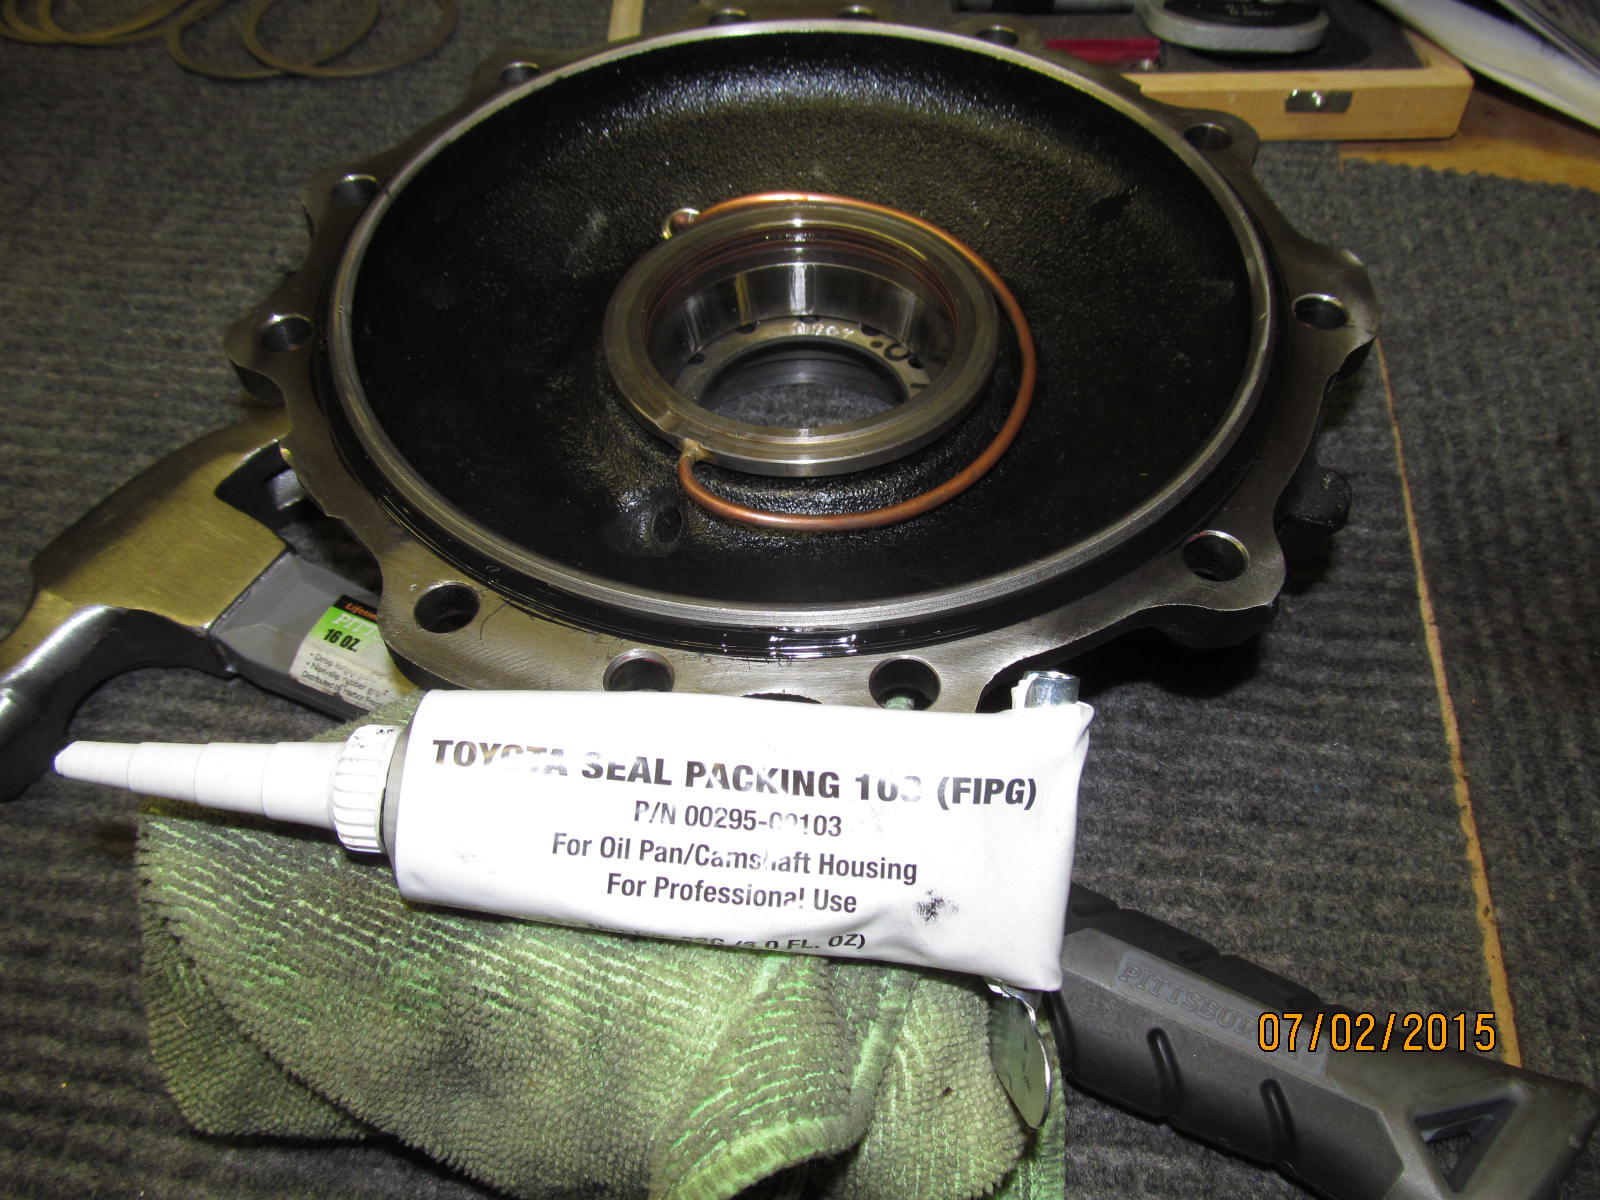
FIPG on the "cover"
|
|
|
|
|
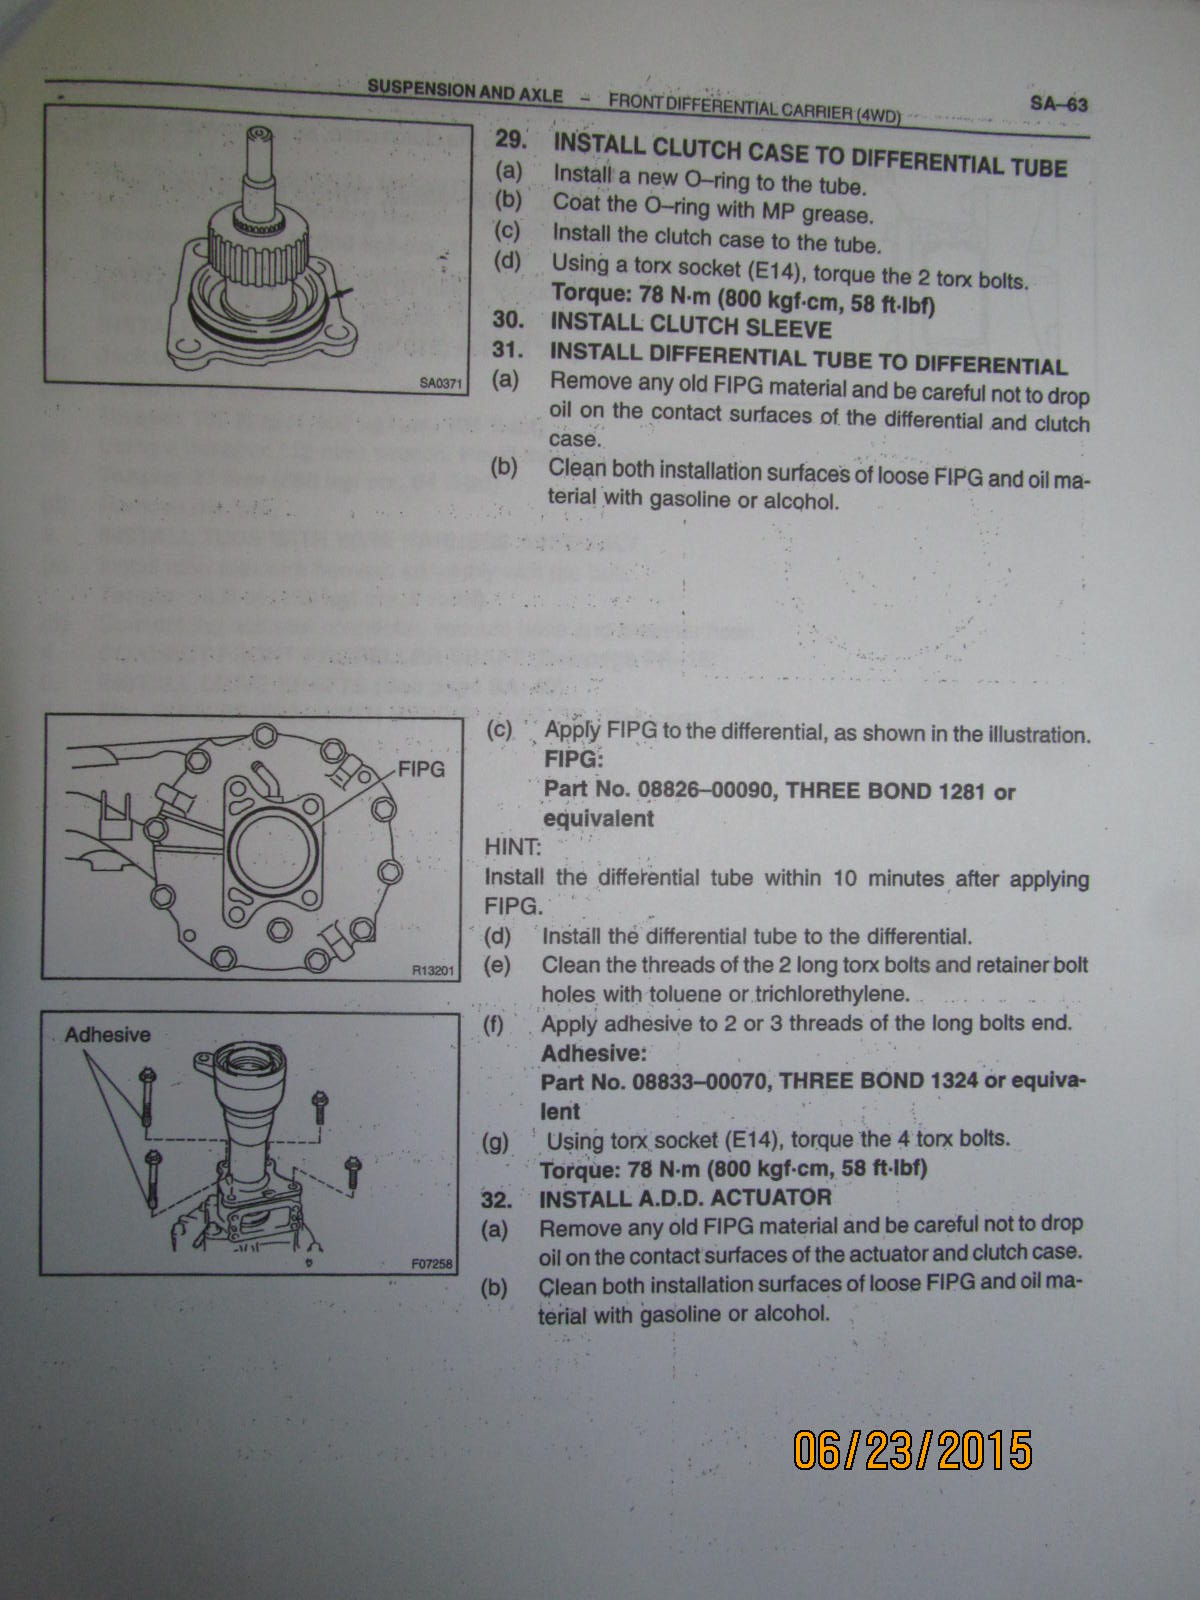
Re-install the differential tube with an E14 socket and 58 ft/lb
|
|
|
|
|
....................
|
|
|
|
|
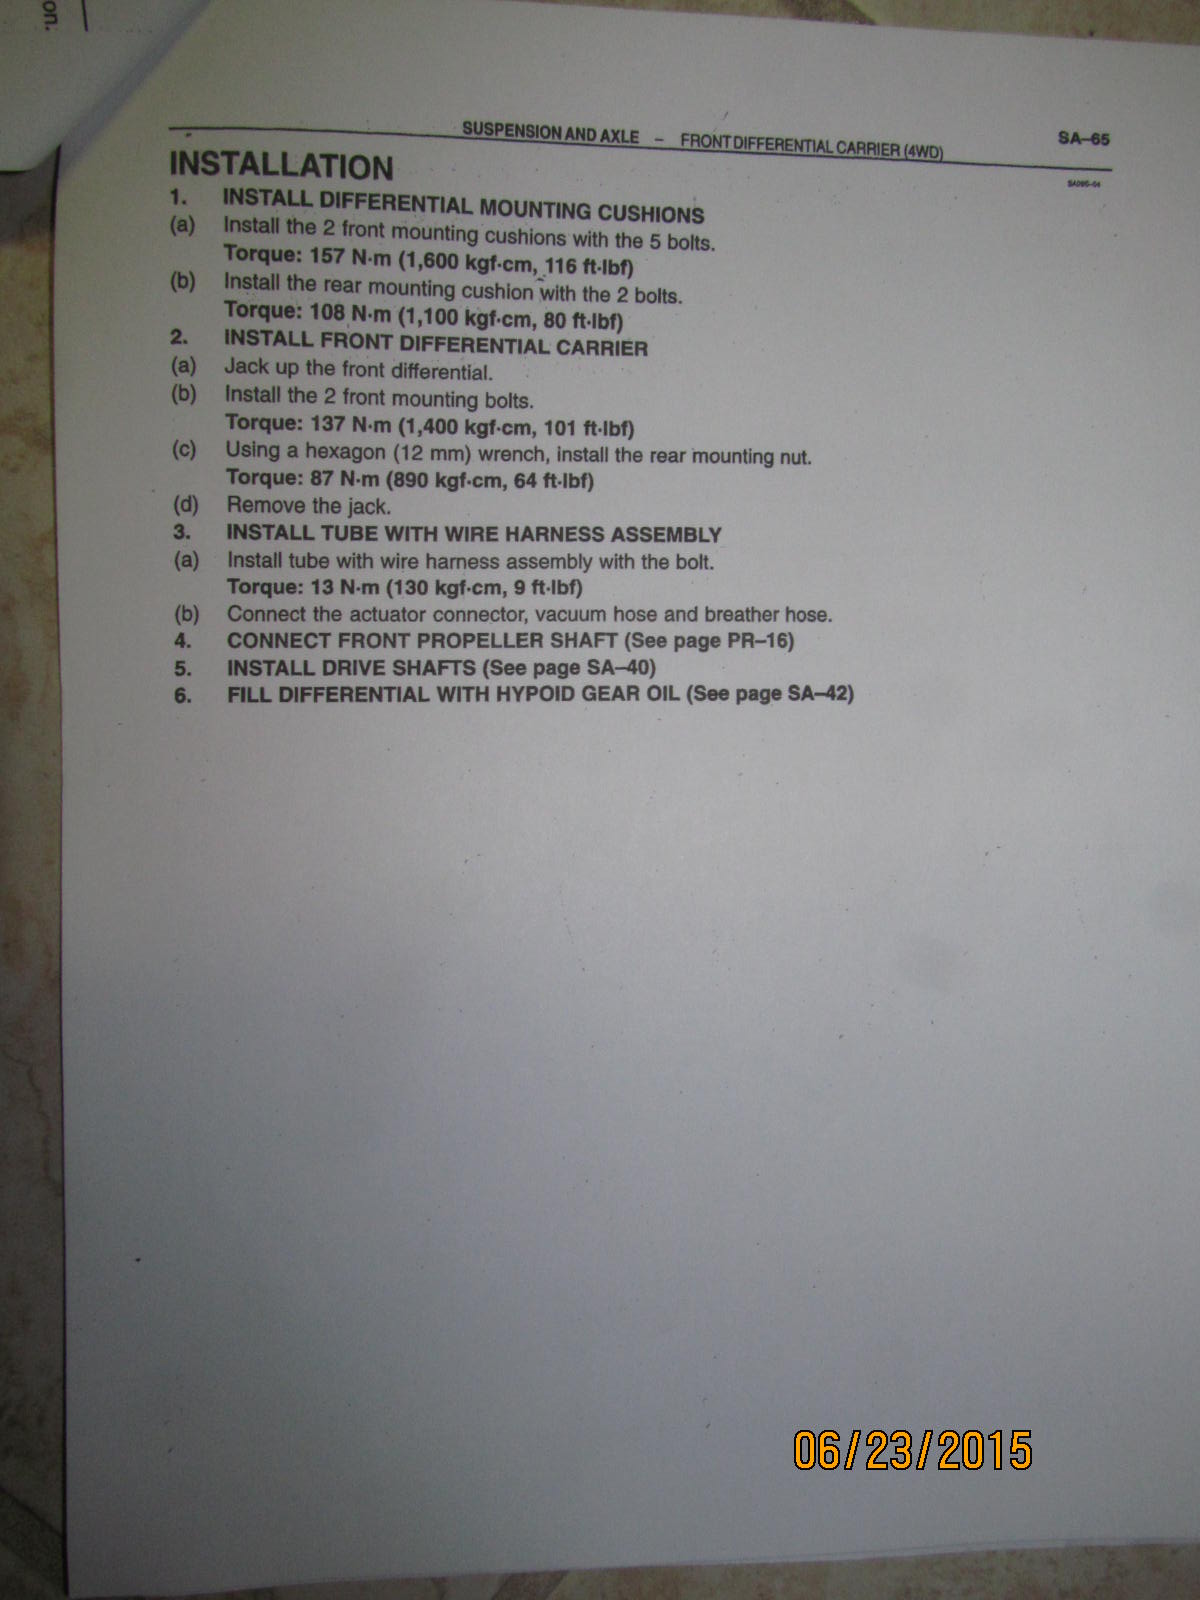
Specs for putting the 55 pound clam under the truck.
|
|
|
|
|
.......................
|
|
|
|
|
......................
|
|
|
|
|
.....................
|
|
|
|
|
.................
|
|
|
|
|
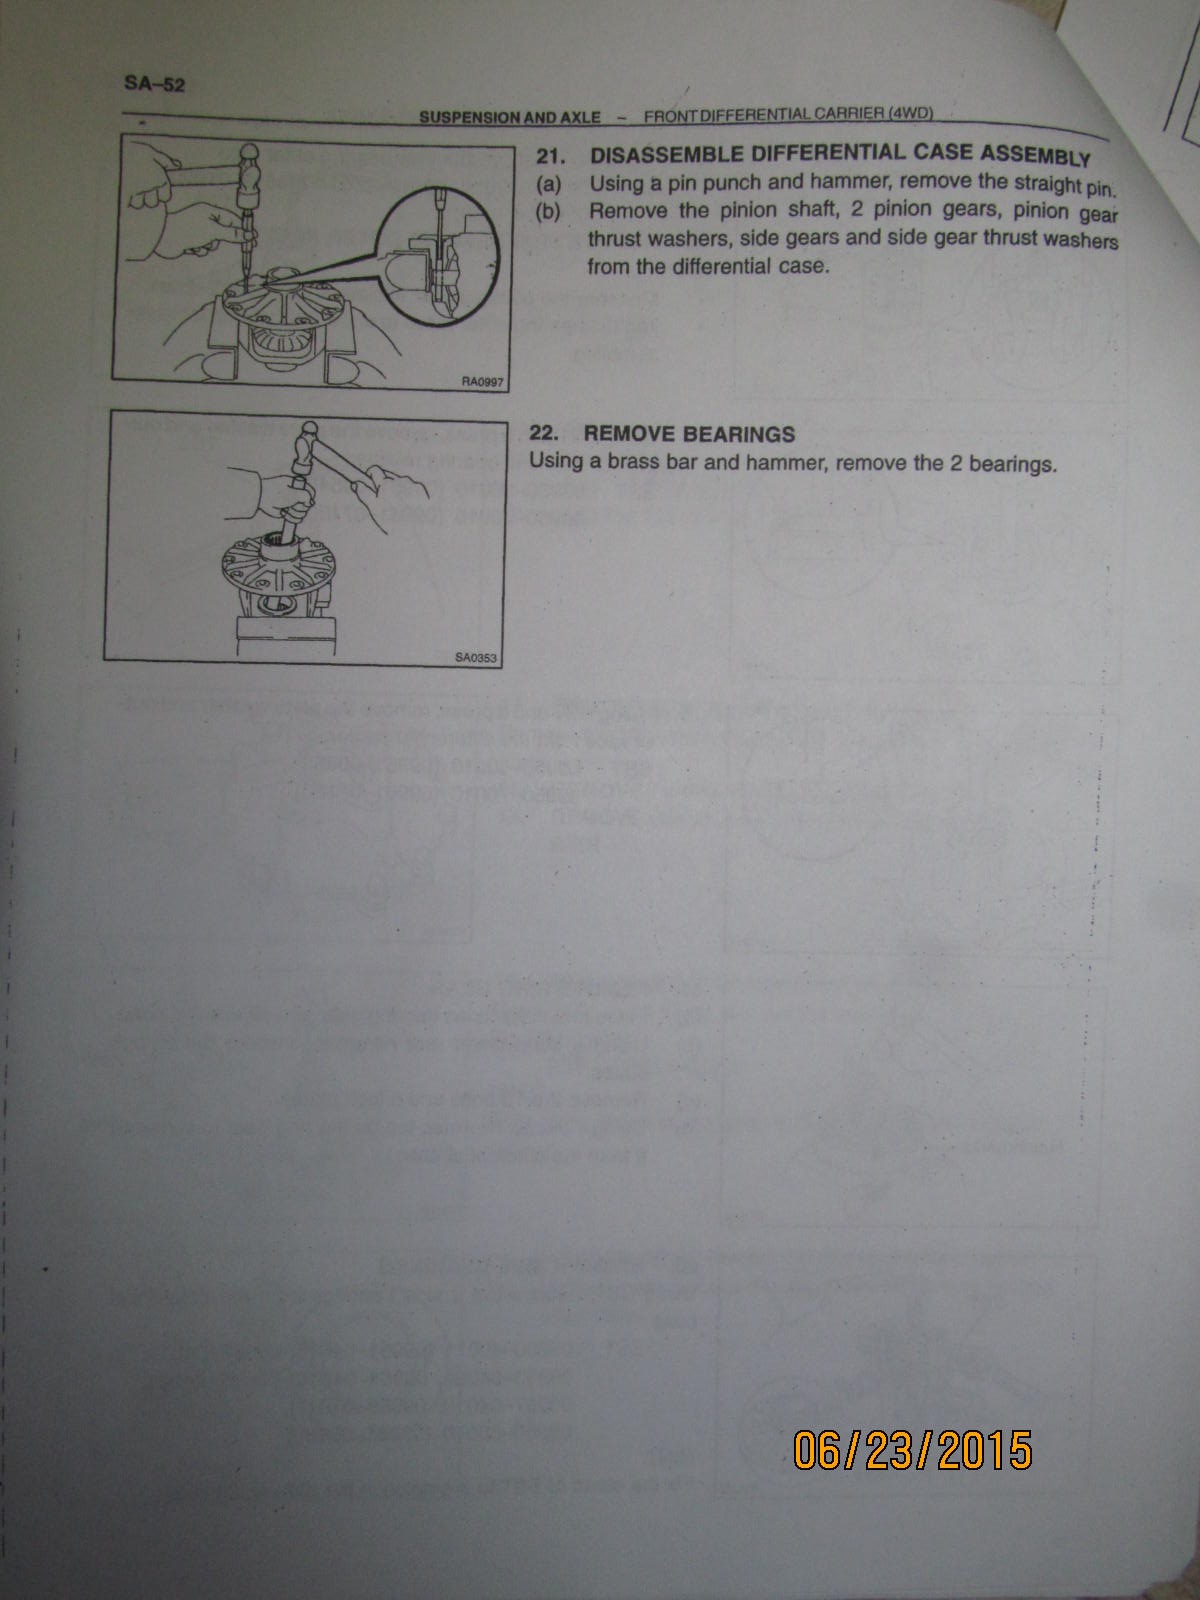
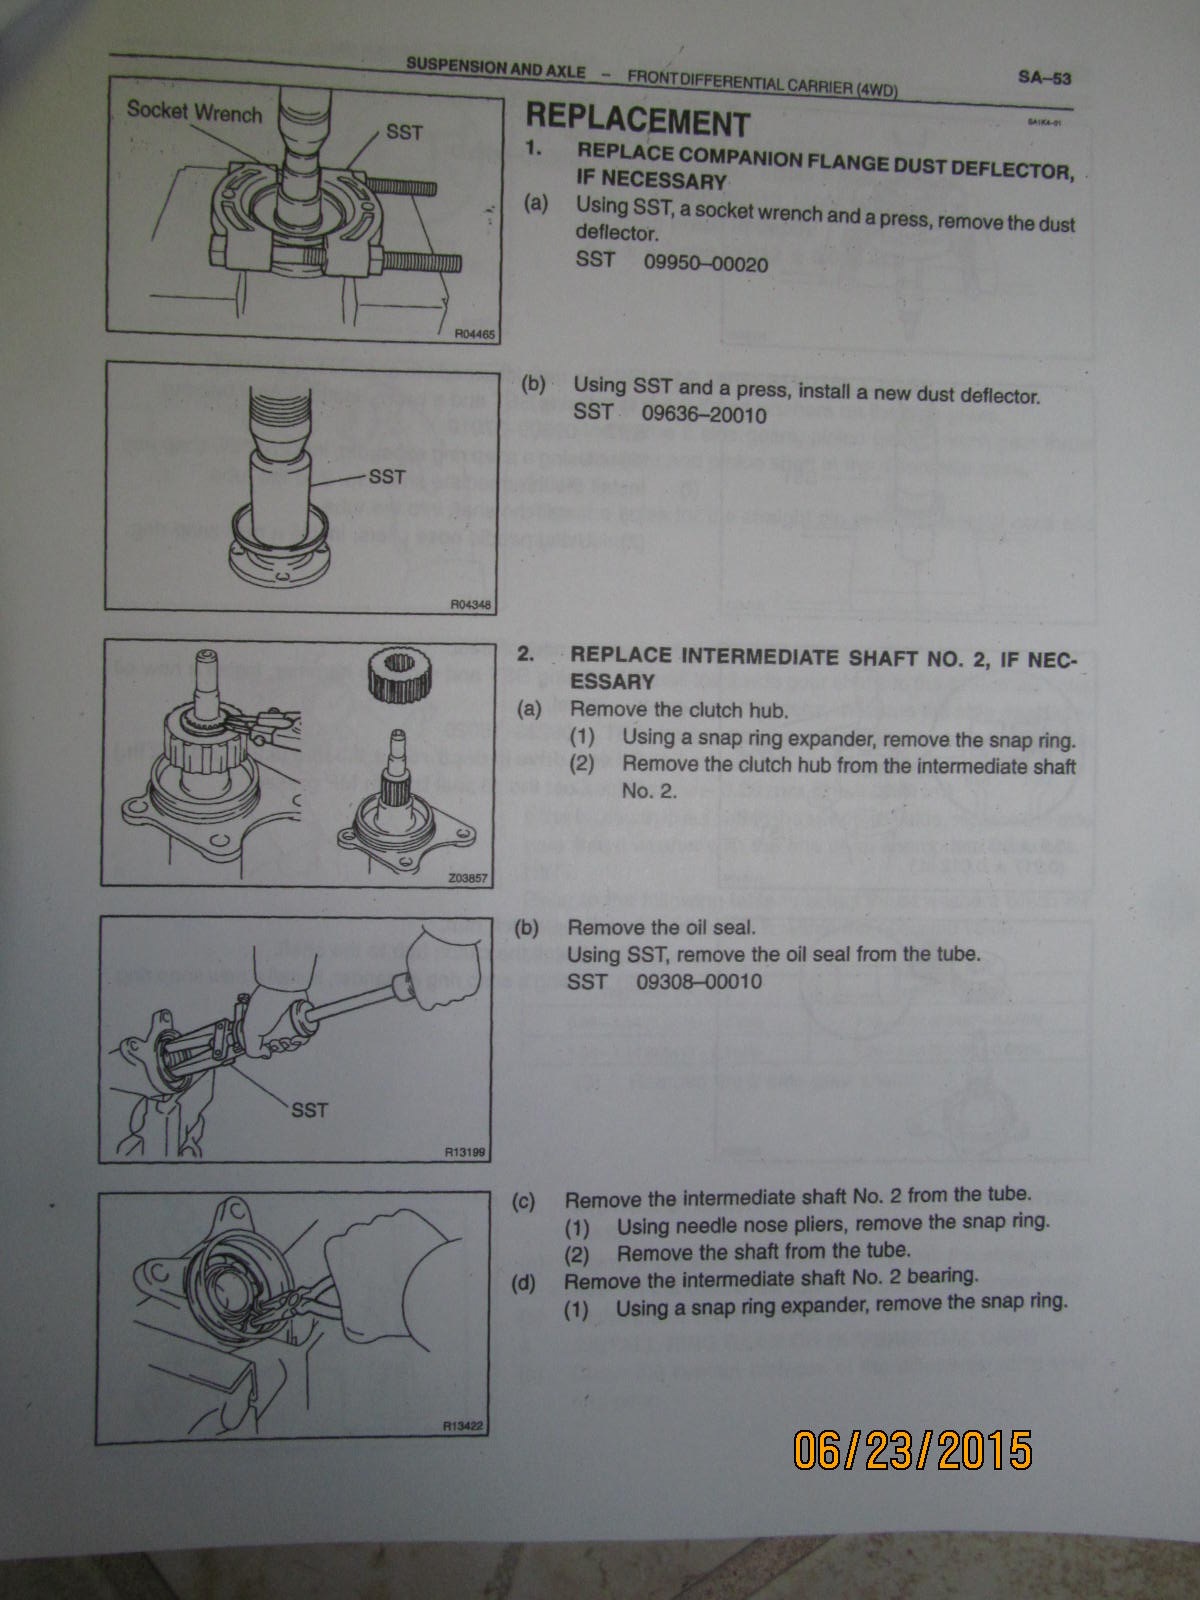
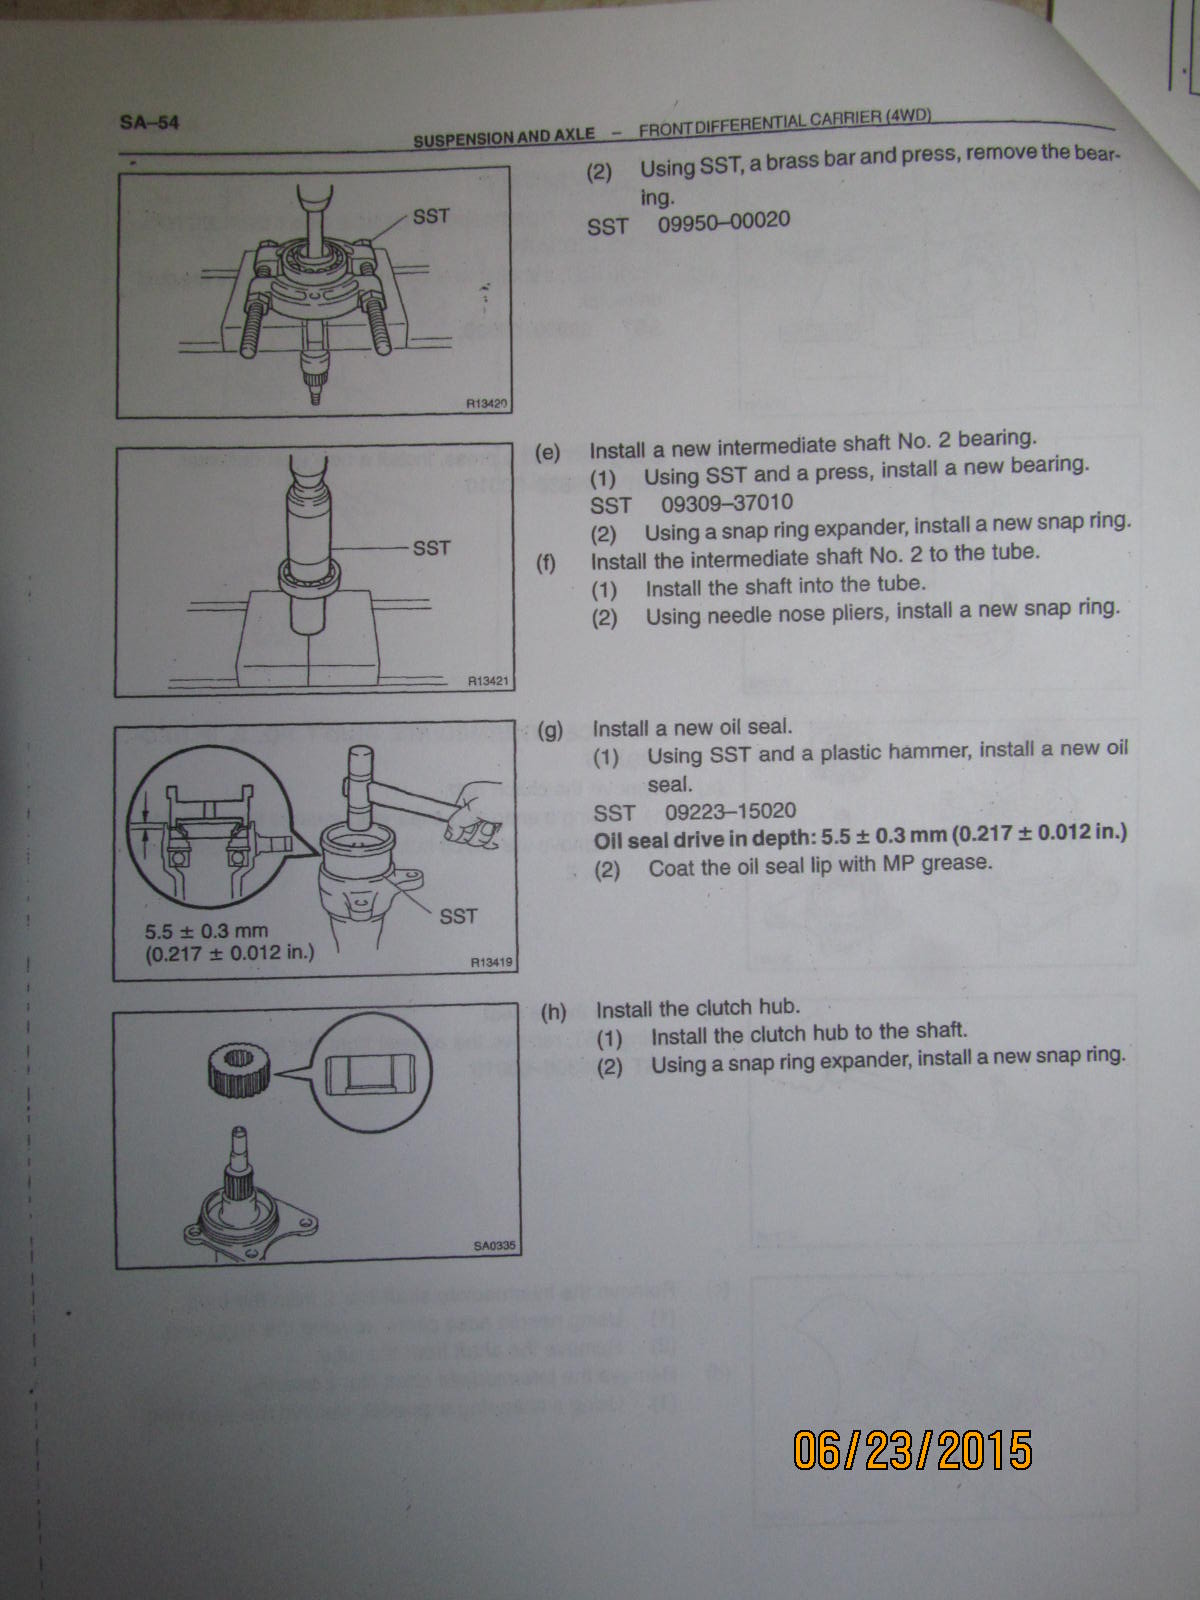
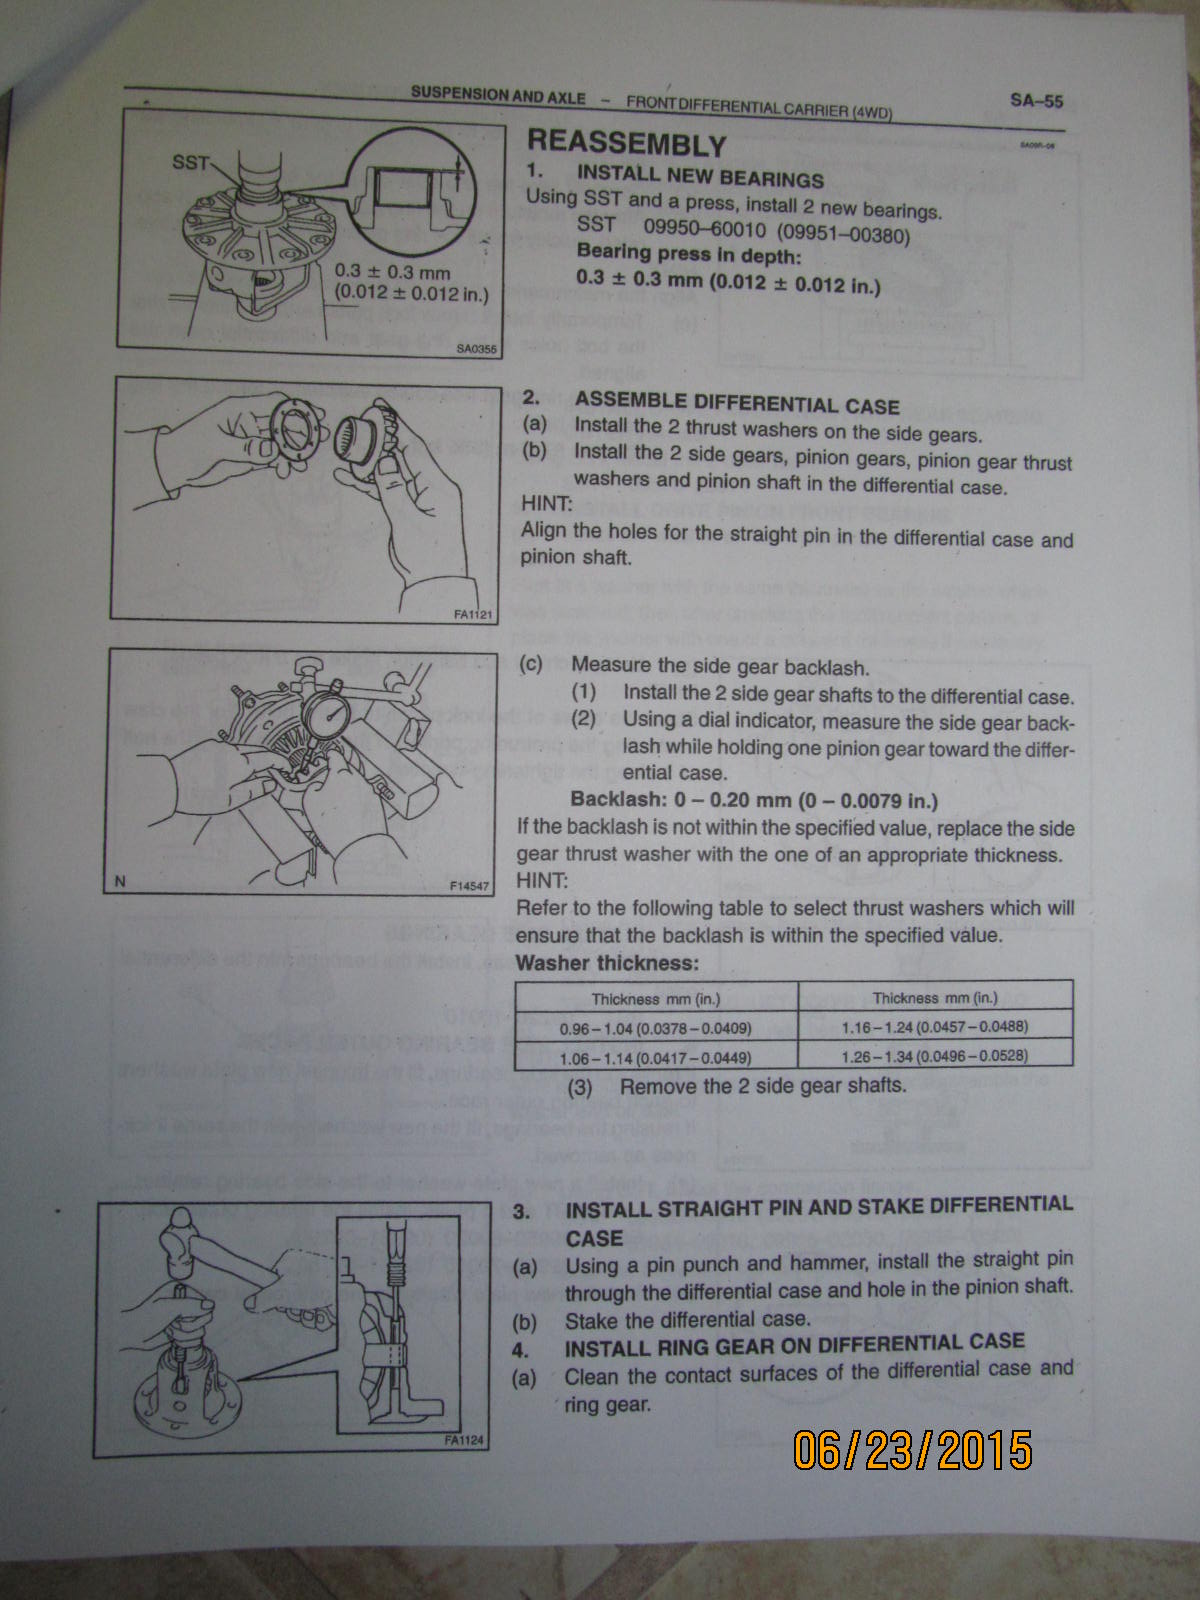
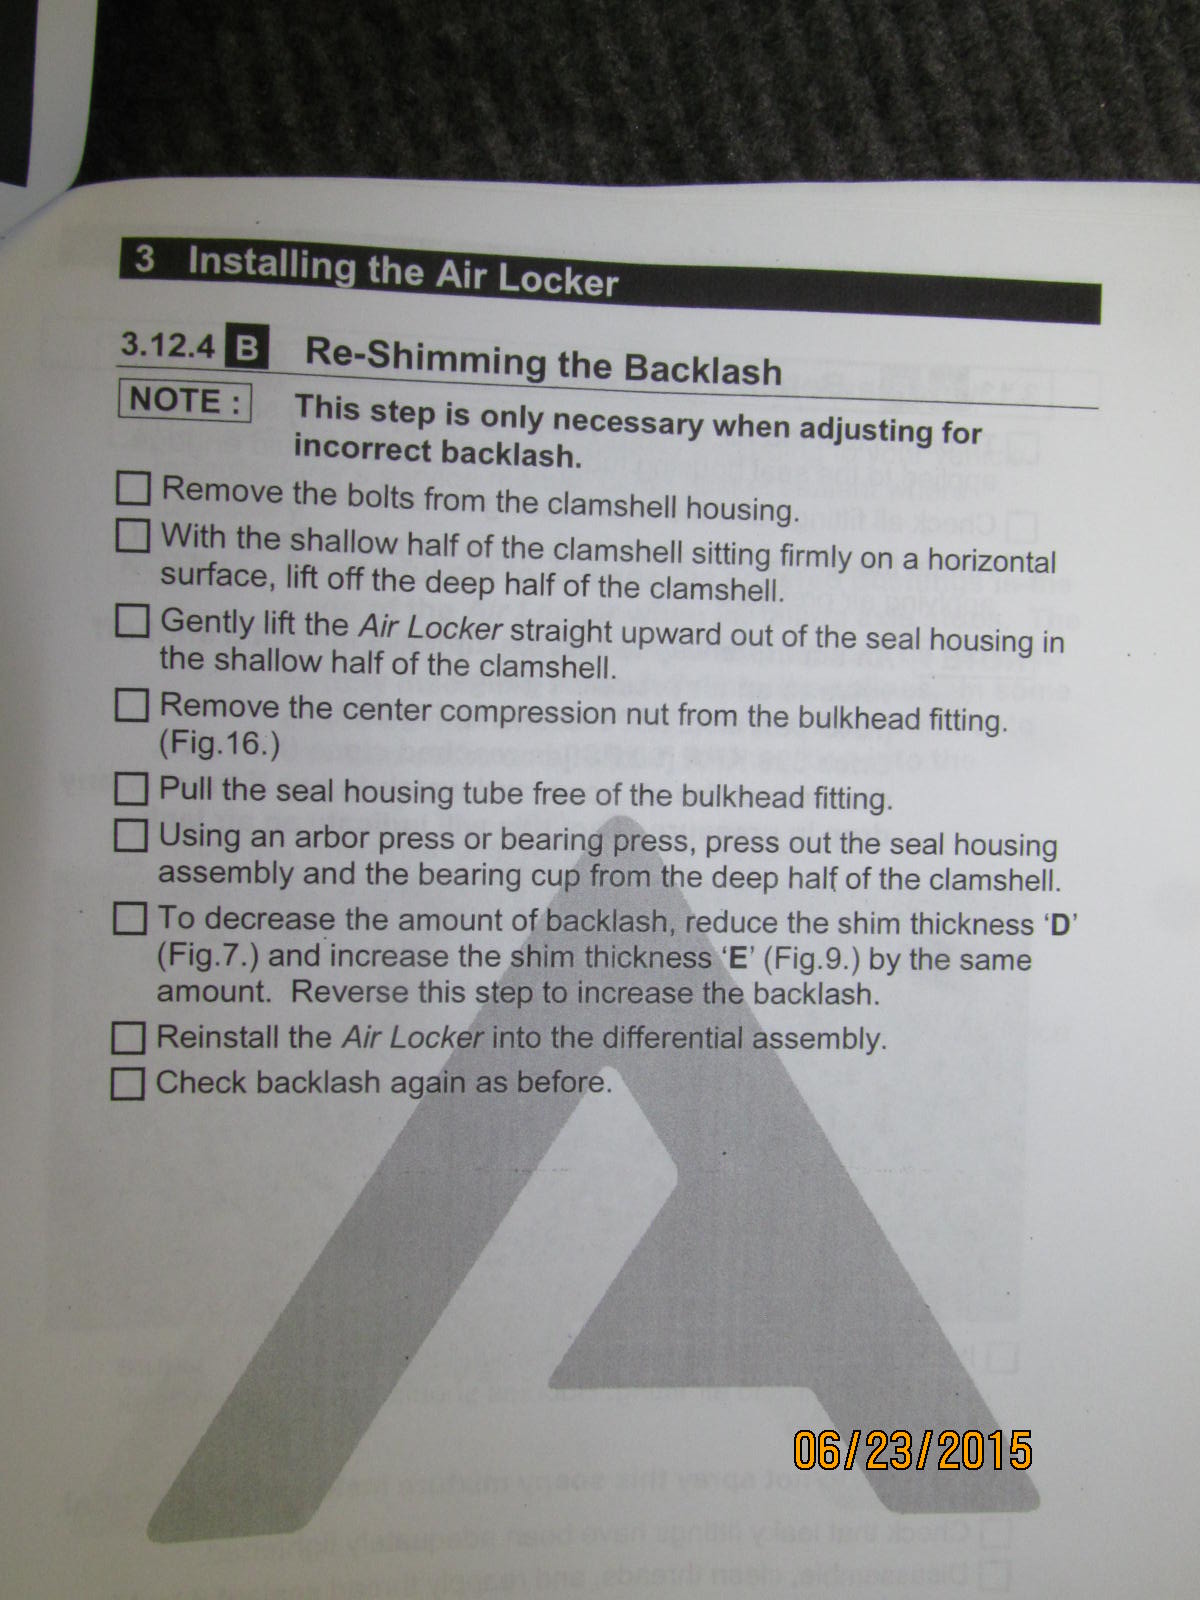
Now the ARB instruction to install the RD90 into the clam.
|
|
|
|
|
Not exactly high quality pictures.
|
|
|
|
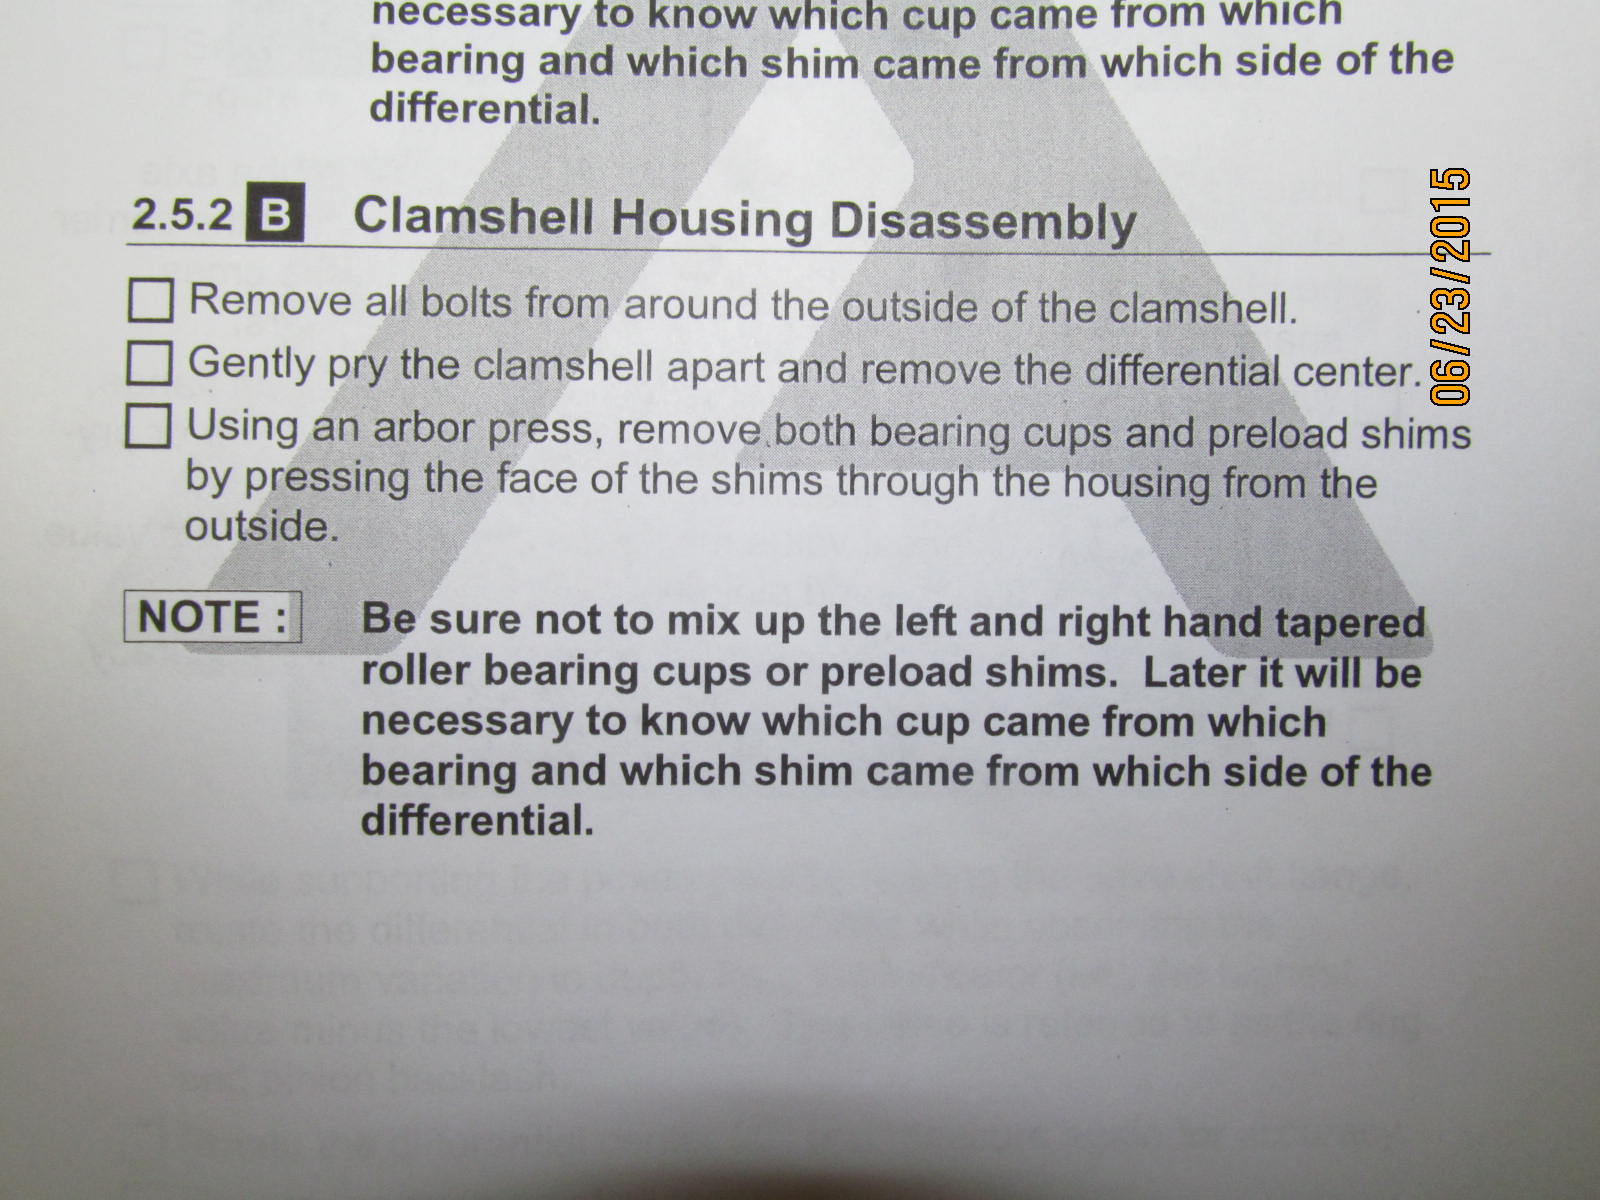
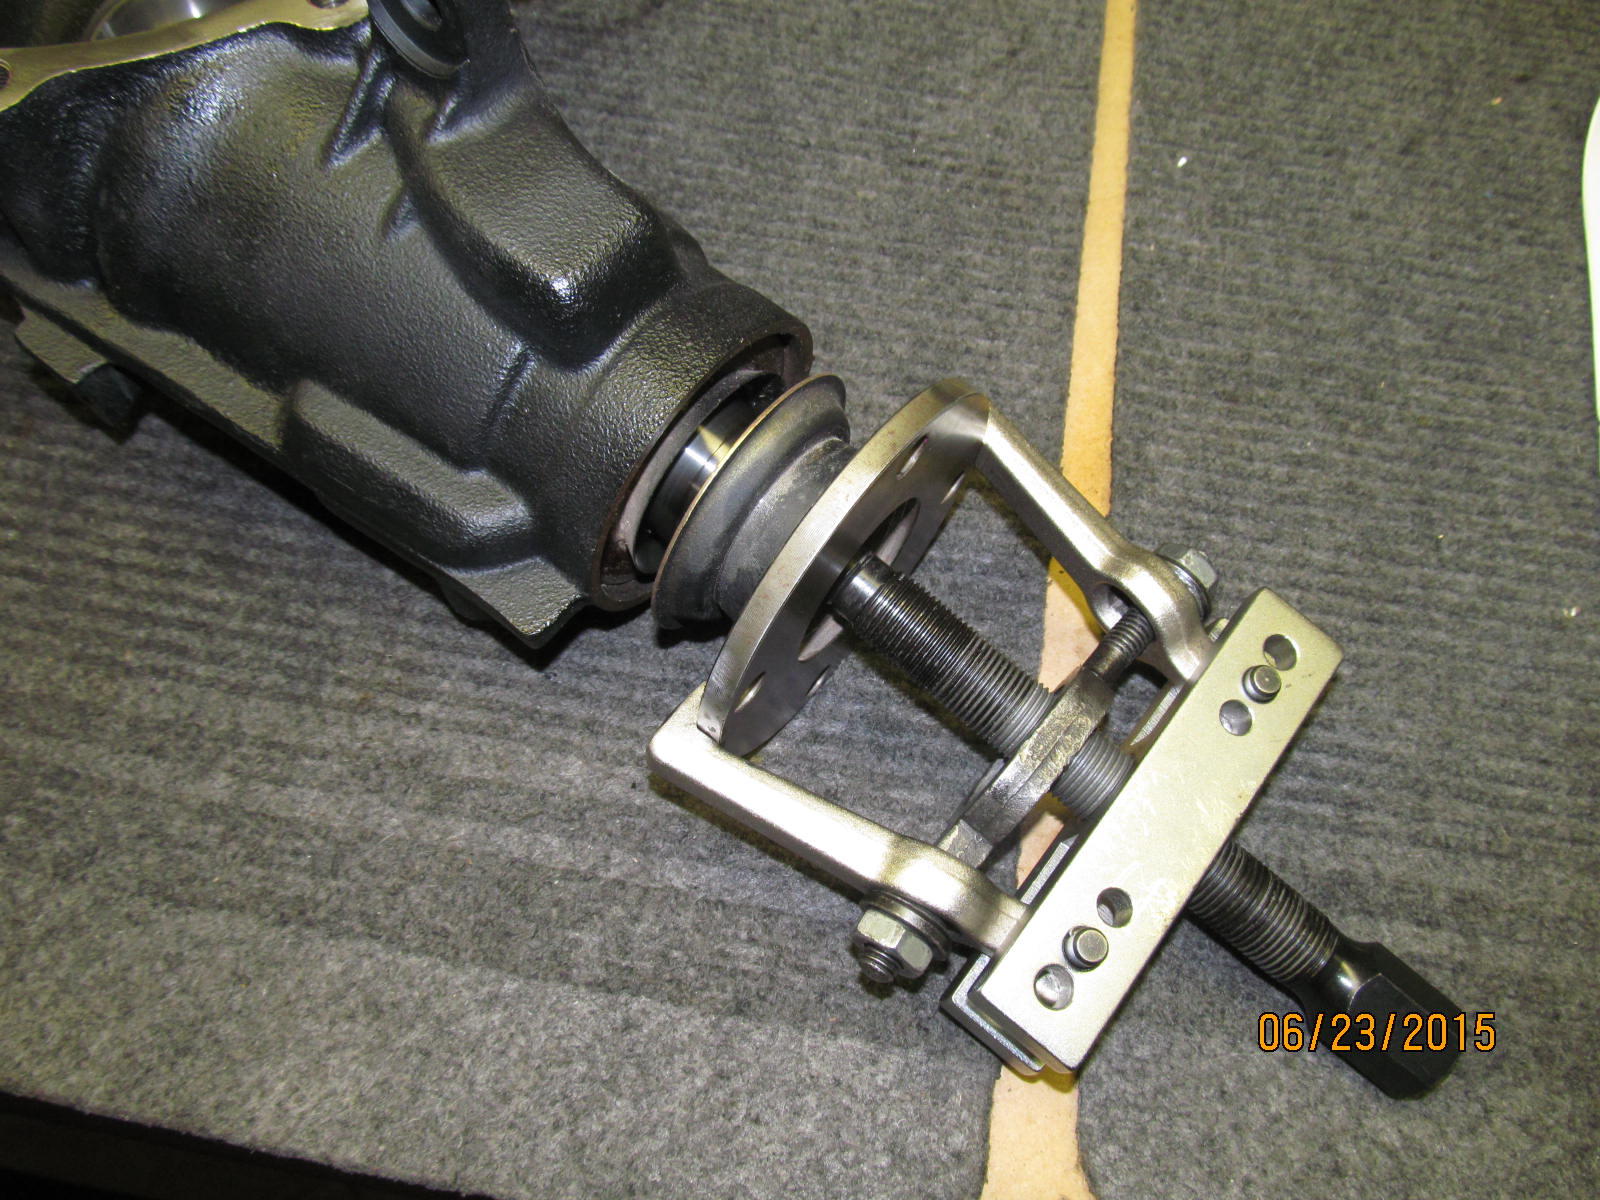
Removing the races is easy and does not damage the "pre-load shims" if one
has the perfect size old race.
|
|
|
|
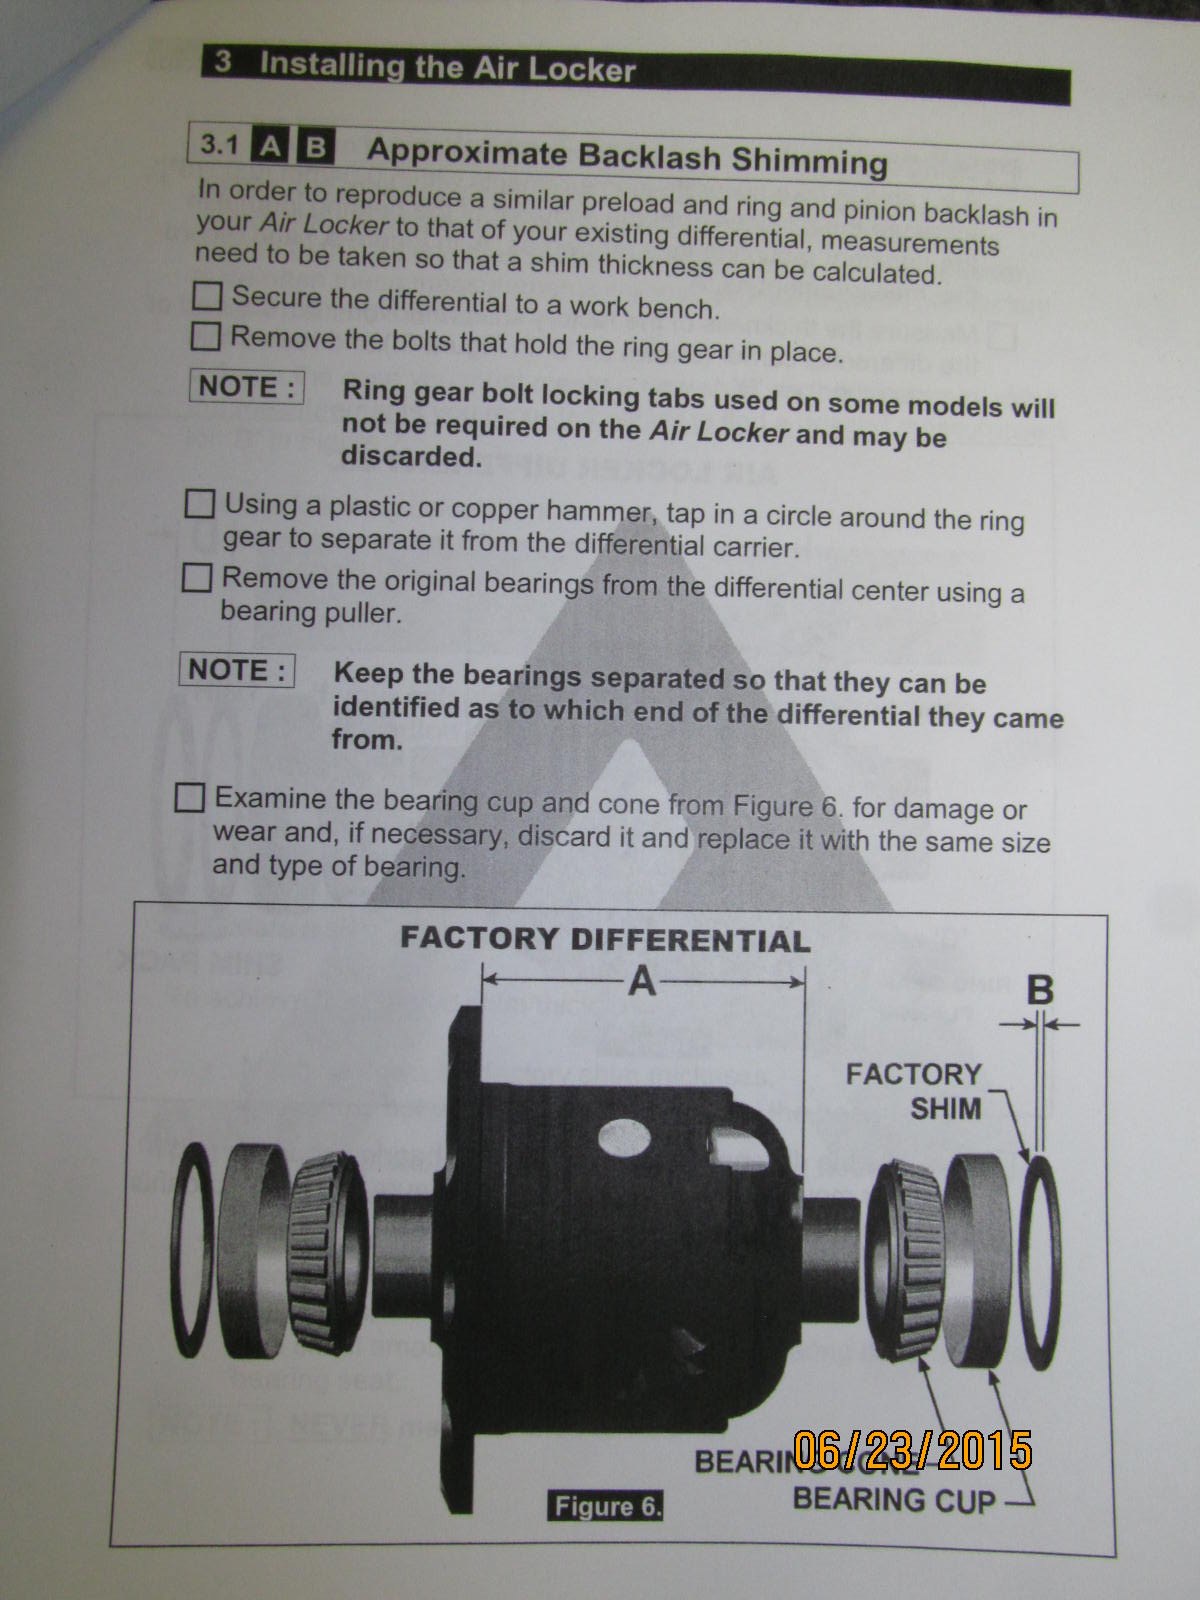
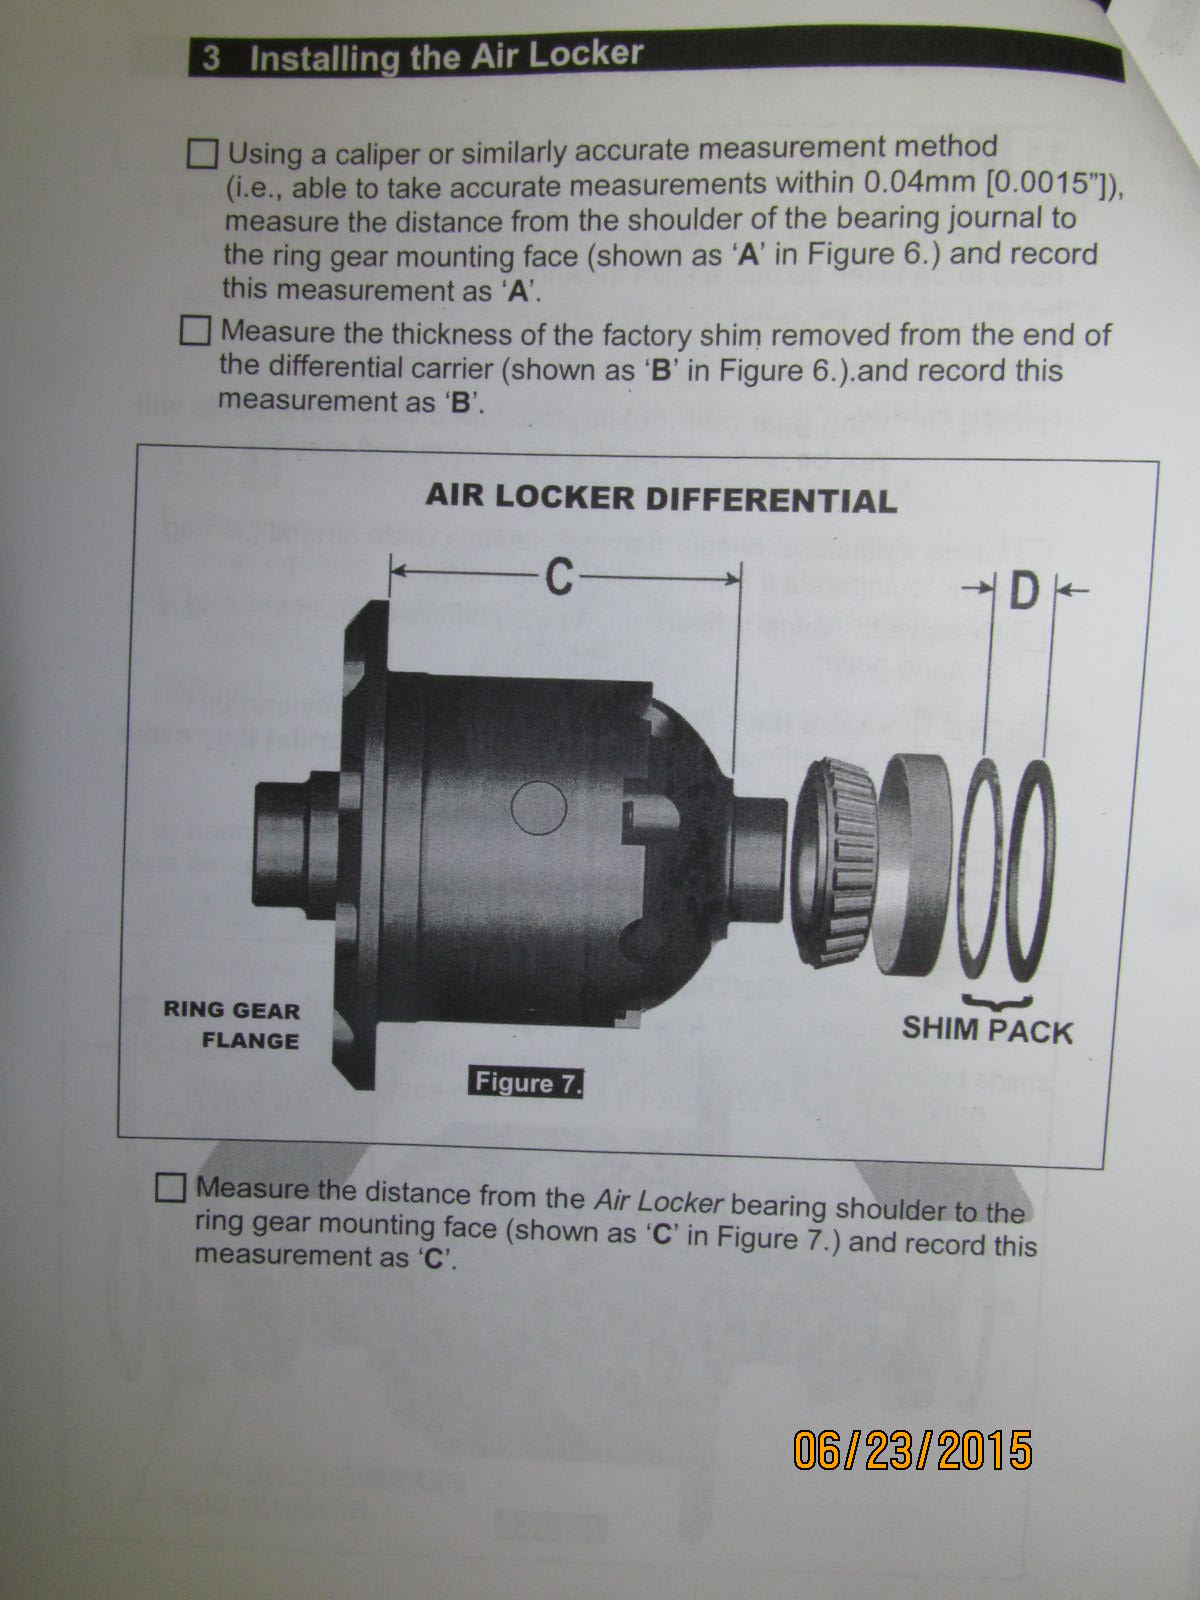
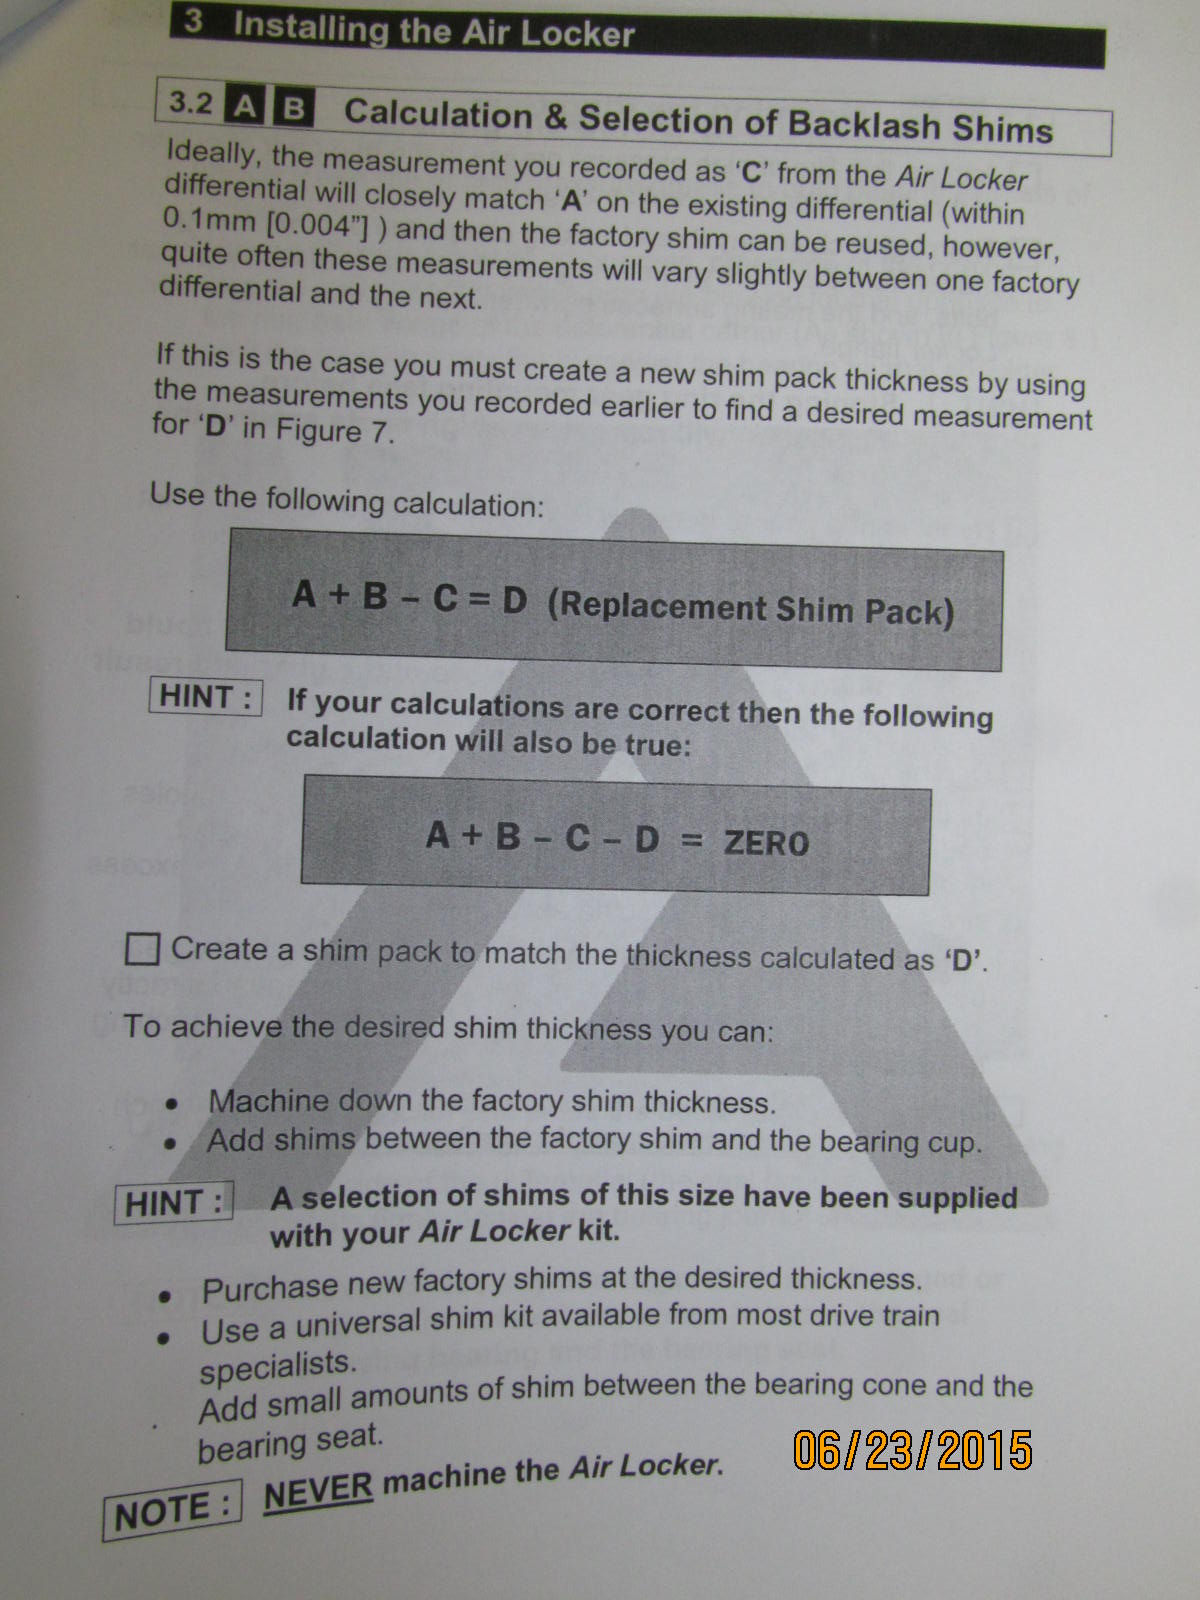
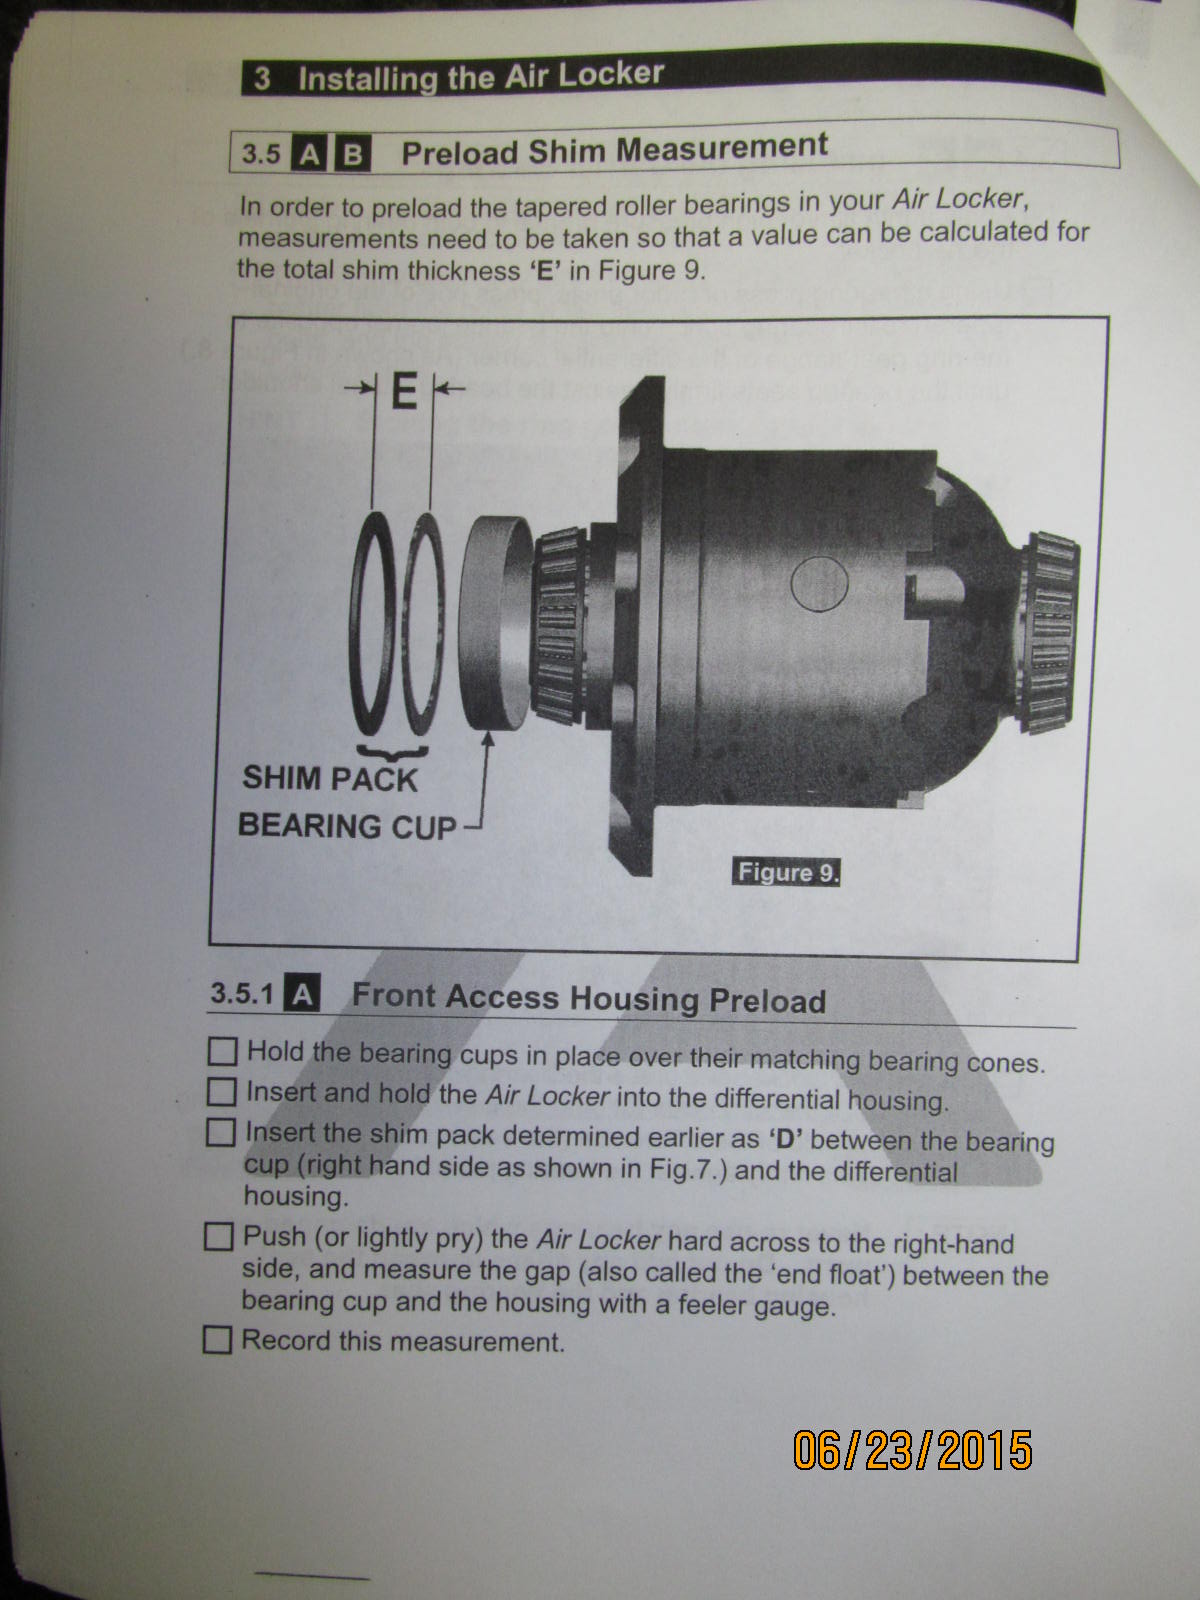
Measuring "A" can be a challenge. Good luck getting an accurate number there.
I chose to waive A B C D.
|
|
|
|
|
....................
|
|
|
|
|
..........................
|
|
|
|
|
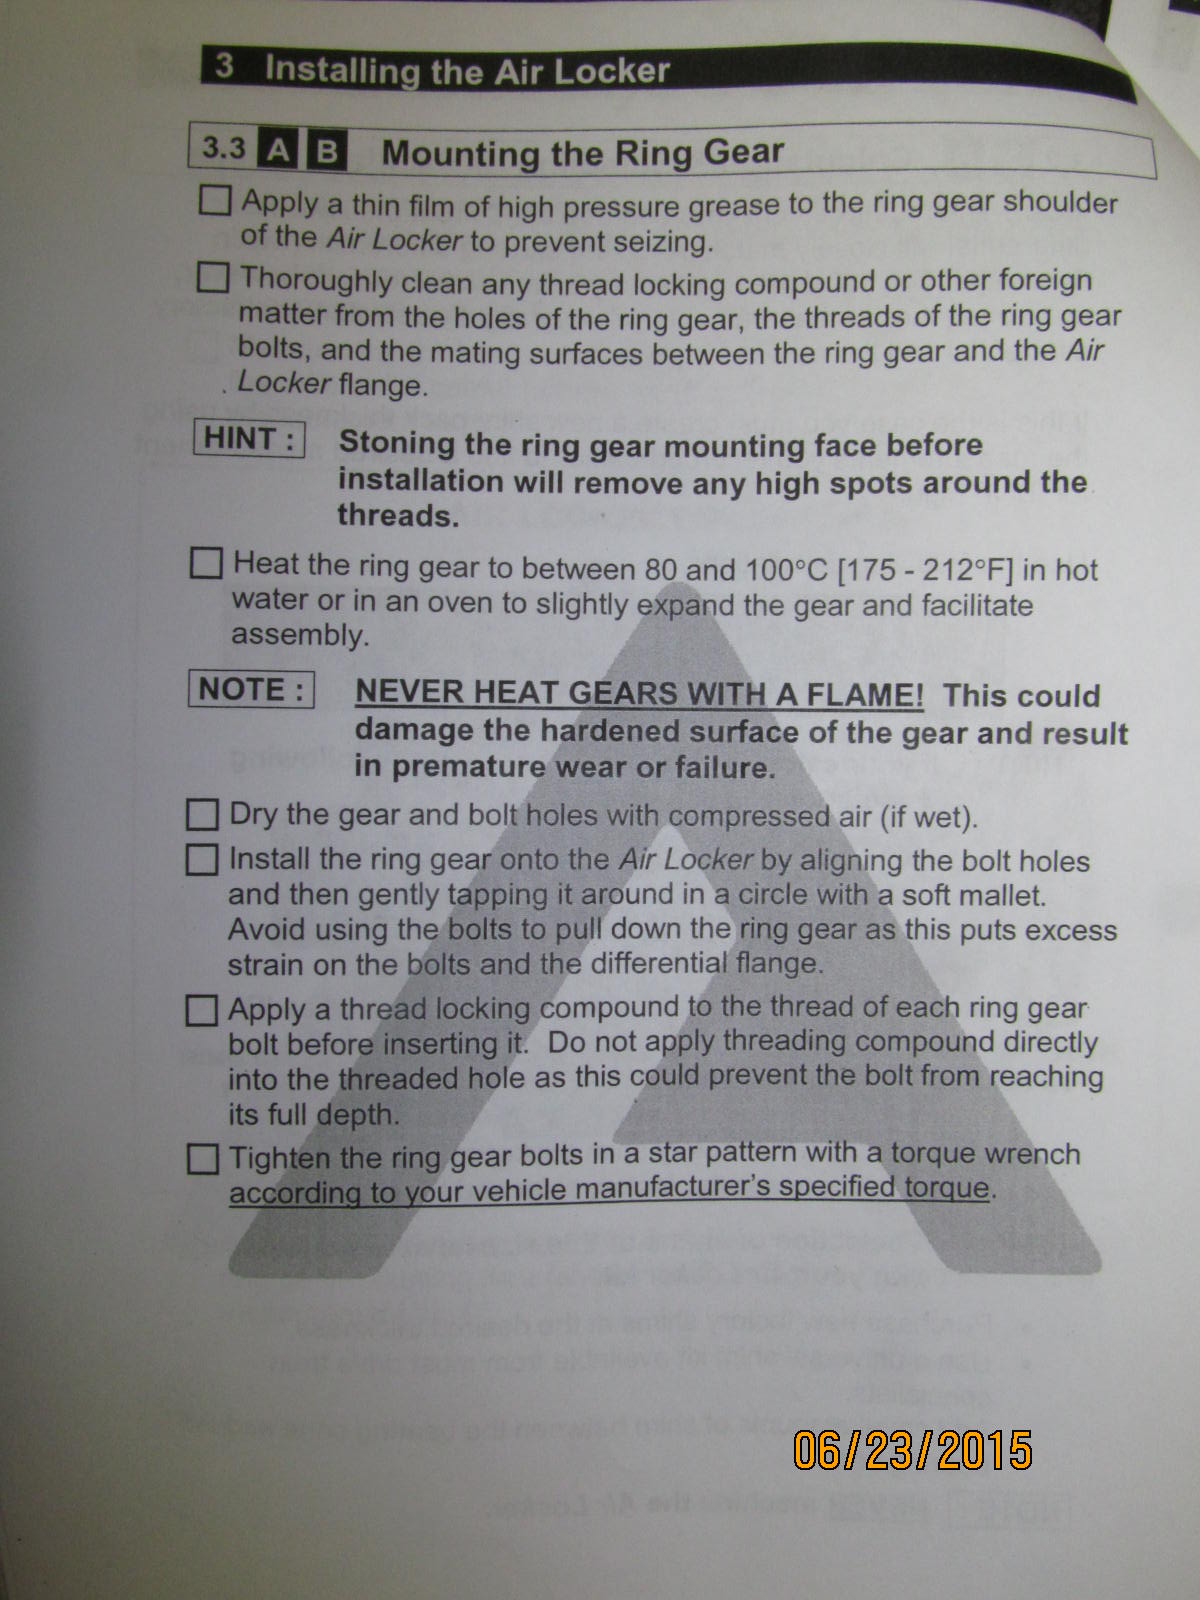
Installing the new ring gear.
|
|
|
|
|
Good notes.
|
|
|
|
|
about carrier bearing preload....
|
|
|
|
|
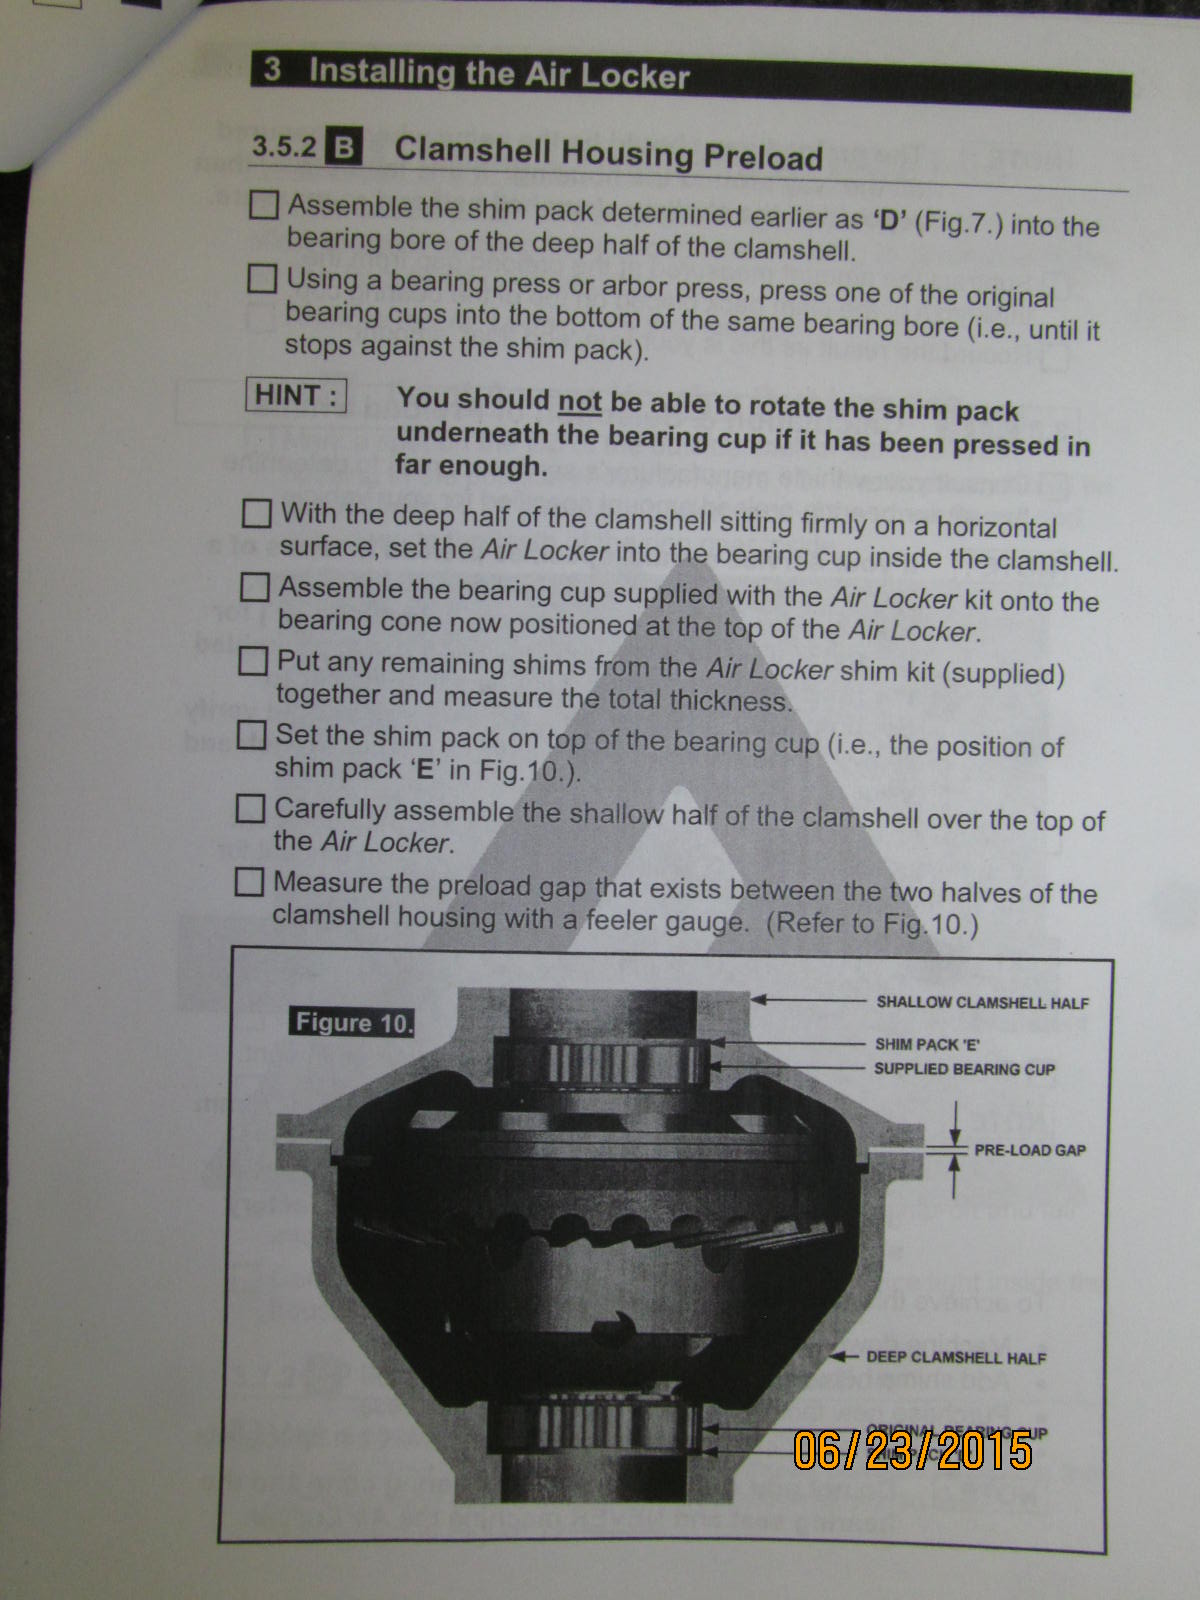
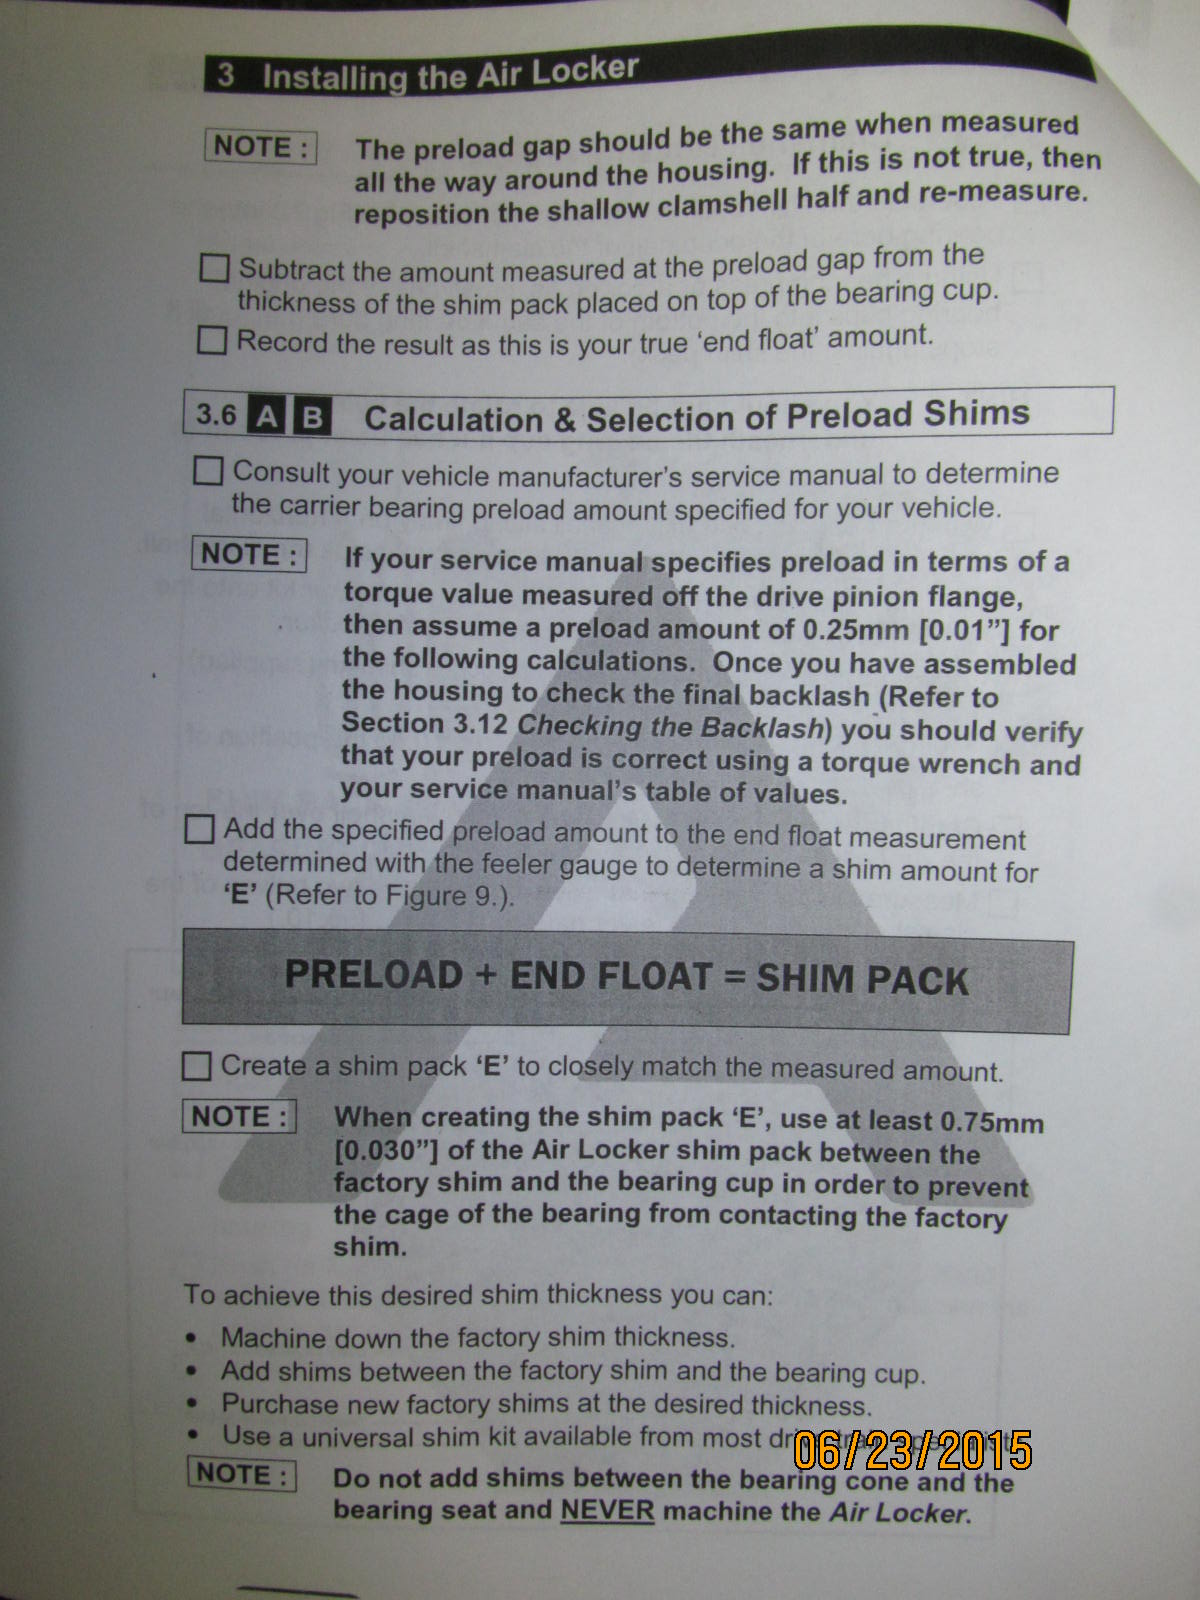
That pre-load gap should be around .010"
|
|
|
|
|
Yes on the .030" shim :)
|
|
|
|
|
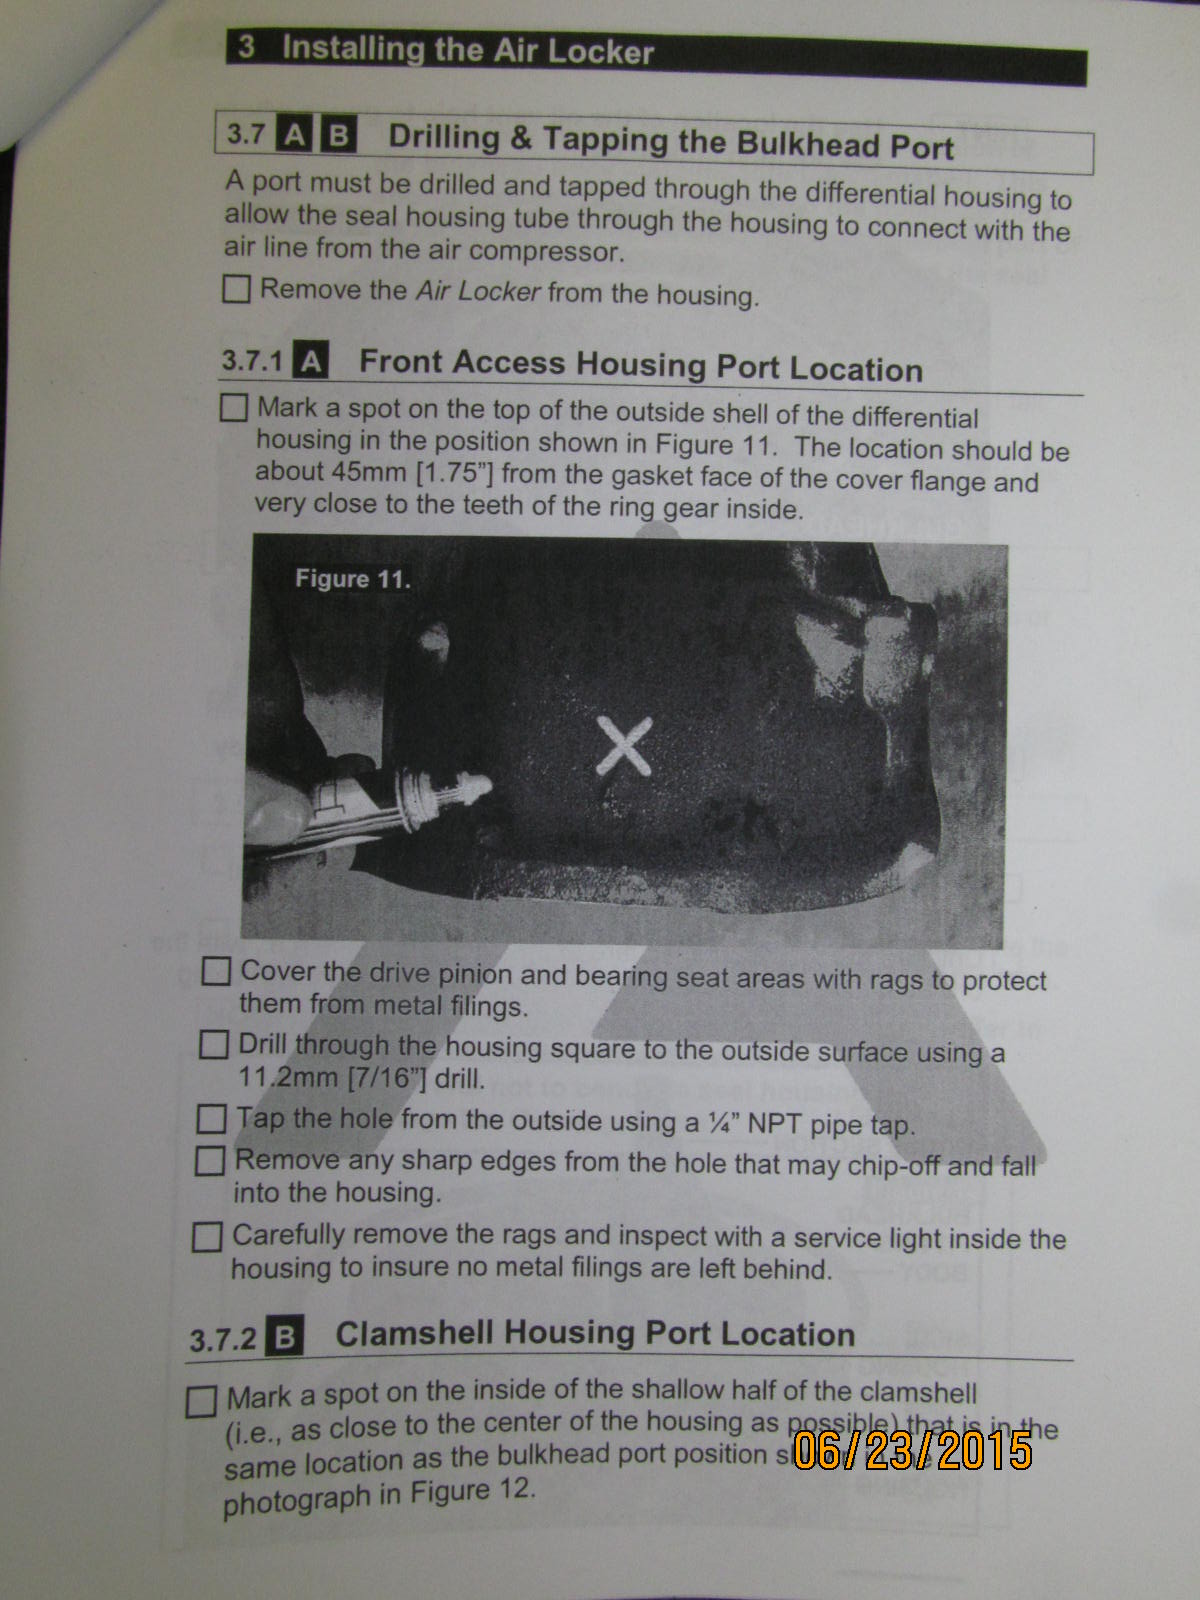
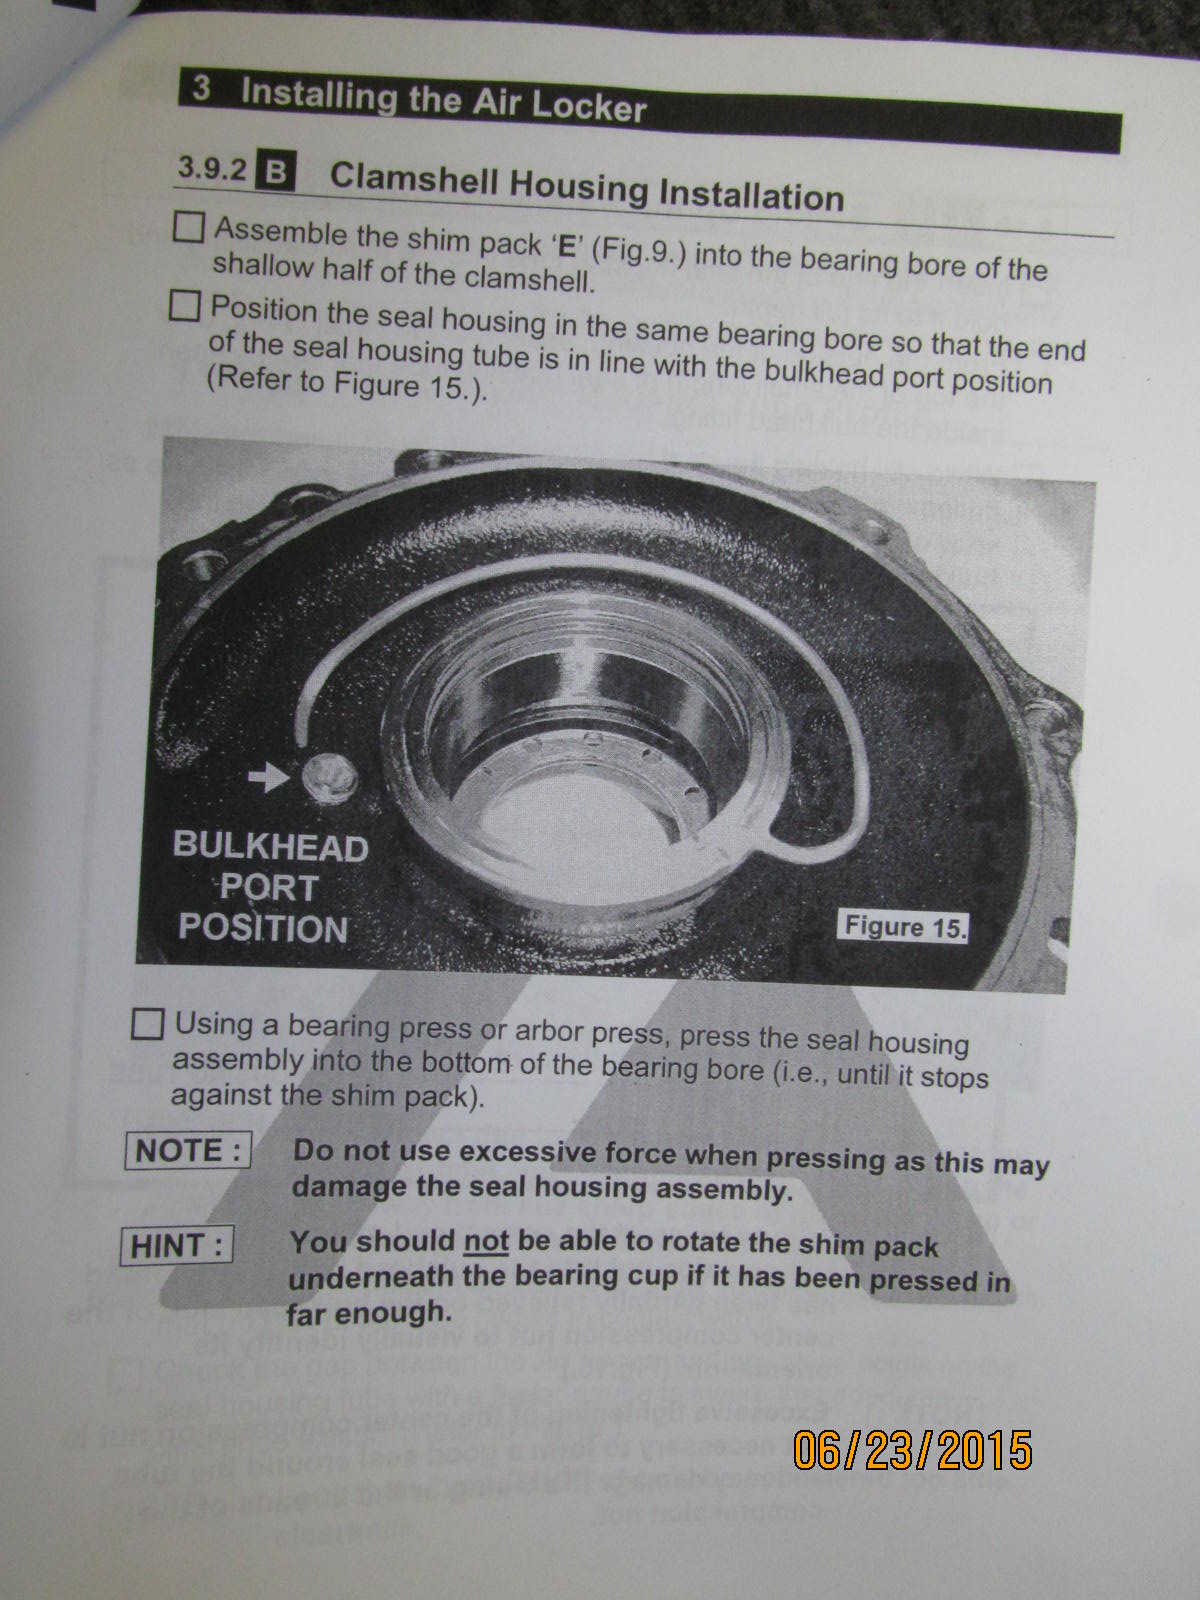
Ignore the part with the white X as it pertains to the other style of diff housing.
|
|
|
|
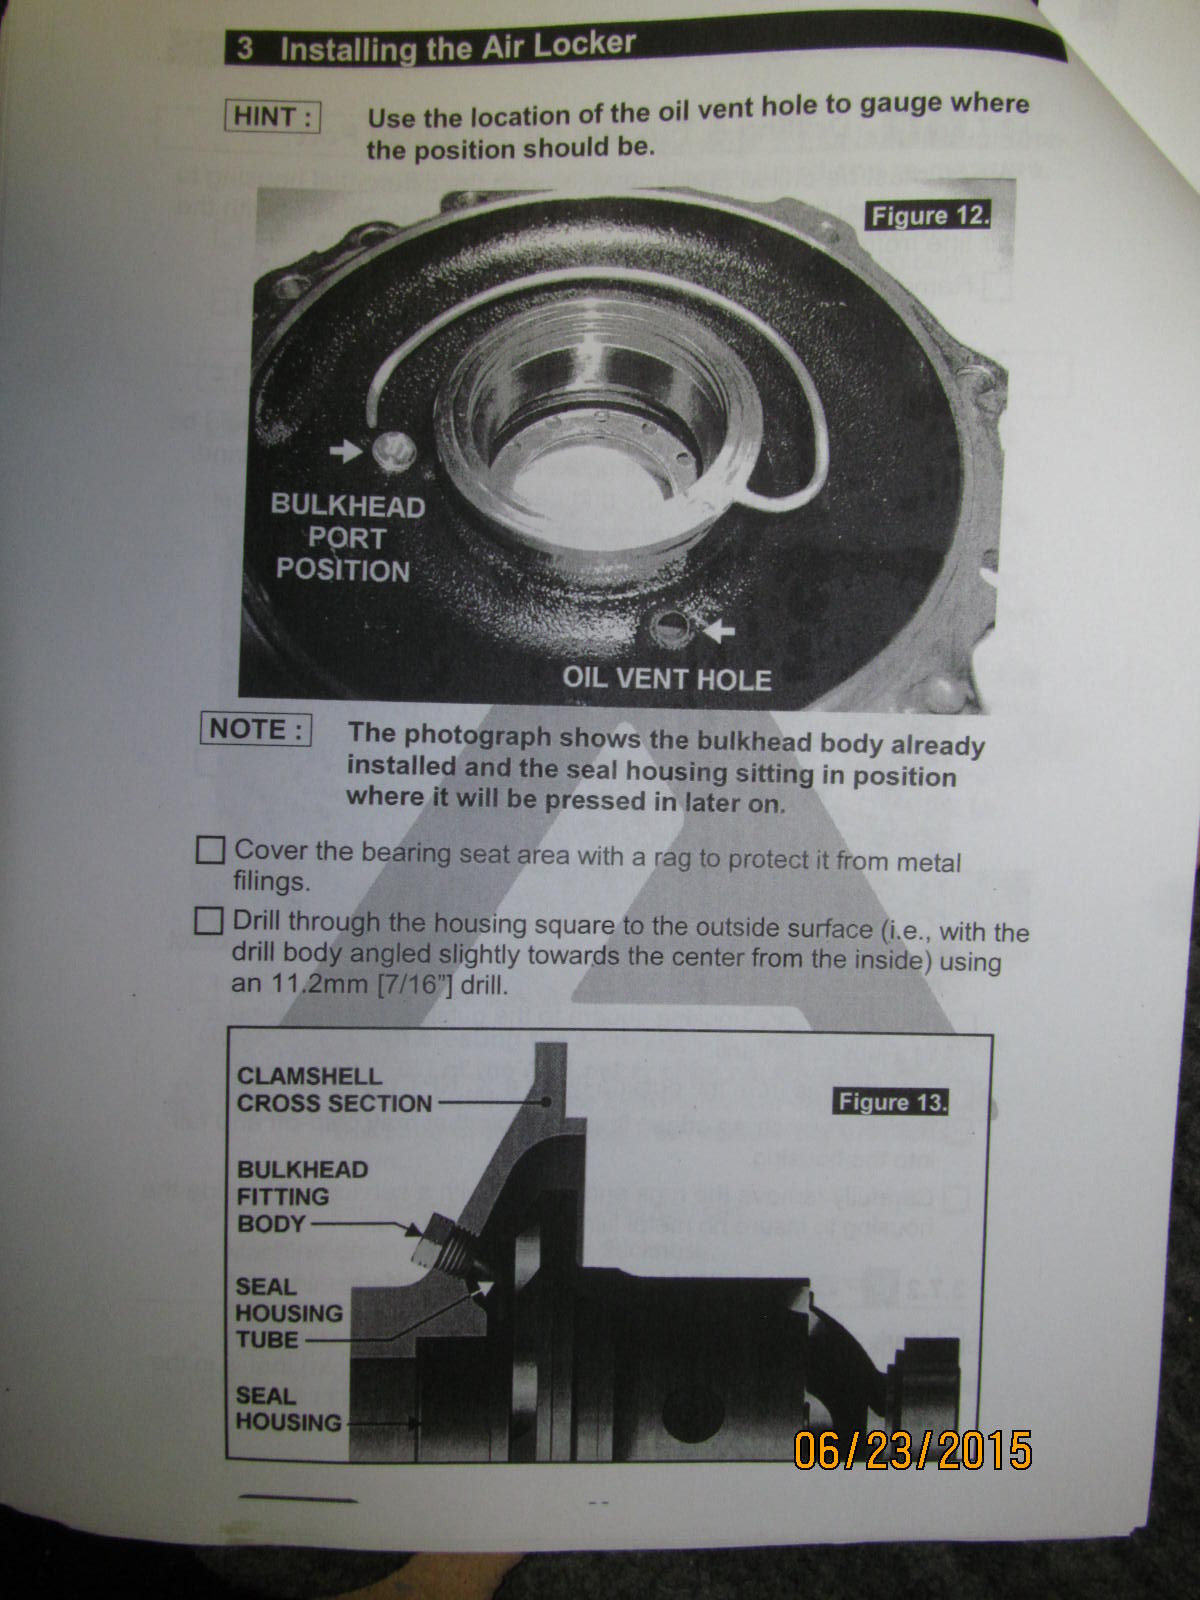
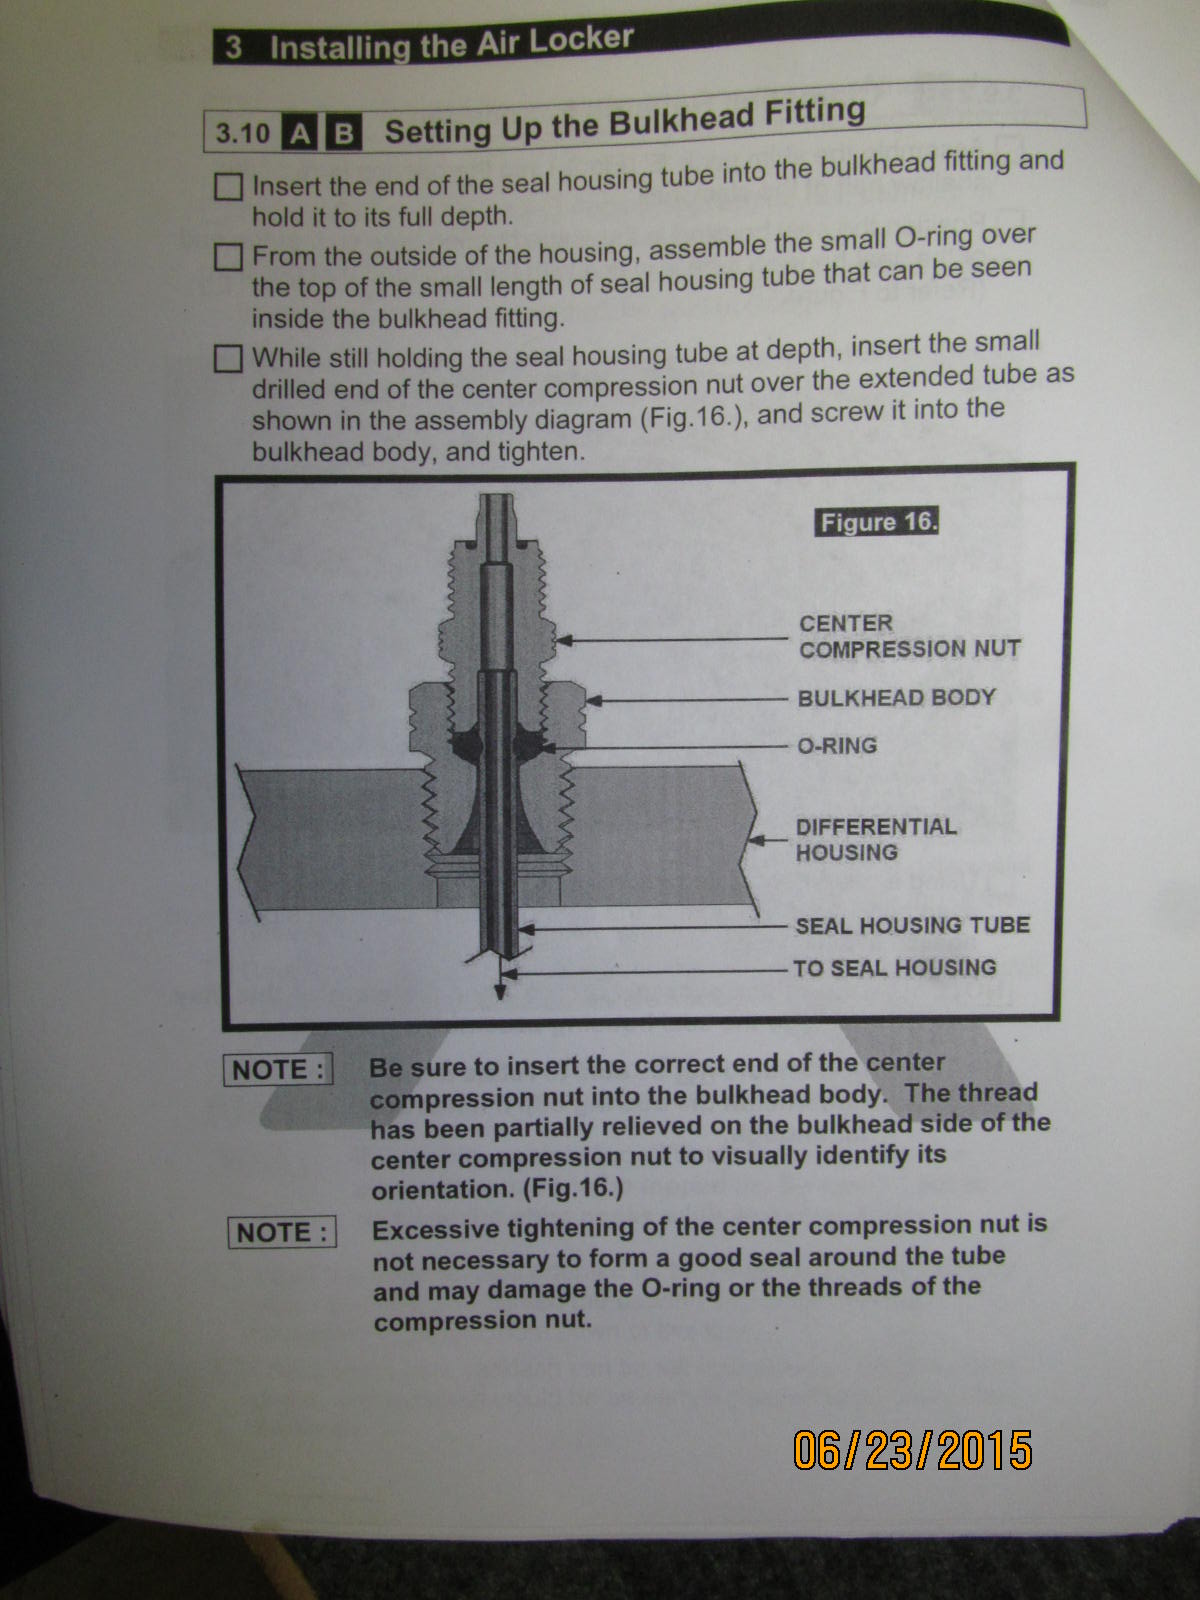
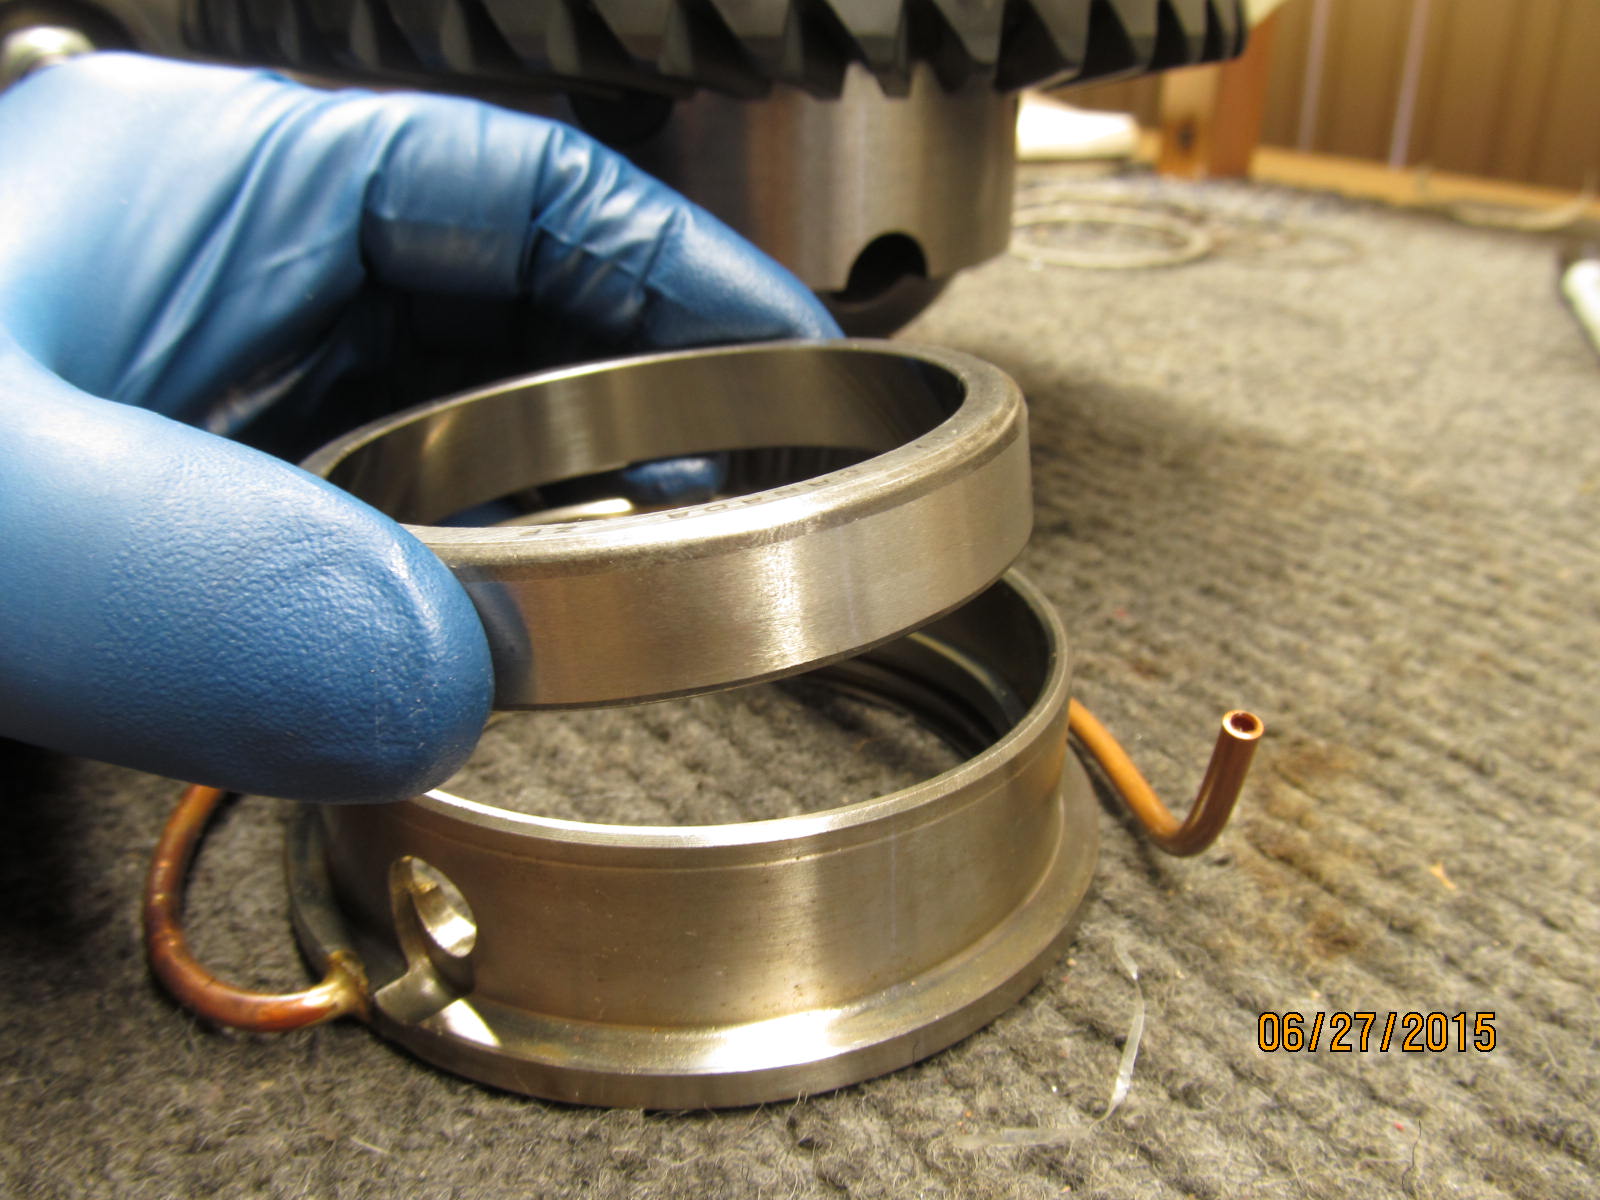
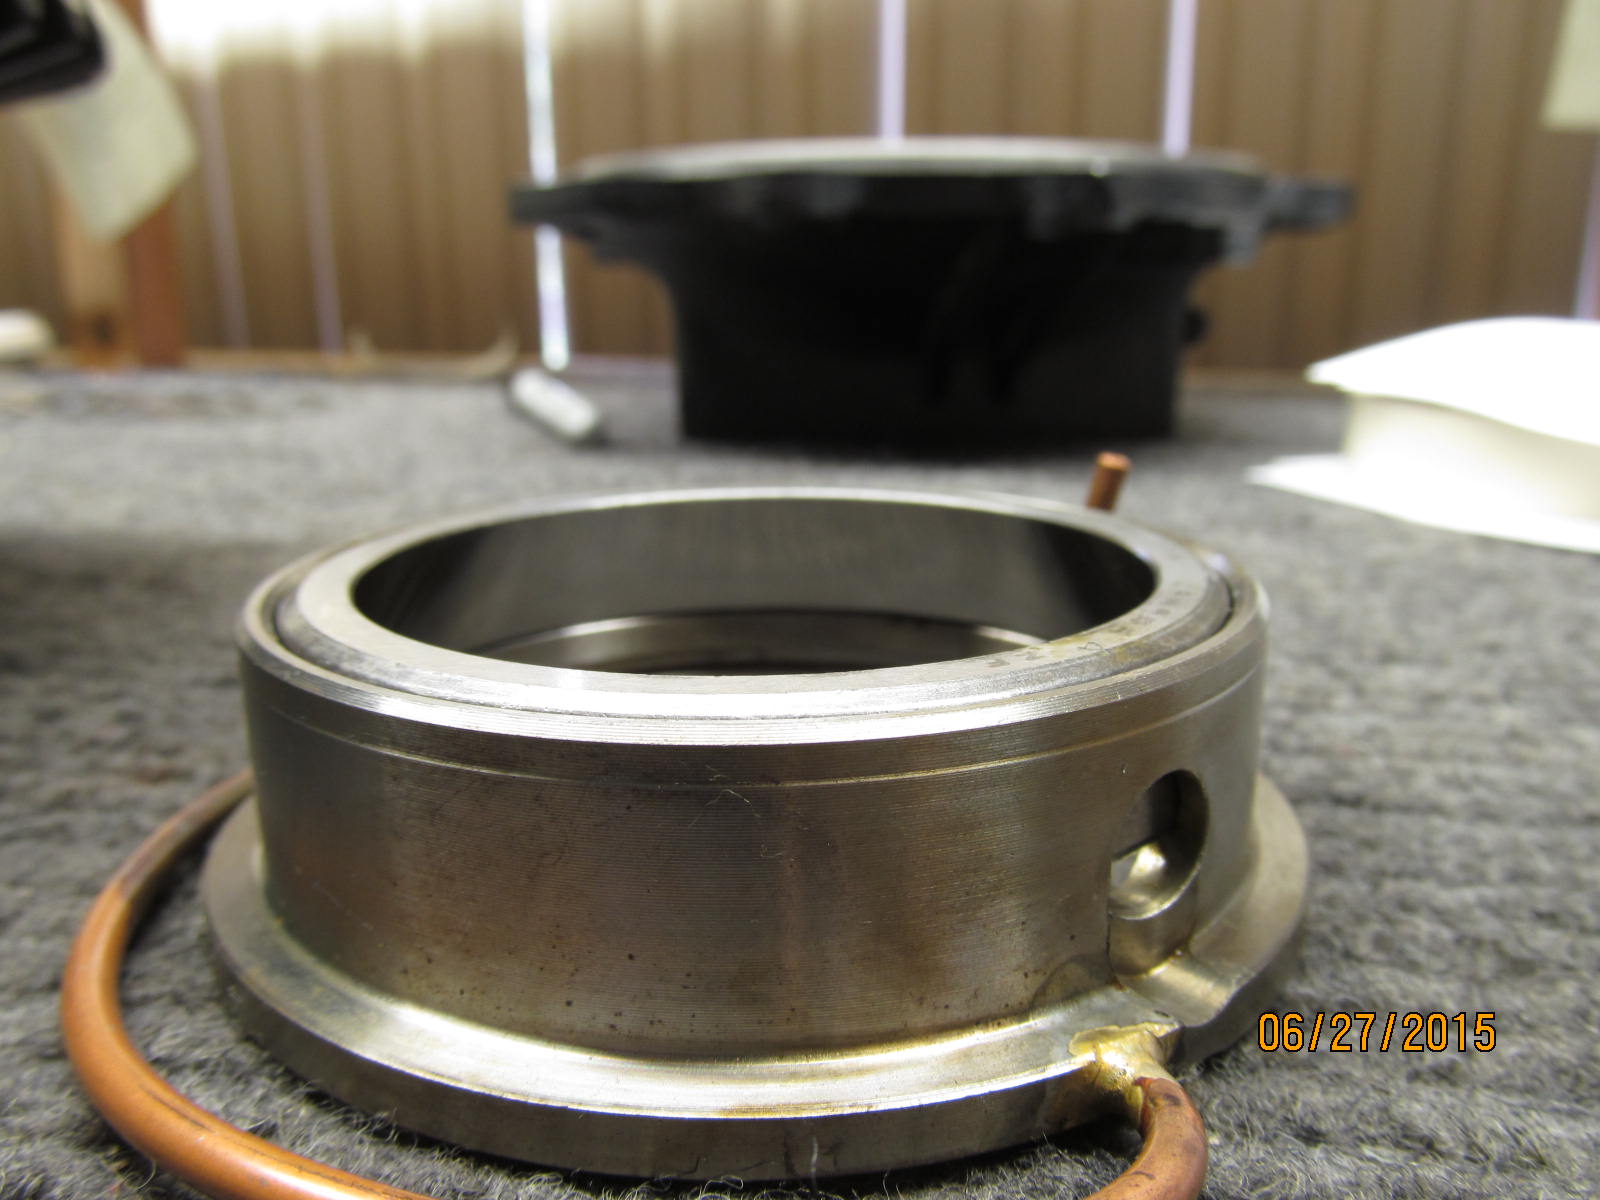
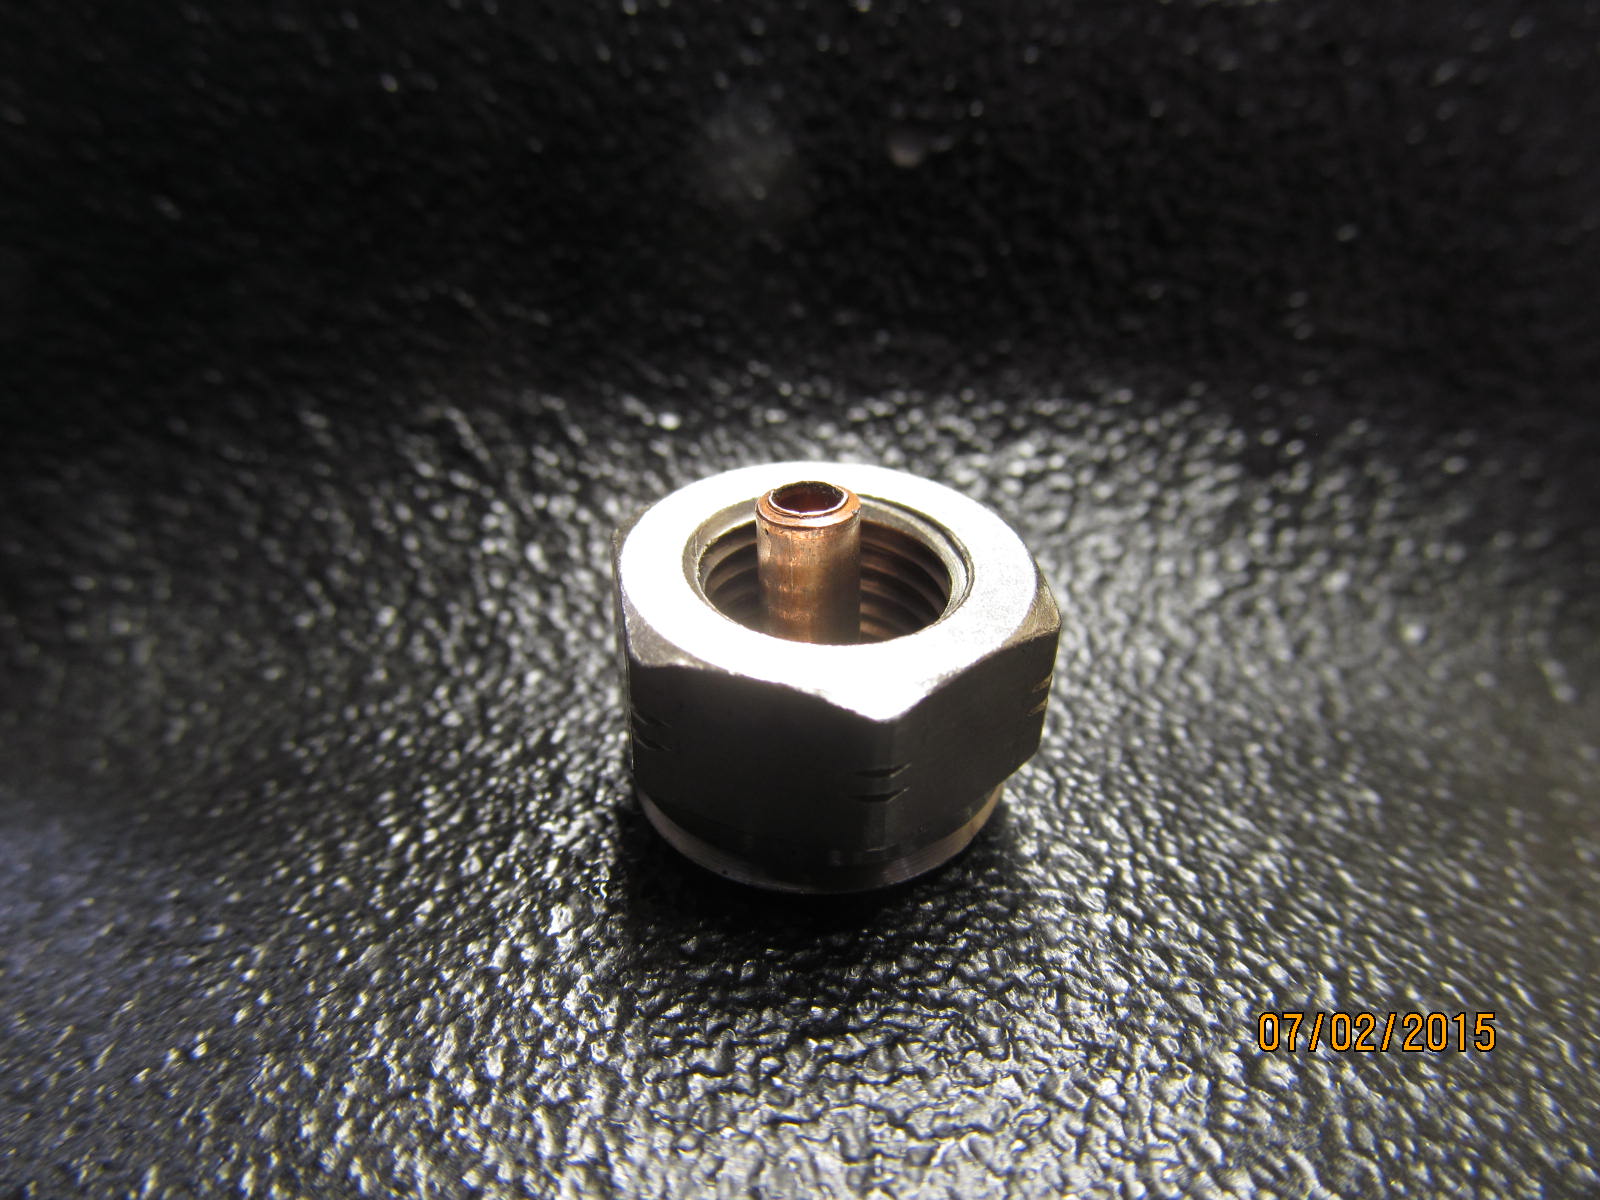
Nice that ARB supplied the seal housing with a pre-formed copper tube and
no trimming needed.
|
|
|
|
|
............................
|
|
|
|
|
........................
|
|
|
|
|
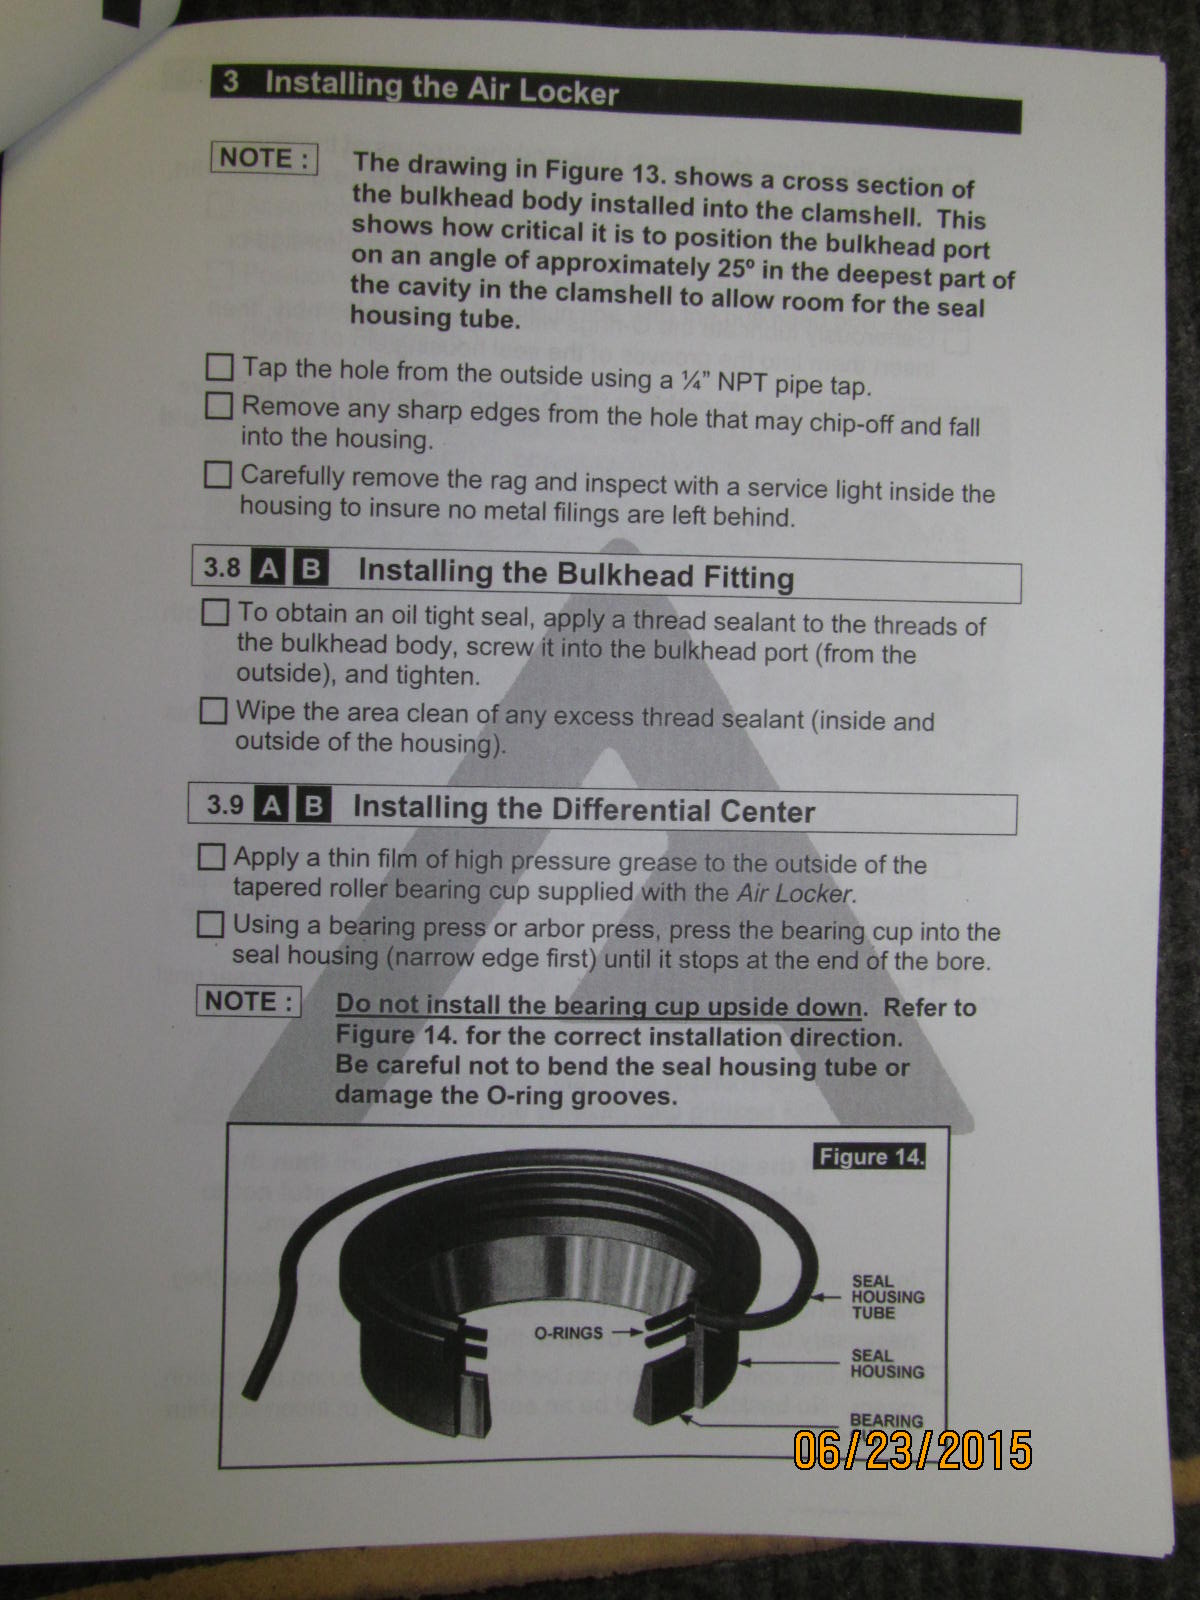
Too many o-rings end up getting crushed. Almost all of the ones I get ARE crushed.
|
|
|
|
|
........................
|
|
|
|
|
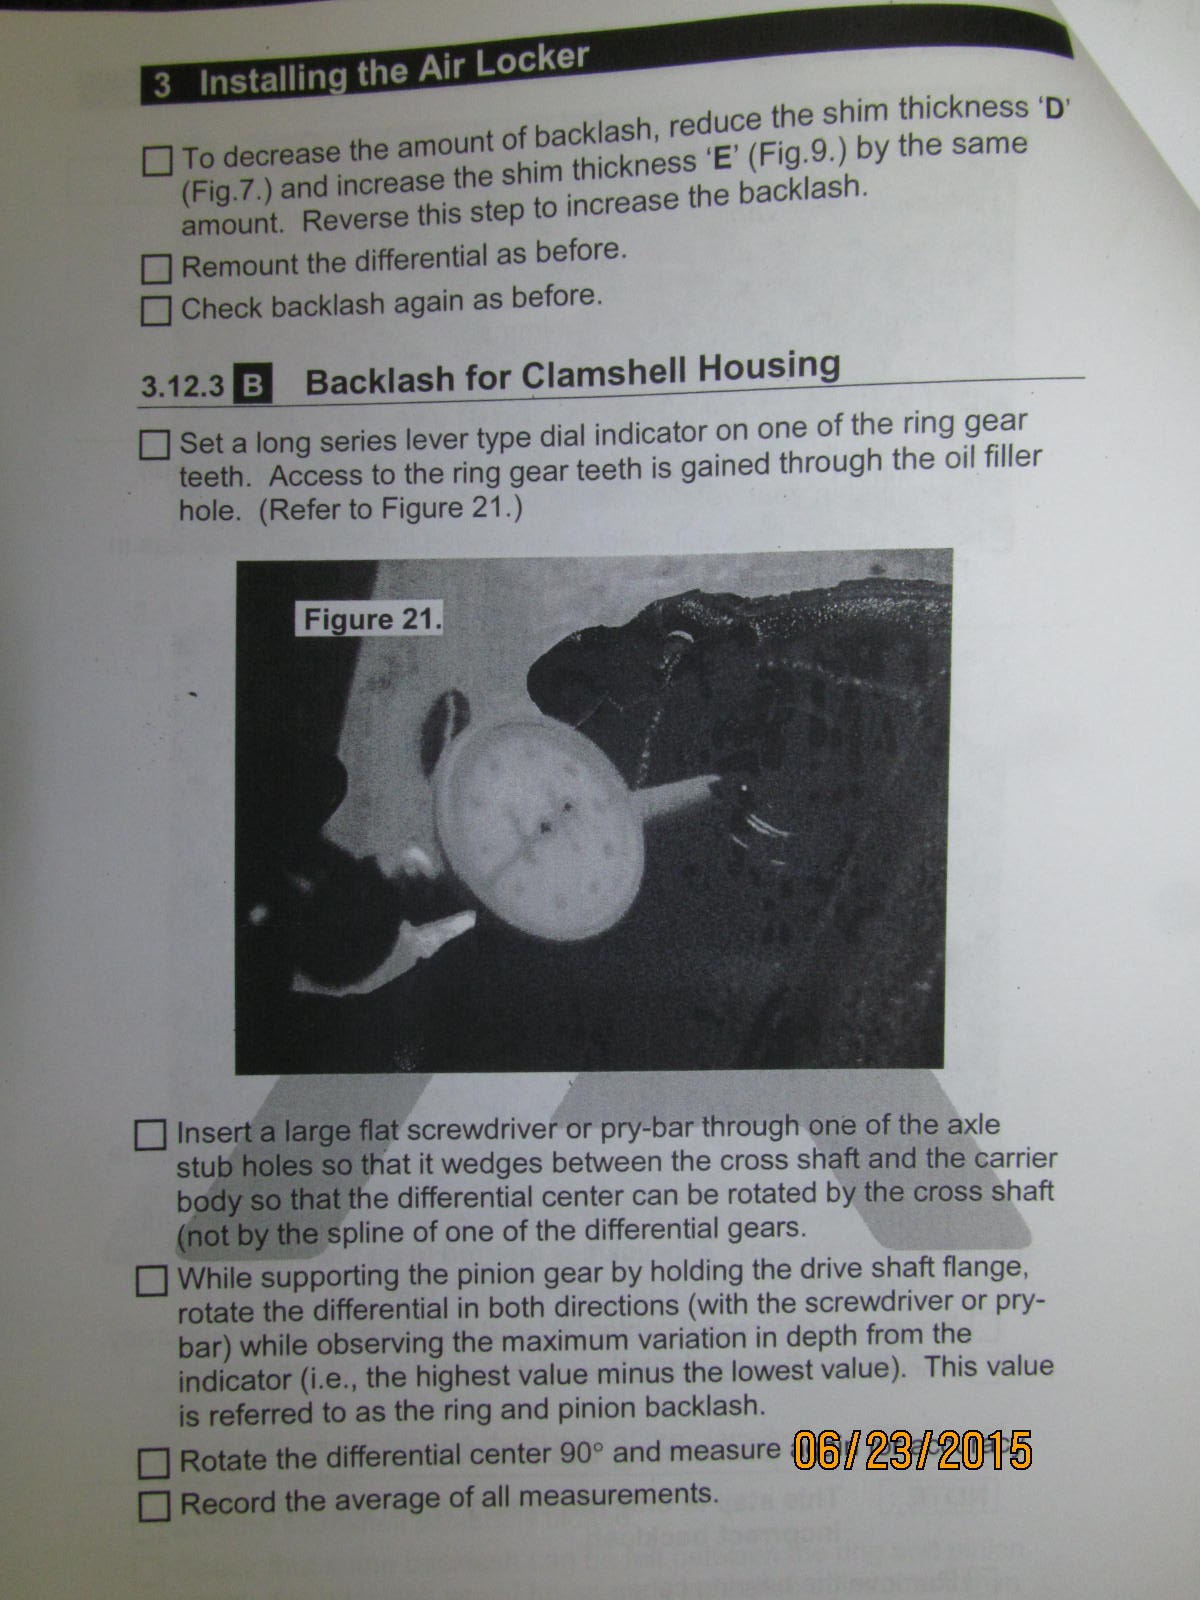
Lever type dial indicators are easy to damage also.
|
|
|
|
|
...................
|
|
|
|
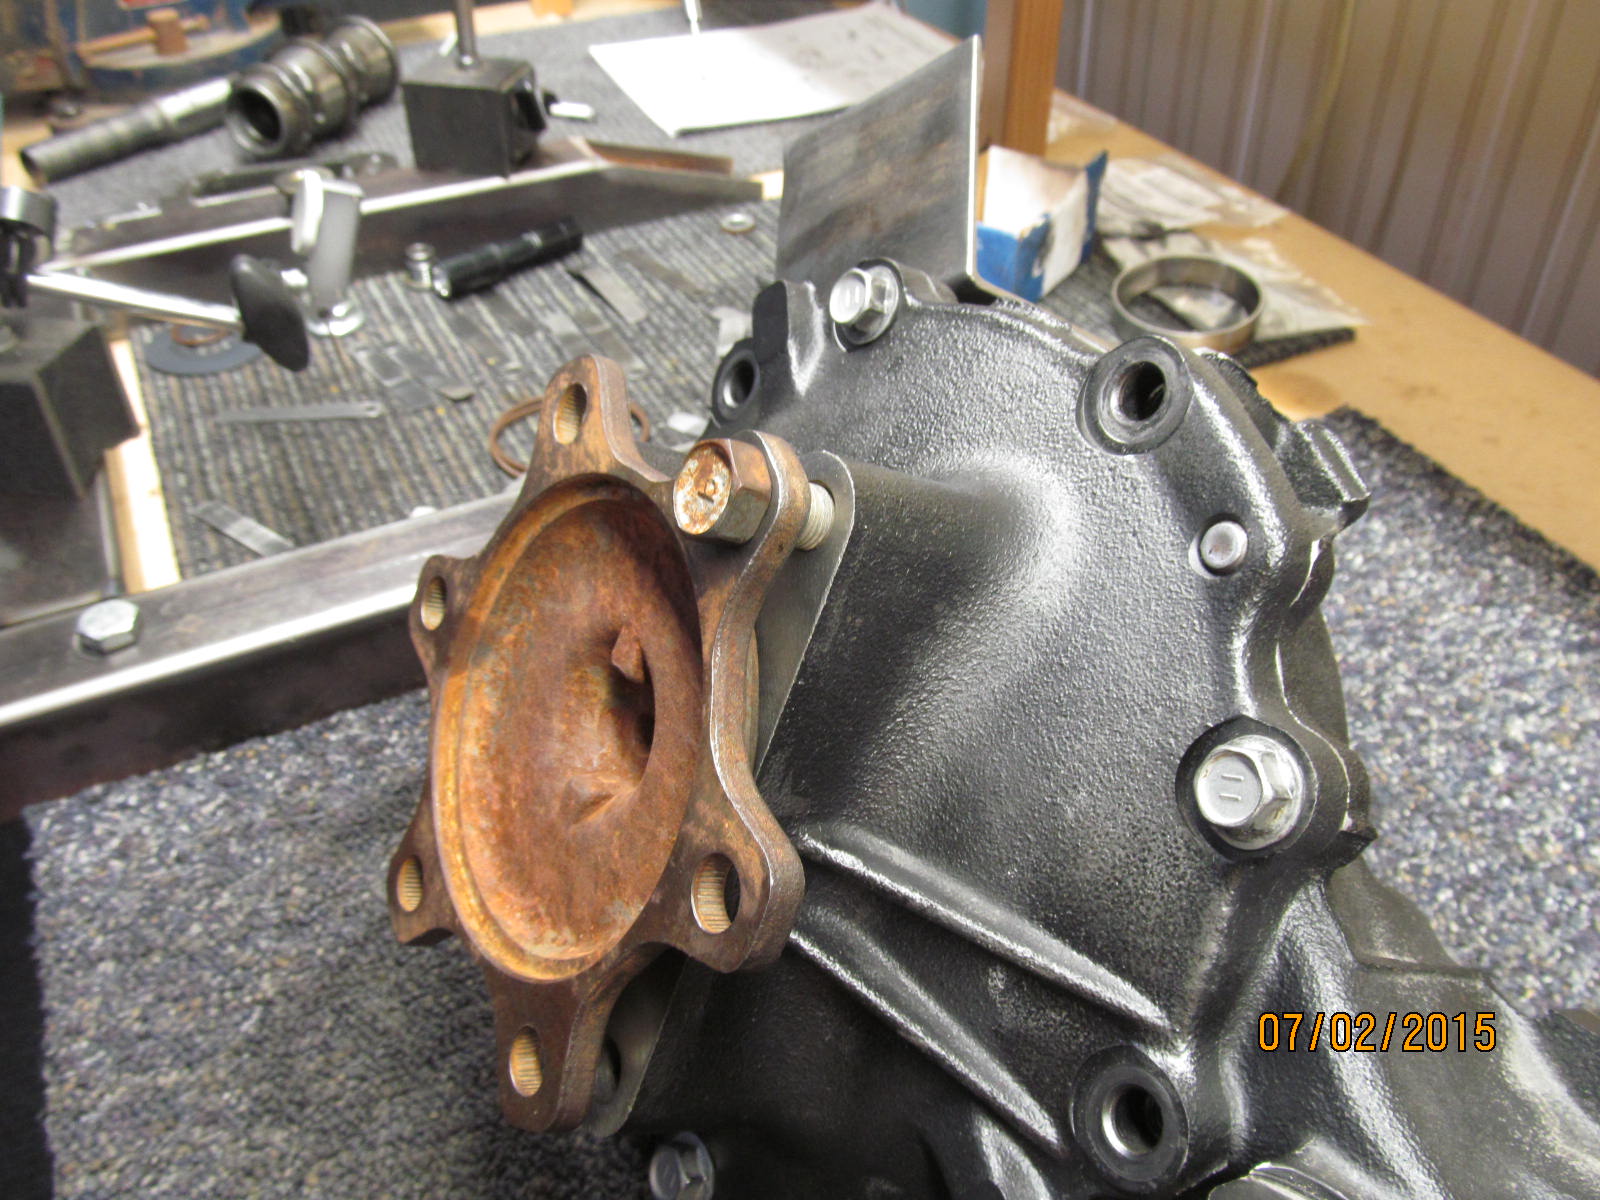
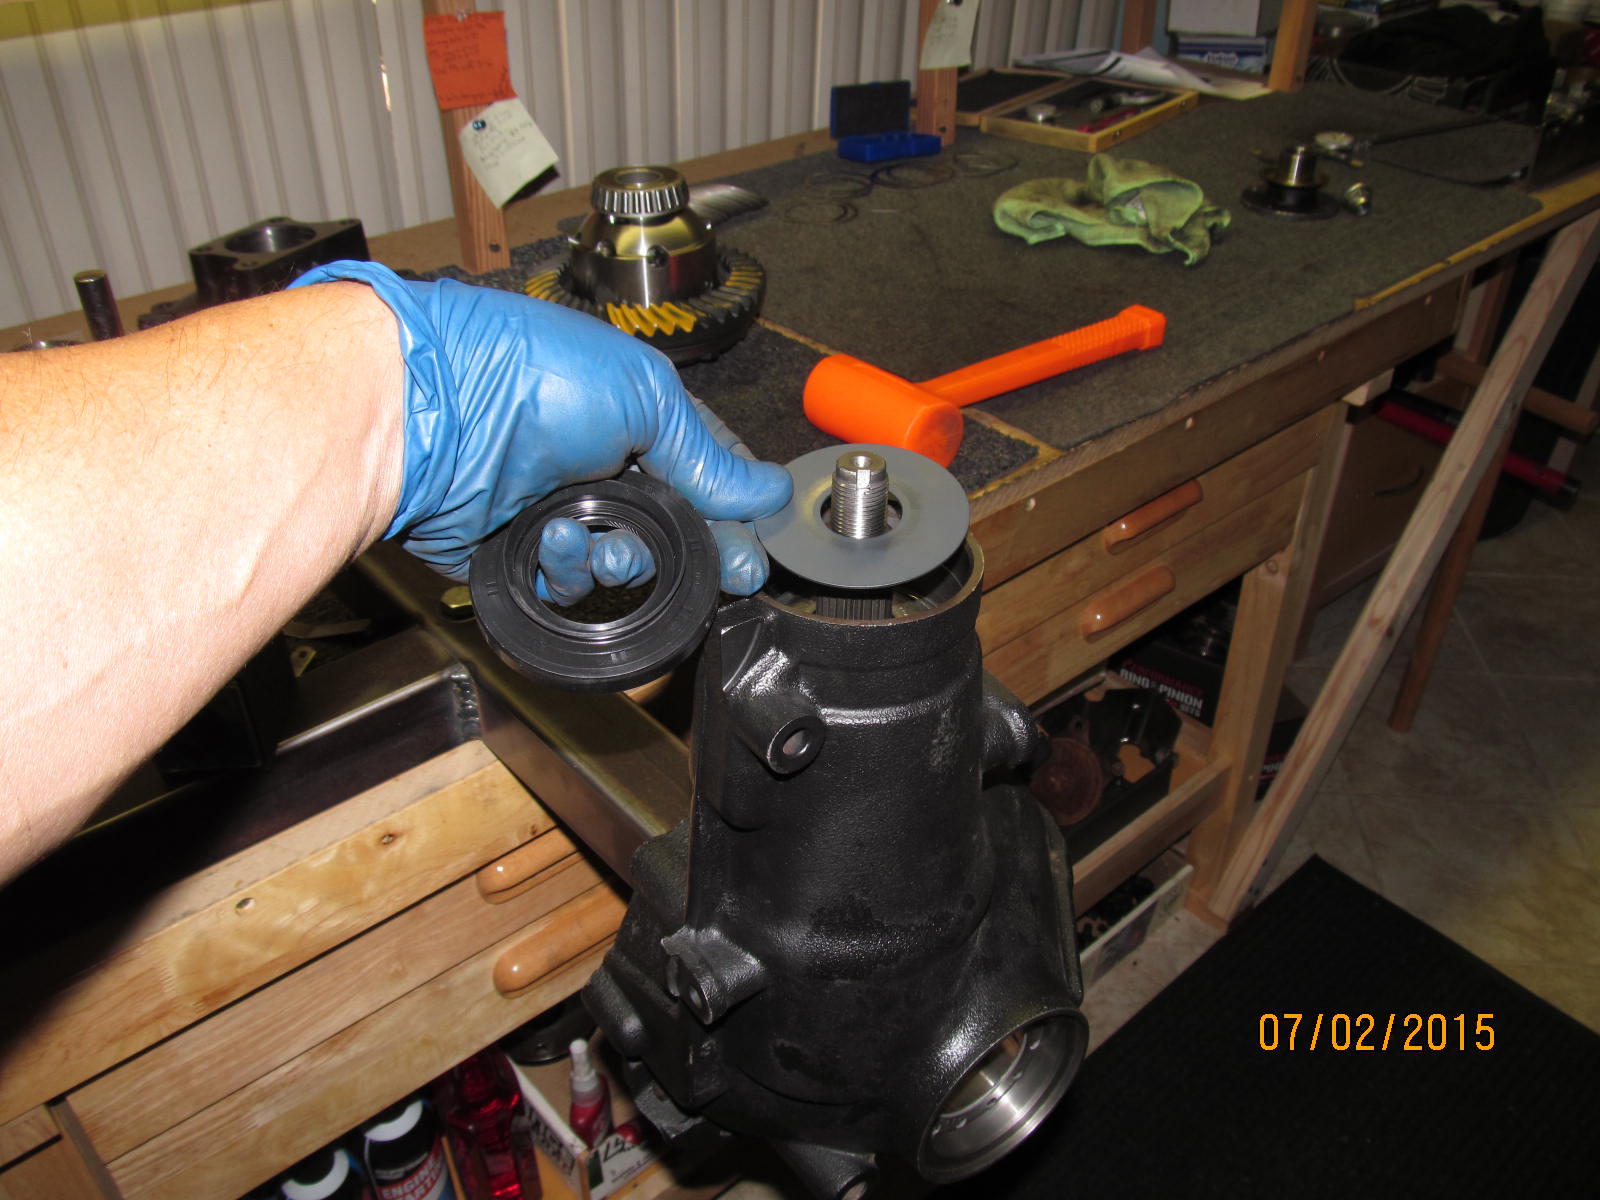
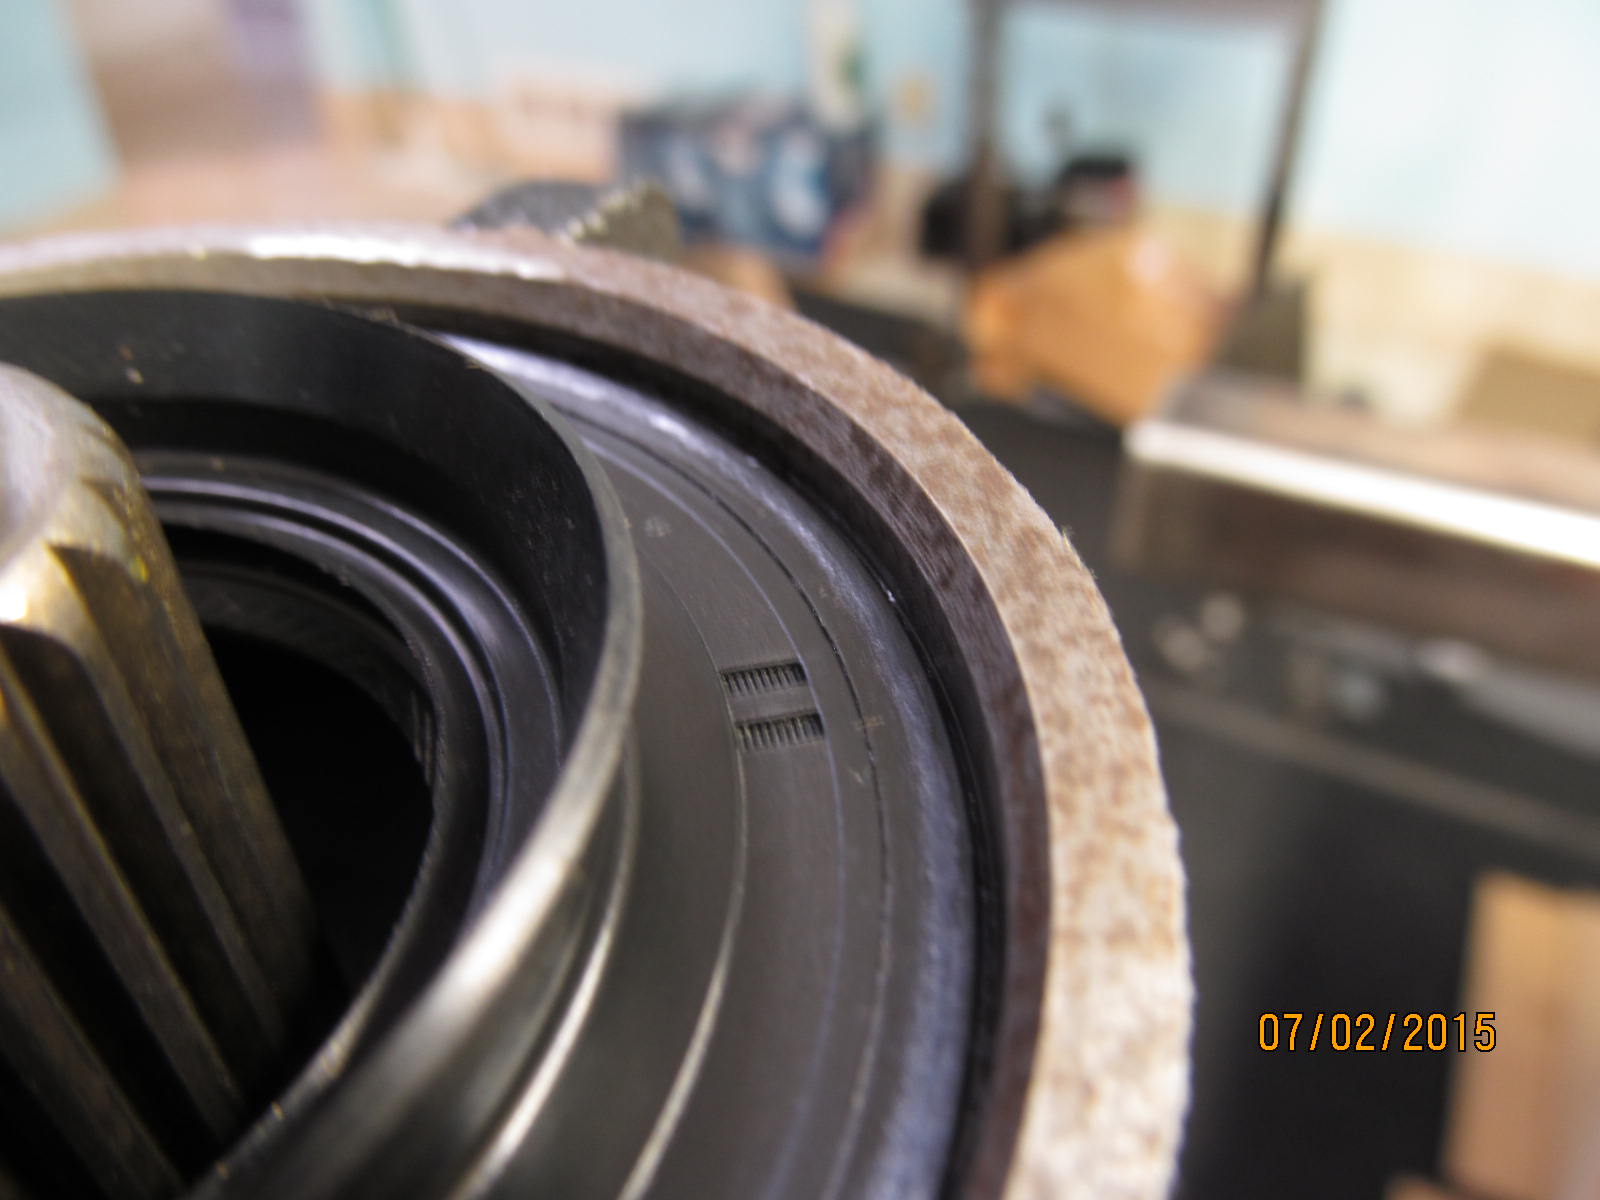
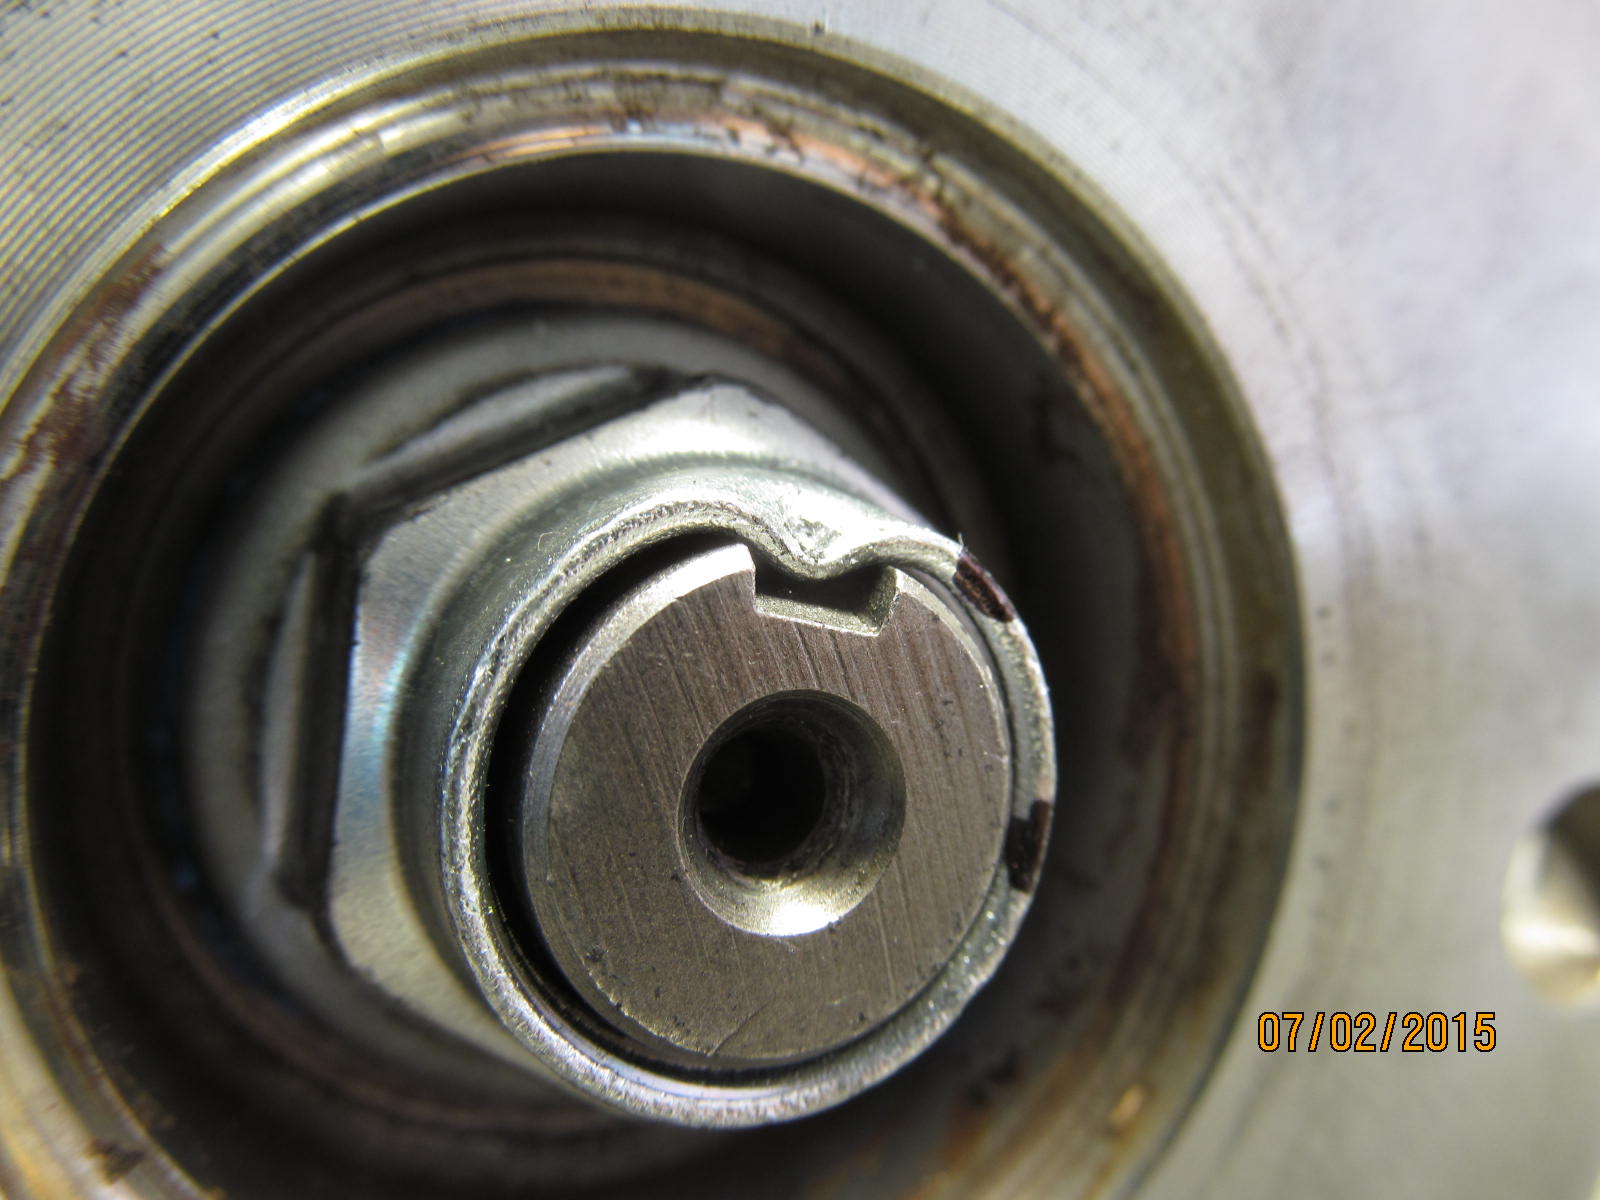
The flange with the unusual dust shield was a tight fit on the pinion splines.
Notice how far down the seal is recessed. The new seal should be recessed down .180".
|
|
|
|
The seal surface on the pinion flange is actually in very good shape. The finger test showed it to be smooth
and no detectable groove to the touch even though the picture seems to show a groove.
|
|
|
|
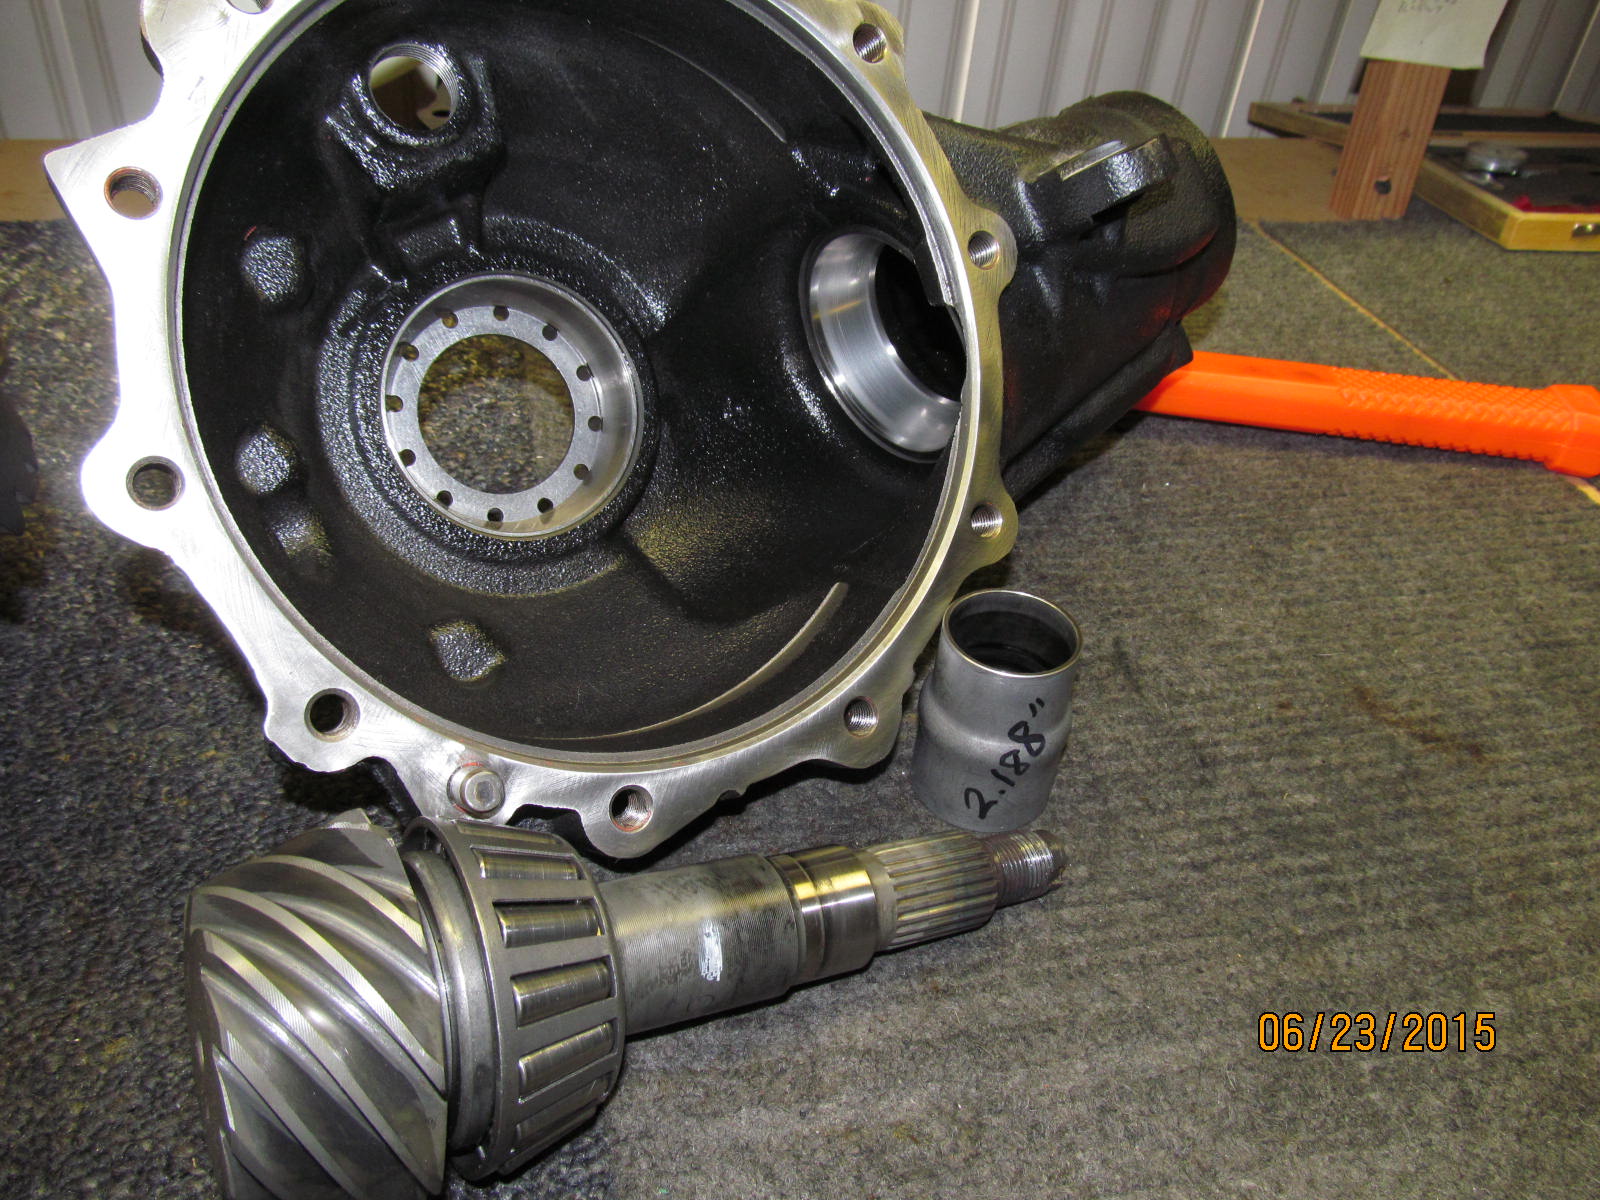
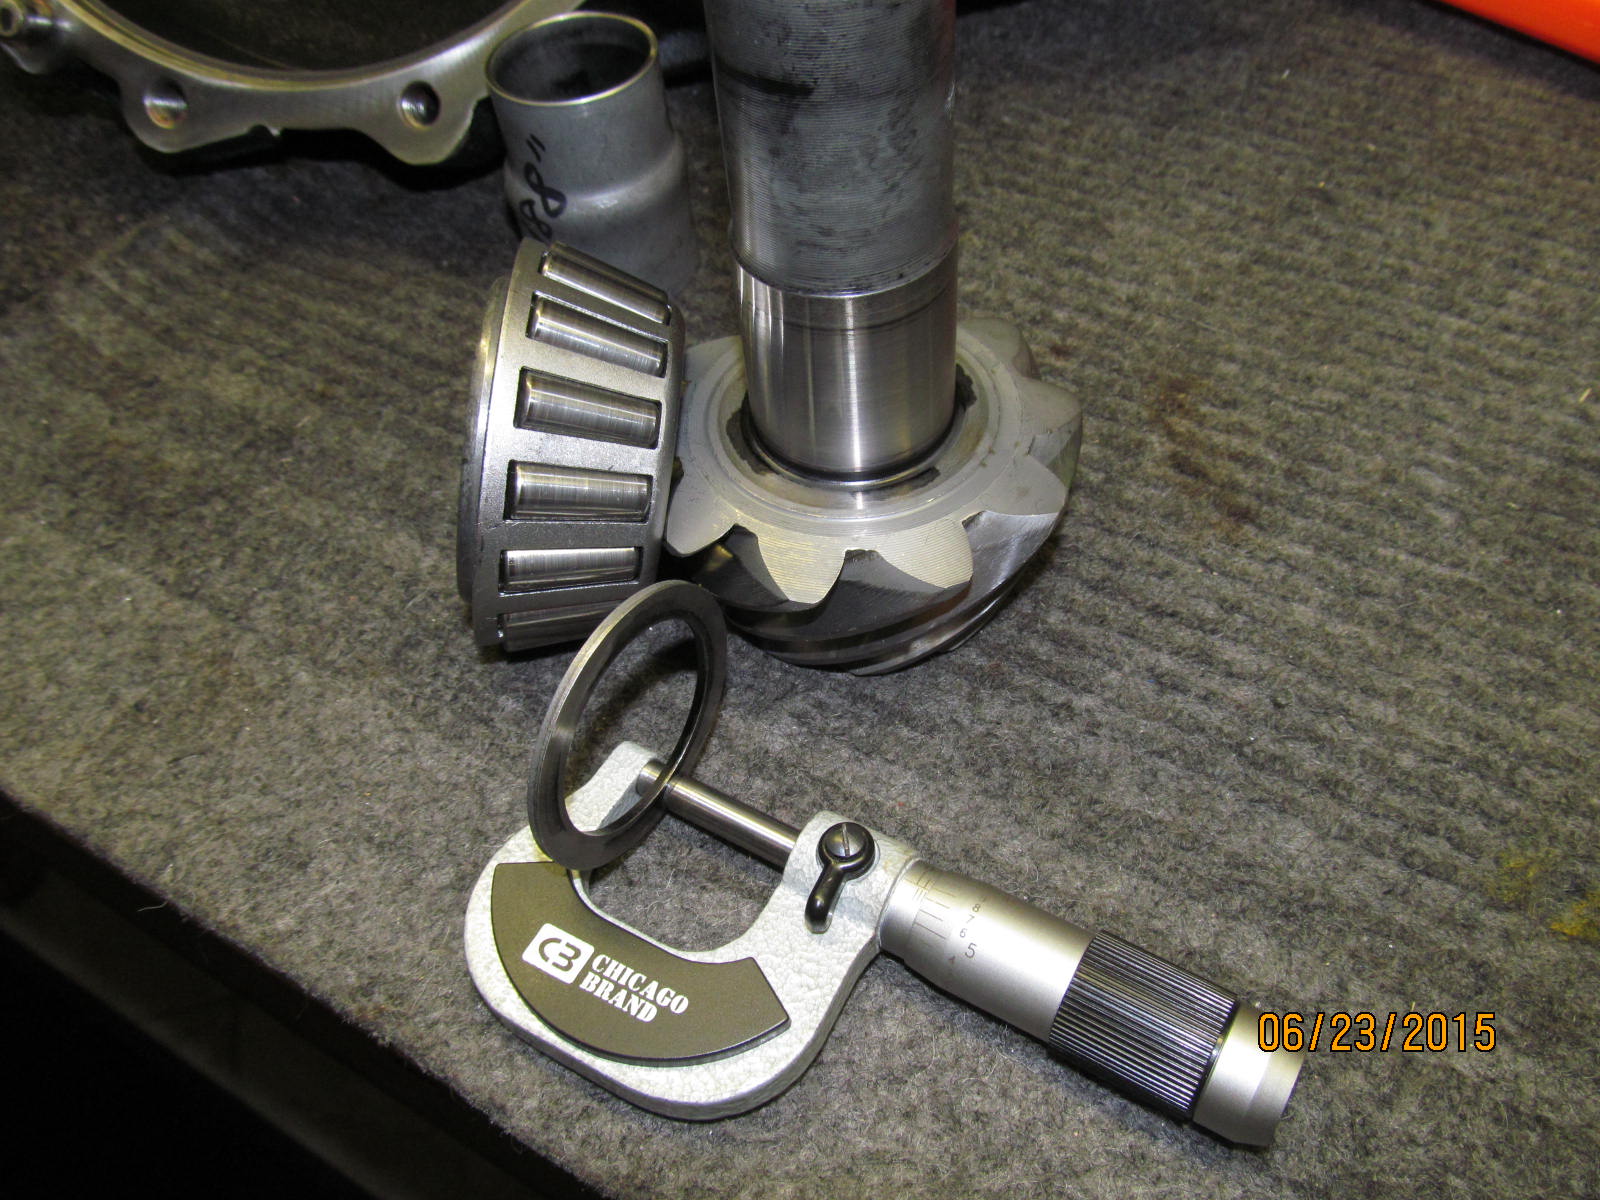
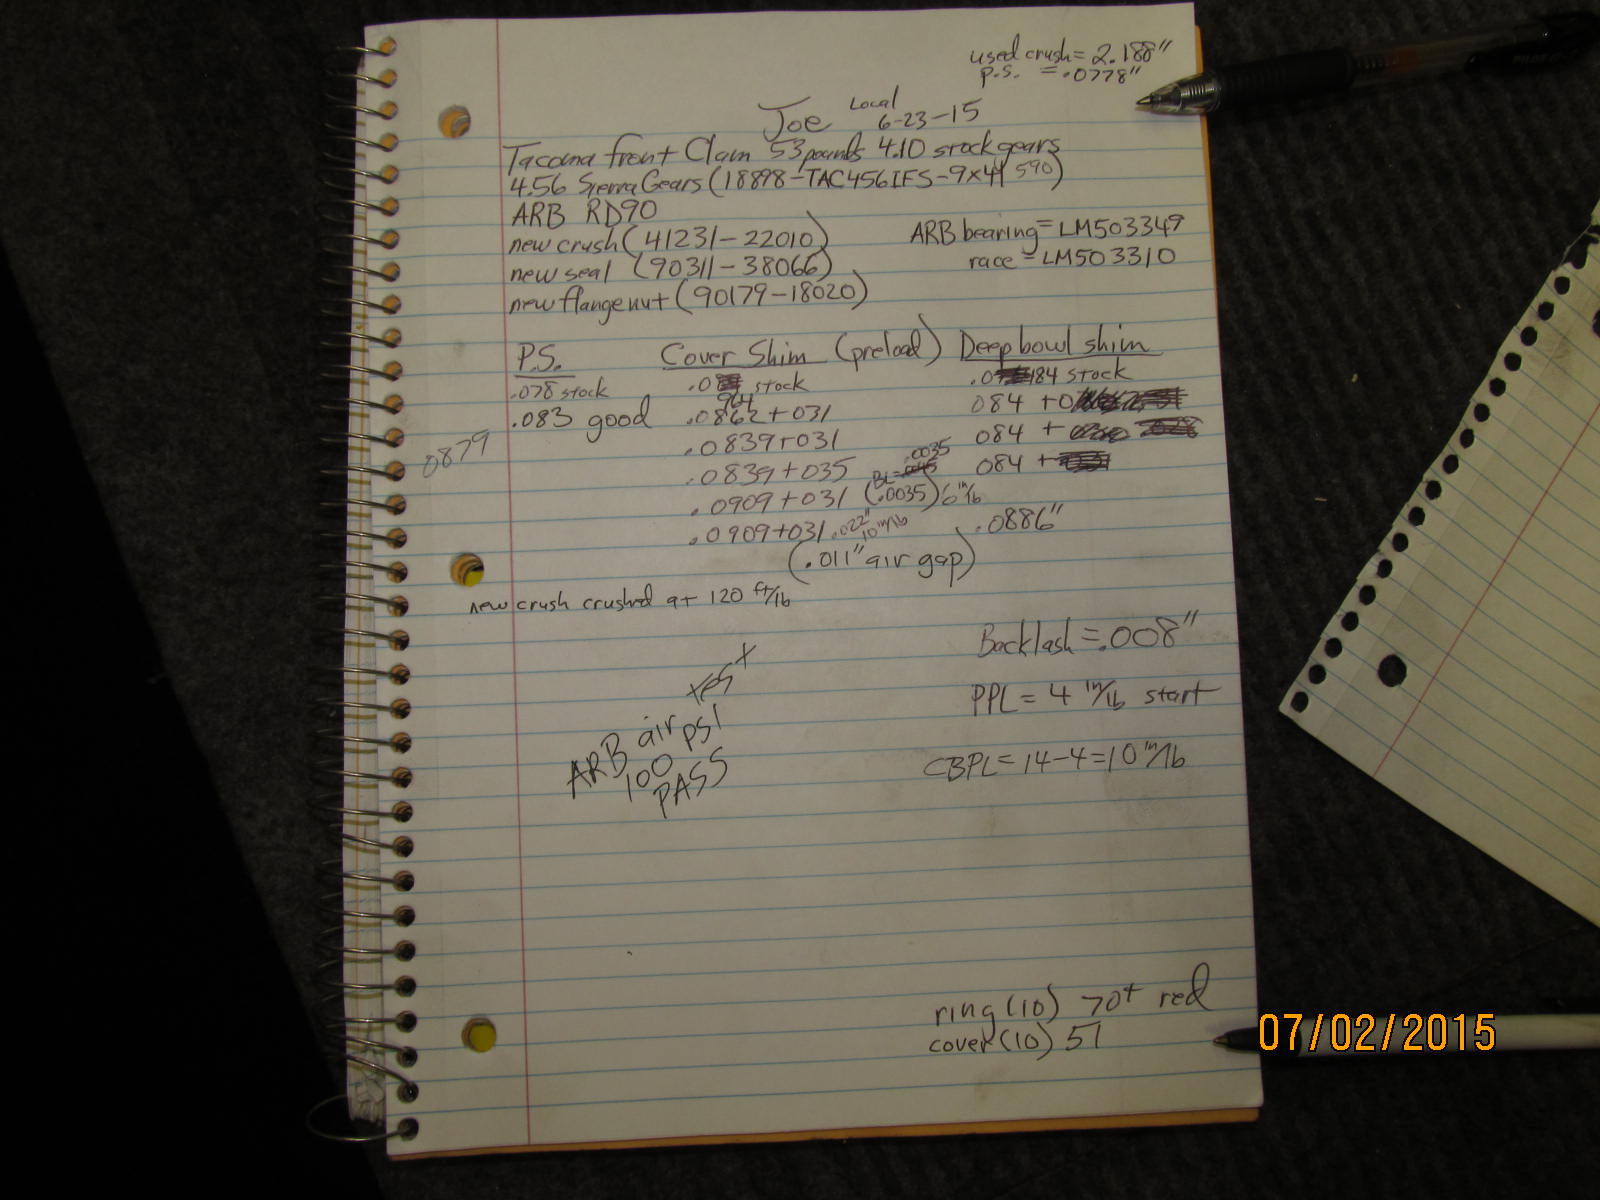
With the pinion out, the races can be seen to be in very good shape. The old crush measured 2.188" and is a good
number to note if one is installing a solid collar but we are not.
|
|
|
|
|
We will re-use the front pinion bearing as the FSM calls it.
|
|
|
|
|
The oem pinion shim measured in at .078"
|
|
|
|
|
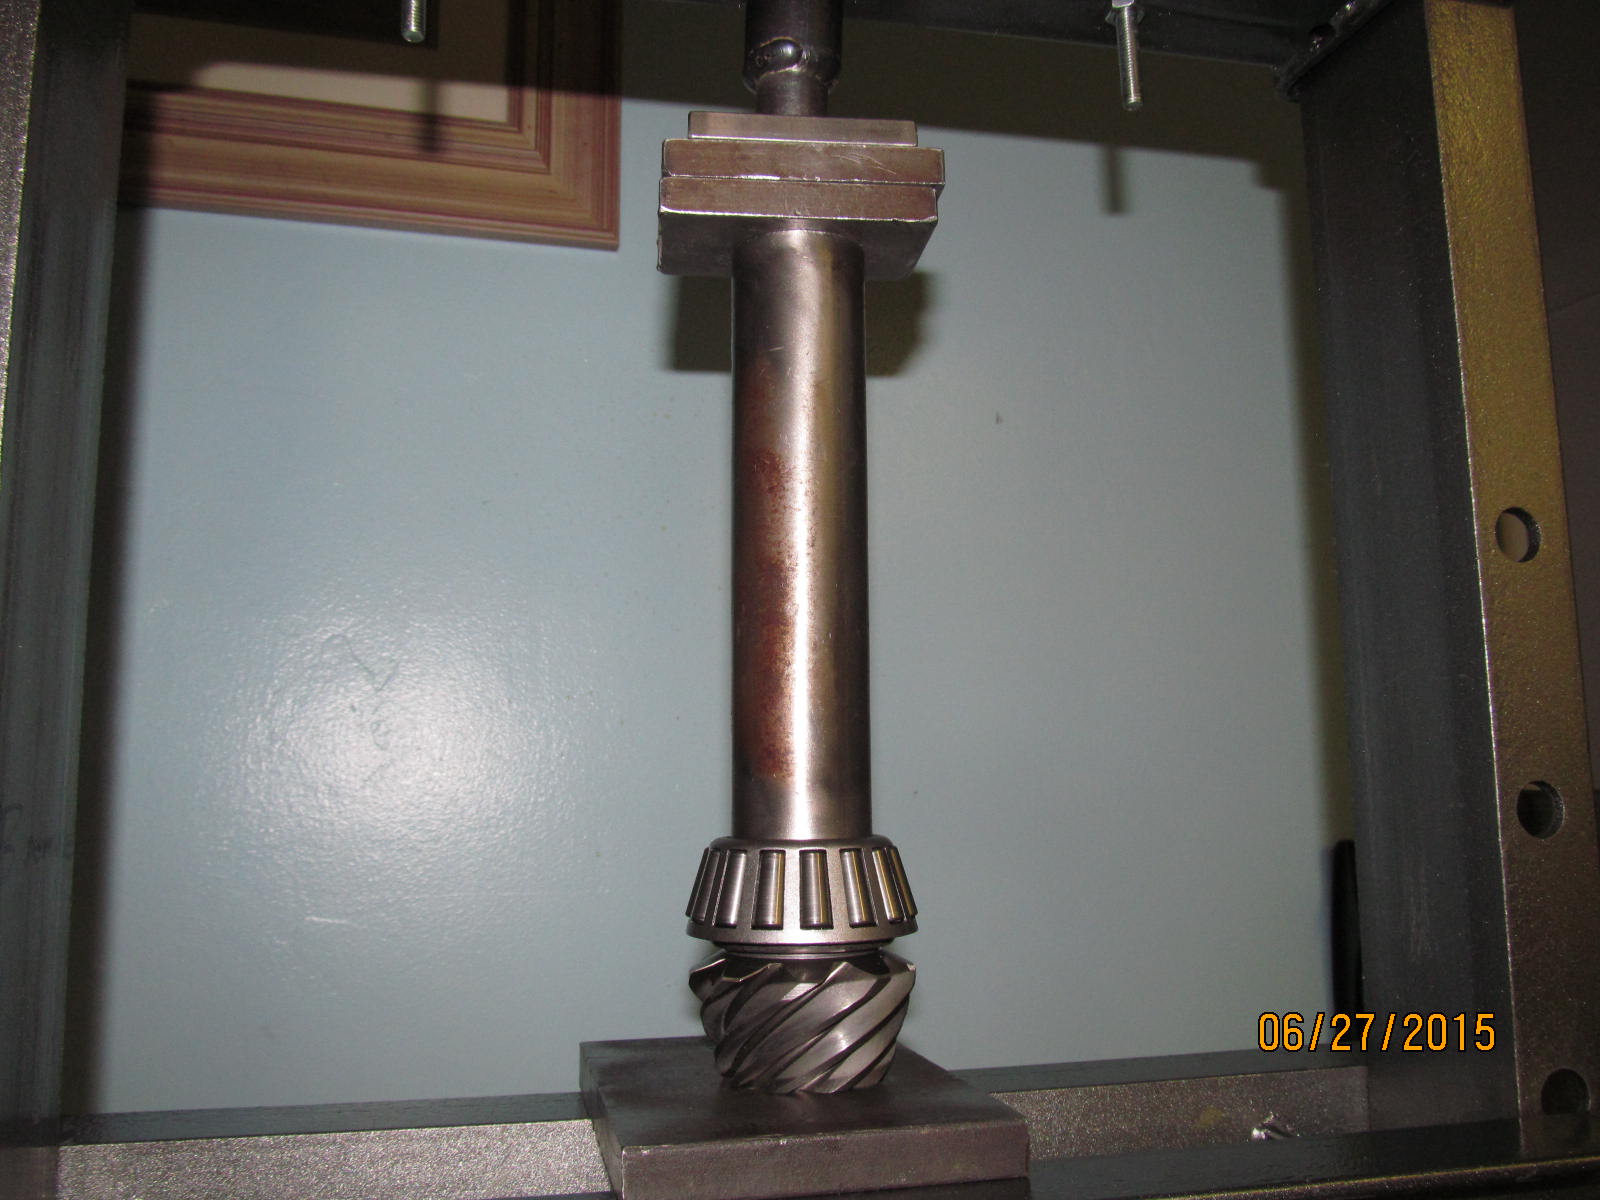
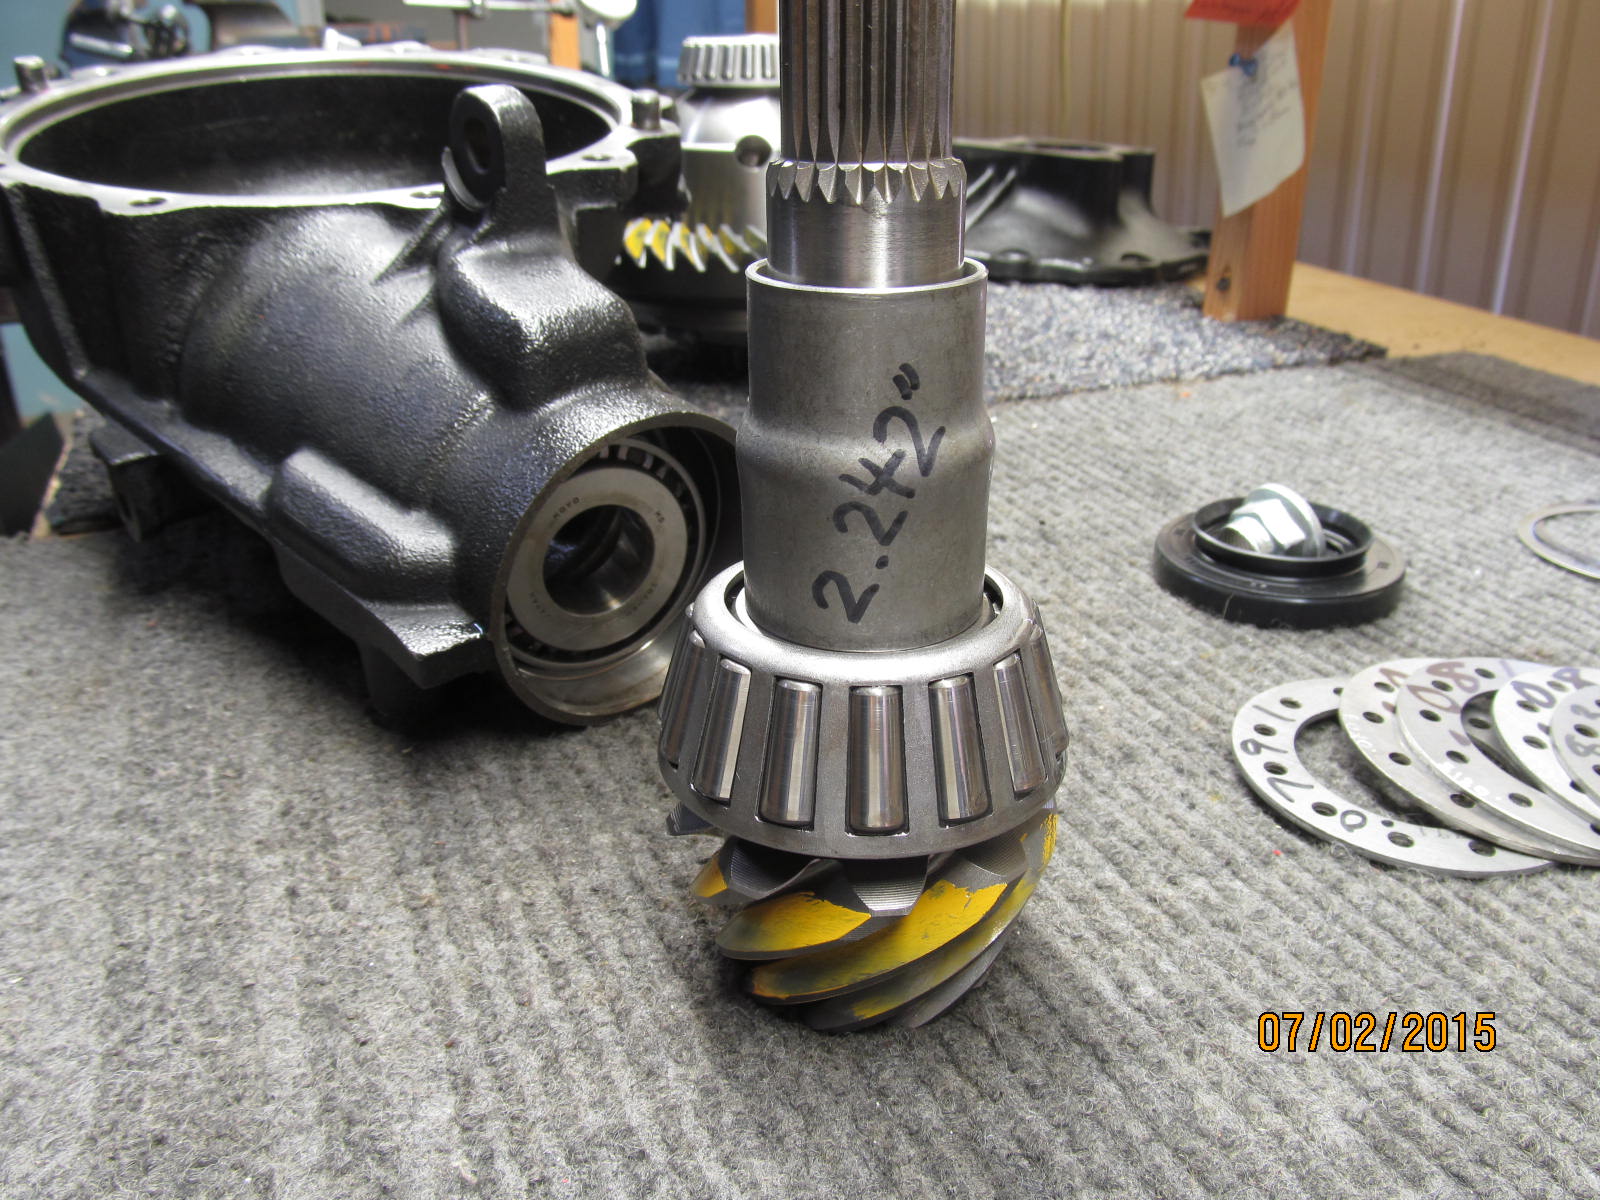
The new Sierra Gear 456 pinion gets the oem shim and bearing pressed on to it.
|
|
|
|
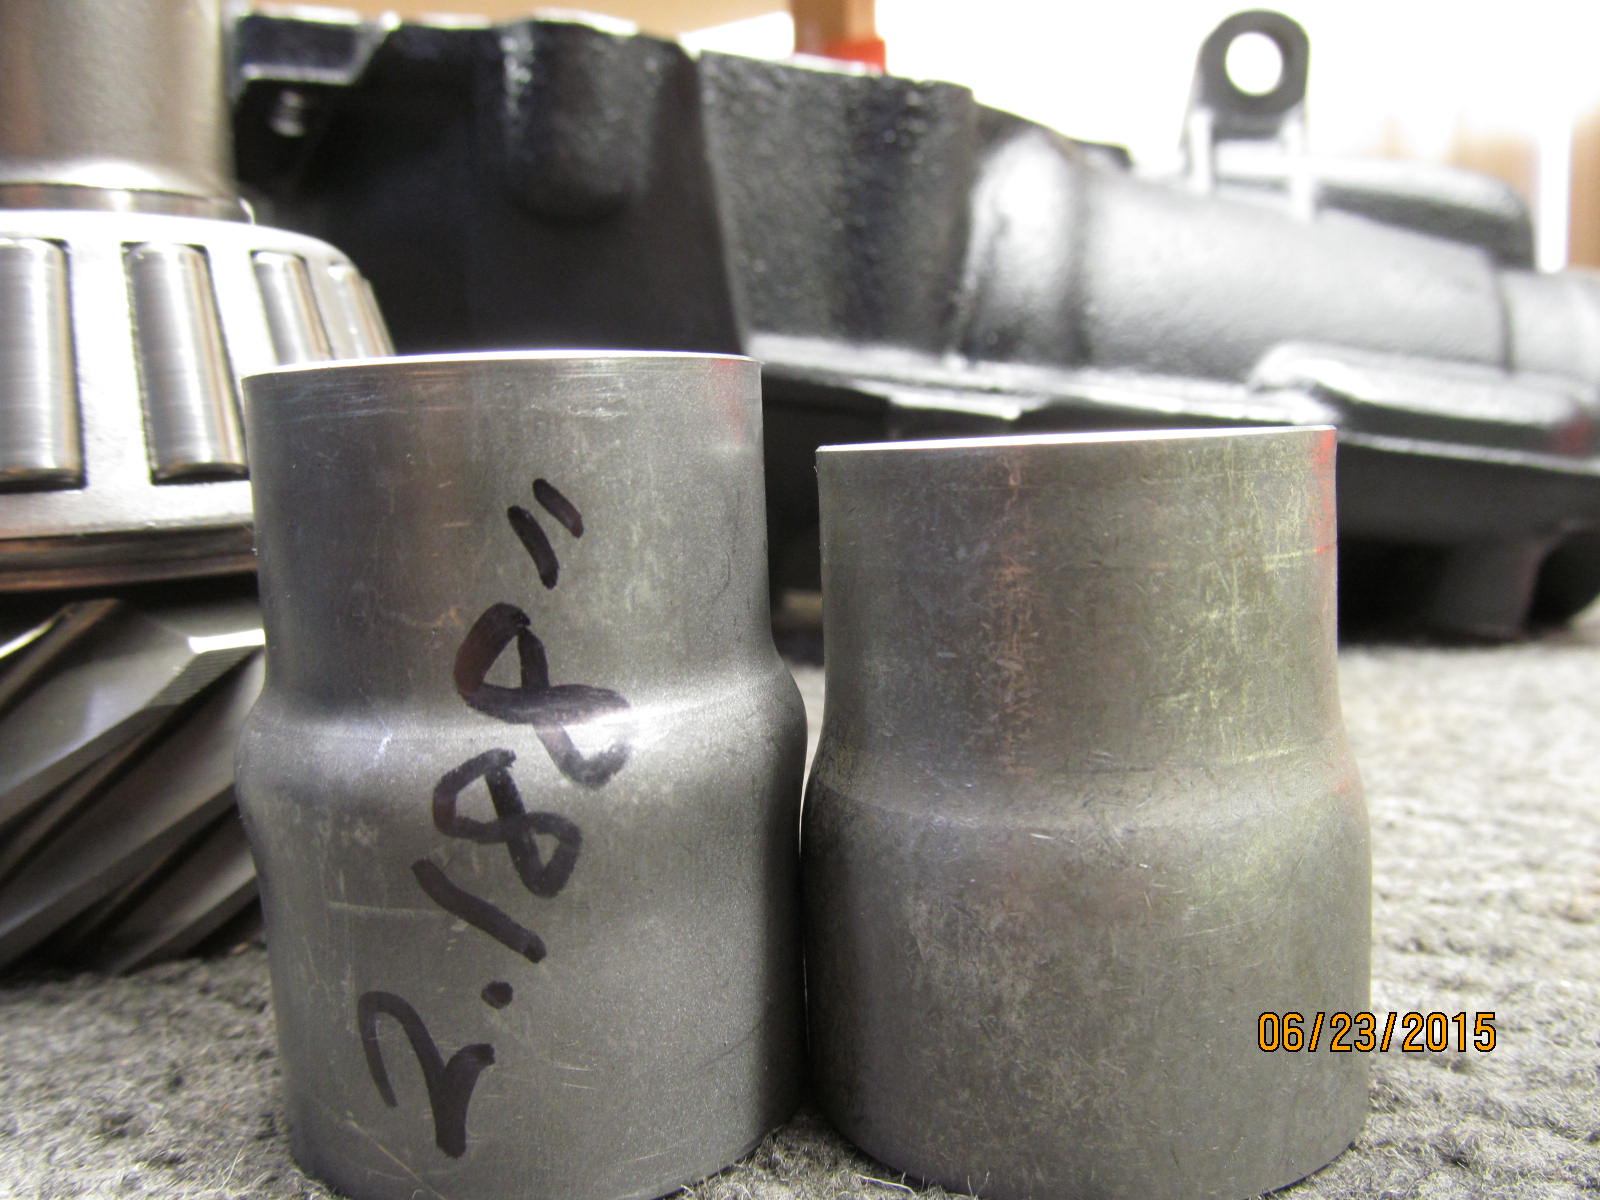
hmmmm....used crush on left and NEW crush on right. That won't work. Turns out the partsman supplied
the wrong one. The correct part number is 41231-22010 FYI
|
|
|

|
|
Use your own SST to remove the pinion seal...this is mine.
|
|
|

|
|
Assemble the pinion end less the crush and seal....those are saved for last.
|
|
|
|
|
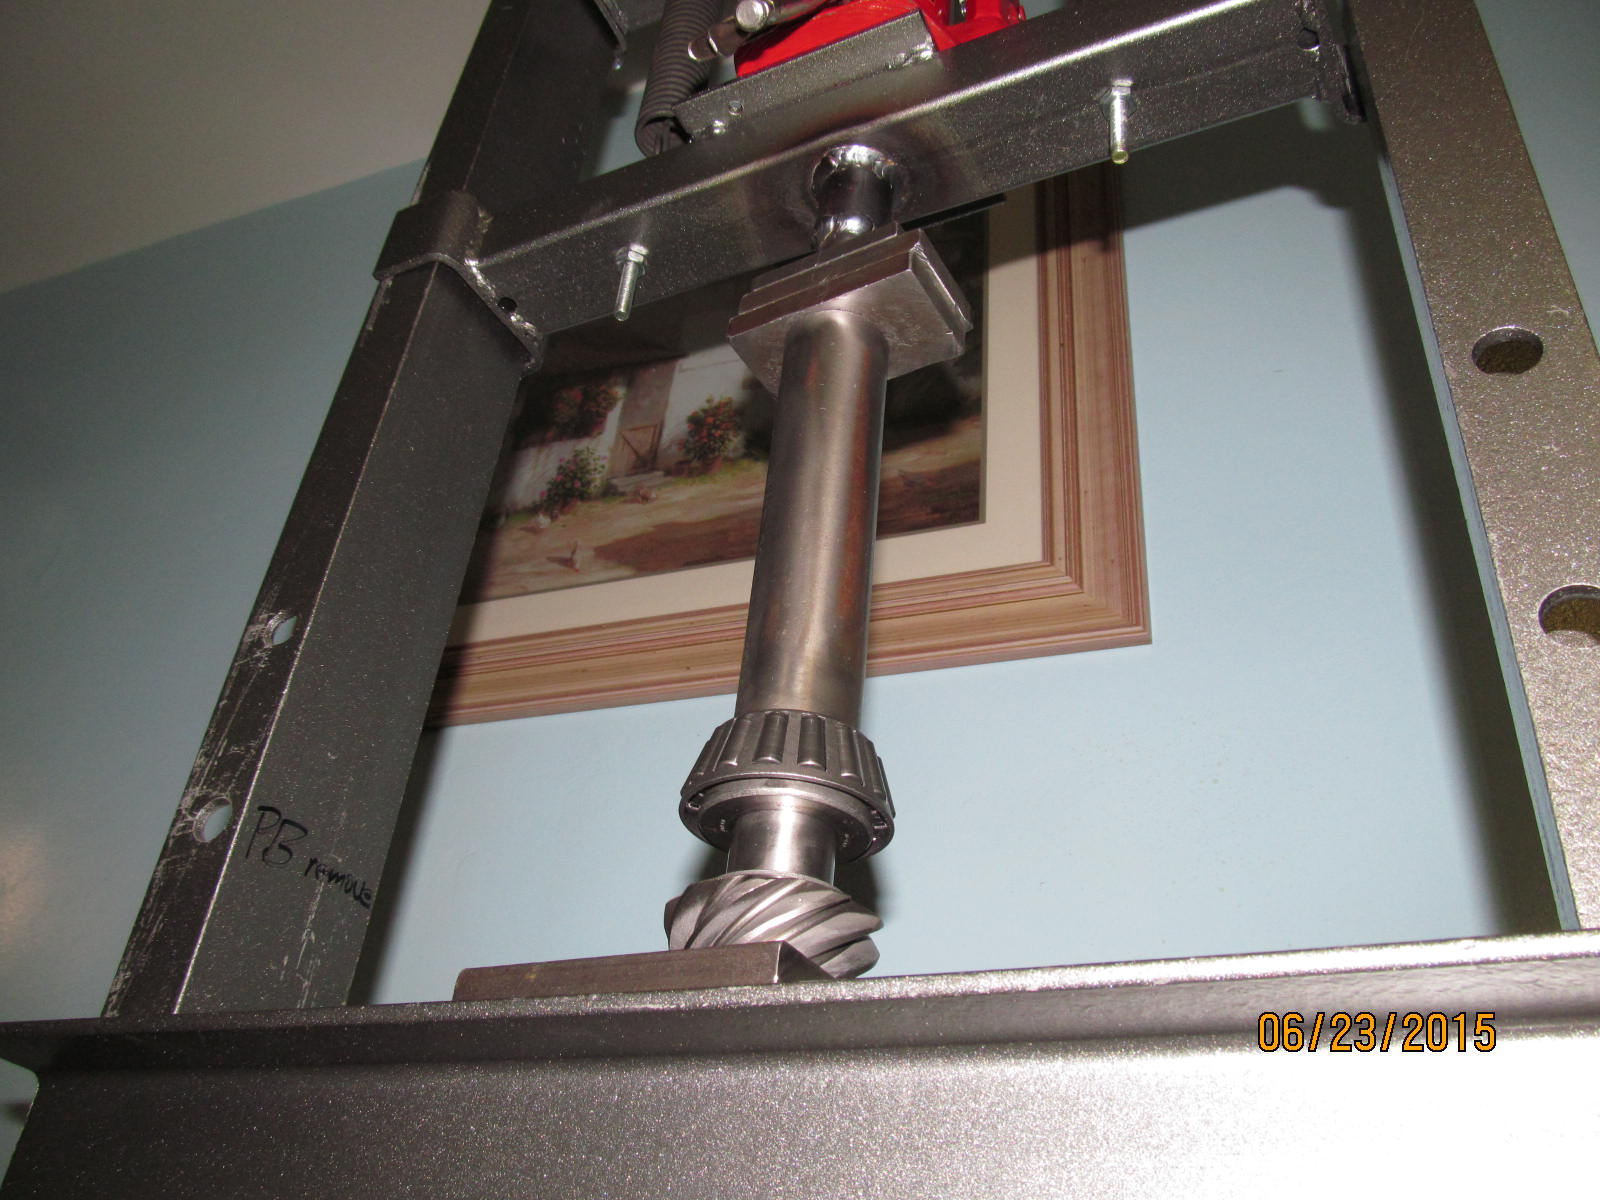
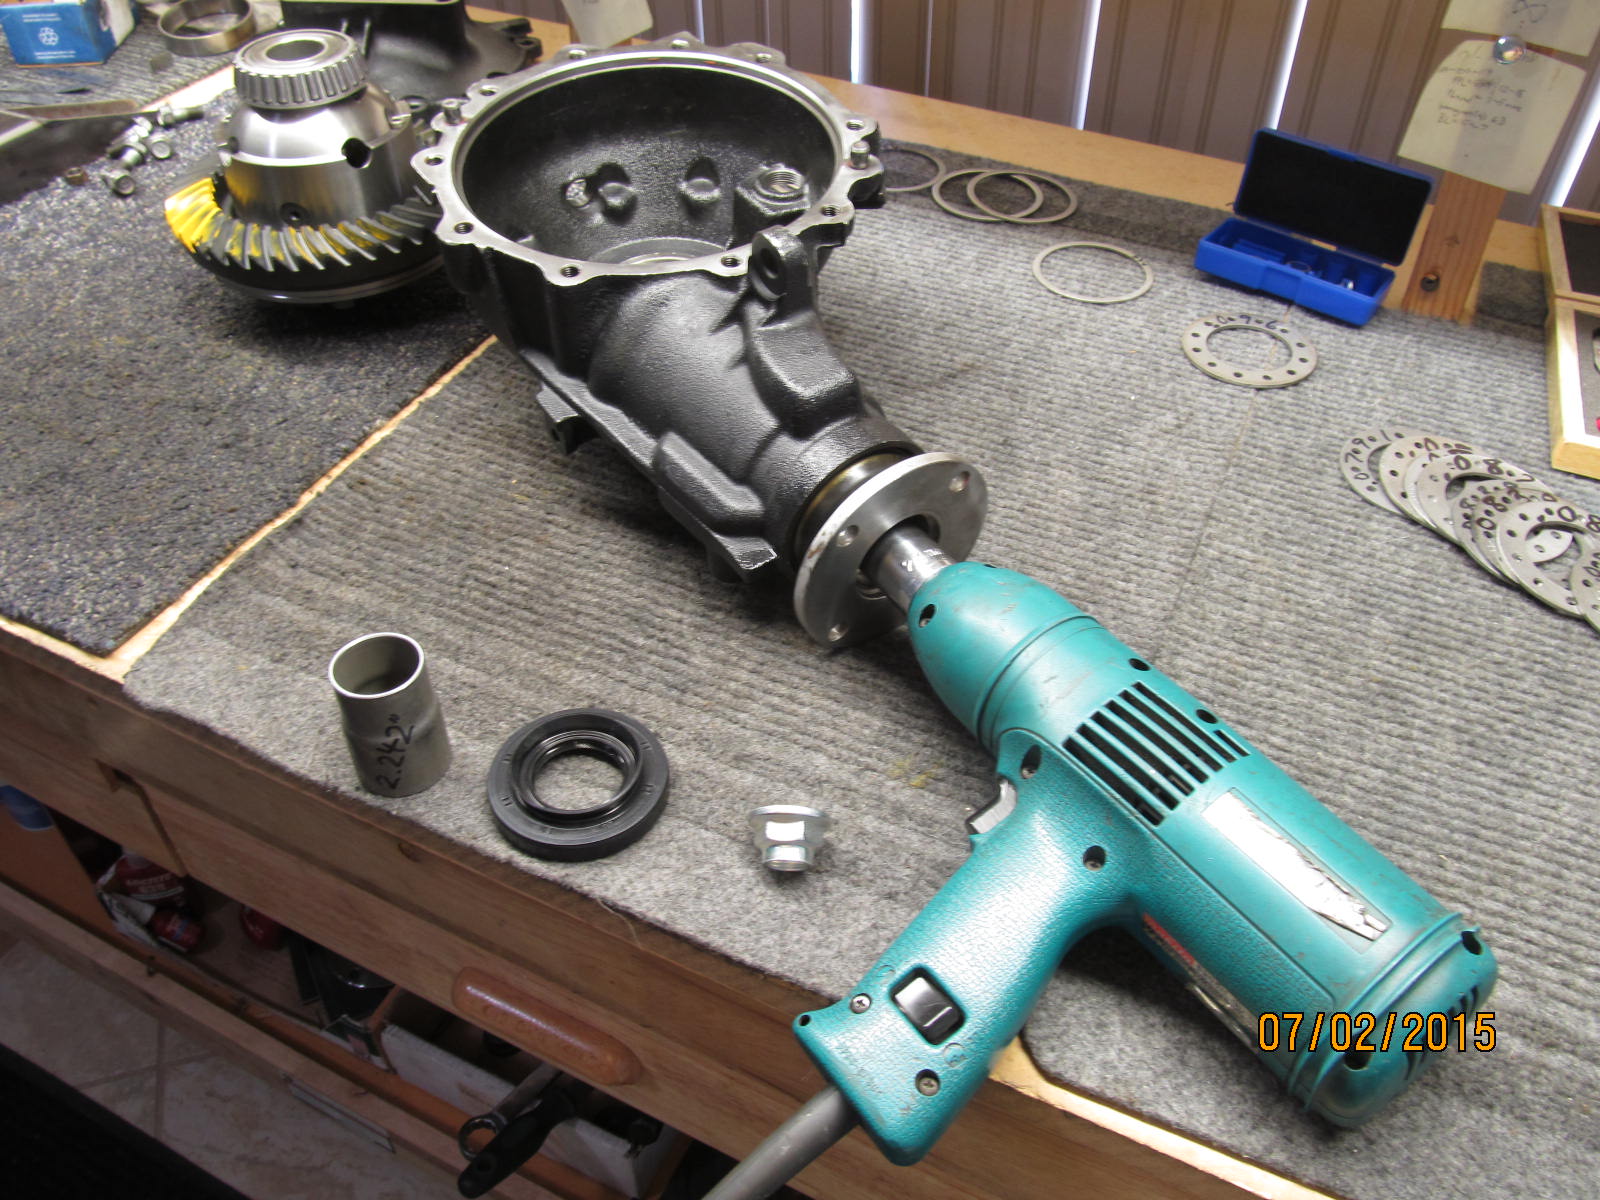
The gear install fixture came in very handy for tapping the flange on far enough to thread the nut on.
|
|
|

|
|
Tighten it up just enough to get modest pinion preload tension.....between 10~20 inch/pounds preload.
|
|
|
|
|
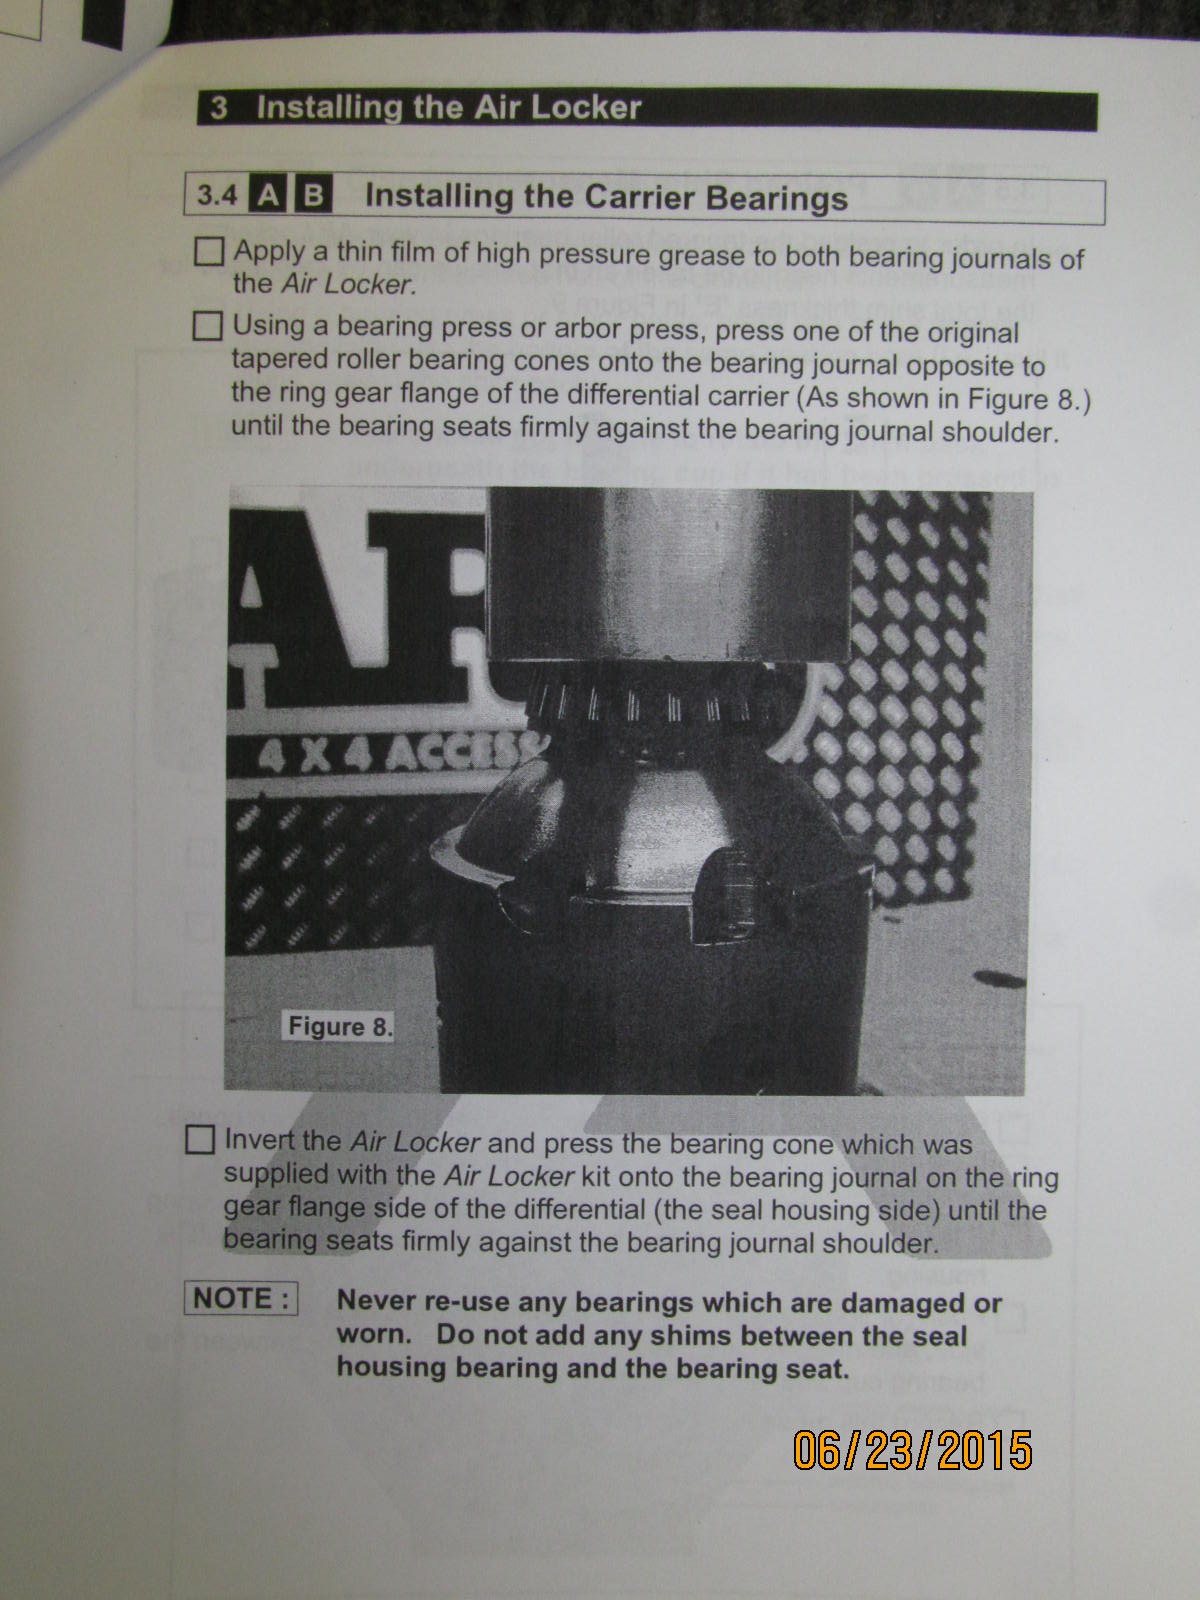
The very good condition used carrier bearing is pressed on the ARB case.
|
|
|
|
|
The washer plate shown has to be pushed out with the race not visible on the other side.
|
|
|
|
I found a perfect fit (within a couple thou of perfect) using the inner piece of a bearing from a
8.4" T100 gear install.
|
|
|
|
|
Fits almost perfect.....hardly any jiggle room.
|
|
|
|
|
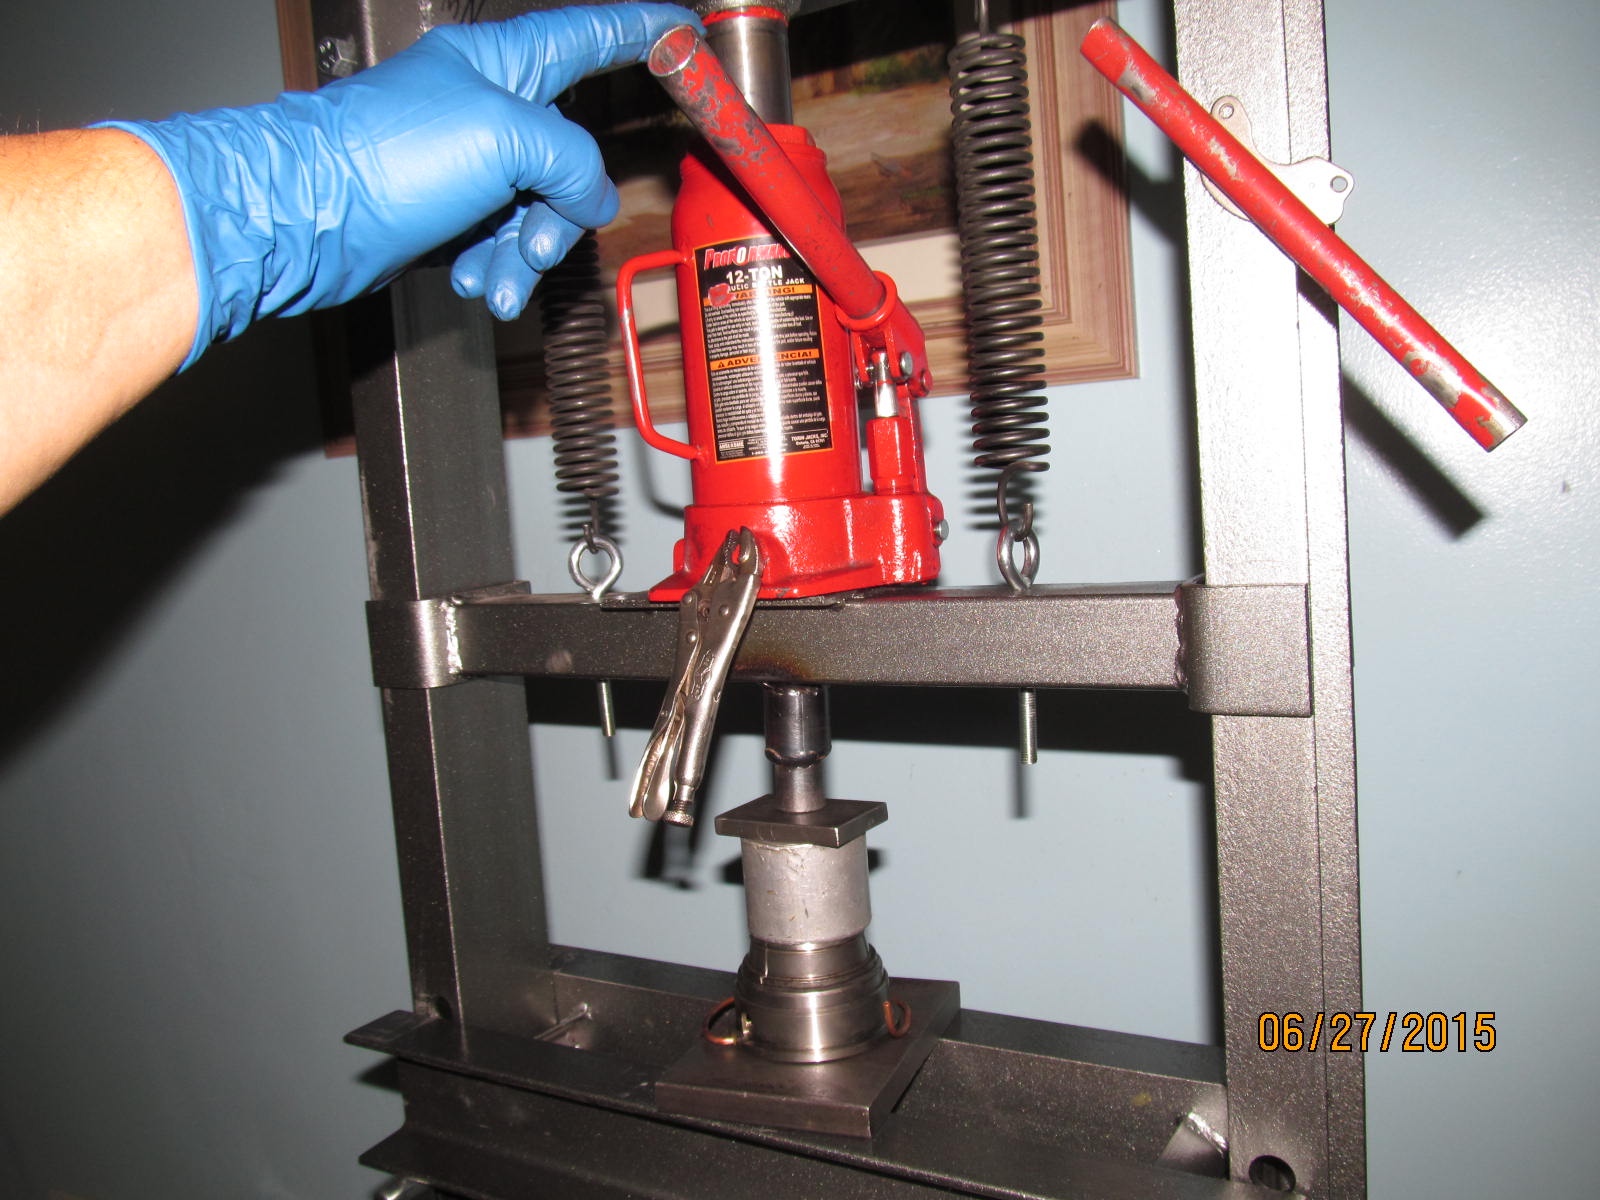
Now the Harbor freight 12 ton can easily push out the washer plate with the race at the same time.
|
|
|
|
|
And here the two are.
|
|
|
|
|
This is the ARB supplied bearing for the other journal (the side the seal housing assembly will be on).
|
|
|

|
|
It can be pressed on or even tapped on.
|
|
|
|
|
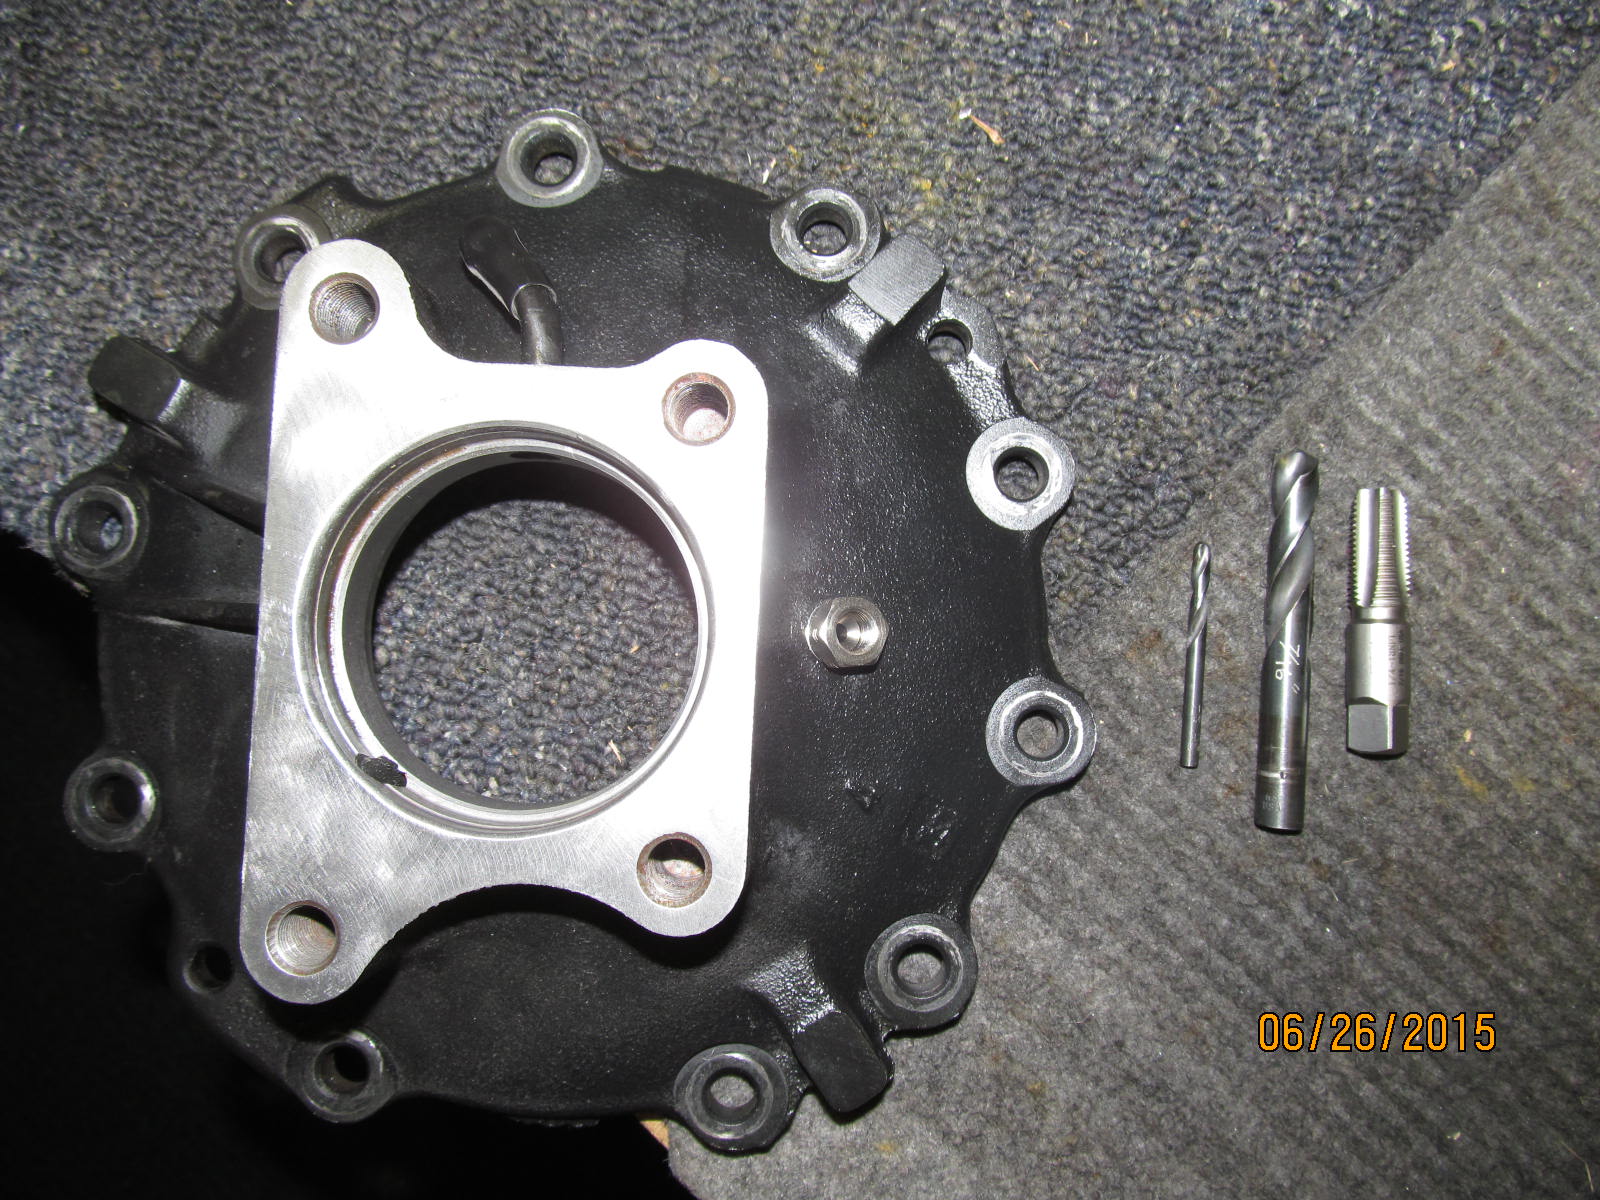
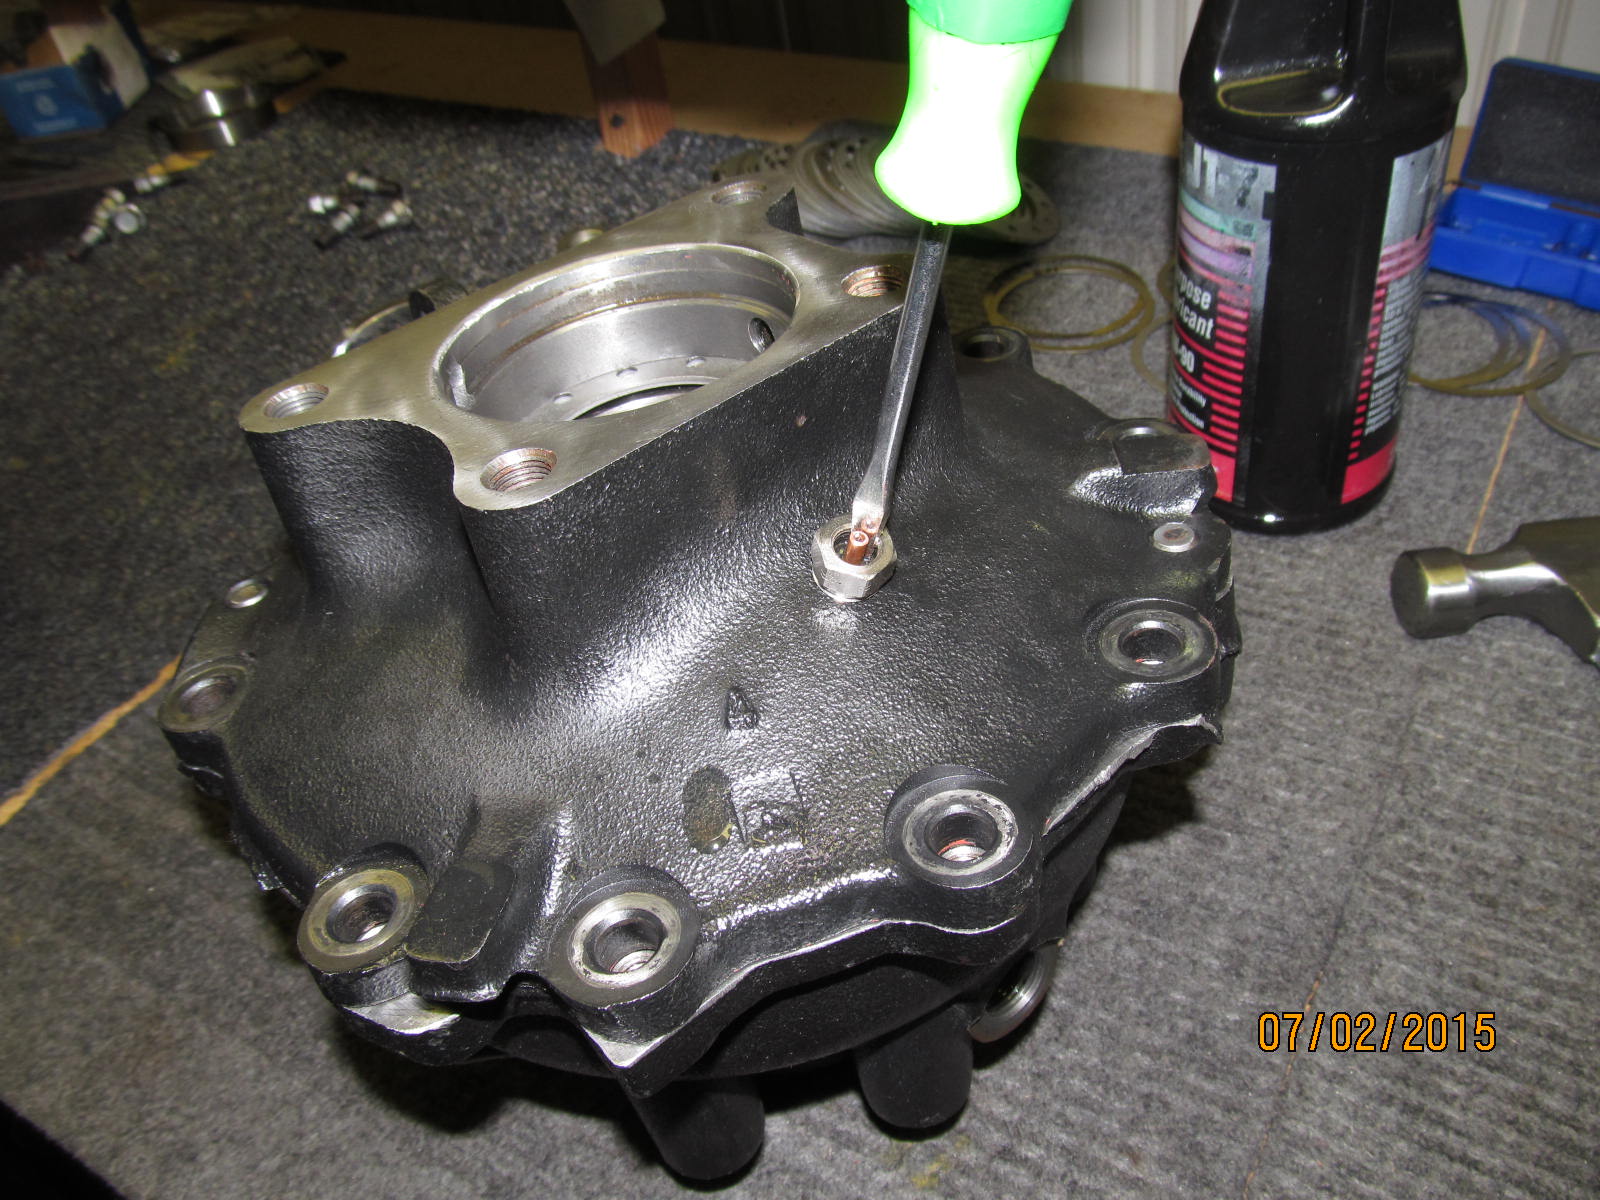
I couldn't wait to tap the hole for the bulkhead fitting. 1/4" NPT and a 7/16" drill bit.
|
|
|
|
|
..........................
|
|
|
|
|
.................................
|
|
|
|
|
.............................
|
|
|
|
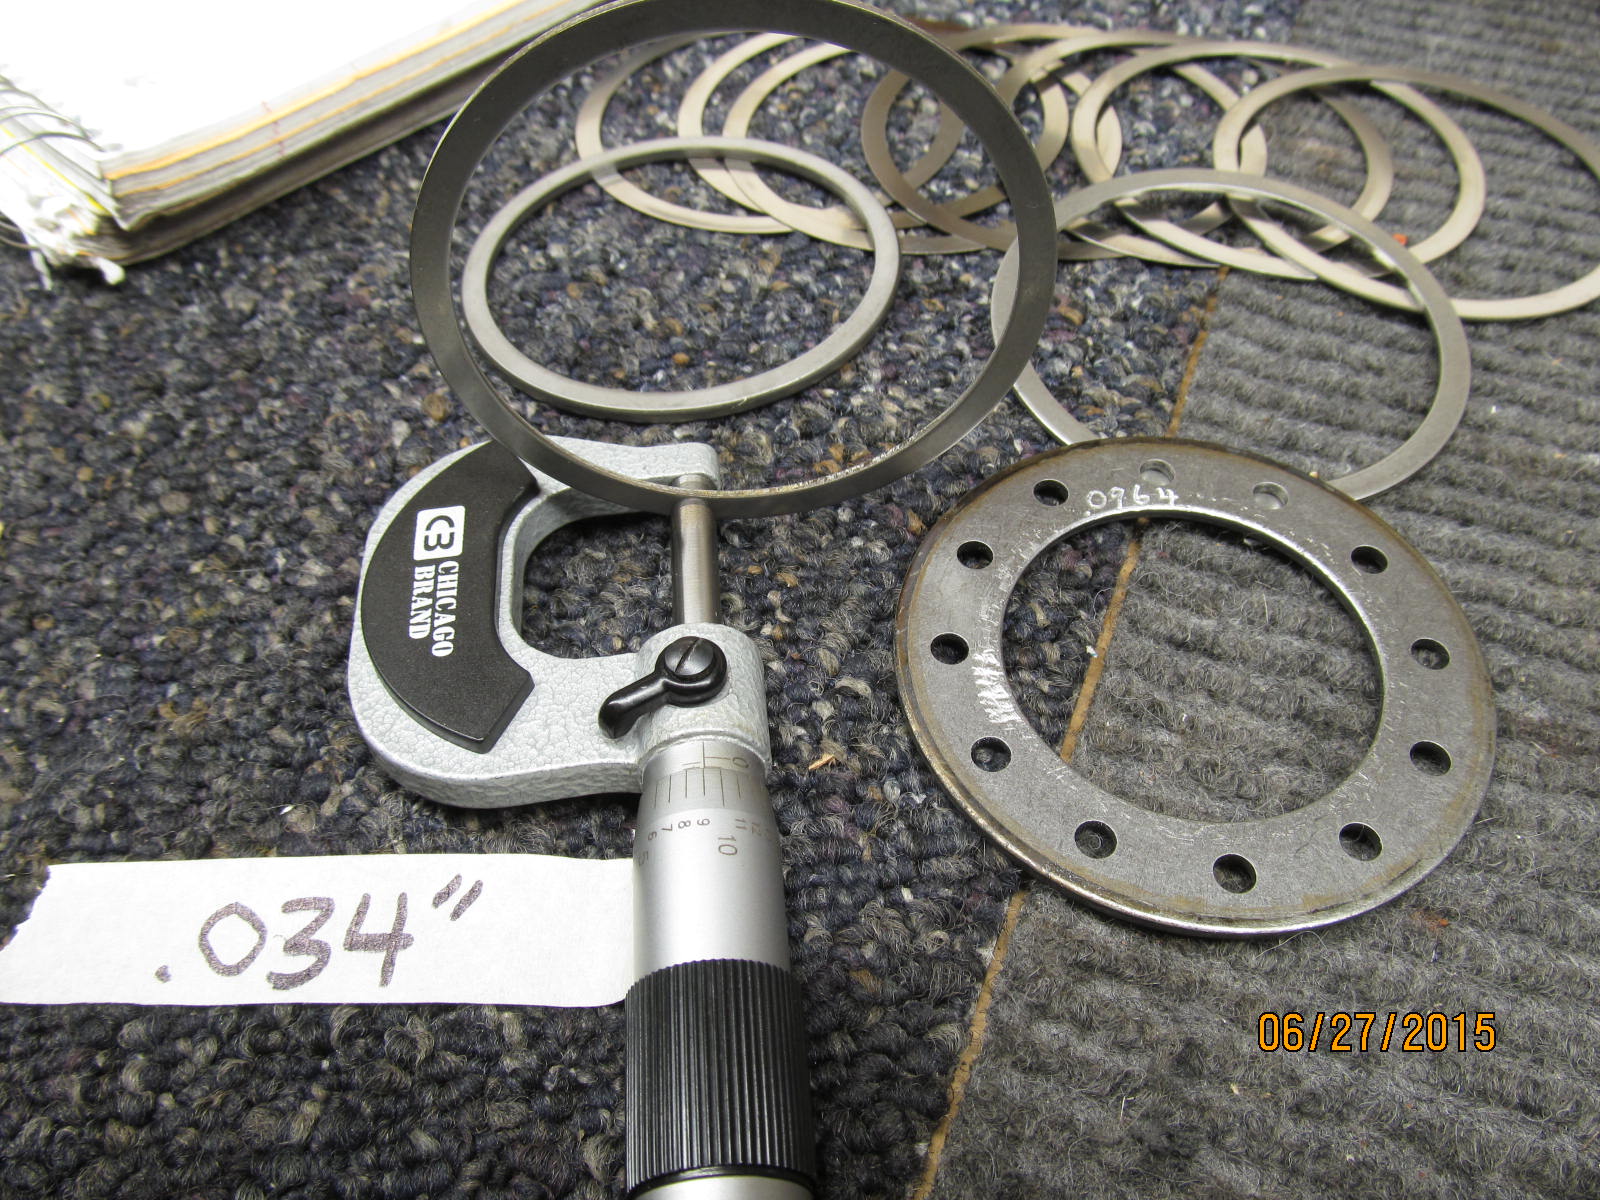
ARB recommends a minimum of .030" to prevent the cage of the new bearing from contacting the
OEM washer plate so I chose .034" from the supplied ARB shim selection.
|
|
|
|
|
The 034 goes right on top of the OEM washer plate.
|
|
|
|
|
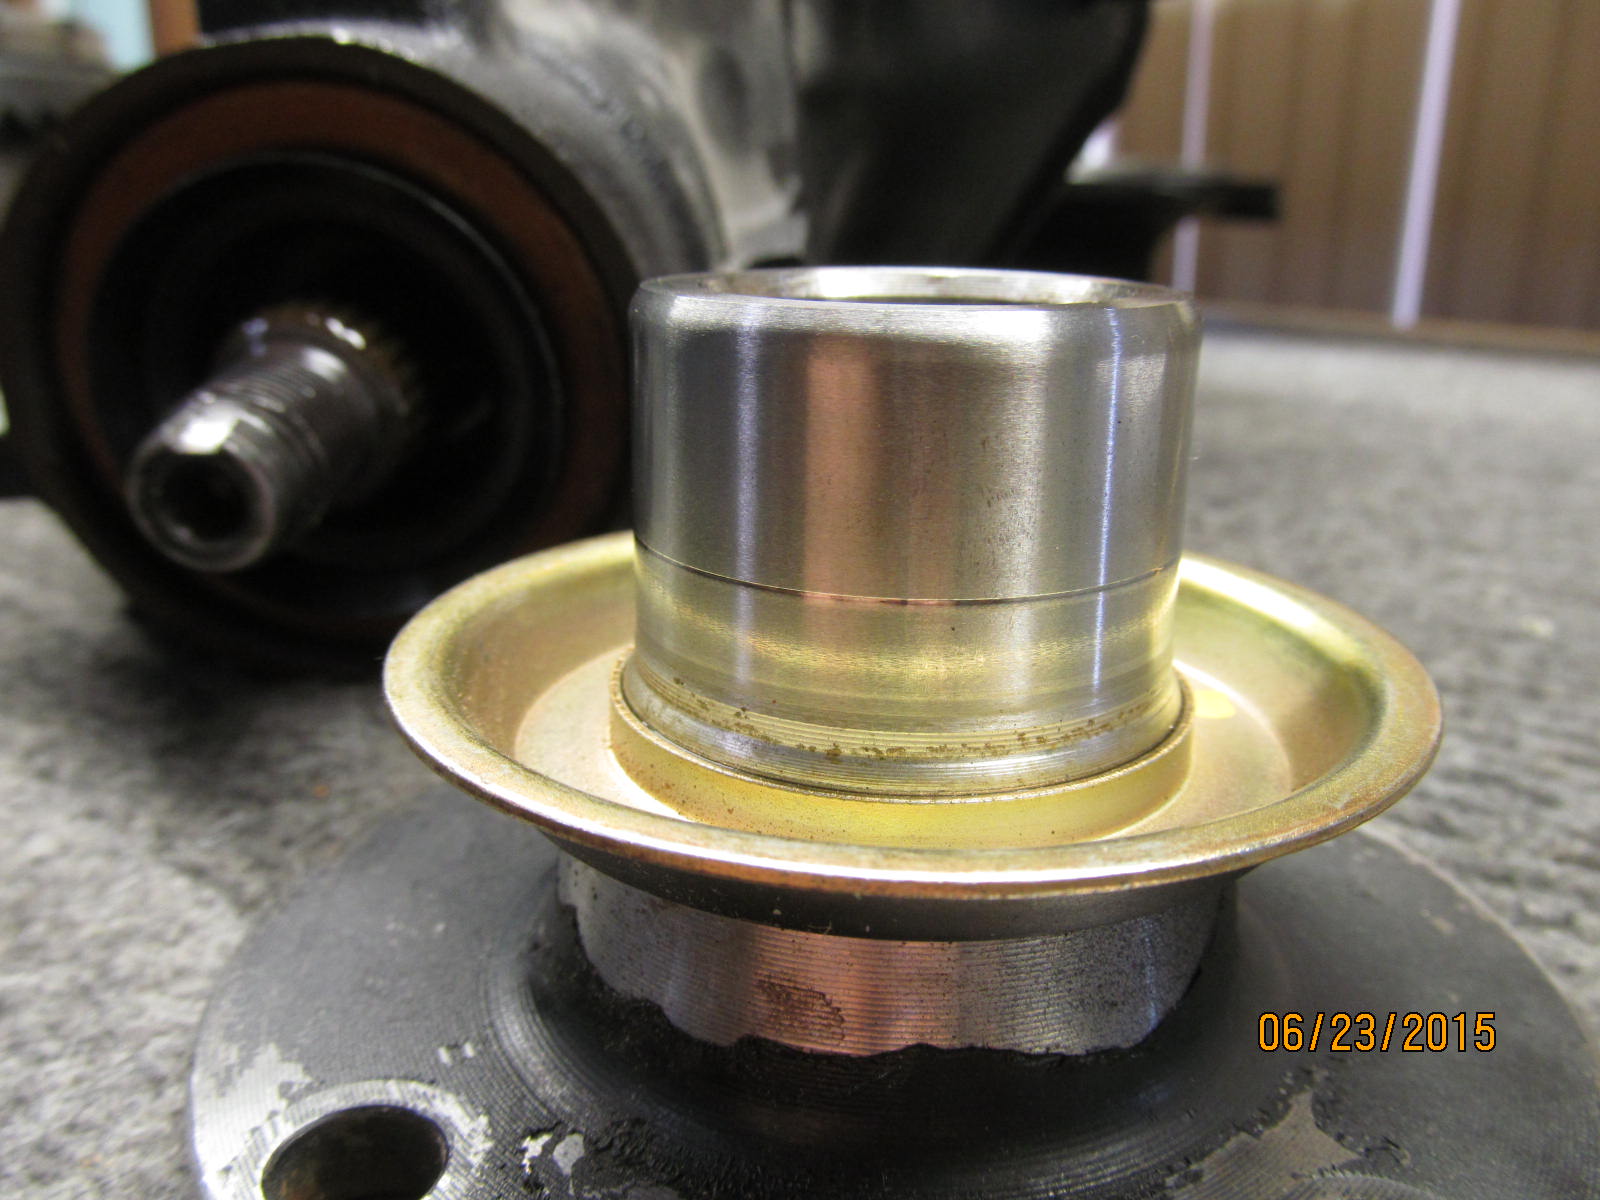
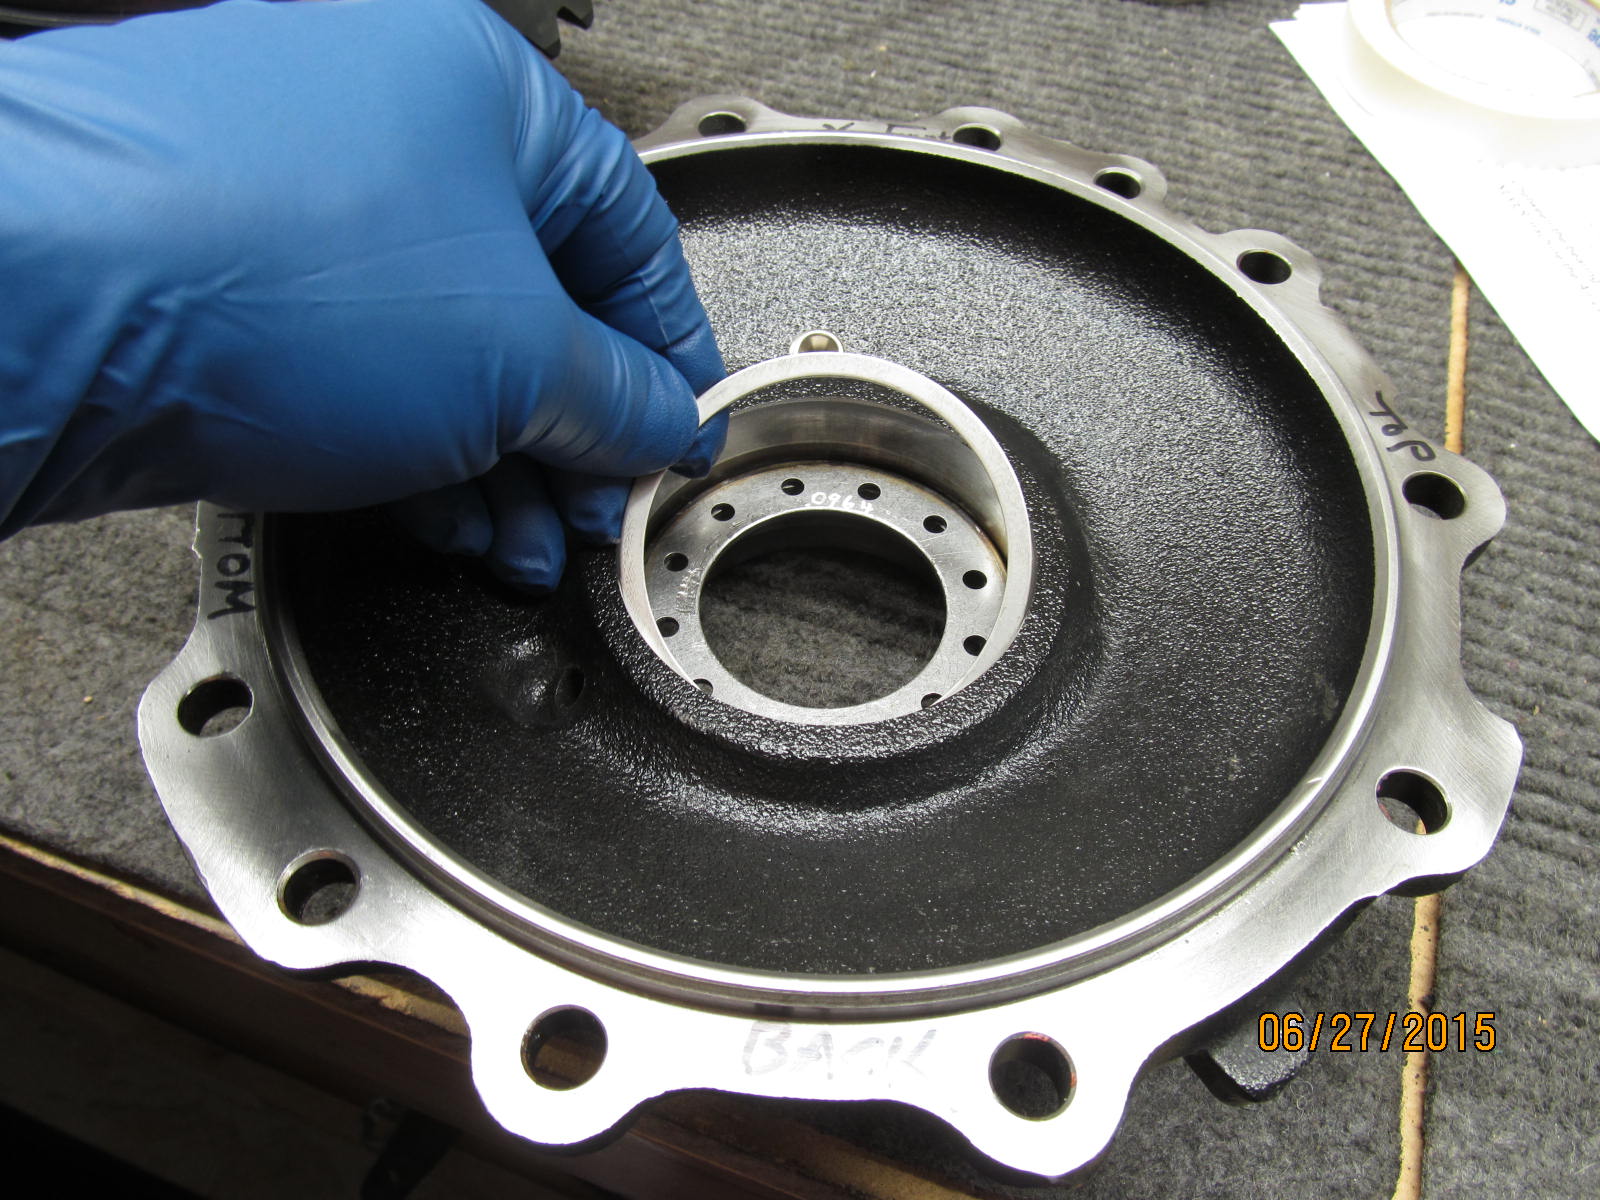
The ARB supplied race...
|
|
|
|
|
...presses into the seal housing.
|
|
|
|
|
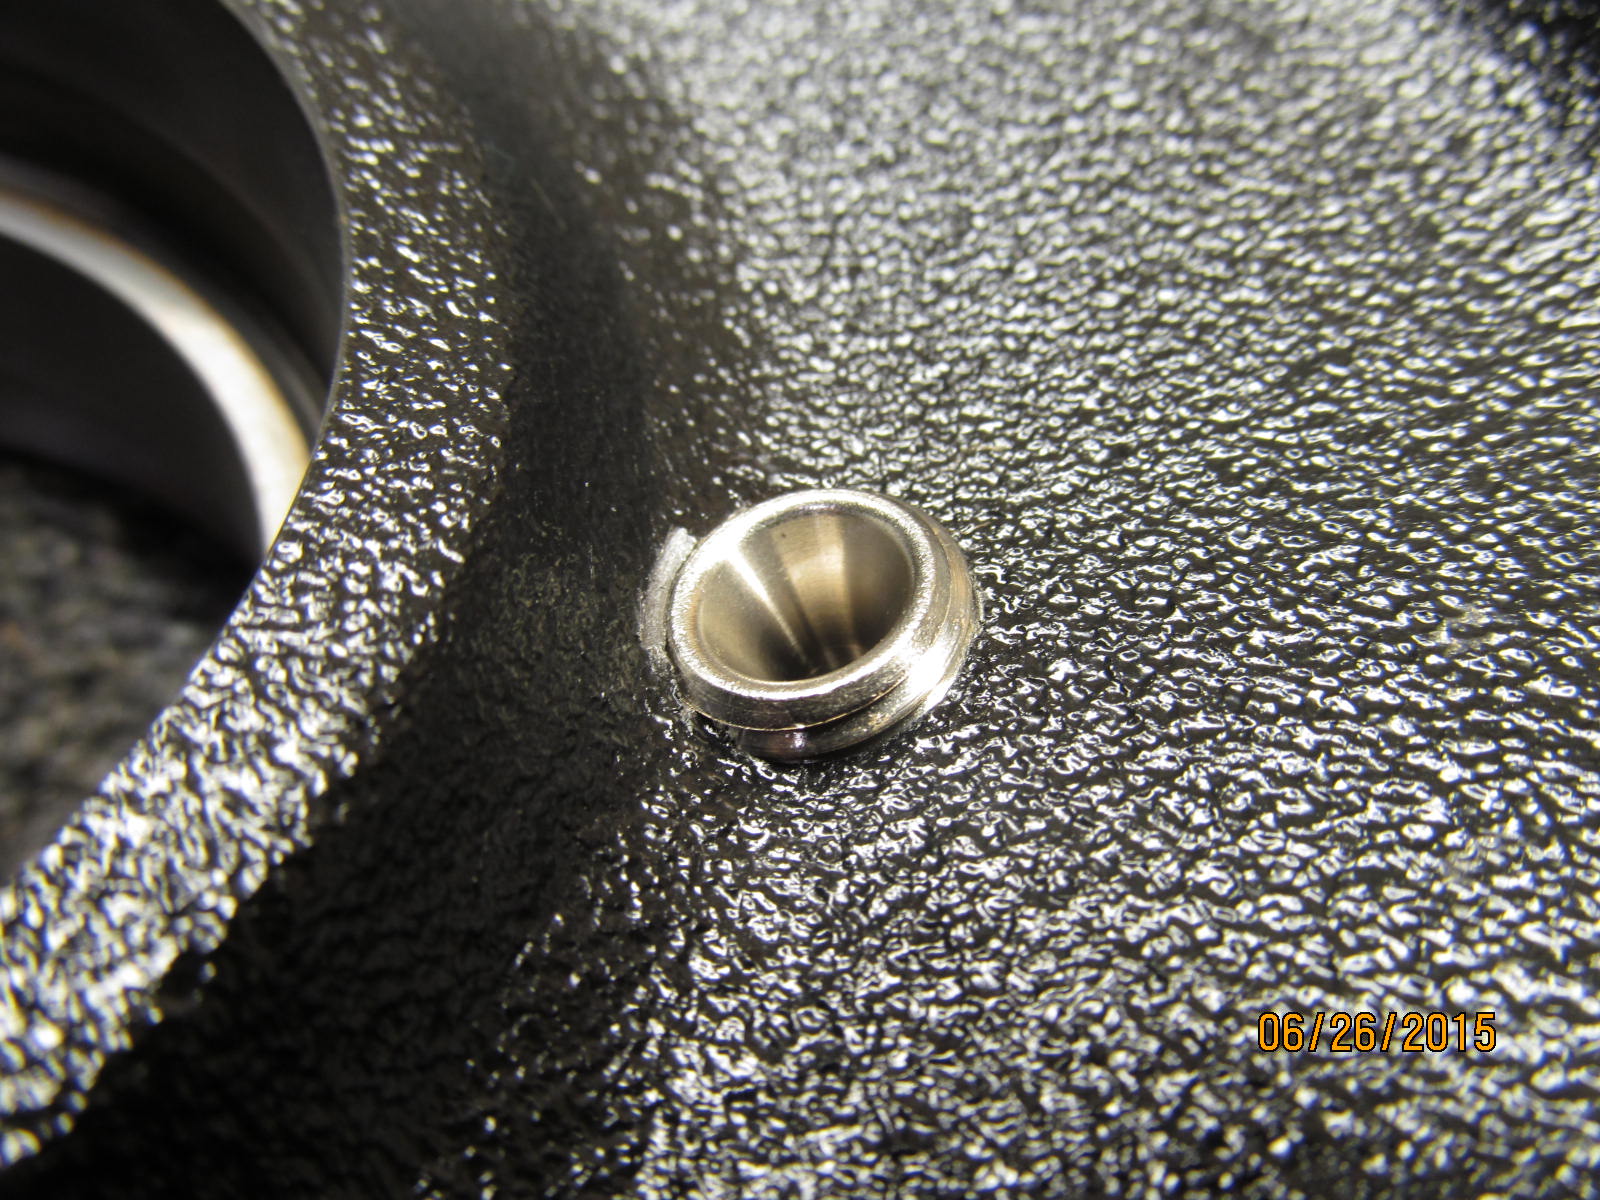
Just takes 1 finger.
|
|
|
|
|
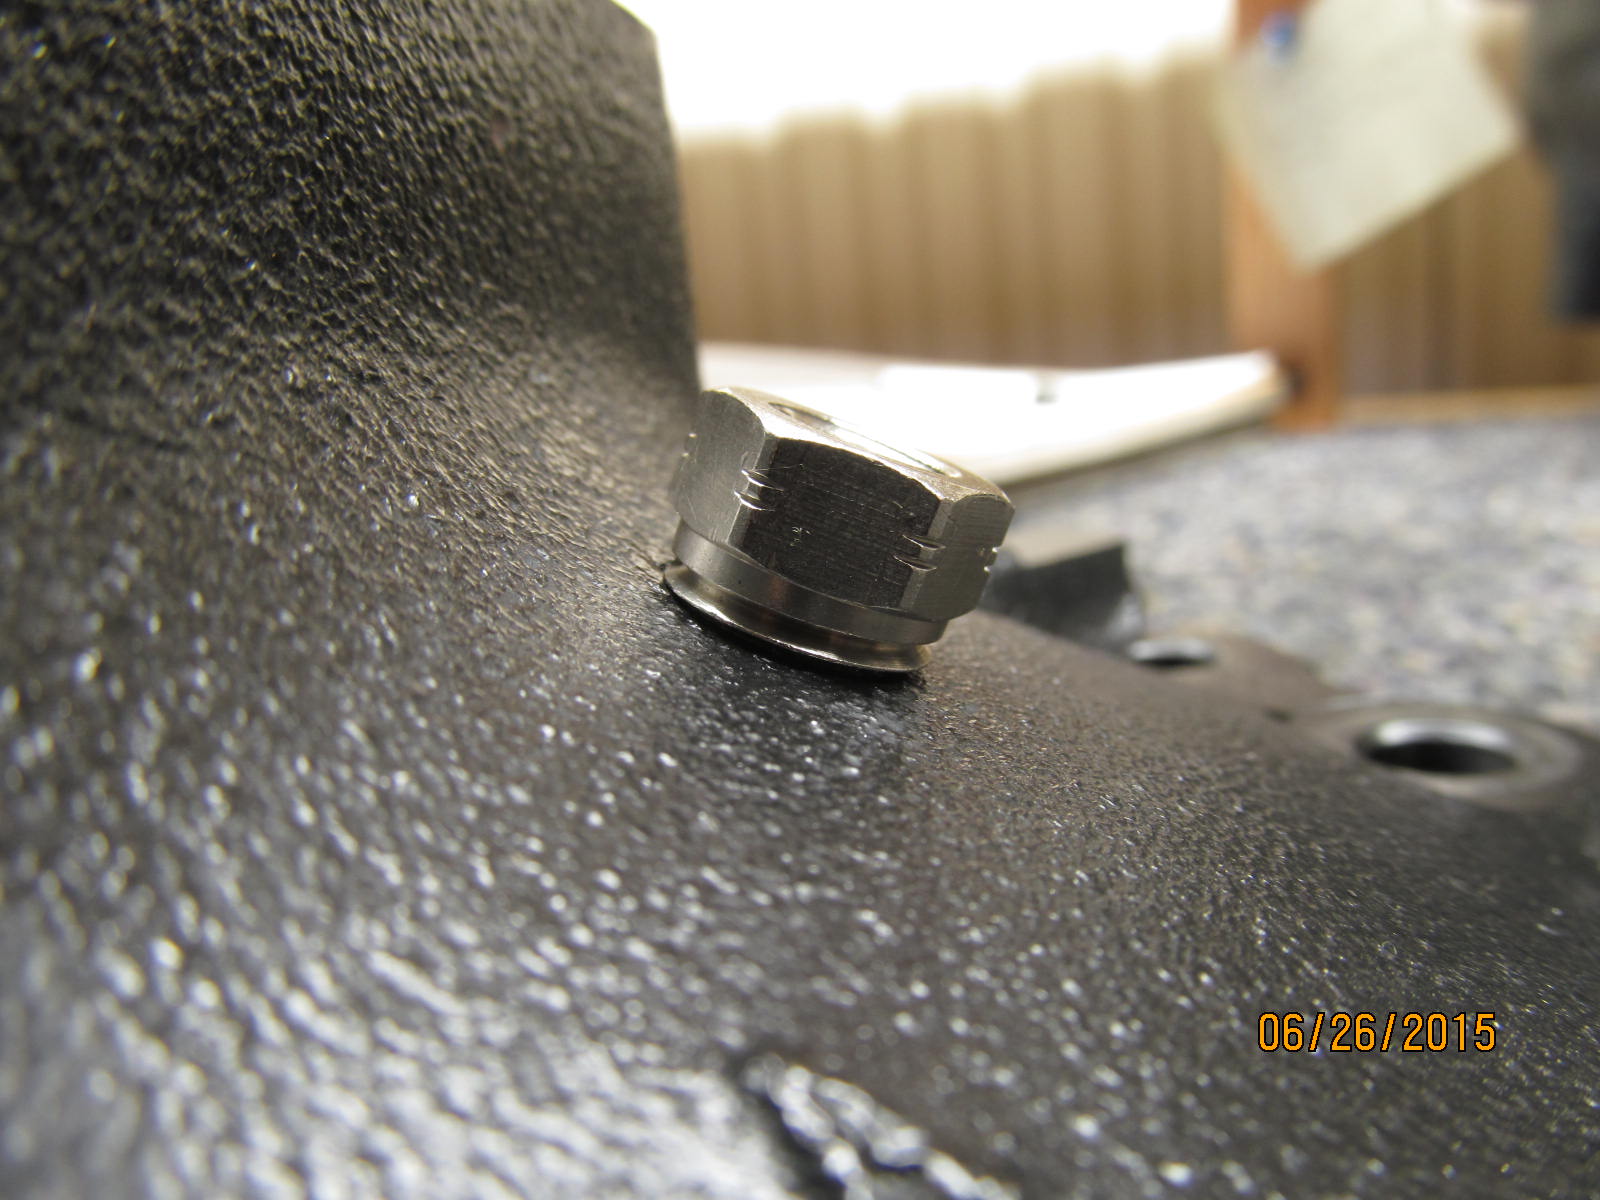
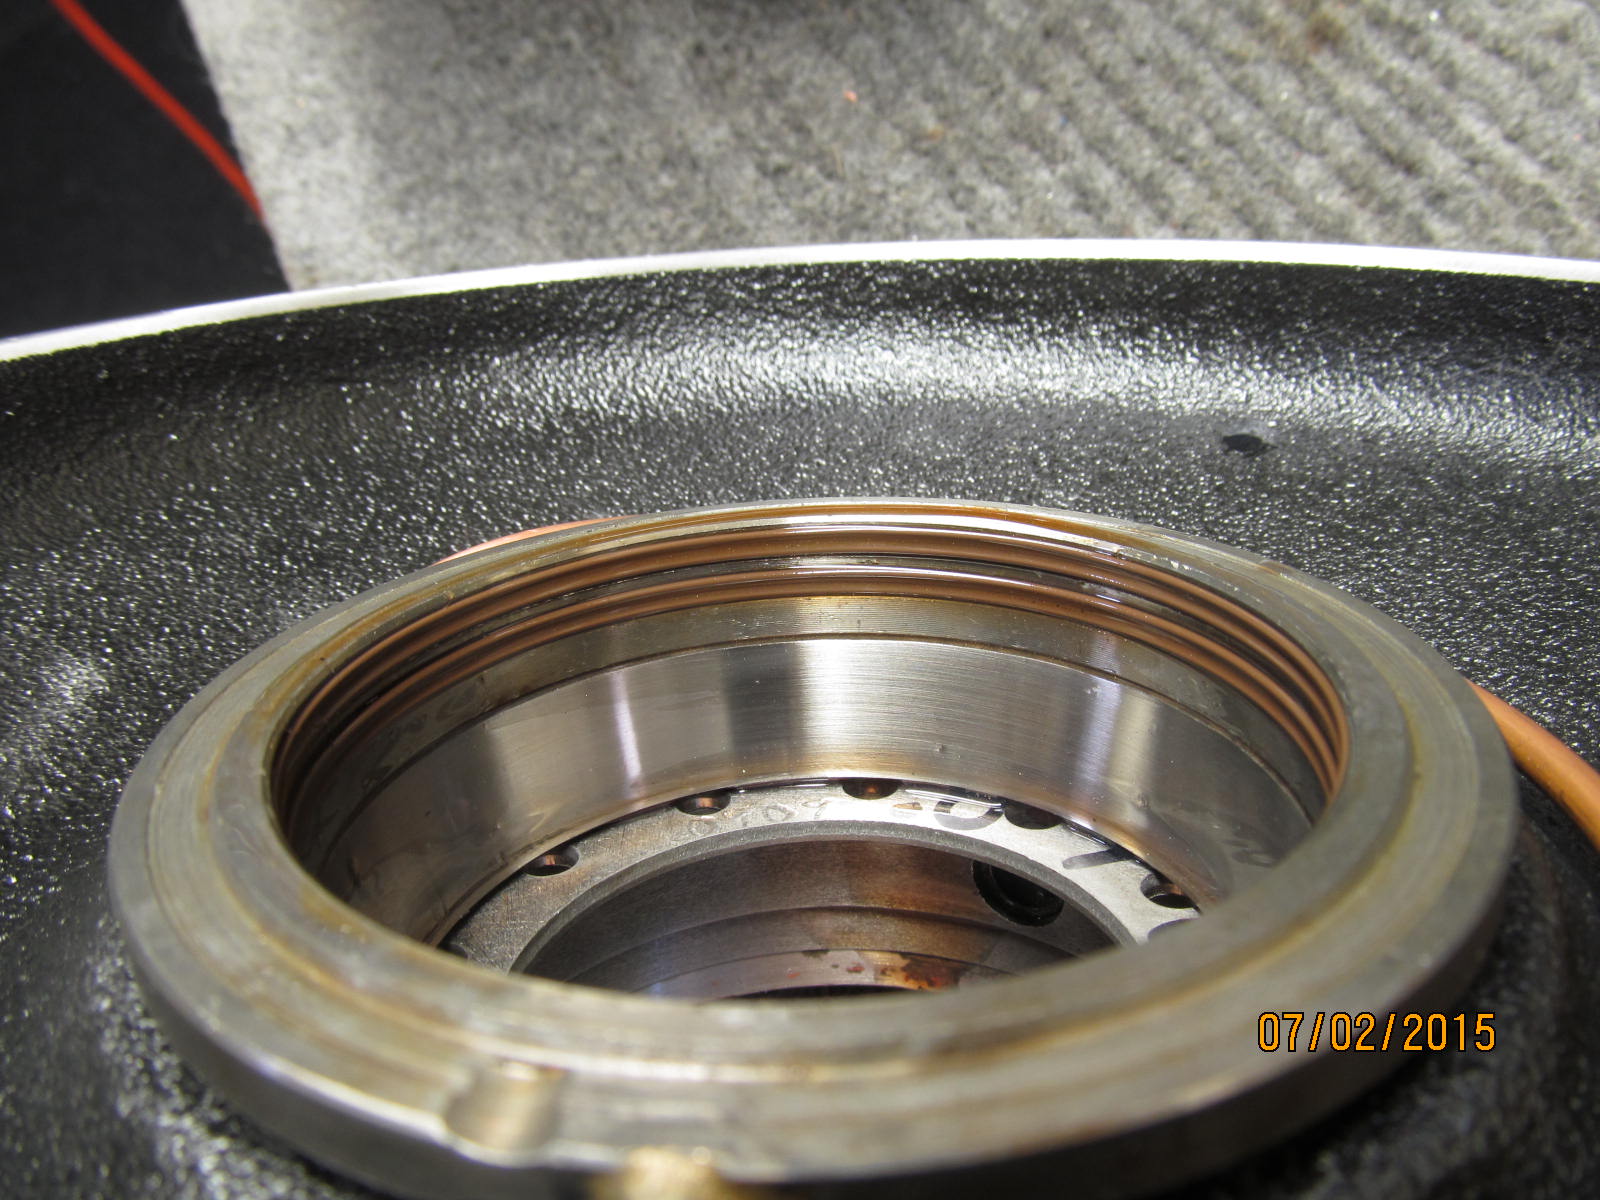
It is easy to feel it bottom out so positively and this is what it looks like.
|
|
|
|
|
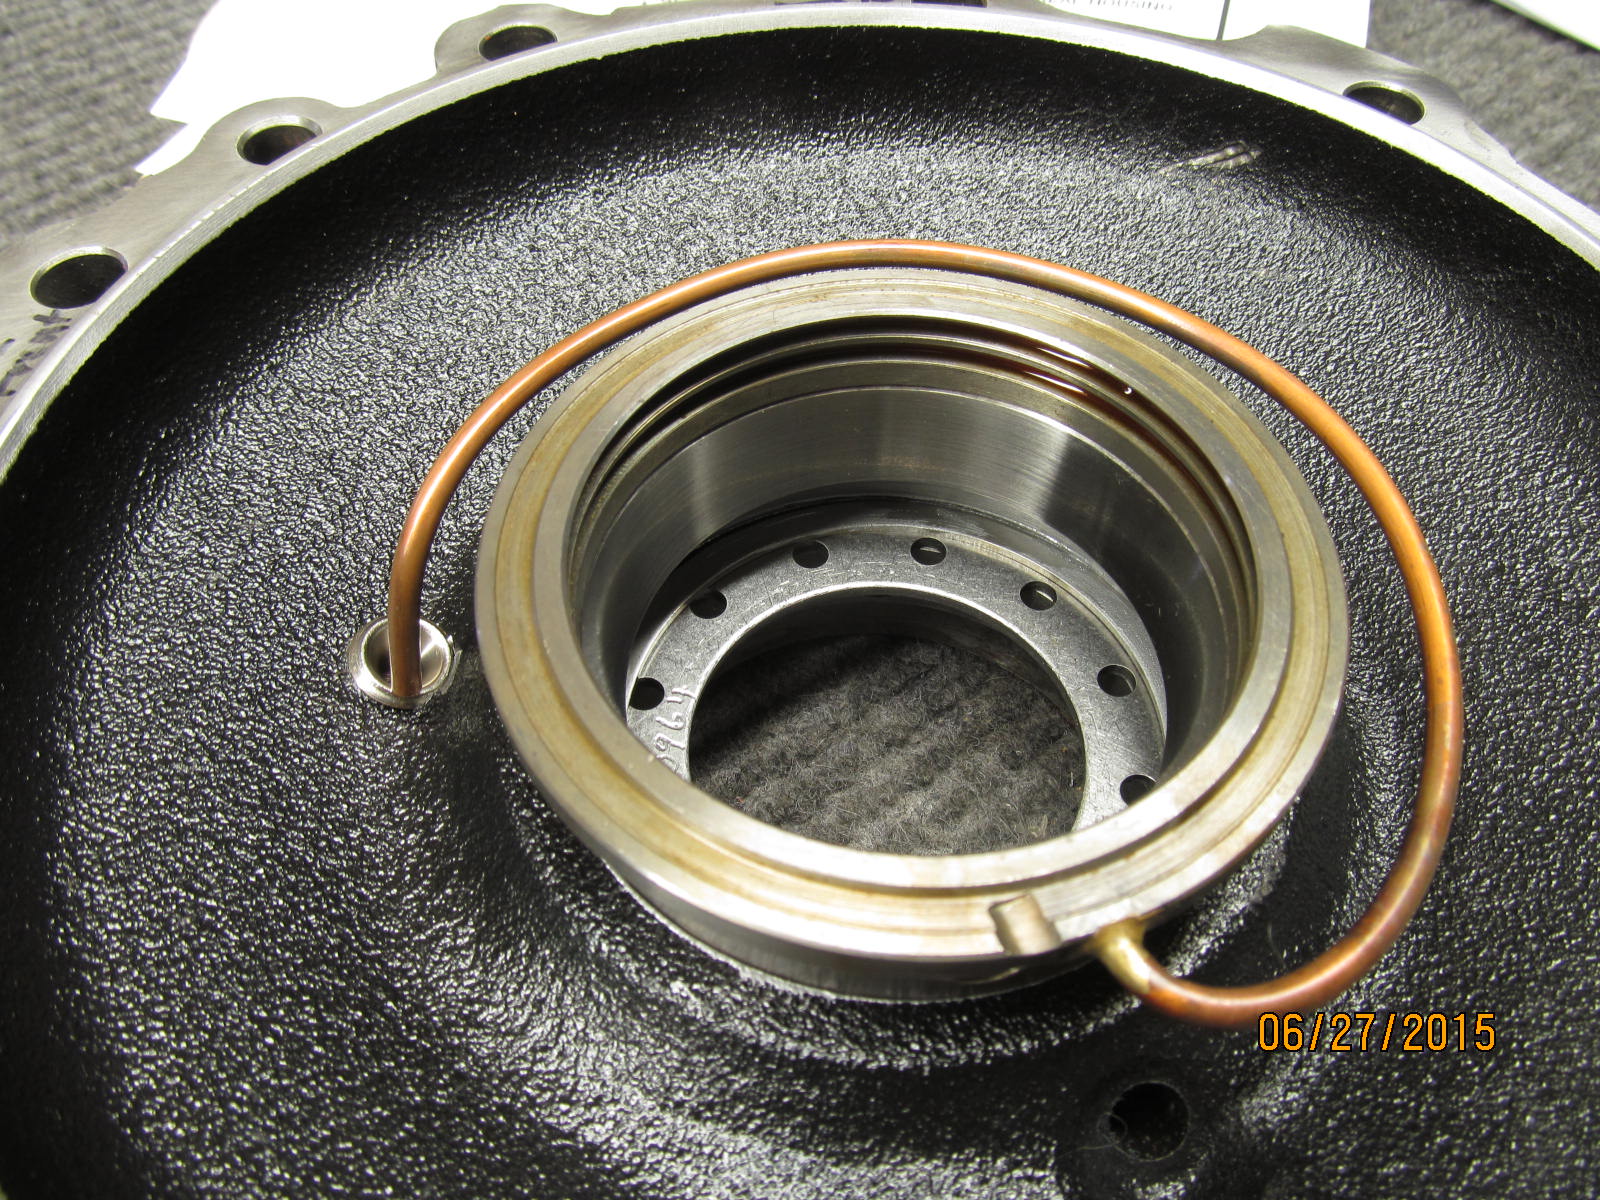
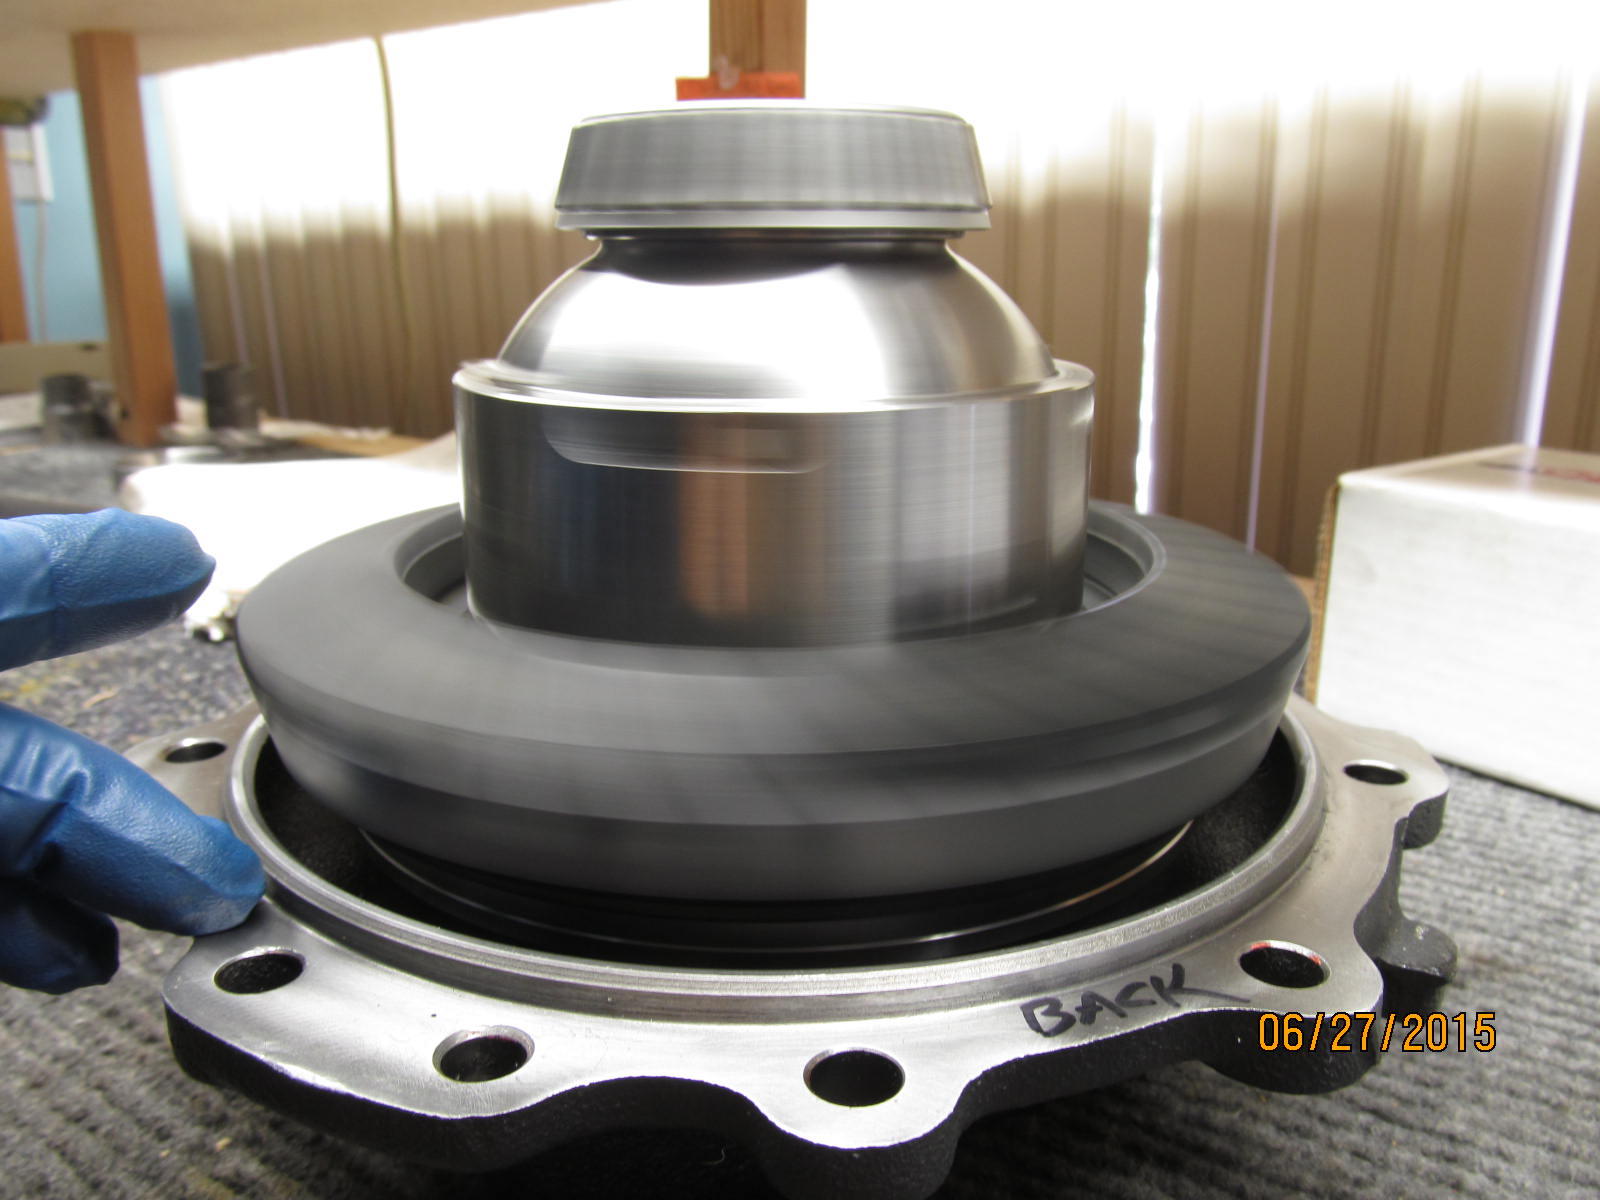
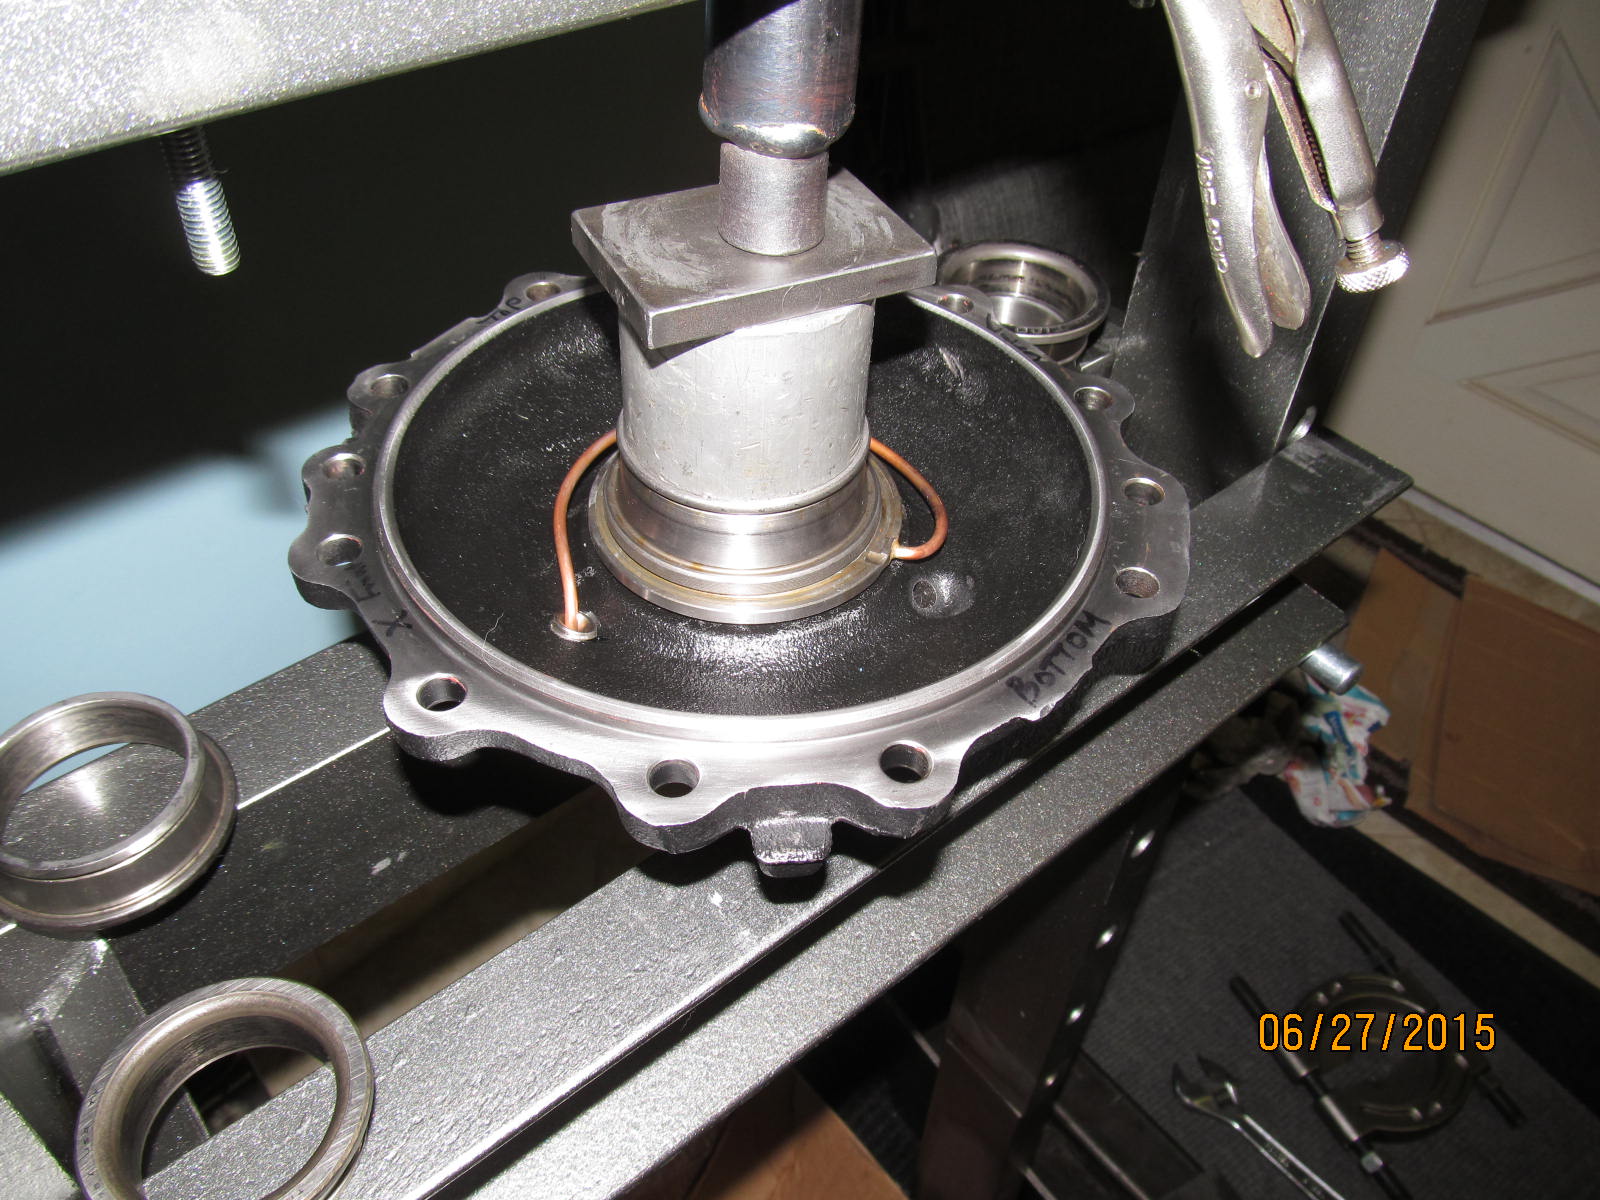
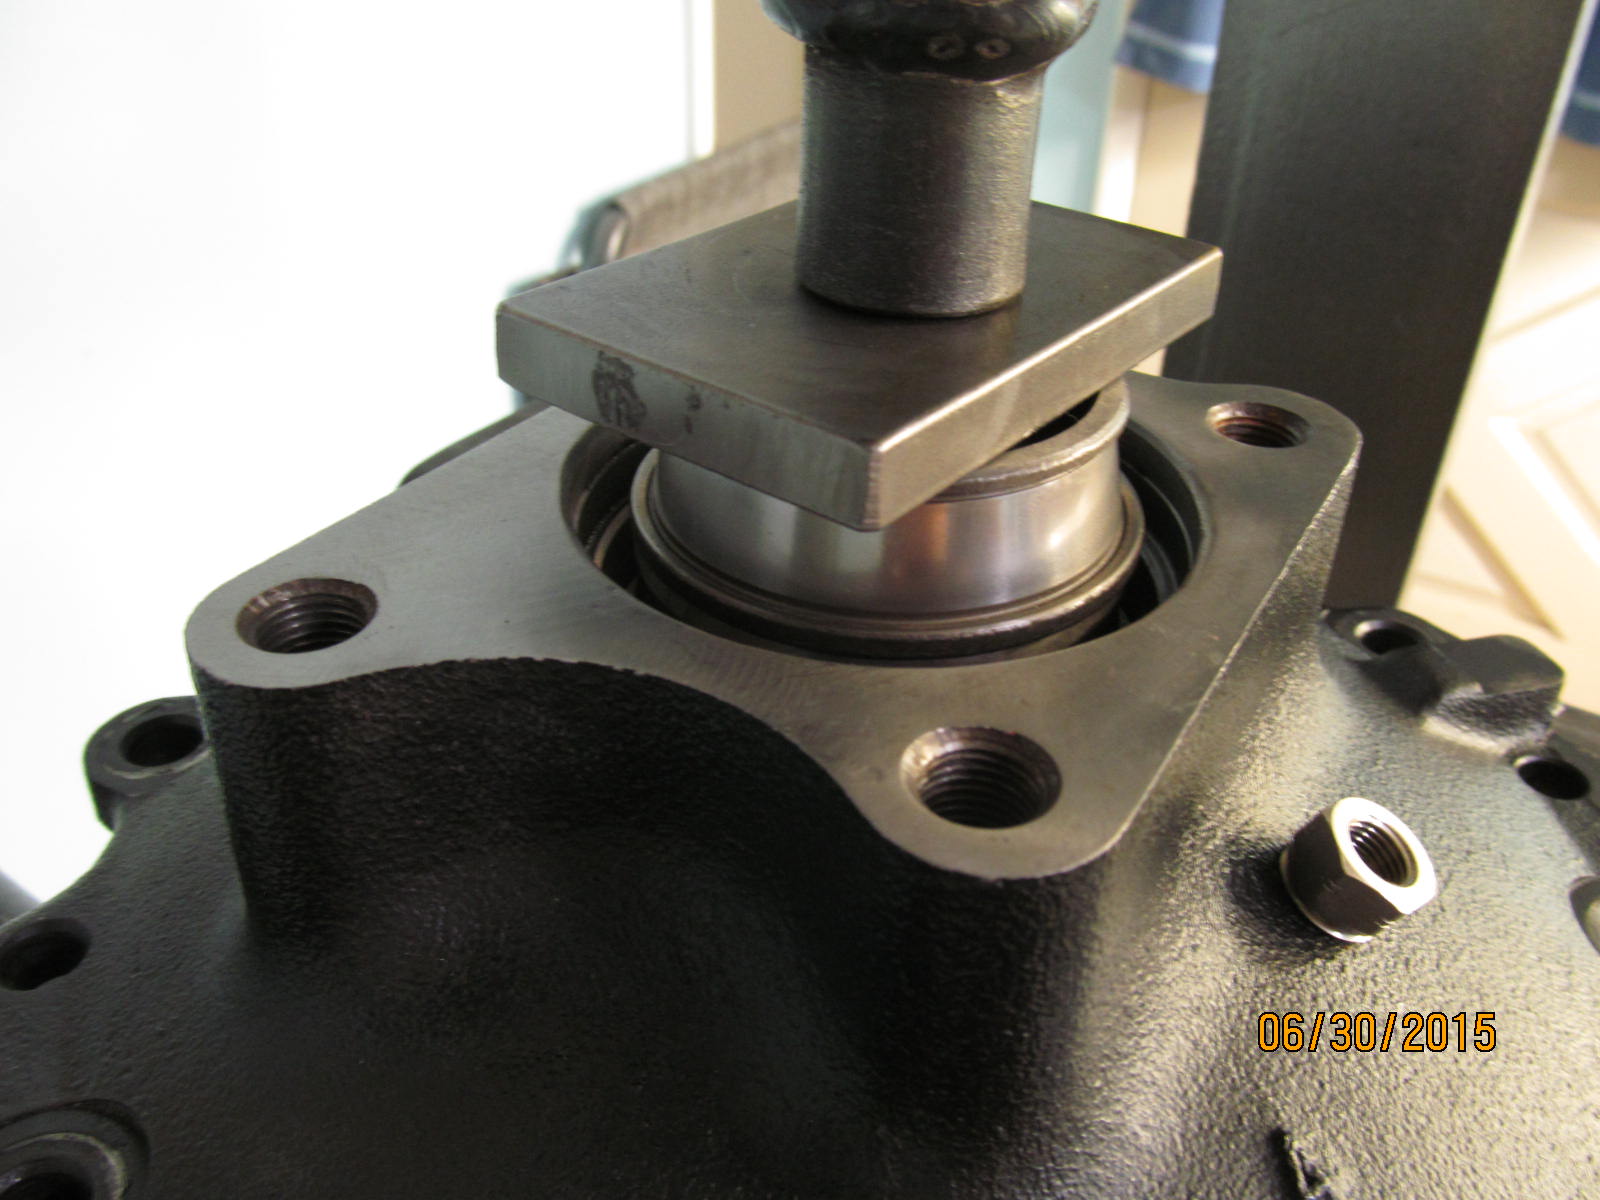
Now press this up against the shim combo.
|
|
|

|
|
The 12 ton is more than enough juice to get the job done. Just 1 finger.
|
|
|
|
Some shops forget to use the 030" shim and the results are disasterous. But the 034" gap (shadow) can easily
be seen in this shot.
|
|
|
|
|
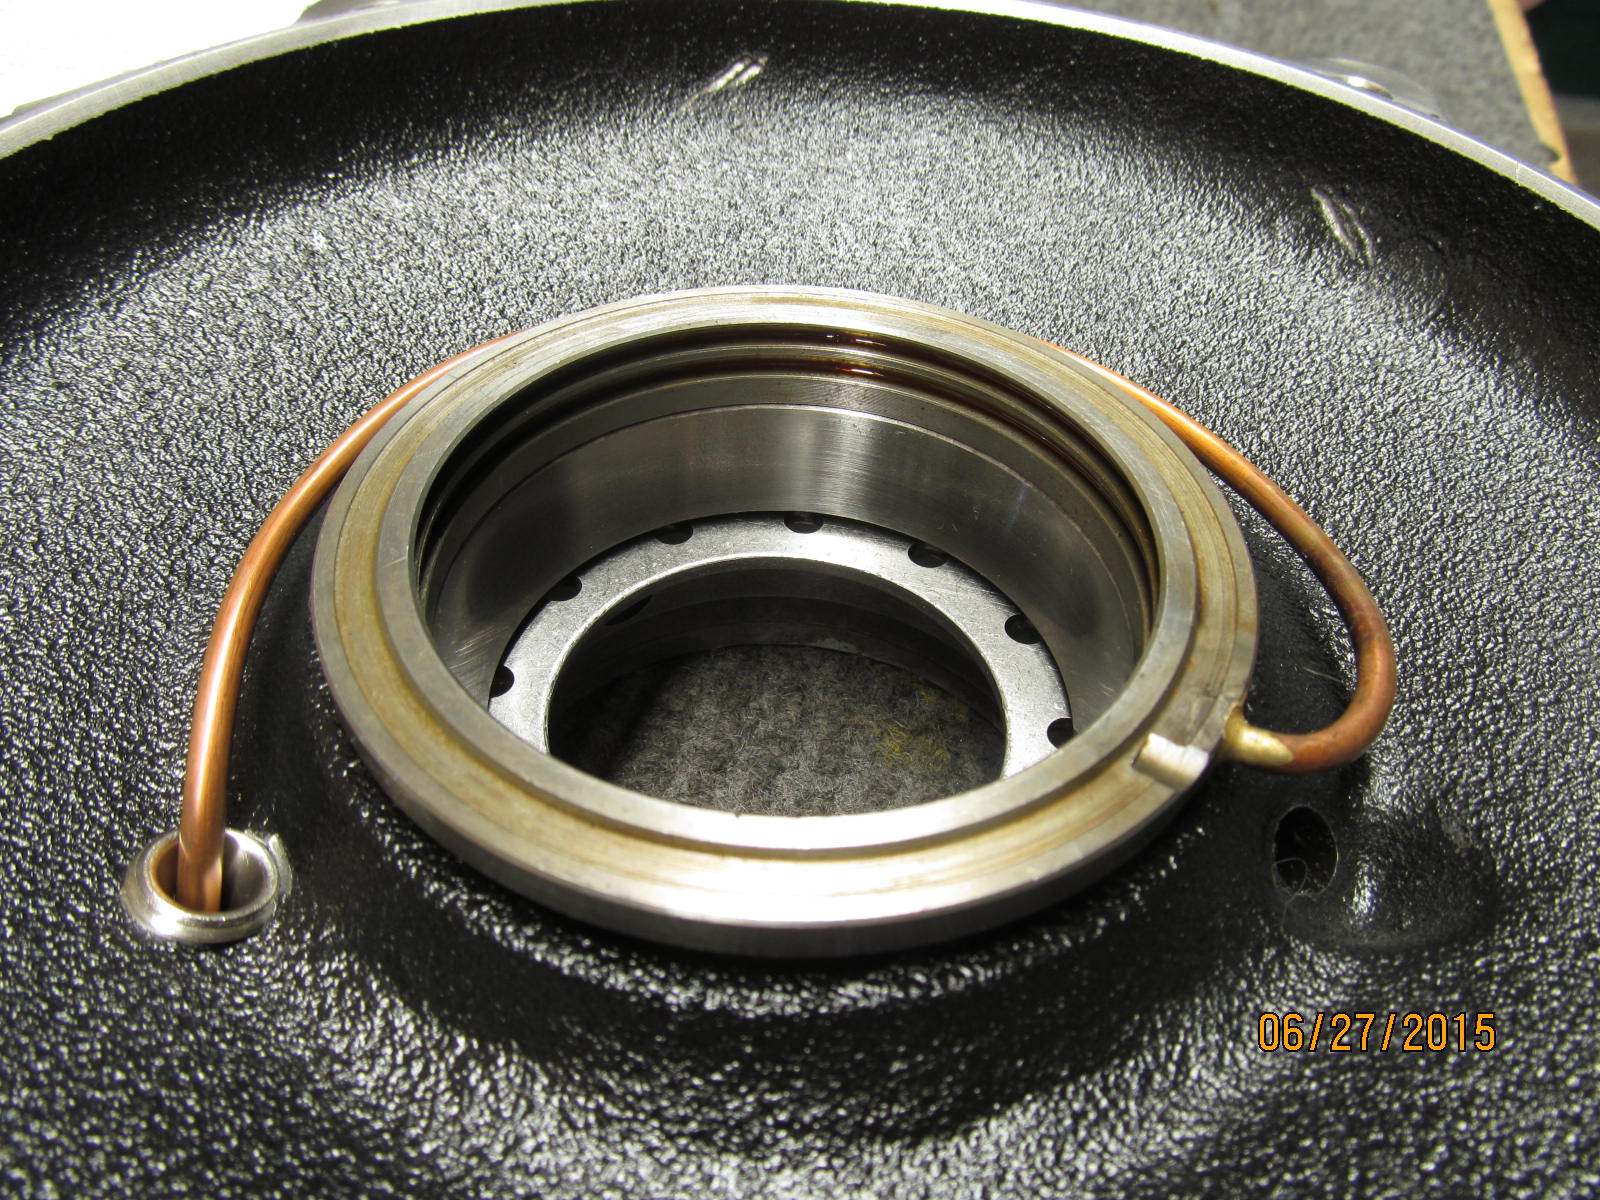
My test for clearance...like a spinning top....spins very freely and no scraping noise heard.
|
|
|
|
|
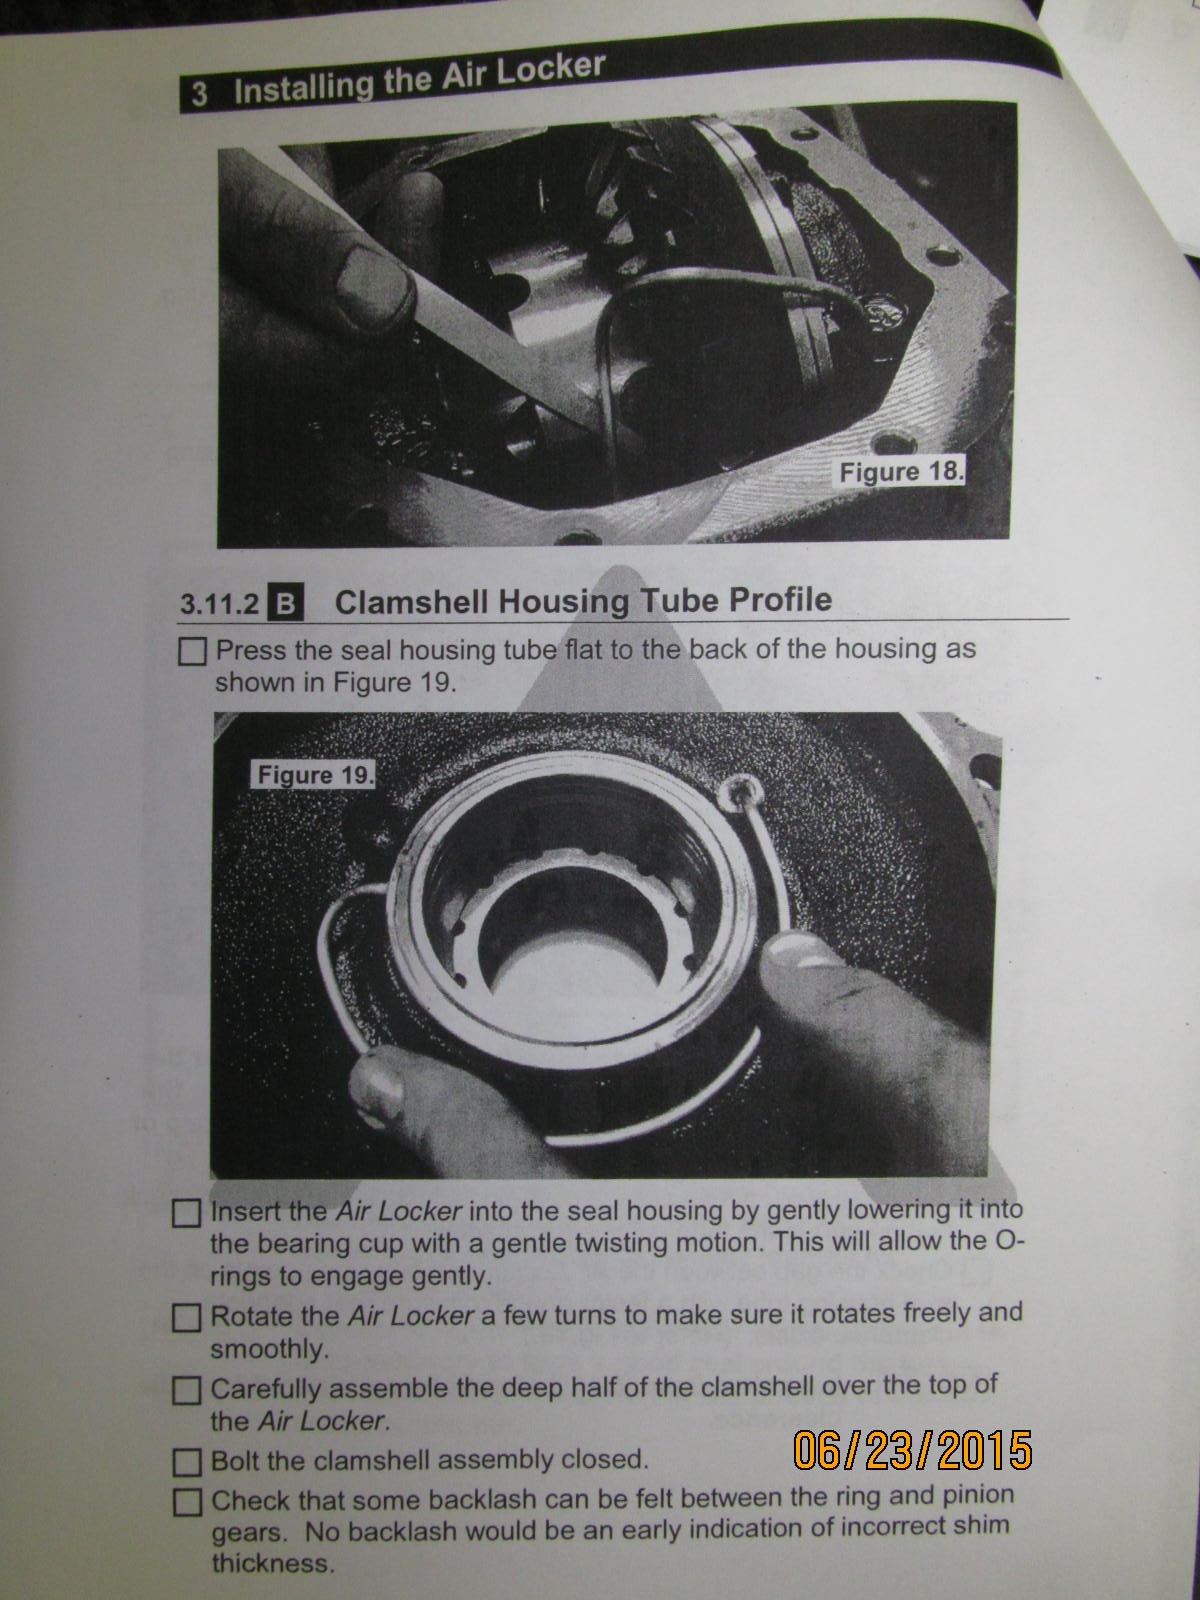
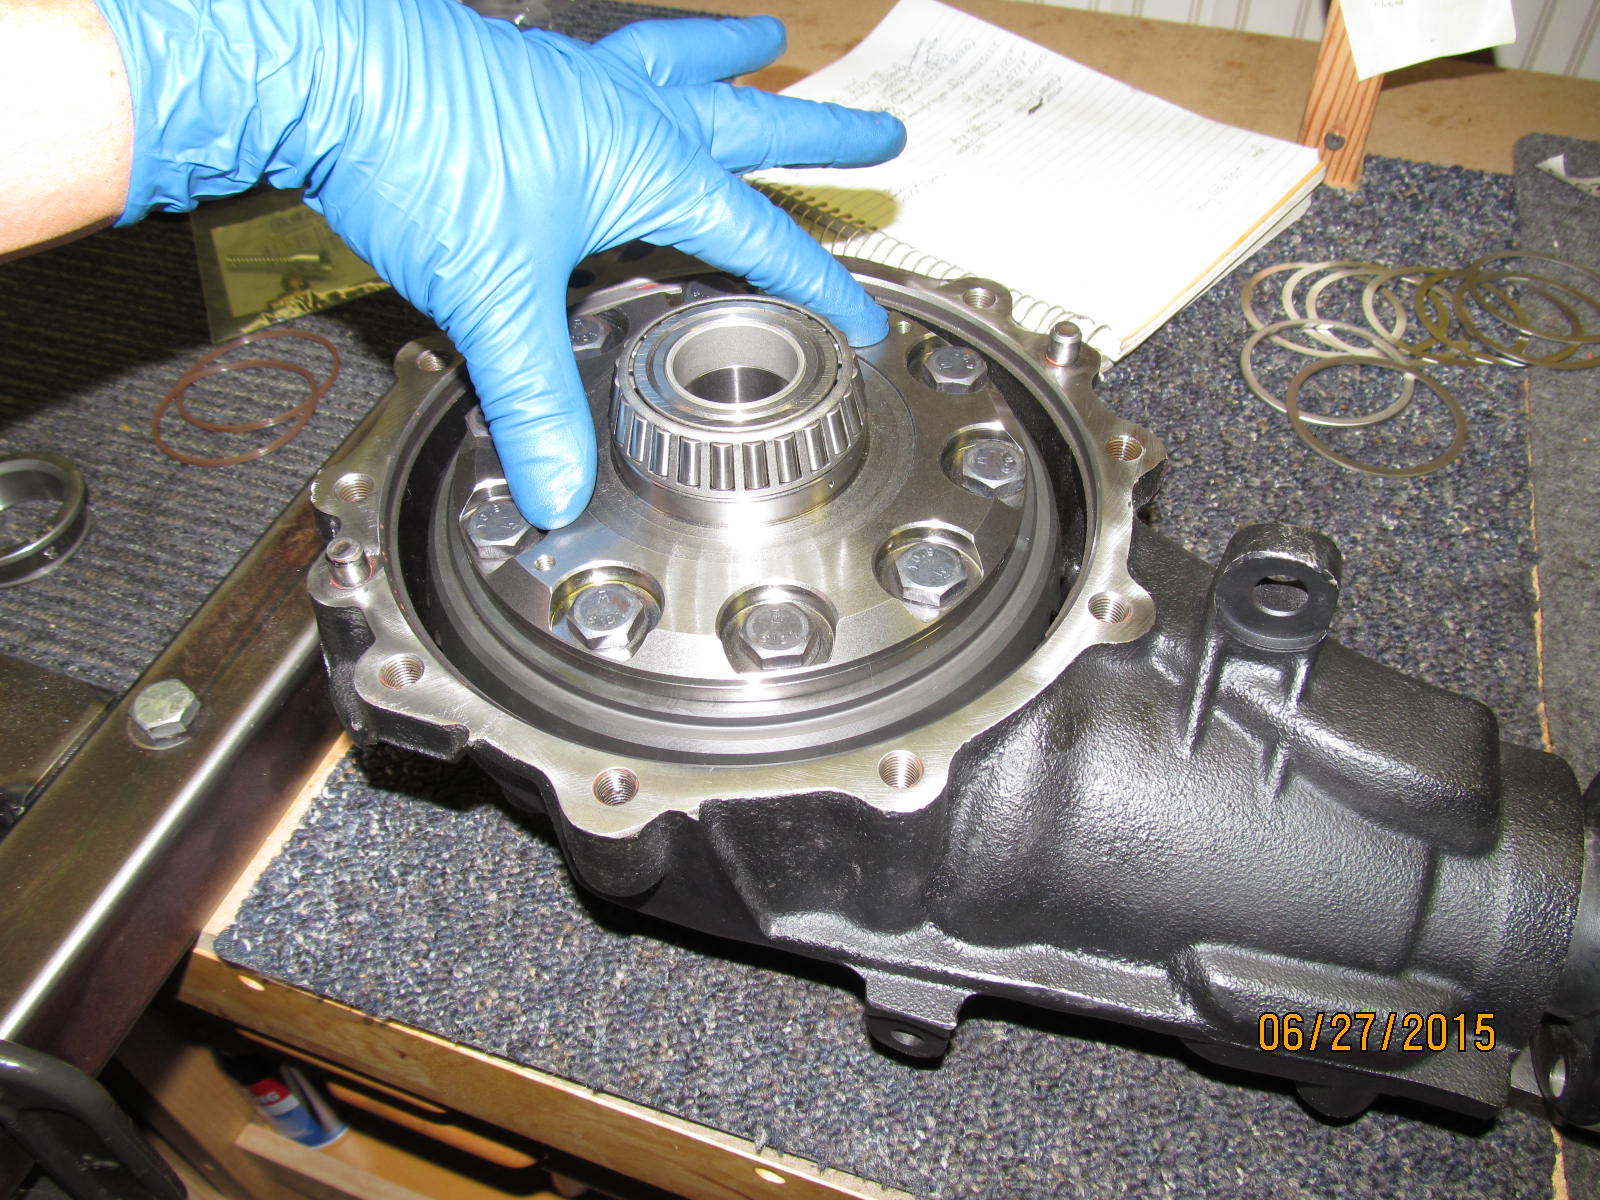
Placing the ARB in the "deep dish" I feel some backlash so we might be able to make a good paint test.
|
|
|
|
|
Cover gets tapped on.
|
|
|
|
|
I found that the gap was excessive at about .032" (needs to be closer to .010")
|
|
|
|
|
|
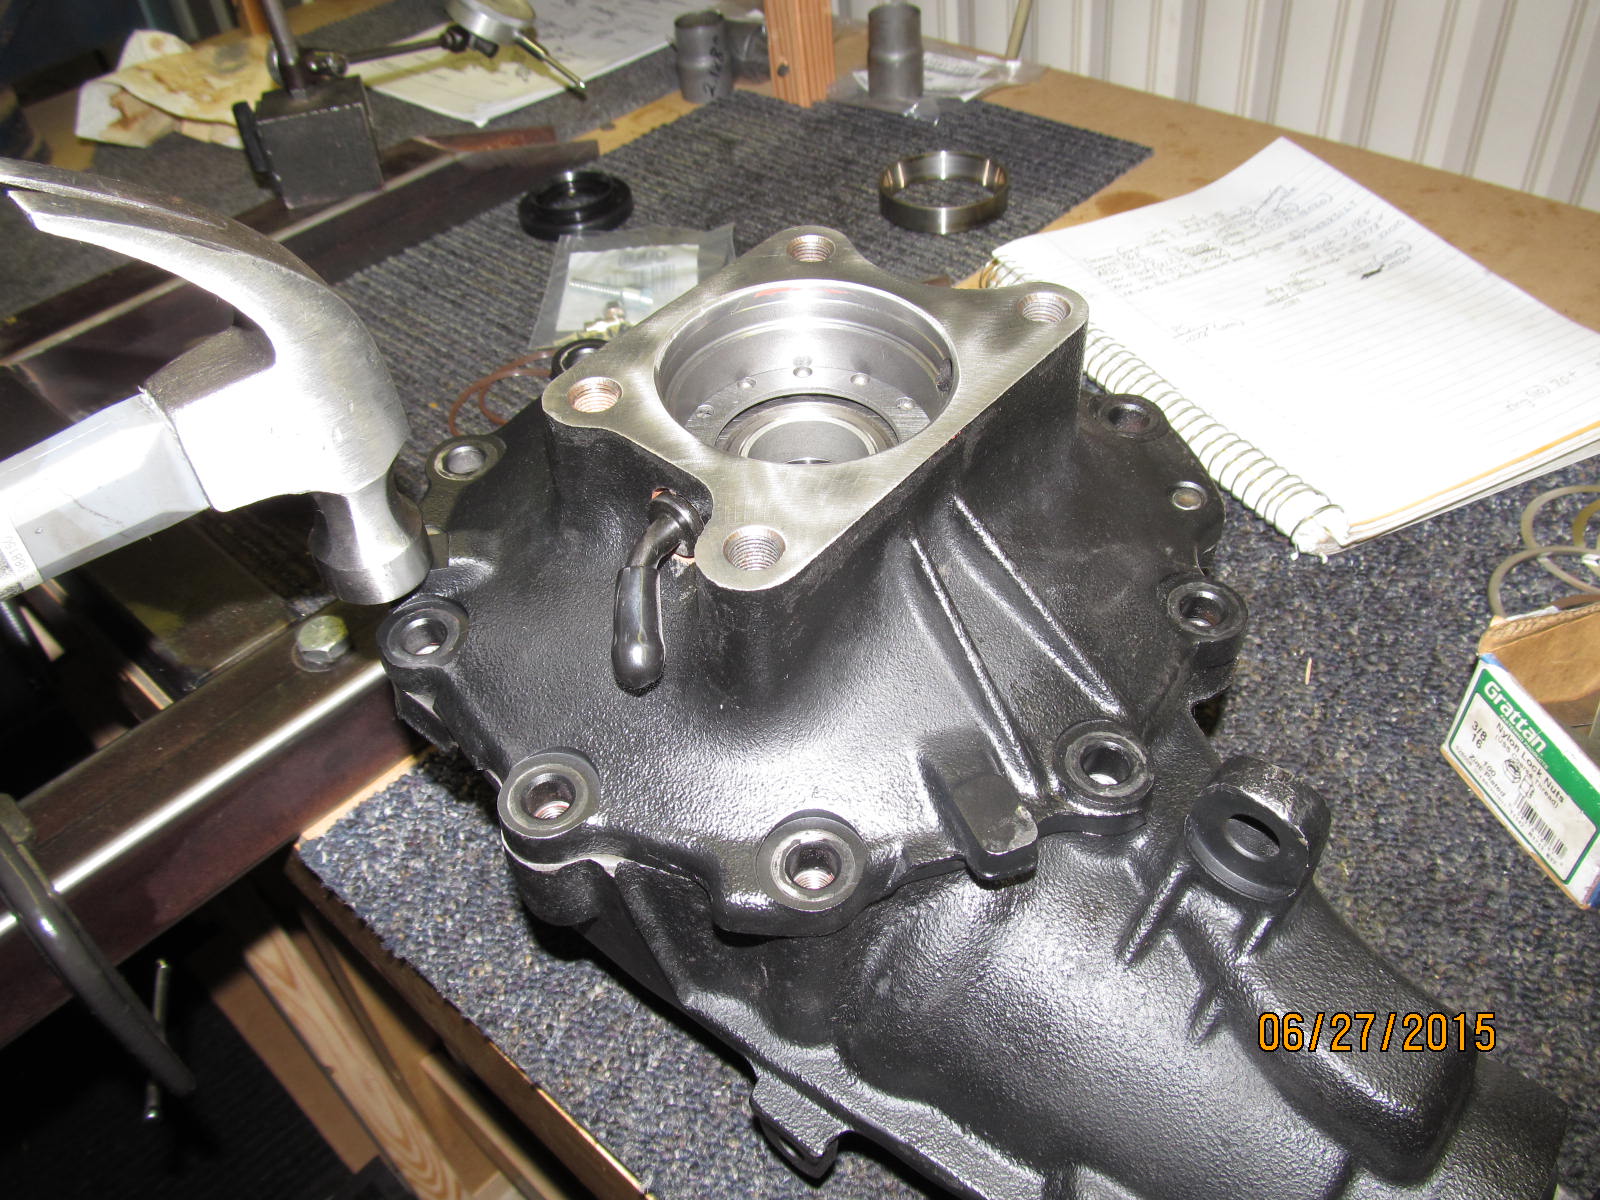
Off comes the cover.
|
|
|
|
|
Press the seal assembly out again. Change shims around.
|
|
|
|
|
|
Press it back in.
|
|
|
|
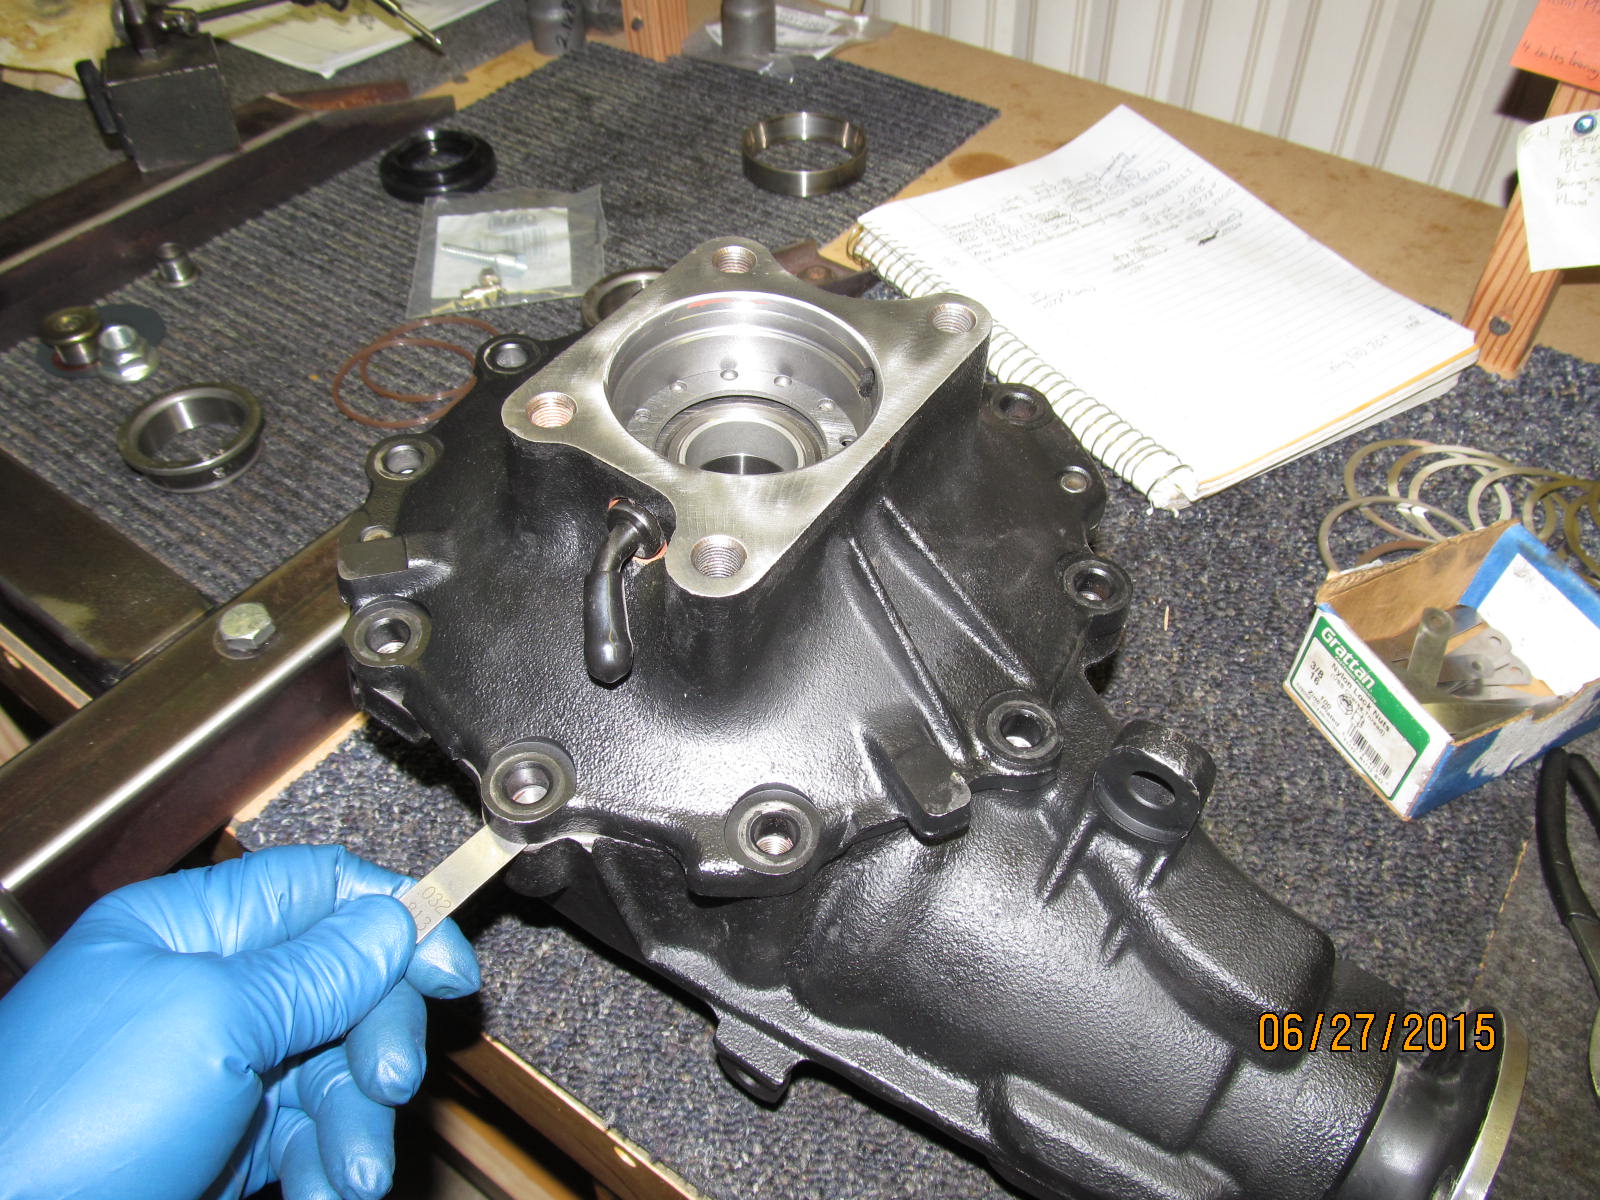
This time I shifted the cover clockwise 1 set of holes and it dropped right down like it was made
for these holes. Easier to measure the average gap around the cover which was about .006" as shown here.
|
|
|
|
|
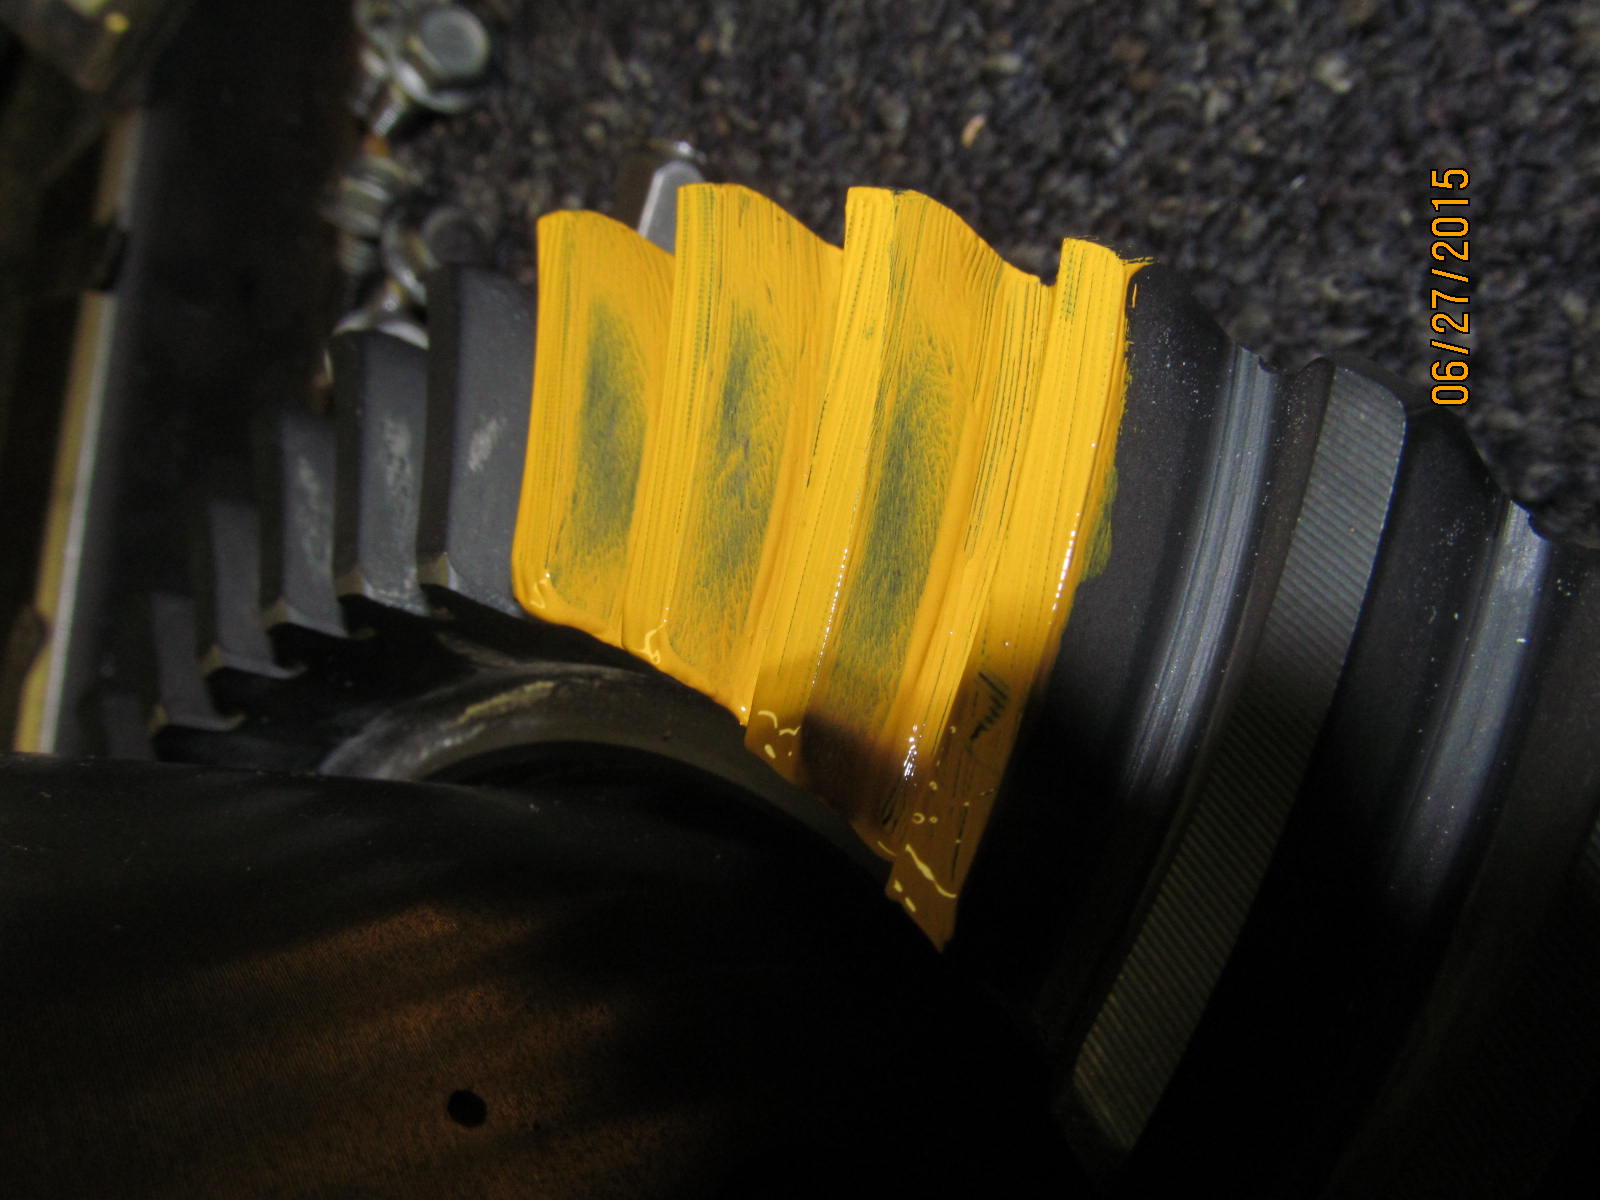
Not shown here but remove the case and paint 3 teeth with yellow marking compound. Then drop the case back
in and align the cover with the keyed holes. Snug all 10 bolts down.
|
|
|
|
|
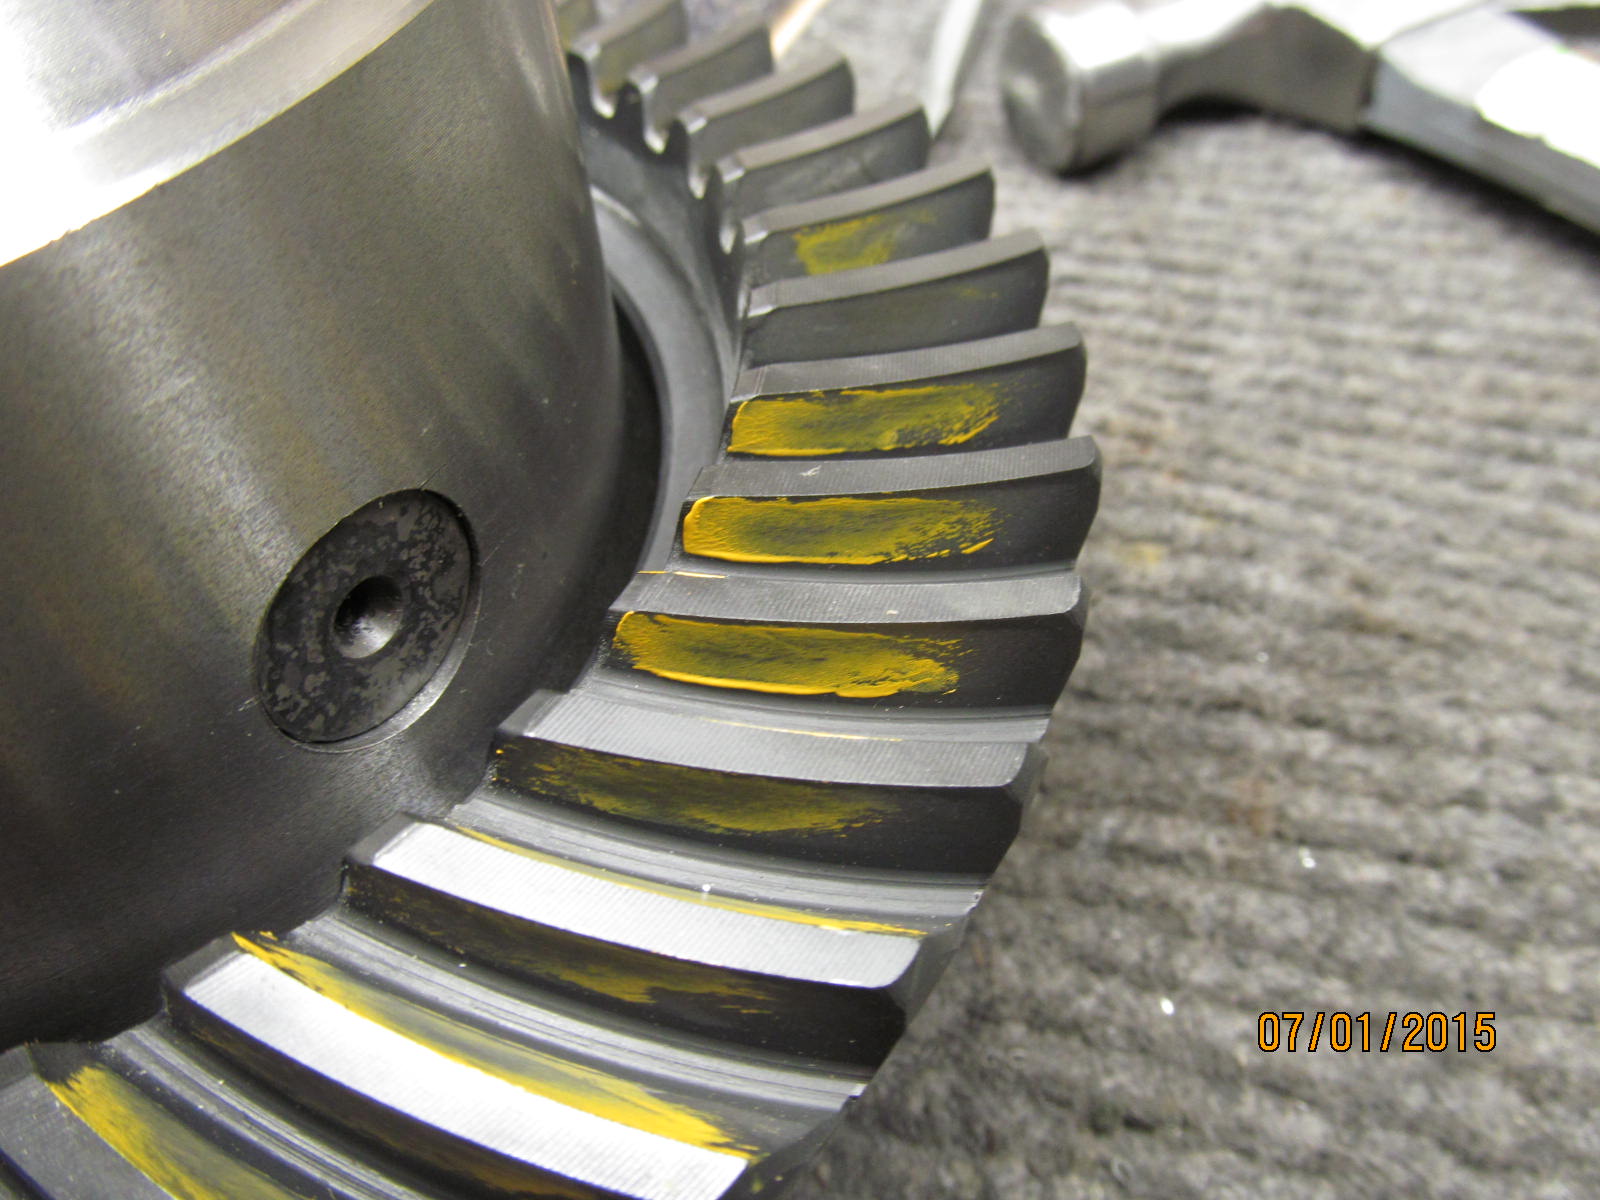
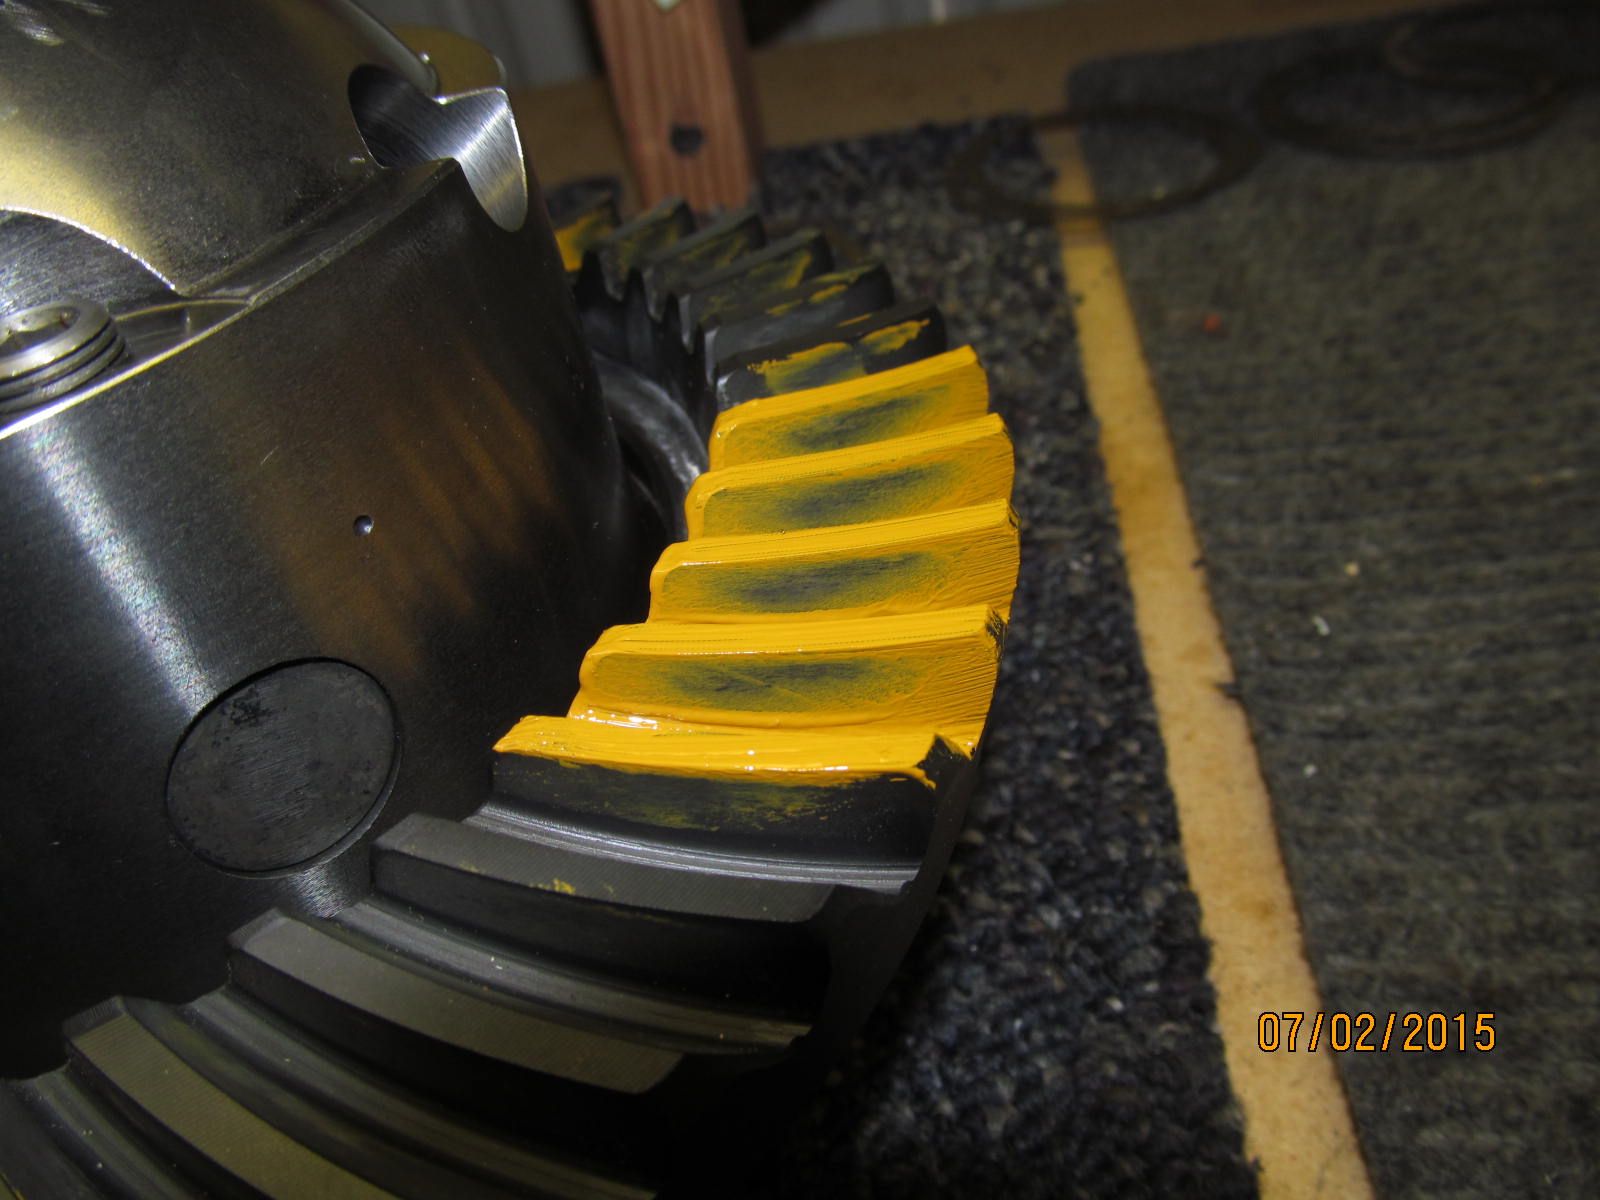
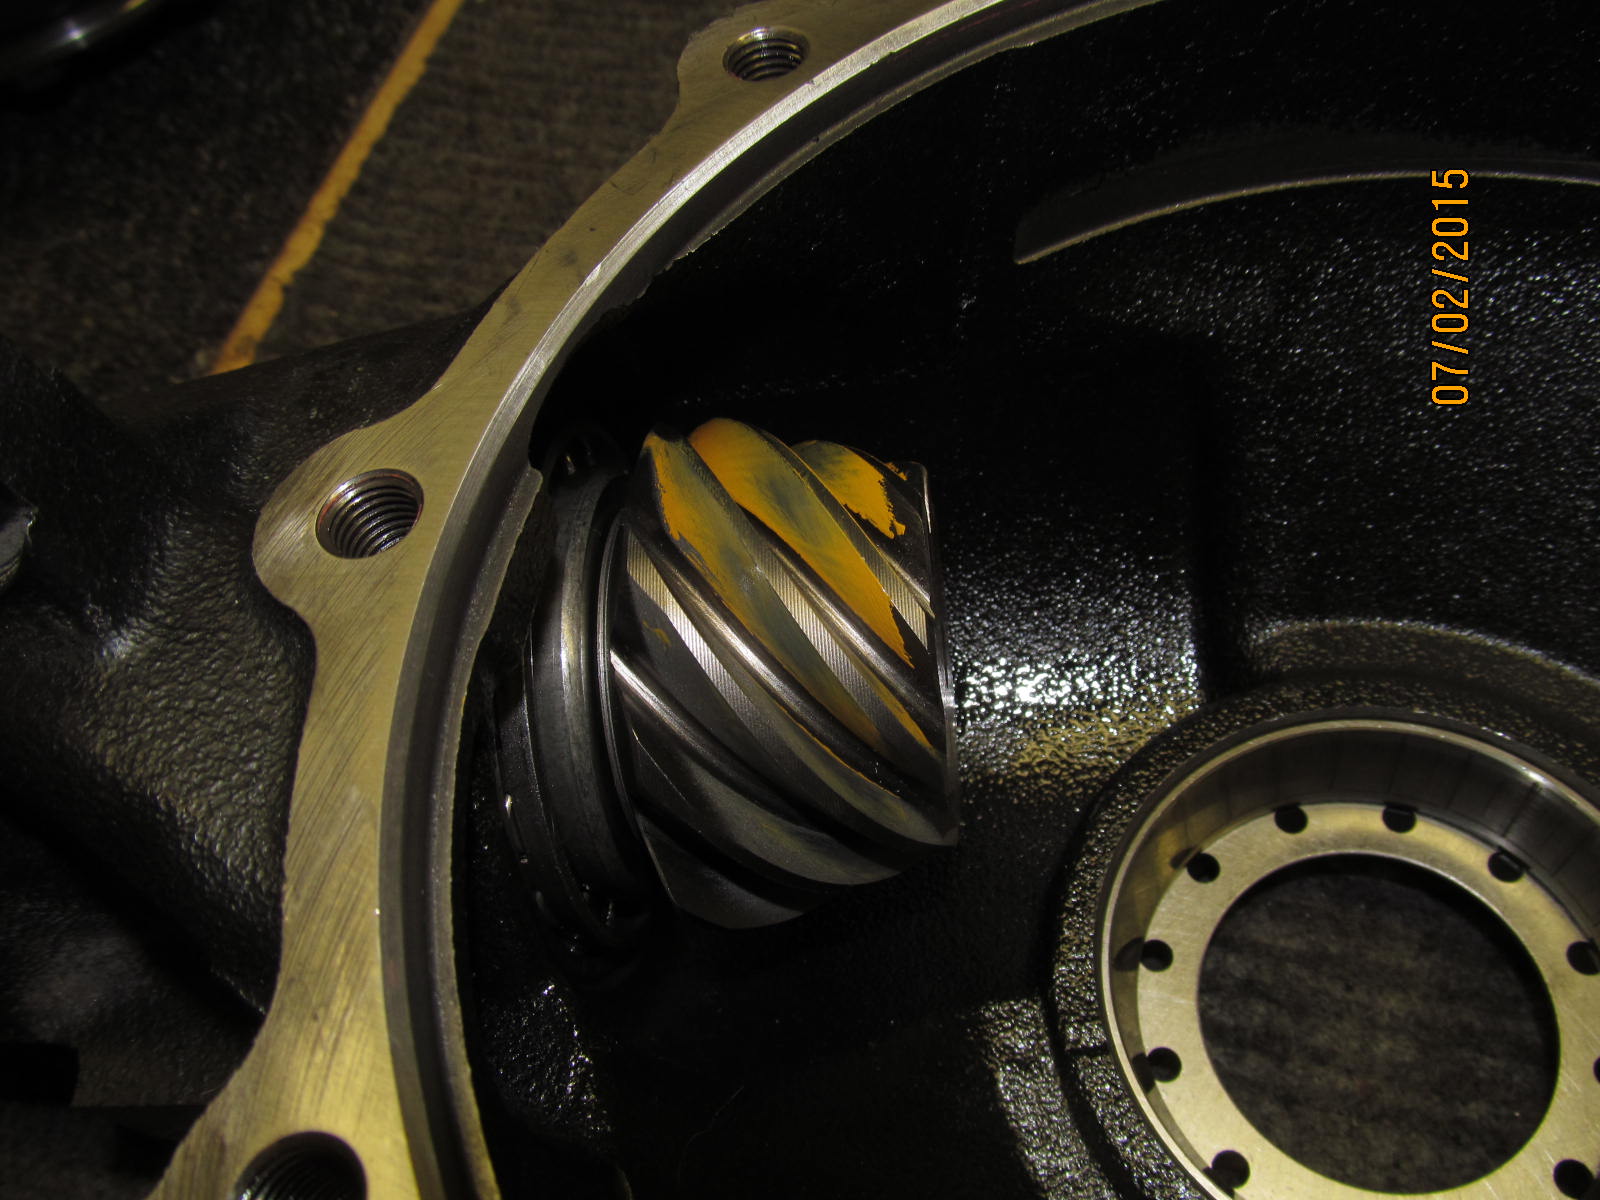
Paint the pattern and remove cover to inspect. Drive side shown above and appears close but could be deeper.
|
|
|
|
|
Coast.
|
|
|
|
|
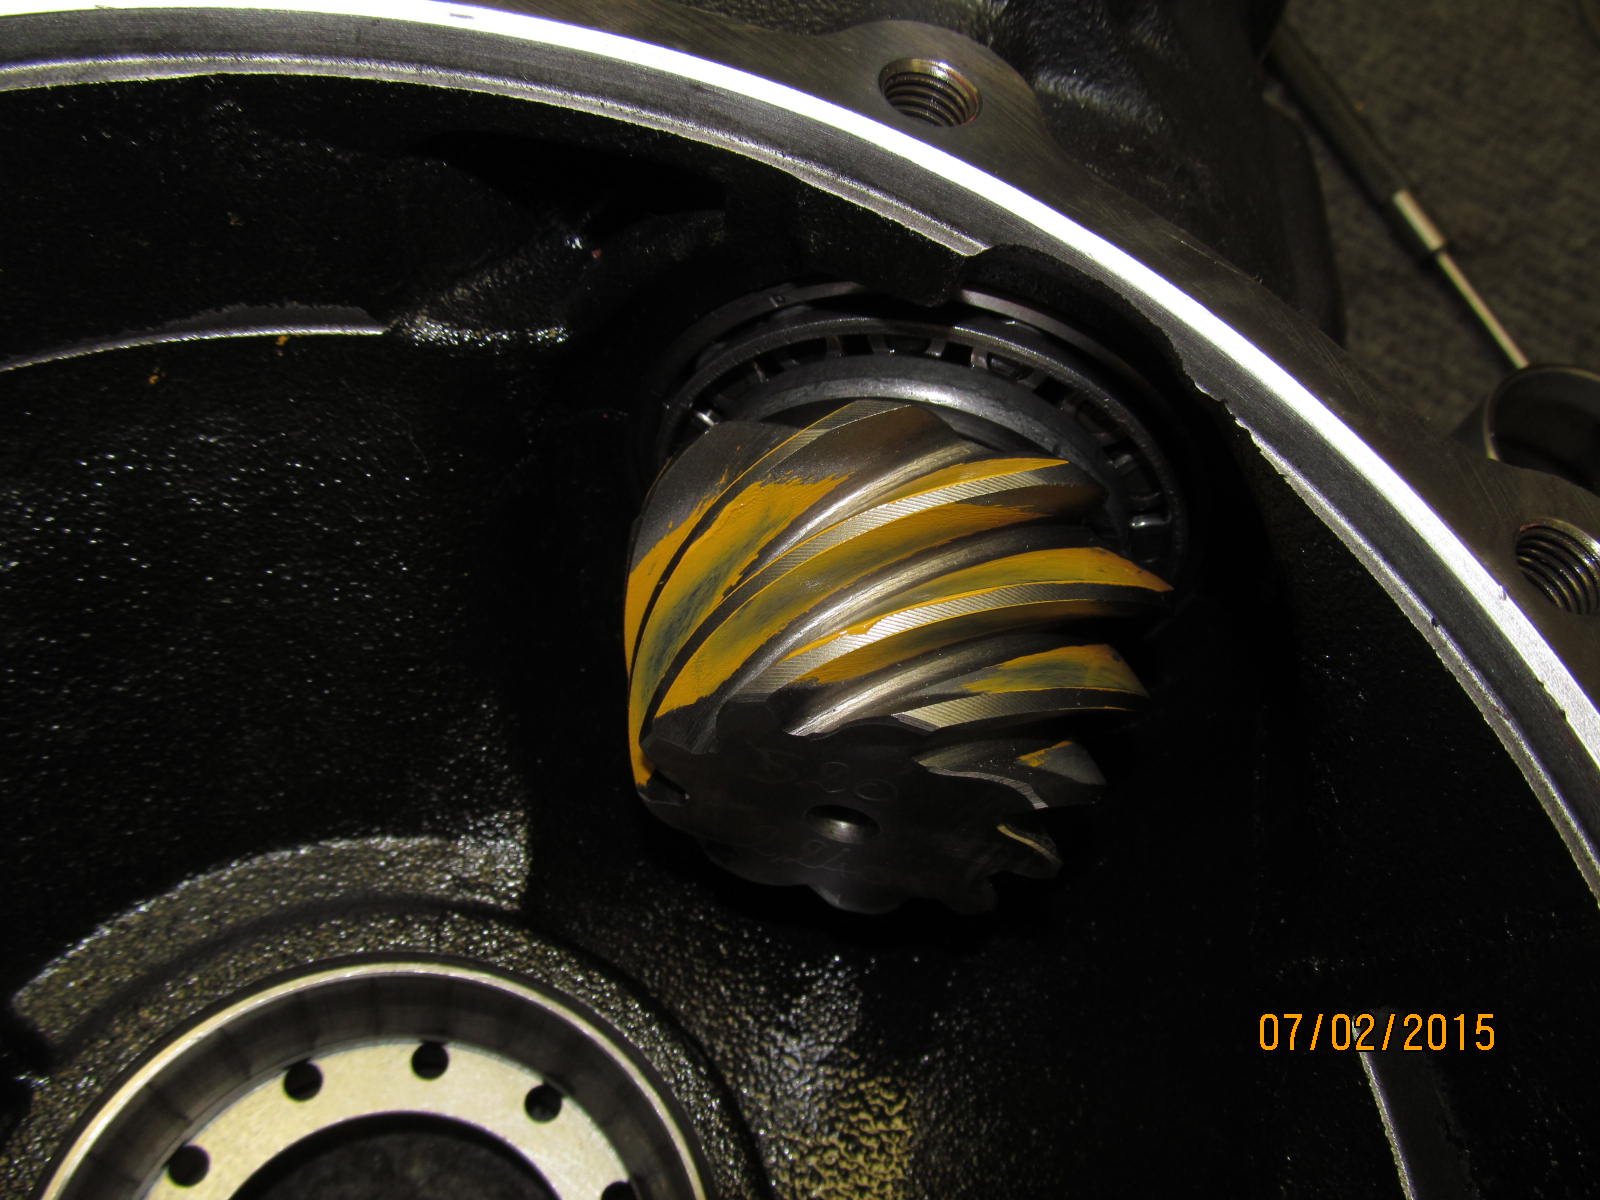
Drive side of the pinion tooth and the deepness here suggest a slight shallowness for the ring tooth.
|
|
|
|
|
Pull everything apart again.
|
|
|
|
|
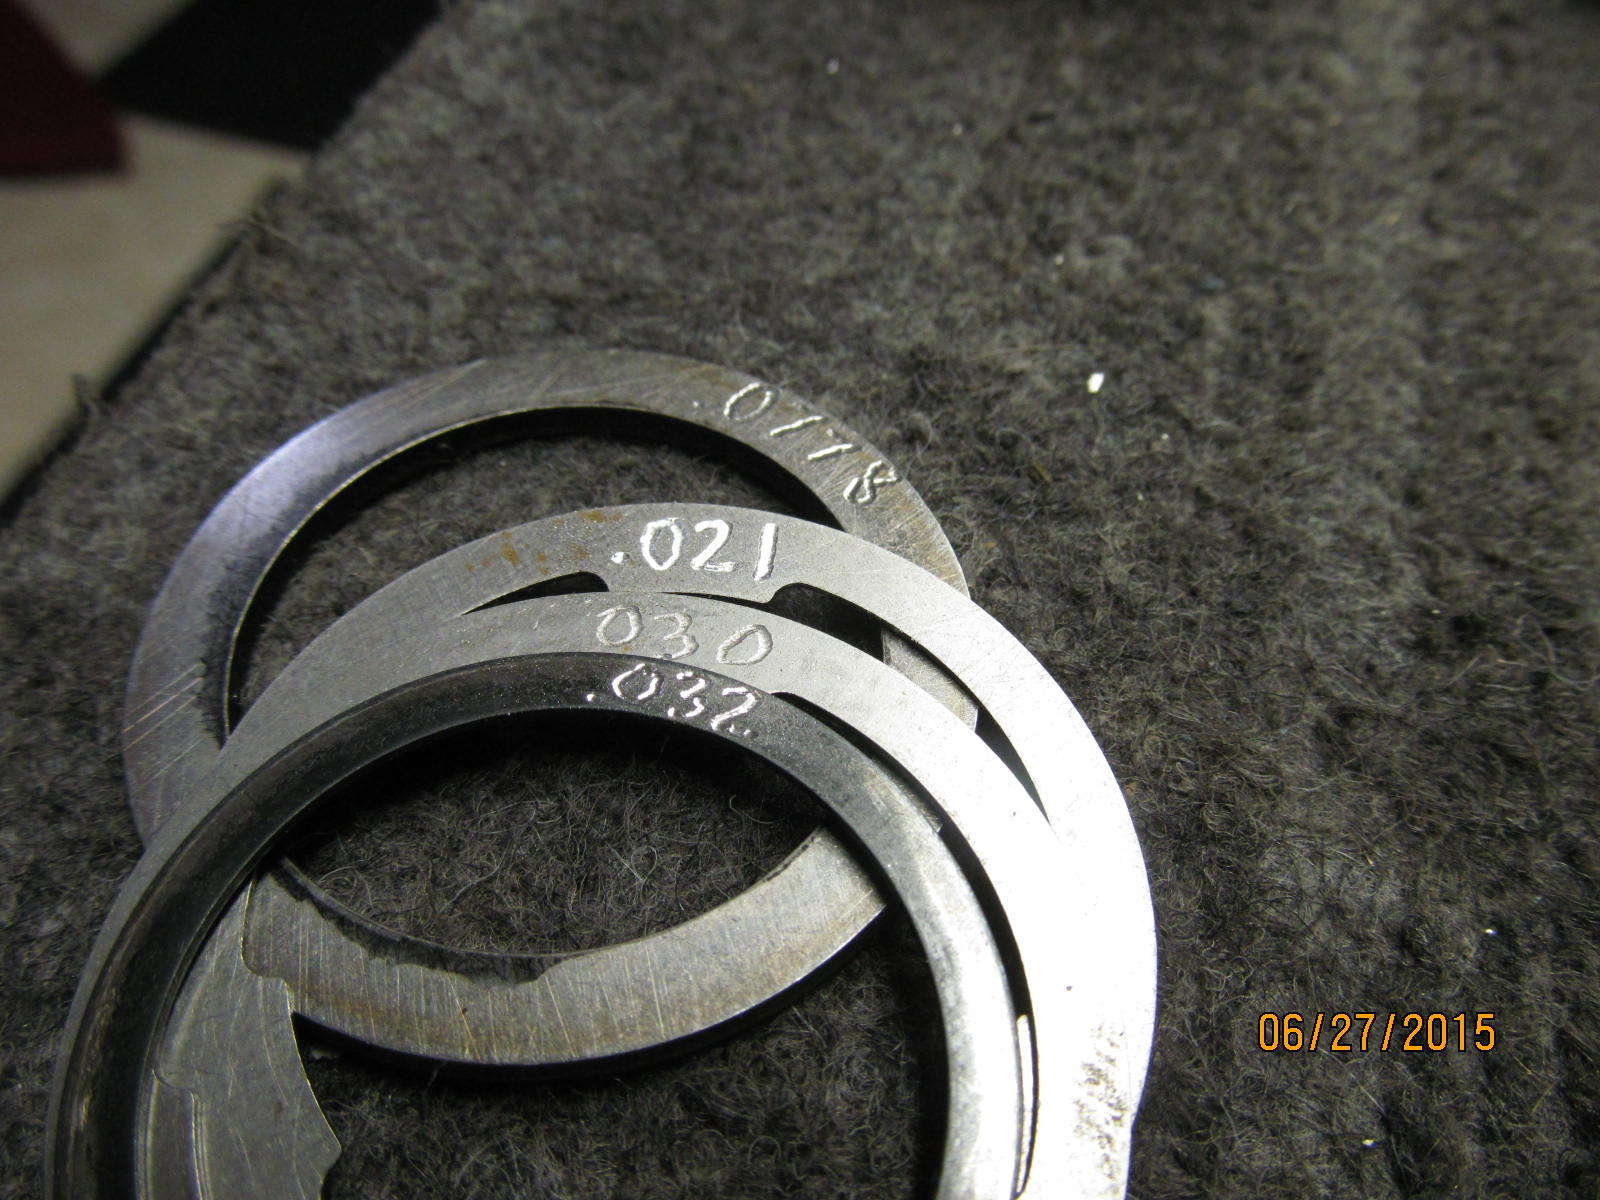
Going to use the 3 shims that add up to .083".....about .005" deeper than before.
|
|
|
|
|
Press them on...
|
|
|
|
|
I had to change the washer plates on the carrier bearings a little bit also.
|
|
|
|
|
|
Mount the pinion again. There's A LOT of "agains" happening here that are not shown in the pictures :)
|
|
|
|
|
Tightened up the pinion nut til the right amount of drag is felt. (It's only a paint test)
|
|
|
|
|
Lining up the long lever style test dial indicator.
|
|
|
|
|
...................
|
|
|
|
|
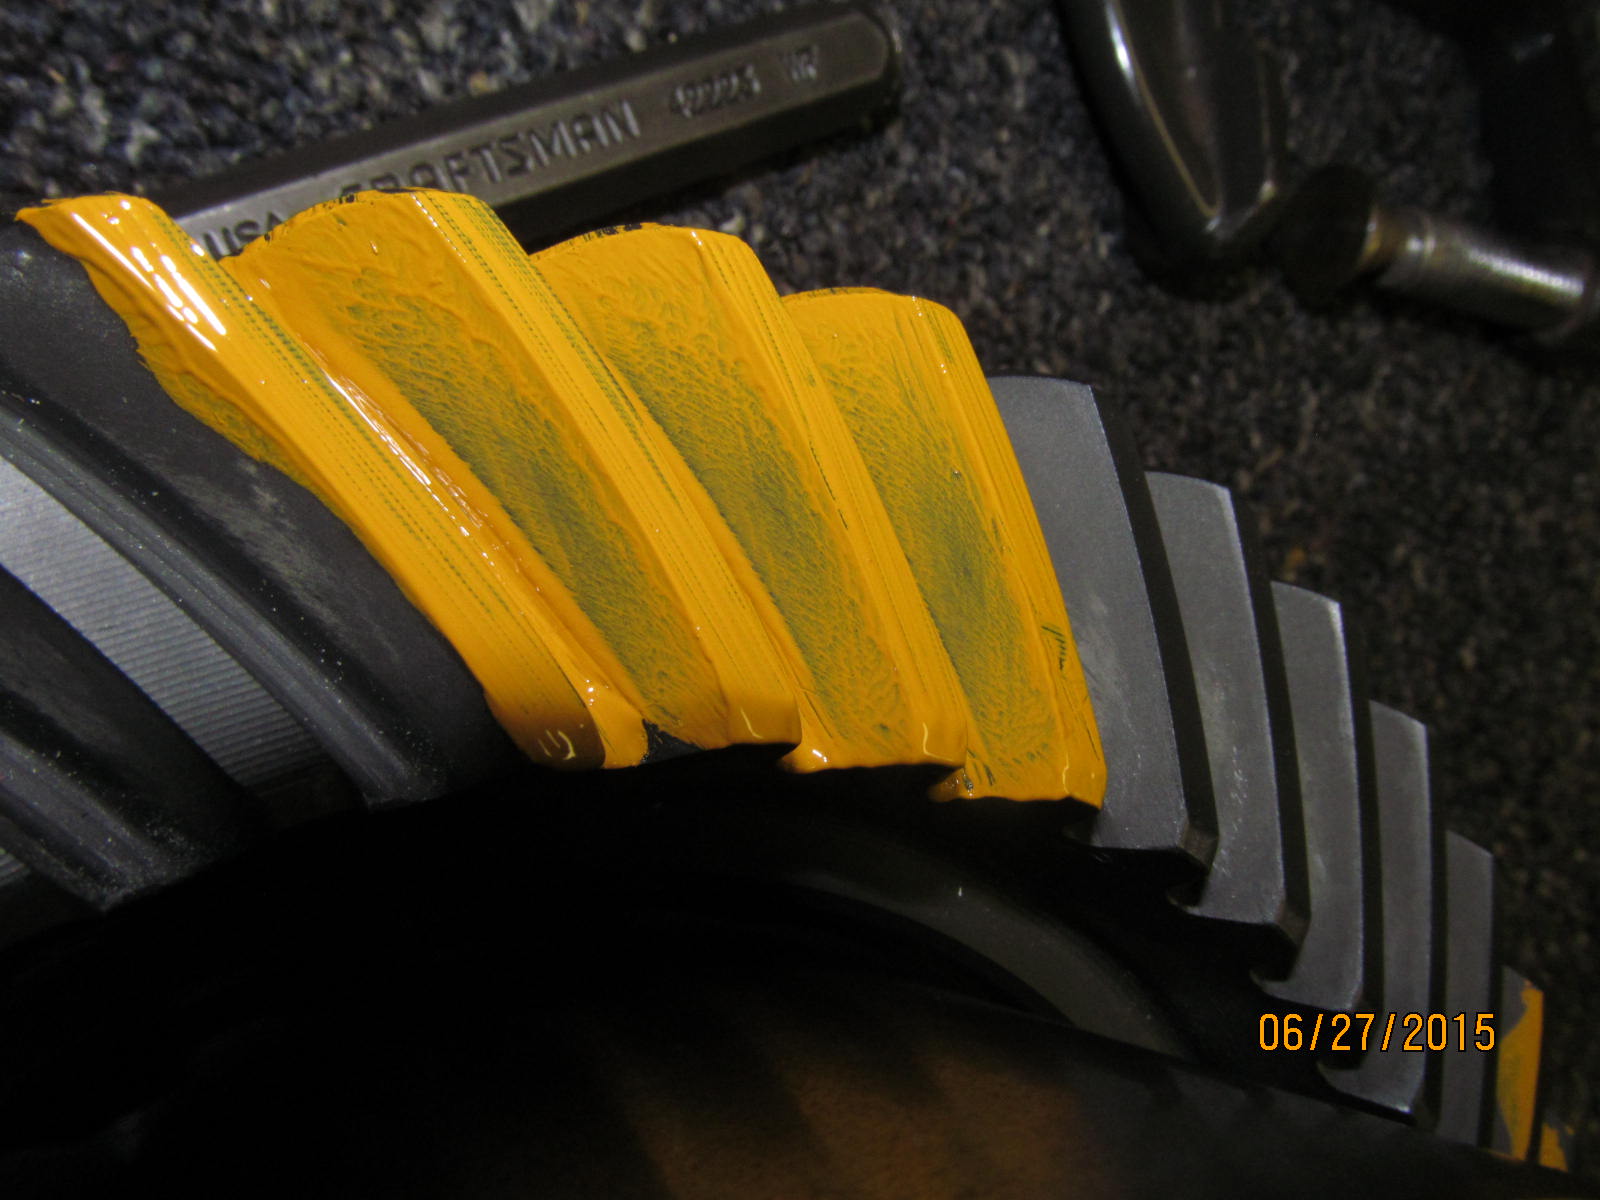
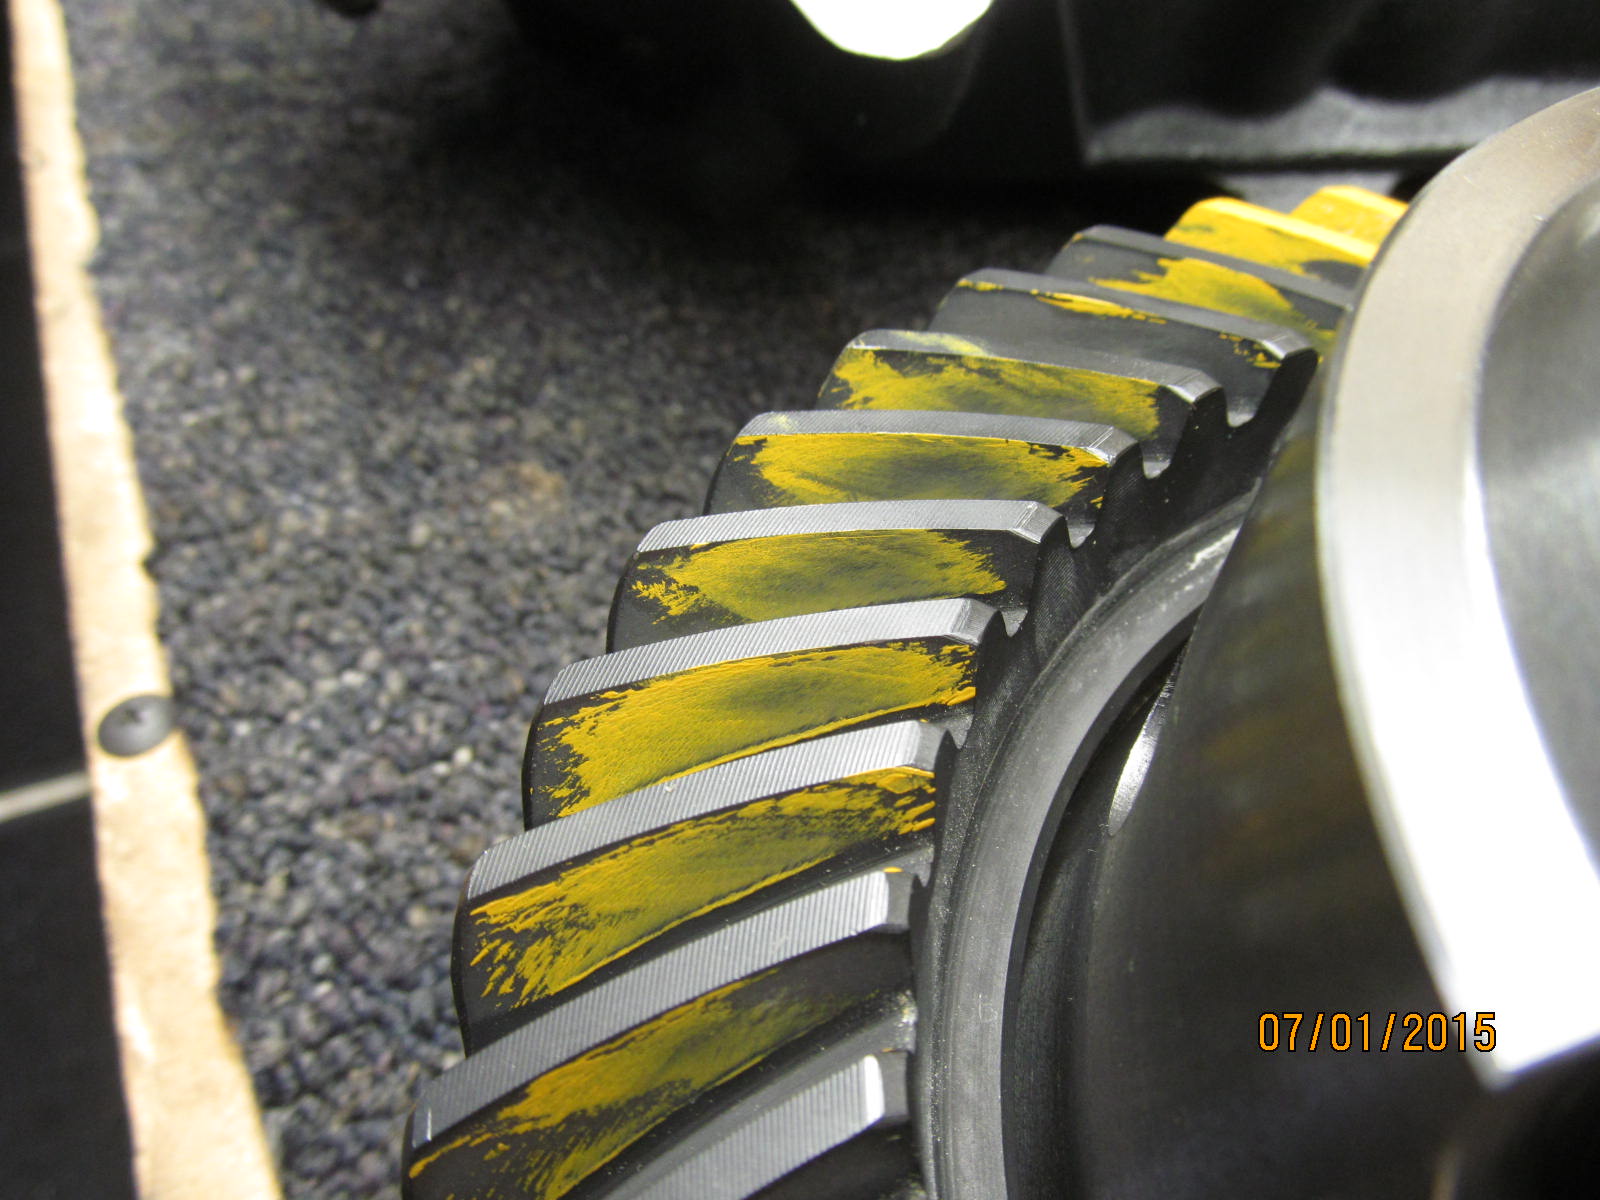
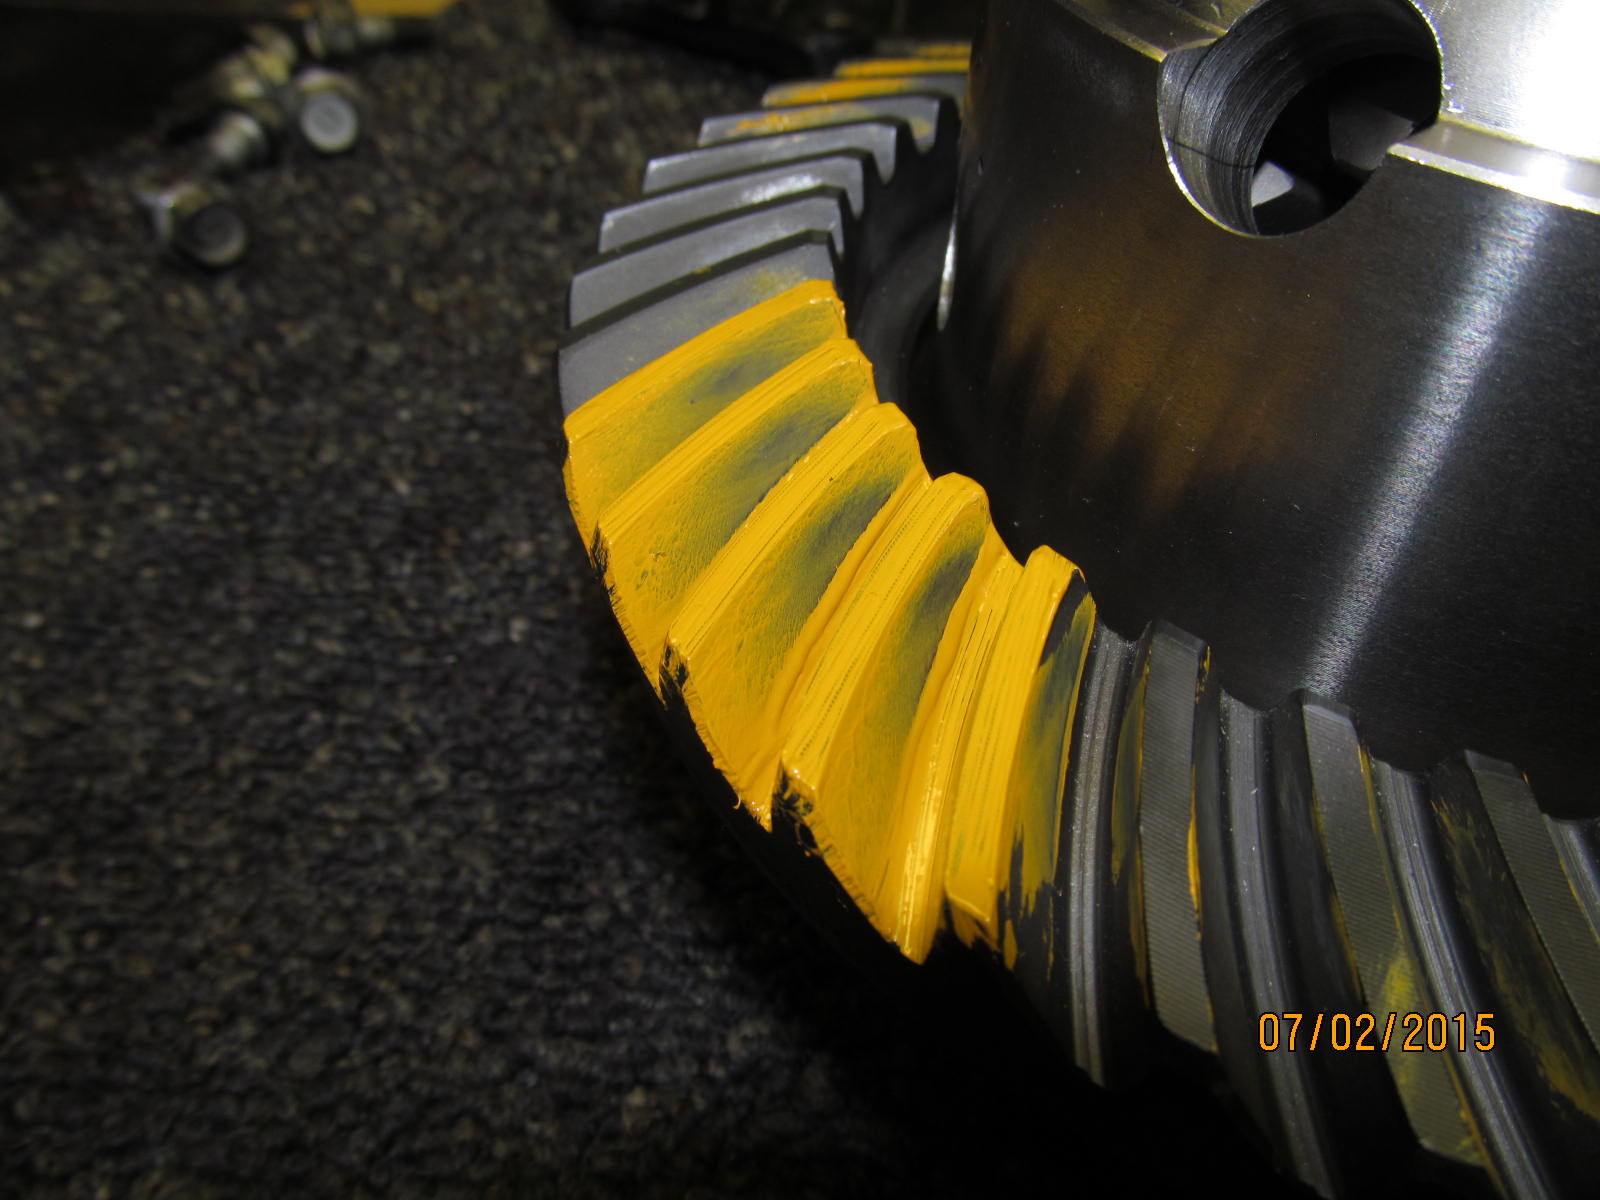
Drive side with the thicker pinion shim of .083"....slight toe and depth is right on.
|
|
|
|
|
Coast side...slight toe also and good load bearing position.
|
|
|
|
|
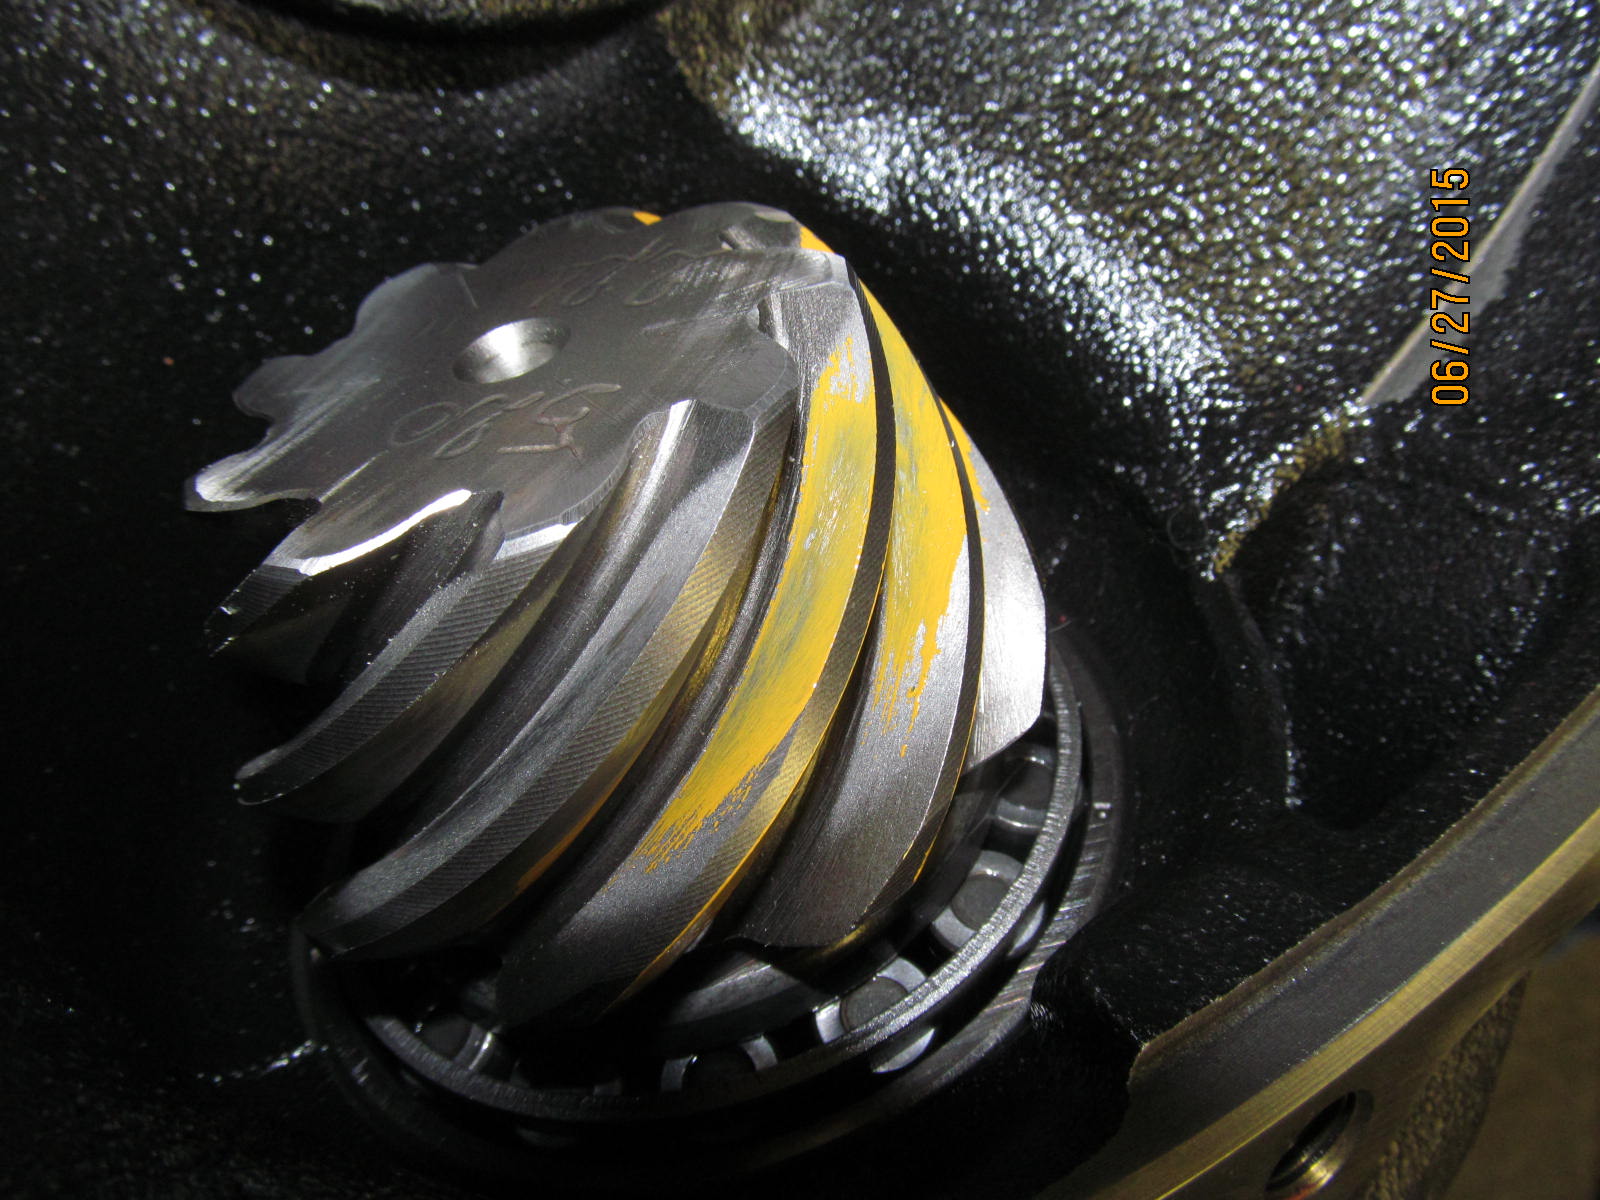
Drive side of a reverse paint.
|
|
|

|
|
Coast side of reverse paionted surface.
|
|
|
|
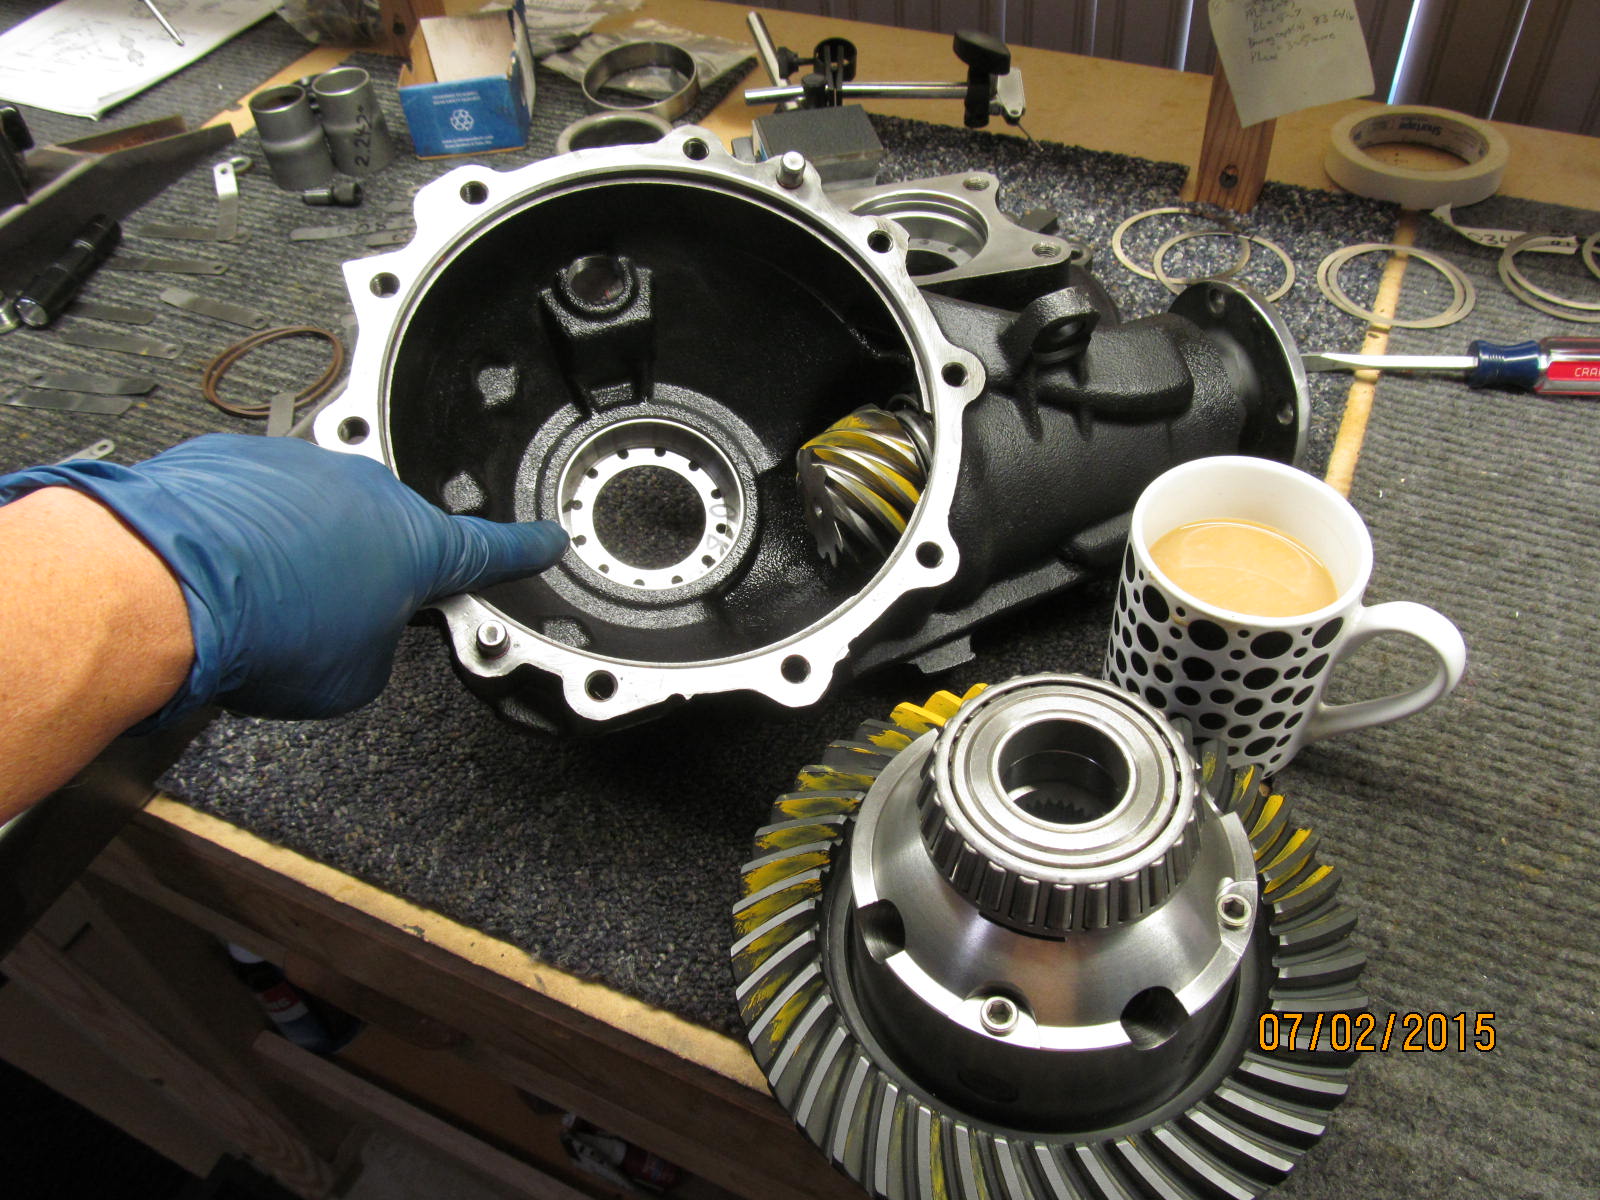
Time to take the washer plate out again to fine tune backlash and carrier bearing preload.
Ahhhhh.....hot coffee.
|
|
|
|
|
Pressing it out....
|
|
|
|
|
New washer plate.
|
|
|
|
|
Pressing it back in.
|
|
|
|
The ARB instructions talk of specifically checking that the washer plates are firmly pressed in
and they don't spin in place.
|
|
|
|
|
ARB in place....
|
|
|
|
|
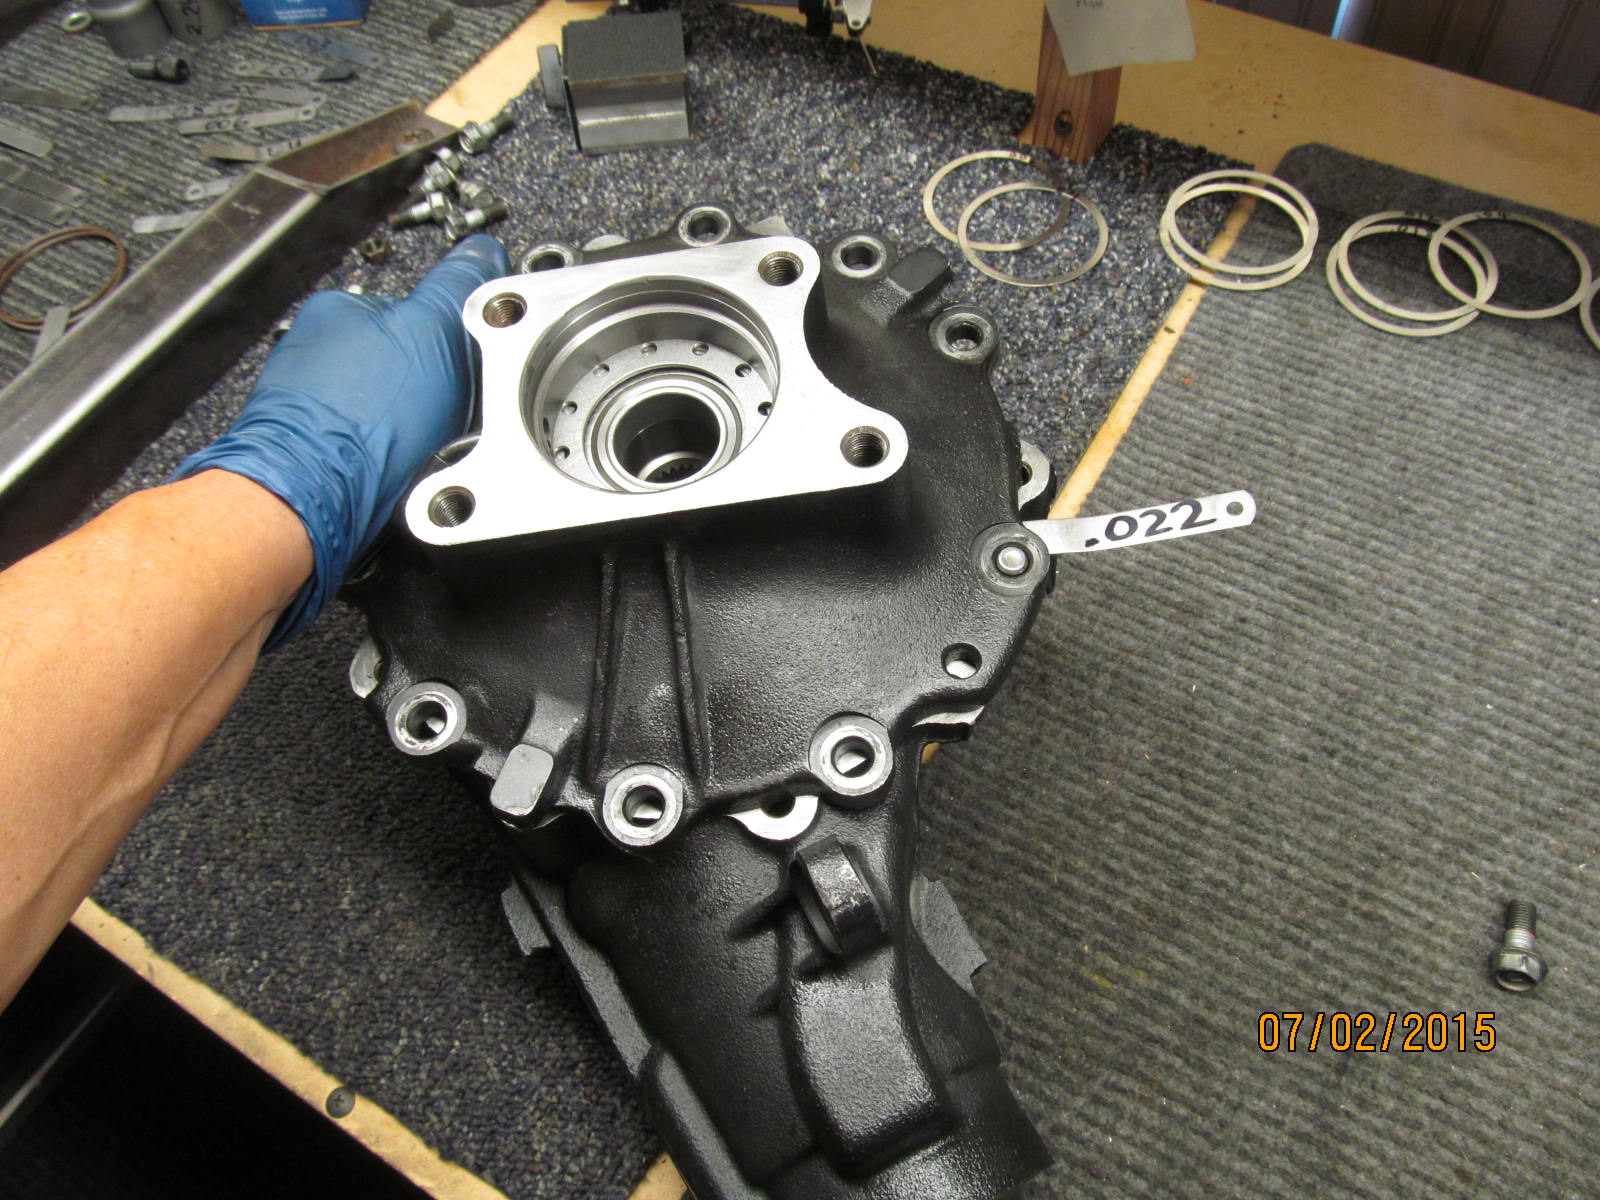
Same as before.....shifted the lid purposely clockwise about 1" so carrier bearing preloads can be approximated.
|
|
|
|
Squeeze down on the left side and a .022" gauge just fits in on the right side. So that means the lid
is about .011" average all the way around.
|
|
|
|
|
|
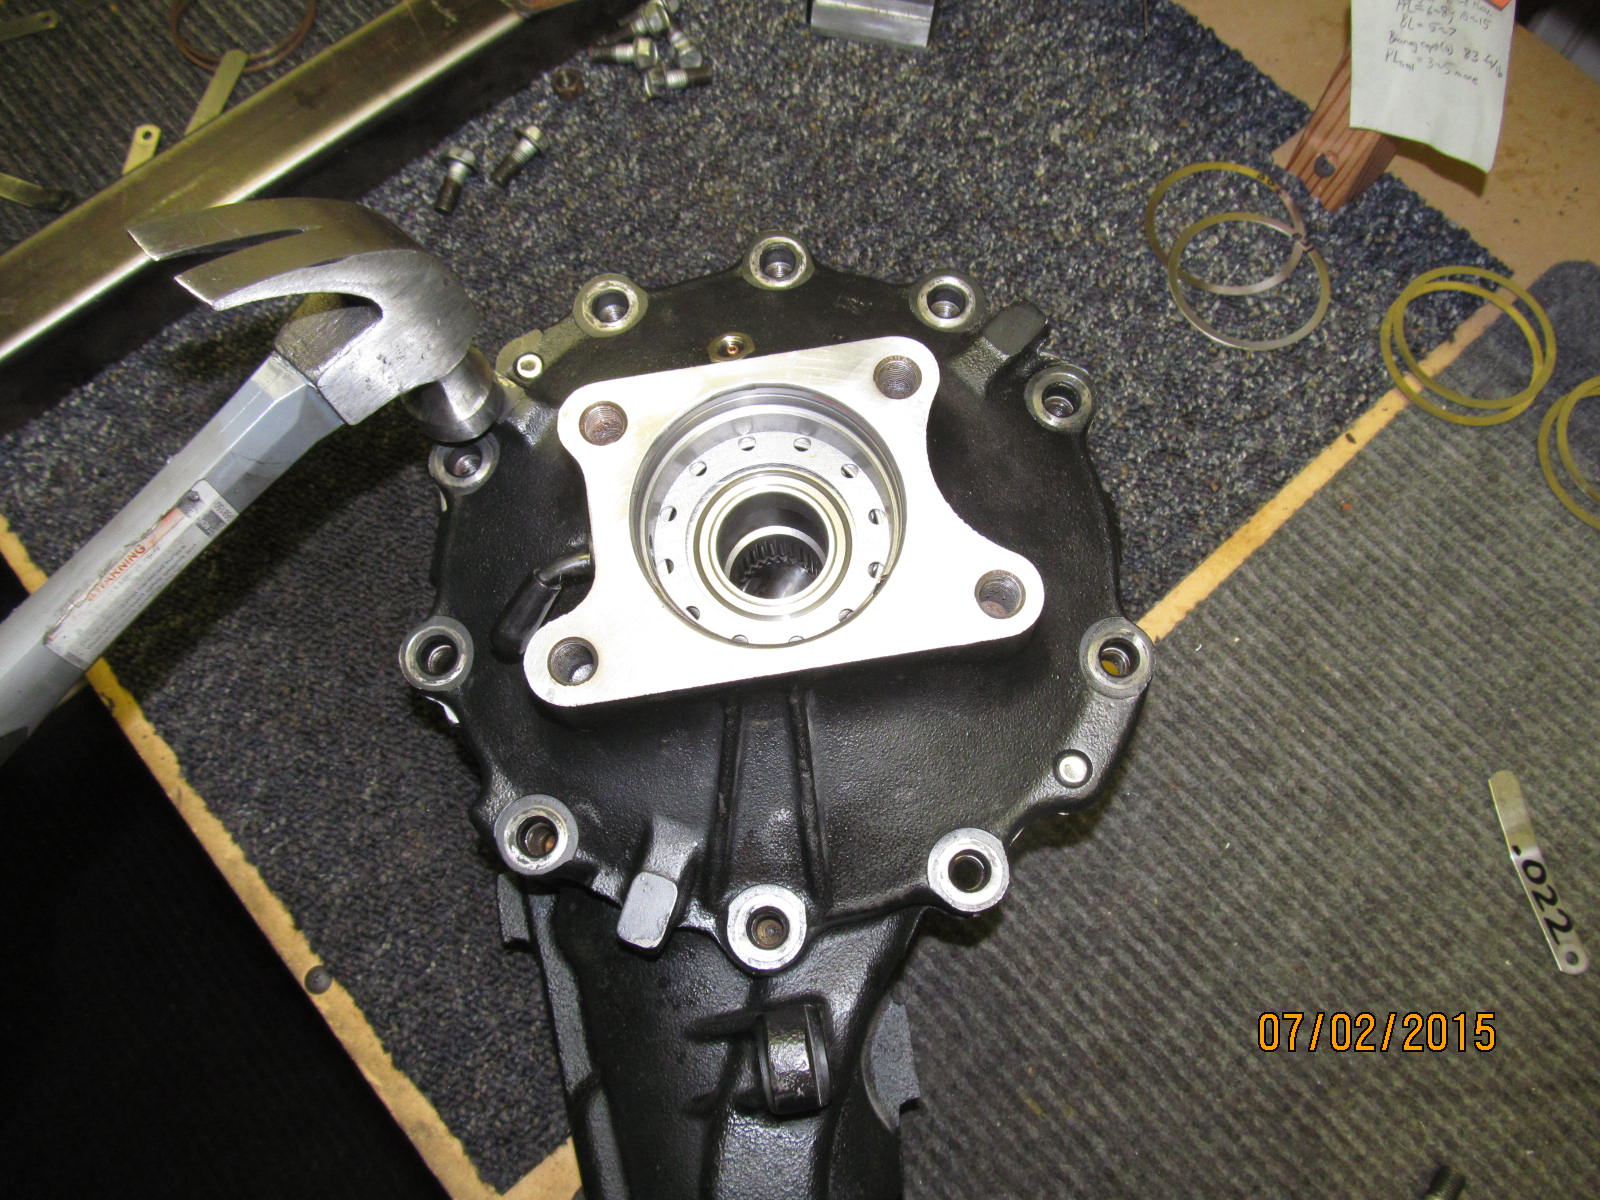
Re-align the lid into the 2 keyed pegs and tap down.
|
|
|
|

|
|
Put at least 4 bolts in spread evenly around the lid.
|
|
|
|
|
I used my forgiving electric impact to snug the 4 bolts down.
|
|
|
|
|
|
I measured a combined 10 in/lb
|
|
|

|
|
Backlash was checked in about 4 places on the ring gear and it's just fine for this upcoming pattern check.
|
|
|
|
|
Another specialized tool I made to keep the sidegear locked in place for the paint test.
|
|
|
|
|
A tool for capturing the sidegear on the other side.
|
|
|
|
|
Resistance is offered here while the pinion flange drive side is turn back and forth generating the paints.
|
|
|
|
|
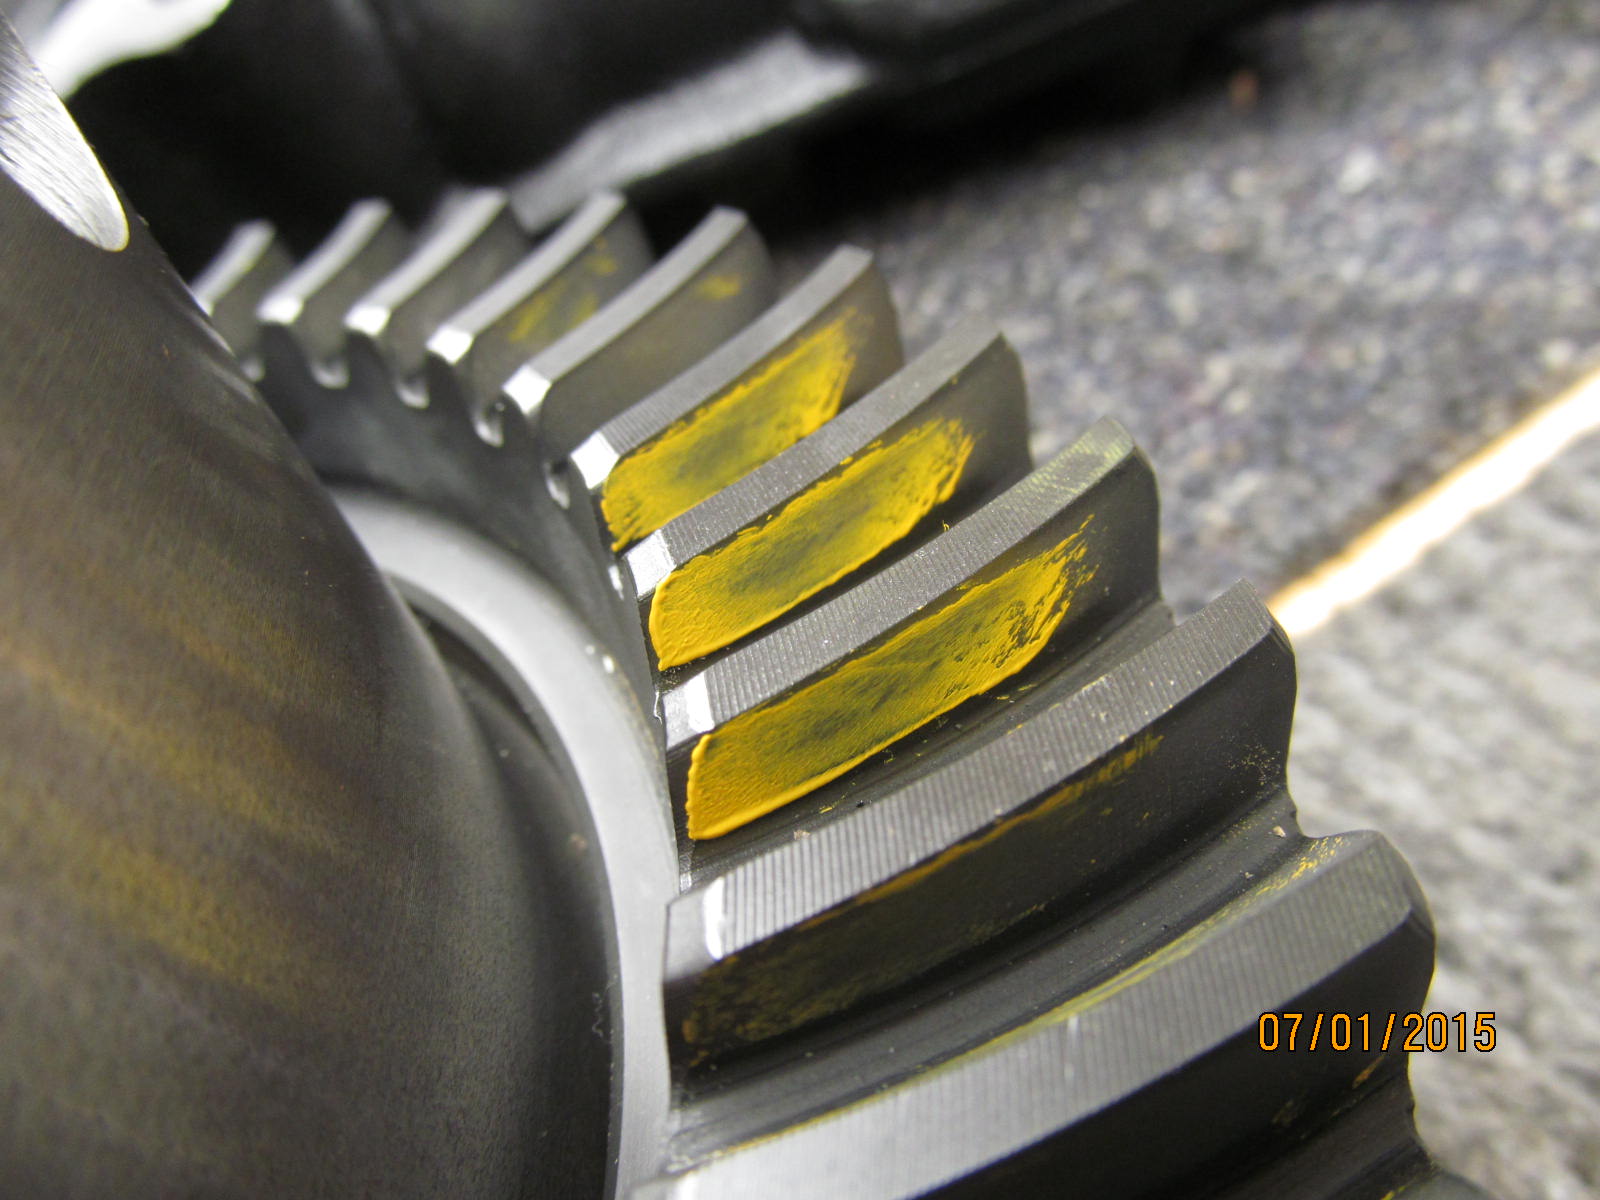
Drive side. I have to develope a better way of generating more resistance for a better looking paint.
|
|
|
|
|
Coast side.
|
|
|
|
|
On the left side is an example of the DRIVE....on the right side is the COAST pattern.
|
|
|
|
|
--------------------
|
|
|
|
|
Ready to finally put the rubberized seal in with the new OEM crush. Remove the old pinion nut.
|
|
|
|
|
New crush is put in place.
|
|
|
|
|
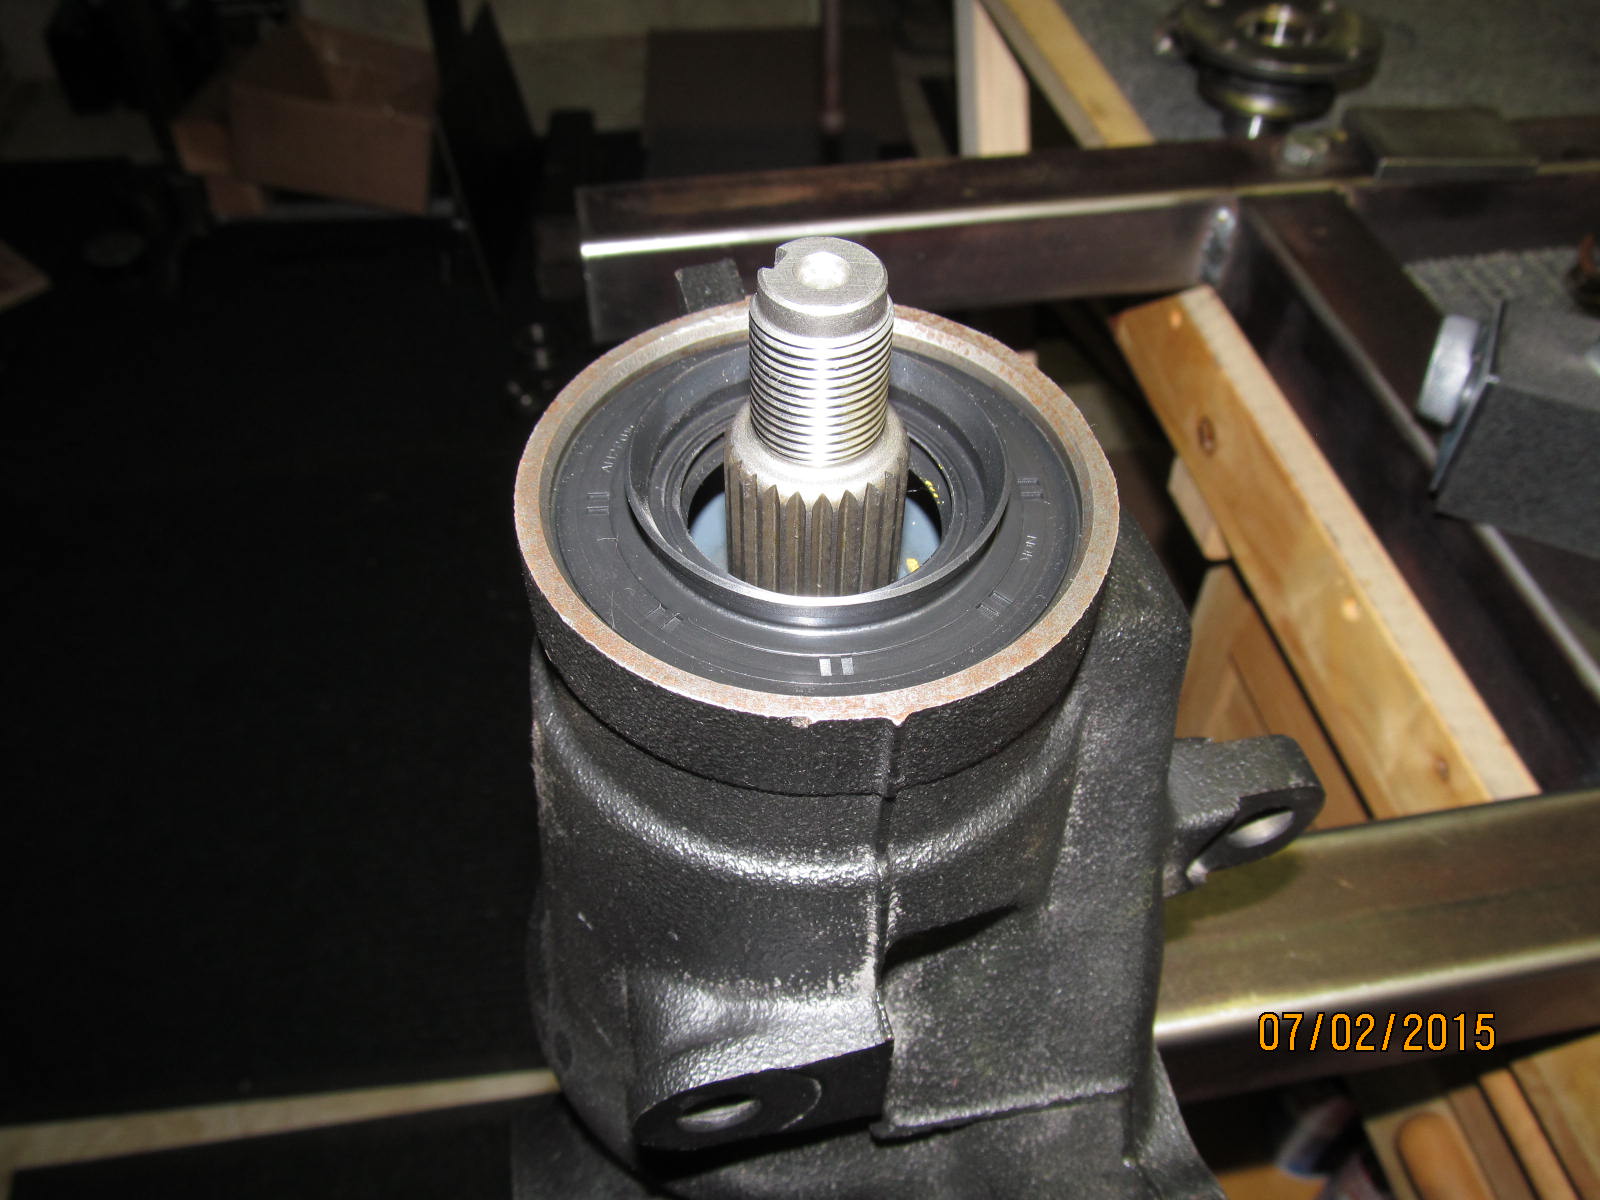
Pinion is inserted and drawn in place. Splashguard is now inserted as shown above.
|
|
|
|
|
New seal is tapped in place. This tool only makes it flush with the top.
|
|
|
|
|
The seal now gets tapped down below the surface .177" per the FSM shown much farther up this long page.
|
|
|
|
|
|
------------
|
|
|
|
The new oem crush sleeve did give or crush at about 120 ft/lb for what it's worth. Don't want to strip
the pinion nut threads out but that tends to occur somewhere's above 175~200 ft/lb from
past experience with the 7.5" IFS stuff. The aftermarket crush sleeves tend to be
more "rigid" so it may take over 200 ft/lb to crush them...bye bye threads.
|
|
|
|
|
|
Used bearings so 4 in/lb start torque for PPL is just fine.
|
|
|
|
|
DING! and this end is now done.
|
|
|
|
|
|
On the outside lid side, the copper tube is fairly well aligned...
|
|
|
|
|
O-rings will now be put in place.
|
|
|
|
|
Lots of clean gear oil and load the o-rings into the slots.
|
|
|
|
|
-----------------
|
|
|
|
|
Test fit time... to see how the o-rings slip onto the ARB case sealing surface.
|
|
|
|
|
Just making sure the copper is coming out as straight as possible and now it is after some tweaks.
|
|
|
|
|
Now to remove the lid and run a bead of rtv(preferrably FIPG).
|
|
|
|
|
51 ft/lb per the FSM on all 10 bolts.
|
|
|

|
ARB air leakage test using my Slime compressor(from Pepboys). By the way, it's a
damn cute compressor especially since it was only $30.
|
|
|
|
|
Joe gets a copy of the notes....as does the whole World Wide Web. Now to call up Joe and have him pick it up :)
|
|
|

|