|
|
|
|
|
|
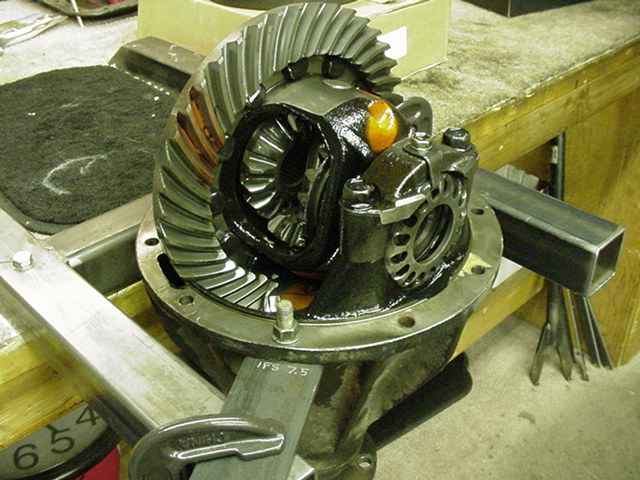
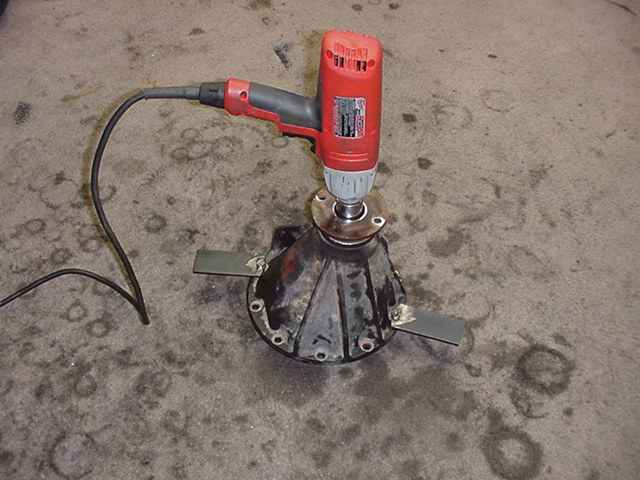
Cody lives in Prescott Valley, AZ and has been running 410 gears with 38.7" Michelin XML tires. Time for a re-gear and 529 was the only choice with that tire. An ARB would be added with a solid collar. |
|
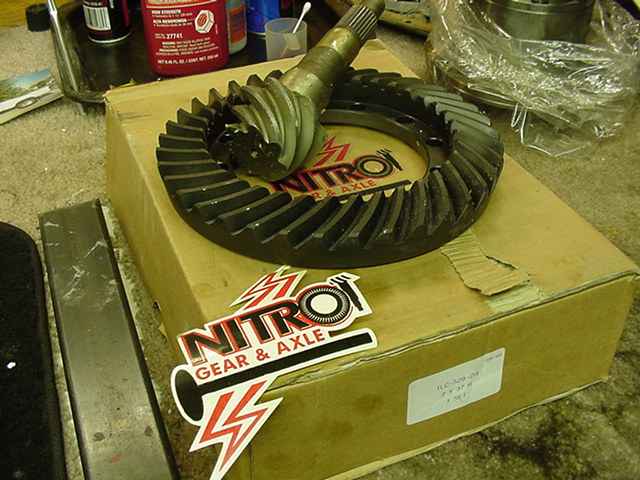
Nitro Gear....I happen to know that Carl from JustDifferentials.com was personally involved in the R&D of these gears and it's their premium line. |
|
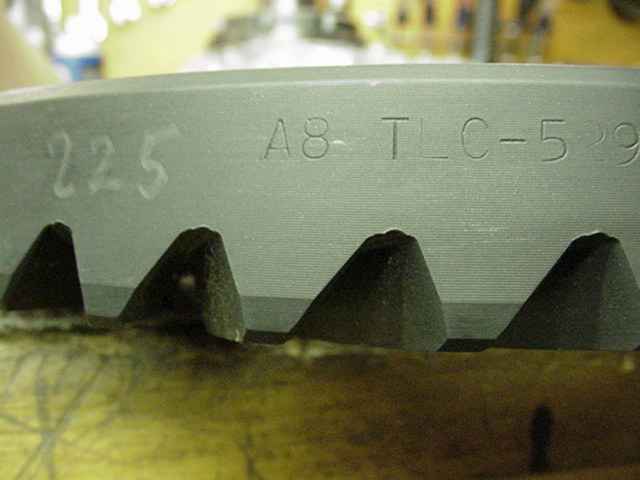
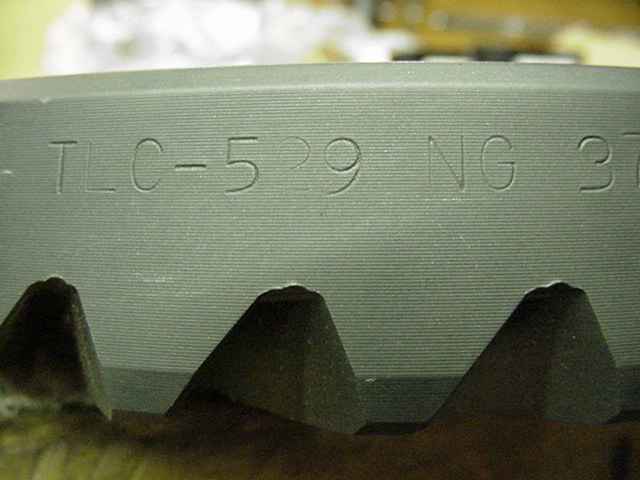
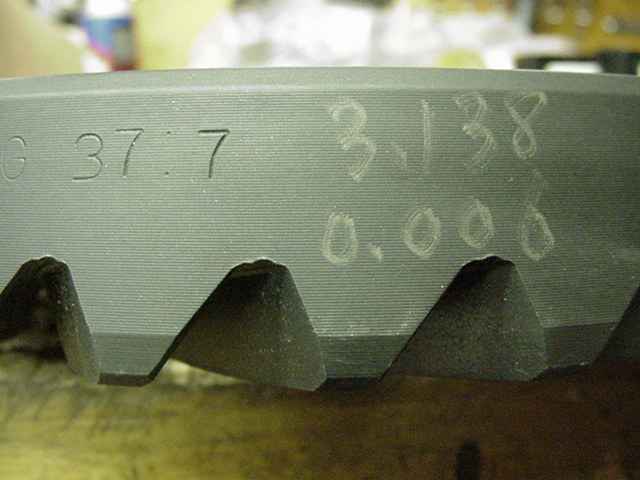
Markings on the ring... |
|
NG = Nitro Gear |
|
... |
|
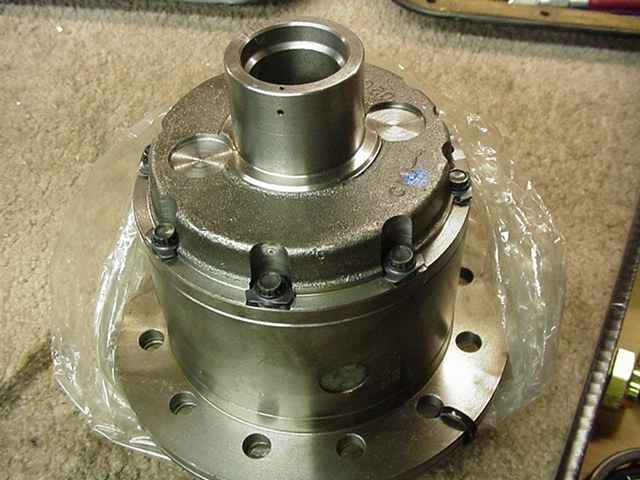
ARB RD124 |

|
... |
|
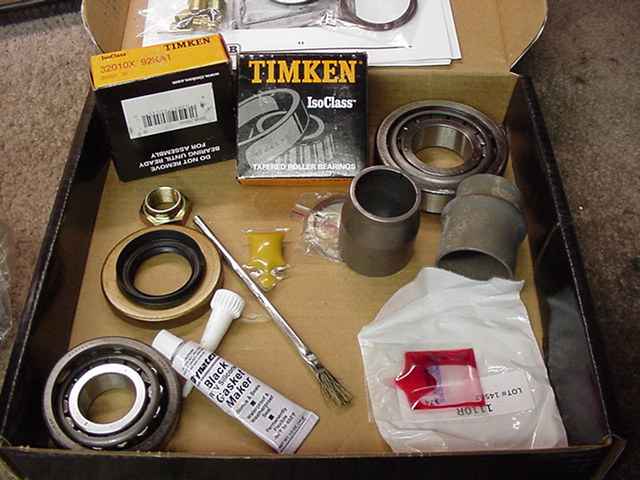
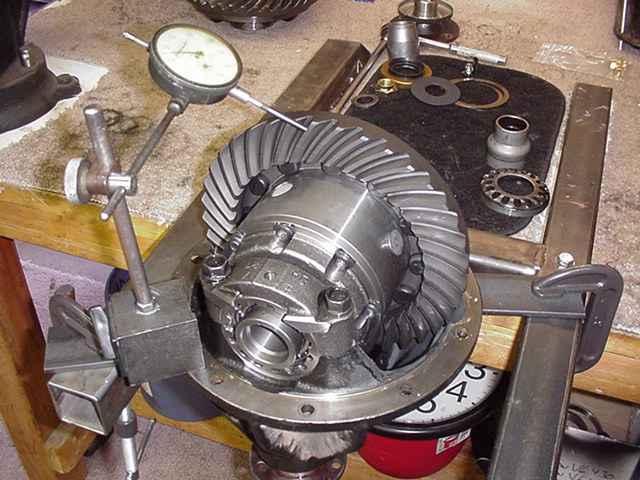
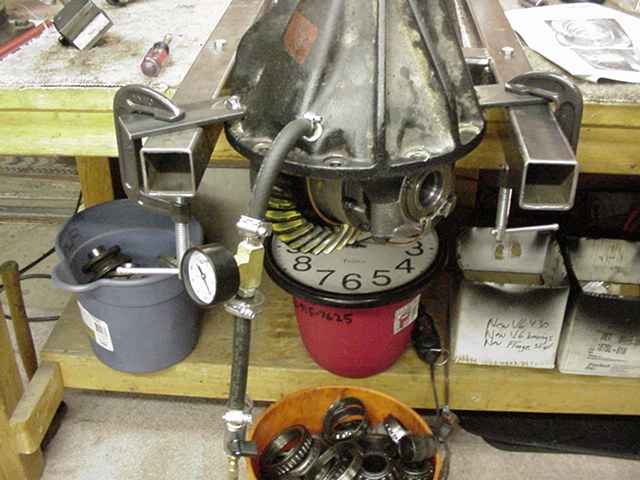
The master kit as supplied from Nitro Gear and Axle. |
|
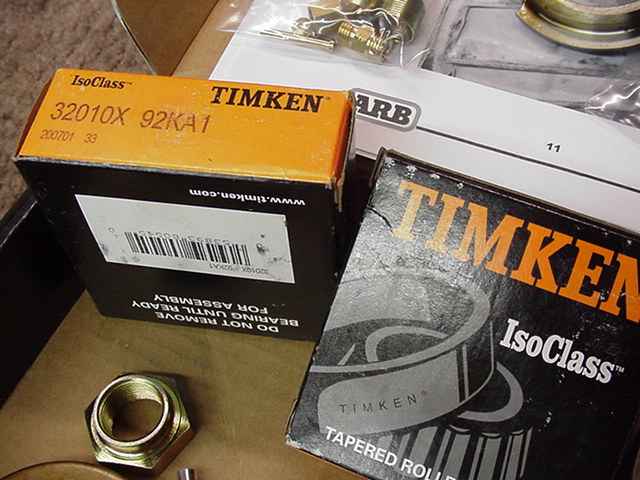
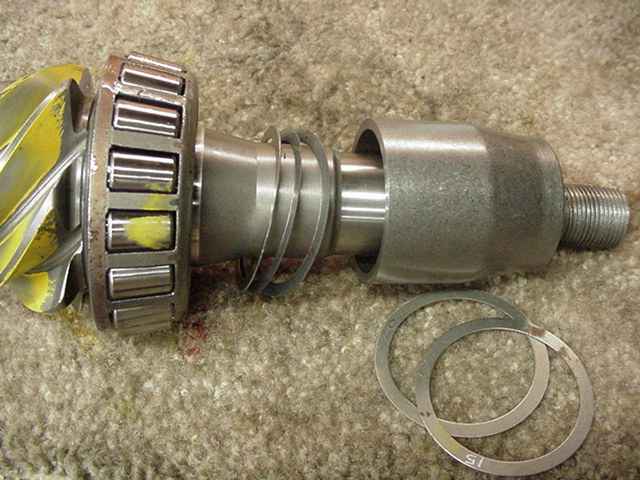
Adapter carrier bearings with the 50mm inside diameter. |
|
The 3rd is torn down.... |
|
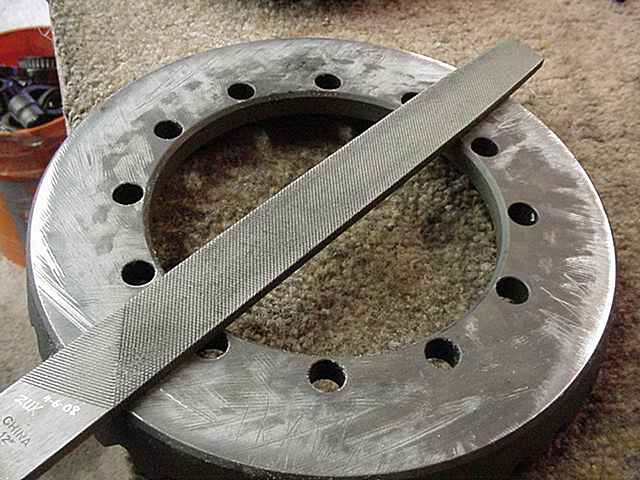
In the process of removing the old races with a soft chisel, I left some little dents. This is leveled flat using my thumb file. |
|
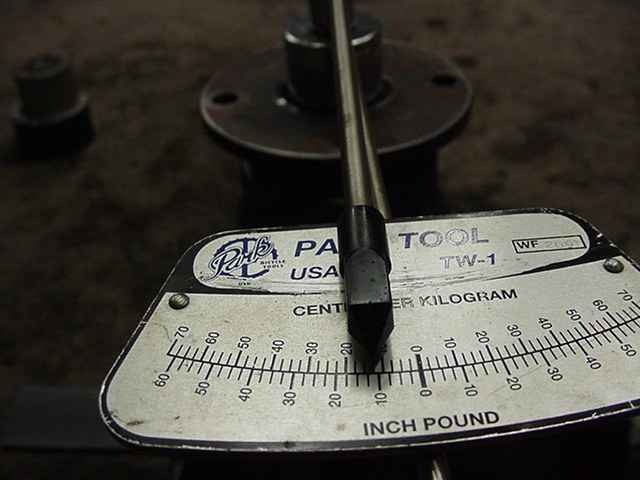
The pinion is installed without a solid collar or crush sleeve. The nut is tightened carefully until about 10 inch/pounds is measured. |
|
Surfaces are lightly filed to check for high spots. |
|
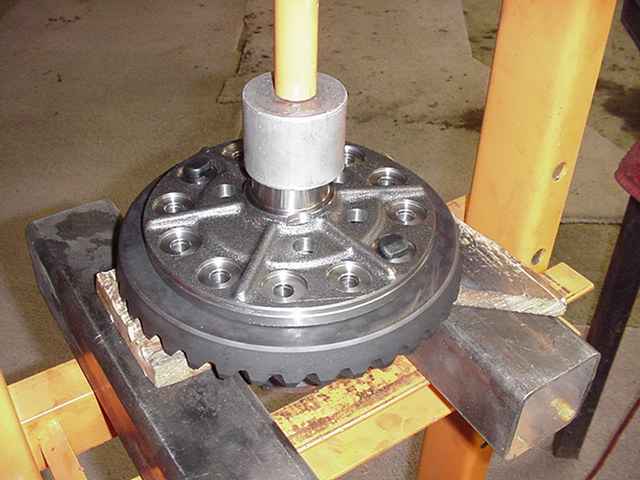
The ring was a tight fit onto the ARB case but the press made easy work of it. |
|
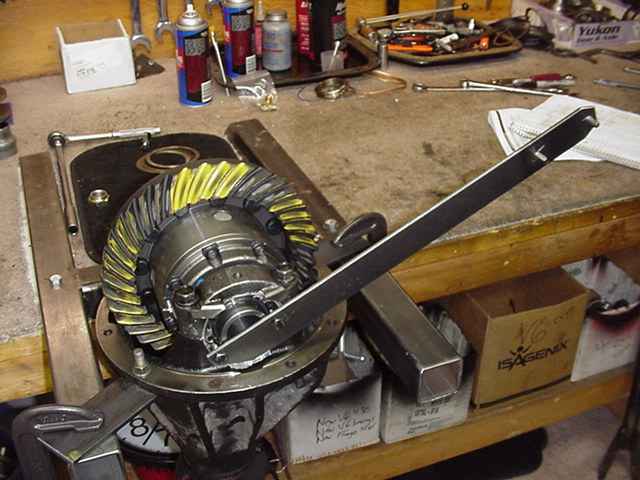
Red Loctite and about 100 ft/lbs makes it right. |
|
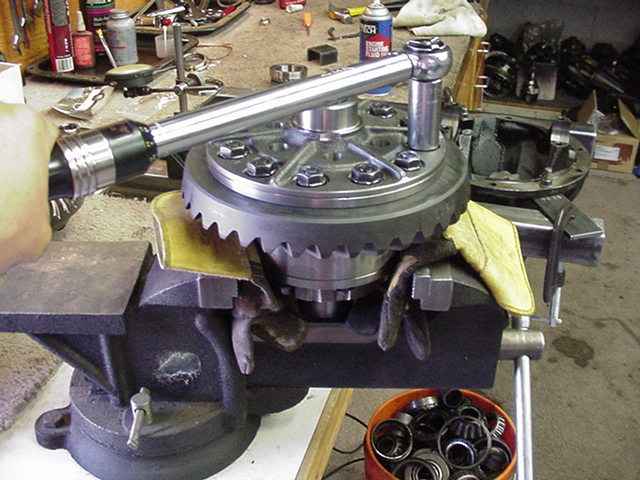
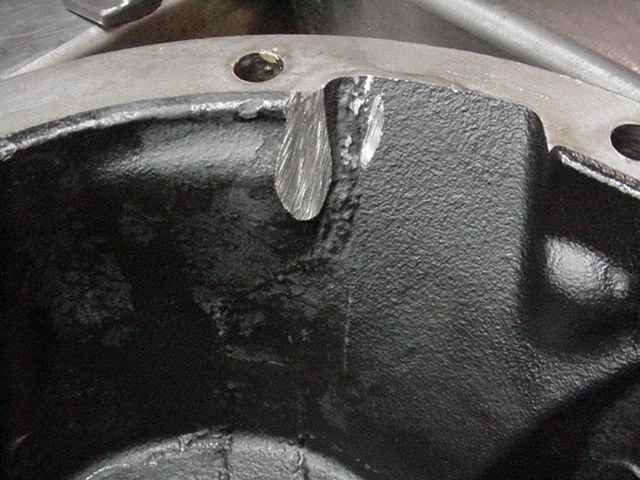
While trying to dial in the backlash, I found that the ring tooth was making contact with the carrier. This doesn't happen with all 529 gears but it did happen with this one. |
|
The contact is "strong" and the fix is an easy one. |
|
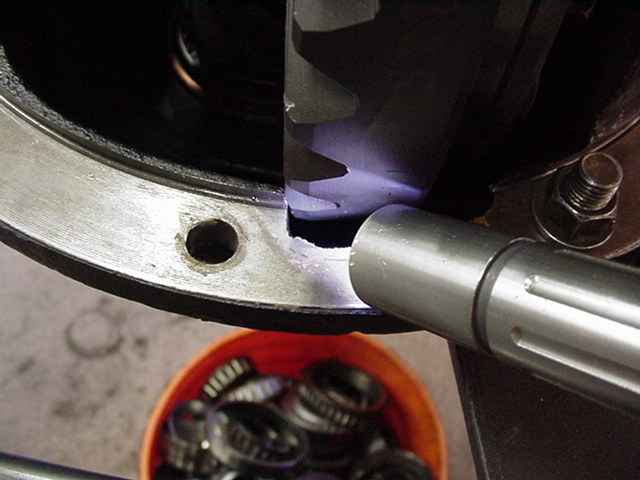
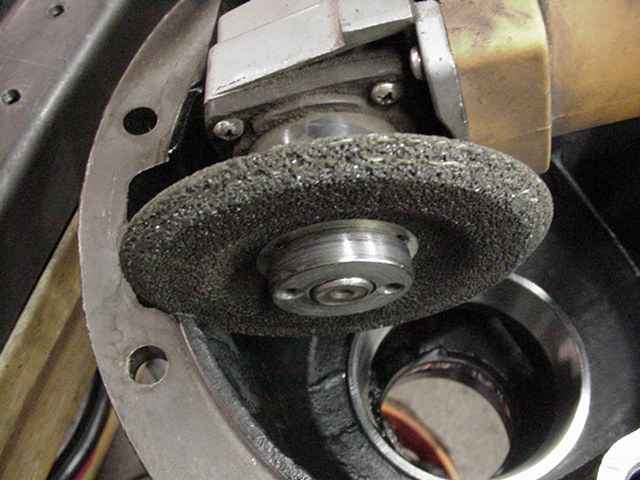
Using the handgrinder, remove a minimal amount of material....maybe .080" deep or so is more than enough. |
|
2 spots on the carrier need to be clearanced like this. |
|
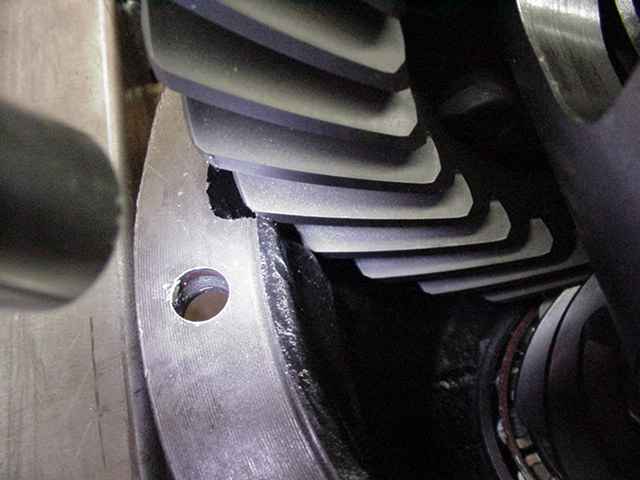
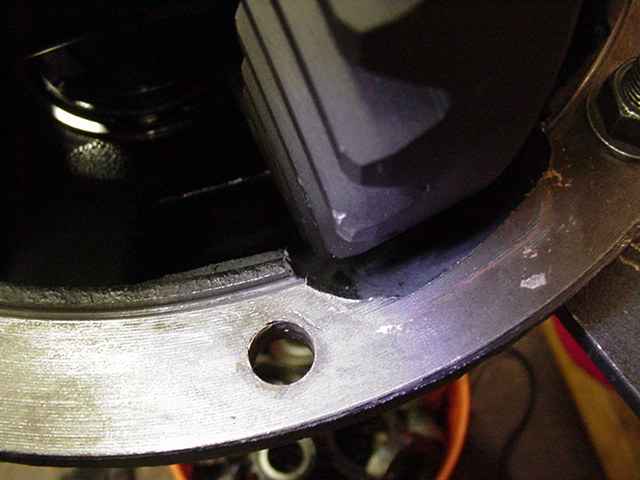
Lots of clearance on this side... |
|
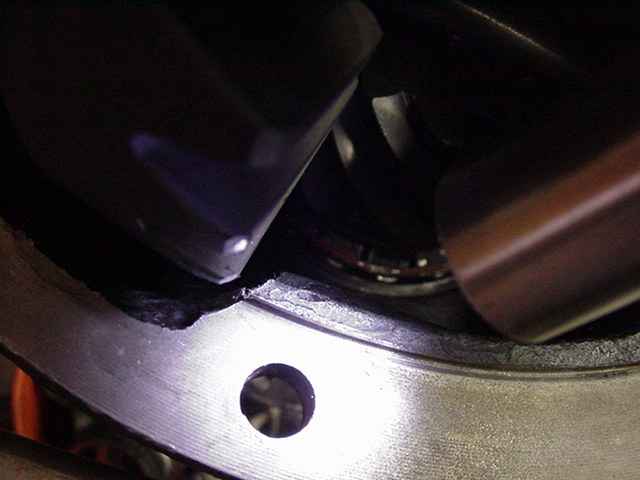
180 degrees away it clears fine also. |
|
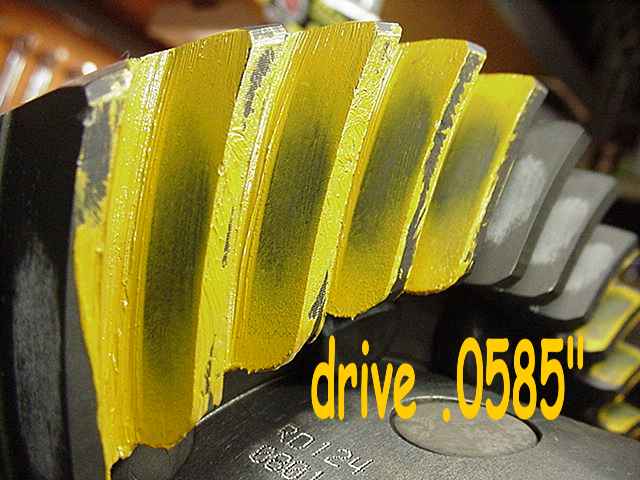
Now that the ring gear will turn smoothly, now the backlash can be set to about .007 for a pattern check. |
|
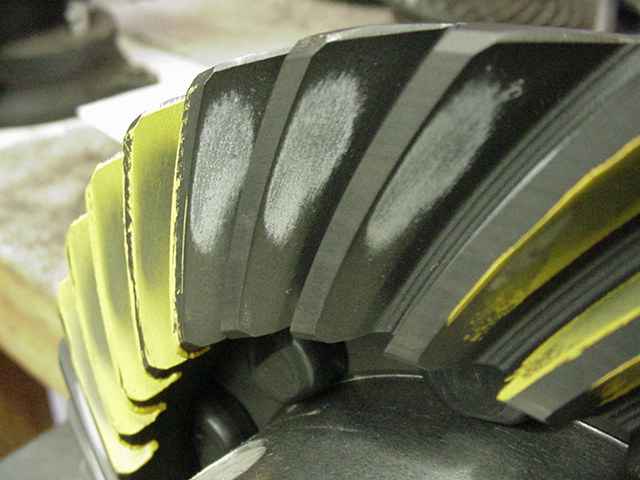
Beautiful pattern. Depth is exact. |
|
The metal to metal "scuffing" that shows the same drive pattern. |
|
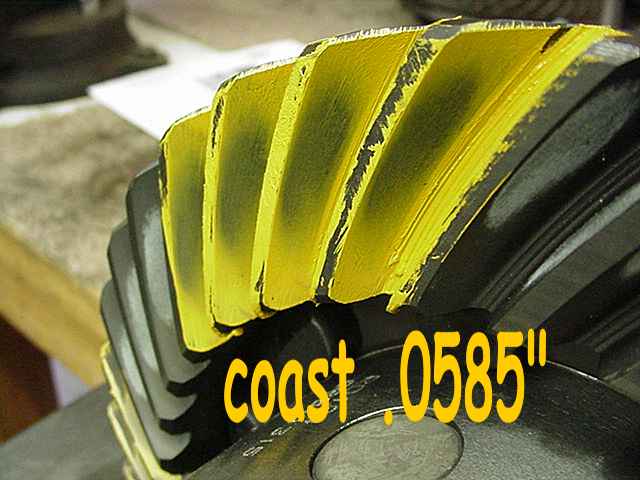
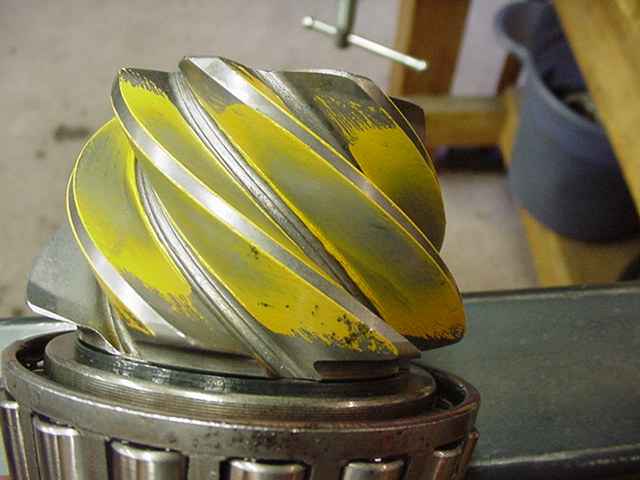
Coast looks good also. |
|
... |
|
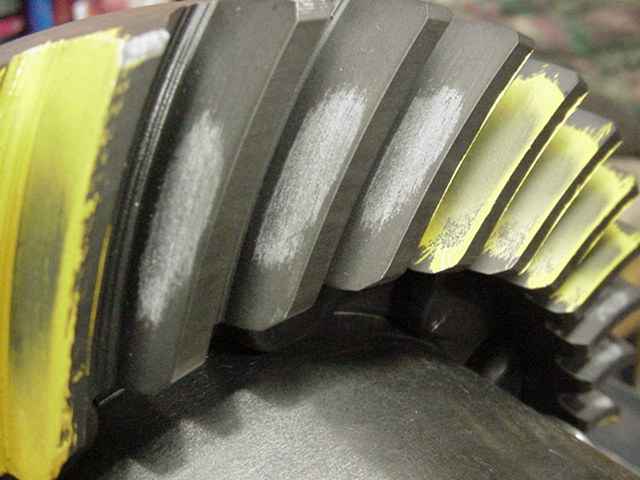
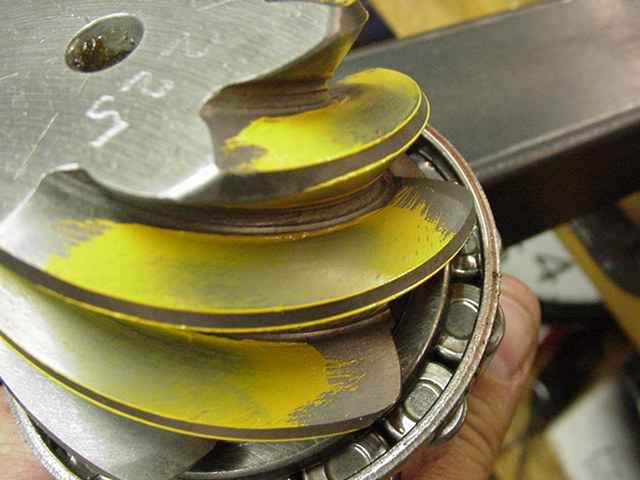
Drive side on the pinion tooth looks nice. |
|
Coast is good. There's nothing wrong with these Nitro Gears...the quality is there. |
|
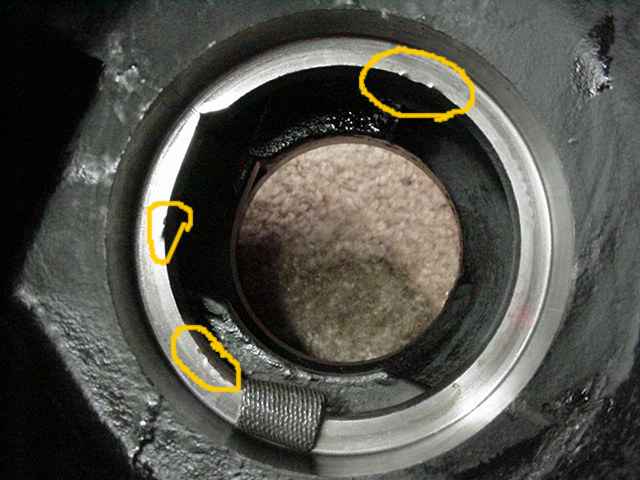
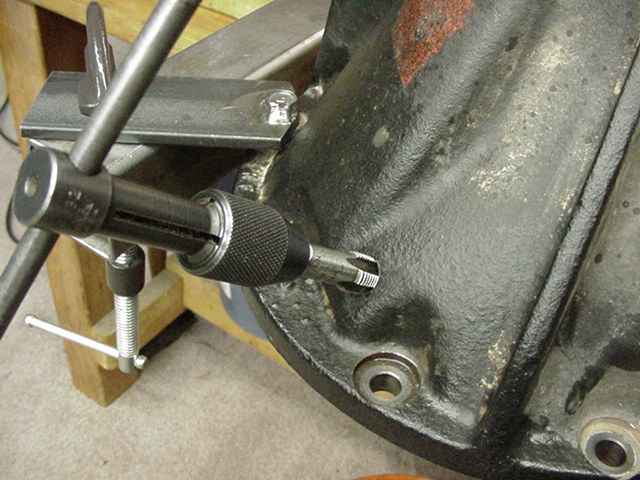
The fitting for the ARB hose is drilled and tapped at this point. |
|
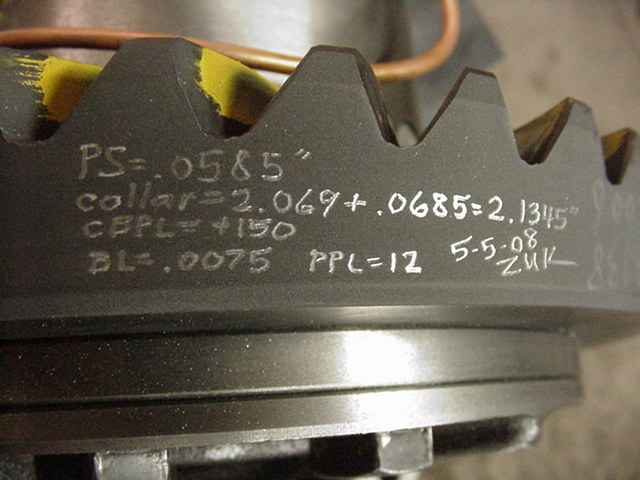
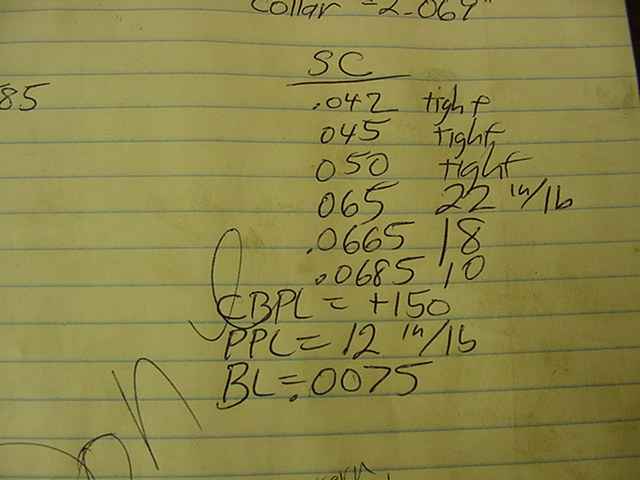
With the pinion depth established, now the solid collar can be installed. It took me about 6 times to get the shim right for the collar. |
|
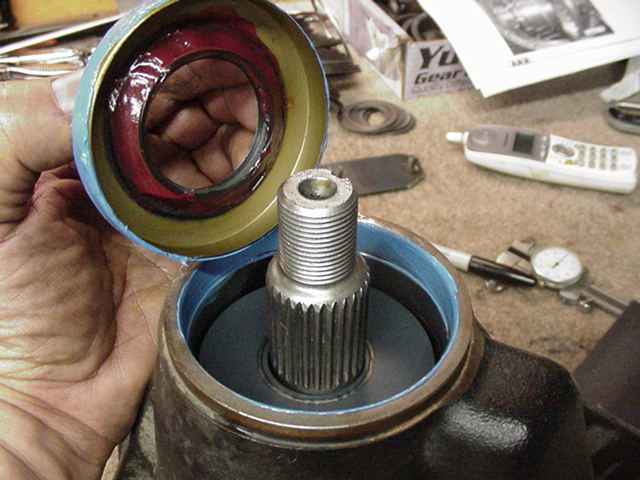
Finally, the seal is prepped with RTV and thick red grease. |
|
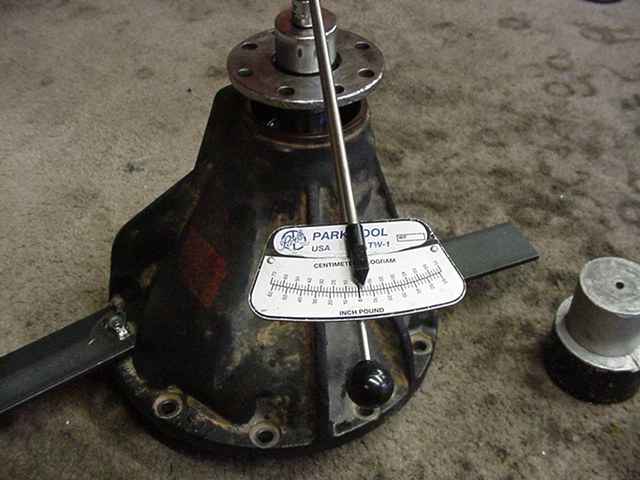
12 inch/pounds is measured for PPL. |
|
The adjusters are carefully tightened until the CBPL reaches 150 ft/lb or even a bit more. |
|
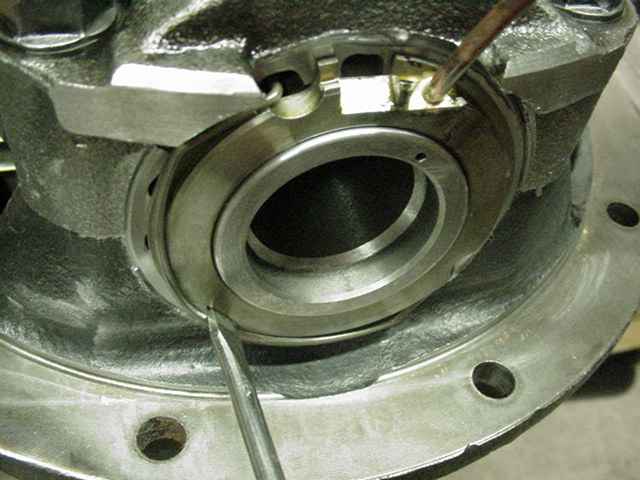
The seal assembly is pushed in place. The clip is snapped in place. |
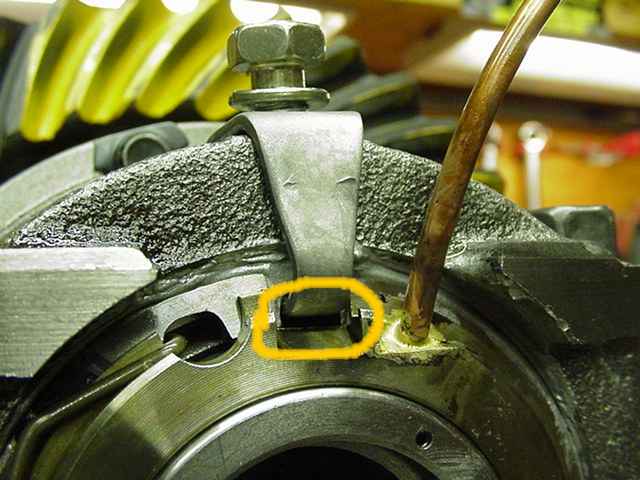
|
Verify that the tab does not contact or push down on the seal assembly. Air leaks could possibly happen if it does. |
|
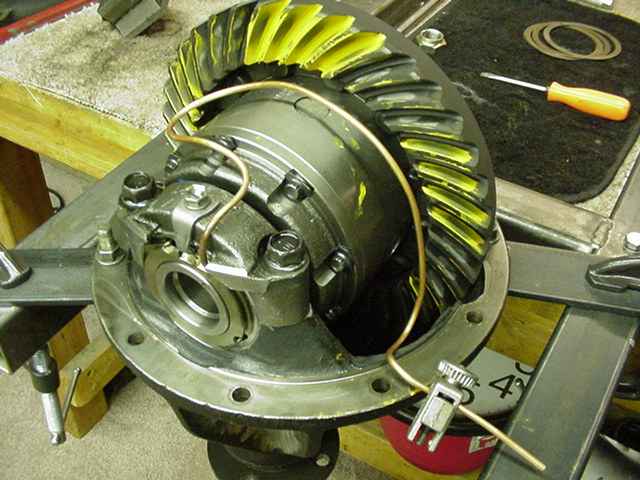
Carefully route the soft copper line with a service loop. |
|
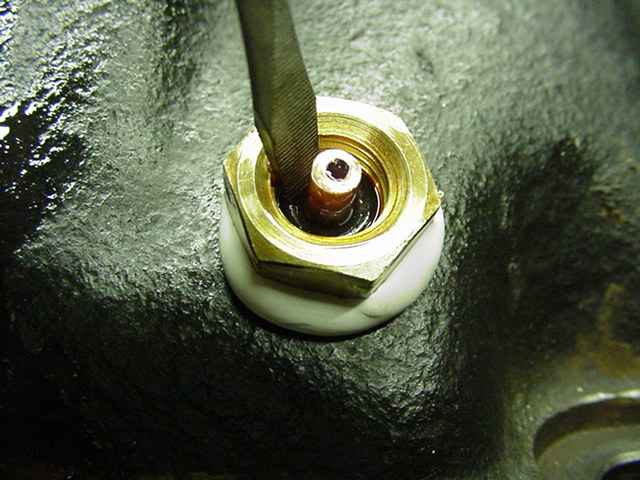
The fat little o-ring is lubed up and carefully pushed in. |
|
Leak tested and all is good. |
|
Specs are dremel drilled on the ring... |
|
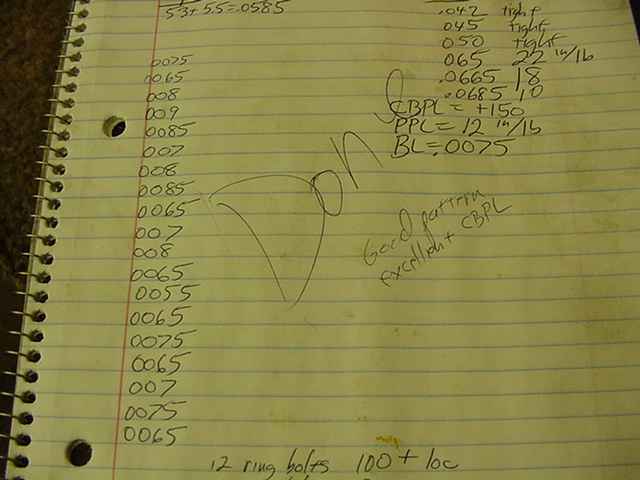
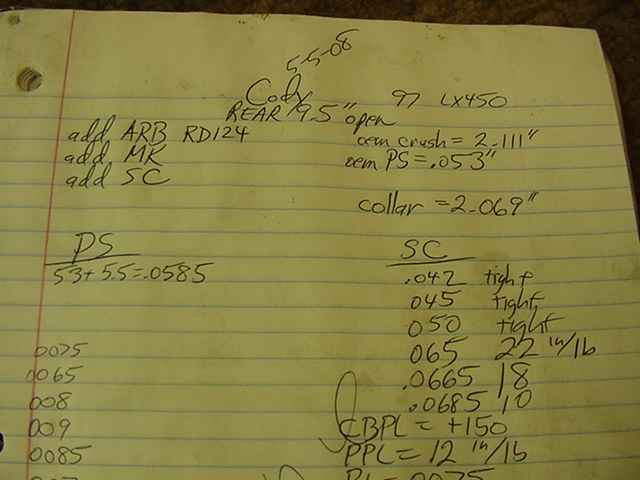
These are the notes I took....here, it took me 6 times to get the PPL right. |
|
The backlash was checked on every other tooth (about 19 places). |
|
Done....Check out the link below for the front gear install. ZUK |
|
|

|