Click HERE to follow the exact 4x4 thread that this info came from.....
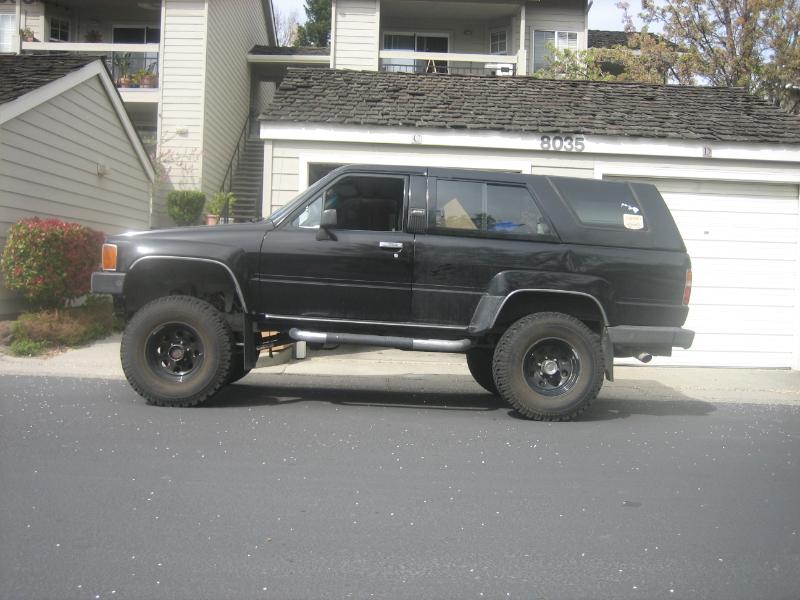
......My 1987 4runner has had saggy rear leafs since I bought it in 2002 with
200,000 miles on it. Now, over 60,000 miles later, and after a 4� Pro Comp lift
kit in 2004 that added 4� blocks to my saggy rear springs, I wanted to remedy
the sag, and the awful spine jarring ride that I�d been putting up with for years.
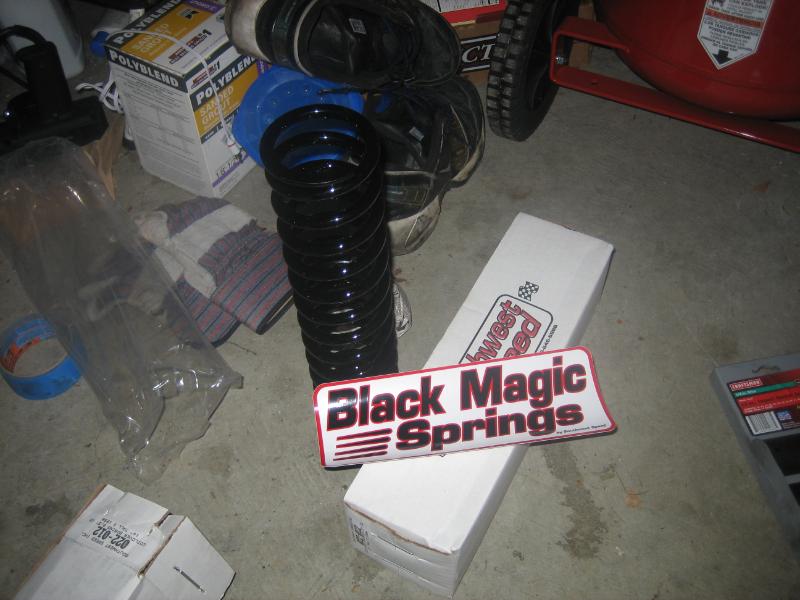
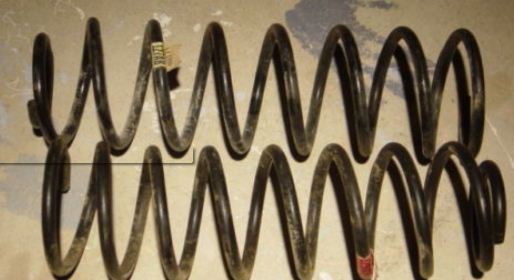
I bought the springs on eBay from the seller that ZUK recommended on his site �
the link is here (I went for the 14� 125# version).
|
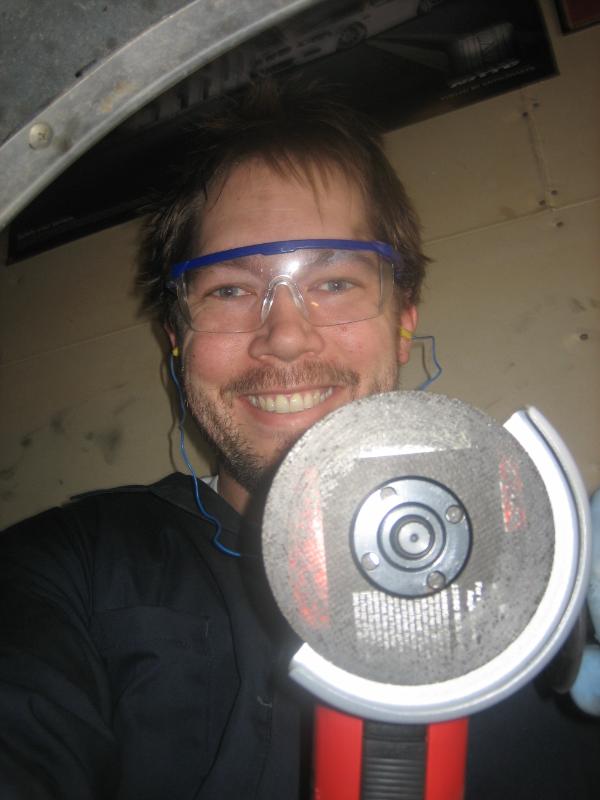
I don�t have welding tools and don�t know how to, so I was going to have to get creative on the install.
I also don�t have a torch, so I had to REALLY get the creative juices flowing when spreading the cut bumpstops apart (more on that later).
The steps are pretty simple (I�m writing this for a non-lifted 4runner):
.....1) Get the truck up on jack stands in the back and take of the rear wheels (chock the front wheels)
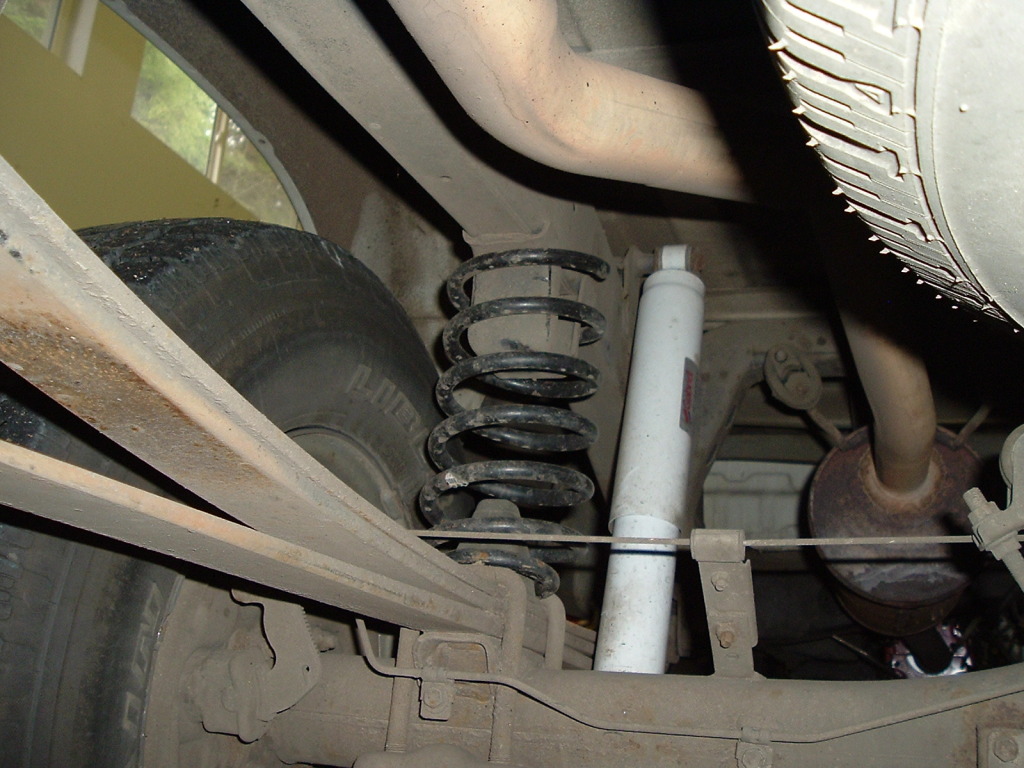
.....2) Cut the OEM frame mounted bump stops (it�s a �U� shape, and you cut the bottom of the �U� out with an angle grinder (I used a 4.5� cutting wheel)
.....3) Move the front part of the remaining cut �U� shaped bump stop forward to accommodate the Black Magic springs (I believe a width of 3.5� was the magic number for me).
.....4) Cram the springs into the cut �U� shaped bumpstops you�ve just cut, and the rubber �pyramid� on top of the OEM leaf (also a bumpstop). You may need a bottle jack to spread the leaf wider, or use spring compressors).
.....5) Reassemble and enjoy.
Note: I already had a 4� block lift in the back, so I had extended SS brake lines and a bracket for the LSPV; if running stock suspension, you may need to disconnect brake lines, buy longer ones, or even buy longer shocks.
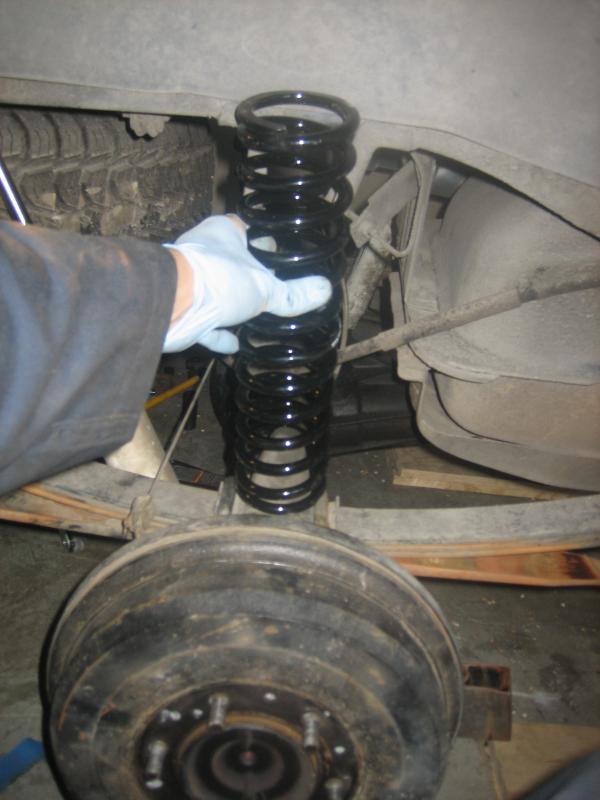
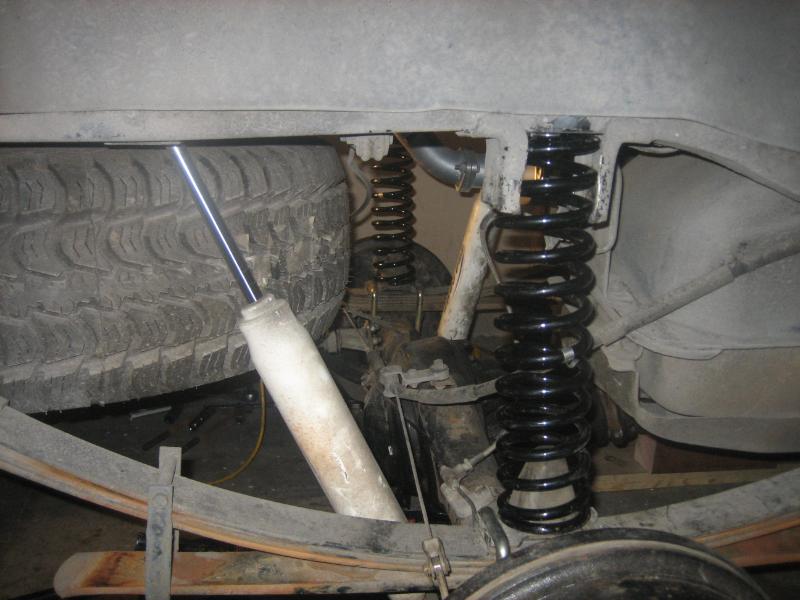
Below are some before and after measurements of the rear suspension:
Before (with 4� blocks on stock leafs):
Top of fender to top of wheel rim: 13.0� (driver), 12.5� (passenger)
Frame to top of axle: 13.0� (driver), 12.75� (passenger)
Frame to ground: 29.0� (driver), 28.5� (passenger)
After (no blocks, stock leads, coil springs):
Top of fender to top of wheel rim: 13.5� (driver), 13.5� (passenger)
Frame to top of axle: 14.0� (driver), 14.5� (passenger)
Frame to ground: 29.5� (driver), 29.5� (passenger)
If the 4� blocks are taken into account with these numbers, the truck gained
about 4.5� to 5� of lift with the coil springs added on (so, assume this for an OEM
setup with no previous lift). The ride height is roughly the same after this, but with
over 5� of space between the leaf and the bump stop now, where before I had about an
inch, and was bottoming out on speed bumps in parking lots. MUCH BETTER!
Here are the steps I took with the mod:
Tip: It�s a good idea to use Liquid wrench or WD40 to loosen up all the components you�ll
be working on beforehand. Spray liberally a week before, 3 days before and the day before your
project to get it adequately primed. Then, before you get everything going, break the nuts on
the U bolts before you raise the truck, as well as the rear lug nuts.
Get the truck up on jack stands (with a 4� block lift this was challenging,
as I had to account for the extra space; I used stacked 4x4s, and 2 �� boards under
jack stands to get the truck�s rear high enough in the air). Make sure you chock the
front wheels well first. Put the jack stands on the frame, just forward of the front
rear leaf hanger.
|
Remove the rear wheels ( I put them in front of the front wheels,
which were already chocked, as an extra precaution).
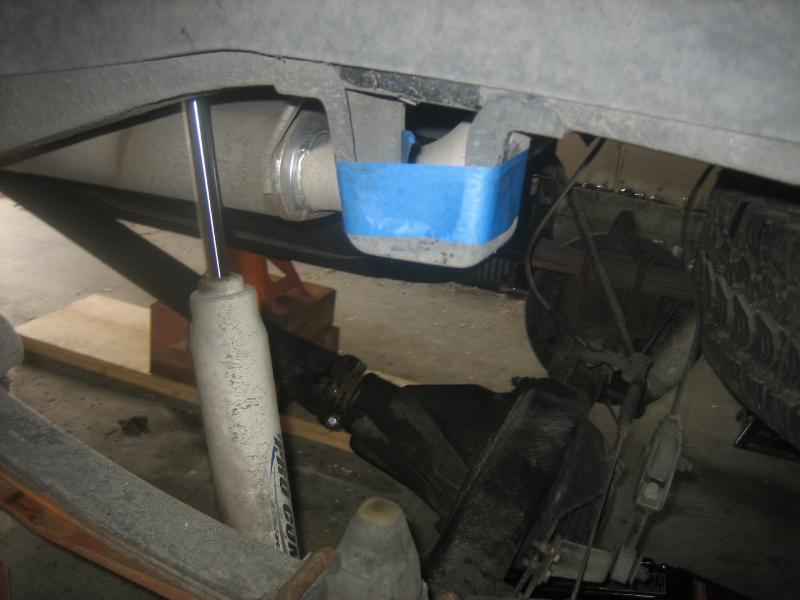
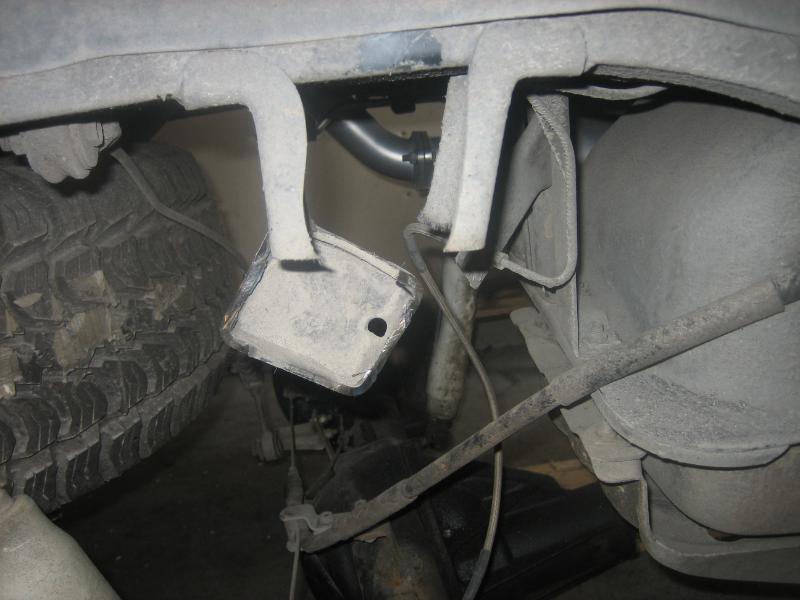
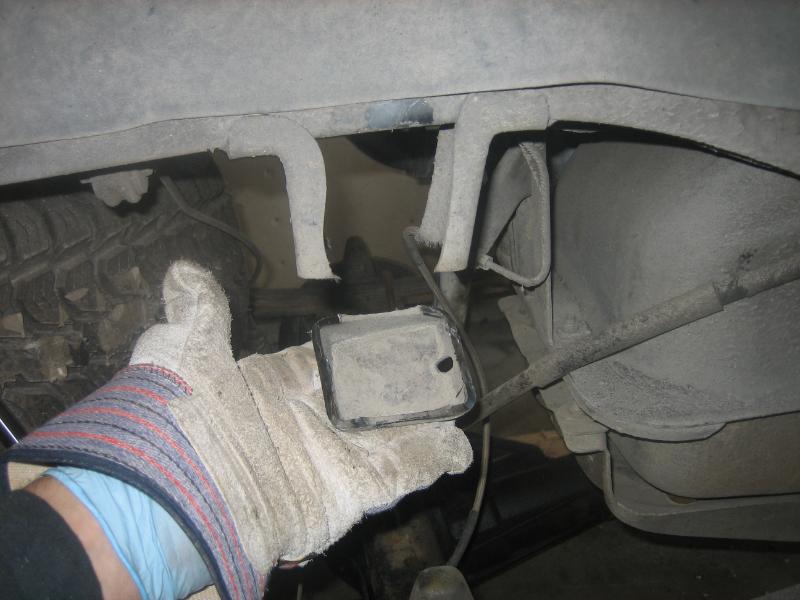
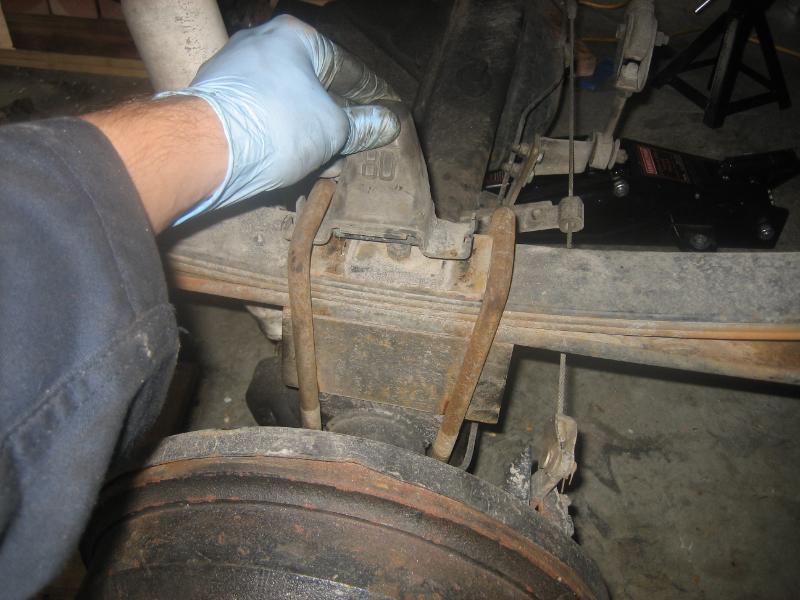
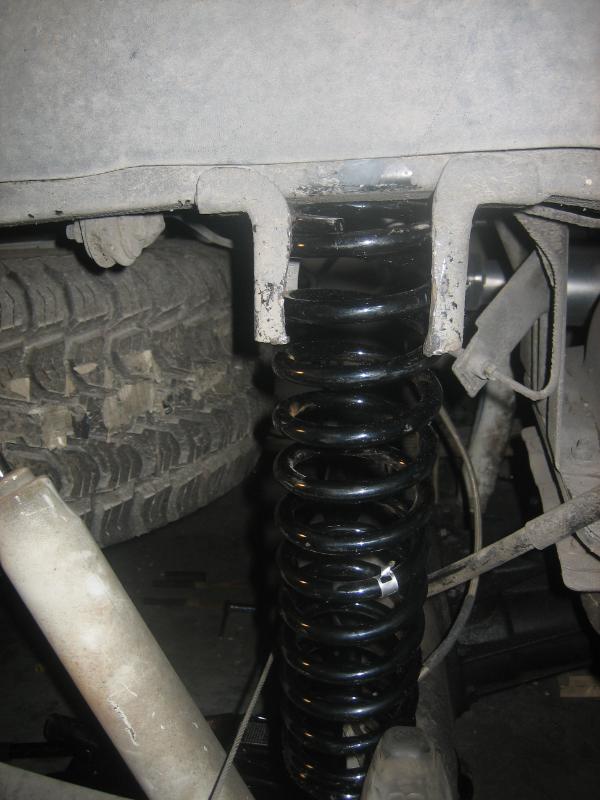
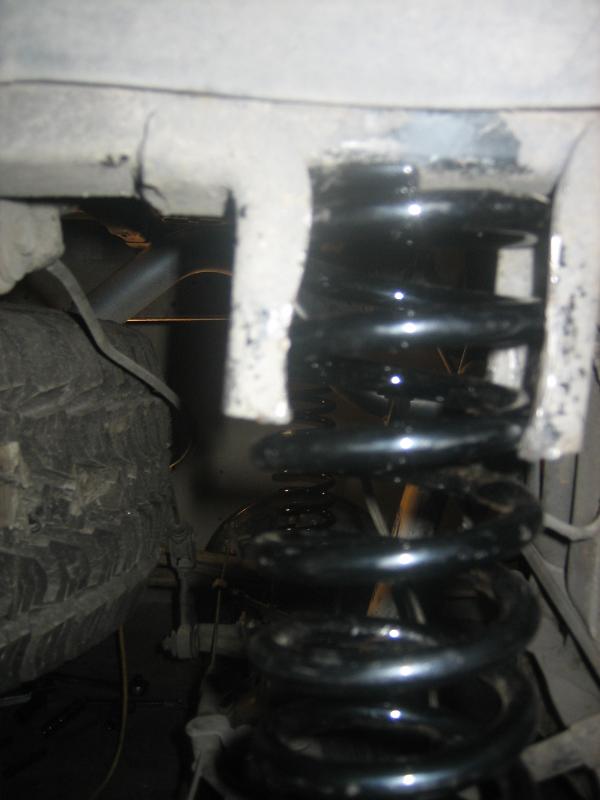
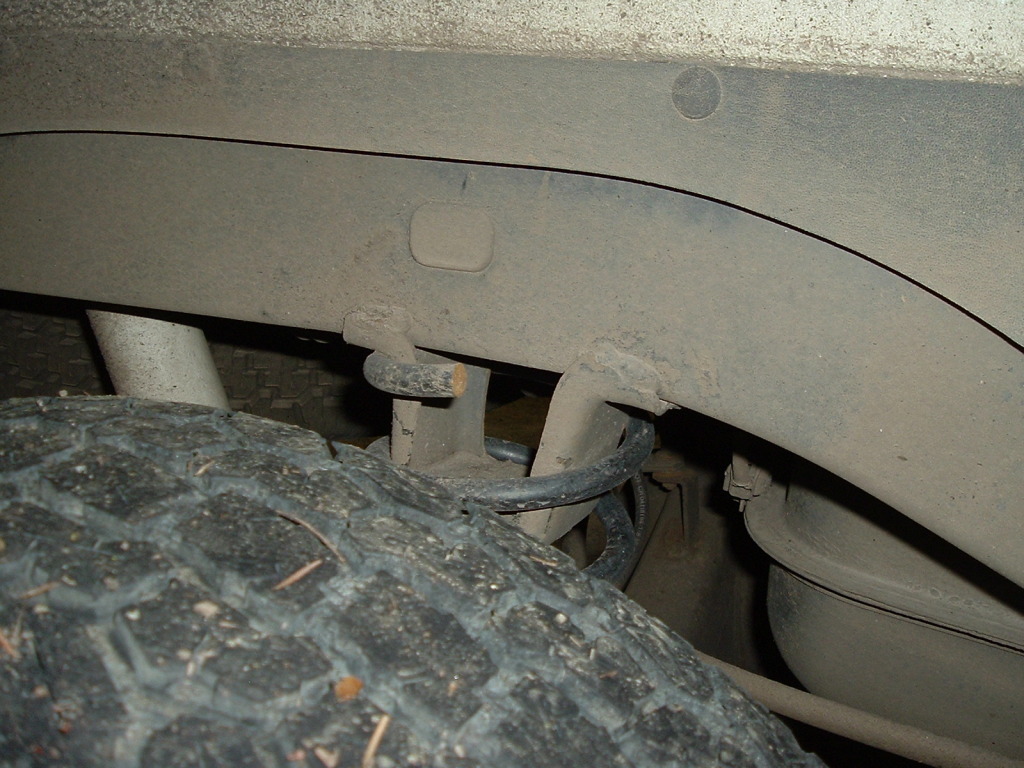
Using an angle grinder/cutoff tool, cut the very bottom of the OEM bumptops
attached to the frame. I used painter�s tape to mark an even line across
the bottom. I wanted to keep as much of the vertical parts of the �U� bumpstop
as possible to support the new coil springs.
|
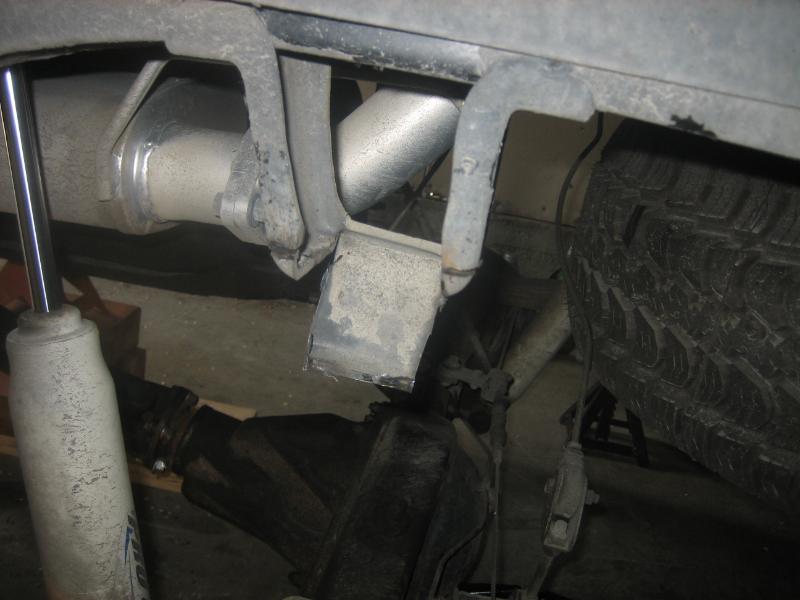
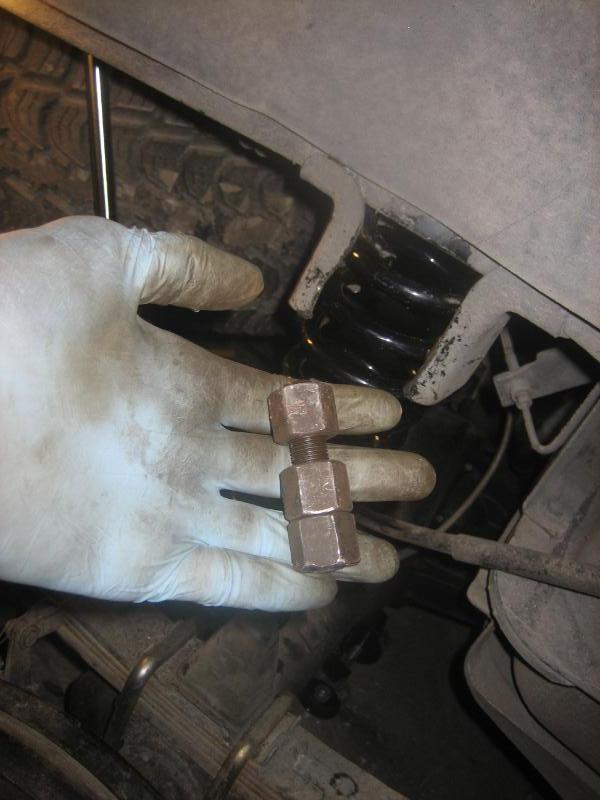
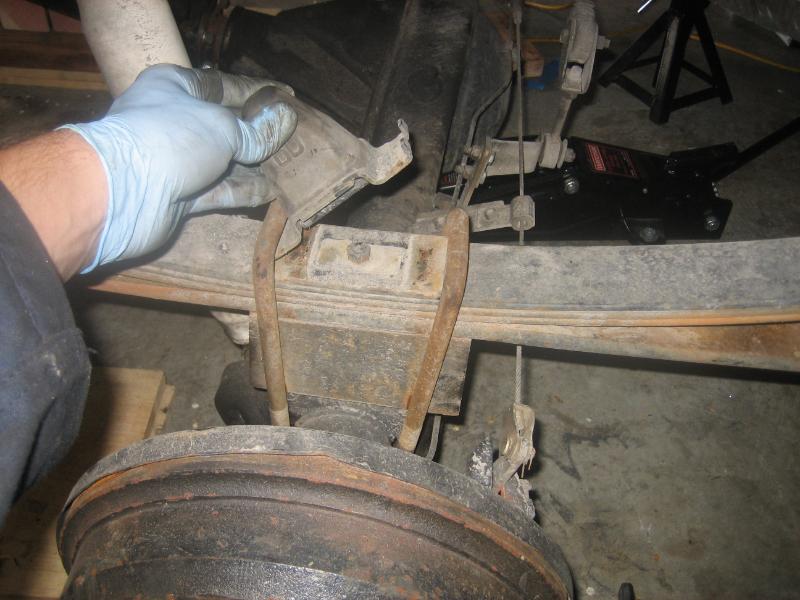
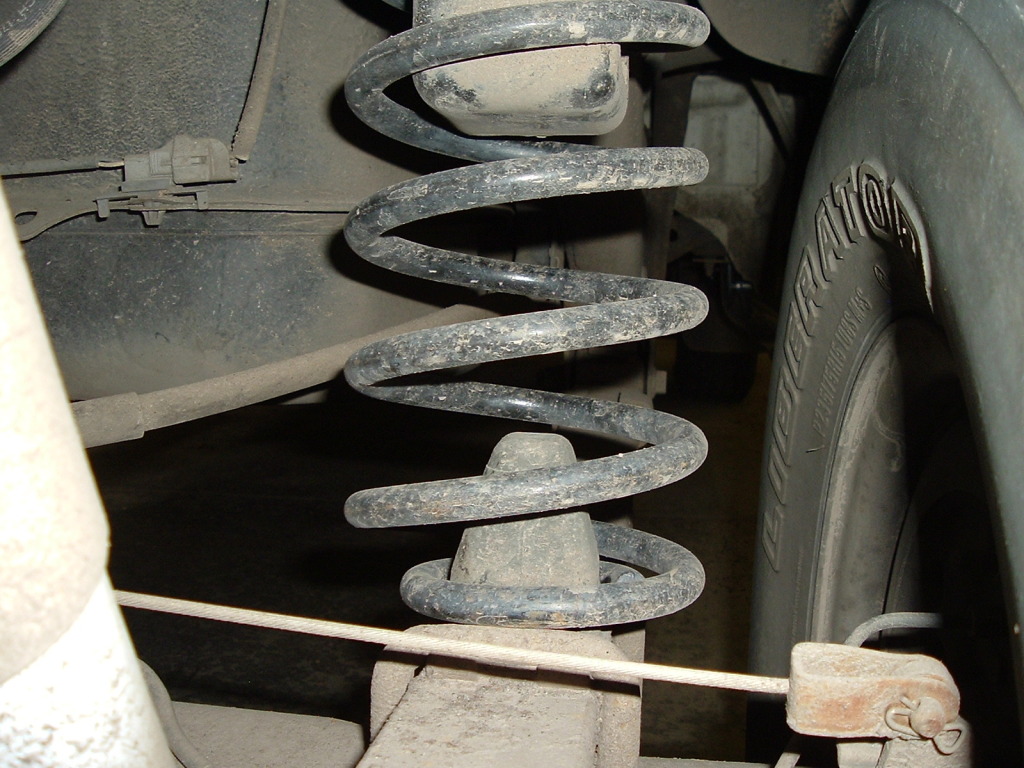
Spread the remaining vertical portions of the OEM bumpstops (I needed about 3.5� of distance between).
If you have a torch, heat it up and then use a hammer to tap the front part forward to better align with
the rear vertical bumpstop portion. If you DON�T have a torch, bending it will be tough. I ended up using
the old 4� block U bolts and nuts to make an expander tool (I cut it t a length just wide enough to fit
between the 2 vertical walls of the OEM bumpstop, and fitted the old nuts onto it (4 of them); I then used
wrenches to *expand* the segment while between the OEM bumpstop vertical walls, and expanded the walls to
make them wide enough to accommodate the new coil springs.
|
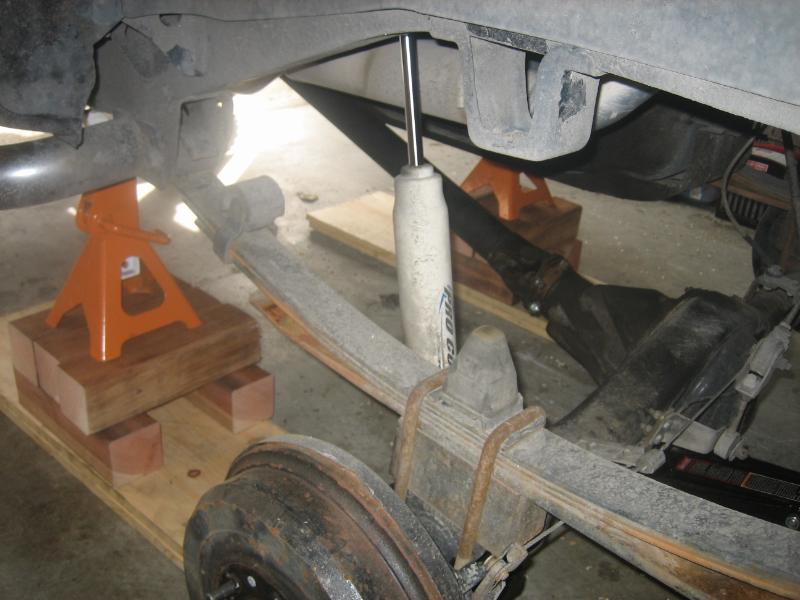
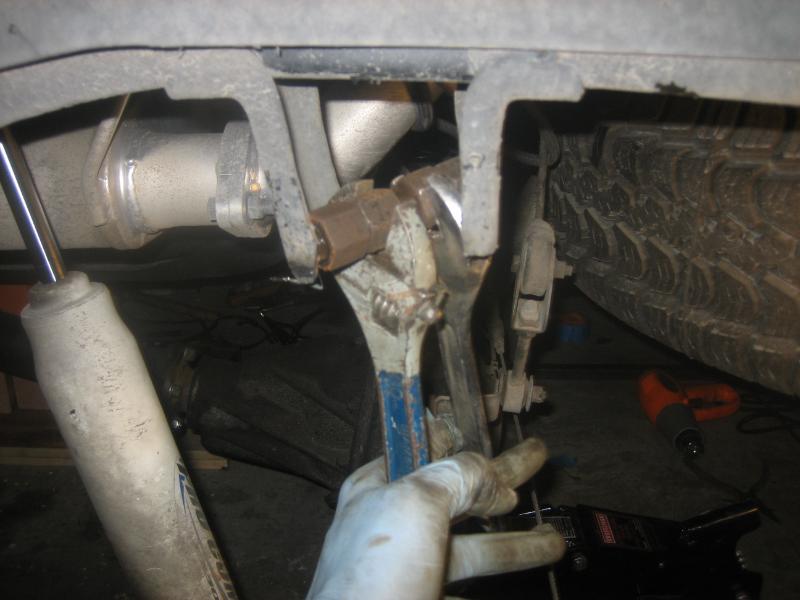
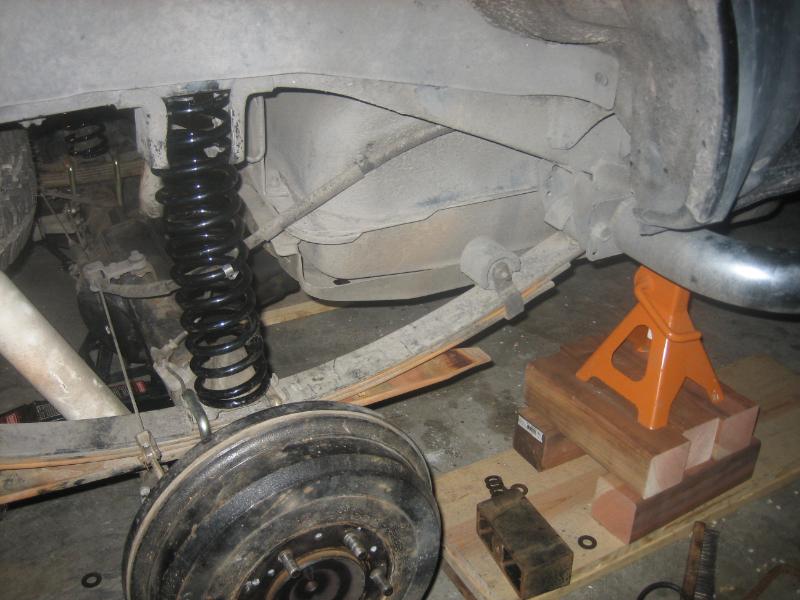
Support the differential with a floor jack before moving on. It's also a good idea to unbolt
the LSPV from the rear axle - two 12mm bolts; suspend it out of the way with a bungee tied to the
exhuast or something similar.
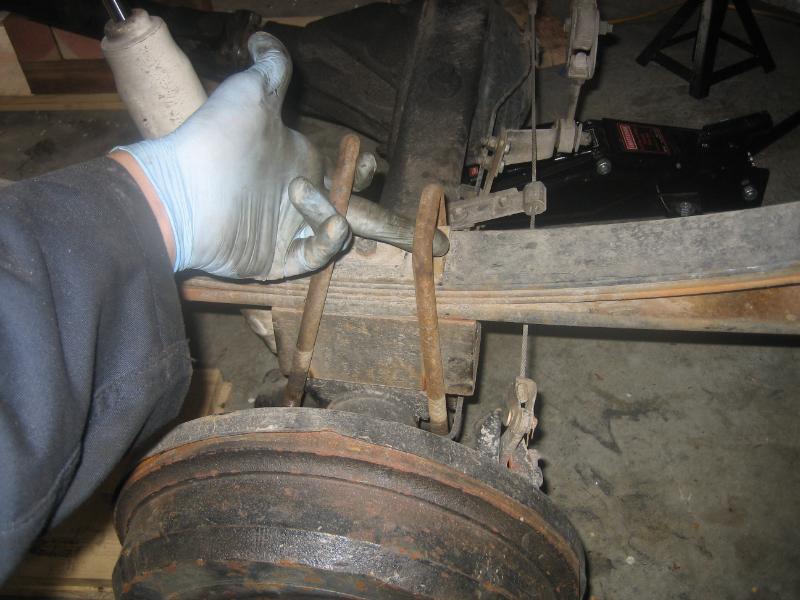
With the differential supported with a floor jack, now it�s time to loosen up the U bolts. Loosen
the Ubolts enough that you can slide in/out the rubber triangle bump stop. If you have a bottle jack,
place it on top of the rear leaf and expand it toward the frame to move the leaf farther away from the
frame; this will allow you to better cram the new coil spring into place. If you don�t have a bottle
jack, you may be able to use either spring compressors or a shim of some sort to leverage the new
spring in between the bump stop rubber triangle and the old �U� shaped bump stop that you just cut.
|
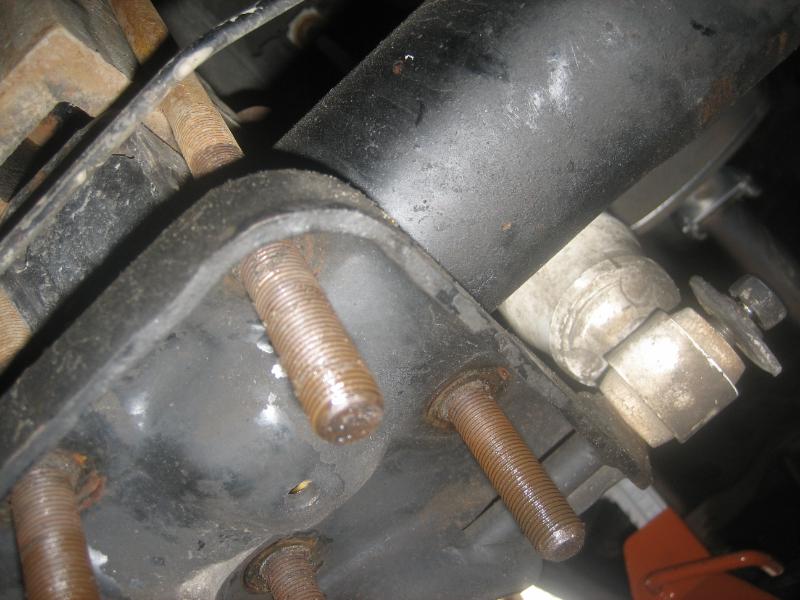
Note: Since I had the 4� blocks installed, I need to get back to factory U Bolts for
this mod since I wasn�t using the blocks anymore. I got lucky a few weeks ago when shopping
for generic U bolts at AutoZone�.a guy who worked there had a newer model Tacoma and had
just installed some aftermarket springs, so he sold me his OEM U bolts and nuts for $10 � score!
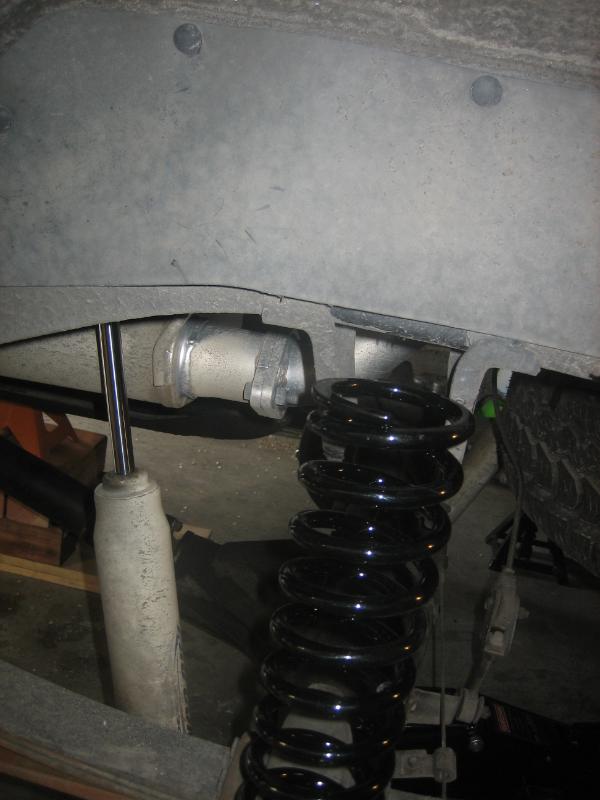
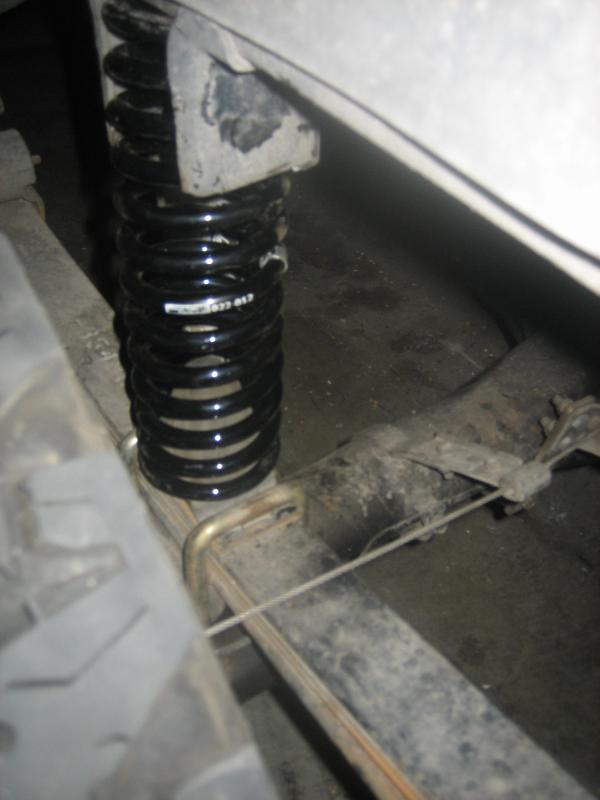
Remove the rubber triangle bump stop and place it into the bottom of the new coil spring; cram the
other end of the coil spring into the recently cut �U� shaped bumpstop. With the new spring planted into
the upper, cut bumpstop, leverage the bottom part (with rubber triangle installed) back onto the rear leaf
spring perch where it was before (this is where the bottle jack expansion trick comes in handy).
|