|
Help ZUK! 98 4Runner has a loud whine/growling noise
|
|
(68 BIG pics loading)
|
|
OCT 13 2013
|
|
|
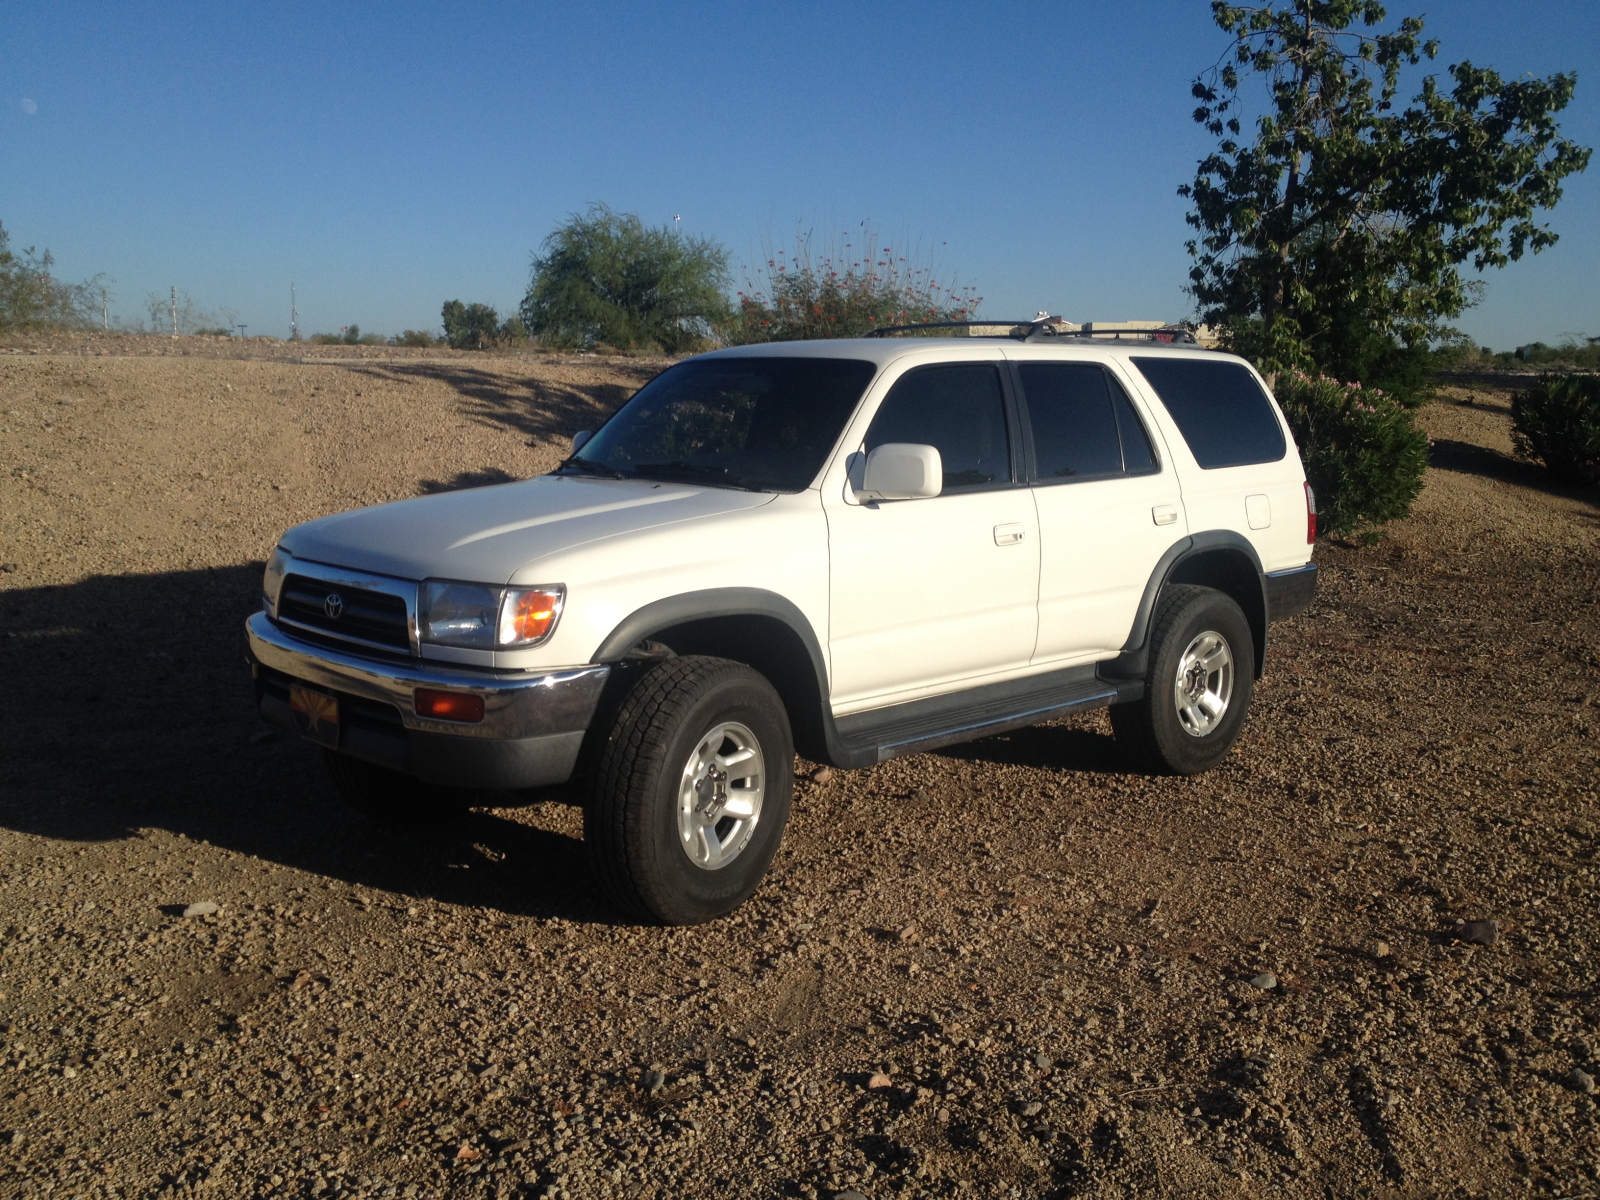
Erik's 1998 4Runner has alot of miles on it...212,000 miles. Recently, it started making a loud growling noise from the rear end.
I might mention that the Runner needed some maintenance in other areas, too. Erik can't believe how four KYB mono-max
shocks/struts all the way around had made such a wonderful difference in the on-road handling. Before, it used to wallow
over over the place...no more. New rear axle bearings were installed. He is aware of the radiator "pink milkshake" issue
and will be changing out the radiator very soon.
|
|
|
|
|
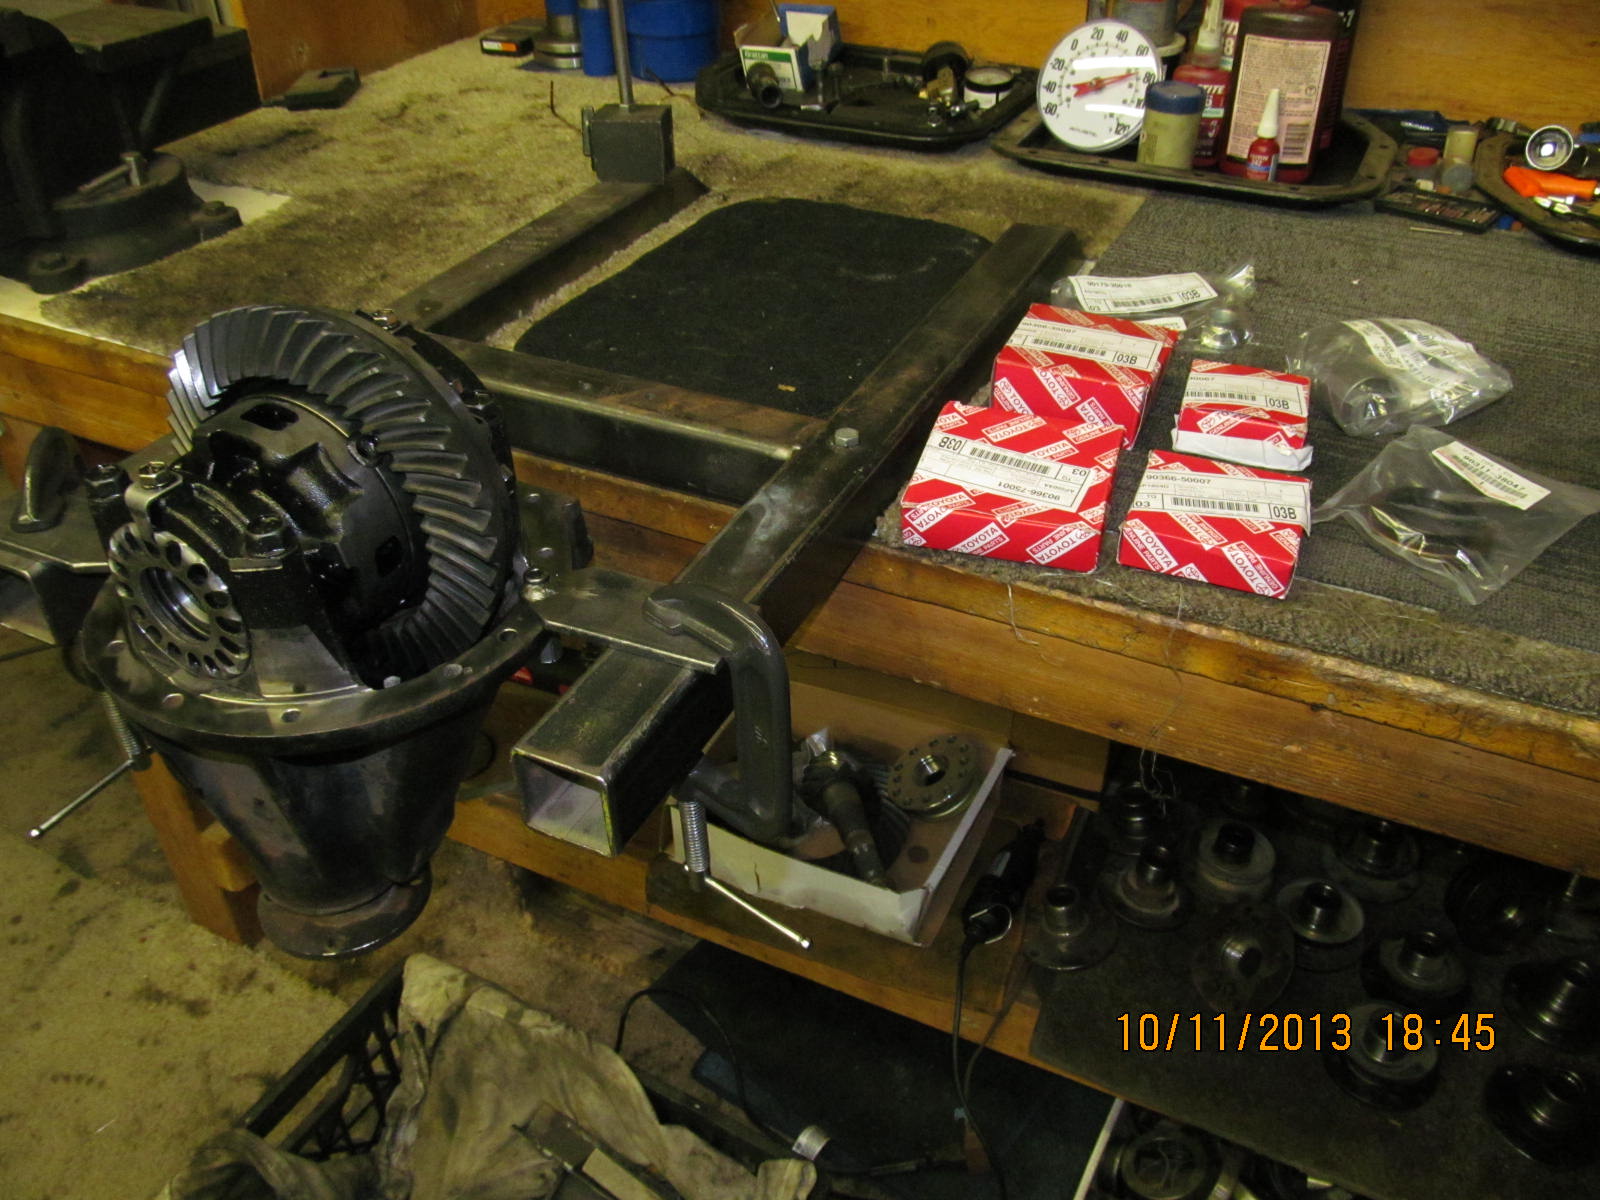
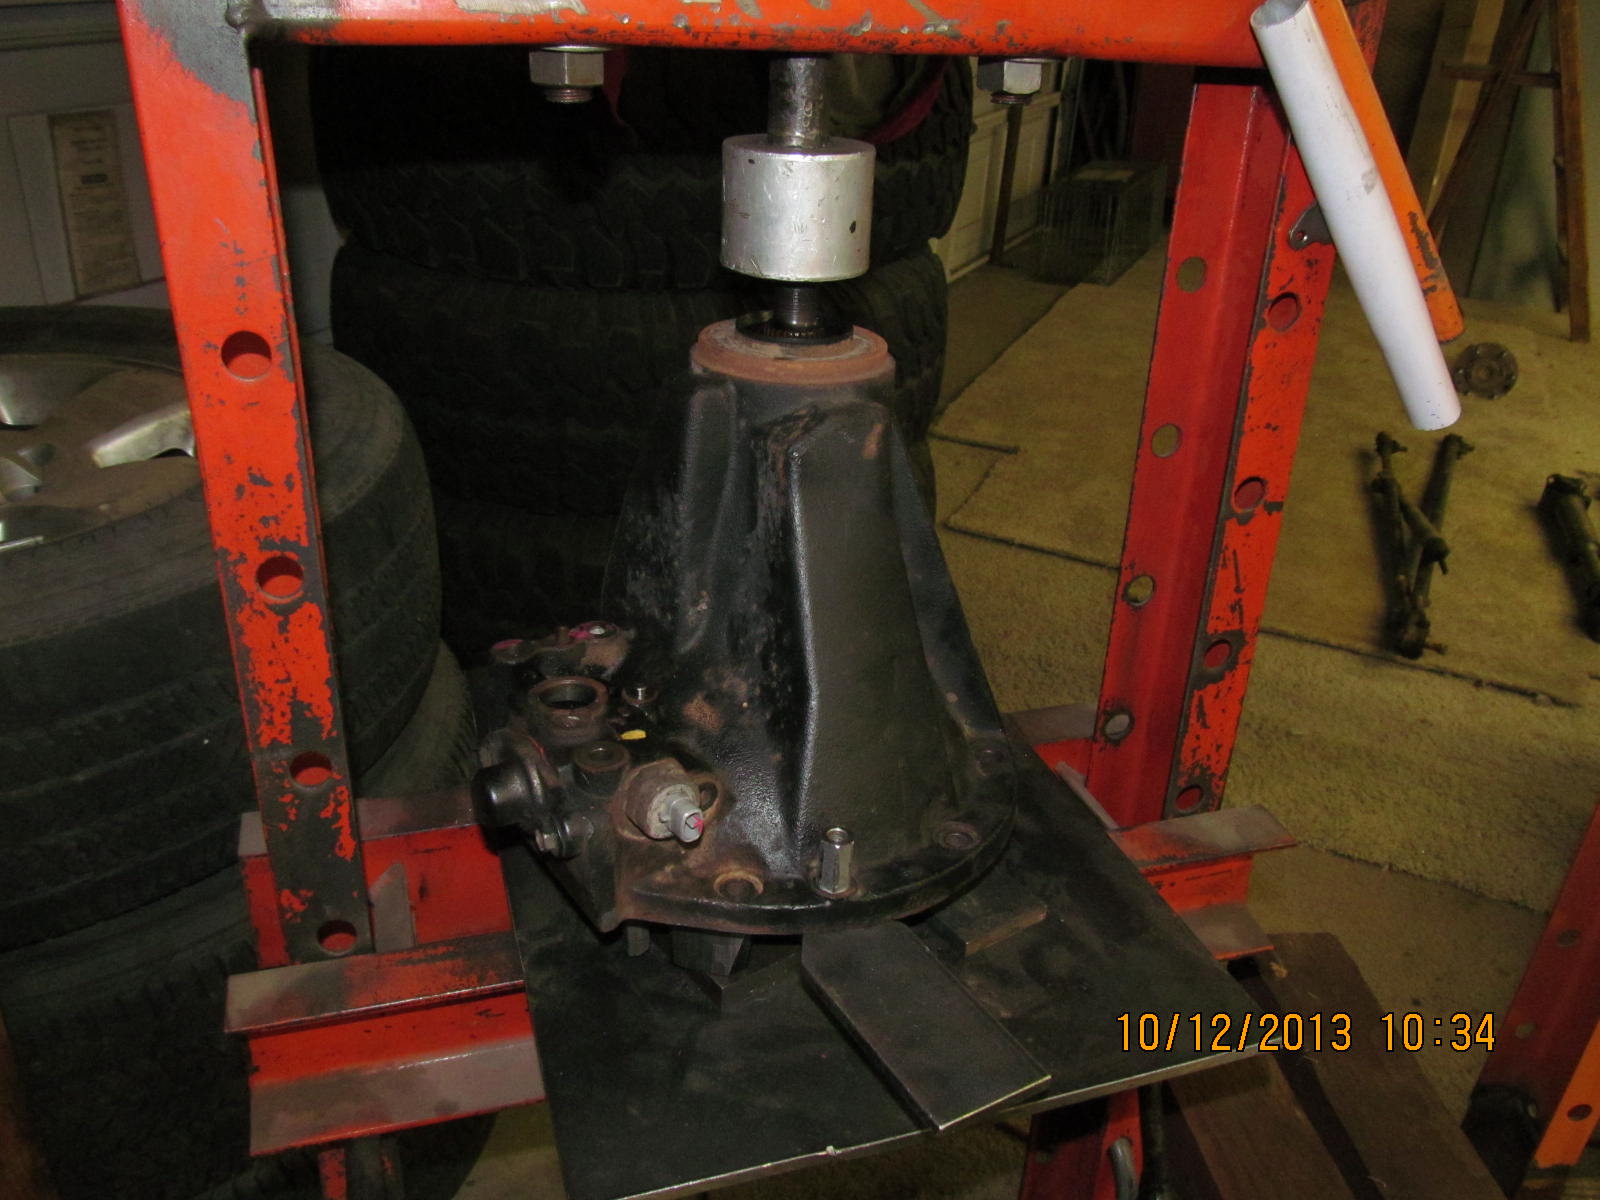
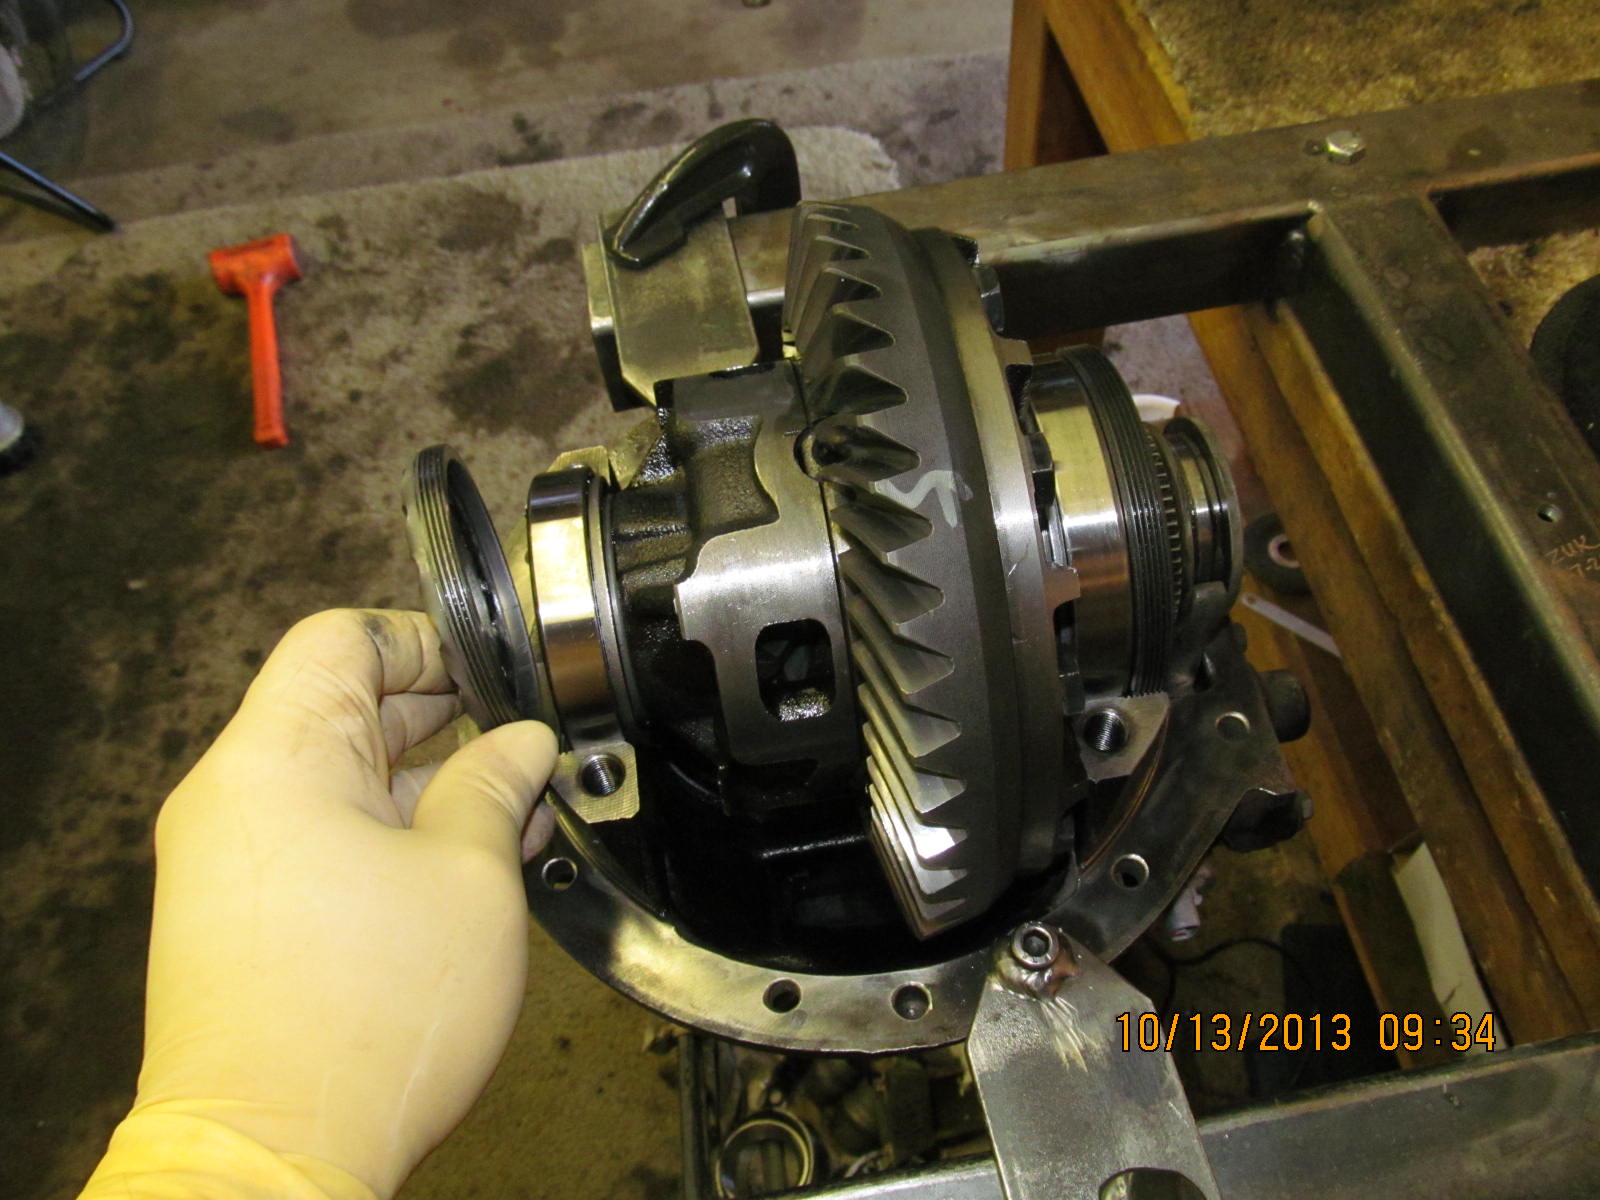
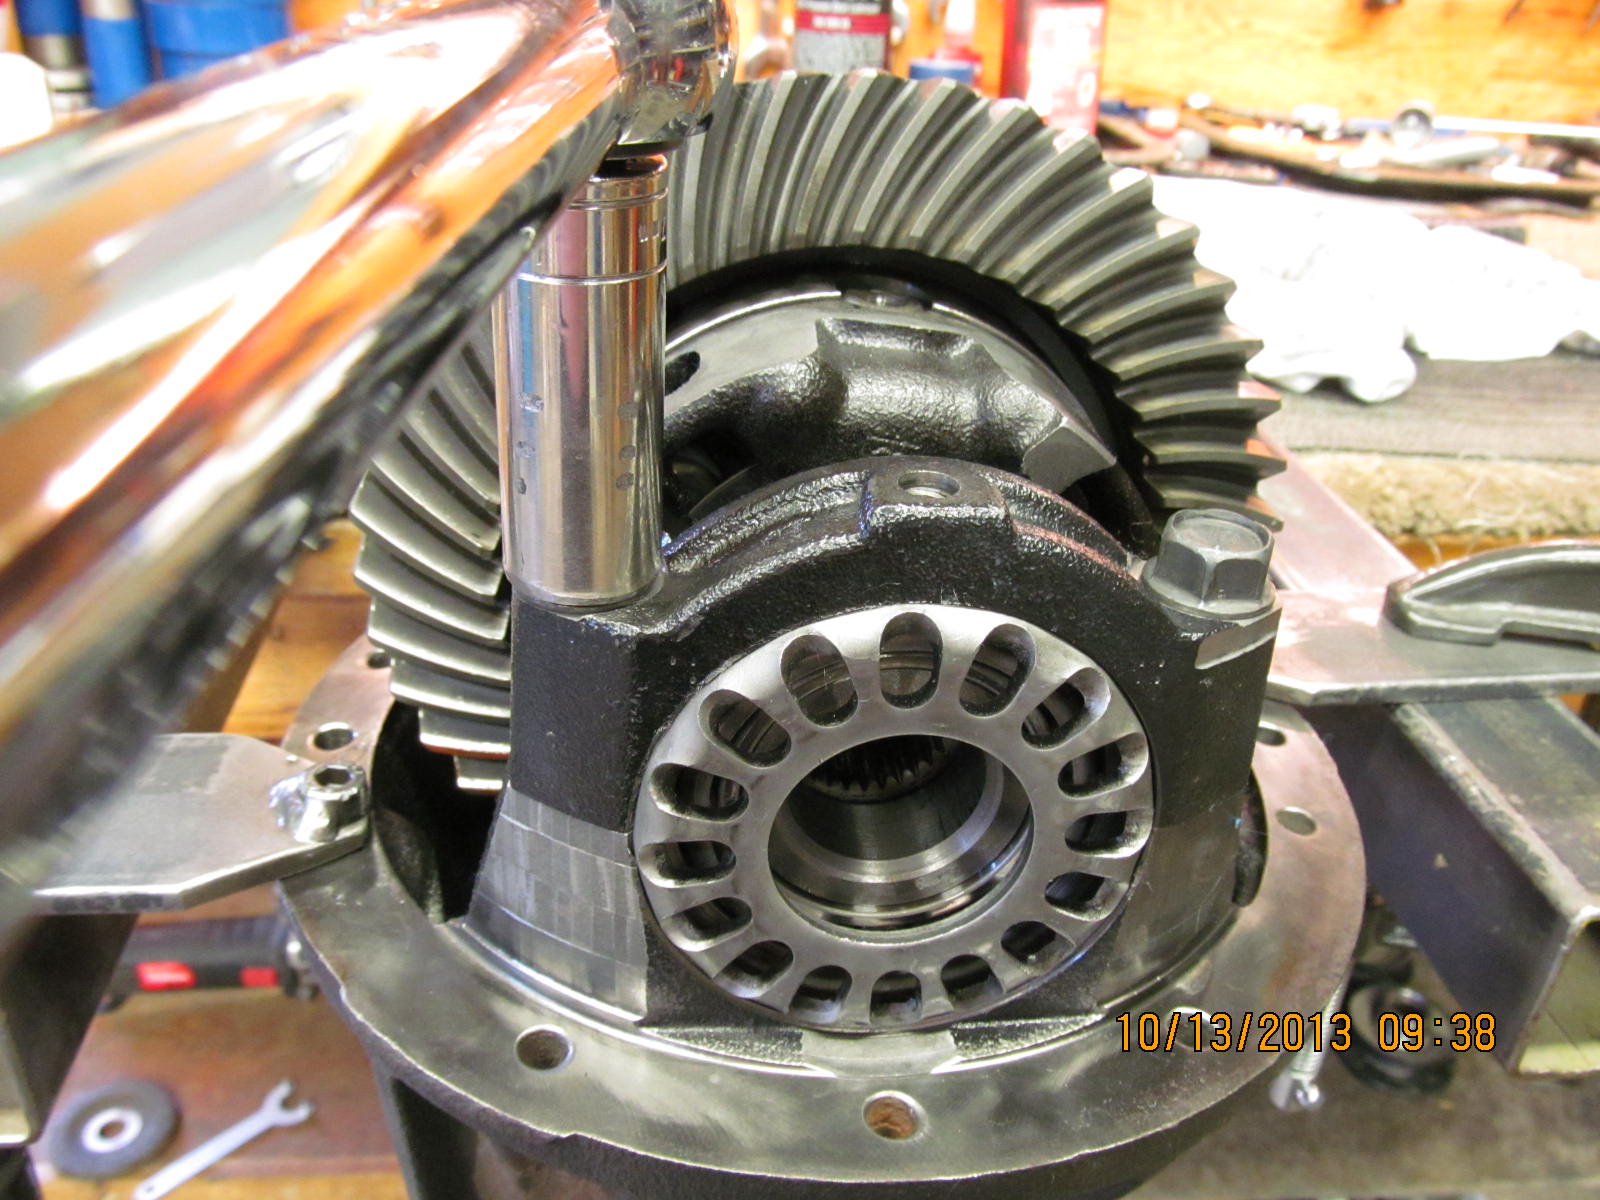
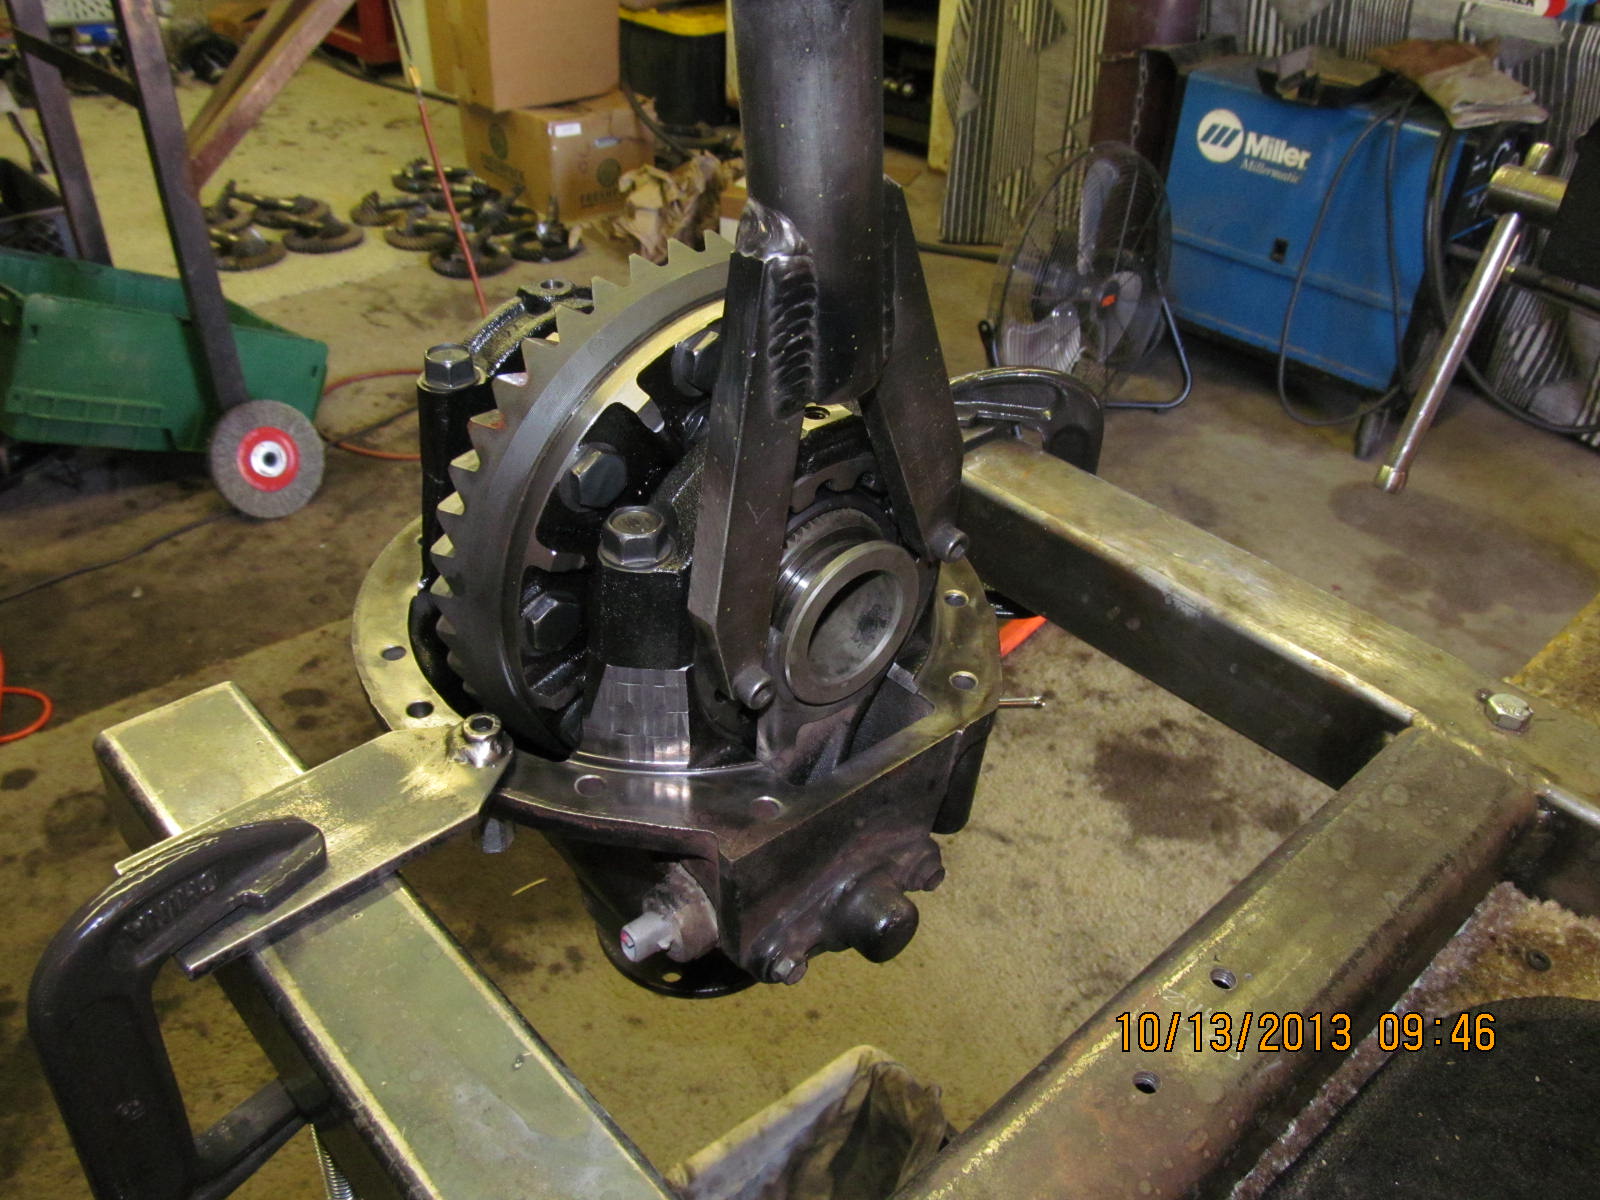
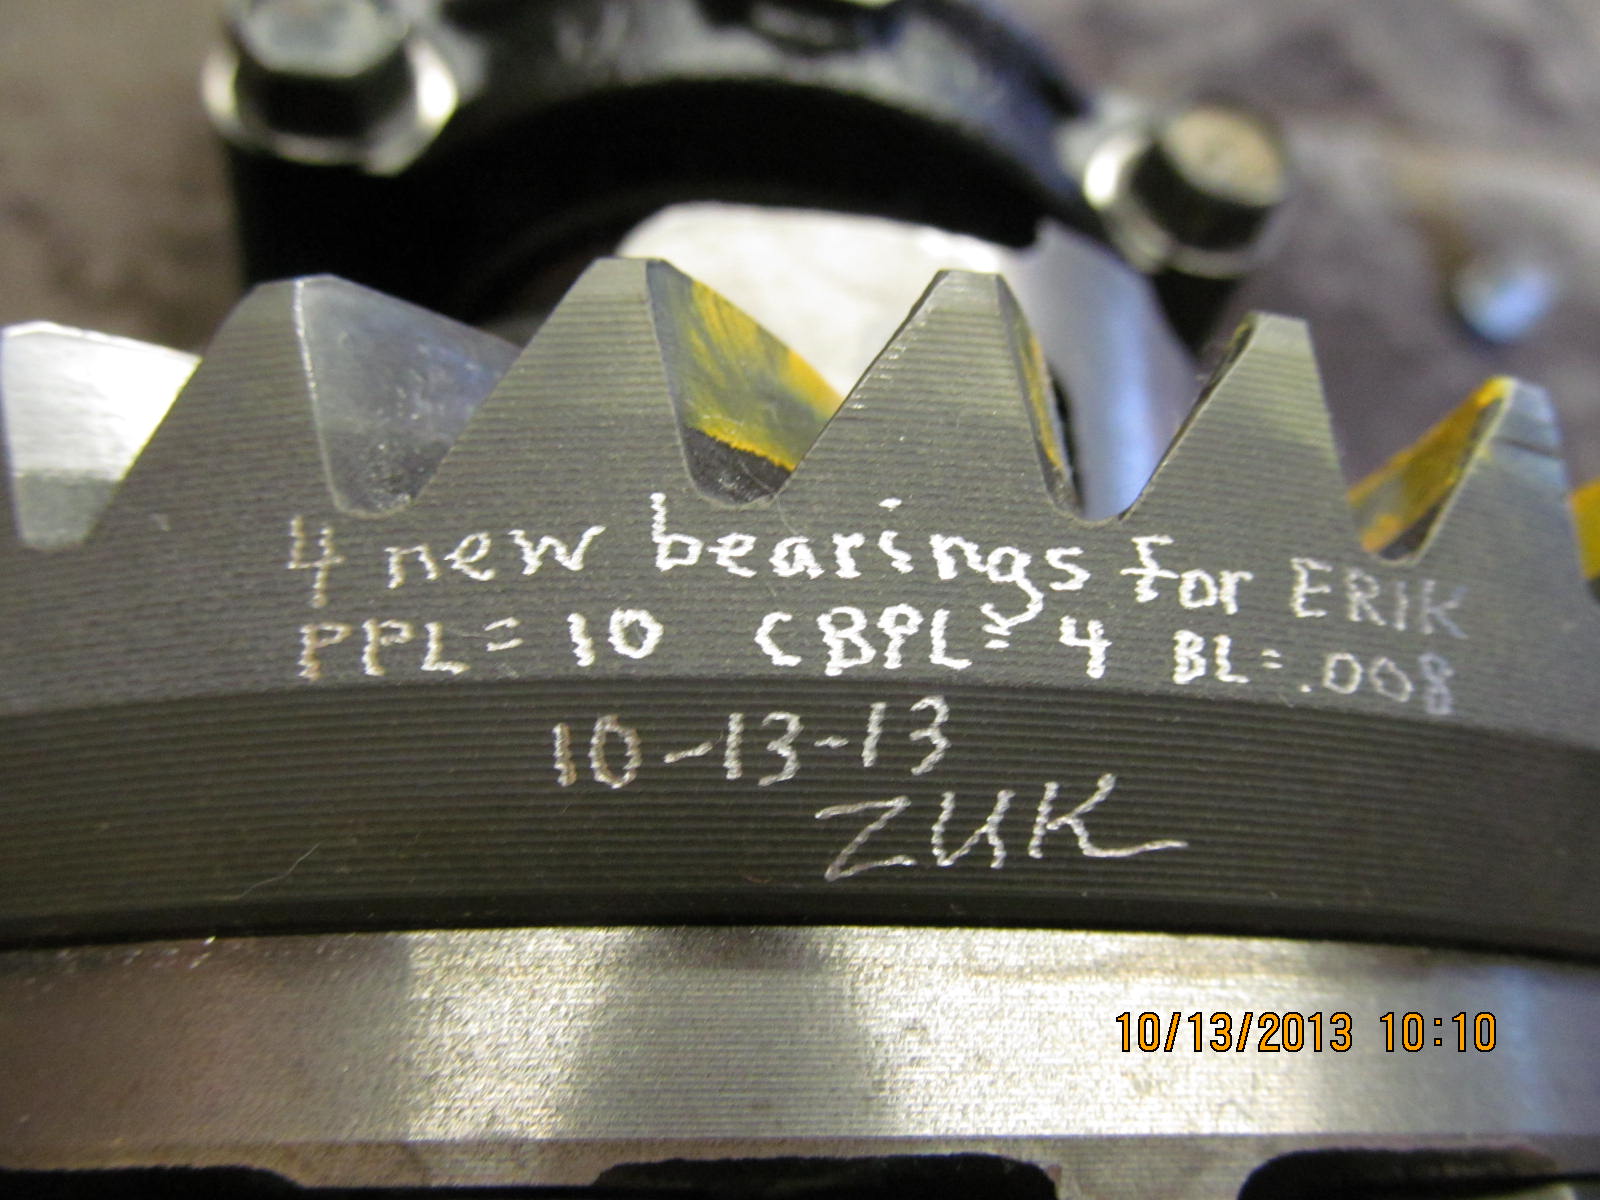
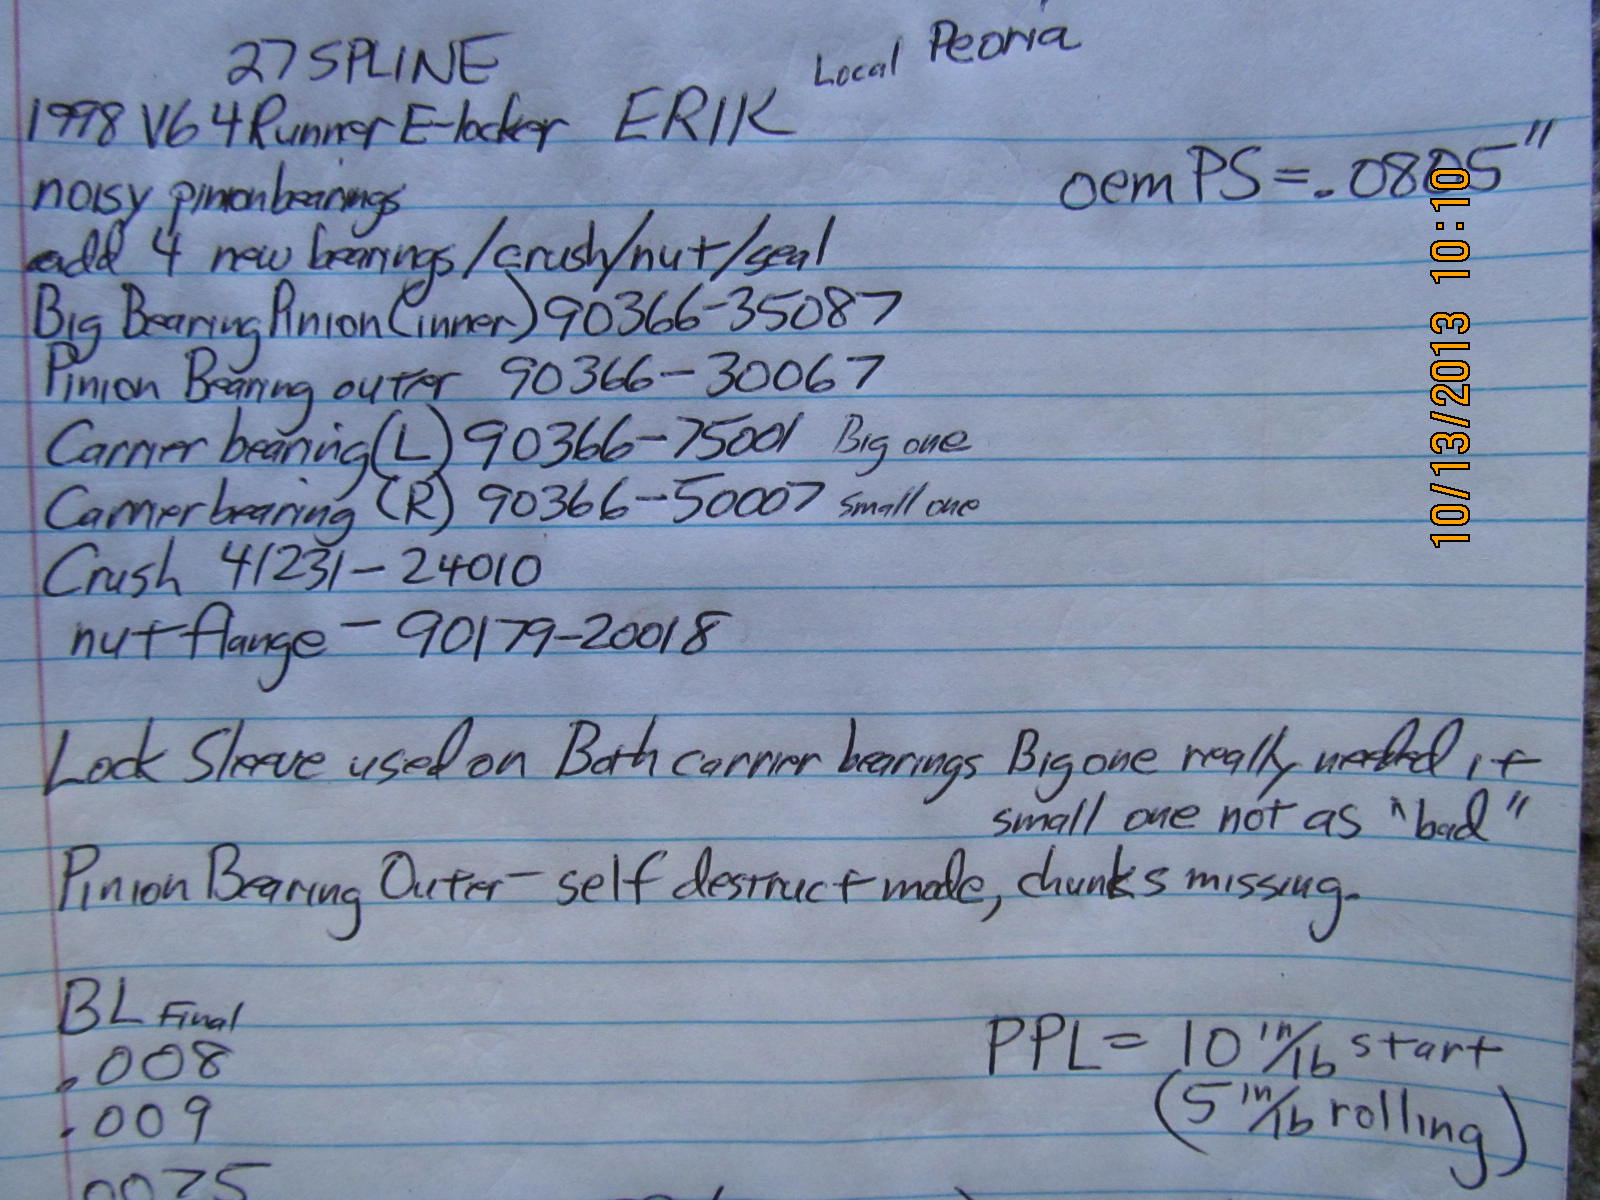
The e-locker was removed and and brought it over along with 4 new bearings/crush/seal/nut.
|
|
|
|
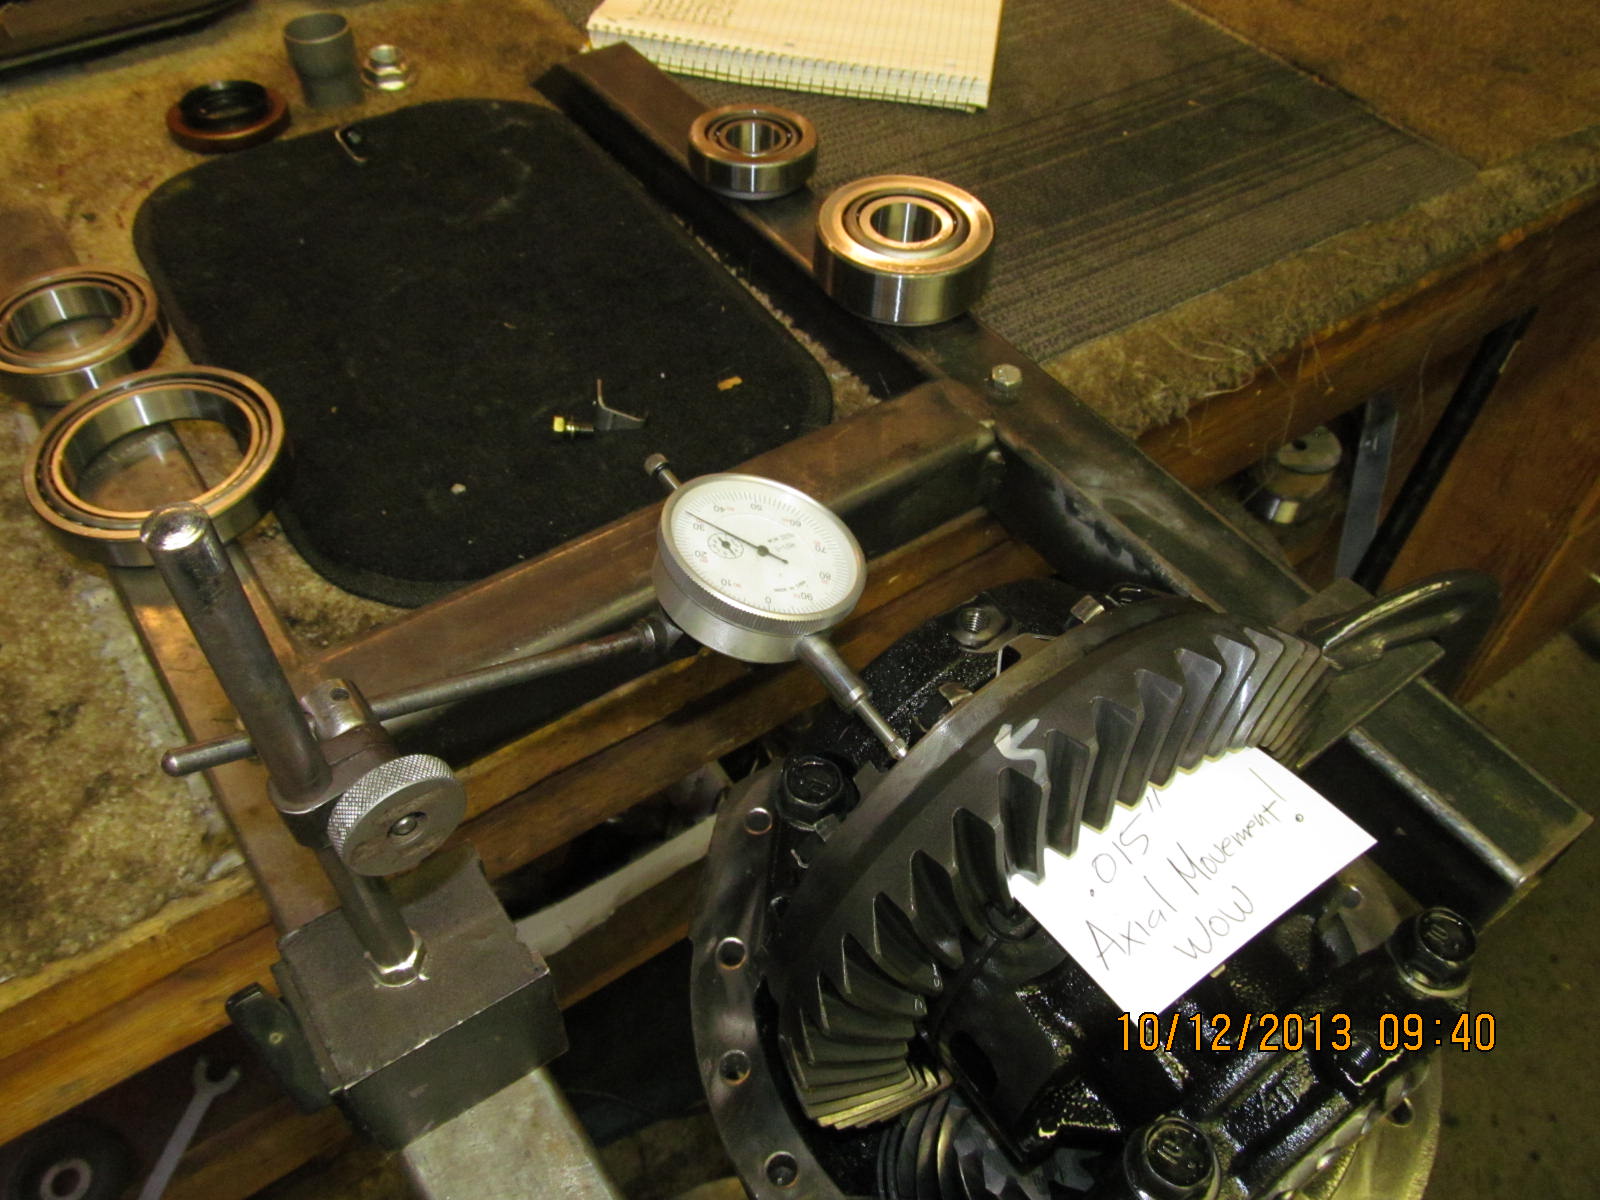
Right away, I noticed excessive slop in the wrong direction. A quick check with the dial indicator showed a truly
excessive .015" play in the axial direction.
|
|
|

|
|
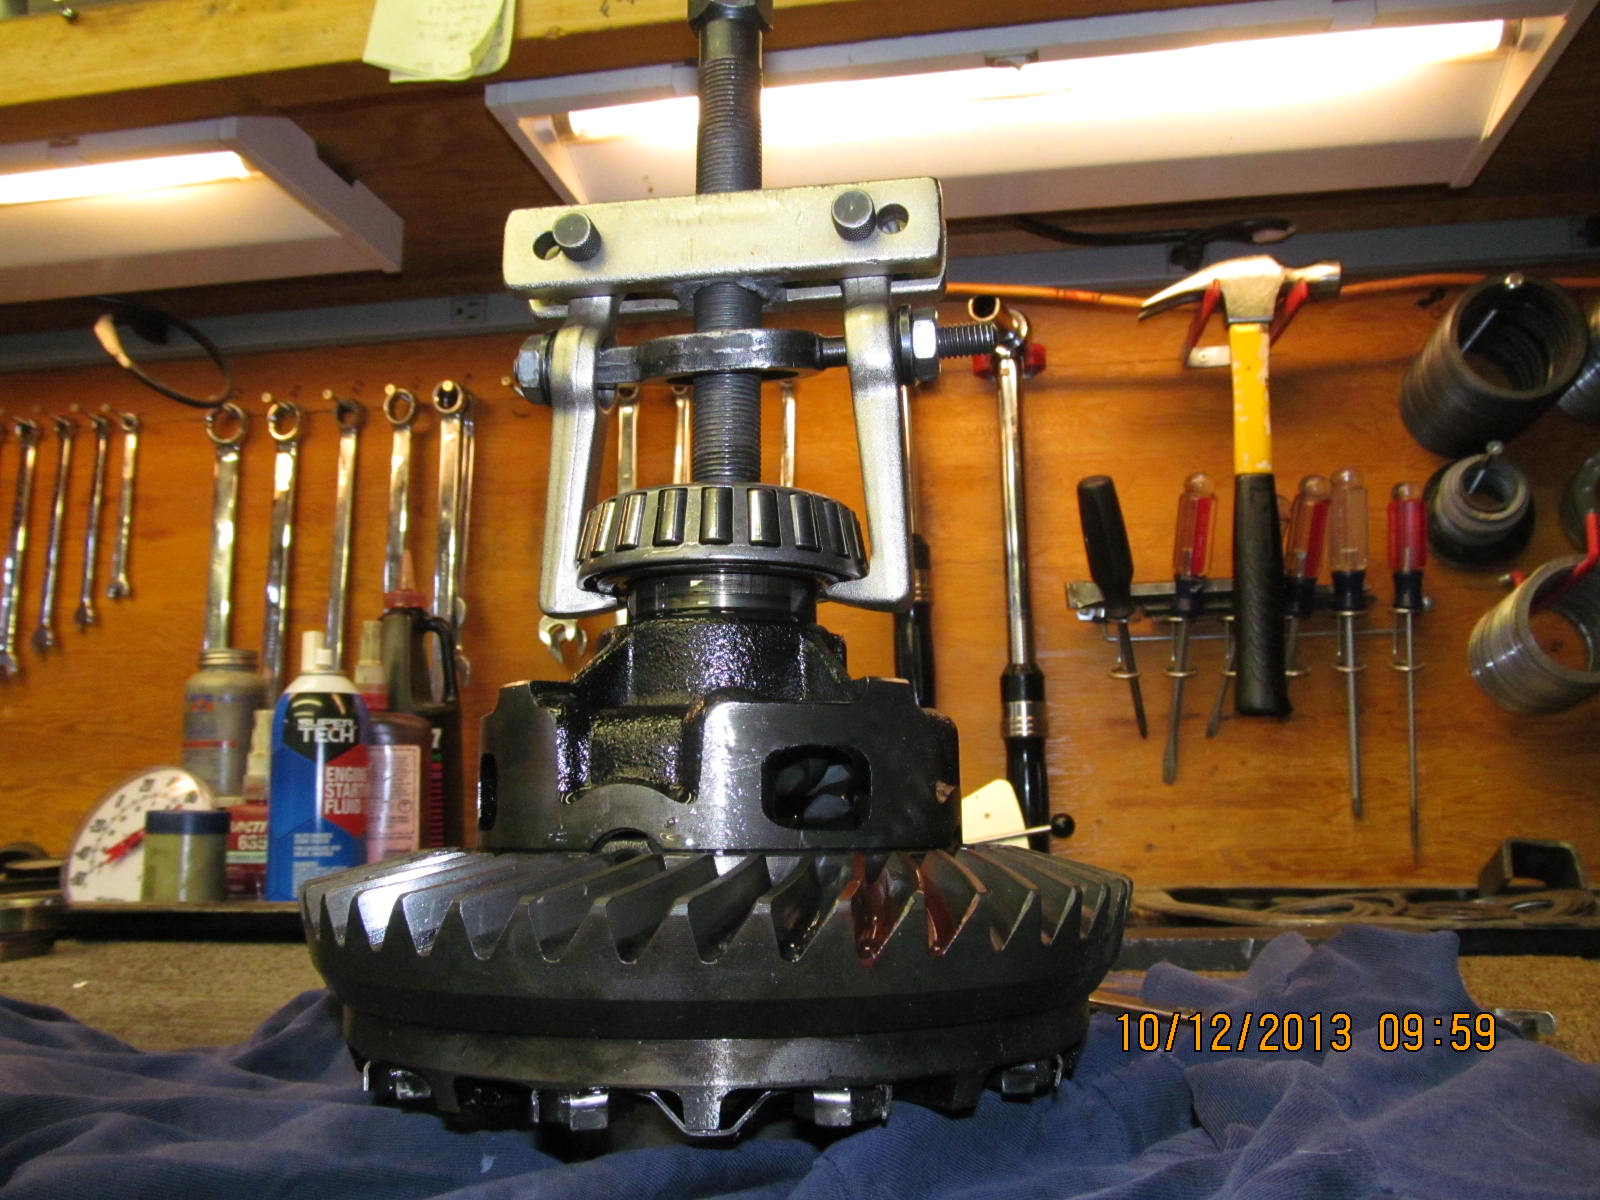
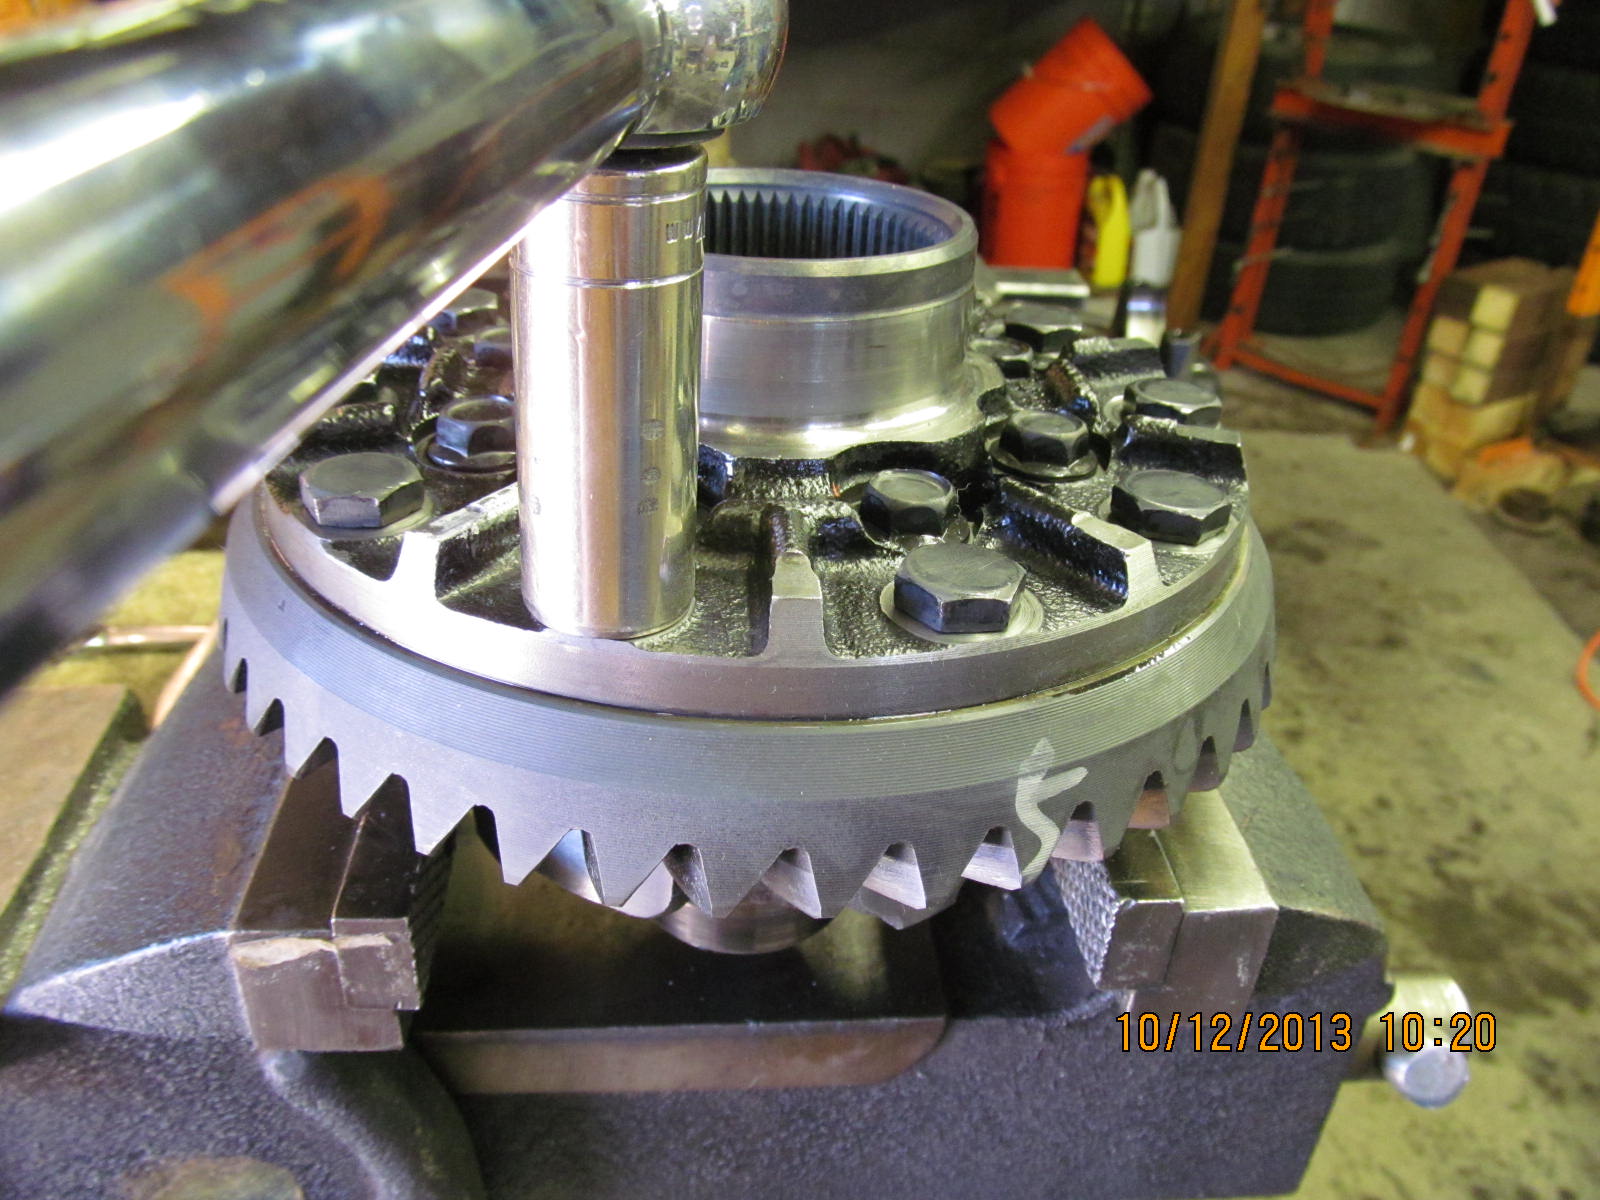
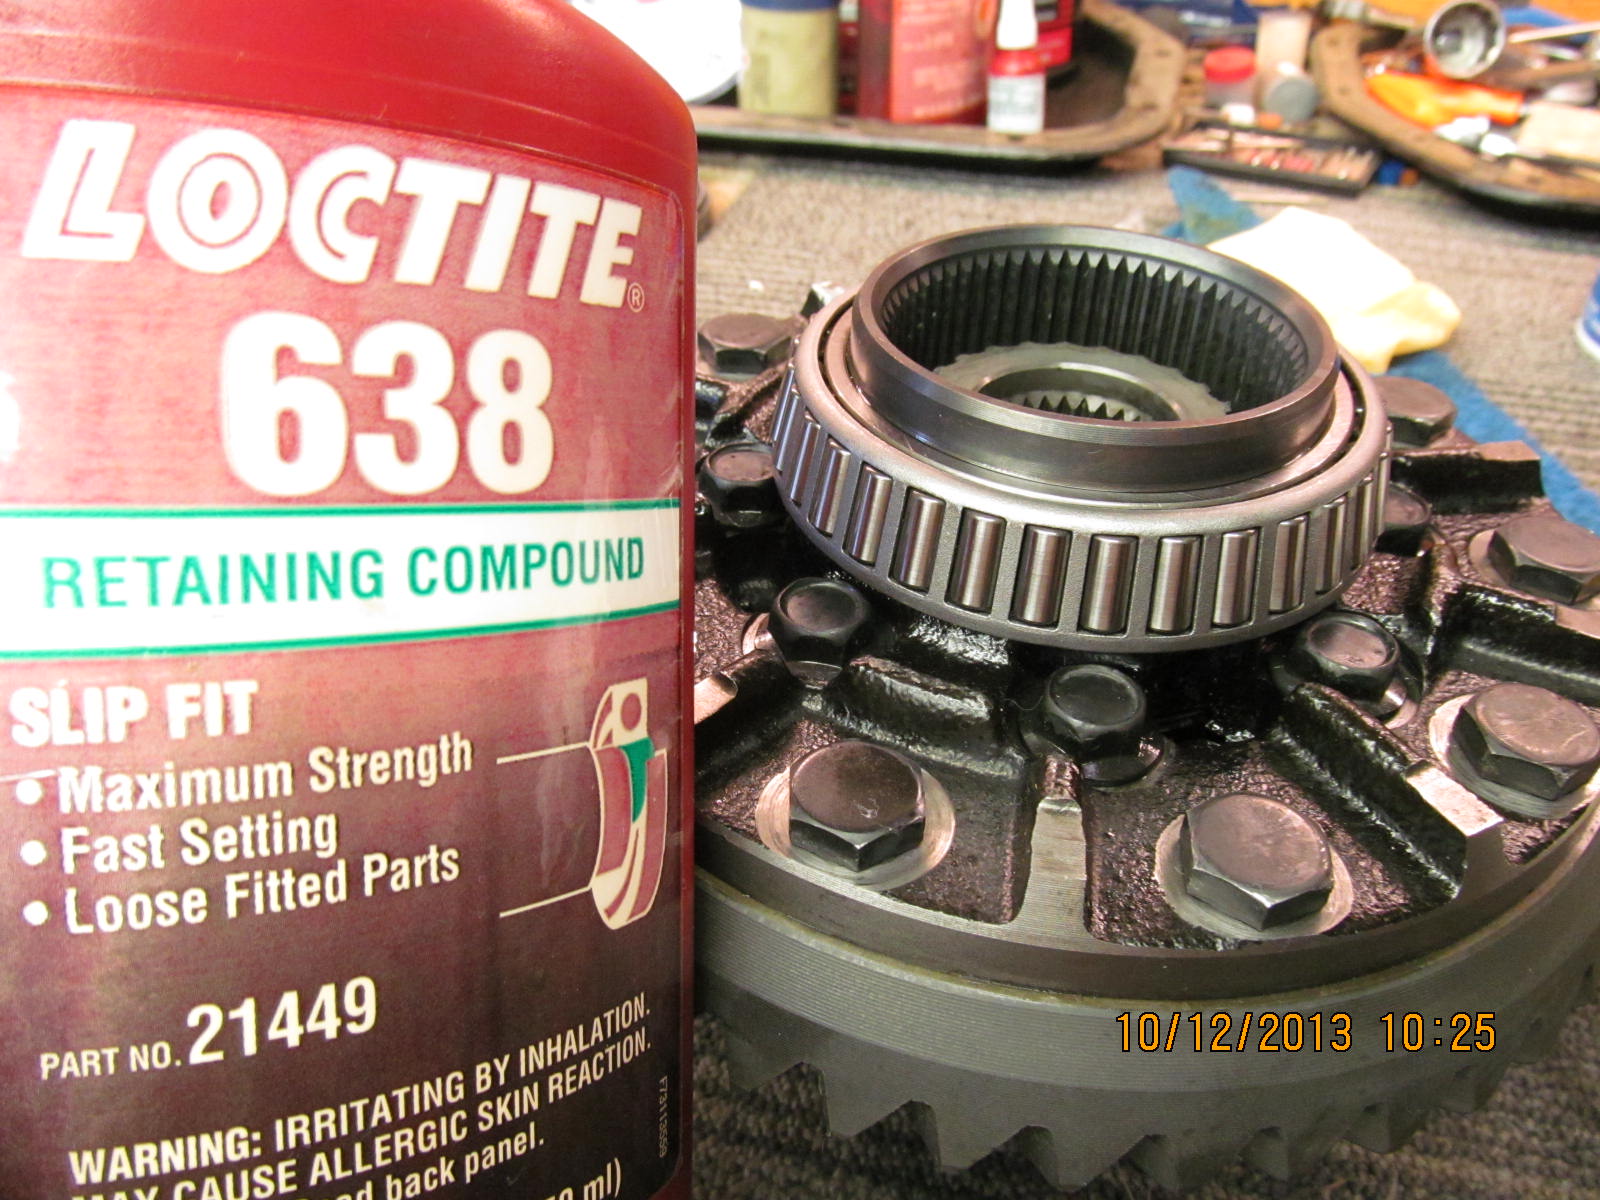
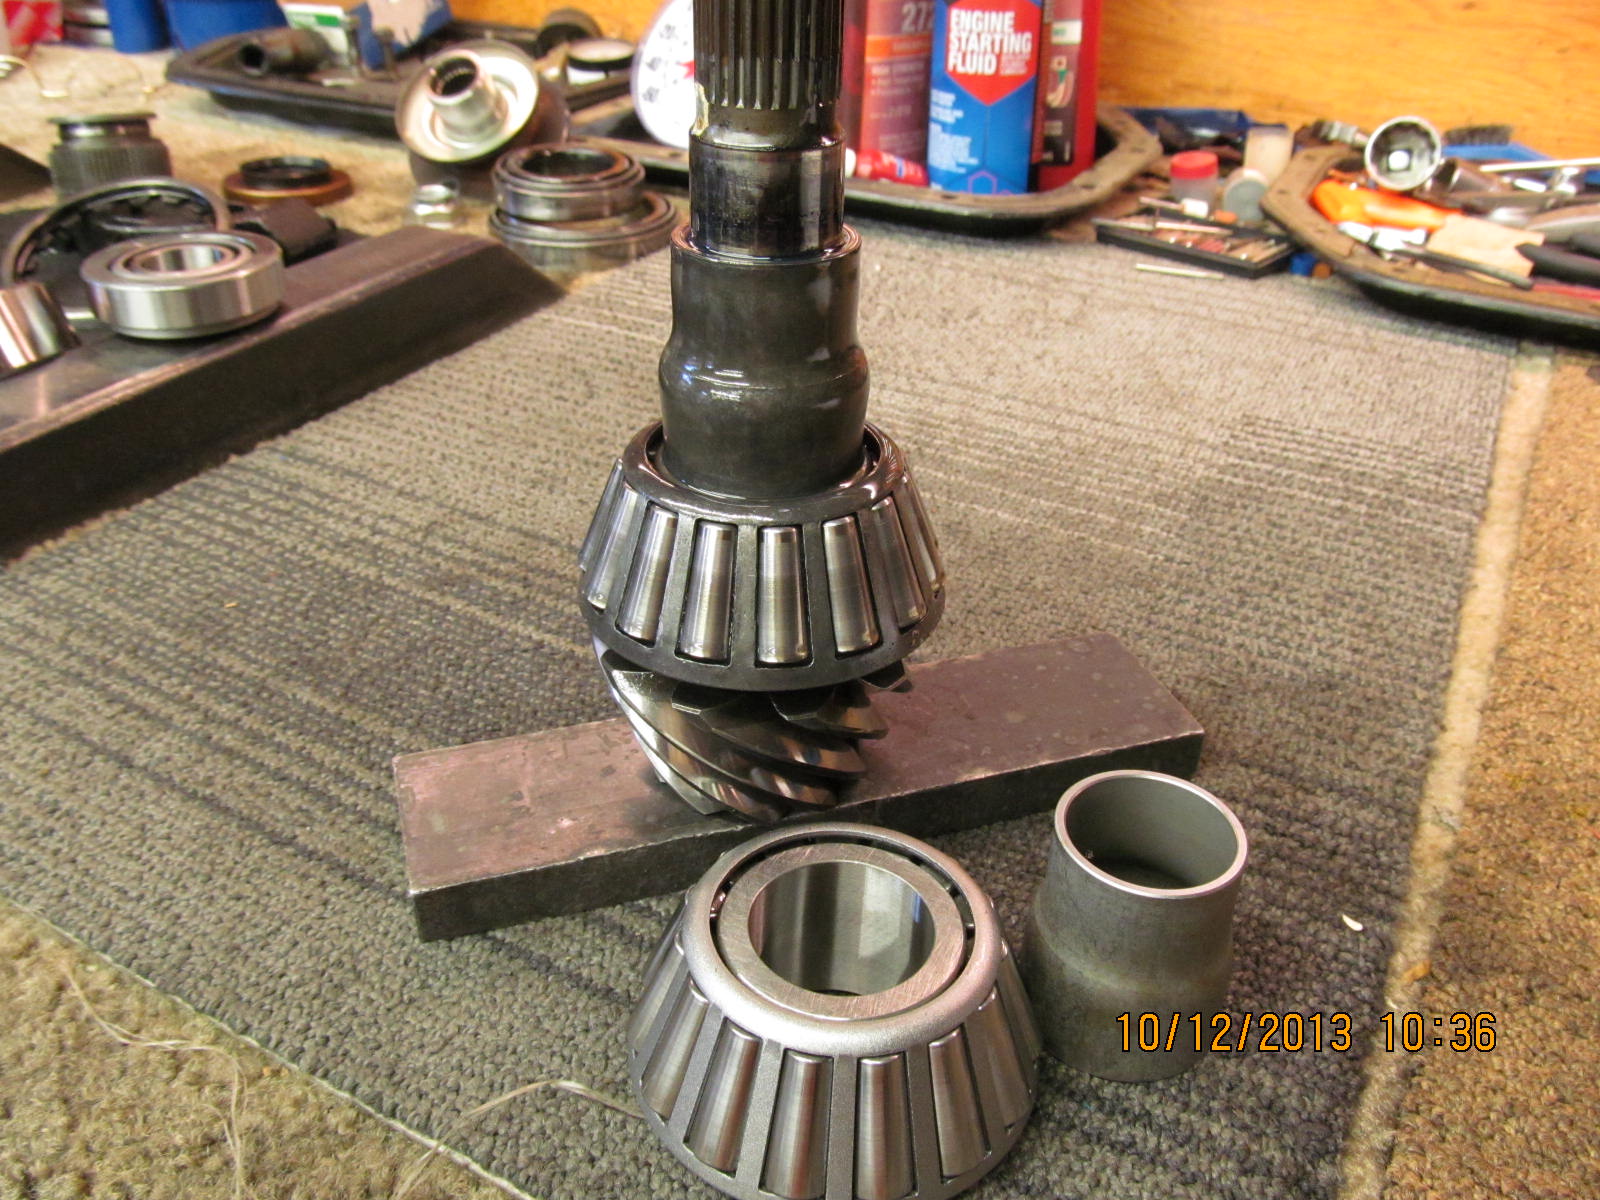
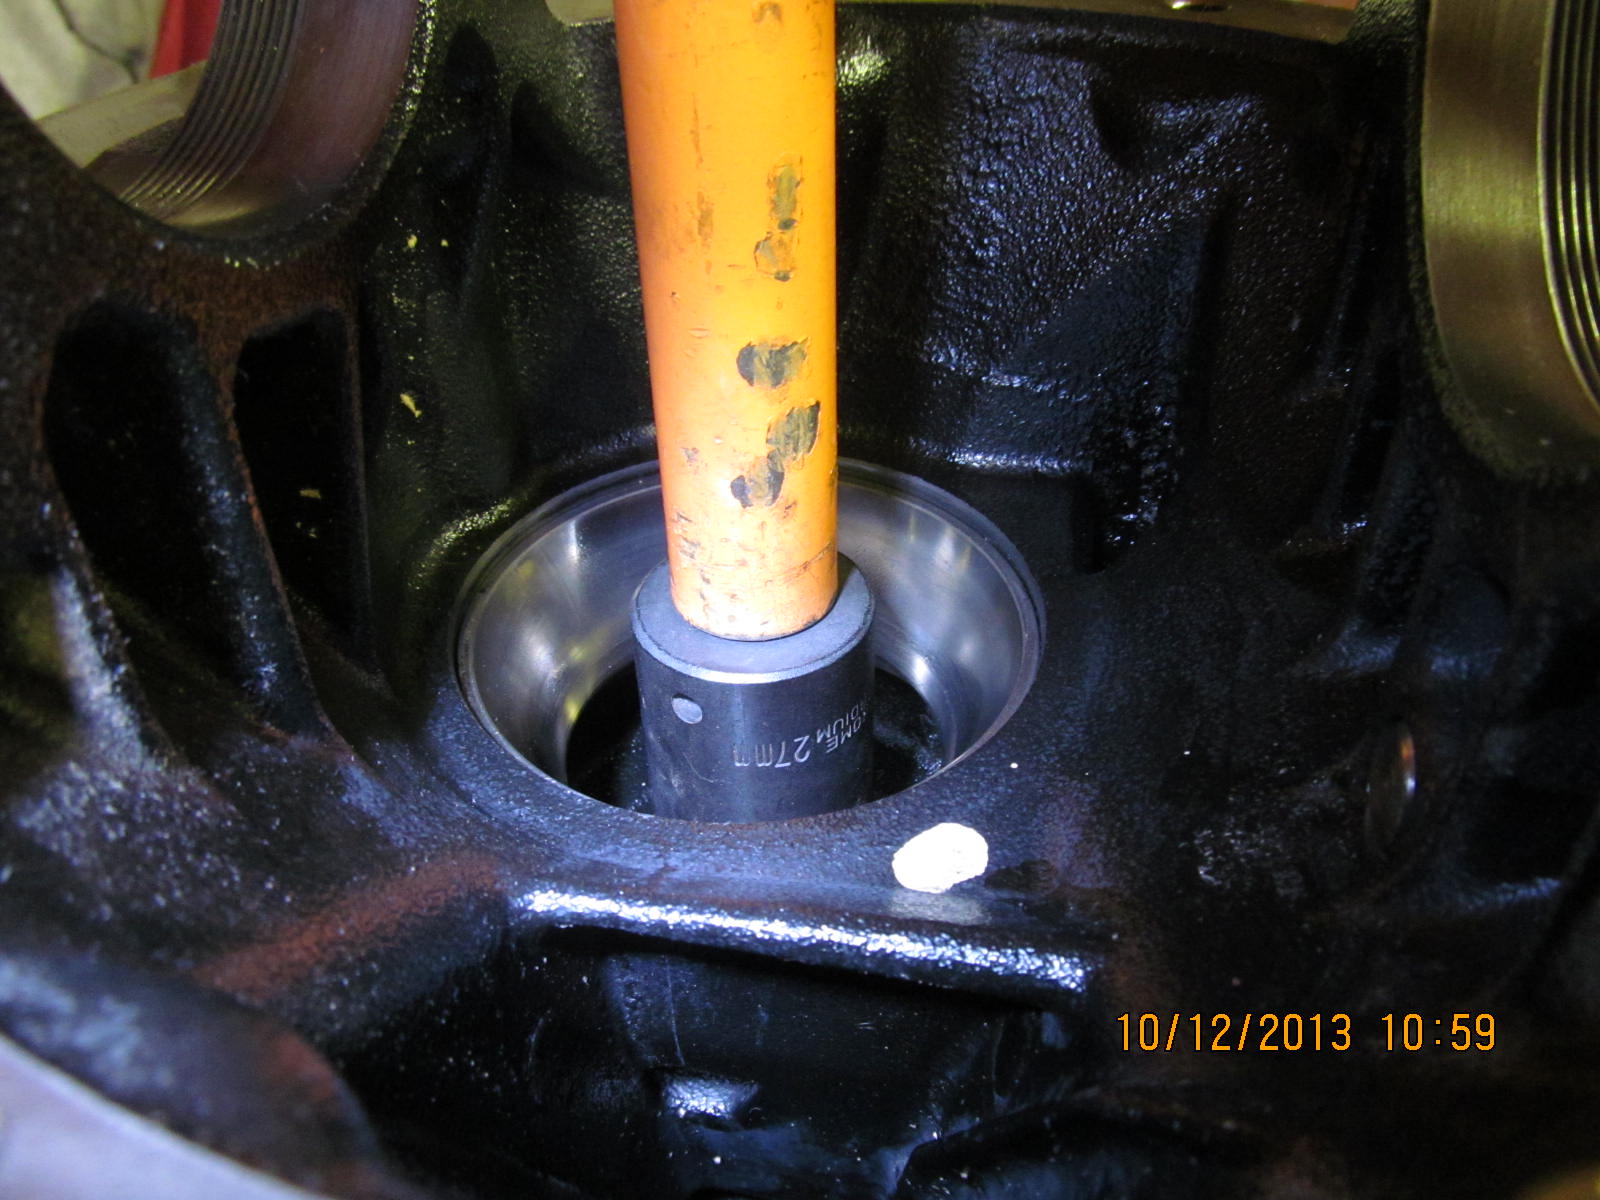
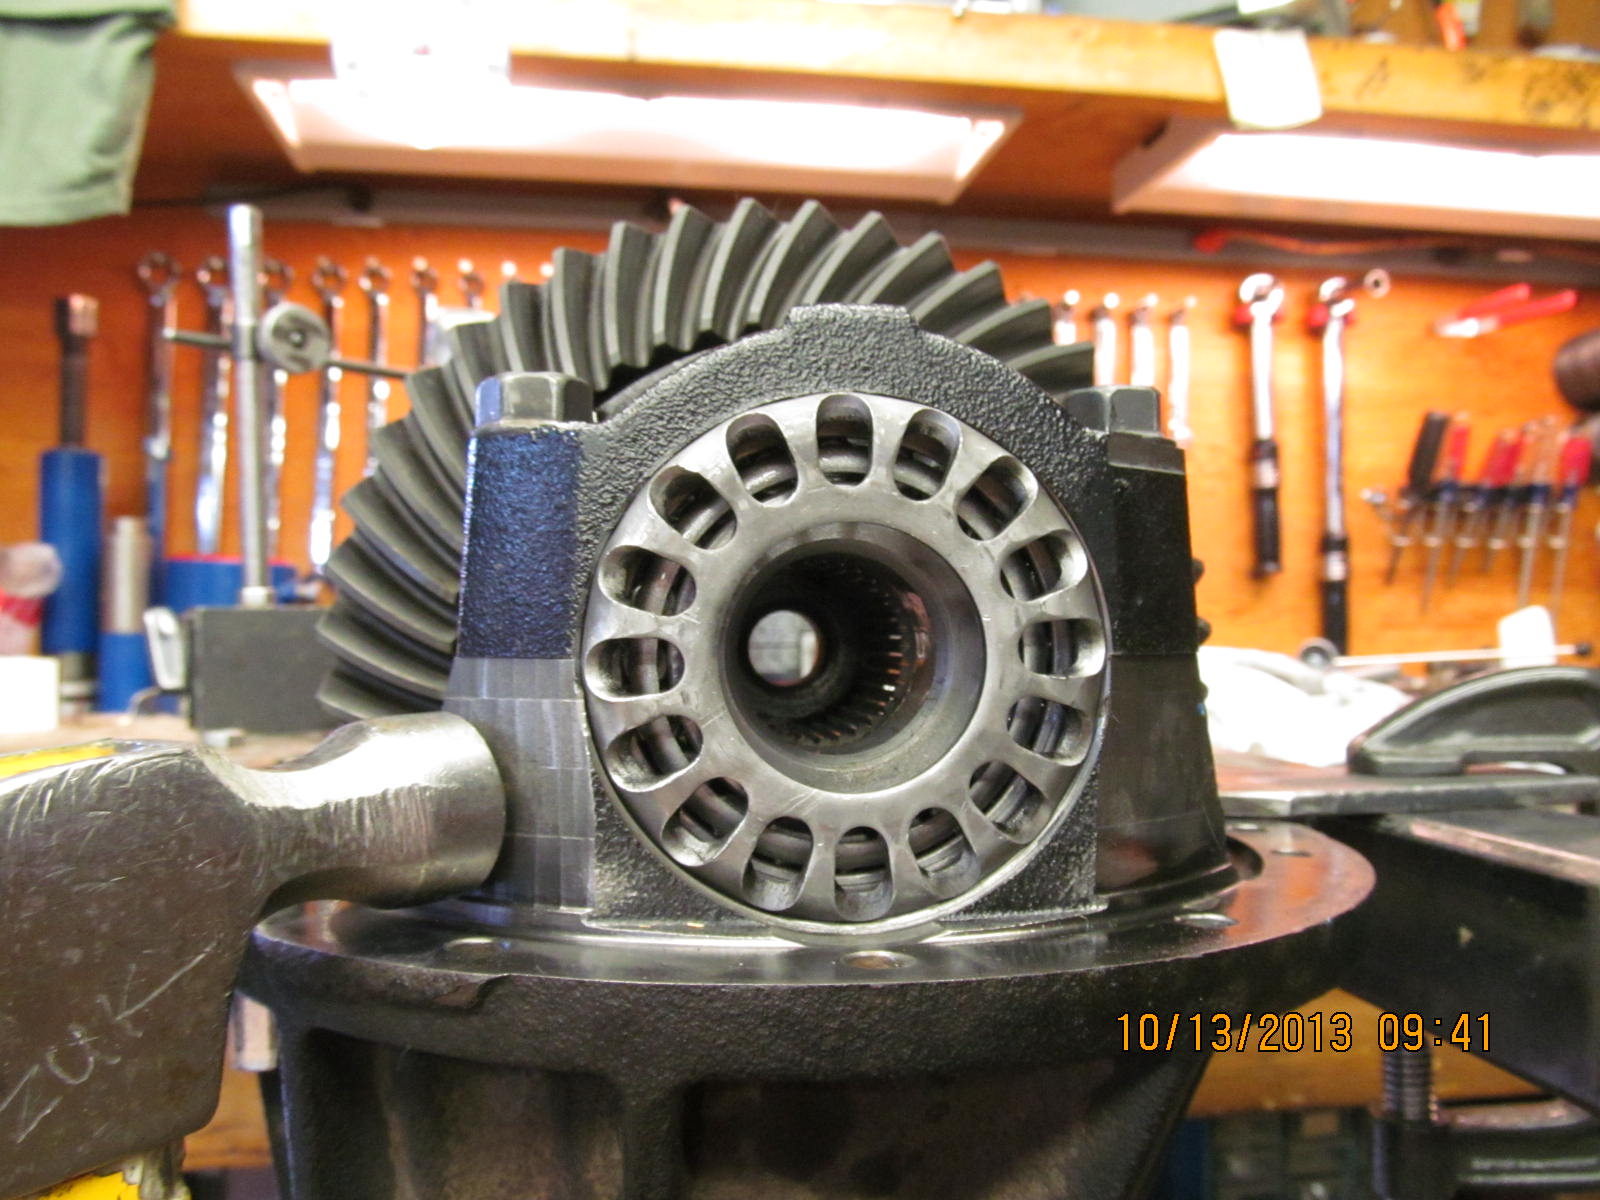
The big carrier bearing came off with finger power. SleeveLock will be used on the new bearing.
|
|
|
|
|
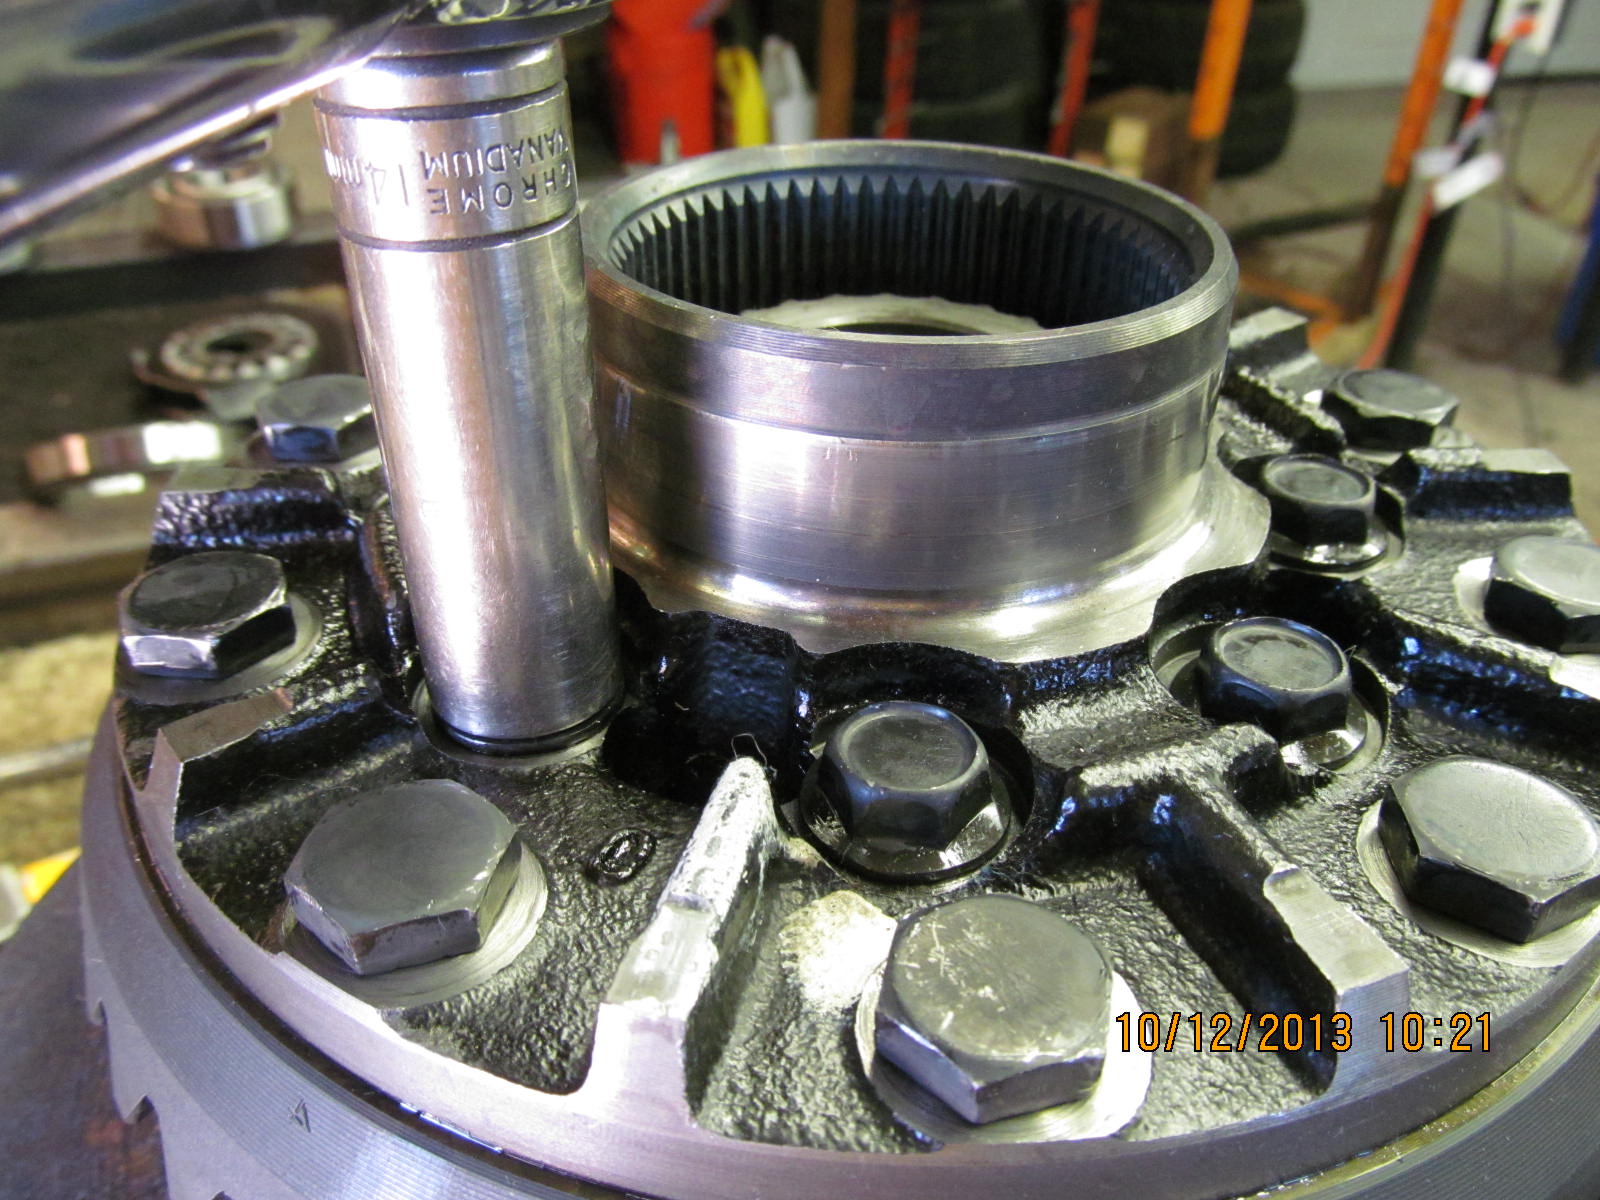
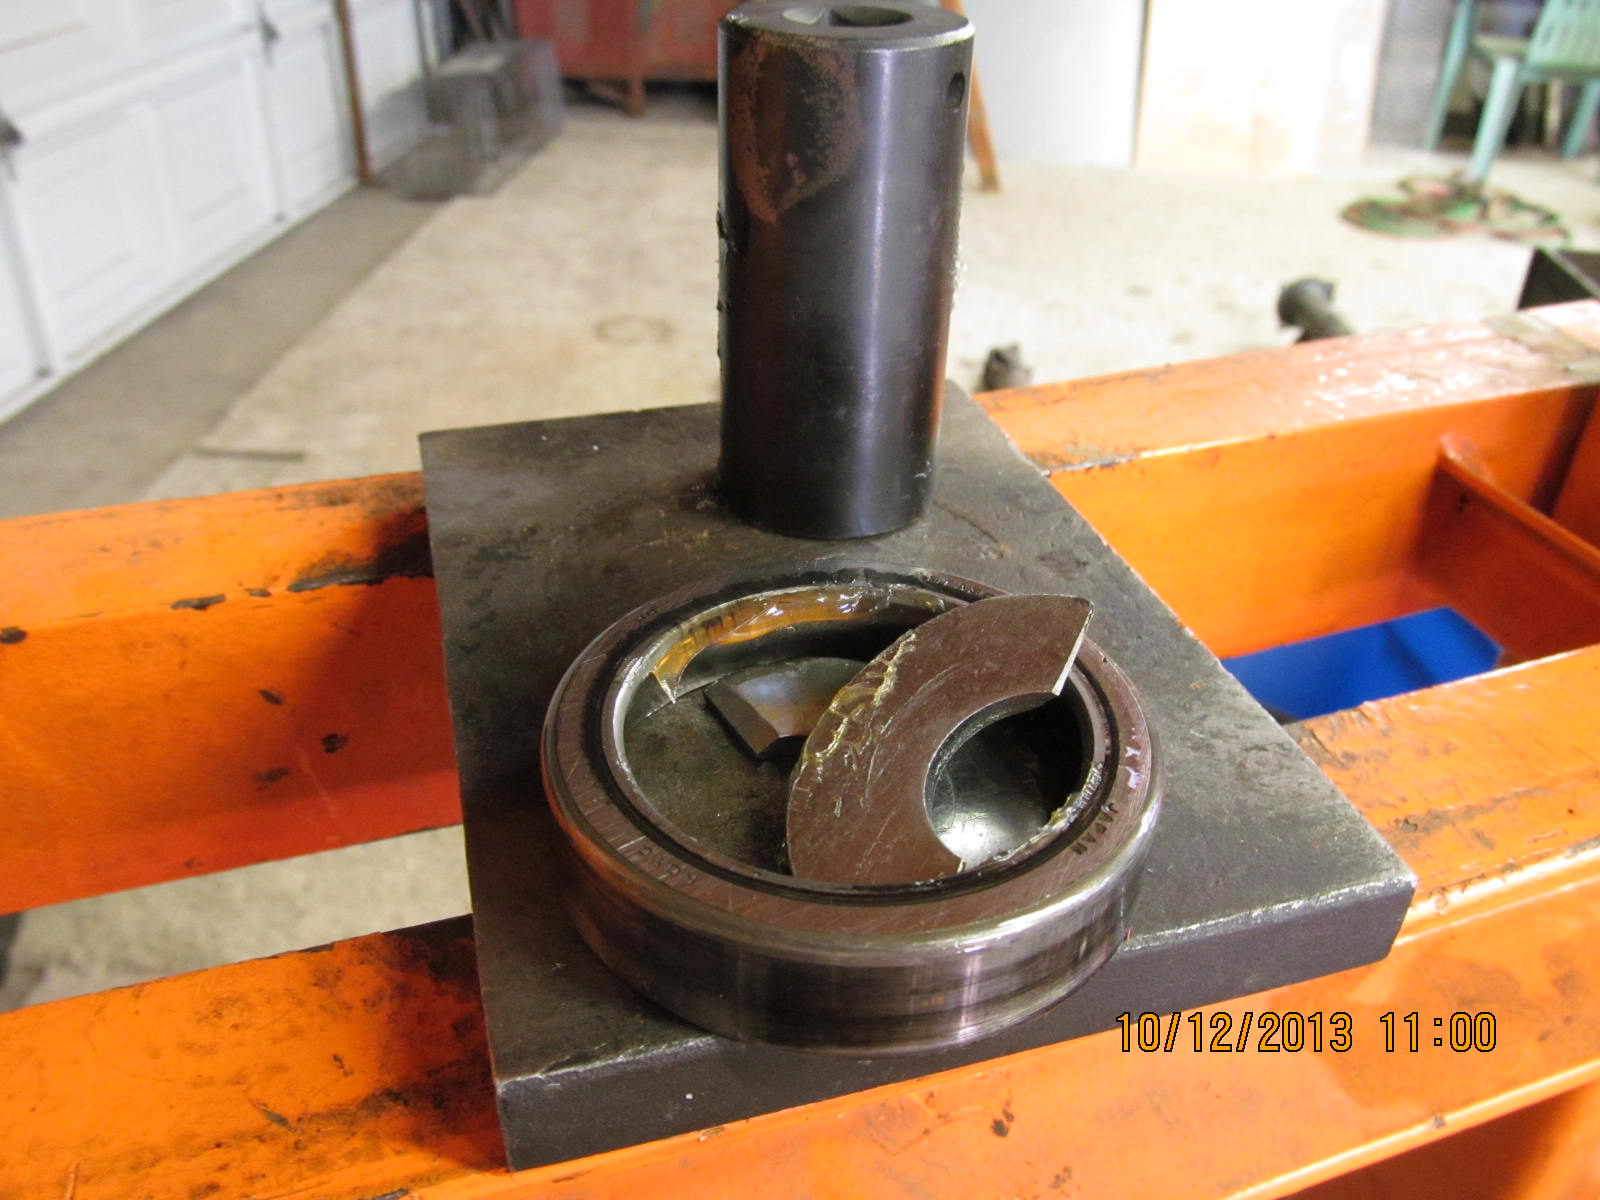
The other smaller carrier bearing was a little tighter but it still came off with relatively little effort.
|
|
|
|
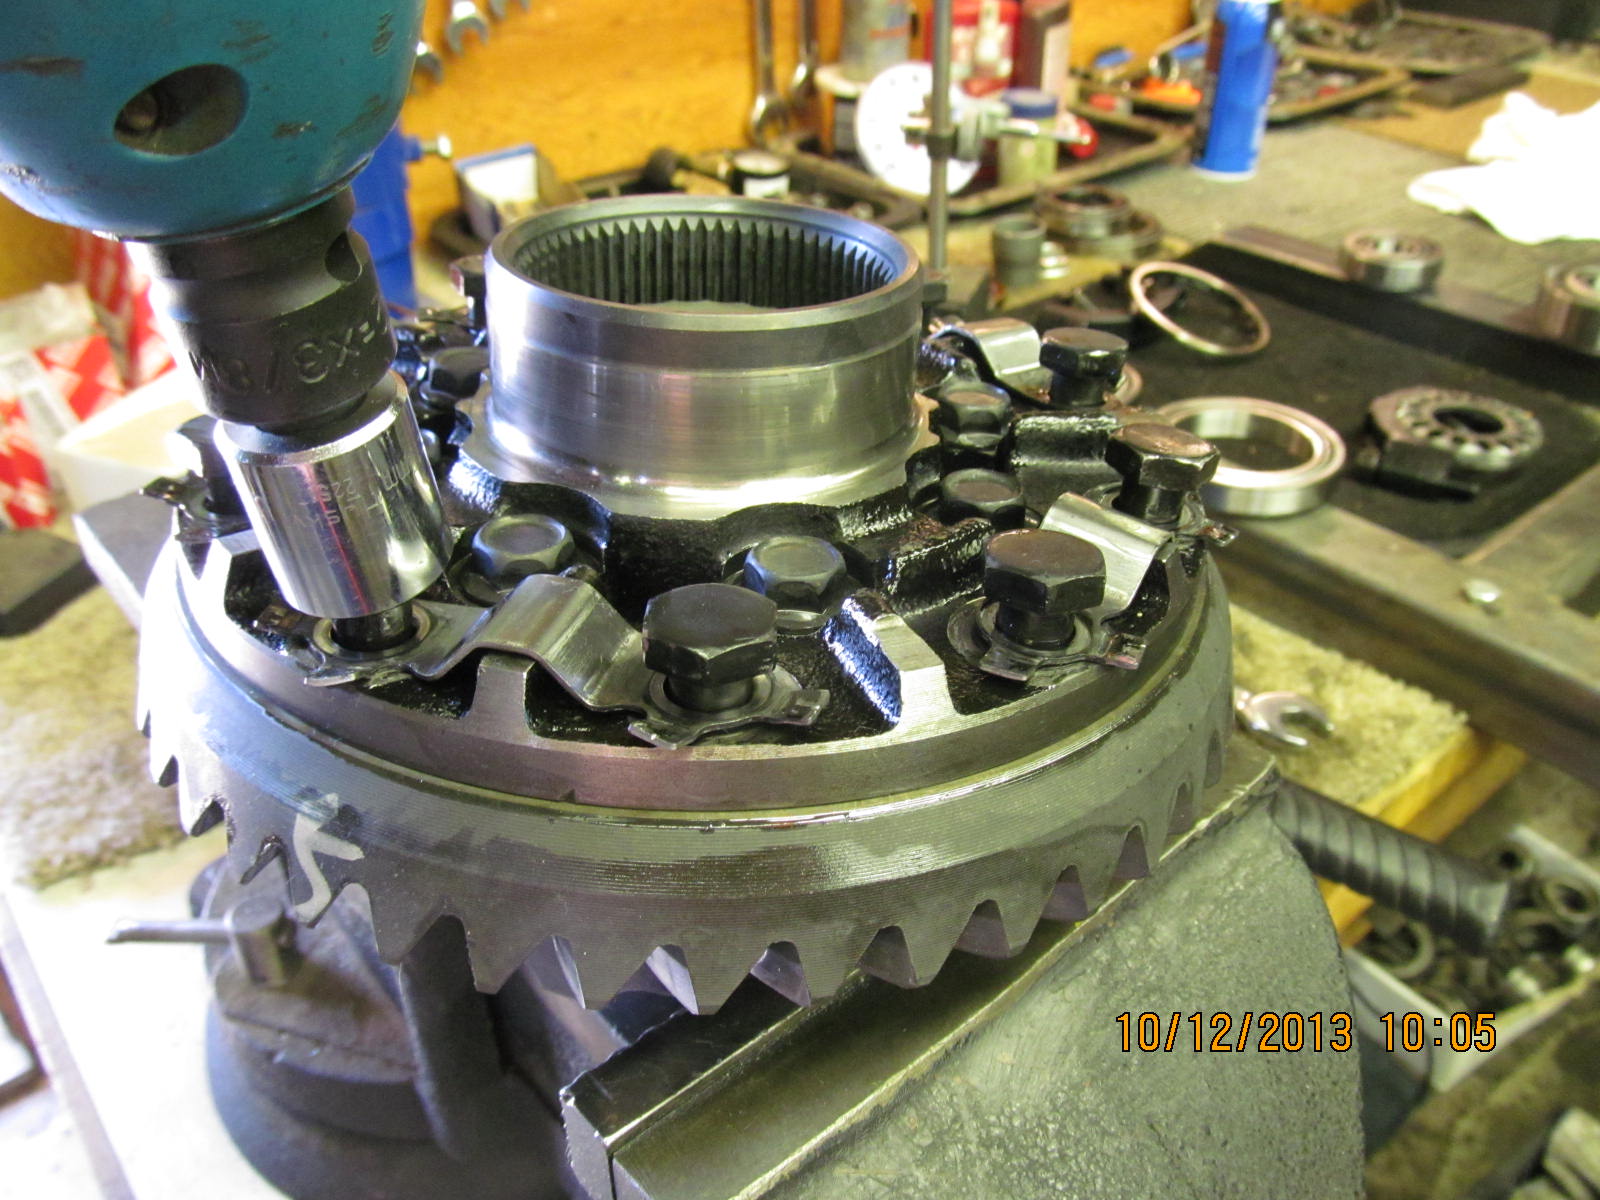
I generally remove these locking tabs just because they get in the way and I cannot get a wrench on the ring bolt
to run a pattern check at the end of this install.
|
|
|
|
|
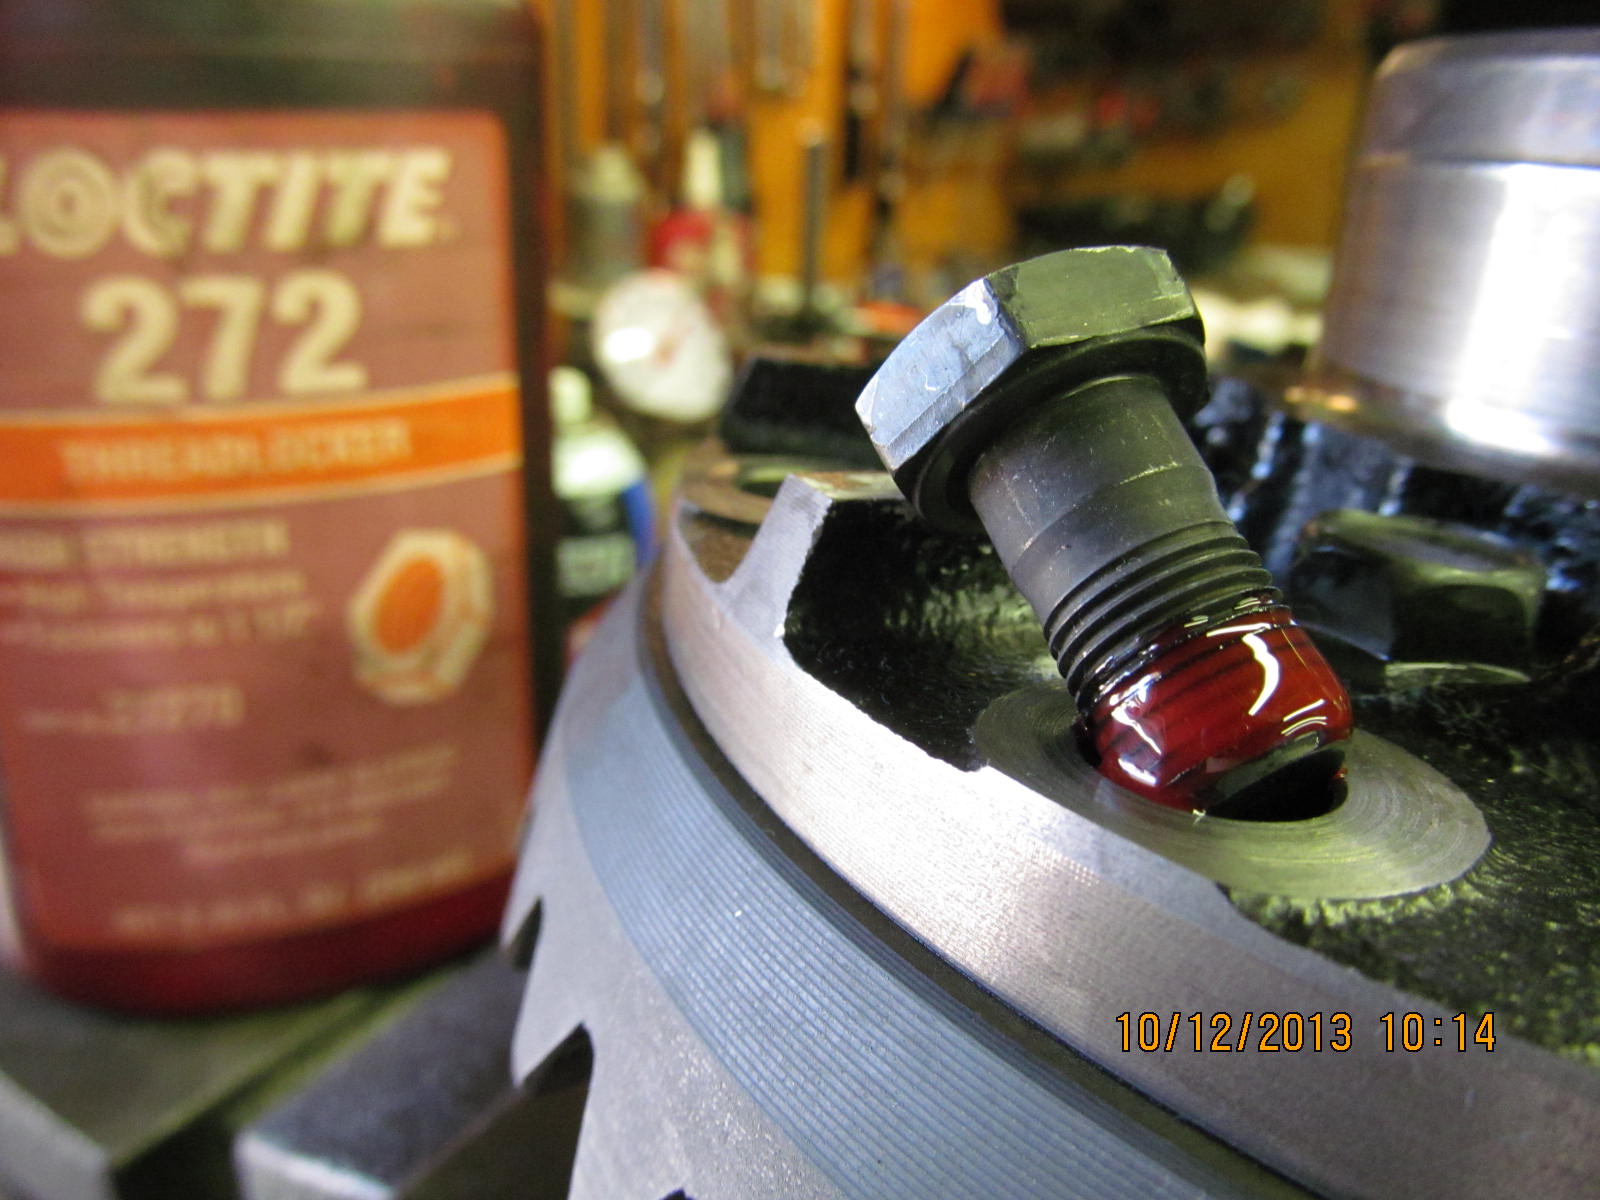
Threads are cleaned and red loctite applied.
|
|
|
|
|
75 ft/lb
|
|
|
|
|
These 8 long case bolts are checked and all are at least 40 ft/lb verified.
|
|
|
|
|
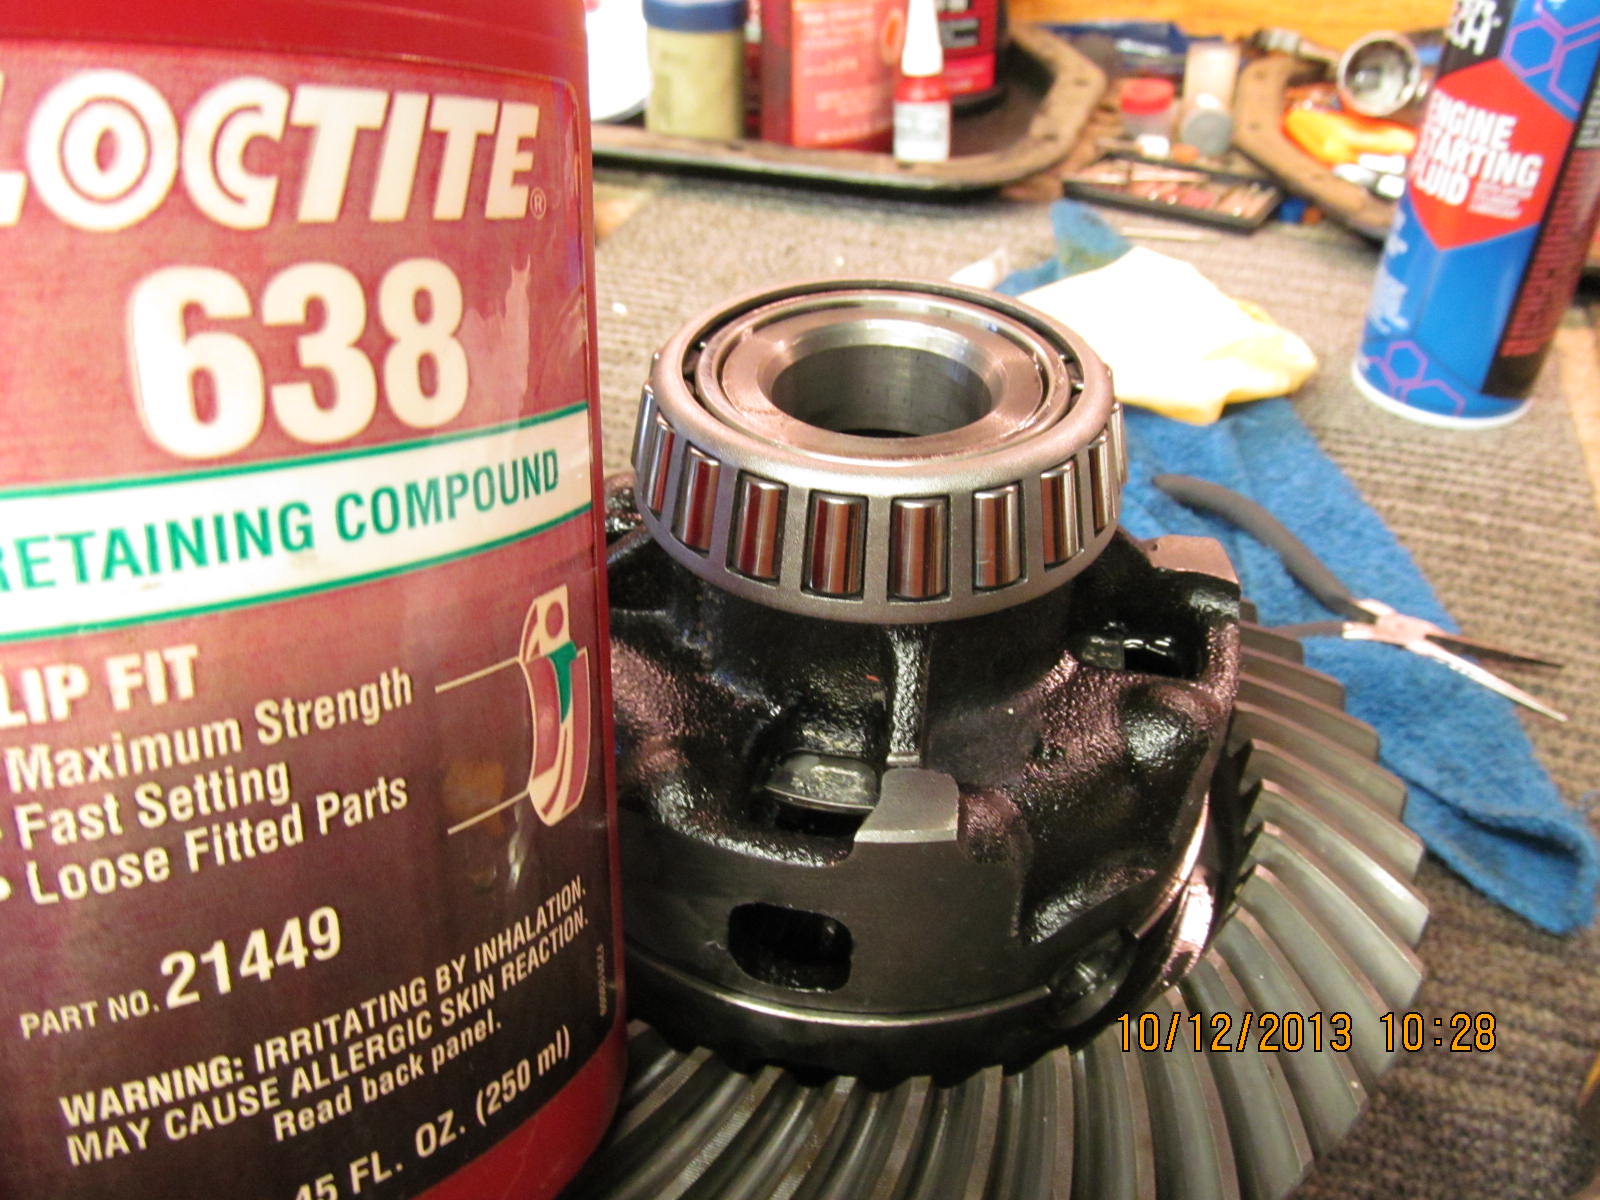
Surfaces are thoroughly cleaned and Loctite 638 is applied. 24 hours set-up time.
|
|
|
|
|
Same thing for the other side.
|
|
|
|
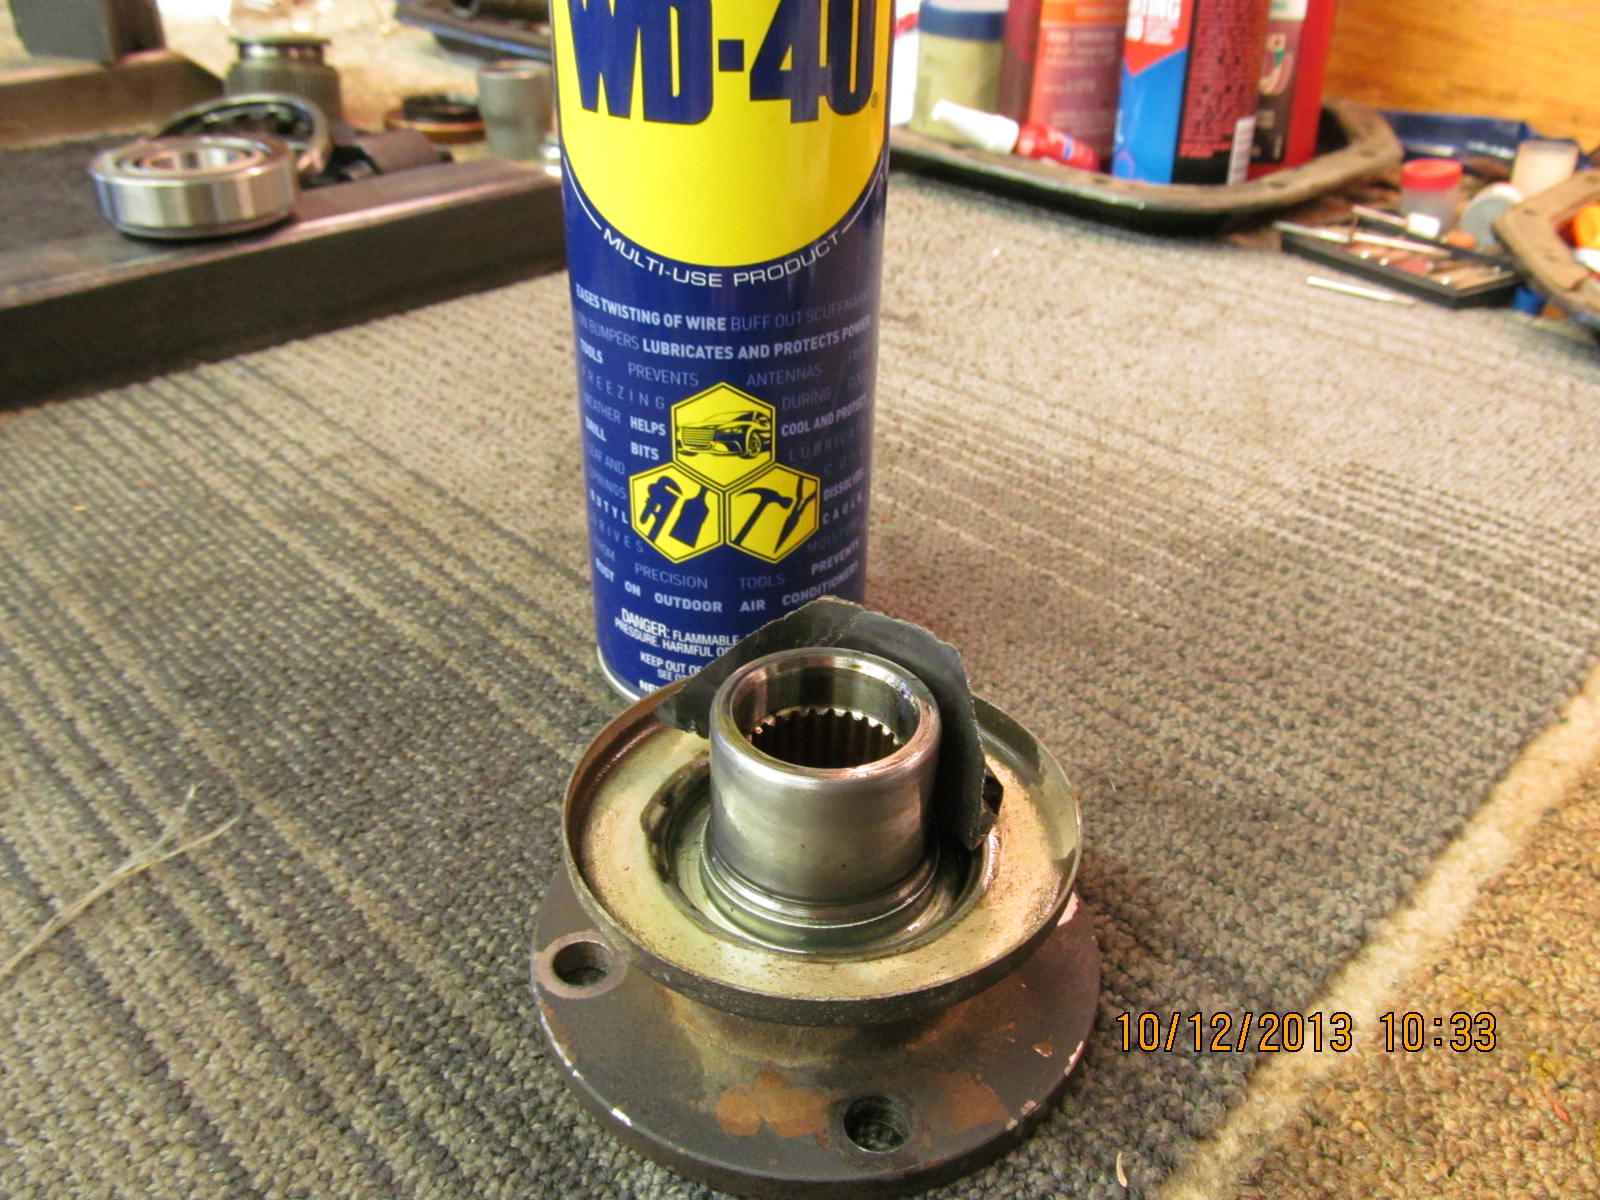
The pinion flange surface looked very good with no deep grooves. I still used some 1000 grit with a little WD-40 to
smooth things out.
|
|
|
|
|
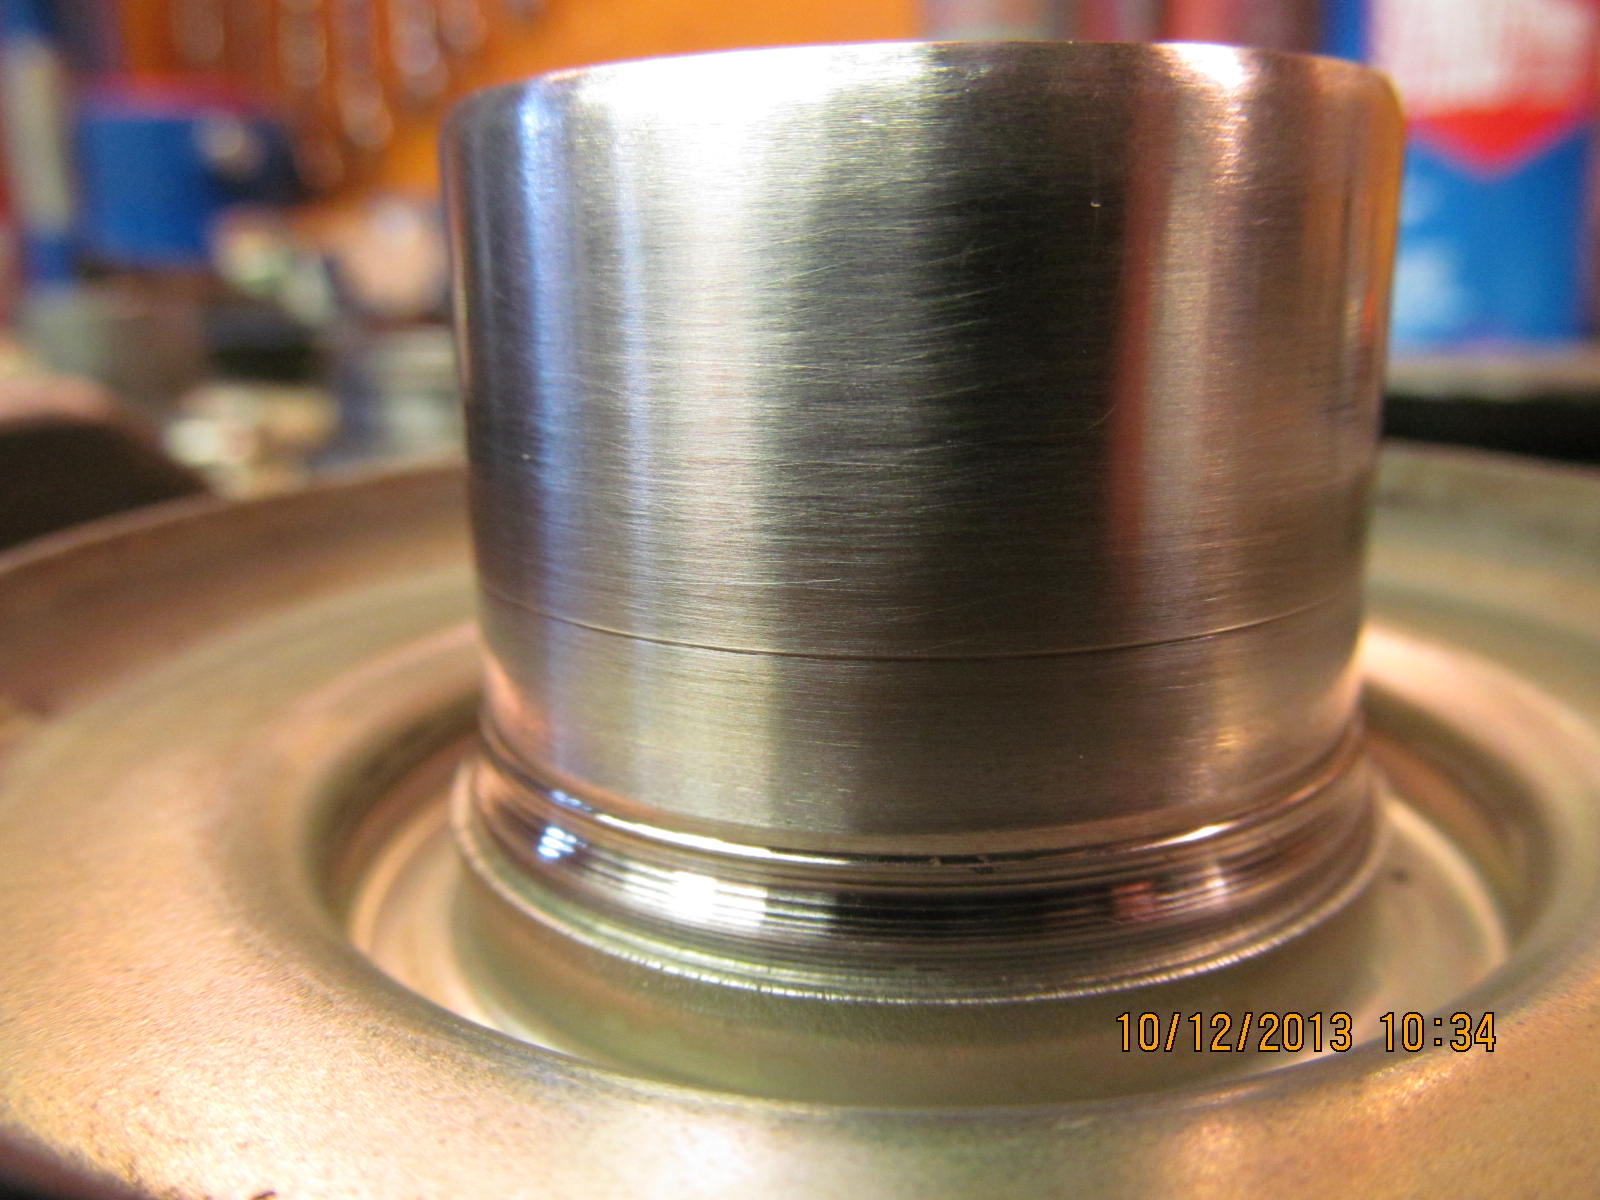
Very nice.
|
|
|
|
|
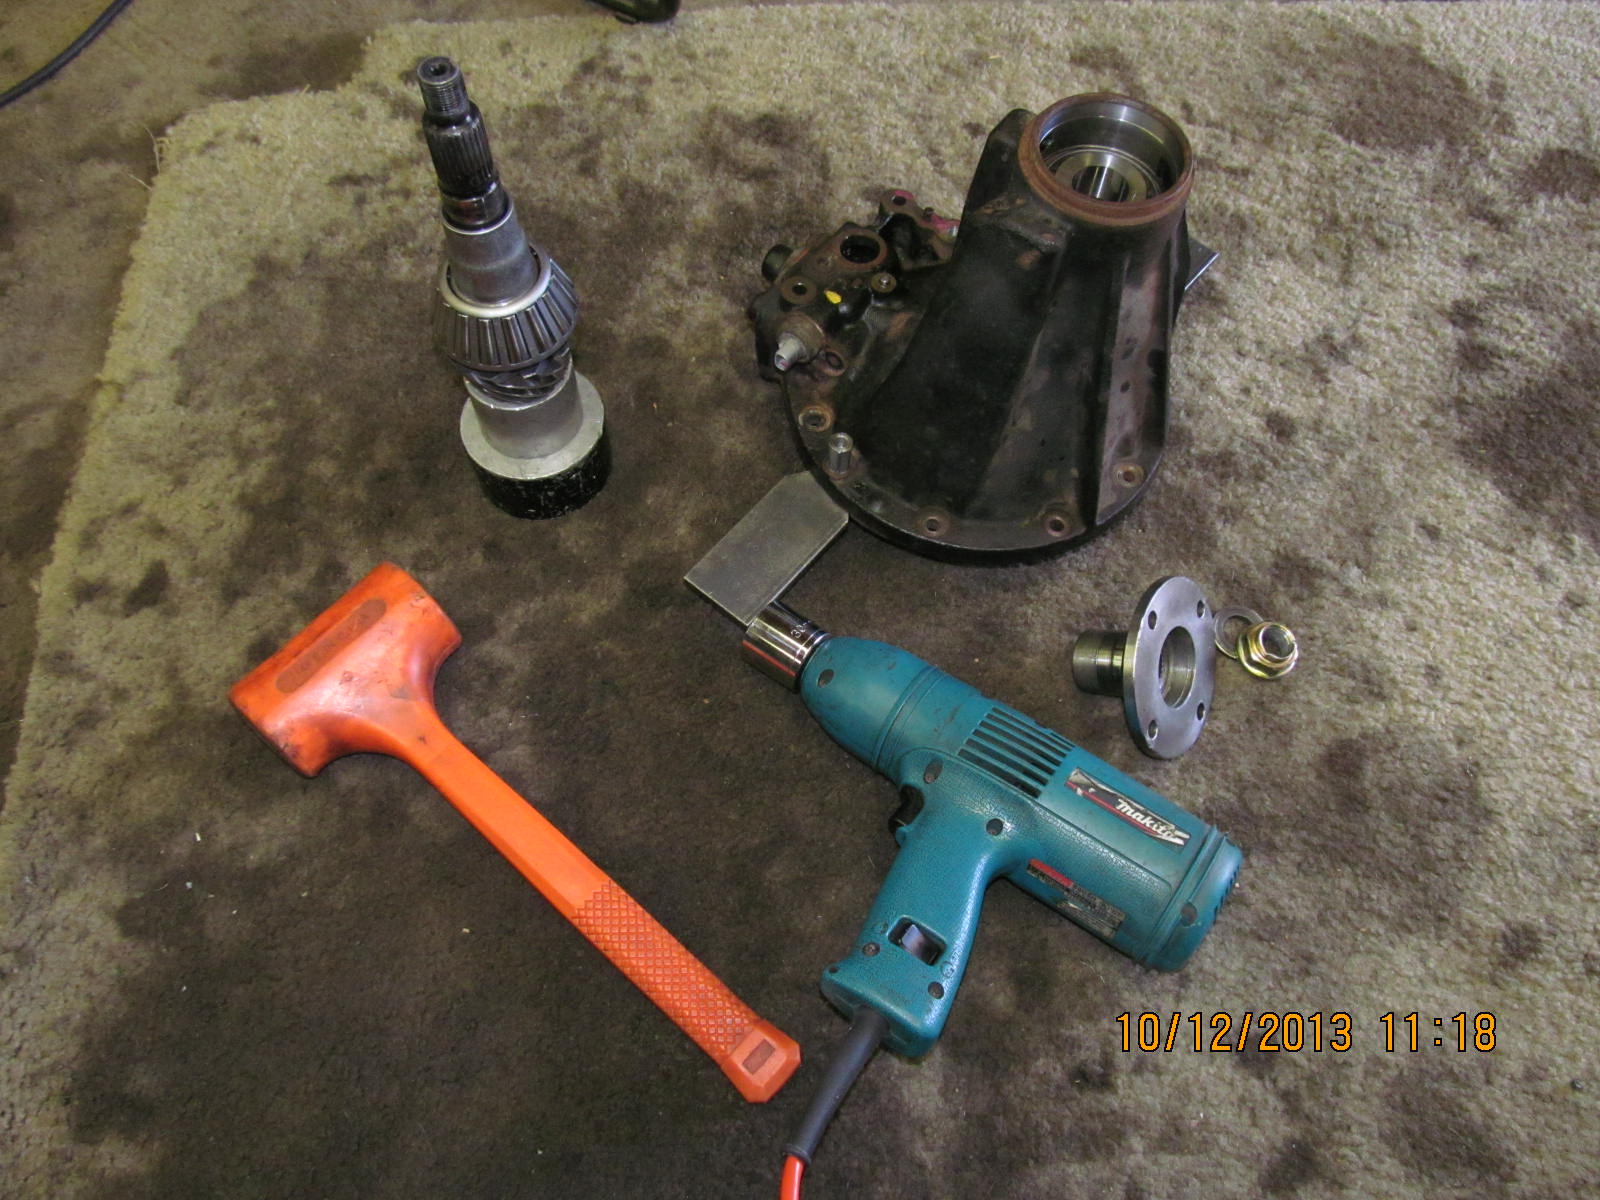
And now on to the pinion end of things. Press the pinion out.
|
|
|
|
|
The new OEM inner pinion bearing and crush sleeve will replace the old.
|
|
|
|
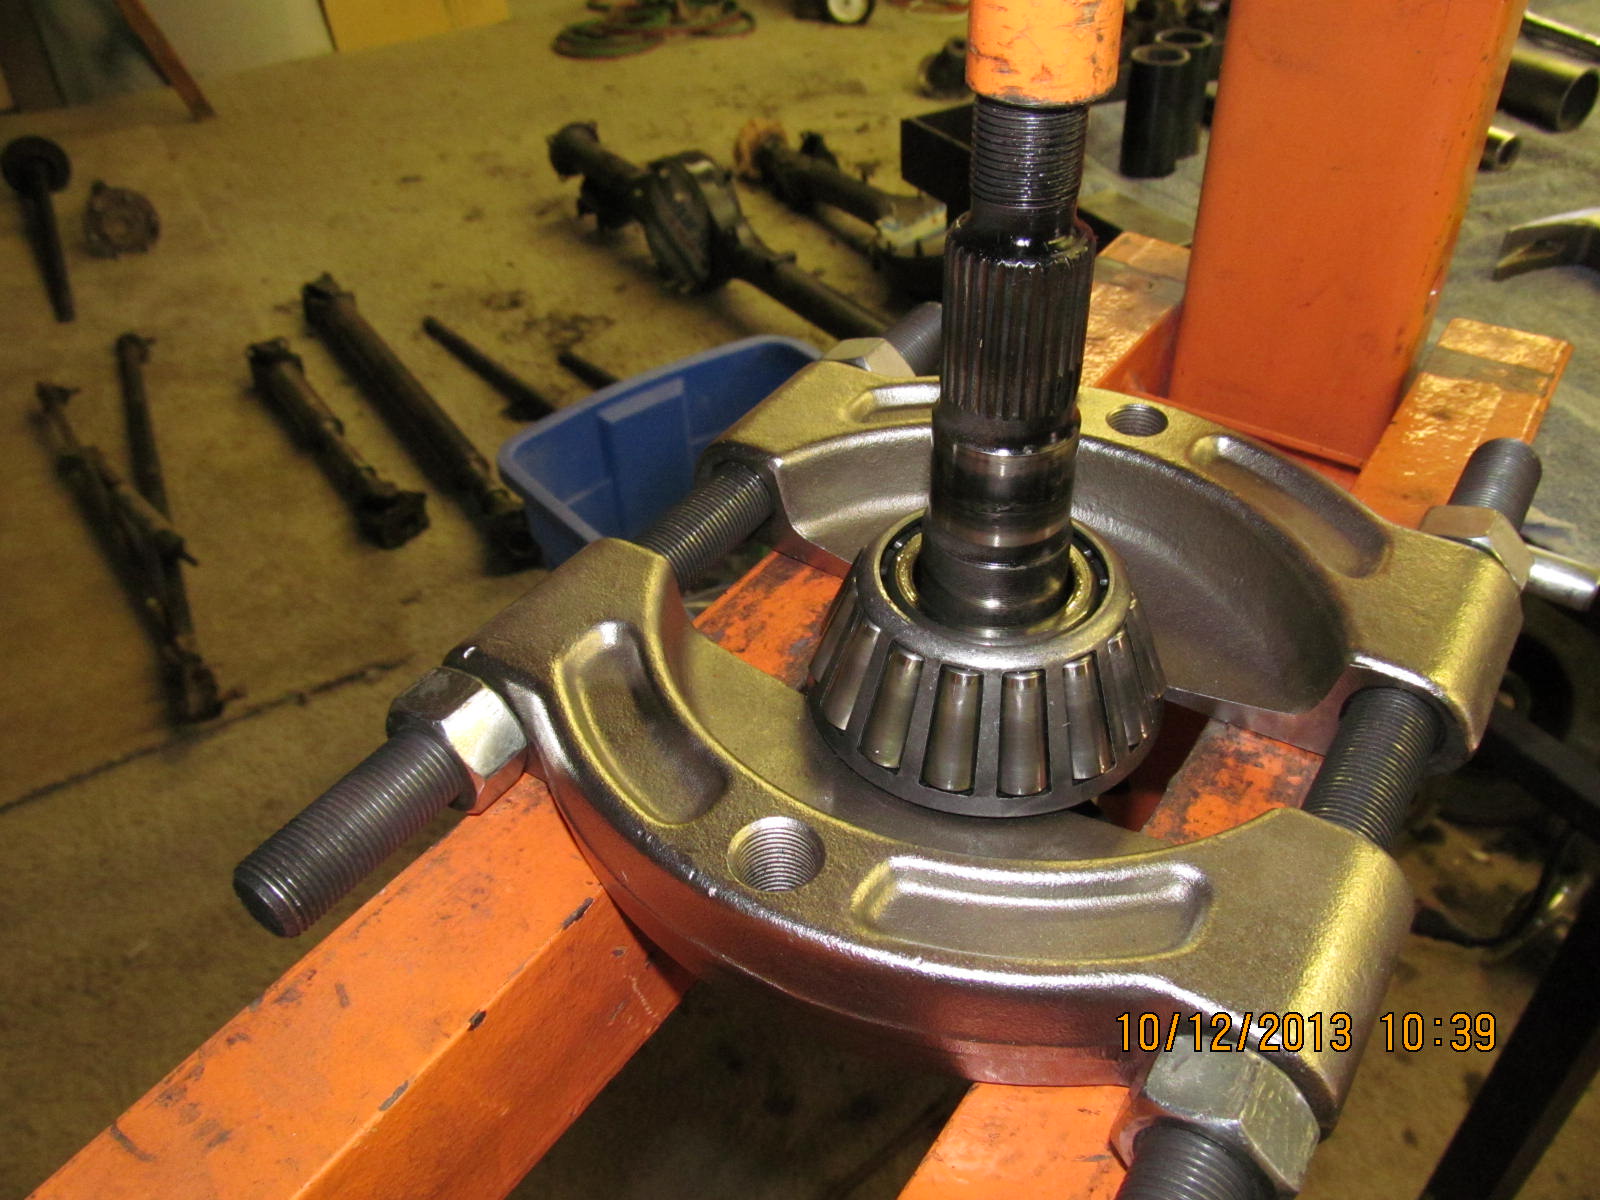
Using the extra large bearing separator, the original bearing came off. This V6 bearing is known for being stubborn
and such was the case with this one. Nice to have the heavy duty separator :)
|
|
|
|
|
The factory .080" shim is left in place while the new KOYO bearing is pressed on.
|
|
|
|
|
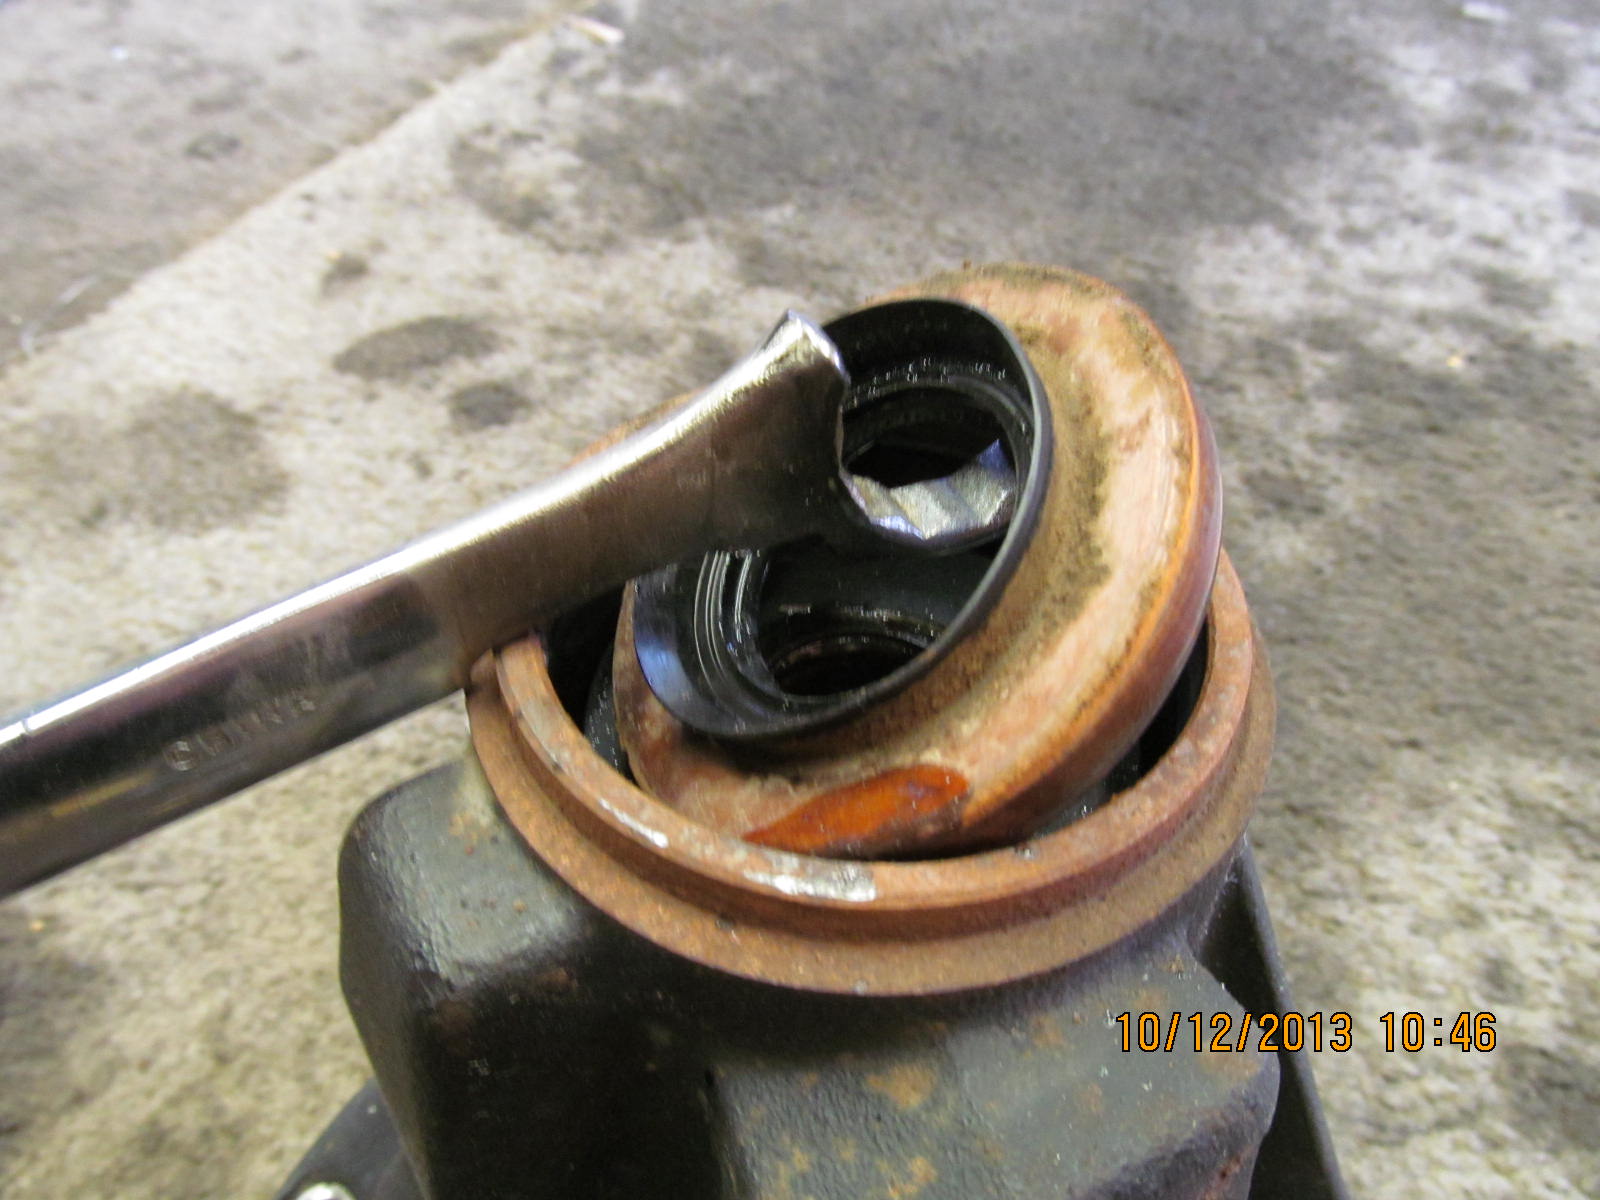
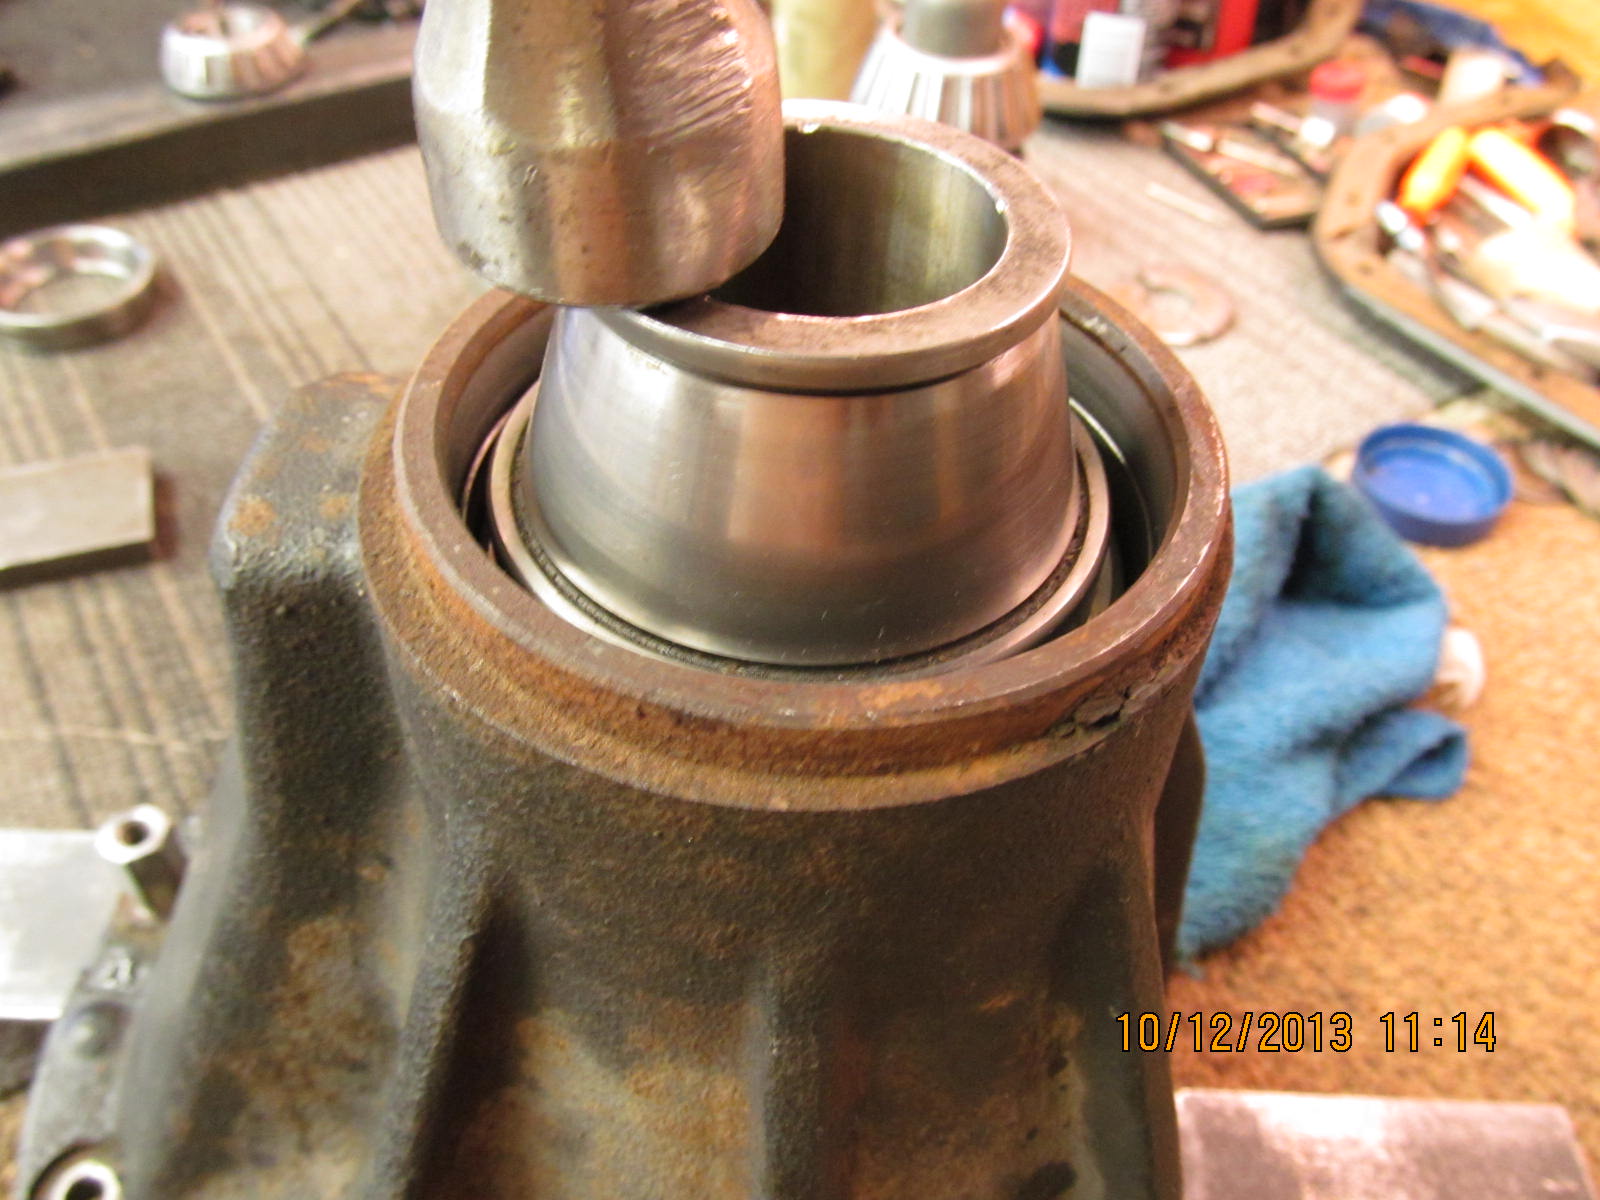
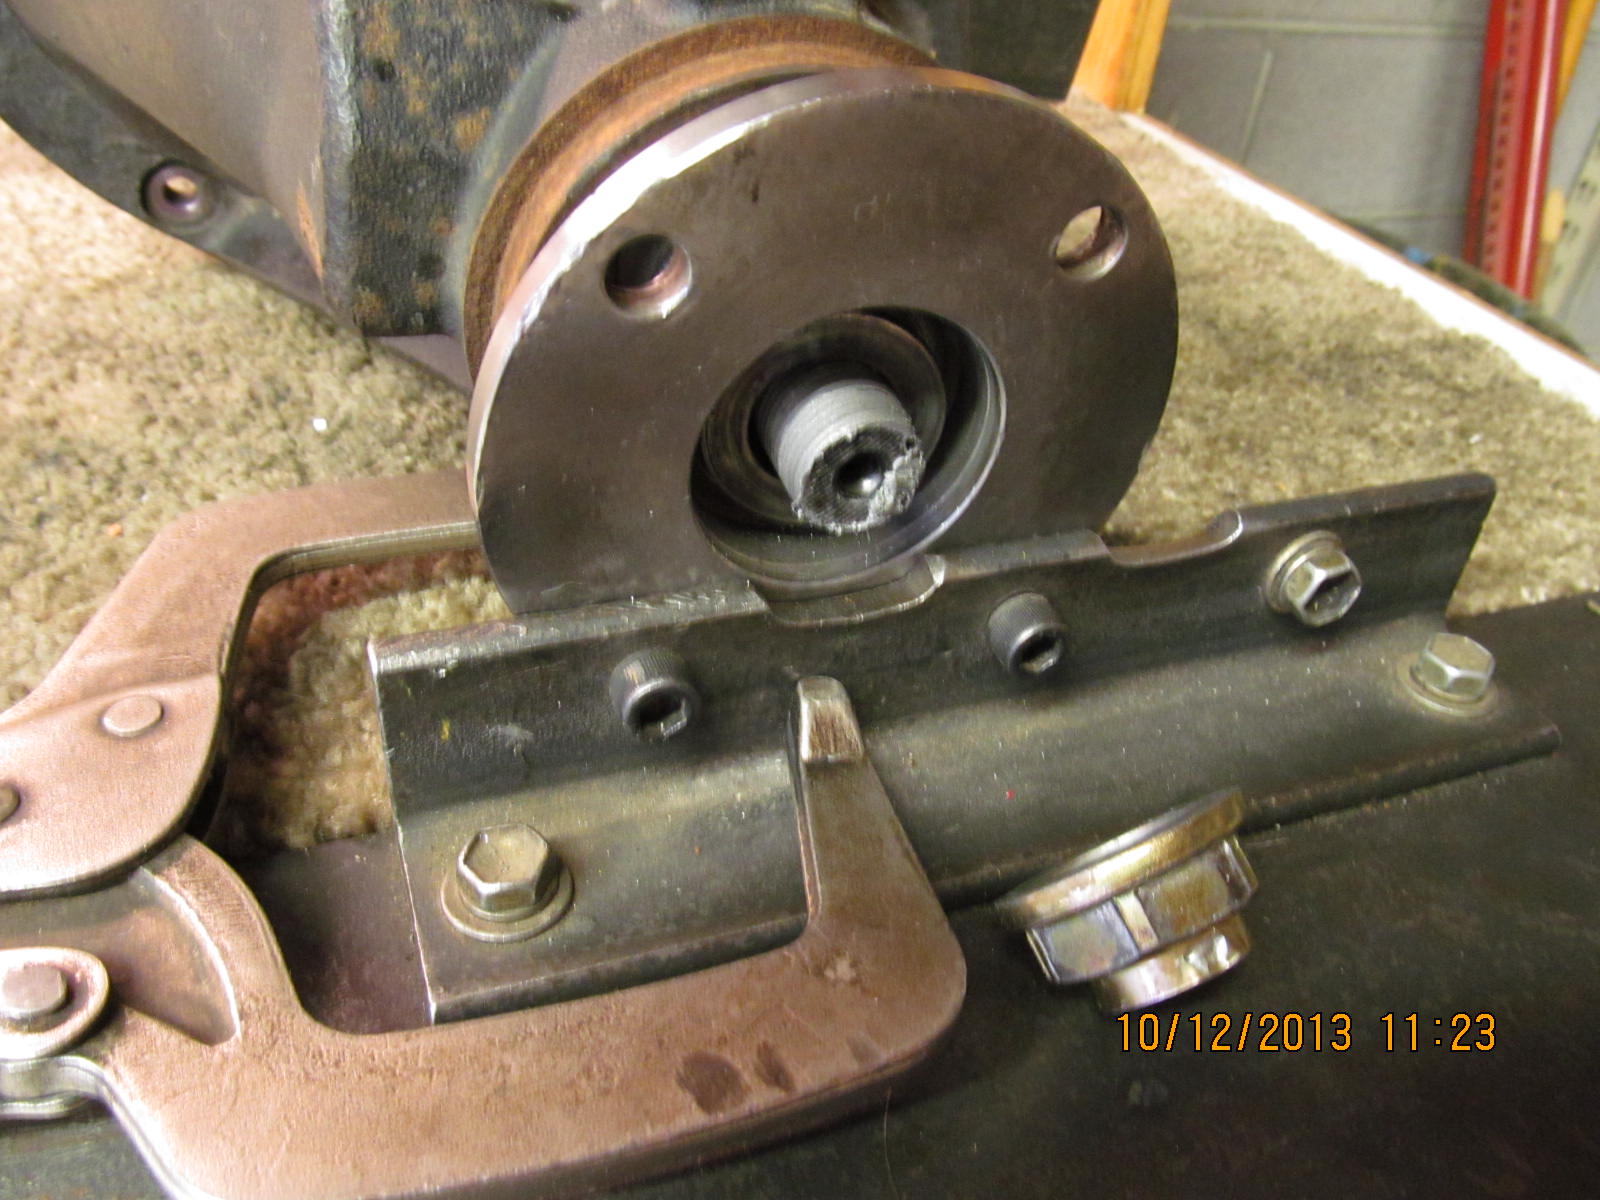
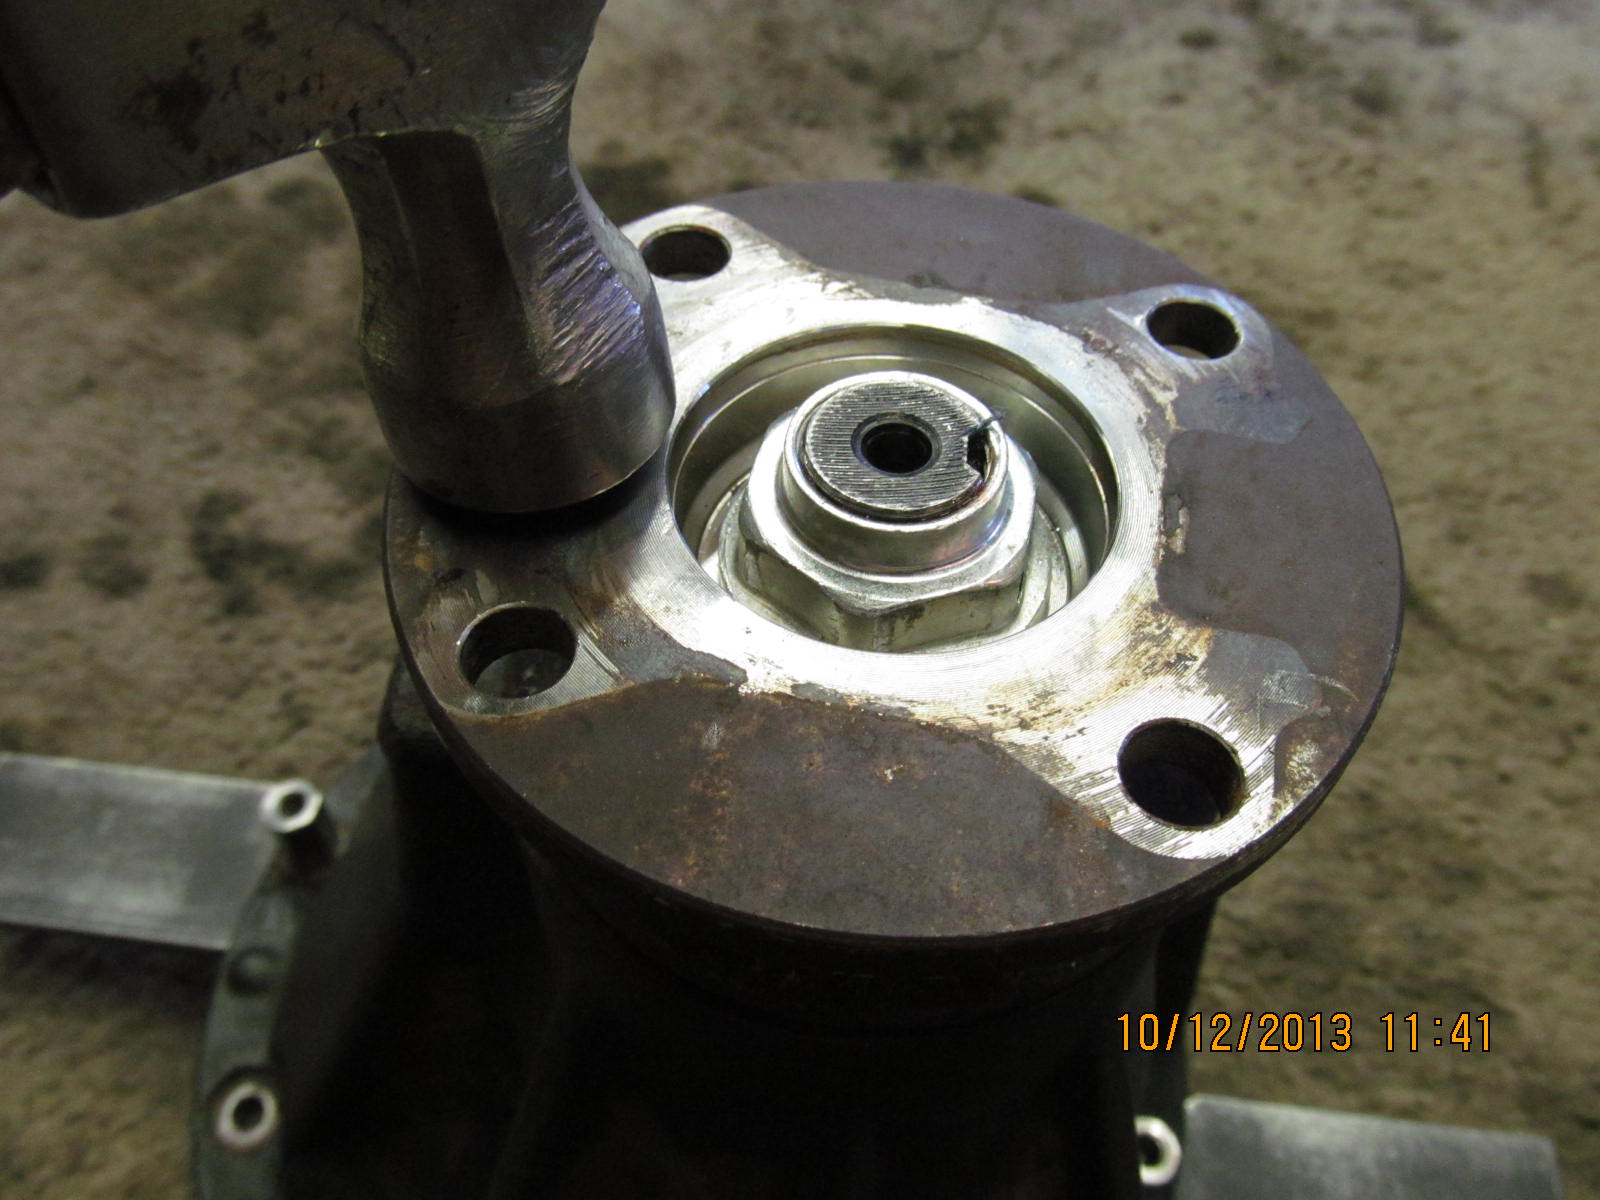
A modified old wrench can make for a nice seal remover.
|
|
|
|
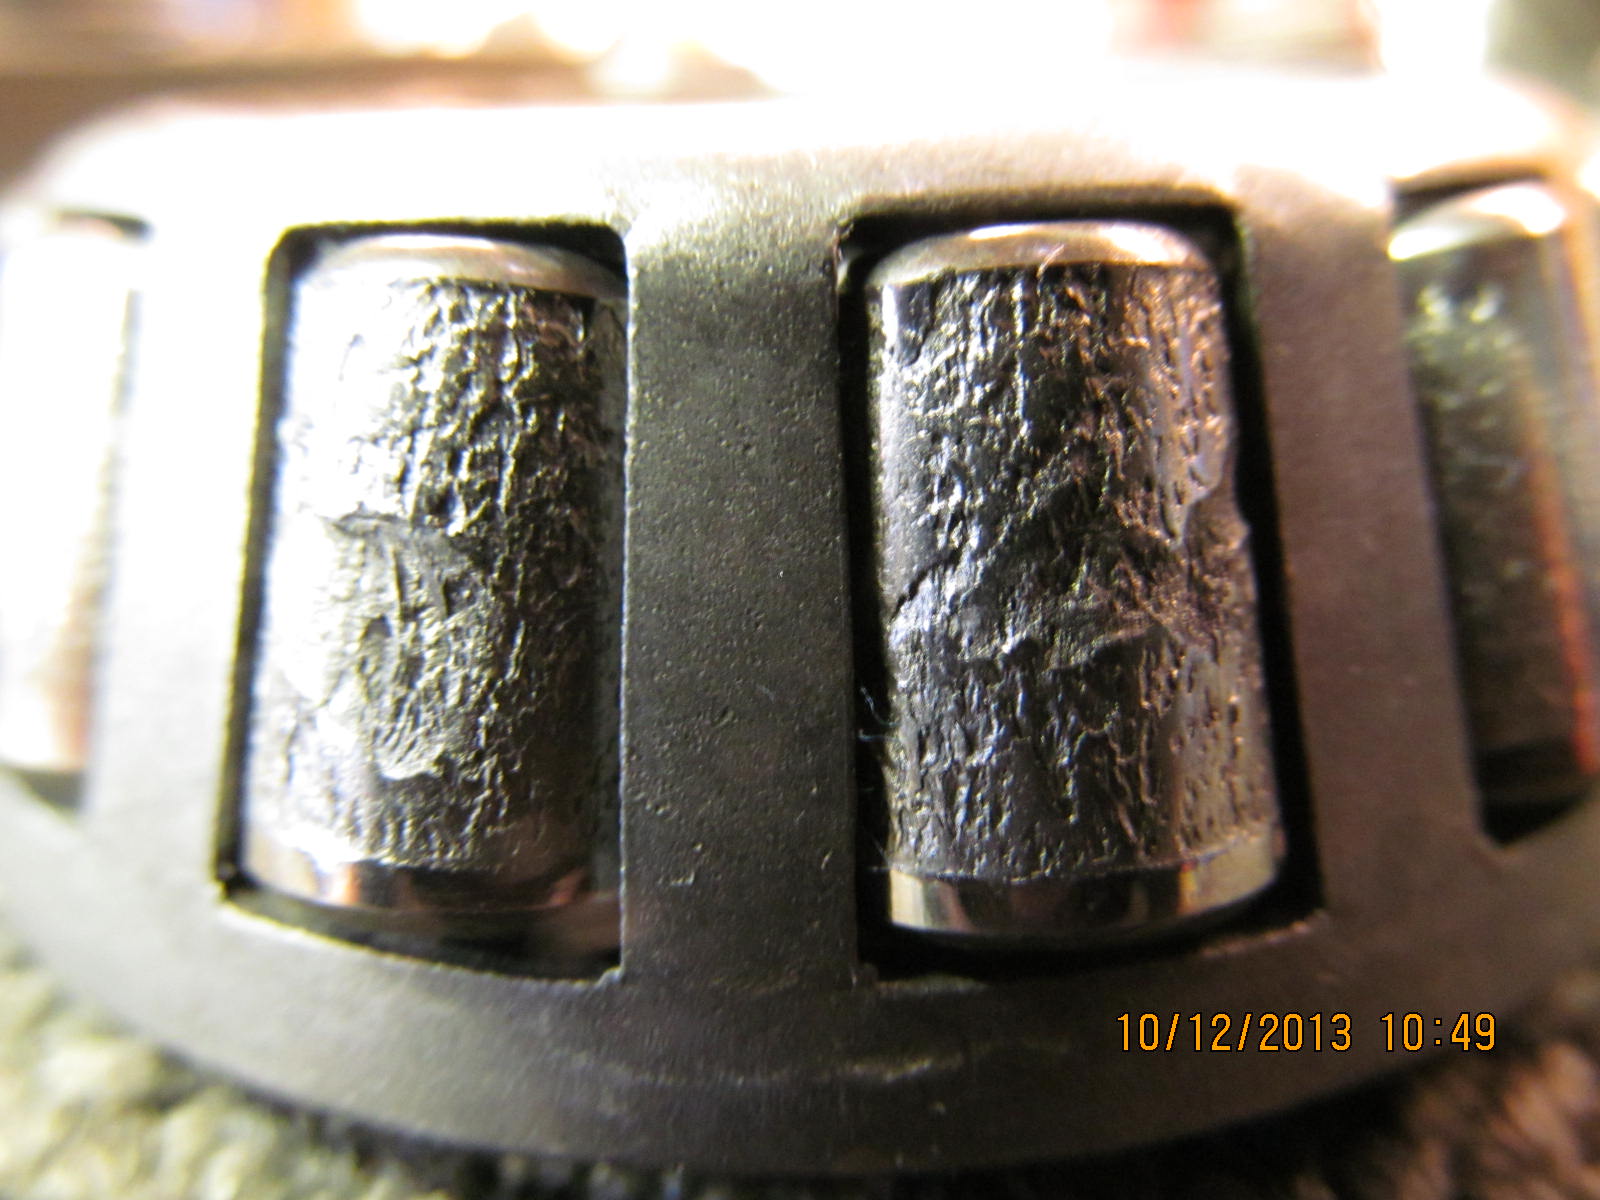
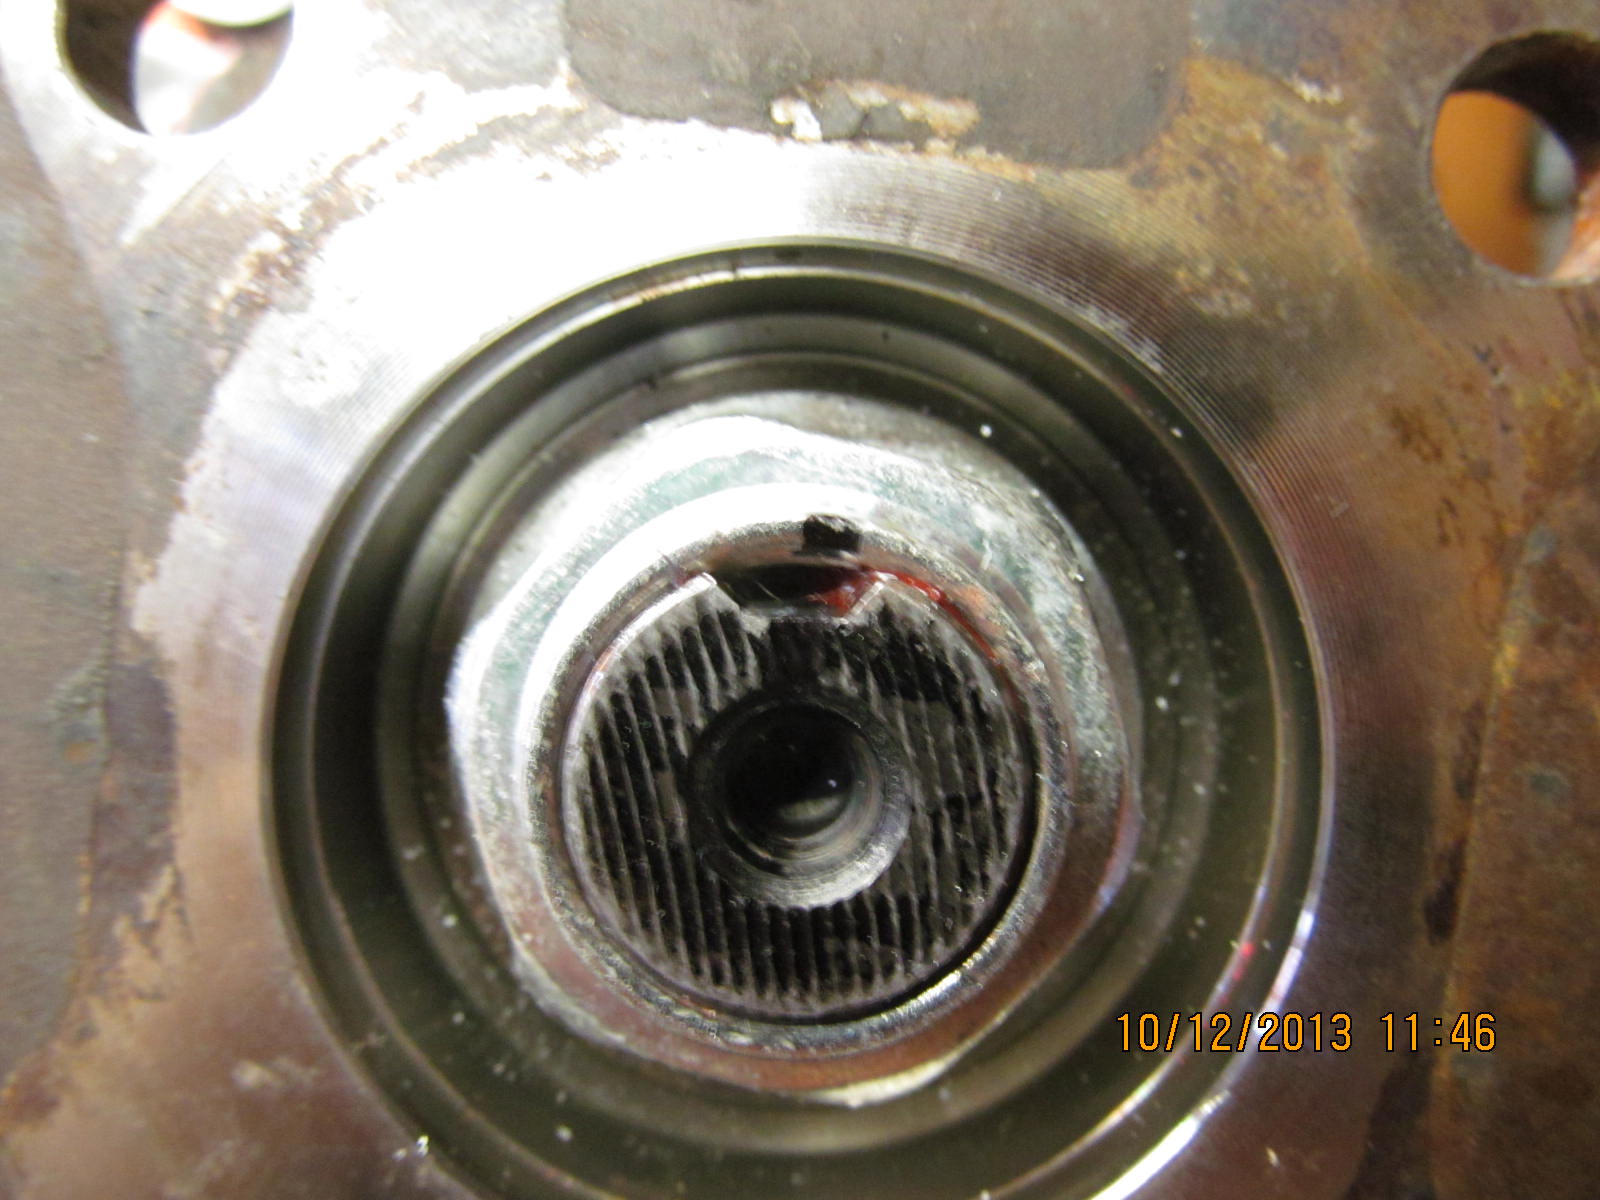
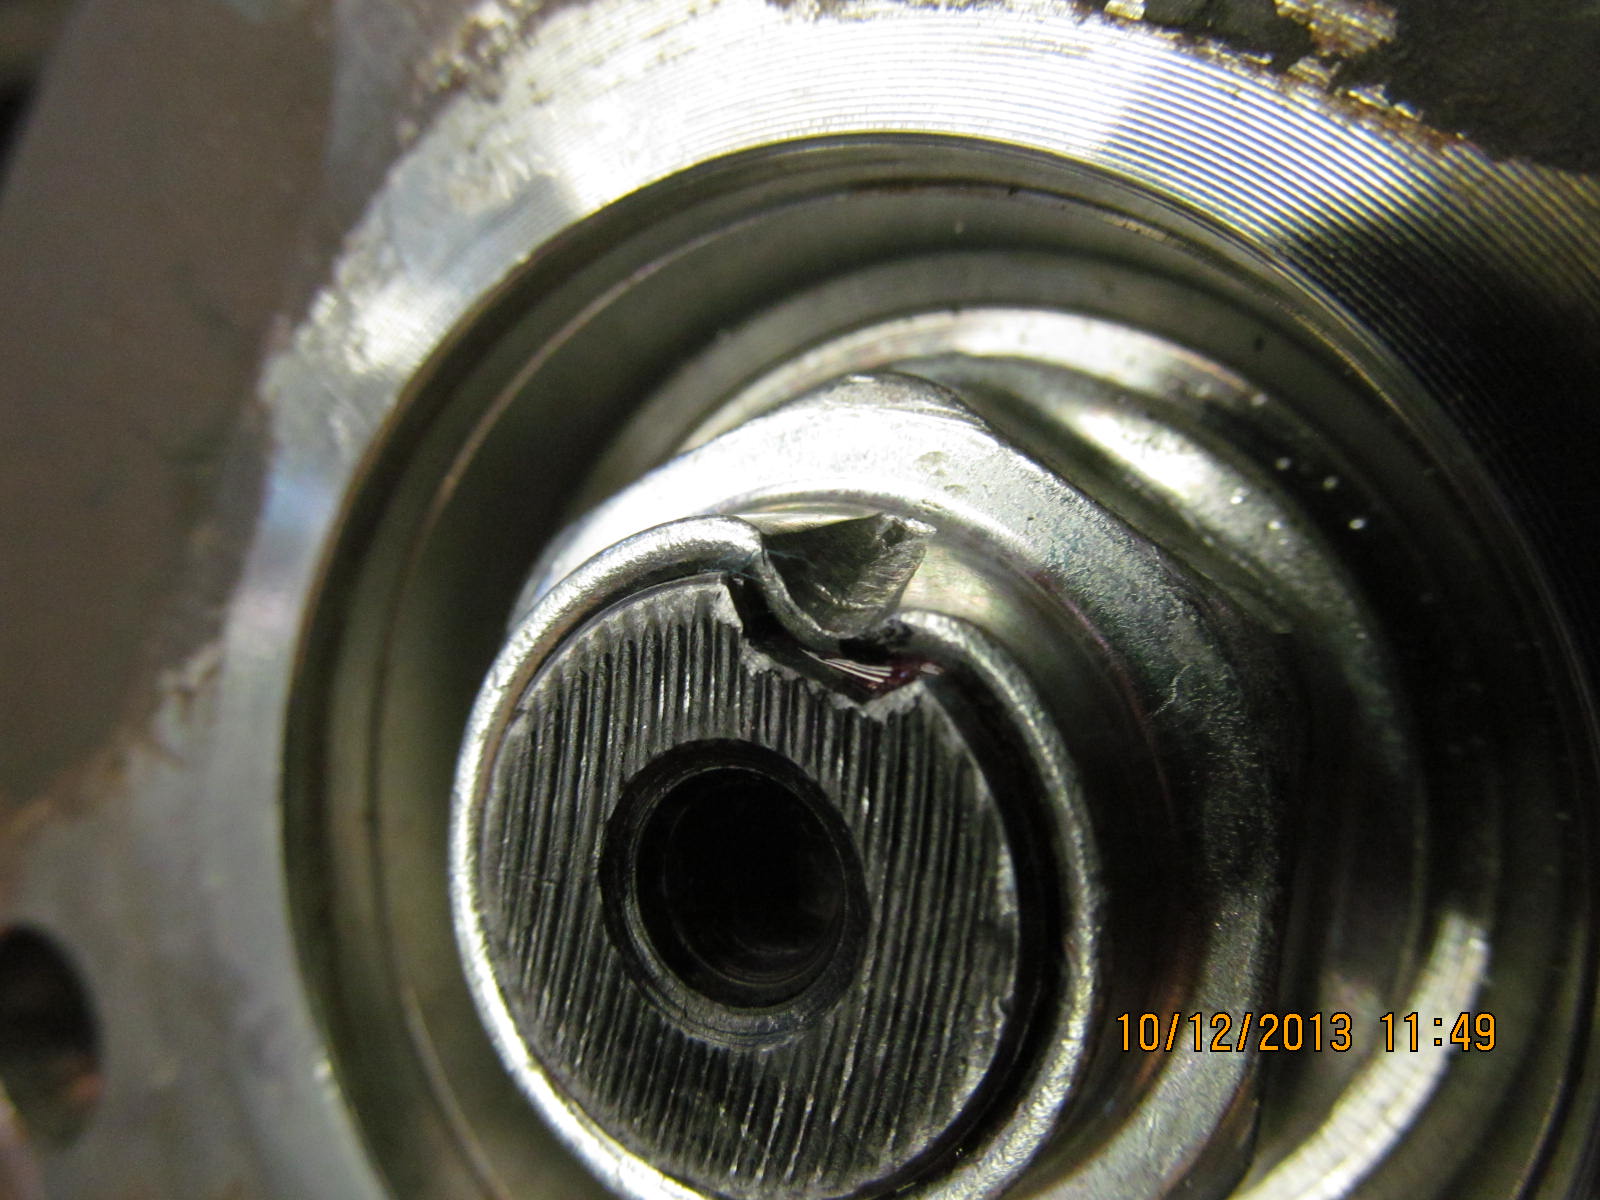
Perhaps this is the source of the jet noise Erik was reporting? The rollers on this outer pinion bearing are in some
of the roughest shape that I have seen.
|
|
|
|
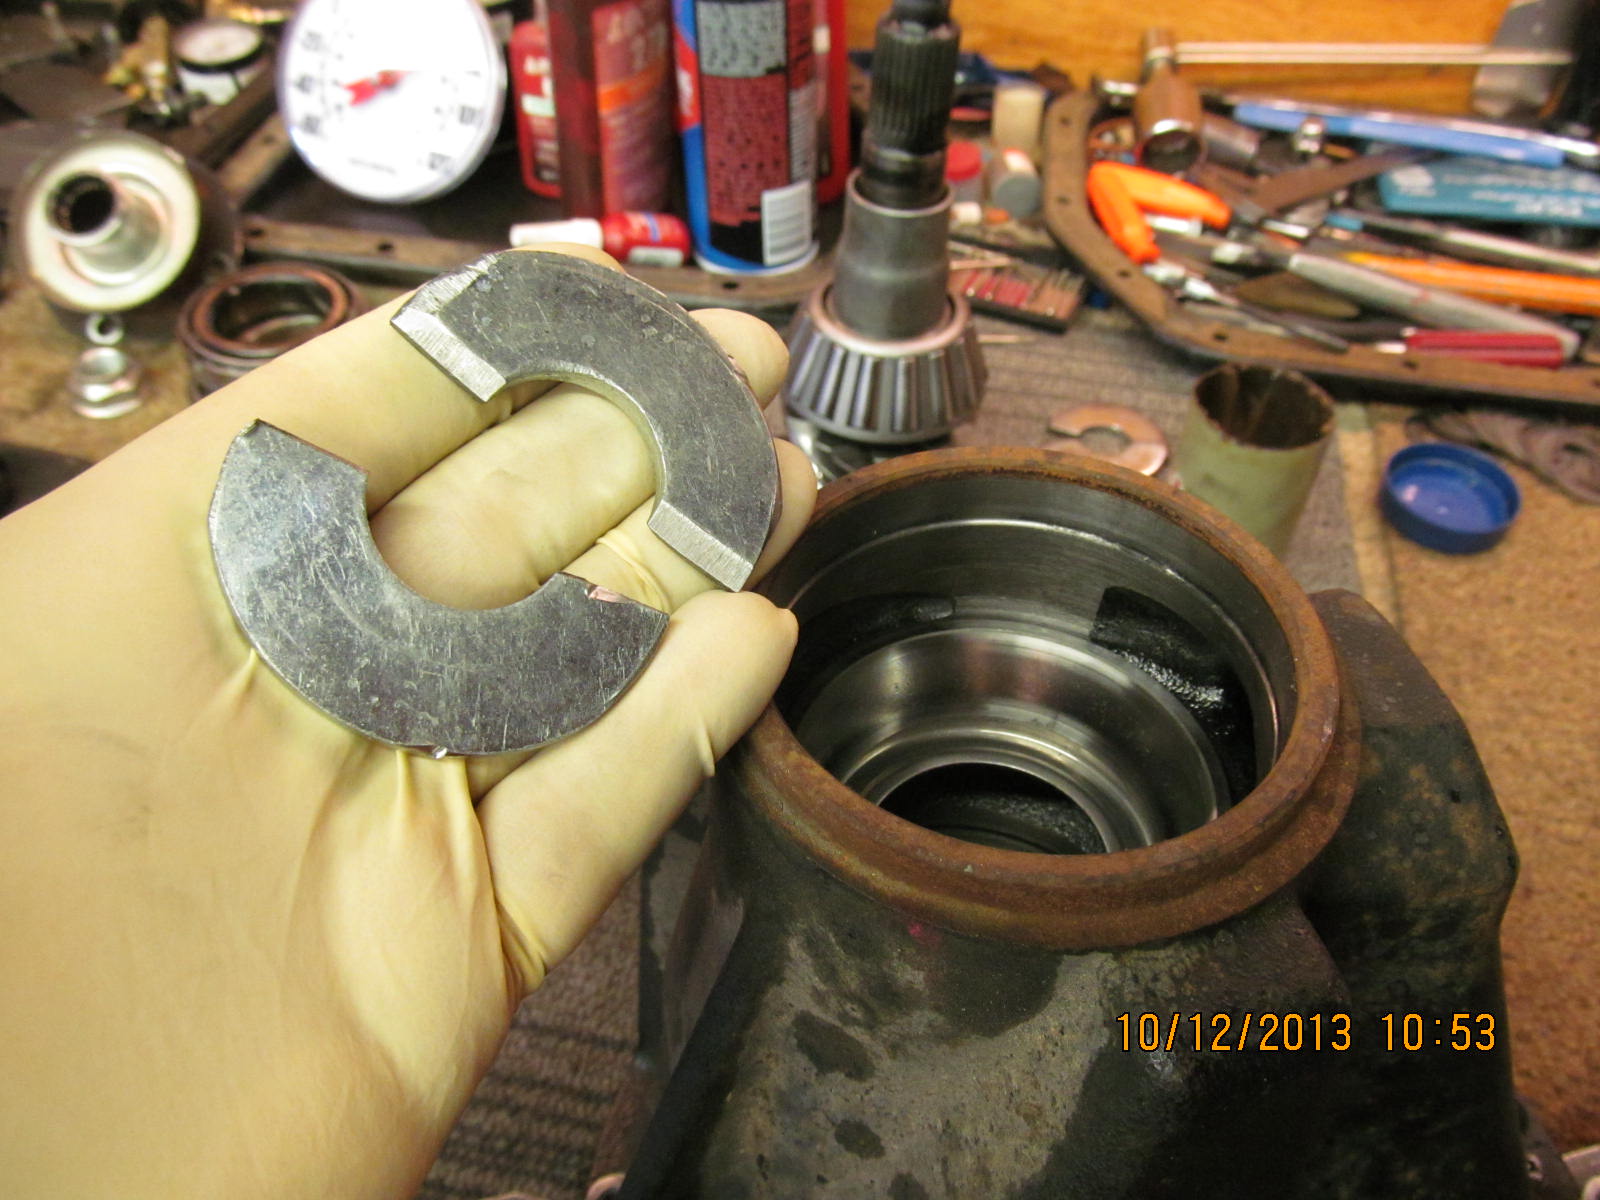
Scott Szymanski, down near Tucson, passed along this simple yet effective way of removing the outer pinion race without the
least bit a damage to the oil retainer. I use this split washer tool all the time now :)
|
|
|
|
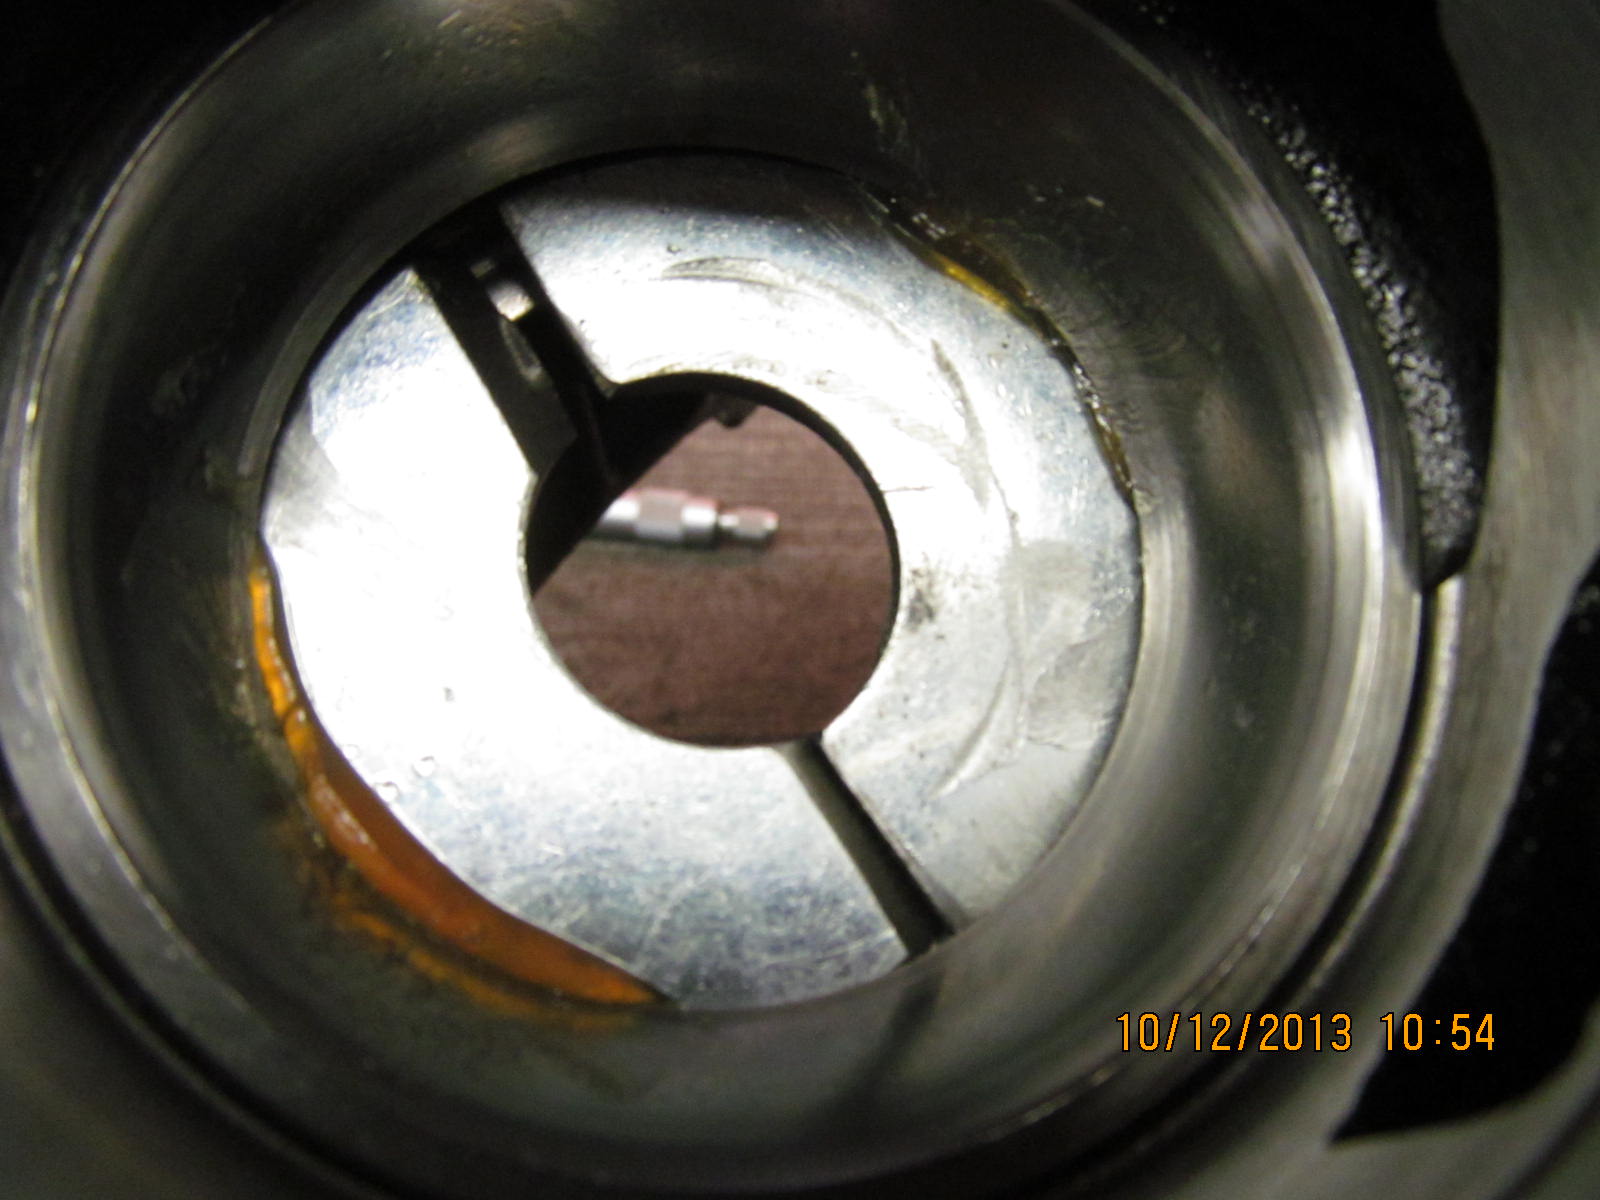
Looking at the above pic with the washer hole in the center...I just thought of another improvement for Scott's tool....hmmmm....
guess I'll try it on my next e-locker. Scott- let me know what you think of it 
|
|
|
|
|
....................
|
|
|
|
|
And out comes the washers and the outer pinion race.
|
|
|

|
|
No dents or holes. 100% undamaged oil retainer.
|
|
|
|
|
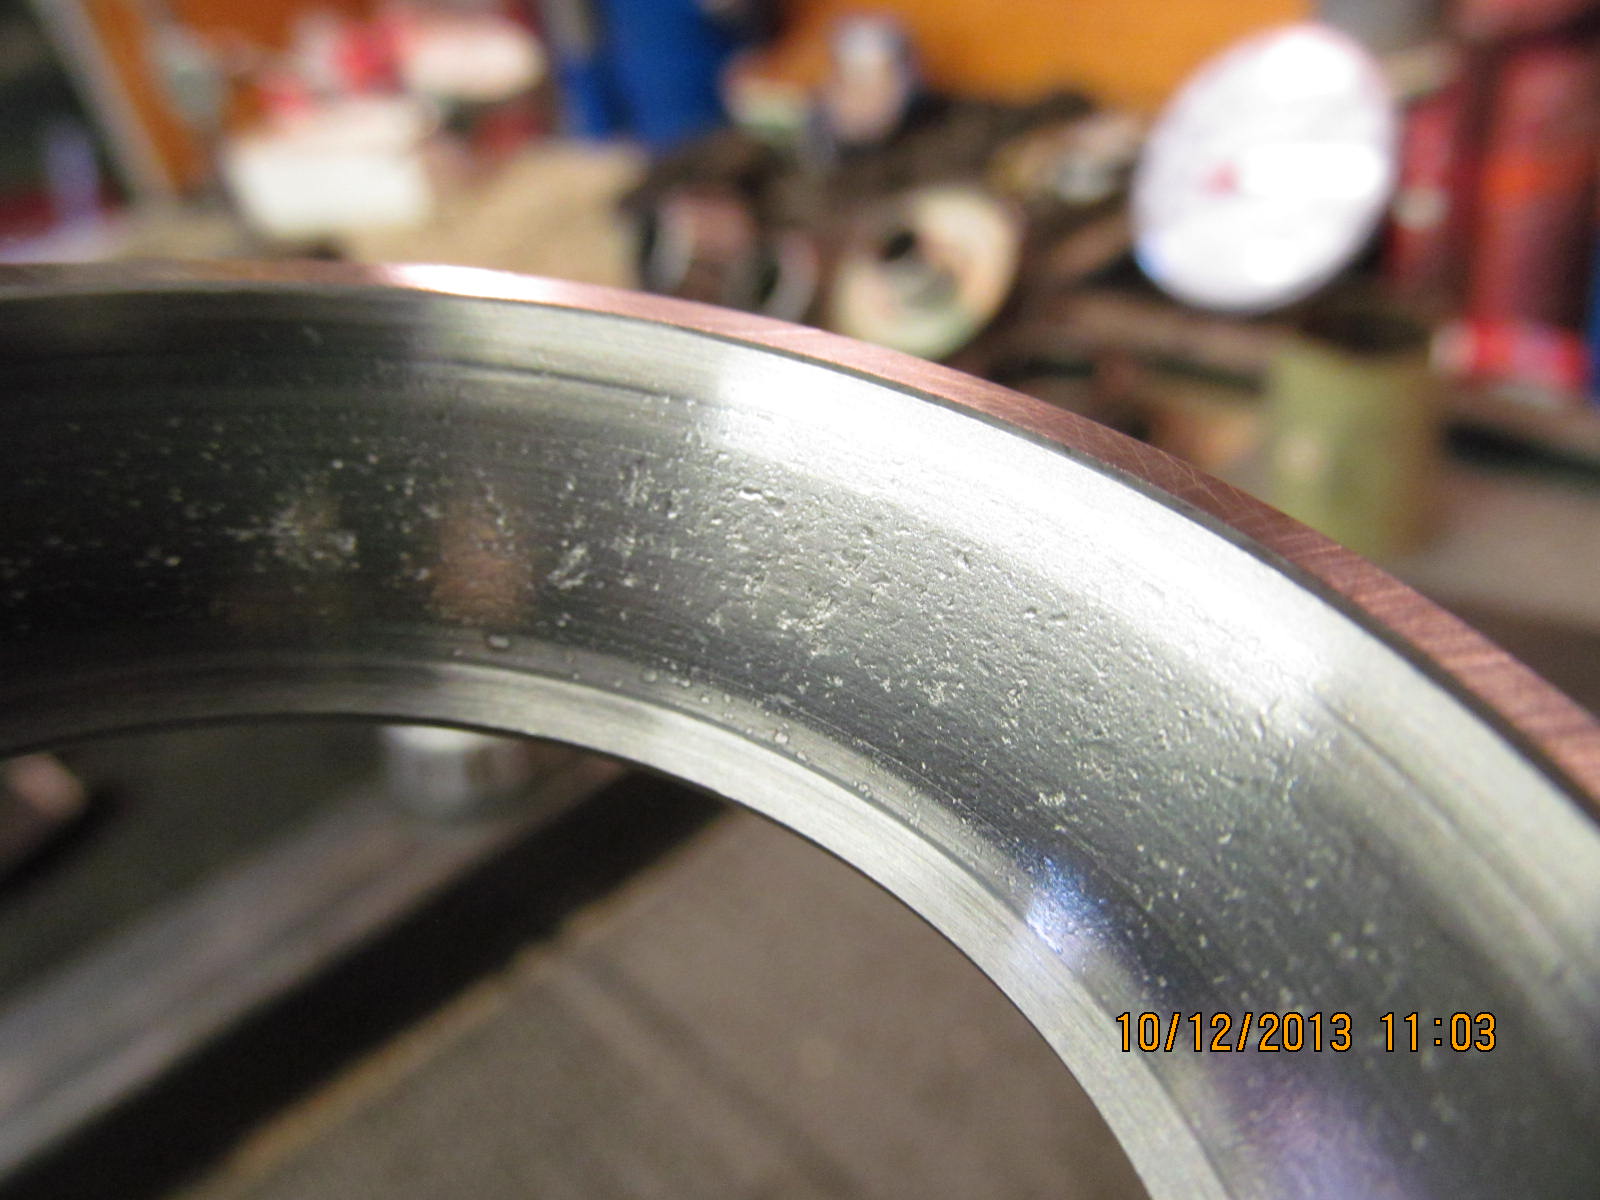
Close-up of outer race surface. Not pretty.
|
|
|
|
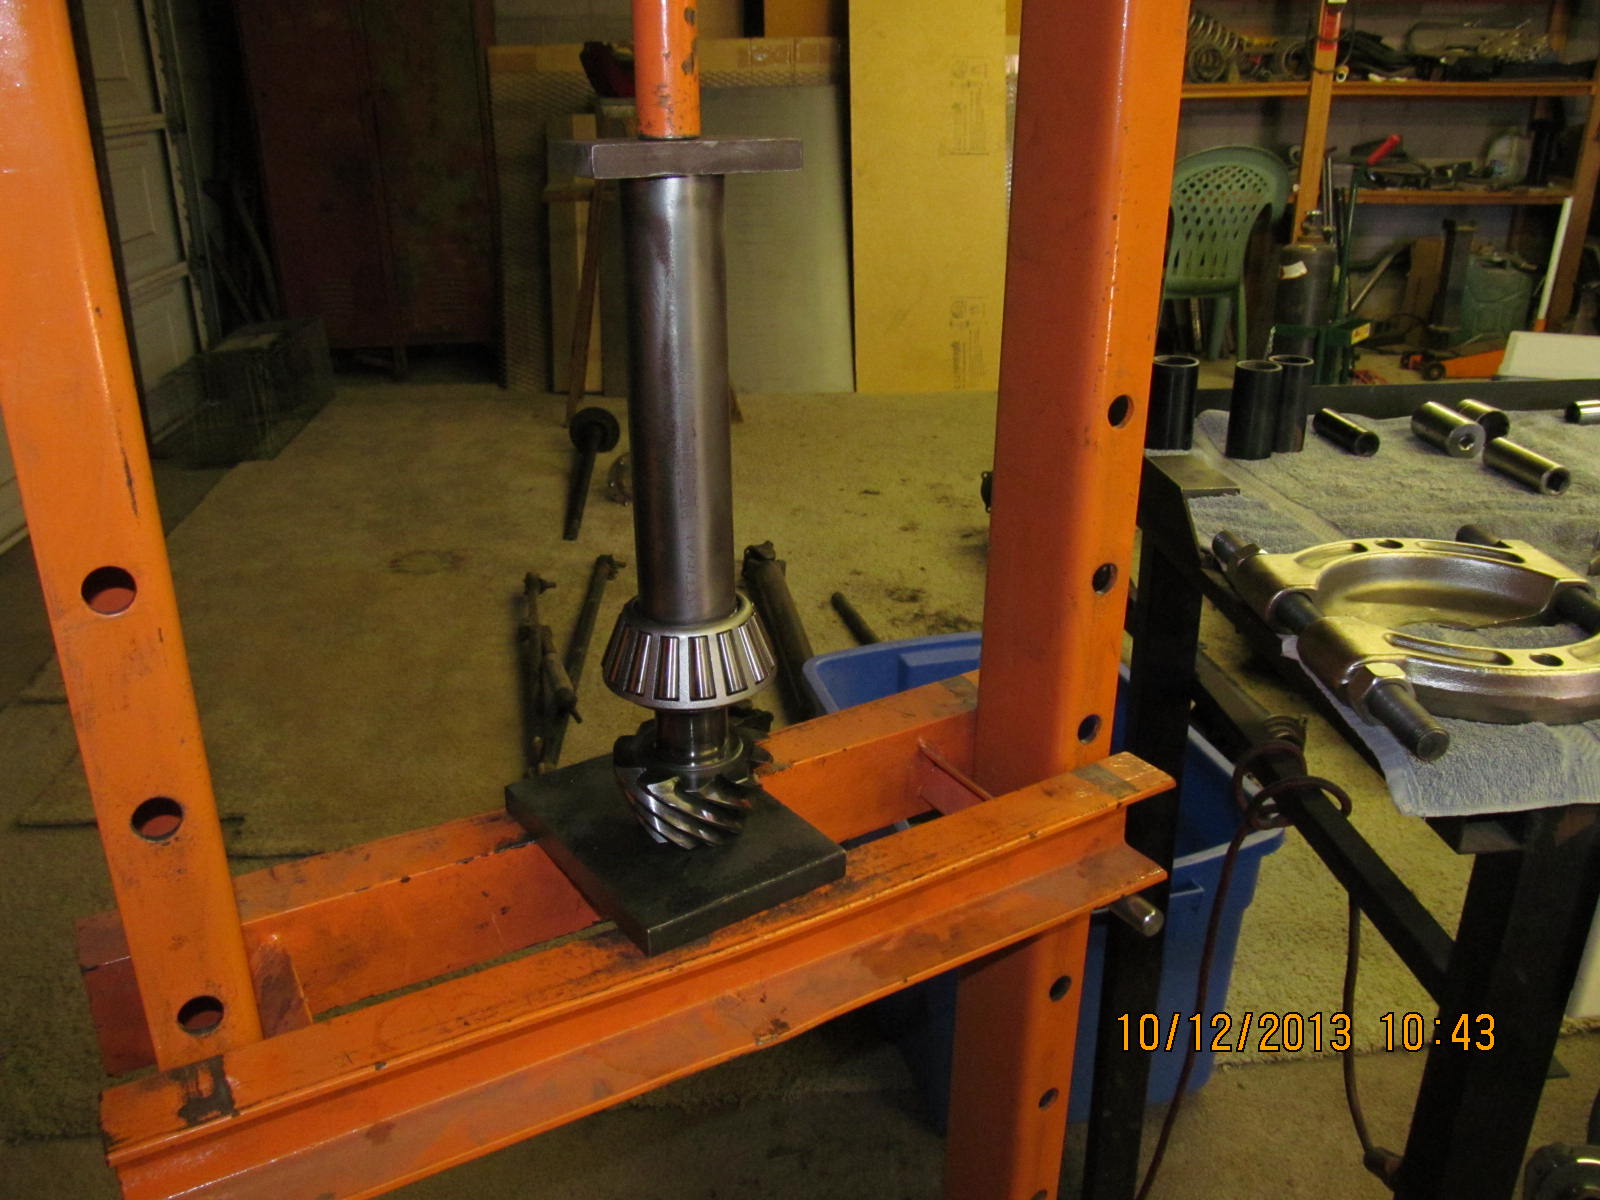
Time to now press the large inner race in place. I used to use a soft chisel to pound it in but always wondered
if the pounding was effecting the machined surface the rollers ride on.
|
|
|

|
|
Old bearing/race materials come in very handy....all the time it seems.
|
|
|
|
|
Tap tap tap.
|
|
|
|
|
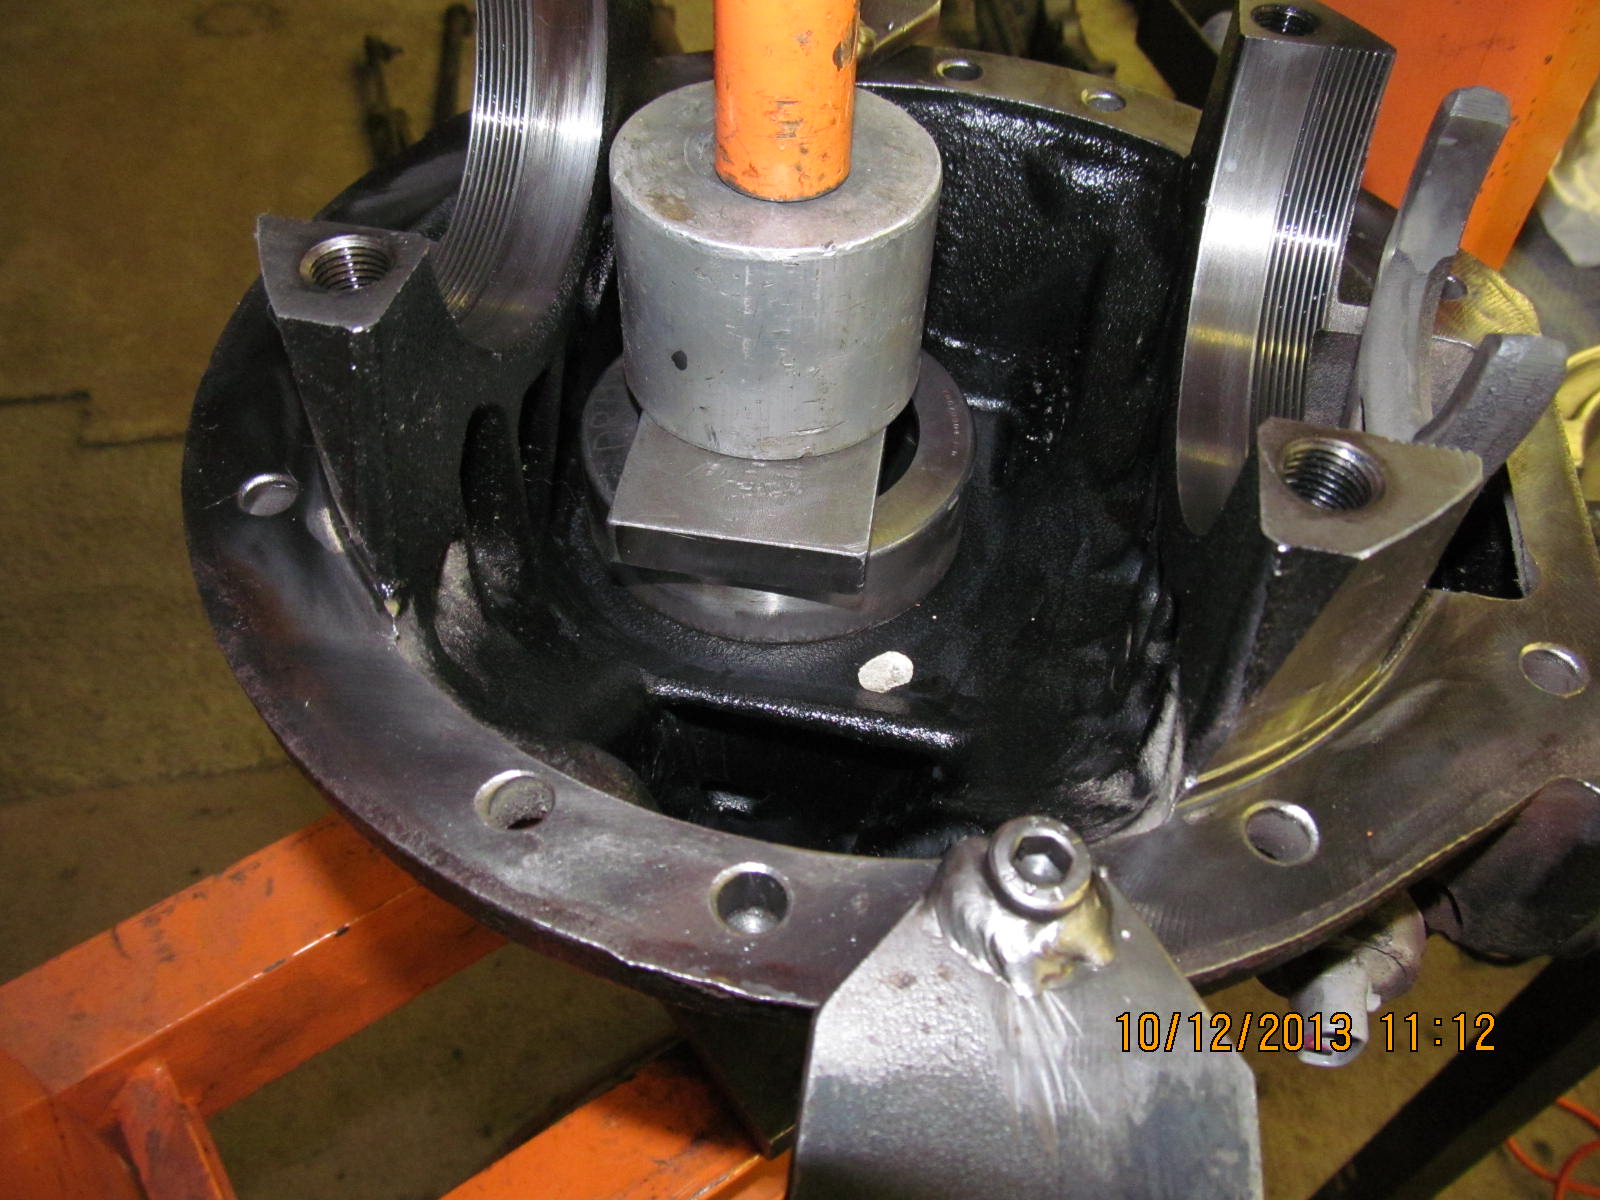
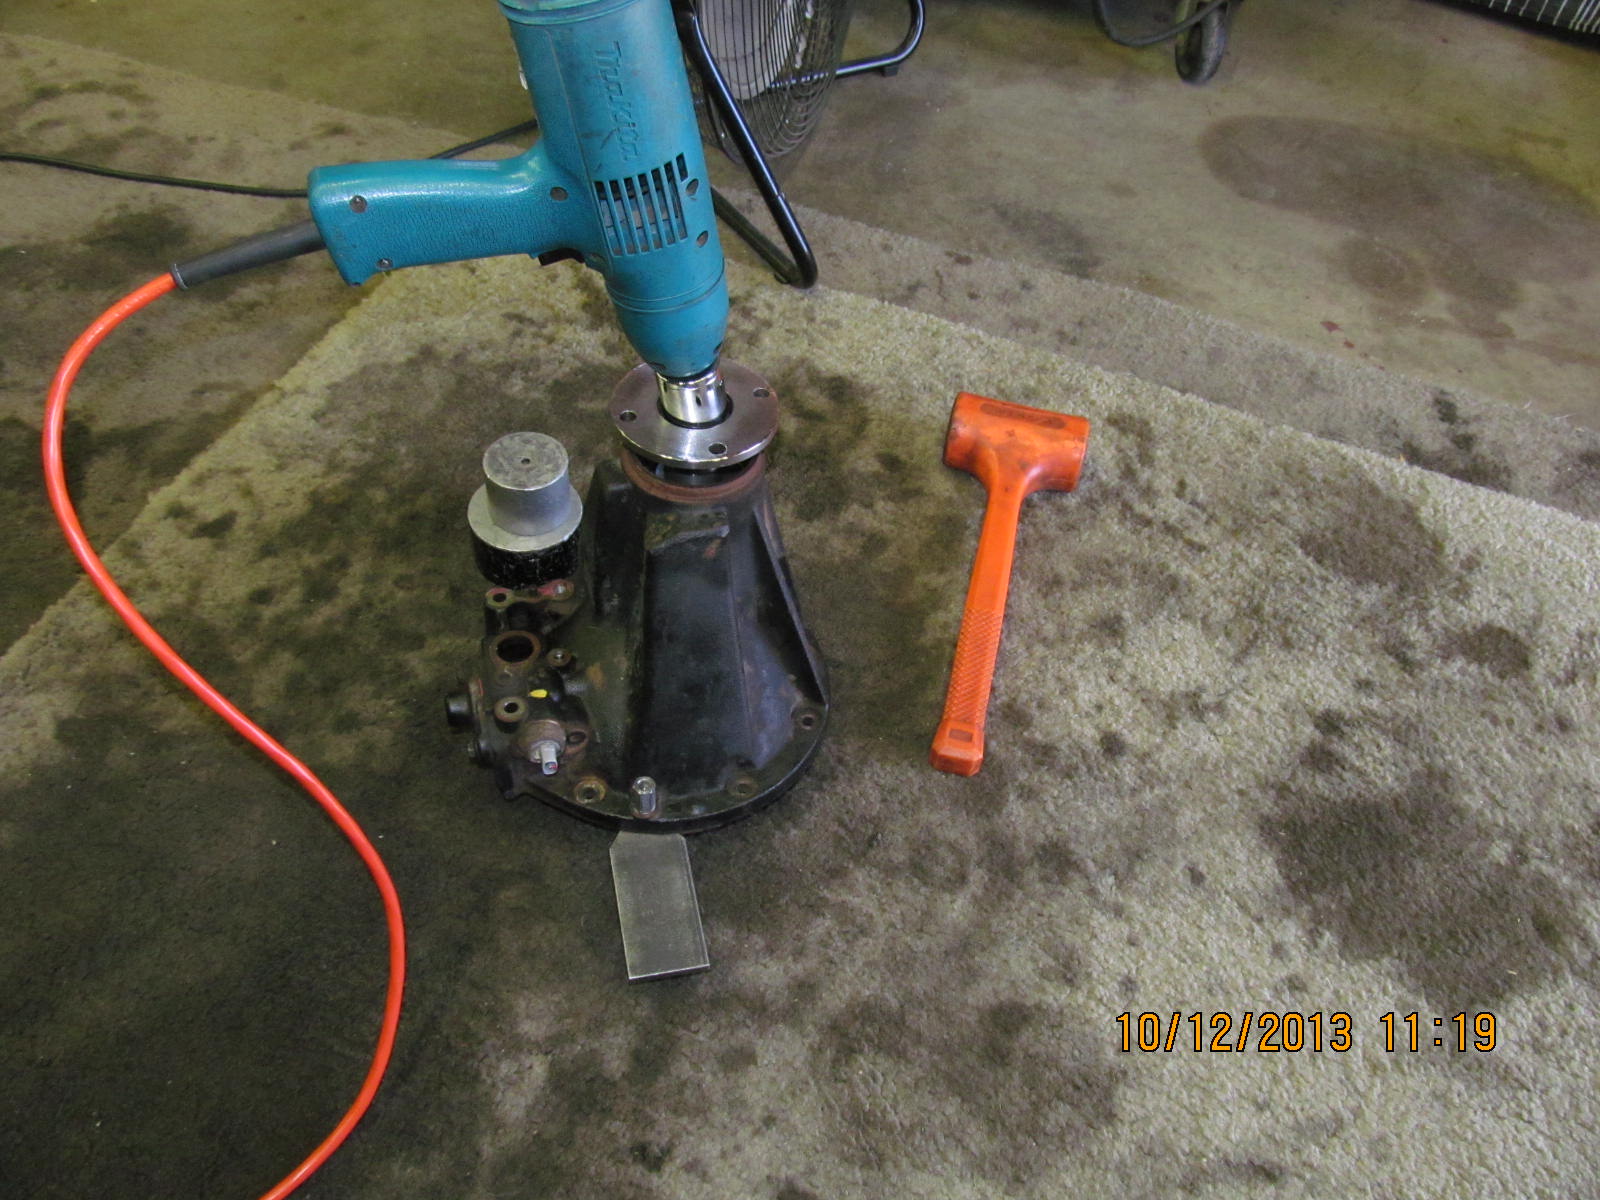
The pinion end can now be assembled with the new factory crush sleeve. An old pinion nut and the shop flange will be used here.
|
|
|
|
|
The nut is snugged up as tight as the crush sleeve will allow. There is still about .100" of vertical up/down play.
|
|
|
|
|
I will now take out almost all of that play. Anti-seize helps prevent any thread damage.
|
|
|
|
|
With the crush sleeve crushed 90% to the target, the nut is removed.
|
|
|

|
|
Shop flange is now removed. Anti-seize is thoroughly cleaned of off the pinion threads. I like to use ether for that process.
|
|
|
|
|
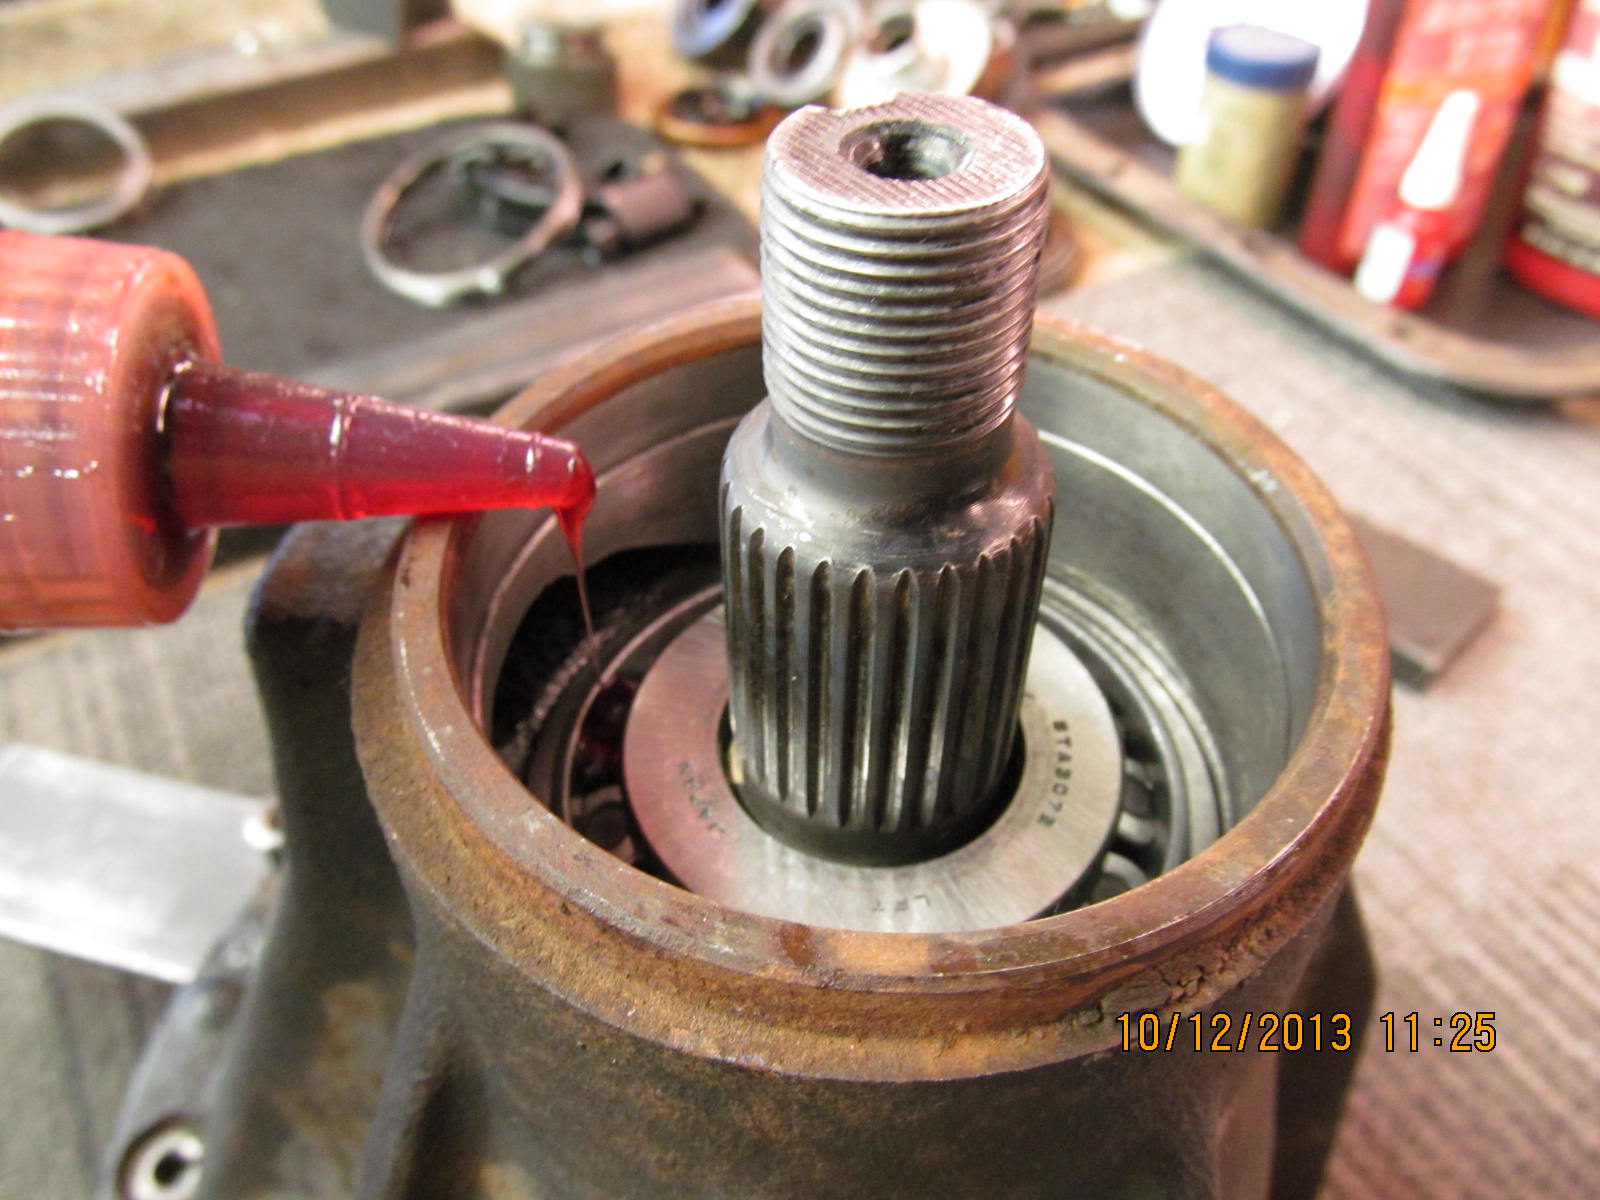
Gear oil is liberally applied to both the outer and inner bearing.
|
|
|
|
|
Splash guard goes in place.
|
|
|
|
|
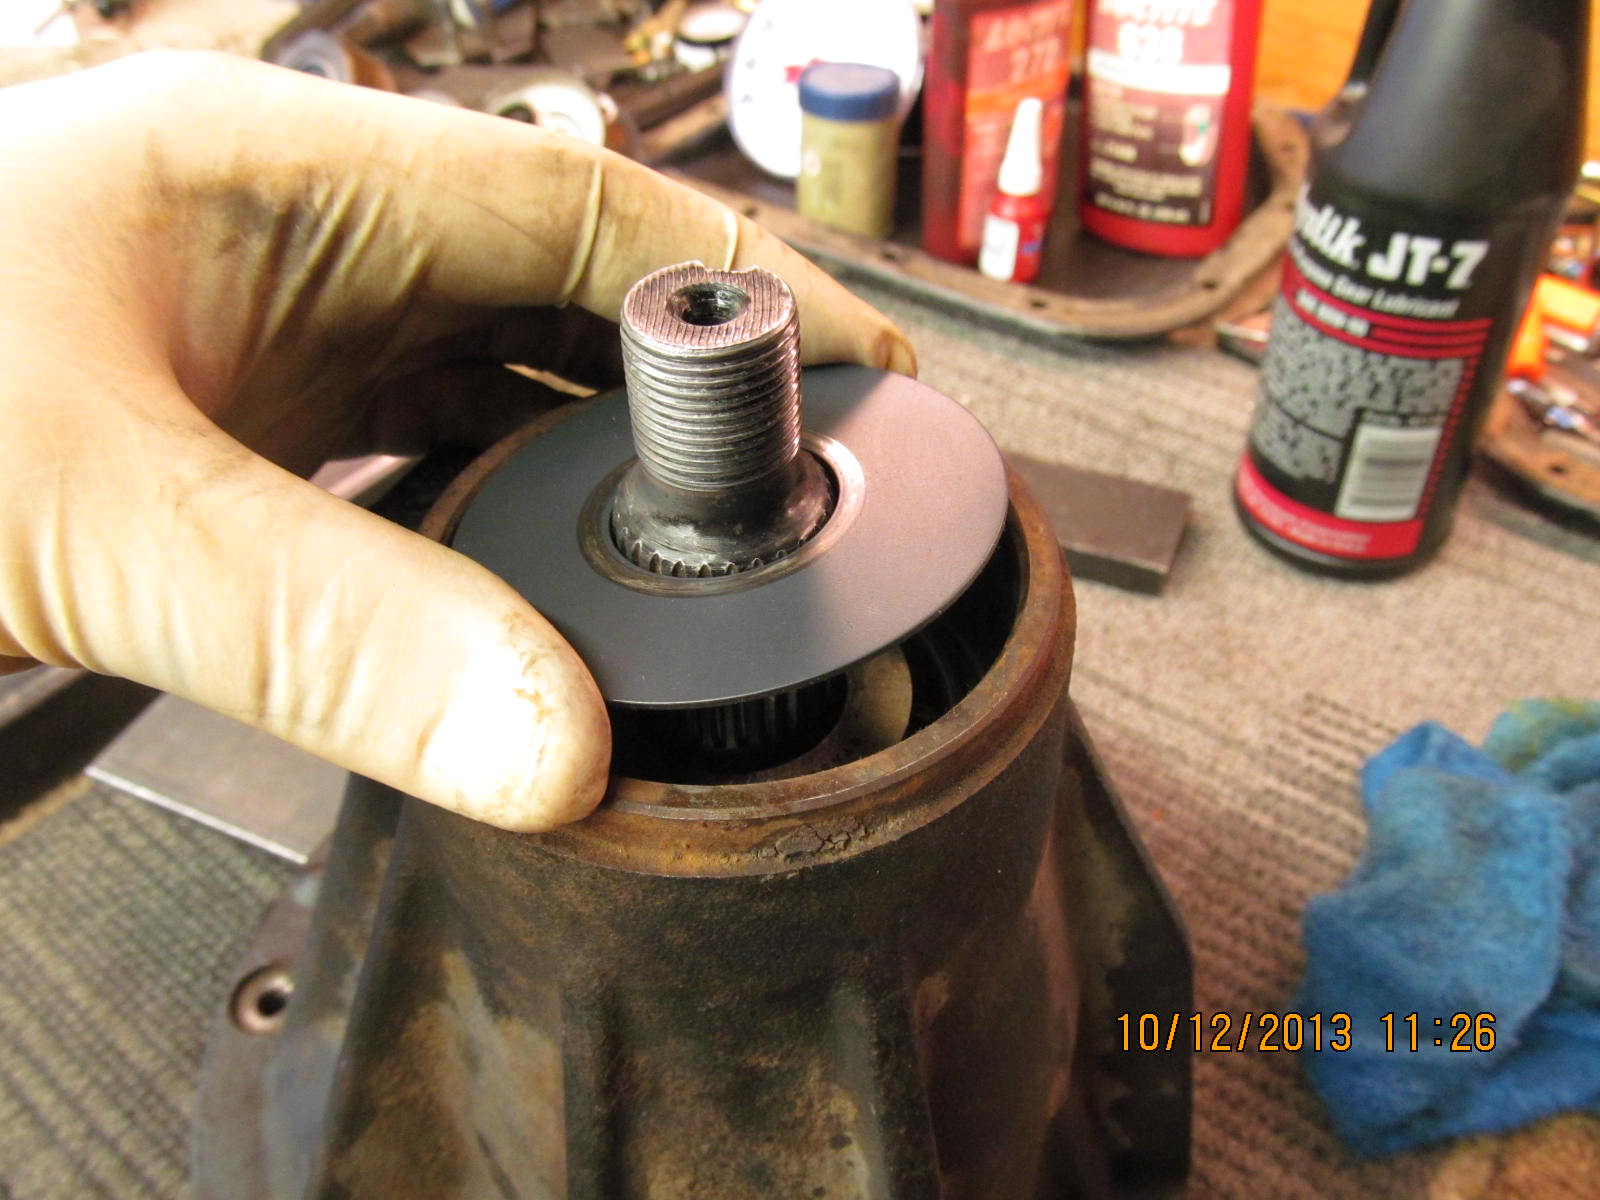
Grease is applied to the garter spring. Blue rtv is probably very much optional where you see it there but I tend to prefer it.
|
|
|

|
|
Seal is now tapped in place.
|
|
|
|
|
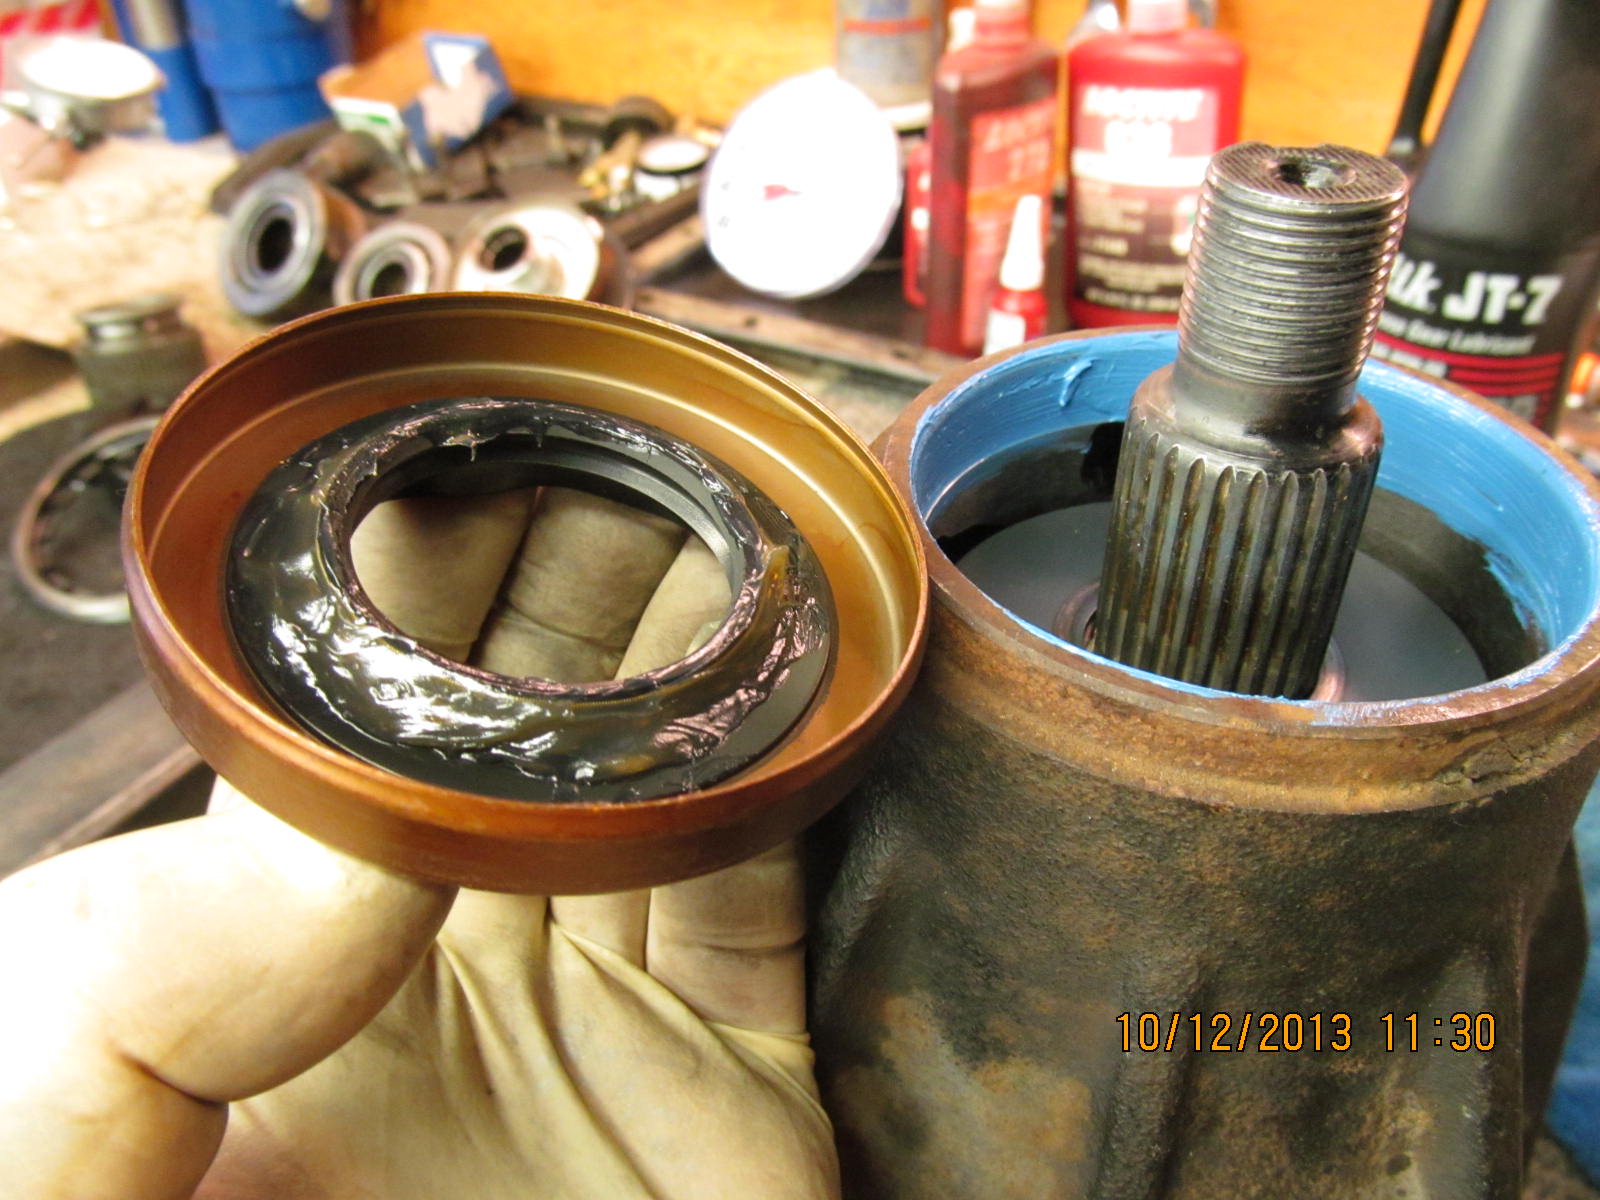
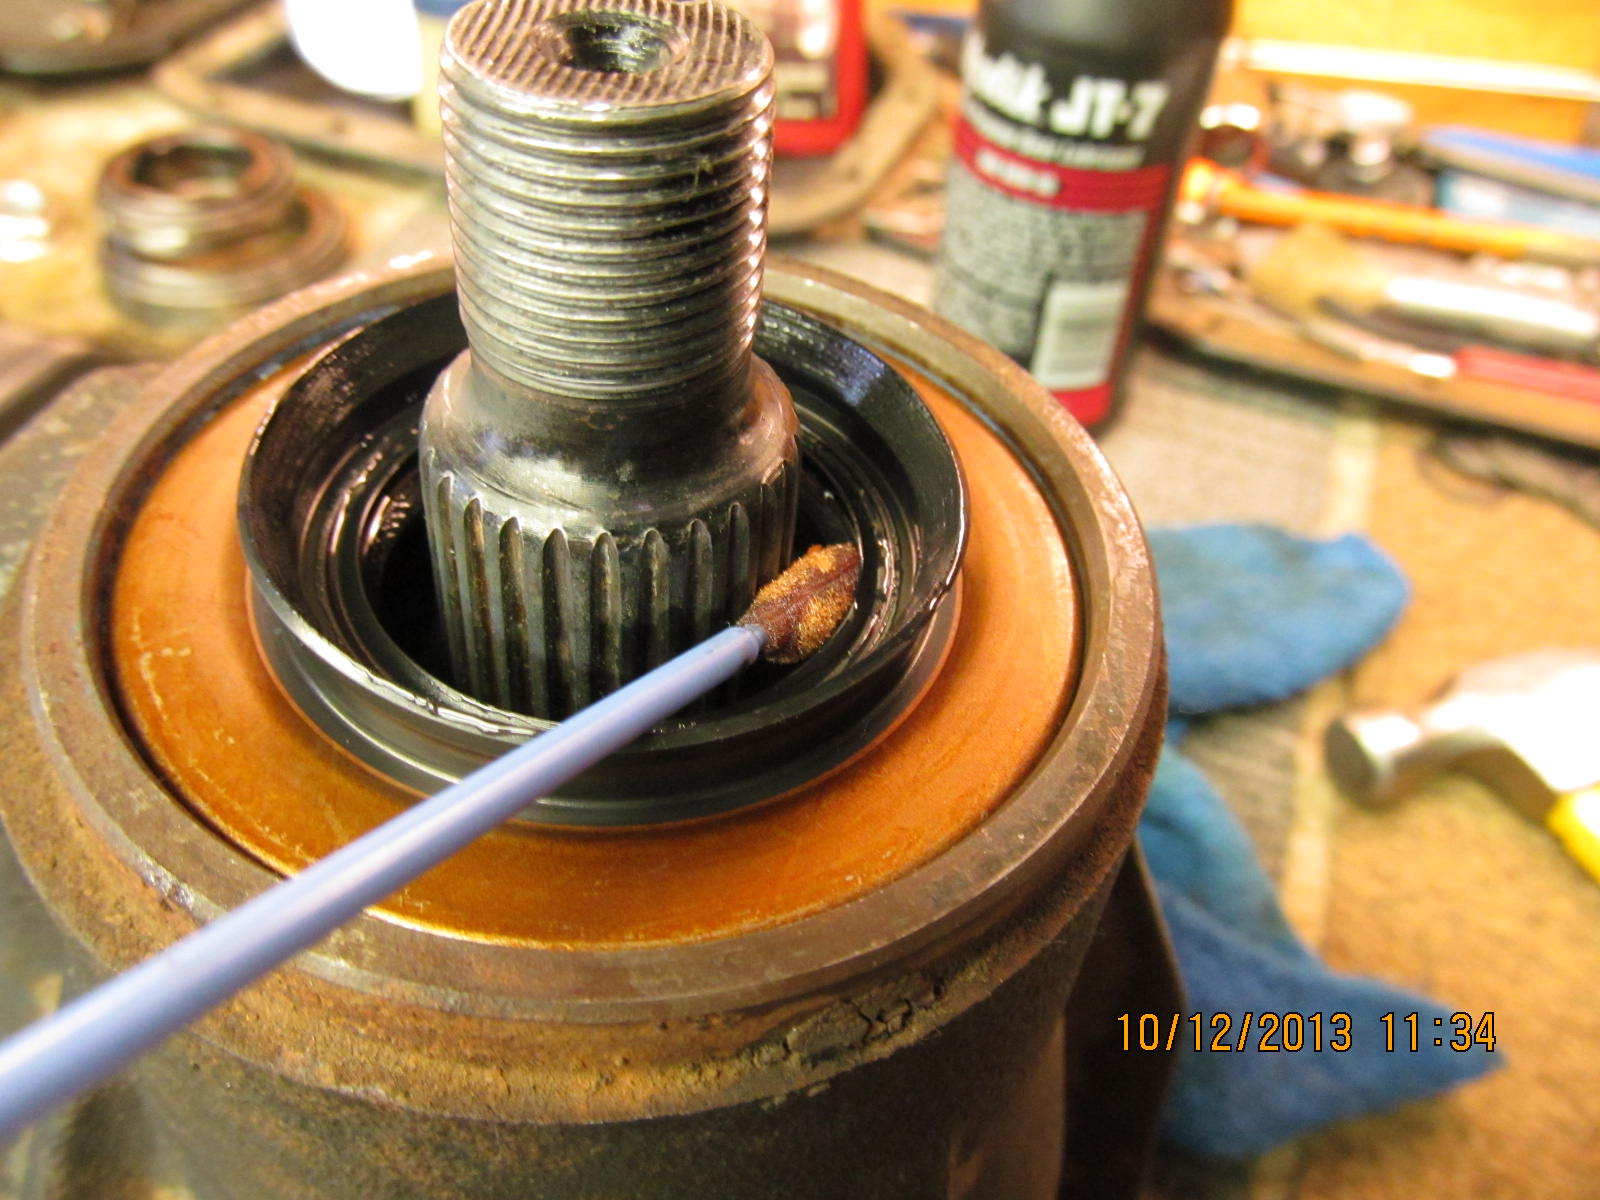
Gear oil is swabbed on all seal surfaces.
|
|
|
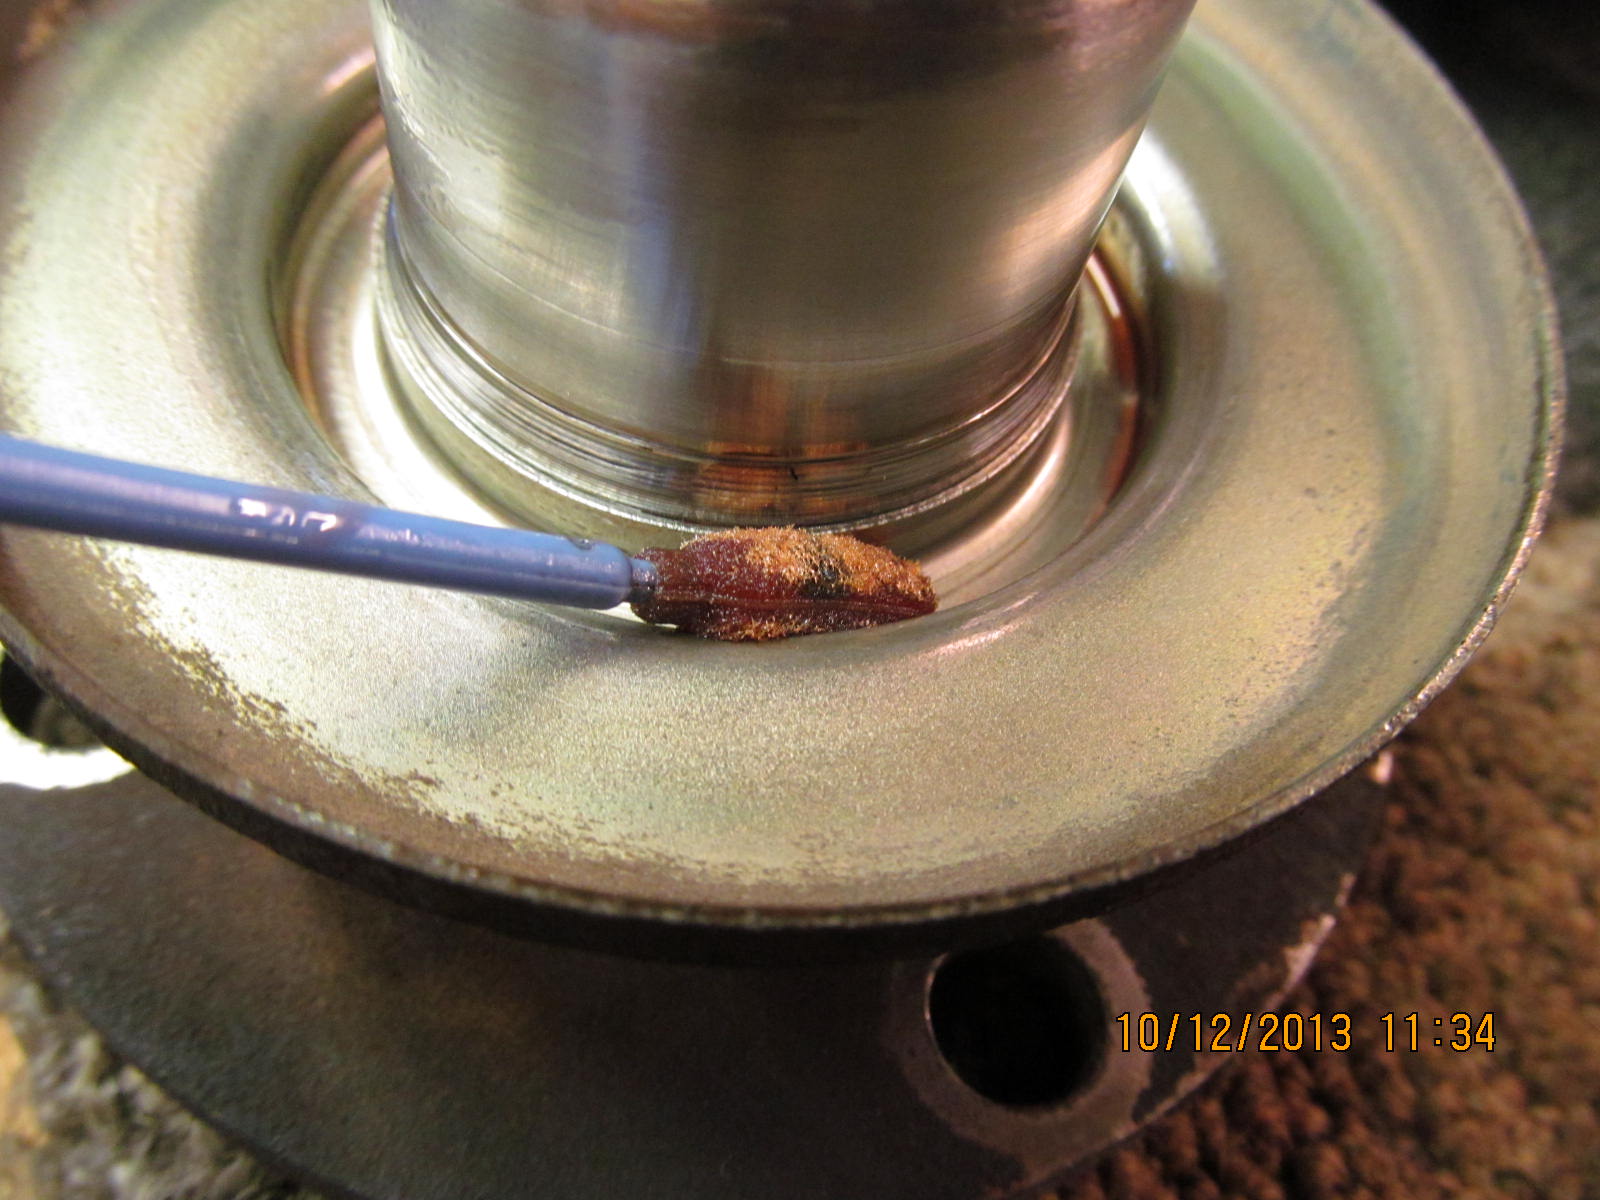
|
|
Even oil is applied here...anything I can do to reduce the seal resistance close to zero while I make PPL measurements.
|
|
|
|
|
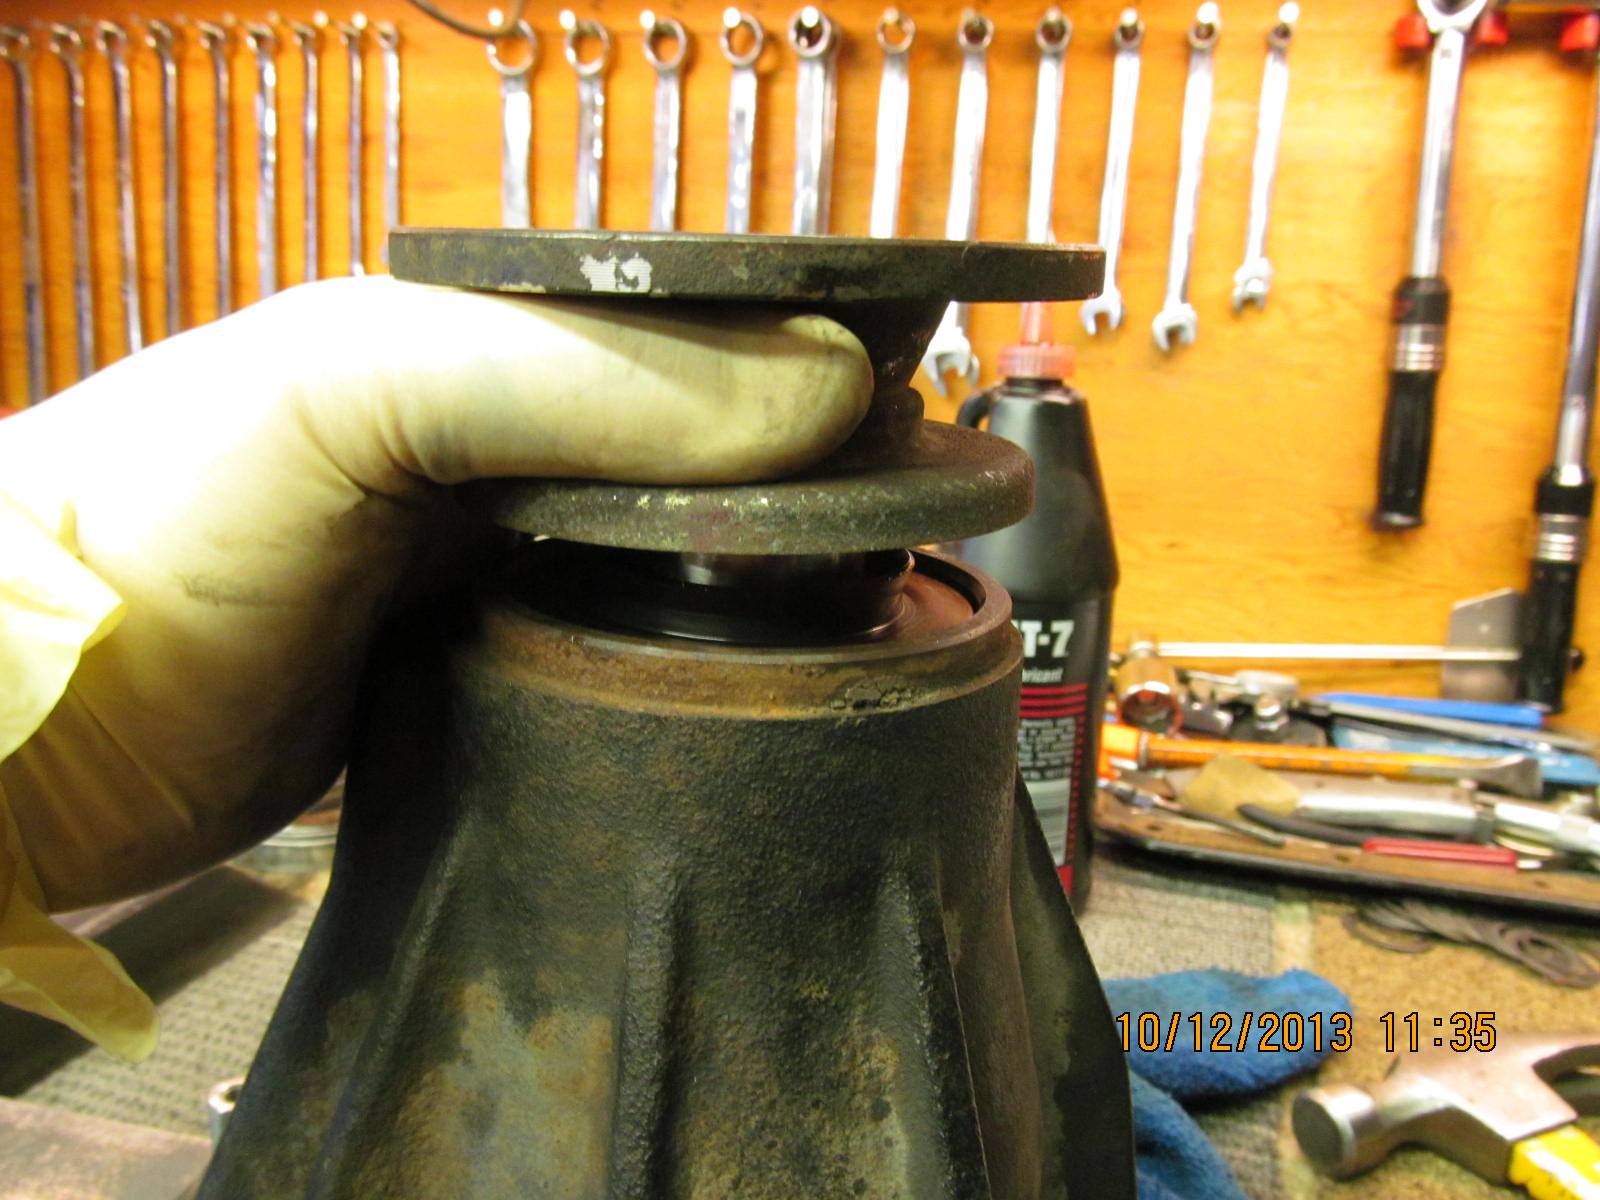
Factory flange is put in place.
|
|
|

|
|
Blue rtv and red loctite on the new nut.
|
|
|
|
Now for the final tightening. Less than 1/4 turn of the nut and all the play is gone. Have to tighten it now in very
small increments and check for a preload increase. Time consumming.
|
|
|
|
|
To equalize the inner/outer roller tensions, a soft tap tap tap as the pinion is turned is very effective.
|
|
|
|
|
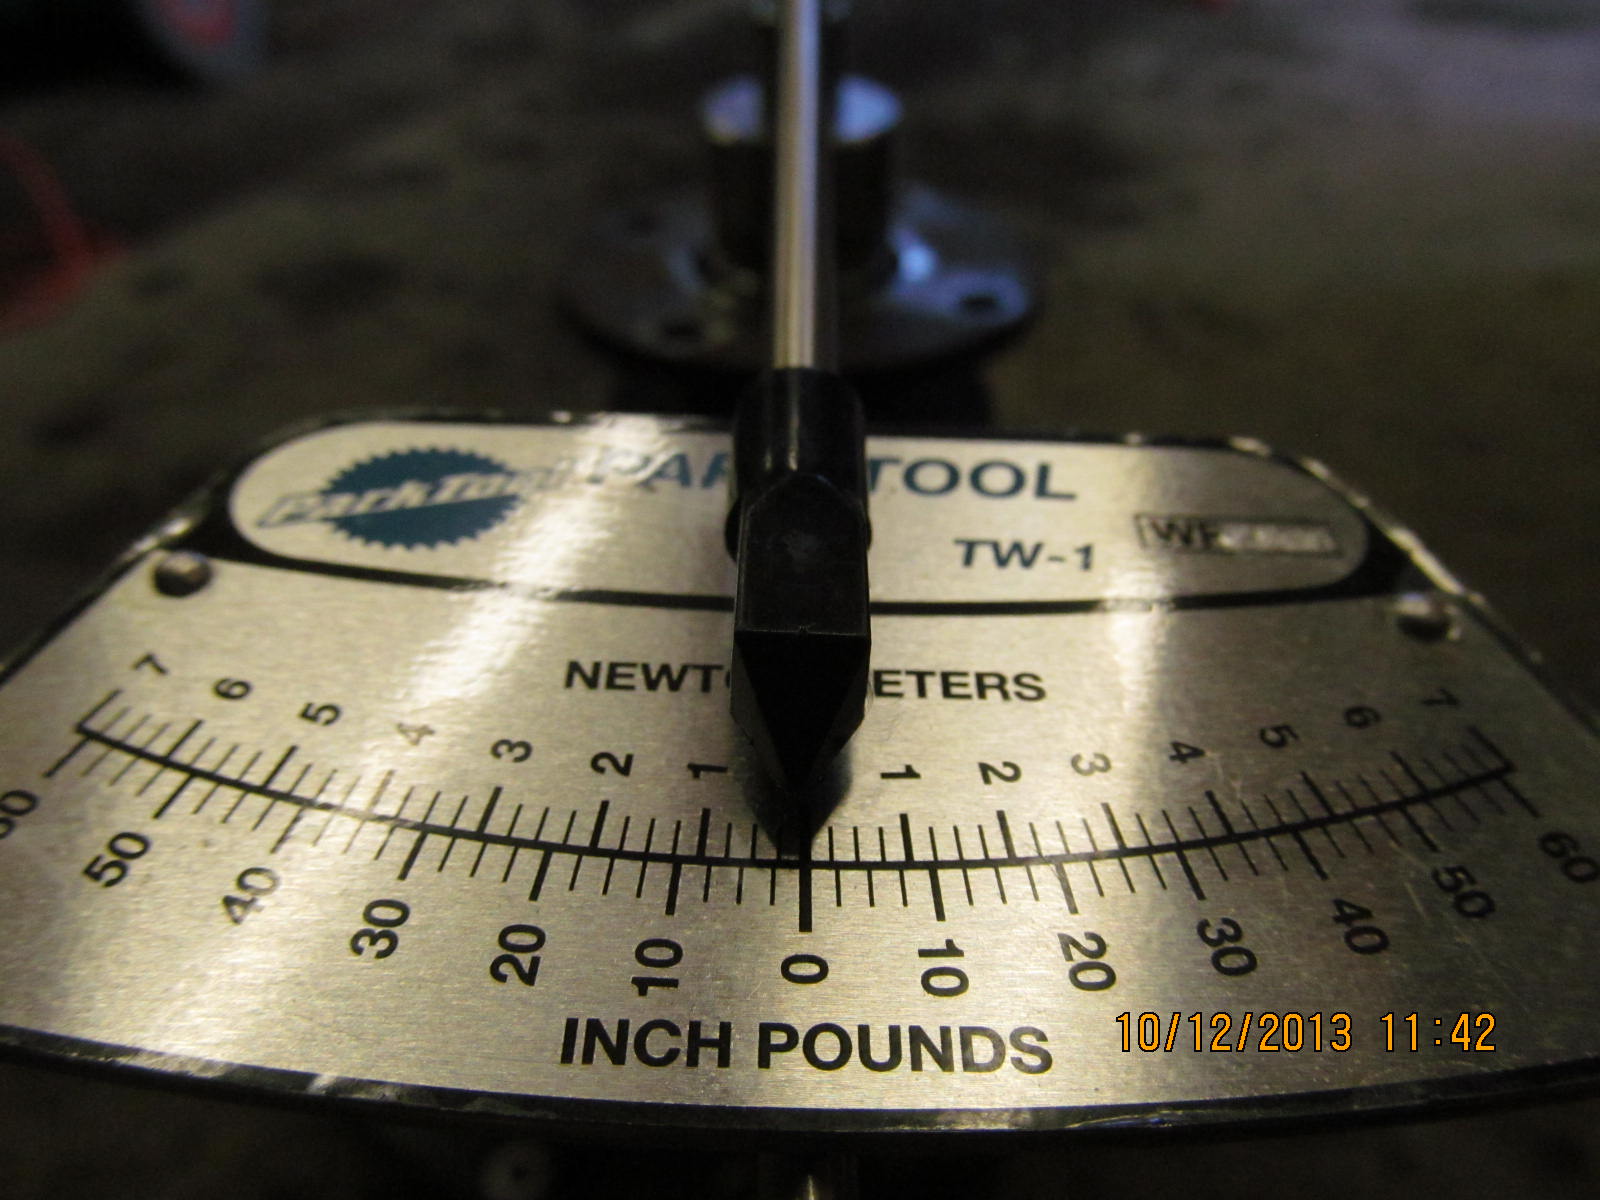
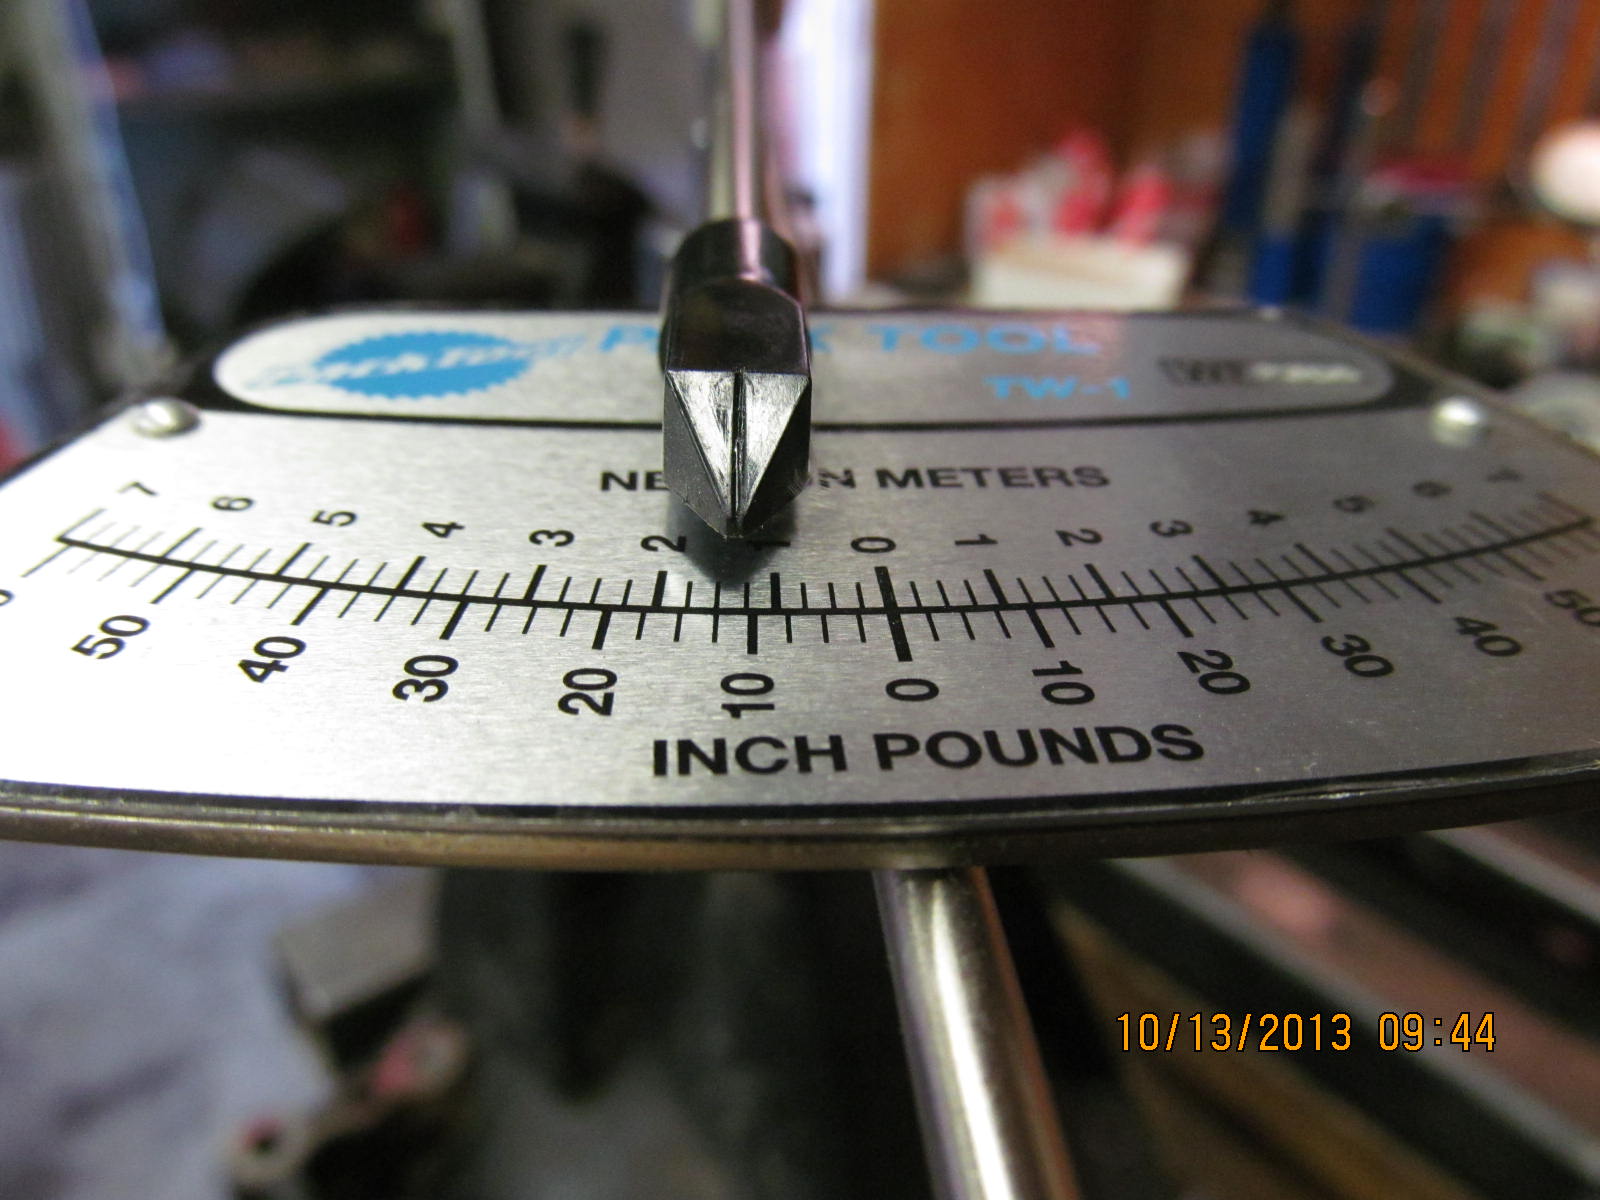
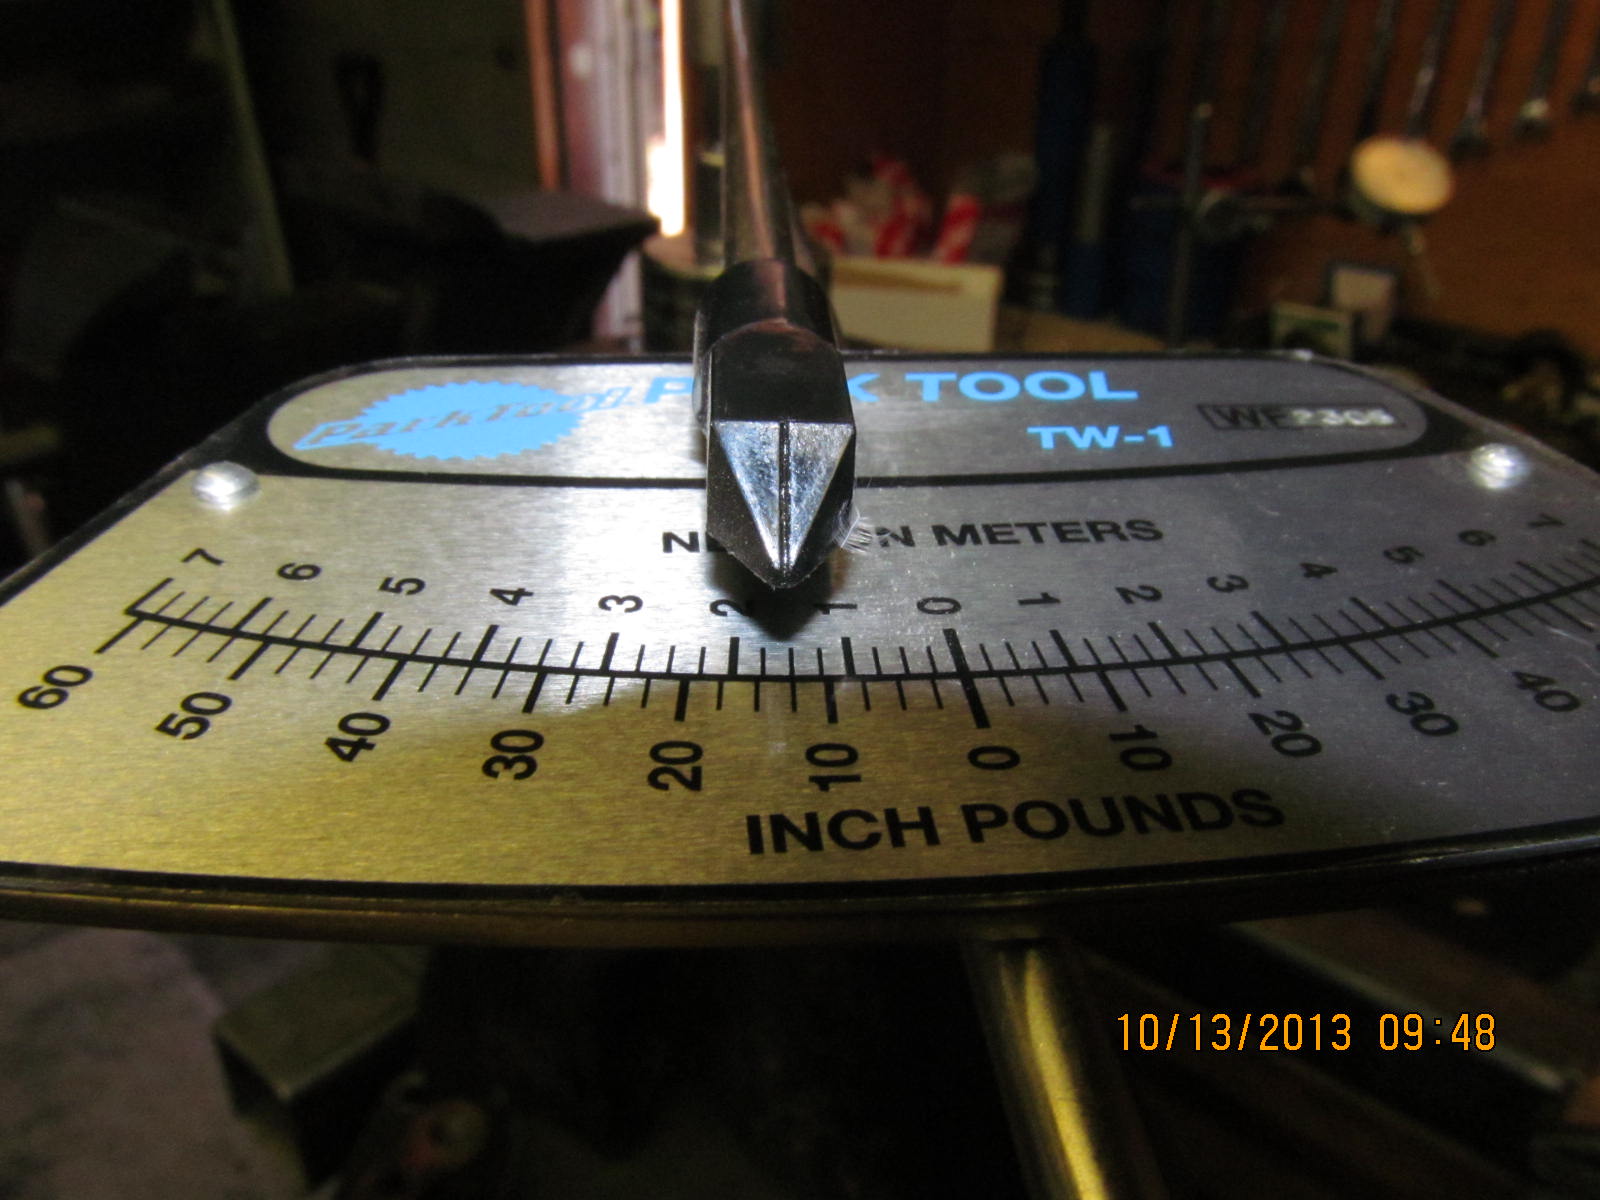
I measure about 1 inch/pound start torque.
|
|
|
|
|
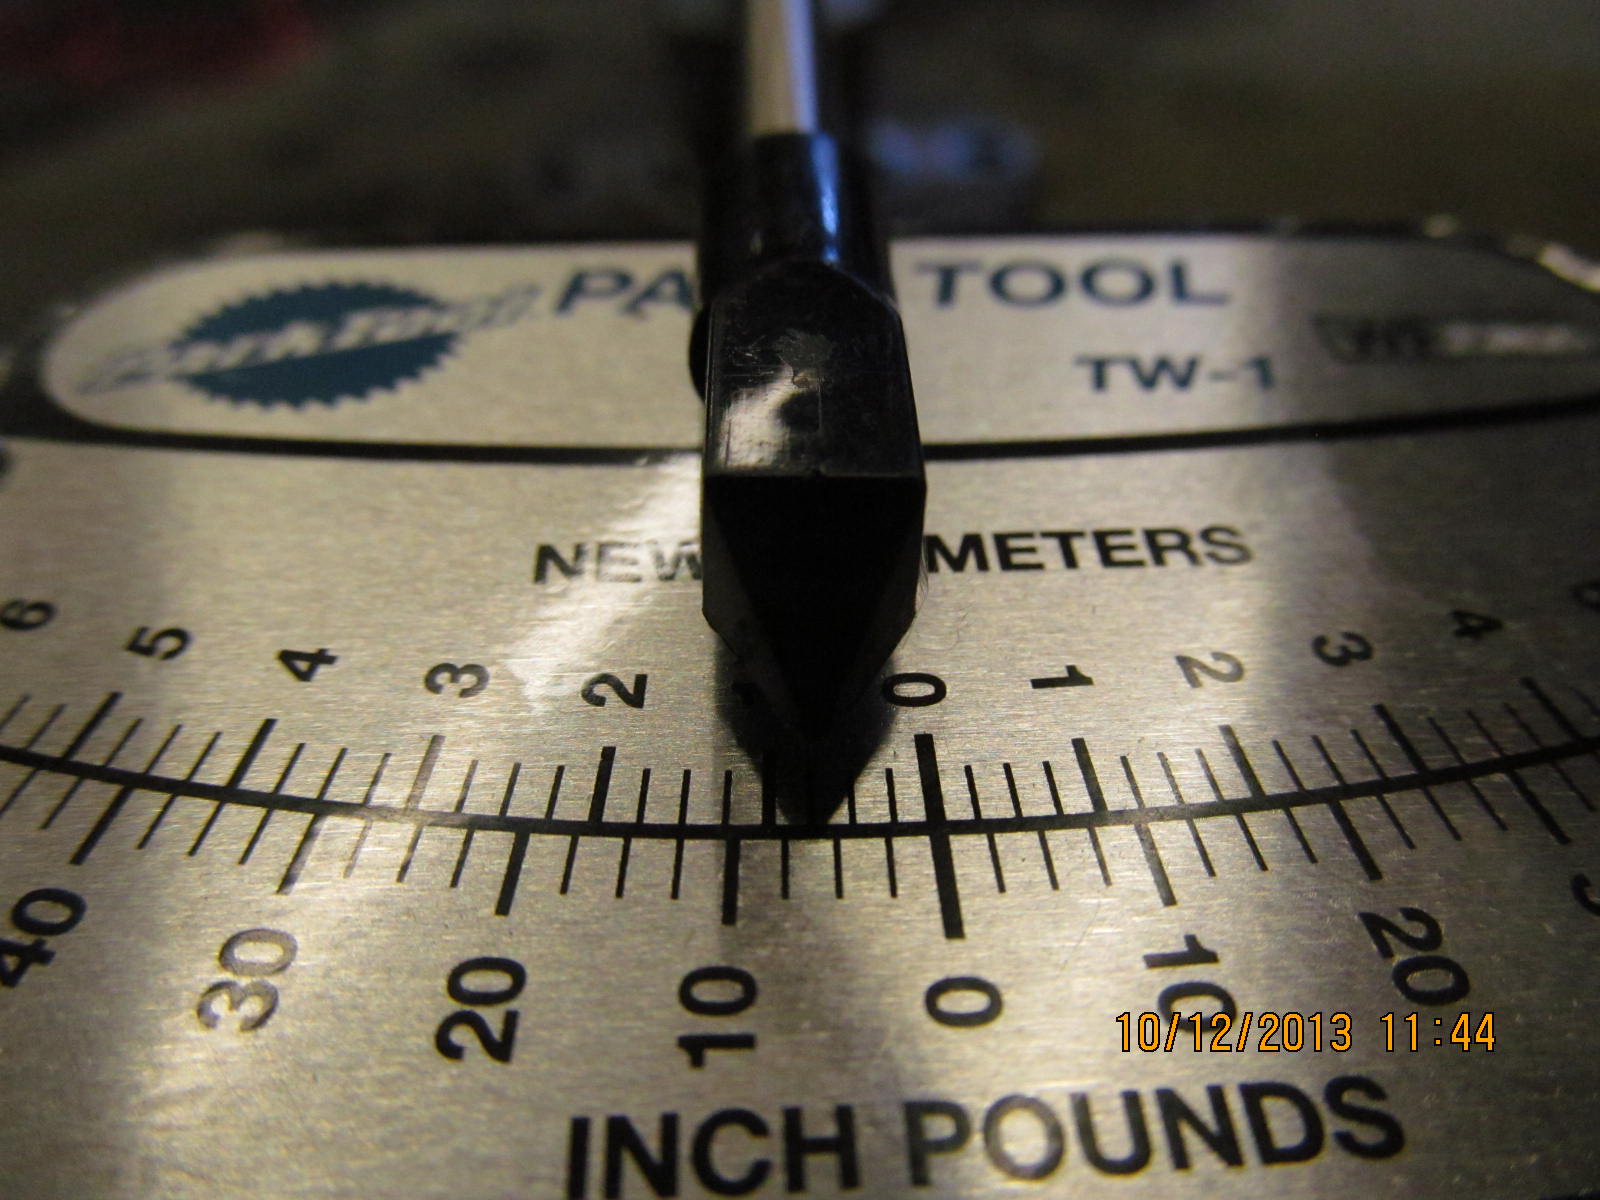
I tighten the pinion nut a smidge more and recheck...about 7 in/lb start torq.
|
|
|
|
|
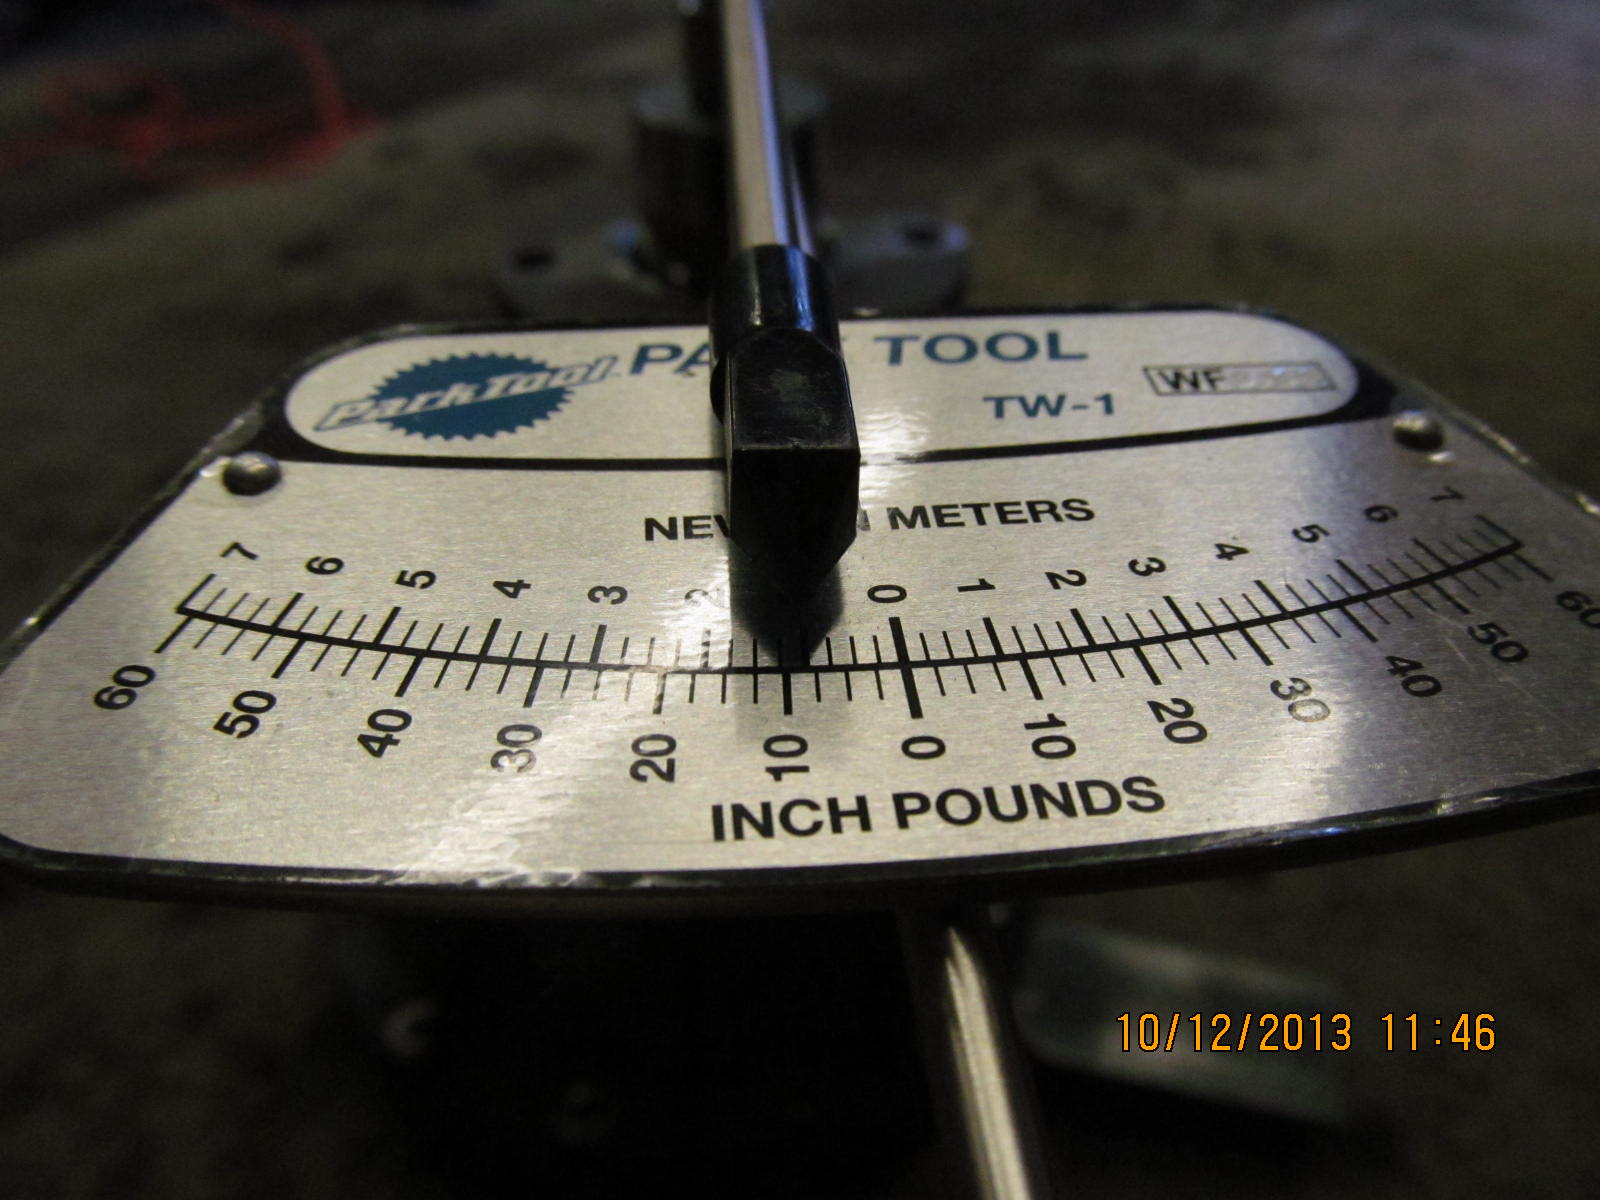
Just a smidge more on the nut and now I measure a nice 9 or 10 in/lb start.
|
|
|
|
|
........................
|
|
|
|
|
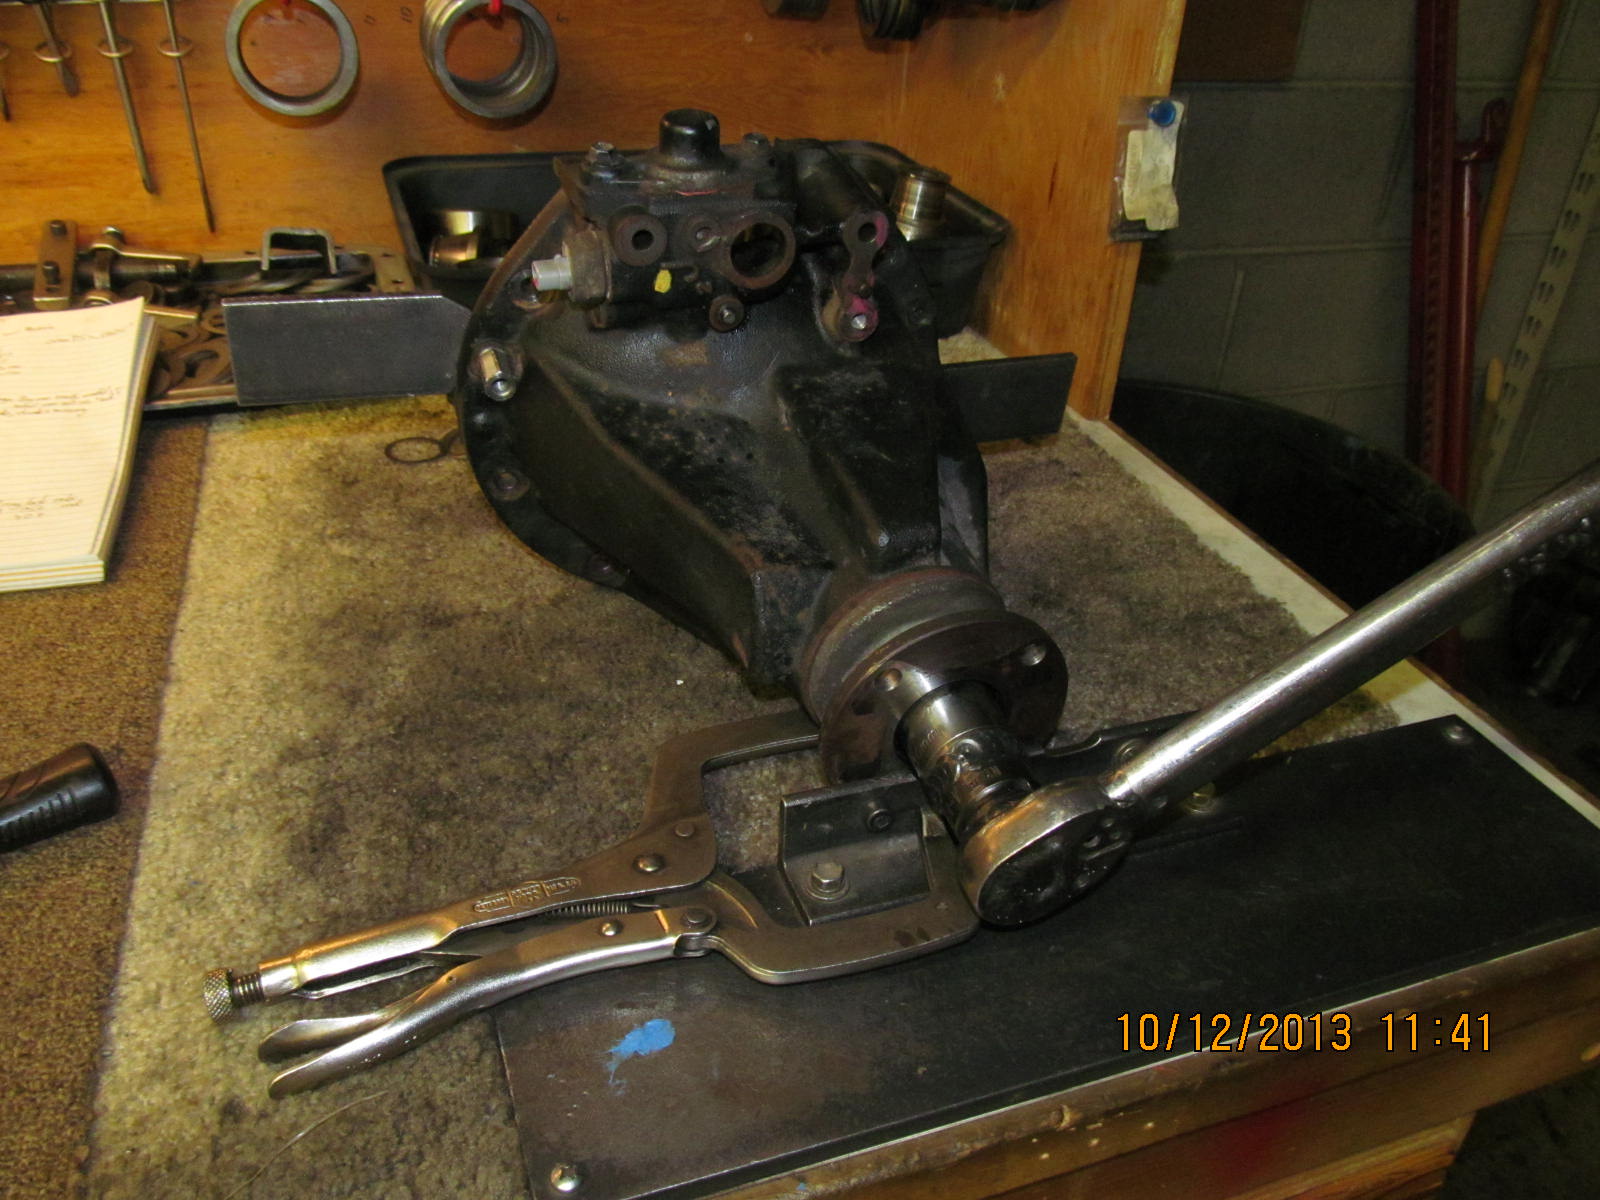
DING! and this end is done.
|
|
|
|
The sleeve lock compound has had 24 hours to cure so now this end can be assembled. I am very careful to make sure
the threads are in the groove properly.
|
|
|
|
I use the rubber end to smack the bearing cap down. If it makes a nice solid landing sound then I know the
threads are in alignmment.
|
|
|
|
|
Now the 4 bolts can be tightened to 75 ft/lb. The wheel adjusters should still turn freely with just finger pressure.
|
|
|
|
|
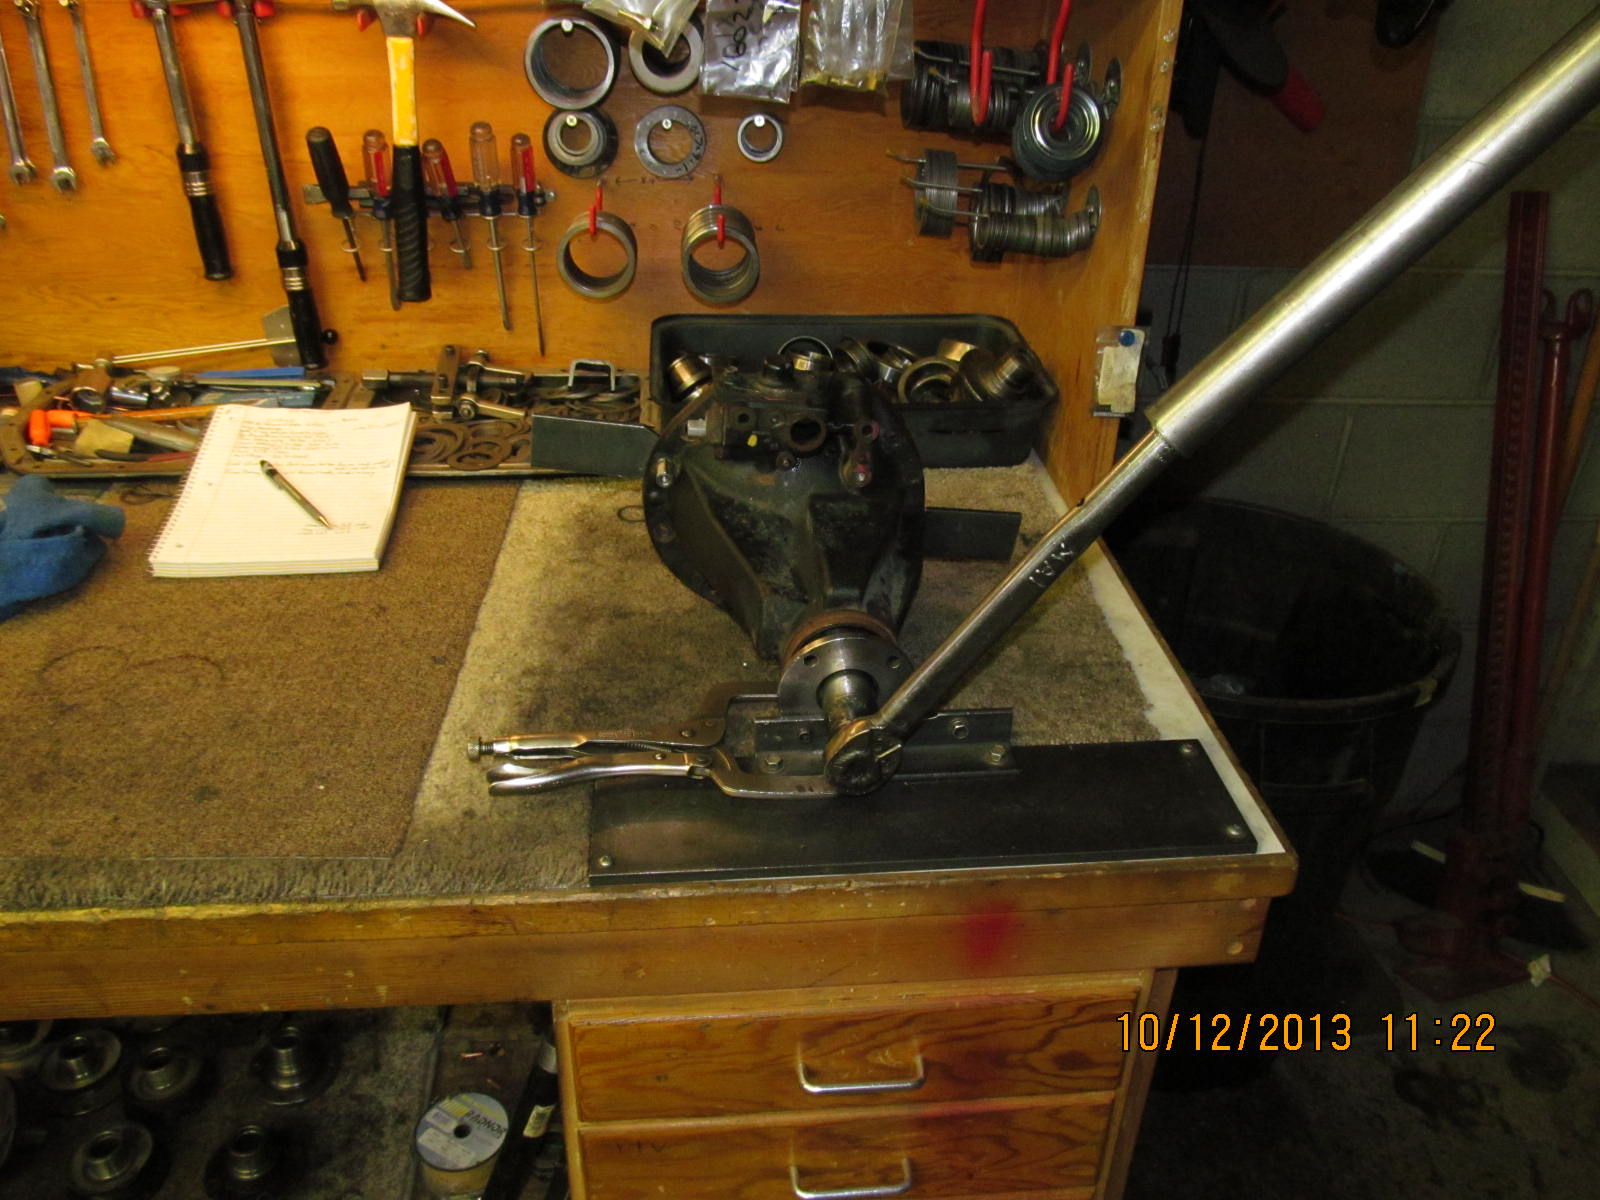
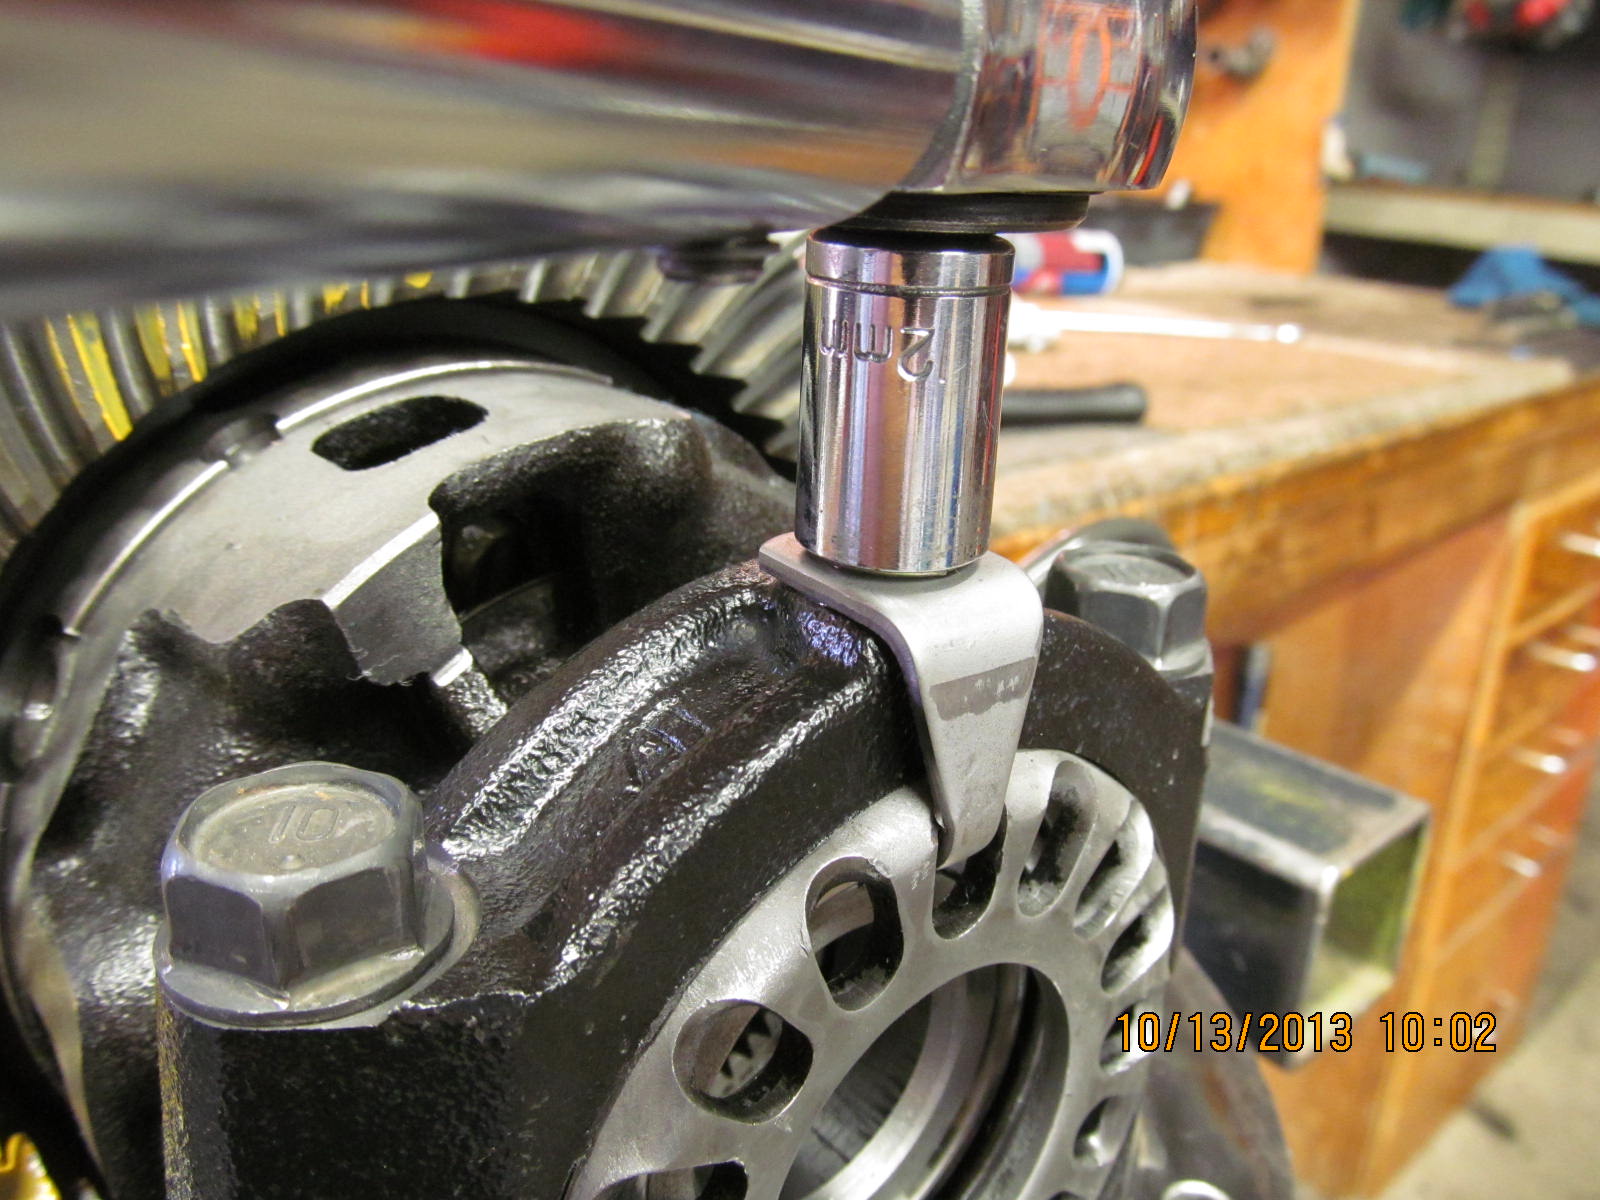
Rapping here on the 4 corners while turning the pinion/ring gear will equalize tensions nicely.
|
|
|
|
|
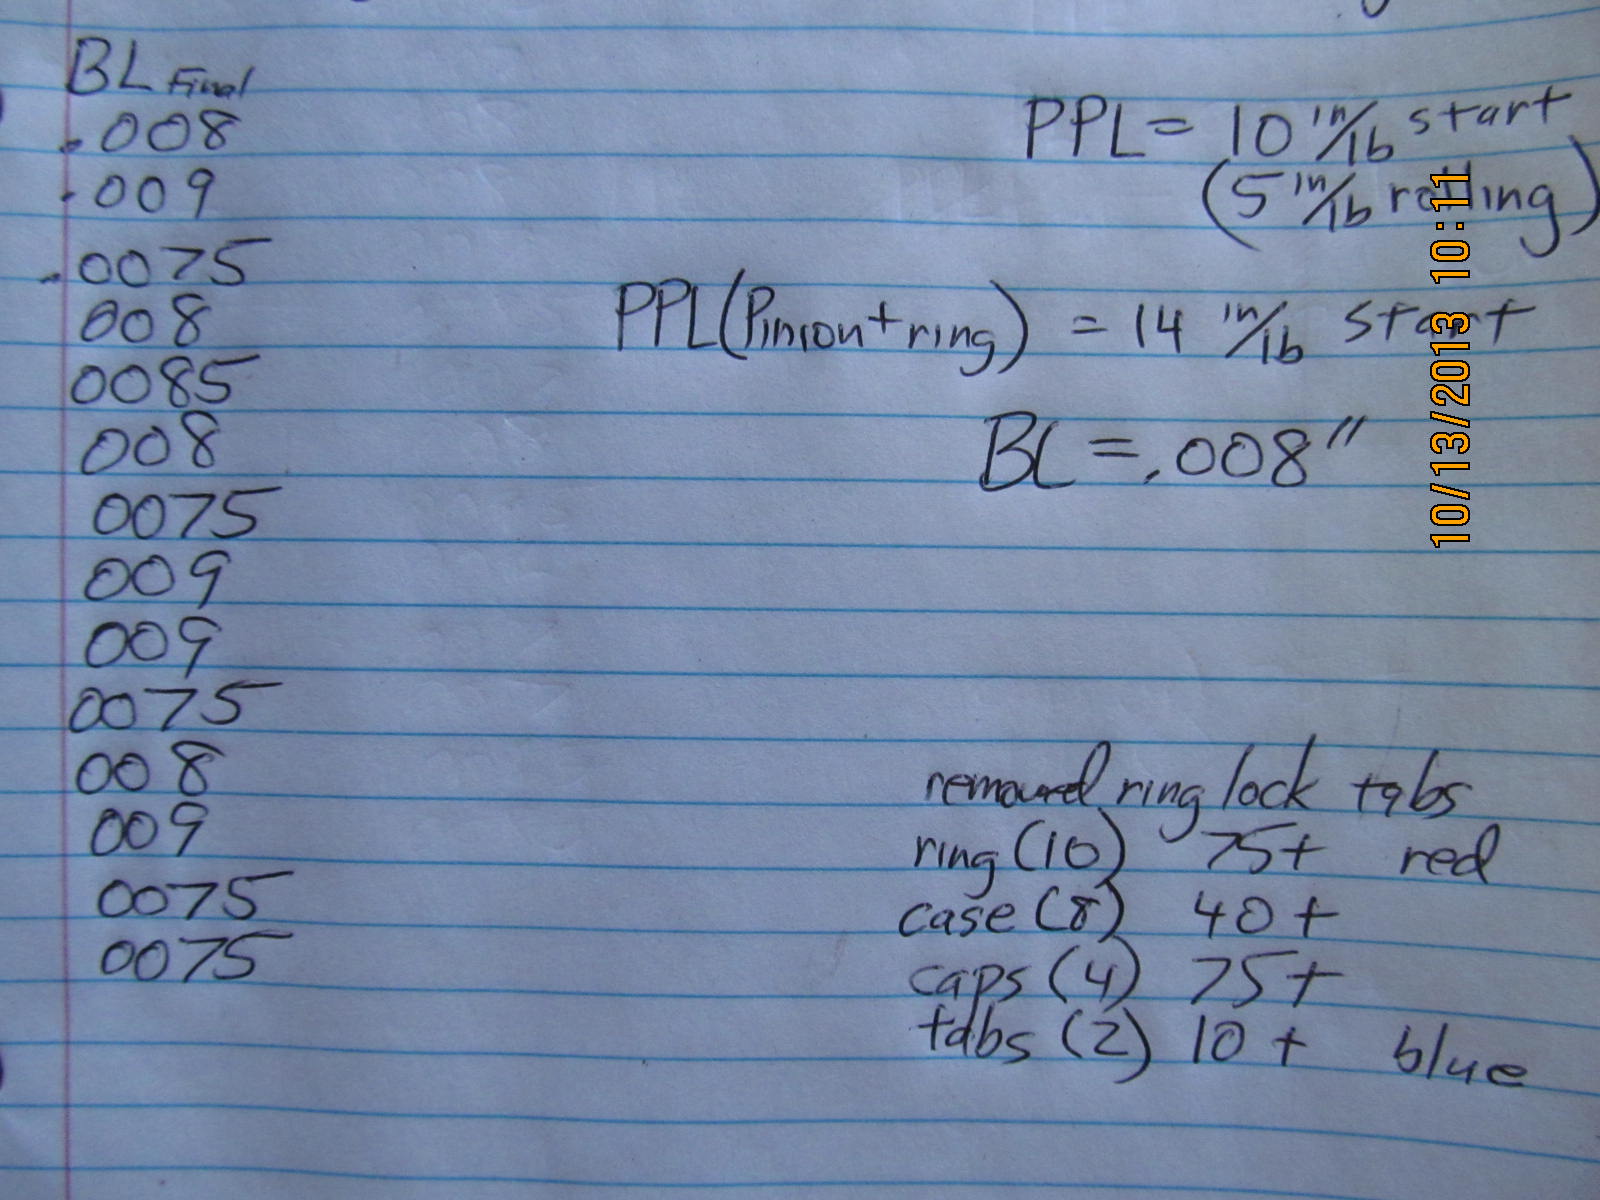
Backlash is guided into spec while the wheel adjusters are tightened up a little at a time.
|
|
|
|
|
I'm seeing 1 or 2 inch/pound increase due to the carrier bearings so far...
|
|
|
|
|
Let's tighten this 1 more notch...
|
|
|

|
|
...and tighten this side 1 notch.
|
|
|
|
|
Now I'm seeing 14 in/lb and this is perfectly adequate for a daily driver.
|
|
|
|
|
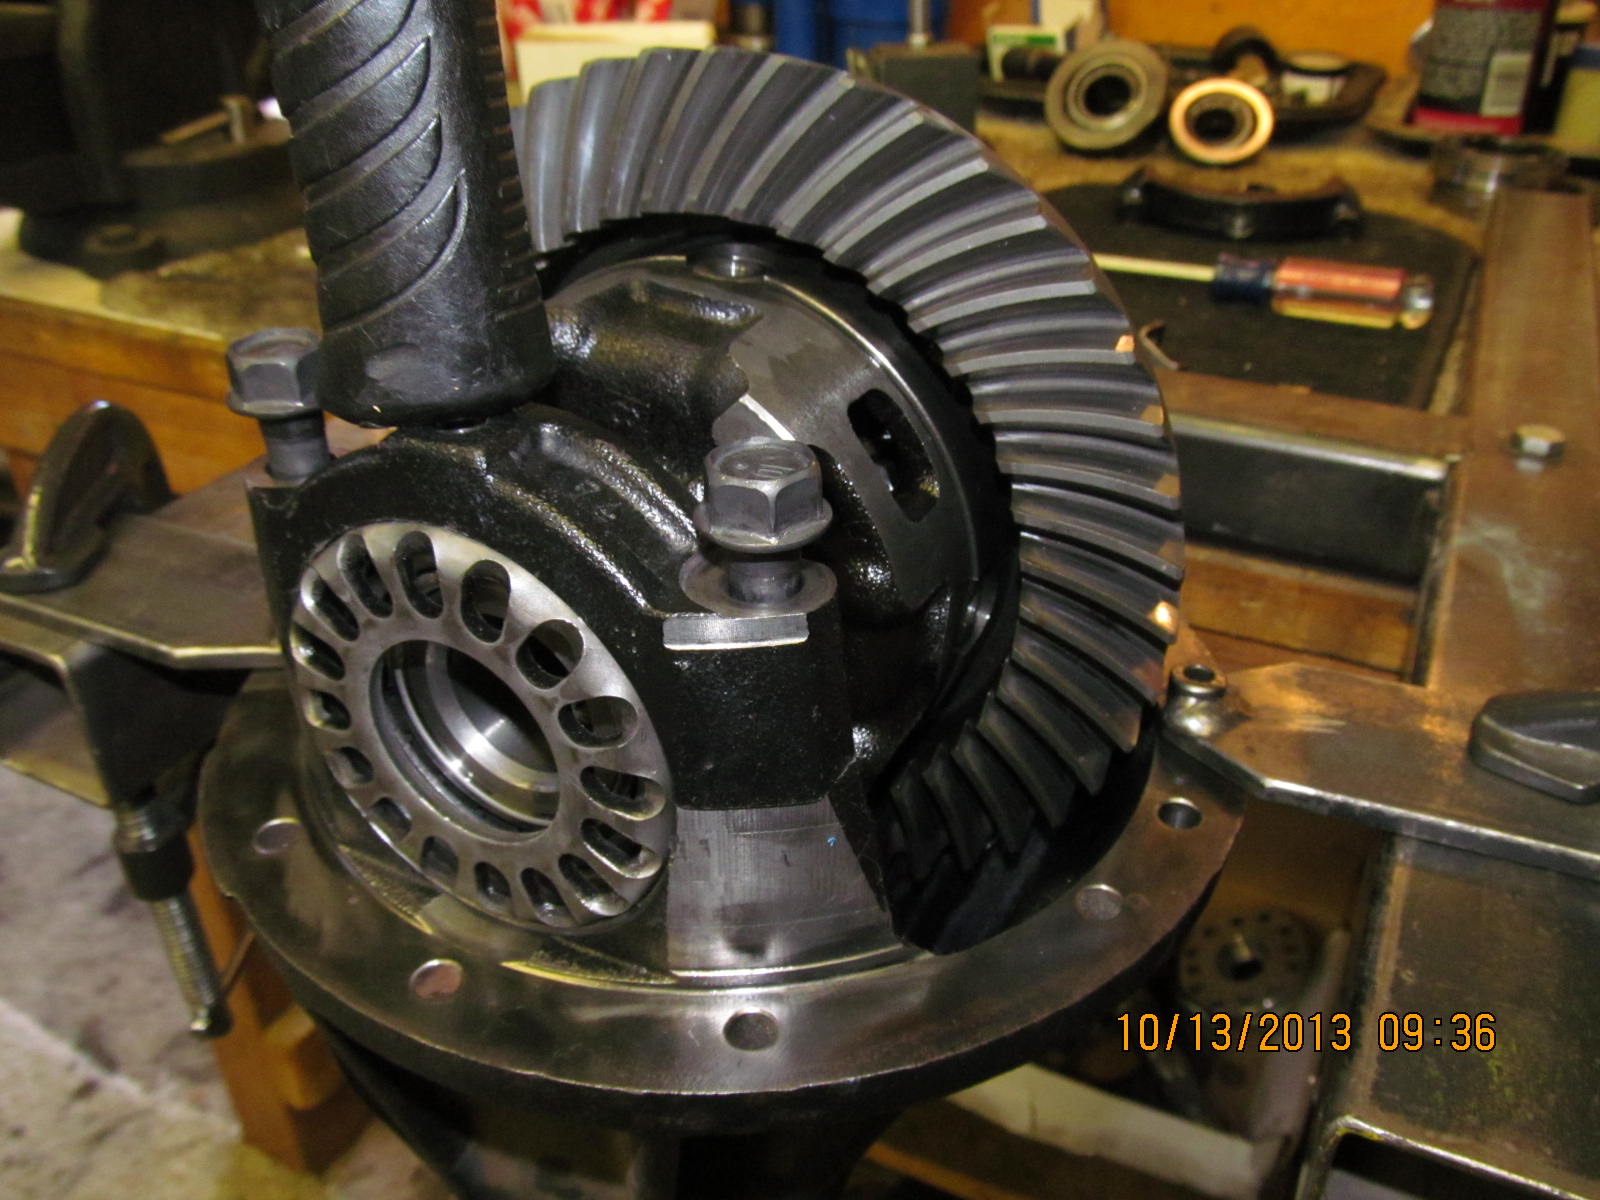
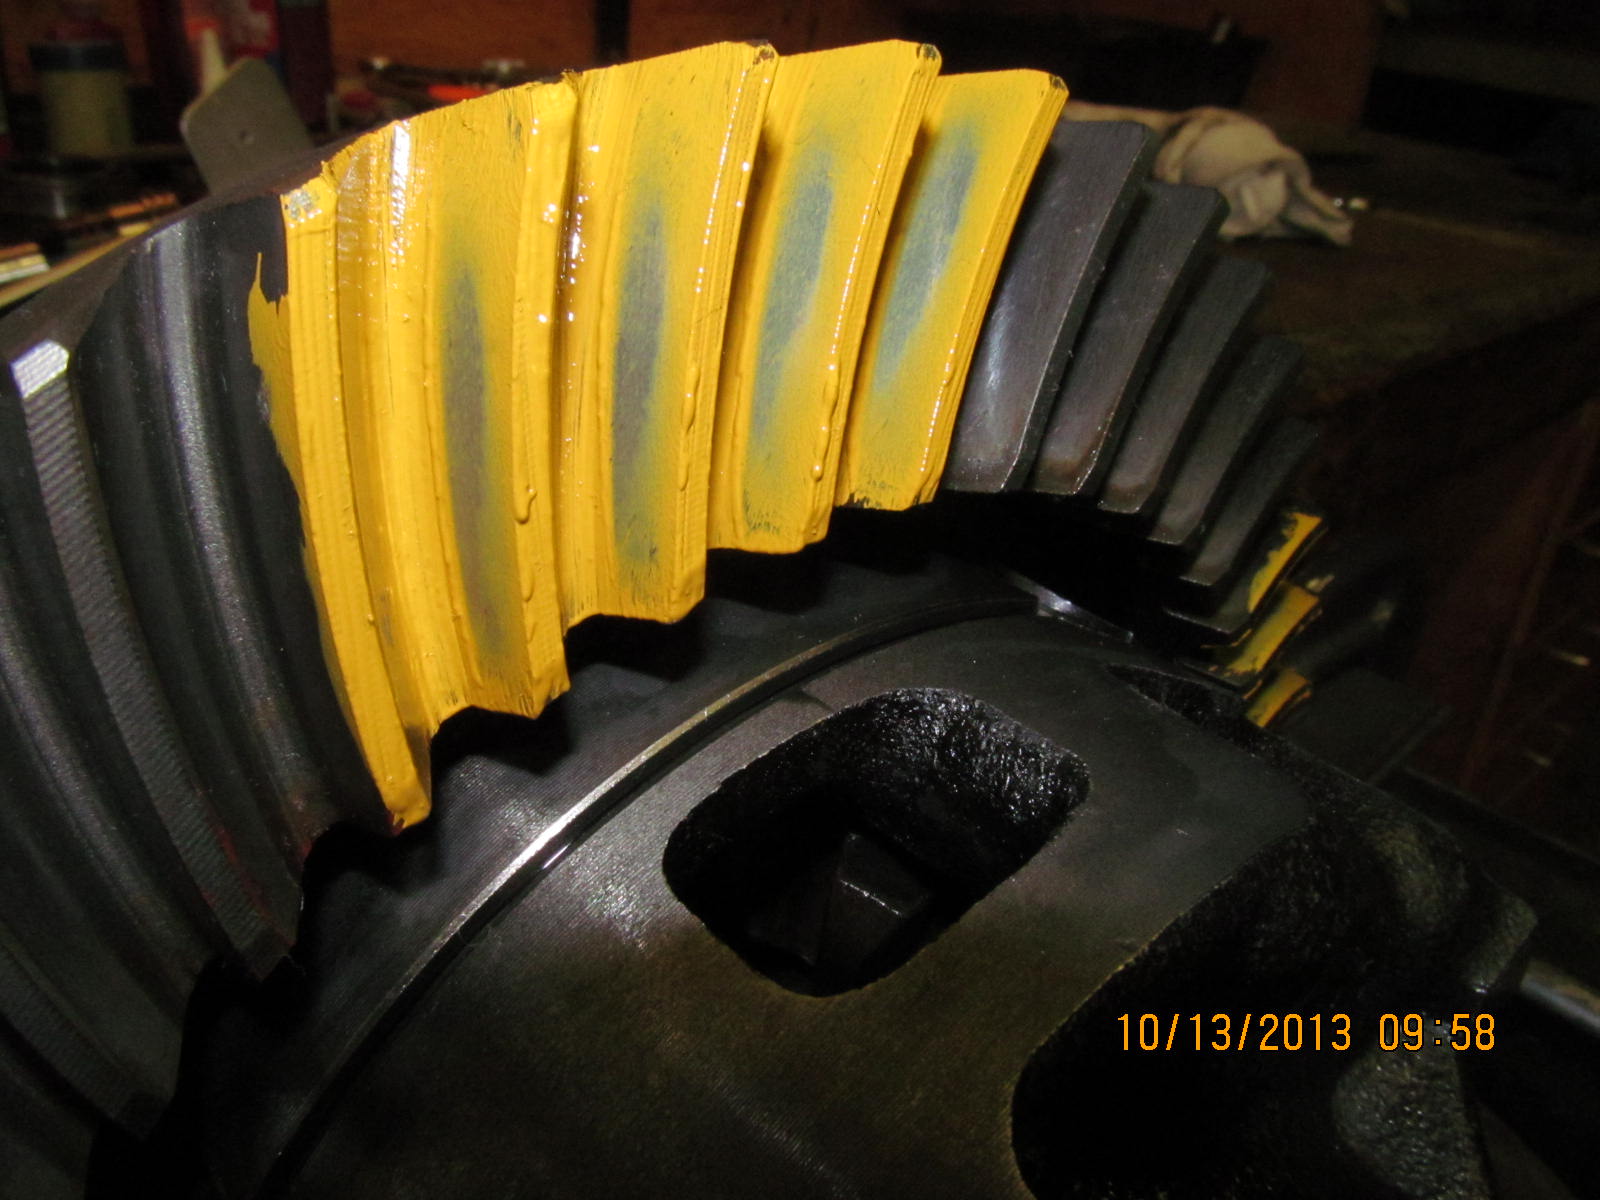
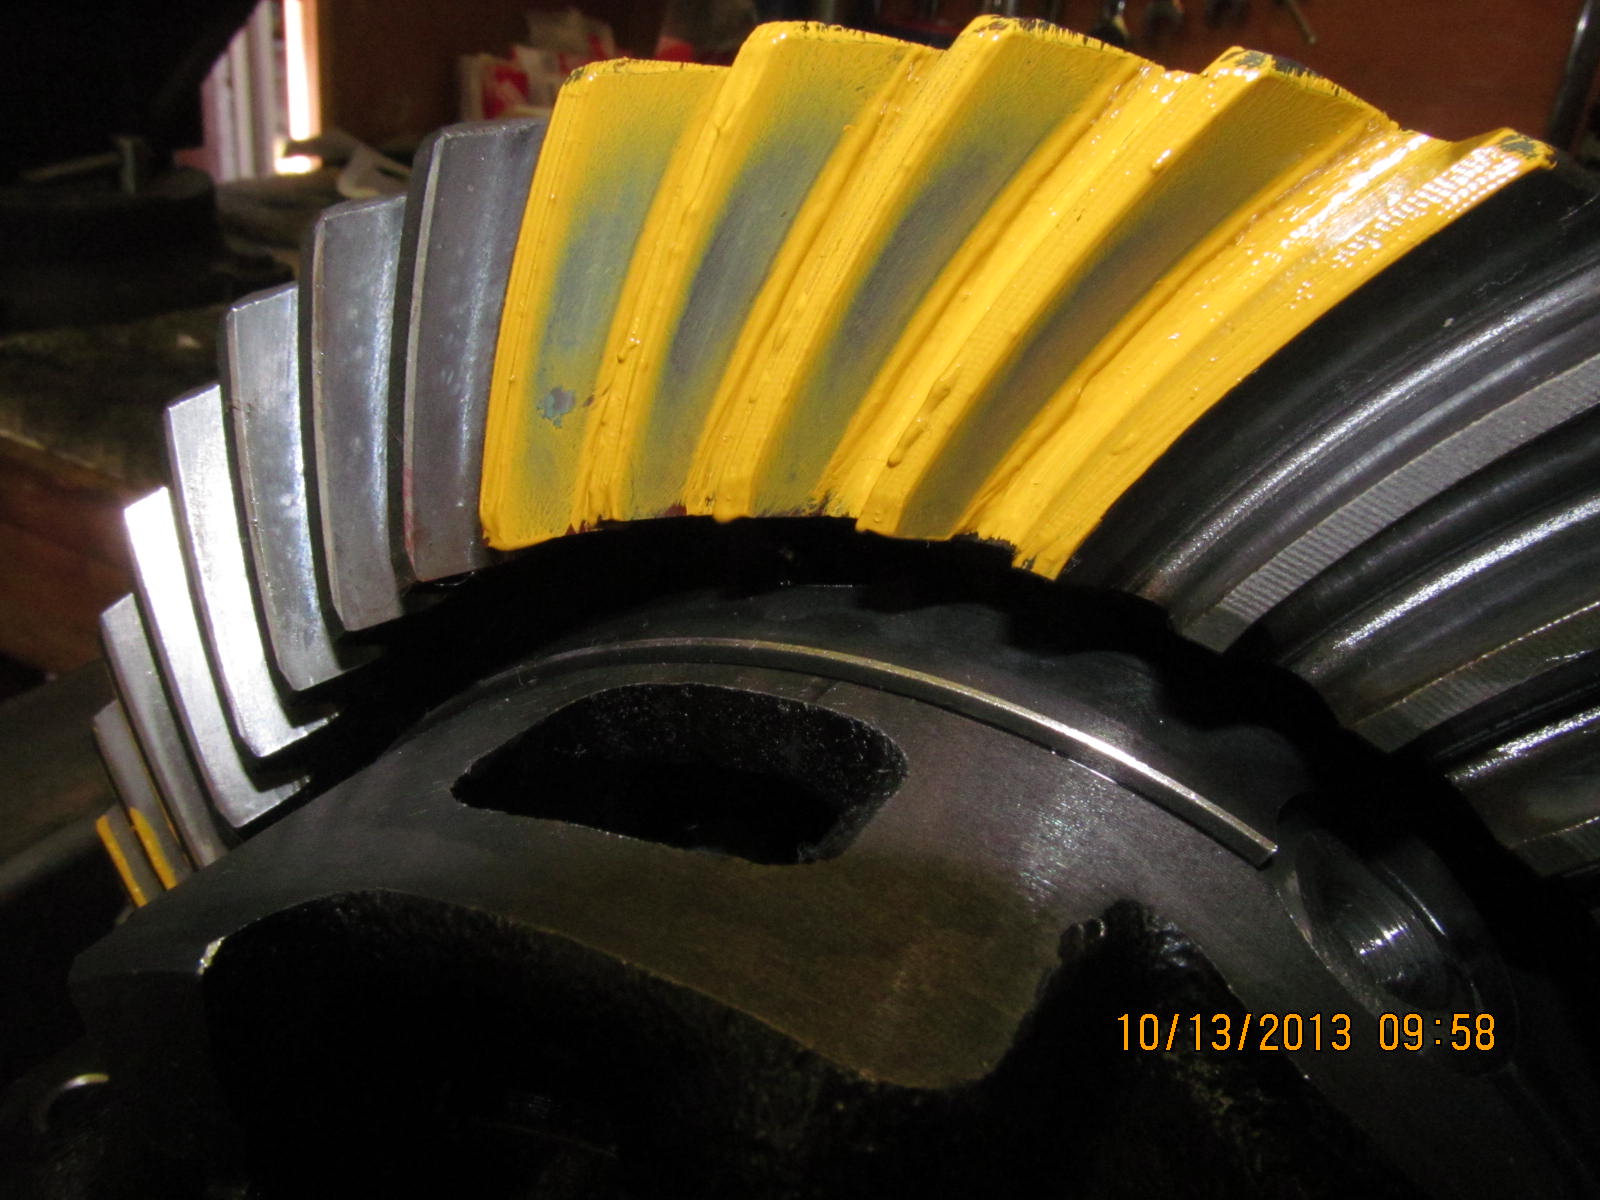
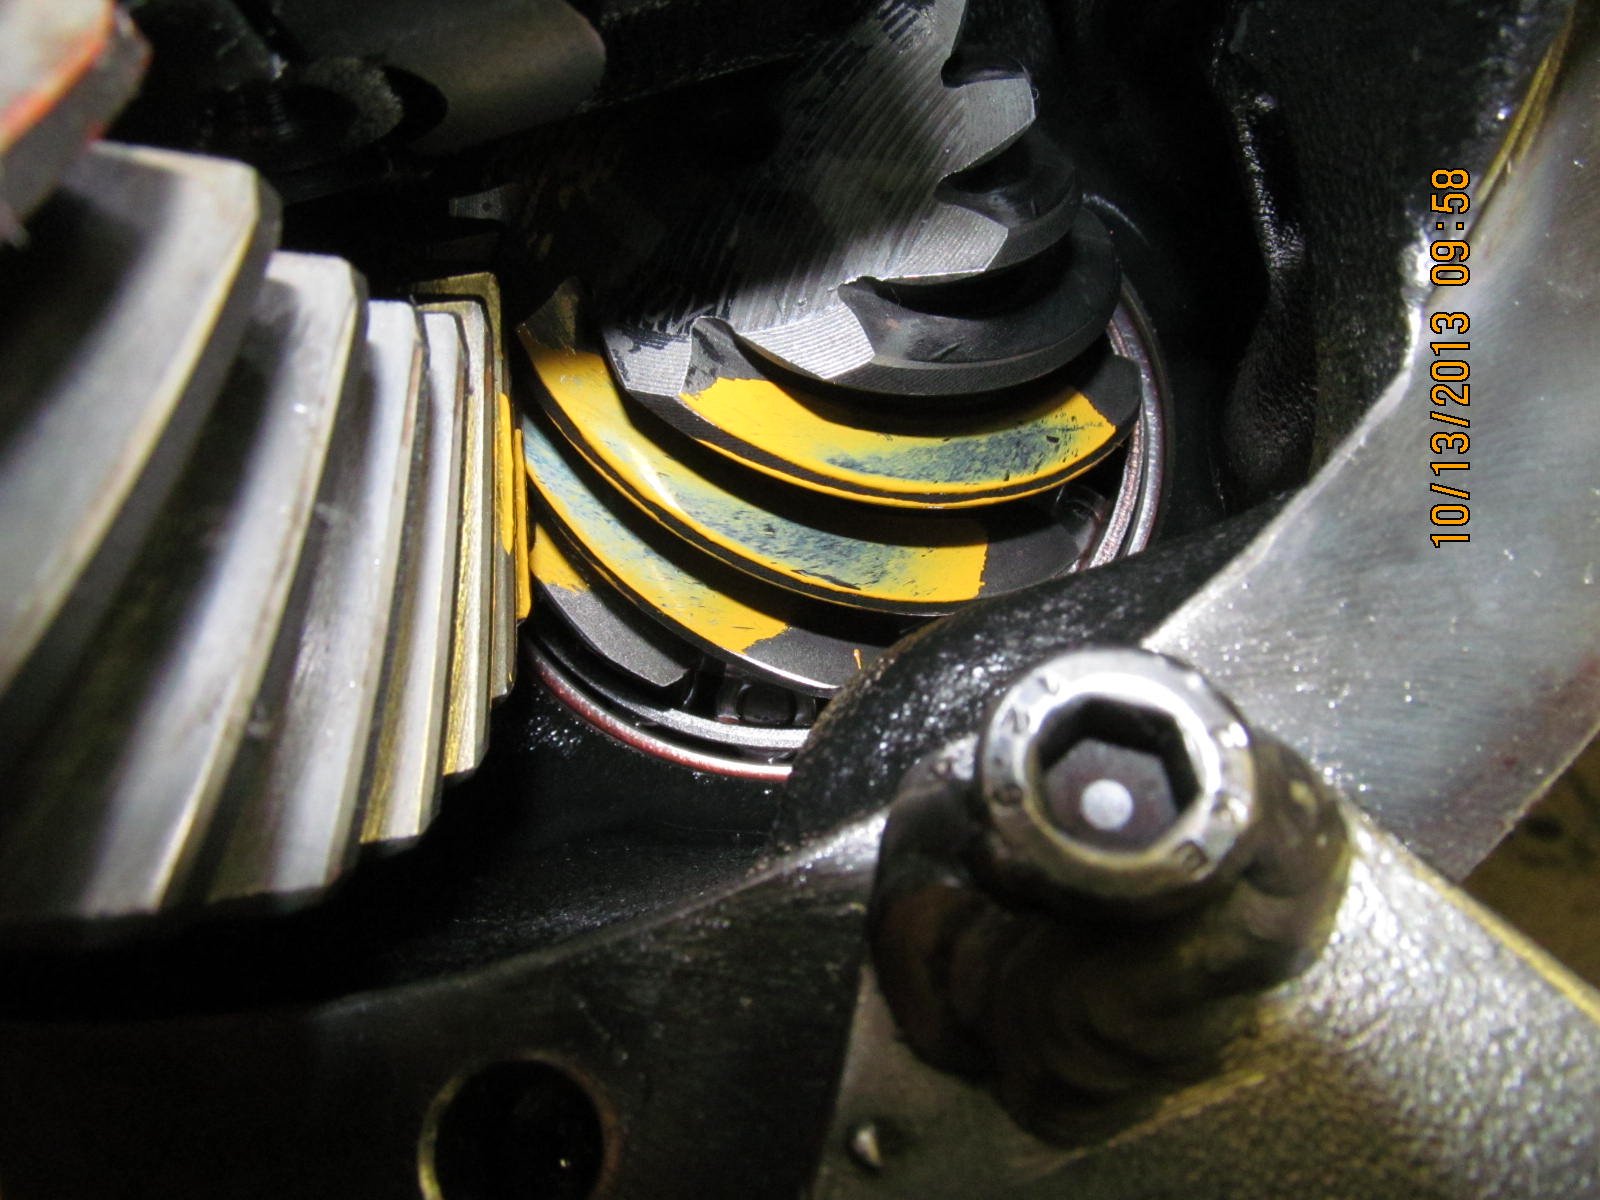
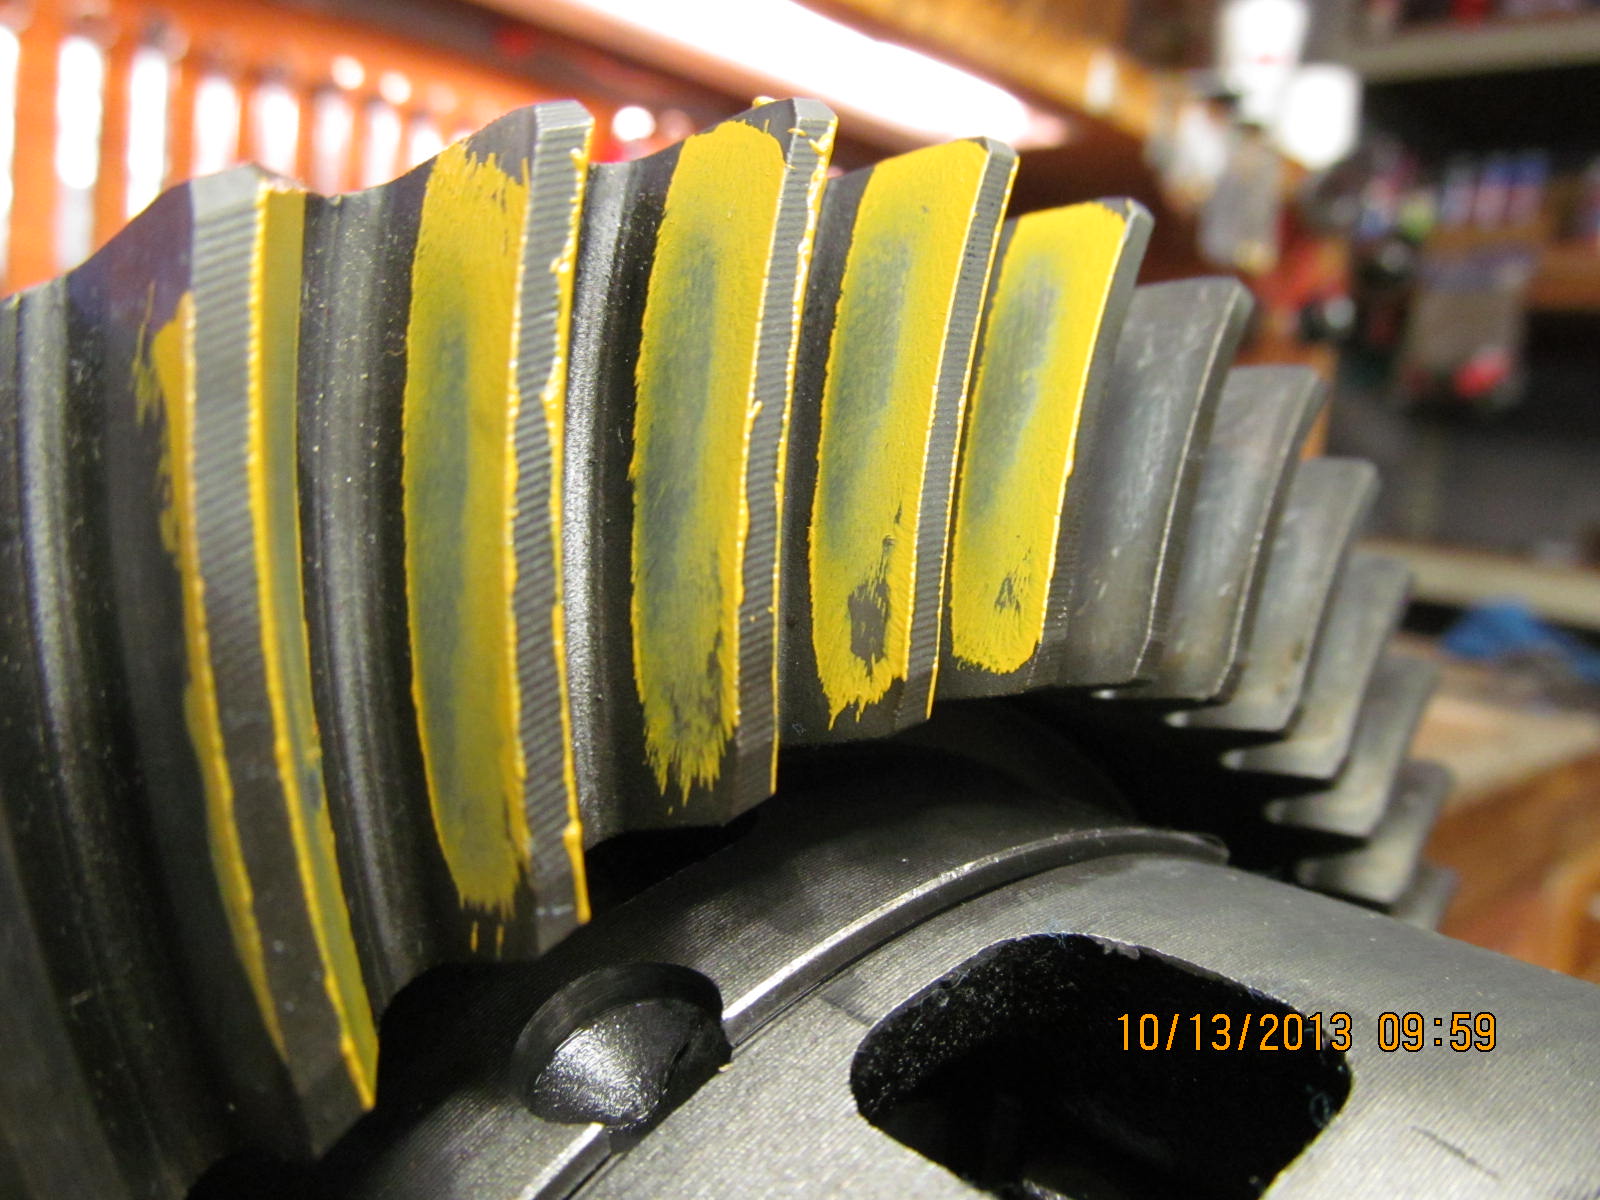
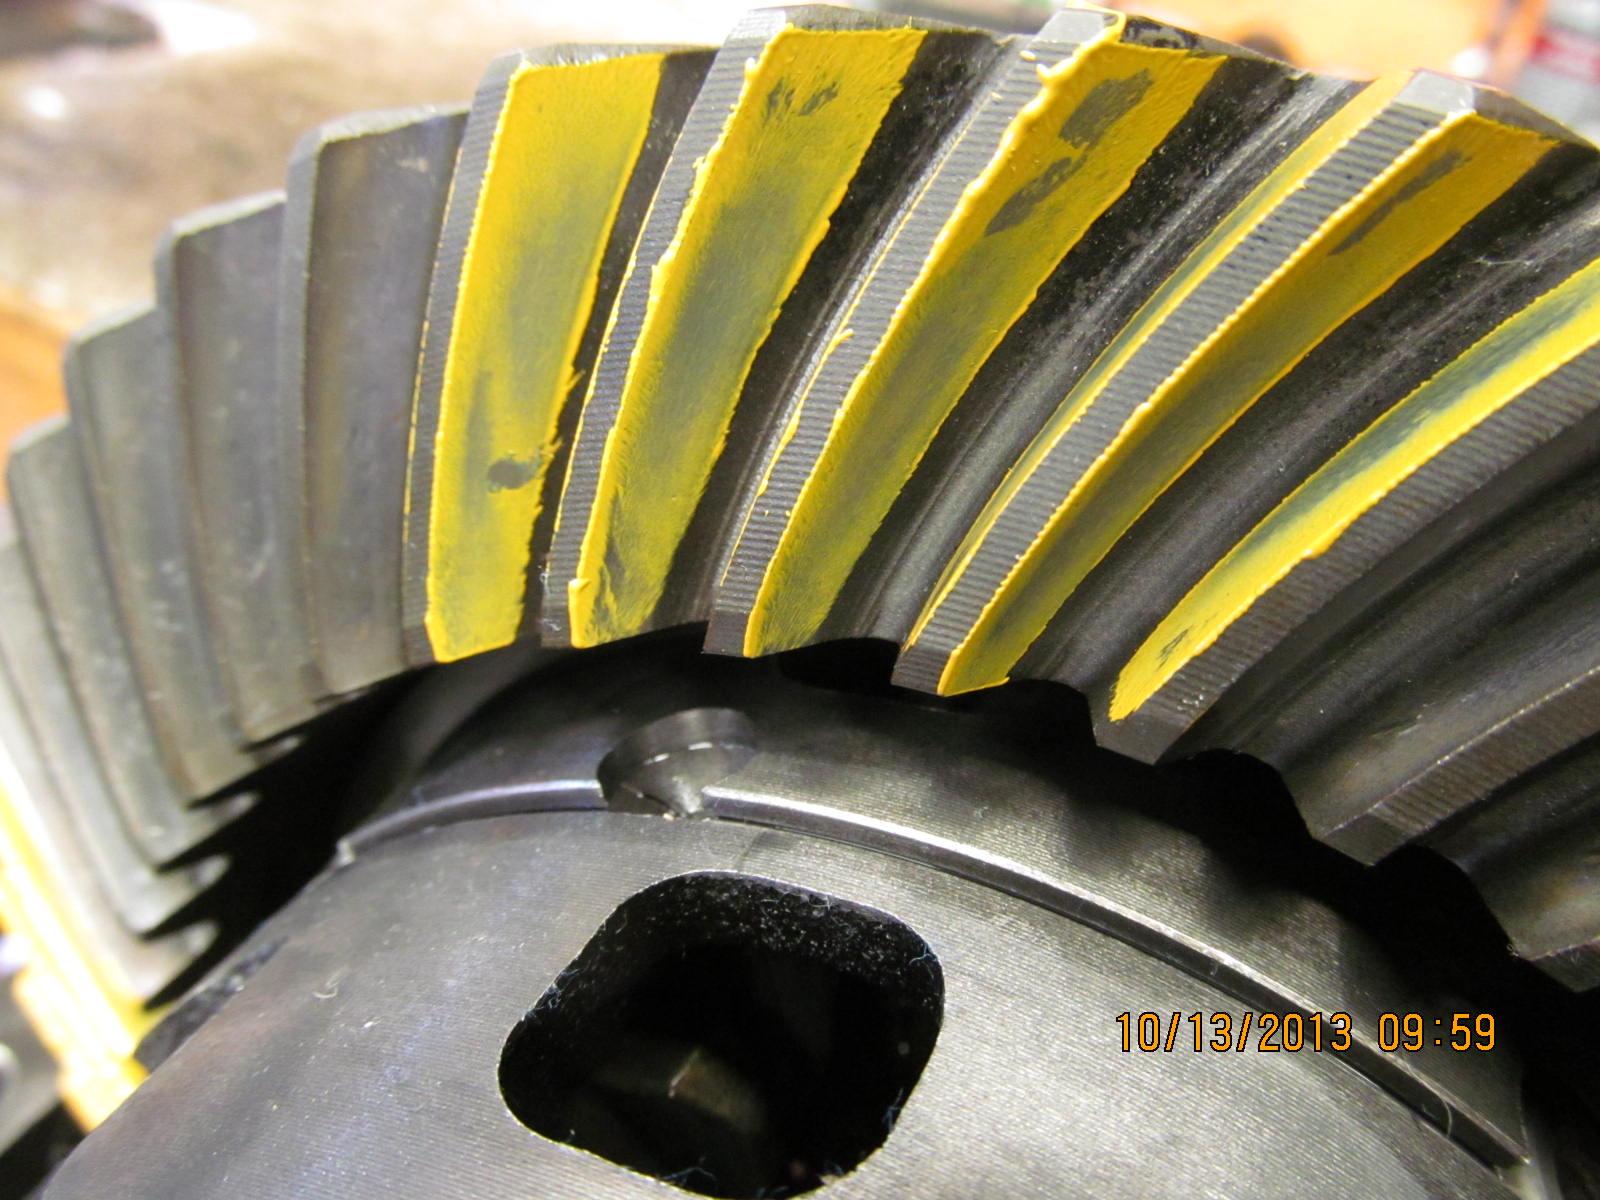
Drive side....looks very good.
|
|
|
|
|
Coast...very good.
|
|
|
|
|
Drive side on the pinion.
|
|
|
|
|
drive side....reverse painted tooth.
|
|
|
|
|
Coast....reverse painted.
|
|
|
|
|
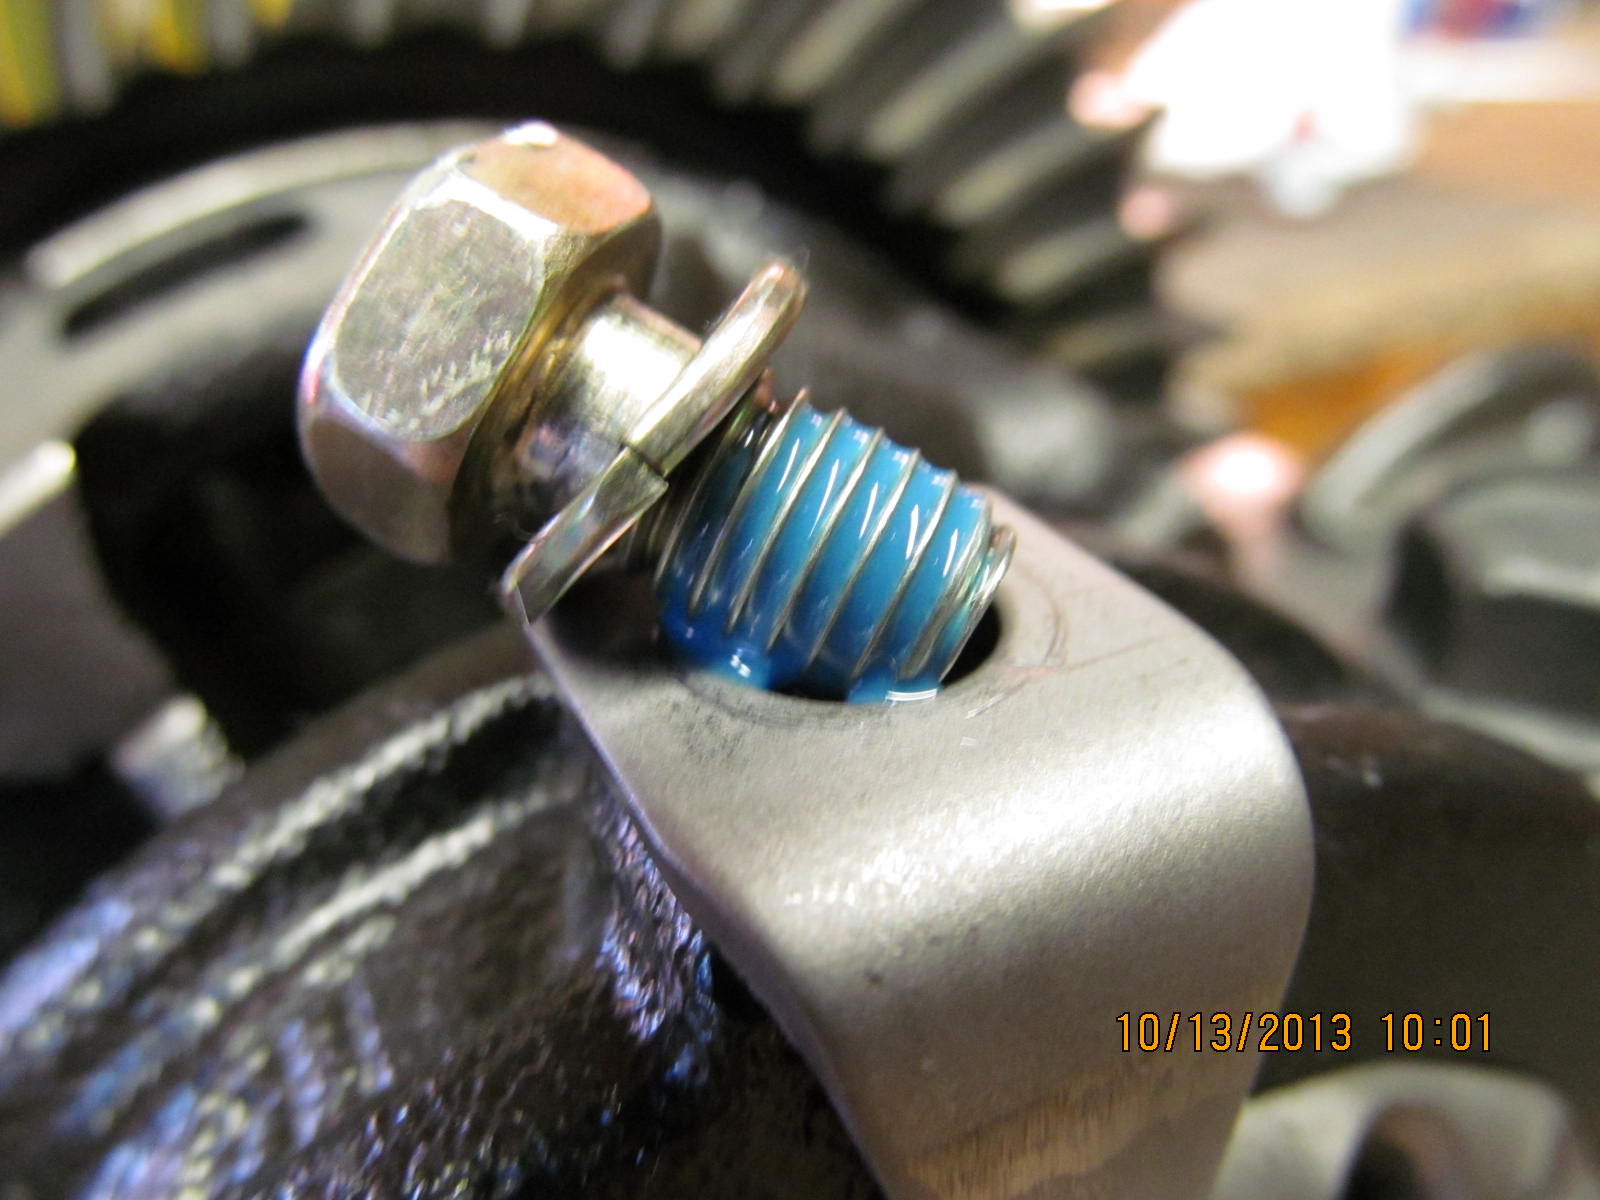
Now to install the lock tabs. Blue loctite.
|
|
|
|
|
10 ft/lb
|
|
|
|
|
.....................
|
|
|
|
|
assembly notes.
|
|
|
|
|
Done. :)
|
|
|

|