|
|
|
|
|
|
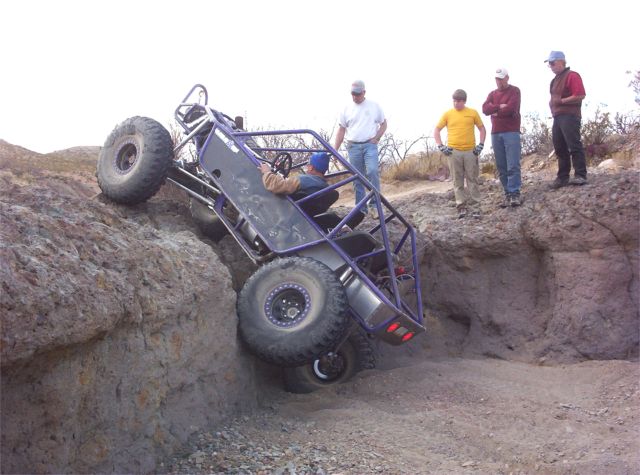
Flexor is a local in Mesa, AZ. When I did my first gear install for him, he was on 37" tires...he's up to 42" now. The rear has not been a problem for over 3 years. This might seem quite surprising considering the rear is a "4 cyl 3rd" and has 571 gears. But those gears are quality Precisions...they are heat and cryo treated...and they were installed to high standards. It's powered by a peppy 4.3L Vortec with a TH350 auto tranny. It has dual Toyota cases with a 4.7 in the rear one. |
|
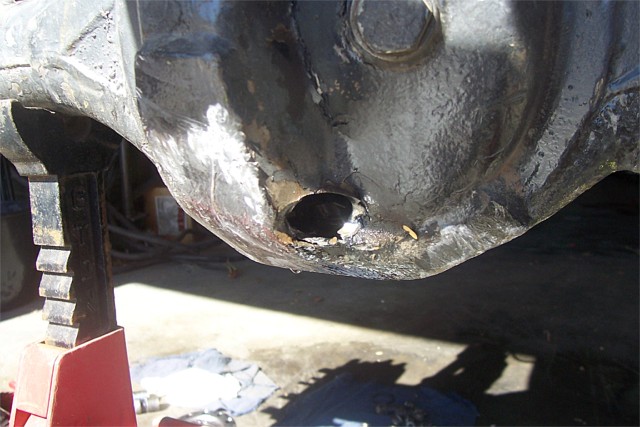
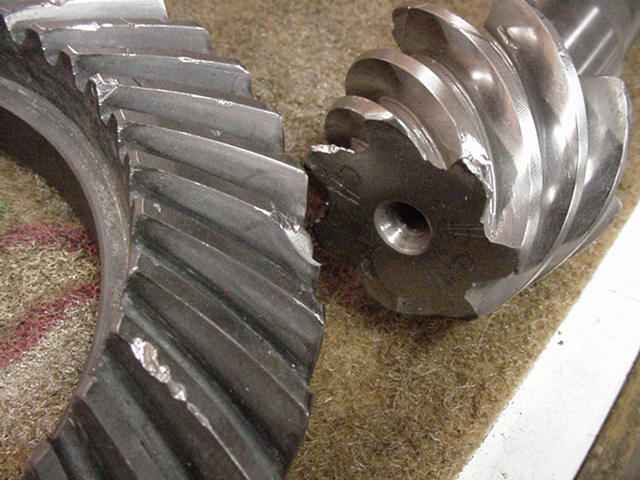
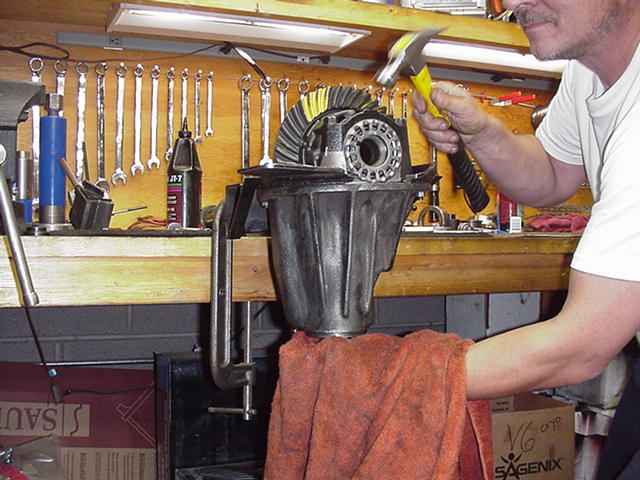
This just recently happened out on the trail...something tried to escape from the front diff. One big POW! and no more front wheel drive. |
|
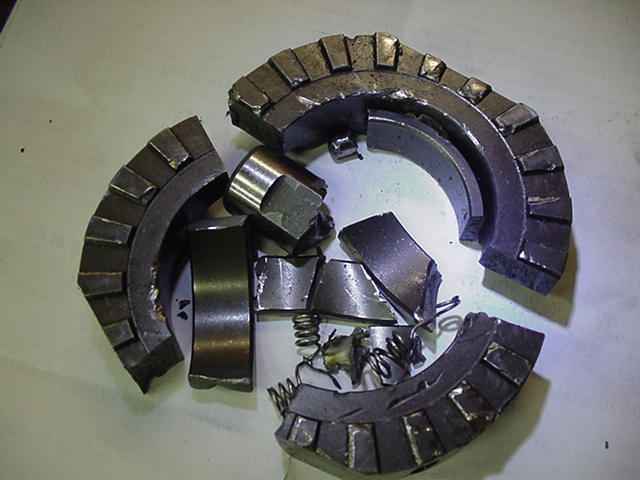
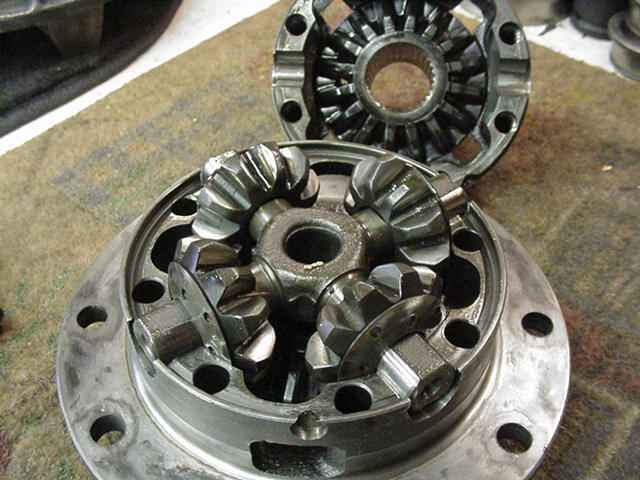
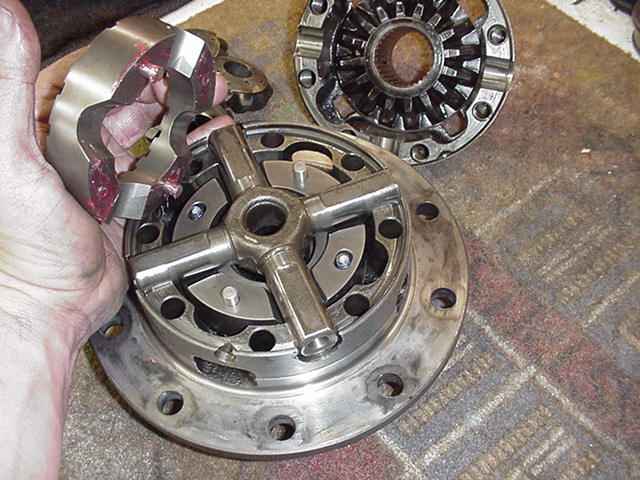
Flexor's front "4 cyl 3rd" was a 2 pinion open case design and the weak link was the cross-pin. The pin exploded which took out the Lockright....which damaged the ring and pinion. |
|
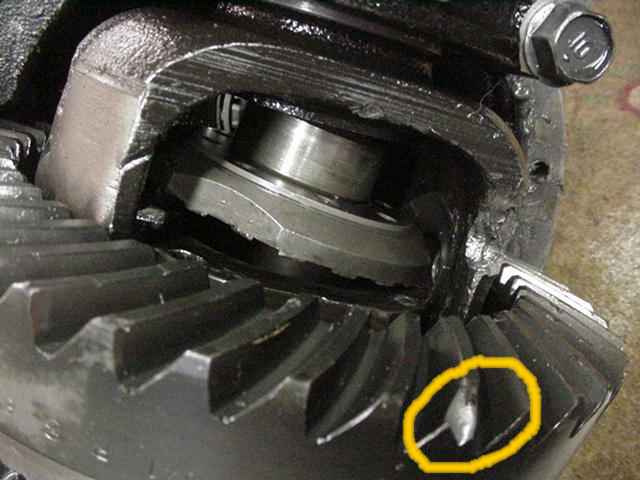
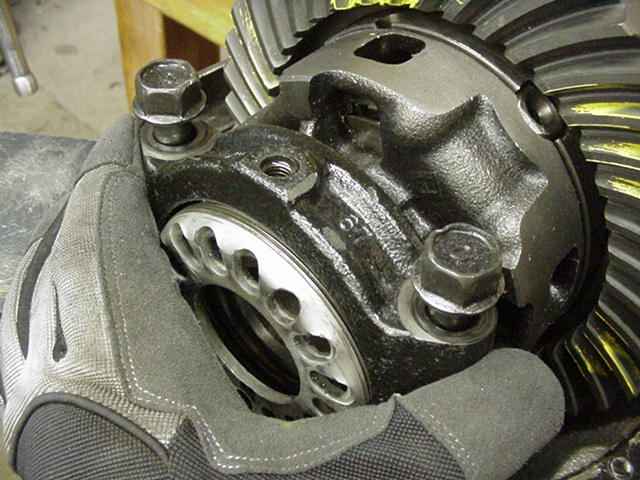
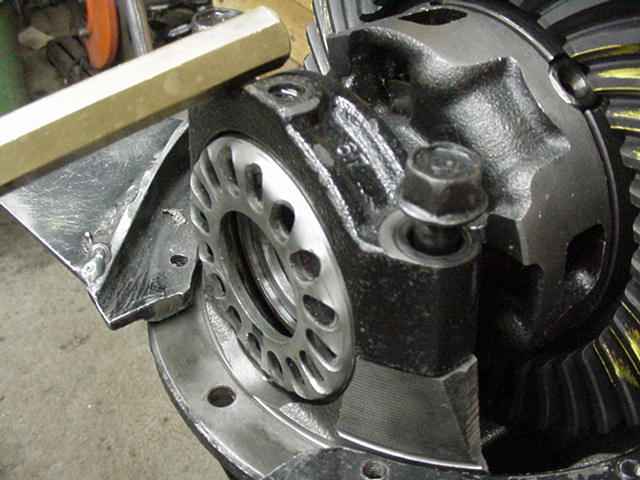
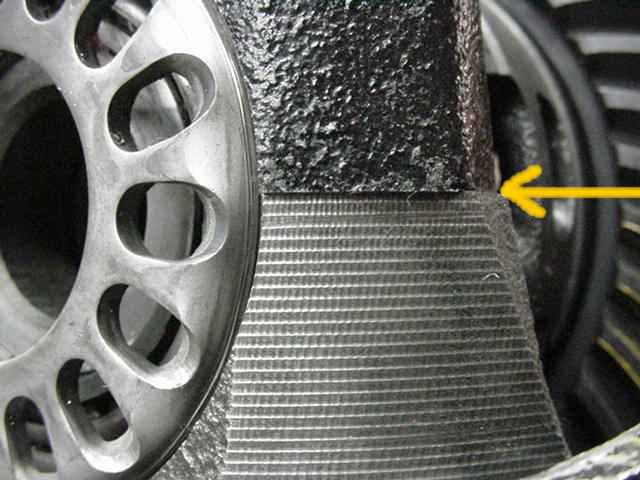
Those chunks got caught in the ring/pinion and damaged/chipped the teeth enough to cause concern. |
|
... |
|
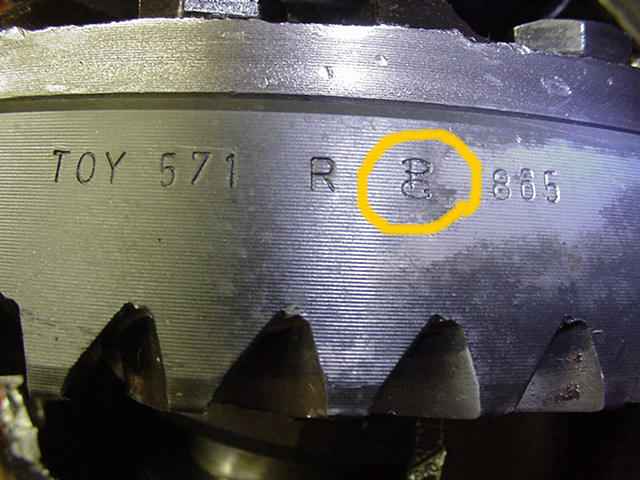
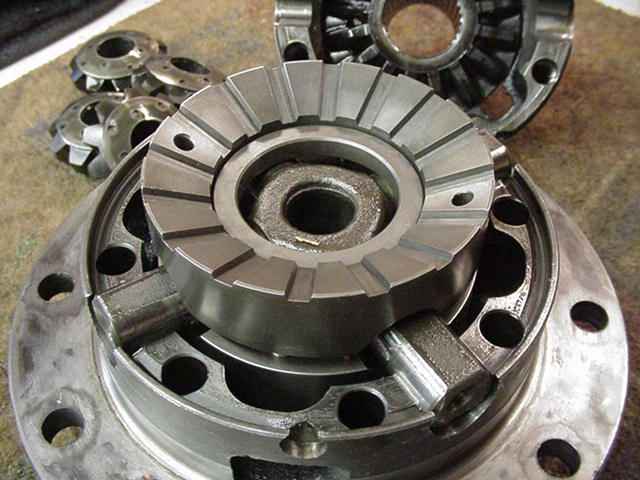
This "old style" PRECISION ring and pinion was not cryo treated yet let the records show that it held up quite well. The old ones had the PG stamped on the ring... they are known to have outstanding set-up patterns and extremely stable backlash readings around the entire ring gear. The new Precision gears do not have the PG on the ring...they are very good gears but they are not quite like the PG version. |
|
I've worked on this front 3rd twice before....
|
|
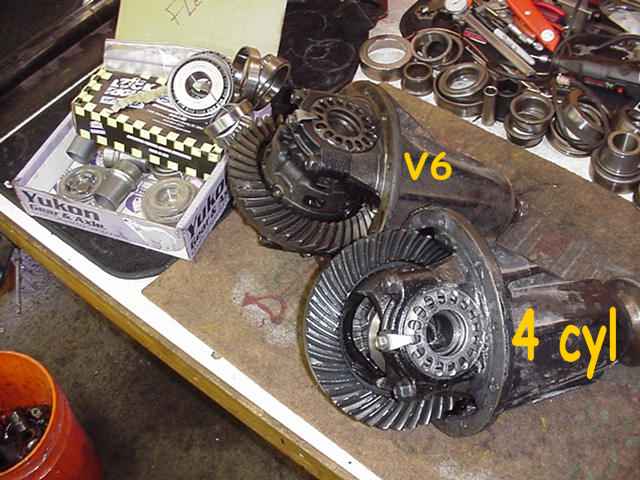
Shown is the V6 3rd and the cryo V6 bearings that will help in the strength department. The cryo bearings are about 5 times more durable and will keep their pre-loads longer. |

|
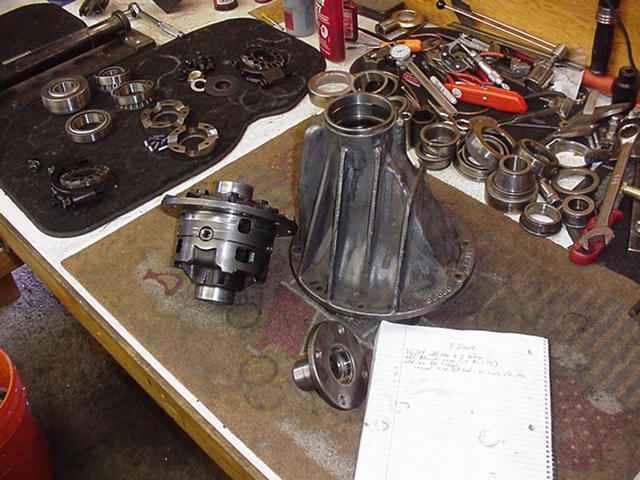
The busted 4 cylinder 3rd still had plenty of CBPL(carrier bearing pre-load). |
|
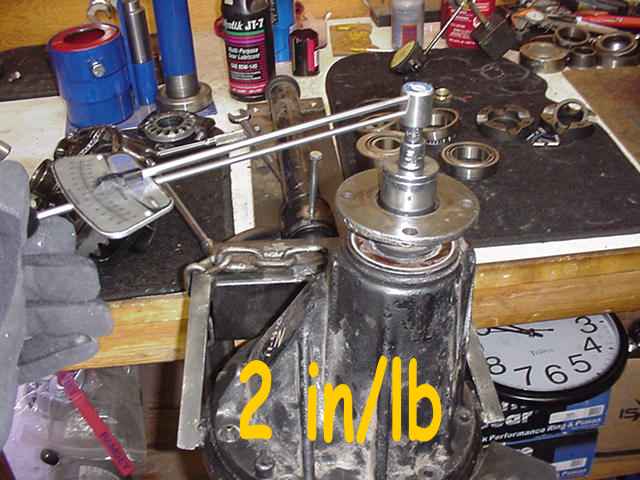
PPL(pinion pre-load) was down to about 2 inch/pounds. |
|
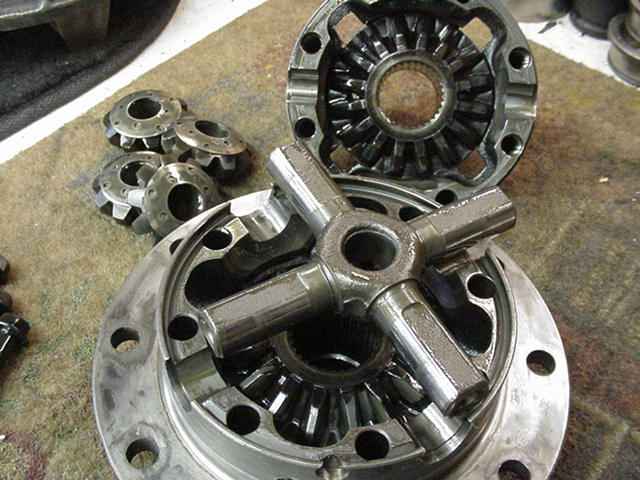
The V6 case is a 4 pinion full case design....a strong case design. The V6 also has larger carrier bearings and a monster inner pinion bearing. The actual strength increase due to larger bearings is questionable....I say 10% but that's just my guess. Strength increase due to the one extra fin on the carrier itself....zero. Strength increase due to the longer V6 pinion heads.....zero. |
|
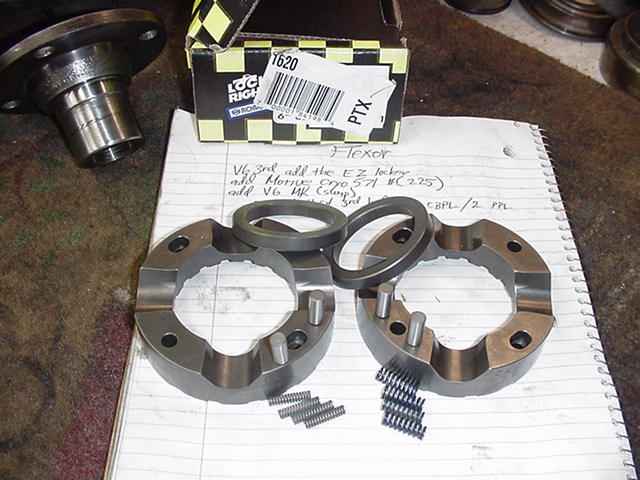
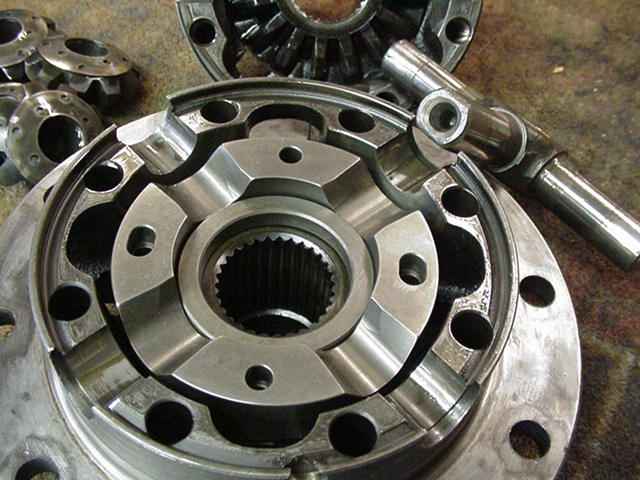
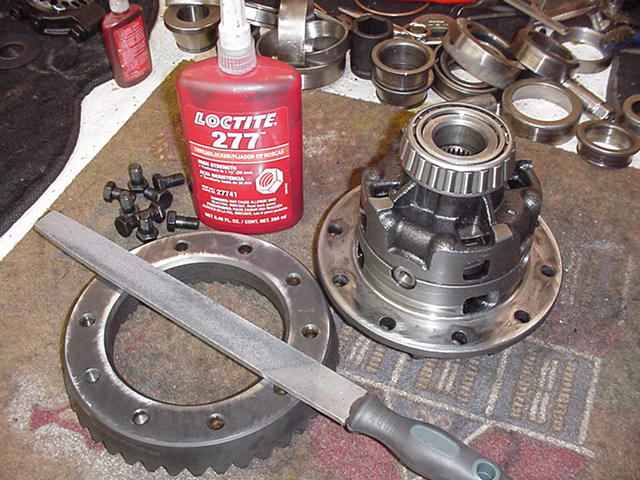
The V6 Lockright is simple and easy to install. |
|
First, remove the 8 long bolts that hold the 2 case halves together... |
|
... |
|
Remove the 4 spider gears from the cross...discard them. |
|
Install driver and the inner spacer ring. |
|
Add the pins and springs... |
|
Place the pins/springs in the other driver. Use thick grease to keep them in place. |
|
Plop the driver in place and don't forget the spacer ring. |

|
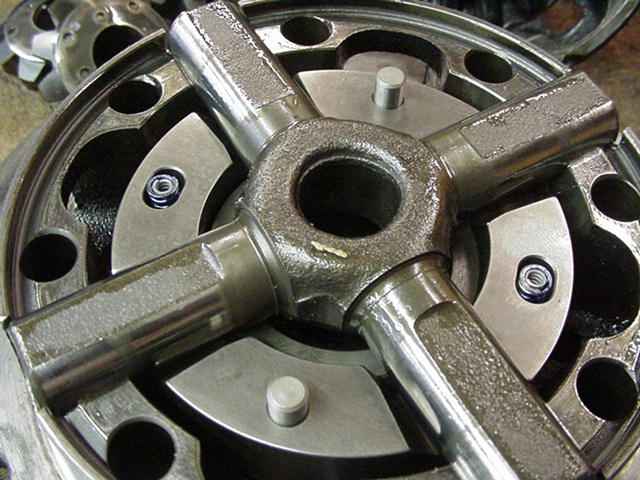
Place the other case half in place making sure the drilled notches are lined up. |
|
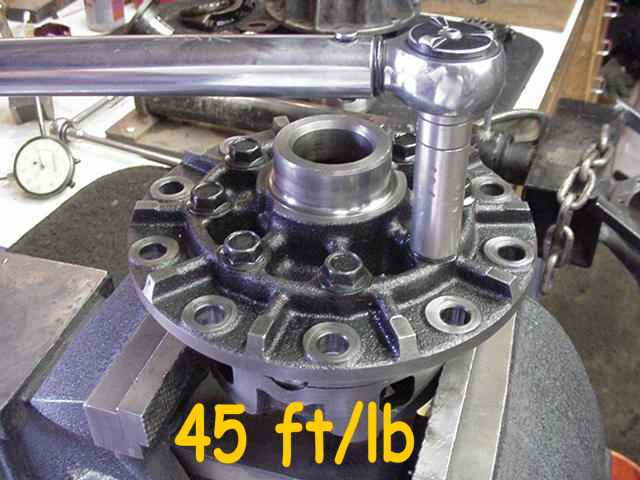
Cross torque the bolts to 40~45 ft/lb. Done. No locker tolerance measurements are possible with this design unlike the open 2 pinion design. |
|
The carrier bearings were a loose fit onto the journals so I used some green "sleeve lock" and all is good. |
|
The carrier bearings were pressed in place and some pressure was kept on them until the sleeve-lock cured. |
|
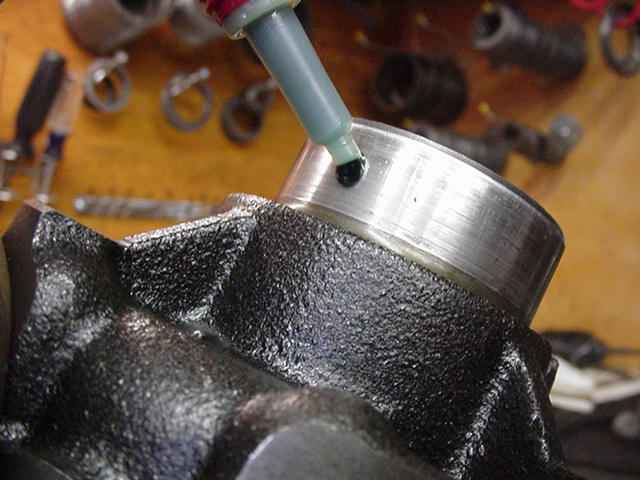
Pinion bearing races will be pressed in place. I always make sure the surfaces are clean and have no dings or ridges that might prevent the races from fully seating. These are perfect. |
|
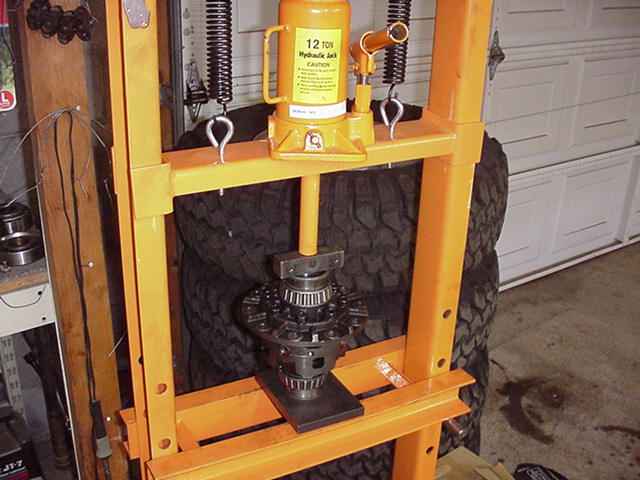
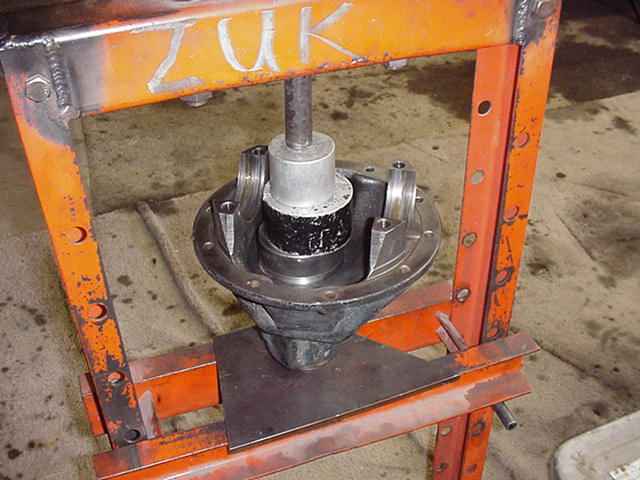
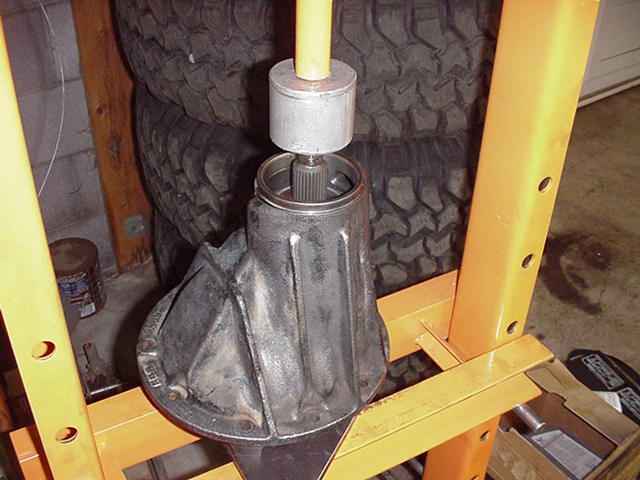
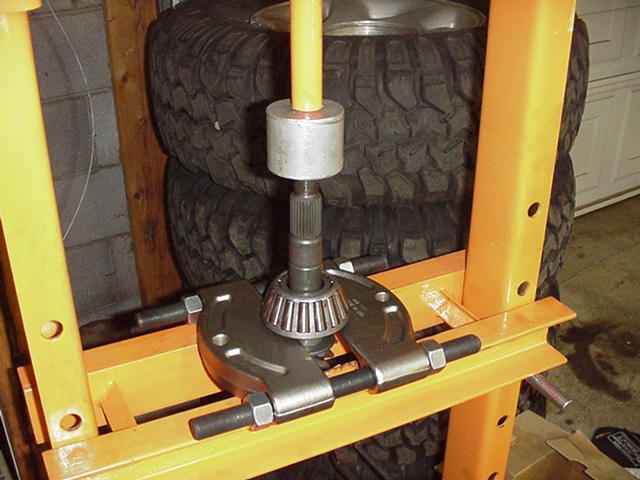
This 12 ton press from Harbor Freight has paid for itself many times over. Time to get a new though....this one is looking pretty beat up :) |
|
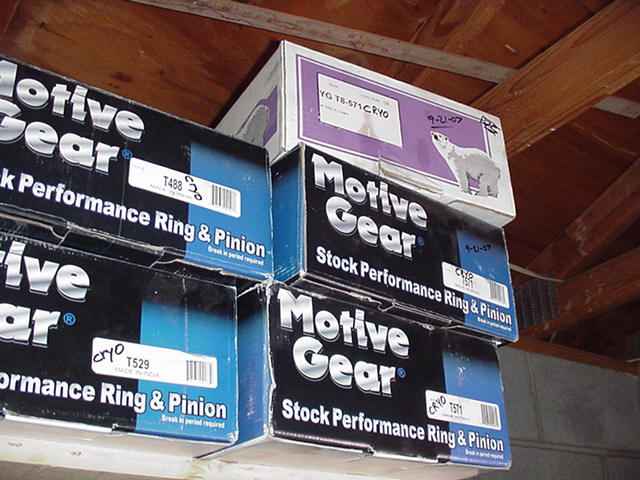
I try to keep a few cryo treated gears ready...just in case. |
|
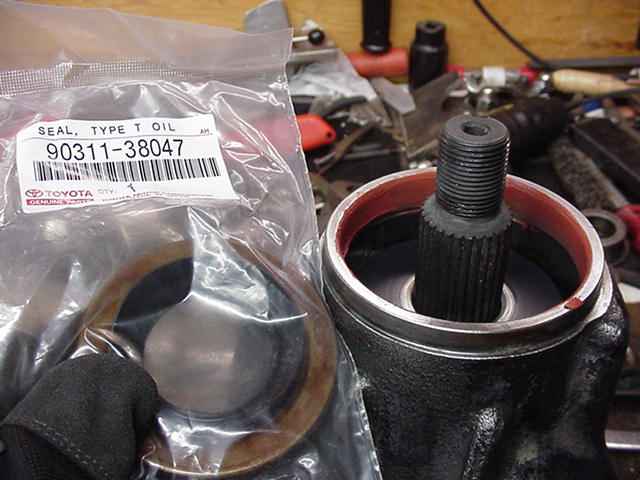
For this install, we will be using a high quality cryo treated MOTIVE 571 ratio. It was cryo treated locally at Cryogenics International. |

|
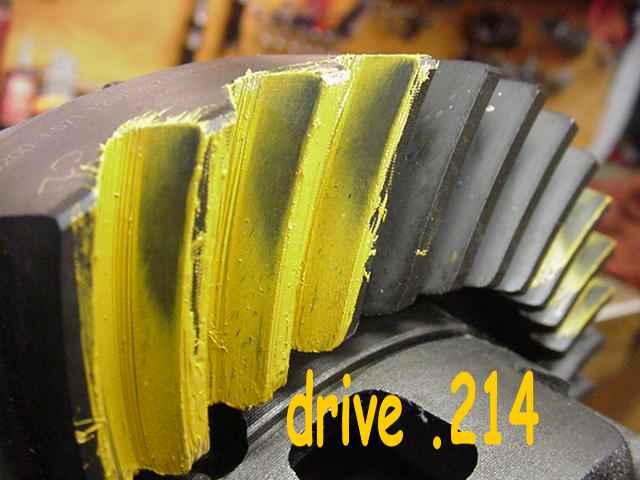
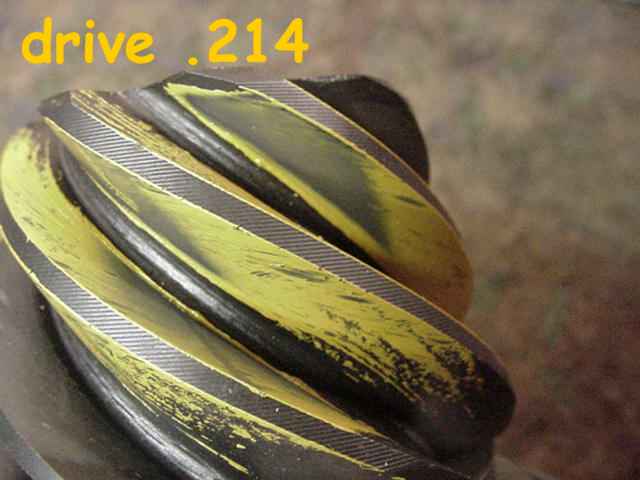
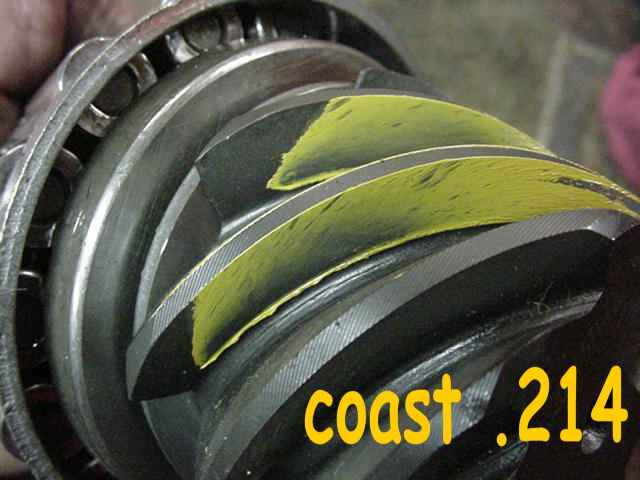
A .214" shim is sandwiched between the pinion and the bearing. |
|
The pinion is then installed in the carrier without the solid collar. The pinion nut is carefully tightened until there is about 10 inch/pounds of drag. The collar will not be installed until AFTER the proper pinion shim has been found. |
|
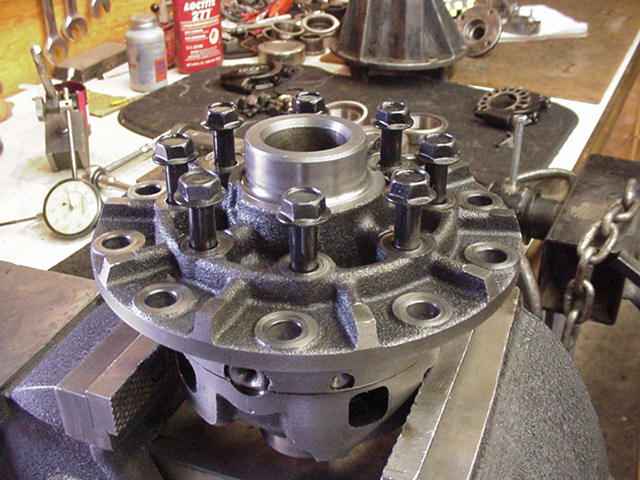
Surfaces are filed to check for burrs and high spots. The ring is then installed with red Loctite and 75 ft/pounds. Then the case is installed in the carrier and backlash is set to about .007 with mild CBPL. |
|
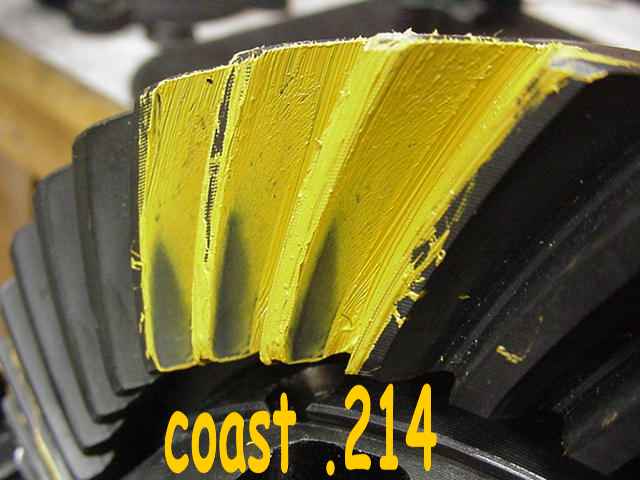
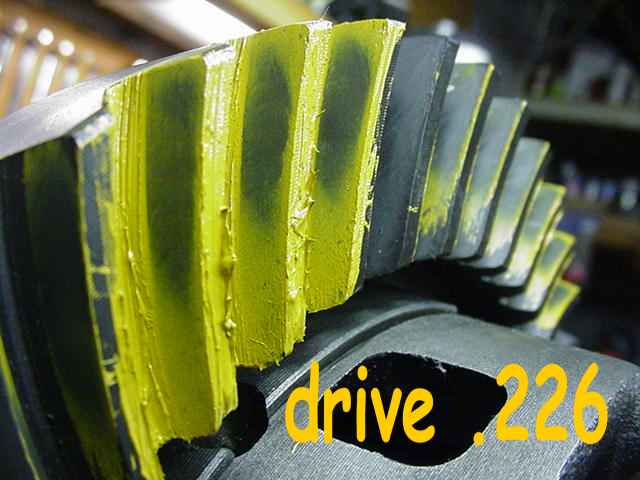
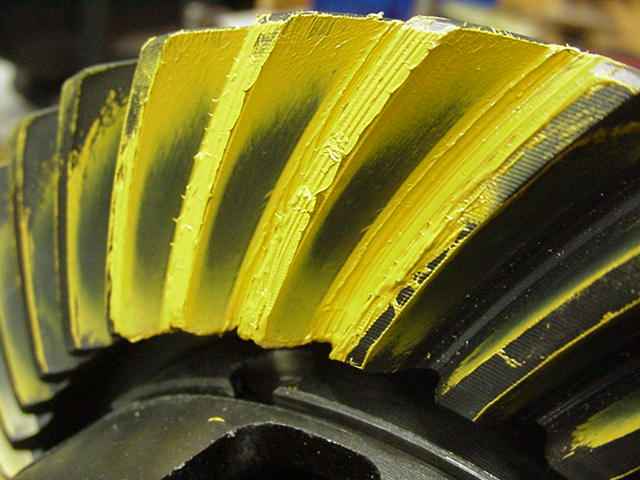
Yellow paint is applied and the resulting pattern shows that it's very shallow. |
|
... |
|
teardown....pinion is removed....... |
|
While the pinion is out, I sometimes examine the "load bearing pattern"....this is on the drive side of the pinion tooth. |
|
Deep in the pinion tooth equates to shallow on the ring tooth. |
|
My large bearing splitter works very nicely for capturing the bearing while the pinion is pressed out. |
|
There's a little bit of a trick to making sure the bearing cap is properly seated on the adjuster ring threads... |
|
It involves threading the 2 cap bolts on about 3 turns each....lower the bearing cap and tap it lightly with a hammer or some other light weight chunk of metal. |
|
When tapping it down, it will feel like a sudden solid bottoming out of the bearing caps. Also, there will be no gaps on both sides as shown above. |
|
It's important to smack the cap a number of times while the pinion is rocked back and forth. This allows the carrier bearing rollers to shift in the race and bearing tensions from left to right sides are 'equalized'. This can cause a shift in BL and the CBPL will lighten up some in the process. |
|
Looking better but it looks like it can go deeper. More pinion depth will pull the pattern closer to center, also. |
|
... |
|
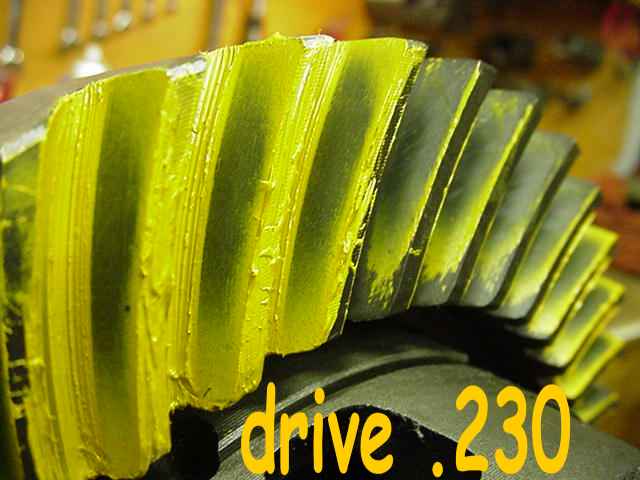
4 more thou deeper and looks good. But I bet I can touch it just a bit deeper... |
|
... |
|
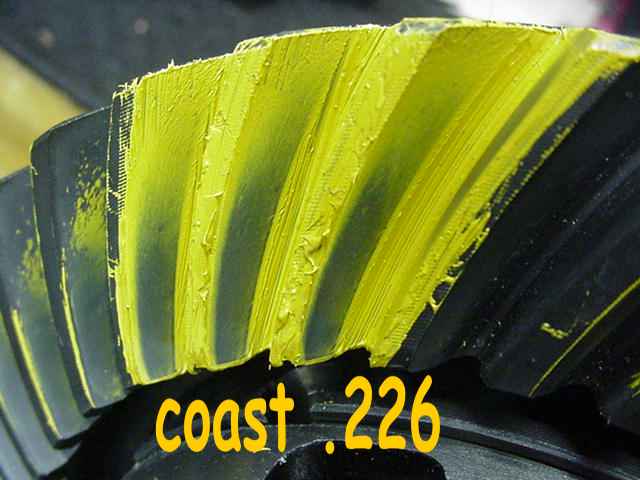
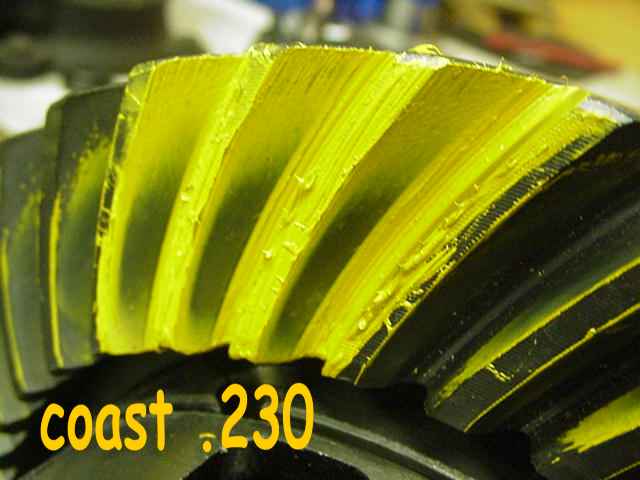
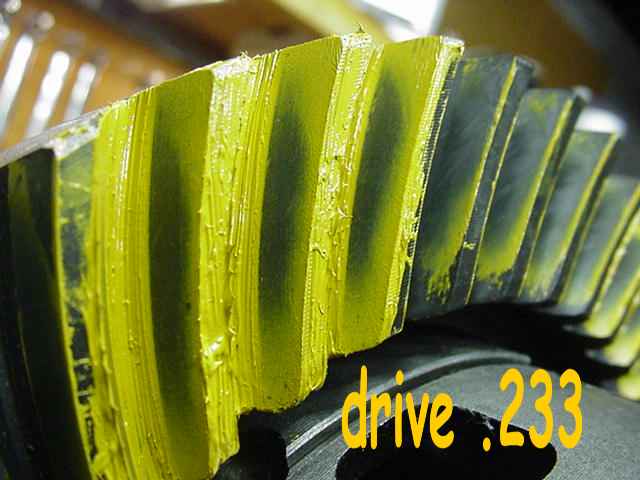
3 thou deeper...for Flexor with 42" tires, this is perfect. |
|
Coast looks nice. |
|
Pinion looks great. |
|
I've already loaded the solid collar in place....I used .028" for its shim and that resulted in a nice solid 12 inch/pound of PPL (pinion pre-load). The slinger goes on and finally the pinion seal as shown above. |
|
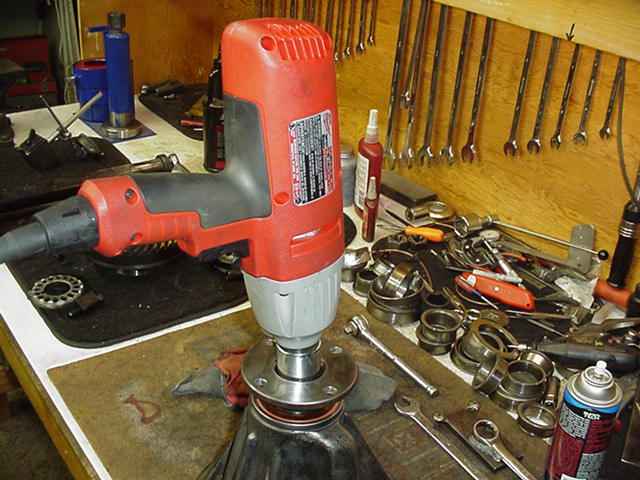
The electric impact does a good job of running the nut on tight... |
|
...but I usually get the cheater bar out and go the extra 1/16 of a turn. |
|
There's high strength red Loctite on the threads but I still ding the nut almost always. |
|
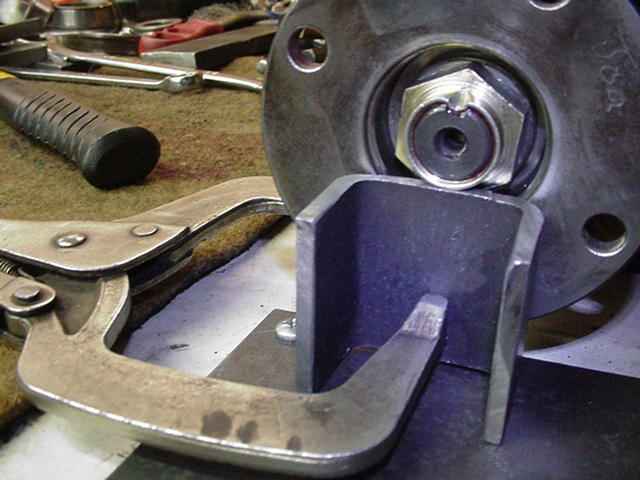
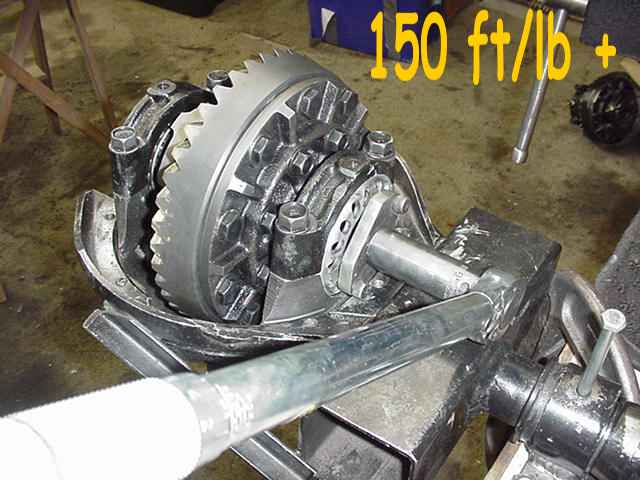
I really tightened these carrier bearings....in excess of the 150 pound usual reading. All 4 bearings have been
professionally cryo treated so their durability is almost off the charts. With a good gear oil they will last longer
than the rest of the buggy. I don't have to worry about water in the oil because this is Arizona :)
|

|
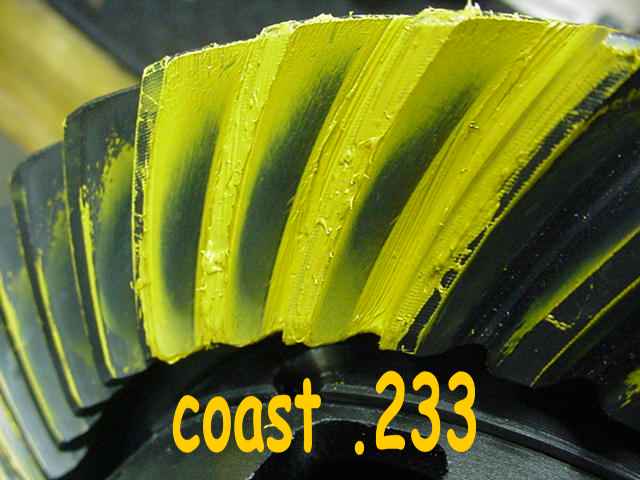
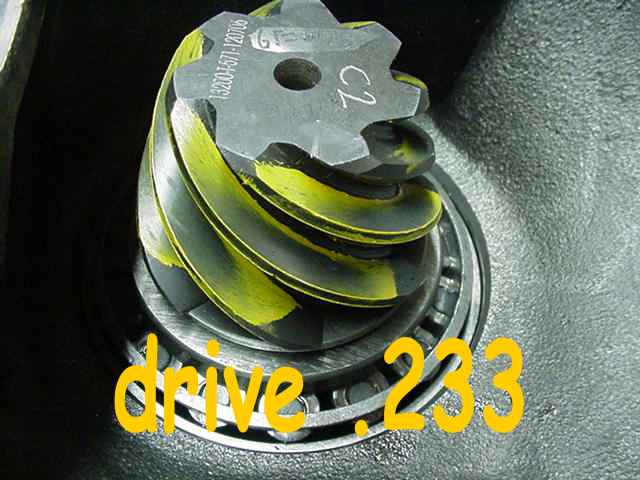
One more re-check of the drive and coast sides...they look great. |
|
Nice. |
|
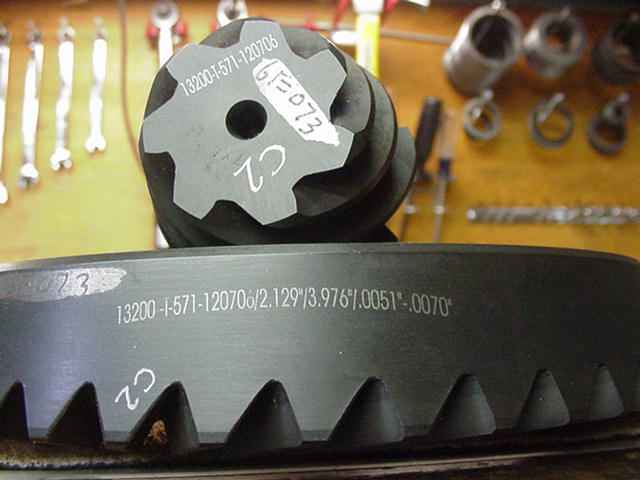
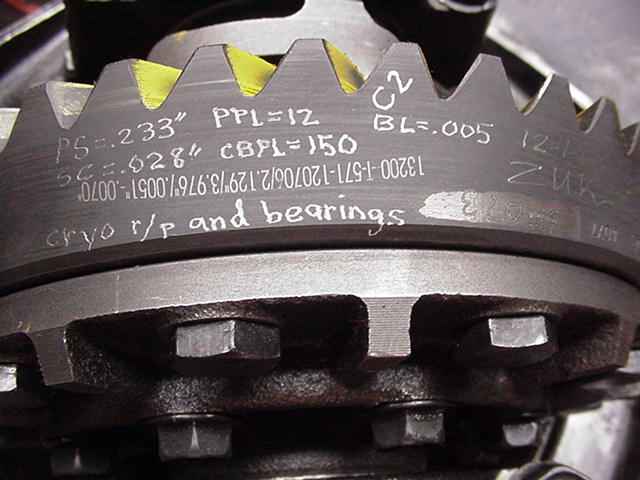
Specs used and date coded. |
|
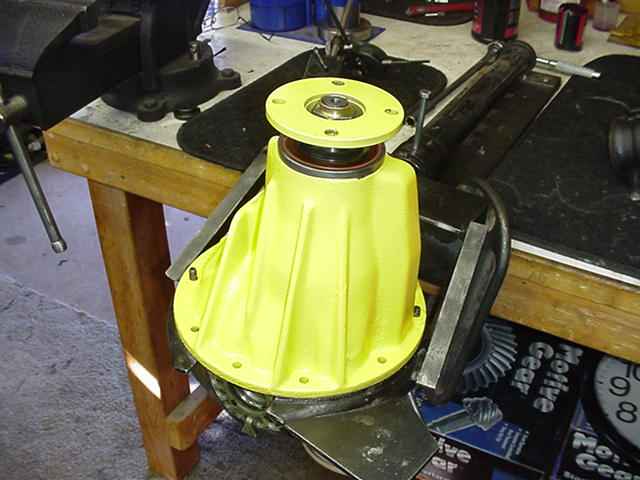
Some bright yellow paint and it's ready for the buggy. ZUK |

|