|
|
|
|
|
|
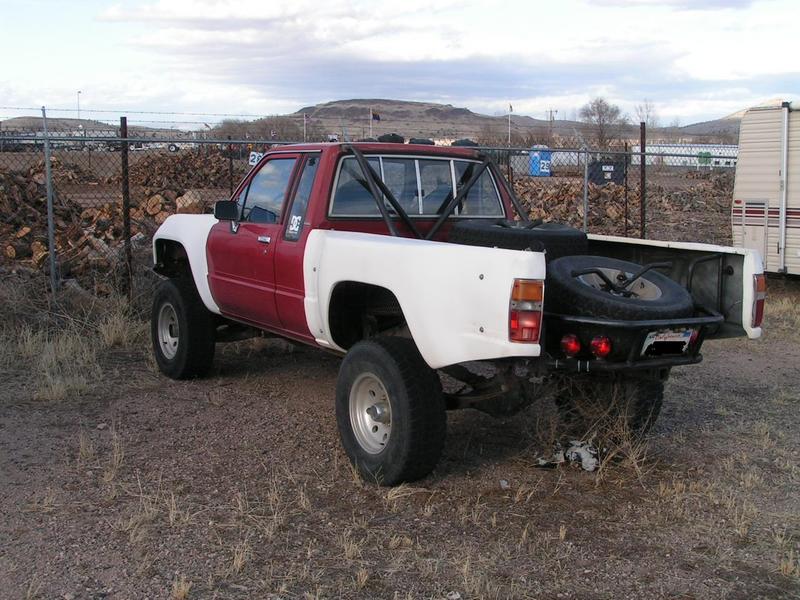
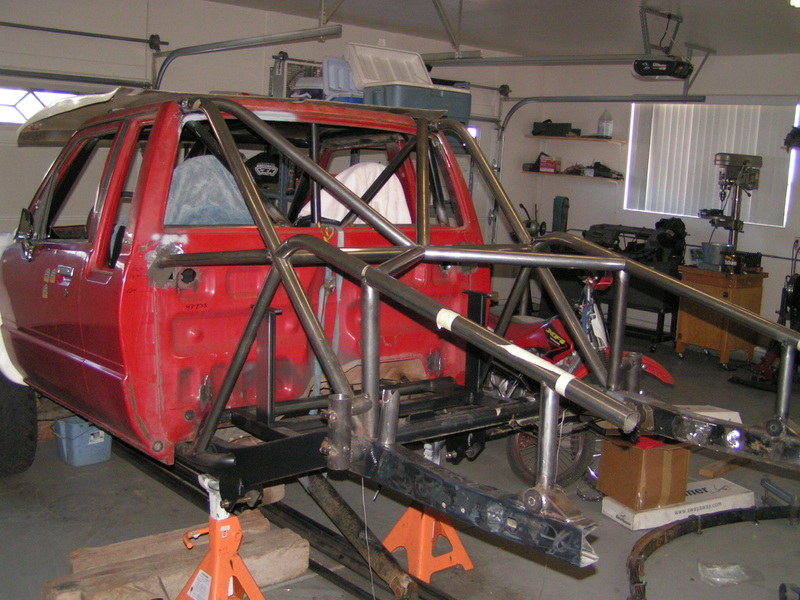
Geoff lives up in Prescott, AZ and is in the process of doing a build-up on an 87 x-cab 4x4 truck with 22R and a 5 speed. The plan is to make it into a desert pre-runner truck and it will still see some pavement use also. The soon to be added T100 rear axle/3rd will have Motive 488 gears and a TRD/Kazuma Eaton LSD. |
|
On the TTORA board is a build-up thread of Geoff's progress... Geoff's build-up |
|
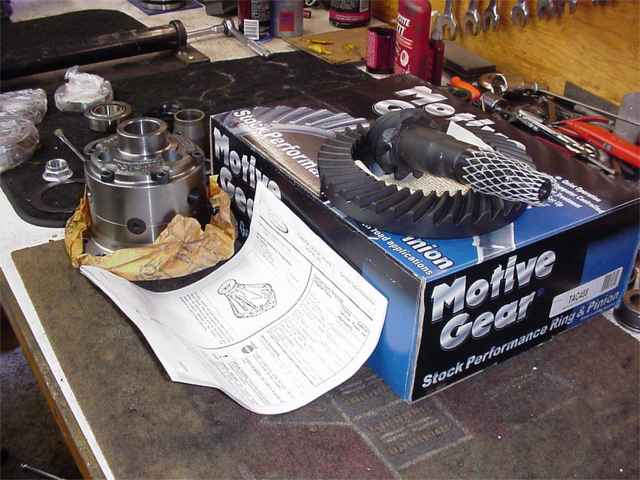
Geoff supplied all the parts. Here is the 488 Motives and the Eaton LSD. |
|
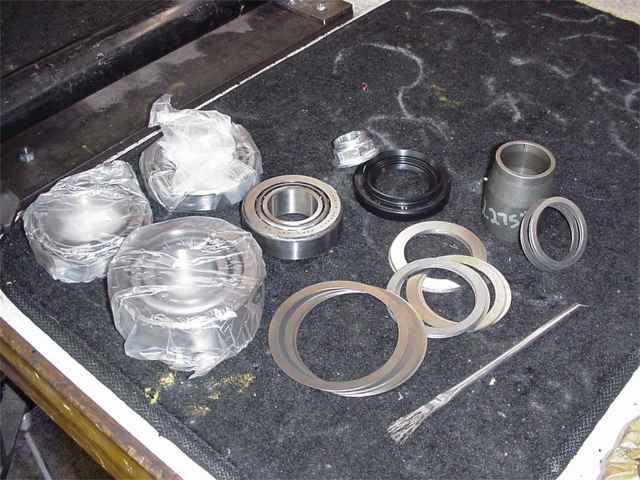
Here's the master install kit and the solid collar. Geoff gets a big |
|
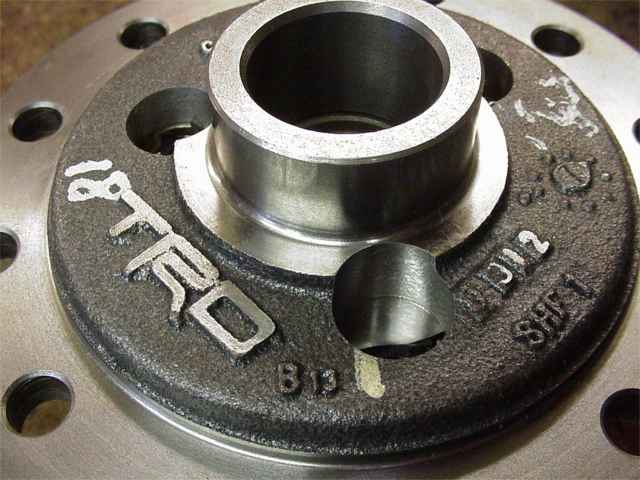
These are manufactured to Toyota specs for TRD by Eaton.
|
|
These aftermarket units are pre-tensioned to 400 ft-lbs as opposed to the 200ft-lb pre-tension units the factory installed. Also, this TRD/Kazuma LSD has 3 forged spider gears.....the OEM toyota LSD has only 2 spider gears. This limited slip unit is very street friendly yet adds substantial traction over an open differential. |
|
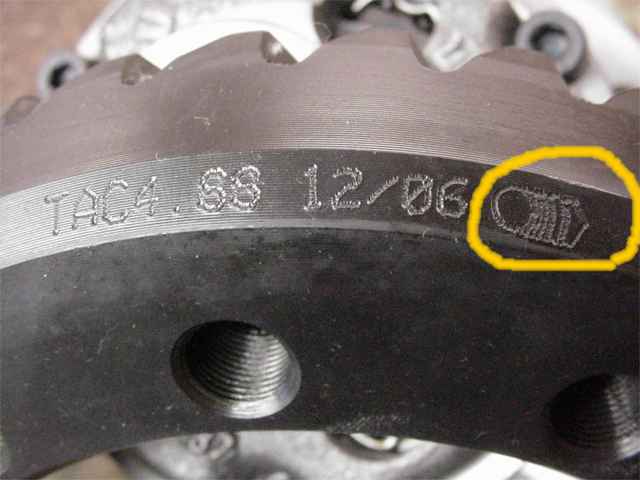
Motive gears often have this symbol on the rings. |
|
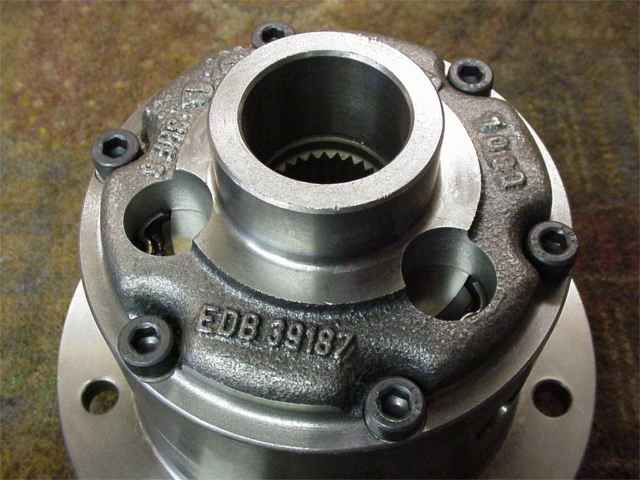
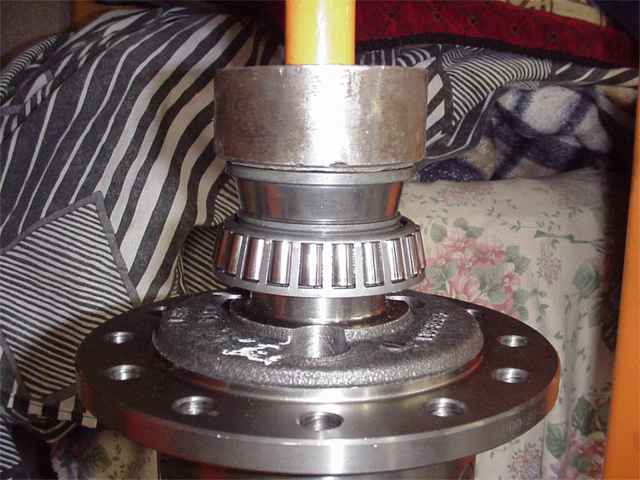
This 488 pinion has the larger 29 spline count. This means the factory 29 spline flange will slip right on. |
|
New carrier bearings are pressed on. |

|
Surfaces were filed to check for ridges and irregular spots. None found. |
|
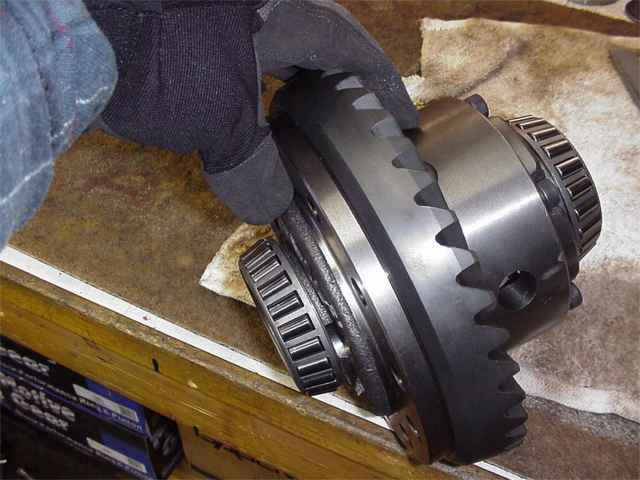
I was impressed with the way the ring gear slid on. Machinists call this a "slip fit"...the ring gear pushed in place with just the force of my hands and careful alignment....no rubber hammer or hydraulic press needed. It was a perfect fit and absolutely no play was detected. Excellent machining on Eaton's part. |
|
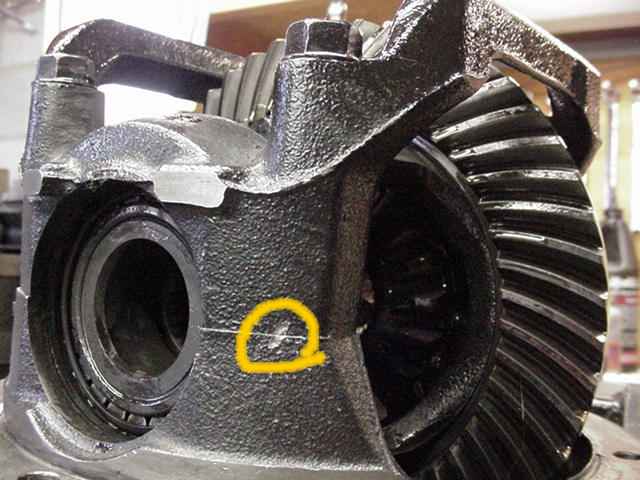
Step 1 is to mark the bearing cap to make sure it does not get put on 180 degrees turned around. These have matched bores. |
|
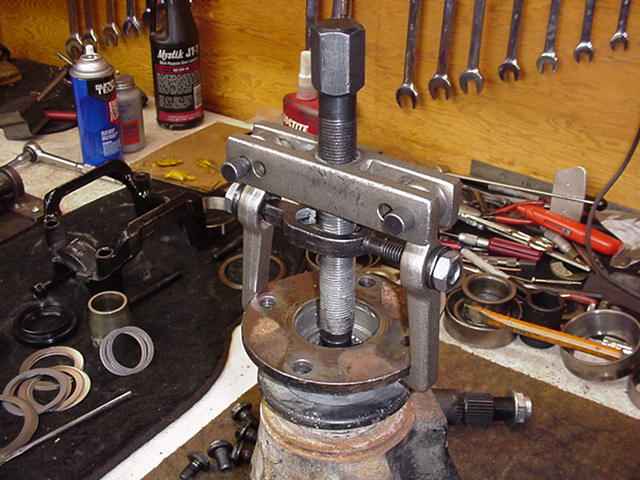
I'm sure this OEM 3rd has some good miles on it....bearings are well worn and the carrier bearing pre-load (CBPL) is all but gone. Here, I was able to remove the CB shims with only a finger. |
|
This is the way flanges should fit...tight. The 2 jaw puller was required to get it off. I have noticed that
the 29 spline flanges all seem to fit very tight. On the contrary, most of 27 spliners that I use in the standard
8" gear installs seem to have a loosy goosy fit.
|
|
None of the master kits that I am aware of supply new ring gear bolts for this application. It's ok to re-use these flanged 12mm fine threaded bolts. Red Loctite and about 75 ft/lbs. |

|
The pinion depth shim is typically behind the pinion head...but not on these non-TRD 3rds. A thick shim is located behind the large inner pinion race. The shim gets a little damaged in the process of punching the old races out but the damage can easily be ground off. |
|
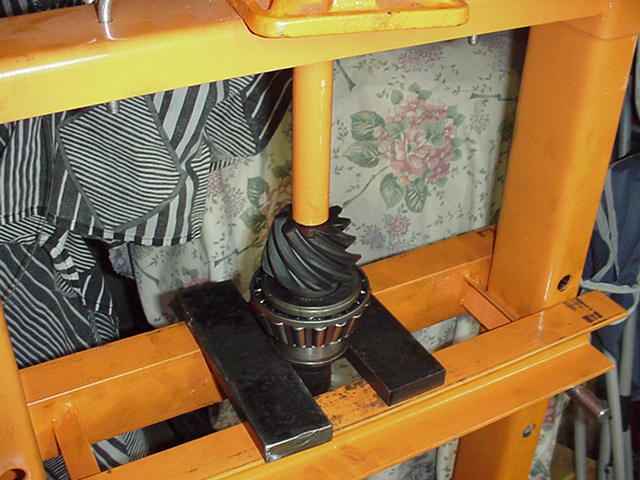
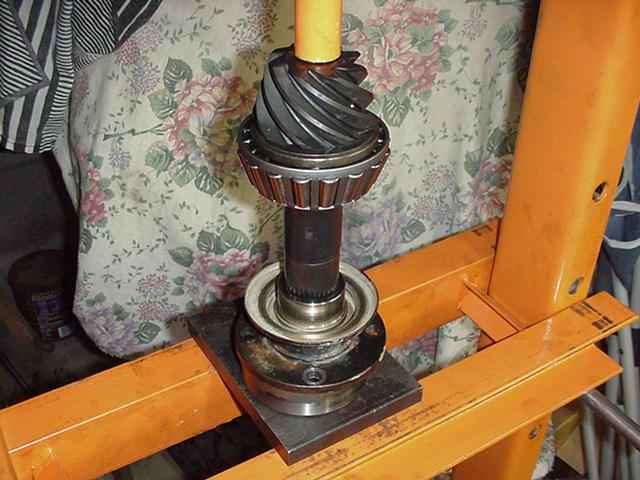
The new bearing is pressed onto the pinion. This is a very massive bearing...even larger than the V6 mini-truck bearing. |
|
This 29 spline flange was so tight that I pressed it on and off twice to make assembly/dis-assembly more managable. |
|
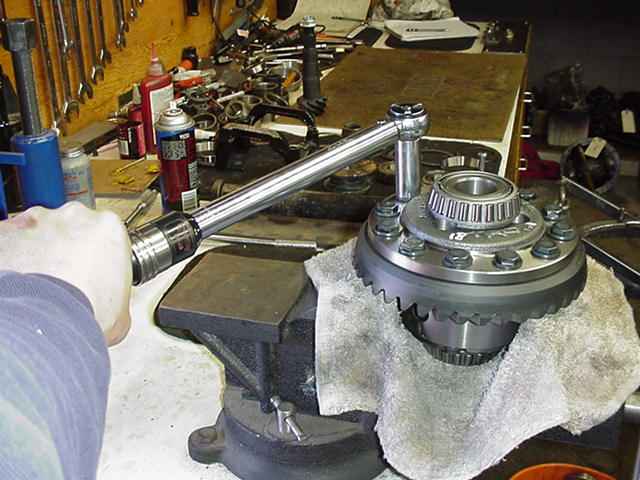
It's best to assemble it without the solid collar until we are sure of having achieved the proper pinion depth. Just tighten the pinion nut 'til about 15 in/lbs of PPL is achieved. |
|
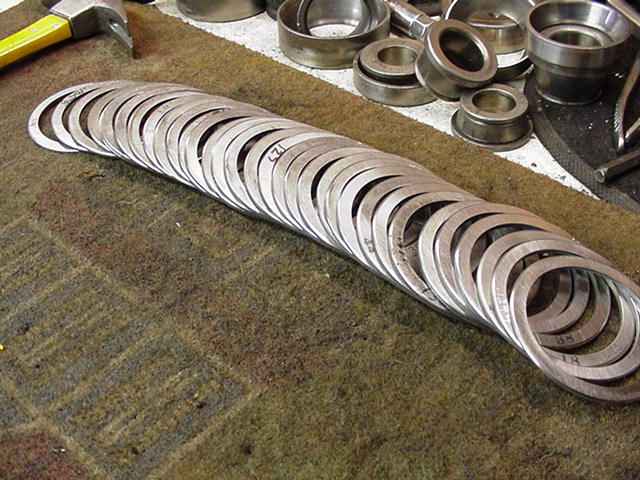
Here is a complete set of side shims(washer plates)...used on the carrier bearings to set BL and CBPL. This job cannot be done right without this large selection the way I see it. |
|
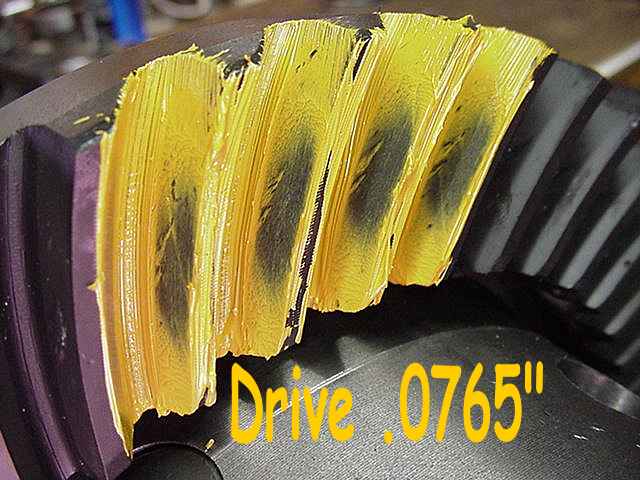
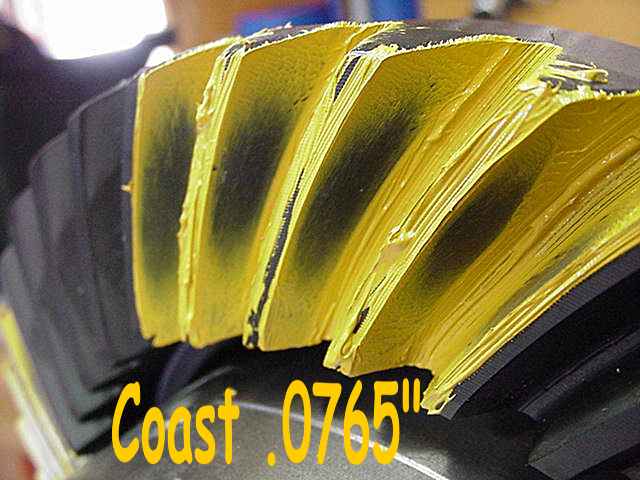
With the LSD in and BL set in the neighborhood of .008" and CBPL at a minimum, a pattern check can now be run. Re-using the factory pinion shim of 0765 has put us real close to the proper depth. Although this is probably "close enough" by the standards of most shops, I can see from the load bearing that I can get it spot on with maybe .003" deeper on the pinion shim. |
|
... |

|
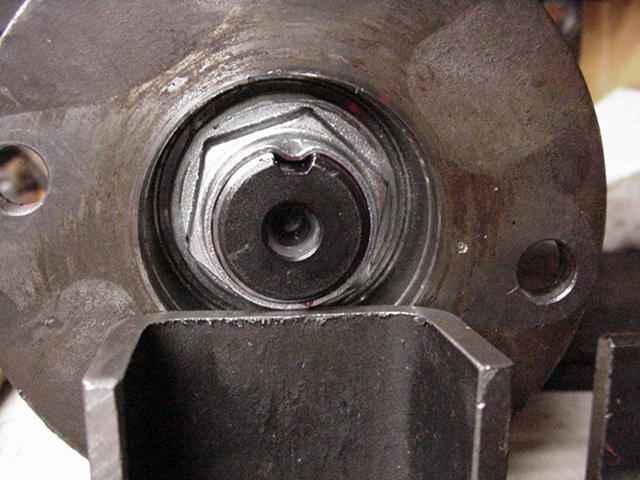
I feel confident enough to install the solid collar now. The old crush sleeve's measured length can give us a good idea of what starter shim to use on the new solid collar. |
|
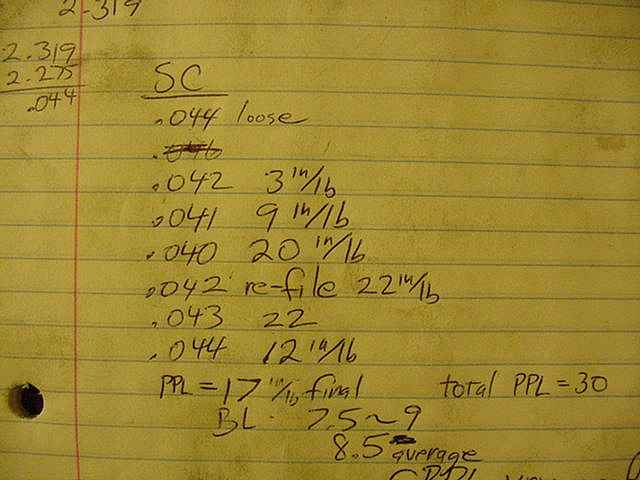
As seen above, it took me 7 tries this time to get it right. By tightening the nut extra tight with a cheater bar I can crush the shims a bit more and, effectively, add more pre-load. The PPL increased from 12 to 17 in/lb by doing this. 17 is the upper limit in the spec. |
|
Red Loctite and ding the nut. |

|
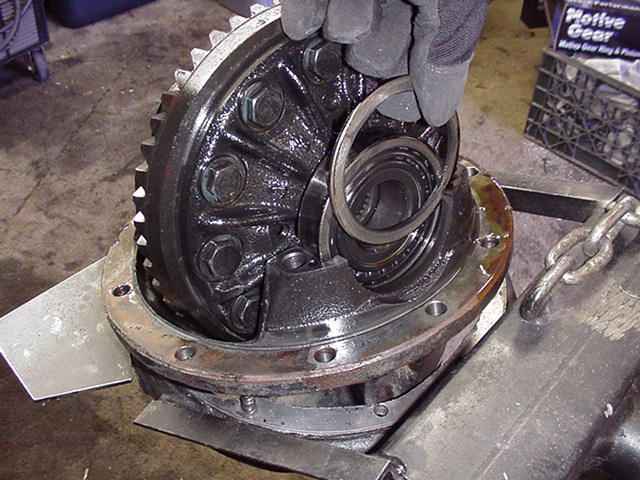
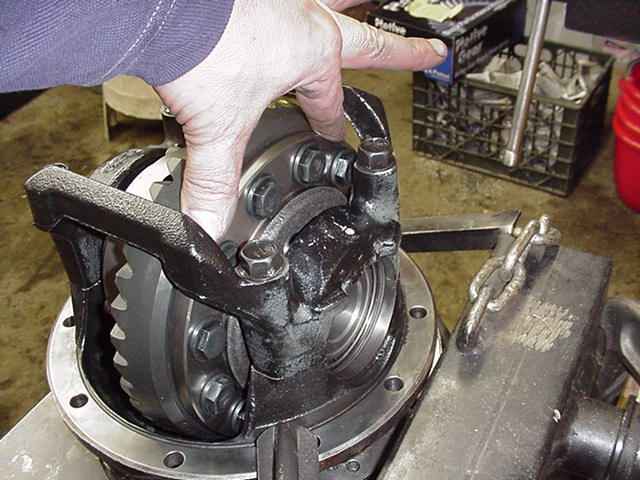
Attention is now turned to the installing the case and setting BL and CBPL. Setting the carrier bearing pre-load is a matter using about the thickest shim possible that can be persuaded in place and guiding the BL in the desired direction at the same time. |
|
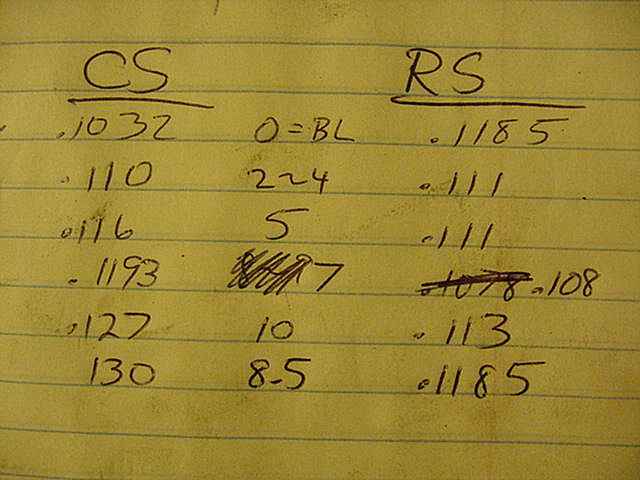
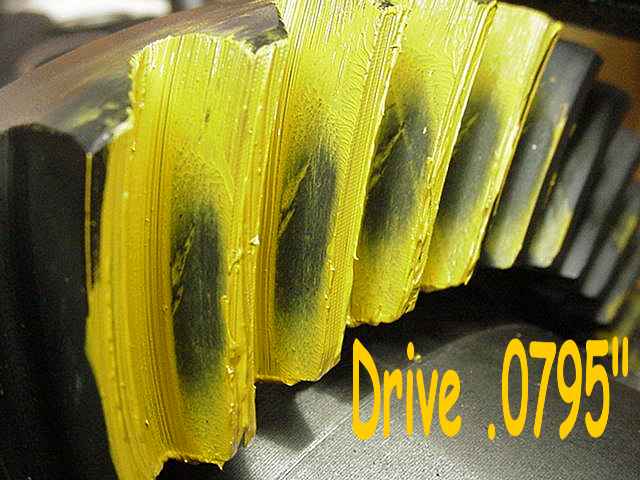
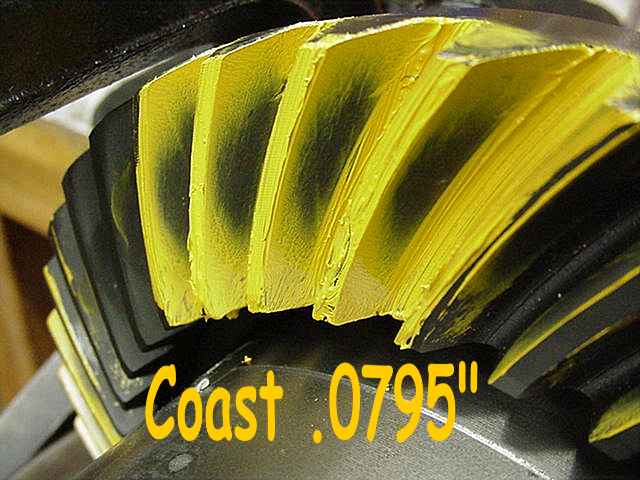
As seen in the notes above, backlash and pre-load must be steered in the right direction at the same time. A soft chisel is used to tap the final washer plate in place. Per the notes supplied with the Motive gear, minimum BL shall be .008". CBPL was set very tight which helps greatly with overall gear strength by minimizing ring deflections. |
|
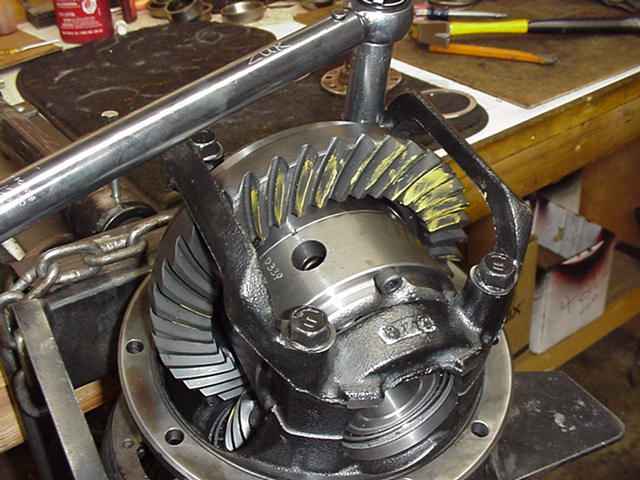
Torque the 4 bearing cap bolts to 75 ft/lb and perform a final BL/CBPL and paint check. |
|
nice. |
|
cool. |
|
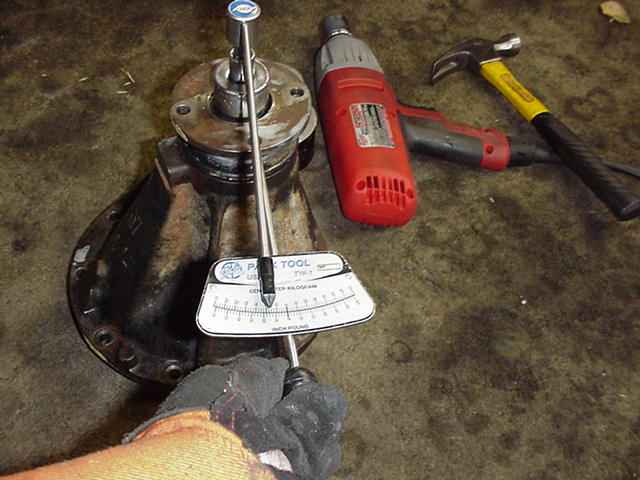
BL varied from 7.5~9 thou for an average of .0085". Here, I am checking the overall CBPL by how easy the ring rocks back and forth thru the backlash range. It took everything I had to rock it even with 2 well planted fingers which tells me I have excellent CBPL. |
|
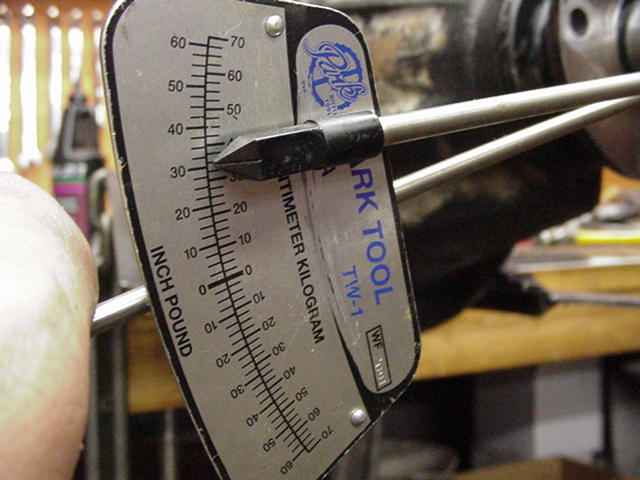
Here, I am measuring the total PPL which measures both the pinion bearing drag and the drag of the turning the carrier bearings also. Combined pre-load is about 30 in/lb which is good. |
|
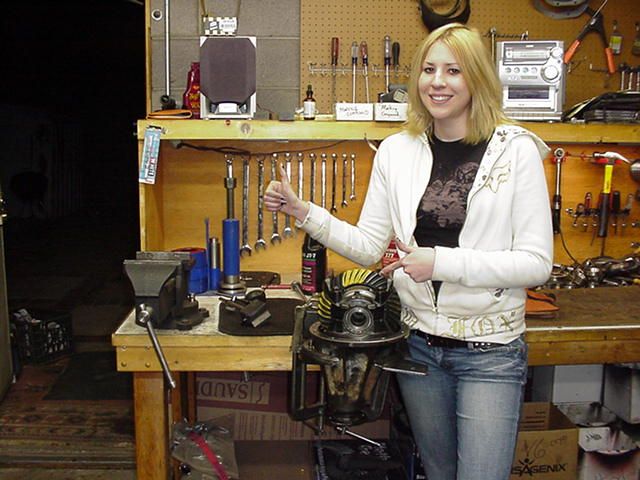
Laura has inspected the pattern and gives it a big thumbs up. Done. |

|
 for getting all the
right stuff for a professional install.
for getting all the
right stuff for a professional install.