|
|
|
|
|
|
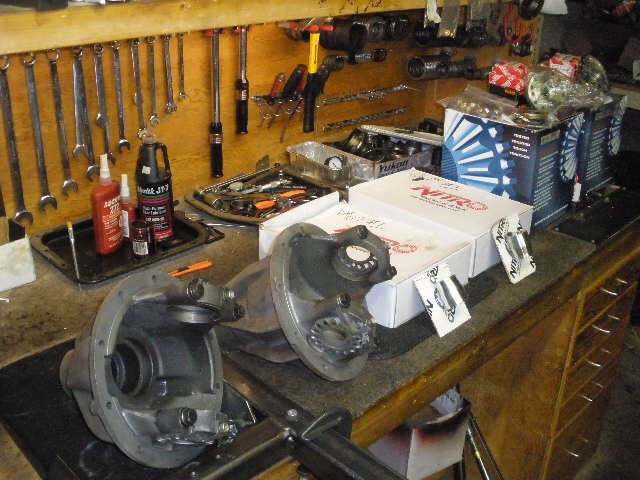
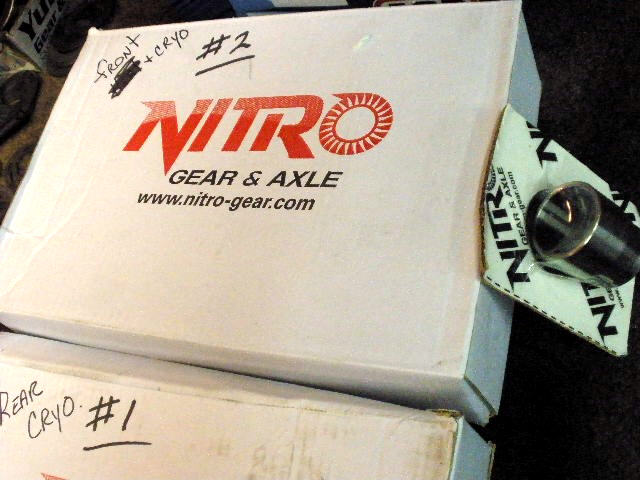
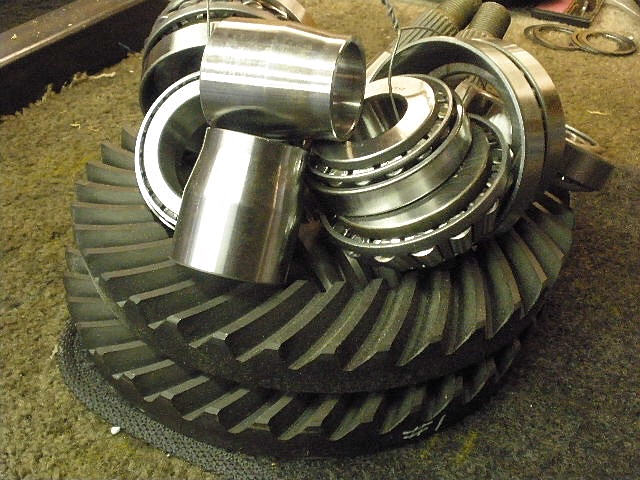
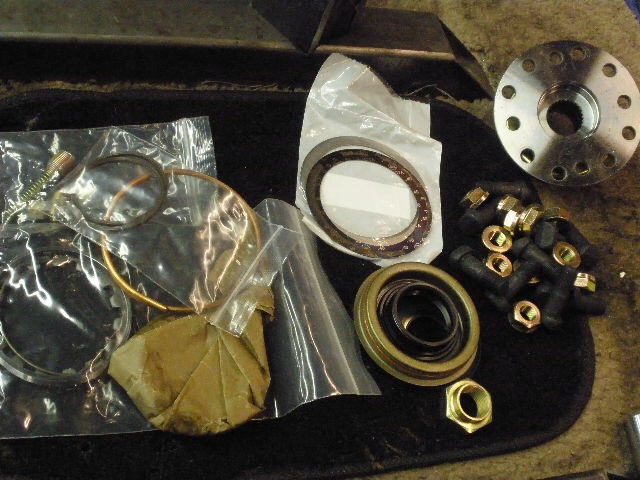
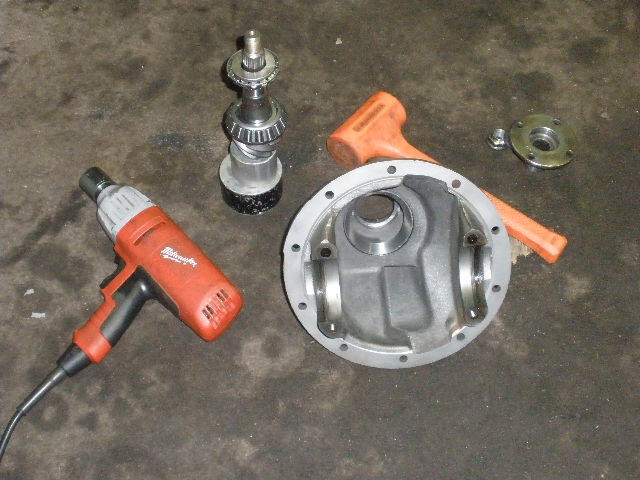
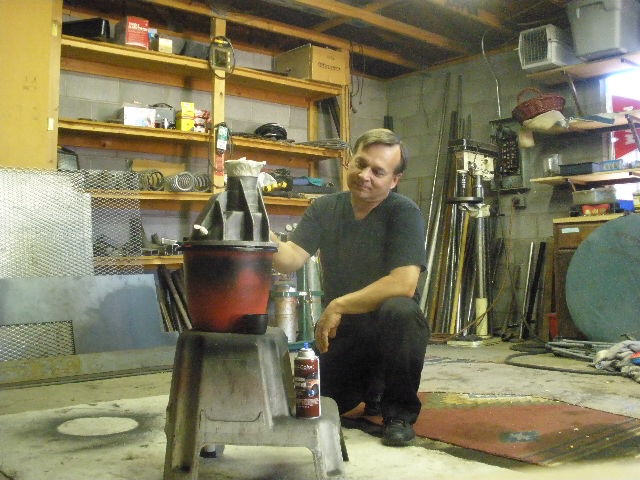
Jay is from Colorado and has sent me these sand-blasted bare TLC 3rds with all the right product. The 3rds are reported to be from an 83 FJ60. Only one of the installs will be documented for the web. |
|
Nitro Gear has always displayed excellent patterns for me and I expect these will do the same. These gears arrived to me already cryo treated....but we will do the unusual and do it a second time. Hardcore audio experts swear that double-cryo improves their hi-fi experience....so who is to say any different for a ring and pinion? It's just a matter of degree of benefit. |
|
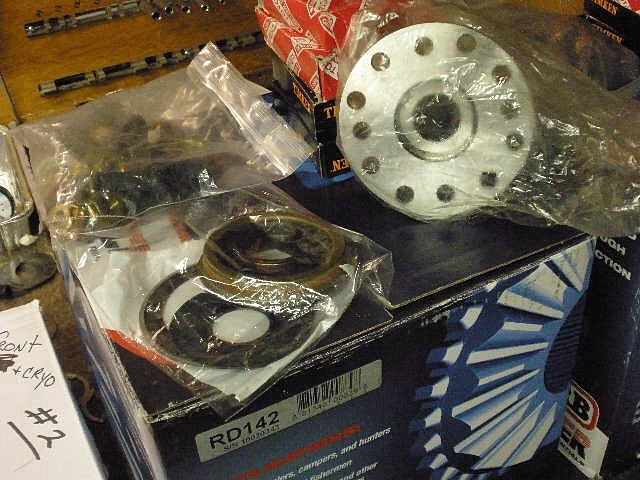
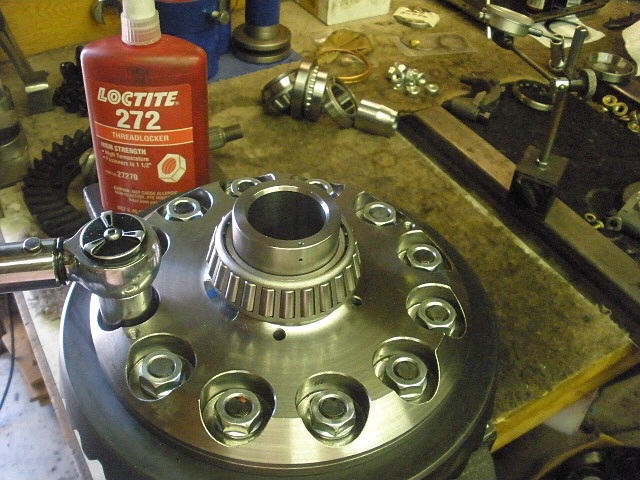
Each 3rd will see new Koyo factory bearings and a triple drilled flange. |
|
``` |
|
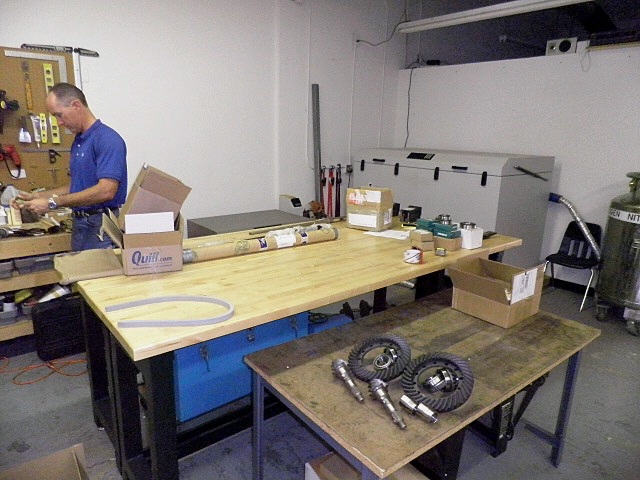
The ring/pinions, bearings, and even the solid collars are ready to go to Scottsdale to Cryogenics International. |
|
The product was dropped off to Charle's operation. |
|
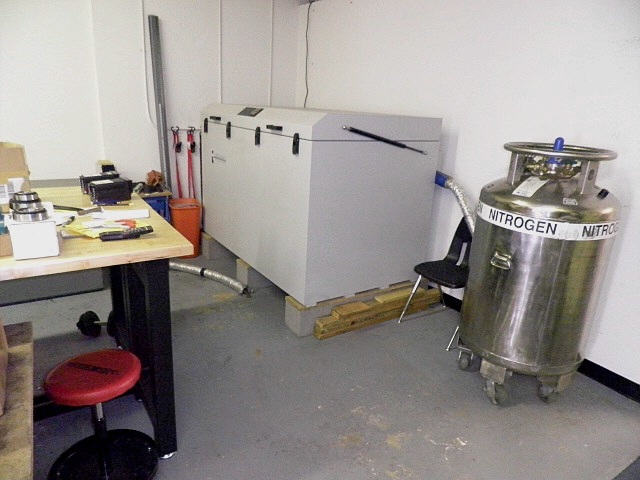
To make a long story short, "Dr. H. E. Trucks", a genius with an I.Q. off the charts, worked closely with Cryogenics International and basically developed the recipes for the cooling process. Here's a google of his name... Dr. H. E. Trucks |
|
The parts are back from the cryo process. Cryo bearings are much more resistant to wear problems. The ring/pinions have seen a double cryo....although wear resistance is way up, probably the most important improvement for us 4-wheelers is the much increased fatigue resistance and over-all strength gains (the ability of the teeth to stay on the ring). Almost all the internal stresses have been removed also. |
|
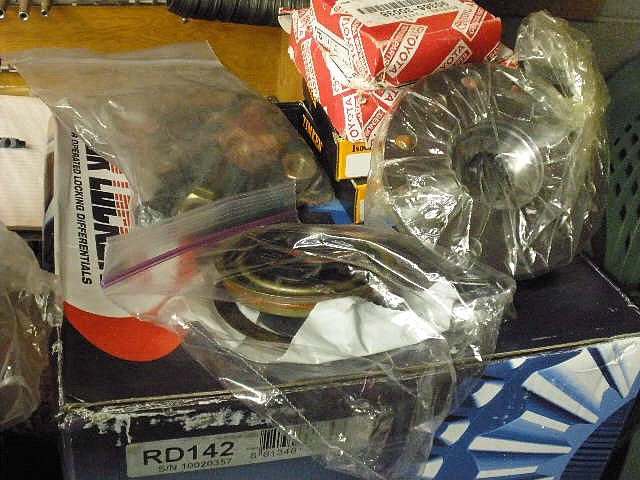
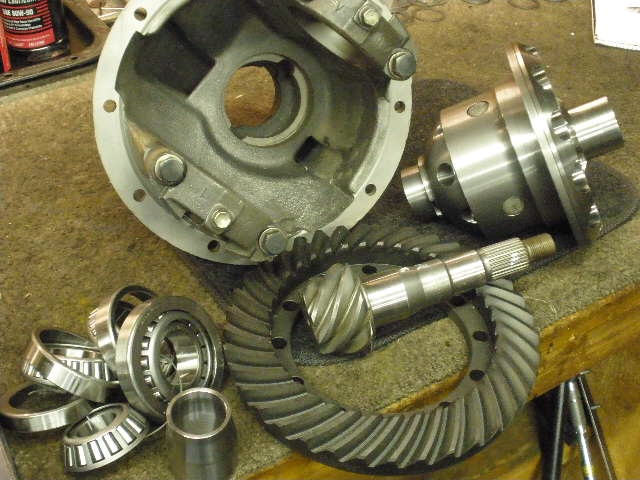
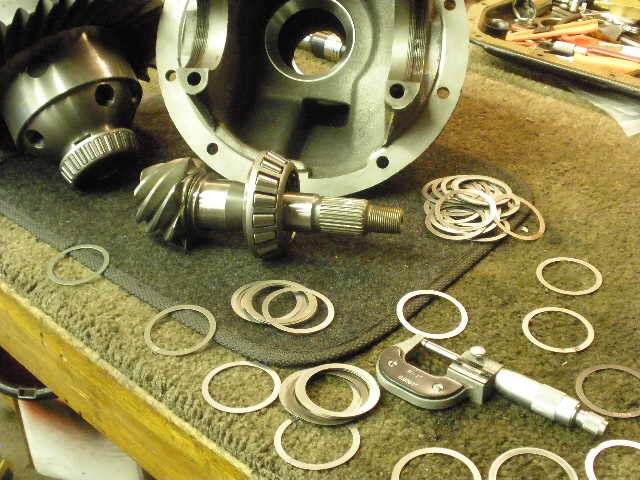
The rest of the parts are sorted and organized. |
|
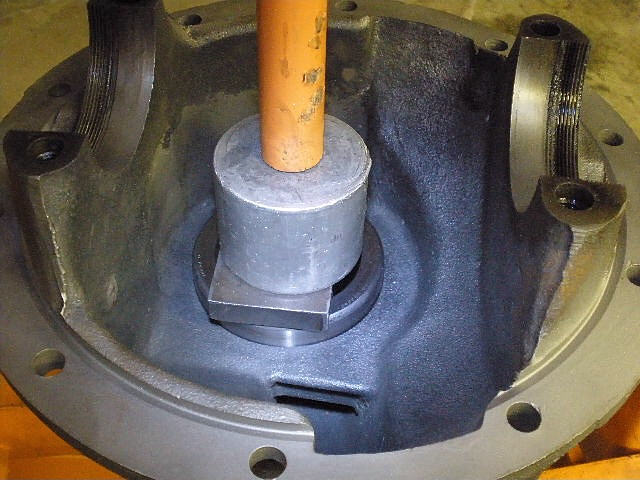
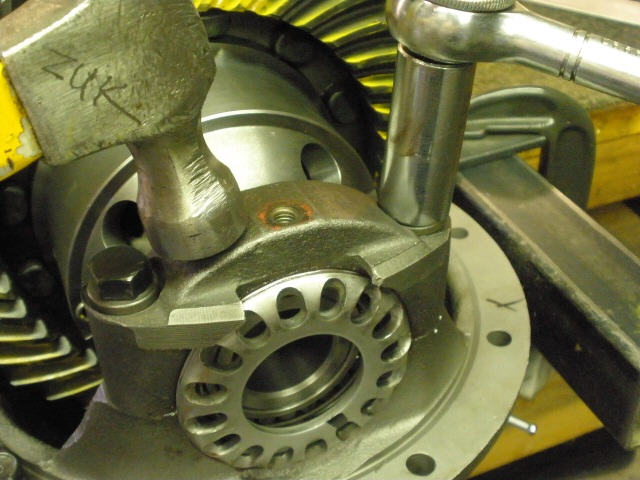
Pinion races are pressed in. In the pic, I'm using an old race to line up with the new one and evenly seat it 100%. I don't use the soft chisel method anymore due to that might be the reason why the pinion bearing pre-load 'oscillates' sometimes as noted with my pendulum style torque wrench. |
|
I realize that the ARB case is accurately machined but I still check both surfaces for irregularities with a large file. |
|
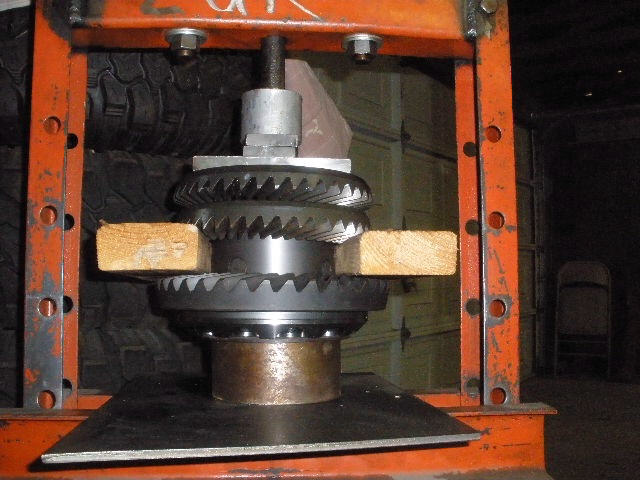
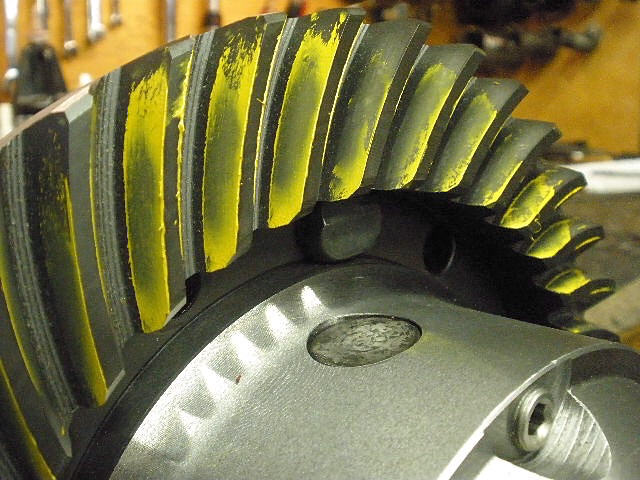
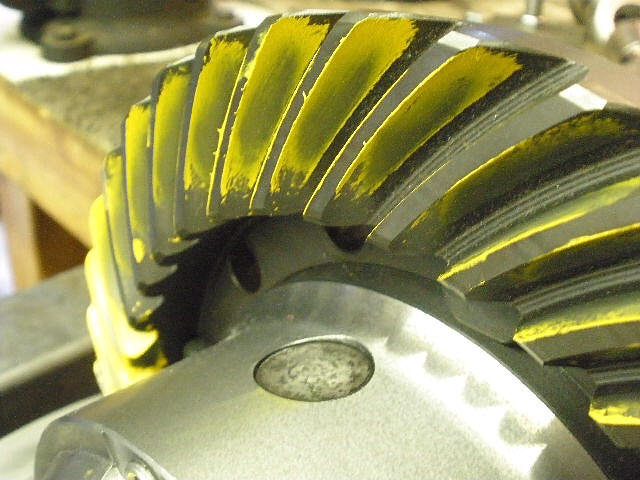
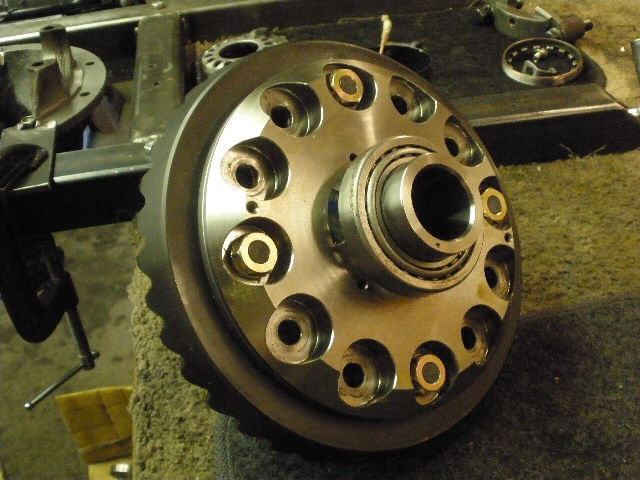
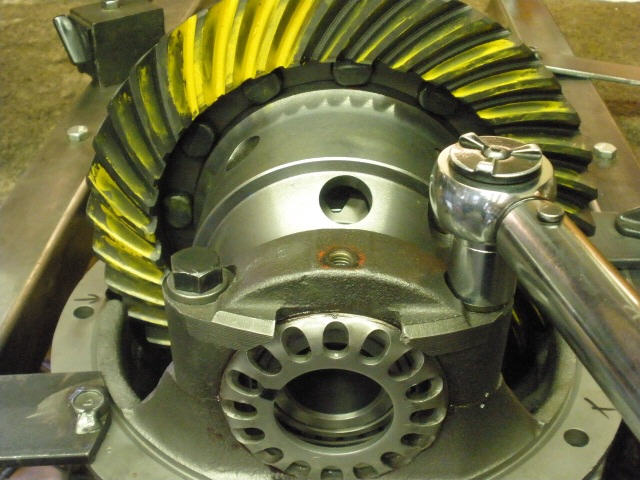
Here, I am pressing the ring down onto the tight fitting case. Pressing from this side makes it easier to align the 12 ring bolts holes. The 12 bolts are long enough where I was able to gravity feed them and get good alignment on the first press. I use whatever is handy for spacing the pieces of wood correctly. Those are old 8" ring gears. |
|
Red loctite is applied to the 12 bolts. |
|
The new "after-market style" nuts are tightened to 100ft/lb....but a funny thing happened on one of the nuts....it stripped itself before I could reach full tightness. The threads on the nut came off but the oem factory bolt had no thread damage at all. After discussing this with Jay, it was elected to order 24 new factory nuts at close to $5 a pop. This has never happened to me on previous TLC installs...but I was also always using the factory hardware, too. |

|
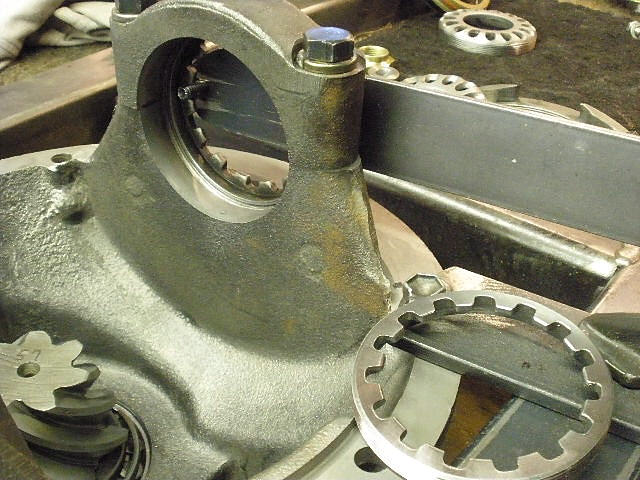
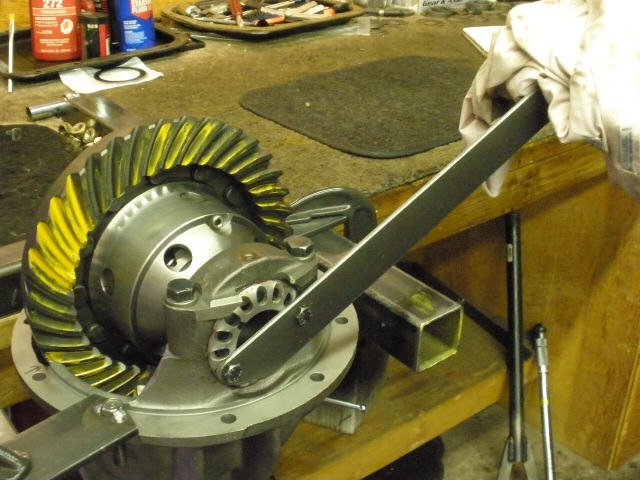
Carrier bearings are both pressed on at the same time. |
|
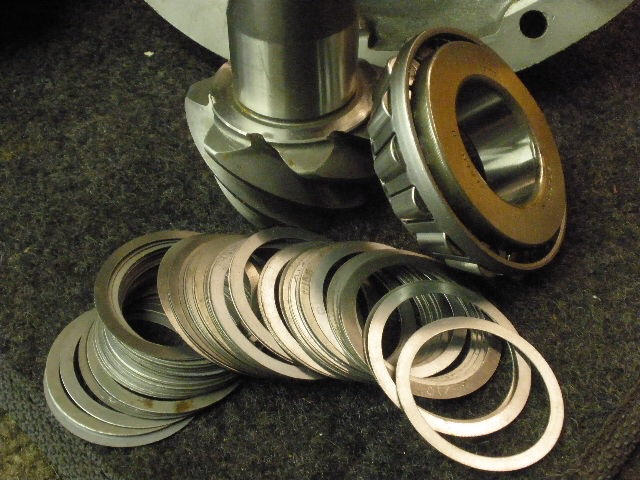
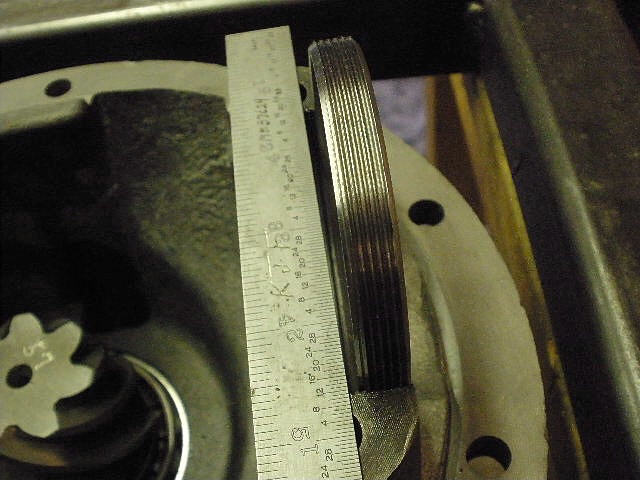
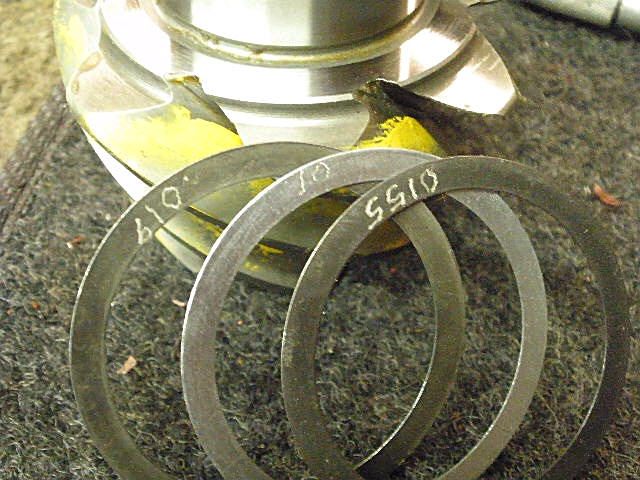
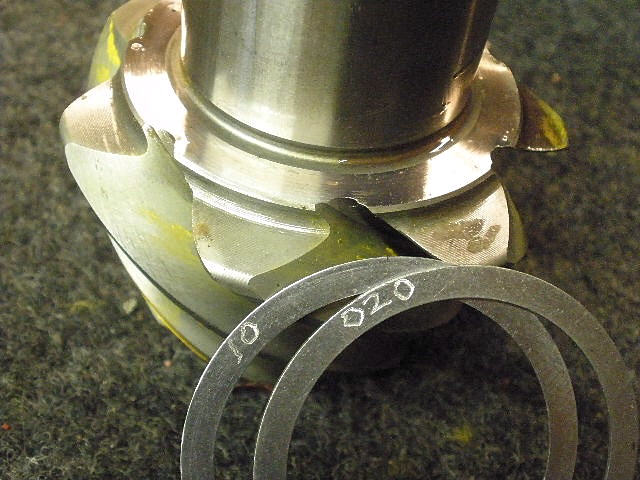
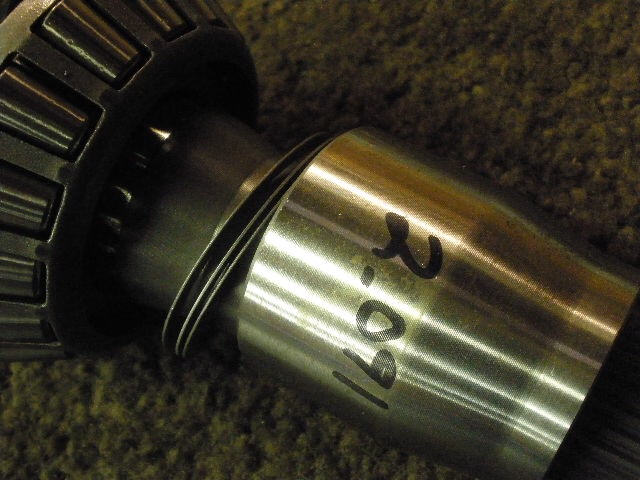
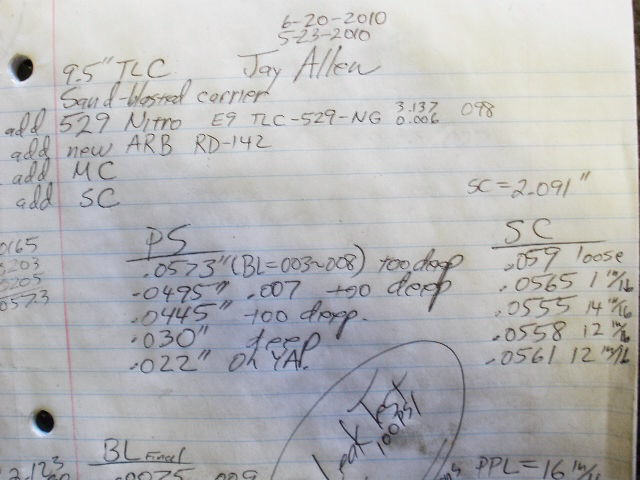
Now onto the pinion end of things. Time to press the starter shim onto the pinion. Past experience has shown that .057" is an excellent choice for later model TLC 3rds....apparently, this 1983ish FJ60 3rd is of a slight casting change and wants to see a thinner depth shim as you will see. |
|
I found 3 shims in my good collection that added up very close to 057. |

|
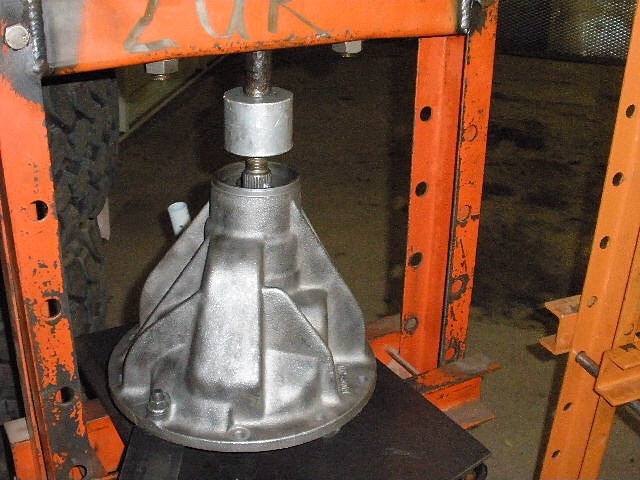
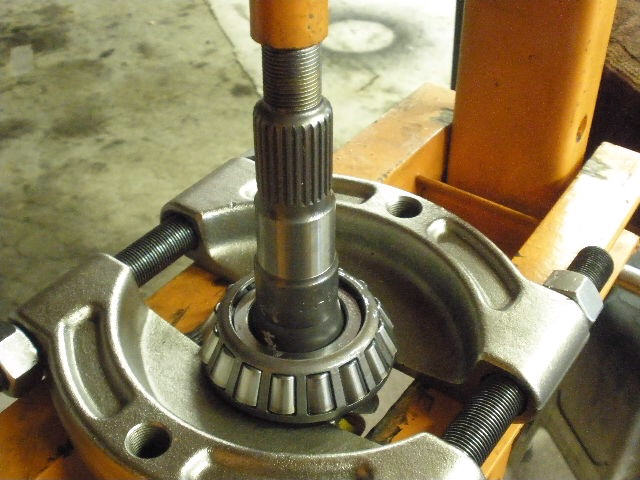
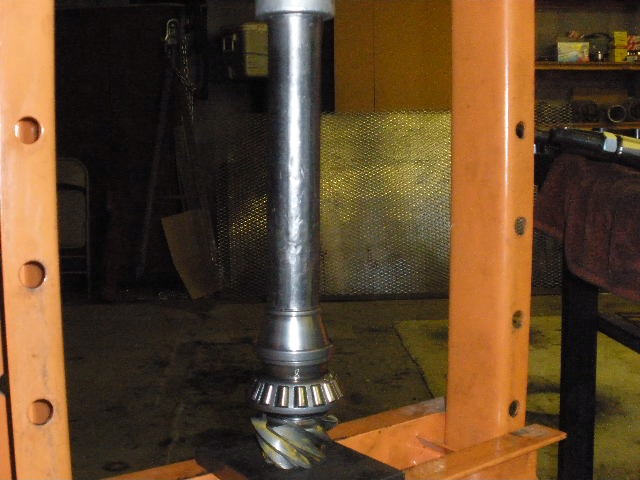
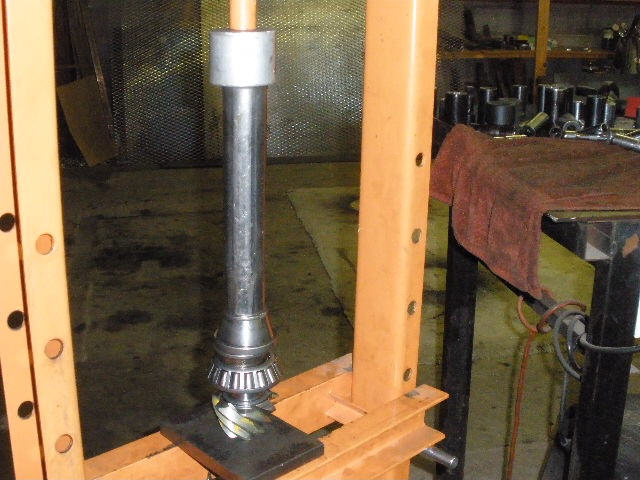
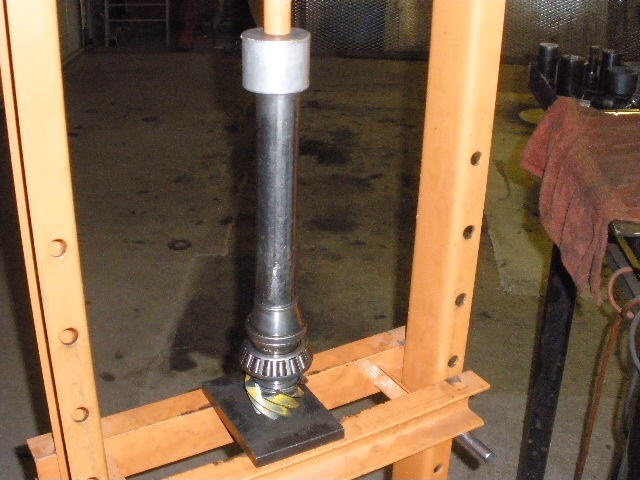
The new Koyo pinion bearing is pressed on with my humble 12 ton Harbor Freight special. |
|
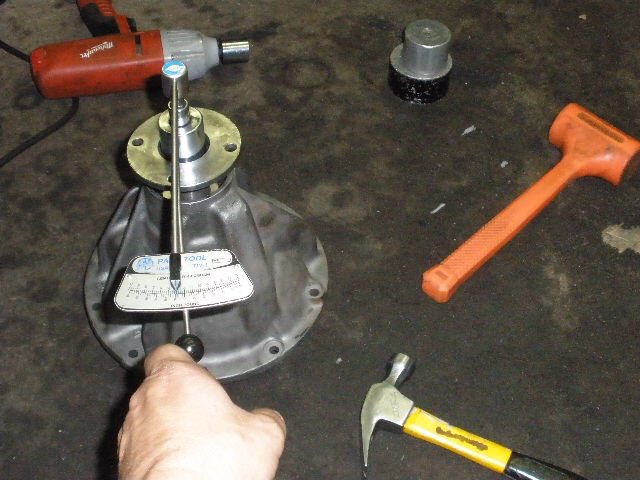
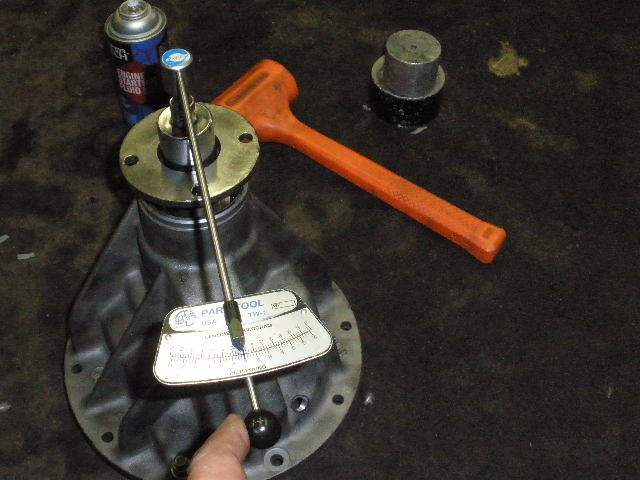
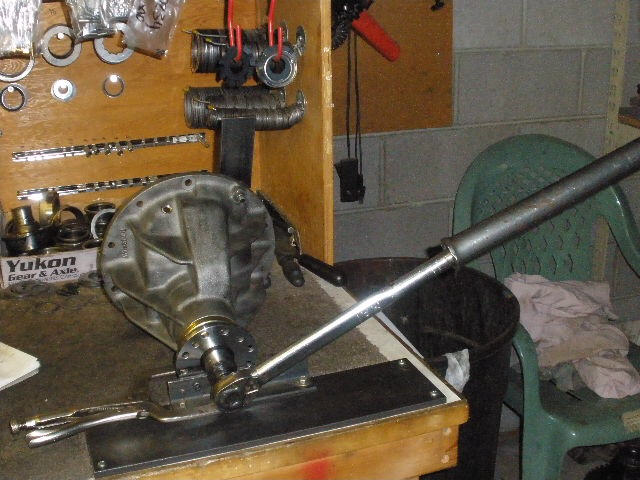
Time to assemble the pinion in place. These are the only tools I need for this task...except for a generous splash of gear-oil on the bearings and the use of a "bicycle torque wrench" to get the pre-load in the ballpark. No crush or solid collar is needed at this time. |
|
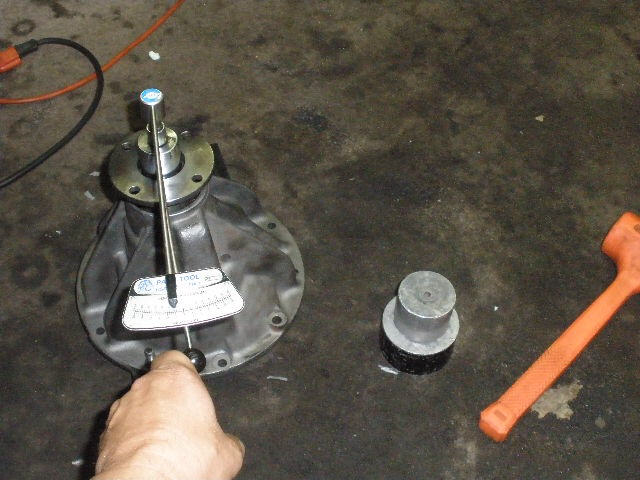
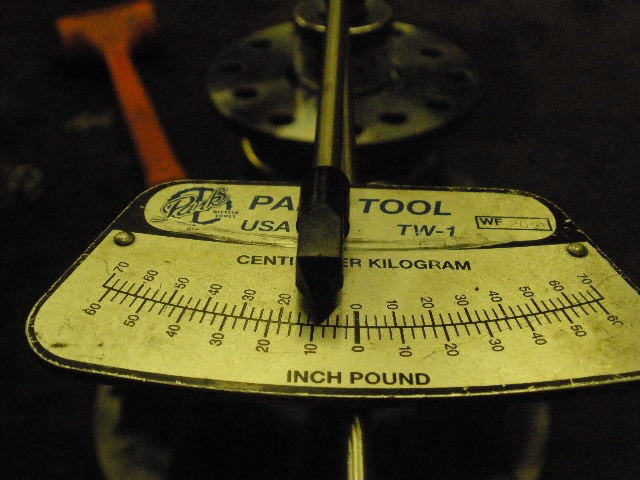
I can do this pretty much by feel but I'm in the habit of using the torque wrench...so I do. I look for 10~15 in/lb for the purposes of running a pattern check. |
|
I was having problems turning the ARB machined adjuster wheel when the cap was tightened down and after comparing it with a spare I had, it was determined that the threads seem to be machined wrong....not deep enough in the thread valleys I think. |
|
I switched back and forth 2 or 3 times...each time the customer arb wheel would seize up and my spare wheel turned easier. |
|
I measured it for being put in the grooves straight....and cleaned the threads with a fine wirebrush to make sure there was no sandblast debris but something was decidedly off with the one wheel. |
|
First time I had that happen....so I used my spare wheel... |
|
...and it's good to have some spares when they are needed. |
|
I'll send it to Jay with the finished 3rd. |
|
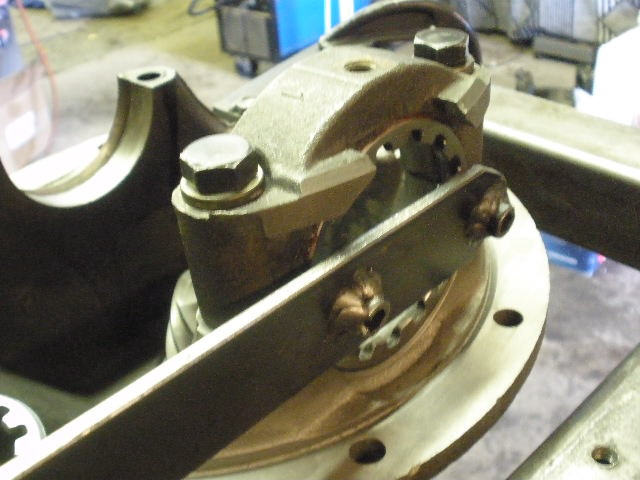
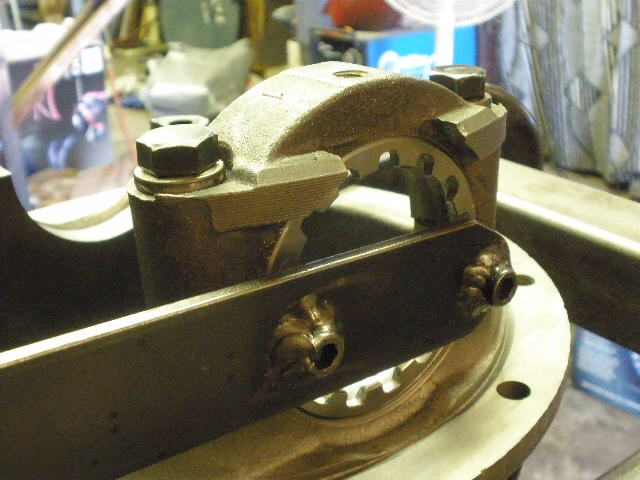
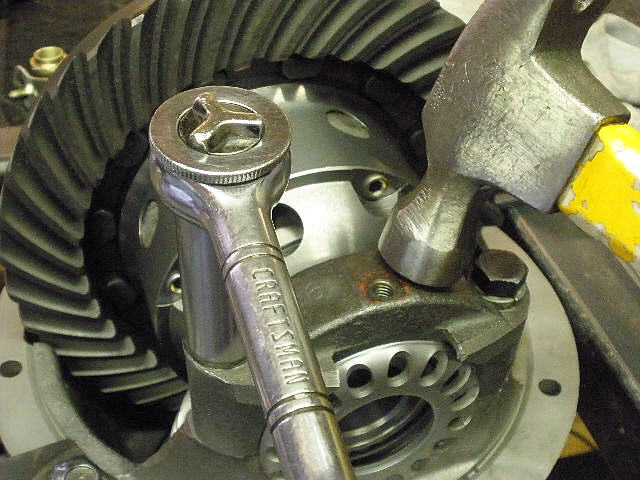
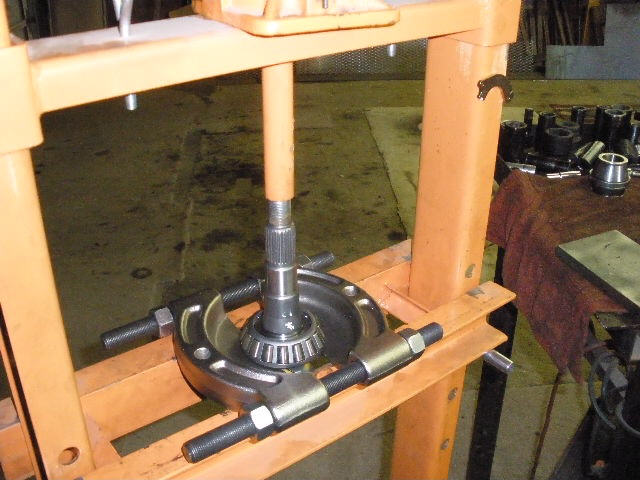
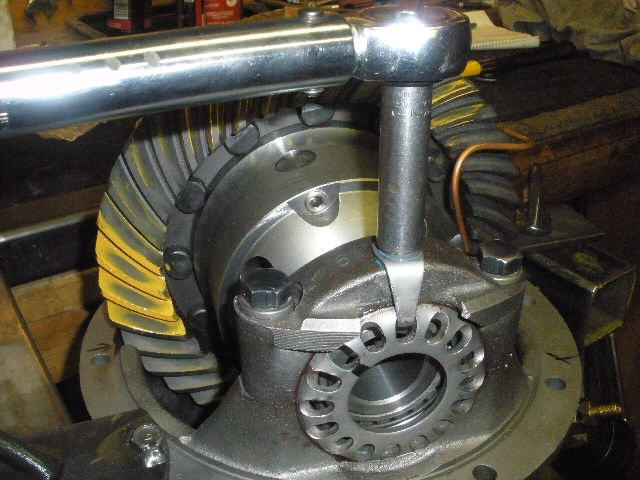
Now, I can finally assemble the case into the 3rd and run a pattern check. Lots of "tap tap" on the caps to make sure the threads shock themselves into alignment as I snug the 2 bolts. The wheels should turn easy using this method. The threads should also be greased up. |
|
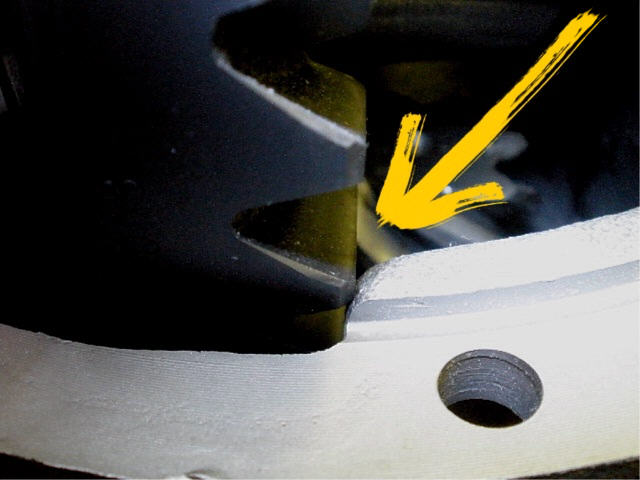
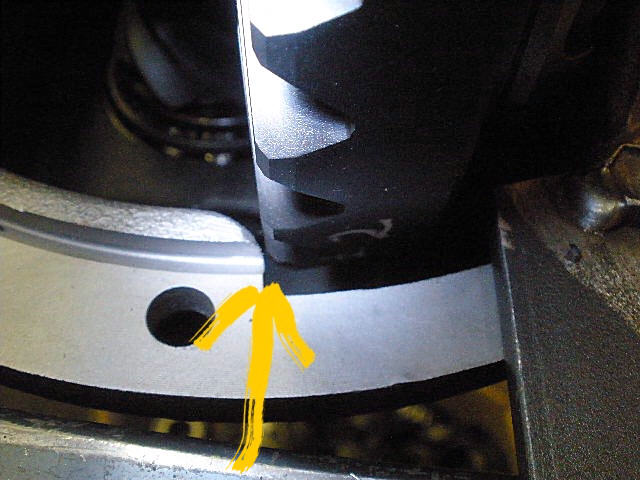
Then I discovered that the ring gear was not turning due to a minor clearance with the casted 3rd. |
|
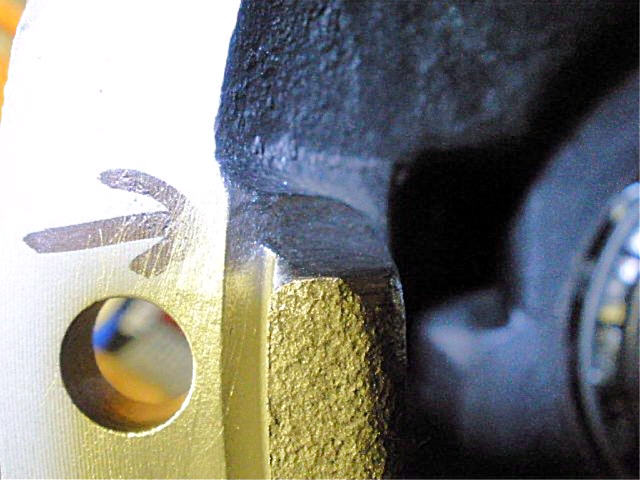
I guess this thick 529 ring gear was more than what the factory figured on in 83. |
|
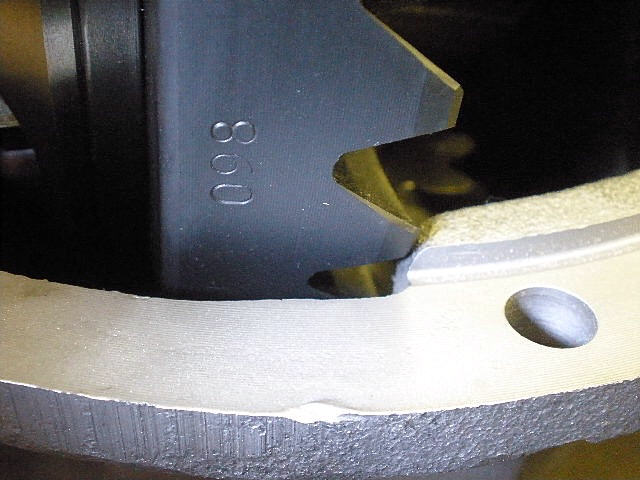
The other side just barely cleared. |
|
Nothing that a little clearancing with a hand-grinder couldn't fix. |
|
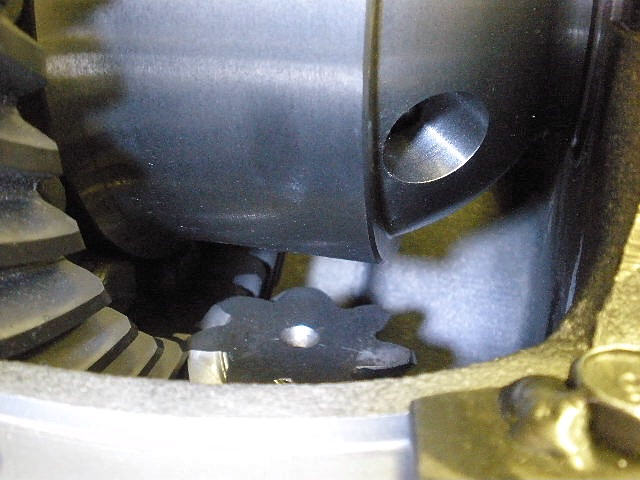
I also checked the clearance from pinion tooth to ARB case. This is never a problem with the TLC 9.5" set-ups. There's over 1/4" clearance here. The same is not true with the common 8" mini-truck 3rds...they come very close and sometimes require a tooth crown mod. |
|
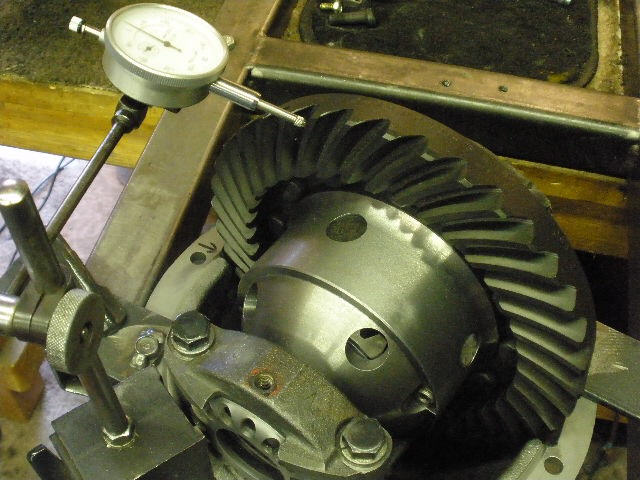
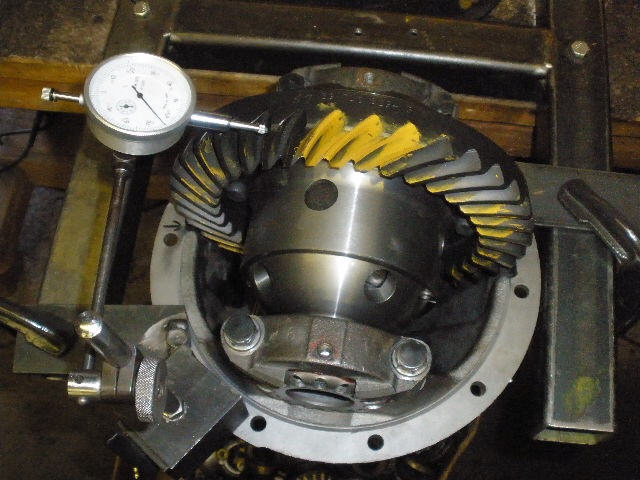
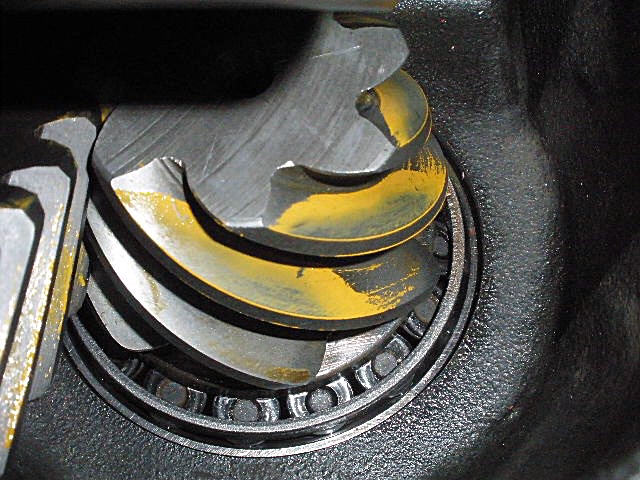
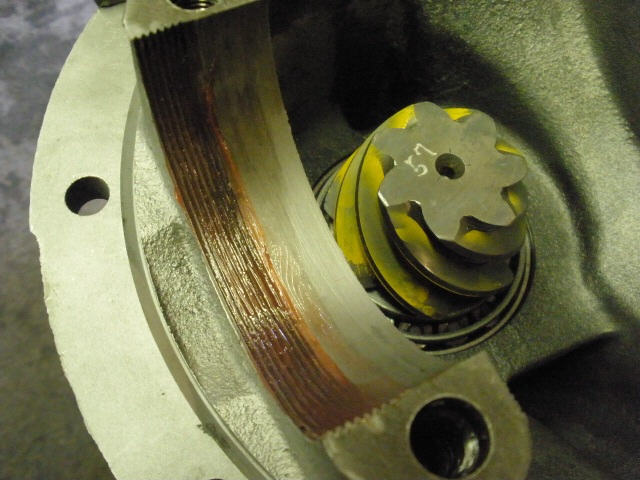
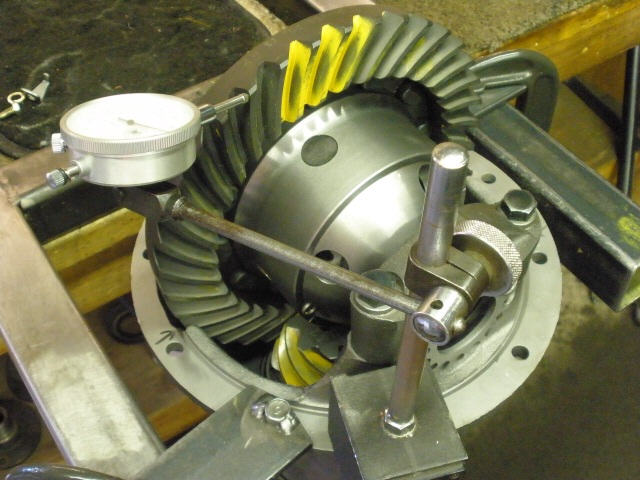
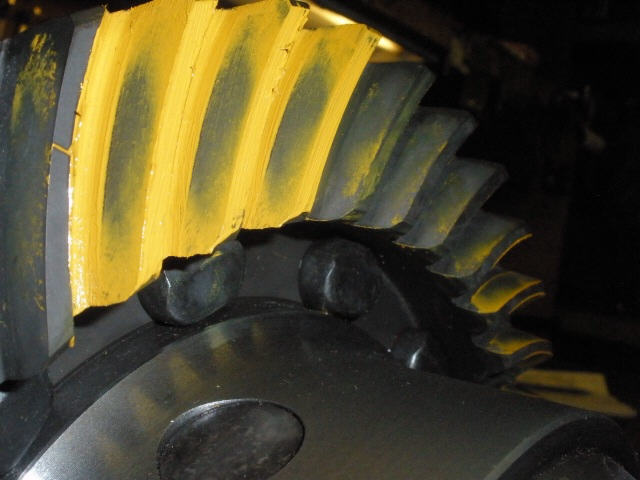
I dial in some carrier bearing pre-load while guiding the backlash close to .008" and then I'm ready for a paint check. |
|
Wow....I thought it would be right on or very close...this is definitely hard on the toe and very deep(too thick on the shim). |
|
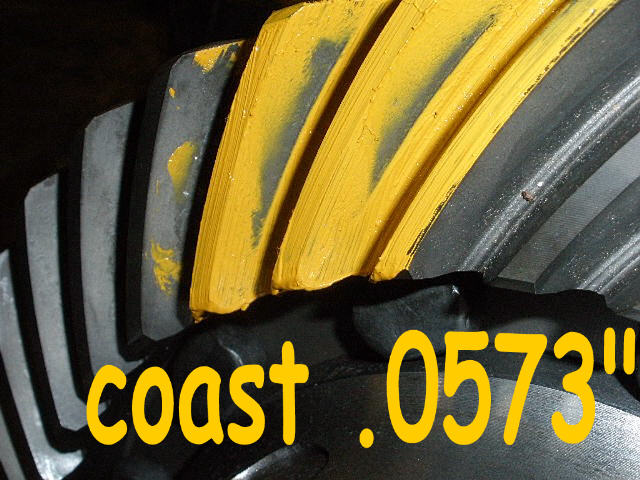
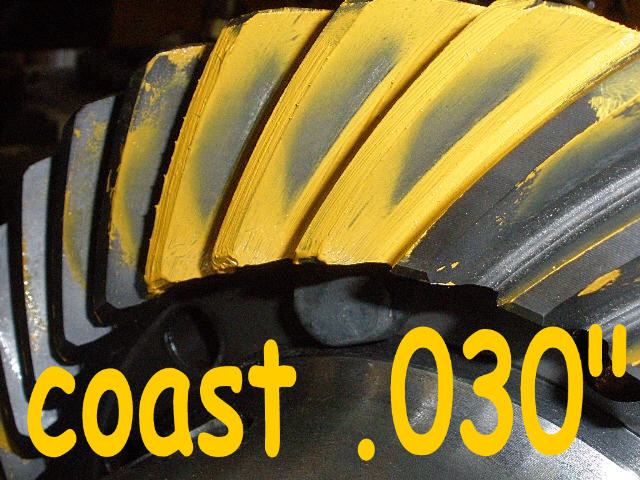
Very deep here on the coast. |
|
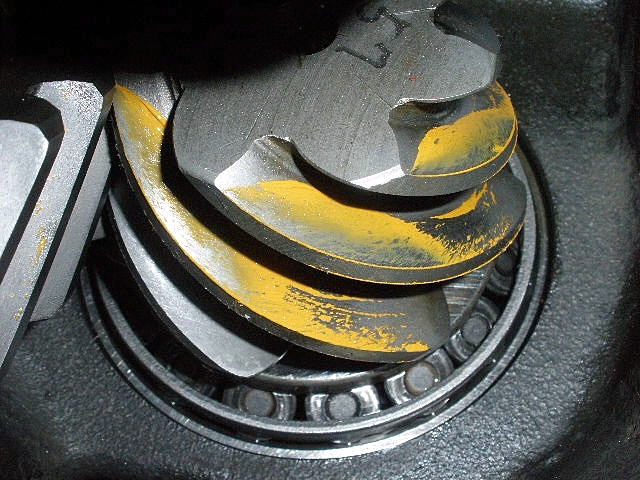
This is confirmed with the pinion contact appearing very very shallow....equal and opposite that on the ring as expected. |
|
So, out comes the pinion. |
|
Off comes the bearing. |
|
I didn't make a big jump in shim thickness...... it's still too too deep. |
|
Coast confirms that. |
|
So does the pinion. |
|
Same thing...take it out...press the bearing off. |
|
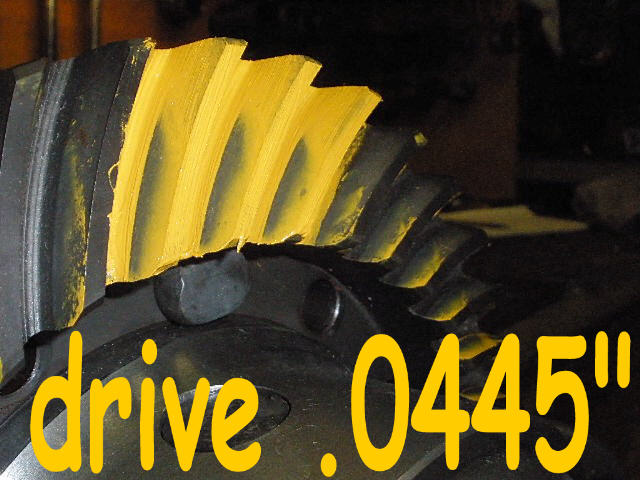
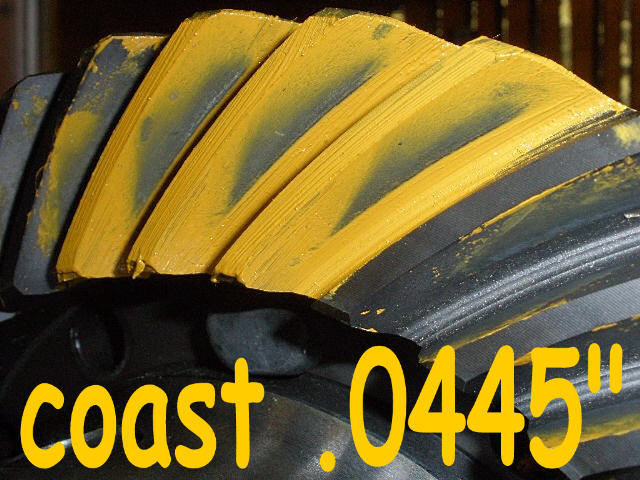
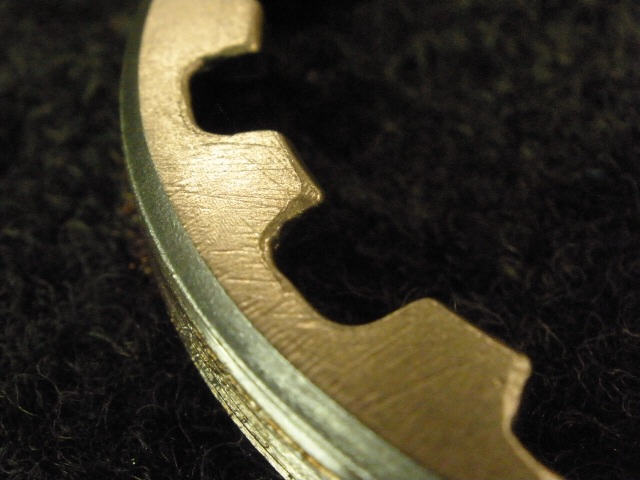
This time let's try .0445" |
|
Press the bearing back on. |
|
Reset the backlash...This can get a bit monotonous but the load bearing pattern needs to be precisely set for maximum strength. |
|
Still too deep. |
|
deep |
|
Confirmed again. Time for a bigger jump in shim. |
|
``` |
|
``` |
|
``` |
|
``` |
|
``` |
|
Closer but still deep. |
|
``` |

|
Pinion agrees it's still too deep as indicated by the shallowness here(tip contact). |
|
``` |

|
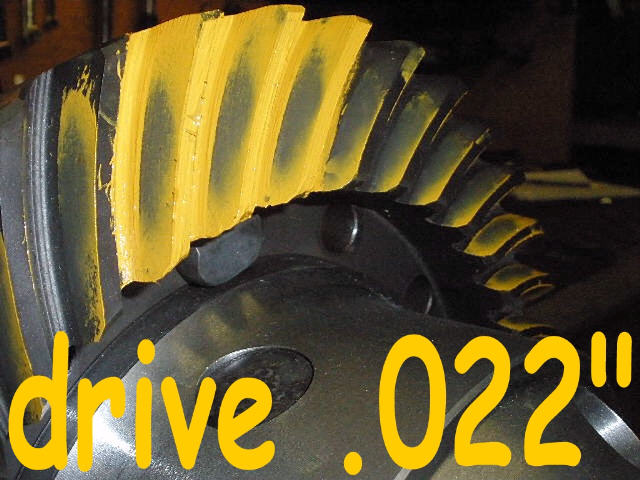
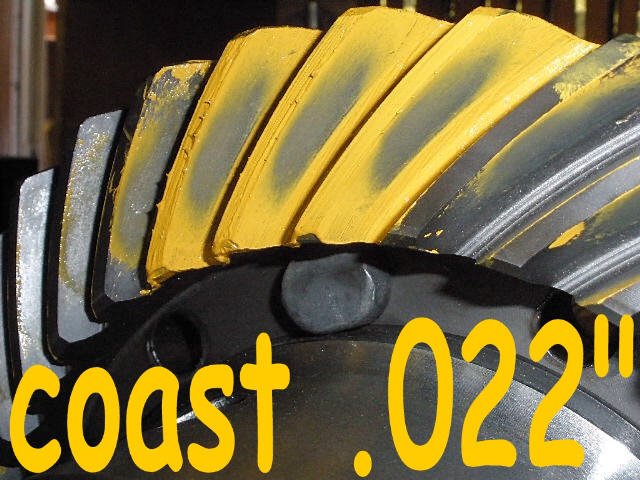
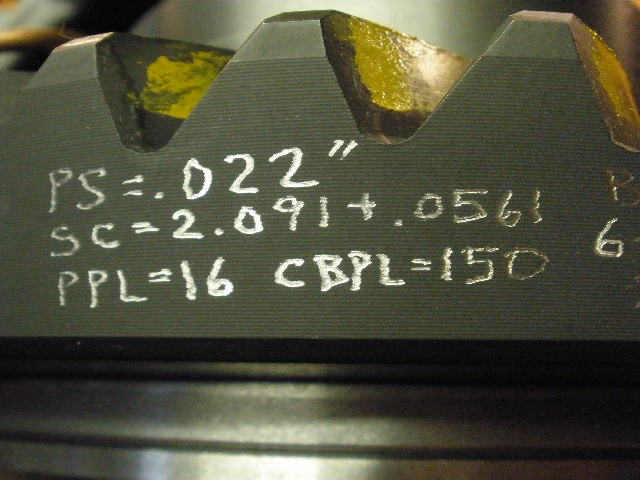
Time to try .022". |
|
``` |
|
``` |
|
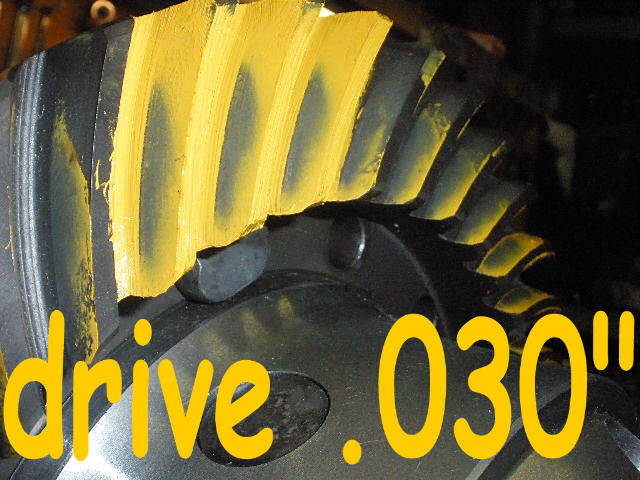
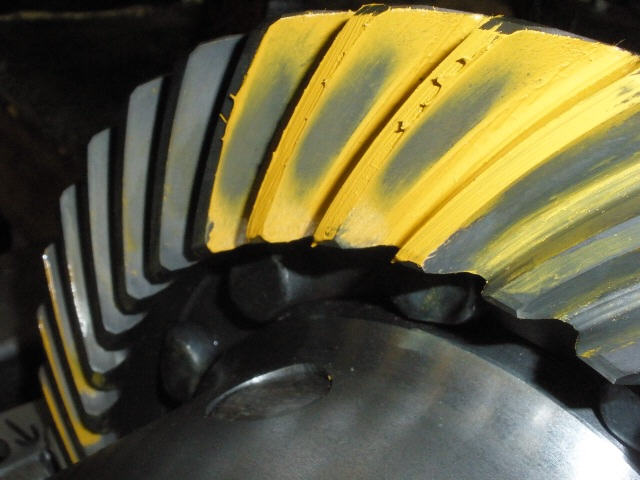
This is more like it. This I consider spot on....actually a touch to the deep side which is my preferred condition. |
|
Coast looks nice. |
|
Pinion says don't touch it. It's good to go. |

|
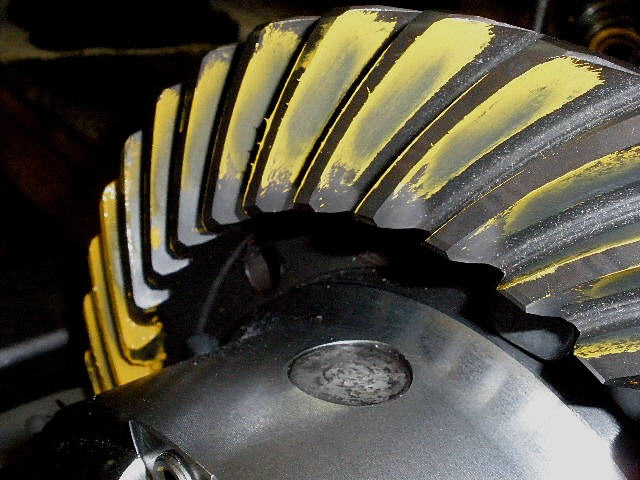
Some checks of the other teeth that were "reverse painted" shows exact desired depth. |
|
``` |
|
``` |
|
``` |

|
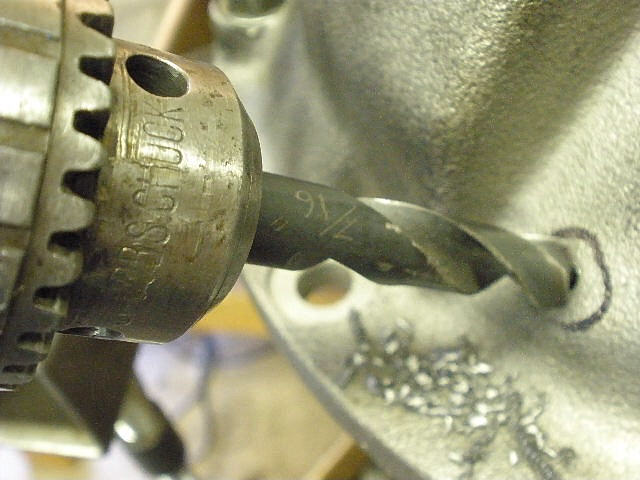
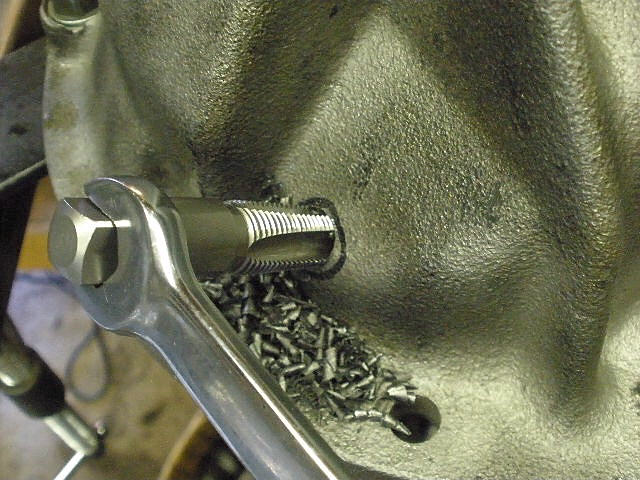
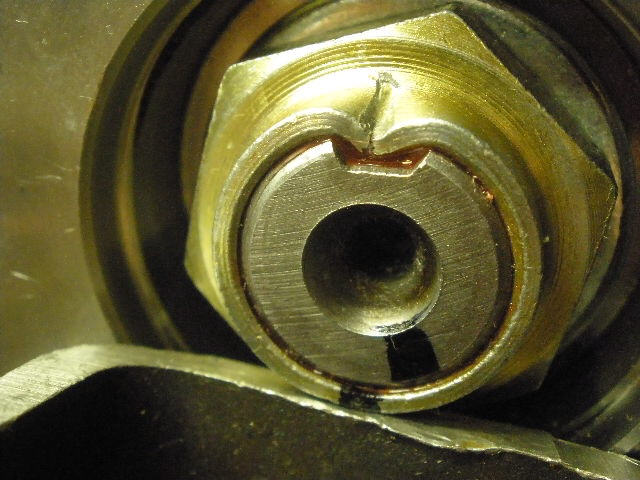
Now to mark and drill for the brass bulkhead fitting. |
|
``` |
|
``` |

|
The NPT tap is tapered...so I tap until about 5 or 6 cutting threads are still visible. That way, the bulkhead fitting seats almost all the way in to the max. |
|
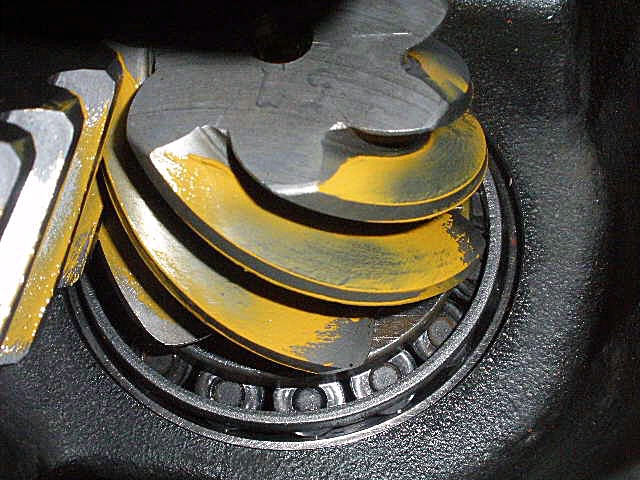
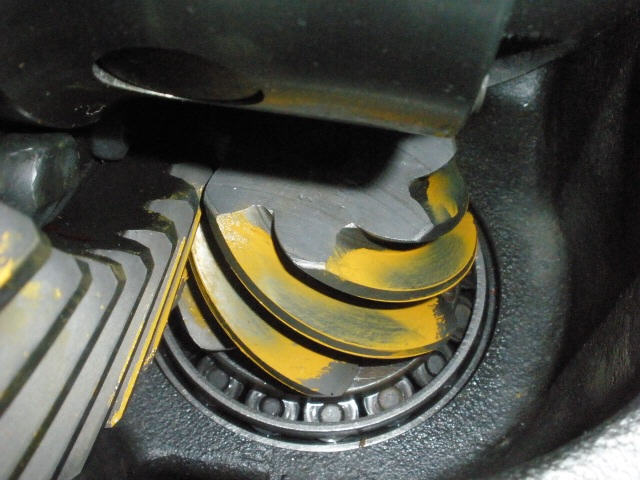
It took about 5 tries before the solid collar was properly shimmed. |
|
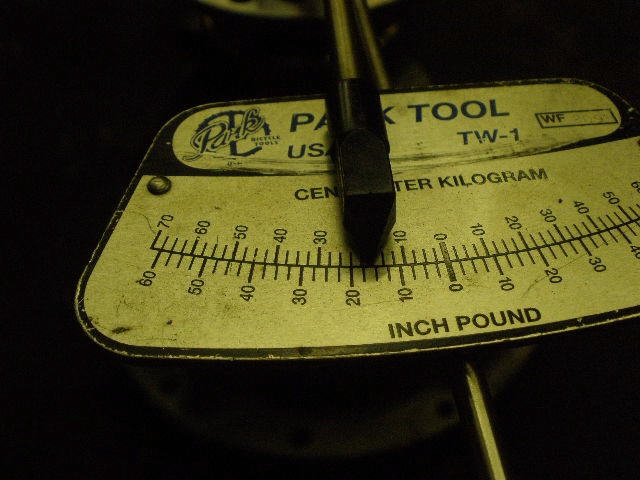
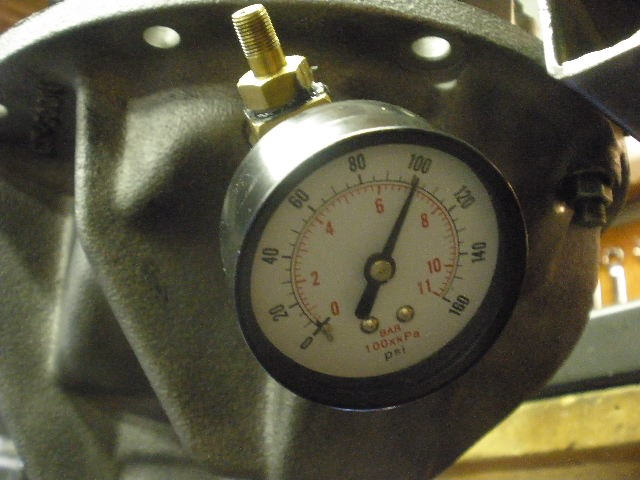
I measured about 12 in/lb. |
|
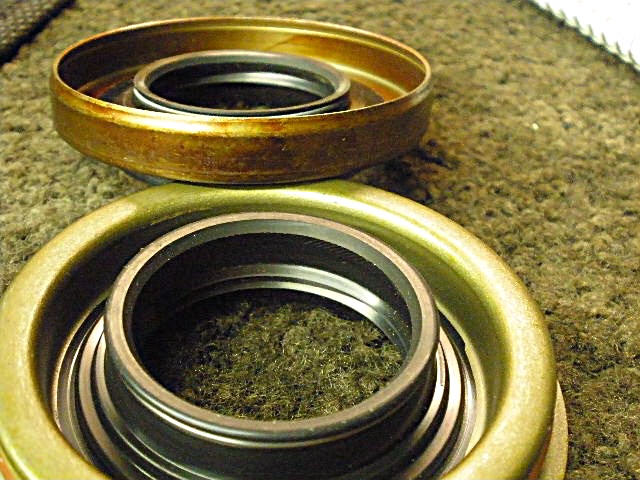
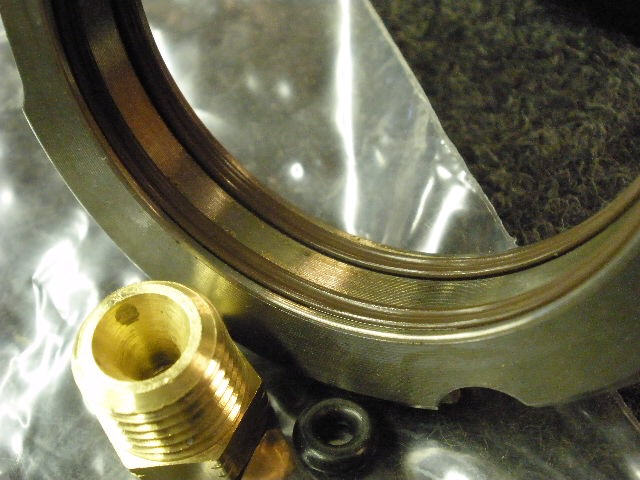
With PPL established, now to remove the shop flange and install the Marlin seal. |
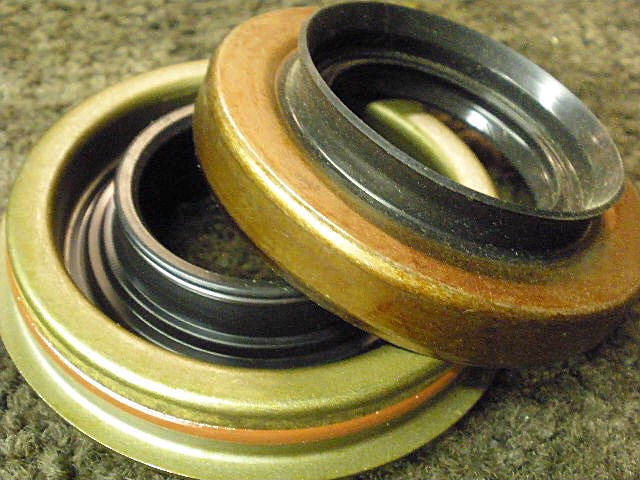
|
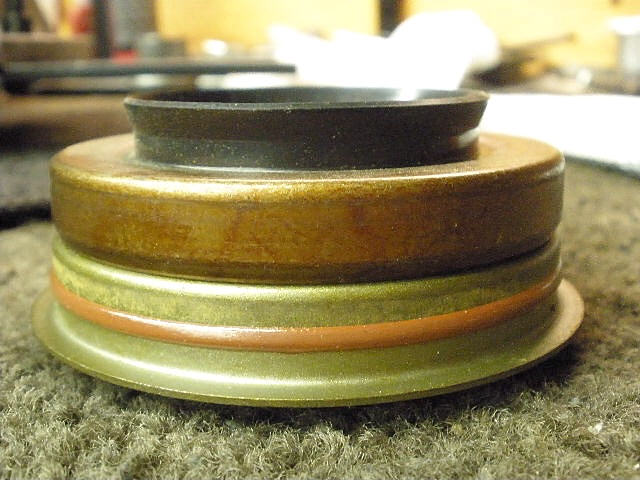
The difference between the Marlin and factory seal is night and day. |
|
``` |
|
``` |

|
Triple seal. |
|
The seal is evenly tapped down. |

|
``` |
|
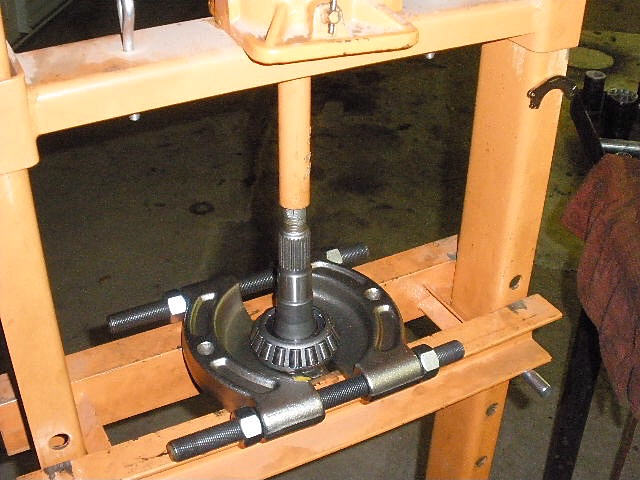
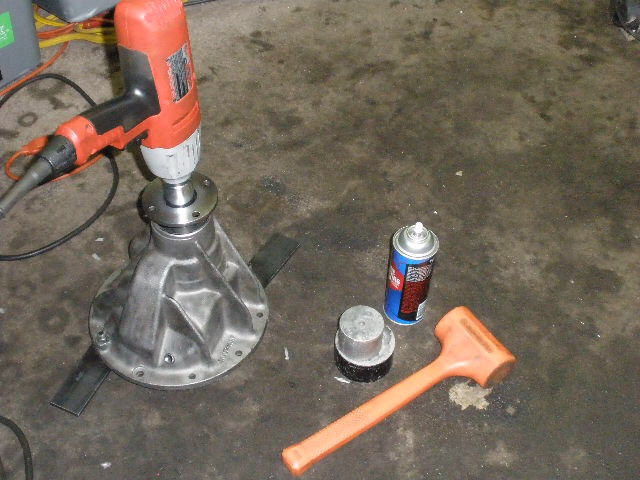
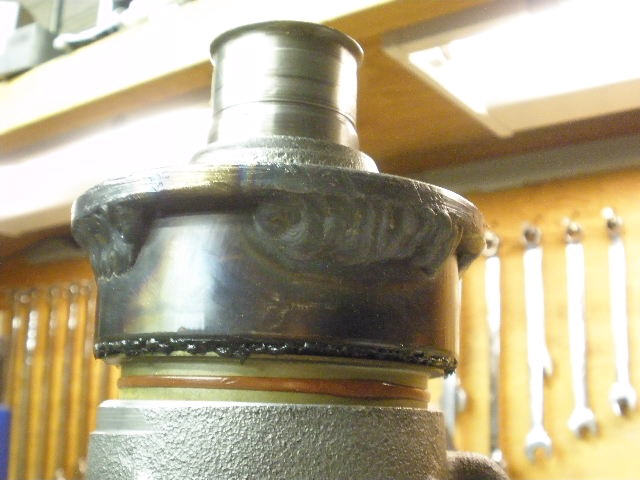
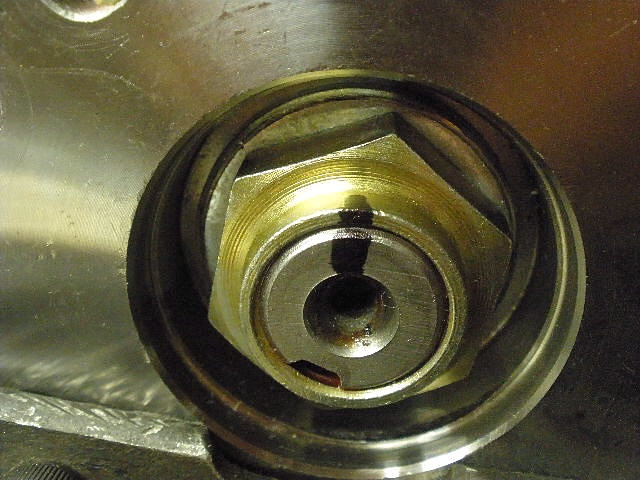
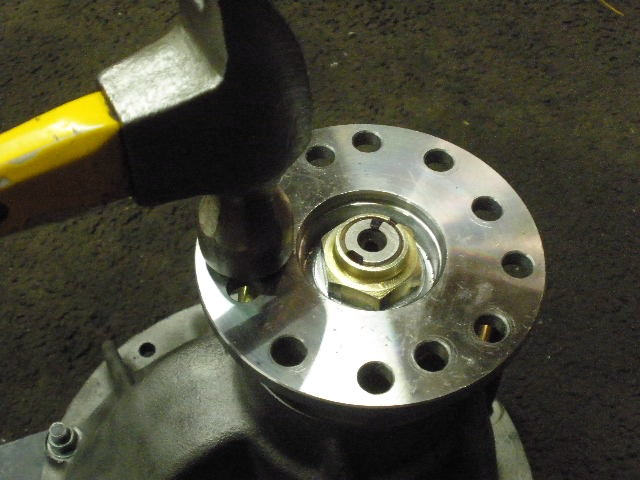
Install the triple drilled flange and loctite on the pinion nut. |
|
Using my electric impact shocks the nut fairly tight and I am measuring about 10 in/lb of PPL. |
|
I can get the nut a bit tighter and increase the PPL some at the same time. I place a black mark for reference. |
|
A little extra leverage will accomplish the task. |
|
You can see the shift in the black marker and I am lightly tapping the flange here to equalize the pinion bearing tension. It helps to rotate the flange while tapping it. |
|
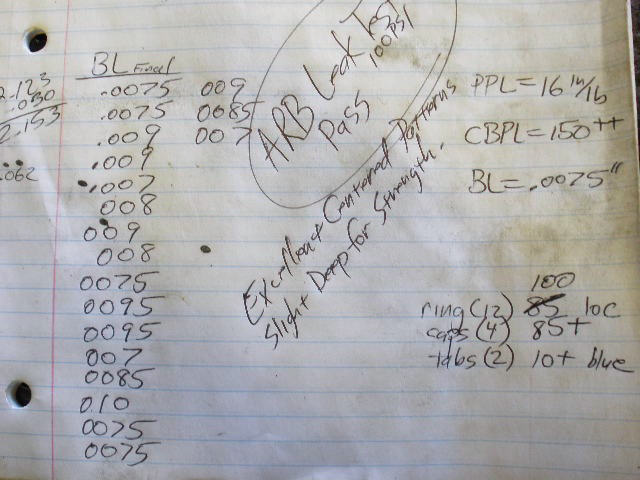
Final PPL is around 16 in/lb. |
|
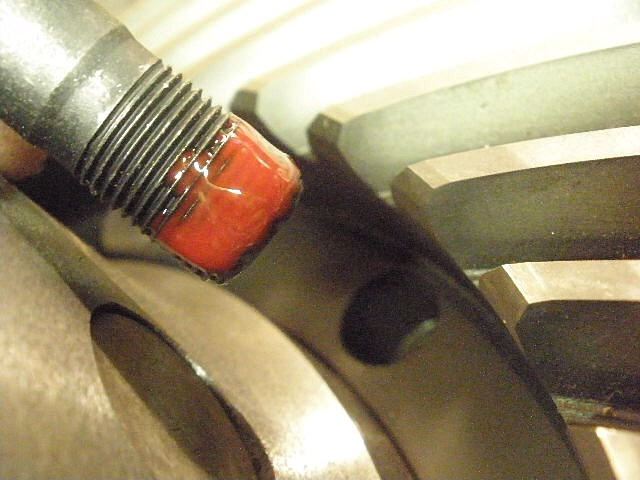
The red loctite will keep the nut from loosening up but dinging the cavity shown here is extra insurance. |
|
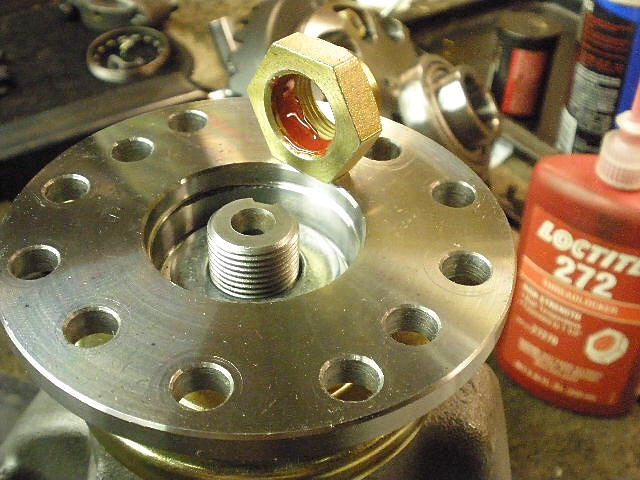
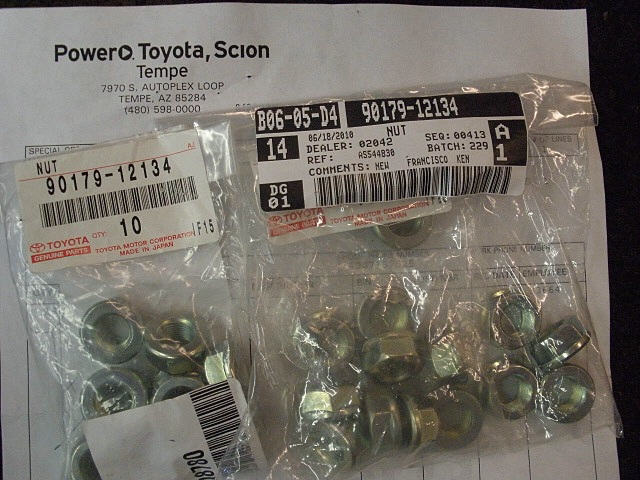
I've been waiting for the new nuts to come in and have been doing this install with 4 bolts in place. |
|
Some of the nuts were back-ordered but they finally did arrive...after about 2 weeks. Part number 90179-12134 for reference. |
|
Now I was able to use red loctite and 100 ft/lb with no issues.
|
|
Lots of thick red grease on the threads. |
|
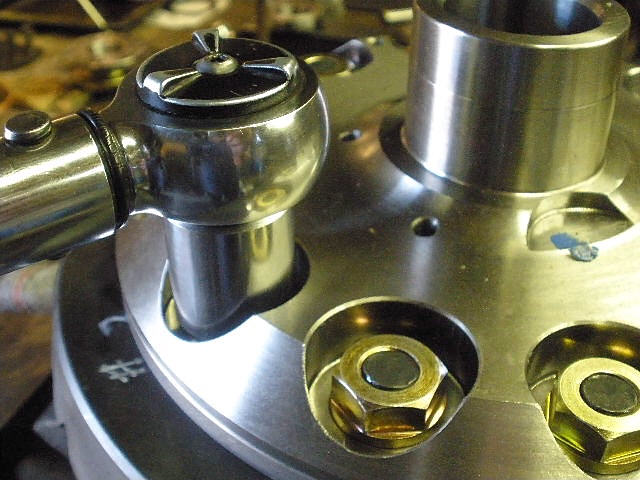
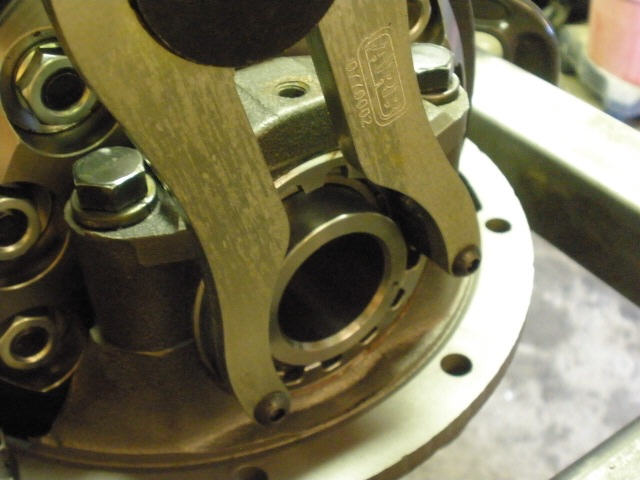
Sometimes, I run a flat file across the special ARB adjuster wheels and then chamfer the edges shown here. I use my dremel tool for this operation. |
|
The wheel is tightened with your tool of choice...and choose well. |
|
The other side is tightened and the tap tap method will help the upper threads align better with the lower ones. |
|
The 4 cap bolts are now fully tightened to the 85 ft/lb spec. |
|
This homemade tool is still my favorite for final tightening of the wheels. I made this with hardened grade 8 5/16" fine thread bolts I believe. The flat stock came from Home Depot and is 18" x 1.5" x 3/16"....if I were to make another, I would only change the flat stock thickness to 1/4" I think. |
|
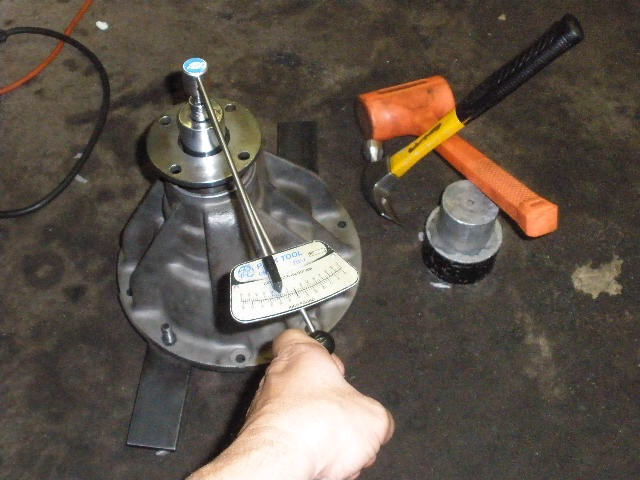
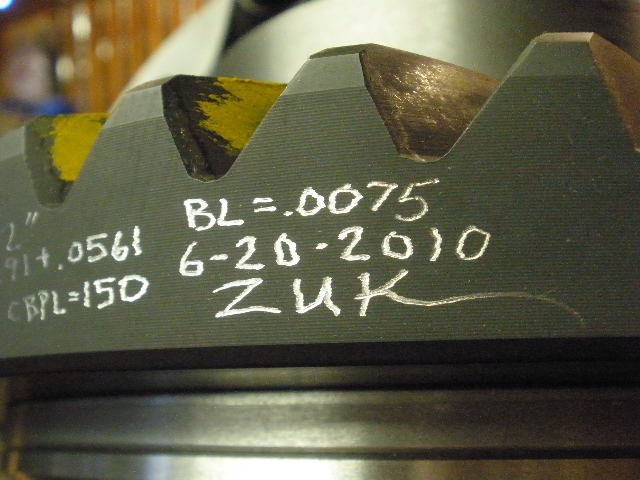
I measured and recorded the backlash on every other tooth for a total of 20 points. The minimum backlash I desired and ended up measuring was .0075". |
|
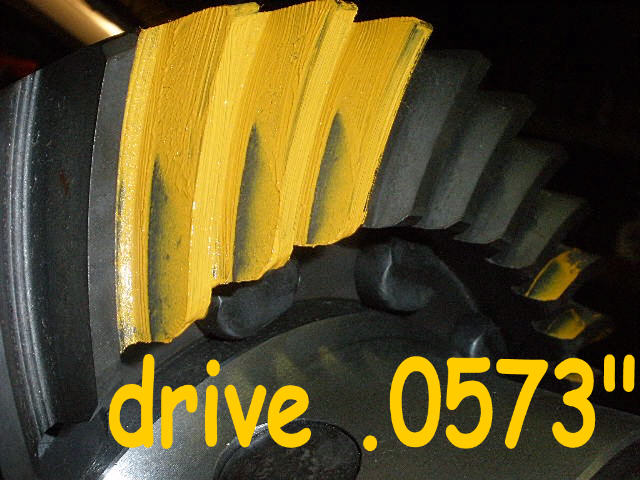
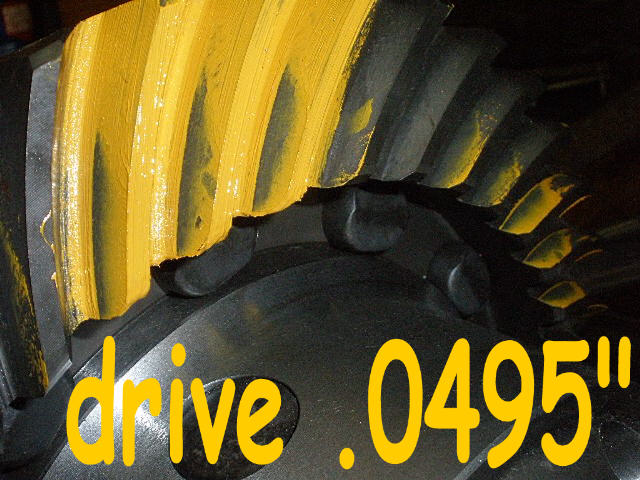
Beautiful drive pattern. Do I detect a slight deepness to it? This is my desired condition. |
|
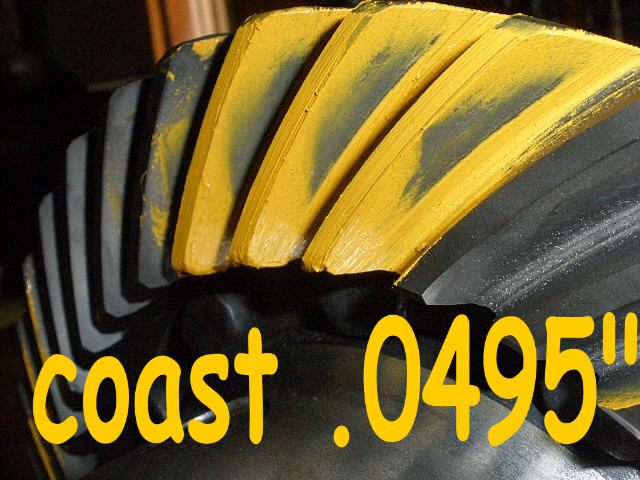
Super coast. And the balance between the drive and coast is excellent, too. |
|
The pinion tooth suggests a slight shallow here...which mean slight deep in the ring gear tooth. The pinion tooth is actually stronger than the mating ring tooth...so this is why this slight shallow is not a problem and can result in a stronger over-all set-up. |
|
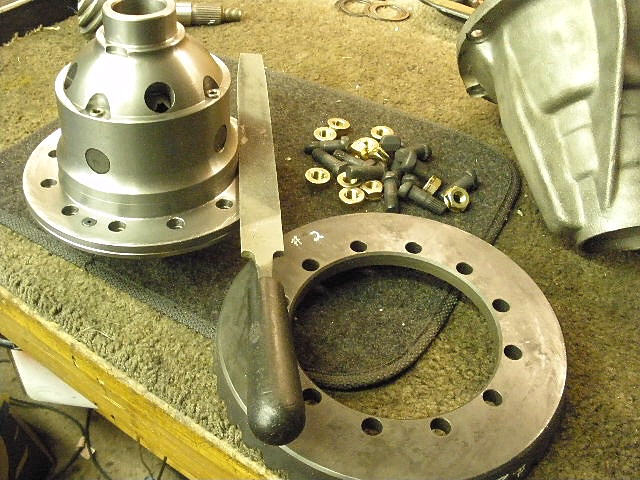
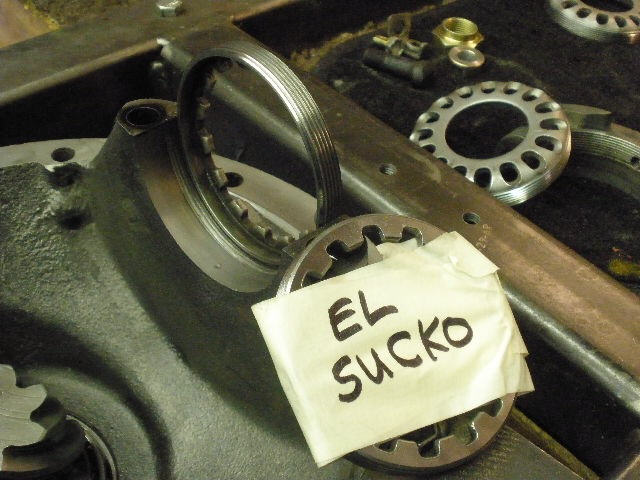
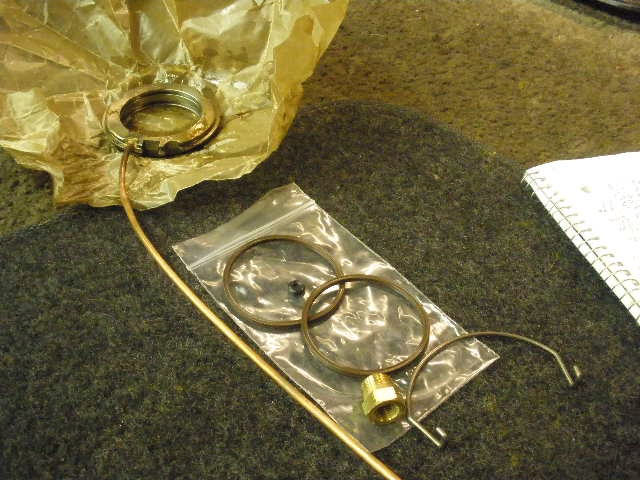
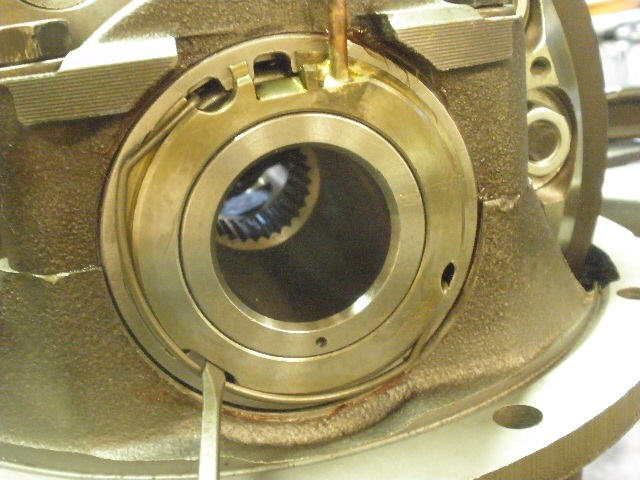
Now to organize the ARB parts. |
|
The x-rings are installed with some gear oil. |
|
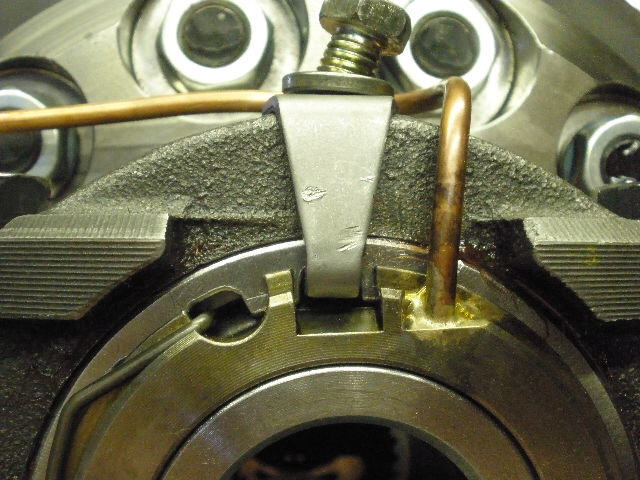
Carefully wiggle the seal housing in place and snap the retainer clip in place. |
|
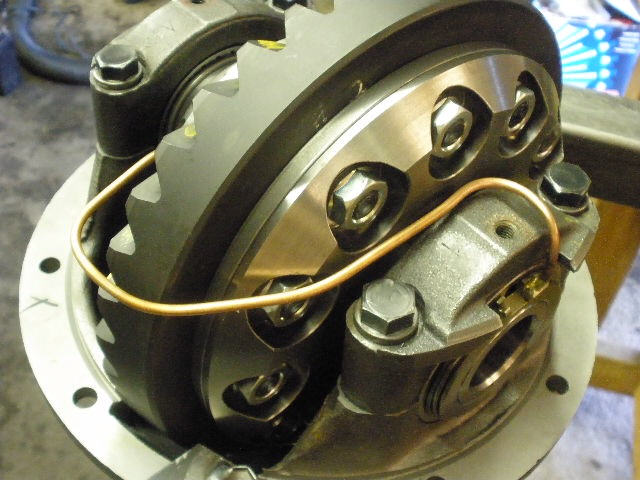
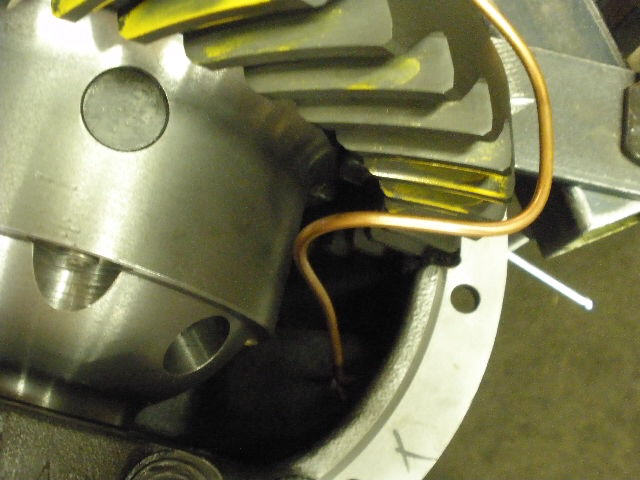
Now the soft copper tubing can be form fitted in place. |
|
``` |

|
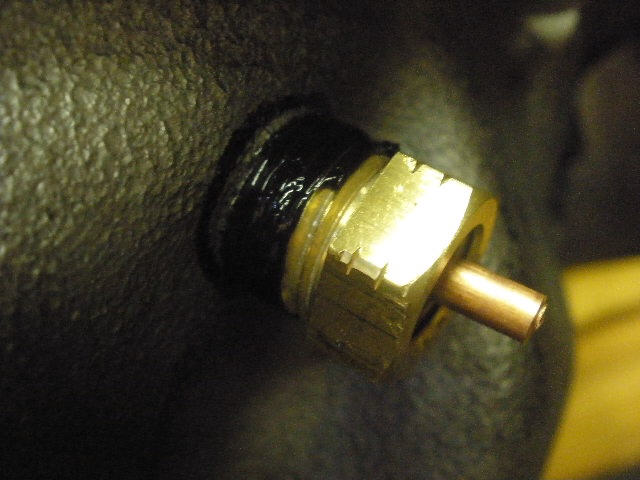
I center it and leave about 1/4" or more sticking out beyond the brass bulkhead body. |
|
Now the bulkhead has rtv or your favorite sealer applied to the threads and tightened up. |
|
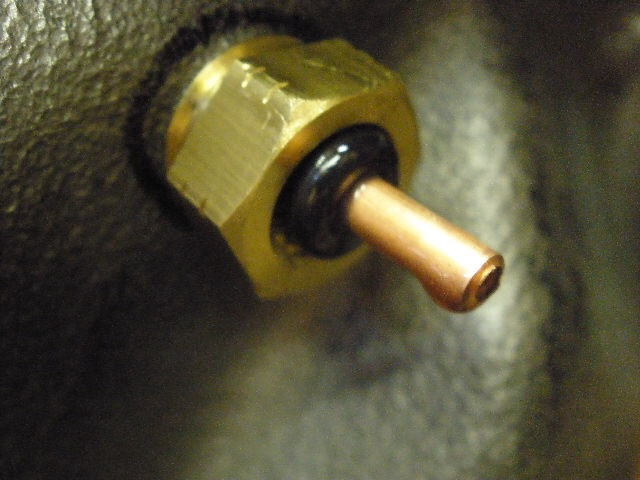
The oiled up fat o-ring is pushed in the brass fitting. |
|
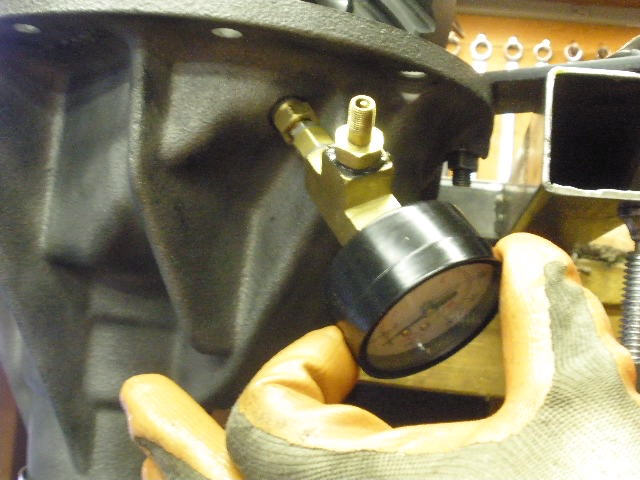
My air leak tester is then screwed on but barely finger tight...as it should be when this is installed under the Cruiser. |
|
Make sure the tab on this side is not contacting the seal housing. |
|
120 in/lb. |
|
No loss of air in over 20 minutes.... |
|
``` |
|
``` |
|
Satin black for Jay. |
|
``` |
|
``` |

|
