|
Two Hi-Pinion Gear Installs ..... ARB RD132 and 488 Nitro 29 spline gears
|
|
(121 good size pics loading...might take a few minutes)
|
|
MAY 1 2013
|
F
|
|
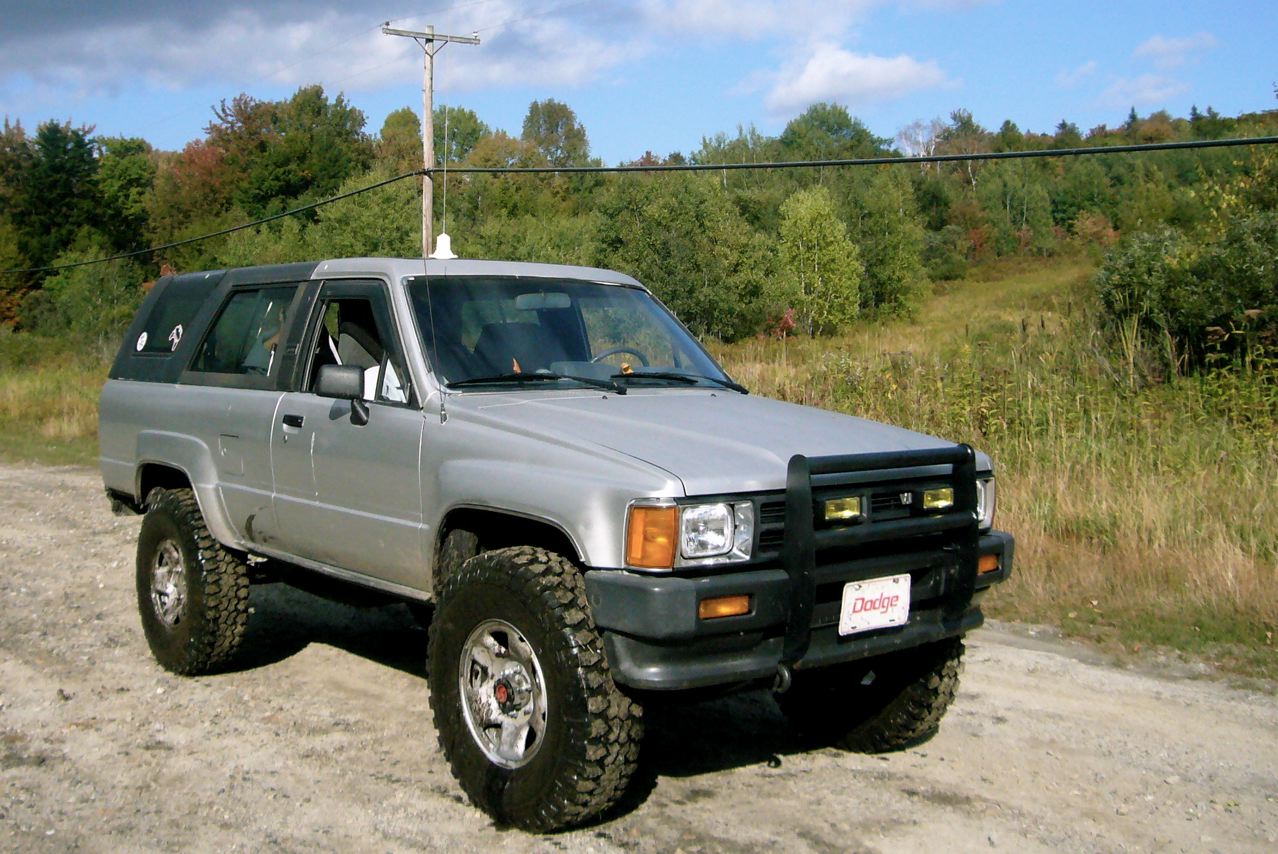
Yopar is Florida based and here's a shot of one of his rigs. This silver '87 4runner
has been a daily driver and trail truck, making several trips to New England from
Florida. 22RE rebuilt with 261c and LCE header, Marlin R10 dual cases w/ 4.7, Toyota
4.88 w/Detroit rear diff (ZUK installed). Having IFS and dual cases was fun, but the
SAS parts are ready, pics to come soon.
|
|
|
|
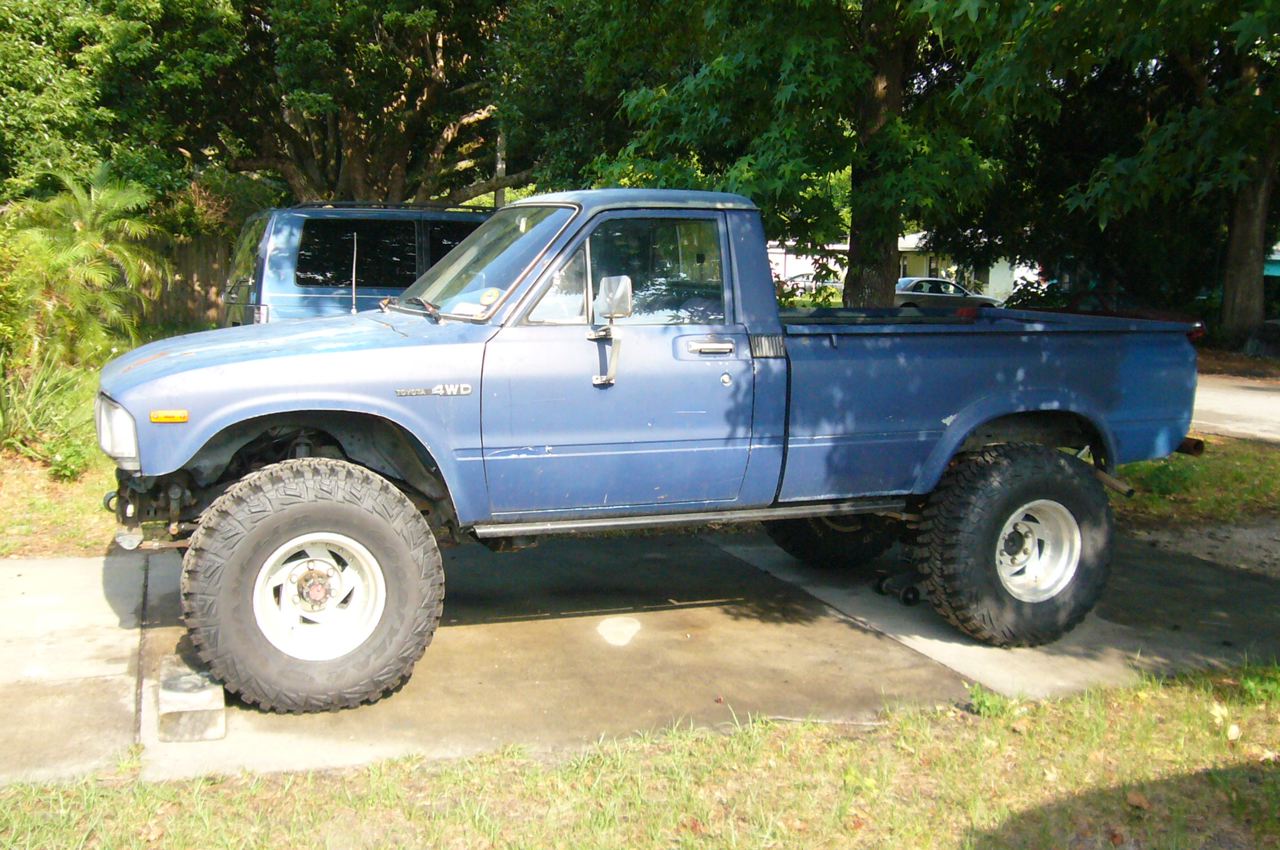
This Blue Project '83 has 20R w/ weber, tri-Y header, Sky hi steer, and Marlin R10
dual cases w/ 4.7 and rear factory Toyota 4.88 w/ Grizzly (ZUK installed).
|
|
|
|
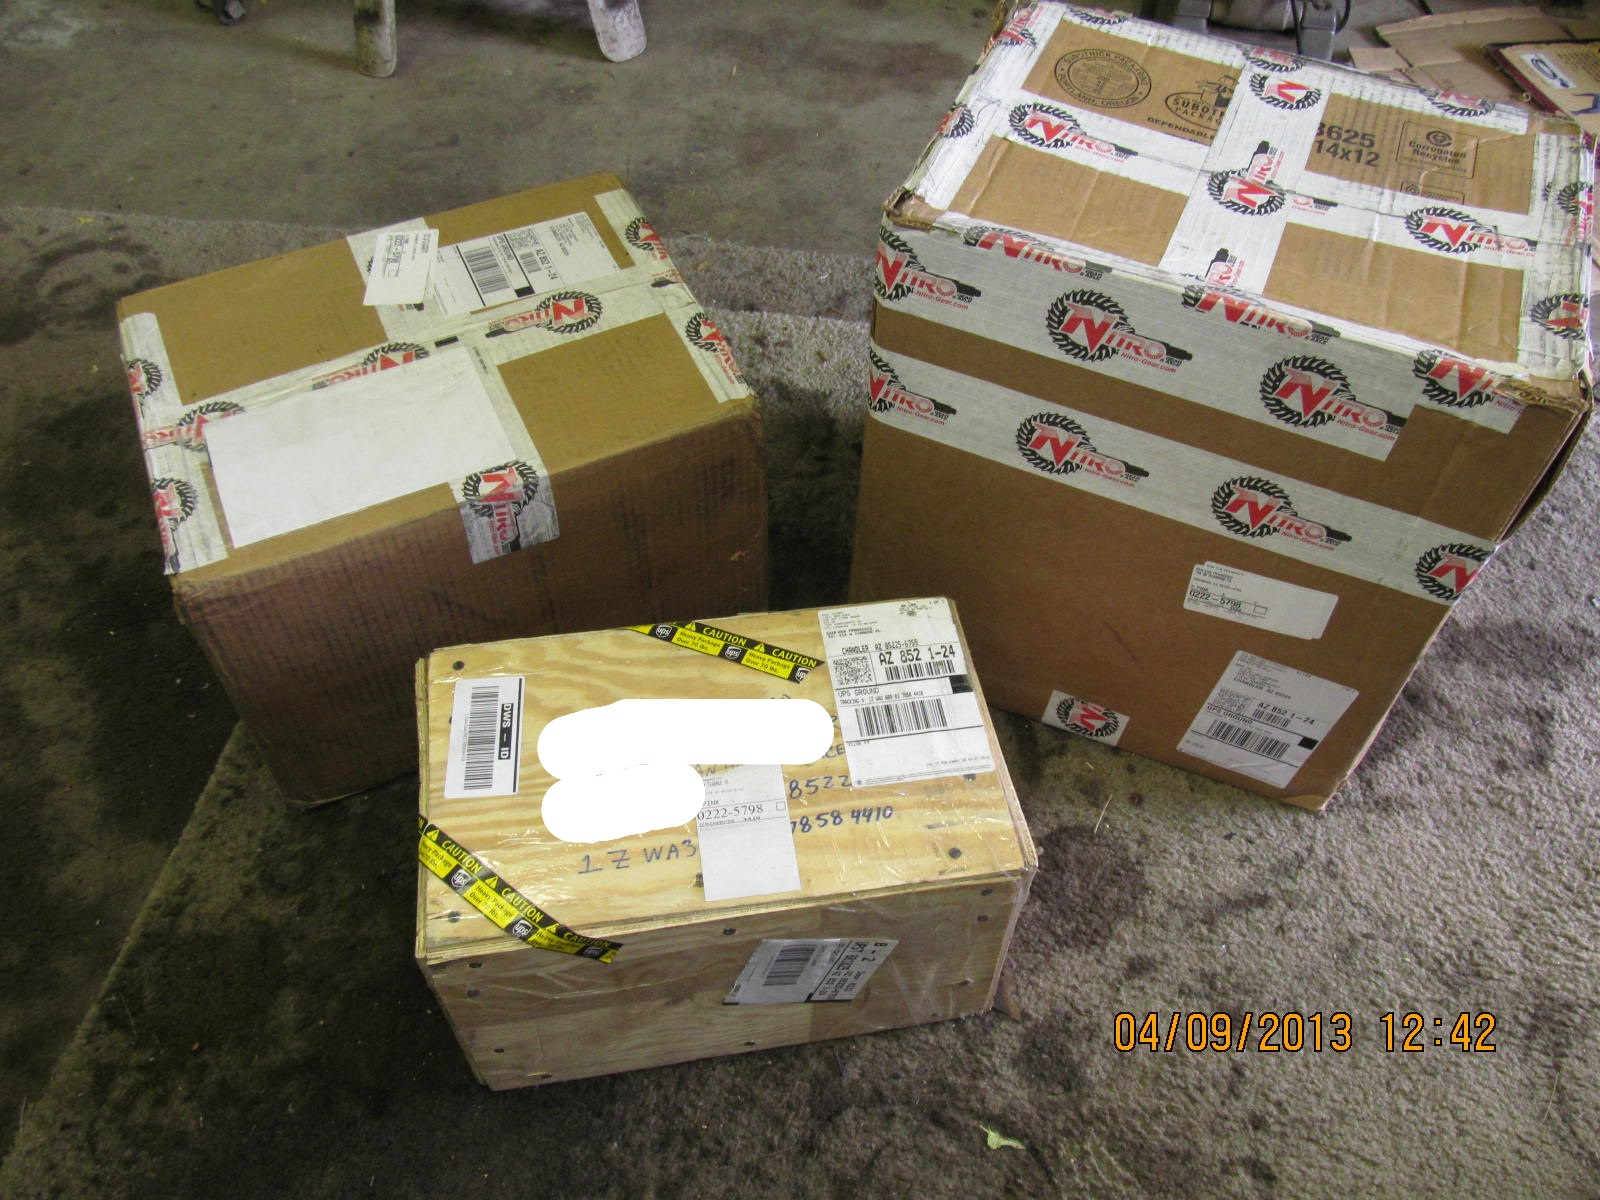
Each of the above rigs will be getting a high pinion 8". Yopar worked on locating
and sending one a week earlier and then he found another online
and it arrived in a wooden crate at about the same time as 2 other
boxes from JustDifferentials.
|
|
|
|
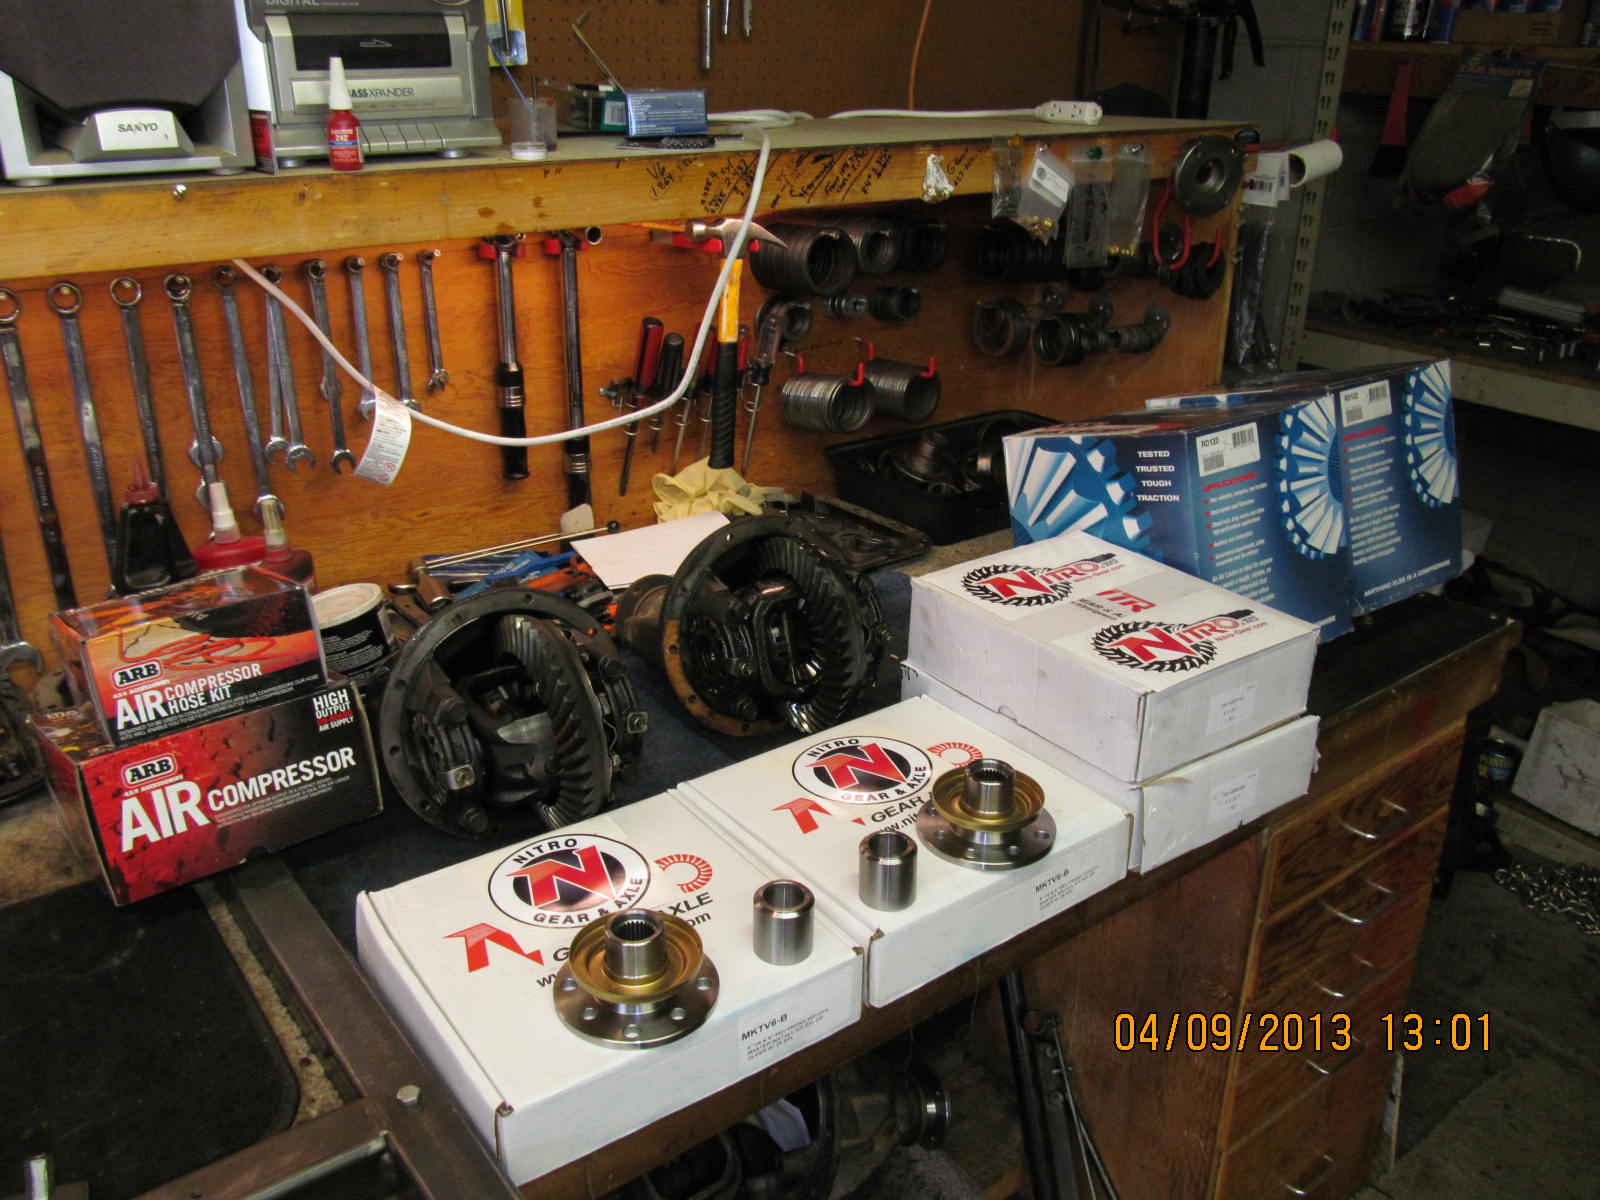
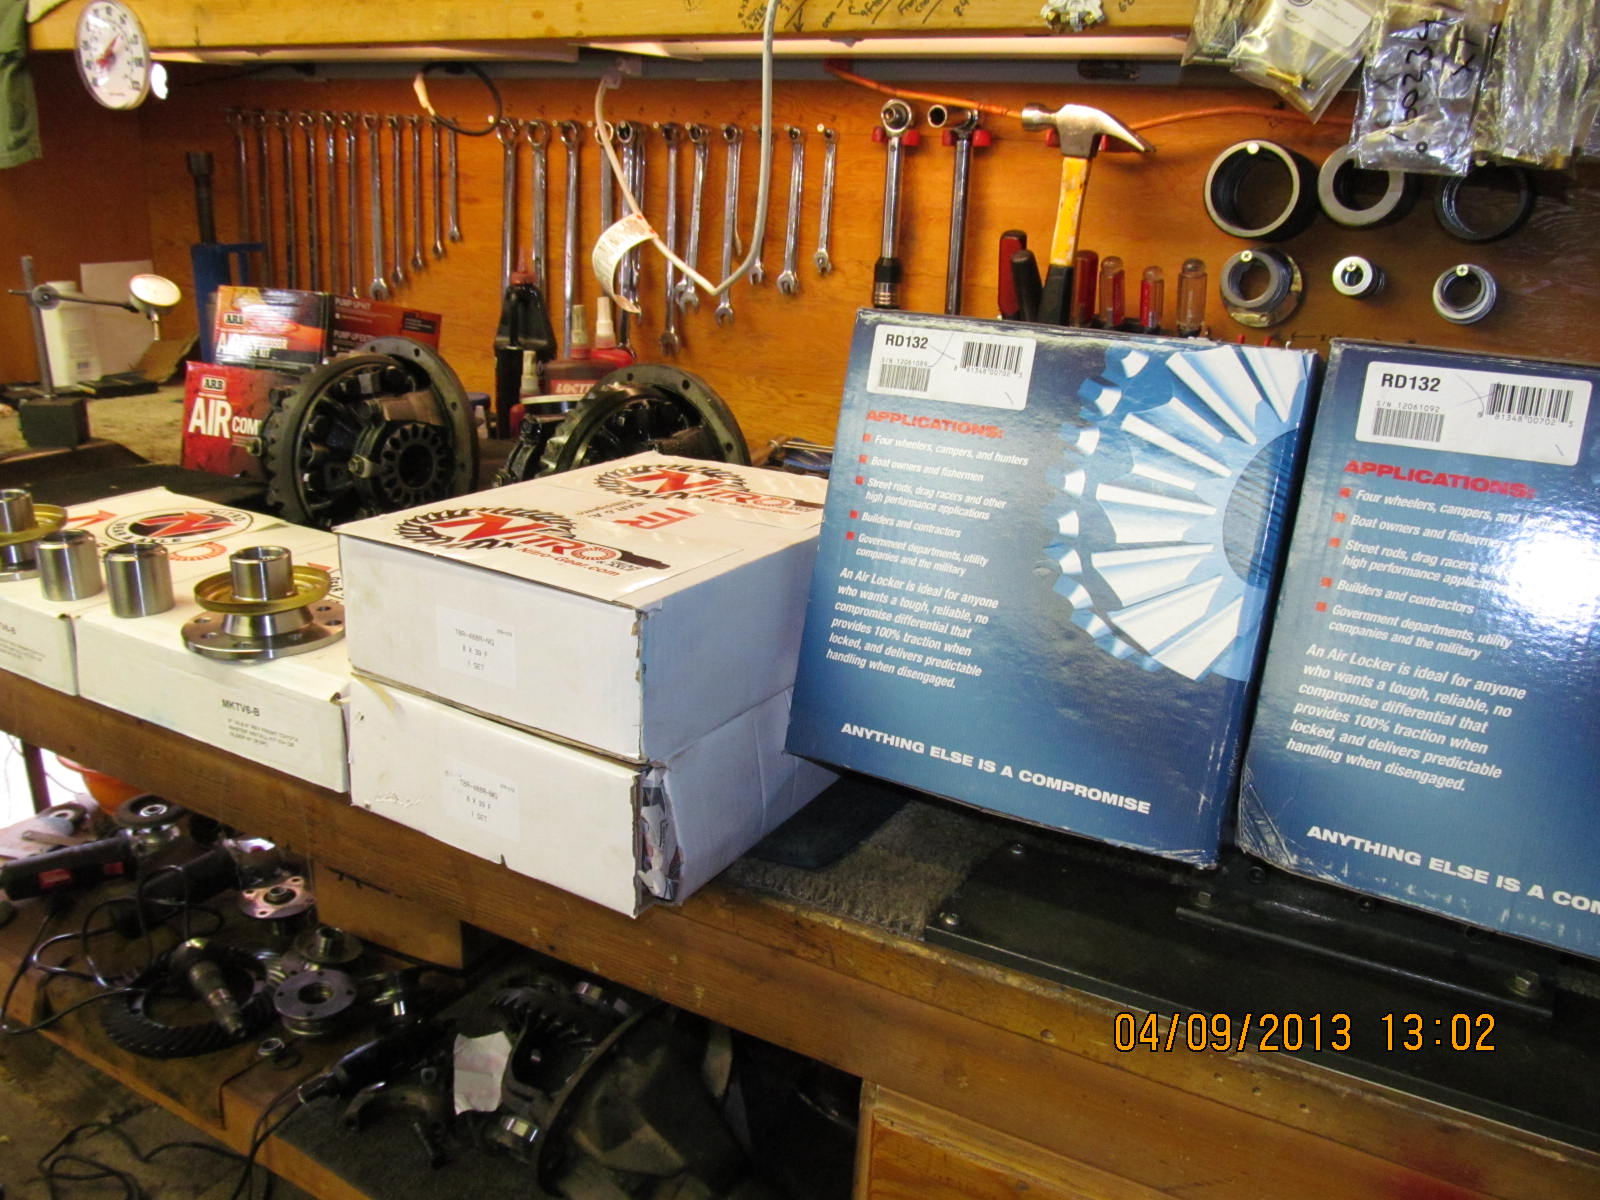
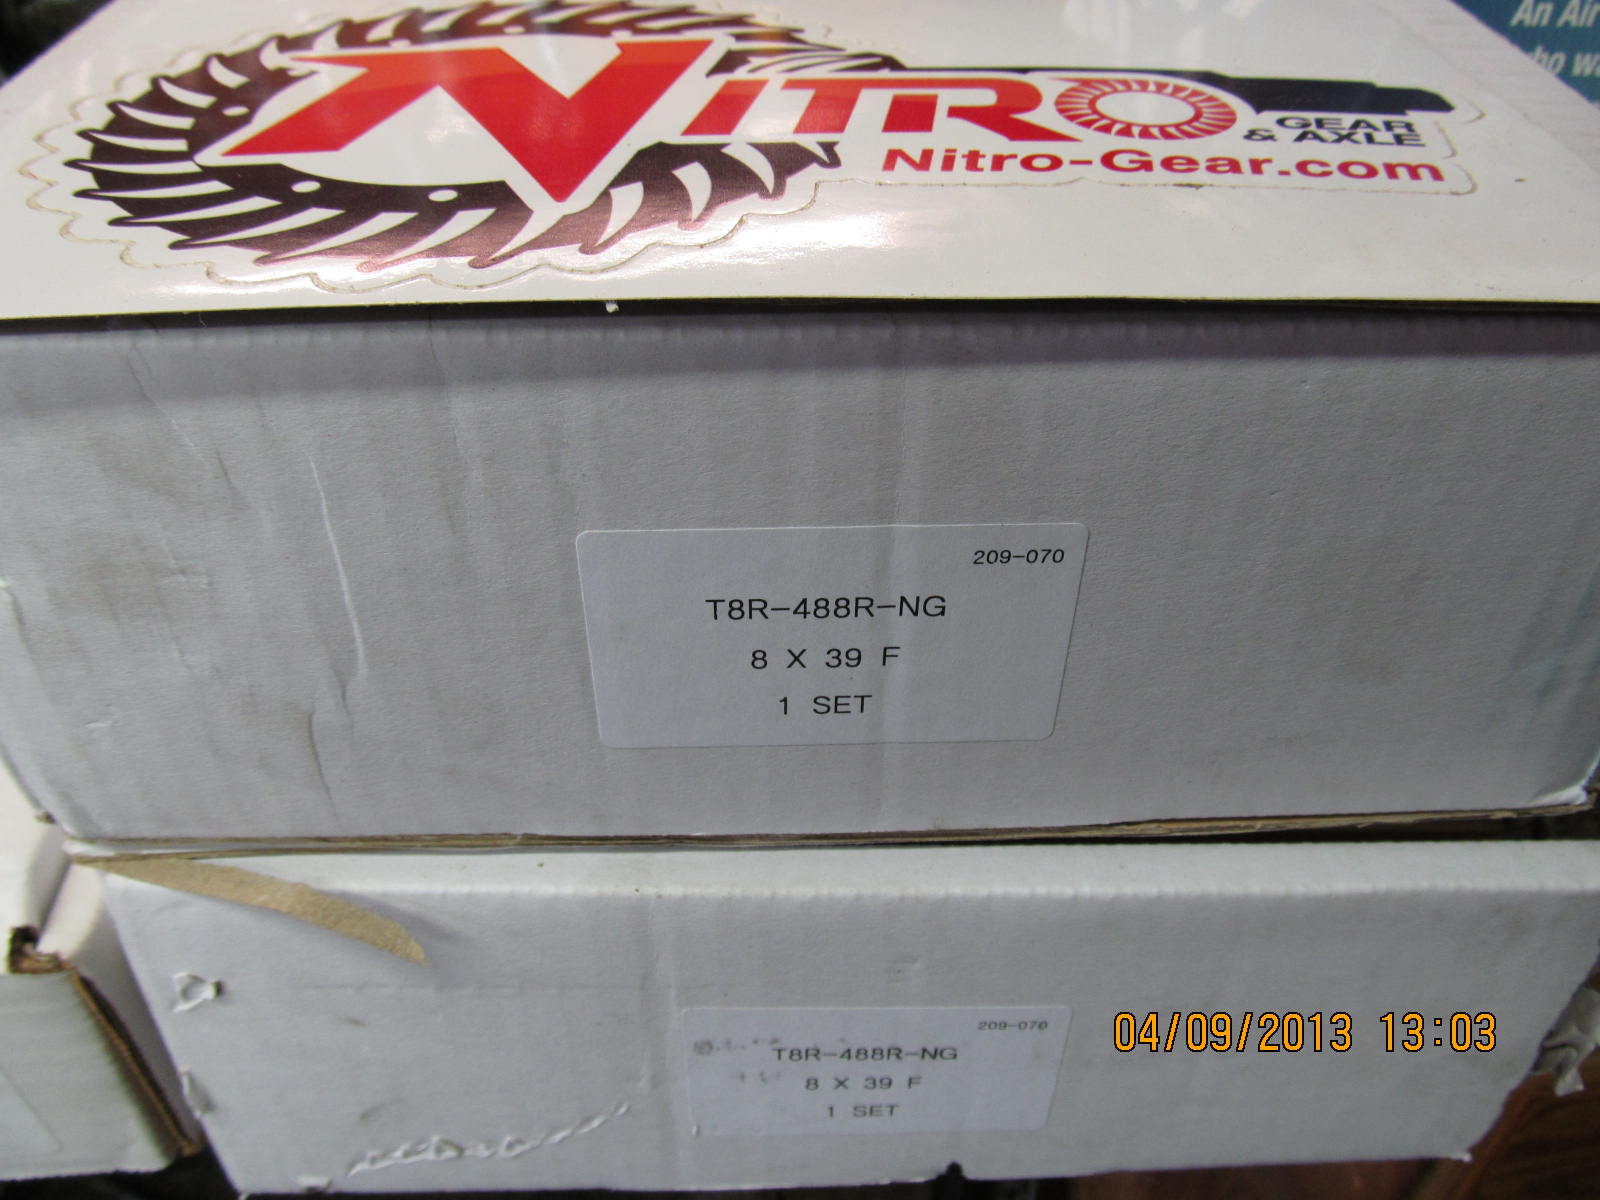
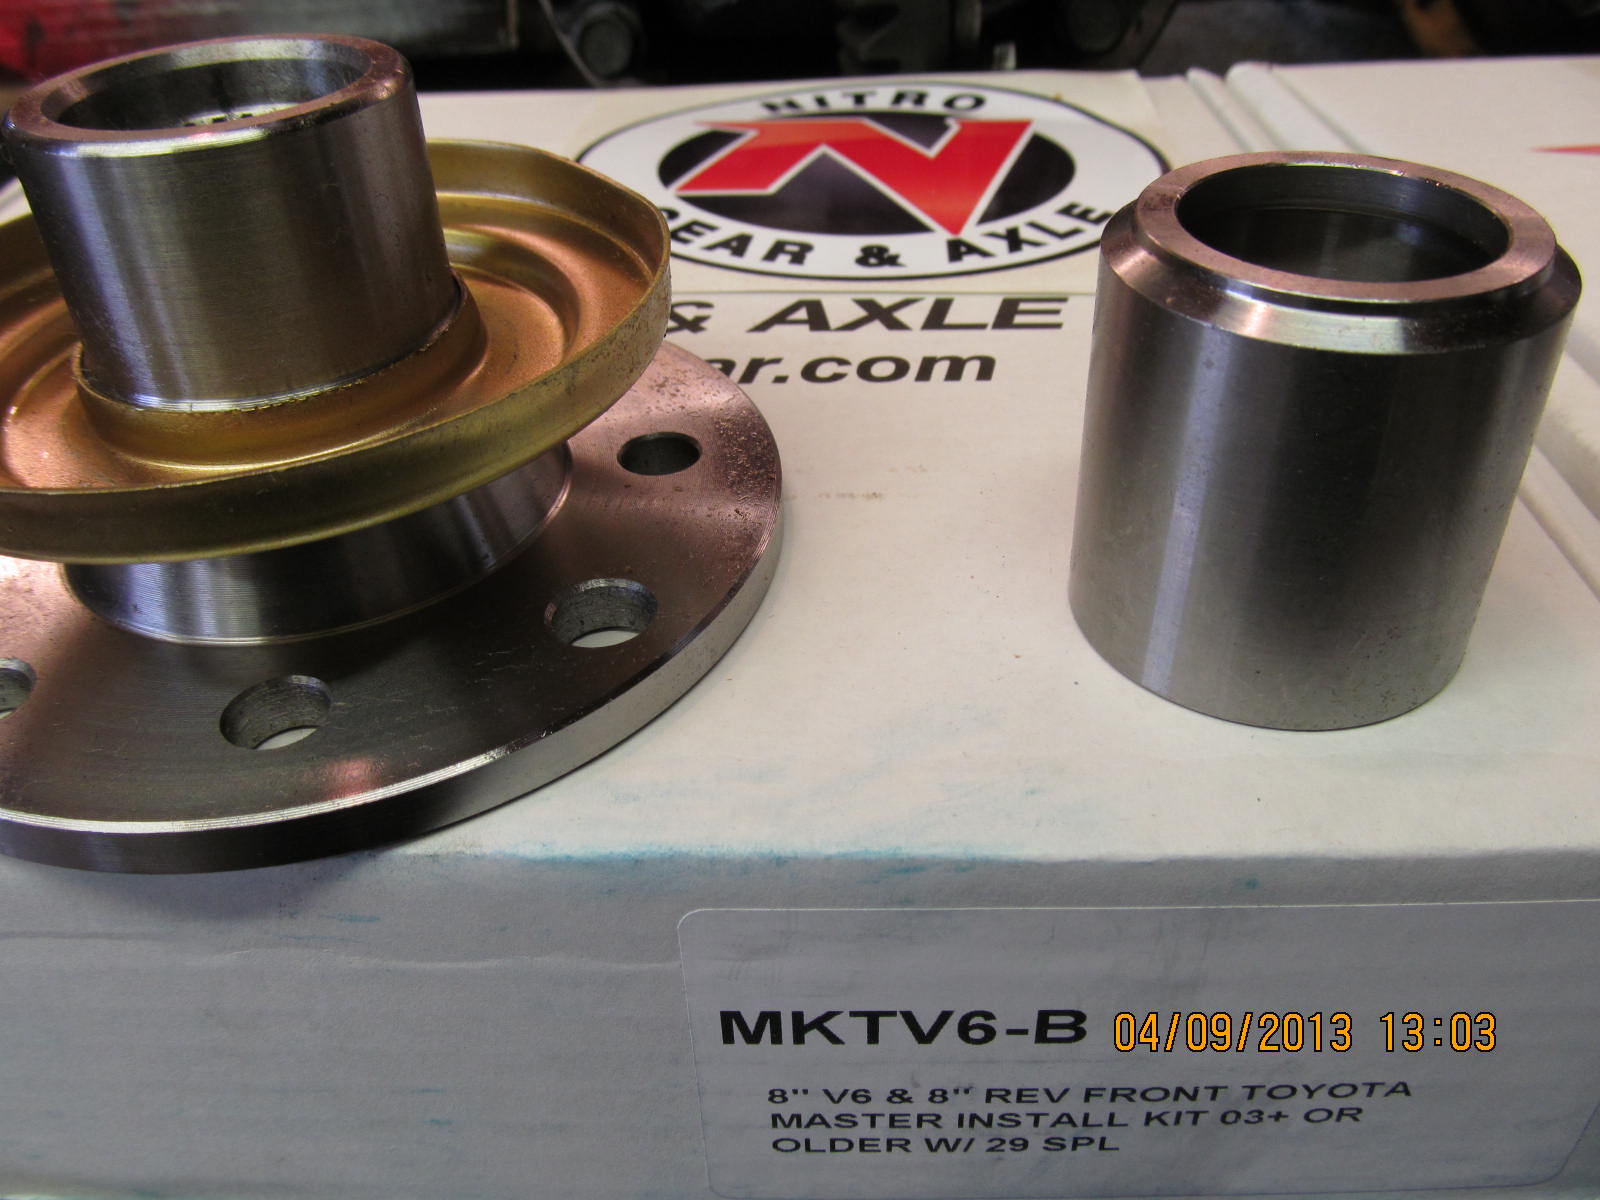
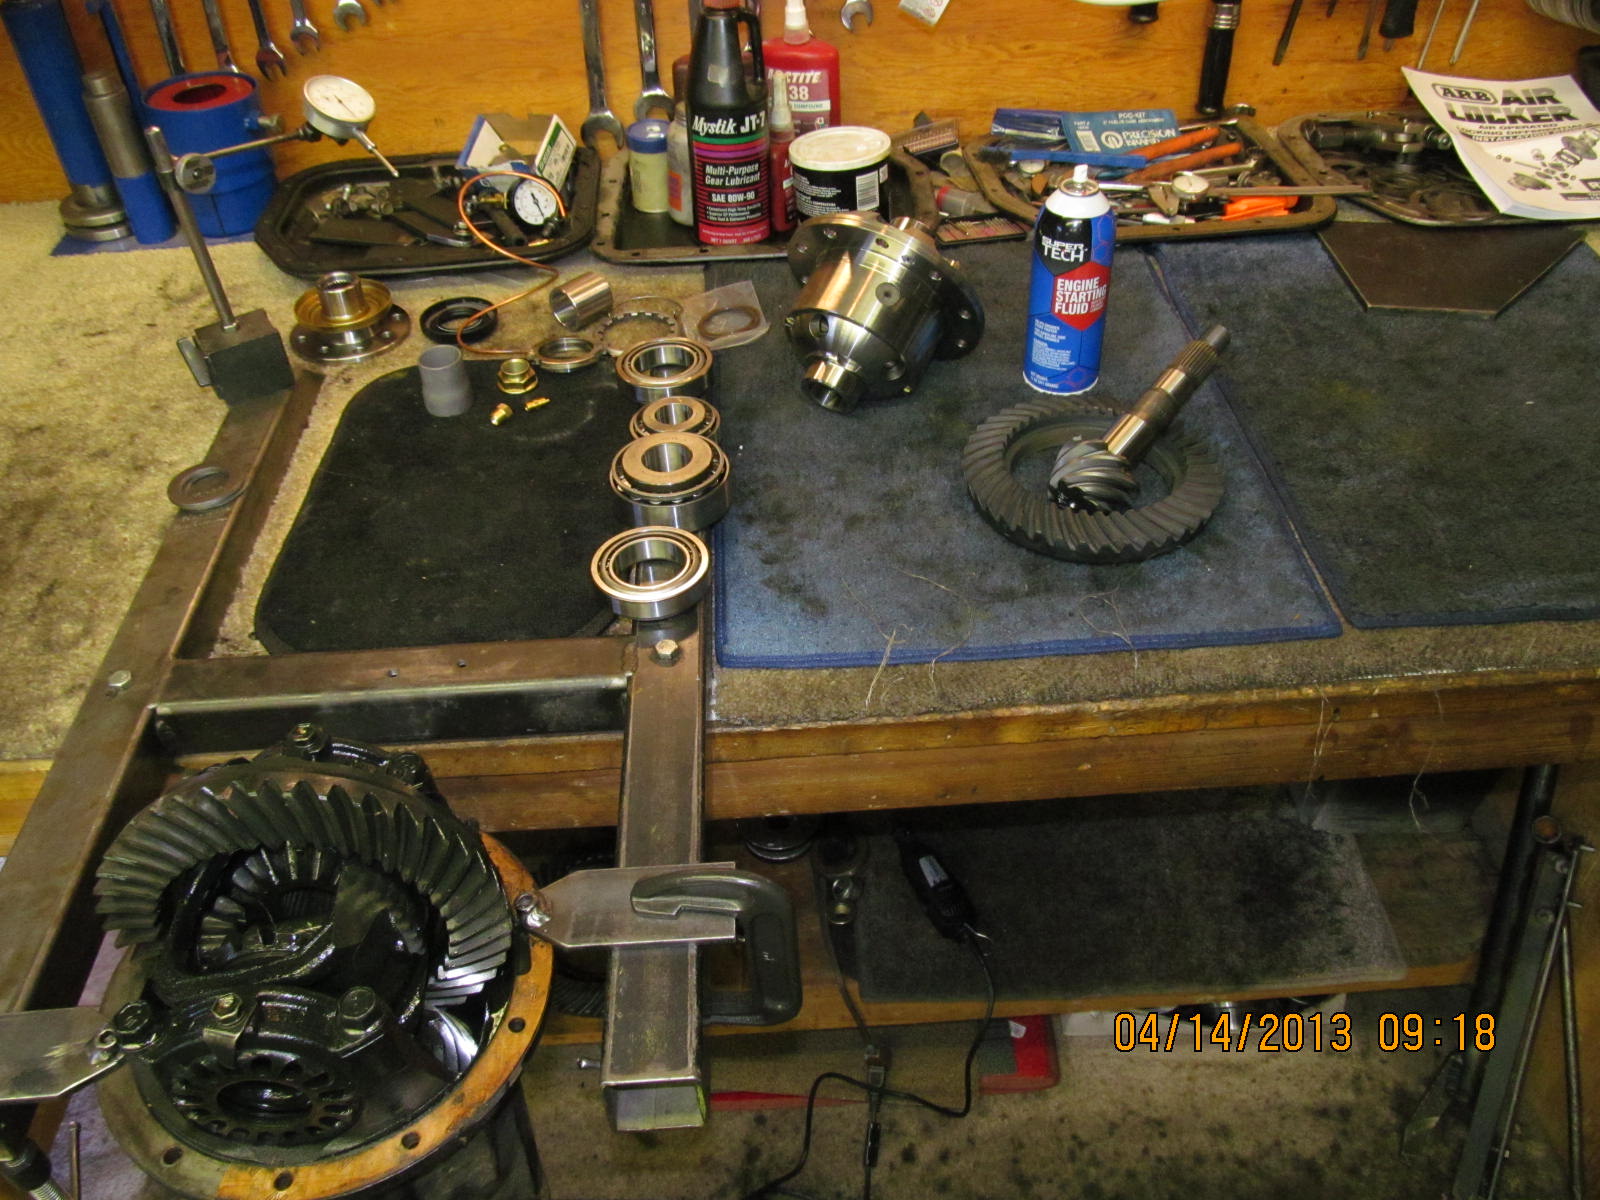
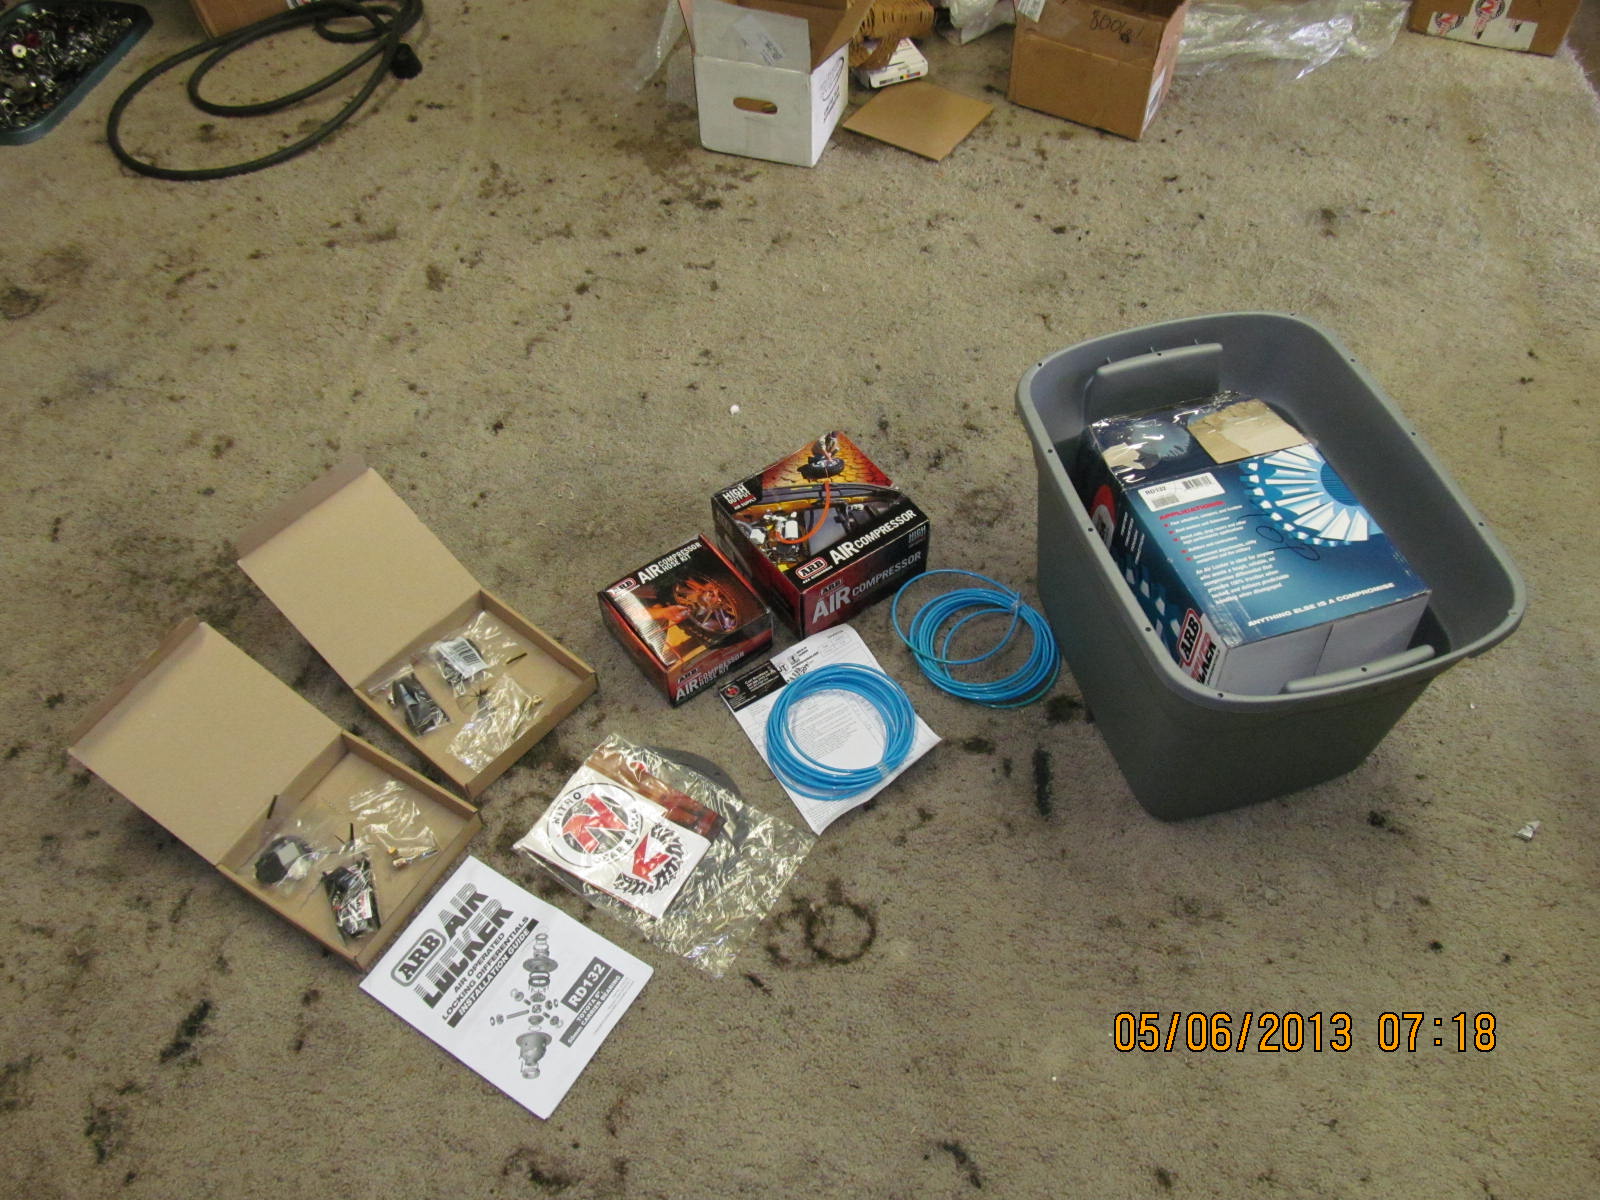
All is on the bench....air compressor and hose kit...hi-pinions...V6 master kits
...29 spline flanges and solid collars...2 Nitro 488's...and two RD132 ARB air
lockers.
|
|
|
|
|
................
|
|
|
|
|
.....................
|
|
|
|
|
......................
|
|
|
|
|
This link will show BOTH of the installs starting with #1 here...
|
|
|
|
|
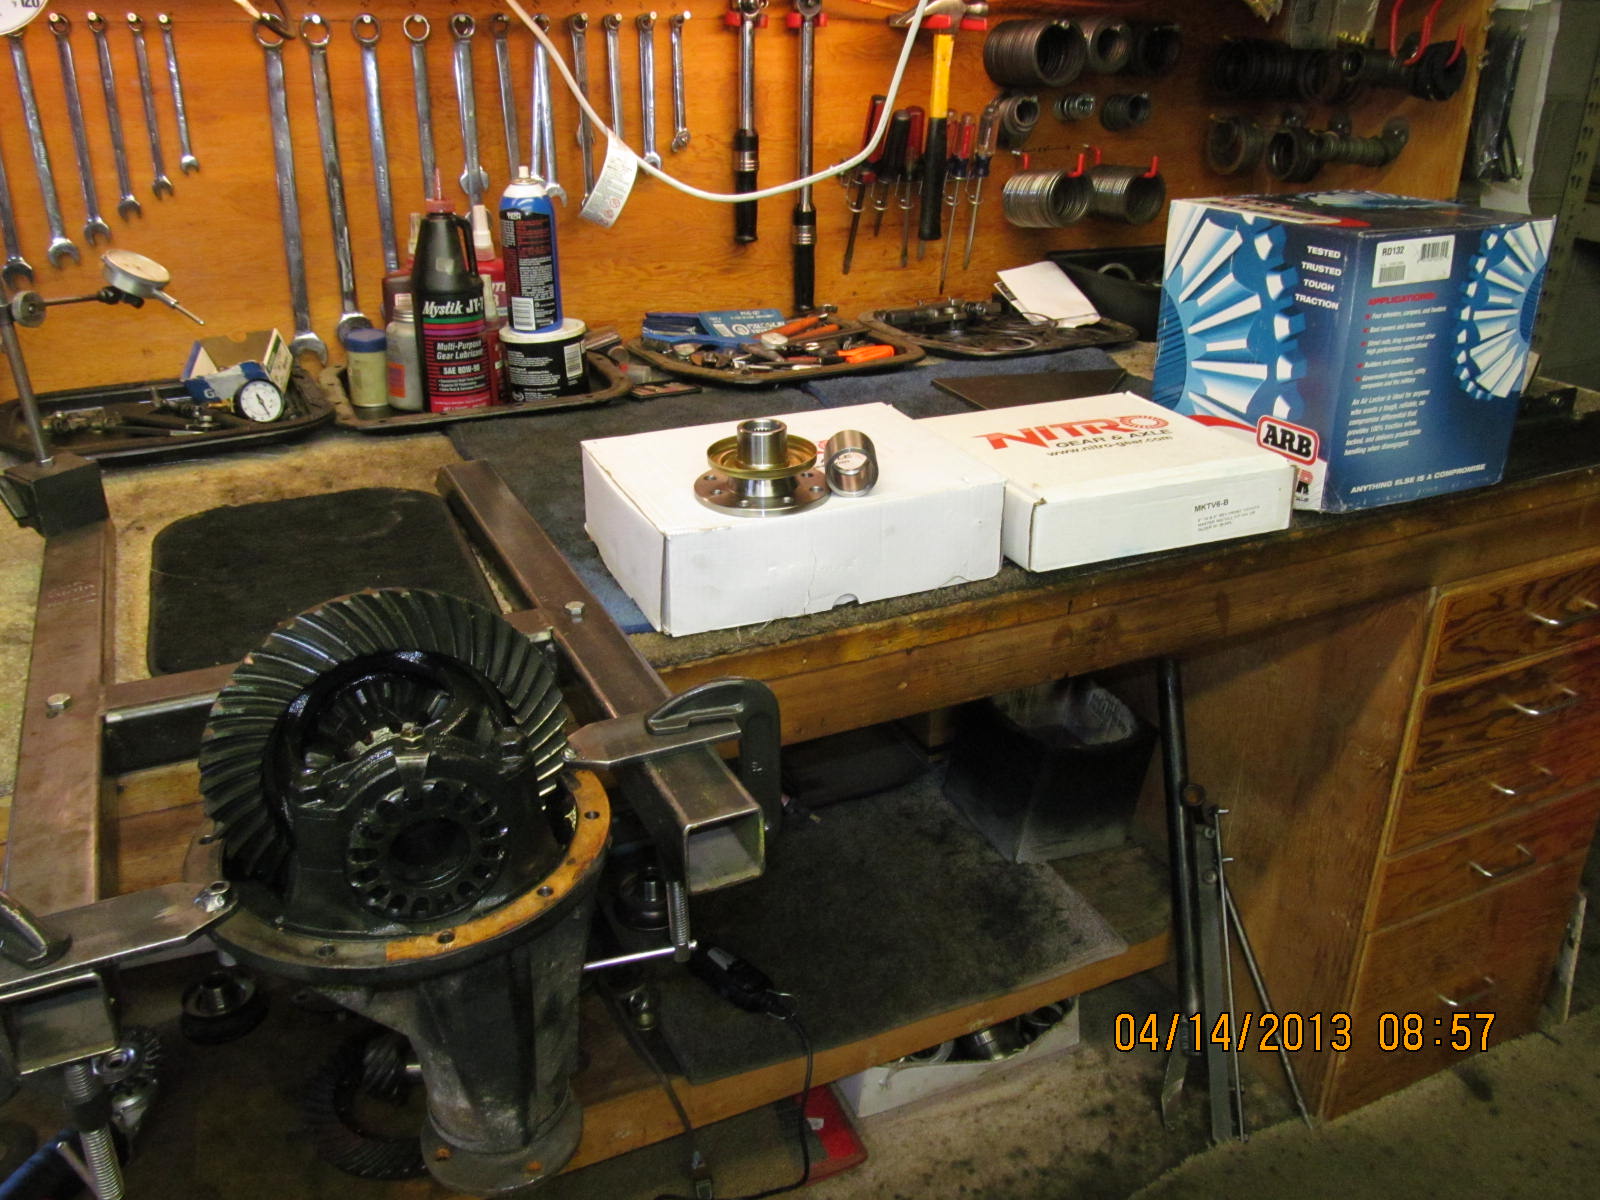
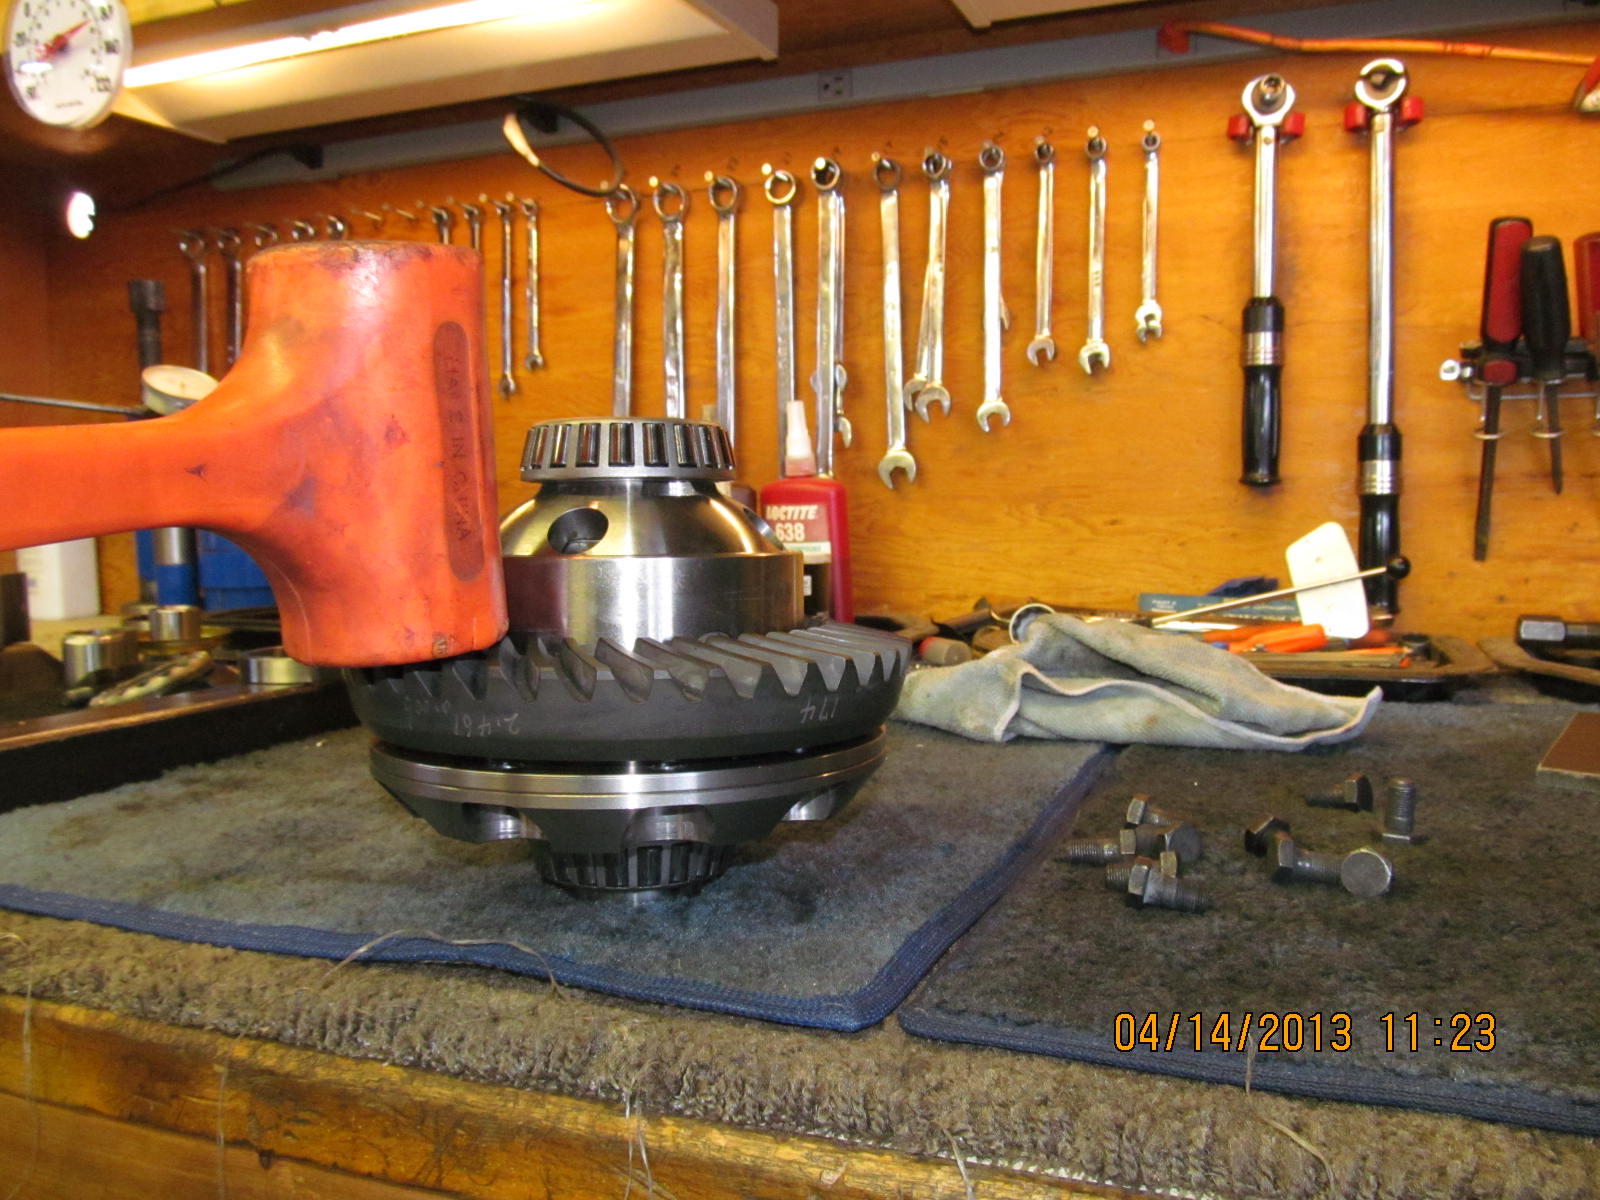
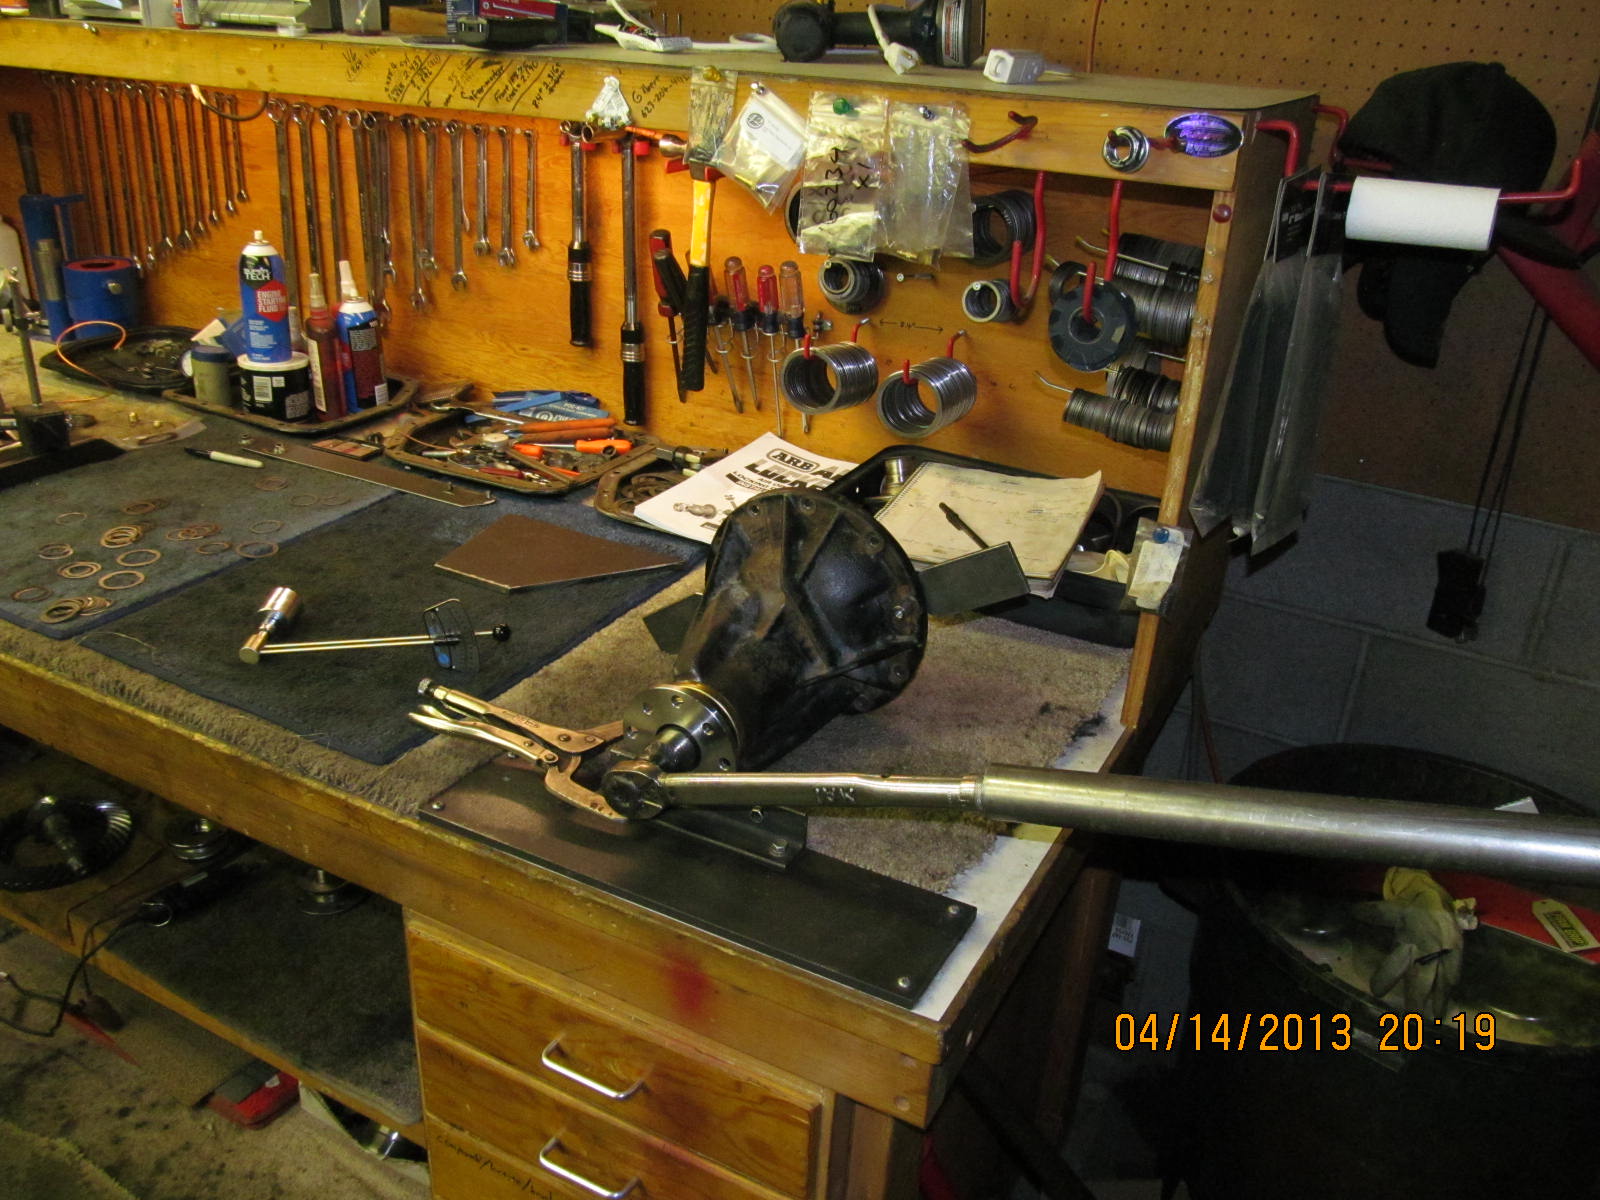
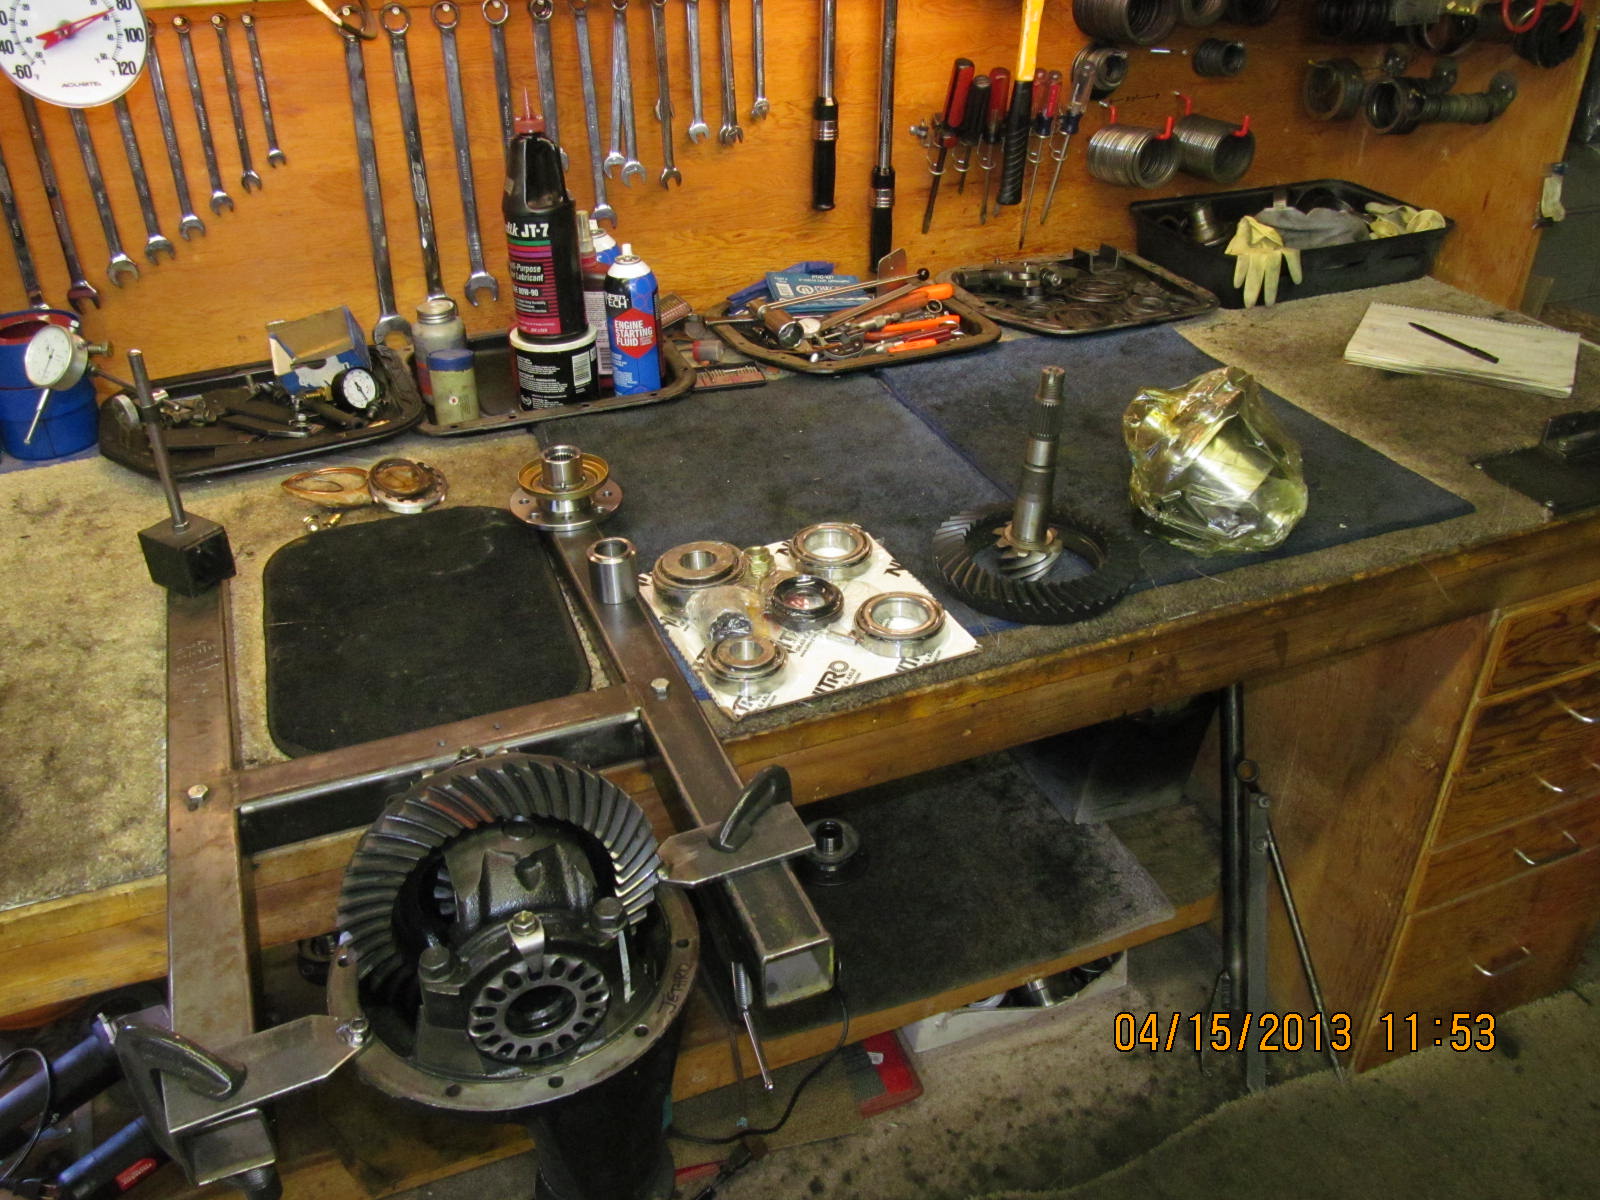
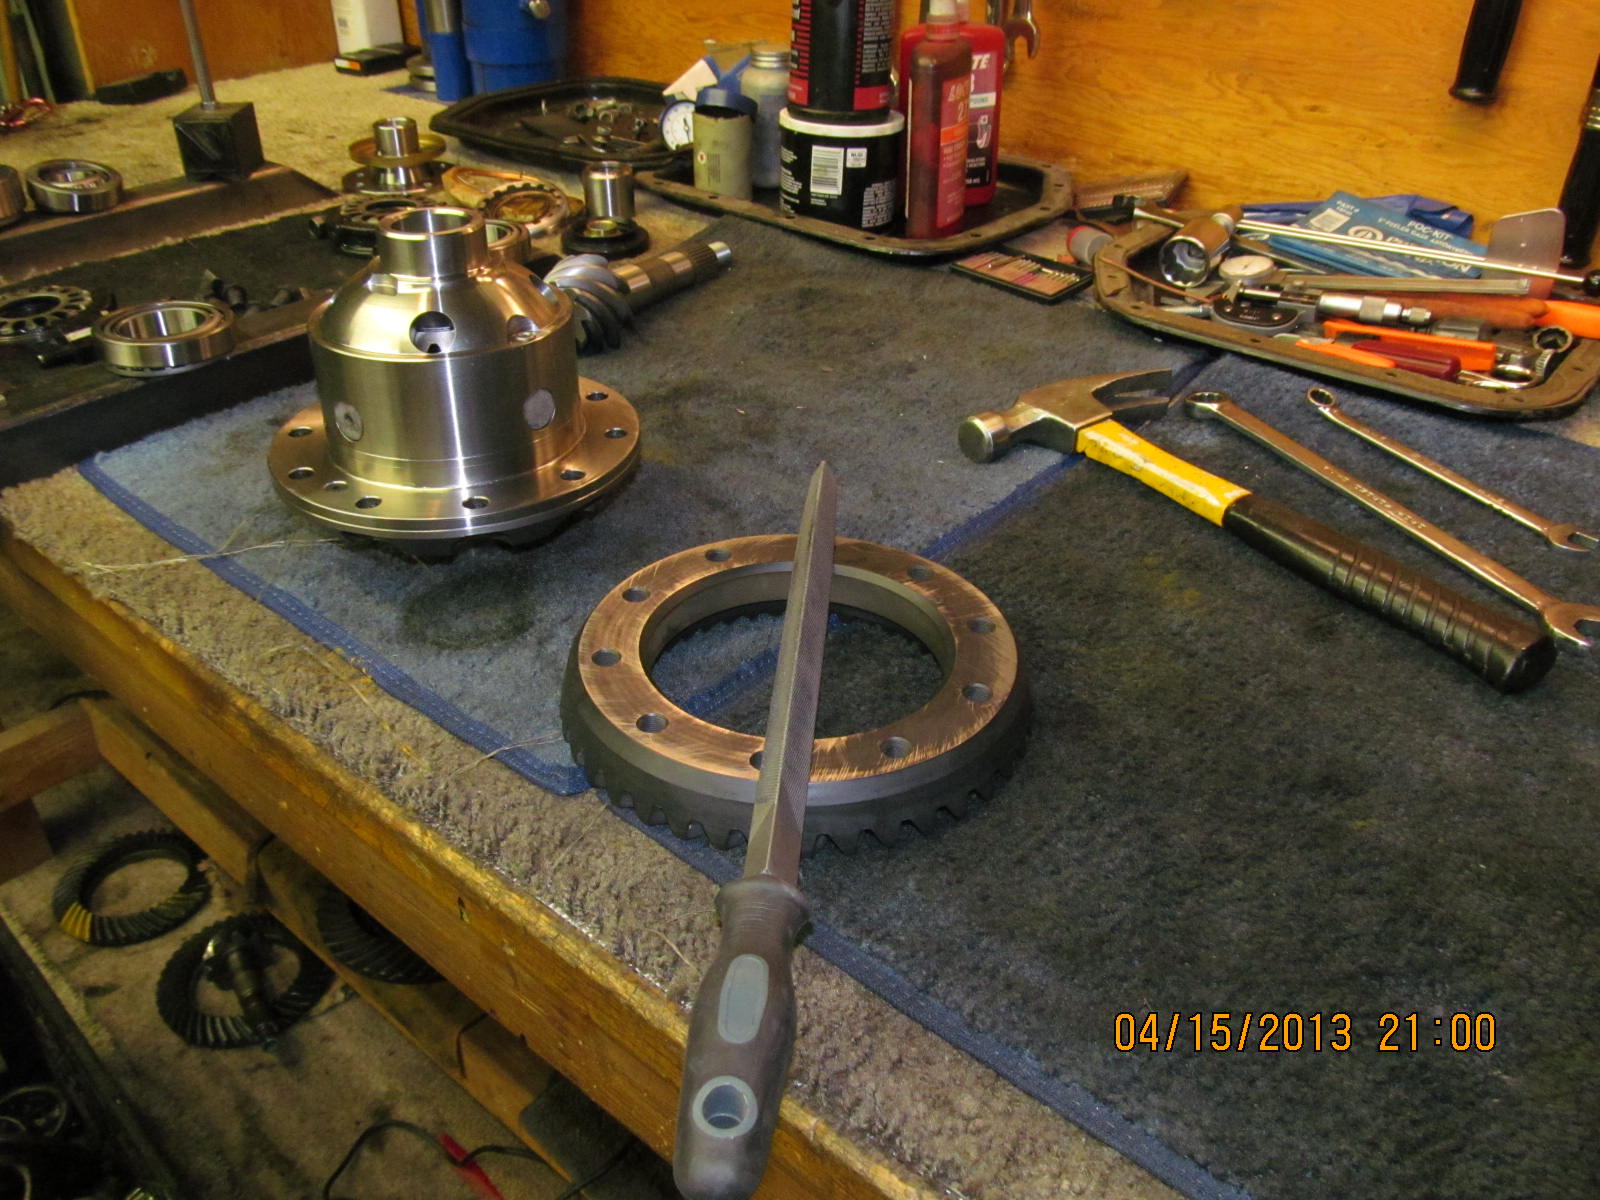
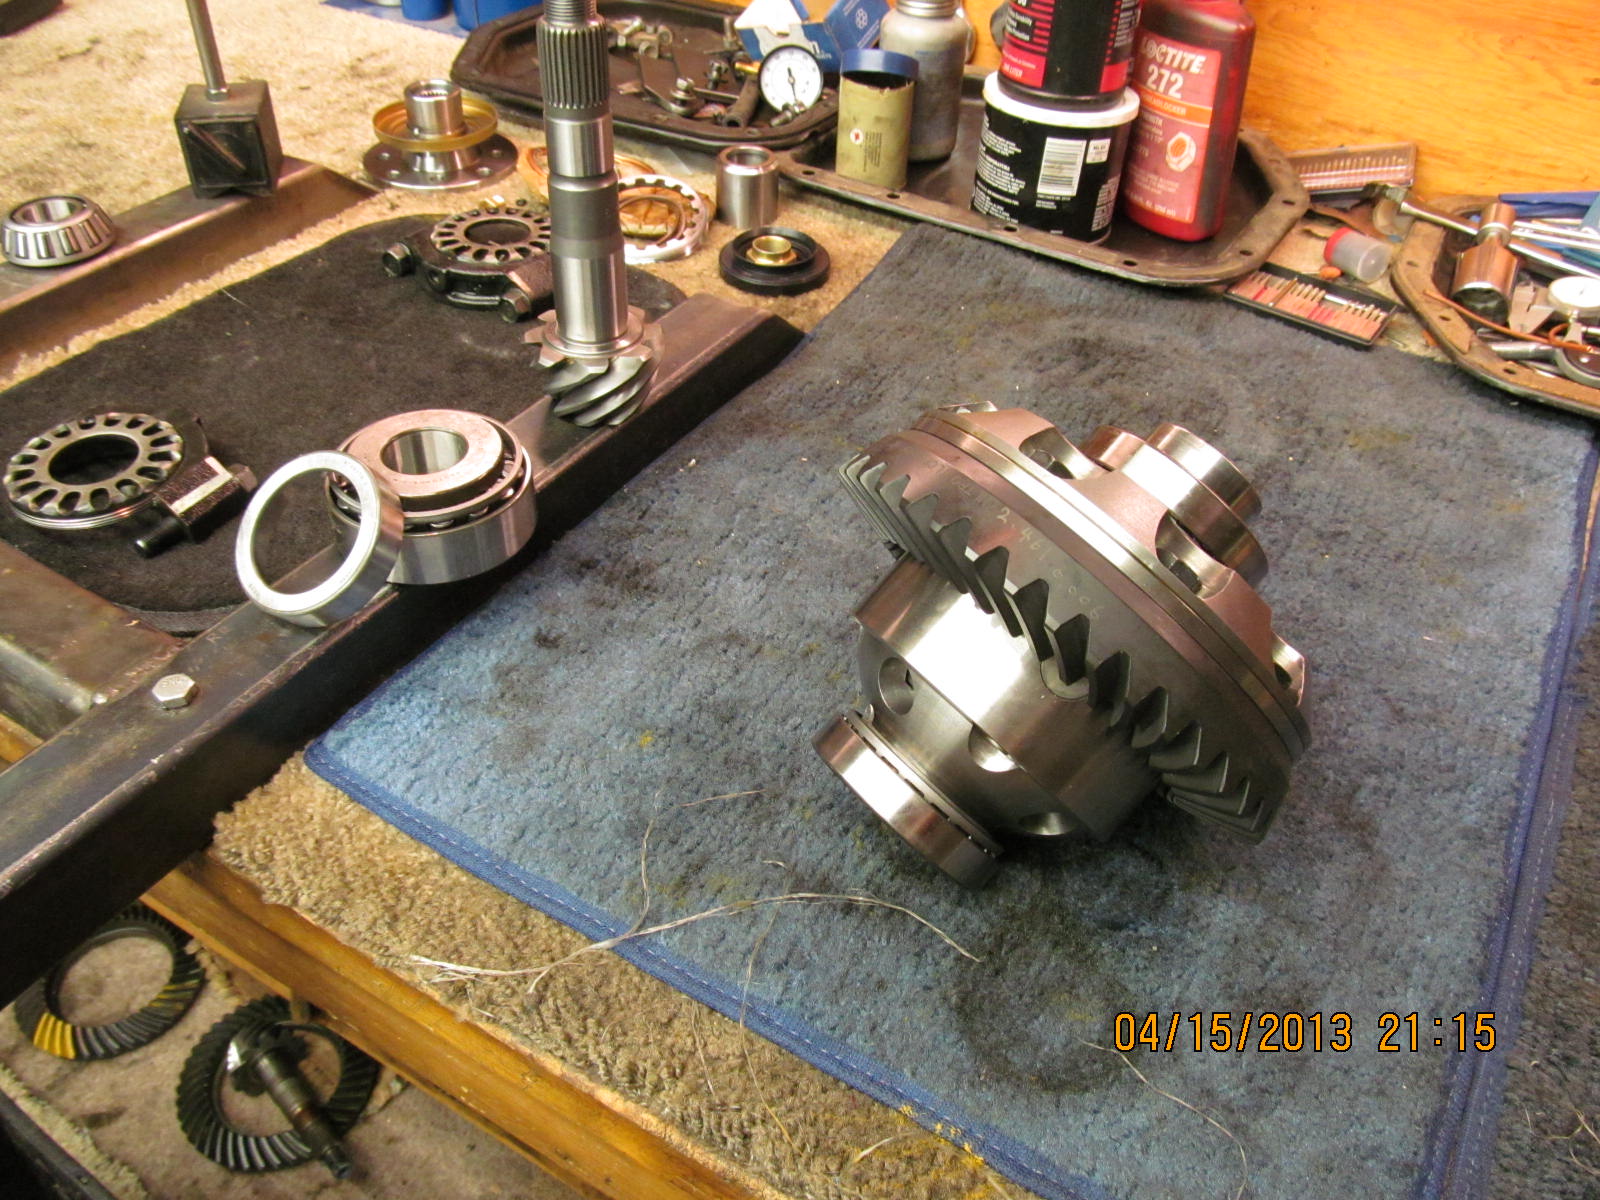
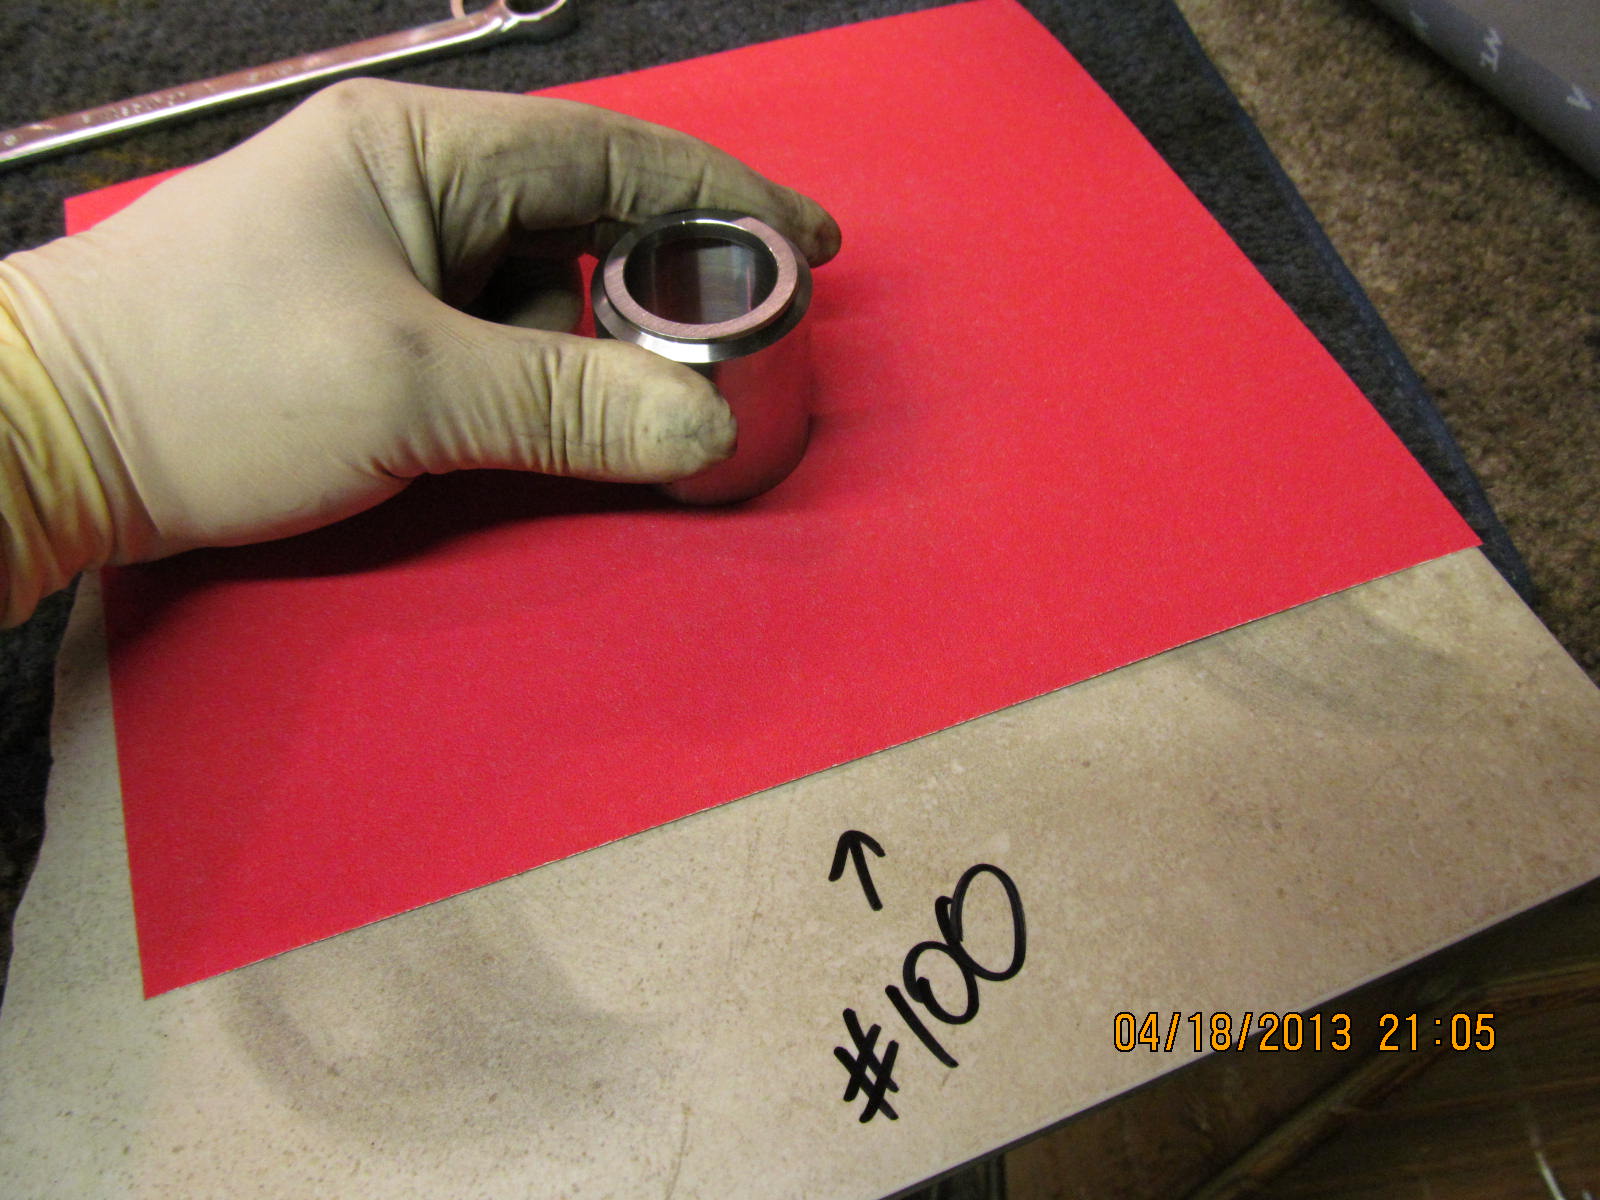
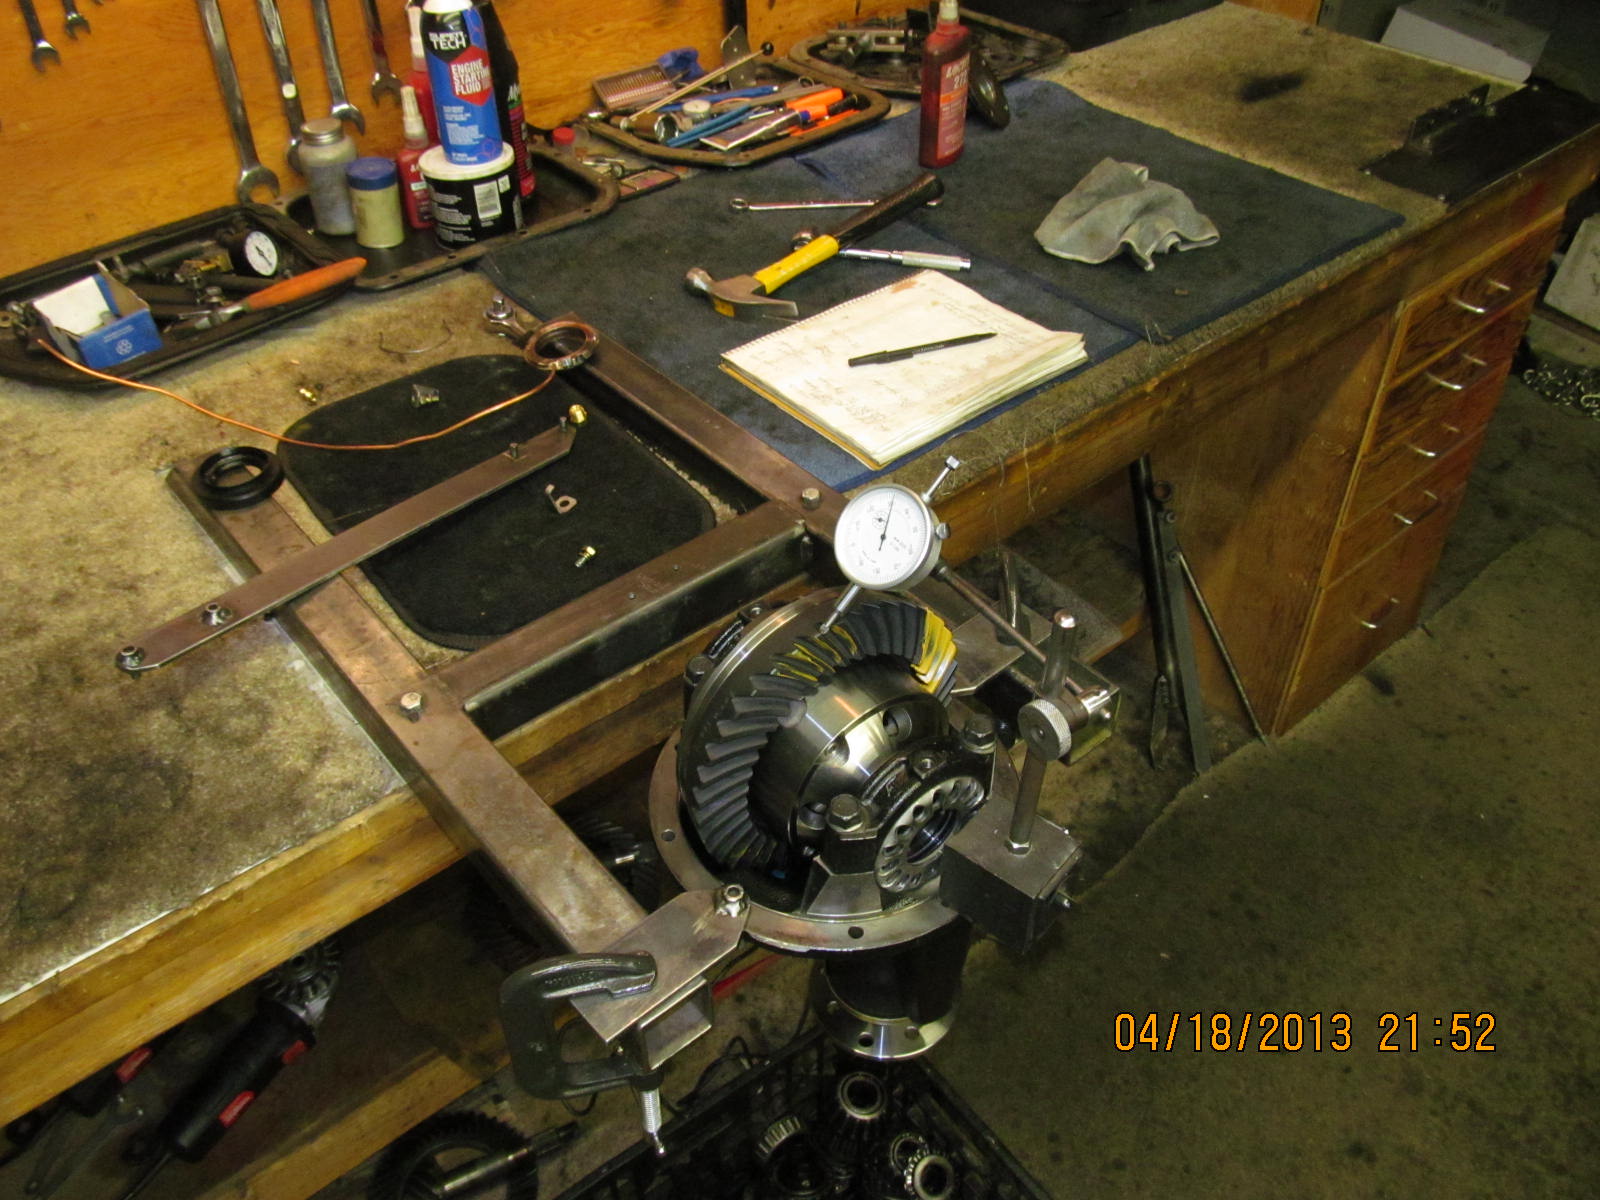
Parts are laid out and organized...everything is here and looks to be the right parts.
|
|
|
|
|
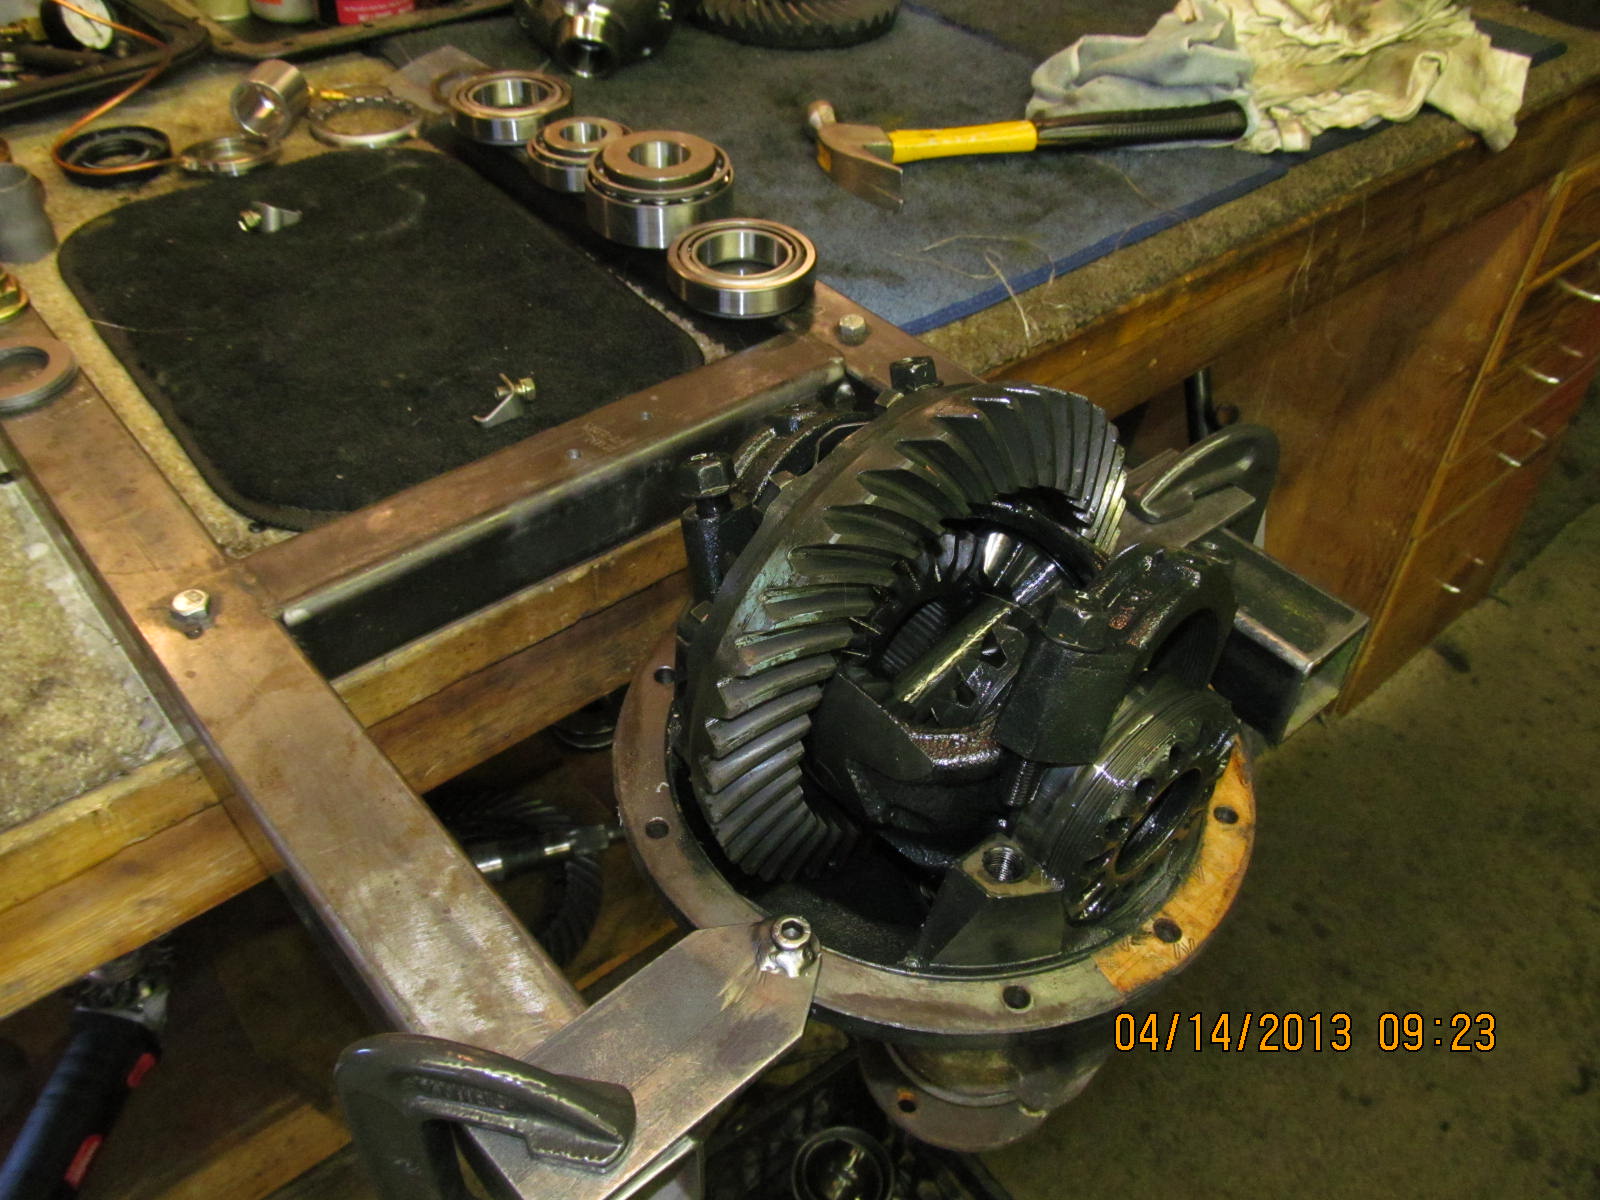
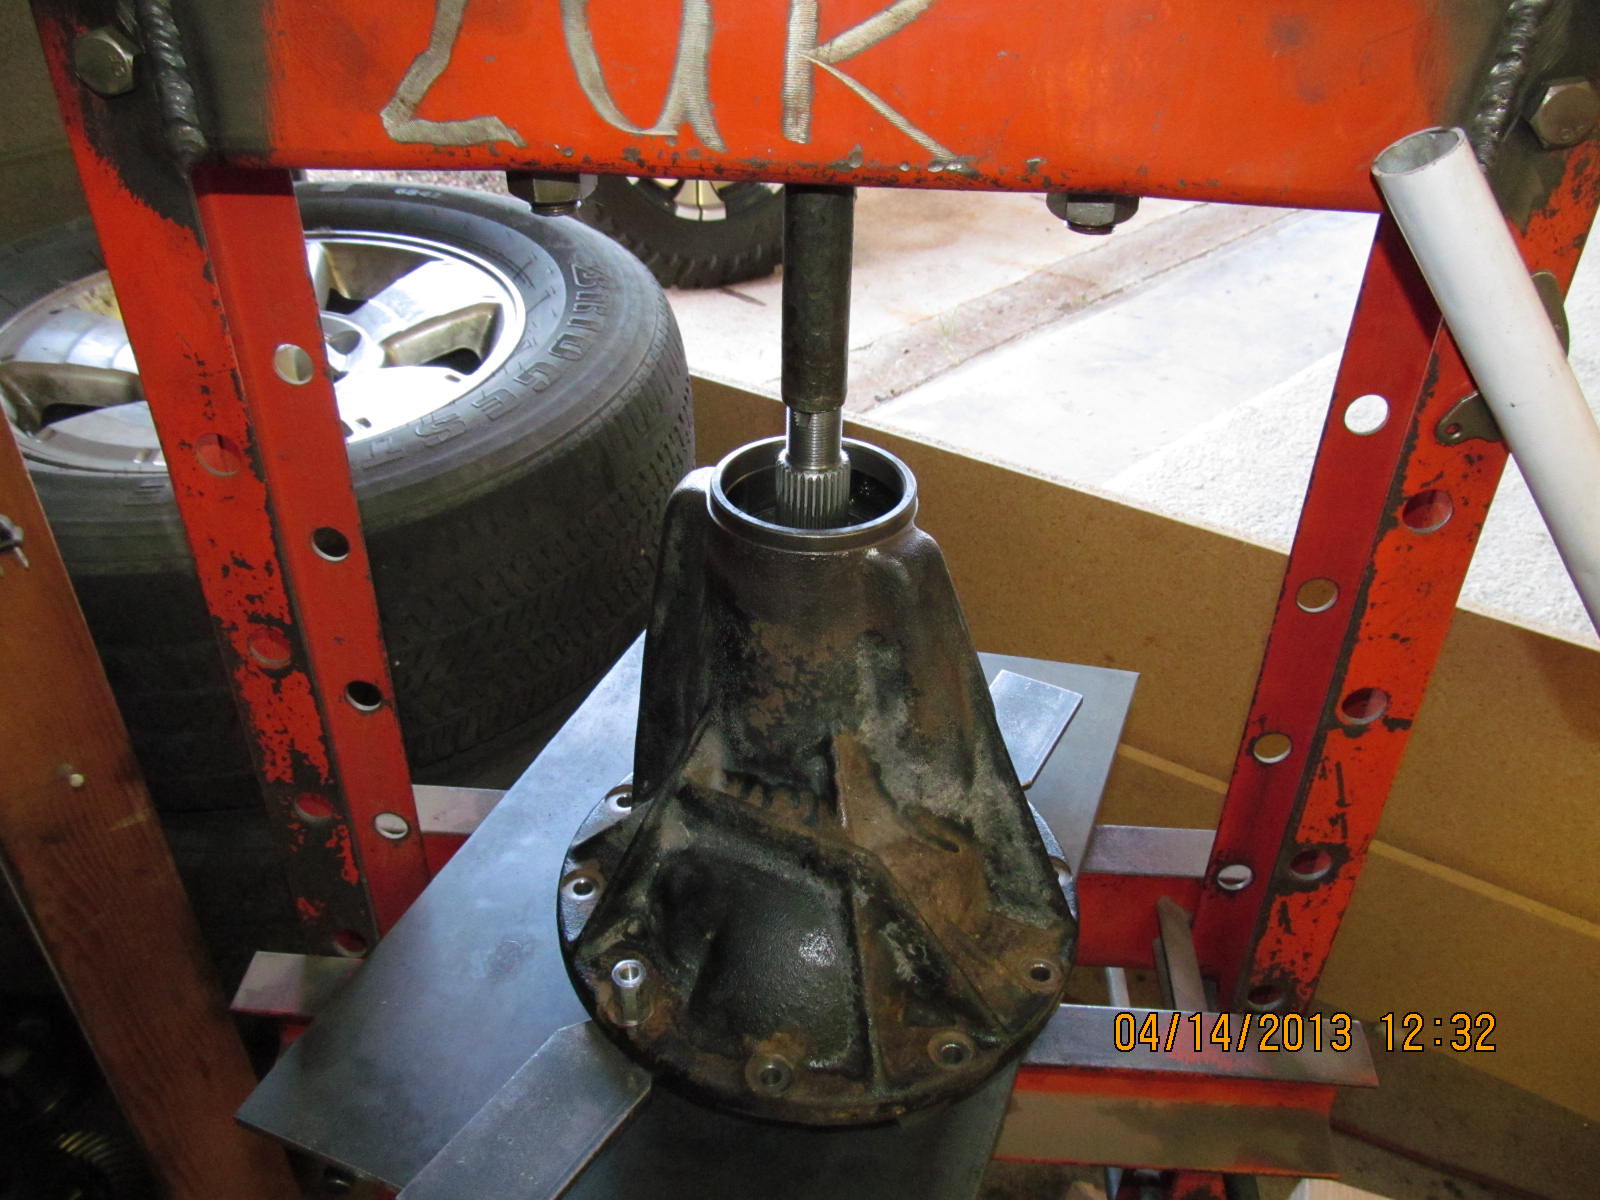
Teardown begins.
|
|
|
|
|
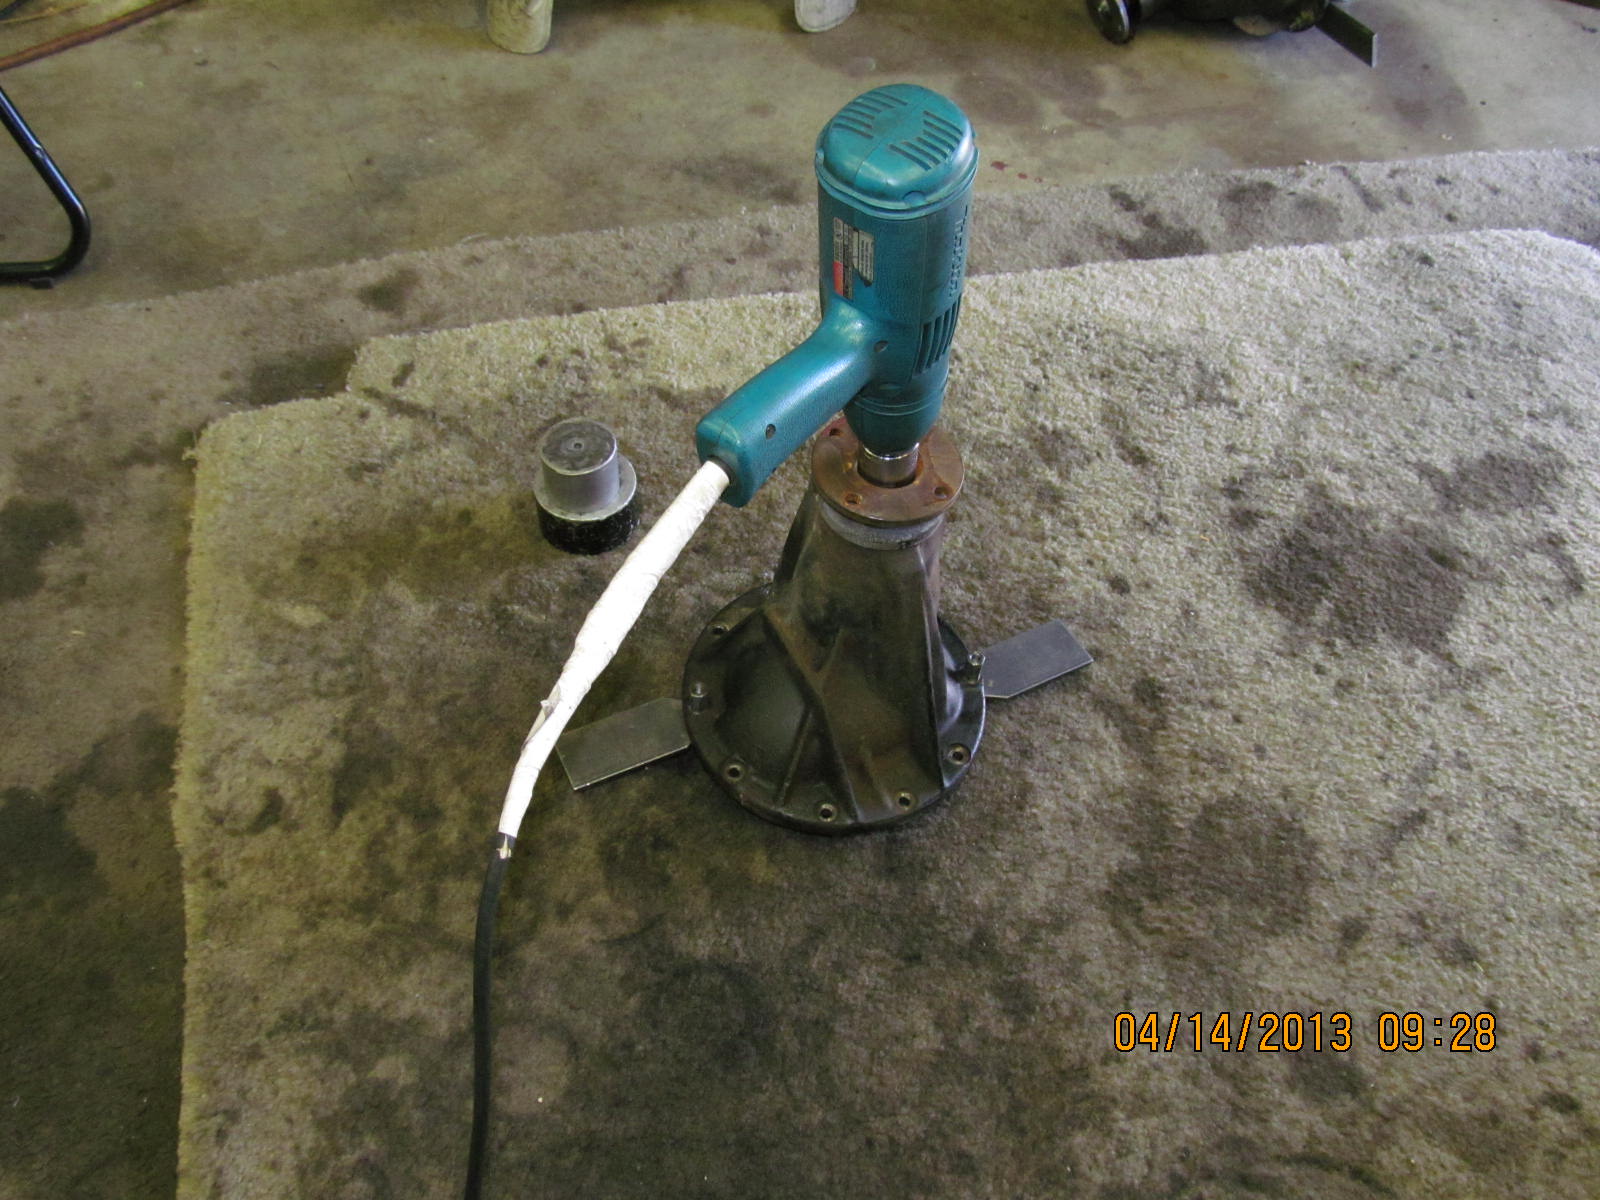
Electric impacts sure speeds things up.
|
|
|
|
|
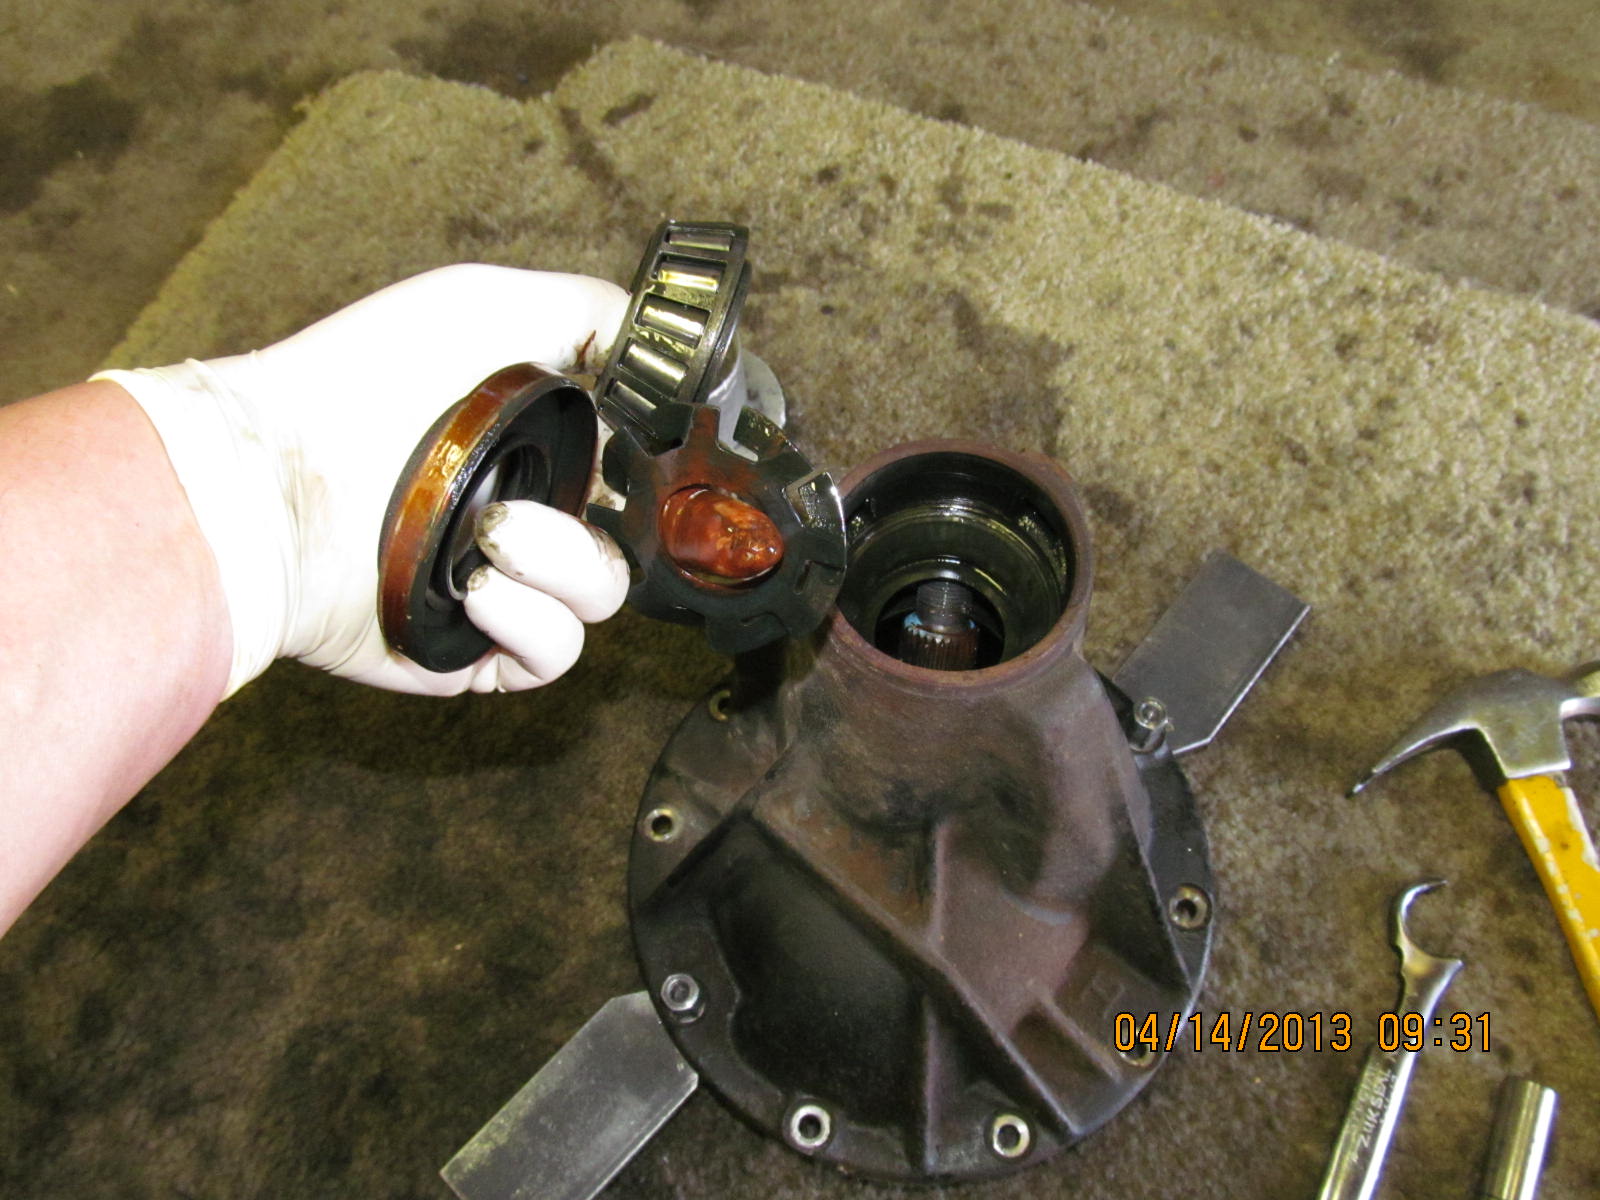
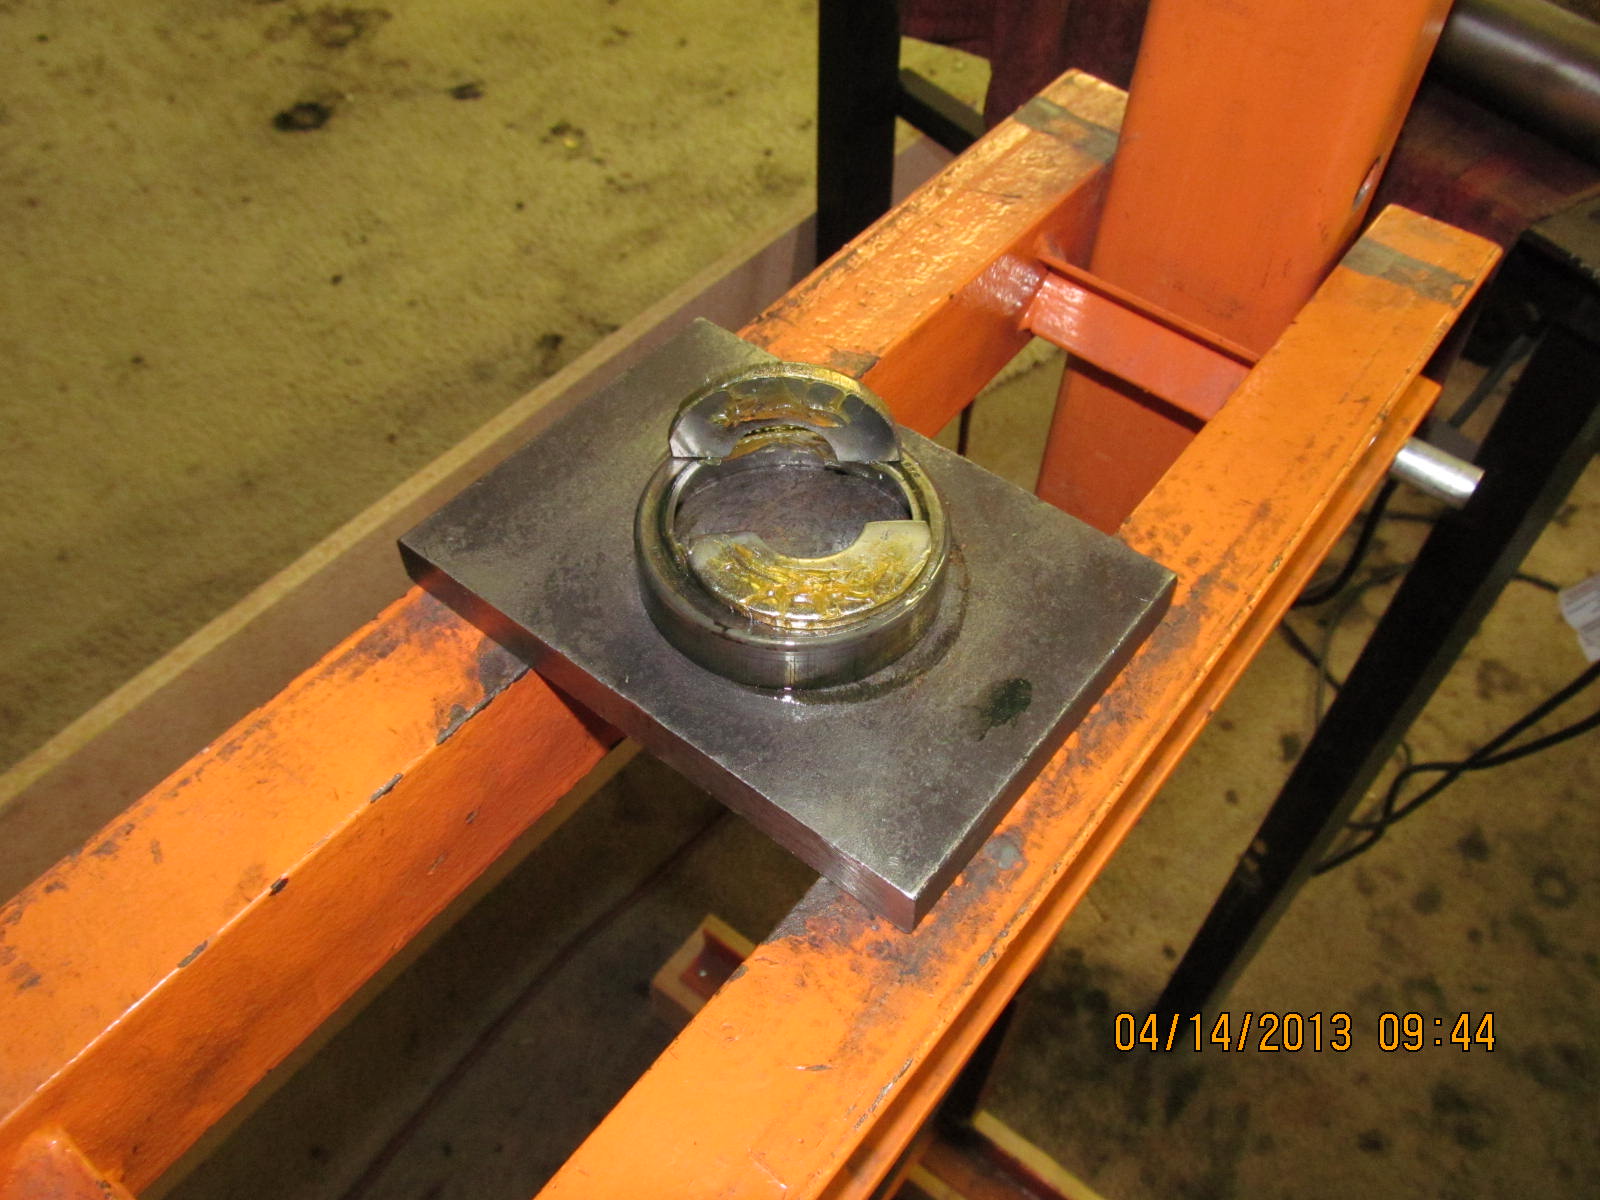
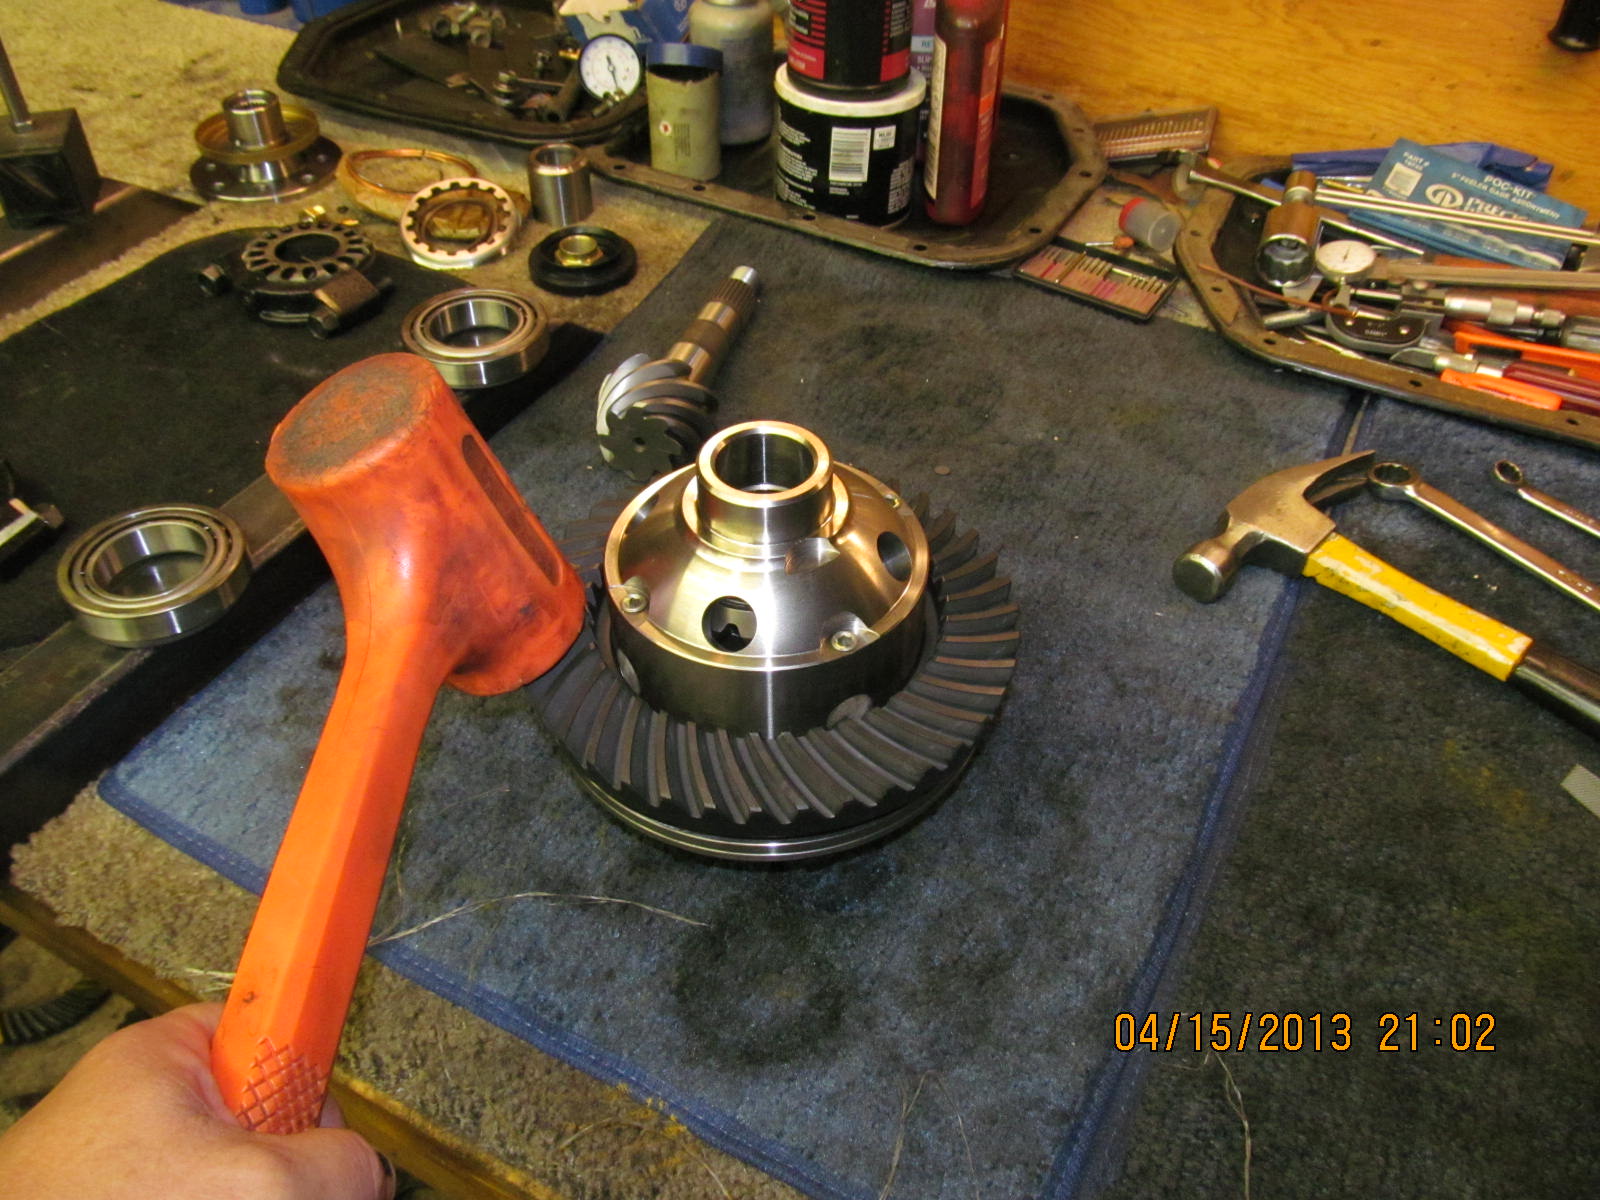
Seal and bearing go in the garbage.
|
|
|
|
|
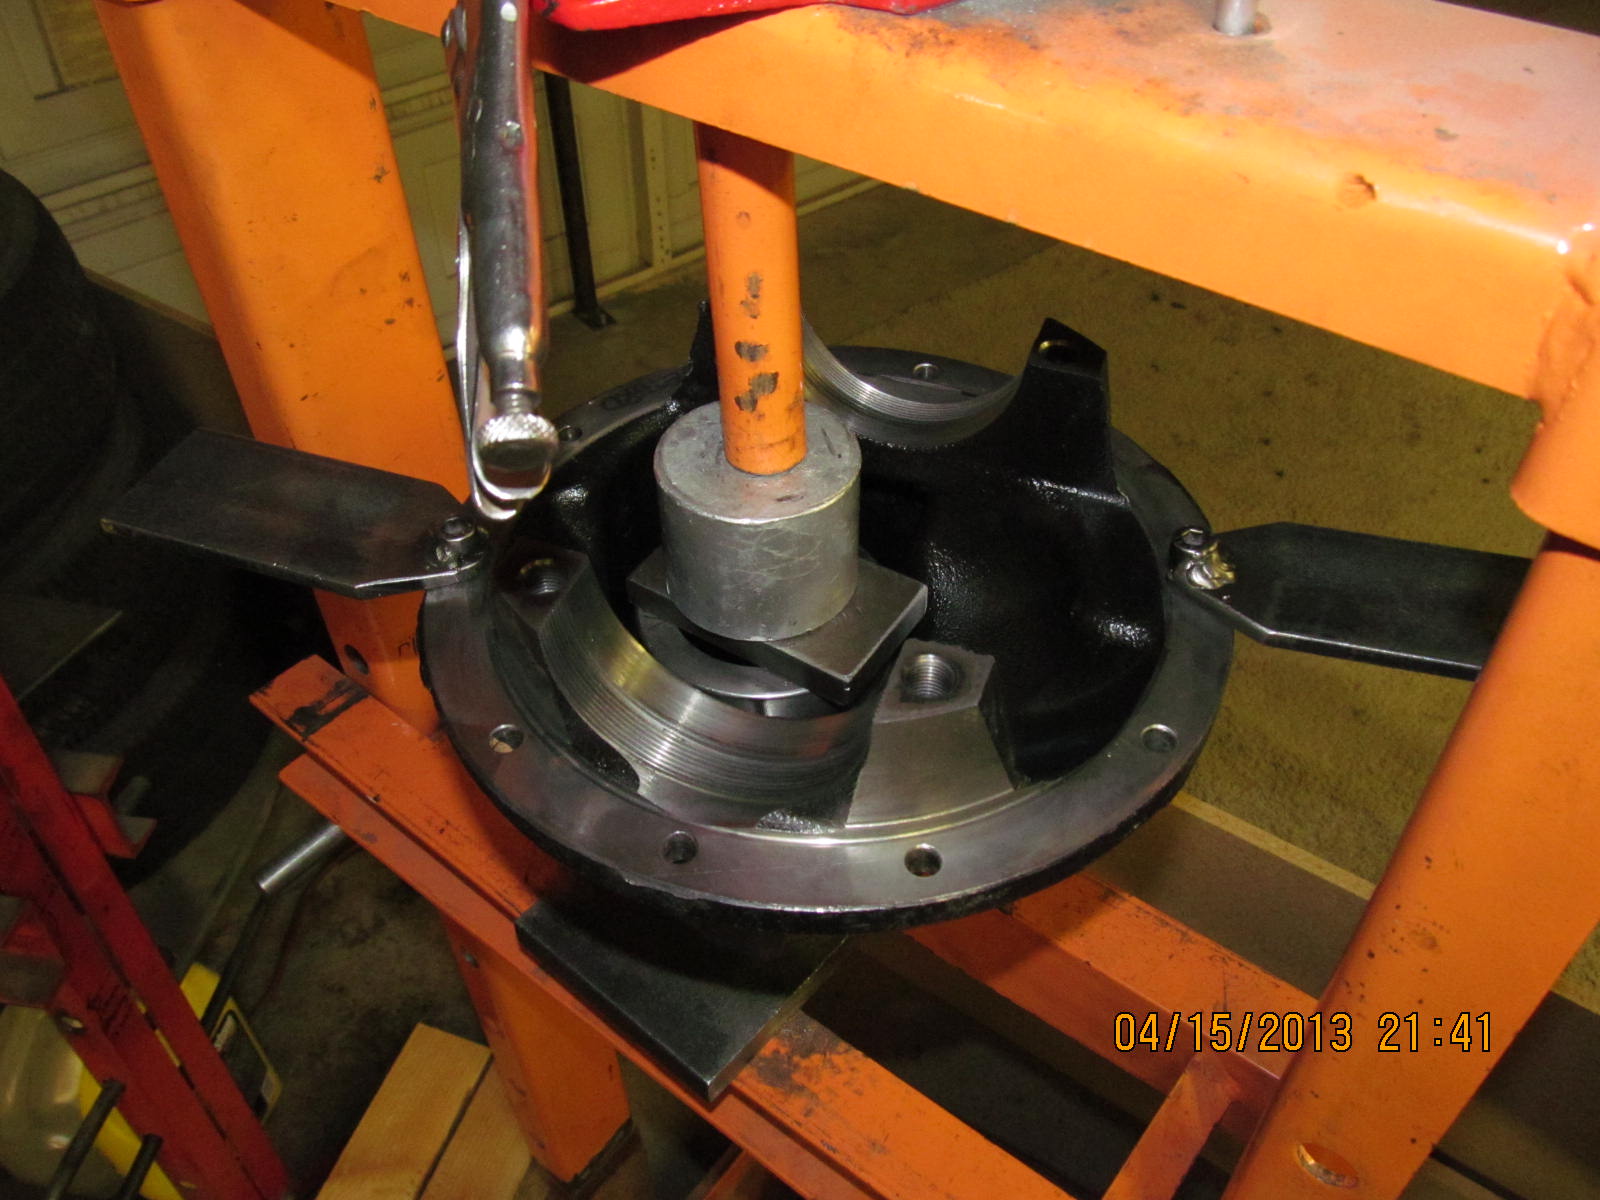
Old outer race is removed using the half washer trick.
|
|
|
|
|
Put some spacers in place and lightly press it out...
|
|
|
|
|
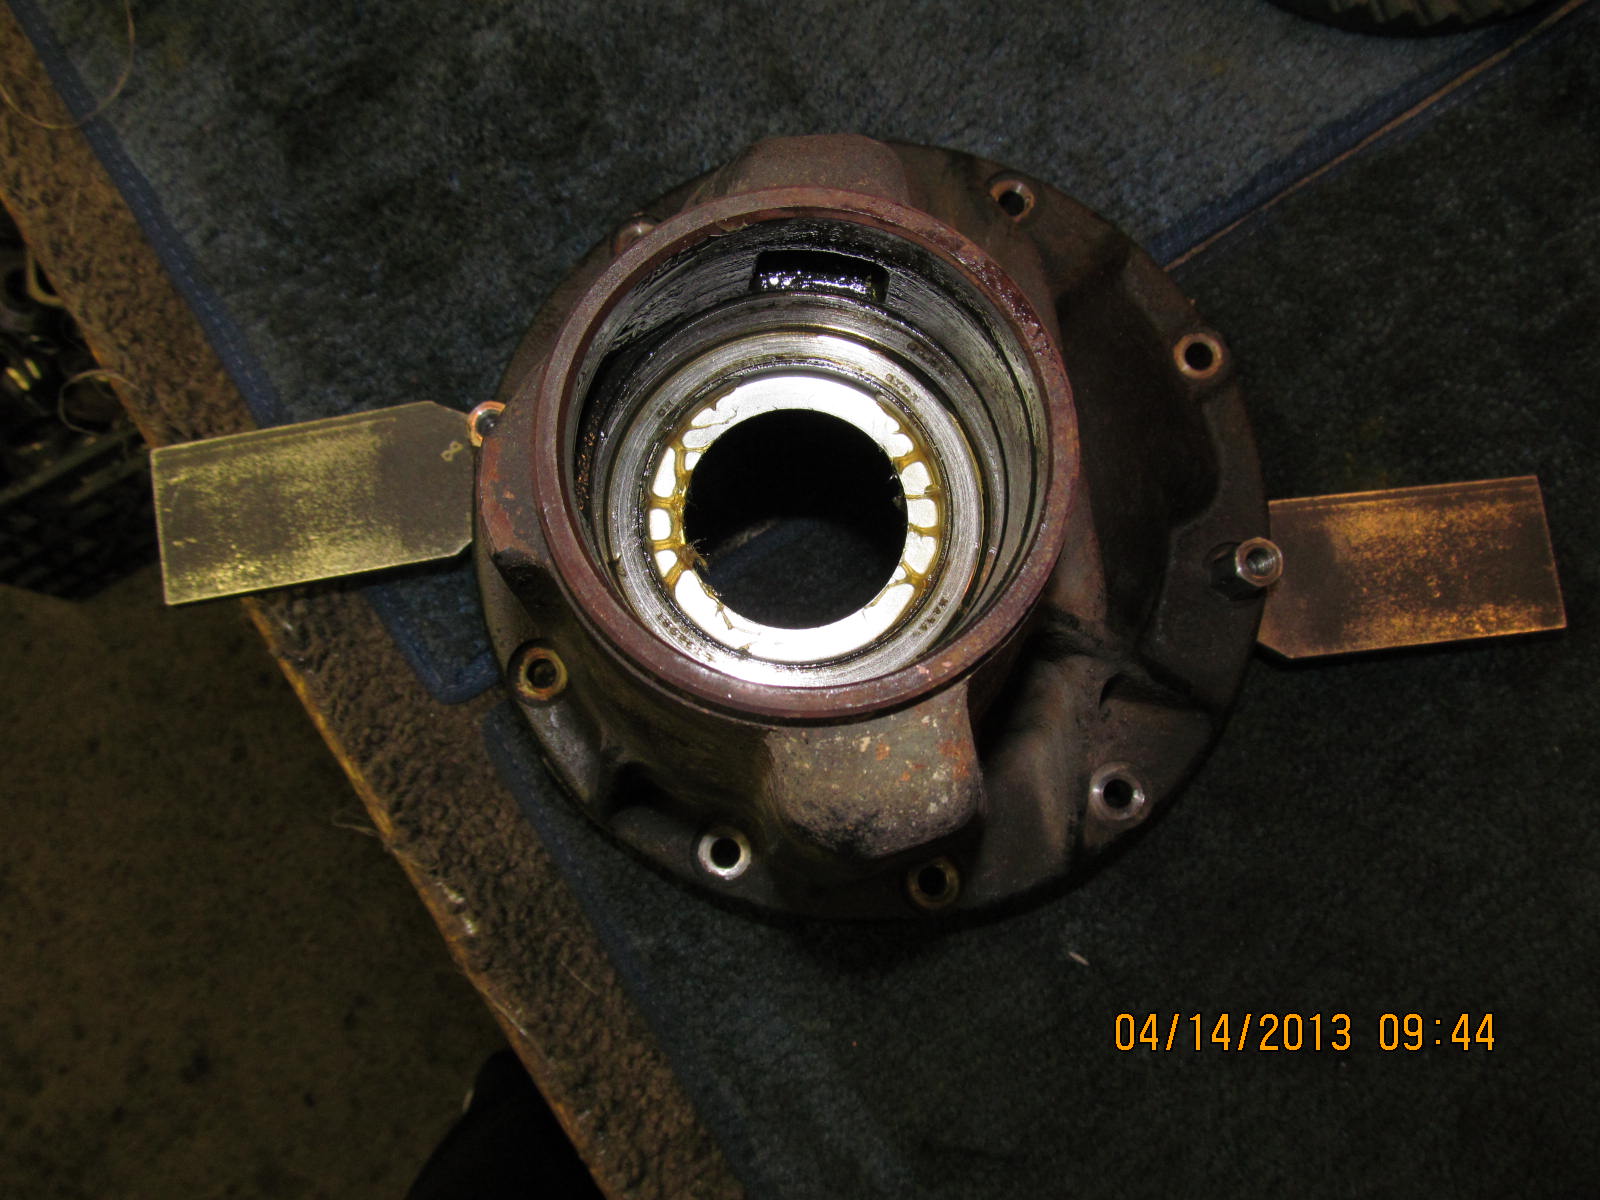
...no damage at all to the oil retainer.
|
|
|
|
|
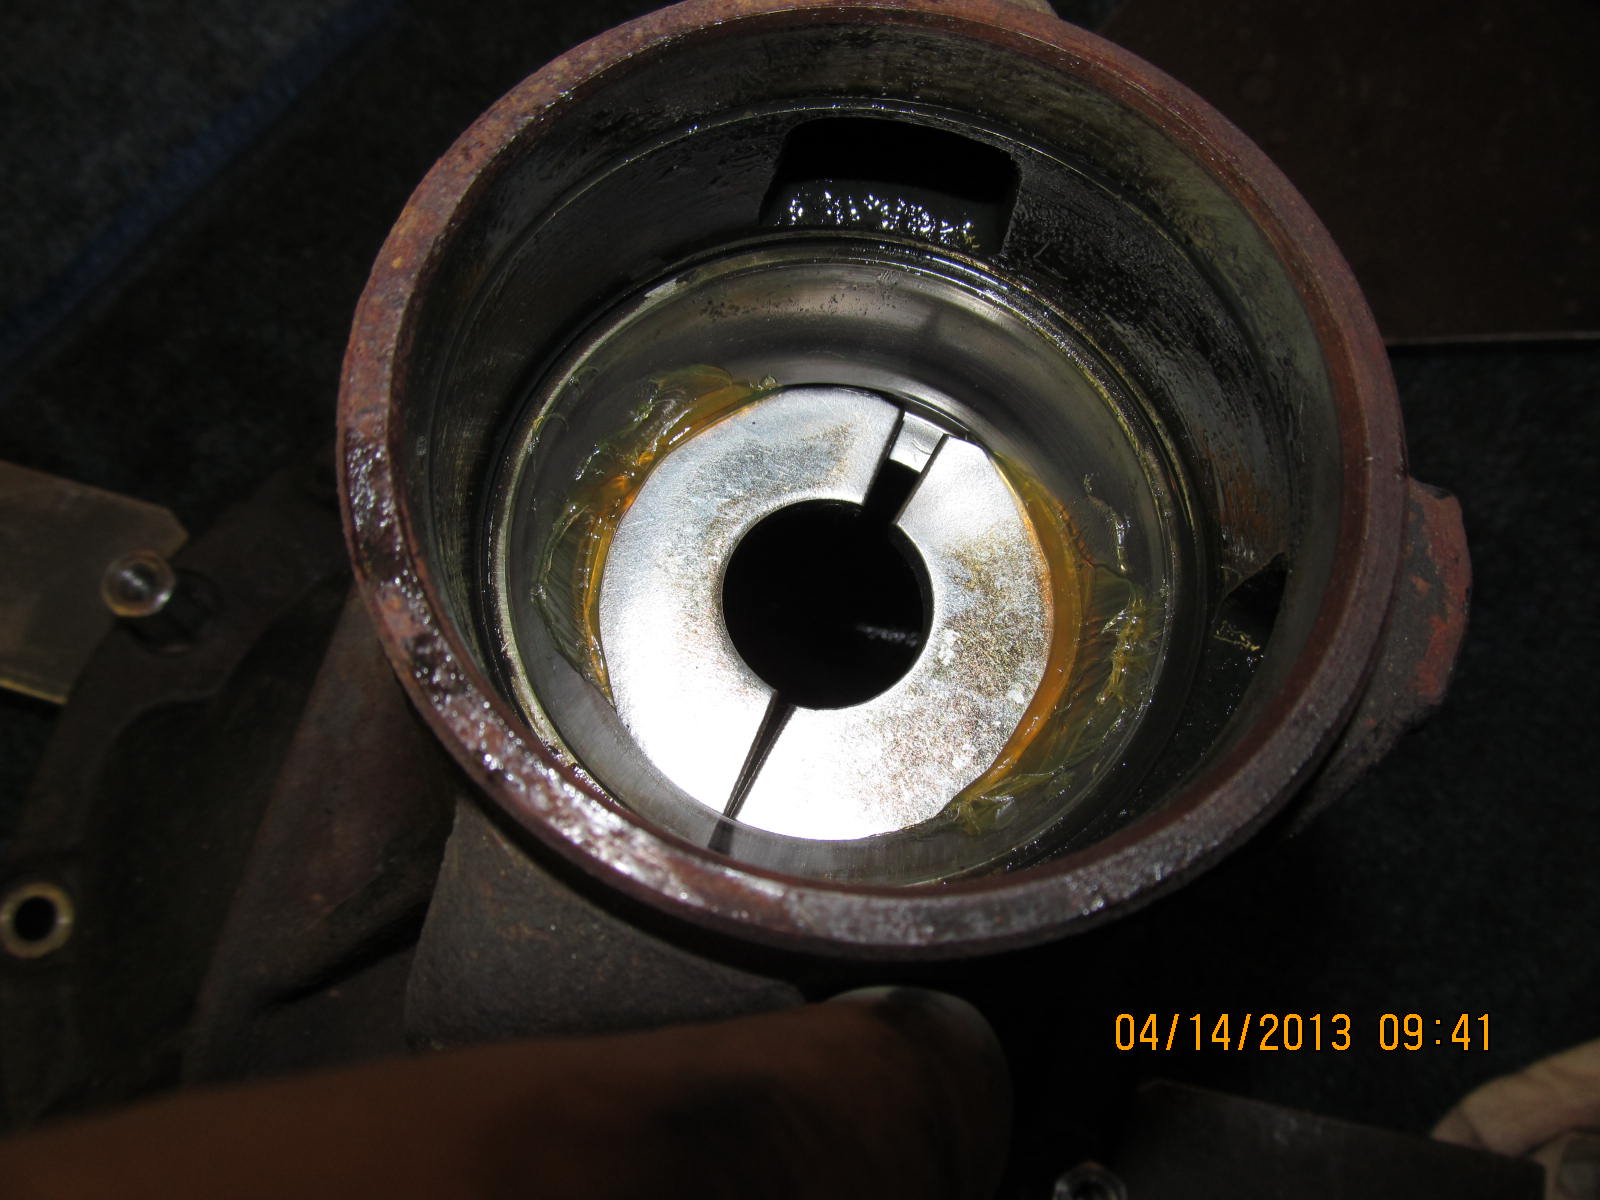
The race dropped out so very cleanly.
|
|
|

|
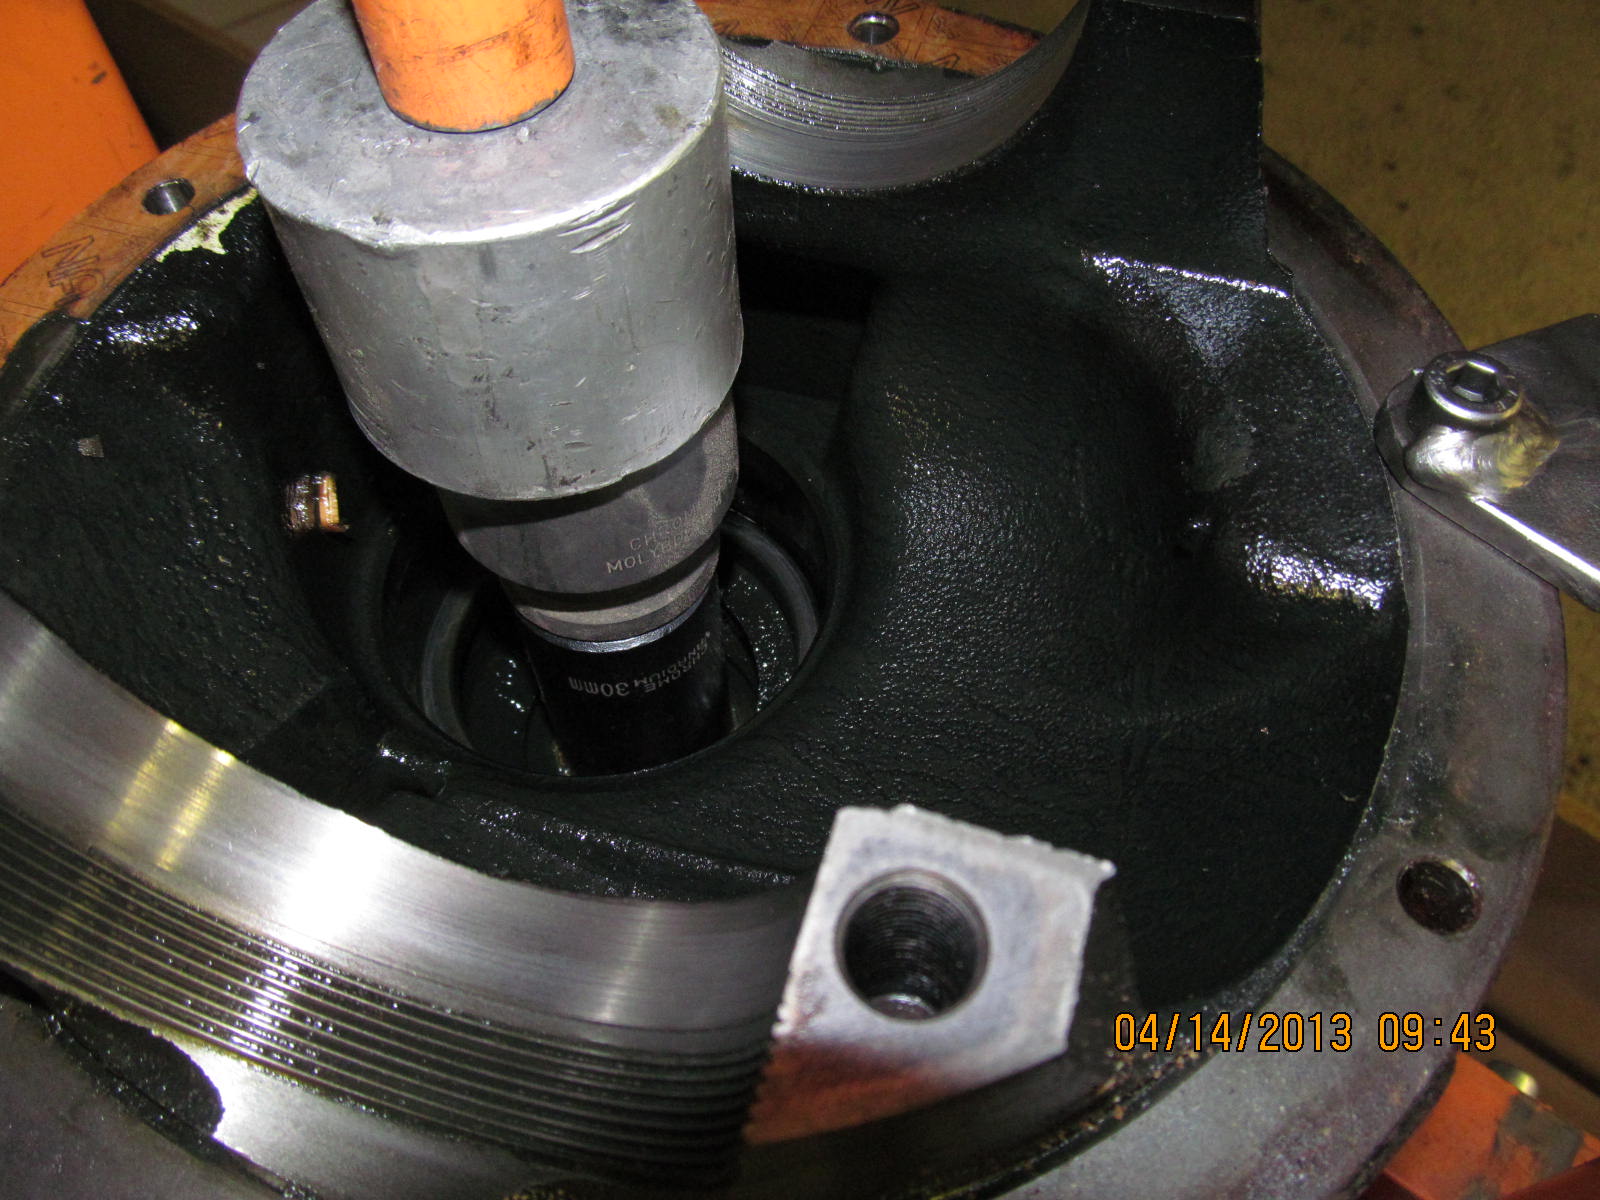
Usually, it takes me about 1.5 cans of ether to clean up the 3rd enough to be
comfortable working on it. The large inner pinion race is lined up and
leveled off...
|
|
|
|
|
...and pressed in the bore fully with no alignment or binding issues.
|
|
|
|
|
The small outer race can be tapped in with the proper spacer widgets.
|
|
|
|
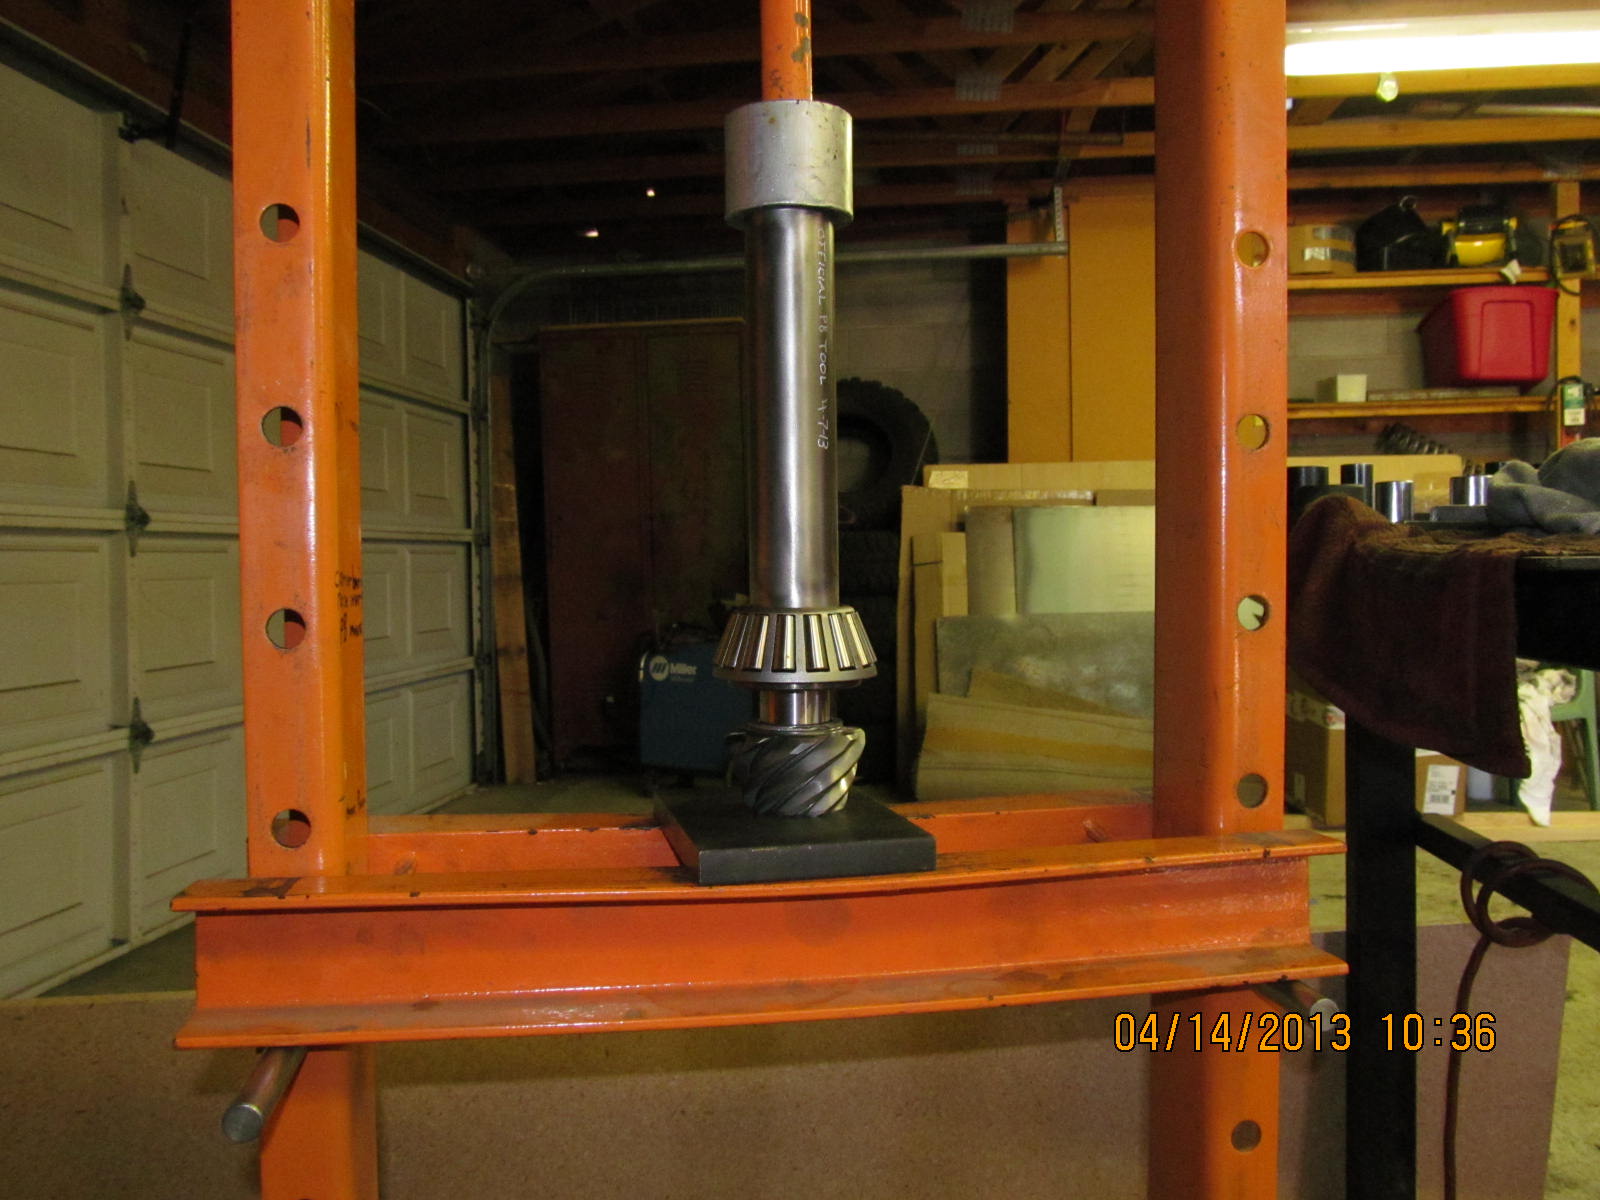
I chose a .0785" shim and pressed the new bearing on. Yes, the beam under the pinion
is really flexing a little. Doesn't seem to hurt anything.
|
|
|
|
|
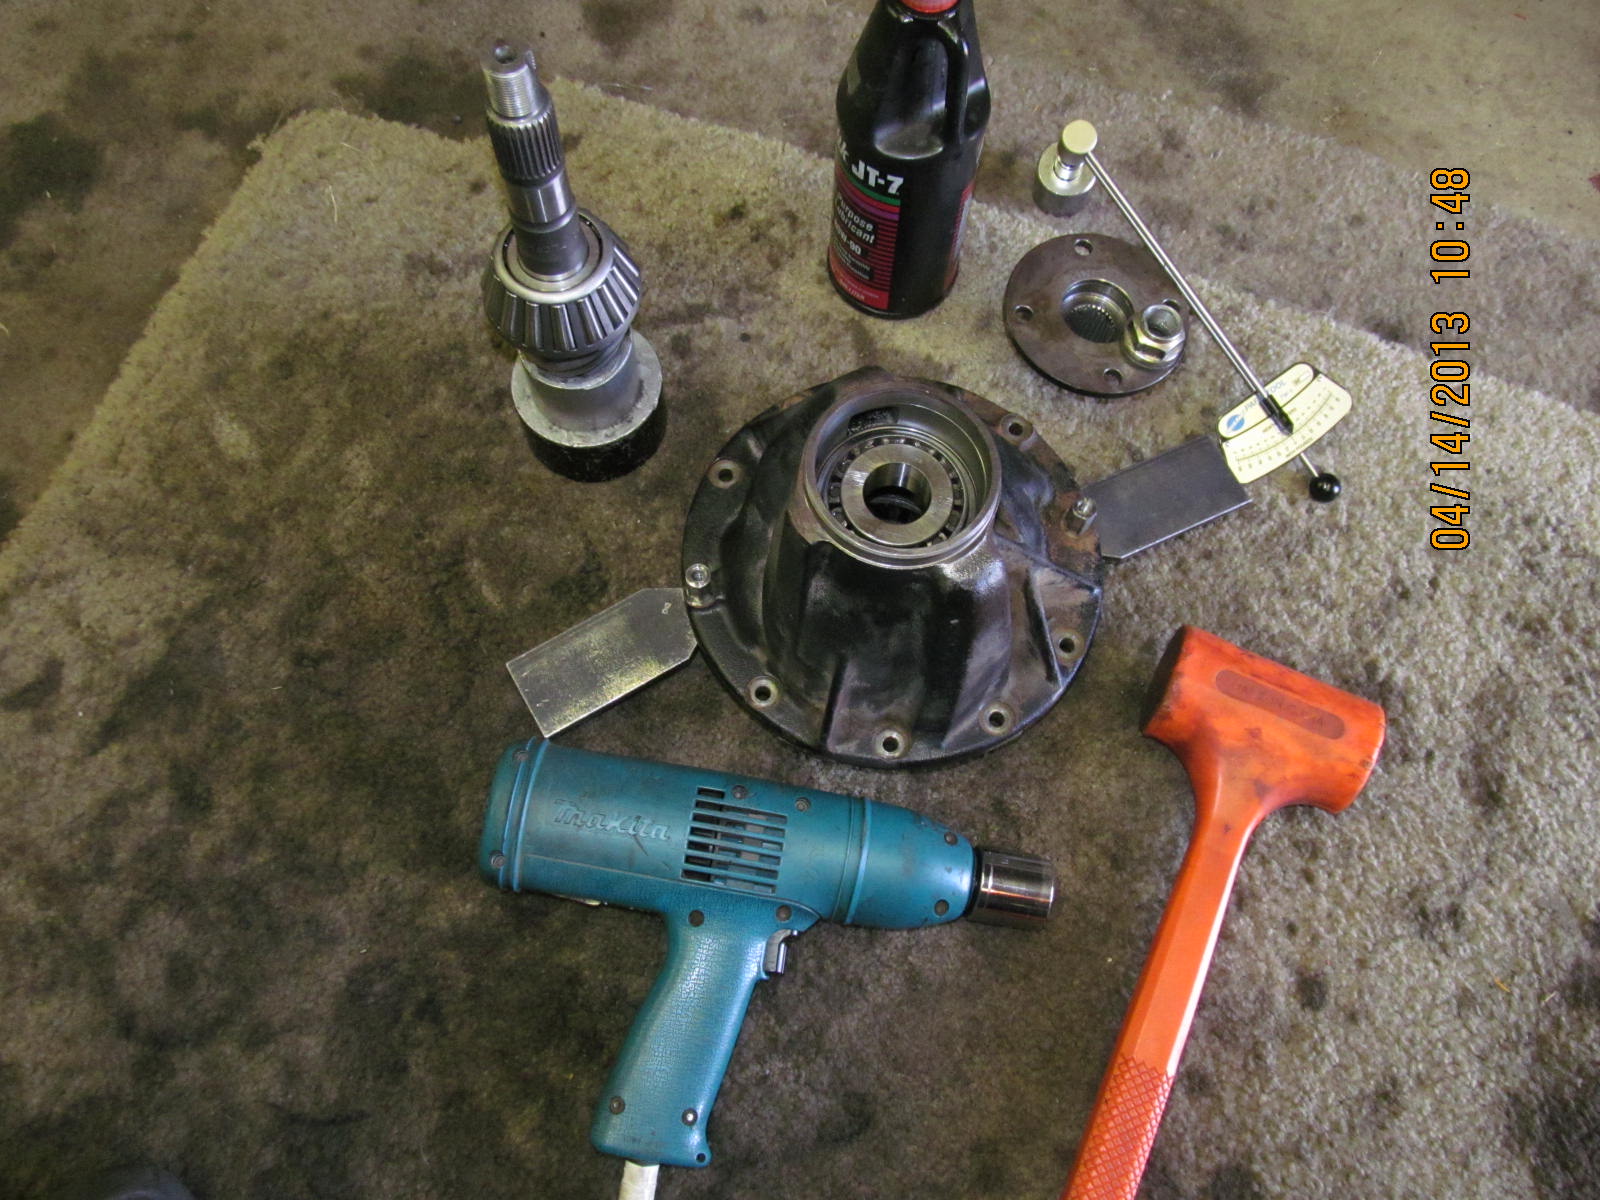
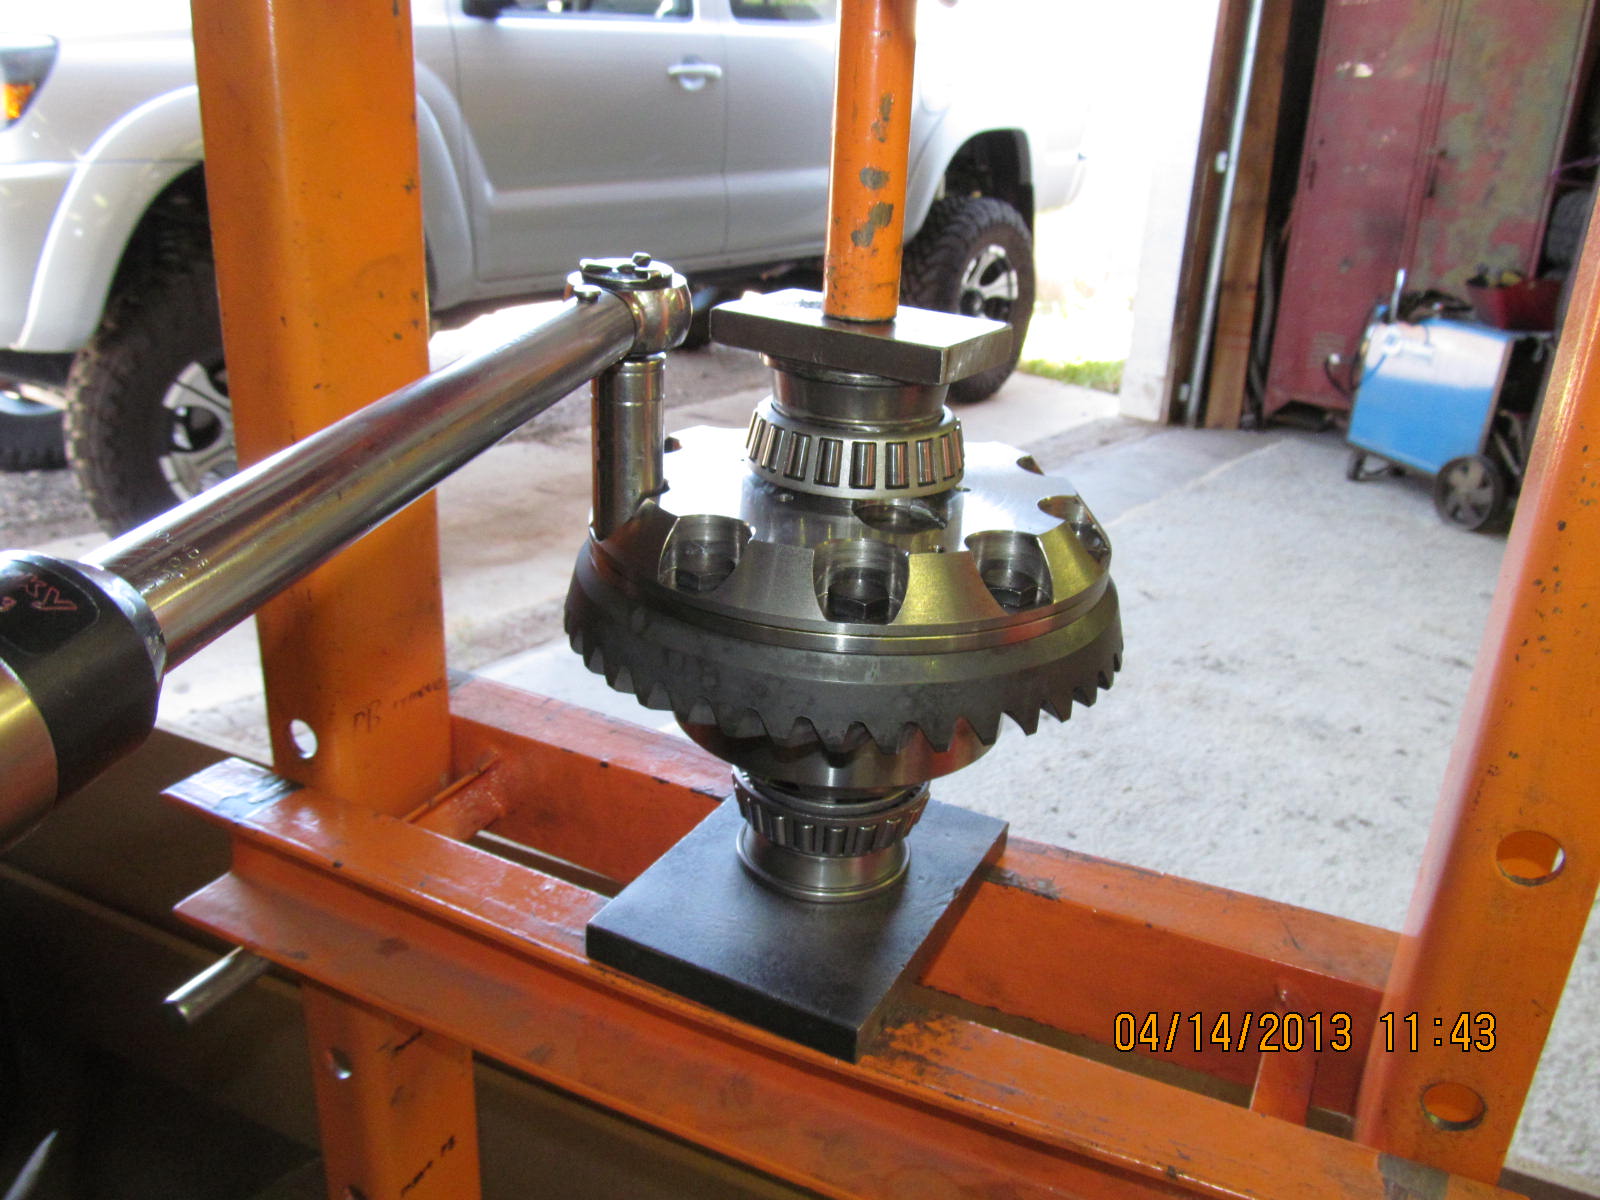
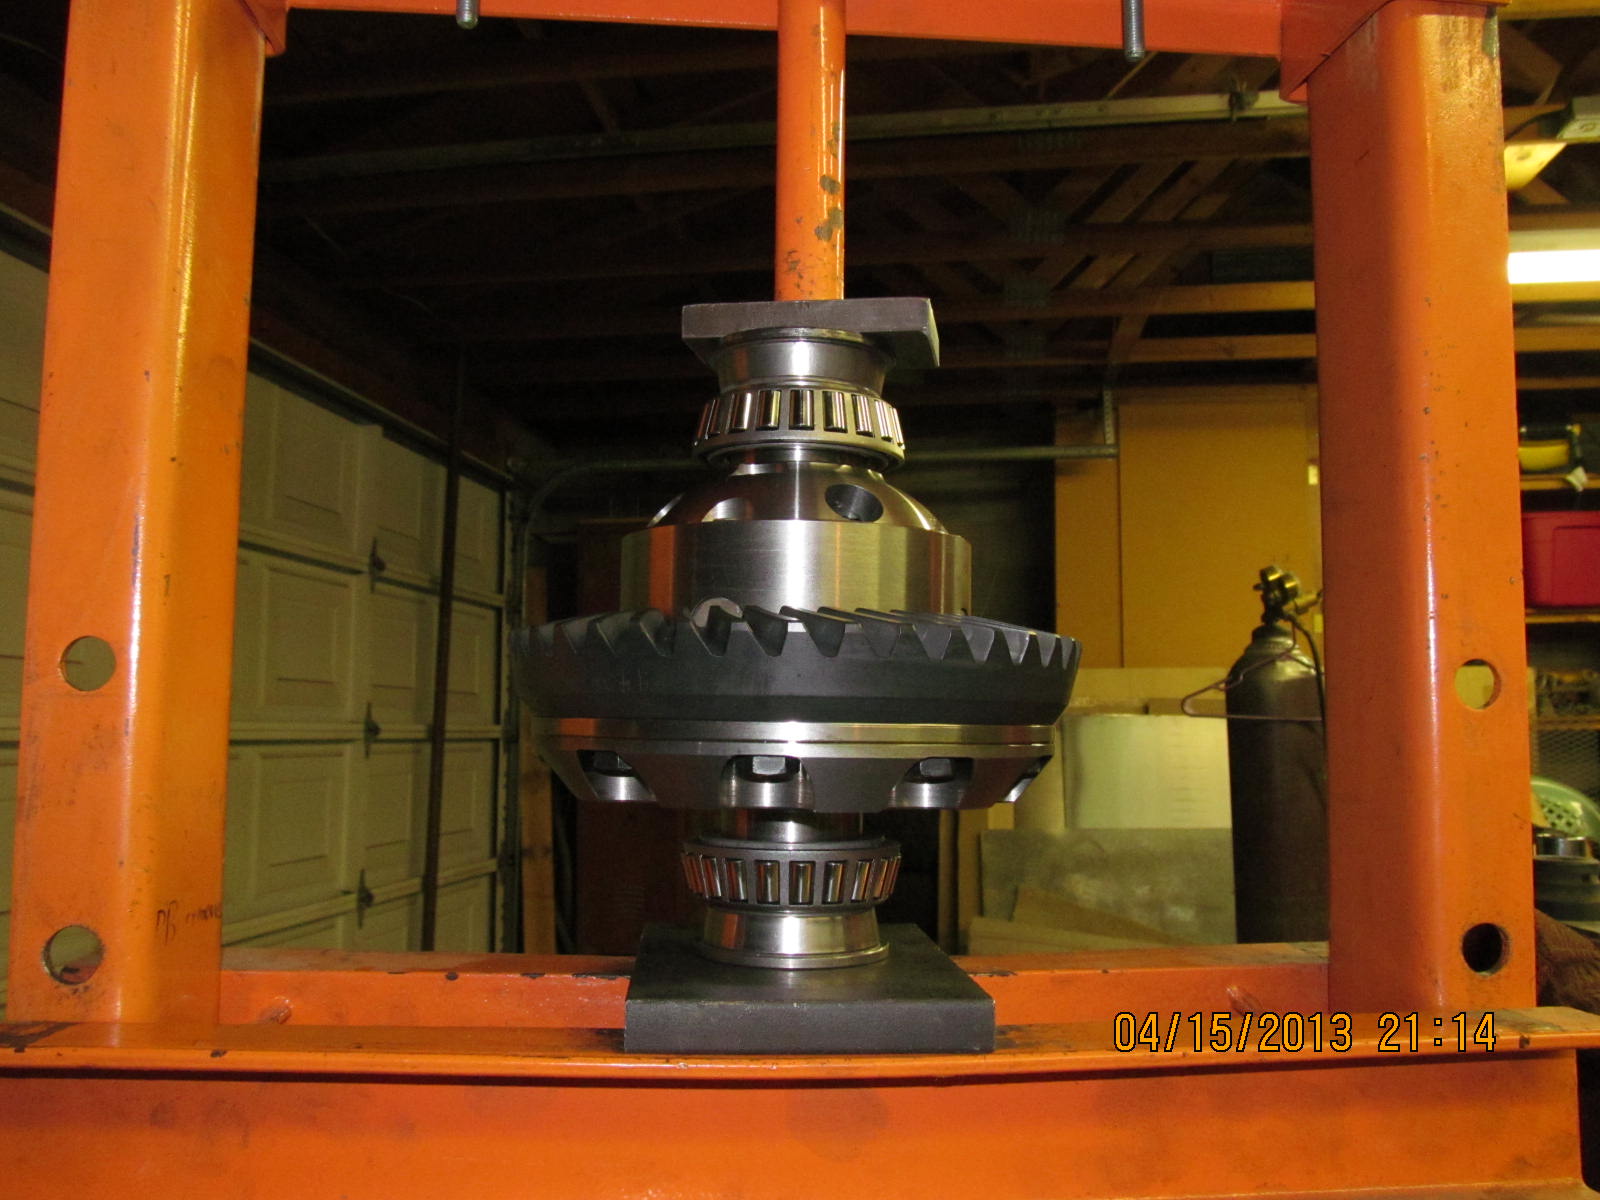
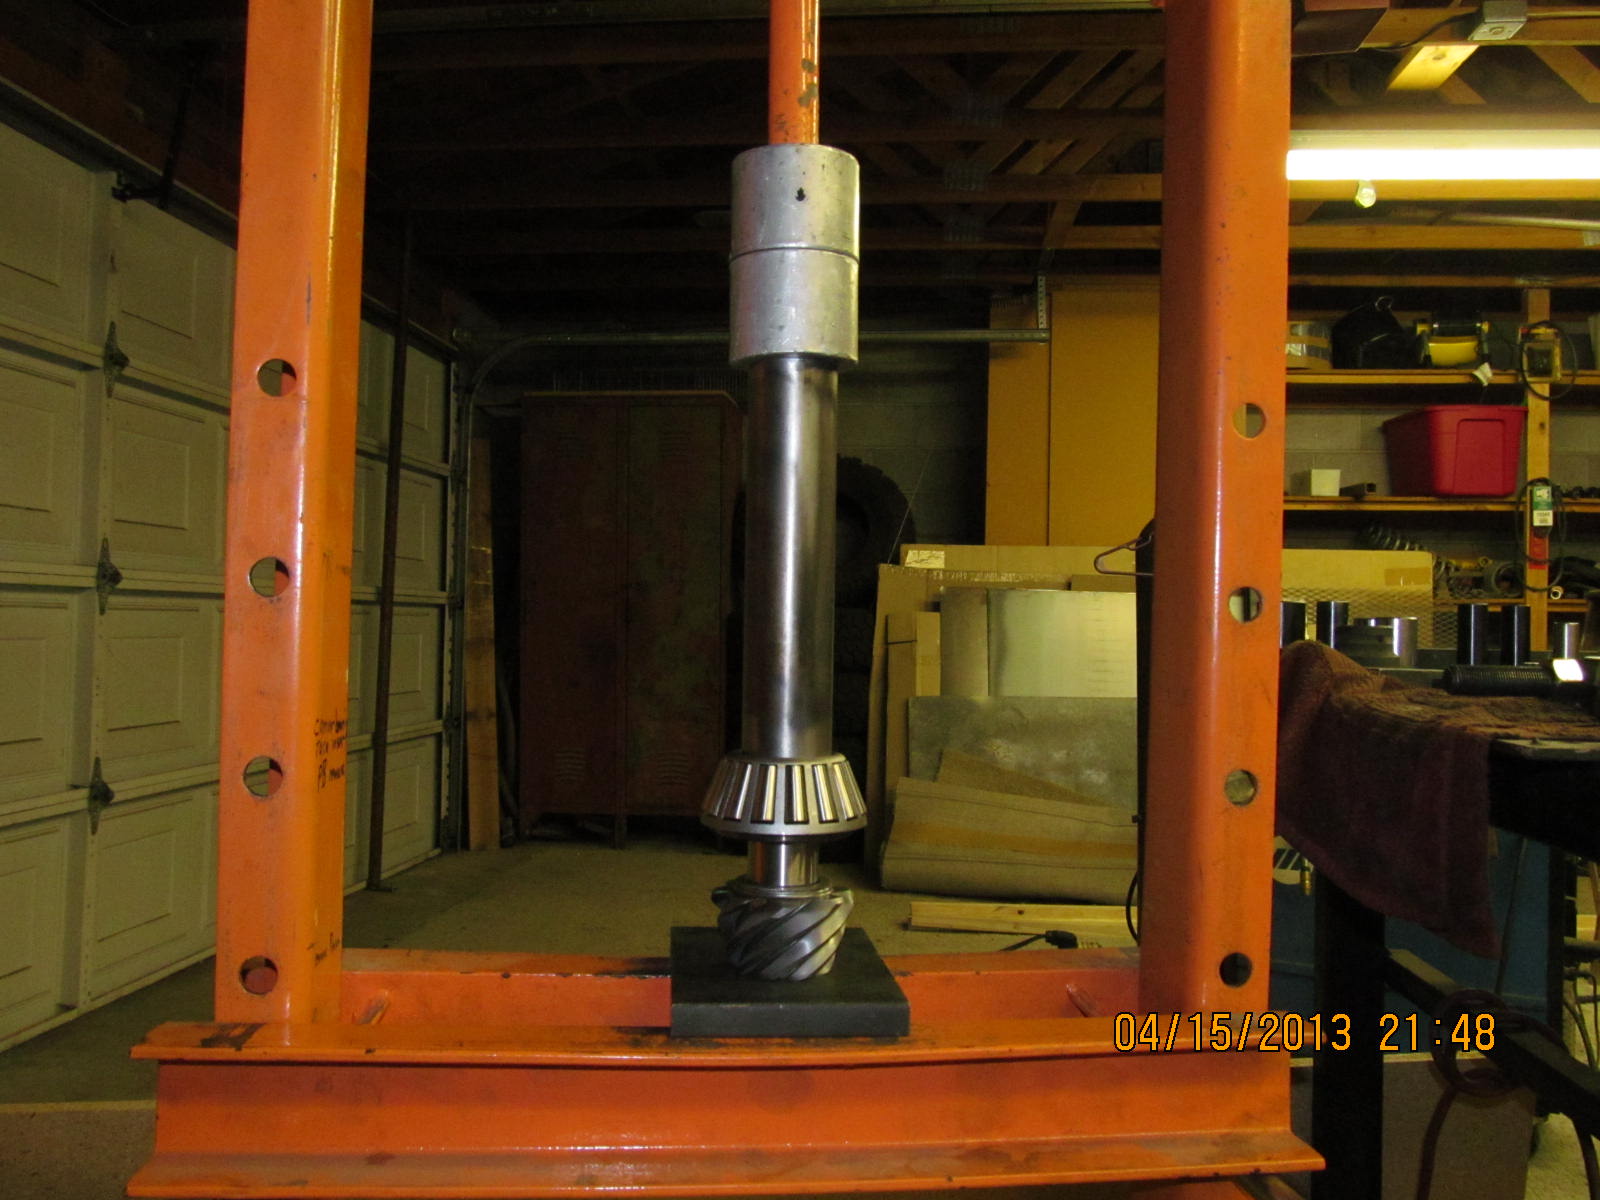
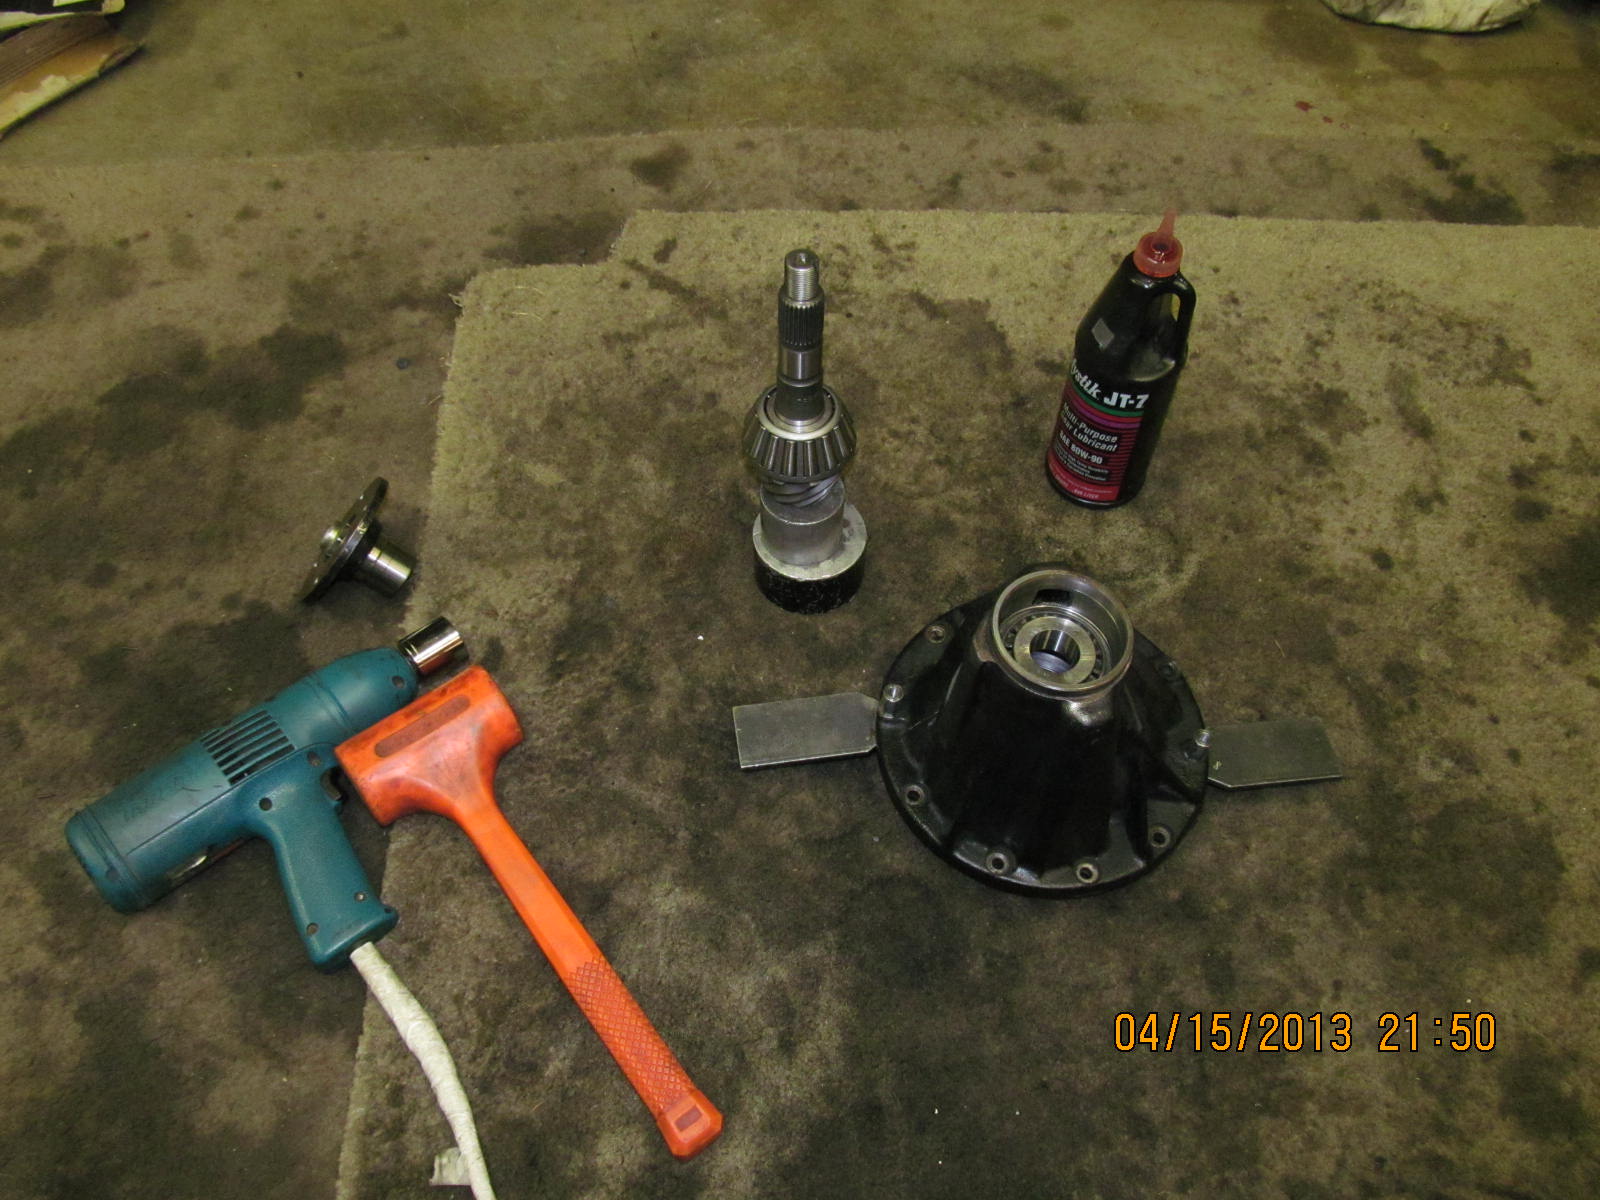
Everything I need to temporarily mount the pinion.
|
|
|
|
|
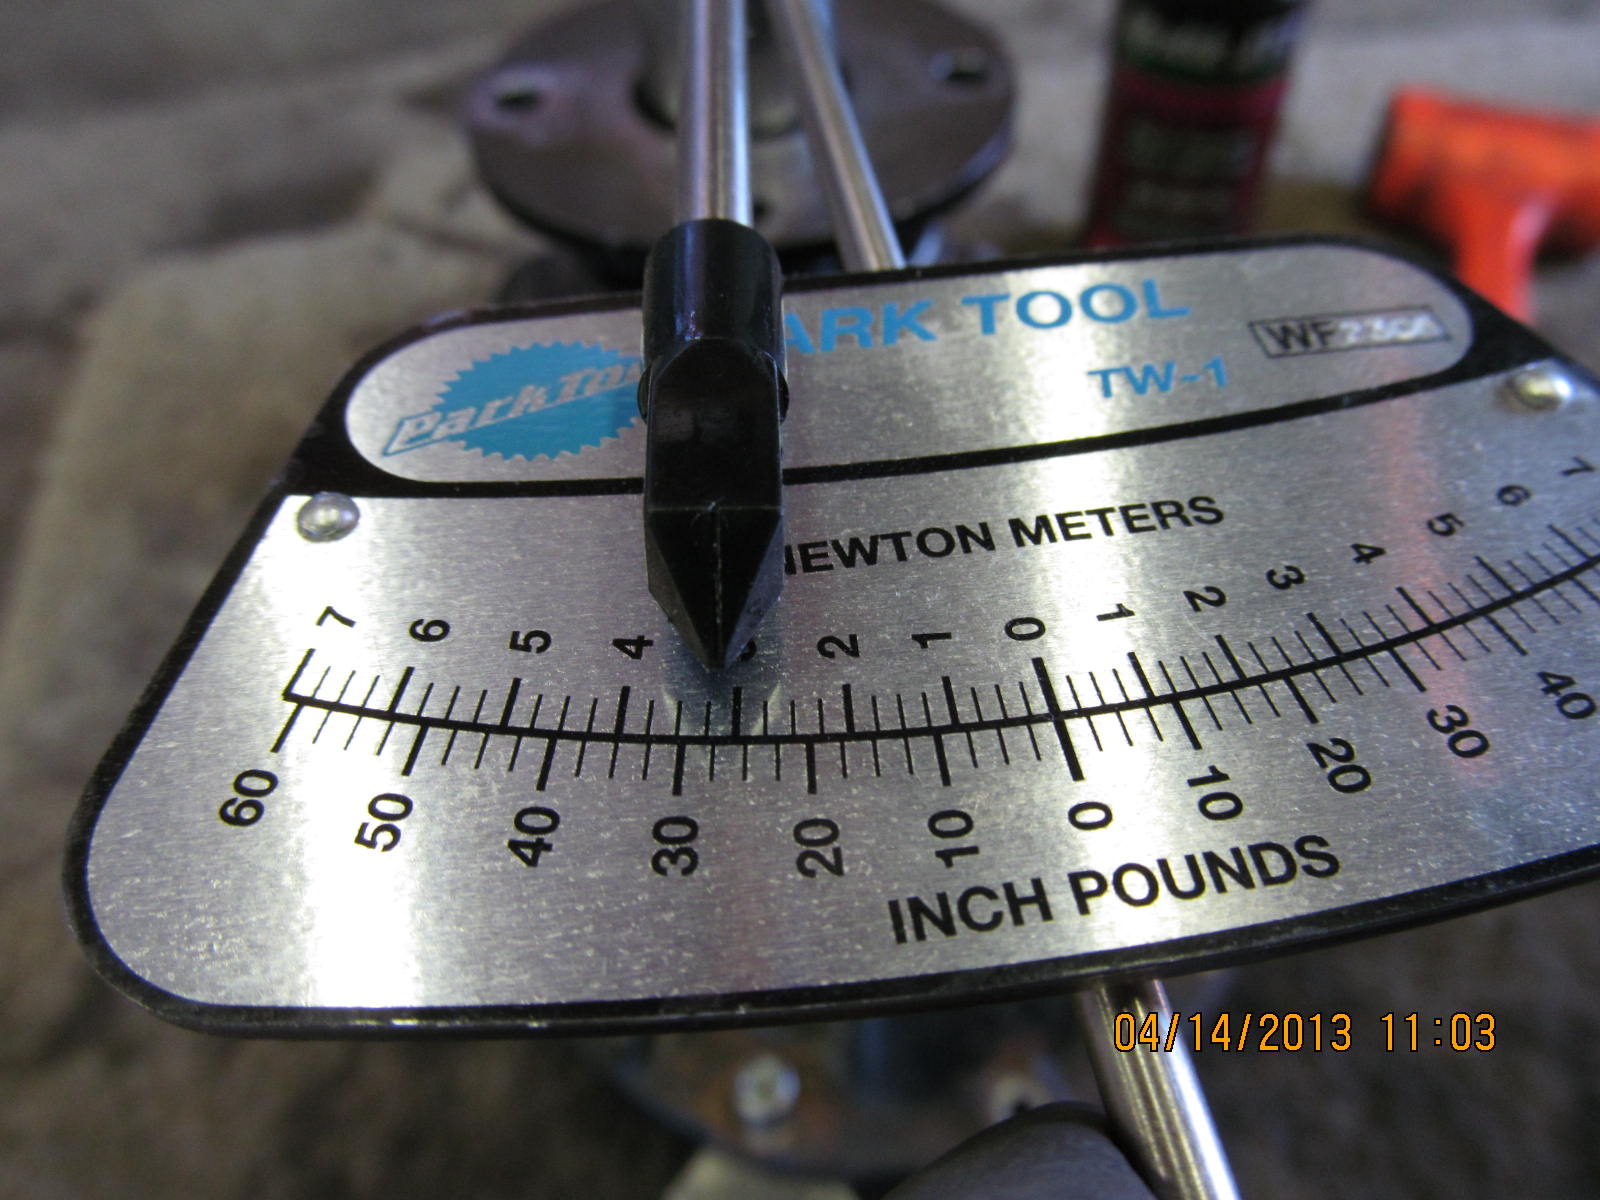
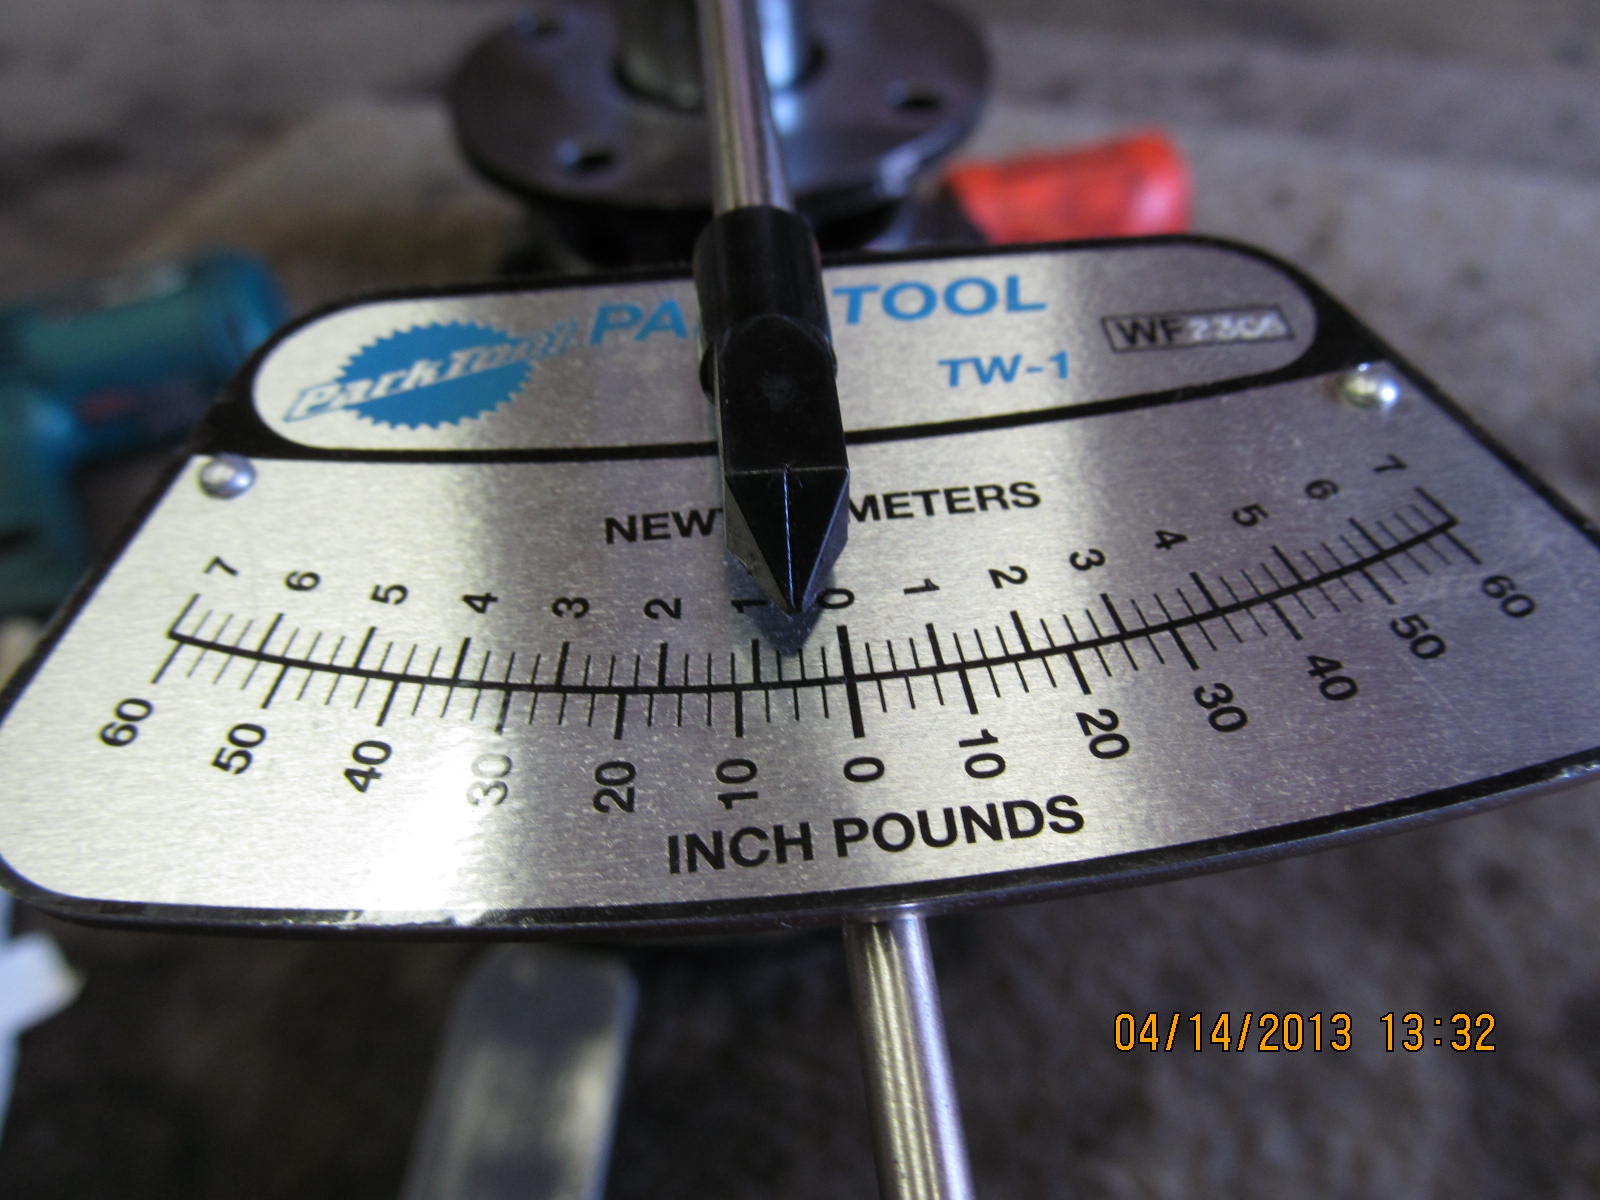
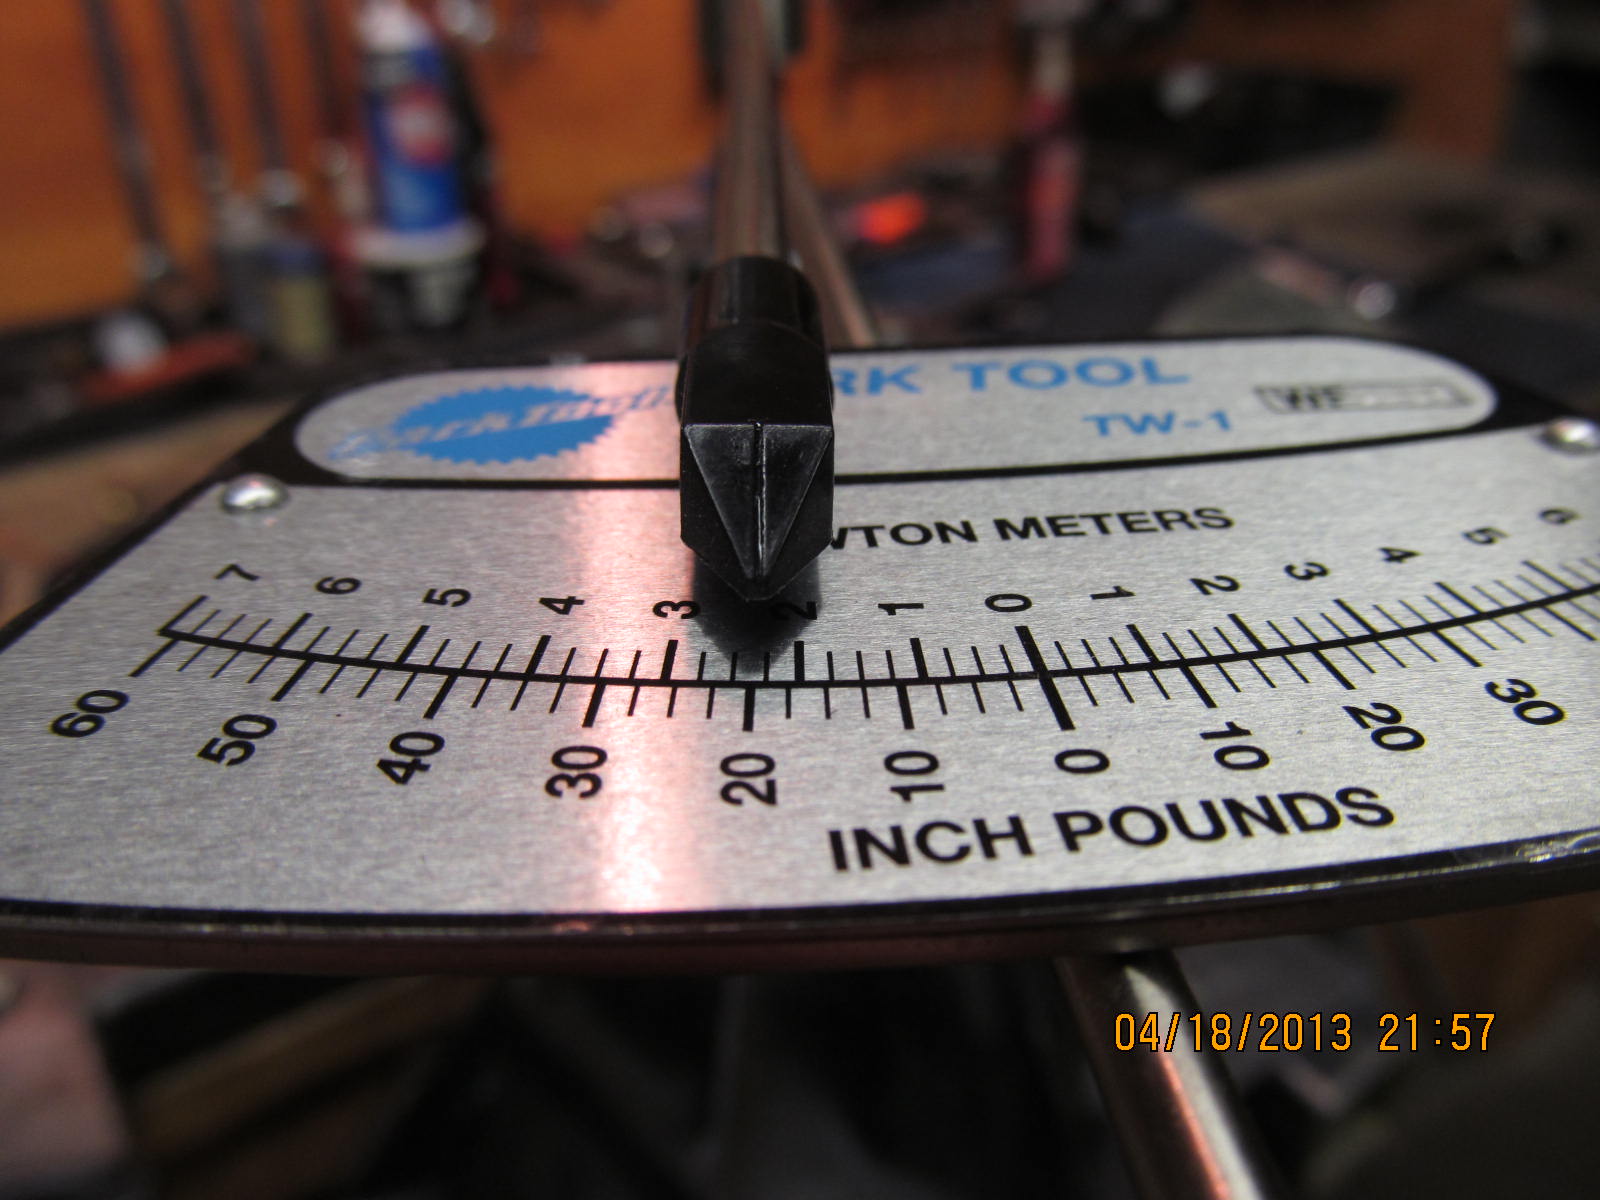
Starting torque is a bit high but this is just a pattern check so no problem.
|
|
|
|
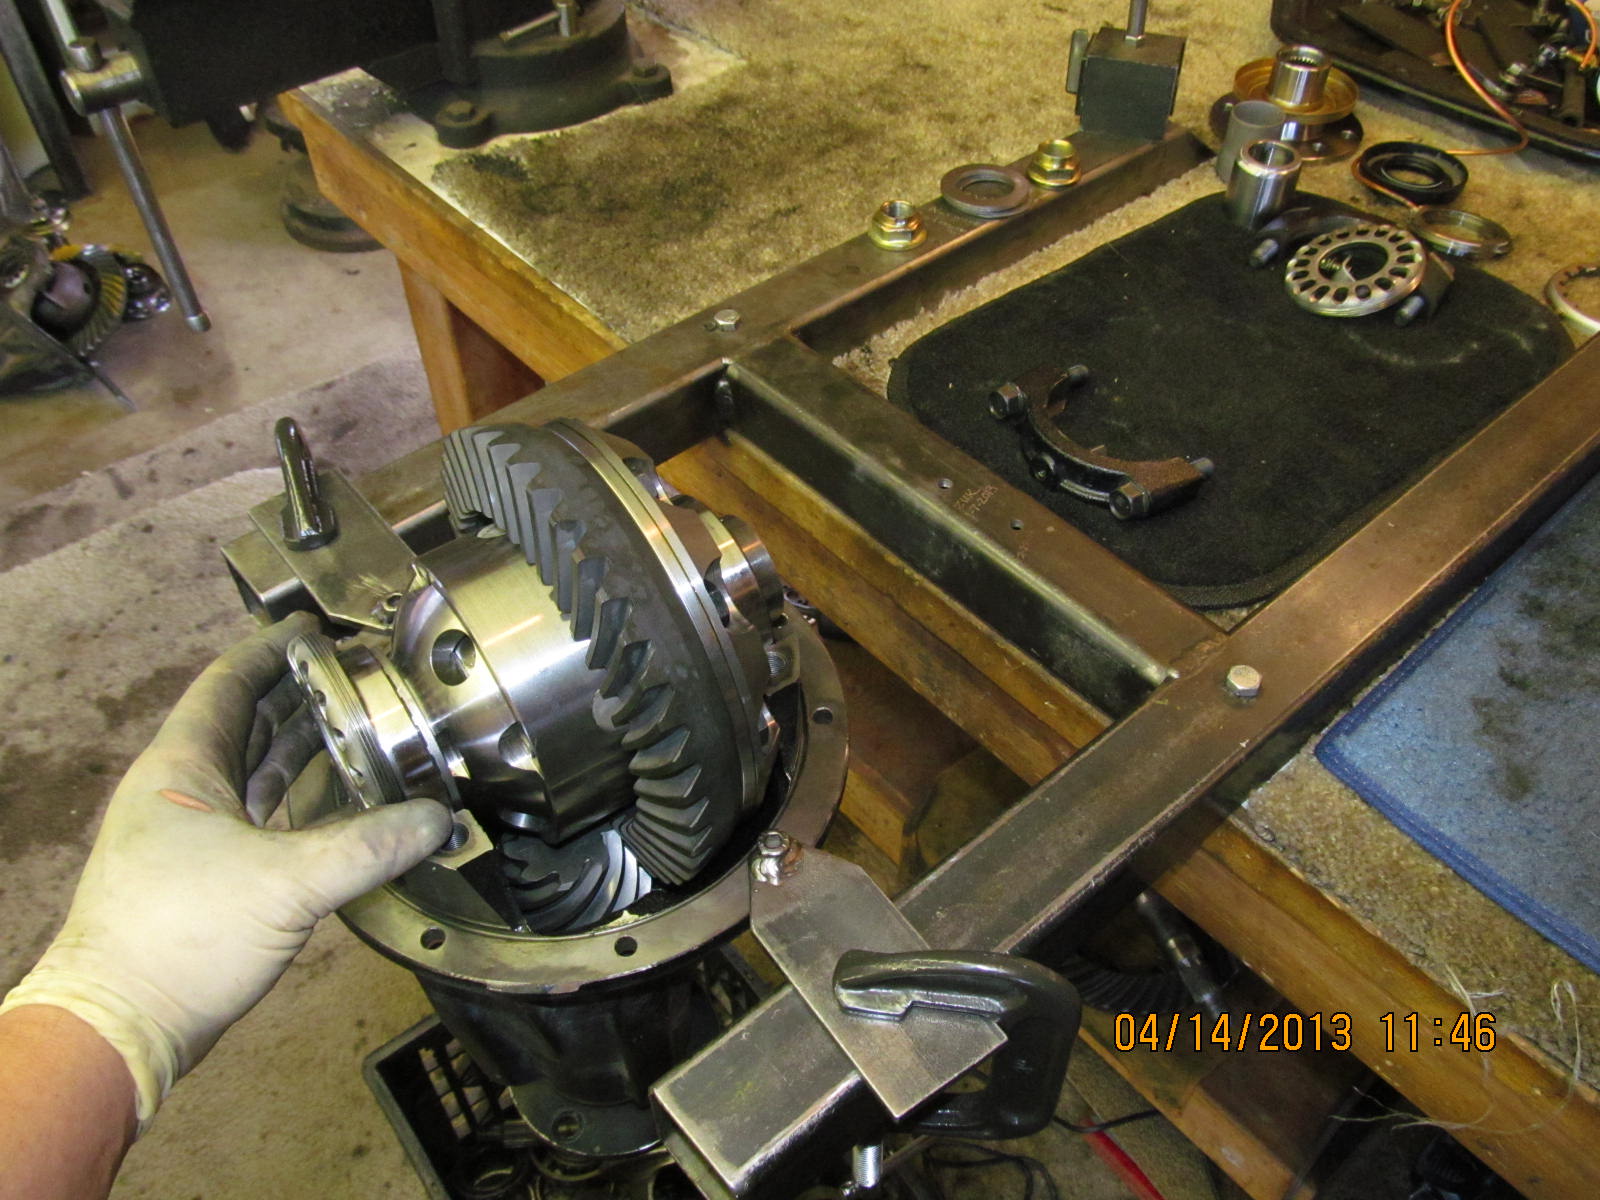
As is the usual case with ARB's, the fit was very tight. At least I was able to
get this one started without the press with a little love tapping.
|
|
|
|
I pulled the ring on the last 1/4" using just wrist strength and equally
tightening the bolts a little at a time.
|
|
|
|
|
The bolts are then removed and red loctite applied.
|
|
|
|
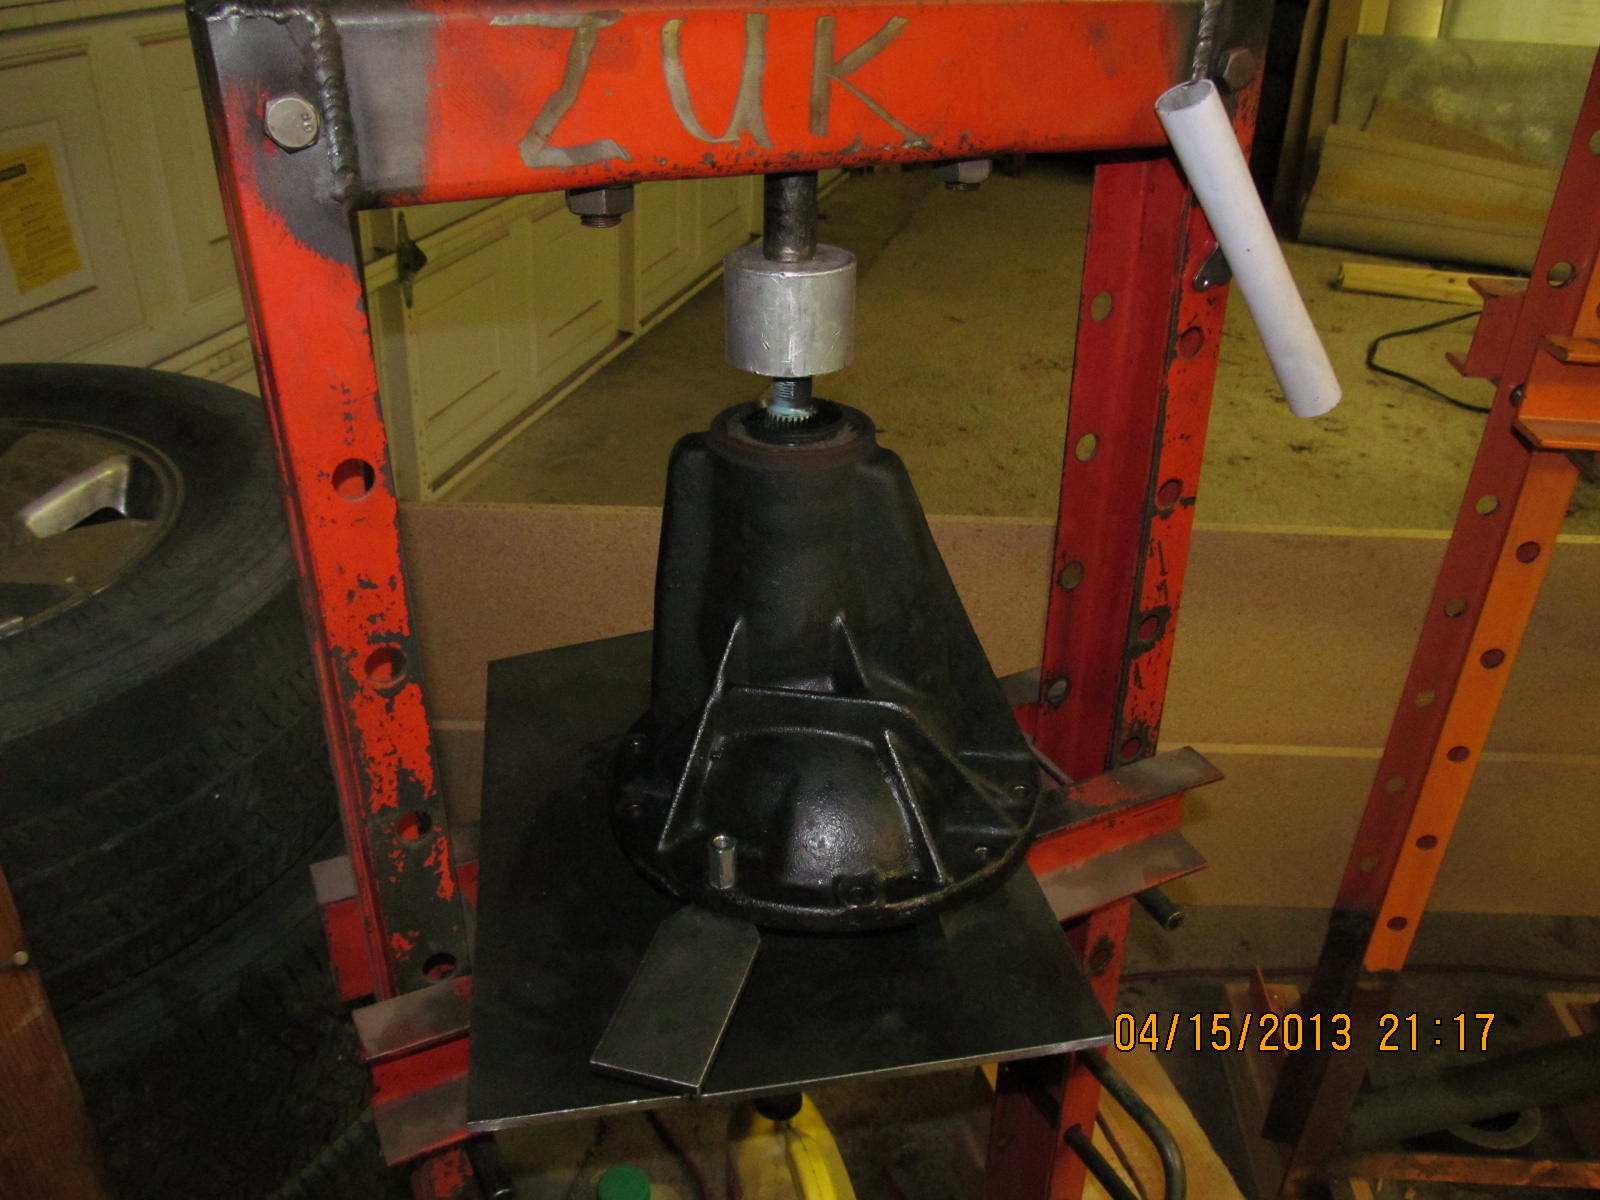
Using the press to stabilize the case, bolts are torqued to 75 ft/lb. This beats
clamping the ARB case in the vice and scratching the surfaces.
|
|
|
|
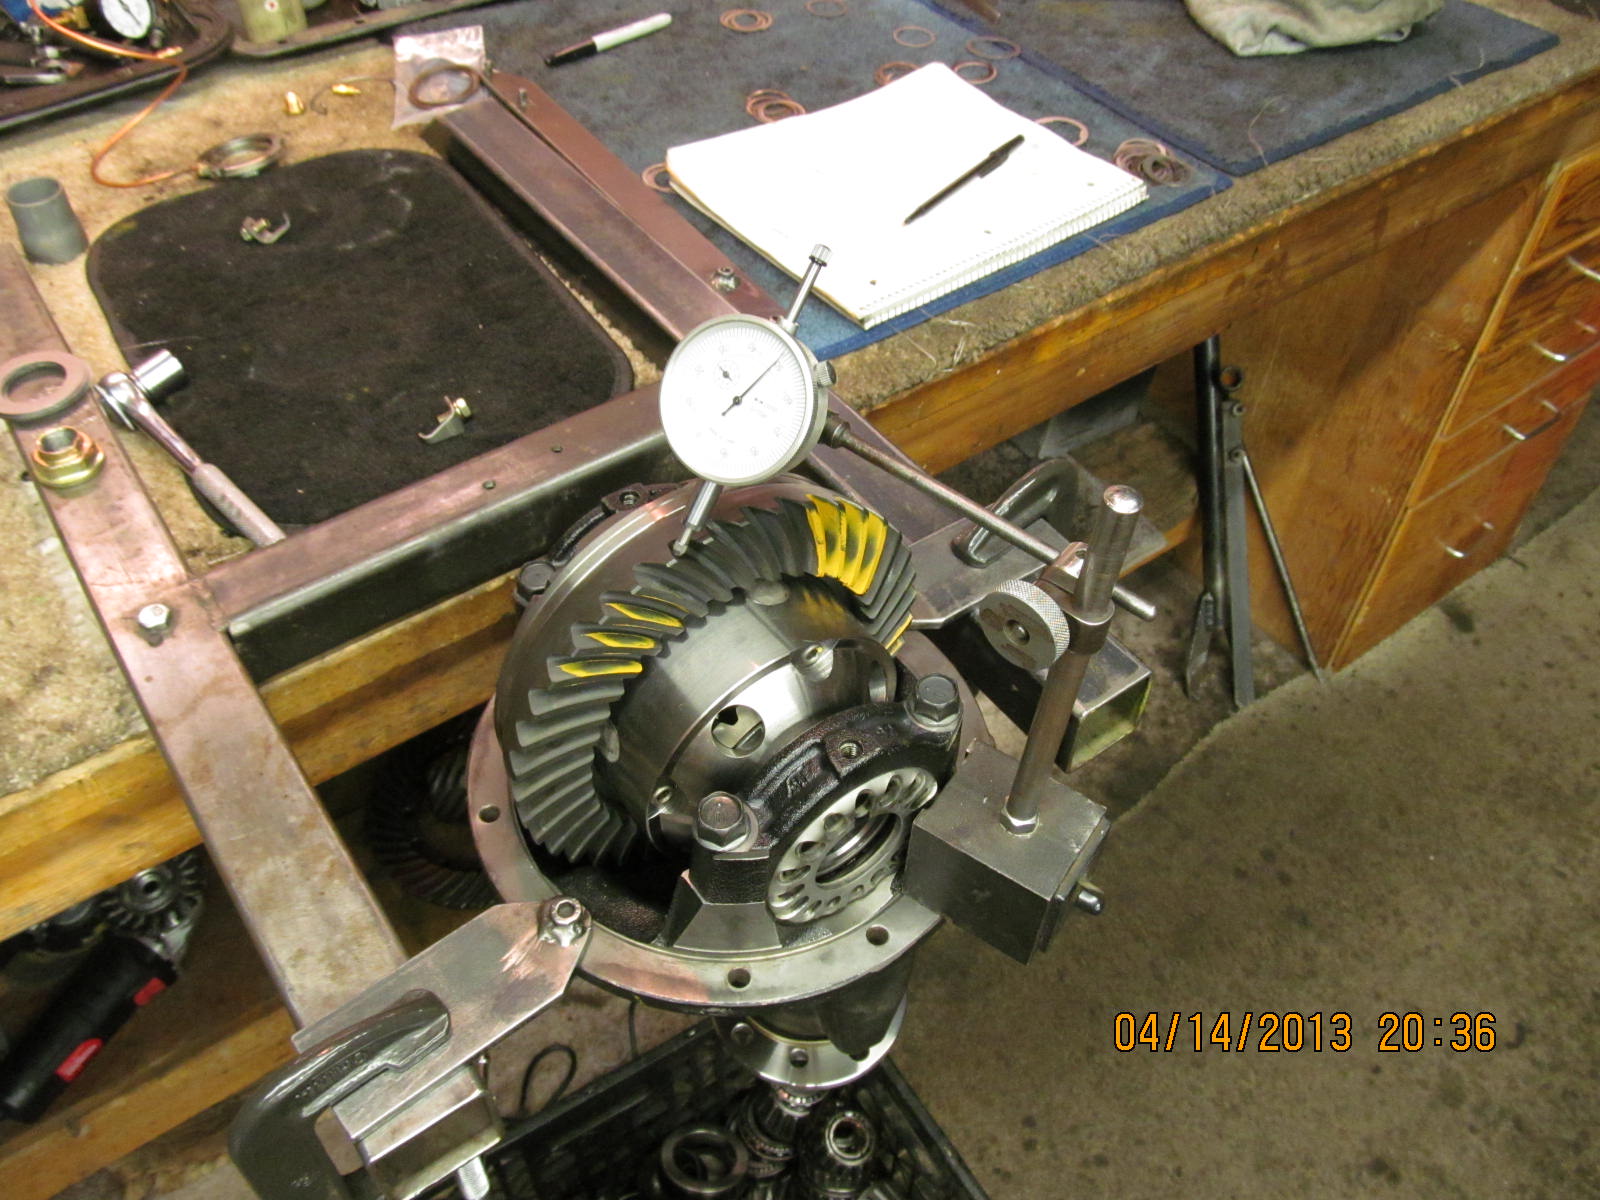
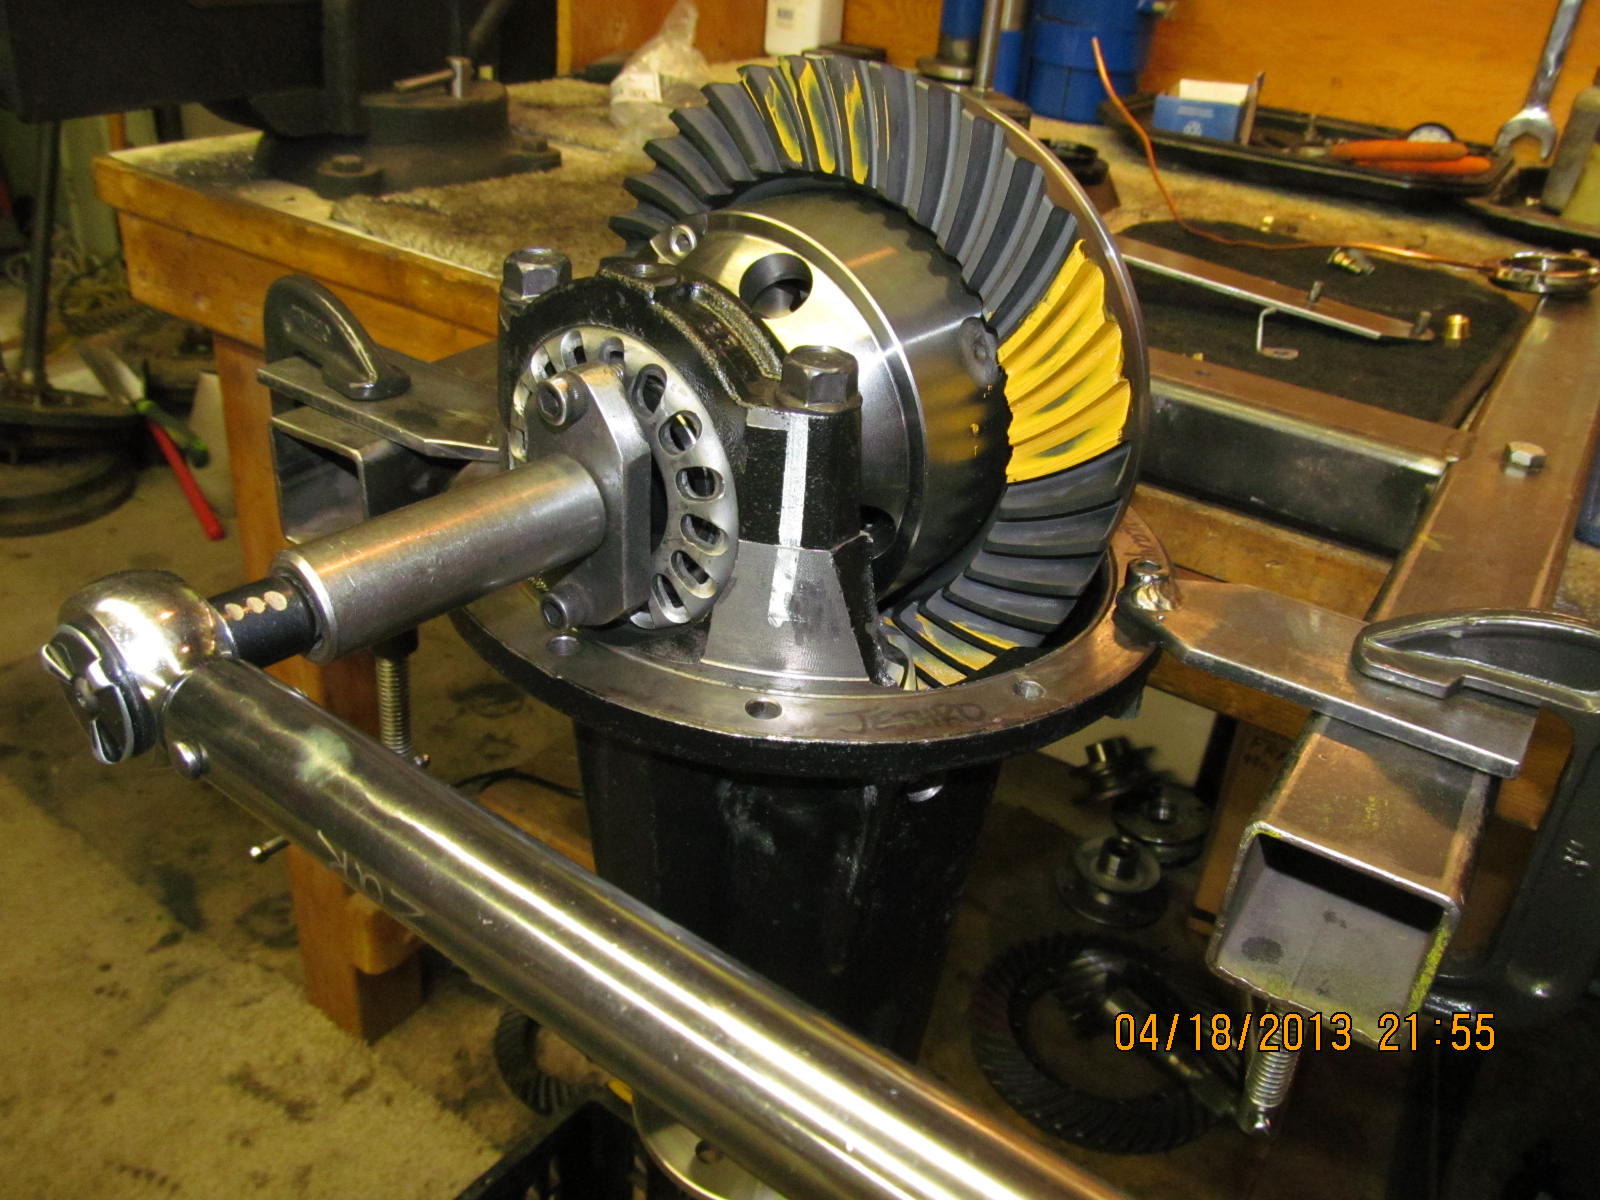
Wheel adjusters are installed, bearing caps are tightened "good and solid".
Backlash and carrier bearing pre-loads are dialed in...
|
|
|
|
|
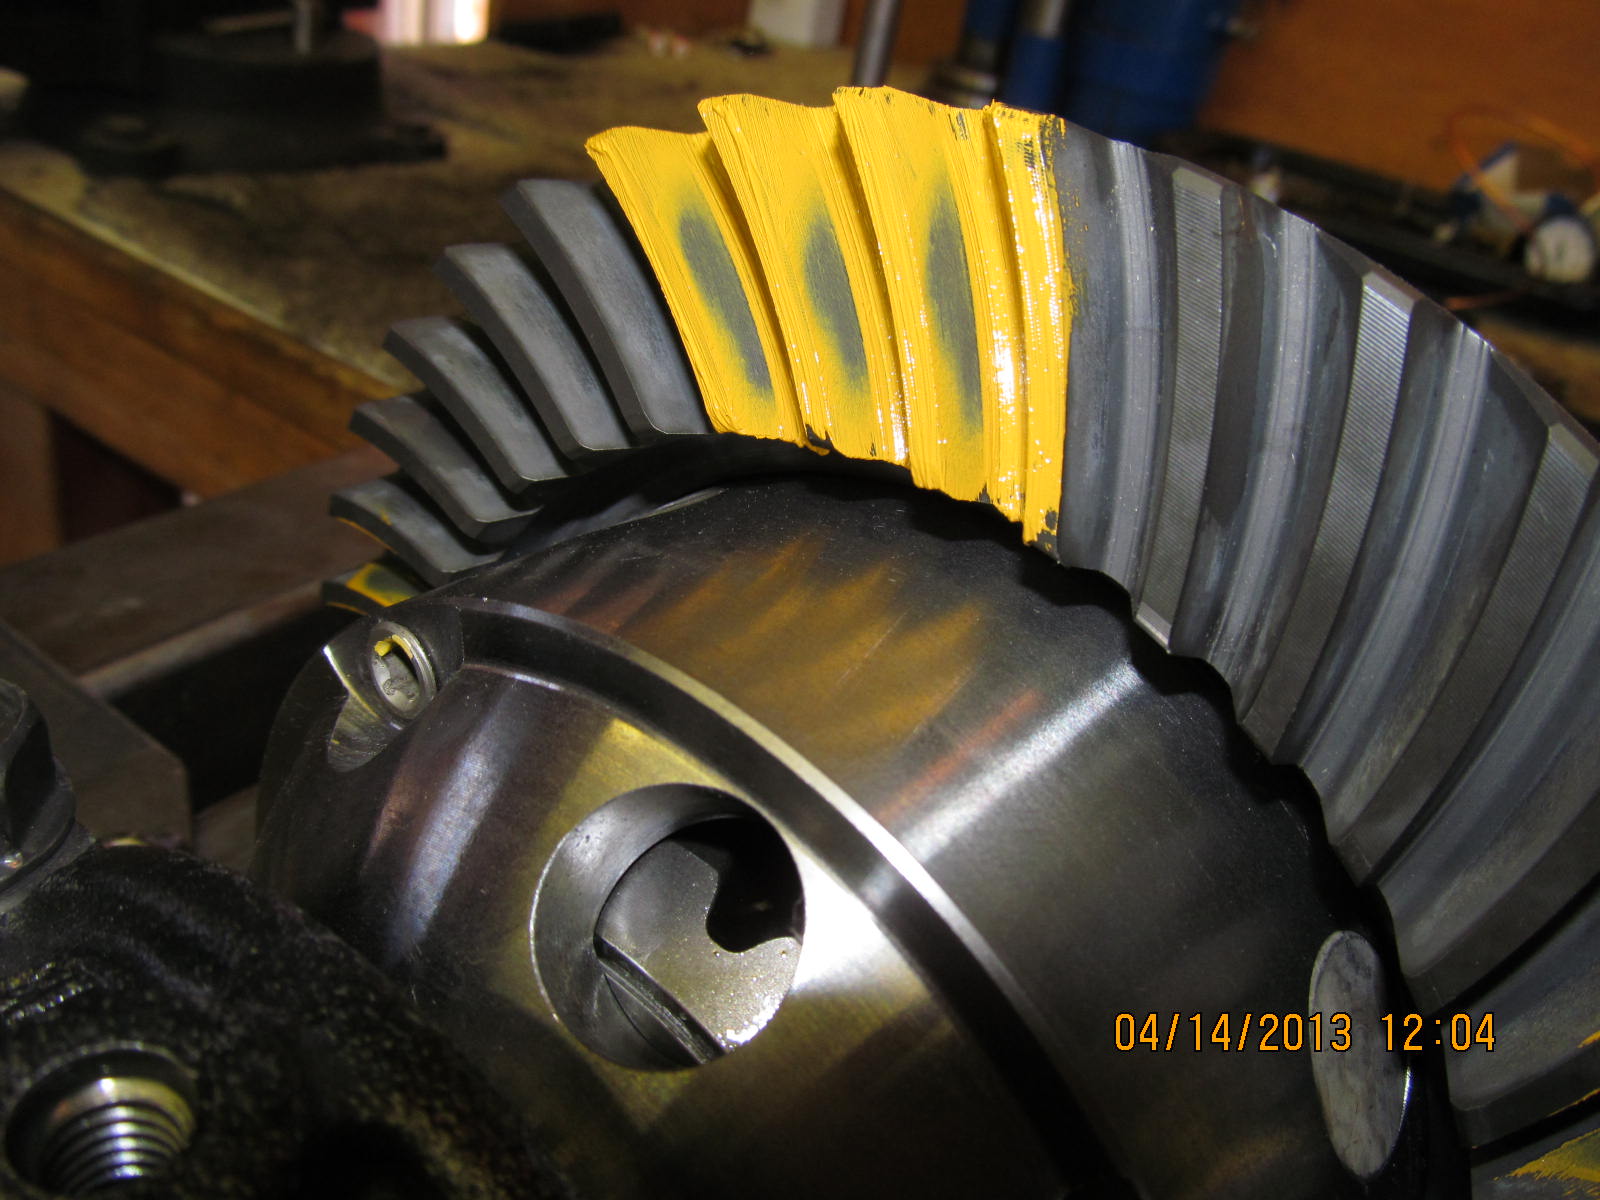
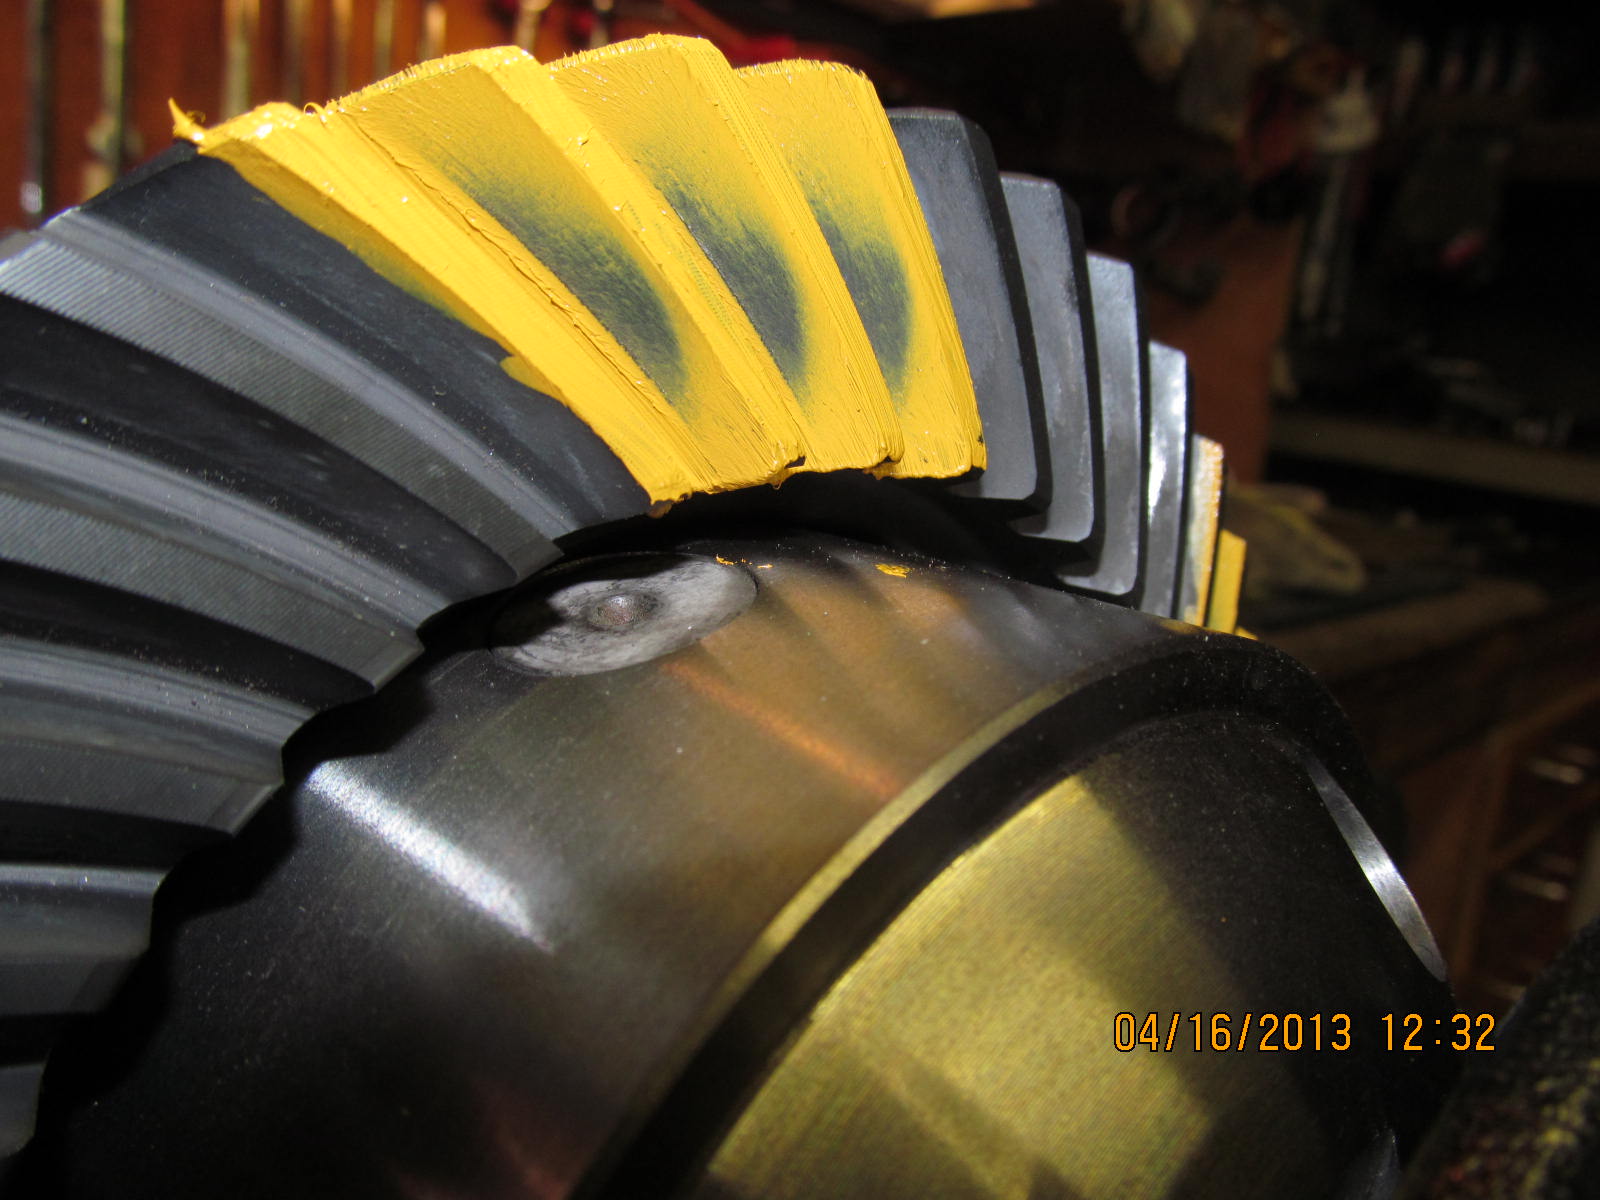
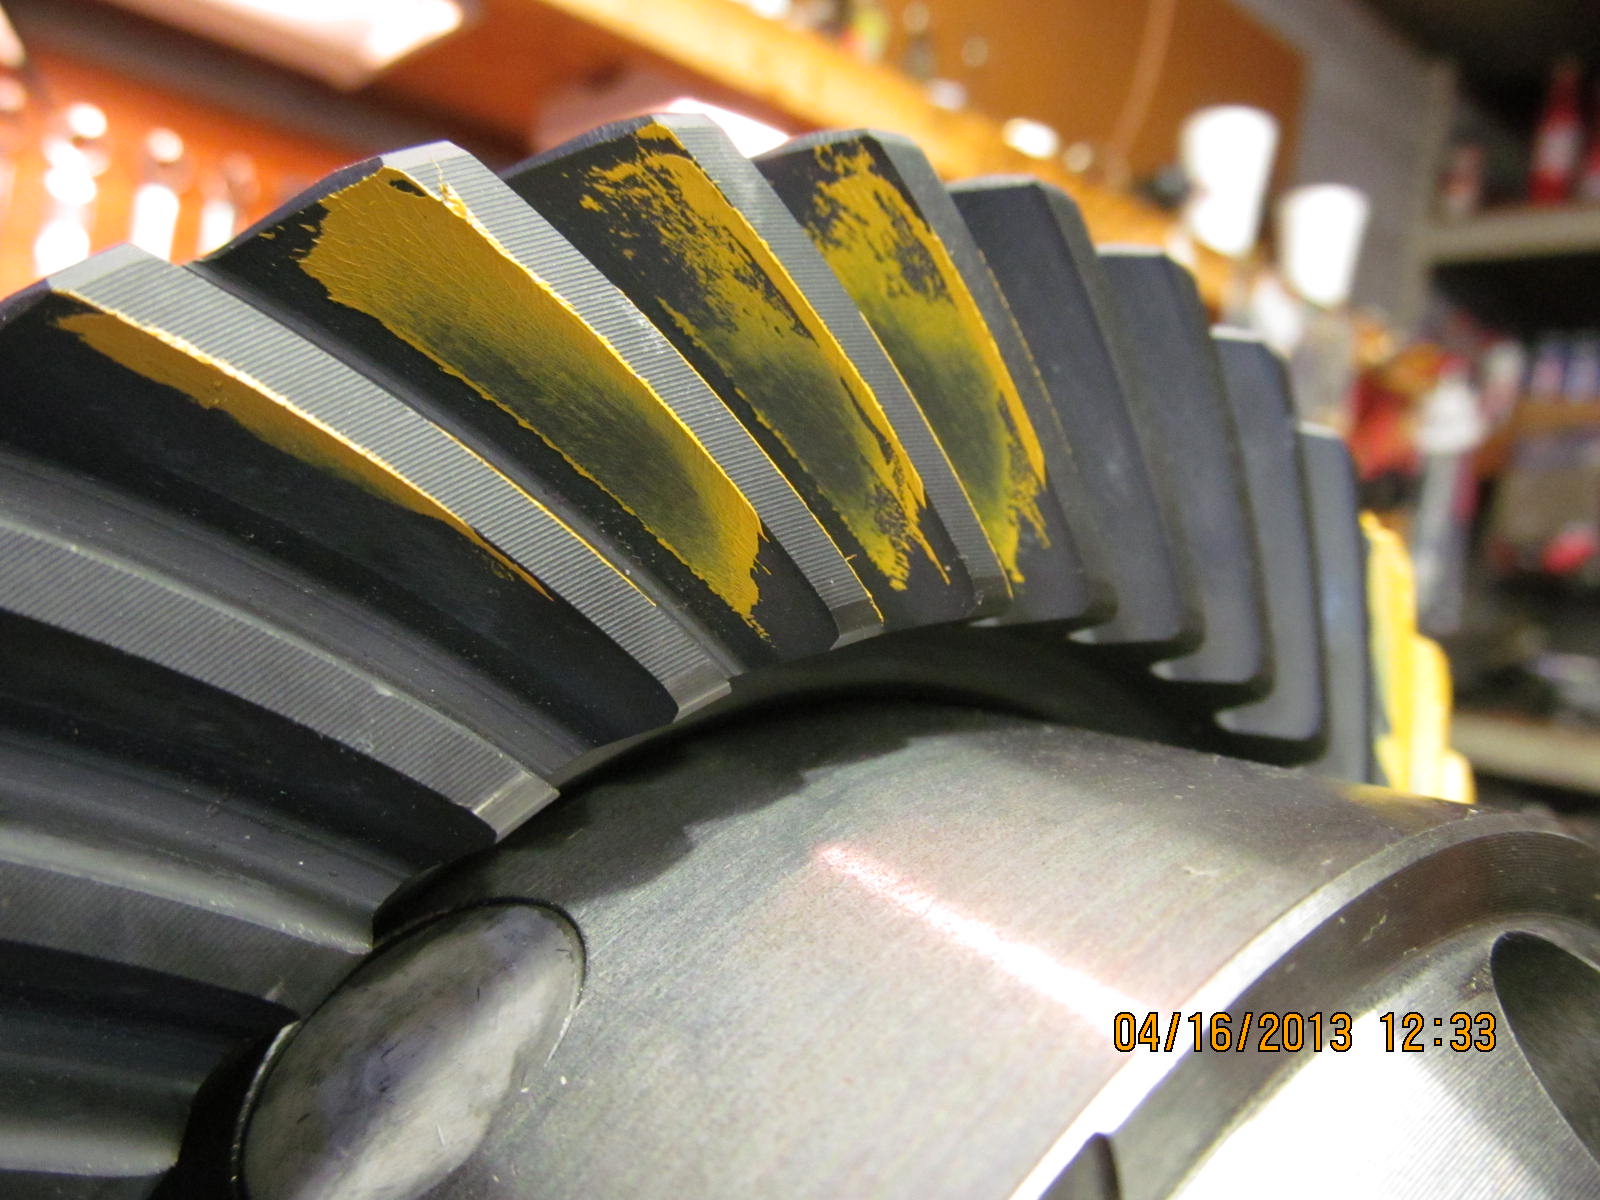
I likey. The depth is good...slight deep. Well centered also.
|
|
|
|
|
The coast is also well centered.
|
|
|
|
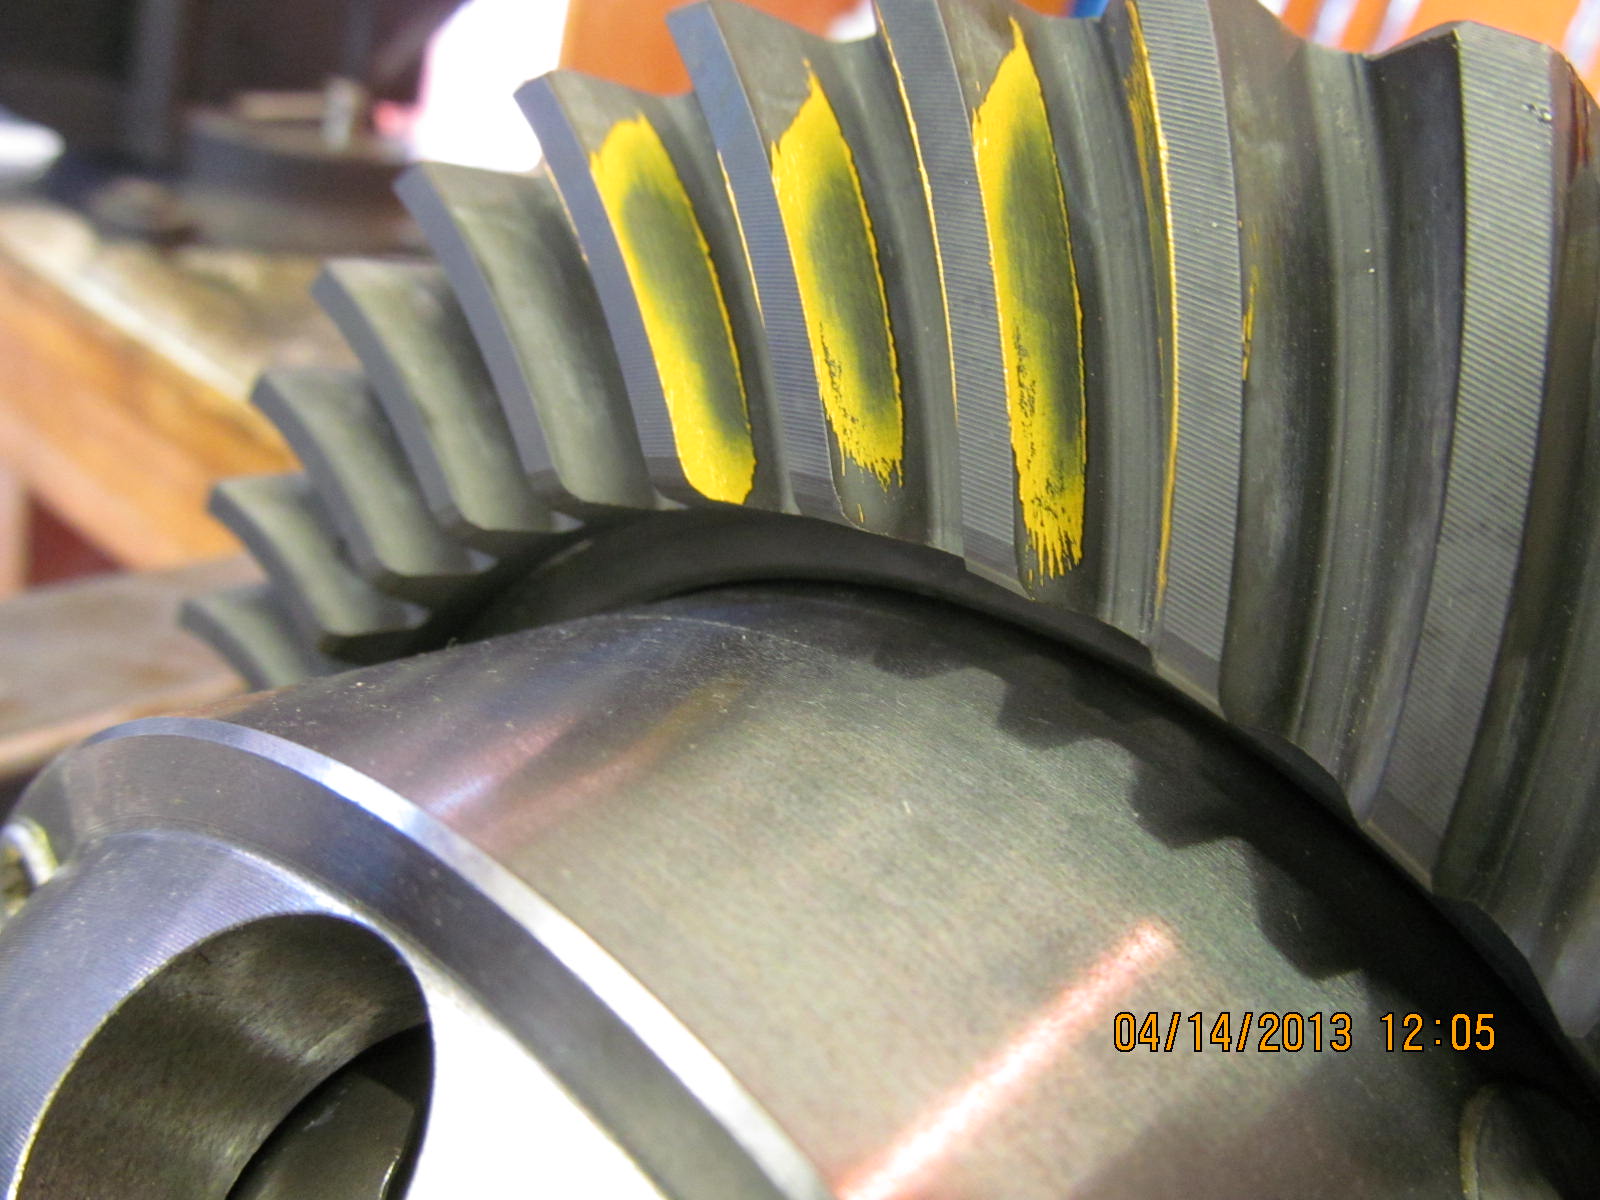
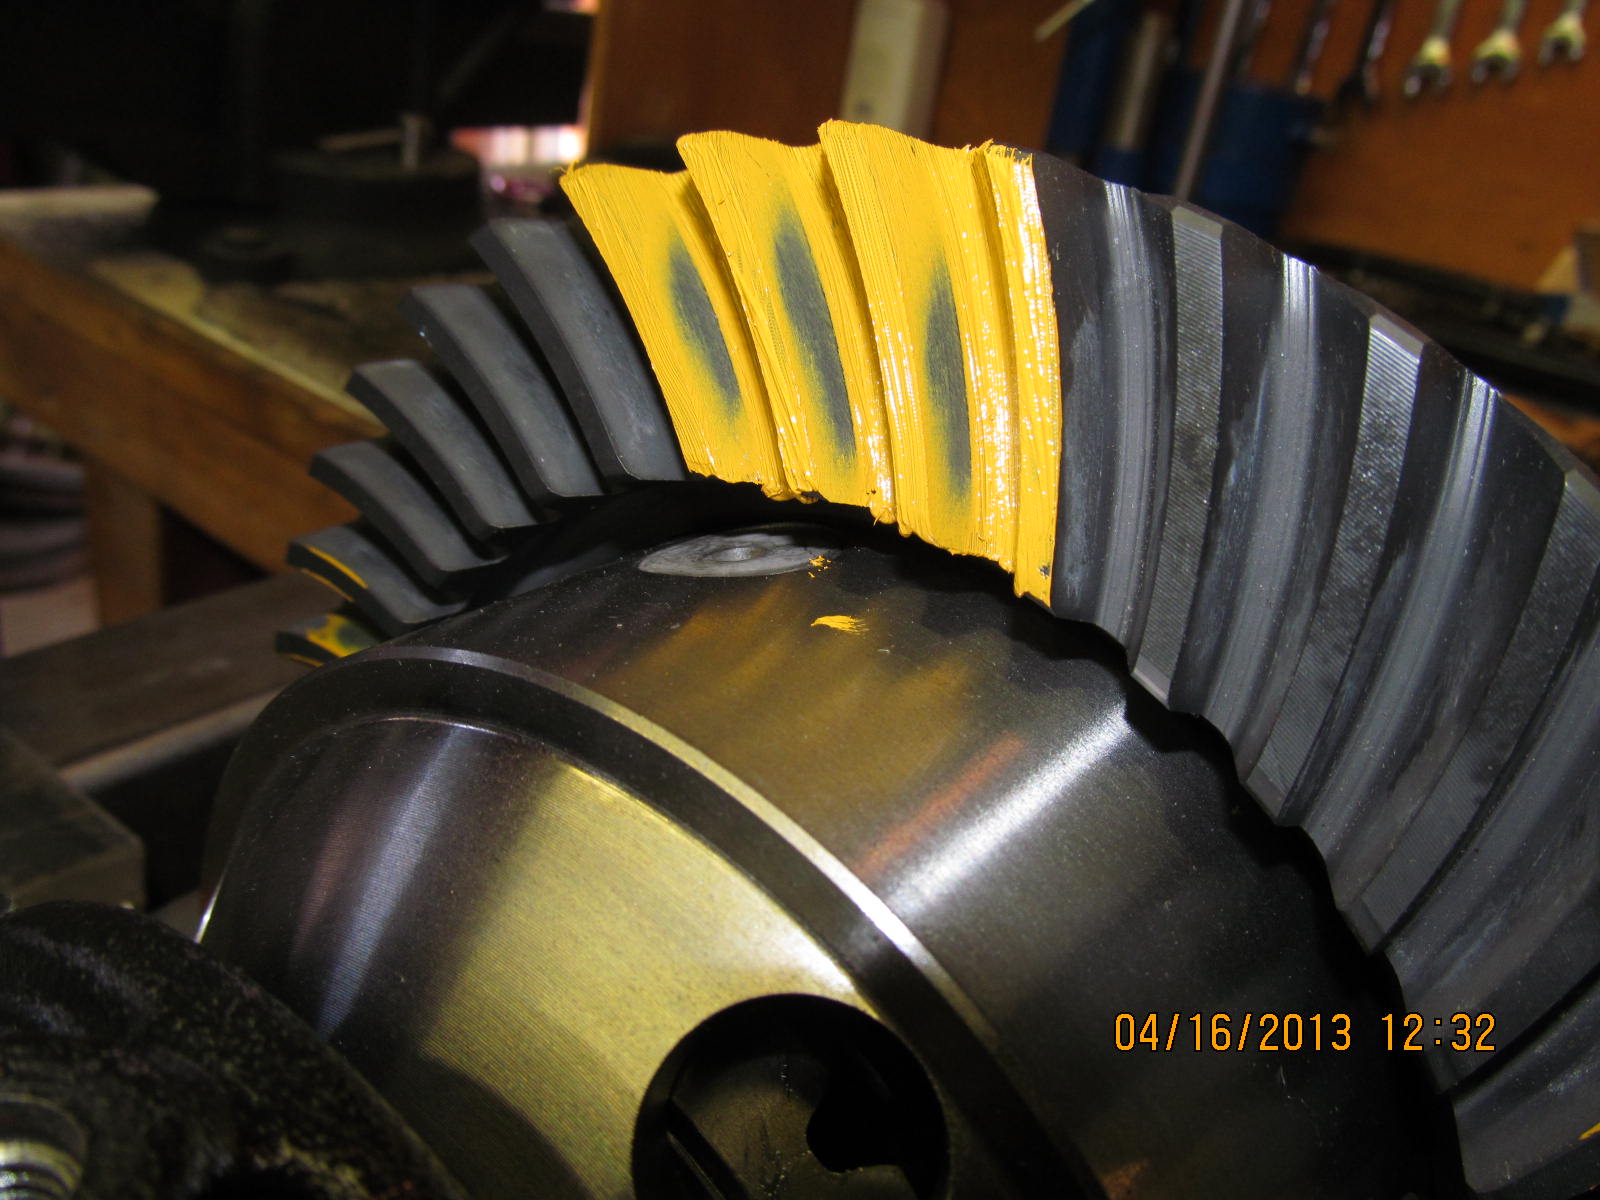
Pinion shows the comet tail is far from hugging the deep root too hard...more
like the tail has swung about halfway out.
|
|
|
|
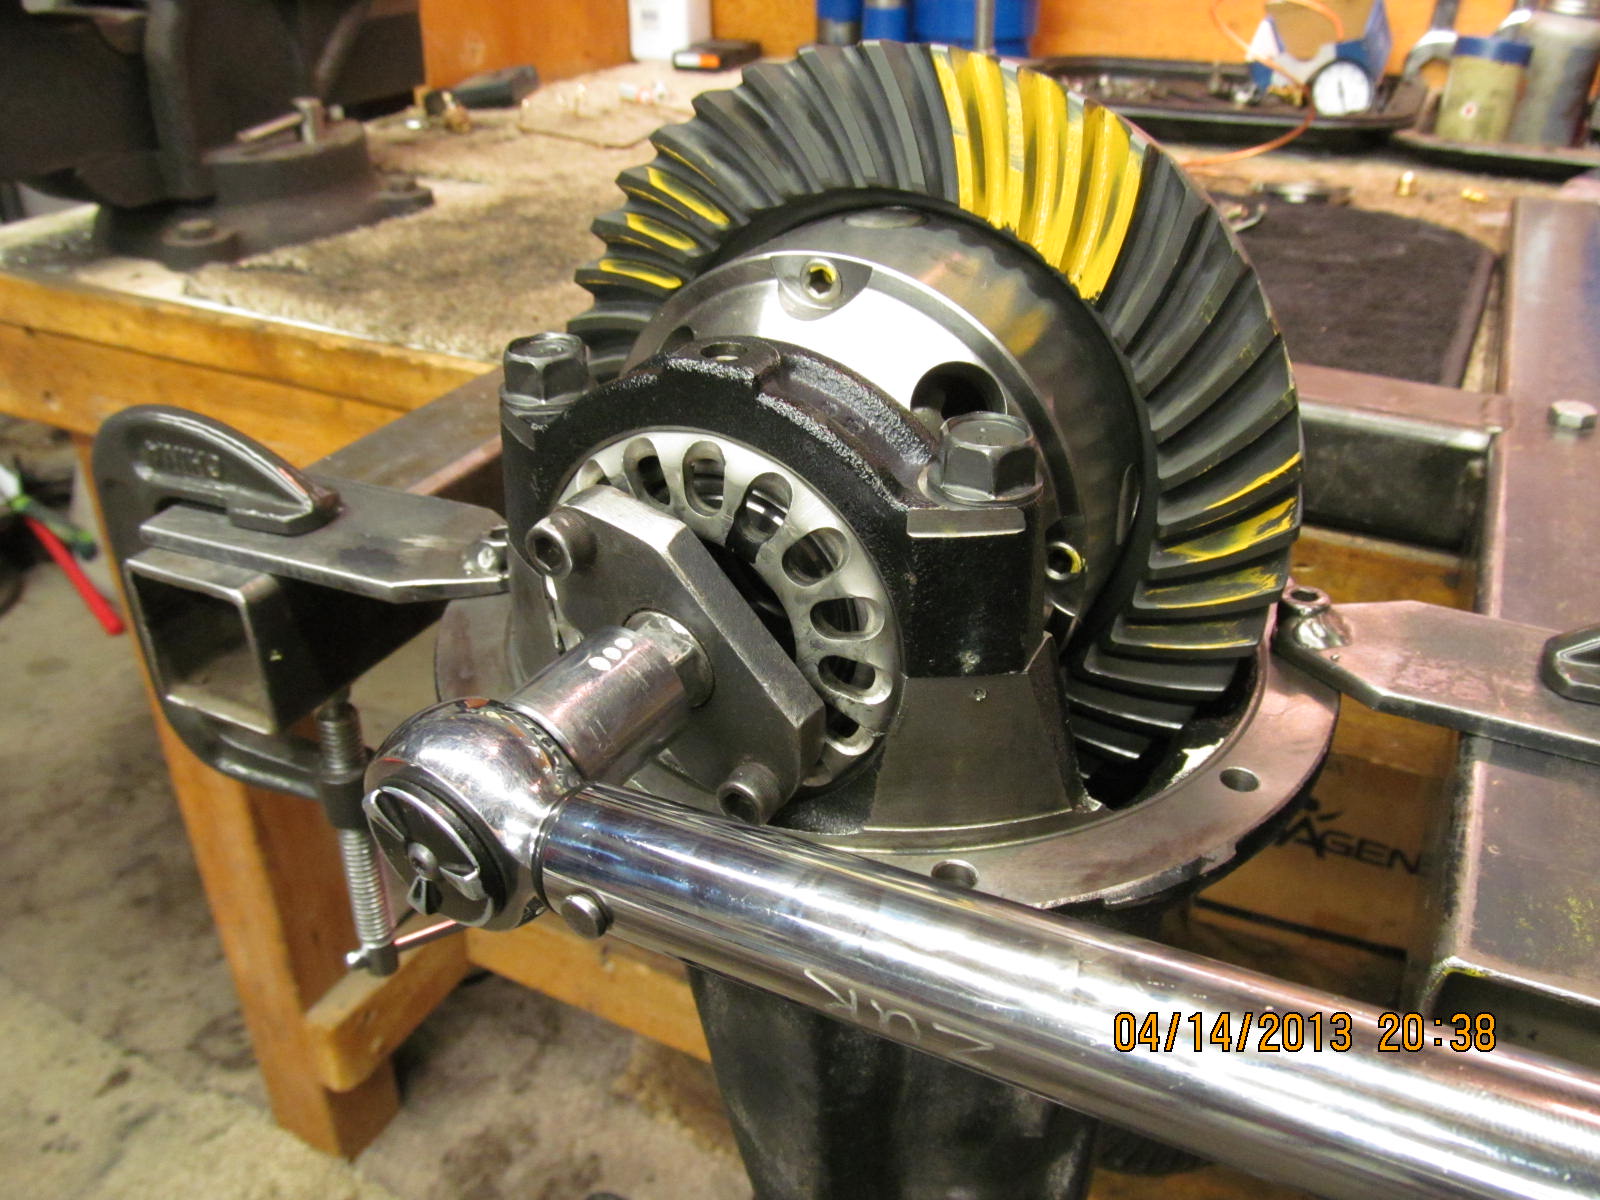
This is the drive side...reverse painted. Gives a different perspective but says
depth is slight deep but far from overly so.
|
|
|

|
|
Coast.
|
|
|
|
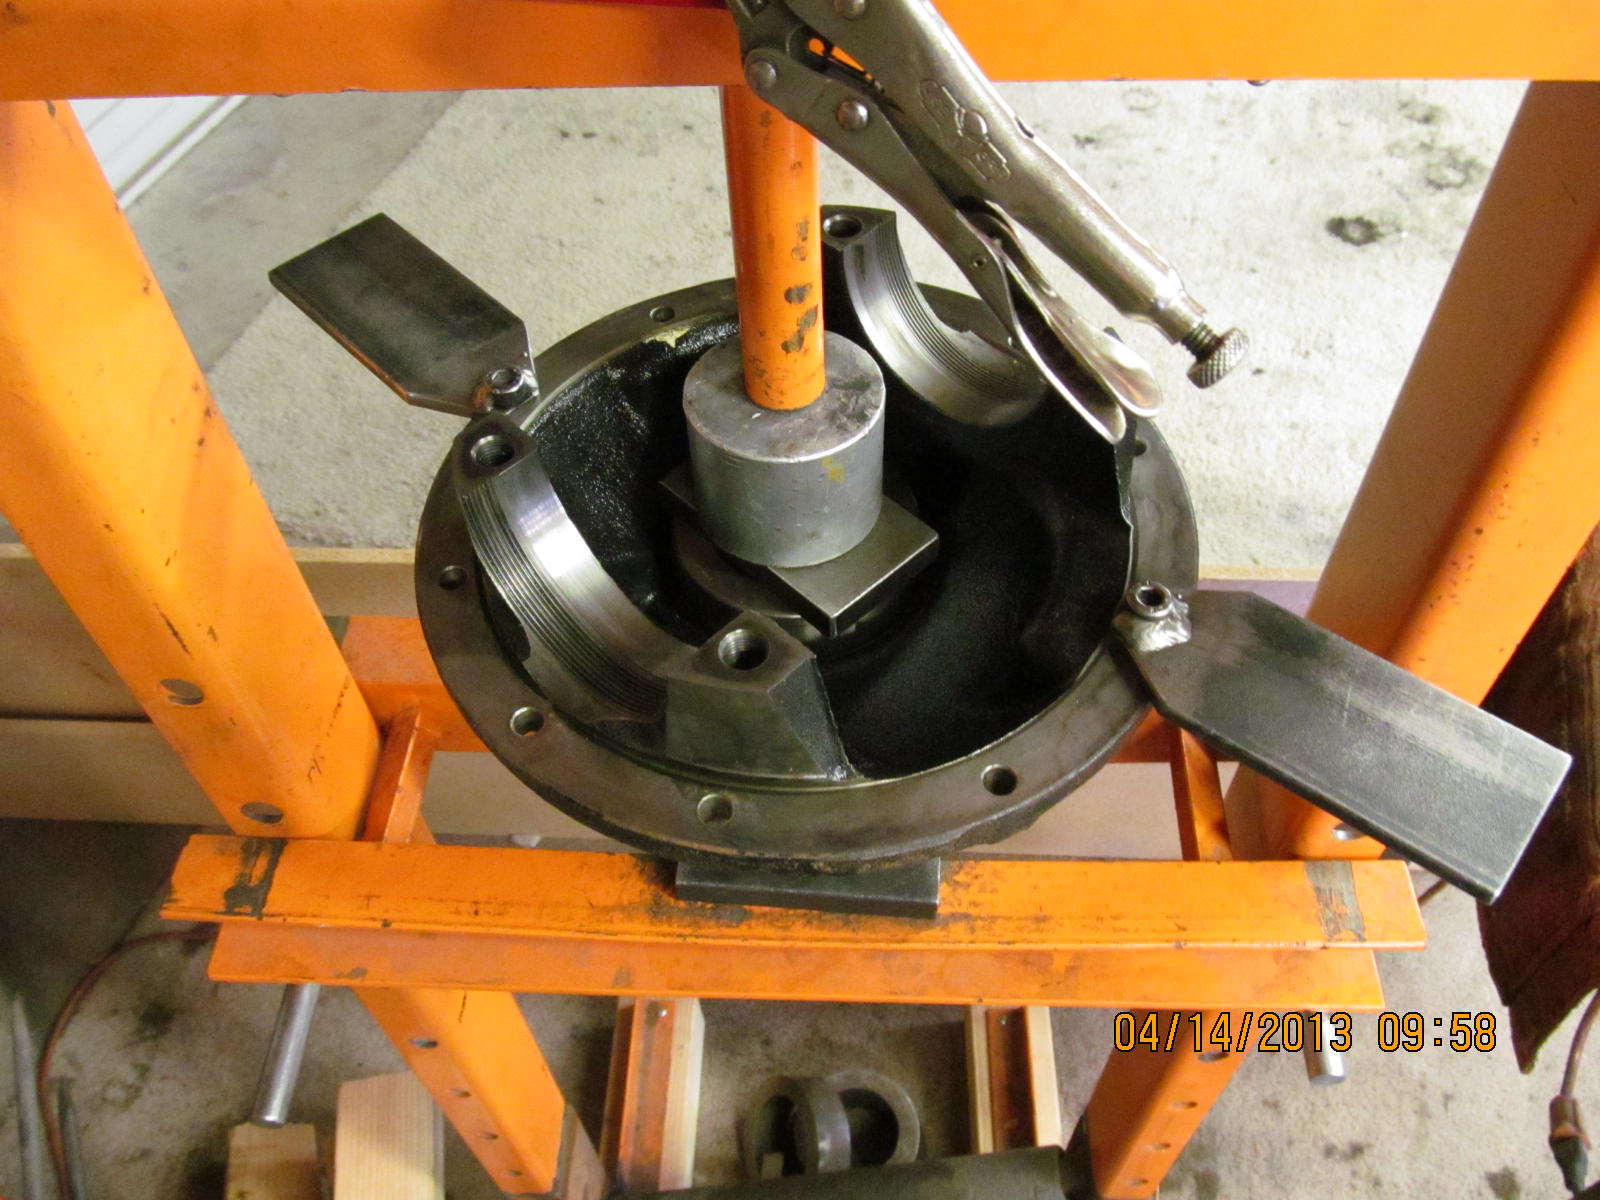
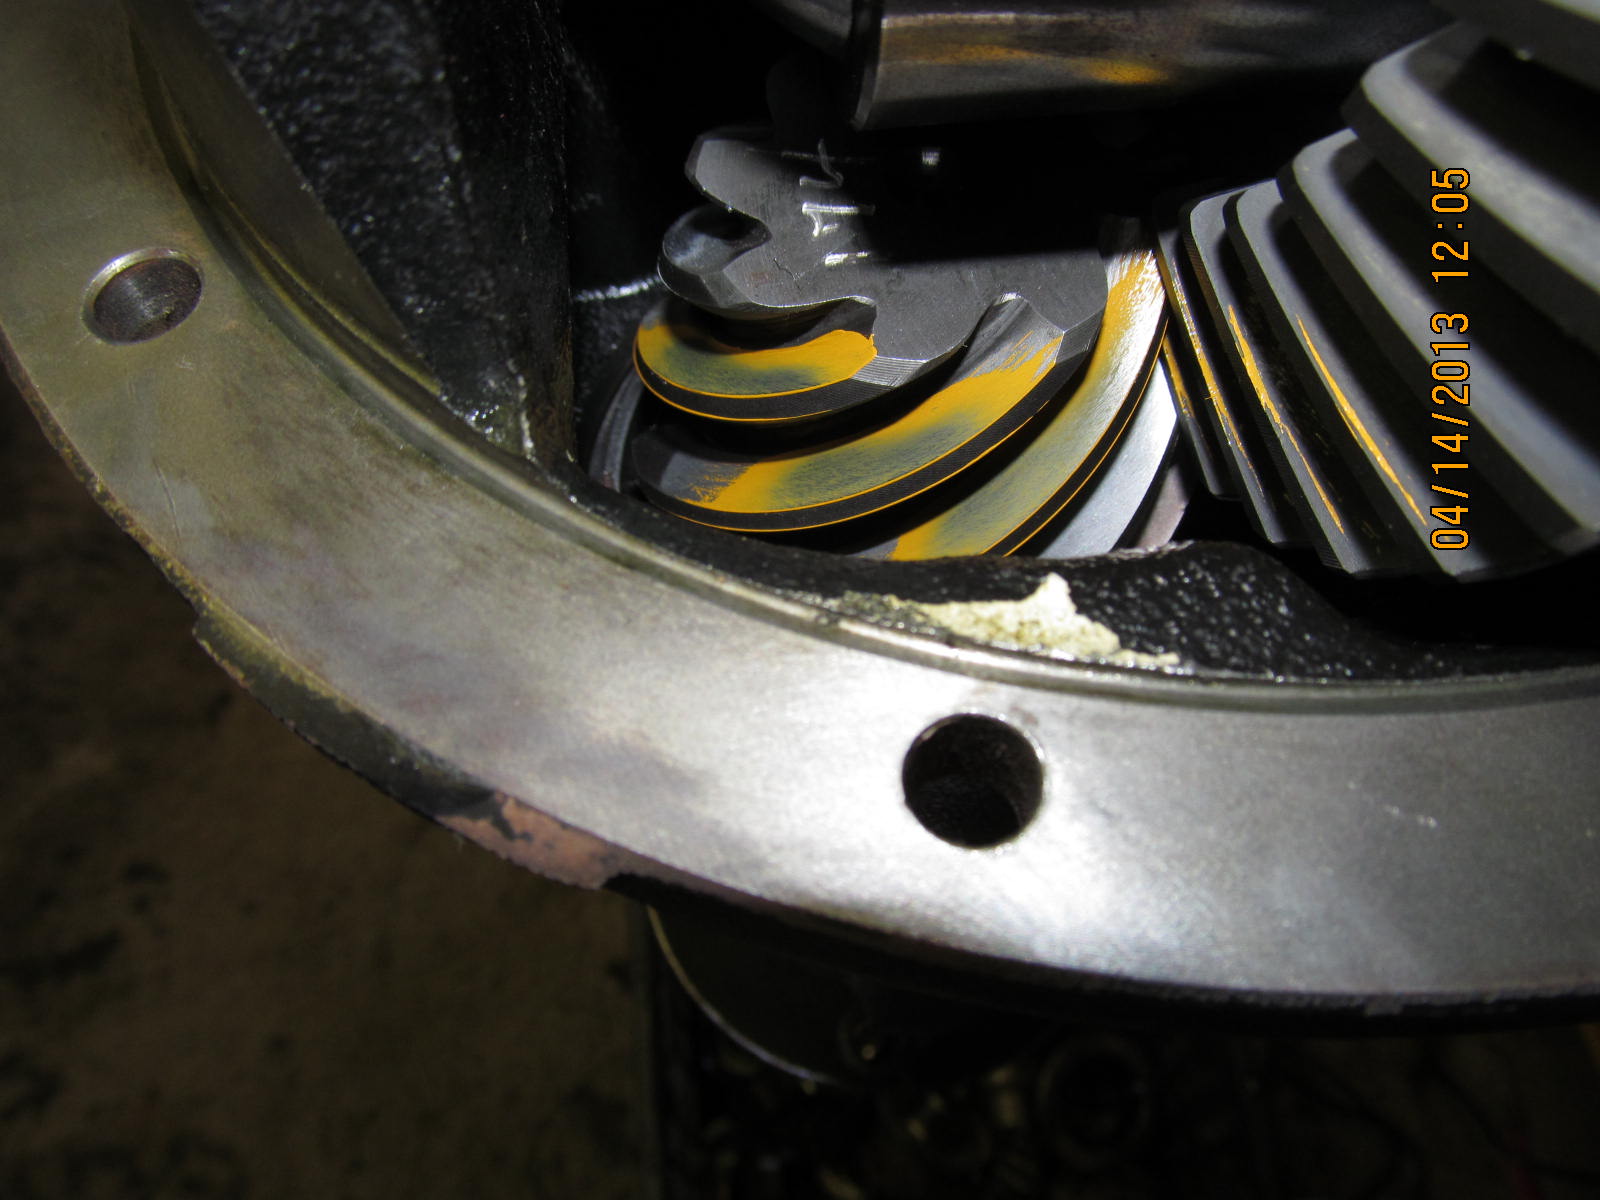
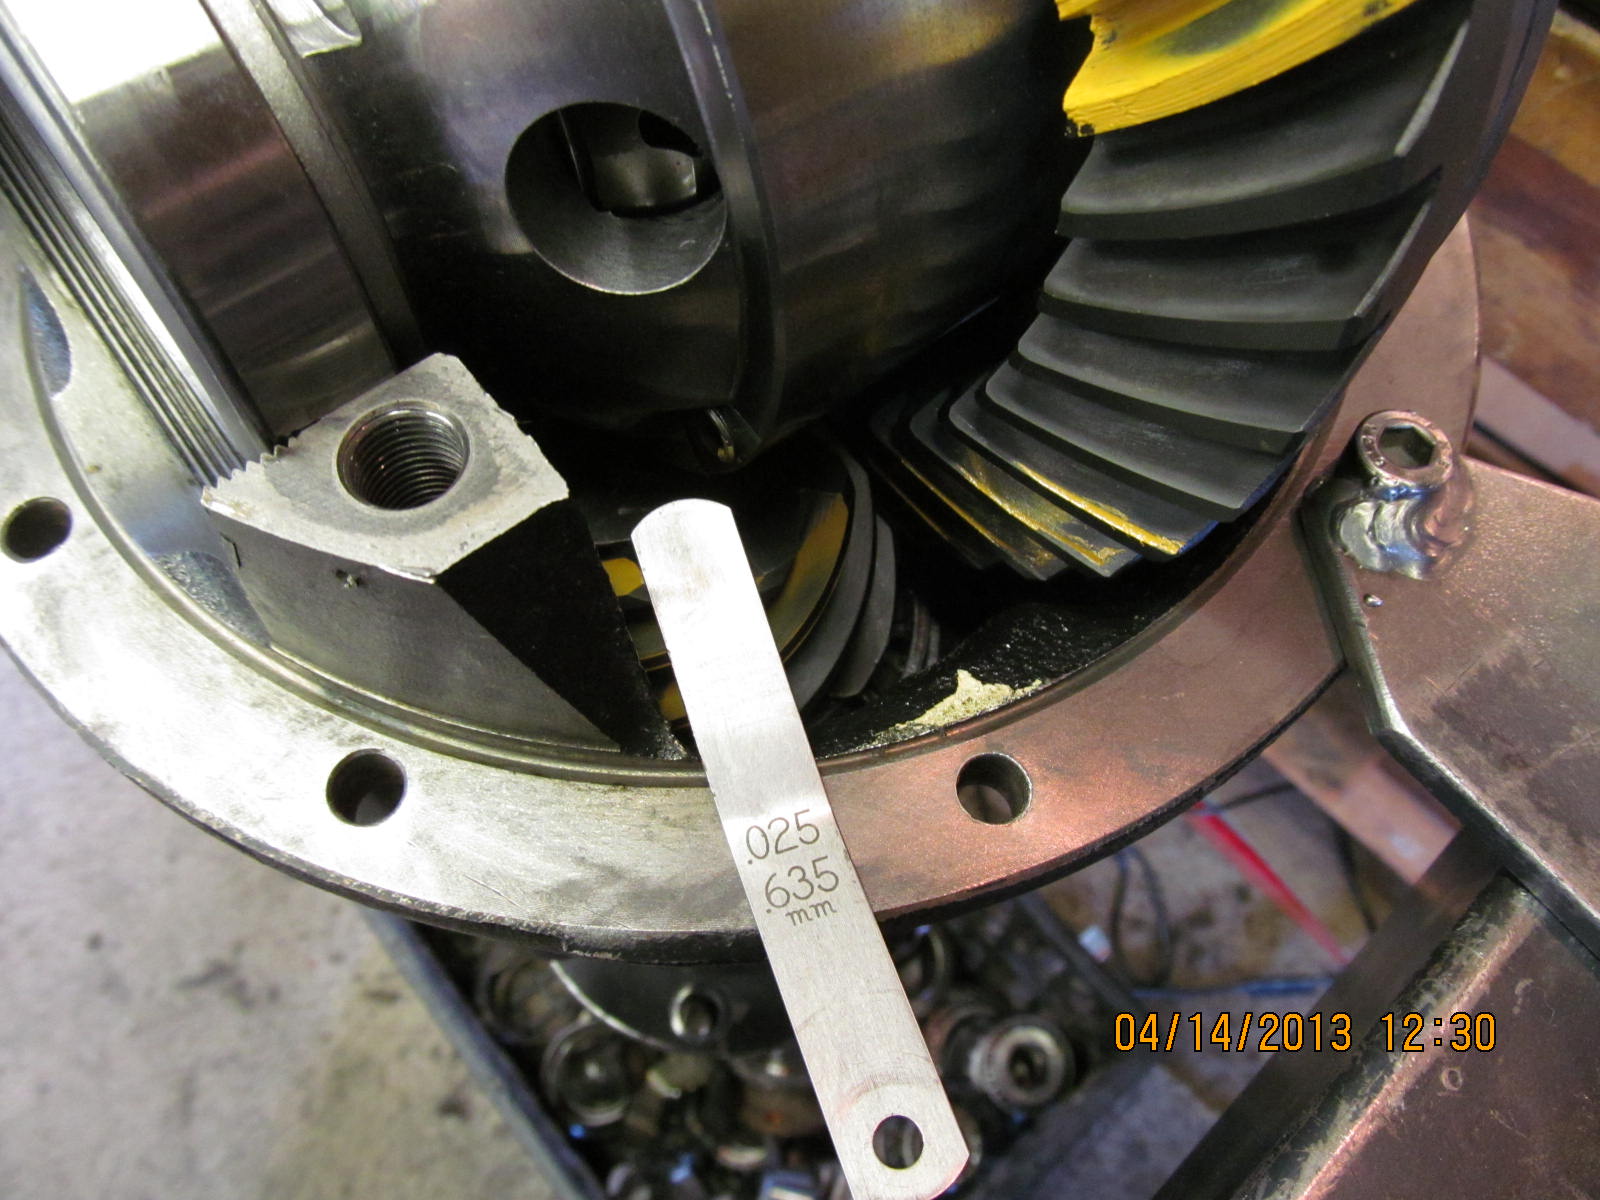
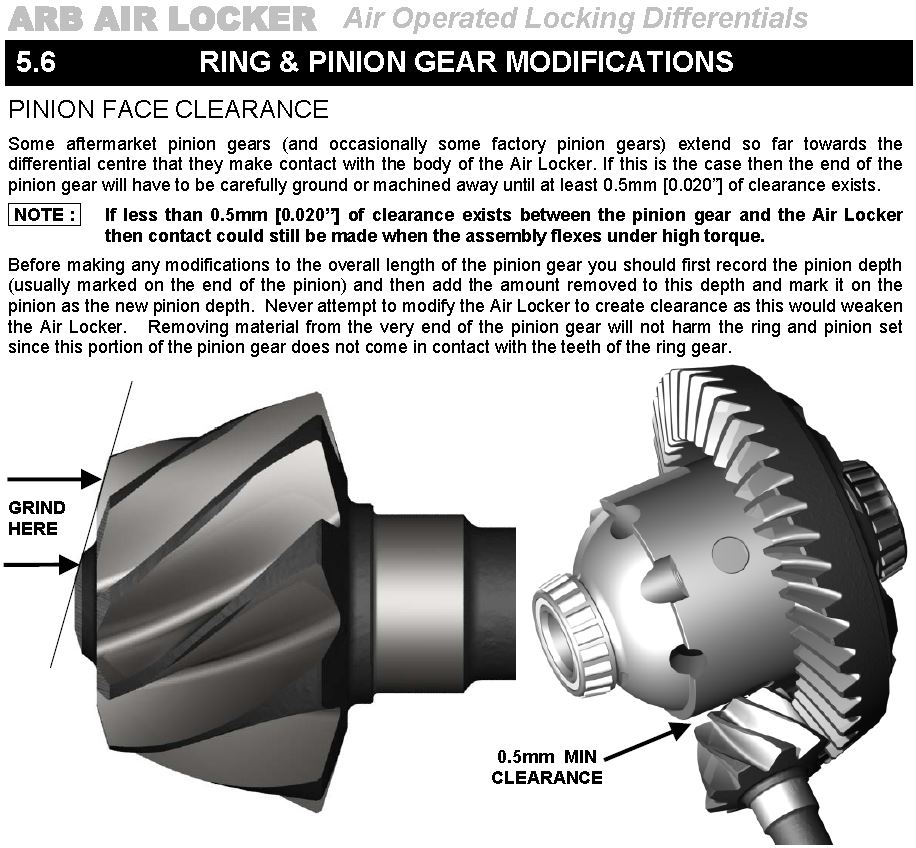
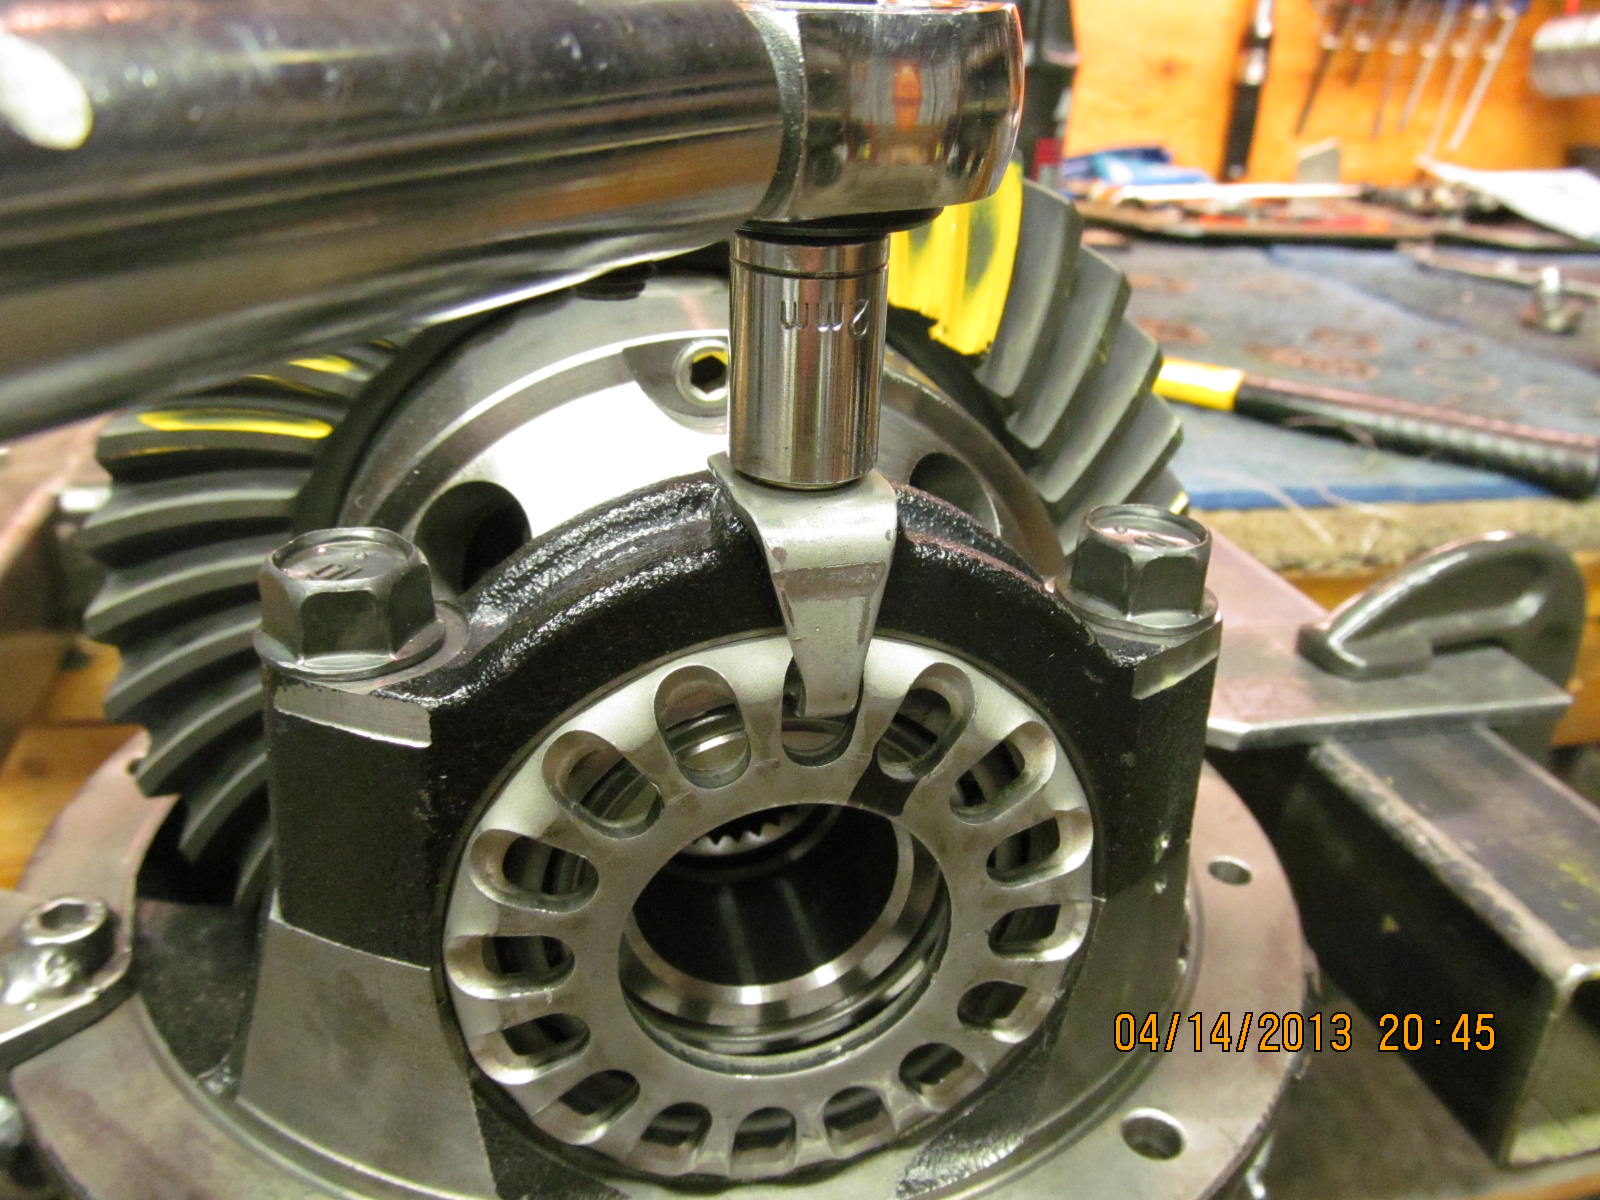
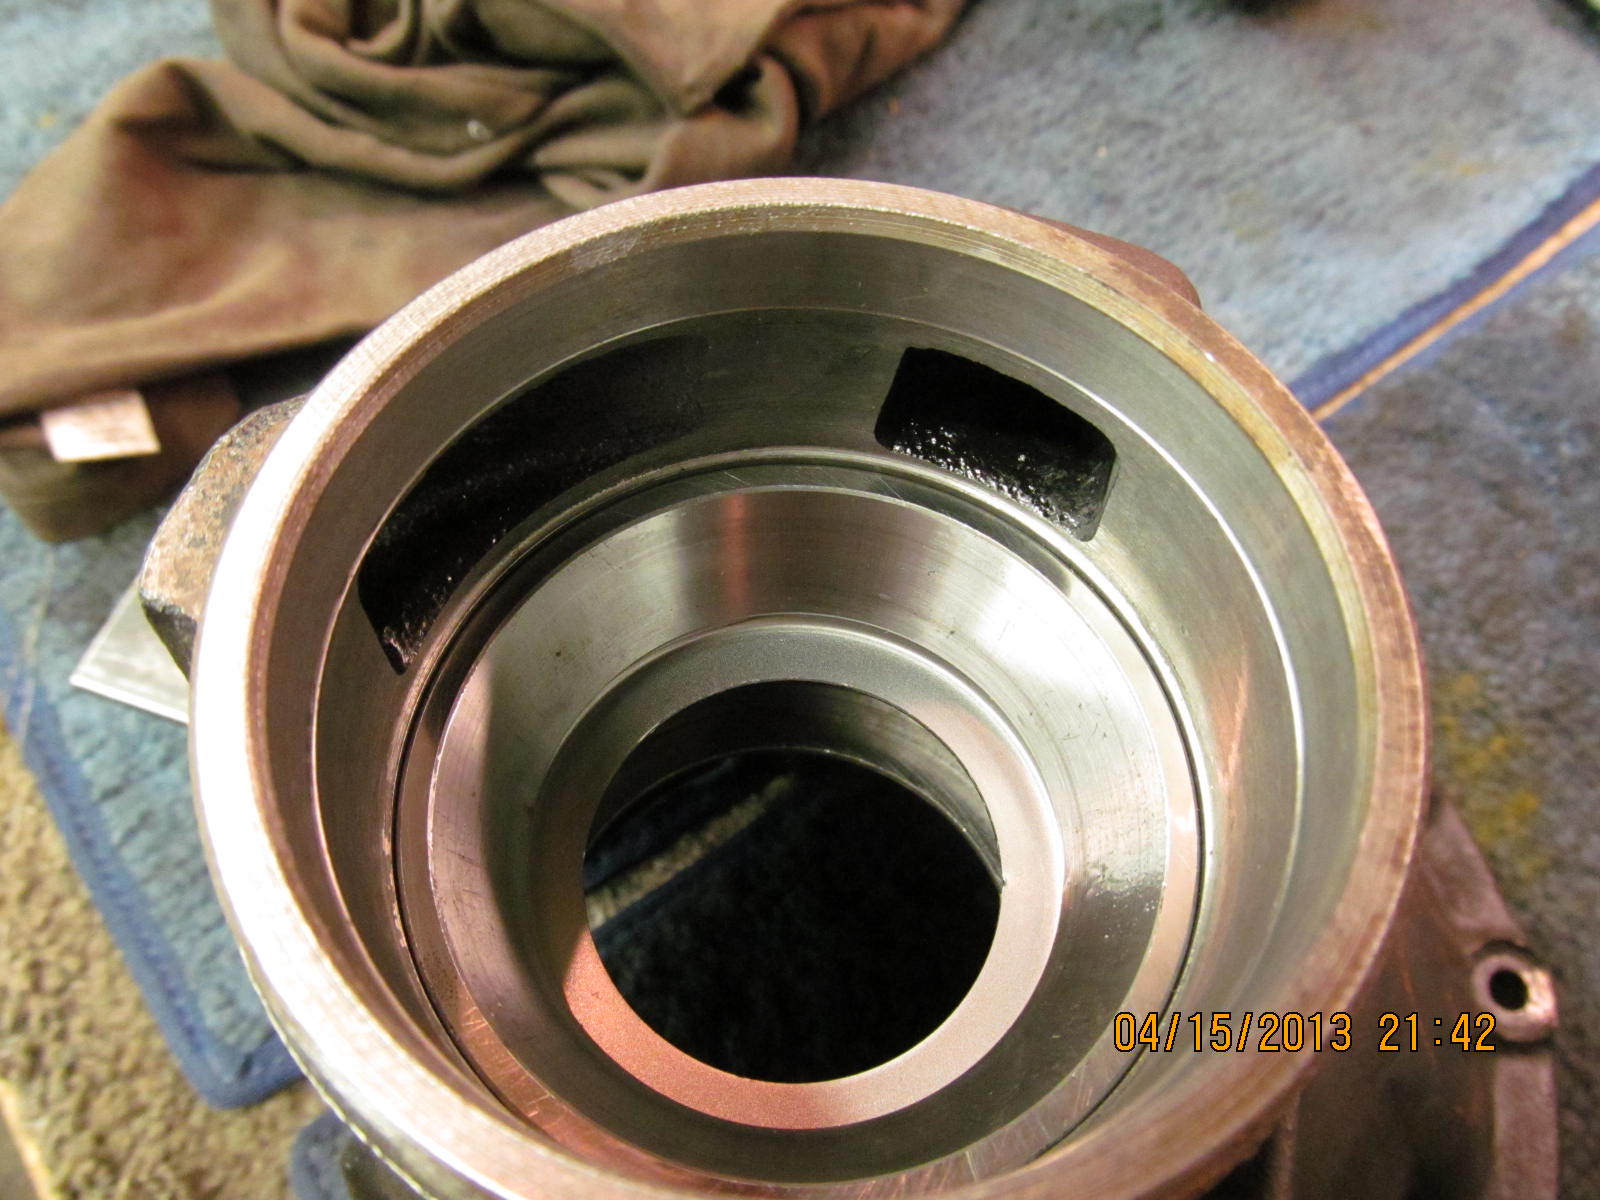
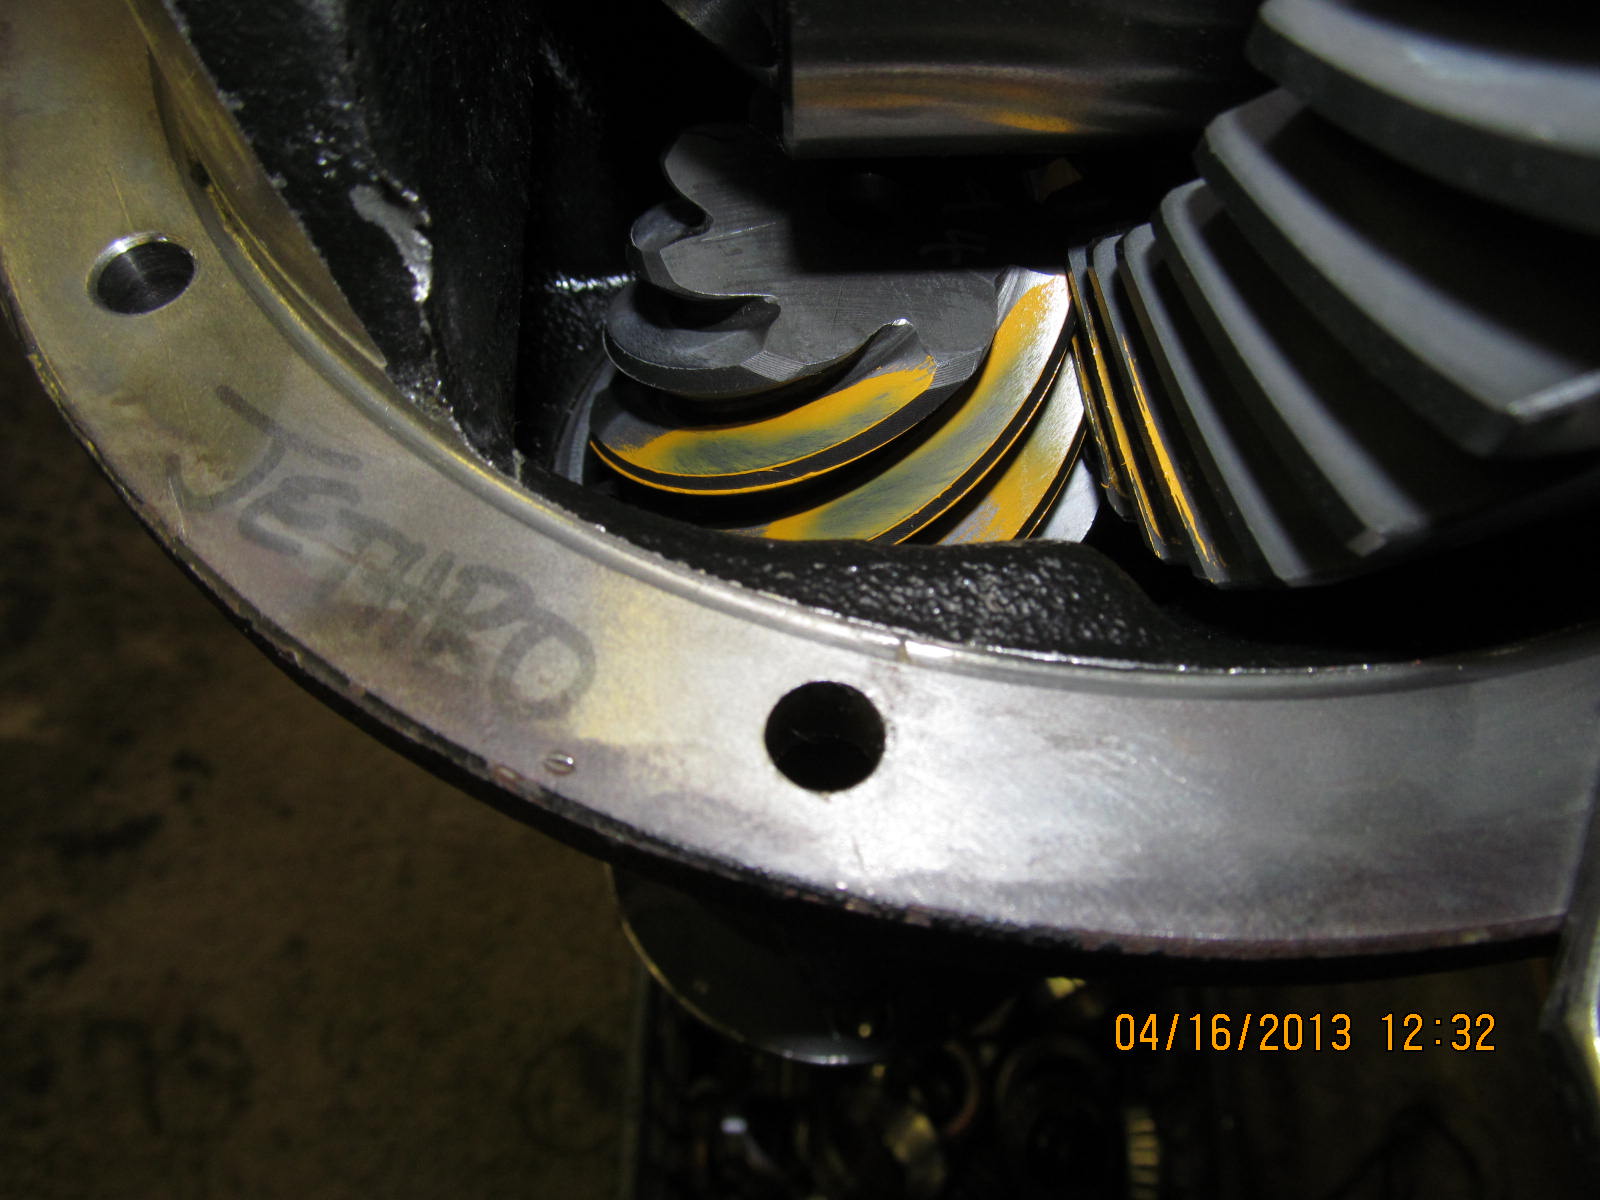
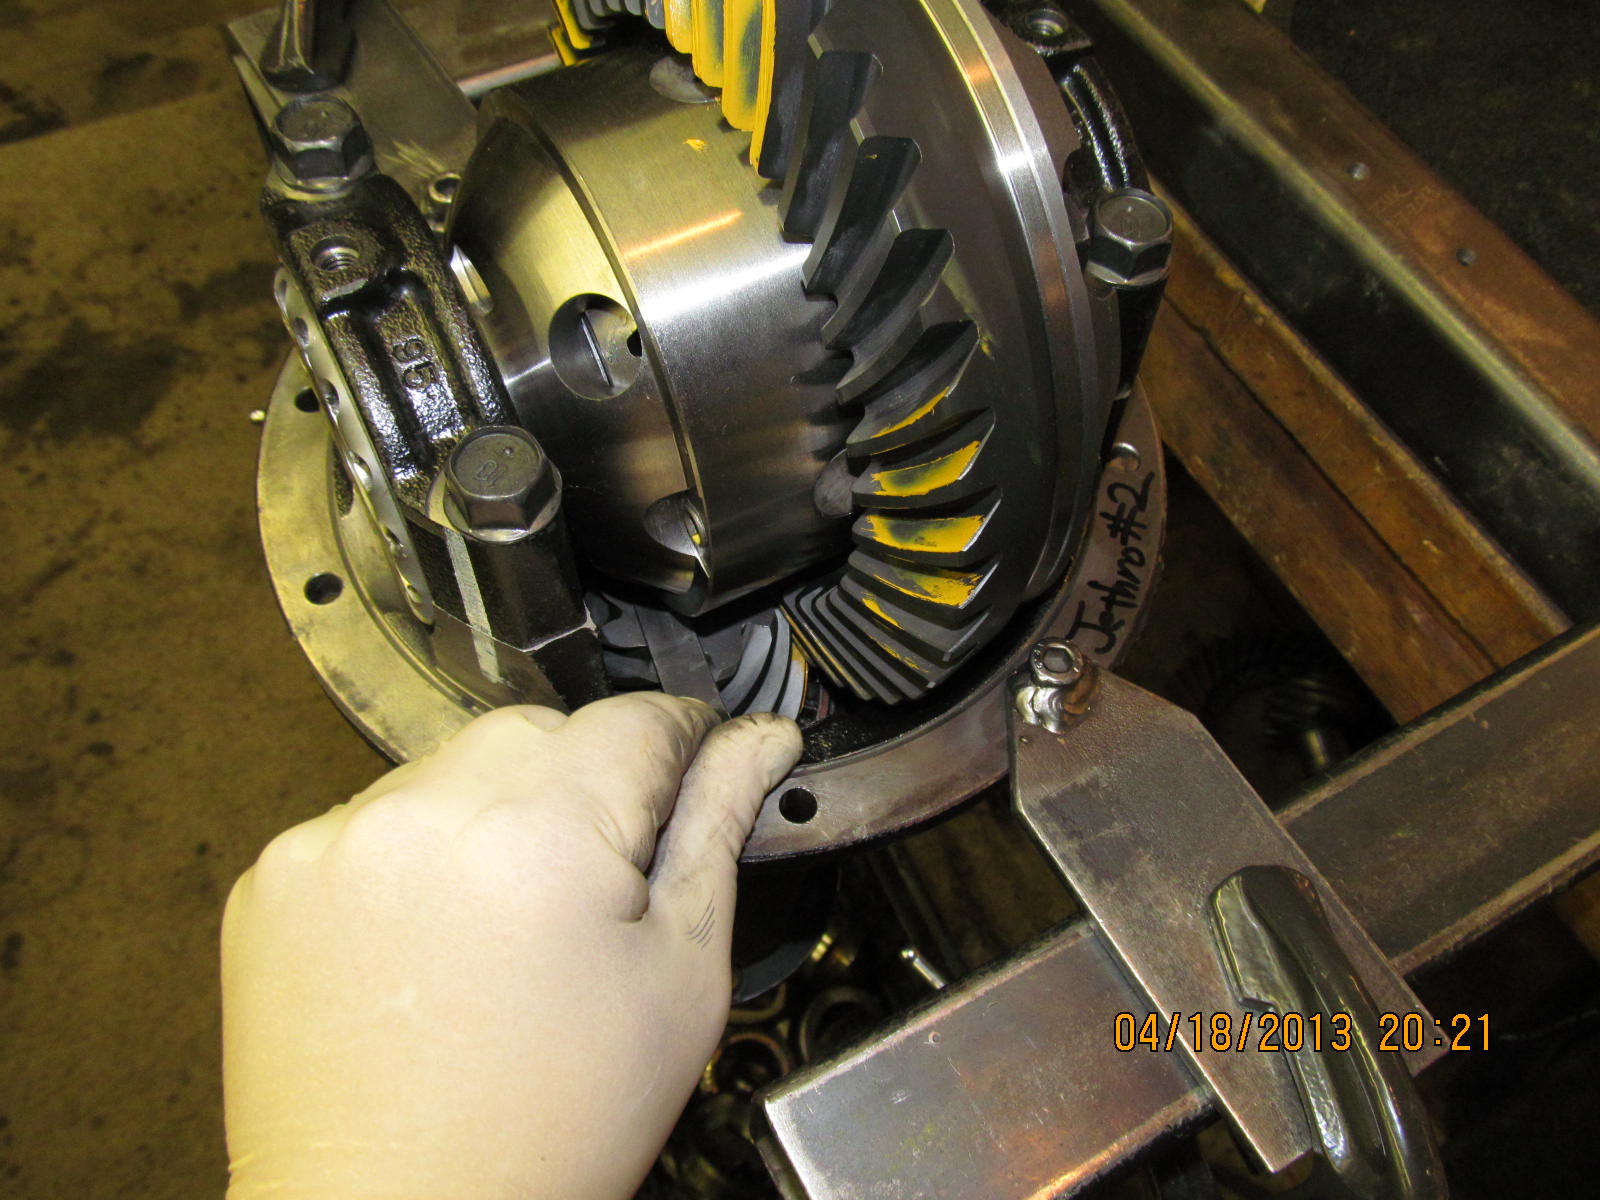
Every ARB that is installed in a Toyota 8" should at least check the pinion to
case clearance. ARB specs it to be at least .020"(.5mm). Here, I am using
a slightly thicker .025" feeler gauge to verify clearance while the pinion is
slowly rocked back and forth.
|
|
|
|
|
........................
|
|
|
|
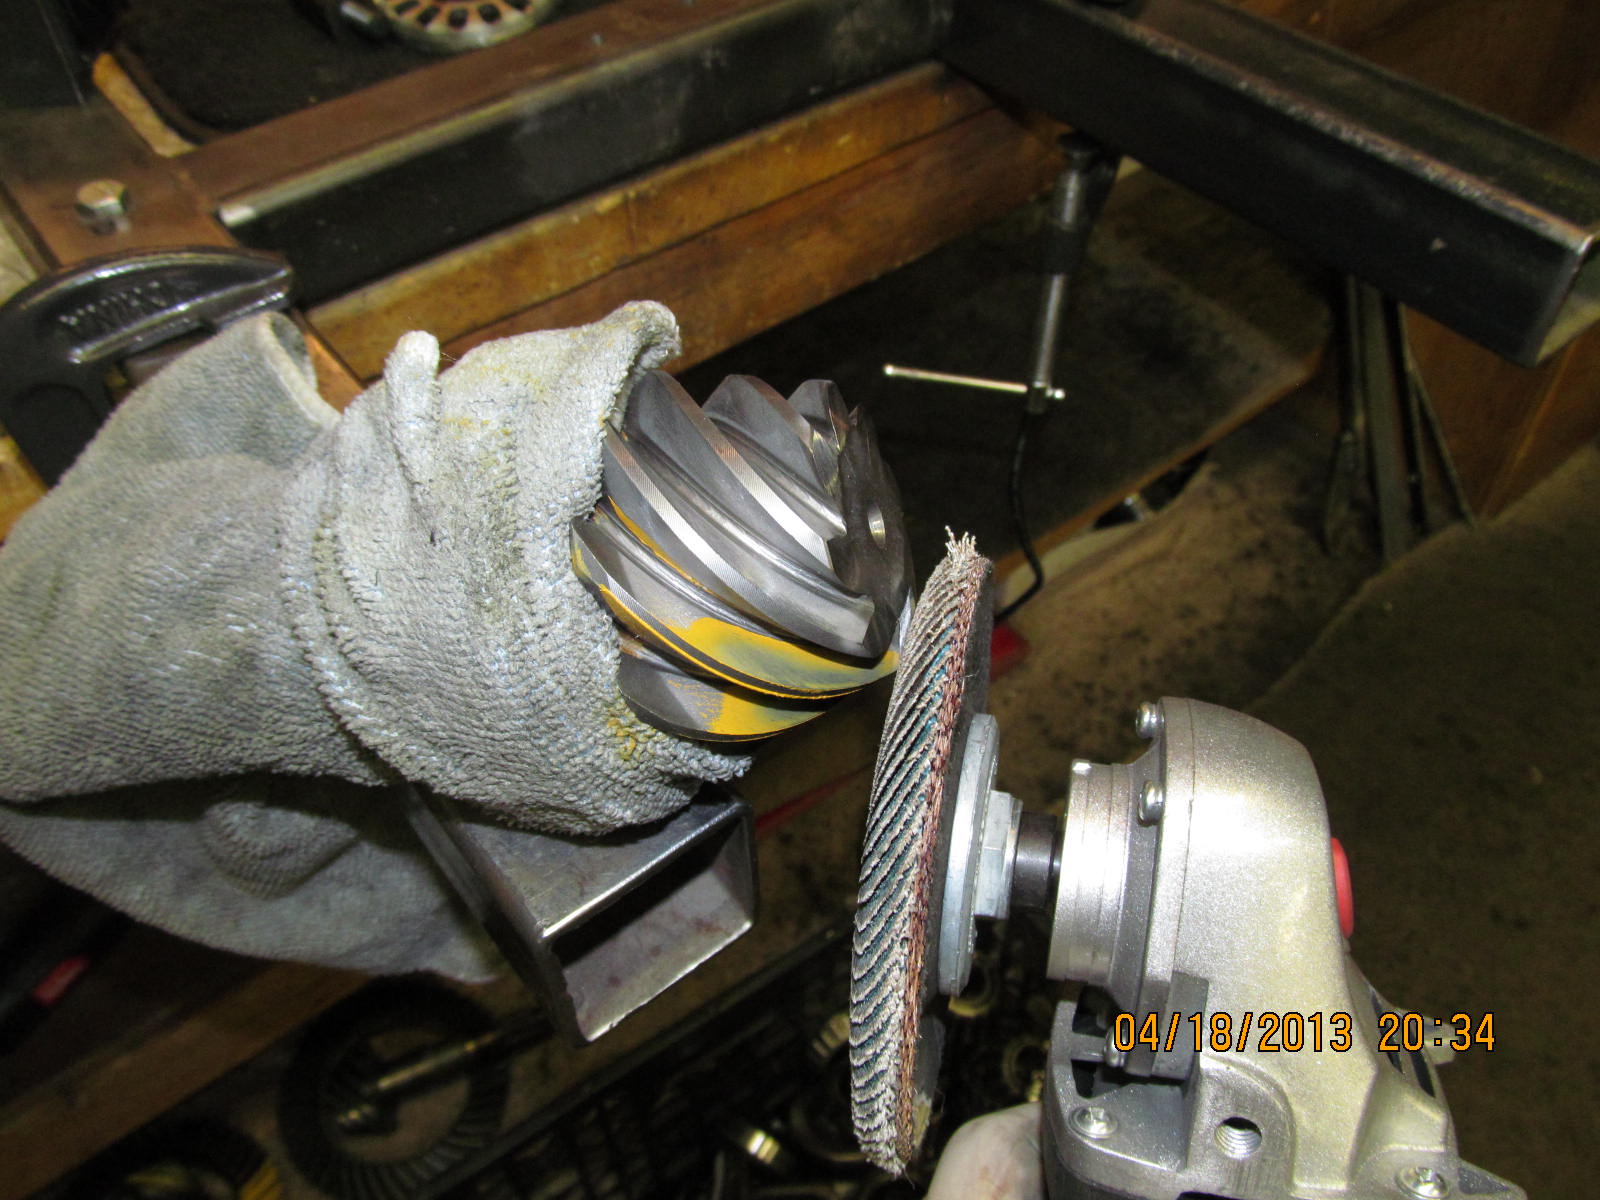
Needless to say, even though there was no obvious contact, it still did not pass
the .025" test so out comes the pinion...
|
|
|
|
|
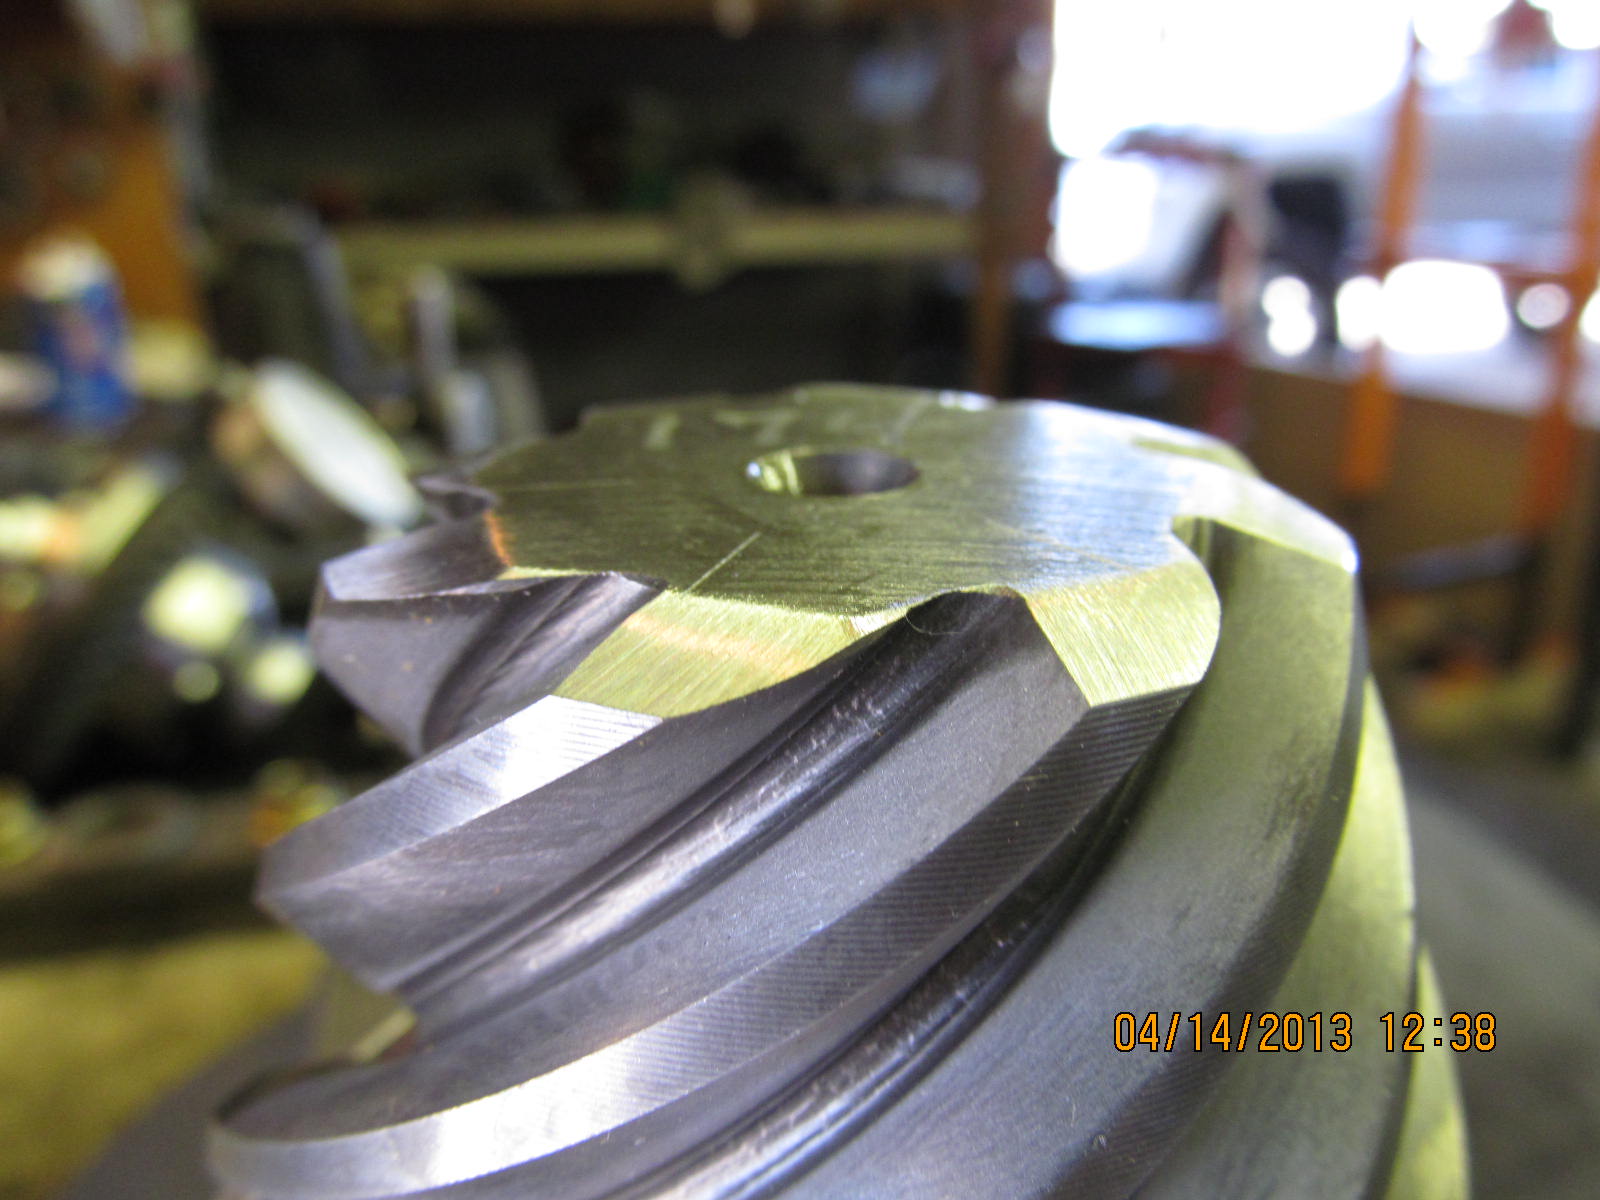
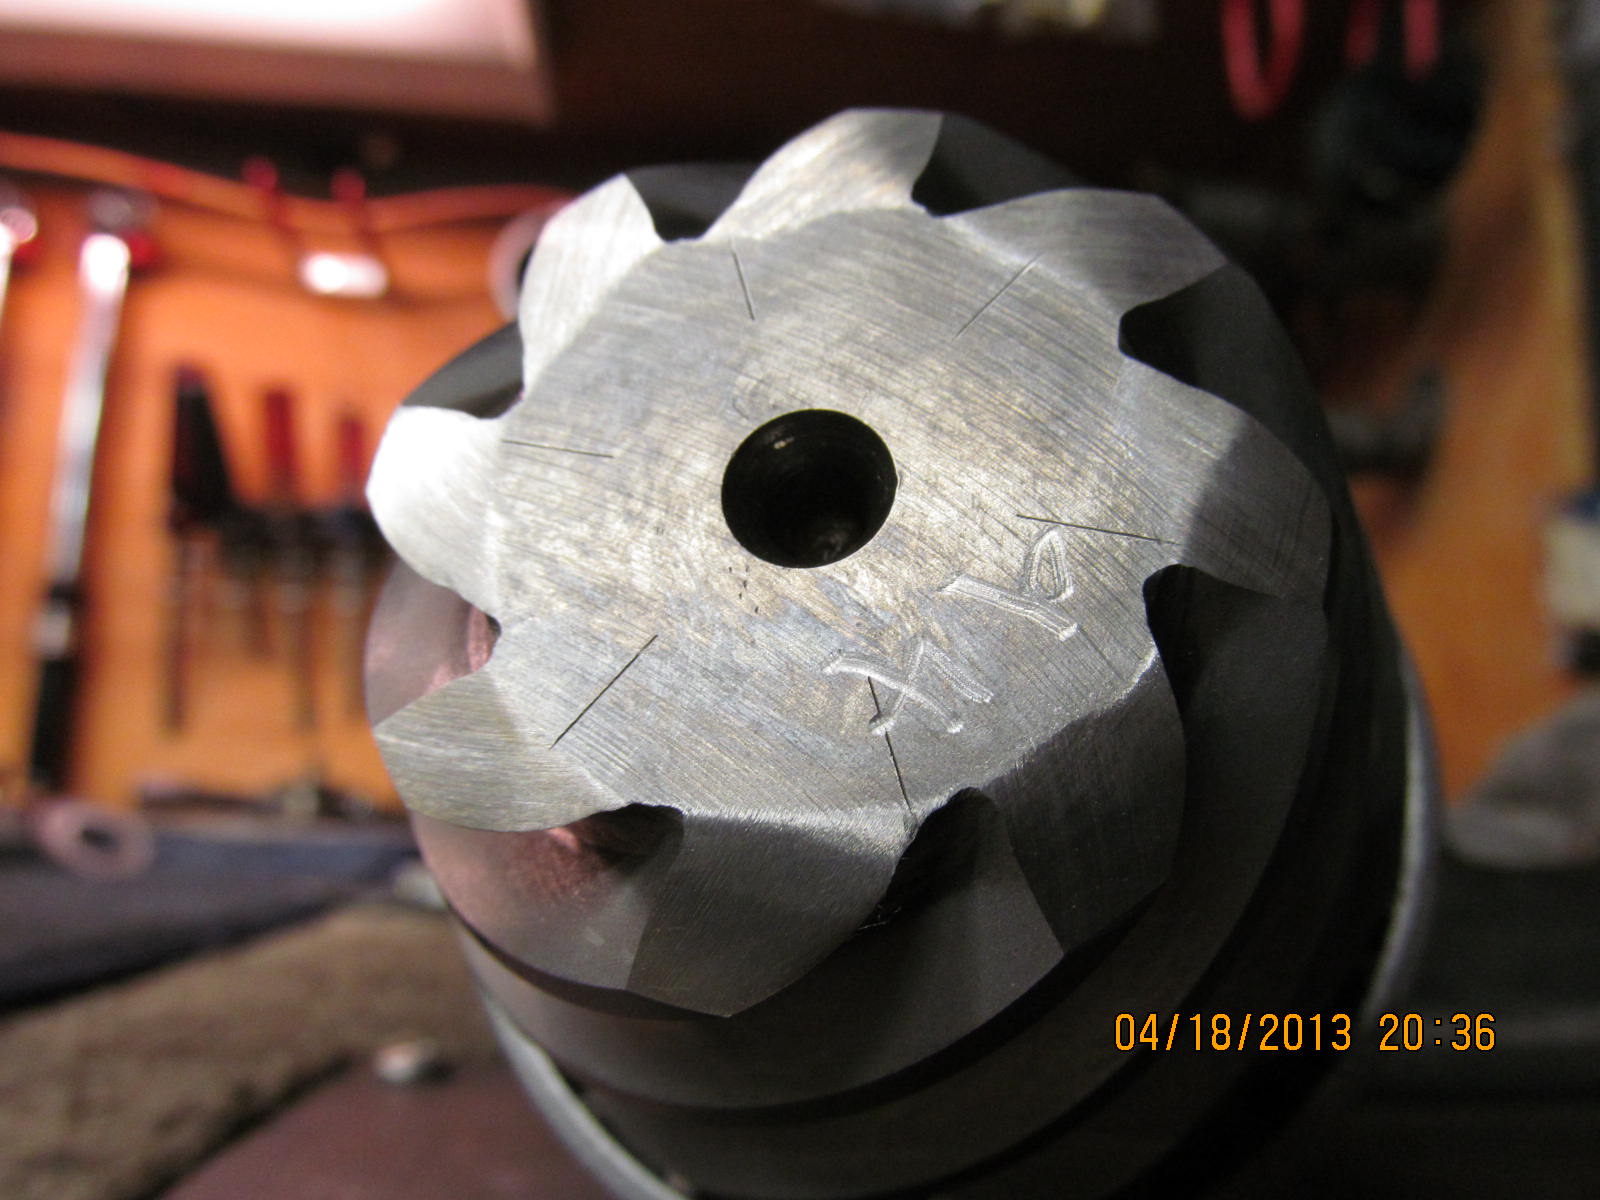
The flapper wheel does such a clean job of beveling the edges.
|
|
|

|
|
.................
|
|
|
|
|
..................
|
|
|
|
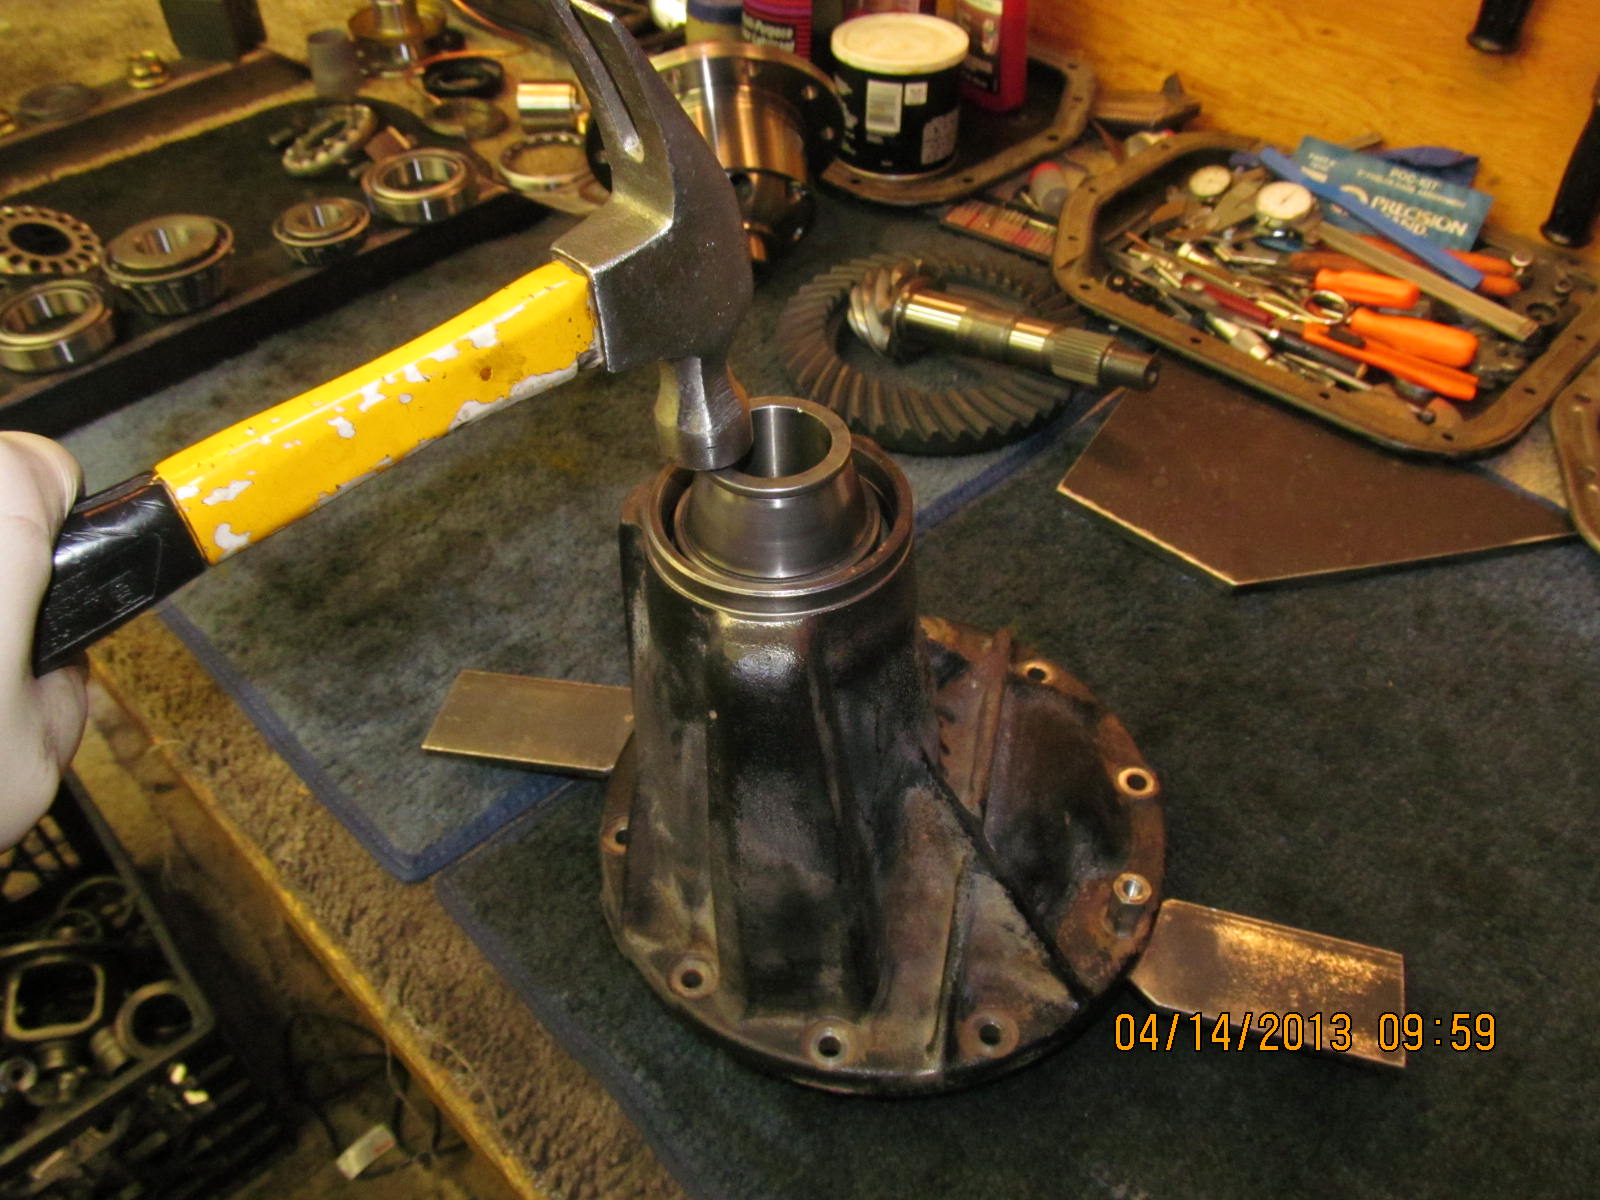
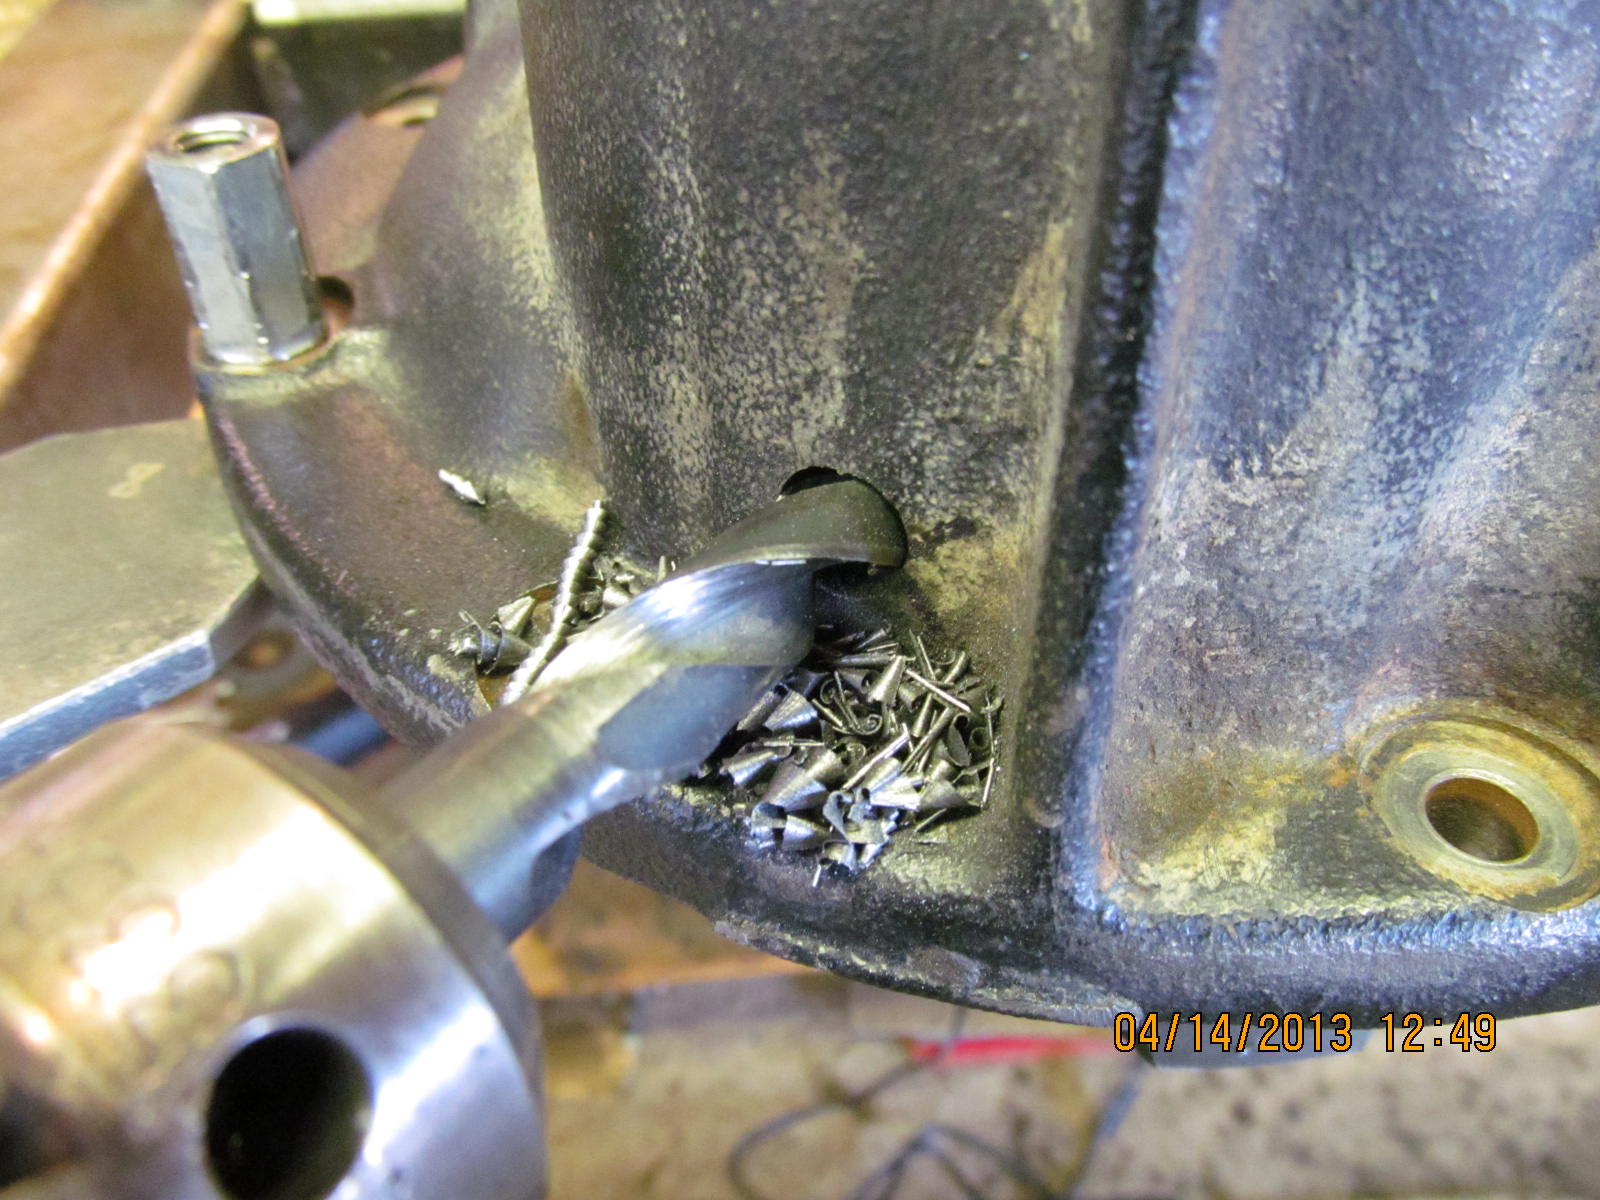
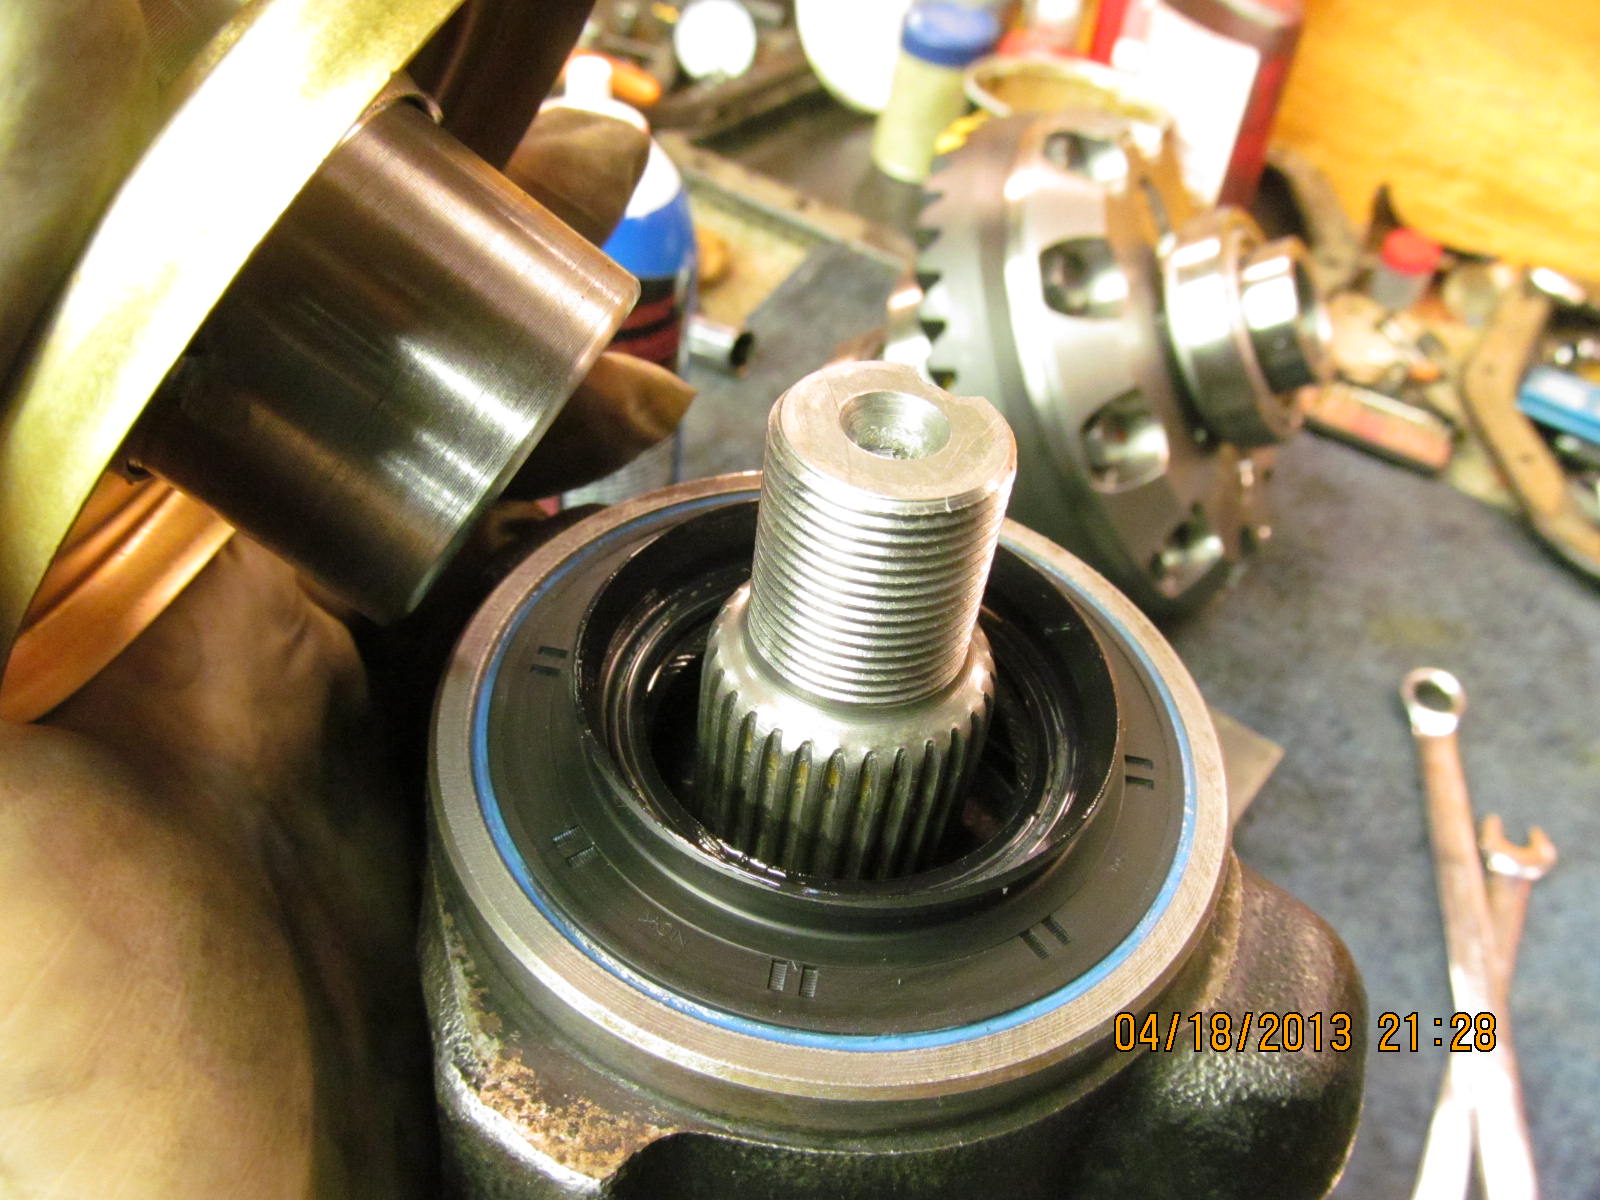
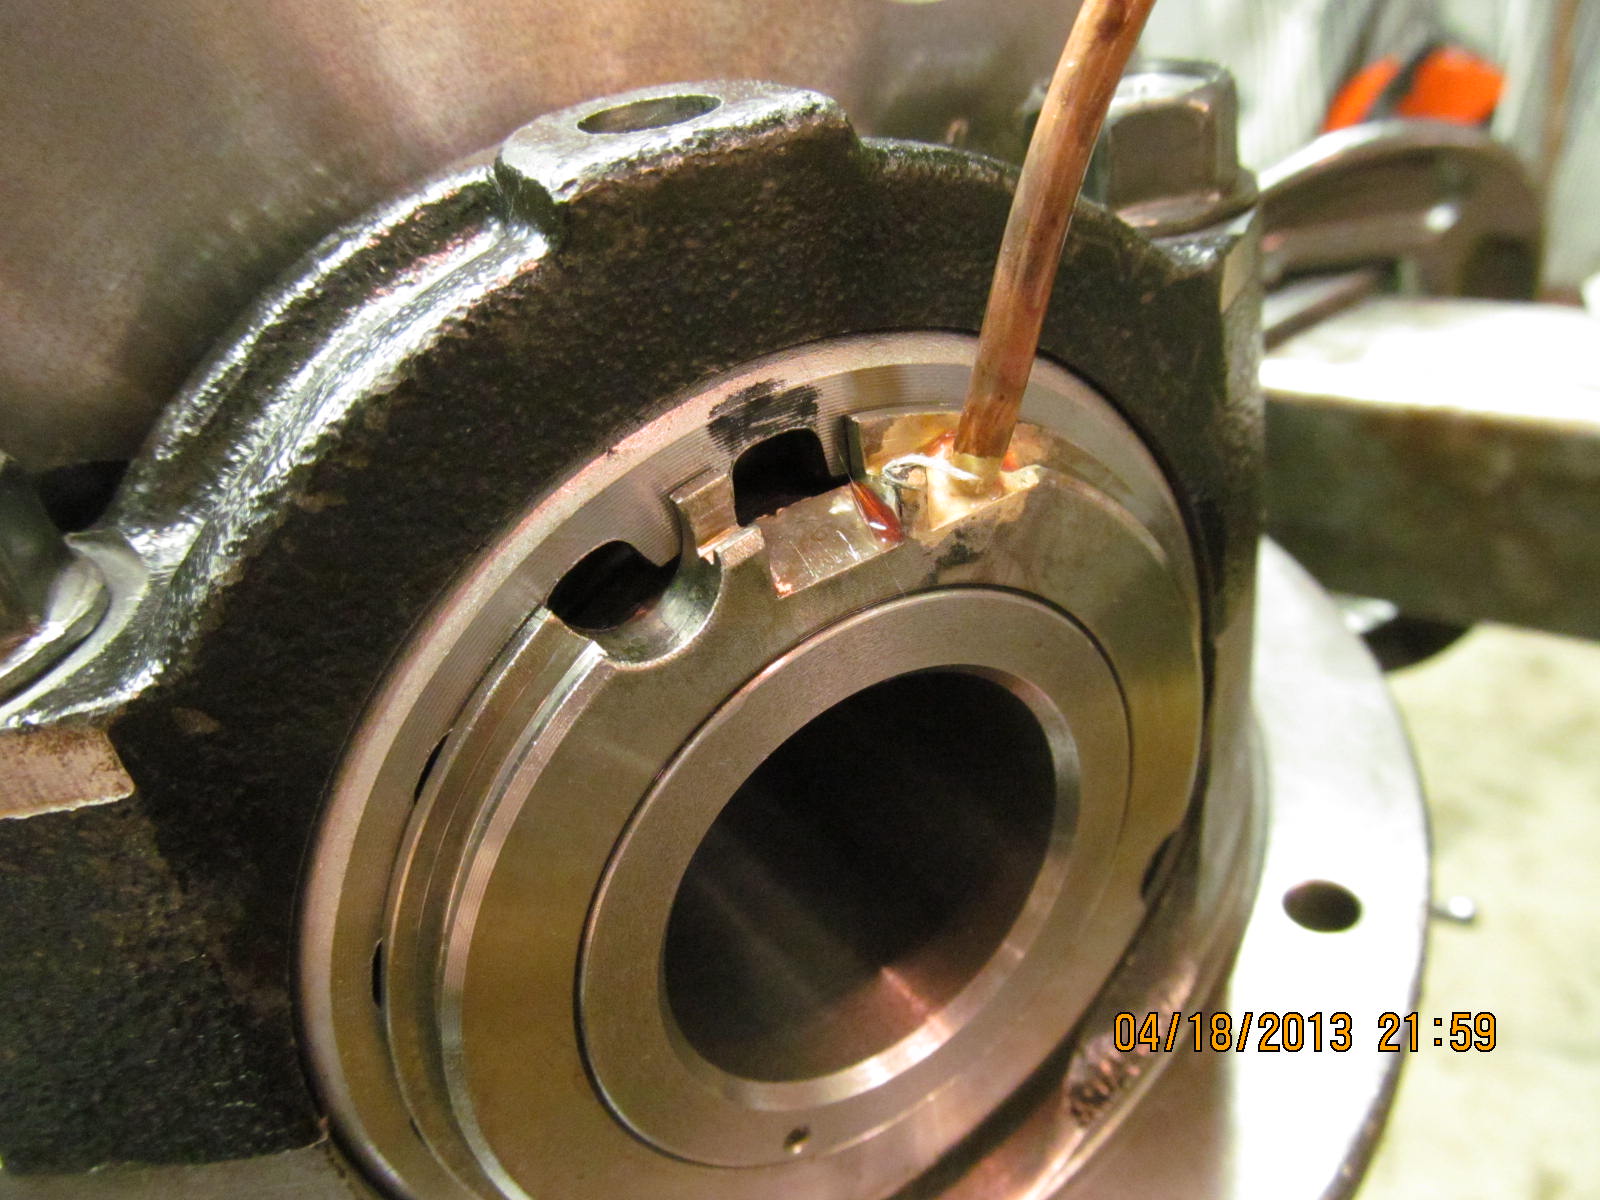
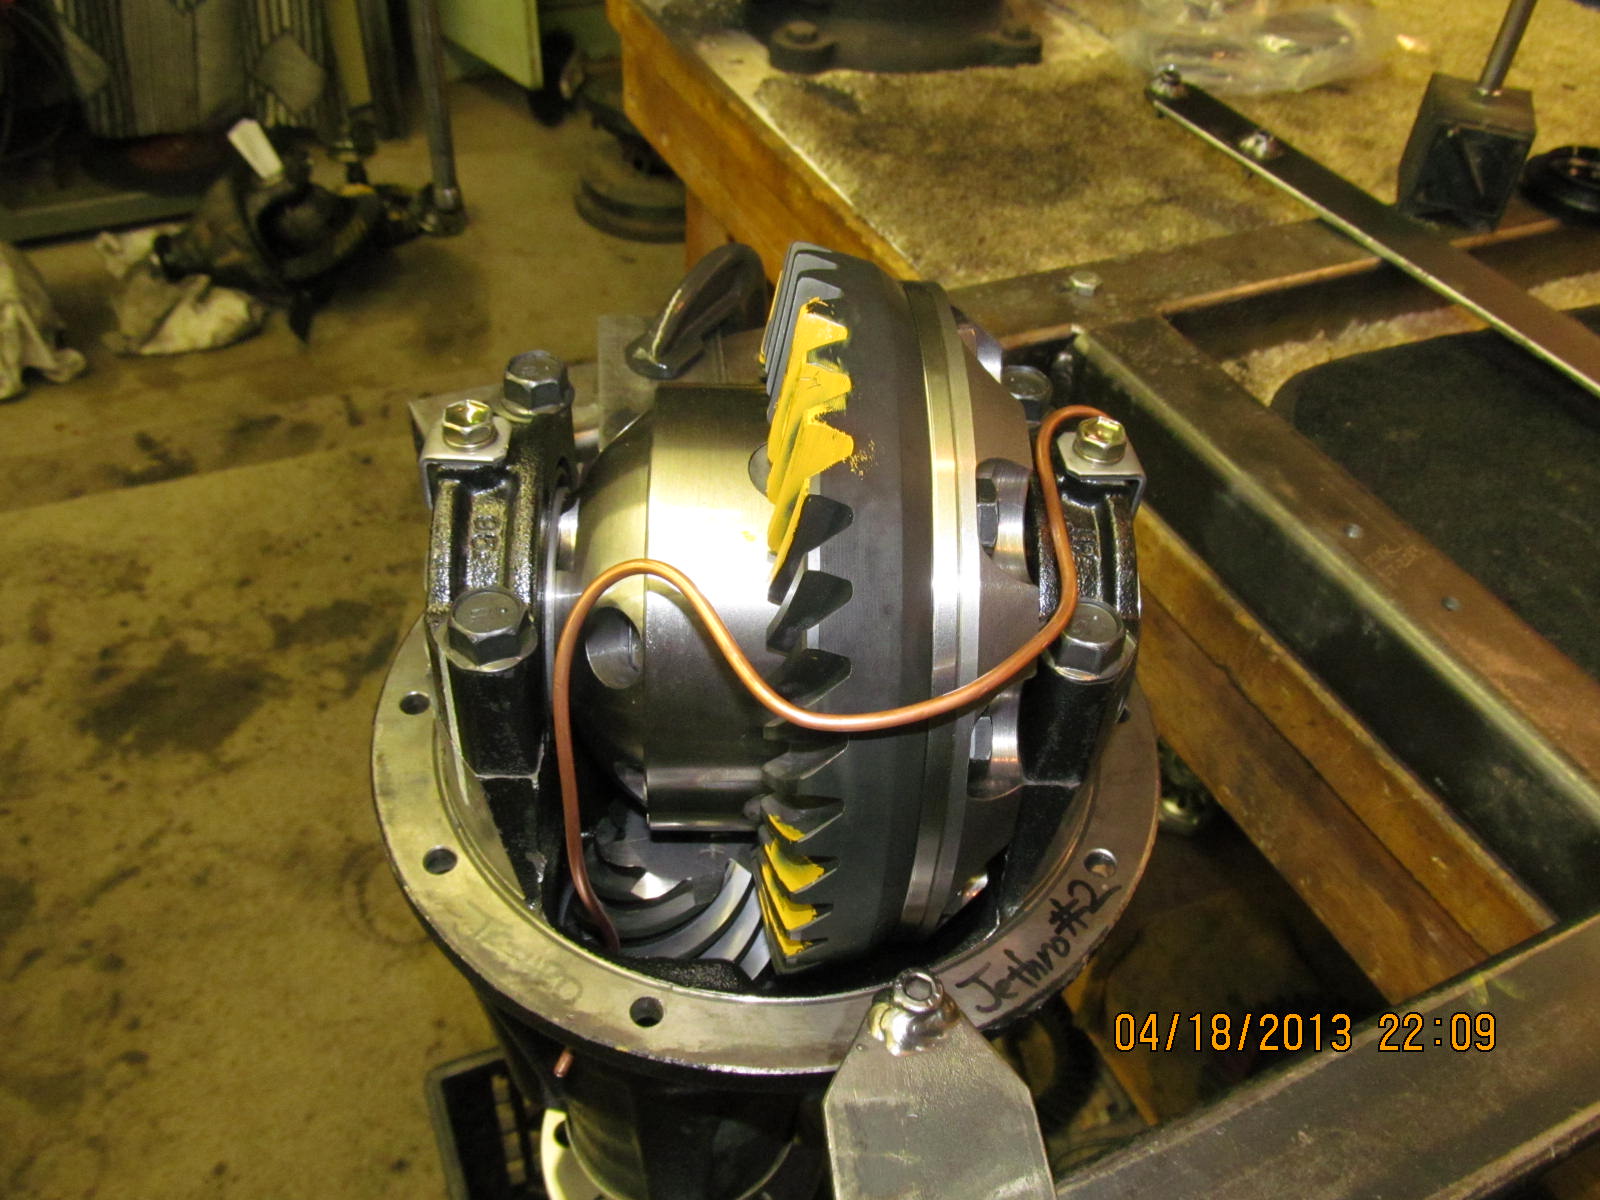
I had previously marked where the hole needs to be and, with the pinion out, now
is a good time to drill and tap for the brass bulkhead.
|
|
|
|
Not going to install it yet but test fitting it, it looks good. Resistance started
to increase at the point shown in the photo. When I get the wrench on it, it will
tighten almost all the way.
|
|
|
|
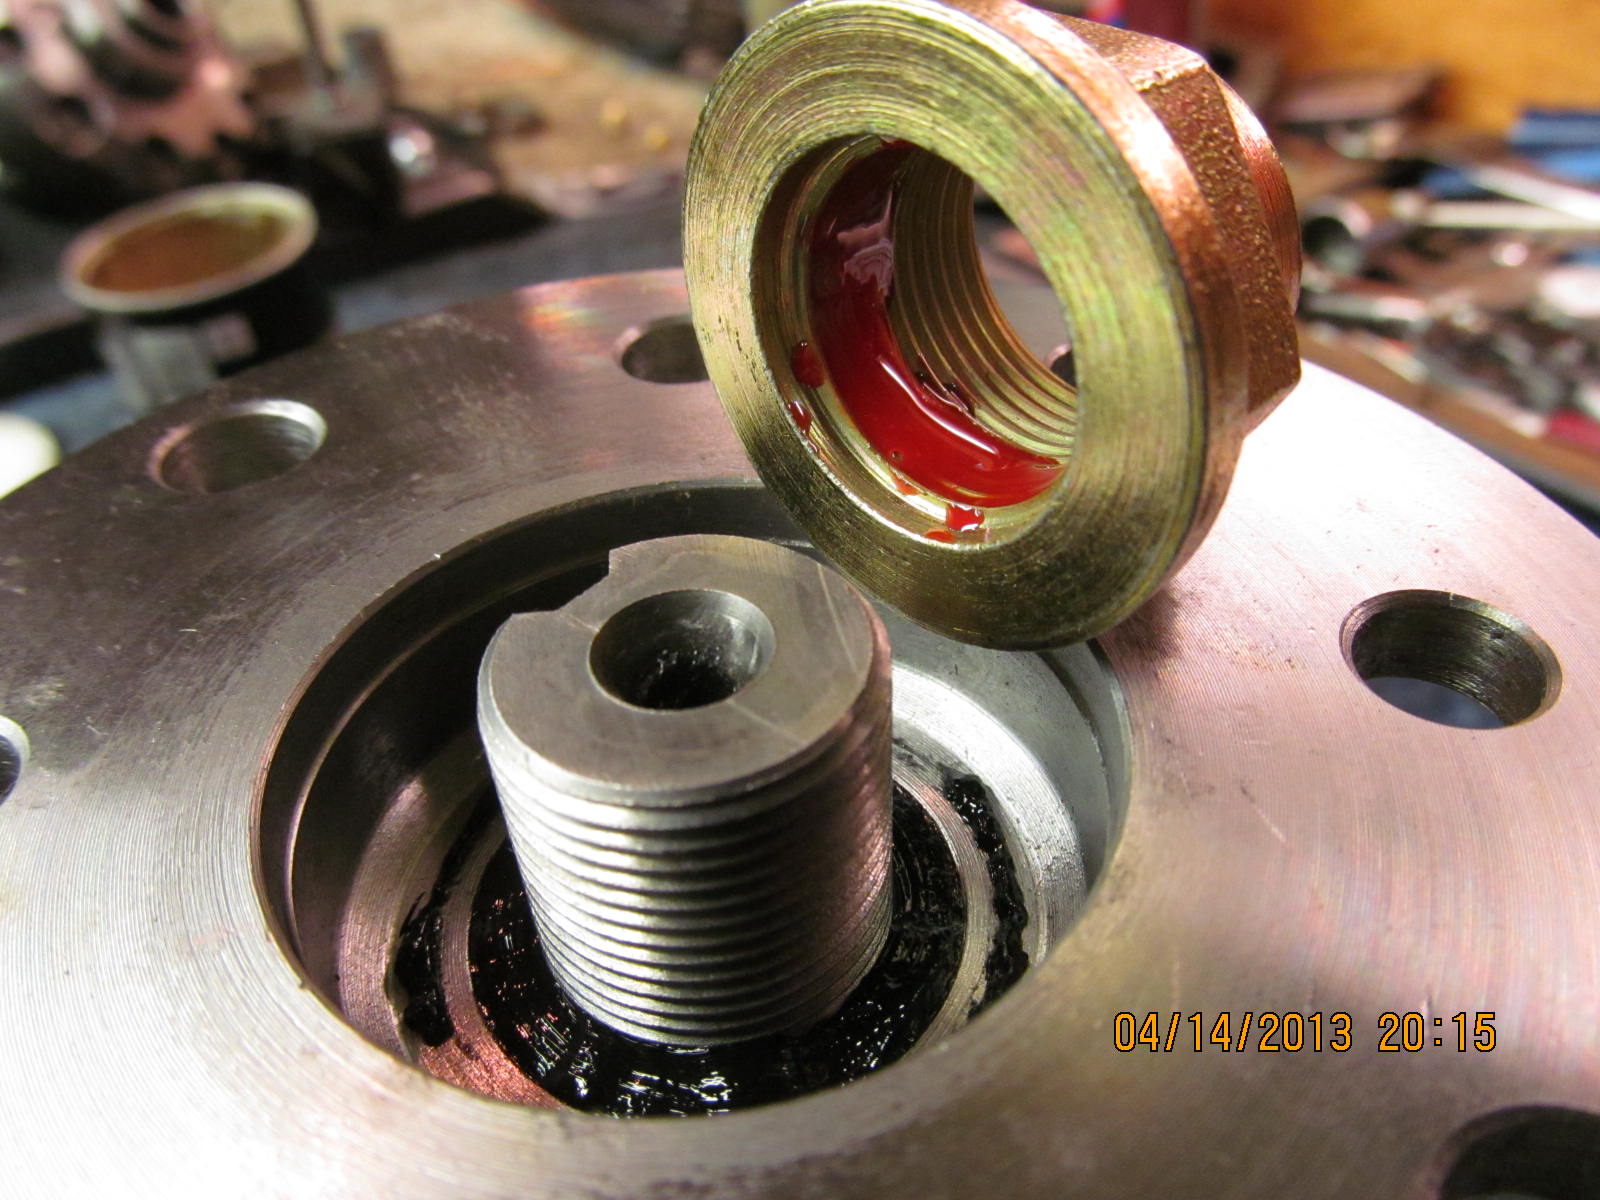
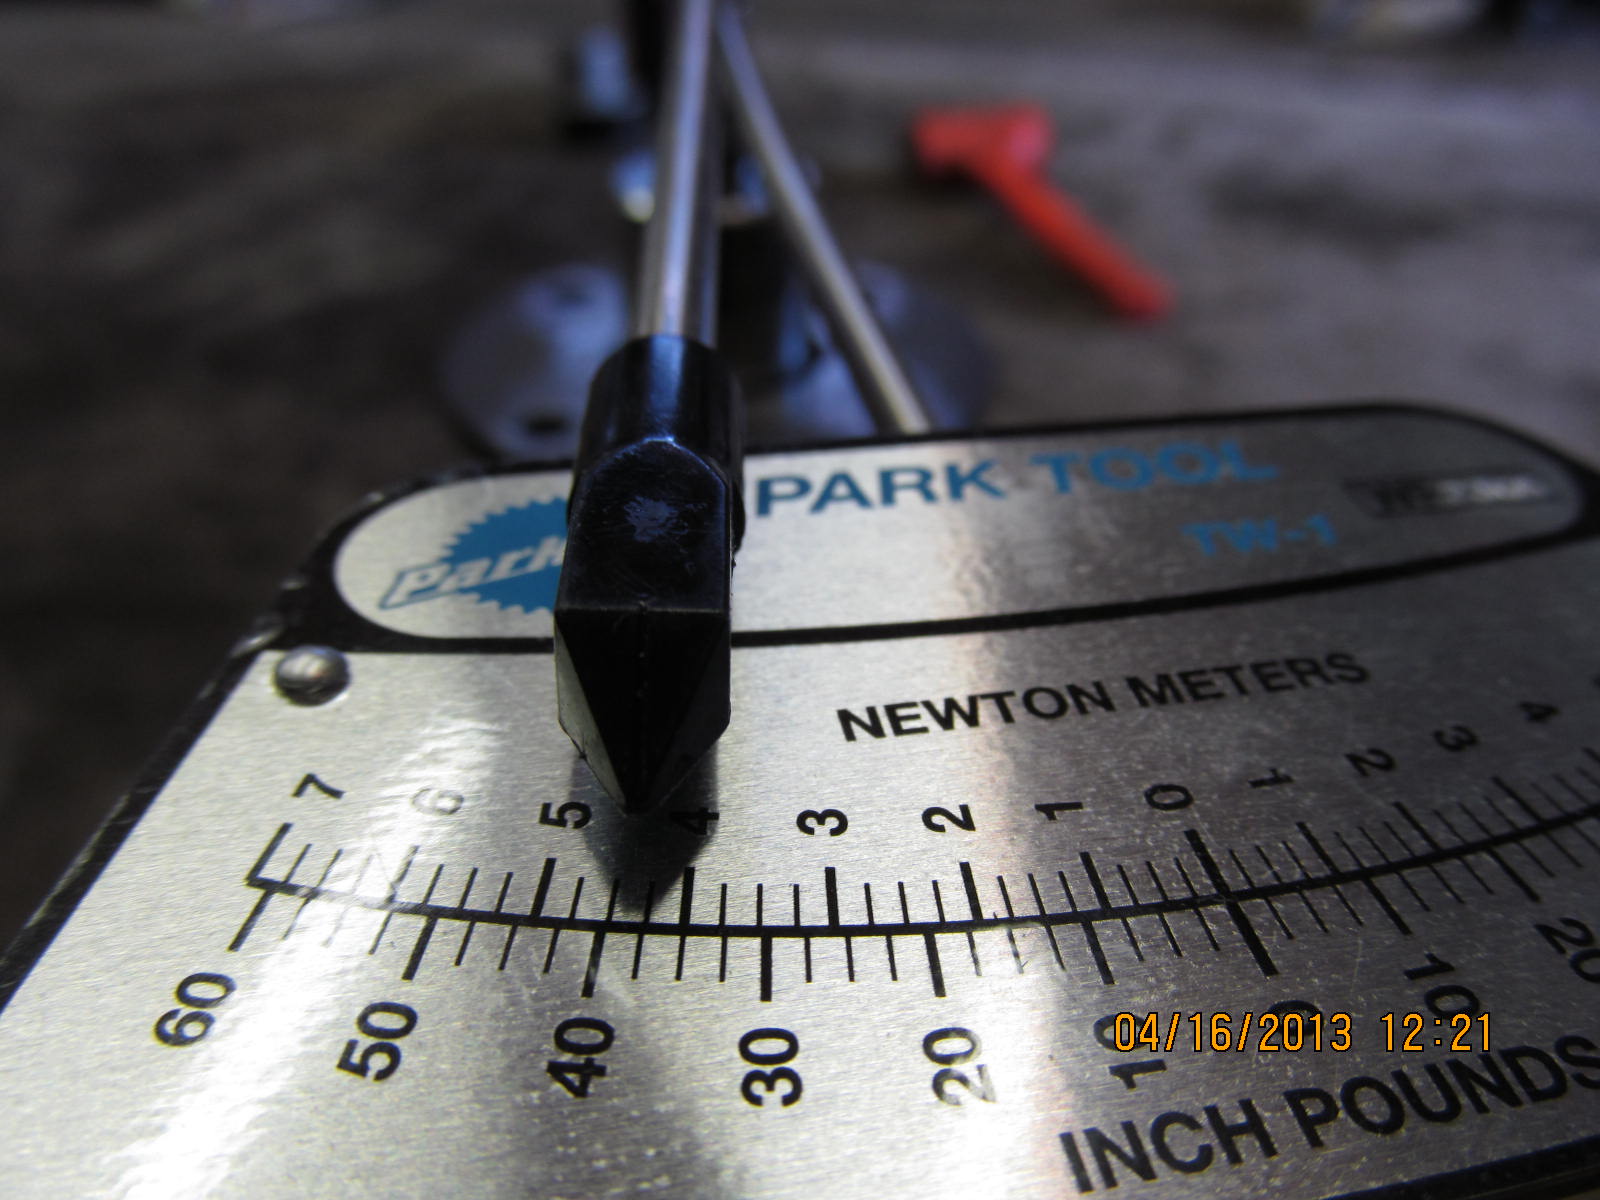
Skipped a few steps here, but when the solid collar plus the shims equal very close
to 1.866" then the "preliminary pinion pre-load" will measure in the desired spot
of about 5 in/lb as shown here. I can tighten the pinion nut even further with
the breaker bar to get up to 10 or 15 inch/pounds if I want.
|
|
|

|
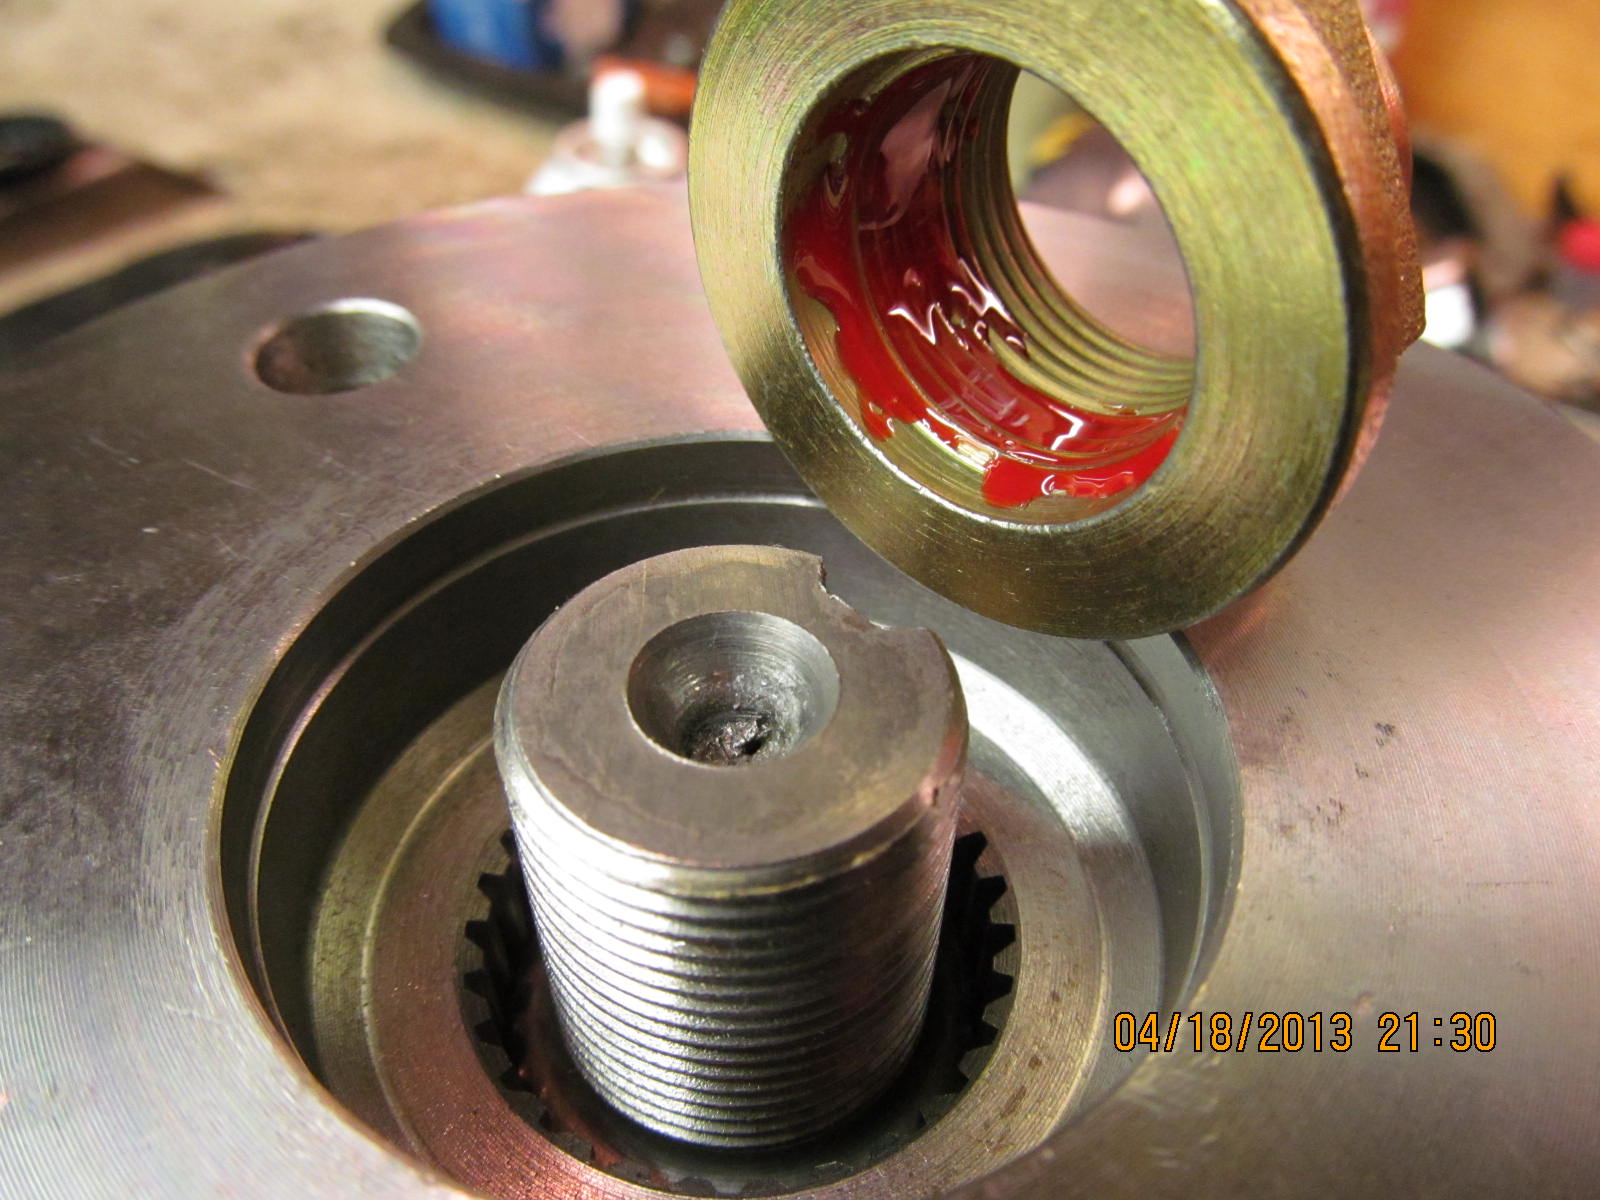
The old shop flange is removed and the black rubberized seal is greased up. Shown
in the pic above, I am using some Permatex ULTRA-BLUE rtv....I recommend NOT using
any of the rtv's on the rubberized seals. OK on the metallic ones but not the
rubberized. Long story short...the seal is so slippery under these conditions,
that it can migrate out. A light oil on the surfaces is probably acceptable.
After this picture was taken and the seal did decide to migrate out of the hole,
I cleaned all the blue rtv off with starting fluid and pressed the seal in with
the help of the press.
|
|
|
|
|
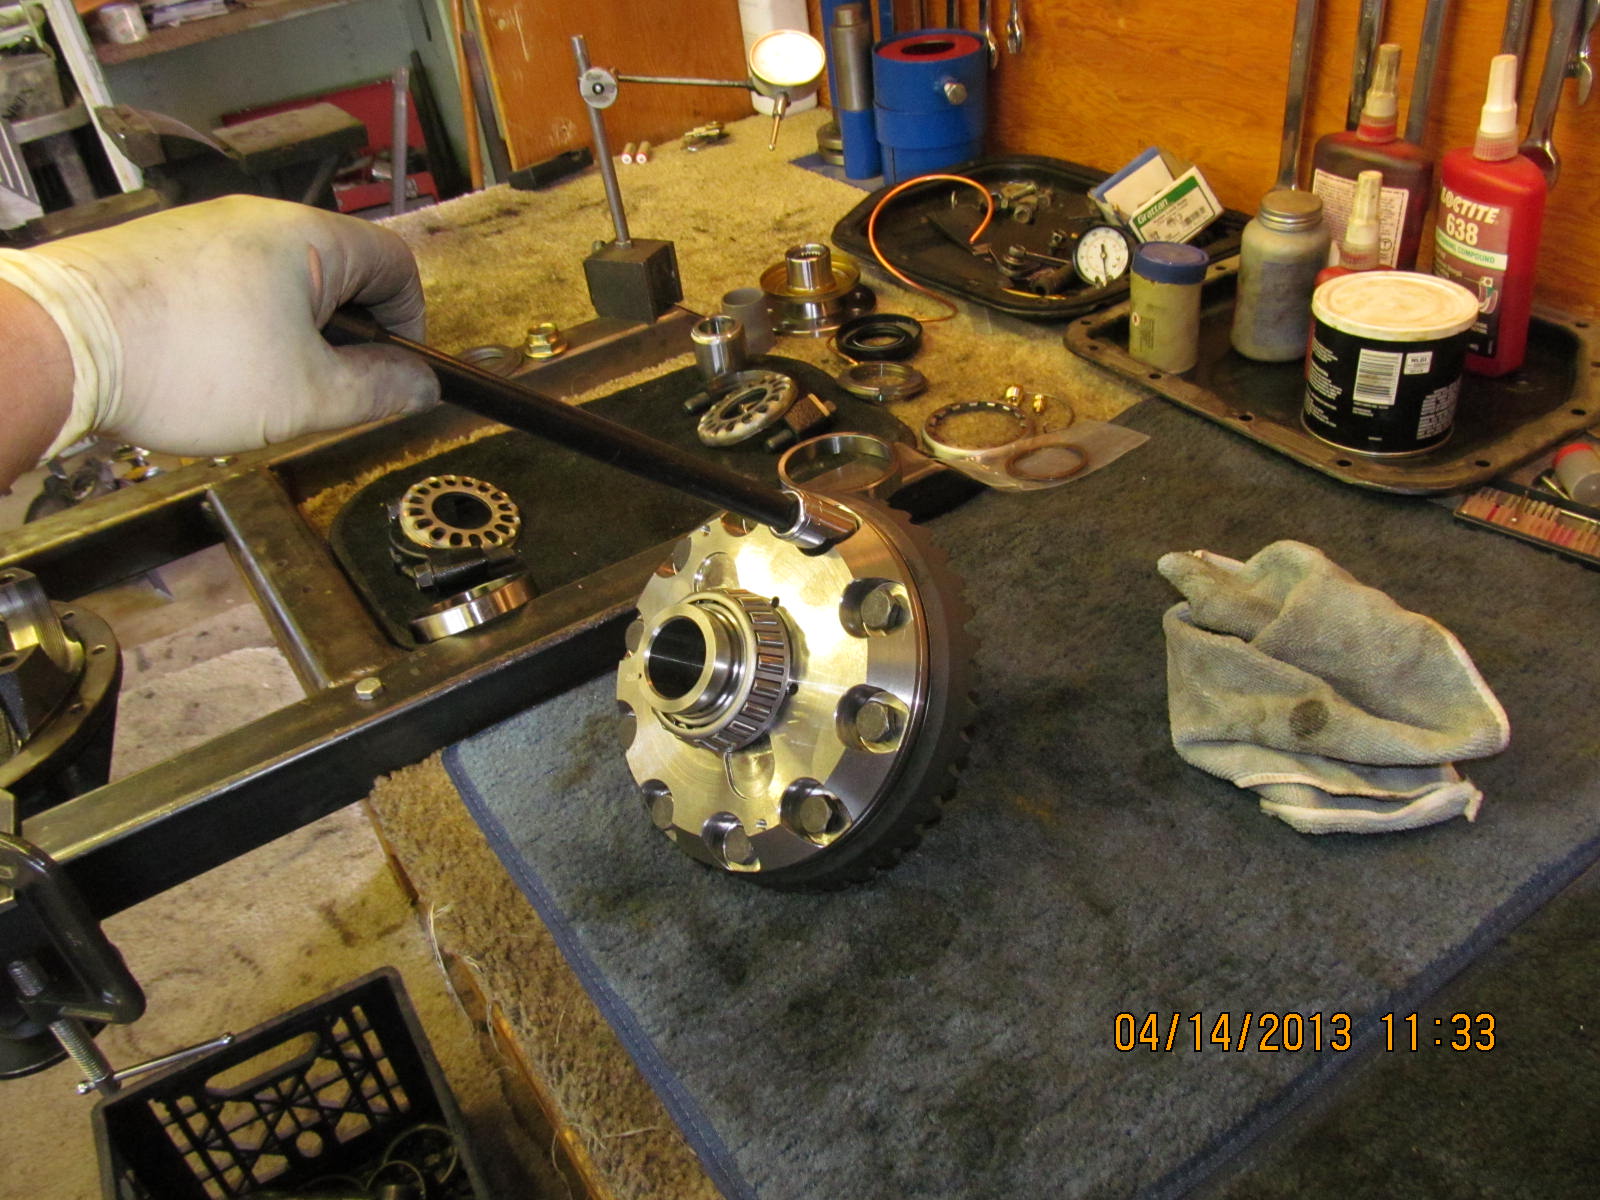
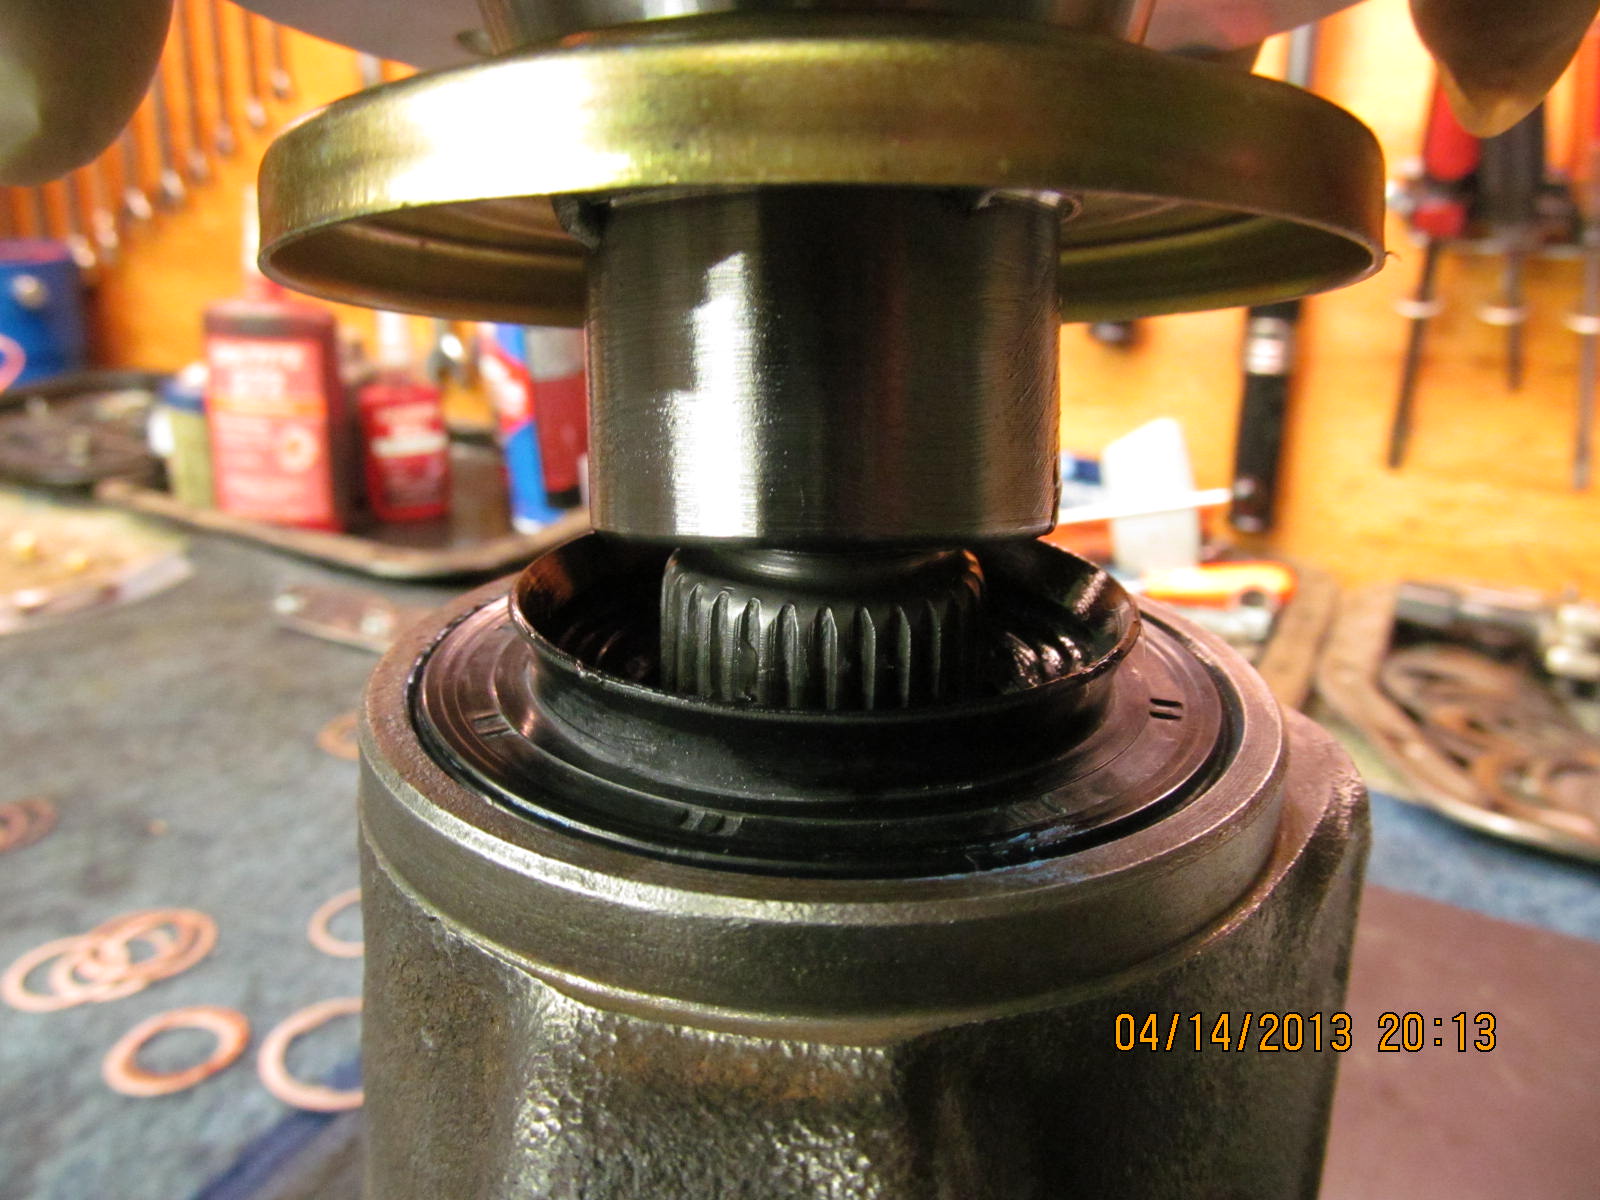
Install 29 spline flange...
|
|
|
|
|
Red loctite on the 30mm flange type pinion nut...
|
|
|
|
The electric impact does a good job of tightening the nut up but the 3 foot cheater
reaches new levels and allows me to "fine tune" the final pinion pre-load value.
Like I have said many times, solid collars are not all that solid. The steel does
compress a small amount with the right persuasion.
|
|
|
|
It now says 15 in/lb but I know from previously checking it that the seal drag
is about 2 in/lb so our actual PPL is 13....a good number.
|
|
|
|
You can see how much more the cheater bar tightened it to achieve the desired
value. Ding and this end is now done.
|
|
|
|
The bearing caps are now tightened to the final 75 ft/lbs. If the wheels do not
turn with your fingers then something was done wrong...
like it has been cross-threaded.
|
|
|
|
|
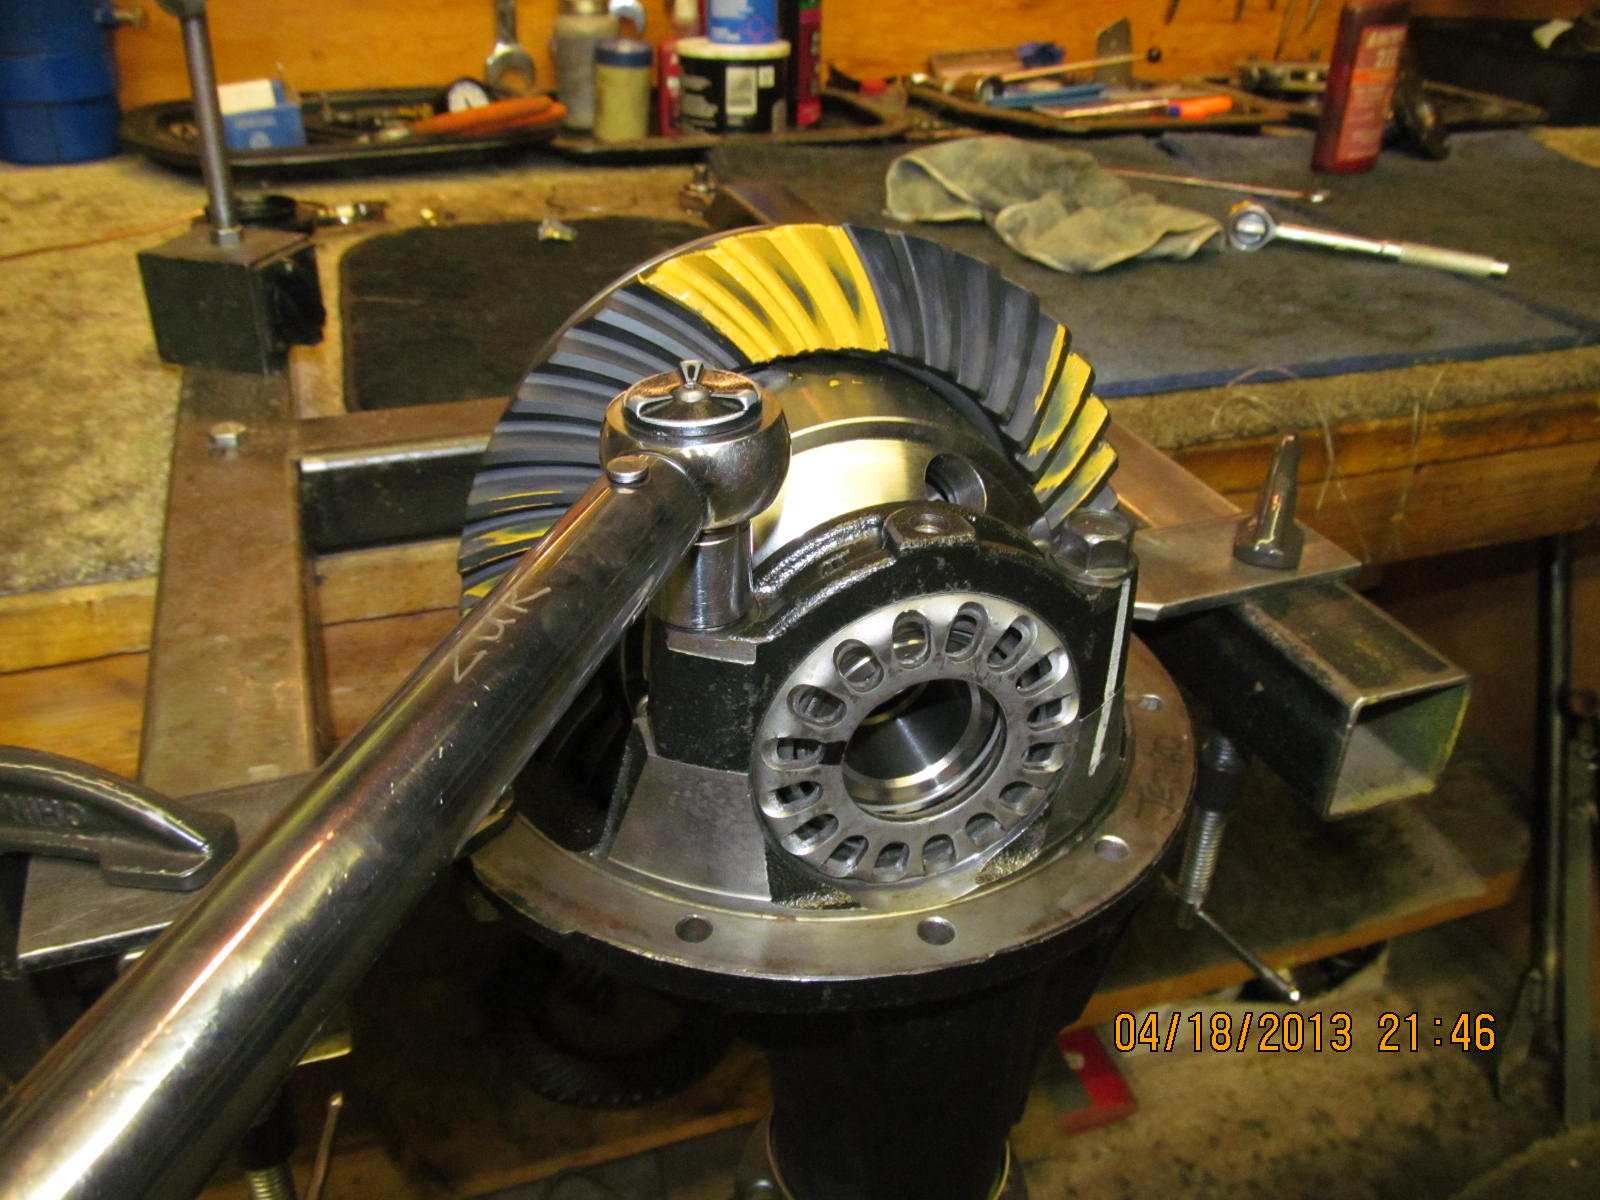
Backlash is dialed in while the CBPL is approaching the 100 ft/lb value.
|
|
|
|
I know what 100 ft/lb feels like but I still measure it just because
it is "expected" :)
|
|
|
|
|
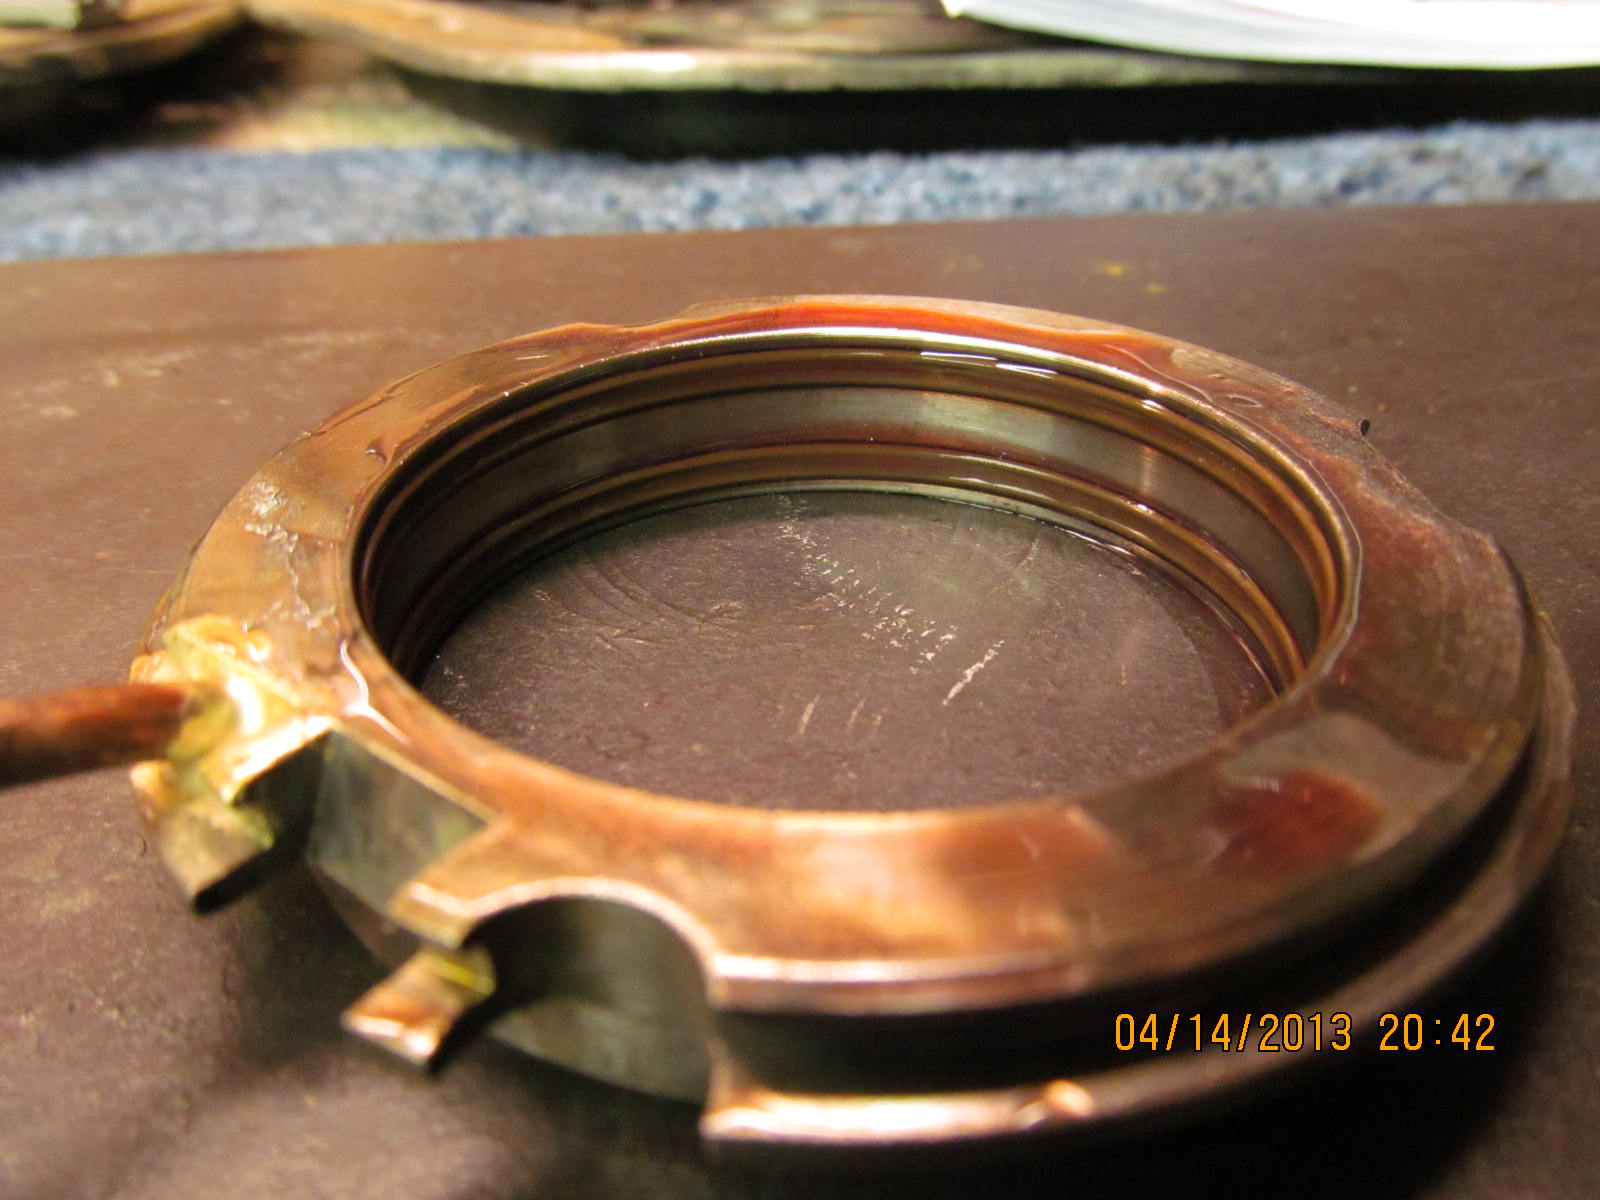
The seal assembly is lubed up generously and ready.
|
|
|
|
|
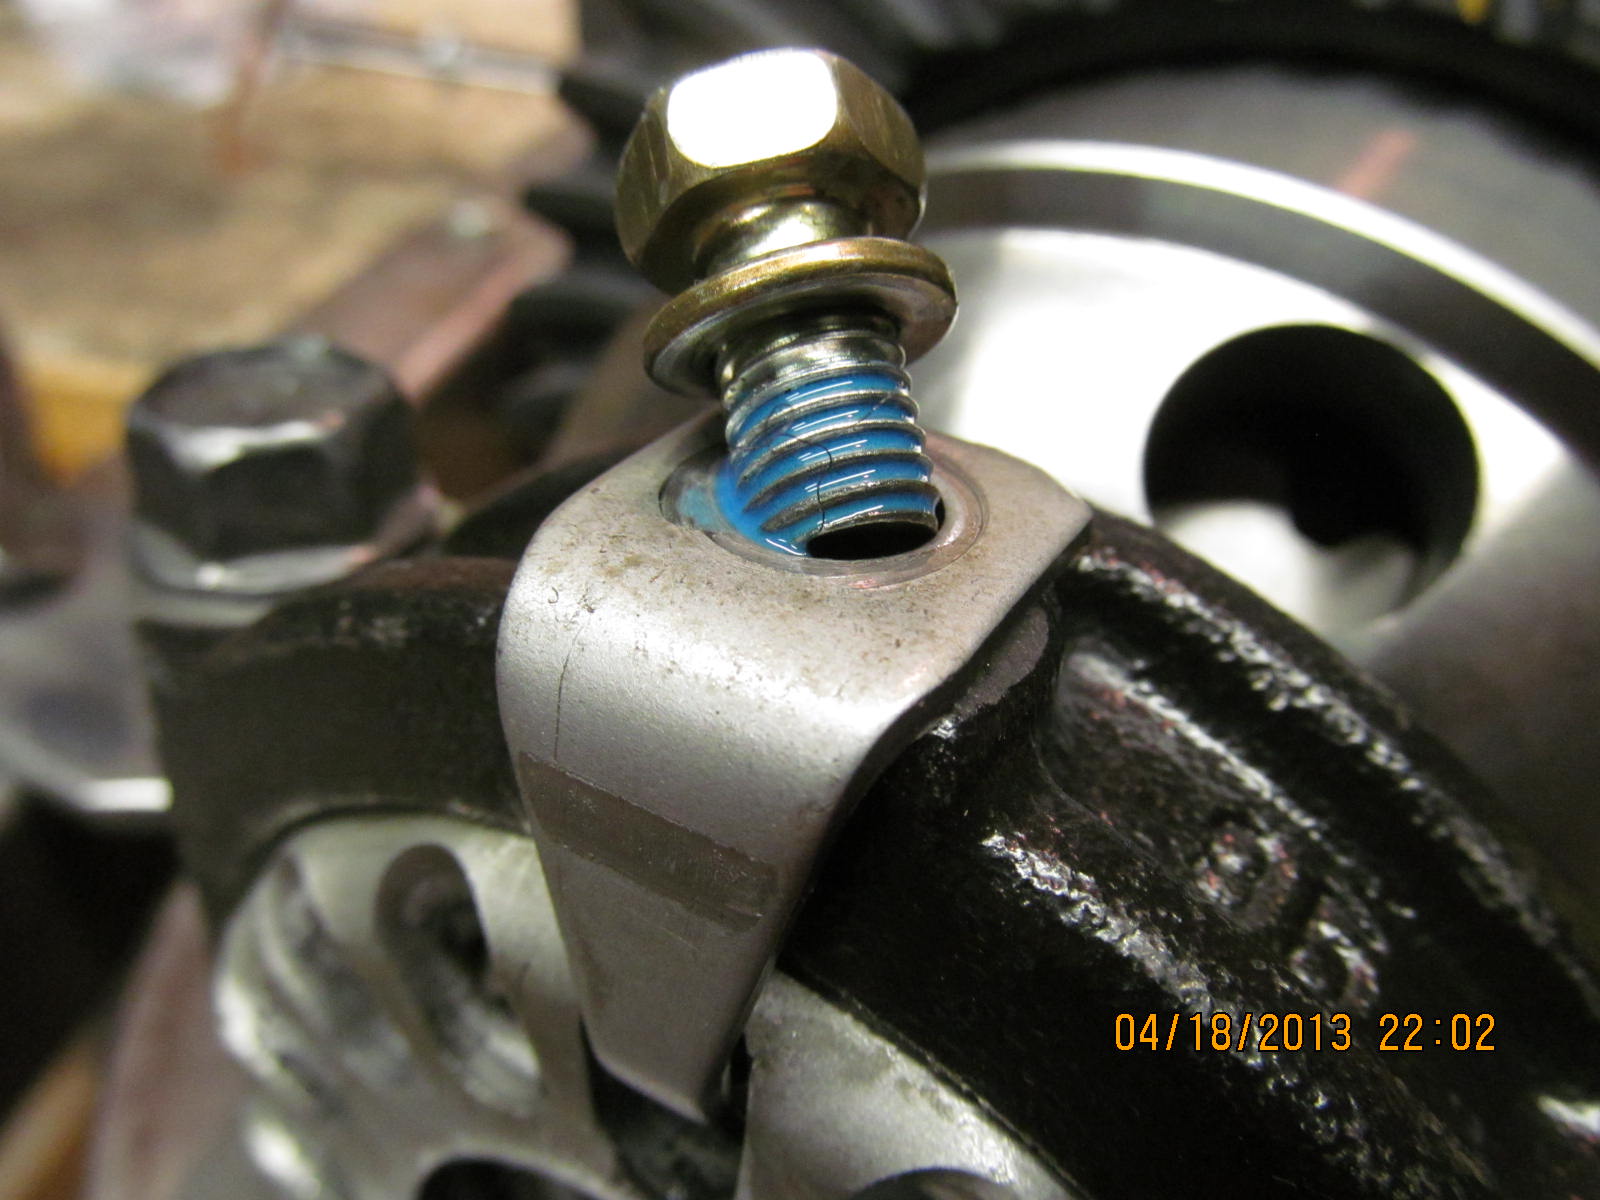
The locking tabs have blue medium strength locktite and 10 ft/lbs.
|
|
|
|
|
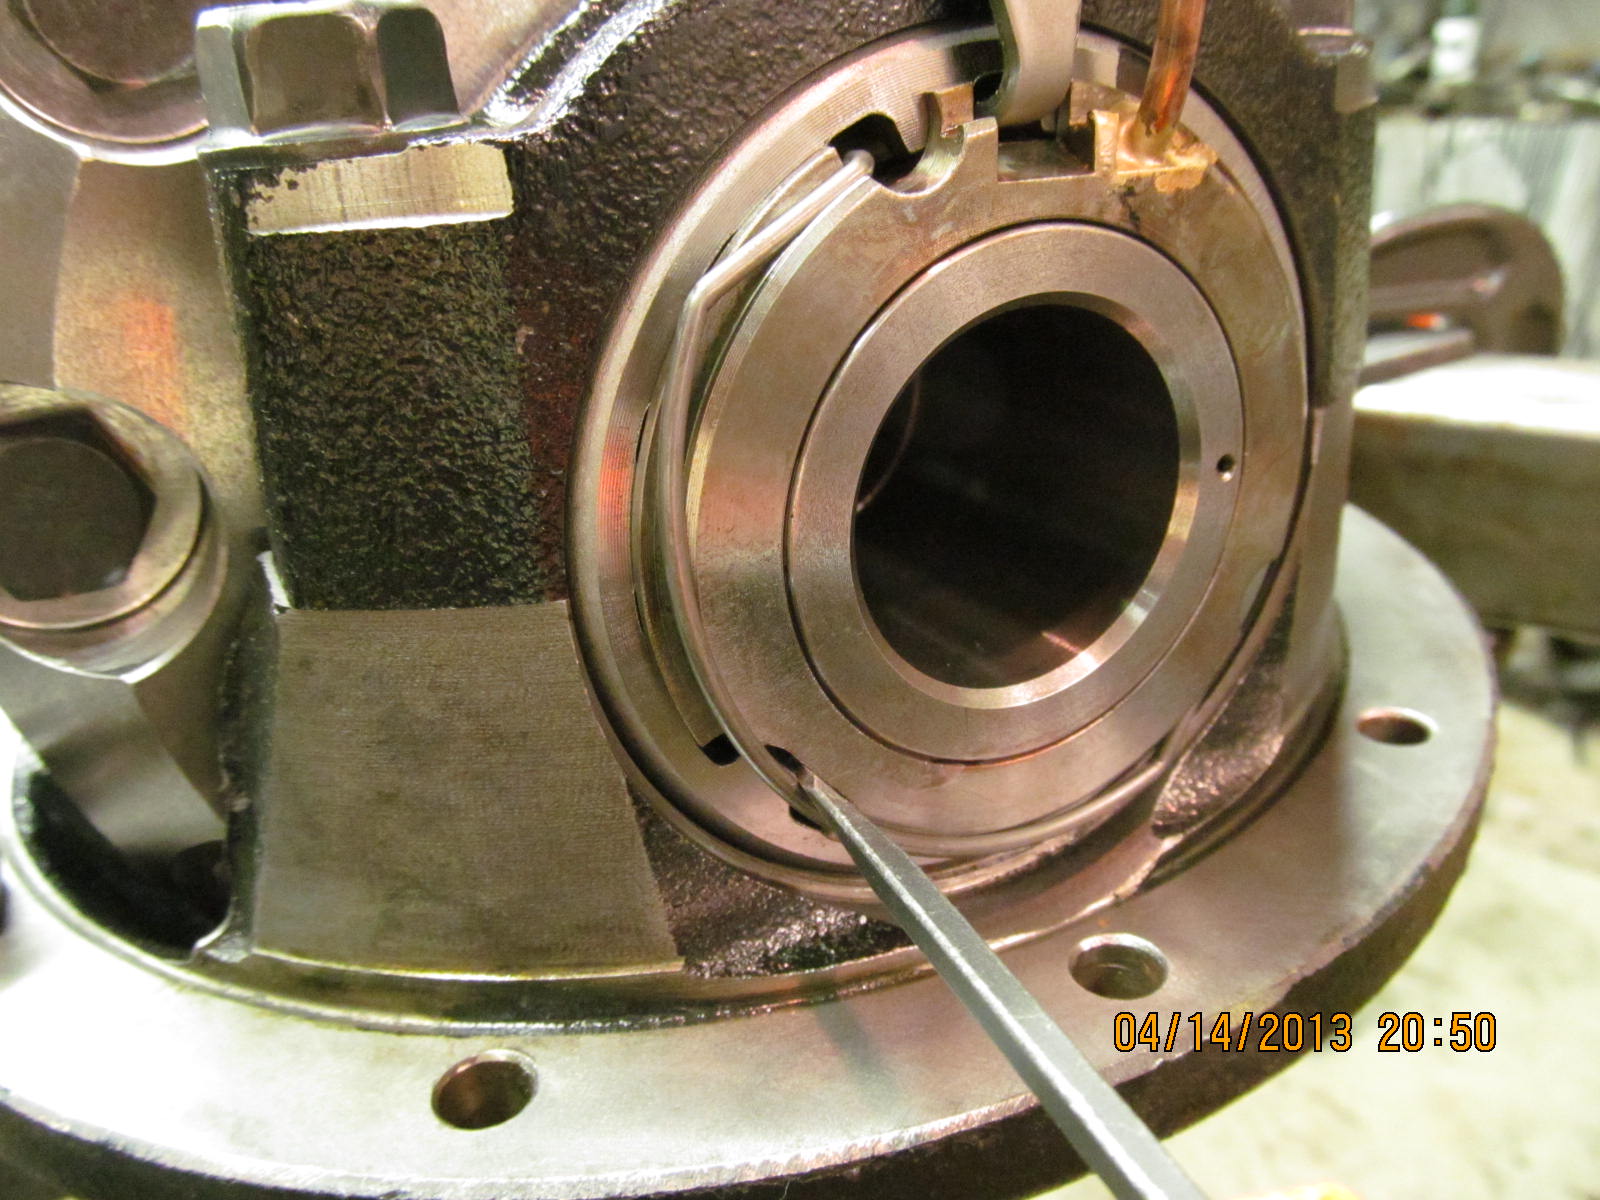
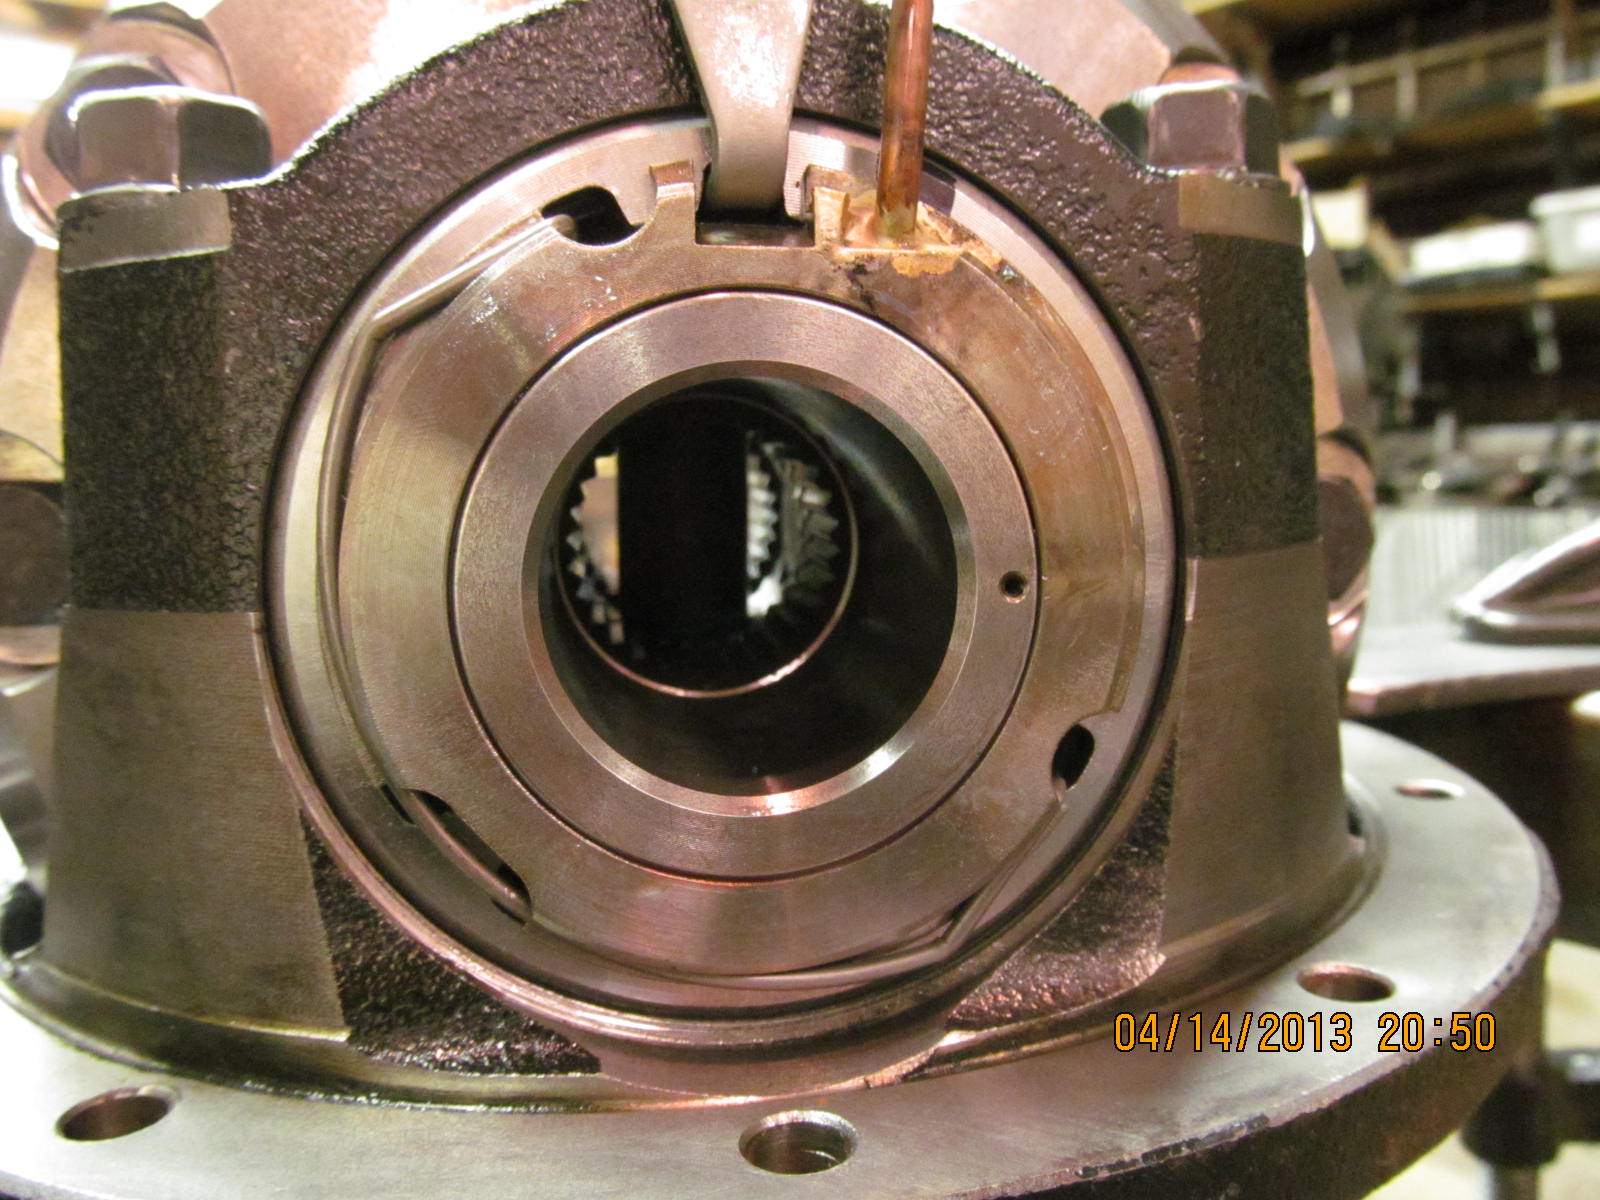
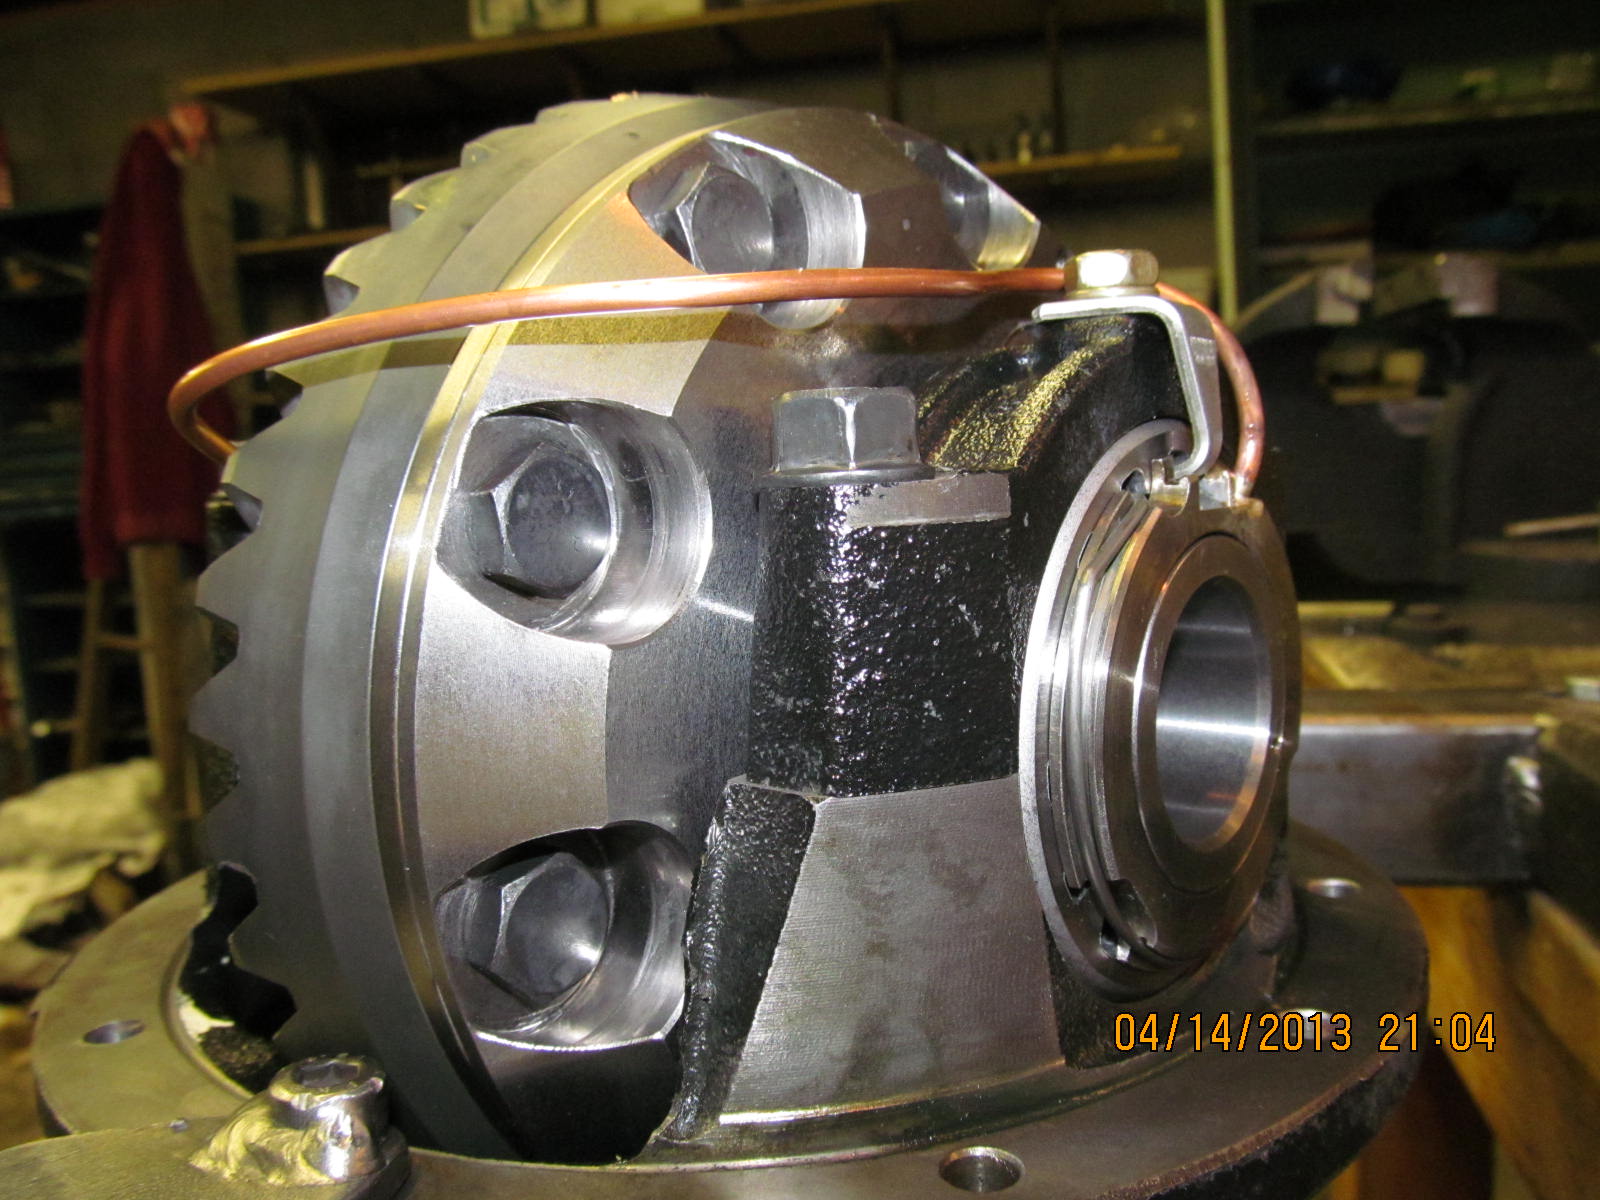
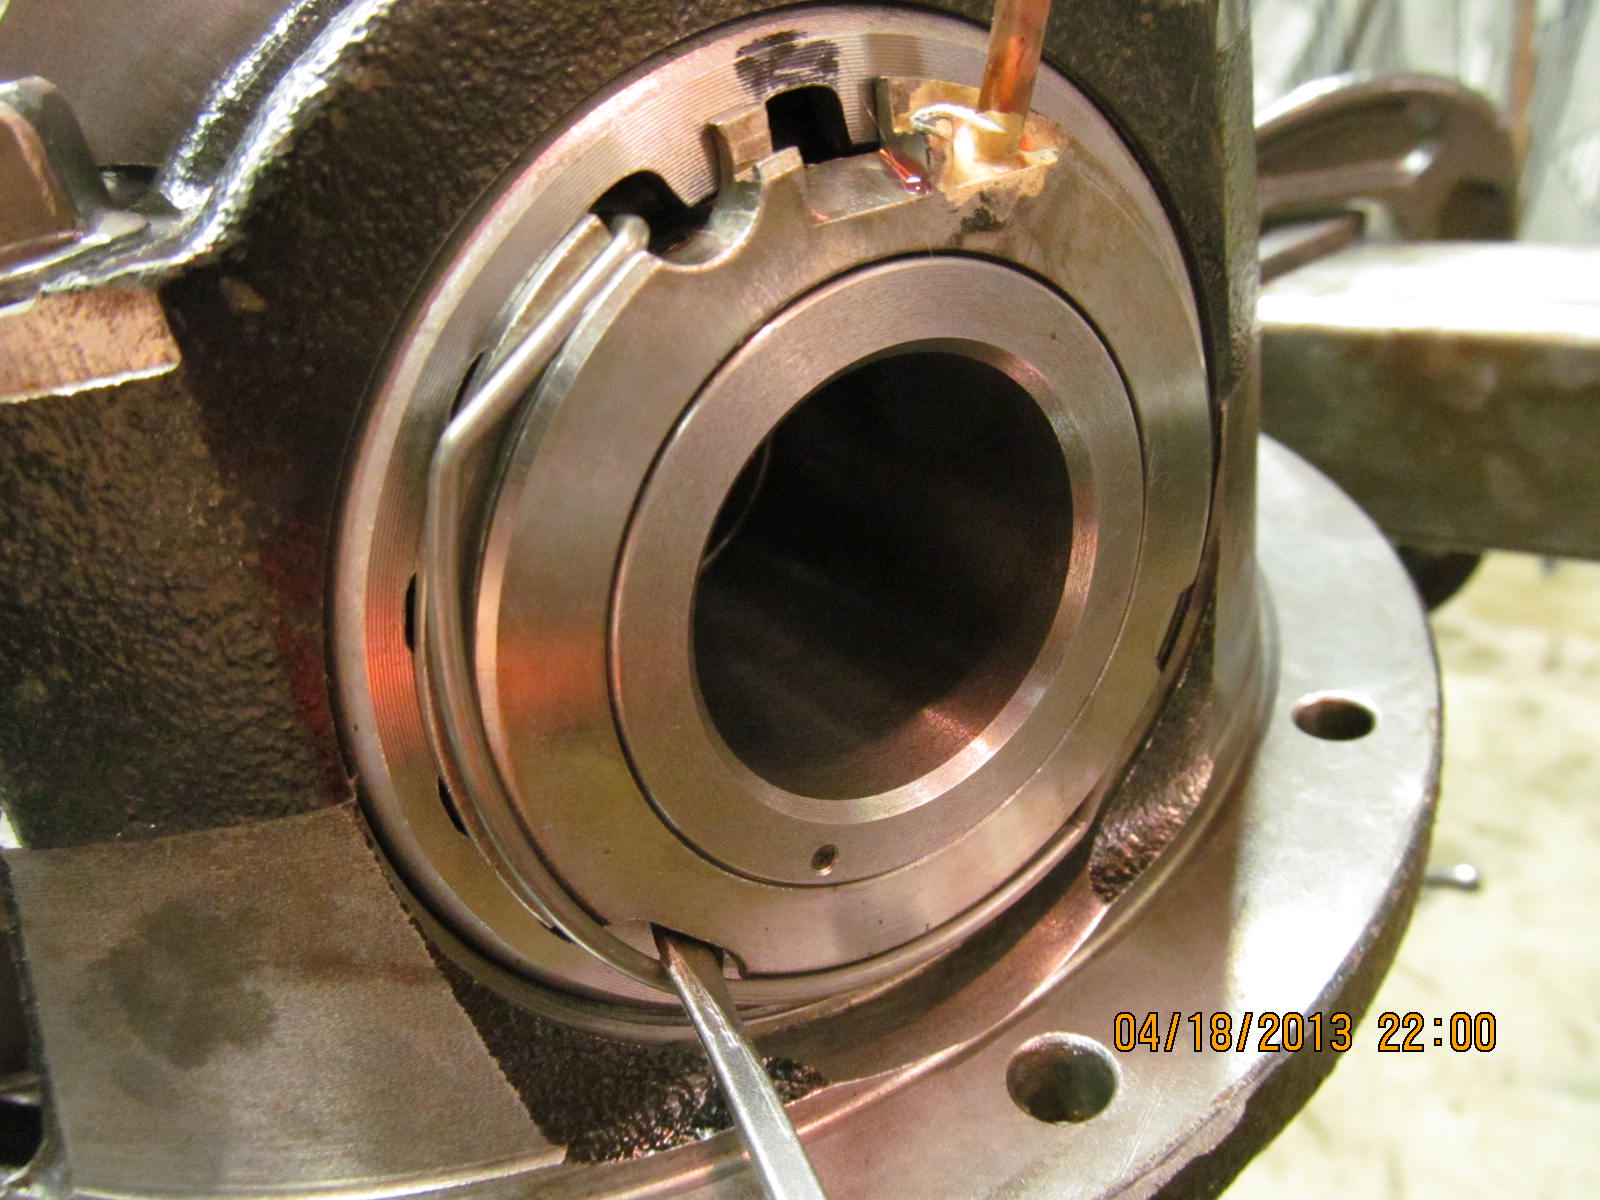
Seal assembly is jiggled in place and the spring loaded retainer clip is snapped in place.
|
|
|
|
|
All looks good.
|
|
|
|
|
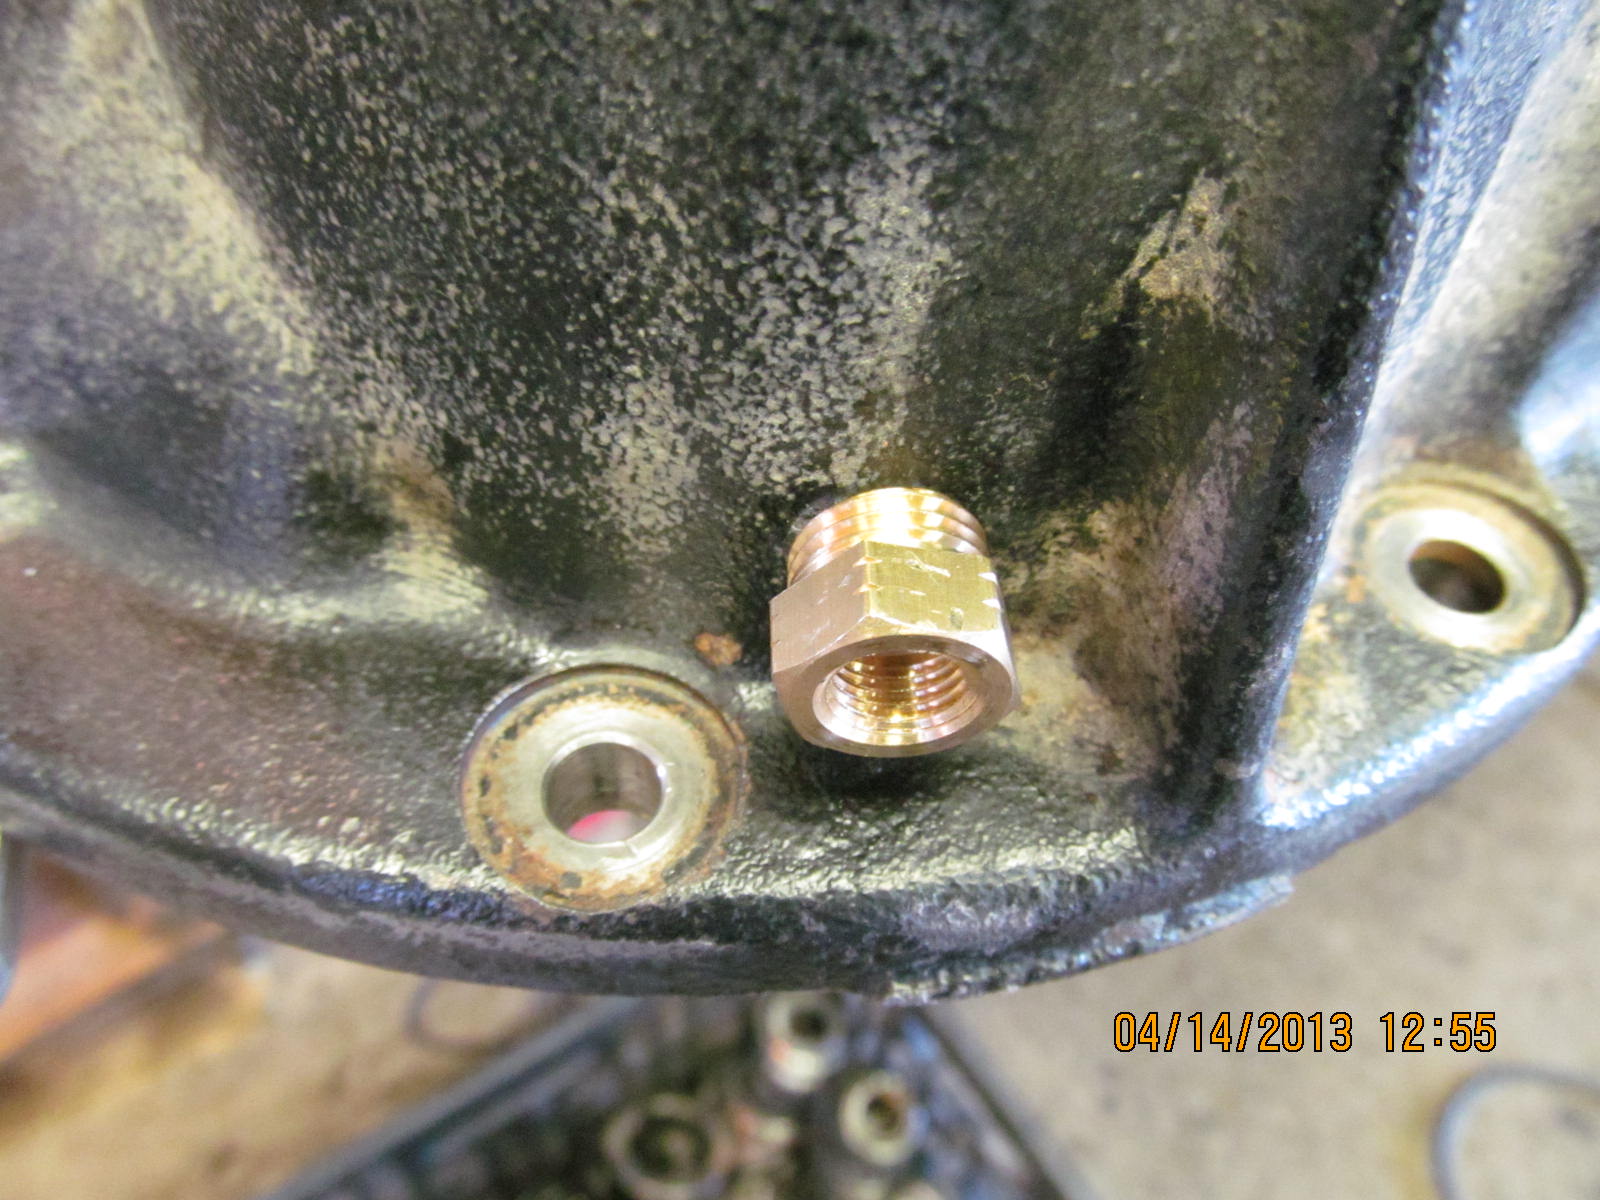
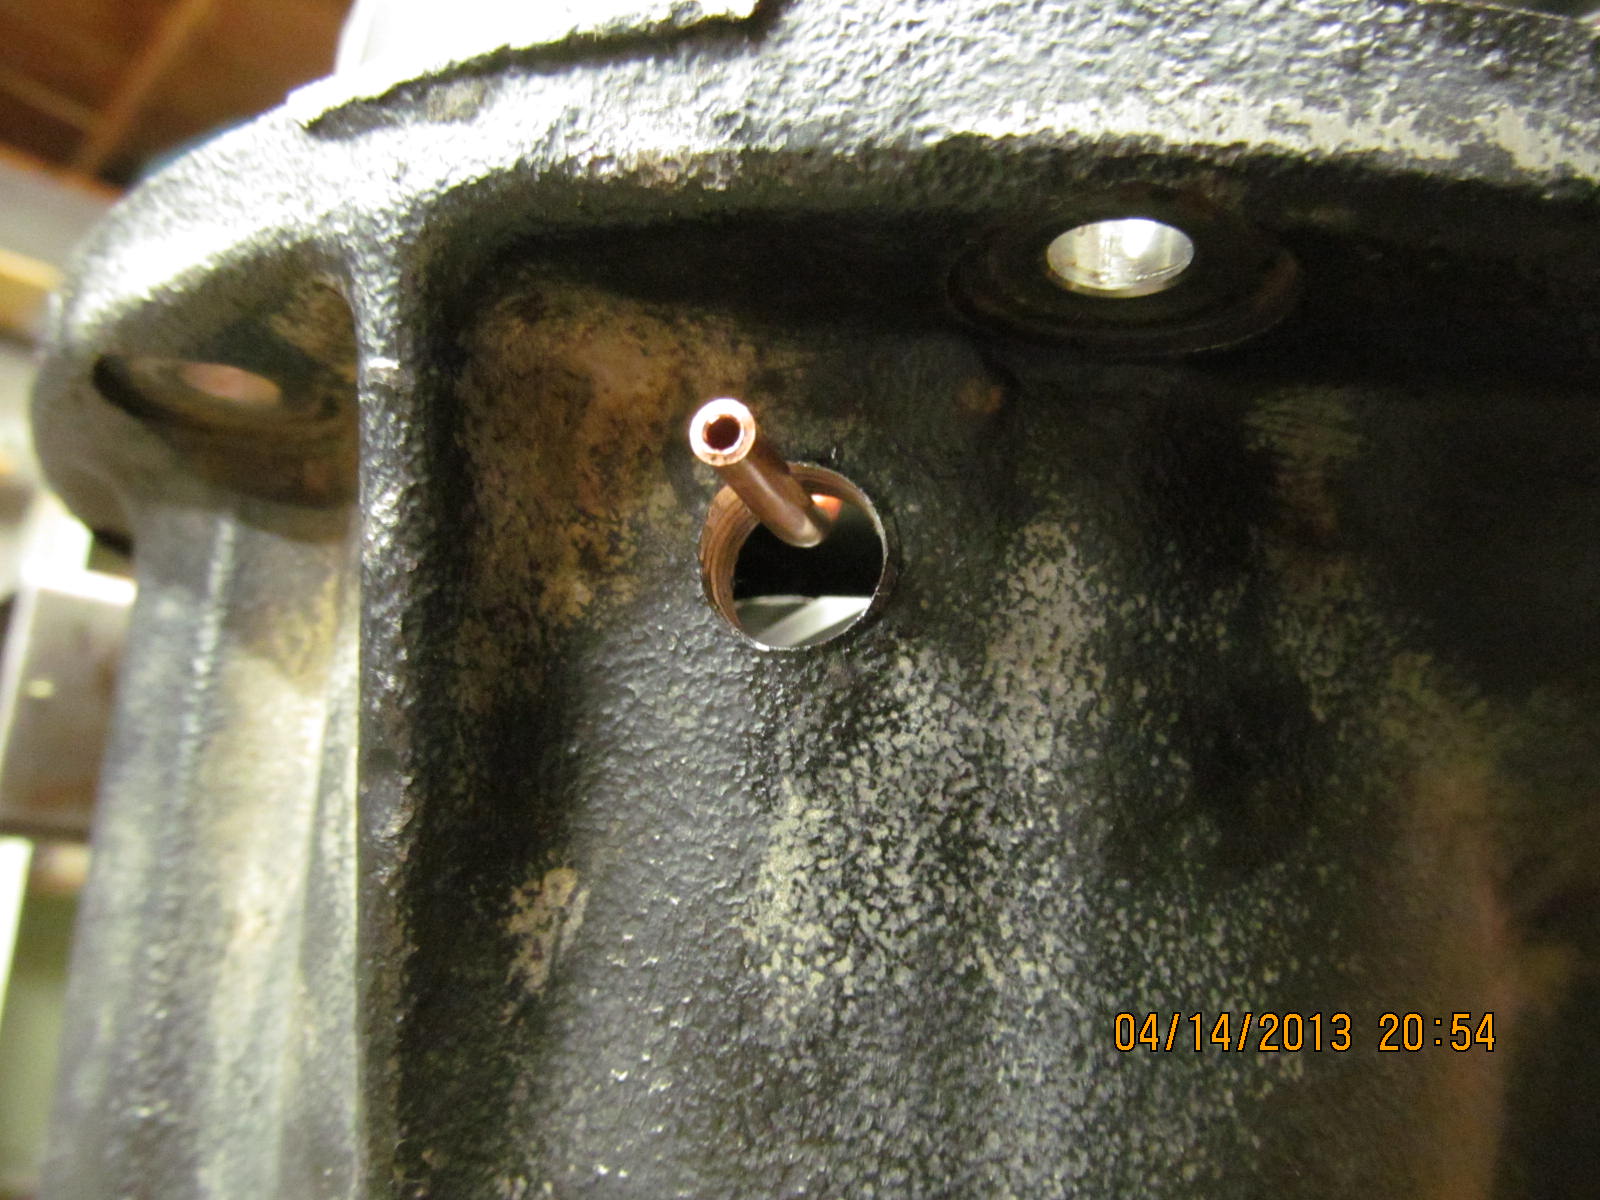
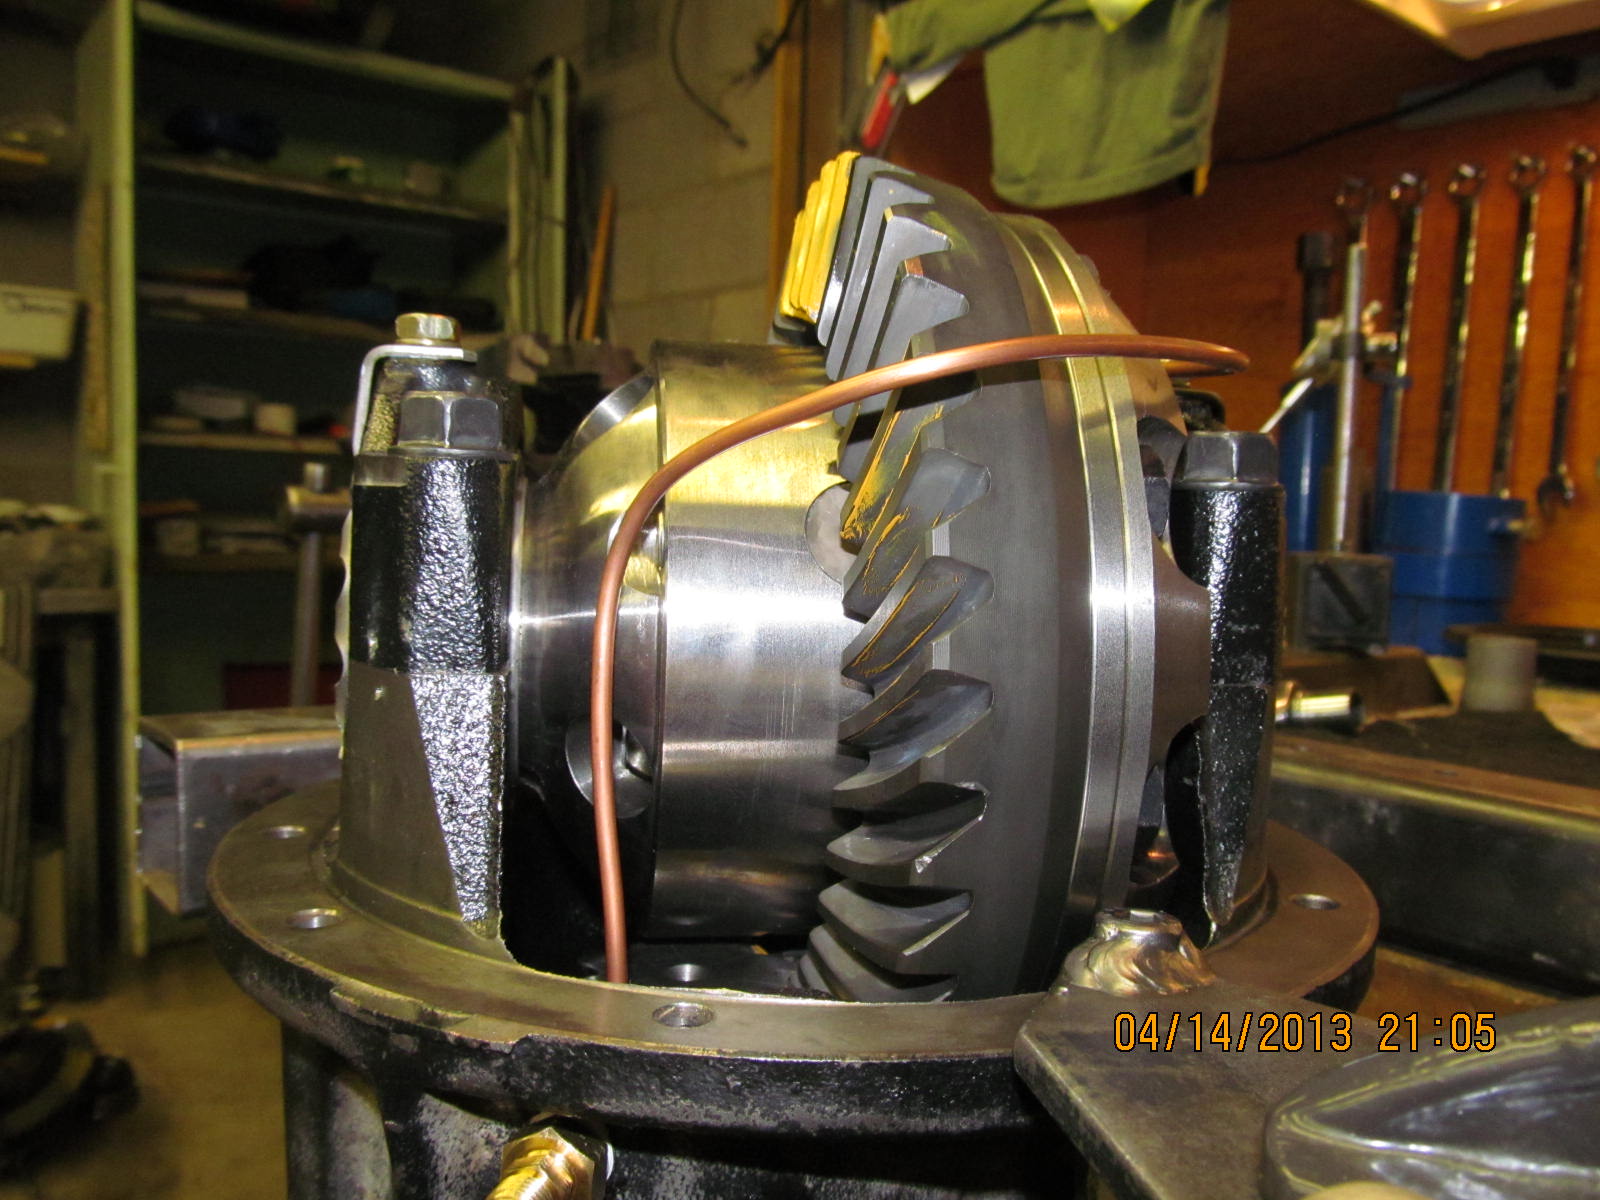
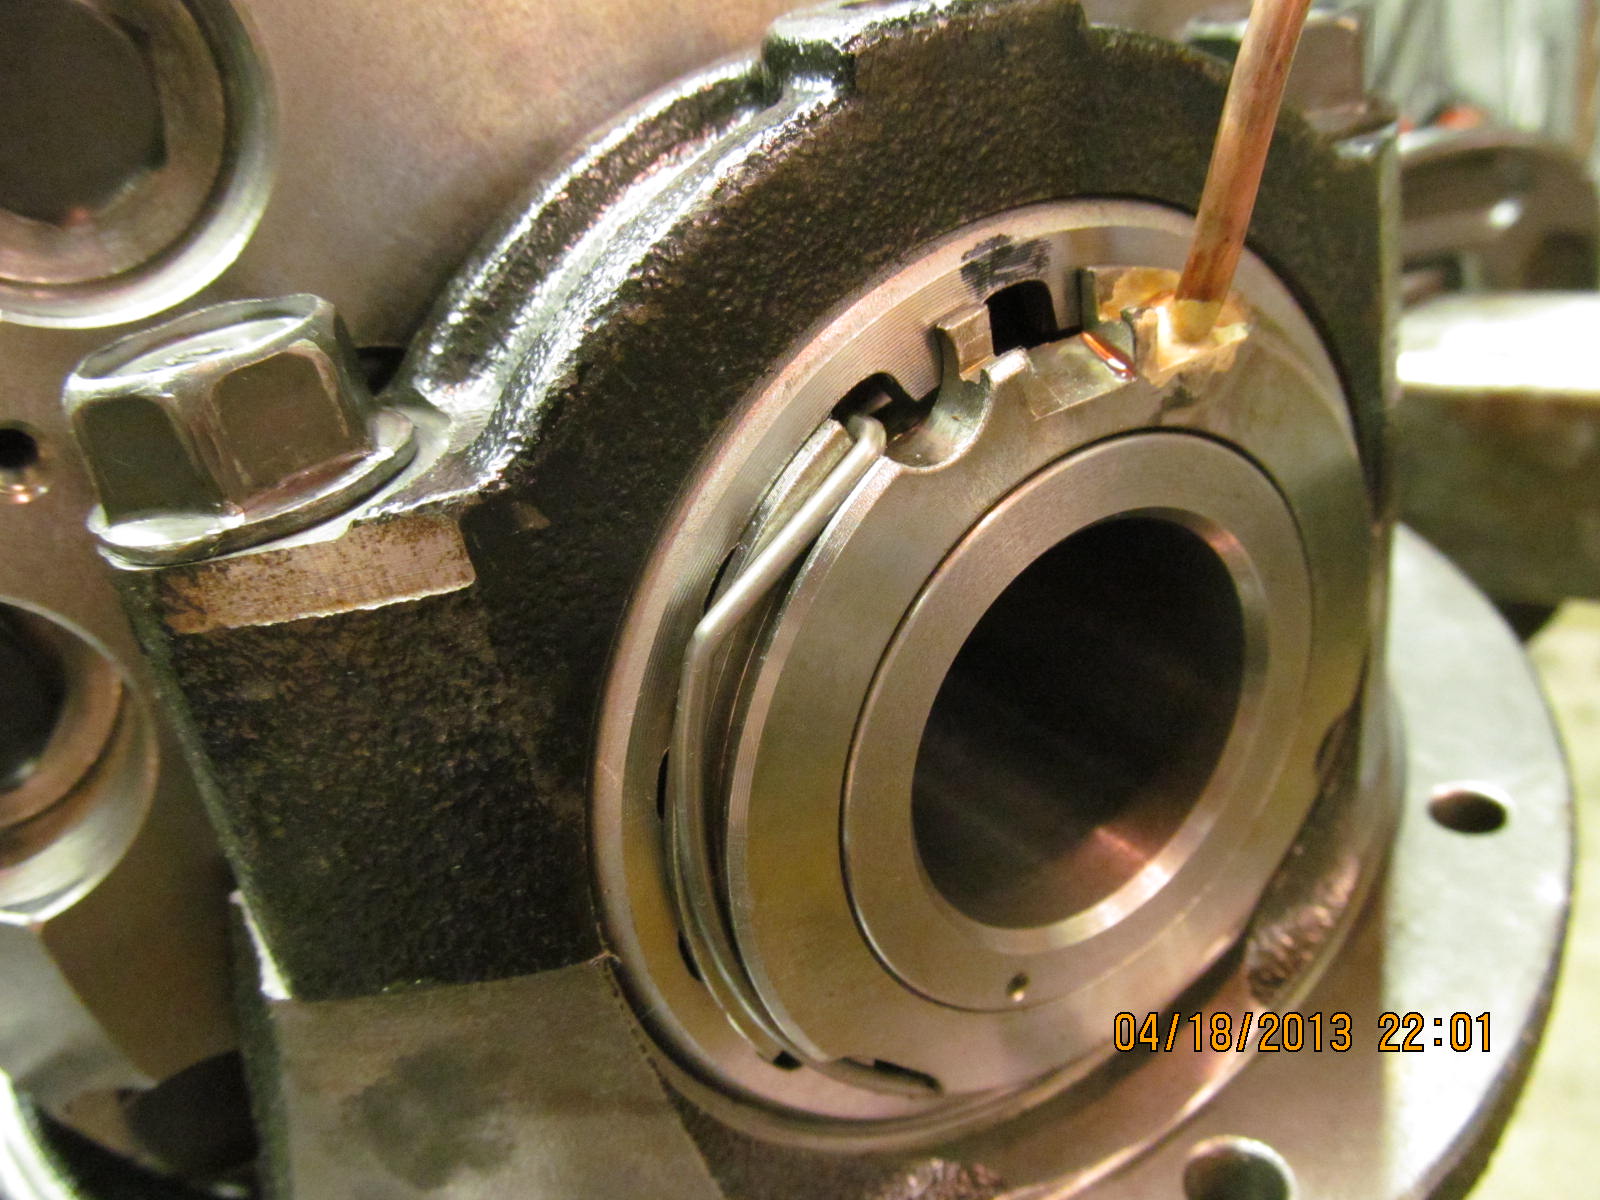
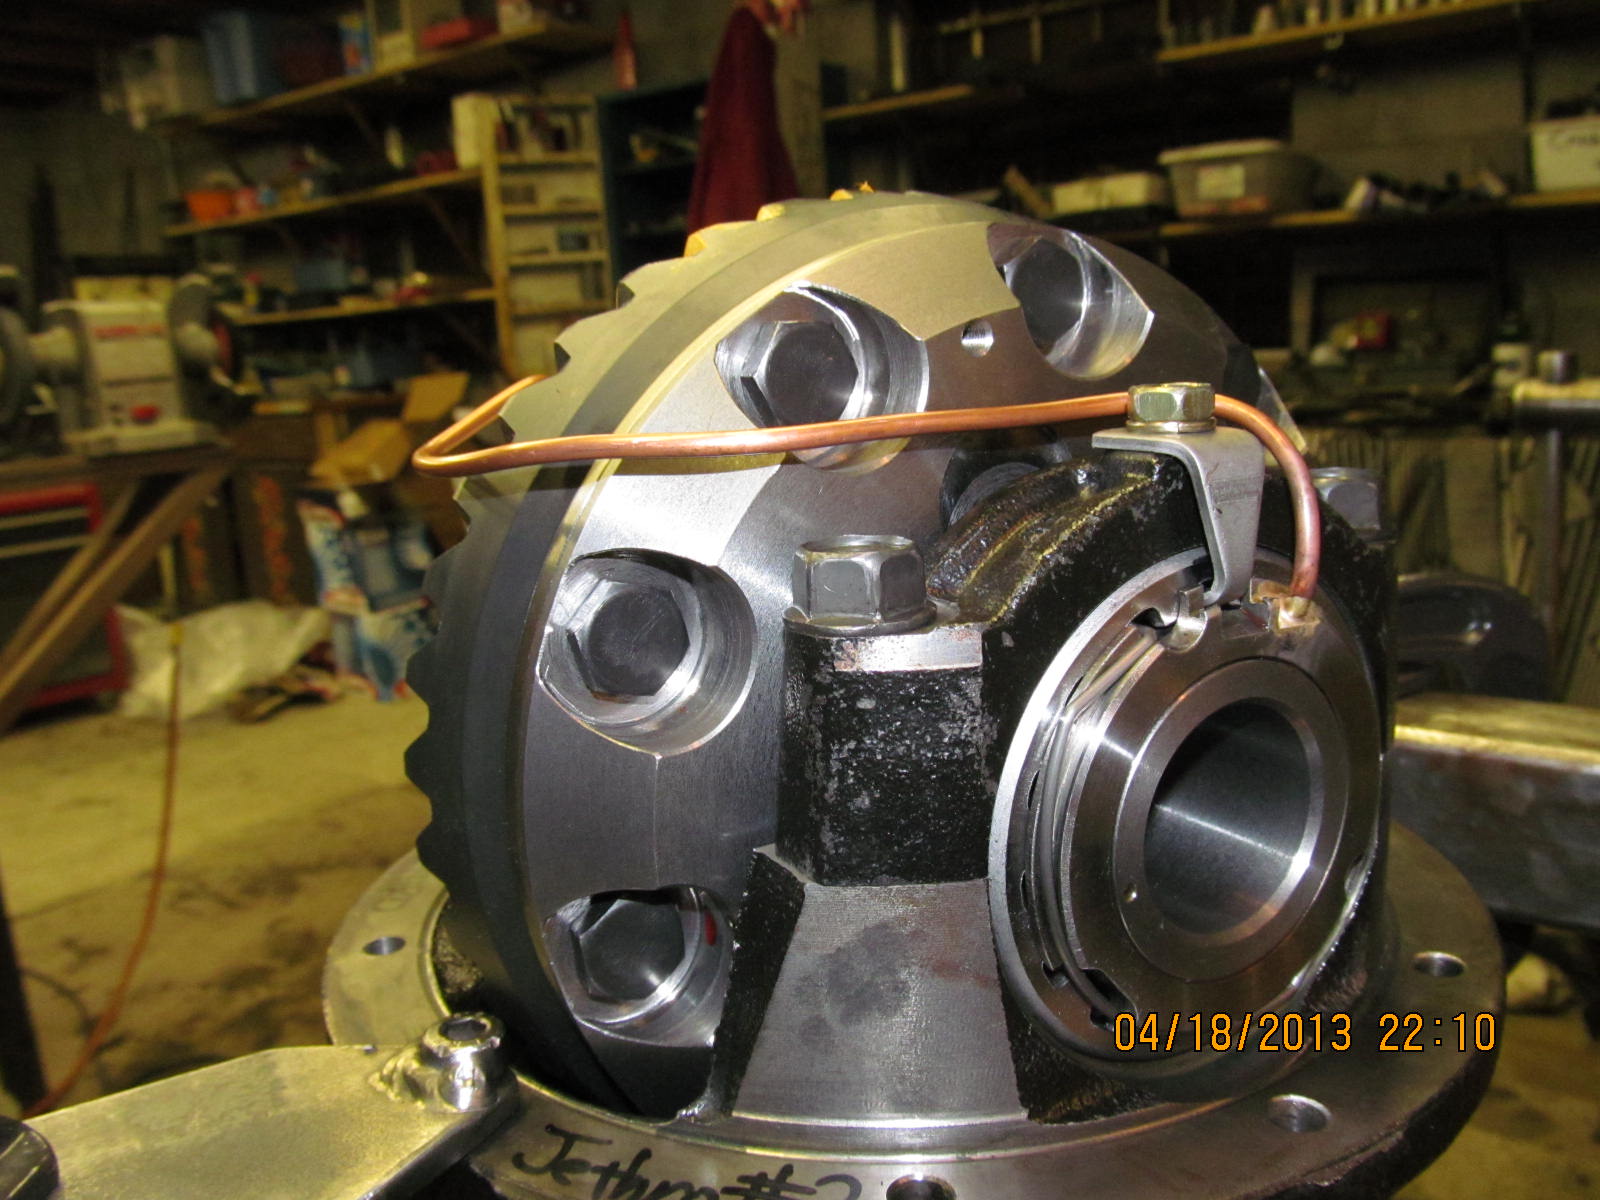
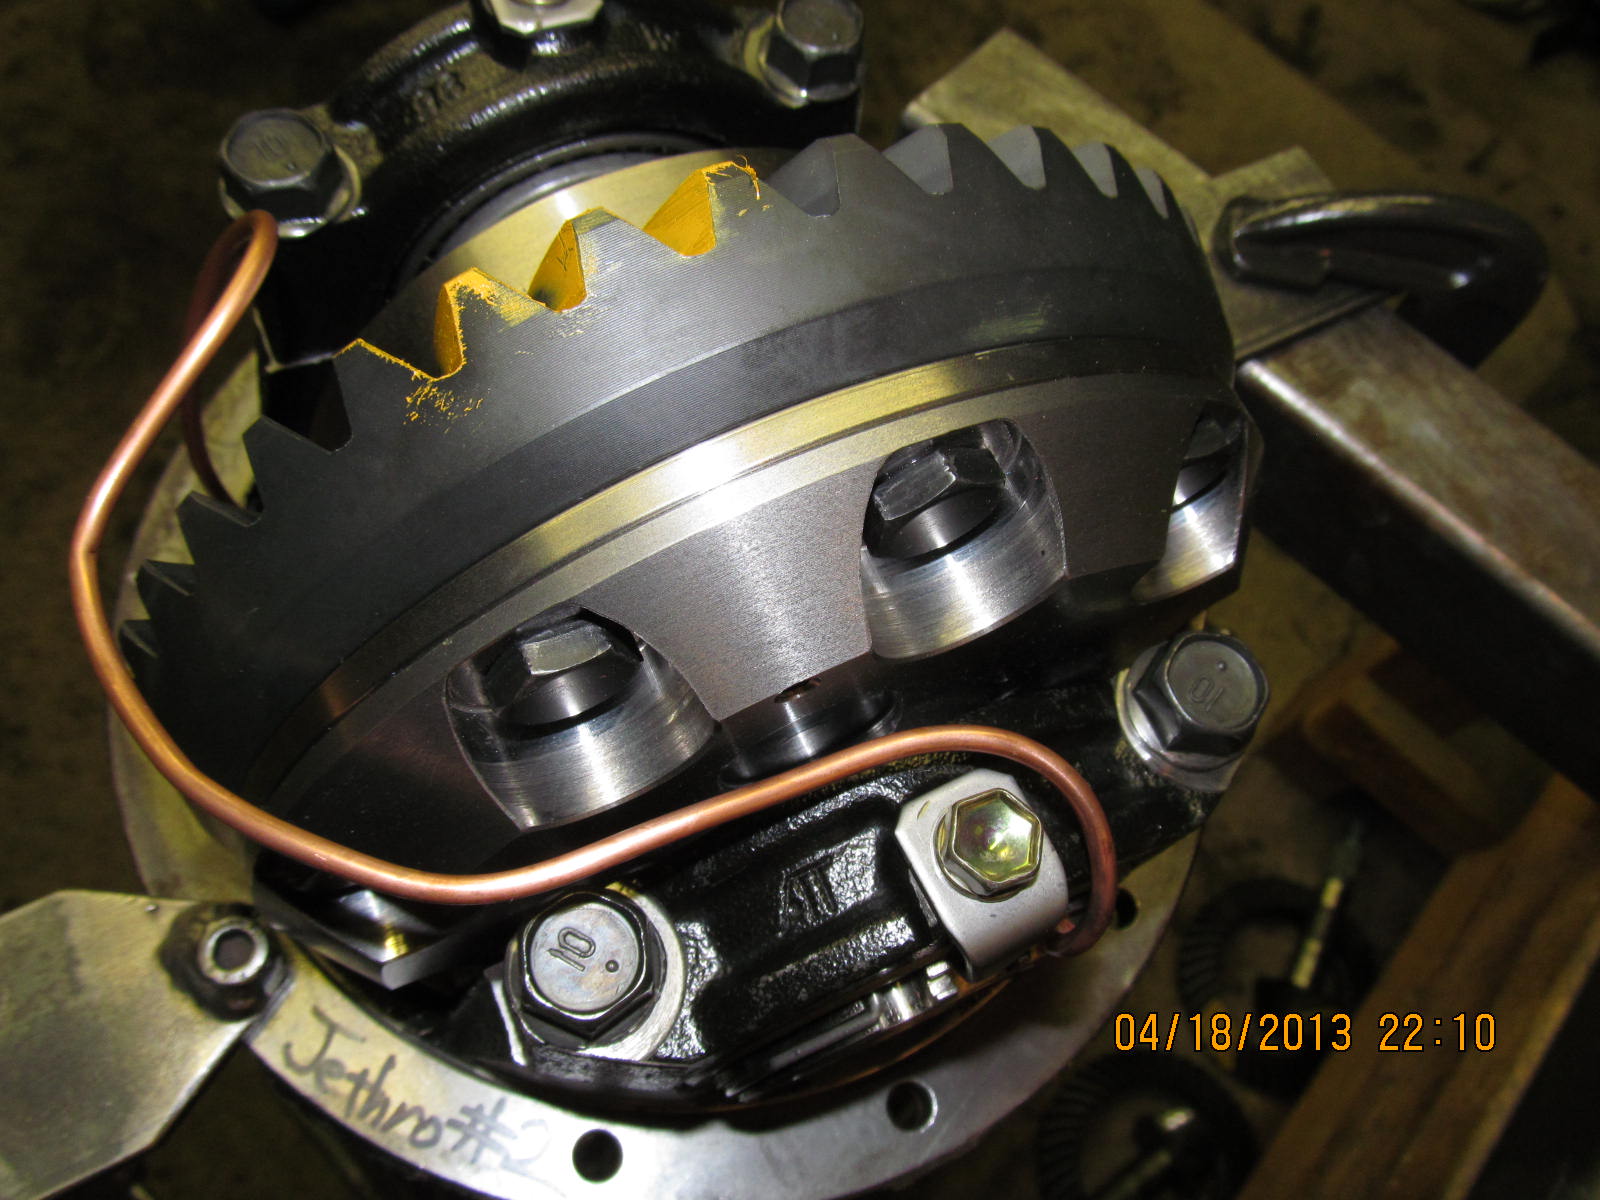
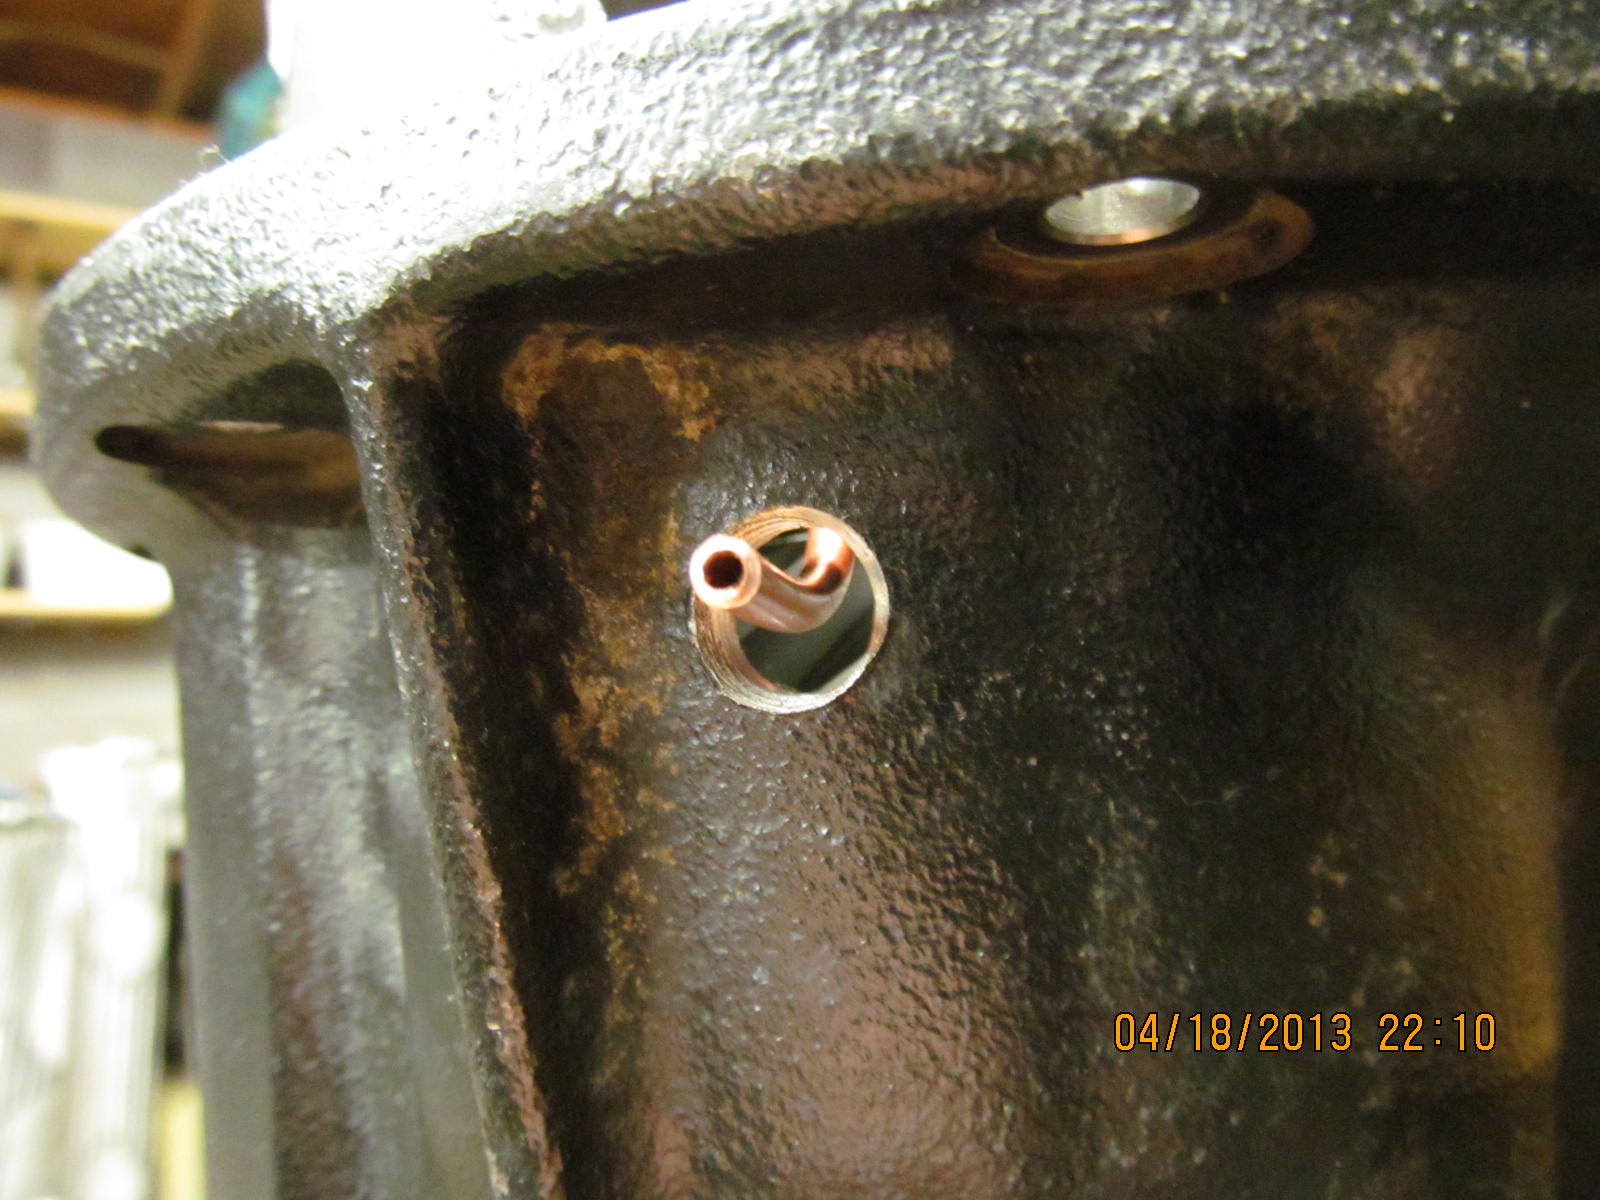
Pre-forming the soft copper line and cutting it to length.
|
|
|
|
|
This is a lot easier without the brass bulkhead in place.
|
|
|
|
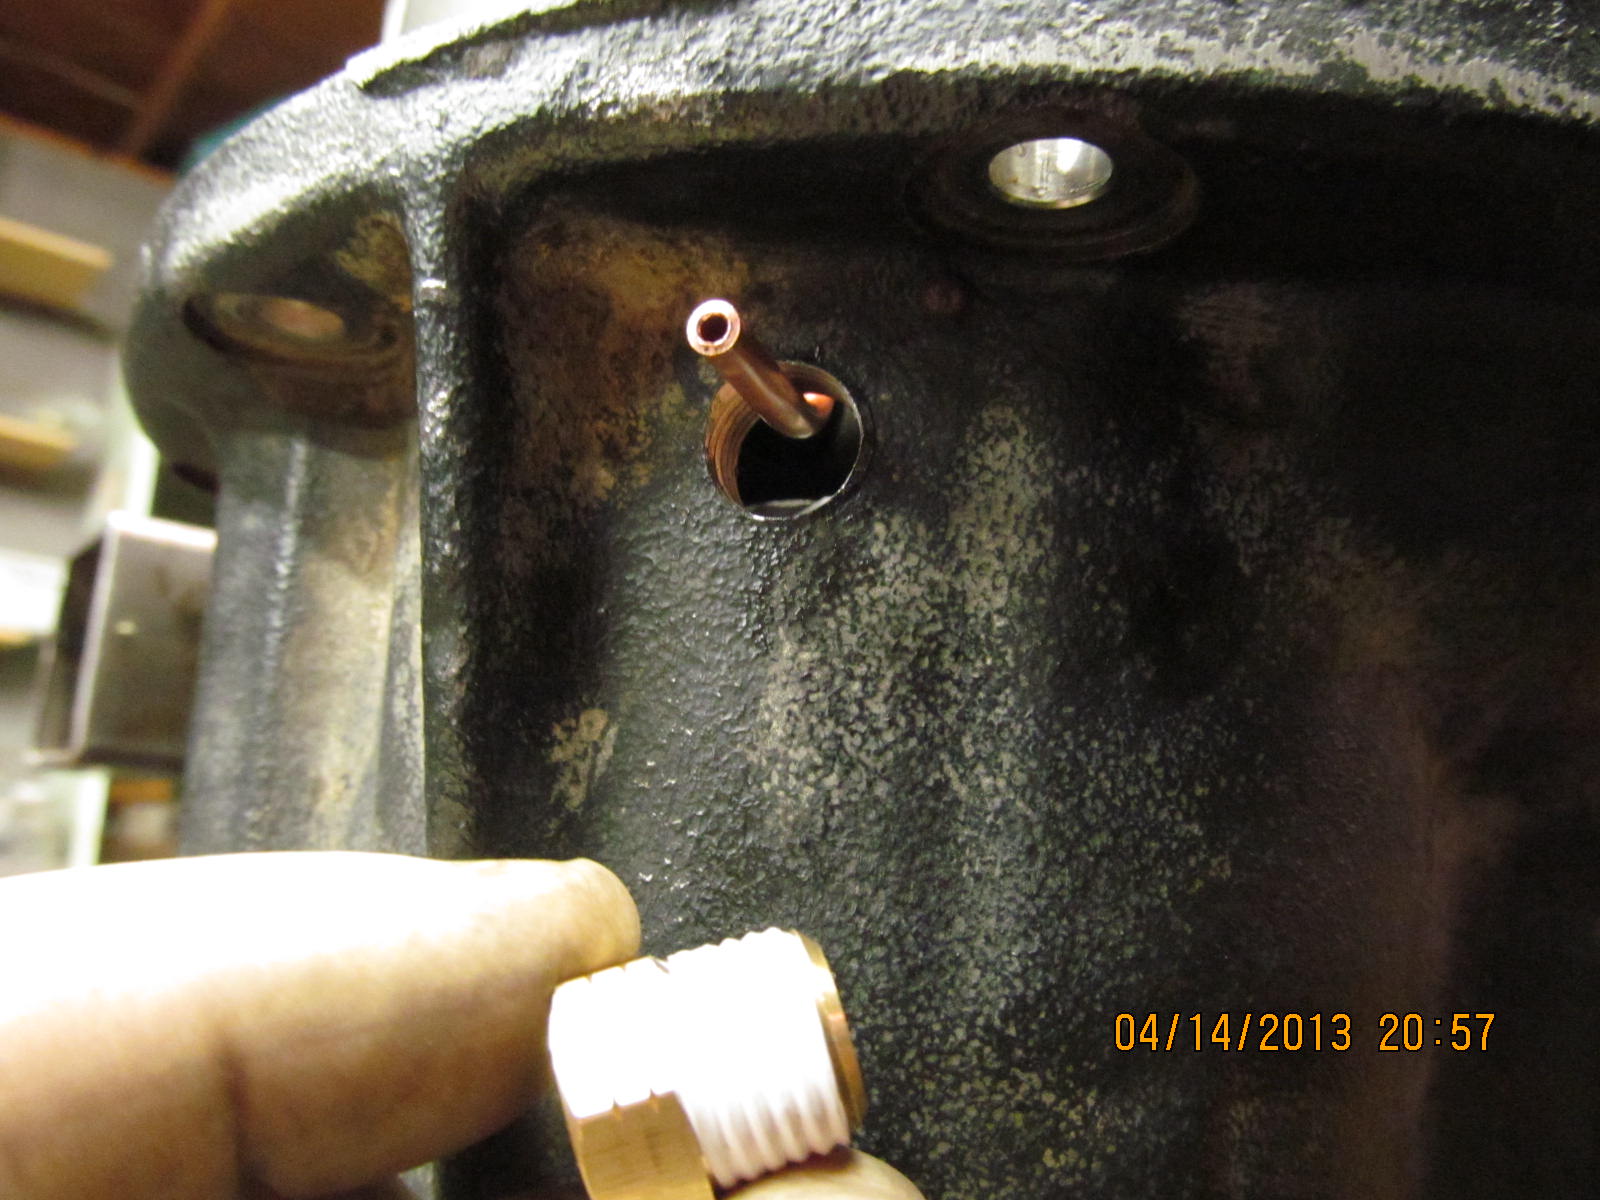
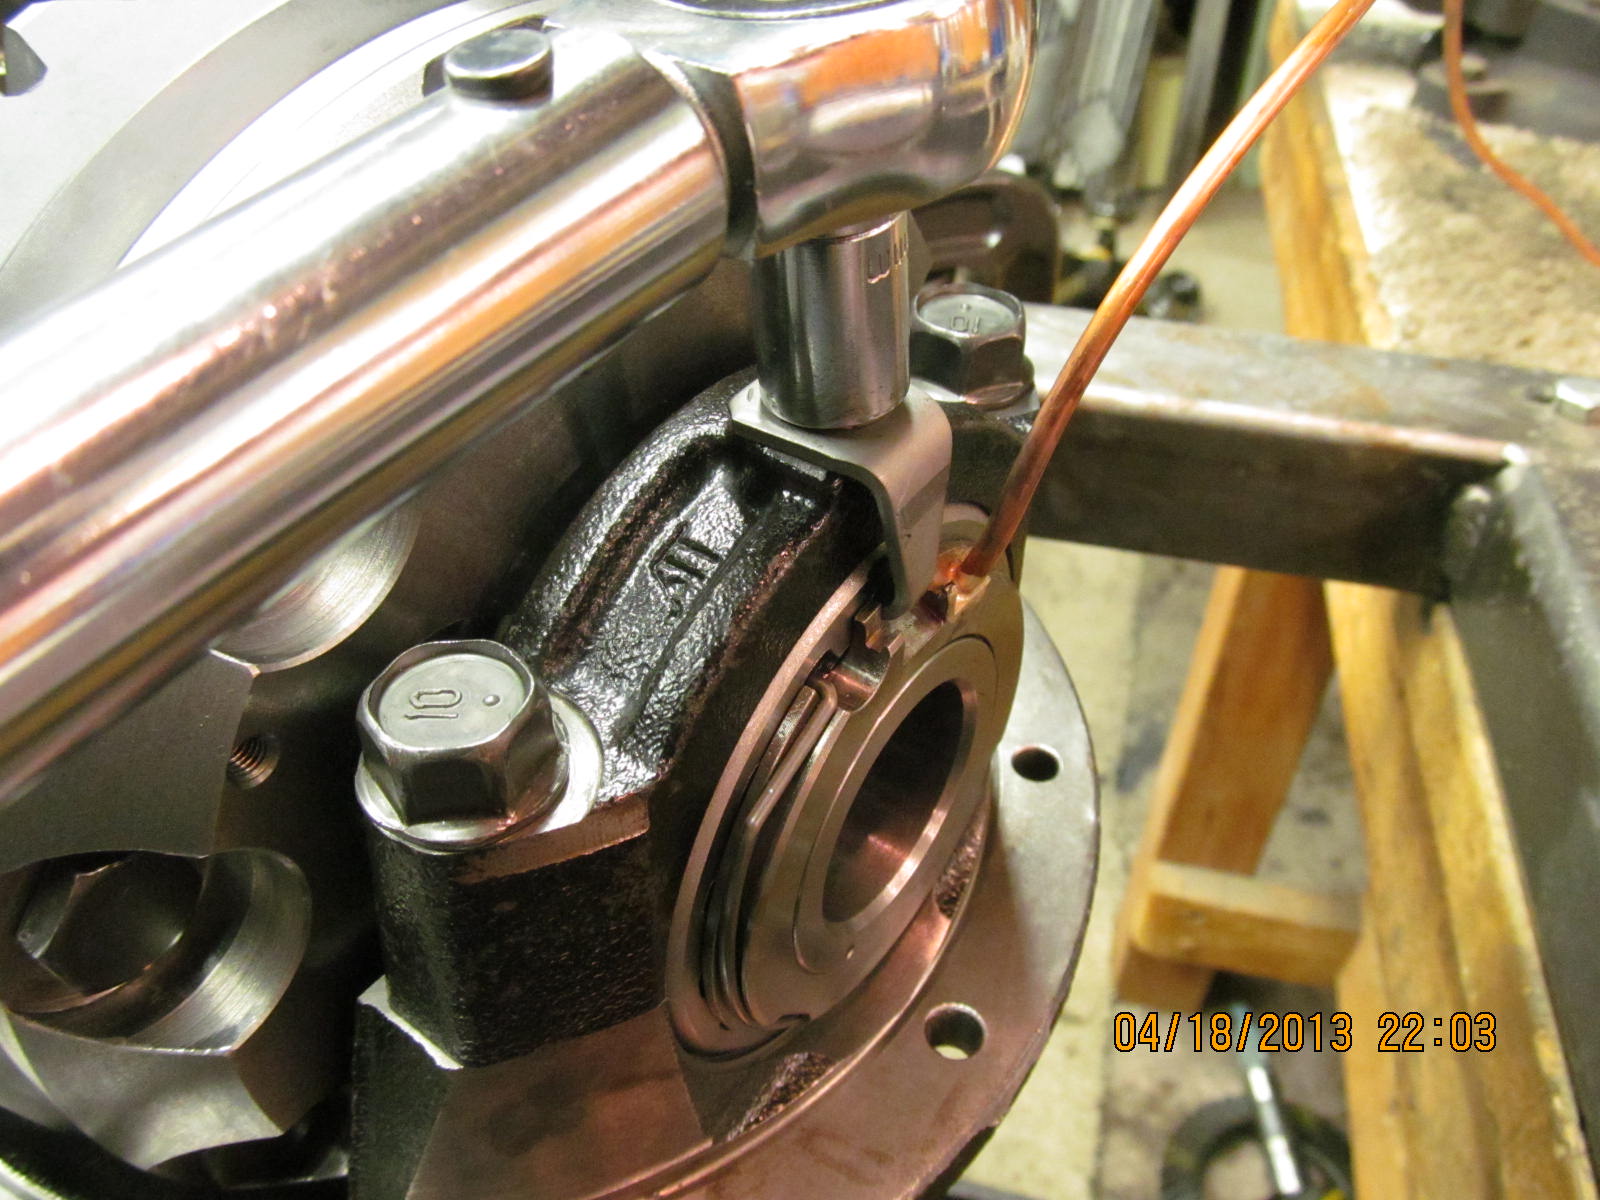
Tweak the copper til it feels stress free in the hole and wrap 3 turns of teflon
around the brass. Tighten it down with a 9/16" wrench and this part is almost done.
|
|
|
|
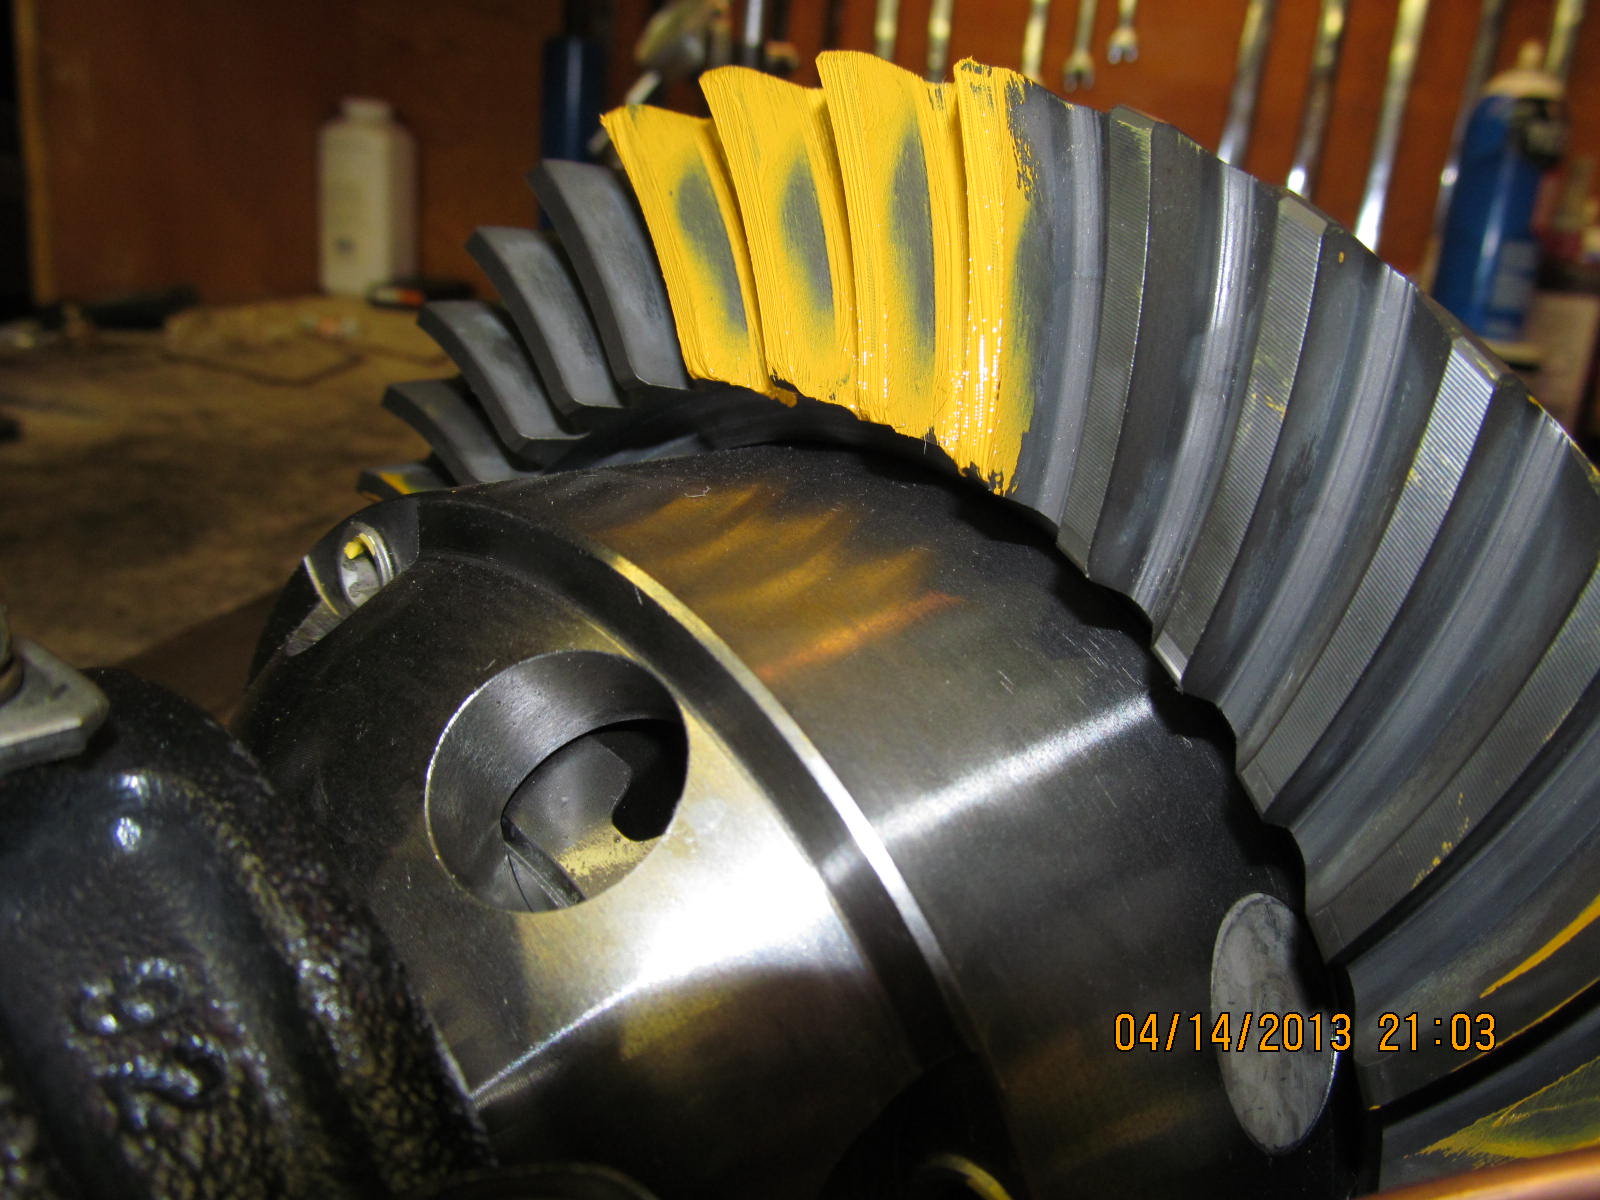
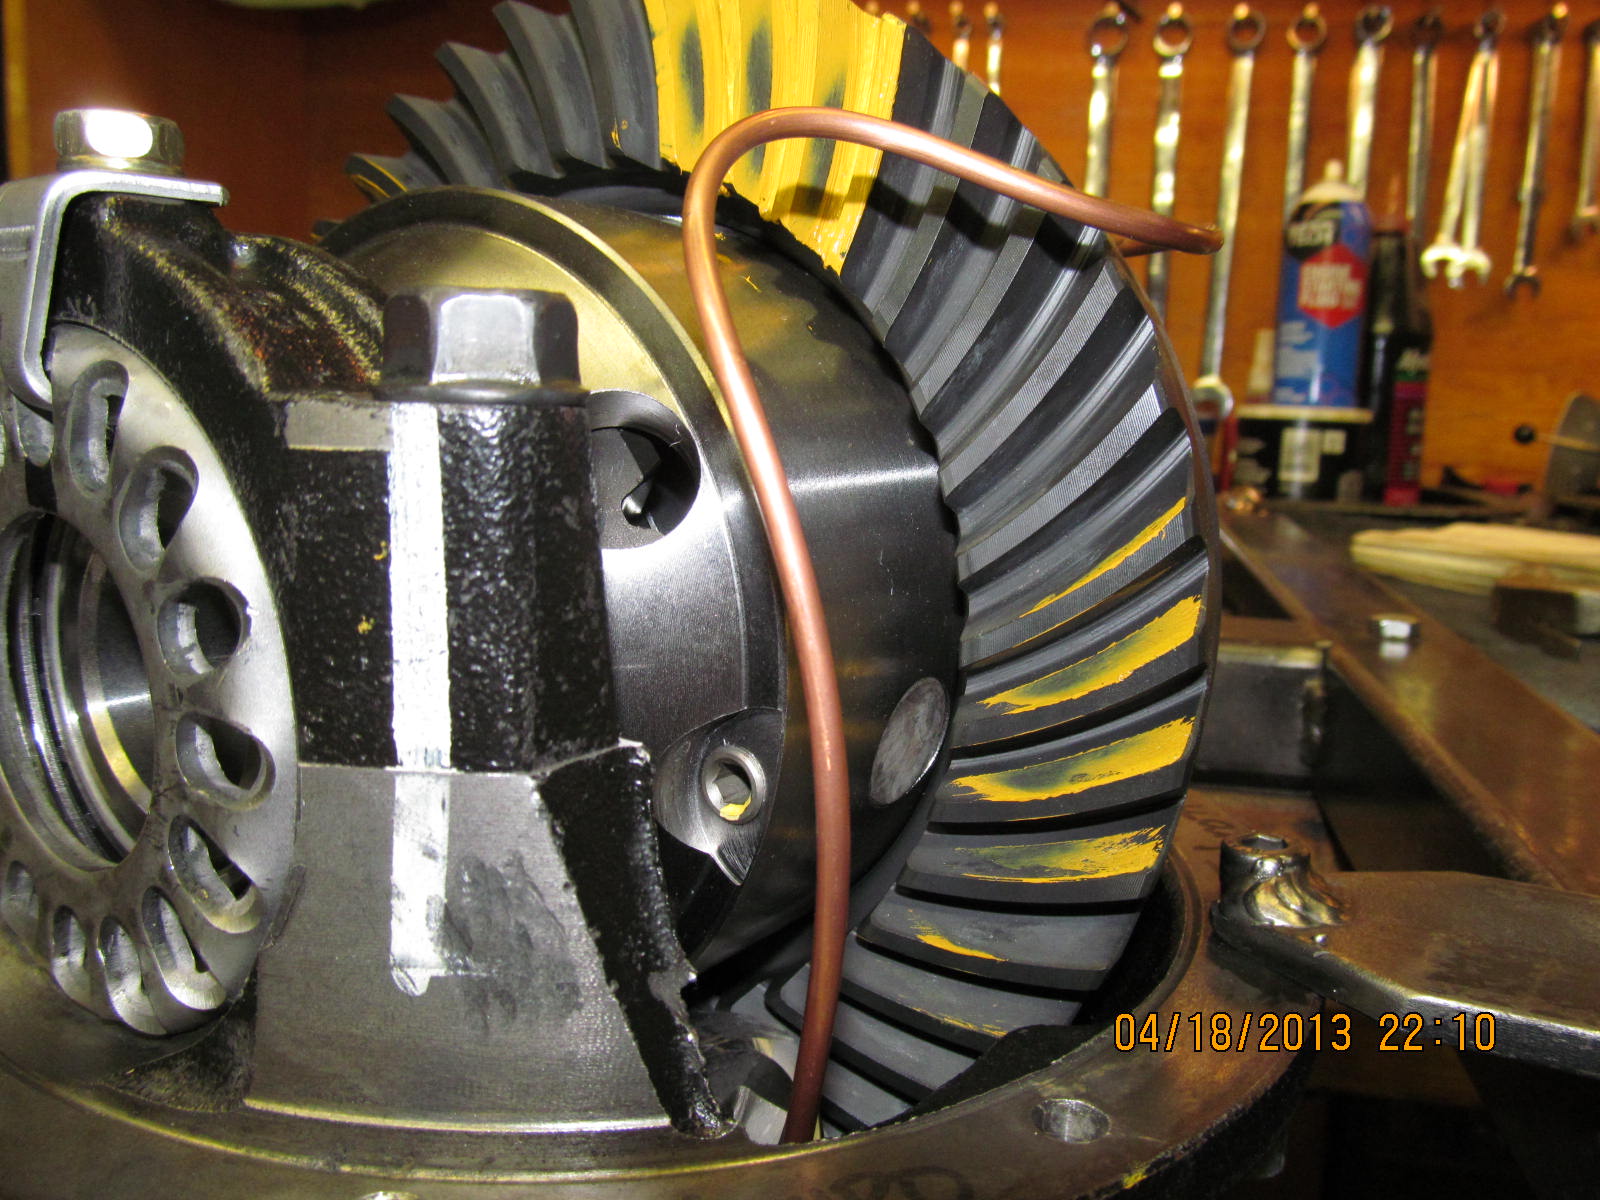
One more pattern confirmation...if everything was done right then there is no
reason for it to change...all looks good here.
|
|
|
|
|
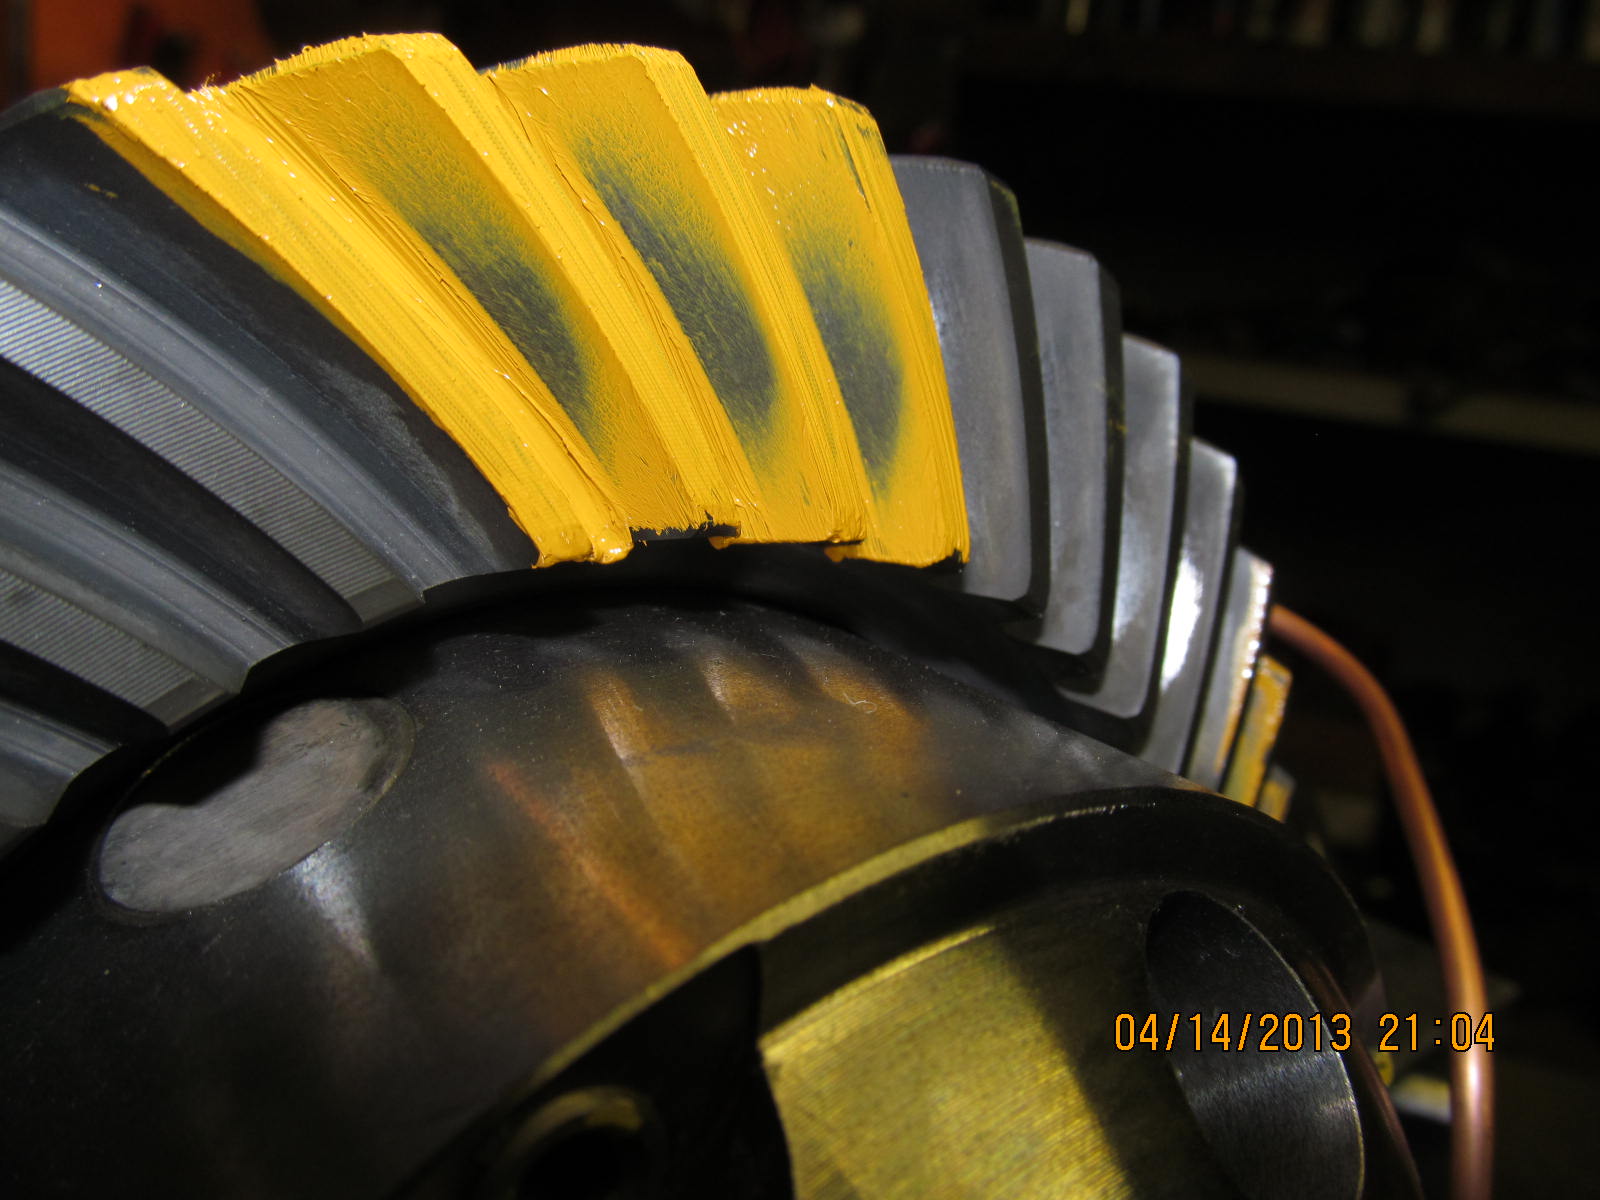
Coast...good.
|
|
|
|
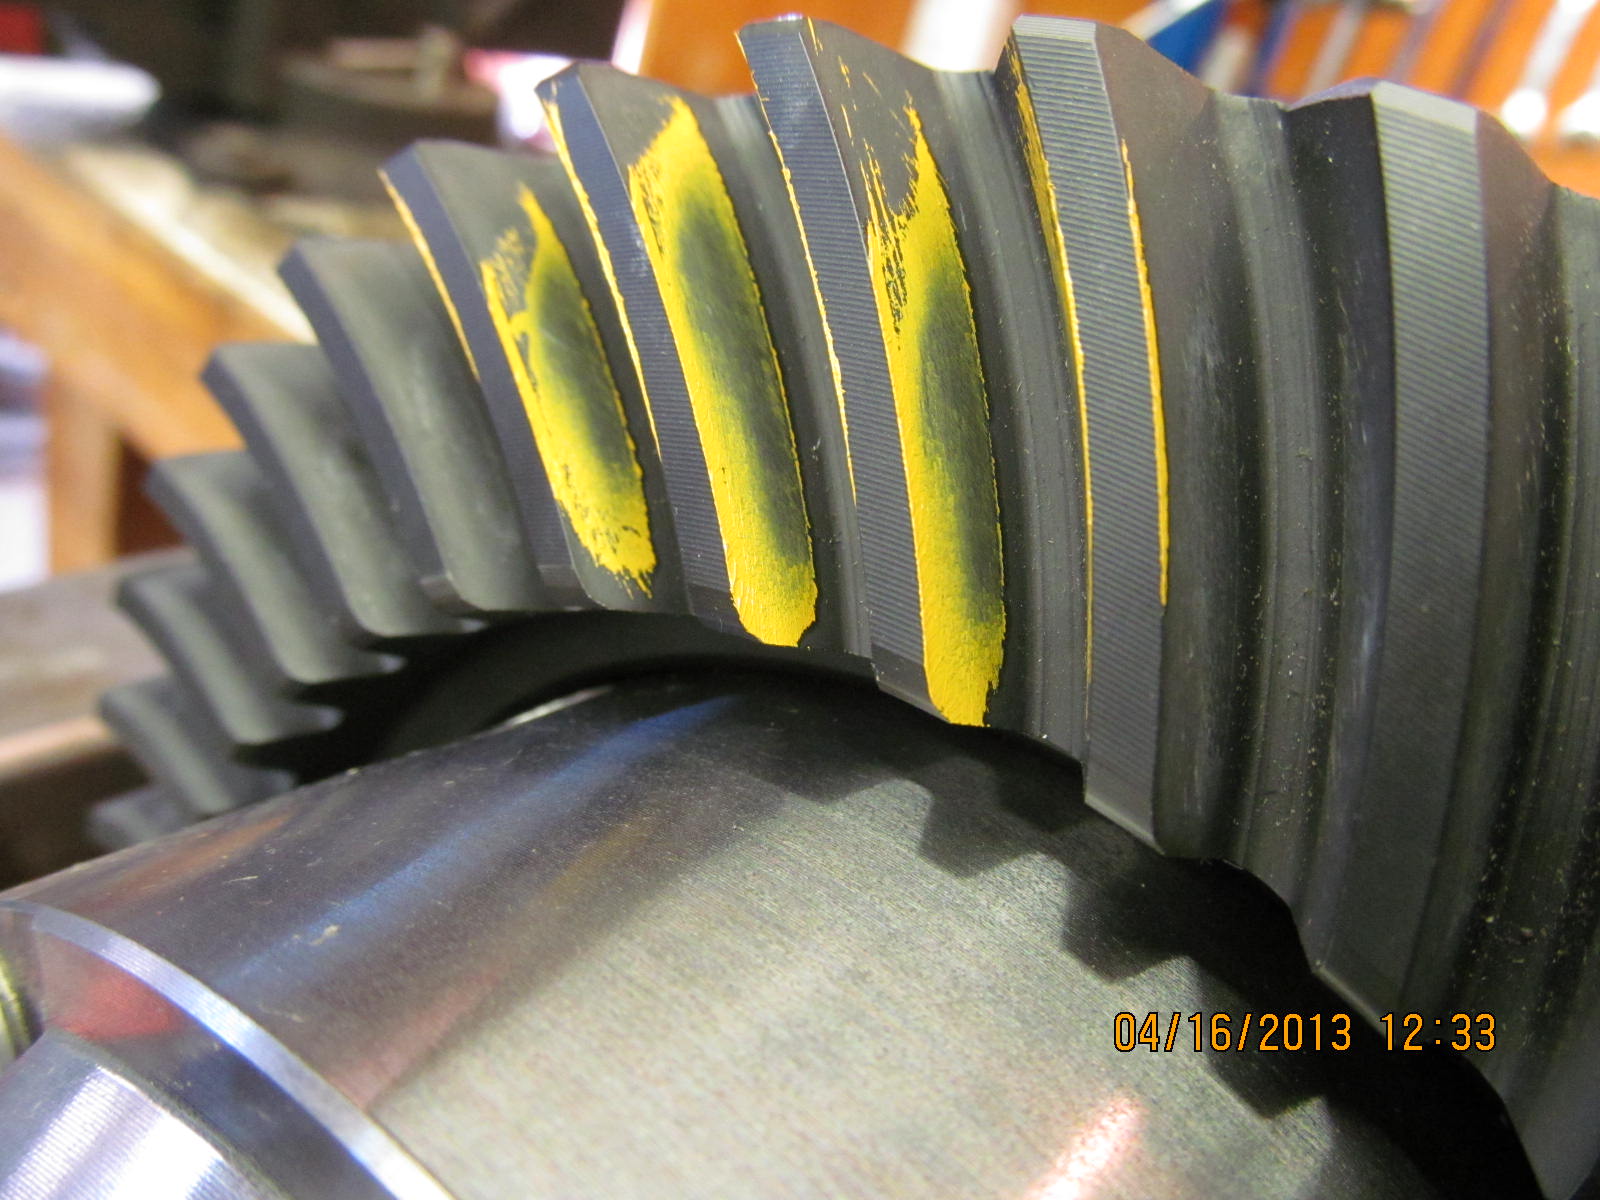
Pinion drive side...nice. Comet looks like it has moved away from the deep root
and centered itself. Very good.
|
|
|
|
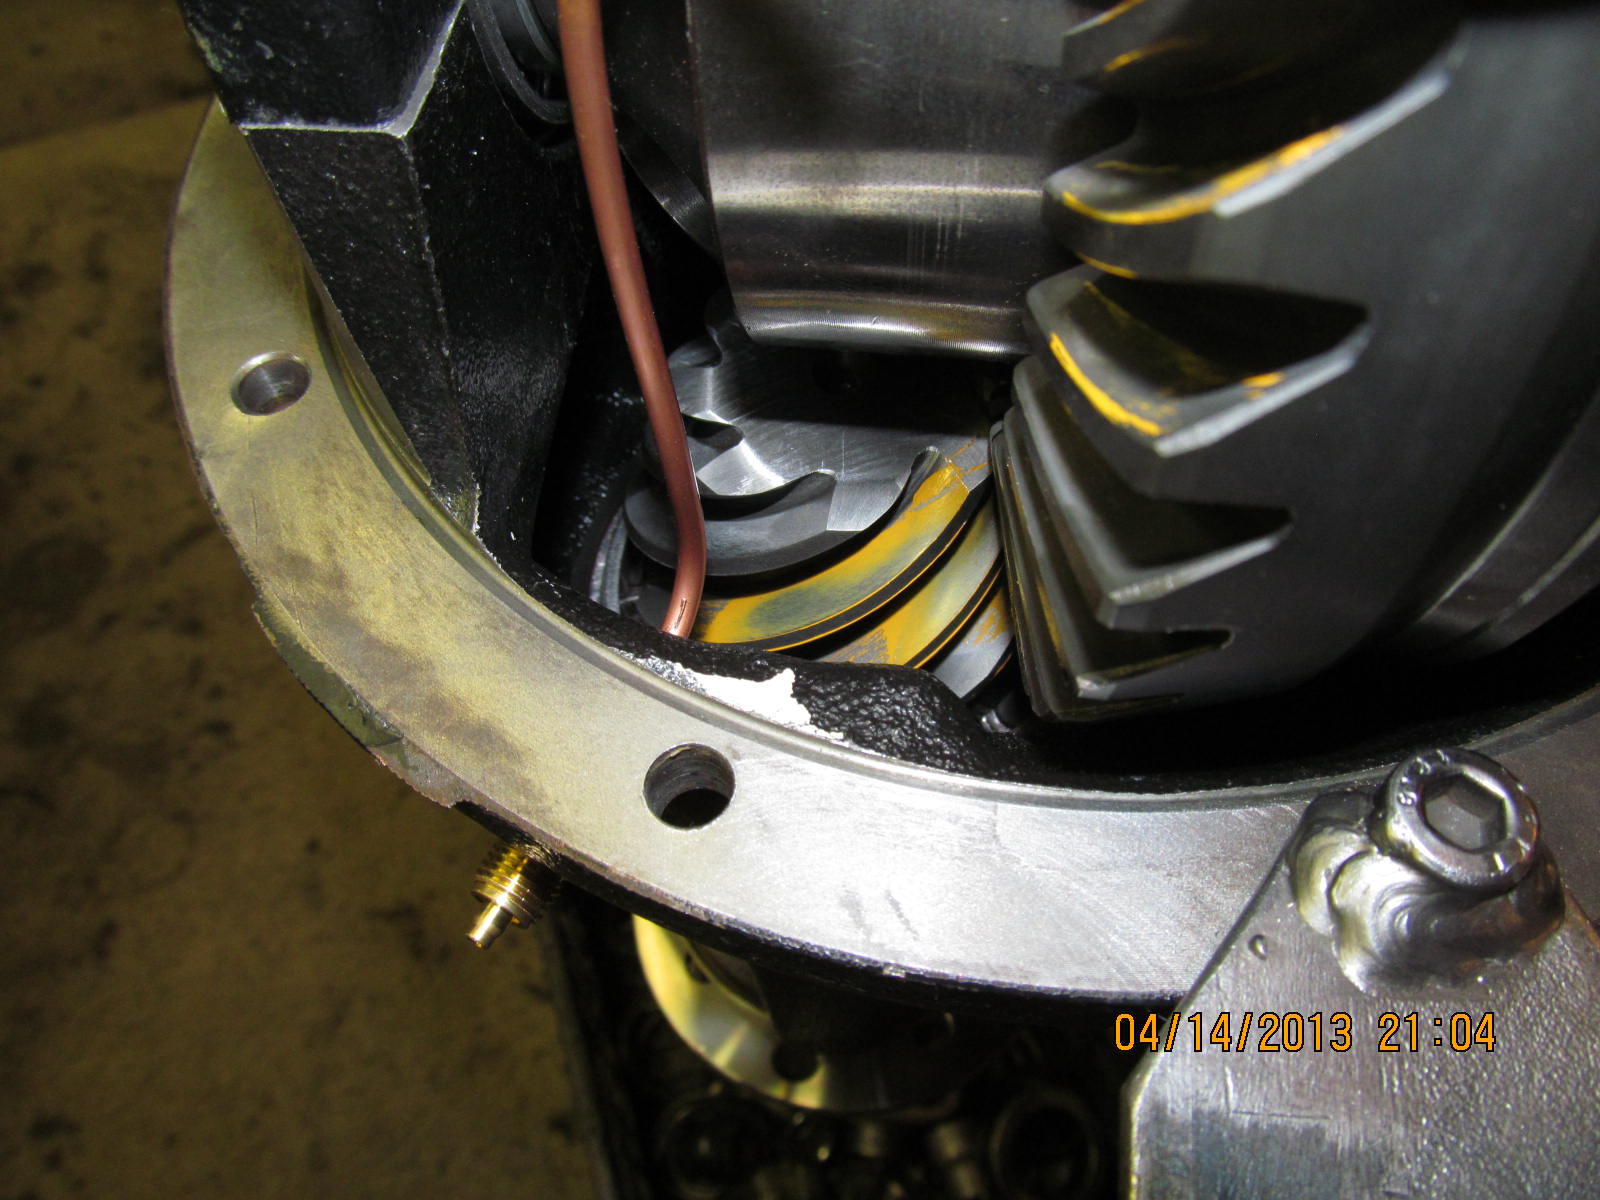
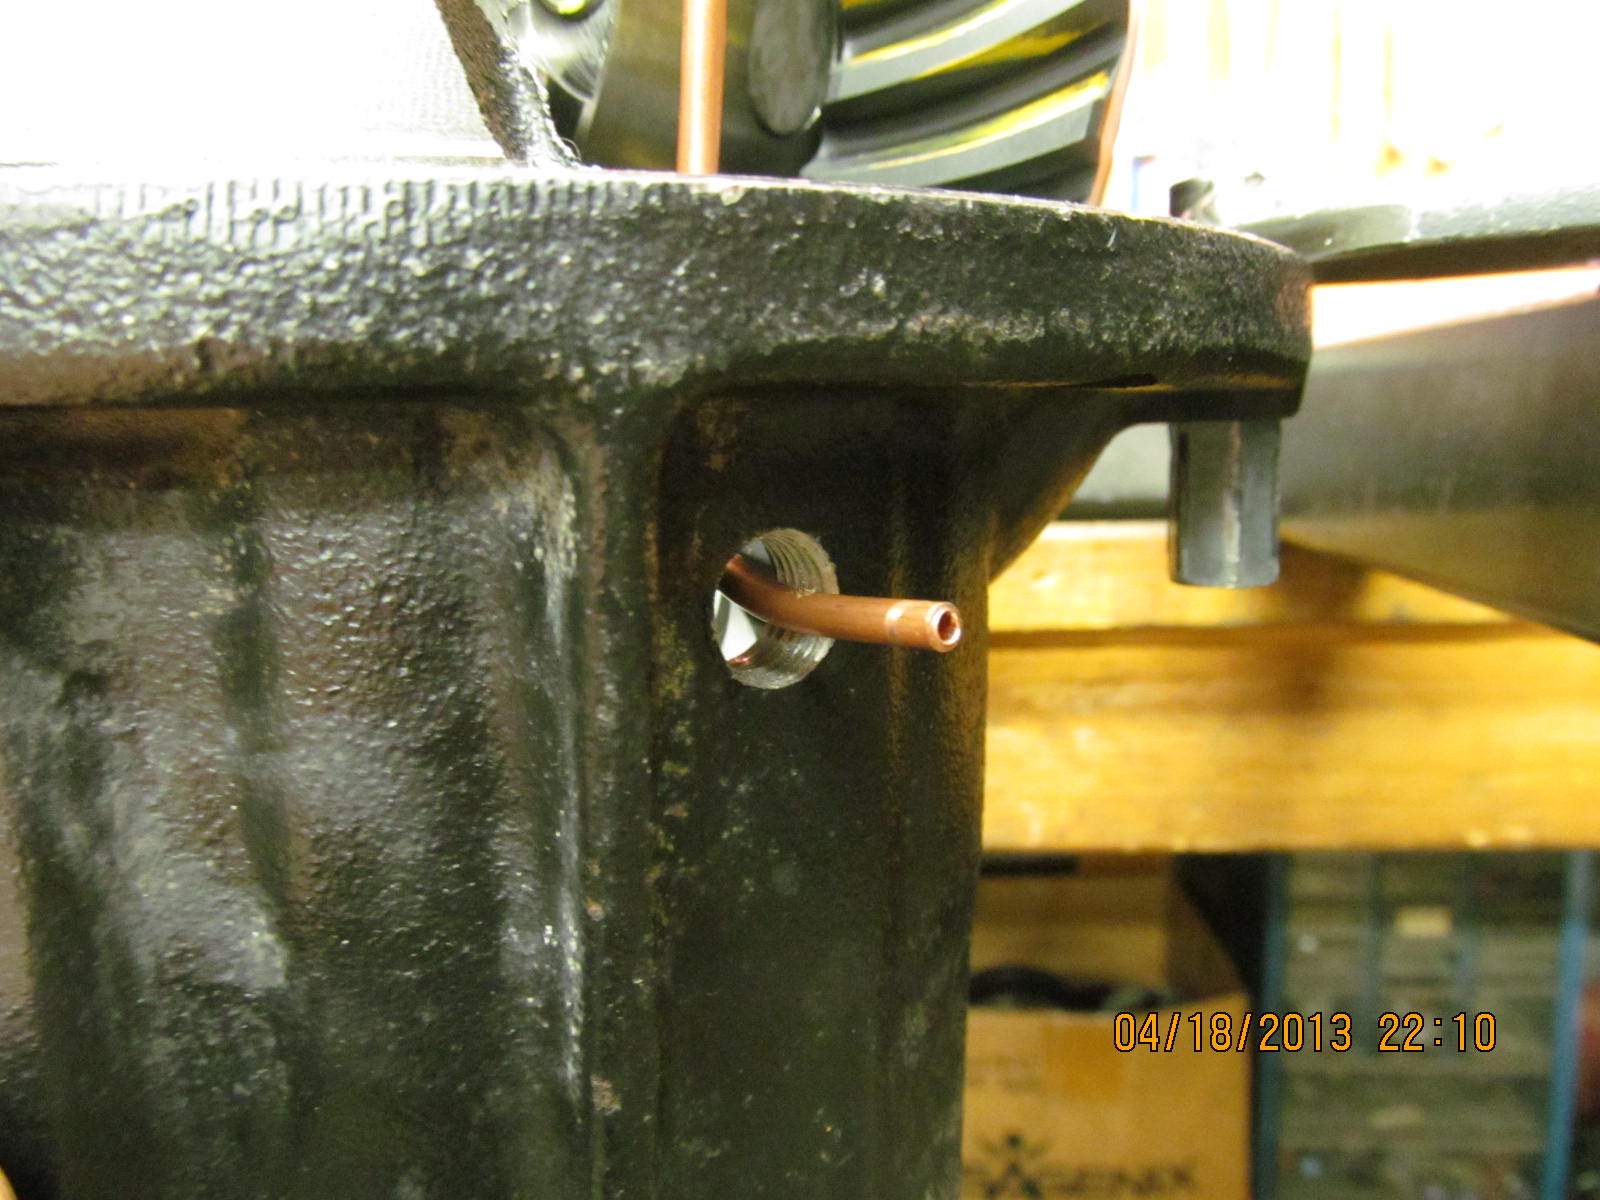
This is what a properly finger formed line looks like. Extra caution must be
observed when slamming the 3rd into the axle housing hole....use care...use
caution...and slowly ease it in trying to avoid the copper smasherooskie.
|
|
|
|
|
..................
|
|
|
|
|
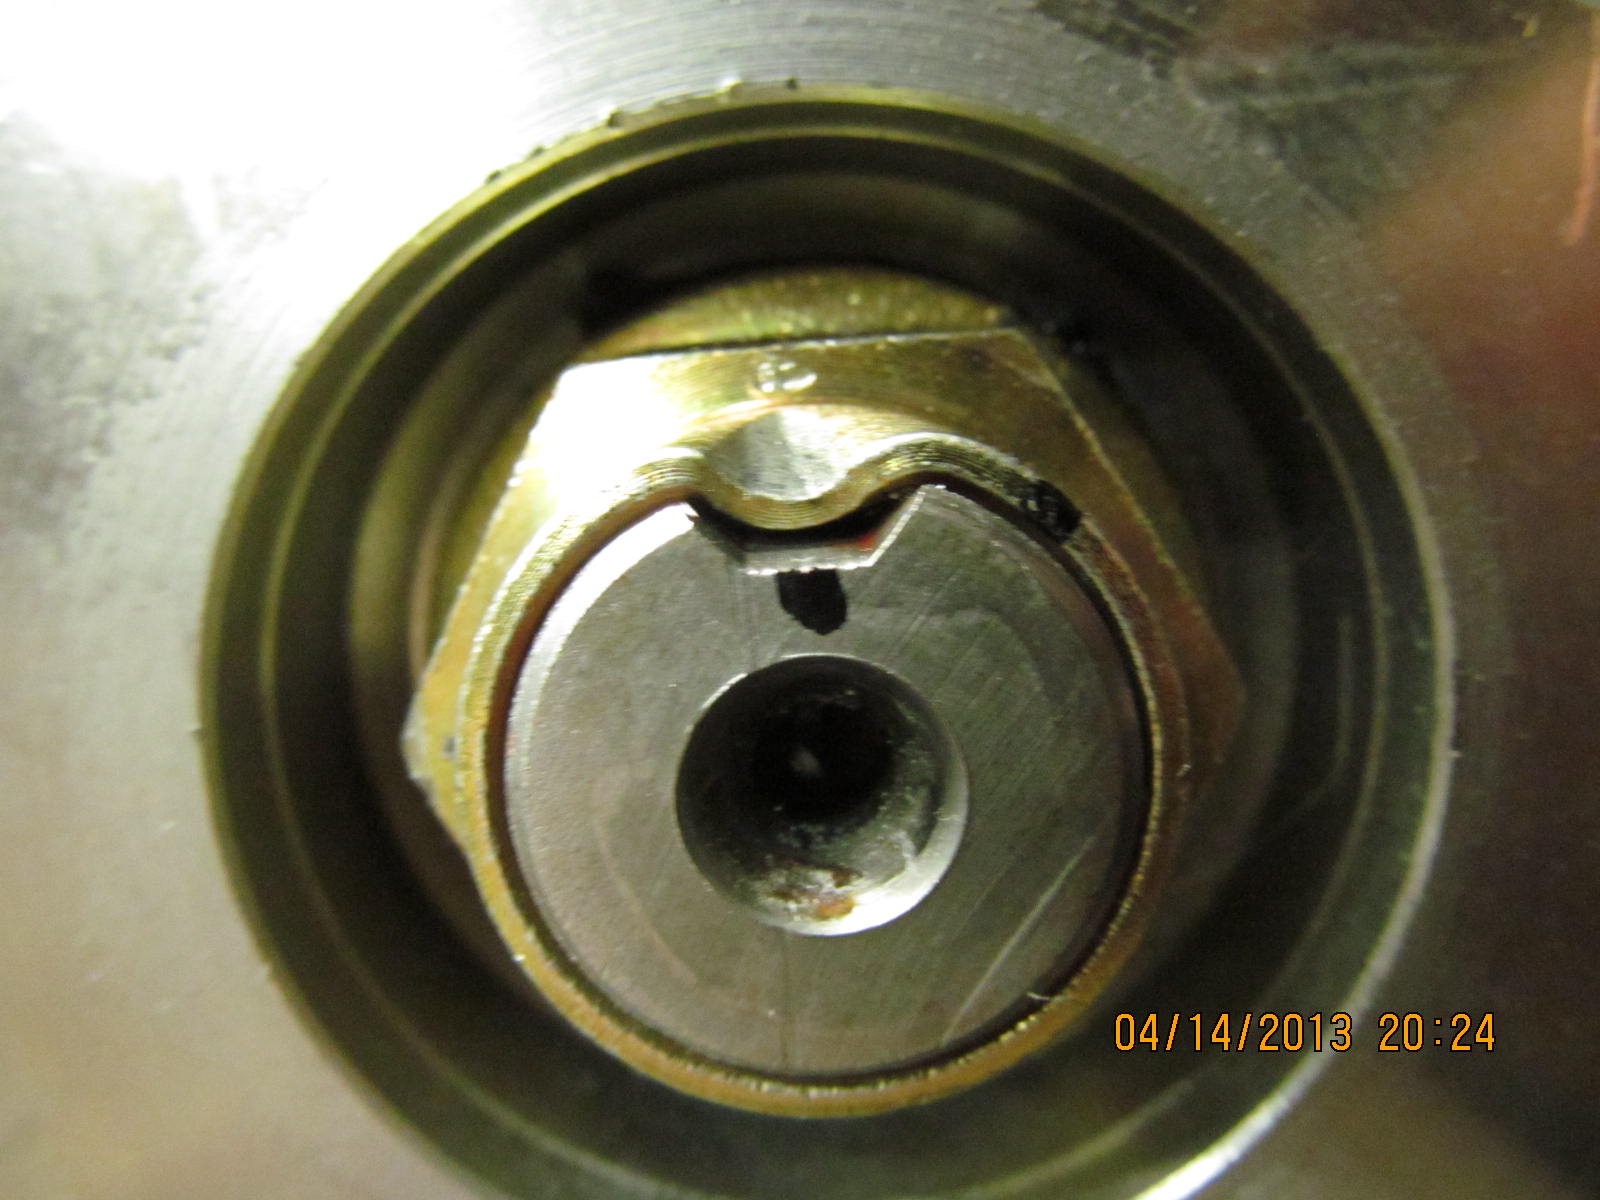
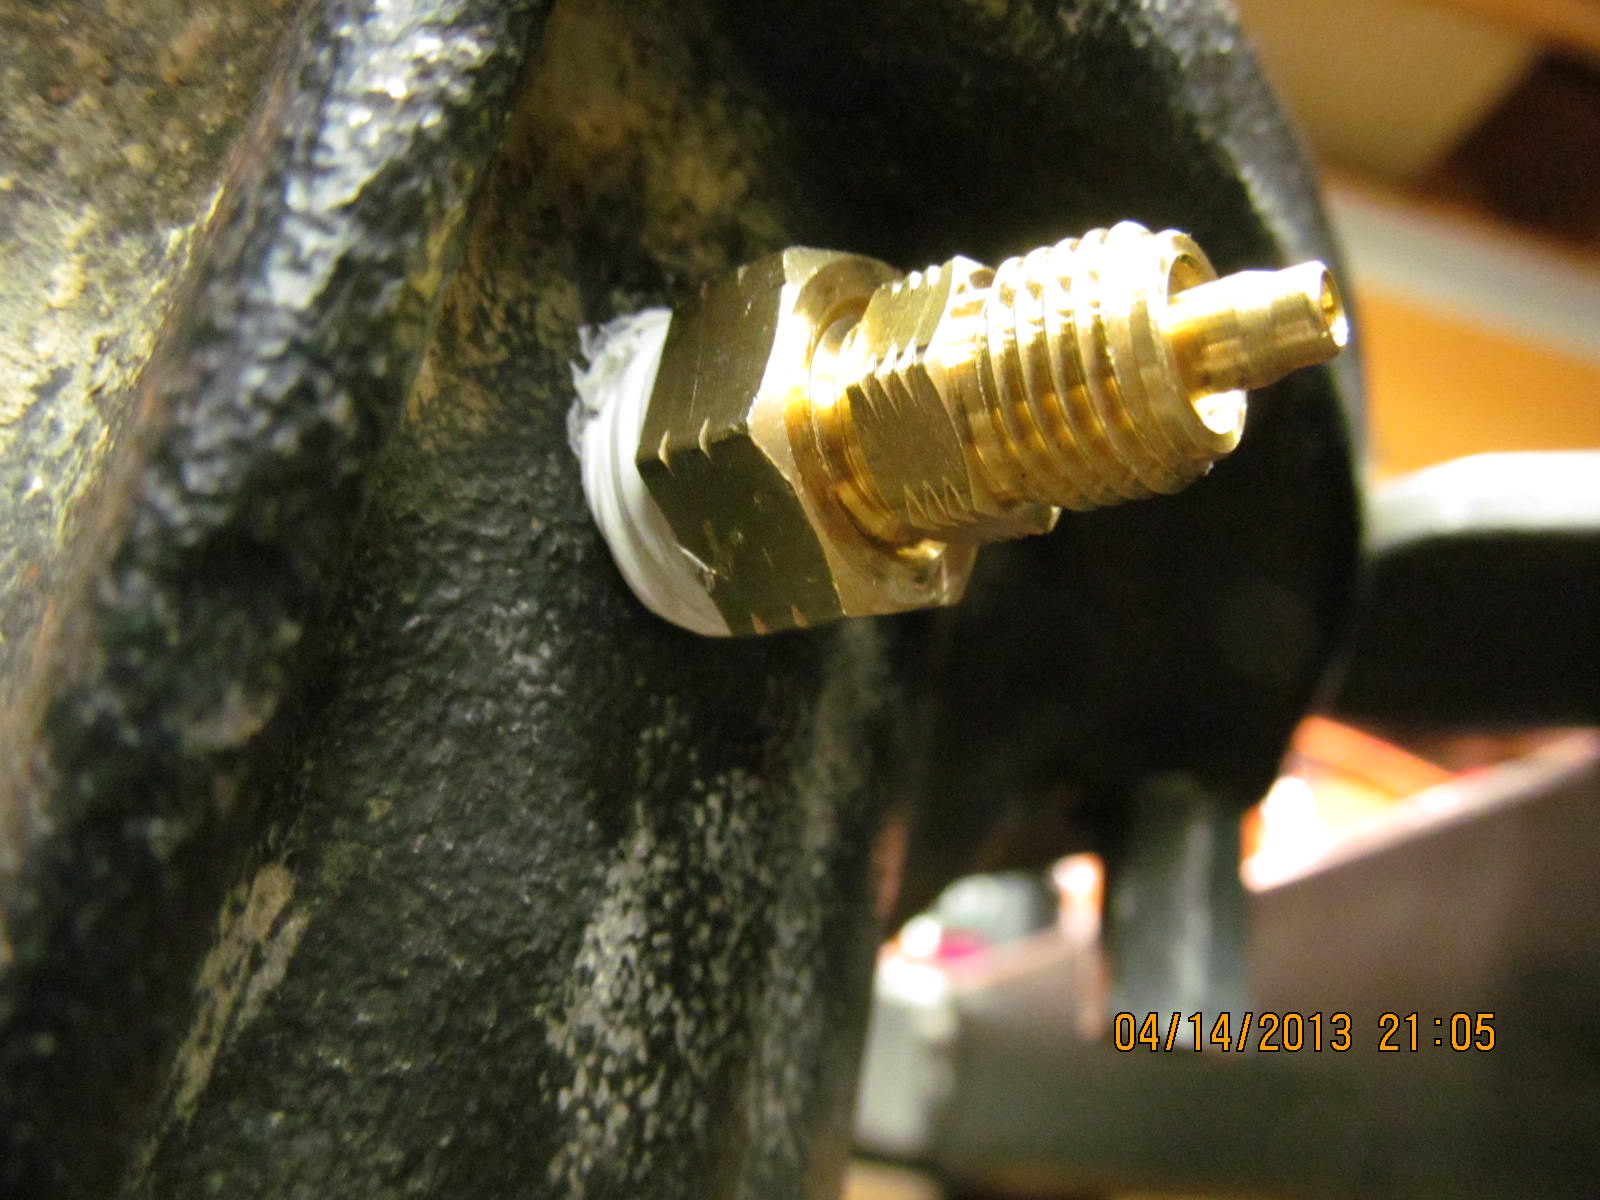
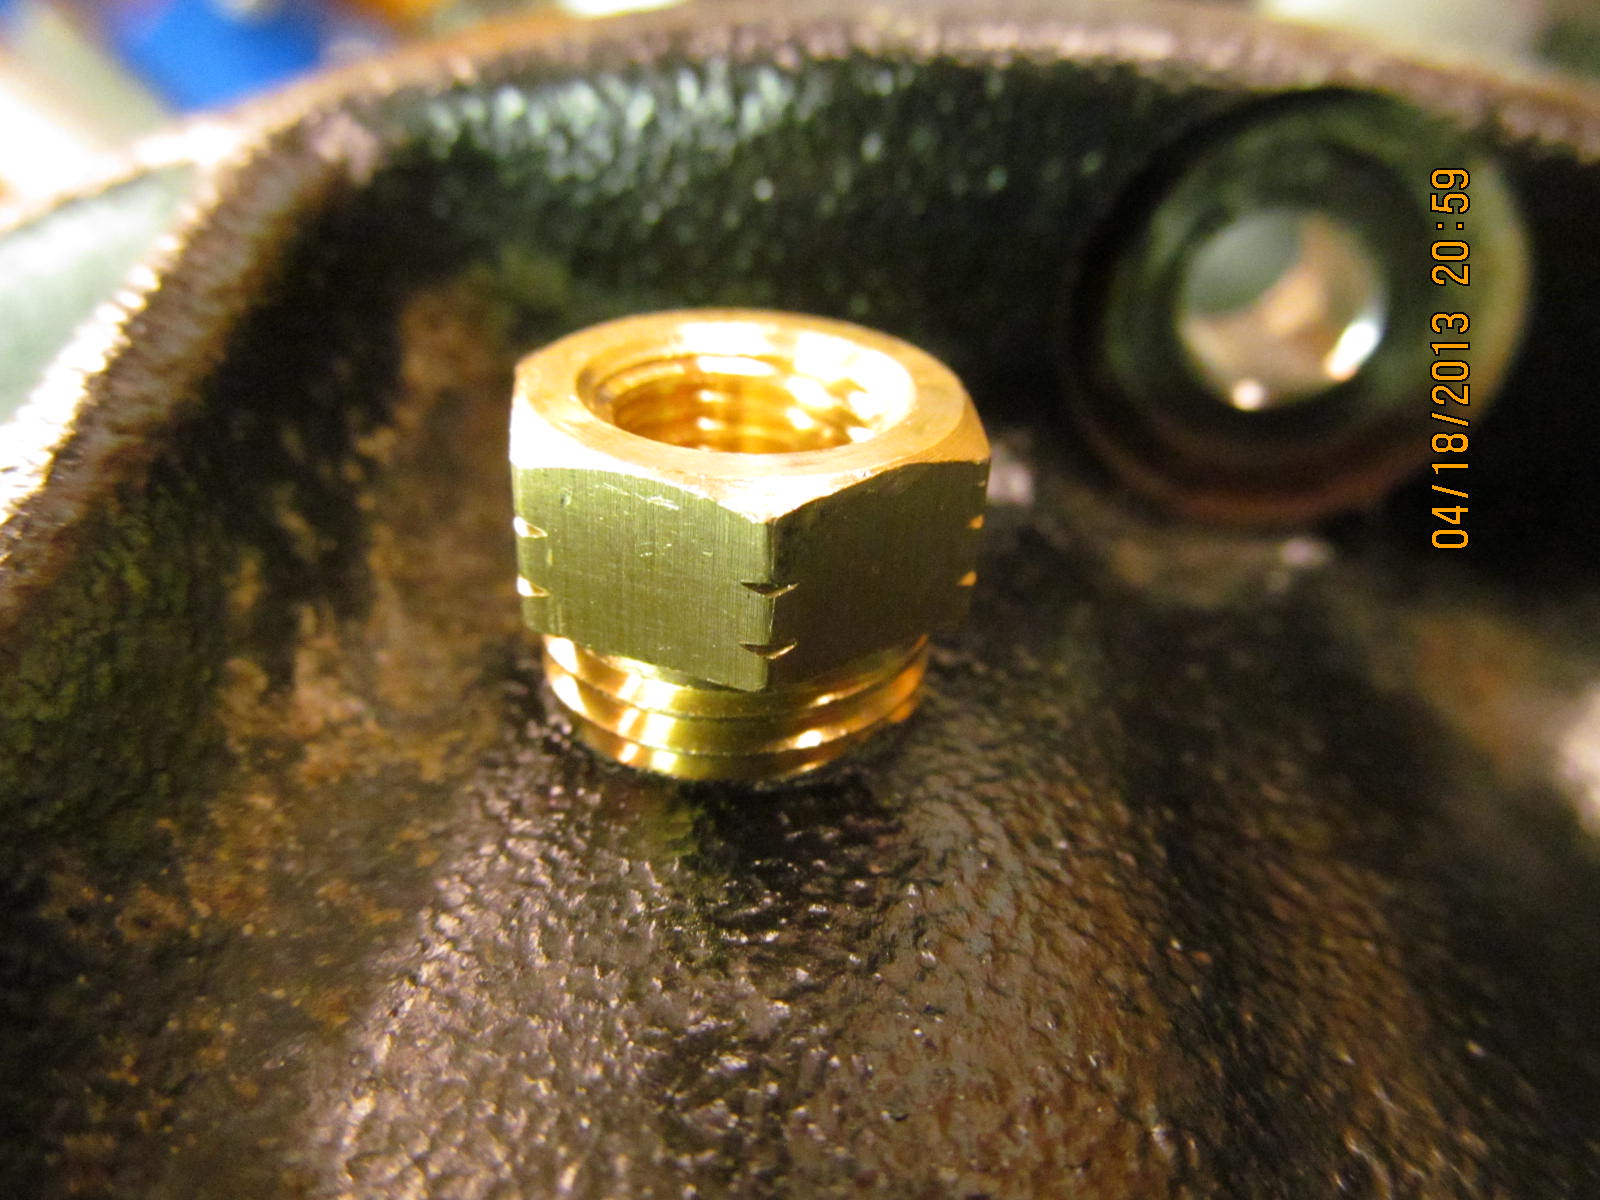
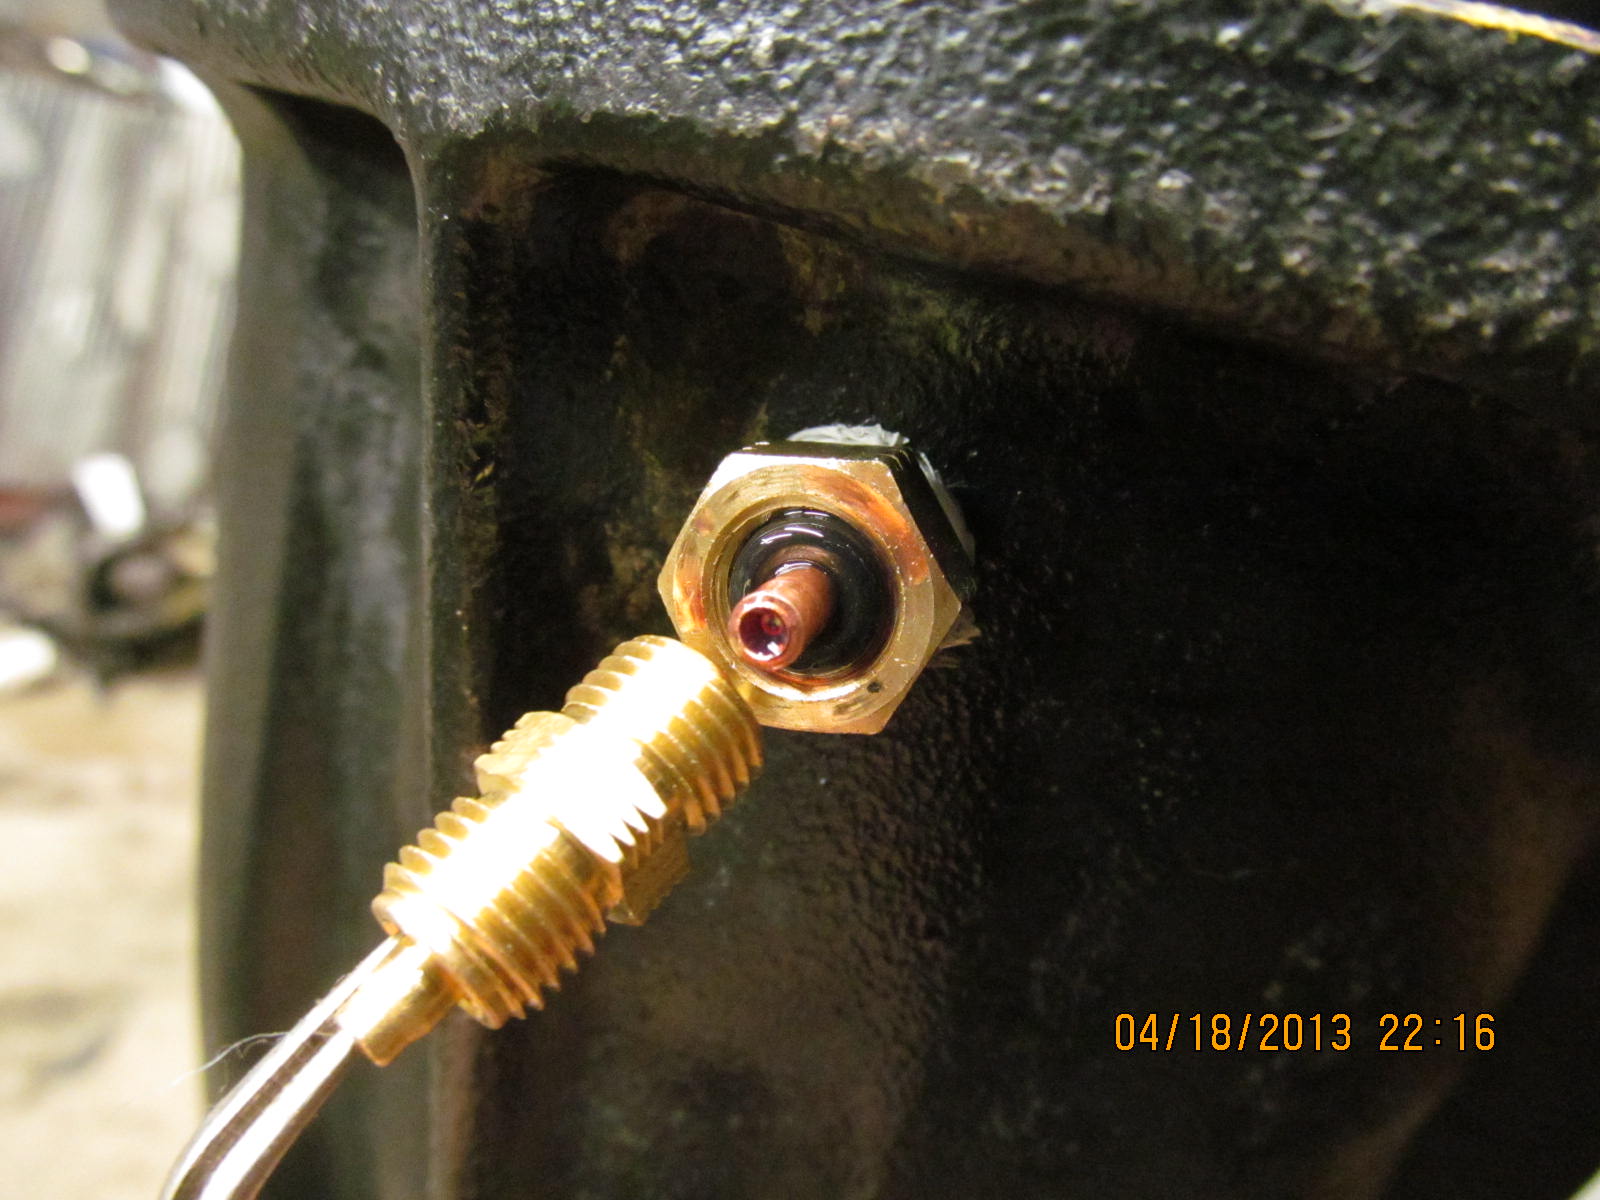
The fat o-ring is sandwiched in between these 2 brass fittings.
|
|
|
|
|
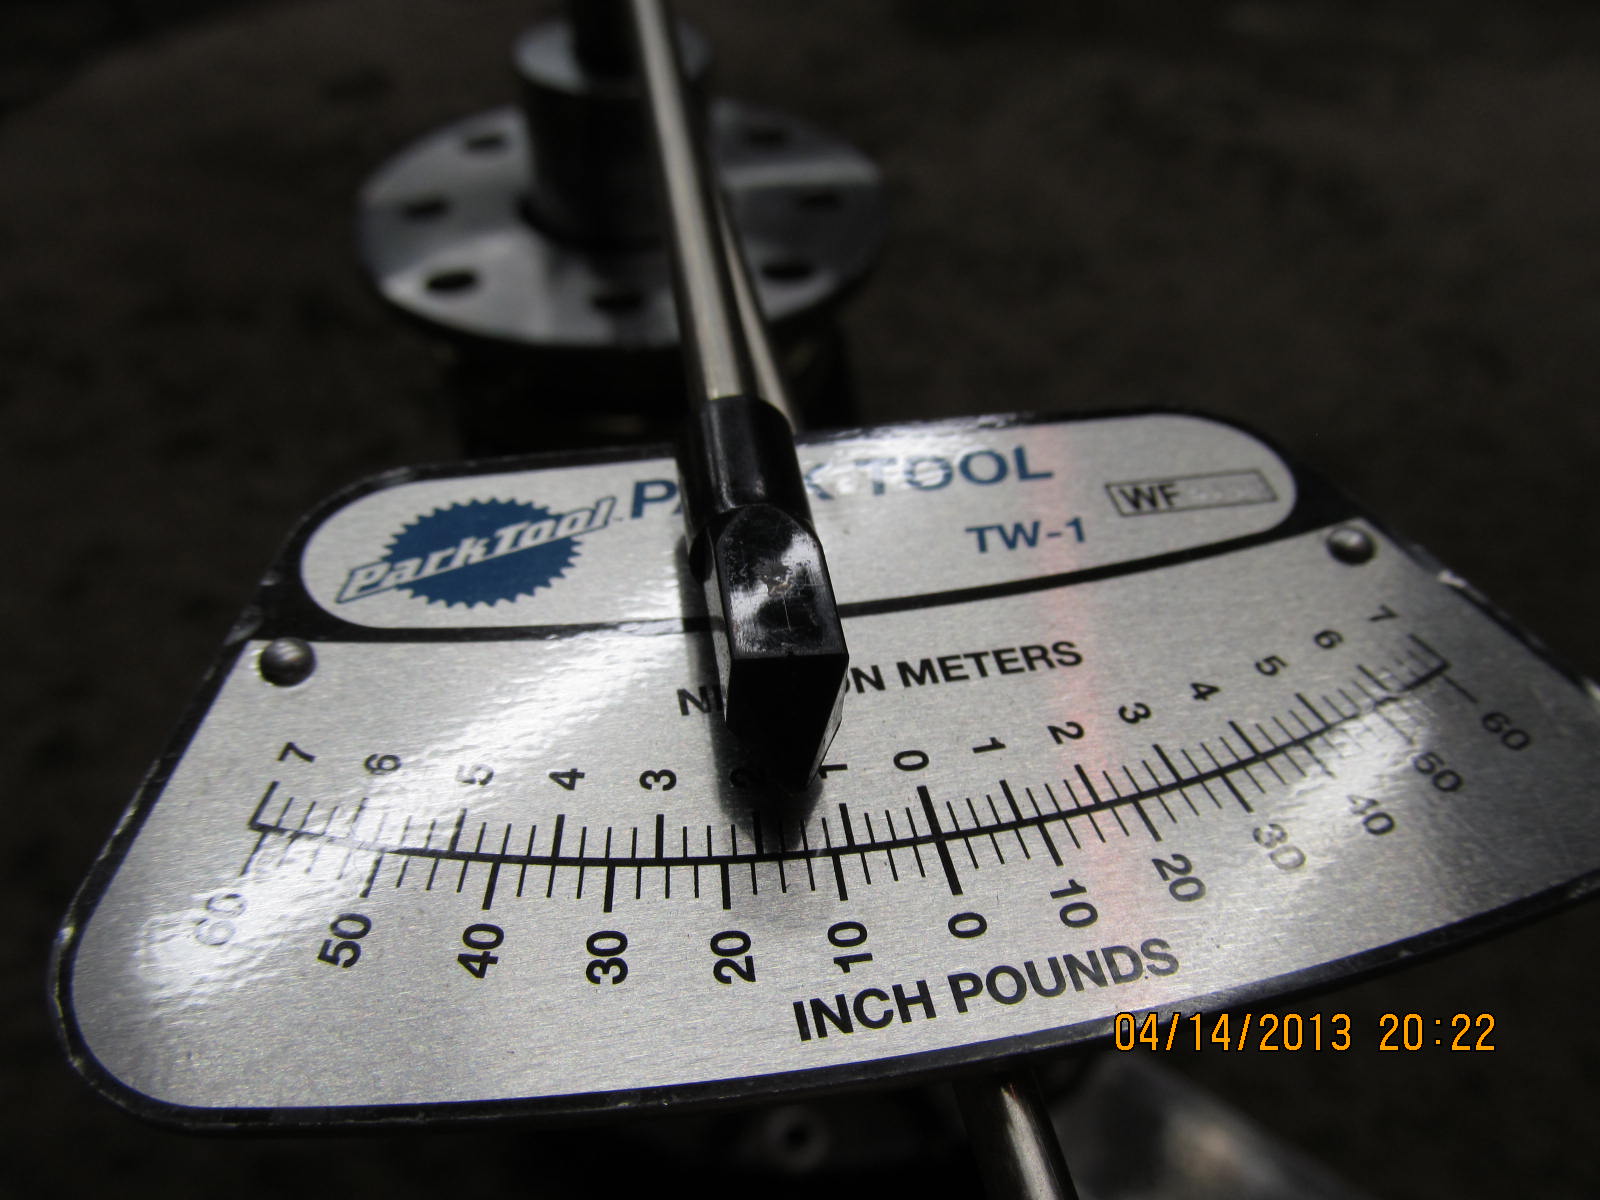
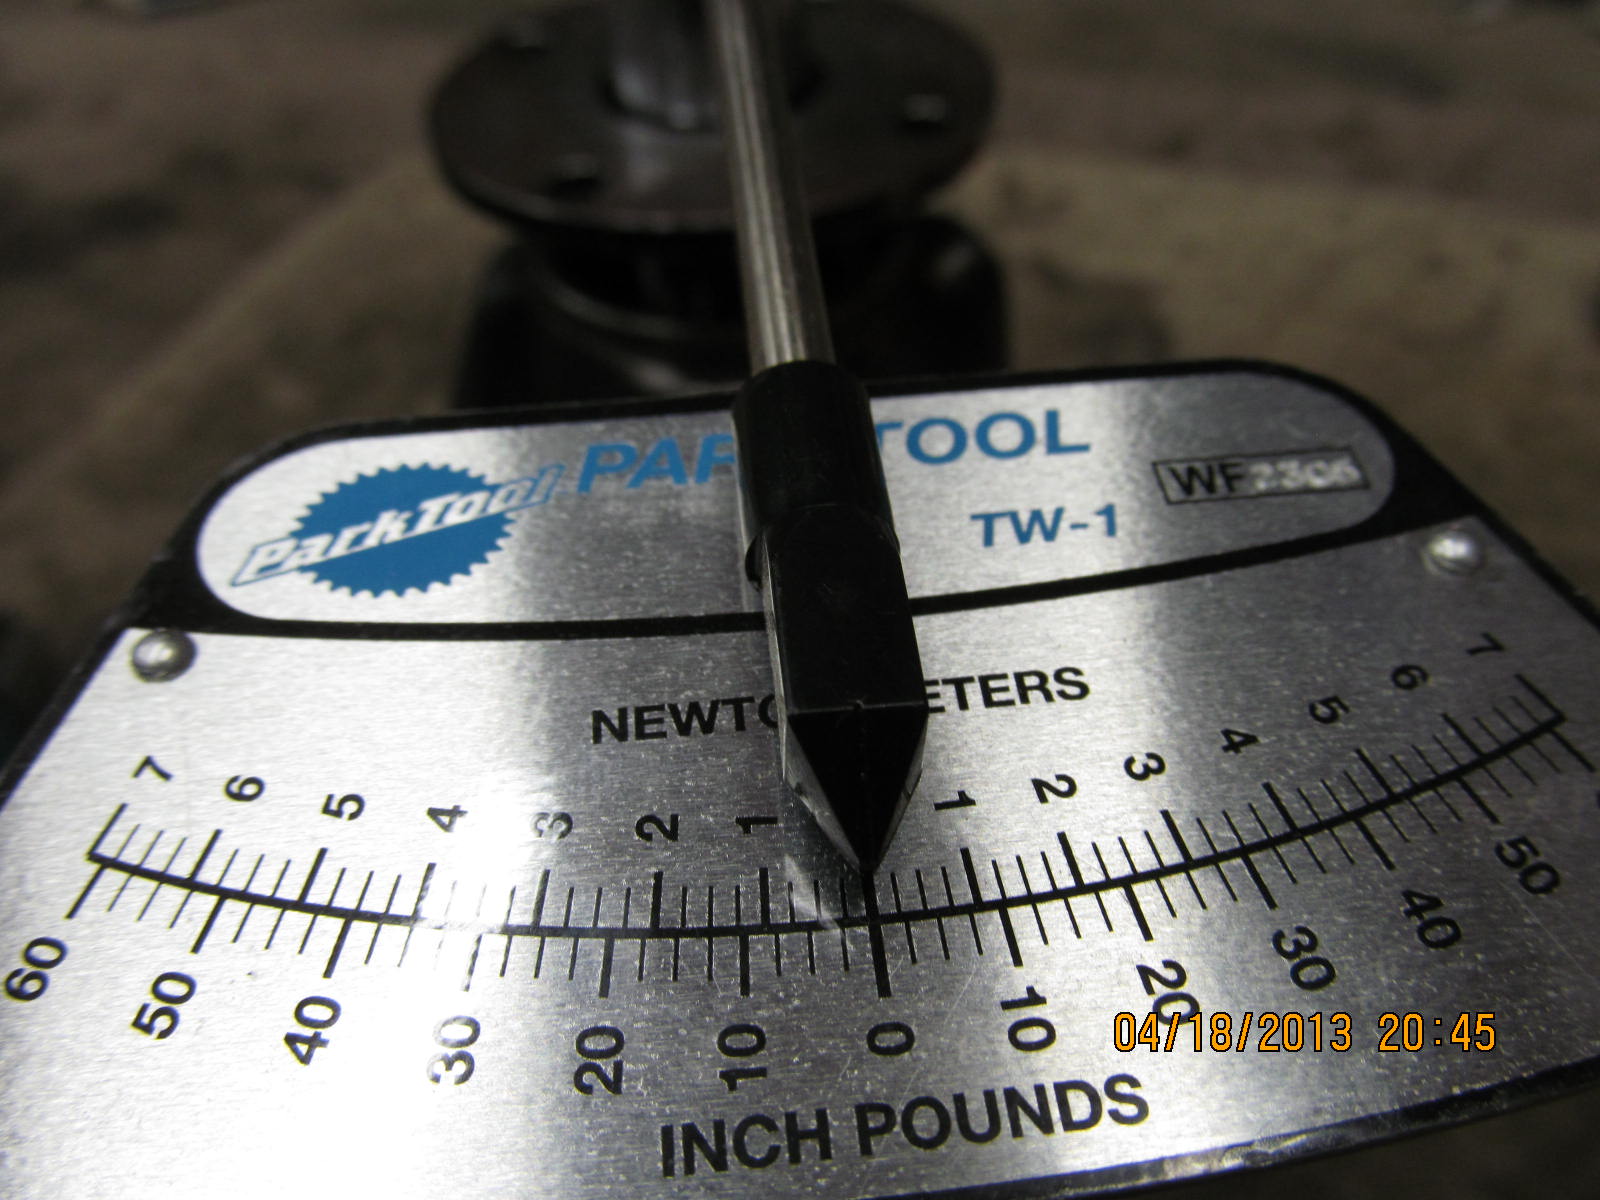
22 in/lbs start torque for pinion preload plus seal drag plus carrier bearing preload.
|
|
|
|
|
Date coded.
|
|
|
|
|
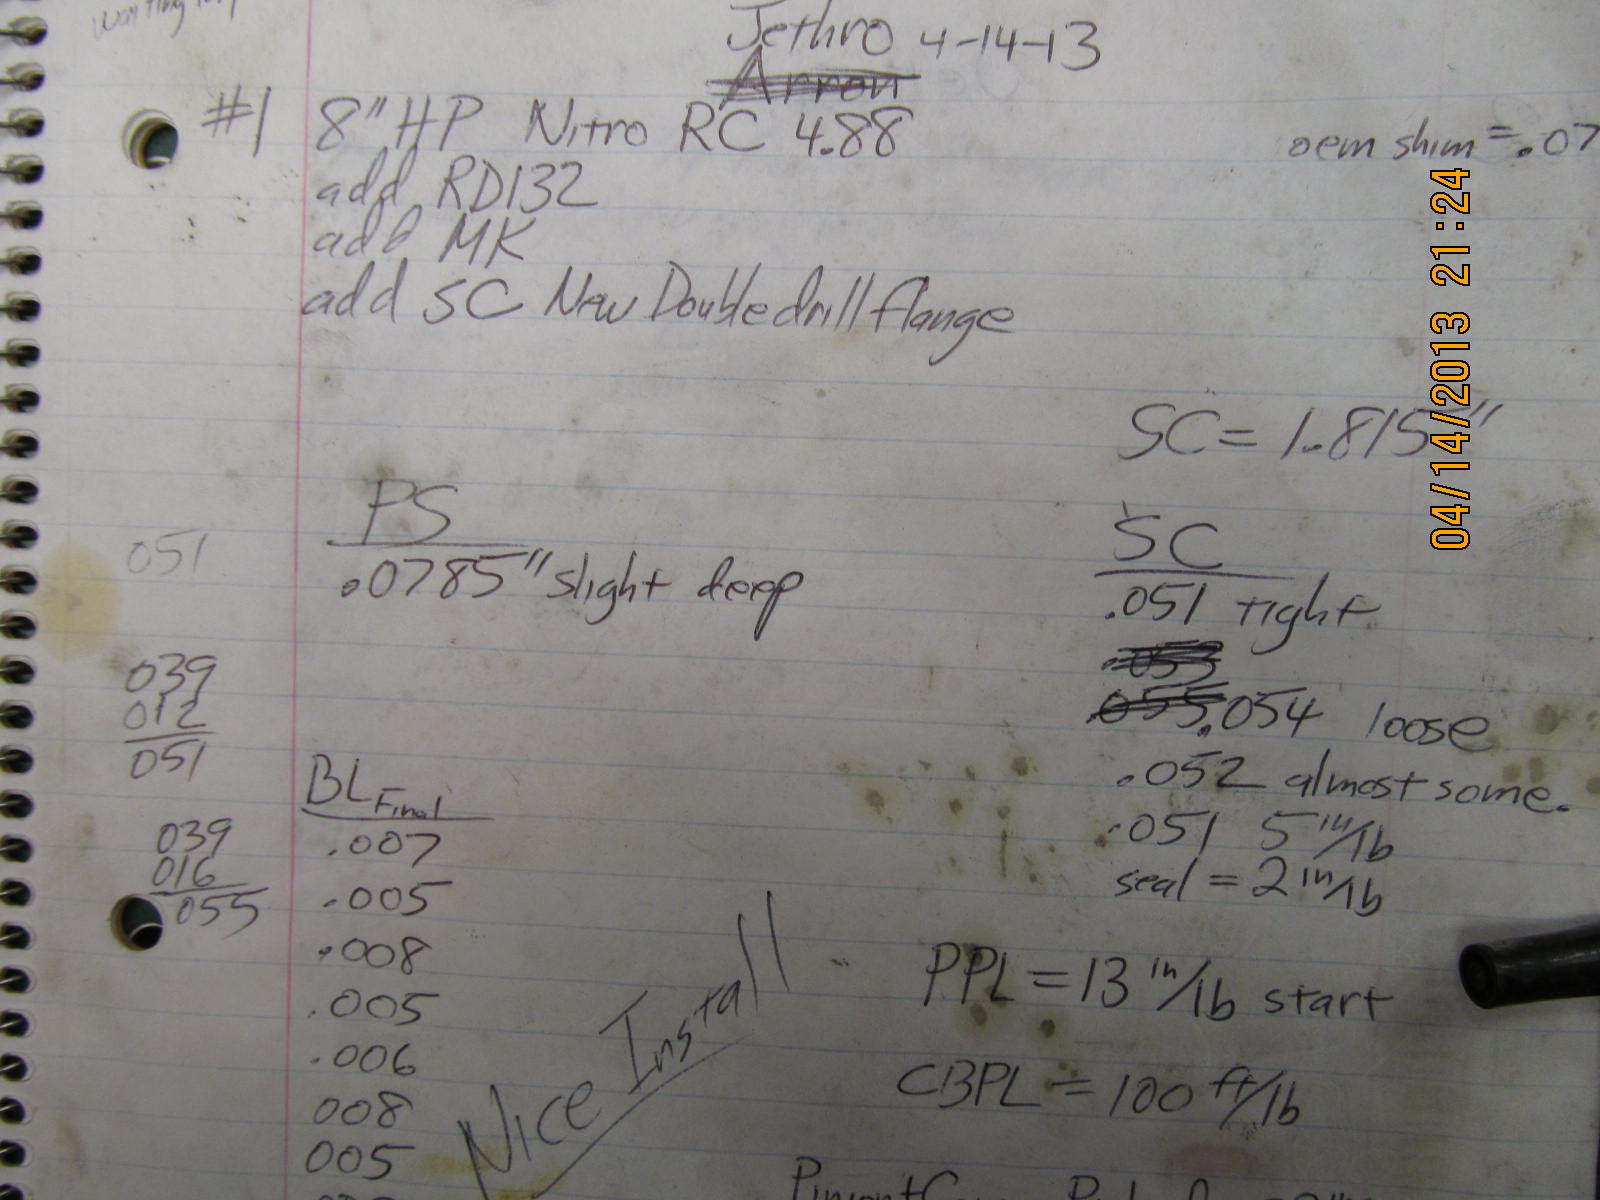
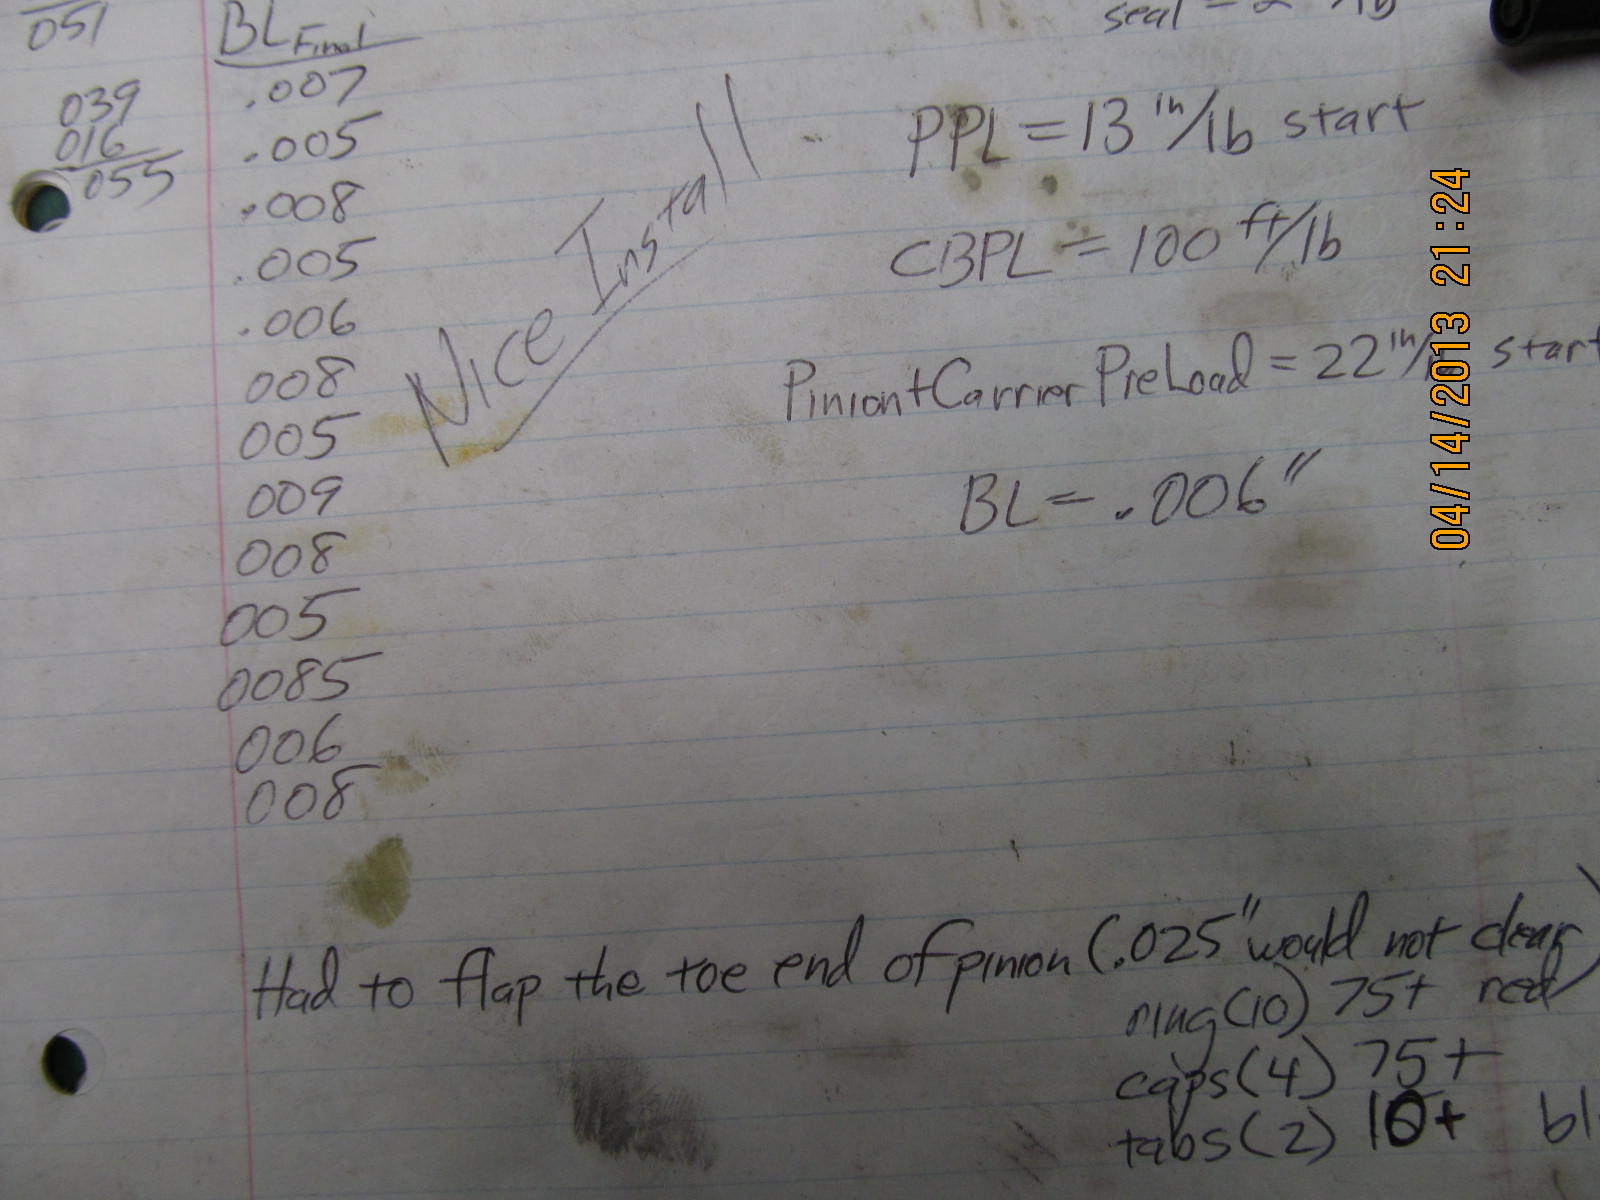
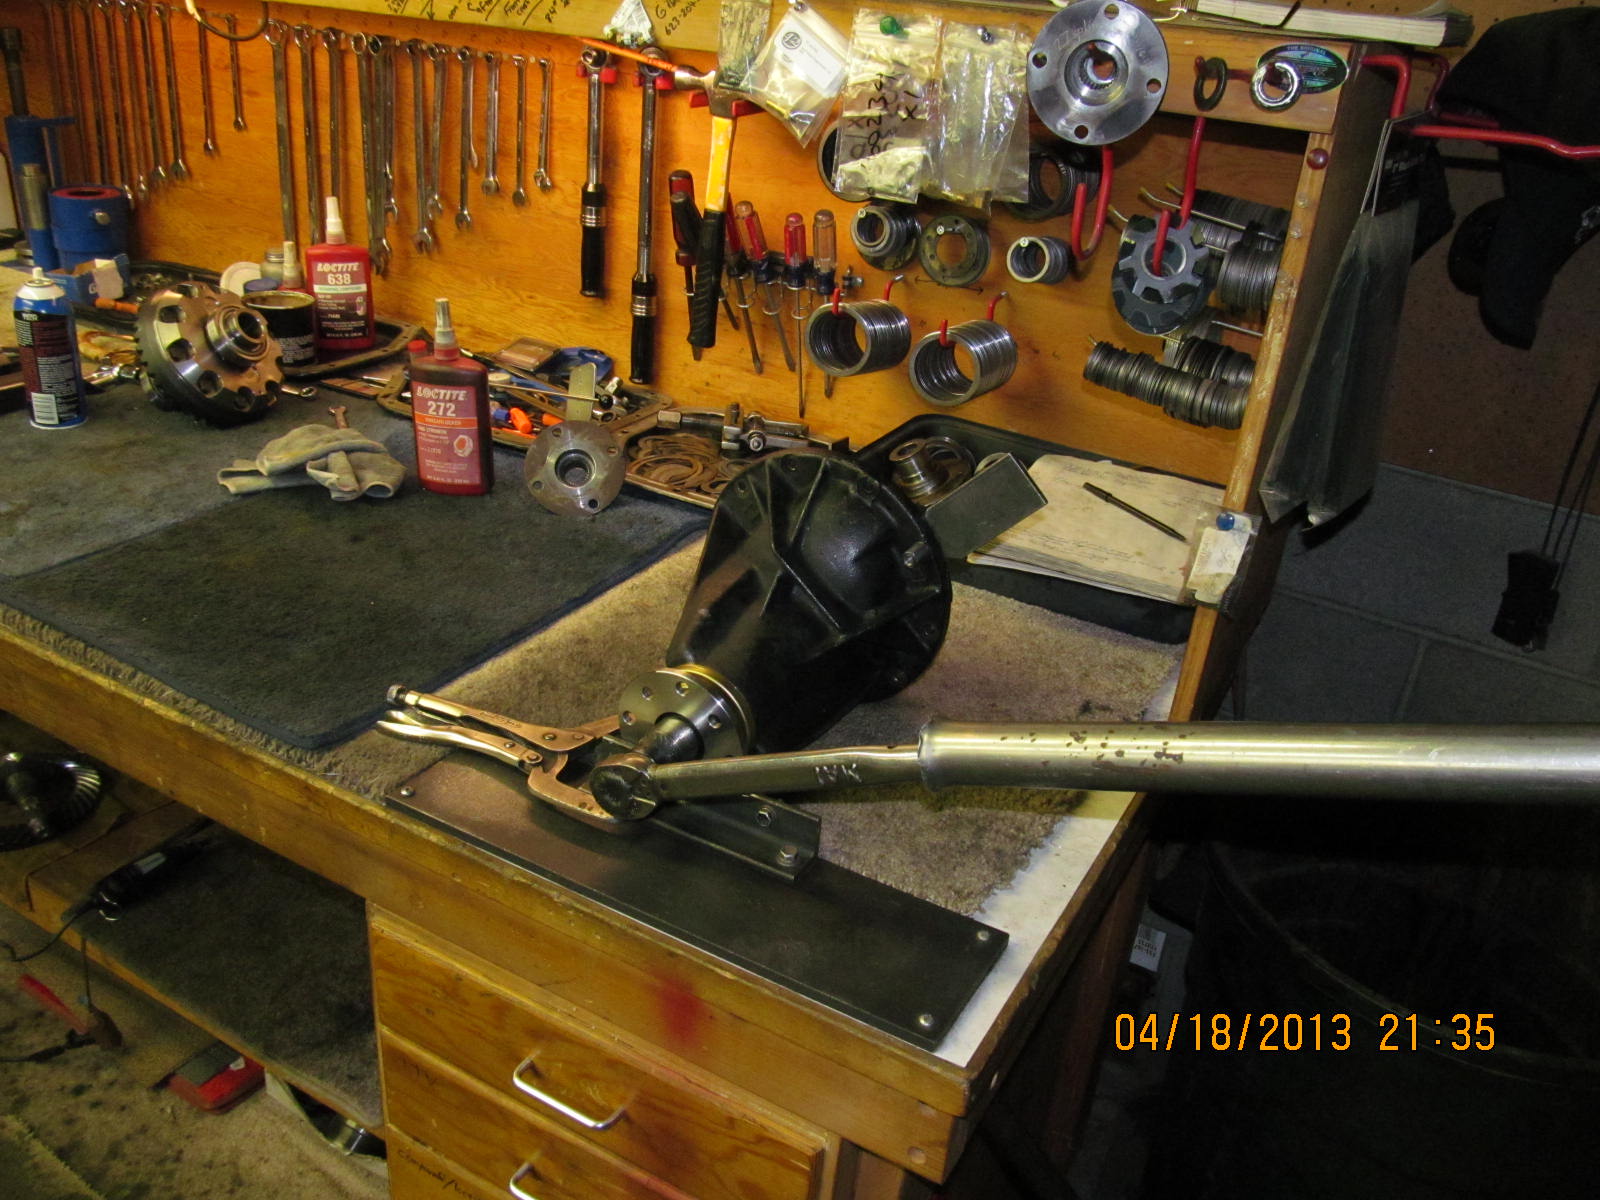
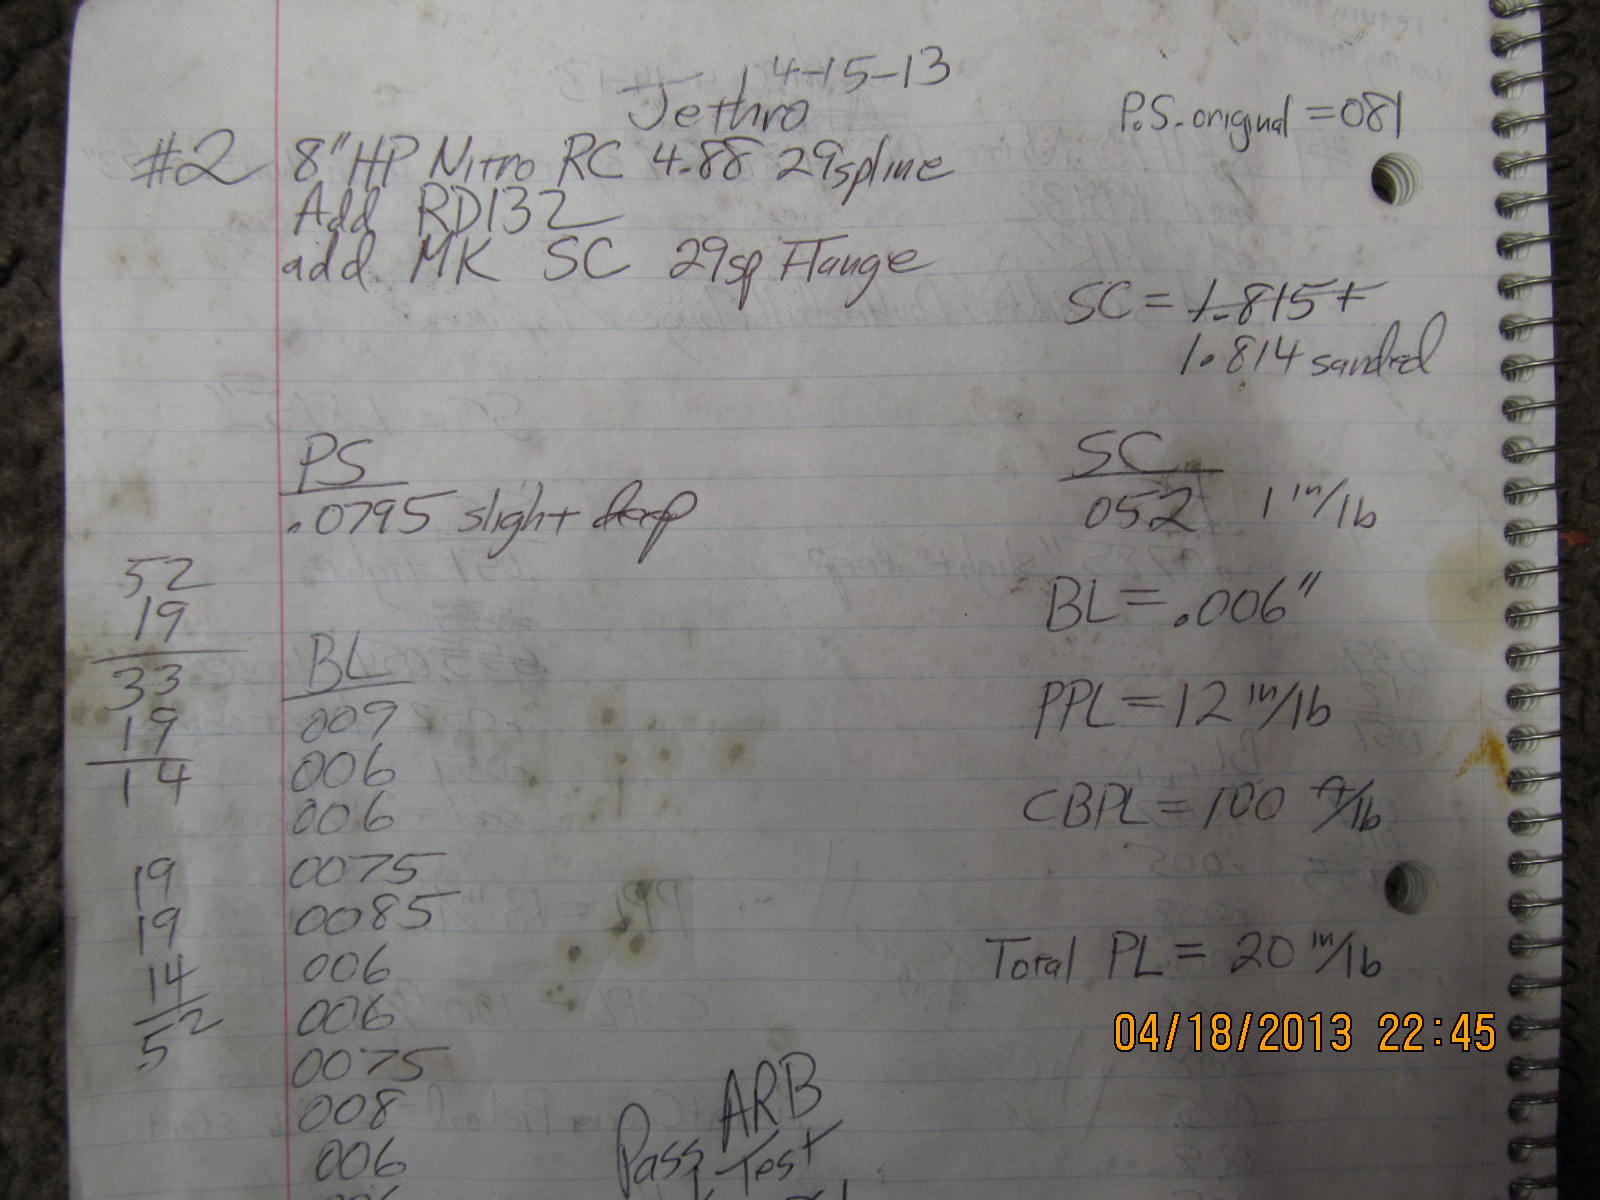
Shop notes of the actual install.
|
|
|
|

|
|
****************************************************************************************************
****************************************************************************************************
****************************************************************************************************
****************************************************************************************************
****************************************************************************************************
****************************************************************************************************
****************************************************************************************************
****************************************************************************************************
****************************************************************************************************
****************************************************************************************************
****************************************************************************************************
****************************************************************************************************
****************************************************************************************************
****************************************************************************************************
****************************************************************************************************
|
Hi-Pinion diff #2
|
|
|
|
|
|
Almost identical to the #1 done above...
|
|
|
|
Surfaces are files and verified burr free. No high spots, no ridges, no unusual
surface features.
|
|
|
|
|
I could not get it started with the lead filled plastic hammer...
|
|
|
|
|
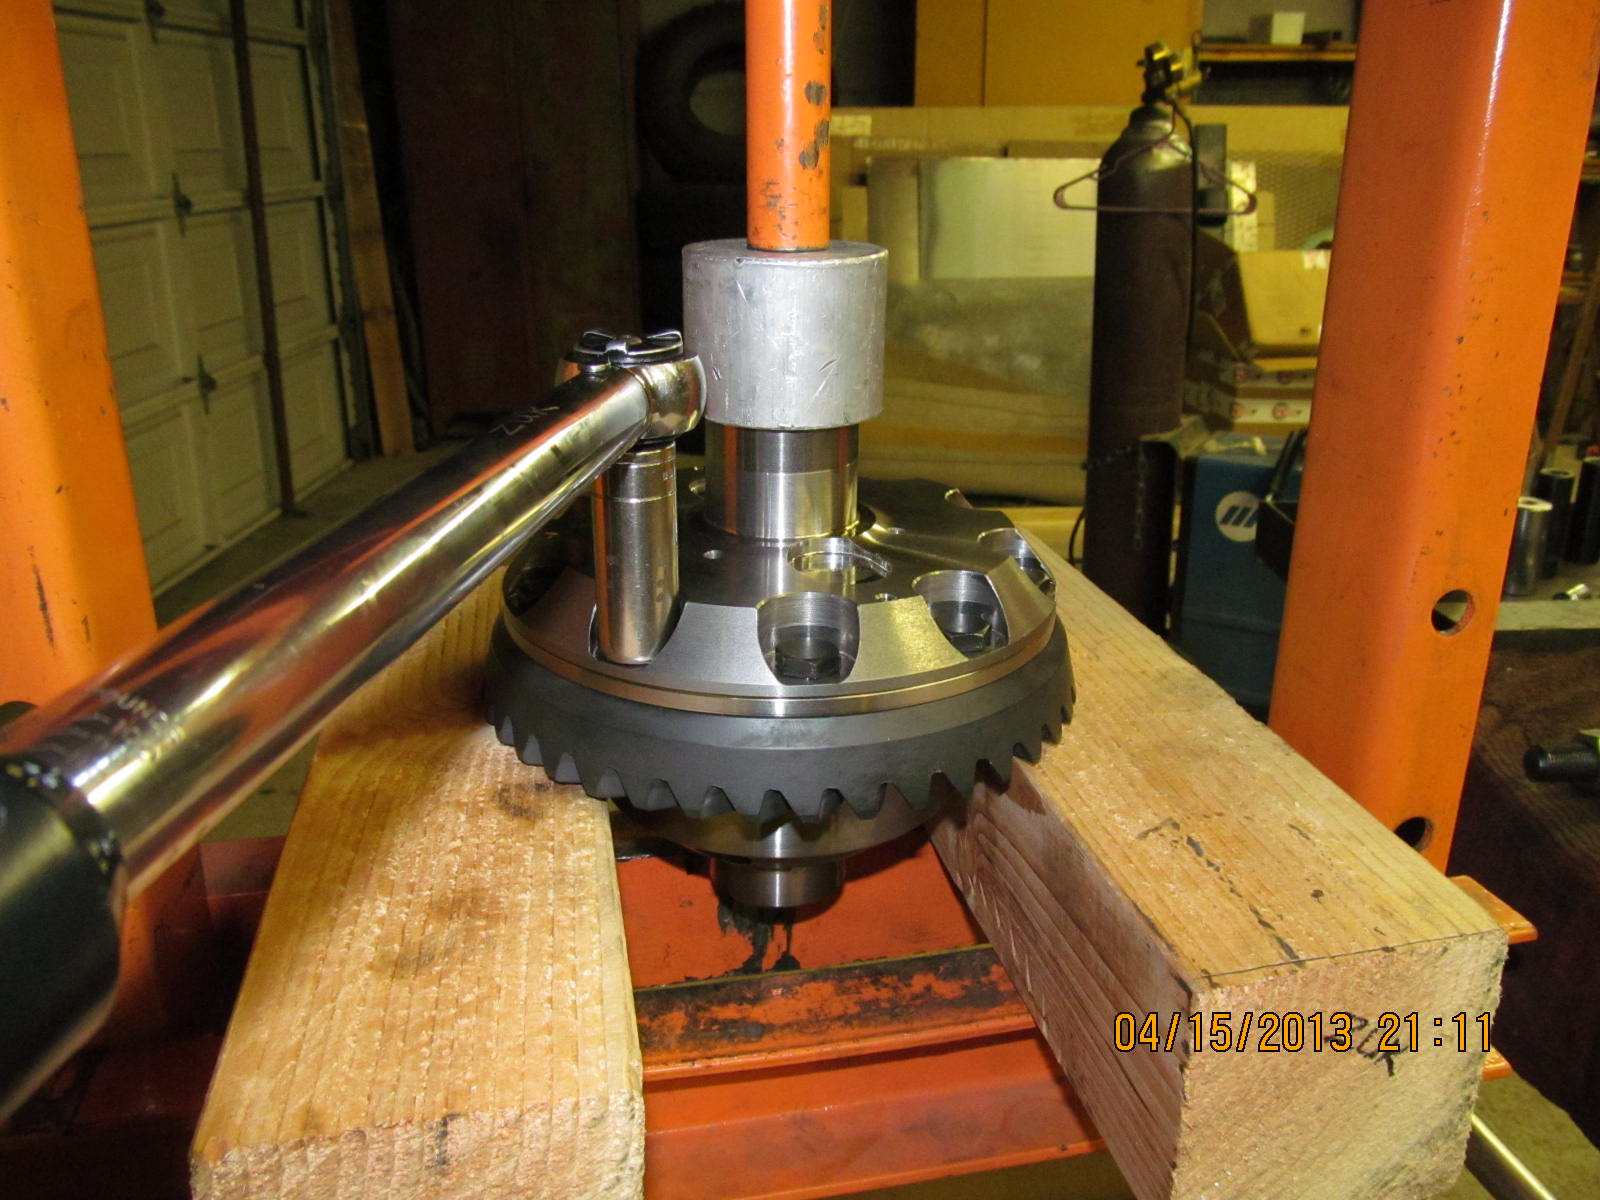
...no problem for the 12 ton press.
|
|
|
|
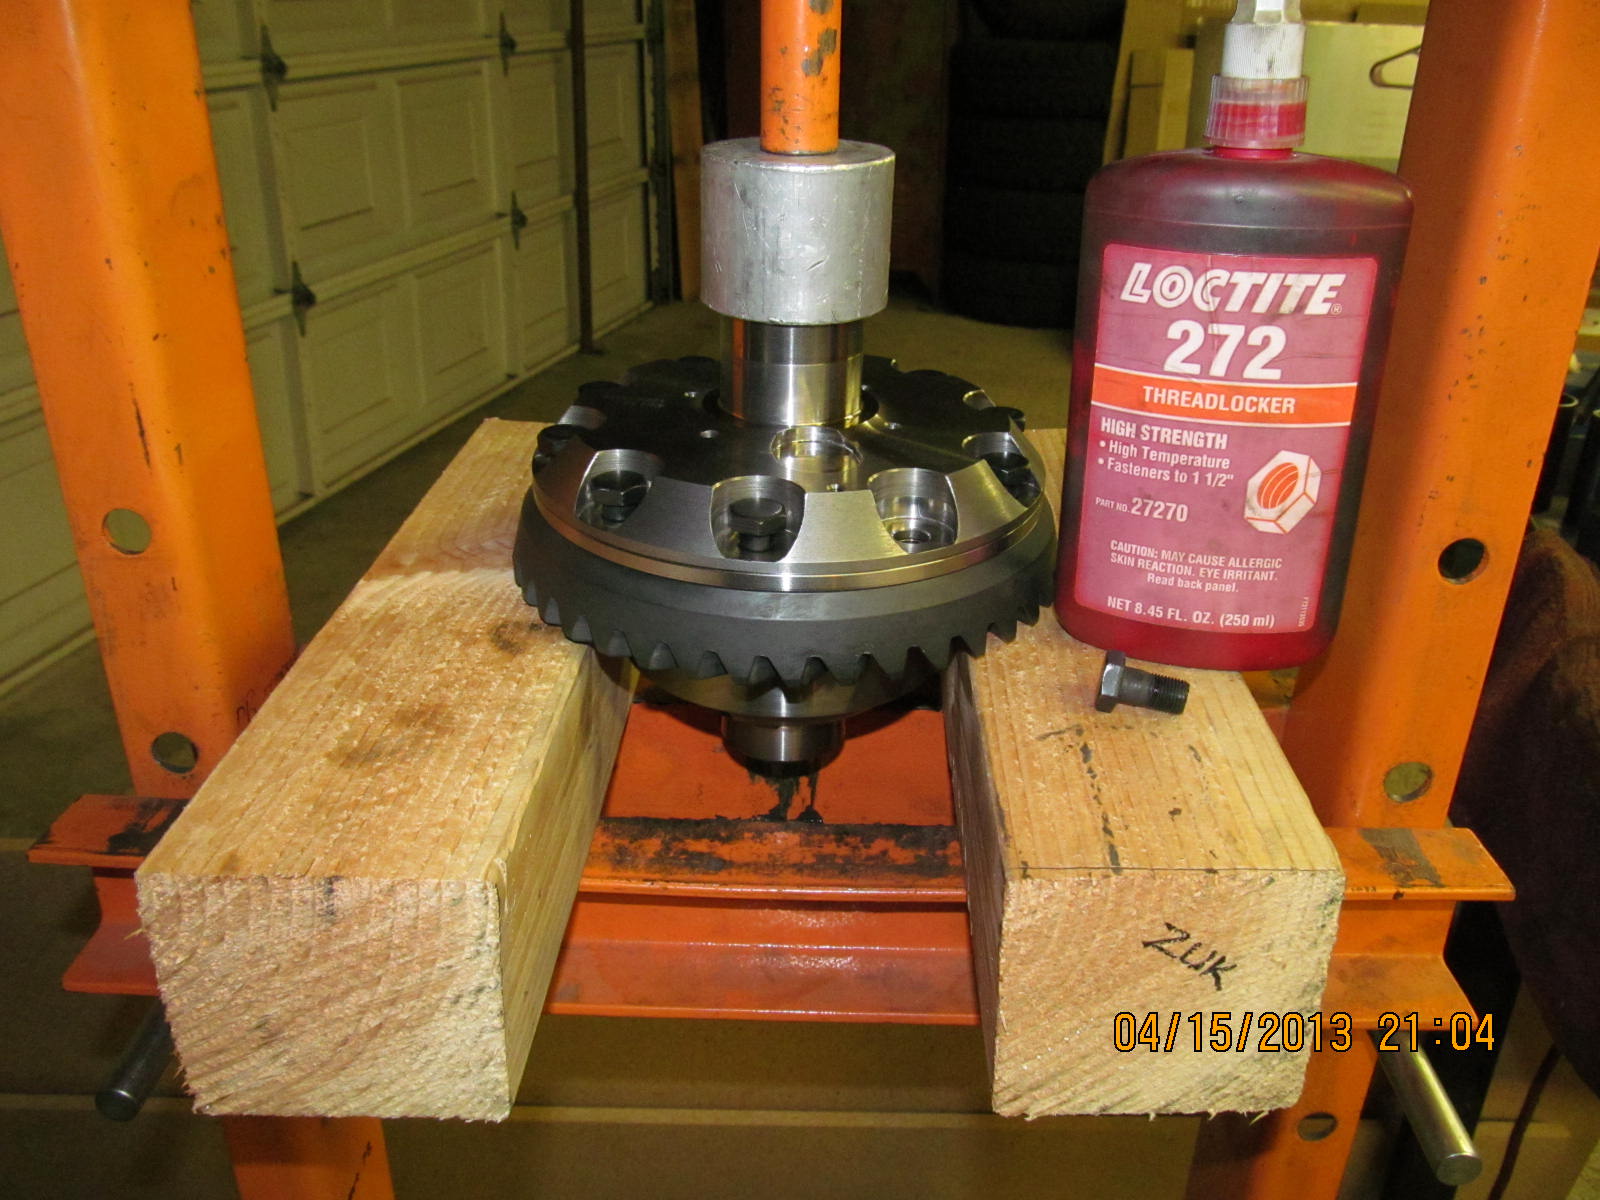
While the pressure was still applied, now is a good time to apply the red loctite
and tighten the ring bolts to the full 75 ft/lb. The ARB case does not shift during
this tightening procedure with probably less than 1 ton of downward force.
|
|
|
|
|
New races are pressed on at the same time.
|
|
|
|
|
Case is now put to the side....
|
|
|
|
|
Everything is removed from the V6 differential and all is cleaned up.
|
|
|
|
New inner pinion race is pressed in. I don't hammer in this race like I did in
the beginning years...even with a brass drift. I feel that some "race ditortion"
can result and oscillations in the final torque readings can be seen and felt.
|
|
|
|
|
The outer race can be hammered in with 100% full contact using another old race.
|
|
|
|
|
Pinion #2 has a slightly thicker shim of .0795"
|
|
|
|
Same thing here...place 3rd over the pinion...beat the shop flange on with the
plastic hammer...tighten nut with impact...splash oil on bearings...impact nut
til it feels and measures in the range of about 15~25 in/lb for pattern check
purposes.
|
|
|
|
|
A little heavy but it's just a pattern check.
|
|
|
|
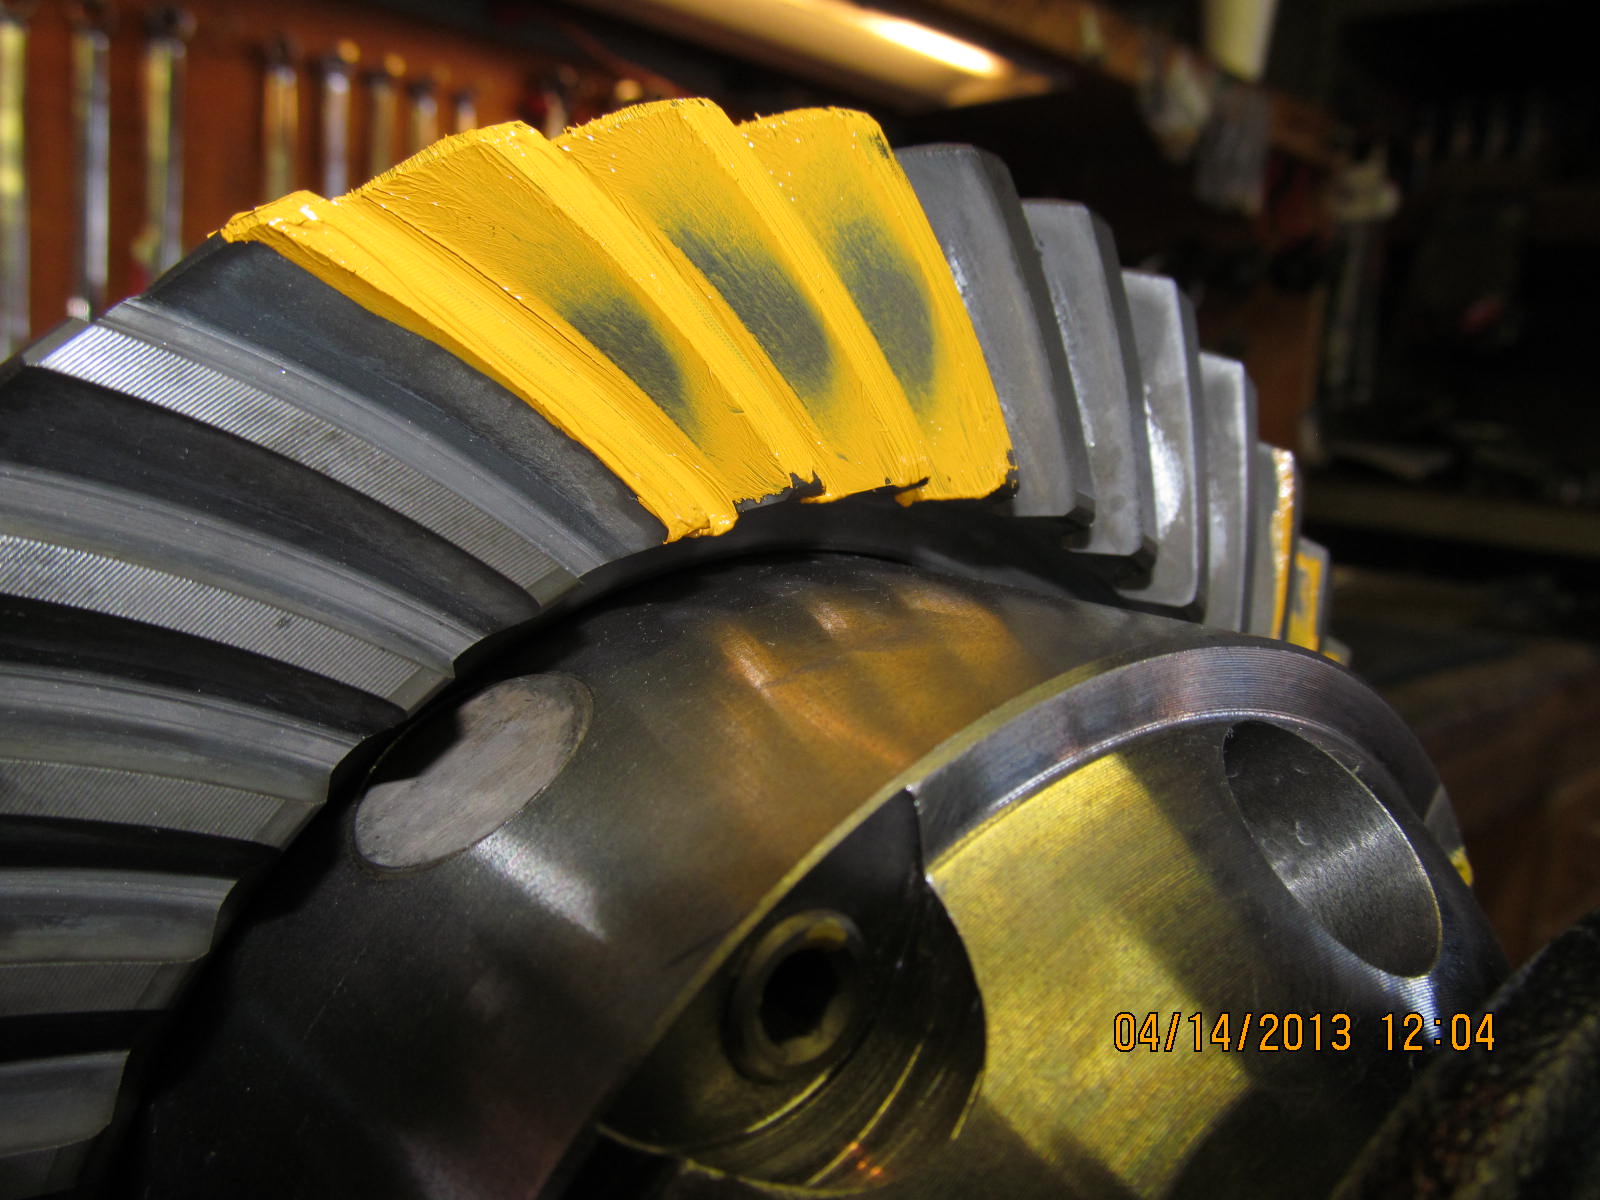
Very similar to diff #1 in depth reading. This is again "slight deep"....leave it
just like this.
|
|
|
|
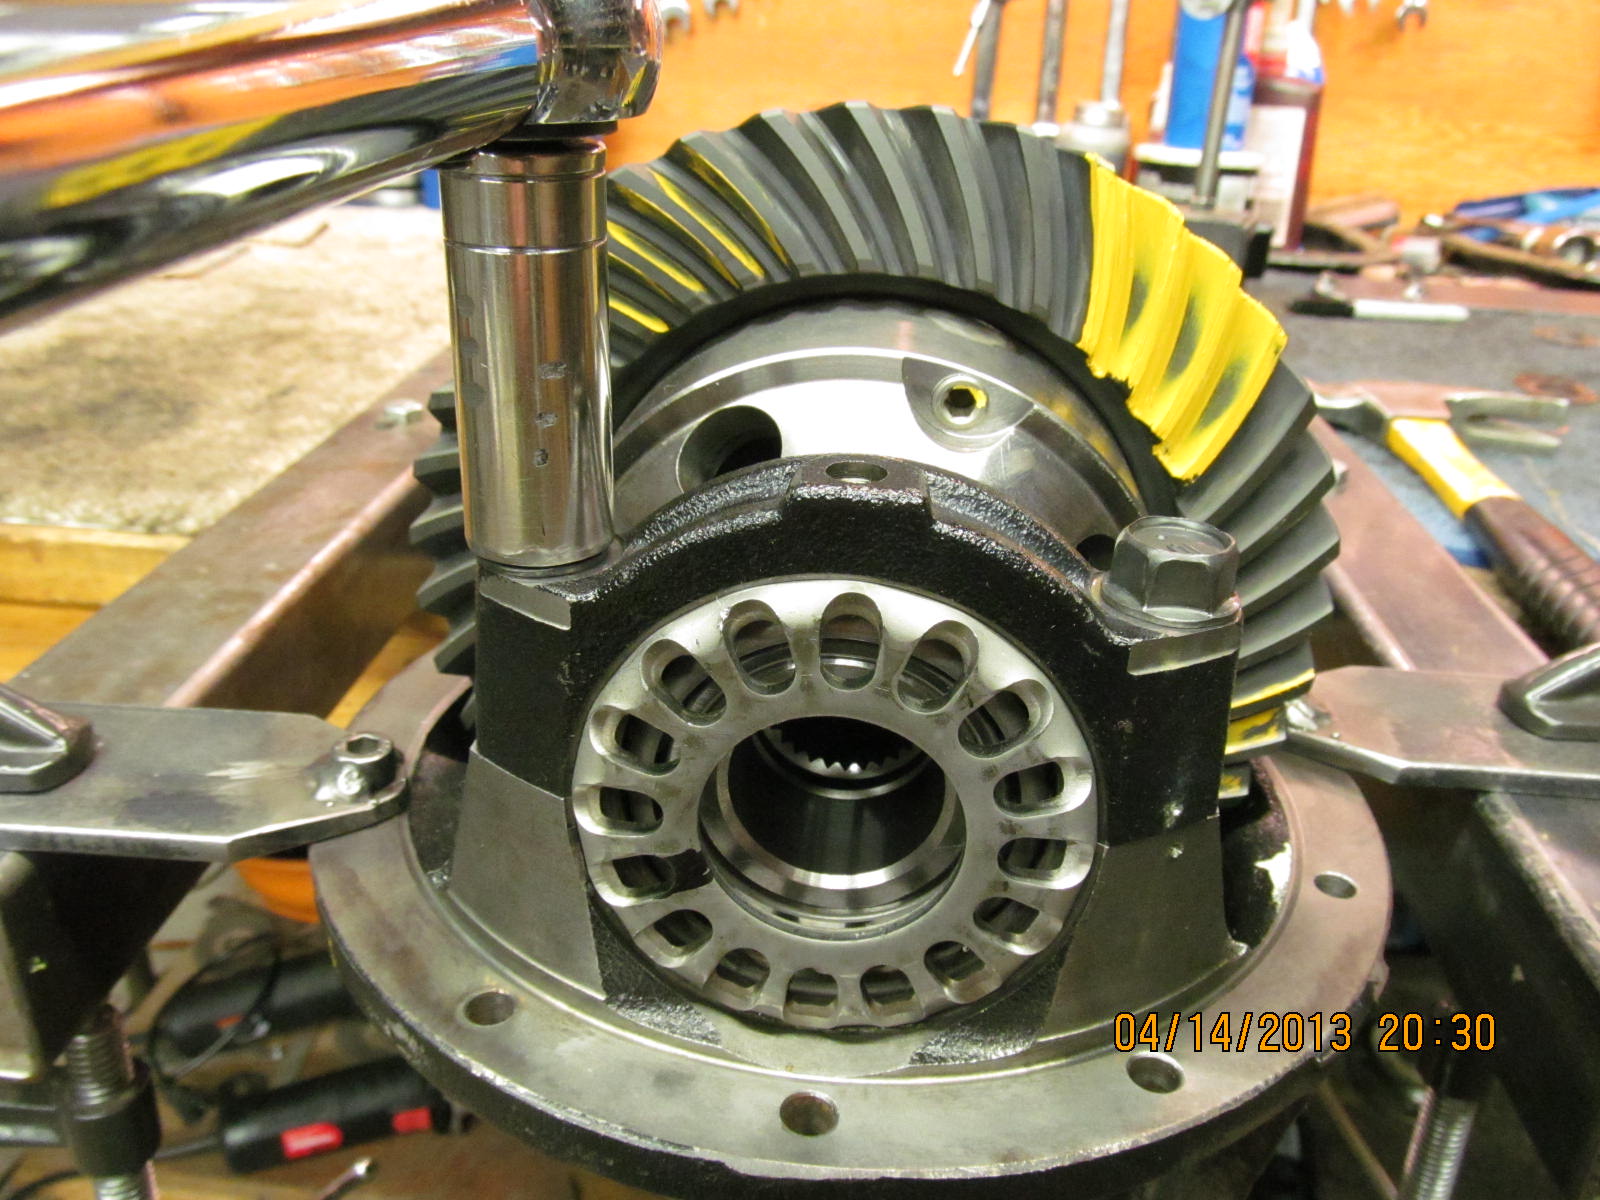
Coast. Looks great. This is a "balanced pattern" meaning the coast and drive patterns
are in the same location from the toe to heel length...equal but opposite each
other....balanced.
|
|
|
|
|
Comet tail on the left is in the middle :)
|
|
|
|
|
Drive side...reverse painted...shows a pattern that I wish I could get each and every time.
|
|
|
|
|
Coast.
|
|
|
|
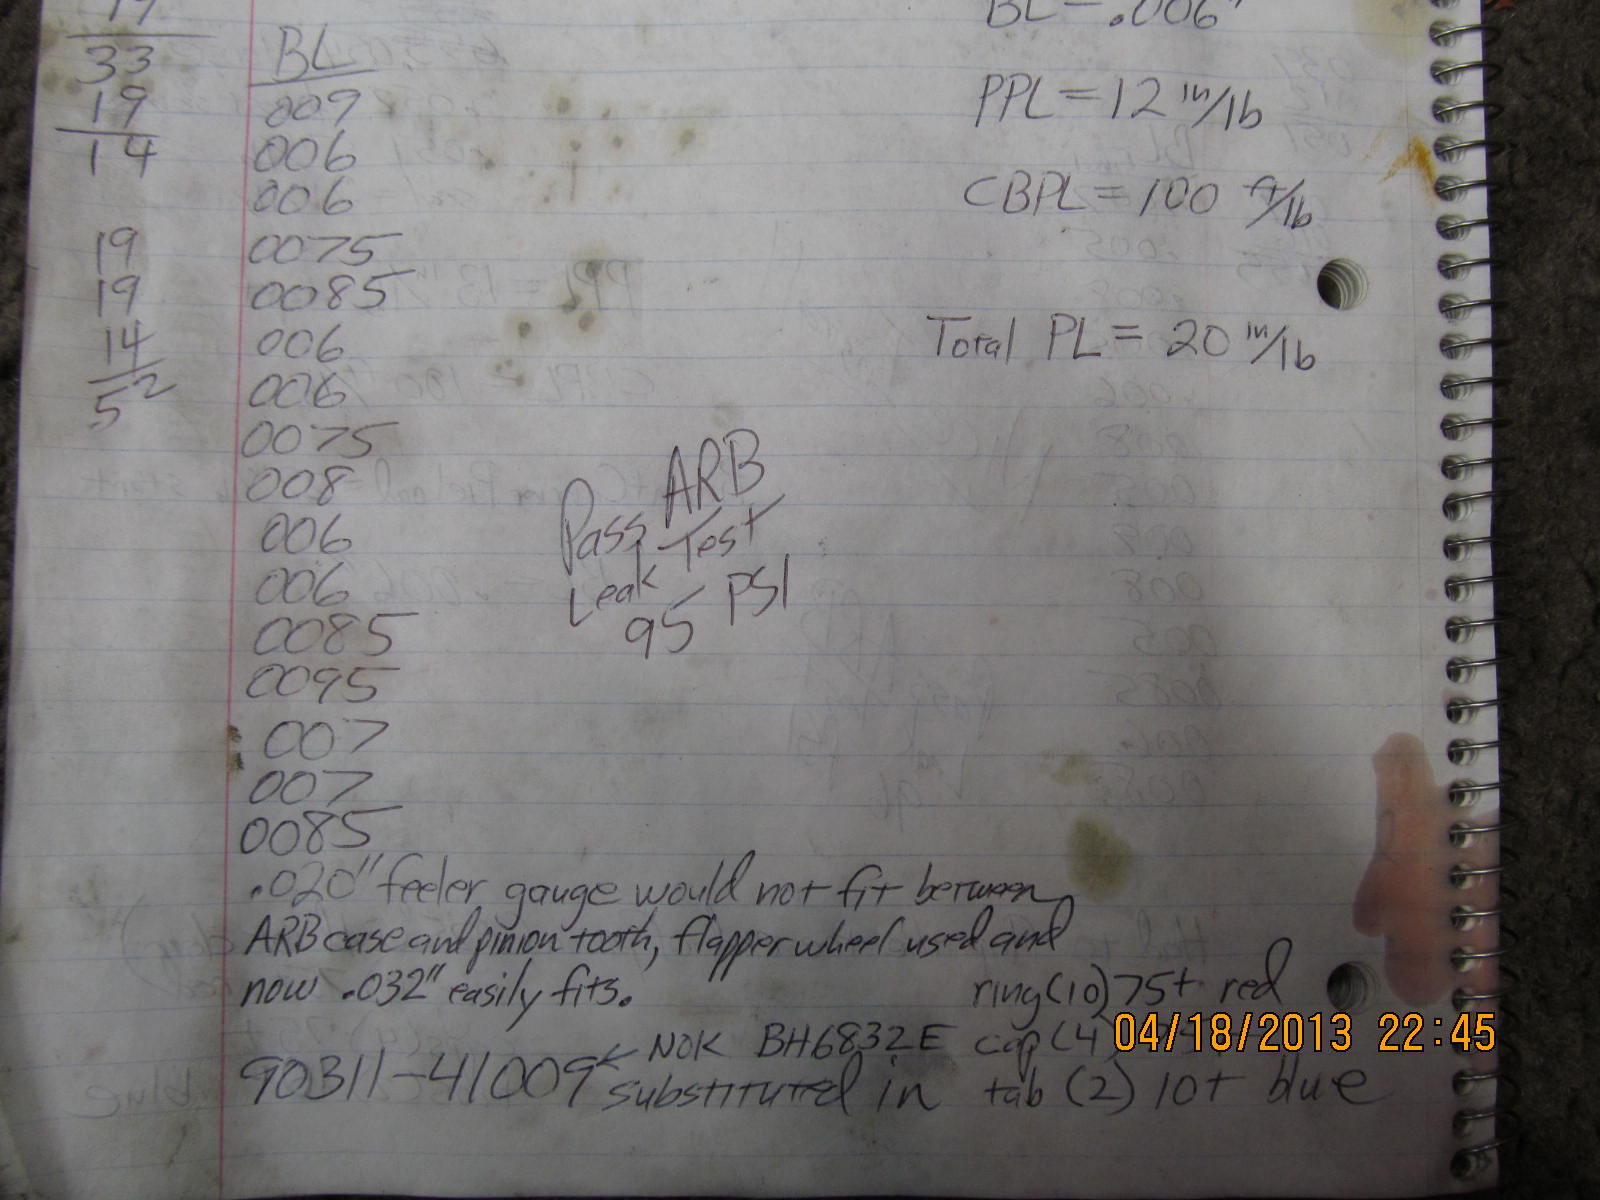
Case clearance test....failed. I think I used a .035" feeler here and it would
not fit inbetween. It's so easy to chamfer or "relieve" the pinion toe end
corners with a flapper wheel that just might as well do it each and every
time whether it needs it or not.
|
|
|
|
|
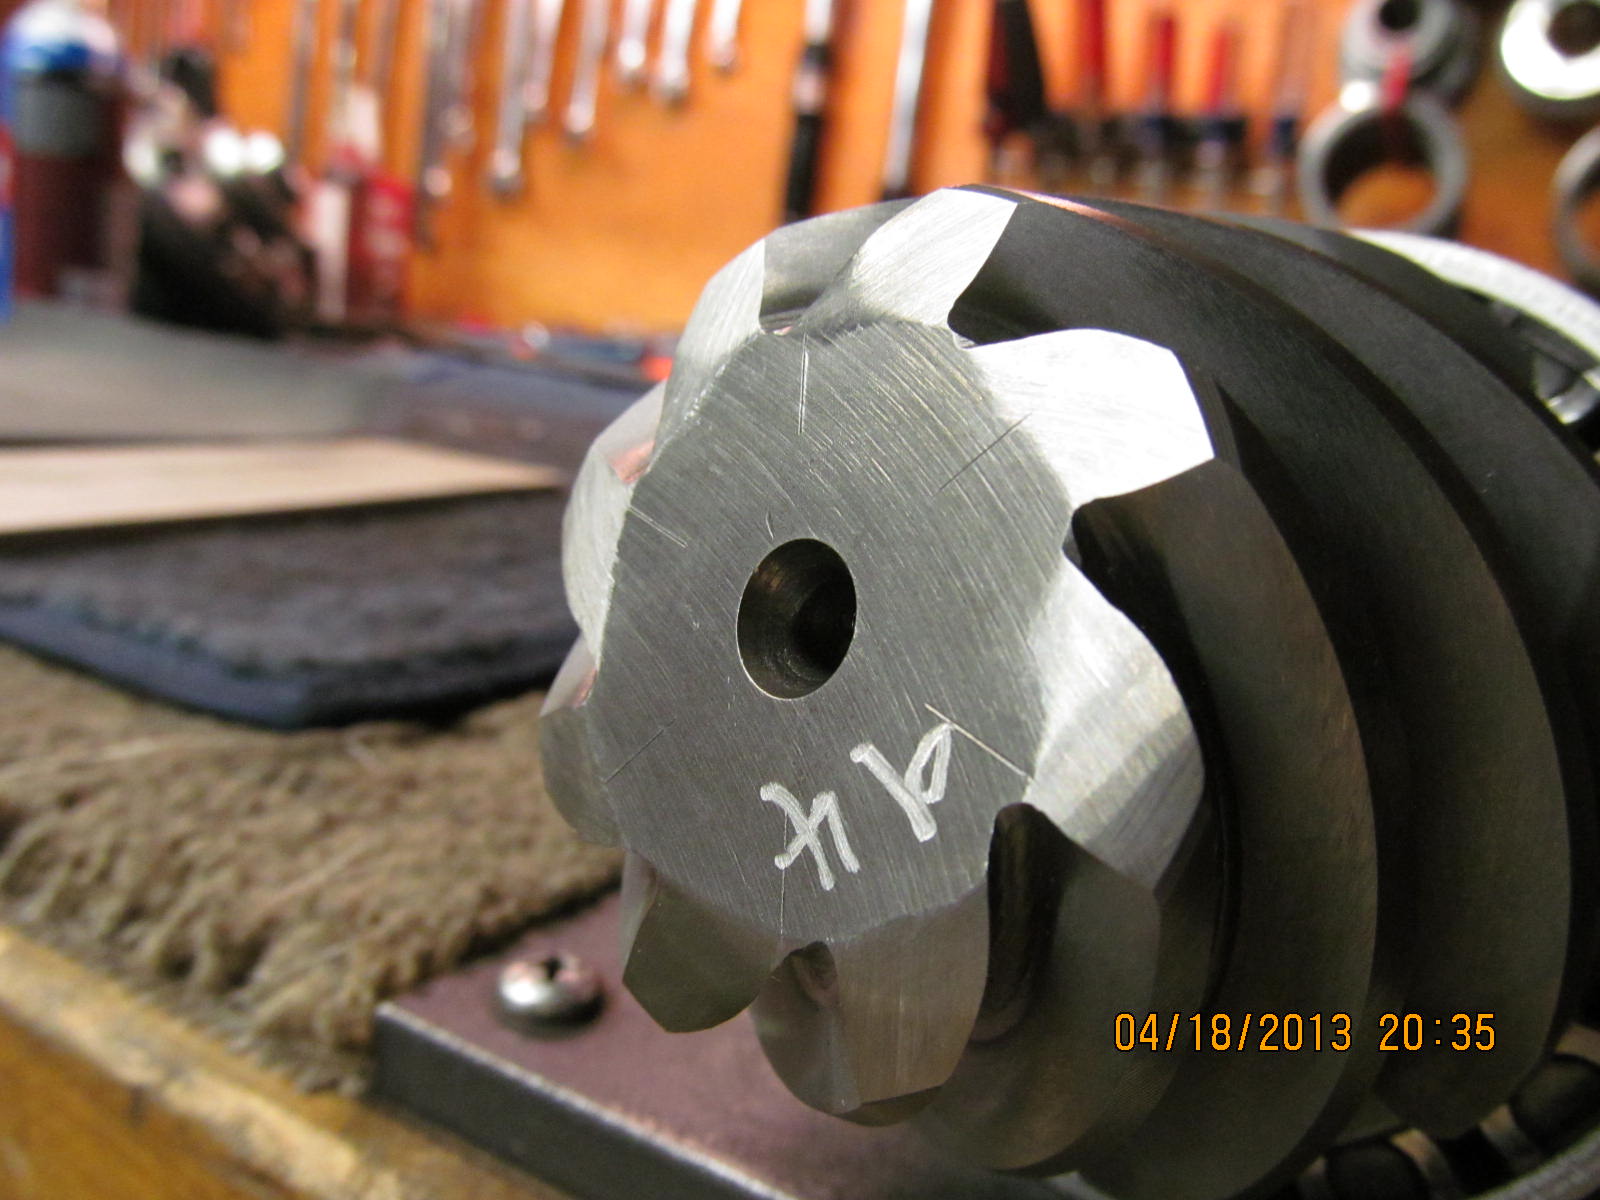
Took almost 1 minute to do all 8 teeth.
|
|
|
|
Tooth integrity remains the same....but arb case integrity goes way up as these
pinion teeth are not likely to ever contact the case.
|
|
|
|
|
...................
|
|
|
|
A piece of 100 grit sandpaper on a super flat piece of ceramic tile
can fine tune a solid collar.
|
|
|
|
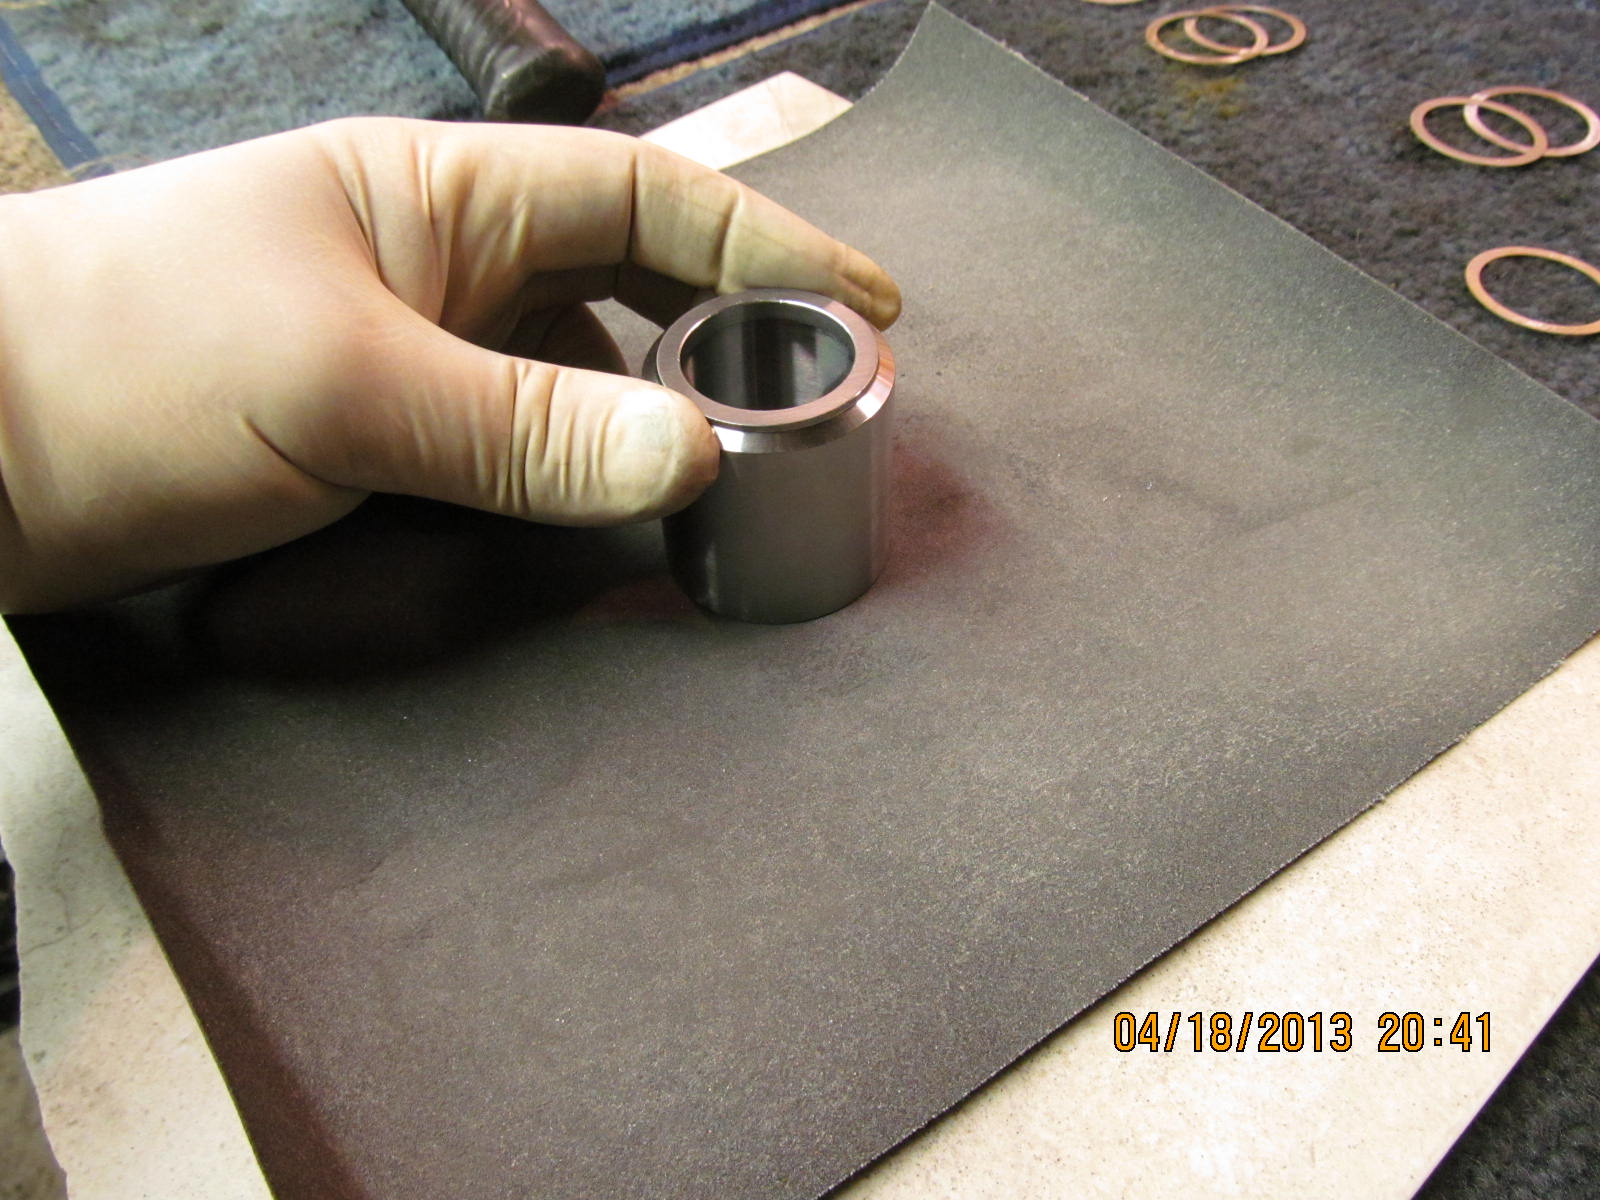
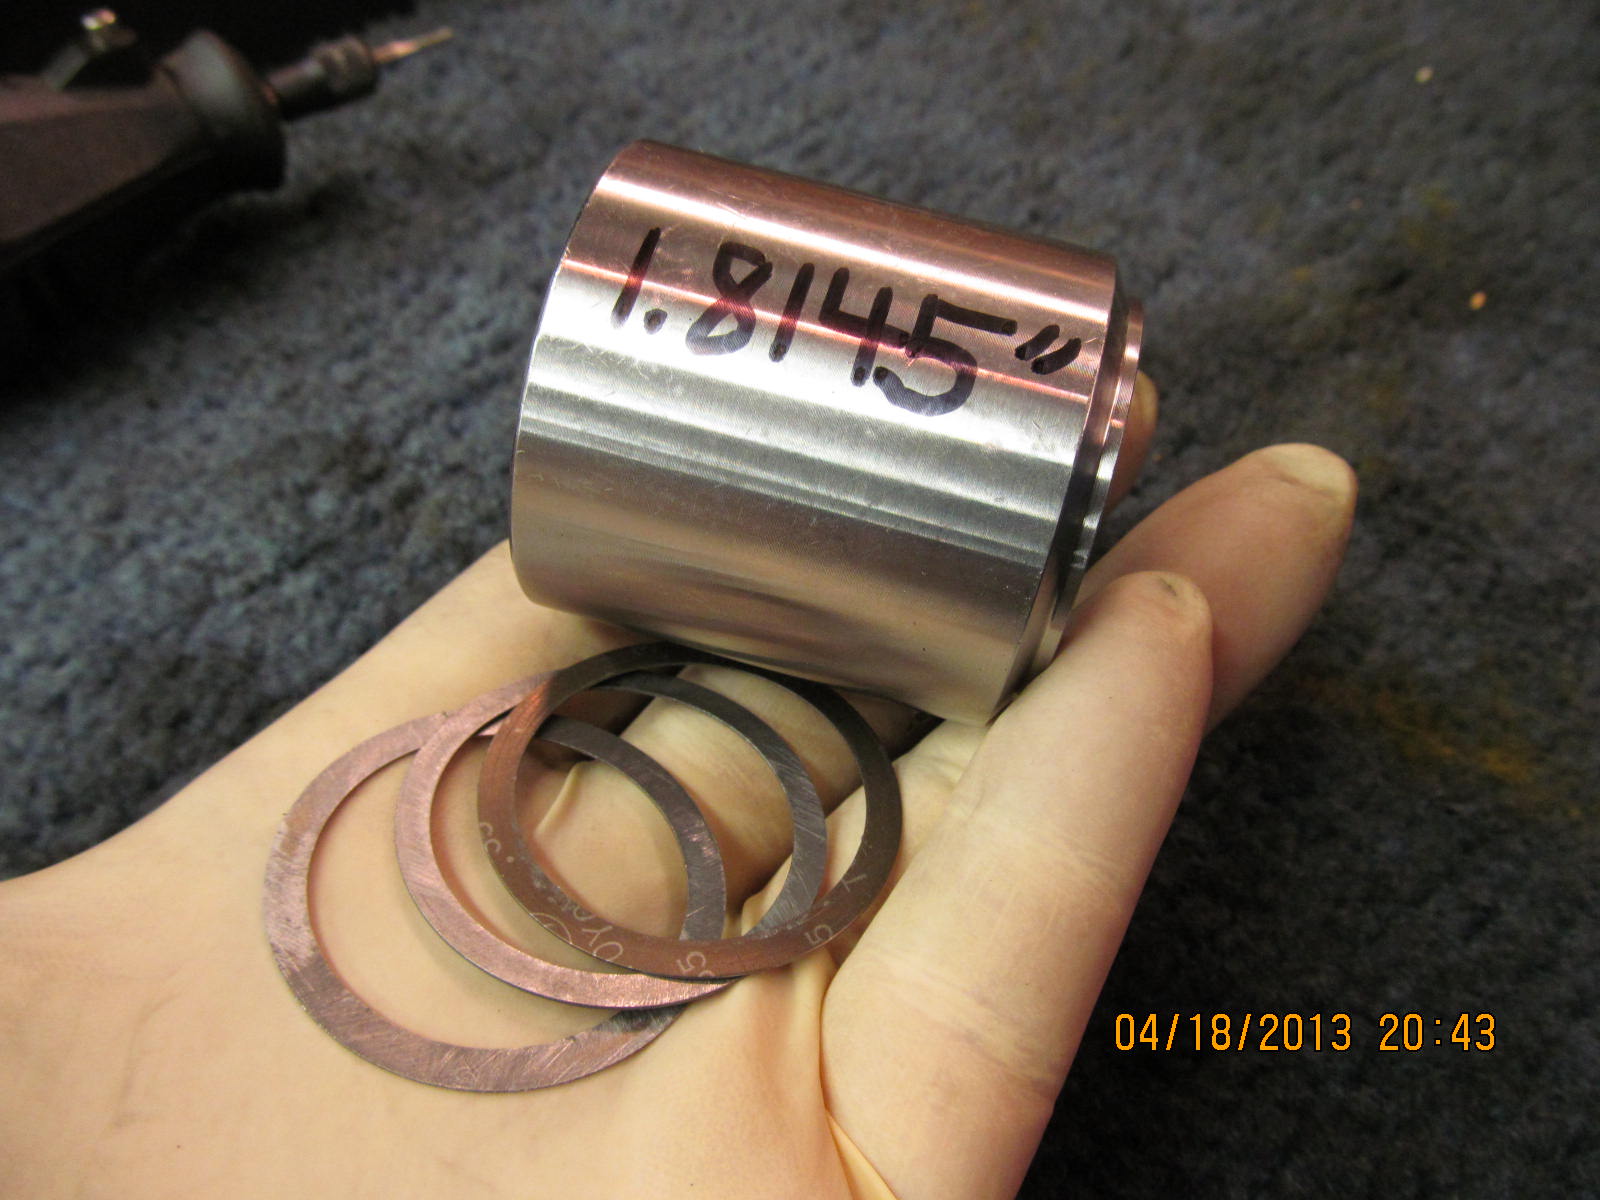
After a few trials, I ended up with .052" worth of shim with a collar that was
1.8145"....not quite 1.815"...total length is 1.8665"...and this resulted in
1 in/lb of PPL using the electric impact to tighten the flange done.
|
|
|
|
|
... 1 in/lb
|
|
|
|
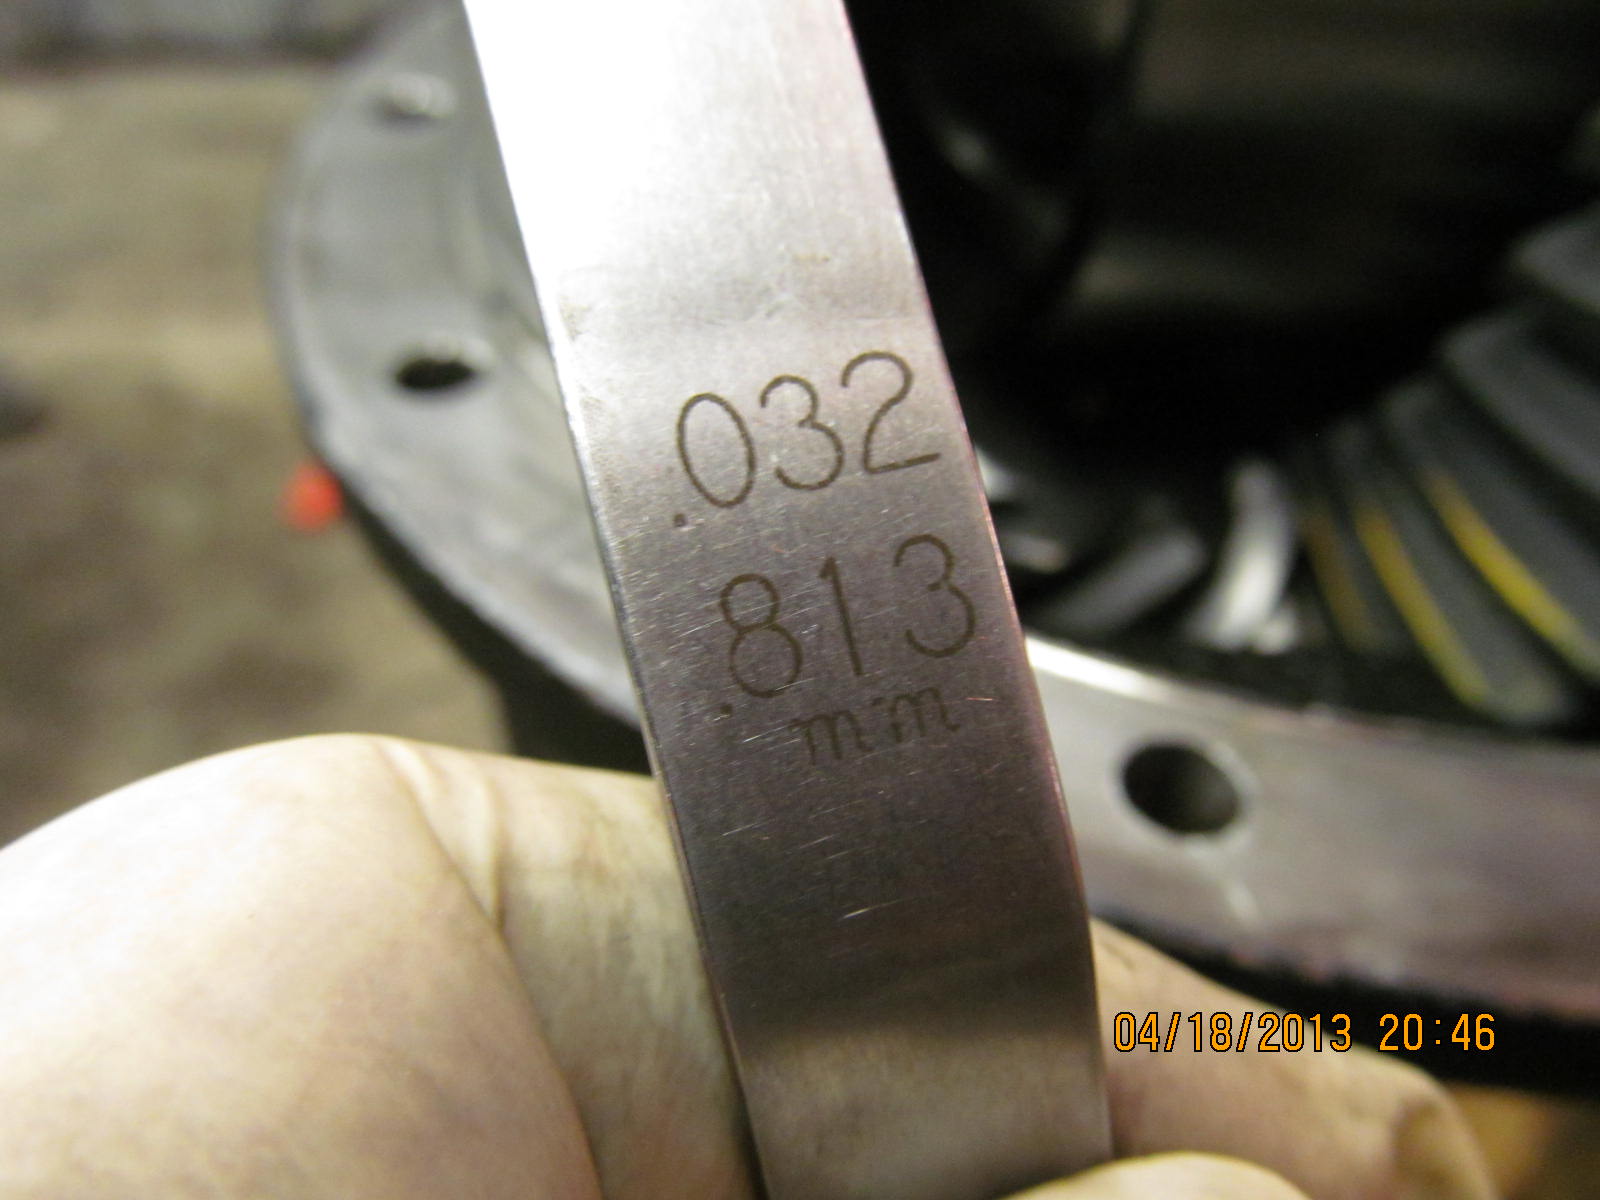
I just realized I used a .032" feeler on the ARB case clearance measurement.
Actually, I like the idea of verifying that a .040" feeler(1mm) will
clearance the case. ARB's .020" spec is a bare minimum.
|
|
|
|
|
I marked and drilled/tapped the bulkhead fitting hole and test fitted it.
|
|
|

|
|
Pinion is now pressed out to get it ready for the solid collar.
|
|
|
|
I can take off a few more "microns" of material to get the PPL up a few more points.
All it takes is 15 seconds here.
|
|
|
|
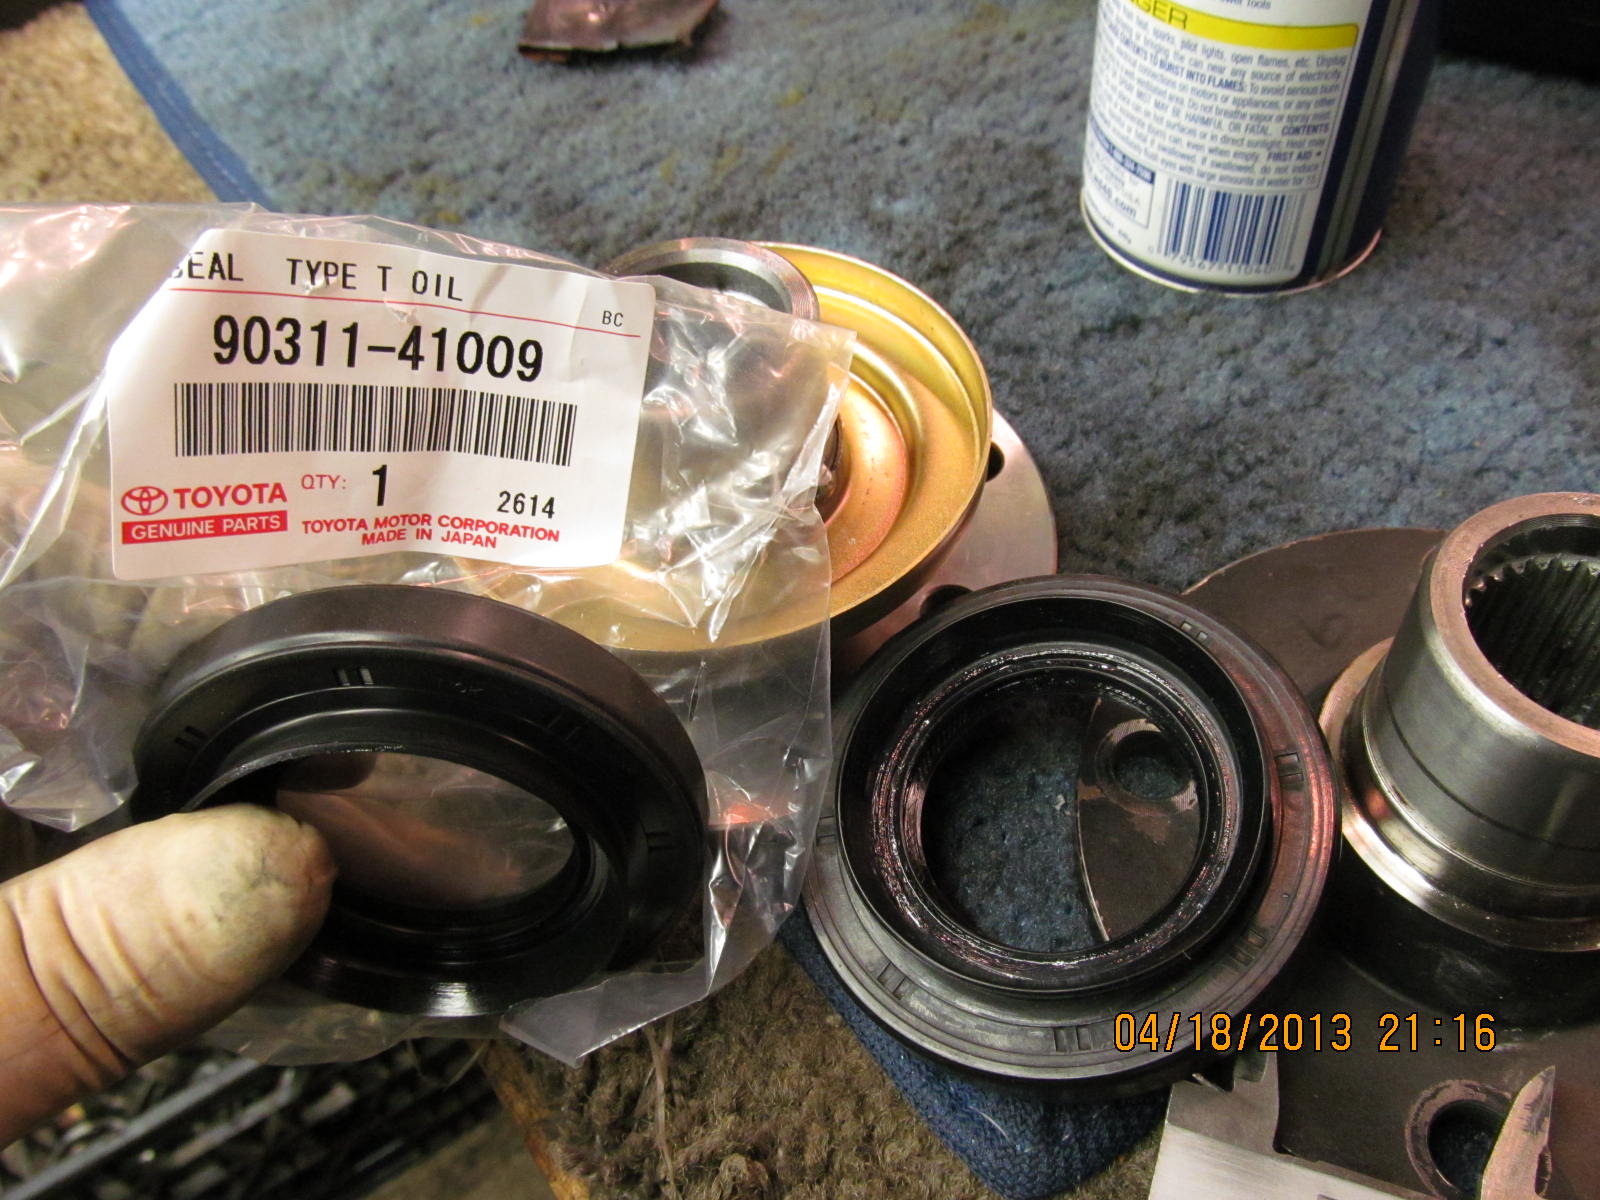
The seal supplied in the master kit just seemed snug on the pinion shaft....tighter
than what I was comfortable with.... so I substituted in the
OEM 90311-41009 29 spline seal.
|
|
|
|
As mentioned earlier, probably best to NOT use any type of rtv on the rubberized
seals.....a small chance of it popping out or migrating somewhat before the
rtv dries. A drop of gear oil should work aok.
|
|
|
|
|
Just like the other one....red loctite on clean threads.
|
|
|

|
This OEM seal contributed very little to the PPL equation. Seal drag contribution
looks to be less than 1 in/lb.
|
|
|
|
|
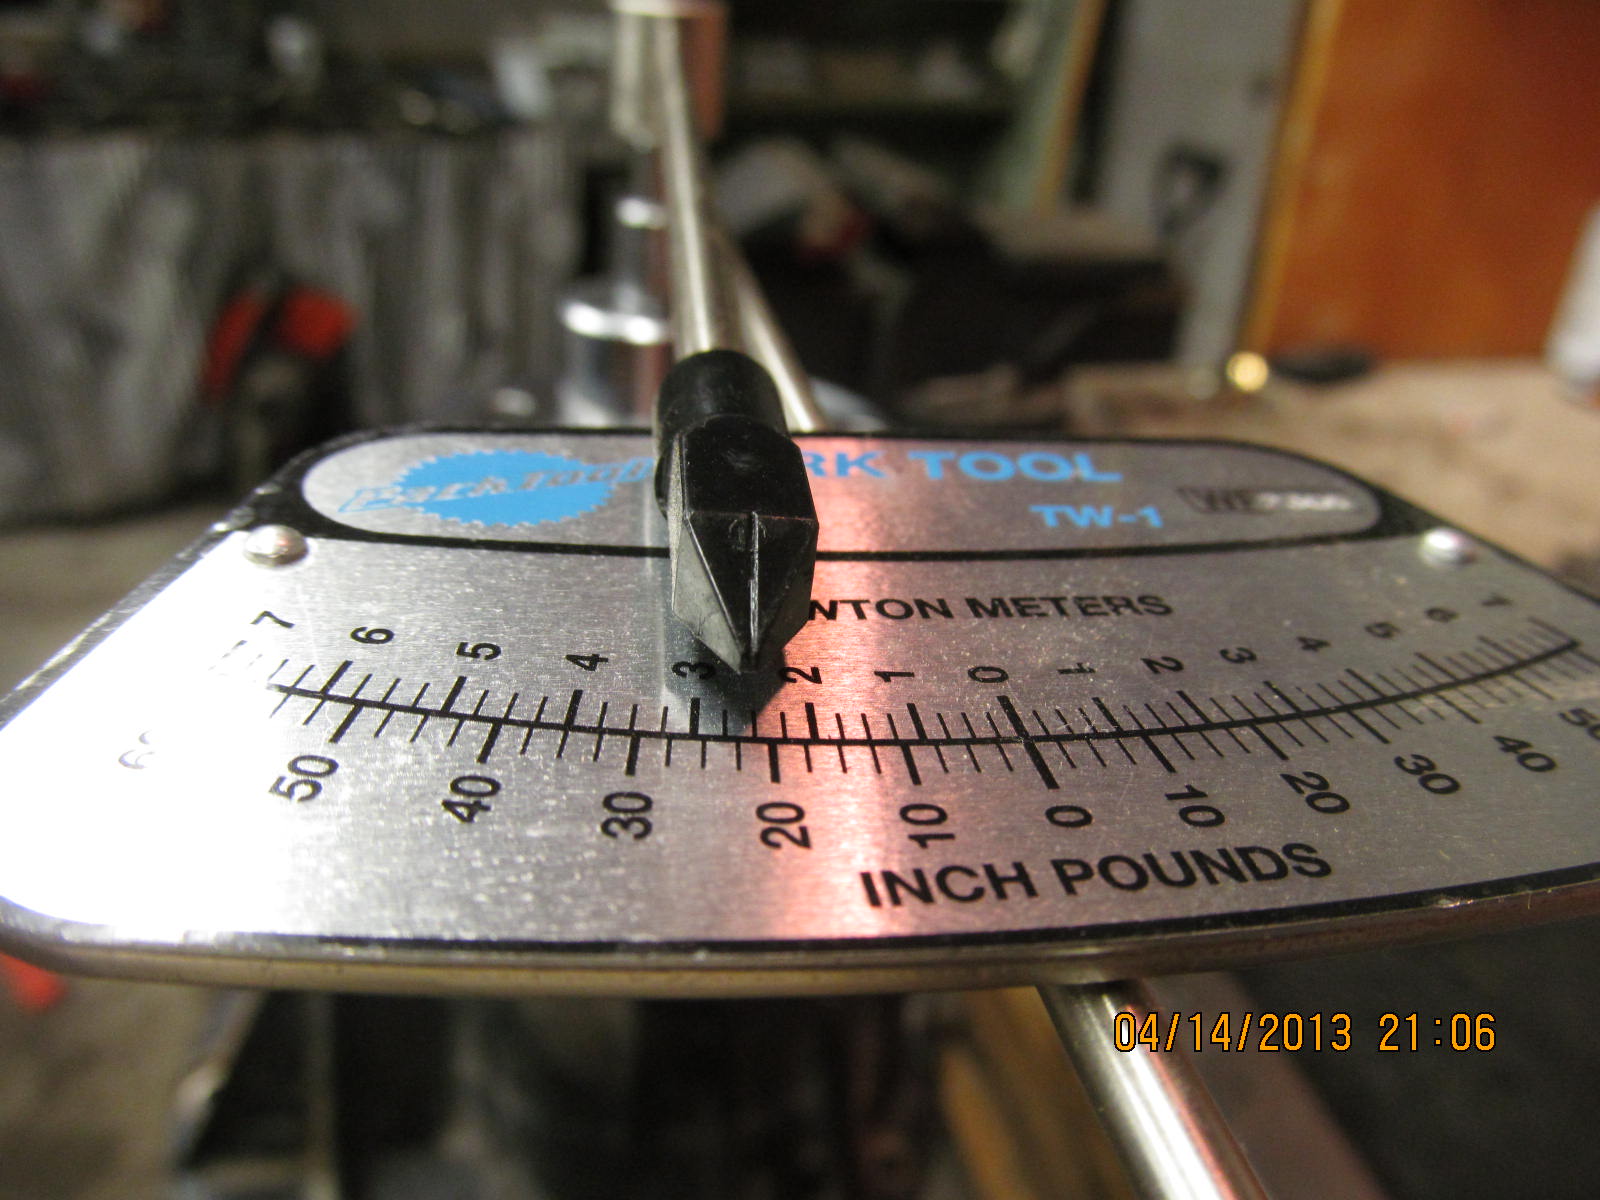
Tighten the pinion until the desired PPL is reached.
|
|
|

|
|
12 in/lb is a good all-around number....
|
|
|
|
Just like the other one, 75 ft/lb on the 4 bearing caps and then the readings are
written down in the notes to make 100% sure it was really done.
No loctite on these bolts.
|
|
|
|
|
Backlash is recorded on every other tooth here.
|
|
|
|
|
Carrier bearing pre-load is verified to be 100 ft/lb minimum and it is.
|
|
|
|
Flip the 3rd over and measure the total pre-load...pinion plus ring gear. I
measured 20 in/lb. PPL was 12 so that means 8 in/lb is the carrier
bearing contribution.
|
|
|
|
|
Lots of gear oil on the viton "x-rings" and carefully jiggle the seal assembly fully in place.
|
|
|
|
|
Pop the clip in place.
|
|
|
|
|
..........................
|
|
|
|
Blue loctite. Notice how clean those bolts appear. That starting
fluid (ether) really does a job.
|
|
|
|
|
10 ft/lb.
|
|
|
|
|
........................
|
|
|
|
|
.............................
|
|
|
|
|
............................
|
|
|
|
|
.......................
|
|
|
|
|
Route it and form it so the copper is relaxed about in the center.
|
|
|
|
|
.........................
|
|
|
|
|
Assemble the fitting. Use some gear oil on the o-ring.
|
|
|
|
|
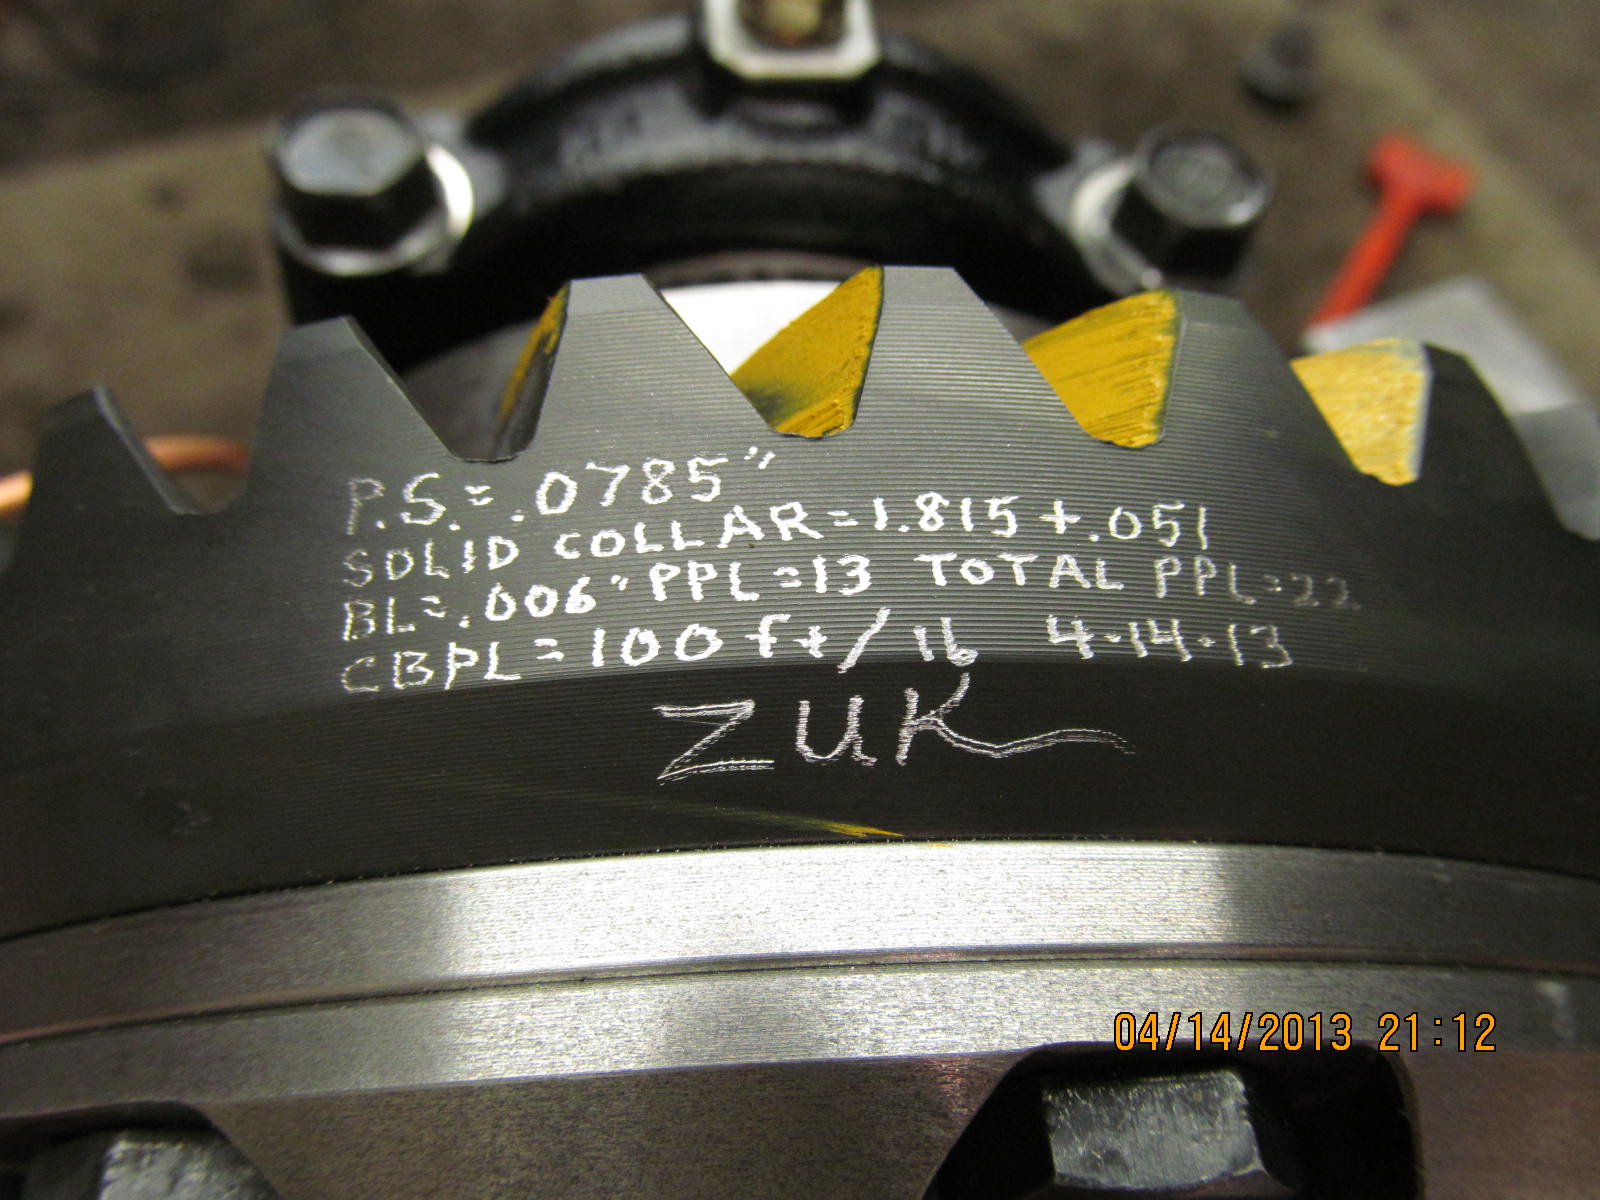
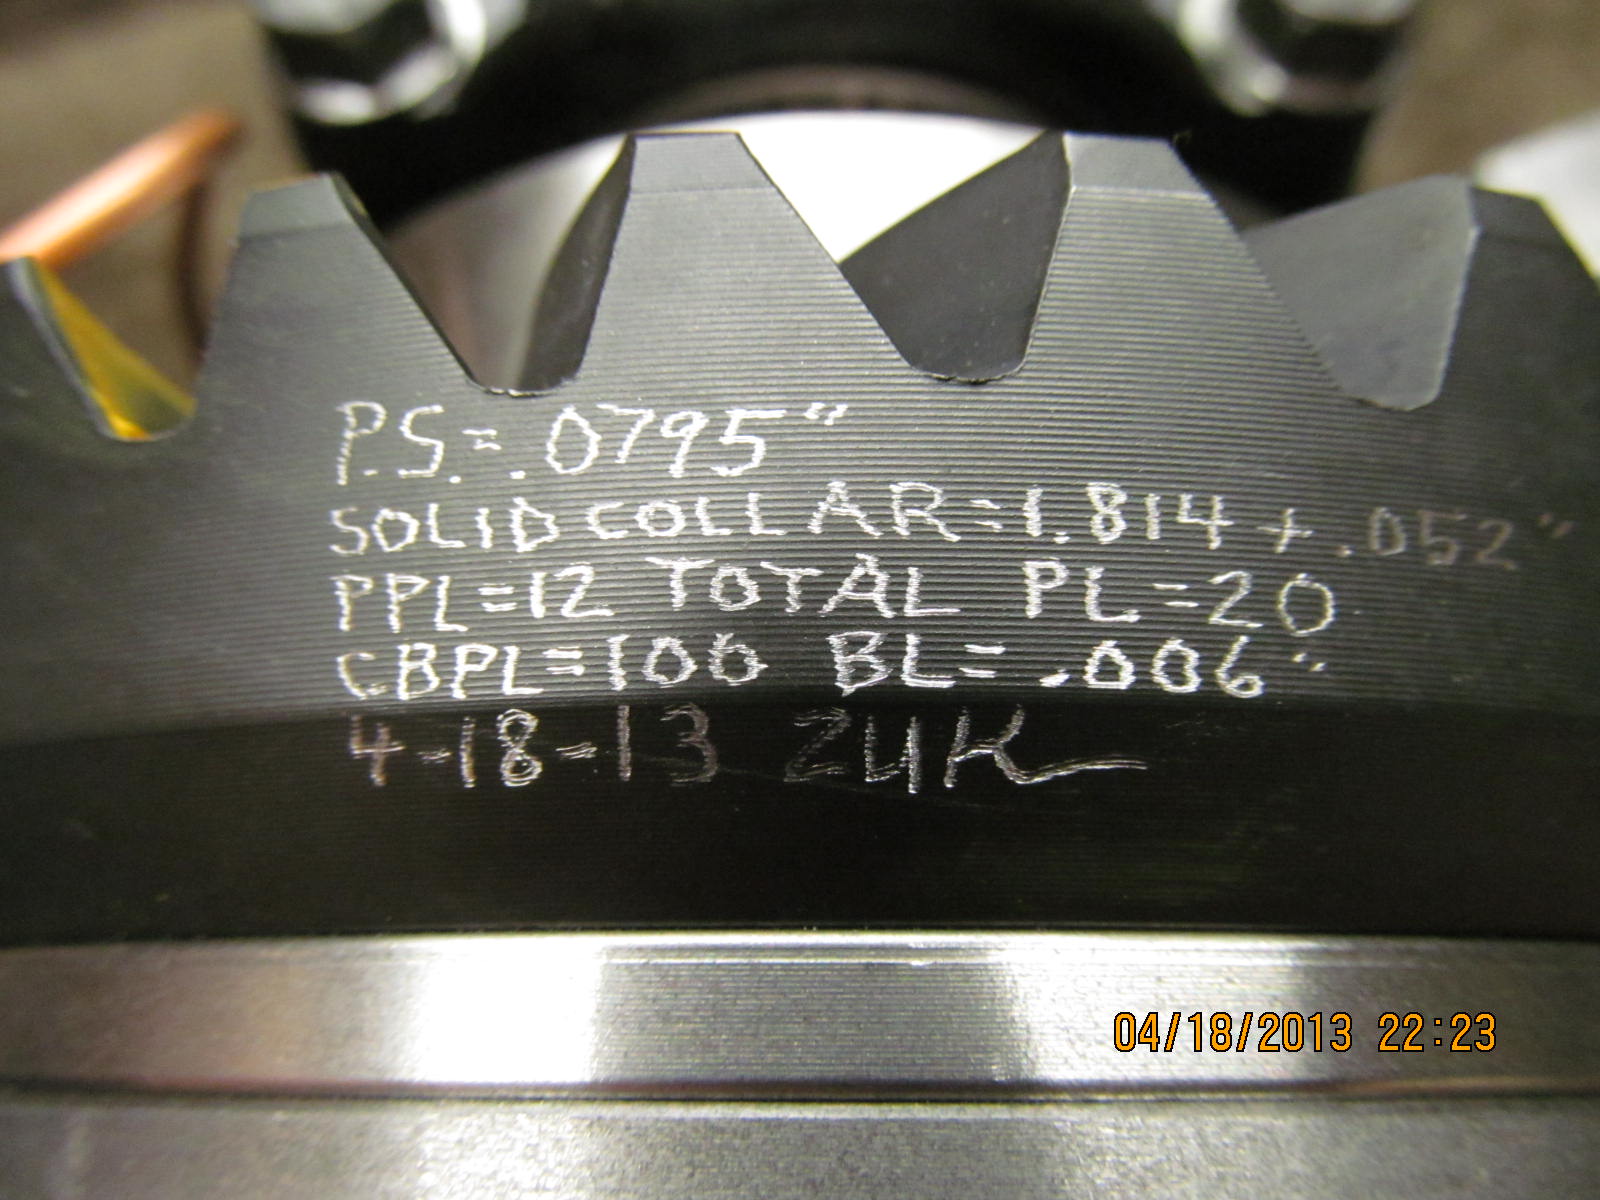
Some measured specs are scribed on the ring.
|
|
|
|
|
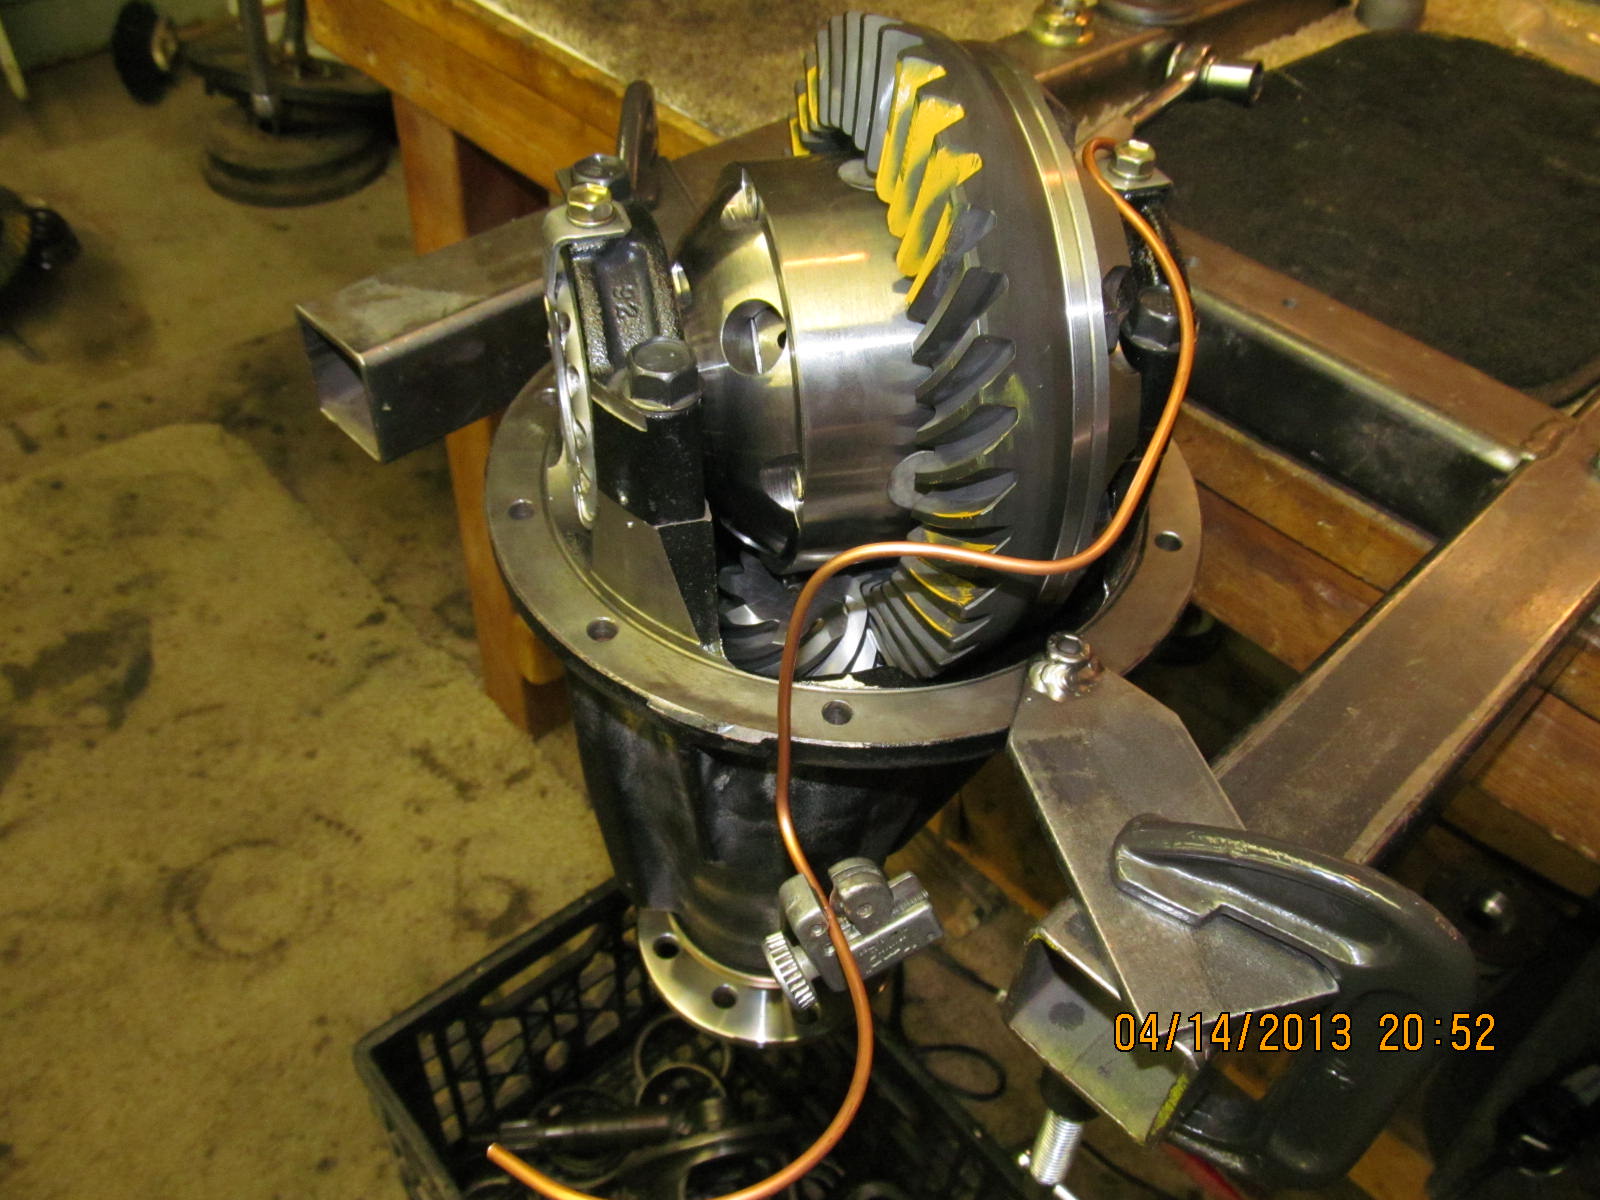
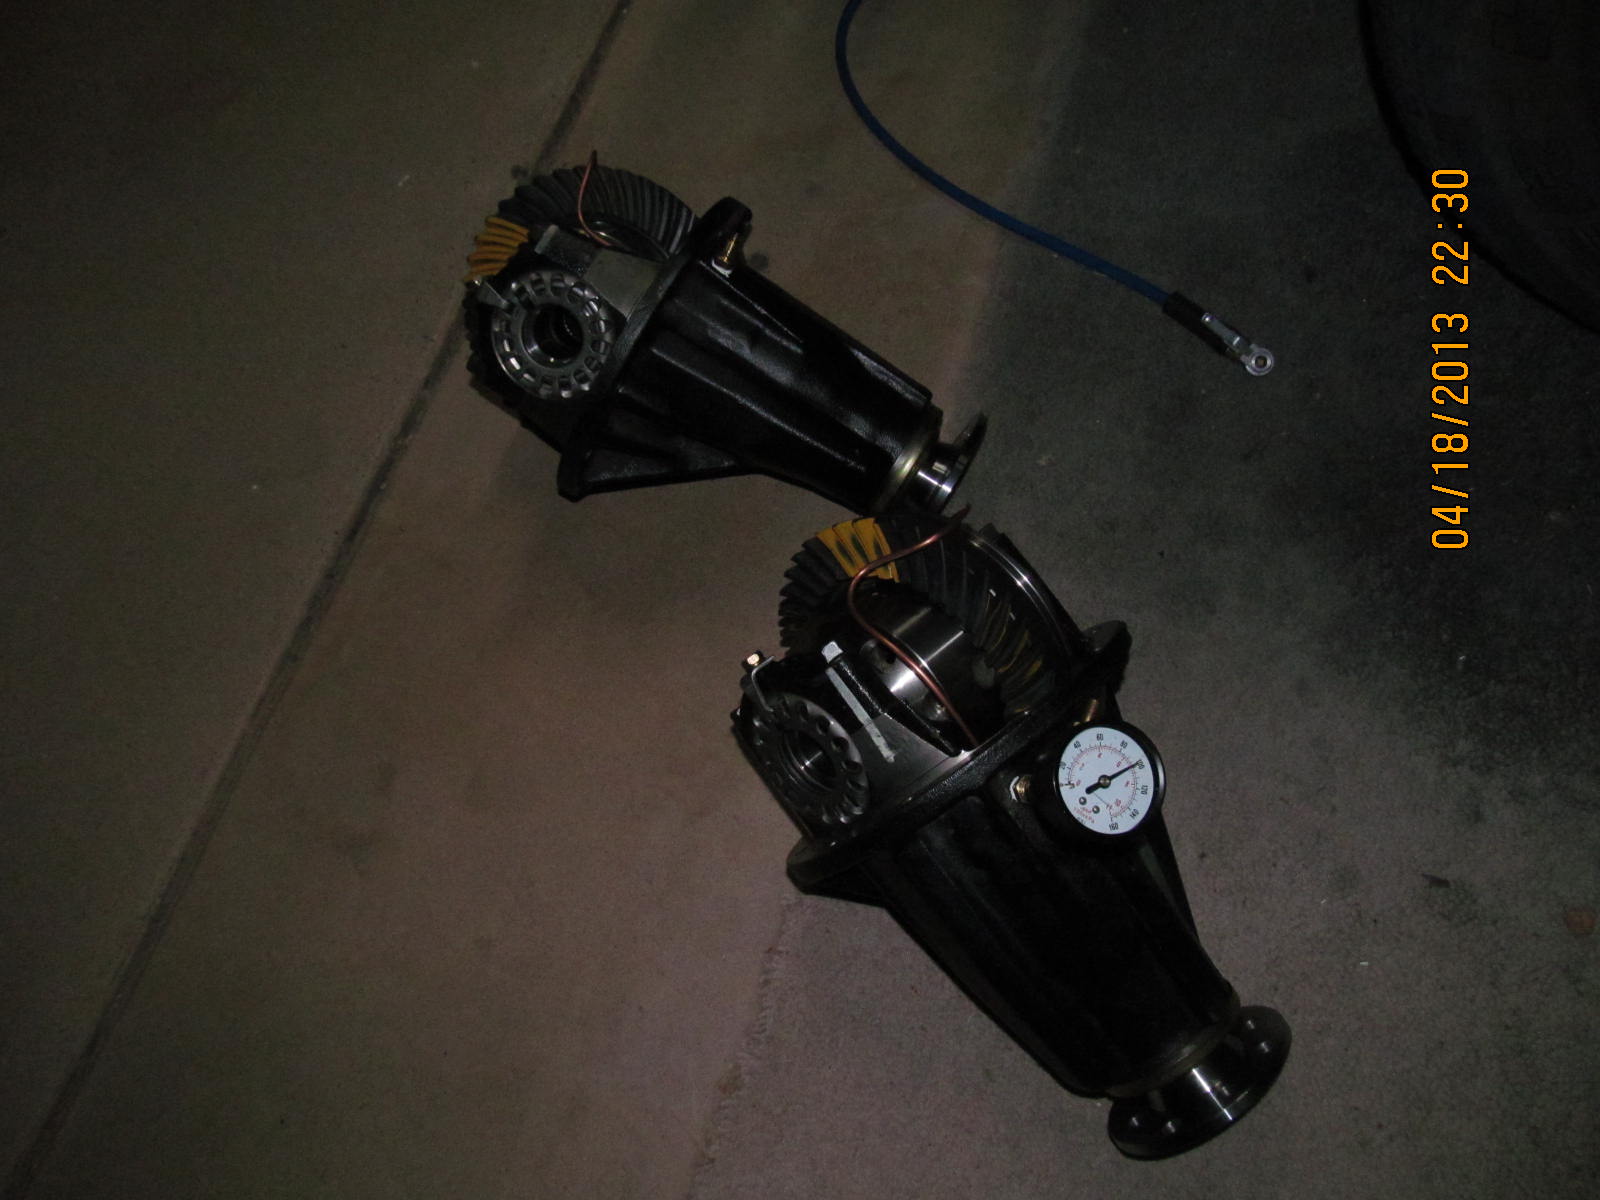
Both of Yopars' ARBs are leak tested at the same time. Pass.
|
|
|
|
|
|
|
|
|
|
|
|
|
|
There's a box in the box...only the ARB box is visible so basically, the 3rd is
well anchored inside. Not seen is the low profile cardboard boxes UNDER the arb
box. They act as an excellent cushion to dissipate the load hot spots on the bottom.
|
|
|
|
|
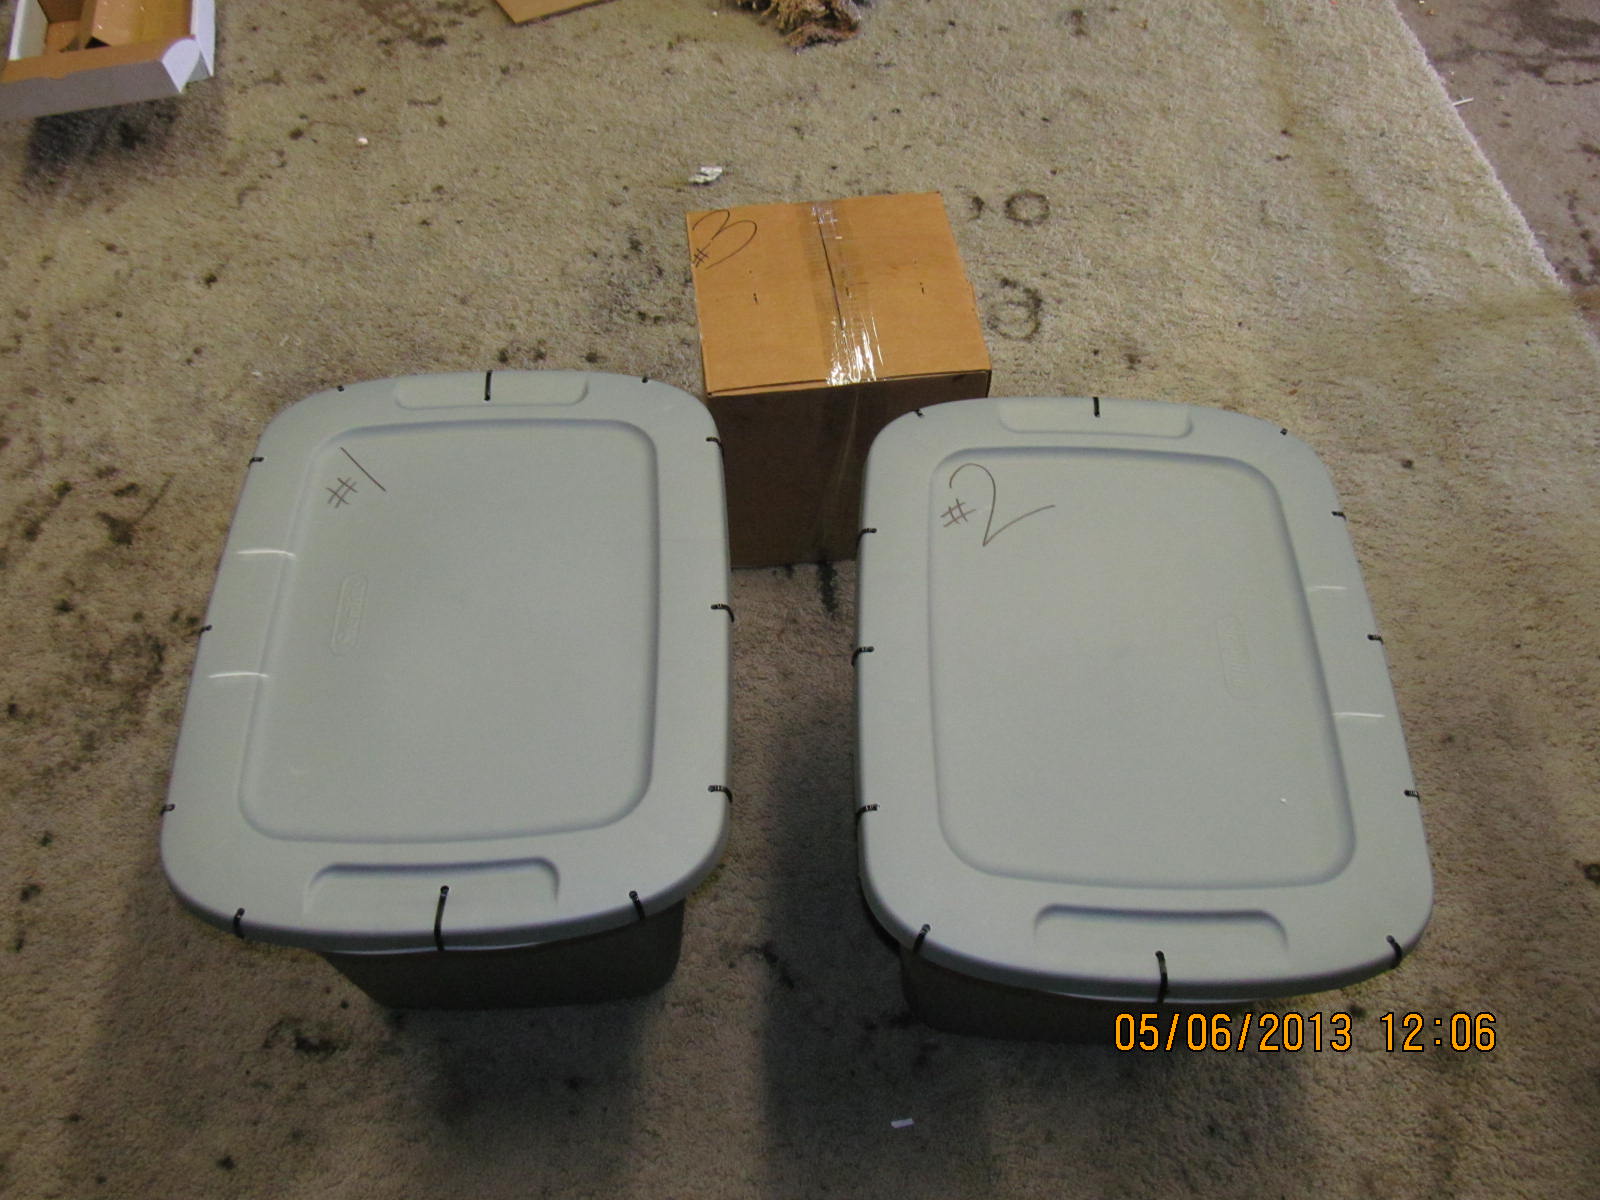
3 boxes heading back to Florida :)
|
|

|