|
Two 8.4" 529 differentials...rear one busted...front needs a check-up
|
|
(87 good size pics loading)
|
|
NOV 25 2012
|
|
|
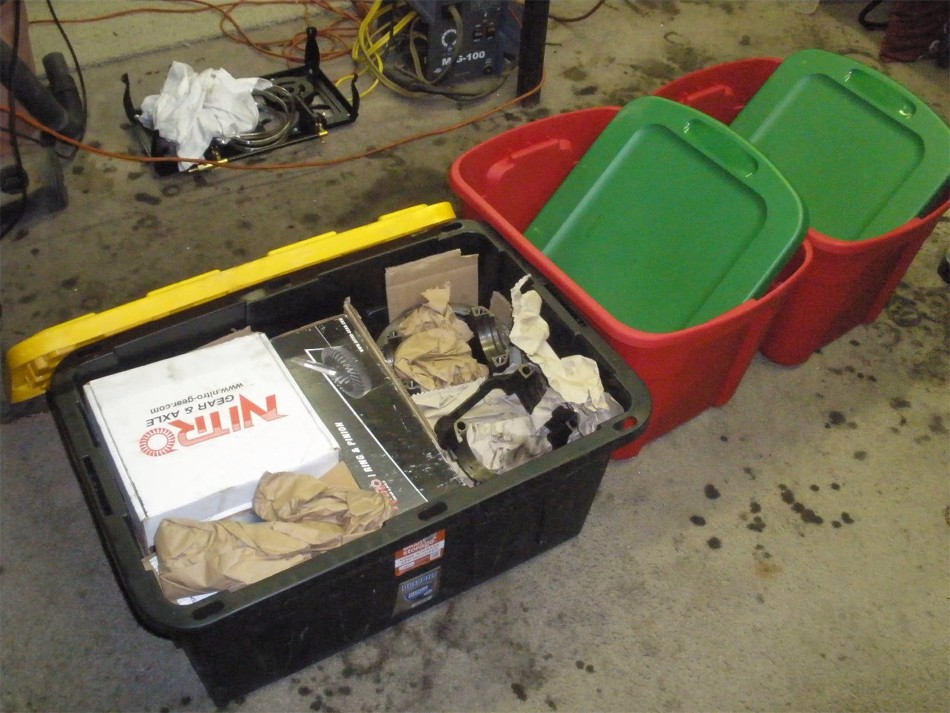
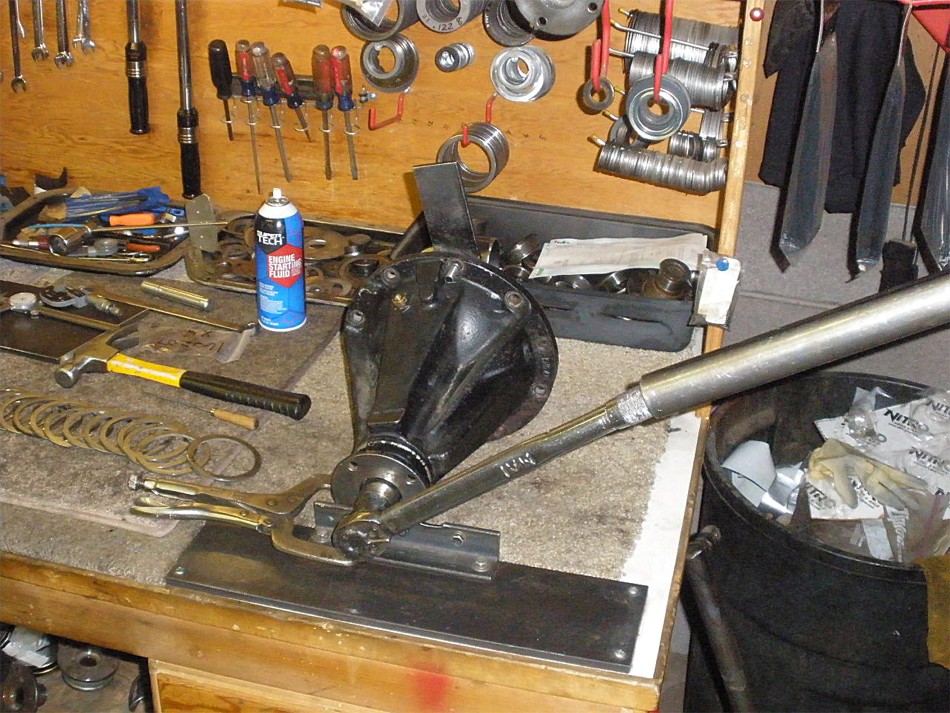
As received from Jon up in the northwest state of Washington....150 pounds.
Both 8.4 3rds in the same tote with ARB's made for a very heavy tote. The
"Christmassy" totes on the right will be used for the return trip.
|
|
|
|
|
The first 45 pics here are of the rear install.
|
|
|
|
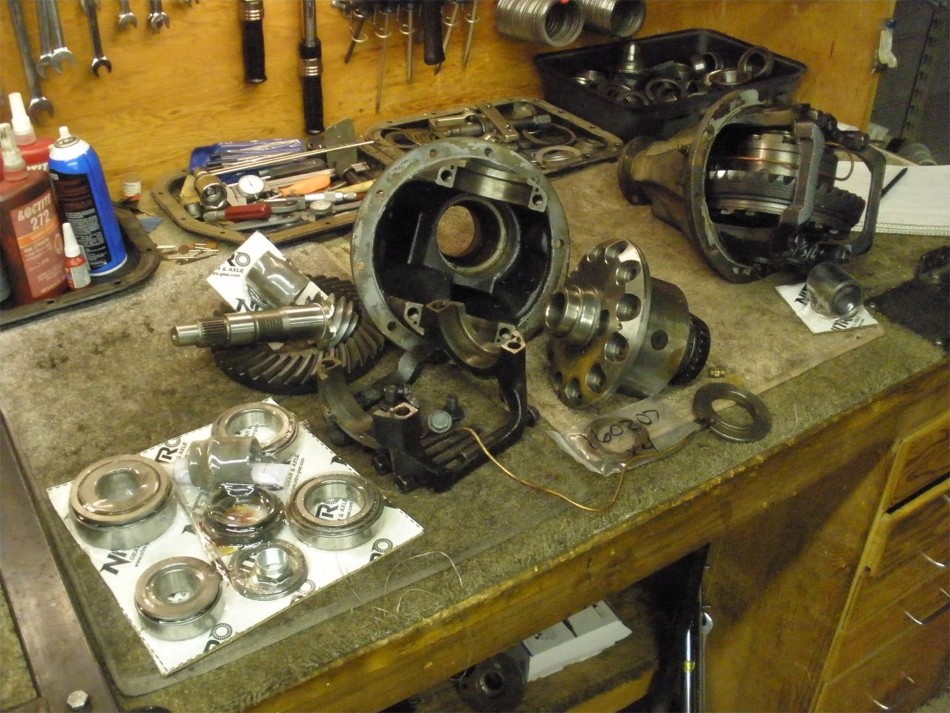
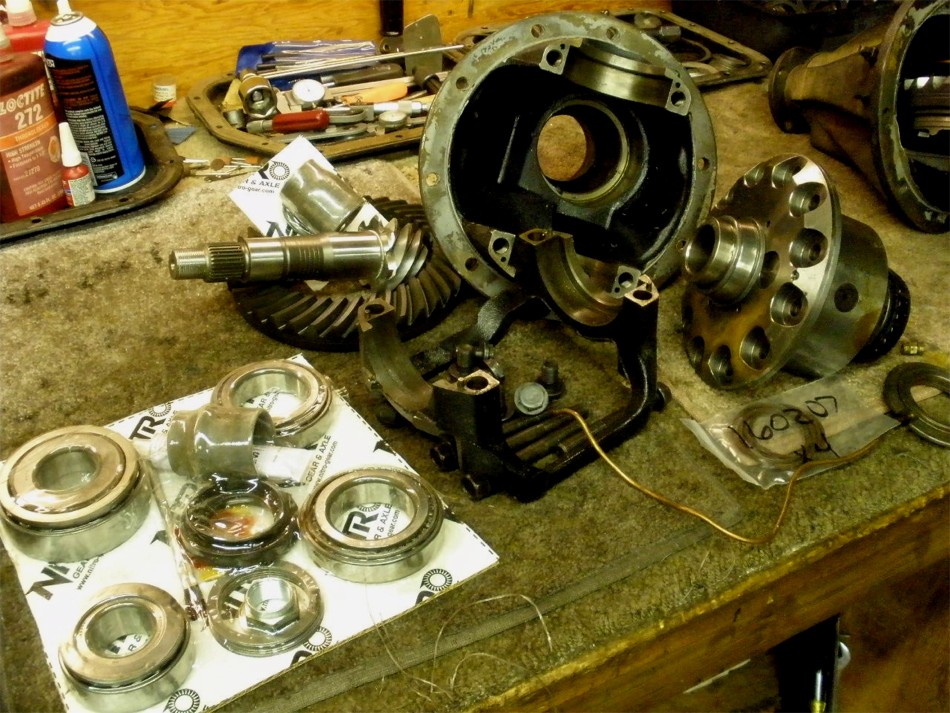
Jon didn't send the broken stuff but he only had 2000 miles on the rear one and
it busted. He had both of his 3rds rebuilt with 529 gears and ARB by a reputable
shop with a strong ethernet presence. He reports that he did have a chance to
measure the pinion shim which was a very thin .073". Everything was layed out
and all is there for the rebuild.
|
|
|
|
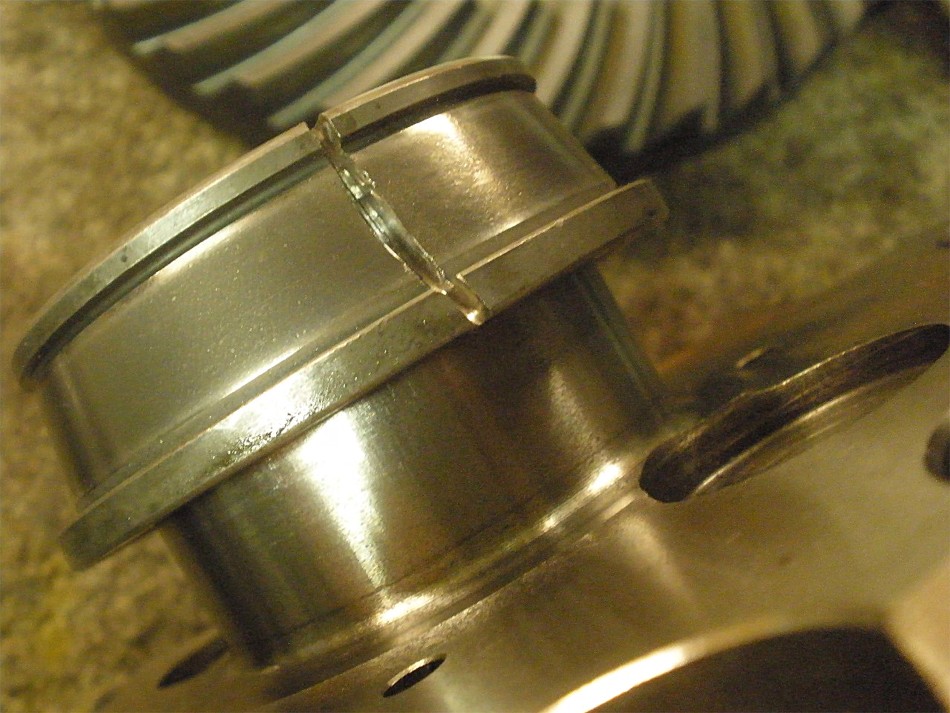
The inner guts of this carrier bearing comes off easy if a high speed dremel tool
is used to cut it like this.
|
|
|

|
|
Both surfaces are verified burr-free with a large file and all looked good.
|
|
|
|
|
Red Loctite on the clean flange bolts...
|
|
|
|
|
...and 85 ft/lb on all twelve.
|
|
|
|
|
Both carrier bearings can be started in this fashion.
|
|
|
|
But I switch to the press to finish it up. Always save the old bearings to use them
as I have here. ;)
|
|
|
|
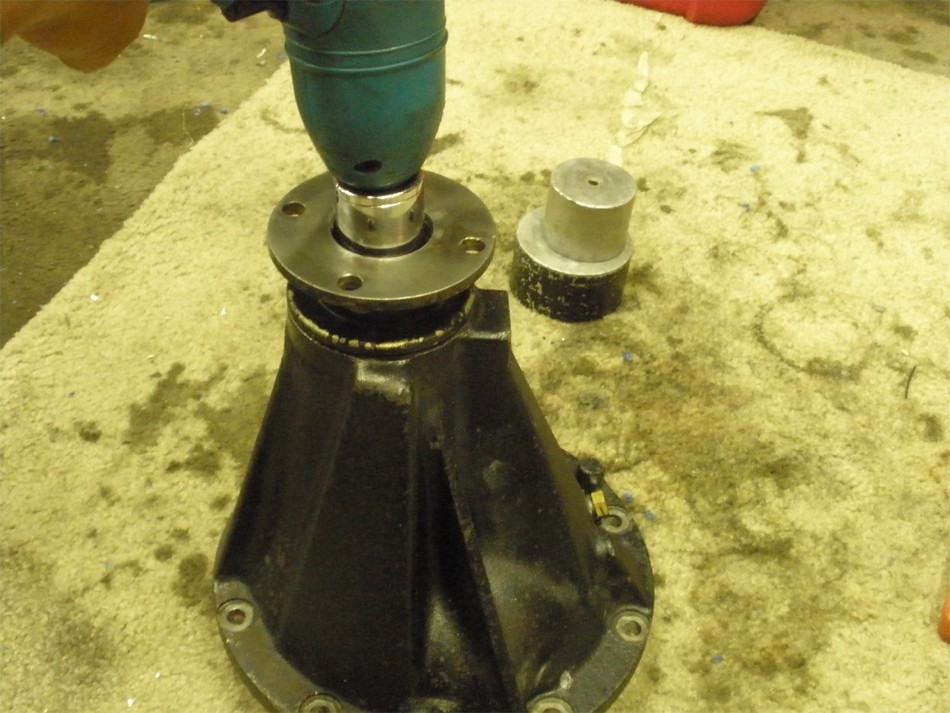
Same thing with the small outer pinion race here....use the old race to tap the new
one in with no damage.
|
|
|
|
|
The press makes easy work of the inner pinion race here.
|
|
|
|
|
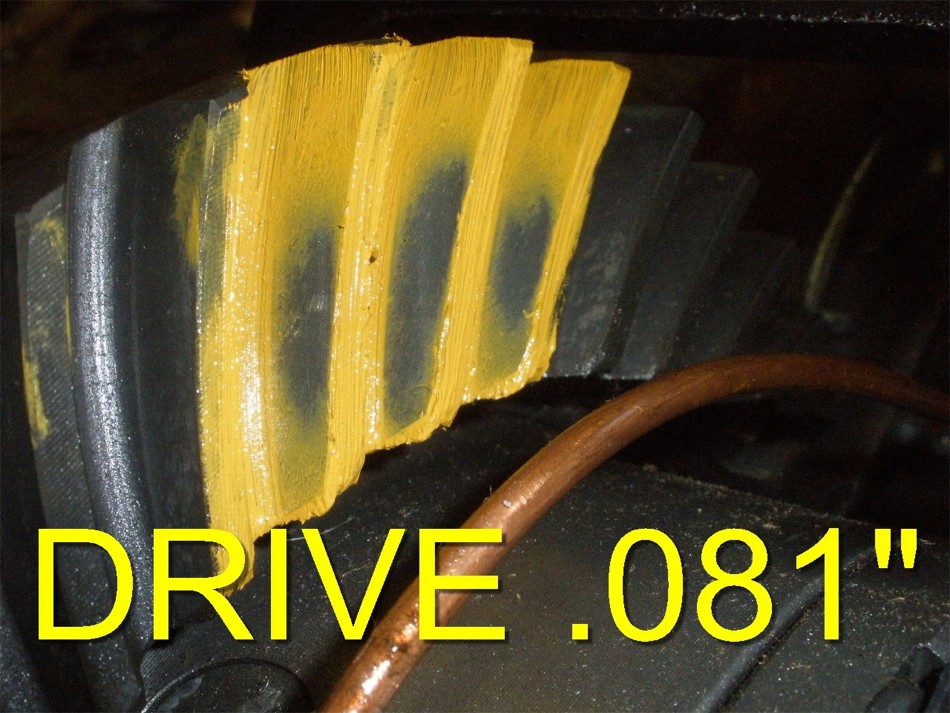
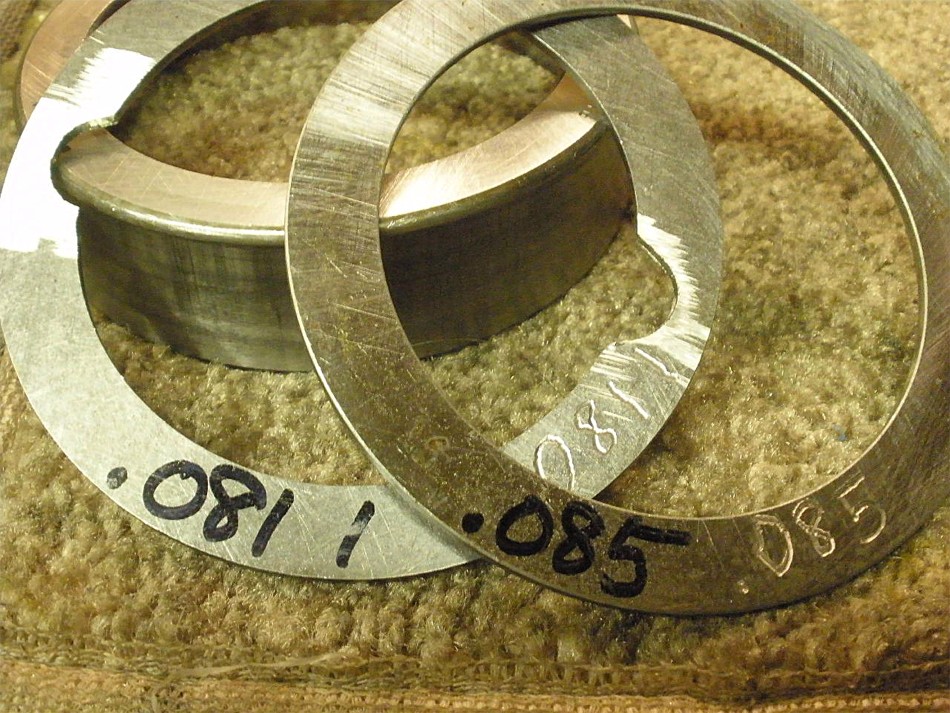
With this new Nitro Gear ring/pinion I will start with .081" for the pinion shim selection.
|
|
|
|
|
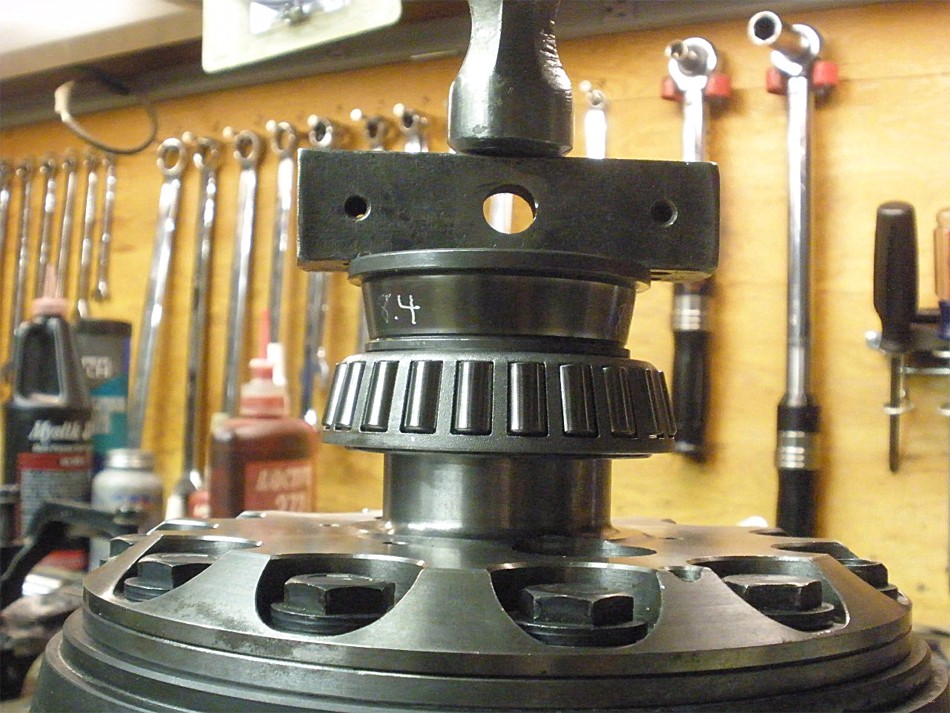
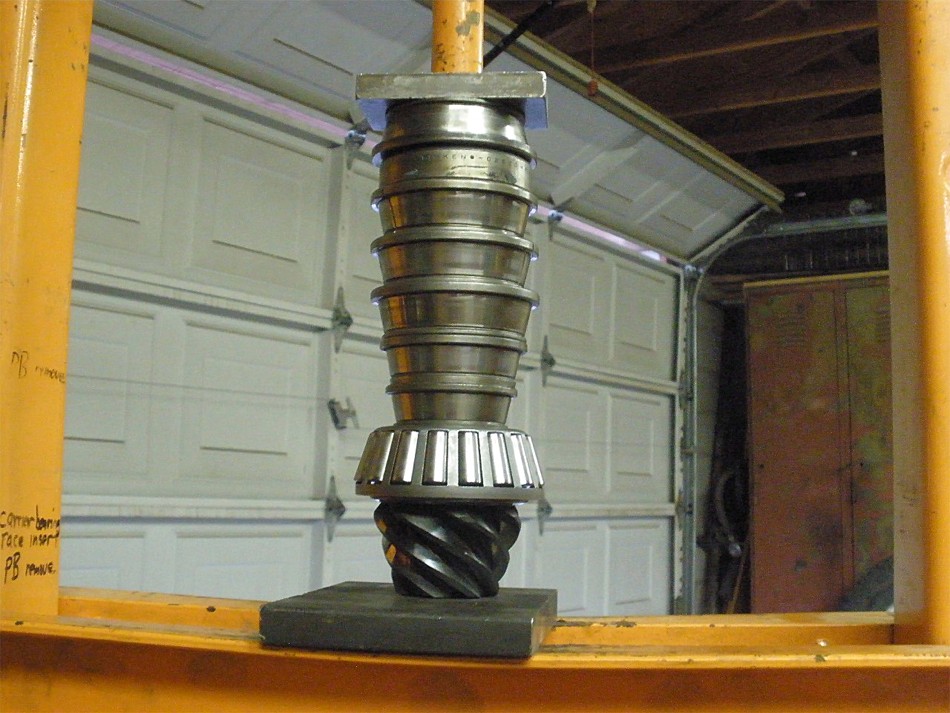
So many options for pressing on the pinion bearing....this is one of them.
|
|
|
|
|
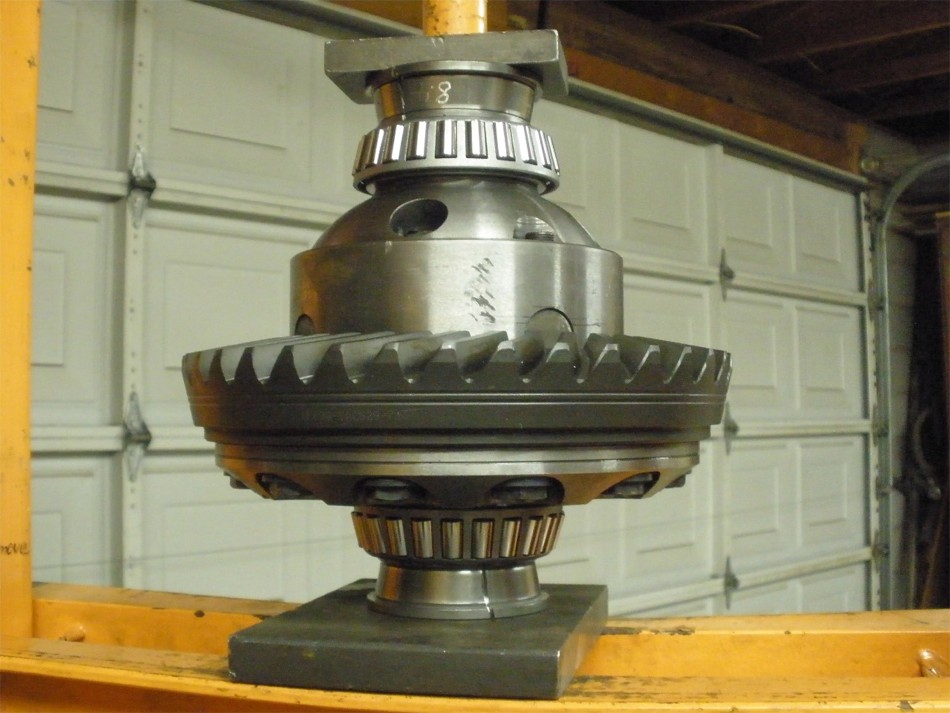
Loading up the pinion for a paint depth check...no crush or solid collar at this point.
|
|
|
|
|
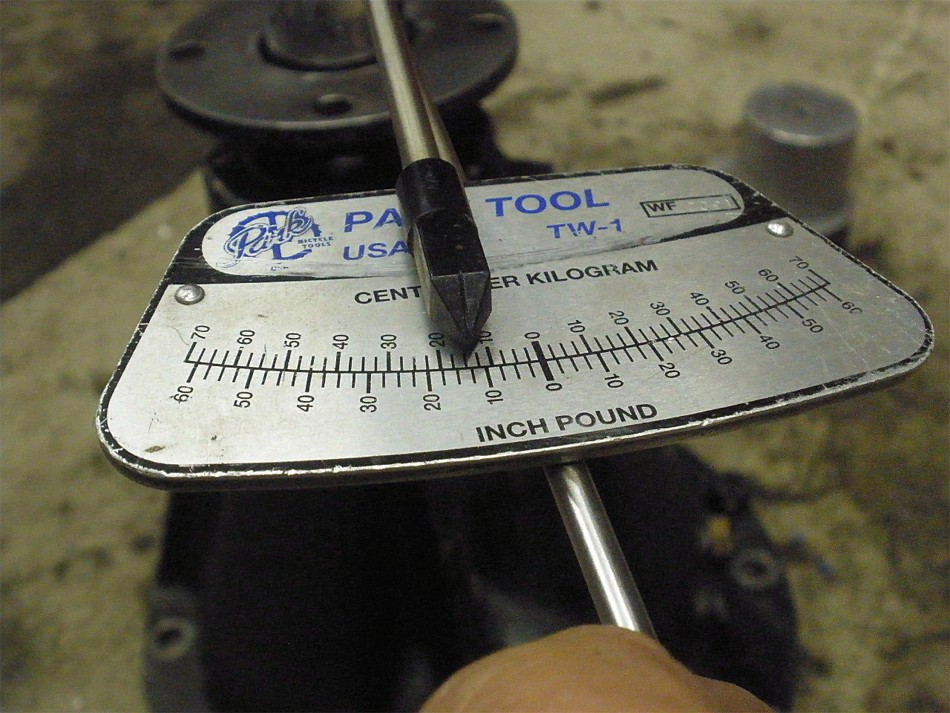
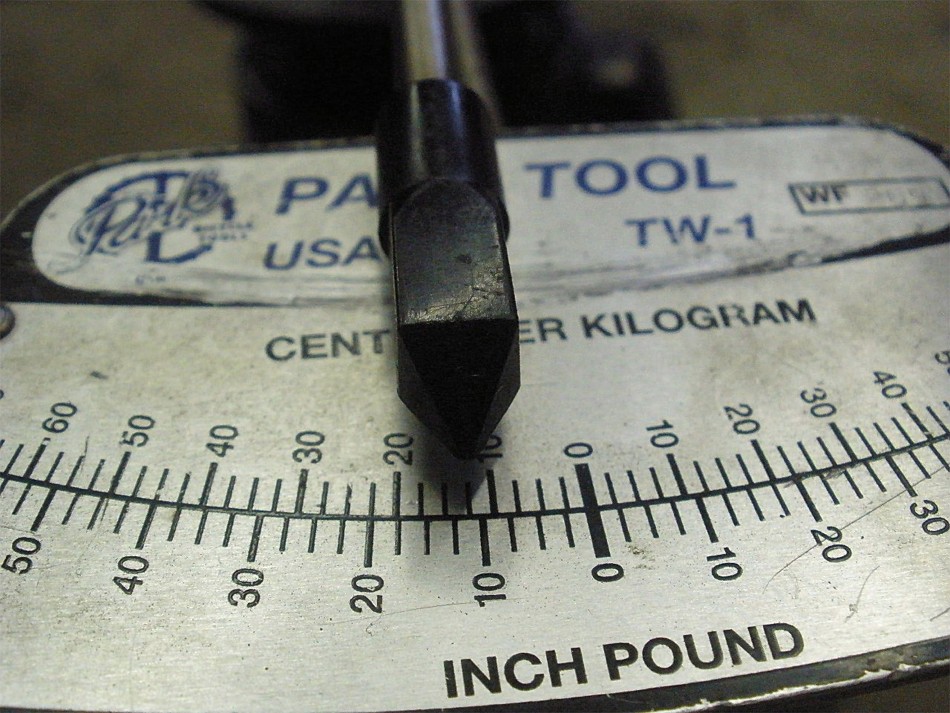
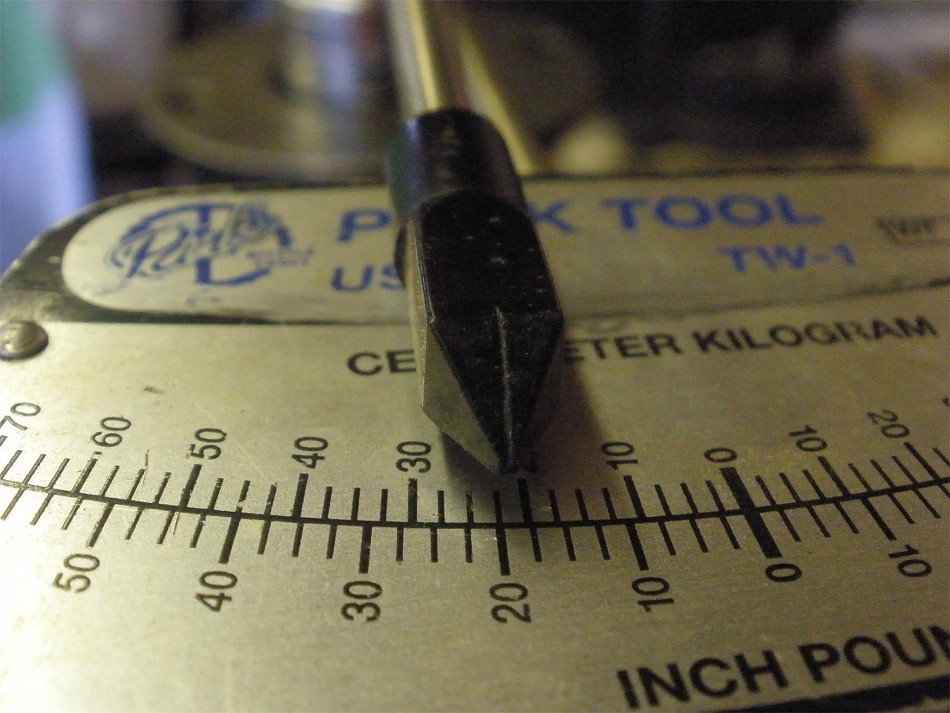
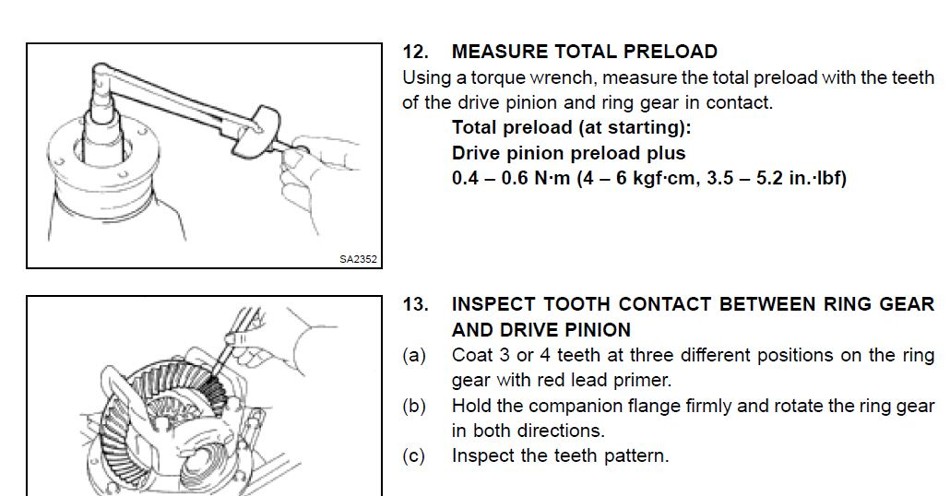
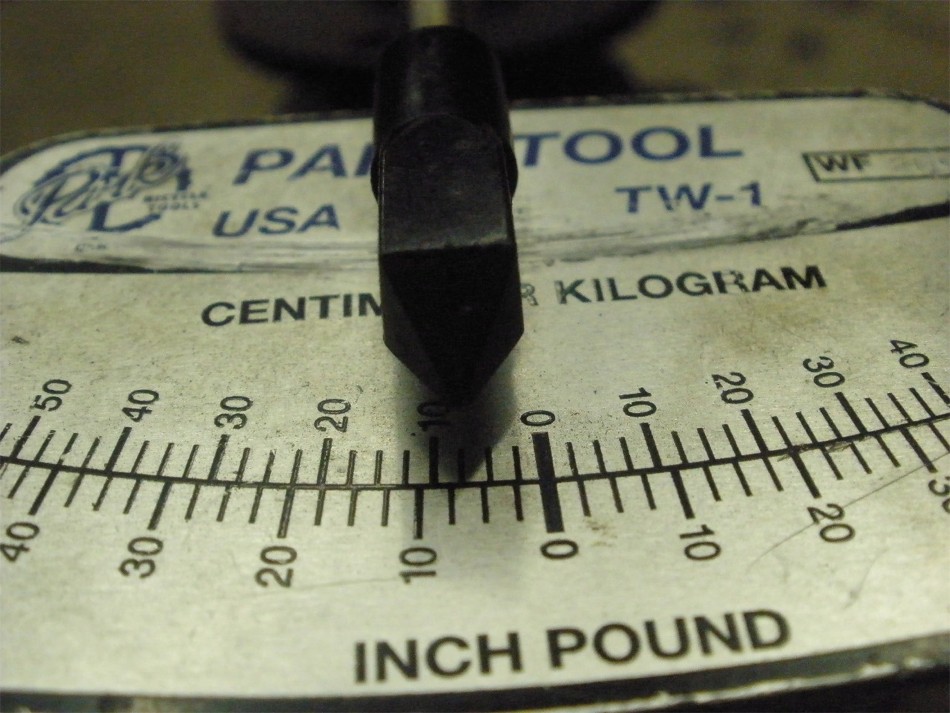
A quick torque check shows that all is good to go...about 12 inch/pounds start torque.
|
|
|
|
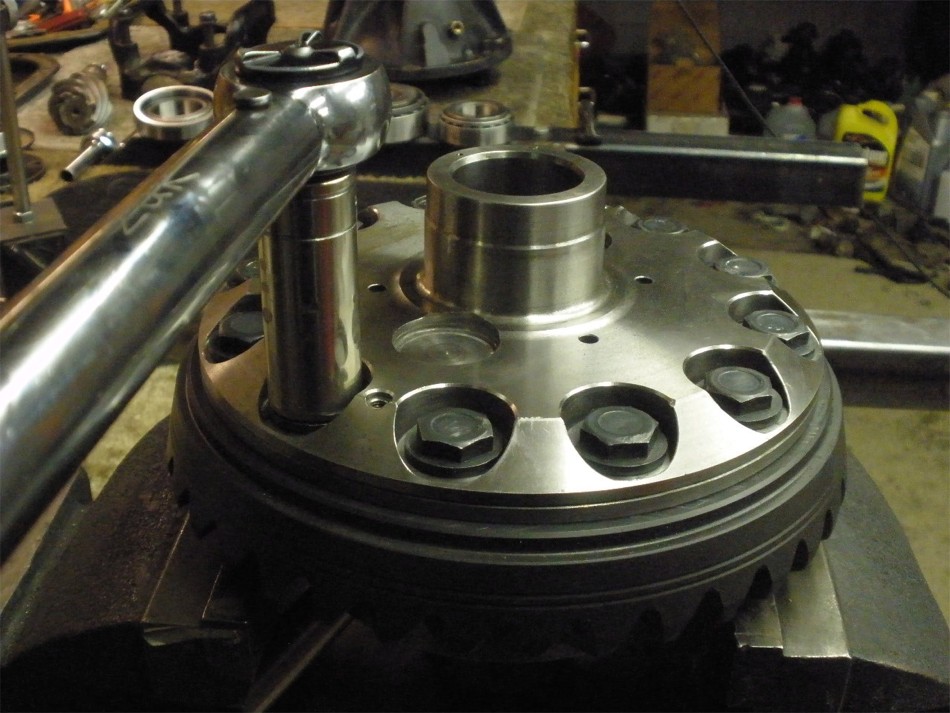
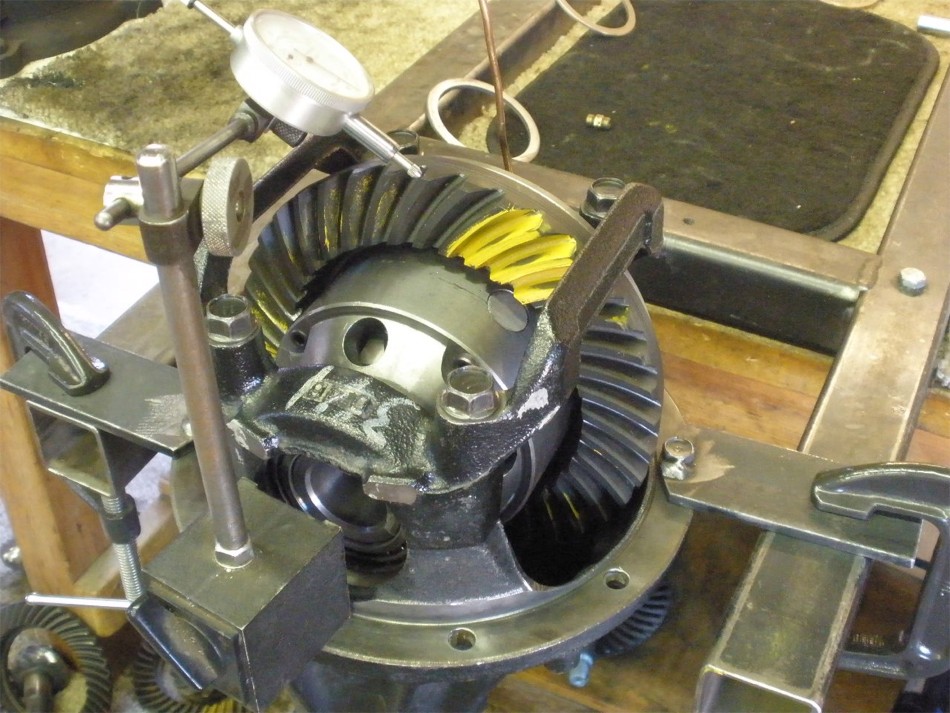
It's probably best to go all the way and put the girdle on and snugged down...backlash
readings get weird sometimes with only half the carrier bearings being supported.
|
|
|
|
|
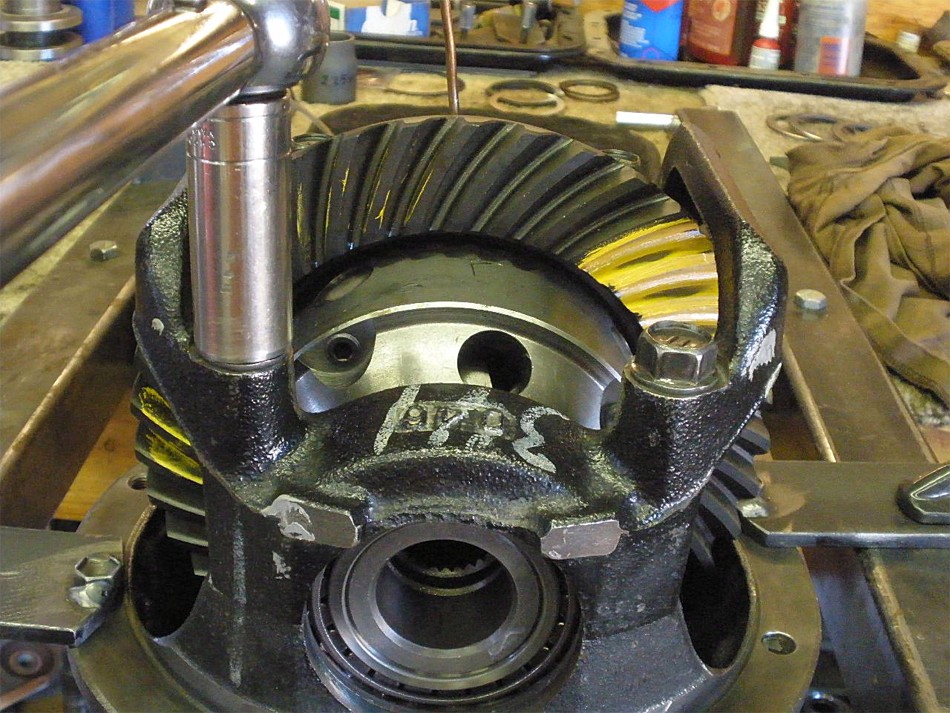
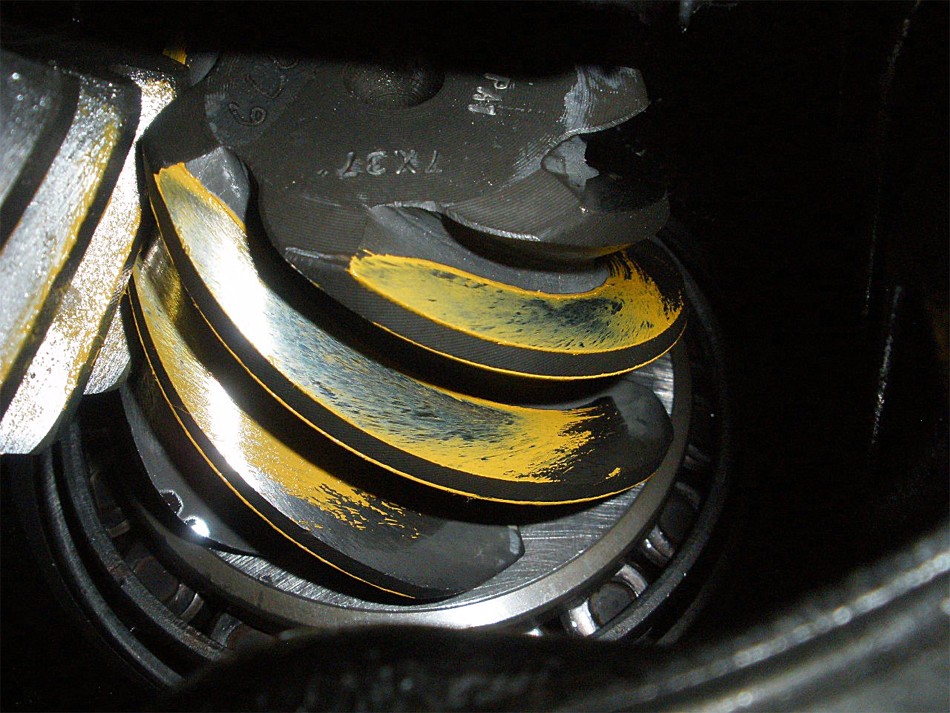
Pinion depth looks to be right in my target zone...slight deep as shown here.
|
|
|

|
|
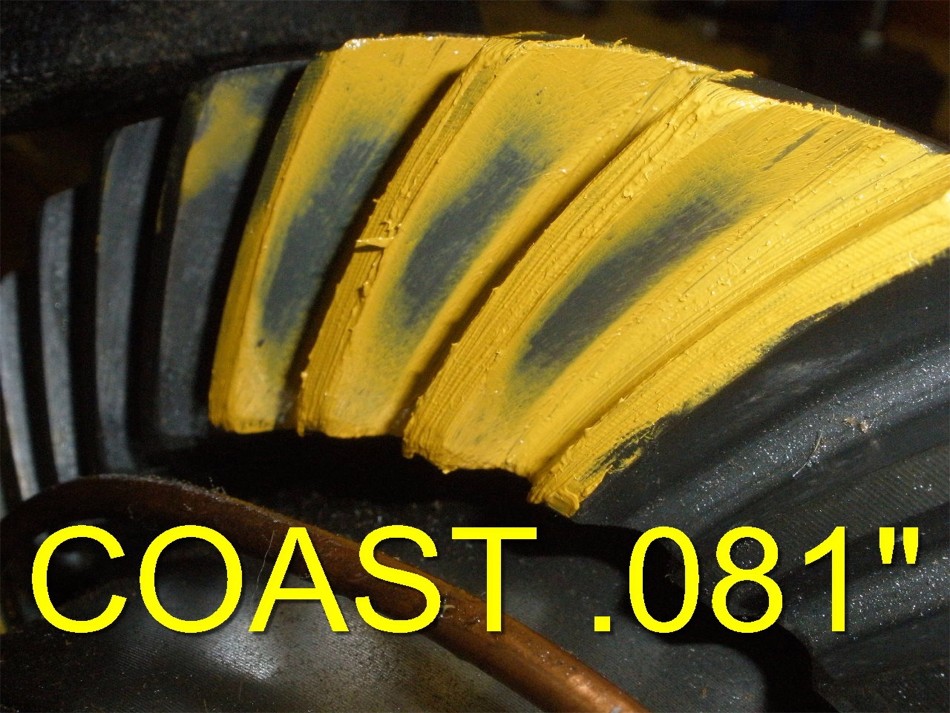
Coast side....looks like 081 is a keeper :)
|
|
|
|
|
The pinion drive tooth looks good.
|
|
|
|
|
Now to dis-assemble and fit up the solid collar.
|
|
|
|
|
Press the pinion out.
|
|
|
|
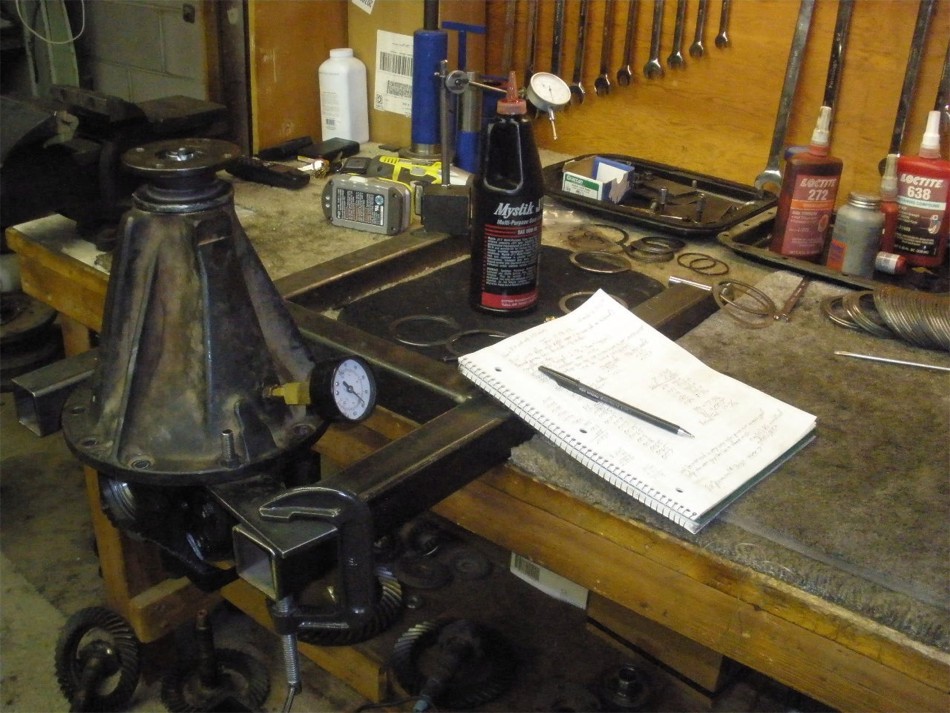
Time to do the math now. Several tries to get it right are the norm.....
took me about 5 tries.
|
|
|
|
With about 200 ft/lb on the pinion nut, I was only getting 1 or 2 inch/pounds...but
when I get the cheater bar out later, I can dial in more inch/pounds. Solid collars
do compress maybe 12 to 24 microns with enough leverage.
|
|
|
|
|
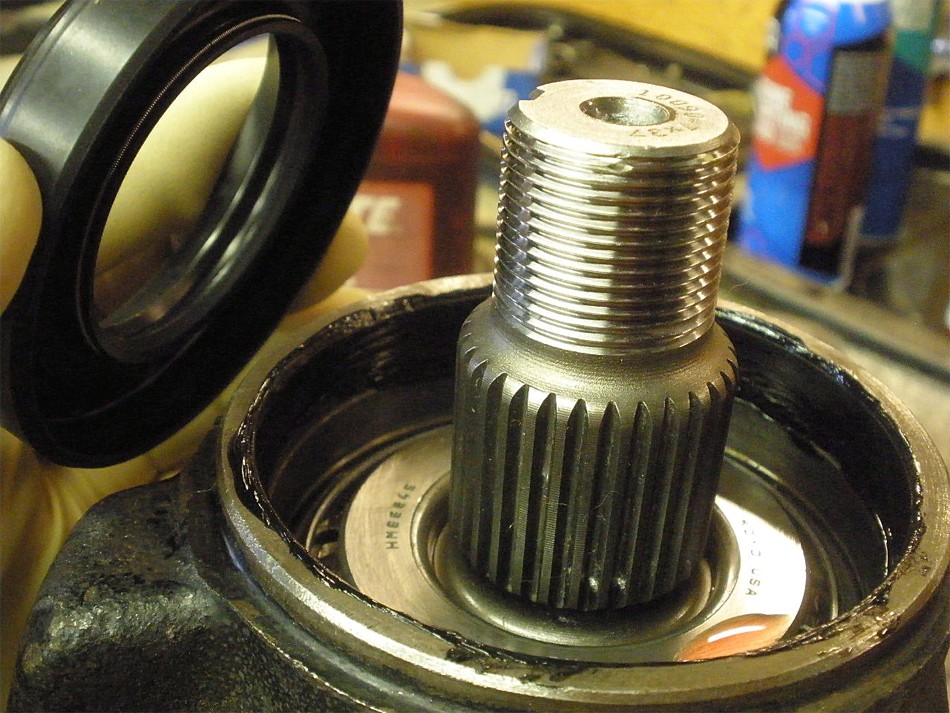
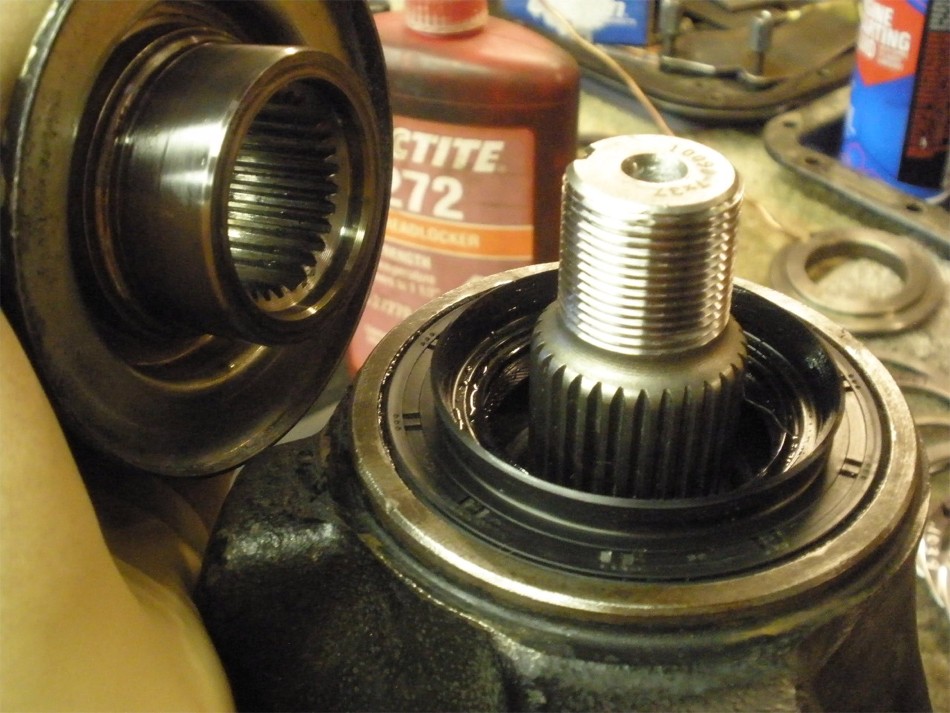
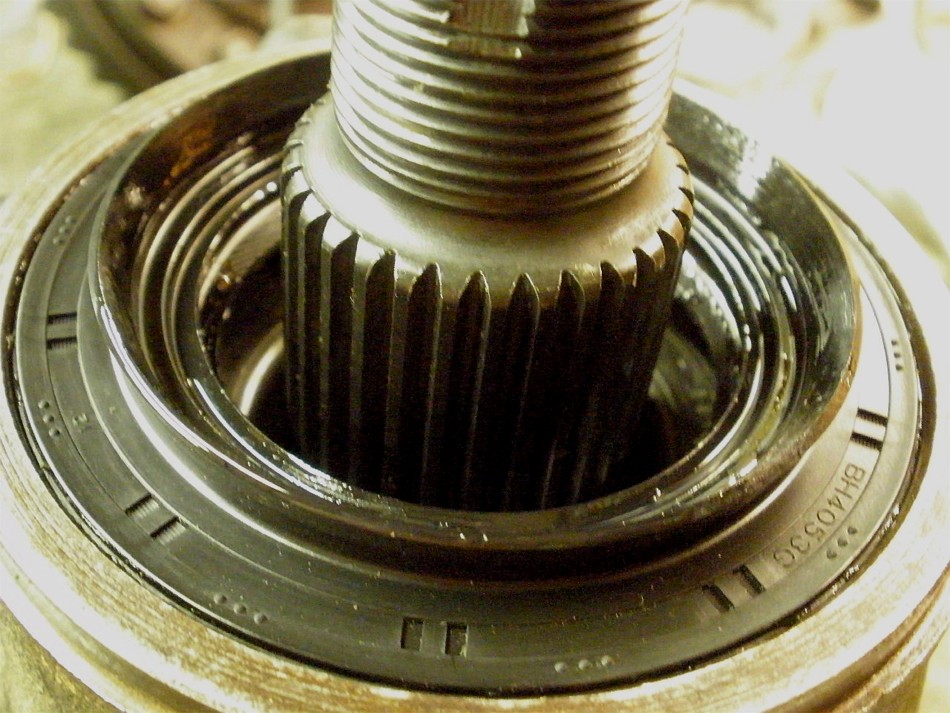
The new OEM rubberized seal is installed.
|
|
|
|
|
Flange is next.
|
|
|
|
|
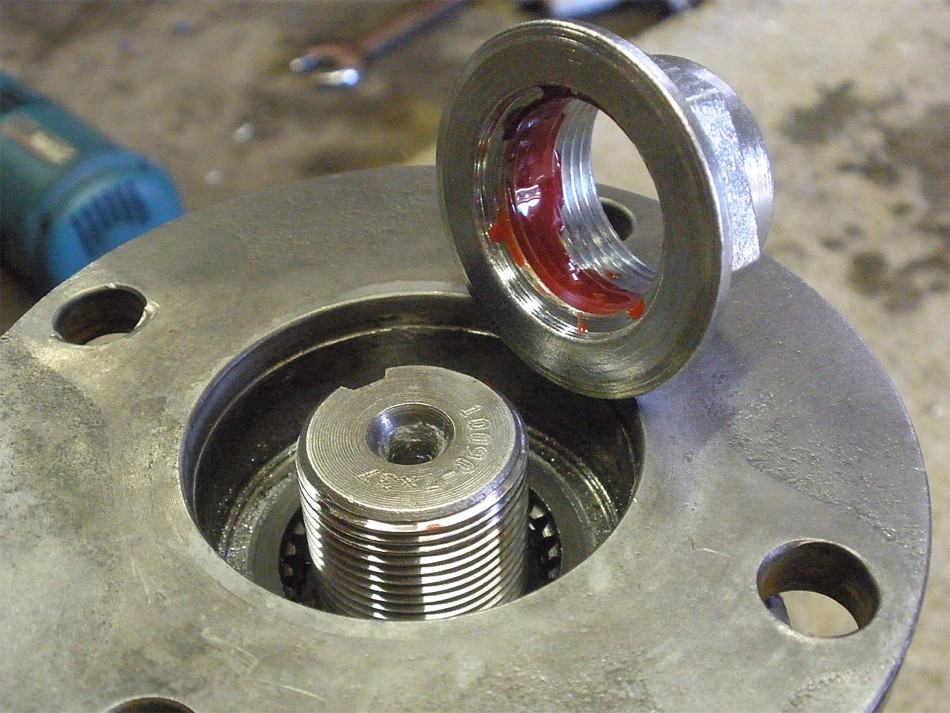
Red Loctite on the new flange nut.
|
|
|
|
|
....
|
|
|
|
|
Crank the nut tighter...
|
|
|
|
|
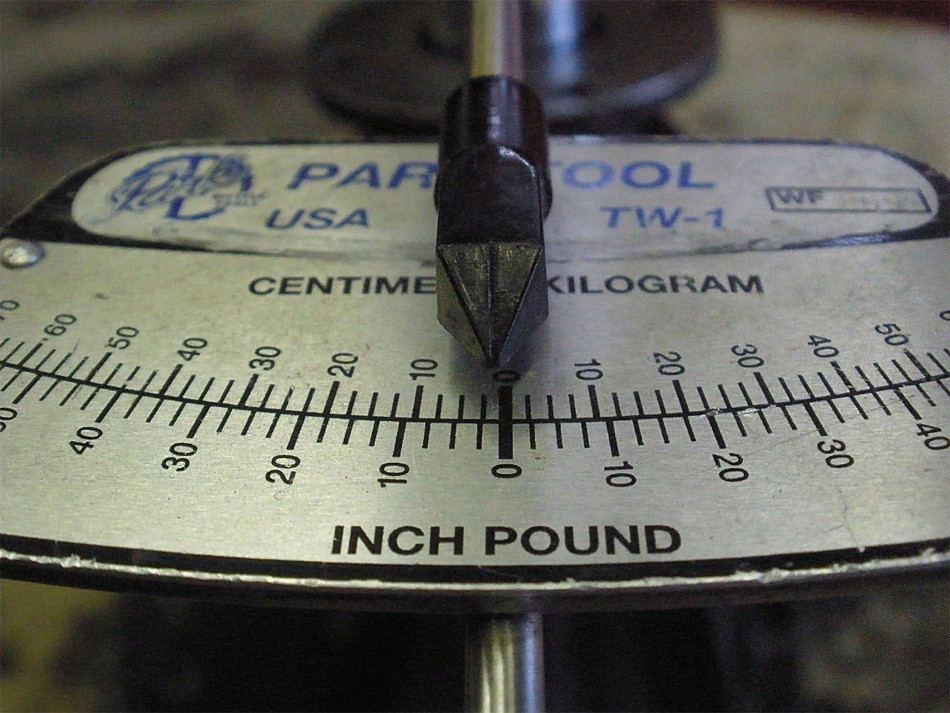
Nice. I now have 12 in/lb of start torque.
|
|
|
|
|
DING and this end is done.
|
|
|
|
|
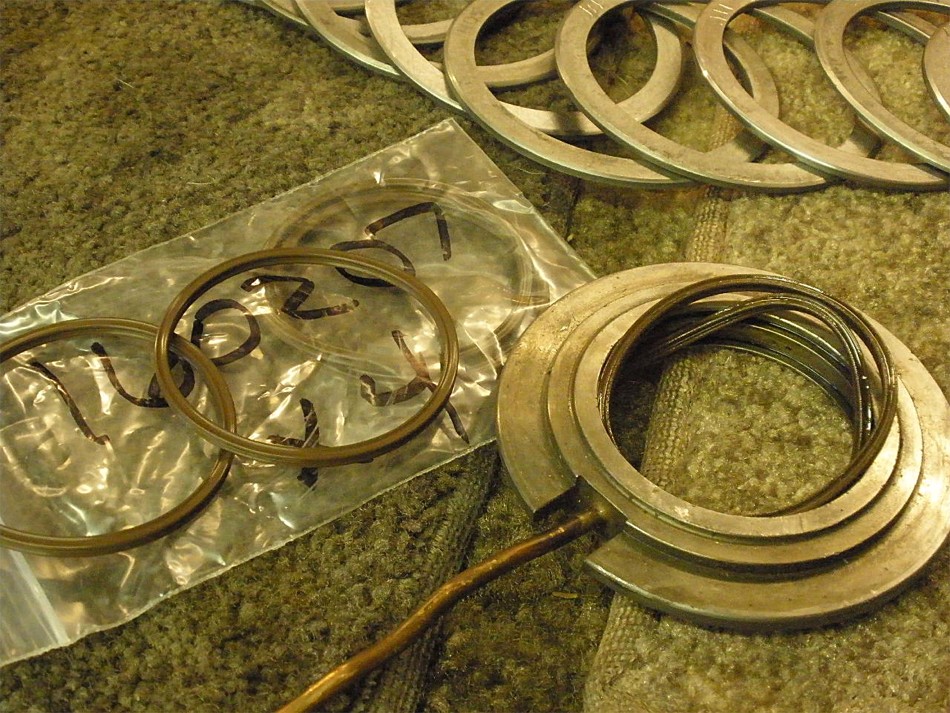
New x-rings can now be installed.
|
|
|
|
|
Lubed with clean gear oil, the assembly can be wiggled in place.
|
|
|
|
|
....
|
|
|
|
Getting the correct washer plate for both sides involves experimentation and time.
Proper bearing tensions are important. Not enough pre-load is the usual case but
not when I do it. :)
|
|
|
|
|
85 ft/lbs on the 4 girdle bolts.
|
|
|
|
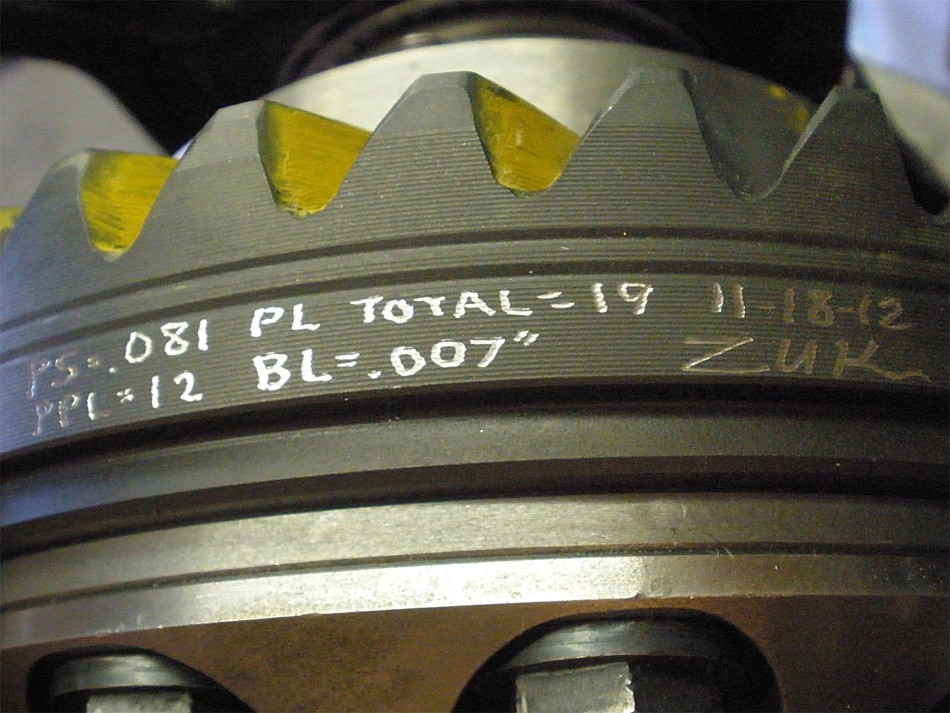
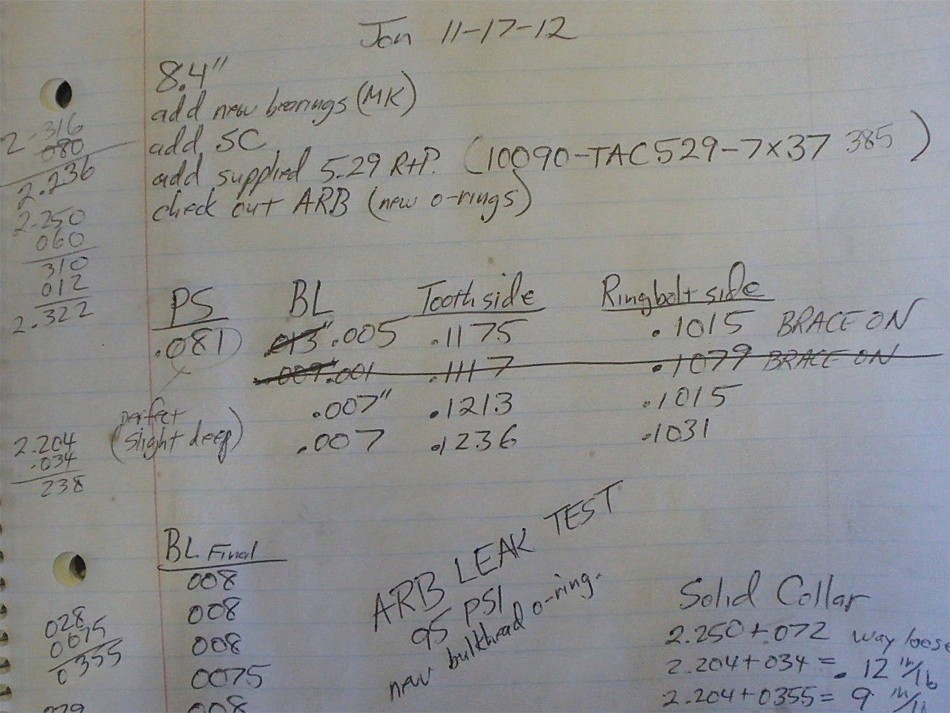
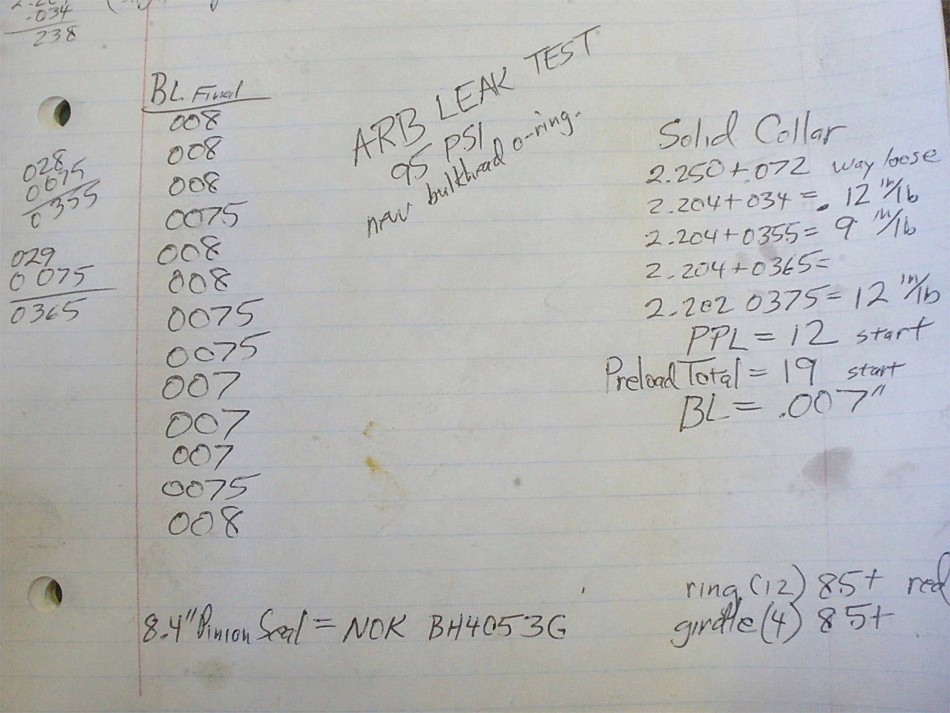
A quick preload check shows I have excellent carrier bearing preload. Earlier, I
measured the pinion preload as 12....the 19 shown here is the combined pinion plus
ring pre-load. Doing the math, there is about 7 in/lb of pre-load for the ring
alone. See snippet below.
|
|
|
|
|
|
|
|
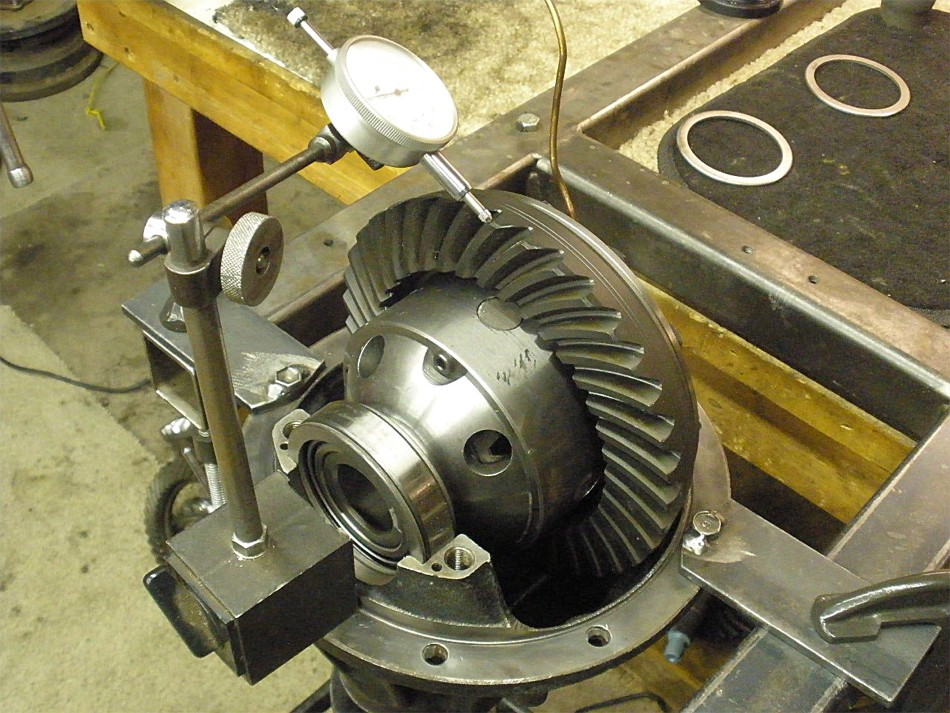
Backlash is recorded on every 3rd tooth.
|
|
|

|
|
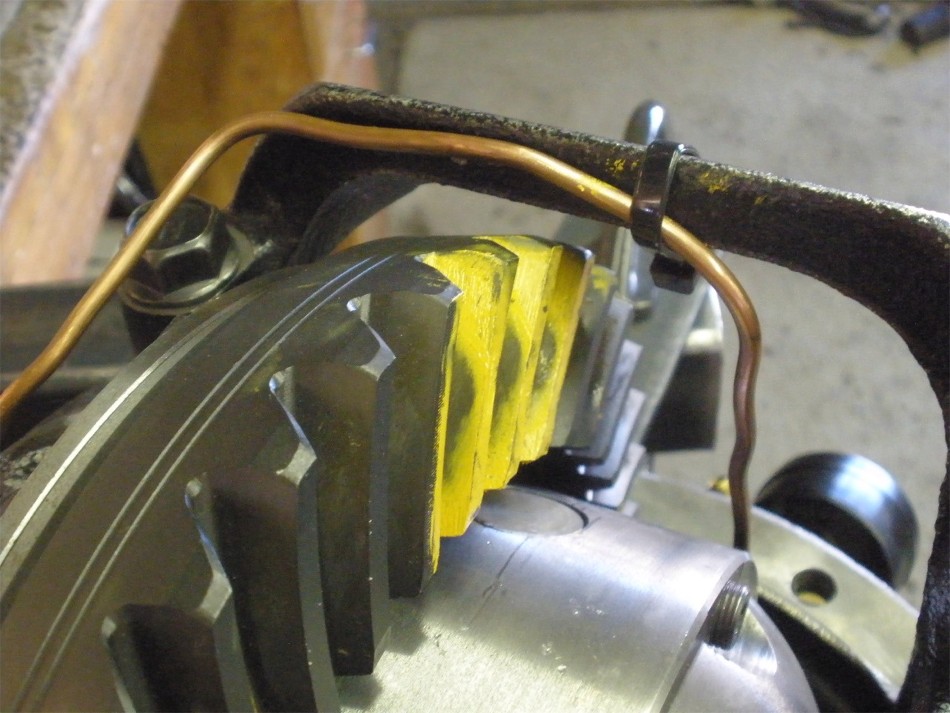
The soft copper tube is routed.
|
|
|
|
|
A tie-rap secures it just like in the ARB instructions.
|
|
|
|
|
ARB air test...pass.
|
|
|
|
|
The ring is scribed.
|
|
|
|
|
Ready to go. Not seen is all the cardboard on the underside of the burrito wrapped rear 3rd.
|
|
|
|
|
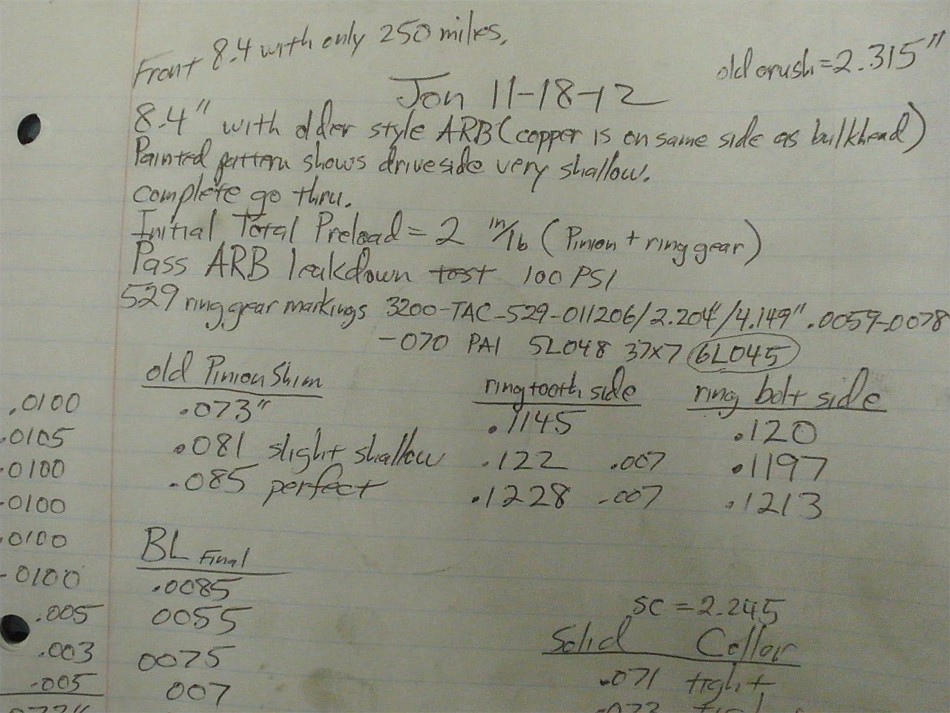
Rear 8.4 notes.
|
|
|
|
|
End of the rear install...the pictures below are of the front 8.4" check-up.
|
*
**
***
****
*****
******
*******
********
*********
**********
***********
************
*************
**************
***************
****************
FRONT 8.4" CHECK-UP BELOW
FRONT 8.4" CHECK-UP BELOW
FRONT 8.4" CHECK-UP BELOW
FRONT 8.4" CHECK-UP BELOW
****************
***************
**************
*************
************
***********
**********
*********
********
*******
******
*****
****
***
**
*
|
|
|
Jon's front 3rd has only about 250 actual miles on it but he wanted it checked out....
and to upgrade the crush sleeve with this solid collar.
|
|
|
|
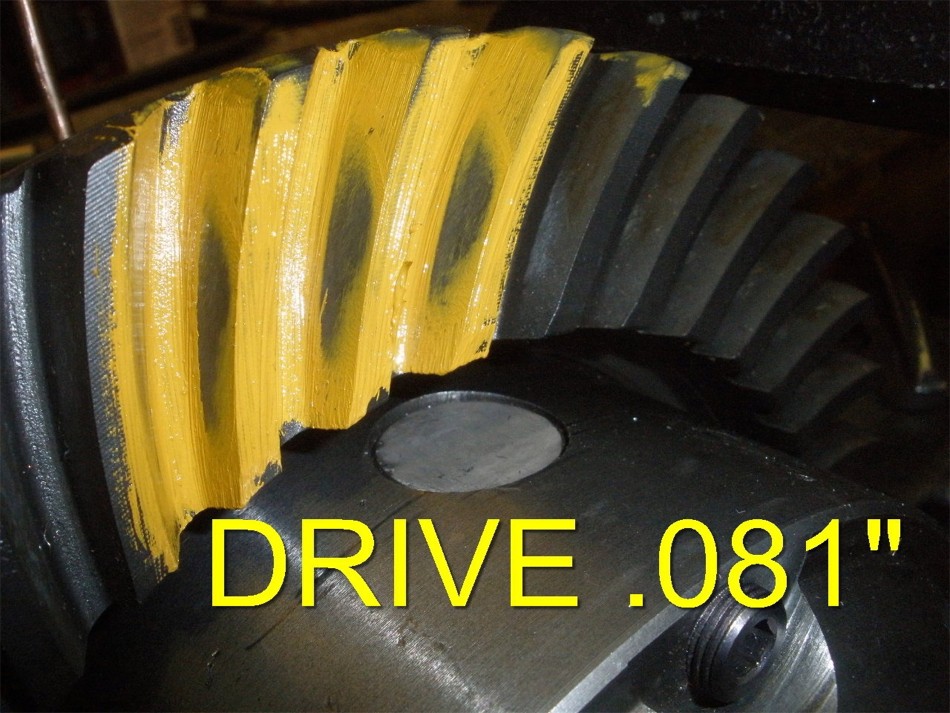
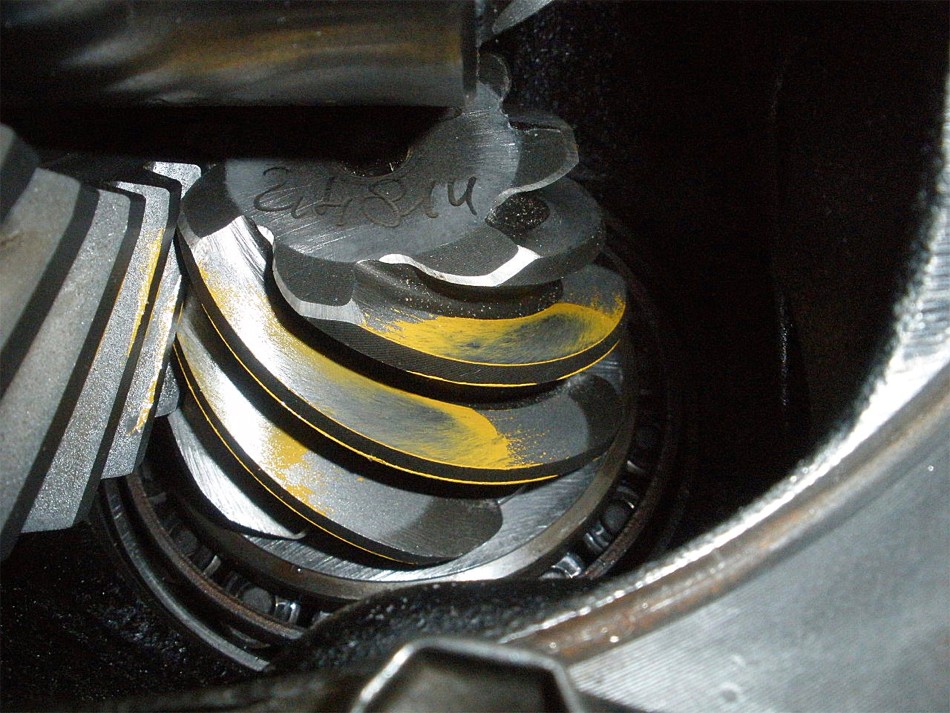
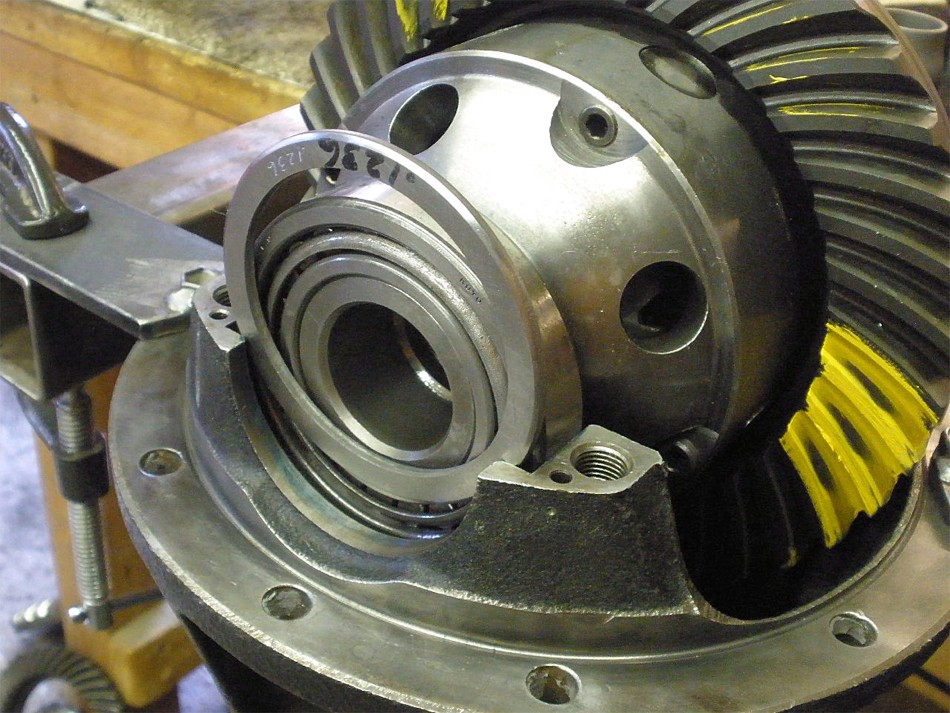
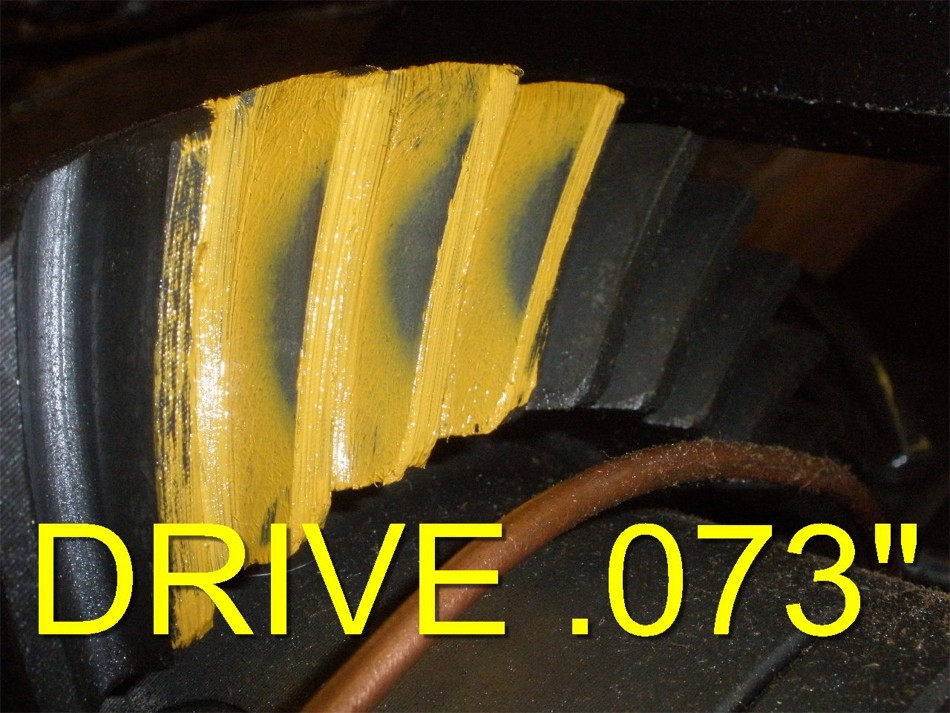
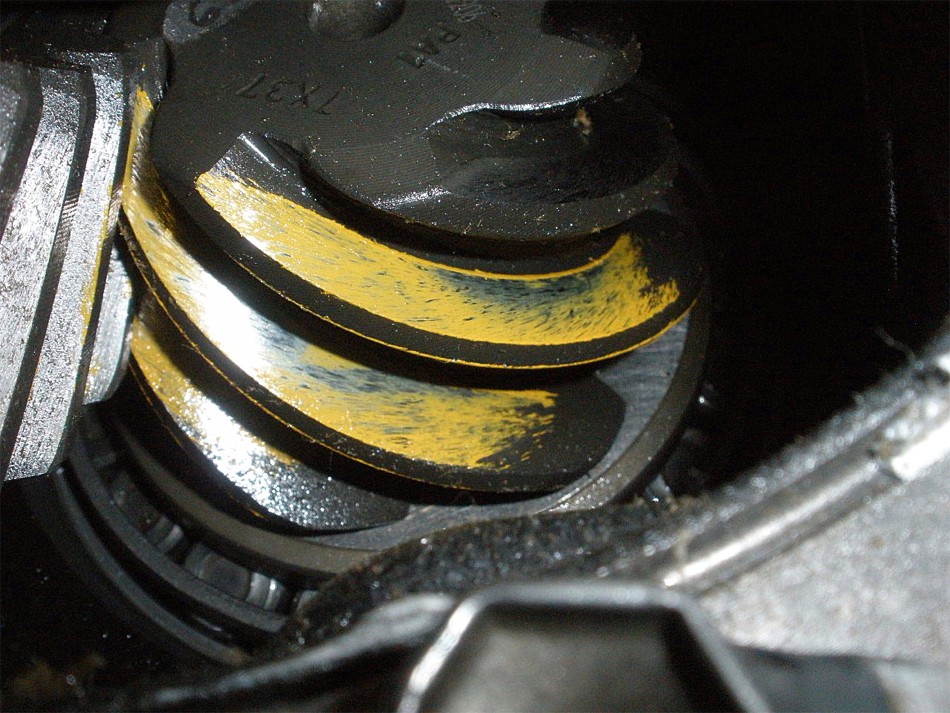
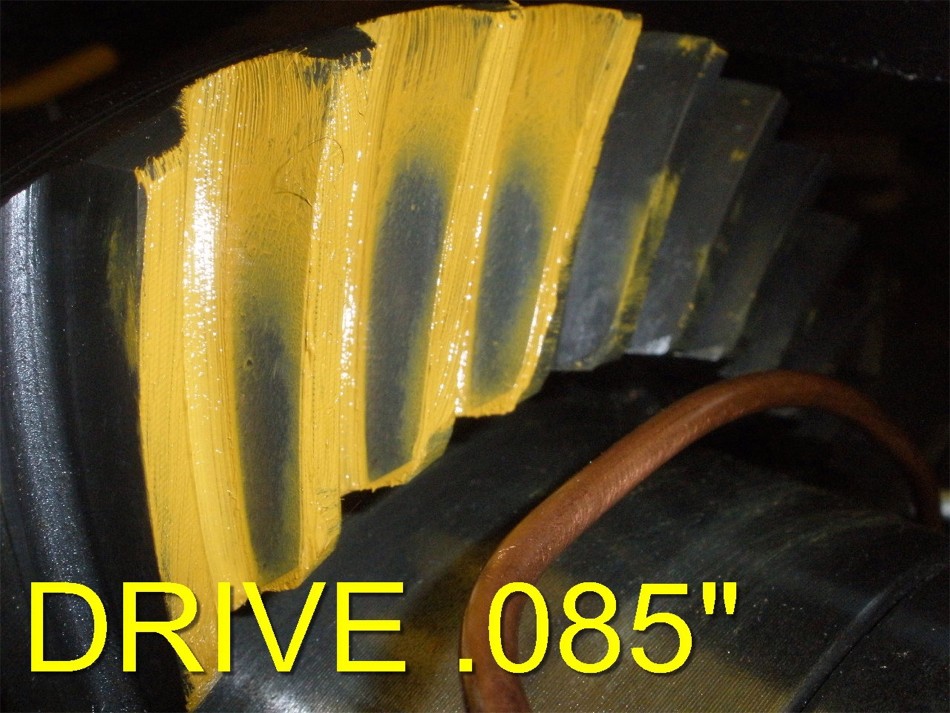
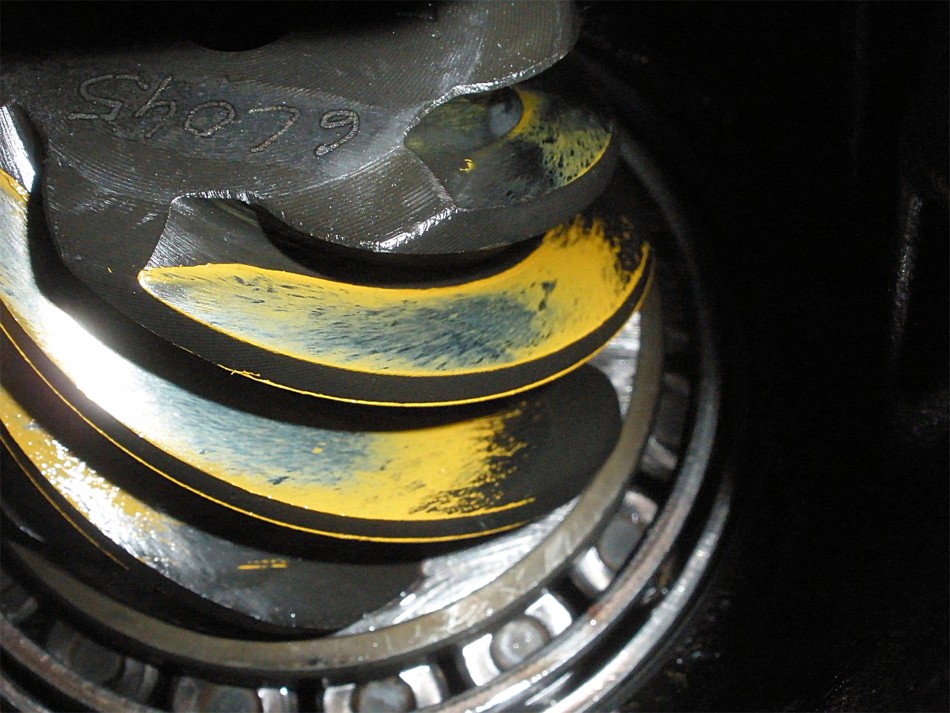
A paint check reveals that the load bearing is far too shallow on the ring tooth.
Jon was lucky that he didn't chip the ring teeth while backing up. Farther down
this link I determined that the pinion shim was measured at .073" so I placed that
info on the above picture.
|
|
|

|
|
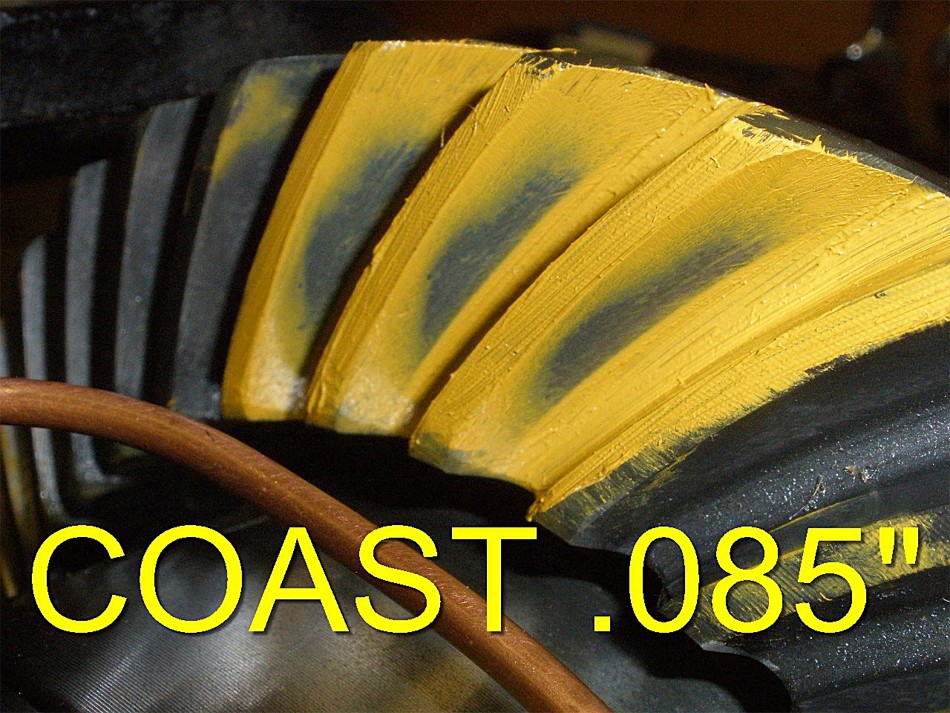
Coast.
|
|
|
|
|
Pinion tooth look very deep...equal and opposite that of the ring tooth.
|
|
|
|
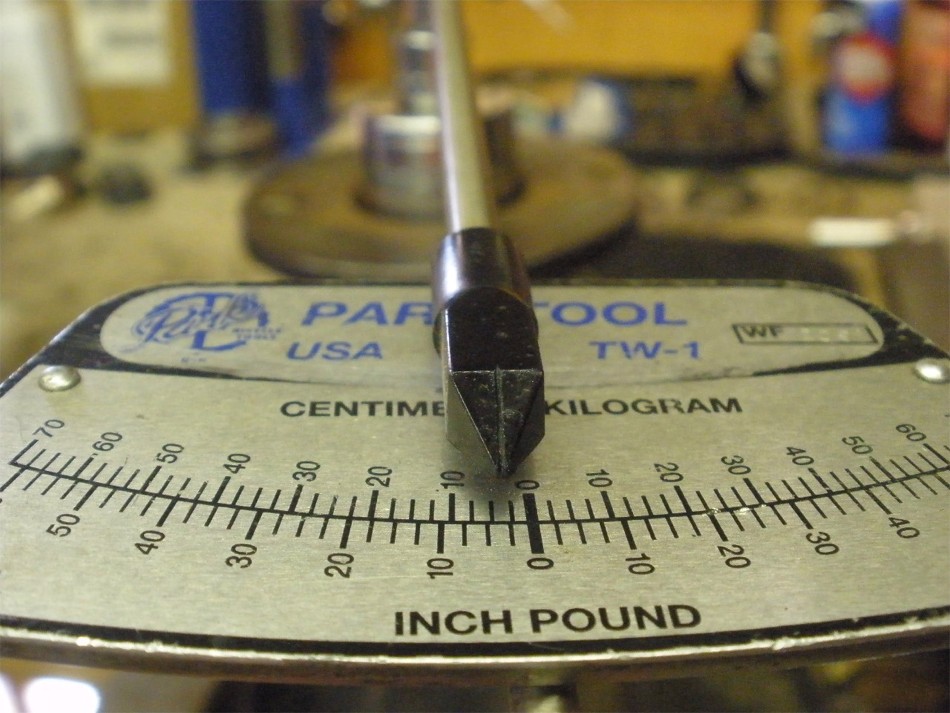
Total pinion plus ring pre-load is somewhat light at 3 inch/pounds for only
having 250 rotational miles on it.
|
|
|
|
|
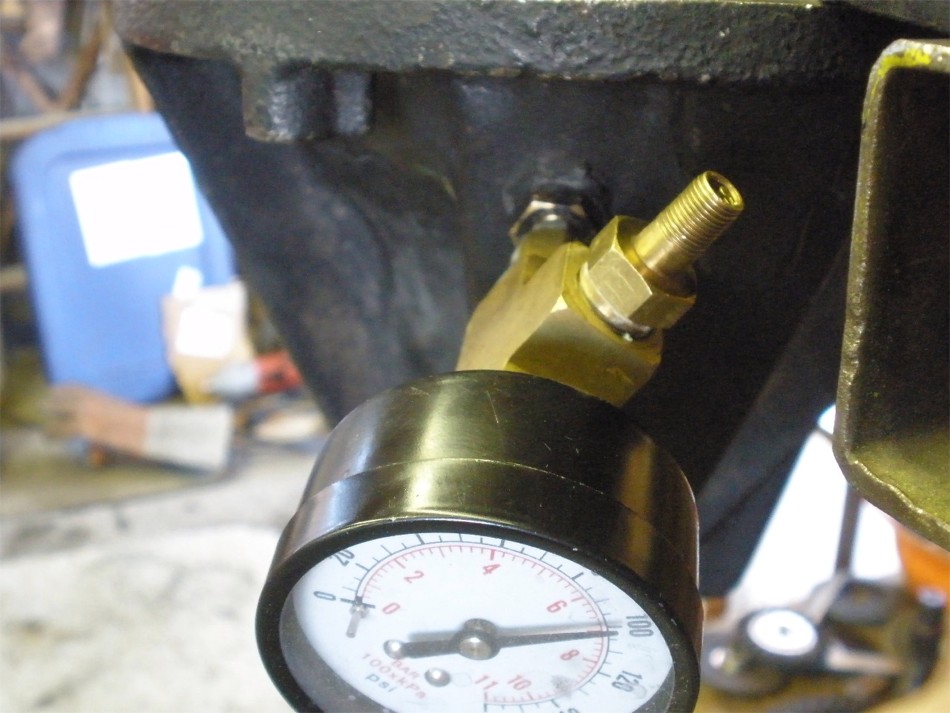
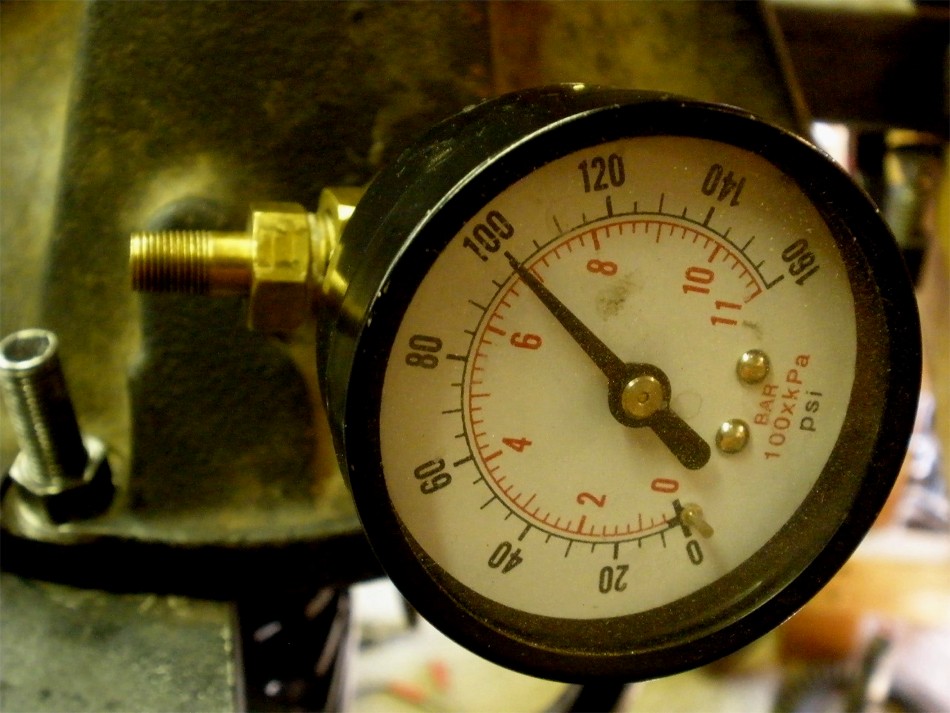
PASS on the air test.
|
|
|
|
|
PASS on all the ring bolts being at 85 ft/lb minimum.
|
|
|
|
|
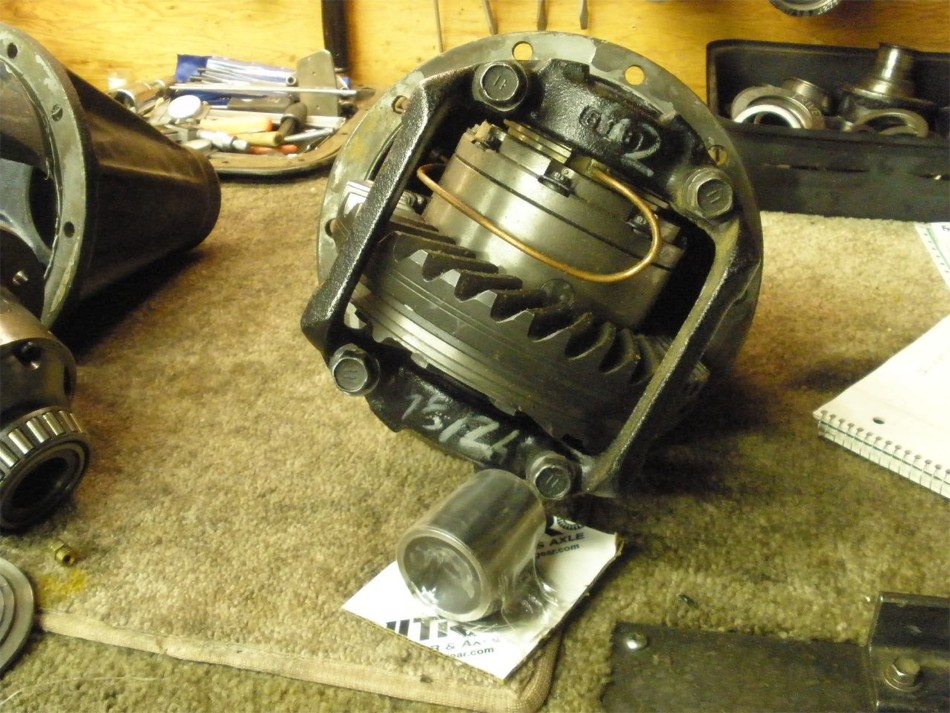
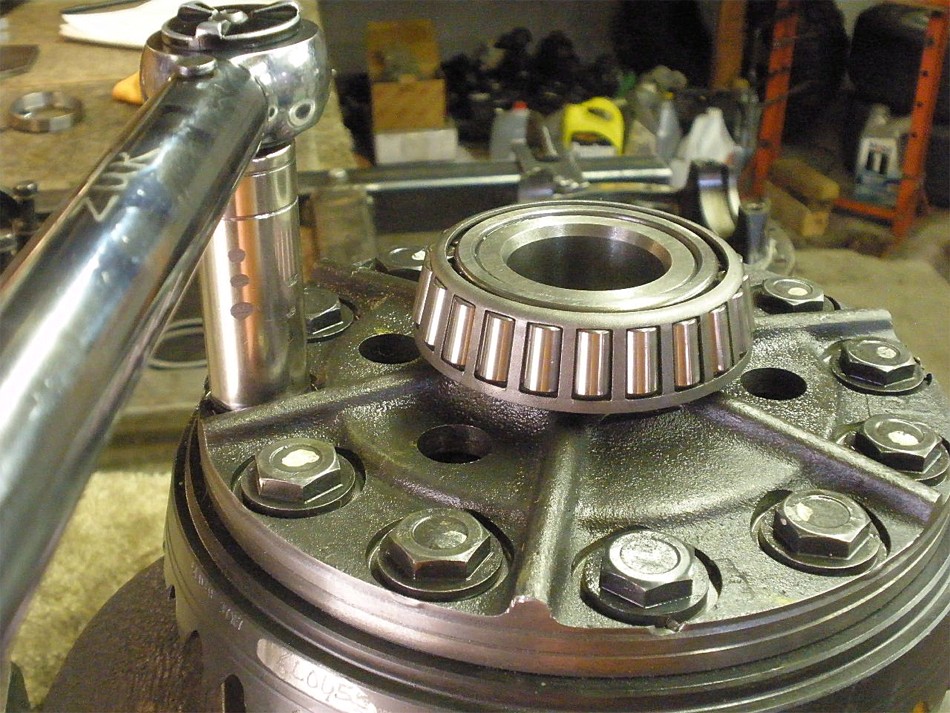
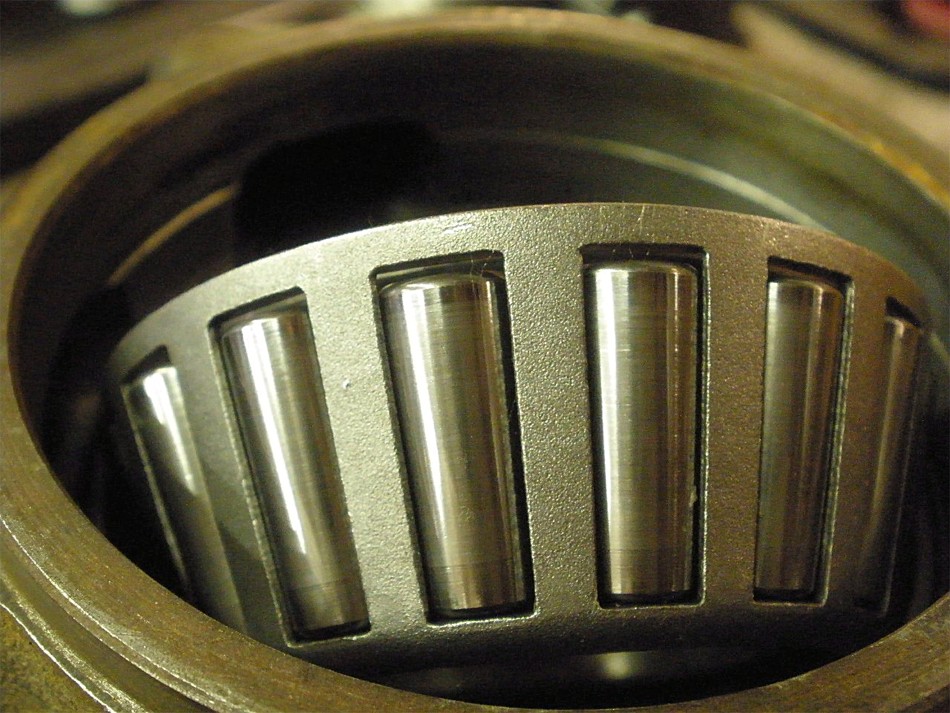
Carrier bearings appear ok.
|
|
|

|
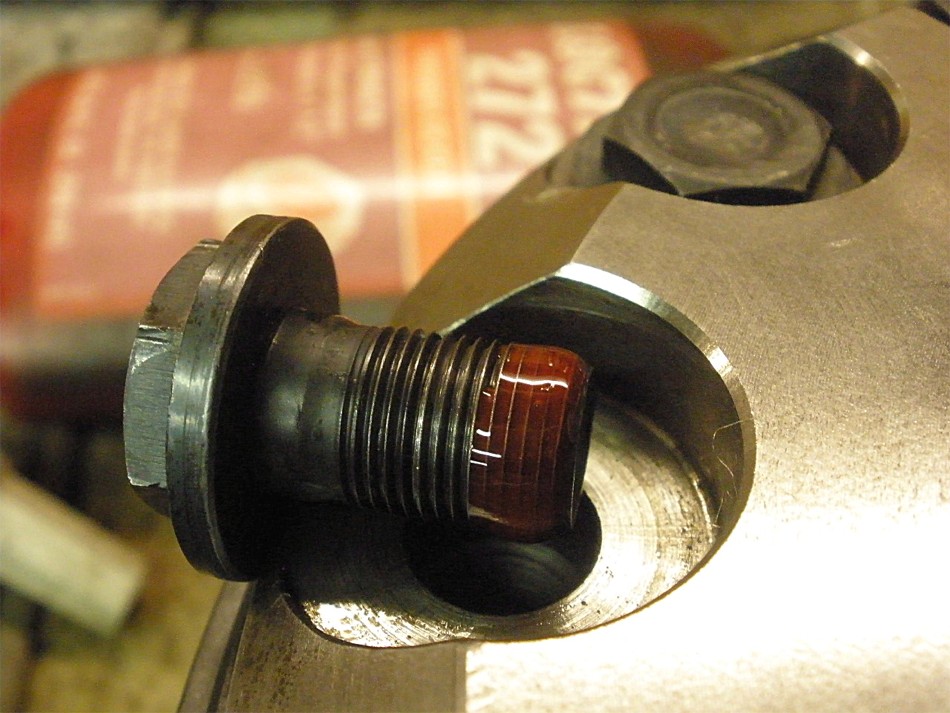
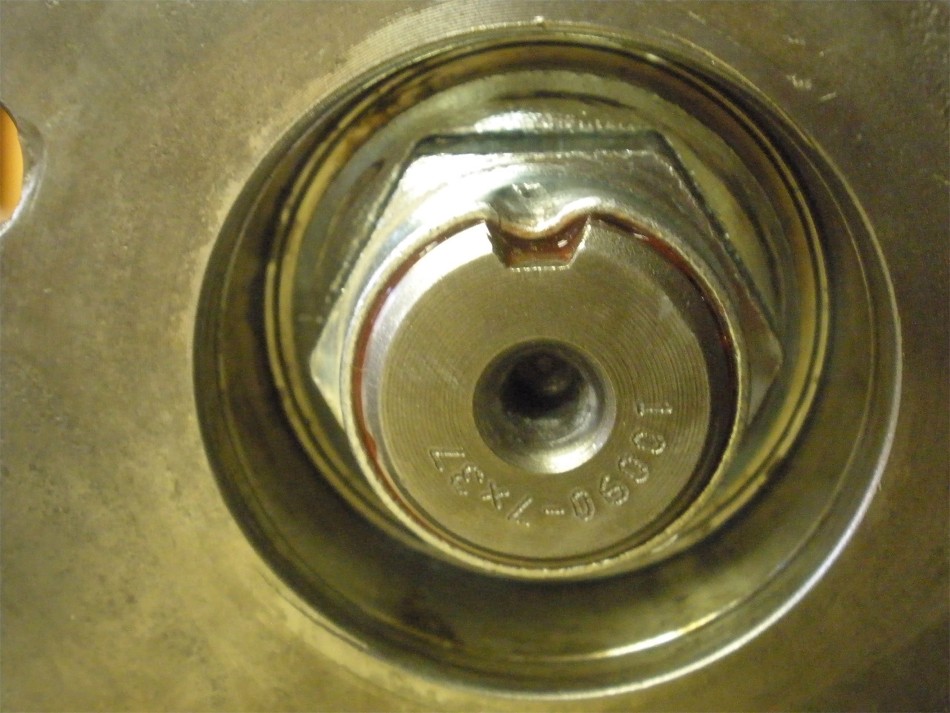
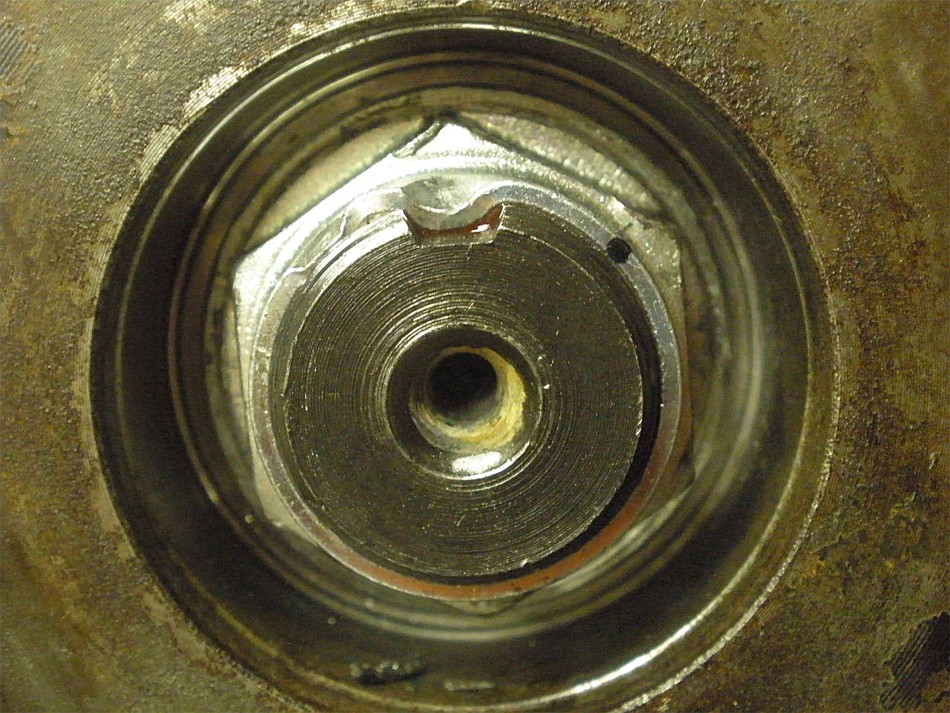
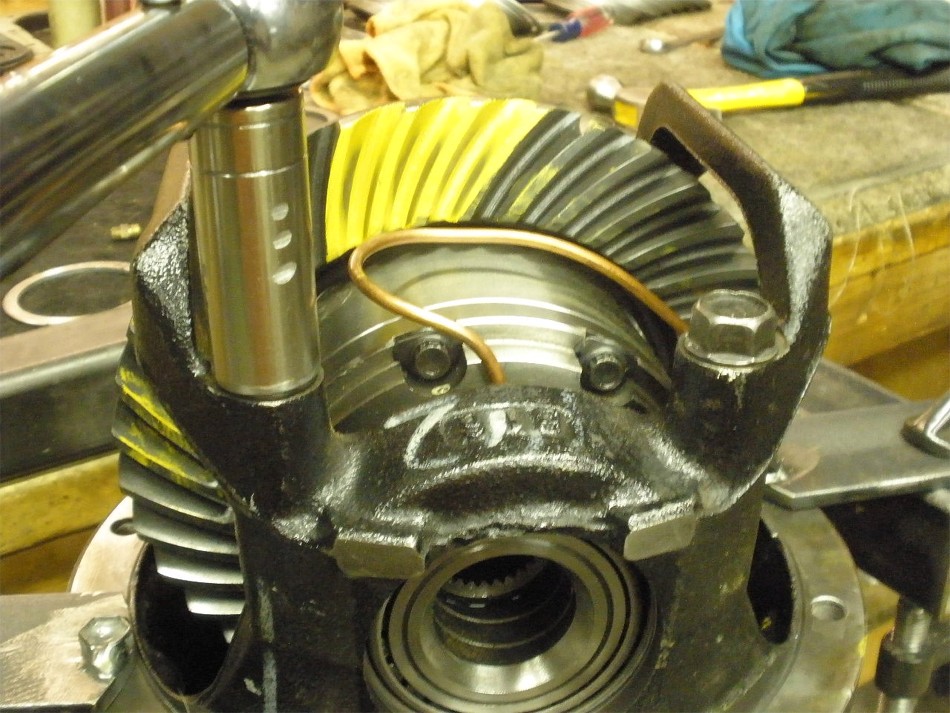
What happens to the soft copper tube when the insert is over-tightened....a little
more and the air supply could be cut off.
|
|
|
|
|
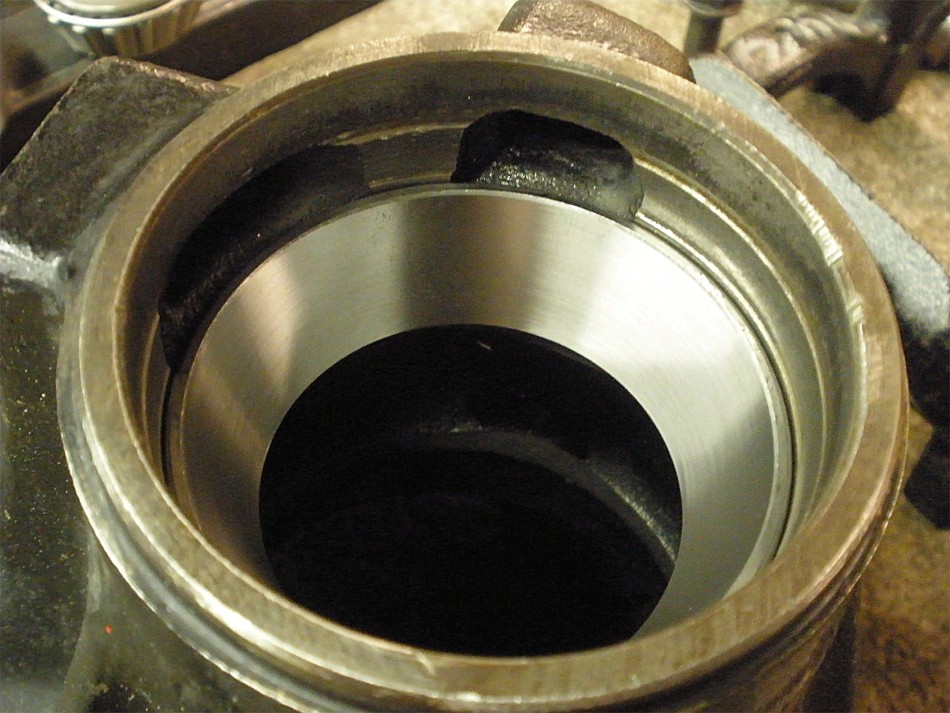
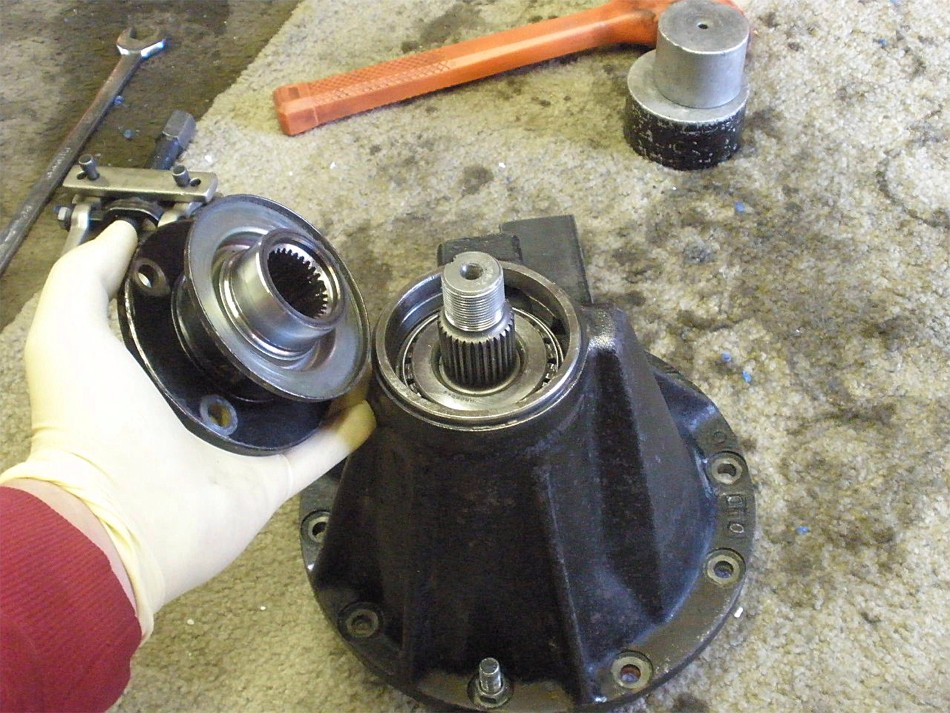
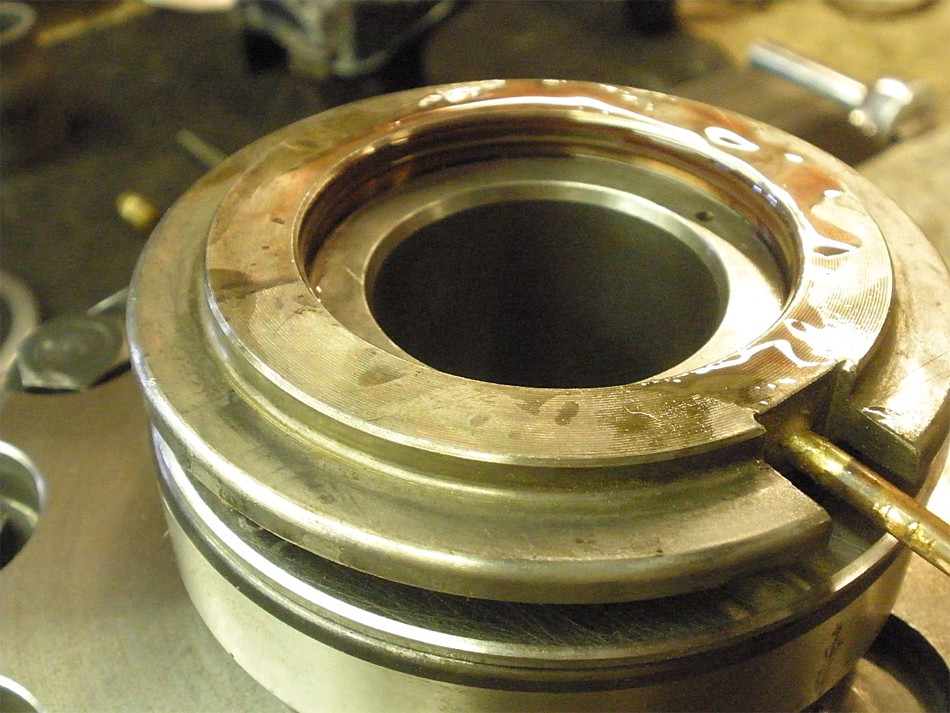
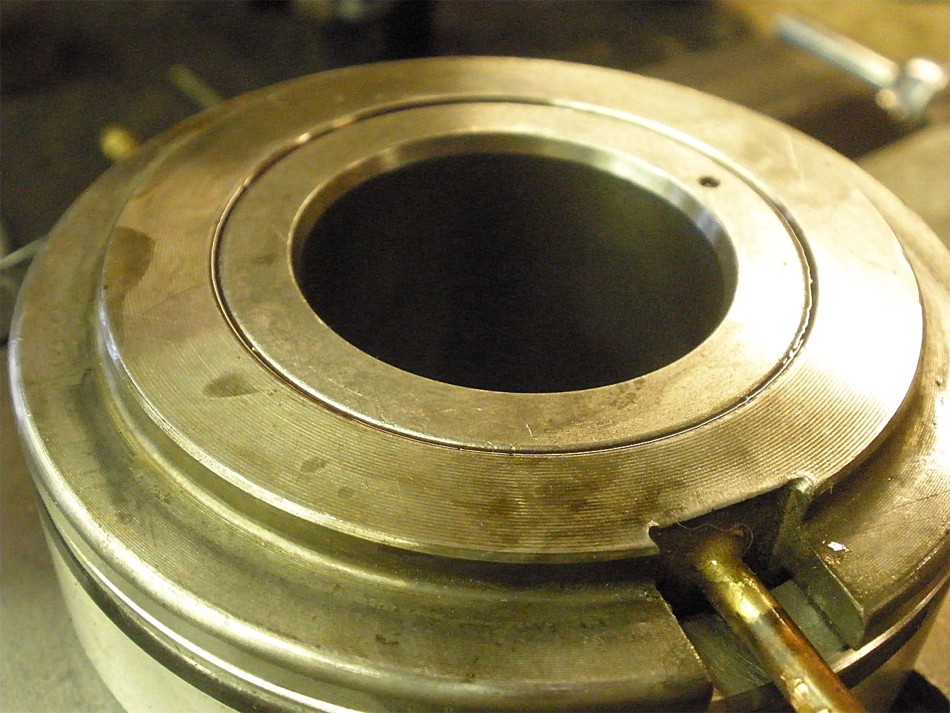
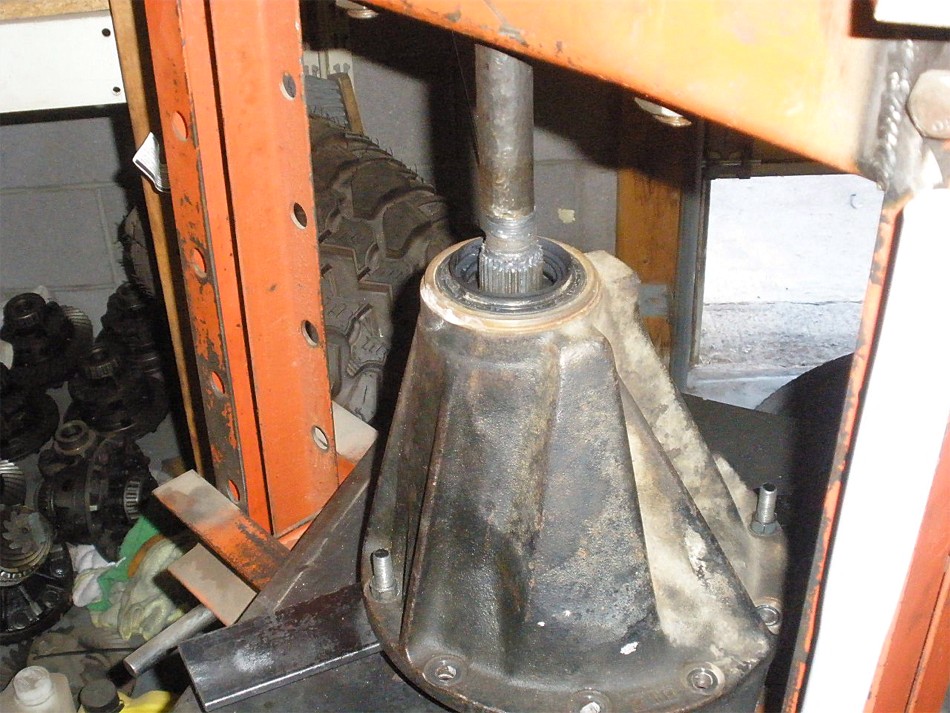
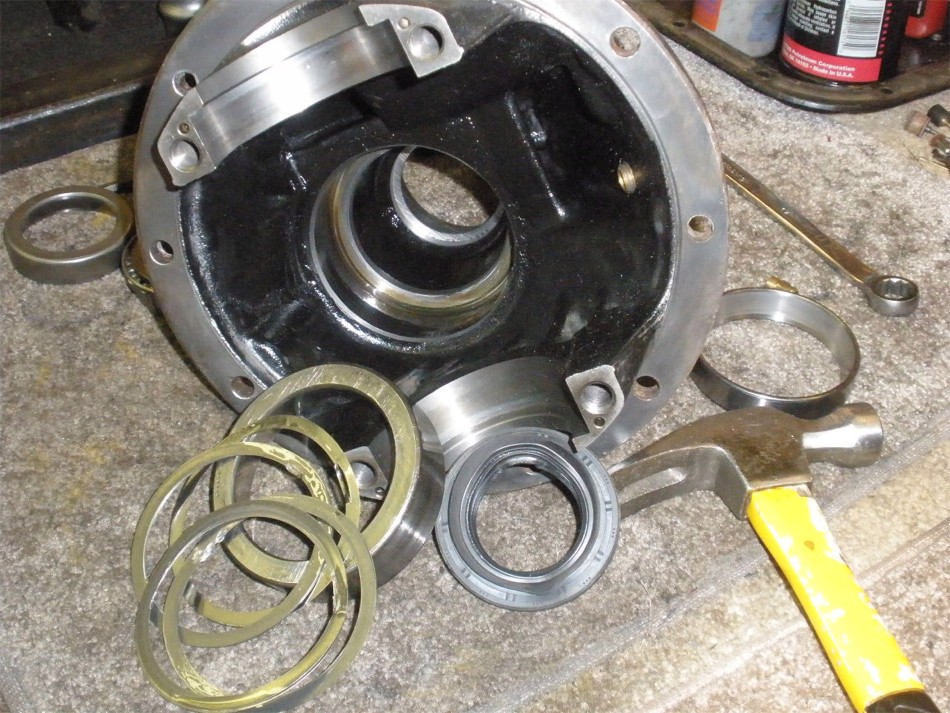
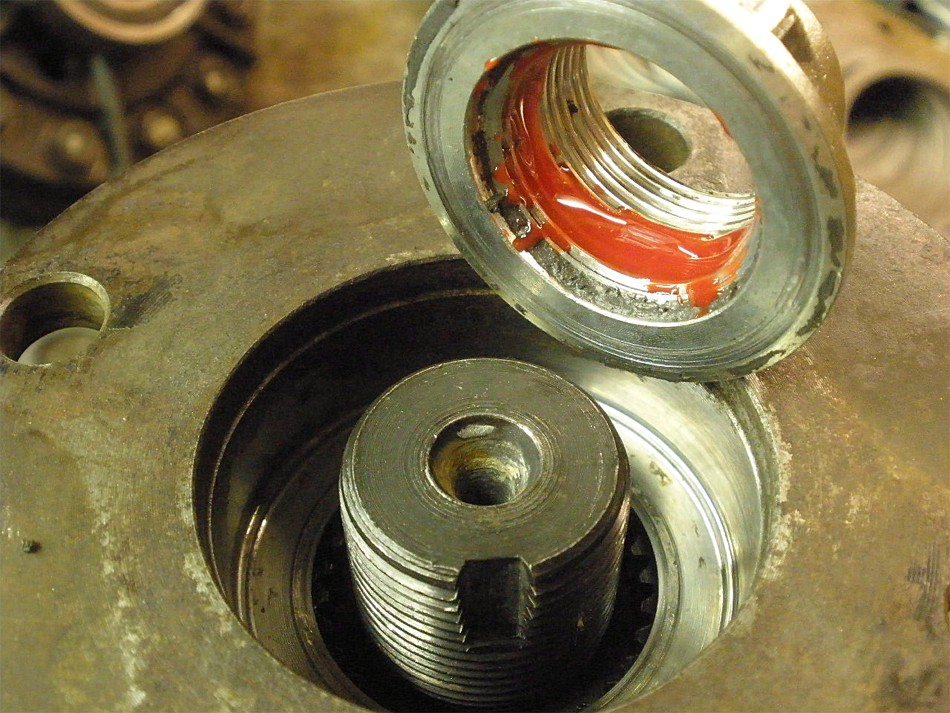
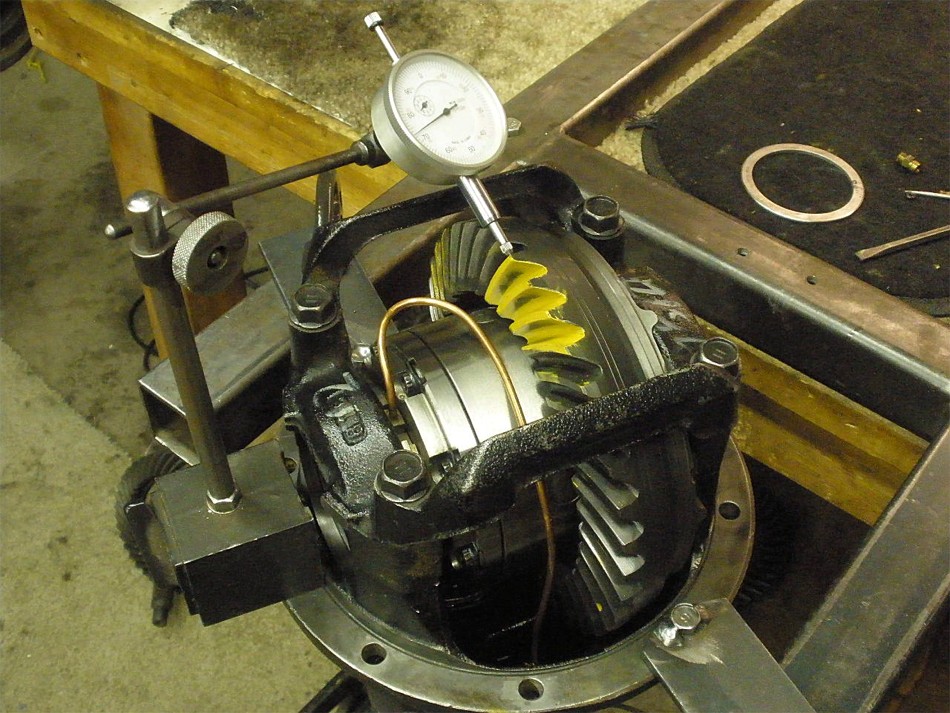
Time now to peek in the top end and inspect the outer pinion bearing.
|
|
|
|
|
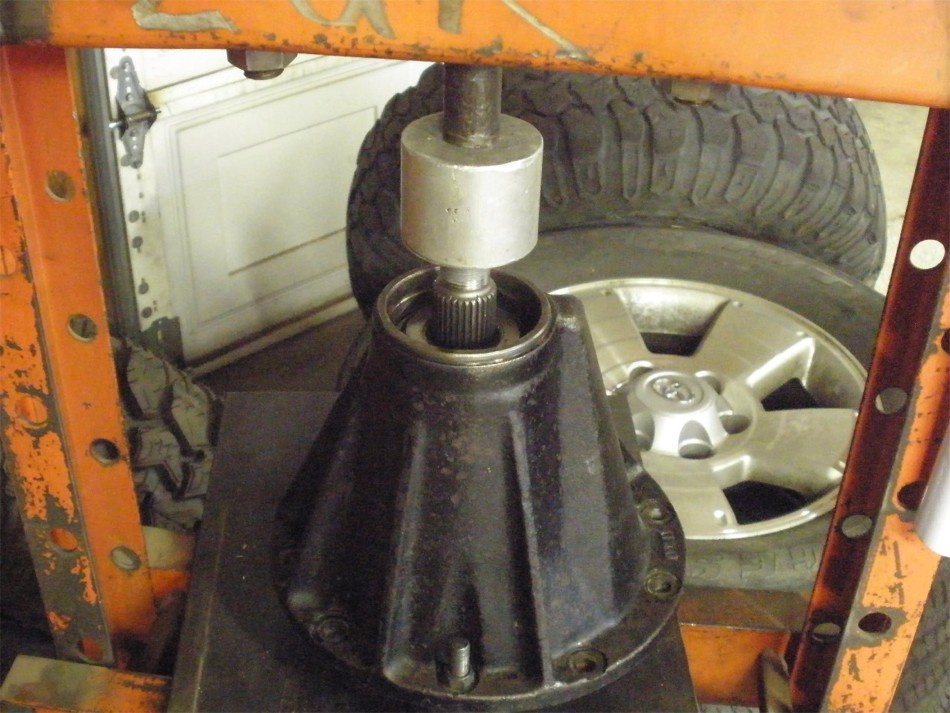
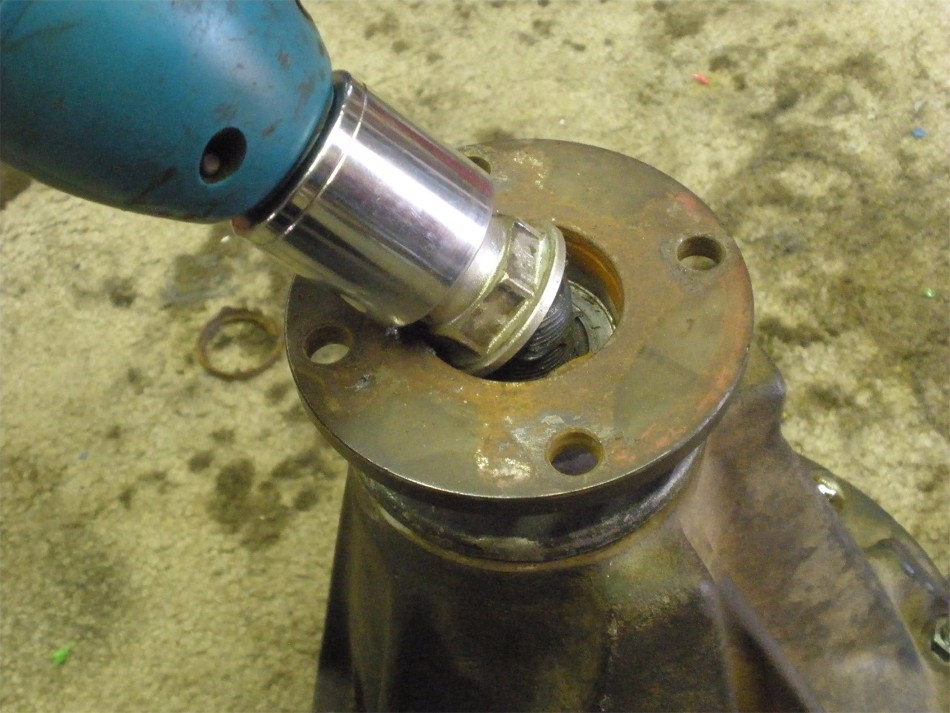
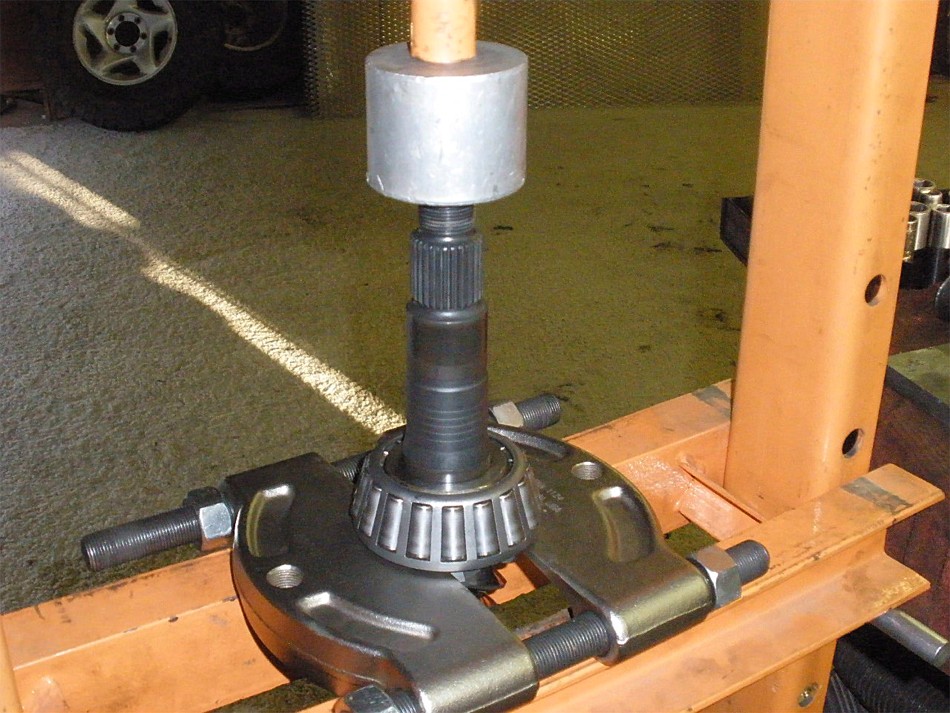
Push the pinion out...
|
|
|
|
|
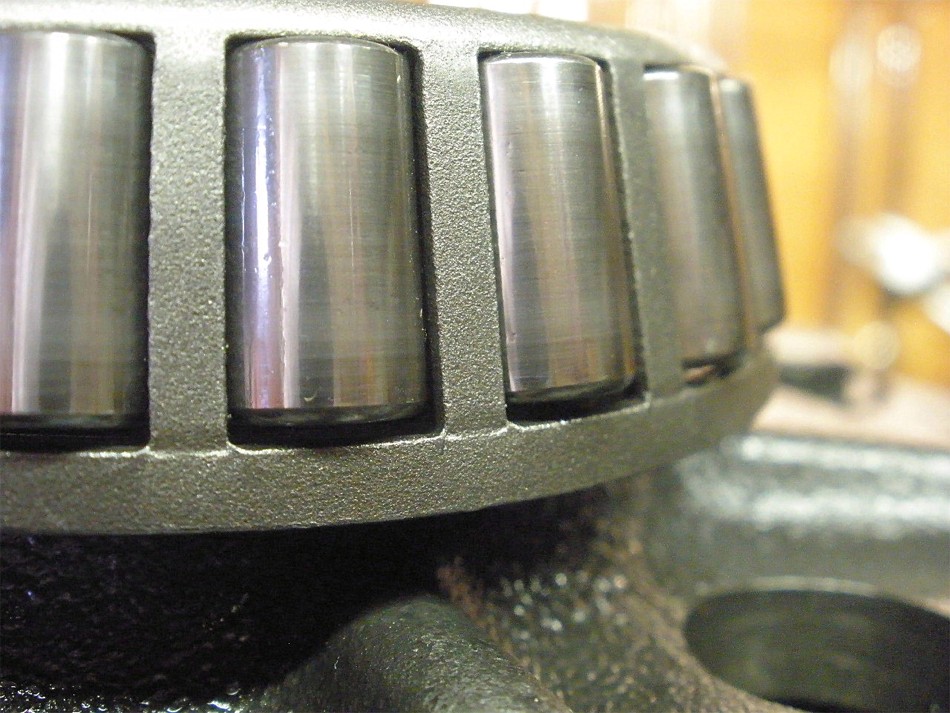
...Outer pinion bearing looks ok.
|
|
|
|
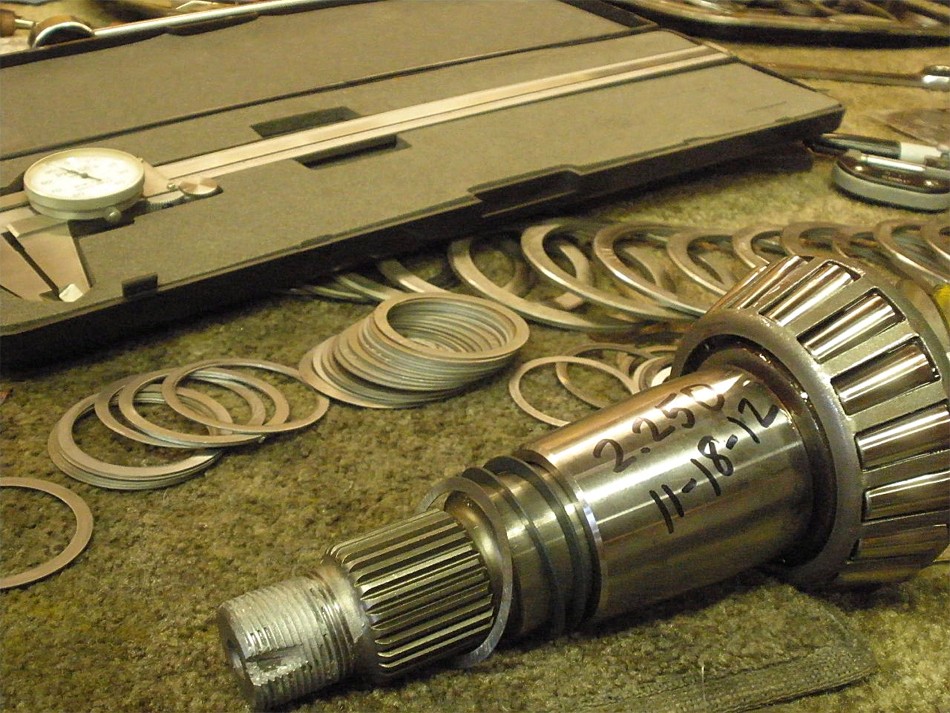
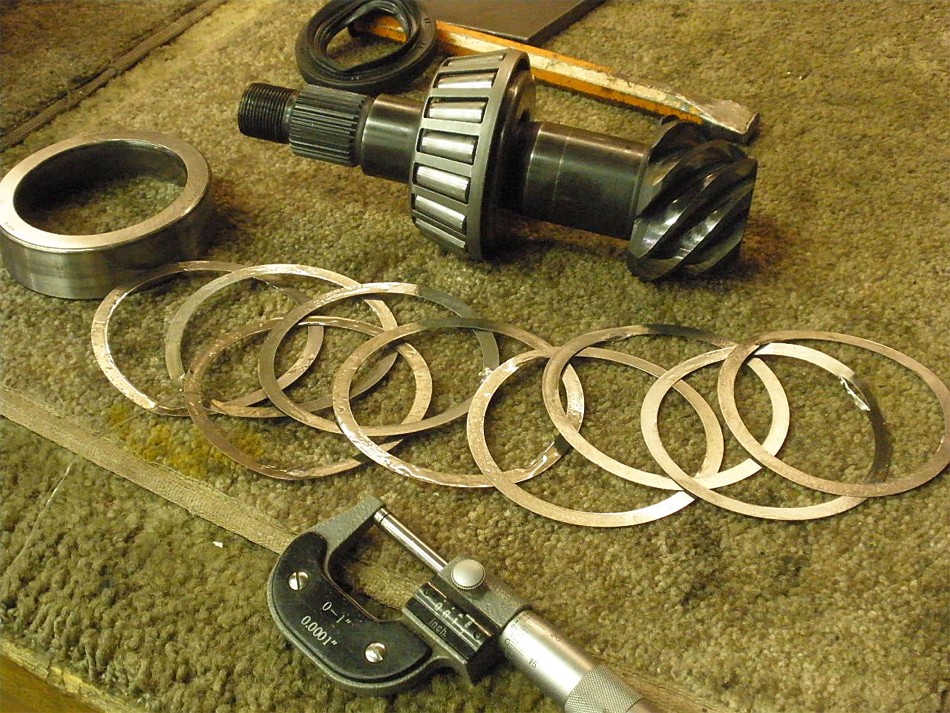
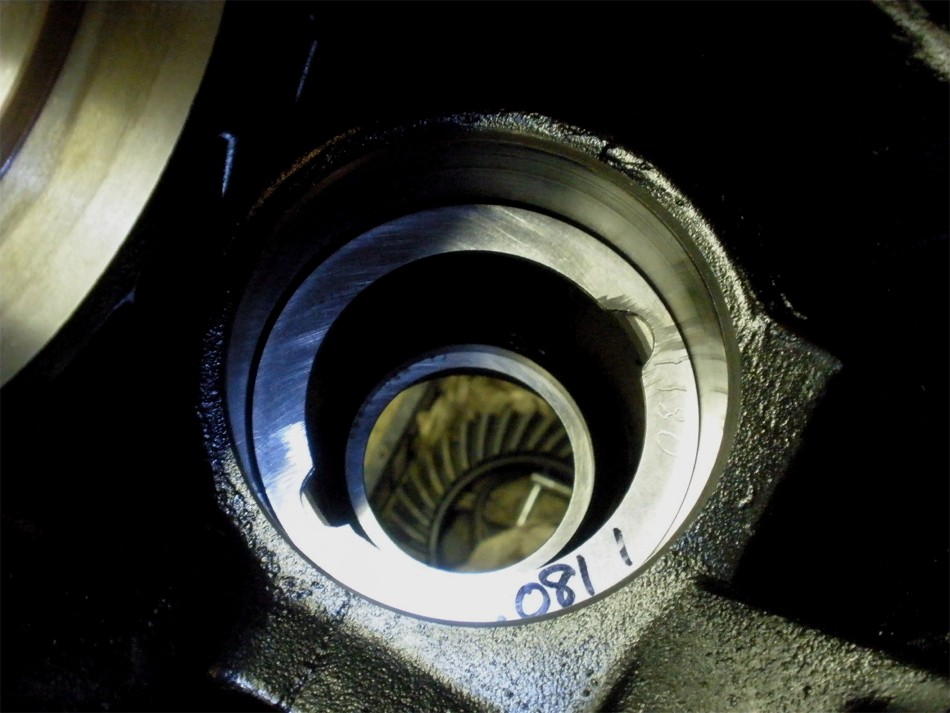
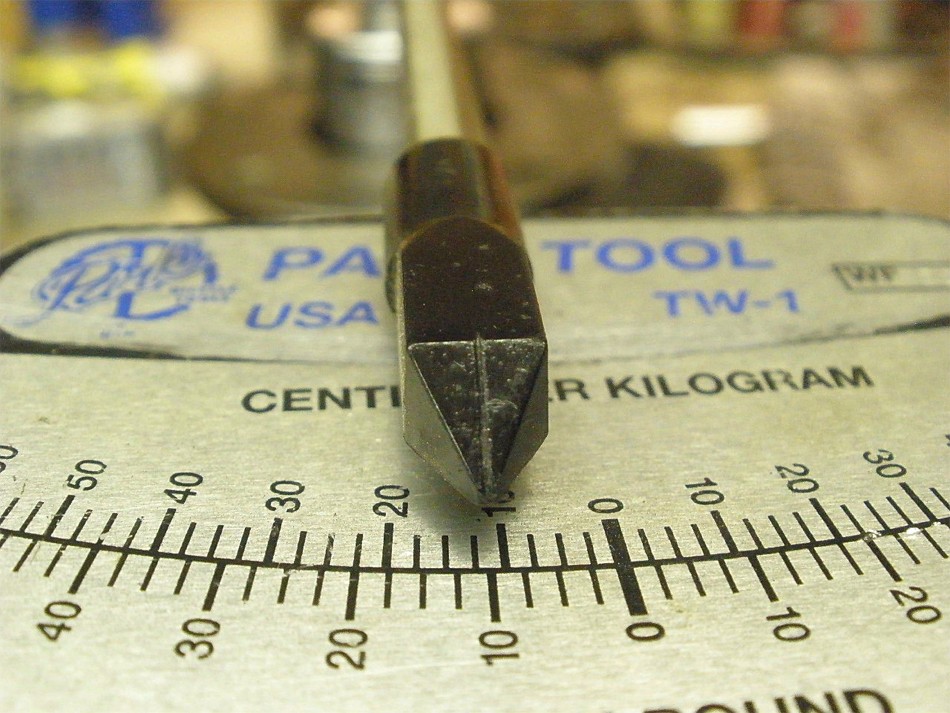
On the 8.4's, the pinion shims are commonly placed behind the large inner pinion race.
Those shims on the left add up to 073.
|
|
|
|
|
Thought I saw some shim behind the big inner pinion bearing...
|
|
|
|
...but that was not the case(optical illusion). Anyways, as mentioned earlier, those
9 thin shims added up to 073....same exact number that Jon measured for the rear 3rd
pinion shim when he was into it.
|
|
|
|
|
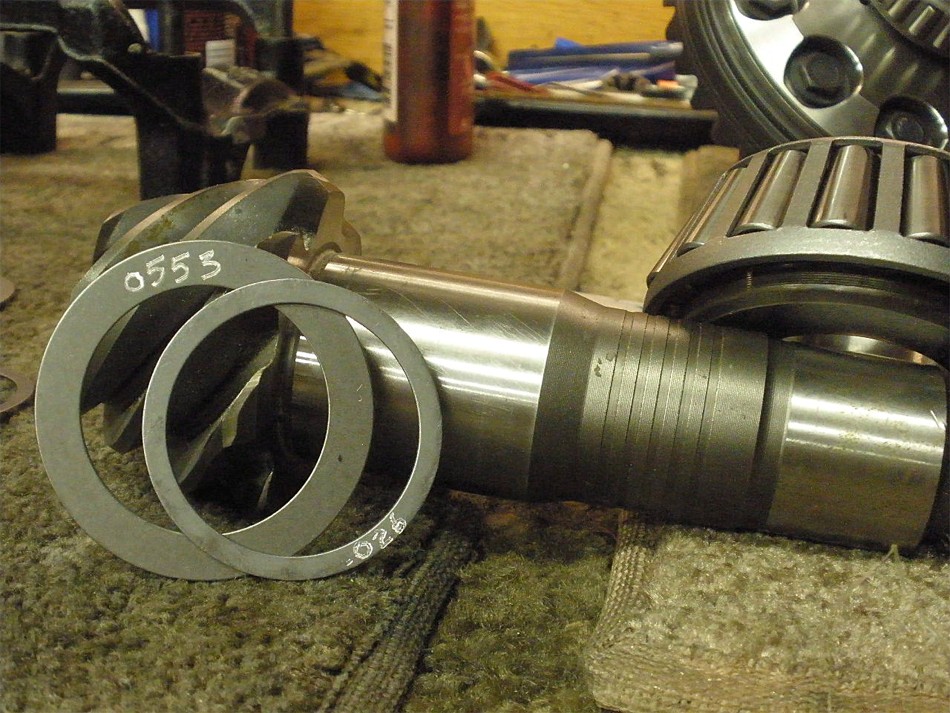
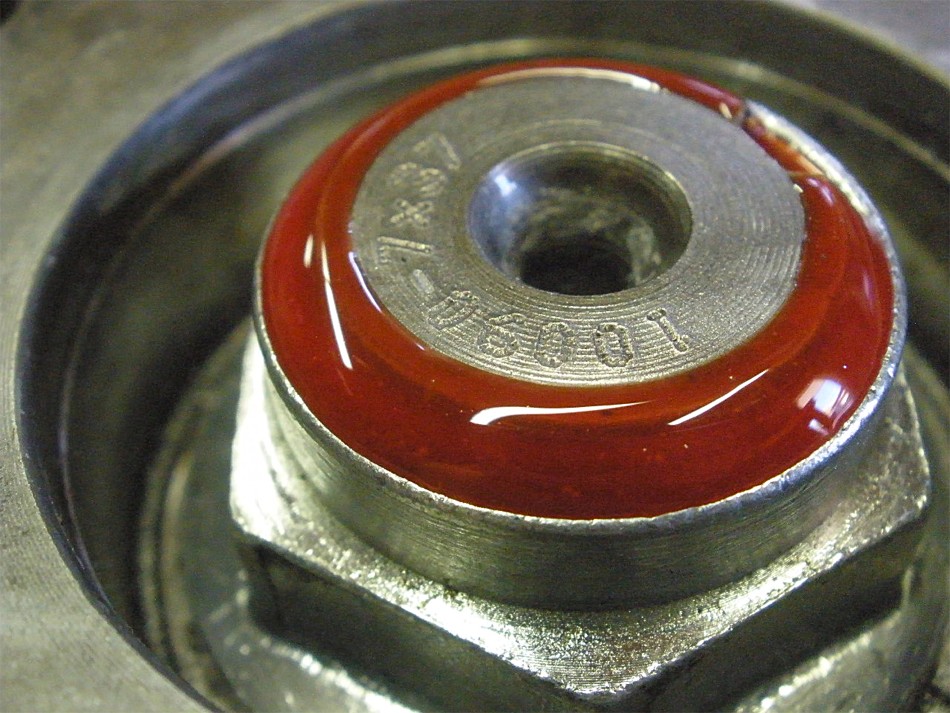
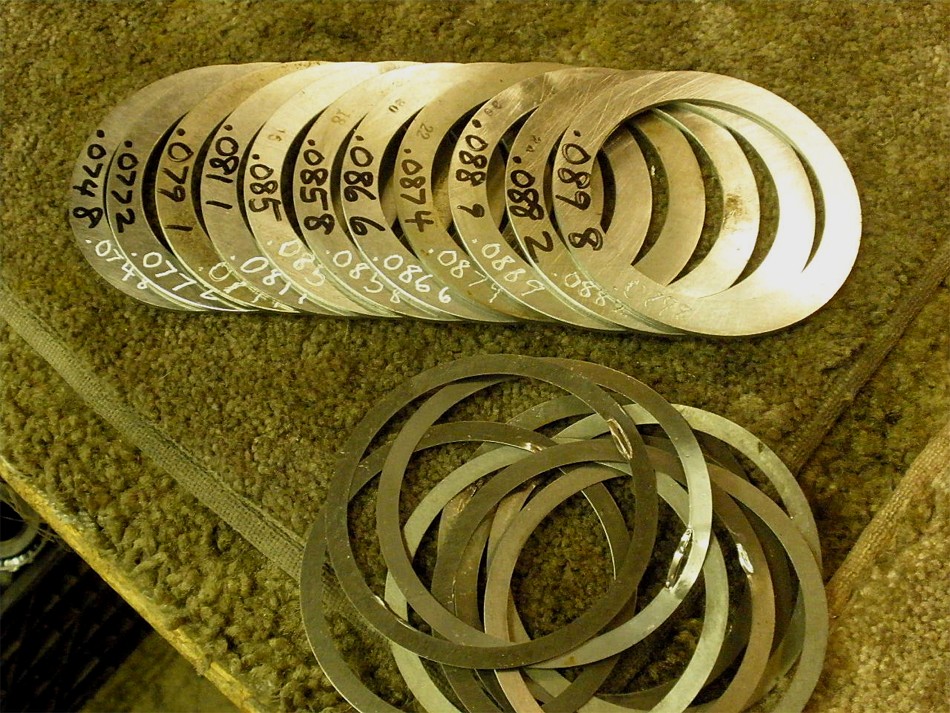
Instead of using 9 skinny shims, I will use one of these OEM factory thick washer plates.
|
|
|
|
I'll try a thicker 081. Thinking ahead, I placed a notch in 2 places on the shim so I
can tap the race out without causing further shim damage....and it worked.
|
|
|
|
|
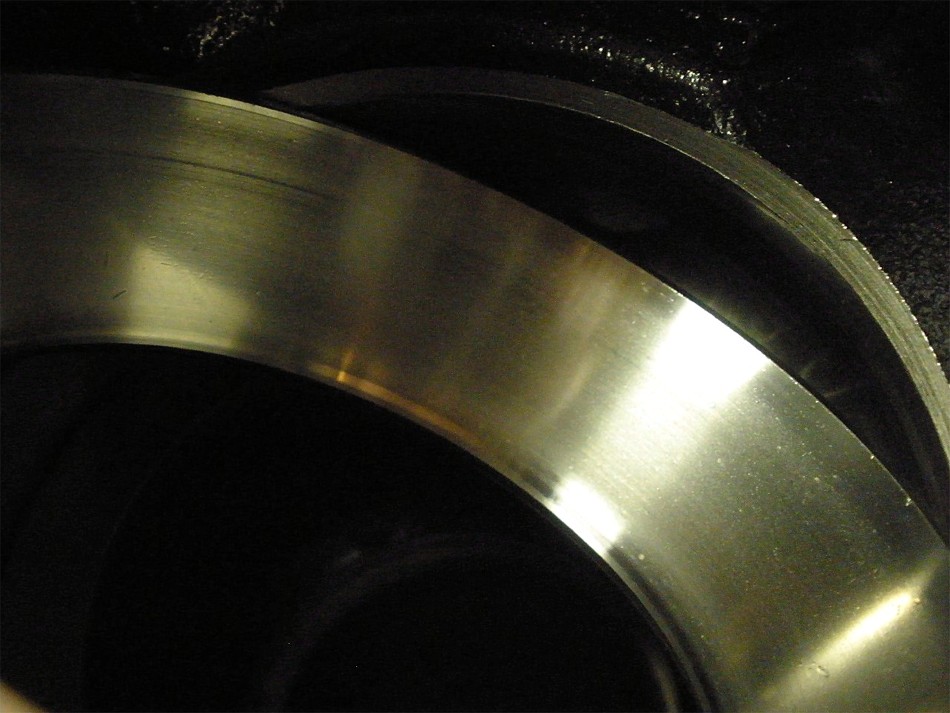
A quick inspection shows some pitting on the large inner race but it looks ok.
|
|
|
|
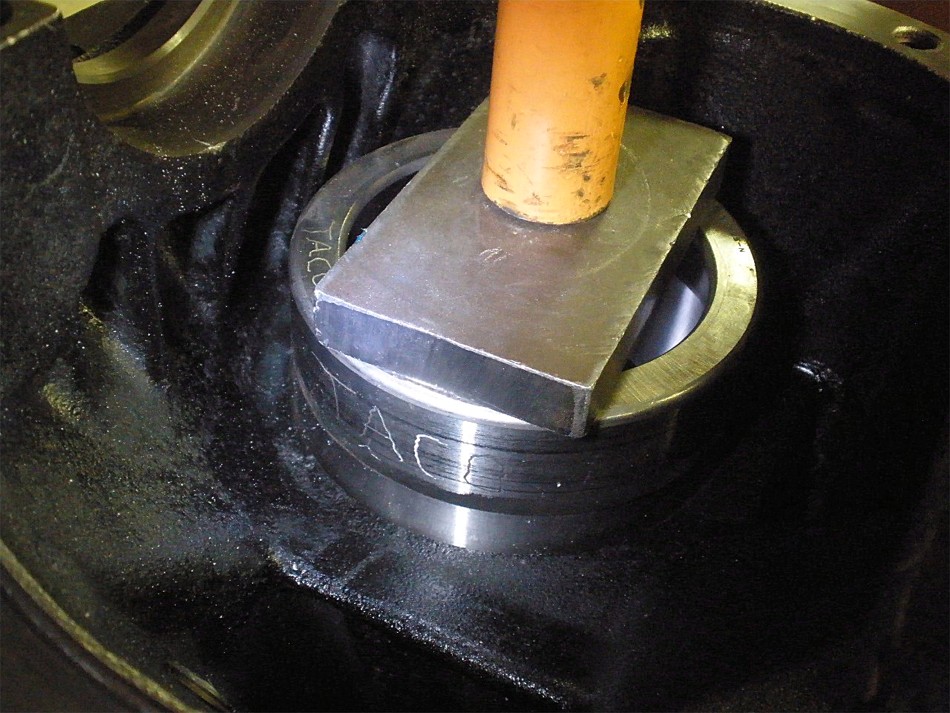
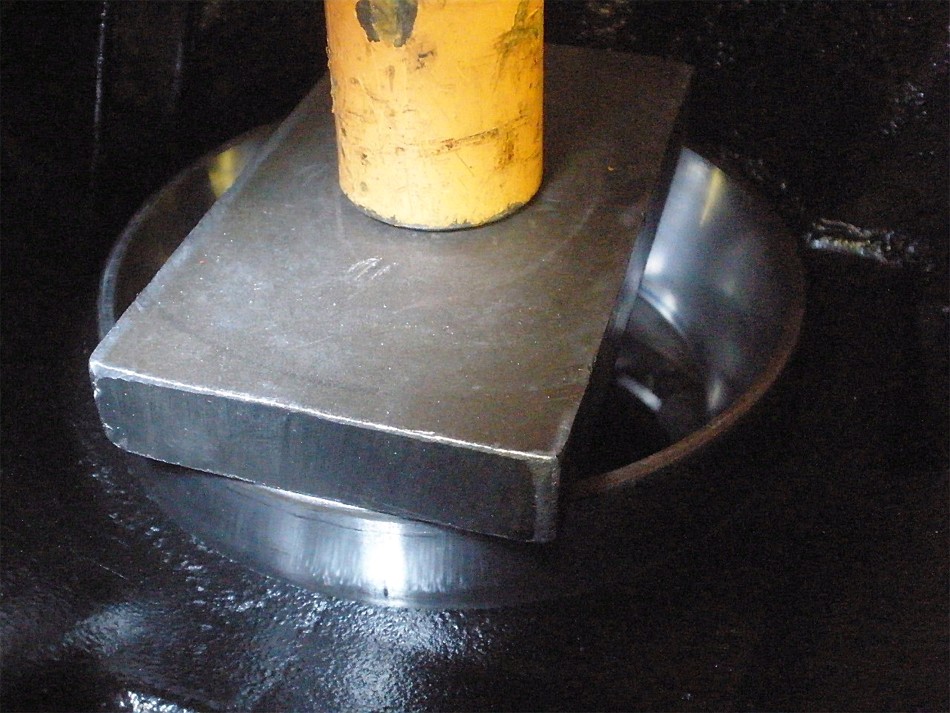
The race is pressed in place. Not shown but I backed up the steel plate in the pic
with an old, same size race to make sure the race is fully pressed into the bore.
|
|
|
|
|
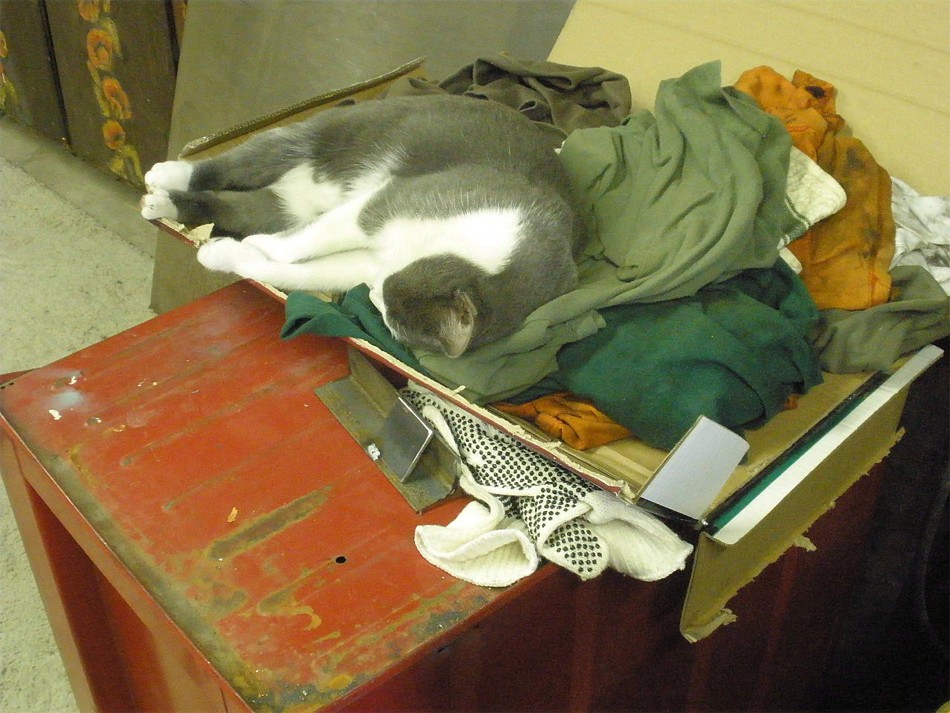
Such a good shop cat.
|
|
|
|
|
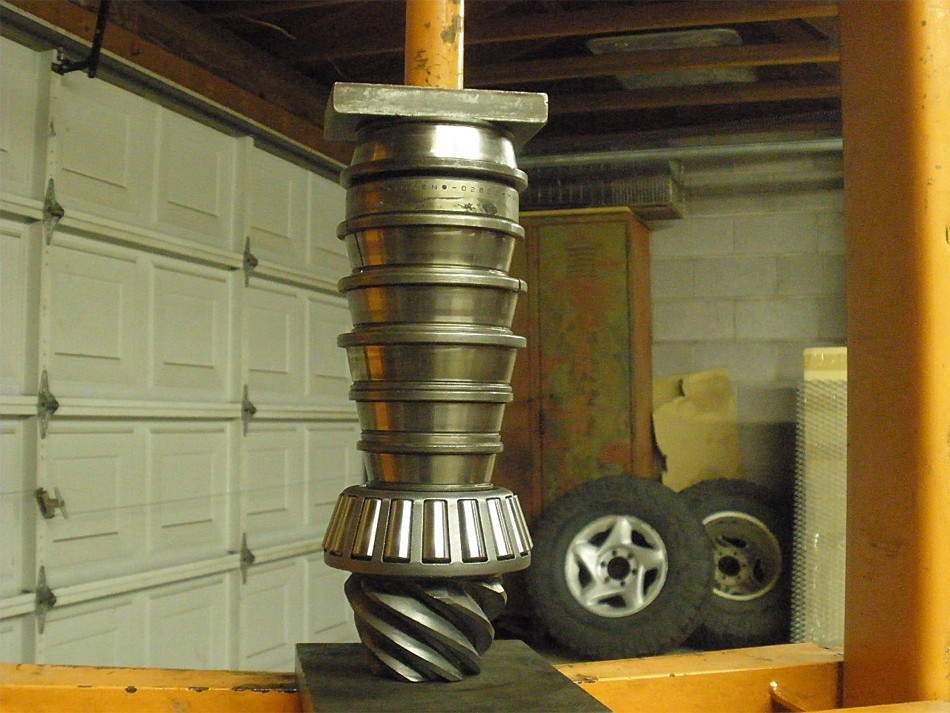
Pressing the pinion bearing back on.
|
|
|
|
|
Re-assemble and a quick pattern check shows the drive side to be close....but somewhat shallow.
|
|
|
|
|
Coast looks deceptively ok.
|
|
|
|
|
Pinion shows deep....meaning ring is shallow.
|
|
|
|
|
I am now very confident that this 085 will be the ticket...
|
|
|
|
|
...confident enough to install the solid collar...
|
|
|
|
|
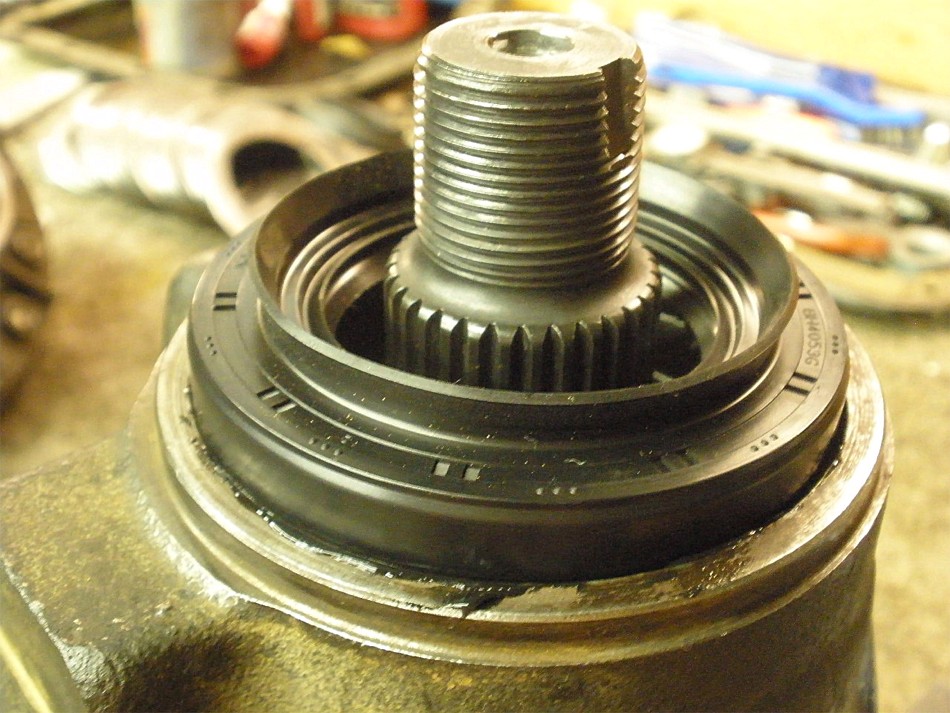
...and install the pinion seal.
|
|
|
|
|
Loctite on the nut.
|
|
|
|
|
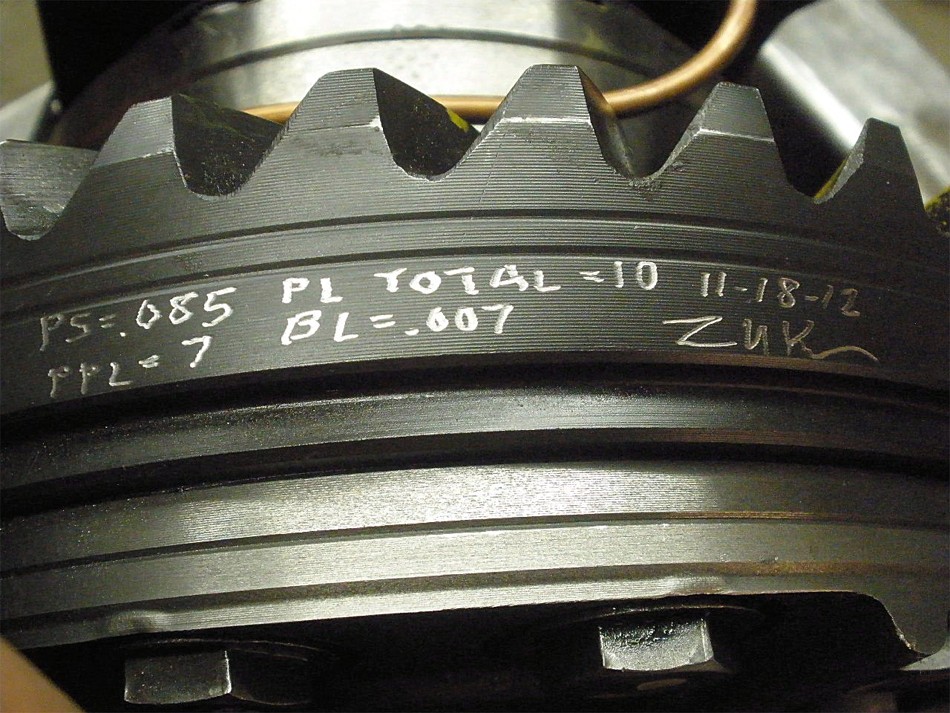
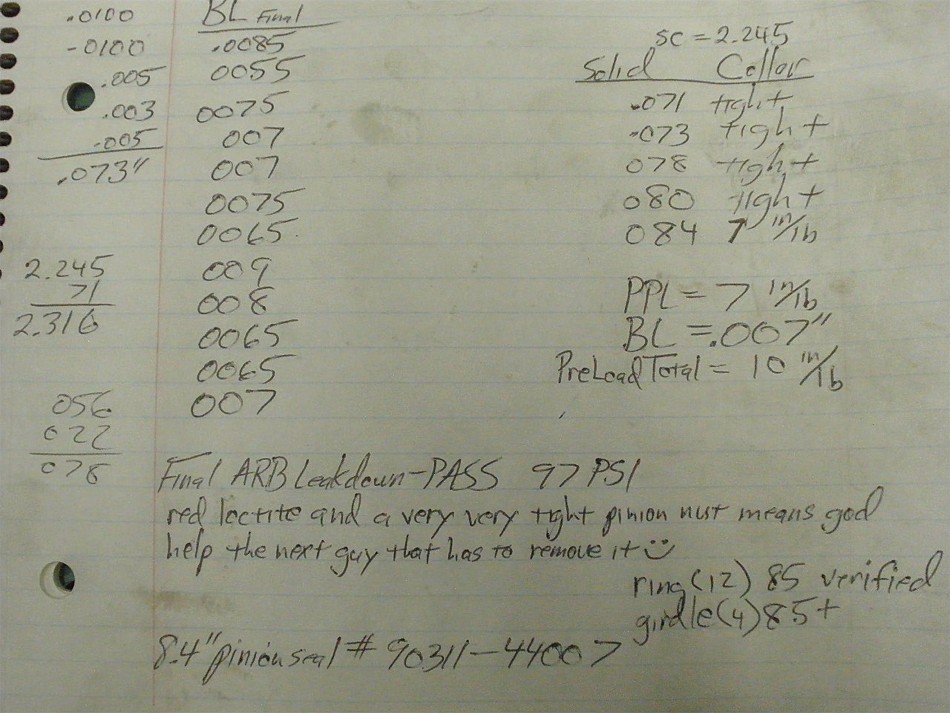
Final PPL is 7 inch/pounds for these used bearings.
|
|
|
|
|
Ding and this end is done.
|
|
|
|
|
The 085 washer was the ticket. Exact depth on the drive side.
|
|
|
|
|
Coast is nice....centered and much deeper in appearance compared to the 073 original.
|
|
|
|
|
Pinion looks great.
|
|
|
|
|
Now the final assembly. 85 ft/lb on these 4 bolts.
|
|
|
|
|
Backlash is recorded on every 3rd tooth. Backlash is 007.
|
|
|
|
|
Preload of combined pinion plus ring is 10 in/lb.
|
|
|
|
|
PASS on the ARB test.
|
|
|
|
|
Scribed the ring gear.
|
|
|
|
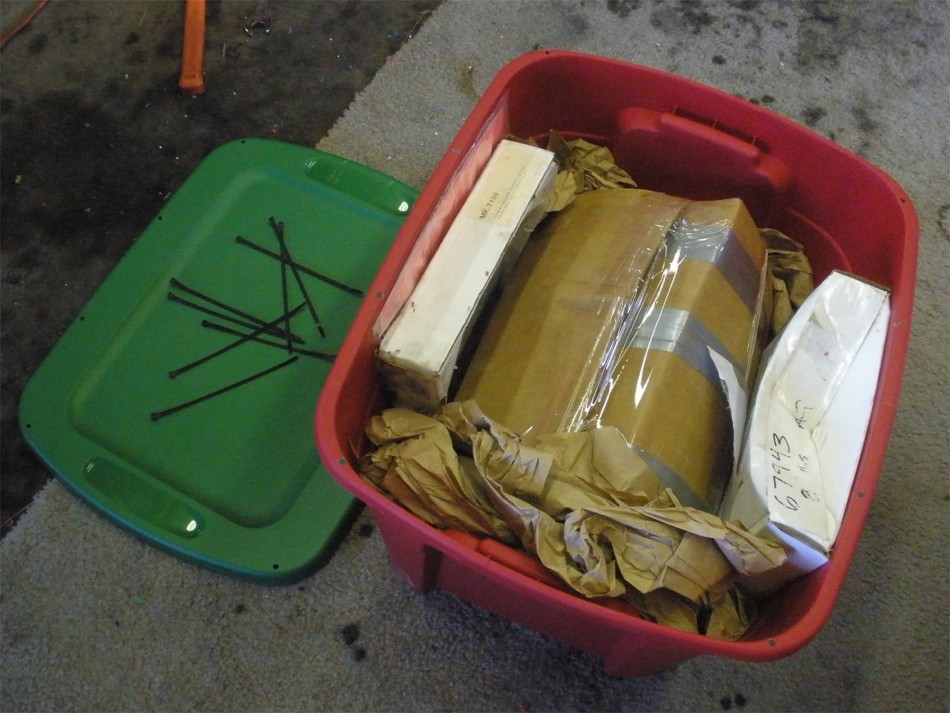
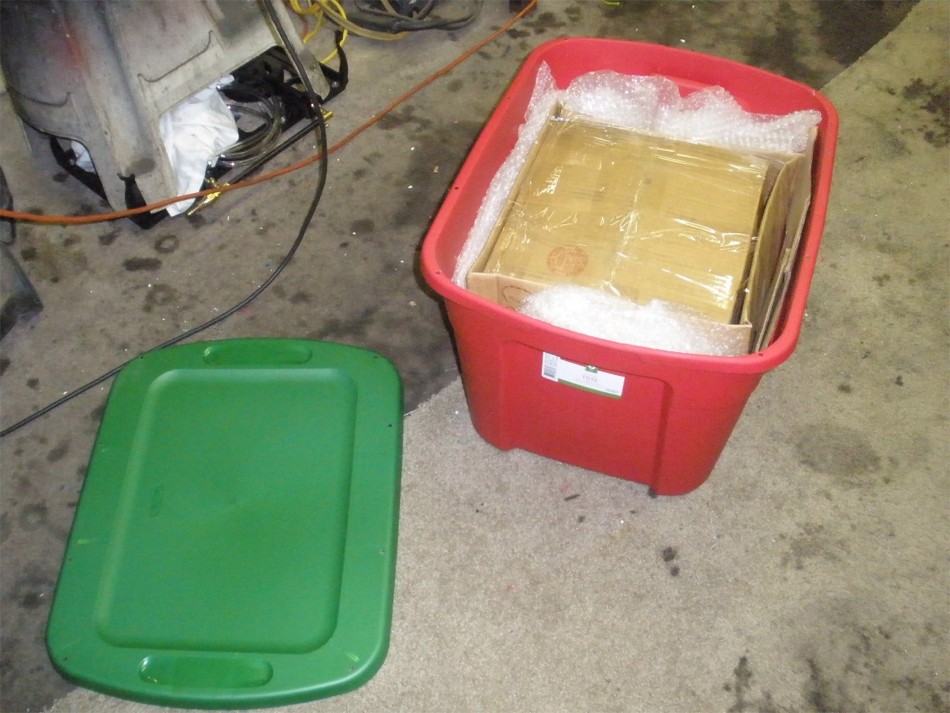
I found 2 boxes that fitted inside each other and wrapped them up tight in tape. The
3rd is actually in the inner box at a 45 degree angle(corner to corner) so it's not
going to move around and is locked in place very well.
|
|
|
|
|
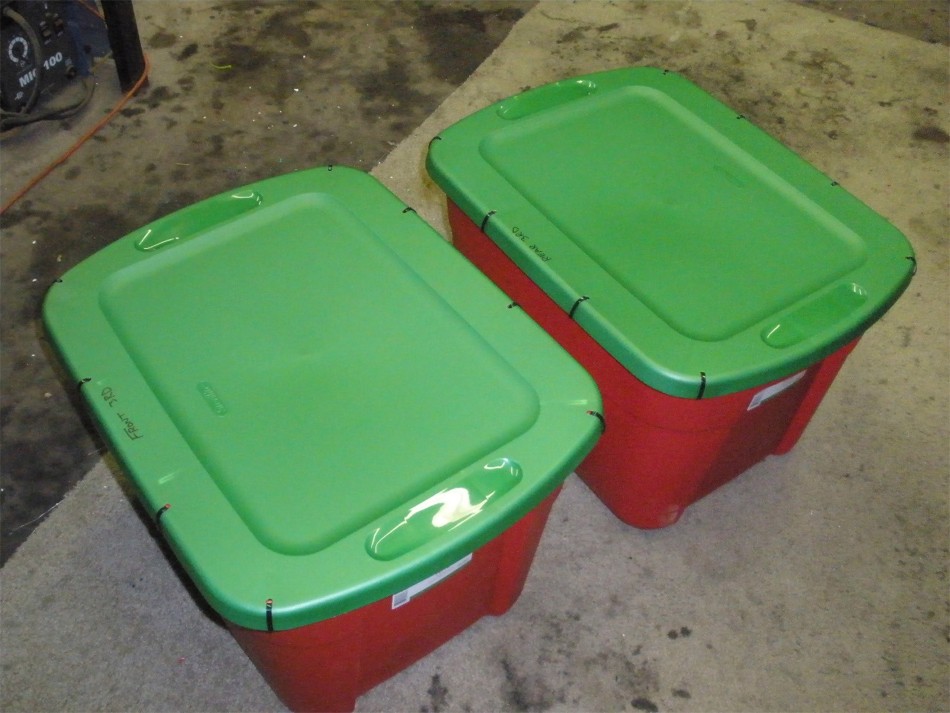
2 pre-Christmas 3rds ready to head back to Jon....76 pounds each one.
|
|
|
|
|
...
|
|
|
|
|
...
|
|

|