|
Josh's 1995 V6 3rd gets new bearings and a Spartan Locker
|
|
(73 BIG pics loading)
|
|
AUGUST 7 2014
|
|

|
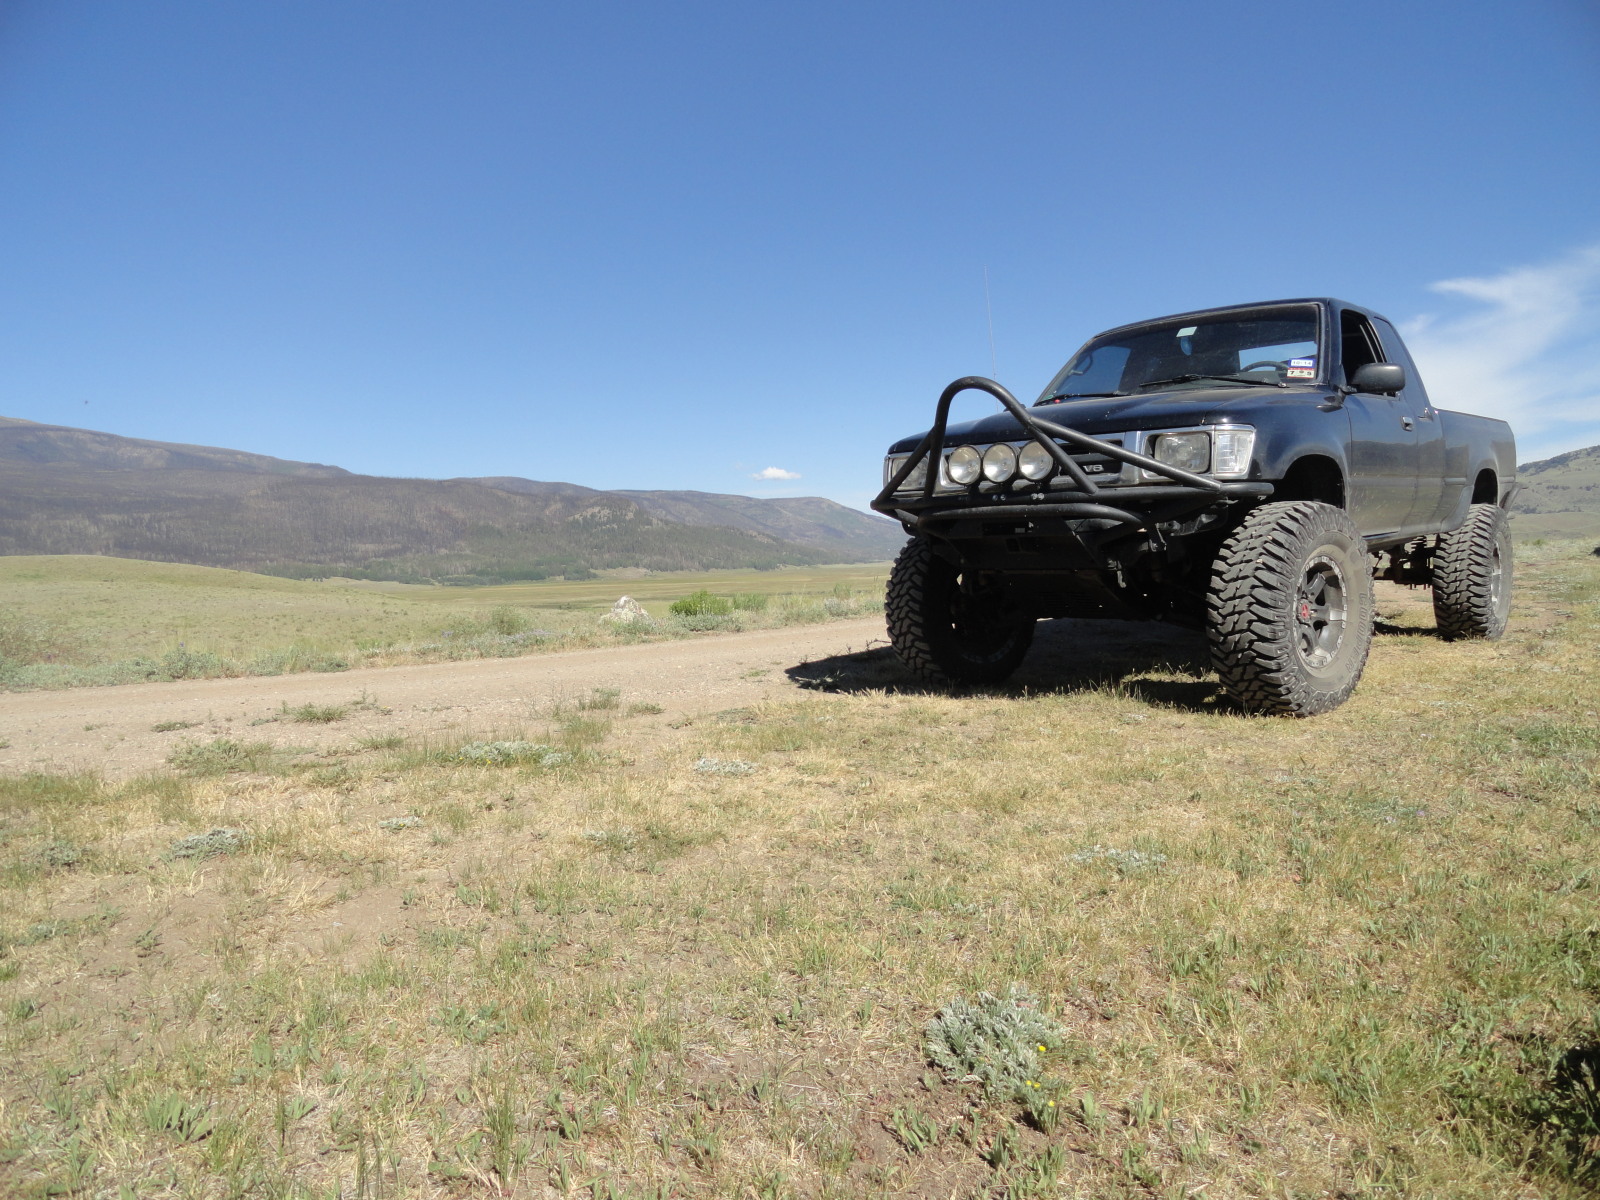
Josh lives in Texas and enjoys taking his 1995 3.0L pick-up out wheelin' and on an occassional camping trip.
In the above picture, he is on a camping trip with his fiance and uncle in Colorado.
|
|
|
|
|
I see a rear coil in this picture....
|
|
|
|
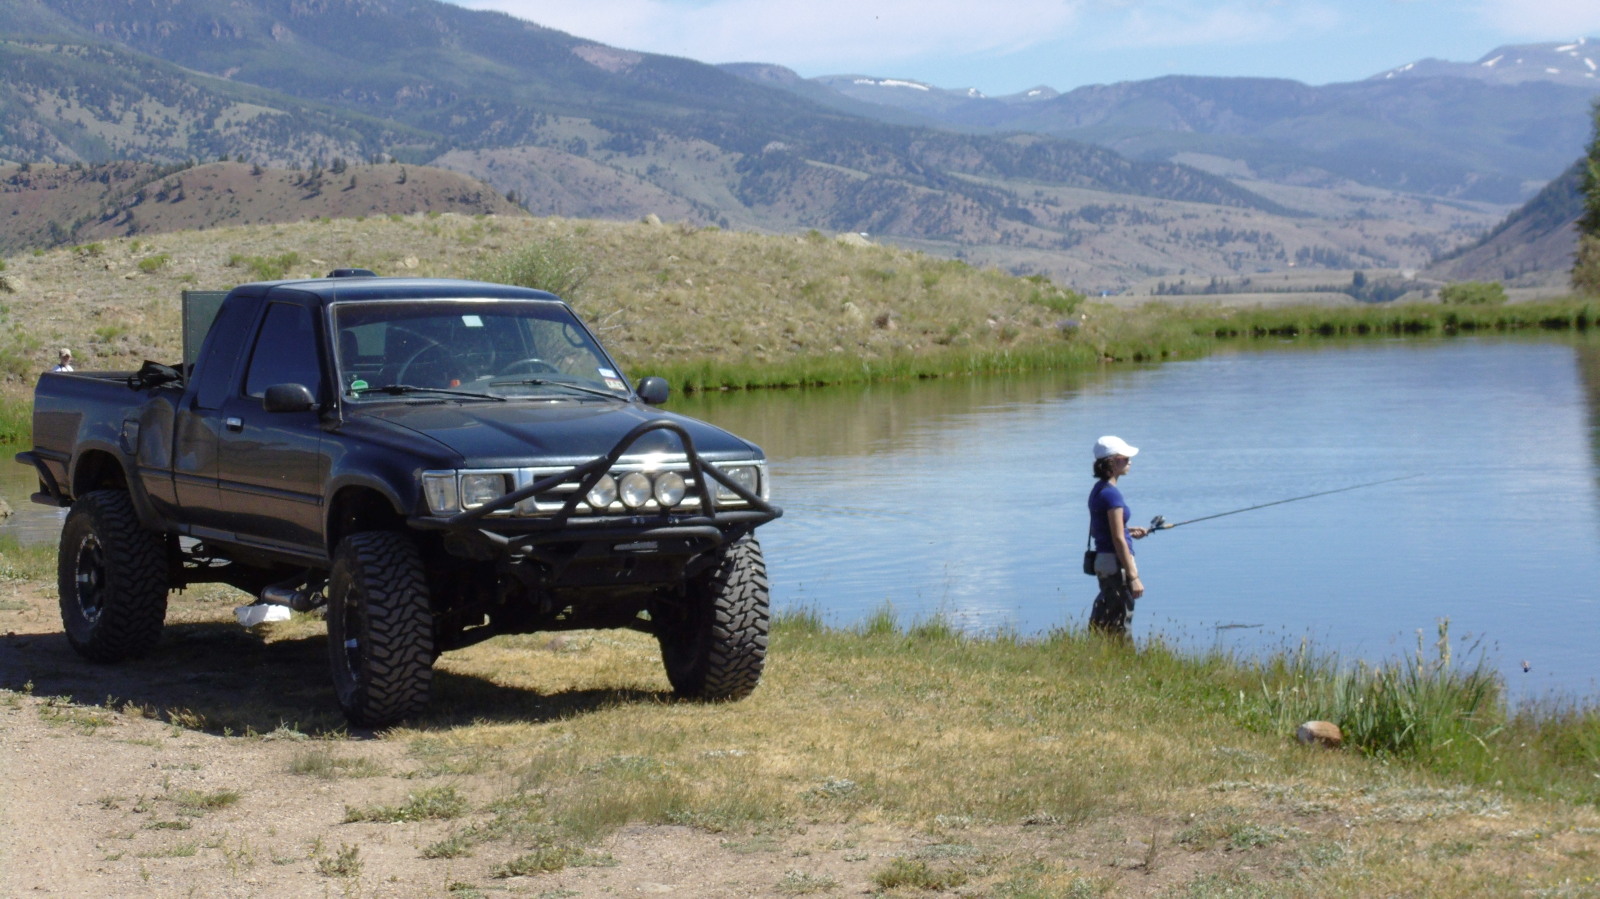
The fishing was good I understand. In my emails with Josh, he said they had a lot of fish that week....had it
grilled and also they fried it. My own favorite is to have it fried in butter in a cast iron skillet 
|
|
|
|
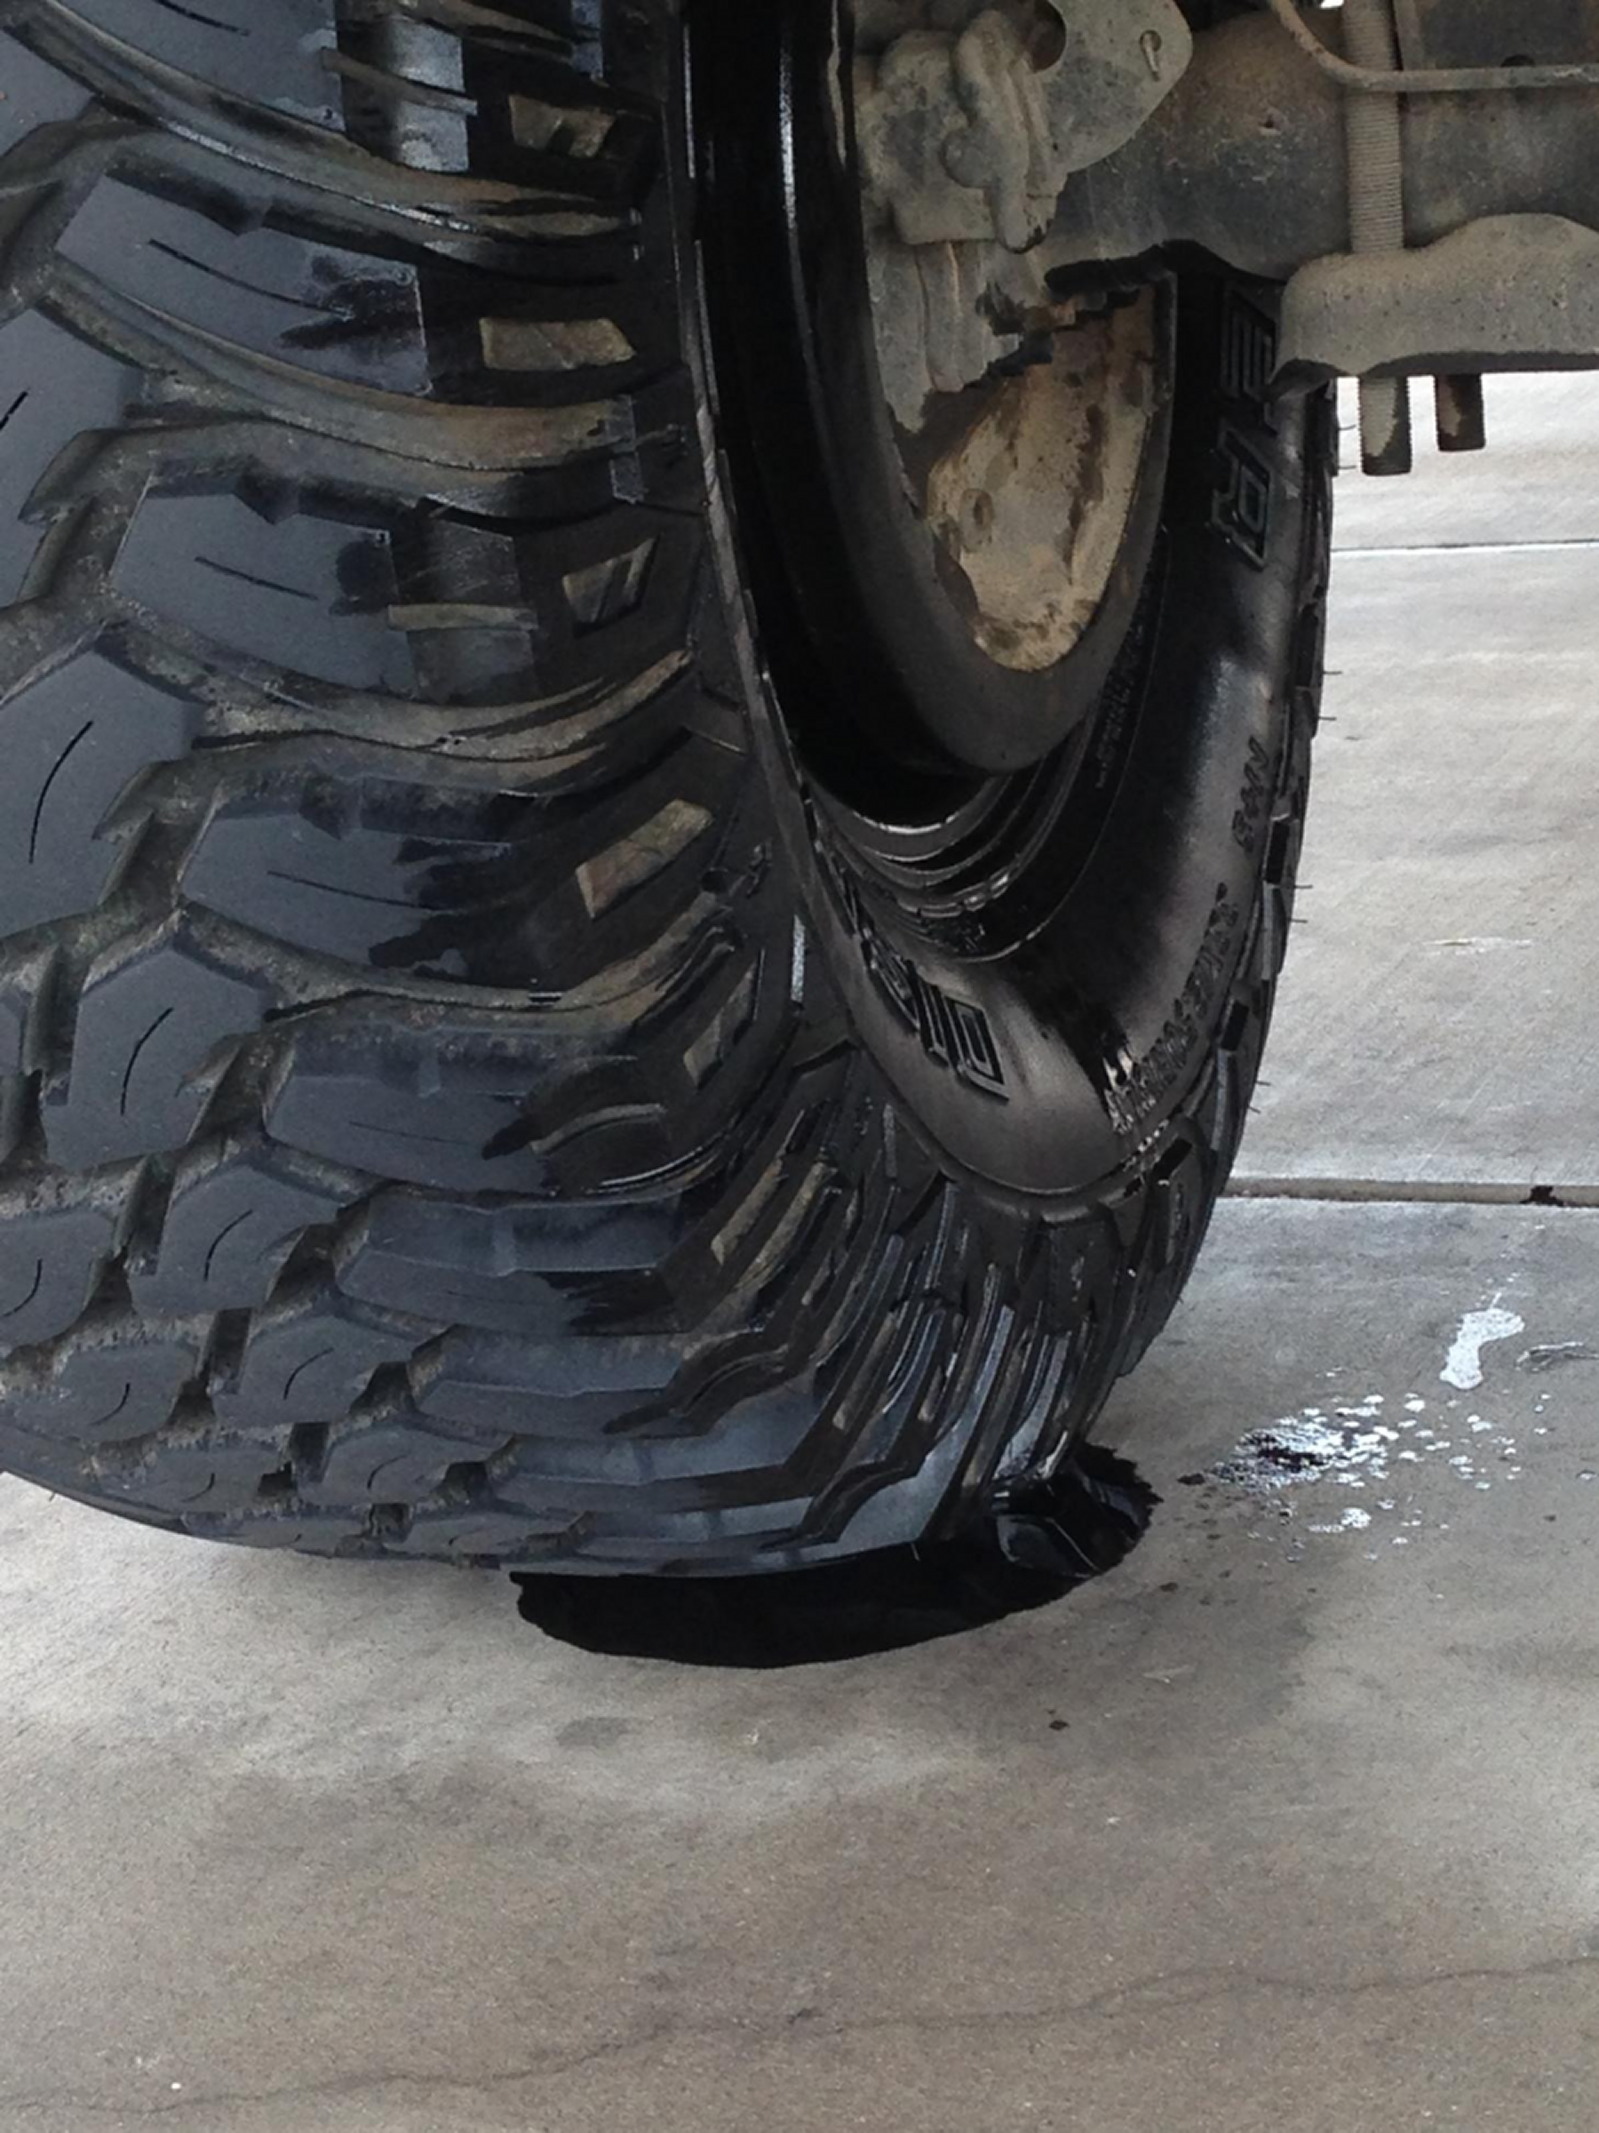
Anyways, the rear V6 pinion seal started to leak oil....and the axle seals were also gushing oil as seen here.
So now Josh figured was a good time to go thru the rear-end and do all new bearings in the axle and the 3rd.
Josh reported to me that the axle bearings (ball bearings) almost fell apart when he slid the axles out
for inspection.
|
|
|
|
|
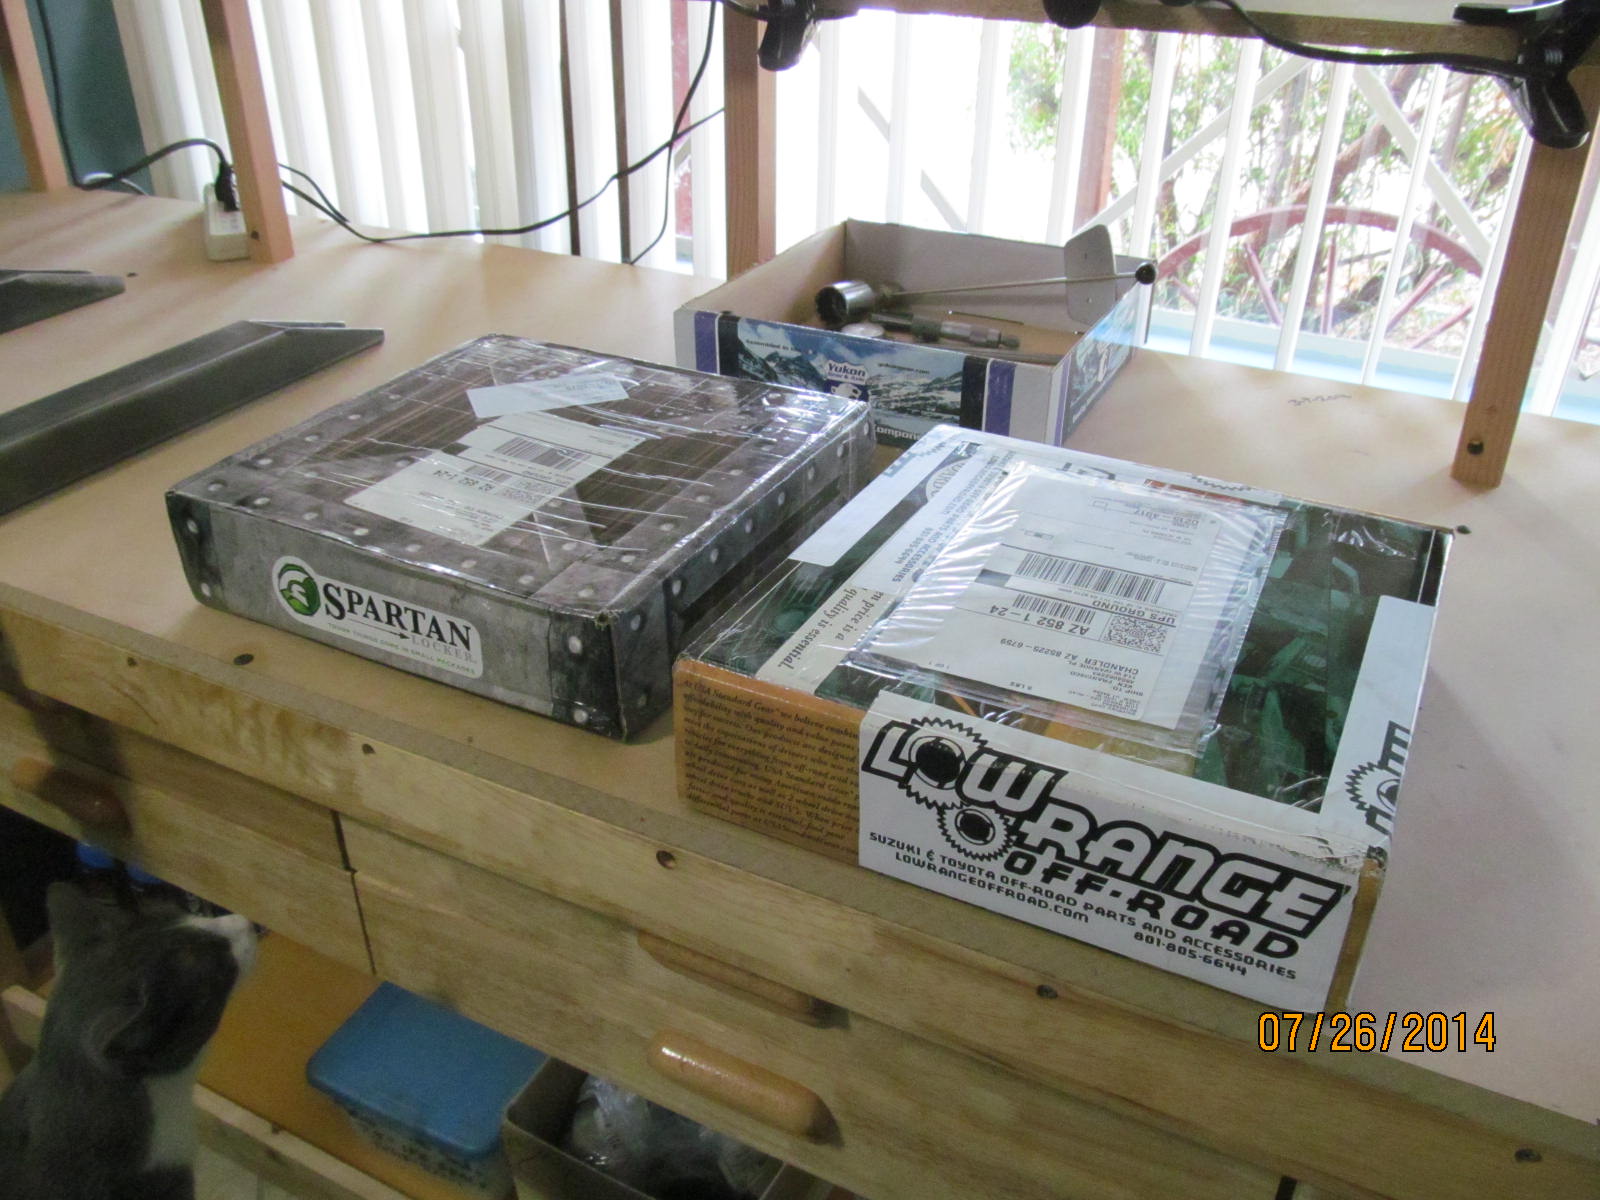
Product arrived in quick order. A Spartan auto-locker will also go in at the same time.
|
|
|
|
|
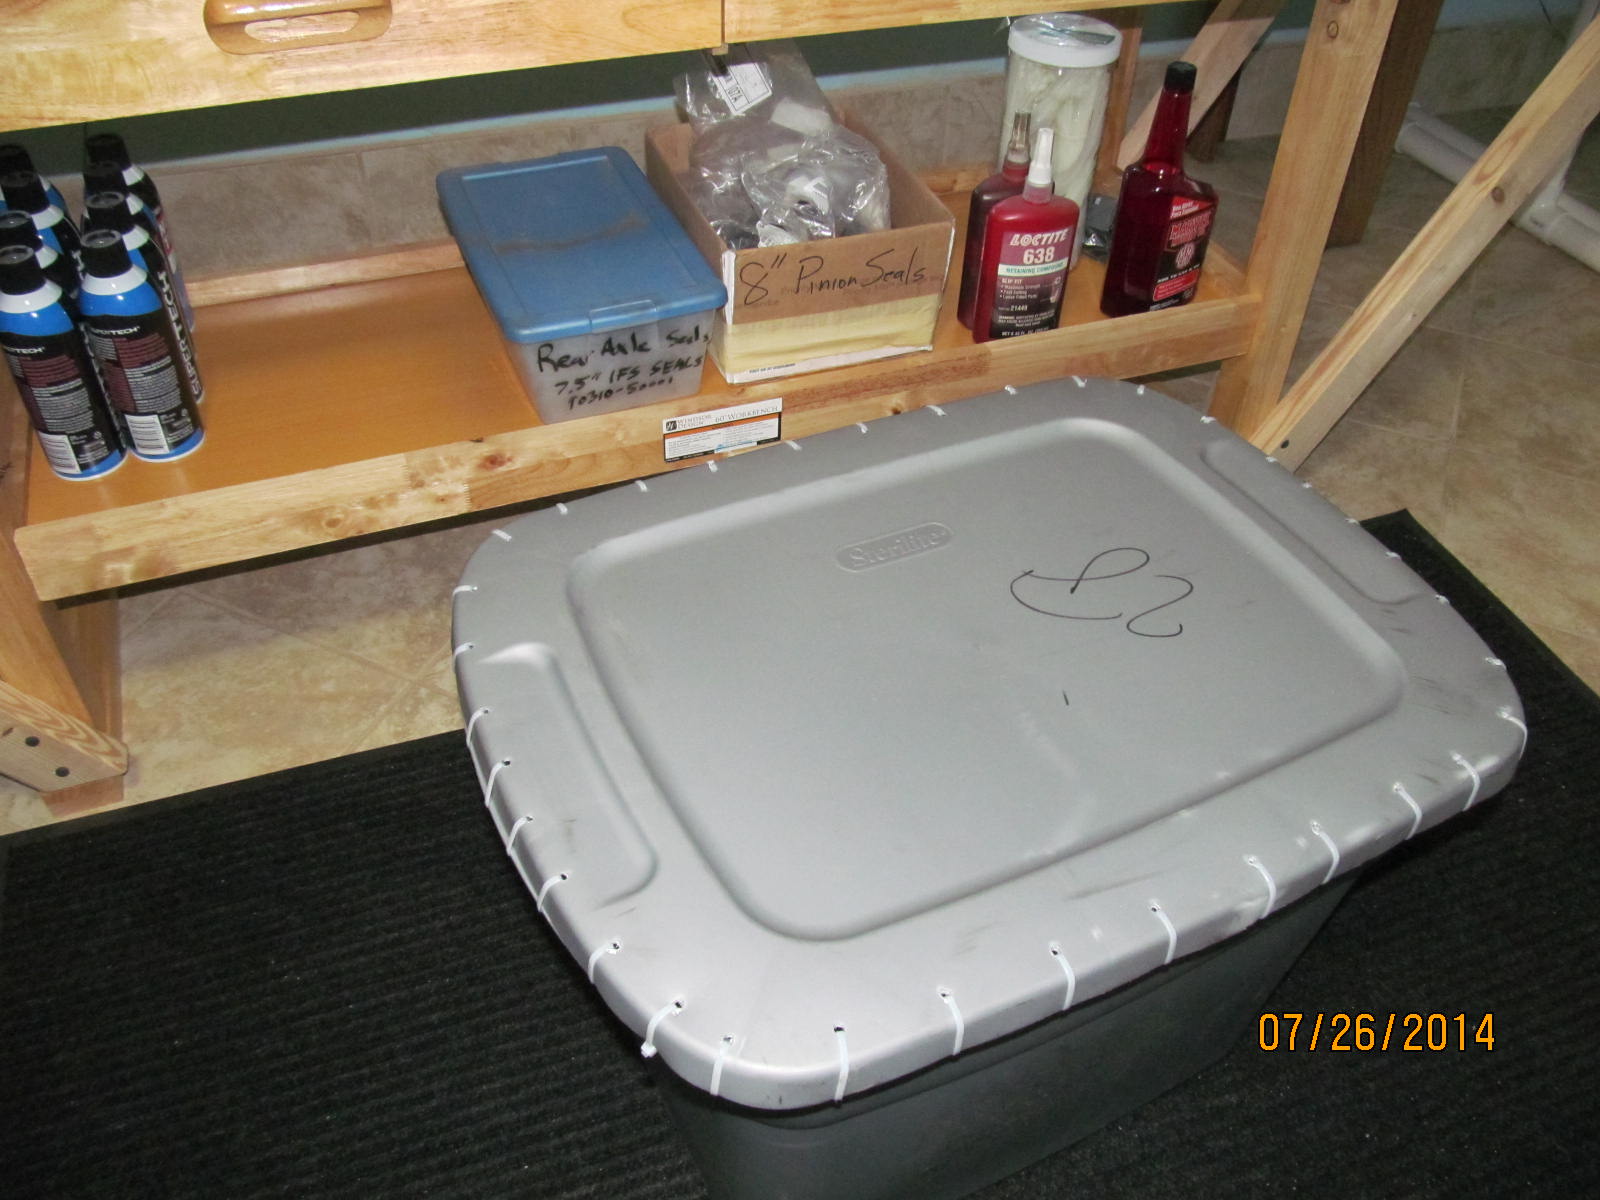
Josh was not shy with the tie-raps :)
|
|
|
|
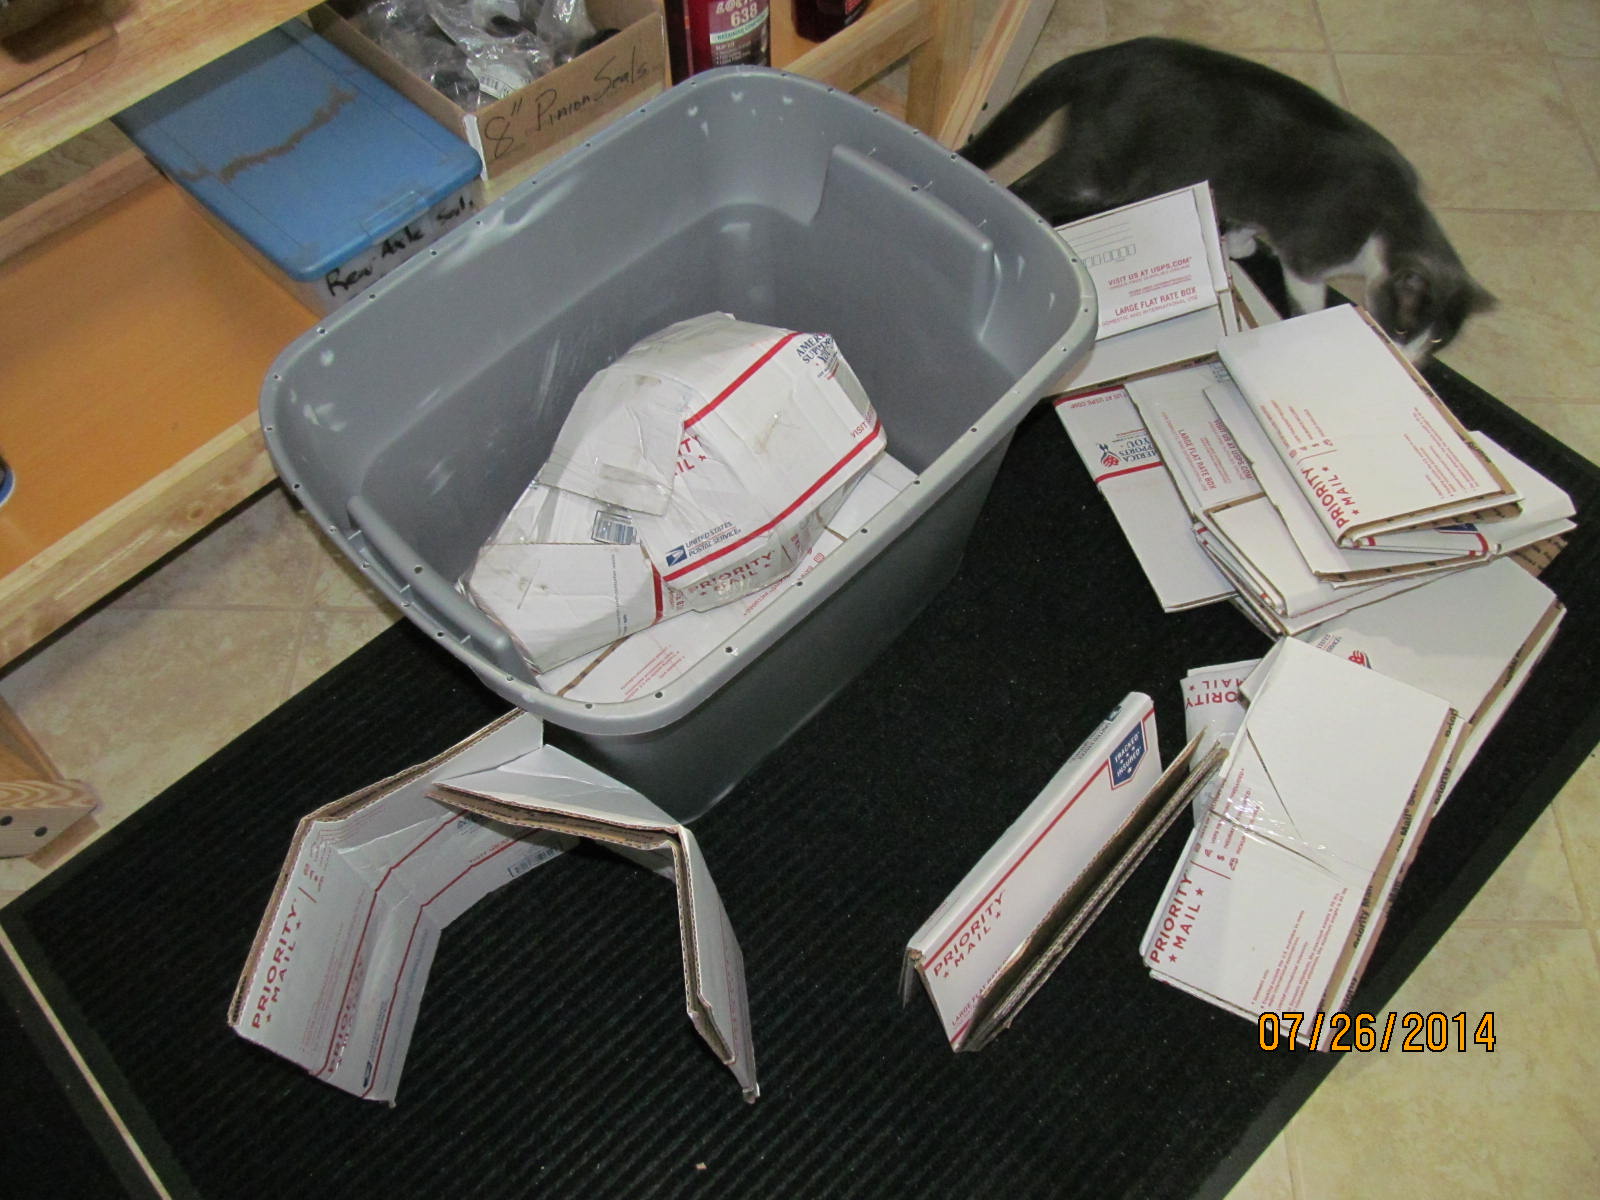
Nice packing job...the base has about 2 inches of cardboard under the diff to prevent breakthru...
and it worked great.
|
|
|
|
|
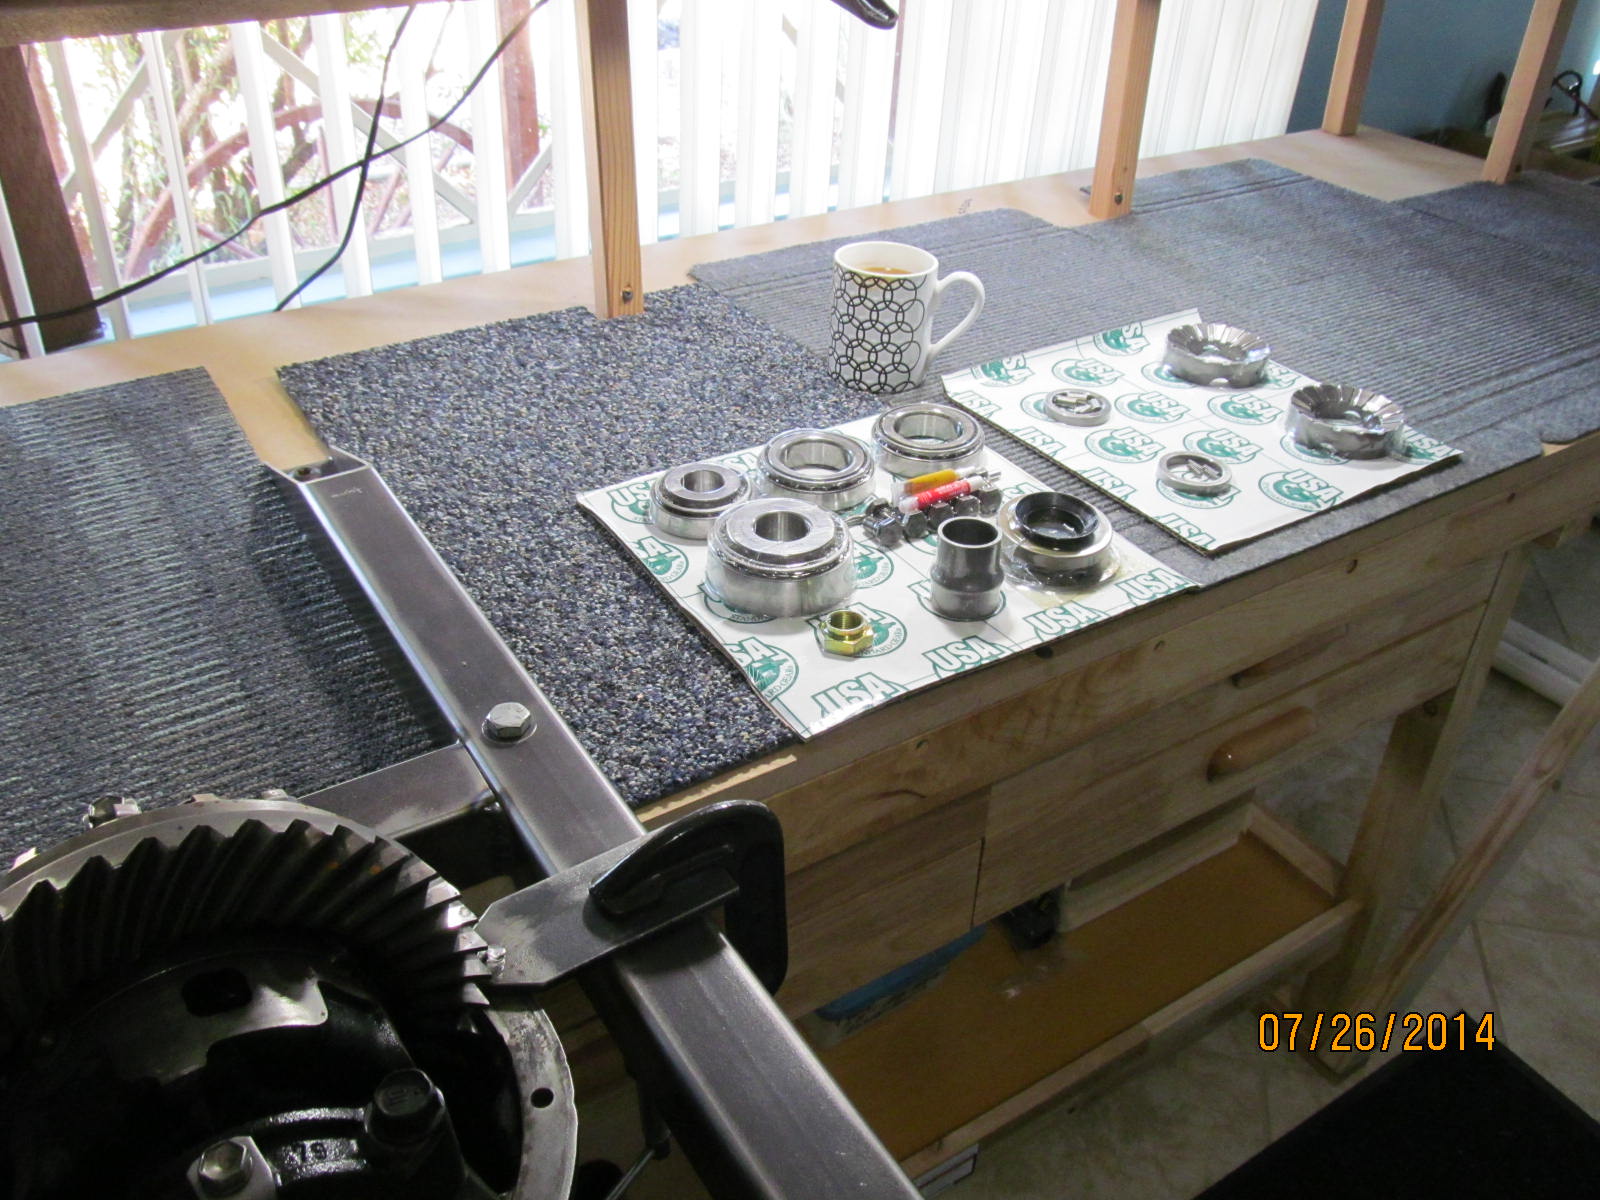
Nothings beats a hot cup of joe in the morning....and a master kit/Spartan.
|
|
|
|
|
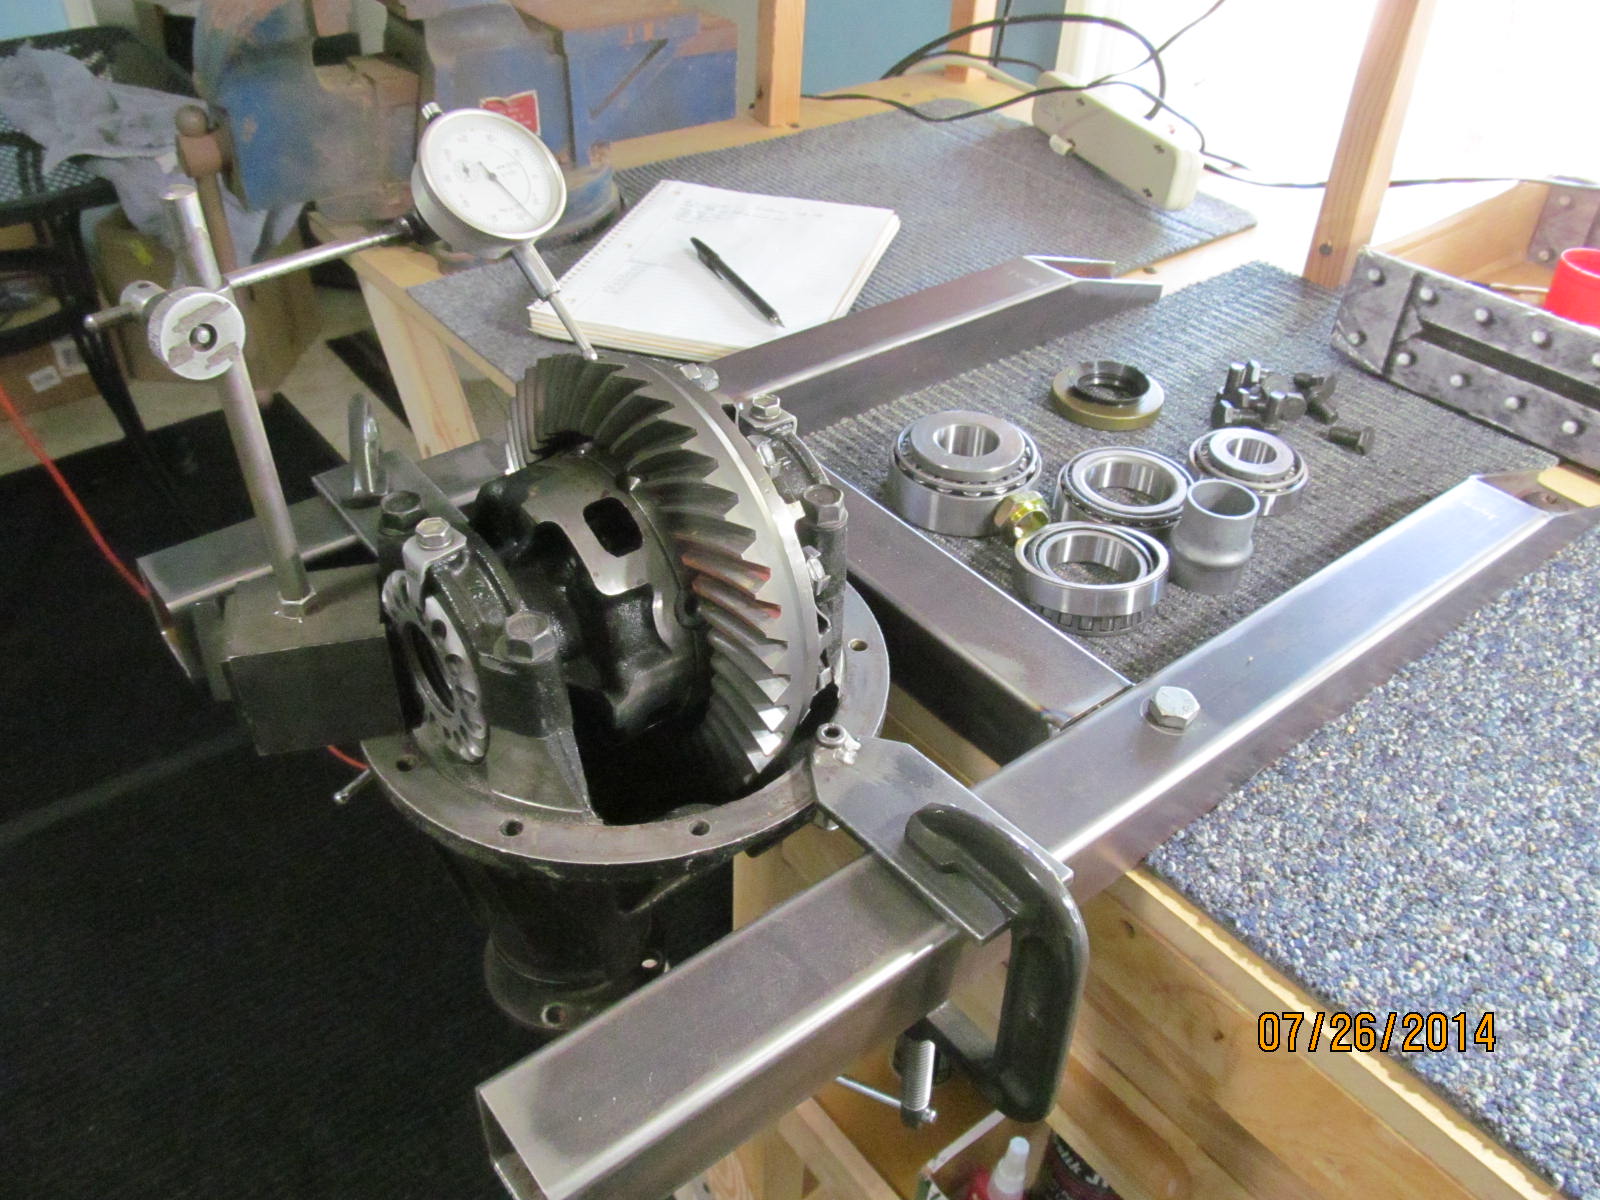
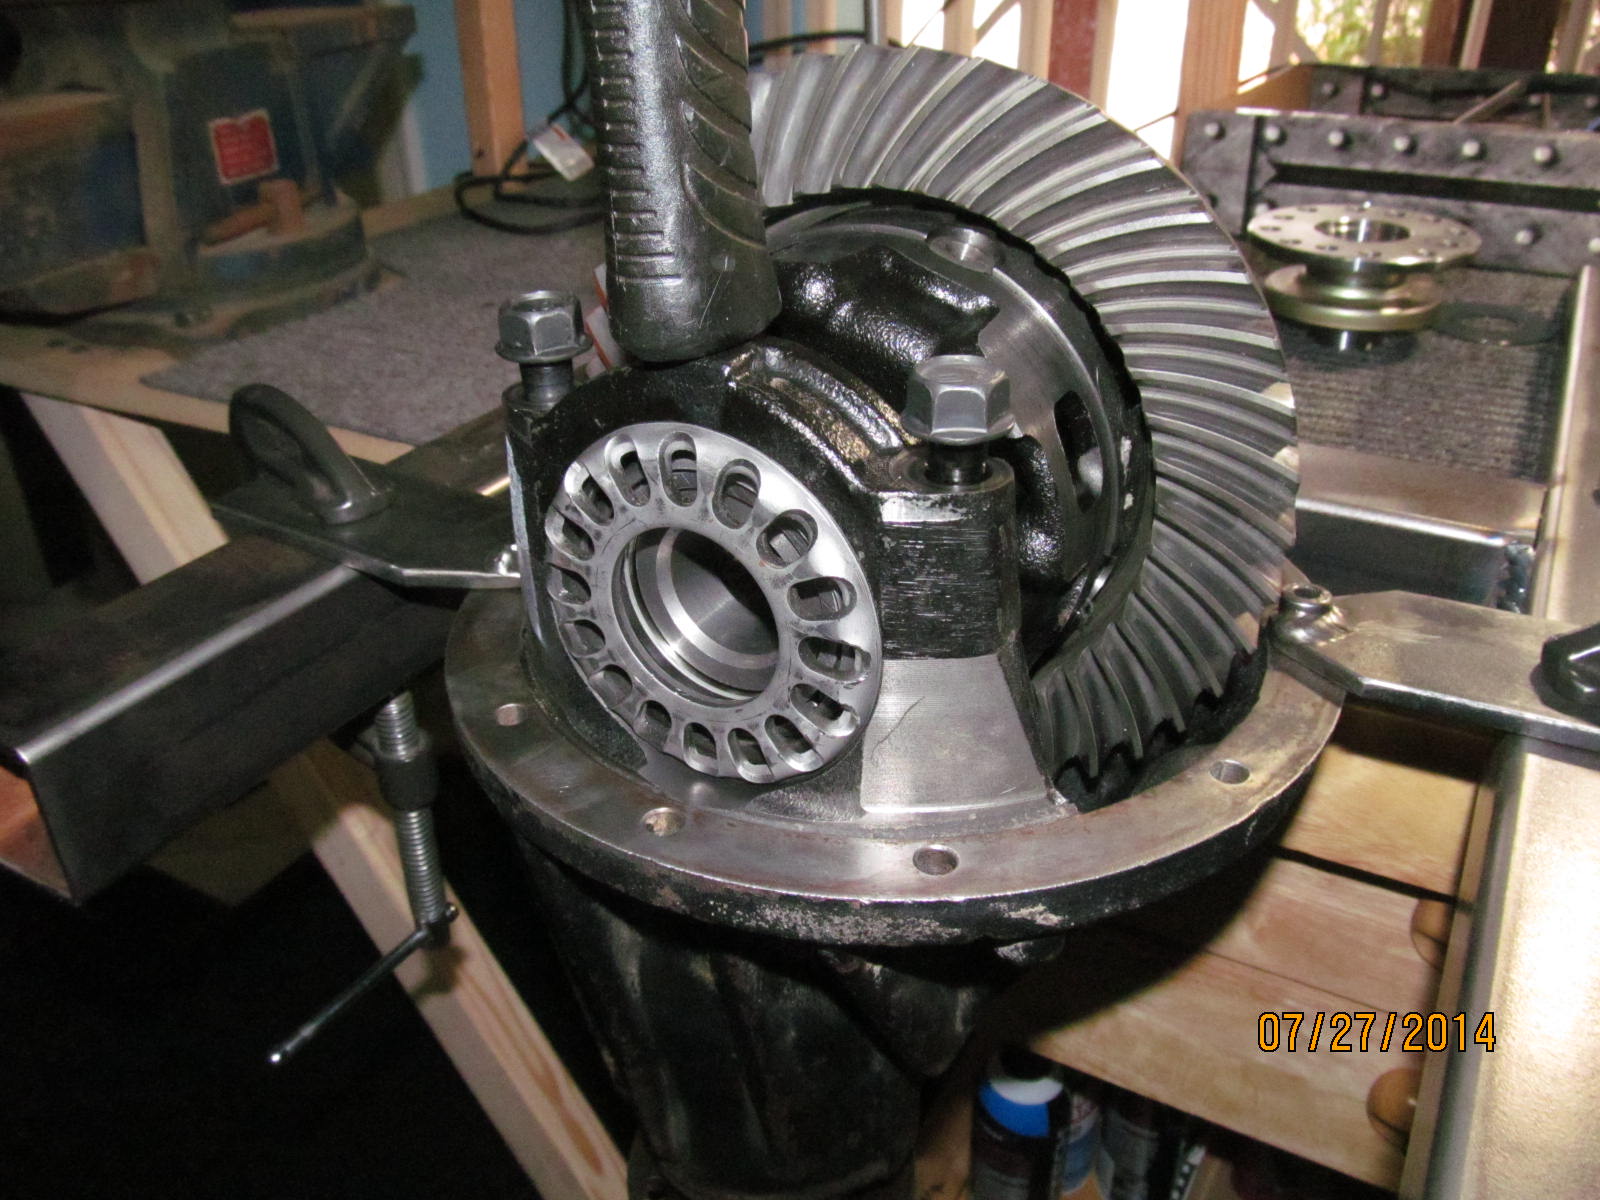
Backlash was checked first. Loose it was not so no problem there.
|
|
|
|
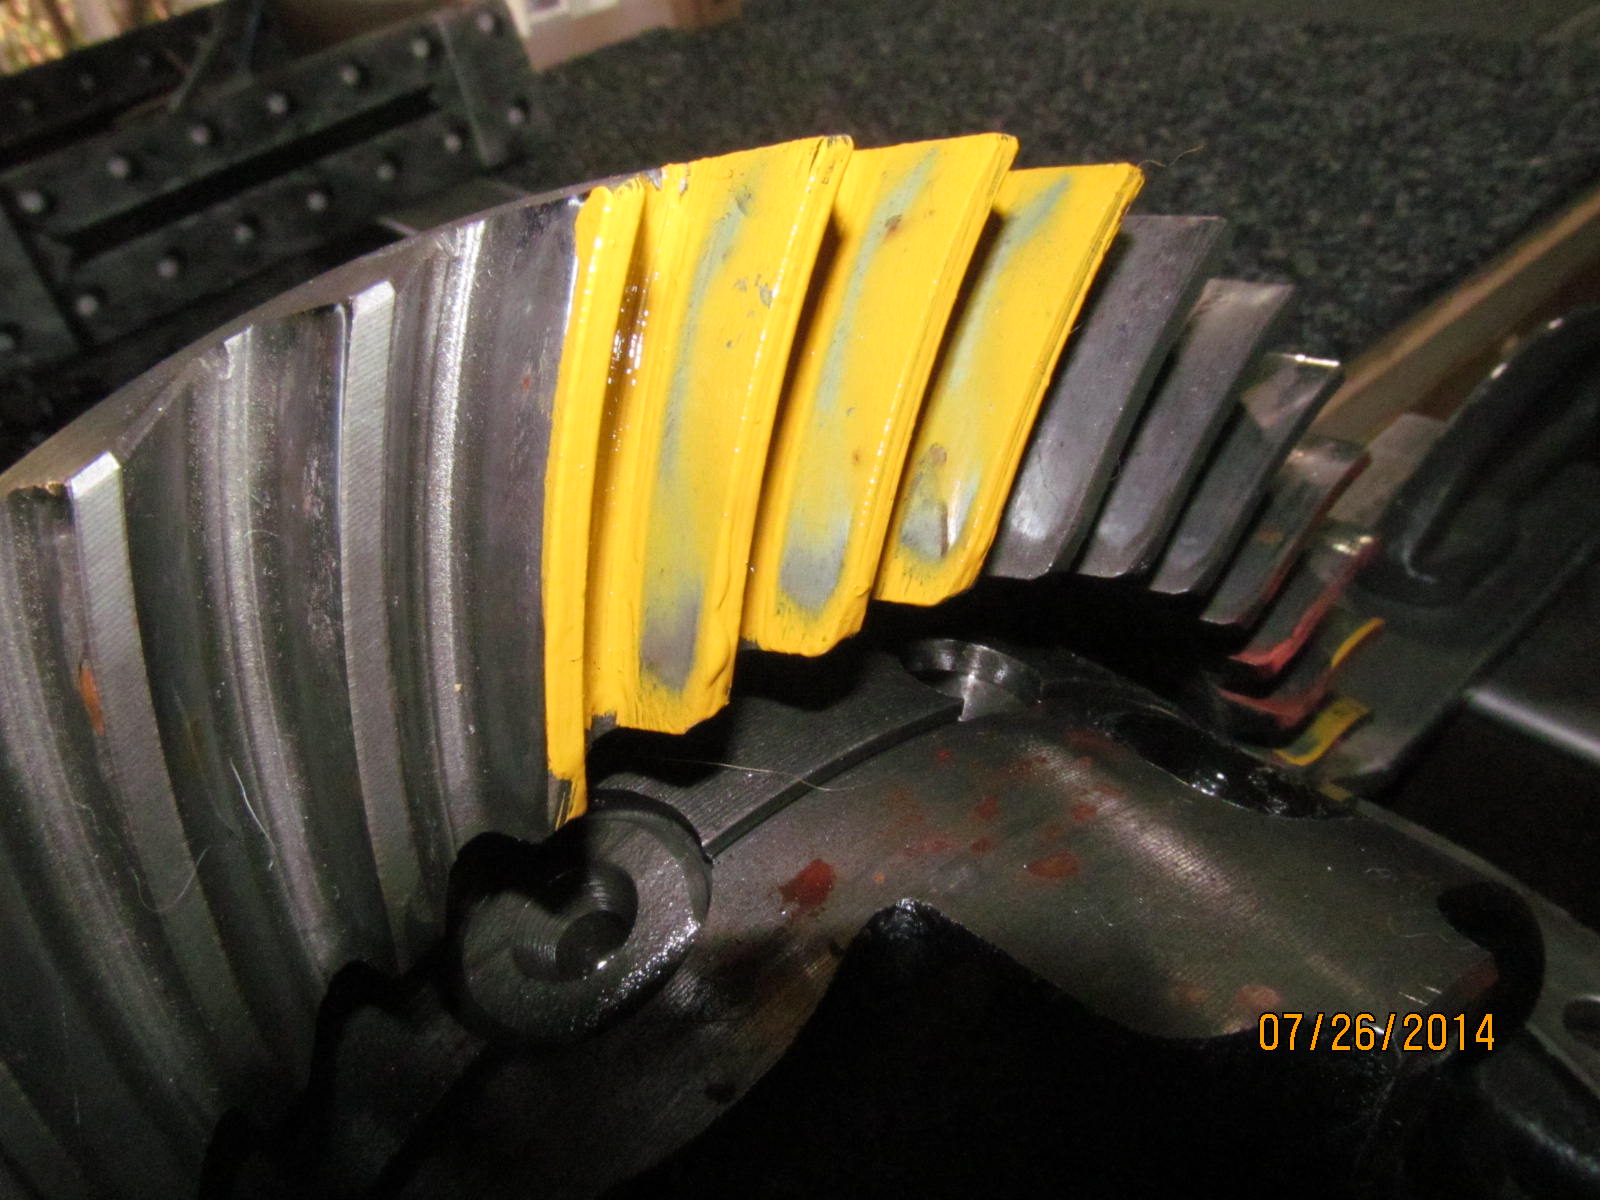
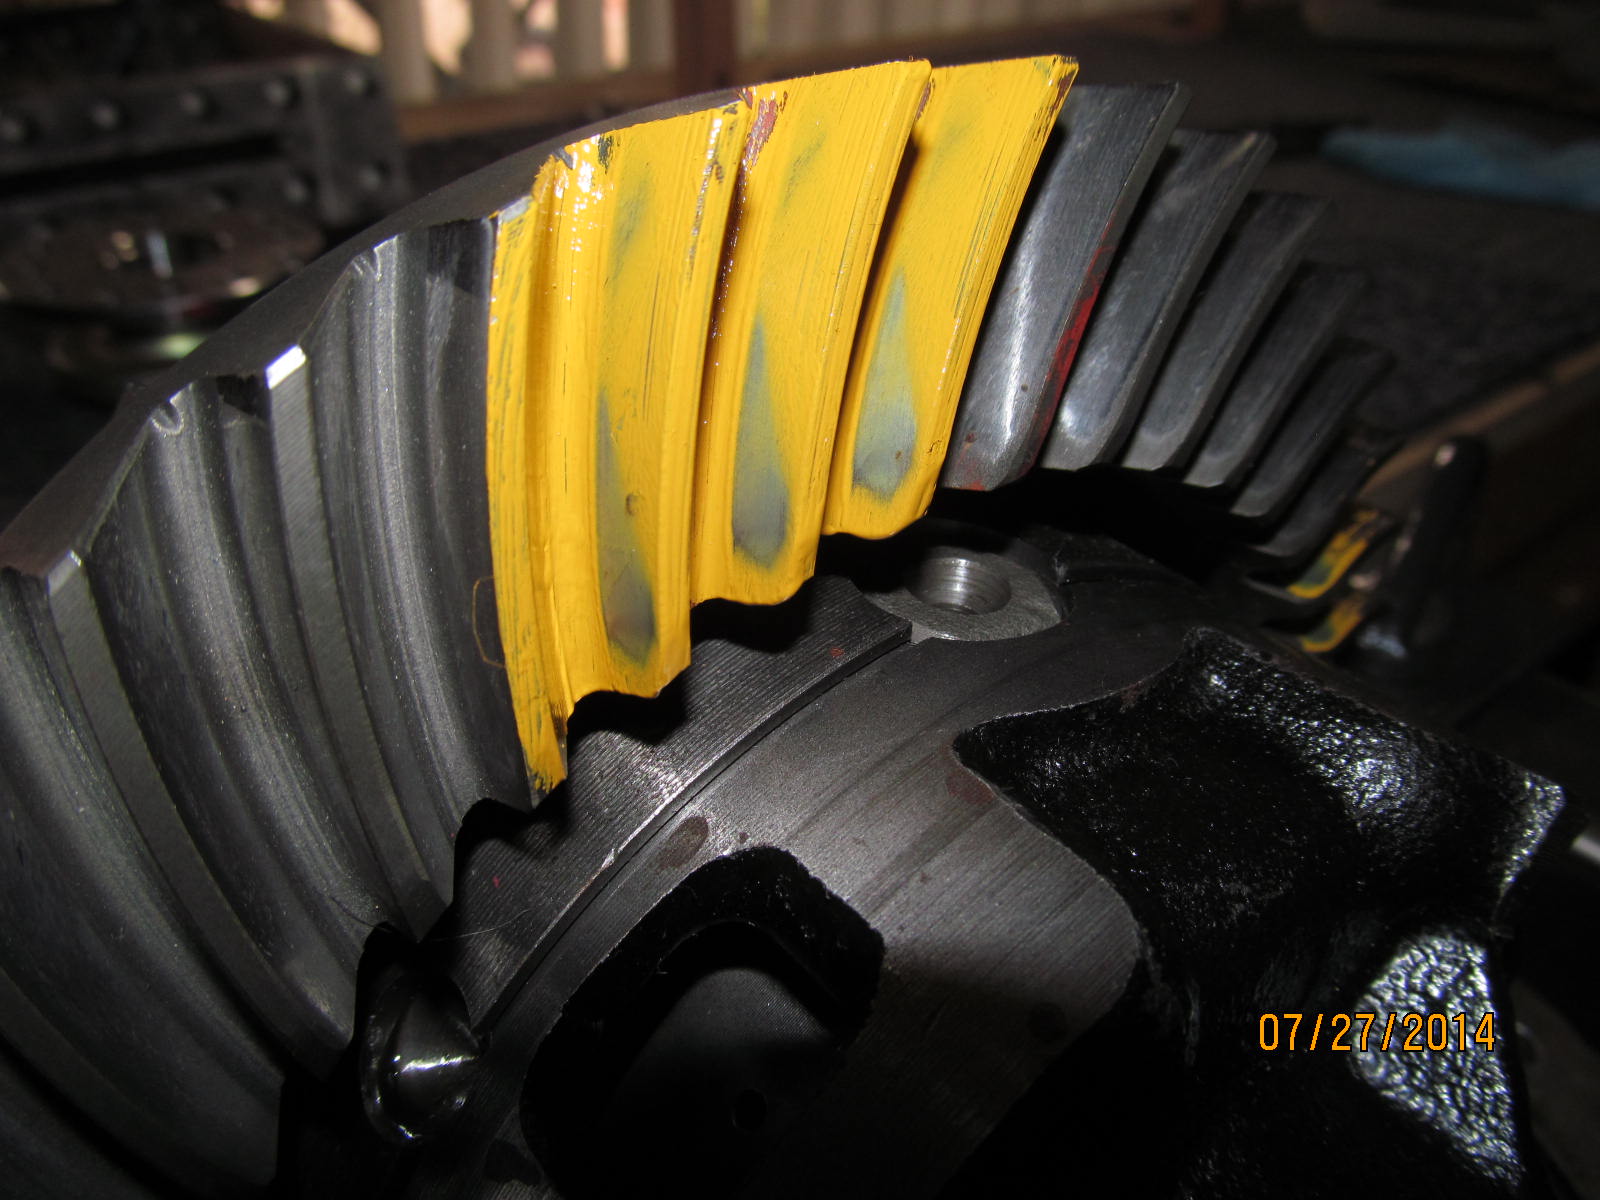
Drive side pattern indicated some wear where there should not be. Heavy contact on the toe end(inside)....
and heavy contact deep in the root. Notice the "void" spot where the paint has not moved. The wobbly pinion
has caused this "out of place" wear. This does not mean this ring and pinion is trash....but it might mean
that it will make some small noises even with new bearings.
|
|
|
|
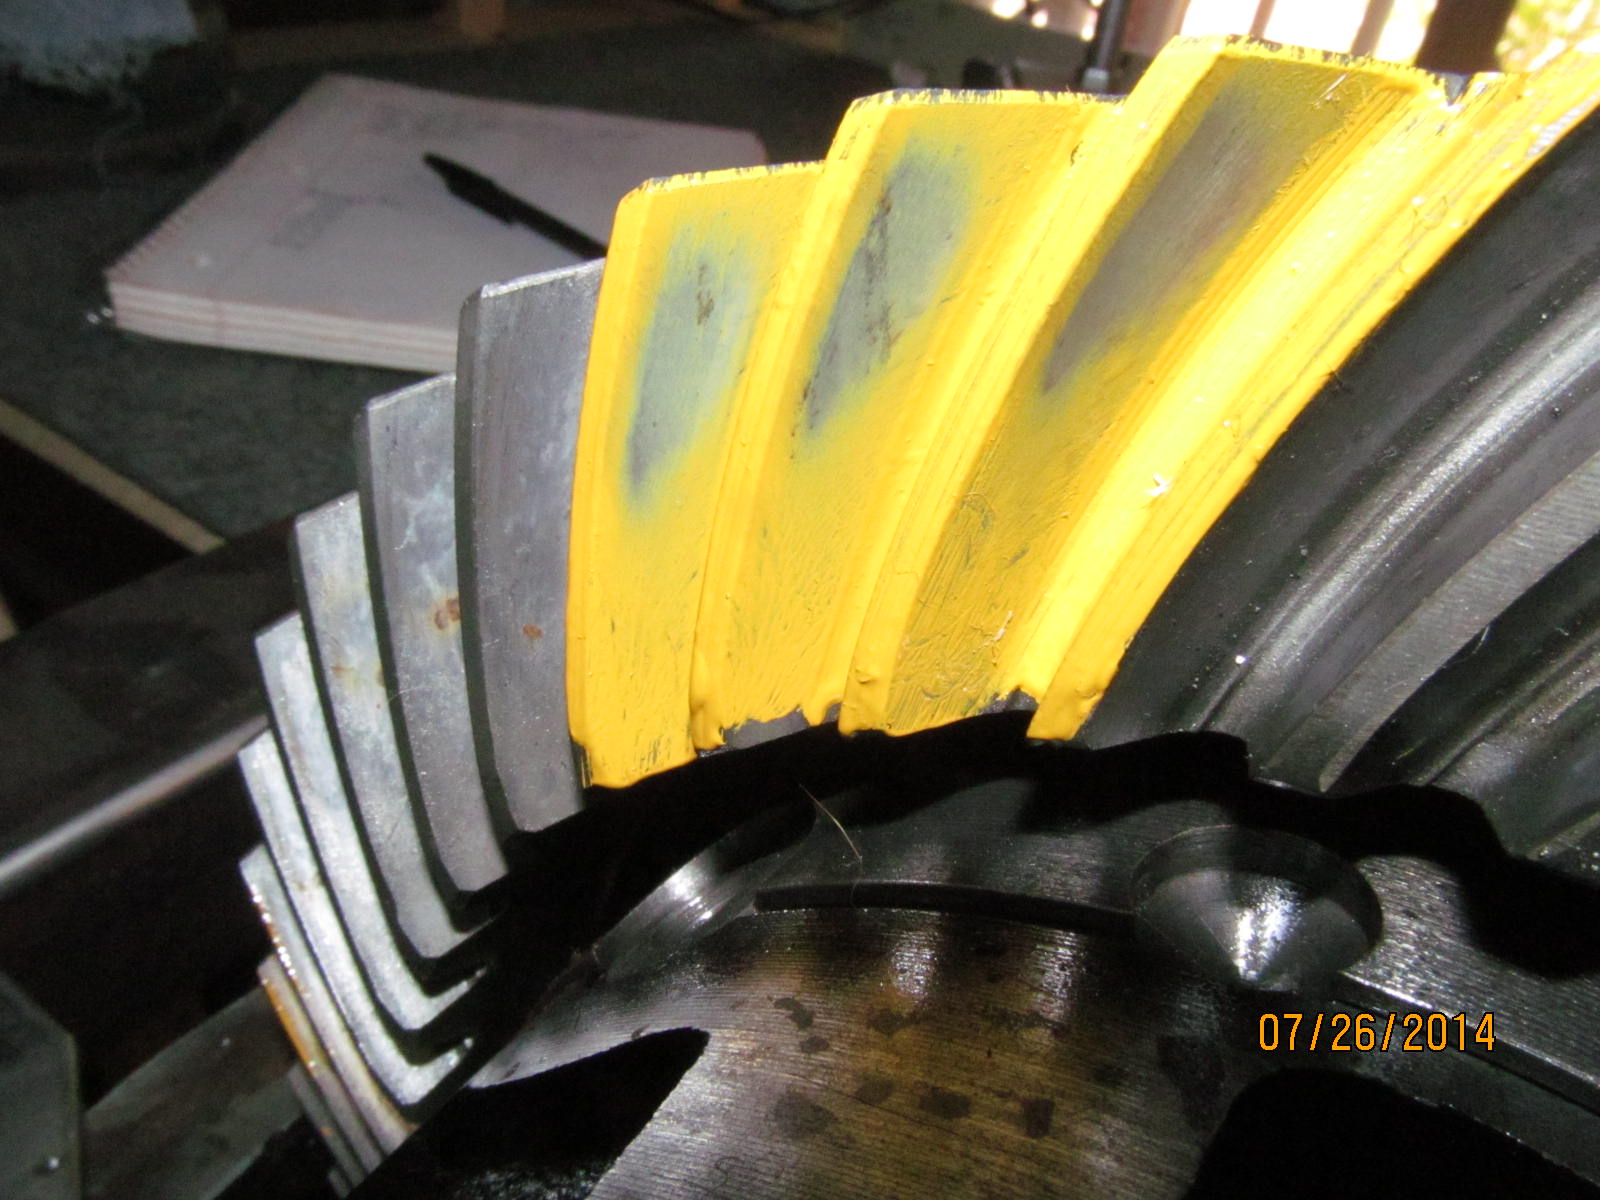
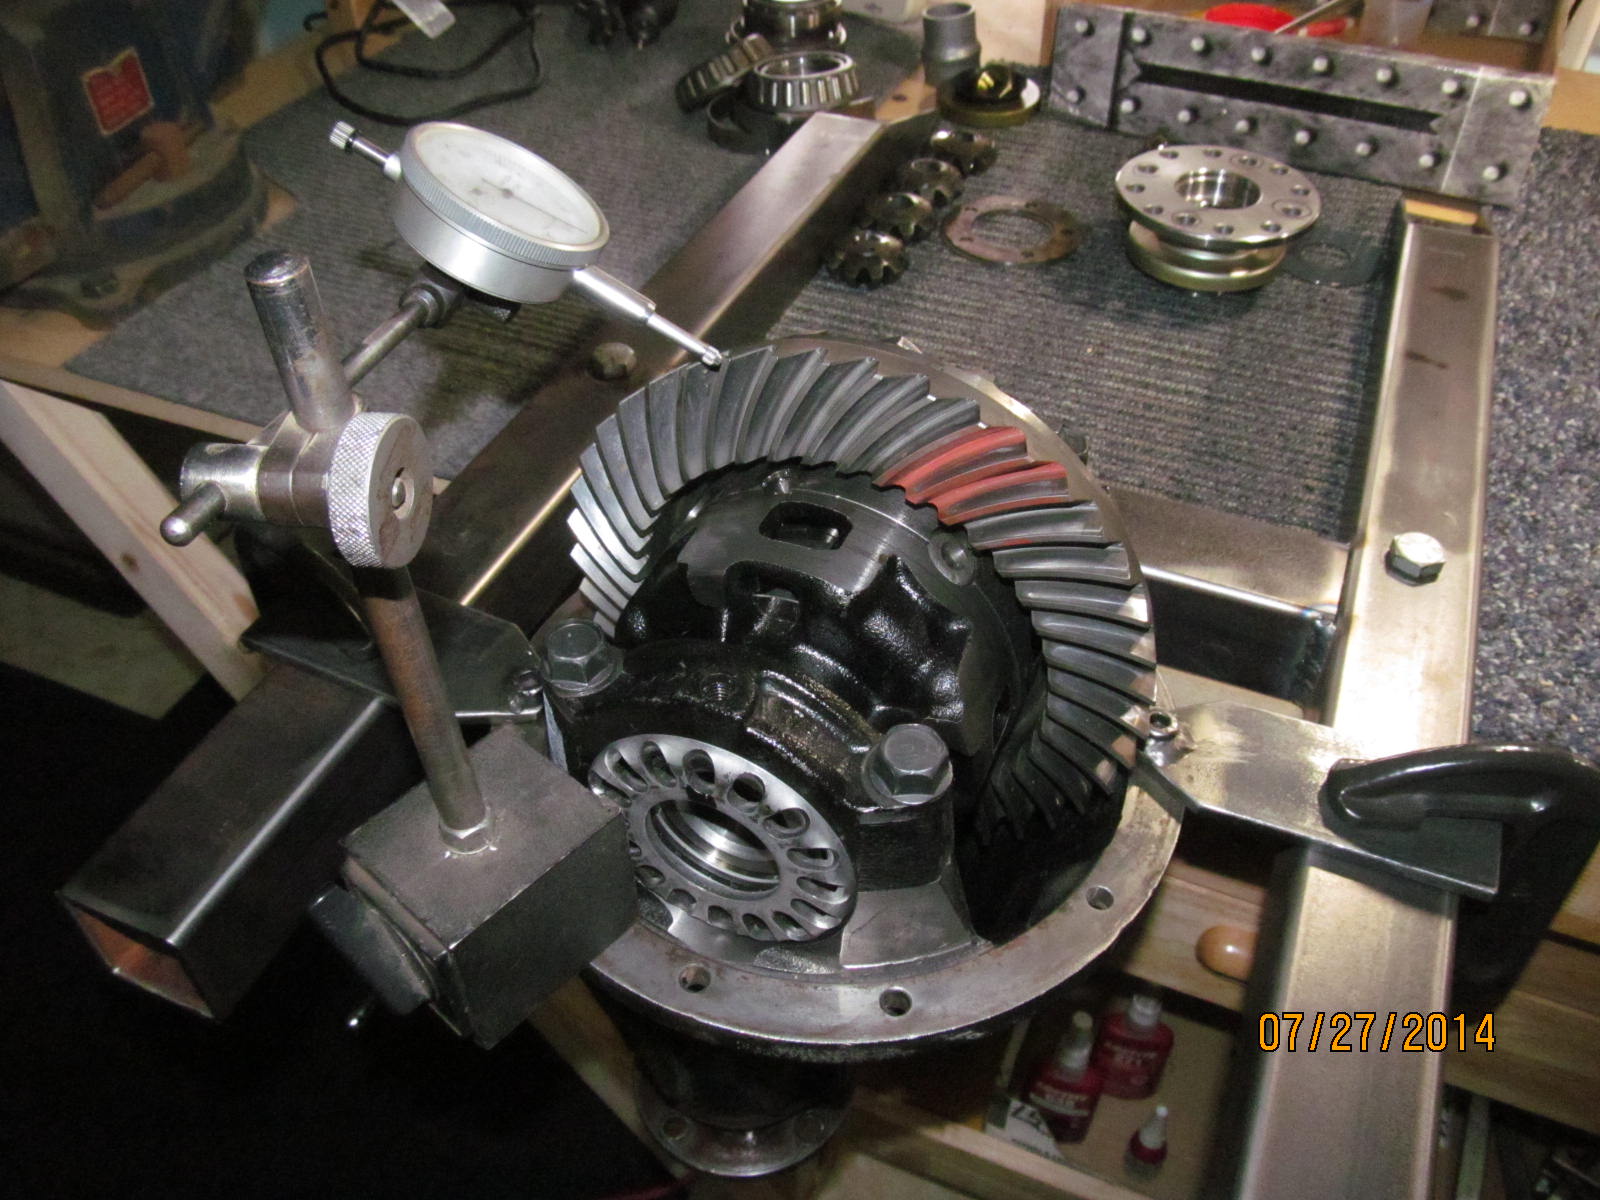
The coast side has a little more contact on the coast end. With new bearings and some time on the road
this pattern may change for the better.
|
|
|
|
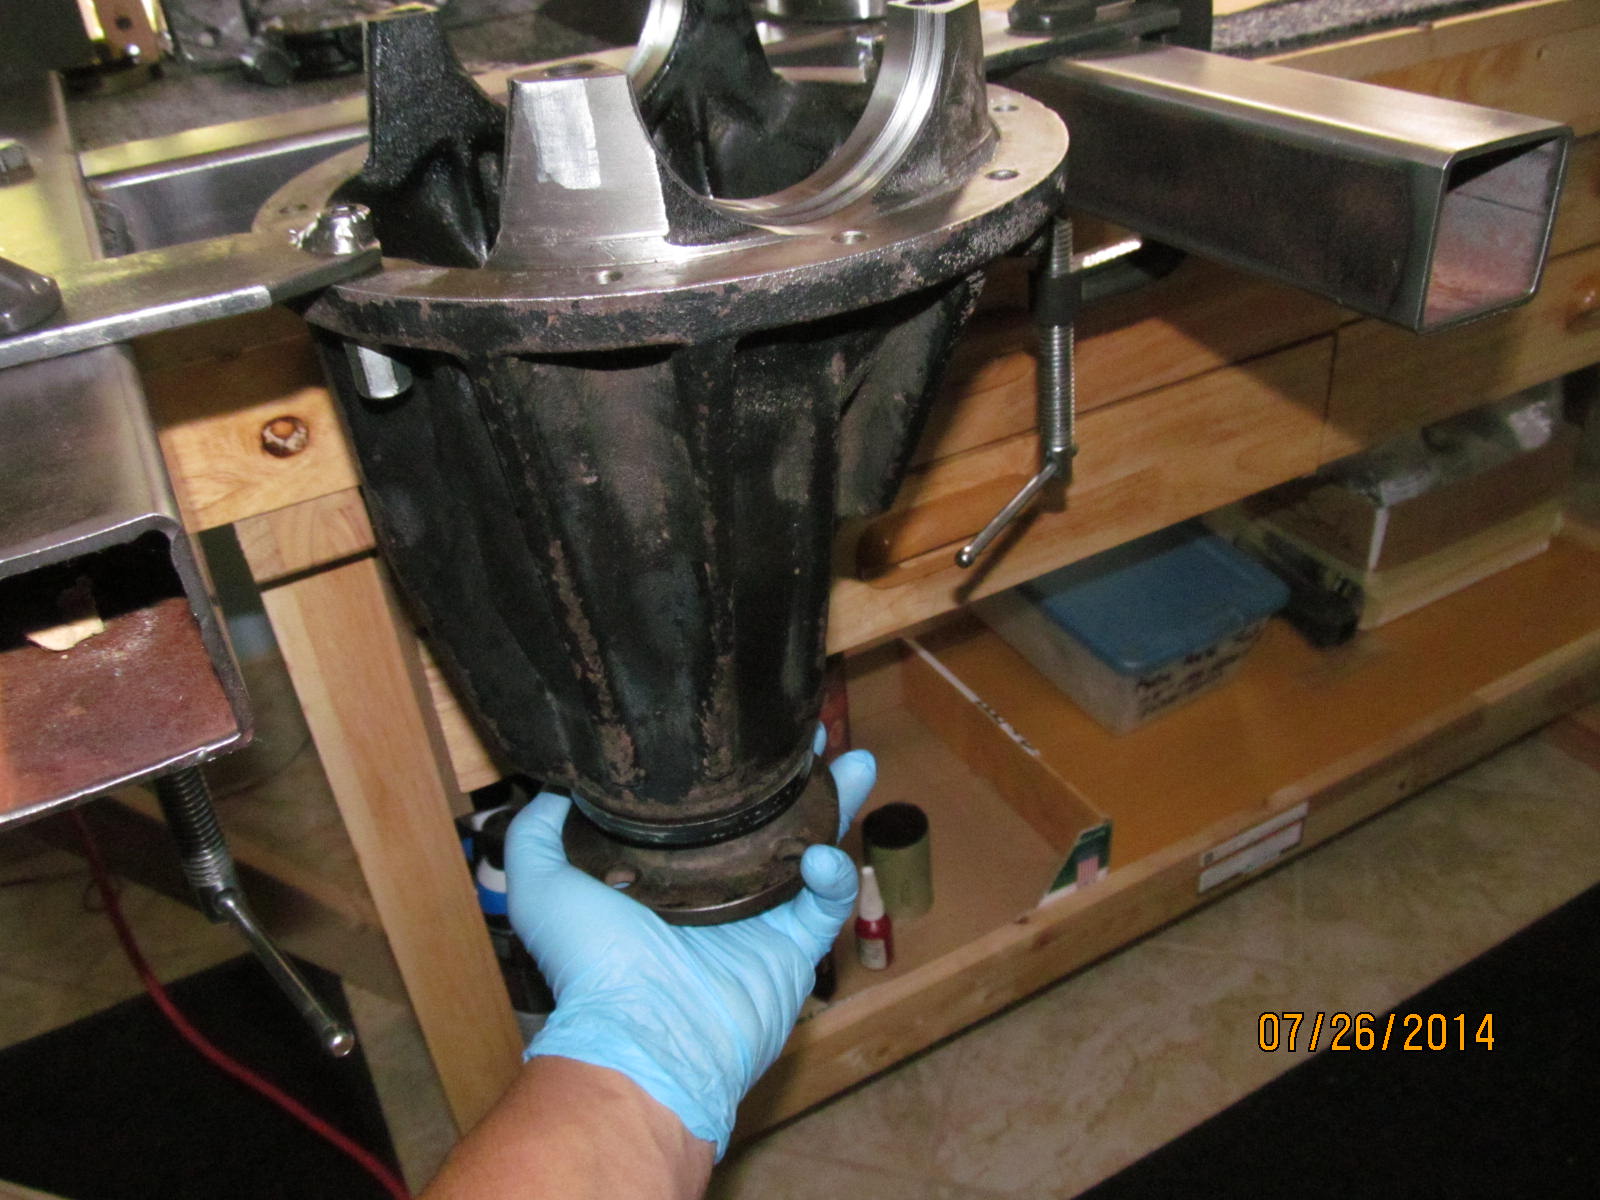
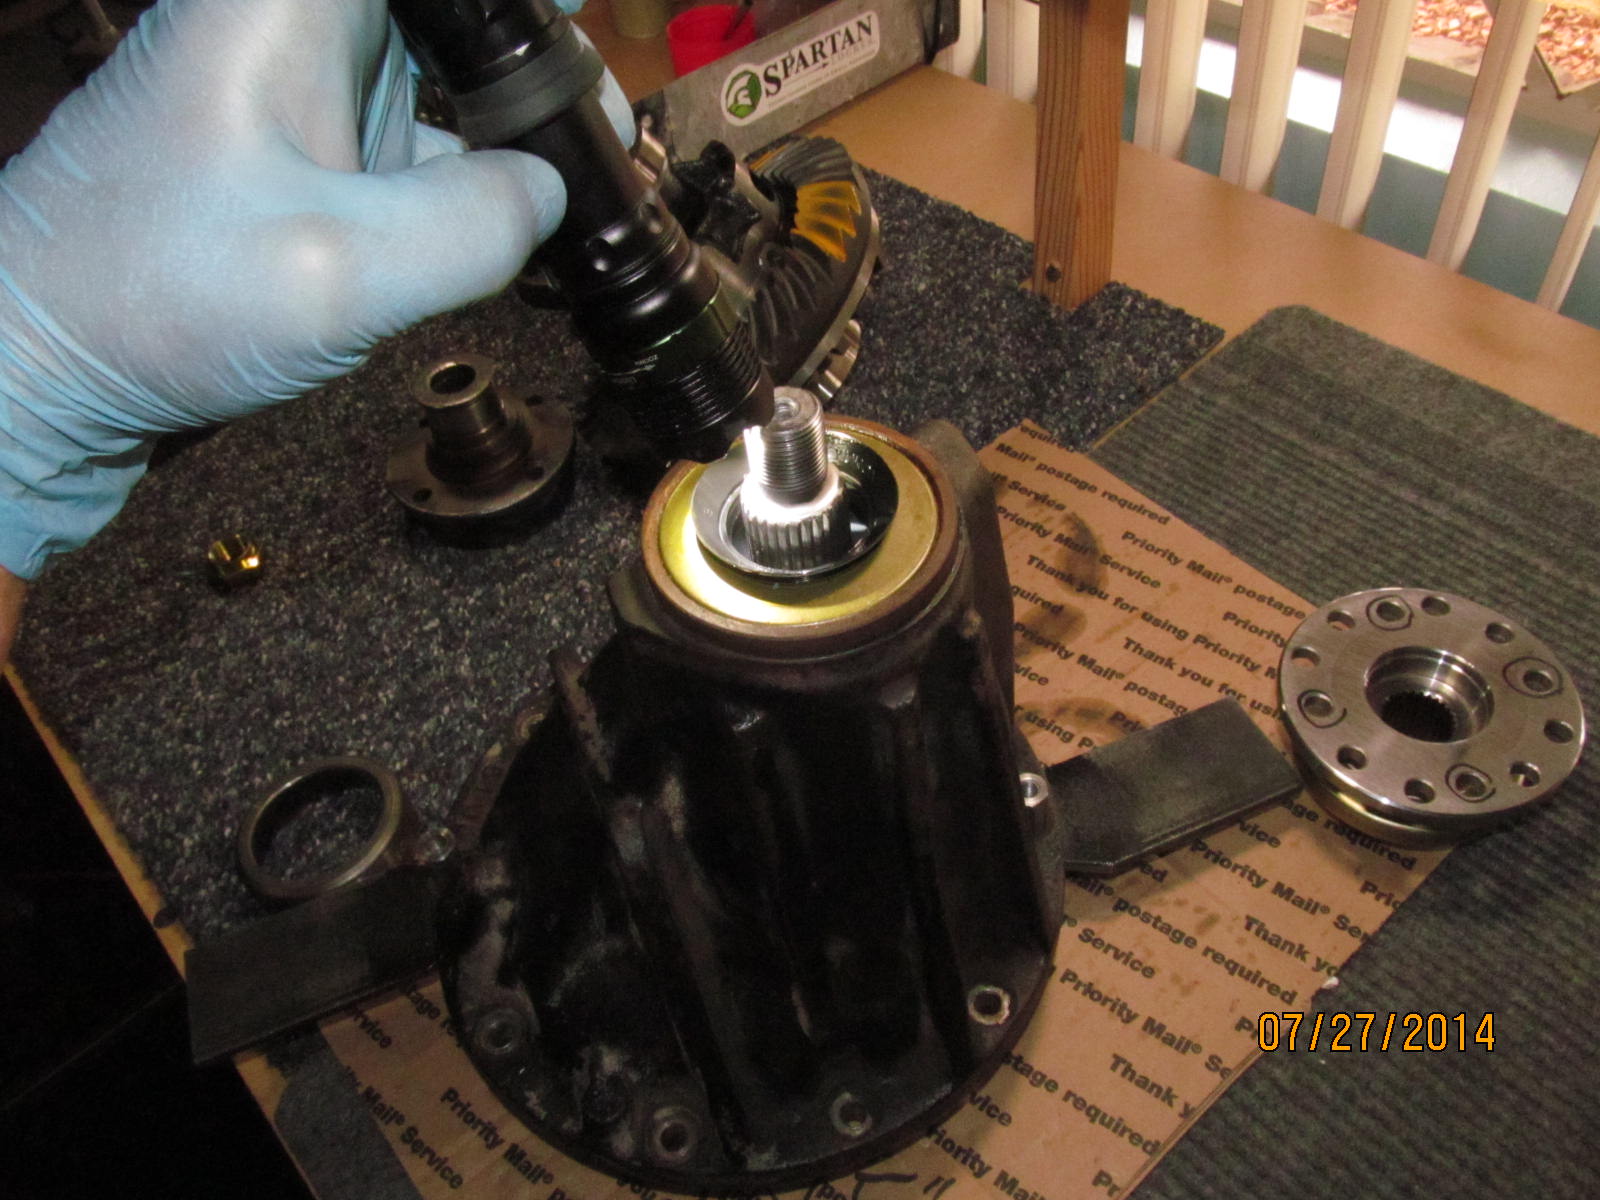
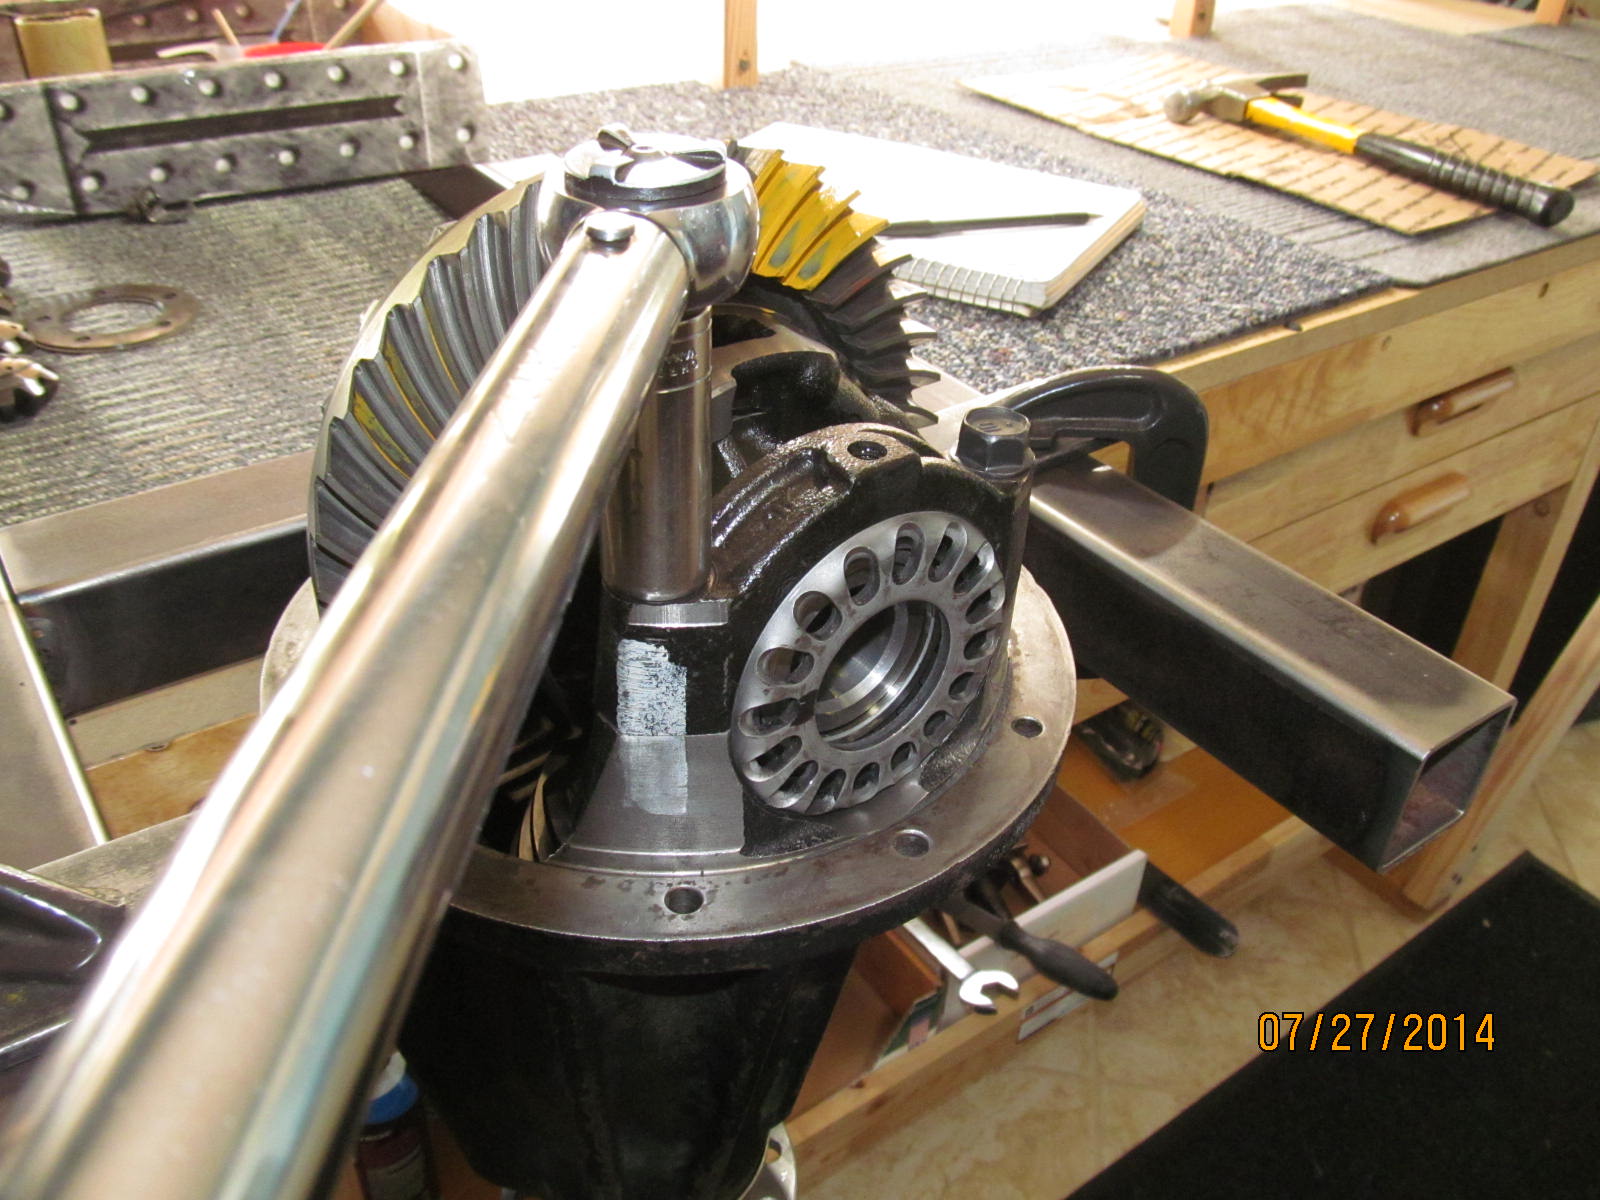
With the case guts out, it is easier to see any issues going on with the pinion end. I can feel and see some
wobble here. No wonder the seal was leaking.
|
|
|
|
|
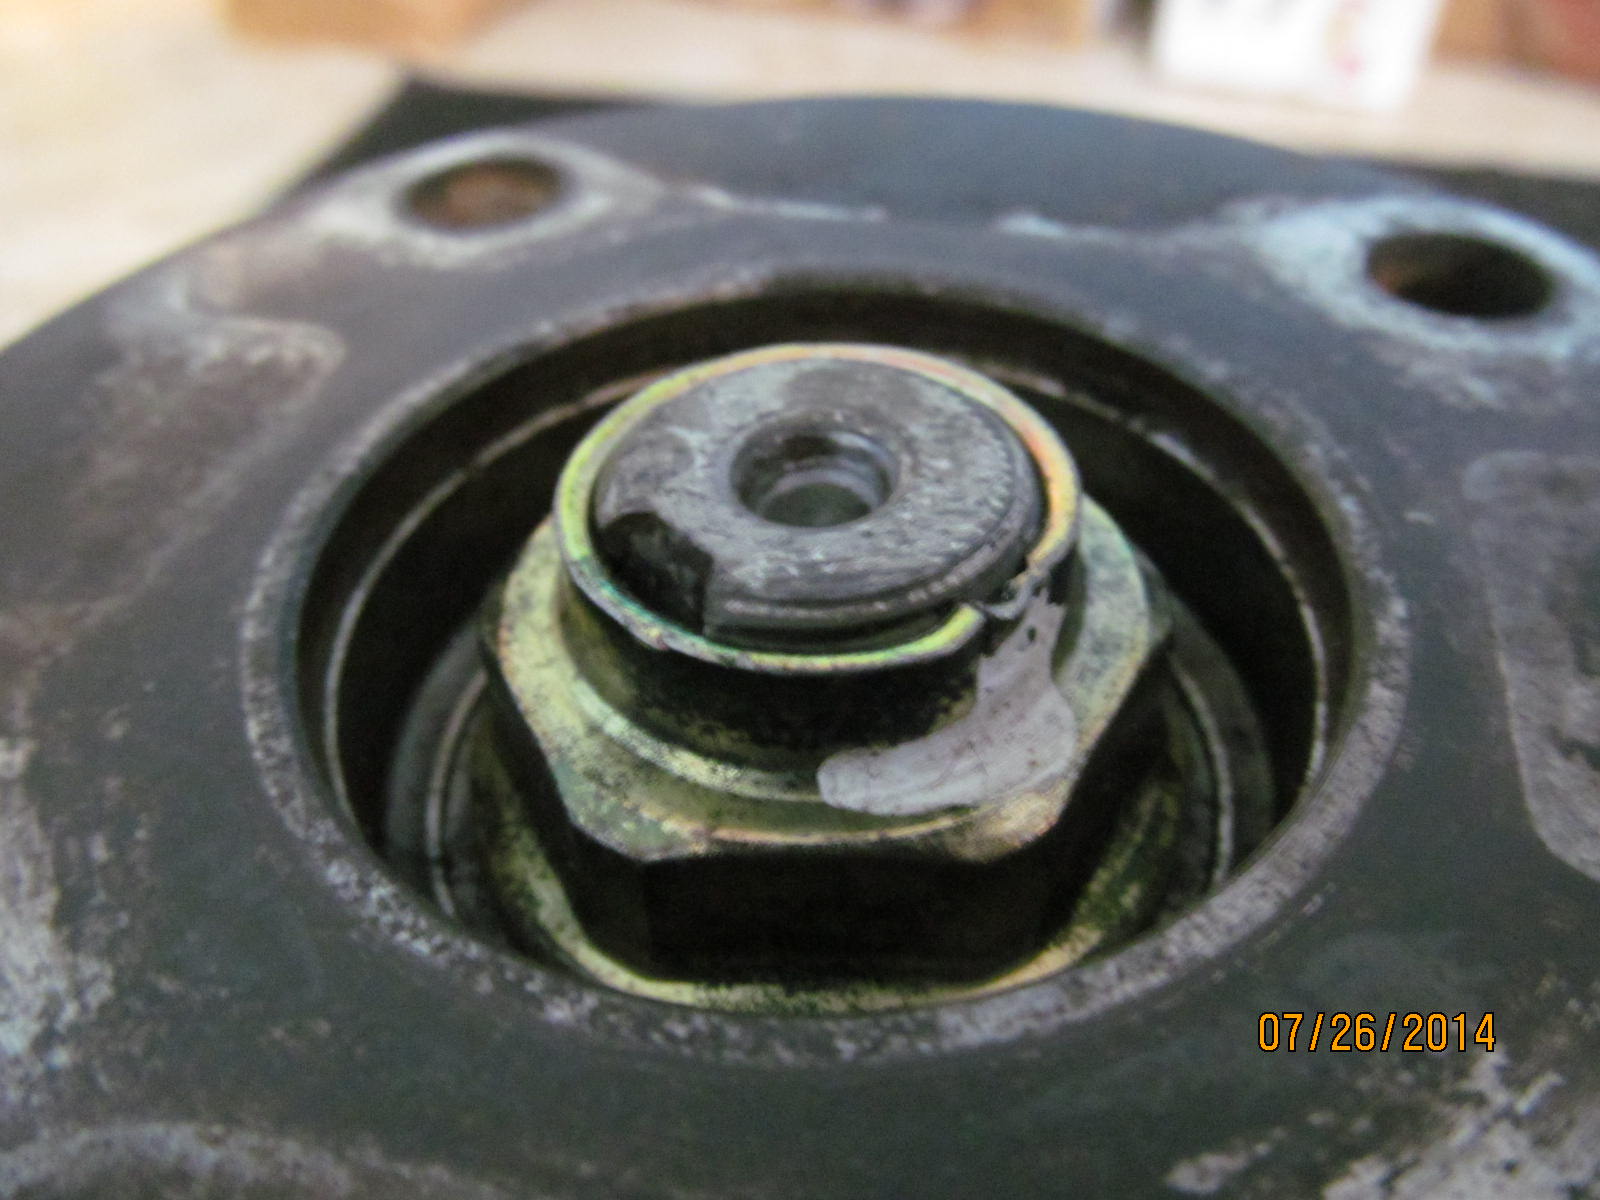
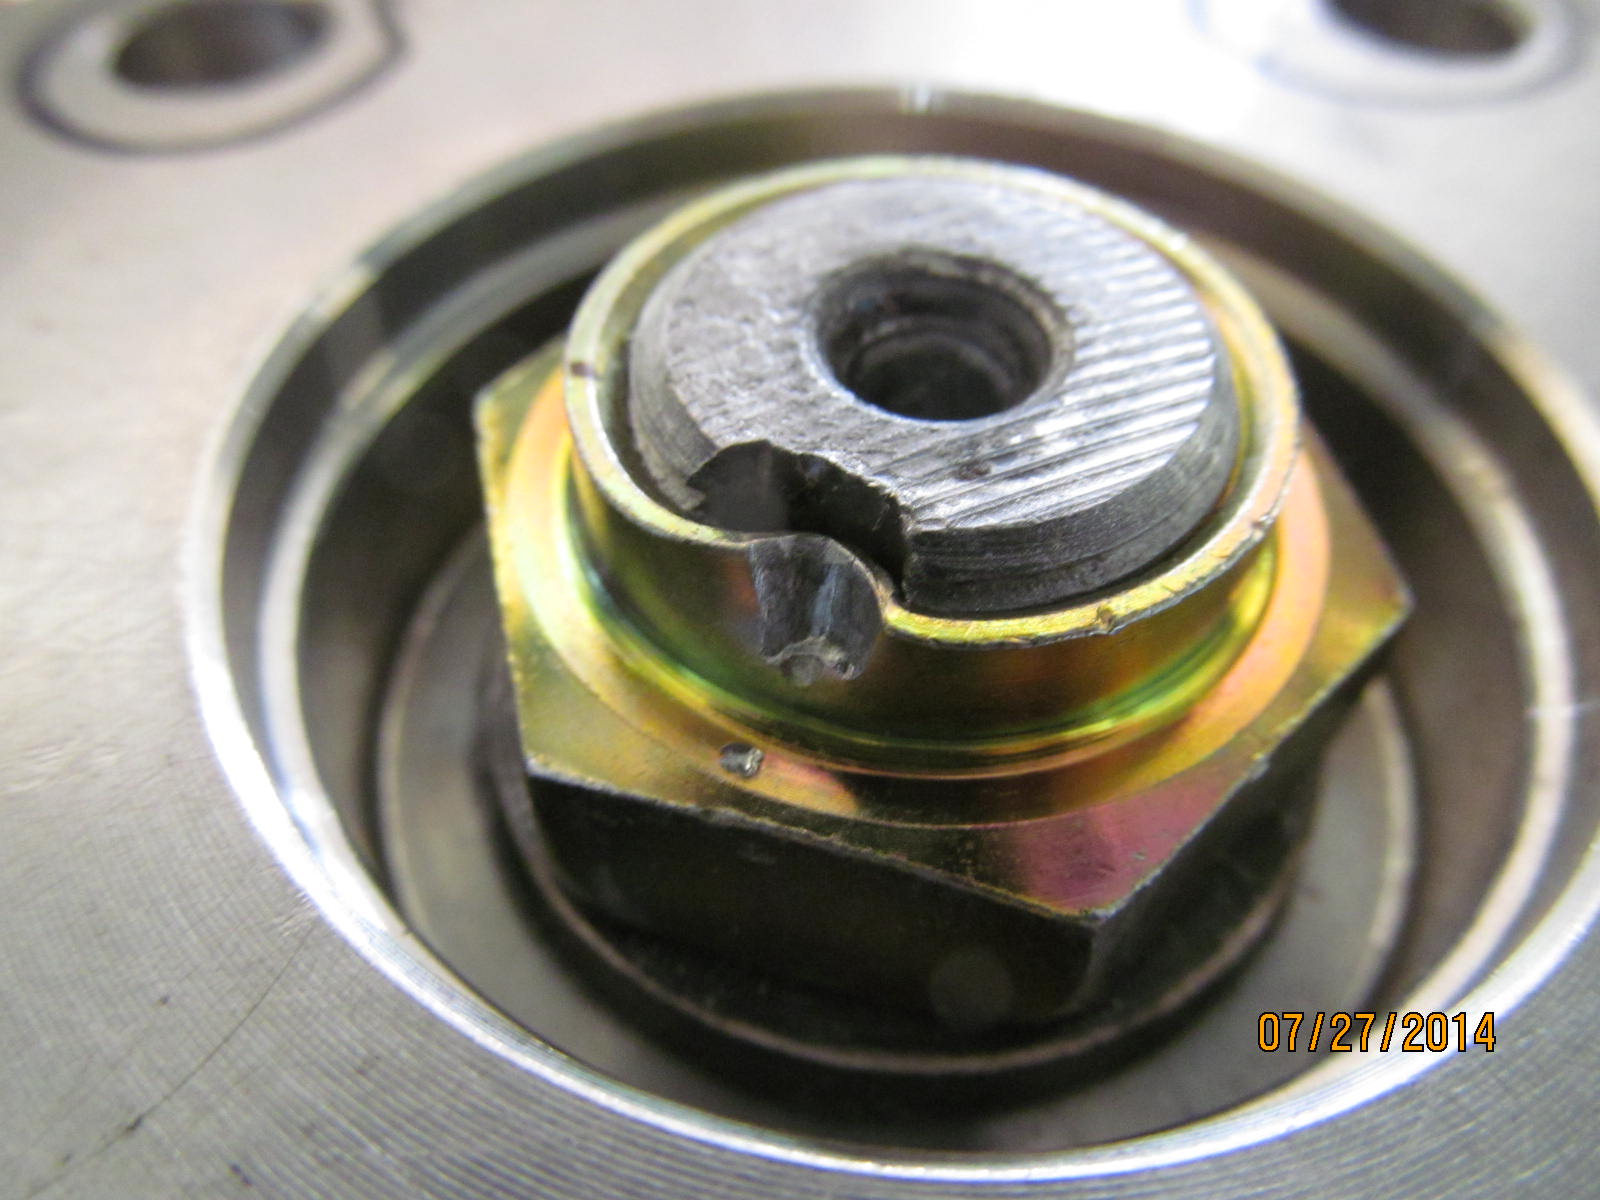
As the slightly blurry picture shows, the staked nut has been moved.
|
|
|
|
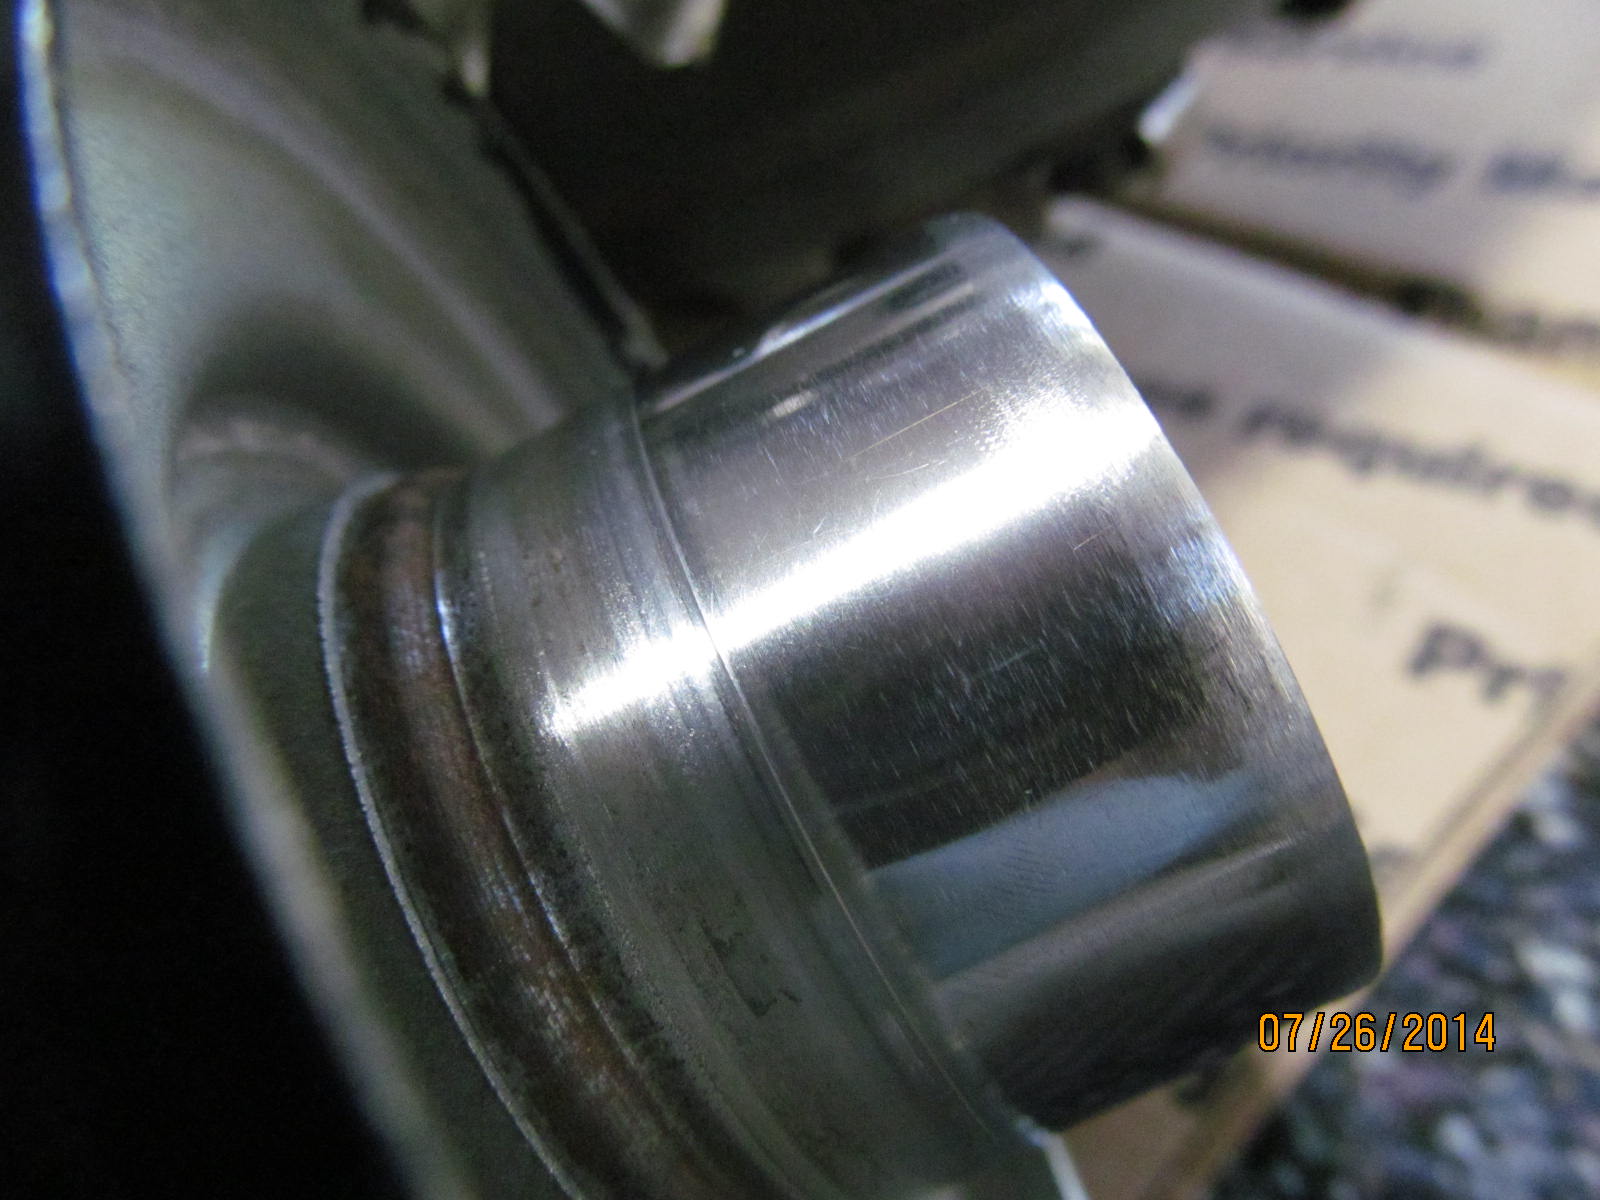
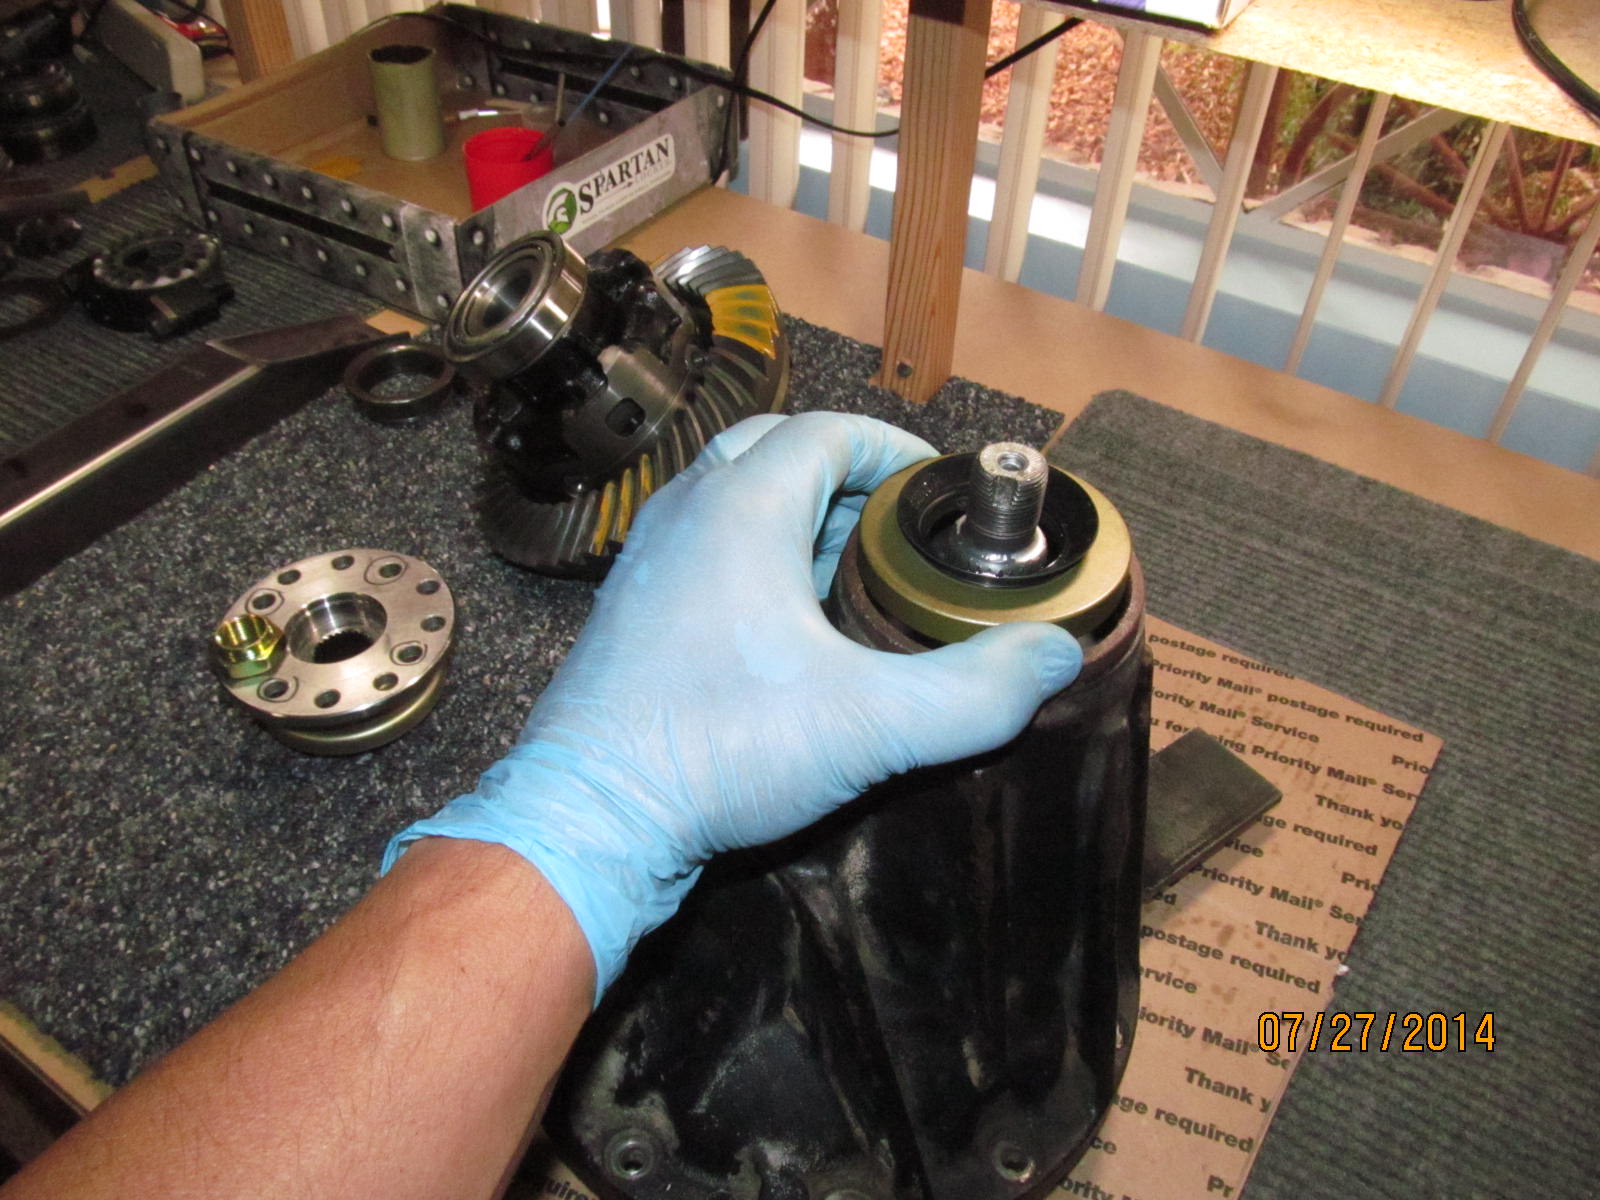
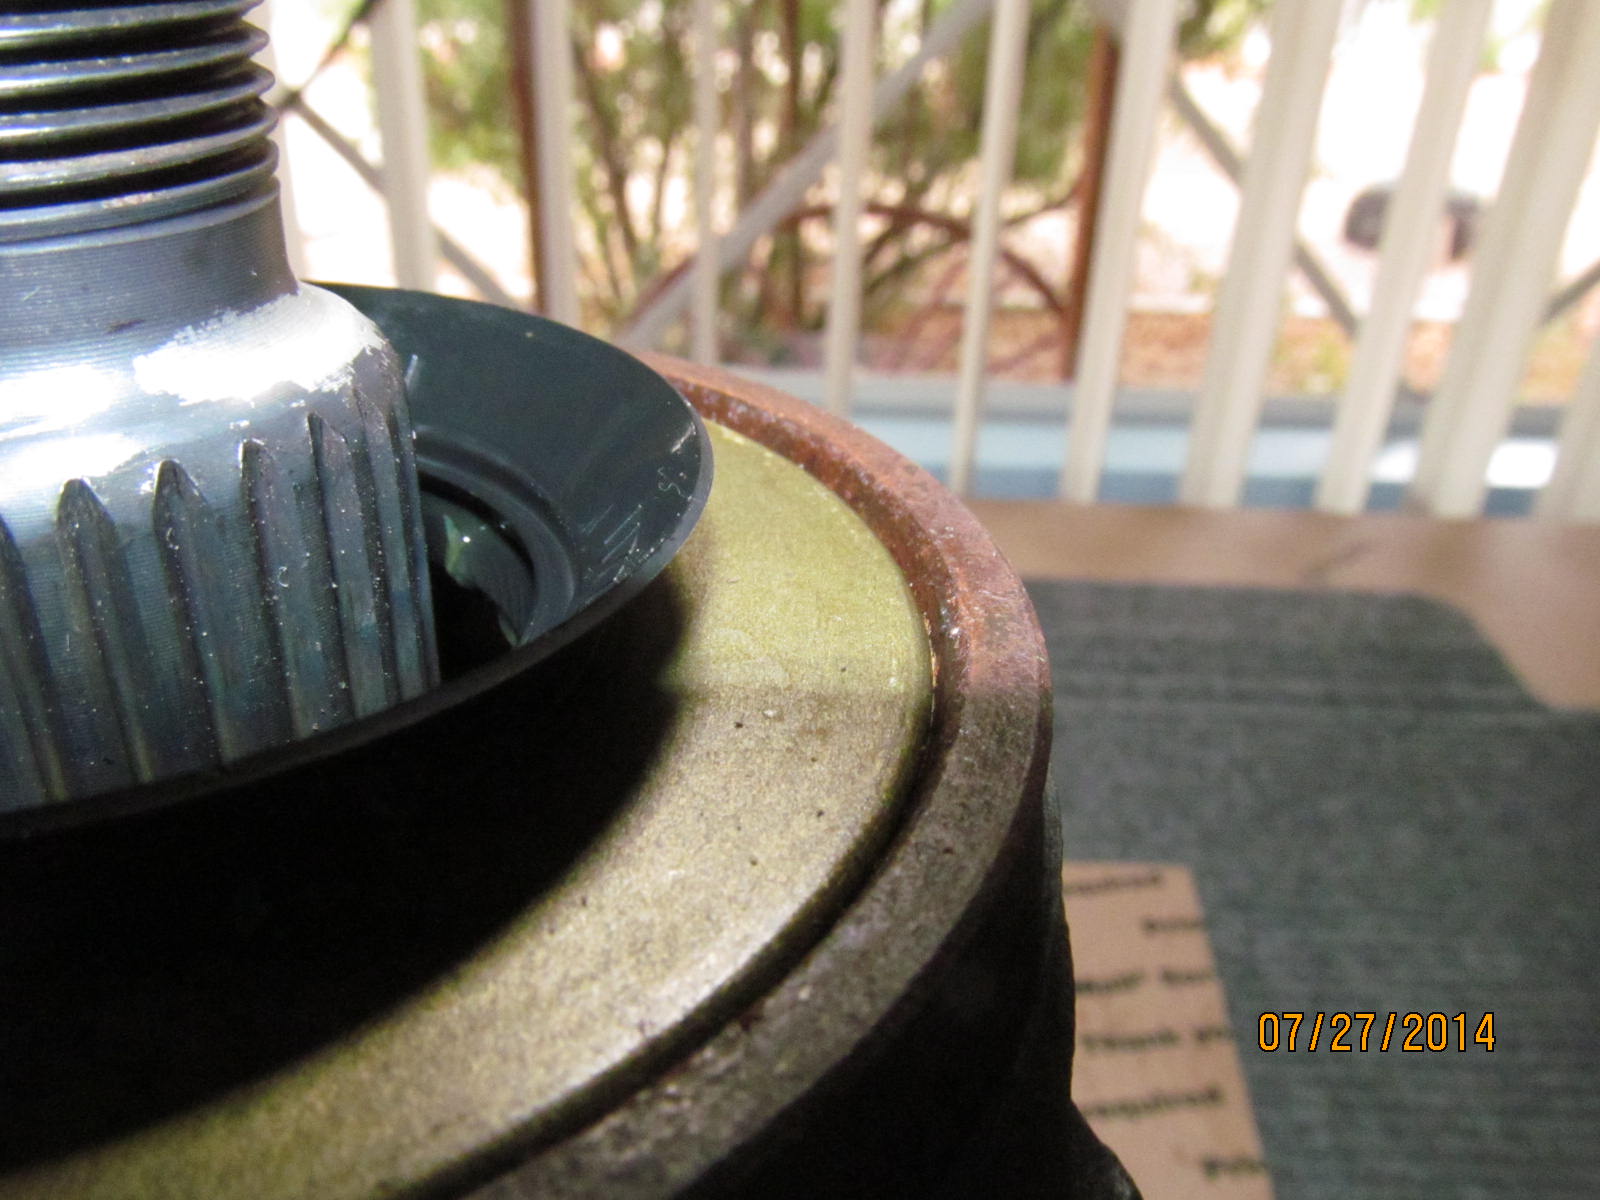
Usually, with a wobbly pinion, the seal surface on the pinion flange takes a beating and developes a noticable
groove and this one was no exception. A new triple drilled flange will replace it.
|
|
|
|
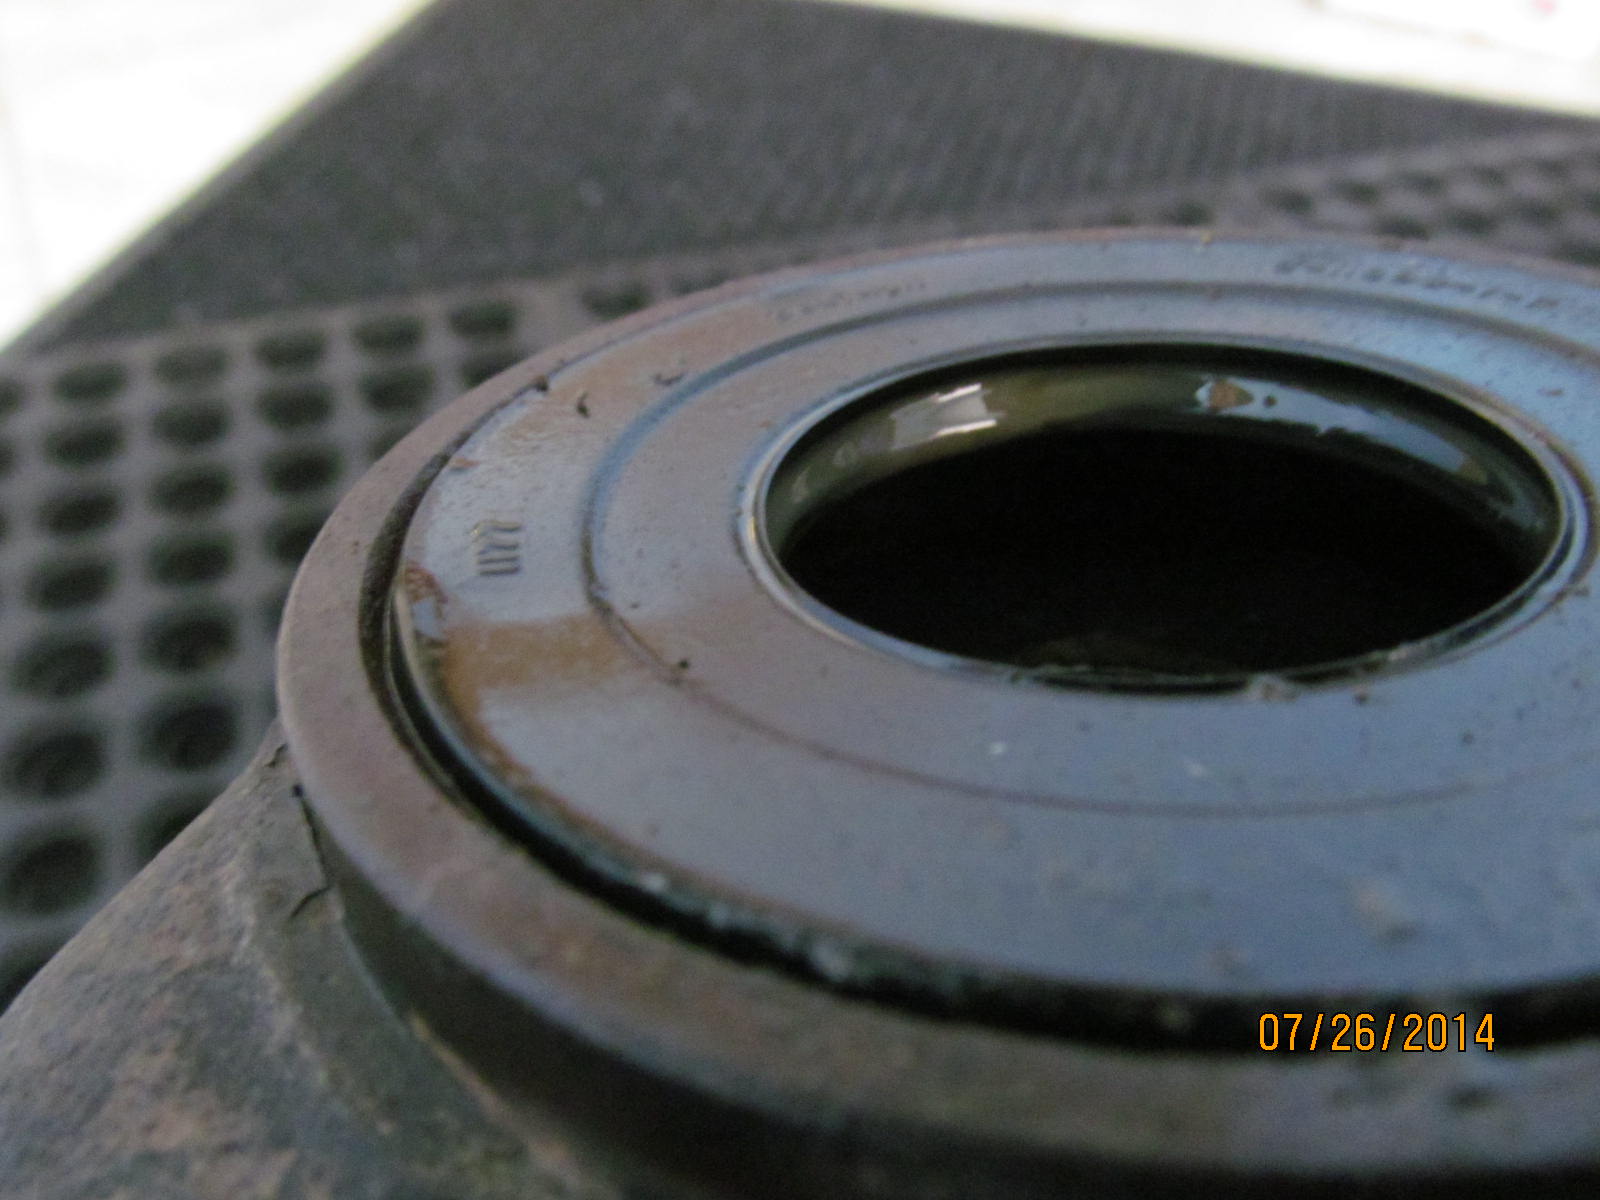
The seal is not the factory seal. Probably replaced once or twice in the past. This one was not installed right
and has an indentation on the left side and that might contribute to a leak.
|
|
|
|
|
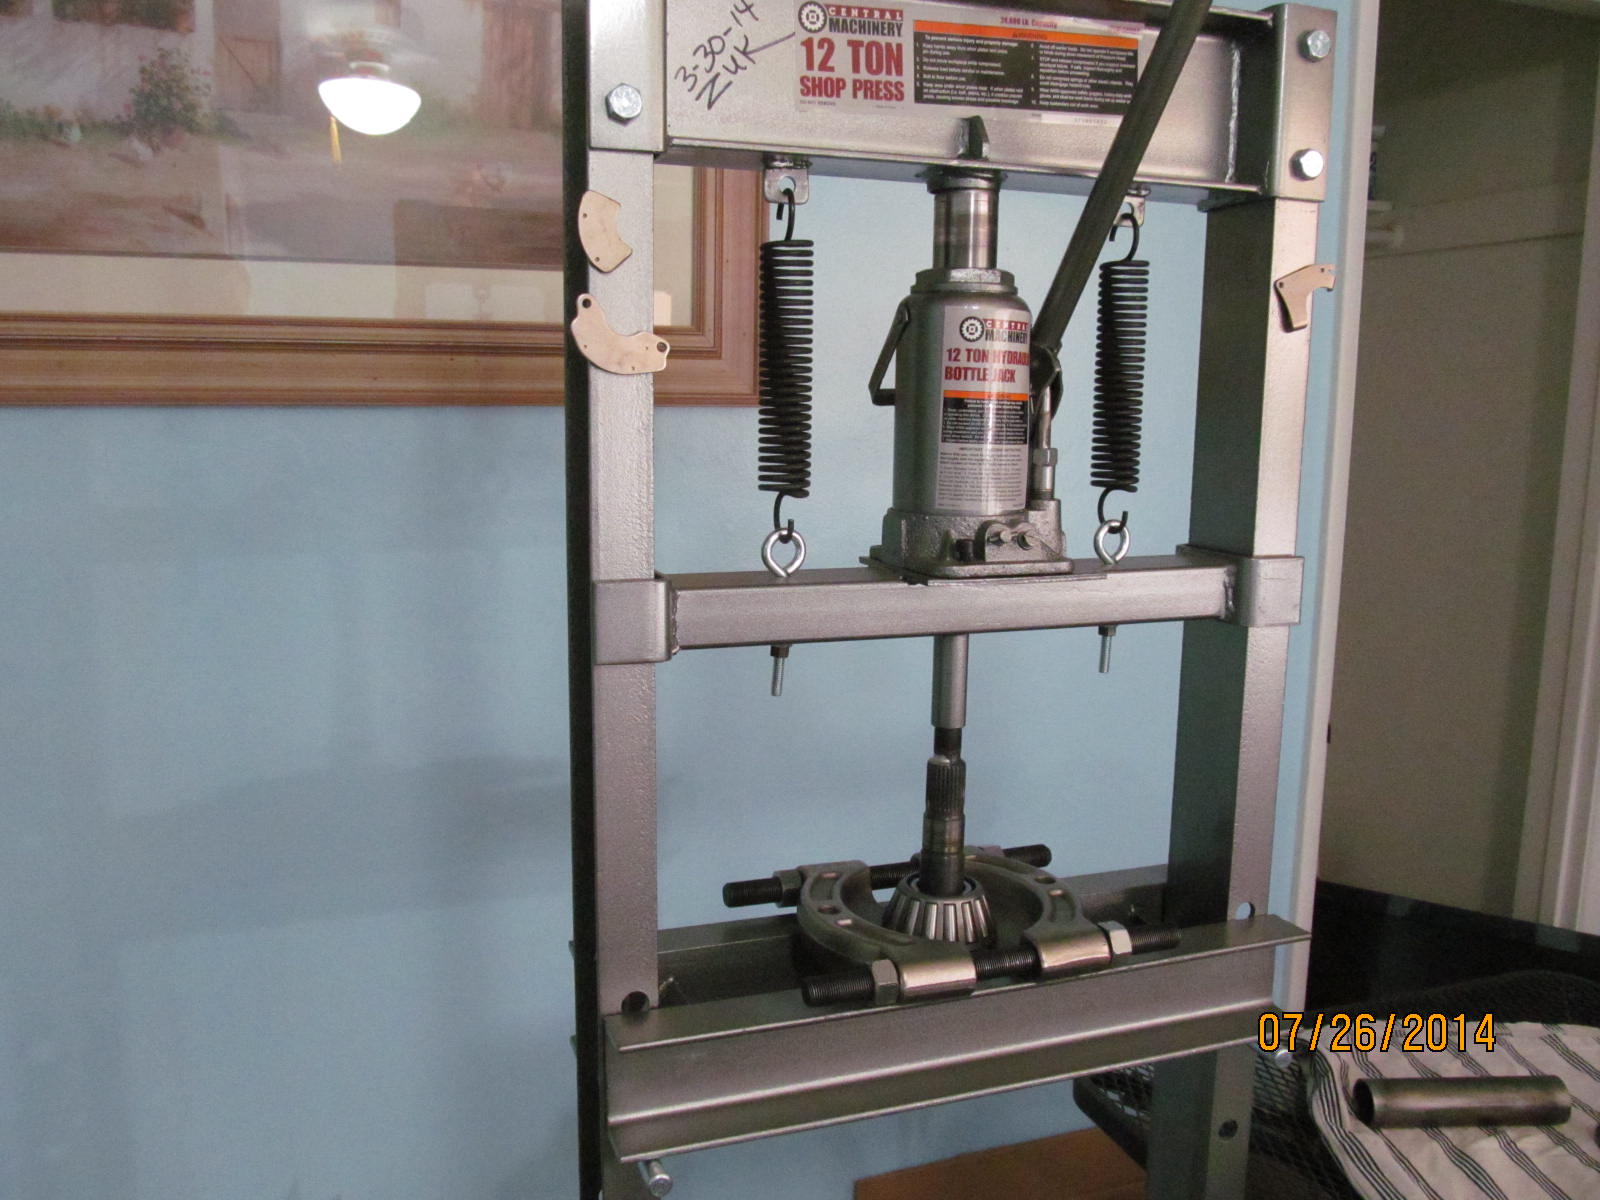
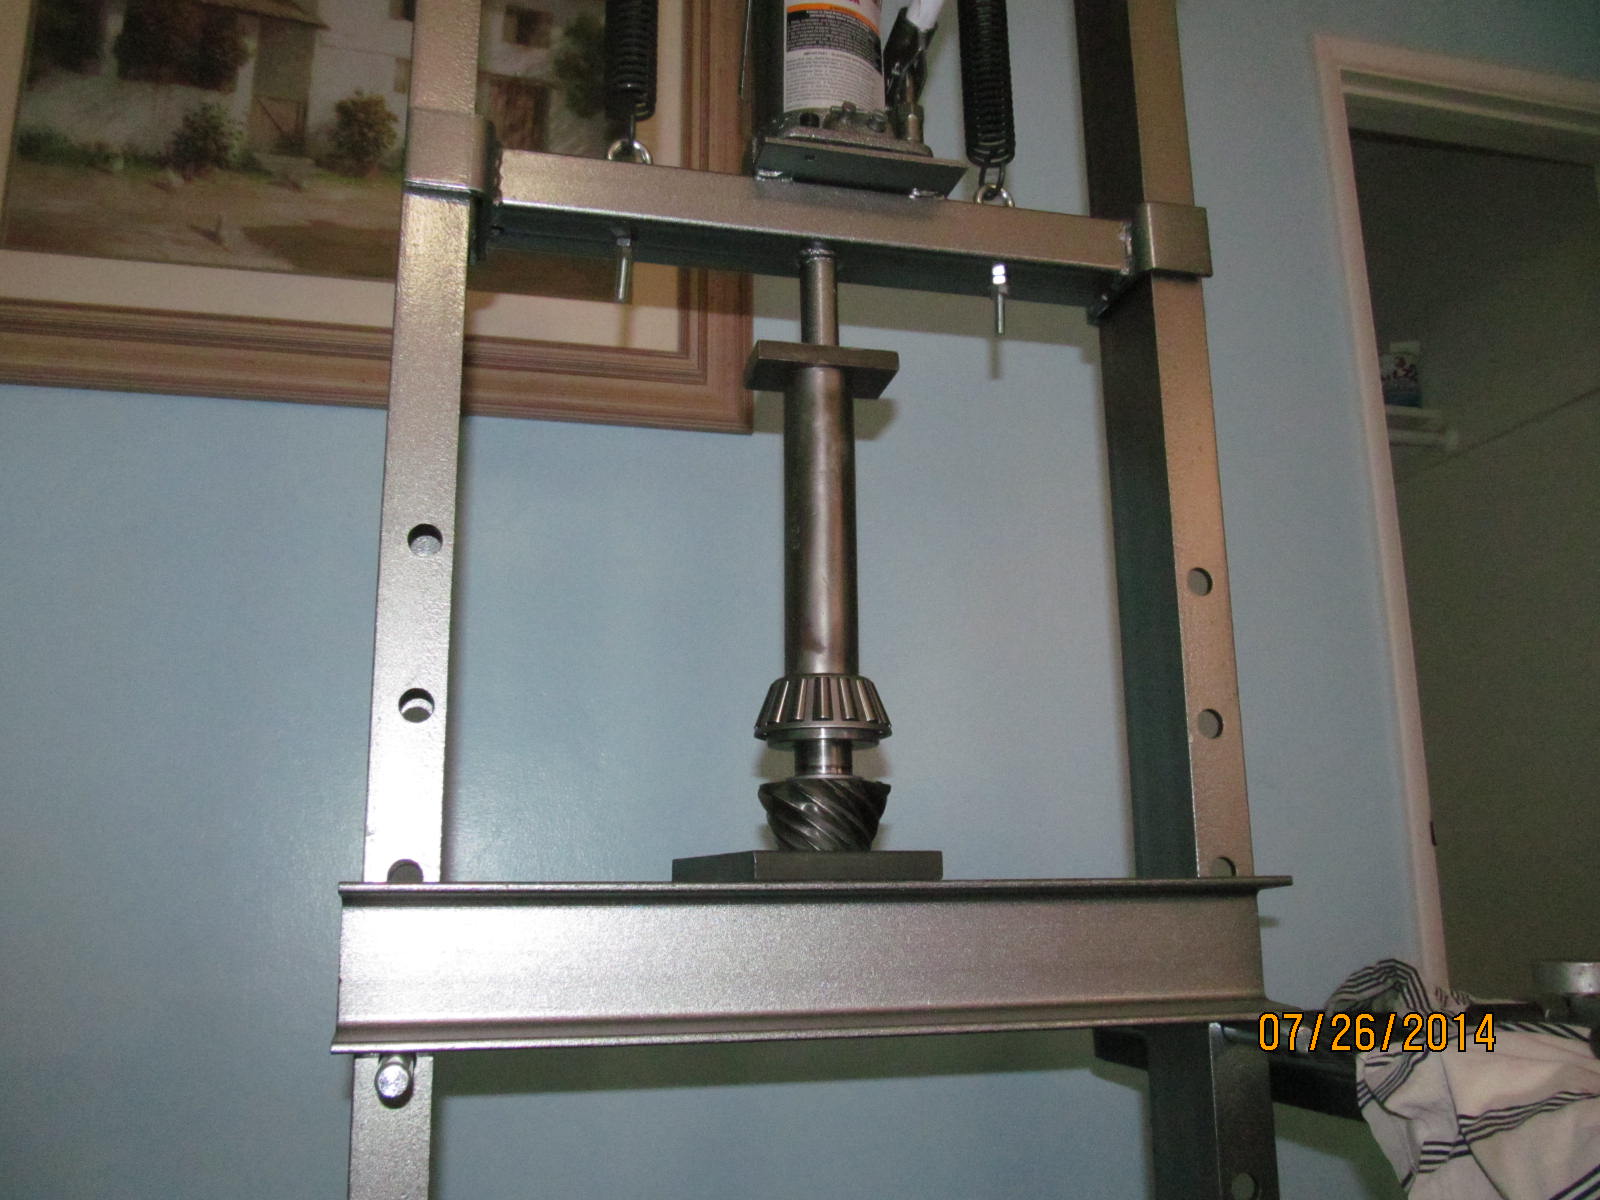
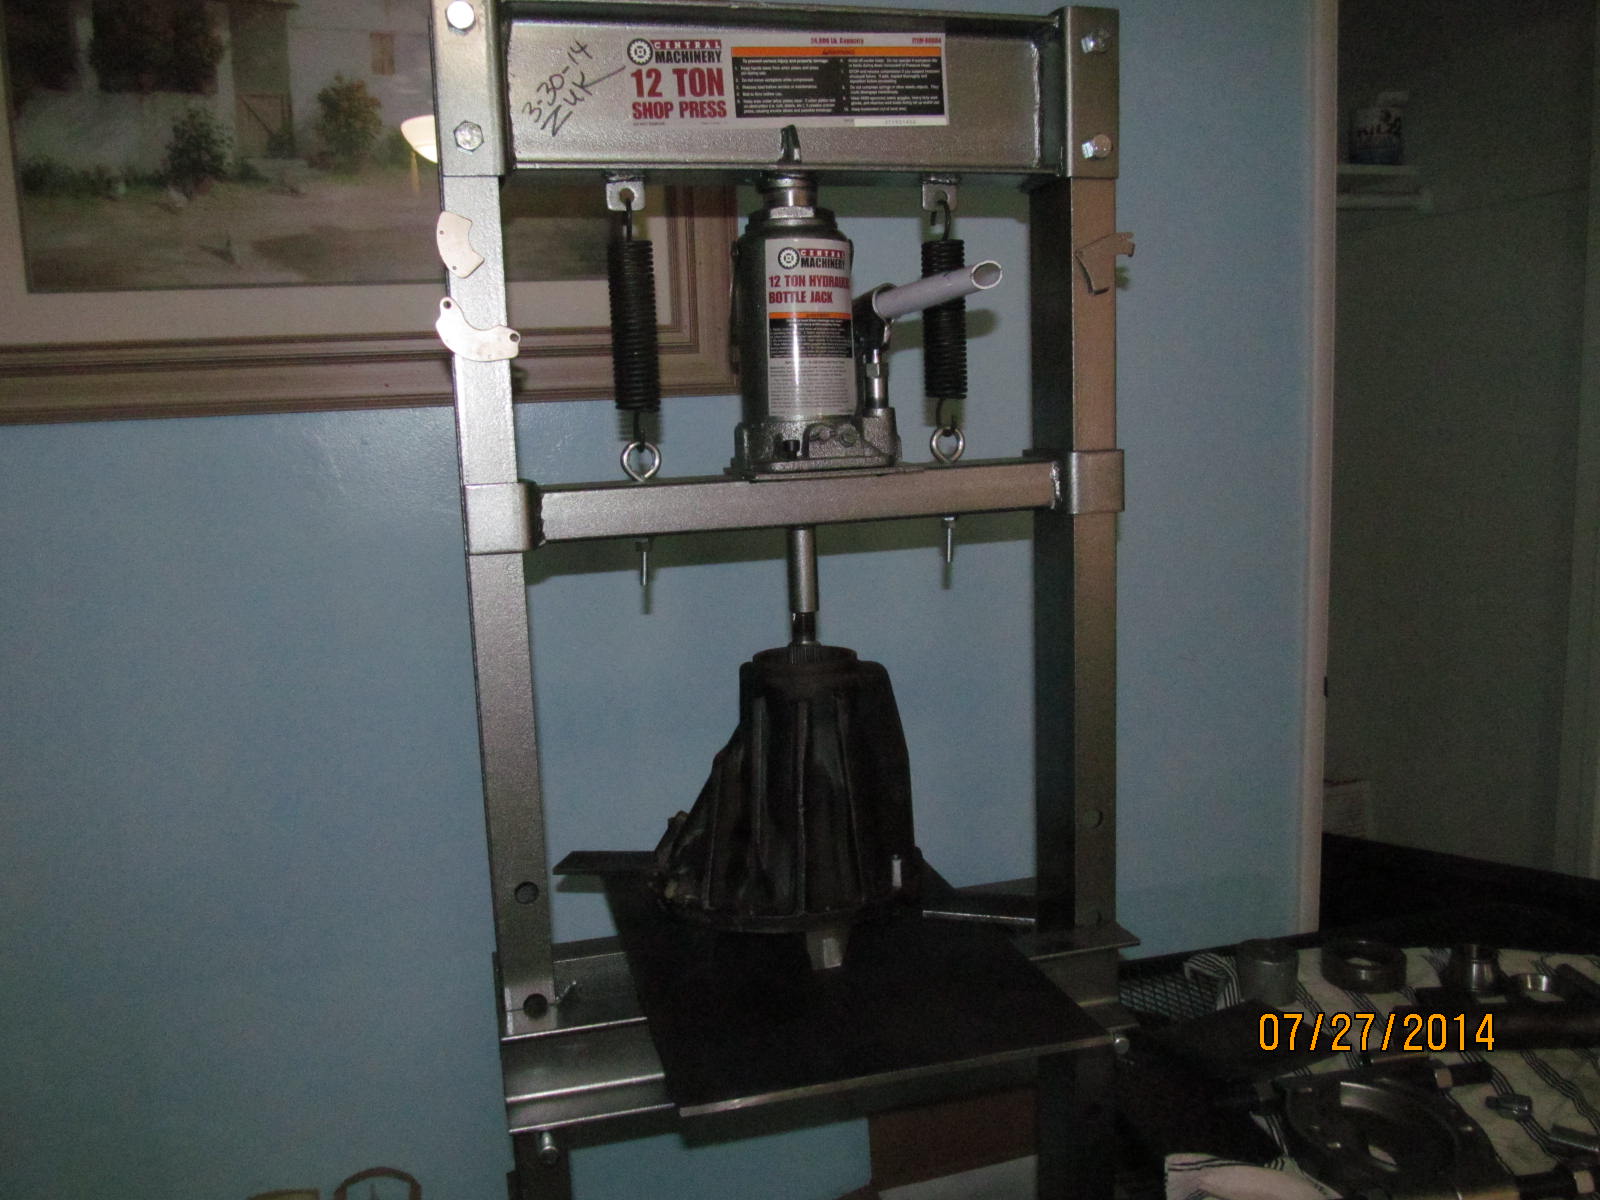
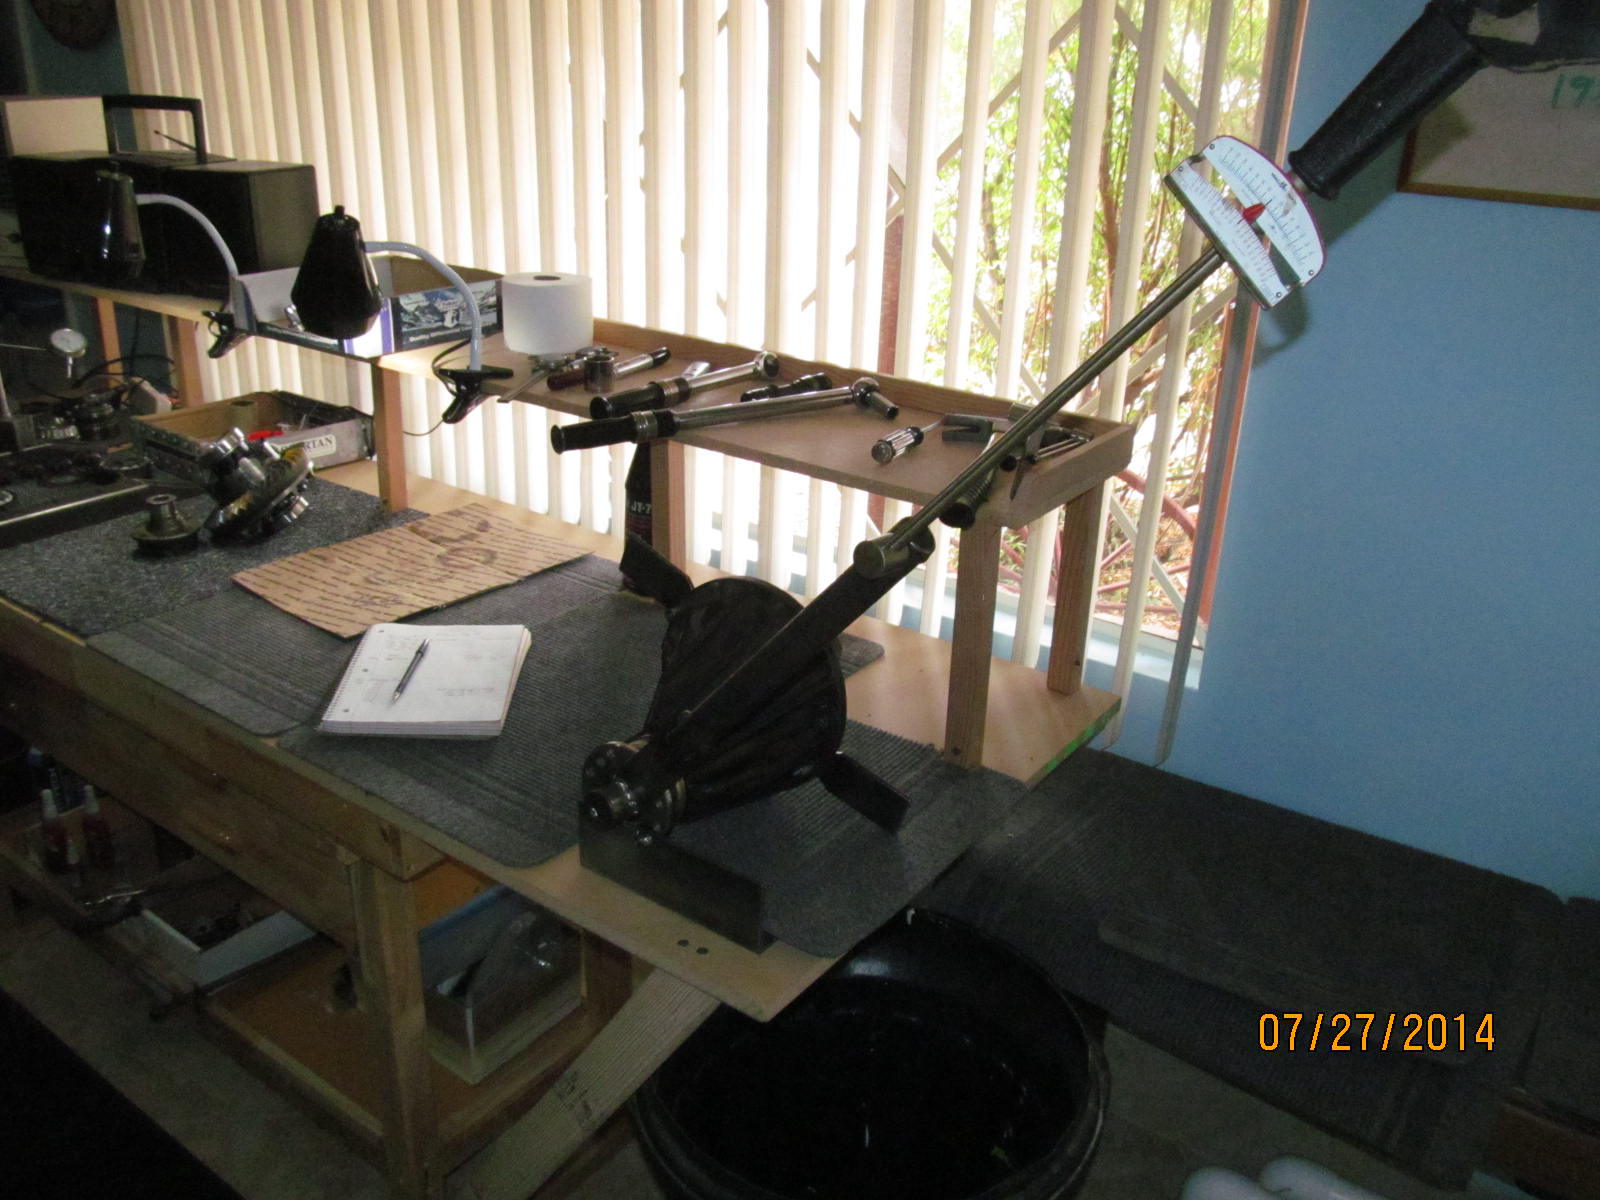
How many of you have a 12 ton press in your living room? Just wondering :)
|
|
|
|
|
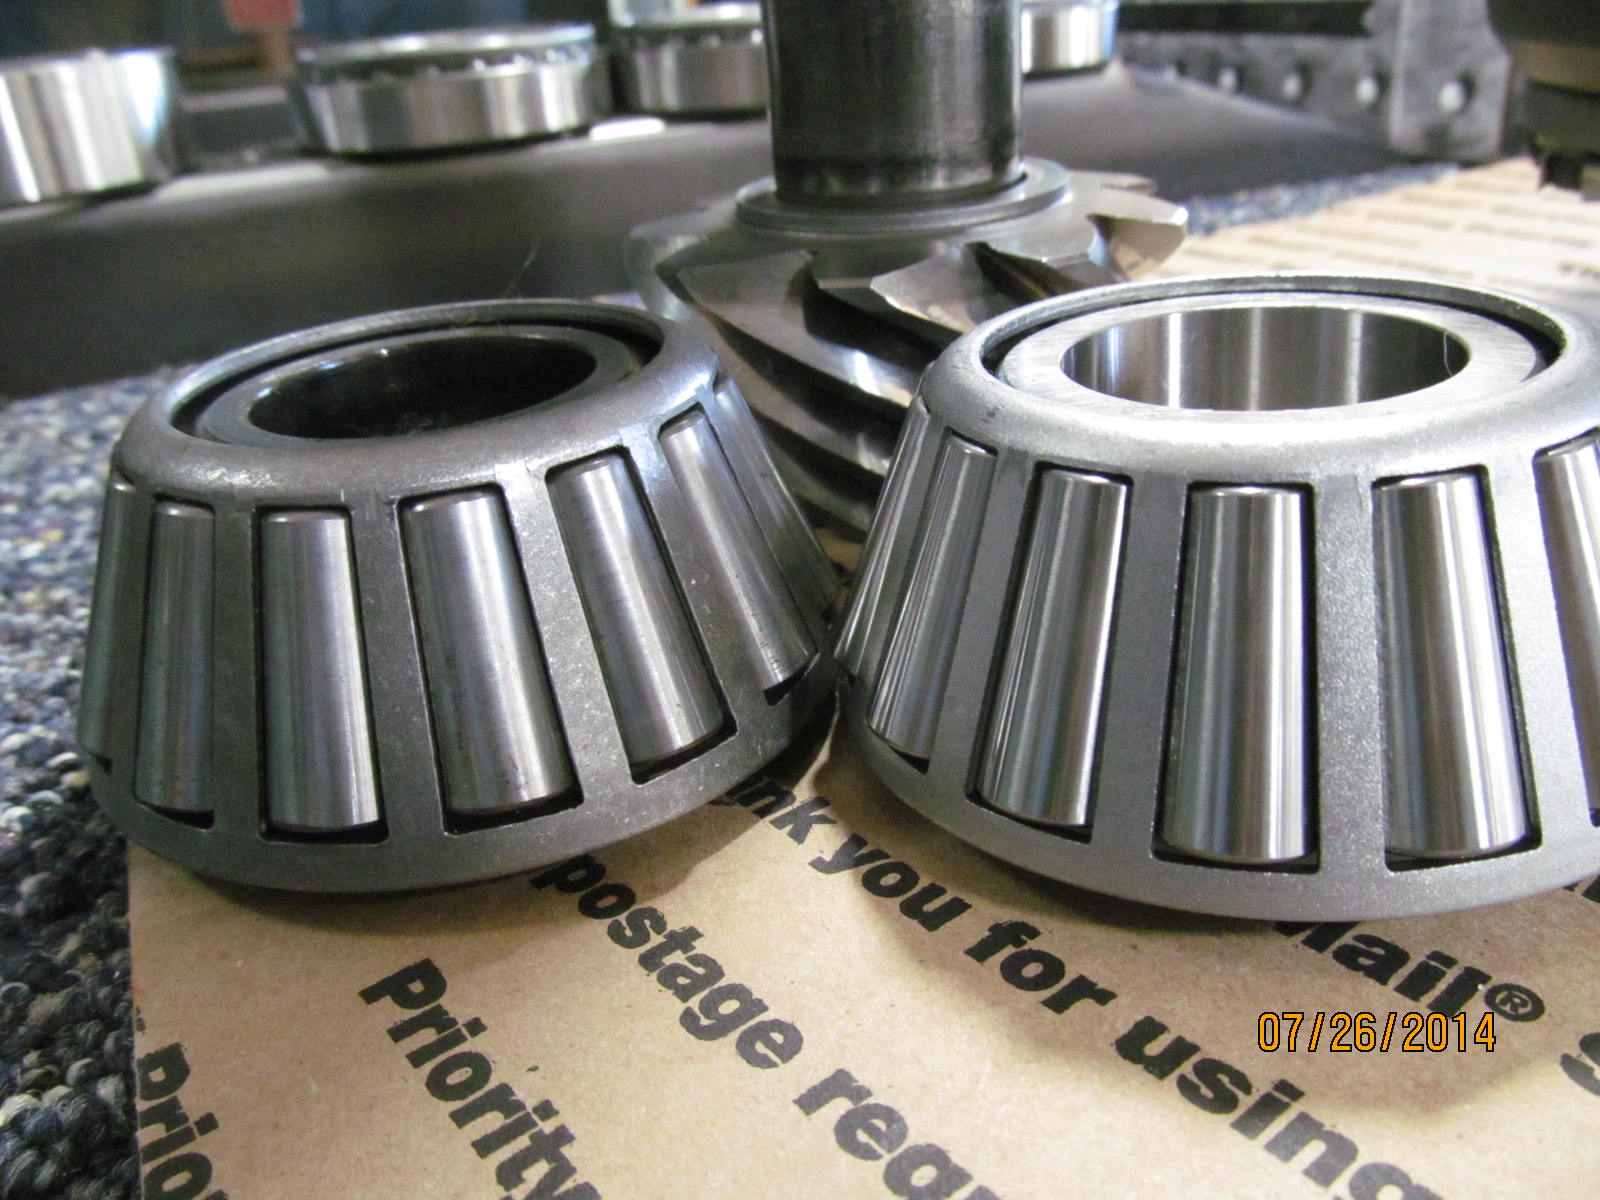
Old bearing on the left...new on the right.
|
|
|
|
|
Pressing the new bearing on with the same factory .0775" pinion shim.
|
|
|
|
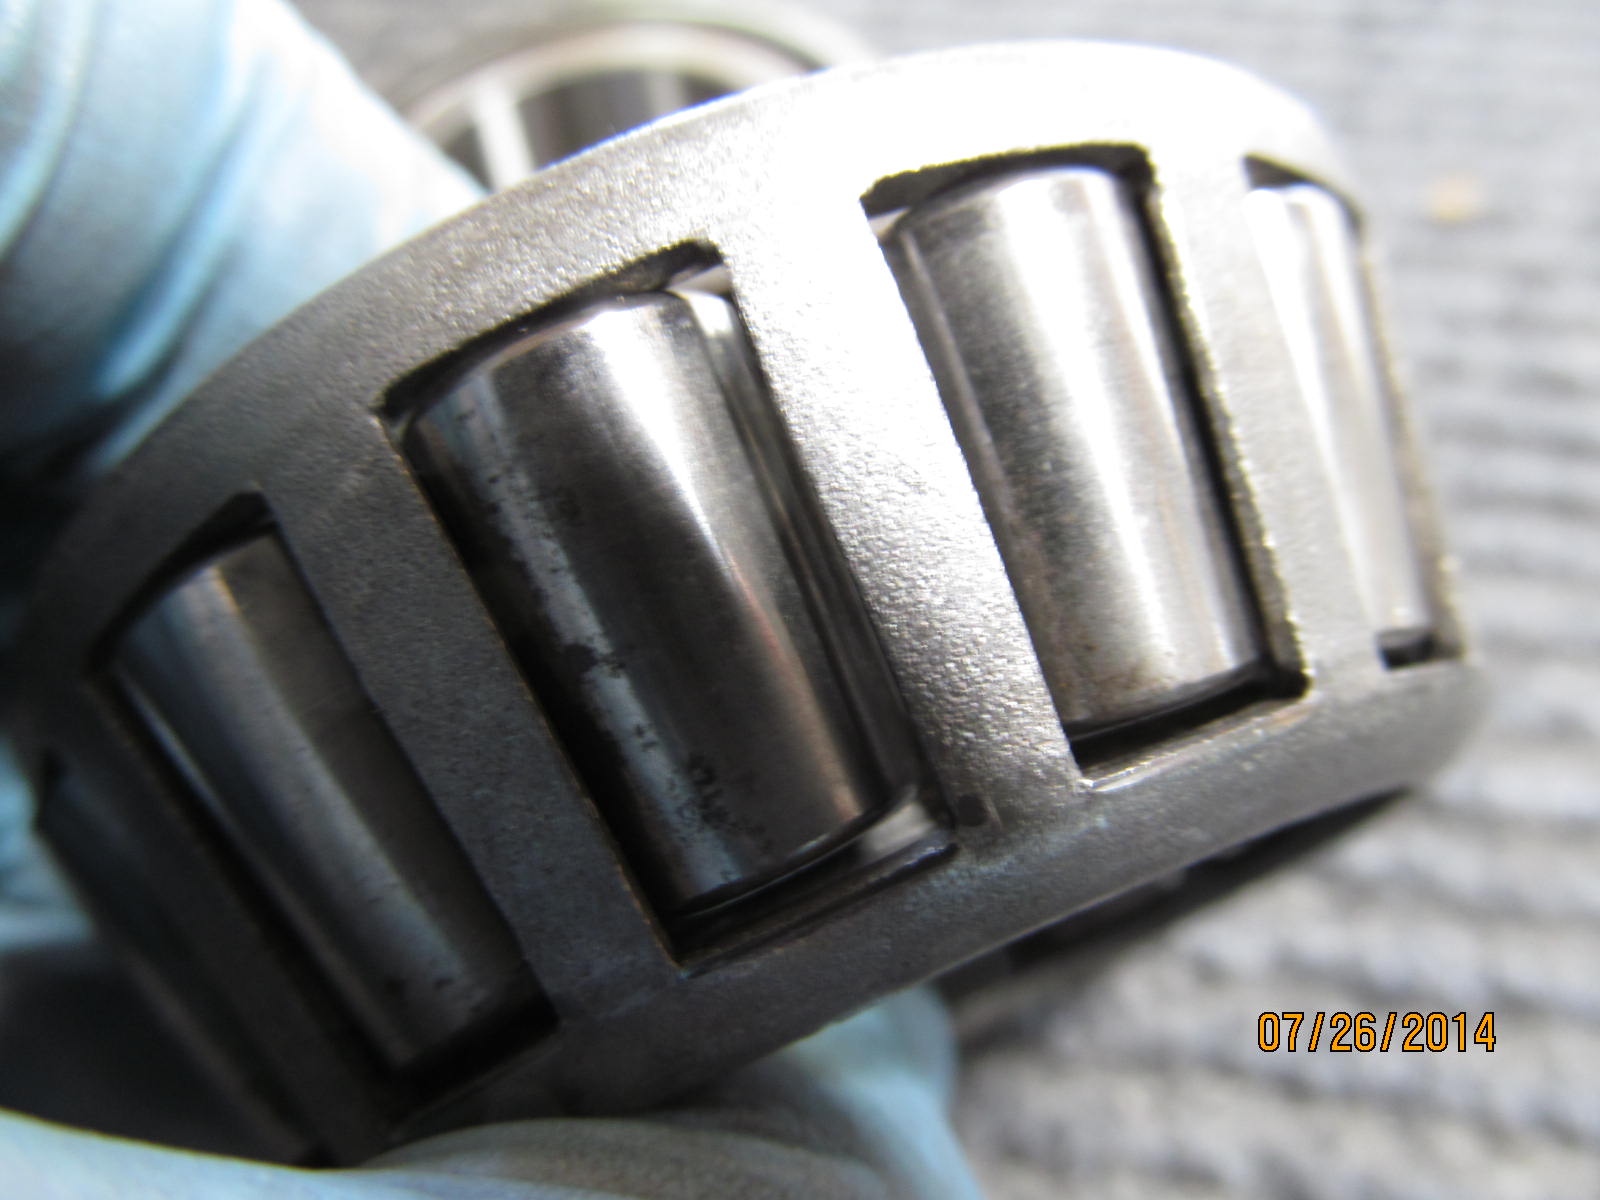
The small outer pinion bearing does not have an actual chunks missing but the tapered rollers are pretty
much "shot".
|
|
|
|
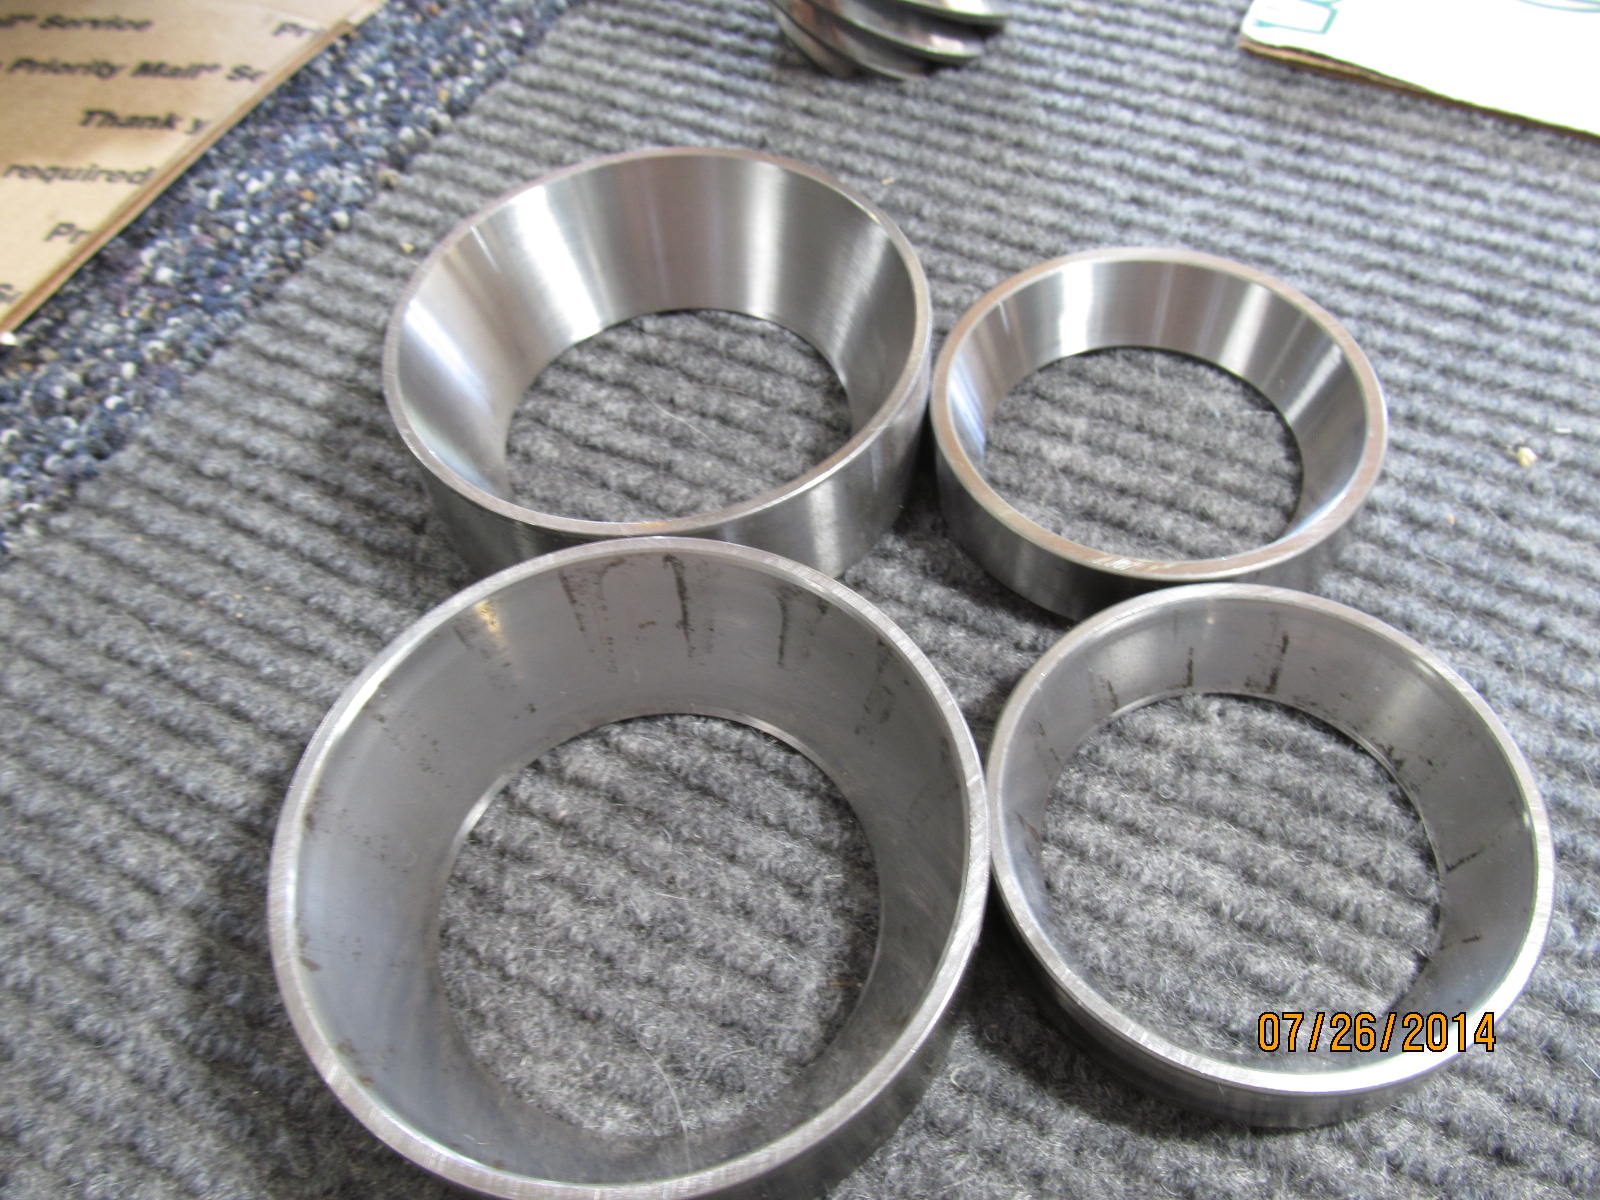
New races compares to the old. The old were wiped as clean as possible. That's rust and pitted wear showing up
in the pic. Maybe water got in there sometime in the last 19 years?
|
|
|
|
|
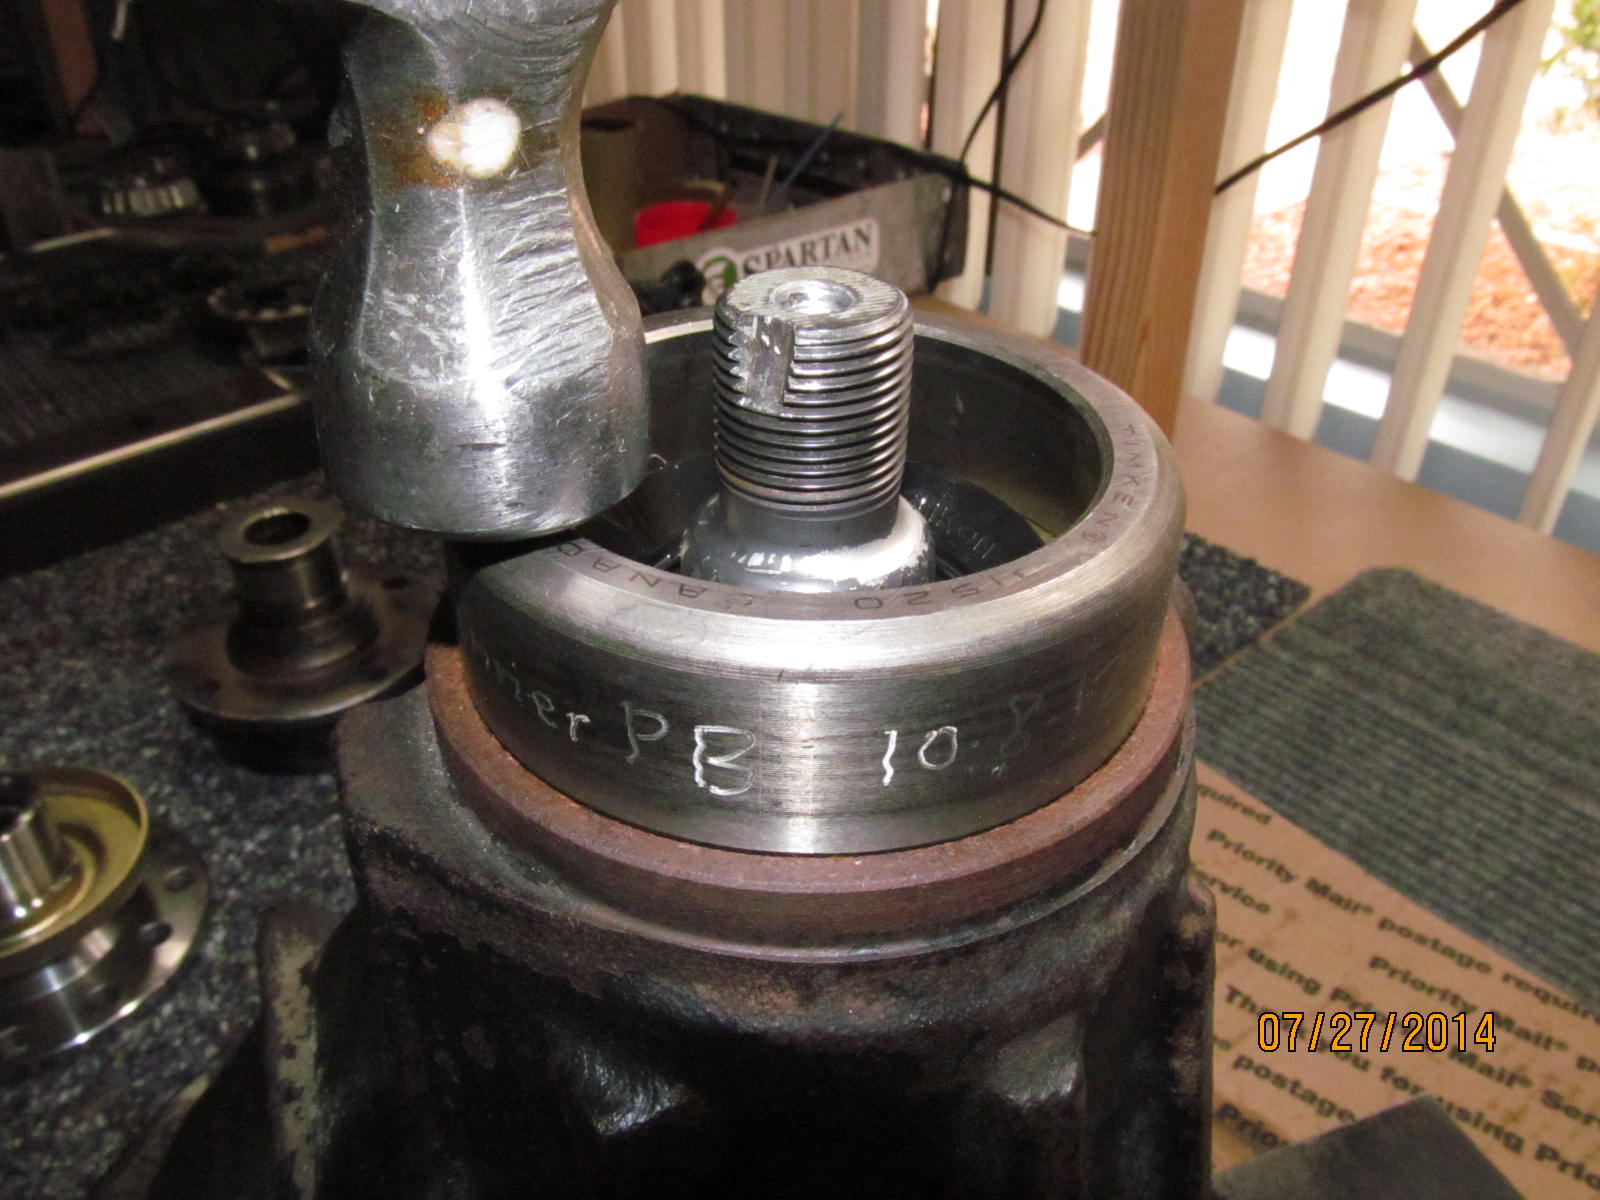
The outer race taps in nicely with a hammer just fine.
|
|
|
|
|
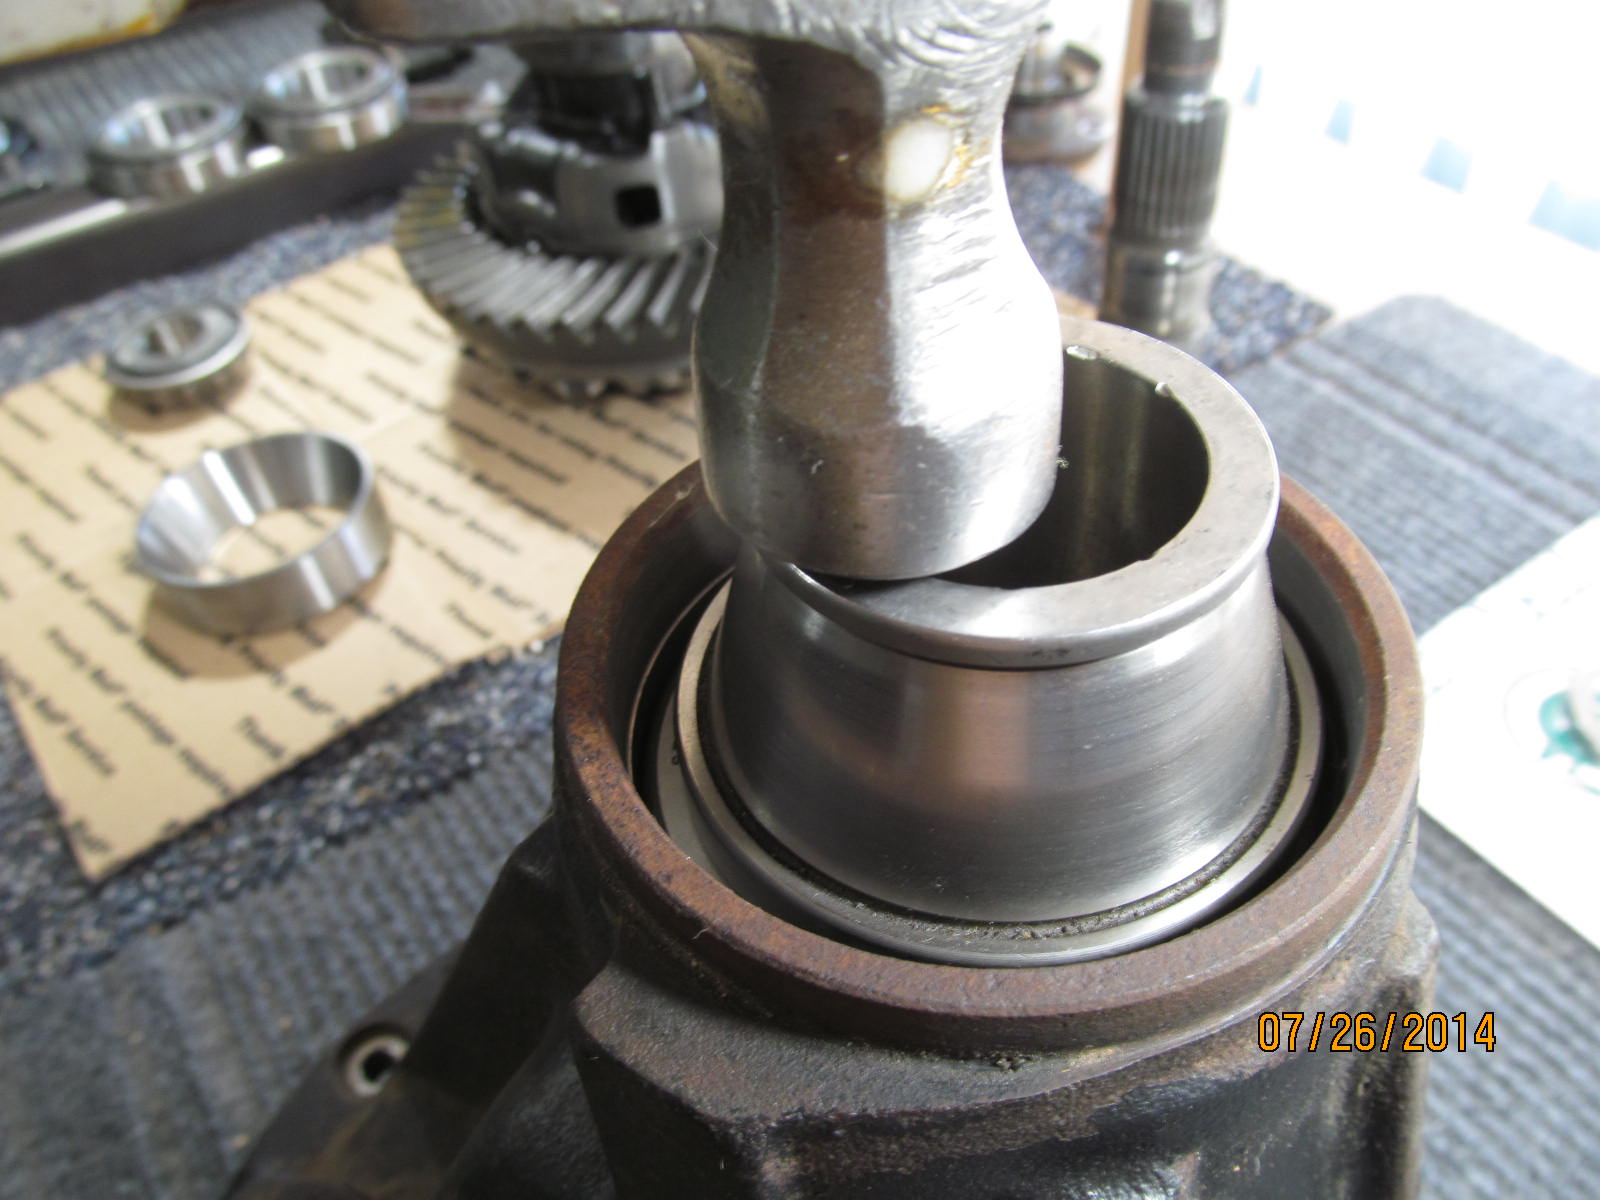
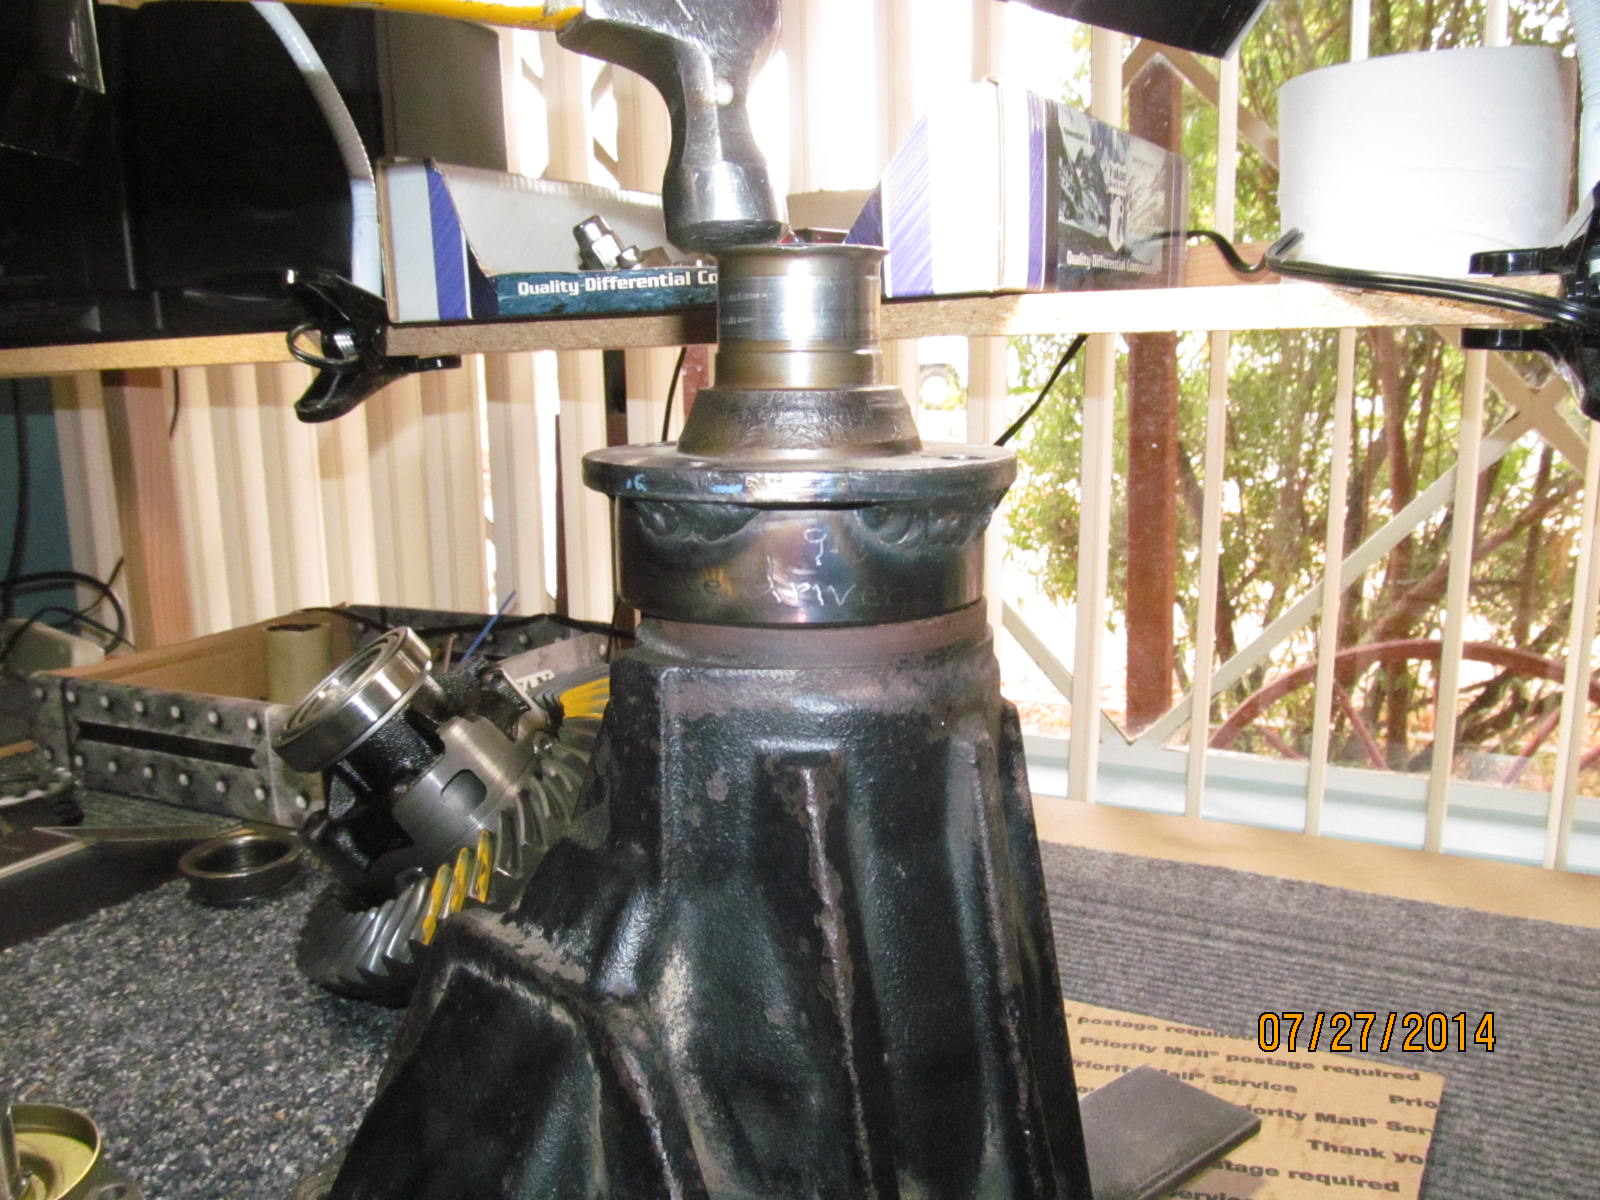
More care should be used with the larger inner race...start it even and straight and the press will do the job.
|
|
|

|
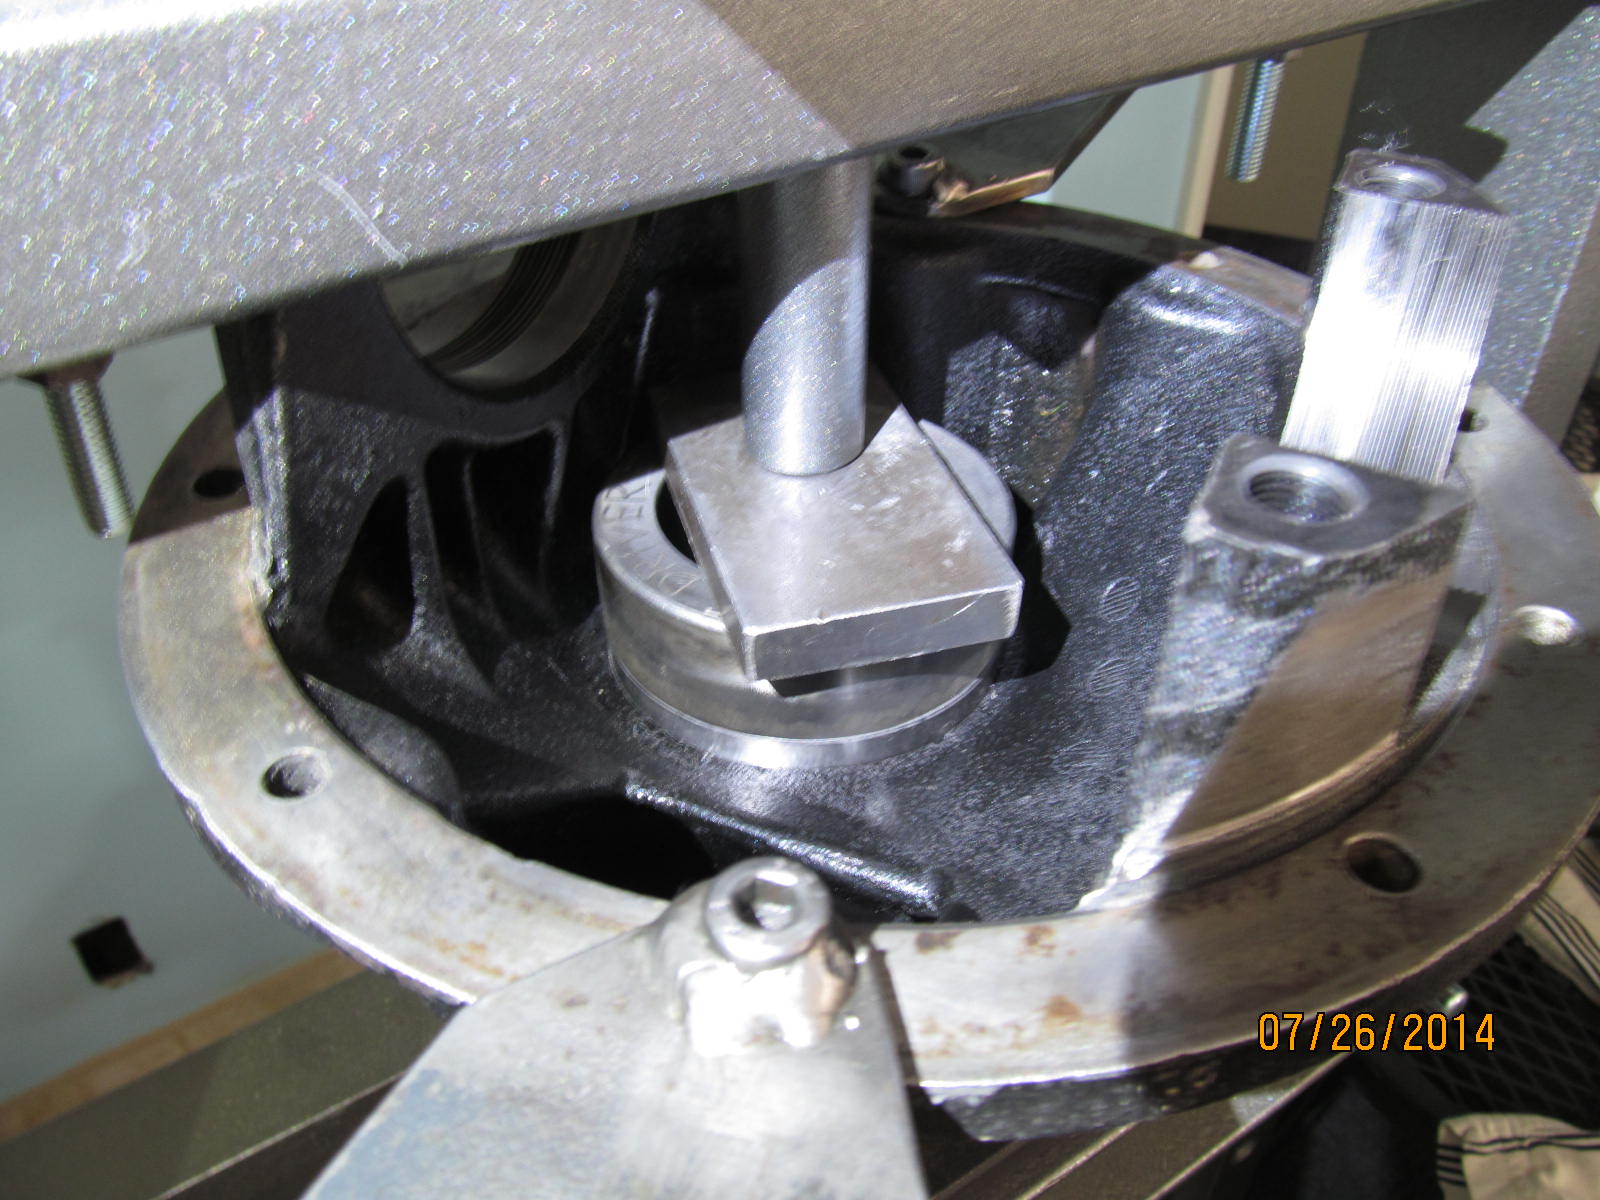
Now to load up the pinion end of things....since I am re-using the ring/pinion and the same .077" pinion shim then
I could have installed the solid collar also at this point....but, out of habit, I did not here. I just wanted
to do one paint check before officially finalizing the top end.
|
|
|
|
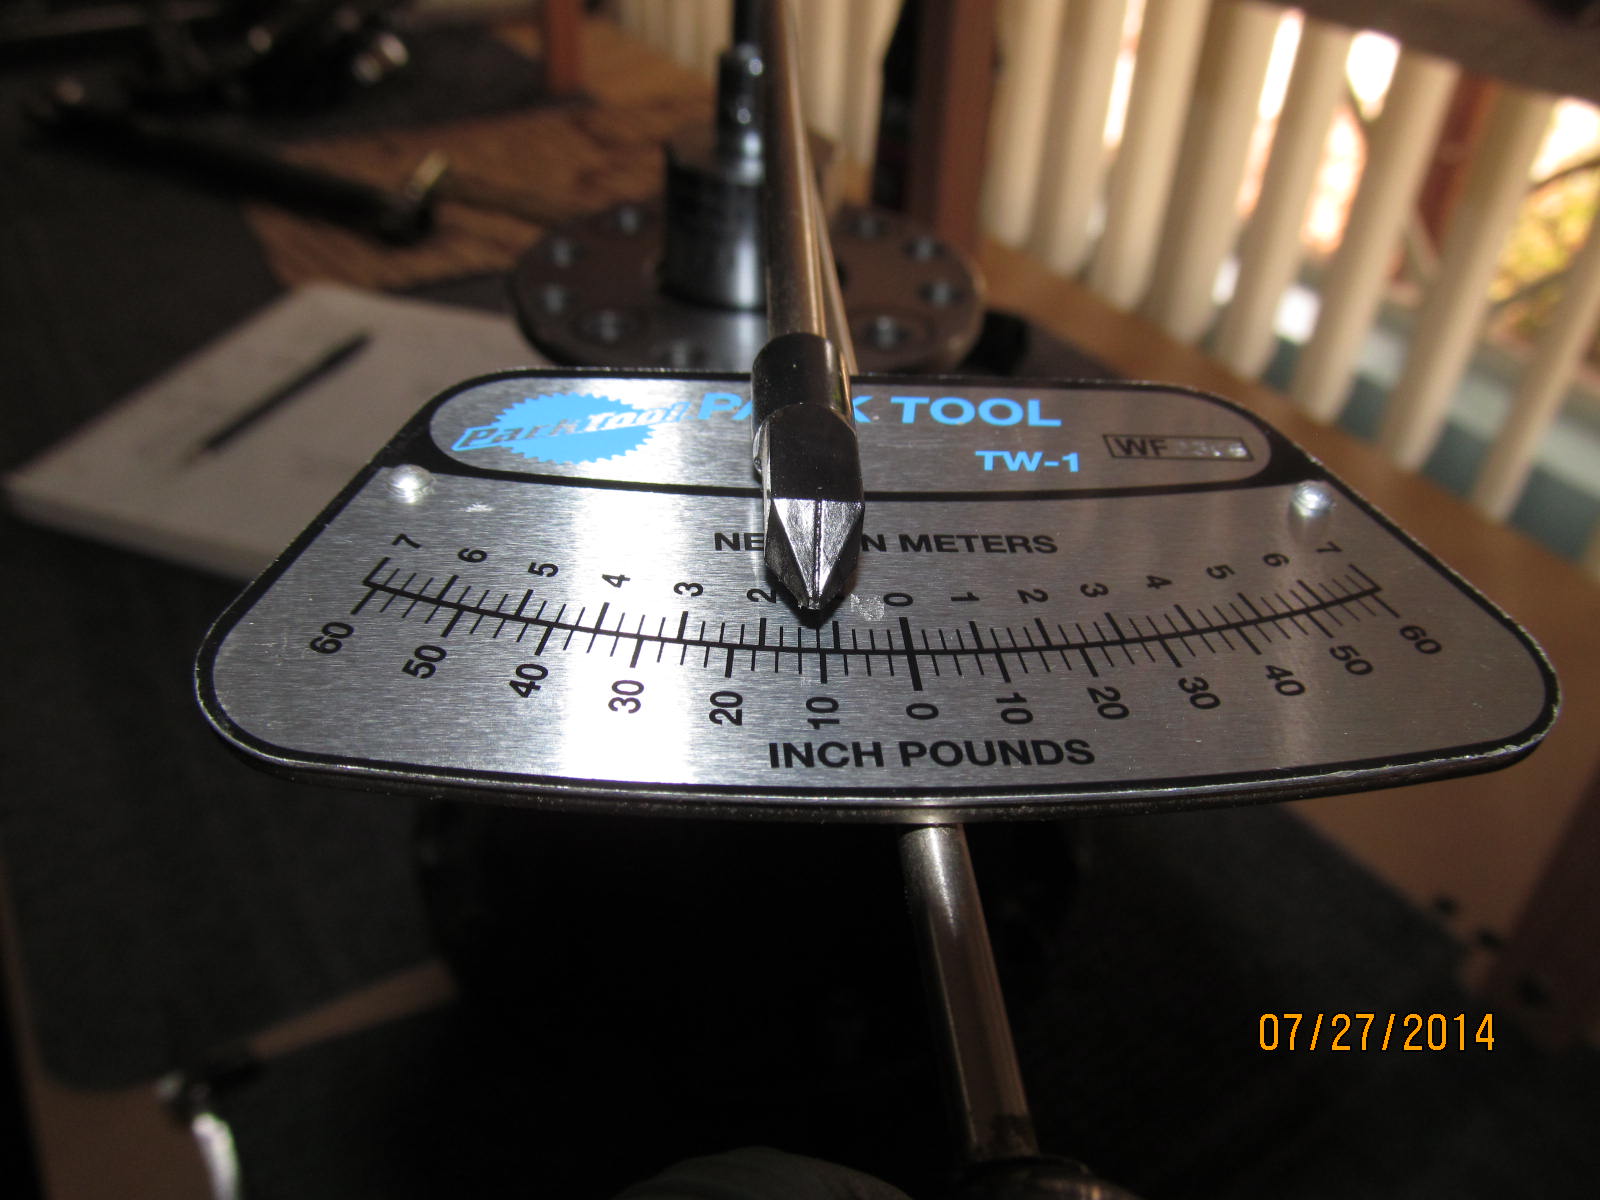
I snugged the pinion nut until I saw some pre-load. In this case, 15 in/lb is adequate for the initial paint.
But, I could have put the solid collar in at this point, too.
|
|
|
|
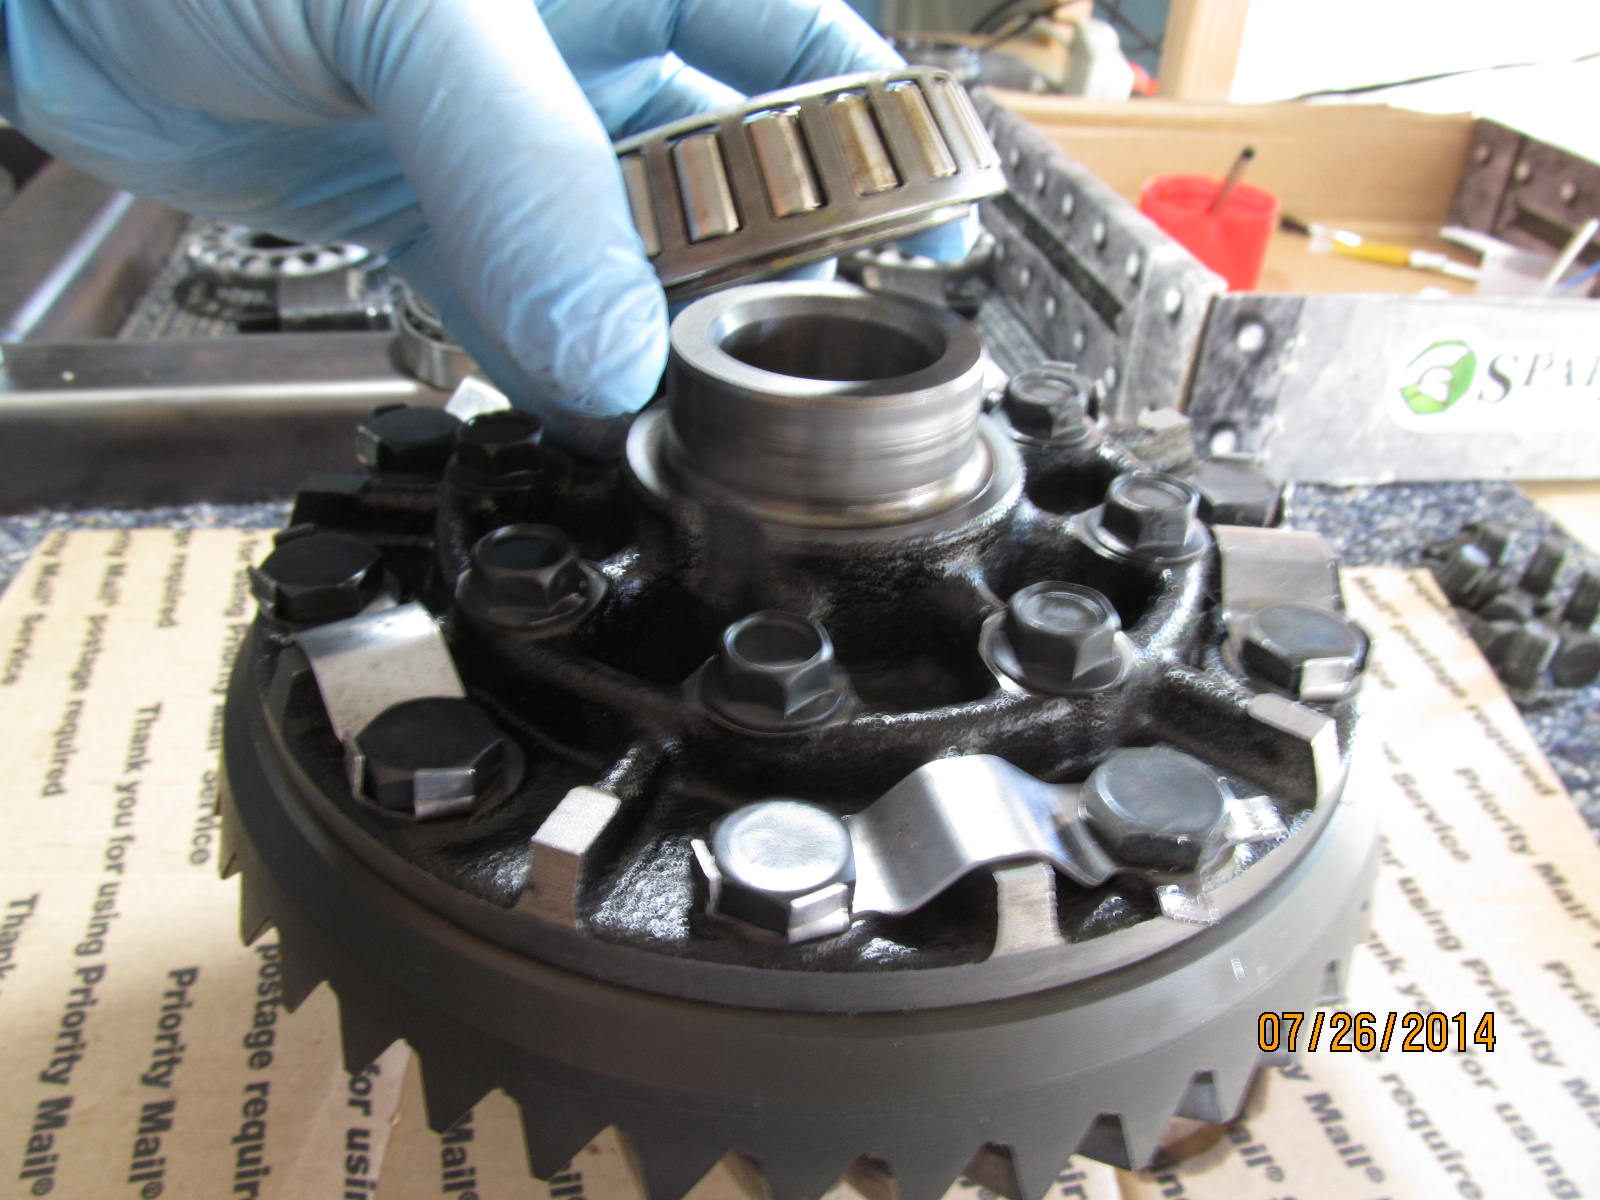
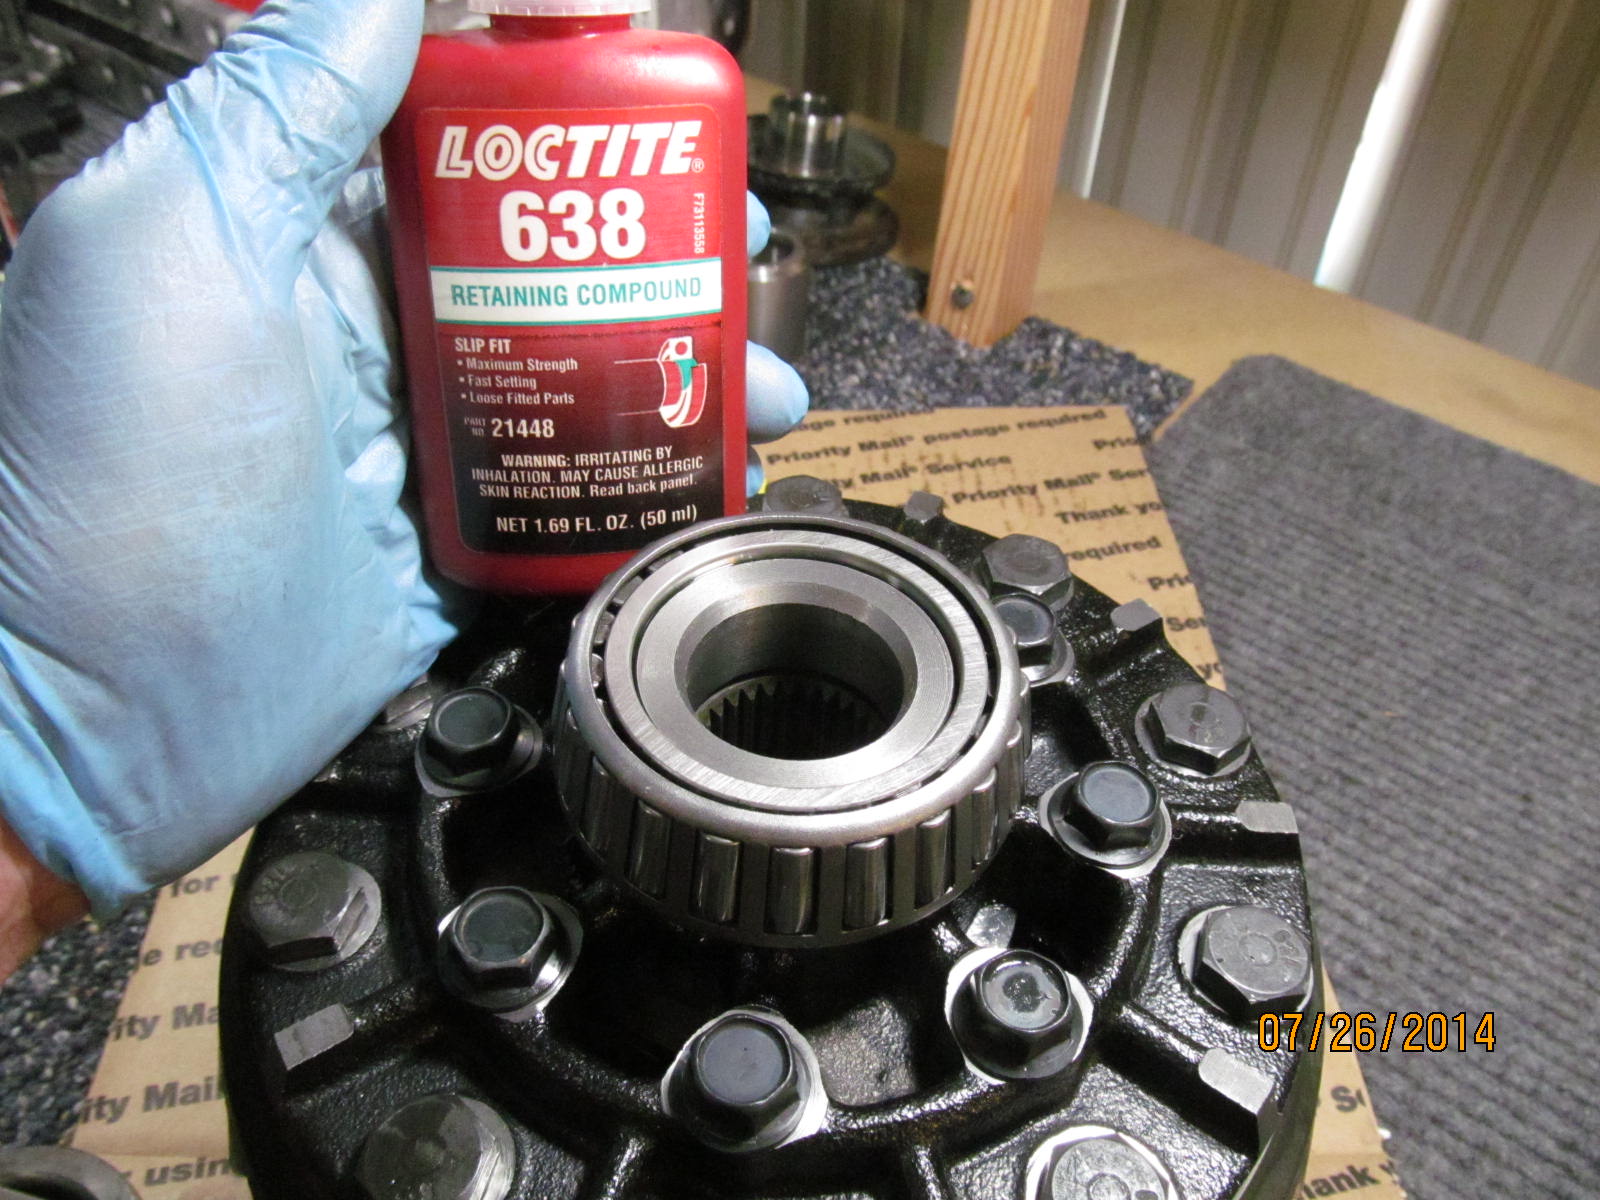
The original bearing was a loose fit....most likely the new one will be also so I will use "sleeve lock" on
both new carrier bearings.
|
|
|
|
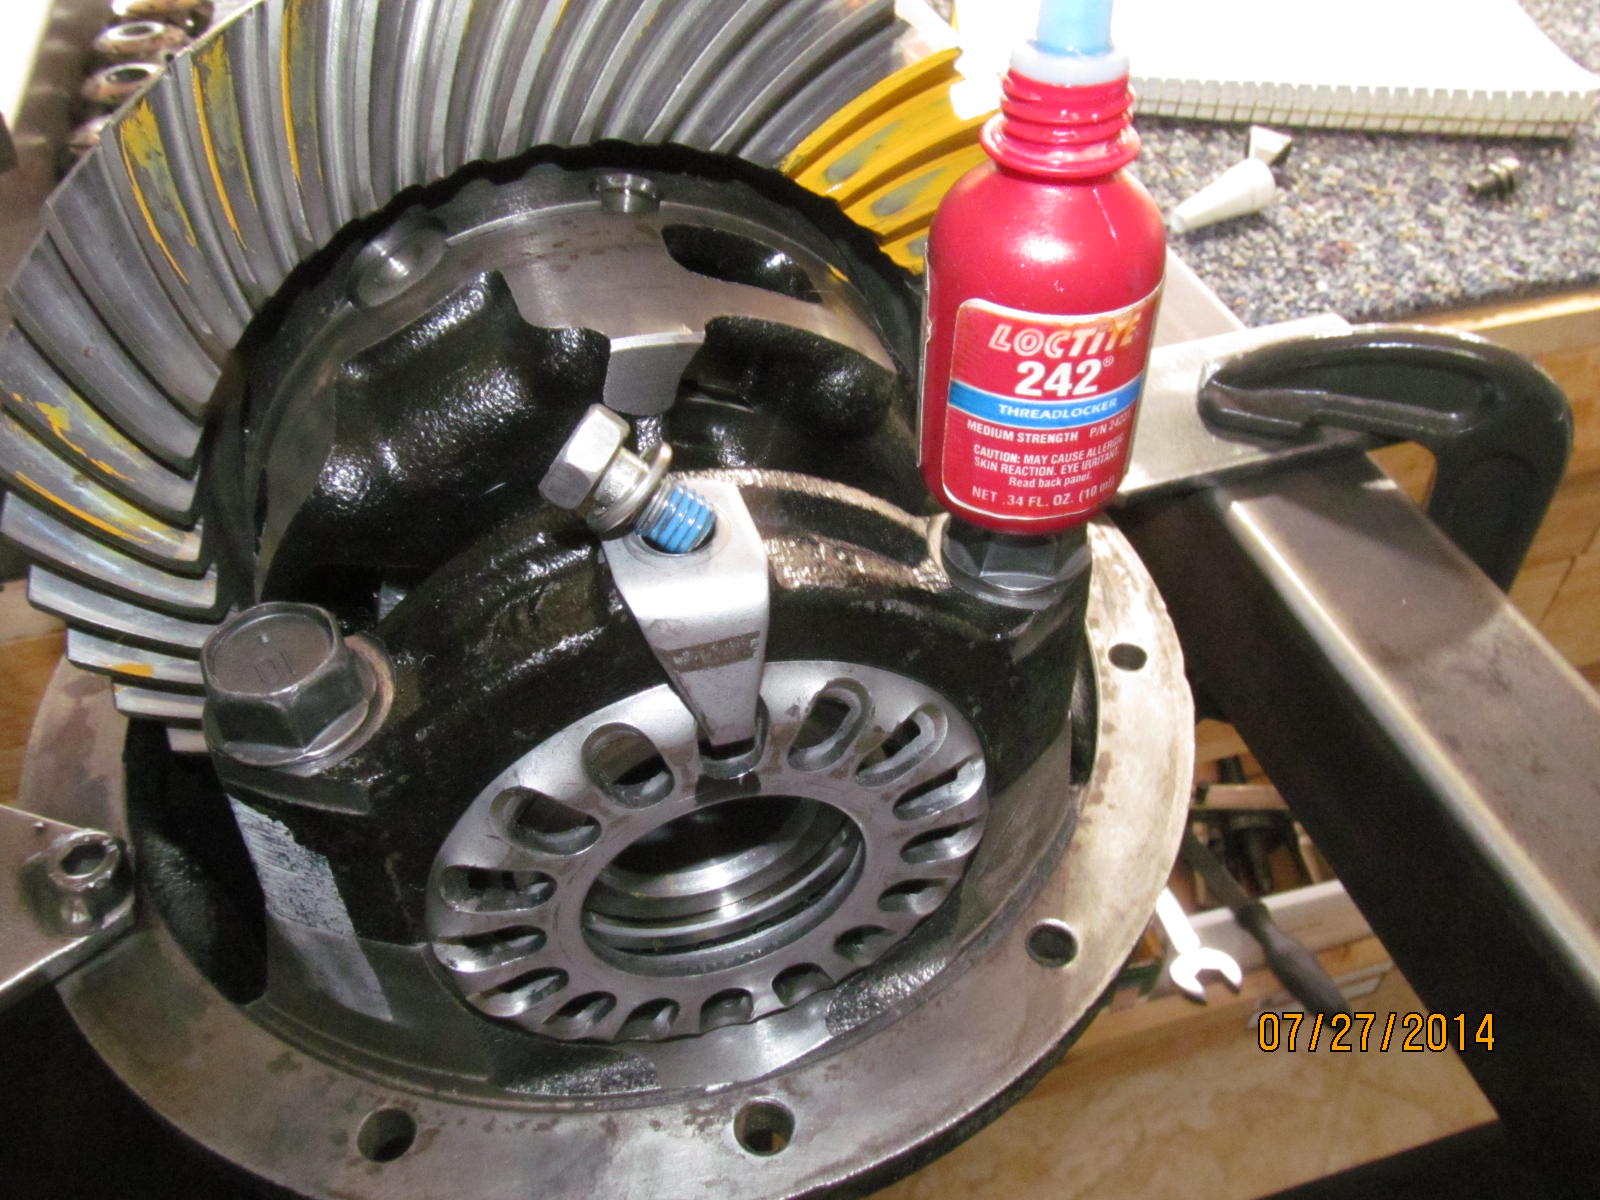
New ring gear bolts came in the master kit so why not use them? Besides, the lock tabs get in the way of the
17mm wrench when I go to do a paint test.
|
|
|
|
|
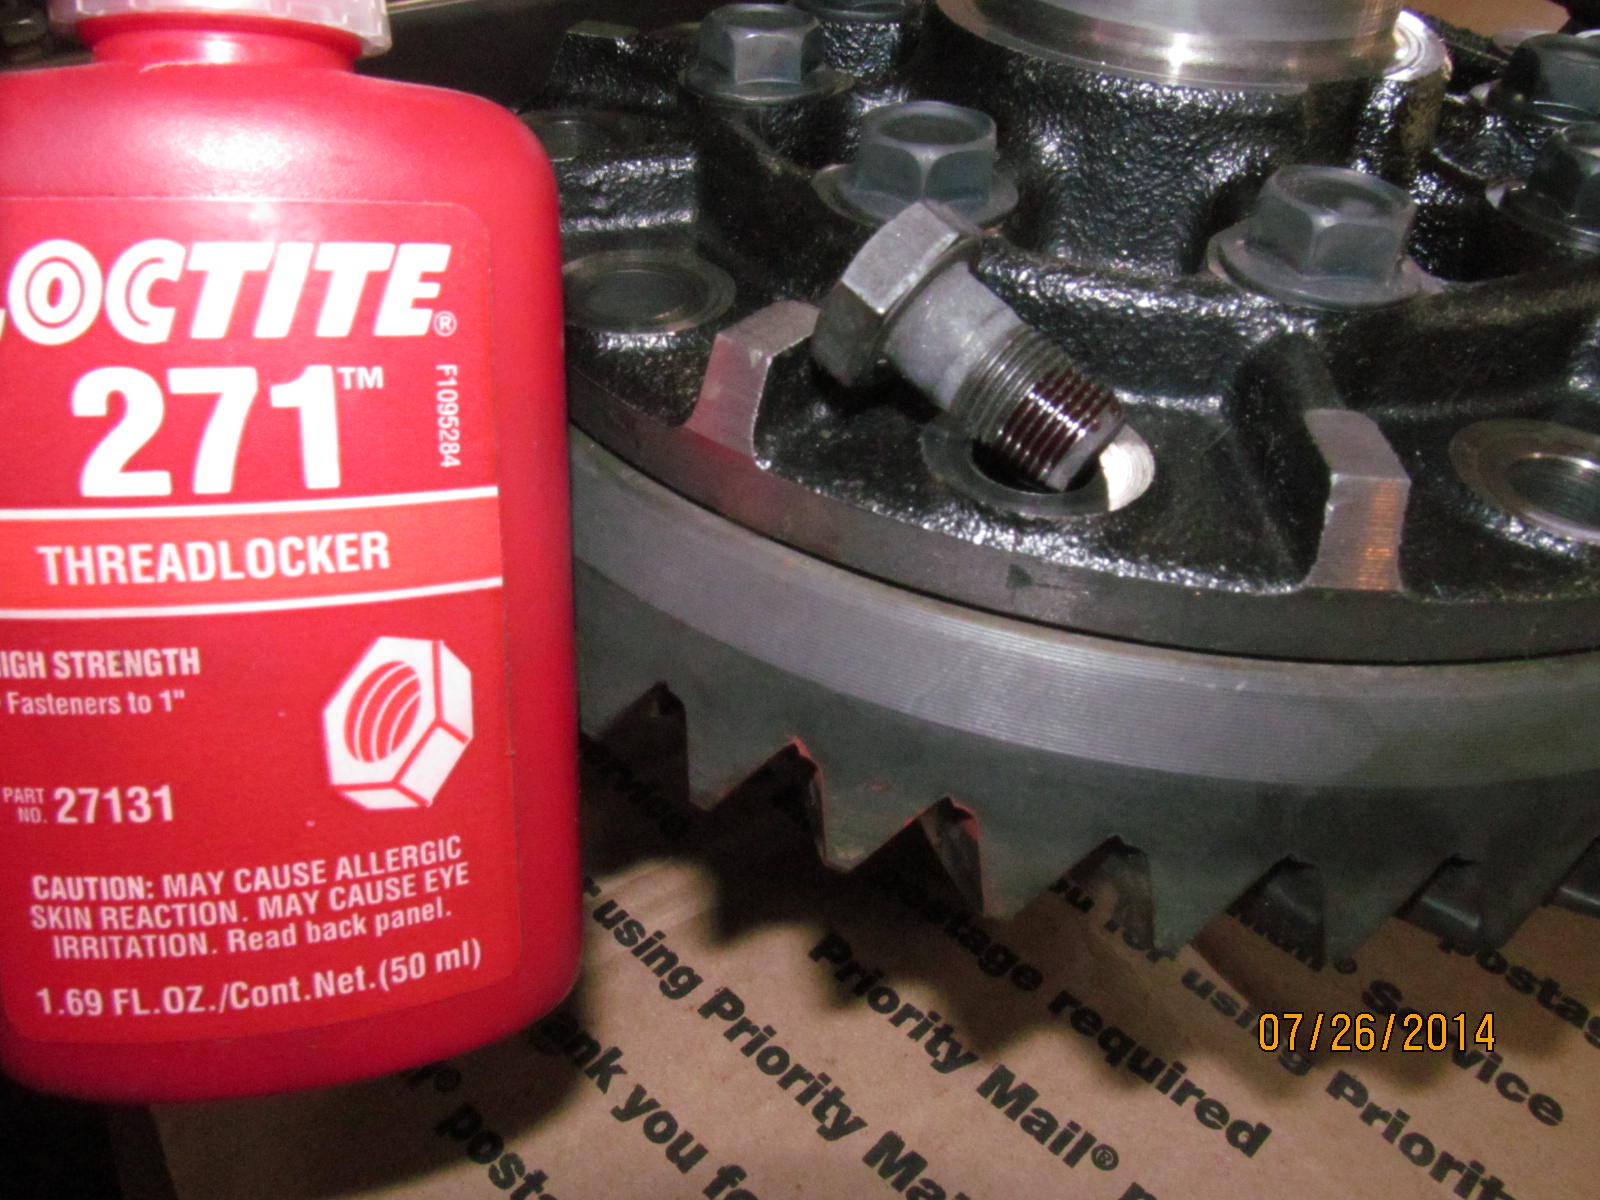
Red loctite is good insurance.
|
|
|
|
|
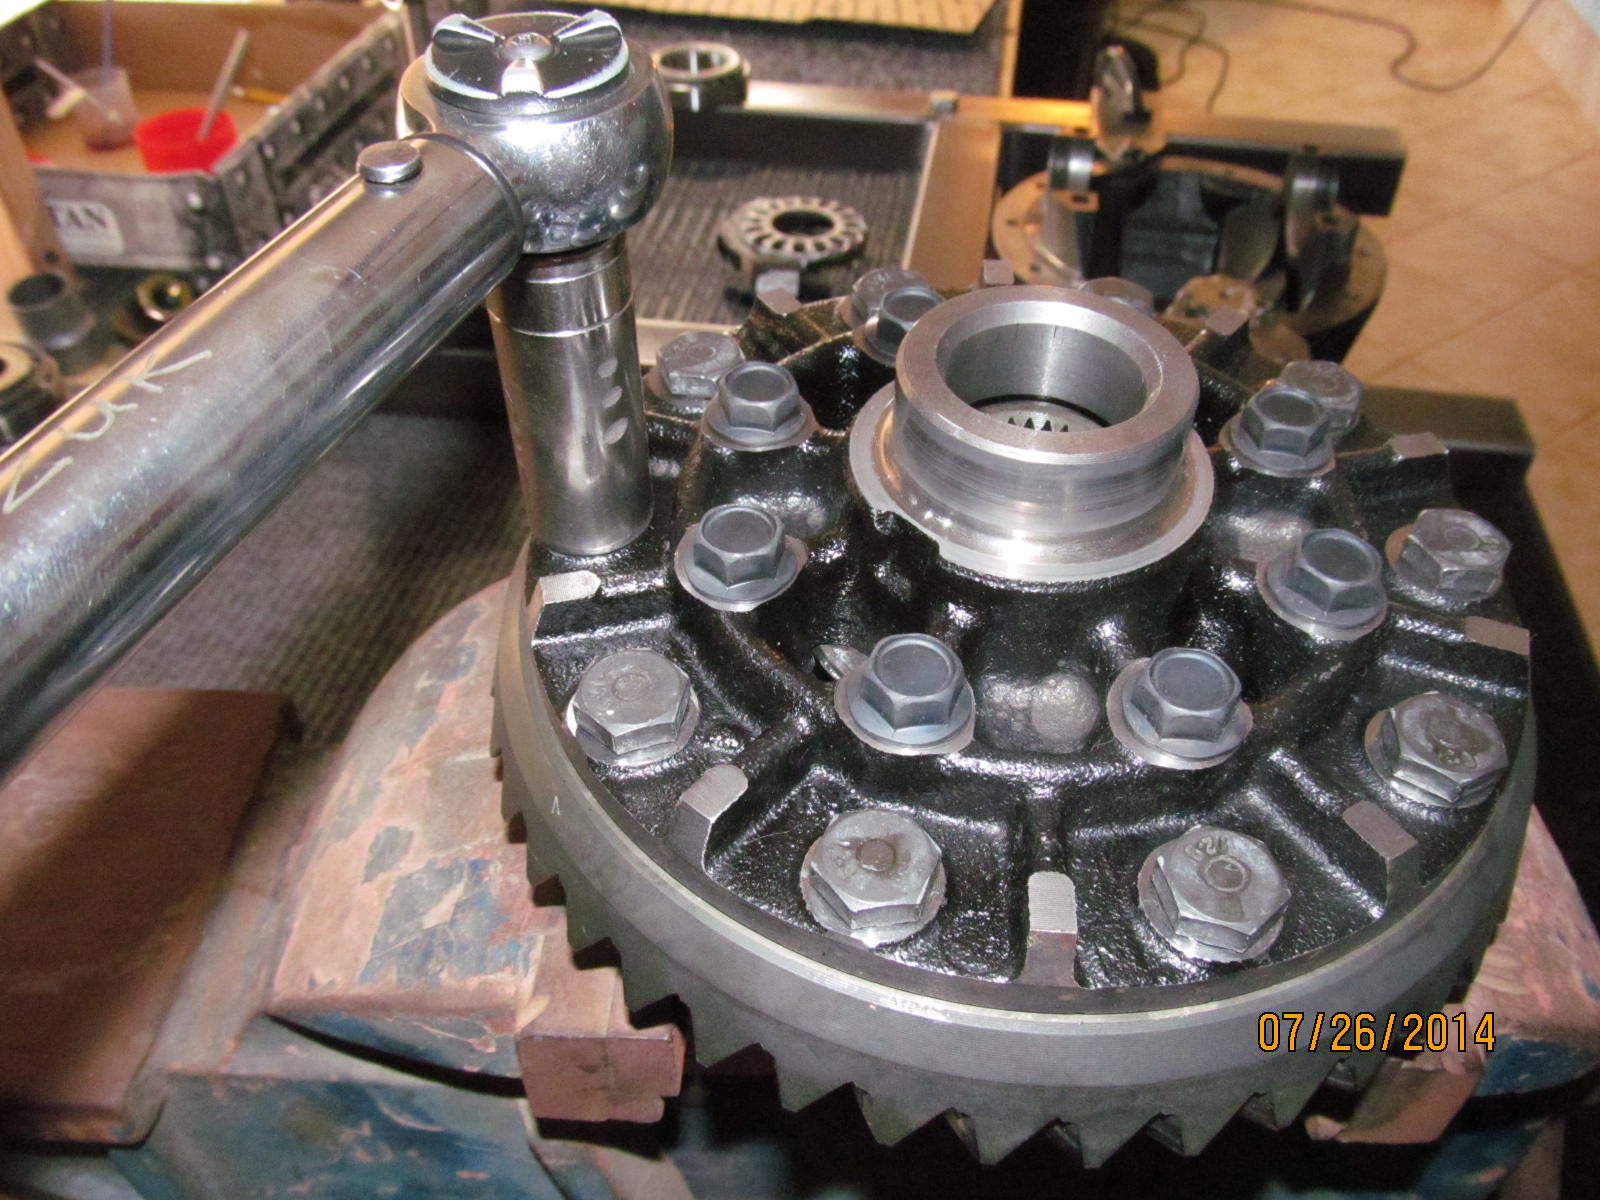
Each one is torqued to 70 ft/lb.
|
|
|

|
|
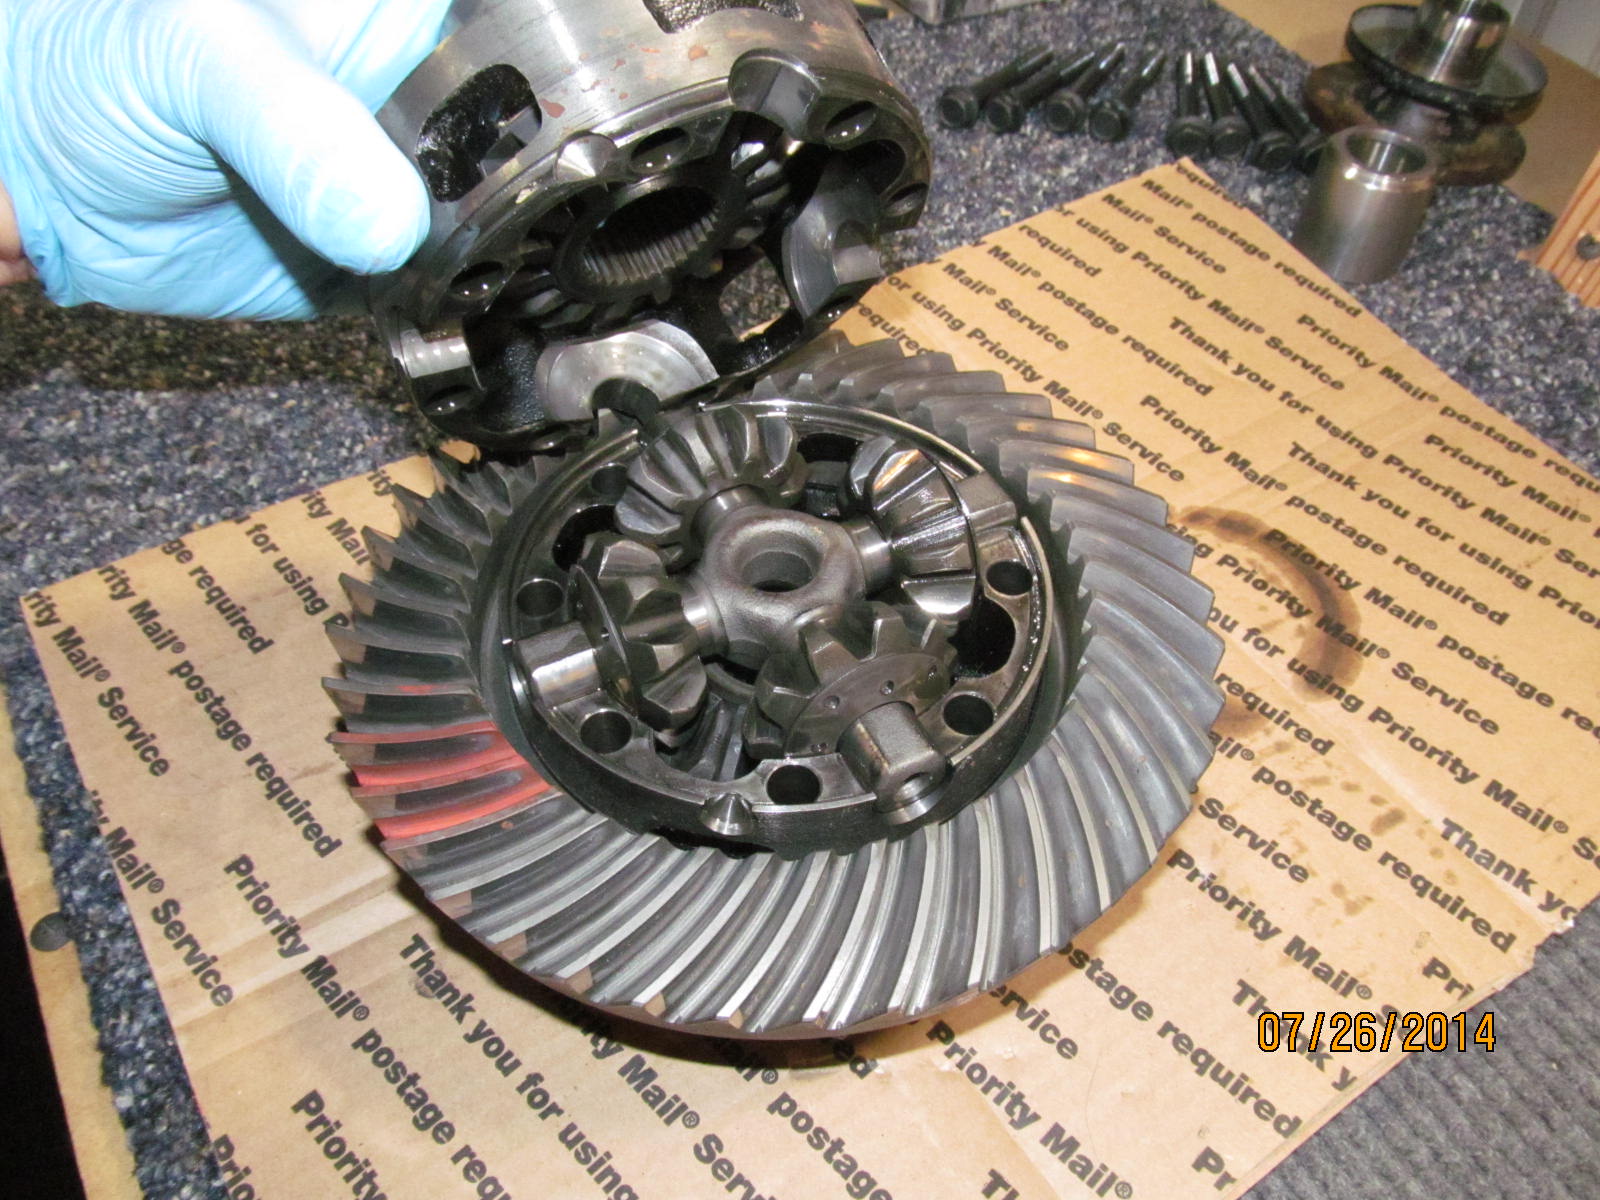
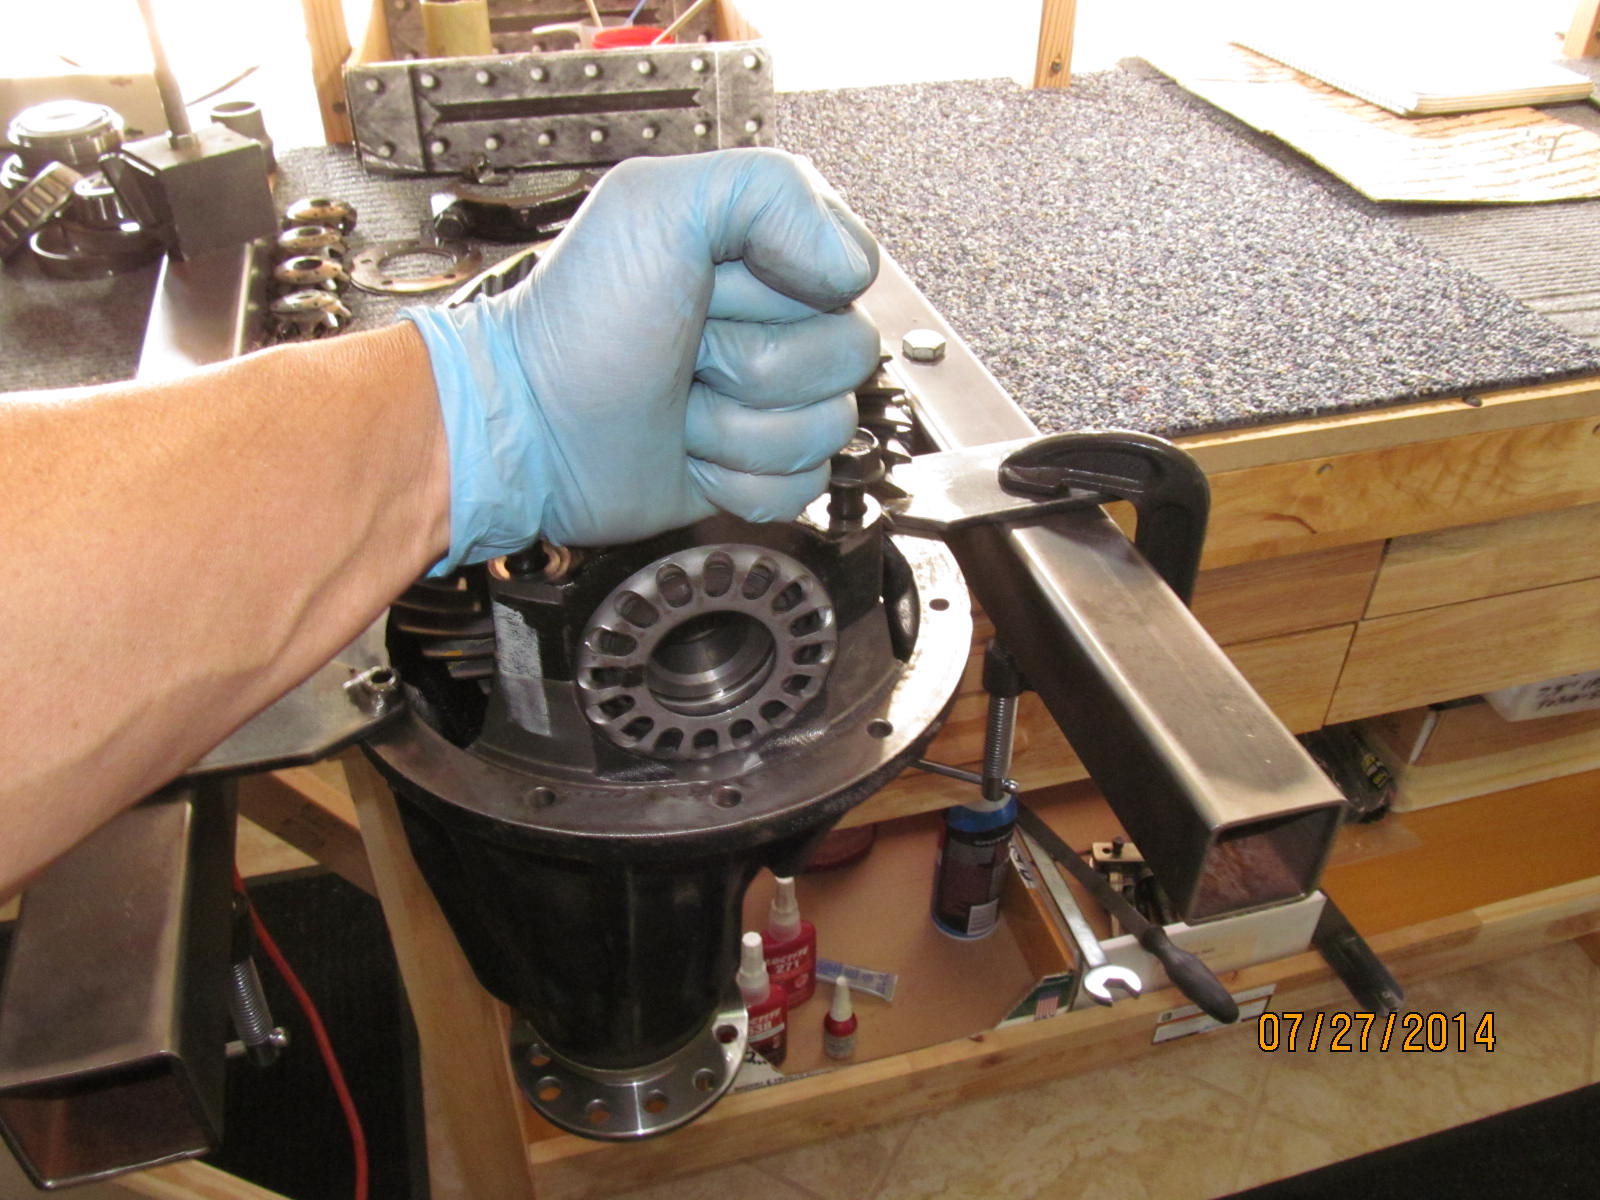
Time to install the Spartan.....loosen all 8 of the long 14mm case bolts.
|
|
|
|
|
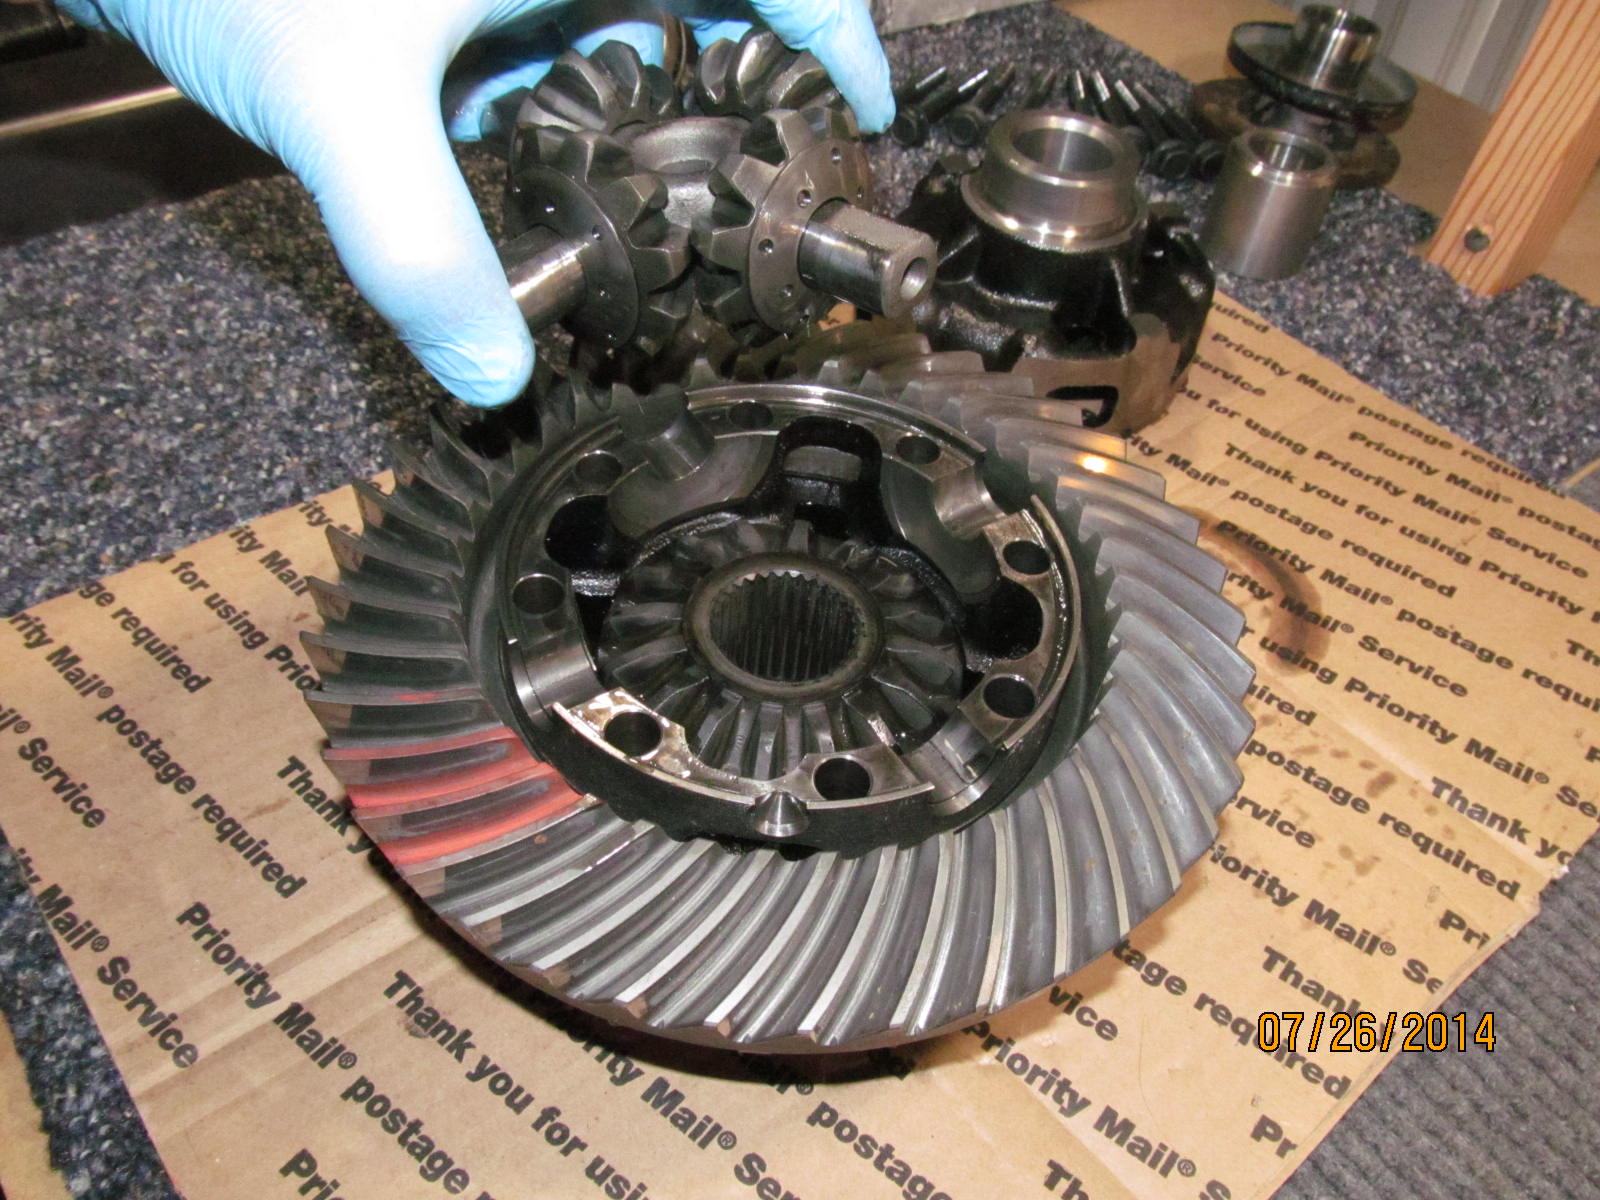
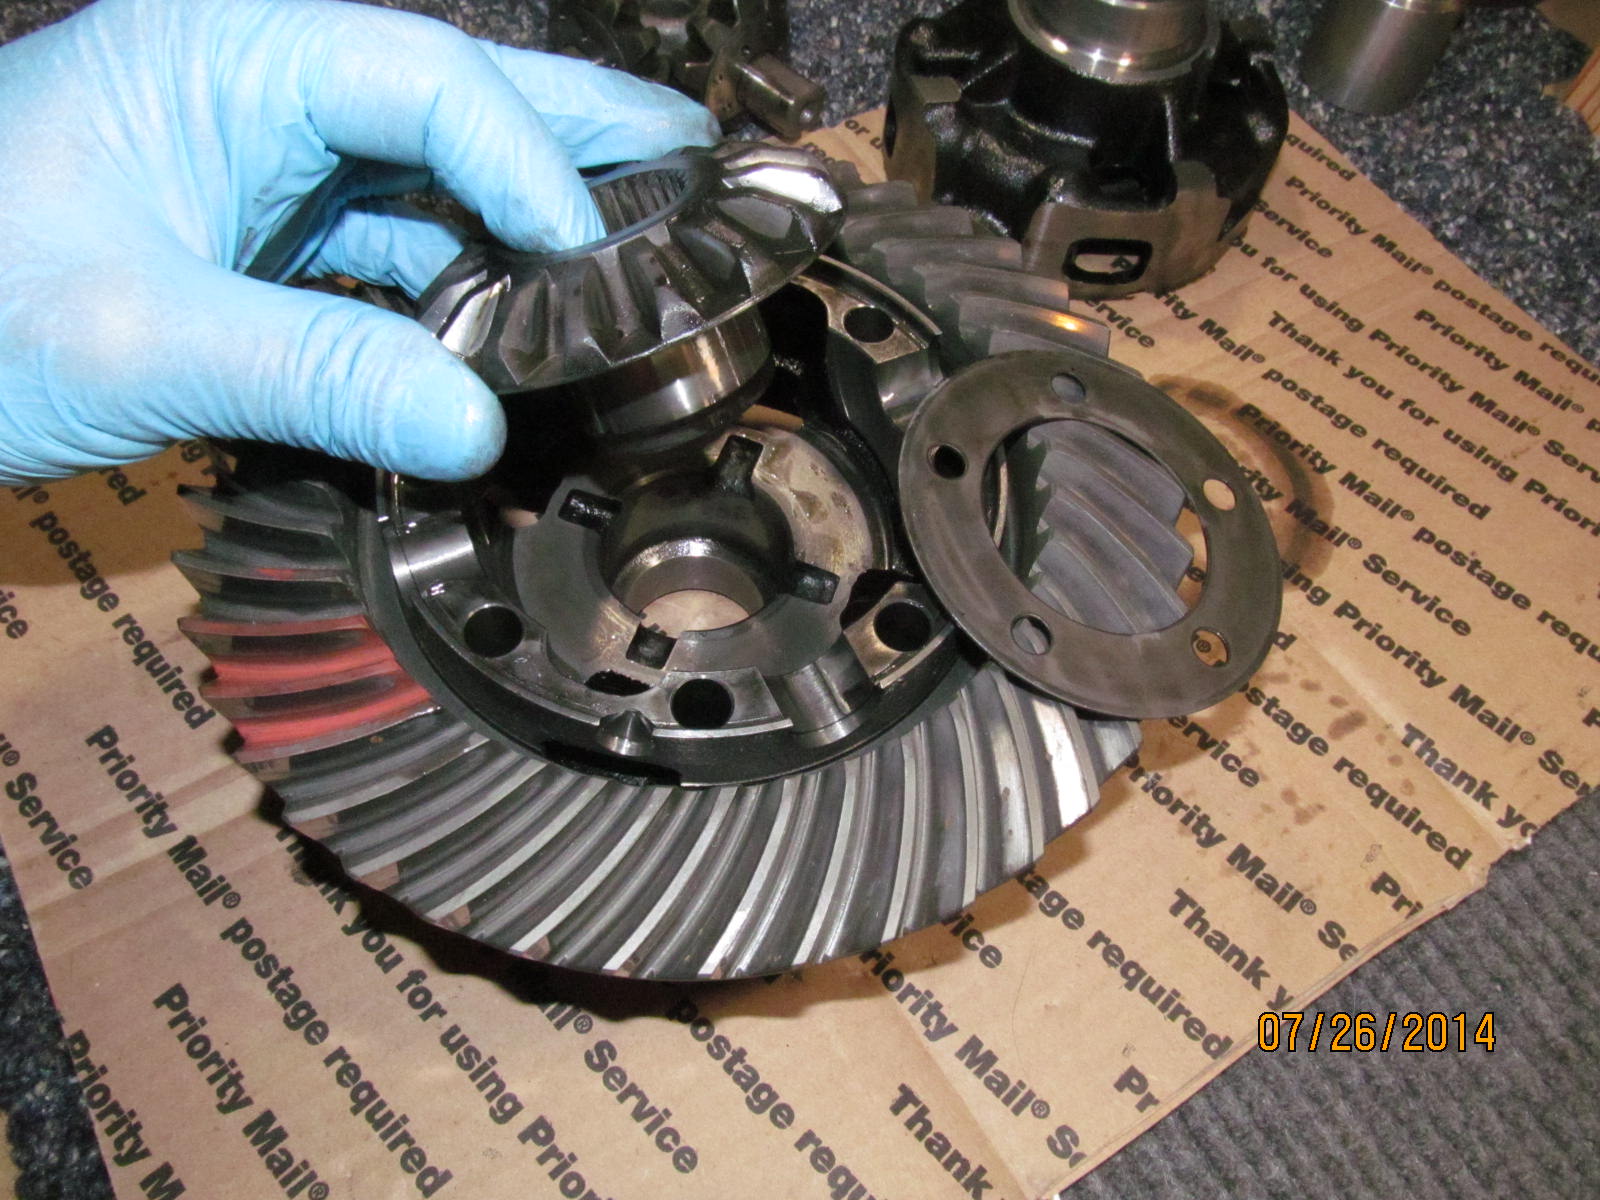
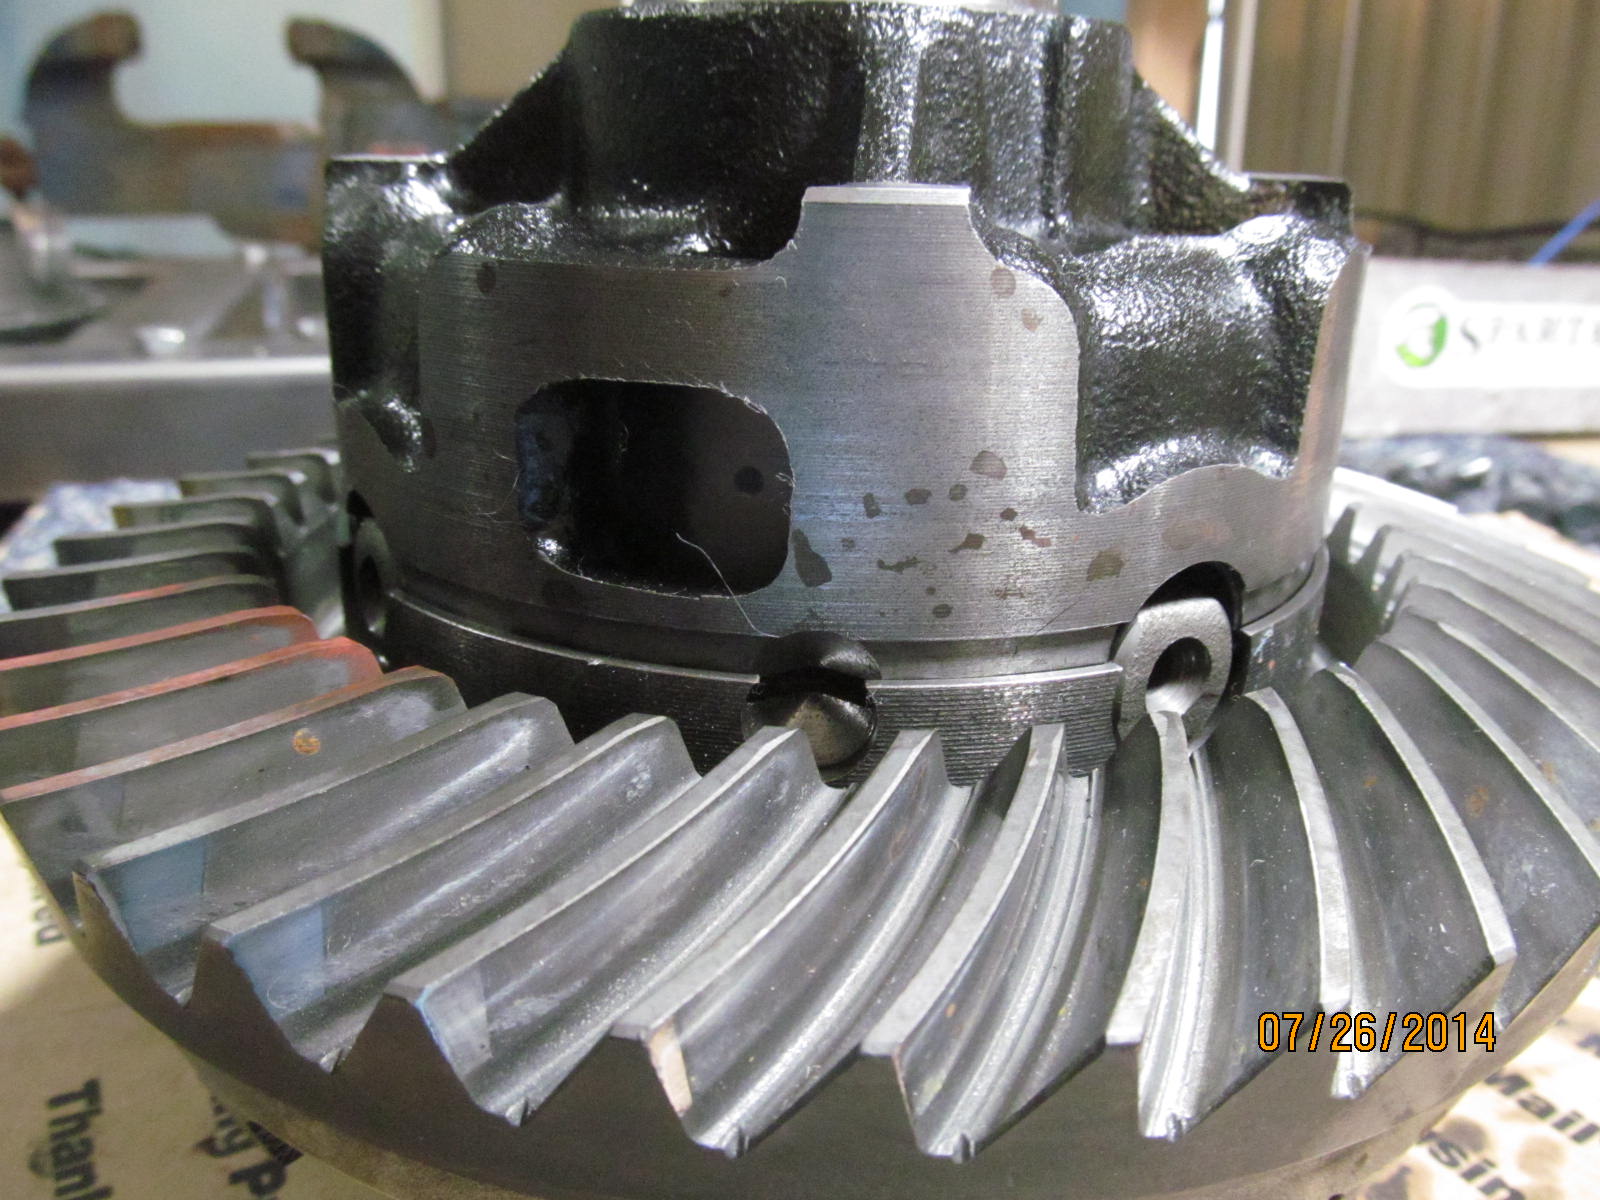
Separate the case halves....4 spiders, 2 sidegears, and a 4-way cross.
|
|
|
|
|
....
|
|
|
|
The thrust washers on the backside of both sidegears are not re-used. Remove them and re-insert the sidegears
into the hole.
|
|
|
|
|
Shear simplicity.
|
|
|
|
|
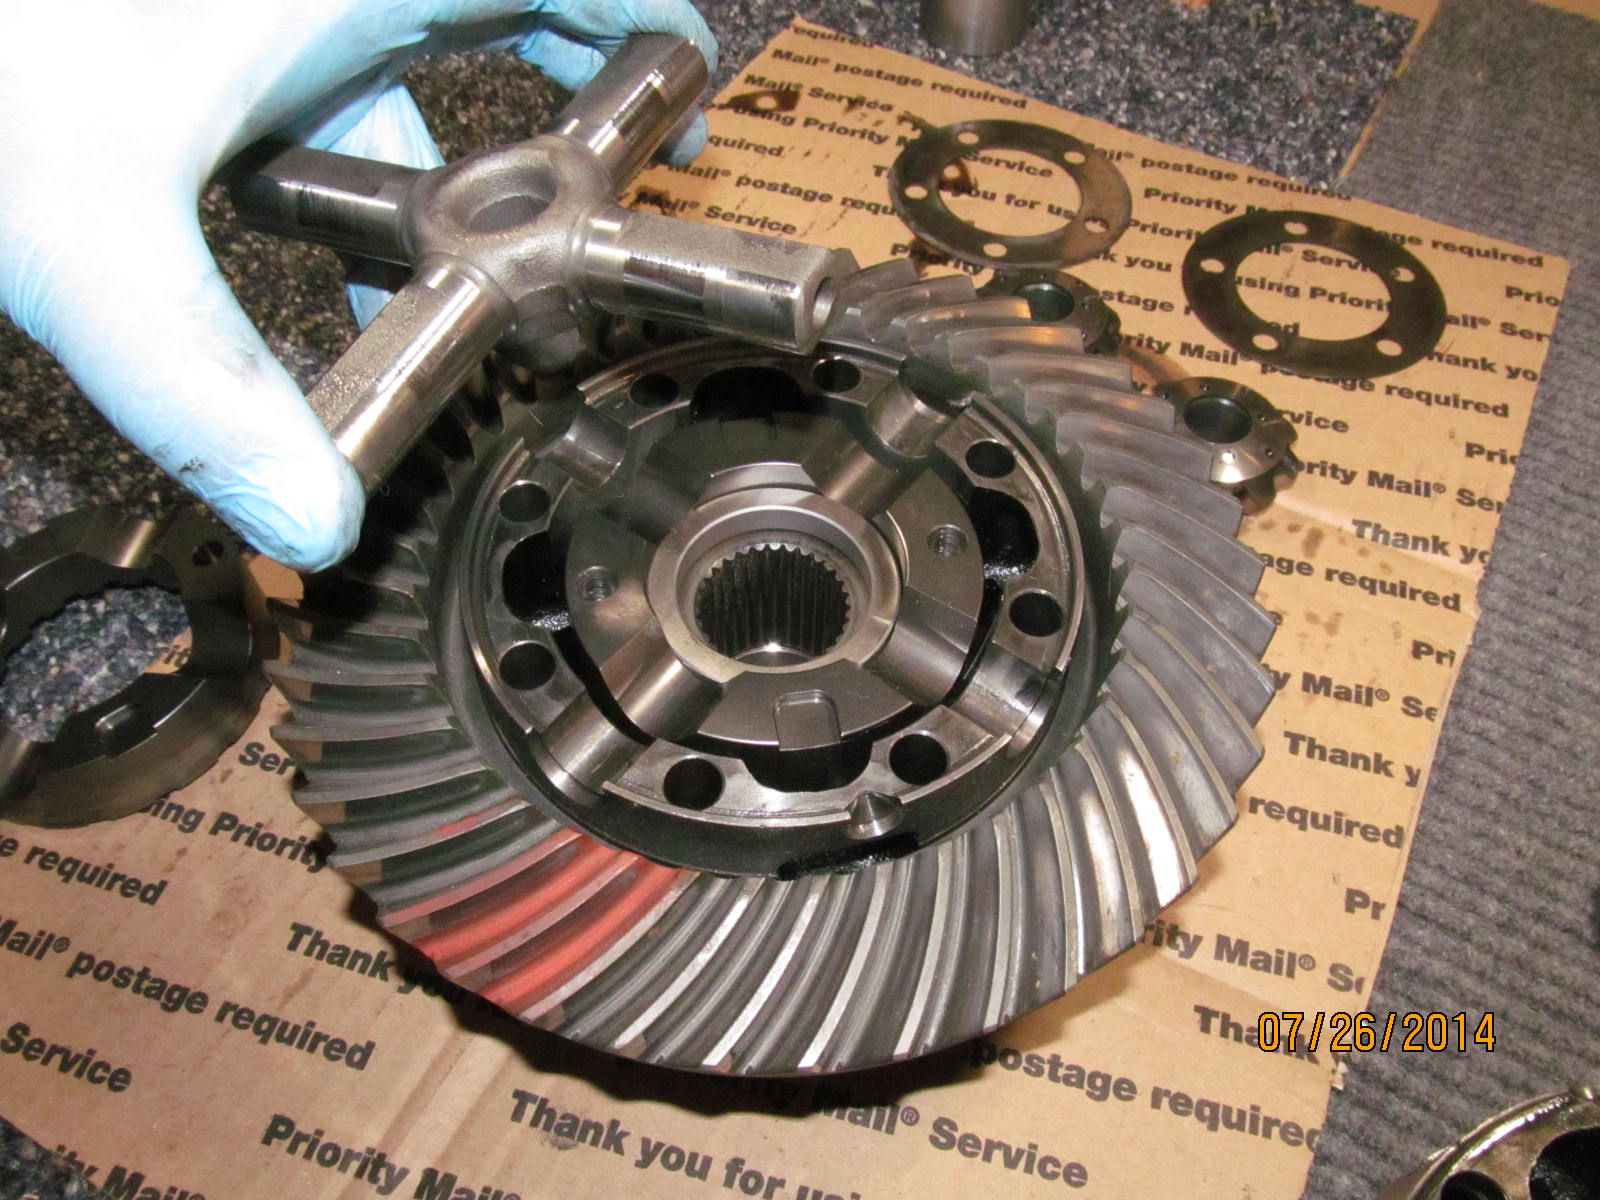
Place a driver and a spacer ring in then load the cross up(no spiders).
|
|
|
|
Place the extra thick pins(largest in the auto-locker industry) and internal springs in the associated drivers
and sandwich it together.
|
|
|

|
|
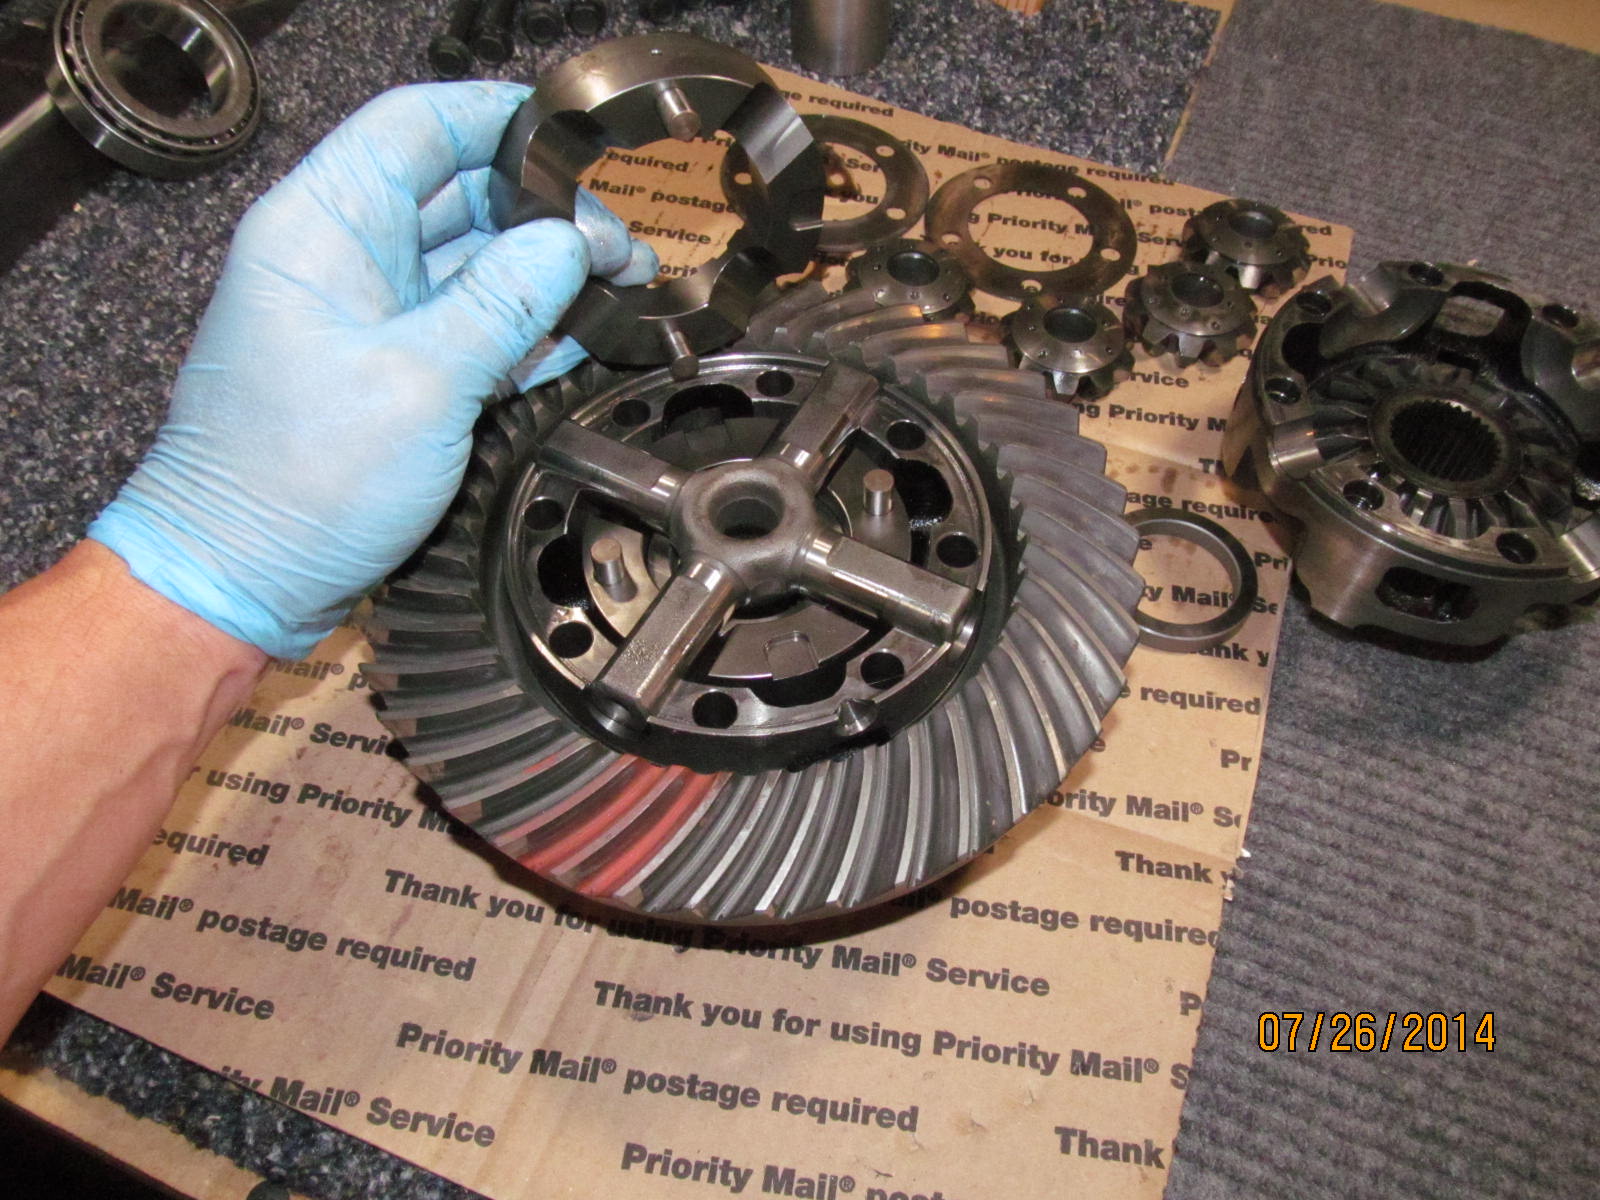
Lastly, the other spacer ring goes on top...
|
|
|
|
|
...then couple up the remaining case half.
|
|
|
|
The 14mm bolts get 40 ft/lb....fsm says 35 but auto lockers strain that compressive bond a bit more so 40 is
a good number.
|
|
|
|
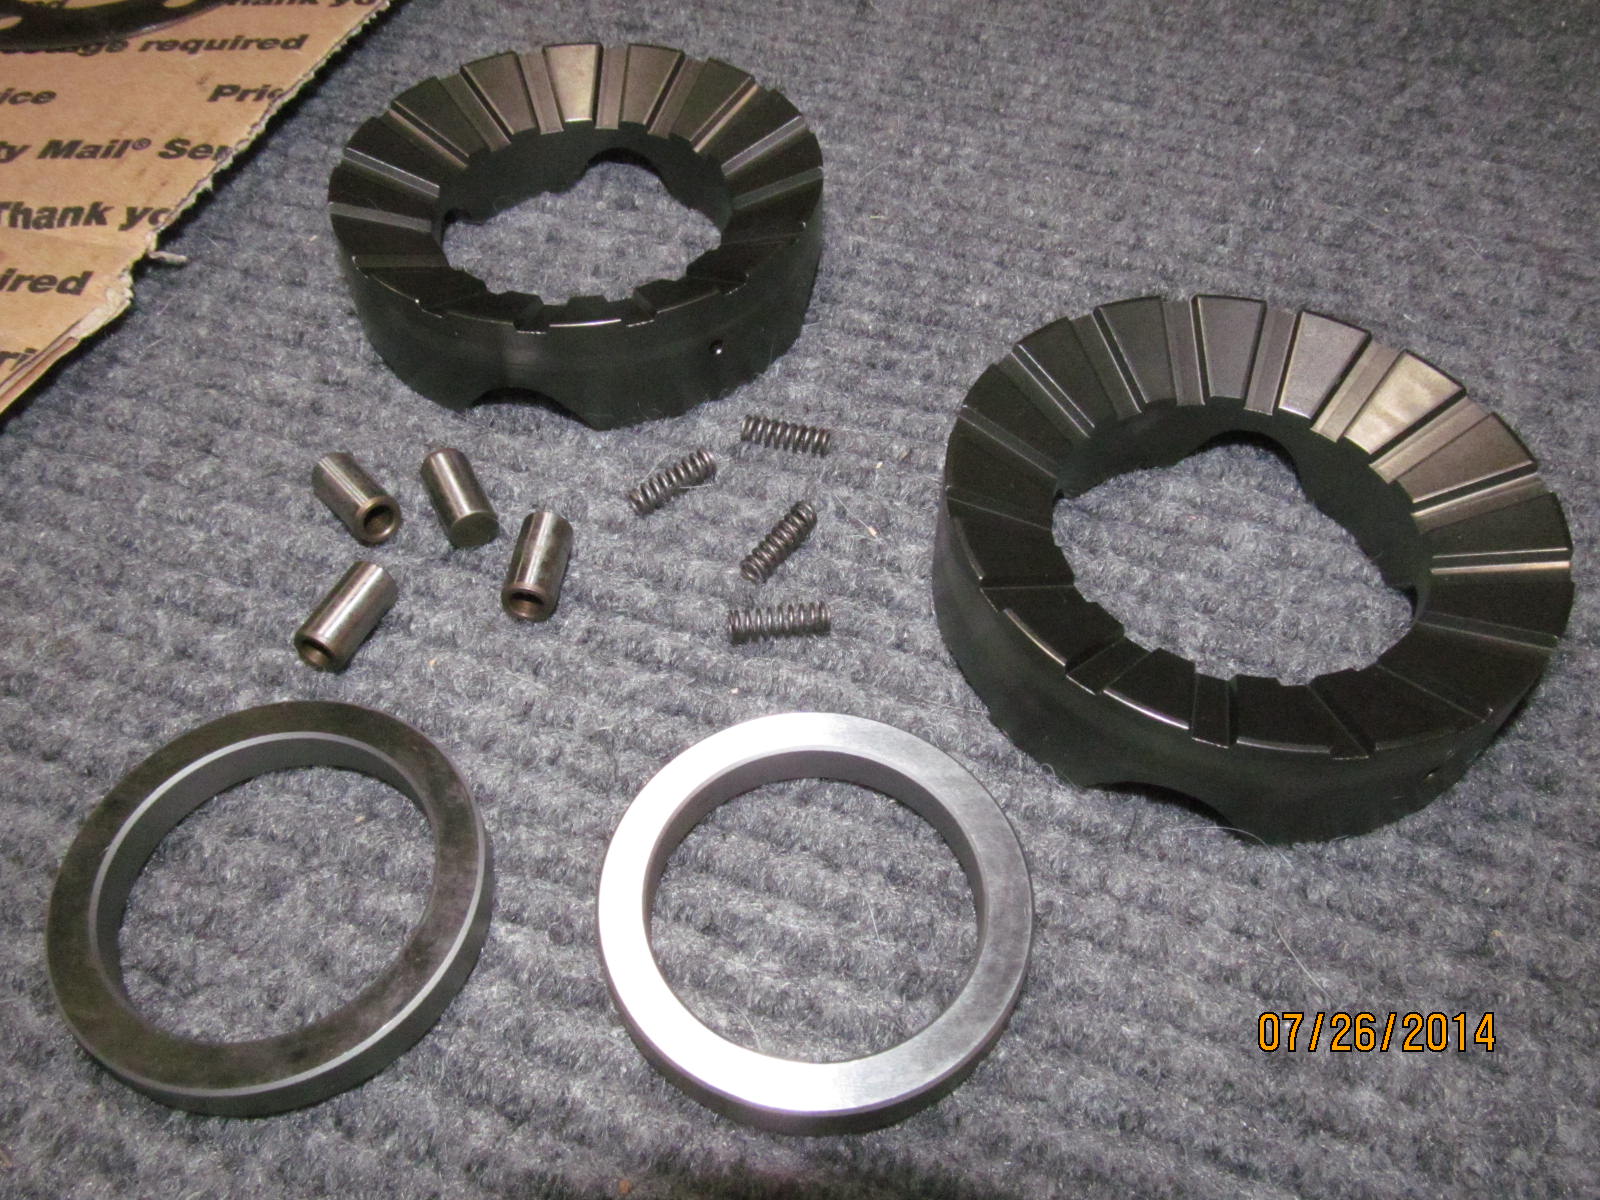
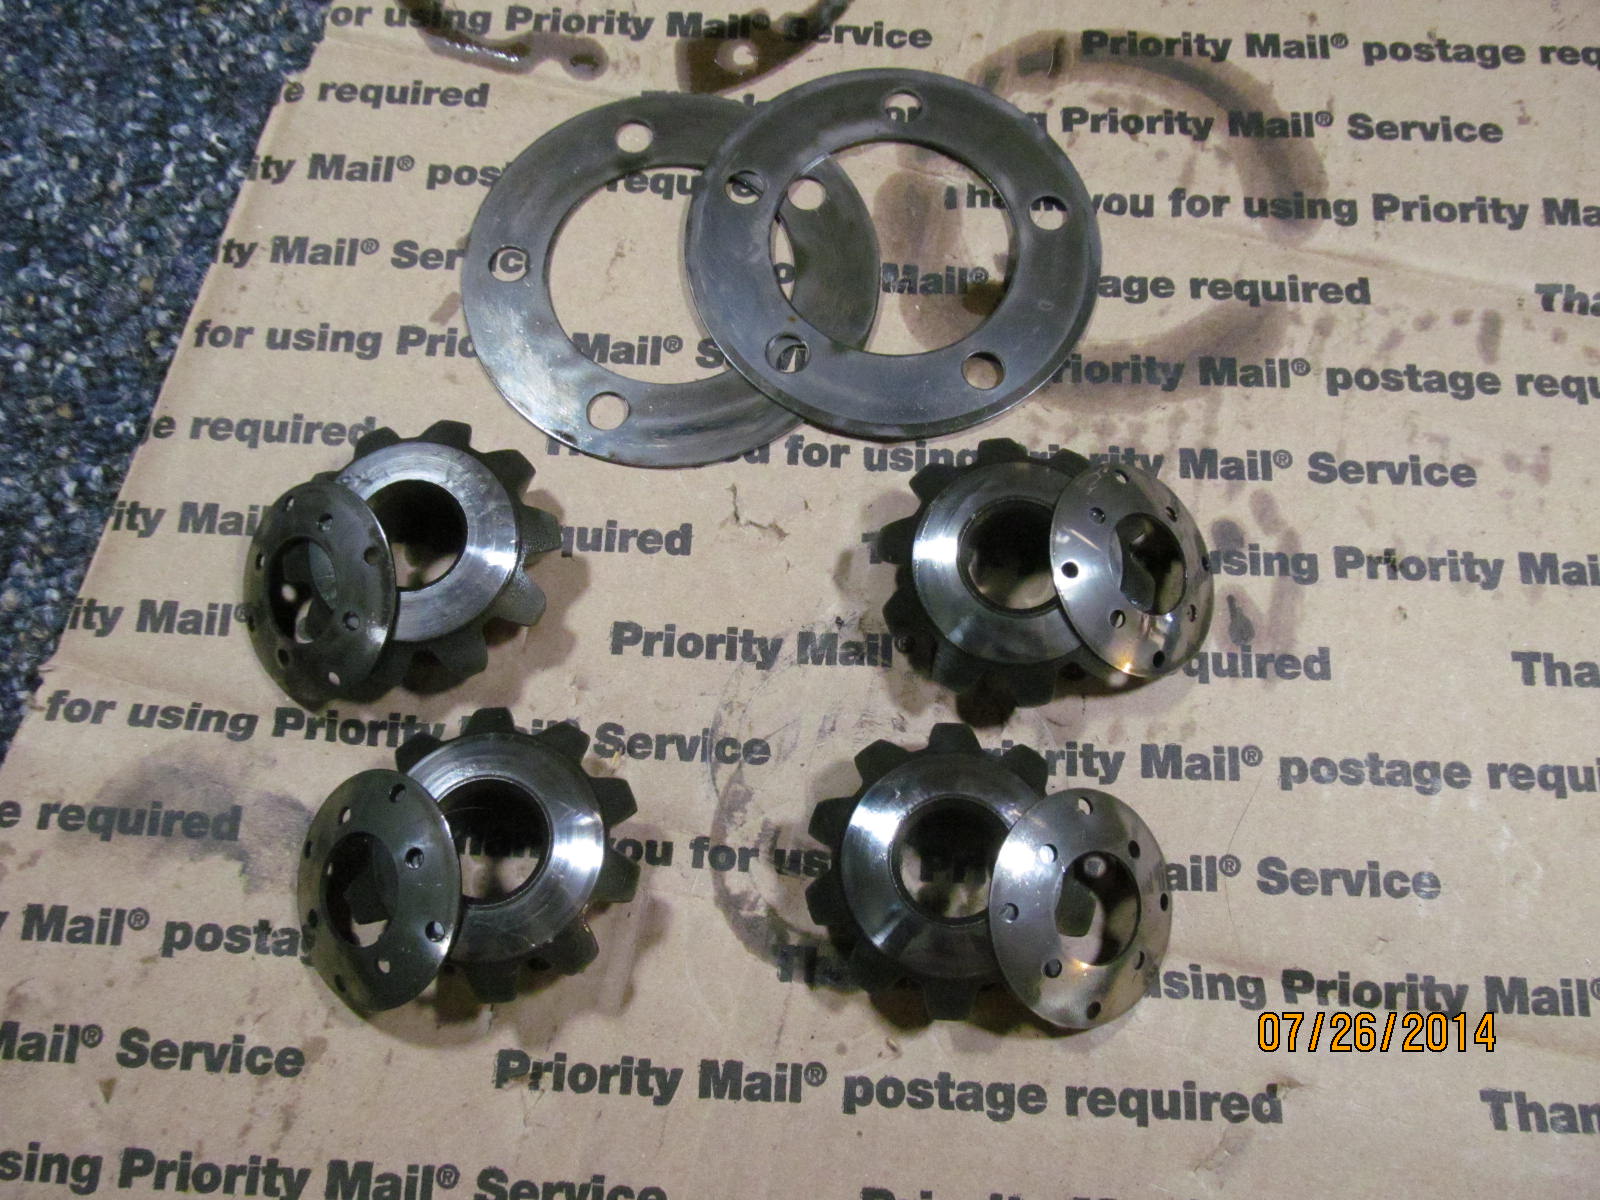
Hopefully, these are the only parts you have left over. Best to probably save them in just case you ever want to
go "open" again....but who in their right mind would ever do that?
|
|
|
|
|
A sleeve lock compound is now used on the 2 journals. It's best to let this set overnight to cure.
|
|
|

|
|
Early the next morning...now to assemble the case end and pattern check it.
|
|
|
|
If the threads are properly lined up then the rubber end of a hammer will result in a
nice, solid SNAP! engagement sound.
|
|
|
|
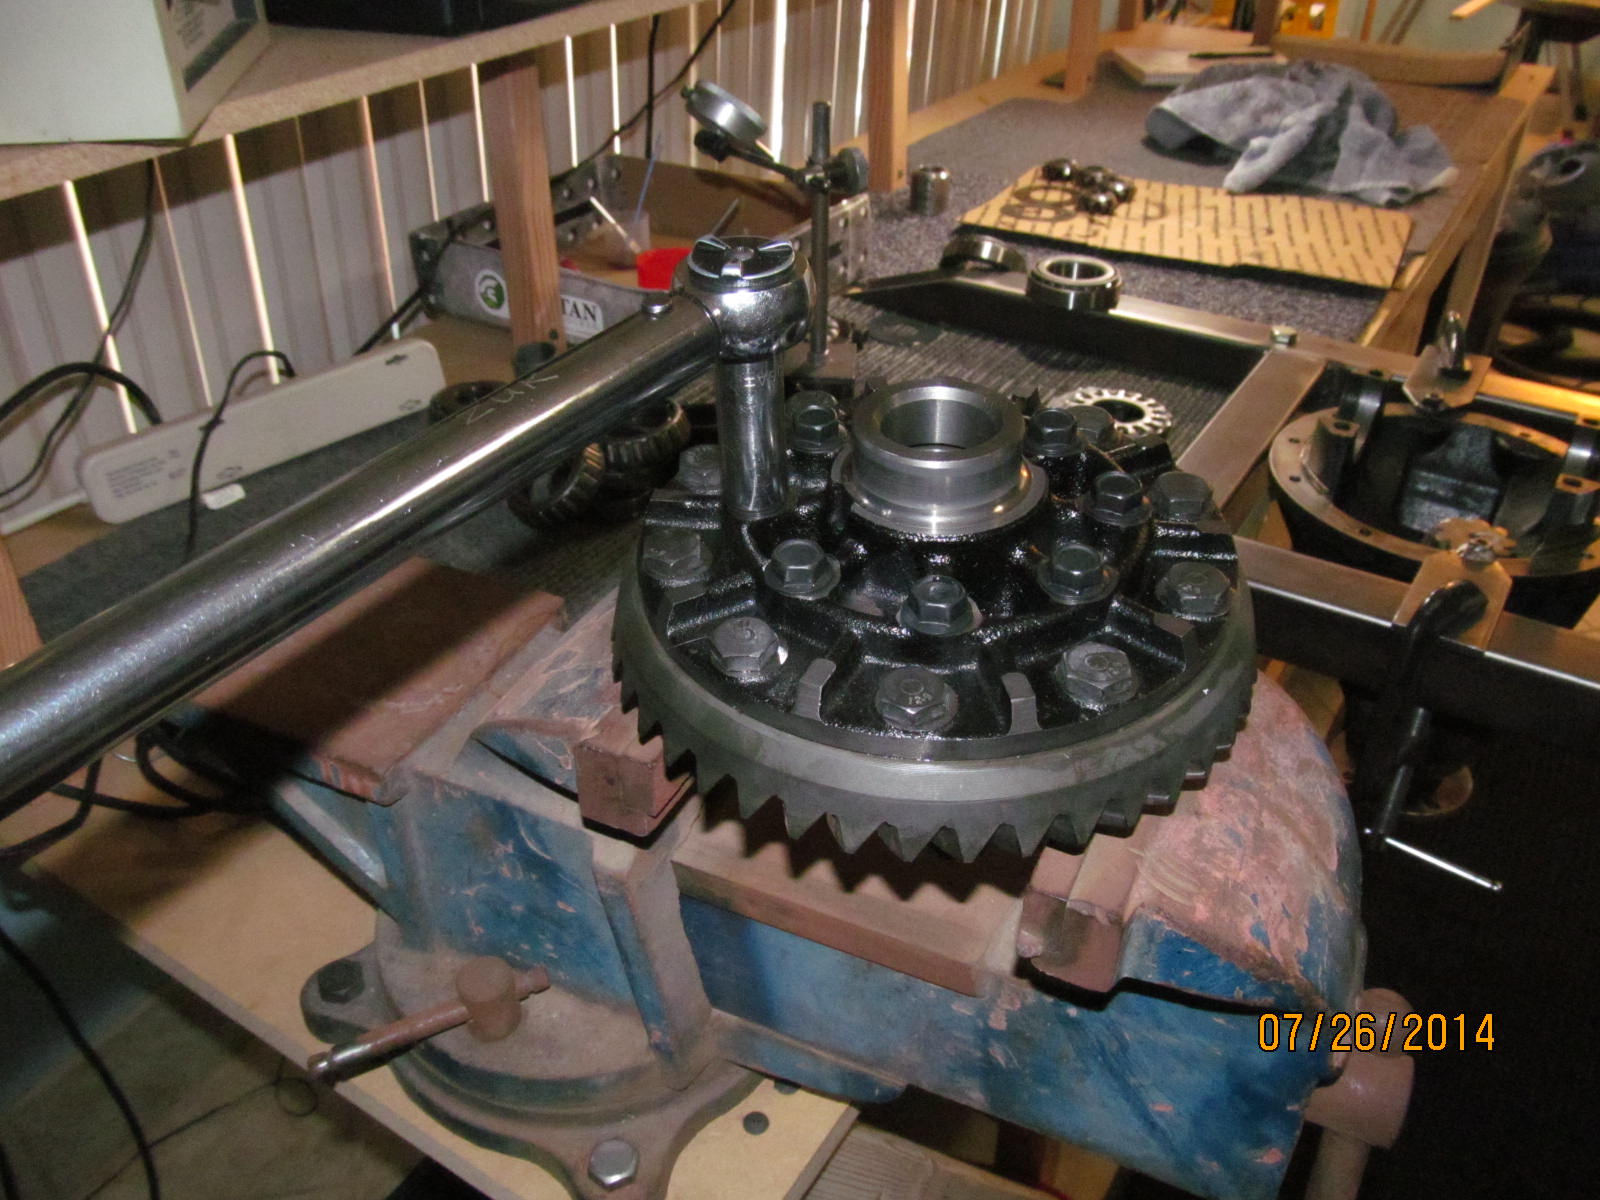
Dial in some some cbpl and set the backlash to approximately .007".....not mandatory to be exact as this is a
casual pattern check.
|
|
|
|
|
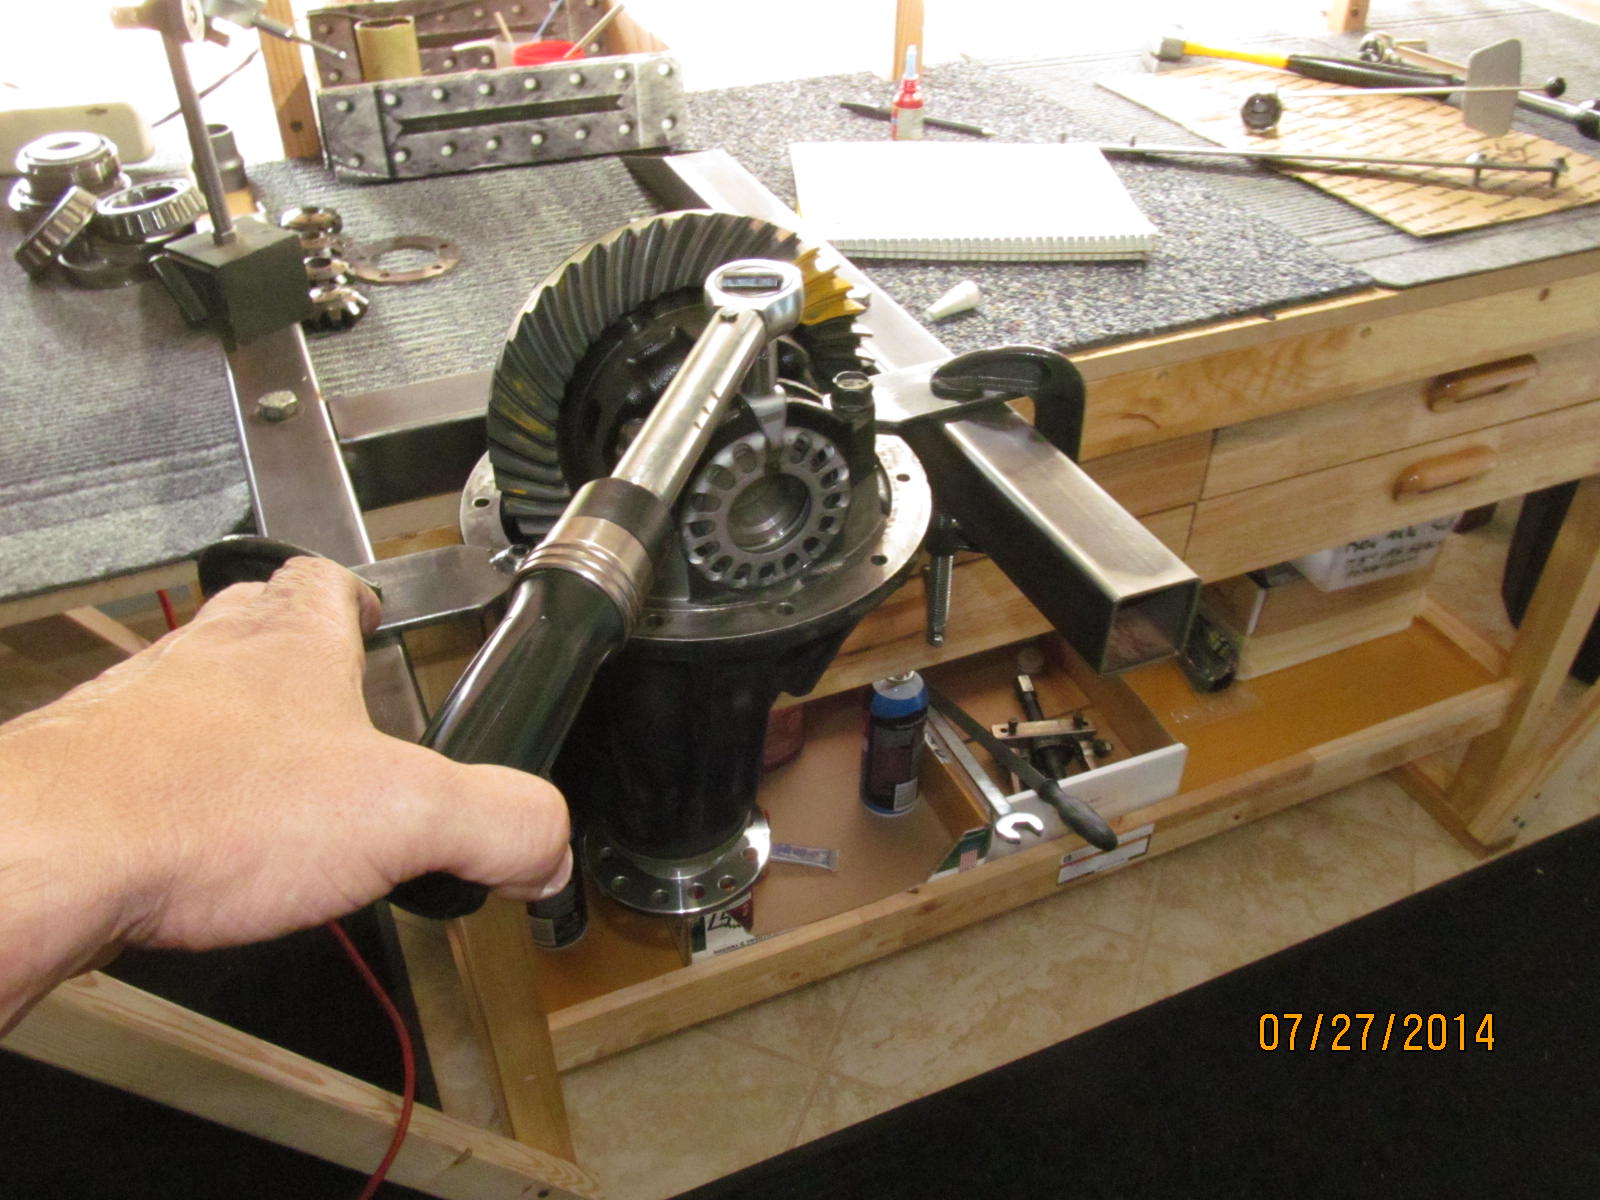
Grab the pinion end with a rag and turn the ring gear back and forth 3 times.
|
|
|
|
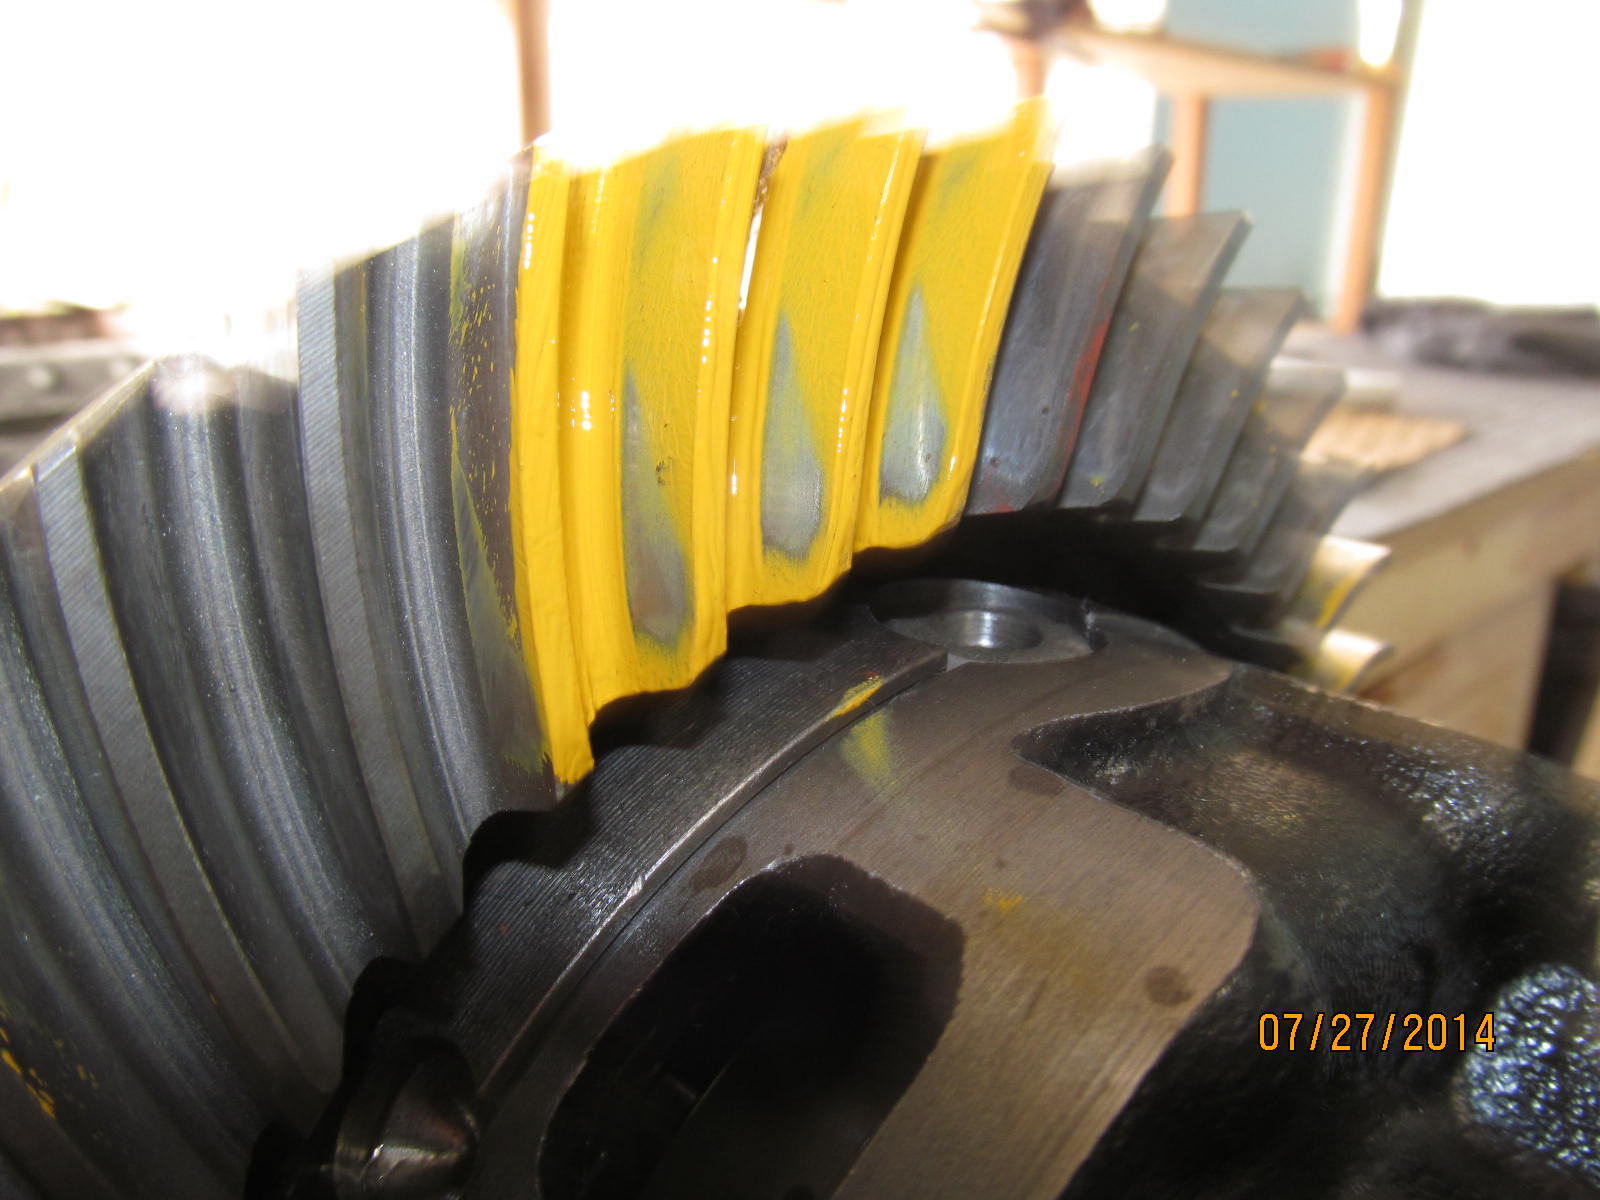
Drive---the wobbly pinion has caused some out of place wear. Heavy toe and a missing piece of the pattern....even
with new bearings and proper specs to set to, there may be a small amount of noise...noise that may also
disappear with time.
|
|
|

|
|
Coast looks great.
|
|
|
|
|
Now to disassemble it one last time.
|
|
|
|
|
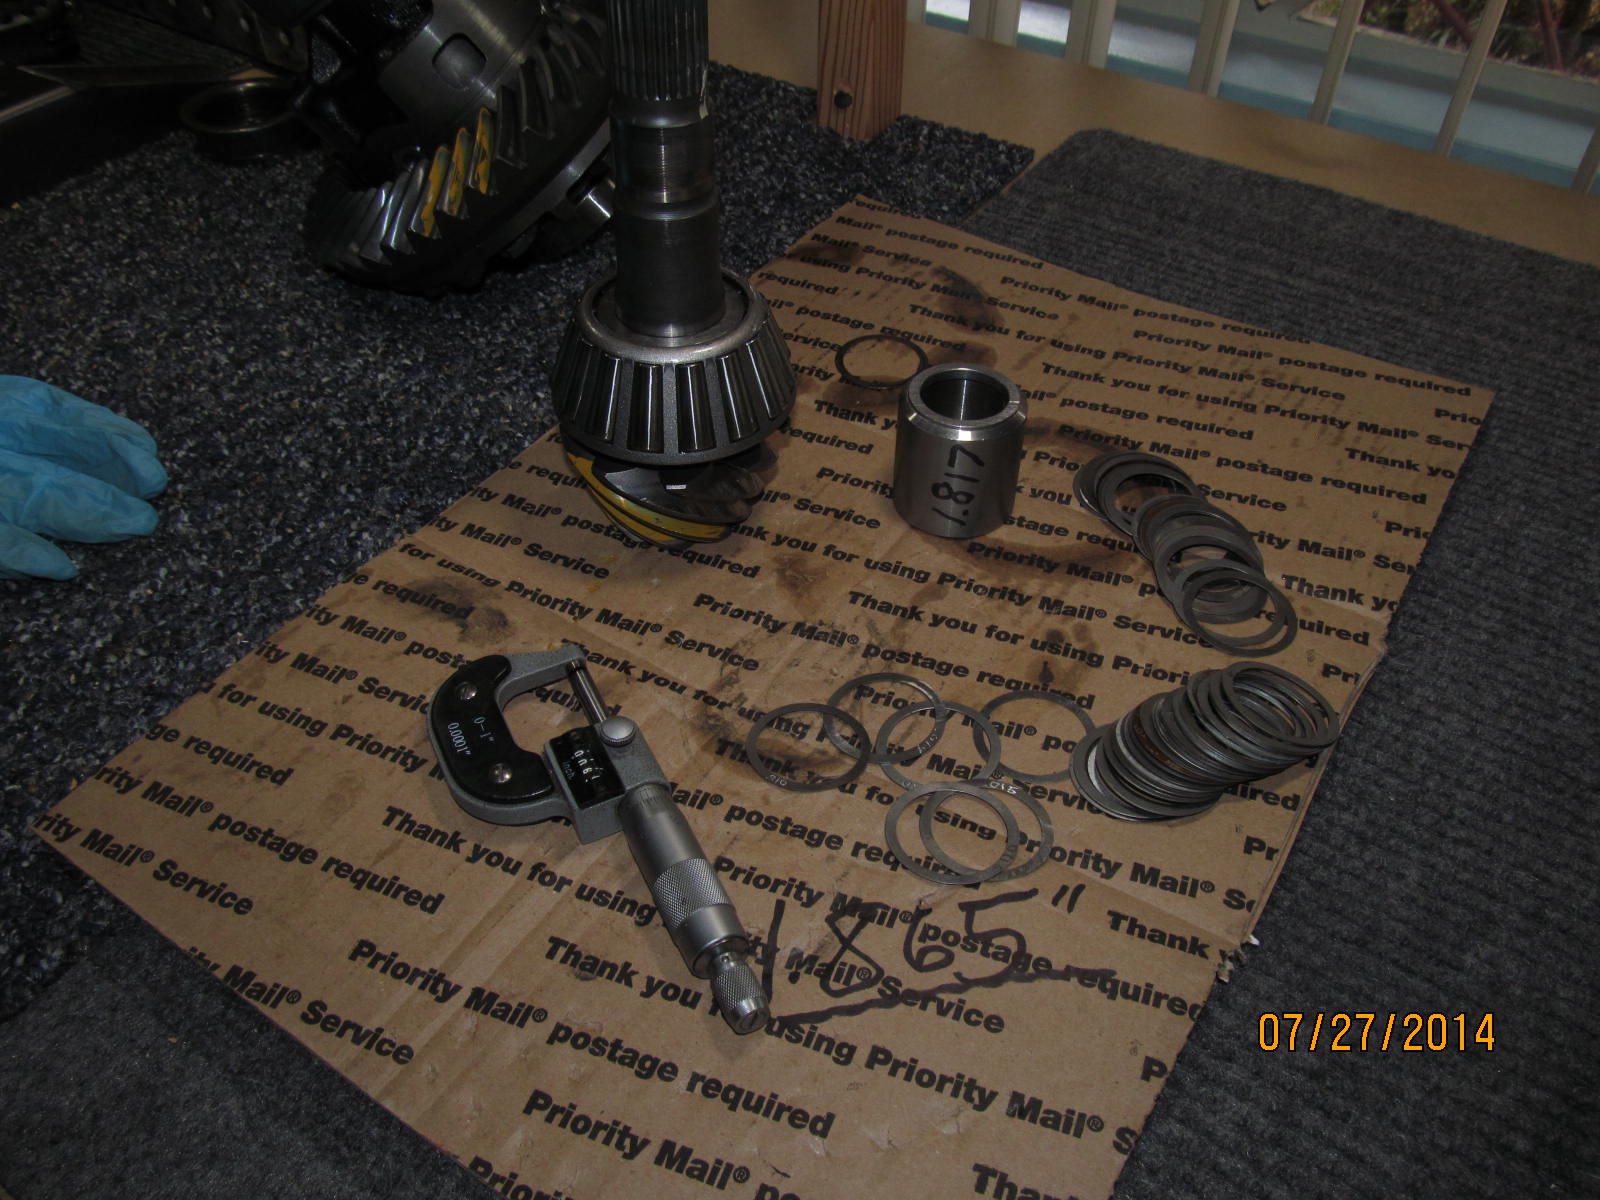
Solid collar now goes in. I know it should be roughly 1.865" total length(shims plus collar).
|
|
|

|
So, if I use a 015" plus 015" plus 019" shim then that means the total length of collar plus shims
will be 1.866" in this case...
|
|
|
|
|
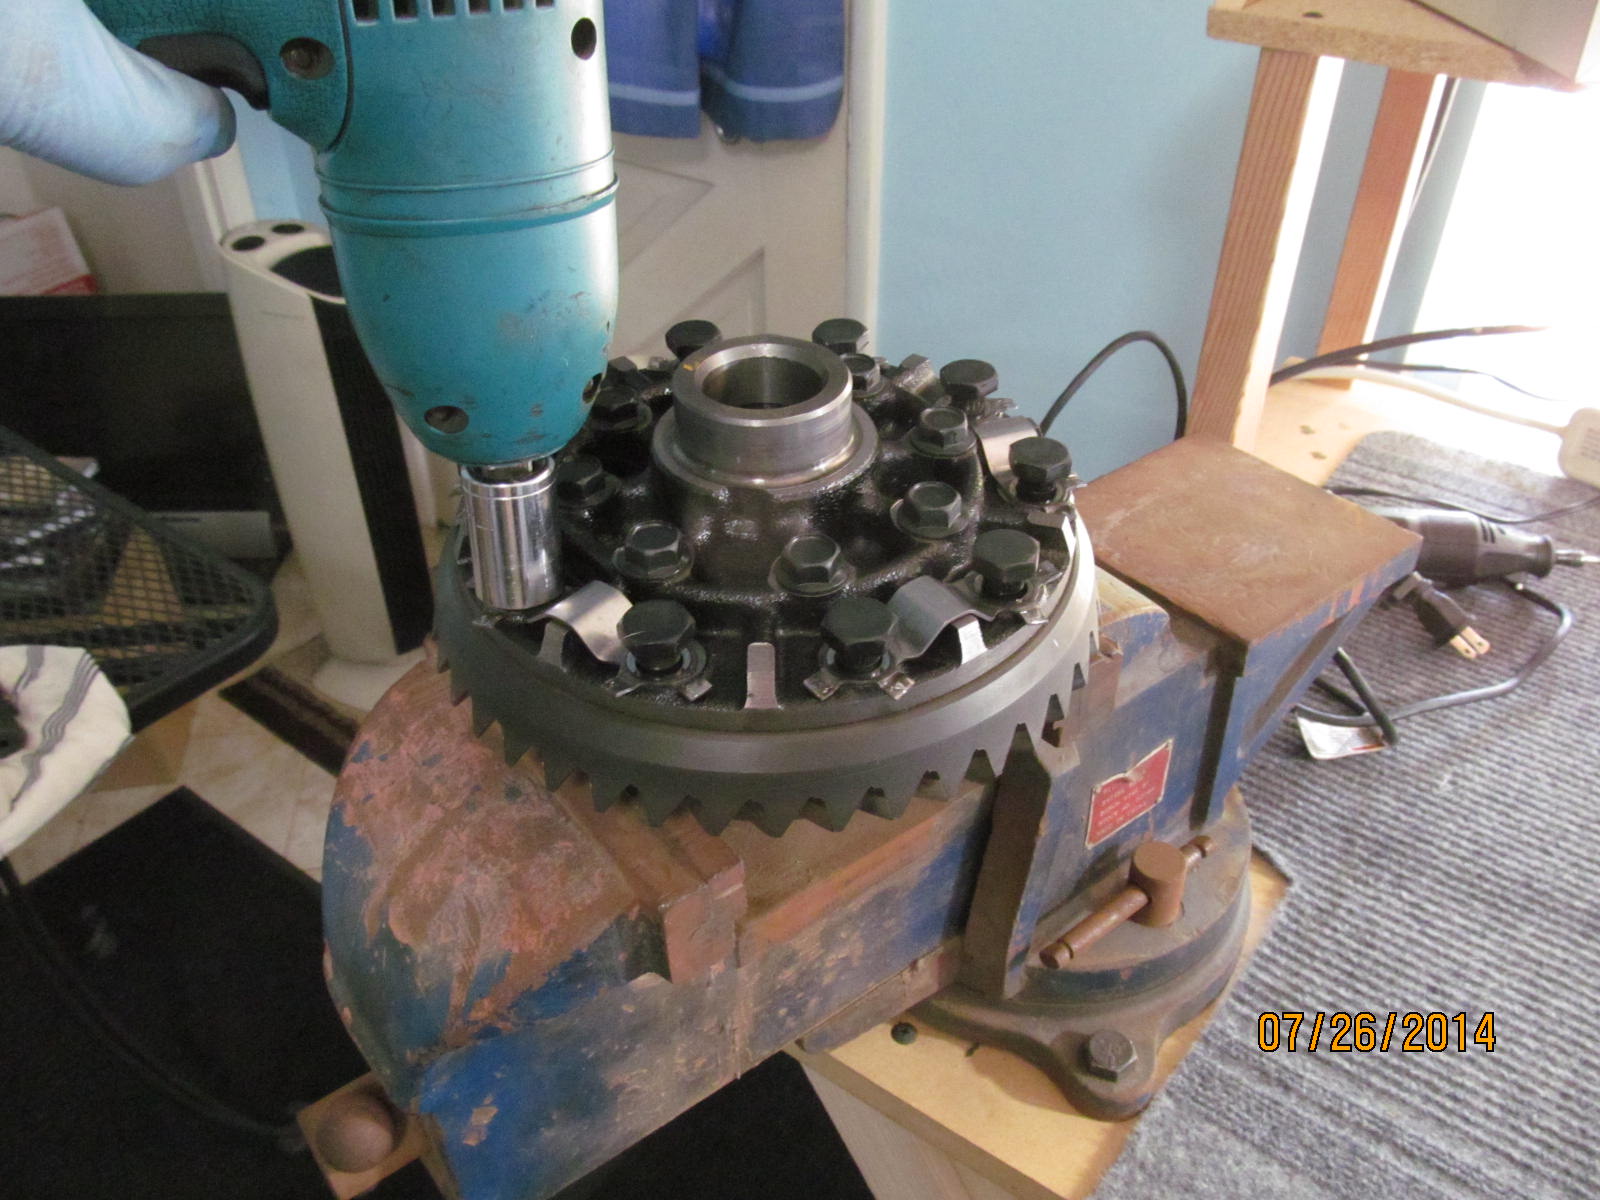
Re-assemble and tighten good with the electric impact only.
|
|
|
|
|
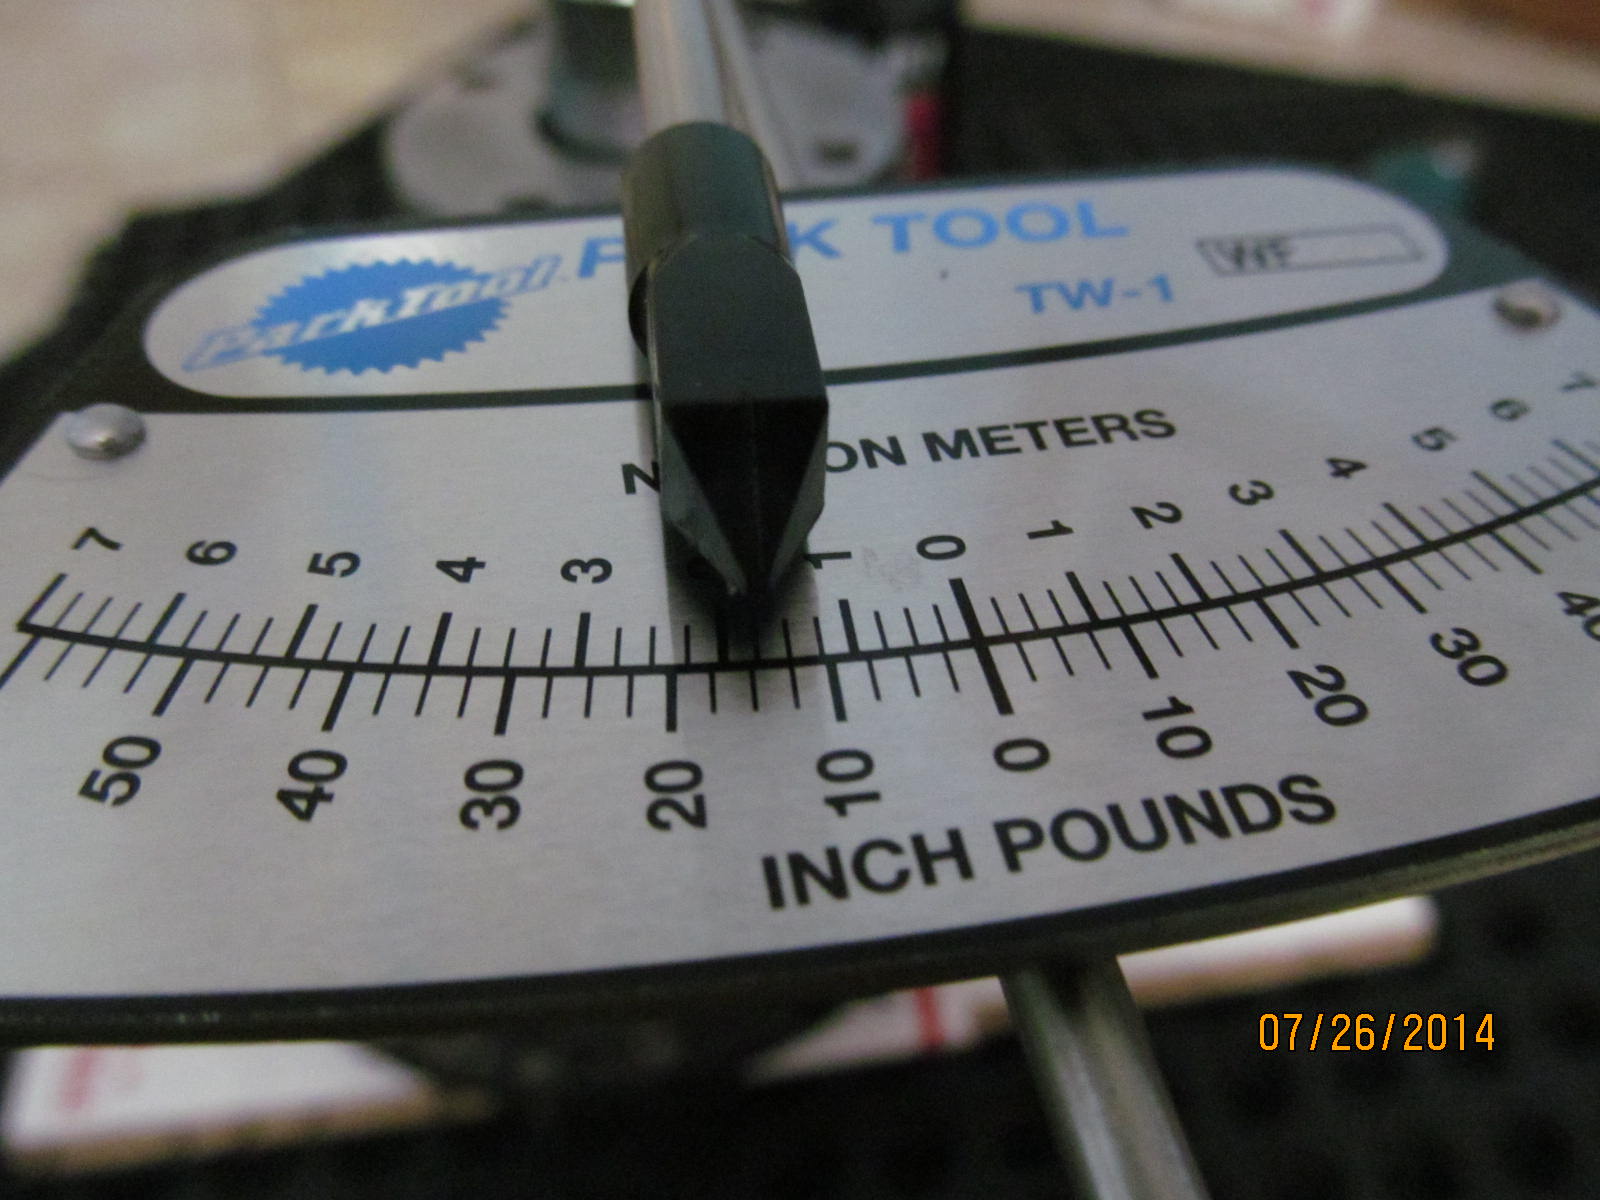
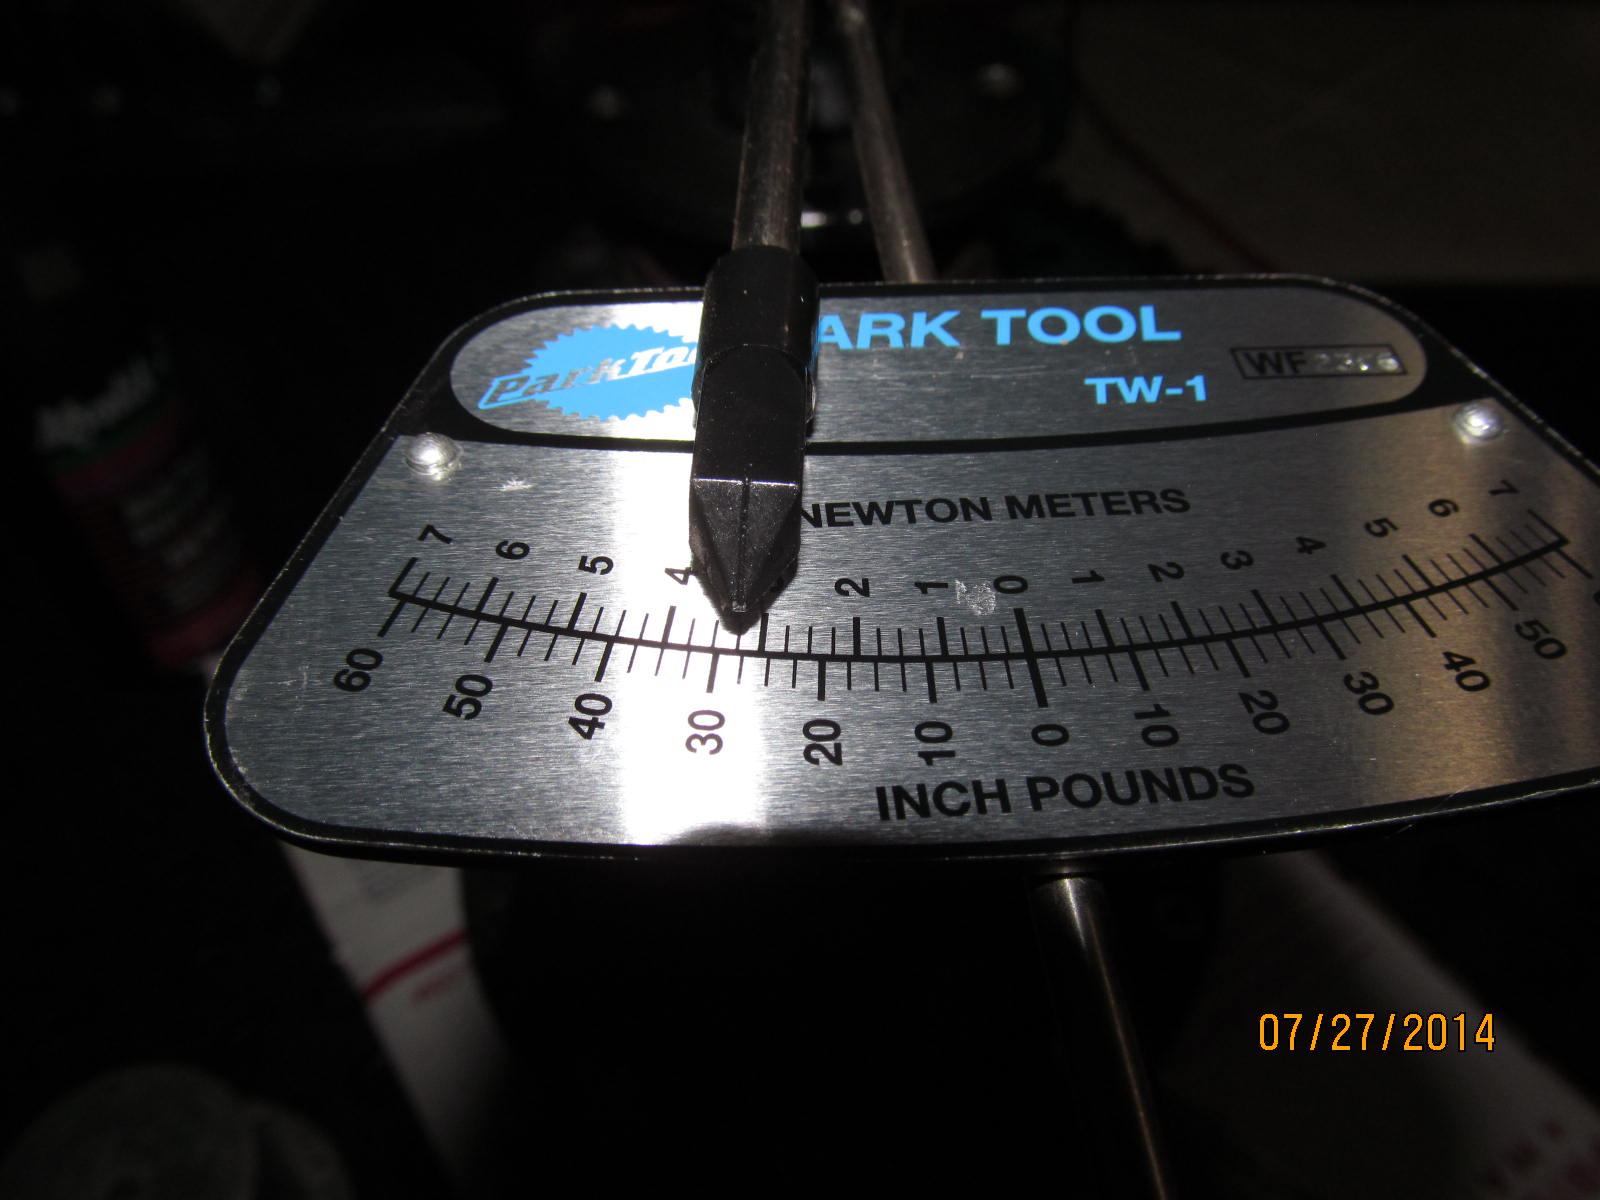
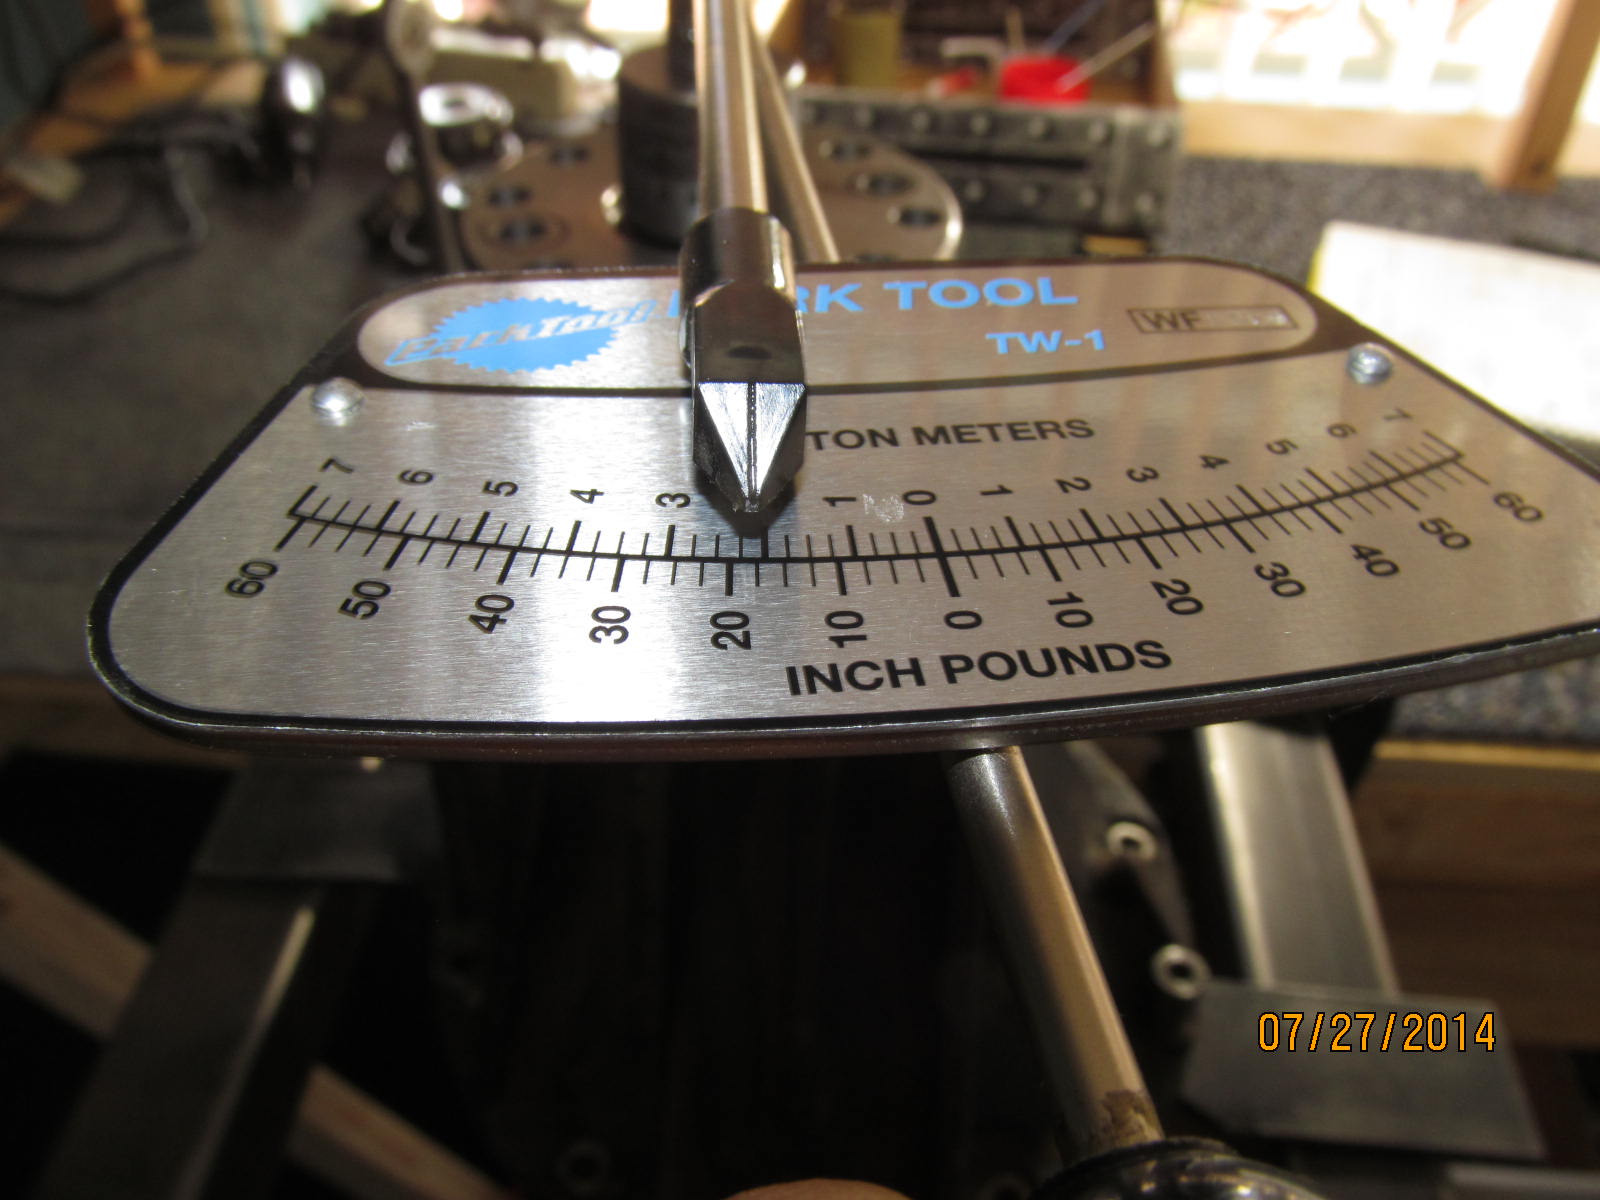
I thought it might be too loose....instead, it's too tight at 30 inch-pounds.
|
|
|

|
Take it all apart and remove a .015" shim and add a .019" shim in its place. Re-assemble and YES. Success on the
second try....not bad. Explaining that more, I mean that on the 2nd try, with the extra .004" thicker shim, I
measured a PPL of 0 or 1 inch/pound but I also know if I use my cheater bar I can tighten the solid collar
even more and, due to the compressive nature of the collars, means I can dial in my PPL to the 11 in/pound spec.
|
|
|
|
|
Now to install the new seal. But before I do....
|
|
|
|
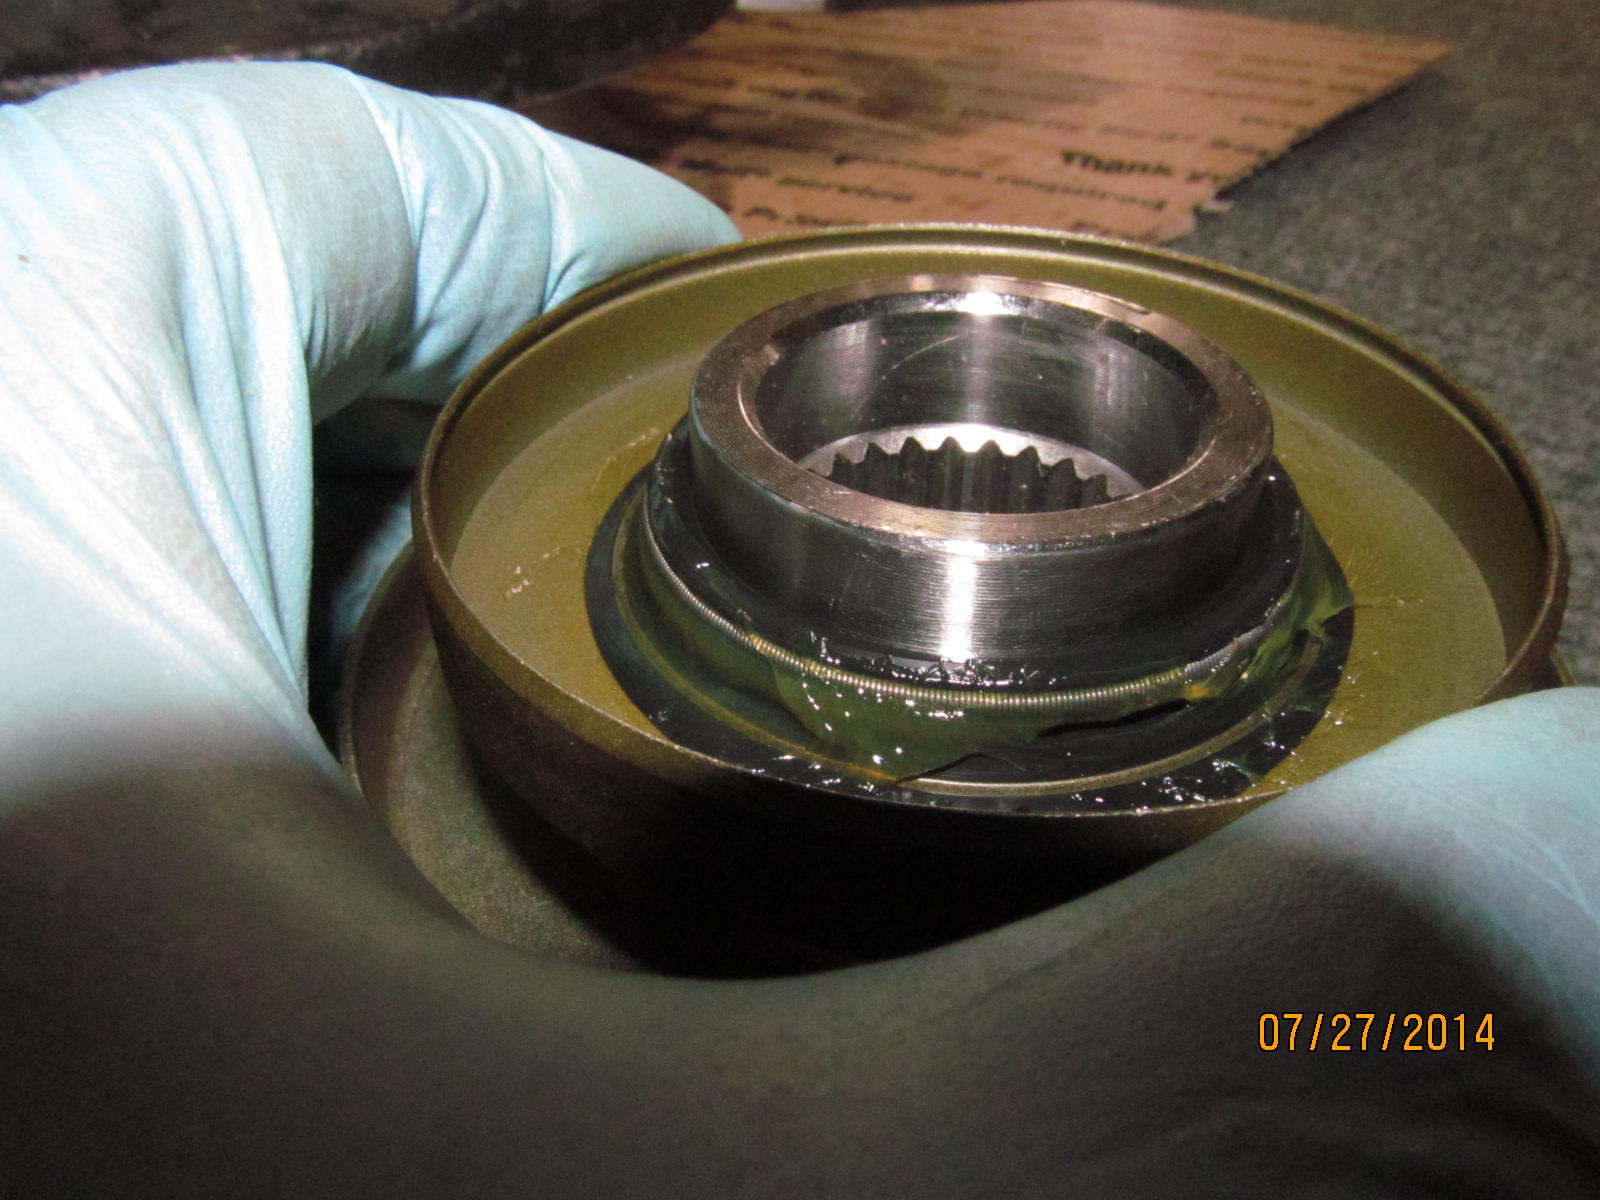
....let's check the lip fit on the new flange. Slips on with good tension....rolls the lip over that the garter
spring is clamping very nicely. All is good.
|
|
|
|
|
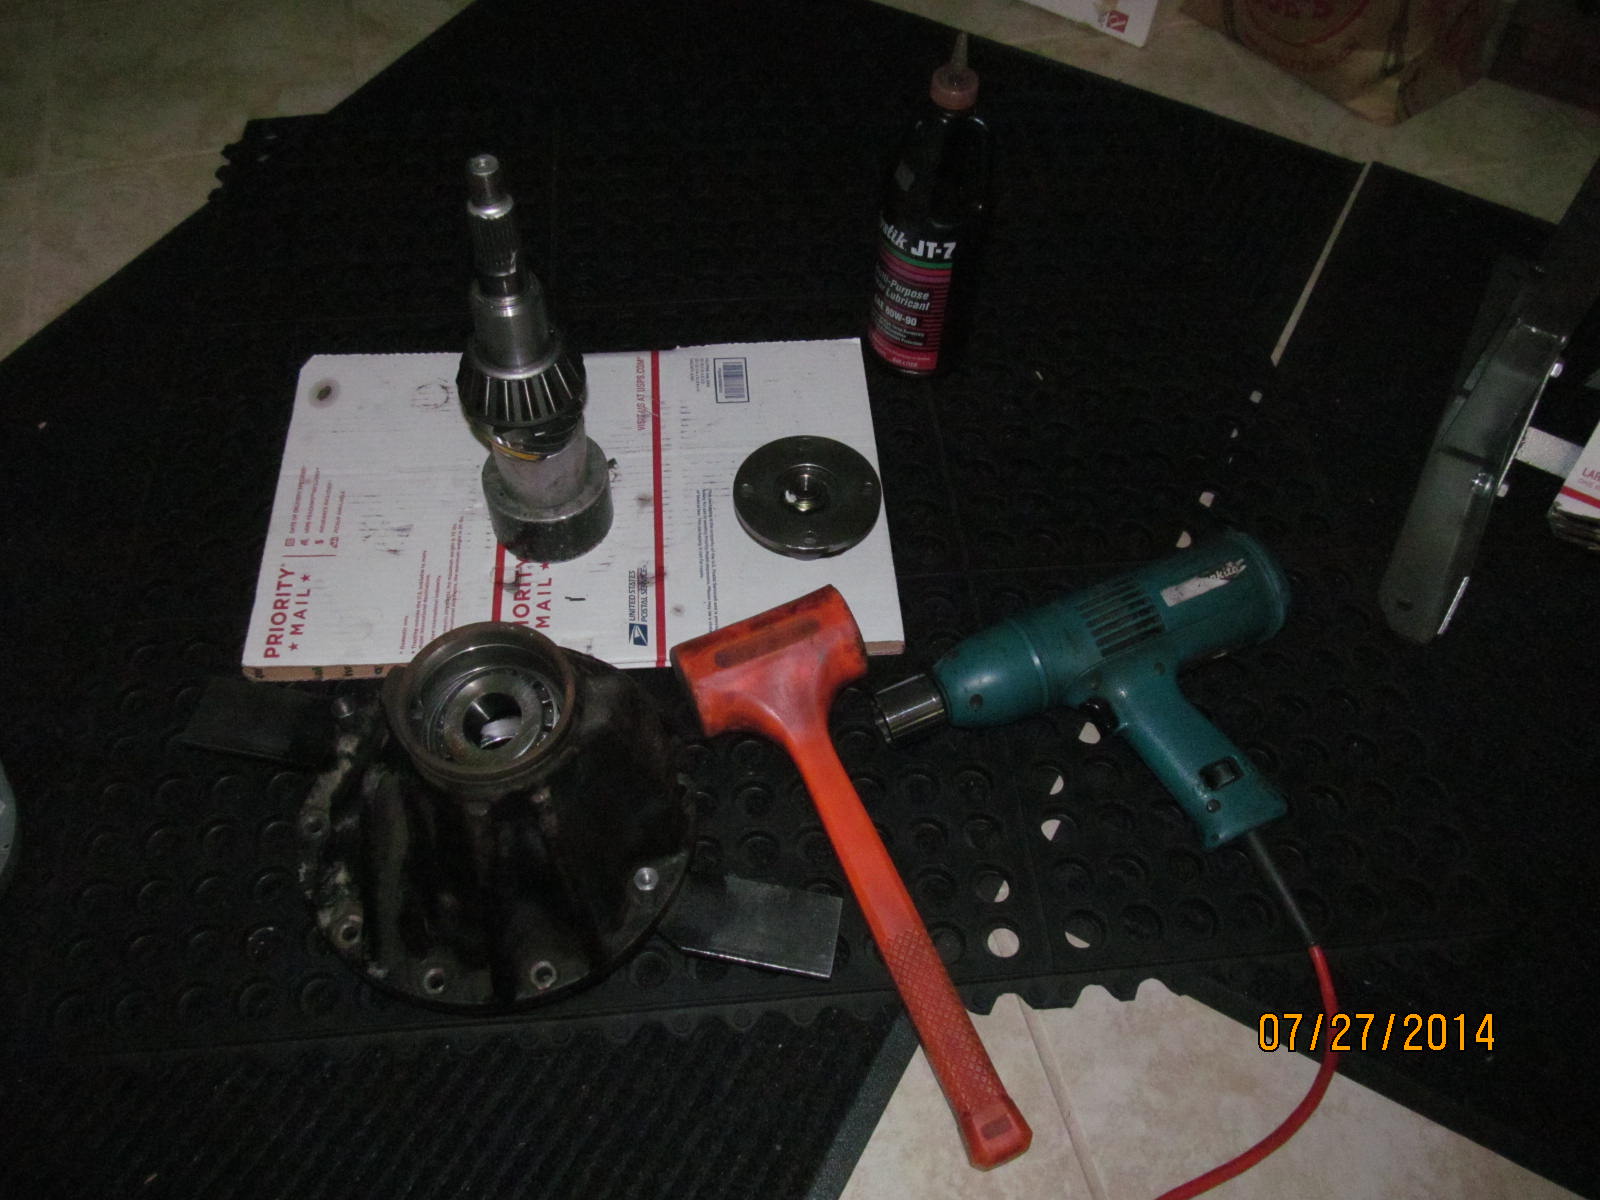
Smack the seal down with my patented seal installer.
|
|
|
|
|
Then I might use another "just right" diameter race to tap the seal down another 1 or 2mm per fsm specs.
|
|
|
|
|
.....
|
|
|
|
Checking to make sure a garter spring did not pop off....and all is good here. The grease is good insurance
that the garter will stay in place.
|
|
|
|
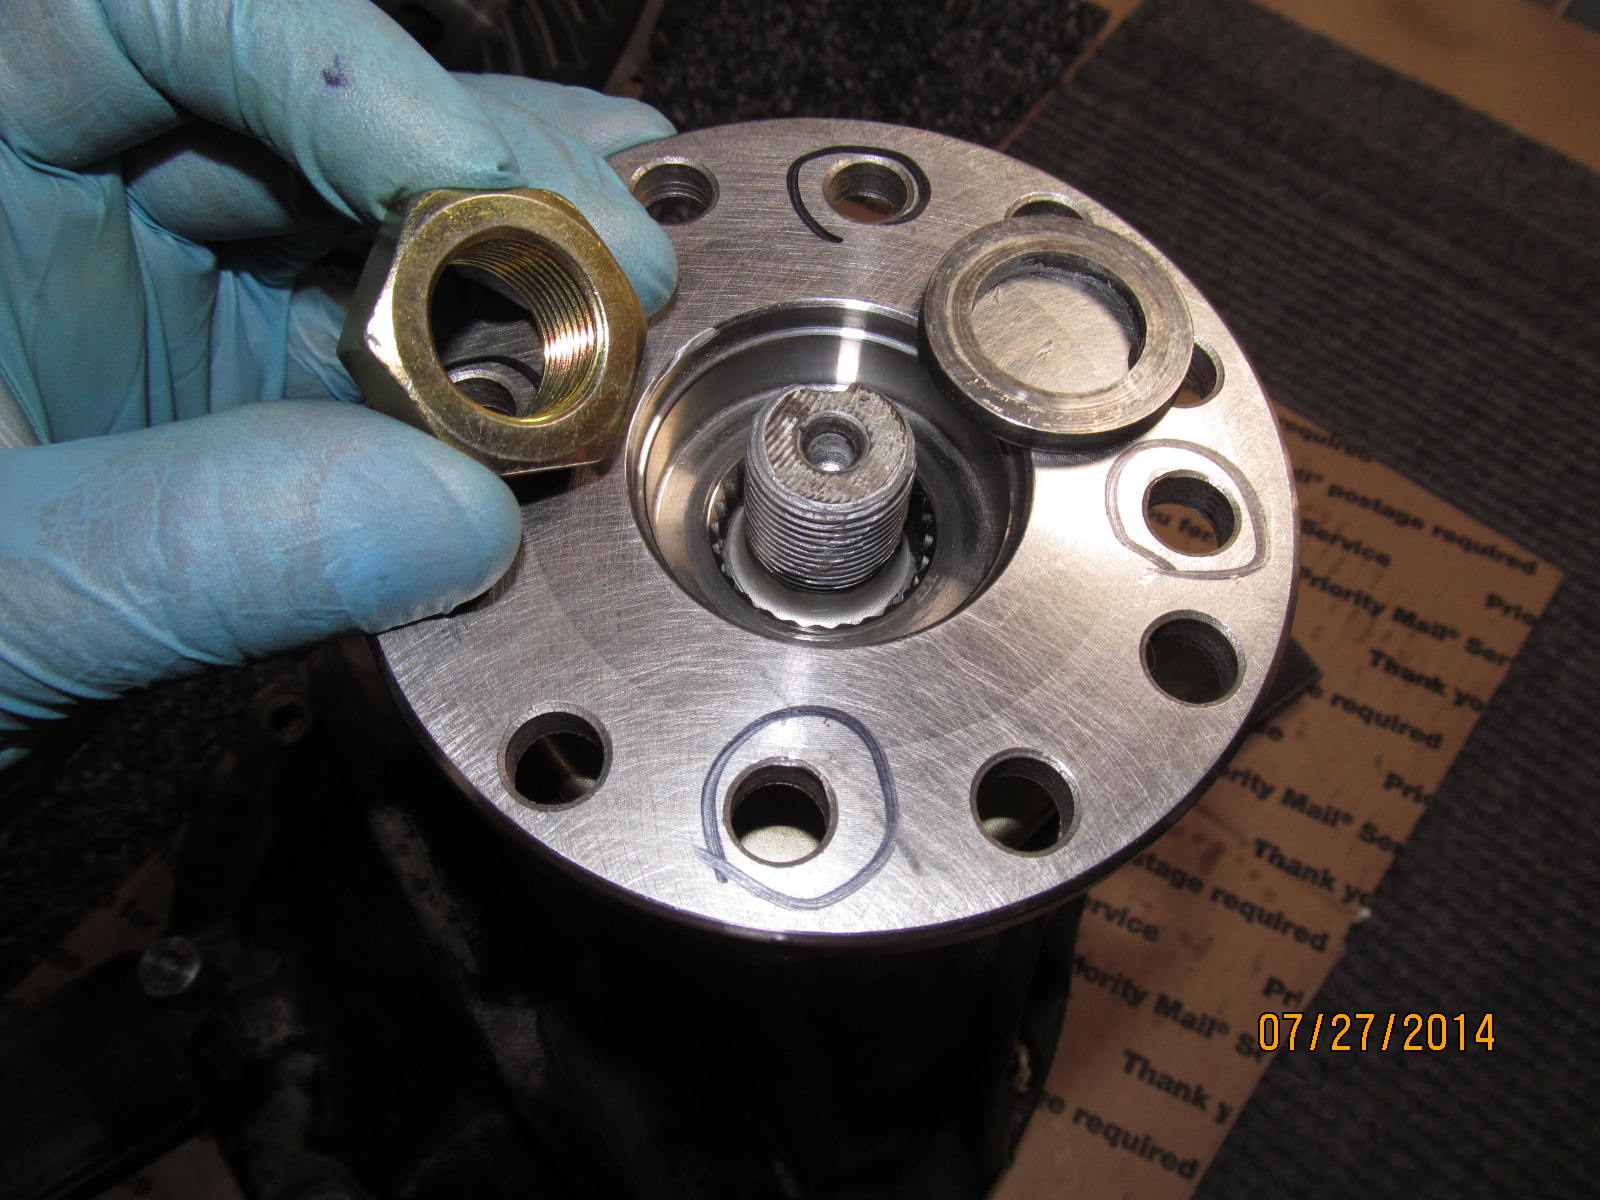
Because of the small shoulder surface of the nut, a good hardened OEM pinion washer must be used. Also, I am
using aluminum based anti-seize on the pinion threads.
|
|
|
|
|
I made it to 190 ft/lbs....
|
|
|
|
|
....to get a final pinion preload reading of 11 in/lb.
|
|
|
|
|
Ding the nut and it will always stay tight without human intervention.
|
|
|
|
Now to assemble the other end. Done right, a solid seating noise will be heard if the
threads are in proper alignment.
|
|
|
|
|
75 ft/lb in 4 places.
|
|
|
|
|
Backlash is set....carrier bearing preload is set....and the locktabs are now installed.
|
|
|
|
|
10 ft/lbs.
|
|
|
|
A quick check of the combined pinion pre-load plus carrier bearing preload is 19 in/lb start torque. That
means our CBPL is 19 - 11 = 8 inch/lb
|
|
|
|
|
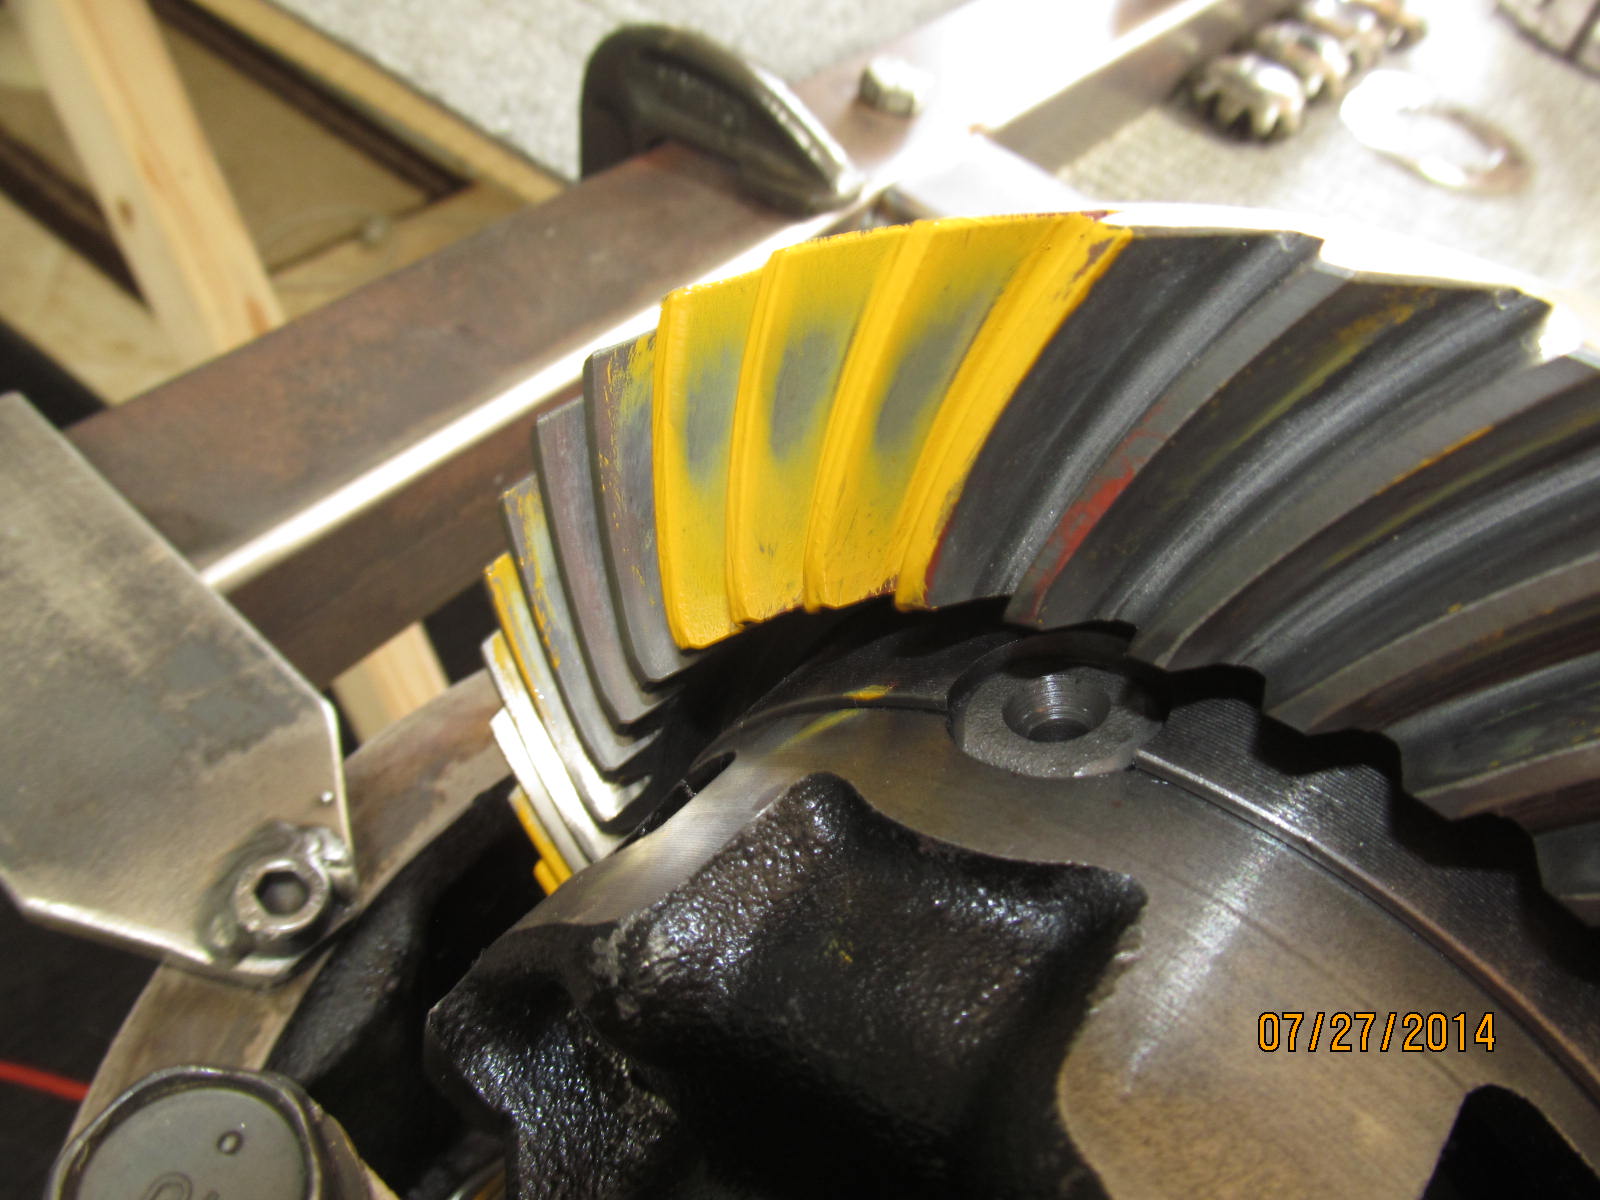
Final dive side paint pattern. Same as before. No surprise.
|
|
|
|
|
Coast still looks great.
|
|
|
|
|
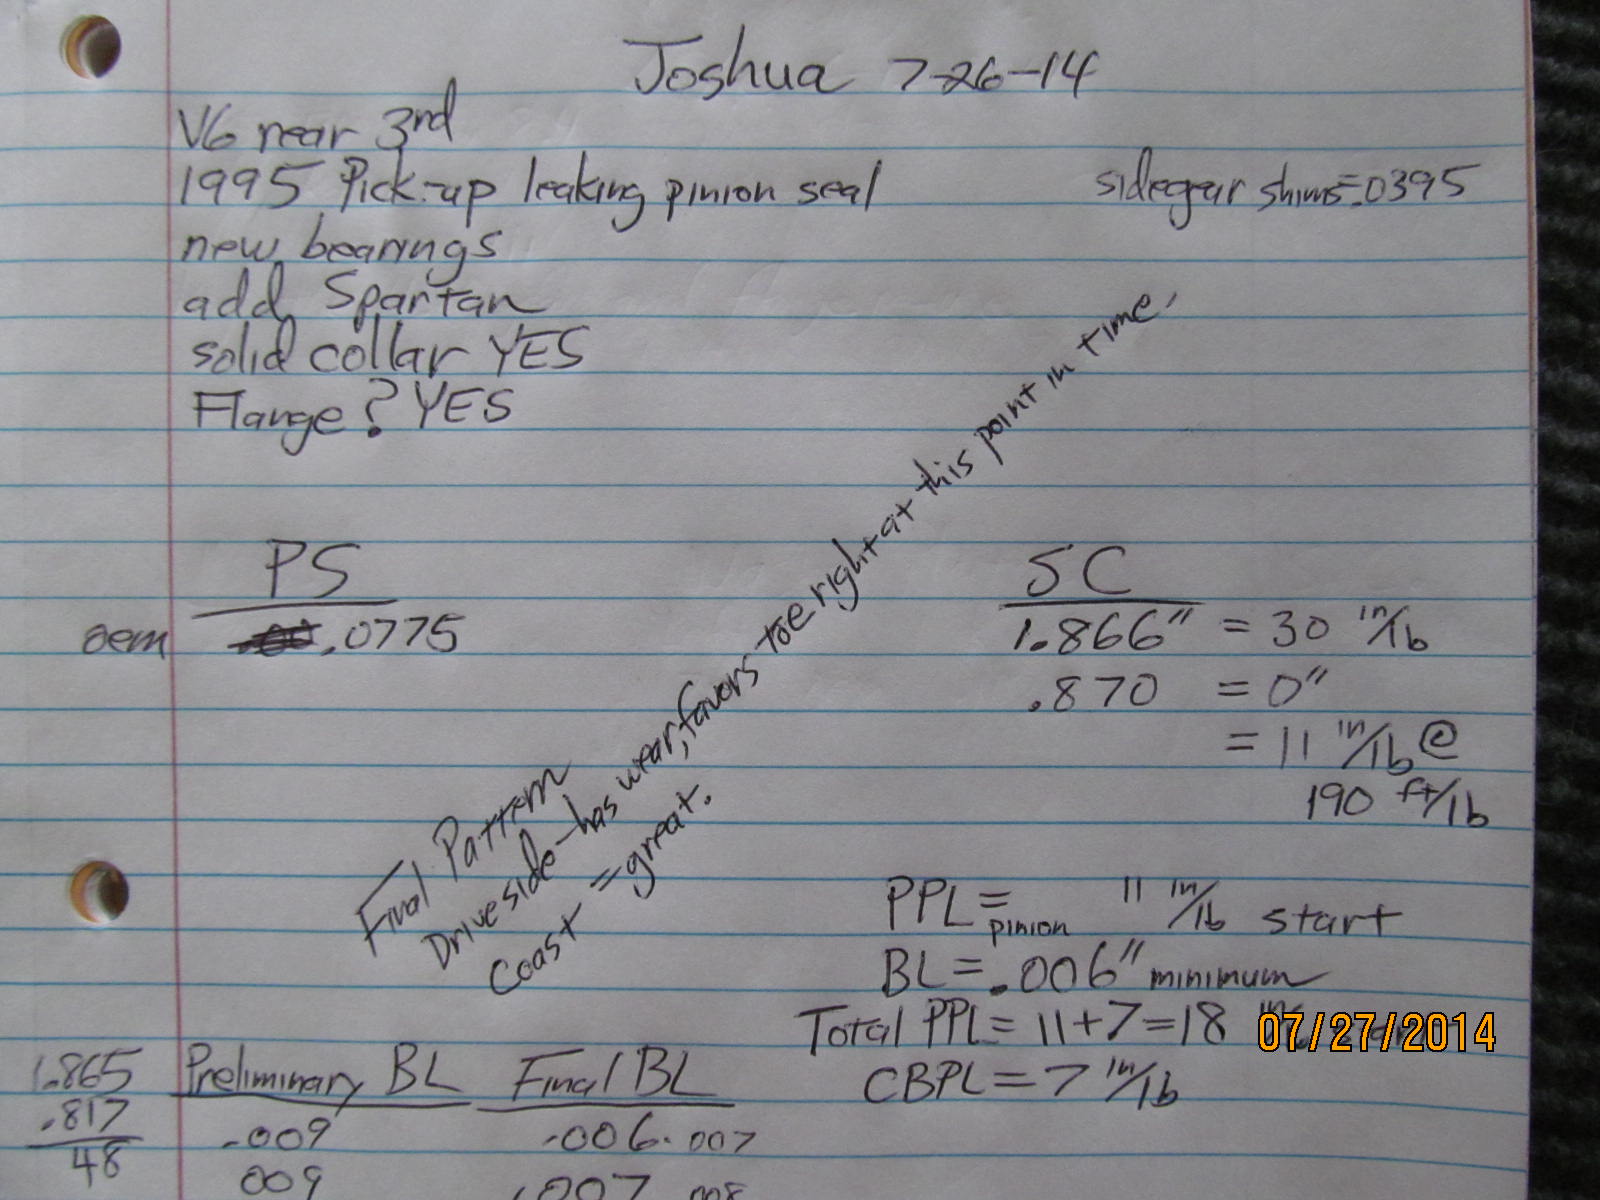
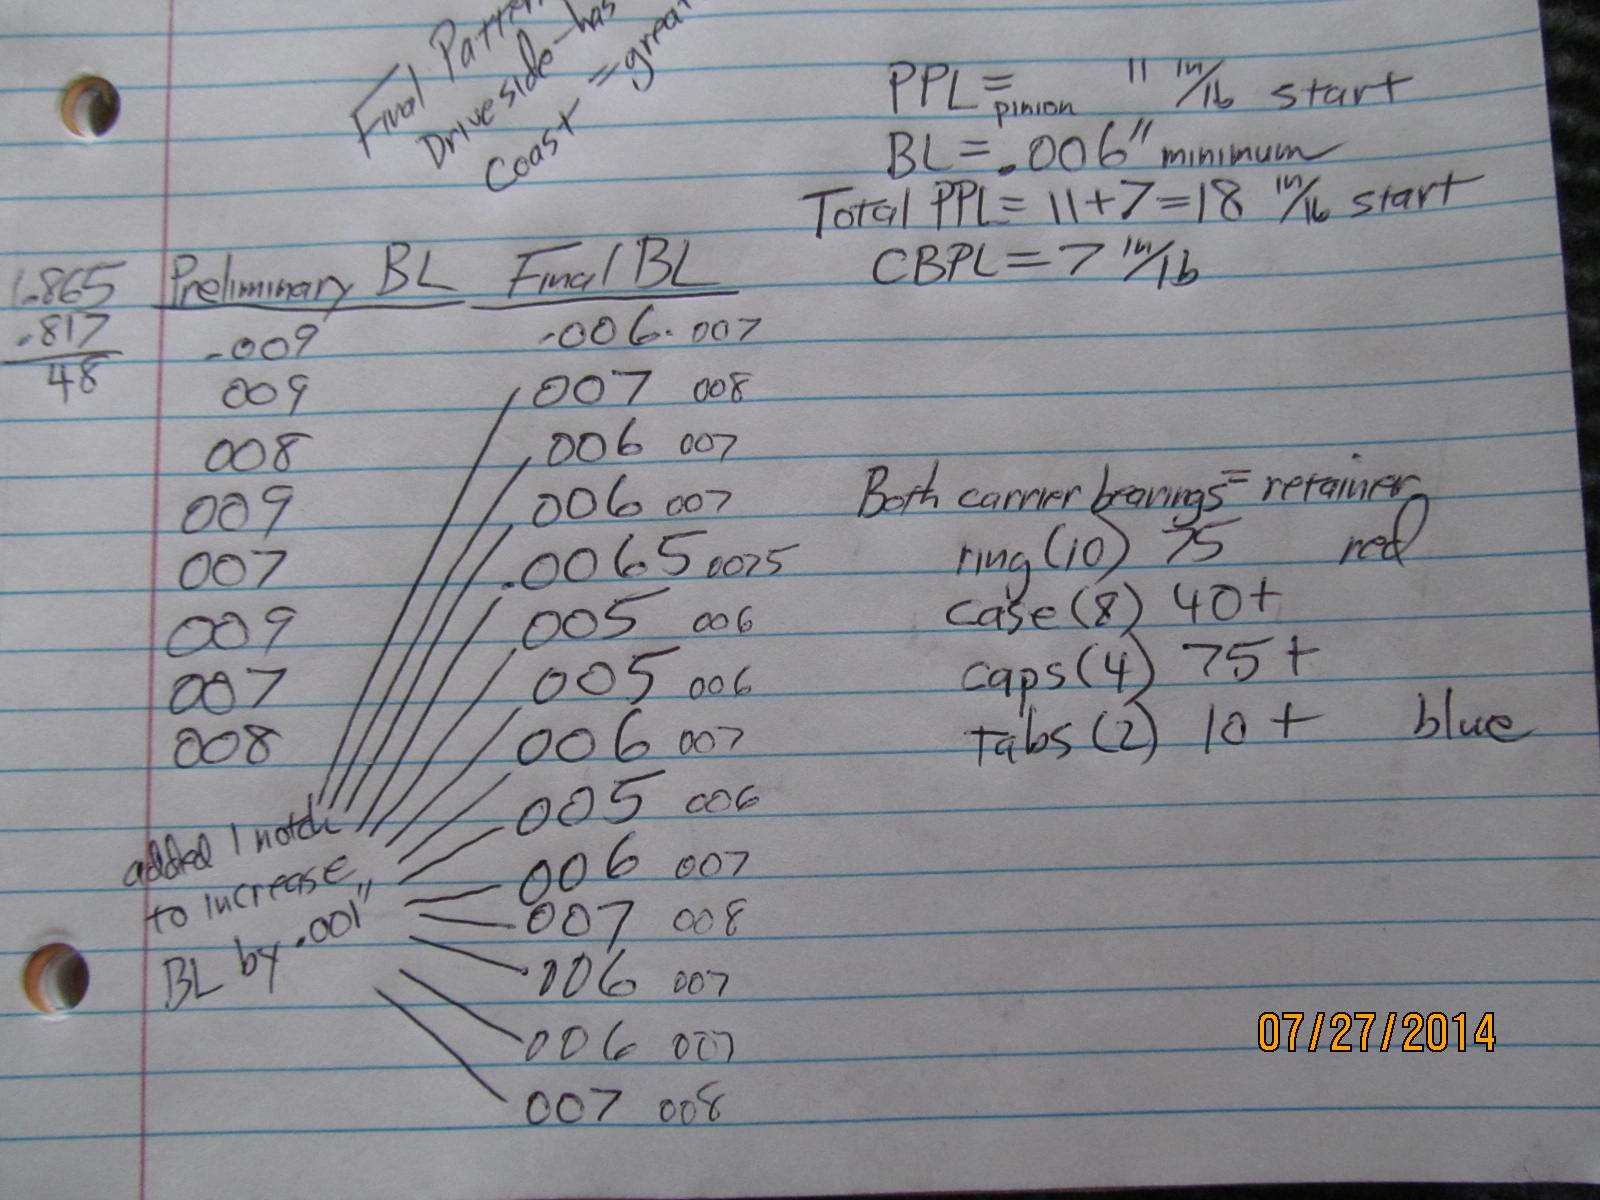
Notes I took during the install...
|
|
|
|
UPDATE----8/9/2014---------------
Josh has been driving around with the rebuilt diff now for about a week and shares some info...
As quoted from Josh's emails to me...."My Pickup is a 95 3.0 just put a fully rebuilt engine in. It has 231k
on it as of now. Coils are on this truck, it rides much better, hauls better and almost never squats unless its
loaded down hard. Definitely a keeper unless I decide to lift it more.
Locker is excellent. Massive off road difference. Walks through mud and over obstacles much easier now. Going
to help a lot this hunting season at our lease in Louisiana. Popping is less frequent now. And I have already
gotten street driving down. While the drivetrains noise is still present its quieter and less constant."
|
|
|

|