|
|
|
|
|
|
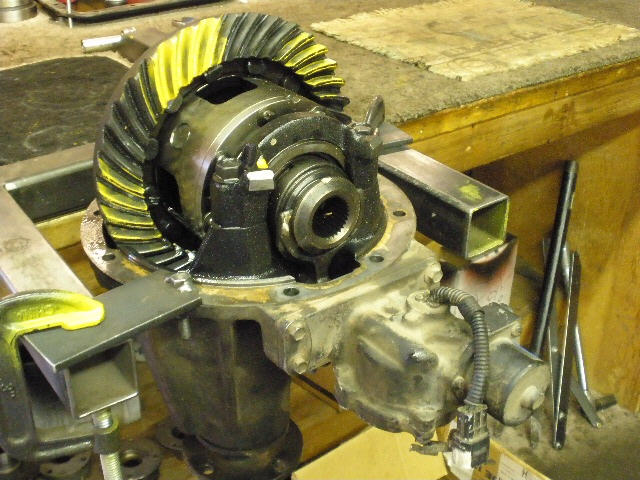
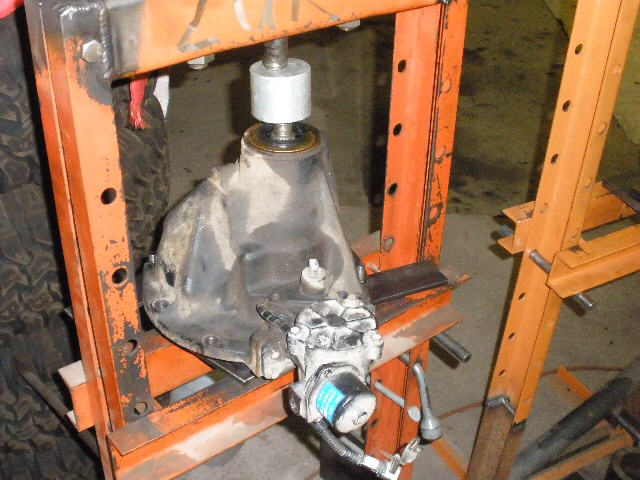
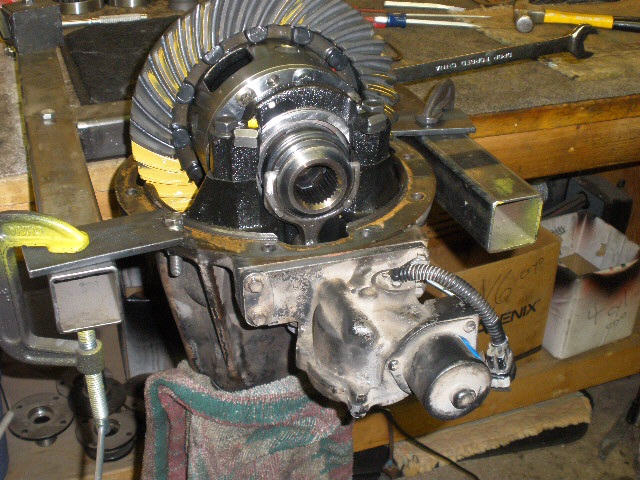
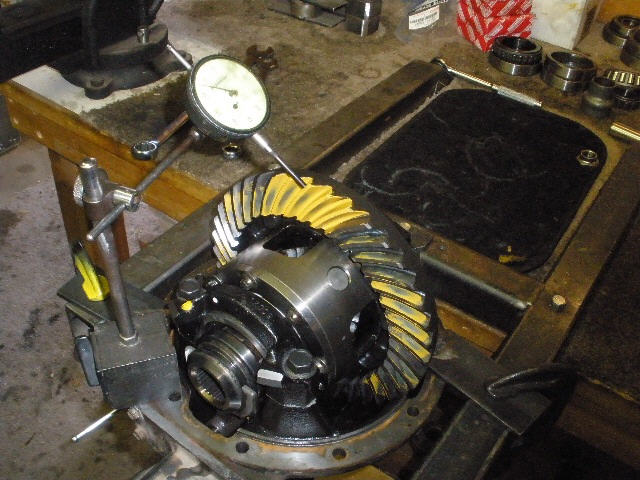
After seeing how many issues were going on with the front, Kerry decided to pull the rear 3rd and bring it over for a thorough re-build. |

|
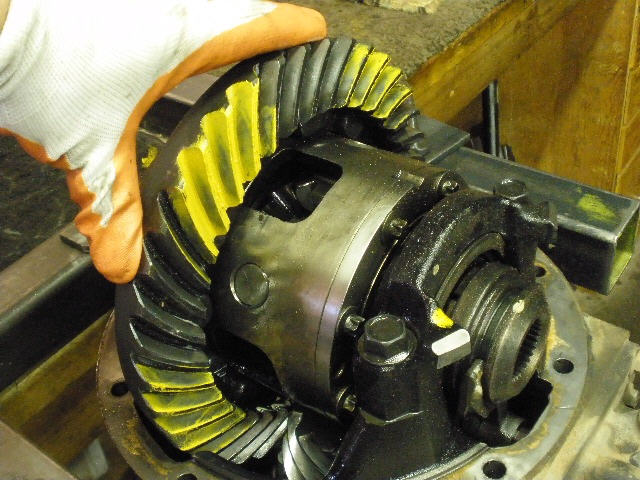
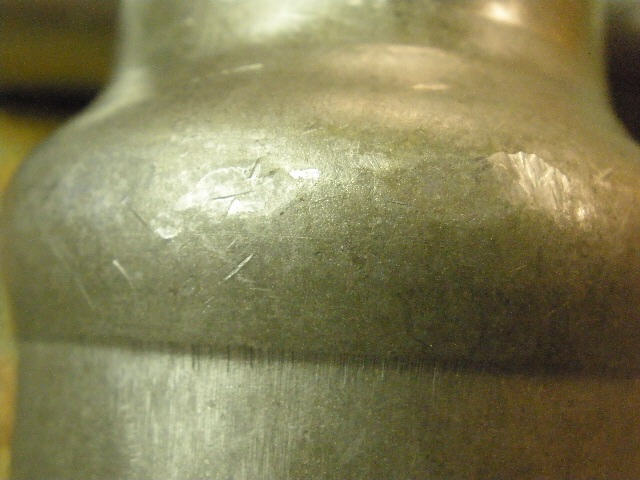
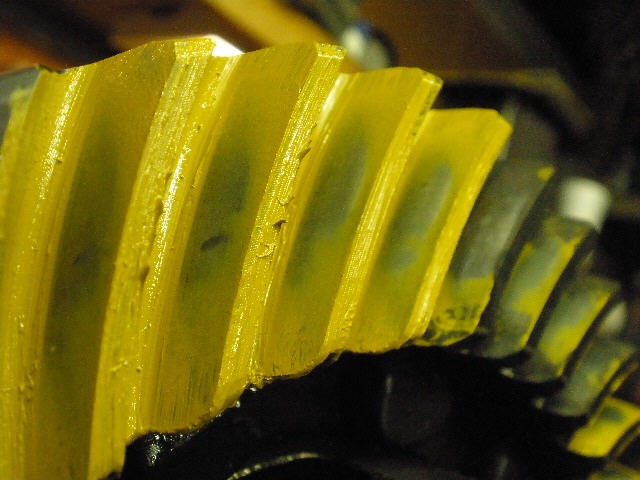
A quick paint and the drive side looks ok...perhaps a touch shallow. |

|
coast |
|
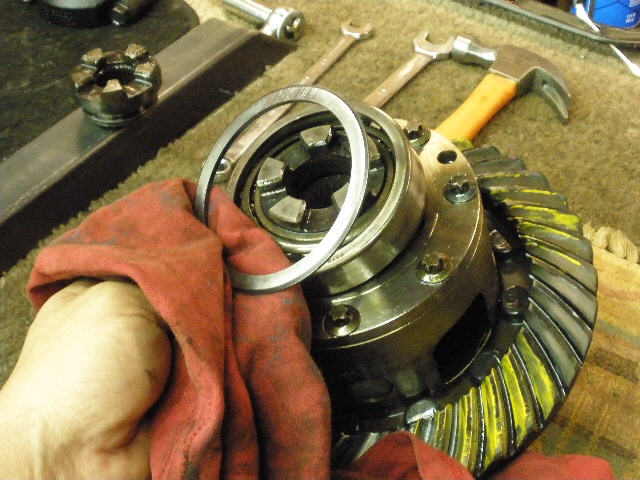
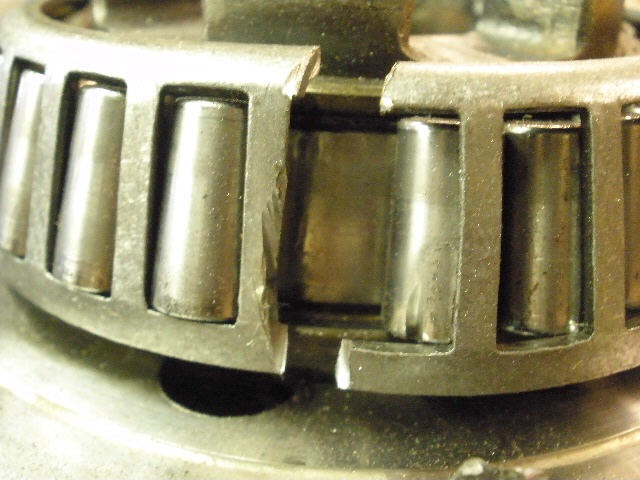
I realize that the master kit did not include new carrier bearings so these had about 180,000 miles on them and the same exact washer plates (carrier shims) so the result is a lack of CBPL as shown in the pic. I could wiggle the ring back and worth with no effort at all. If the monster-sized carrier bearings are re-used, which is done alot, then at least beef up the washer plates on both sides an equal amount to re-new the pre-load a bit. |
|
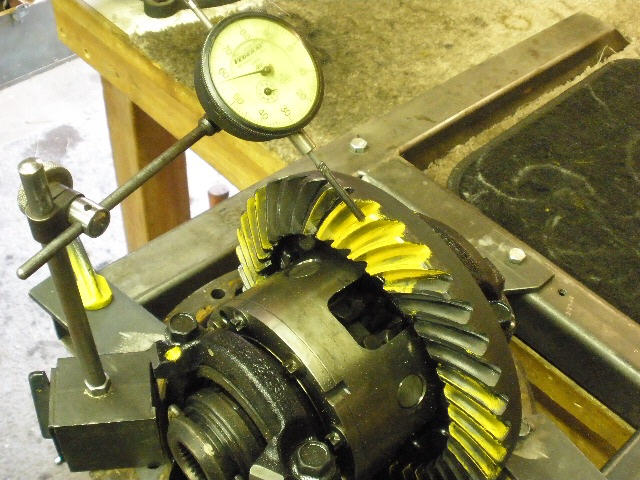
Backlash was around .005" which is a little on the low side. |
|
Not staked.....no loctite. |
|
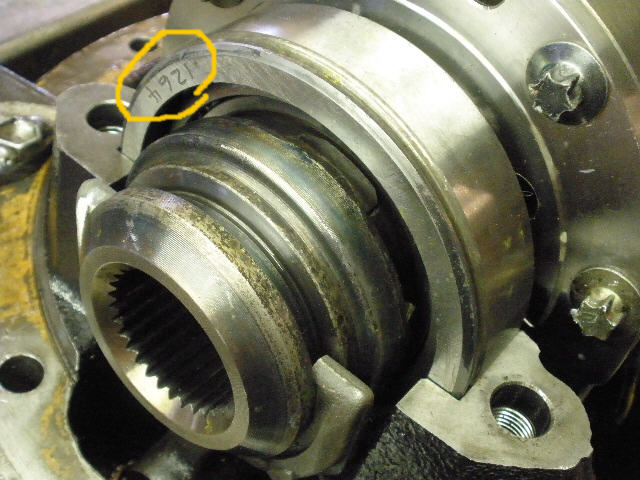
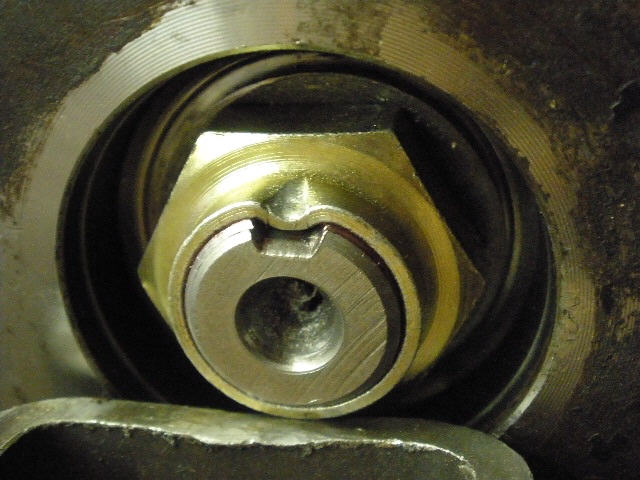
This pinion was loose also. I could see vertical up and down movement. |

|
Nitro Gear. |
|
``` |
|
First, remove the bearing caps. |
|
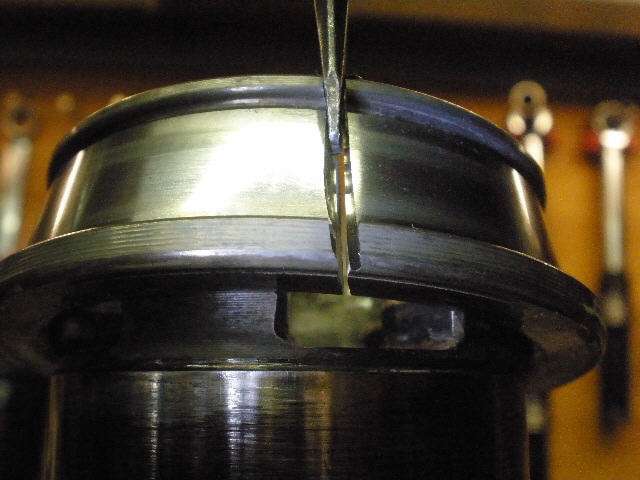
I tried to remove the washer plate with just my finger strength....I did manage to slide it up an 1/8" or so. That will change when I put it back together. |

|
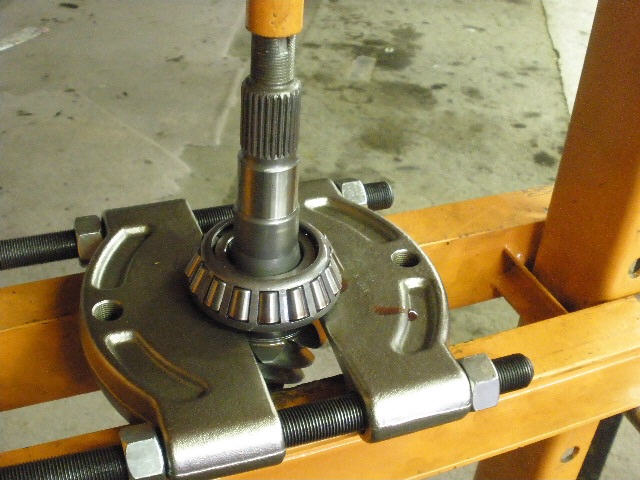
A little leverage and the case pops right out. |
|
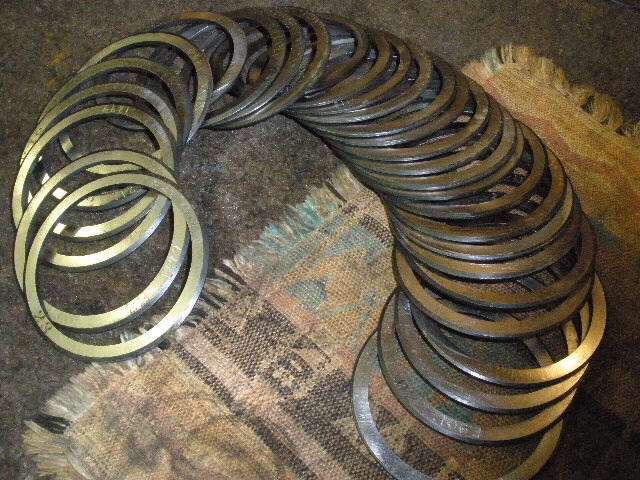
The washer plates are measured and documented. |

|
Considering the high miles, the carrier bearing rollers are adequate. It's common to re-use these high mile bearings perhaps because they are so over-sized and can probably go over 300,000 miles with a good oil. |
|
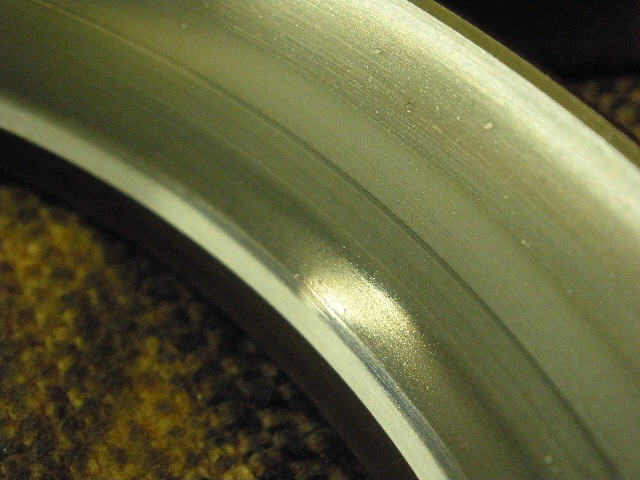
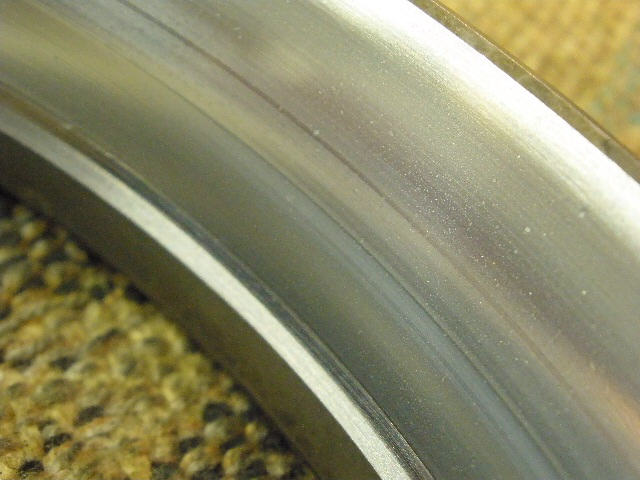
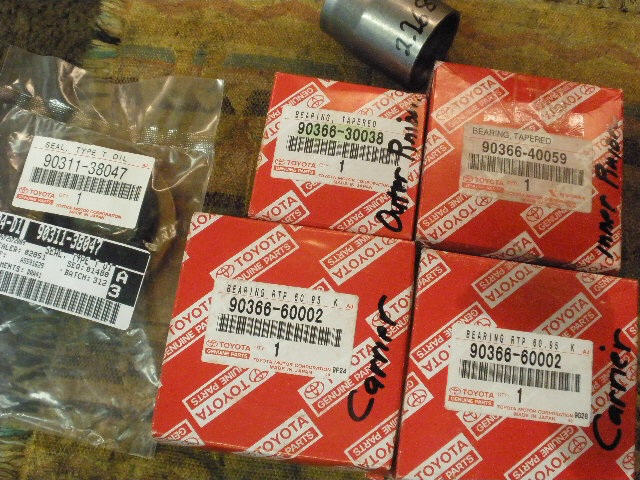
If I catch the reflecting light just right then it's possible to capture it with my digital camera with super macro. The micro flaws in the carrier bearings races show up. Even though these bearings can go more miles, it's still a better idea to just replace them with new OEM Koyo bearings....part number 90366-60002 both sides. Kerry chose to do just that. |
|
``` |
|
Now back to the pinion end. As noted earlier the pinion nut was not staked or loctited. It was a little tighter than finger tight I noted when I went to remove it. |
|
Press the pinion out. |
|
The old original crush collar had been re-used. A hammer was used here in an attempt to lengthen the collar. |
|
This I might do out on a trail somewhere....but not in a shop (bang the collar out to re-use it). |
|
``` |
|
``` |
|
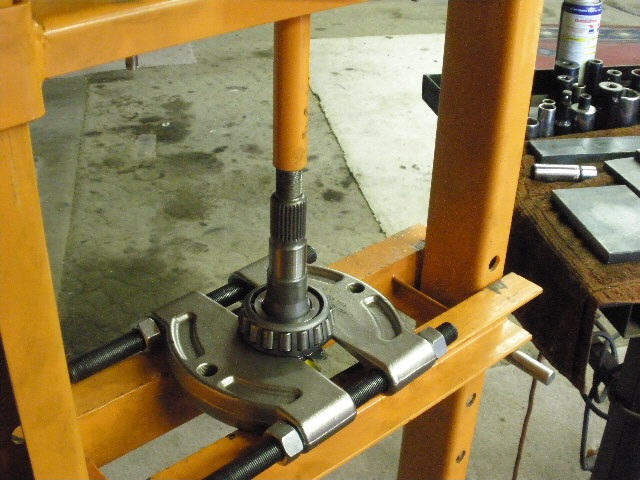
Back to the pinion, the 12 ton press easily separates the pinion from the bearing. |
|
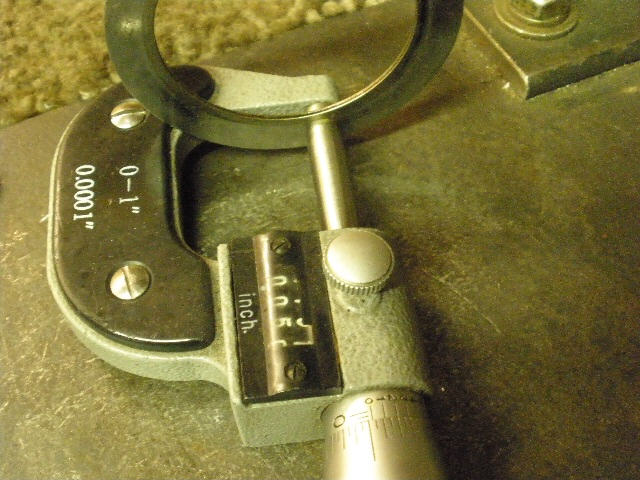
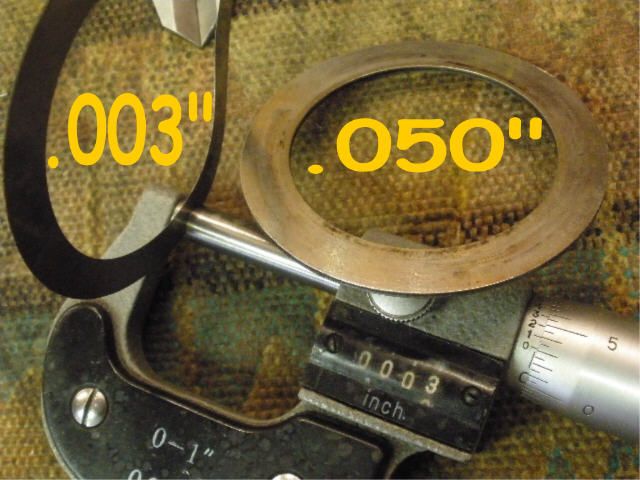
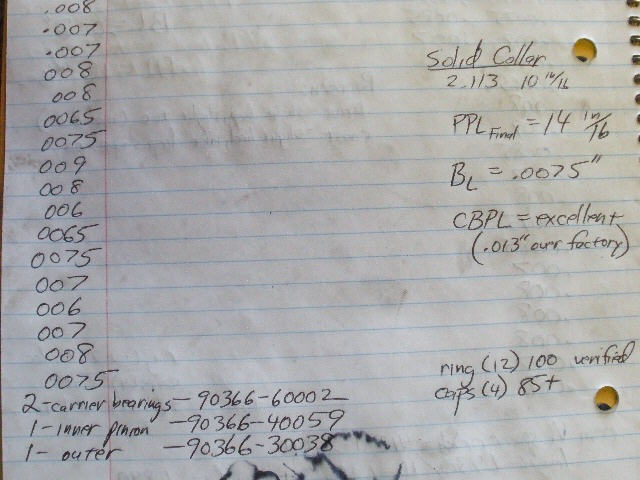
Pinion shim measured .0502" on the micrometers. |
|
The pinion bearings had only 2000 miles on them but the sloppy pinion probably beat them a little more than normal. |
|
All new factory ordered bearings will be installed as well as a new seal and a solid collar this time. |
|
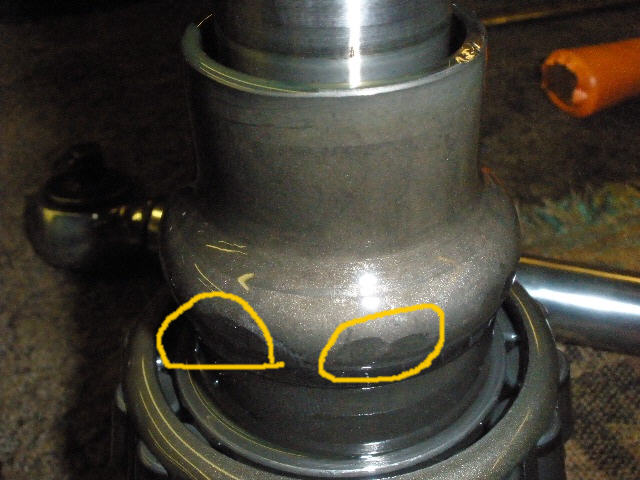
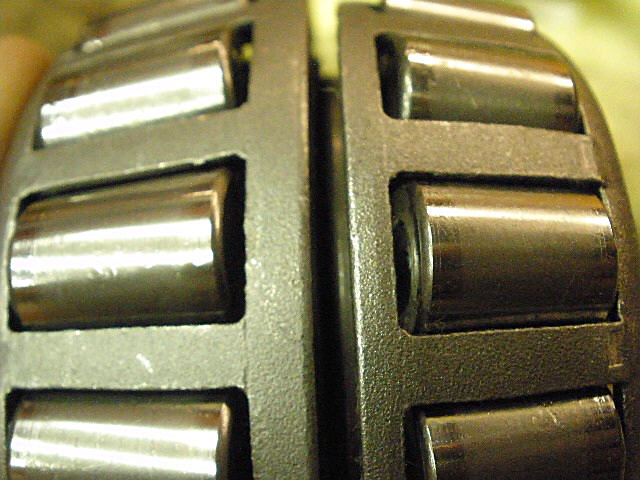
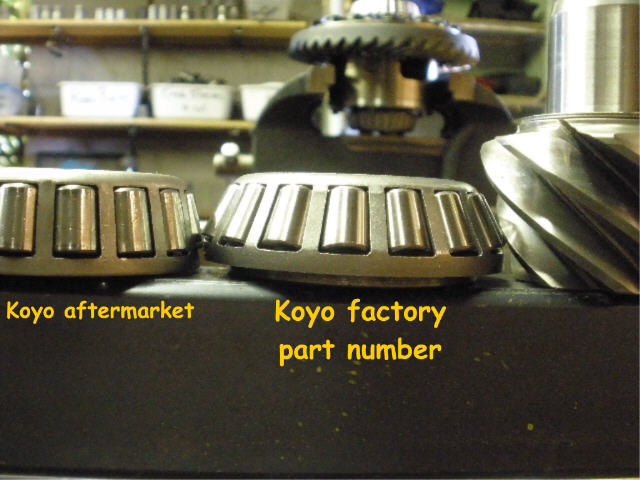
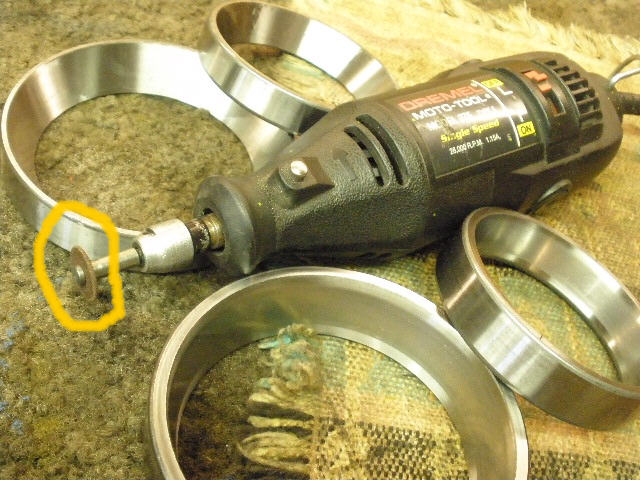
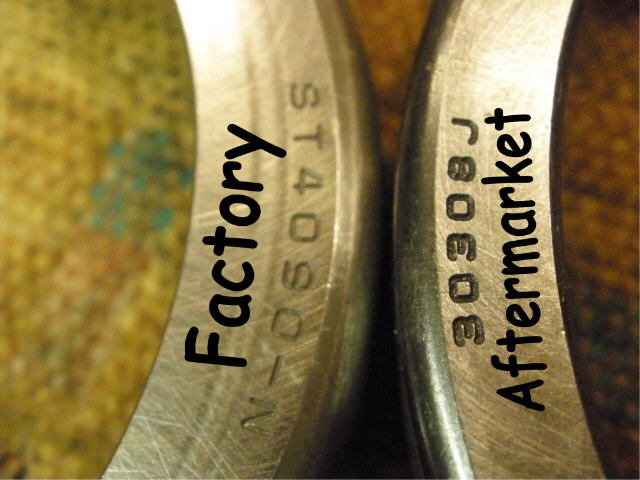
The after-market bearings are Koyo part numbers also but show some interesting roller angle differences. |
|
The factory .0502" pinion shim will now be squished behind the bearing. |
|
An interesting issue here came up when replacing the AFTER-MARKET variety of Koyo bearings....there is basically no lip exposure to tap them out and replace them with the factory bearings. I got lucky and with the right screwdriver with a good tip, I was able to catch an edge and tap the larger inner race out. |
|
The outer pinion race was impossible without removing some material...there was no exposed lip to tap out. The dremel will fix that. |
|
``` |
|
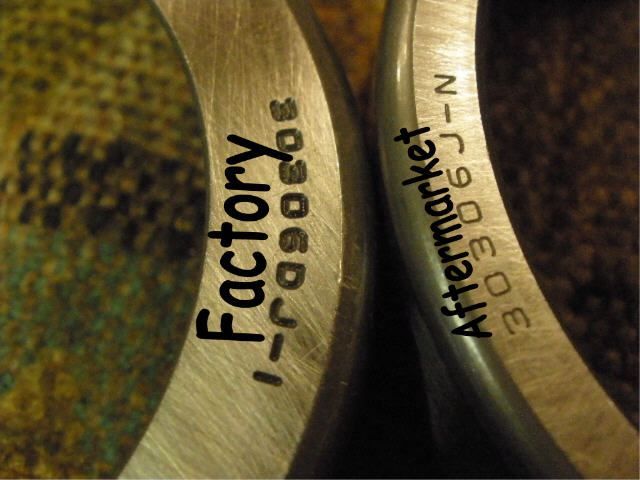
Notice how much less flat surface lip the after-market inner race has. |
|
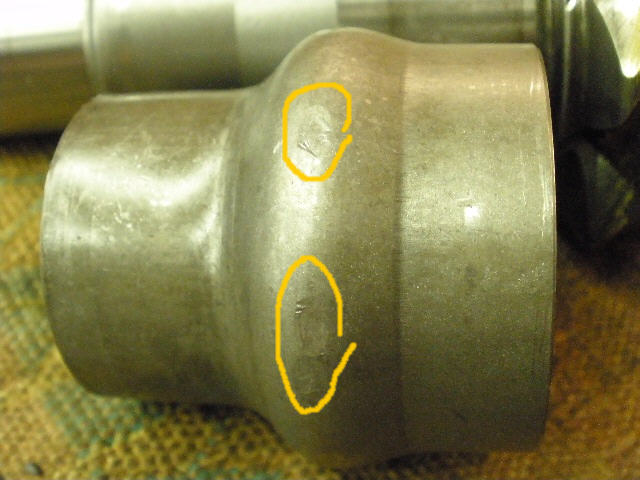
The after-market outer race is even worse. A potential real headache turned into just a minor delay with the right tools. |
|
The new factory races are installed. Take notice of the generous amount of lip available if they ever need to be tapped out. |
|
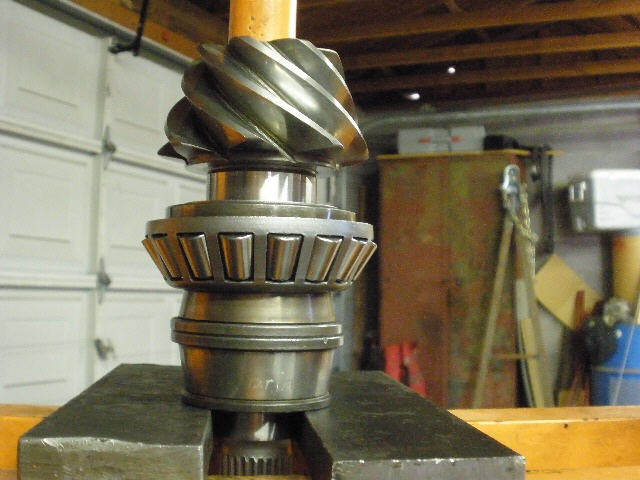
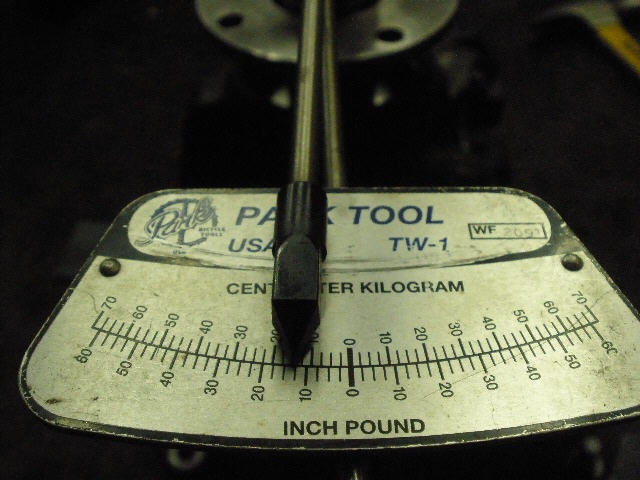
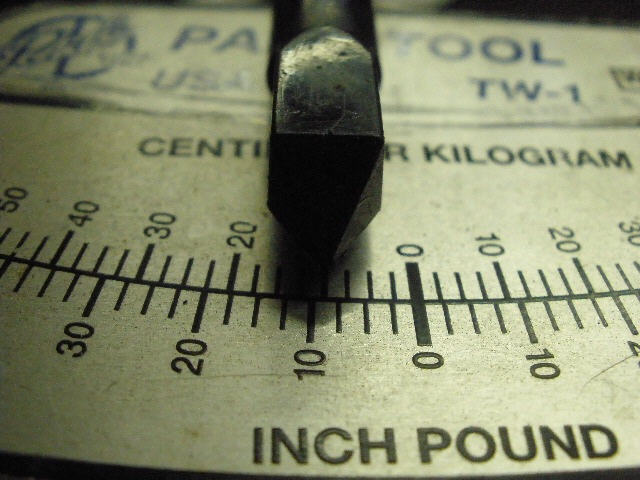
So, the pinion is installed with no crush or solid collar at the point. The pinion nut is step tightened until about 10 in/lb of pre-load is measured. Lots of gear oil, of course, on both bearings for a realistic measurement. |
|
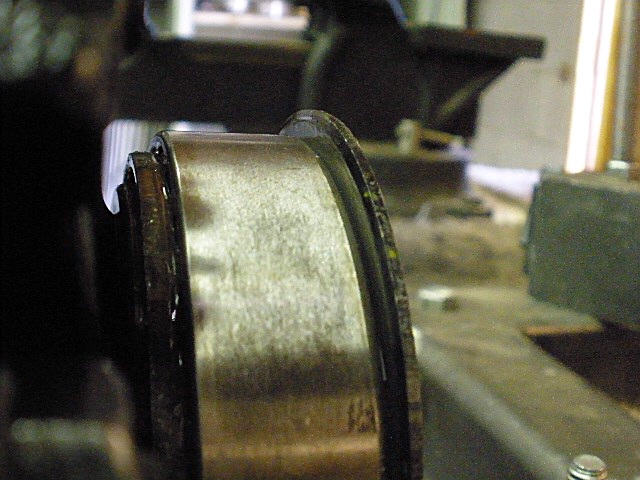
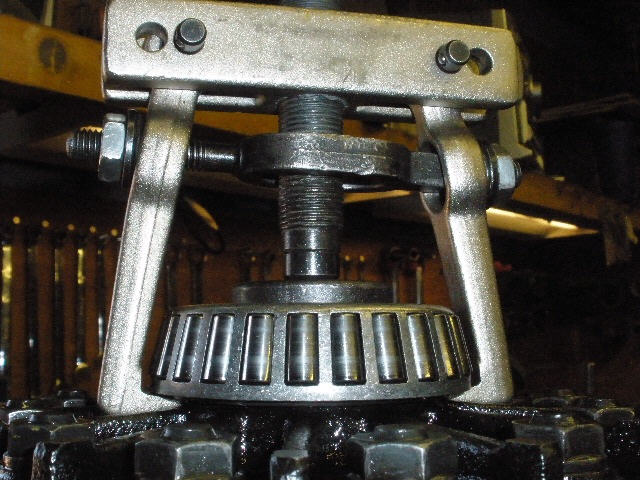
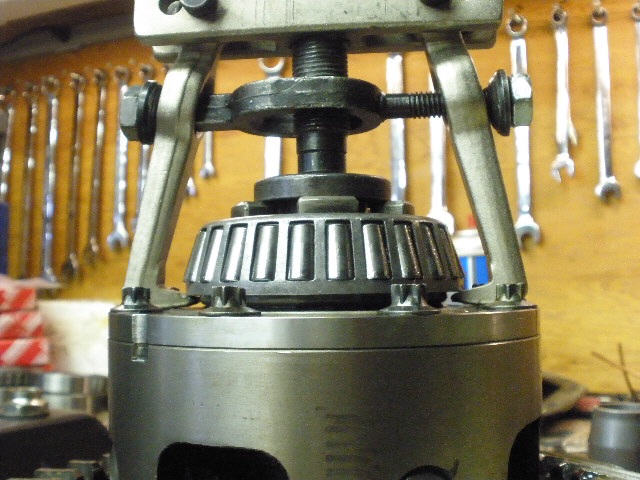
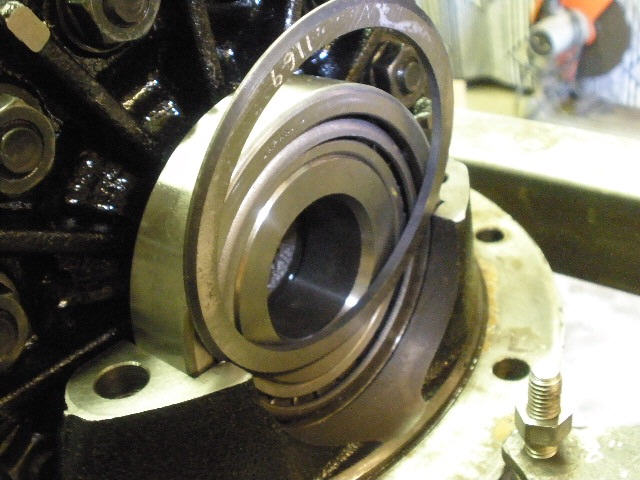
Now to replace the old carrier bearings. The bearing on the ring side comes off easy. There's enough room for the fingers to reach under and solidly capture the main bearing collar. |
|
Off it comes. It's good to have the right tool |
|
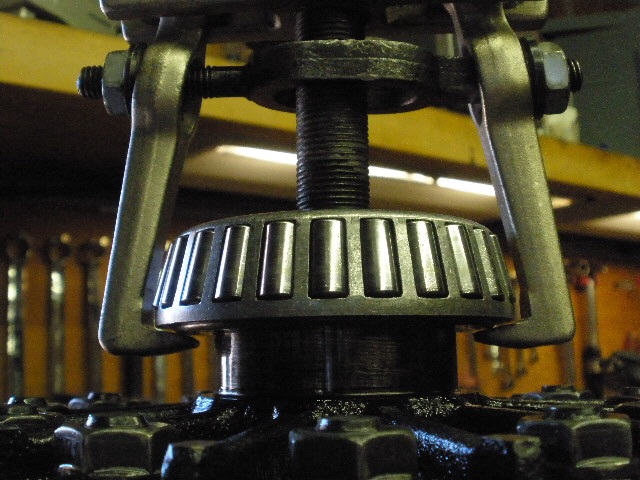
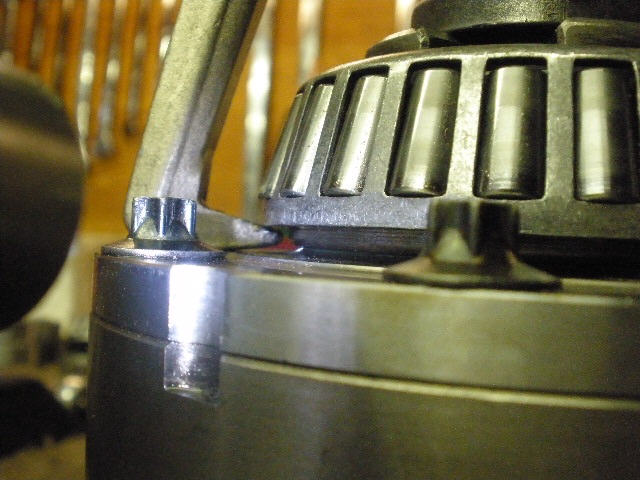
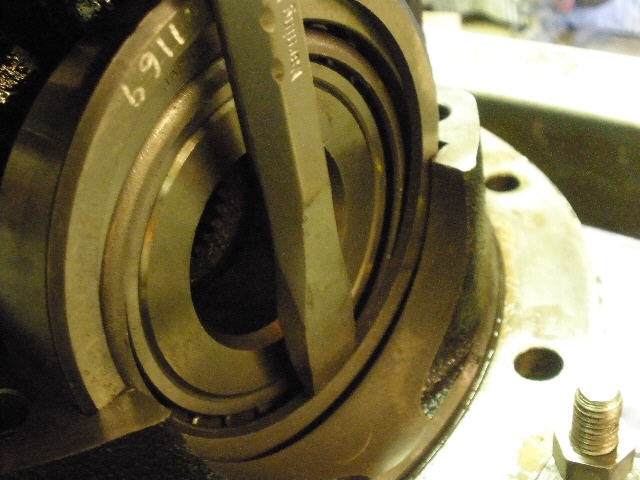
Now the bearing on the other side is a different story. No tool known to man can reach up under there to get enough grip to remove the whole assembly. |
|
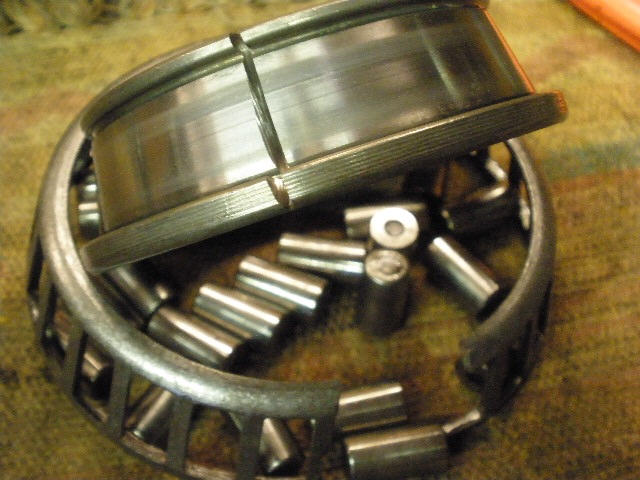
I have tried, in the past, pulling on the steel cage but it just distorts, breaks, and rollers are everywhere. The inner portion of the bearing remained stuck in place. |
|
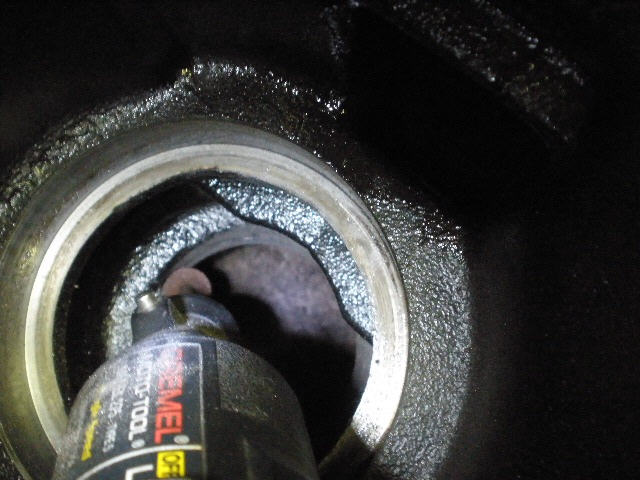
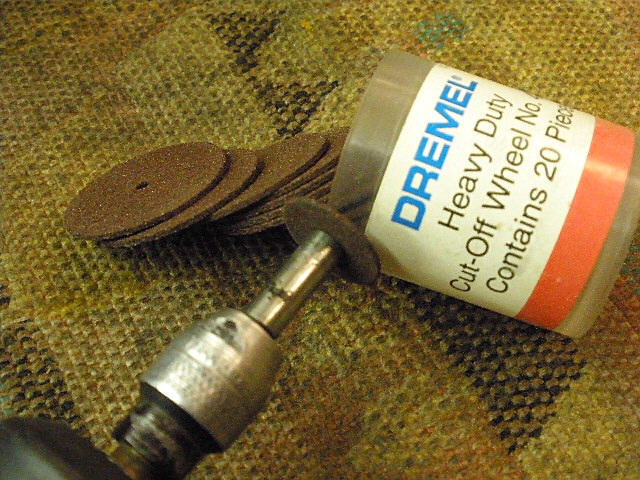
Out comes the dremel again. |
|
With just a little cutting.... |
|
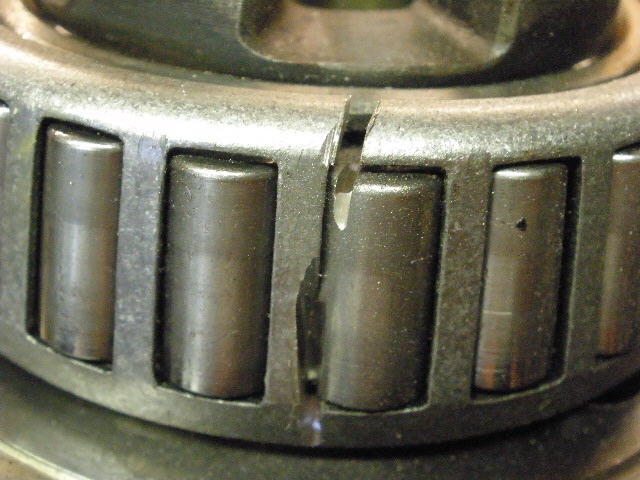
...the cage will separate... |

|
...and now I have access to run a weakening cut in the bearing. |
|
A small screwdriver wedged in the cut and lightly tapped with a hammer will cause the bearing to crack open and slide off easily with the screwdriver still in place. |
|
``` |
|
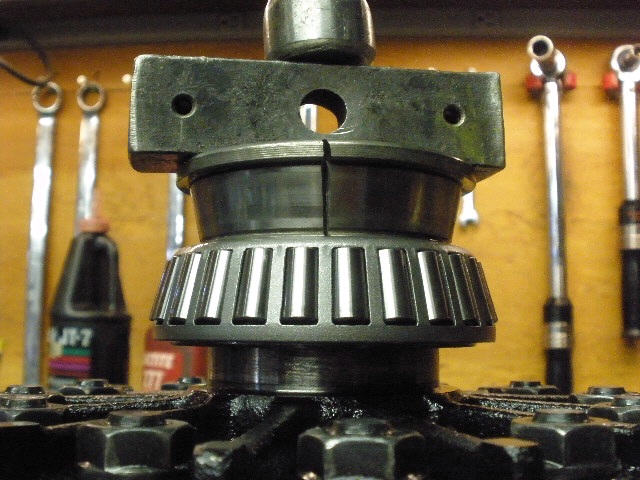
The new bearing can be tapped in place now. |
|
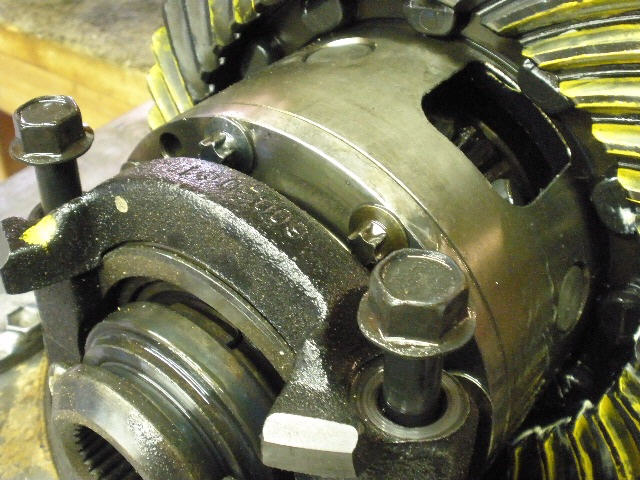
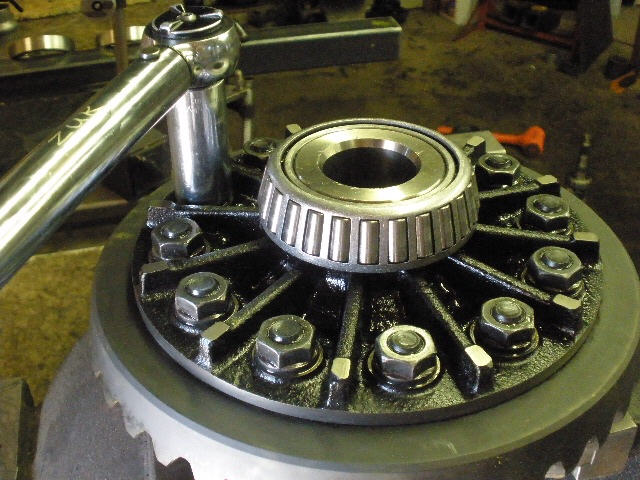
These are strong high quality fasteners from Toyota. They are re-usable. Loctite is optional and was not used this time.
I verified 100 ft/lbs on all 12 flange nuts and all were tight 100%.
|
|
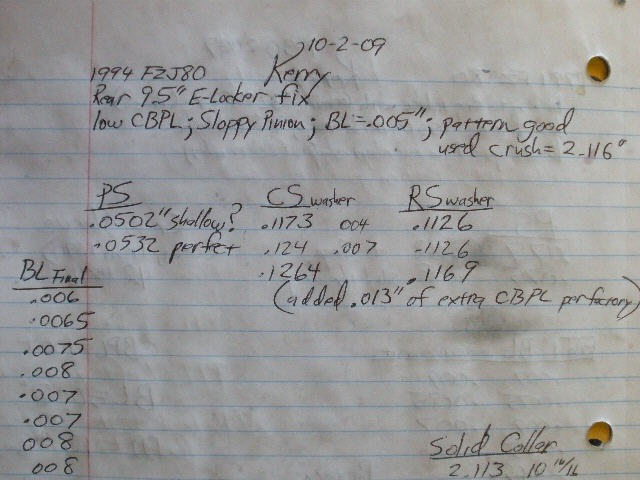
The case is now installed with the factory washer plates. Backlash was too tight measuring at only .004" so a .007" thicker plate was inserted on the case side (left side in pic) and that brought the backlash up to an acceptable .007". |
|
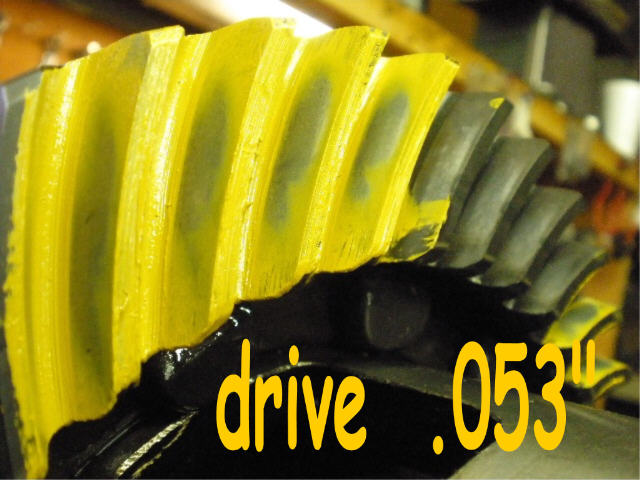
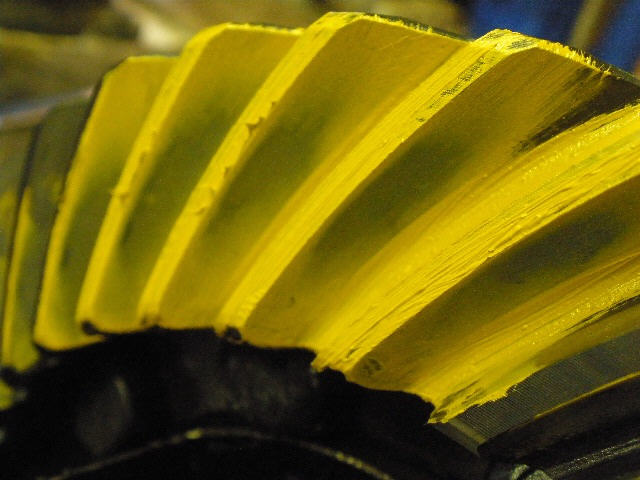
Drive side is close just like before but looks like it could go deeper. |
|
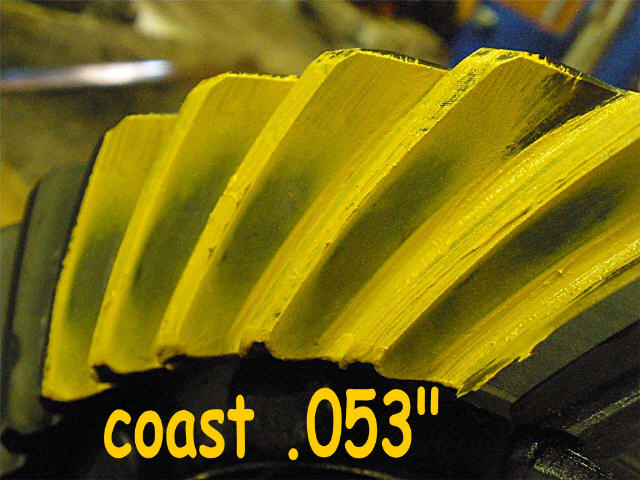
Coast is favoring the toe quite a bit. Notice the lack of "balance" between the drive and coast? Notice how the drive is favoring heel and coast is towards toe? I can get both of them closer to center with a combination of a deeper pinion and less backlash. |
|
Repeat as before...press the bearing off... |
|
...and add in a .003" shim. |
|
Not shown but the solid collar was installed at this point. |
|
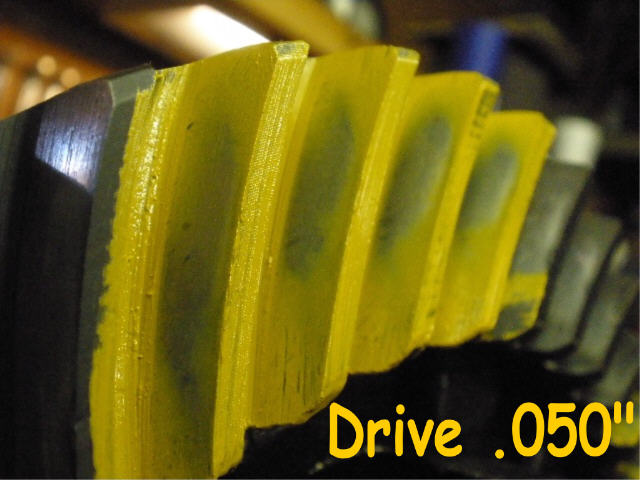
Drive looks right on. |
|
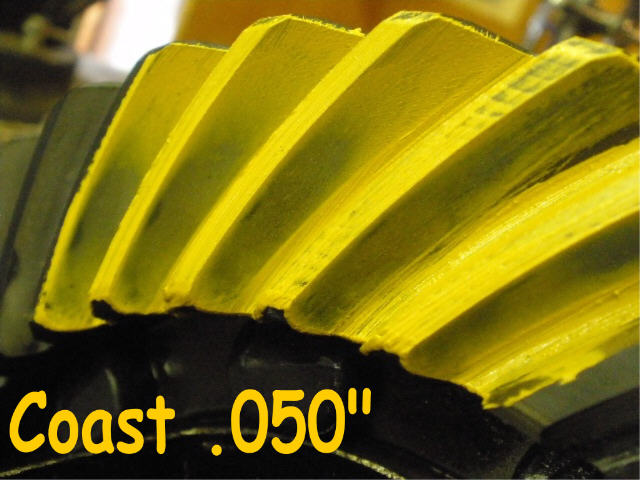
Coast came closer to center. |
|
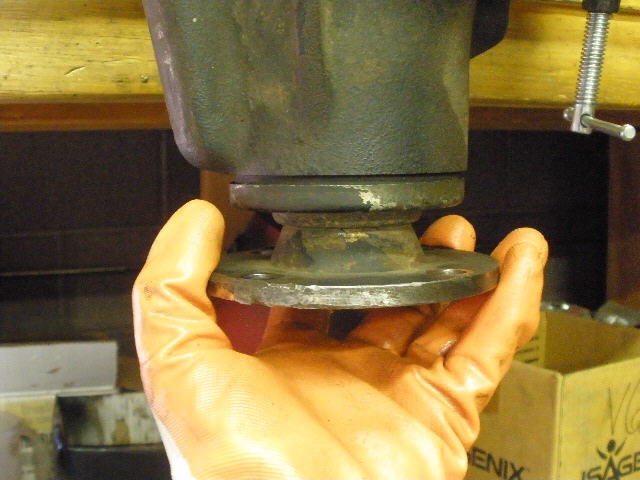
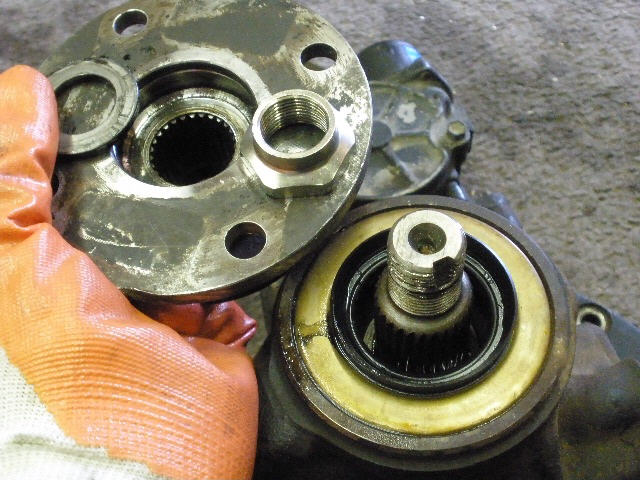
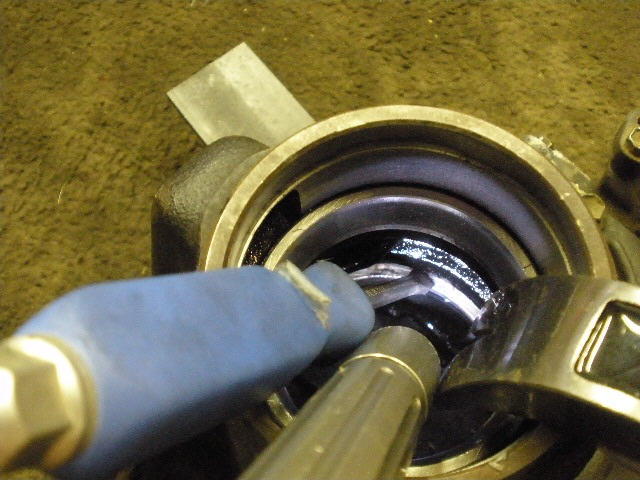
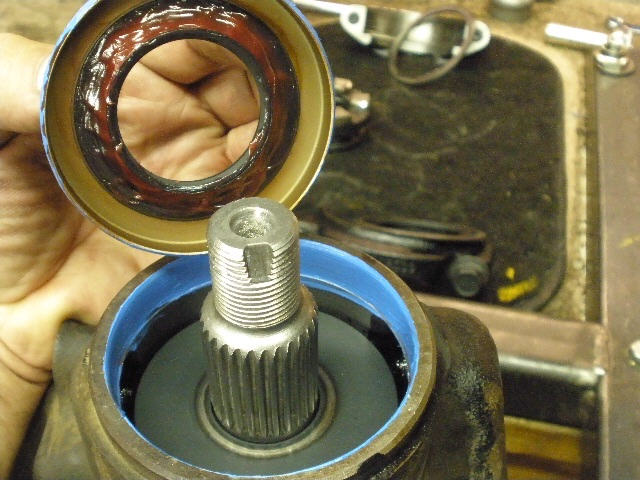
I had my own shop flange on so now to remove it and install the seal. Grease and RTV. |
|
I use an old race to tap the seal down til it's recessed properly. |
|
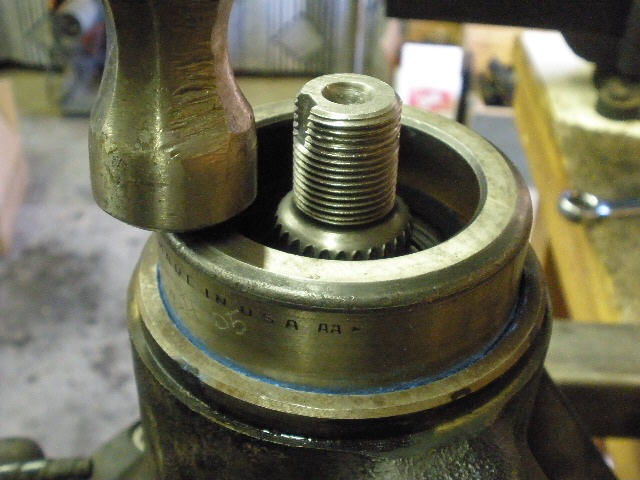
The stock factory flange is now in place and red loctite applied to the new nut. |
|
Last chance to fine tune the cbpl/bl....I want to add even more pre-load while reducing the backlash a little so I added a washer that was .002" thicker on the case-side... |
|
...and .004" thicker on the ring-side. |
|
I use a chisel with rounded corners to minimize shim damage. Believe me, the shim was a tight fit but this is exactly the kind of CBPL needed to prevent ring gear deflections. |
|
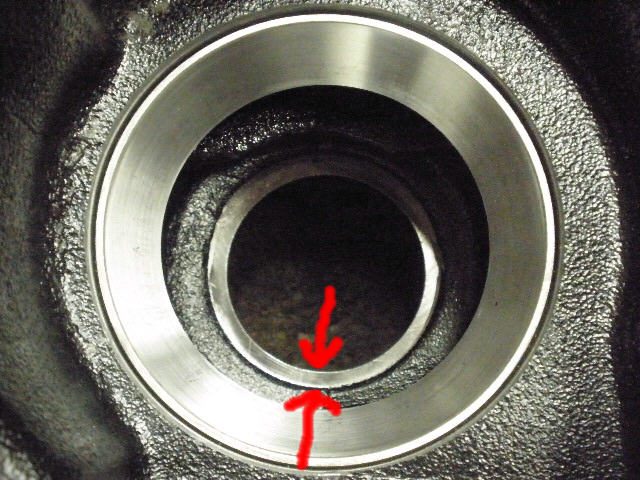
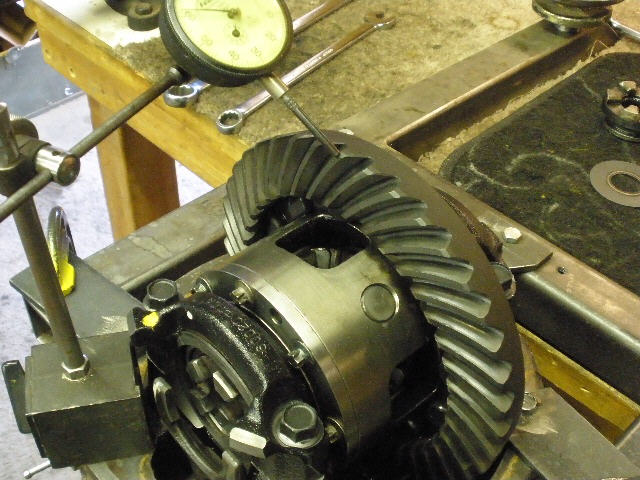
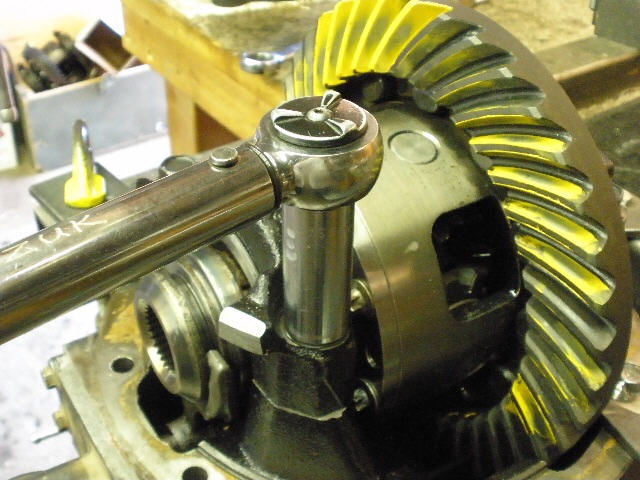
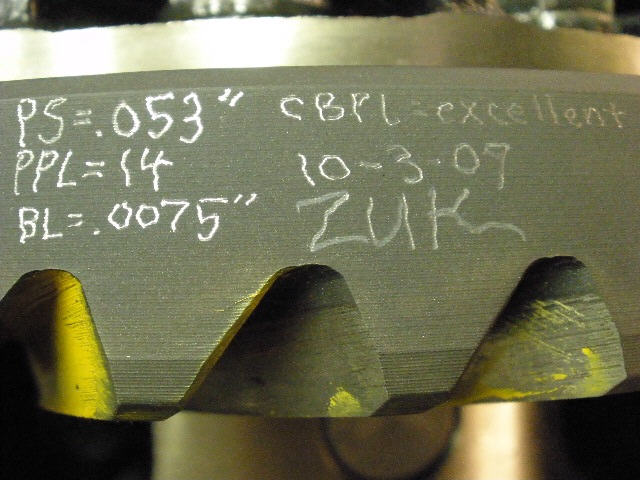
Paint is applied to the ring for one more final check. The best way to get a very readable pattern is to use a towel or rag to add resistance to the pinion while turning the ring gear back and forth 2 times with a 17mm wrench as shown. |
|
Nice...the drive pattern is about centered with what appears the ideal depth. |
|
The coast has been pushed very close to center. Balance between both sides is very good. |
|
85 ft/lb on the 4 bolts. |
|
A full washer plate set is almost necessary to get backlash and carrier bearing pre-load where they need to be. |
|
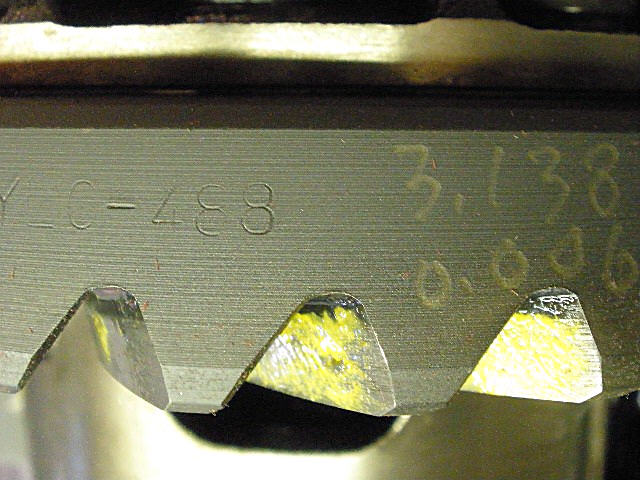
Backlash is recorded on every other tooth. |
|
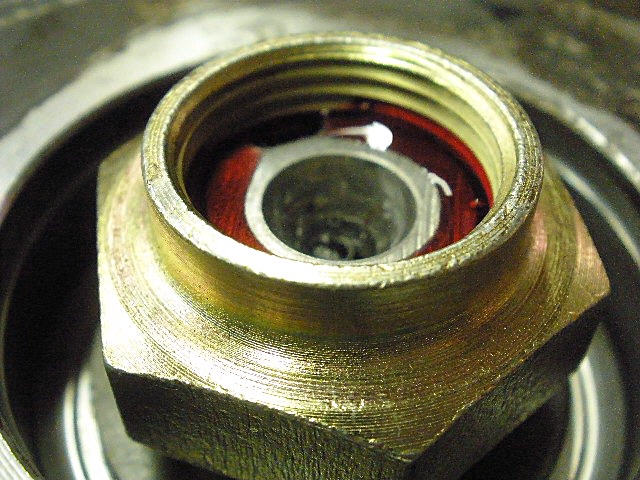
Don't forget to ding the nut. |
|
``` |
|
``` |
|
``` |

|
