|
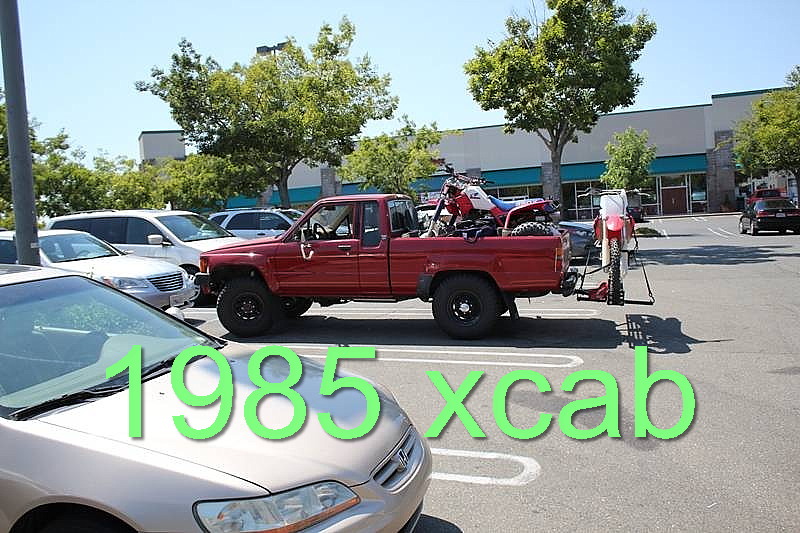
SUPRA LSD in Mike's 1985 400 hp Toyota truck
|
|
(94 good size pics loading)
|
|
Feb 10 2013
|
|
|
|
Mike's '85 truck.
|
|
|
|
|
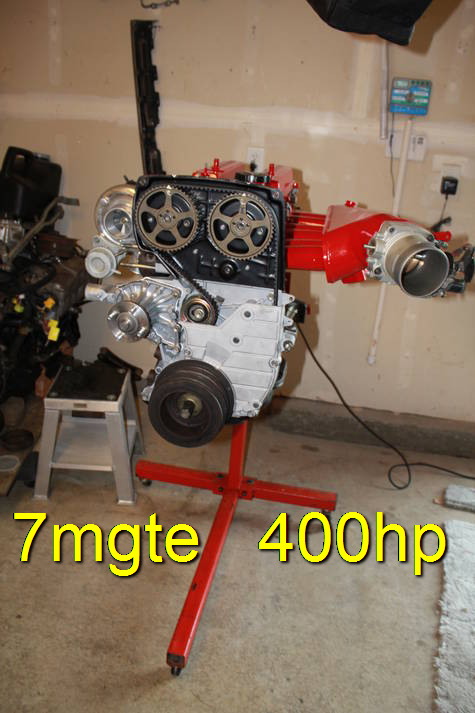
The motor that will be going in it.
|
|
|
|
|
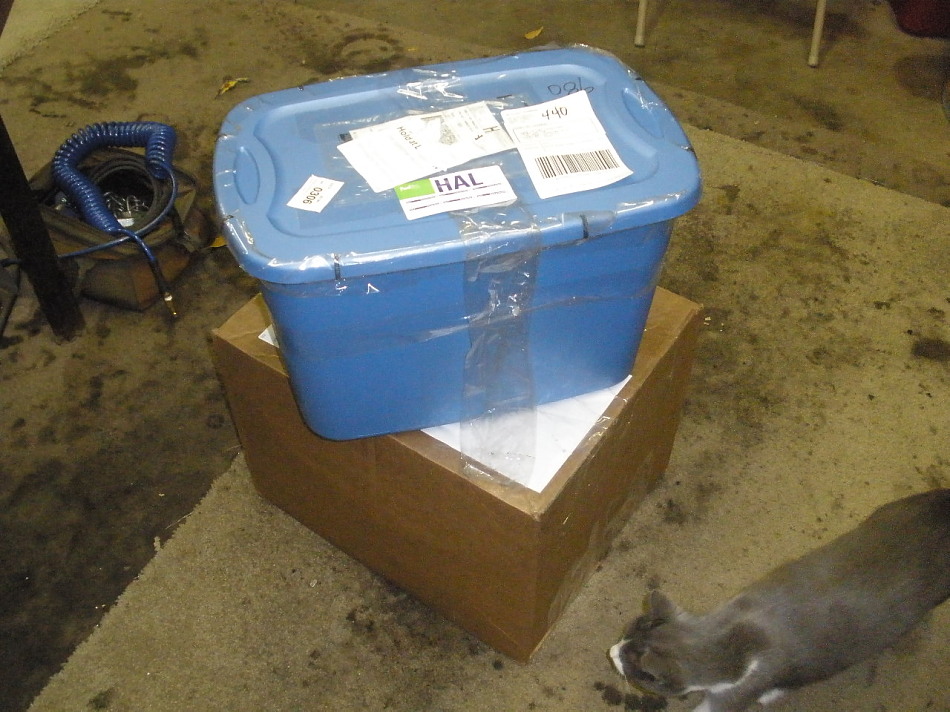
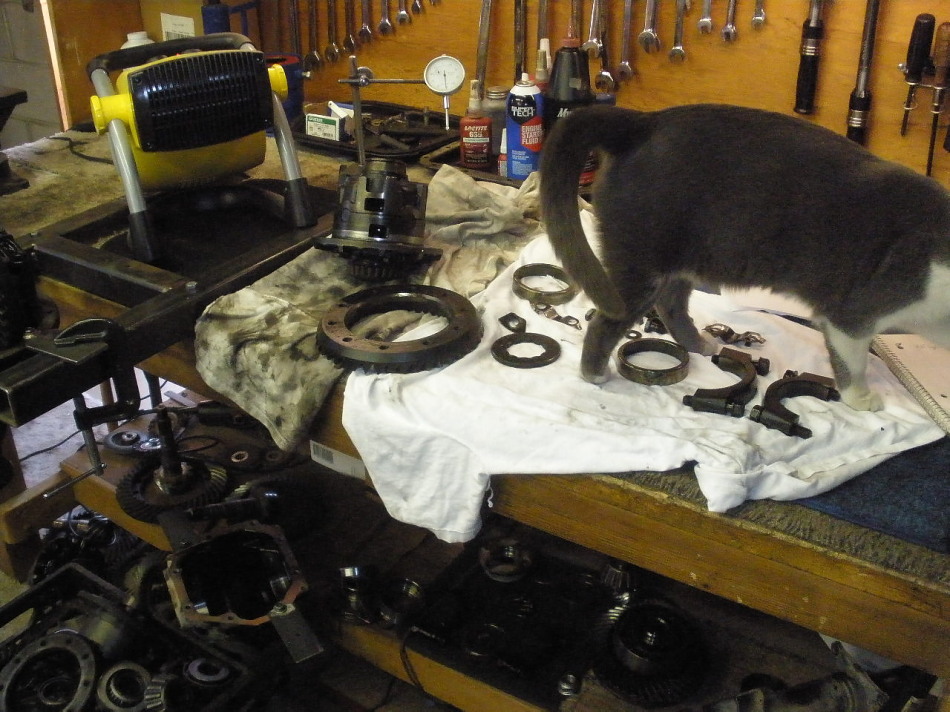
Mike sent 2 boxes my way.
|
|
|
|
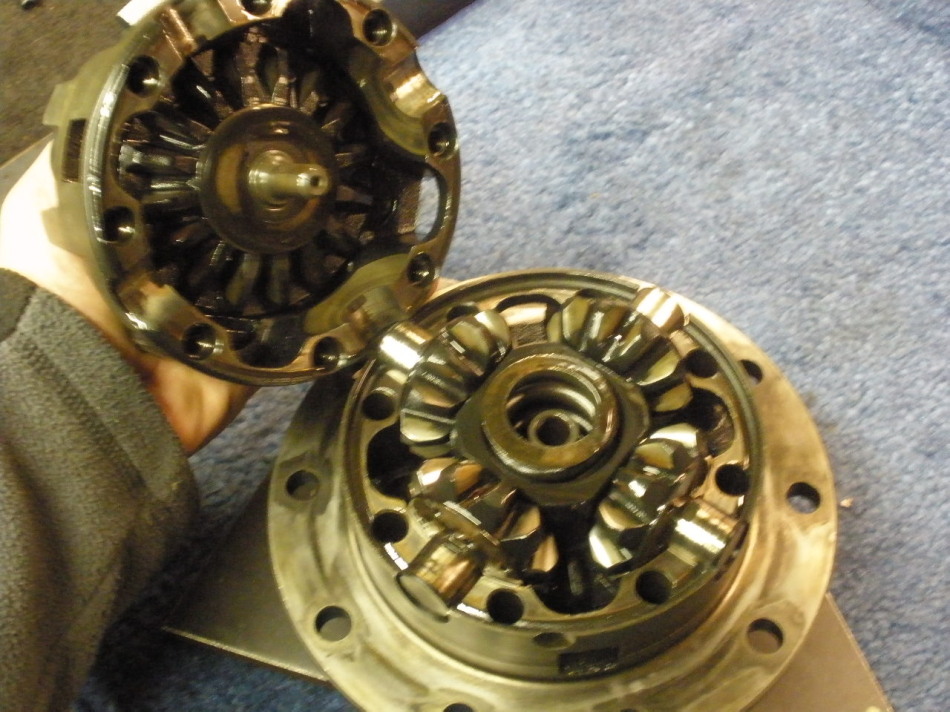
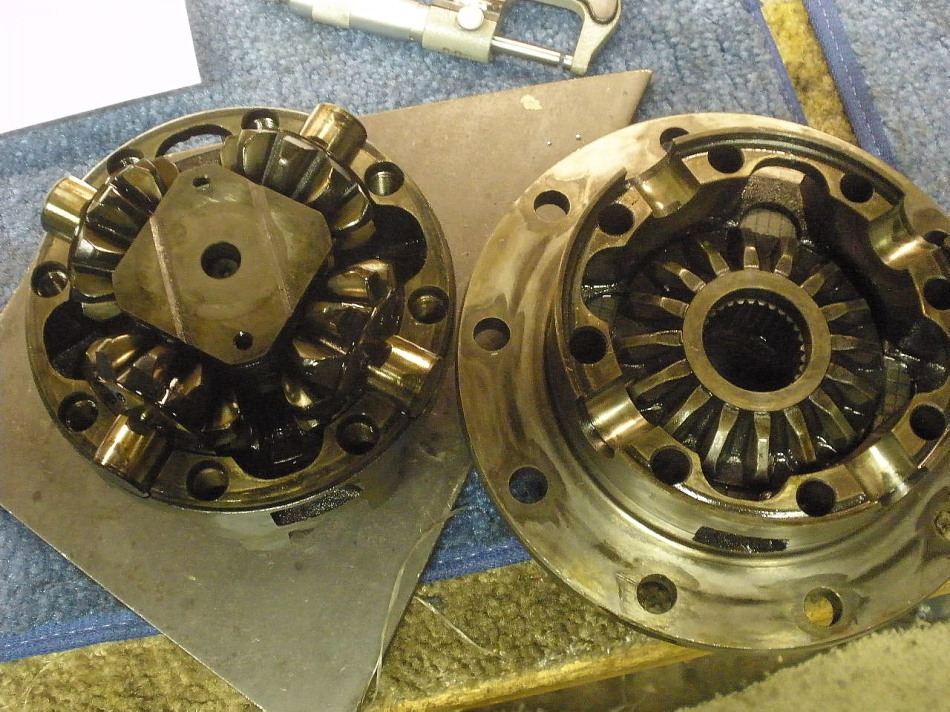
Mike found a spare V6 3rd to send me and the Supra LSD on the right came out
of a 1987 Supra Turbo.
|
|
|
|
Cola is a funny cat sometimes. You'd think they would want to keep their paws
gear oil free but not this kitty.
|
|
|
|
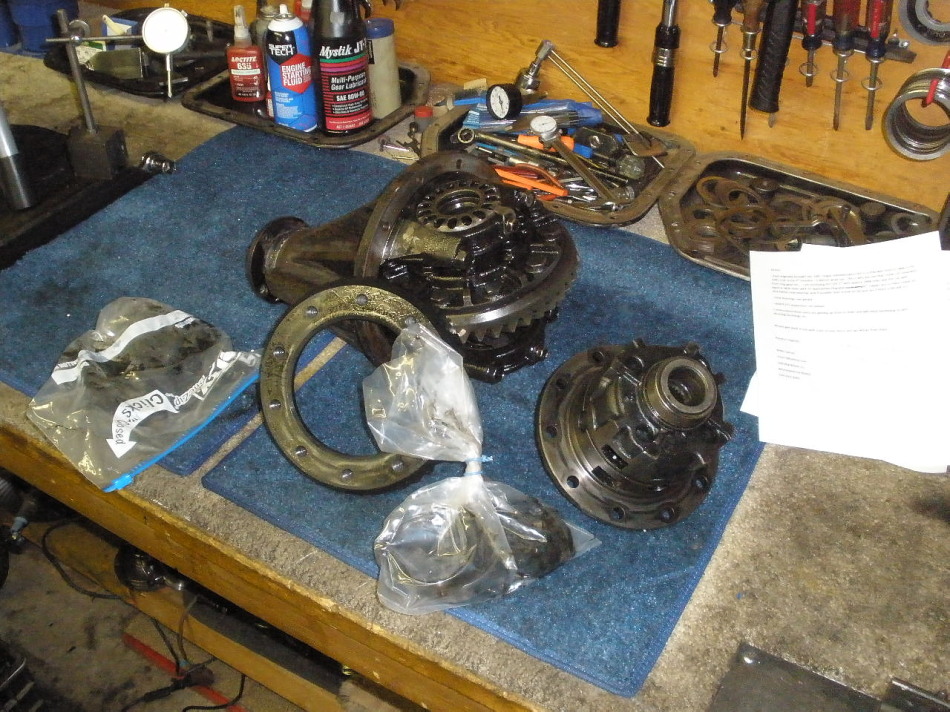
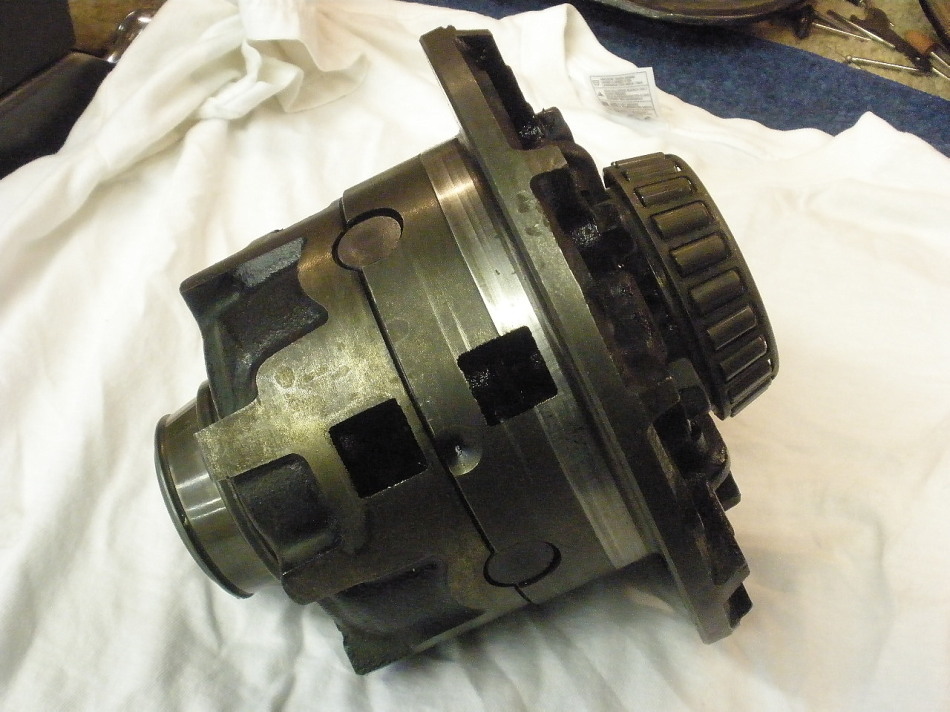
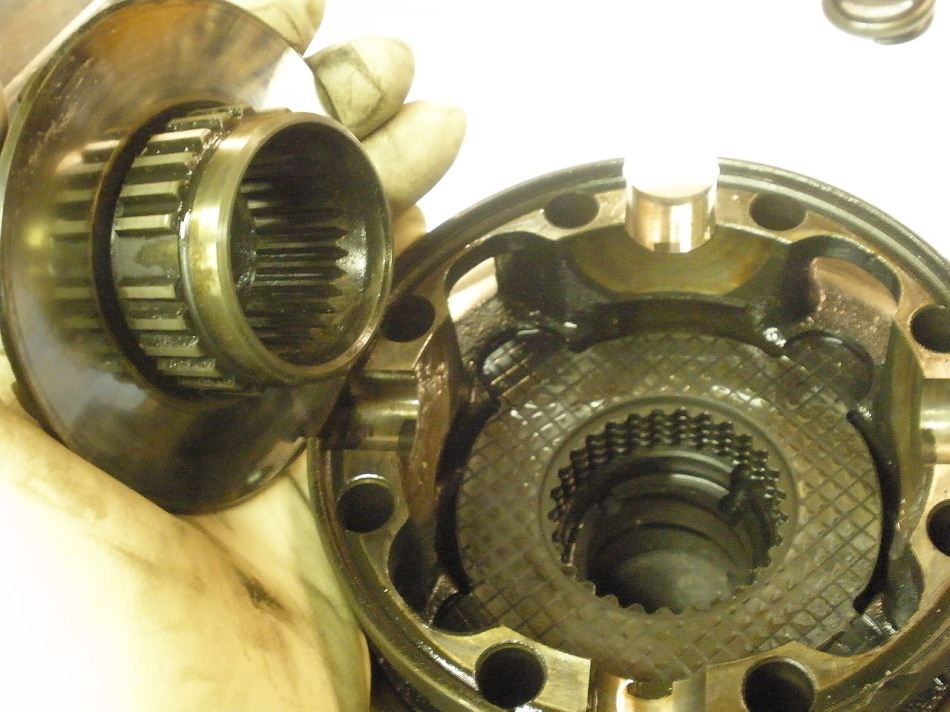
Mike had another guy try to install the Supra but decided he couldn't so
this is the way I received it.
|
|
|
|
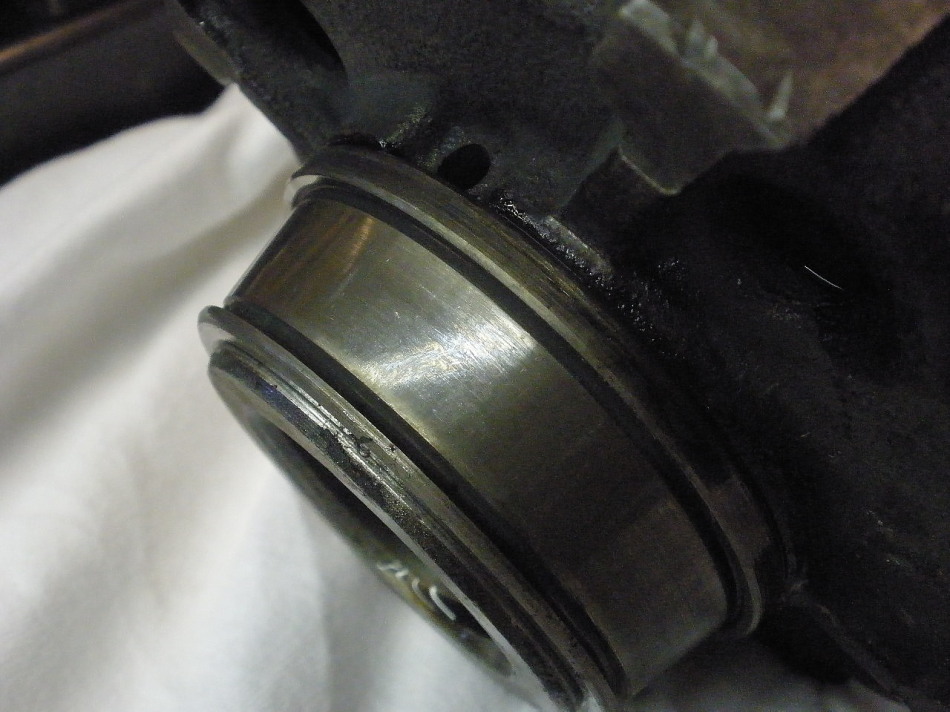
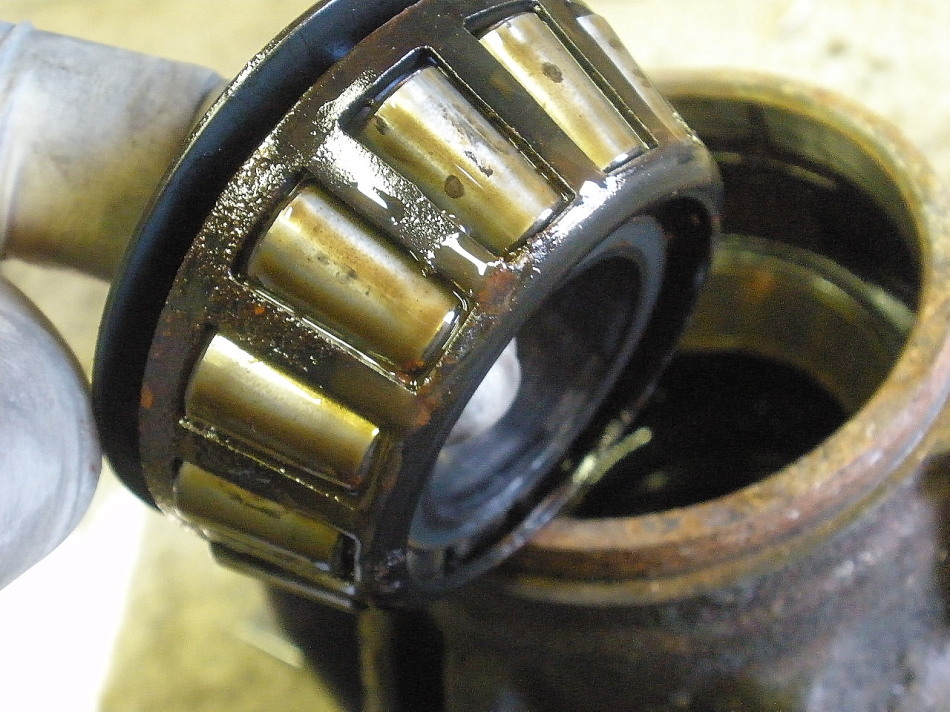
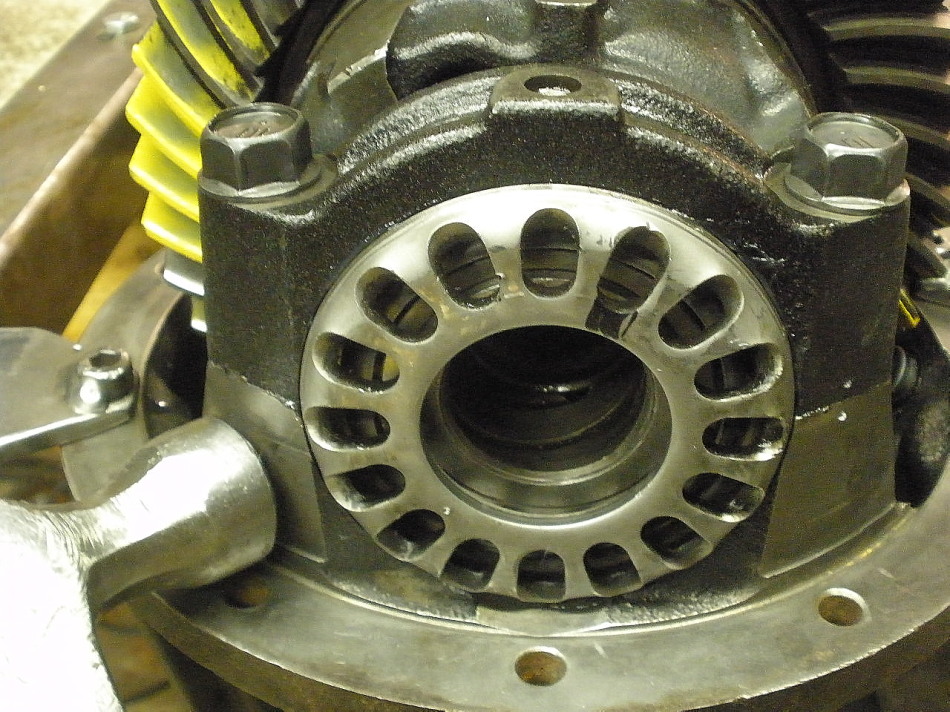
The rollers had decided to fall out of the cage....which could mean that the
bearings were so worn that they should positively be replaced.
|
|
|
|
|
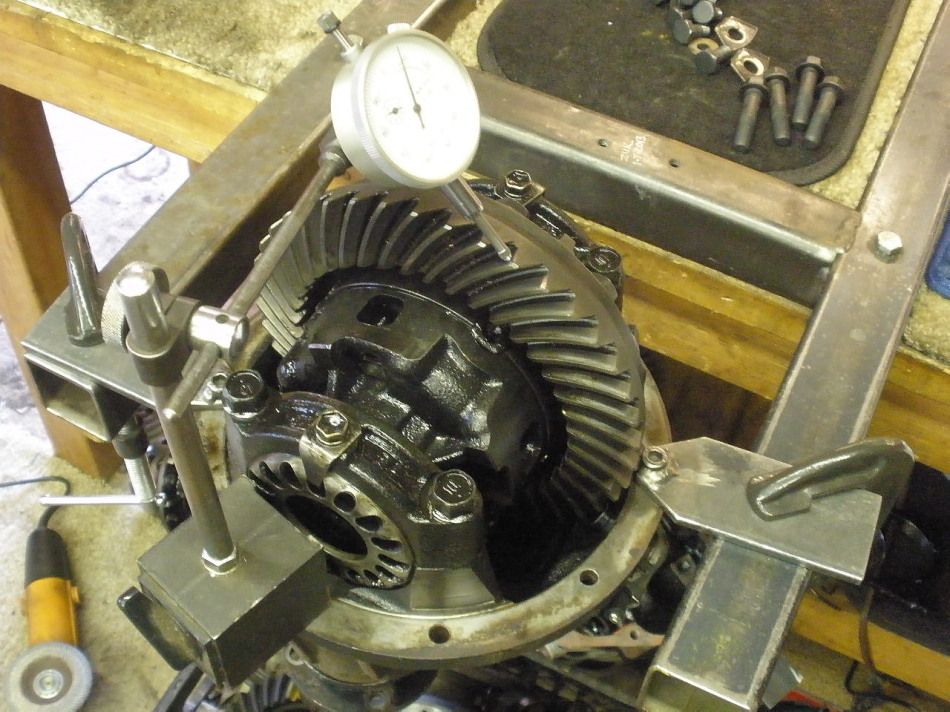
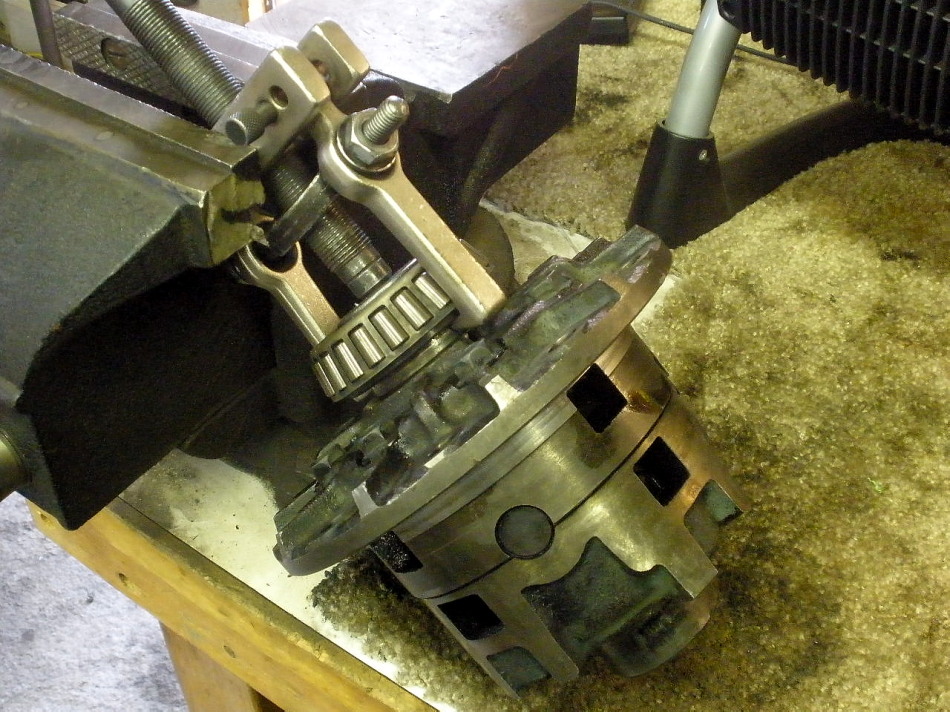
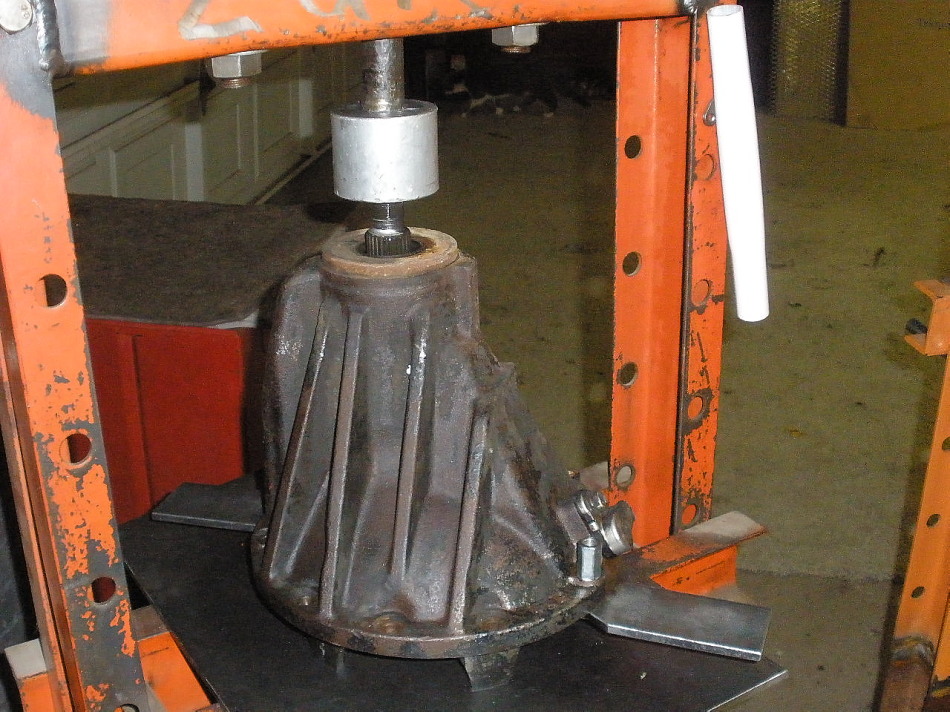
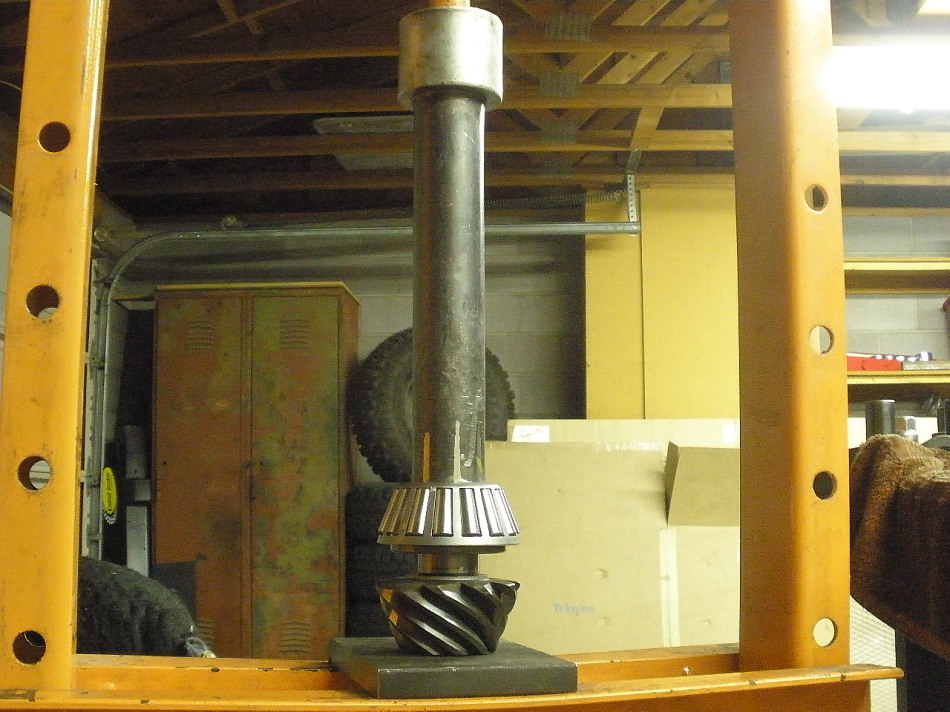
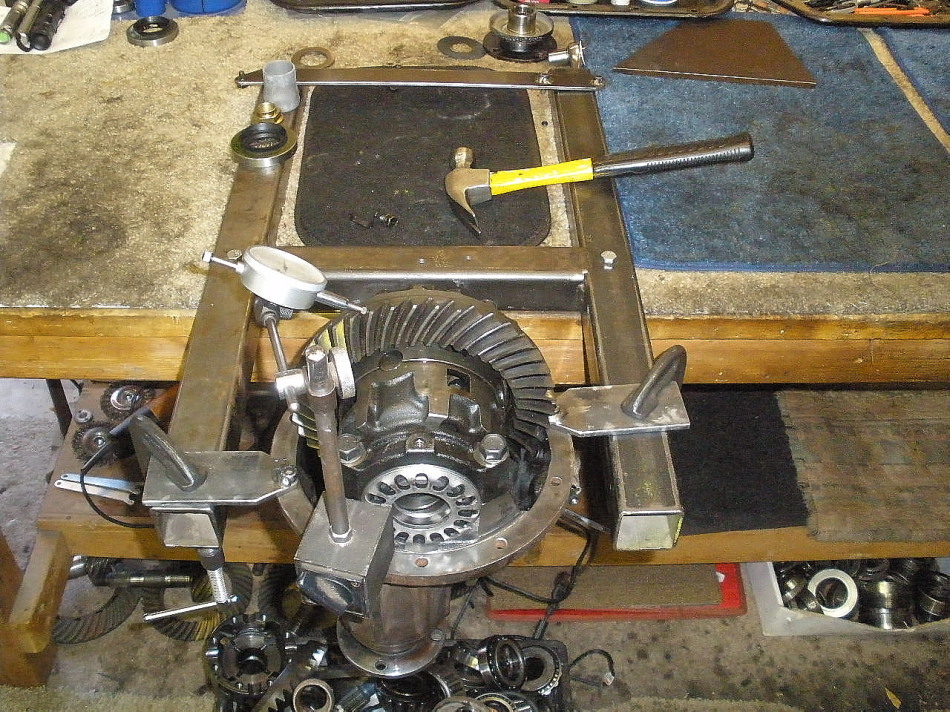
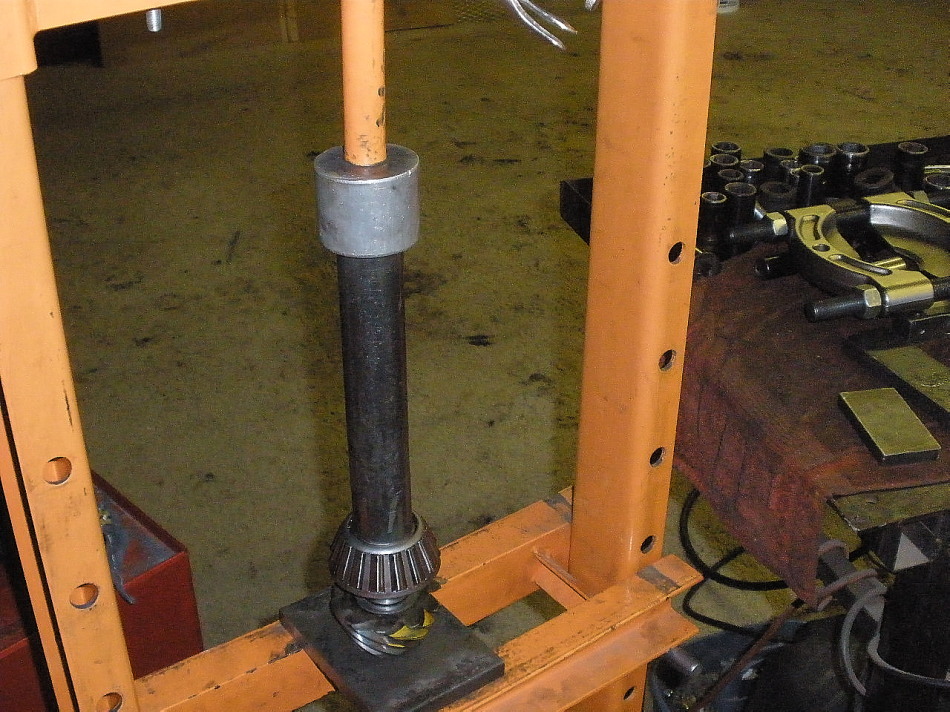
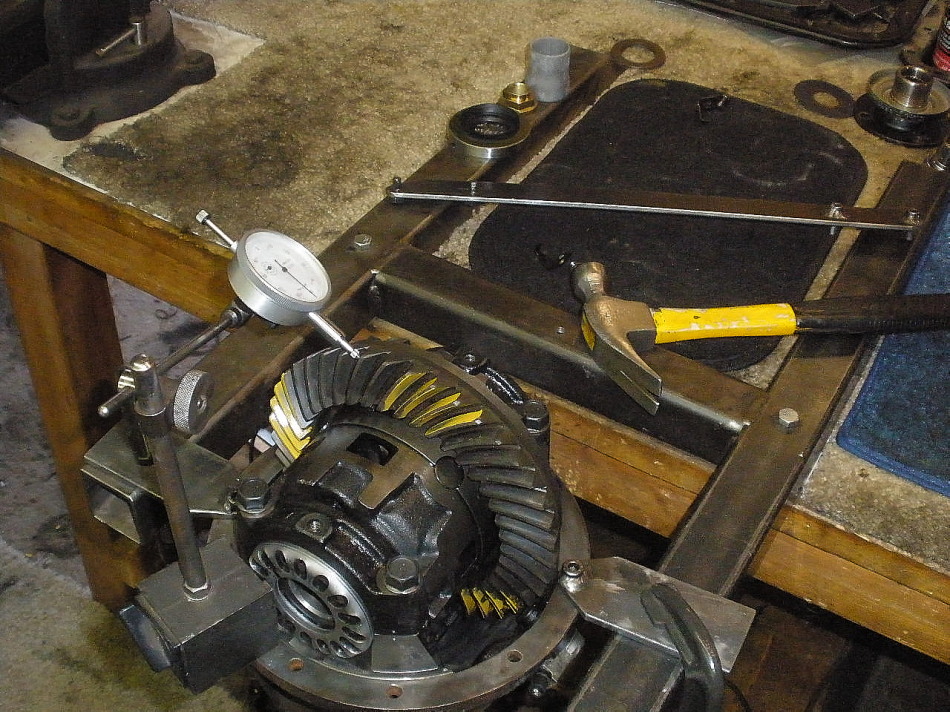
The V6 is mounted to the fixture.
|
|
|
|
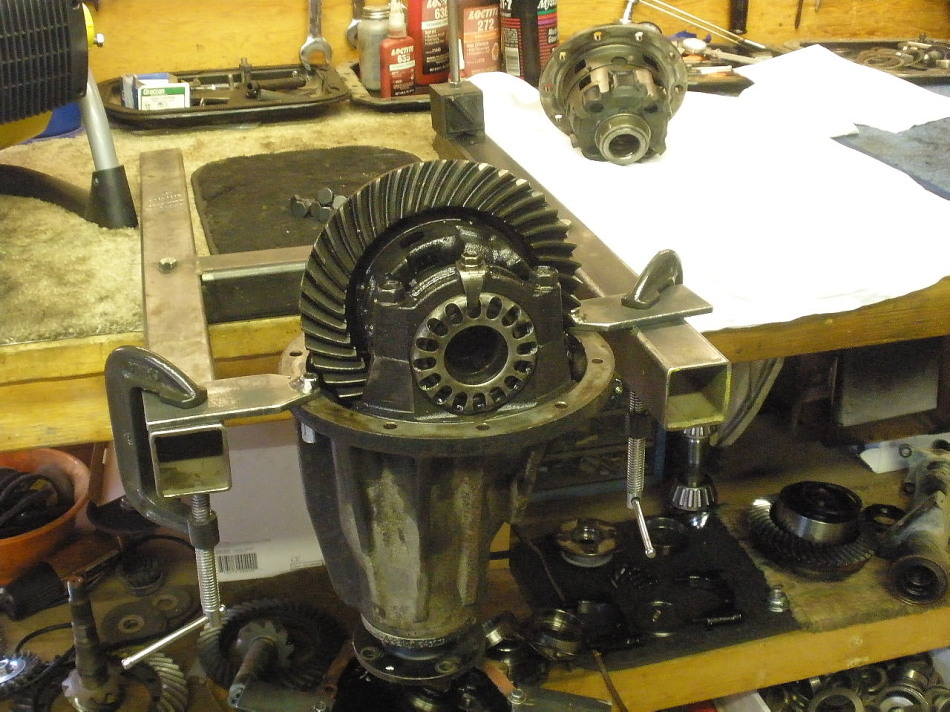
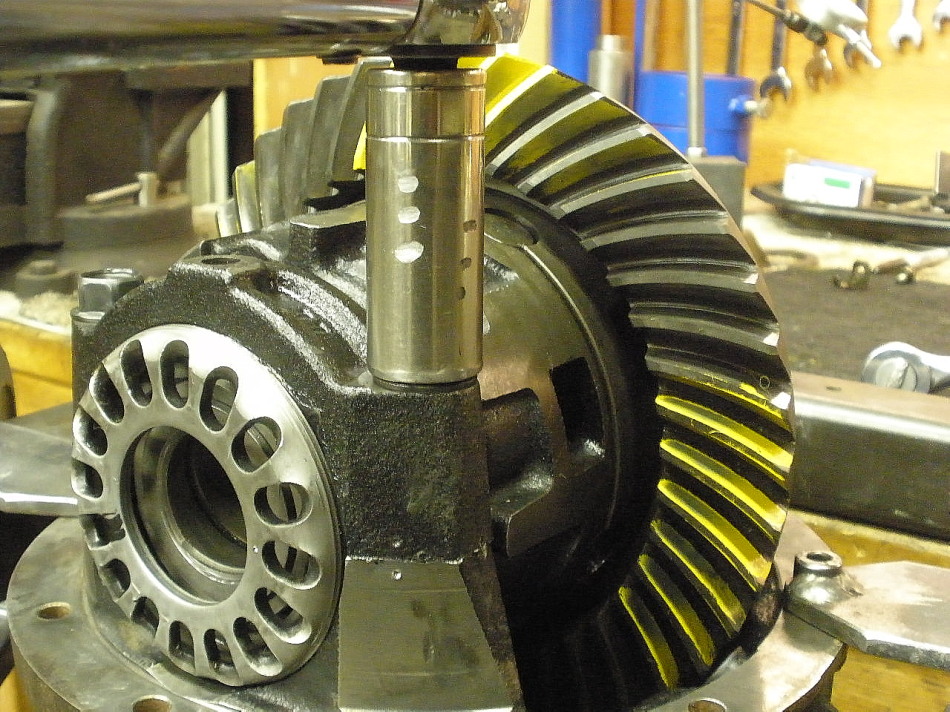
I thought this used ring and pinion was planned for re-use on the Supra LSD.
Backlash is characterized....averaging around .006".
|
|
|
|
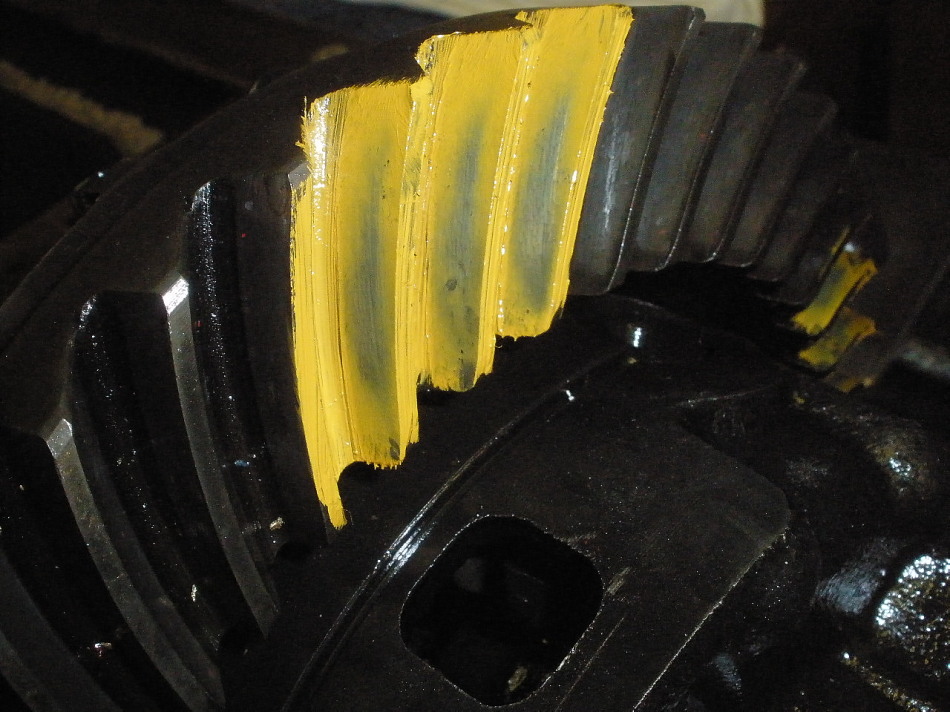
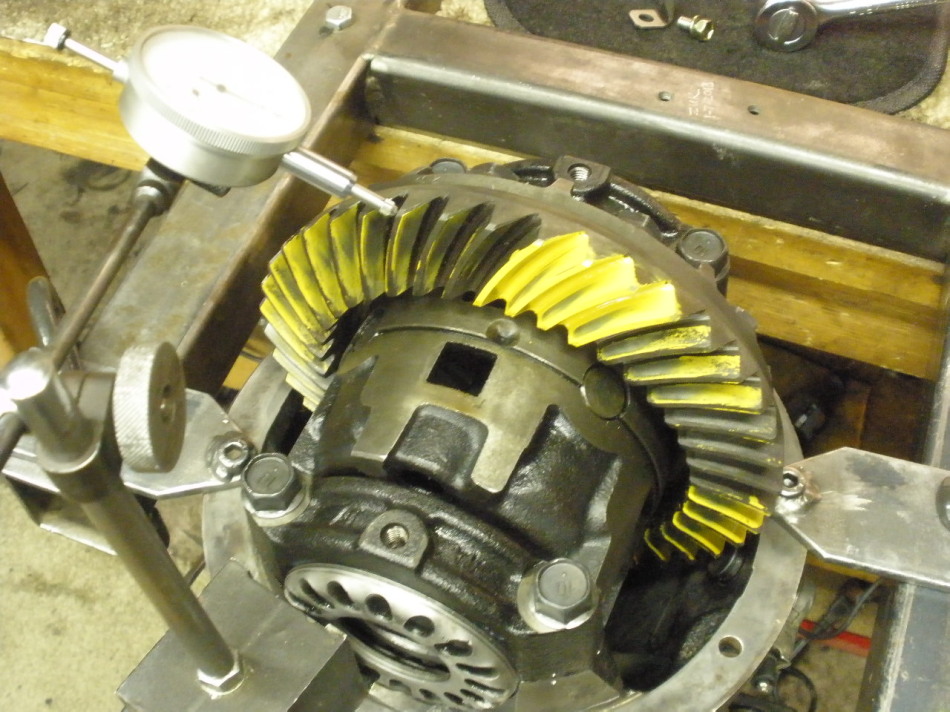
Drive pattern does look somewhat shallow but that can happen when the inner
pinion bearing has worn deeper into the hole effectively making
the pattern appear more and more shallow with high mileage.
|
|
|
|
|
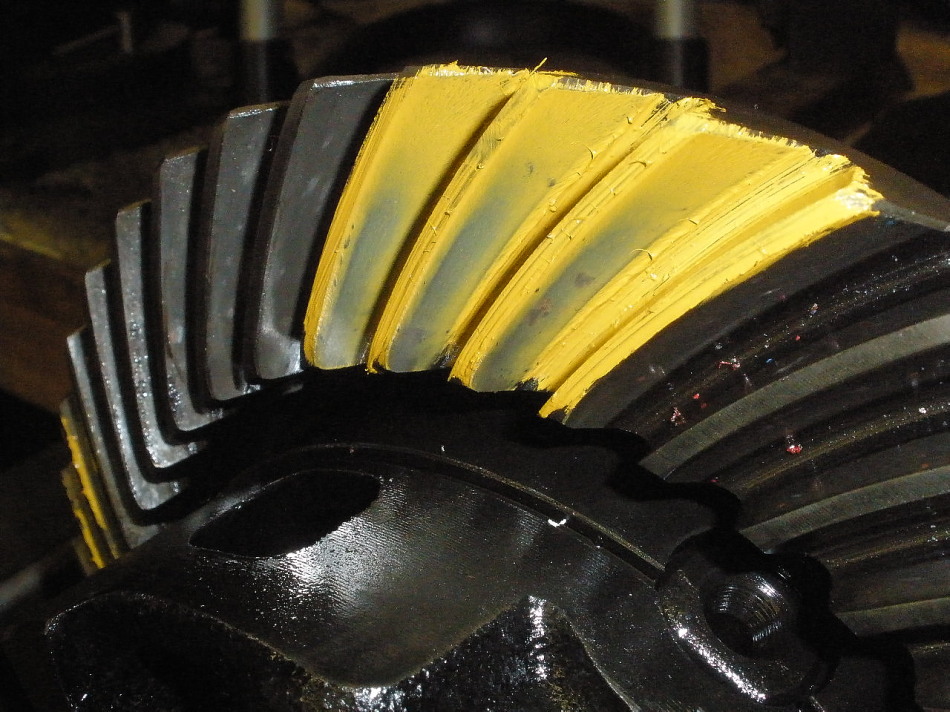
Coast.
|
|
|
|
|
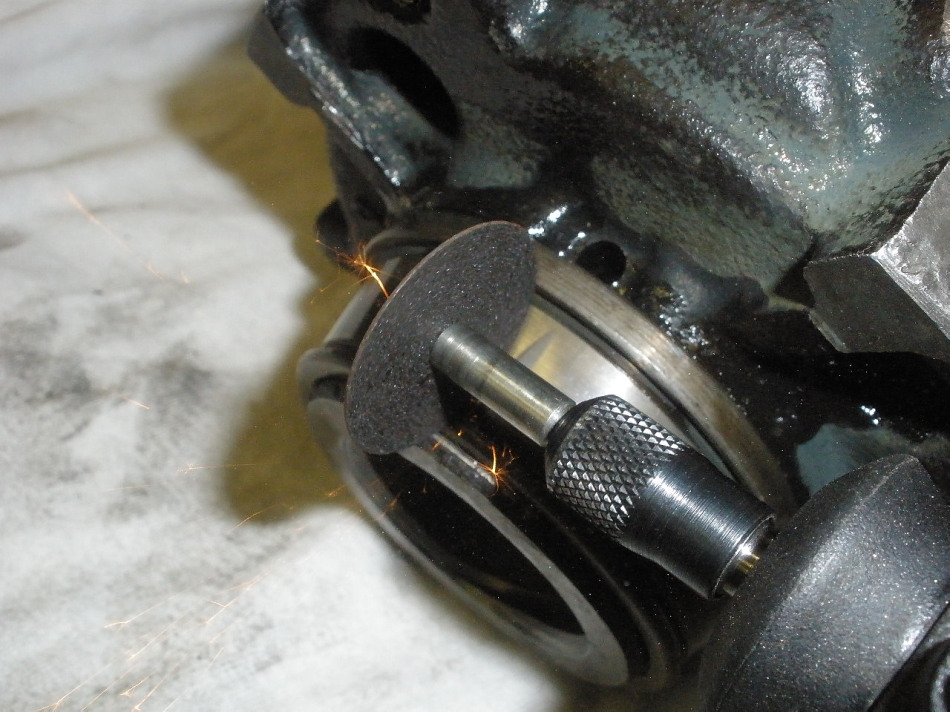
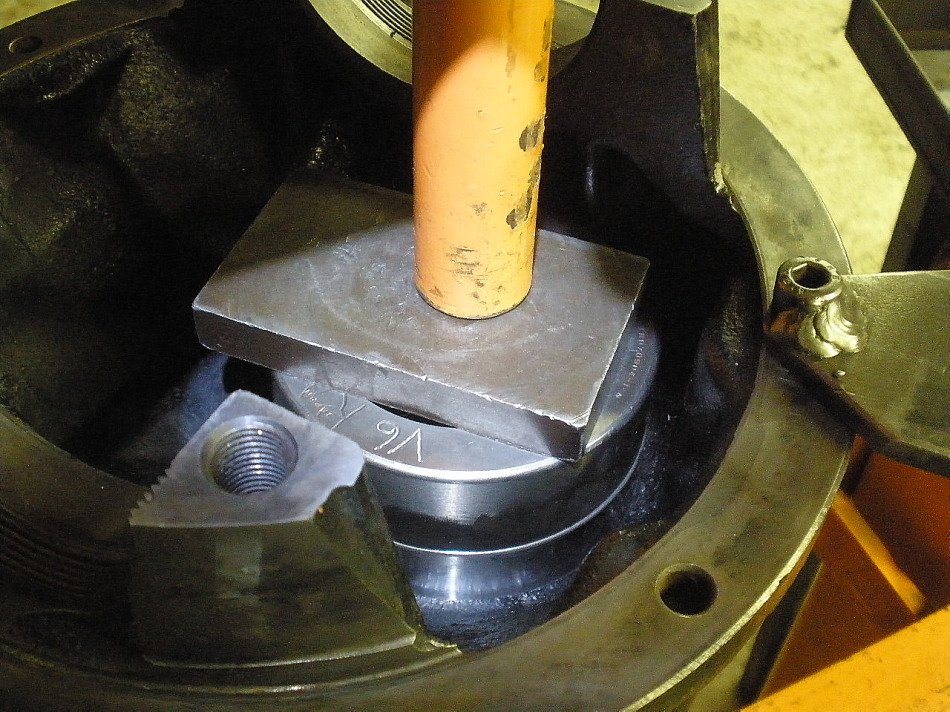
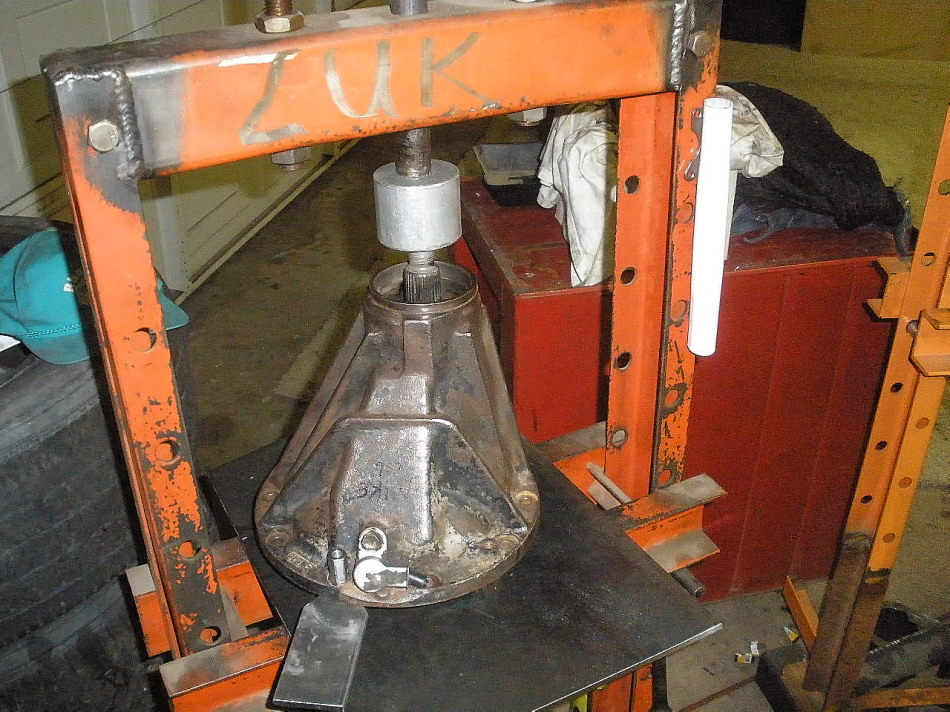
I could have used my 2 jawed puller but decided to grind a slot in it....
|
|
|
|
|
...and tap a screwdriver and then remove the assembly.
|
|
|
|
|
....................
|
|
|
|
|
The other side I did use the puller.
|
|
|
|
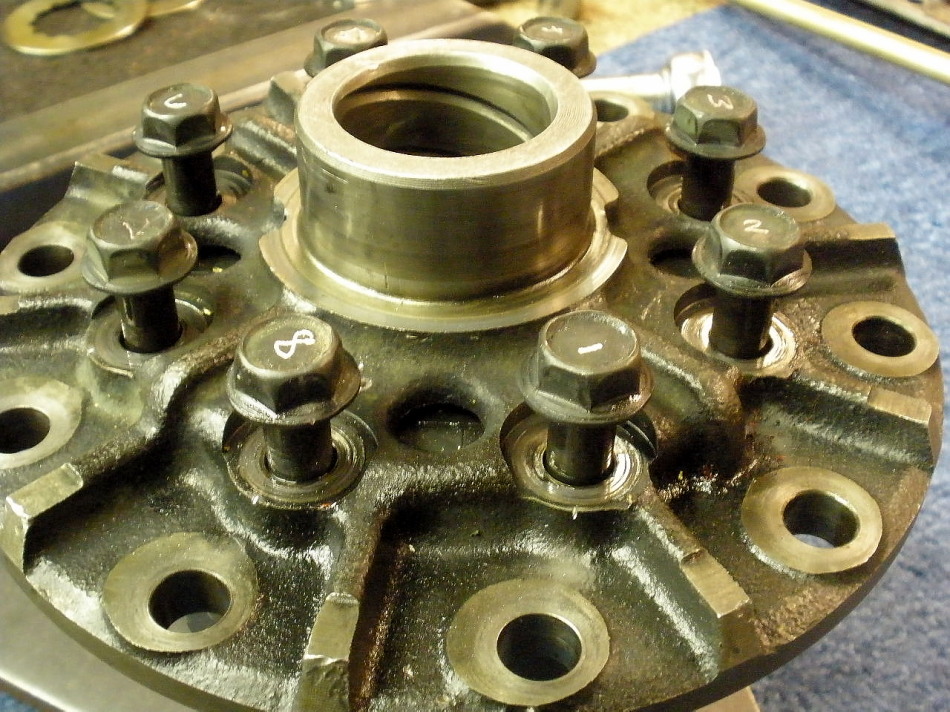
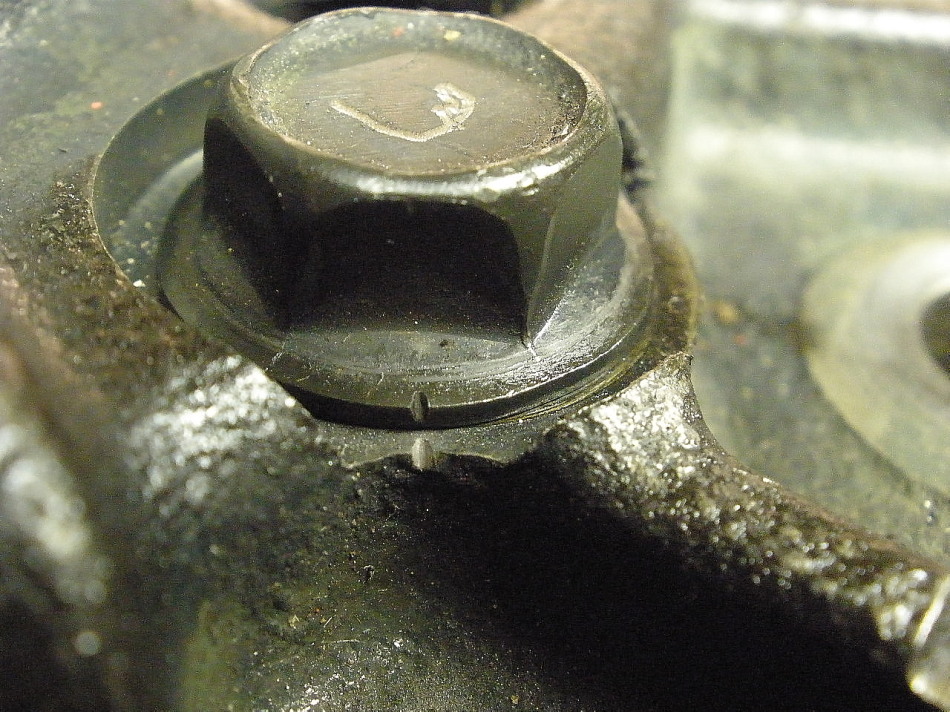
I like to mark the bolt heads 1 through 8 and then place a tiny notch such that
the exact same bolt goes in the same hole and gets tightened exactly as
tight as before.
|
|
|
|
|
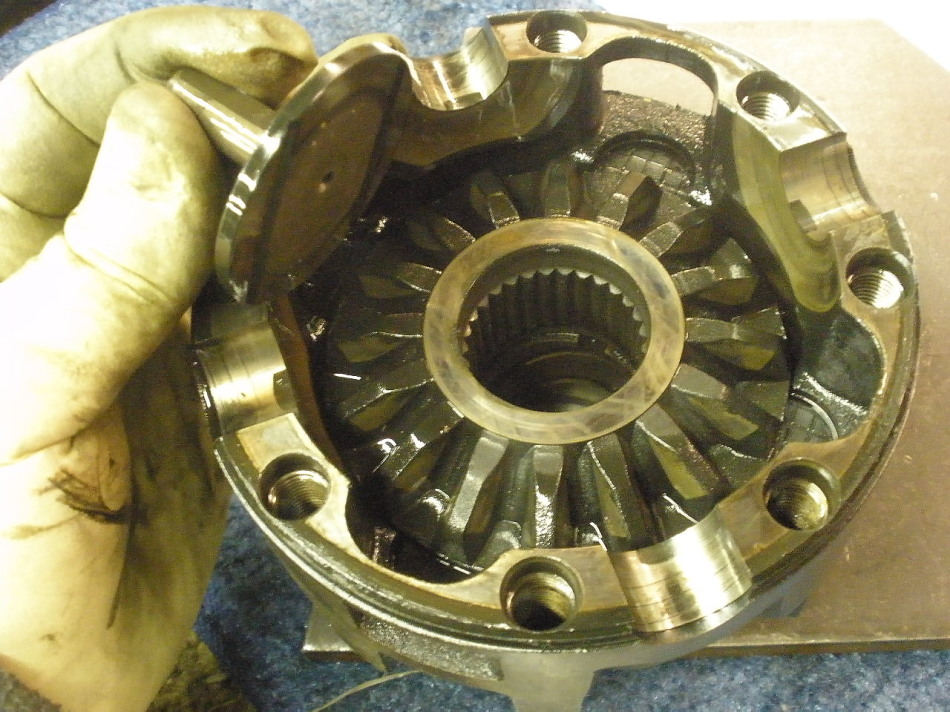
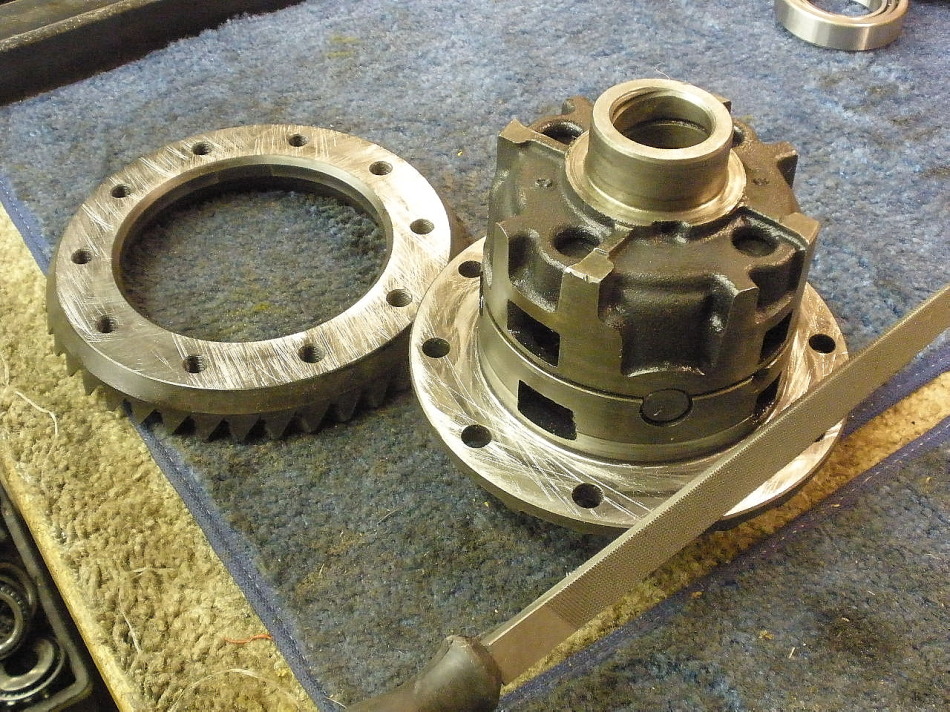
Case is opened up...
|
|
|
|
|
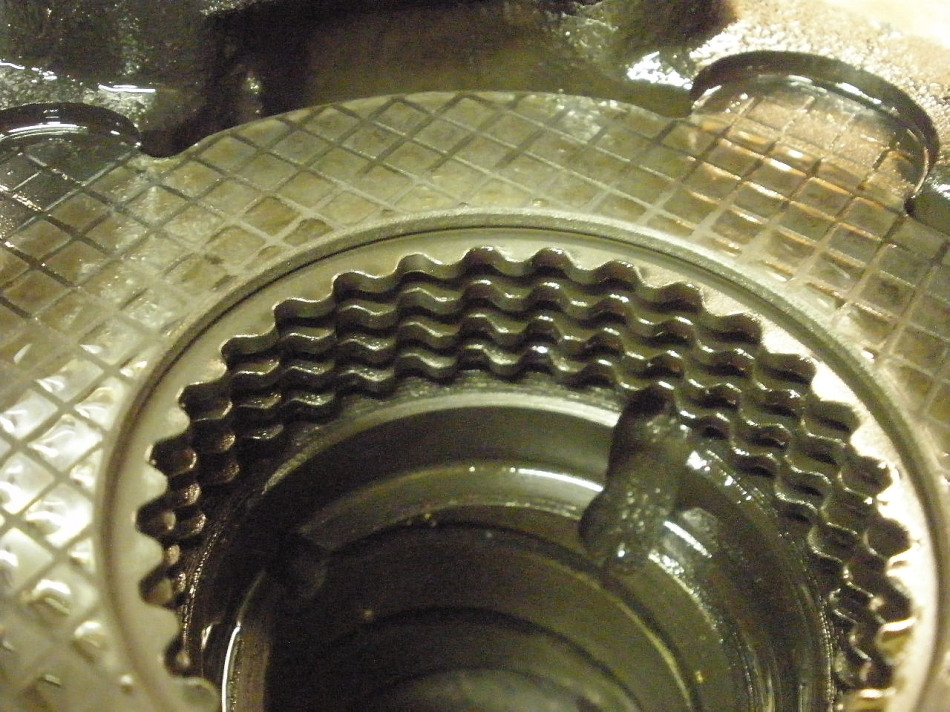
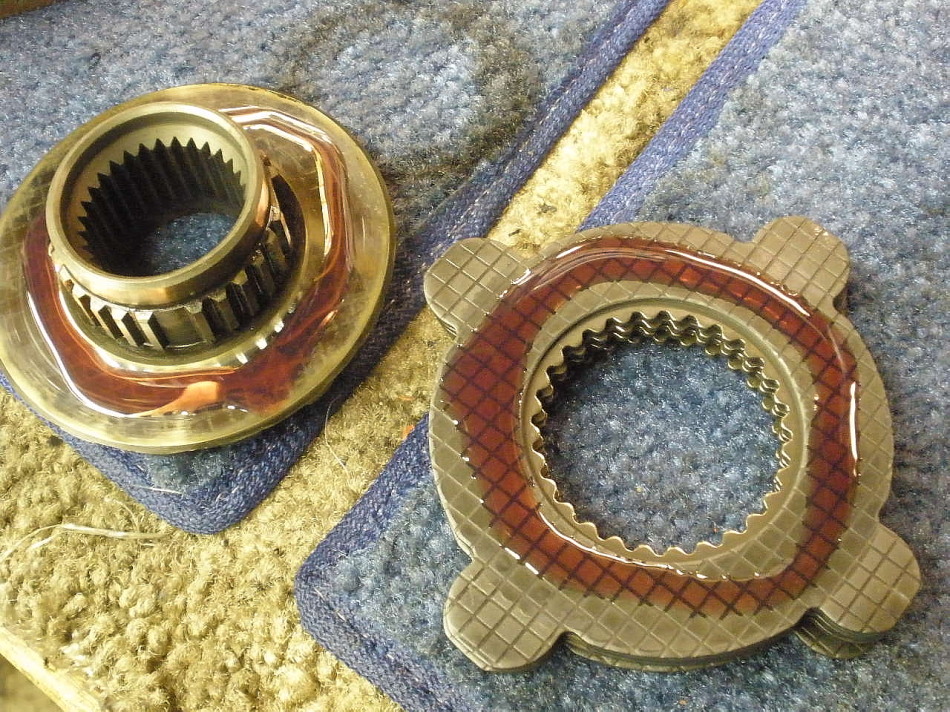
Sidegear is slipped out exposing one of the clutch packs.
|
|
|
|
|
I can see that the plates are alternating.
|
|
|

|
|
Each plate is removed in order and measured.
|
|
|
|
|
This side is done...
|
|
|
|
|
Same thing for the other case half...remove items in order.
|
|
|

|
|
Sidegear is removed.
|
|
|
|
|
......
|
|
|
|
|
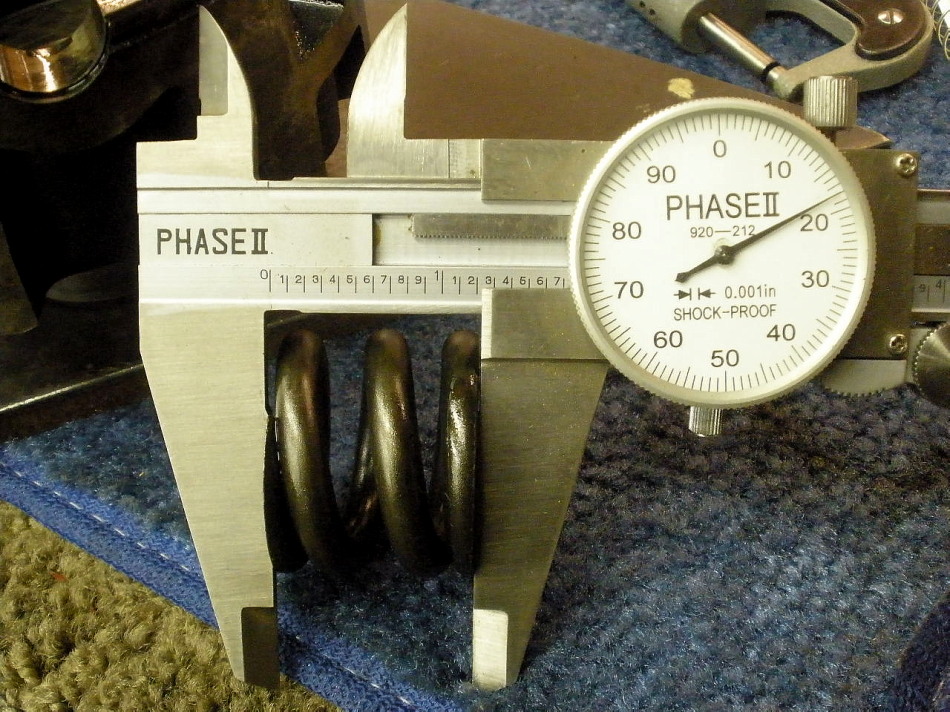
The heavy duty center spring is measured.
|
|
|
|
|
Parts have new hypoid gear oil added and re-assembled.
|
|
|
|
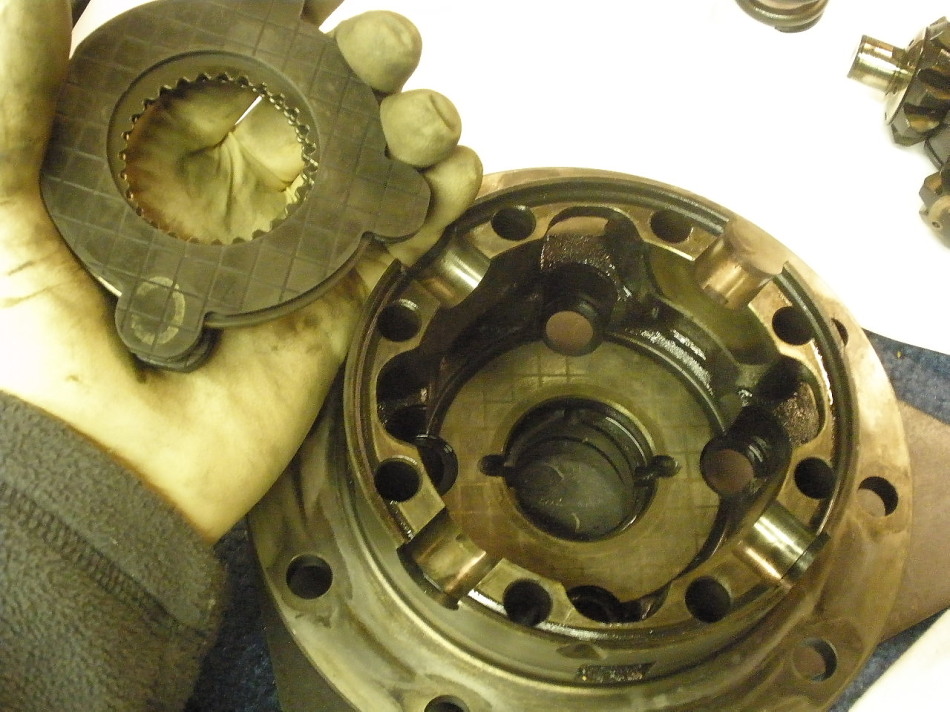
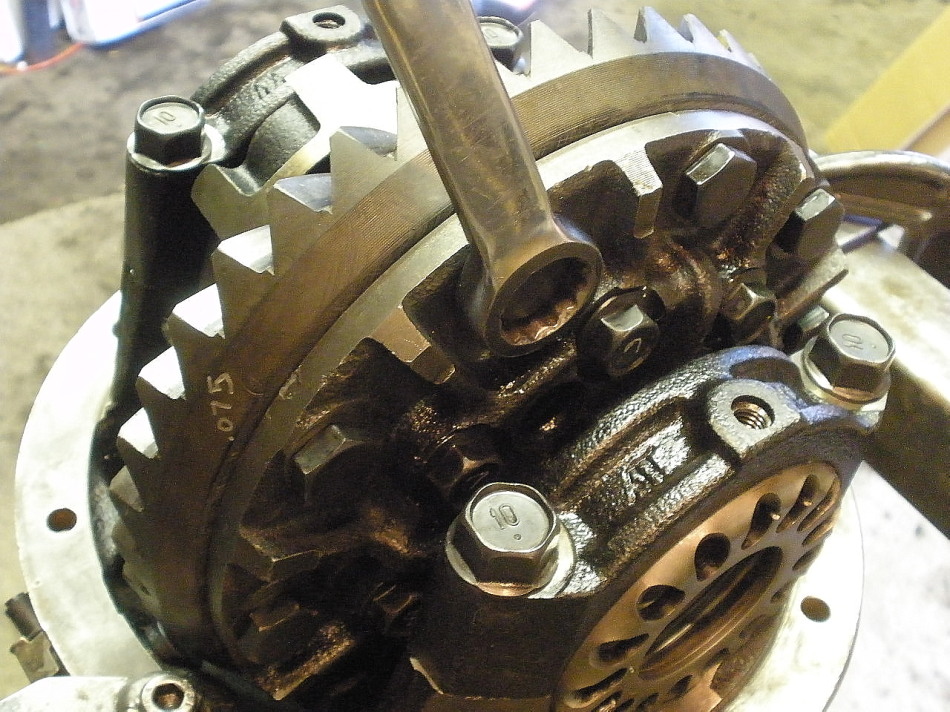
The left half has that plate with 2 nubs that must be aligned with the holes
they recess into. Good luck :)
|
|
|
|
|
Same bolt...same hole. Torque wrench check.
|
|
|
|
Using my Home Depot clicker style torque wrench, I noticed that it took
45 ft/lb to get it exactly the way the factory had it. The FSM says 35.
|
|
|
|
|
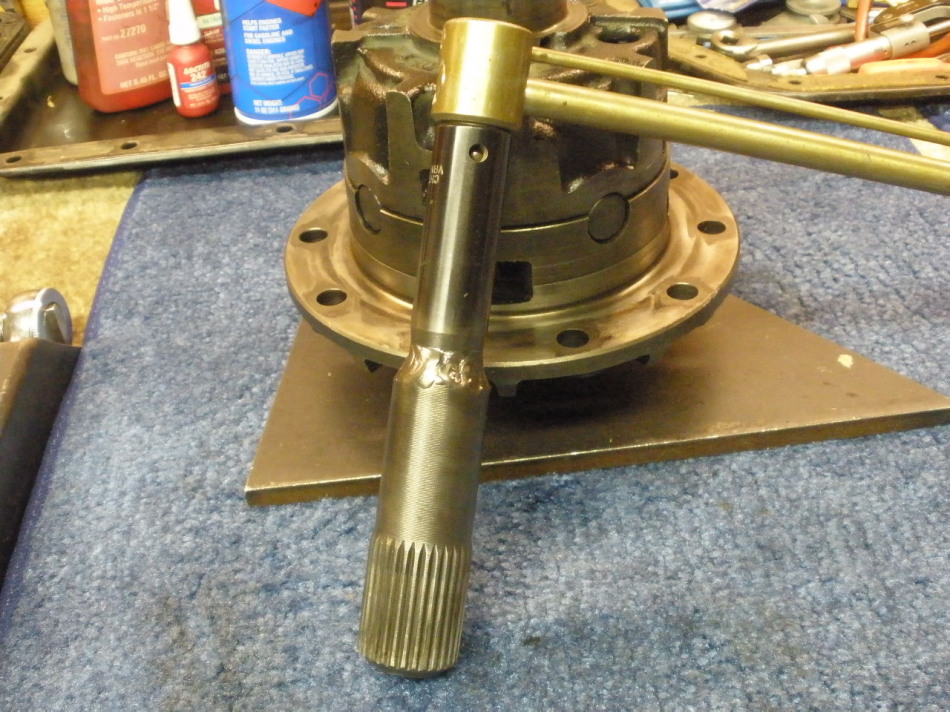
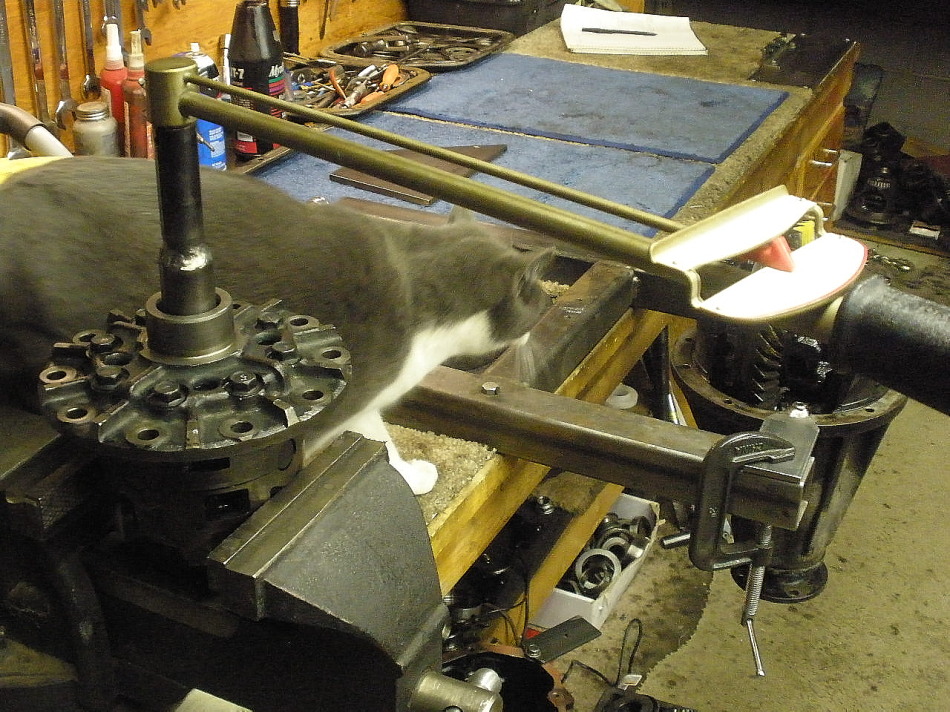
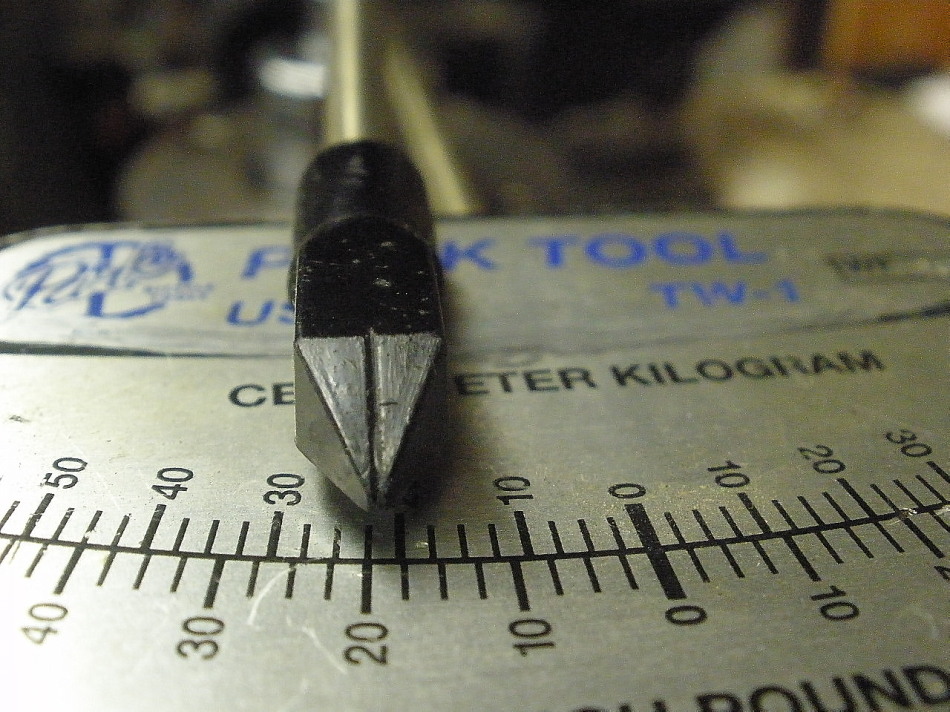
Here's a tool I just welded up. Welds are still warm.
|
|
|
|
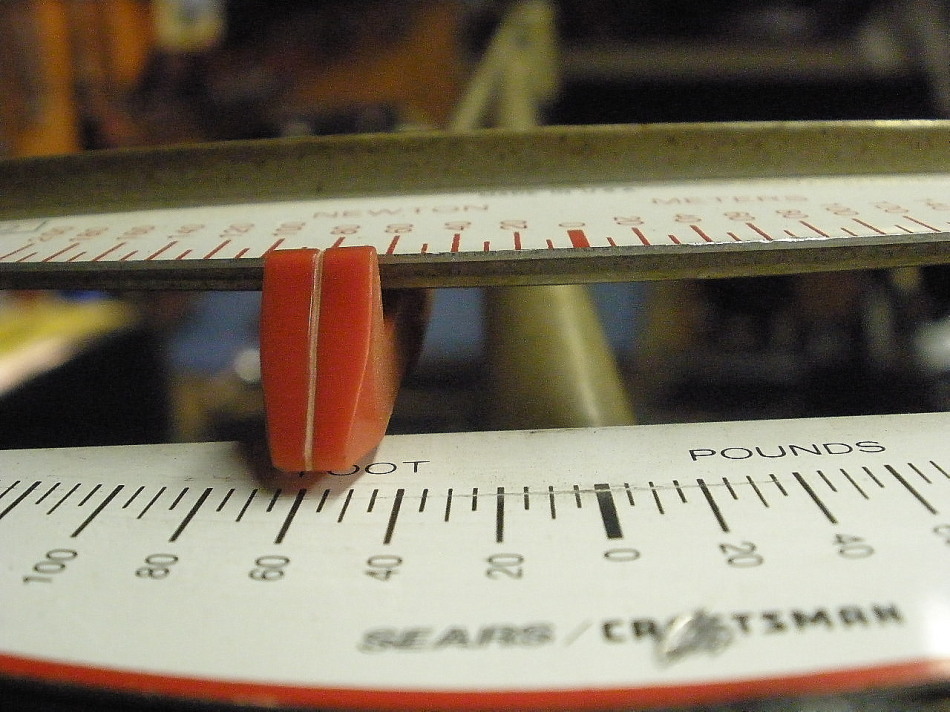
Very effective for this test. With the clutch plates NOT in motion,
the break-a-way torque was over 100 ft/lb but once the plates were
in motion it took as little as 30 ft/lb to keep them moving. No
posi additive used here so I bet that effected the break-a-way.
|
|
|
|
|
..........
|
|
|
|
|
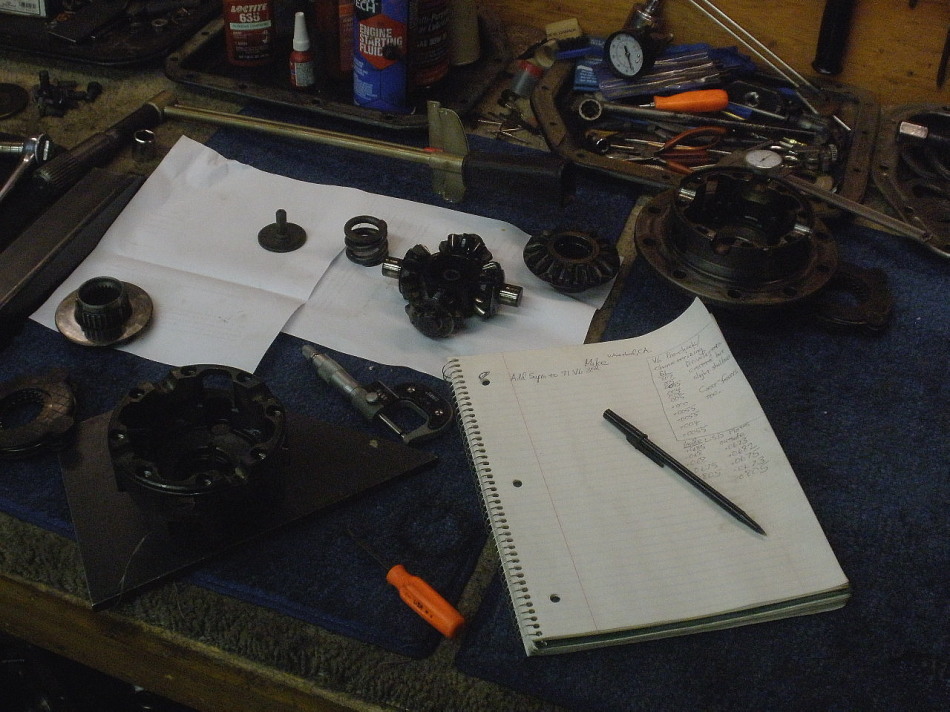
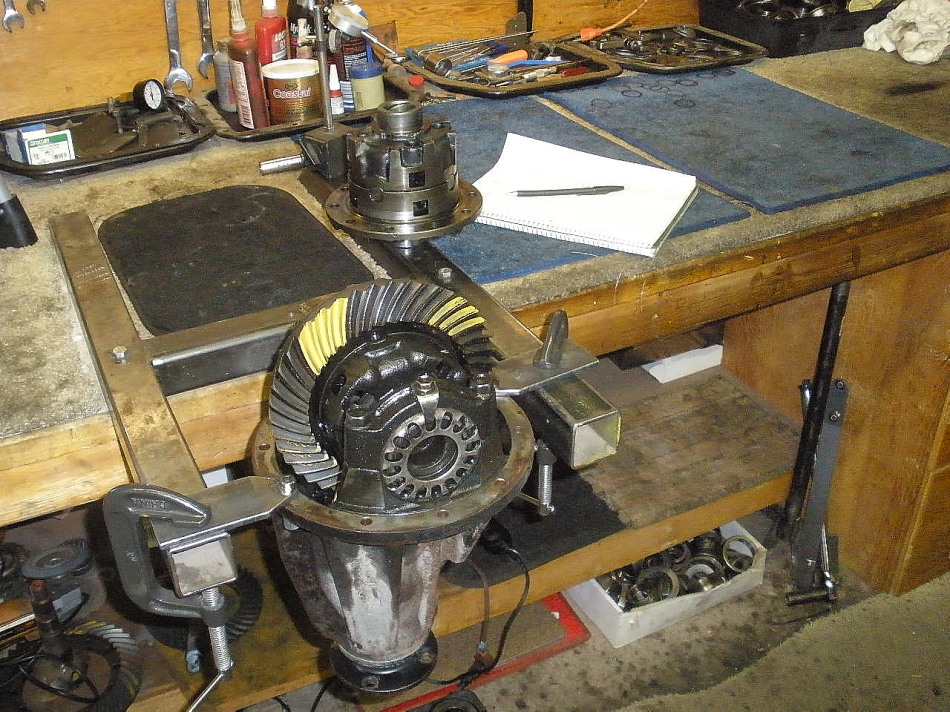
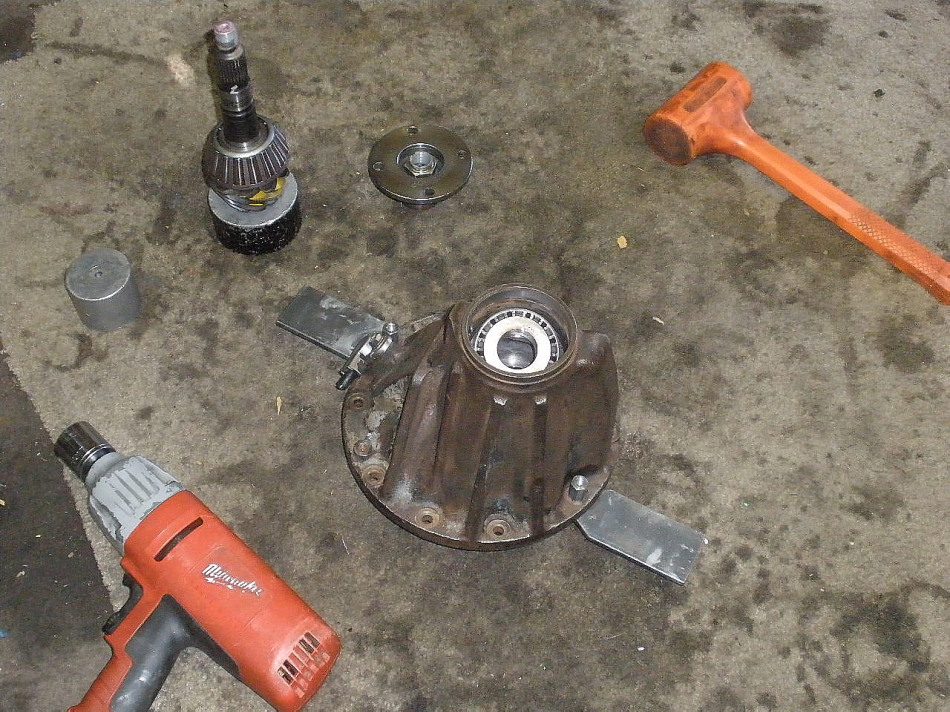
LSD inspection complete and now attention turns to the V6 3rd.
|
|
|
|
|
Teardown begins.
|
|
|

|
|
Guess I'm stronger than I thought...
|
|
|

|
|
...I was able to remove this carrier bearing with my fingers.
|
|
|
|
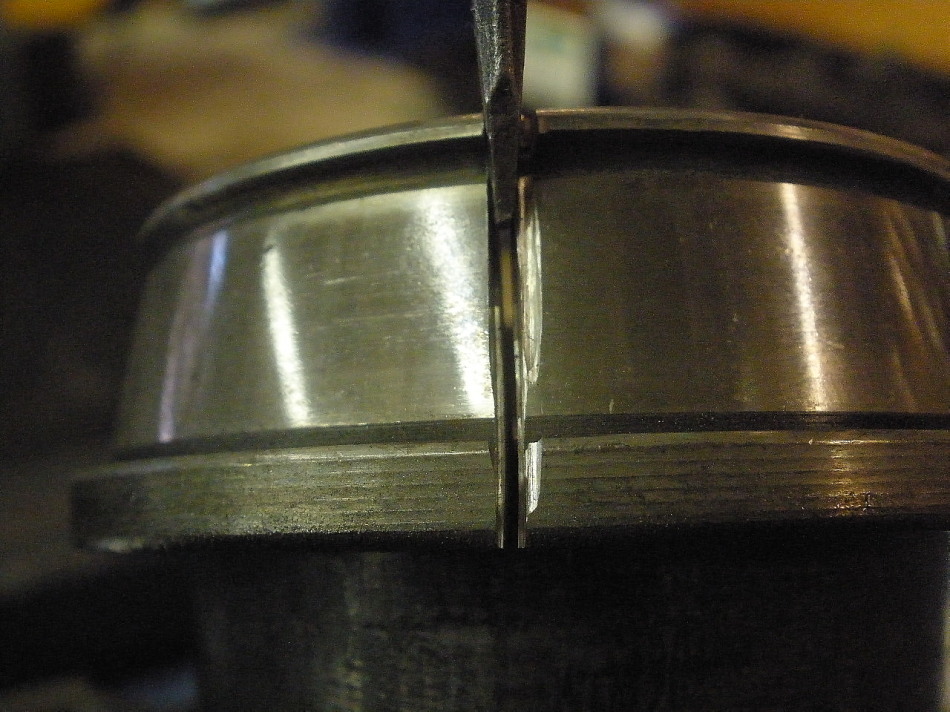
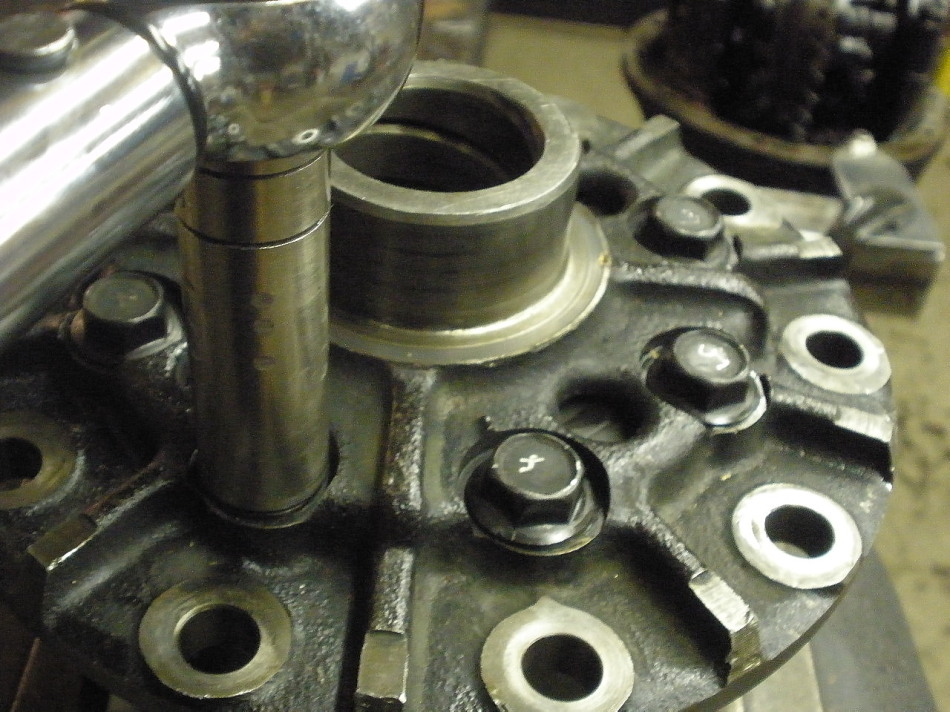
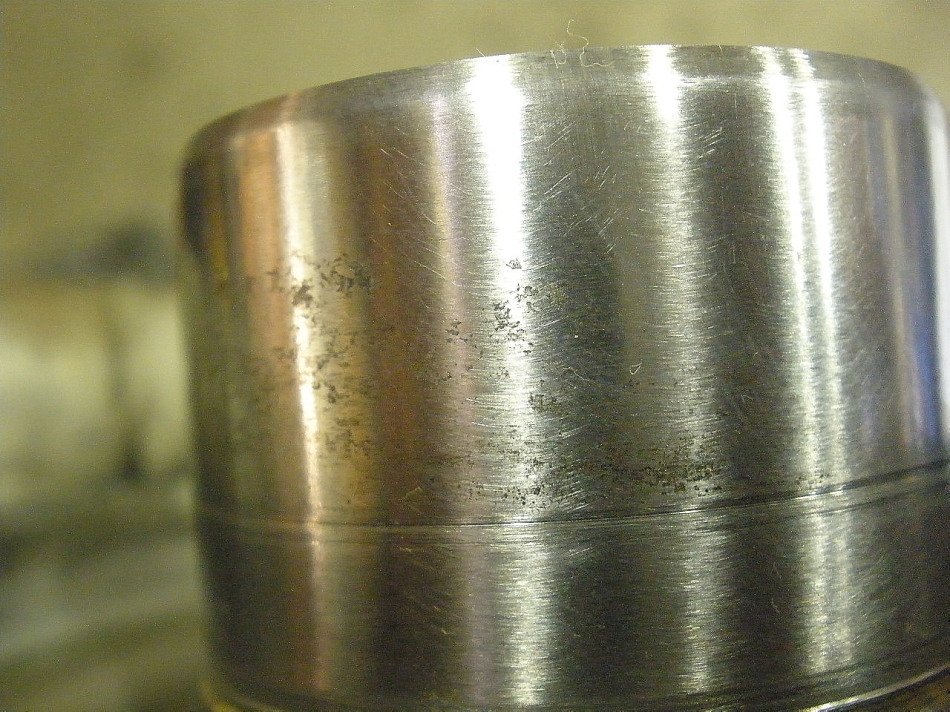
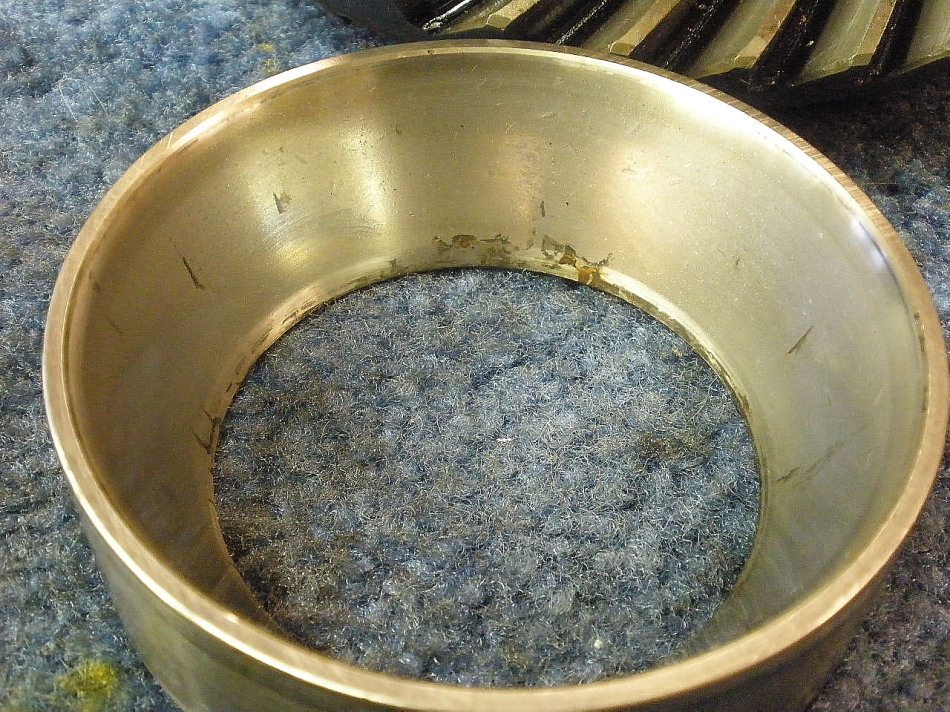
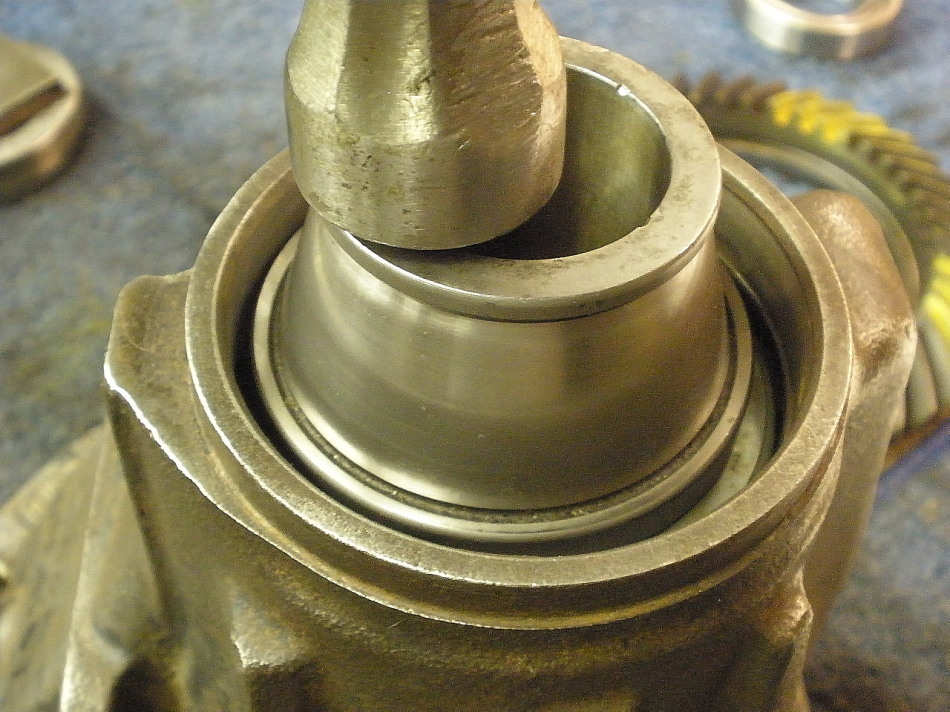
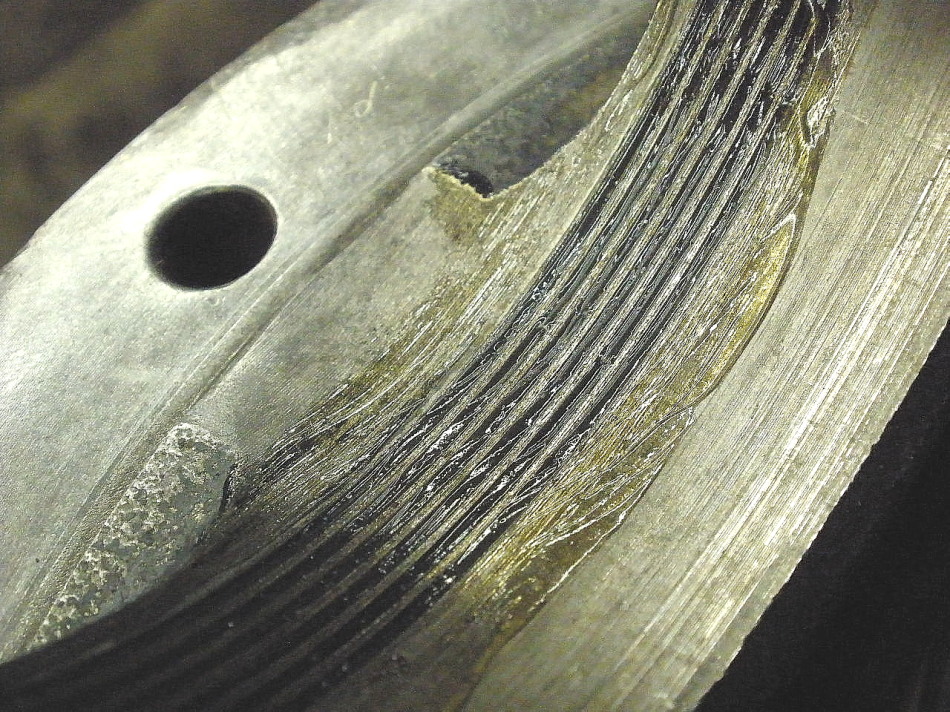
A close up of the V6 journal shows some minor "spun damage". This is of no
concern because this open V6 case will be put aside and the Supra LSD put
in its place. But, if I were to re-use this open case, I would clean the
surfaces and use a special sleeve-lock Loctite.
|
|
|
|
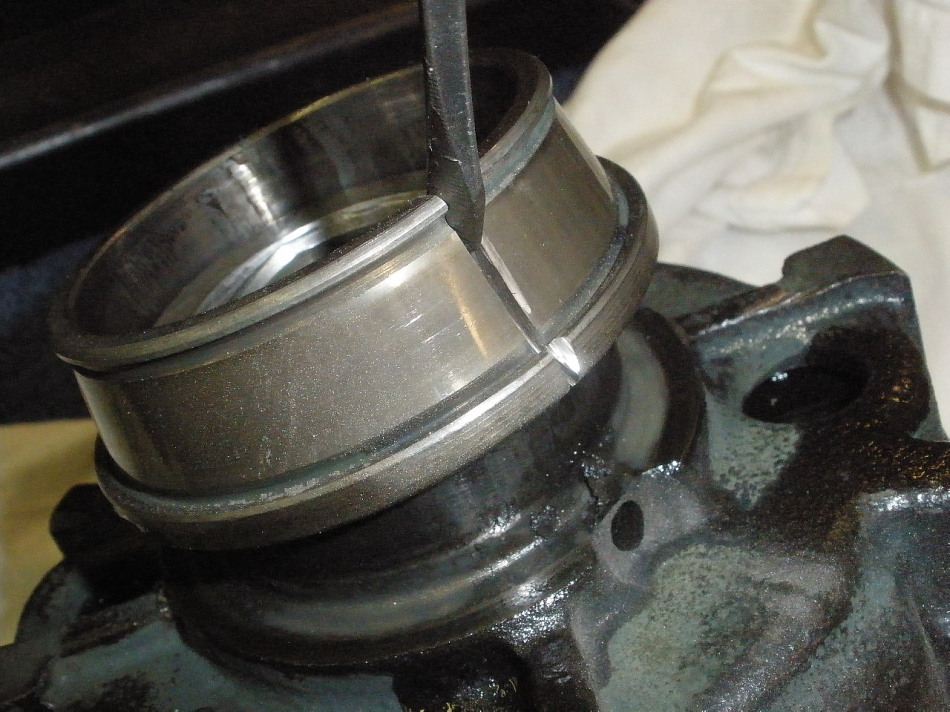
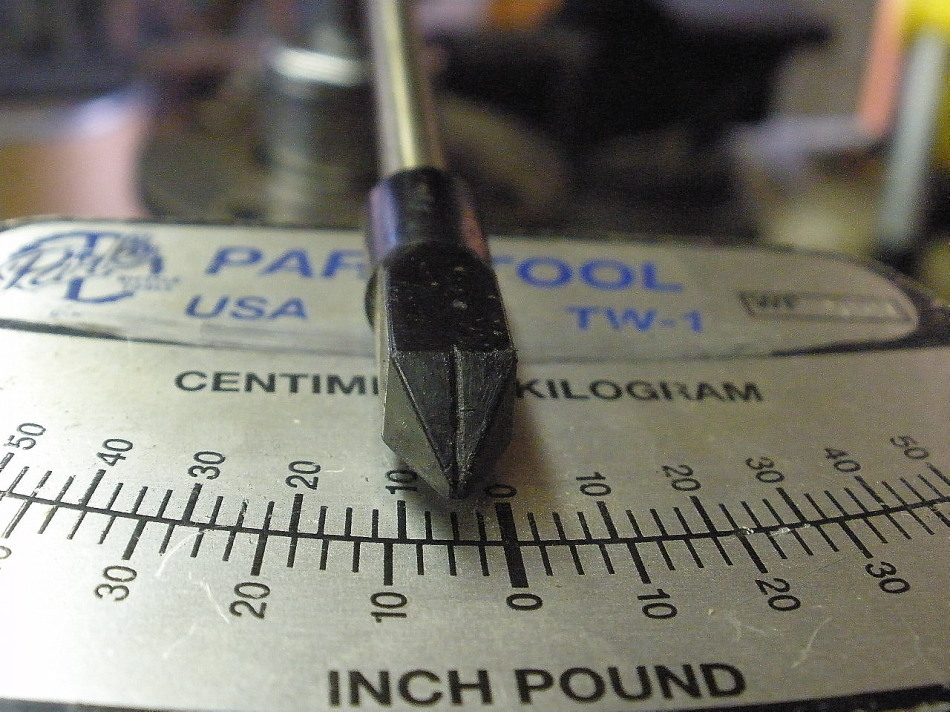
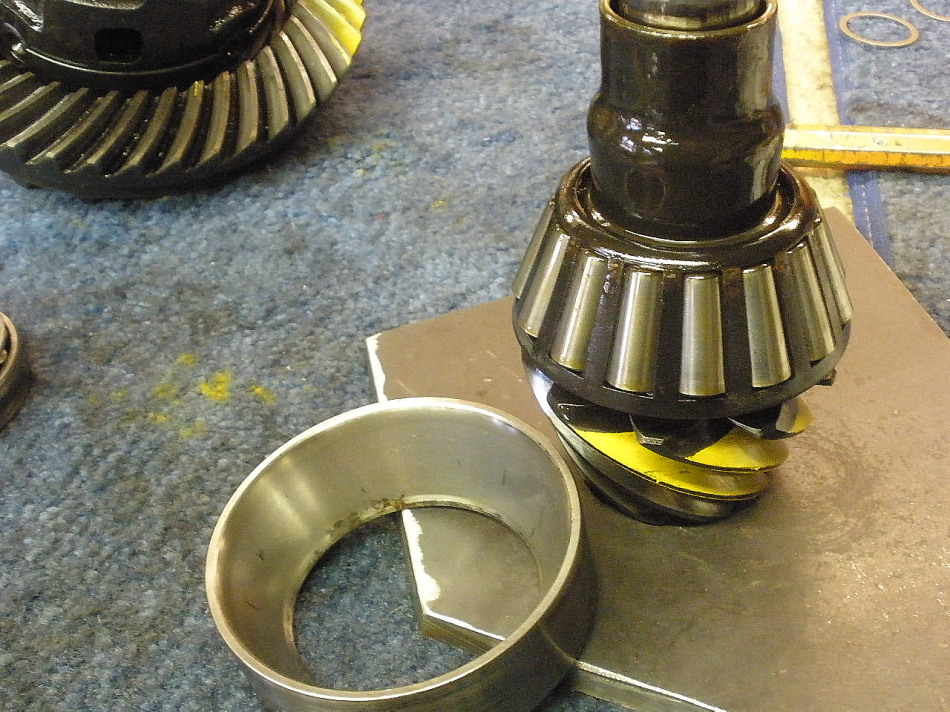
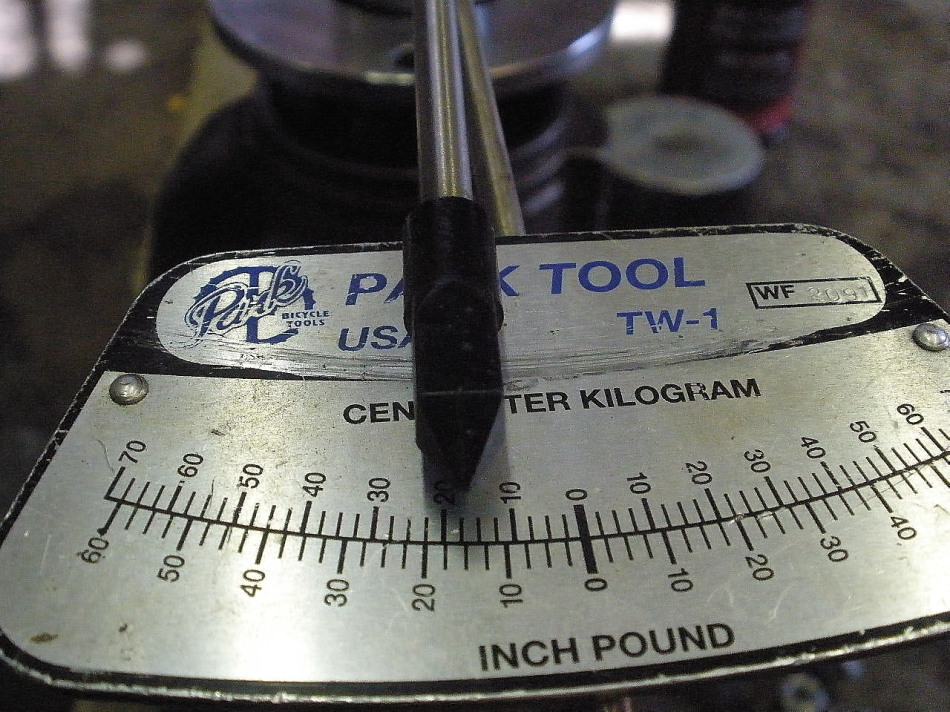
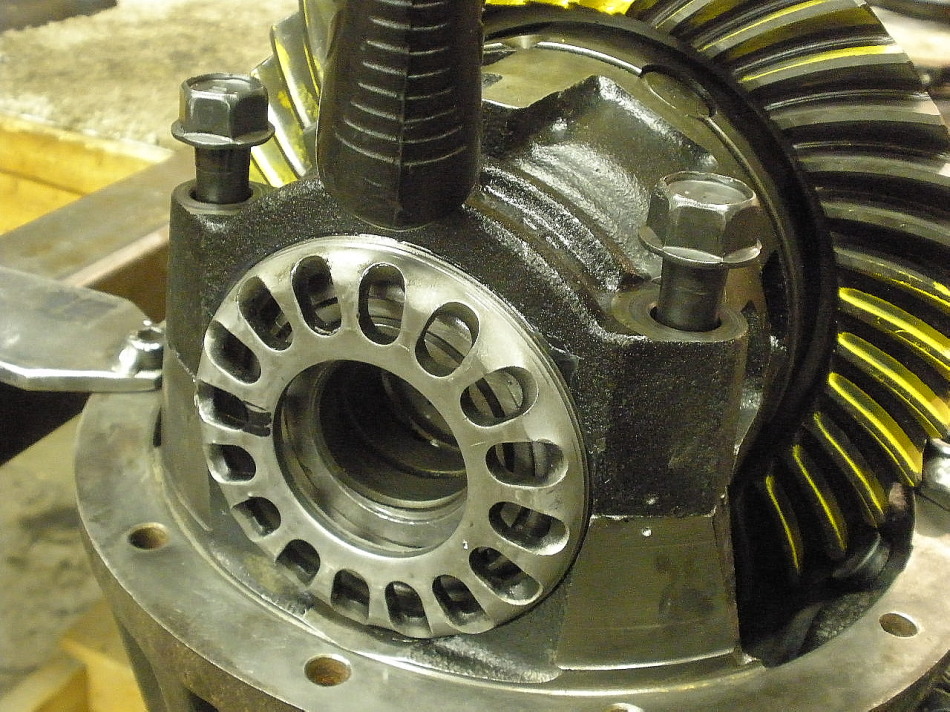
With the case out, I can accurately measure the pinion pre-load by itself. I
see about 4 inch/pounds start torque which is good.
|
|
|
|
|
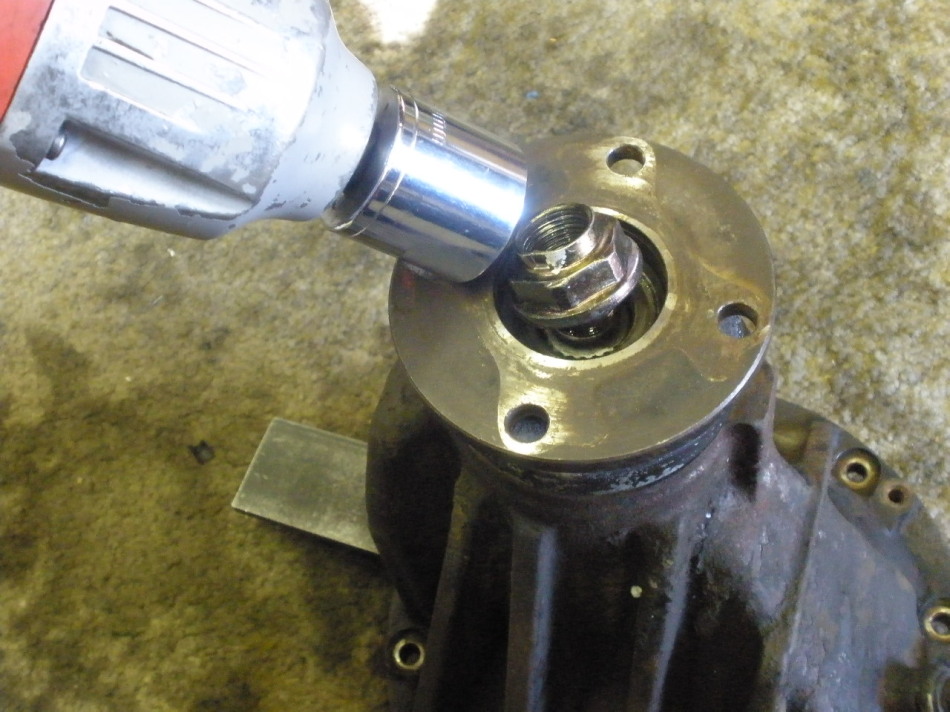
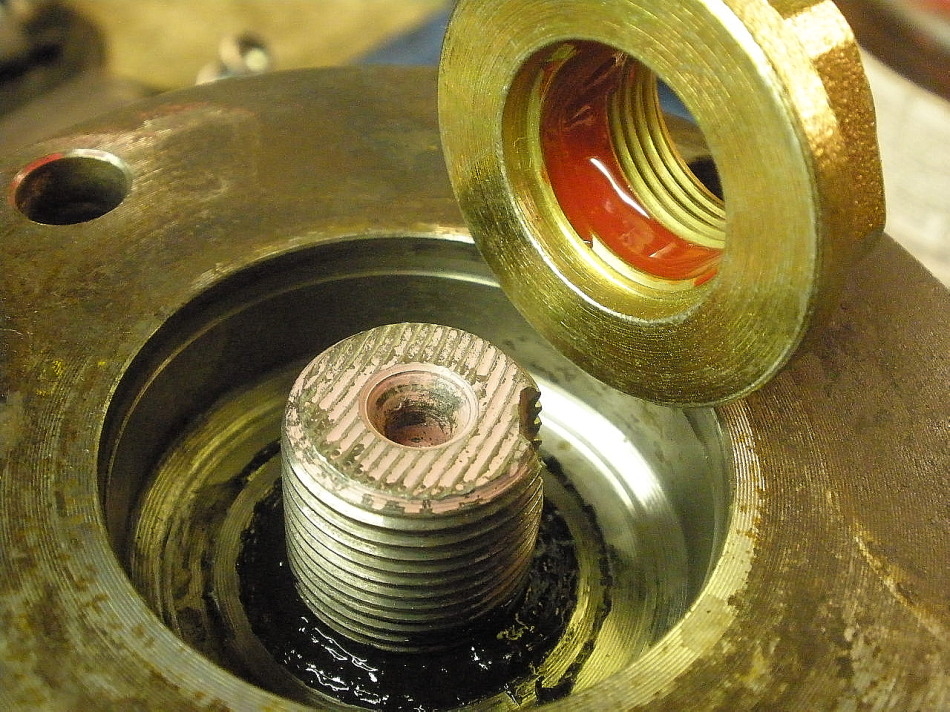
The electric impact wizzes off the 30mm pinion nut in 1.2 seconds.
|
|
|
|
|
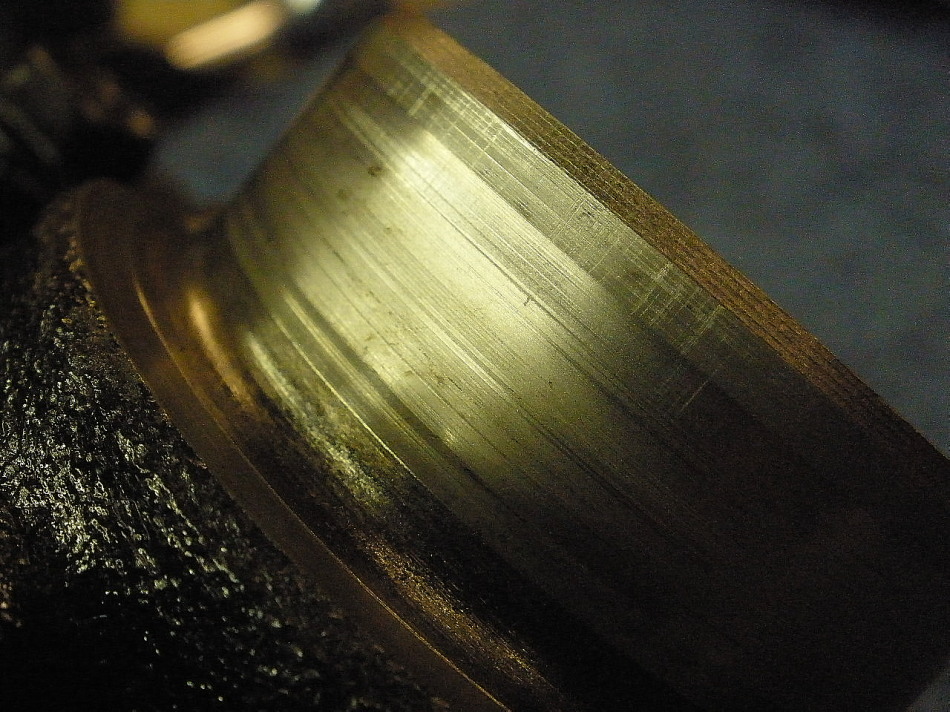
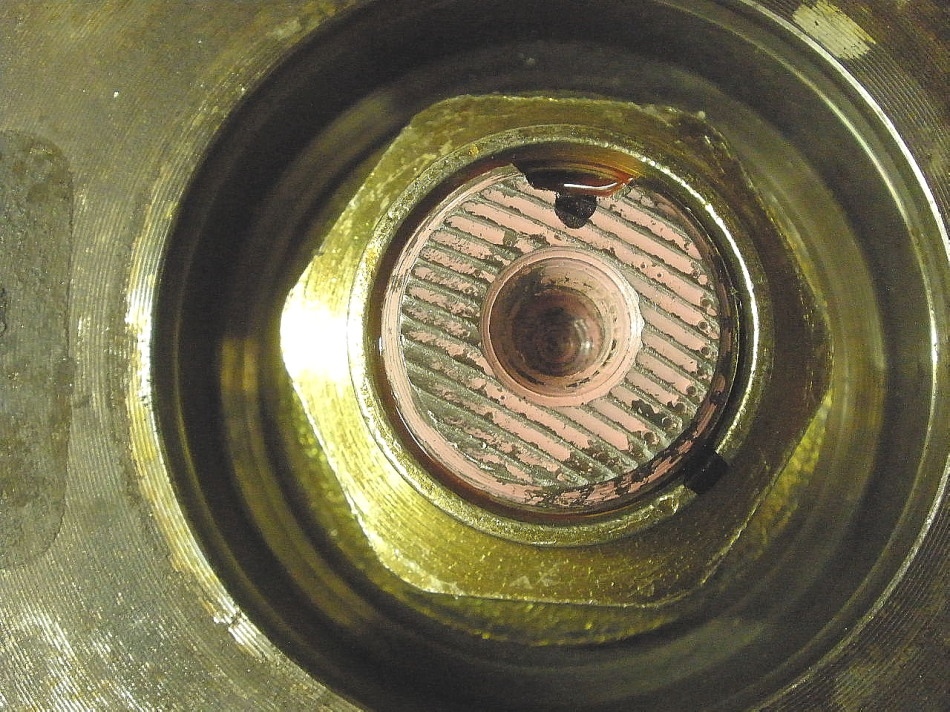
The pinion flange surface that the seal sees has some corrosion and a small groove.
|
|
|
|
|
The surface cleaned up nicely with 1000 grit sandpaper.
|
|
|
|
|
Pinion is pressed out.
|
|
|
|
|
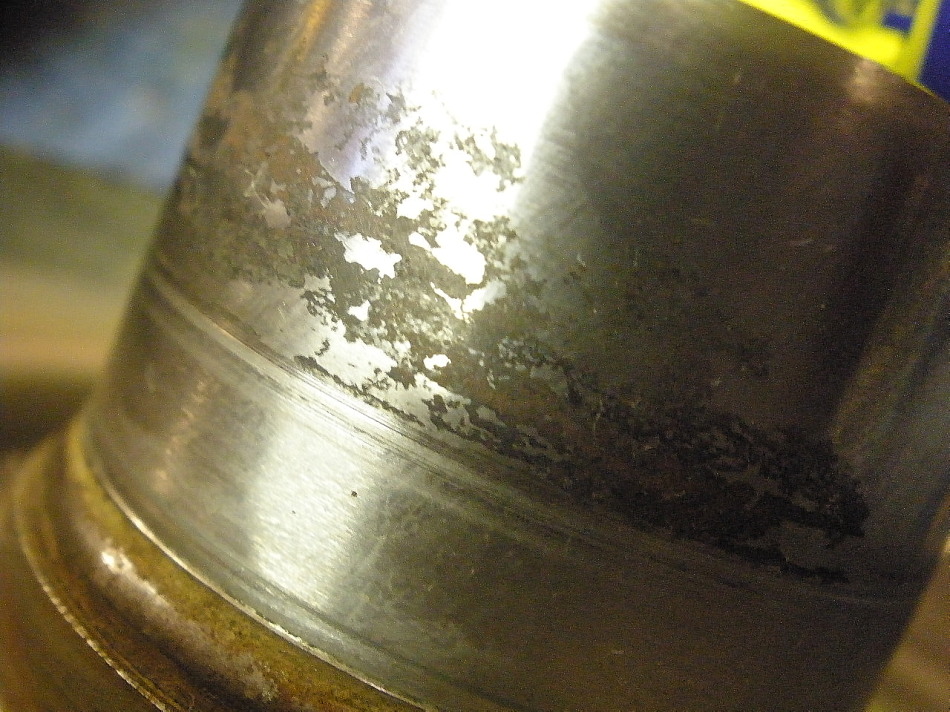
Water damage...corrosion (rust).
|
|
|
|
|
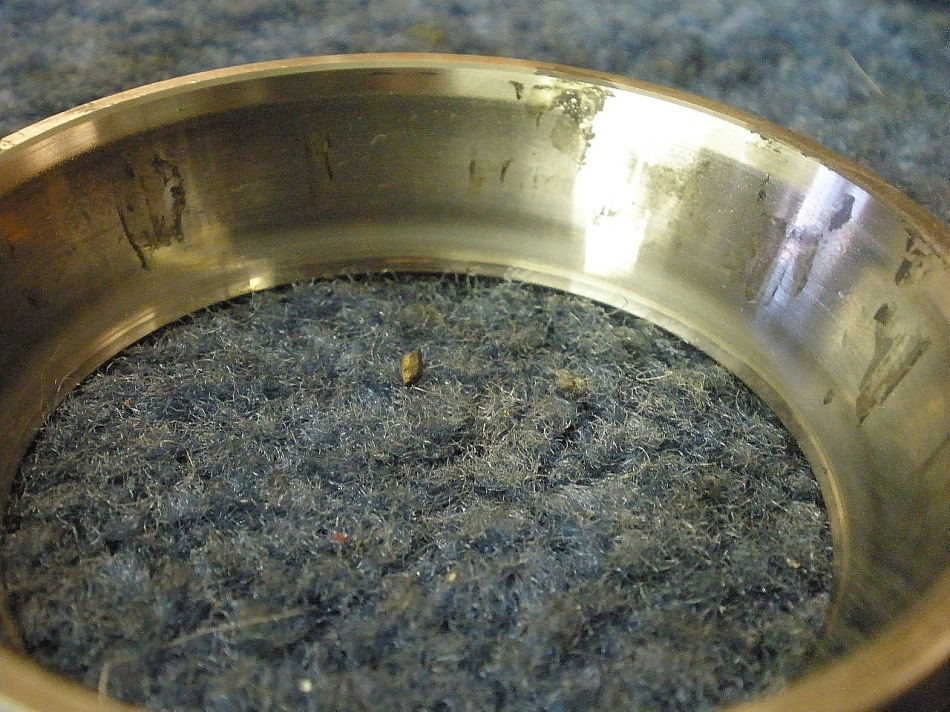
small outer race...corrosion.
|
|
|
|
|
Large inner race....similar corrosion.
|
|
|
|
|
This rebuilt with LSD will see all new bearings. :)
|
|
|
|
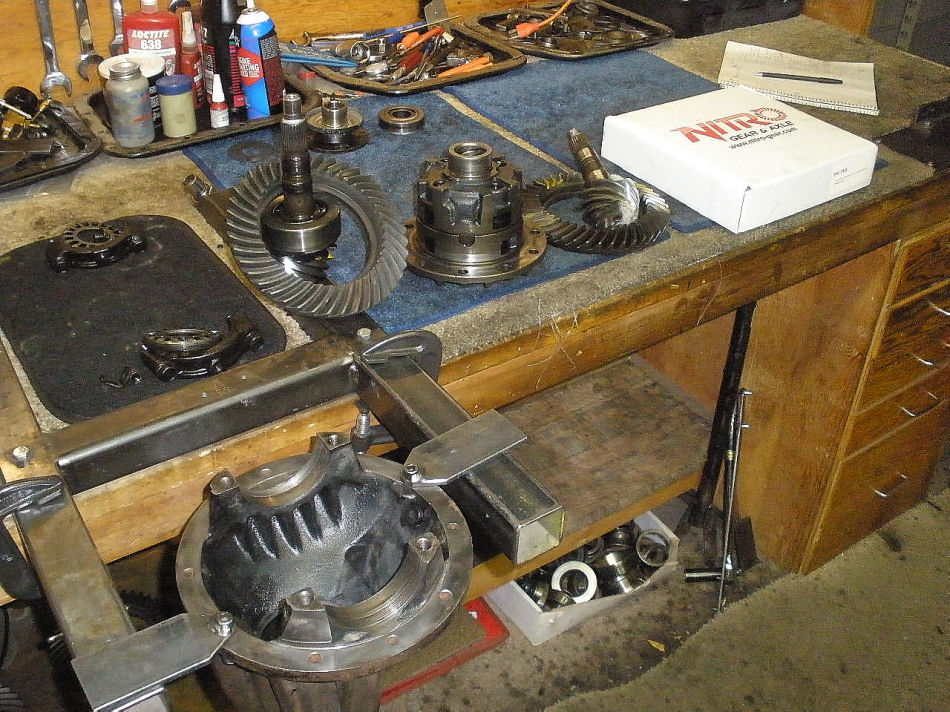
Everything is now cleaned up. I like to use starting fluid for this task. It
evaporates the quickest of any cleaner I know of and disolves the grime. It
was now that I noticed that the gears in the V6 were actually a 4.56 ratio.
Mike requires a 4.10 and I had a spare 410 set so all is well.
|
|
|
|
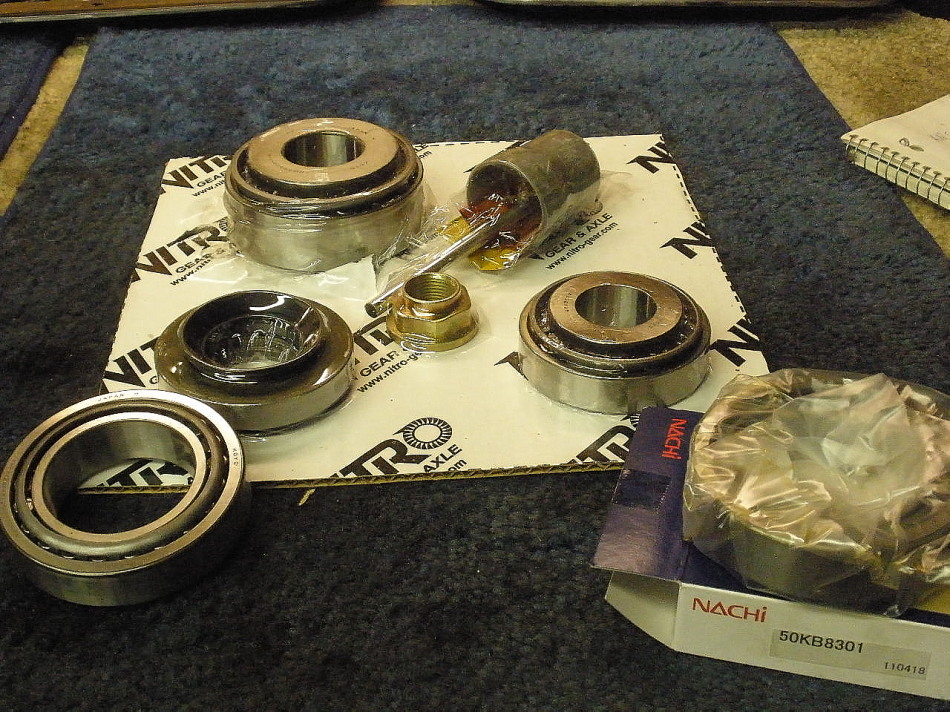
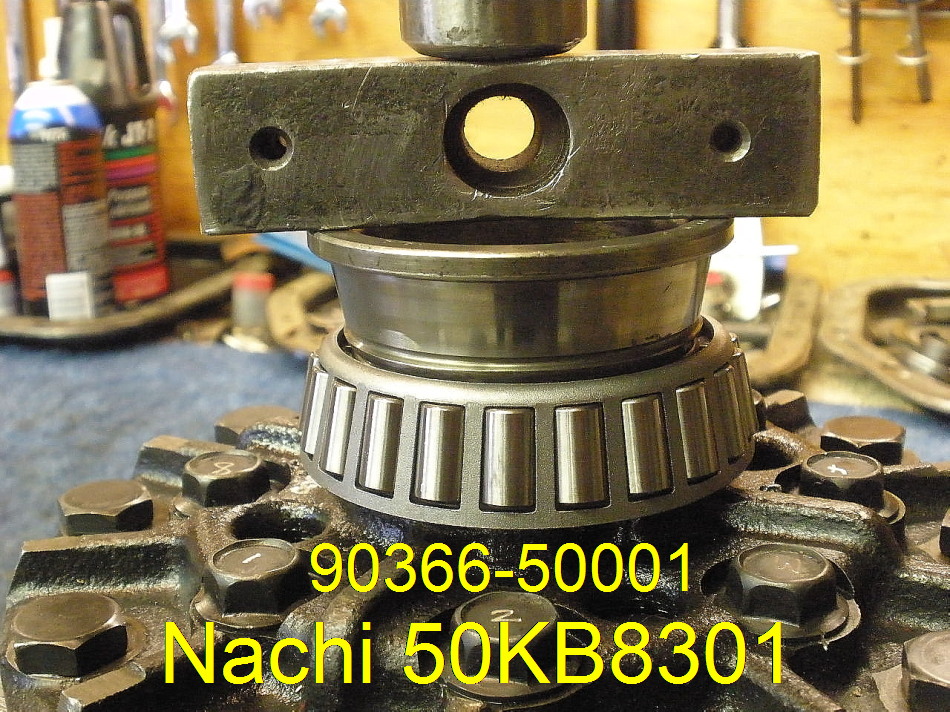
JT's supplied the V6 master install kit. The carrier bearing on the left is the usual
skinny V6 bearing. For the other side, they substituted in the fat bearing shown on
the right. The Nachi 50KB8301 is the same as Toyota OEM 90366-50001. The fat
bearing is needed for the ring gear bolt-head side when installing
a SUPRA LSD into a V6 3rd.
|
|
|
|
The large inner pinion race is pressed in. I used to tap these in using a soft
chisel in direct contact and I have decided that even though the chisel was
a soft steel that it's best to use the press instead.
|
|
|
|
Old pinion bearing parts are very useful for "interfacing" with the new race to
seat them fully in the hole.
|
|
|
|
|
New inner pinion bearing and shim are pressed in place.
|
|
|
|
|
Surfaces are checked for high spots and, as usual, all was good.
|
|
|
|
|
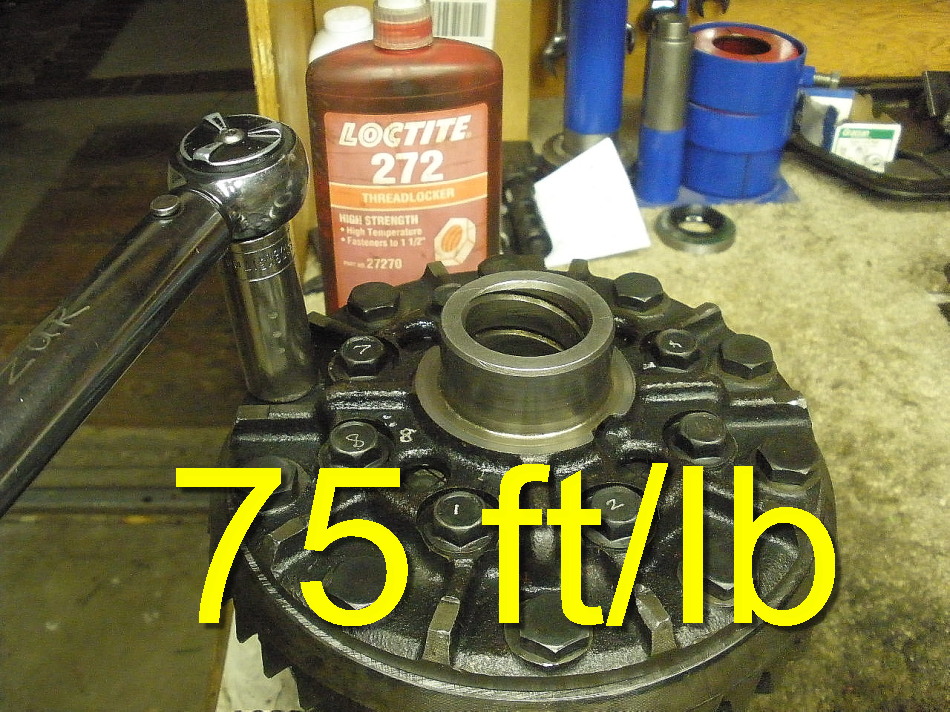
The 410 ring is now bolted to the Supra LSD. Red Loctite and 75 ft/lb.
|
|
|
|
|
The fat bearing goes on this side....
|
|
|
|
|
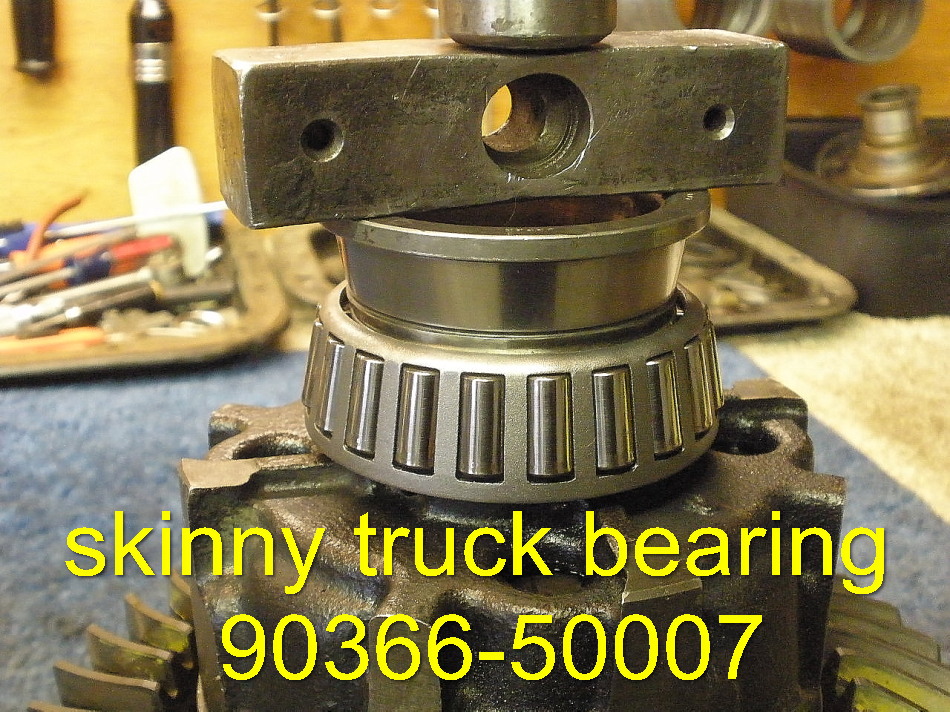
...and the skinny V6 bearing on this side.
|
|
|
|
|
Now to finally load up the pinion end.
|
|
|
|
With the 2 bearings well oiled, I tightened the pinion nut carefully with the
electric impact until it felt "tight enough" for a test paint. I measured about
16~18 in/lb start torque which is ok for a preliminary paint.
|
|
|
|
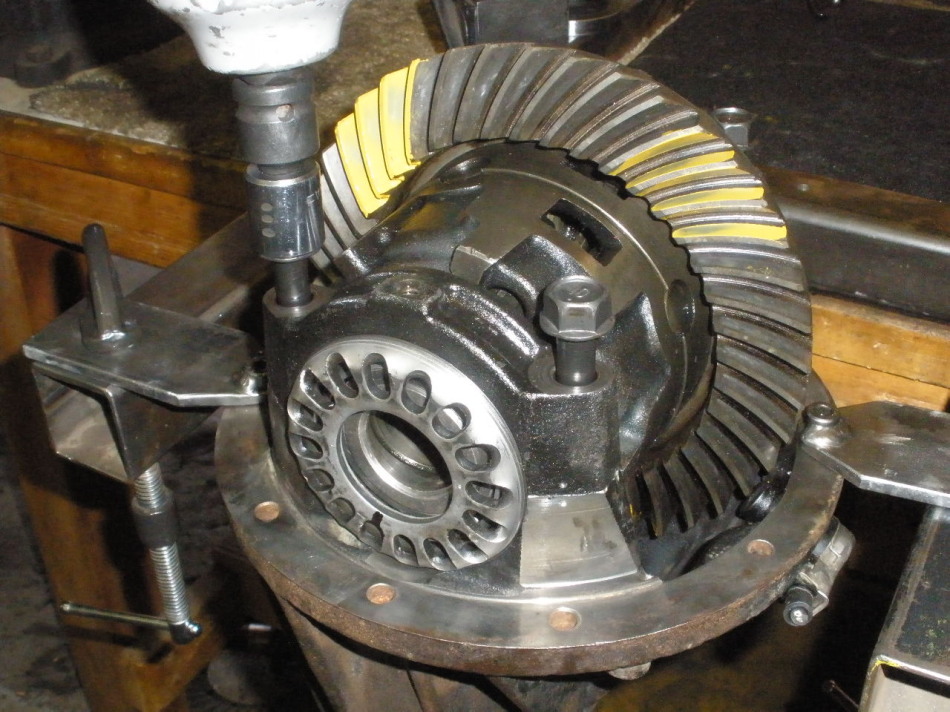
Now install LSD case...dial in some carrier bearing pre-load while guiding the
backlash to a reasonable number. This is just a test paint so .005" to about
.010" would suffice.
|
|
|
|
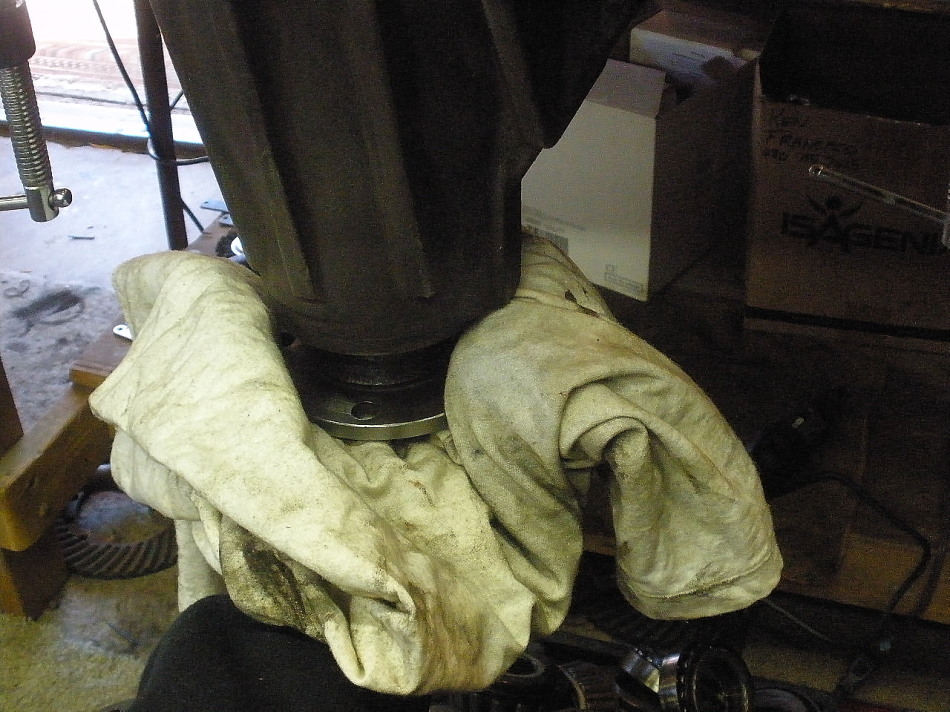
The best method to get an easy to read/see pattern on the ring gear is to
apply some resistance on this end with a rag...
|
|
|
|
...while turning the ring gear back and forth perhaps about 3 times with a
common 17mm wrench as shown here.
|
|
|
|
|
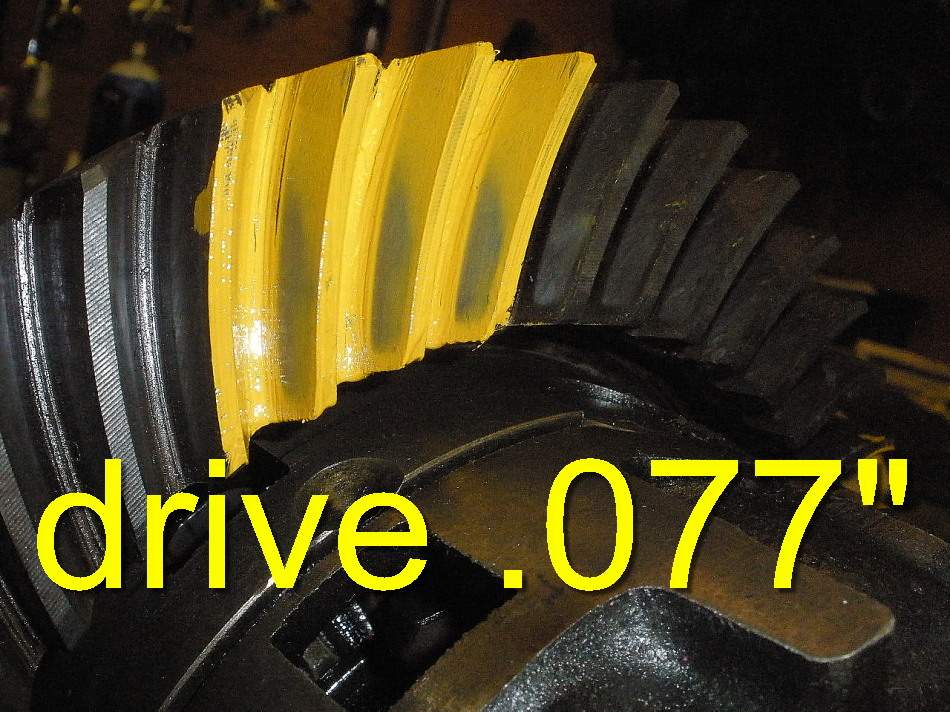
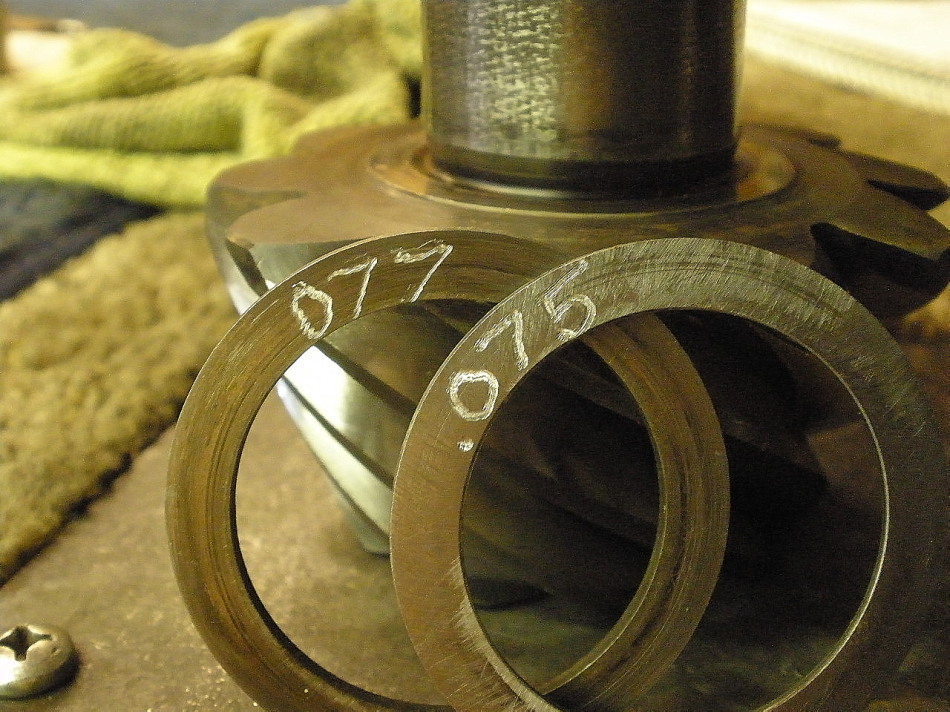
Drive side and the pinion shim is .077".....could be a slight bit too deep.
|
|
|
|
|
Coast.
|
|
|
|
|
It's easy enough to dis-assemble and change the 077 to 075.
|
|
|
|
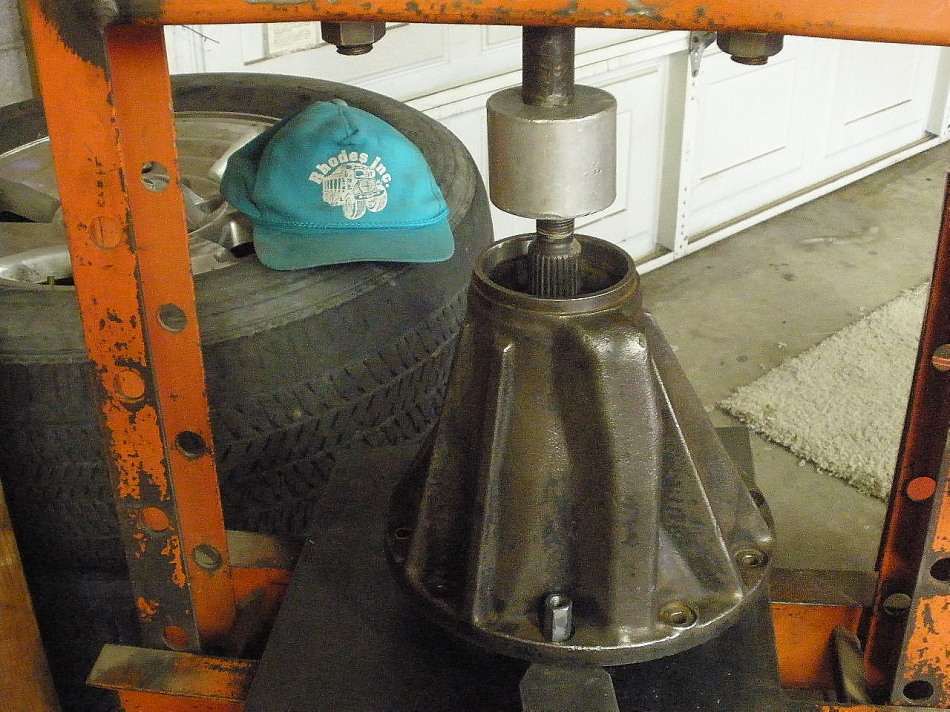
Press the pinion out.
|
|
|
|
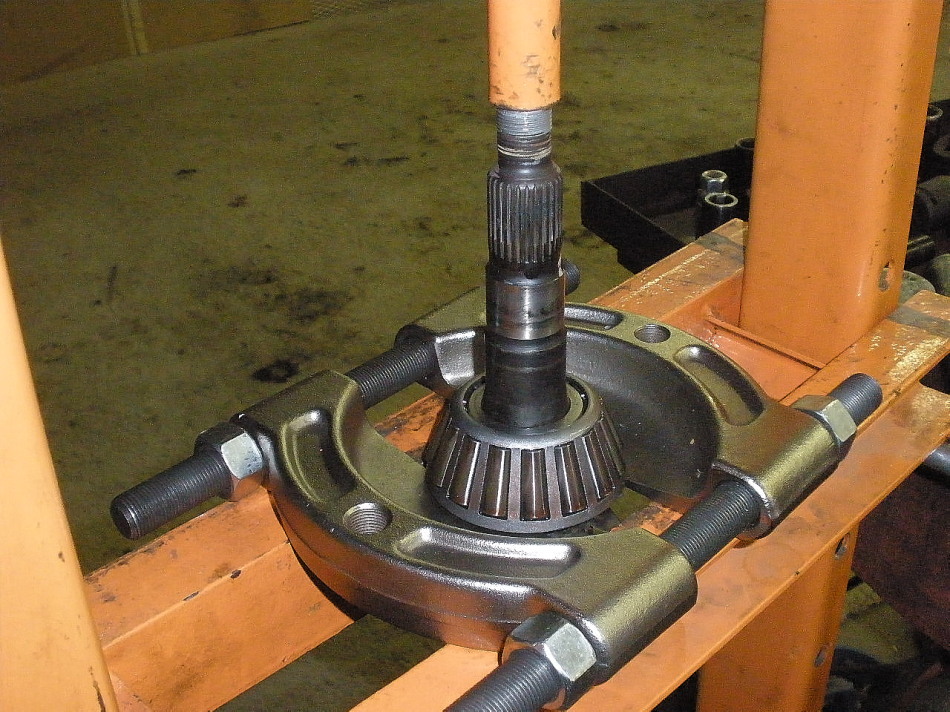
The large OTC-1130 bearing separator makes life easier when
removing pinion bearings.
|
|
|
|
|
The 077 shim is removed and replaced with a slightly thinner 075 shim.
|
|
|
|
|
Press the bearing back on...
|
|
|
|
....then place the 3rd over the pinion...line up the pinion flange on top...stomp
it down some using the lead filled plastic hammer...tighten the pinion nut with
the electric impact until about 20 inch/pounds is felt or measured.
|
|
|
|
Load the case up...tighten the wheel adjusters for some pre-load while getting the
backlash in the "ballpark" range. Does not have to be perfect backlash for a
pattern check but I measure a nice .007" backlash this time.
|
|
|

|
|
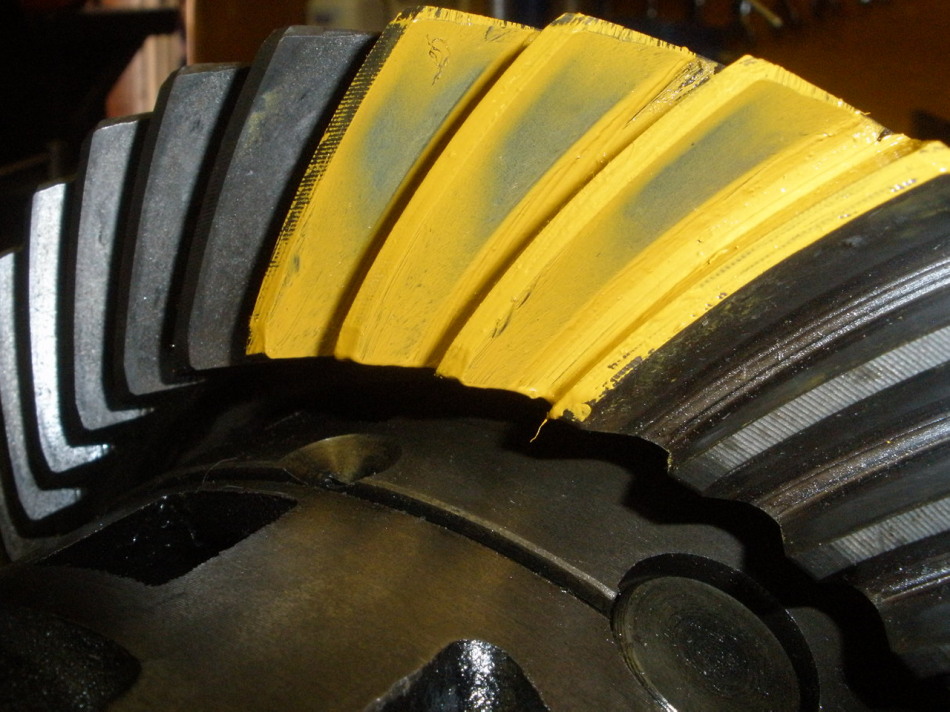
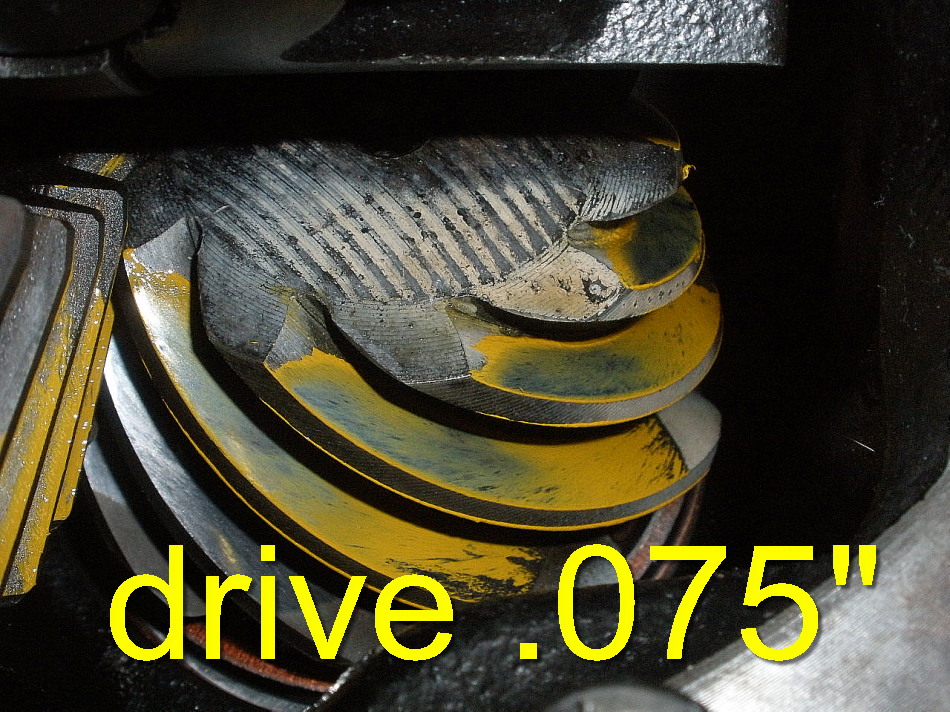
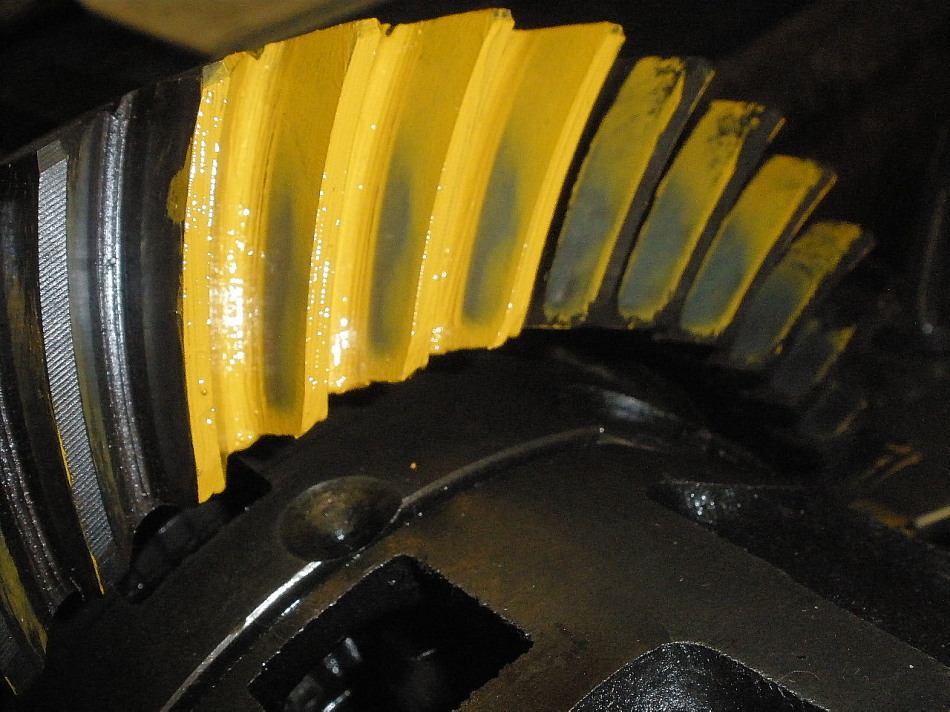
Drive side....Pretty good for used 410 gears.
|
|
|
|
|
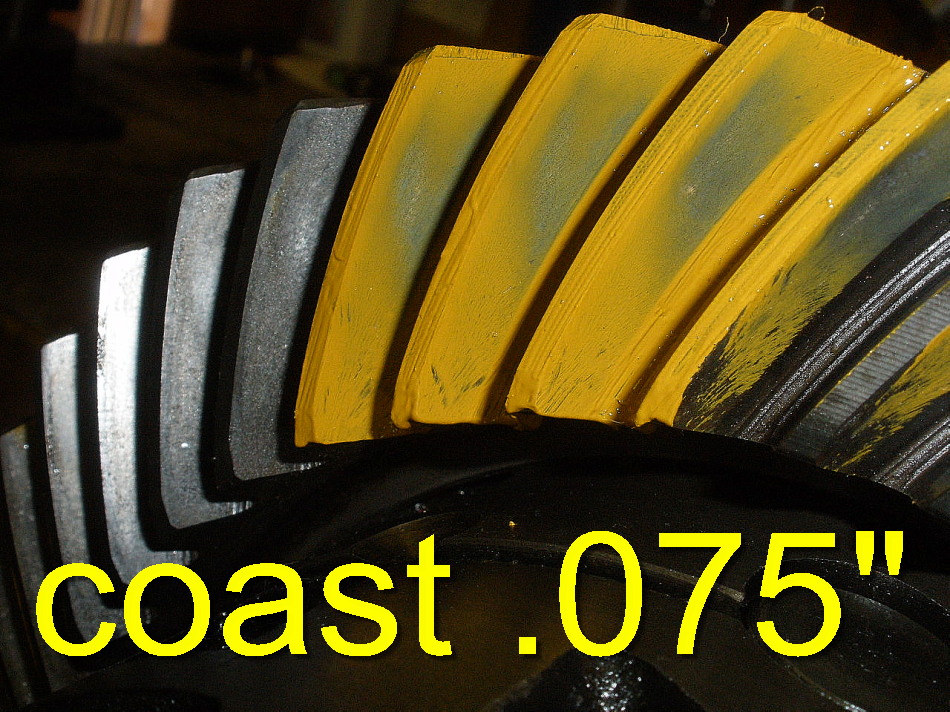
Coast
|
|
|
|
|
Pinion agrees that the depth is right on.
|
|
|
|
|
And, one more perspective from the reverse painted ring tooth...looks good.
|
|
|
|
|
This time, I'm pressing the pinion out for installation of the crush sleeve.
|
|
|
|
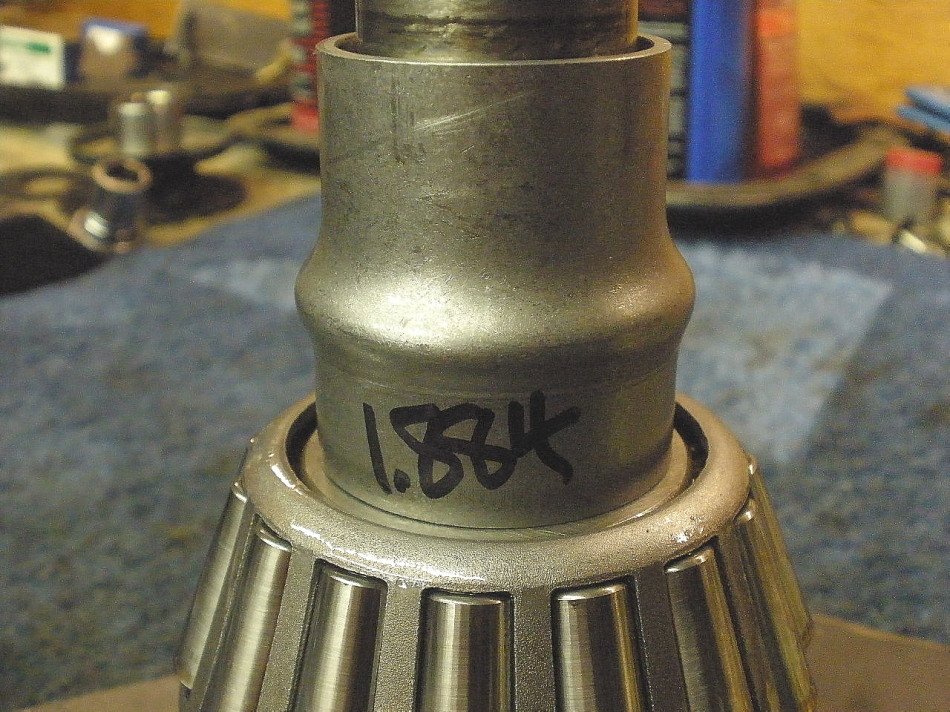
I trimmed it down to 1.884" using my mini-lathe. I know that the final length
will be near 1.866" which means I have less than .020" to crush it to the target
value. It just saves on all the thread damage because I only have to turn the
pinion nut a third of a turn now.
|
|
|
|
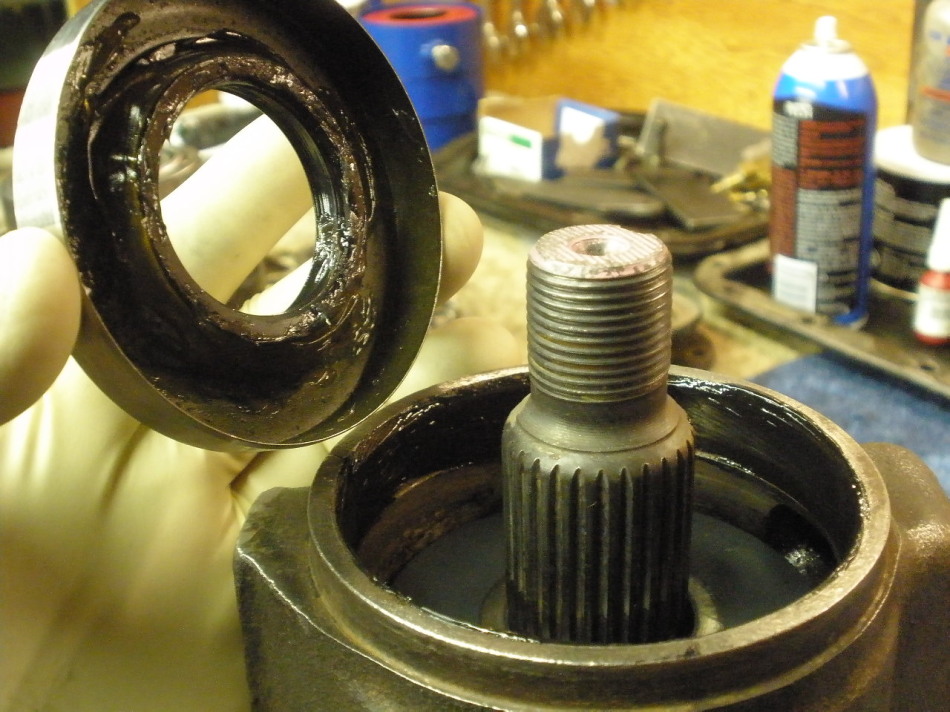
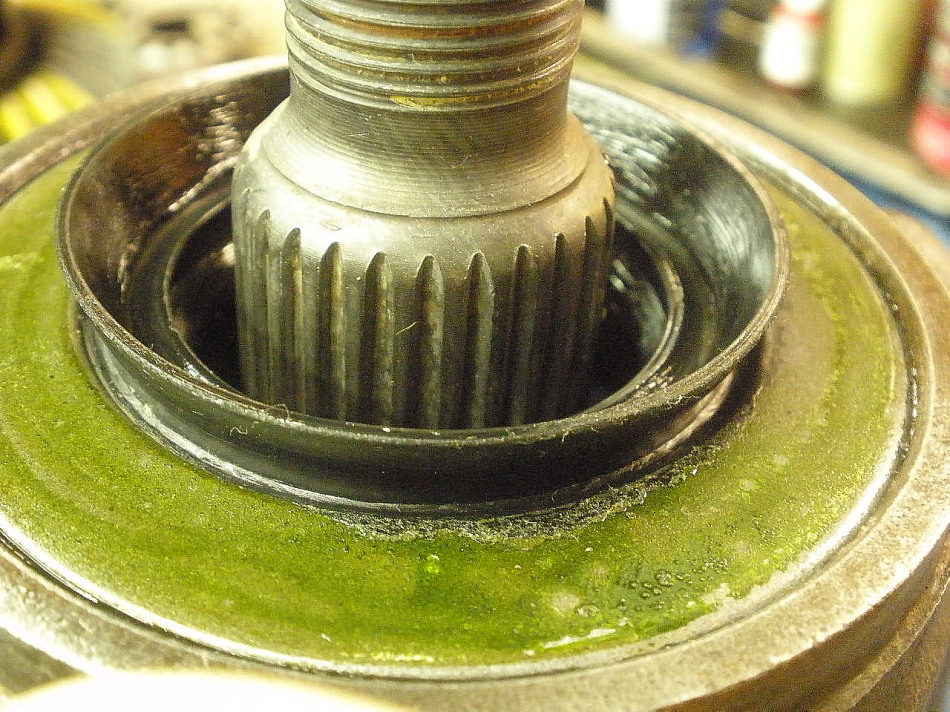
The usual....grease is applied to the tiny spring on the underside of the seal.
This is done to prevent the spring from popping loose during the
hammer smacking process.
|
|
|
|
The seal is tapped on level and then recessed about another
1mm (.040") per factory specifications.
|
|
|
|
|
A generous application of red loctite is applied to the new, clean nut.
|
|
|
|
Ding the top and this pinion end is done. Note the black mark at the 4 o'clock
position. That's how much tighter I was able to get the nut with the cheater
bar to get to the desired amount of Pinion Preload.
|
|
|

|
|
Final PPL (pinion pre-load) verified/measured at 12 in/lb start torque.
|
|
|
|
|
Anything that helps lubricate the threads is ok here. I'm using a thick grease here.
|
|
|
|
The bearing cap is carefully aligned and one quick jab with the rubber end of
the hammer and if it solidly snaps 100% down then everything must be aligned.
|
|
|
|
|
Tighten the 2 bolts on each side up to near full clamping force (about 60~75 ft/lb)...
|
|
|

|
|
...and, if the threads are in alignment then the wheels will turn easy like this.
|
|
|
|
After making any adjustments on the wheels, I make sure the left and
right carrier bearings are "equalized" in tensions by rapping on all
4 corners while turning the pinion.
|
|
|
|
I flipped the 3rd over and measured the start torque of turning both the pinion
bearings and the carrier bearings...about 20 inch/pounds as shown.
|
|
|
|
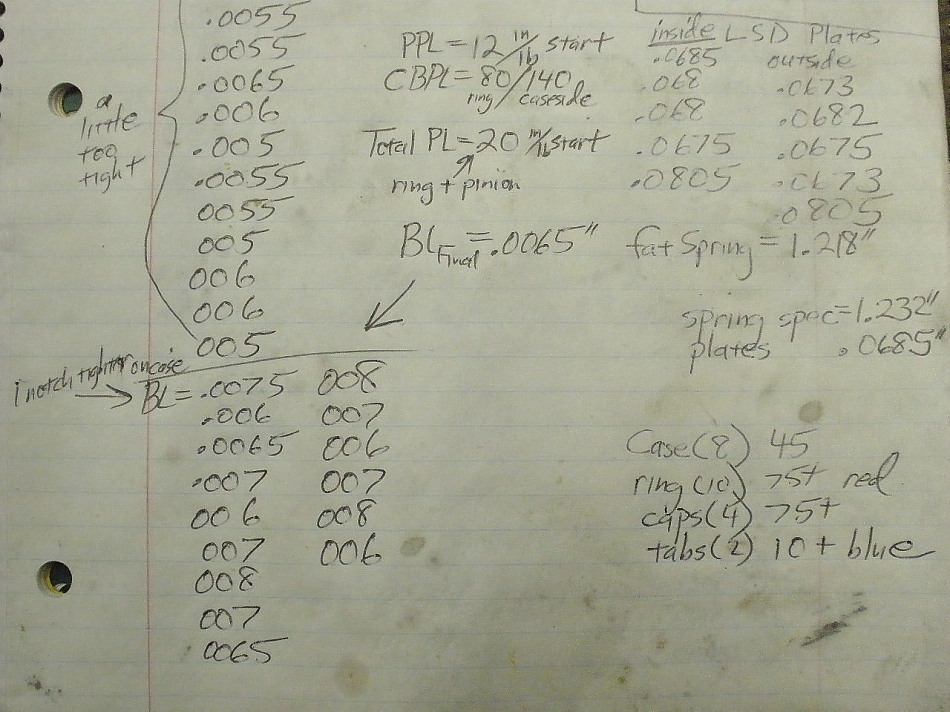
Backlash is measured on every 3rd tooth as shown in the bottom left corner of my
install notes.
|
|
|
|
|
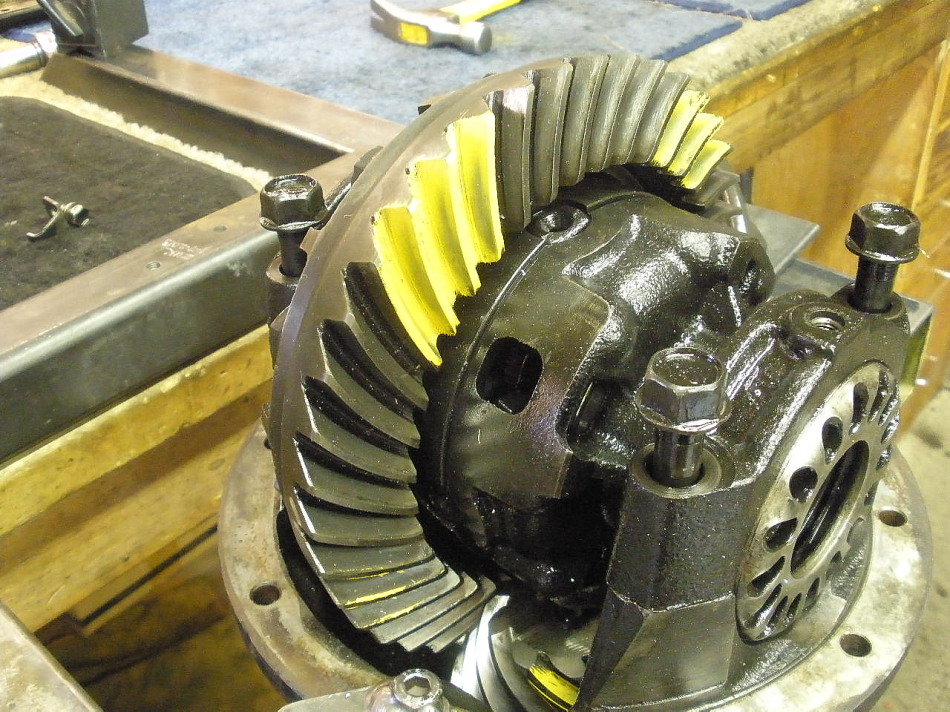
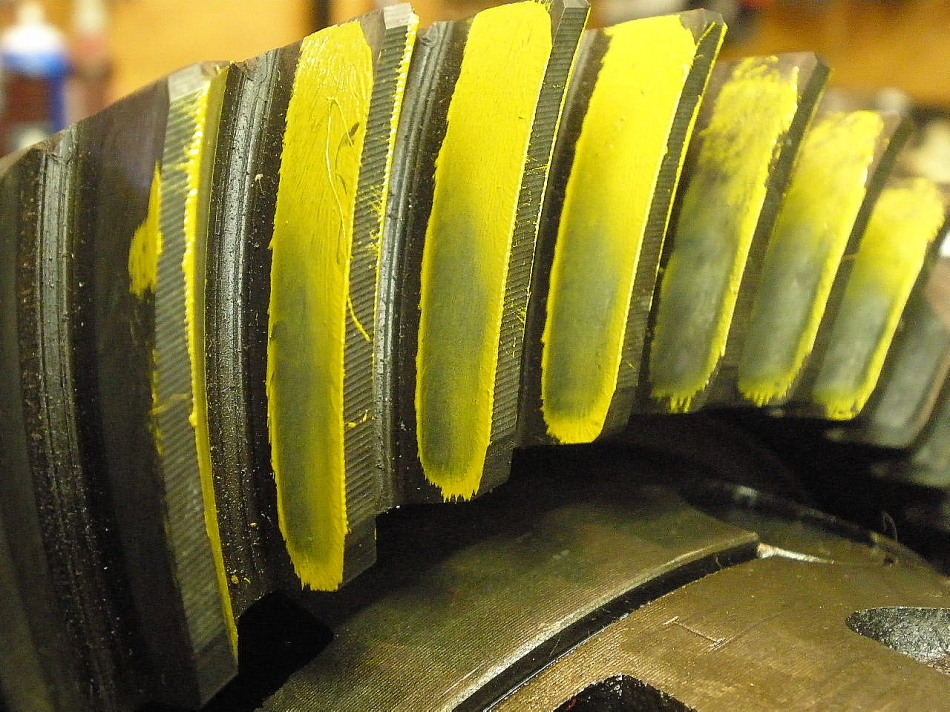
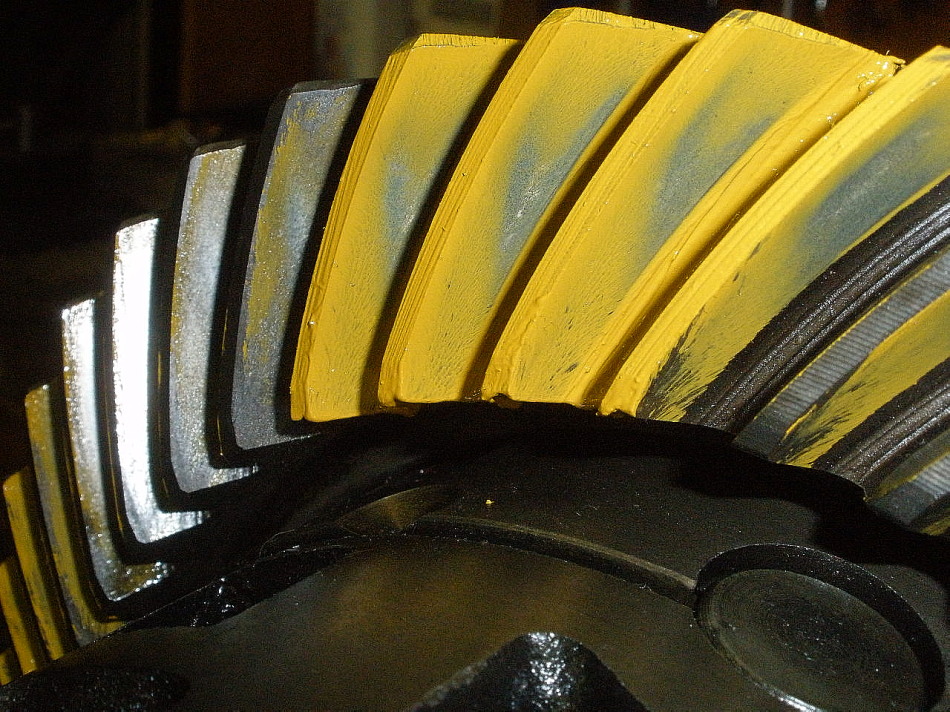
One last final pattern check shows good depth on these used 410 ratio gears.
|
|
|
|
|
Coast.
|
|
|
|
|
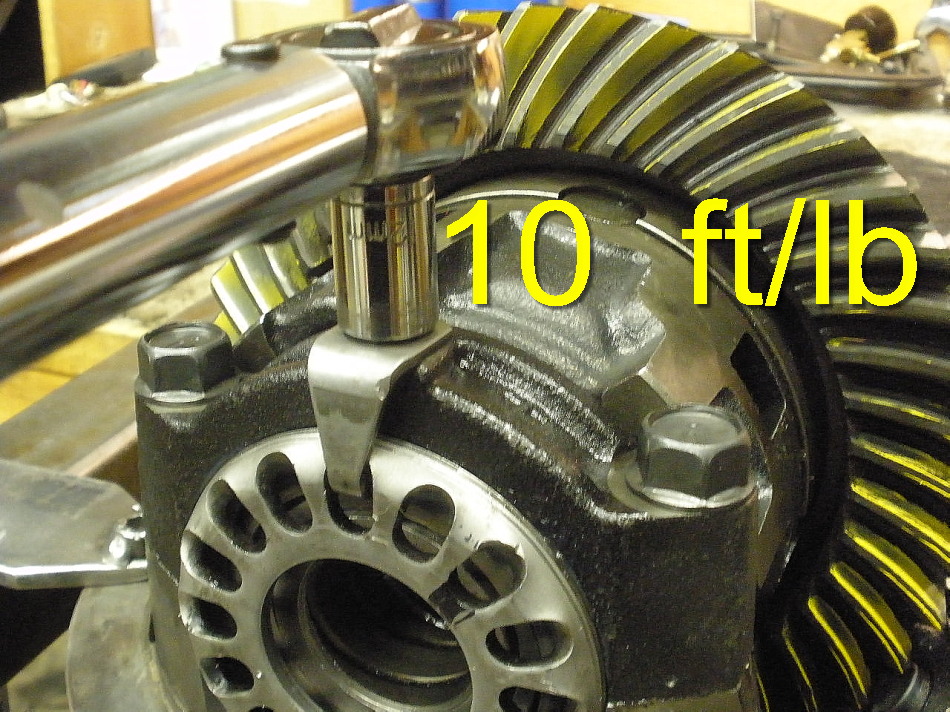
Lock tabs are put in place...blue loctite and 10 inch/pounds.
|
|
|
|
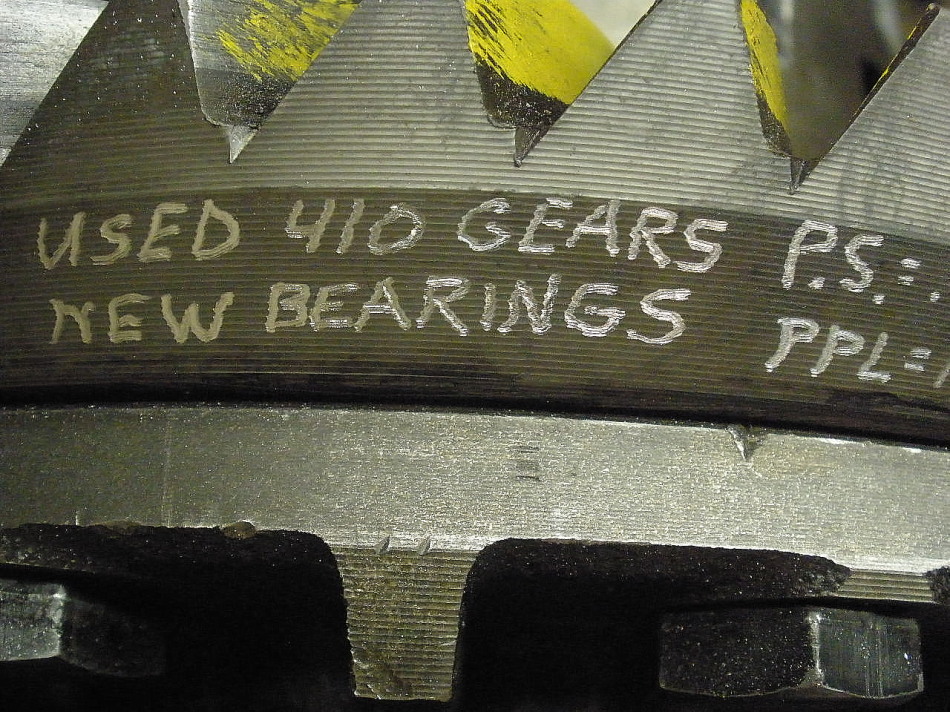
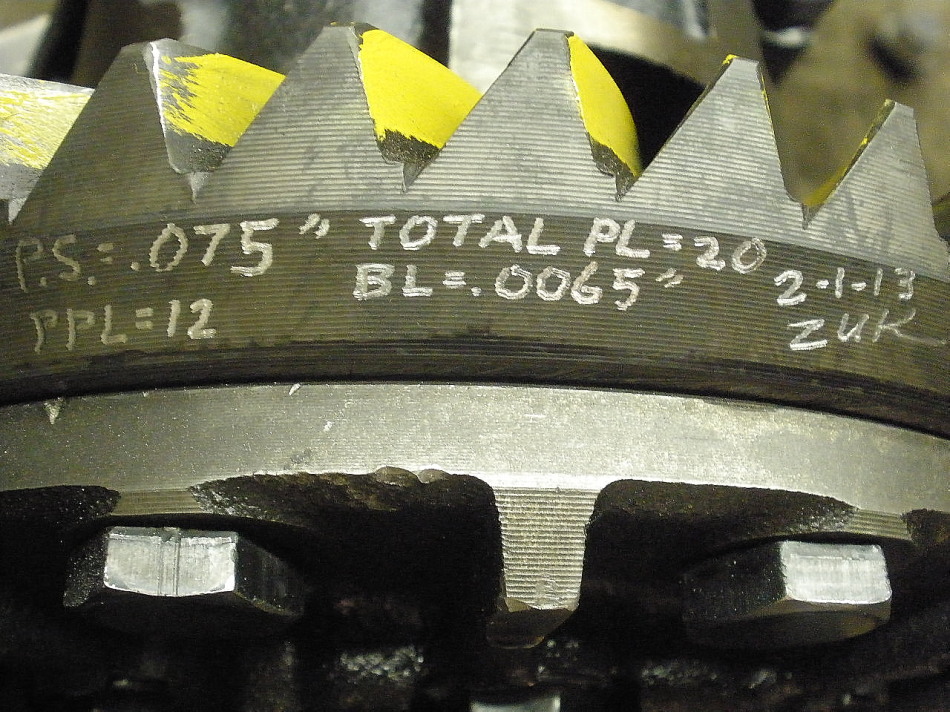
Some related info is ground into the ring gear. This cannot be done without
diamond impregnated bits on the dremel tool.
|
|
|
|
|
Date coded.
|
|
|
|
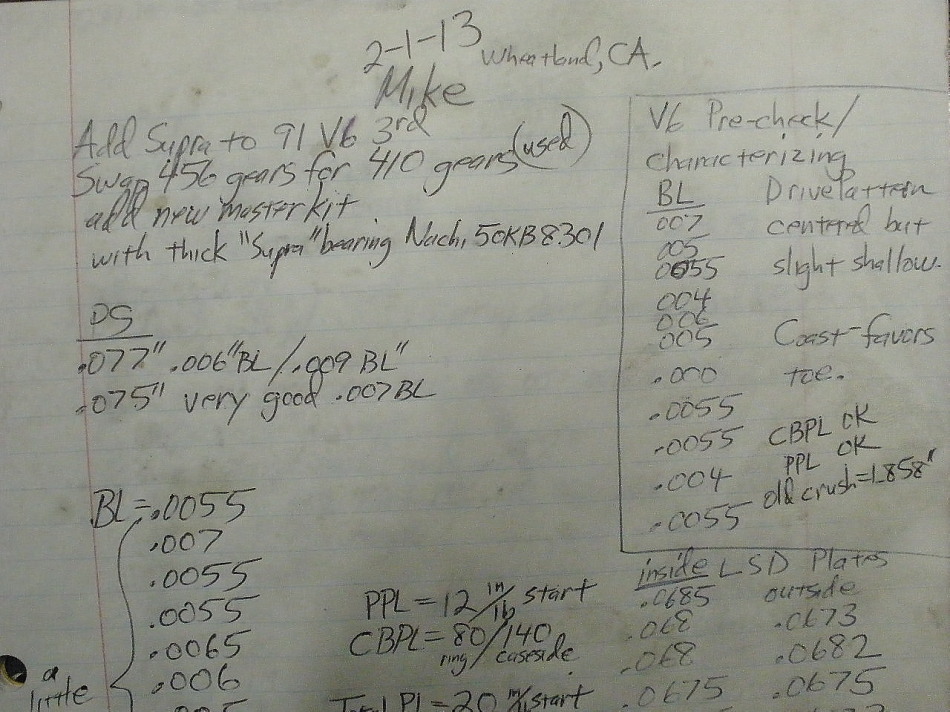
Install notes....they are just notes of the actual recorded info as it happened
'on the spot' so sometimes they might seem a bit messy.
|
|
|
|

|
|
|

|