|
Nick's Hi-pinion 8" gets 529 "Circle K" gears
|
|
(79 good size pics loading)
|
|
FEB 3 2013
|
|
|
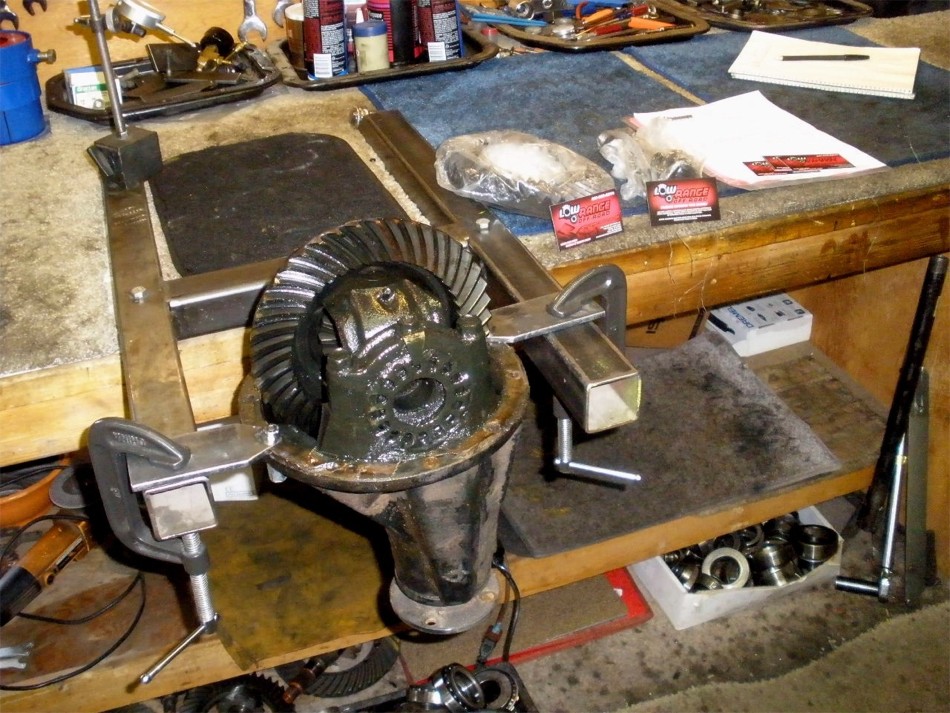
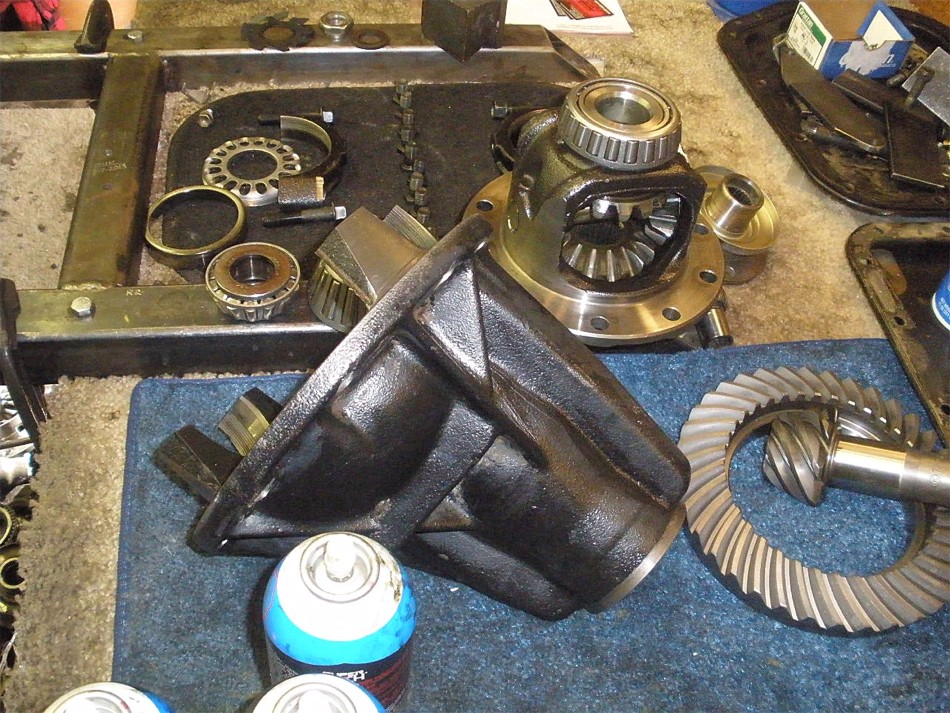
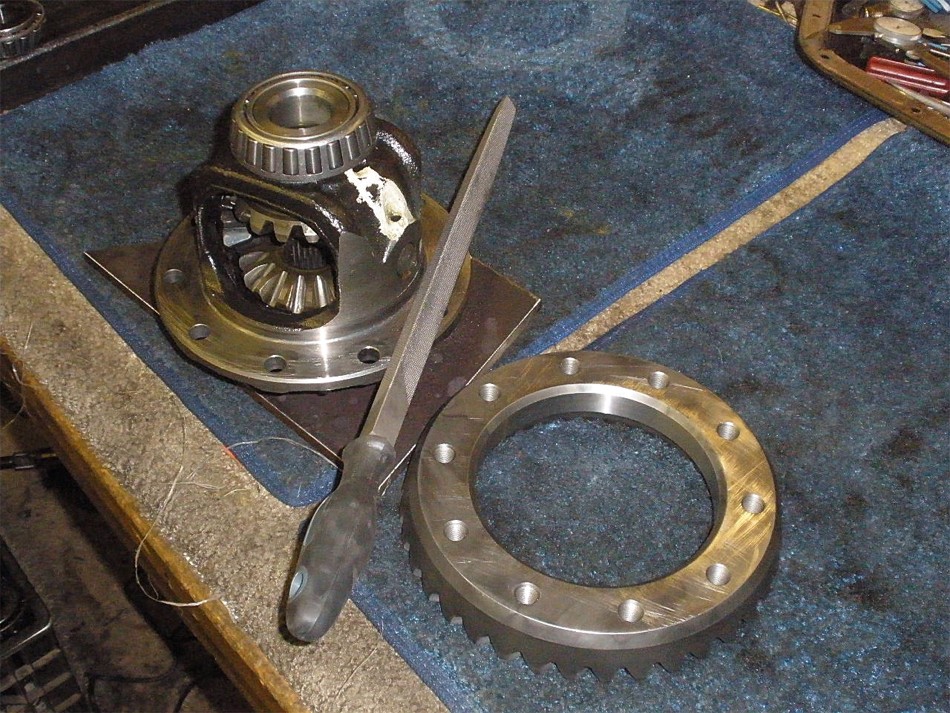
Nick is local to me and dropped off this High pinion 8" and a set of 529 reverse cut
gears from LowRangeOffRoad.
|
|
|
|
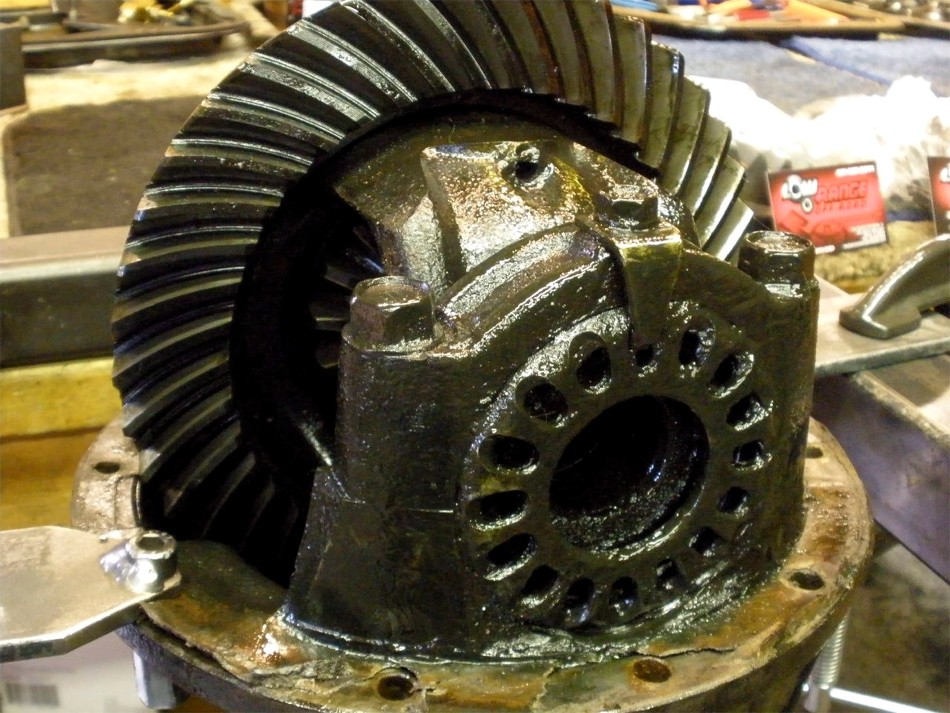
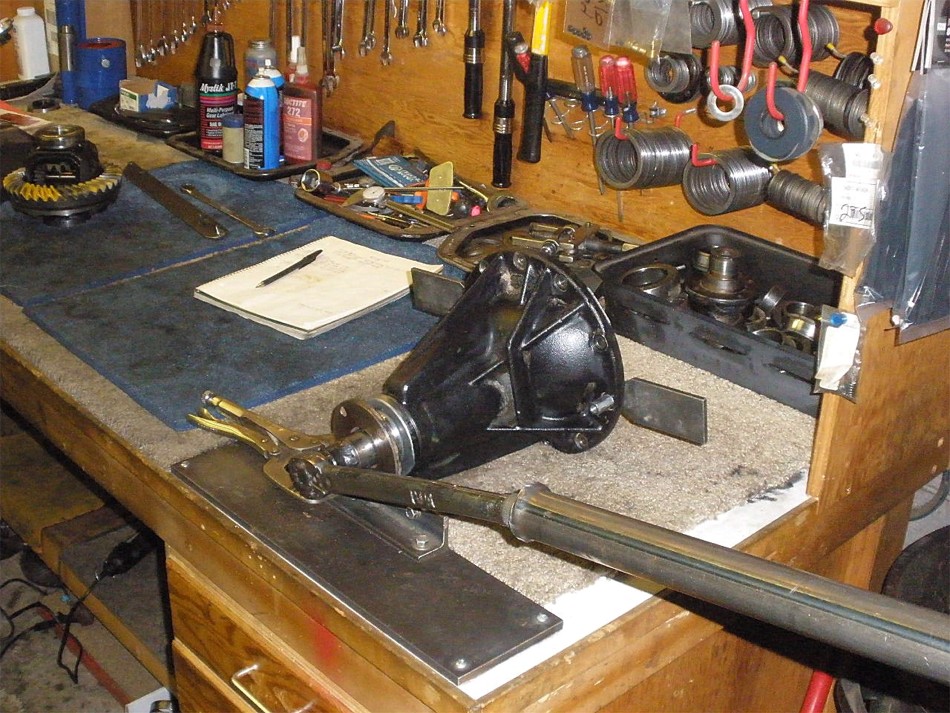
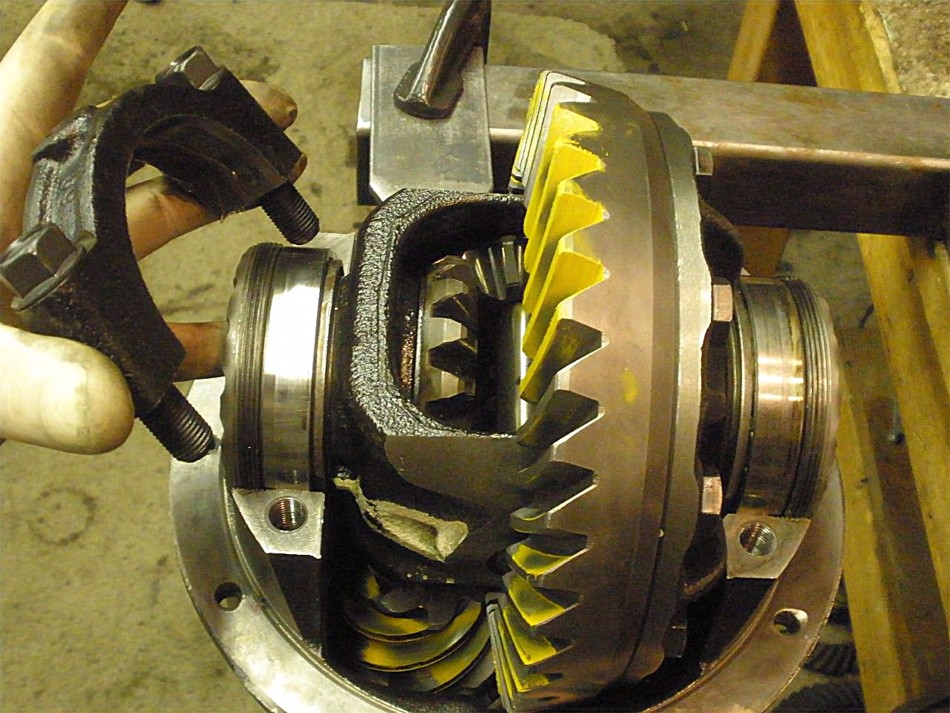
The 3rd was freshly pulled from a FZJ80 in a junkyard. In this picture, it looks
kind of gooey but with a little "TLC" this 3rd will look like new I think.
|
|
|
|
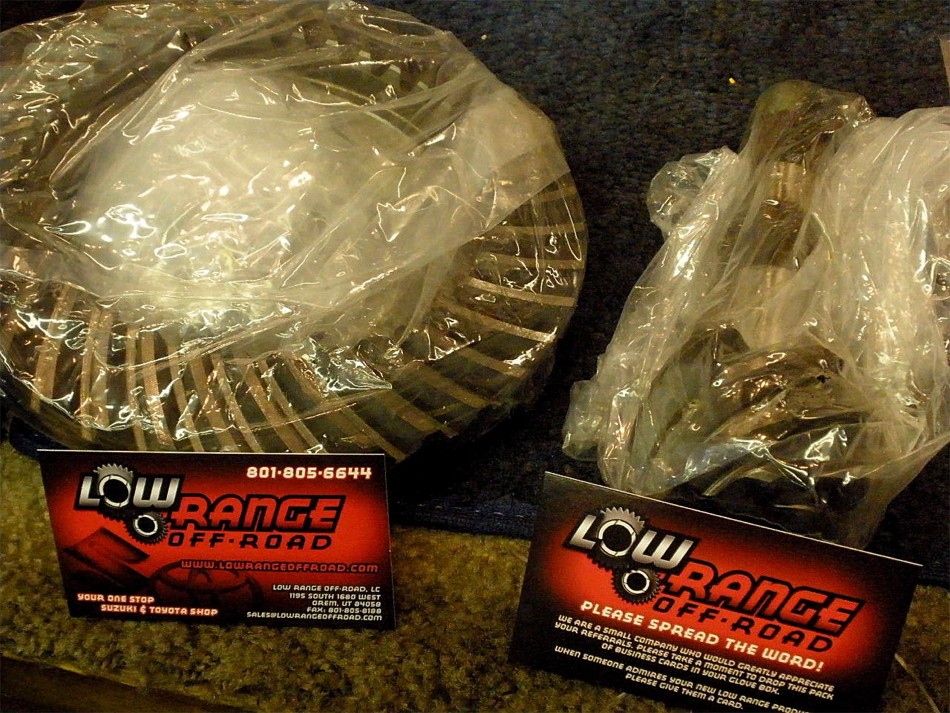
LROR has some very competitive prices. Ring and pinion both well wrapped in
plastic but no cosmoline or rust at all. By the way, I hear that Mineral spirits will
easily remove cosmoline....thanks for that info usfreedom22 :)
|
|
|
|
|
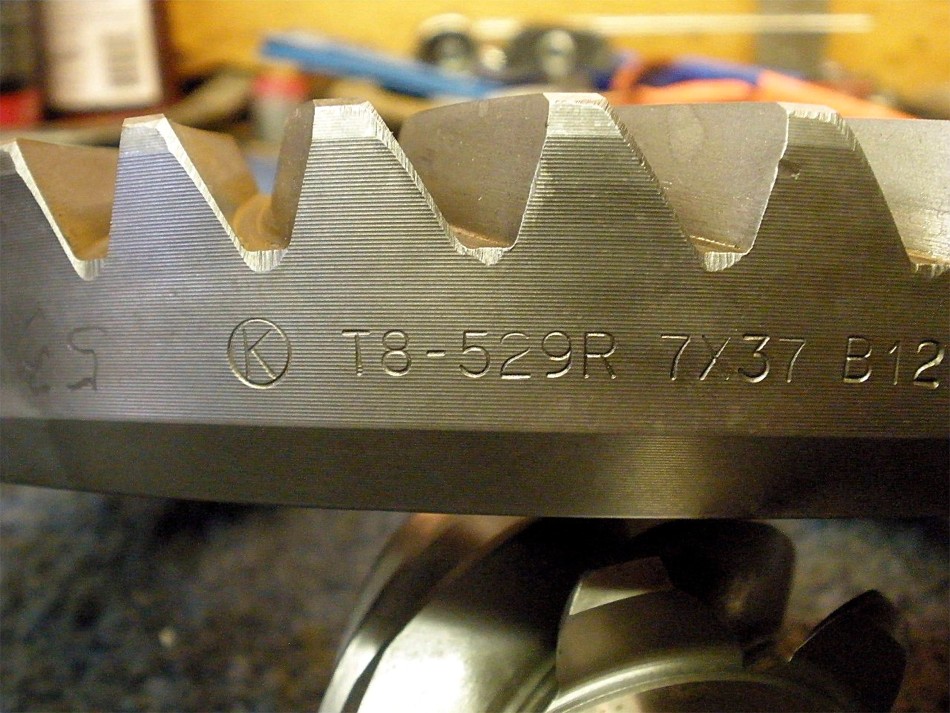
These are quality gears. I understand they ship from Korea of all places.
|
|
|
|
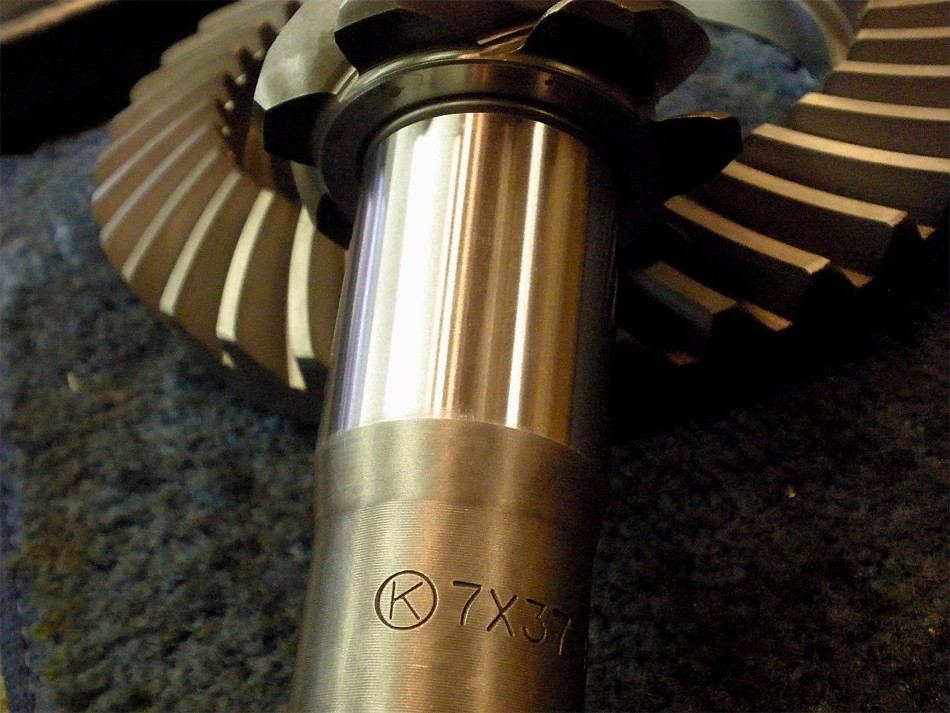
I started looking at that "circle K" a little closer and it stuns me how similar
the "K's" are when compared to Circle K's insignia.
|
|
|
|
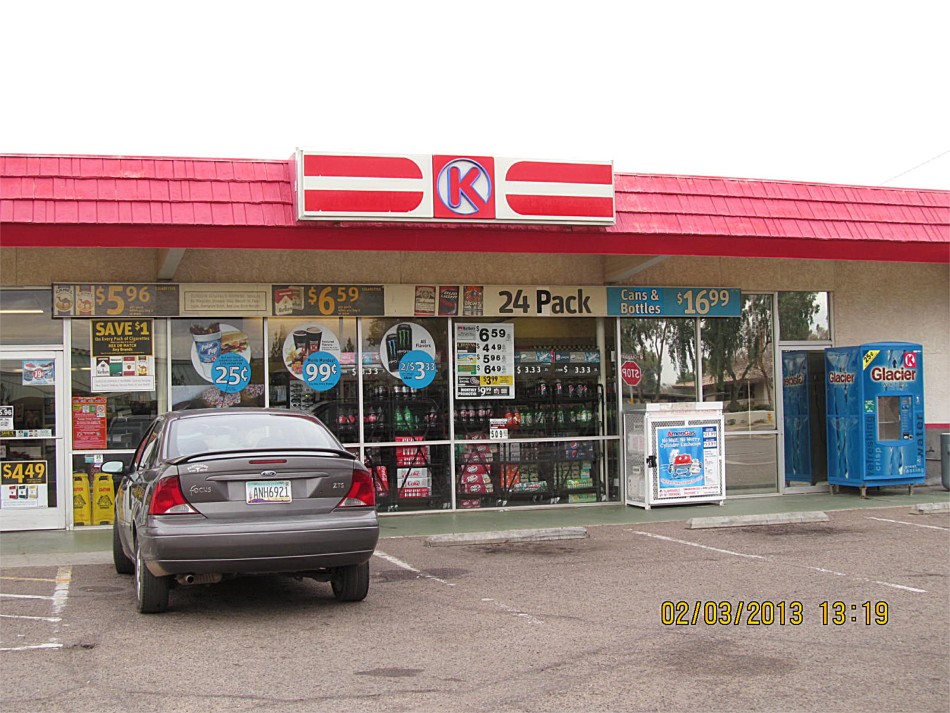
Well, I just happen to be at the local Circle K....took a 44 oz ice tea up to
the counter and the Korean lady cashier said, "That will be 090 cents. Kamsahamnida".
Hmm, I thought to myself....too many coincidences. I had to step out
front and inspect the sign a little closer. Sure does look like the
one stamped on the pinion I thought. Wonder what's around the
backside of the building....probably nothing.
|
|
|

|
Don't try to see the picture details on the smart phone....details will be
missed. I don't know why all those ring and pinions are there but I think
I will leave that mystery for another time and get back to Nick's install.

|
|
|
|
|
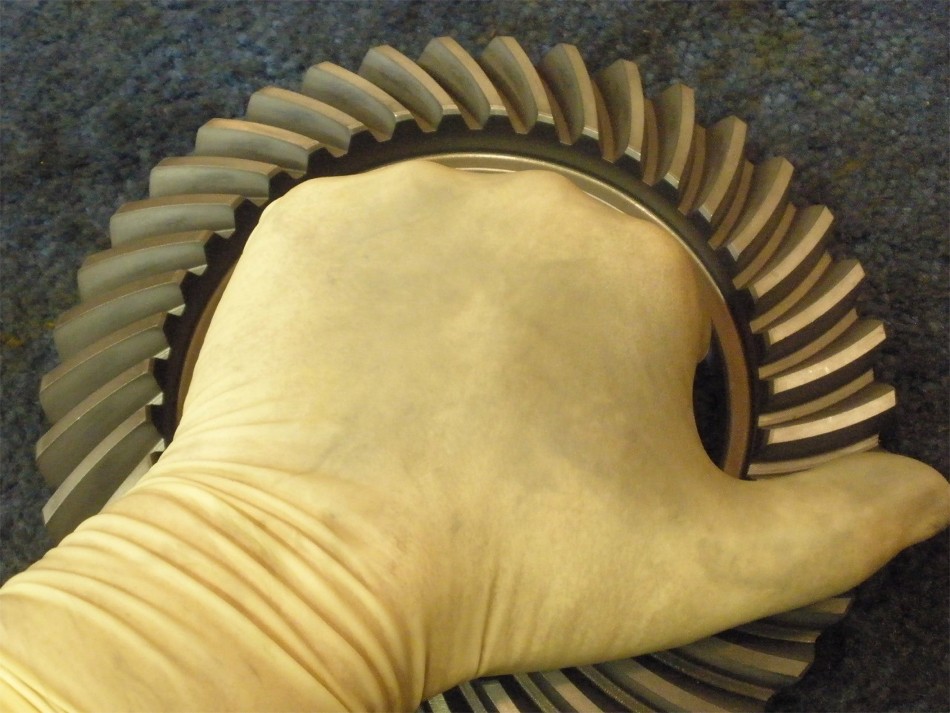
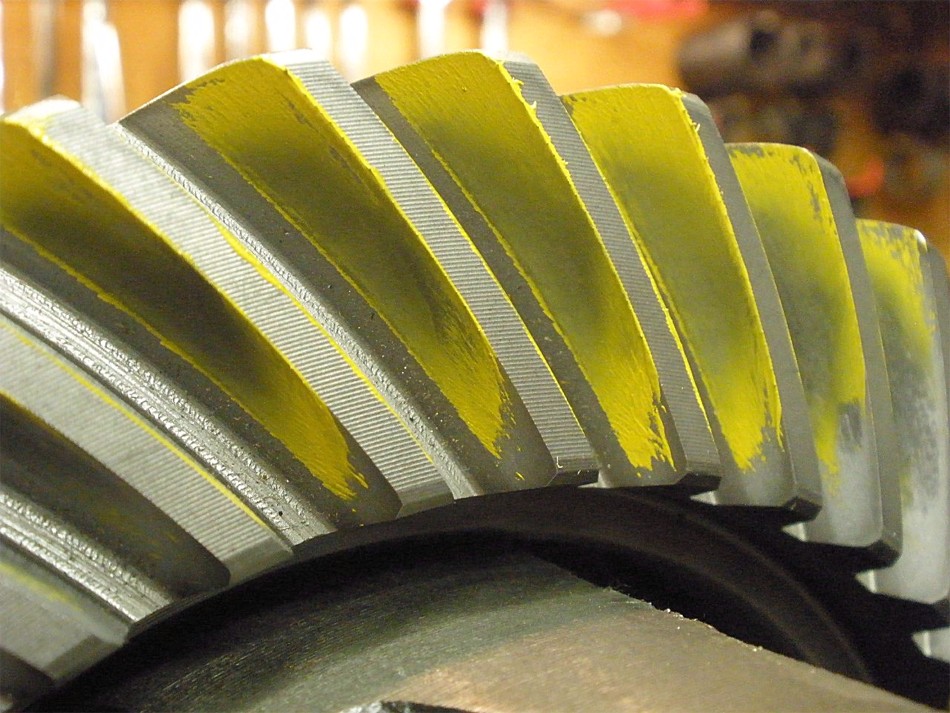
Reverse cut gears if the left thumb follows the direction of the spirals.
|
|
|

|
|
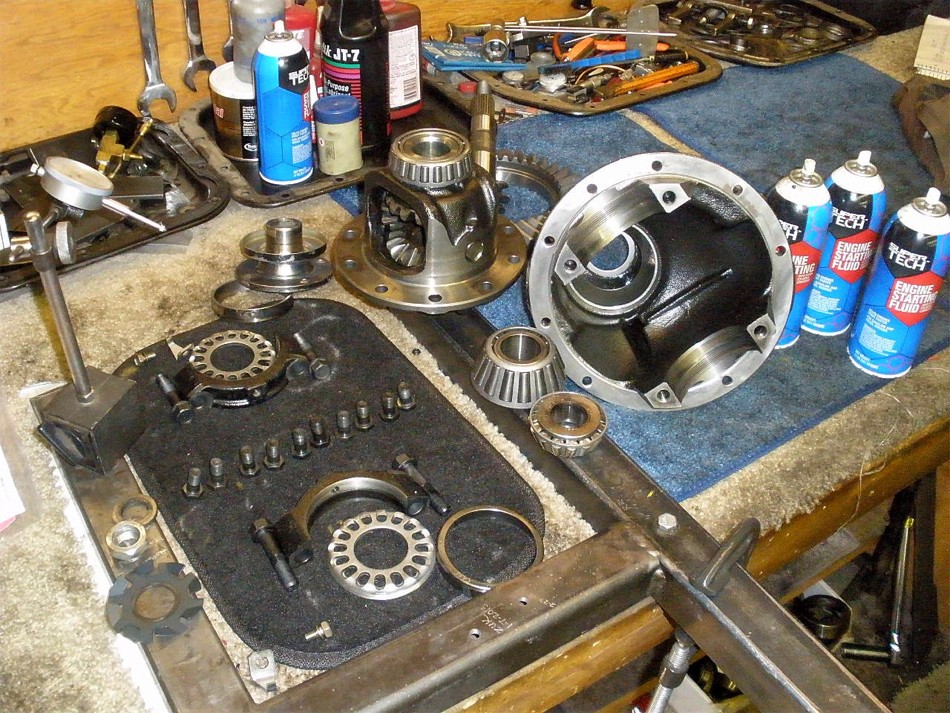
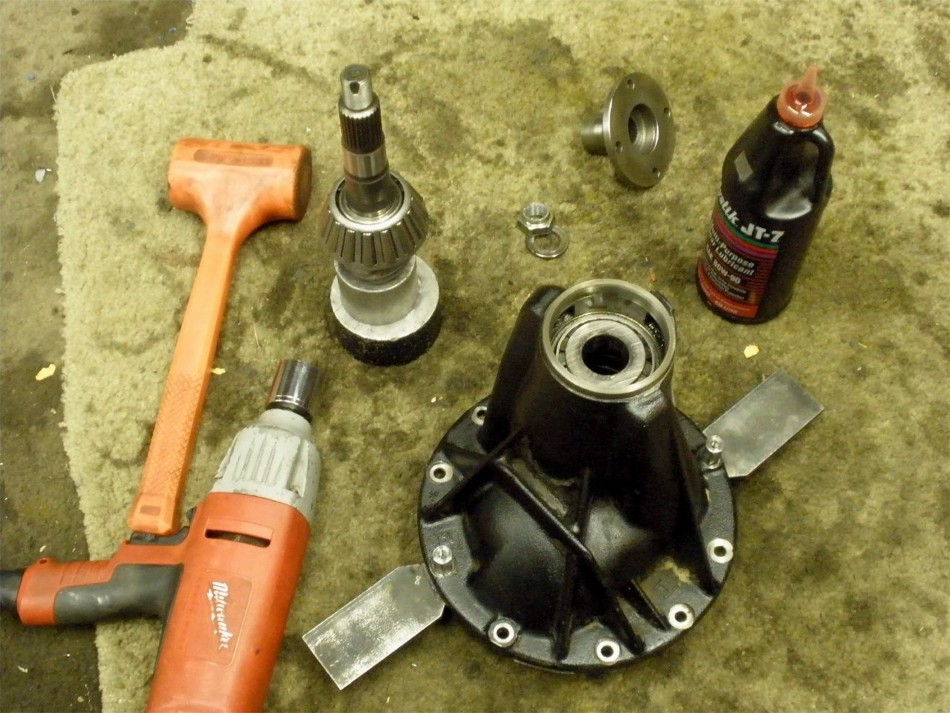
Teardown and cleaning begins.
|
|
|
|
|
3 cans of ether and all is clean.
|
|
|
|
All 4 bearings/races looked surprisingly good and re-usable. This FZJ80 must
have been a very low mileage rig because there was no pitting at all. With this
front end application with manual hubs and 10 or 20 mph is all these gears will
see on the trails, I am ok with these used bearings.
Pre-loads will be lightened up accordingly.
|
|
|
|
|
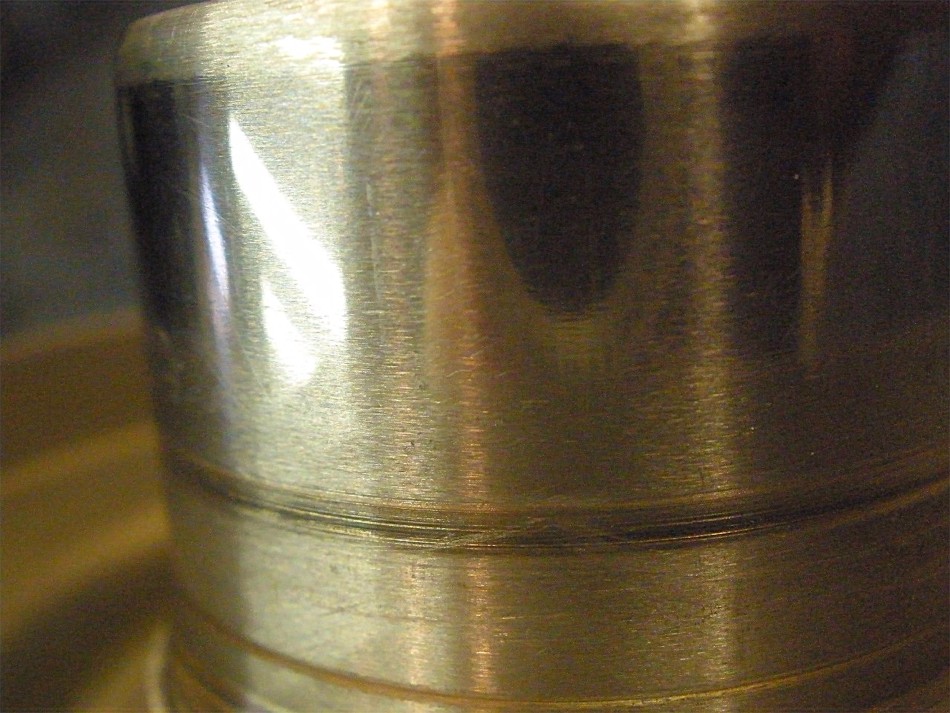
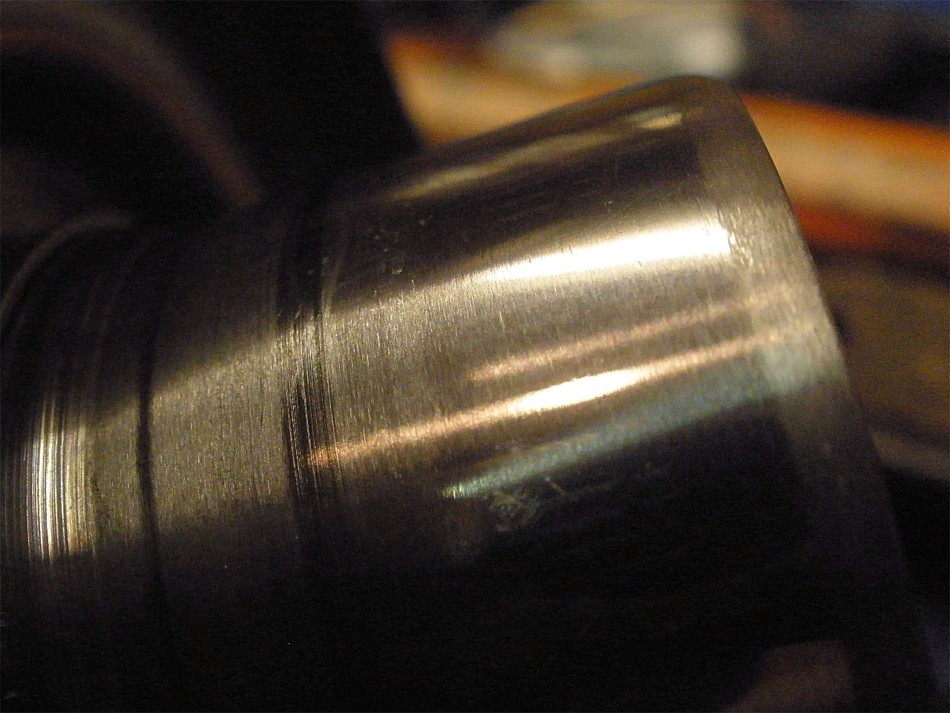
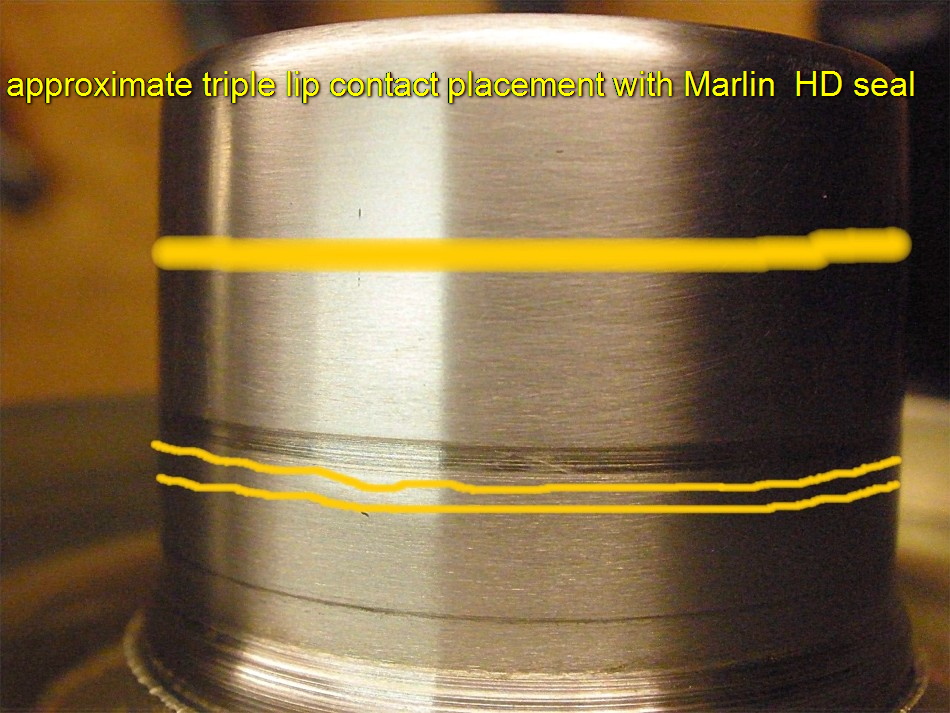
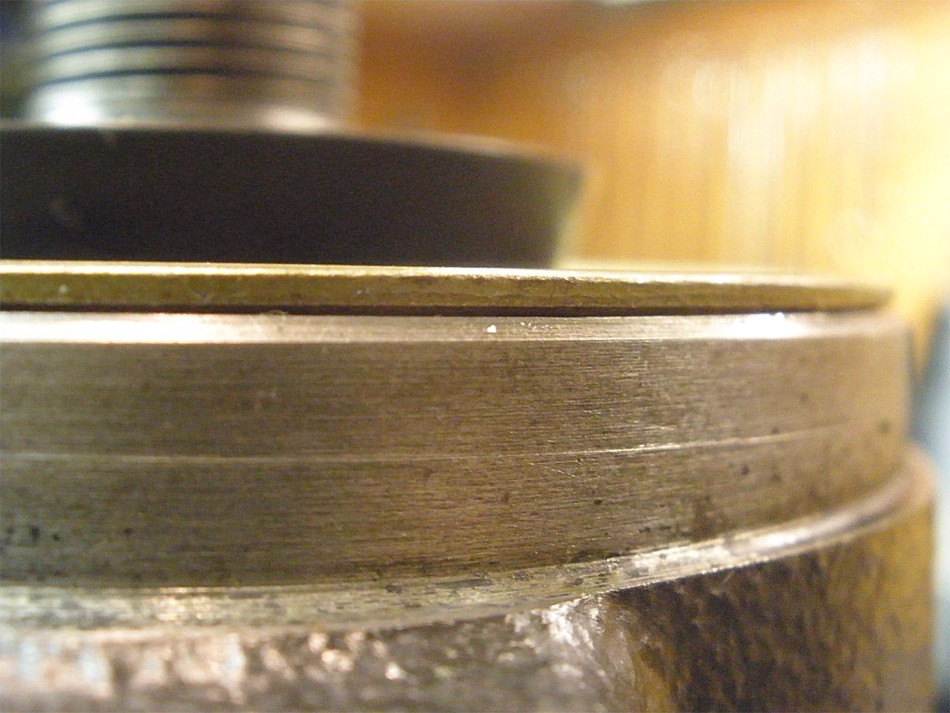
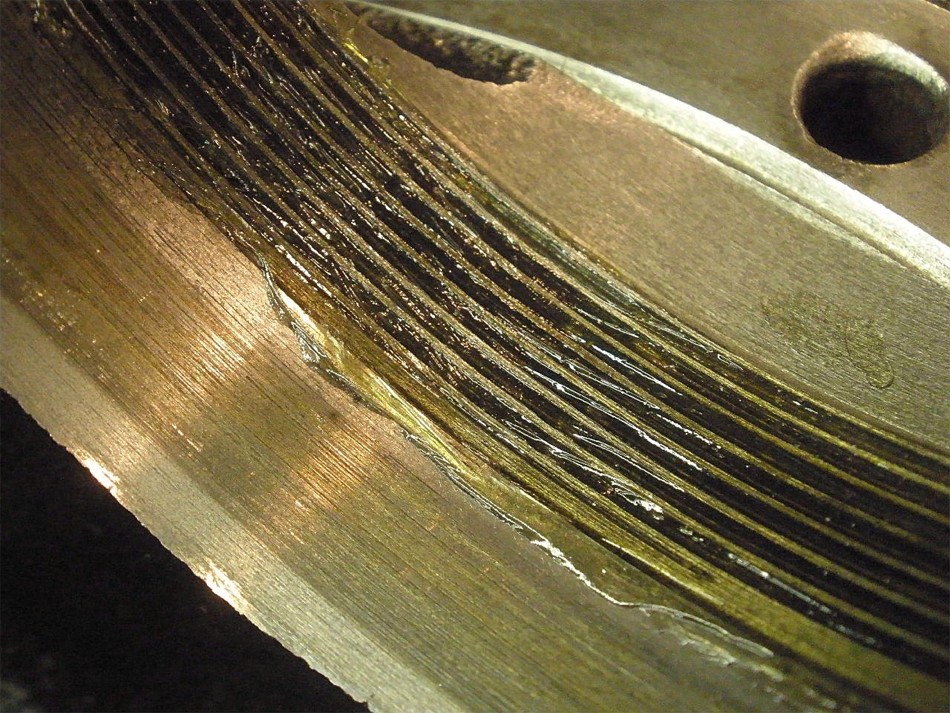
This is a close-up of the seal surface on the pinion flange.
|
|
|
|
There is the typical groove from the OEM seal. 99% of the time, re-using the
flange is not a problem but I have been burned before when I thought the
flange wear was not a problem...and it was. A new flange is always a good
idea....or a better seal that cost less than the flange.
|
|
|

|
This is the oem factory seal....2 lips but only the main lip works for sealing
the gear oil in. The other lip just barely makes contact with the flange and
is really more of a dust seal.
|
|
|
|
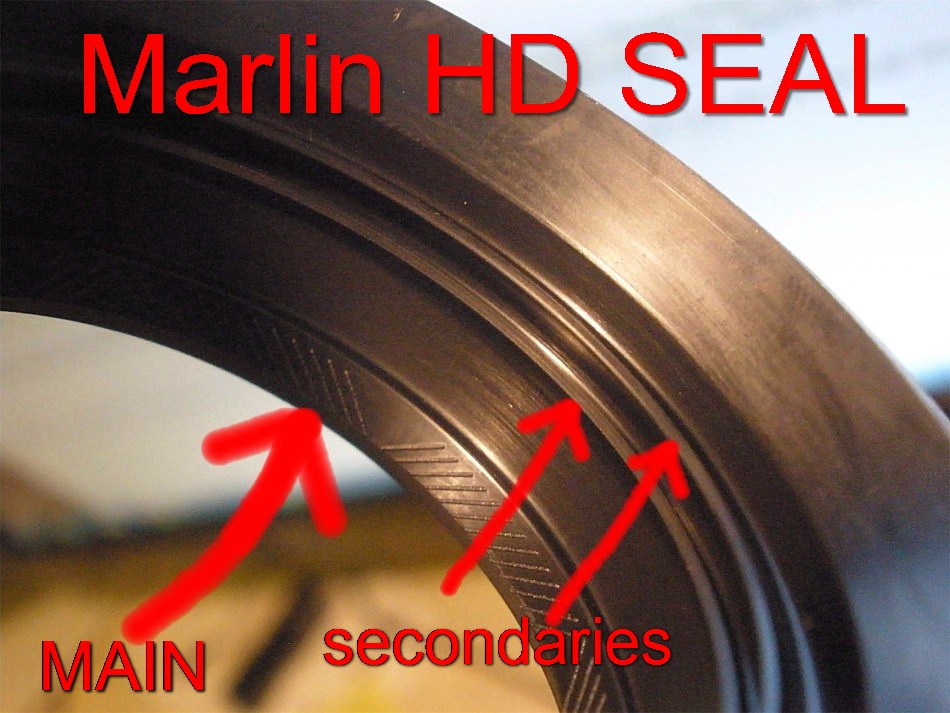
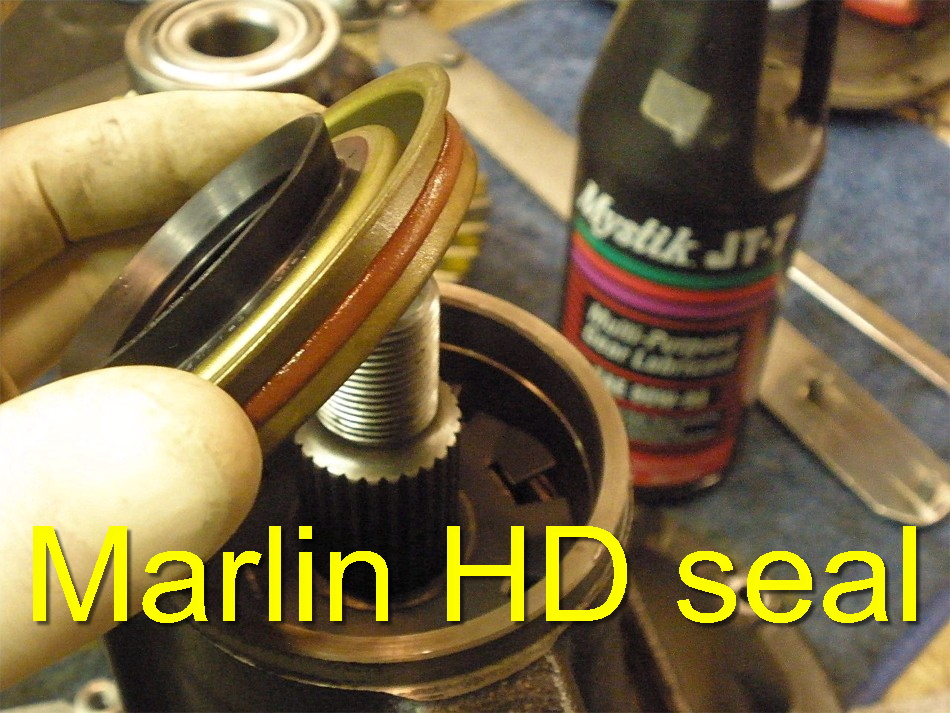
Now, the Marlin seal is truly a good seal....about $20 with the shipping, these
seals are amazing. All 3 lips are a snug fit on the mating flange resulting
in a superior seal. Marlin differential parts.
|
|
|
|
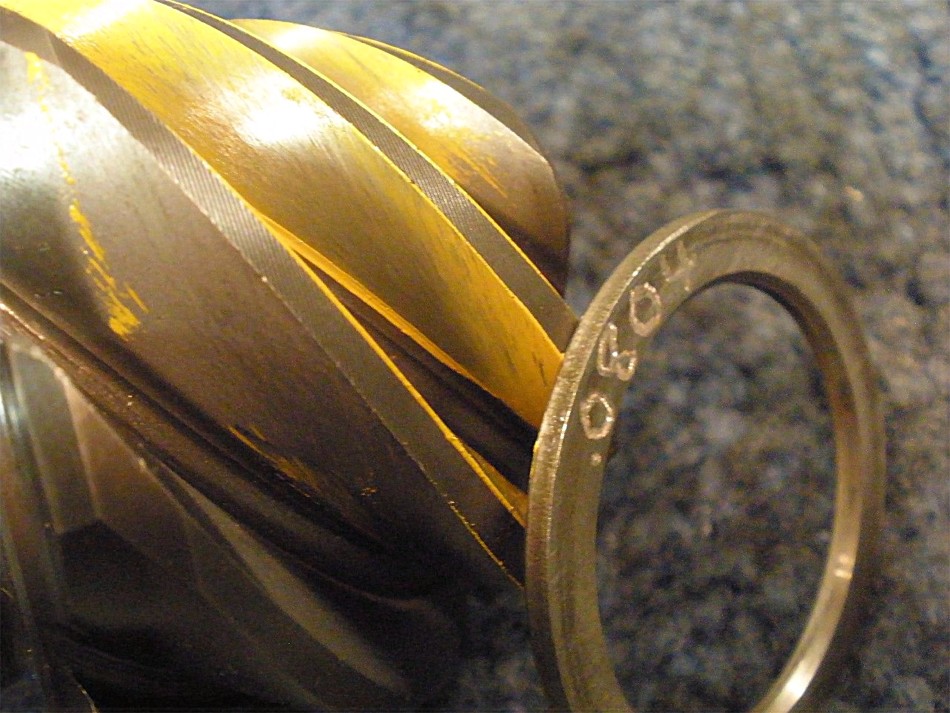
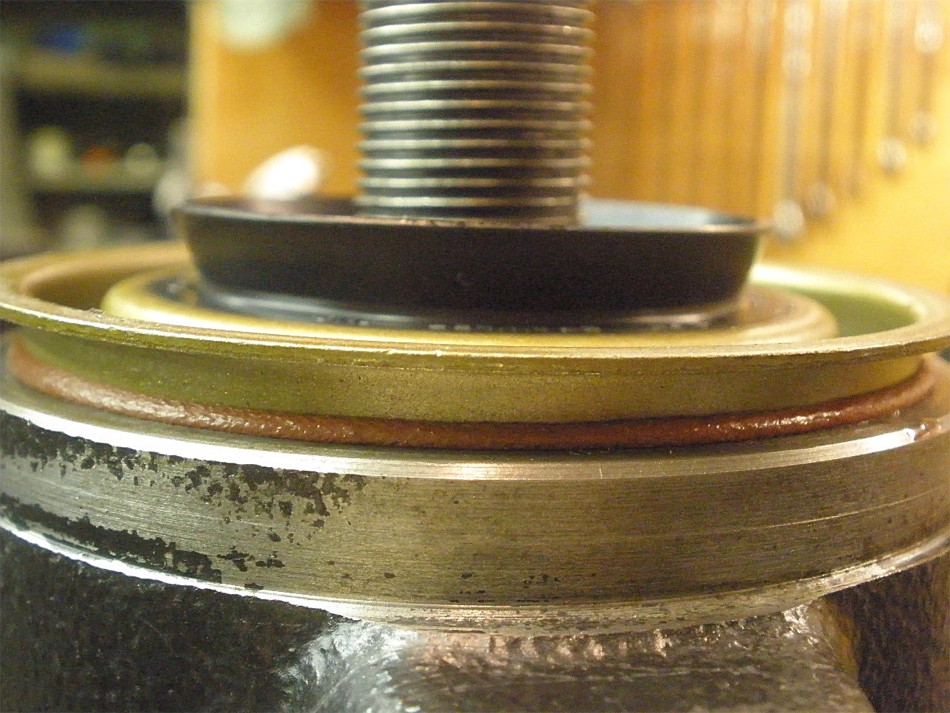
What's really good is that no matter how deep the groove is from the old oem
seal, the Marlin seal places the big main lip about .300" away from the
damaged groove. Even the other 2 smaller lips are in a clean zone. As
long as the flange surface is not pitted or rusted badly, the Marlin
seal should seal just about any flange.
|
|
|
|
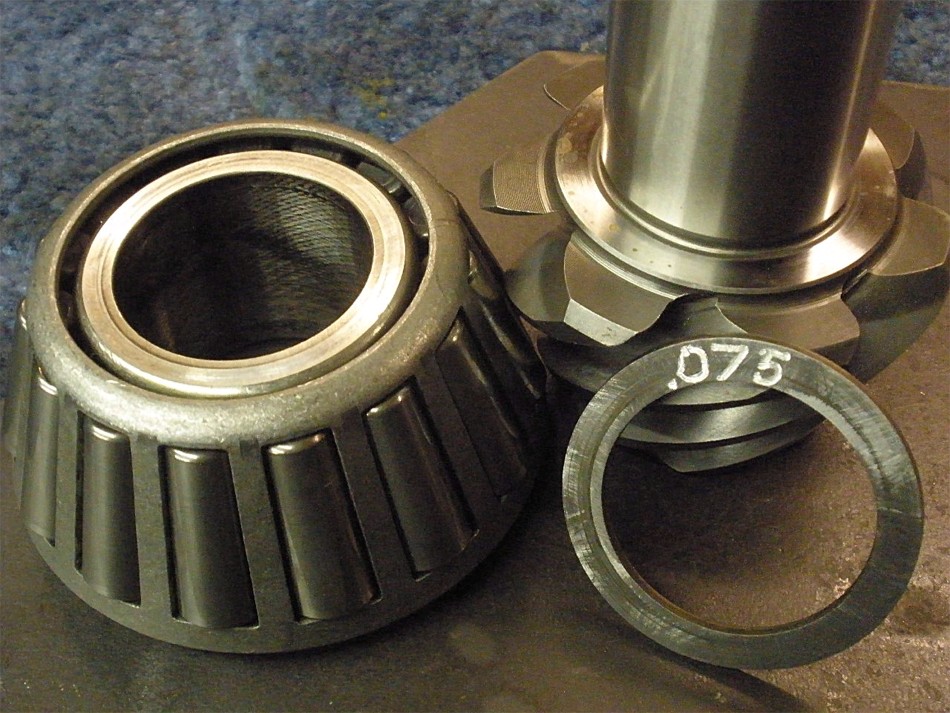
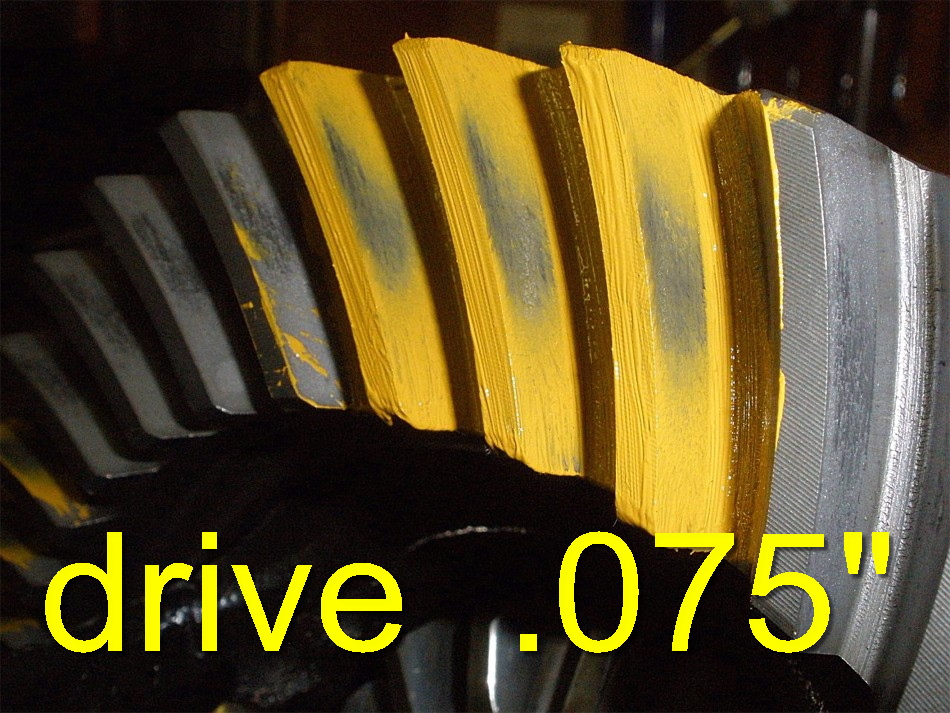
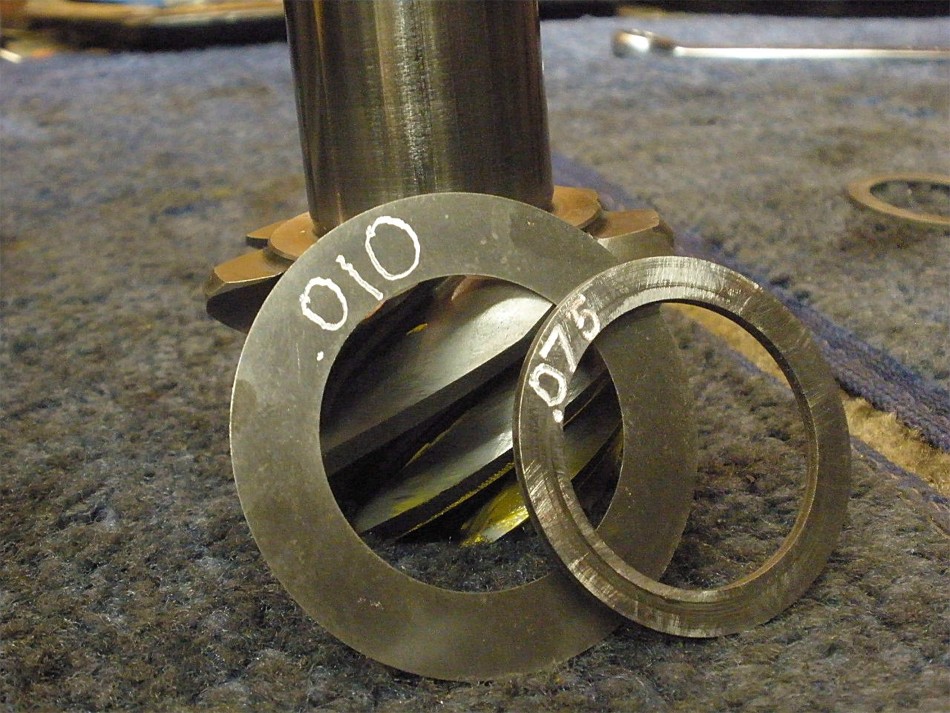
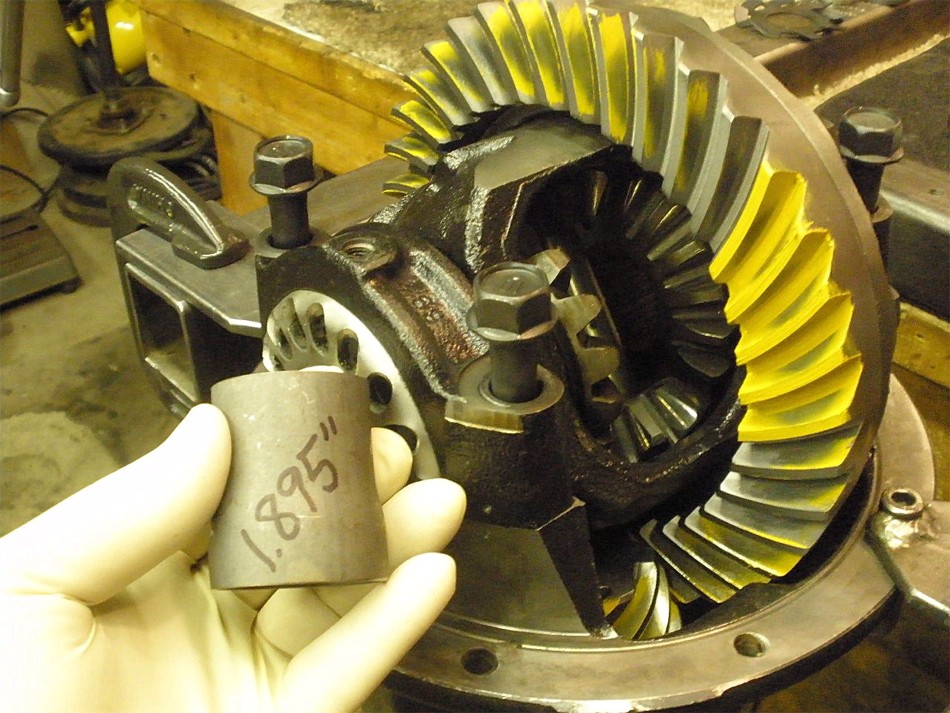
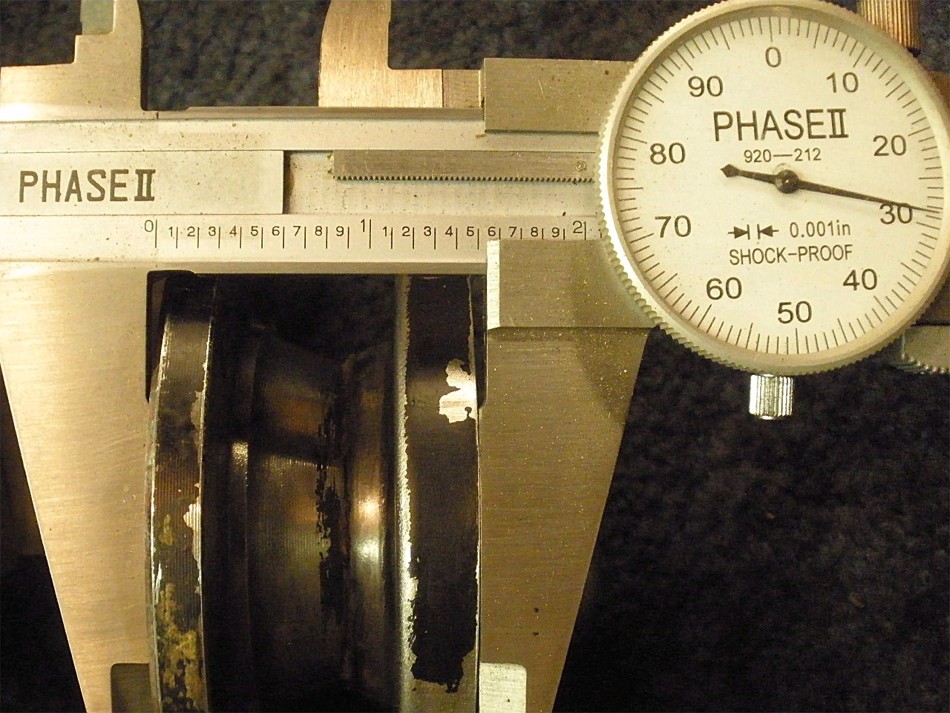
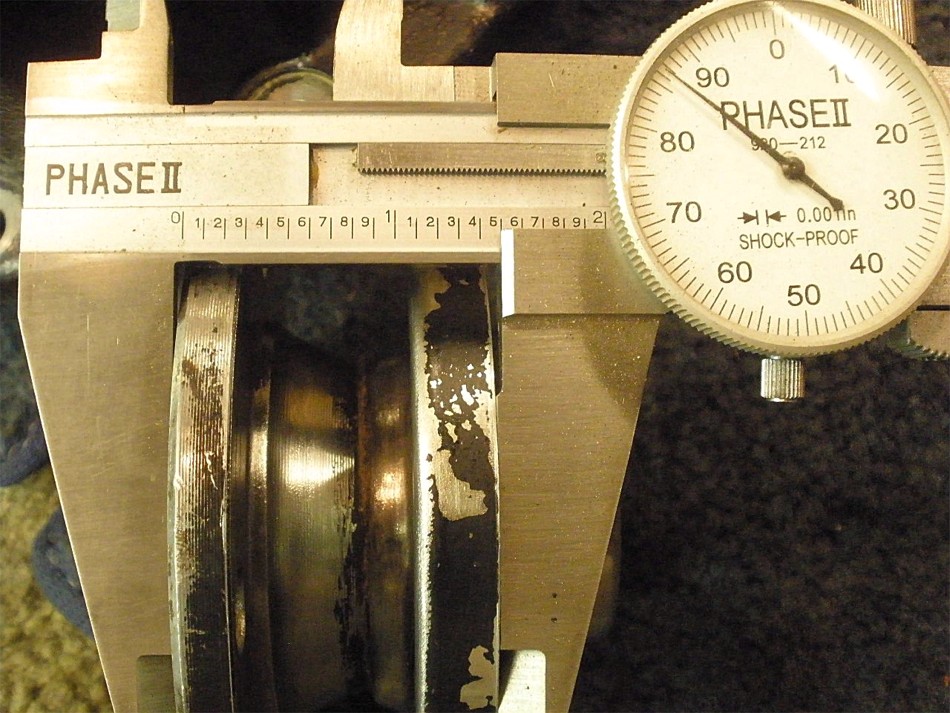
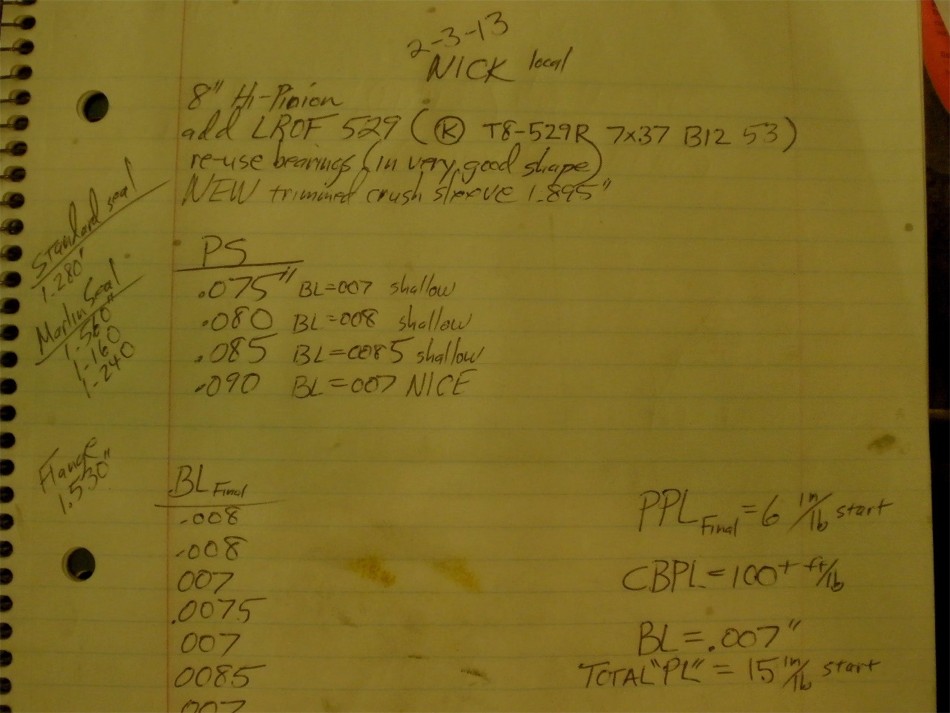
Previous Circle K gears fell into the range of 072 to 078 so 075 will be the
first try at the pinion depth.
|
|
|
|
|
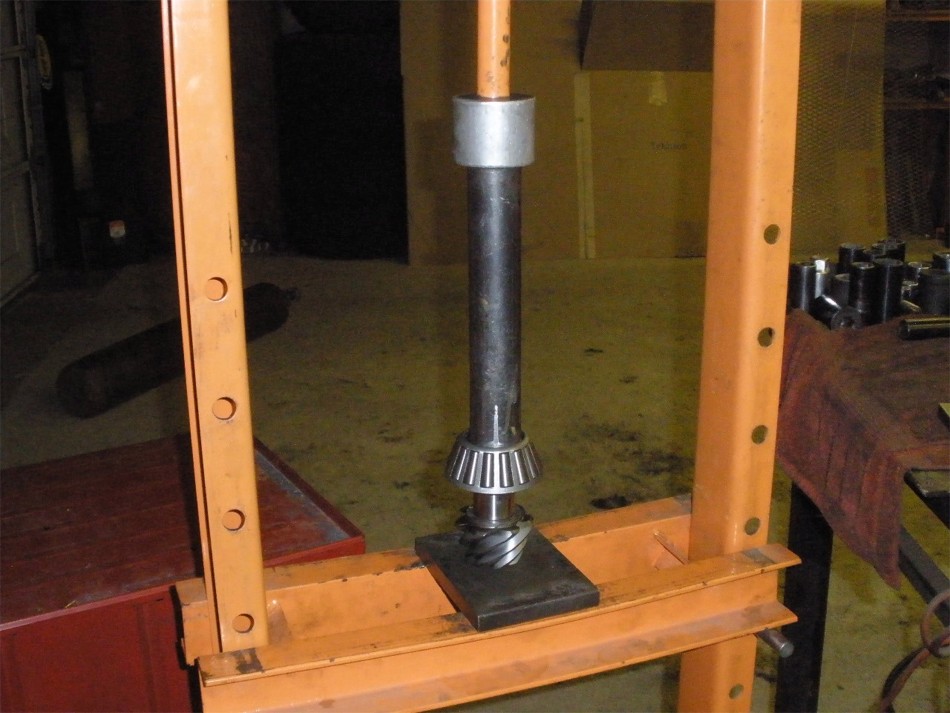
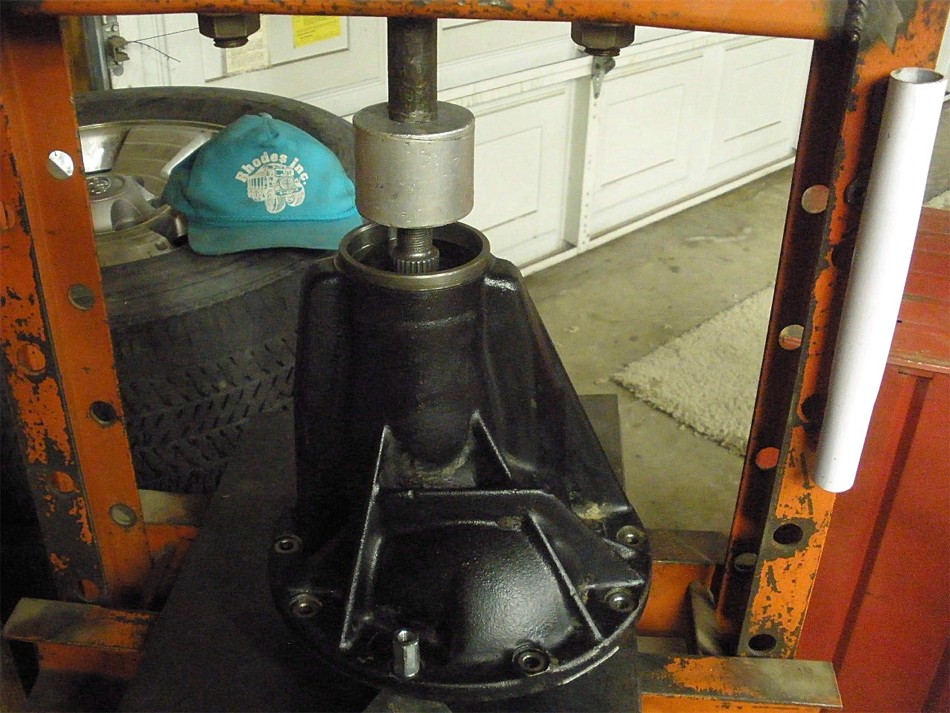
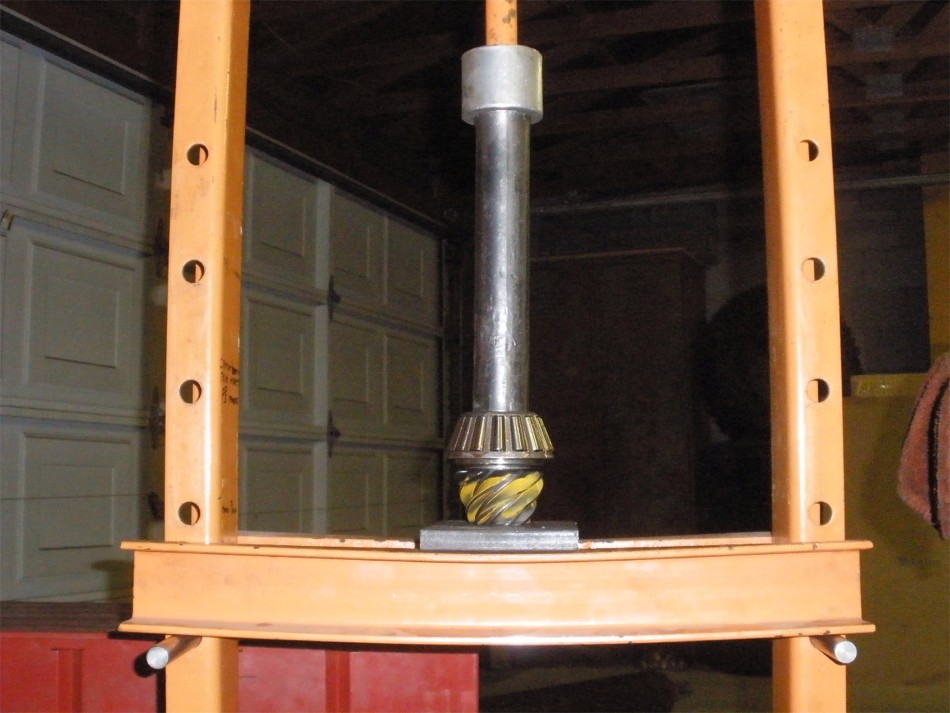
Life is just so much nicer with a press...or 2.
|
|
|
|
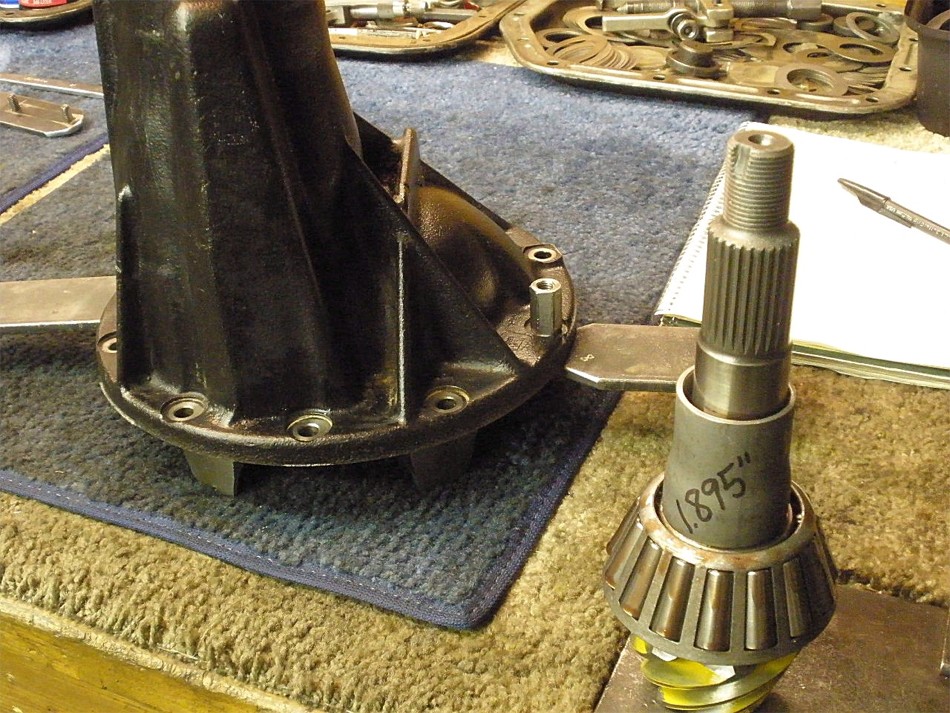
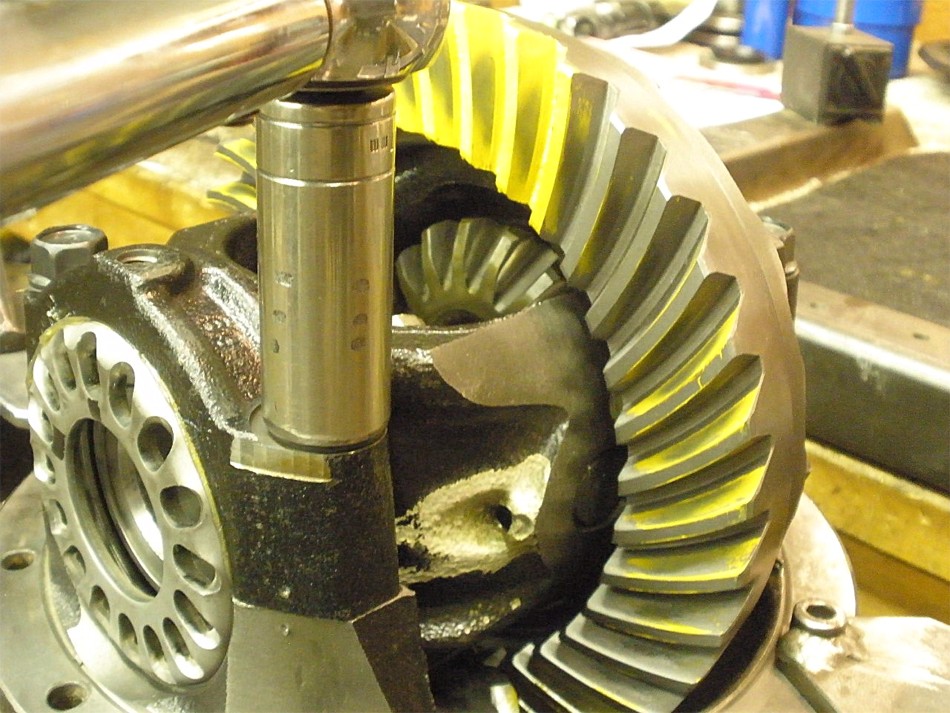
Now, I'm ready to load the pinion into the 3rd. No crush sleeve until the
proper pinion shim is verified.
|
|
|
|
|
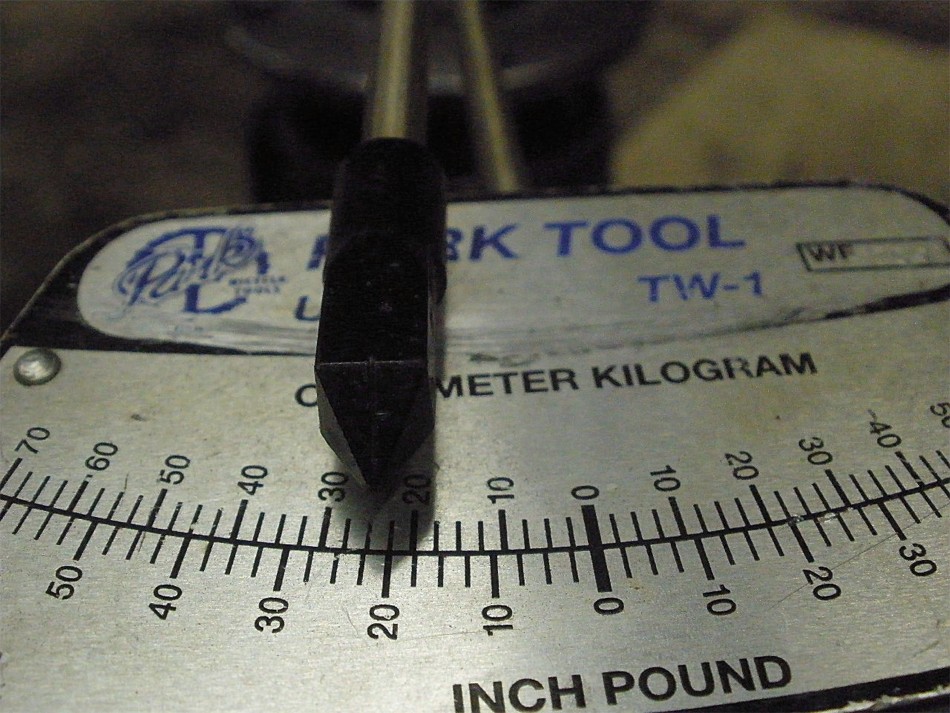
It's a little over 20 in/lb start torque but that's ok for just a pattern check.
|
|
|
|
Now to get the other half ready....surfaces are filed to check for burrs and
high spots. All was good.
|
|
|
|
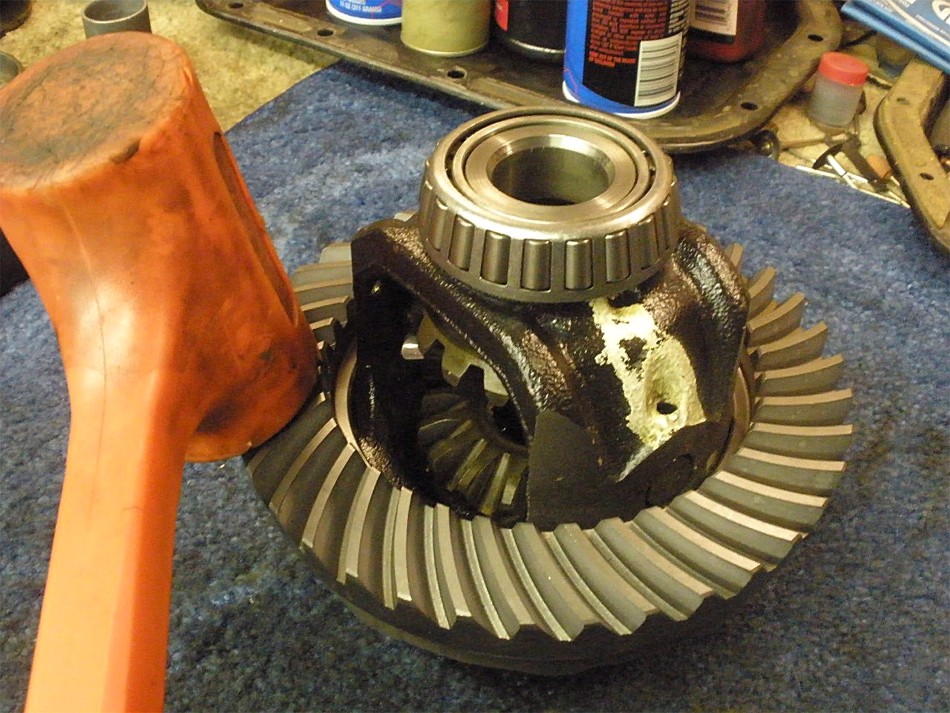
I could not squeeze it on with my fingers but the press was not really needed
either. Just tapped it on with the lead filled plastic hammer.
|
|
|

|
|
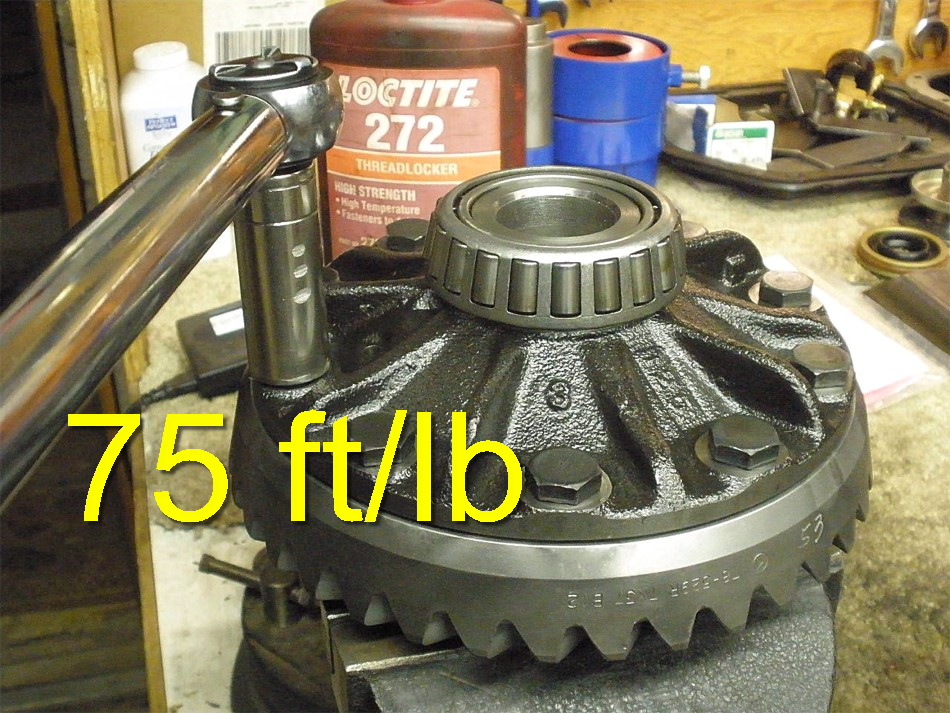
Red loctite has never let me down....
|
|
|
|
|
...neither has 75 ft/lb.
|
|
|
|
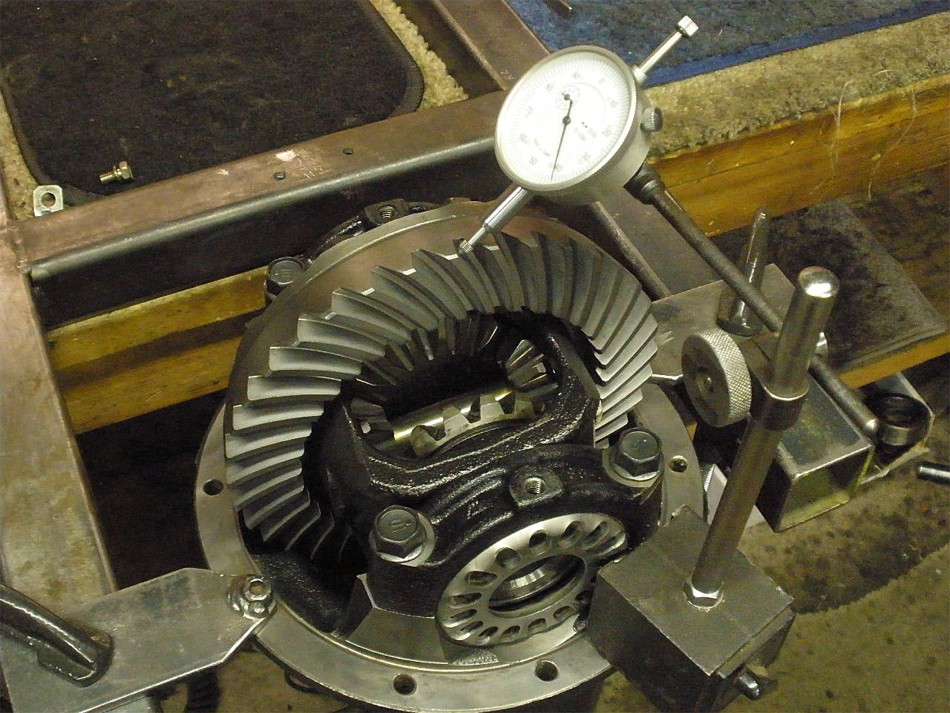
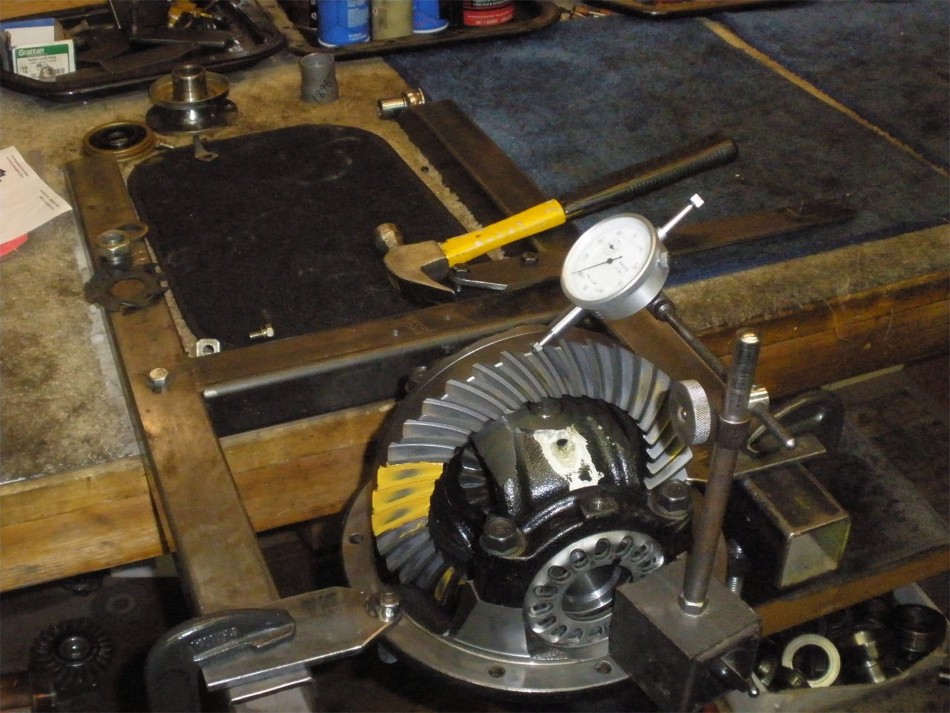
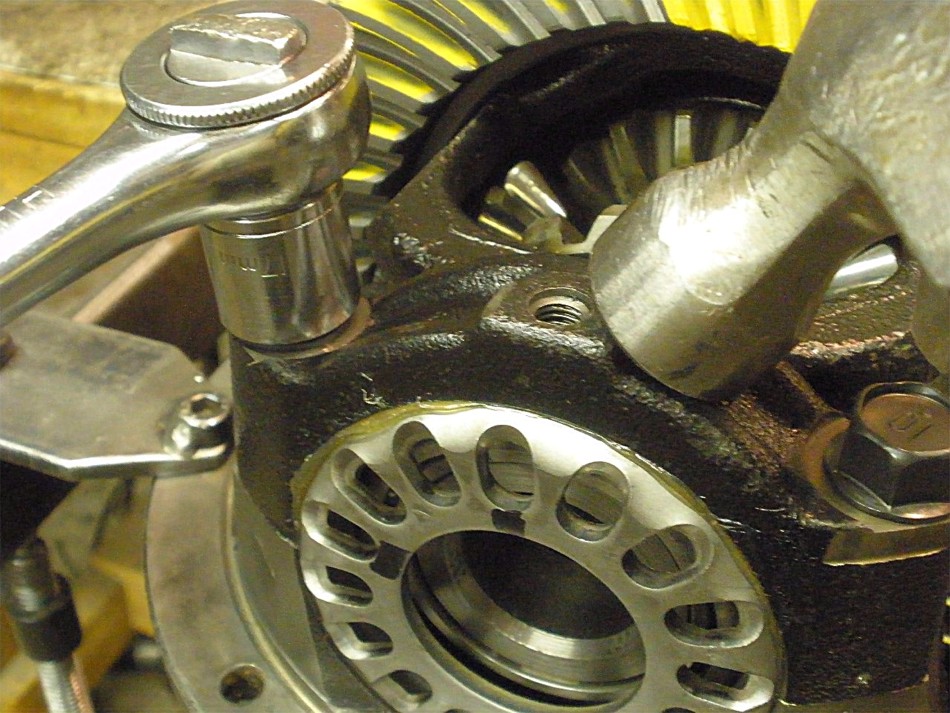
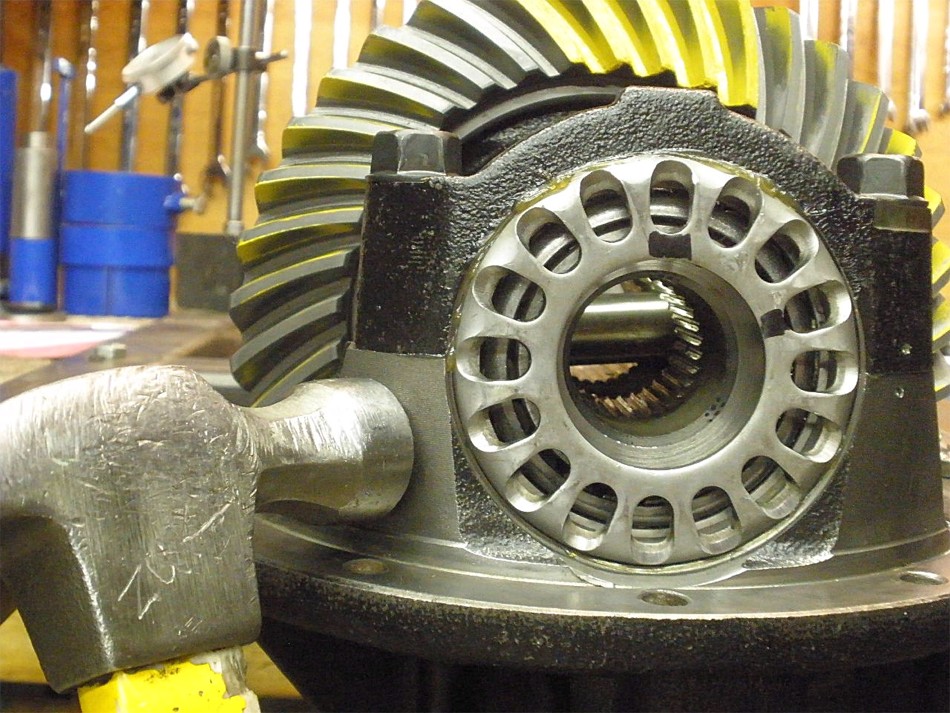
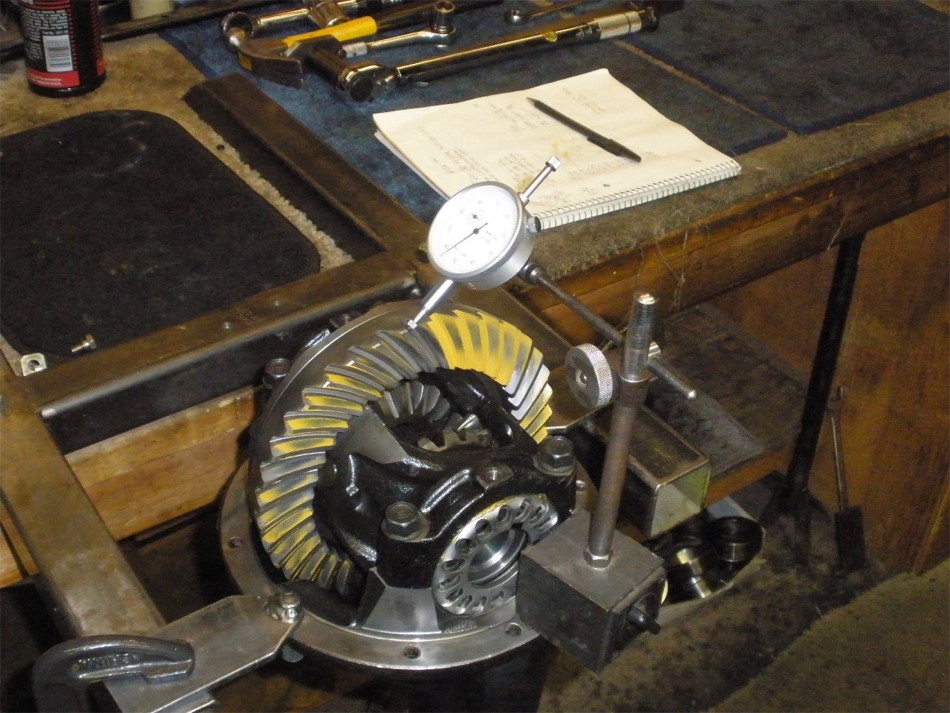
The case is then loaded up...some carrier bearing
preload while checking the backlash.
|
|
|
|
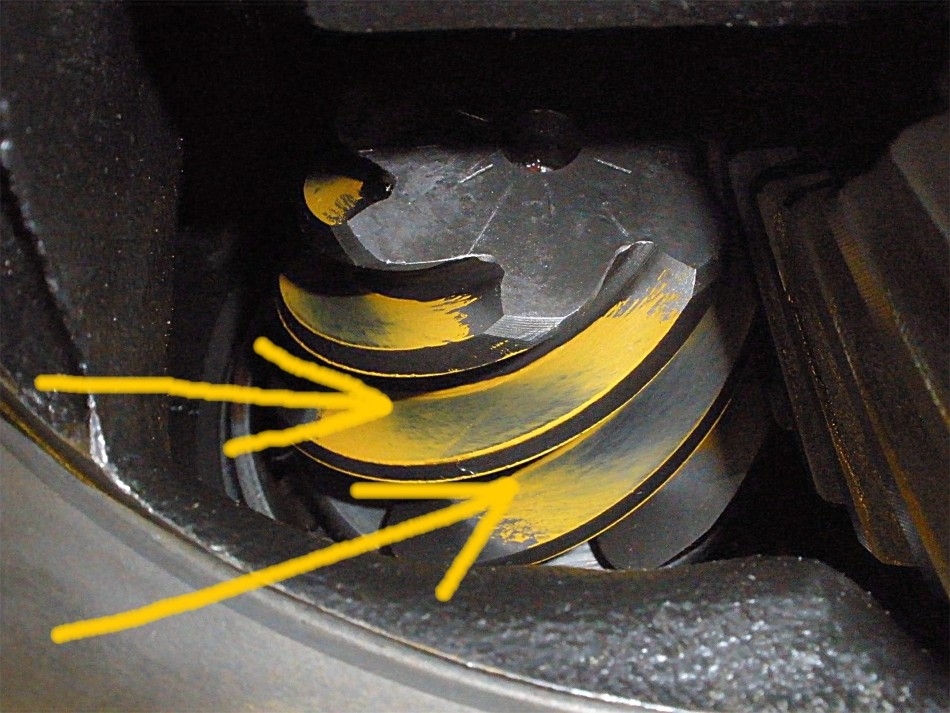
Hmmm...fairly centered...top to bottom...in to out....some shops might
call this good.
|
|
|
|
|
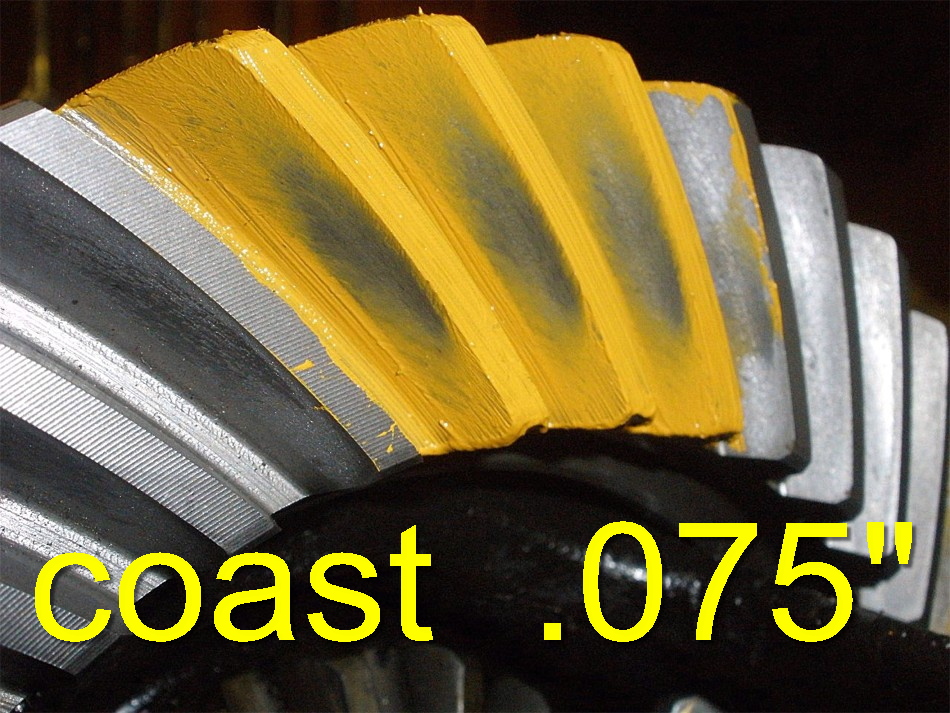
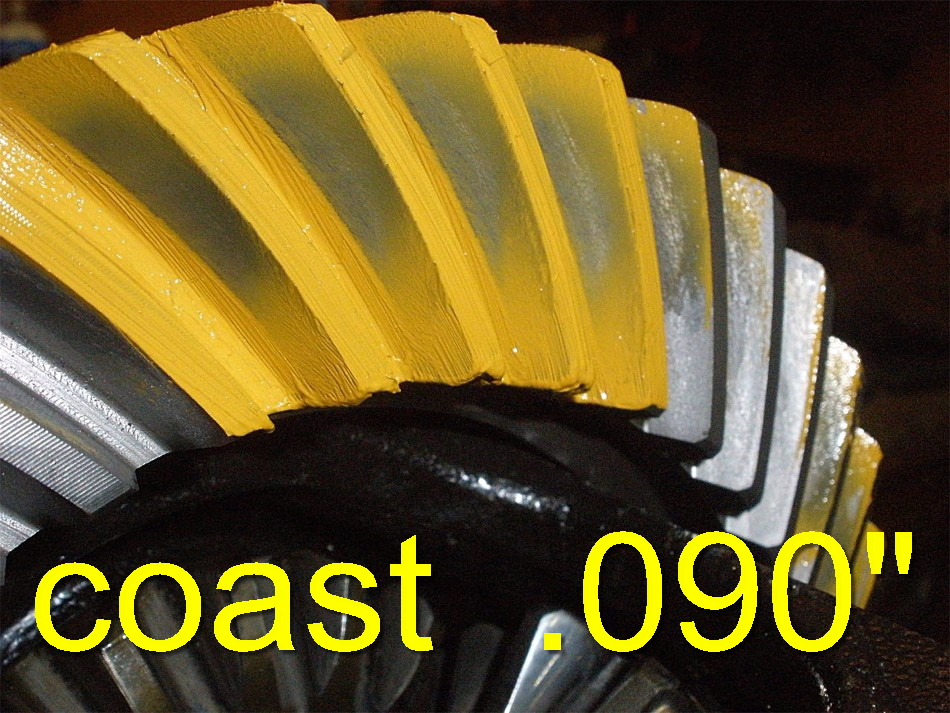
Coast is even in the center.
|
|
|
|
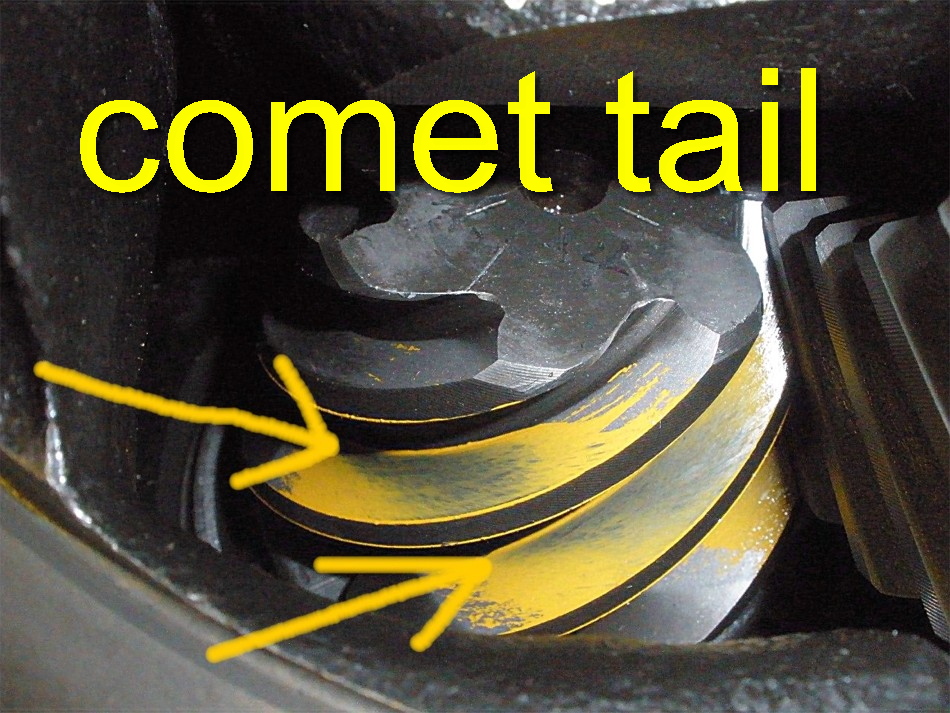
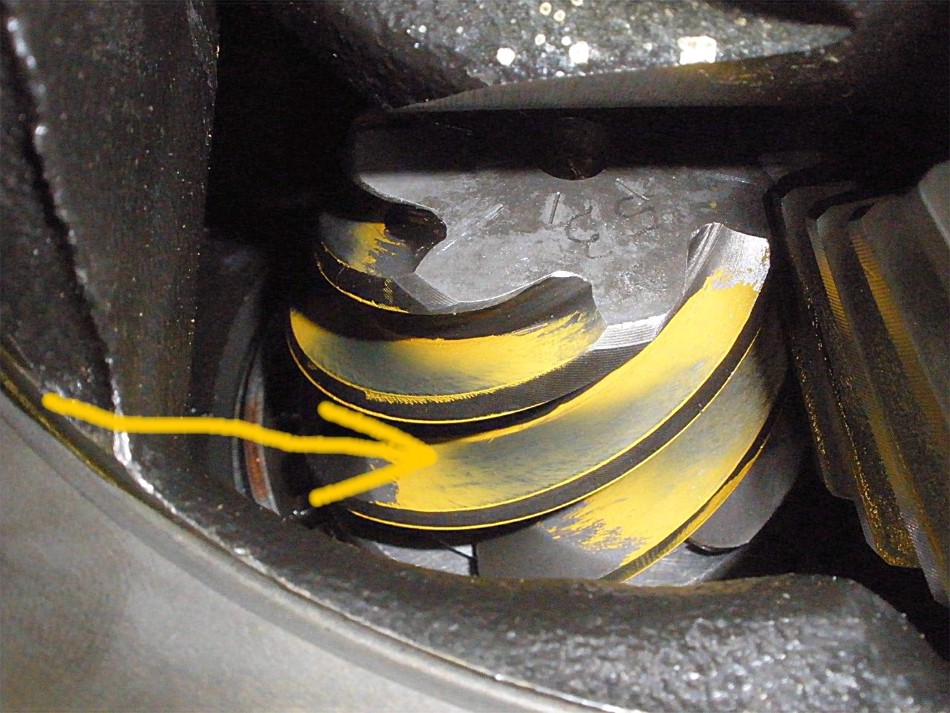
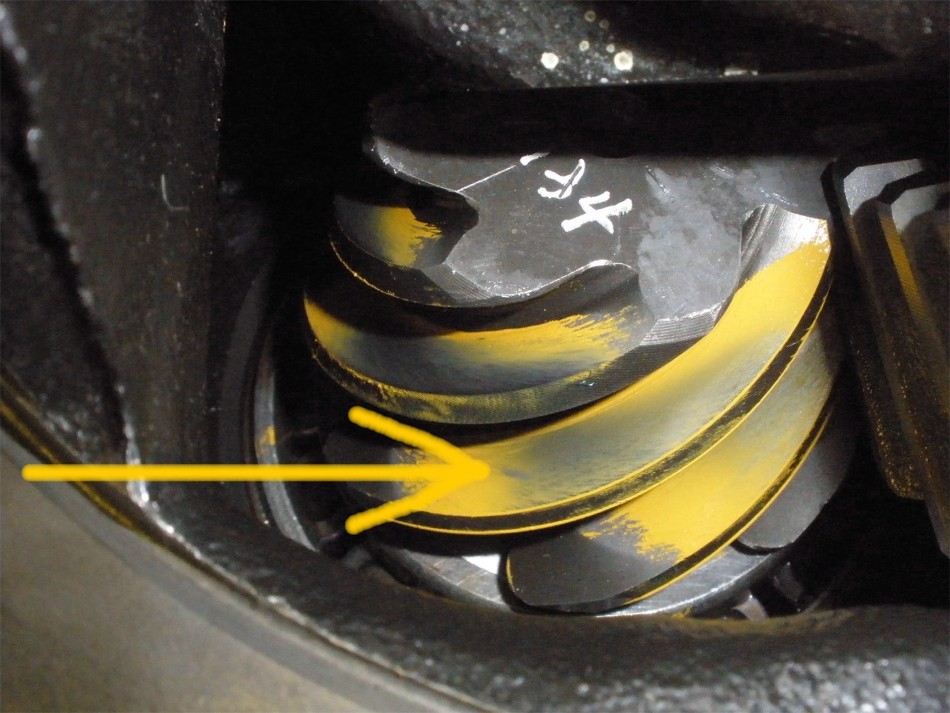
But what does the comet tail say? It's kicked hard to the inside....real deep
....and deep in the pinion means shallow on the ring.
|
|
|
|
|
Teardown time.
|
|
|
|
|
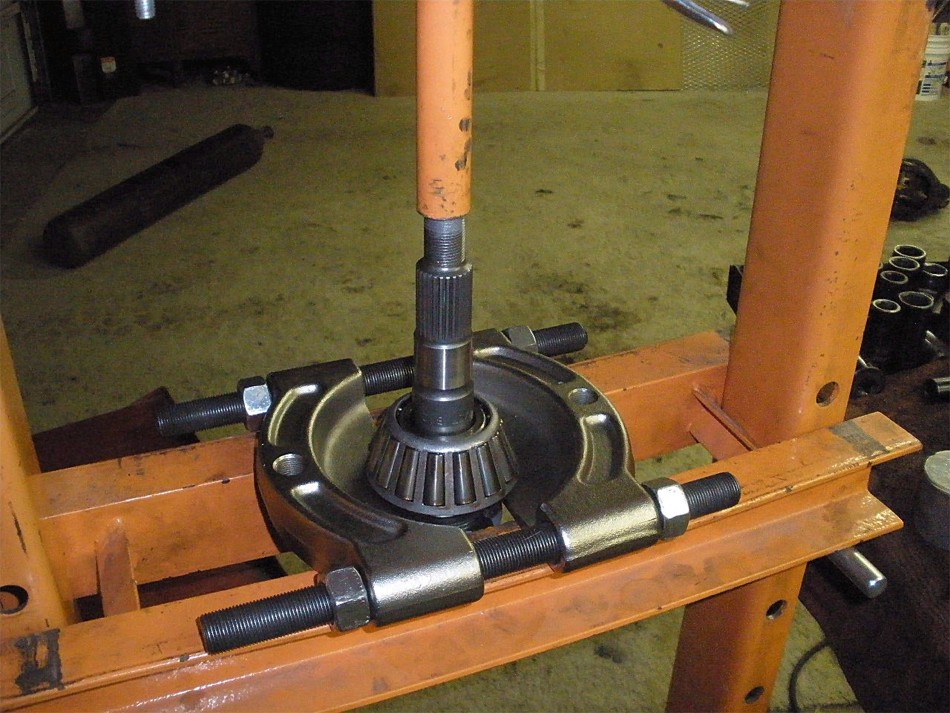
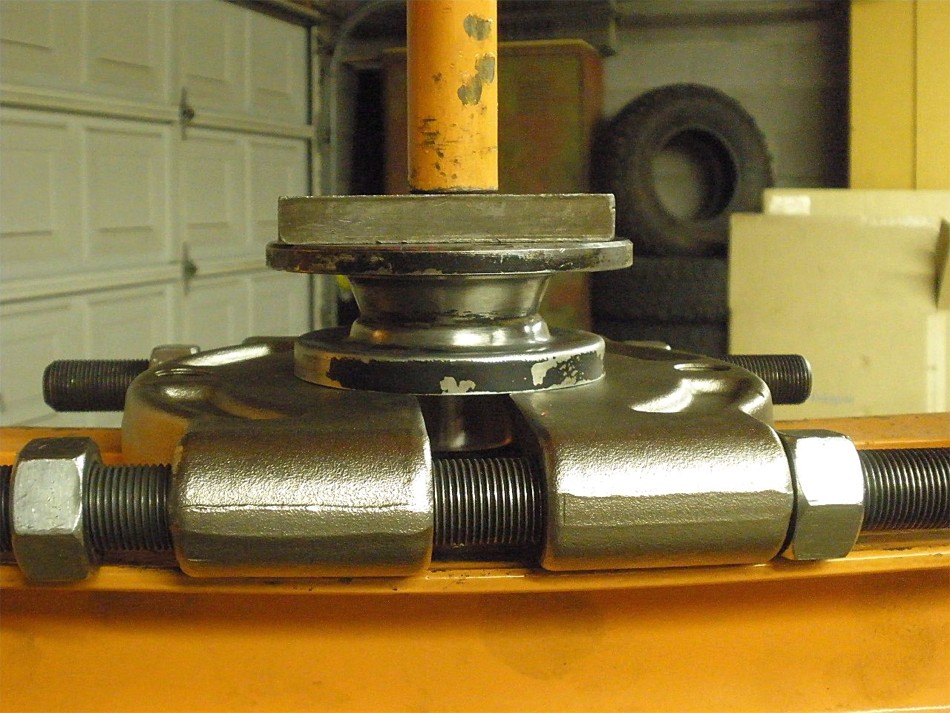
Press the big pinion bearing off...
|
|
|
|
|
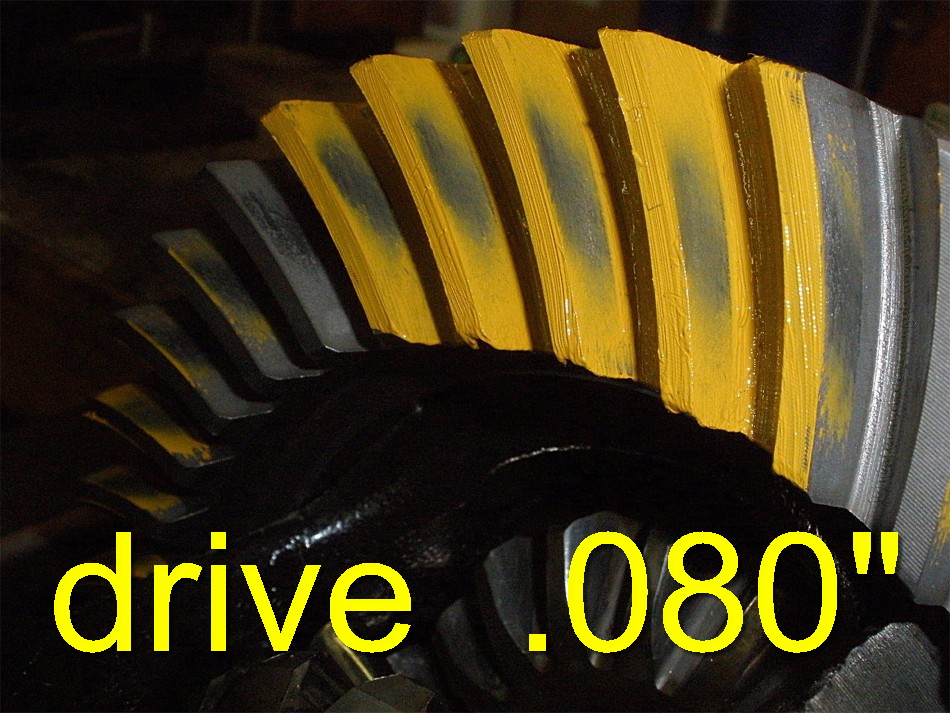
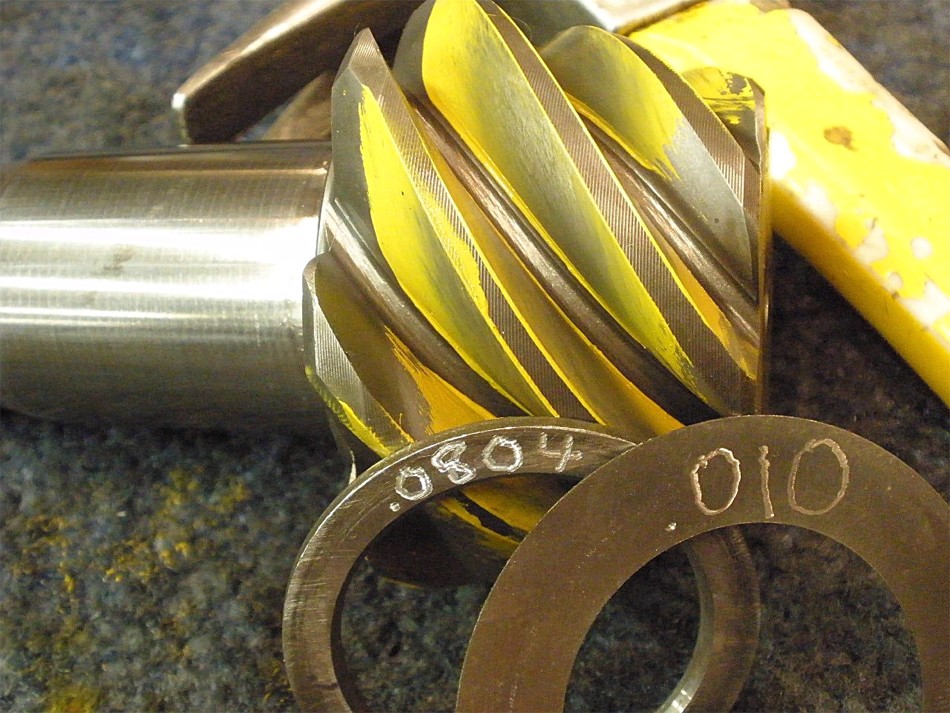
...and now going to up the shim to 080.
|
|
|
|
|
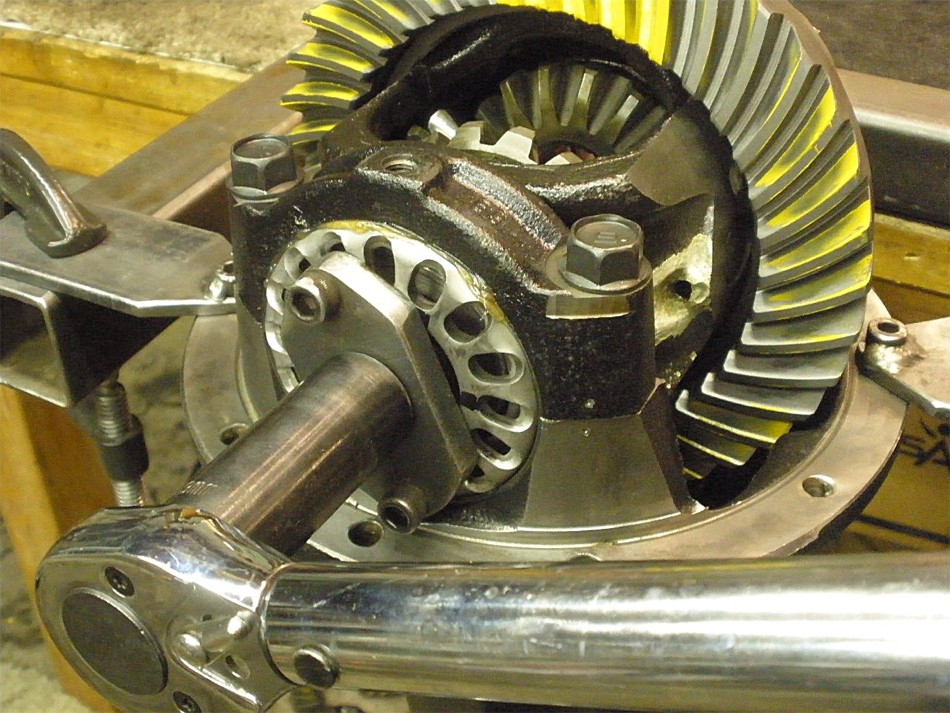
Put it all back together and dial in pre-loads and backlash in the ballpark.
|
|
|
|
|
hmm...almost looks the same as before with 075.
|
|
|
|
|
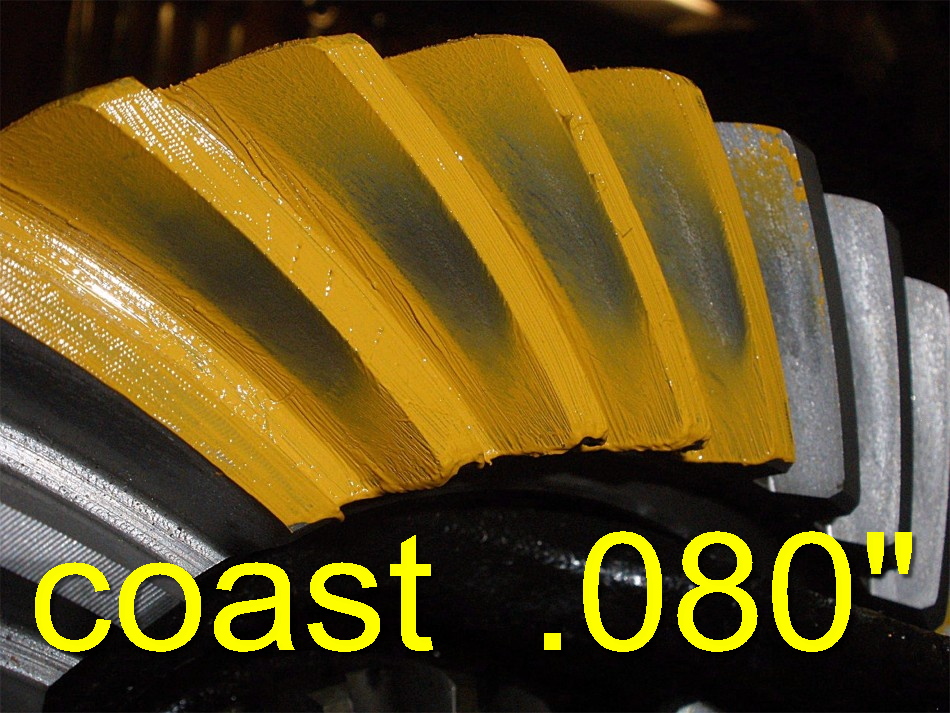
Coast.
|
|
|
|
Tail still way to the inside.
update 8-18-21 Should never have went any deeper than 080.
|
|
|
|
|
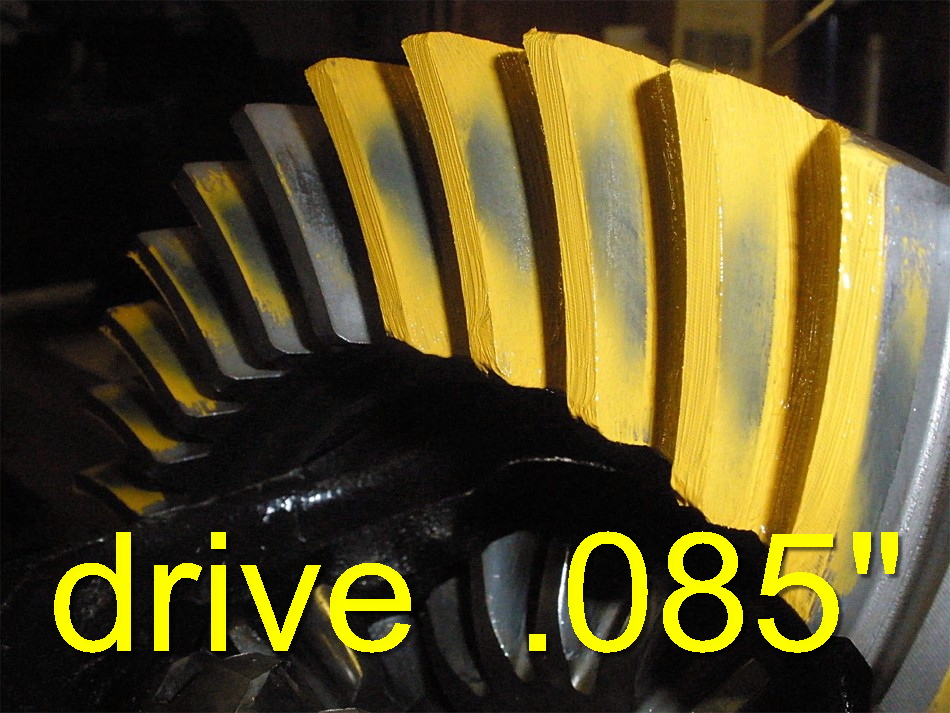
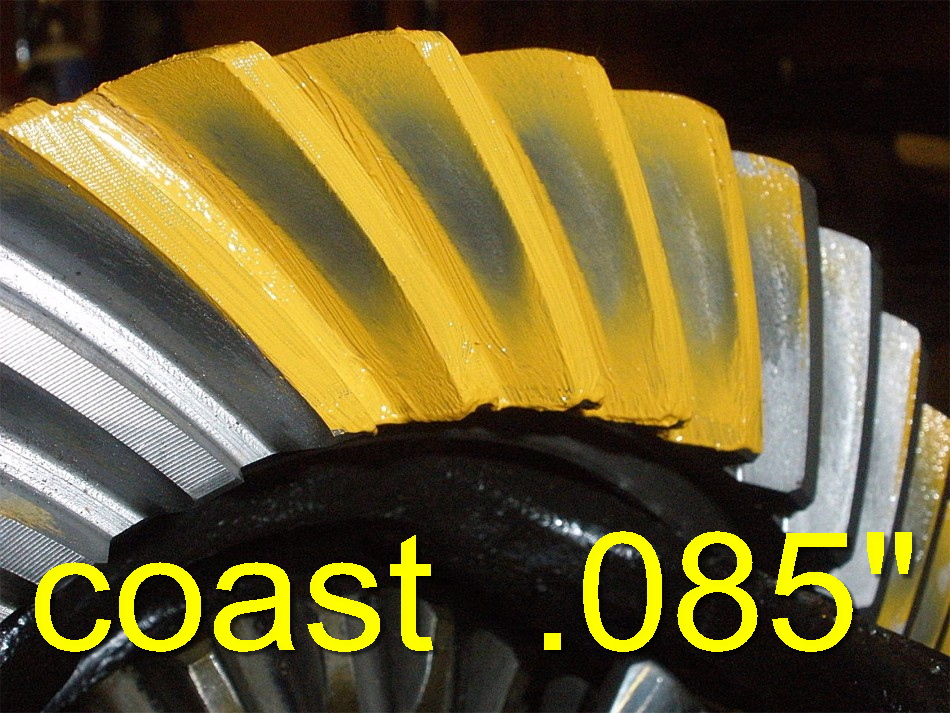
Another teardown and increase the pinion shim to 085.
|
|
|
|
|
The press is really paying for itself today.
|
|
|
|
|
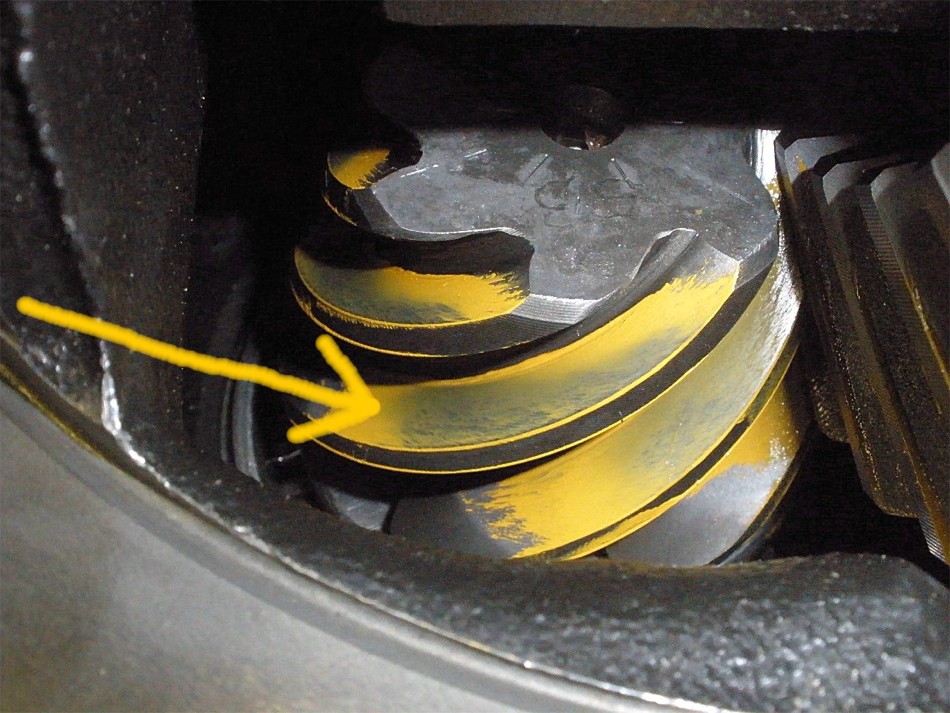
Pattern is going deeper and taking on a new shape.
|
|
|
|
|
Coast looks like it is going deeper to the root.
|
|
|
|
|
The comet tail is starting to shift out some.
|
|
|
|
|
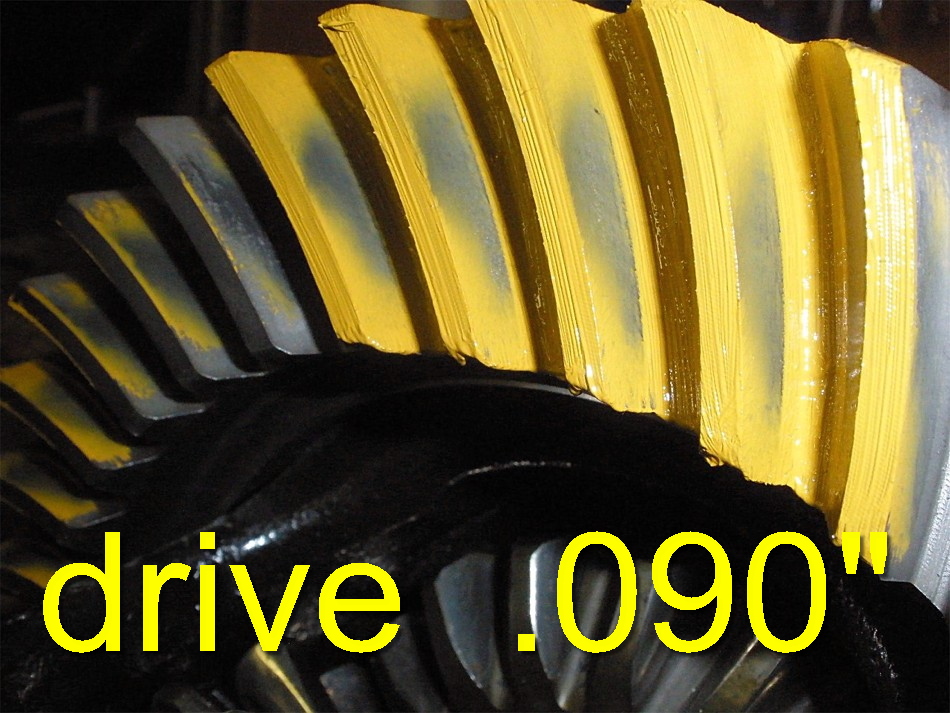
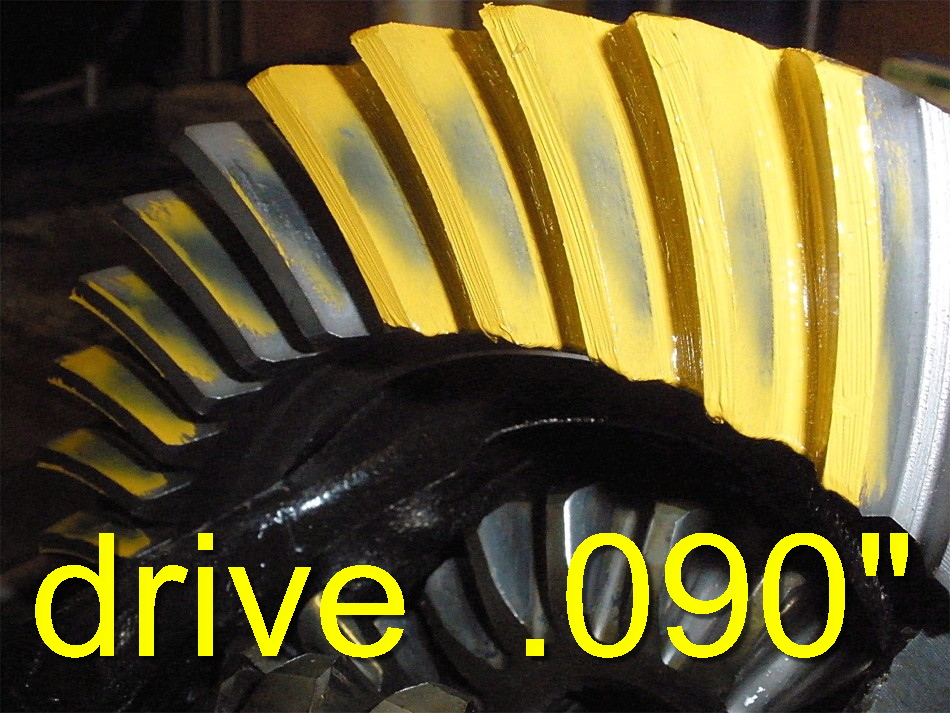
4th time is a charm. 090 might be it.
|
|
|
|
|
That looks good.
|
|
|
|
|
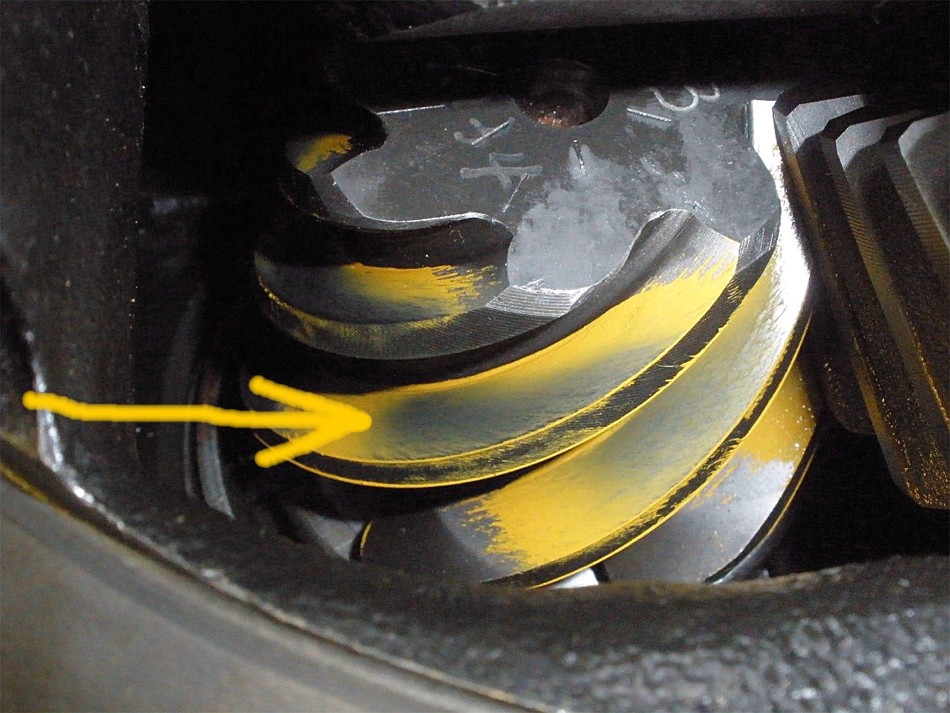
Tail has kinda blended into the center.
|
|
|
|
|
Here's another tooth....more obvious that the tail moved to center.
|
|
|

|
|
Reverse painted tooth...Now this drive pattern looks like it's in the strong region :)
|
|
|
|
|
Reverse painted...Coast looks nice.
|
|
|
|
Last teardown. The crush sleeve has been shortened up on the mini-lathe.
I trimmed off about .040"
|
|
|
|
|
Now to assemble it all.
|
|
|
|
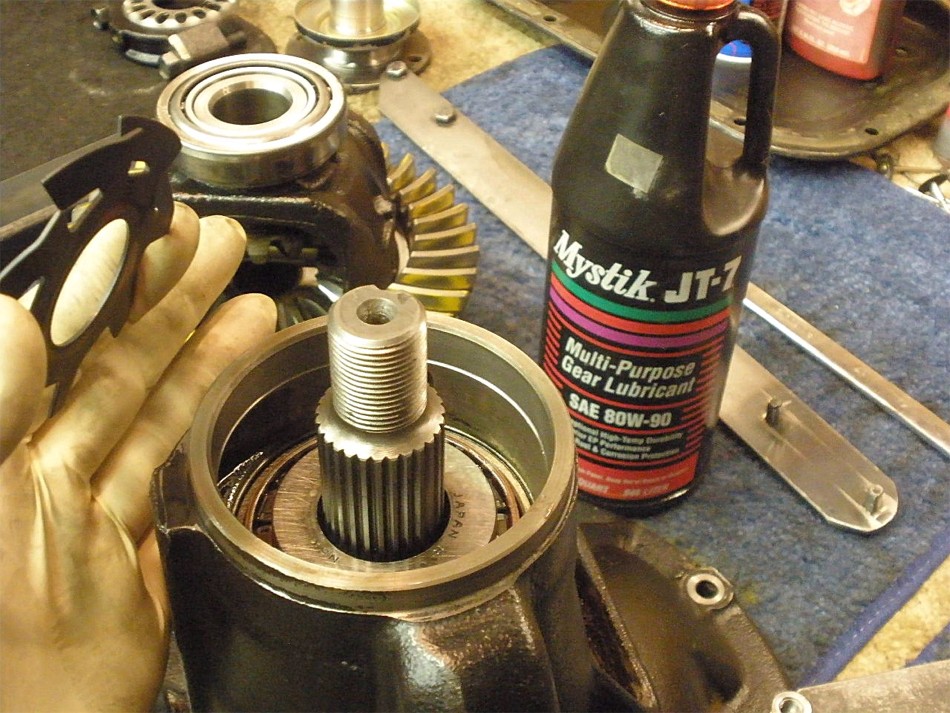
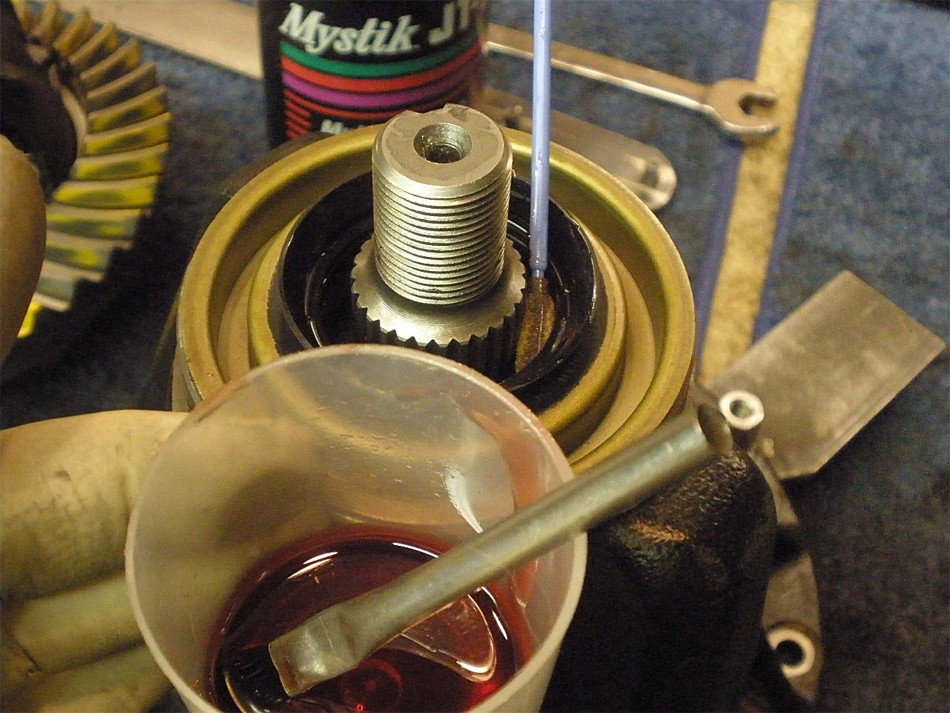
Last chance to add a little more gear oil to the top bearing....then drop the
the oil slinger in place.
|
|
|
|
|
The heavy duty Marlin seal is now lined up.
|
|
|
|
|
The Marlin seal has its own sealer on it.
|
|
|
|
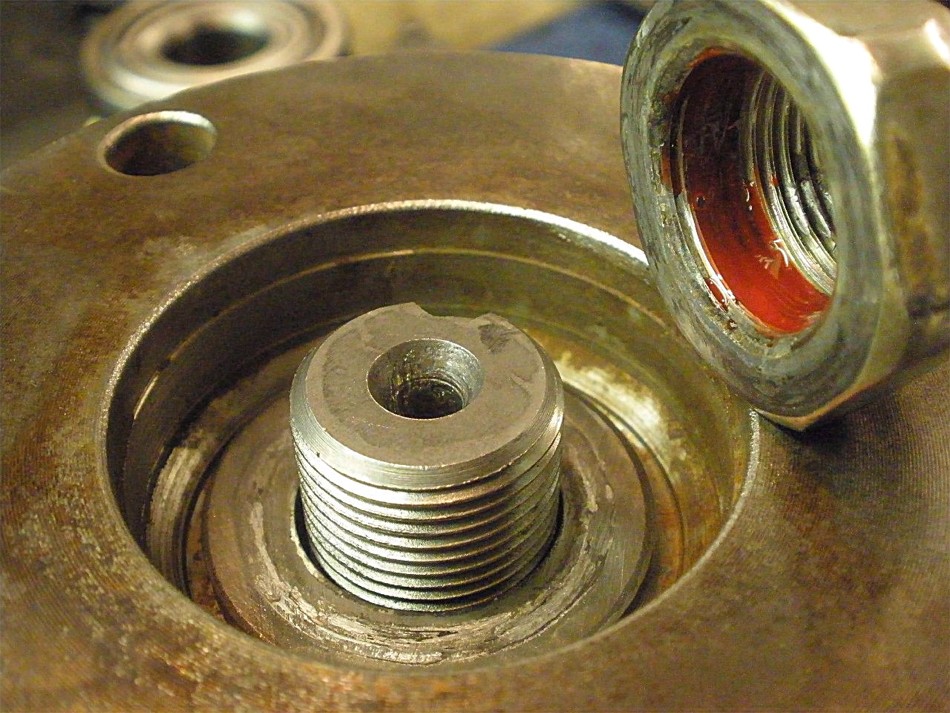
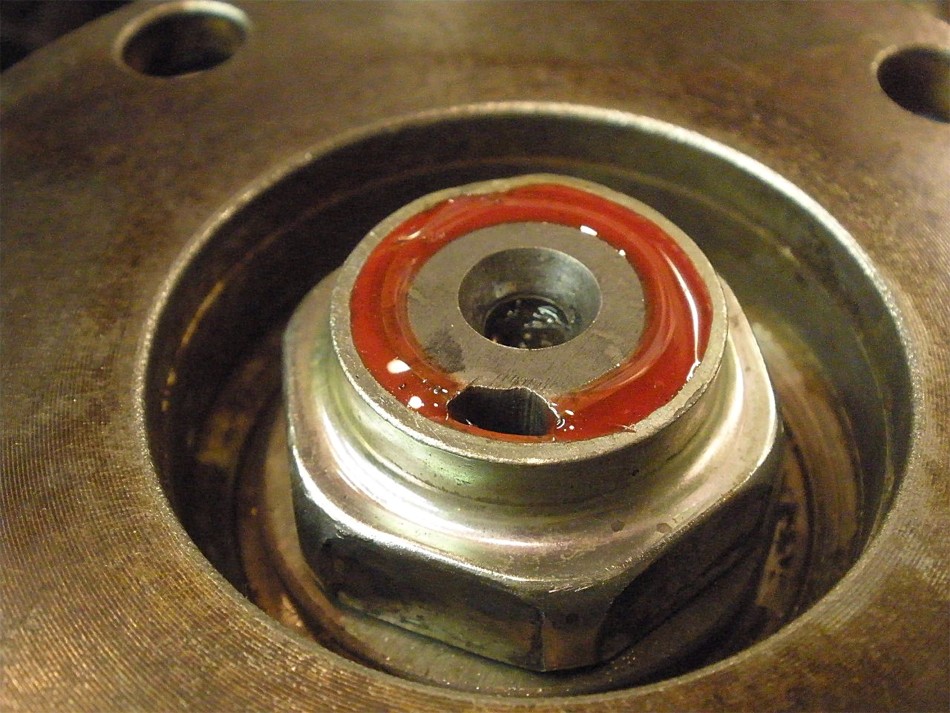
The seal is fully on but adds about .040" of potential contact interference to
the dust cover on the flange. I had this actually happen once so the
solution is easy.
|
|
|
|
The solution is to tweak the dust cover a little bit. The distance is measured
at about 1.530"
|
|
|
|
|
Just push the flange down (dust cover UP) a small amount.
|
|
|
|
Looks like I tweaked it just right...the dust cover has been pushed up
about .040". Now I can be sure that the underside of the dust cover
will not scrape the Marlin metal lip.
|
|
|
|
|
Lots of gear oil on these seal lips.
|
|
|
|
|
Red loctite on the pinion nut.
|
|
|
|
The electric impact clamps the 2 bearings between the crush sleeve...but
not enough power to crush it.
|
|
|

|
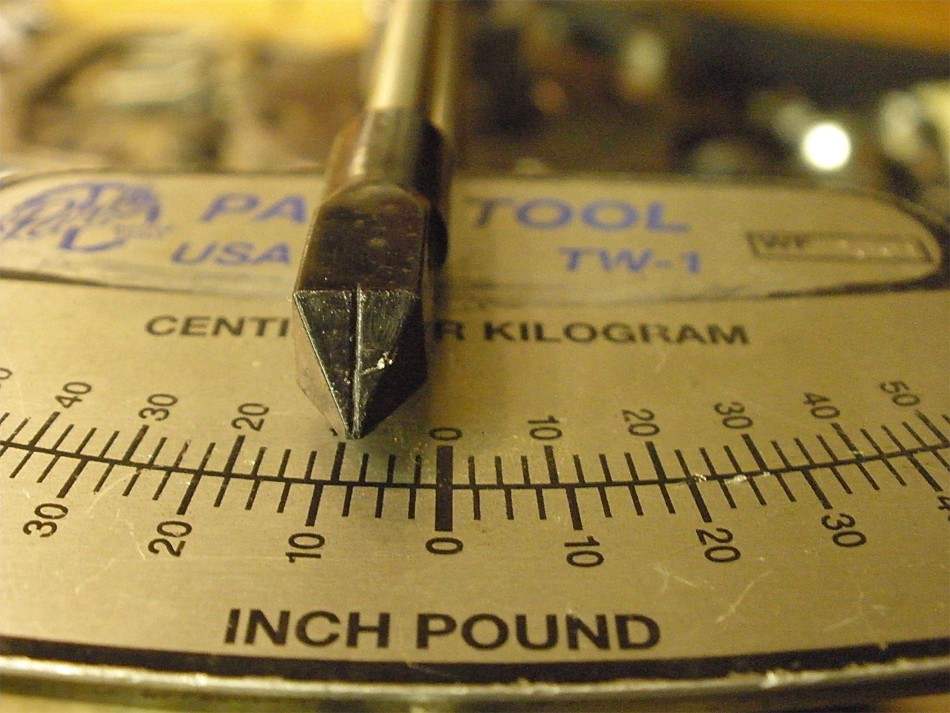
With no tension on the bearings at this point, I can make a quick check of the
drag resulting from the seal. As shown here, I measured a very small
1 inch/pound of drag due to the seal which is normal.
|
|
|
|
|
The 3 foot cheater bar crushed the sleeve with a good amount of difficulty.
|
|
|
|
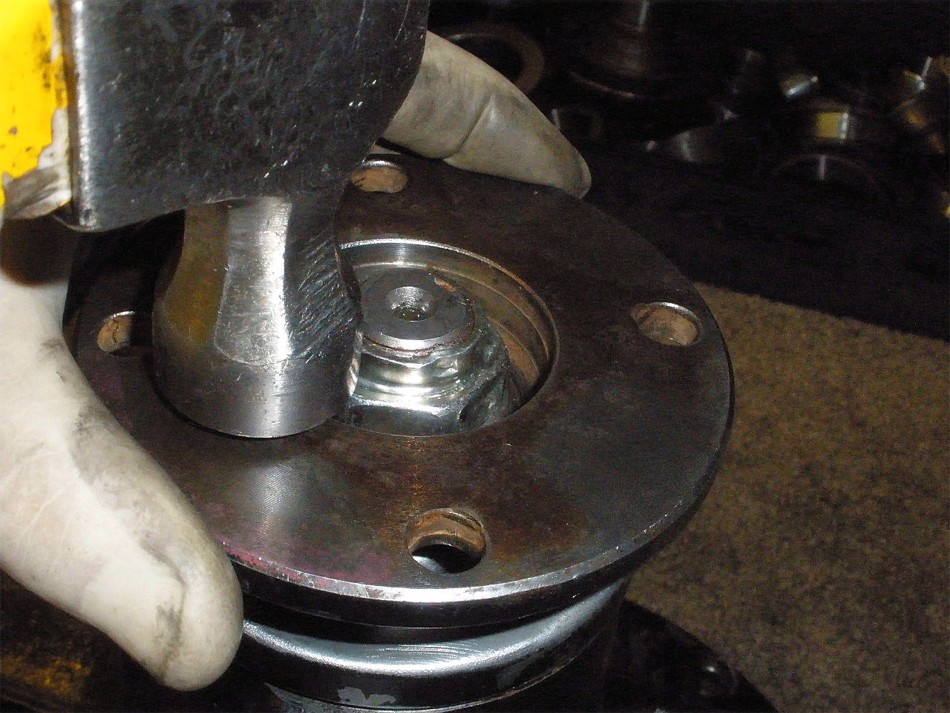
A light tap tap tap while spinning the pinion helps equalize tensions on the
pinion bearings.
|
|
|
|
|
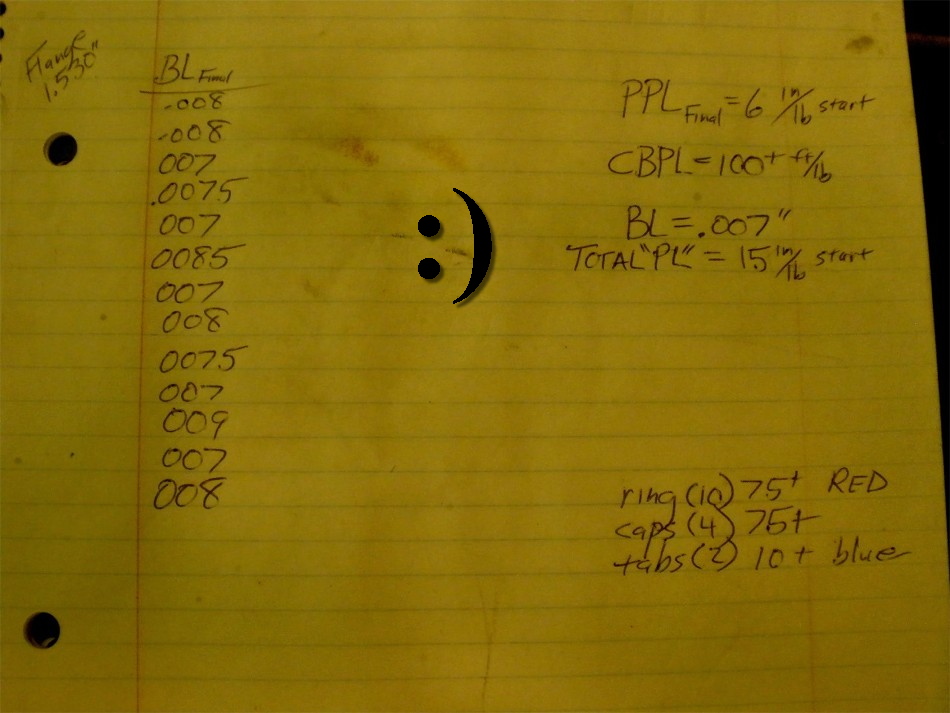
Finally, after about 20 times, I measure 6 inch/lb averaging some readings.
|
|
|

|
|
DING! and this end is done.
|
|
|
|
|
Grease is applied to the wheel adjuster threads.
|
|
|
|
|
Bearing caps are loaded in place and sync'd up to the threads.
|
|
|
|
Lots of tap tap tap while slowly snugging up the 4 bolts helps the wheel
adjuster threads sync up better.
|
|
|
|
Now I can tighten the 4 bolts to the full 75 ft/lb and the wheels will turn
easily with just finger power.
|
|
|
|
What would I do without the hammer.... rapping it here sharply on all 4 corners
while turning the pinion will equalize the carrier bearing tensions and make
my backlash measurements more accurate.
|
|
|
|
|
100 ft/lbs and it barely started to move. All is good.
|
|
|
|
|
One last pattern check...drive is very good with 090.
|
|
|
|
|
Coast is good.
|
|
|
|
|
Comet tail says it all.
|
|
|
|
|
Backlash is measured on every 3rd tooth and recorded.
|
|
|
|
|
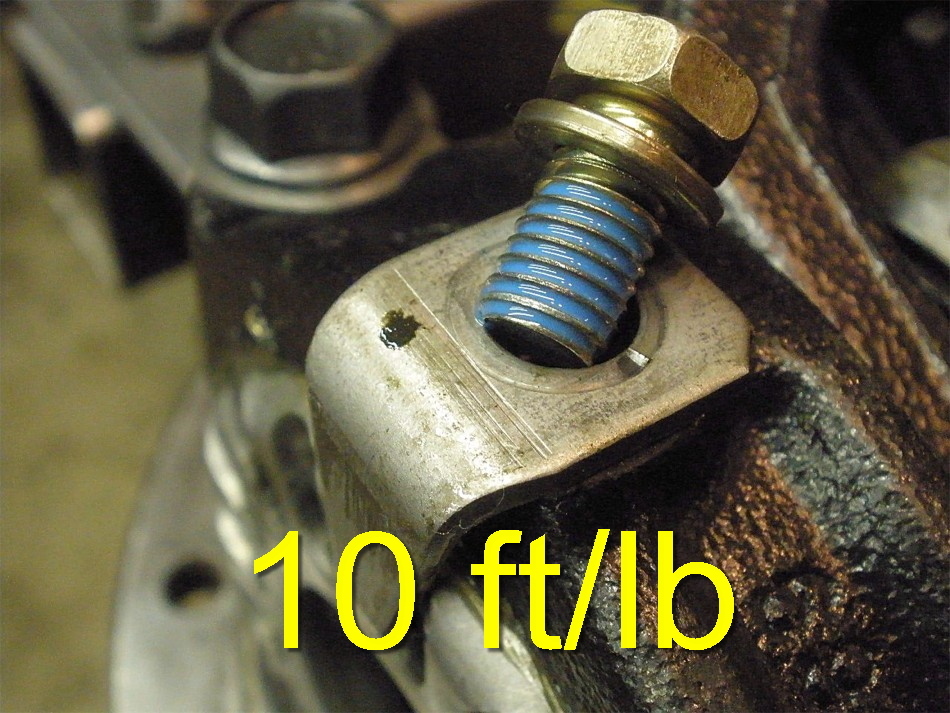
Blue loctite will suffice for these small bolts.
|
|
|
|
|
Even 1 thumb can click off 10 ft/lbs.
|
|
|
|
|
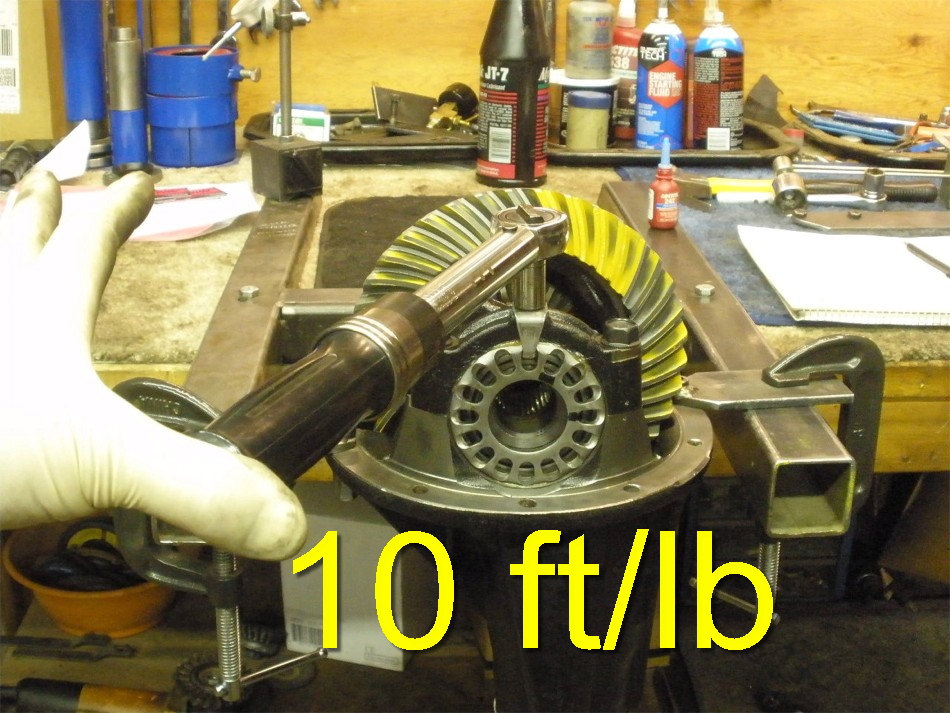
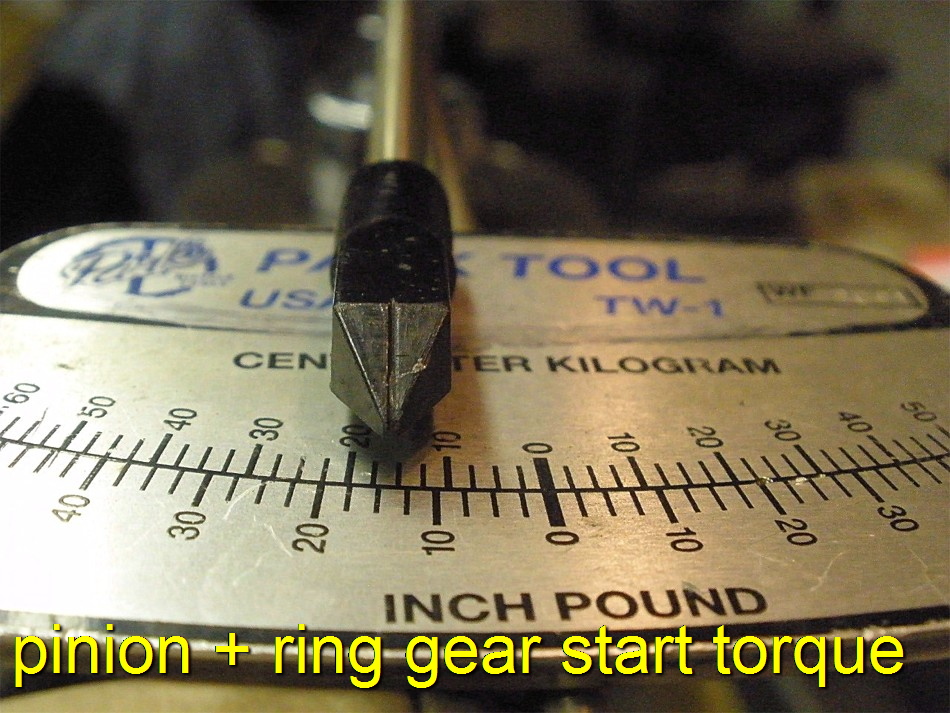
15 in/lb....is the drag measured to turn both the pinion and the ring.
|
|
|
|
|
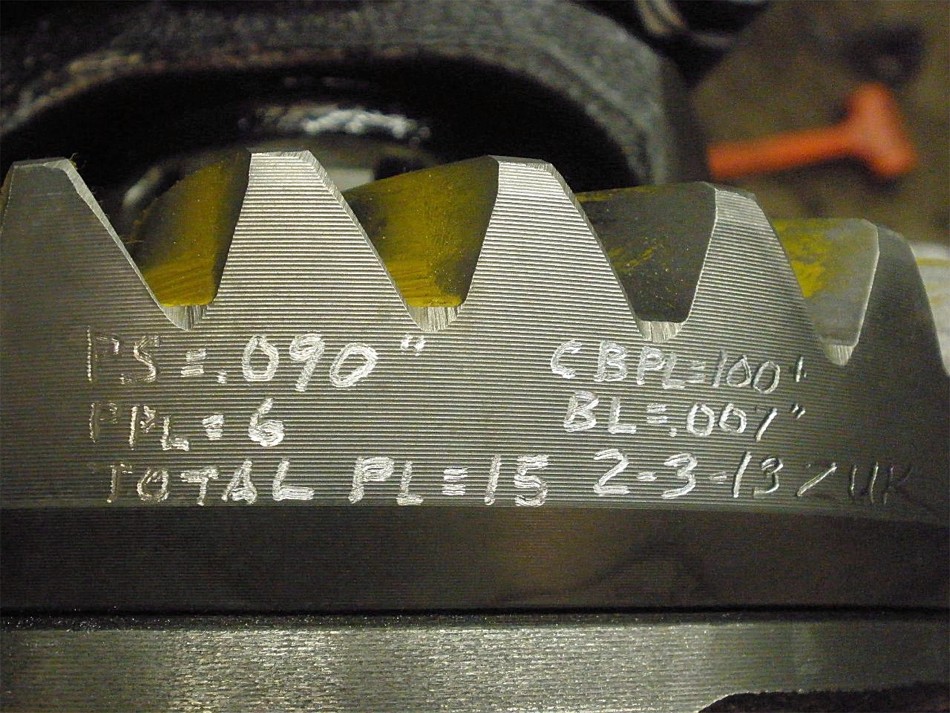
Basic info is scribed on the ring gear using the dremel tool with a diamond tip.
|
|
|
|
|
|
|
|
|
|
|
|
|

|