|
|
|
|
|
|
Pictures are larger...detail is better....loads take longer ;)
|
|
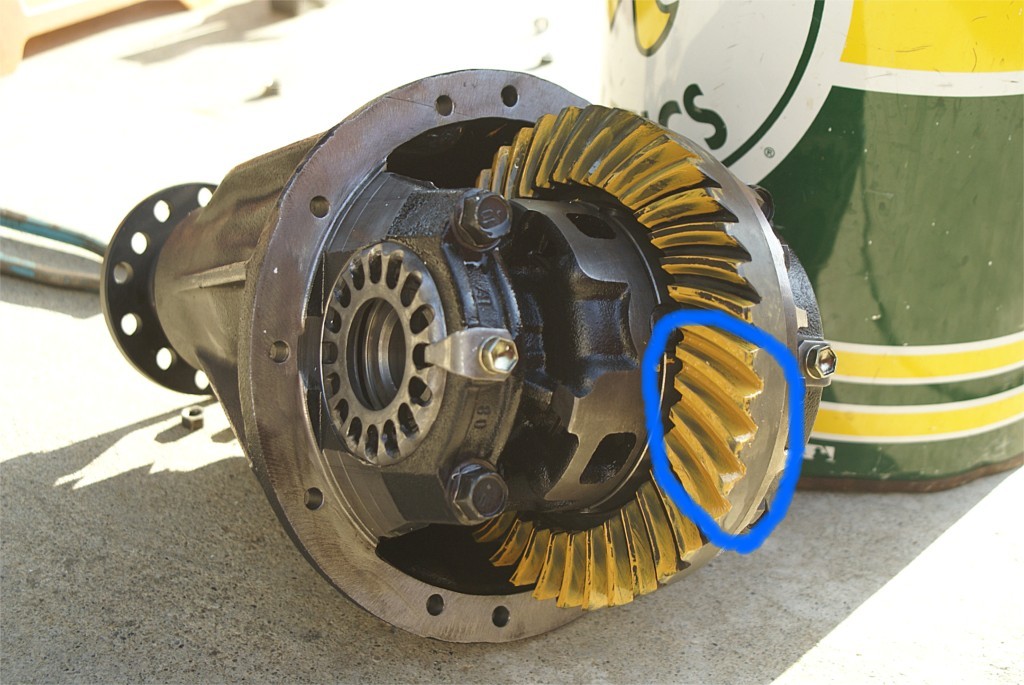
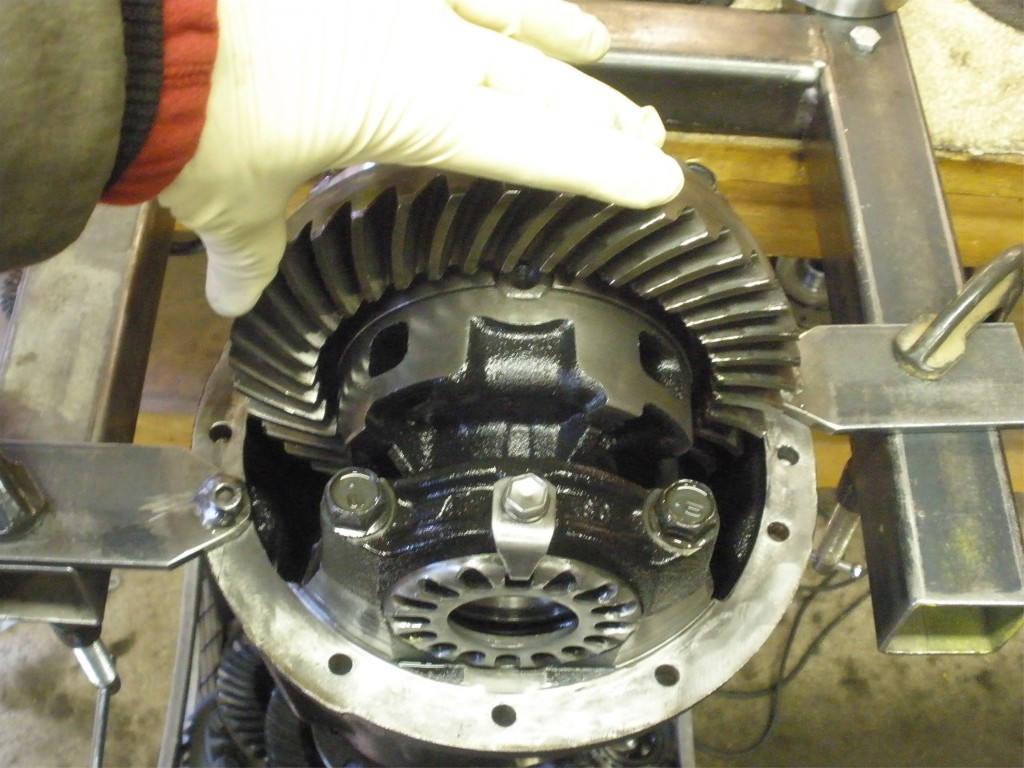
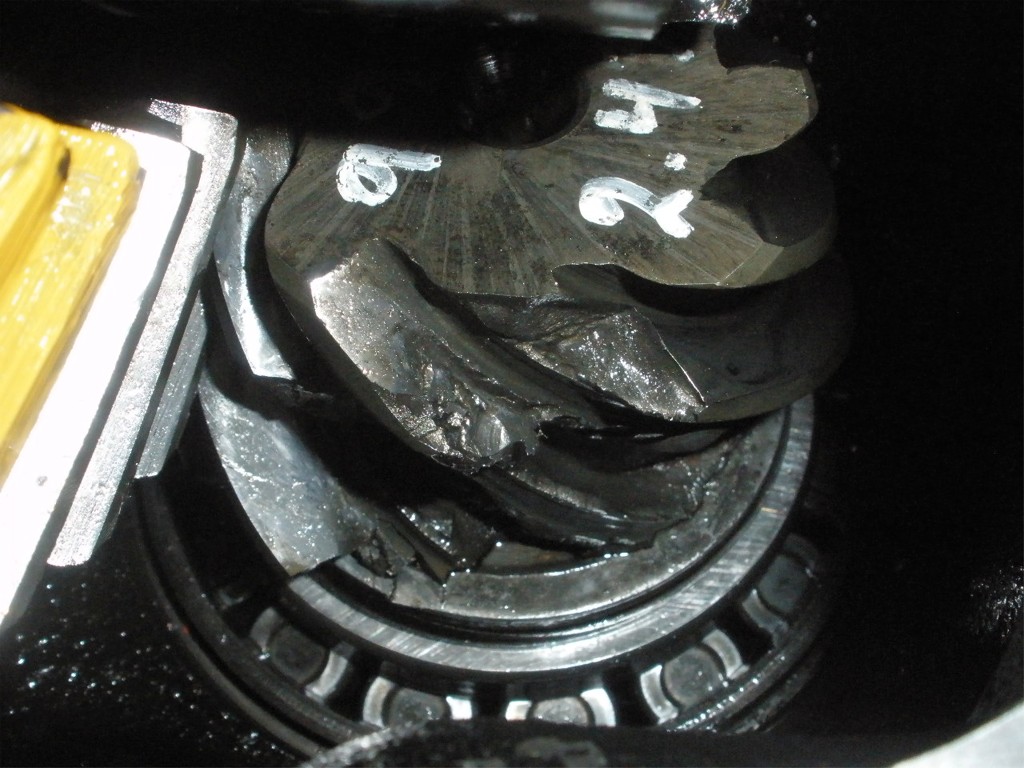
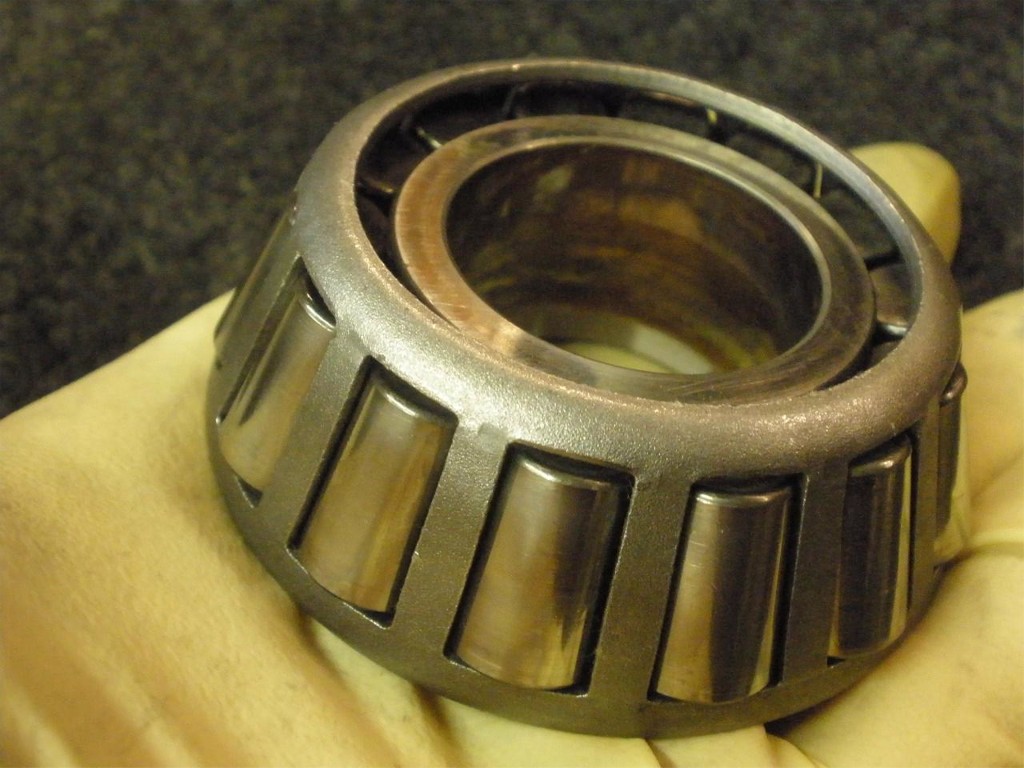
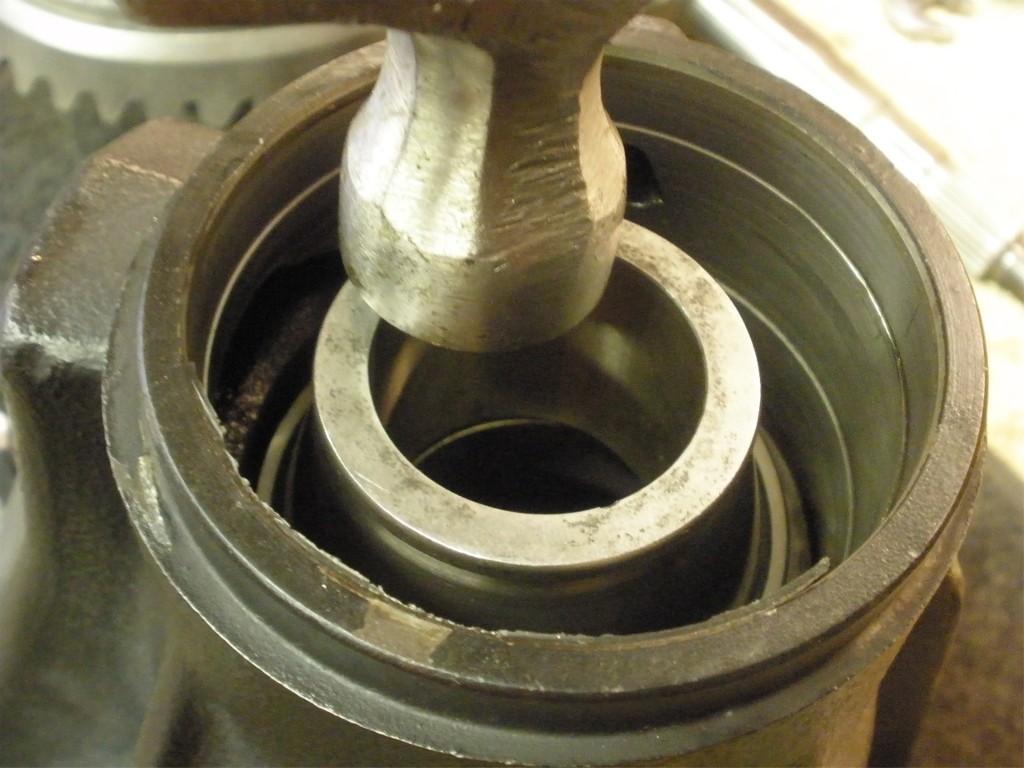
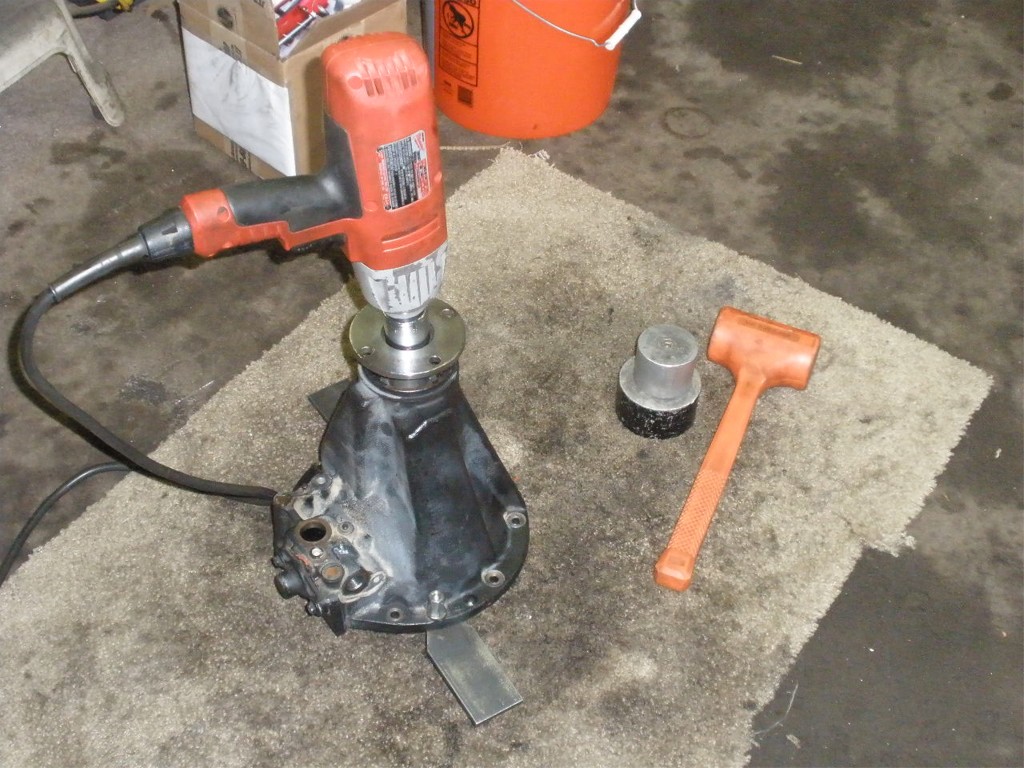
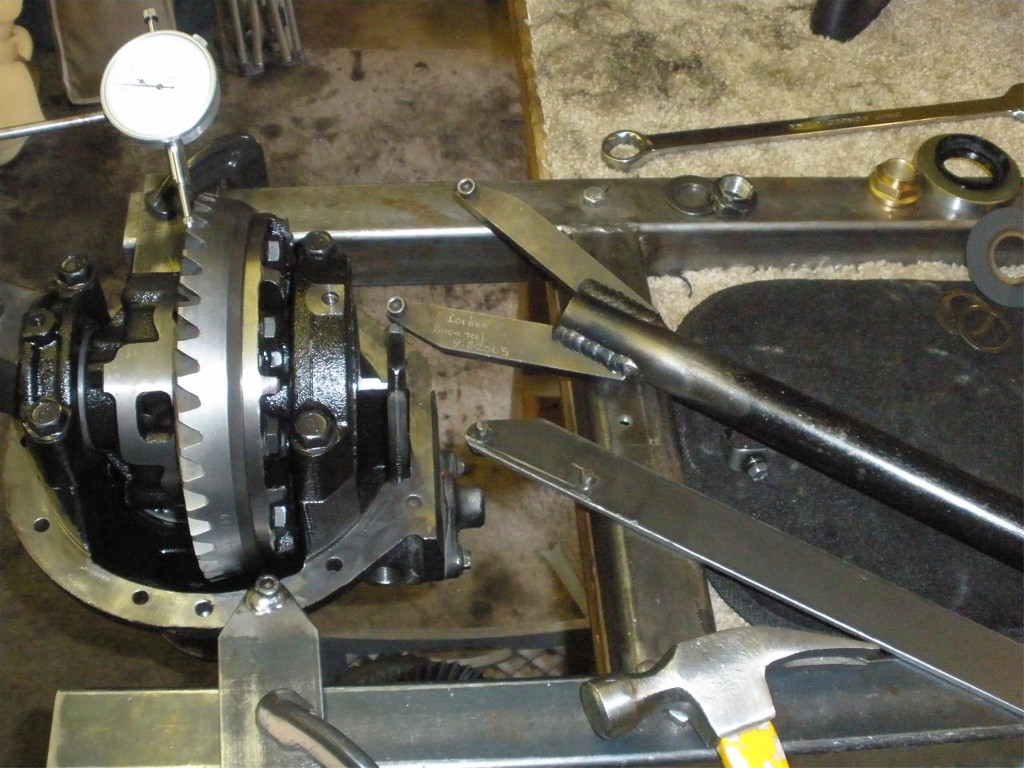
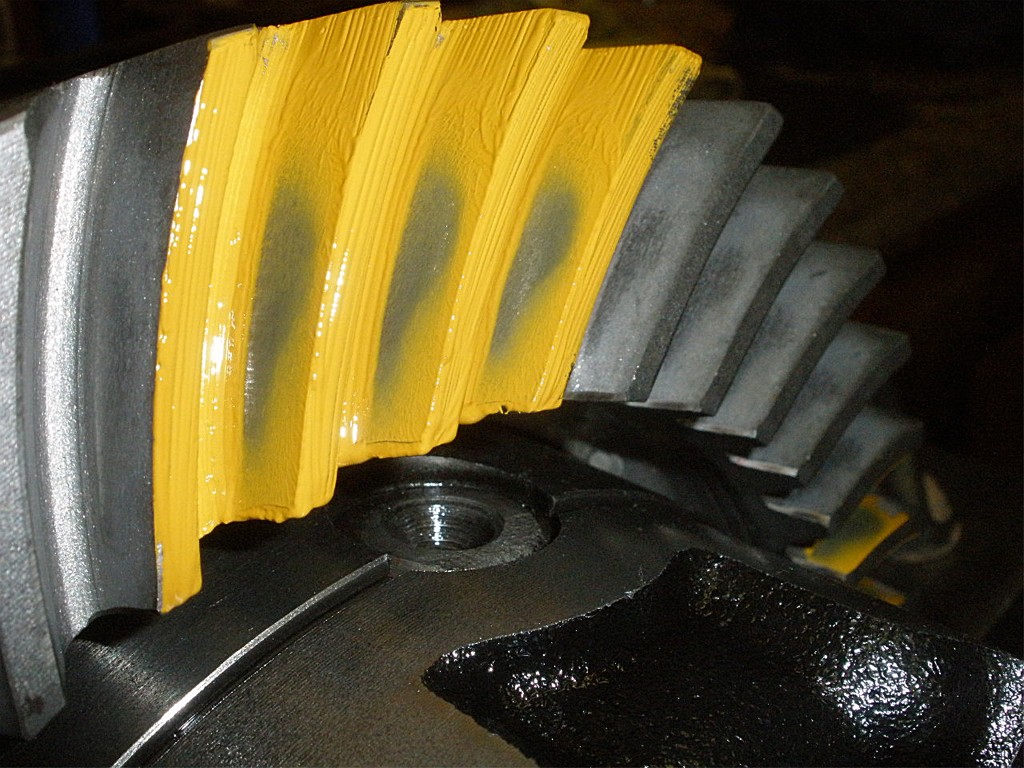
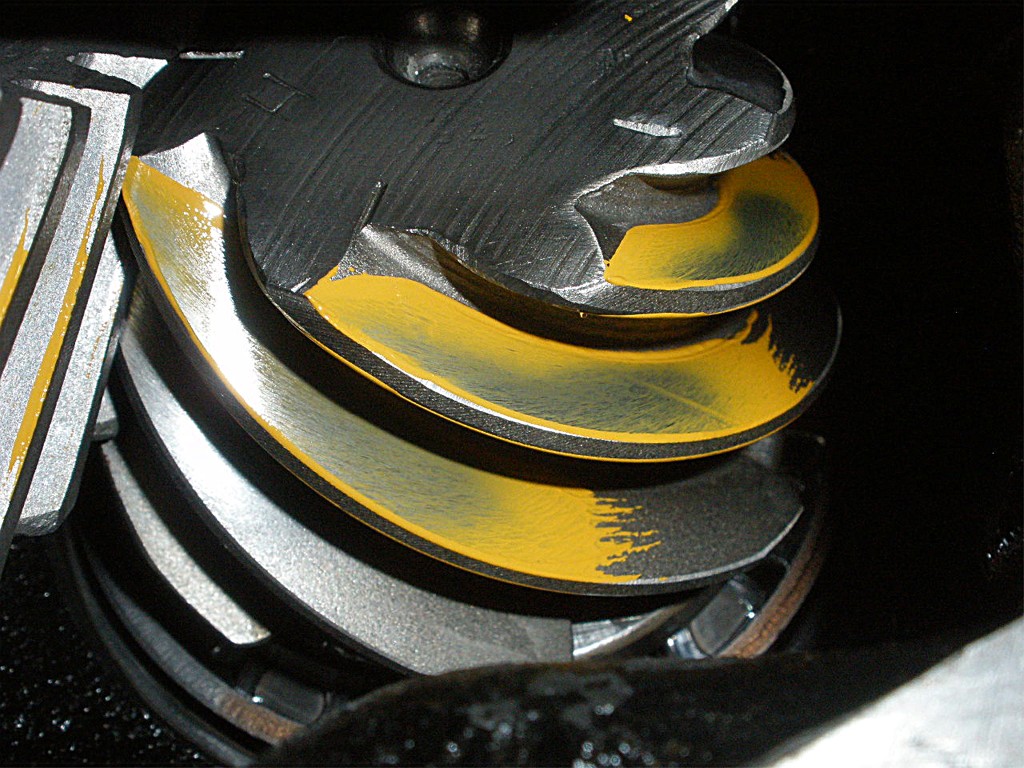
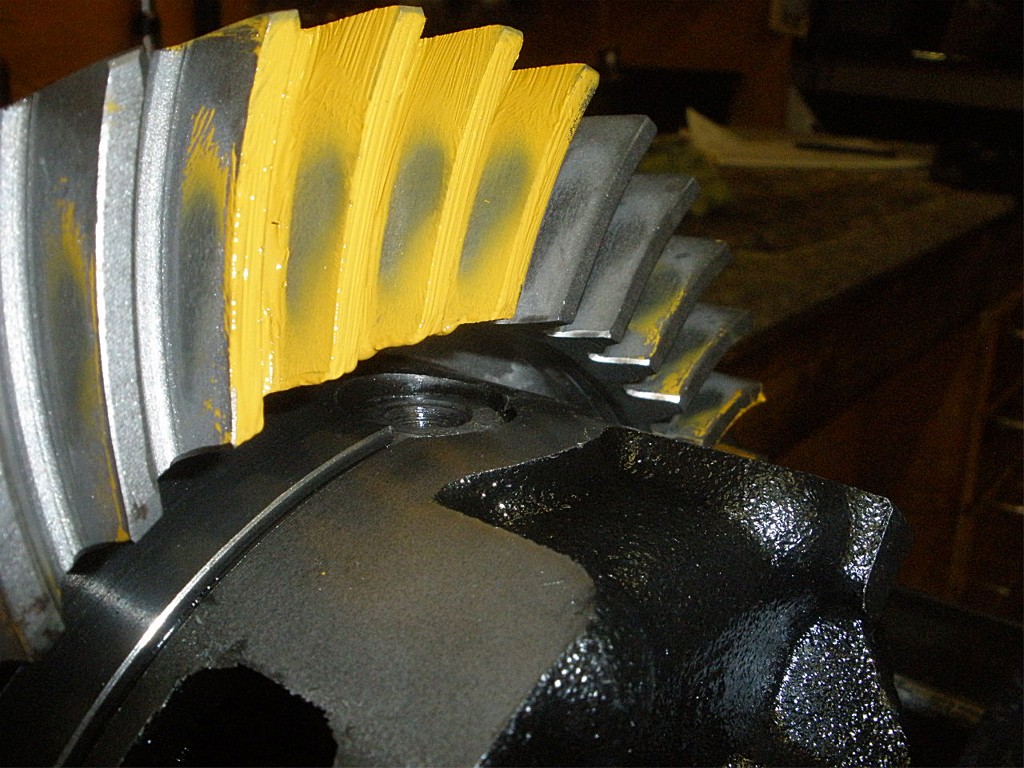
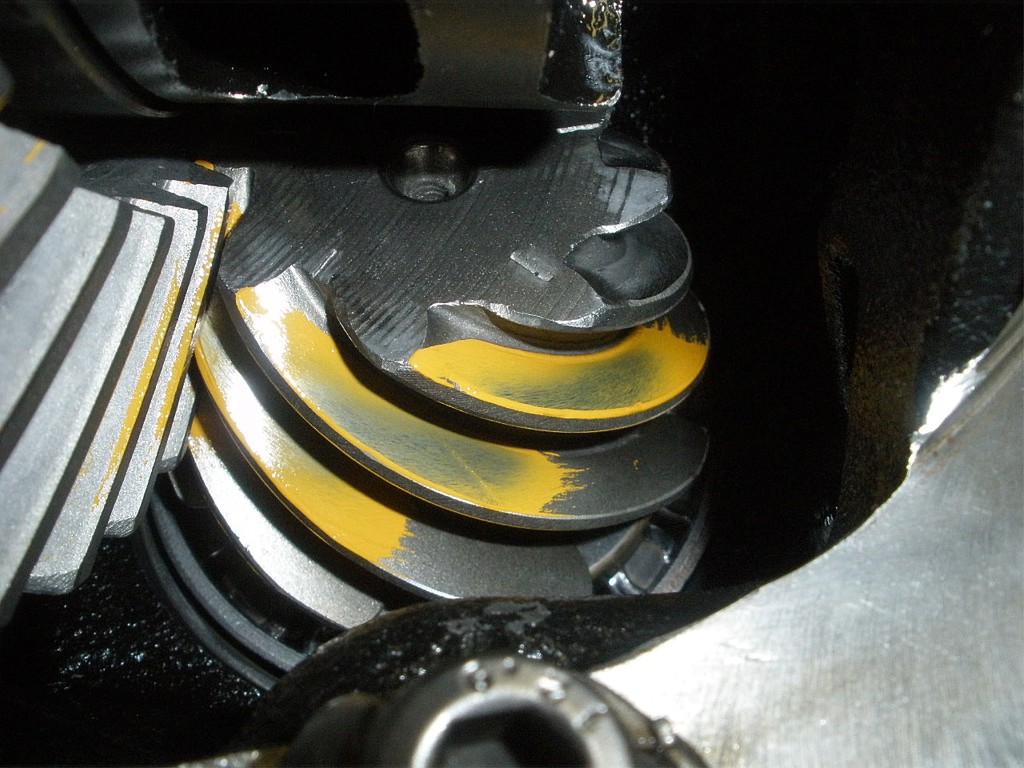
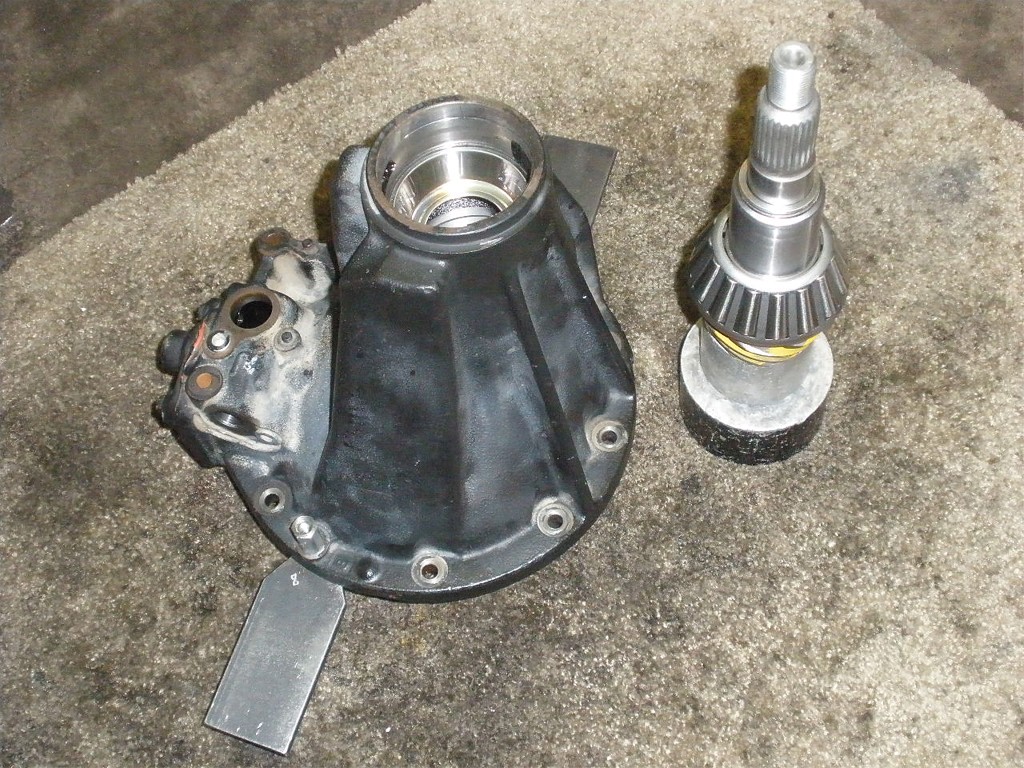
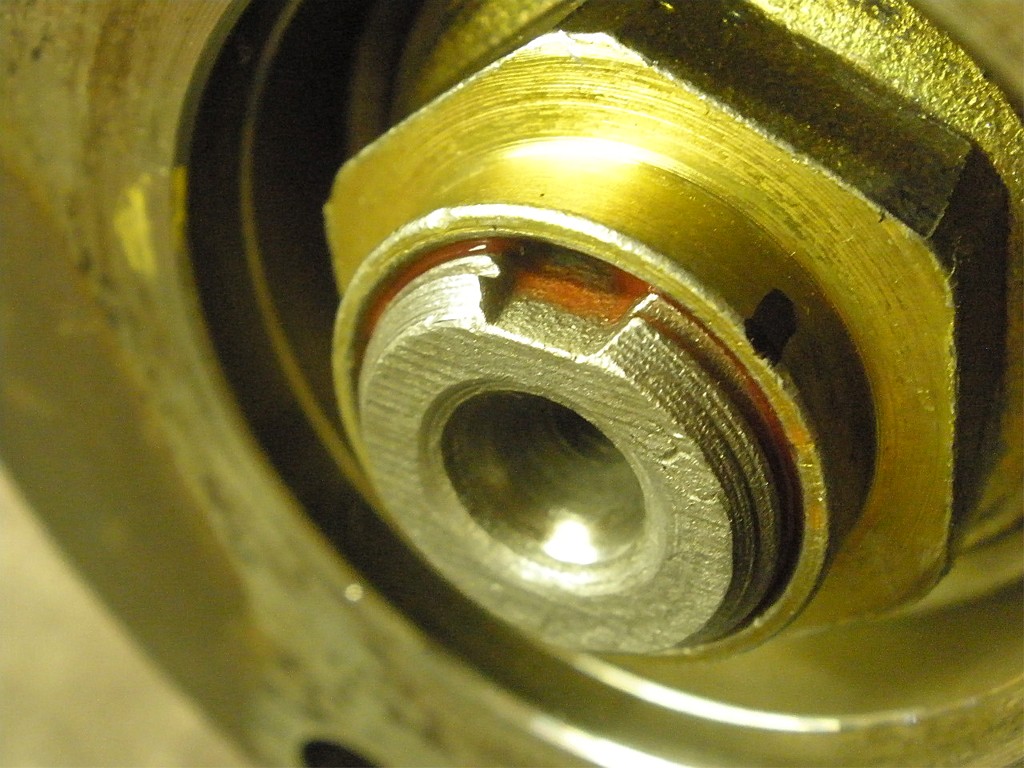
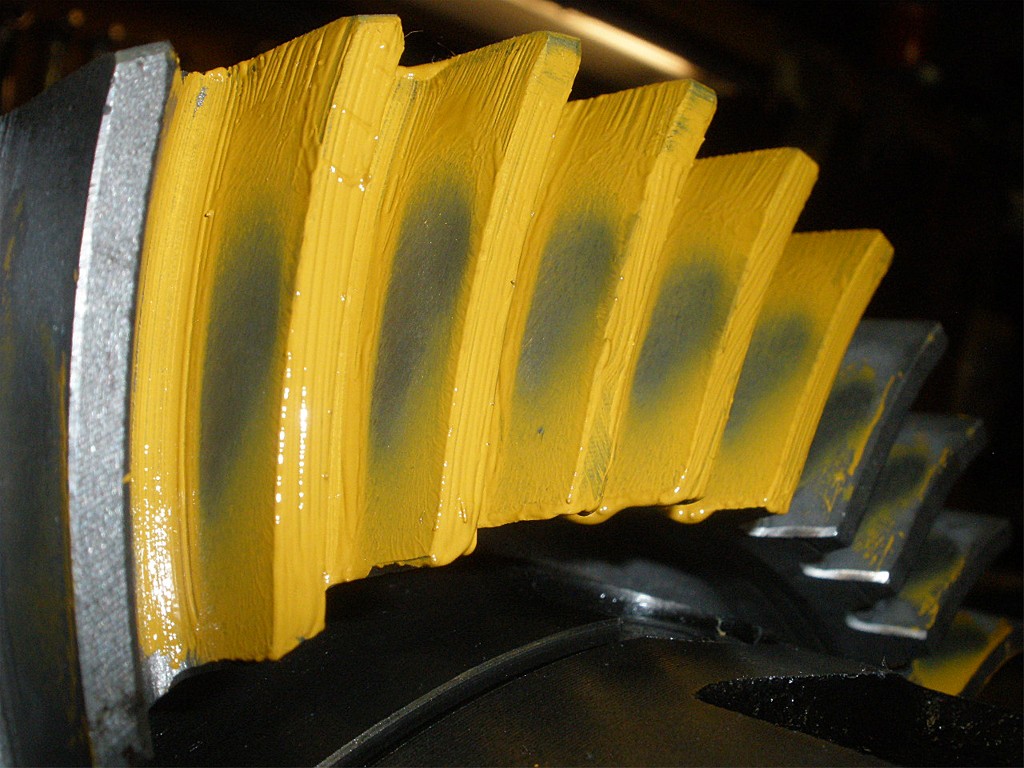
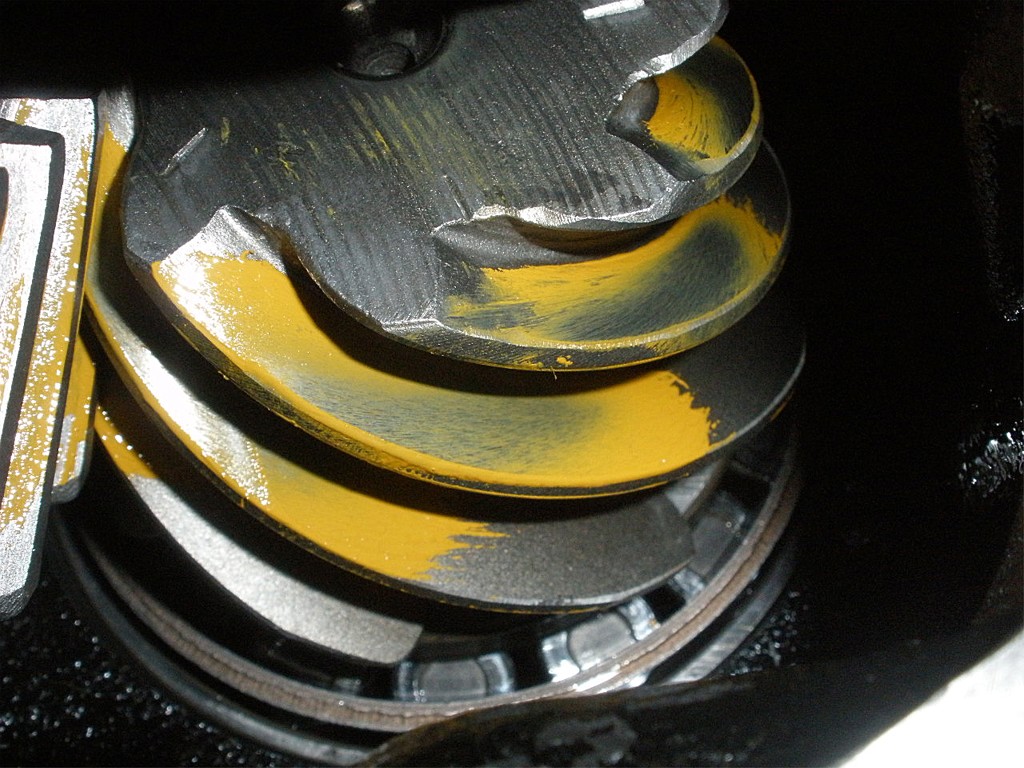
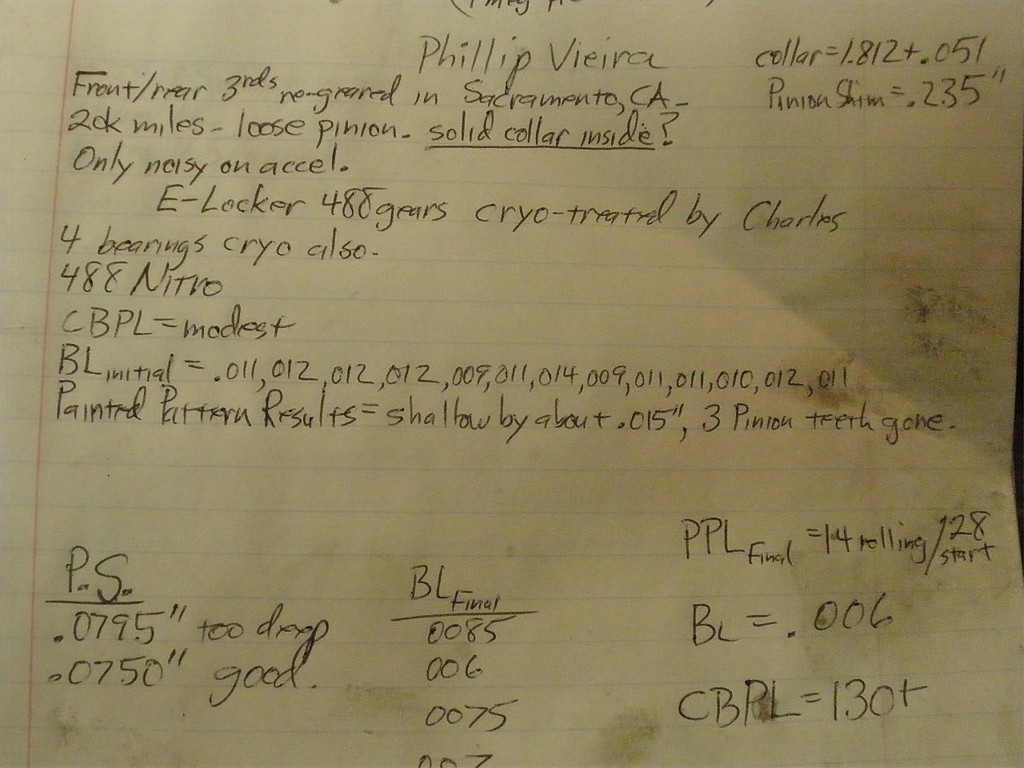
This is the way Phillip received the rear e-locker. I give the differential shop credit for painting the heck out of the teeth. Some shops don't seem to use any paint and it makes you wonder how they know if the depth is correct or not. In the above pic, the painted patterns near the top are the COAST side. Bottom ones are the DRIVE side. The drive side has the most information in terms of proper pinion depth. Too bad it's not as well imprinted as the coast side. Even though the coast appears to be perfect don't trust that until a good paint is done on the DRIVE. Hard to be sure but the drive side appears to be a little shallow. |
|
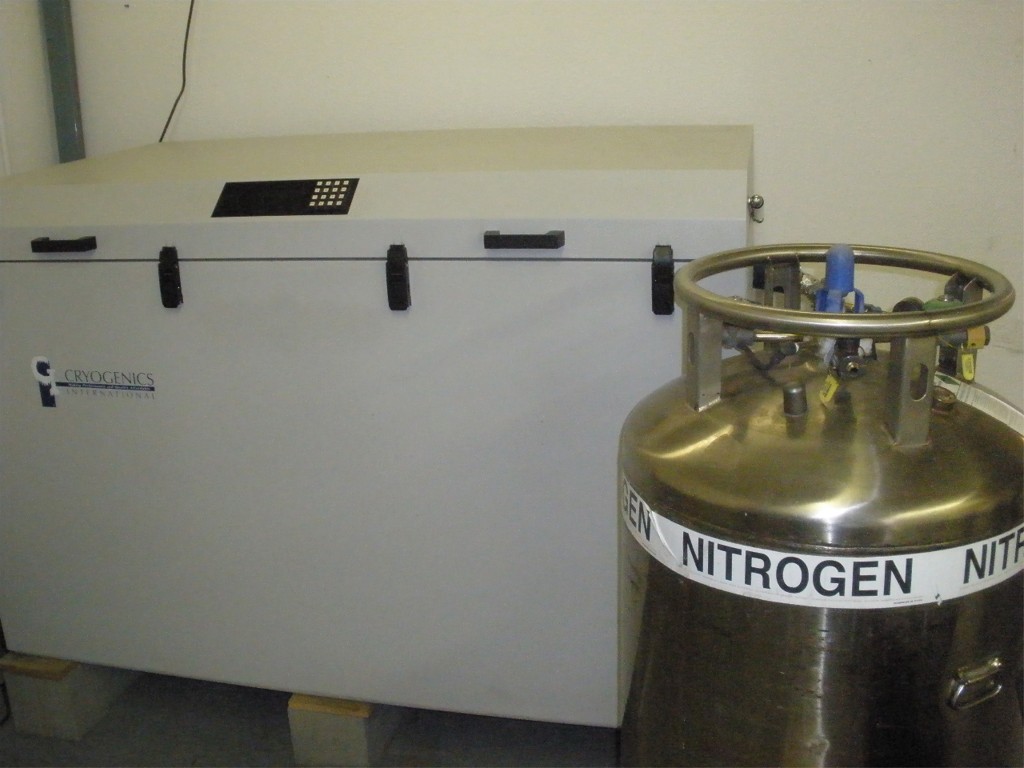
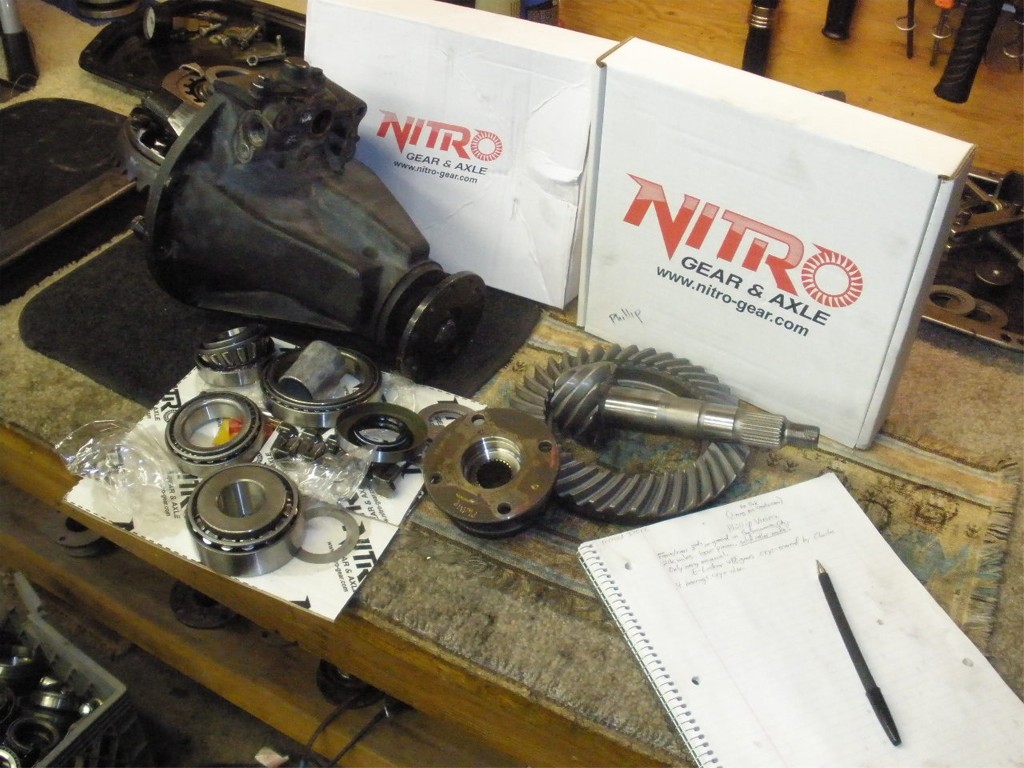
Phil sent the new gears and master kit directly to Cryogenics International |
|
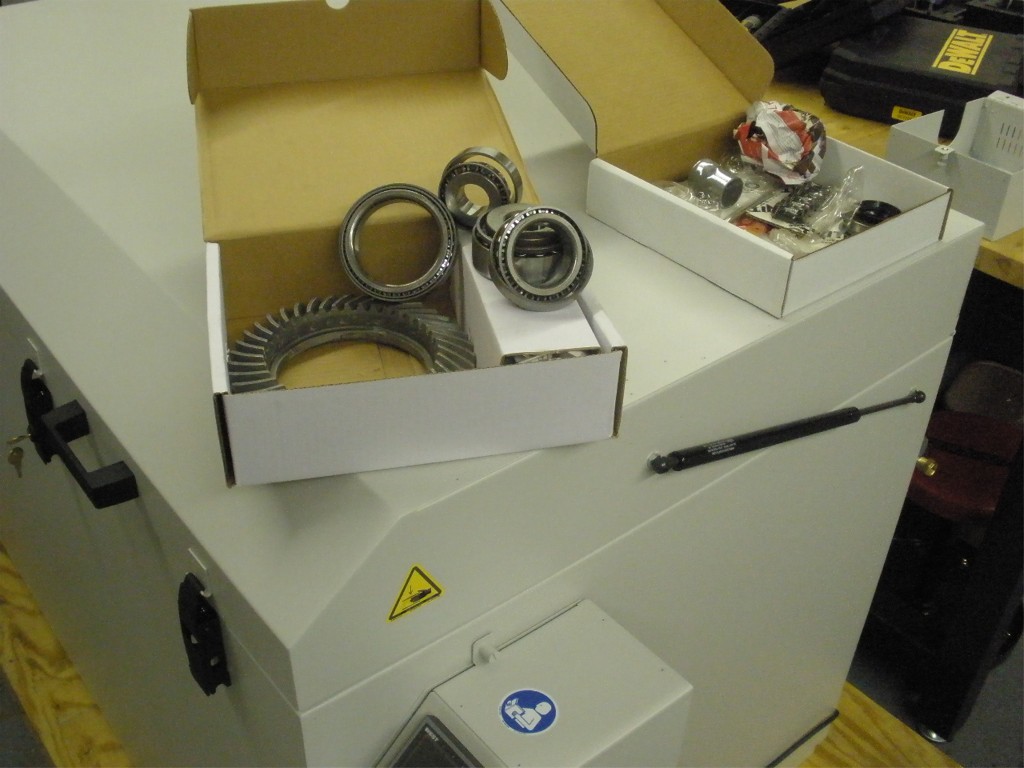
Charles cryo'd only the specified items(ring/pinion/4 bearings). In a nutshell, here's what cryo buys you.....for the bearings, it greatly improves
the wear characteristics. The bearings will maintain pre-loads probably more than twice as long as untreated bearings. |
|
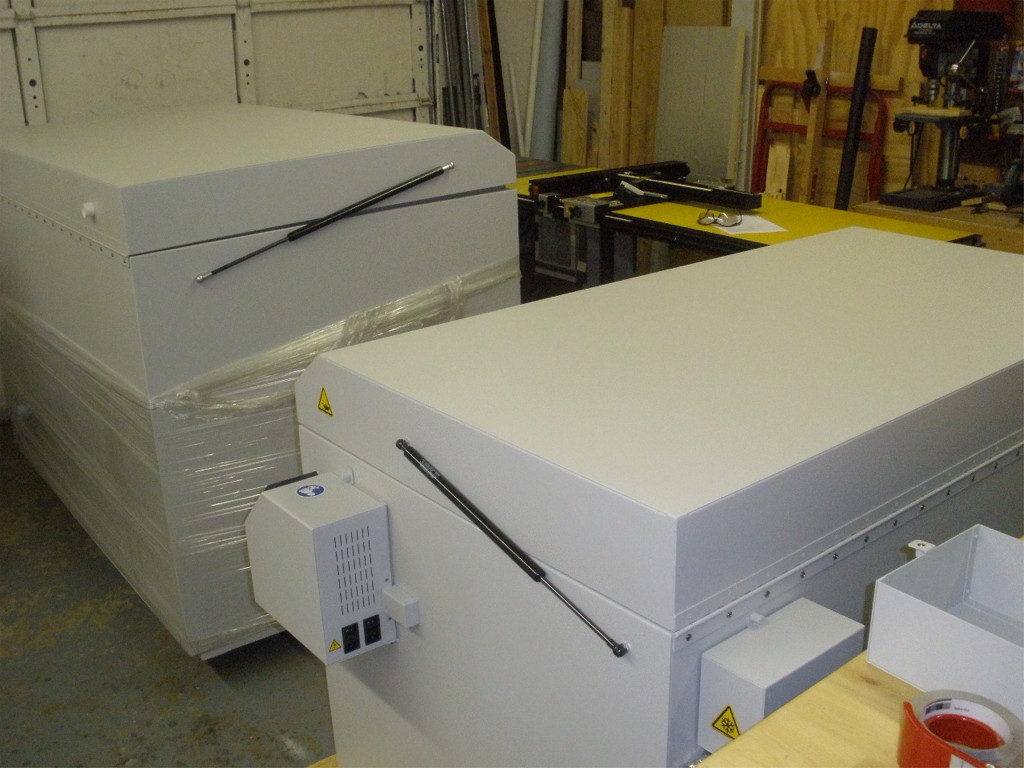
Charles not only cryo treats but also designs and manufactures these electronically controlled cryogenic chambers. The one on the left is going to Saudi Arabia and the other to India. |
|
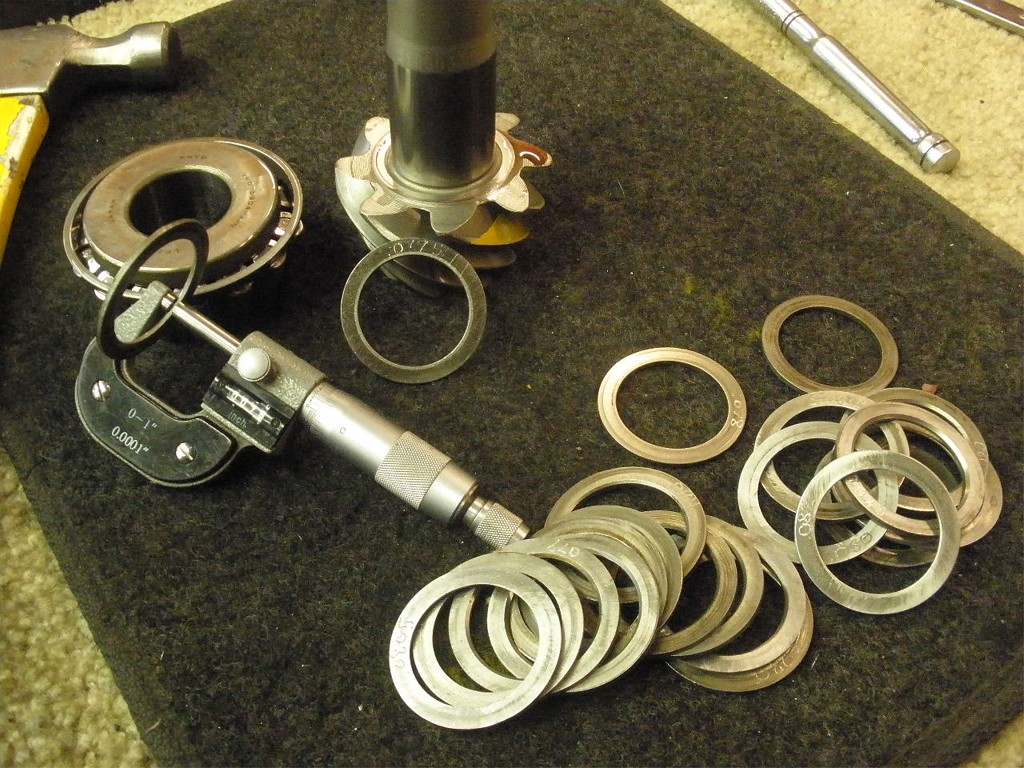
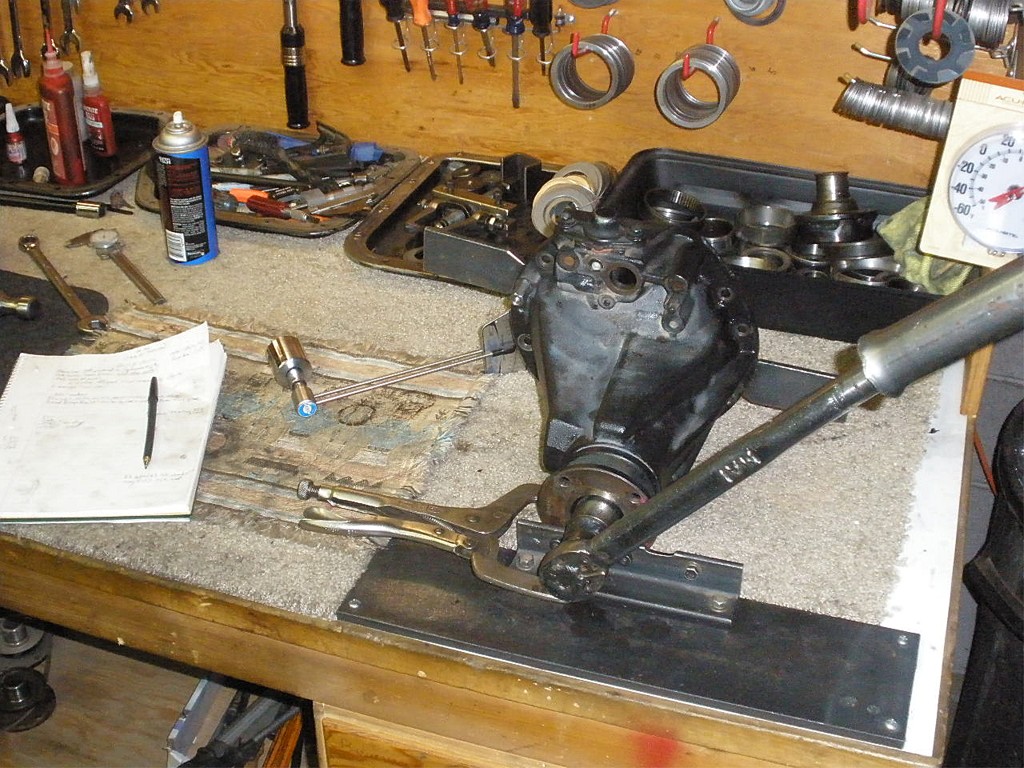
With the cryo gears back at my bench, now it's time to get down to business. Gears, master kit, and a 27 spline flange is all that's needed(Phillip's e-locker had a 29 spliner and most after-market gears are 27 including these Nitros). |
|
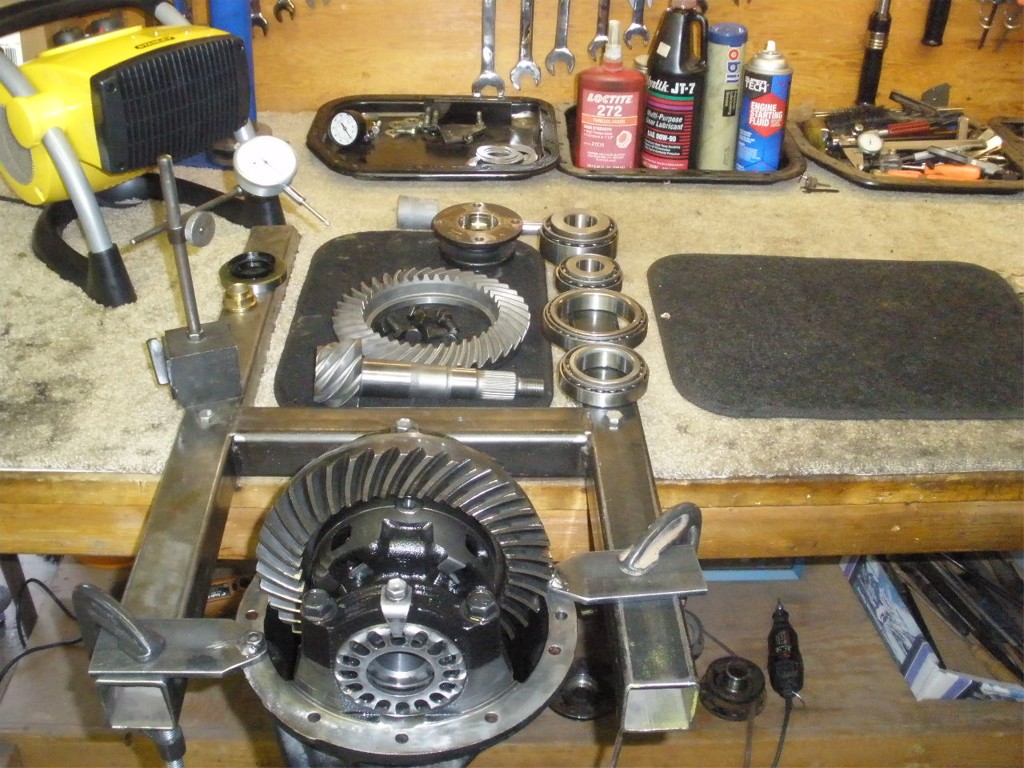
Parts are organized and the 3rd is secured to the fixture. |
|
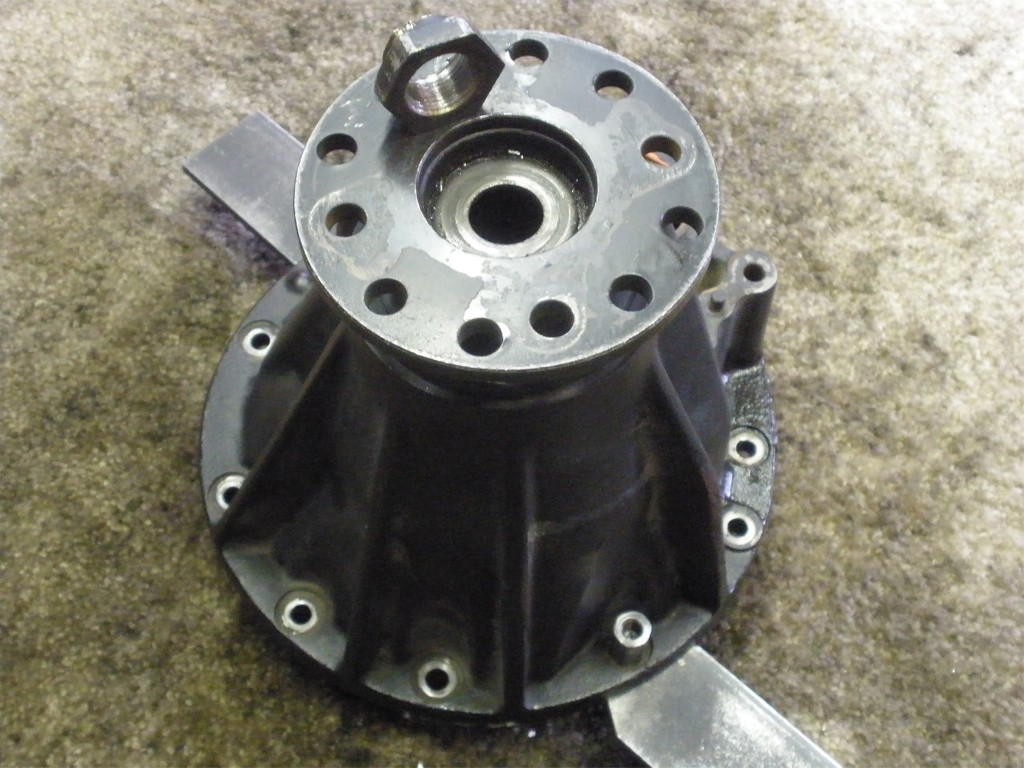
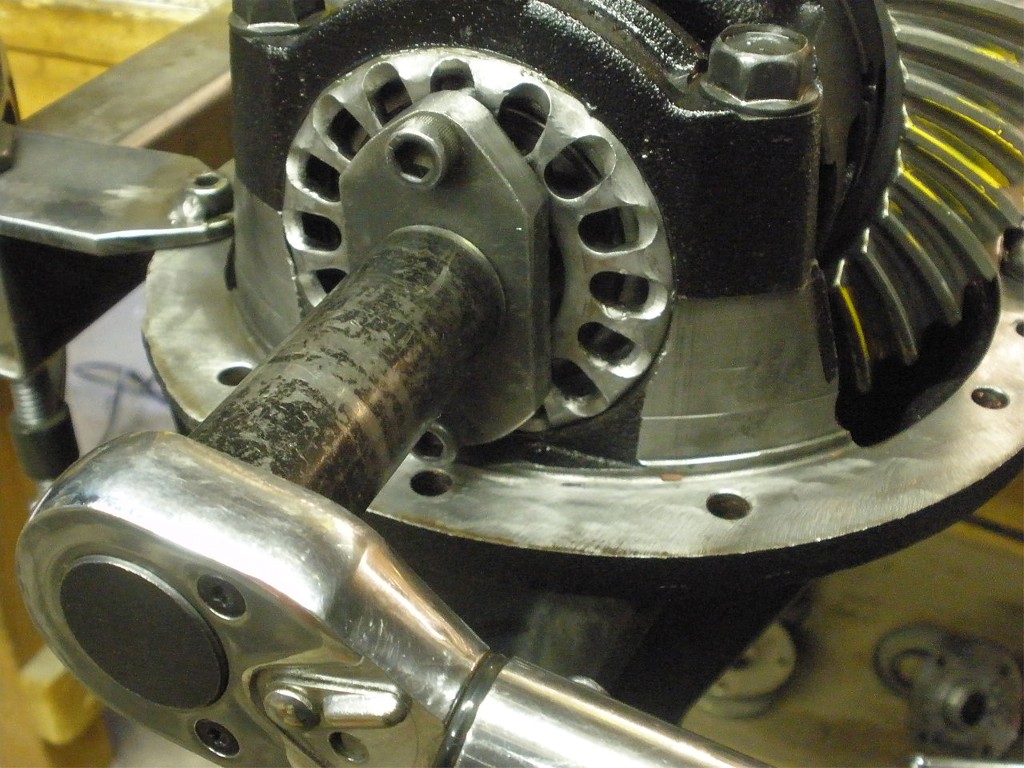
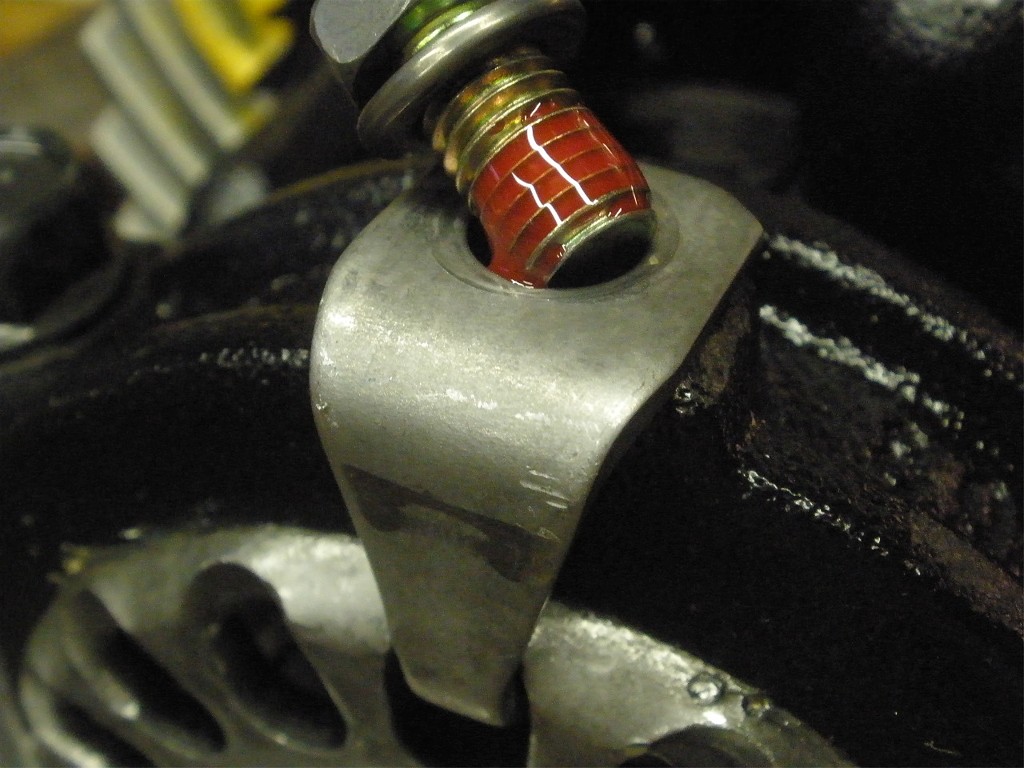
Phillip wisely removed the e-motor which really only requires removing one 12mm bolt and it taps right off. |

|
The plastic sensor was also removed. |
|
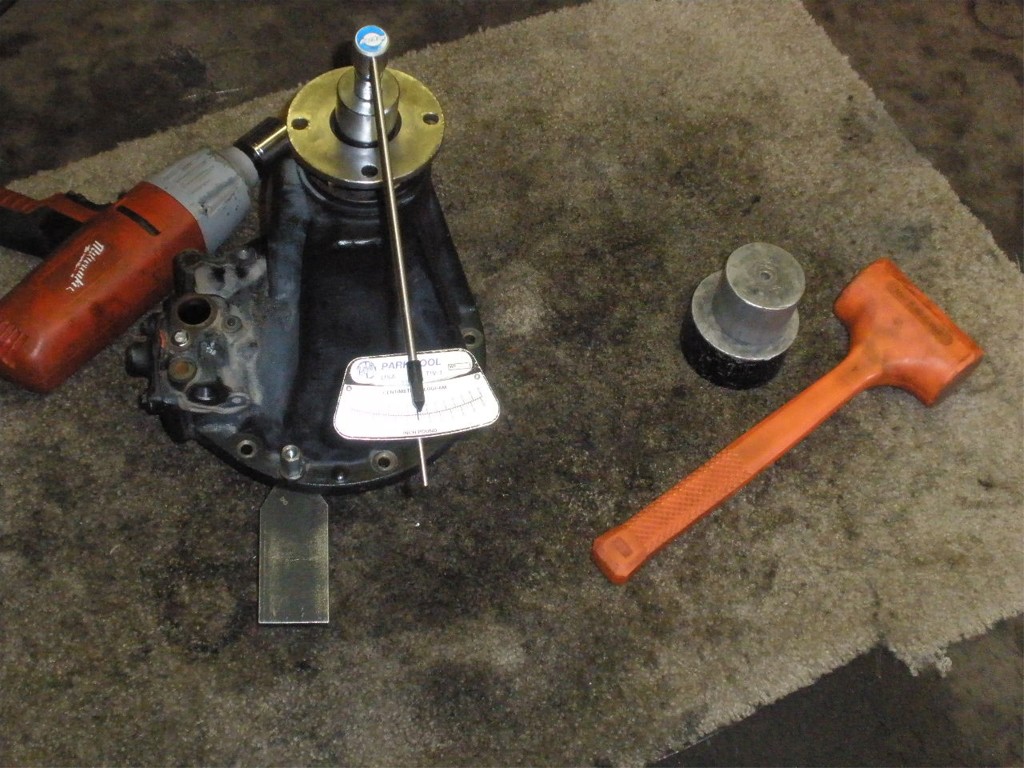
Carrier Bearing Pre-Load seemed modest...expected after 20 or 30 thousands miles. |
|
Backlash is a little wide at around .010"...if the pinion really did pull into the hole more, then I would expect a little more backlash like this. |
|
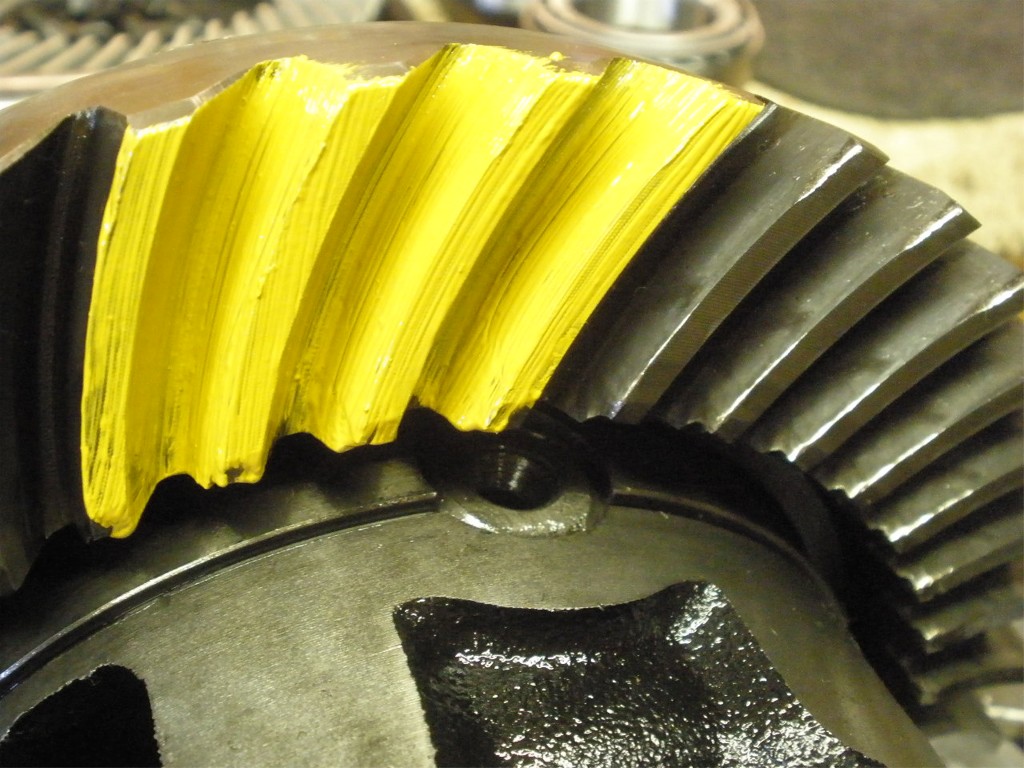
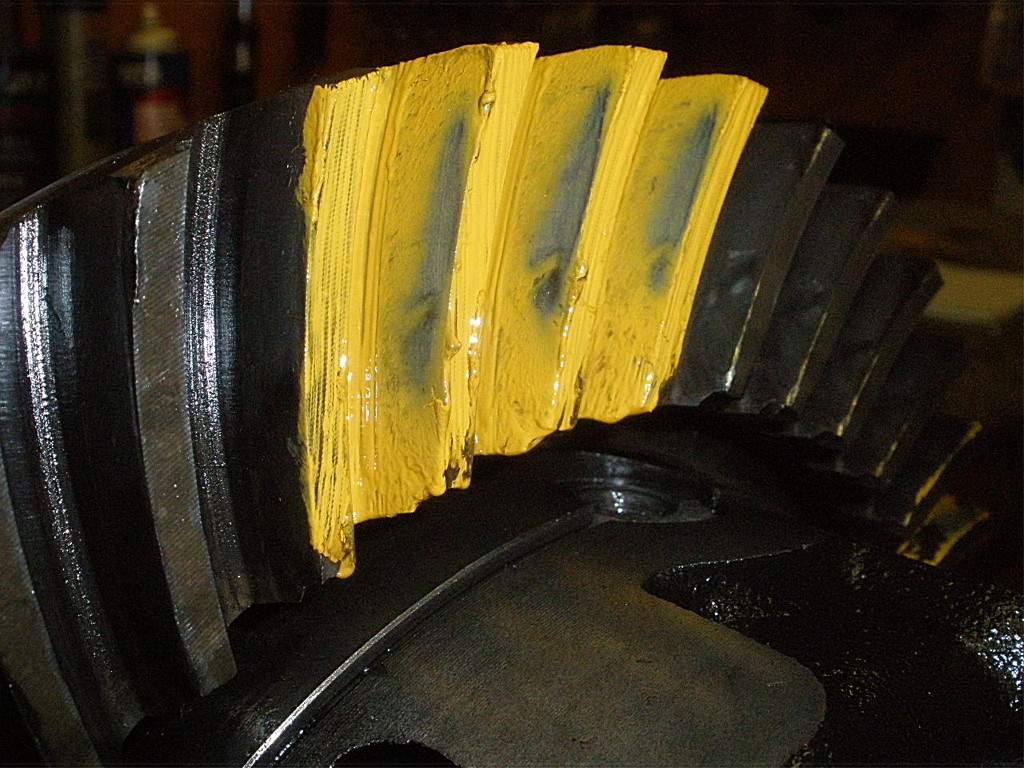
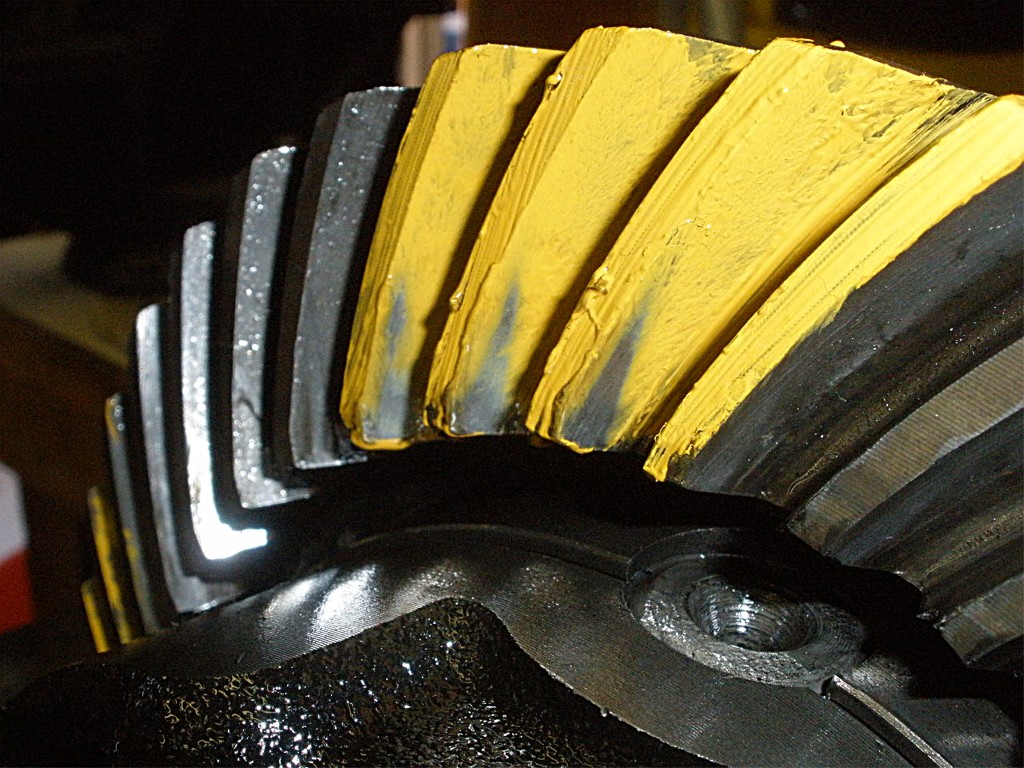
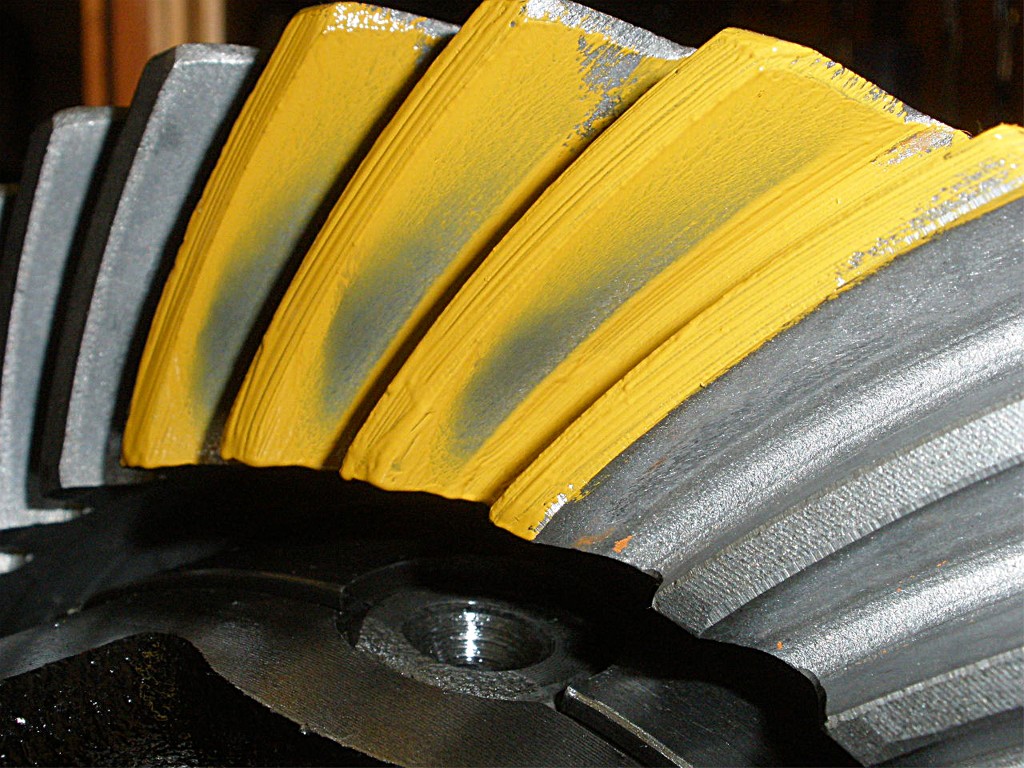
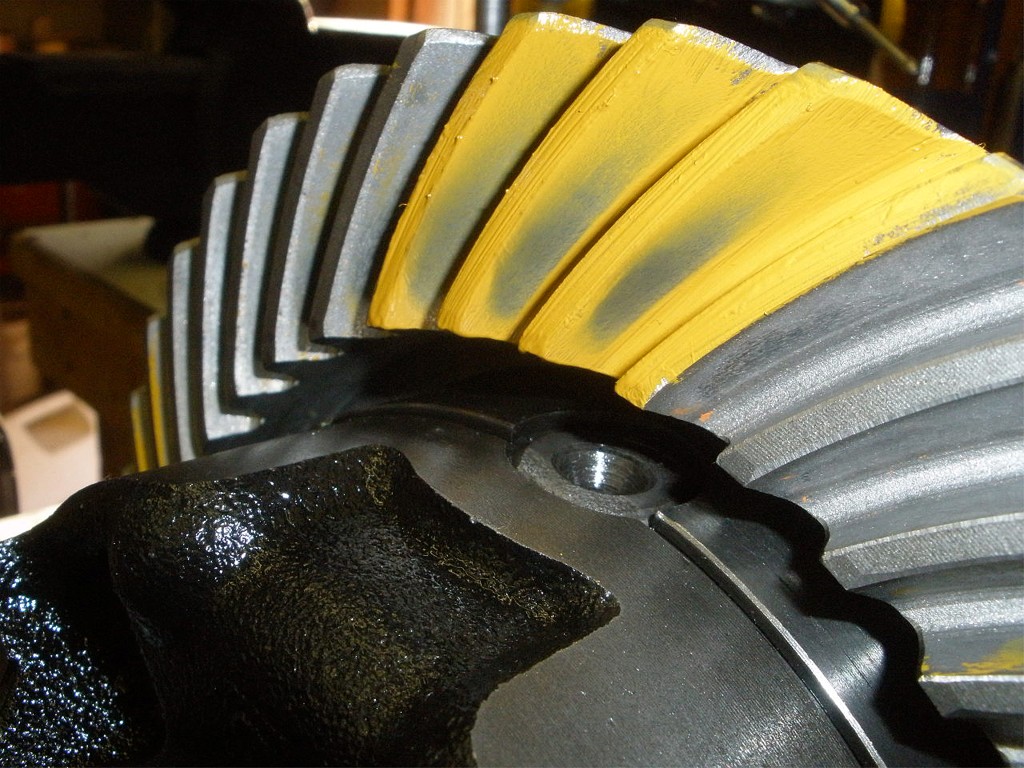
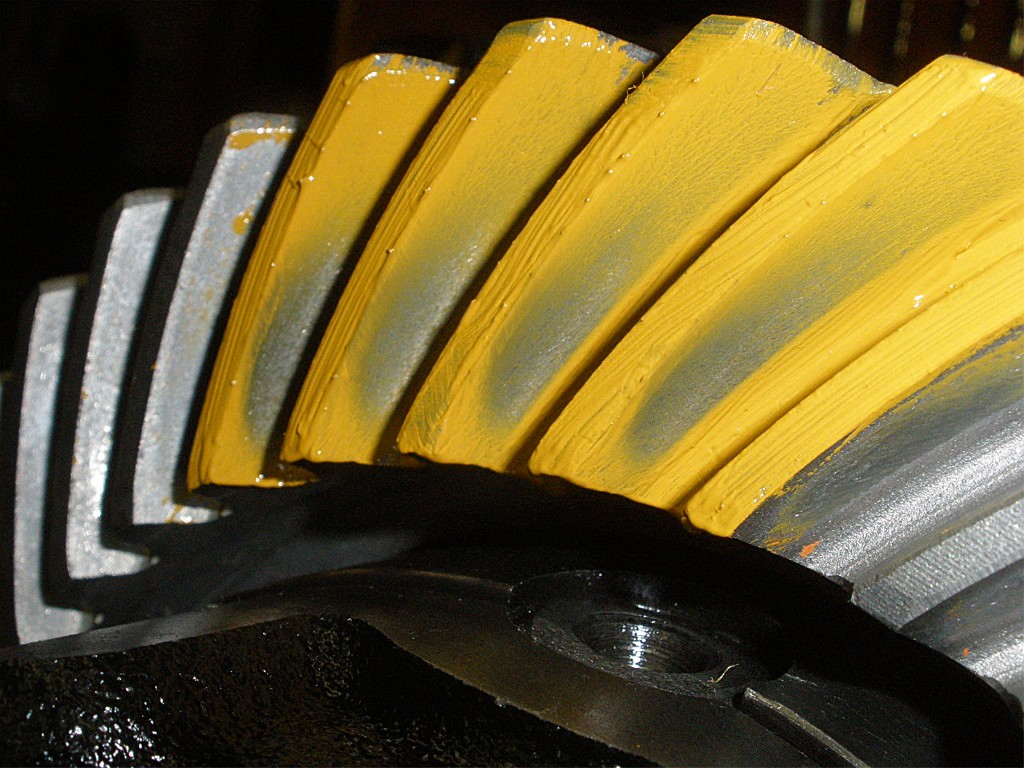
Yellow marking paint is applied to 3 teeth. |
|
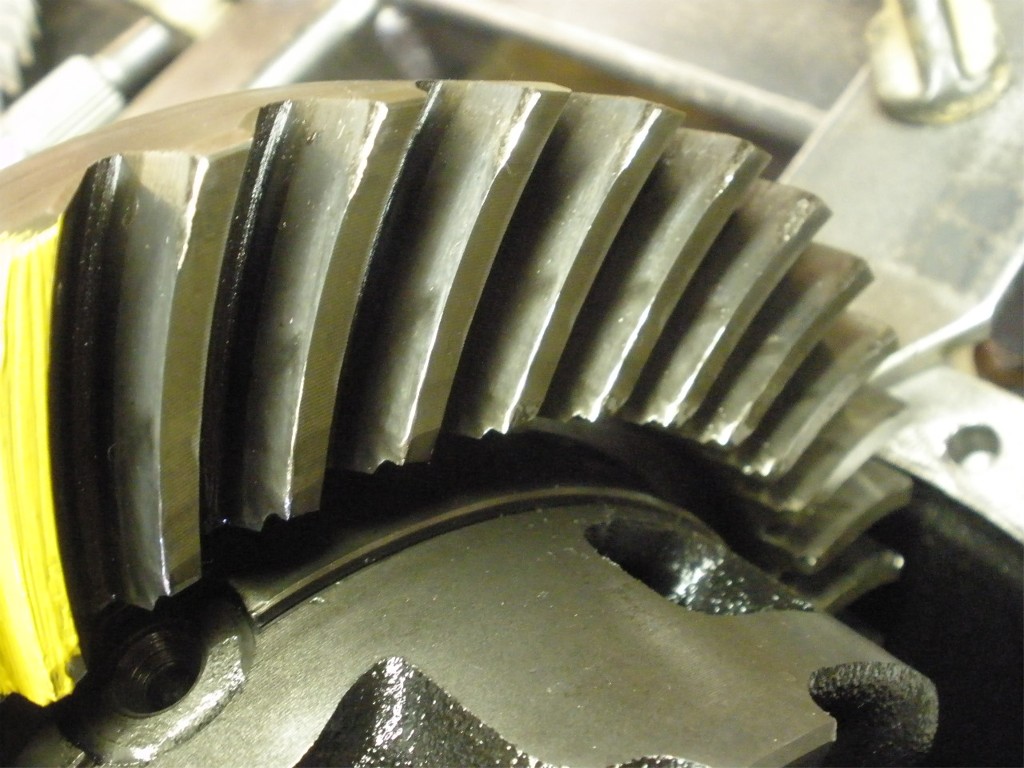
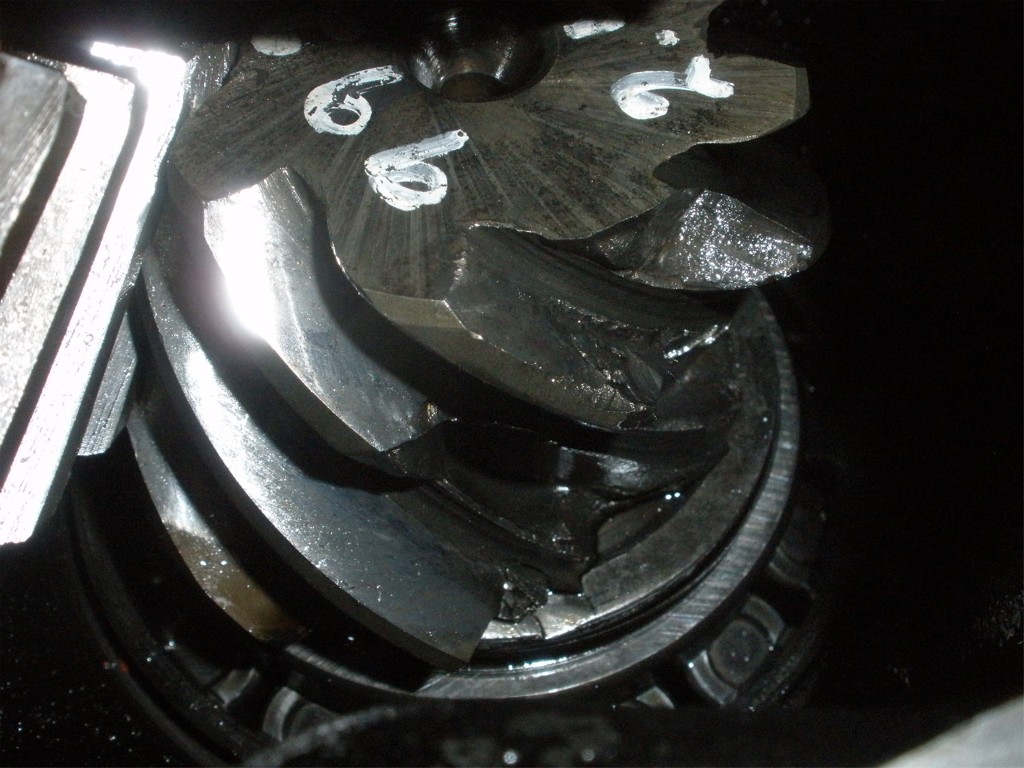
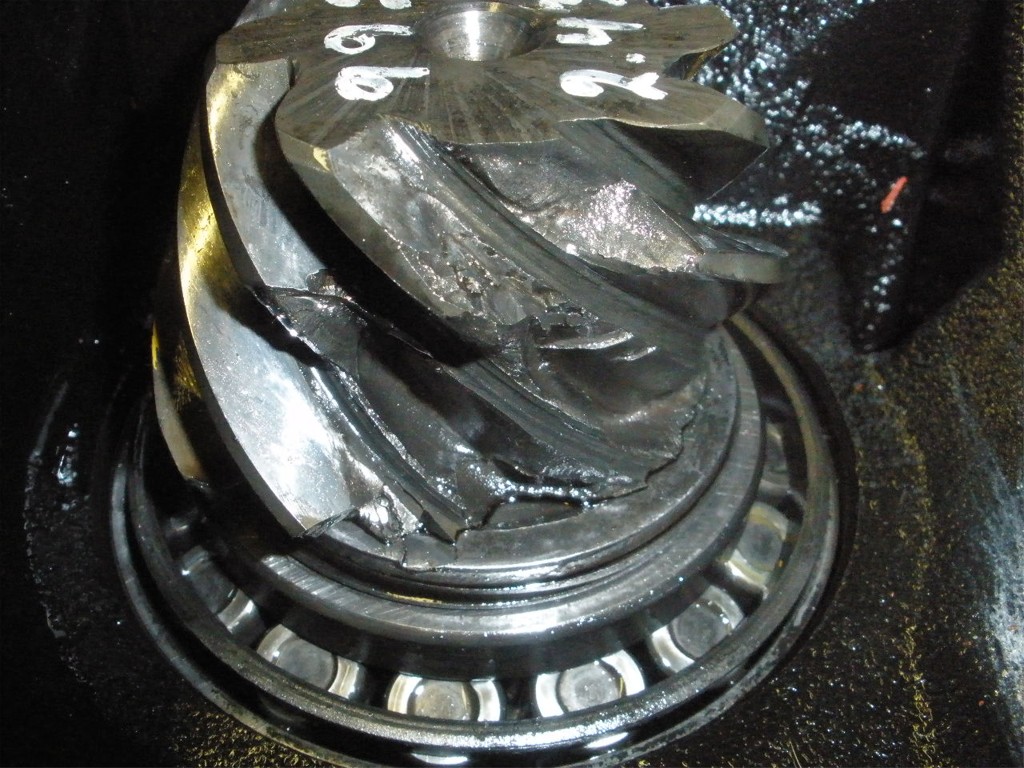
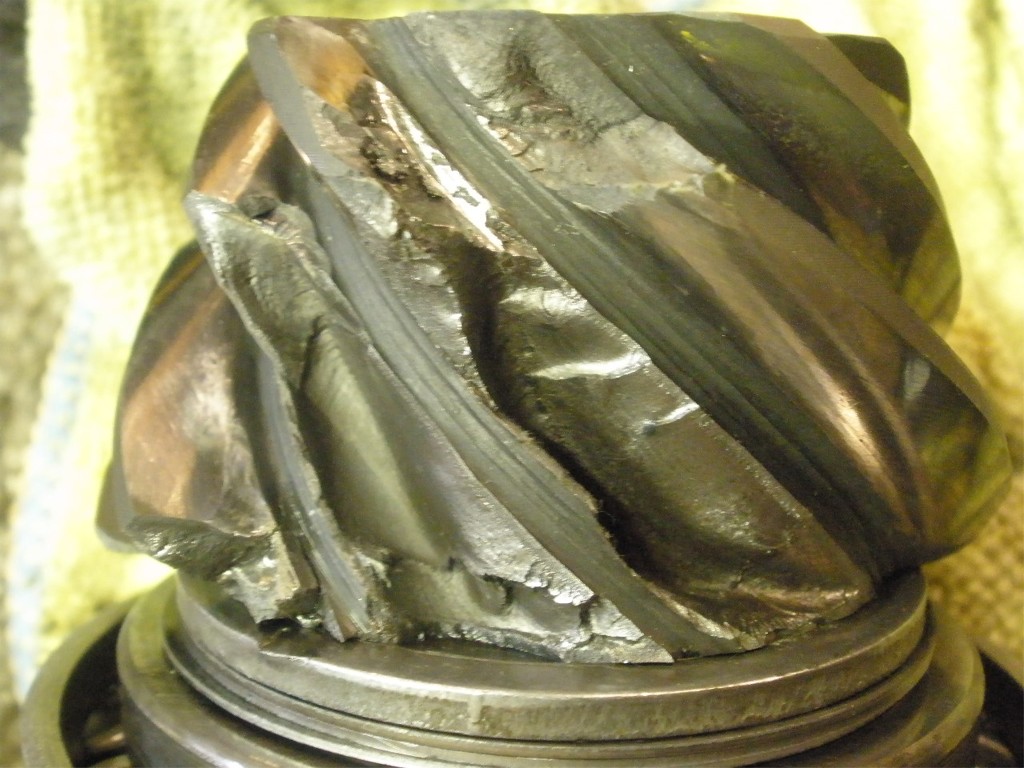
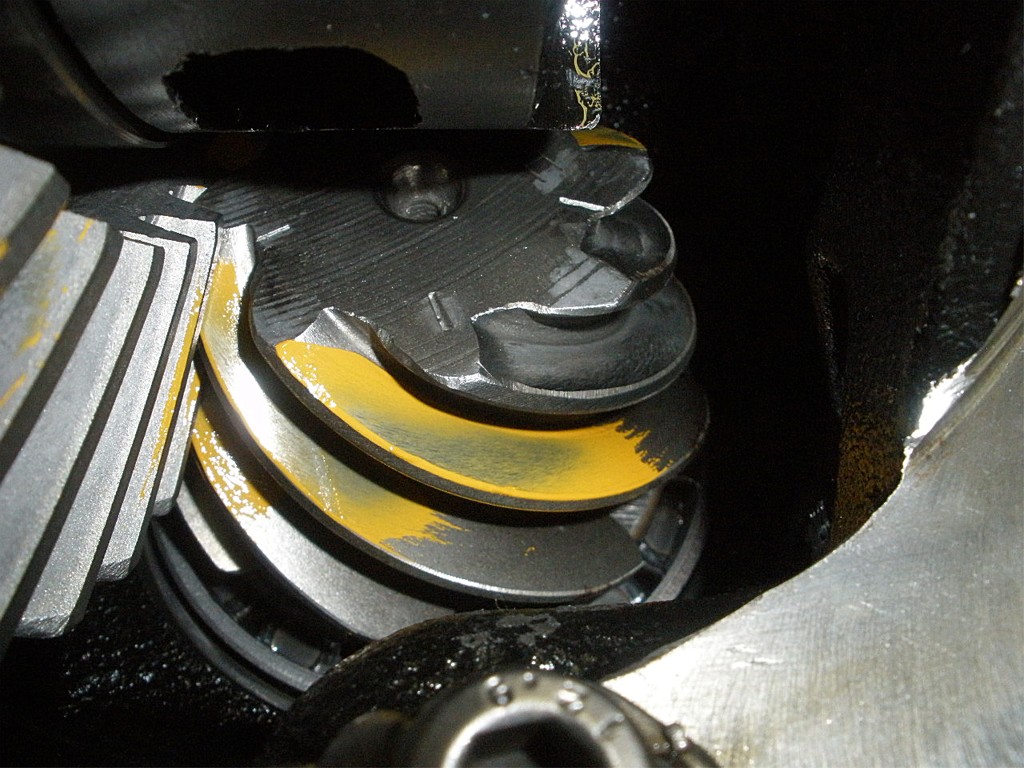
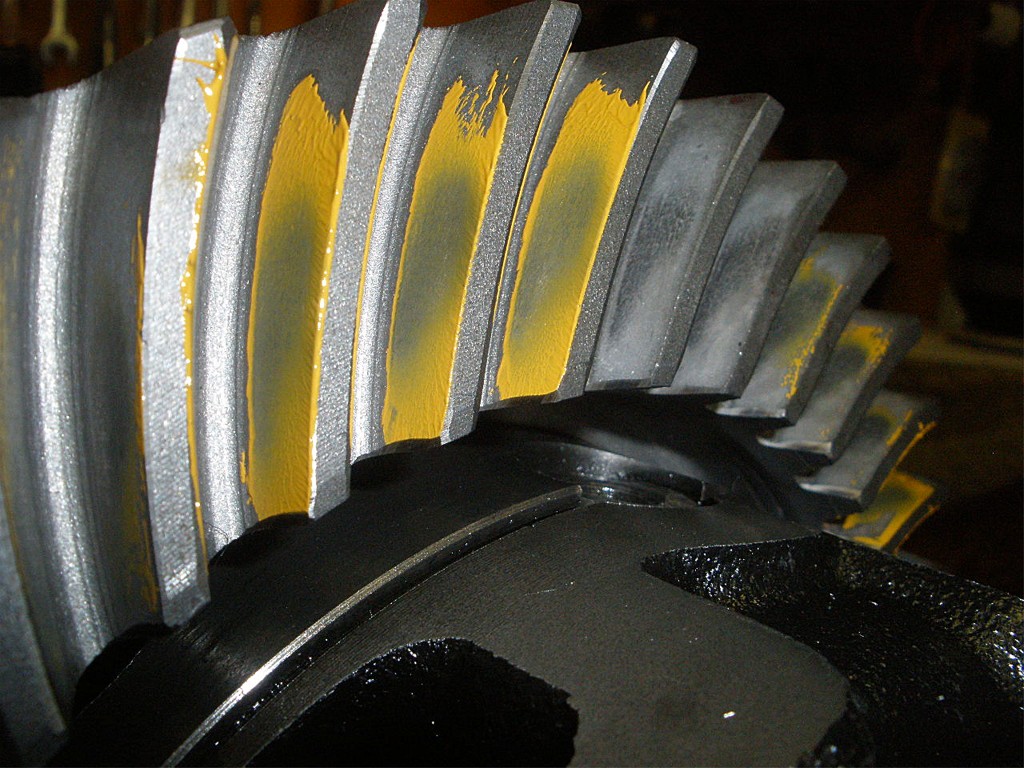
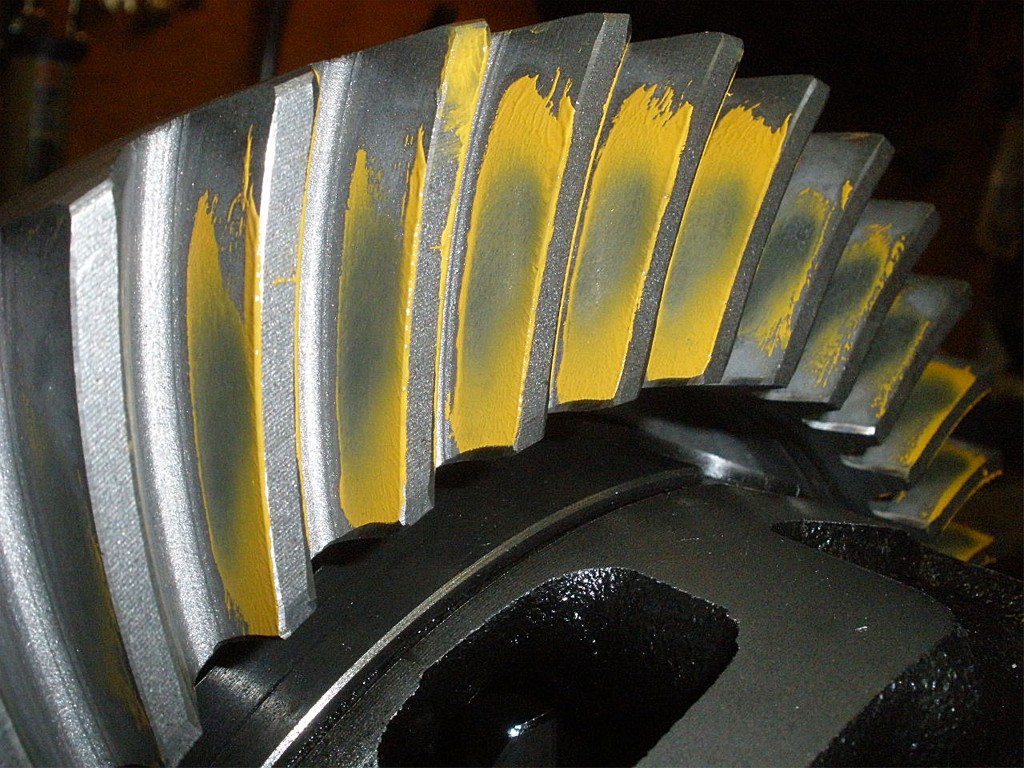
Ring gear teeth are pretty hammered looking. |
|
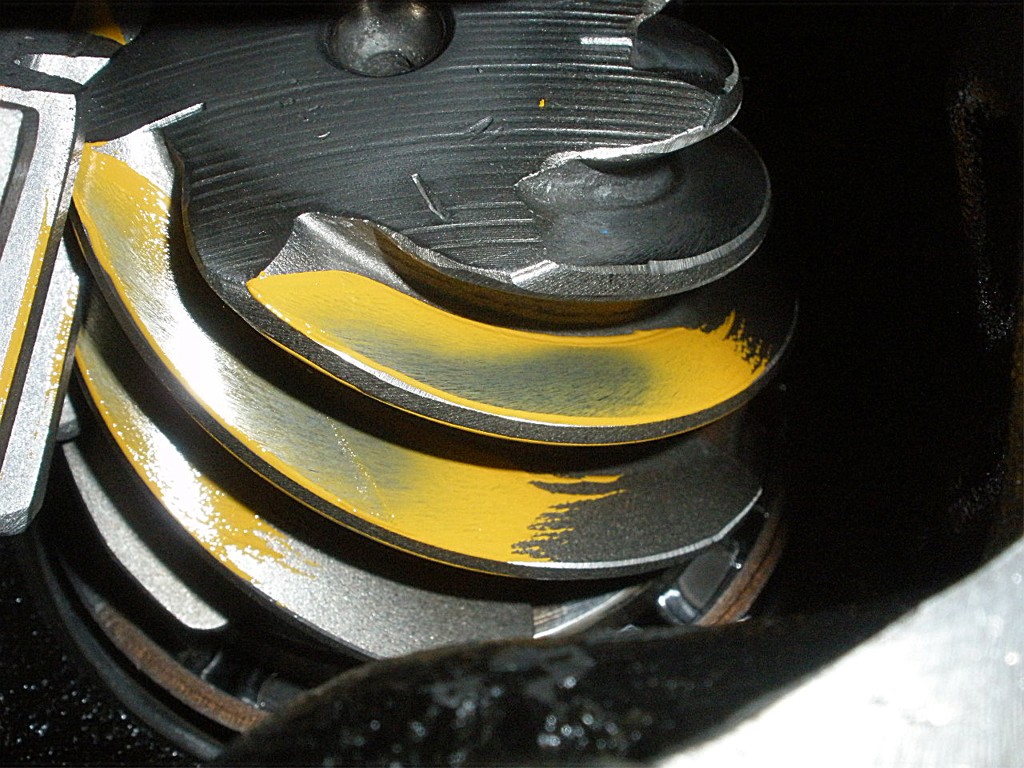
Pinion teeth appear much more hammered. |
|
``` |
|
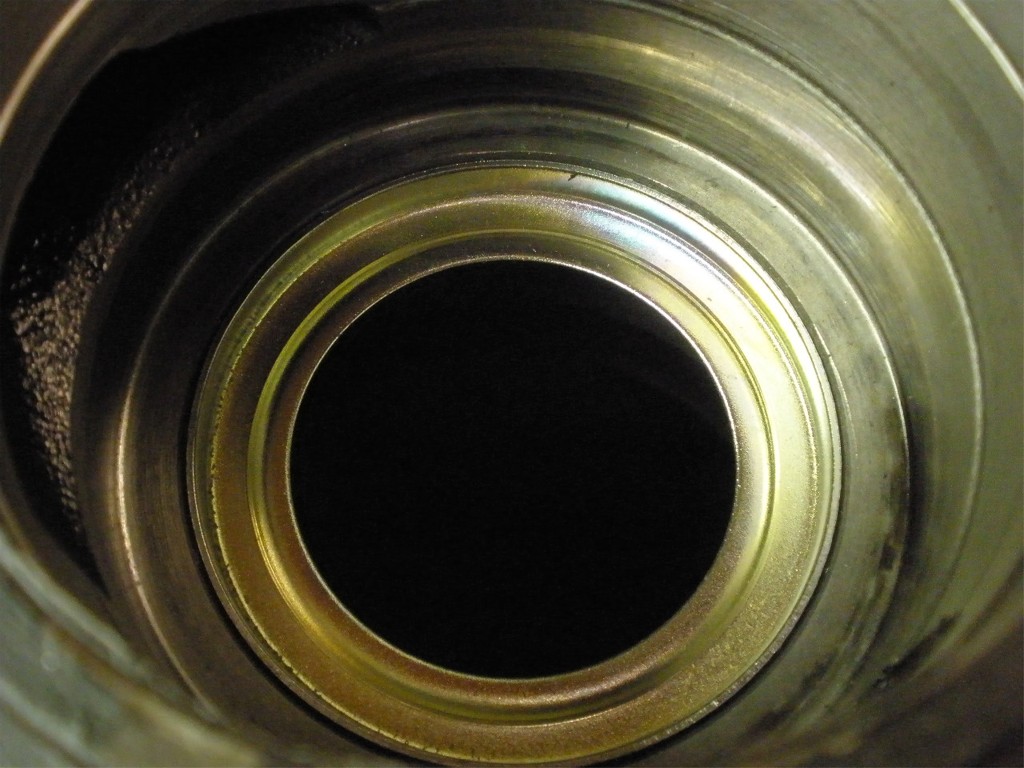
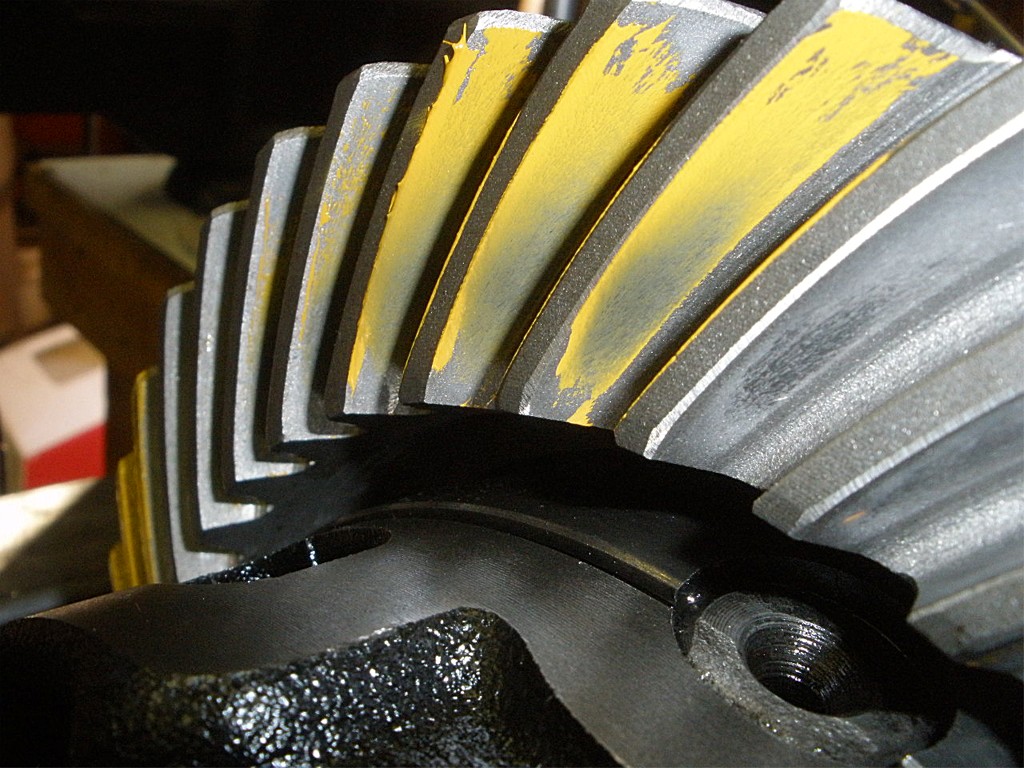
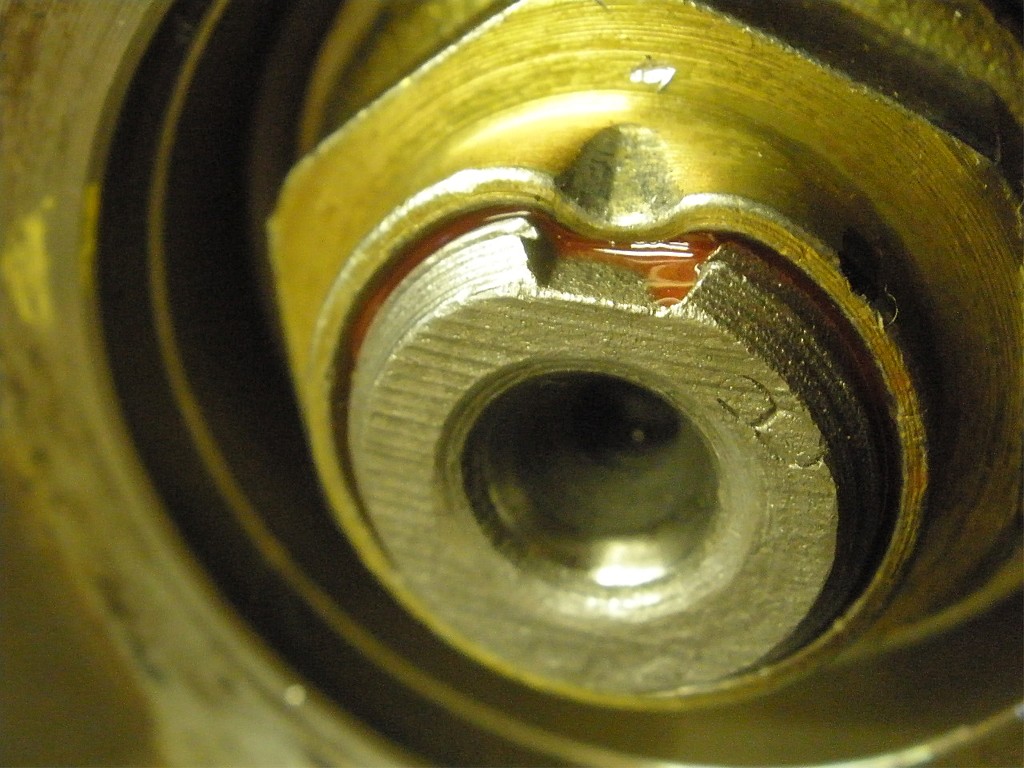
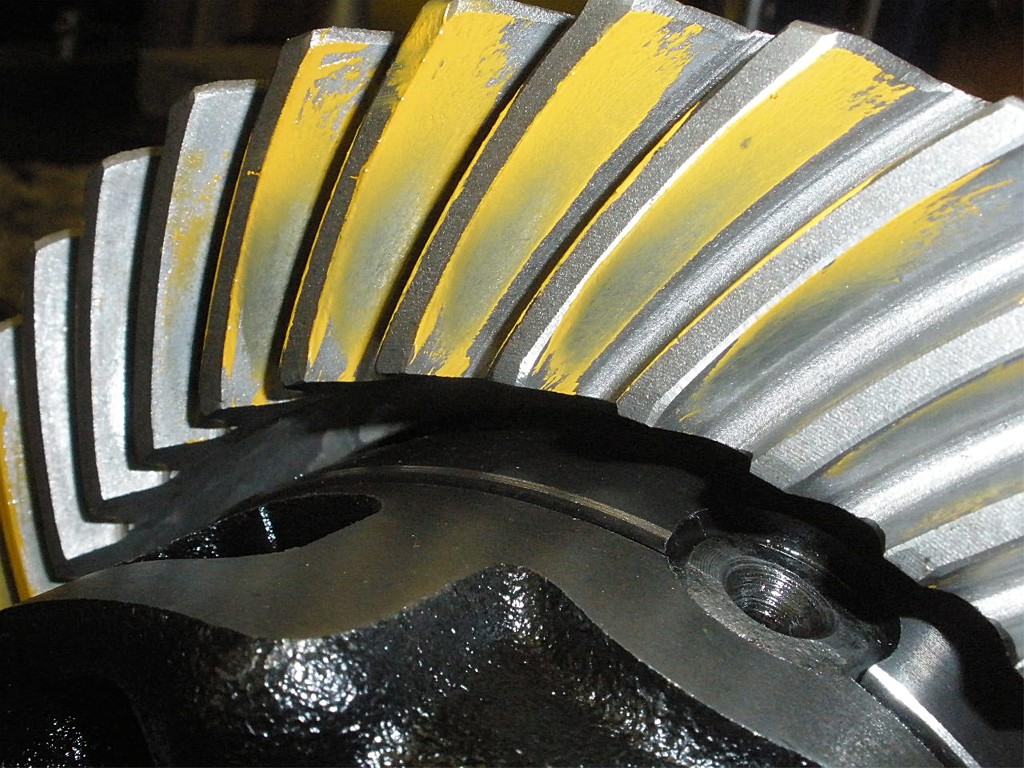
The drive side painted pattern shows very shallow. |
|
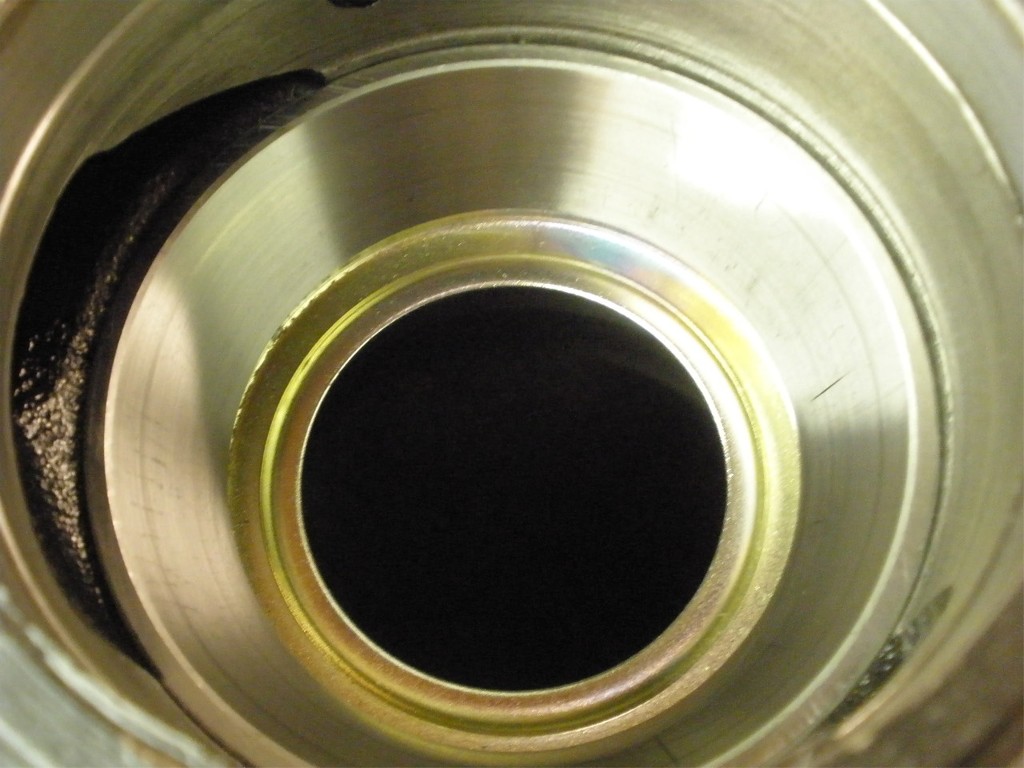
Coast is equal and opposite....shallow. |
|
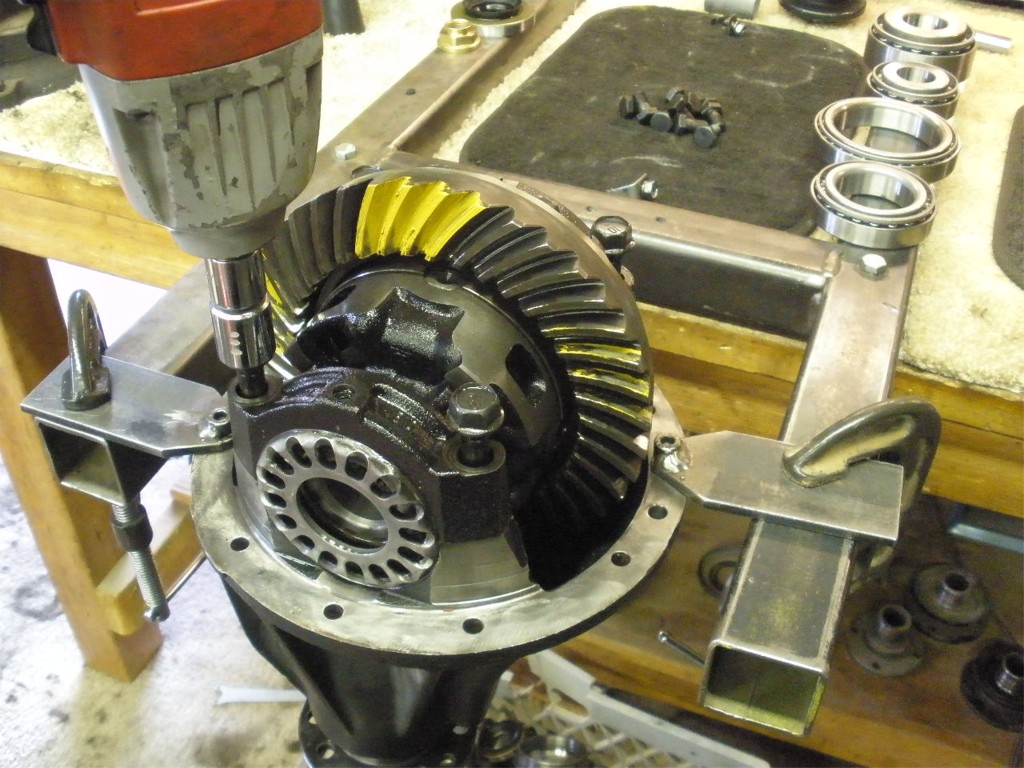
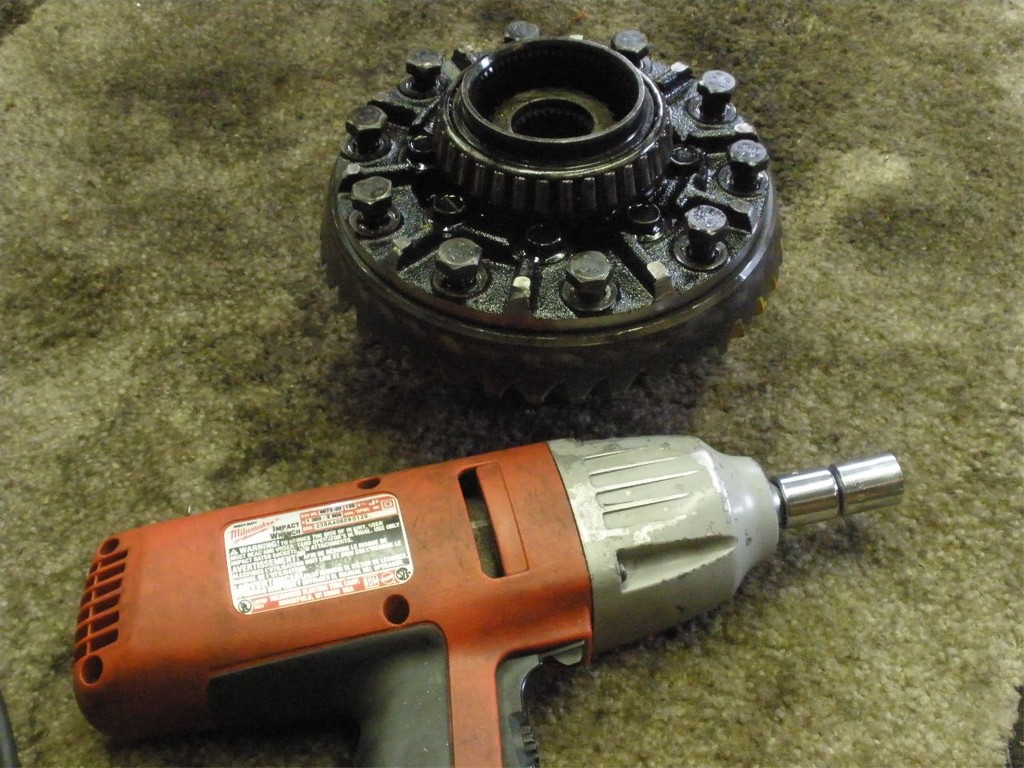
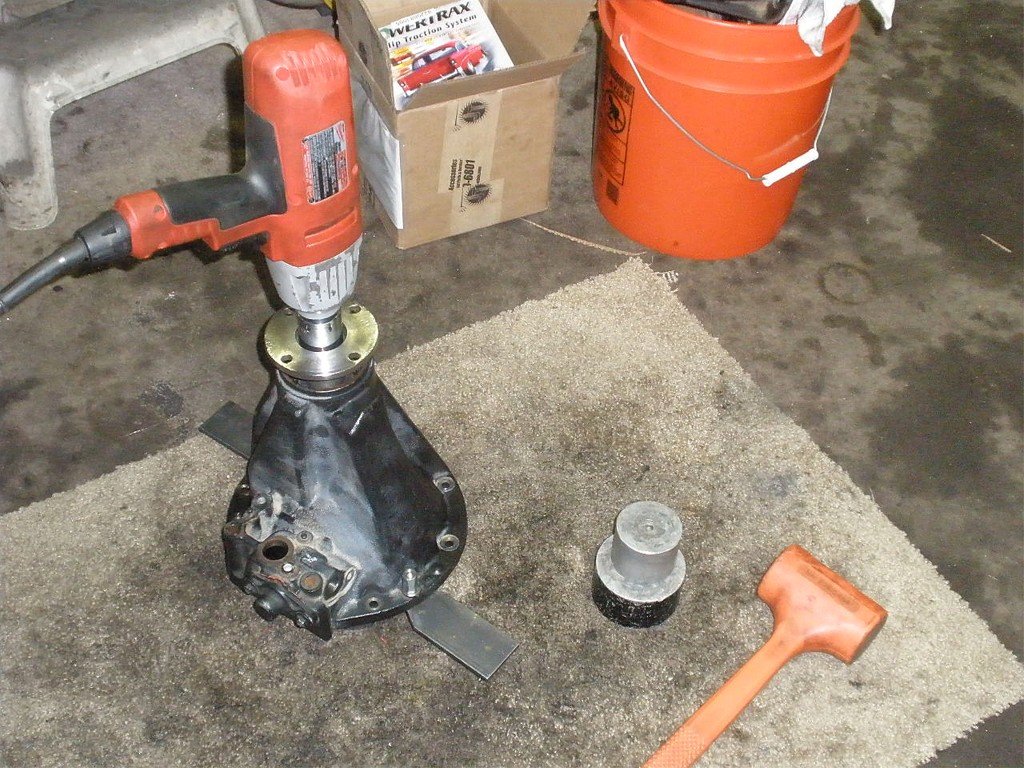
Dis-assembly starts....the electric impact really saves time :) |
|
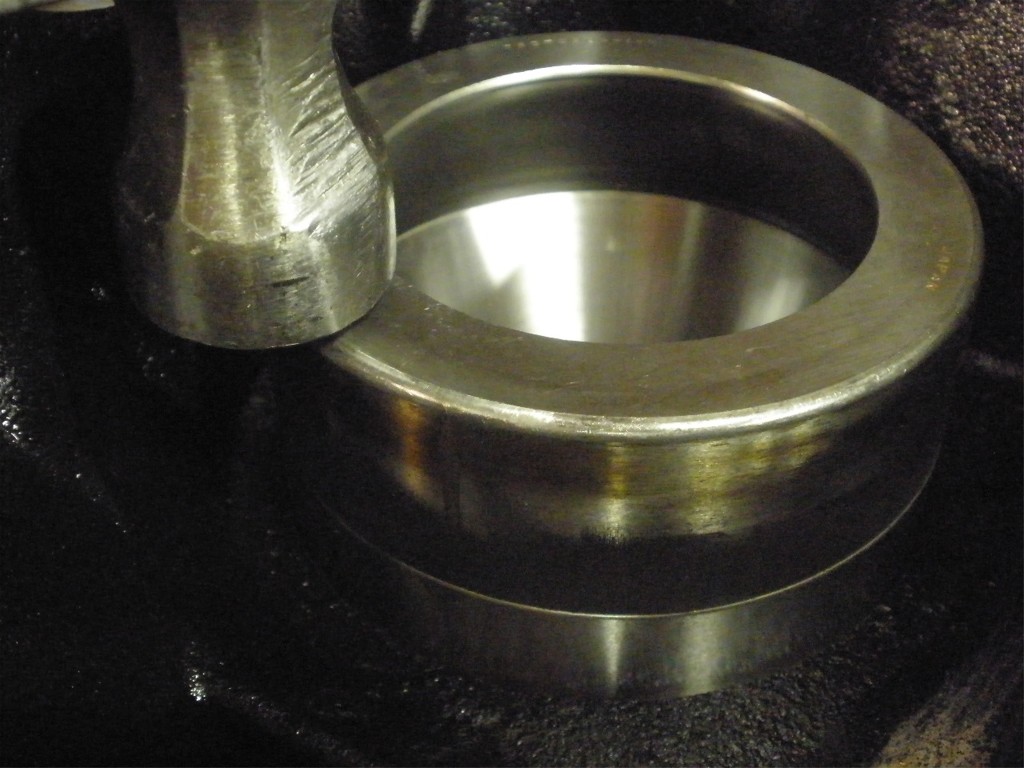
Another shot of the pinion. |
|
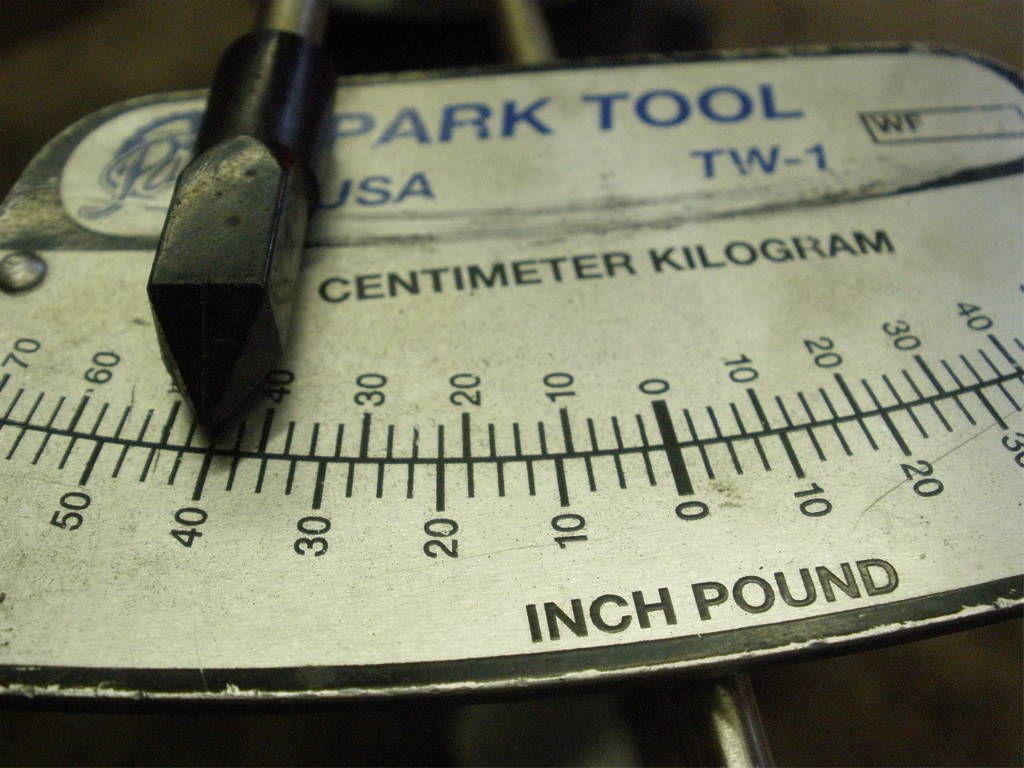
Not that it means very much but I checked the starting/rolling resistance of the pinion bearings. Here is the start-up drag.....40 inch/pounds. |
|
Rolling resistance is a very reasonable 6 or so. Phillip said he discovered the pinion wobbly so he tightened up the pinion nut about 1/4 turn....looks like he tightened it about the right amount :) |
|
Now to break down the pinion end of things. Remove the flange. |
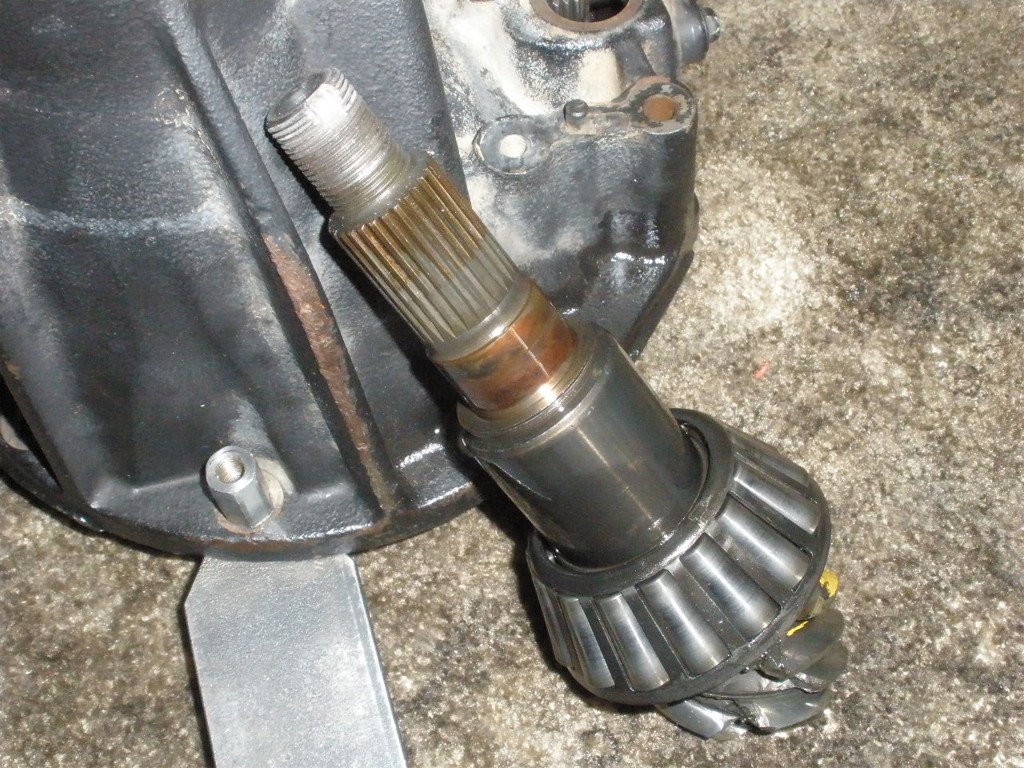
|
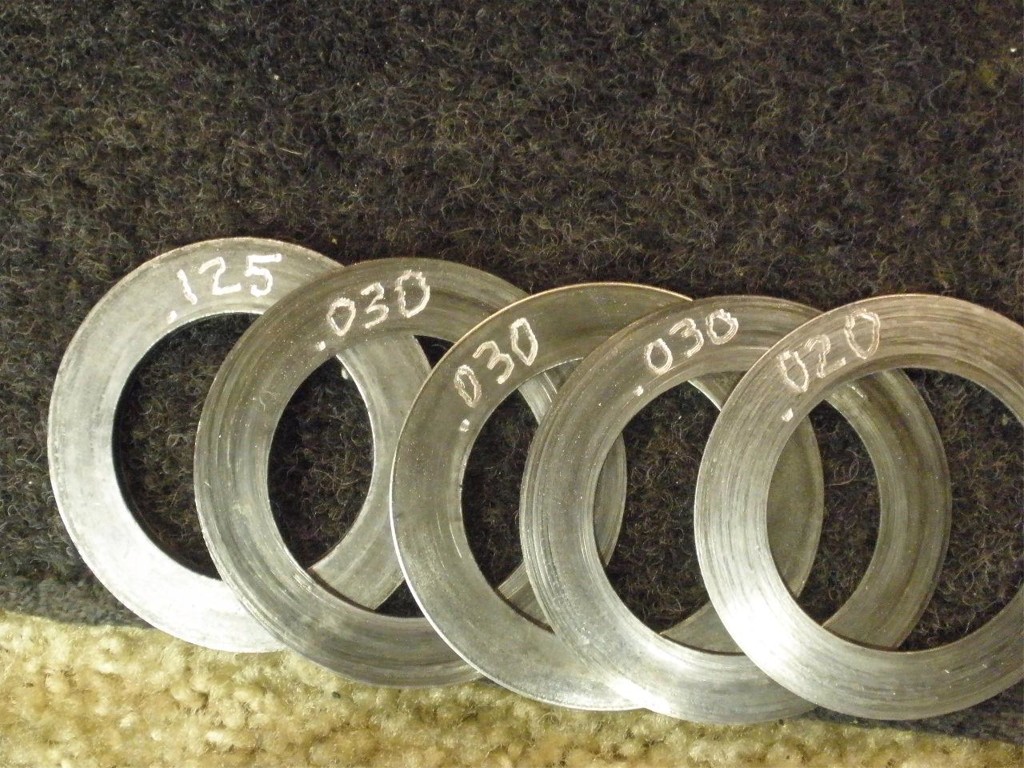
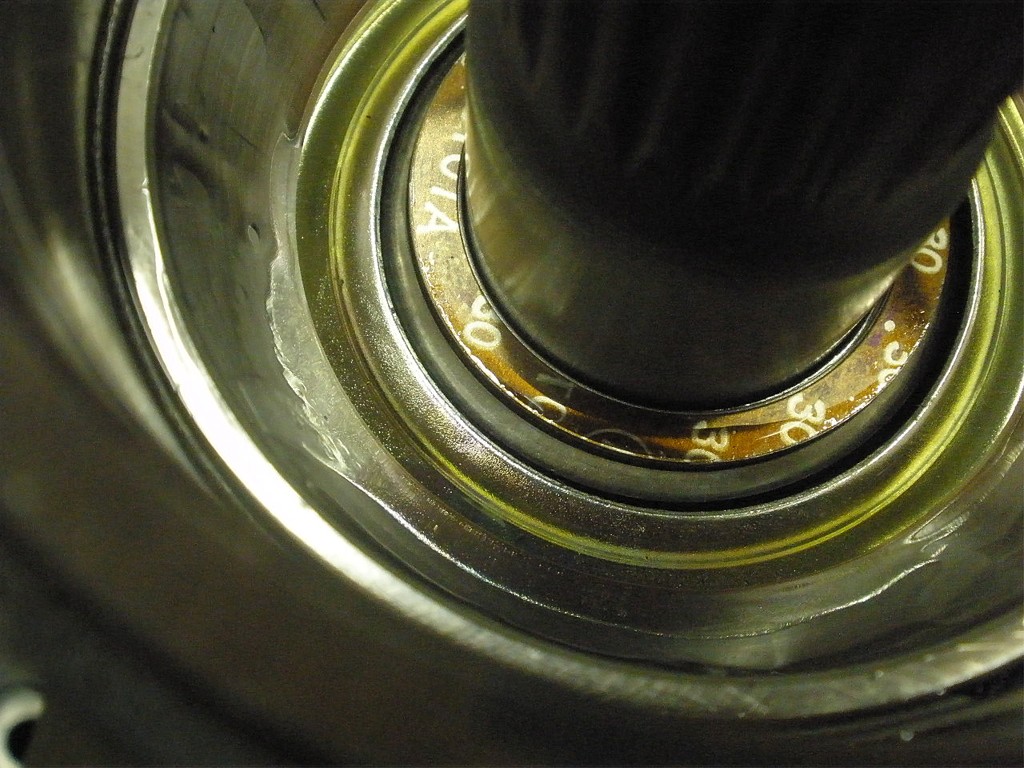
Indeed, there was a solid collar in there with shims on it. I did measure the shim pack and it totalled .051" which is right in the ballpark that I would expect for a properly shimmed collar(1.812" + .051" = 1.863"). |
|
Couldn't resist....another pinion tooth shot. Notice the large stack of shims which is normal when using a "4 cylinder" short pinion head in a V6 E-locker. I have installed a lot of short pinion head gearsets in V6 and e-lockers with no strength concerns at all. |
|
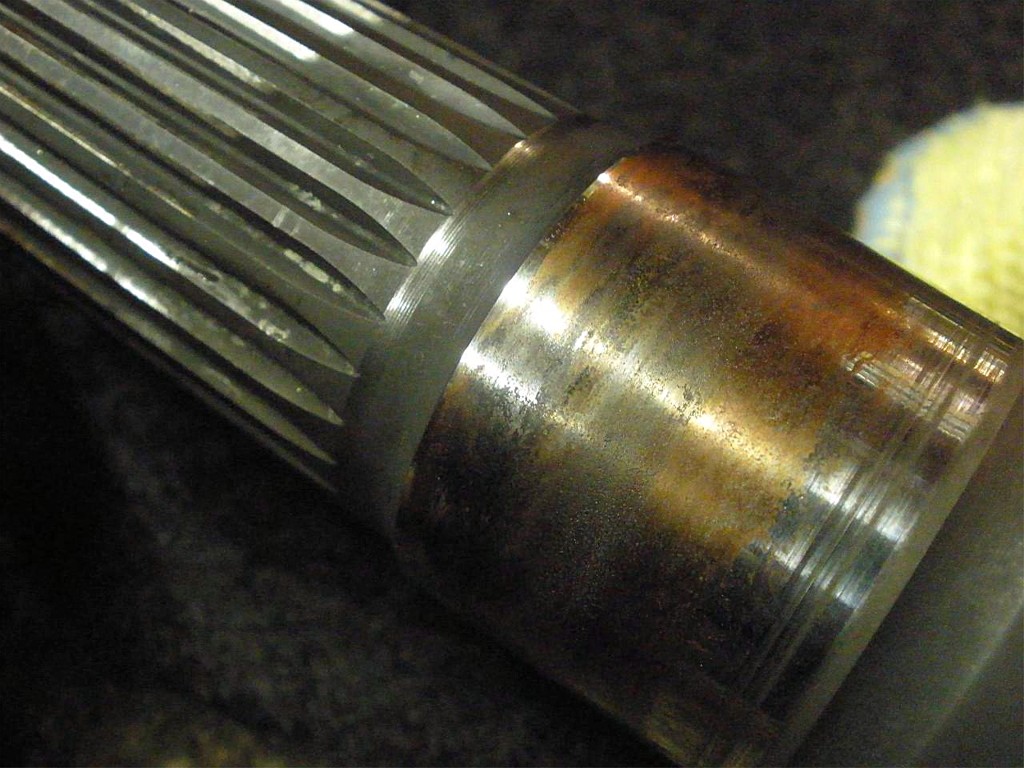
Damaged surface....probably from the the wobbly flange rattling the pinion bearing around. |
|
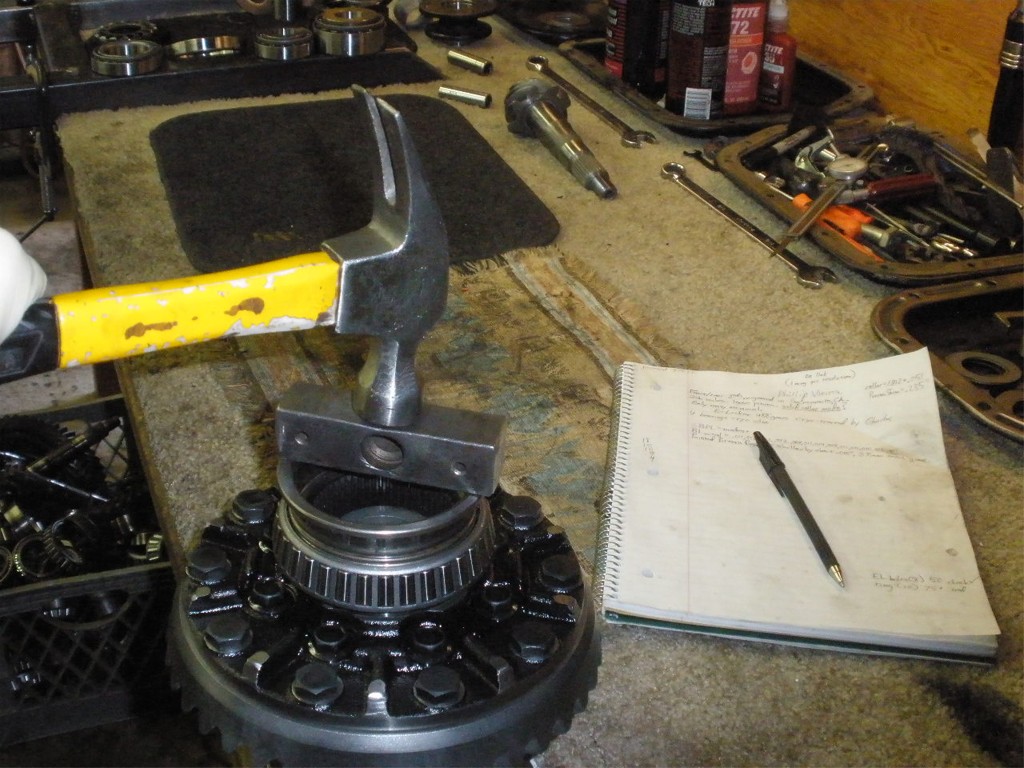
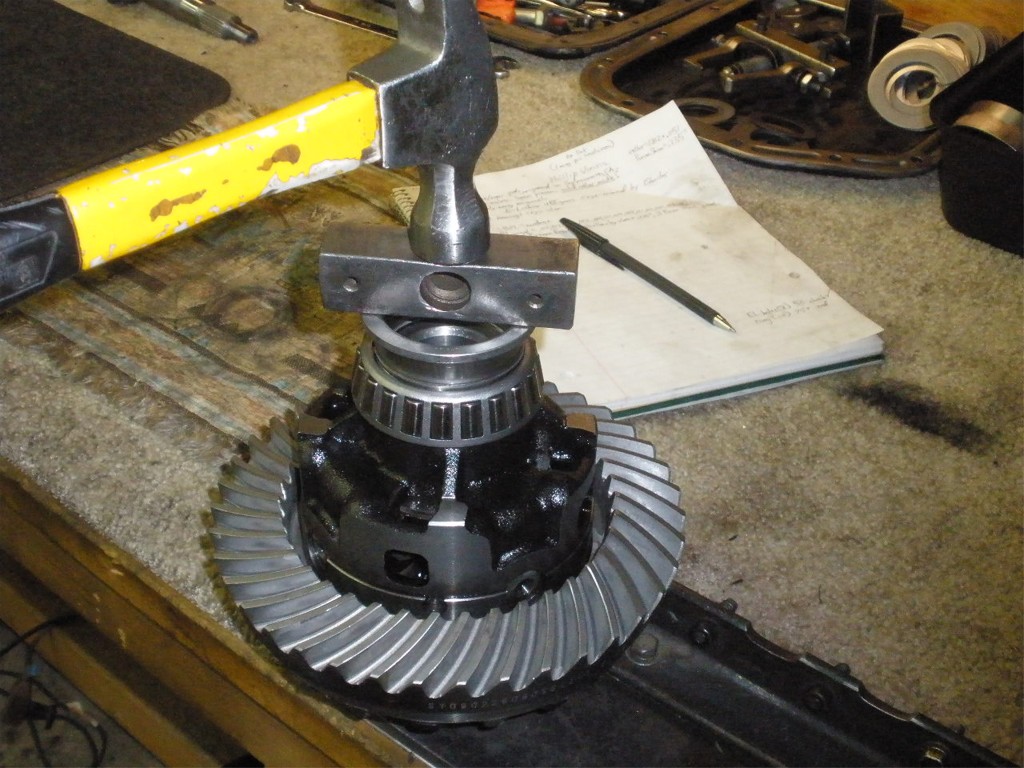
Press the old inner bearing off... |
|
I measured the shim stack and it looks like .235" which is an expected amount when setting up 4 cyl gears in a V6 differential housing. |
|
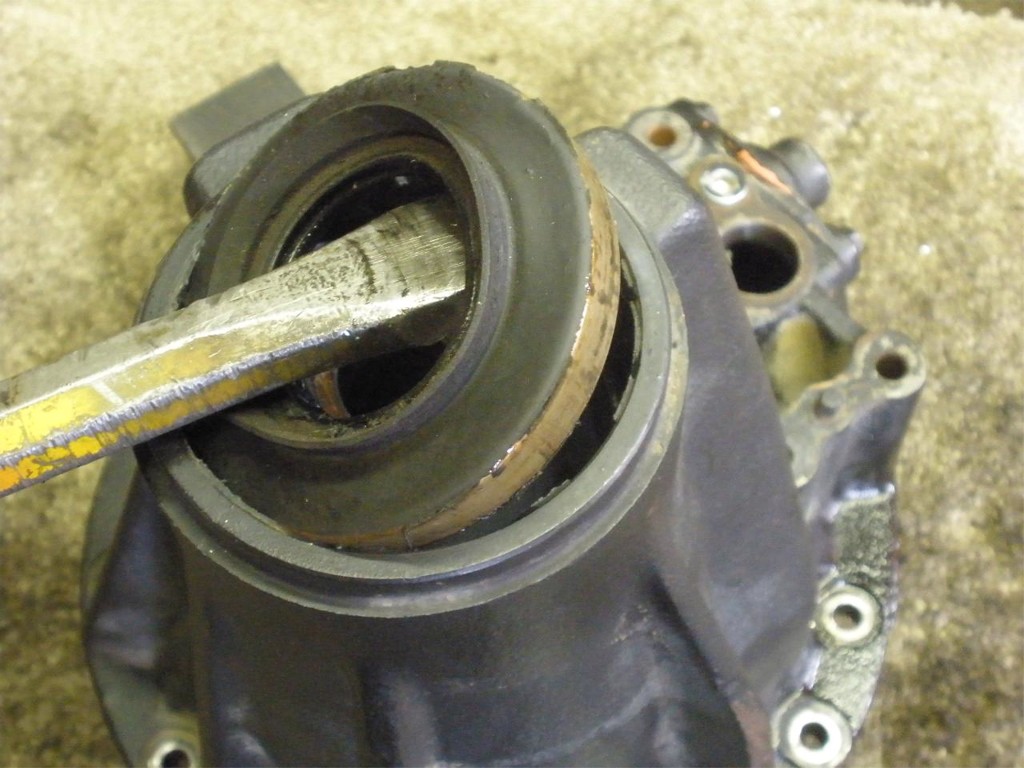
With the proper tool, the seal pops loose. |
|
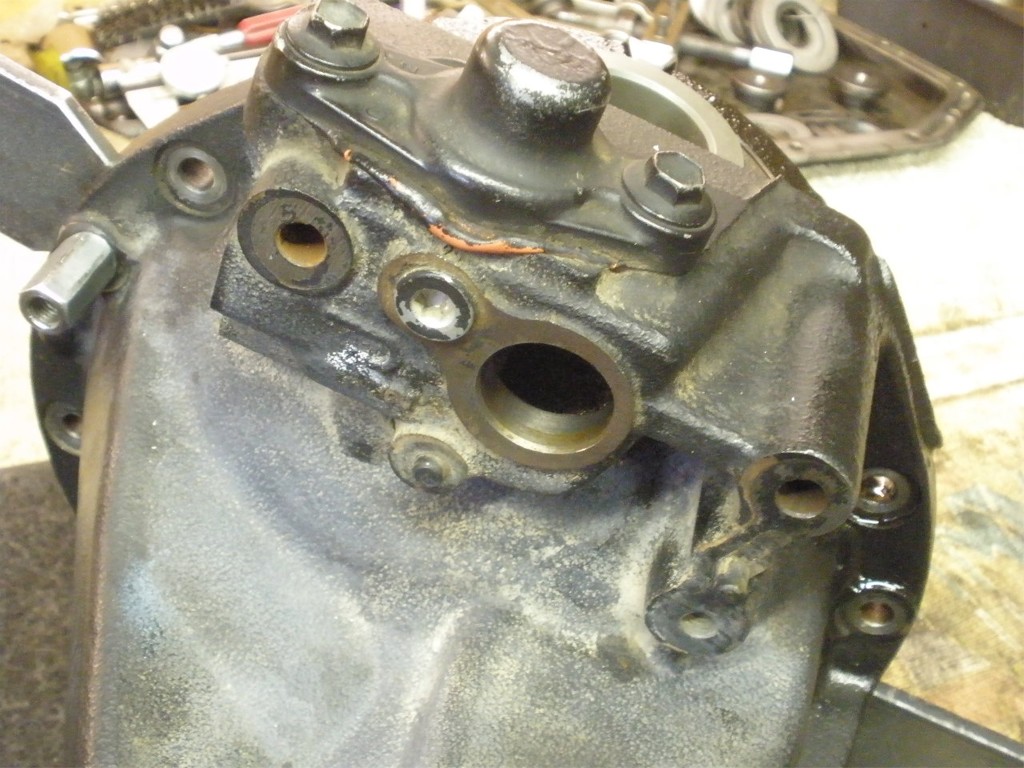
The splashguard above the outer pinion bearing is removed and wiped clean. |
|
The rollers on the pinion bearing seem surprisingly normal for being run with a wobbly pinion for a short time. |
|
The race has pitting damage. |
|
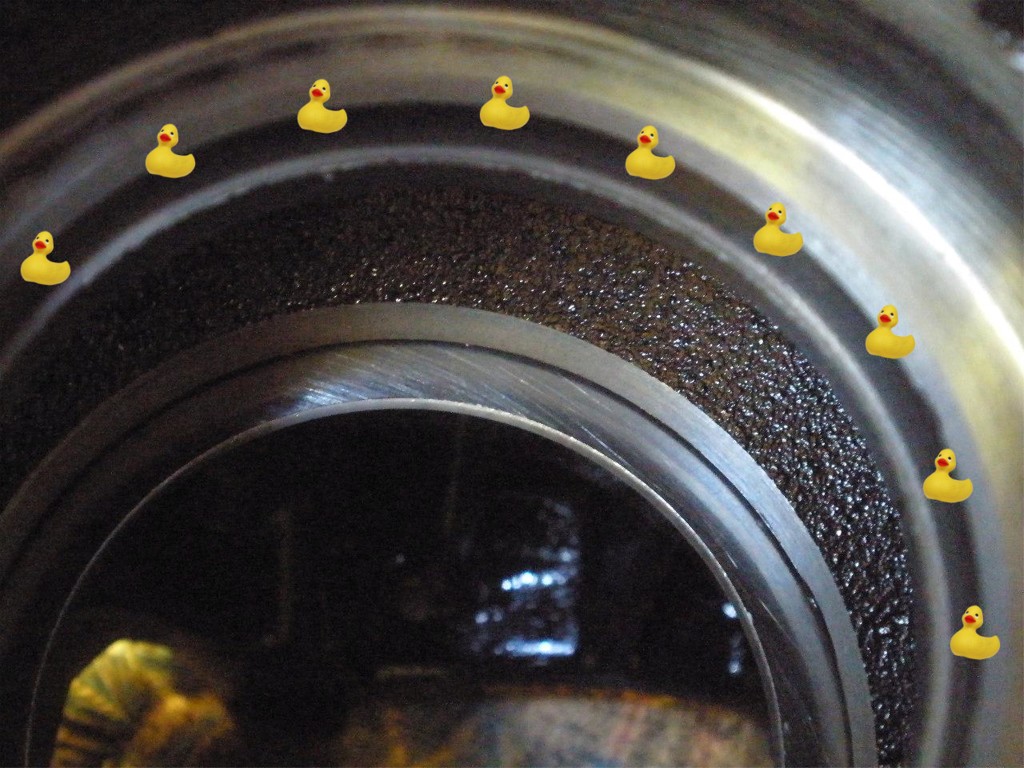
The area where the little duckies are show where the oil retainer would normally be. The previous installers probably left it out after destroying it during the installation of the new bearings. This is hard to prevent. I don't believe that this missing piece had anything to do with the failure mode here. |
|
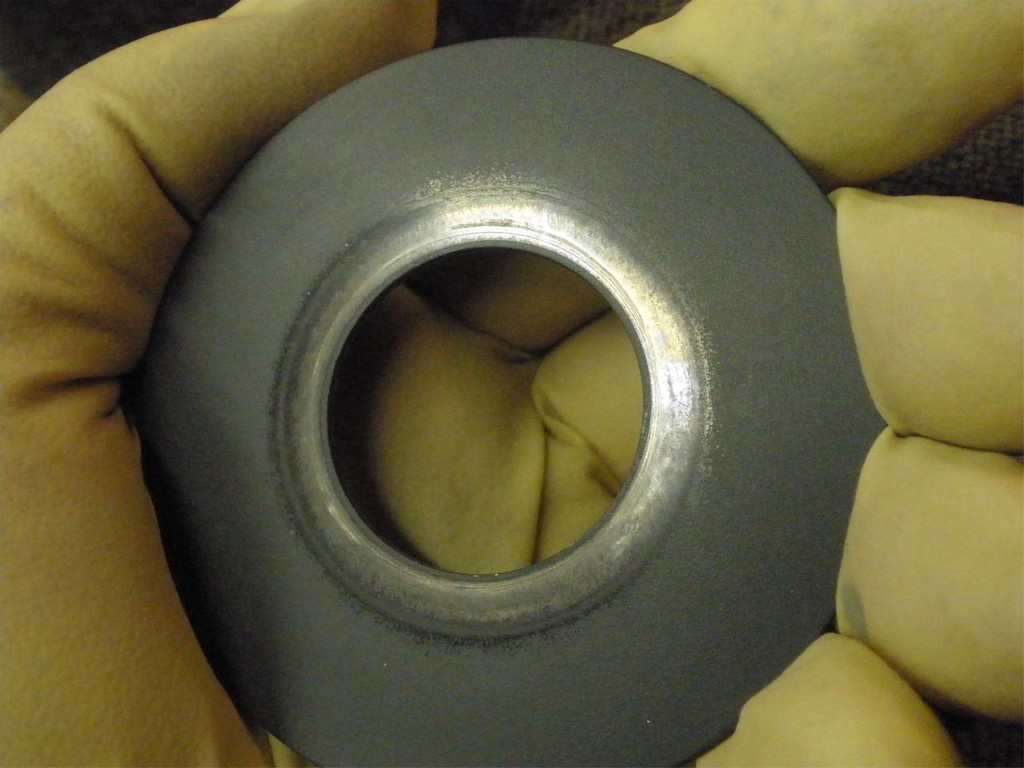
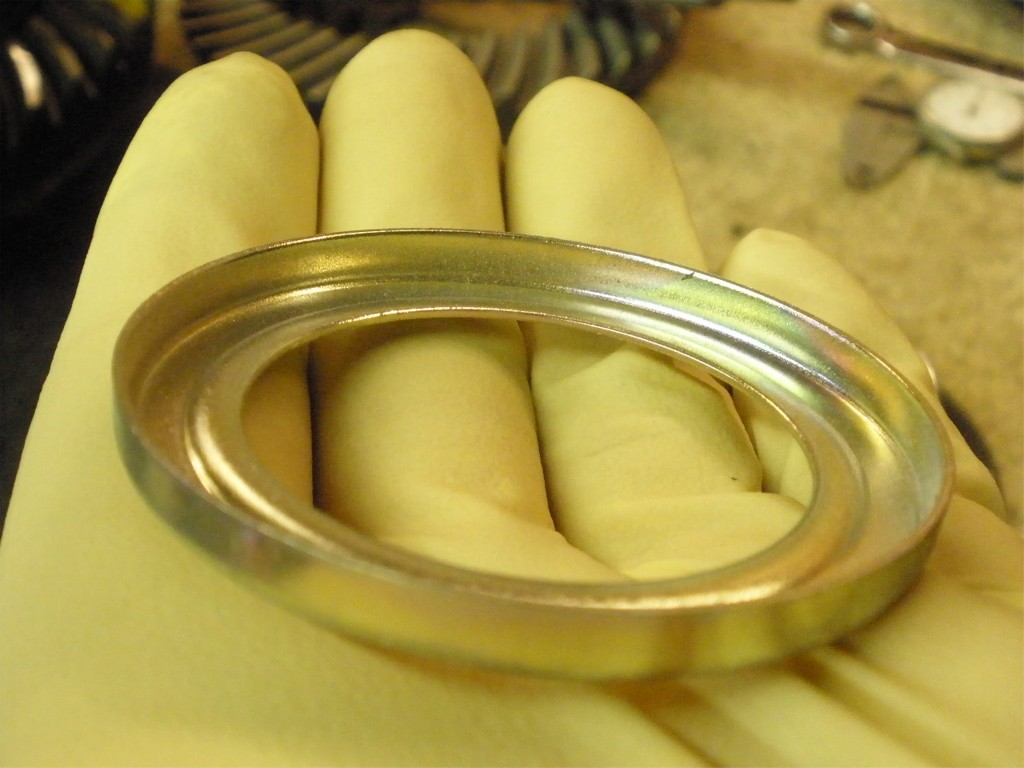
A new retainer will be installed. |
|
It's easy to tap the retainer into position with old throw-away bearing parts. |
|
``` |
|
The new outer race is now tapped in place. |
|
The large inner race is a little trickier to tap in. I used to use a soft chisel to beat it down evenly but have decided that the chisel might be compromising the quality of the pinion pre-load measurements...so now I use a full contact old race to tap it down just enough to get it started straight....... |
|
...and finish it off with the press. I am considering the possibility that the race might not have been seated fully by the previous installer. Because of the recessed nature of the race in the e-lockers, in particular, it is an easy mistake to make. Casual driving on the road(or a hard trail) eventually will cause the race to fully seat. That could cause the pinion flange to appear wobbly and the painted pattern to look shallow just like the above painted patterns. |
|
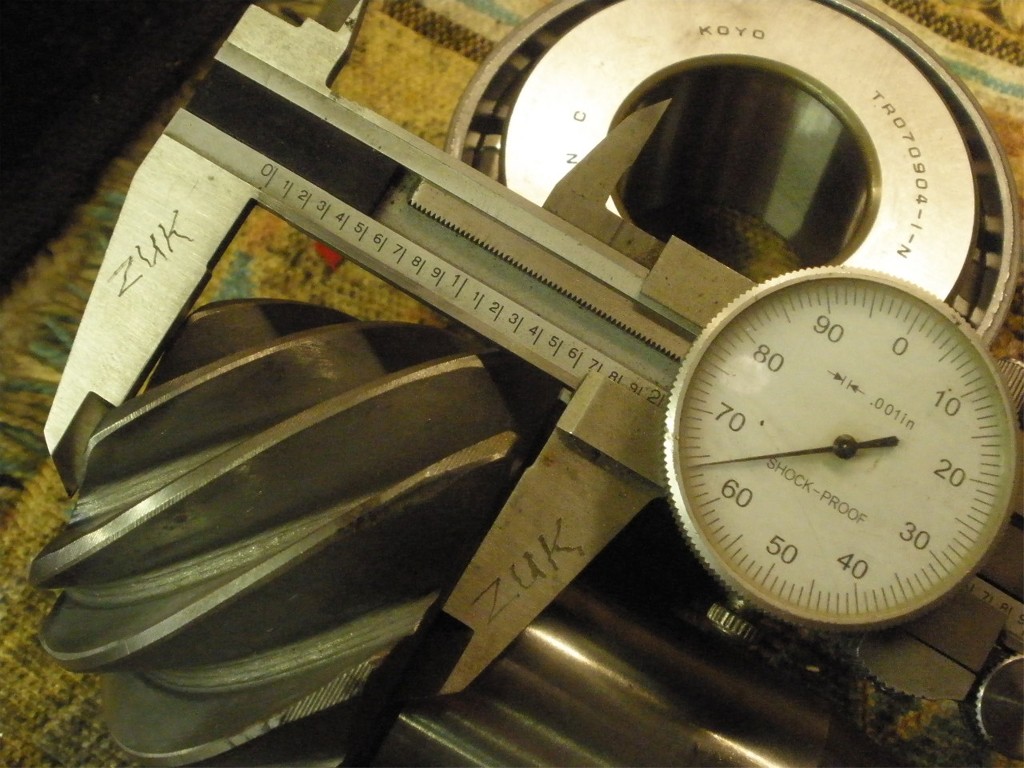
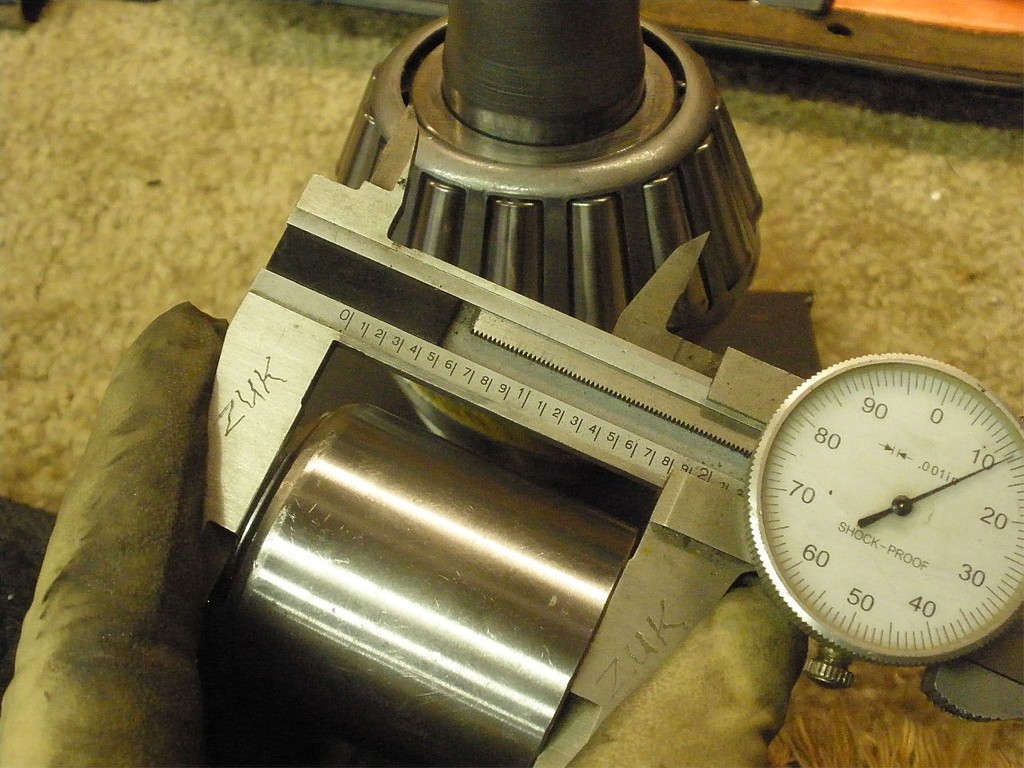
The new 488 V6 pinion head is measuring at 1.664" as a long pinion head should. Short pinion heads measure closer to 1.535" for reference. |
|
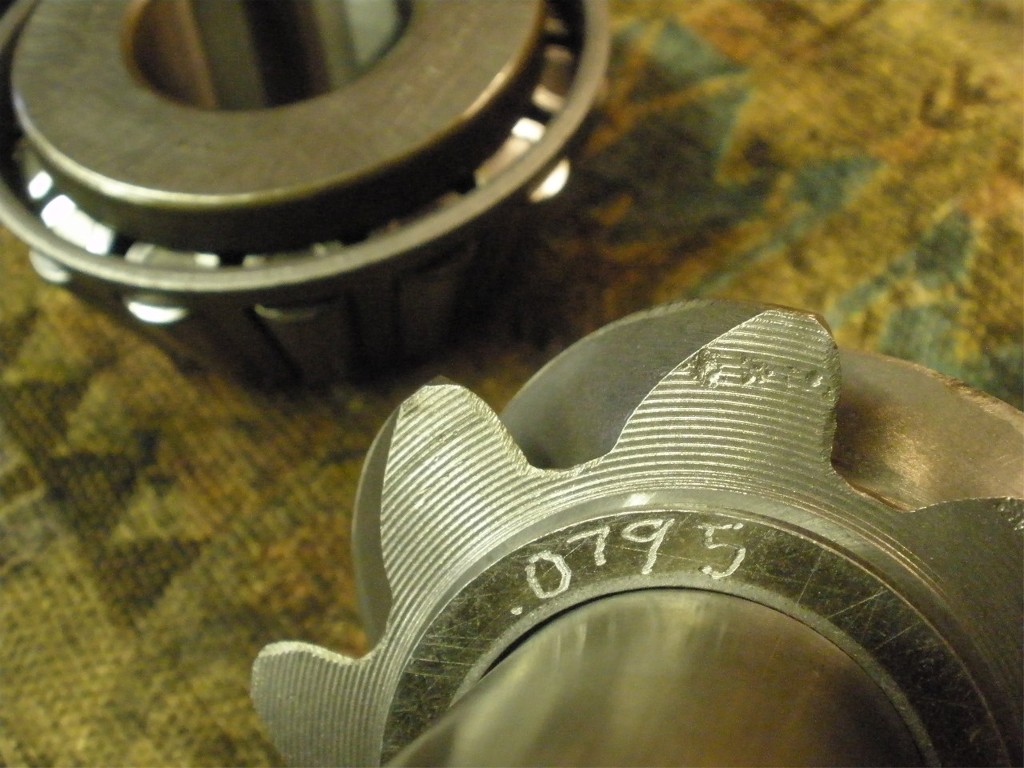
I will start with a typical pinion shim of .0795" |
|
Inner pinion bearing is pressed on. It's just a 12 ton press but seems to handle every gear install I've ever done. |
|
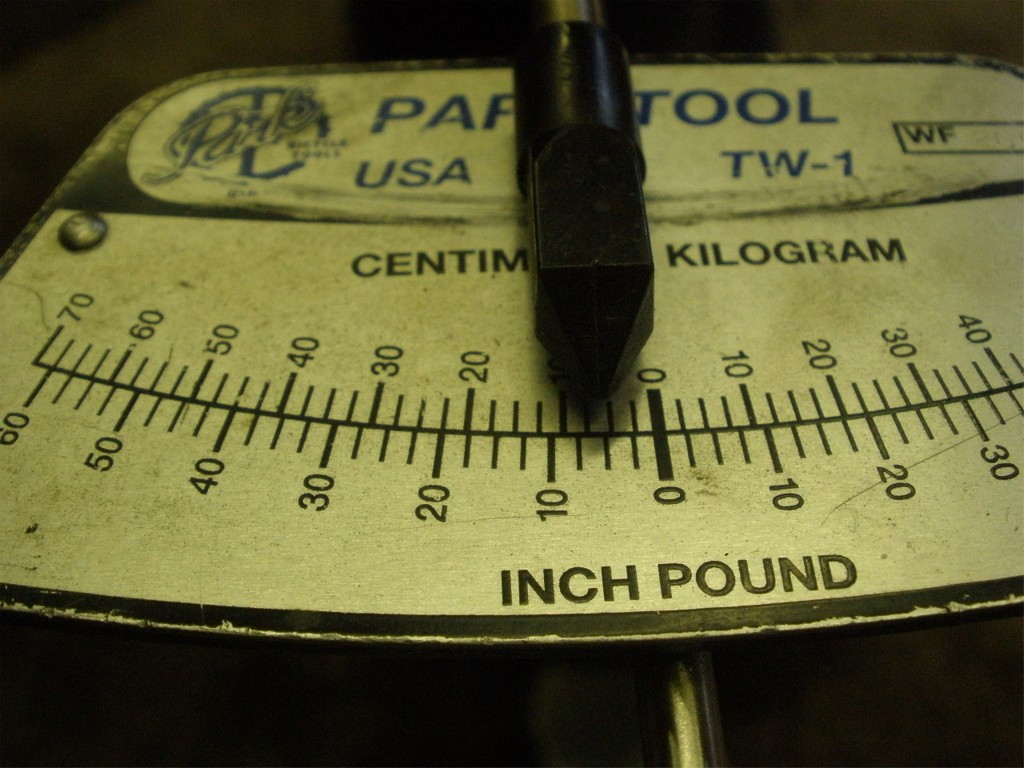
The electric impact buzzes the nut on slow enough where I can get the desired 10 inch/pounds of pinion pre-load for an initial pattern check. |
|
10 in/lb as verified by the $36 pendulum style torque wrench. |
|
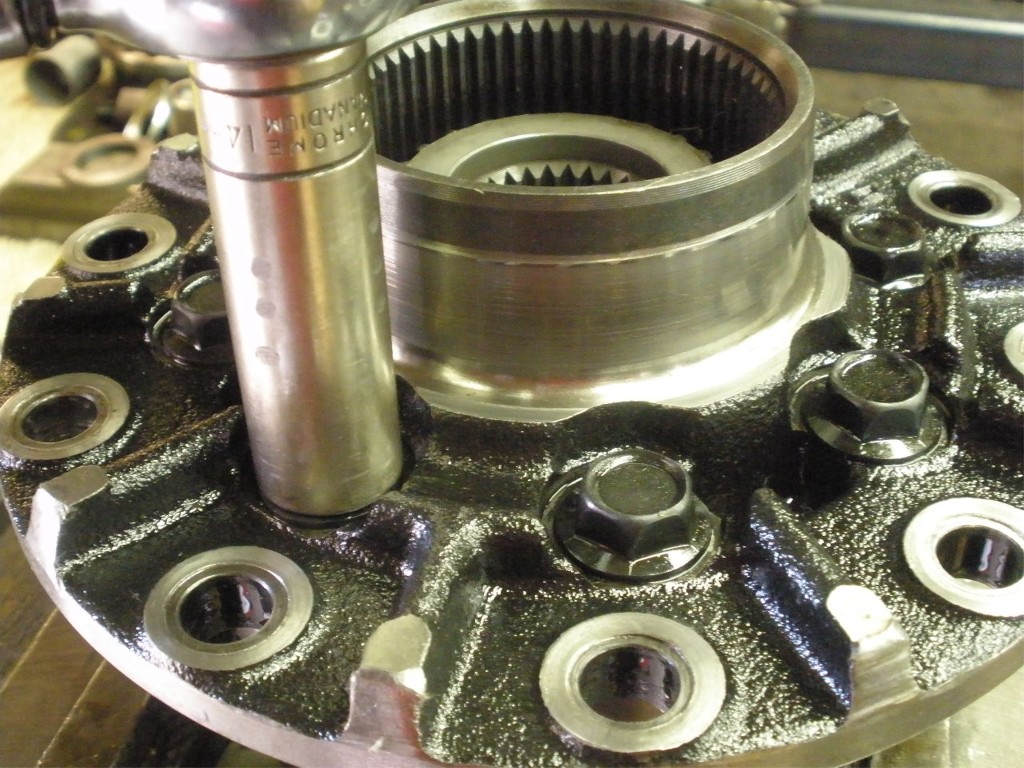
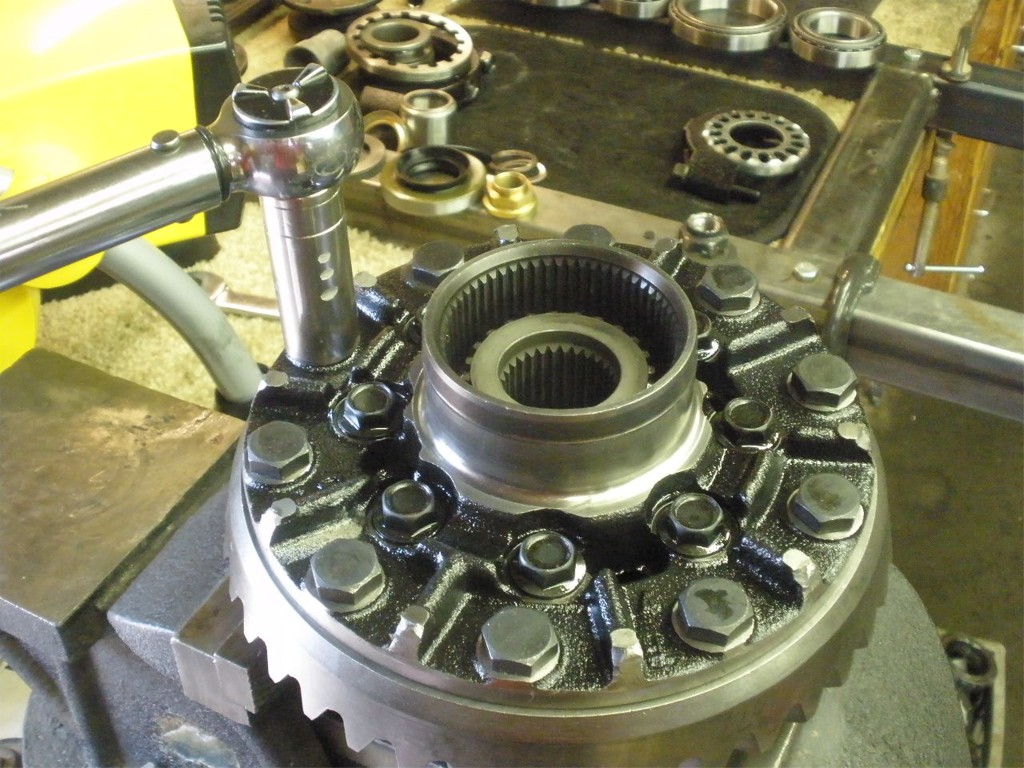
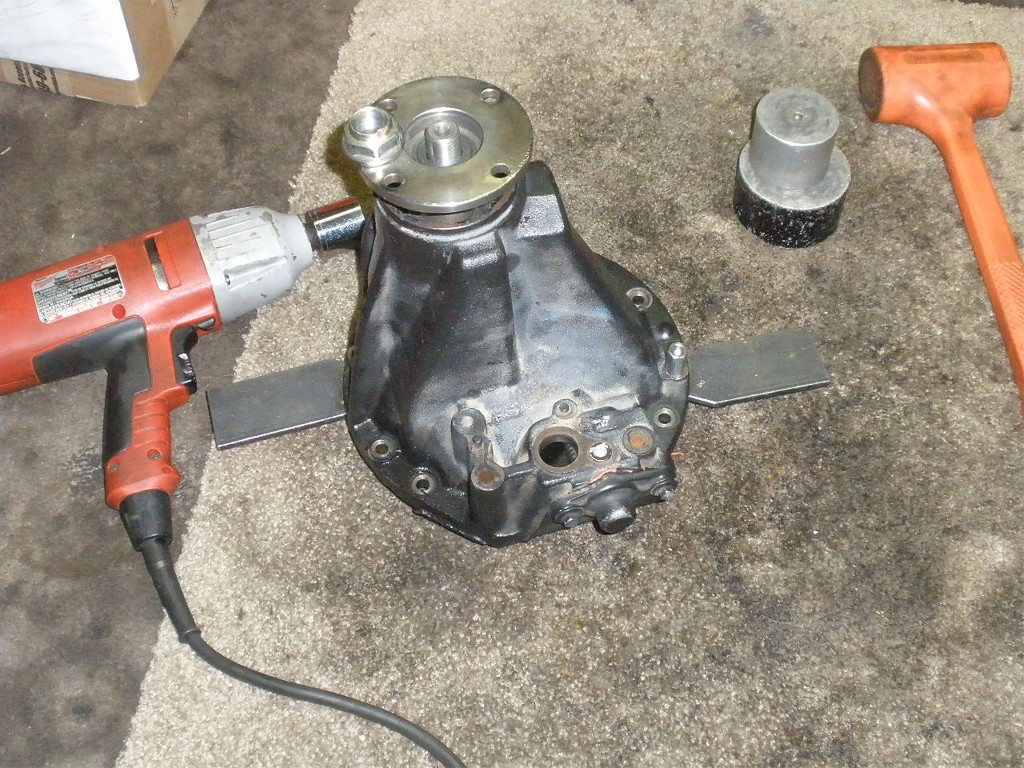
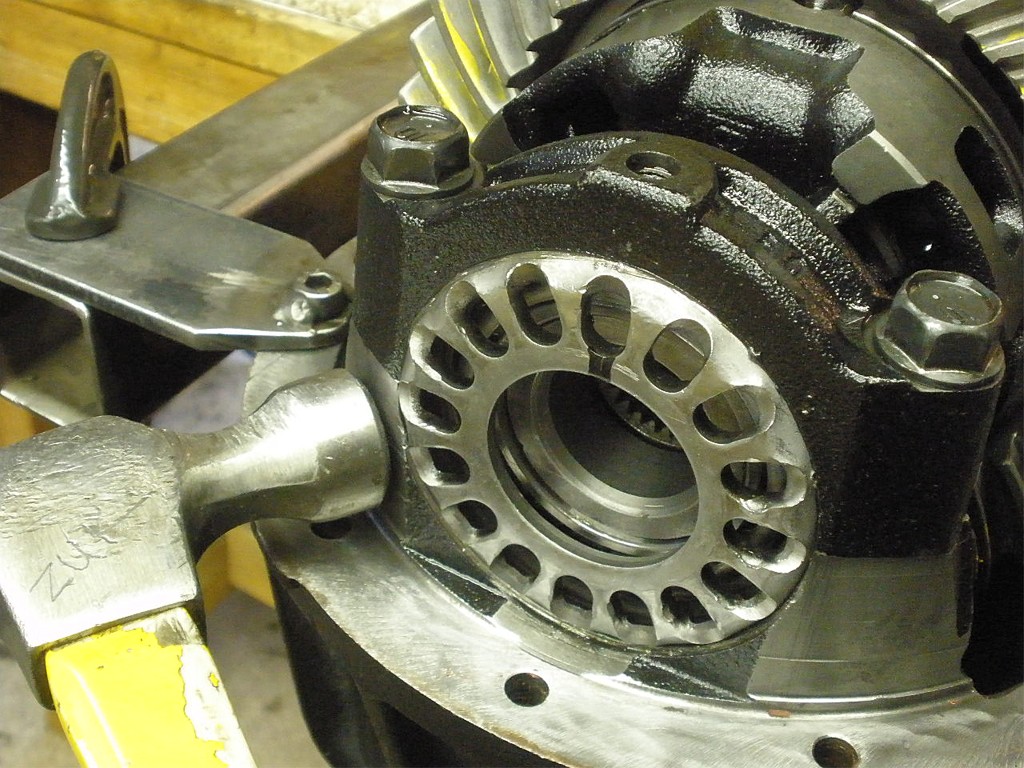
Now, attention turns to the case....and the removal of bolts and bearings. |
|
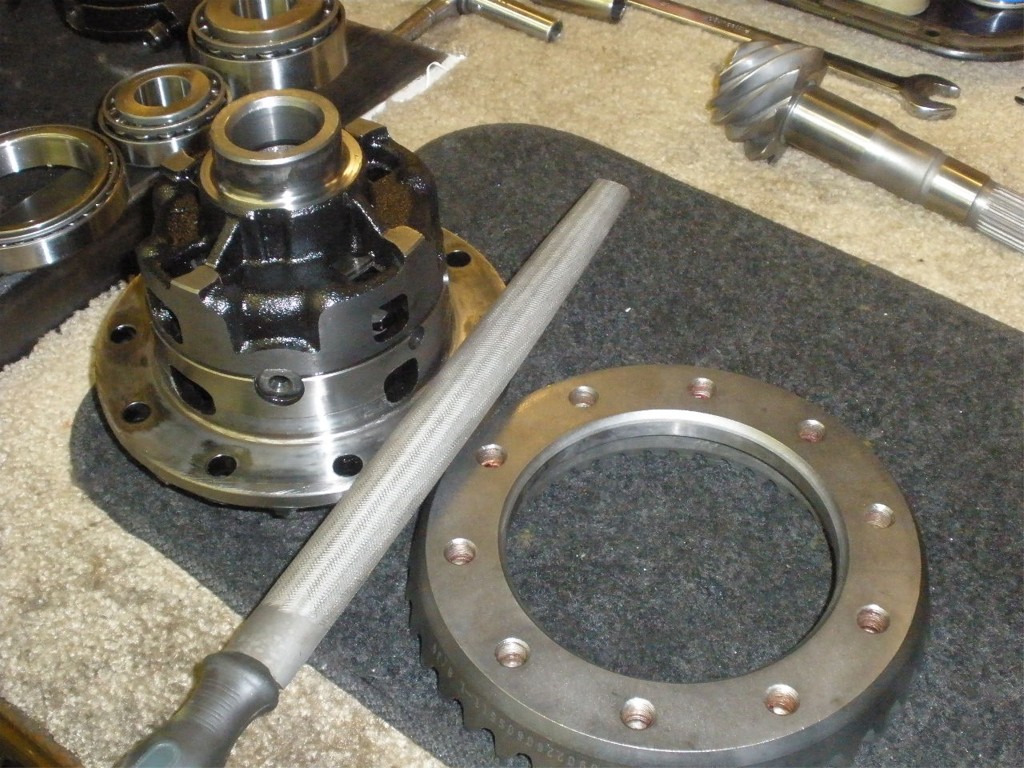
This destroyed ring/pinion is a US Gear...a very good gear. |
|
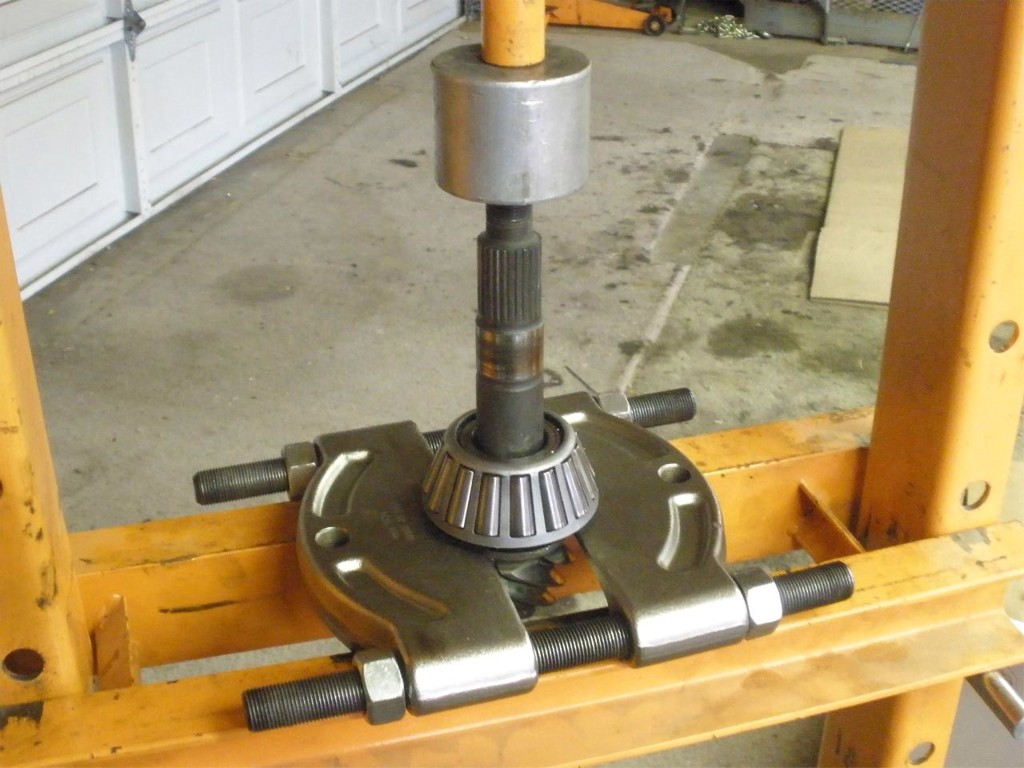
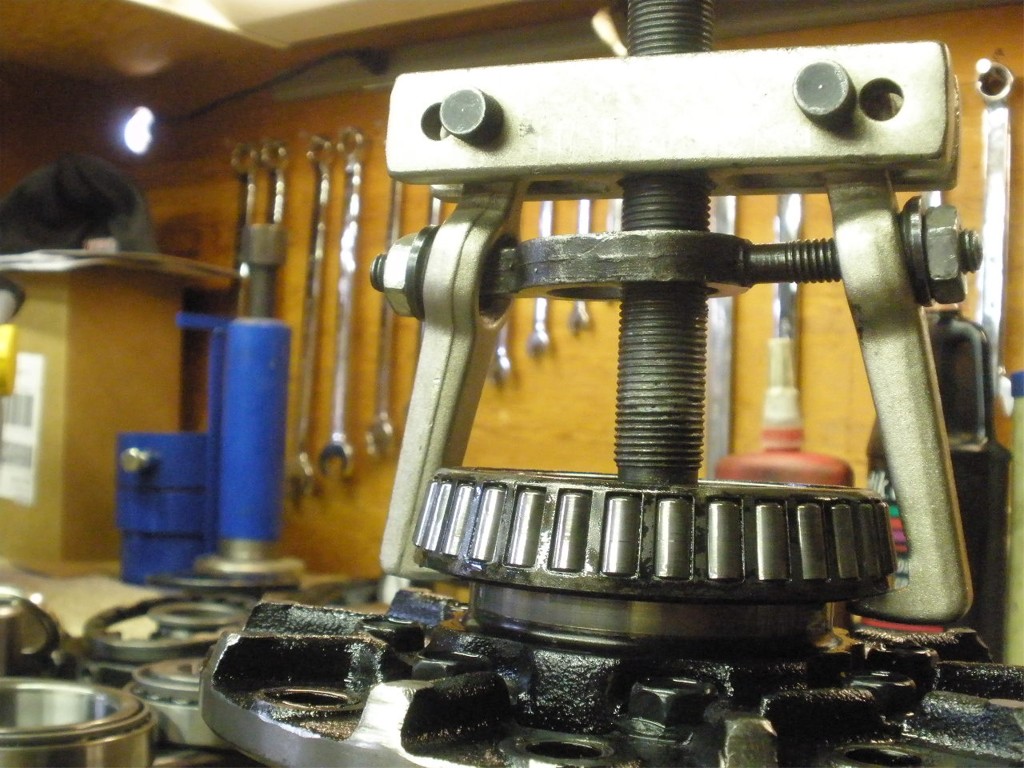
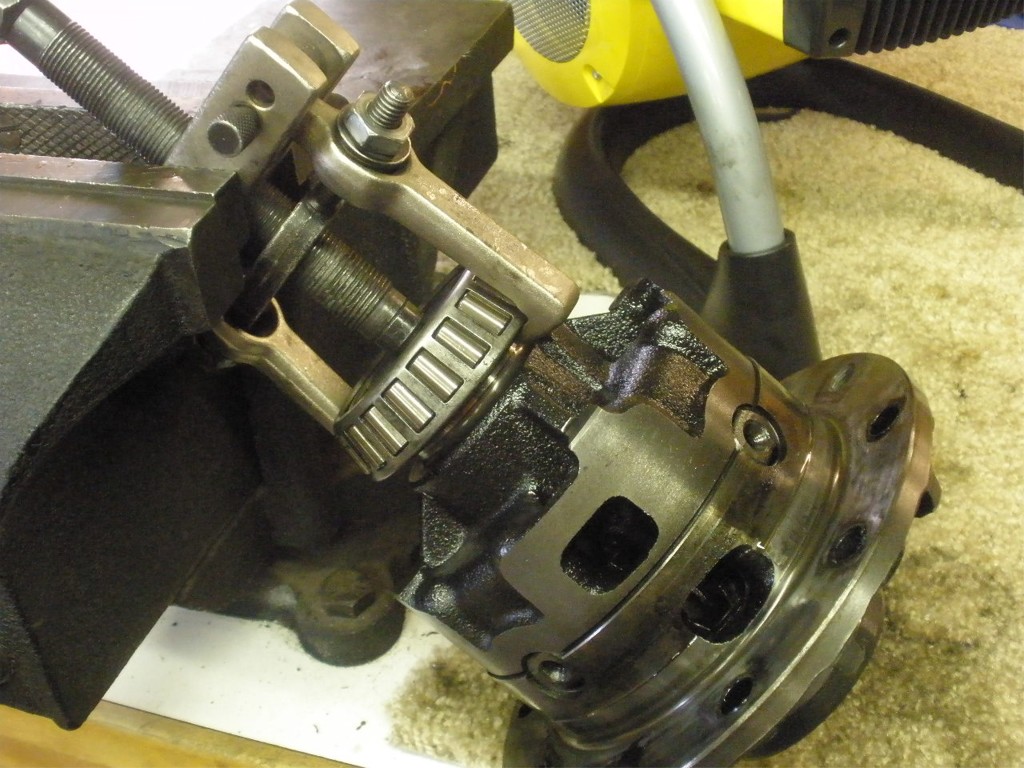
The OTC-4520 bearing puller is a favorite of mine. I have had the 2 finger arms cryo treated to last longer. |
|
... |
|
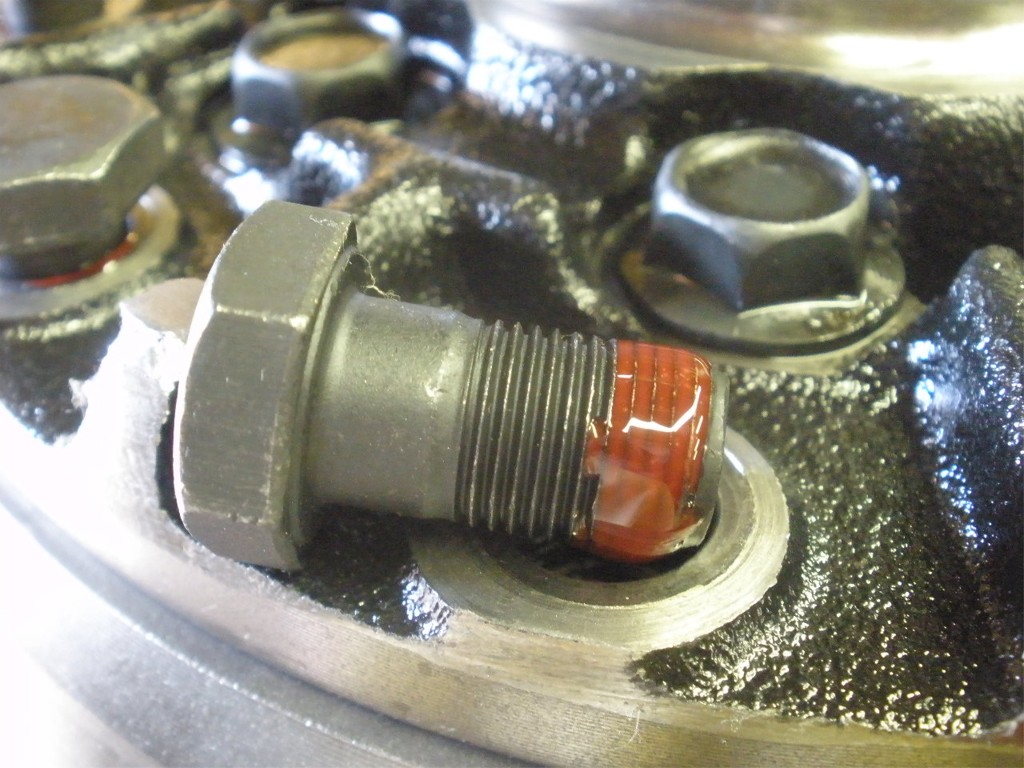
The 8 long bolts are verified to be torqued near the 45 ft/lb number...and they were. |
|
Surfaces are verified as smooth and burr free. |
|
Ring gear bolts are cleaned of oils and red Loctite is liberally applied. |
|
75 ft/lb on all 10 bolts. |
|
Old bearing parts make for very useful tools in bearing installations. |
|
... |
|
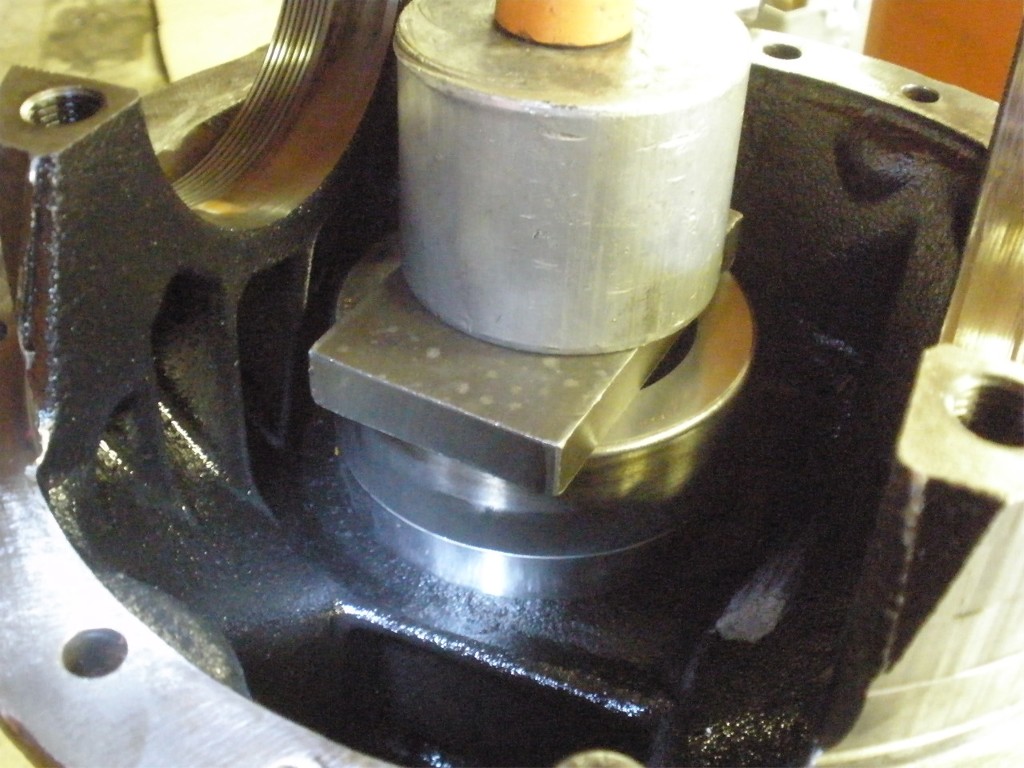
The case is then put in place...bearing caps torqued in place....backlash is set in the .008" ballpark with modest pre-loads. |
|
Drive side----- with .0795" is just a bit deeper than I like to see. |
|
Coast side .0795"---nicely favoring the toe end which is refreshing :) |
|
pinion .0795"--- confirms that the ring gear is too deep(shallow on the pinion means deep on the ring tooth). |
|
``` |
|
Now to tear it all back down and substitute in a thinner pinion shim. |
|
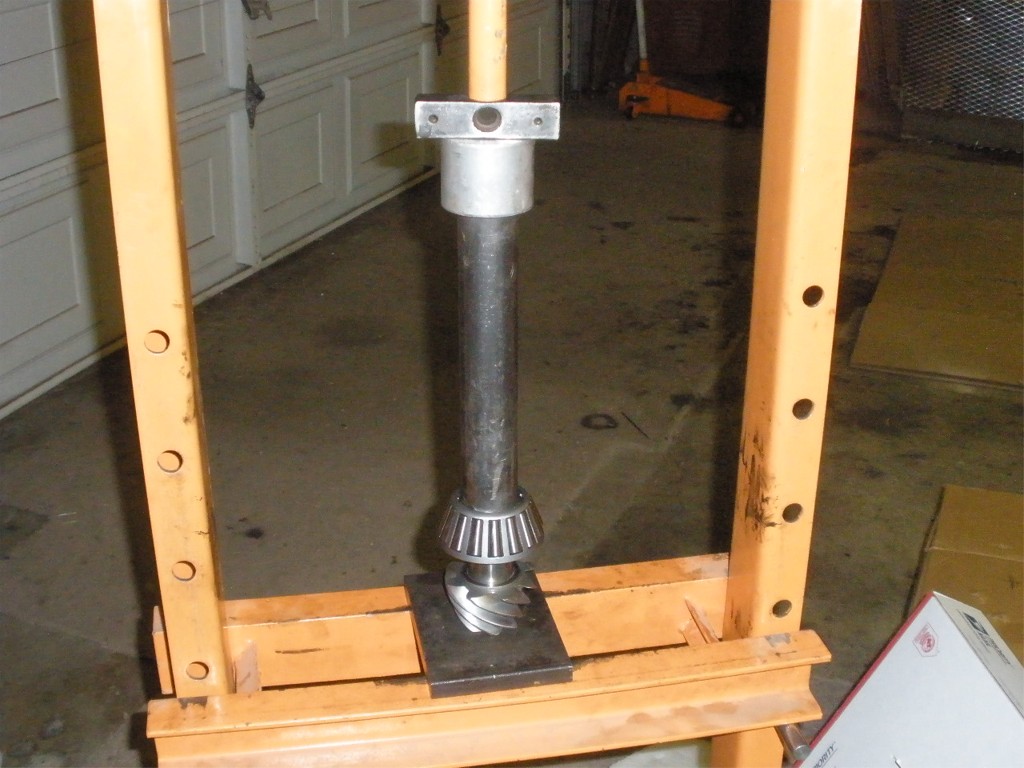
...press the pinion out. |
|
...press the bearing off. |
|
I chose to try .075" |
|
Drive .075"----Much better. It appears to be the exact depth or slightly deep. |
|
Coast .075"---I wish all my installs had a coast that favored the toe like this but it's just not typical. |
|
Pinion .075"----looks great. |
|
``` |
|
Drive .075"--- as seen from the reverse painted teeth. Nice |
|
Coast .075"----reverse painted tooth looks fine. |
|
Now that depth has been established, attention is turned to the solid collar. I know that combined collar plus shim is typically around 1.863~1.866". This collar measures around 1.811" so I came up with .055" in shims and it turns out I got lucky and it was right on. |
|
Now to load up the pinion assembly.... |
|
The design of this solid collar causes it to strongly contact the oil retainer(that was originally missing)...I have my own patented way of flaring the retainer up enough to clearance the collar. As seen in this pic, there is plenty of clearance now. |
|
I cautiously tighten the pinion nut and, as mentioned above, I got lucky. |

|
With the nut rammed tight with the electric impact(150~200ft/lb), I was measuring 8 in/lb of pinion pre-load. I know from previous experience that I can put the 3 foot cheater bar on it and increase the ppl by a few more inch/pounds to tweak it as I see fit. When push comes to shove, solid collars are not perfectly solid. |
|
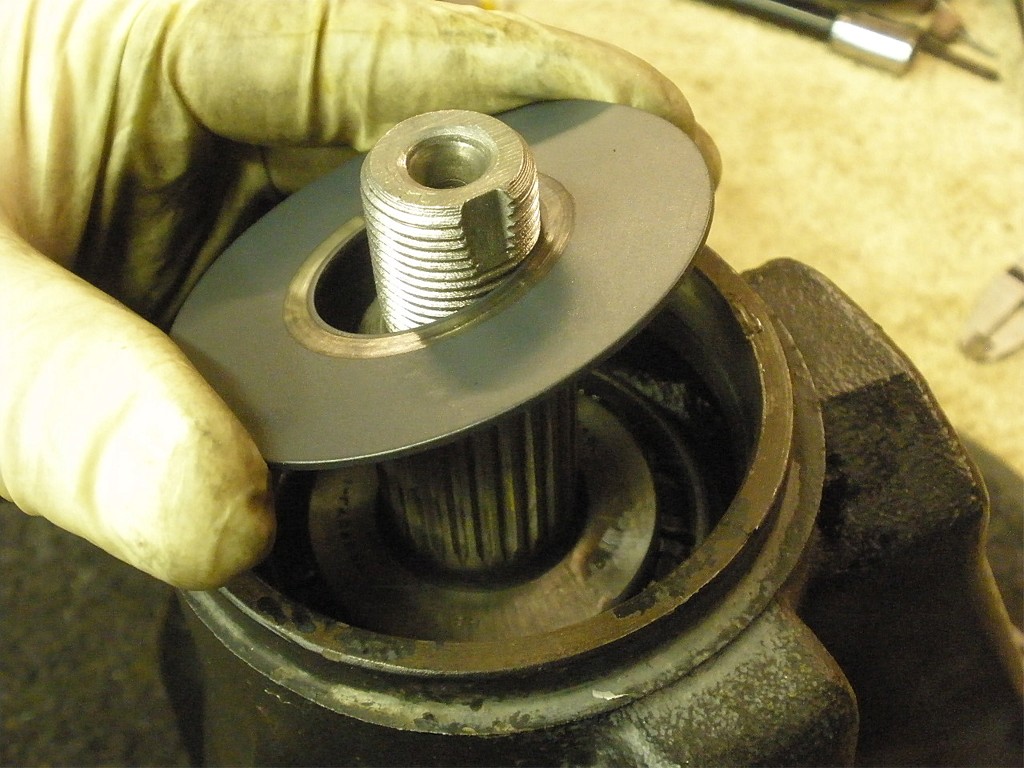
Now to remove my shop flange and install the splashguard, seal, and Phillip's 27 spline flange. |
|
Last chance to splash some gear oil on the outer pinion bearing and I did. That's another trick to getting a smoother, more accurate pinion pre-load measurement and that's to liberally apply clean gear oil to both bearings. |
|
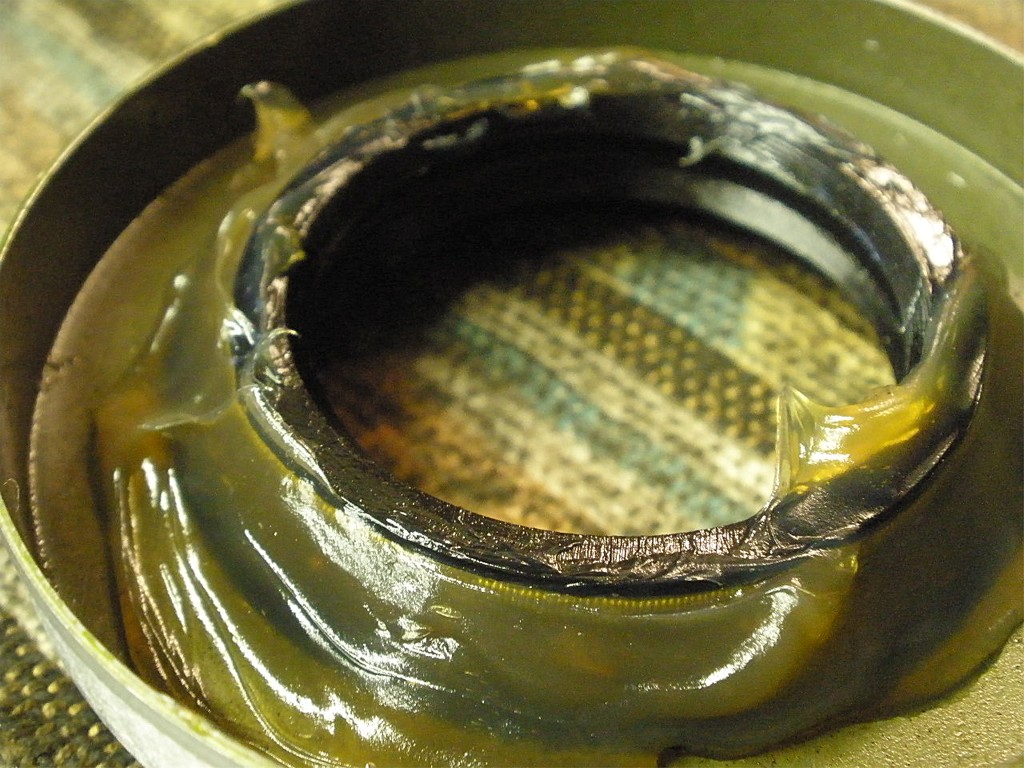
Grease is applied to the inside of the seal where the tension spring is. The spring can pop off when the seal is being tapped on and the grease stops that from happening. |
|
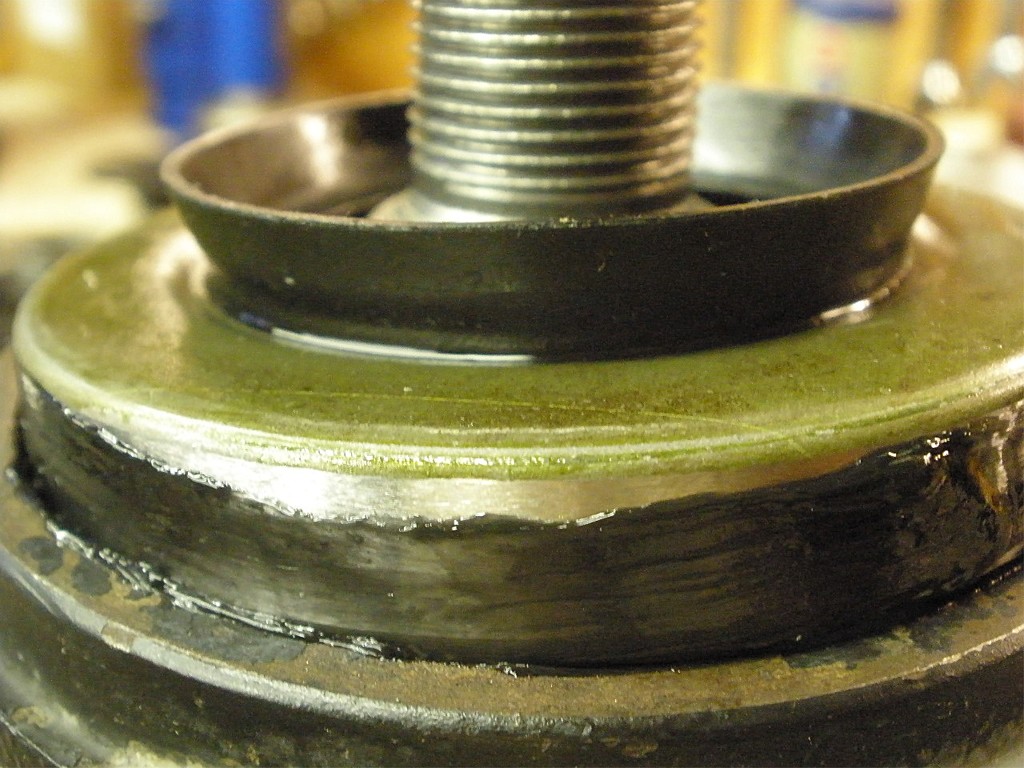
I put some rtv here to maybe help seal the metal/metal contact. It also seems to help it tap in place easier. |
|
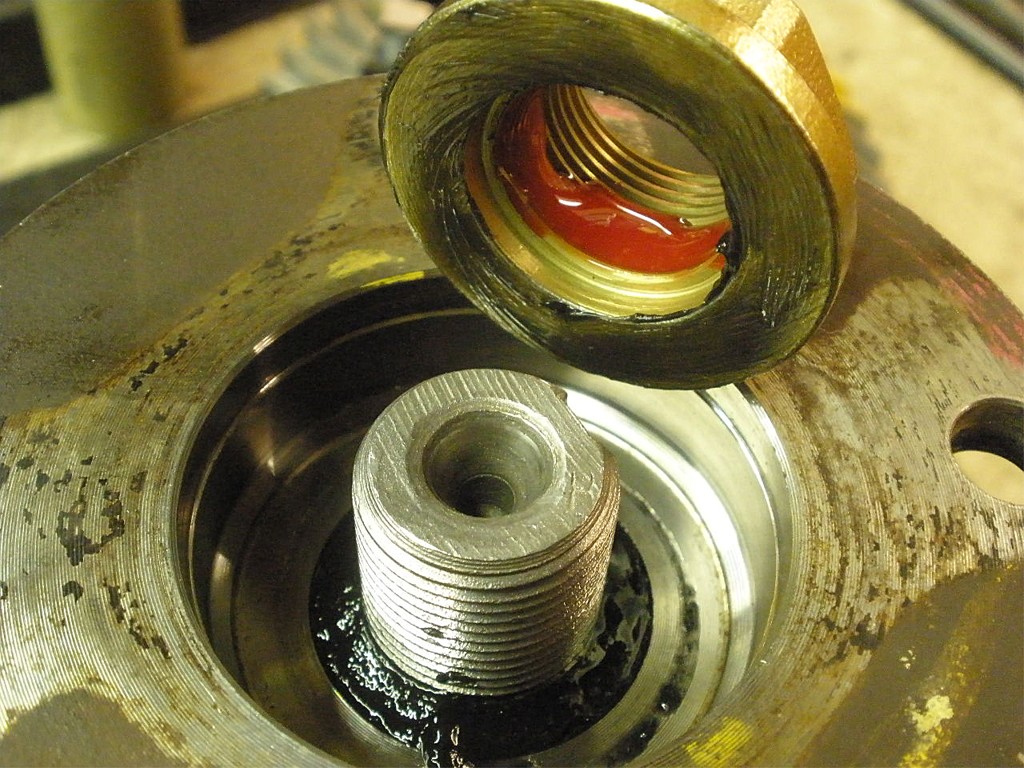
Red Loctite on the new pinion nut.....rtv injected down into the spline area. |
|
The cheater bar will give me another 1/16th or 1/8th of a turn more....enough to compress the solid collar a little bit and change the final pre-load reading. |
|
That black mark used to be over the center of the slot in the pinion threads. :) |
|
DING and this end is done...final PPL measured at 14 in/lb (rolling). |

|
Case is loaded in place...thick grease is applied to the adjuster threads... bearing caps are then torqued to 75 ft/lb. |
|
A couple things are going on here at the same time. I'm tightening both wheels increasing the CBPL and shifting the backlash around. I am smacking the bearing cap area in a safe place while turning the pinion back and forth. This has the effect of equalizing the tensions of the bearings and rollers on both sides. I tap on all 4 corners.....1 corner being shown in the pic. |
|
I had the torque clicker set to over 130 ft/lb before I got some thread motion....130 is plenty tight enough. And that's with well greased threads that have less friction than dry threads. |
|
Once I'm sure that the BL is good and CBPL is very tight then I can loctite the lock tab bolt....10 ft/lb. |
|
One more final check....nothing should change and nothing did. Nice pattern on the drive. |
|
Great coast. |
|
``` |
|
drive---reverse painted---looks nice. |
|
coast. |
|
These Nitro Gears had some unusual markings. Irregardless, they did set up very nice. |
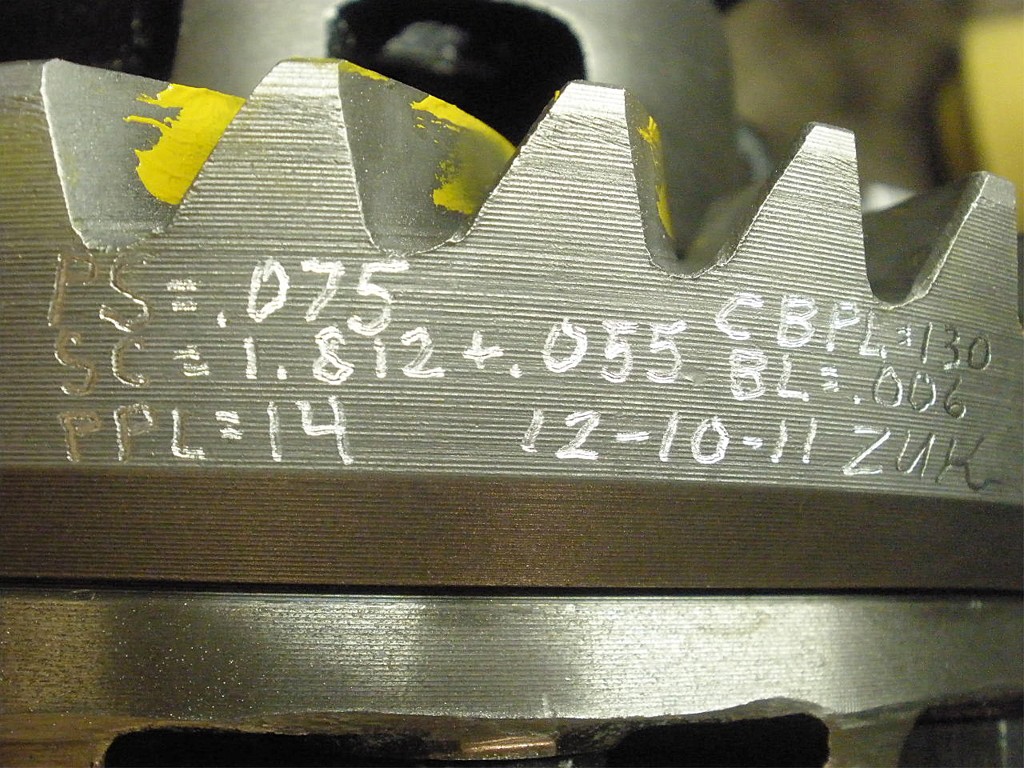
|
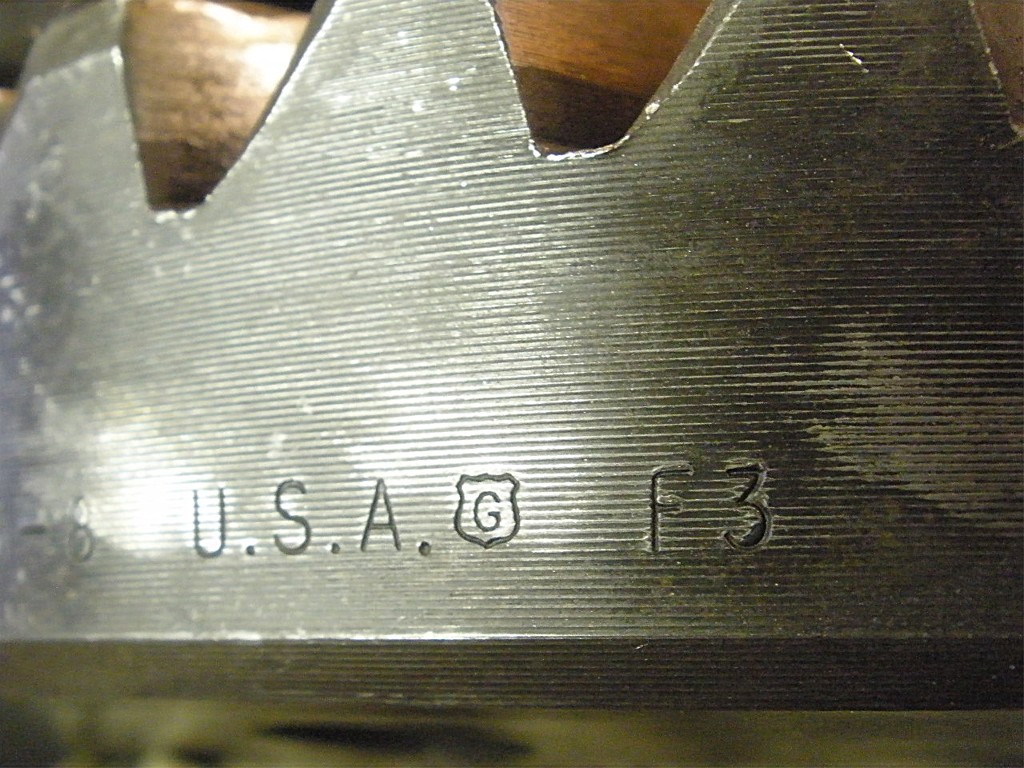
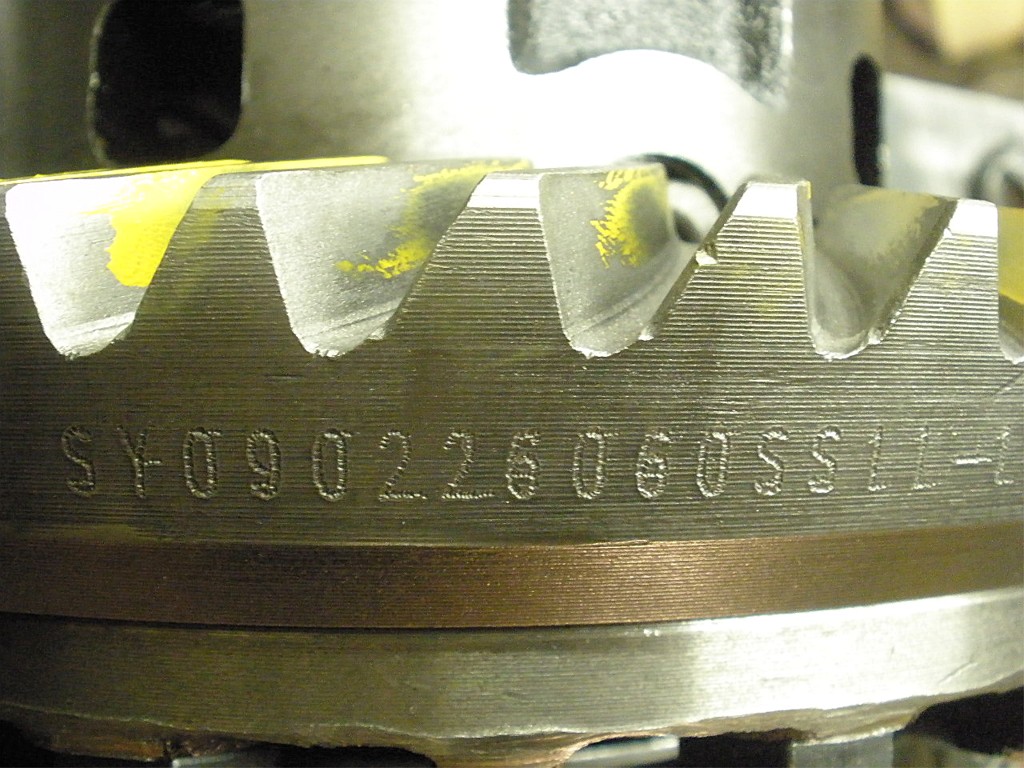
I use a dremel drill with a diamond bit to easily apply some documentation to the 8620 material. |
|
``` |

|
|

|

