|
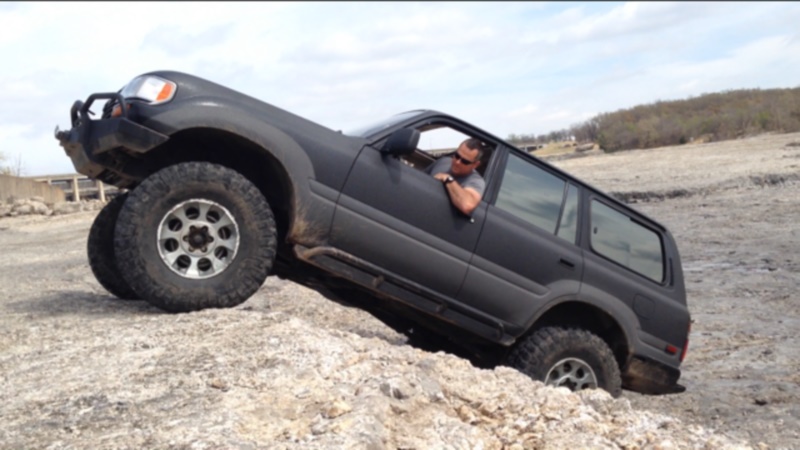
Broke My Front 529 Gears TWICE On My 1997 LX450!
|
|
120 BIG pics loading...give it time :)
|
|
MAY 9 2014
|
|
|
Riley's 97 LX450 has 37" KM2's, auto tranny, factory e-lockers, Marlin 3.1
transfercase gears, Long's(outers) and sliders. The local
"seasoned installer" was not working out for Riley...
|
|
|
|
|
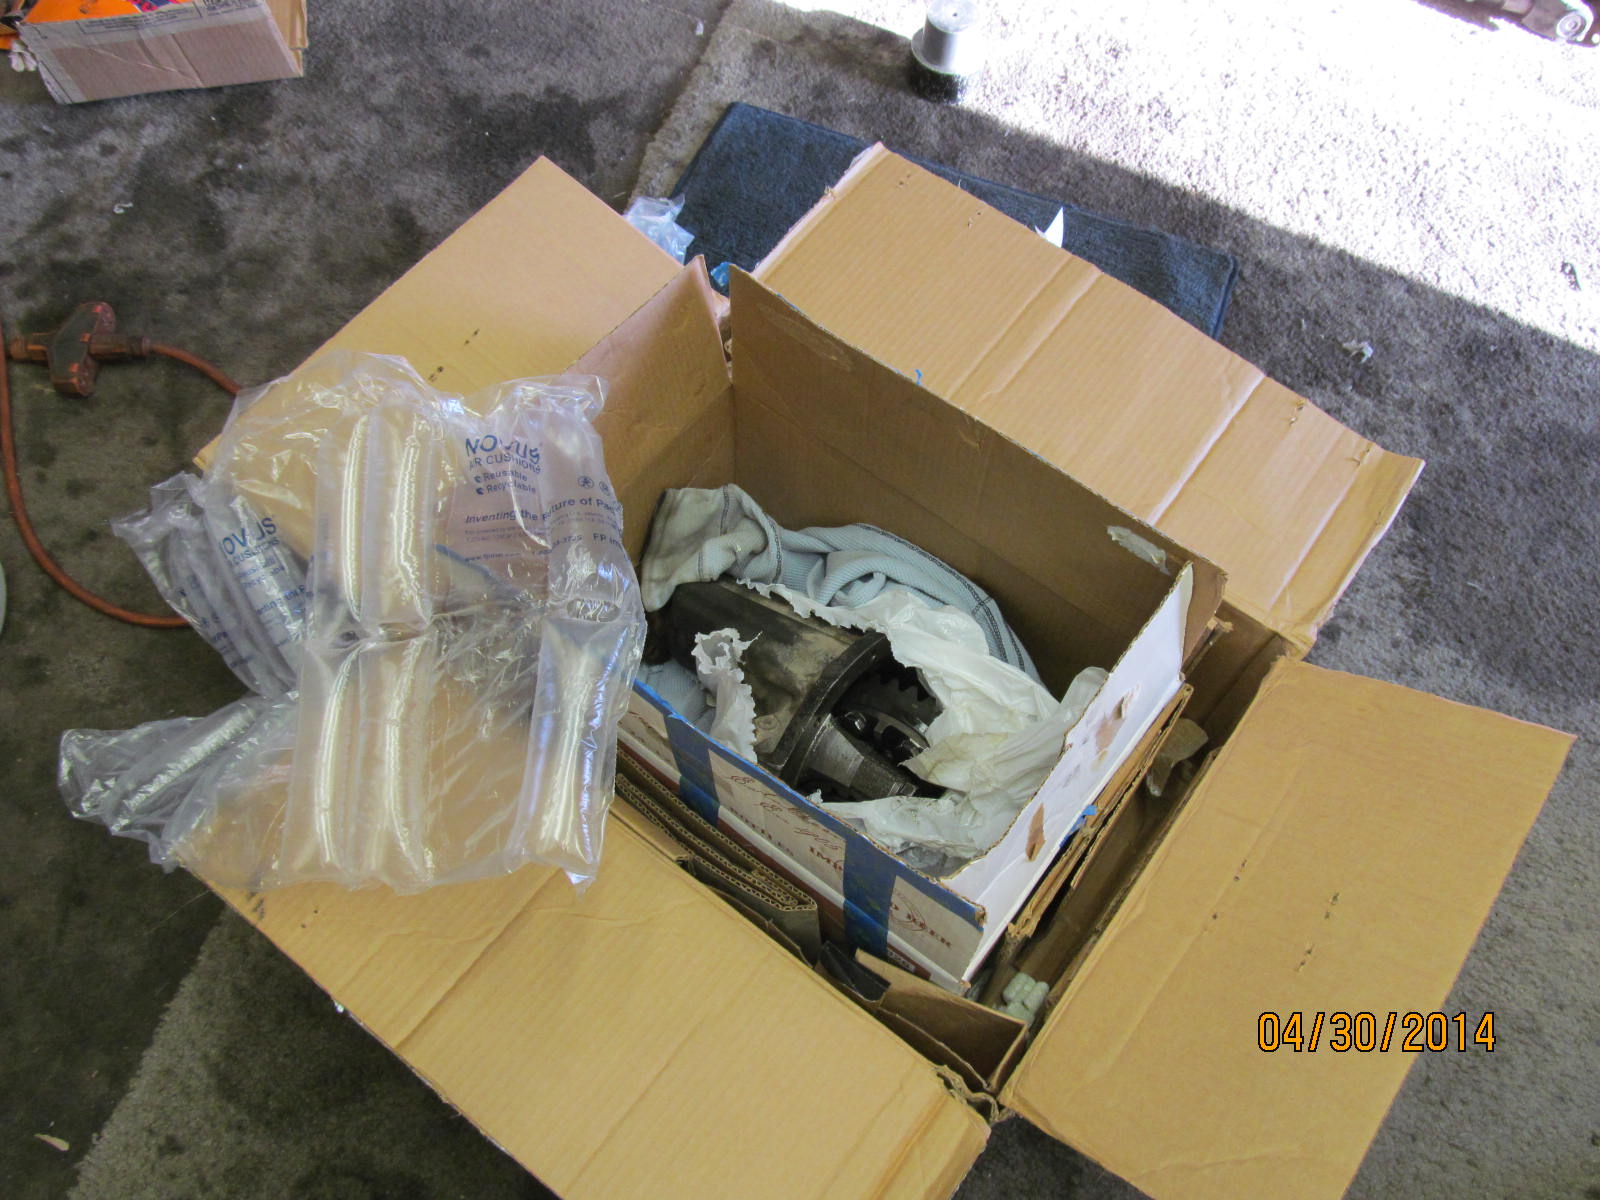
....I soon received this high pinion e-locker fedex ground.
|
|
|
|
|
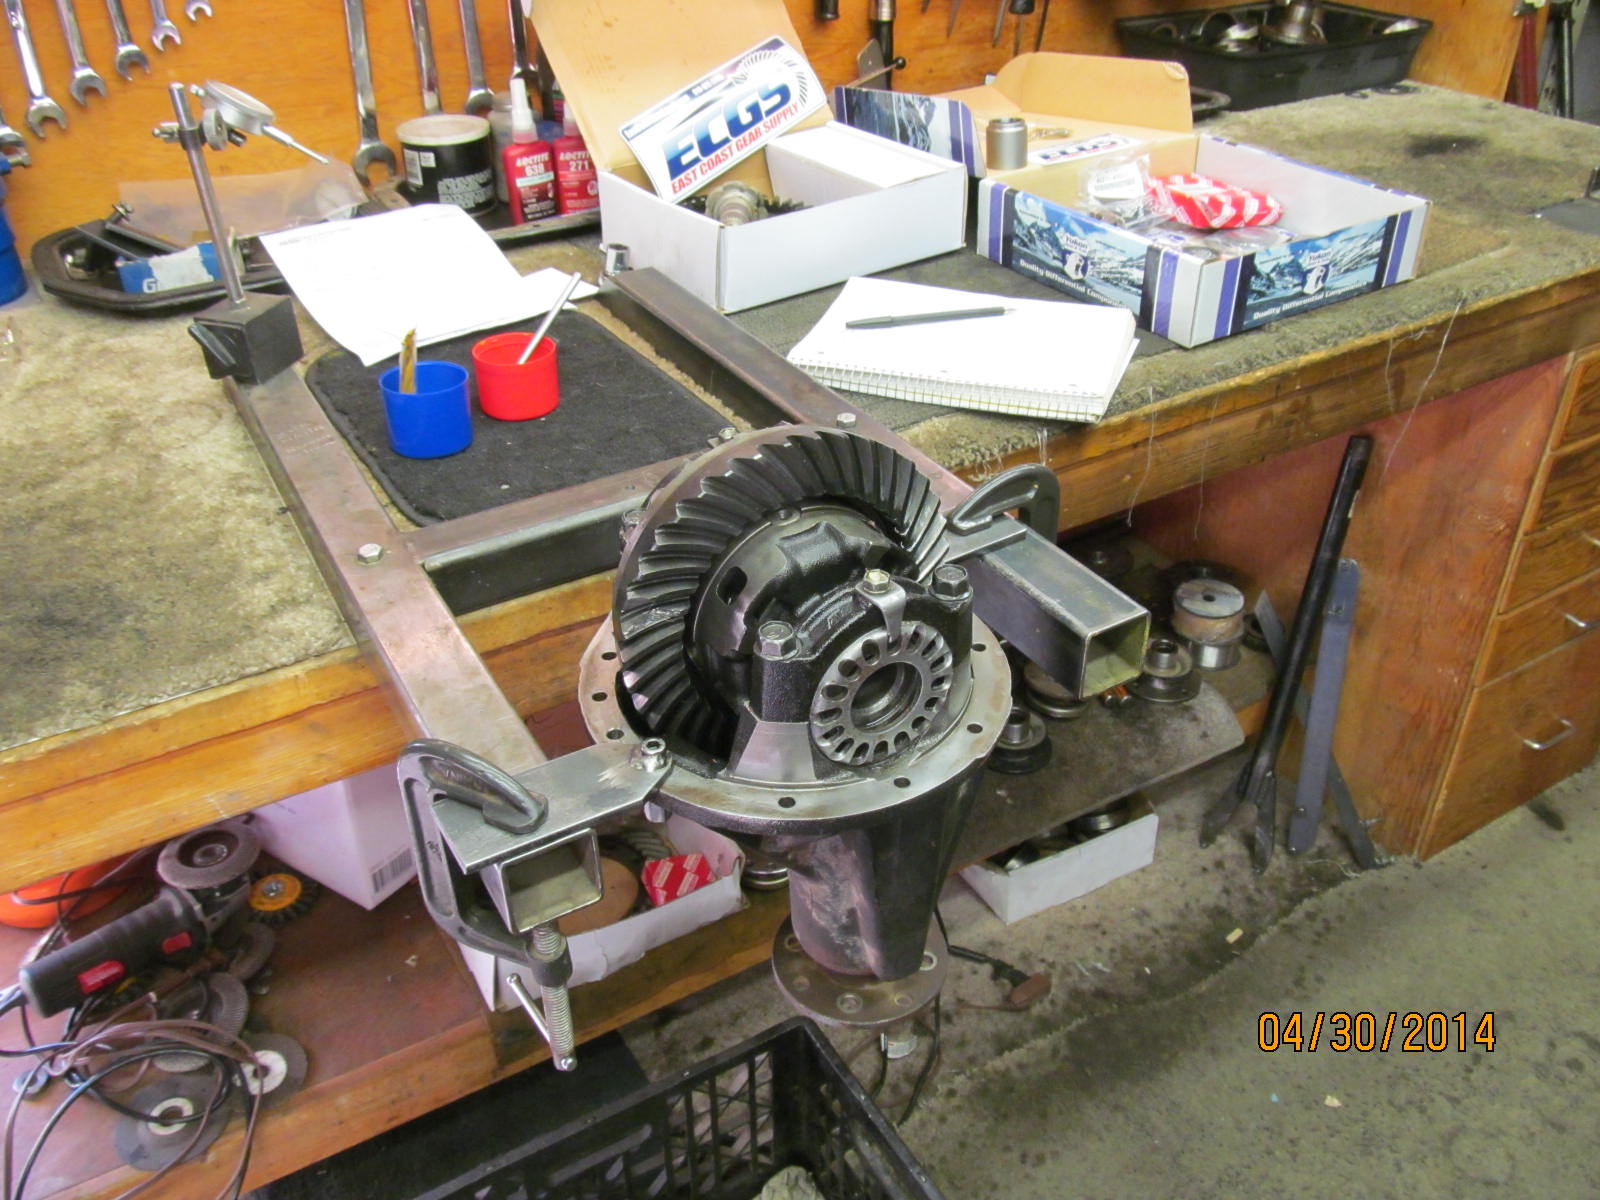
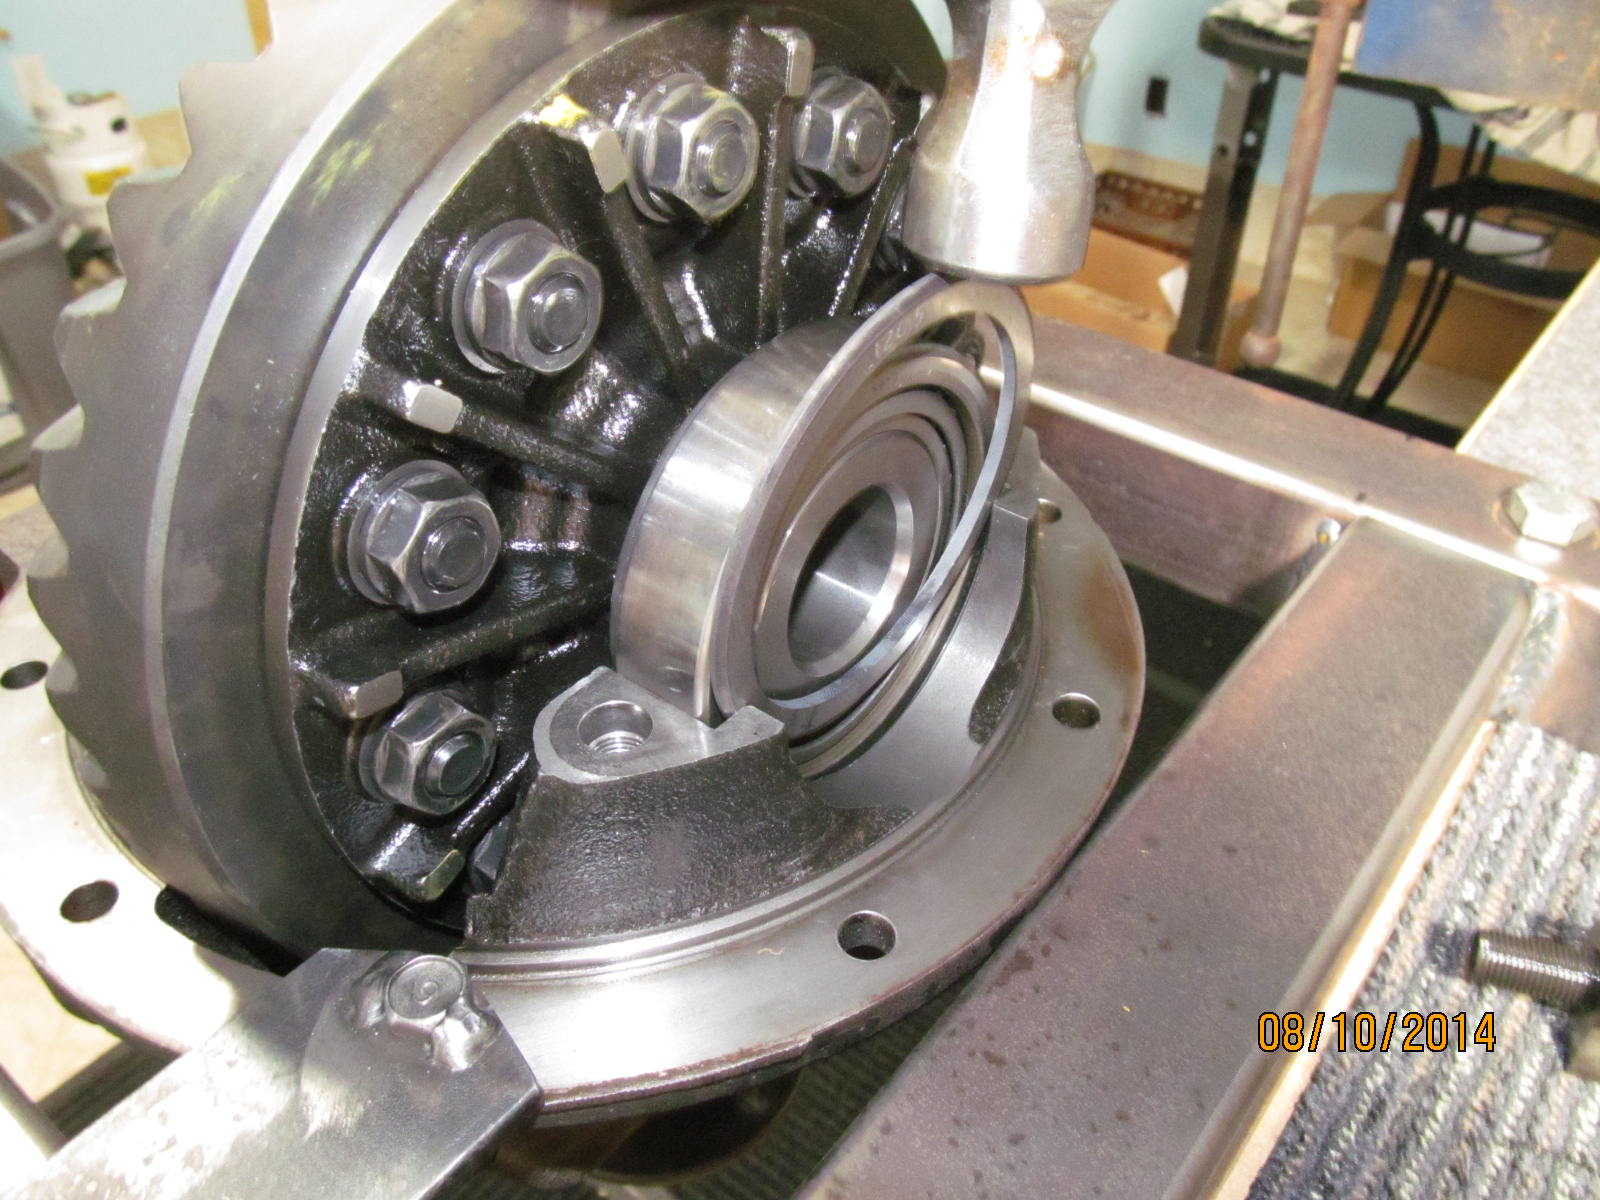
The e-locker is in the fixture and the product from ECGS has also arrived.
|
|
|
|
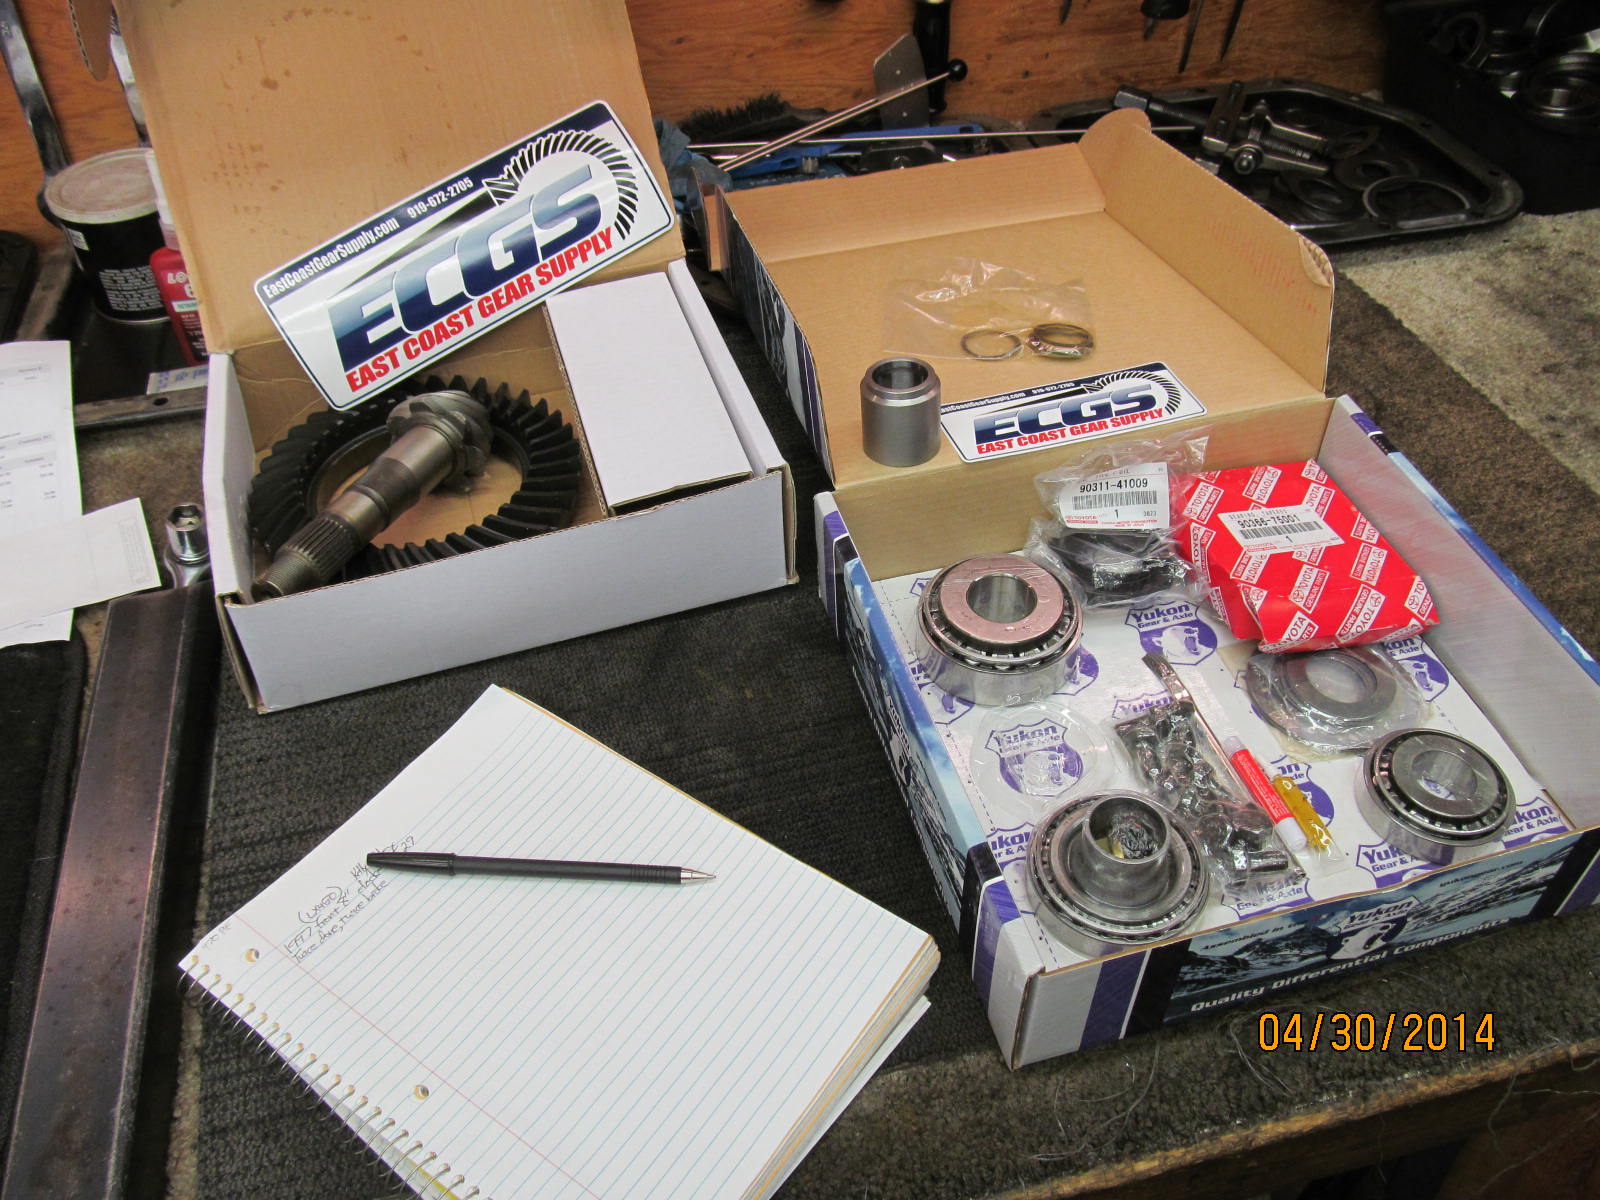
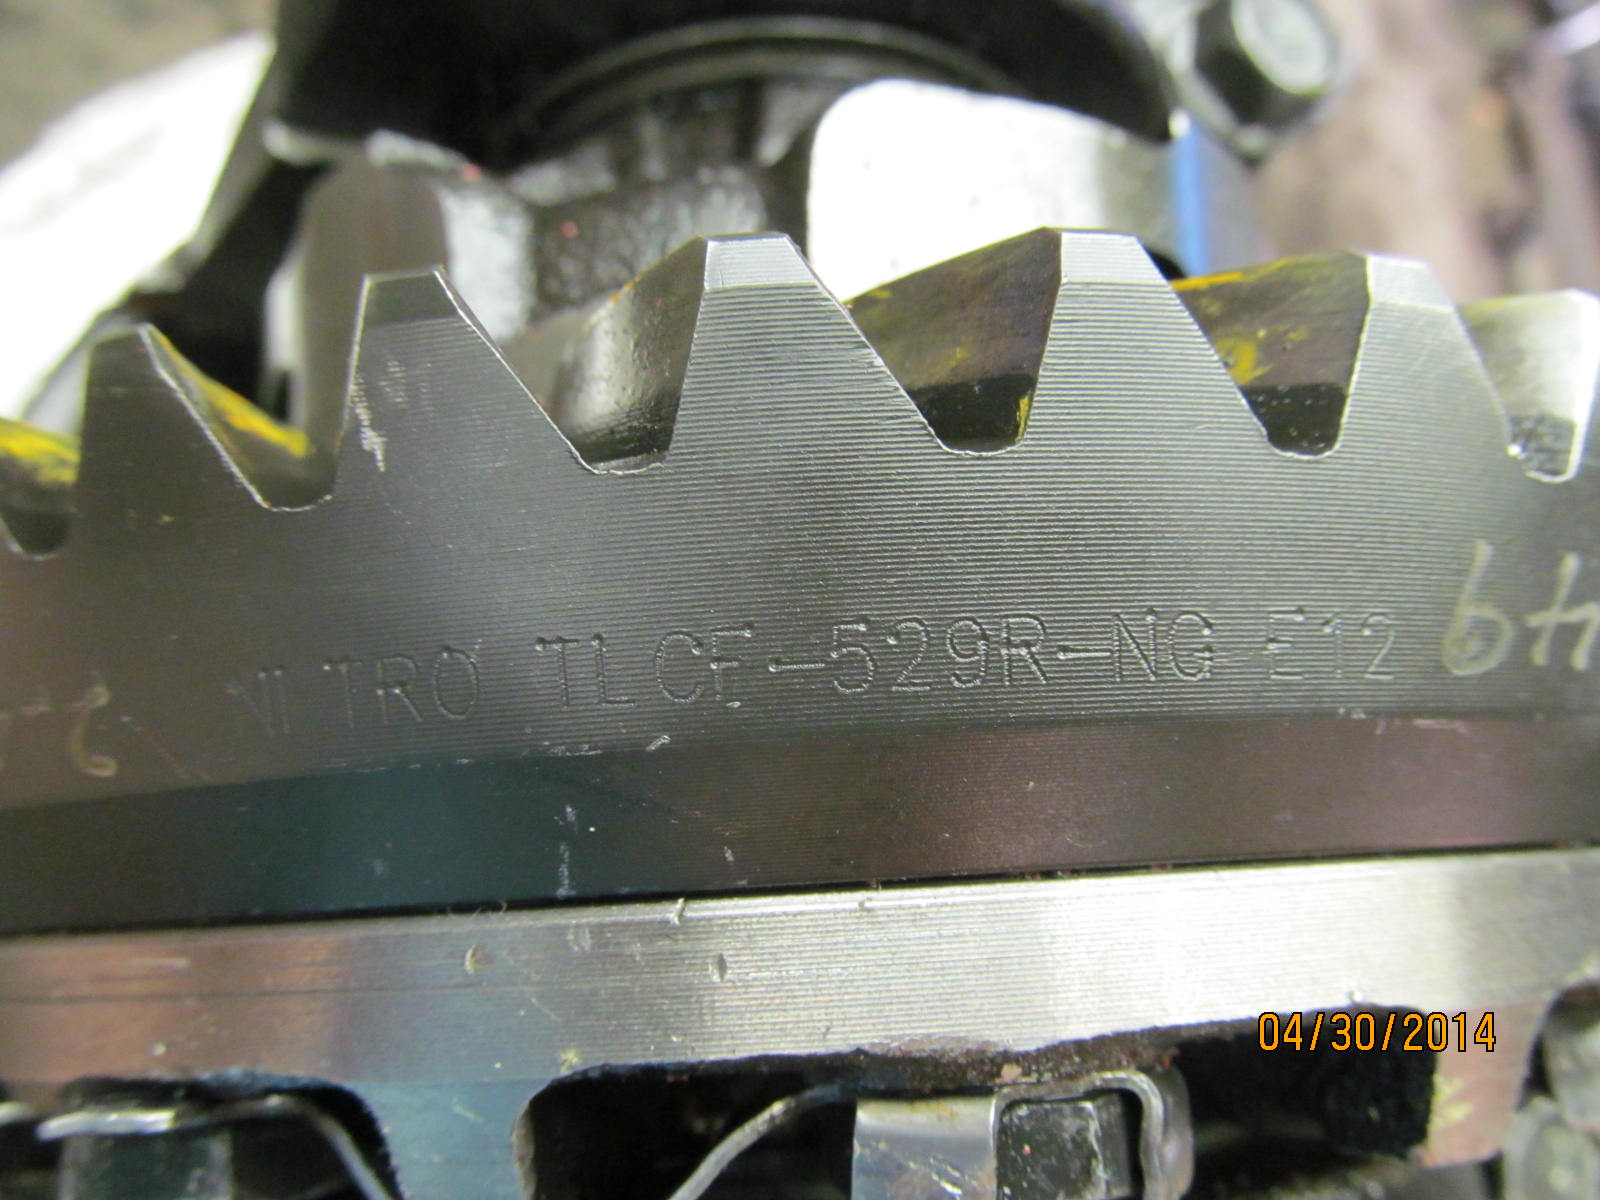
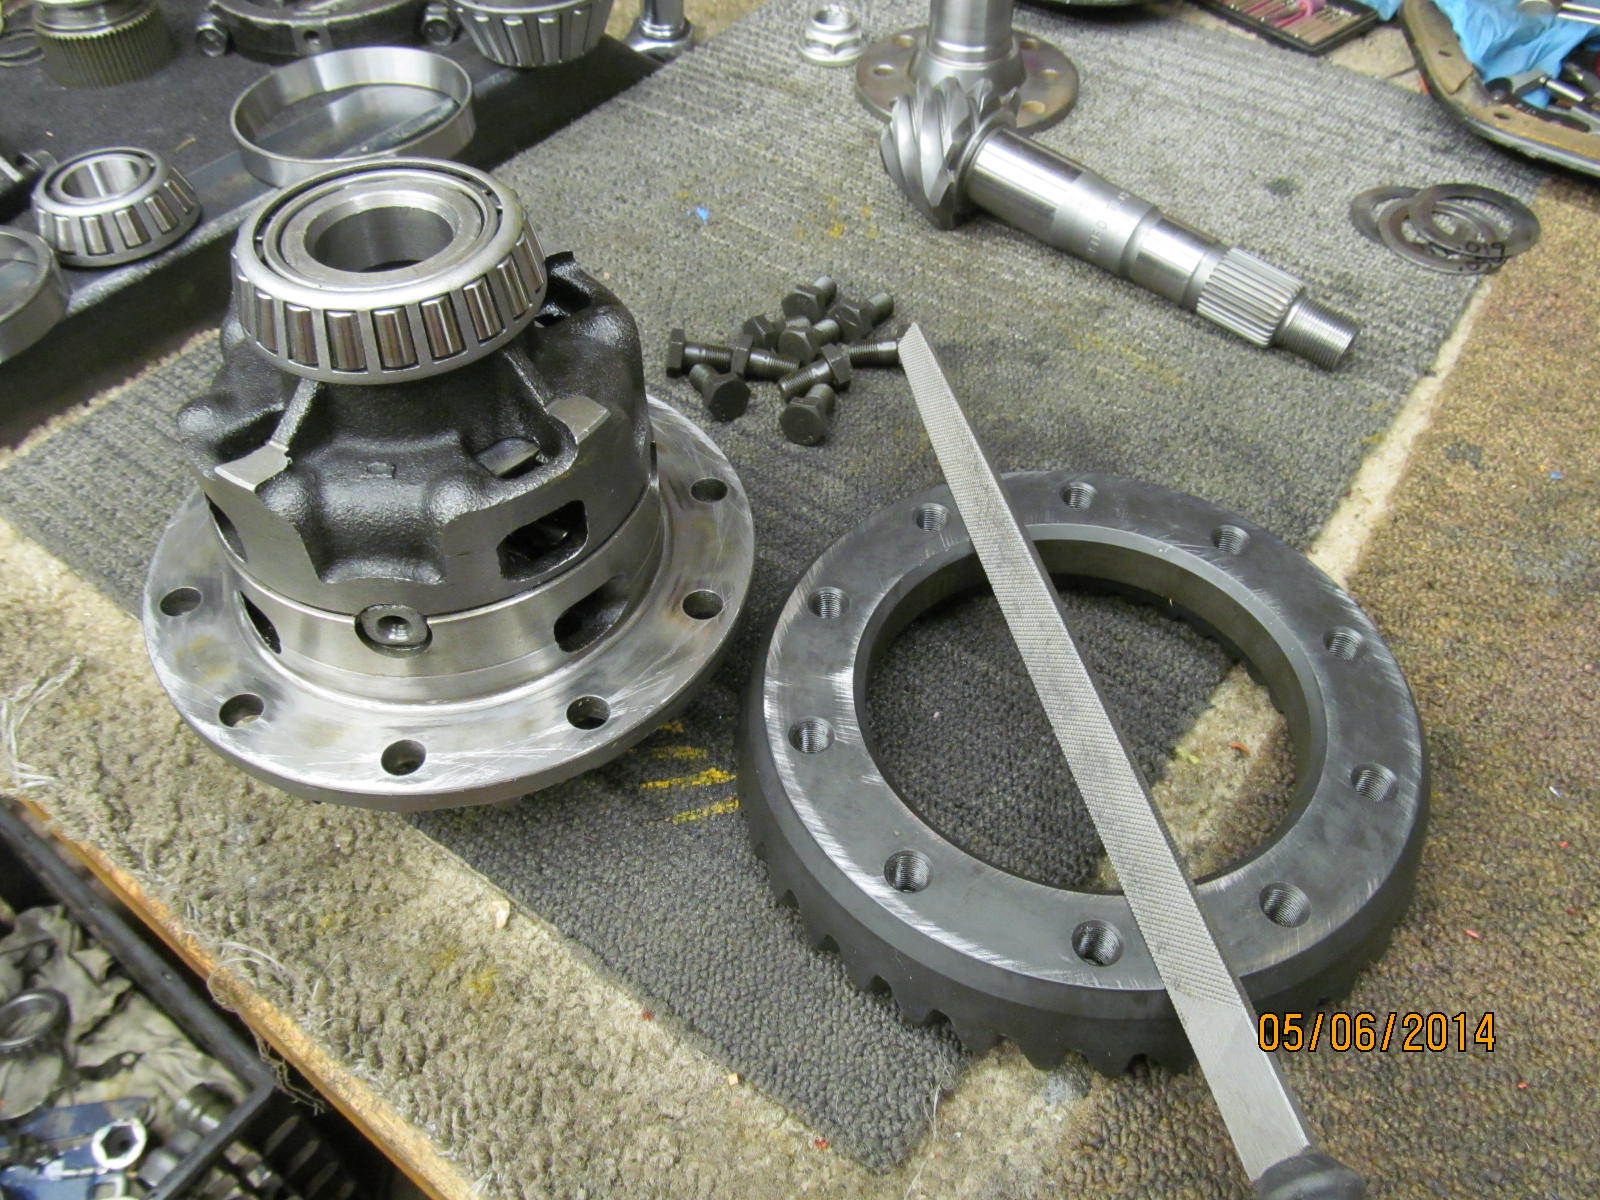
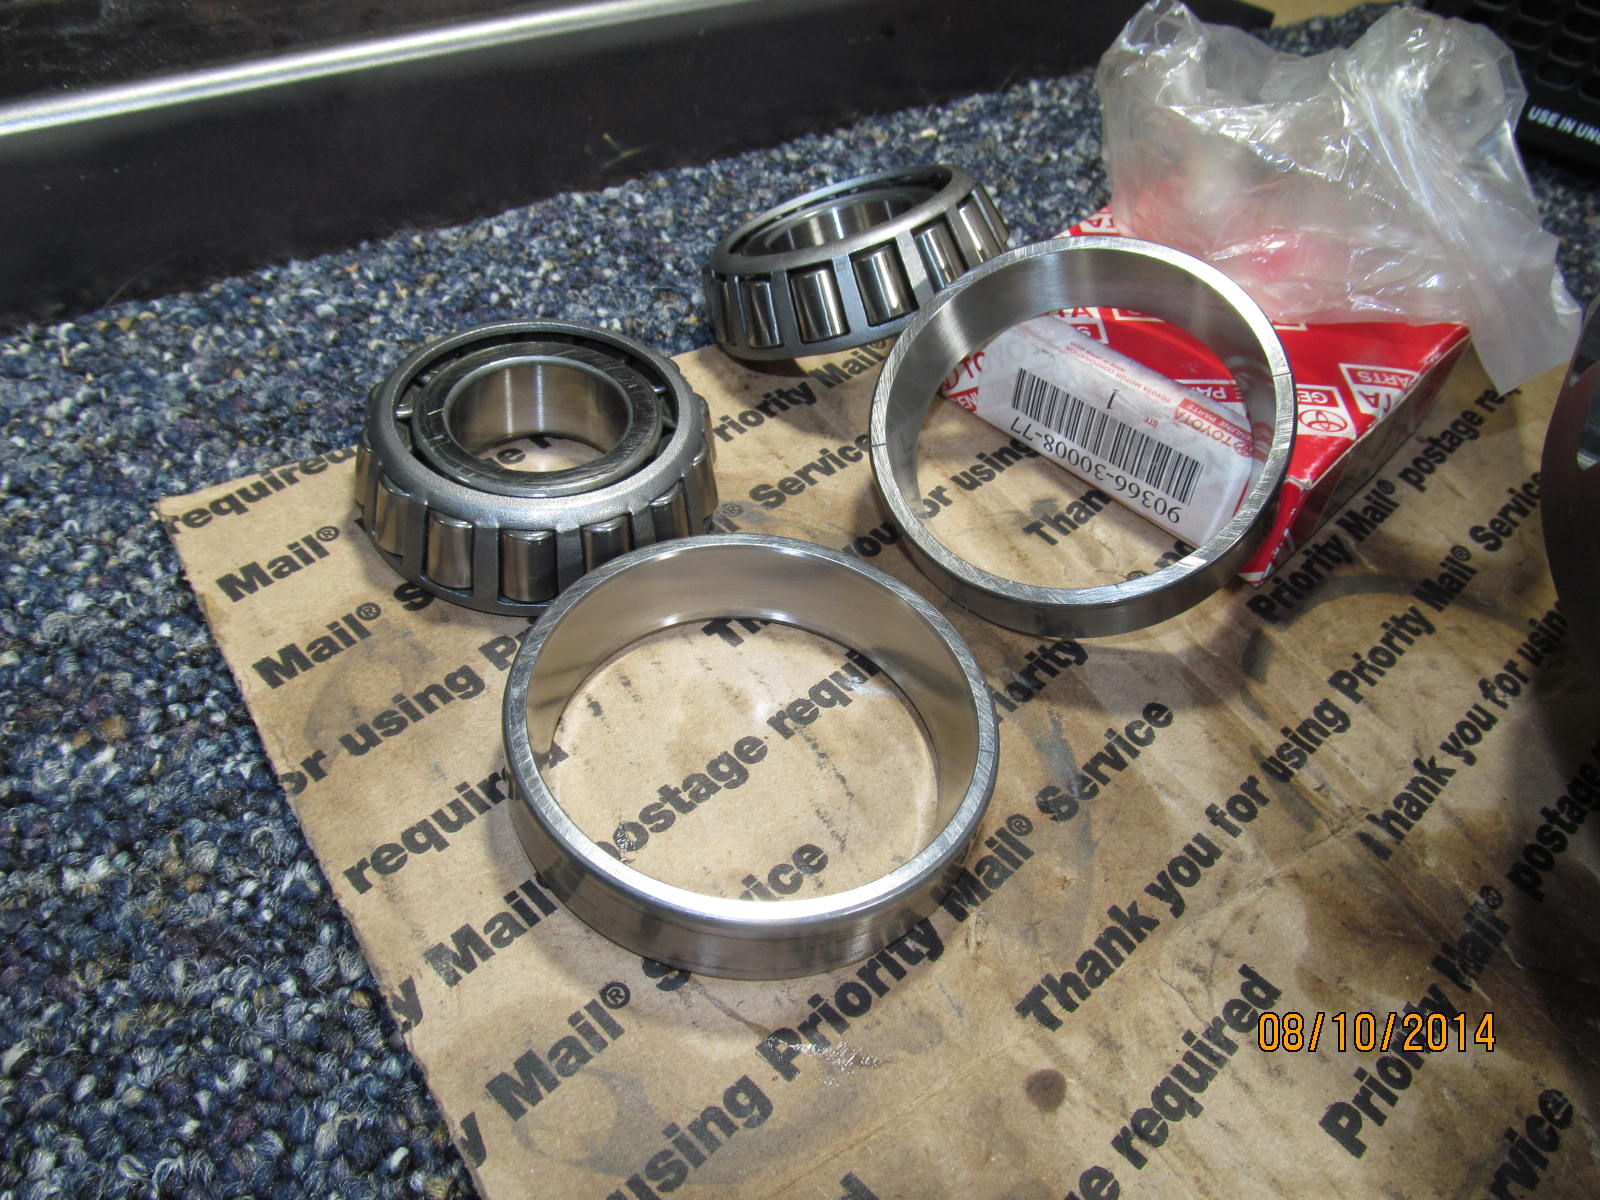
Inventory is taken and it looks like it is all there...Nitro529....solid collar....e-locker master kit with
the 29 spline seal.
|
|
|
|
|
The ring and pinion were cry'd elsewhere in Oklahoma.
|
|
|
|
|
...................
|
|
|
|
|
...................
|
|
|
|
|
Pinion preload actually felt good. Not too tight and not loose at all.
|
|
|
|
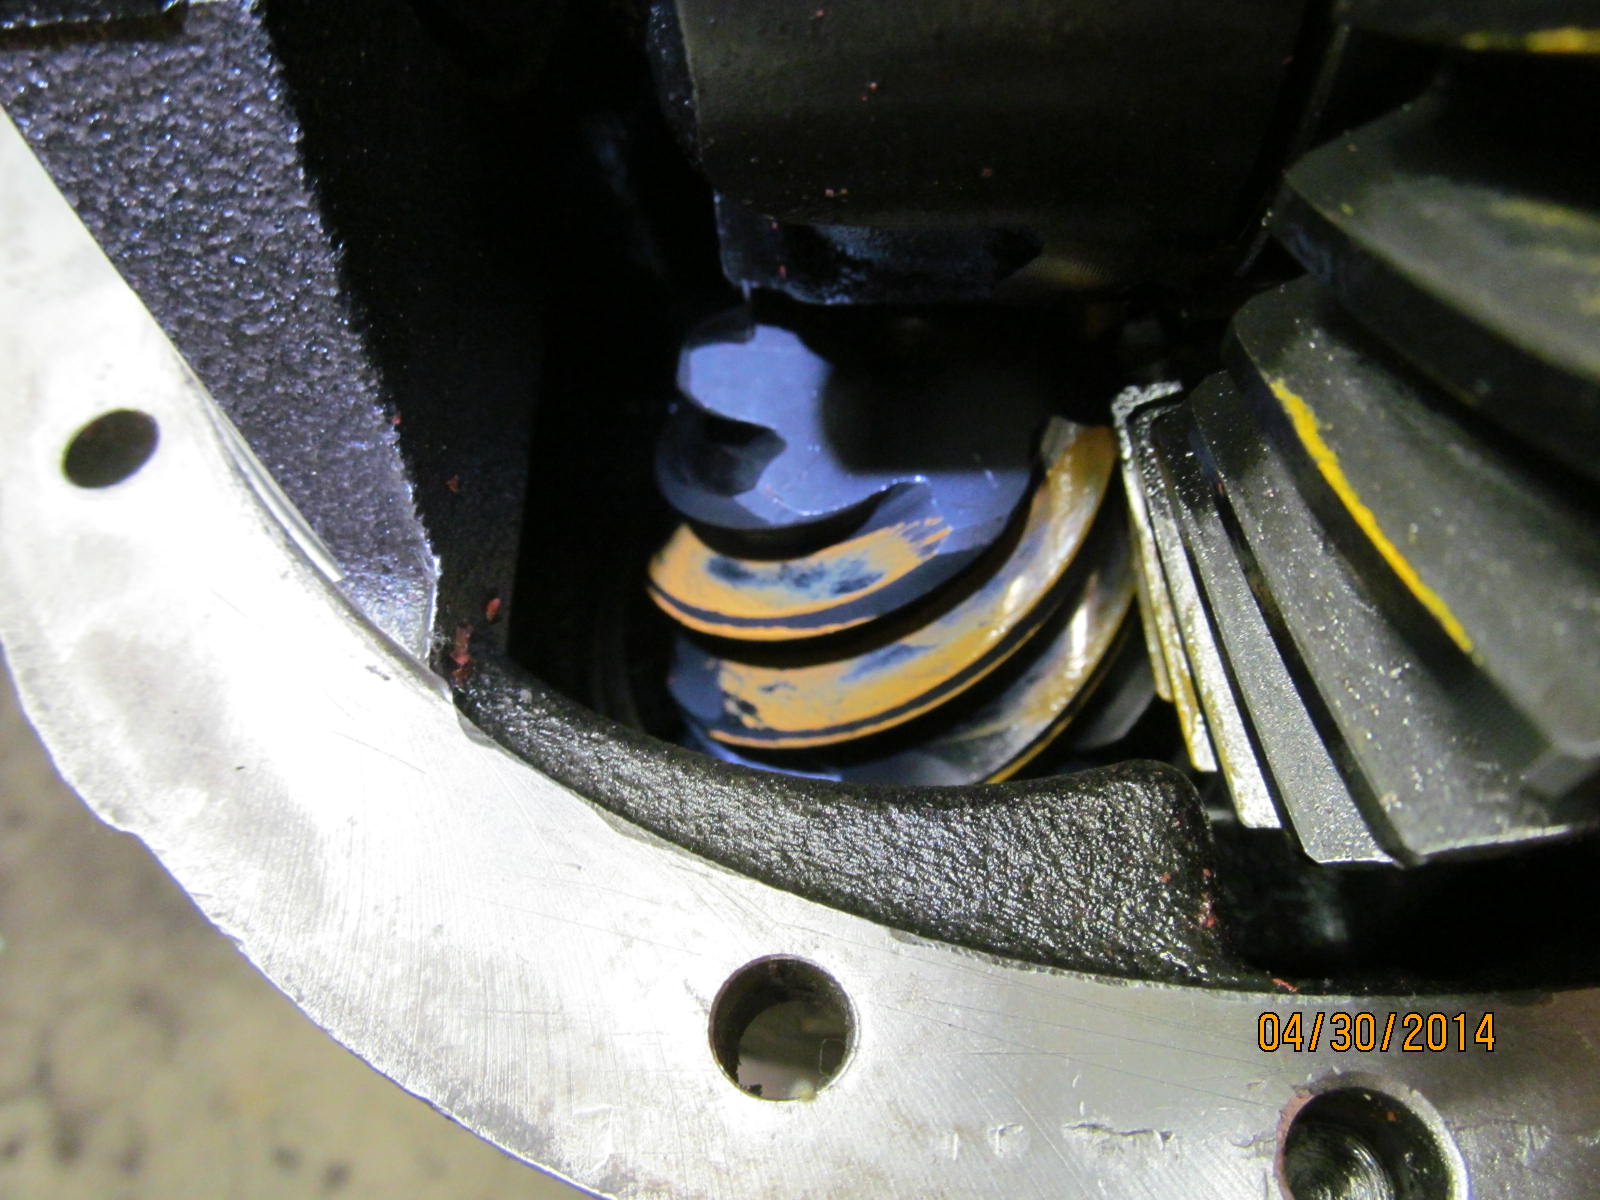
Carrier bearing pre-load was minimal but not loose. I thought I felt some wobble of some sort and I kept
rocking and twisting it ....and concluded it was my imagination.
|
|
|
|
|
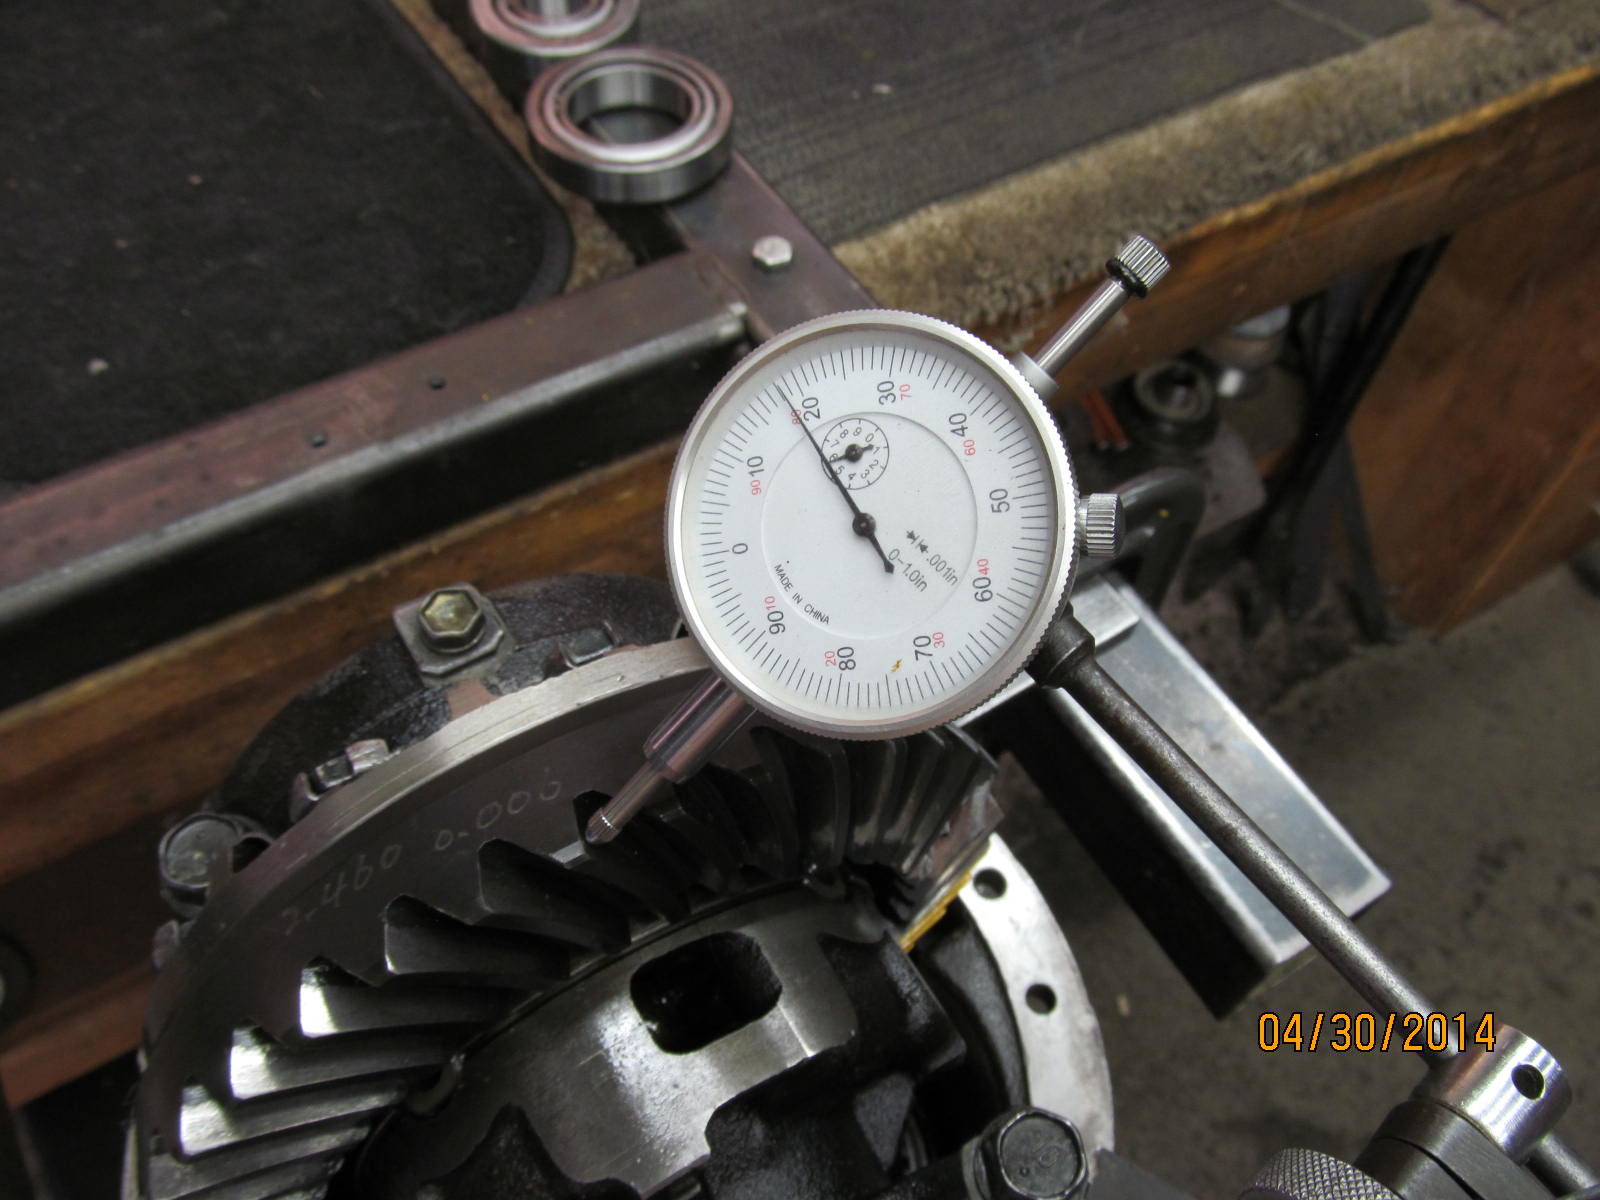
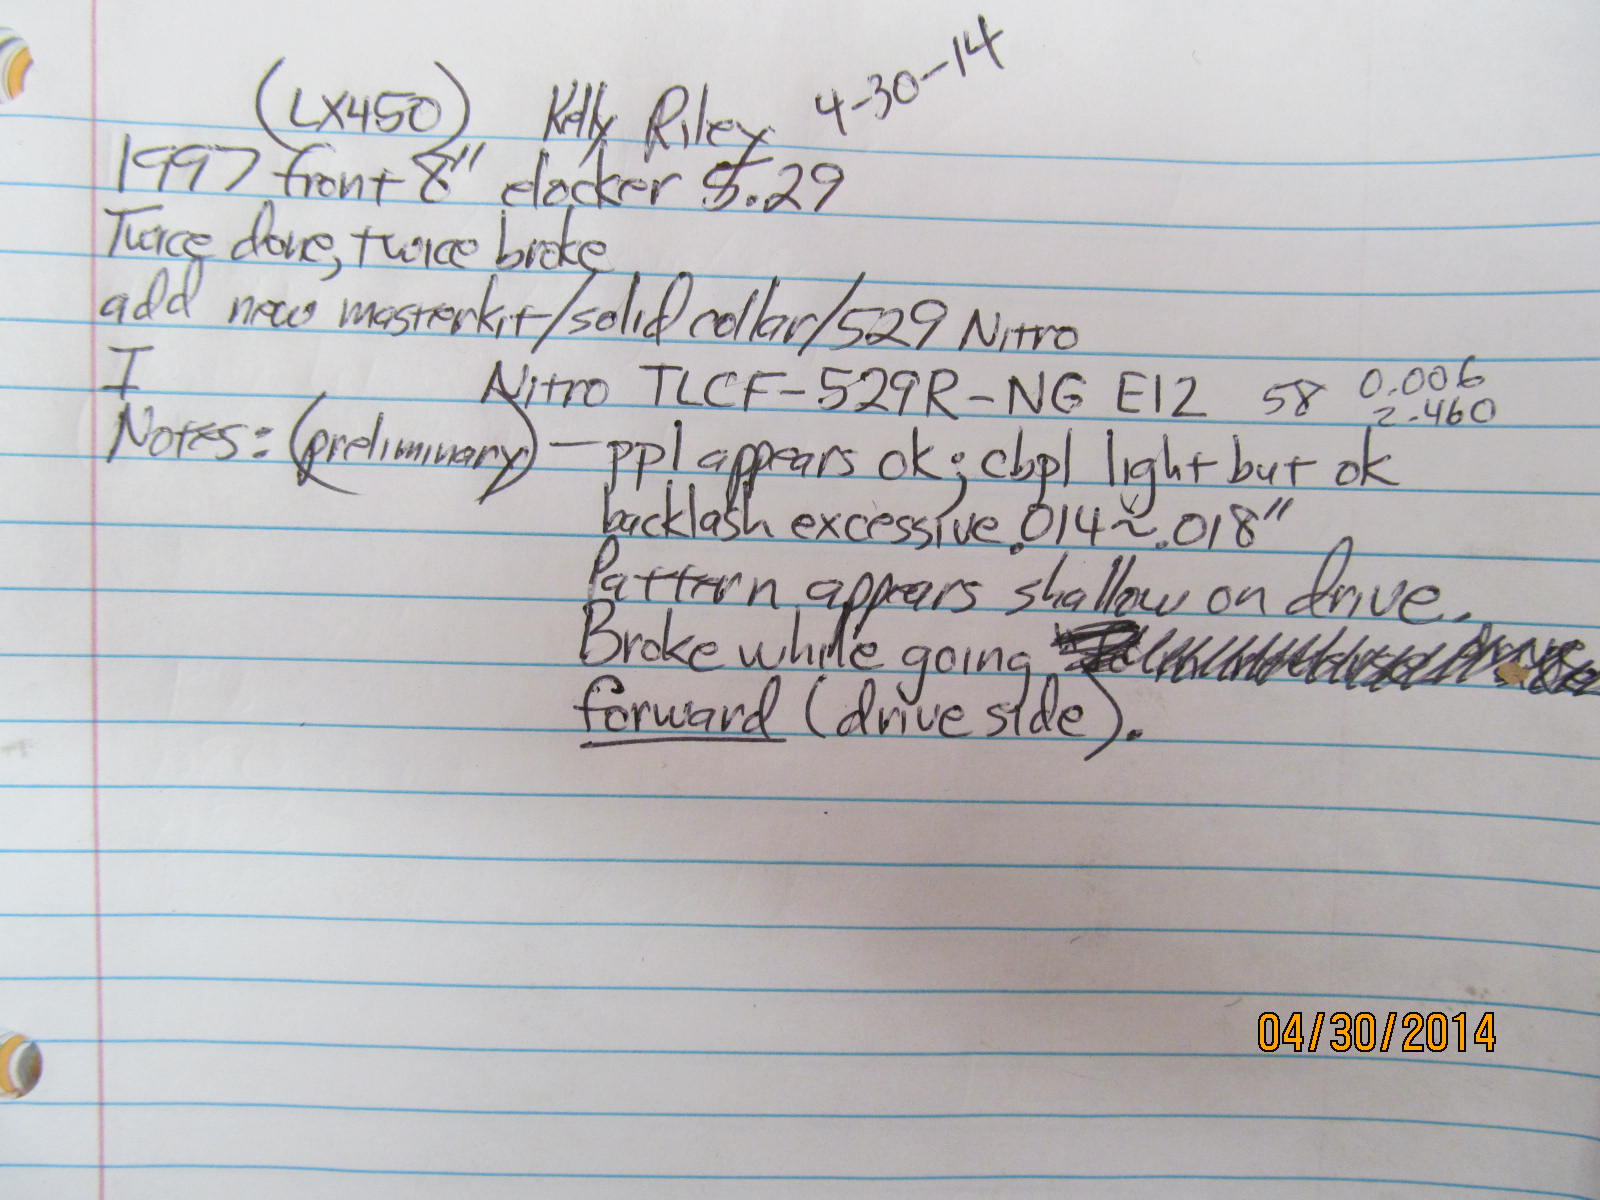
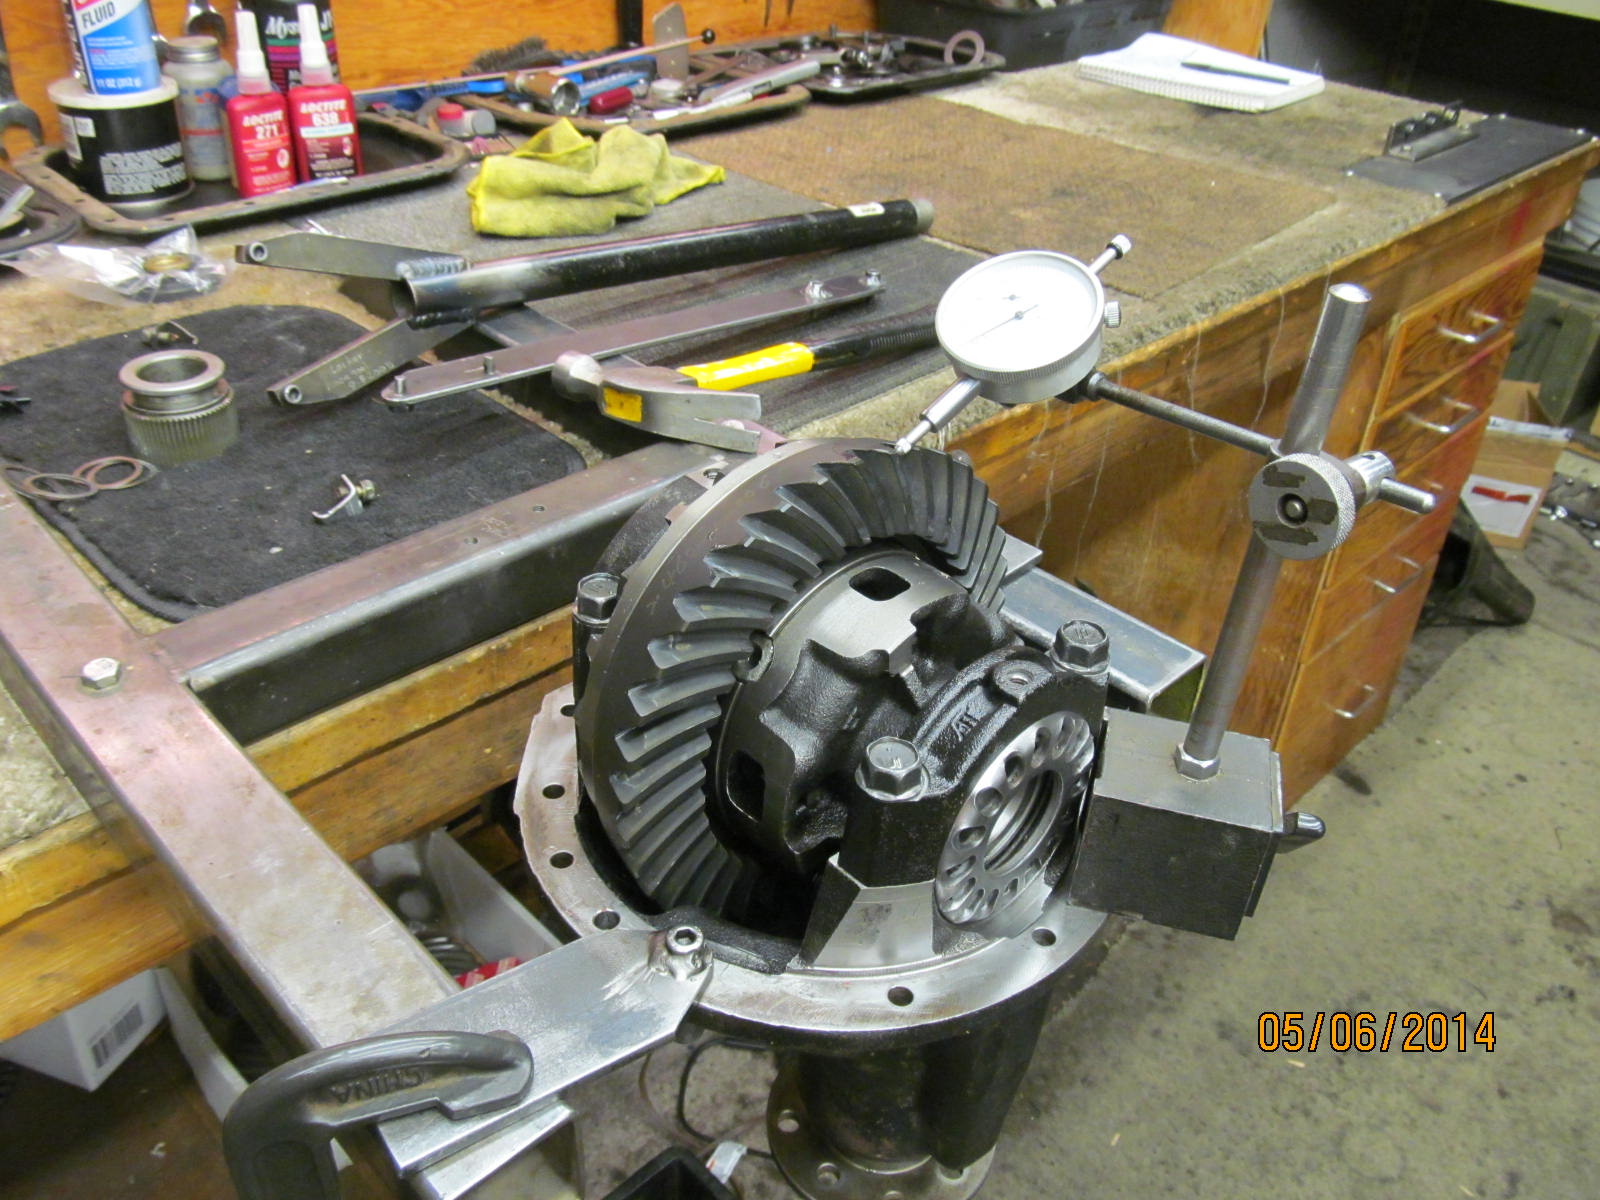
A backlash check revealed it was excessive and measured from about .014" to .018". Should have been half that.
|
|
|
|
|
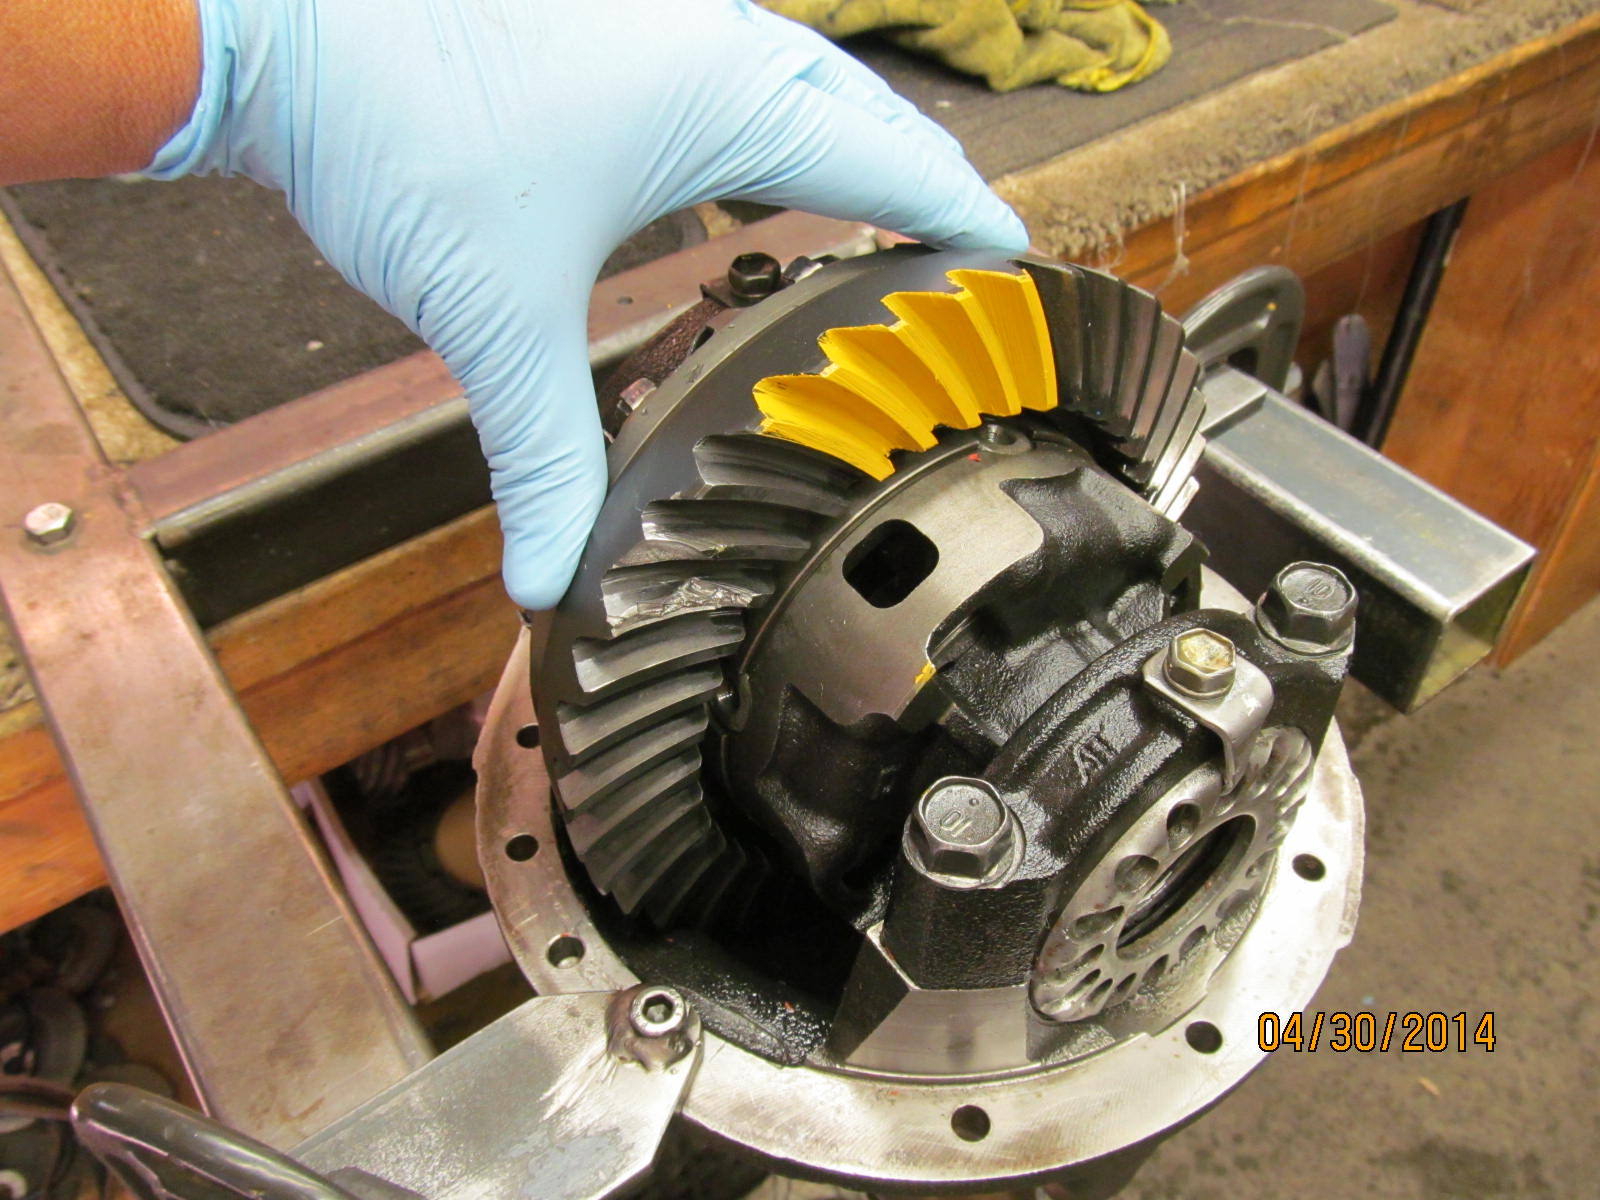
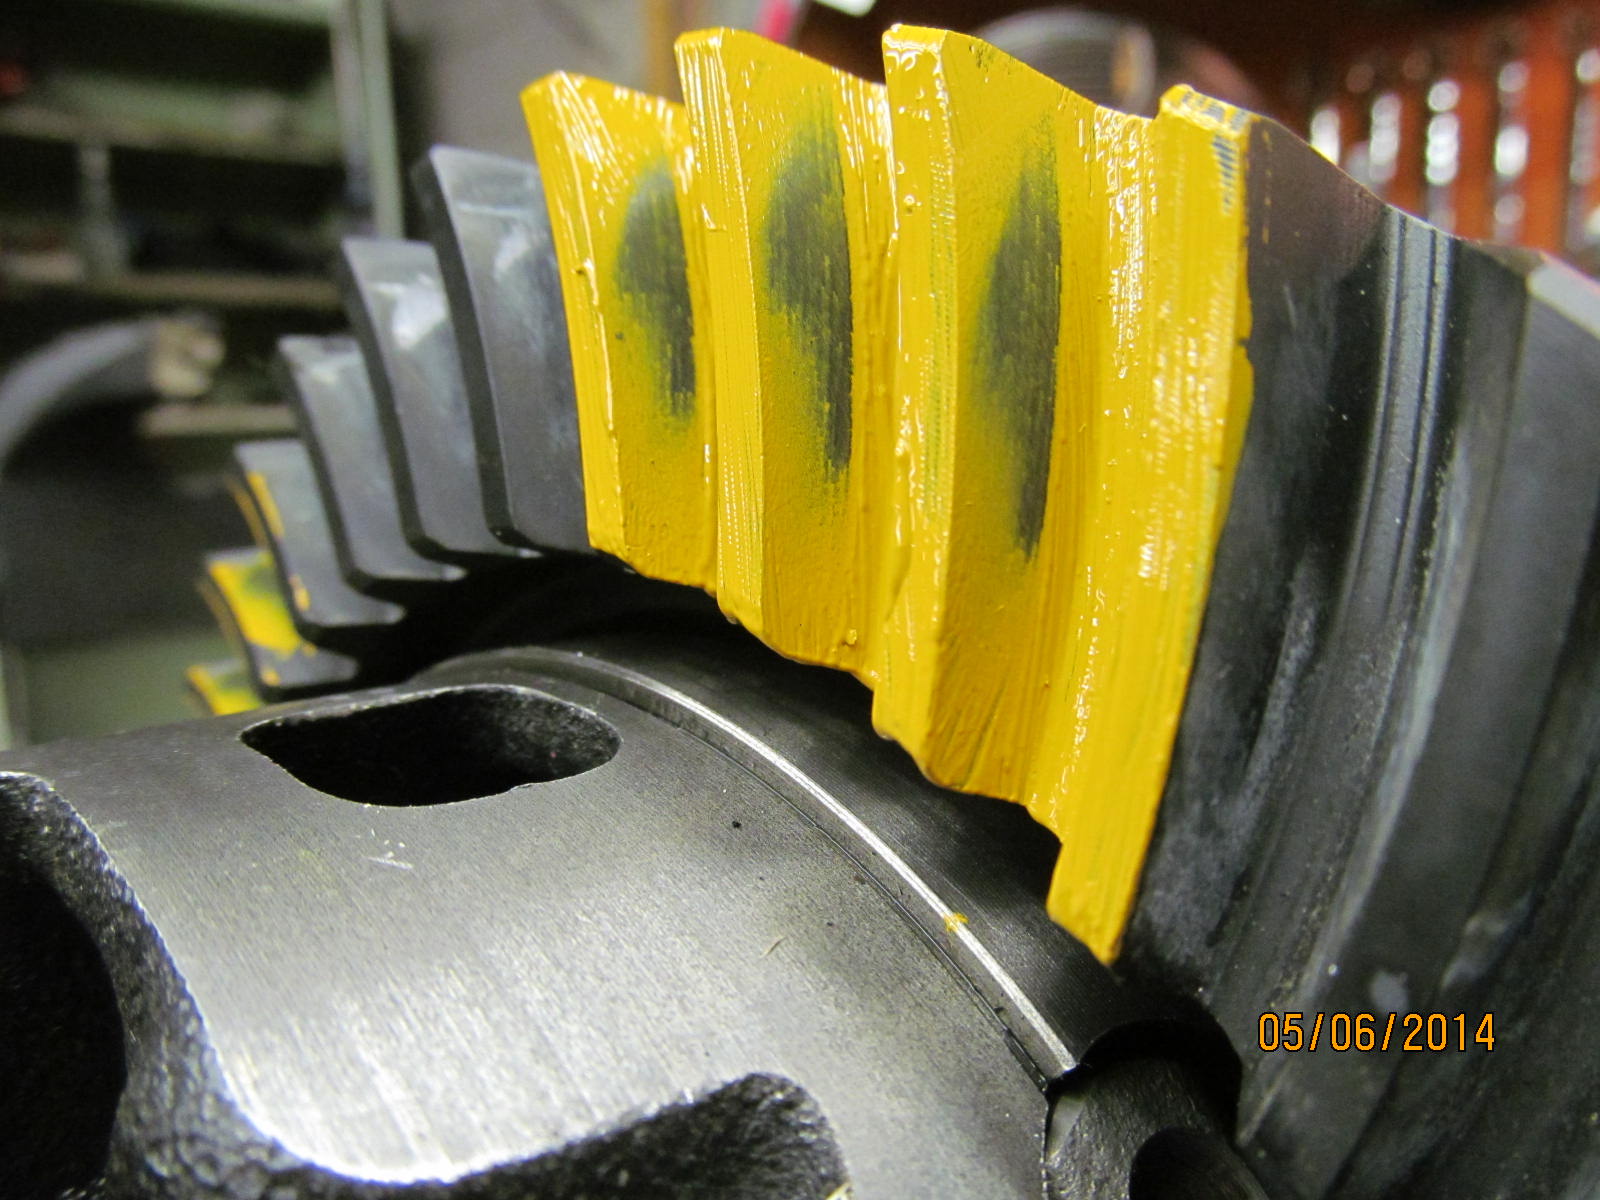
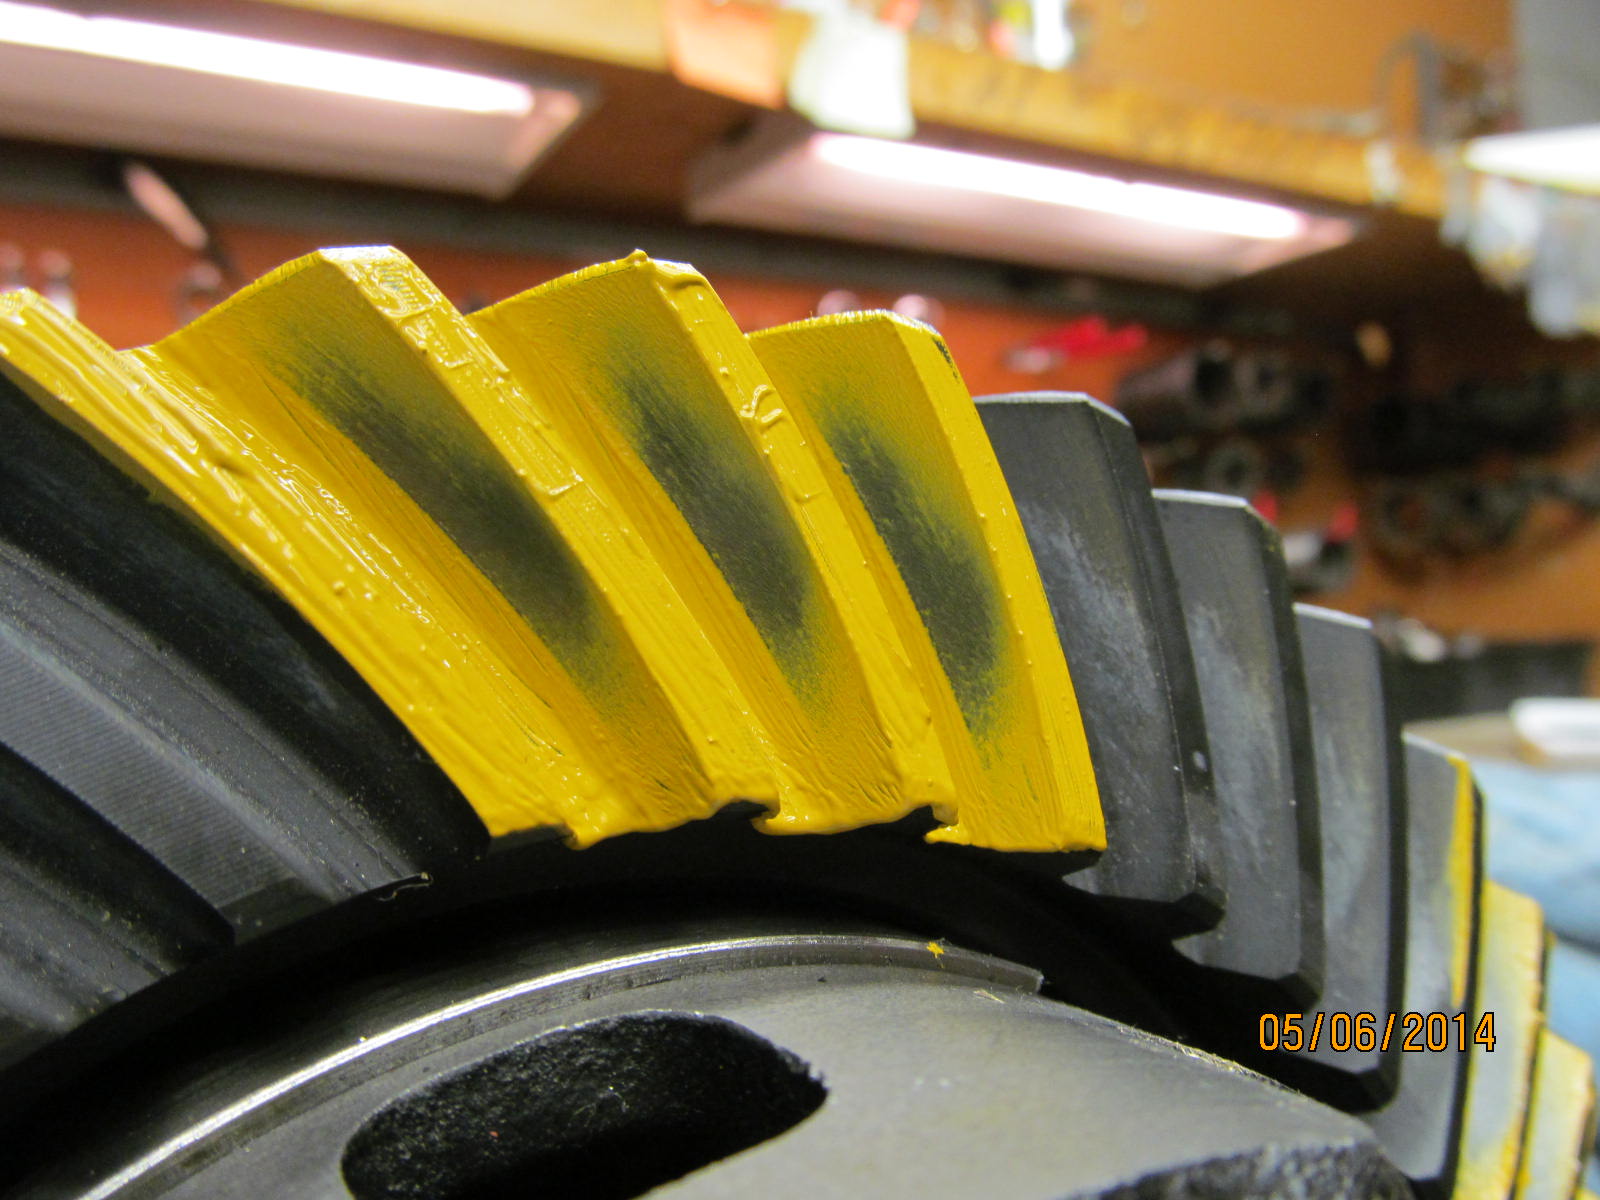
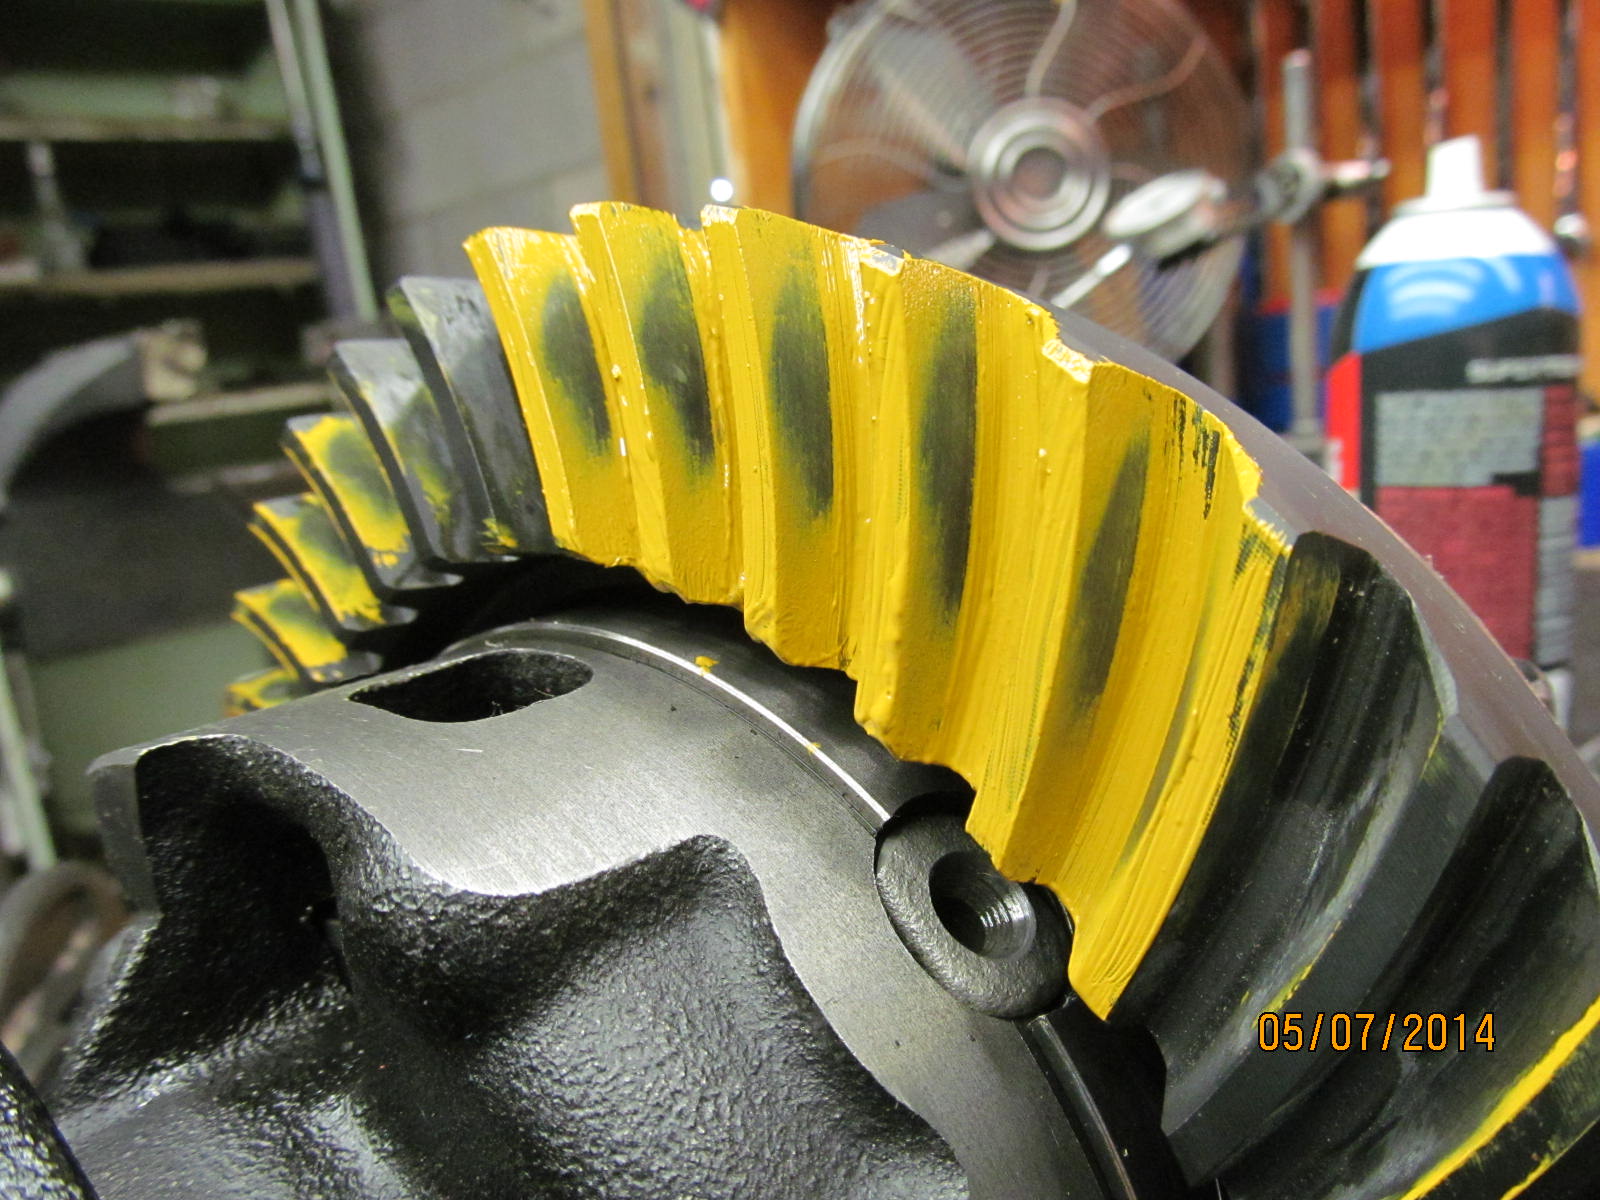
Drive side pattern seems to show being set a little shallow but not overly so.
|
|
|
|
|
Coast was really messed up...appears high on the face and shallow.
|
|
|
|
|
...............
|
|
|
|
|
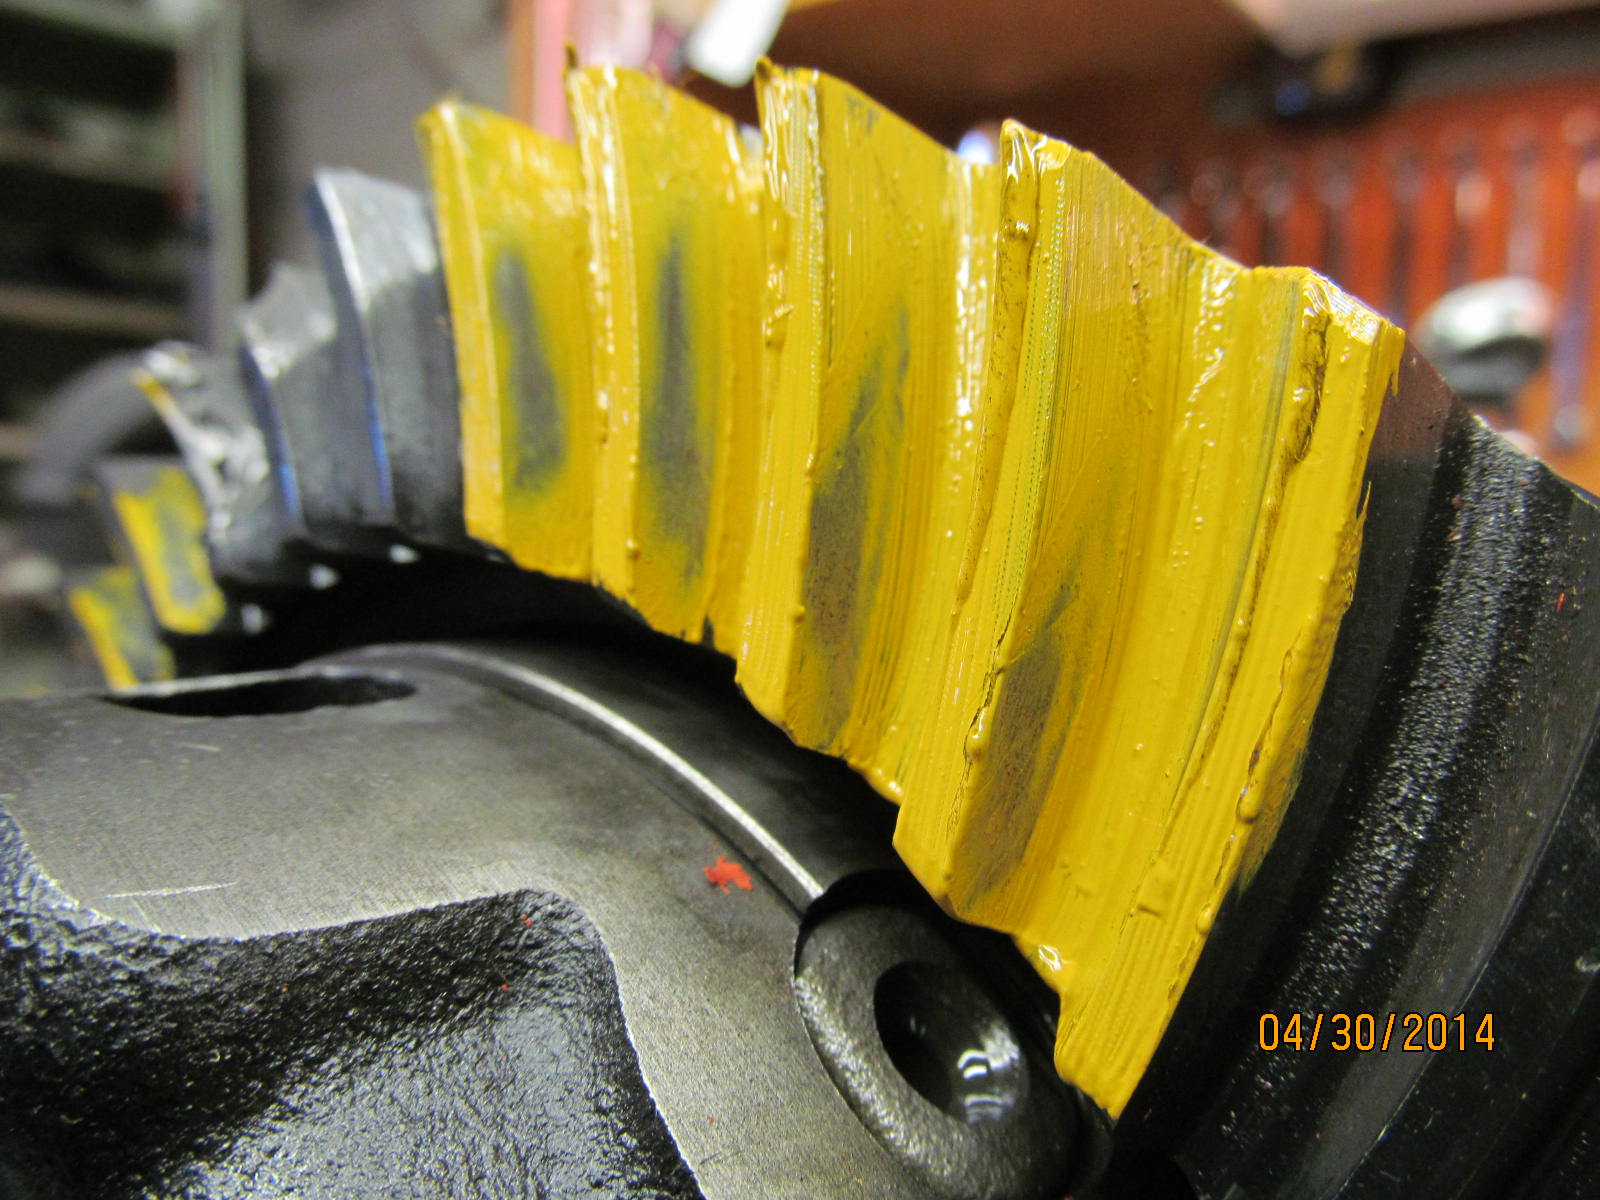
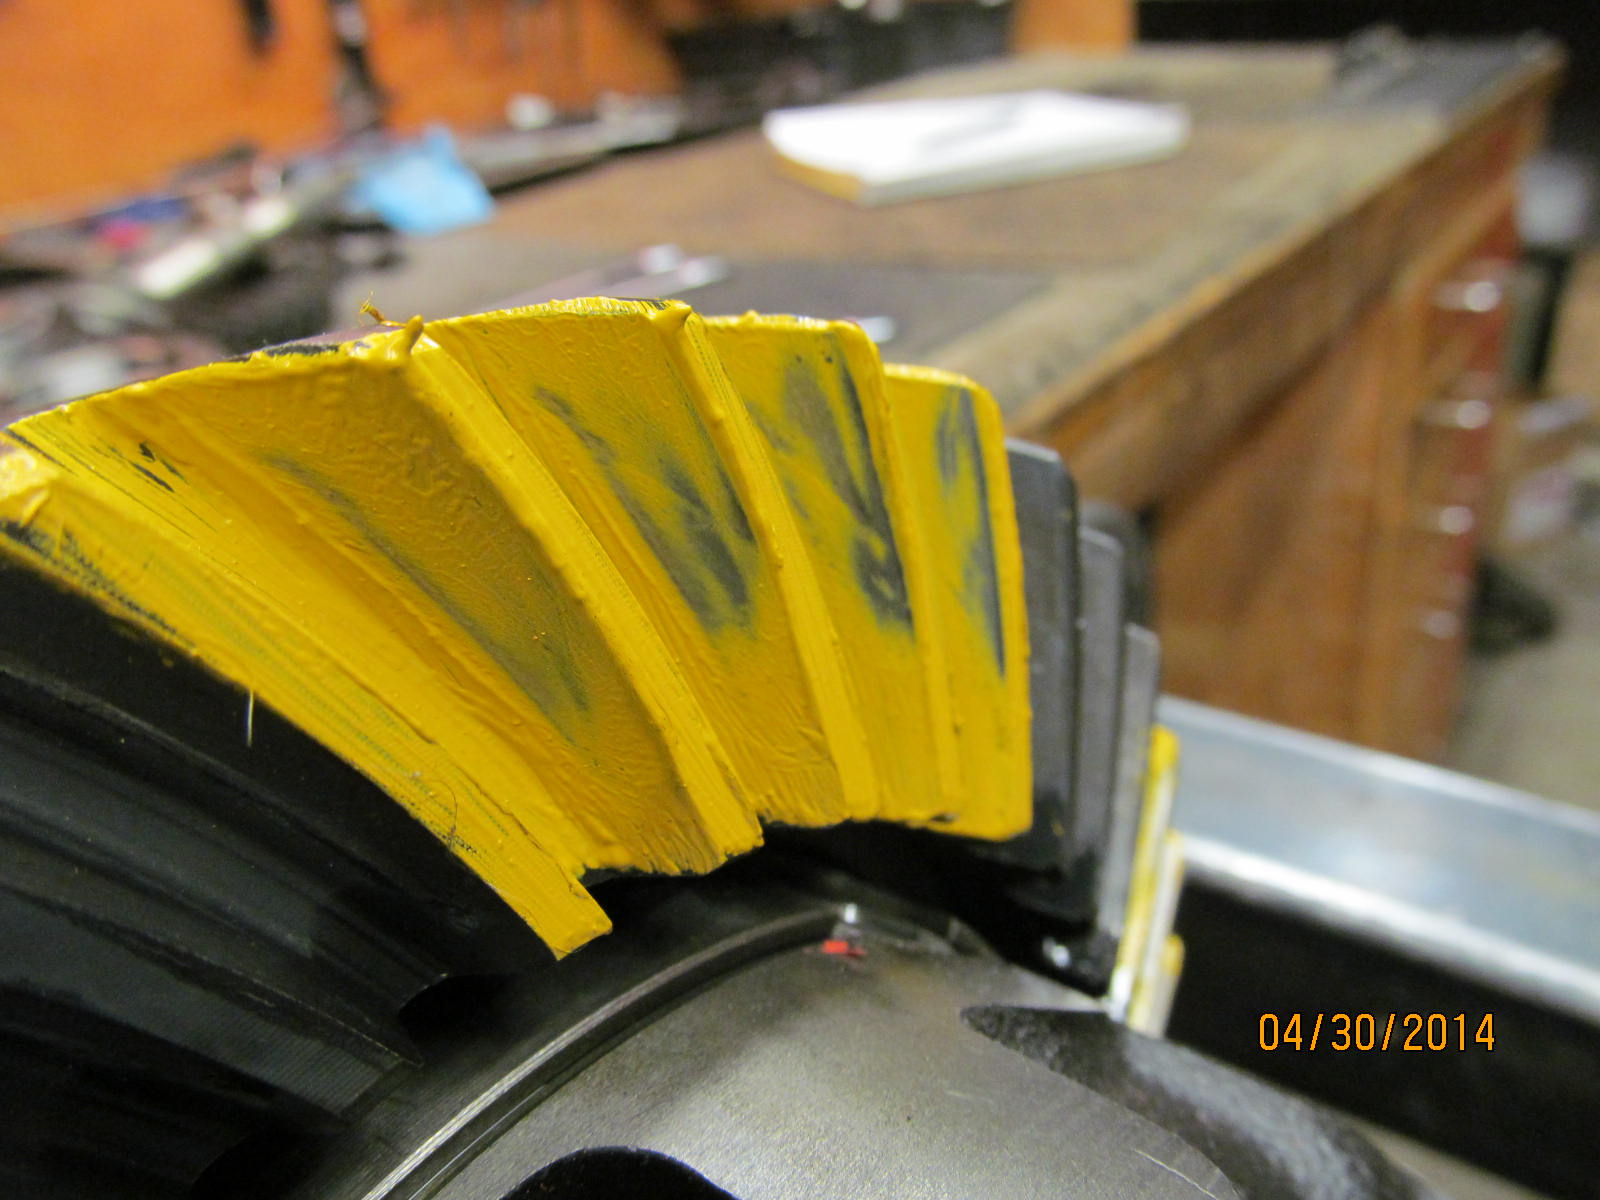
Drive on the pinion tooth might be considered deep indicating shallow on the mating ring tooth.
|
|
|
|
|
Nitro is a good quality gear.
|
|
|
|
|
Notes are started.
|
|
|
|
|
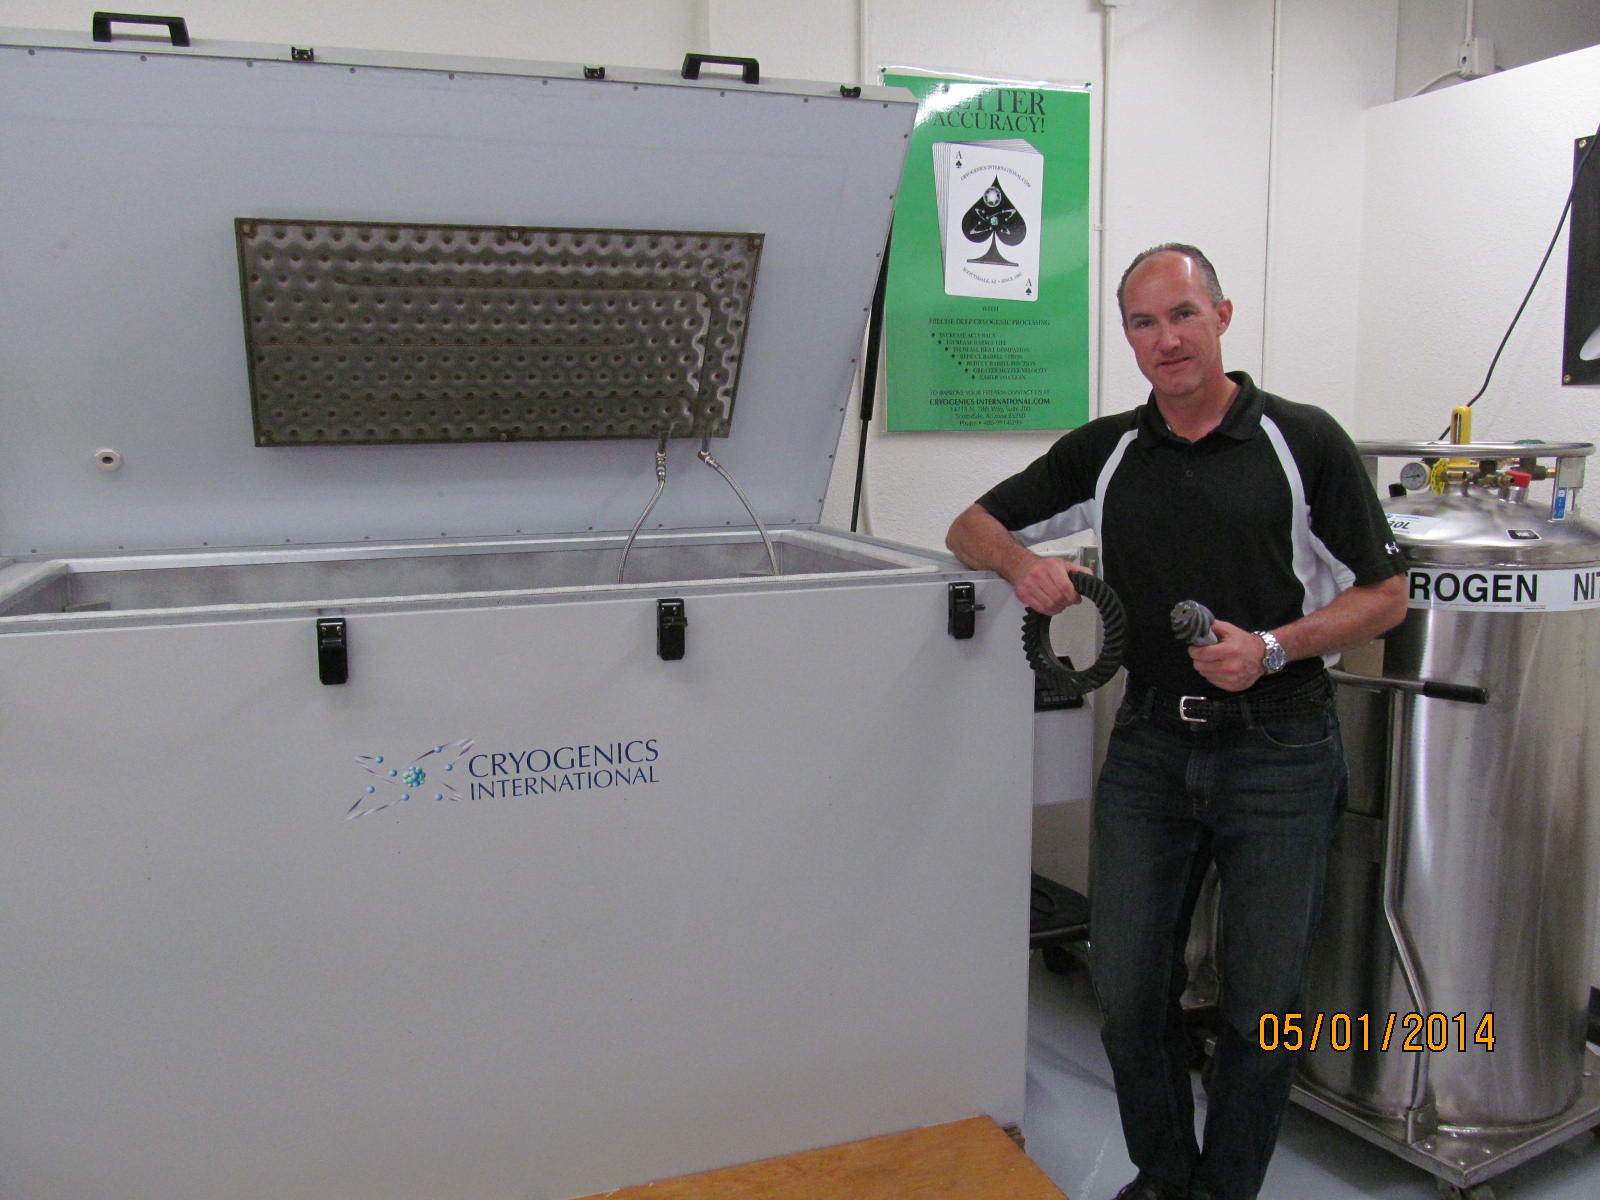
Meet Charles from Cryogenics International who is holding Riley's new Nitro gears.
|
|
|
|
The cryo process will start on Friday and be ready for pick up late Monday afternoon. Charle's operation is a
professional one. The cryo is done right. Cryo basically finishes the heat treat process that was never finished
when the ring/pinion was first made. Properly cryo'd gears will not be brittle. They will be stronger,
more wear resistant, and have a greater fatigue resistance.
|
|
|
|
|
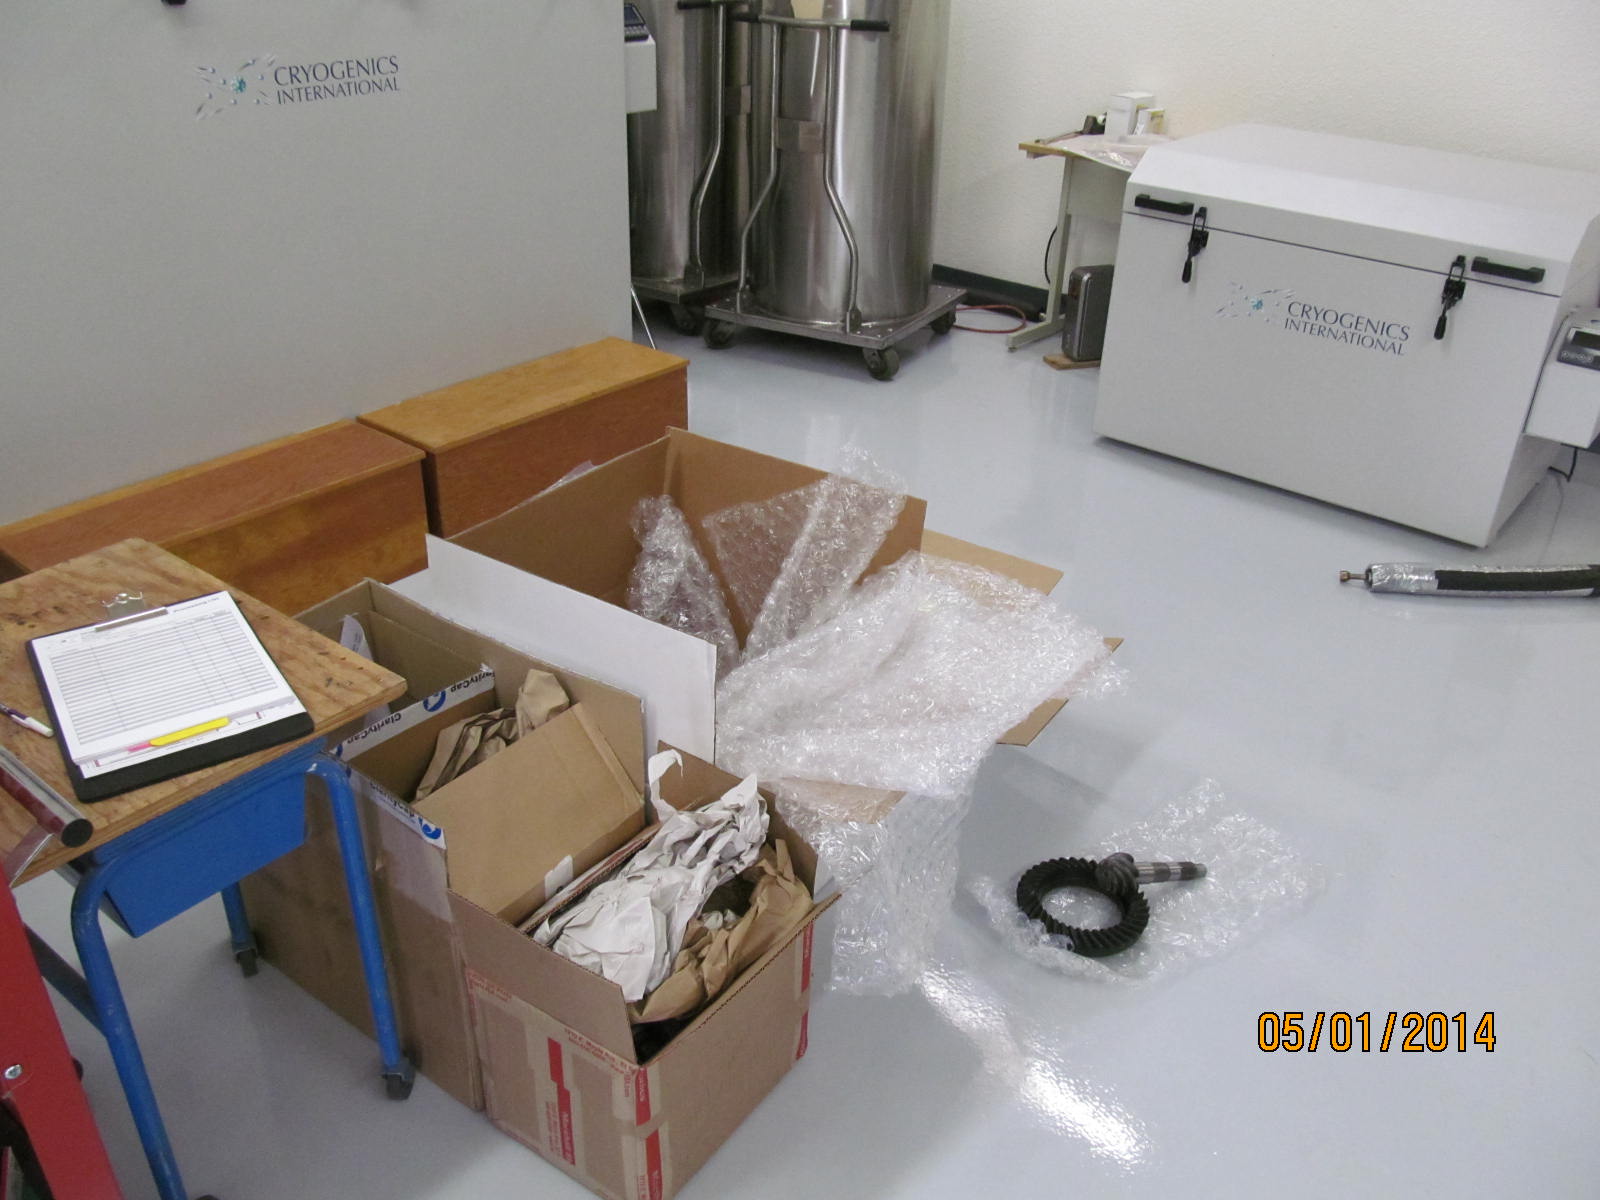
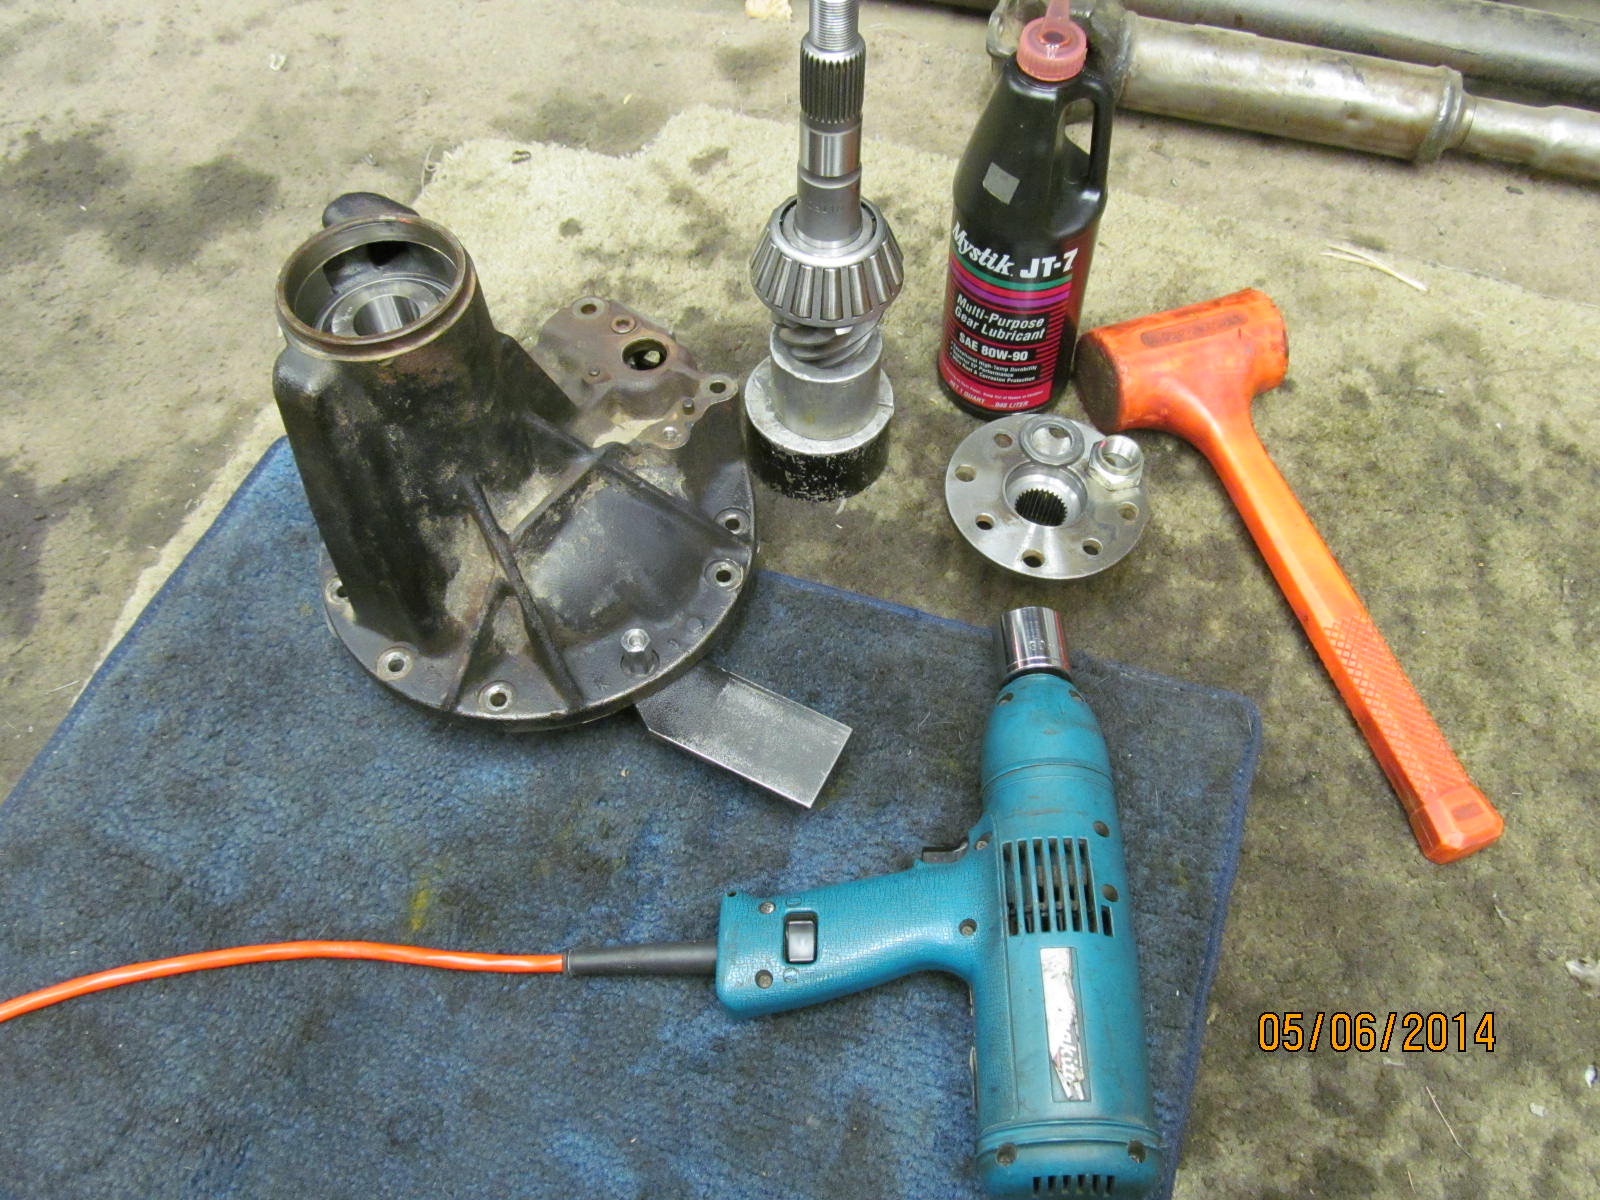
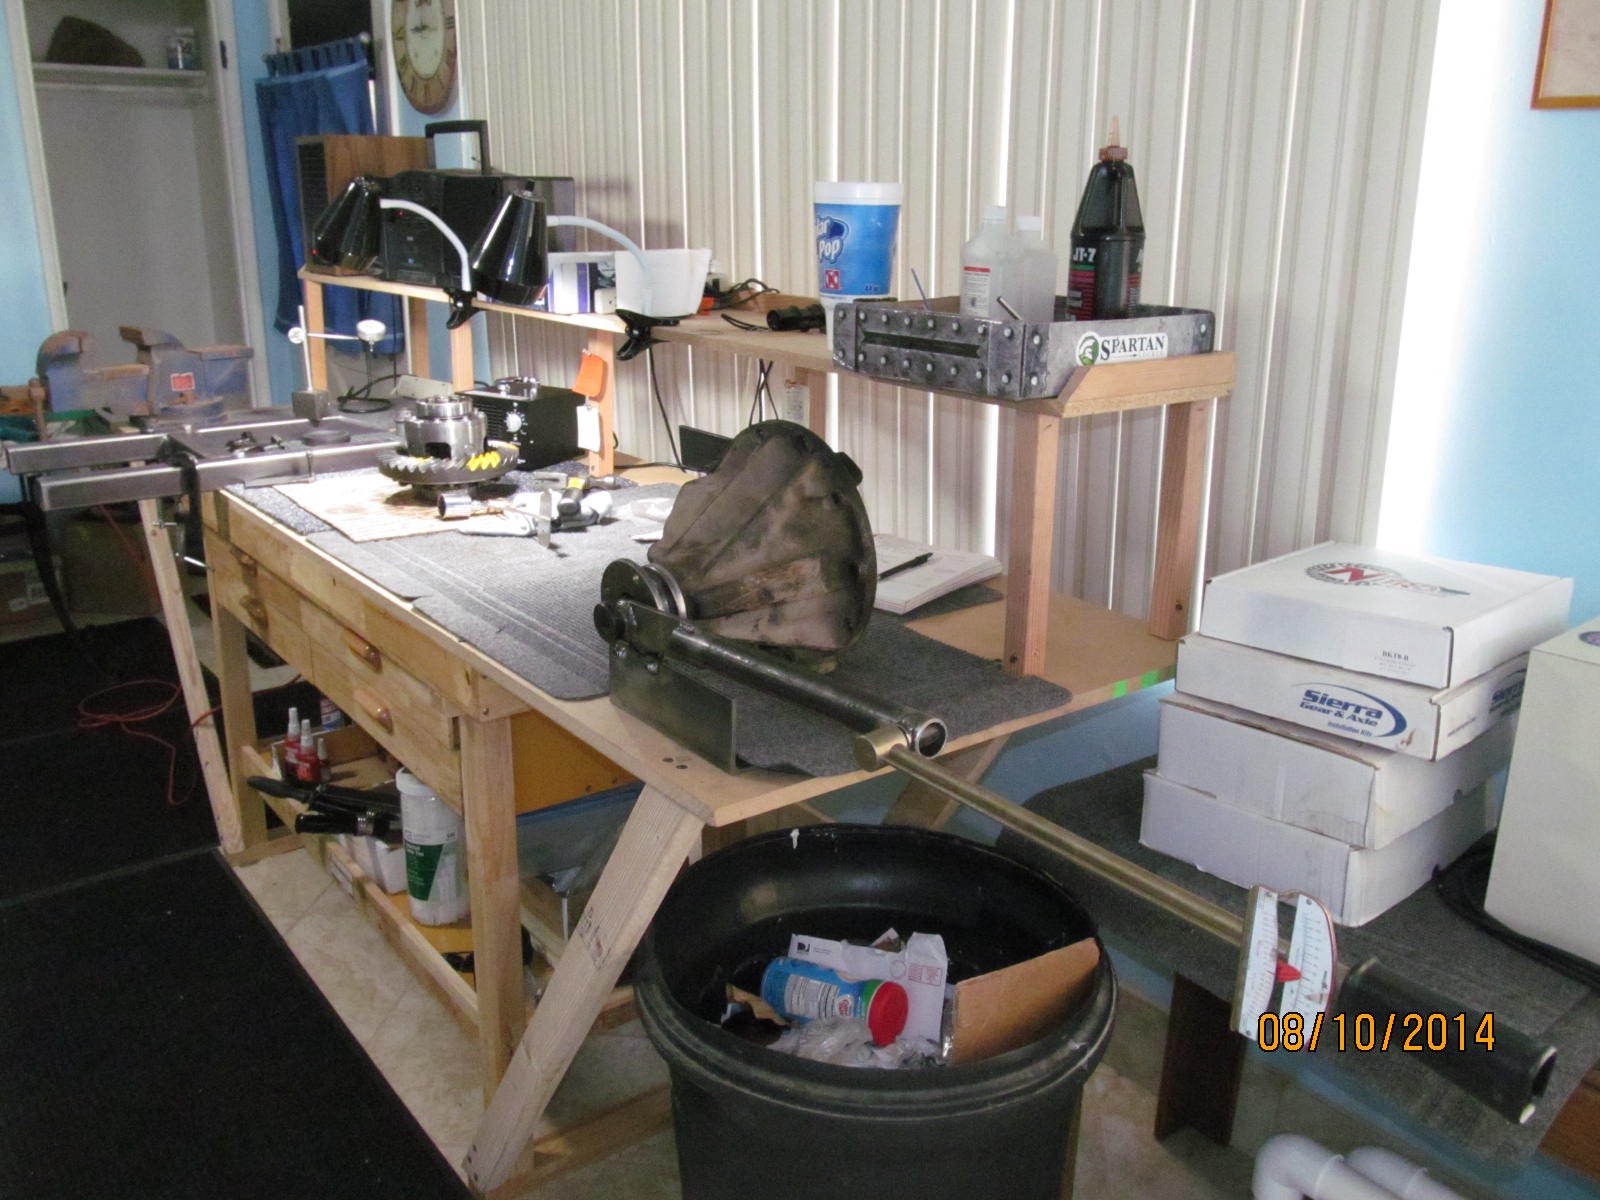
In the meantime, I can dis-assemble and clean parts.
|
|
|
|
|
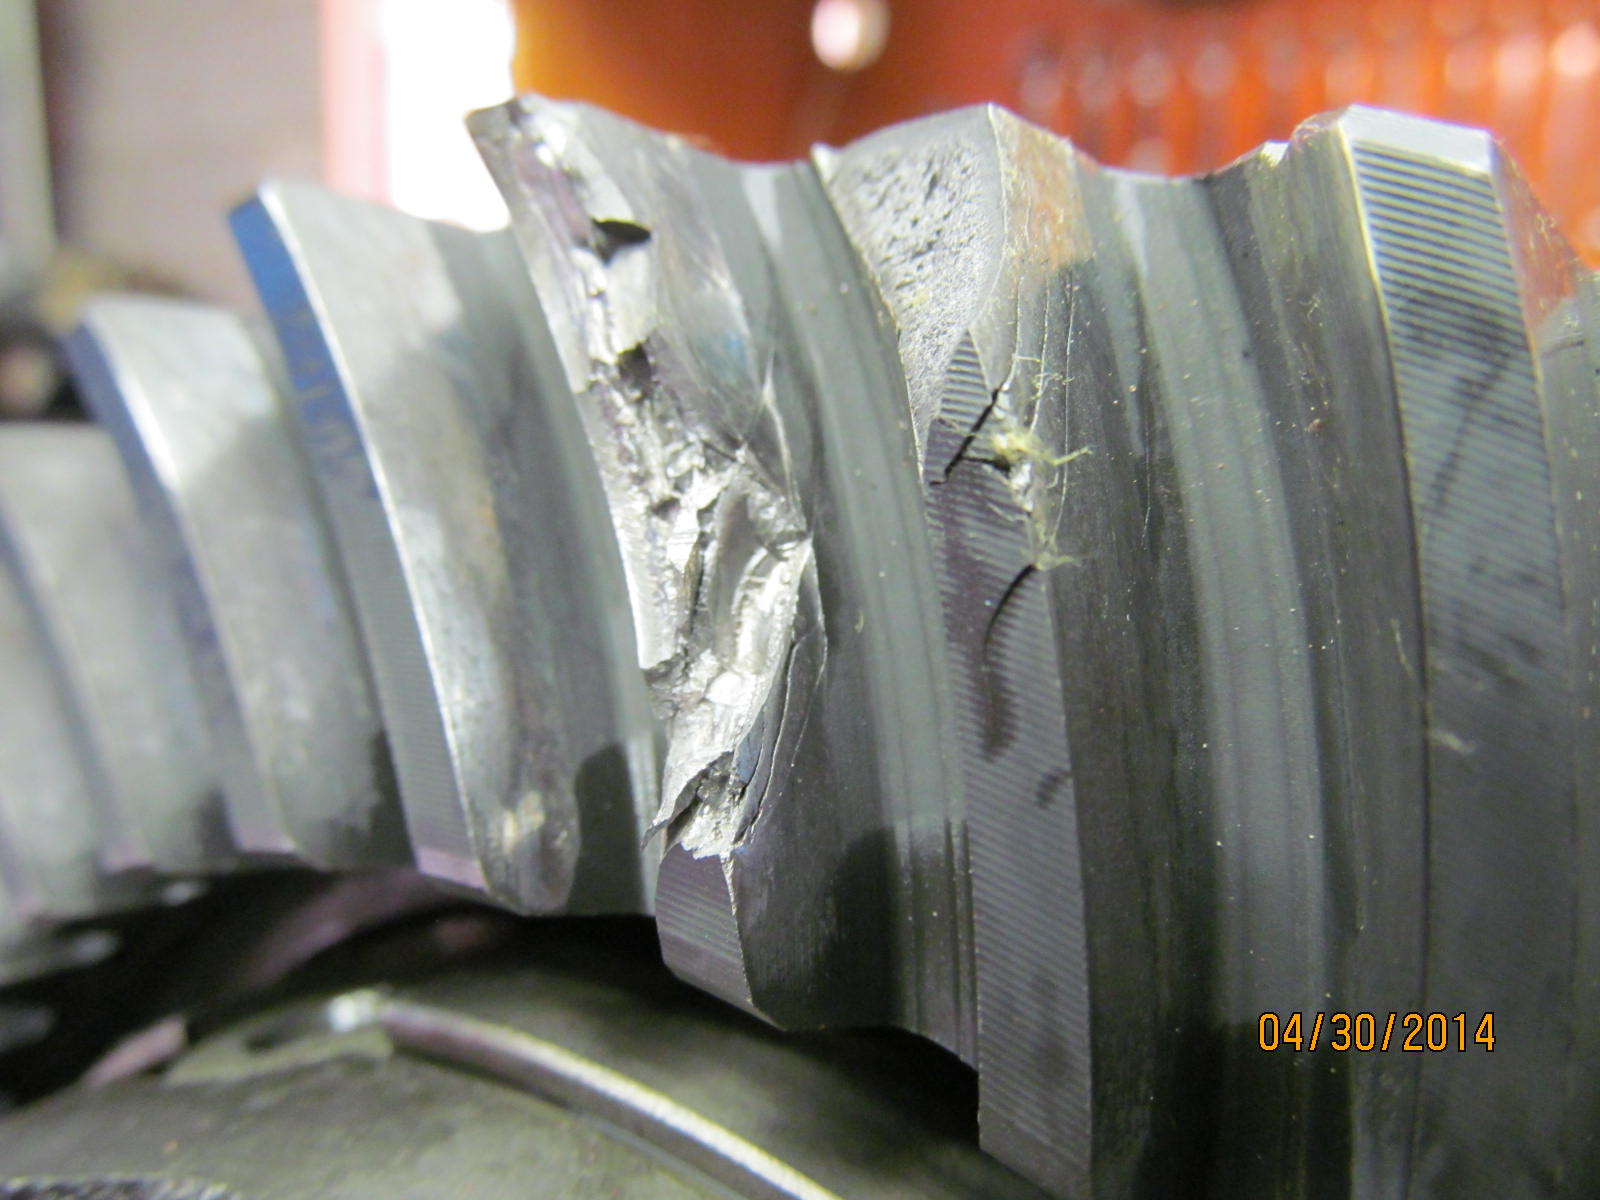
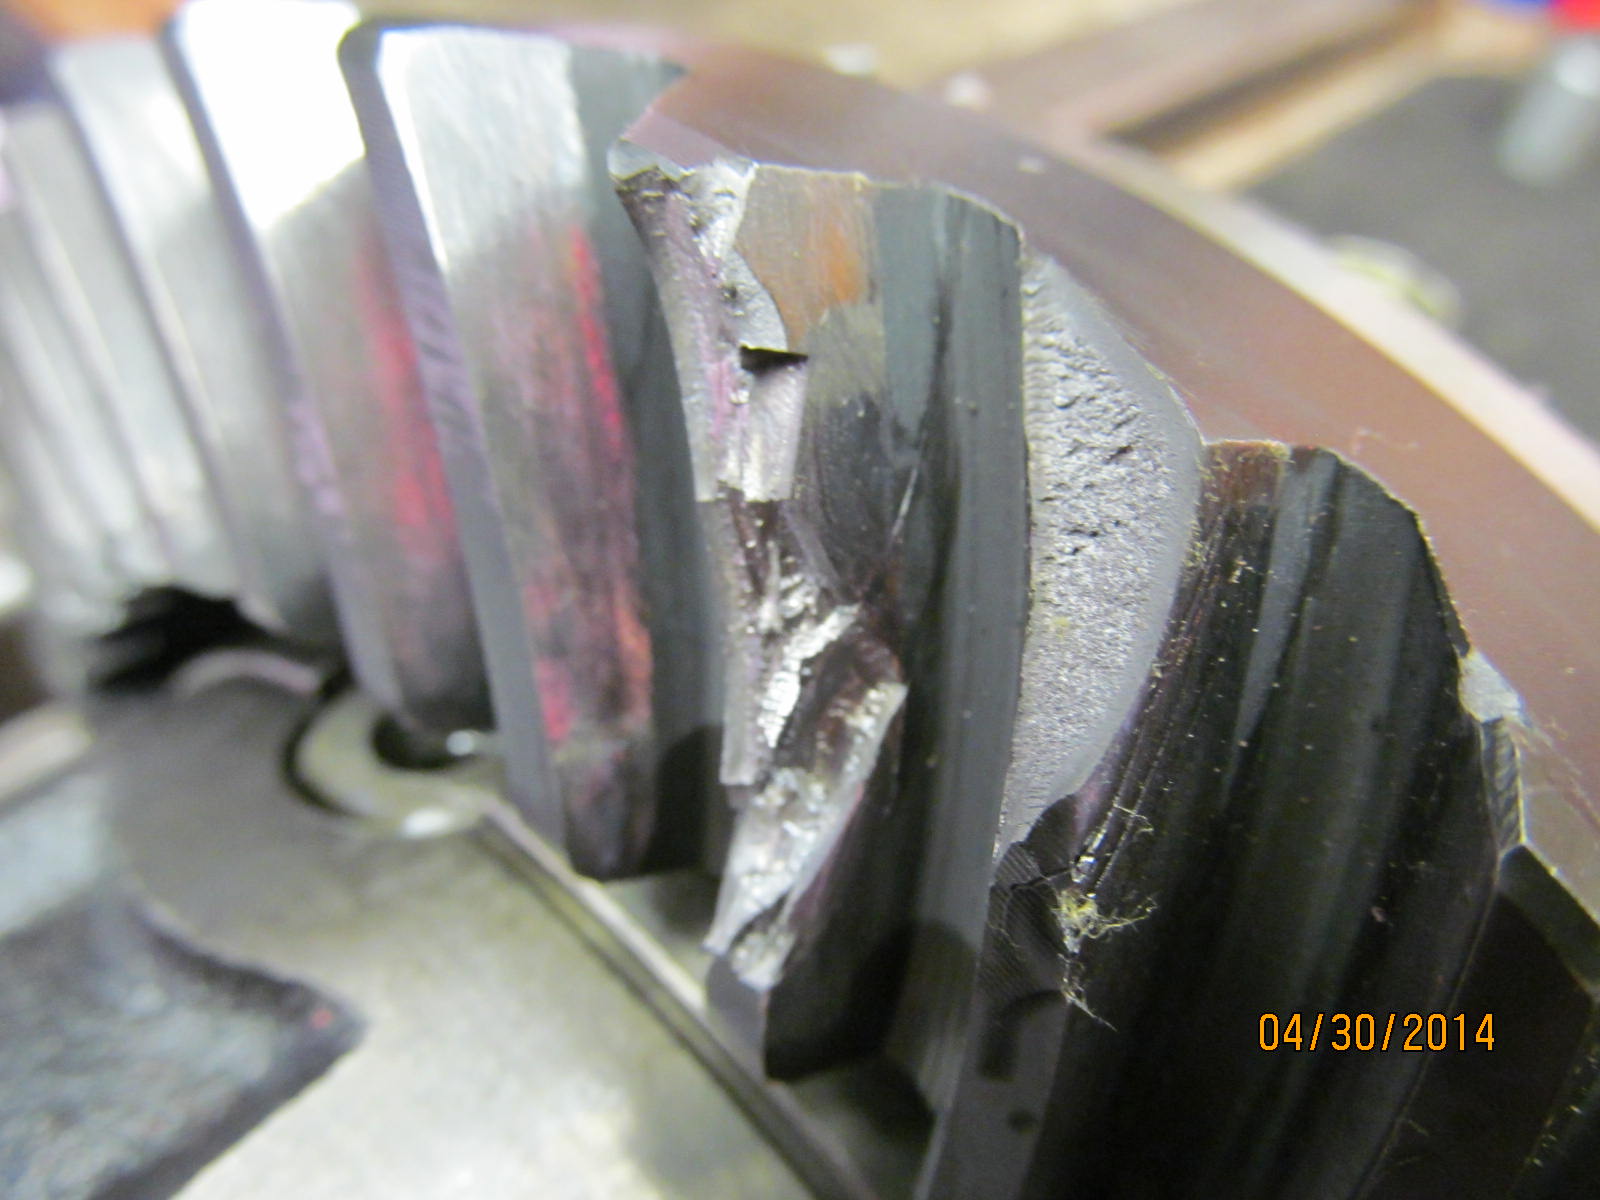
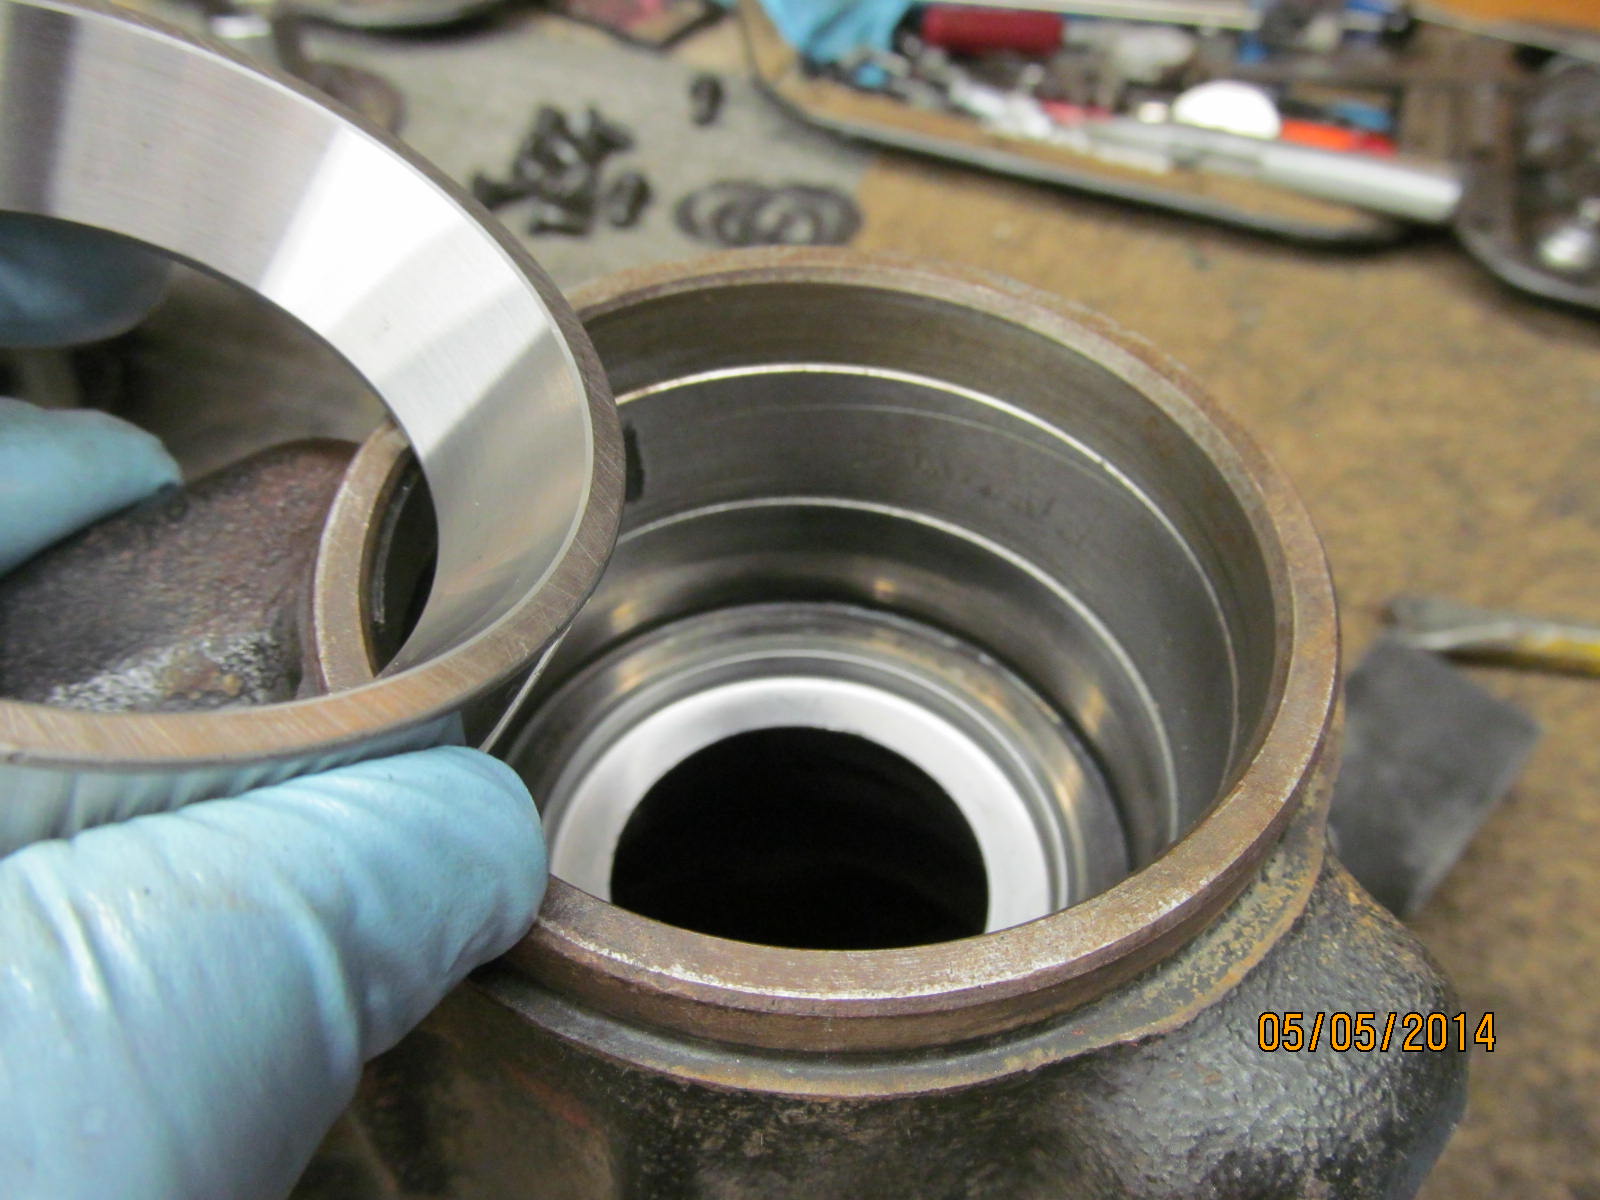
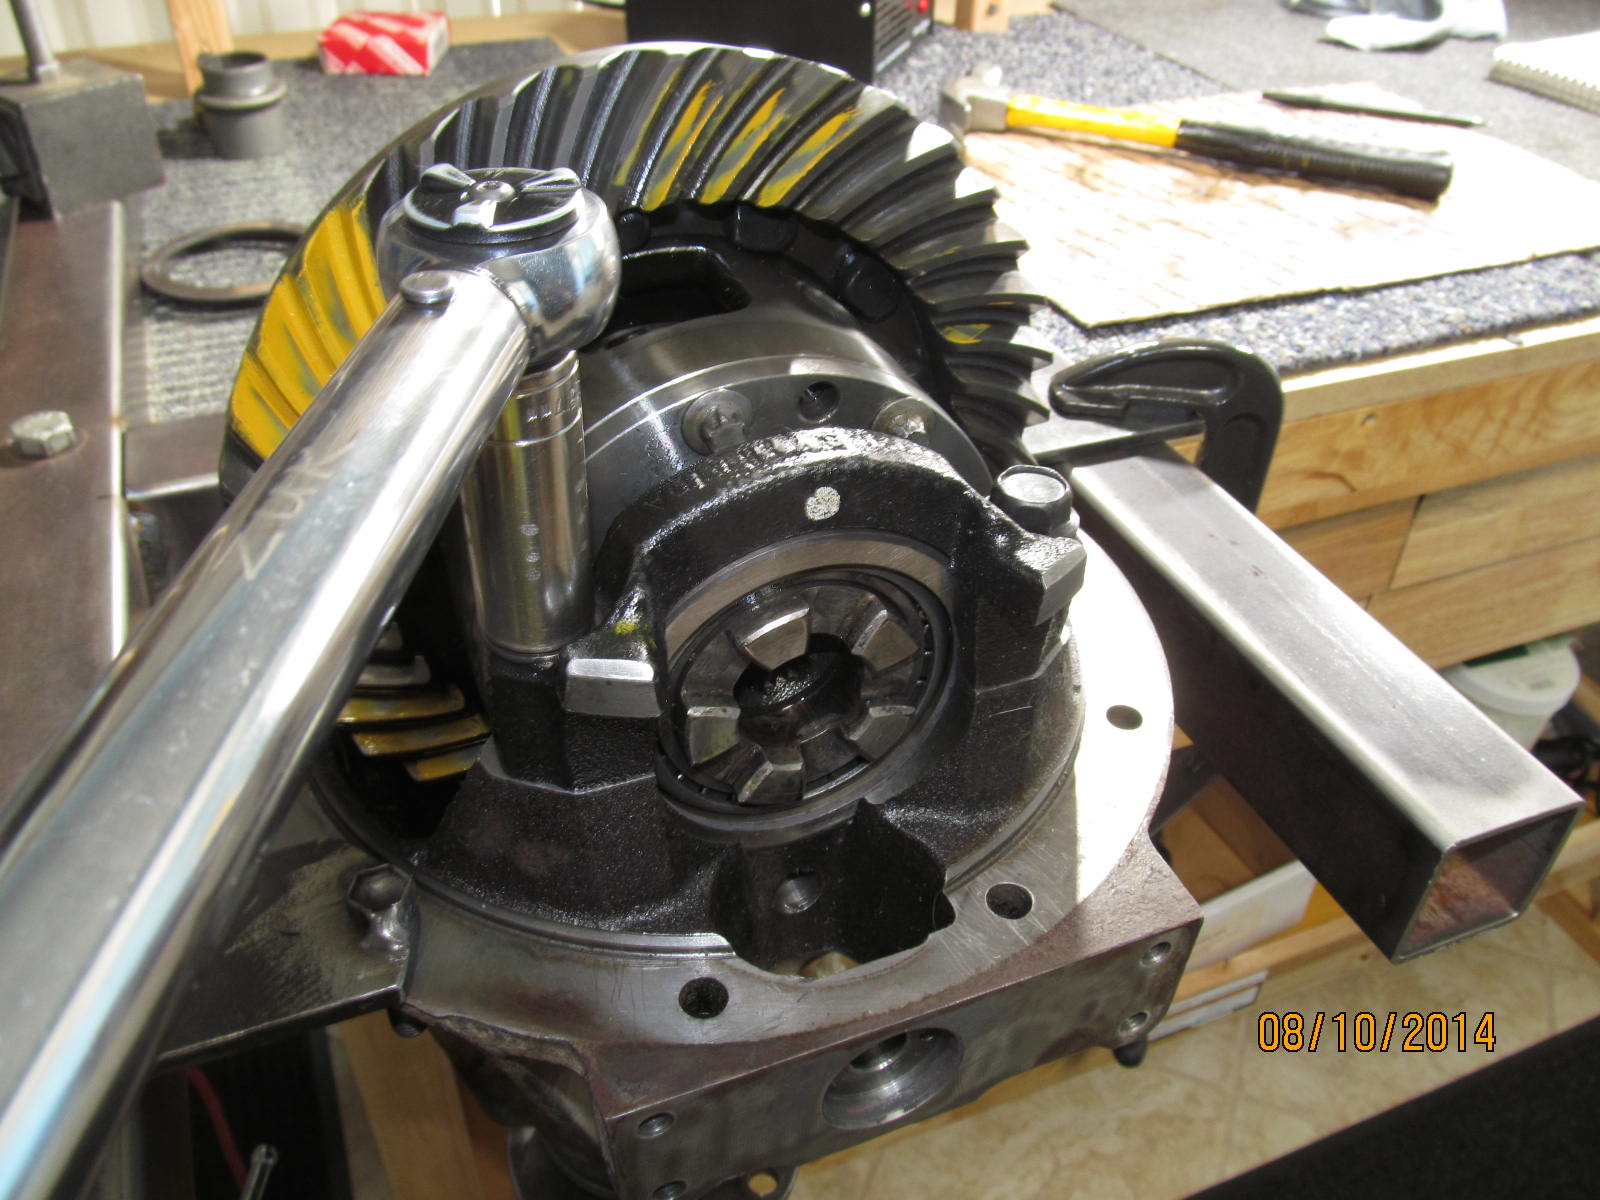
Remove the busted ring gear...
|
|
|
|
|
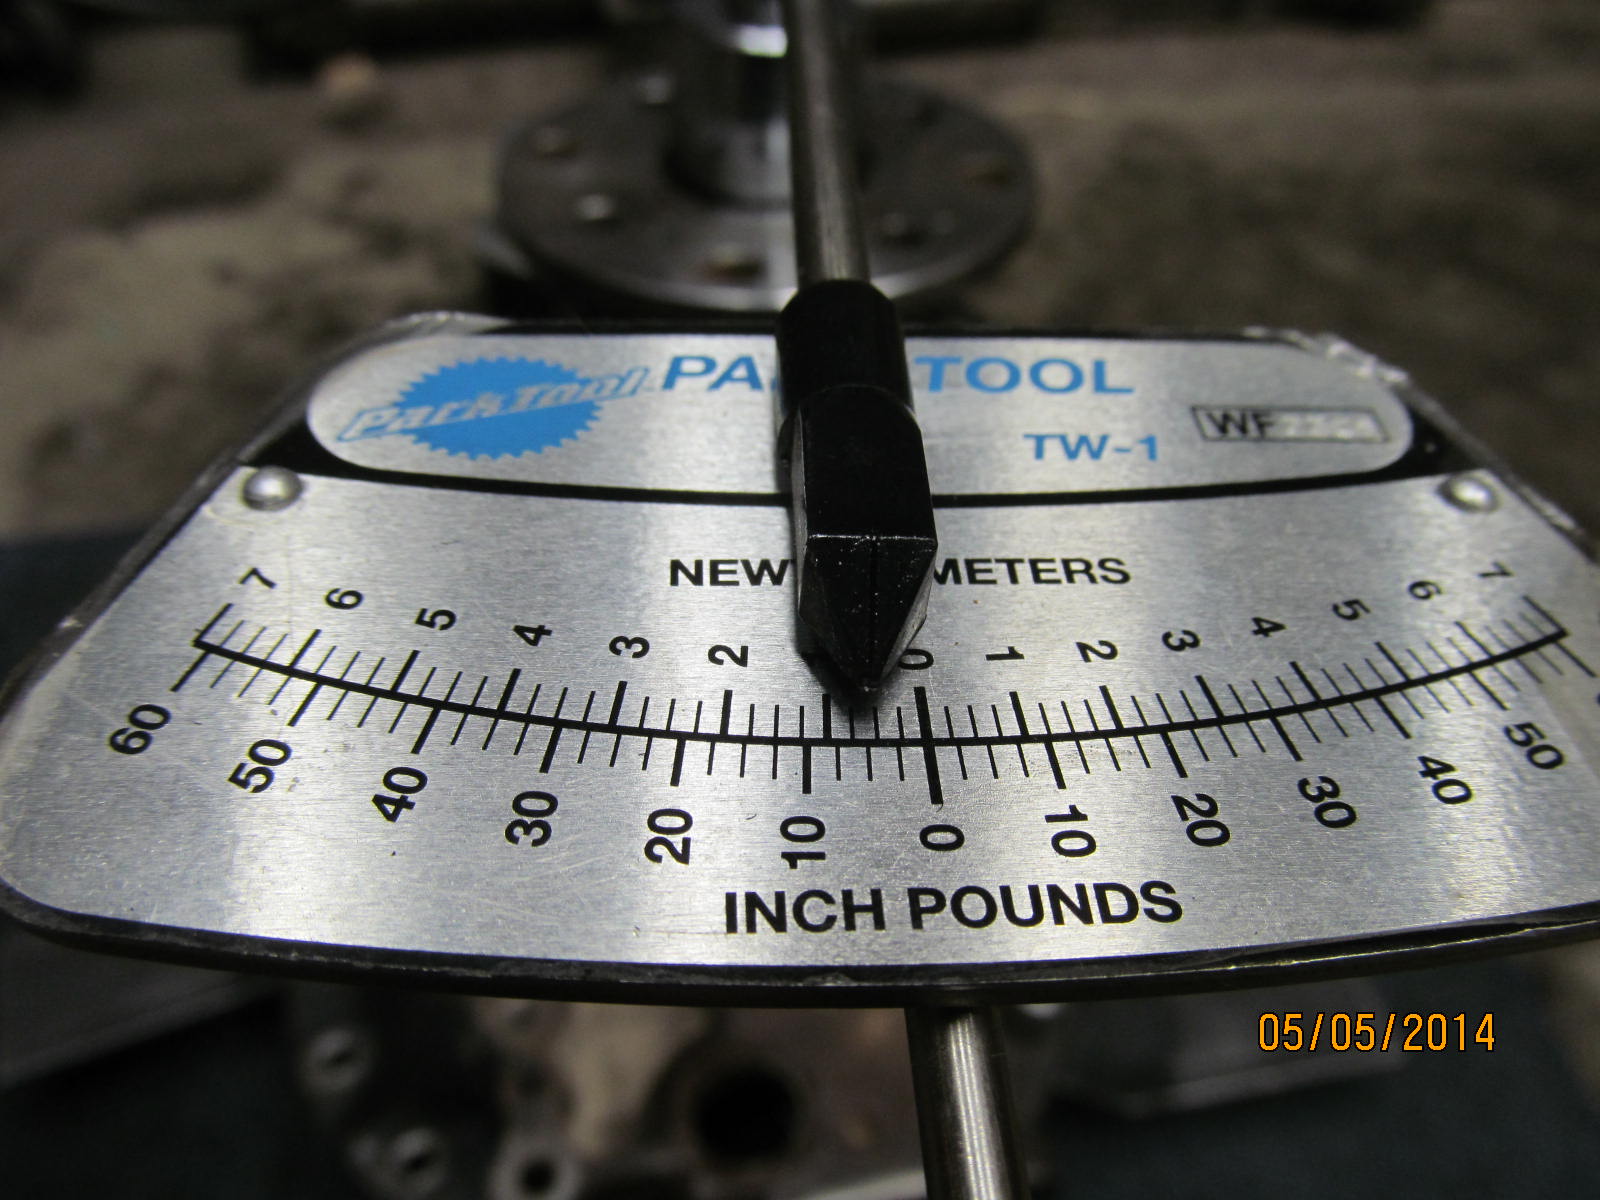
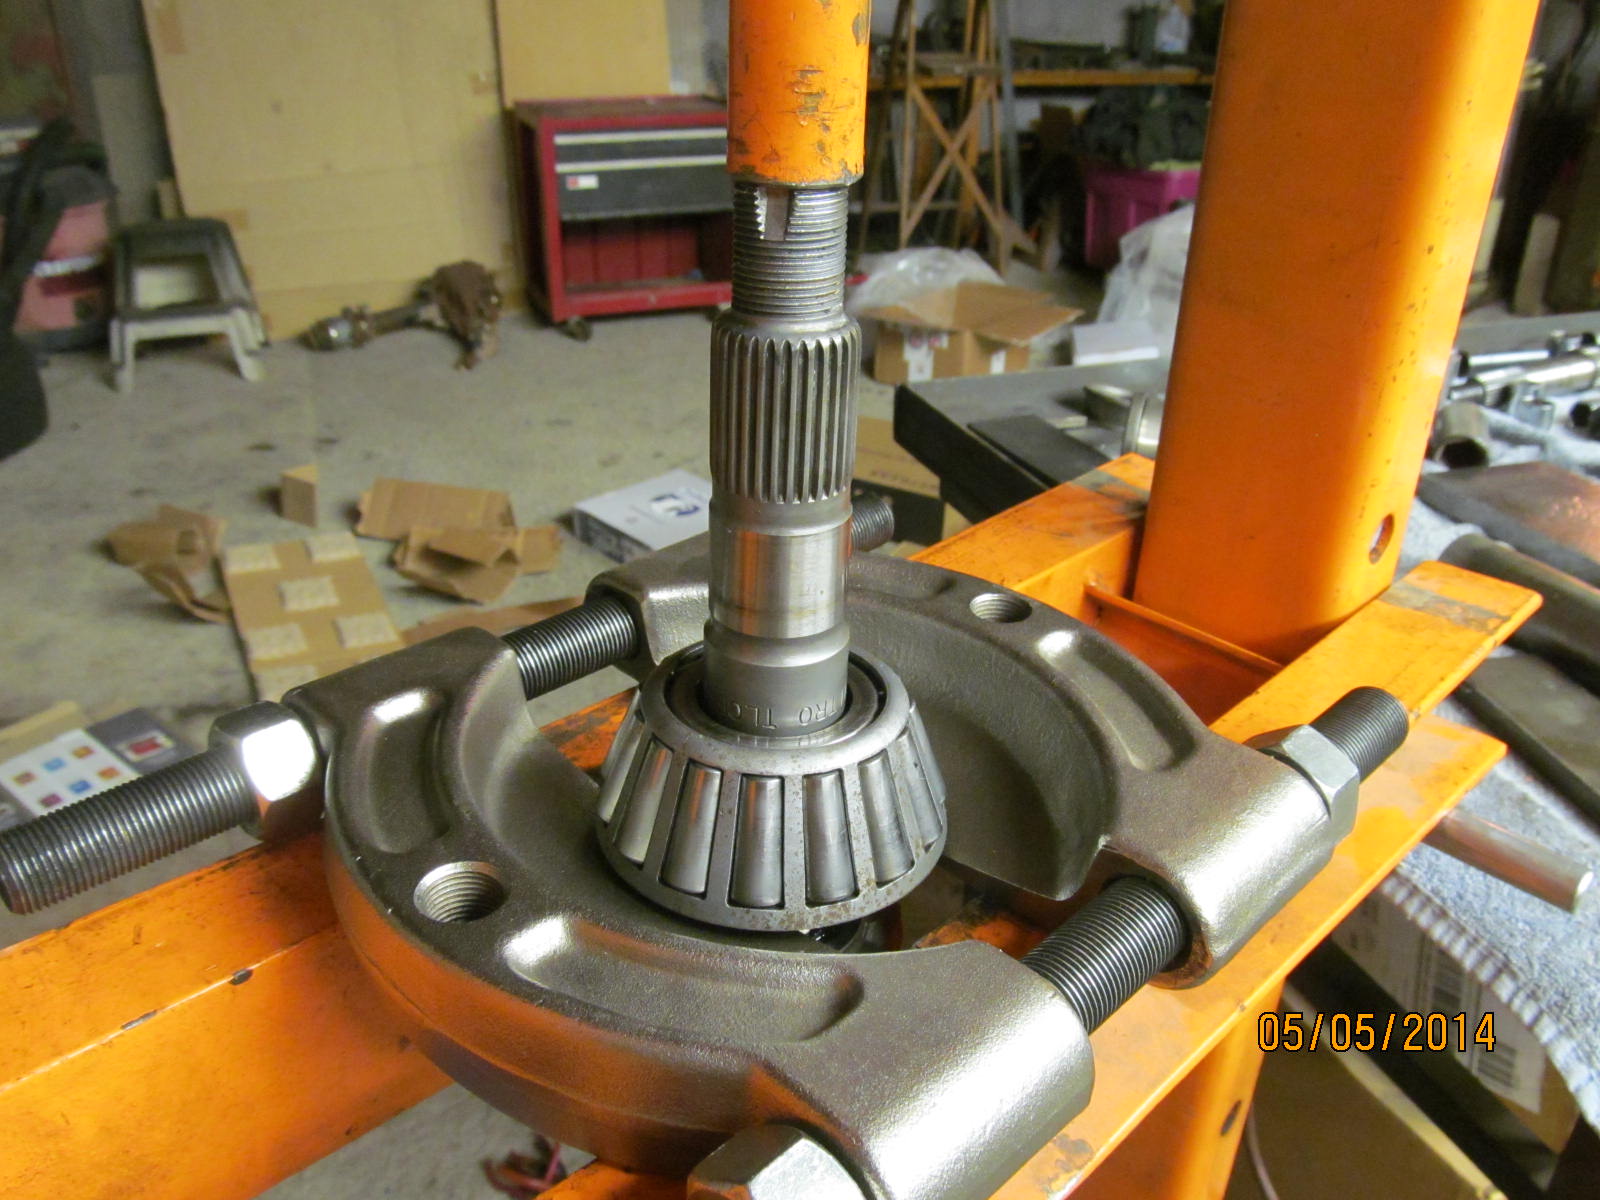
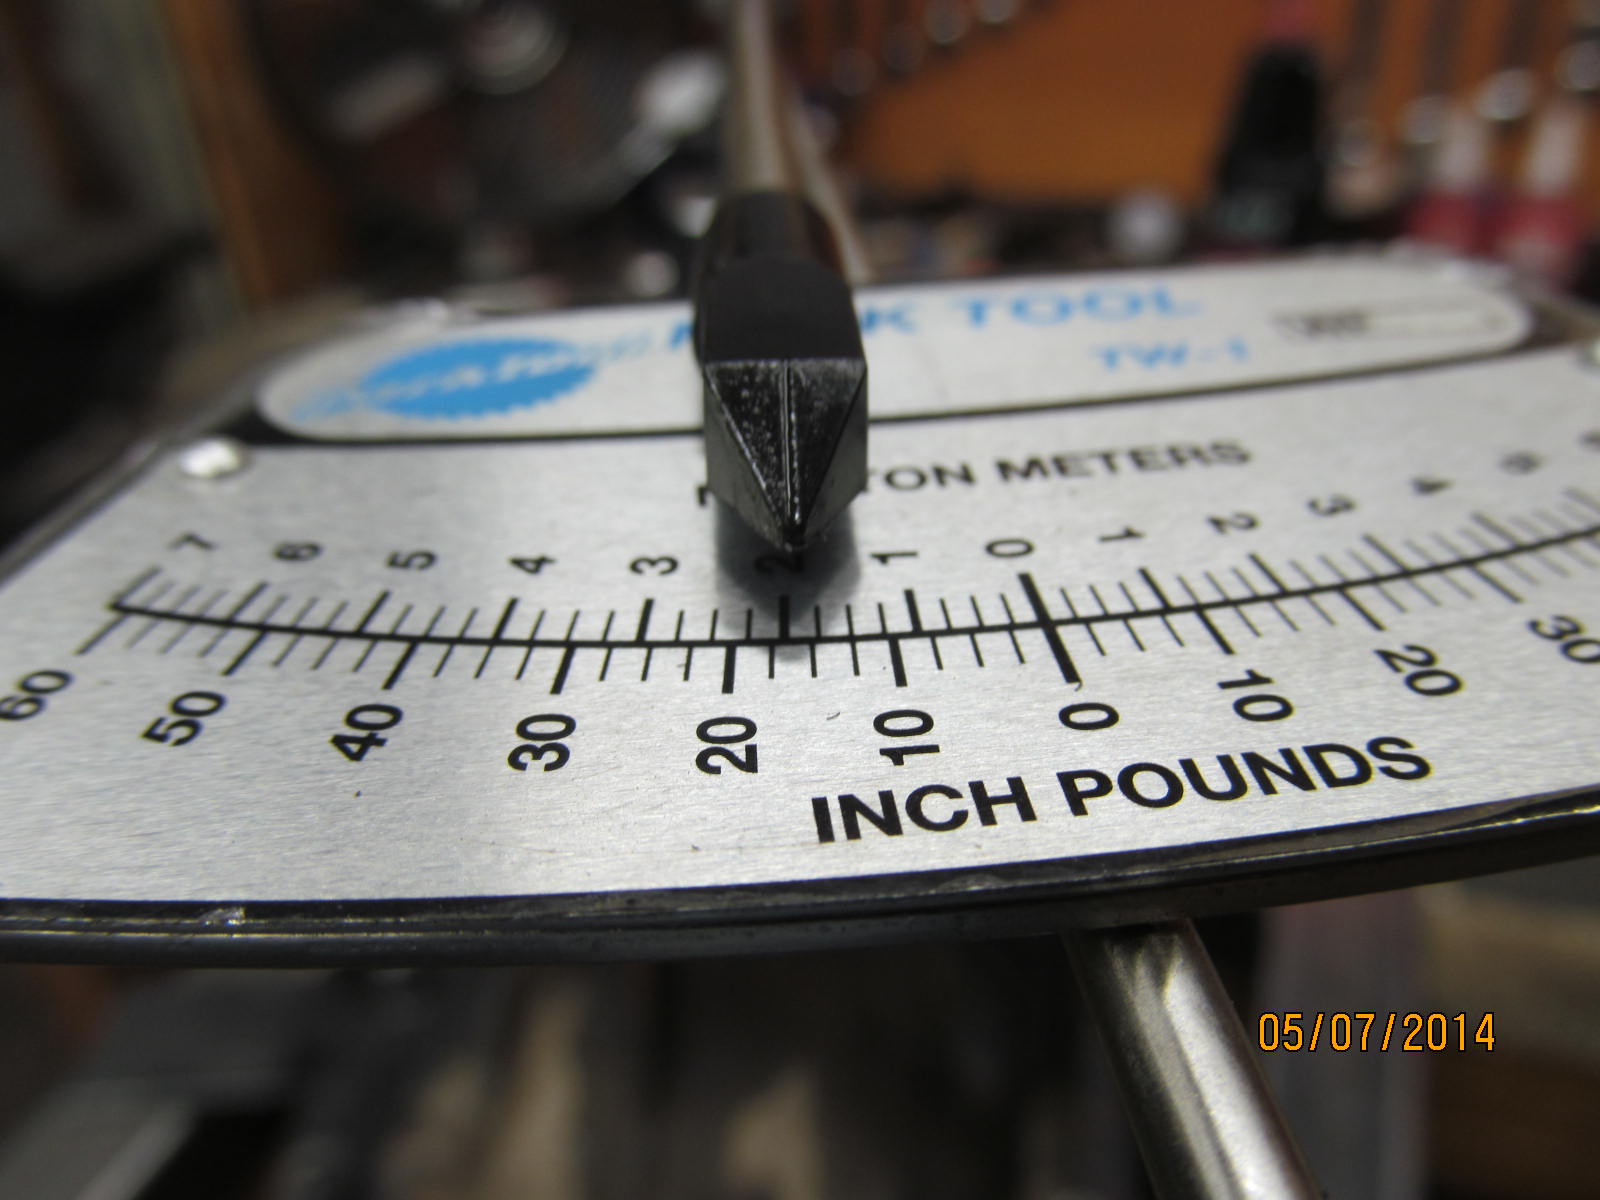
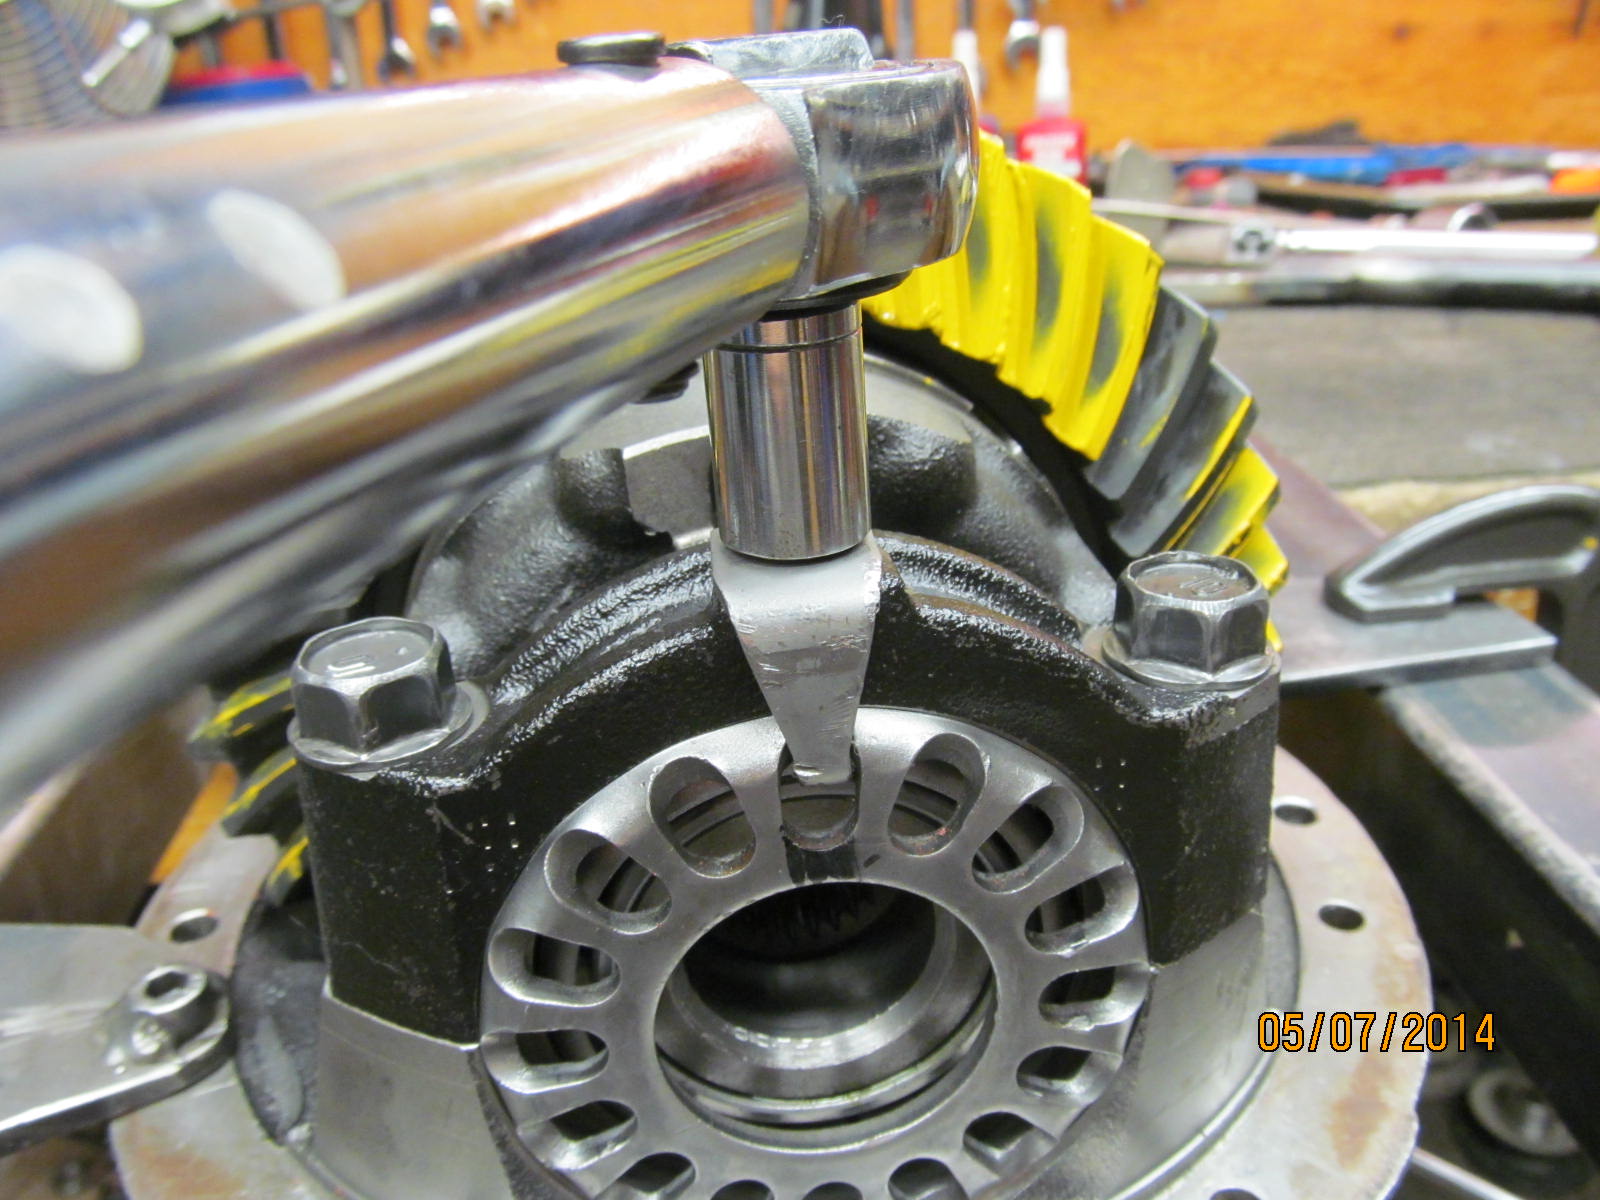
With the case out, I can accurately measure the pinion pre-load. I was noting a very reasonable 5 in/lb.
|
|
|
|
|
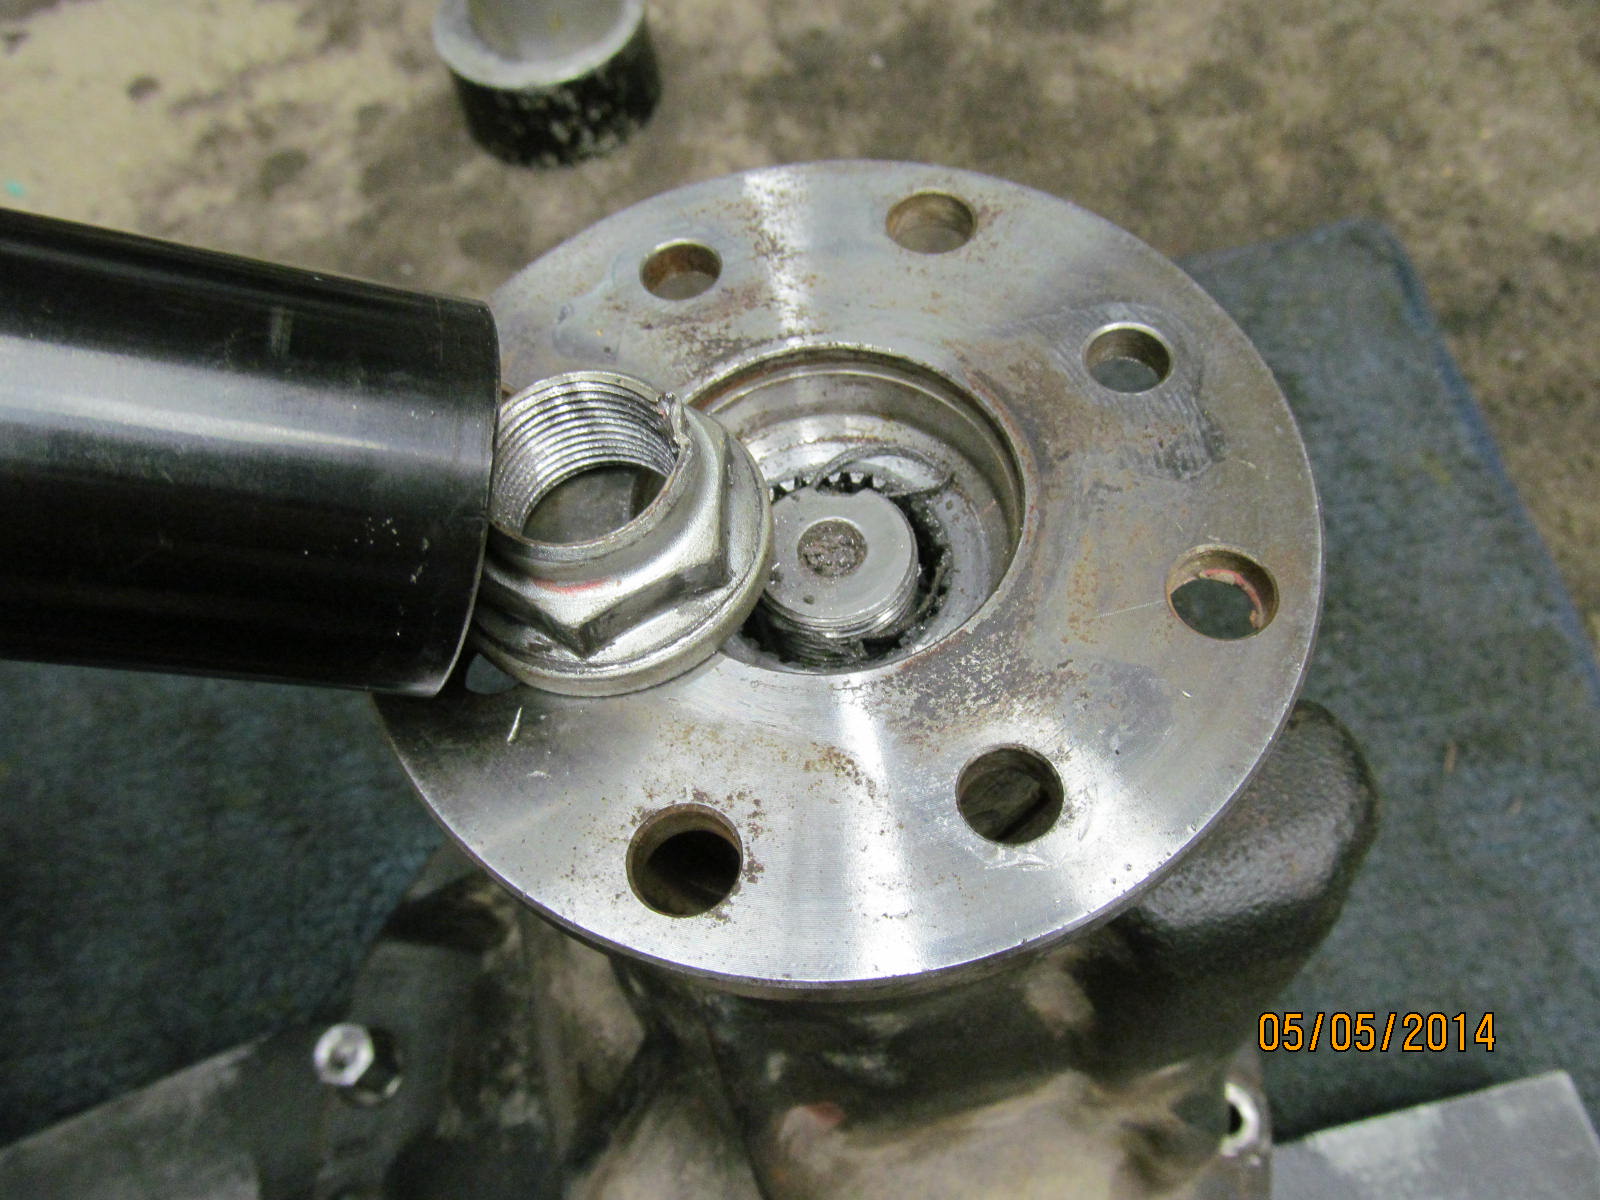
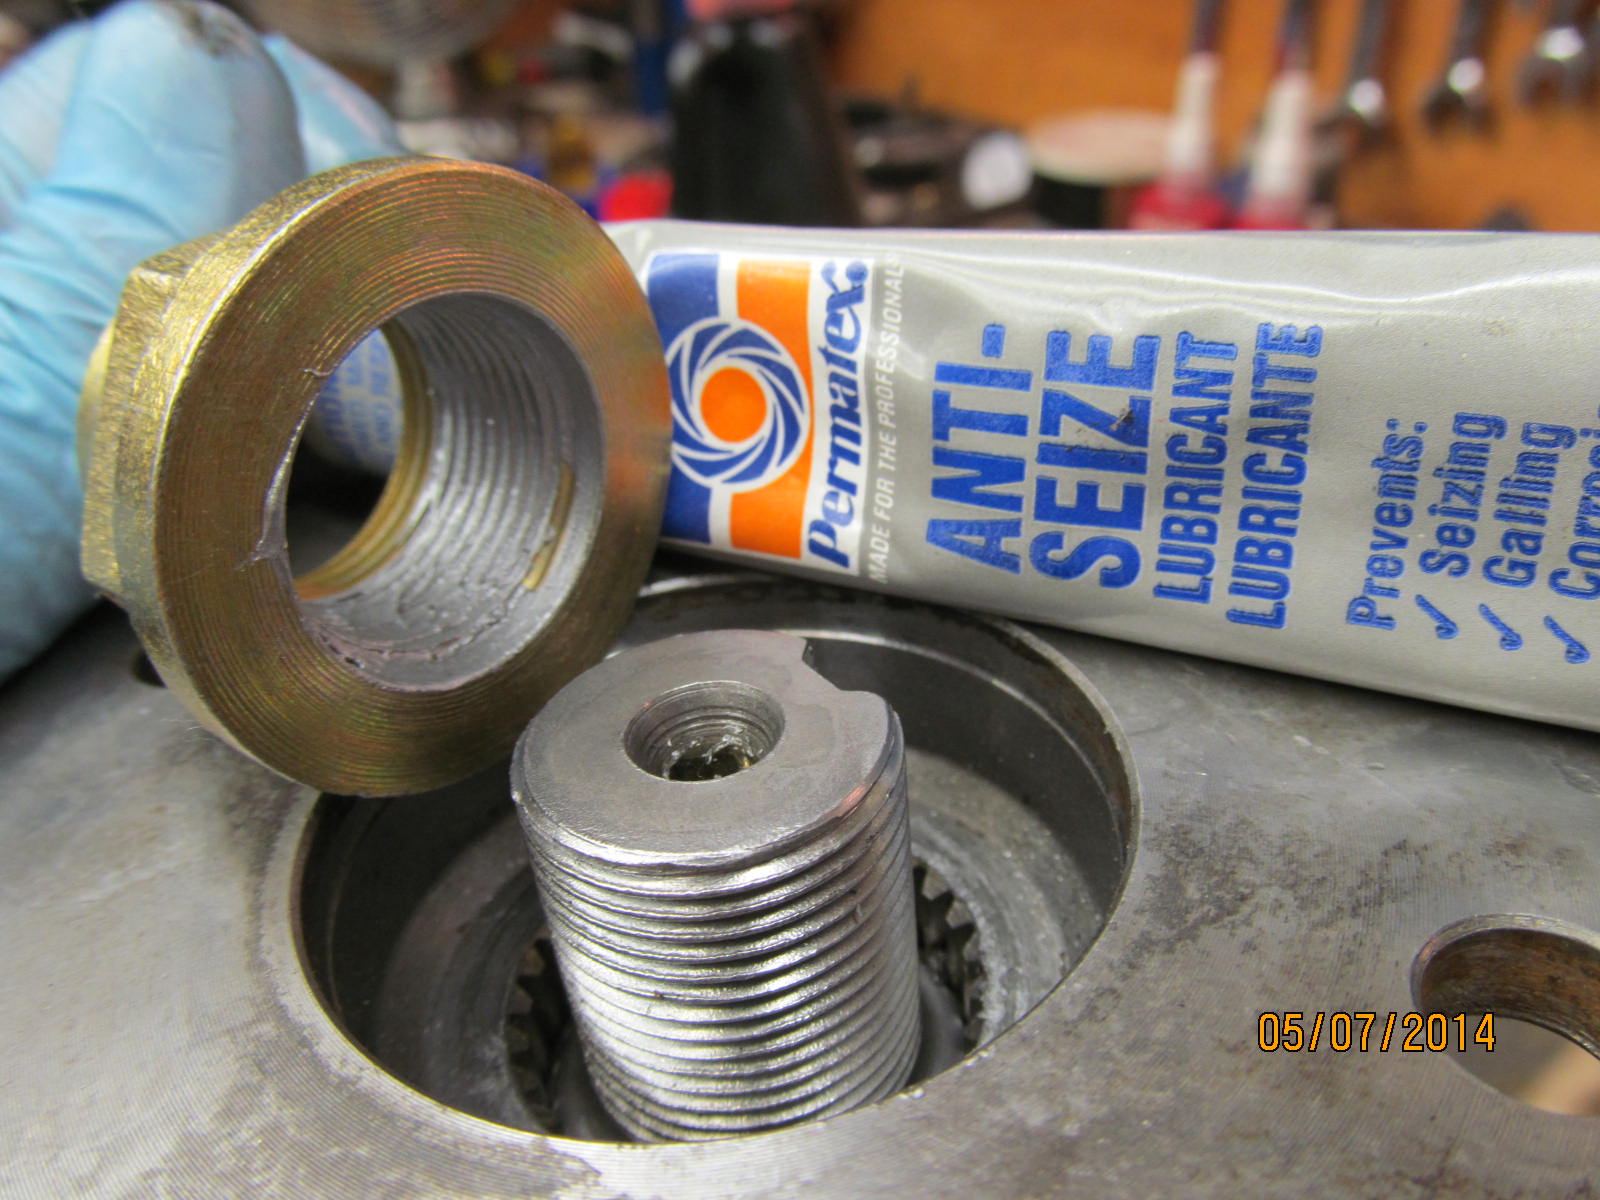
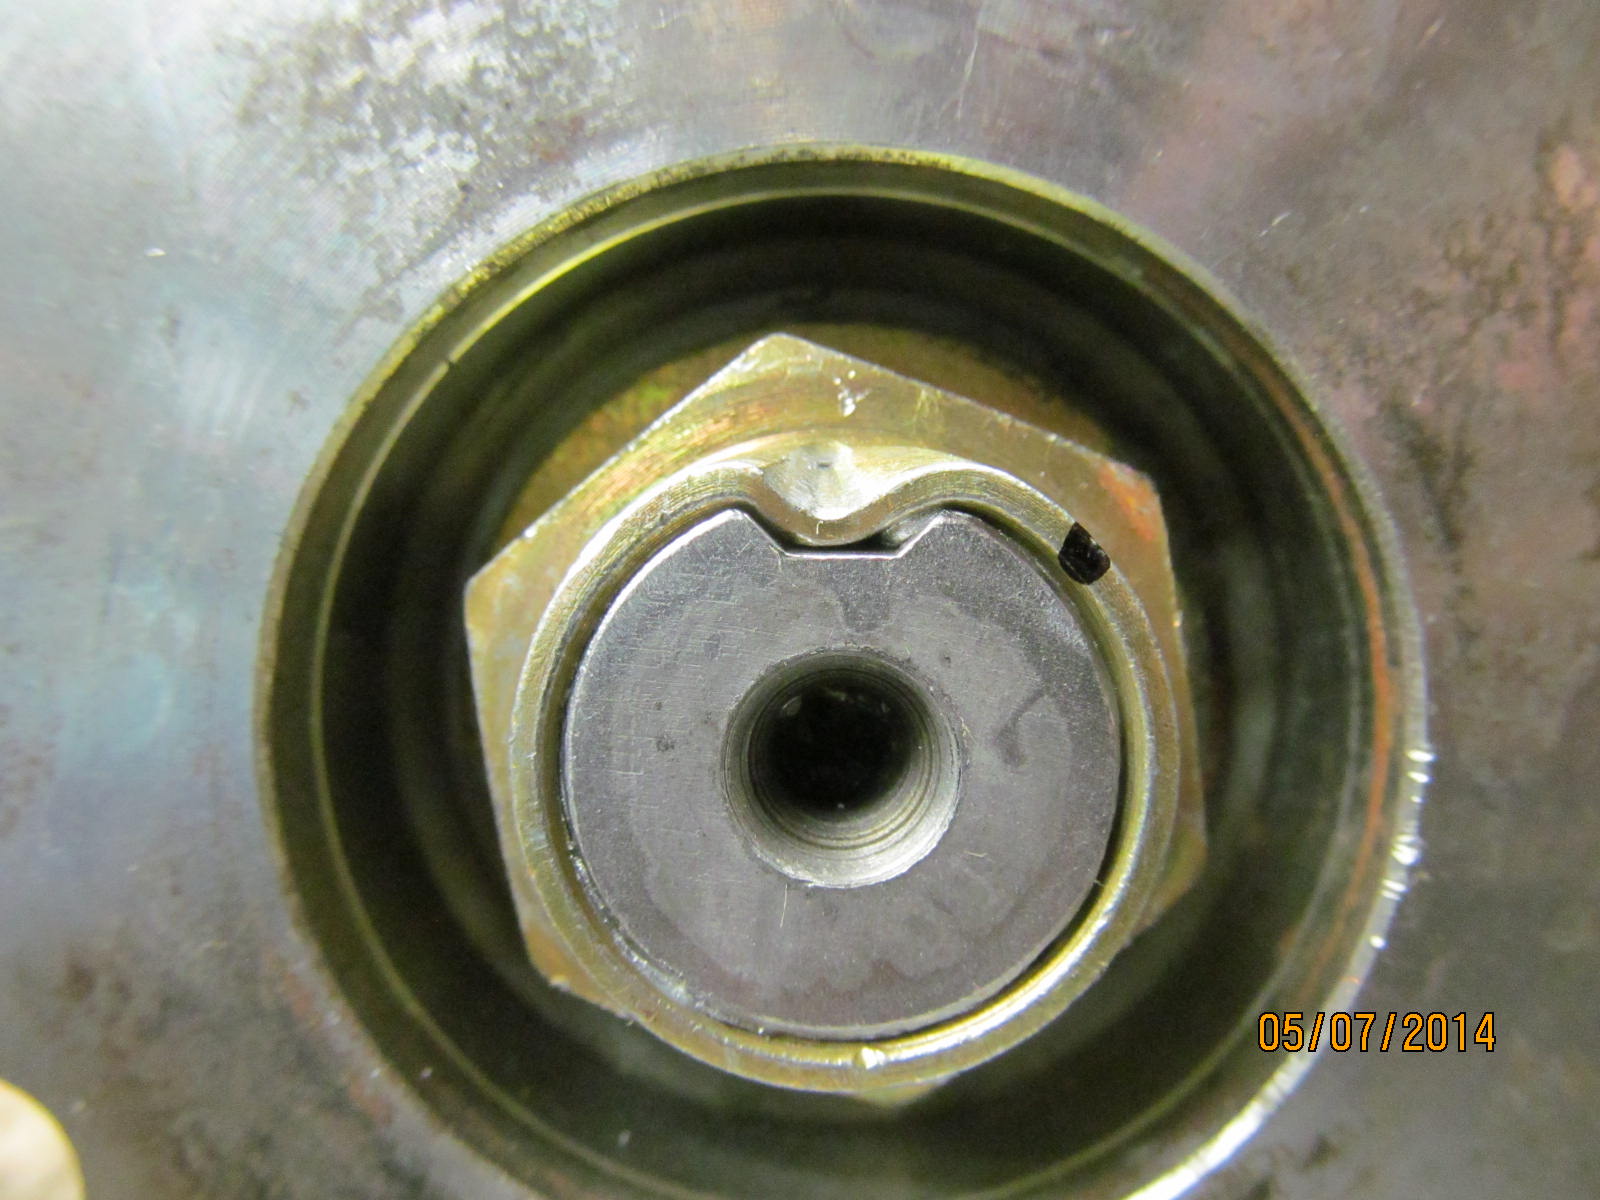
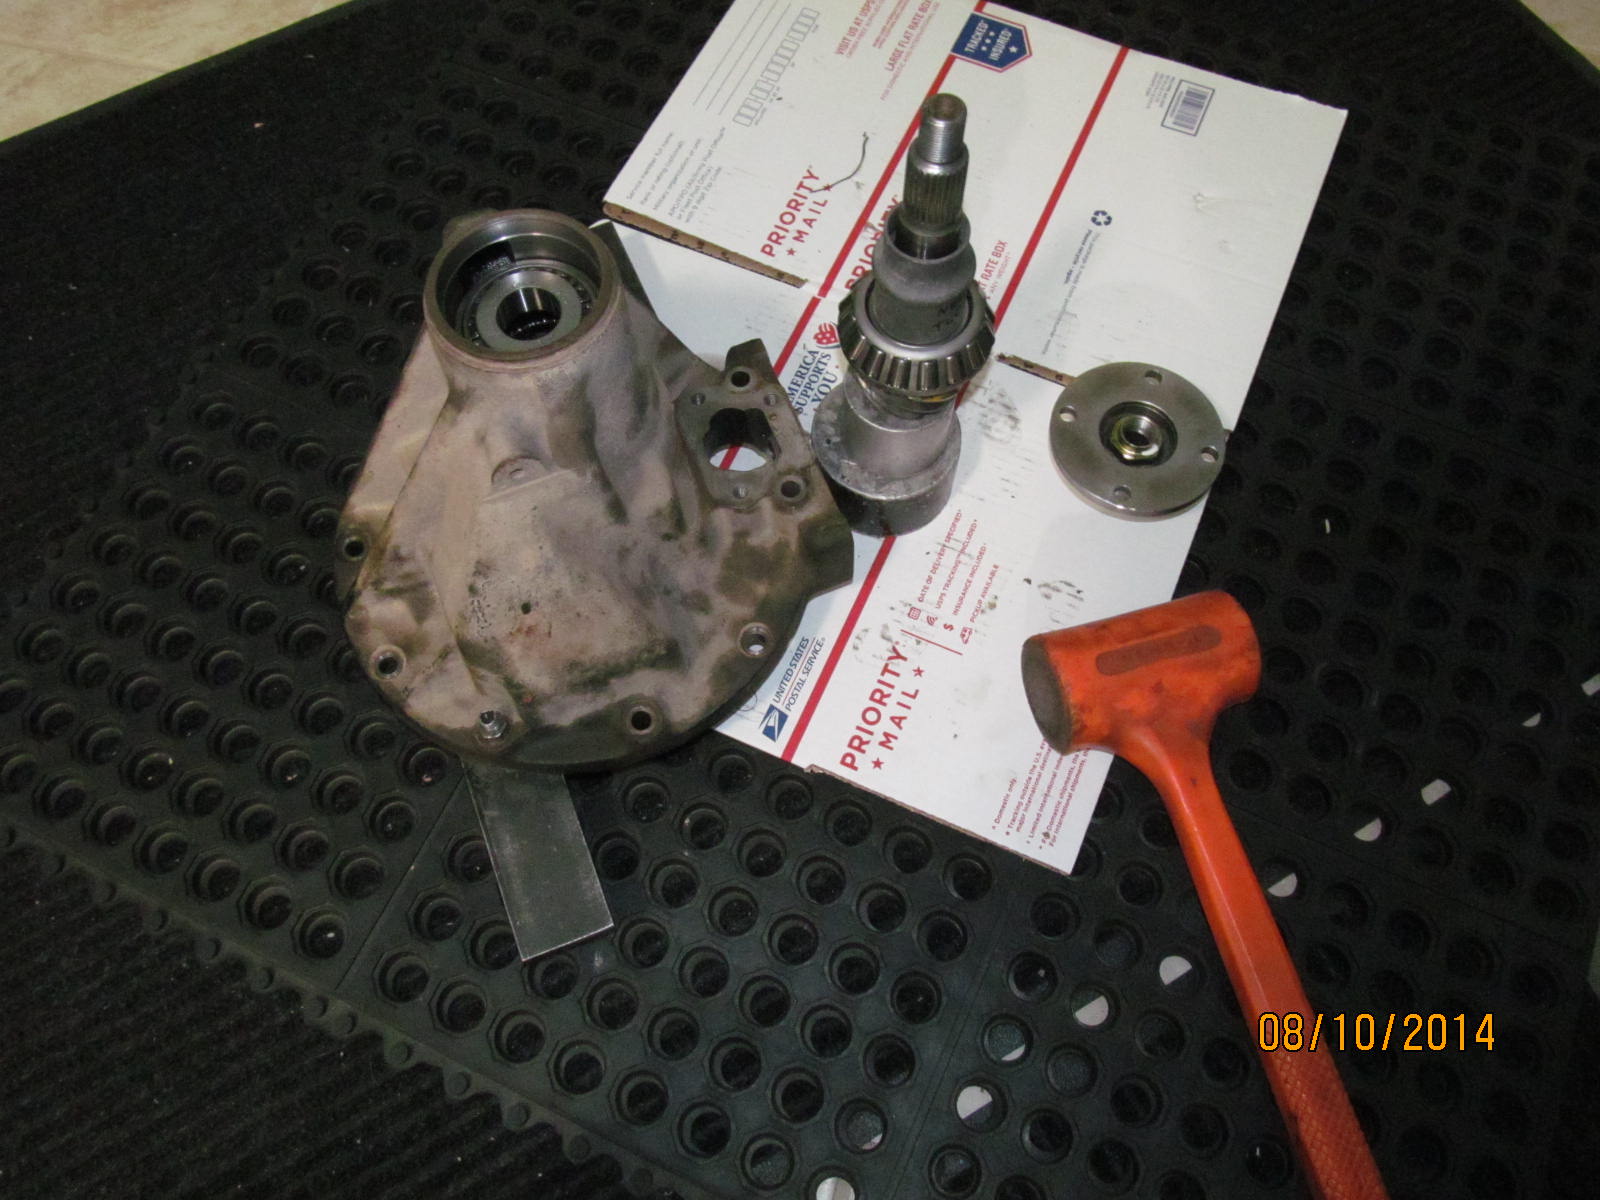
The electric impact removed the pinion nut.
|
|
|
|
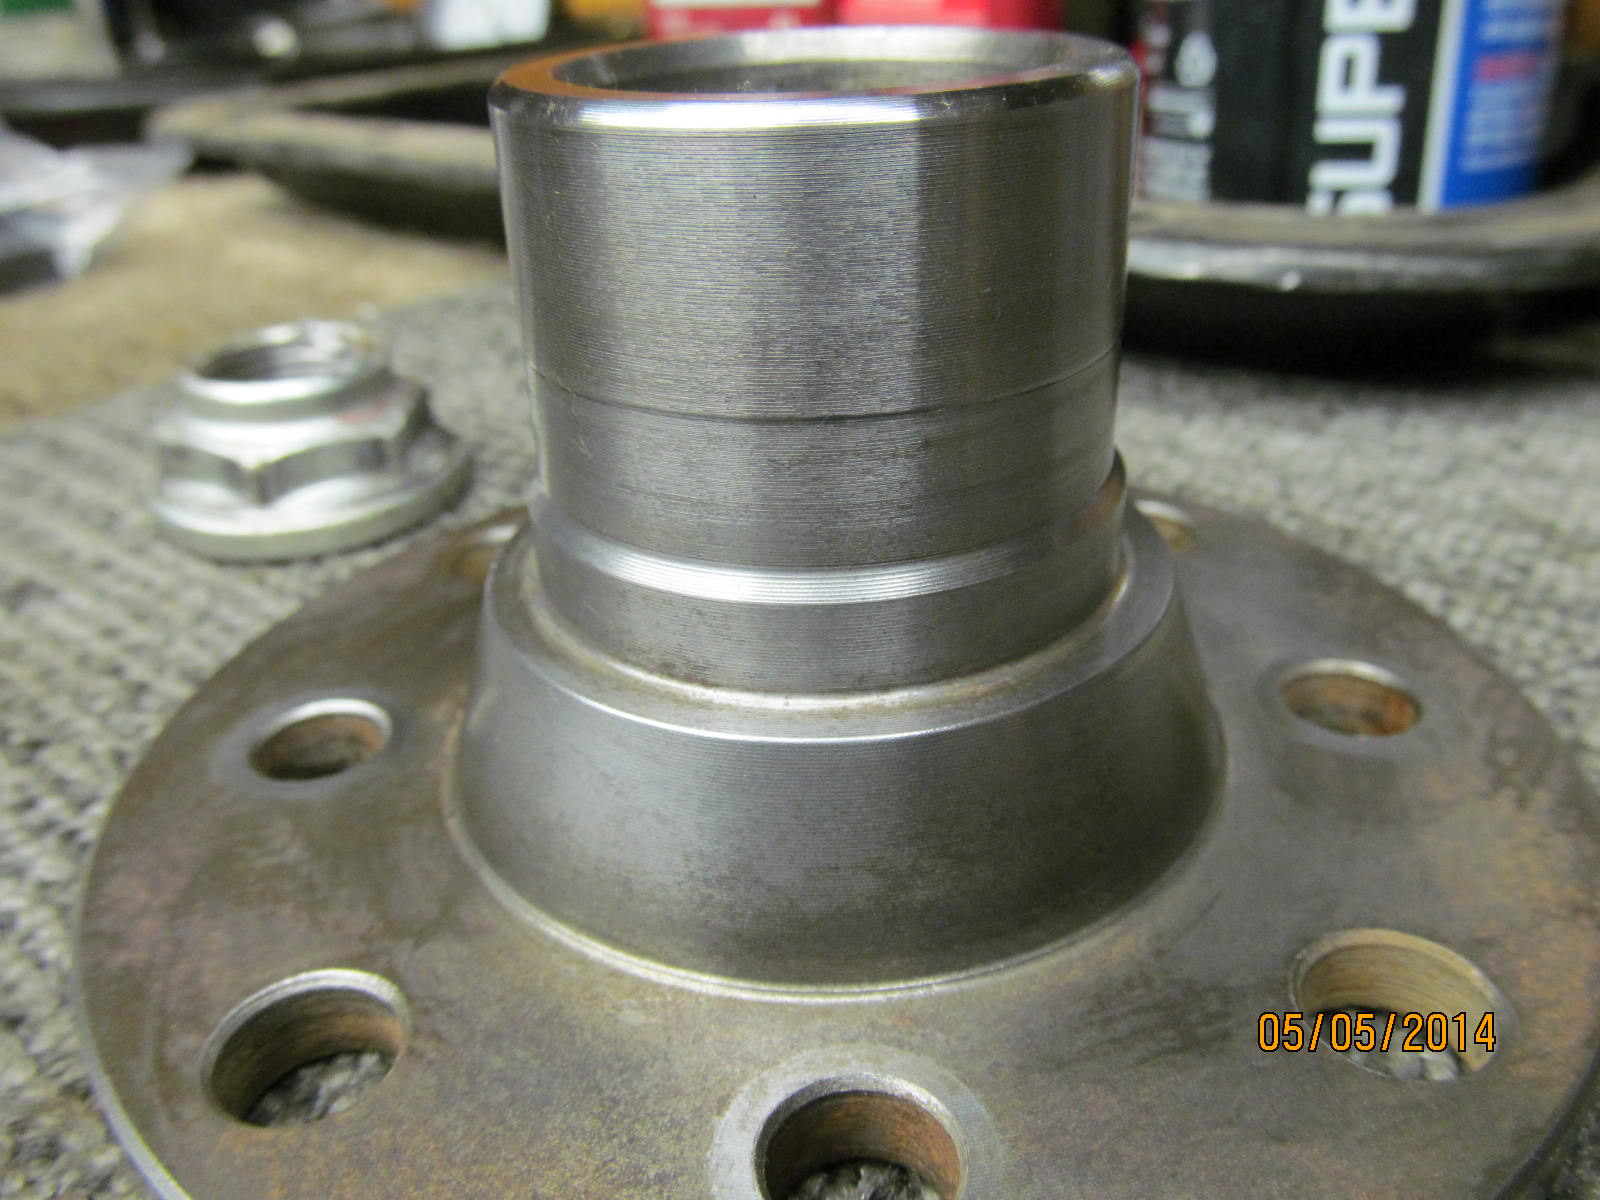
Flange is off and cleaned it up on the high speed wire wheel. 1000 grit sandpaper cleaned up the seal
surface nicely....looks almost new.
|
|
|
|
|
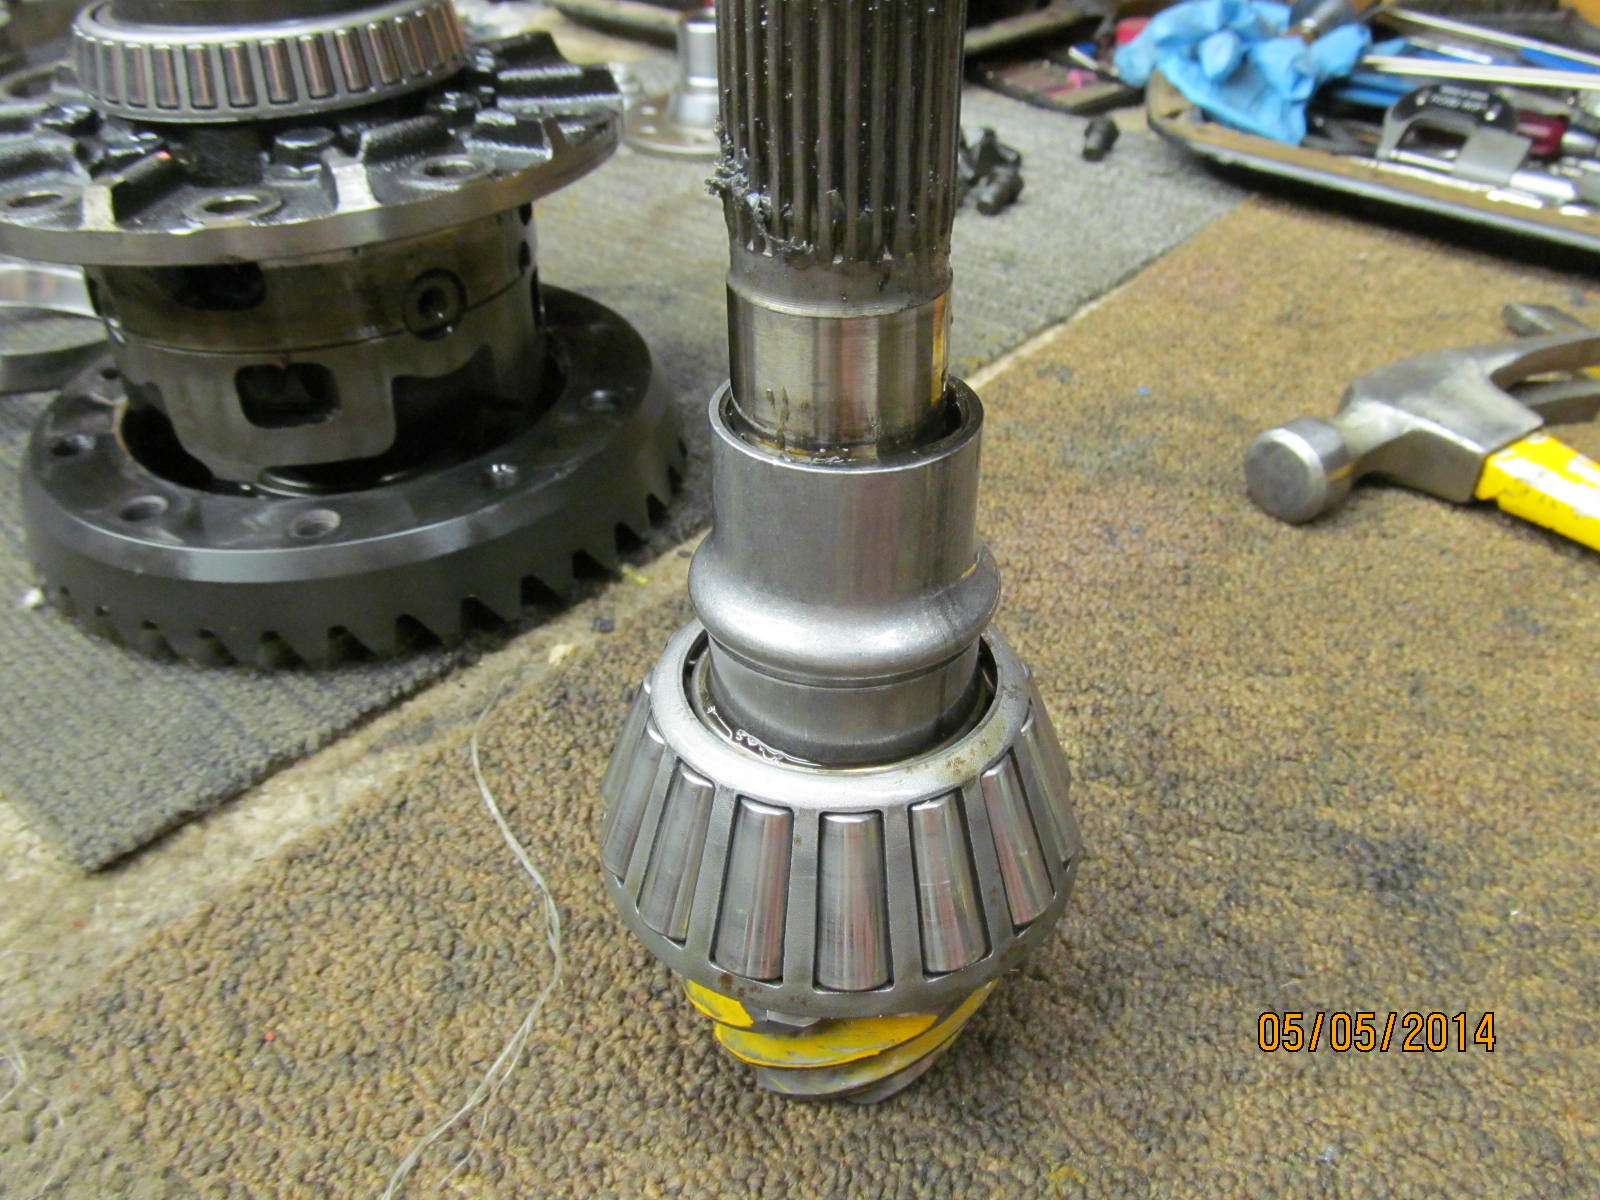
The pinion had a crush sleeve as expected. The crush sleeve was in no way responsible for this failure mode though.
|
|
|
|
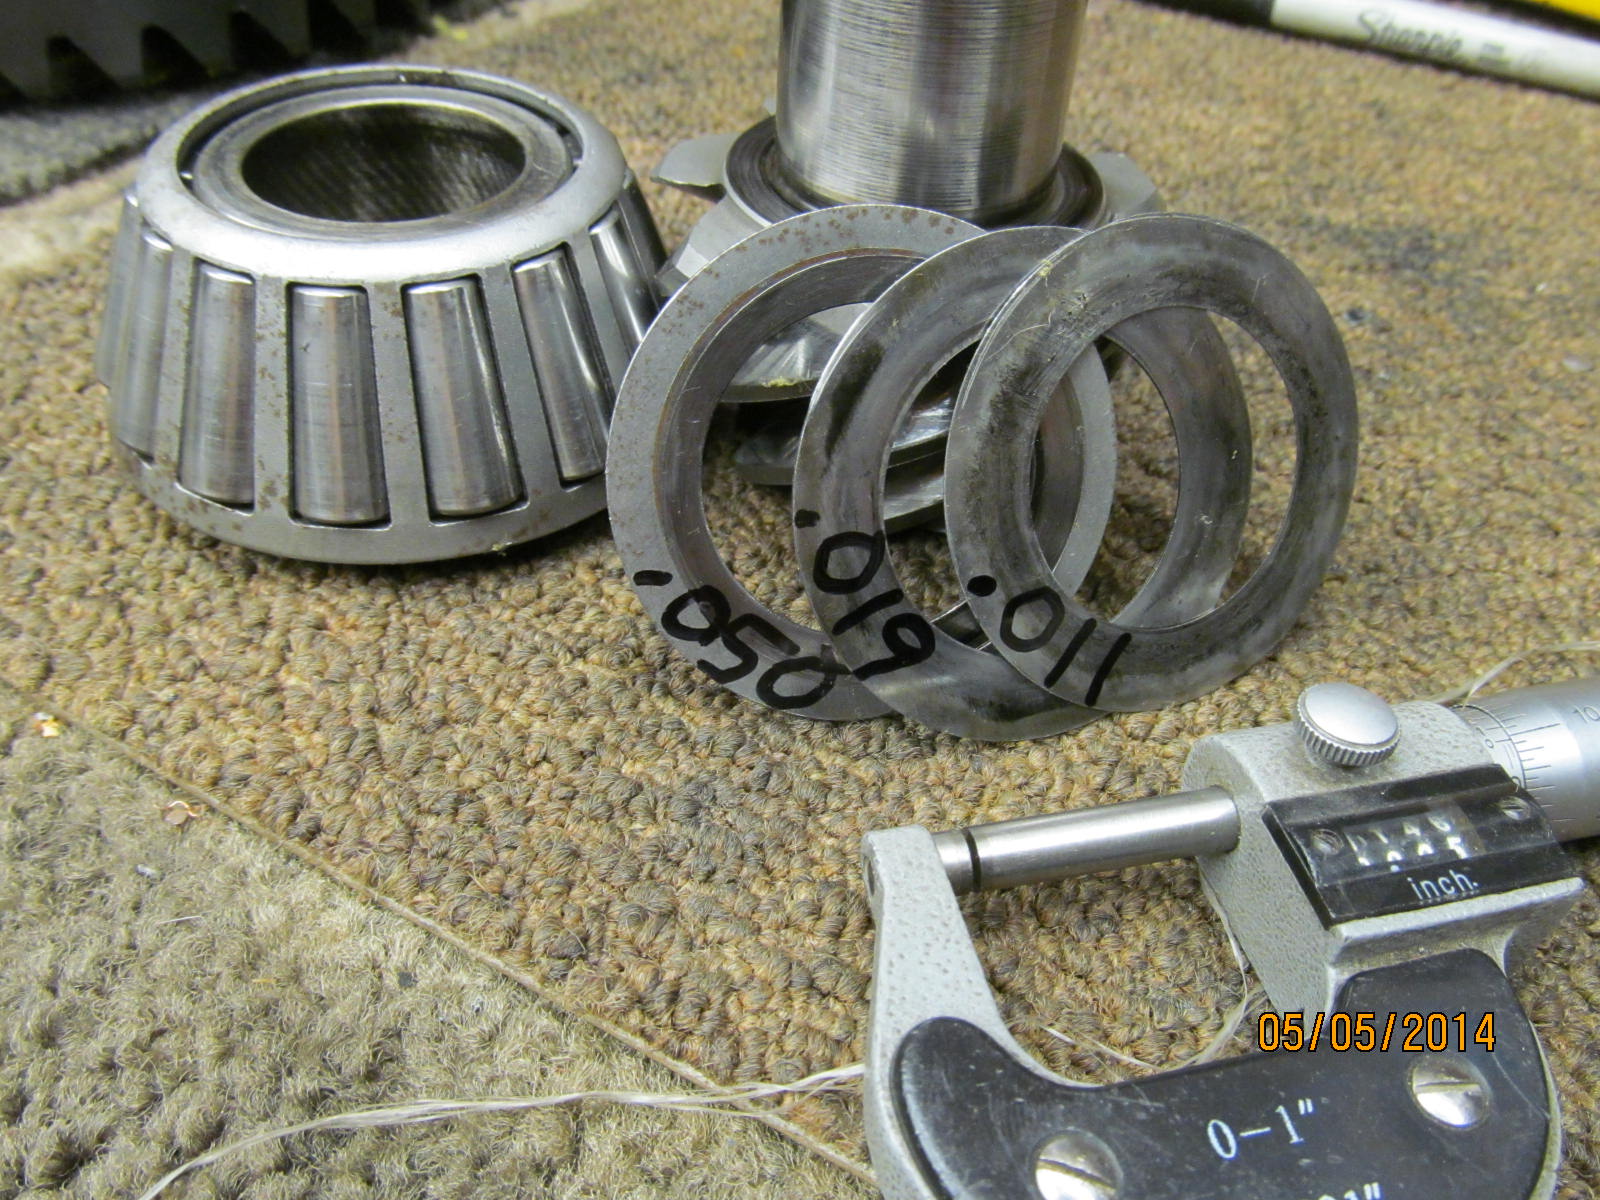
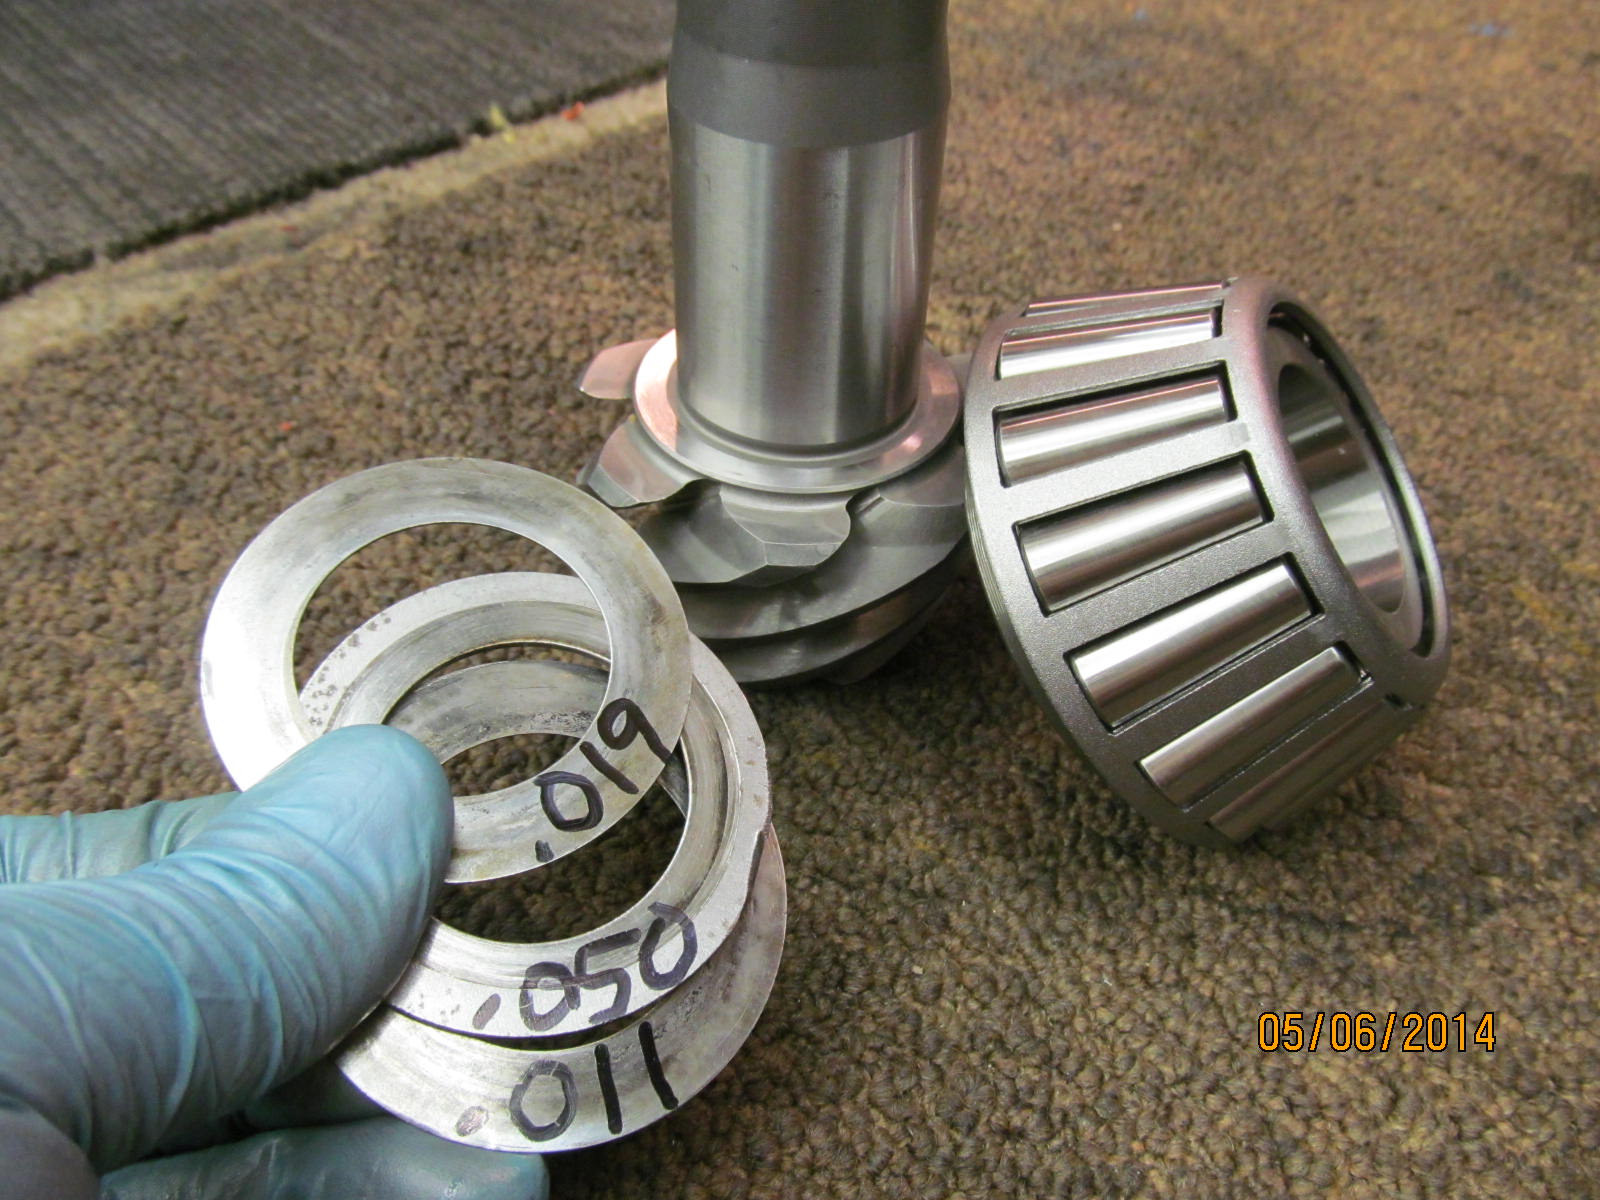
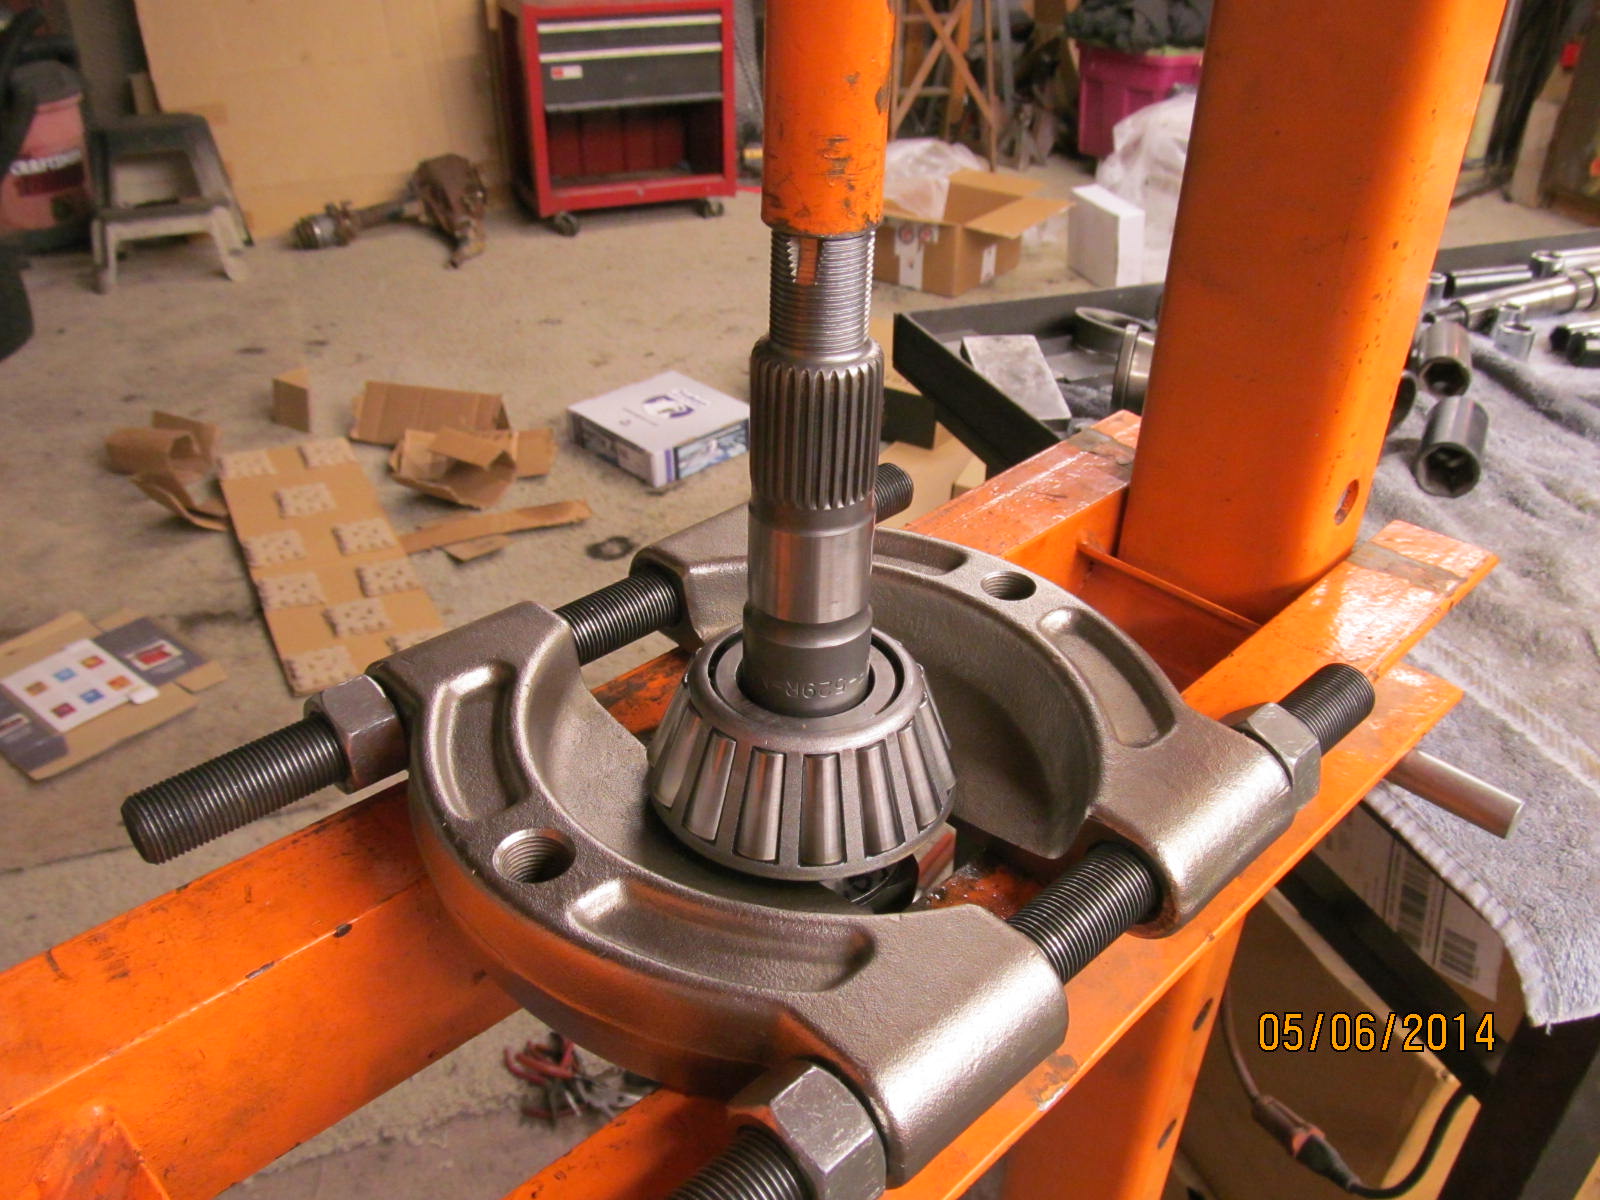
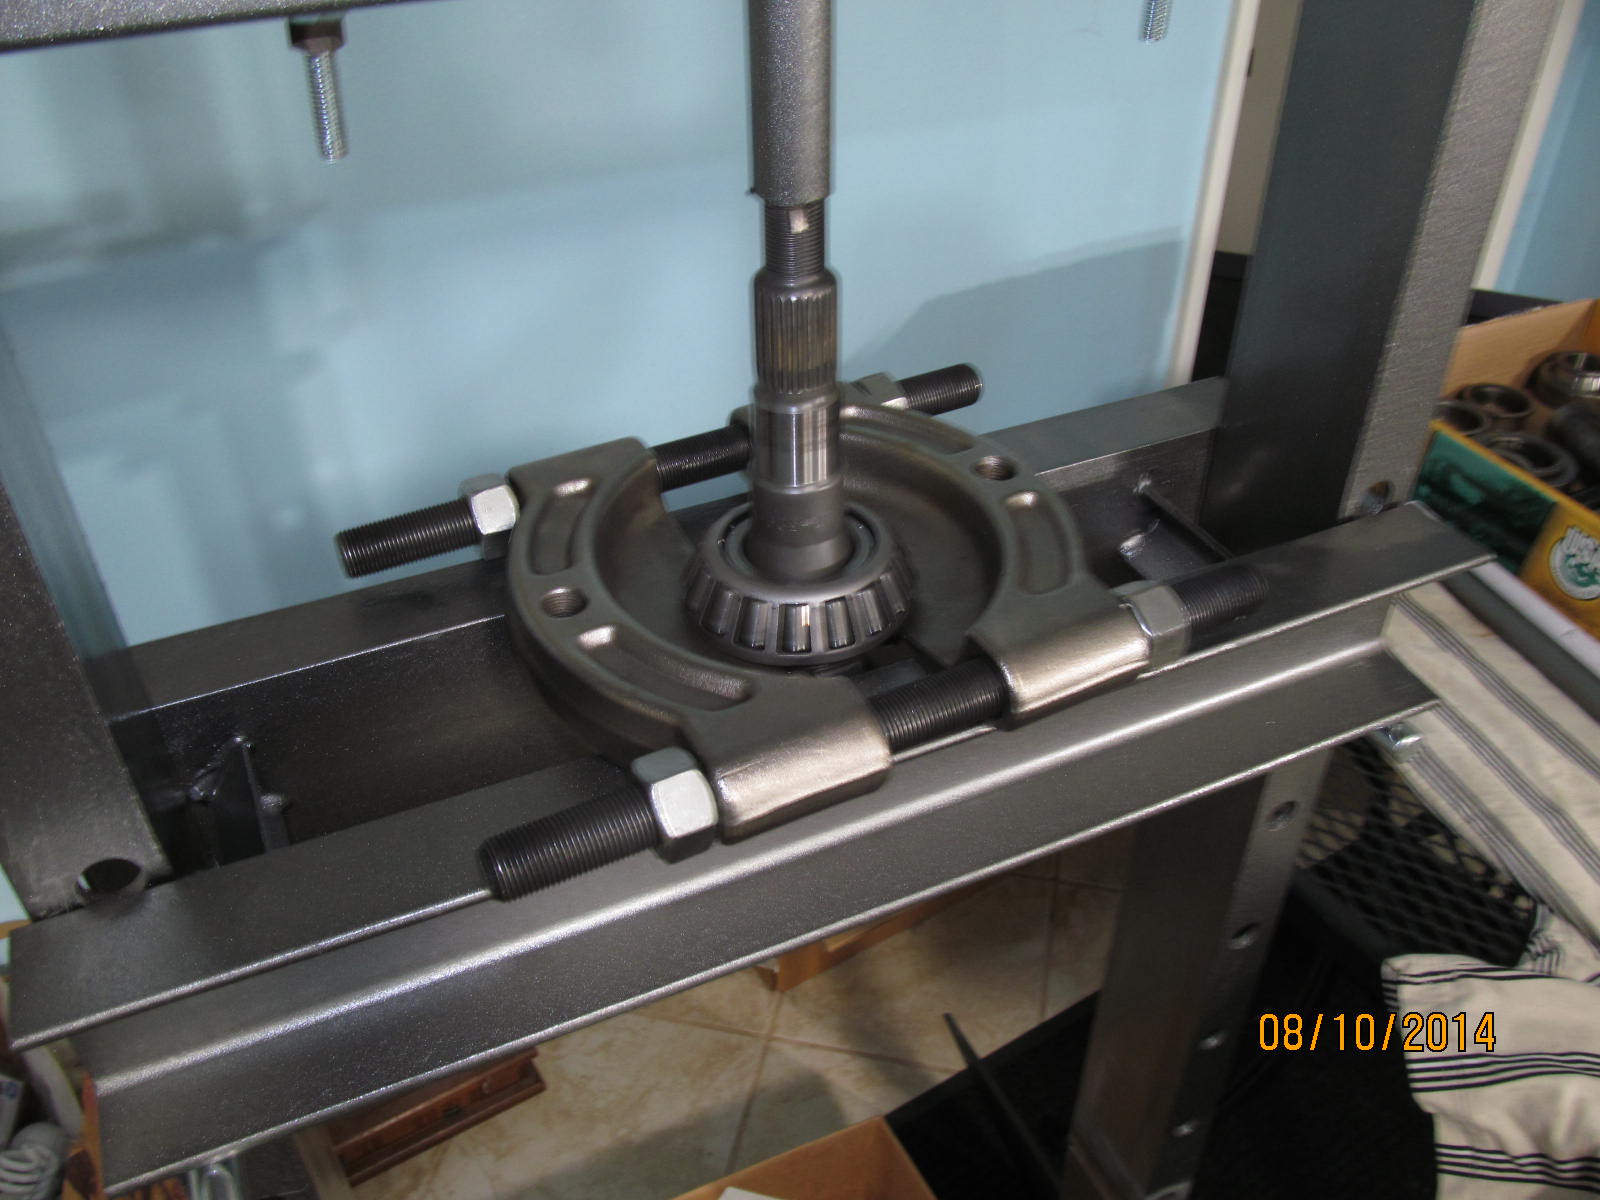
Just curious what value pinion shim was used. The bearing is properly secured with the OTC-1130 bearing splitter
and the press does the rest of the work.
|
|
|
|
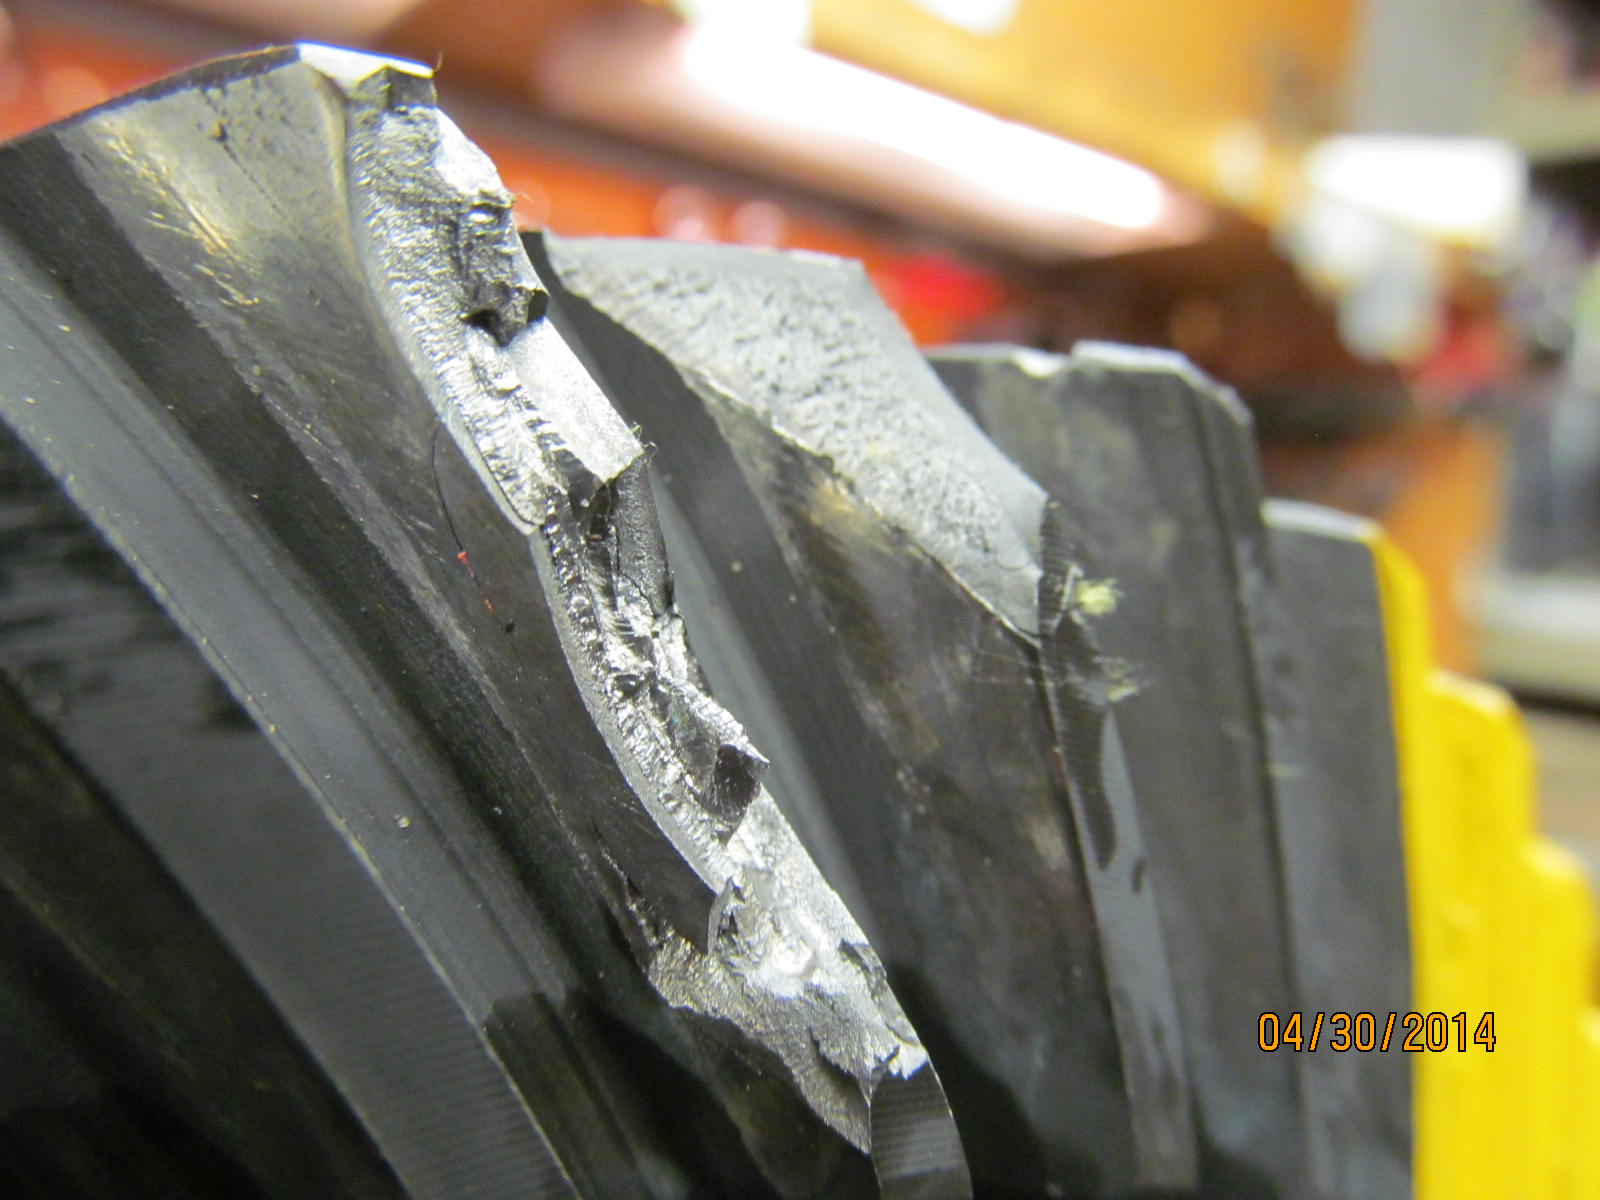
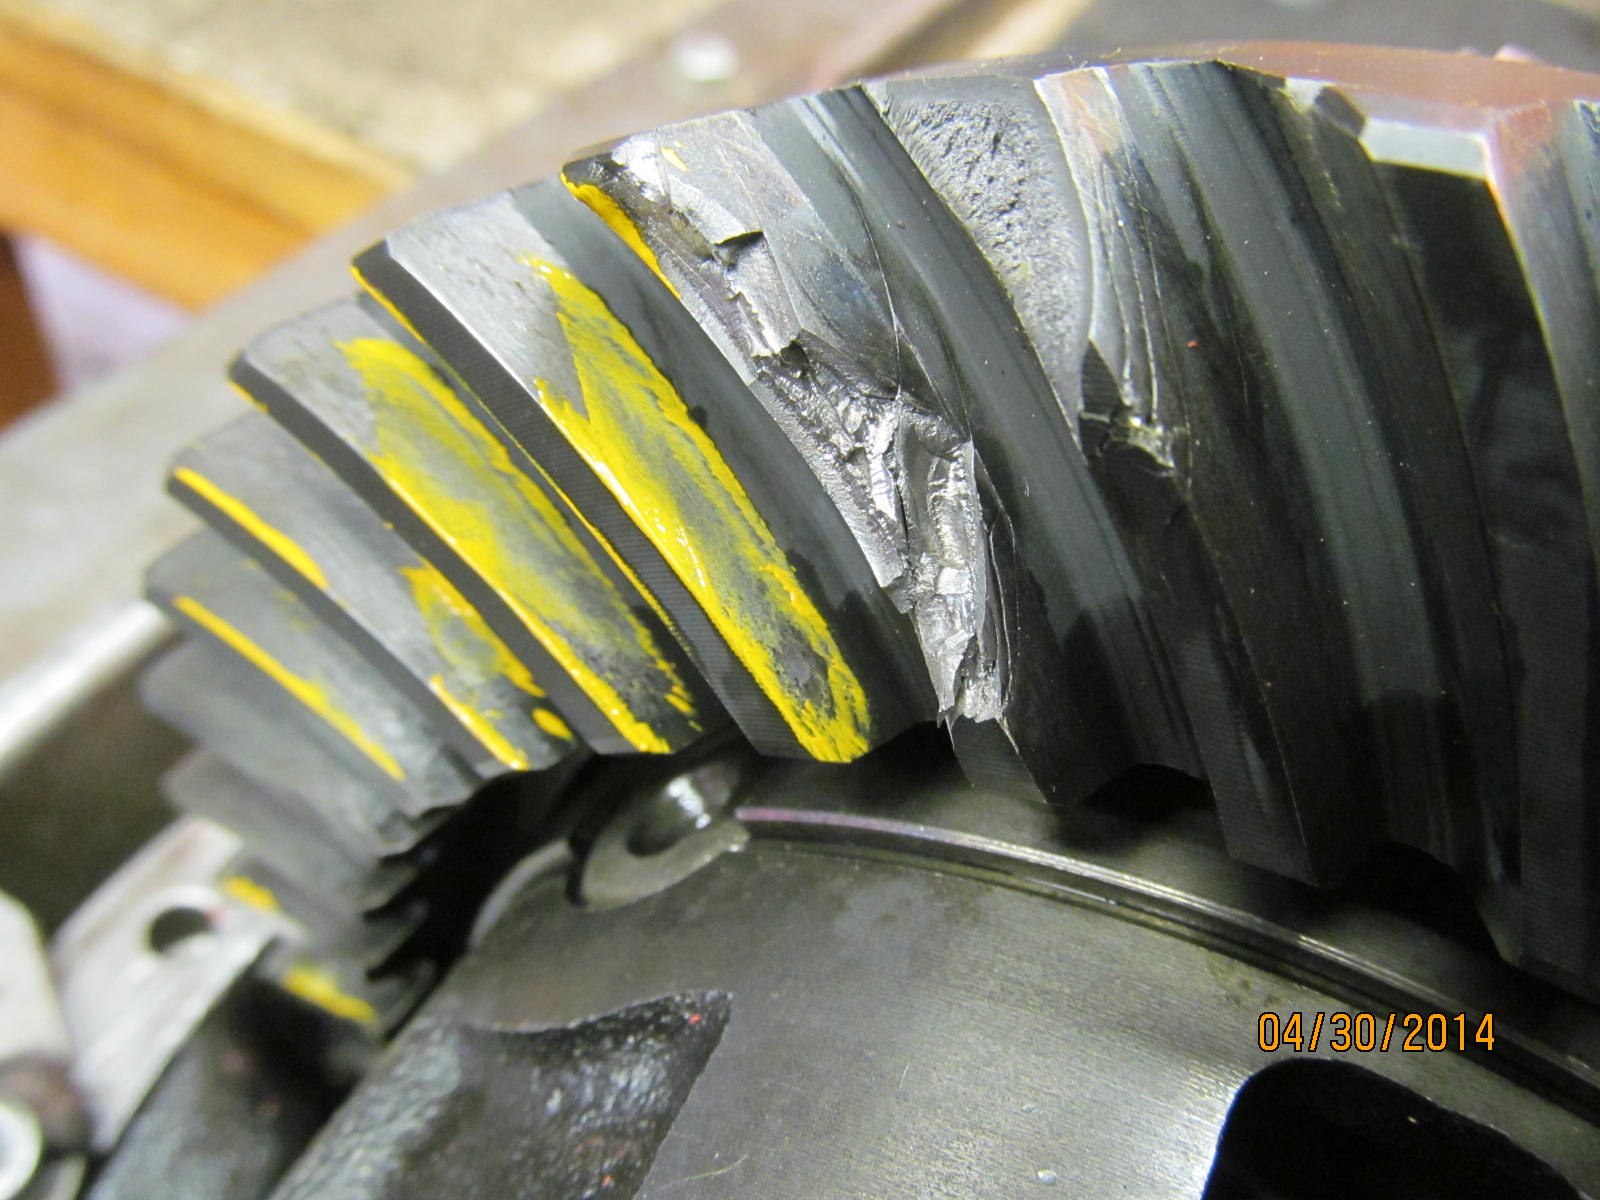
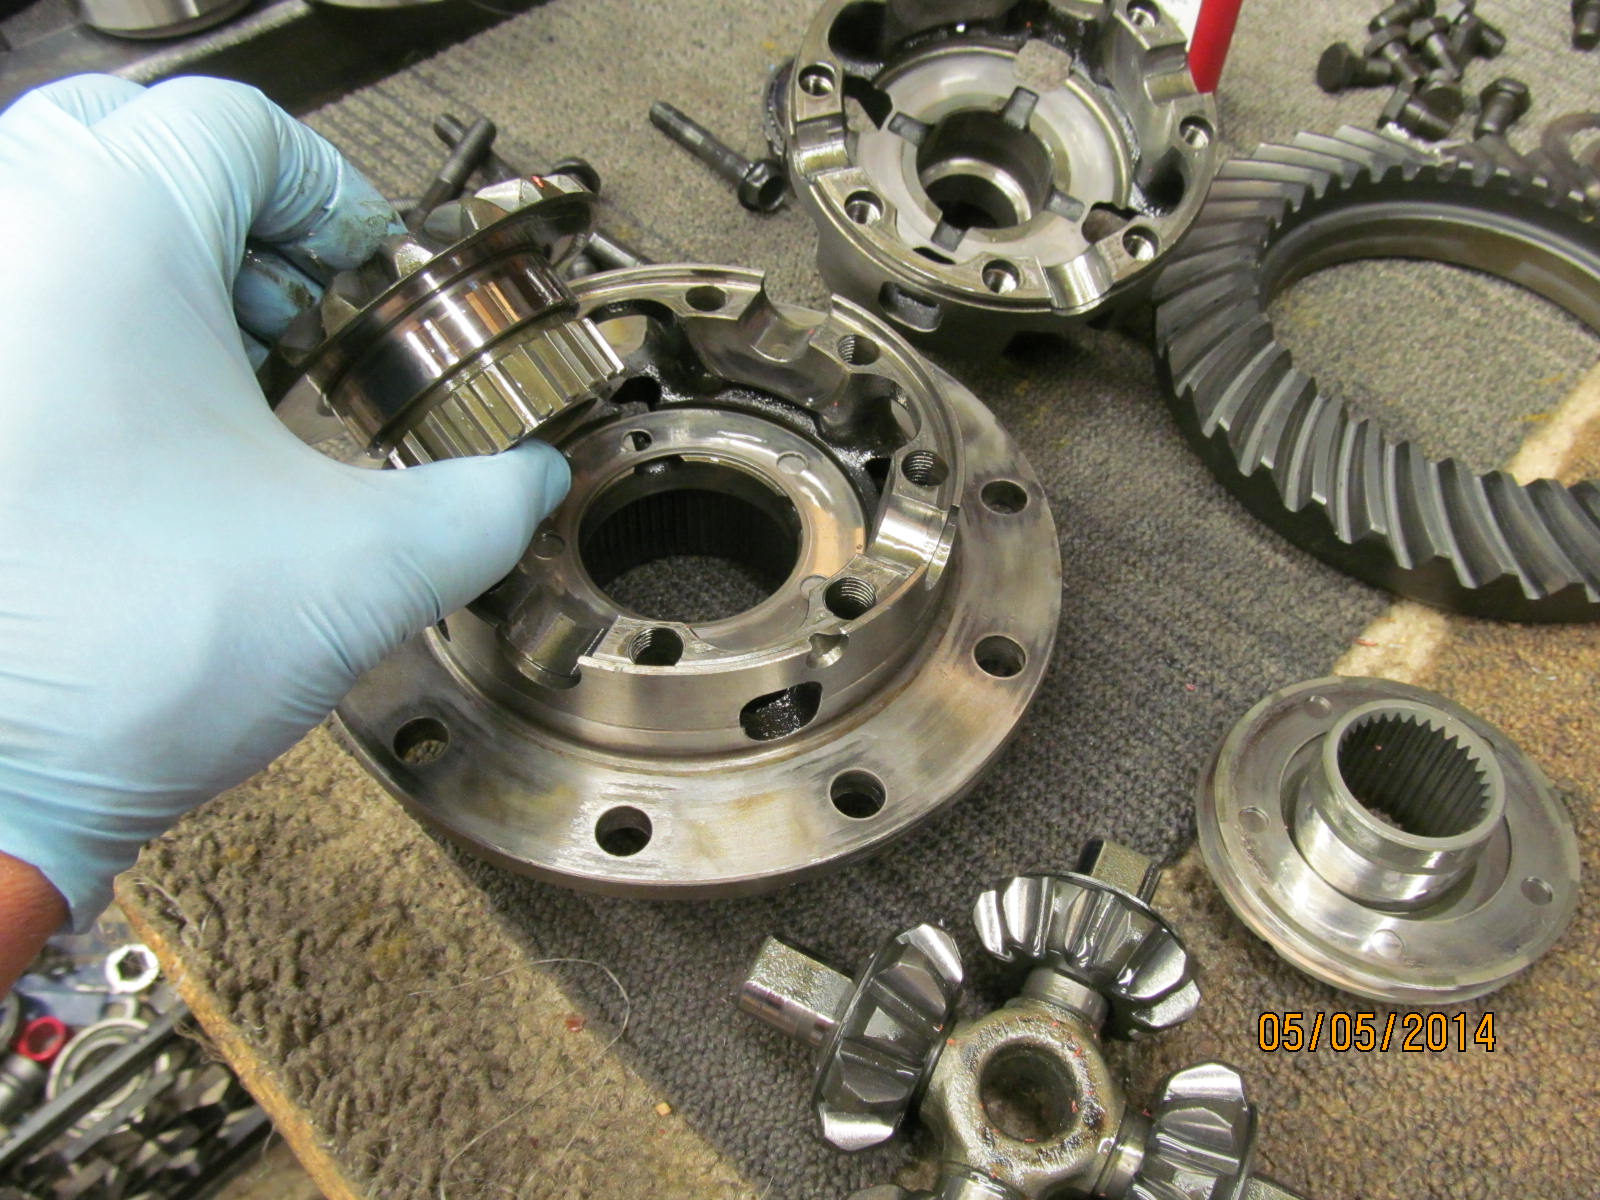
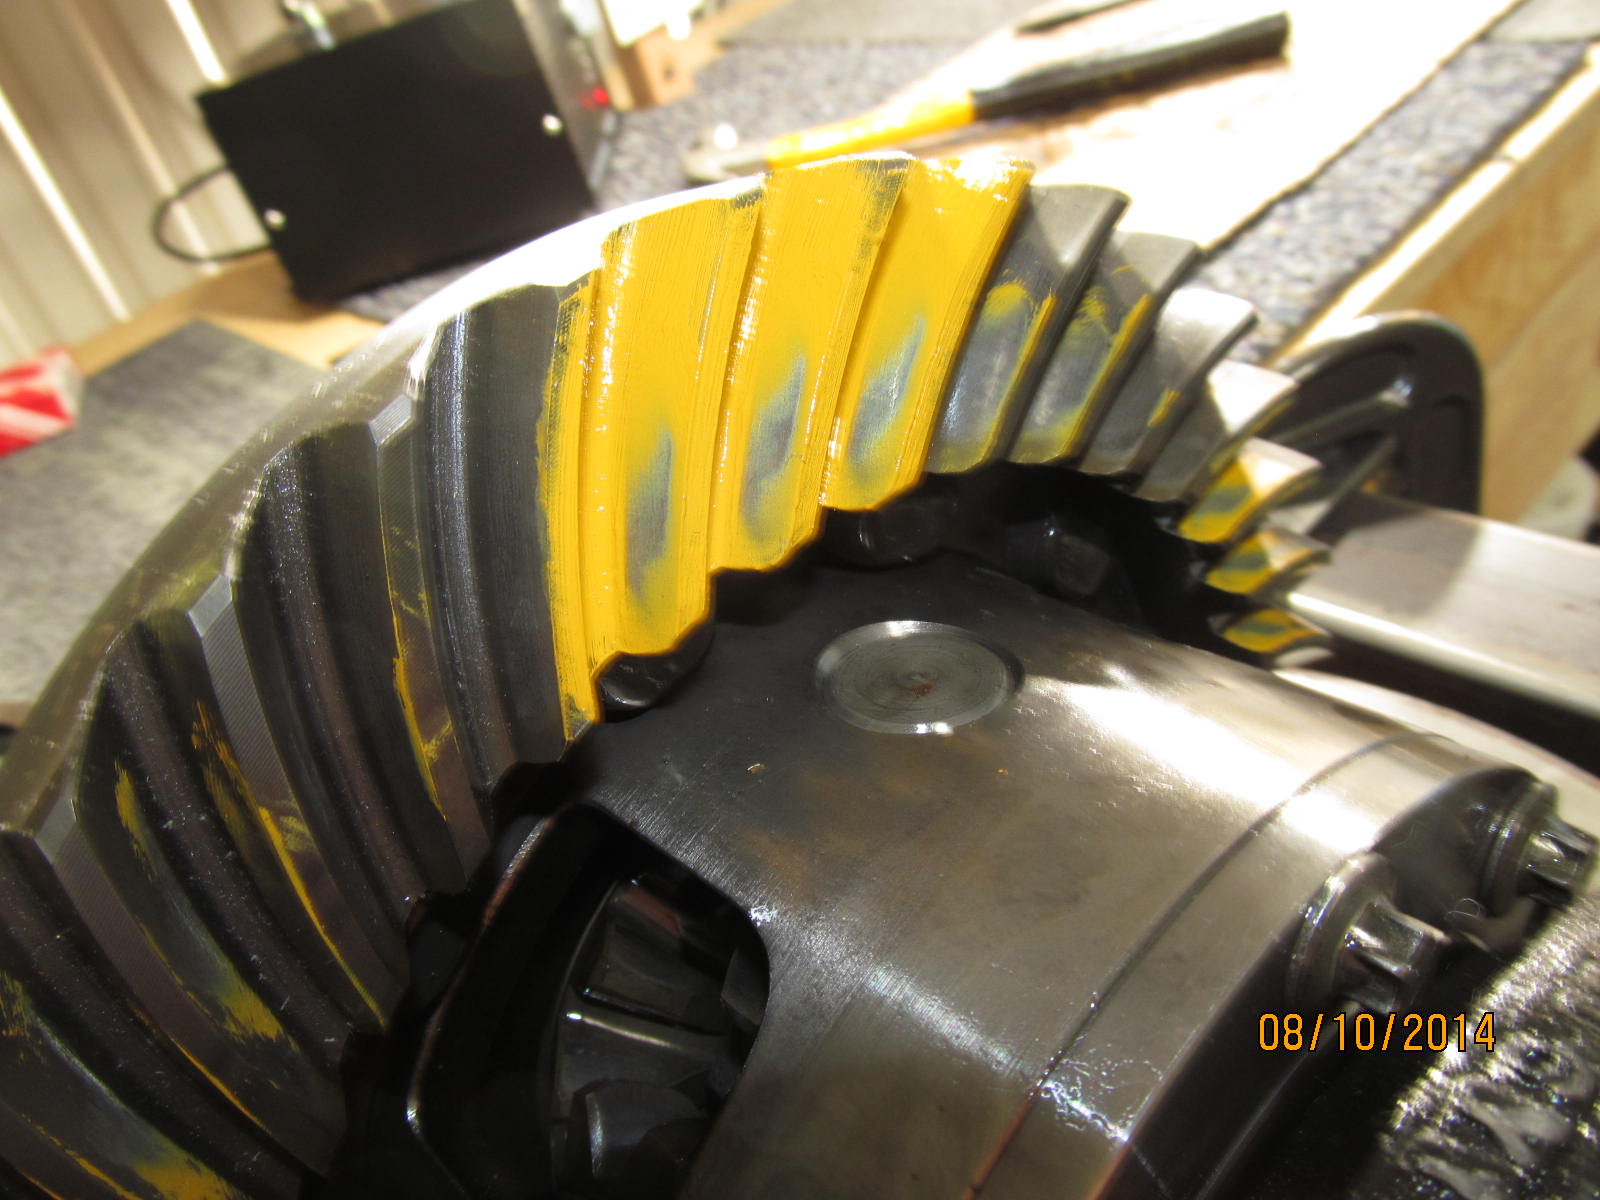
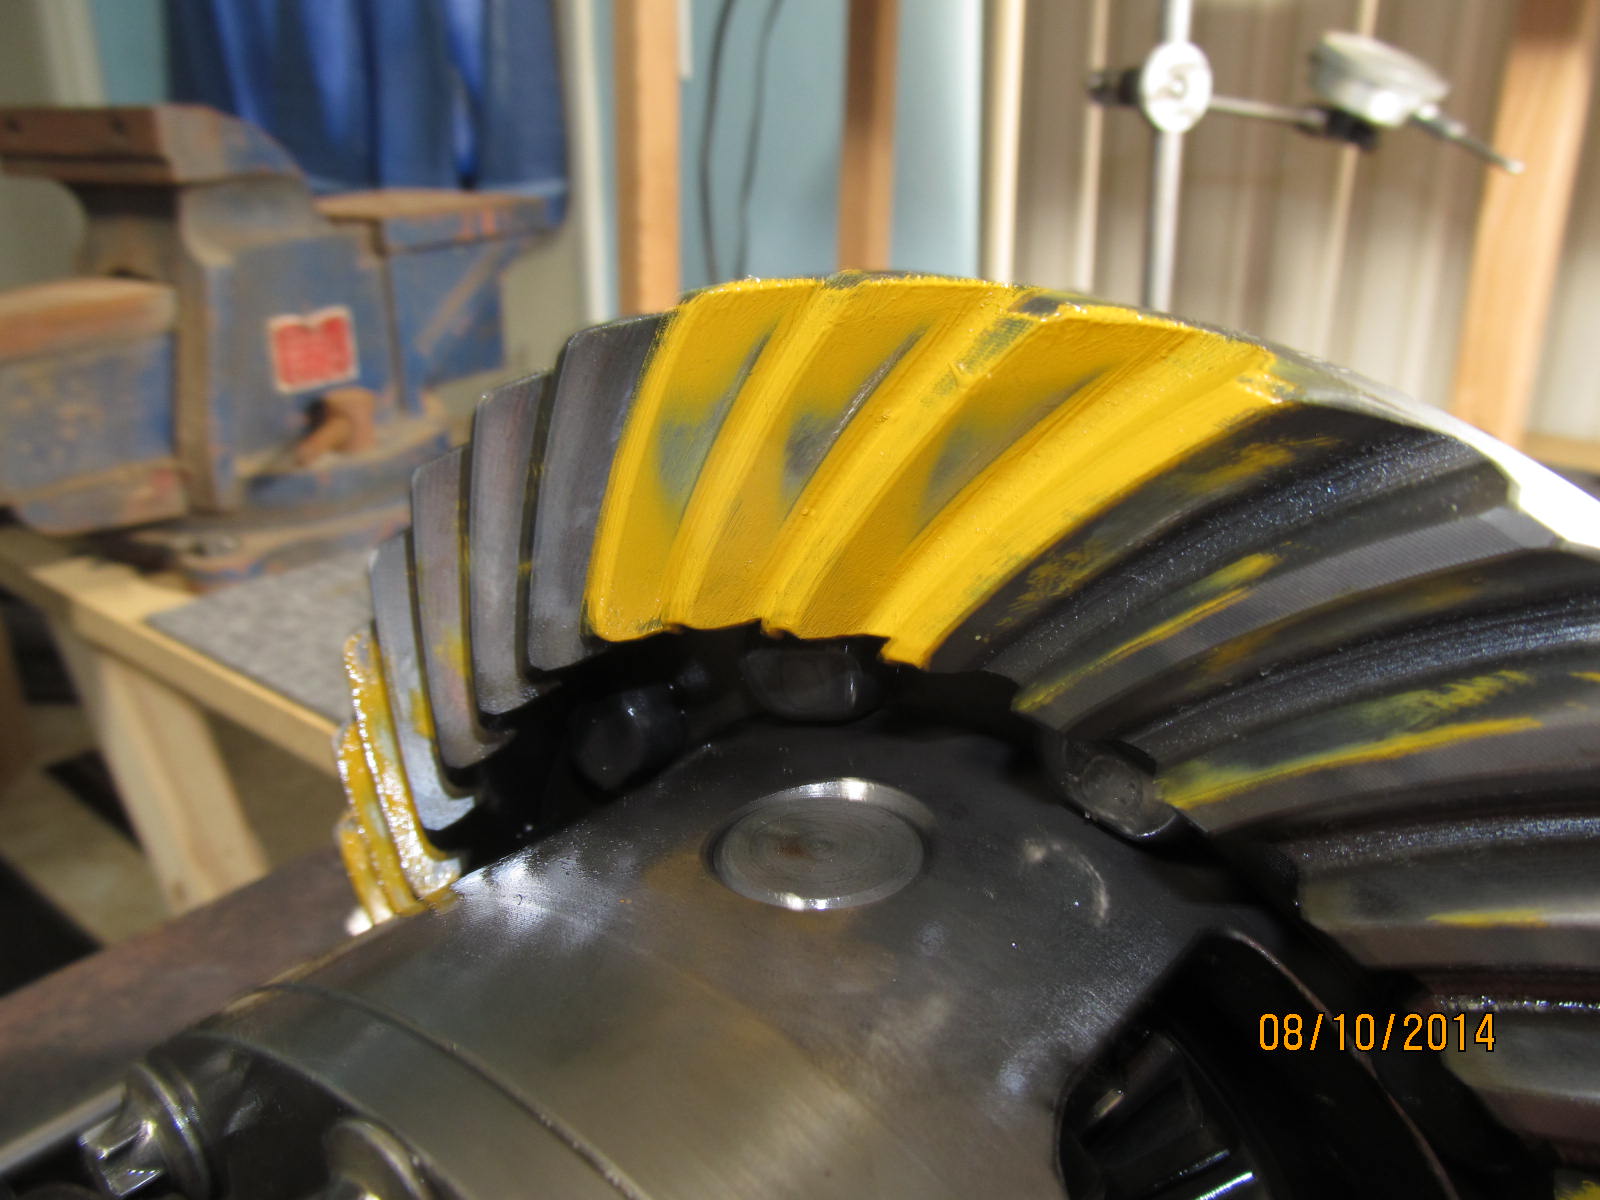
Looks like an even .080" which is perfectly normal for Nitros. Some issues were found with the old pinion....
the teeth all had that "chromey look"...like a reflective mirror. Also, 4 of the 7 teeth had visible cracks on
the top land near the heel end.
|
|
|
|
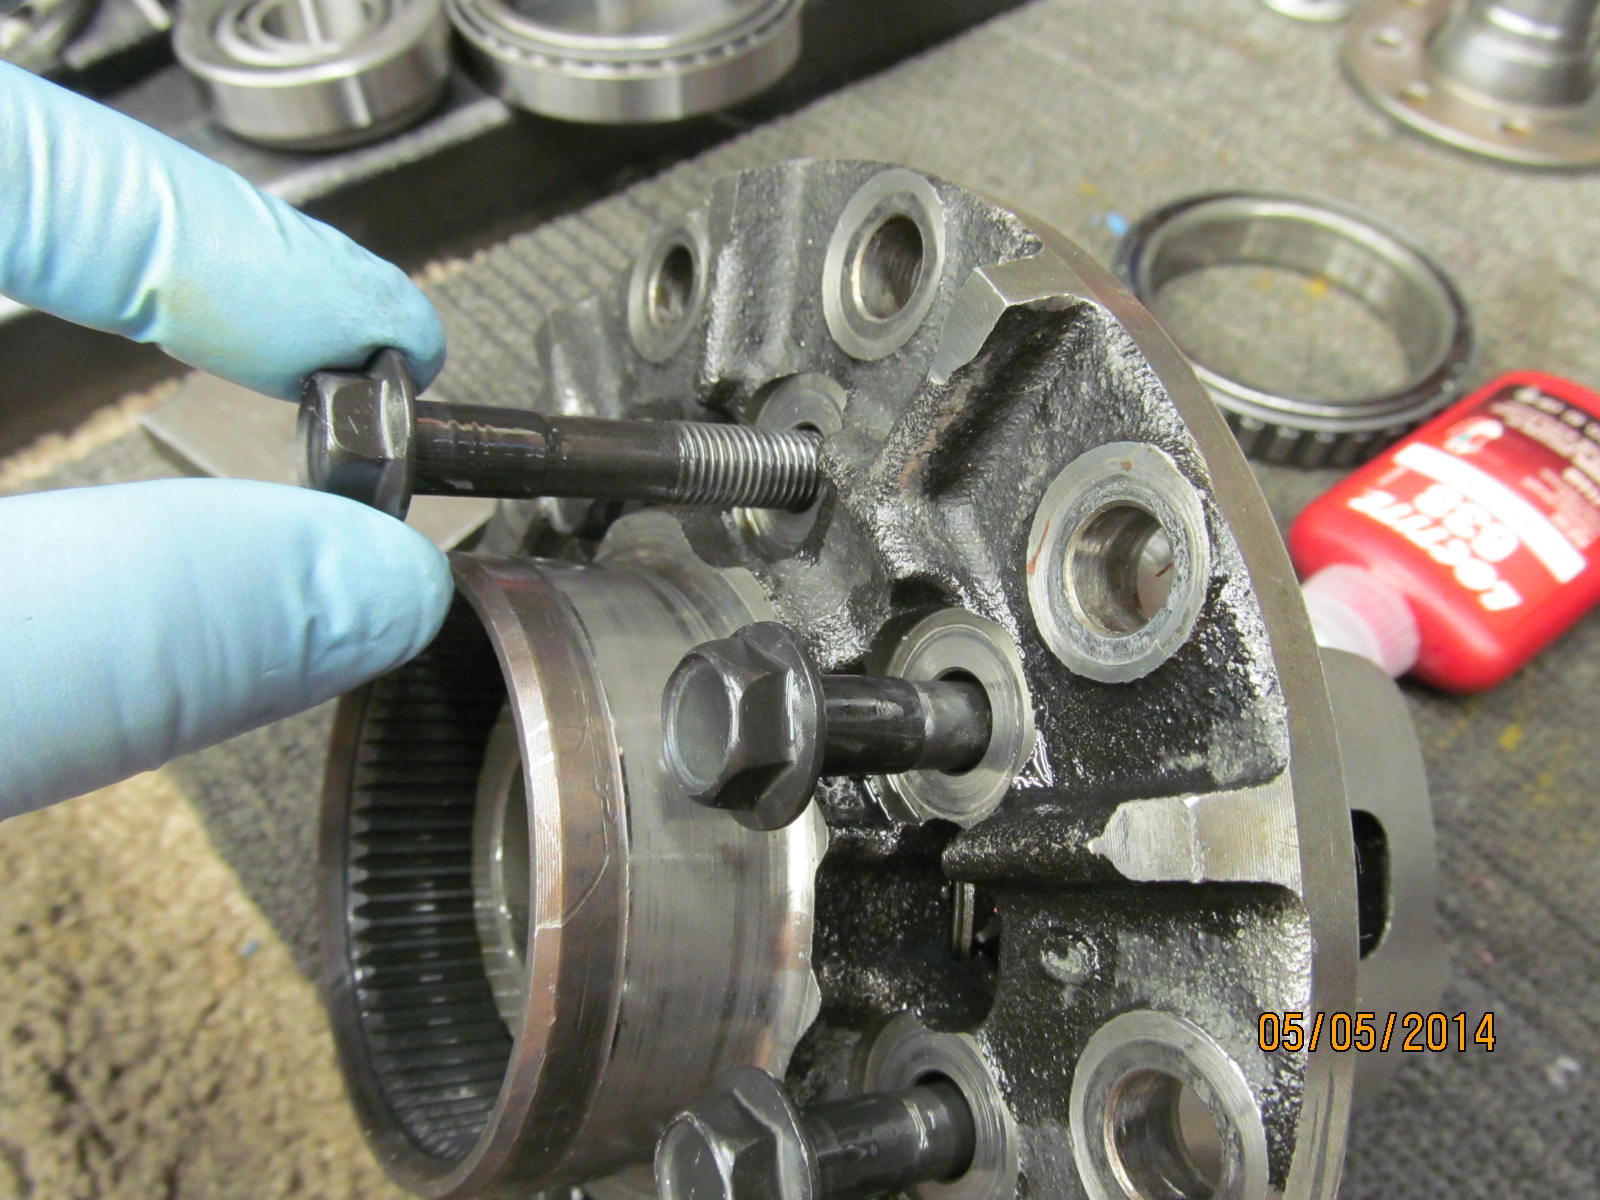
Right about this time, I noticed that all 8 case bolts were about 1 full turn loose. Rarely do these bolts loosen up.
Not sure what happened here but it certainly was a big factor in the tooth breakage.
|
|
|
|
|
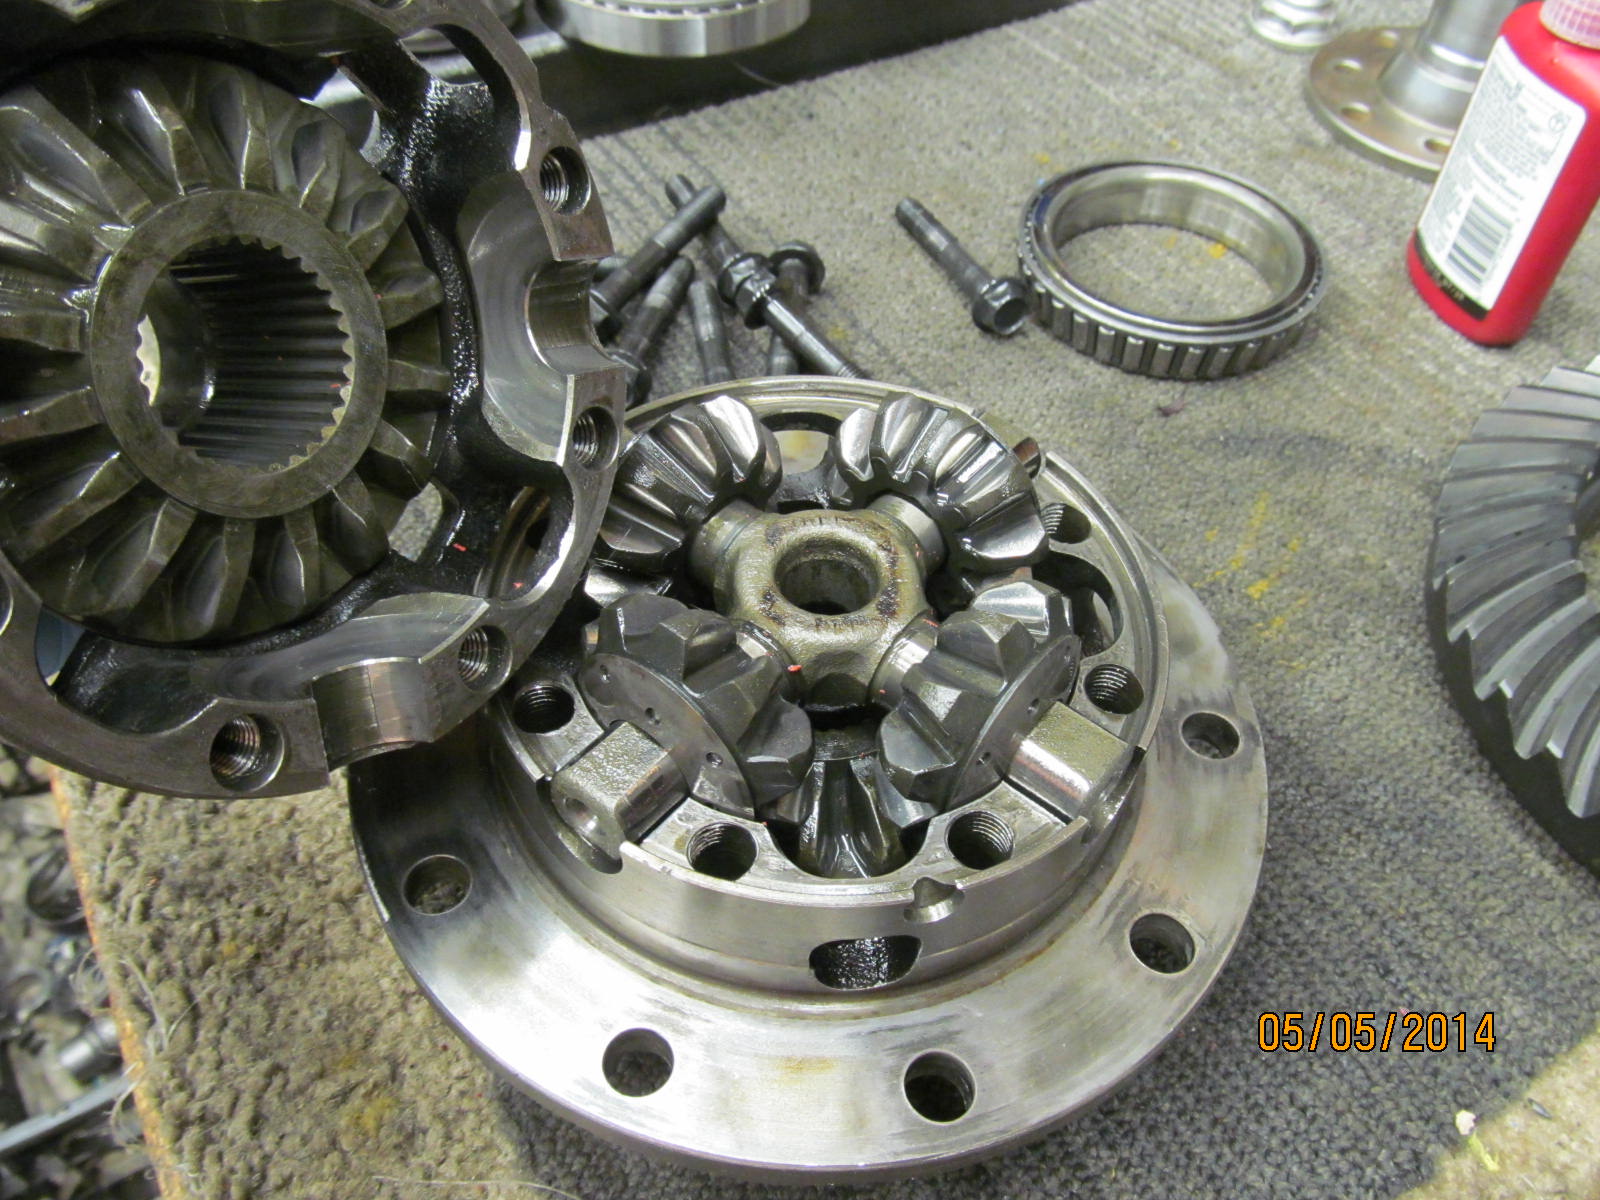
Internals were inspected and no damage.
|
|
|
|
|
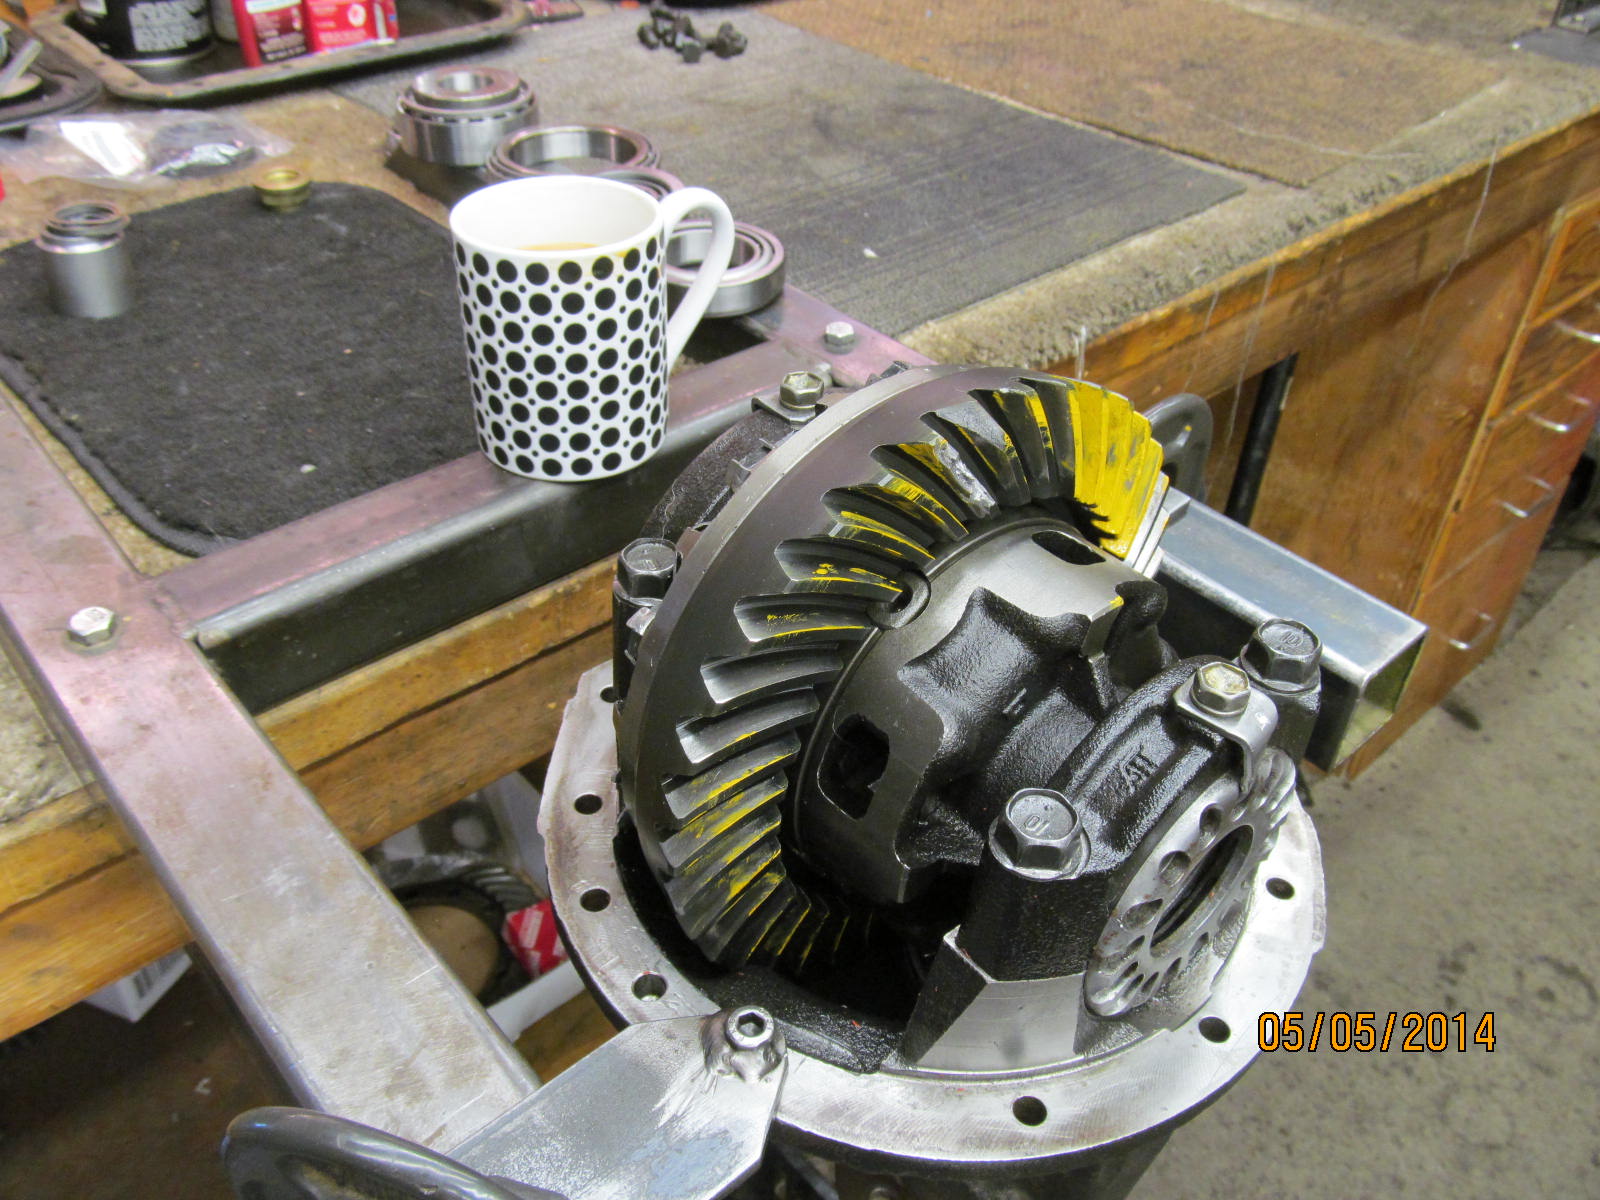
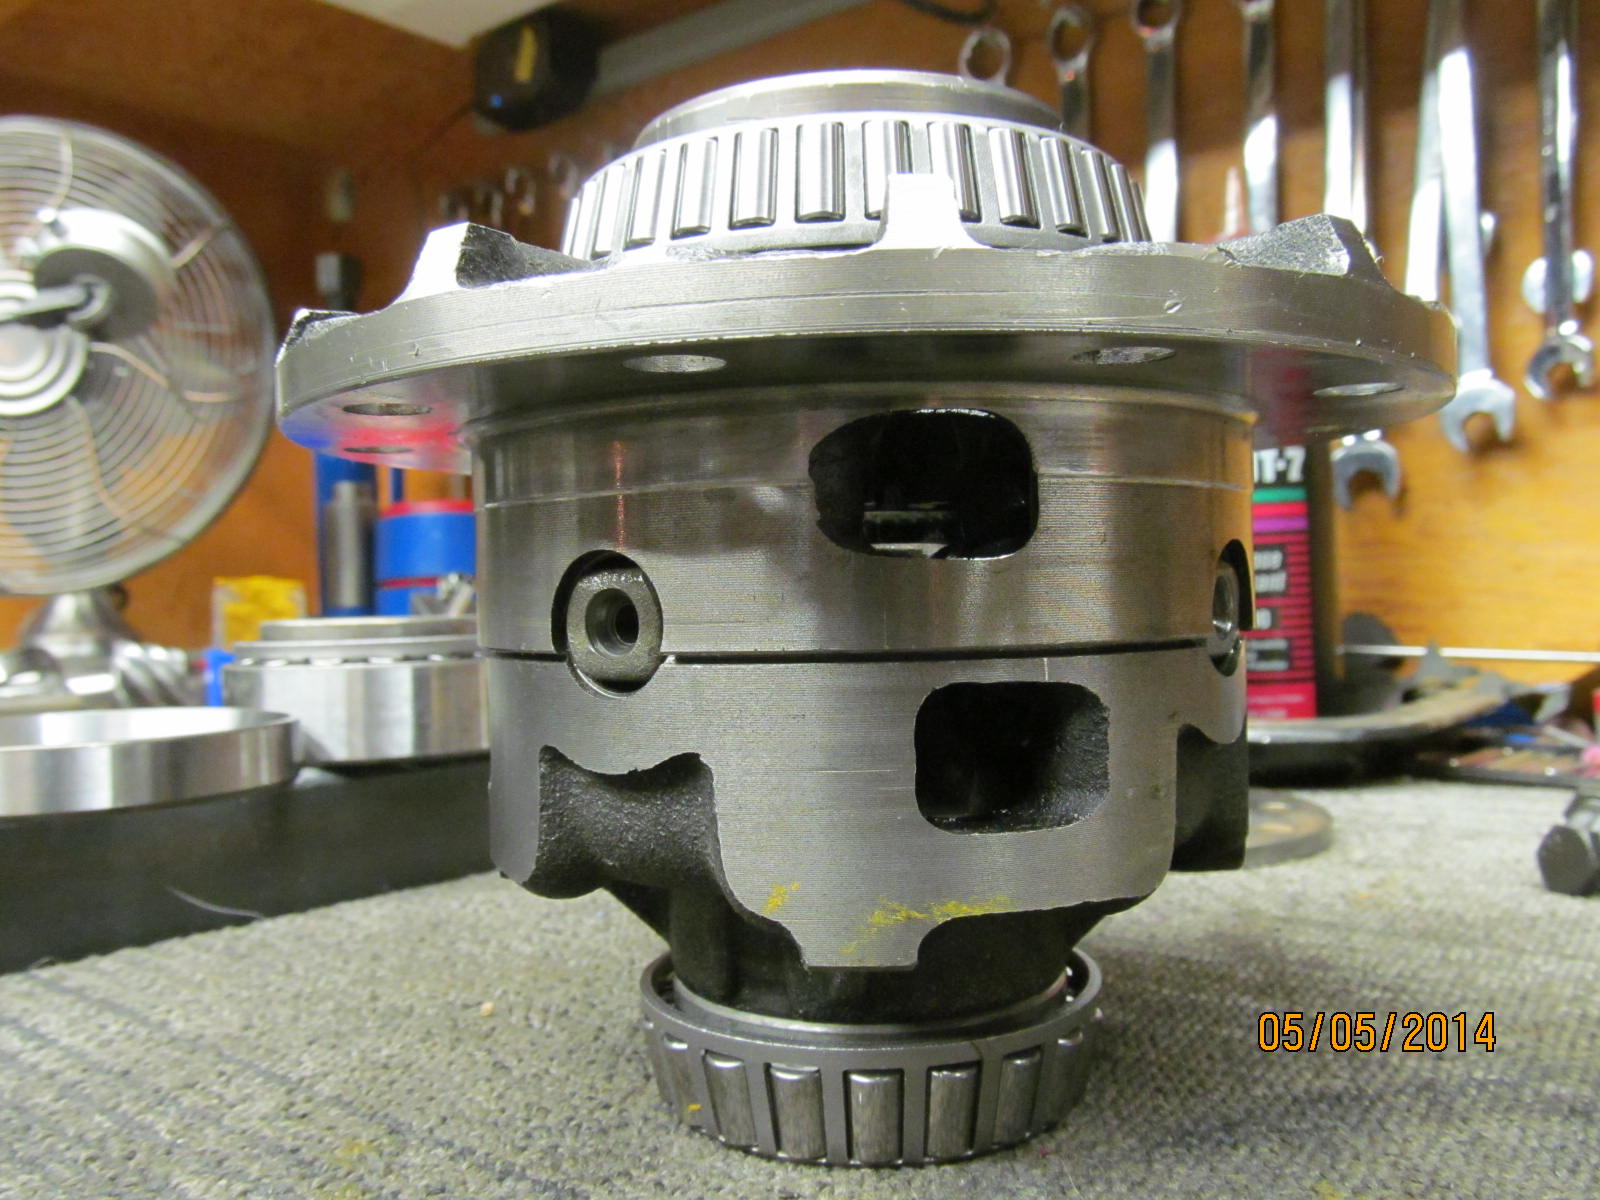
Back together with the case halves...
|
|
|

|
|
FSM says 35 ft/lb but 40 felt a lot better here.
|
|
|
|
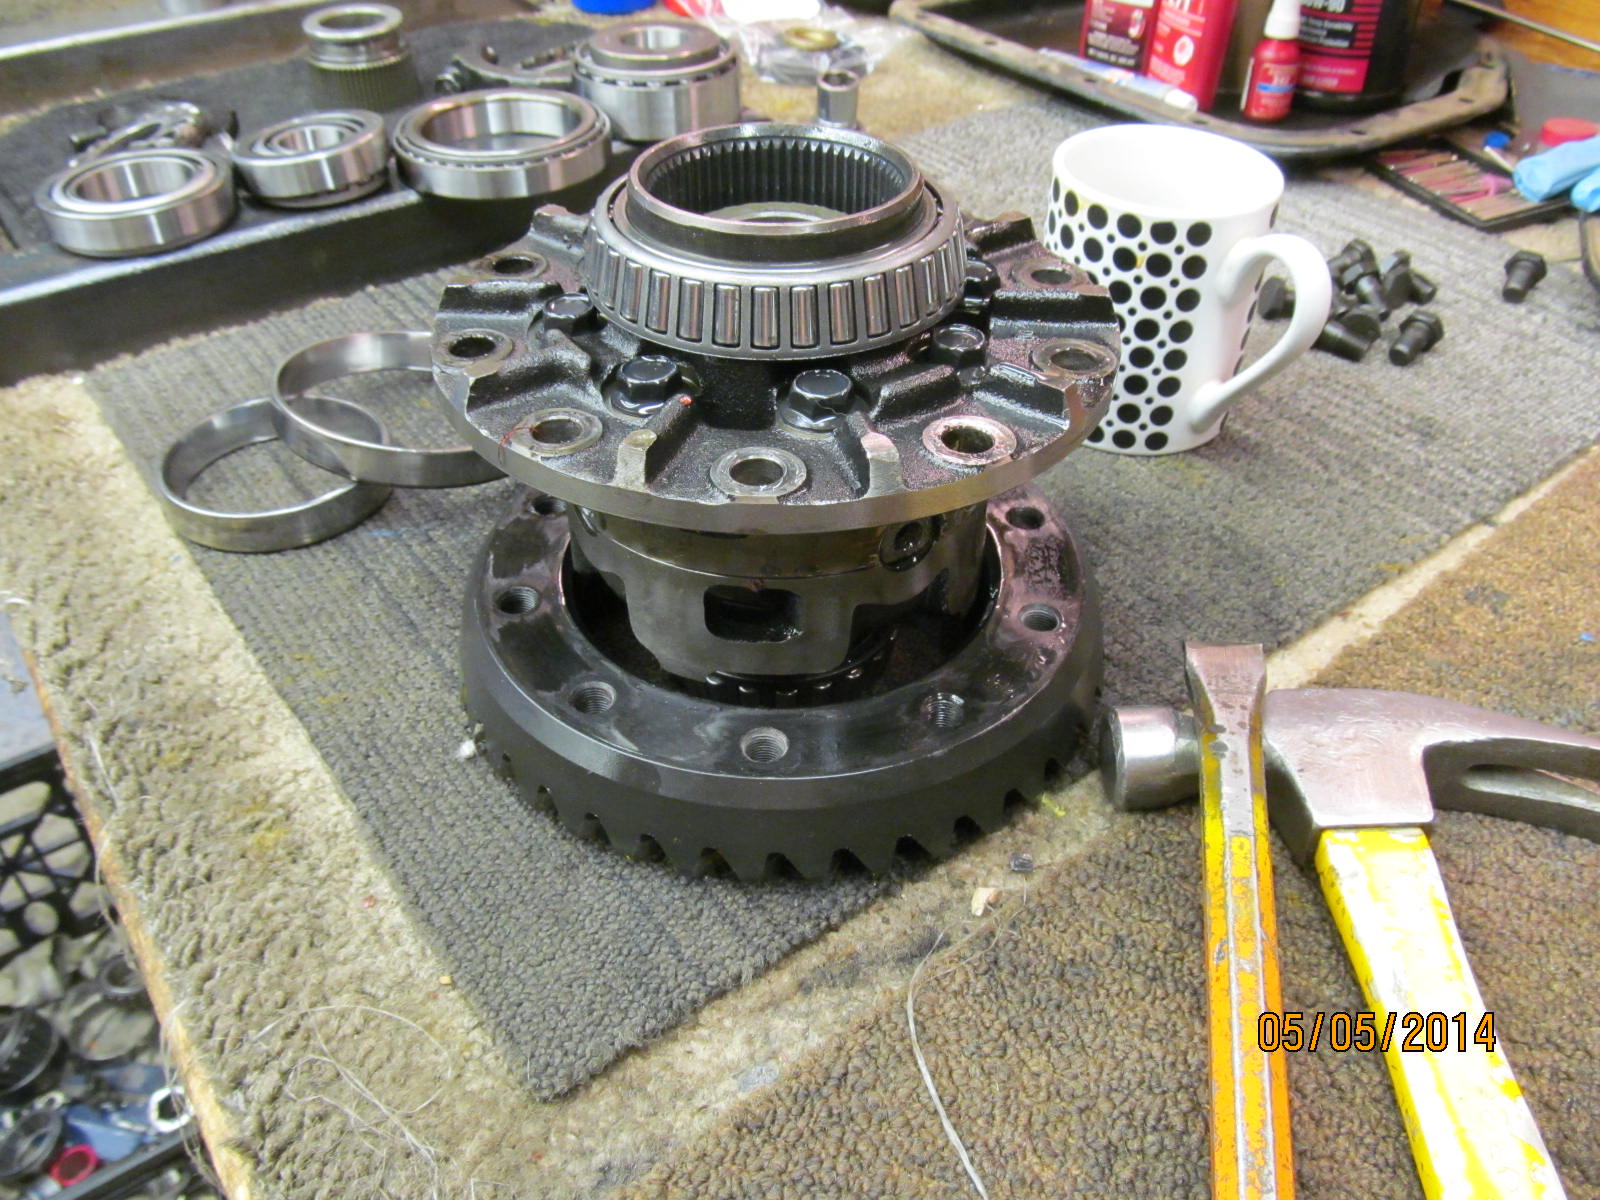
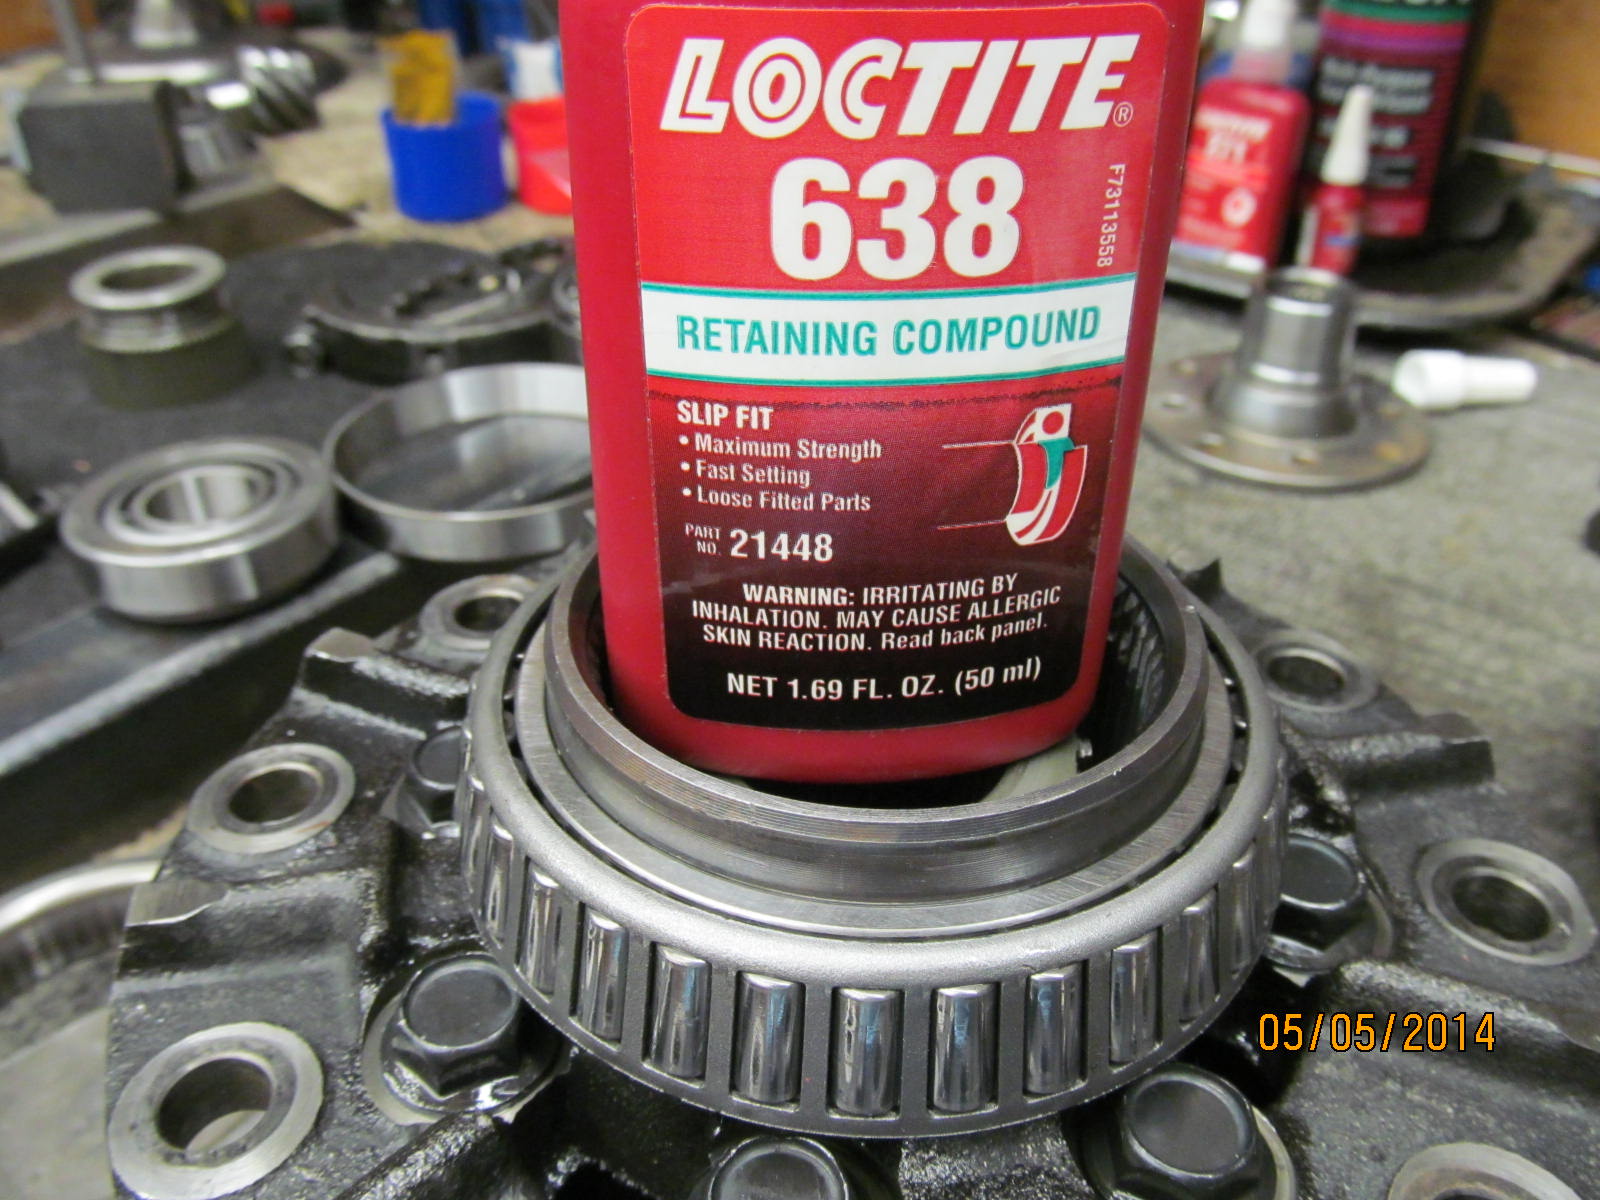
Both new carrier bearings were not as tight on the journals as I liked to see so retaining compound was
carefully applied to the freshly cleaned surfaces.
|
|
|
|
|
They will cure for 24 hours to be sure.
|
|
|
|
|
Seal, oil slinger, and old races are removed. Nothing unusual about their condition. No chunks or anything.
|
|
|
|
|
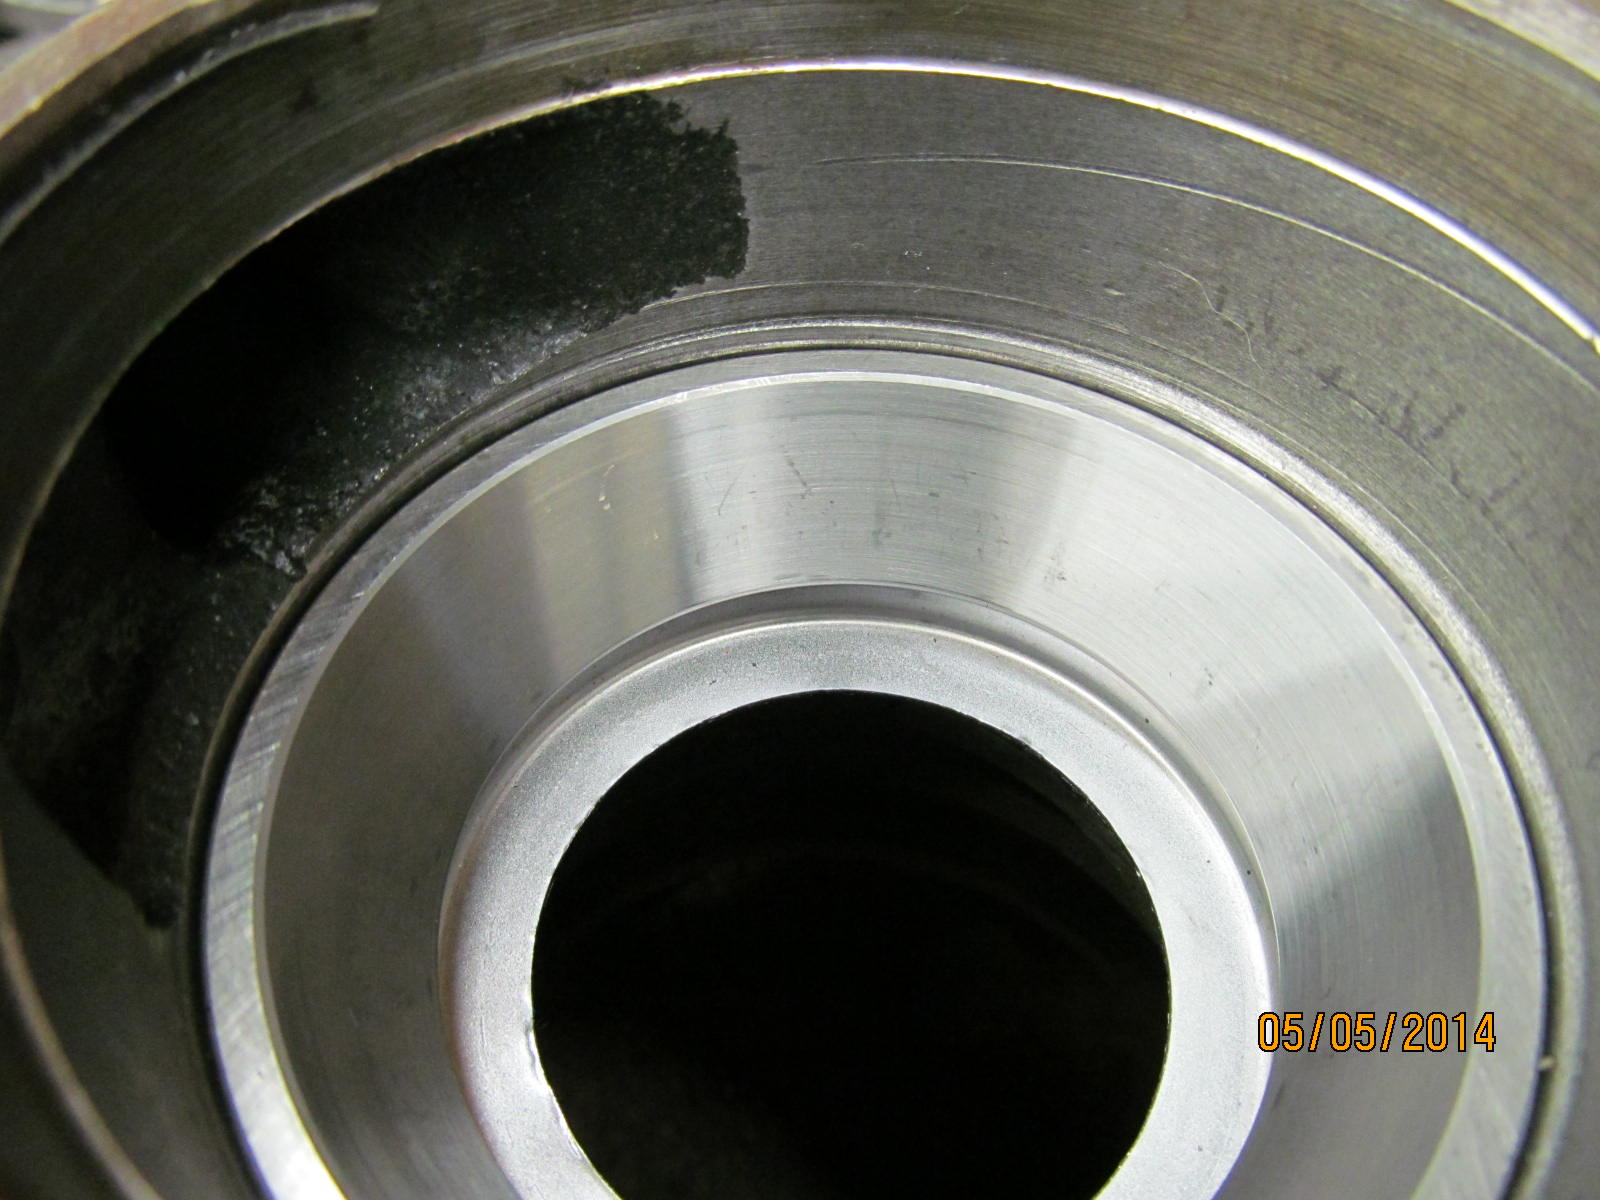
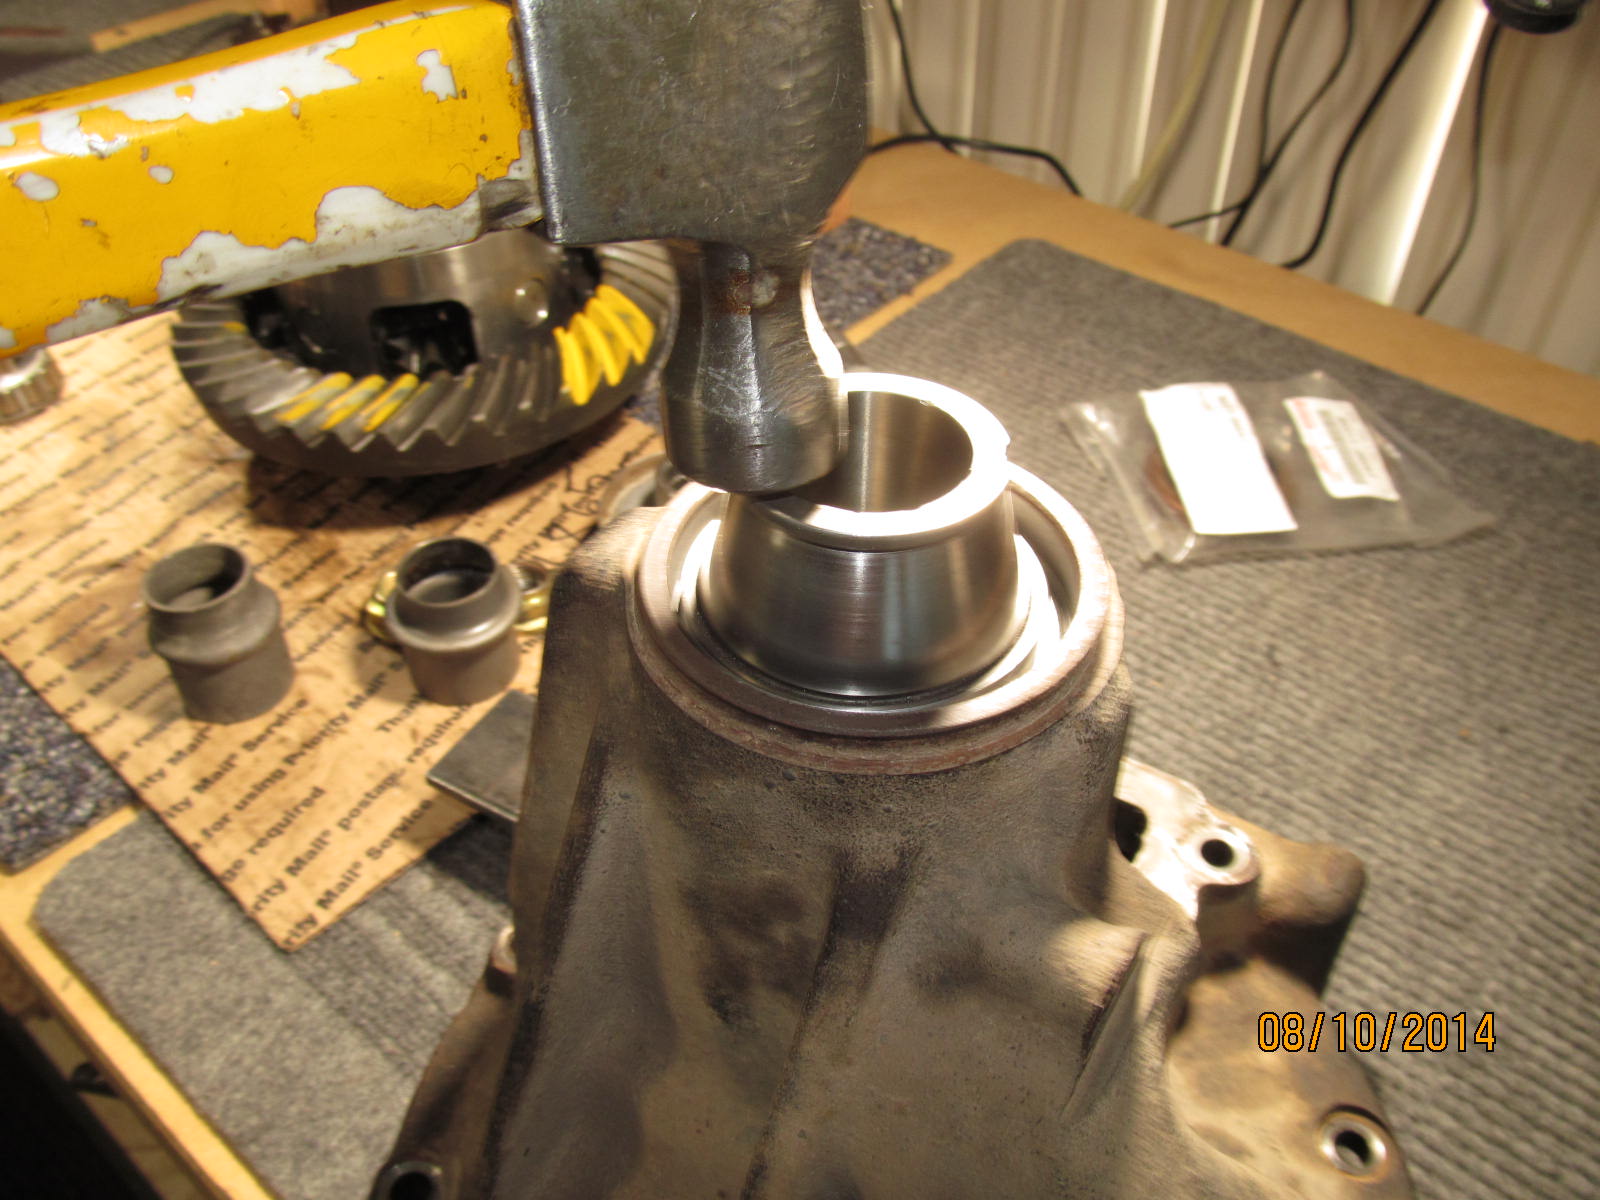
New front race is installed.
|
|
|
|
|
I use another similar used race to tap in the new one with no damage.
|
|
|
|
|
The large back race is a little trickier. It must be started straight or it will bind up cock-eyed in the bore.
|
|
|
|
|
Looks good....100% seated all the way down. ...so said my 12 ton press.
|
|
|
|
I applied plenty of pressure and wanted to see how much material I could remove and the answer is very little.
No burrs or unusual high spots.
|
|
|
|
HA!! Having a little fun here. Pressing the tight fitting ring gear on....actually didn't really take a terrible lot
of pressure. Using whatever was handy for spacers here. :)
|
|
|
|
|
Red loctite on all 10 ring gear bolts...
|
|
|
|
|
...and 75 ft/lb. Ya, I just noticed the crack in my 17mm socket in the pic....
|
|
|
|
|
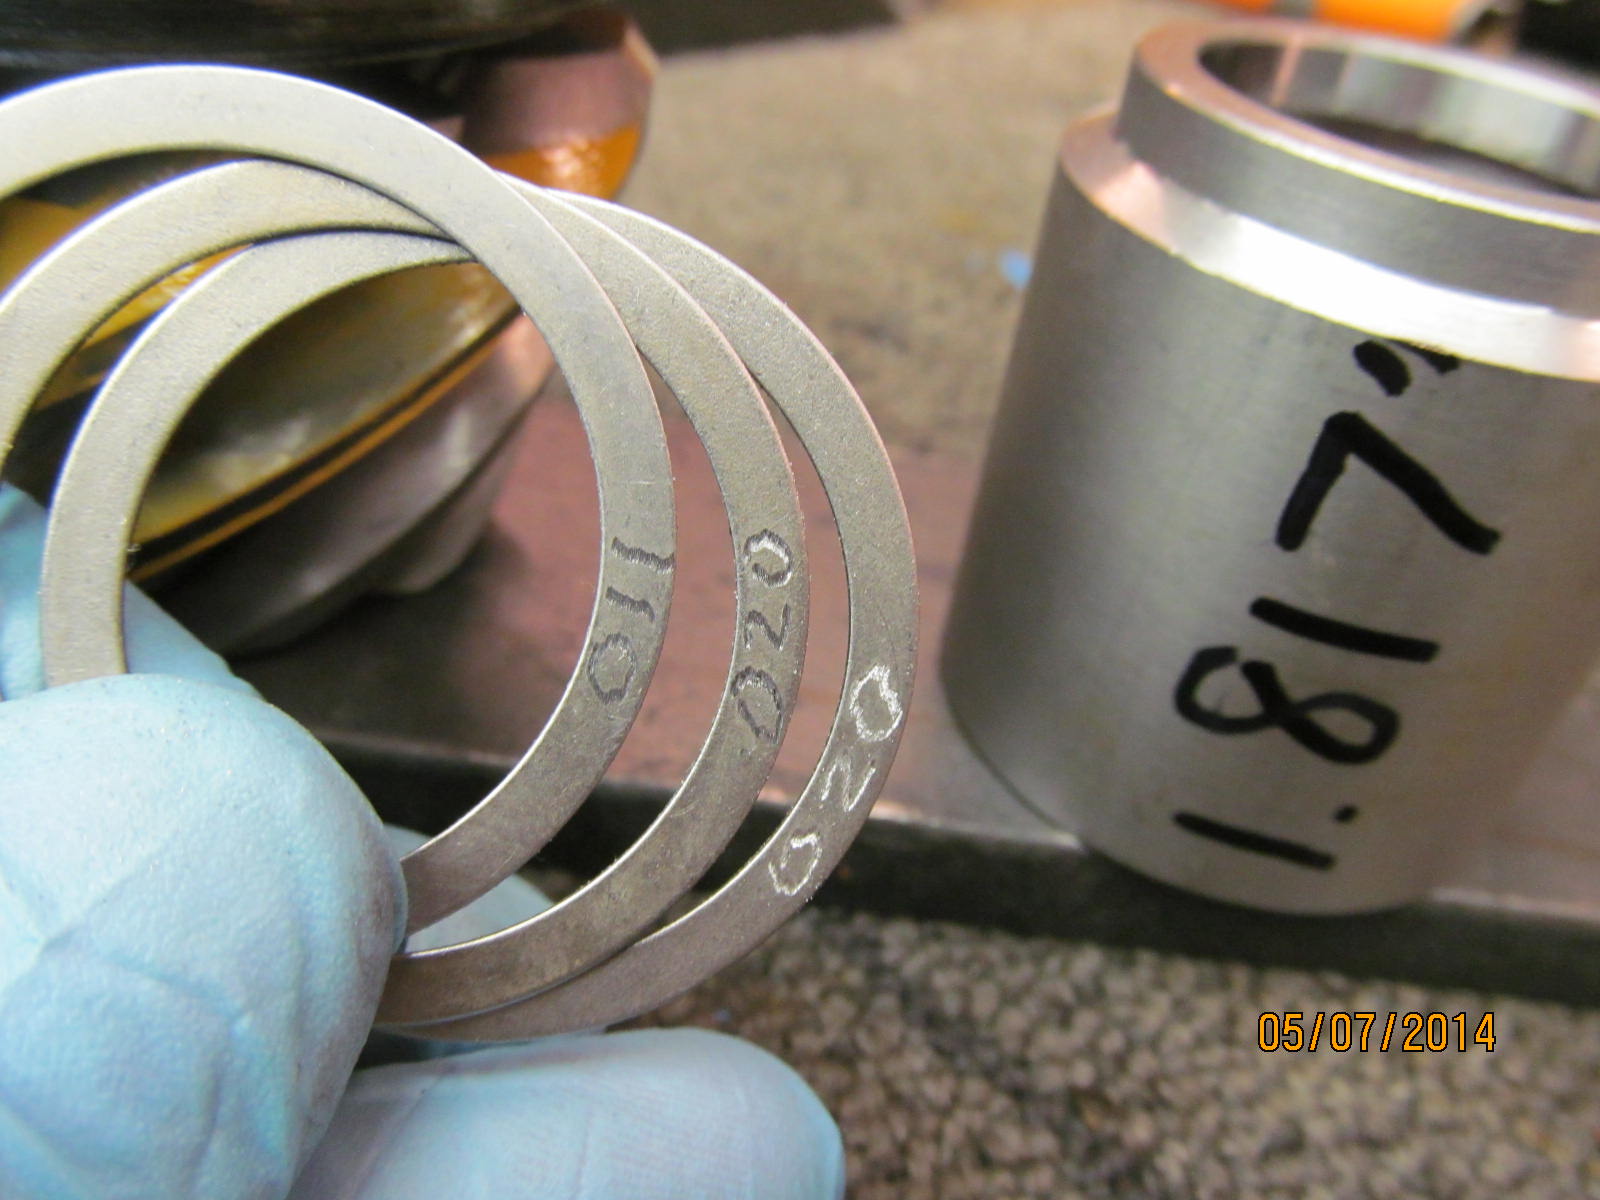
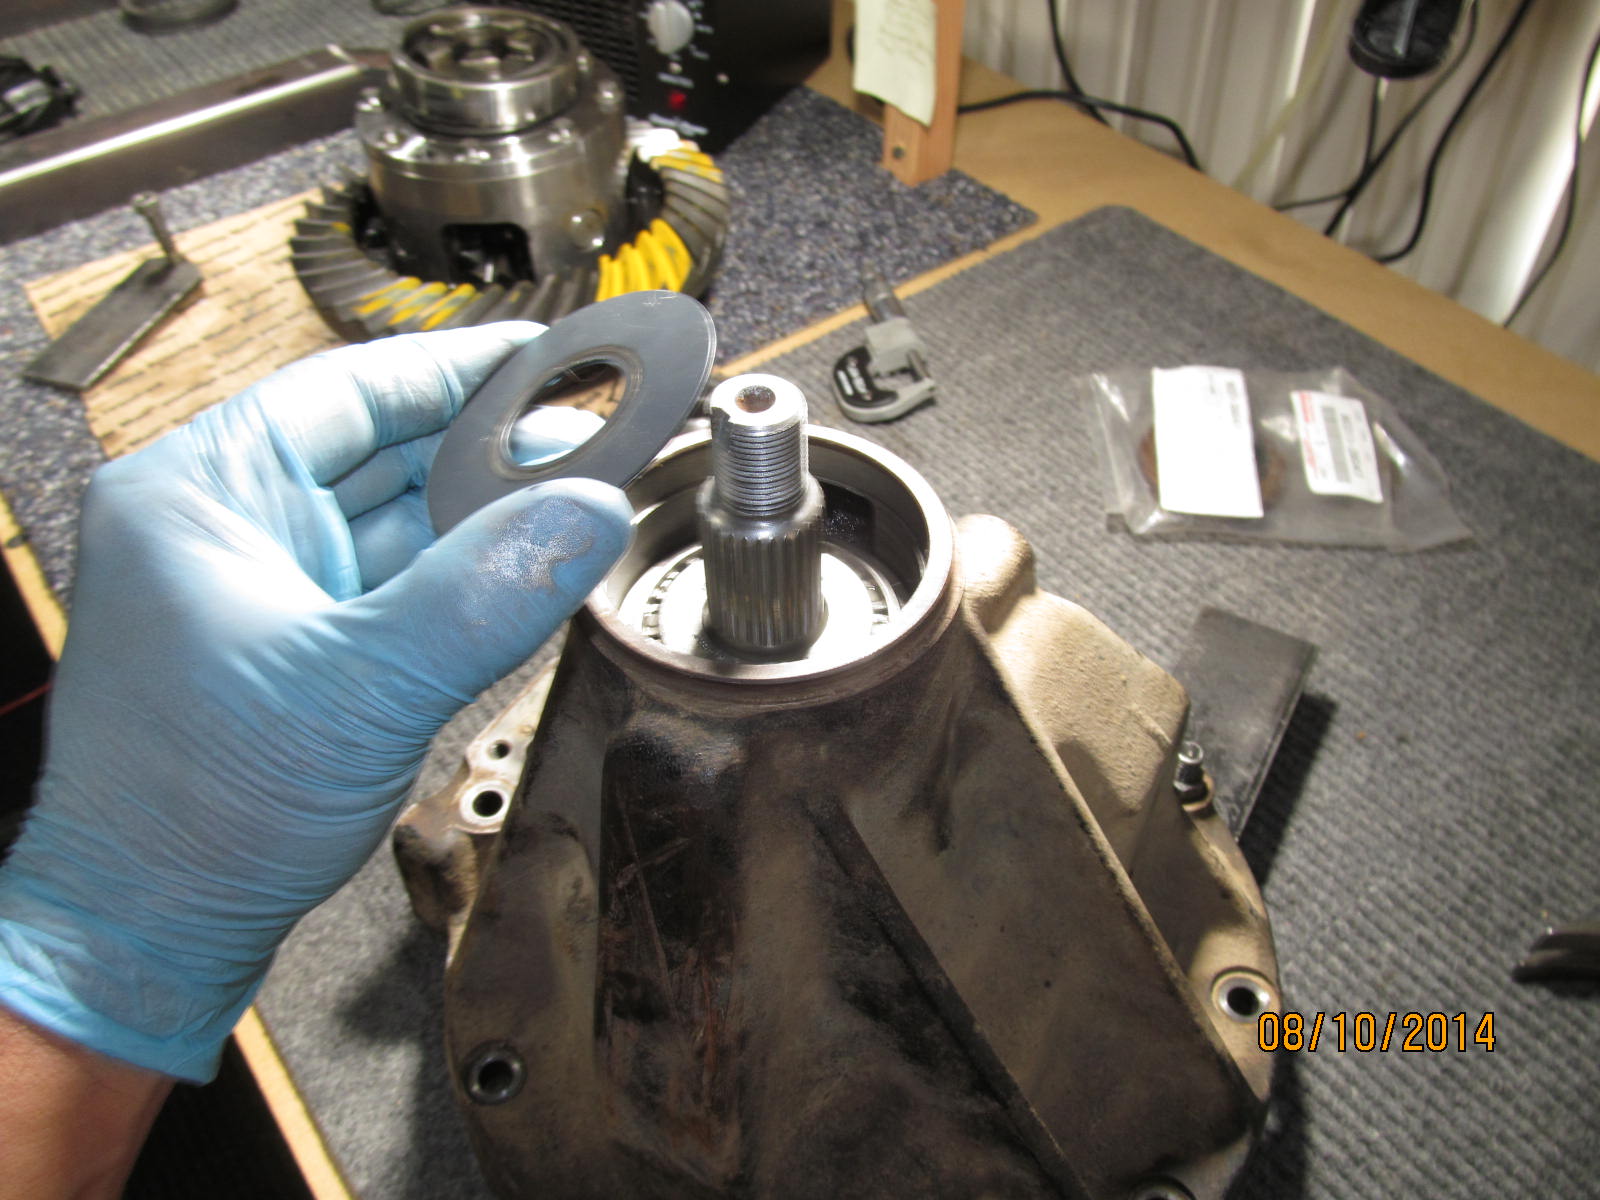
I'll re-use the same .080" shim.
|
|
|
|
|
Press the 080 shim and new bearing on.
|
|
|
|
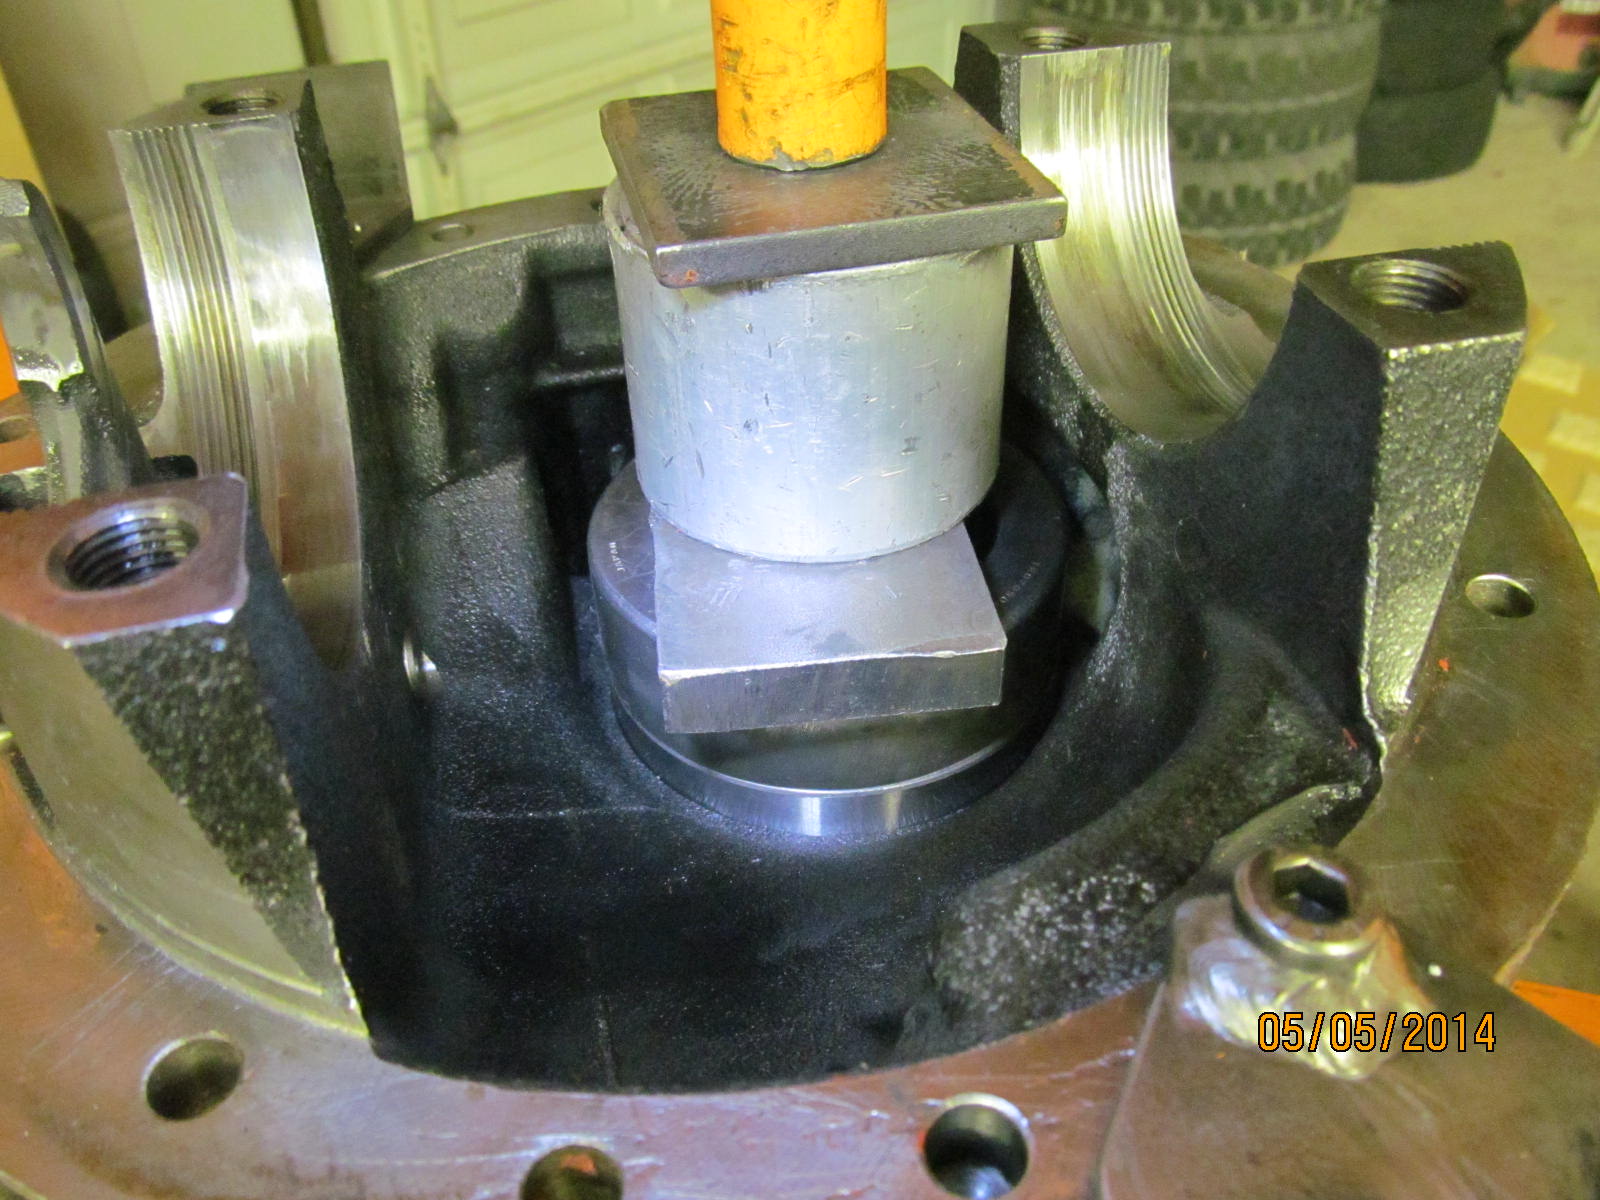
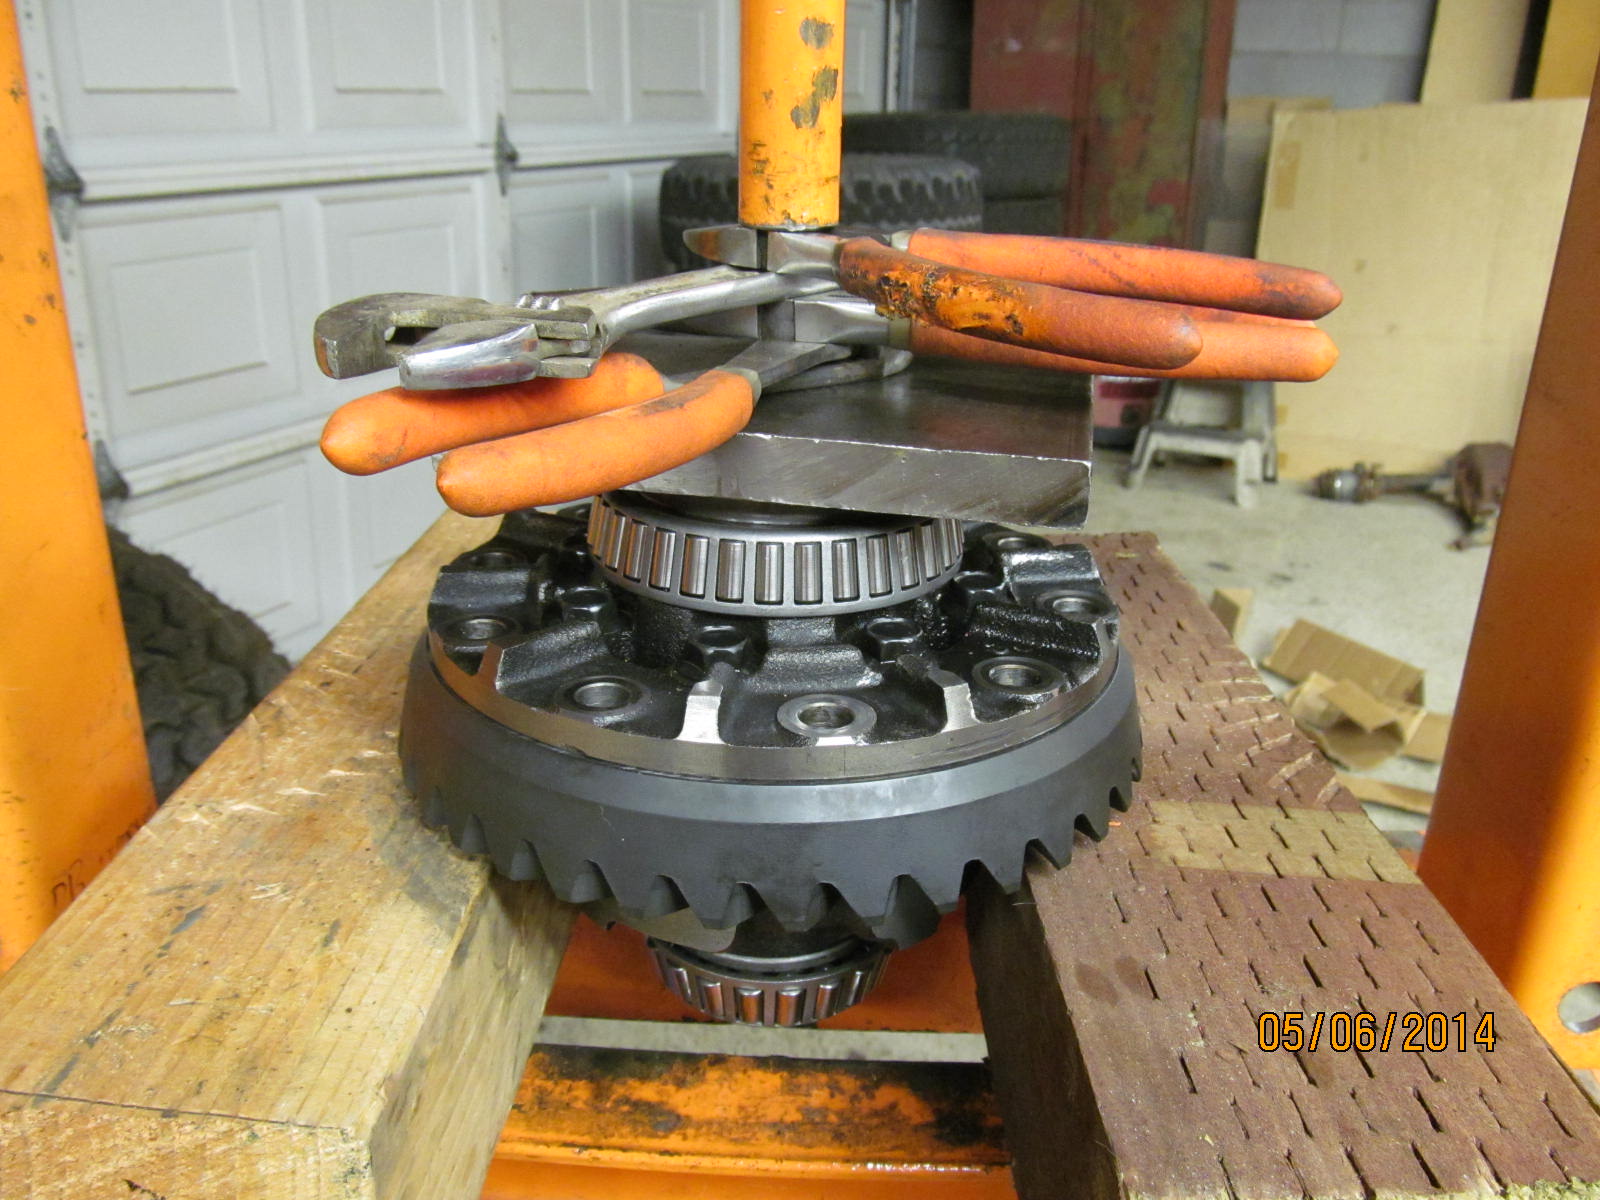
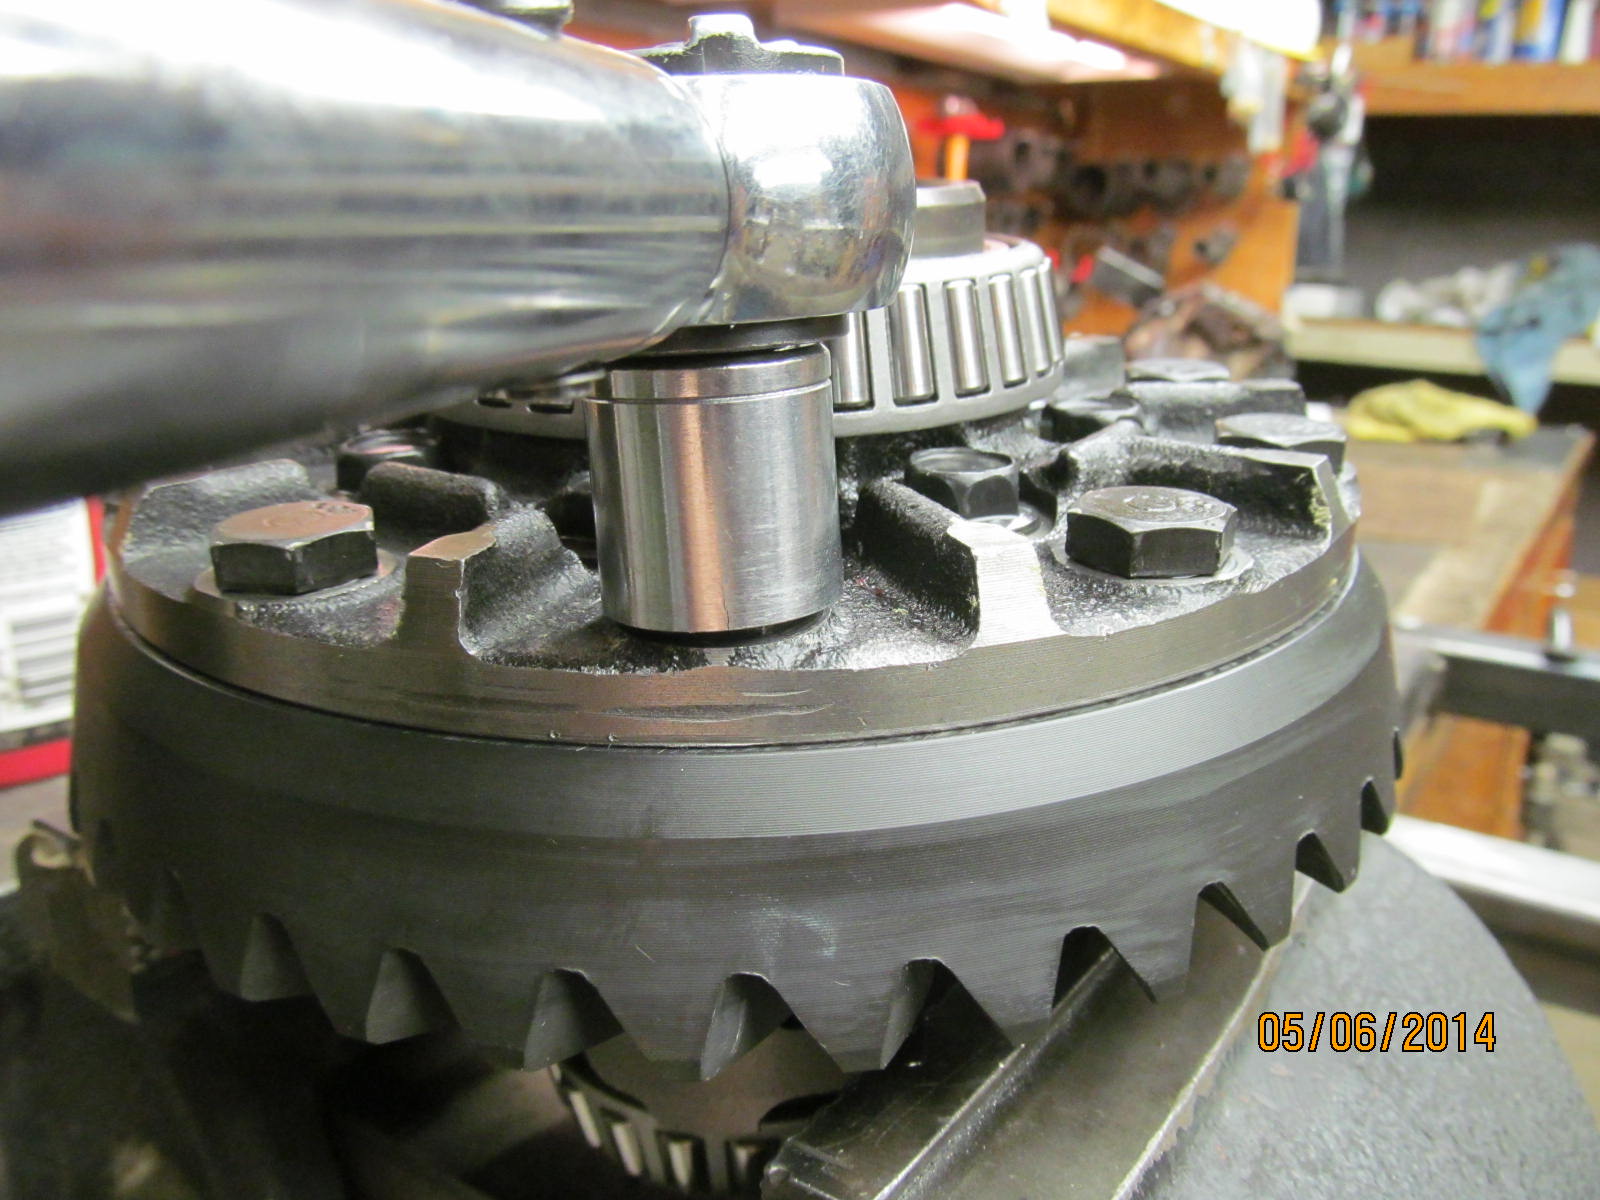
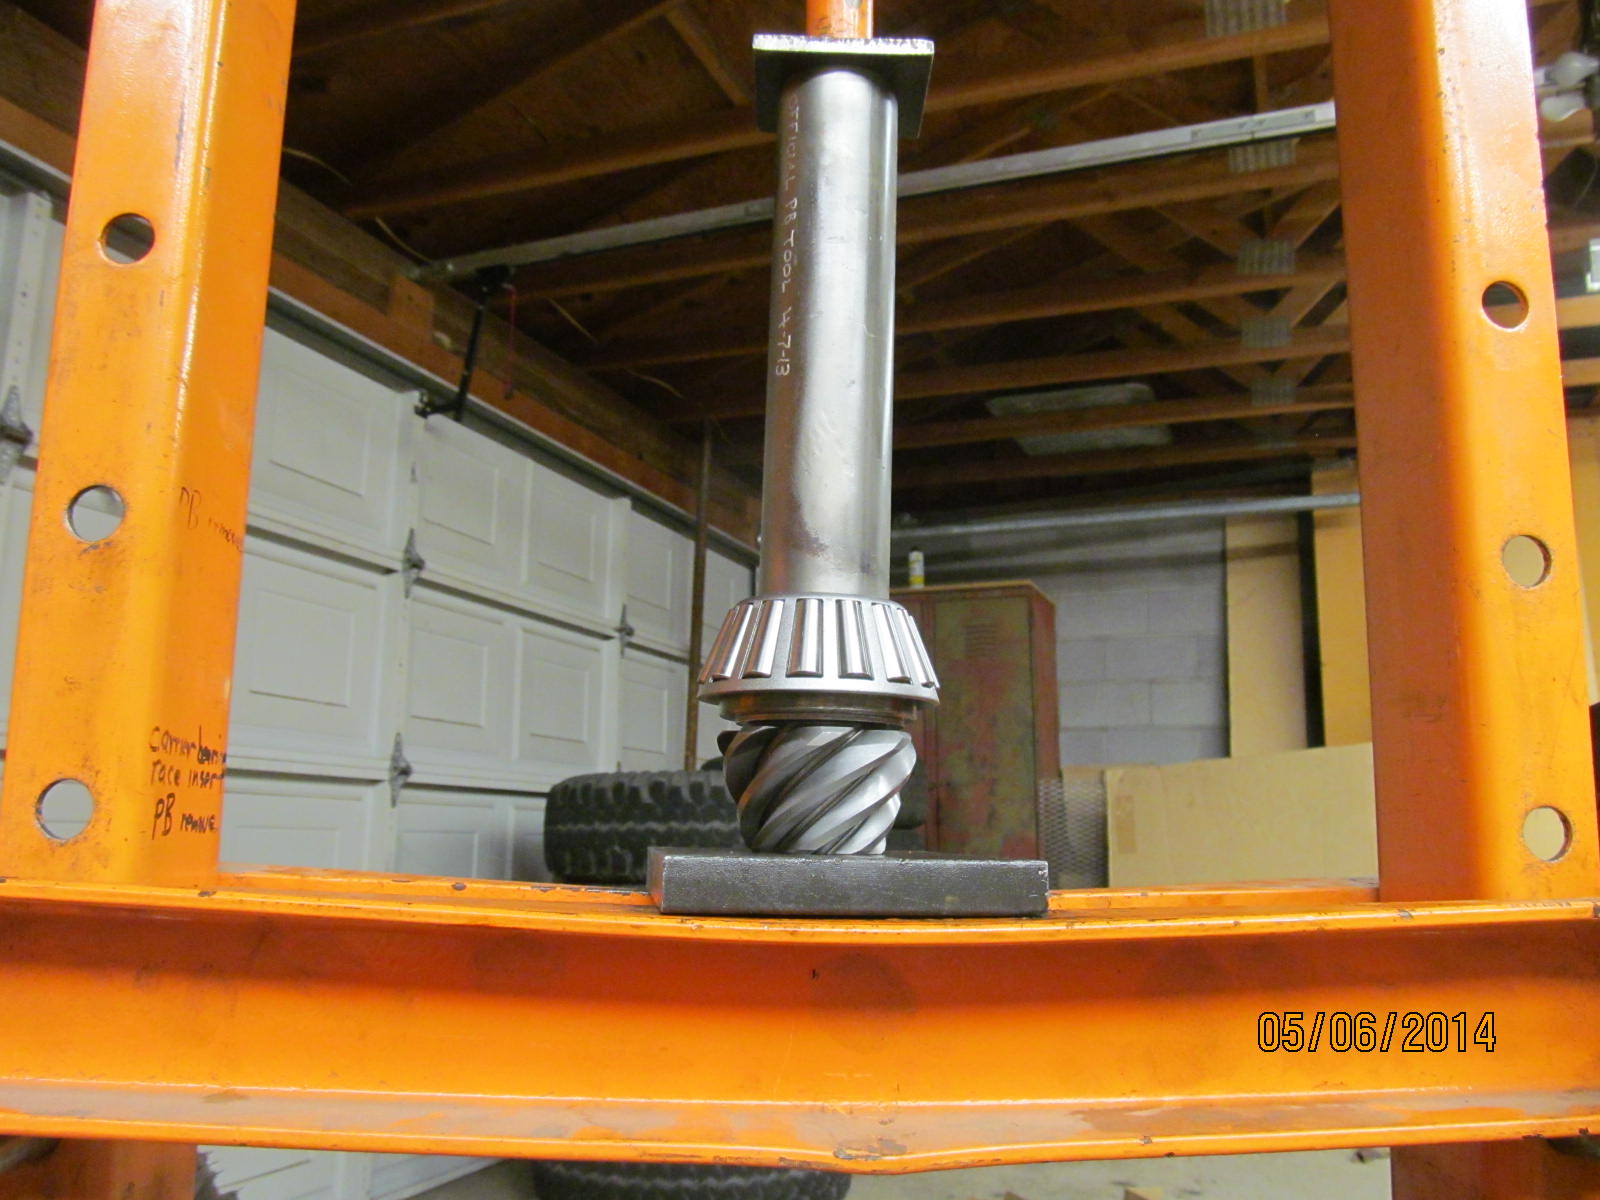
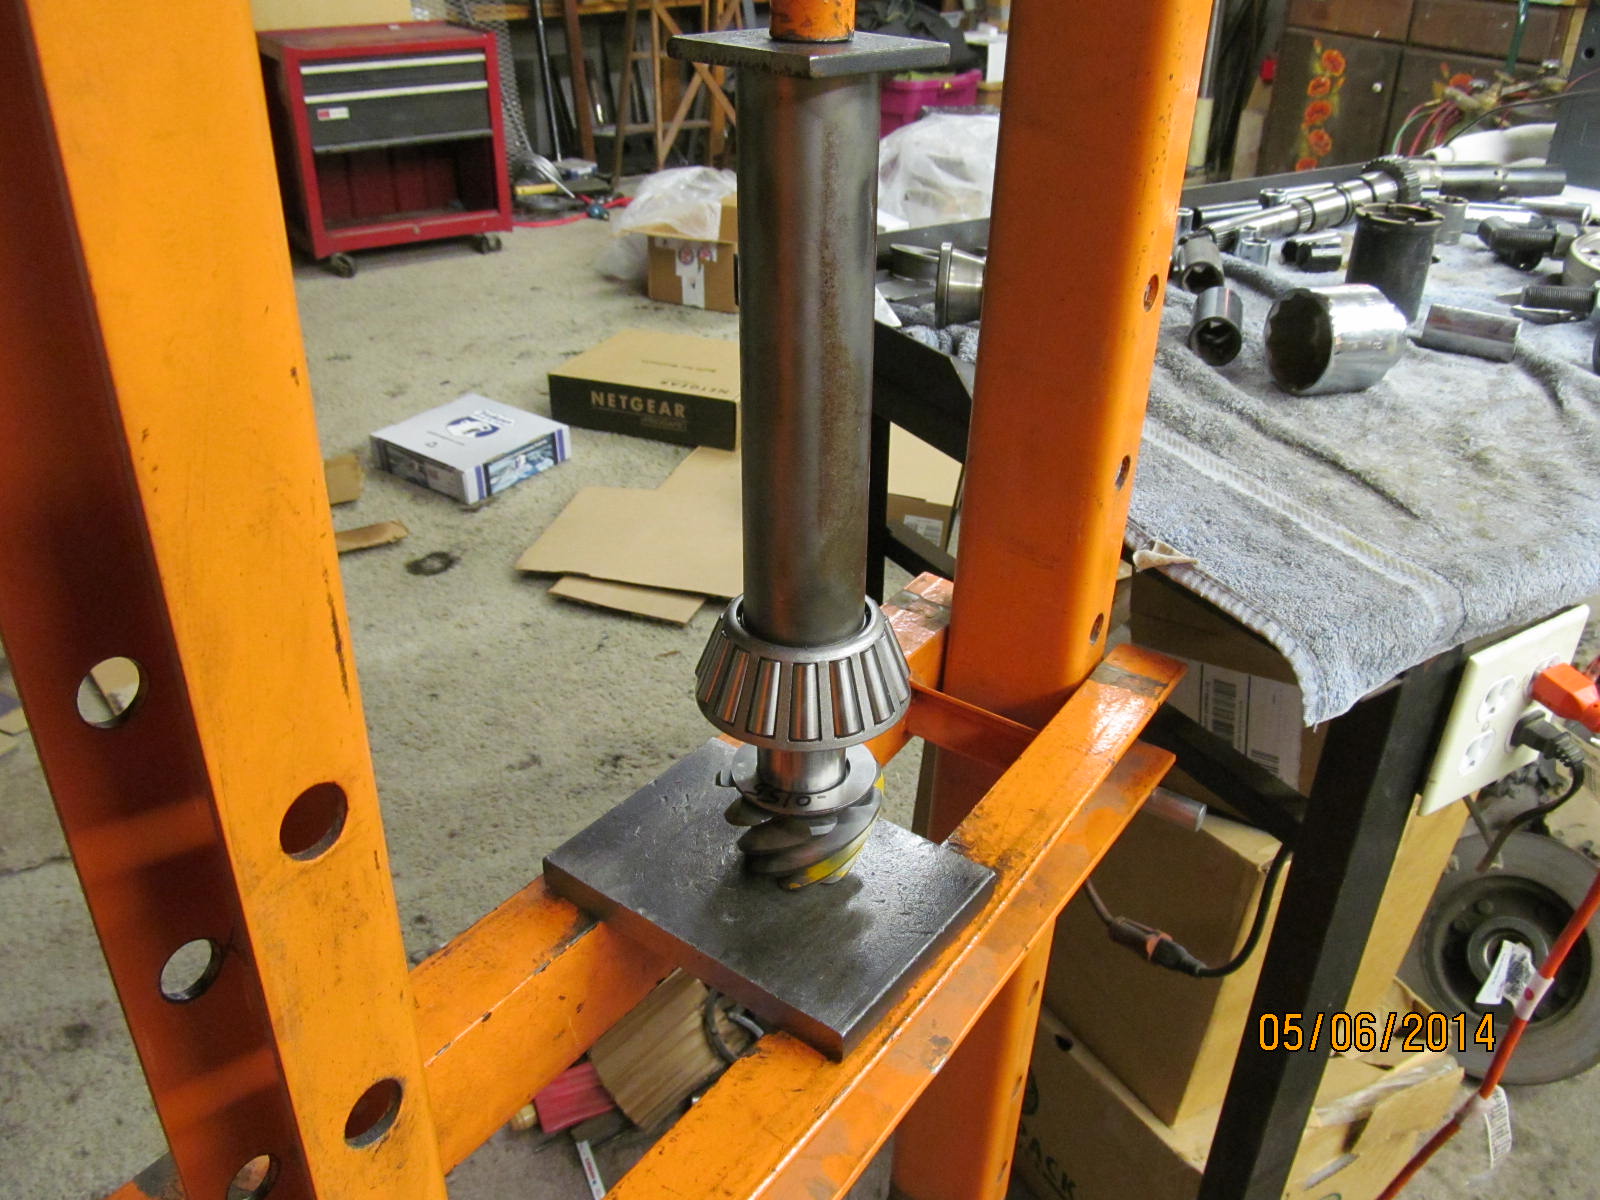
Pinion assembly goes on the raised aluminum blocks...place 3rd on top...then flange...
beat down with lead filled plastic hammer...tighten up with electric impact.
|
|
|
|
A little excessive on the PPL but, as I have mentioned numerous times, this is just for a
preliminary pattern check so all is good.
|
|
|
|
|
Backlash is set close to spec.
|
|
|
|
|
Hmmm. The 080 appears a bit deep...deeper than I like to see it.
|
|
|
|
|
The coast side confirms that it is too deep.
|
|
|
|
|
Shallow on the pinion equals deep on the ring. It does favor the face (top edges) here too much.
|
|
|
|
|
Teardown again....push the pinion off the bearing.
|
|
|
|
|
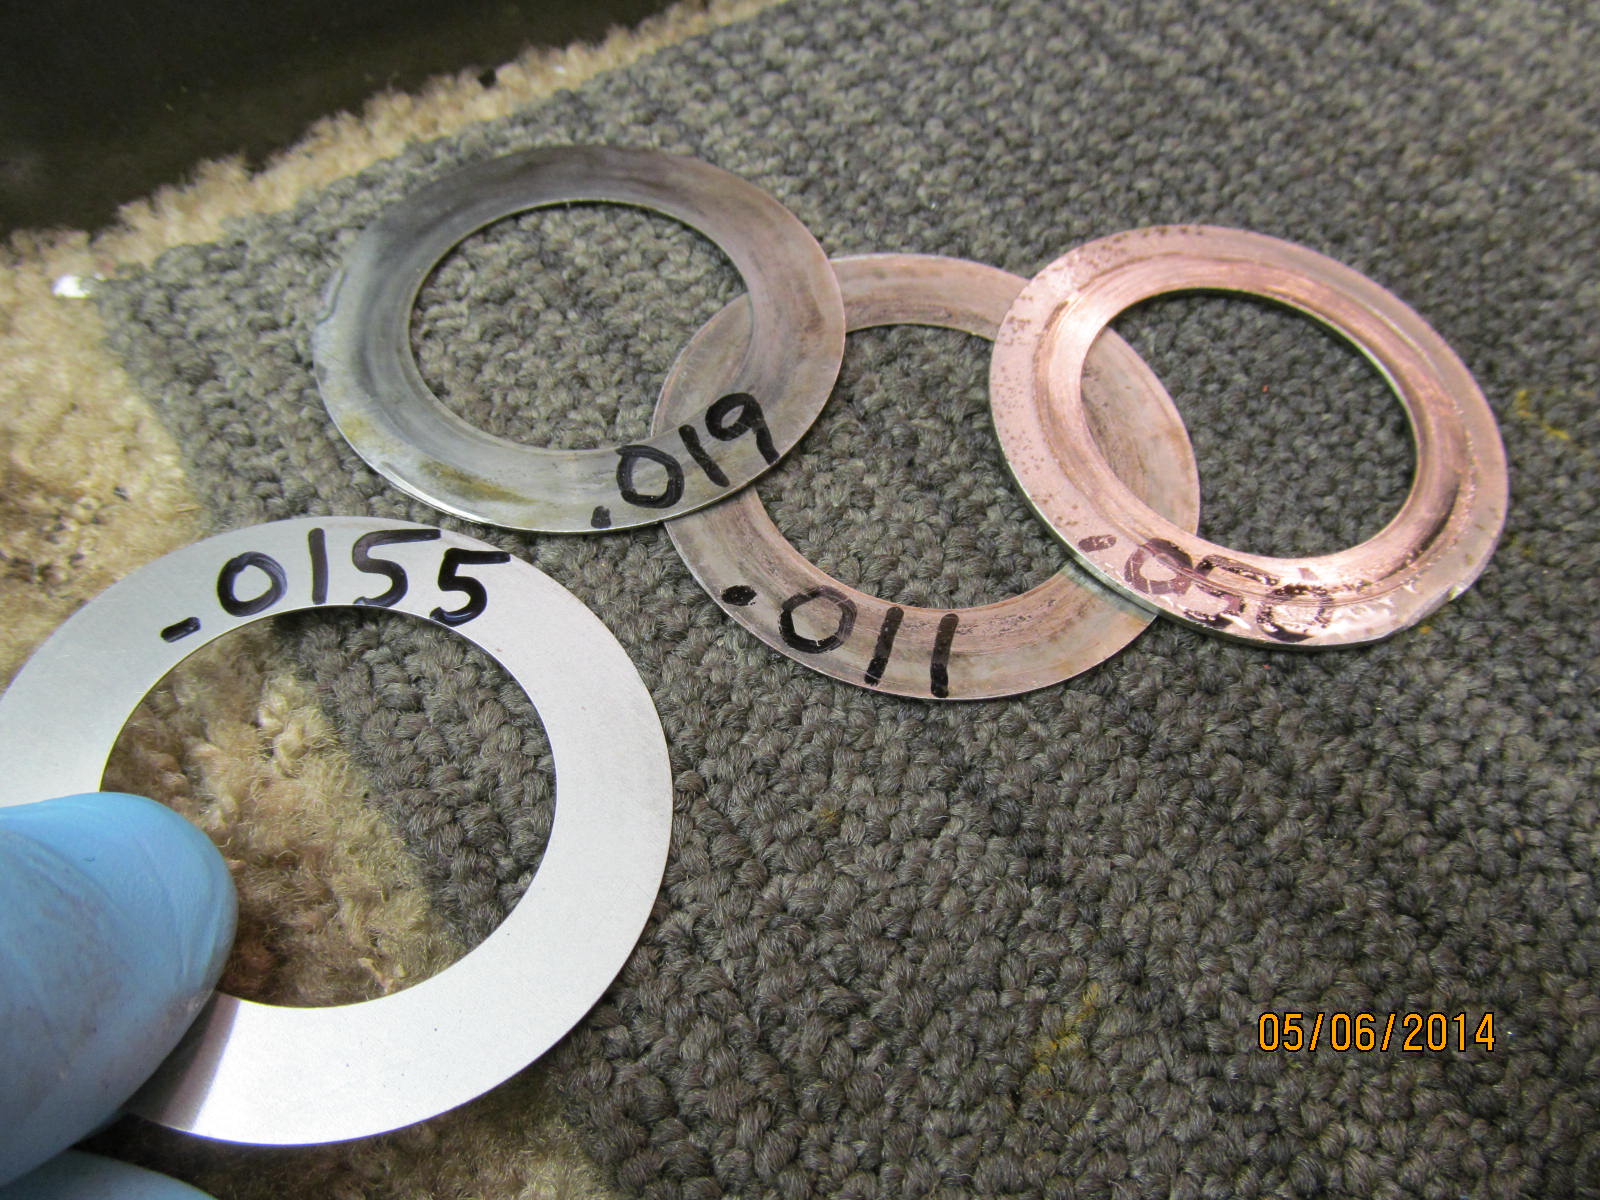
I will take the .019" out and put the thinner .0155" in its place. This backs us out 3.5 thou for less pinion depth.
|
|
|
|
|
Bearing with the new .0765" is pressed on.
|
|
|
|
|
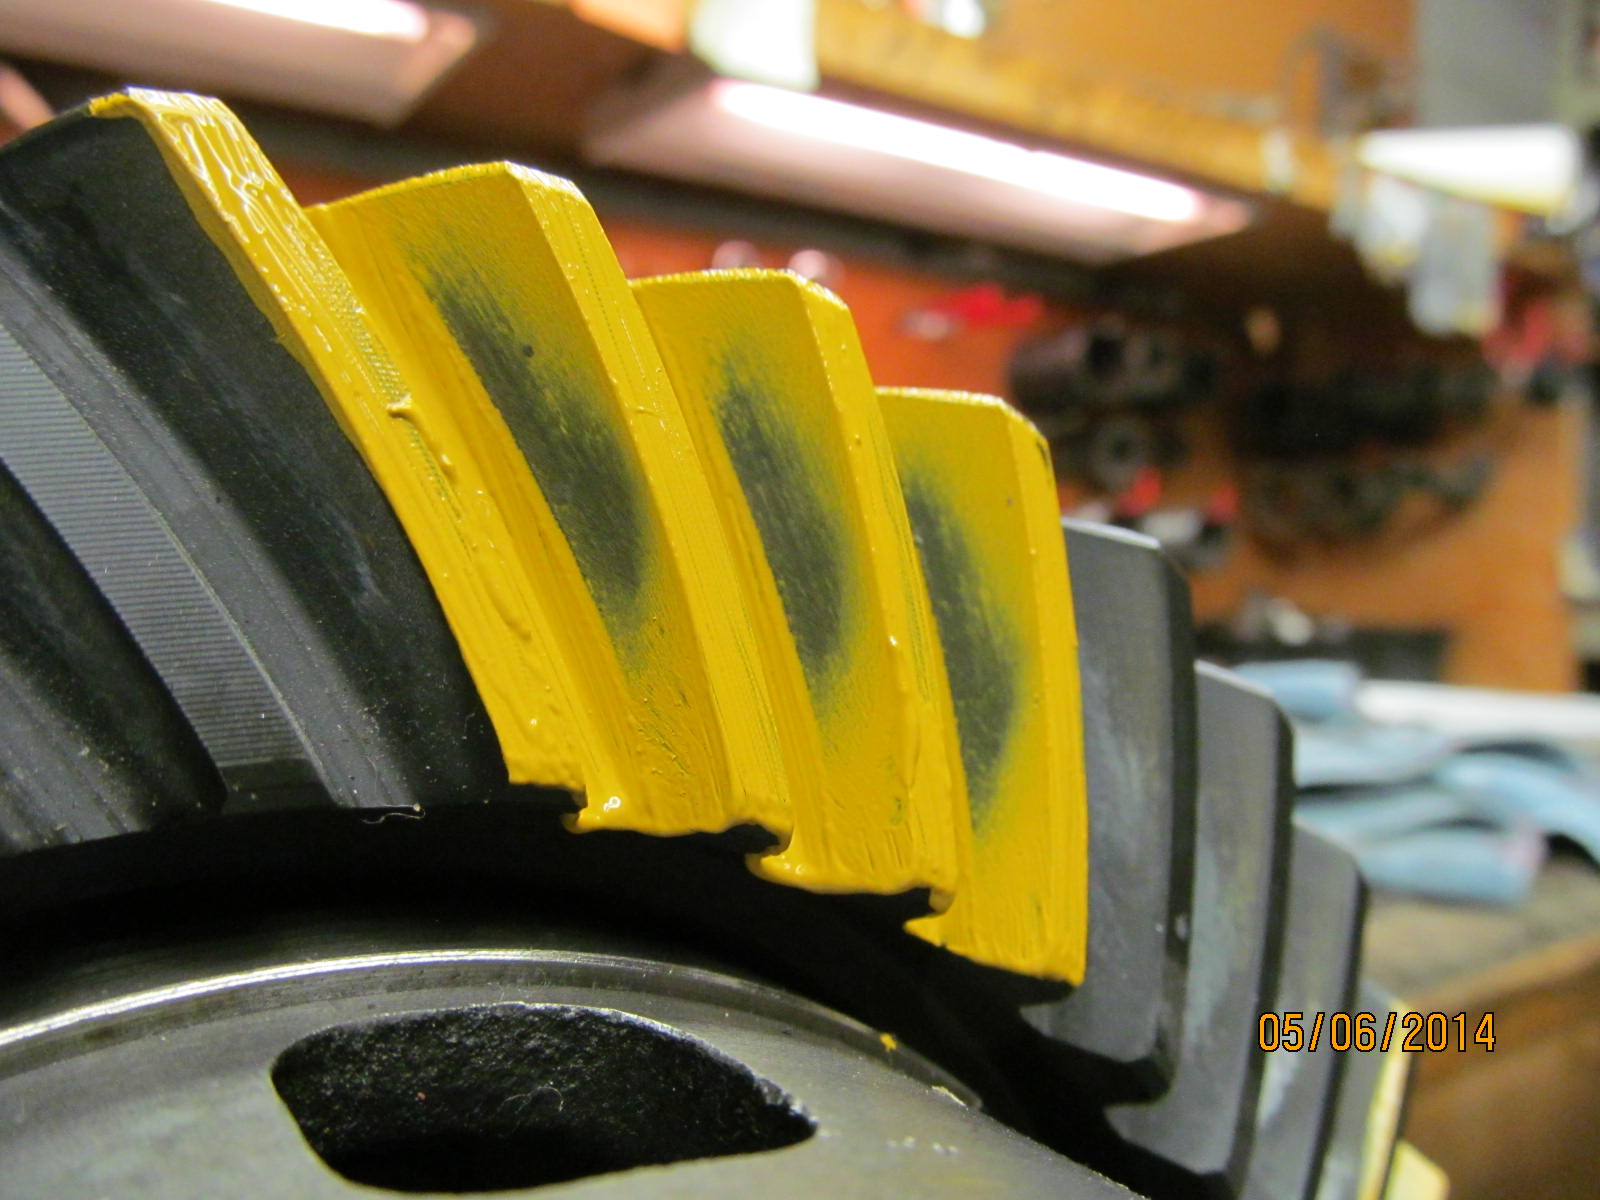
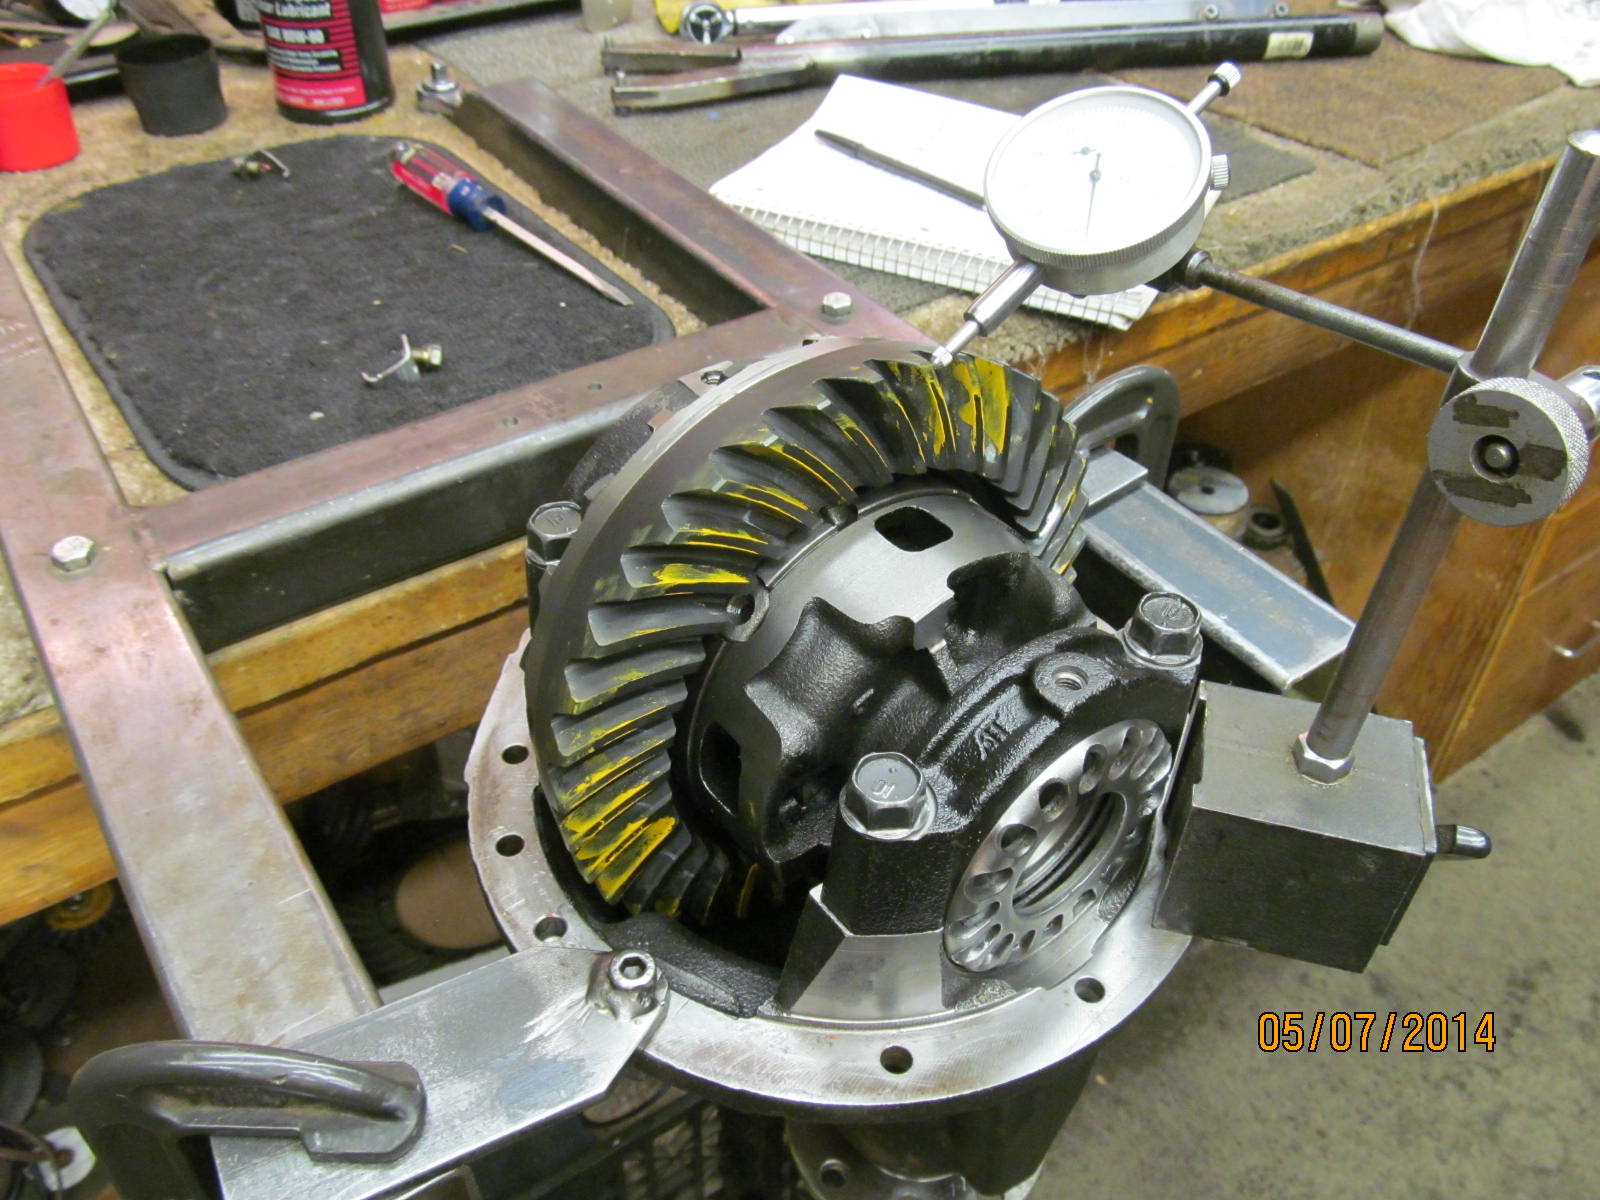
Not quite as deep as before. Ring gear strength is not an issue here with this pattern.
|
|
|
|
|
Coast looks deep but full. Good.
|
|
|
|
|
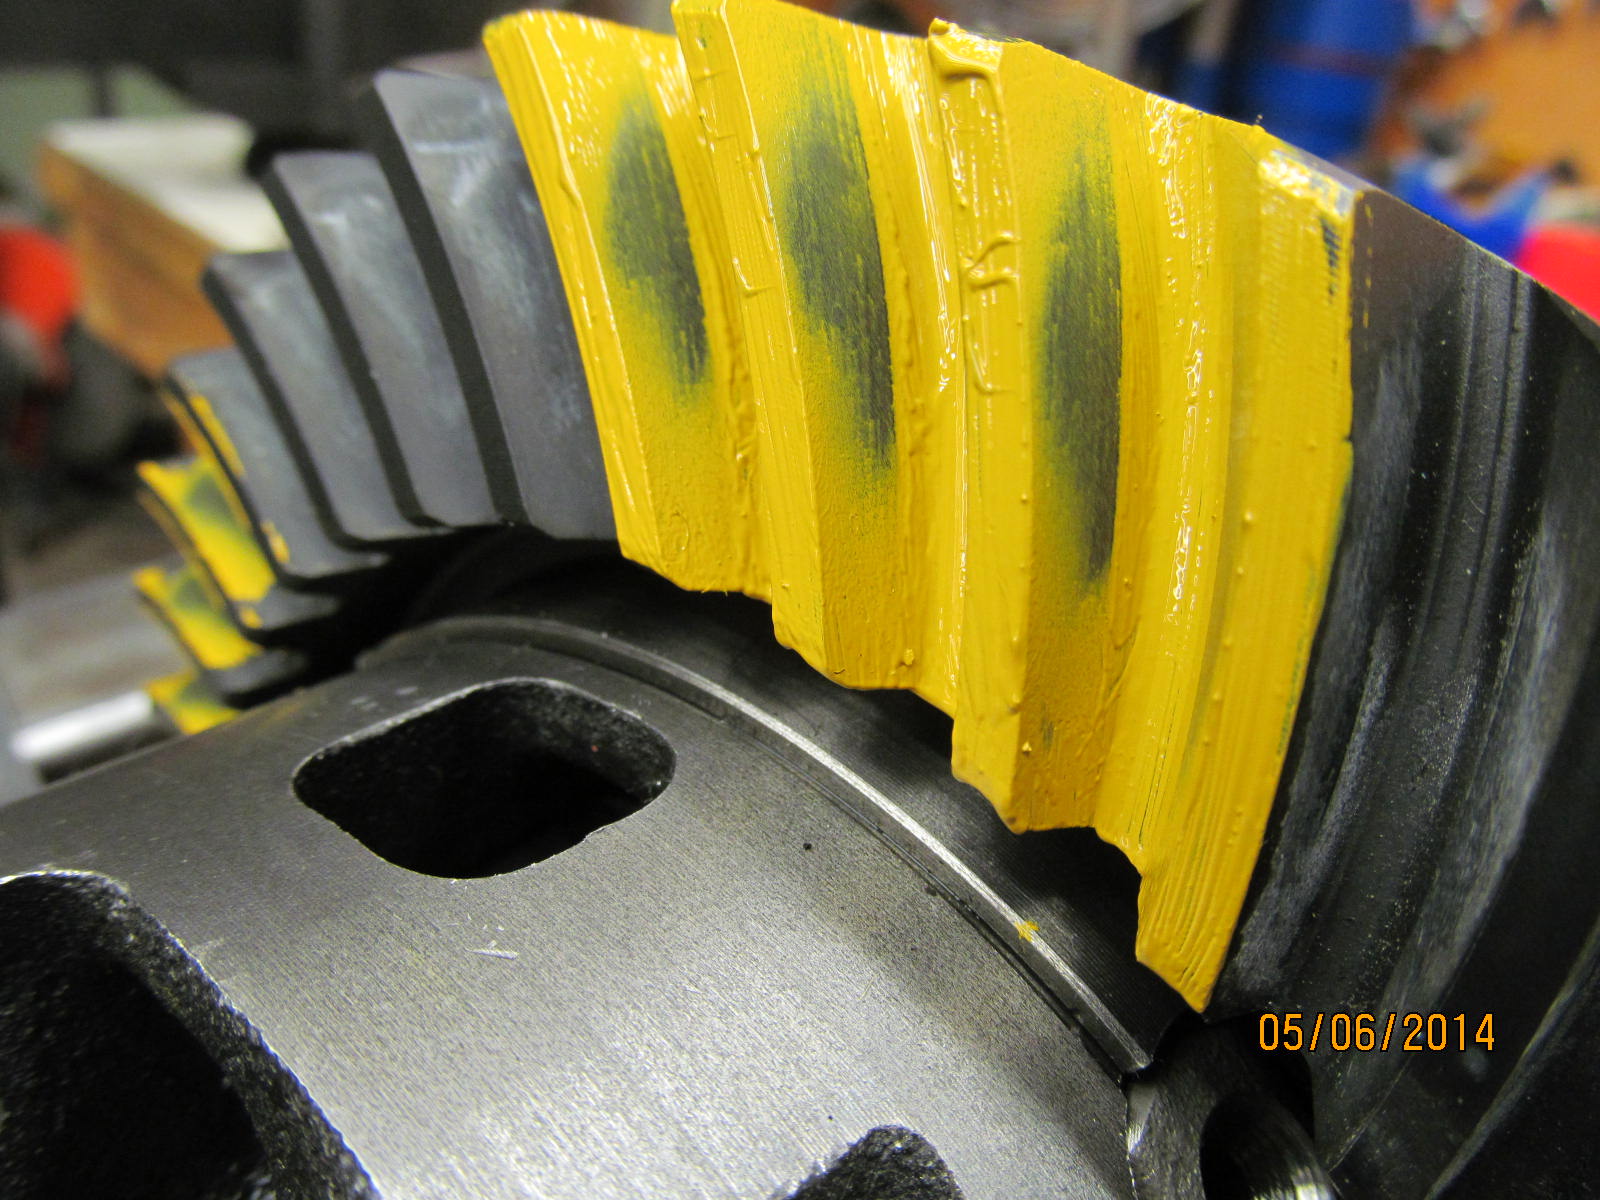
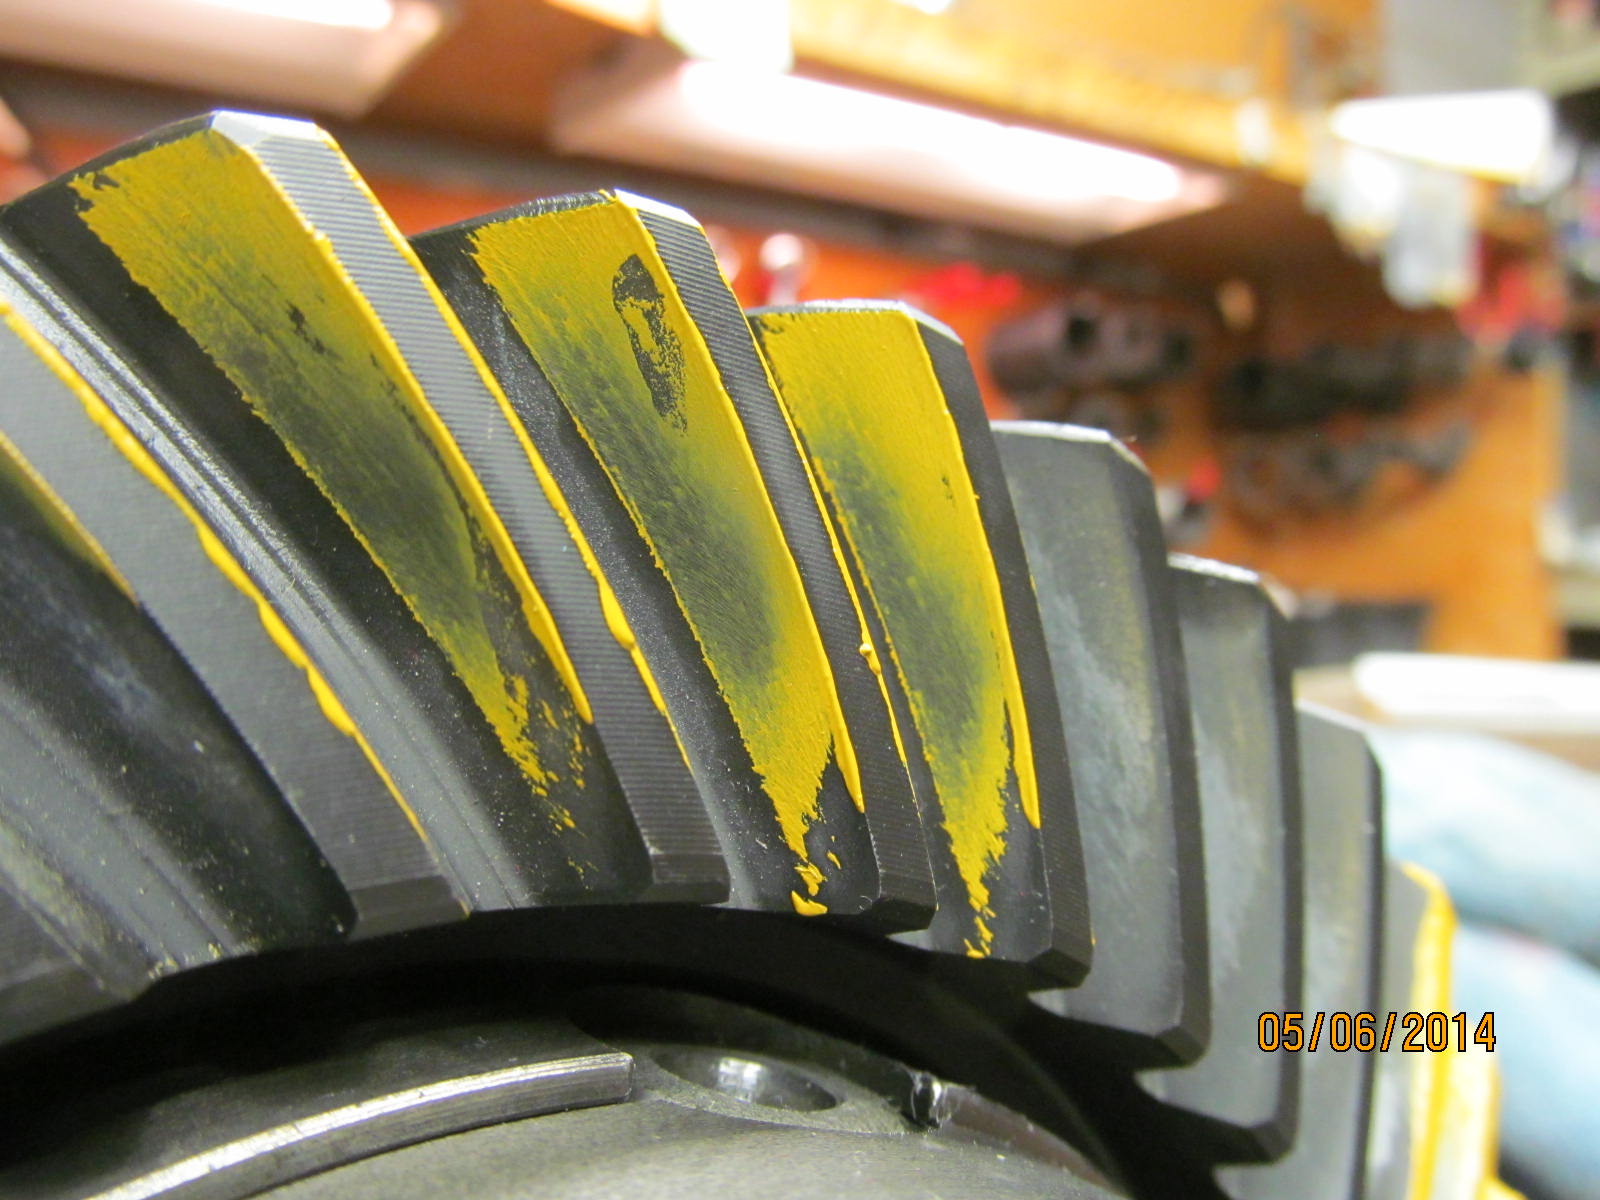
A look at the drive reverse painted tooth. Good.
|
|
|
|
|
Coast reverse painted.
|
|
|
|
|
A blurry shot of the drive tooth. Looks aok.
|
|
|
|
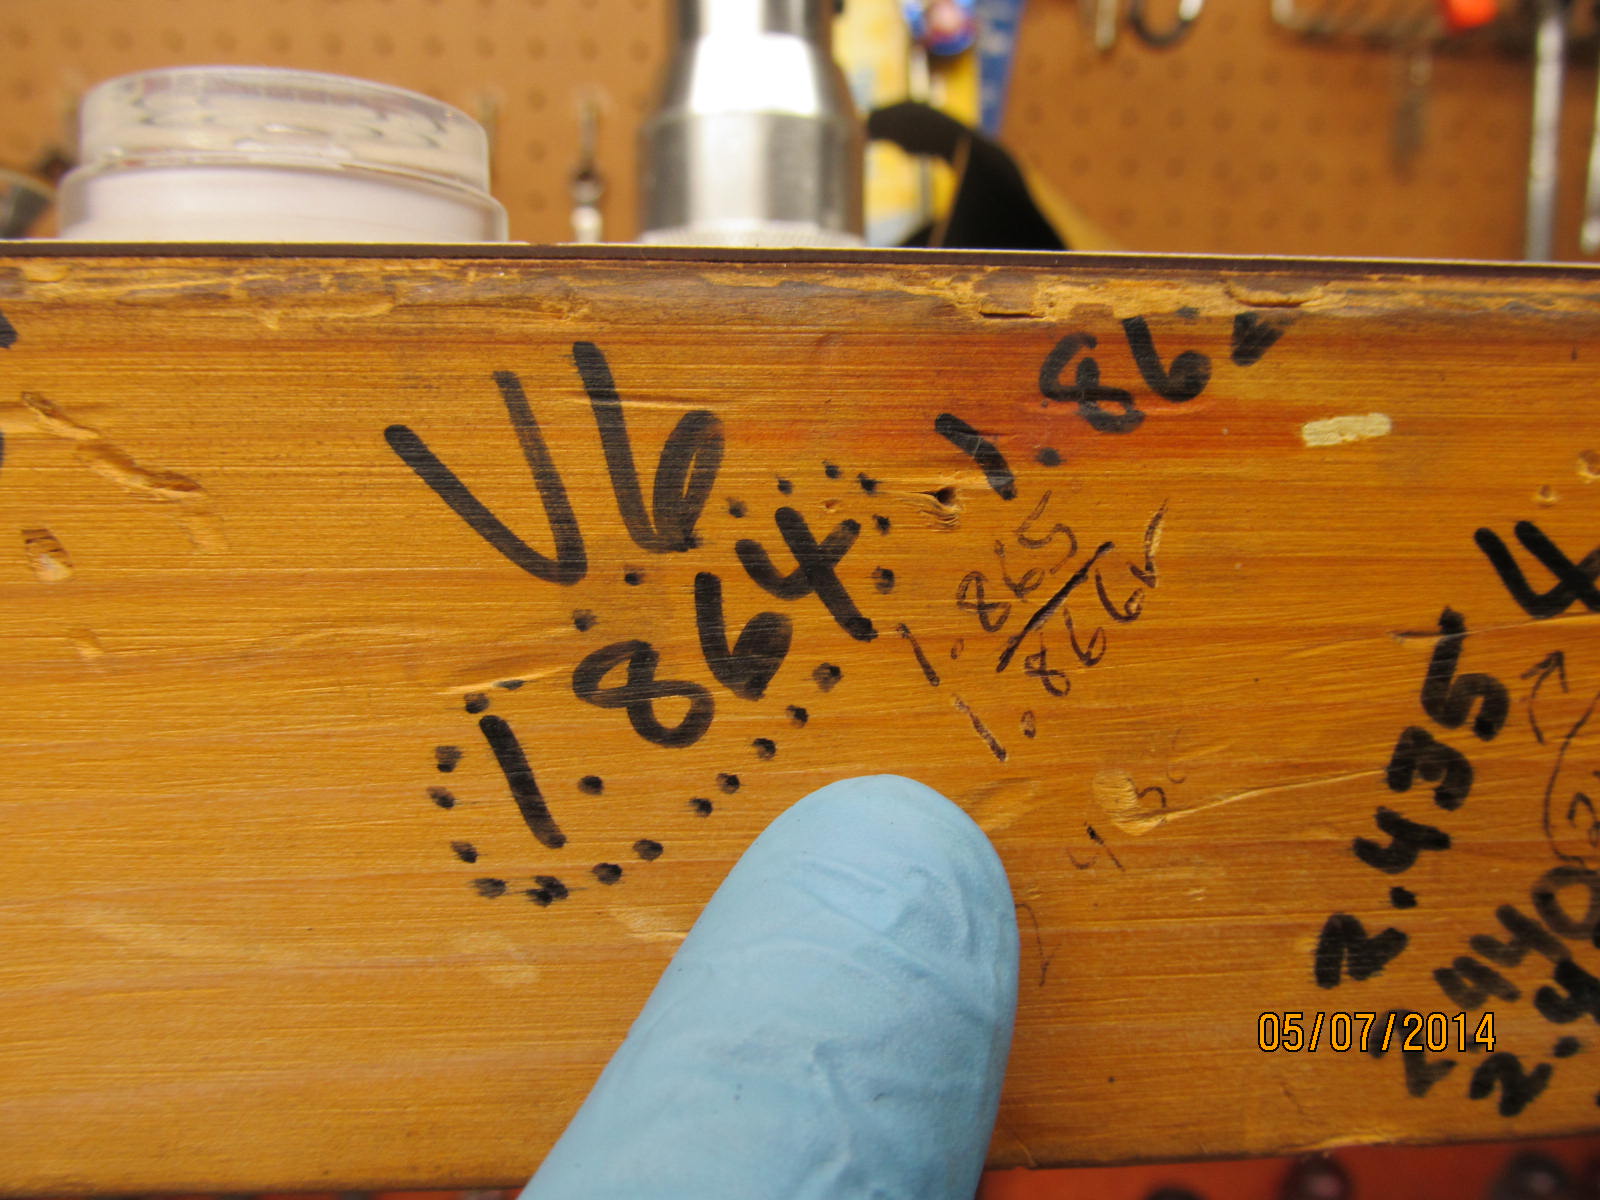
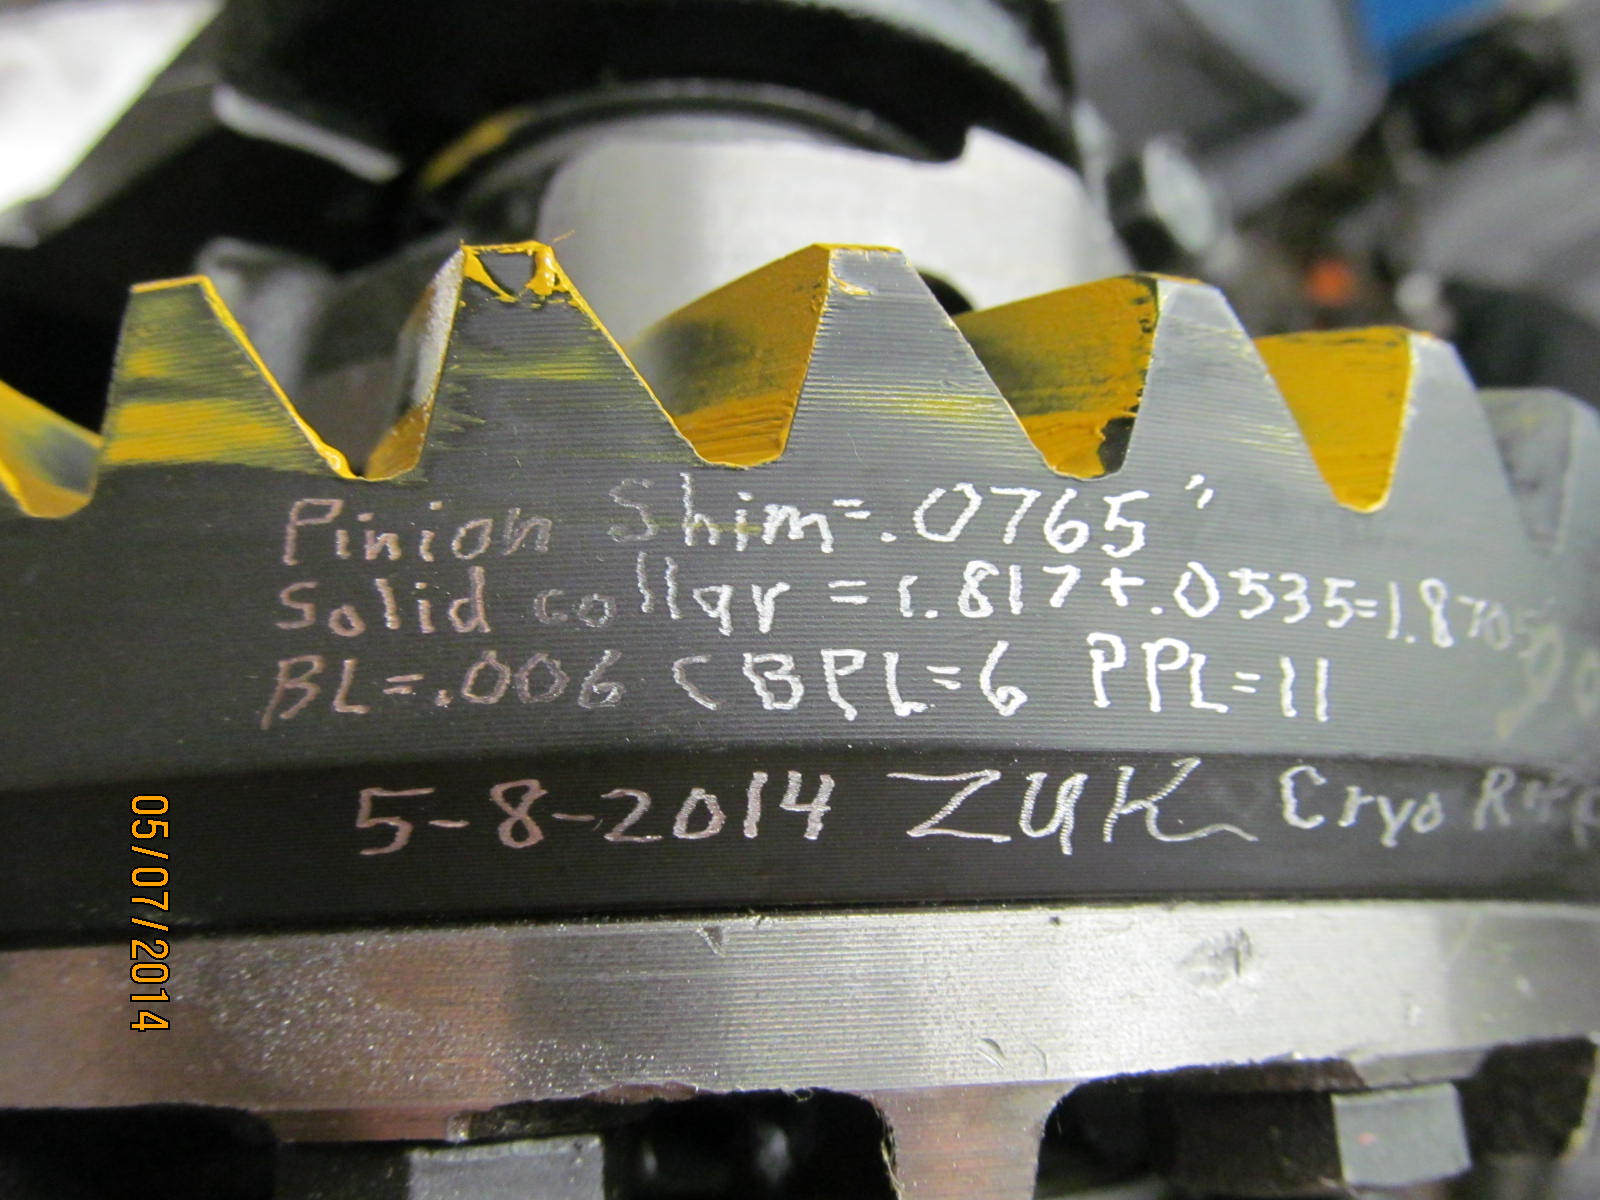
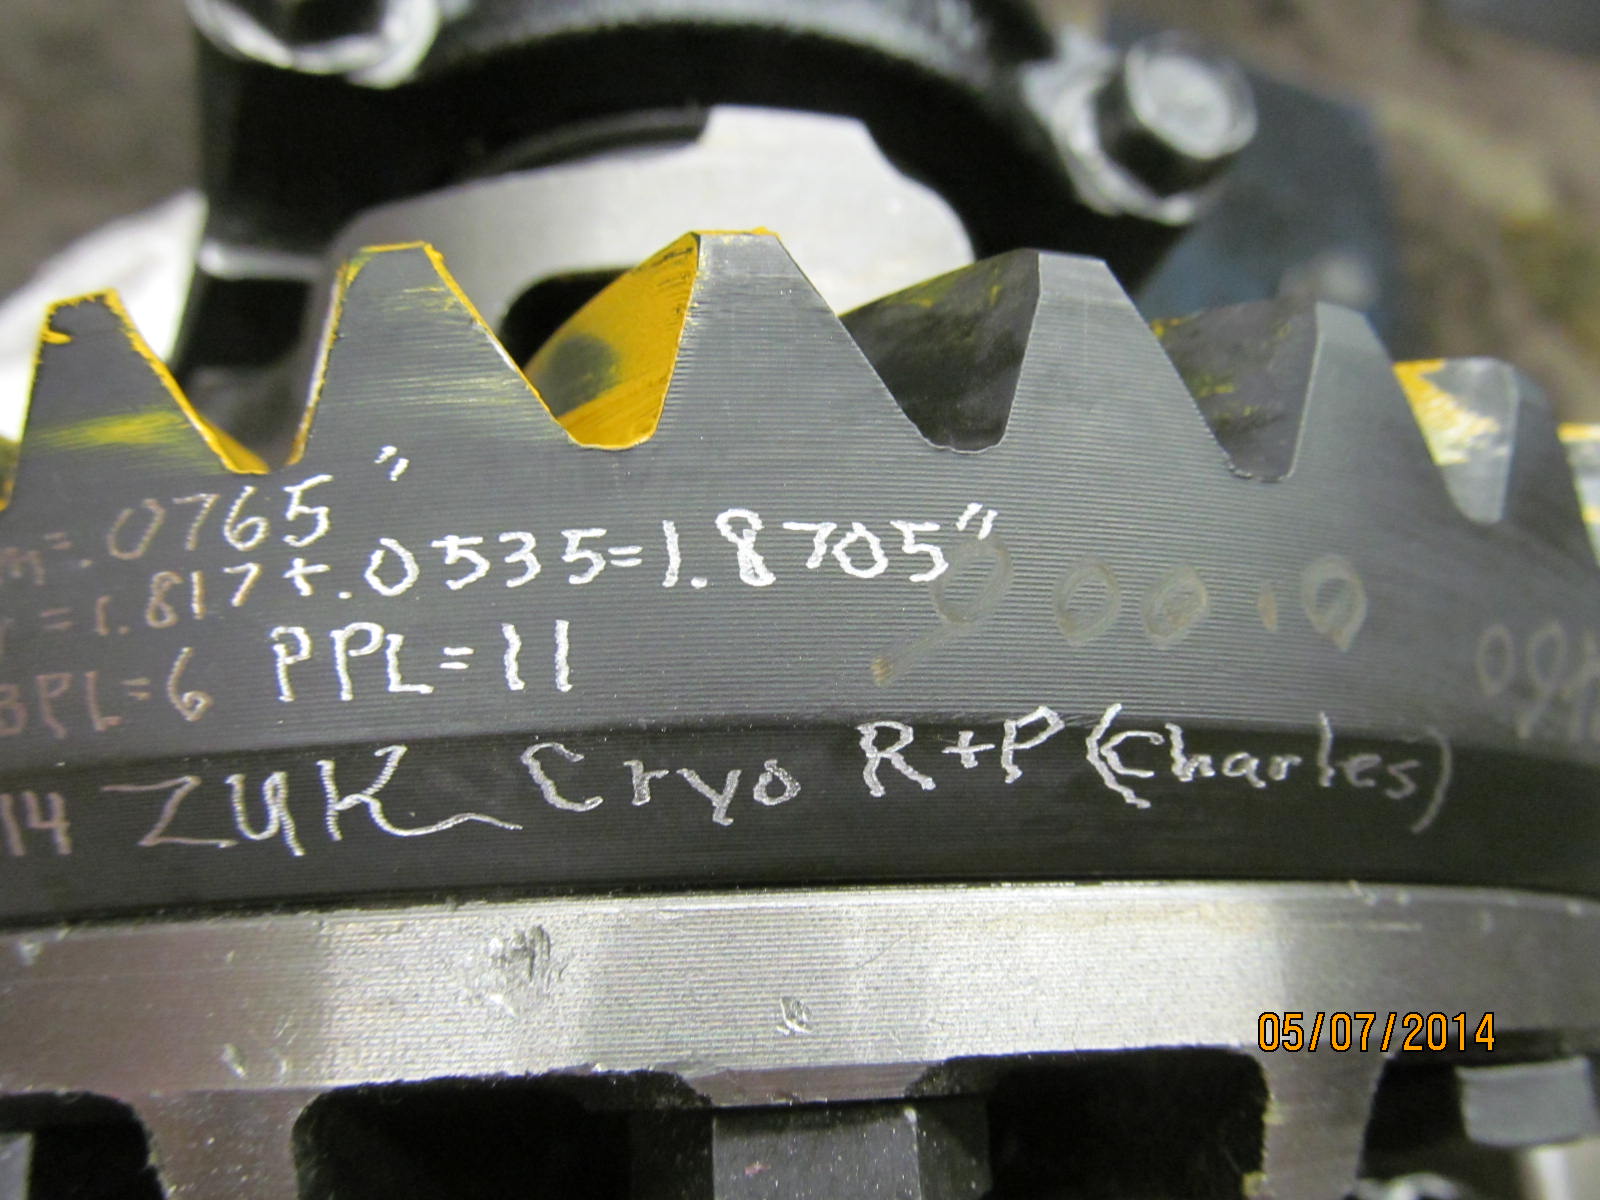
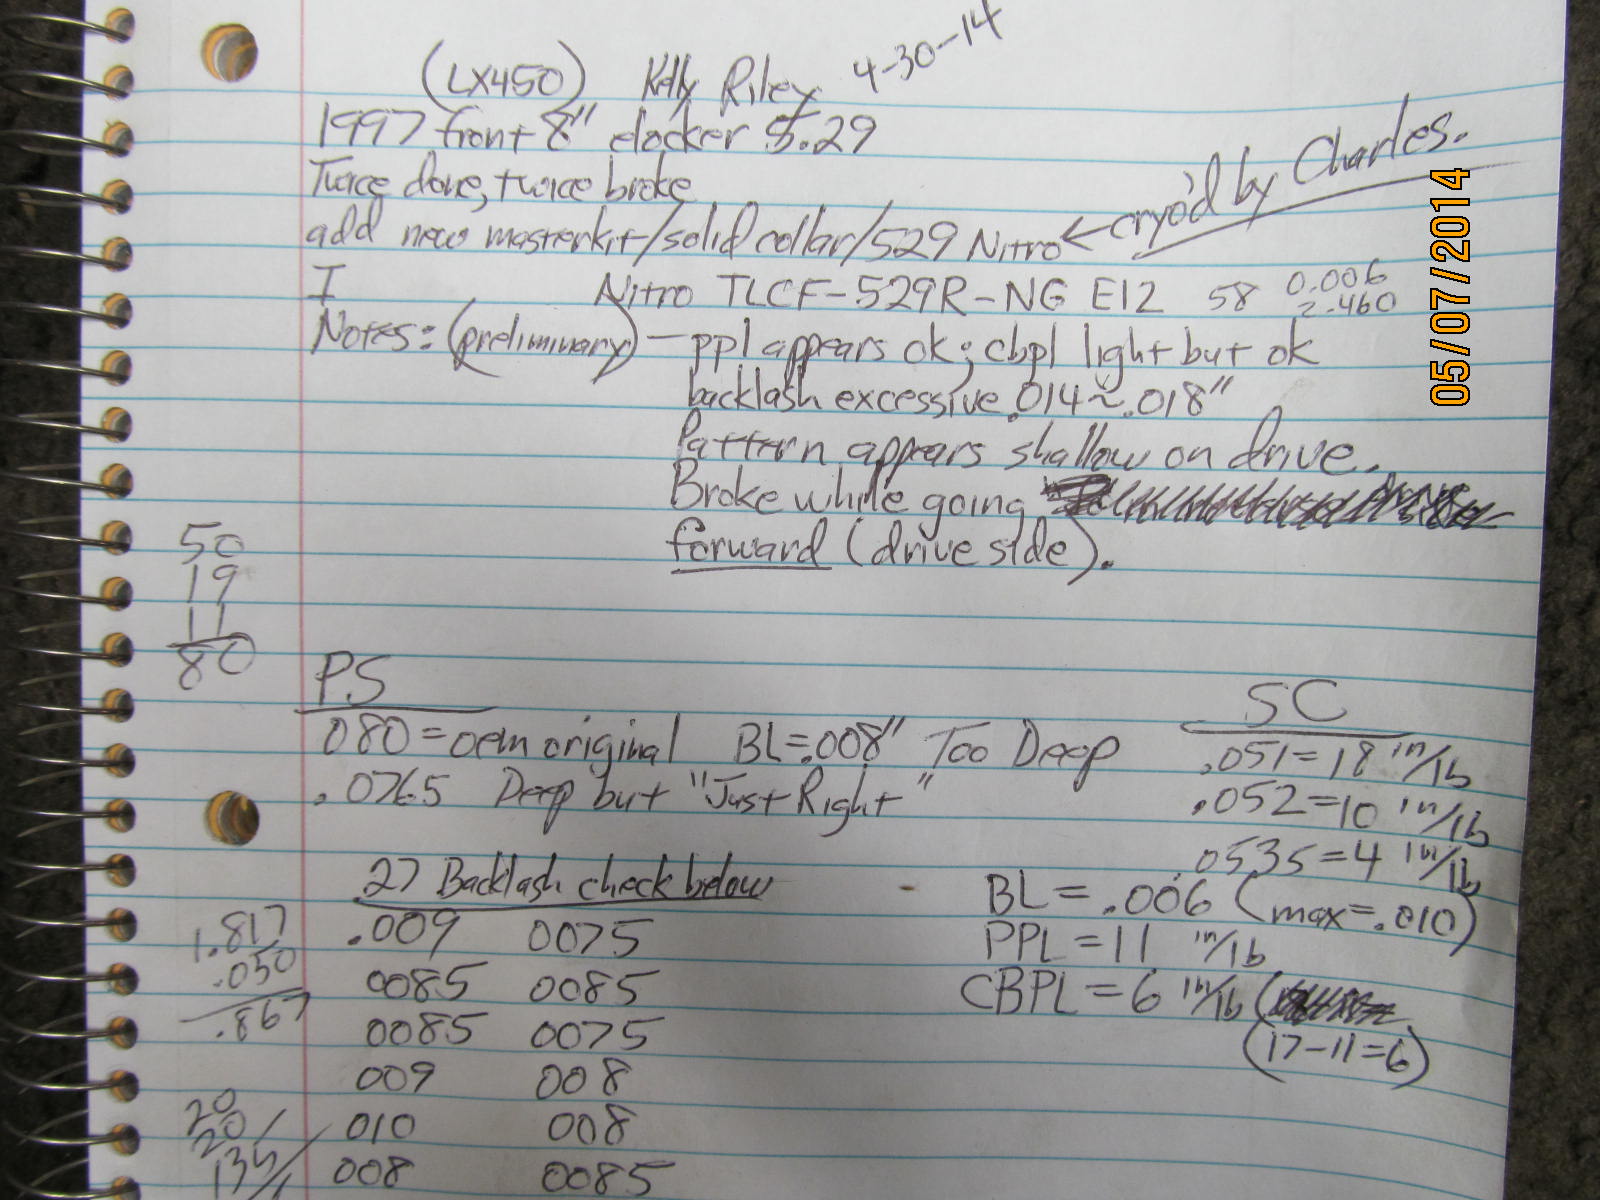
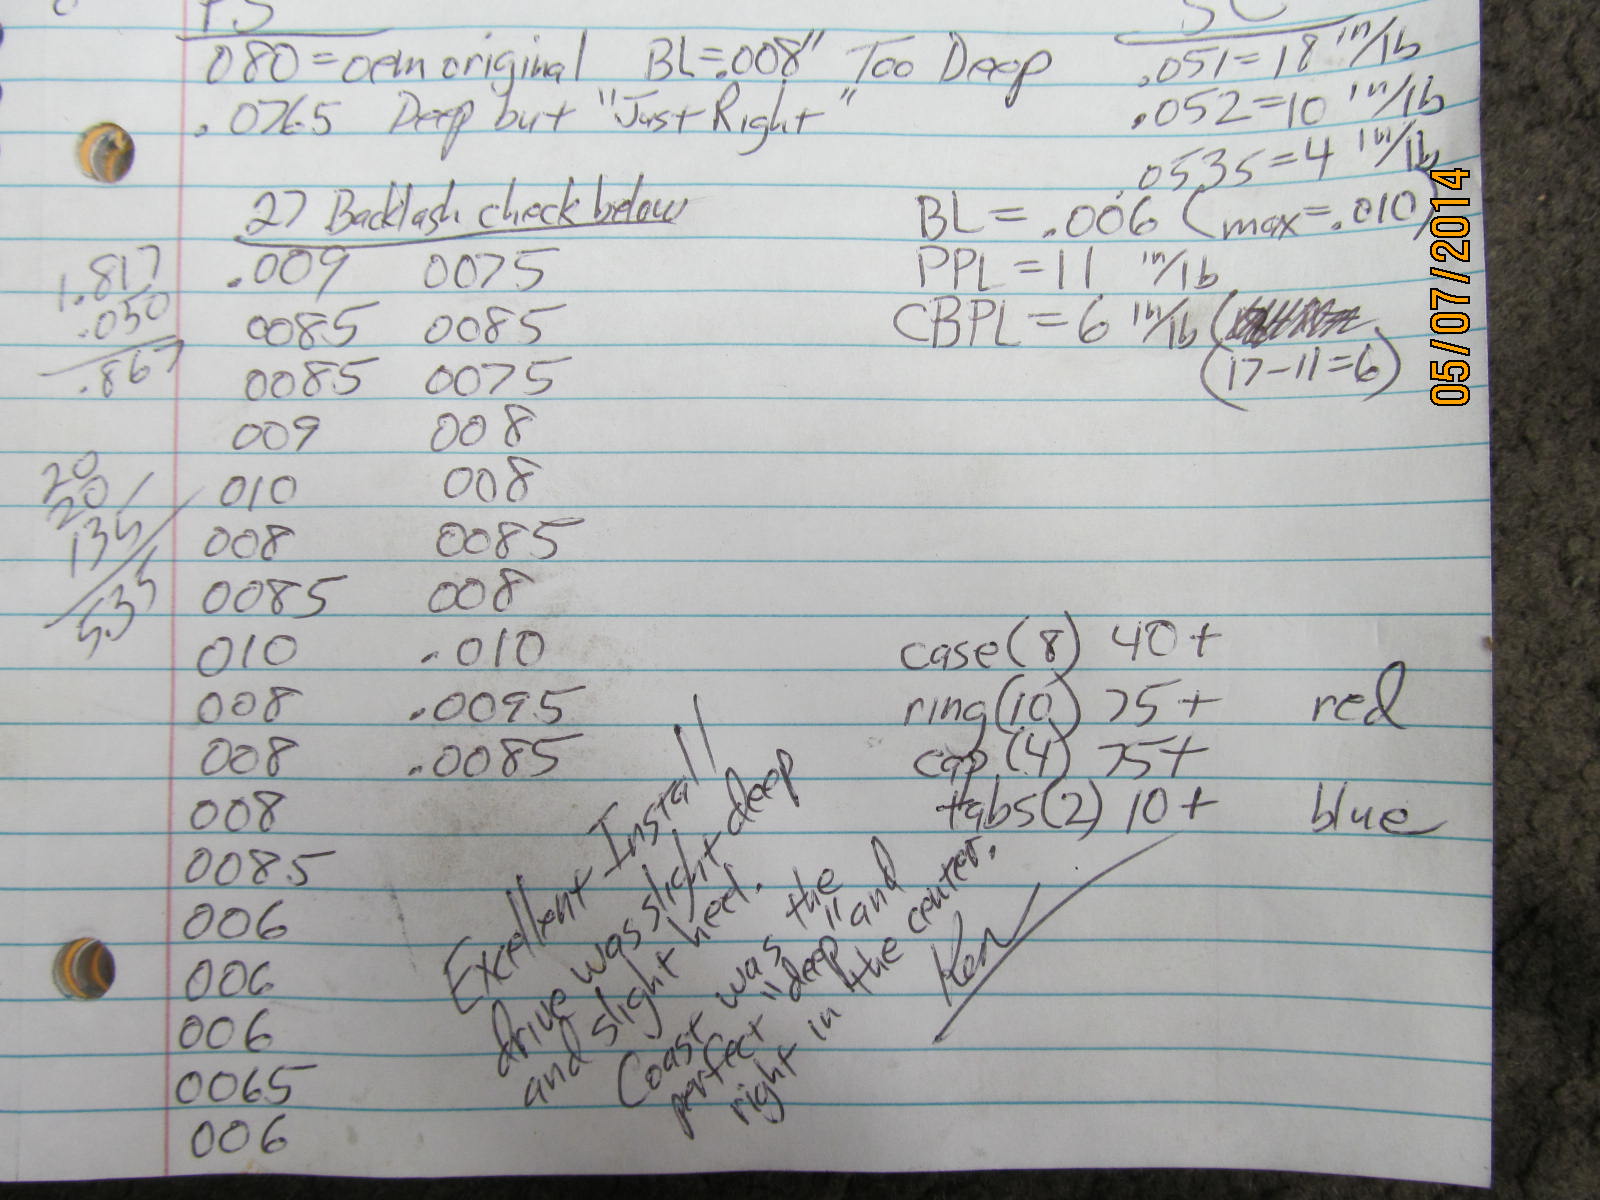
Pinion depth has now been established so onto installing the solid collar. As my text document shows, I should
start with a total solid collar length of about 1.866".
|
|
|
|
I'll use .051" worth of shims...plus the 1.817" collar is a total of 1.868". But, surprisingly, upon tightening the
pinion nut I measured 18 in/lb start torque. Remove pinion and add shim....add .001" and PPL is 10 in/lb and still
too high. Remove again and add another .0015" and now PPL is just right at 4 in/lb start torque. It's "just right"
because it's 4 right now...but once I start really tightening up the pinion nut it will increase
the PPL to 10 or more. Even solid collars can change in length a small amount with
some motivational persuasion.
|
|
|
|
|
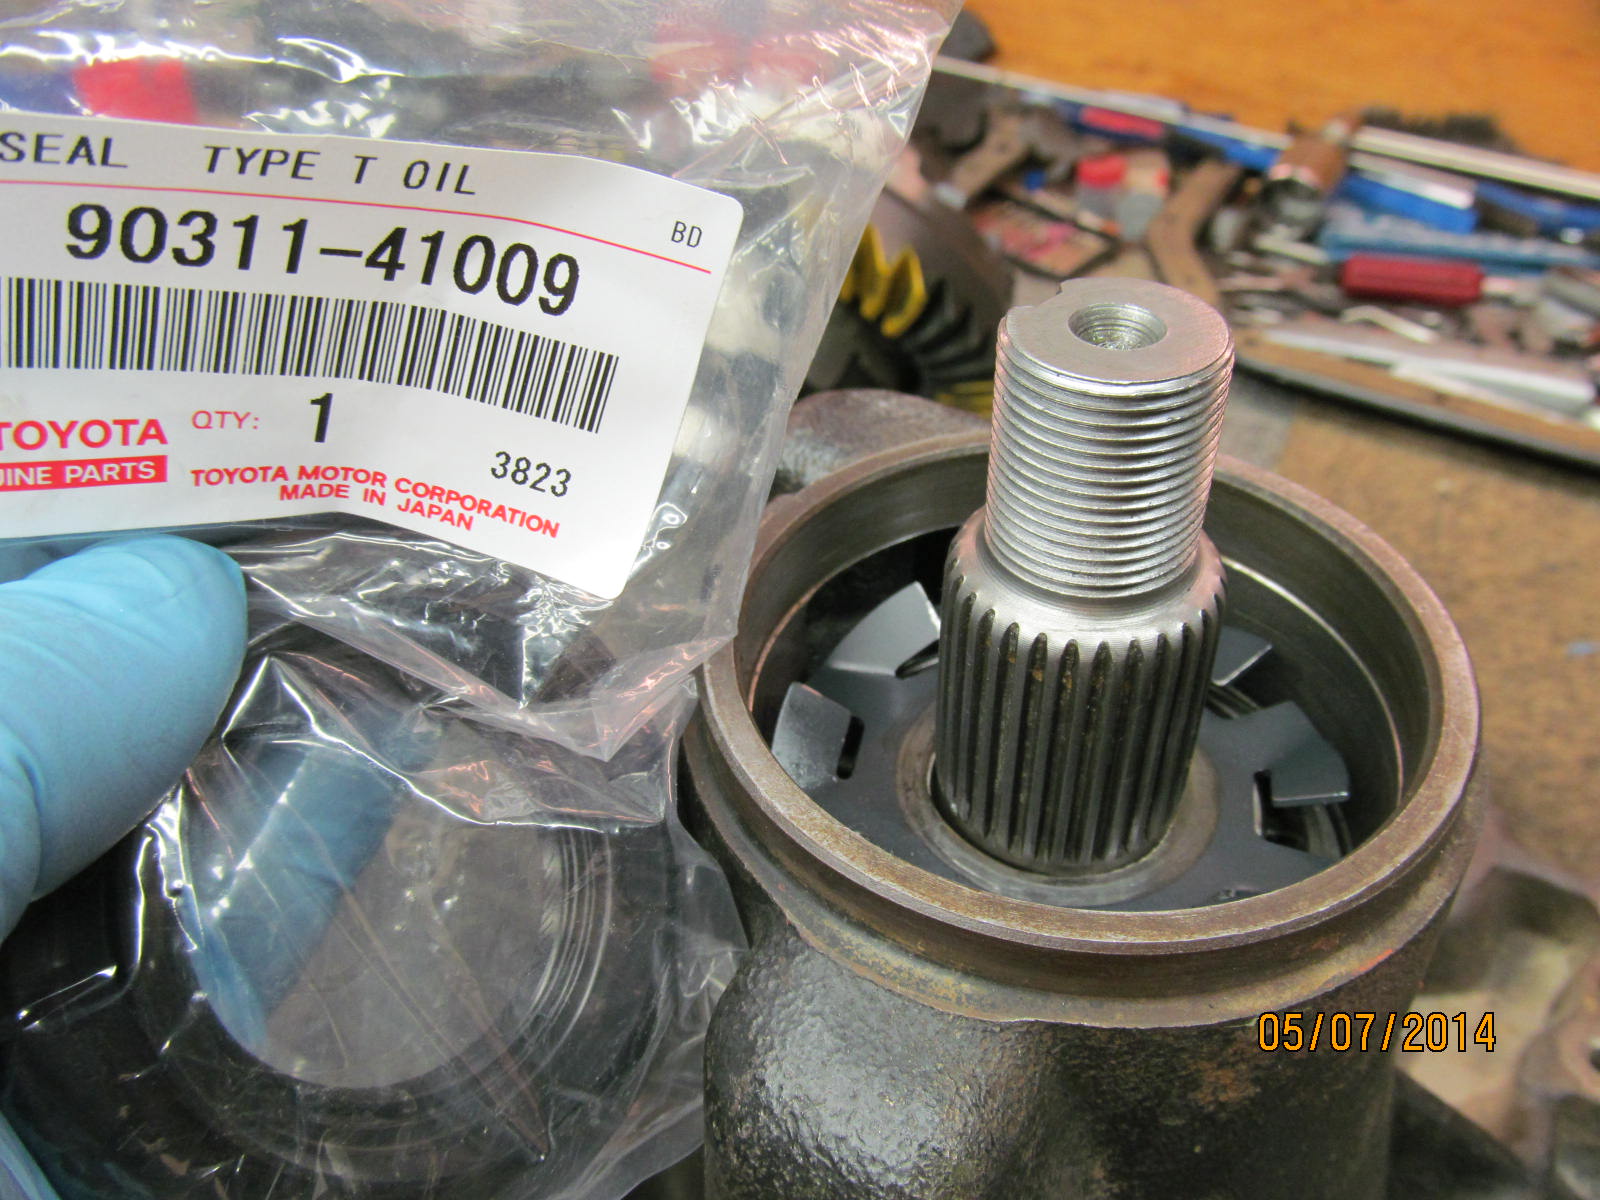
ECGS supplied the high high quality oem seal used for the bigger 29 spline flanges.
|
|
|
|
|
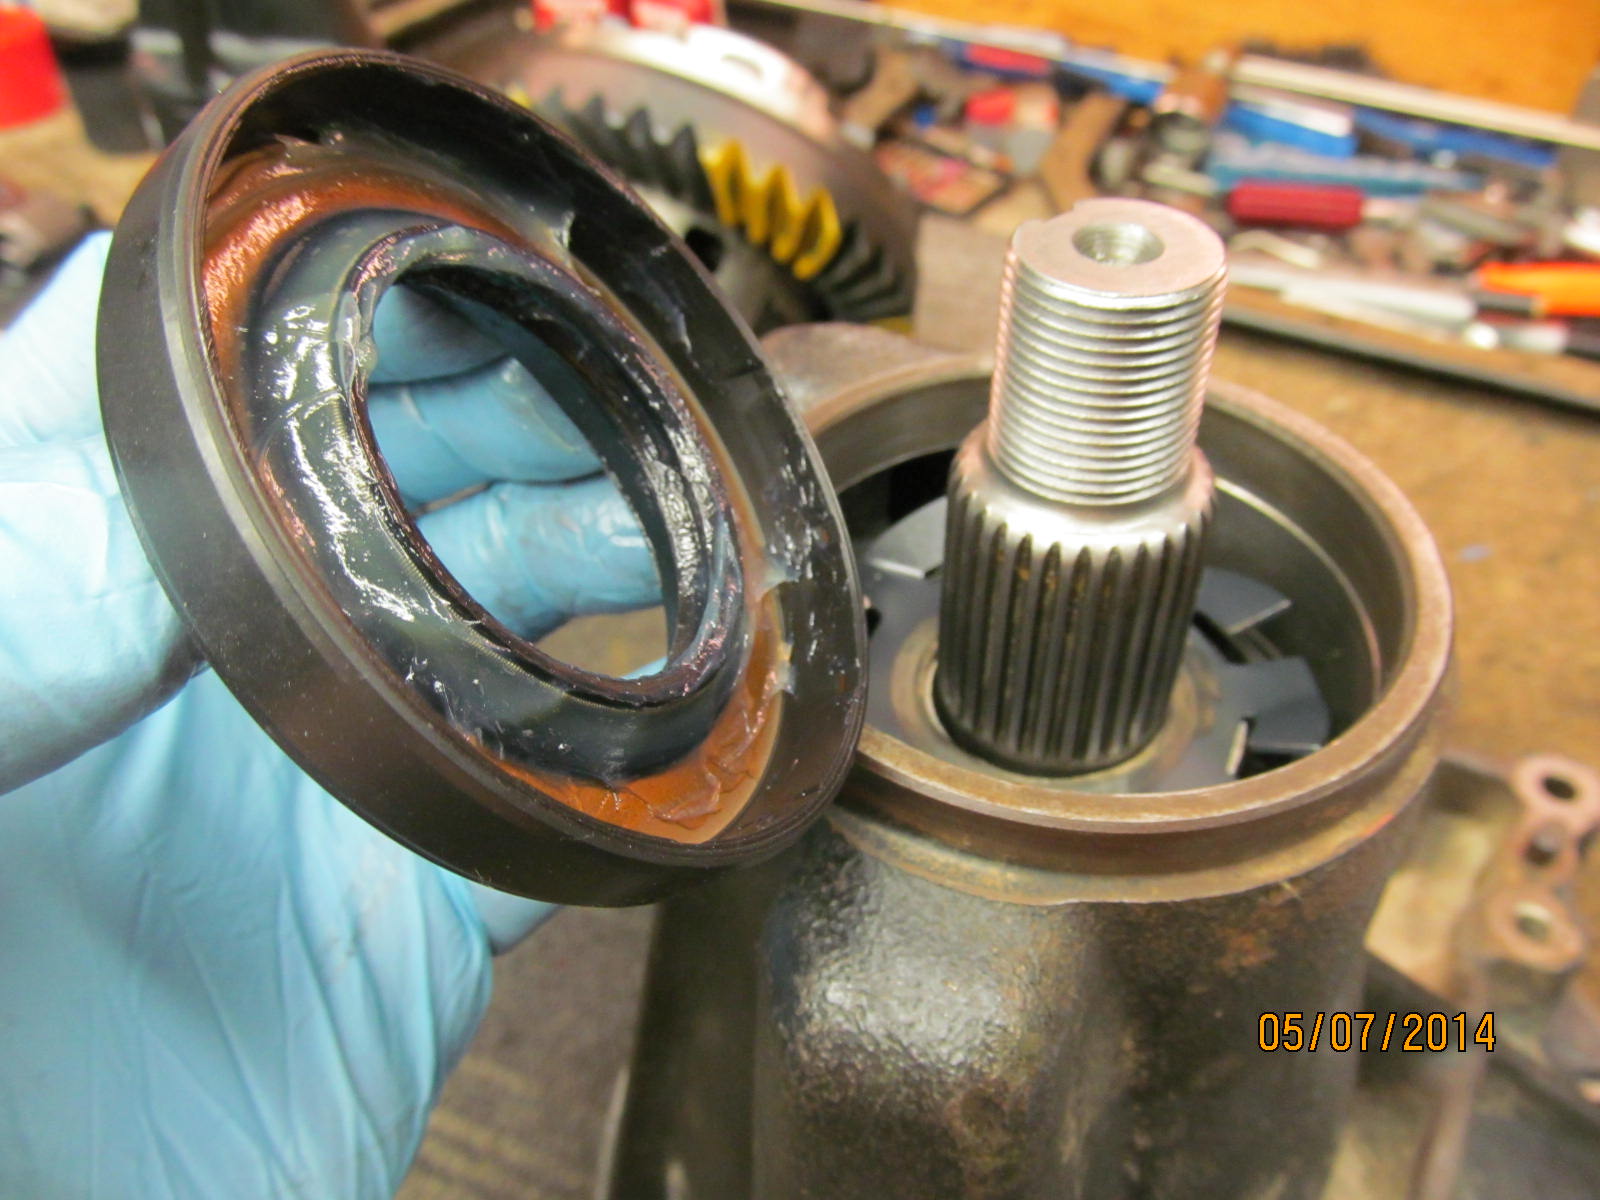
Thick grease is applied to the garter spring.
|
|
|

|
I use the large flat surface of an old race (not shown this time) to hammer down the seal evenly....with no direct
contact with the hammer. No slippery RTV on these rubberized seals....I have seen these seals pop
back out of the bore because of it.
|
|
|
|
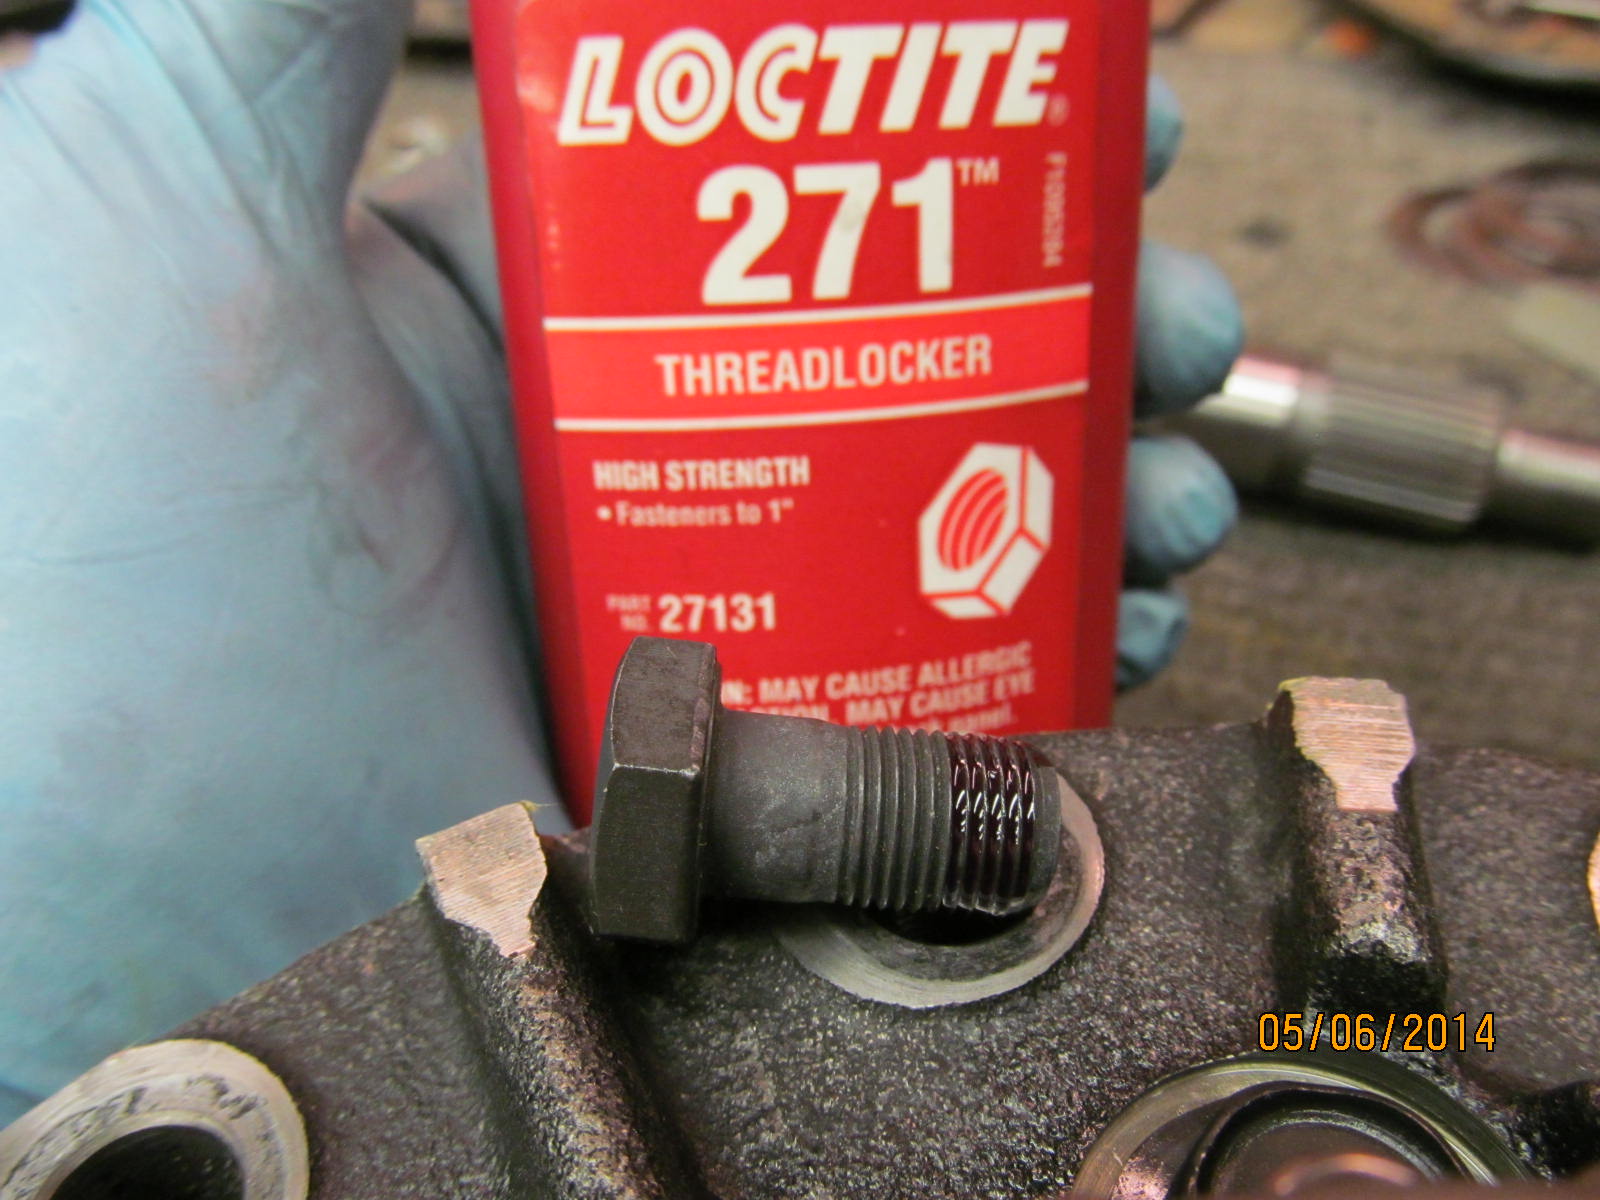
After much thought, I am back to using aluminum anti-seize on the pinion nut instead of high stength Loctite.
Just seems better to use it. Pinion nuts will never loosen up on their own if they are "dinged".
|
|
|
|
Tight as the electric impact will get it and then use the cheater bar to get another 45 degrees rotation as
indicated by the sharpie mark. Next photo shows I am now at a nice 11 in/lb start torque and now I can
DING the nut shown above.
|
|
|
|
|
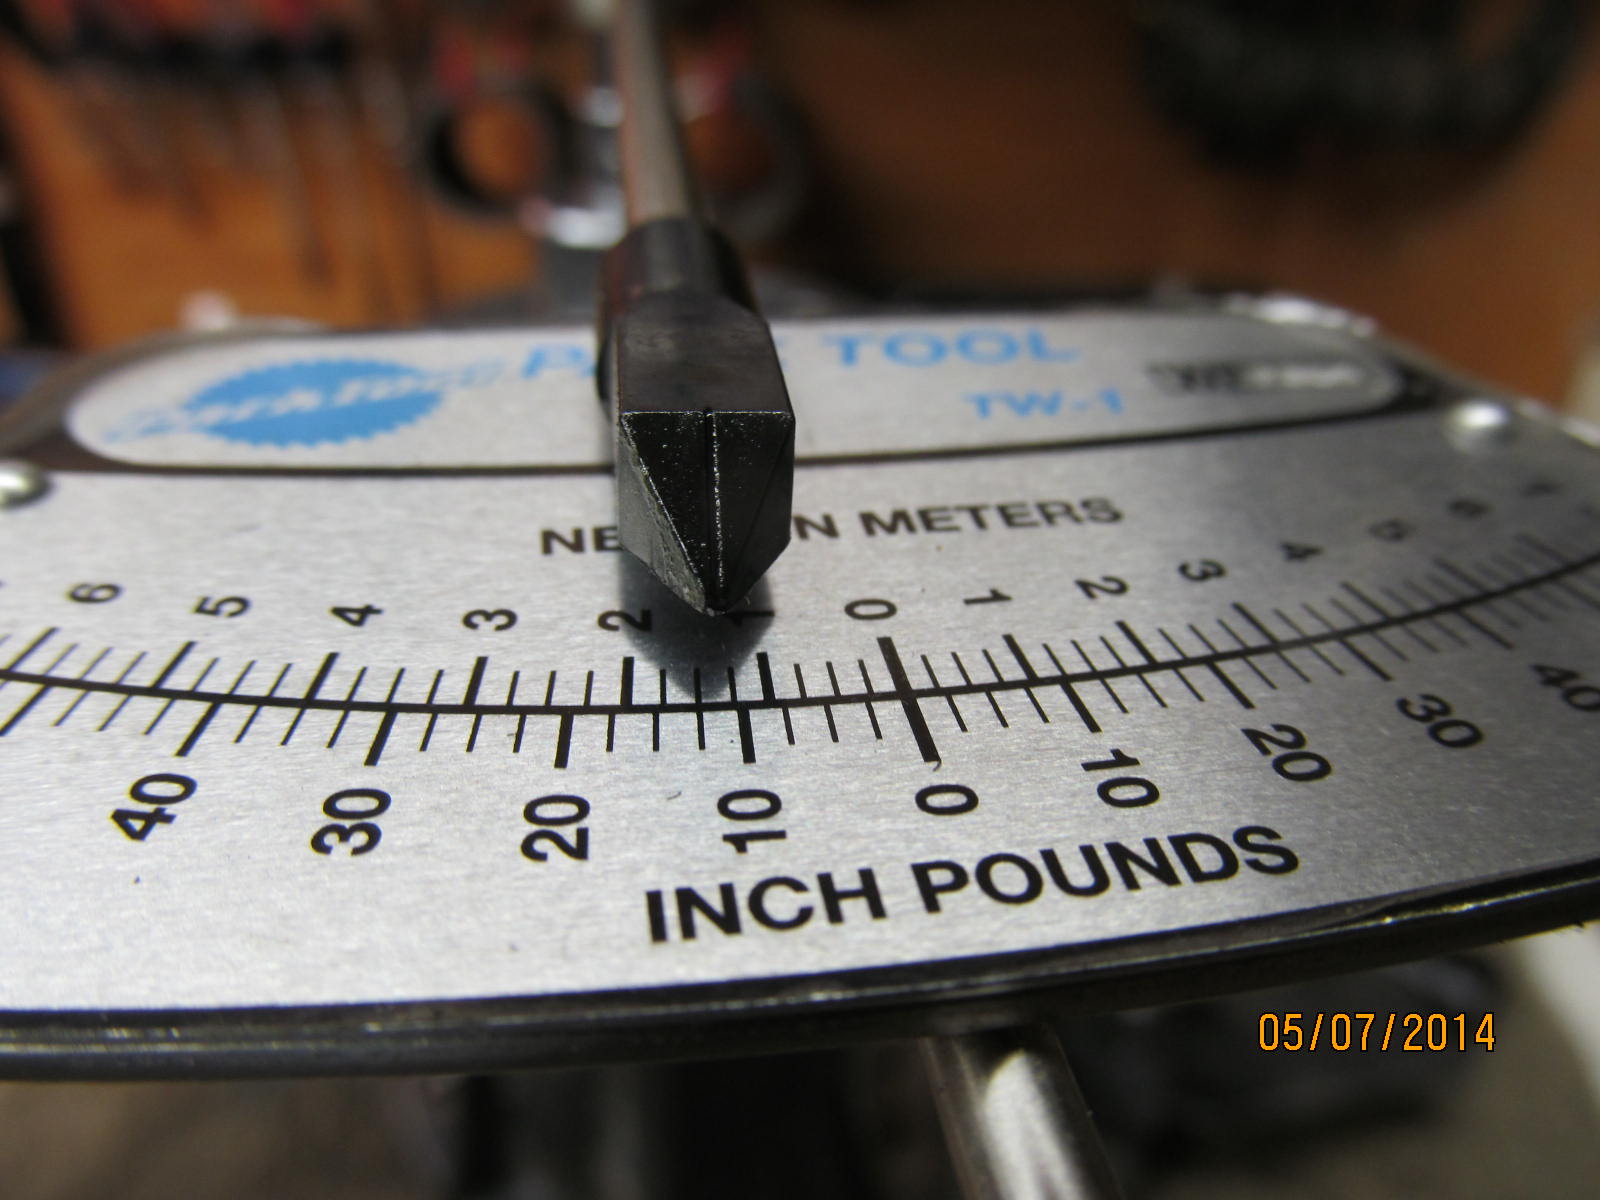
12 in/lb start torque.
|
|
|
|
I can tighten the 4 bearing cap bolts now to 75 ft/lb and dial in the
carrier bearing preload and backlash afterwards.
|
|
|
|
|
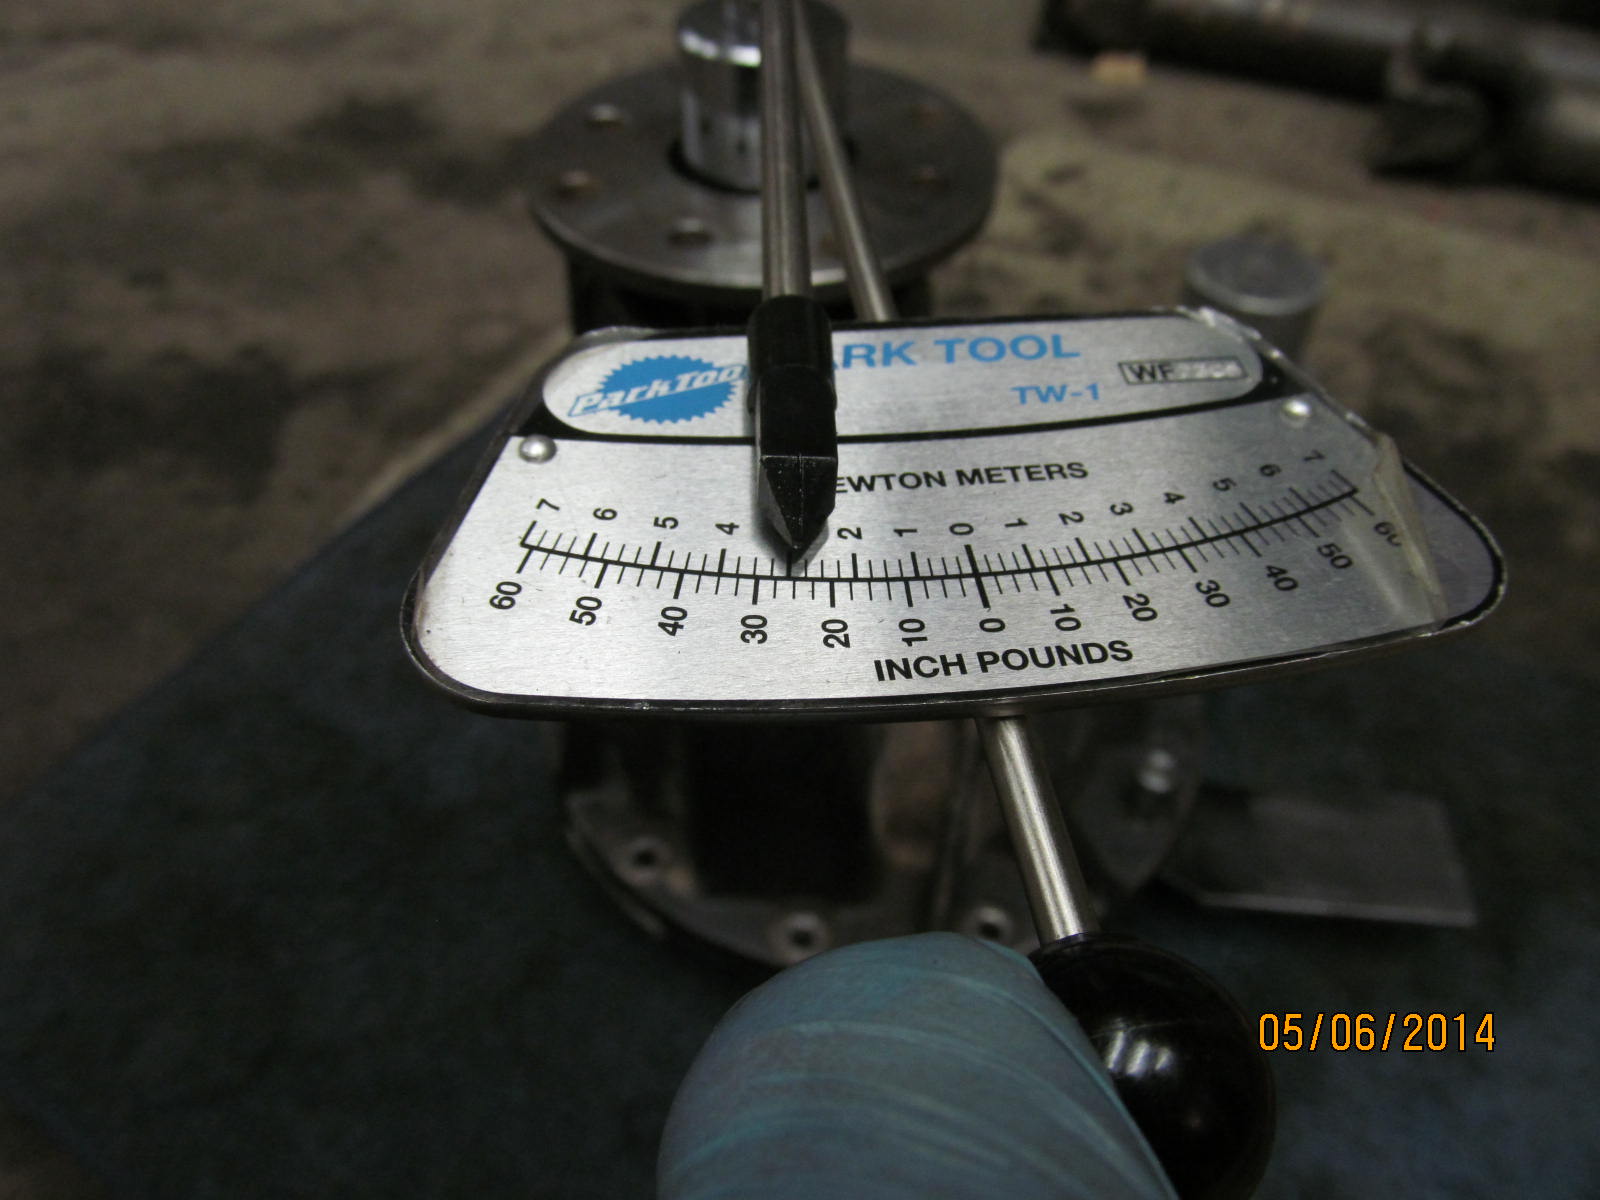
I measured the combined pinion and carrier bearing pre-load at 17.
|
|
|
|
I measured the backlash on 27 places. It varied a little more than typical but the health of this gear install is not
effected. I measured .006" as the minimum backlash and found some places that were .010" backlash.
|
|
|
|
|
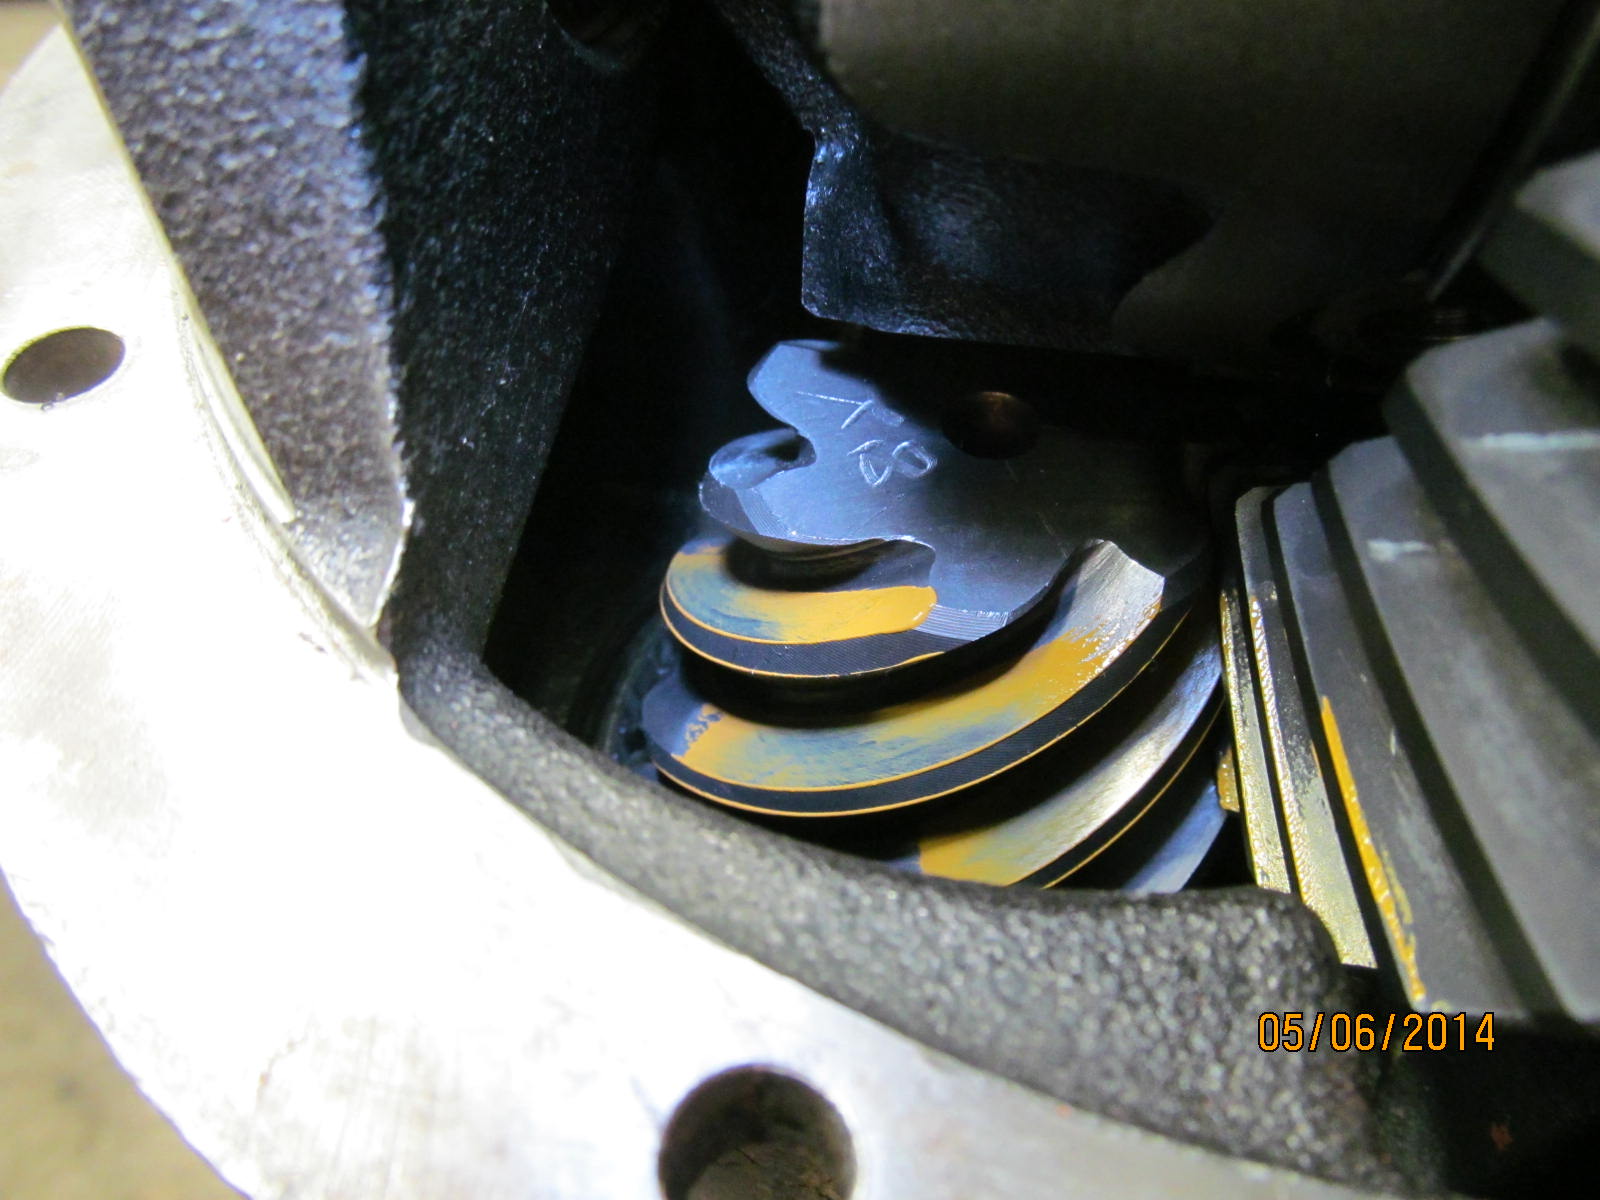
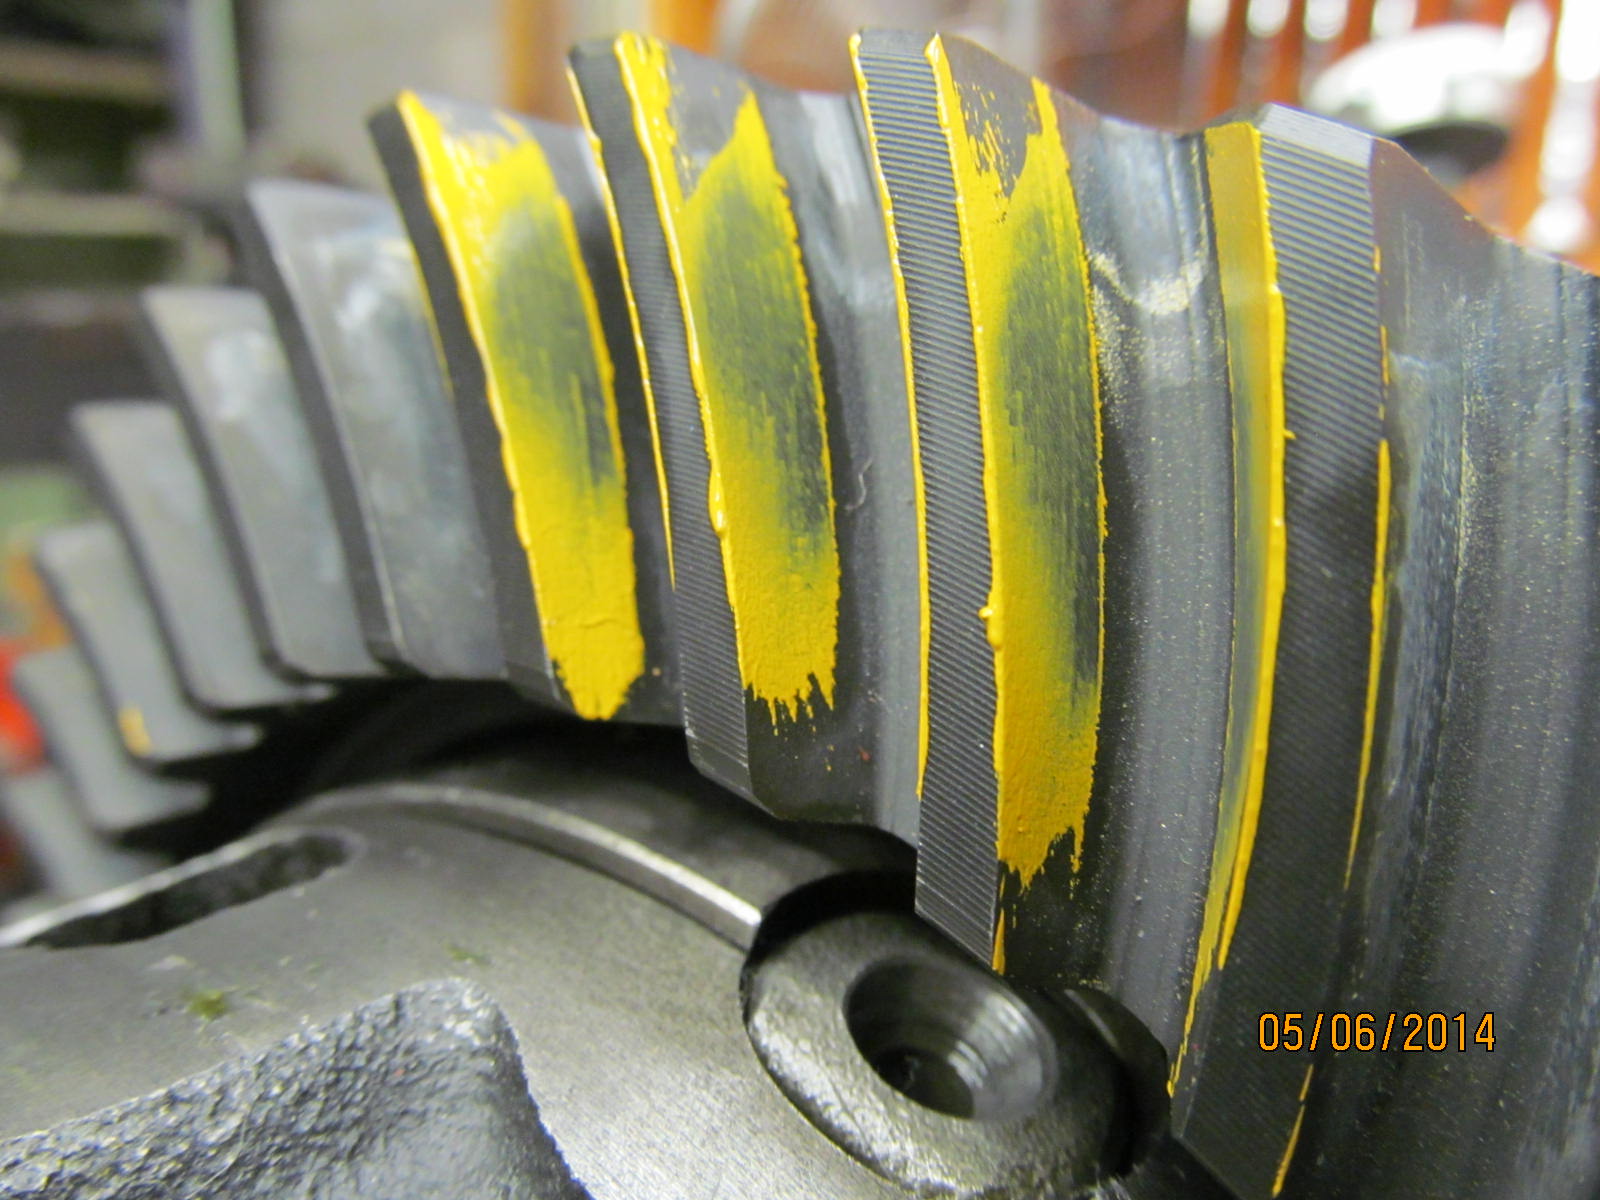
Final pattern check...DRIVE----slight deep with favoring of the heel.
|
|
|

|
|
COAST--- Good and almost perfectly centered contact load bearing patch.
|
|
|
|
|
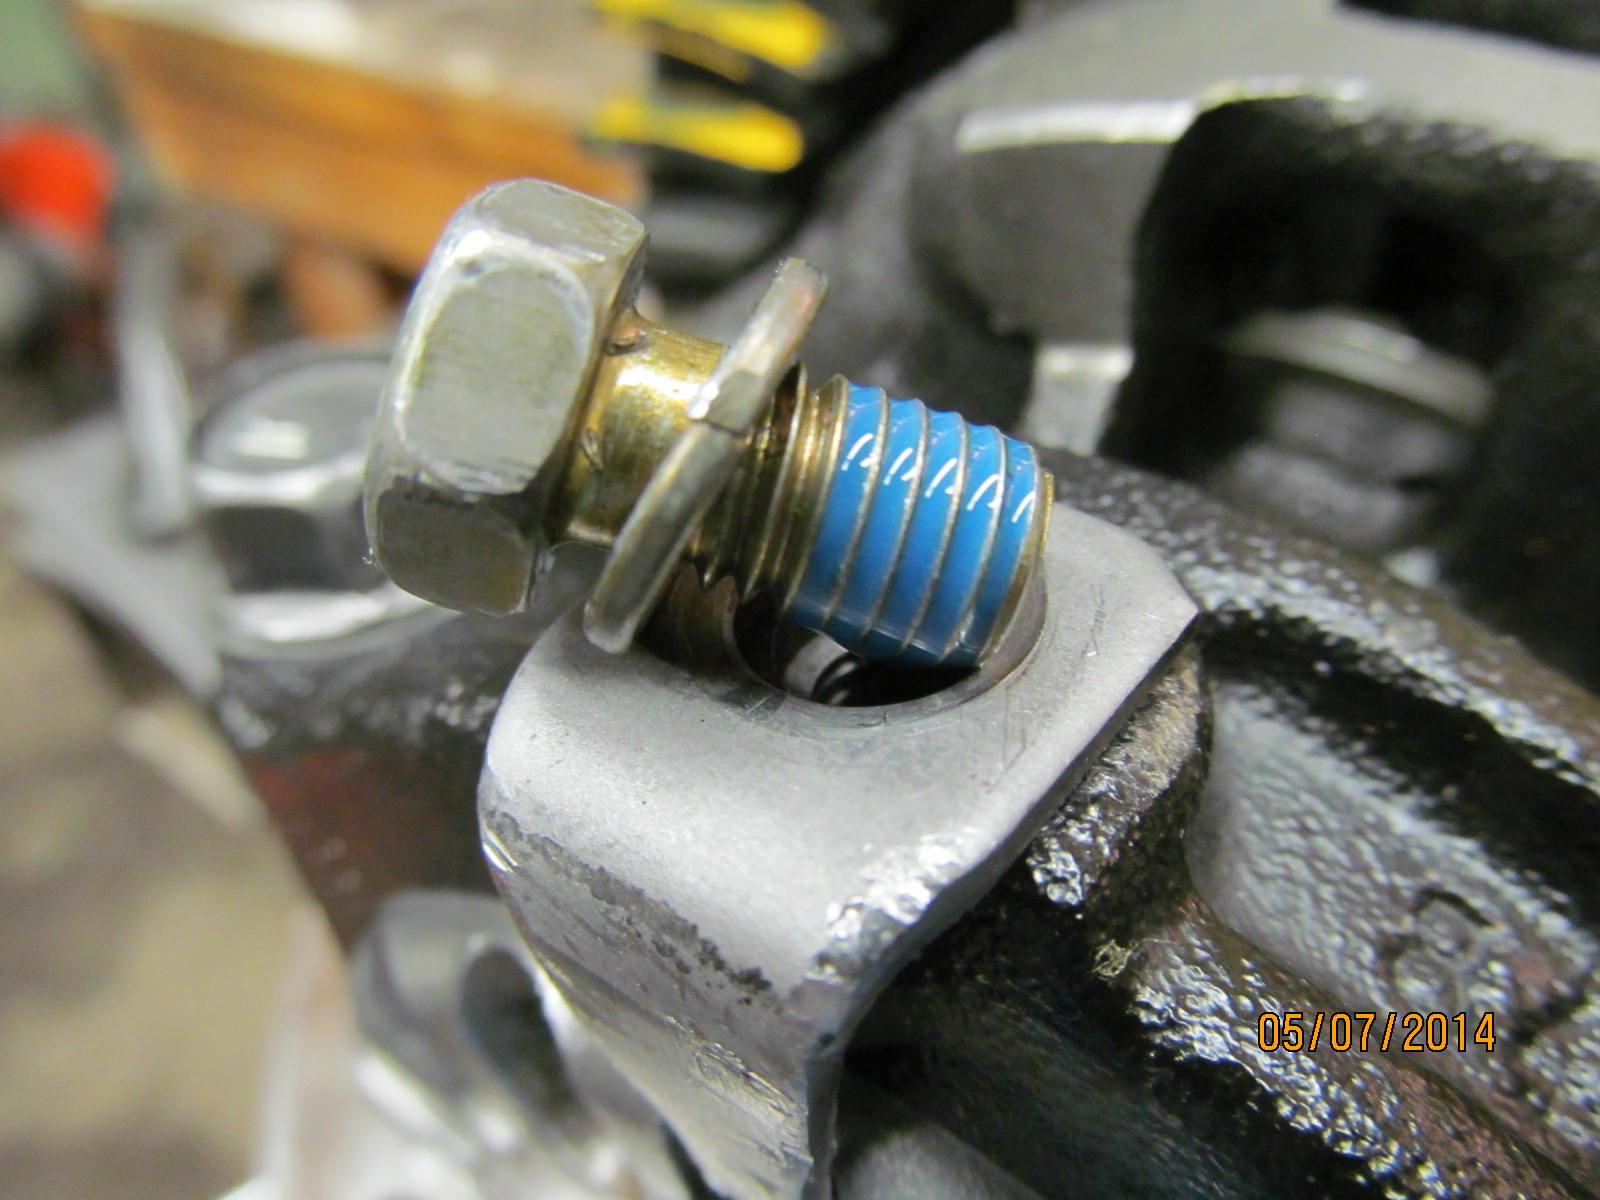
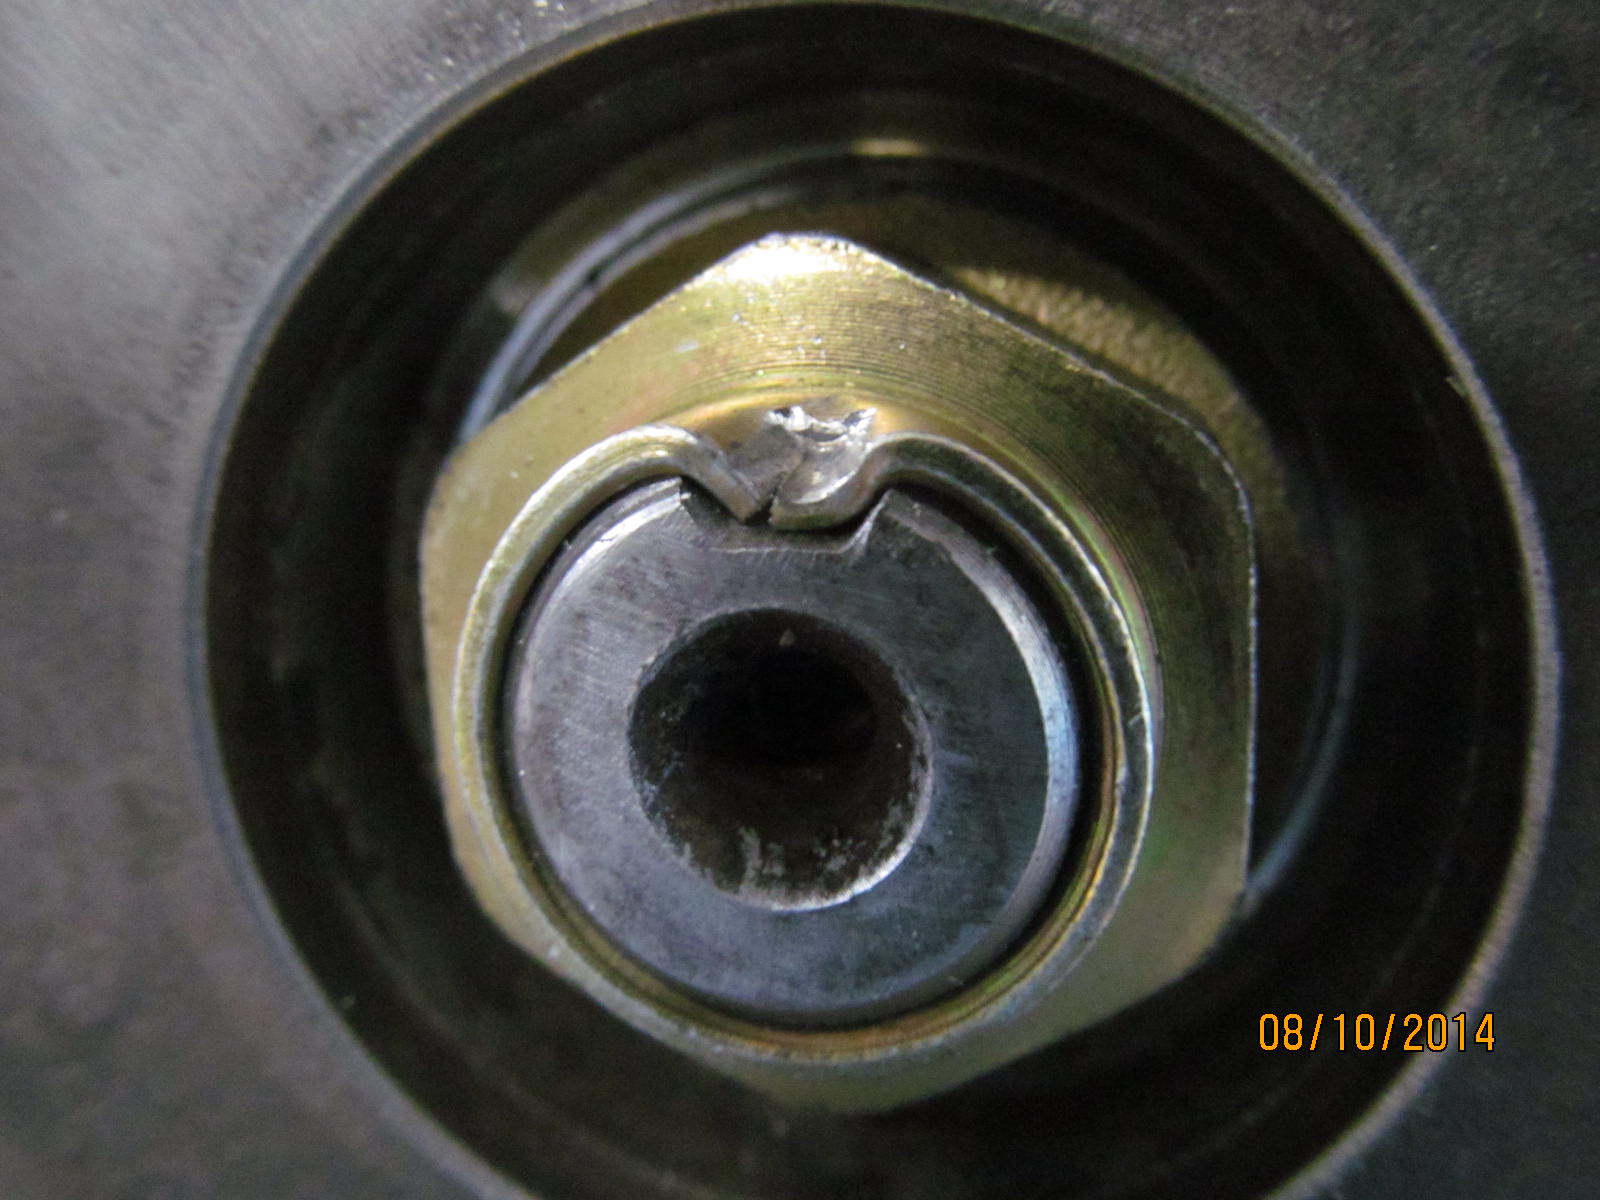
It's ready for the lock tabs. Blue loctite....
|
|
|
|
|
...and 10 ft/lb.
|
|
|
|
|
specs and dated.
|
|
|
|
|
.......
|
|
|
|
|
.....
|
|
|
|
|
Note taking is important :)
|
|
|

|
|
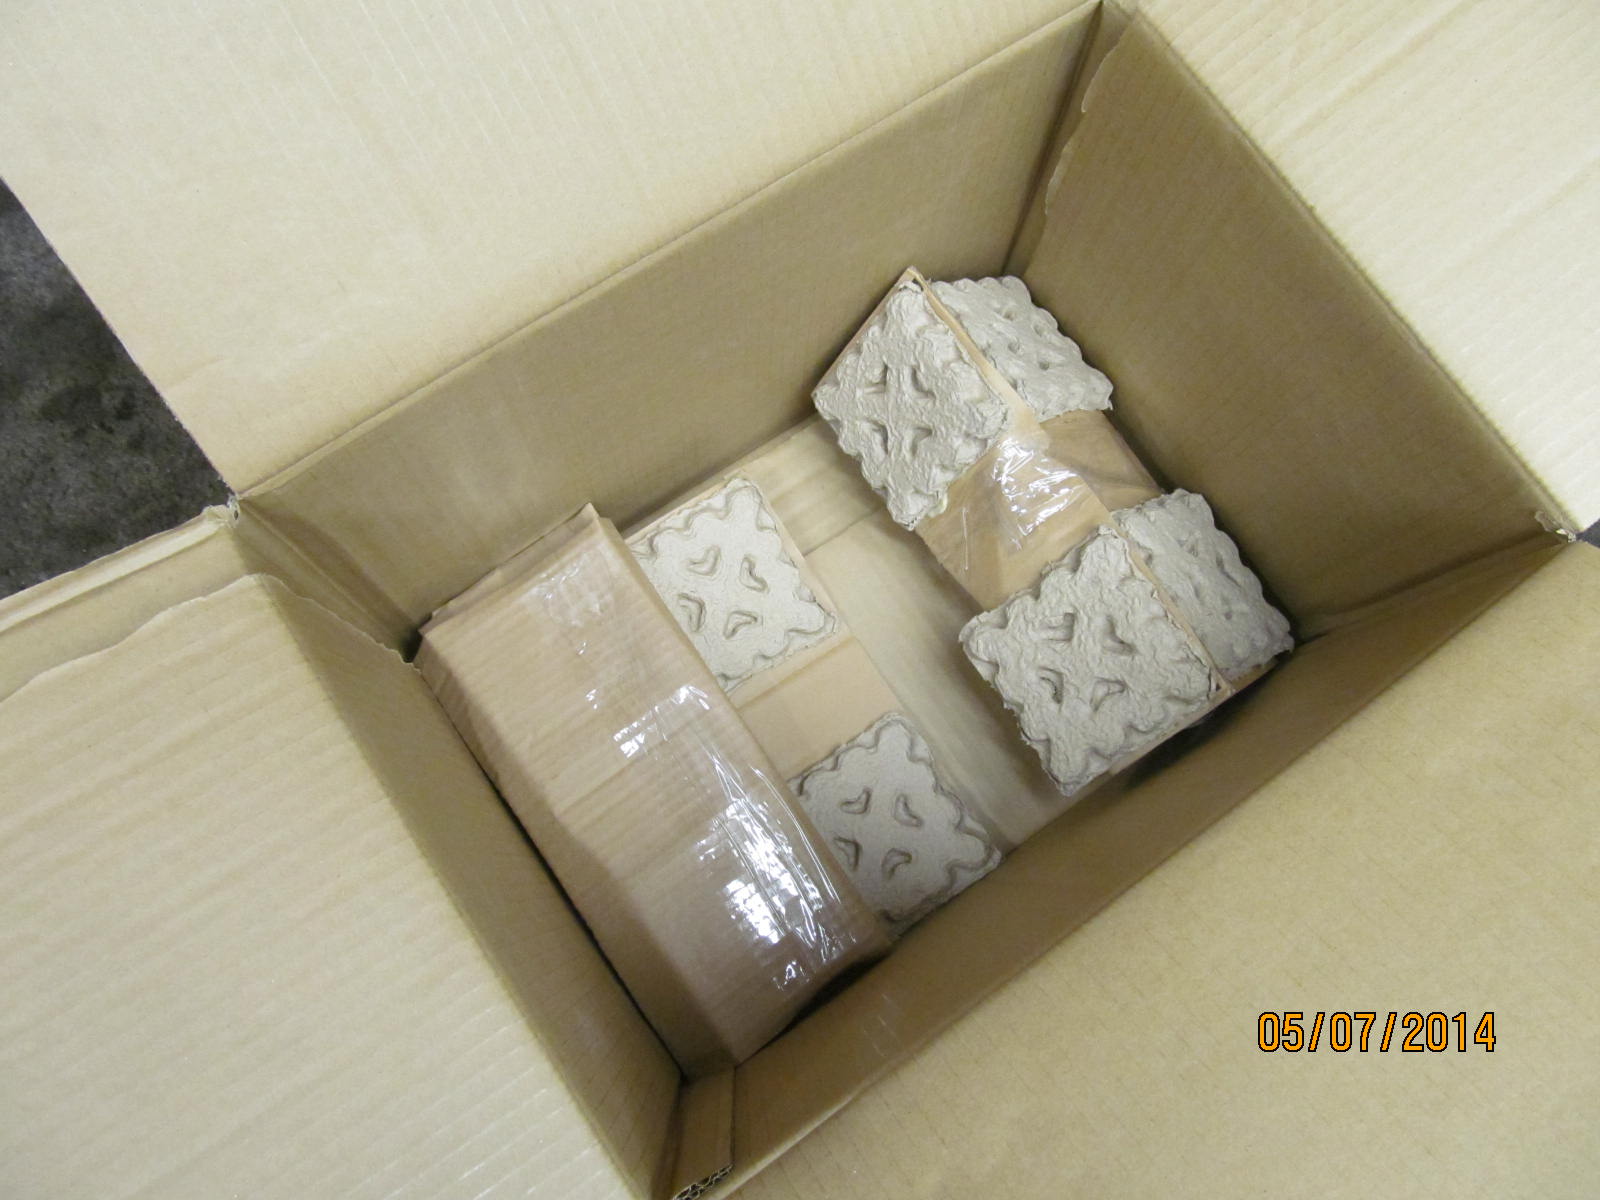
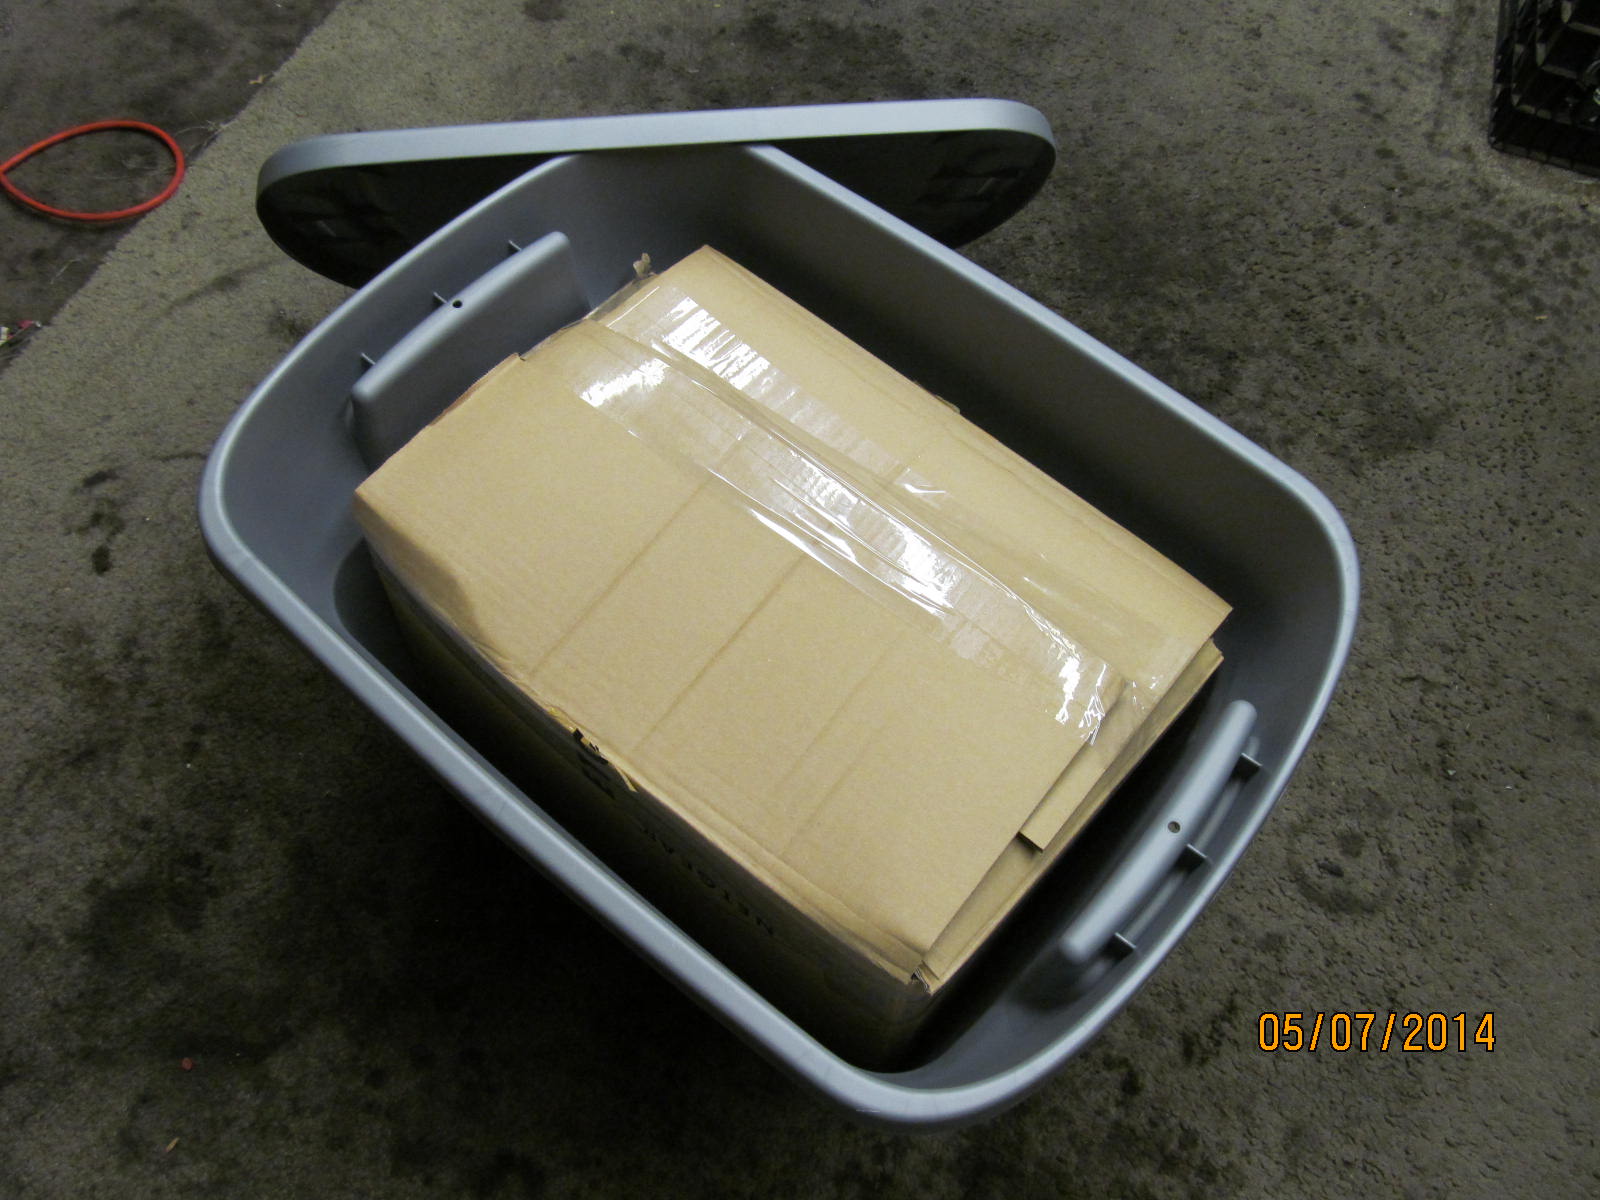
My boxing method for Riley... cut a heavy duty box in 2...
|
|
|
|
|
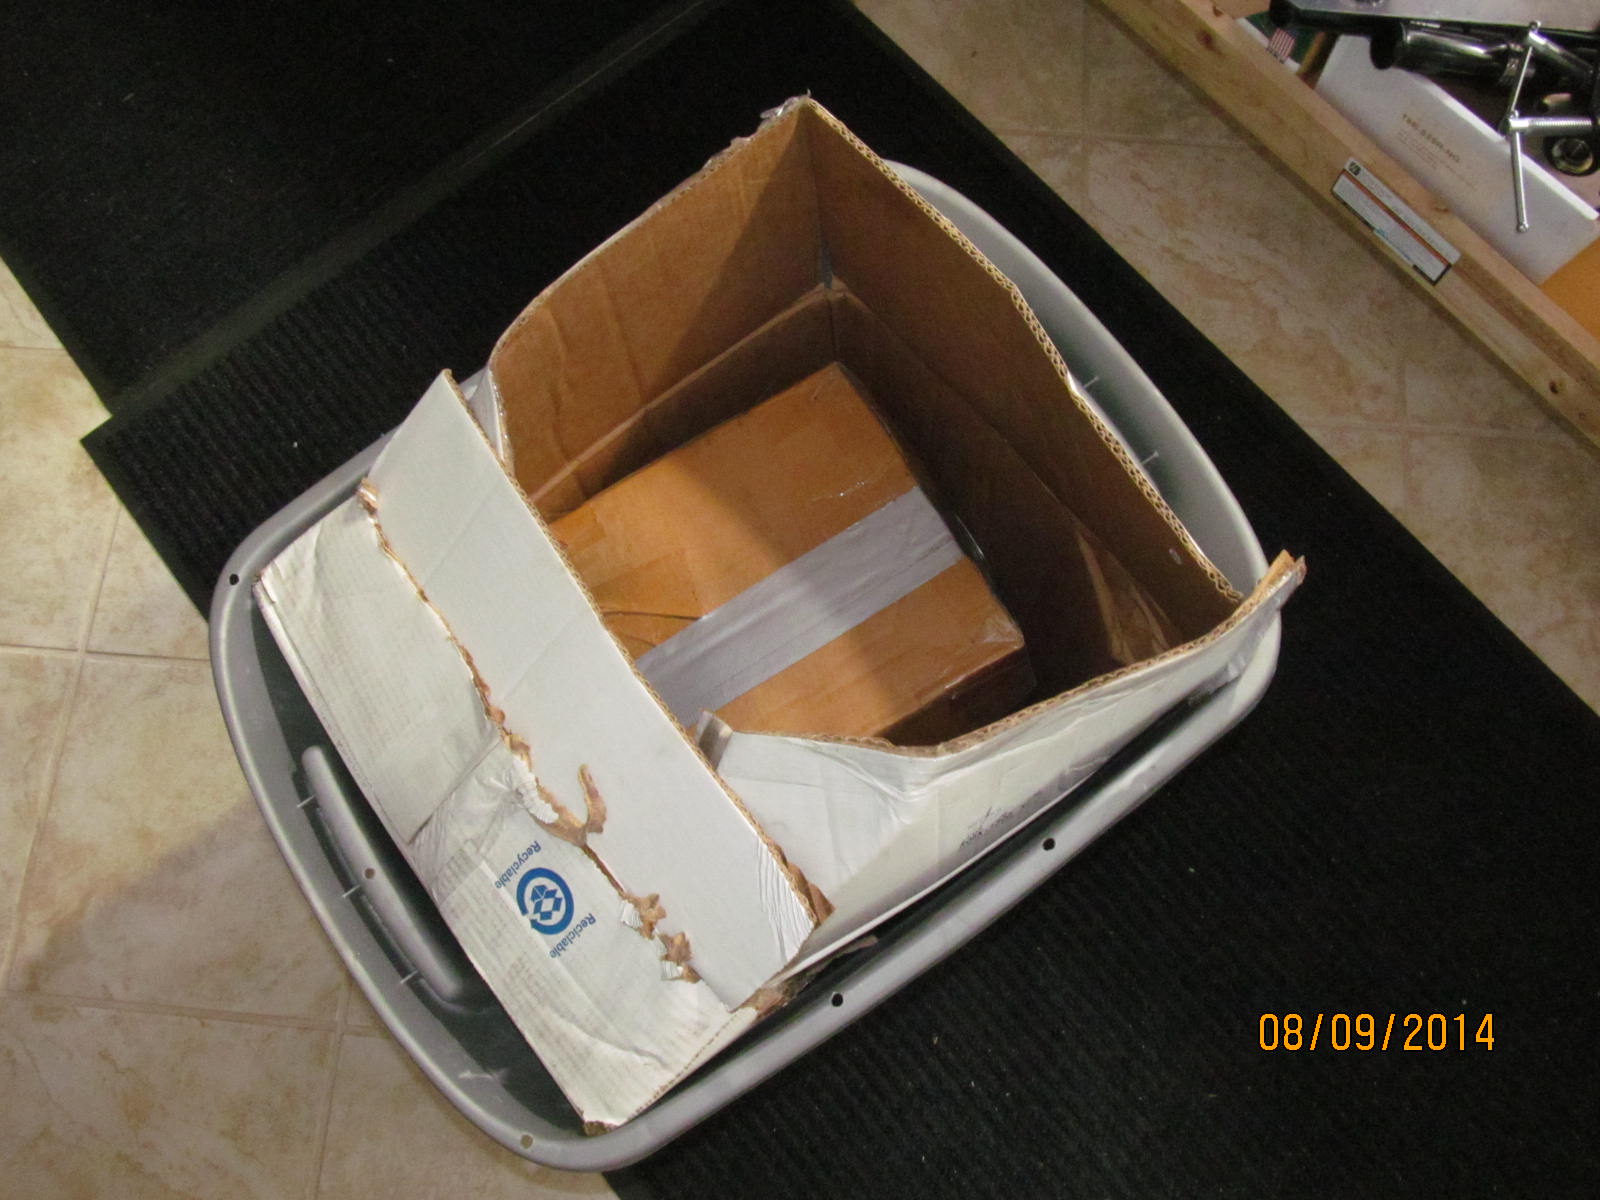
Rolled up cardboard so the heavy diff has a very dispersed footprint on the tote's plastic floorboard.
|
|
|
|
Box was actually a snug fit in the tote...so almost no bubble wrap was needed externally. Back to Oklahoma. :)
+++++++++++++++++++++++++++++++++++++++++++++++++++++++++++++++++++++++++++
+++++++++++++++++++++++++++++++++++++++++++++++++++++++++++++++++++++++++++
+++++++++++++++++++++++++++++++++++++++++++++++++++++++++++++++++++++++++++
+++++++++++++++++++++++++++++++++++++++++++++++++++++++++++++++++++++++++++
+++++++++++++++++++++++++++++++++++++++++++++++++++++++++++++++++++++++++++
+++++++++++++++++++++++++++++++++++++++++++++++++++++++++++++++++++++++++++
+++++++++++++++++++++++++++++++++++++++++++++++++++++++++++++++++++++++++++
+++++++++++++++++++++++++++++++++++++++++++++++++++++++++++++++++++++++++++
+++++++++++++++++++++++++++++++++++++++++++++++++++++++++++++++++++++++++++
+++++++++++++++++++++++++++++++++++++++++++++++++++++++++++++++++++++++++++
Riley's rear 3rd check-up
+++++++++++++++++++++++++++++++++++++++++++++++++++++++++++++++++++++++++++
+++++++++++++++++++++++++++++++++++++++++++++++++++++++++++++++++++++++++++
+++++++++++++++++++++++++++++++++++++++++++++++++++++++++++++++++++++++++++
+++++++++++++++++++++++++++++++++++++++++++++++++++++++++++++++++++++++++++
+++++++++++++++++++++++++++++++++++++++++++++++++++++++++++++++++++++++++++
+++++++++++++++++++++++++++++++++++++++++++++++++++++++++++++++++++++++++++
+++++++++++++++++++++++++++++++++++++++++++++++++++++++++++++++++++++++++++
+++++++++++++++++++++++++++++++++++++++++++++++++++++++++++++++++++++++++++
+++++++++++++++++++++++++++++++++++++++++++++++++++++++++++++++++++++++++++
+++++++++++++++++++++++++++++++++++++++++++++++++++++++++++++++++++++++++++
+++++++++++++++++++++++++++++++++++++++++++++++++++++++++++++++++++++++++++
+++++++++++++++++++++++++++++++++++++++++++++++++++++++++++++++++++++++++++
+++++++++++++++++++++++++++++++++++++++++++++++++++++++++++++++++++++++++++
+++++++++++++++++++++++++++++++++++++++++++++++++++++++++++++++++++++++++++
+++++++++++++++++++++++++++++++++++++++++++++++++++++++++++++++++++++++++++
+++++++++++++++++++++++++++++++++++++++++++++++++++++++++++++++++++++++++++
|
|
|
|
|
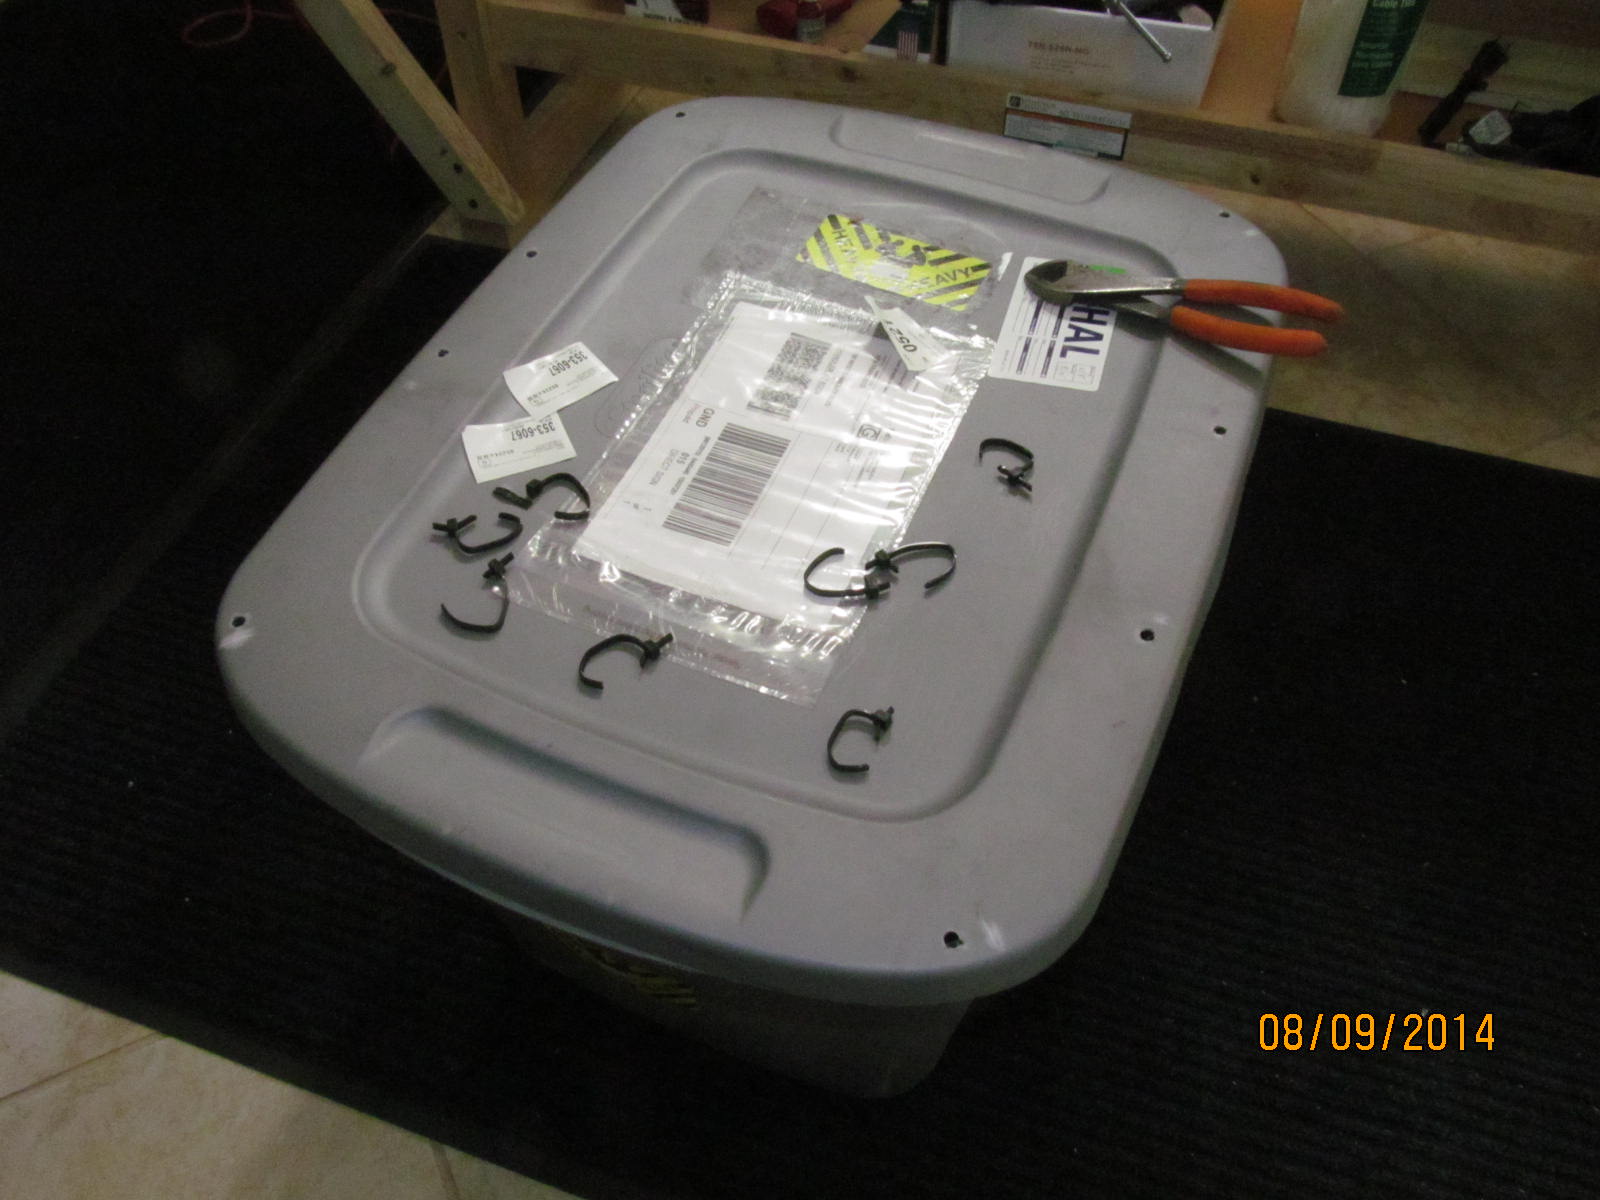
Just received the rear 3rd. August 8, 2014
|
|
|
|
|
Nicely boxed up to keep it stabilized and not shifting around in the tote.
|
|
|
|
|
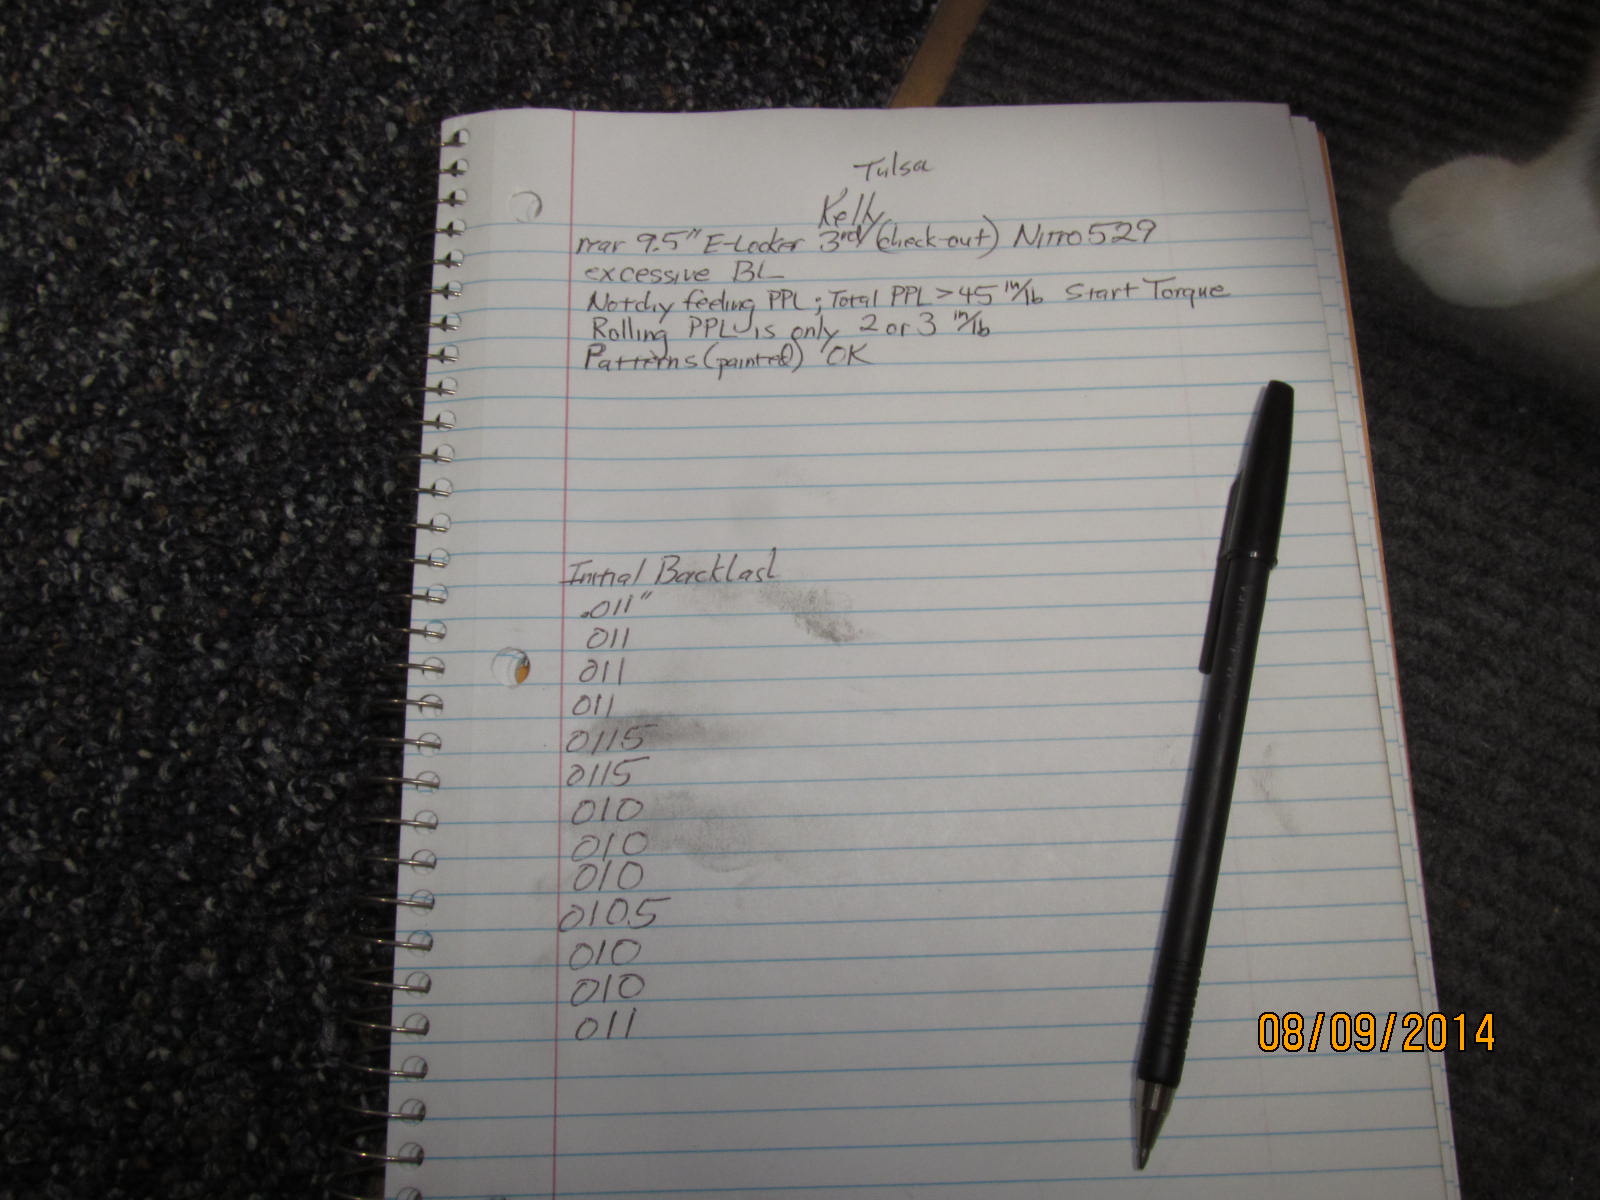
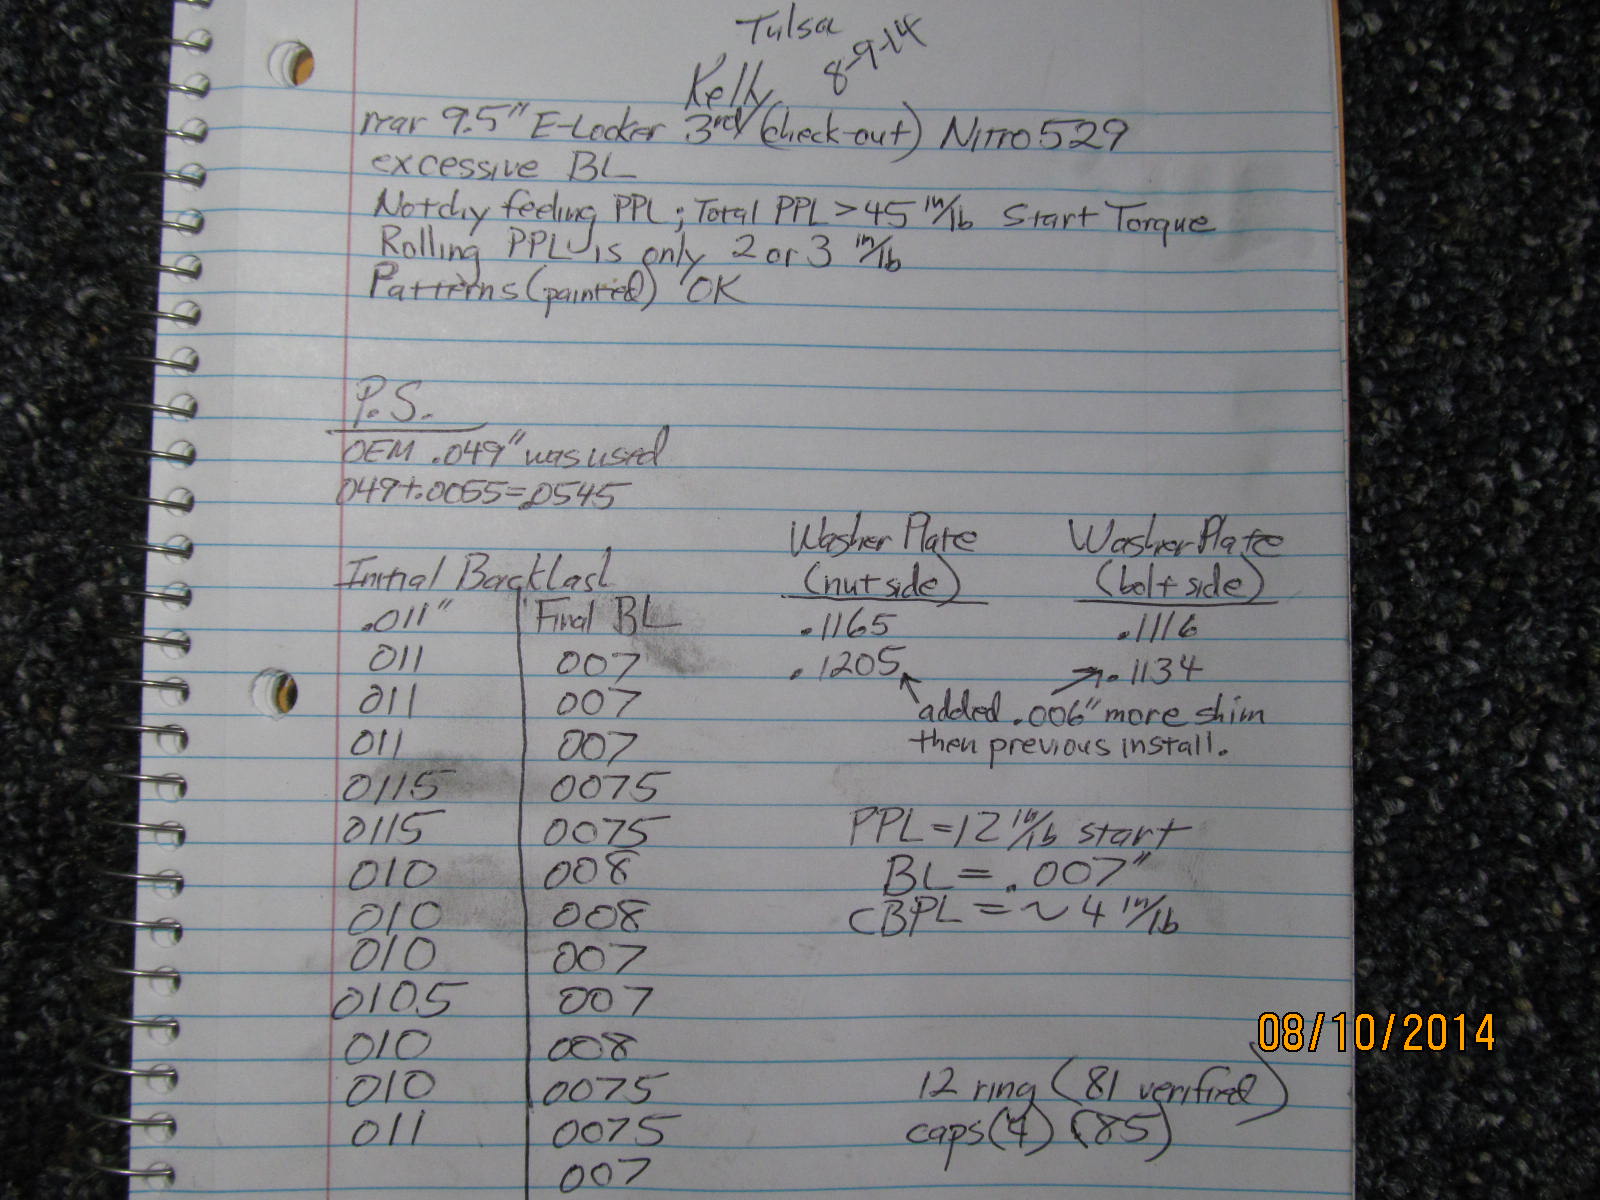
I noted the backlash...it was a little excessive at .011"
|
|
|
|
The pinion bearings were very notchy....took about 50 in/lb to break loose and then when it did the rolling
pre-load was only 2 or 3 in/lb.
|
|
|

|
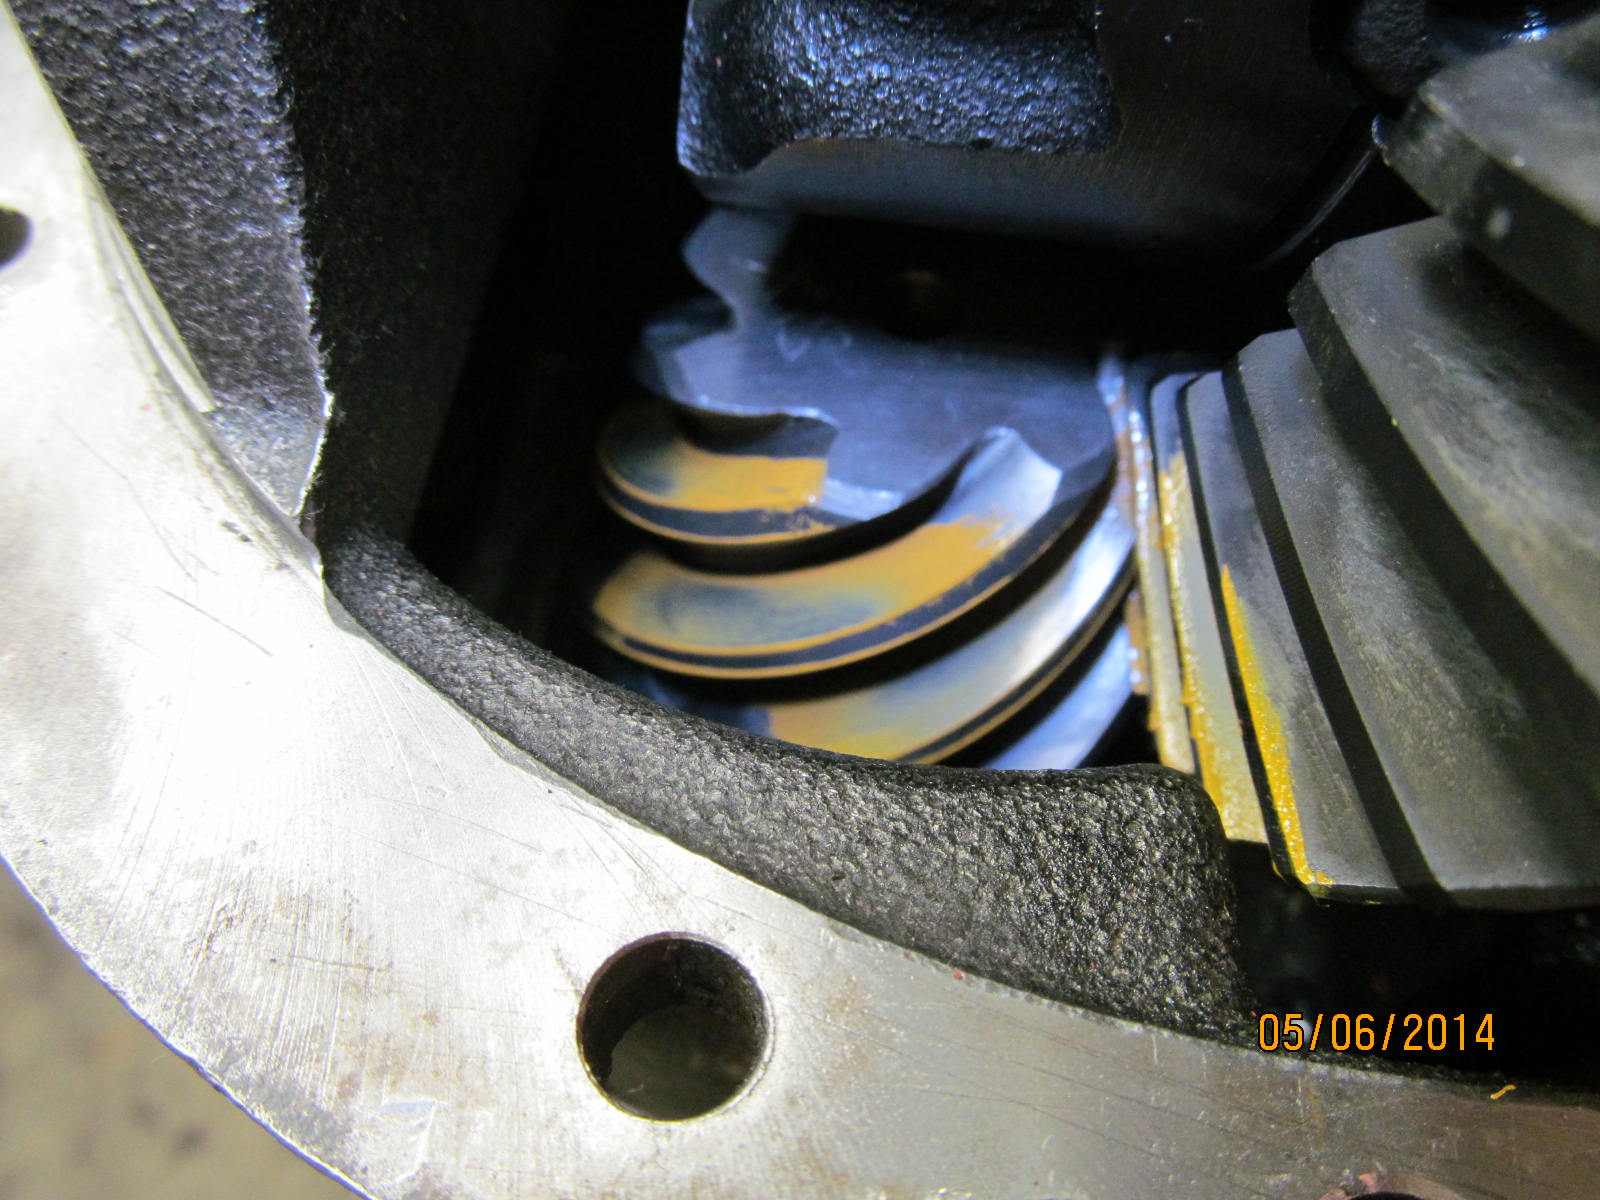
The drive appears "OK" but does seem a little shallow...the Coast can be seen on the lower left and also
has a shallow look.
|
|
|
|
|
Notes are taken.
|
|
|
|
|
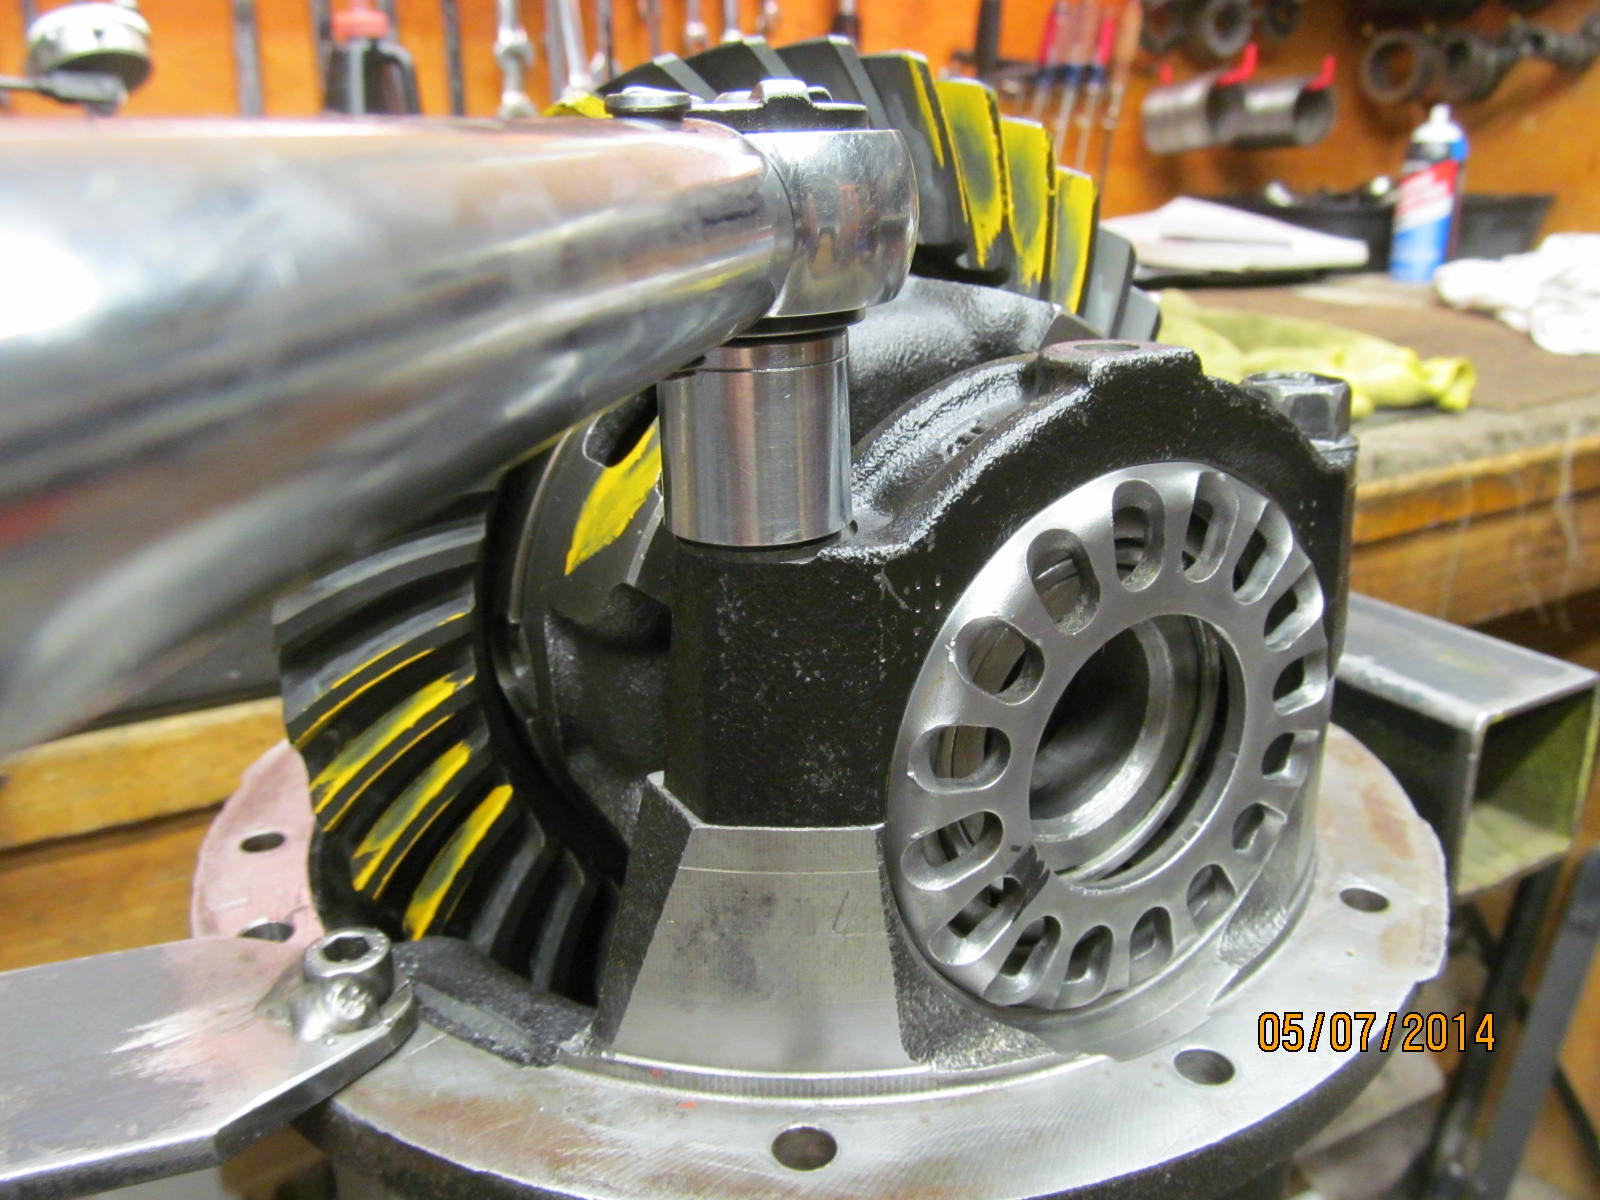
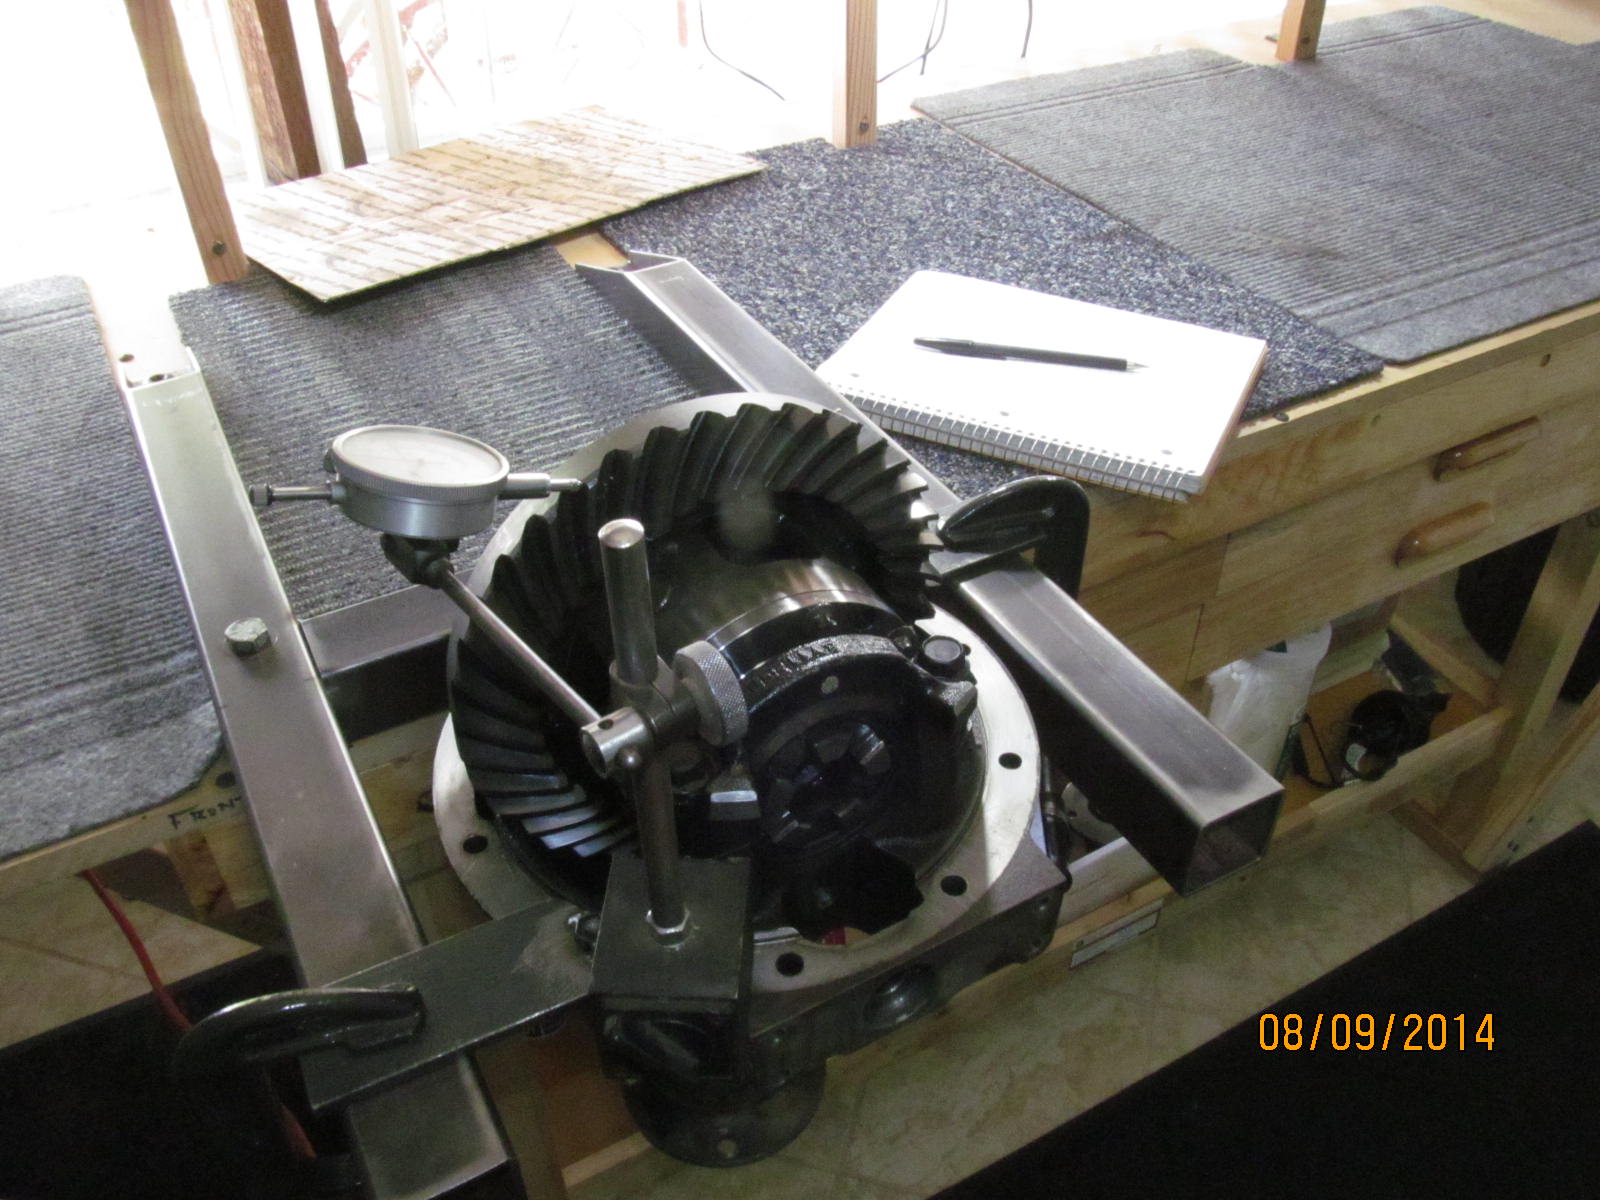
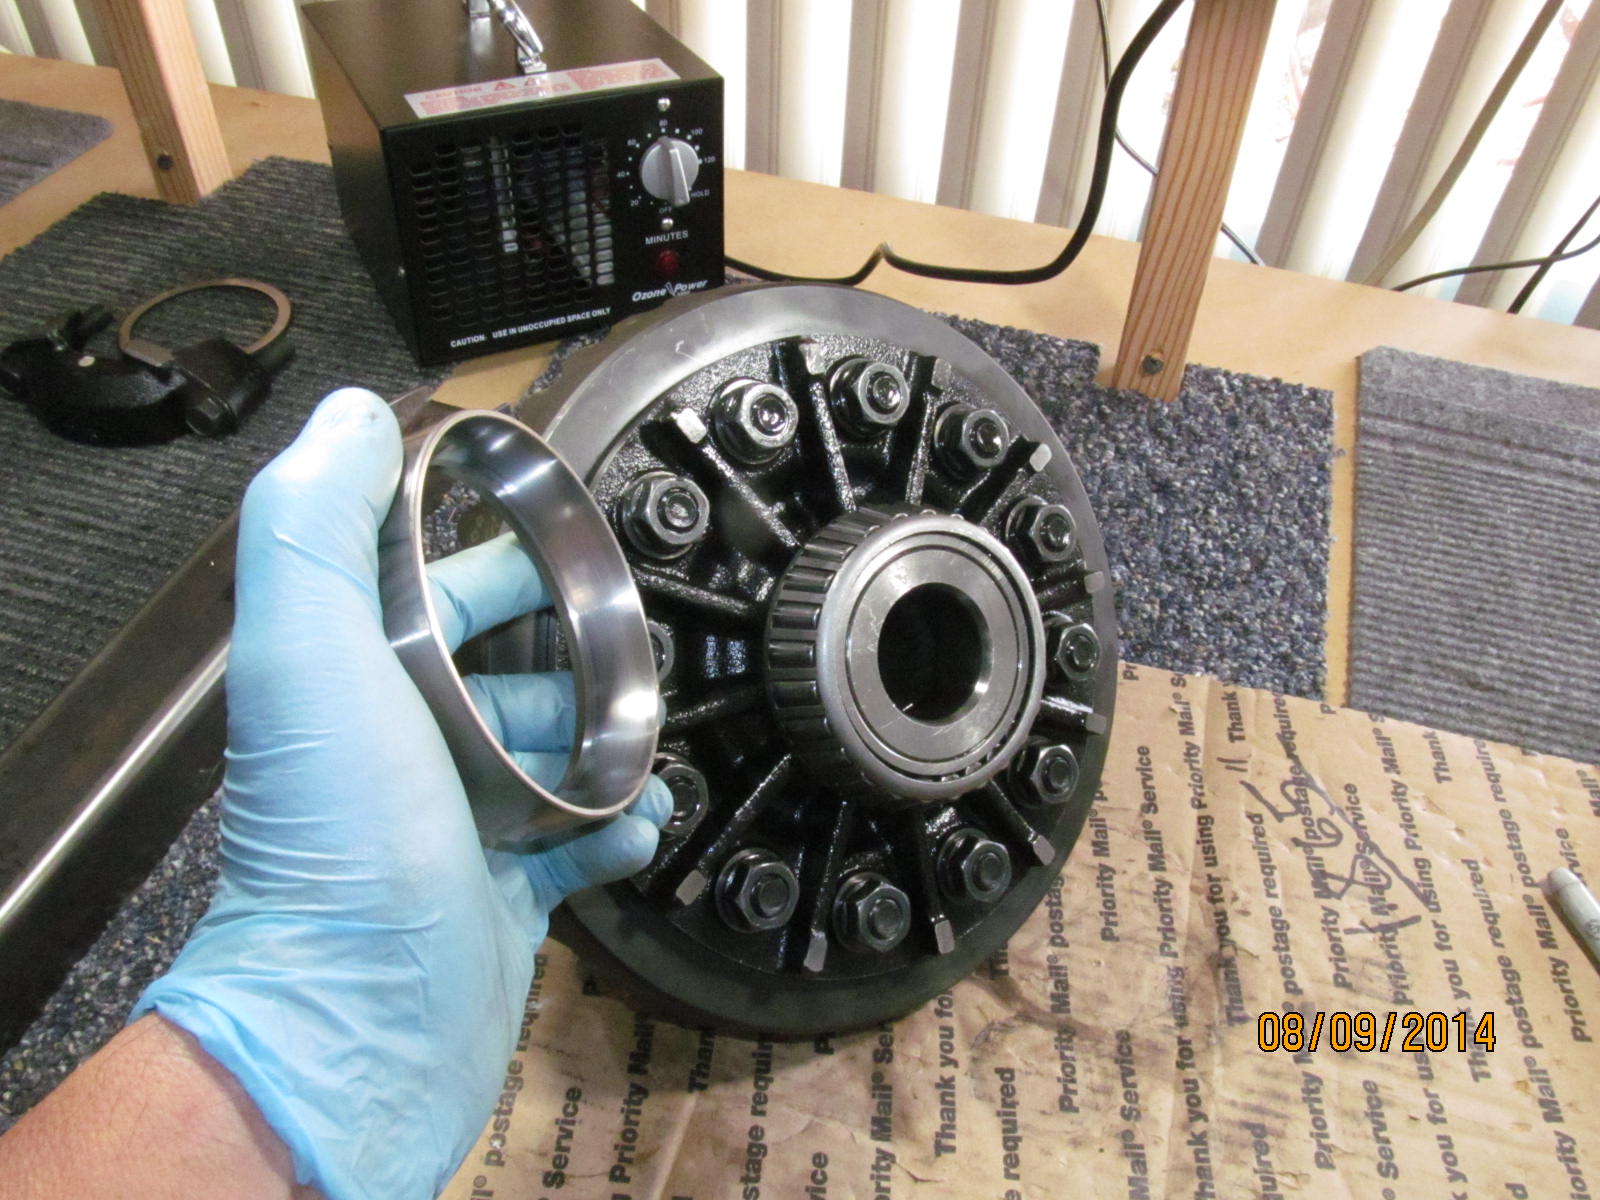
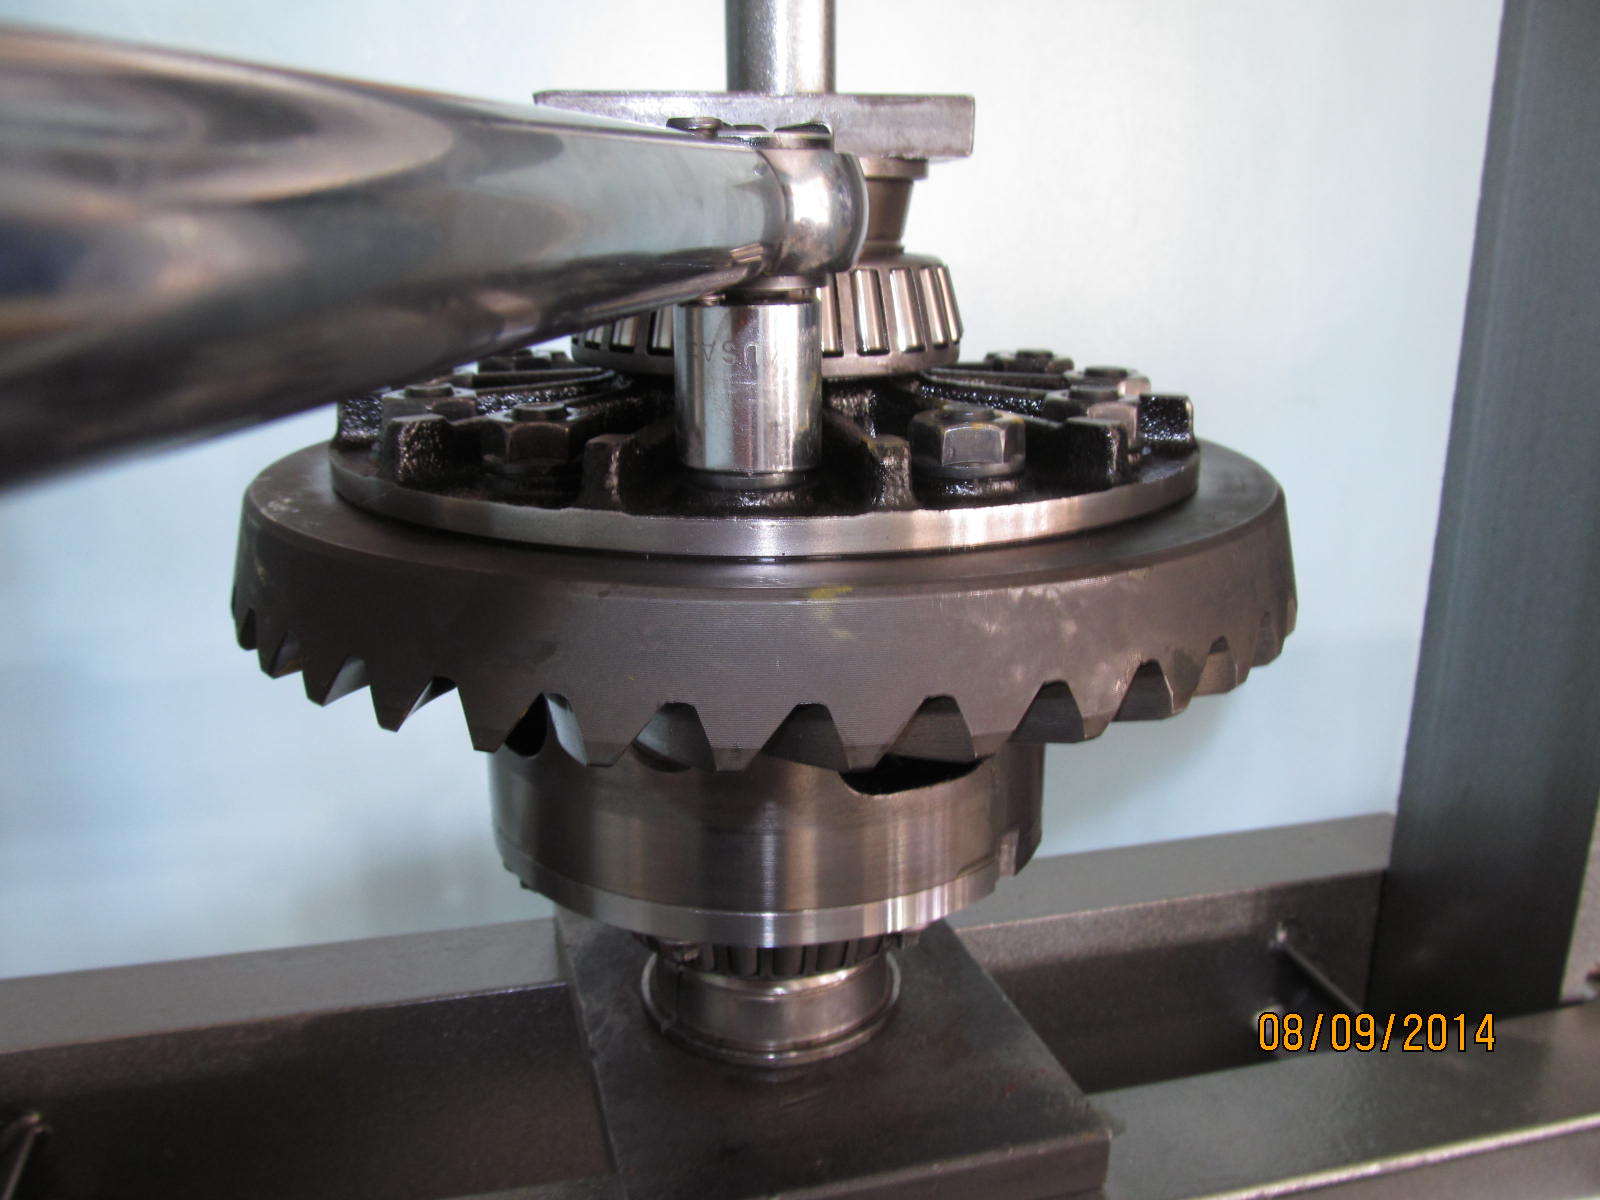
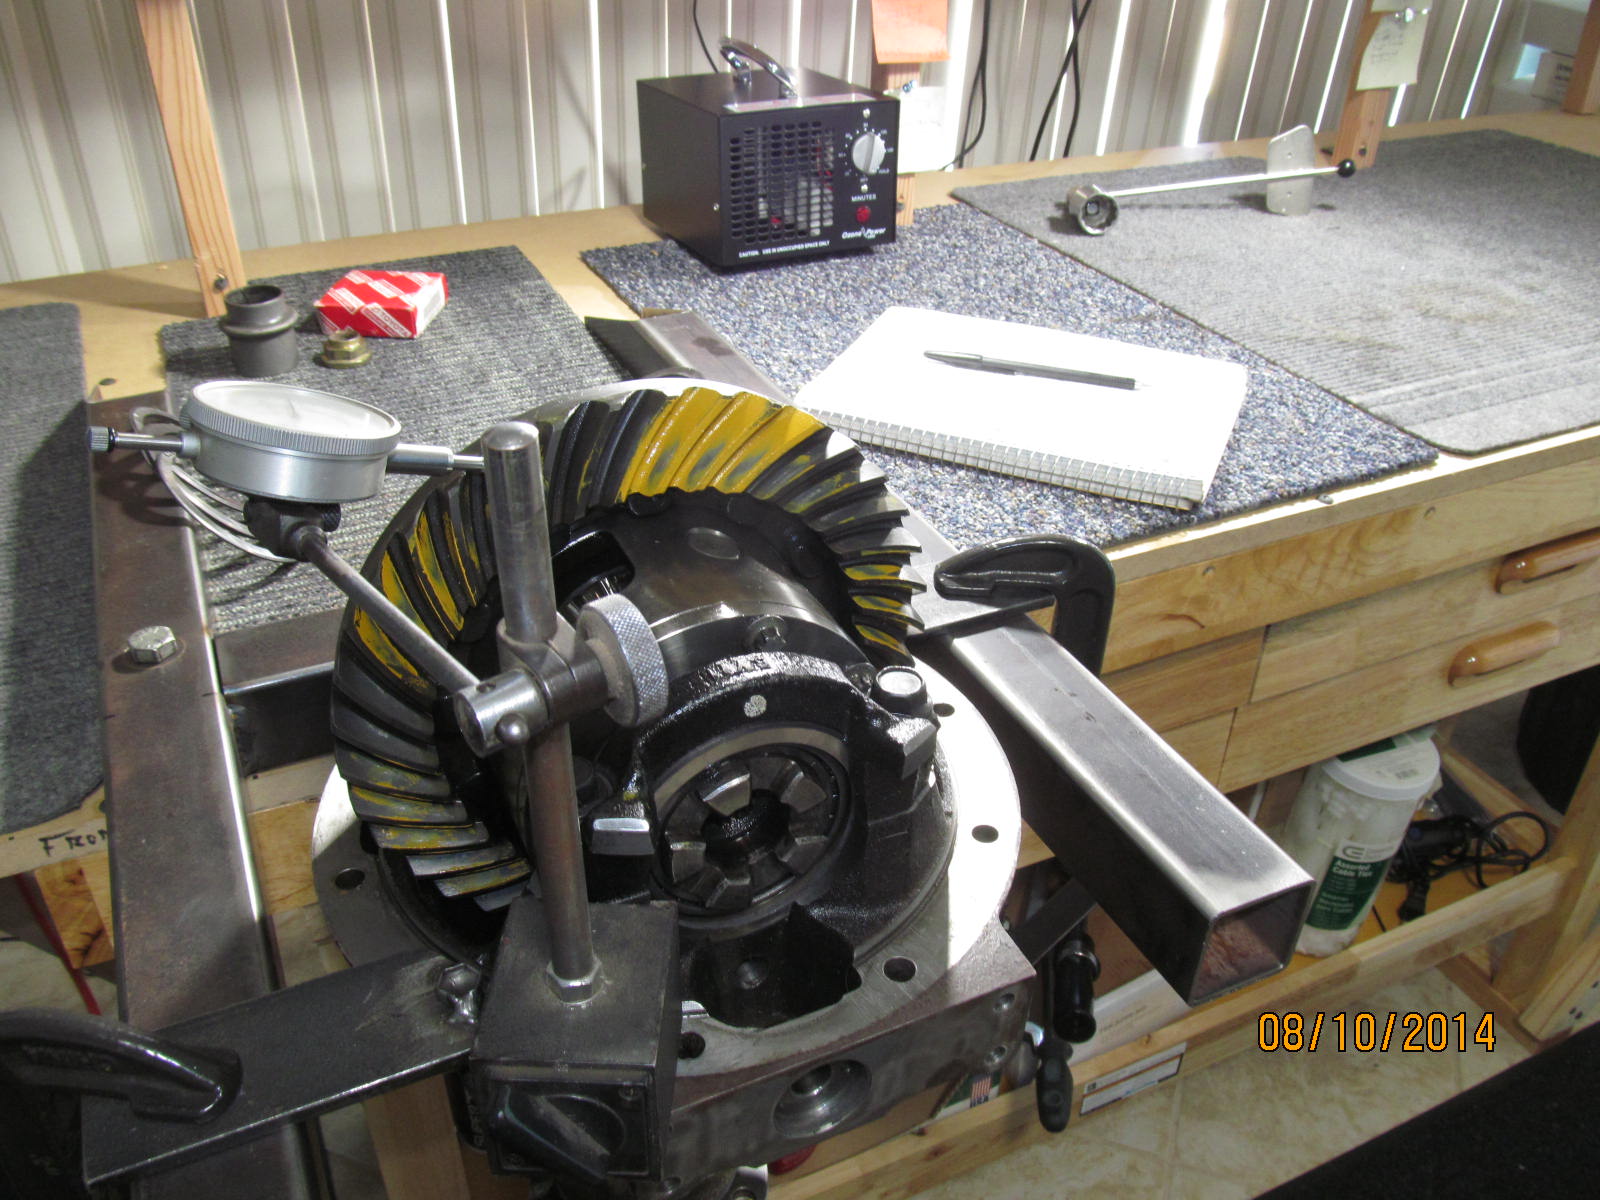
E-locker case is removed. The monster carrier bearings appear to be in excellent shape.
|
|
|
|
|
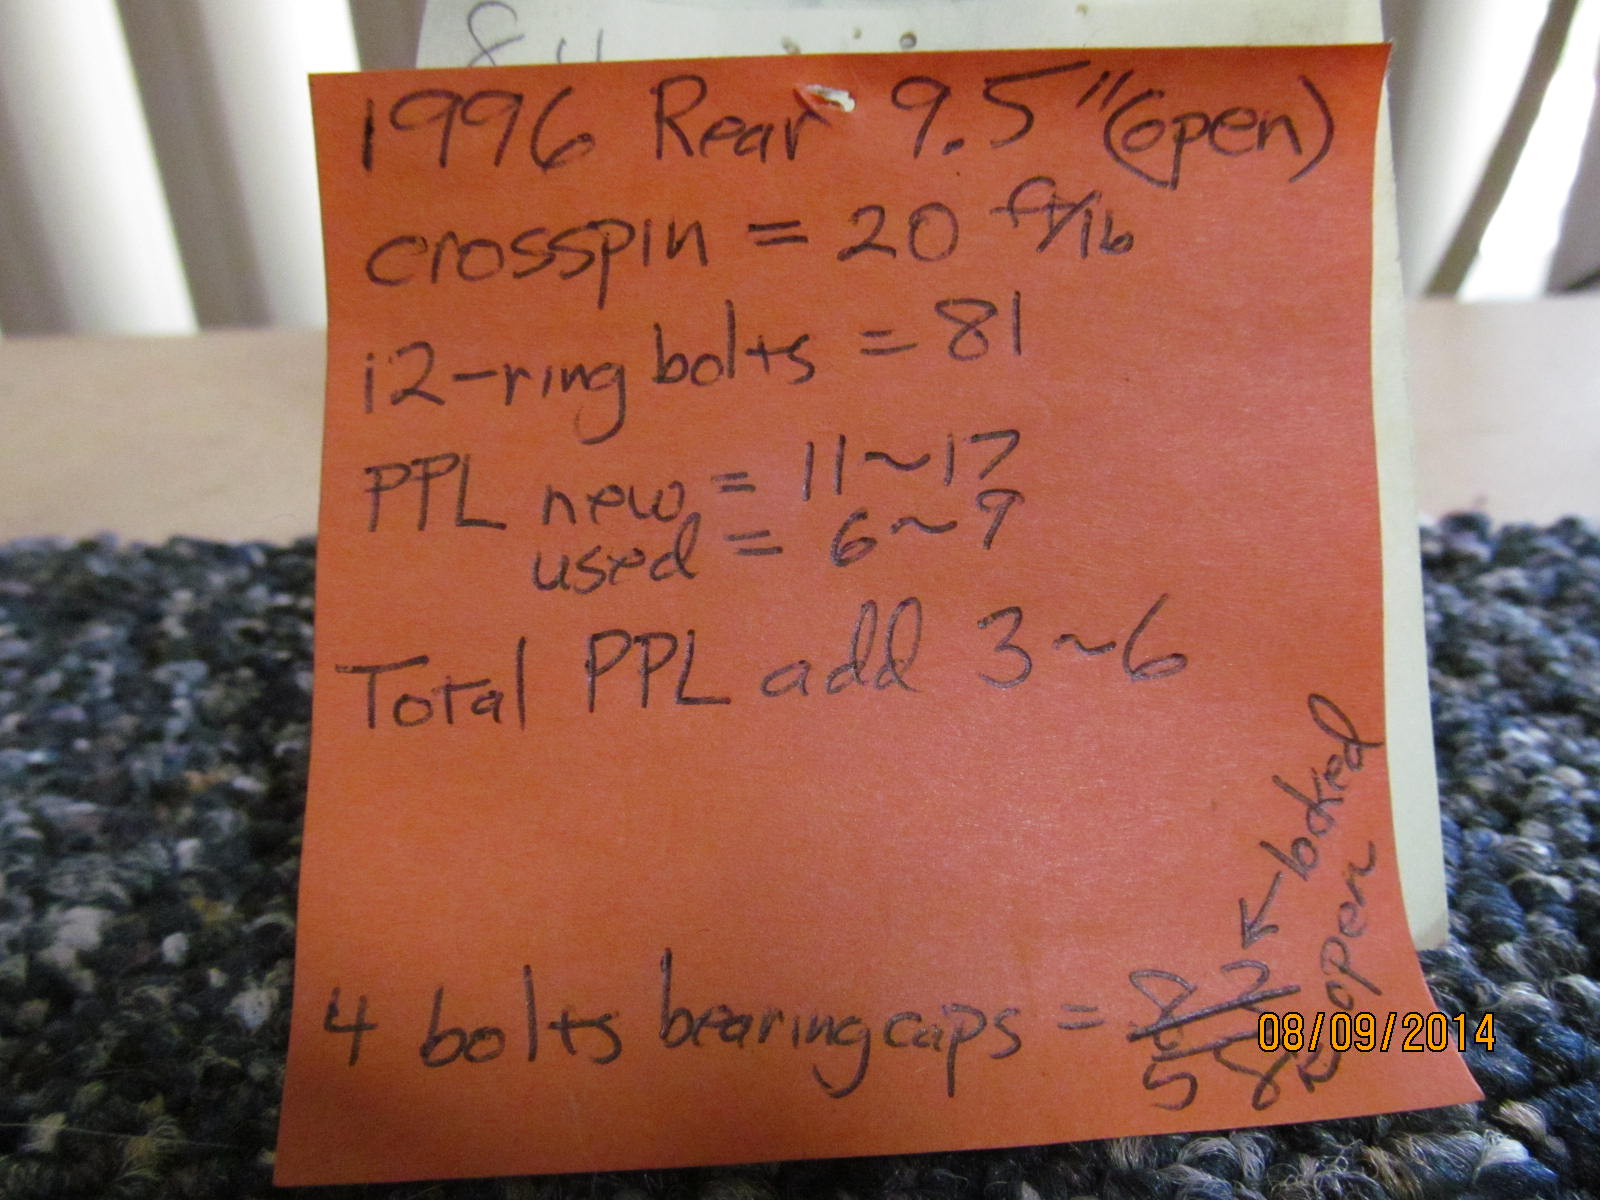
Here's my 9.5" cheat sheet....taken right out of the FSM Toyota manual.
|
|
|
|
|
All 12 ring gear bolts met the 81 ft/lb spec.
|
|
|
|
|
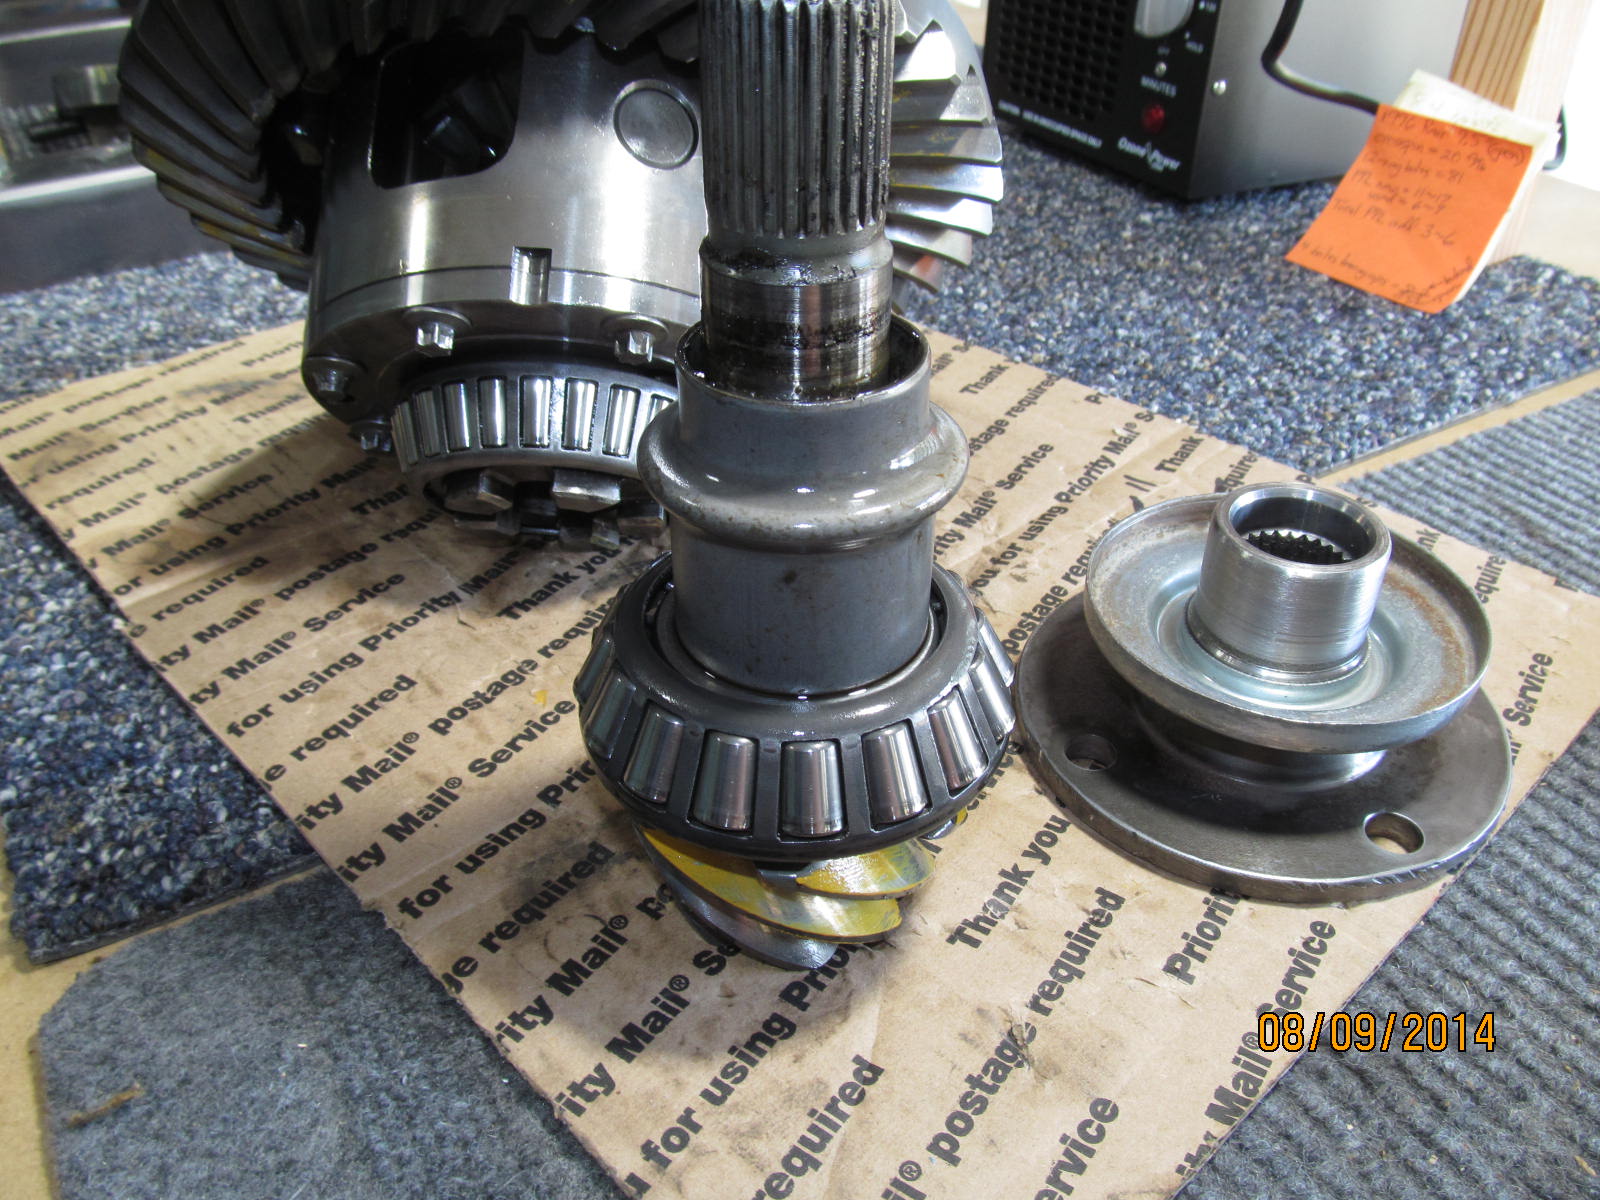
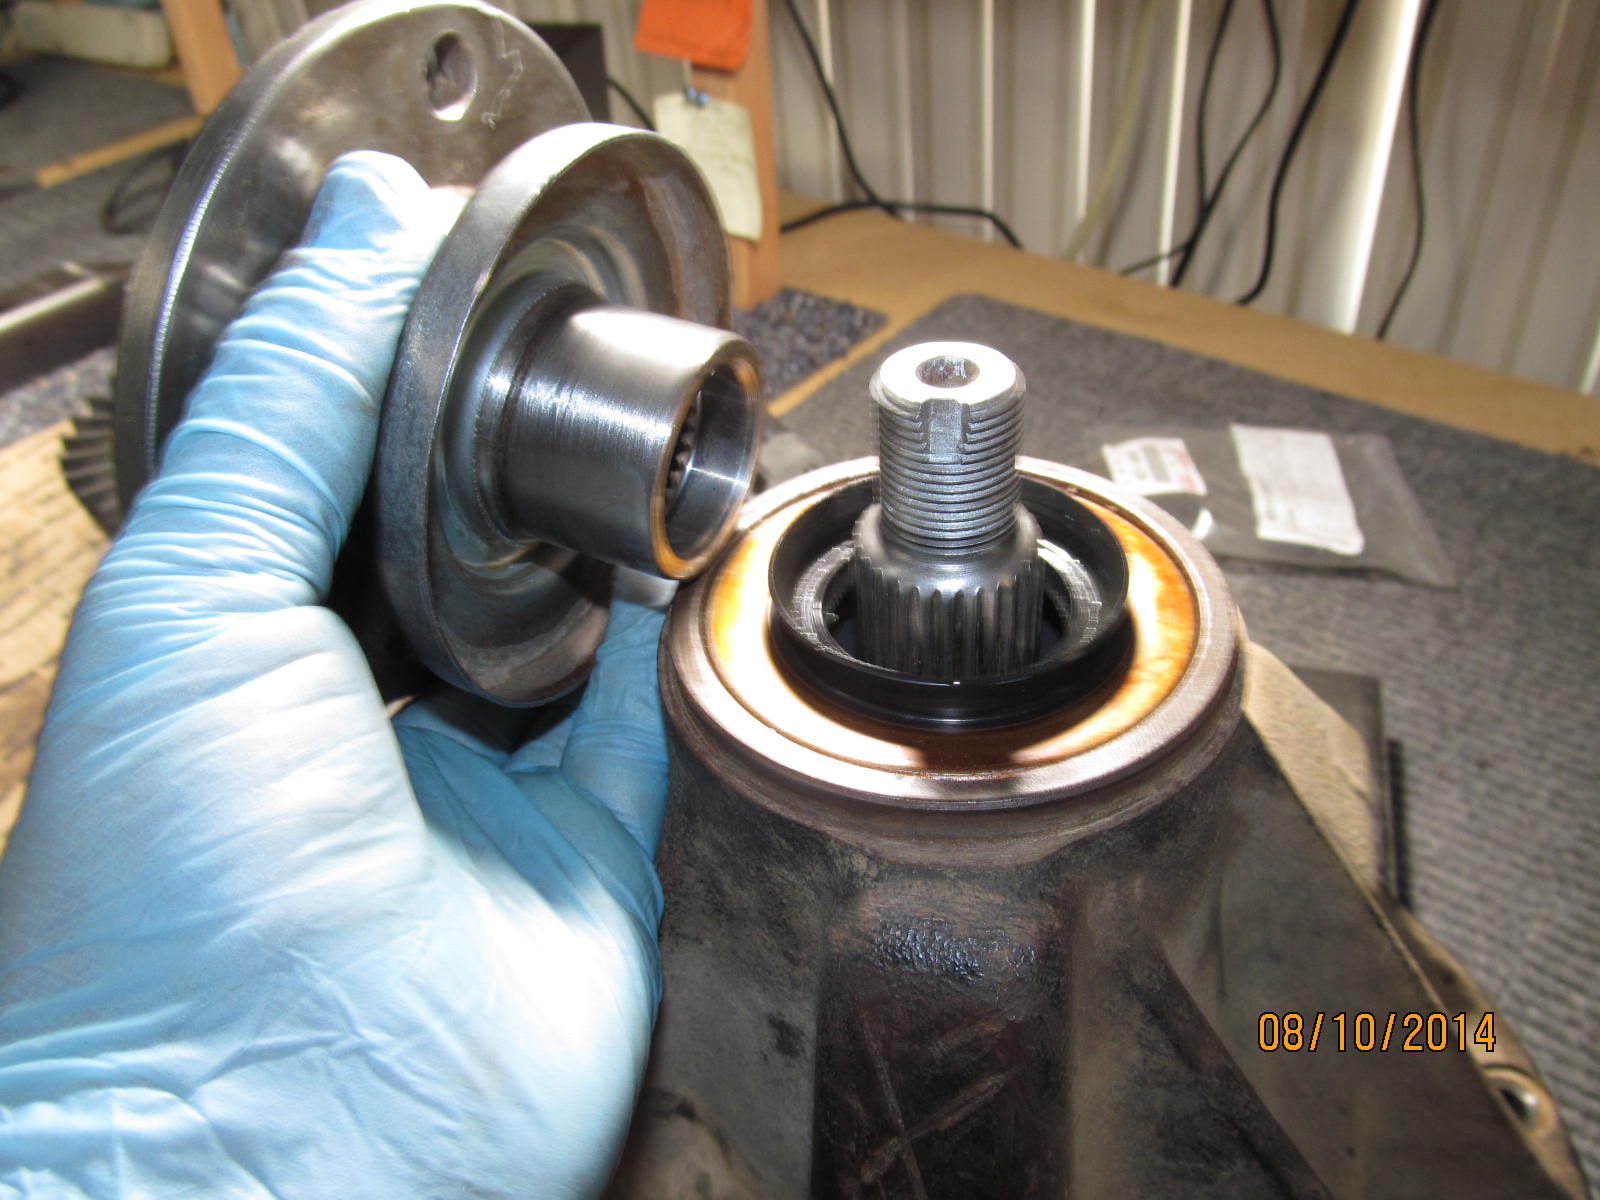
Flange is removed and the pinion is pressed out here.
|
|
|
|
|
A new crush sleeve be used.
|
|
|
|
|
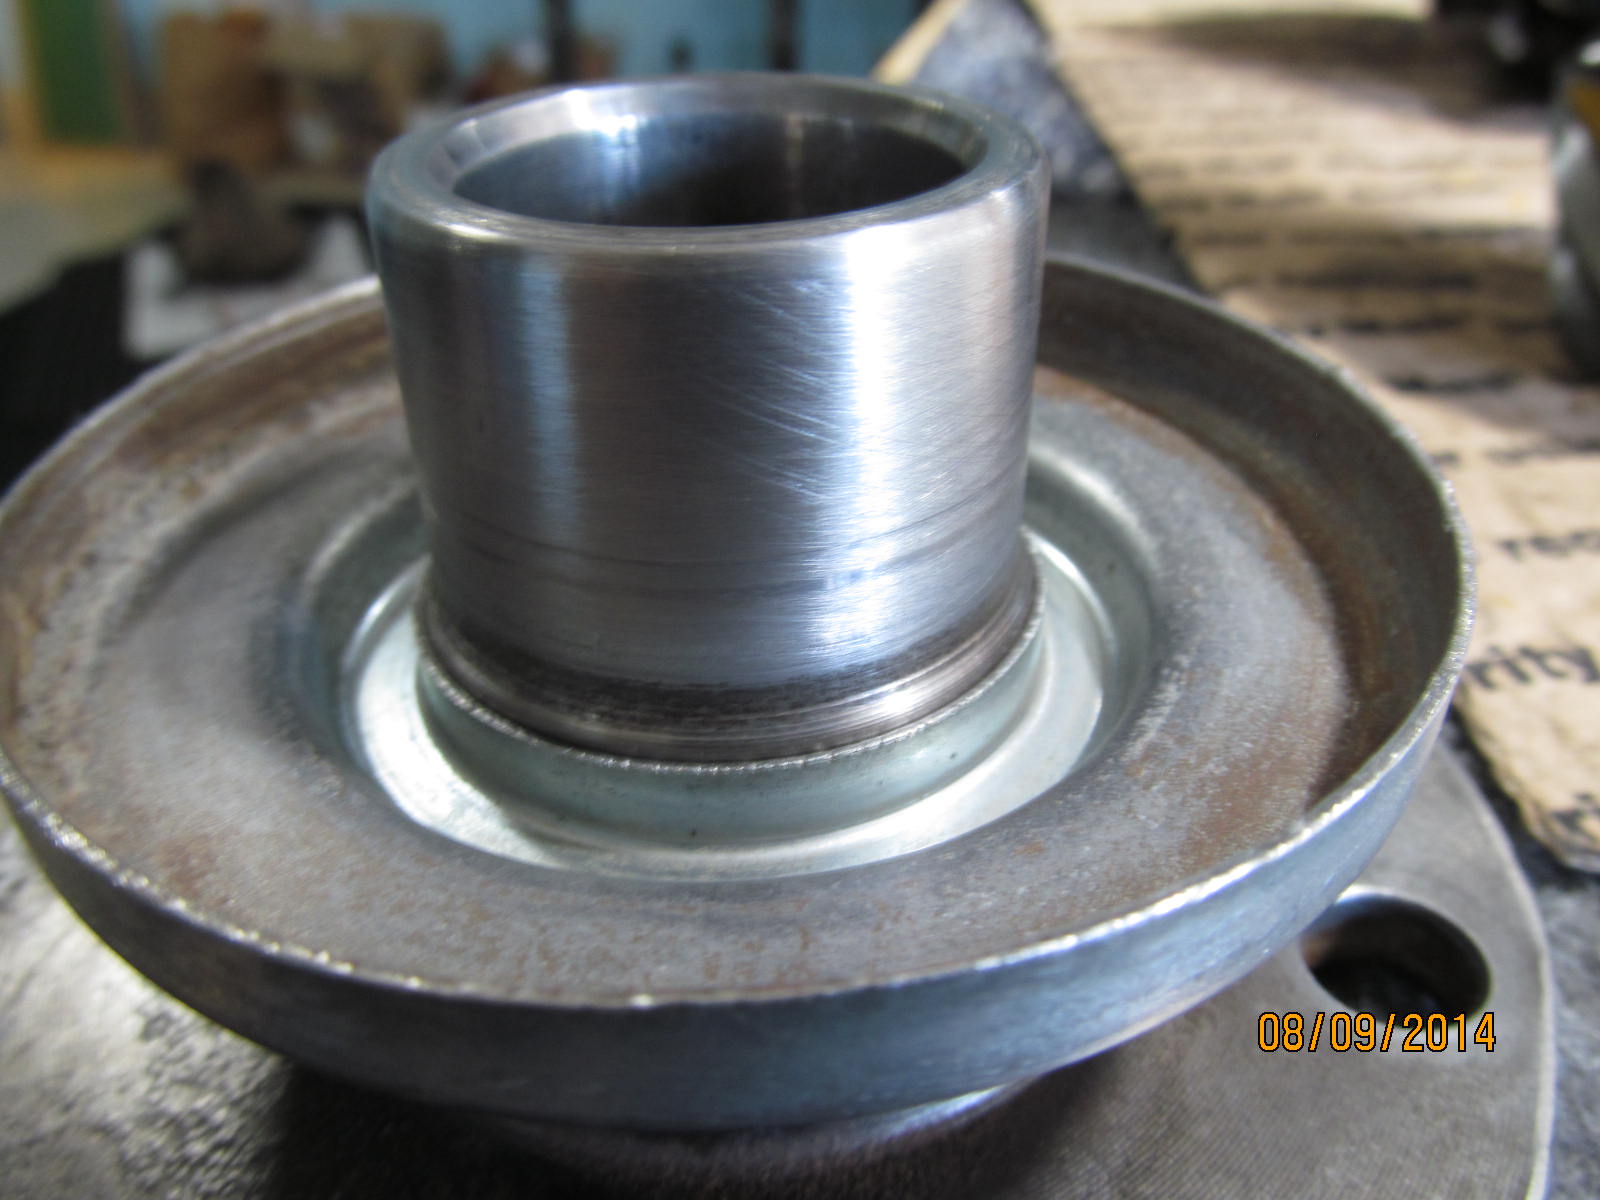
The pinion flange cleaned up nicely and is in excellent shape...no groove to speak of.
|
|
|
|
|
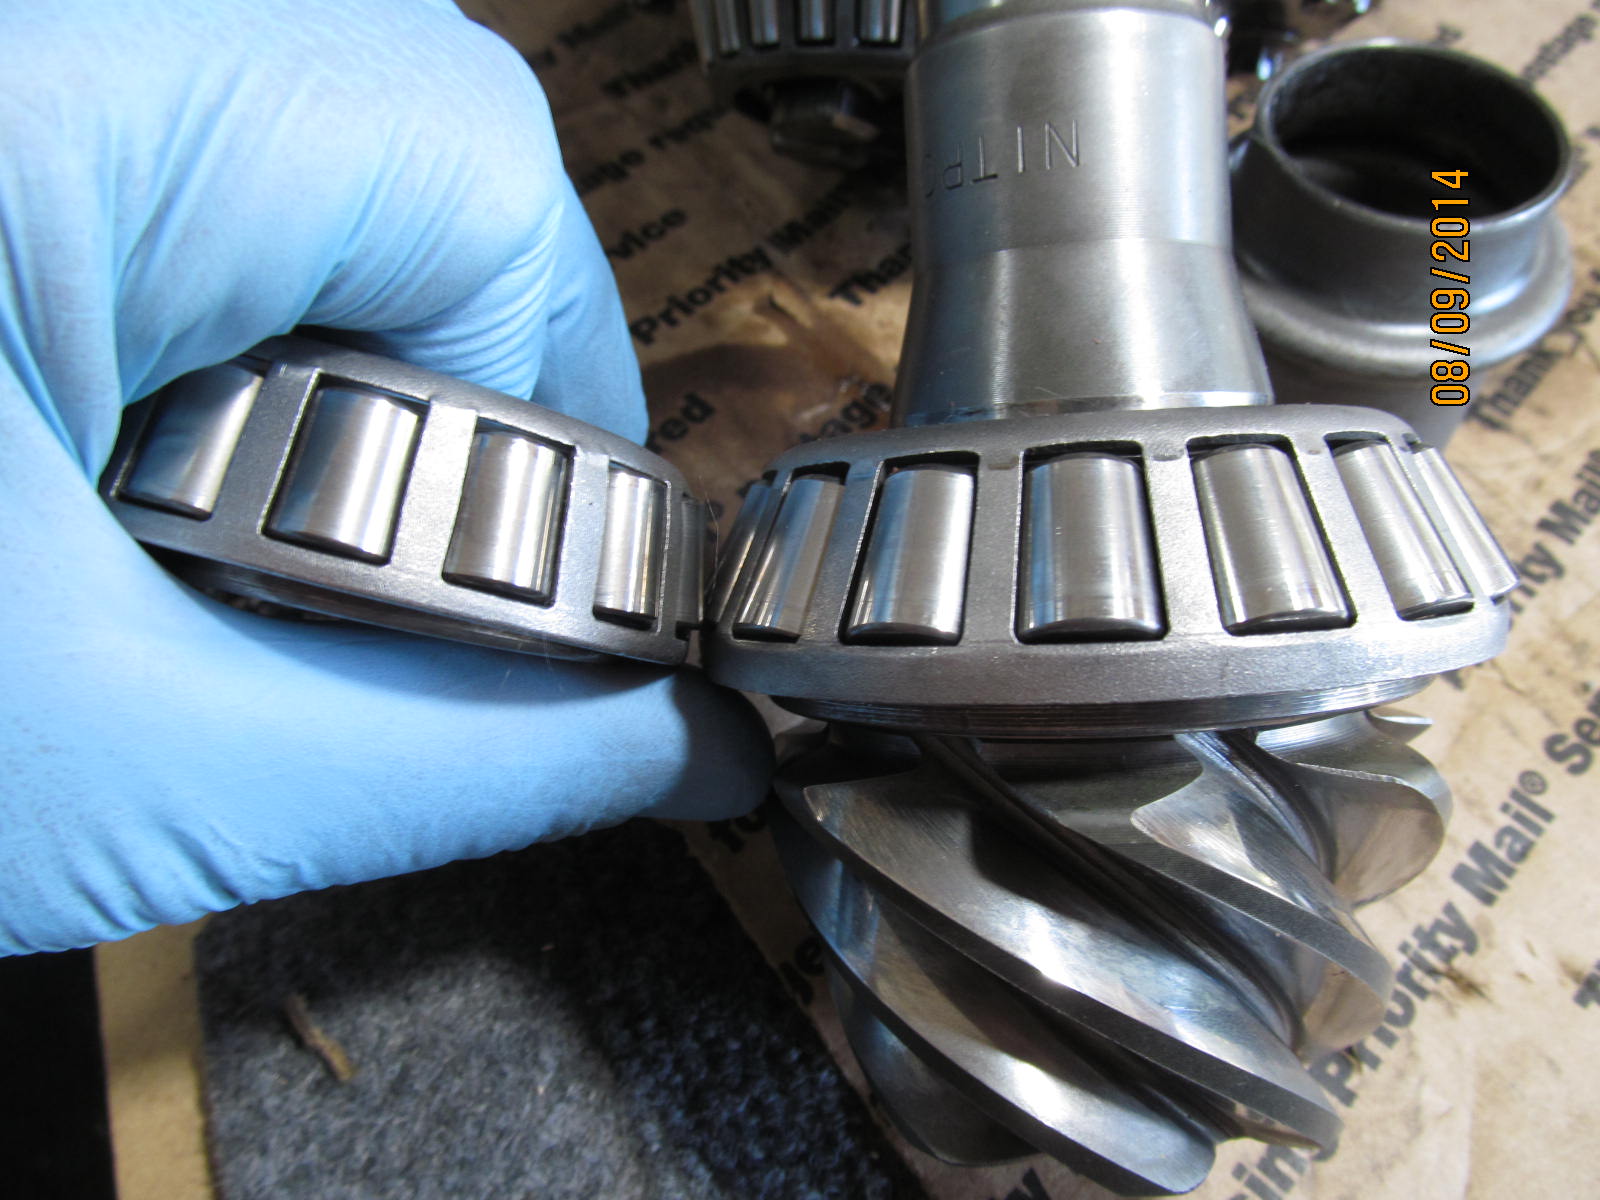
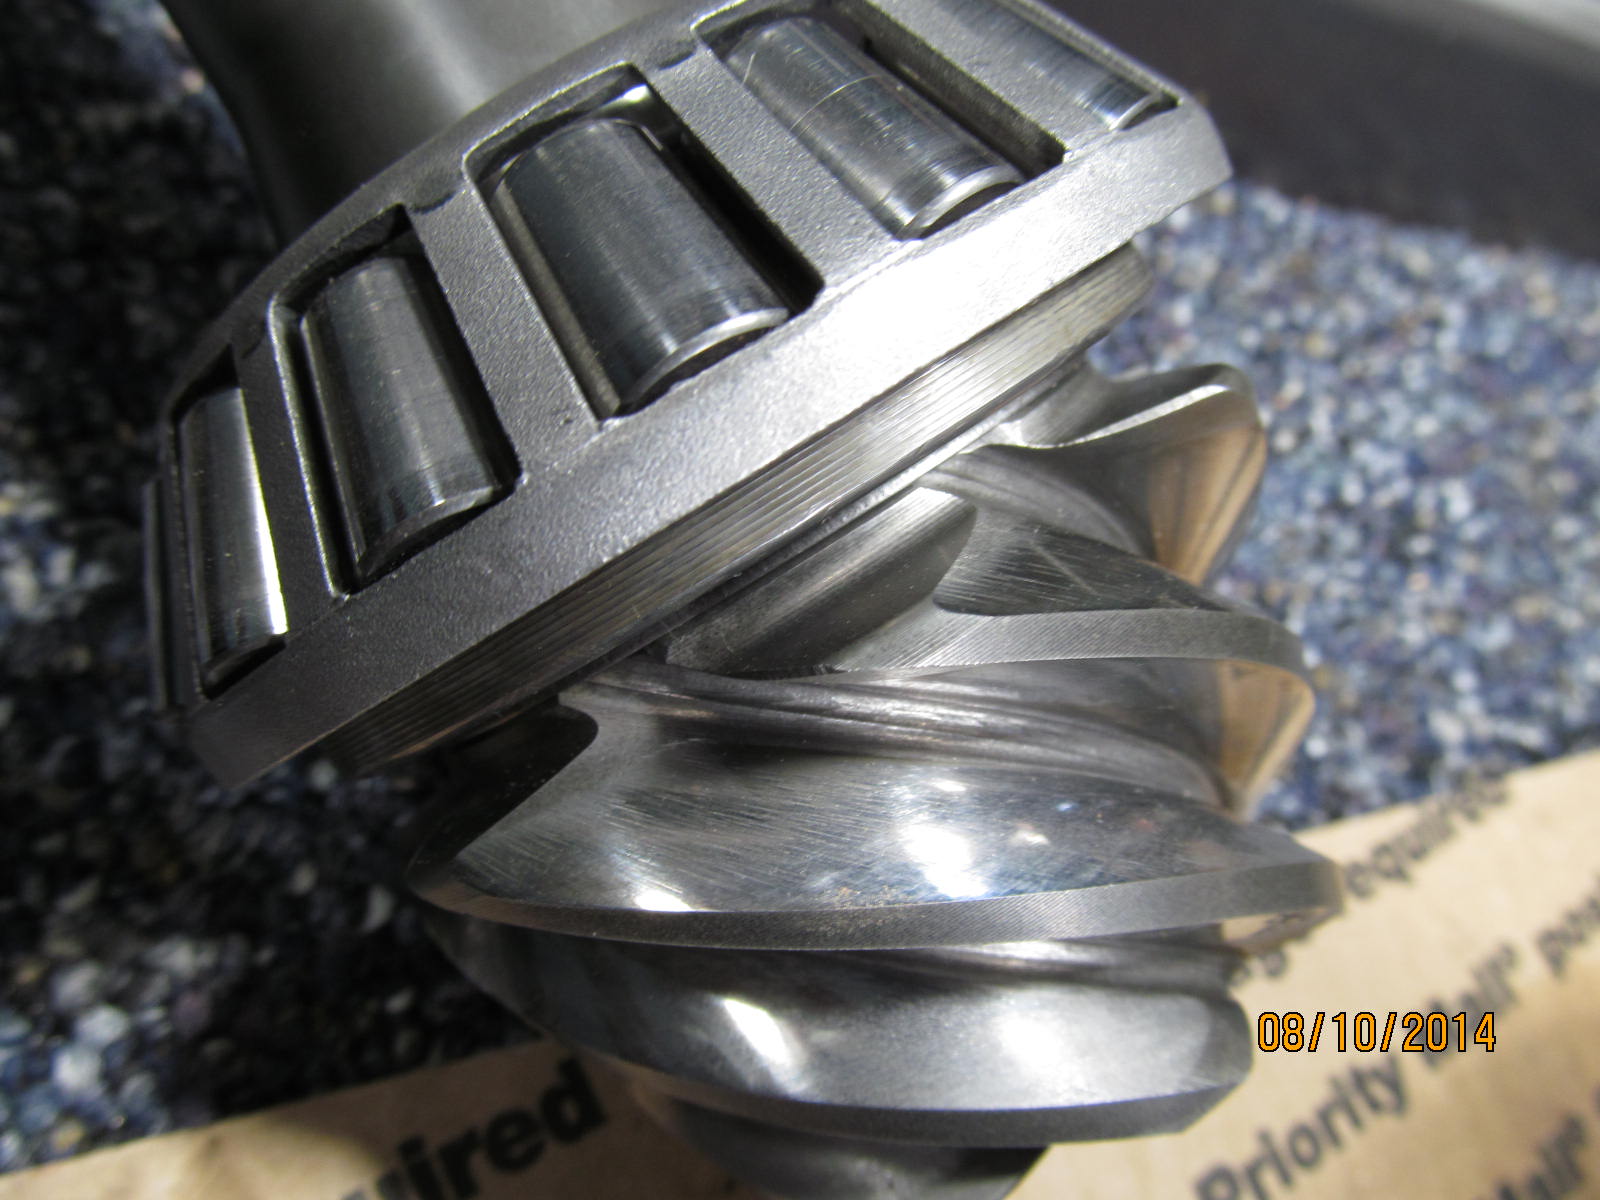
Small pinion bearing next to the big one....both appear to be in good shape.
|
|
|
|
|
I wonder if the last installer re-used the same oem pinion shim?
|
|
|
|
Let's find out. Press the pinion out....sorry for the blurriness. I'm still getting used to the new lighting
conditions of "indoor shooting"....without the powerful shop lights.
|
|
|
|
|
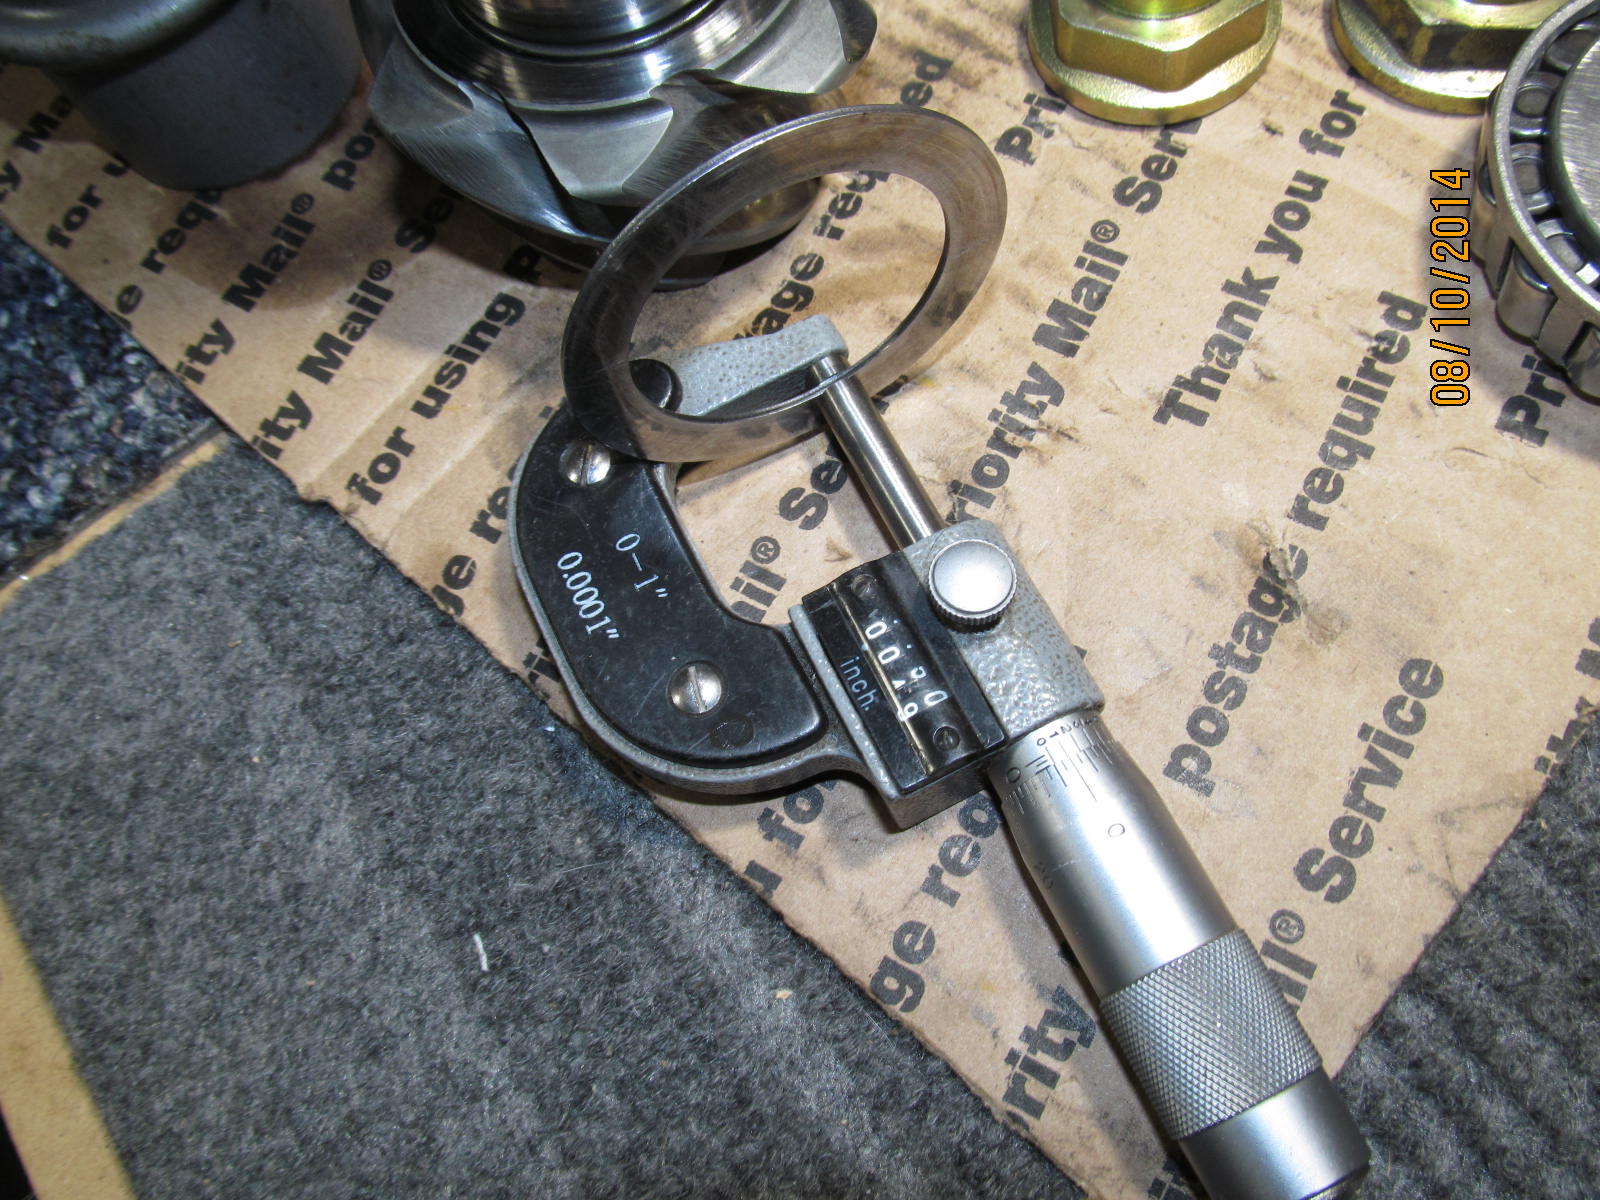
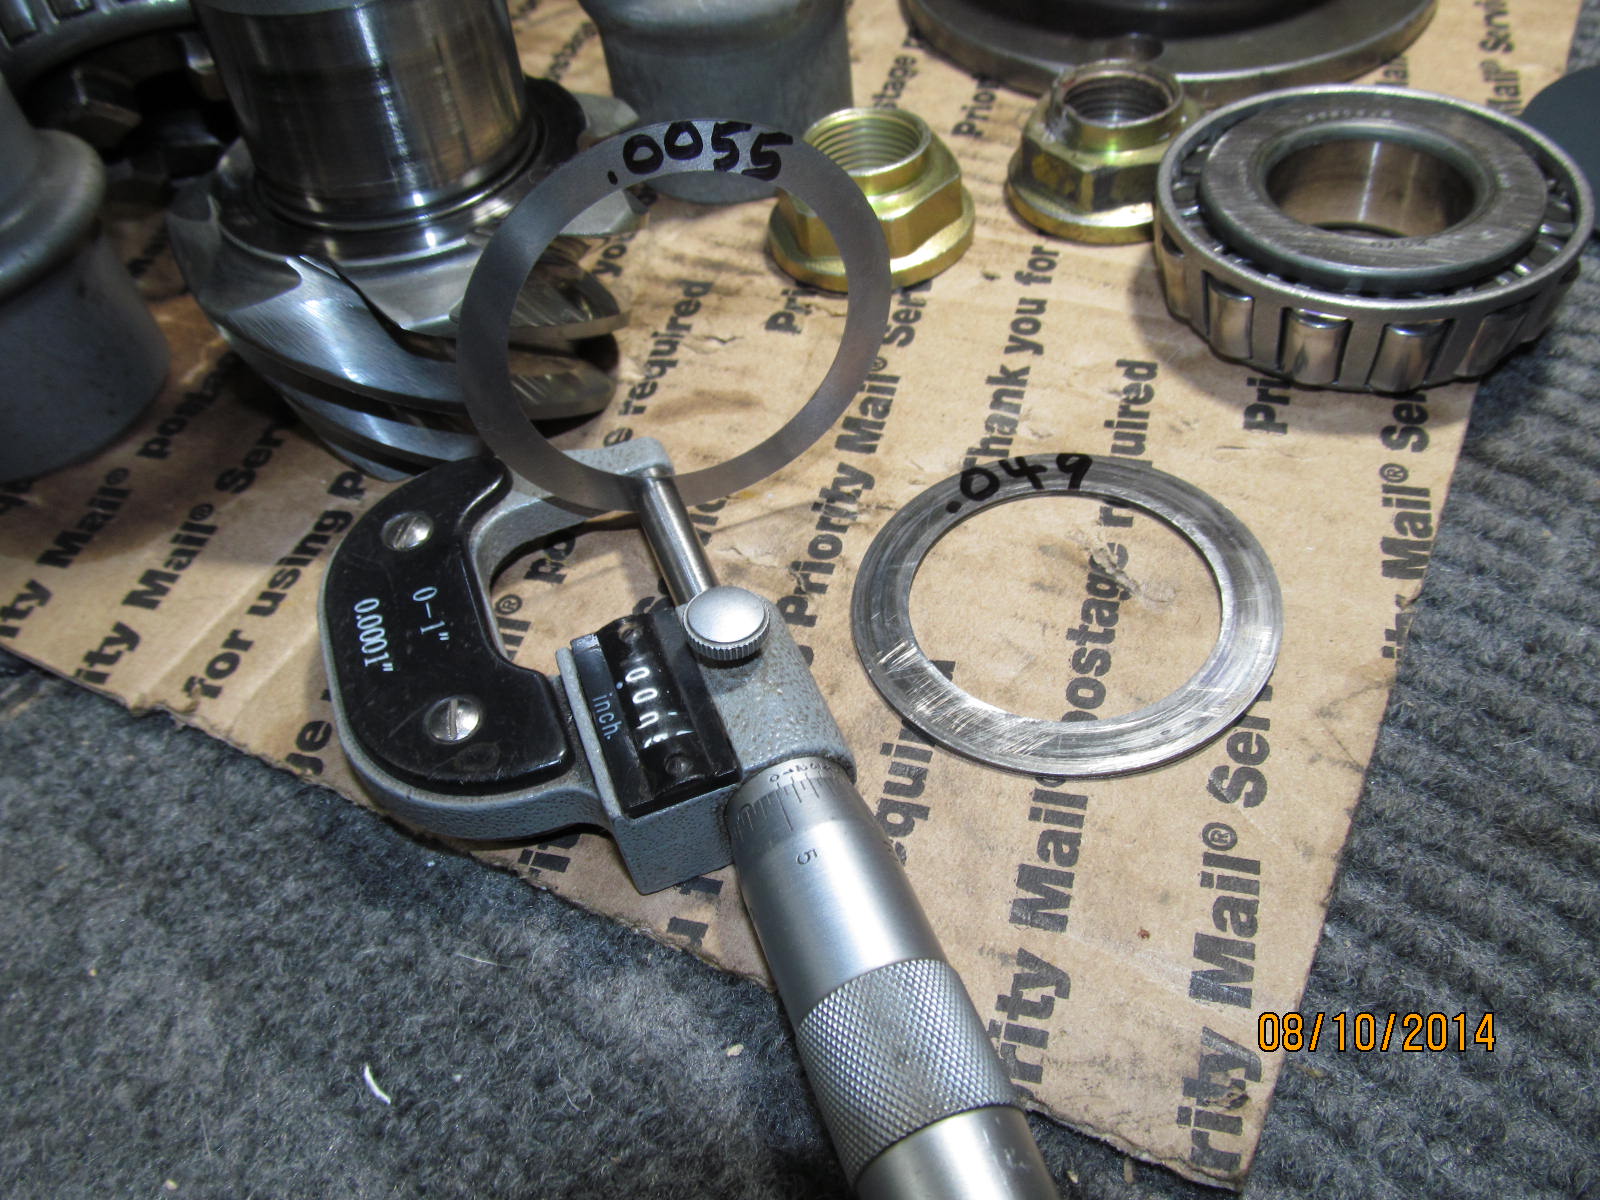
Looks like the OEM .049" shim was used ...and that's all.
|
|
|
|
With Nitro Gears, the actual shim needs to be a little thicker....closer to .057". I'm adding in
this .0055" shim to get closer to that 057 goal.
|
|
|

|
|
It wasn't meant to be pretty....but does the job.
|
|
|
|
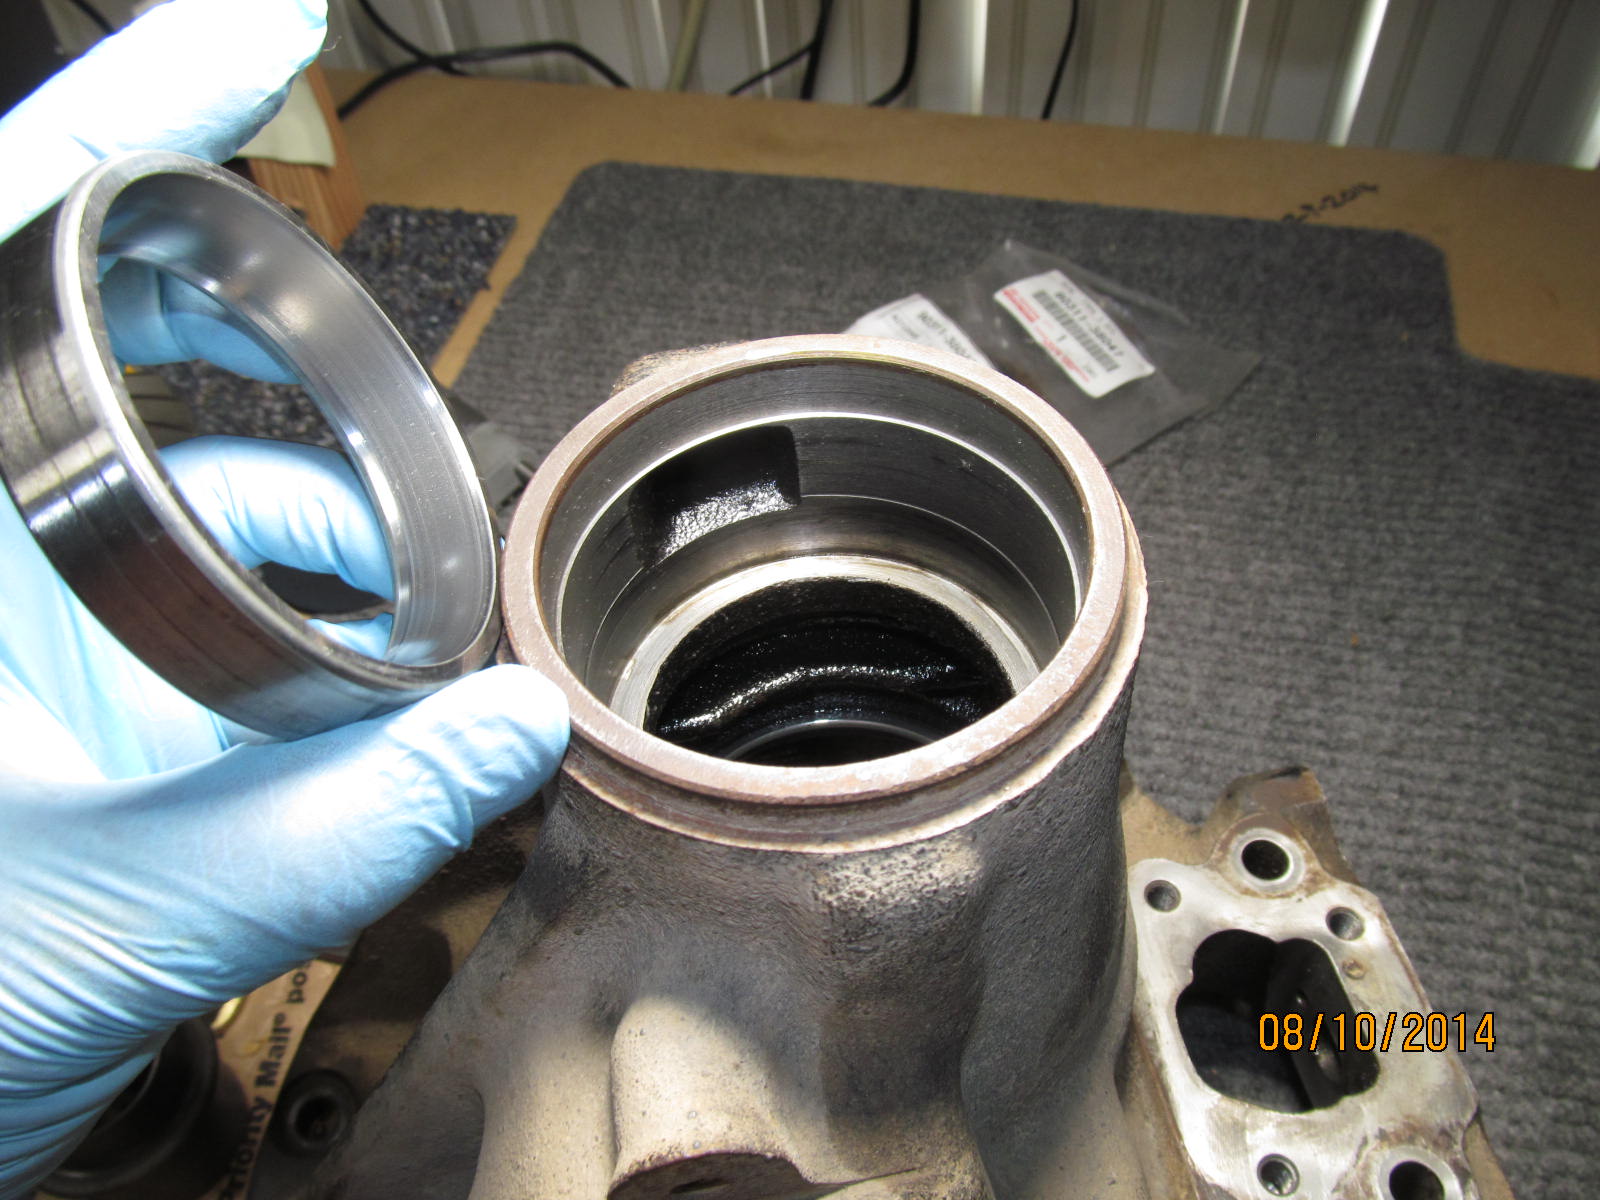
Even though the small outer bearing appeared in good shape, I chose to replace it because of that
notchy feeling.
|
|
|
|
|
New bearing on the right.
|
|
|
|
|
Tapping in the new race.
|
|
|
|
|
New crush is already on the pinion shaft.
|
|
|
|
|
Splash guard is put on first.
|
|
|
|
|
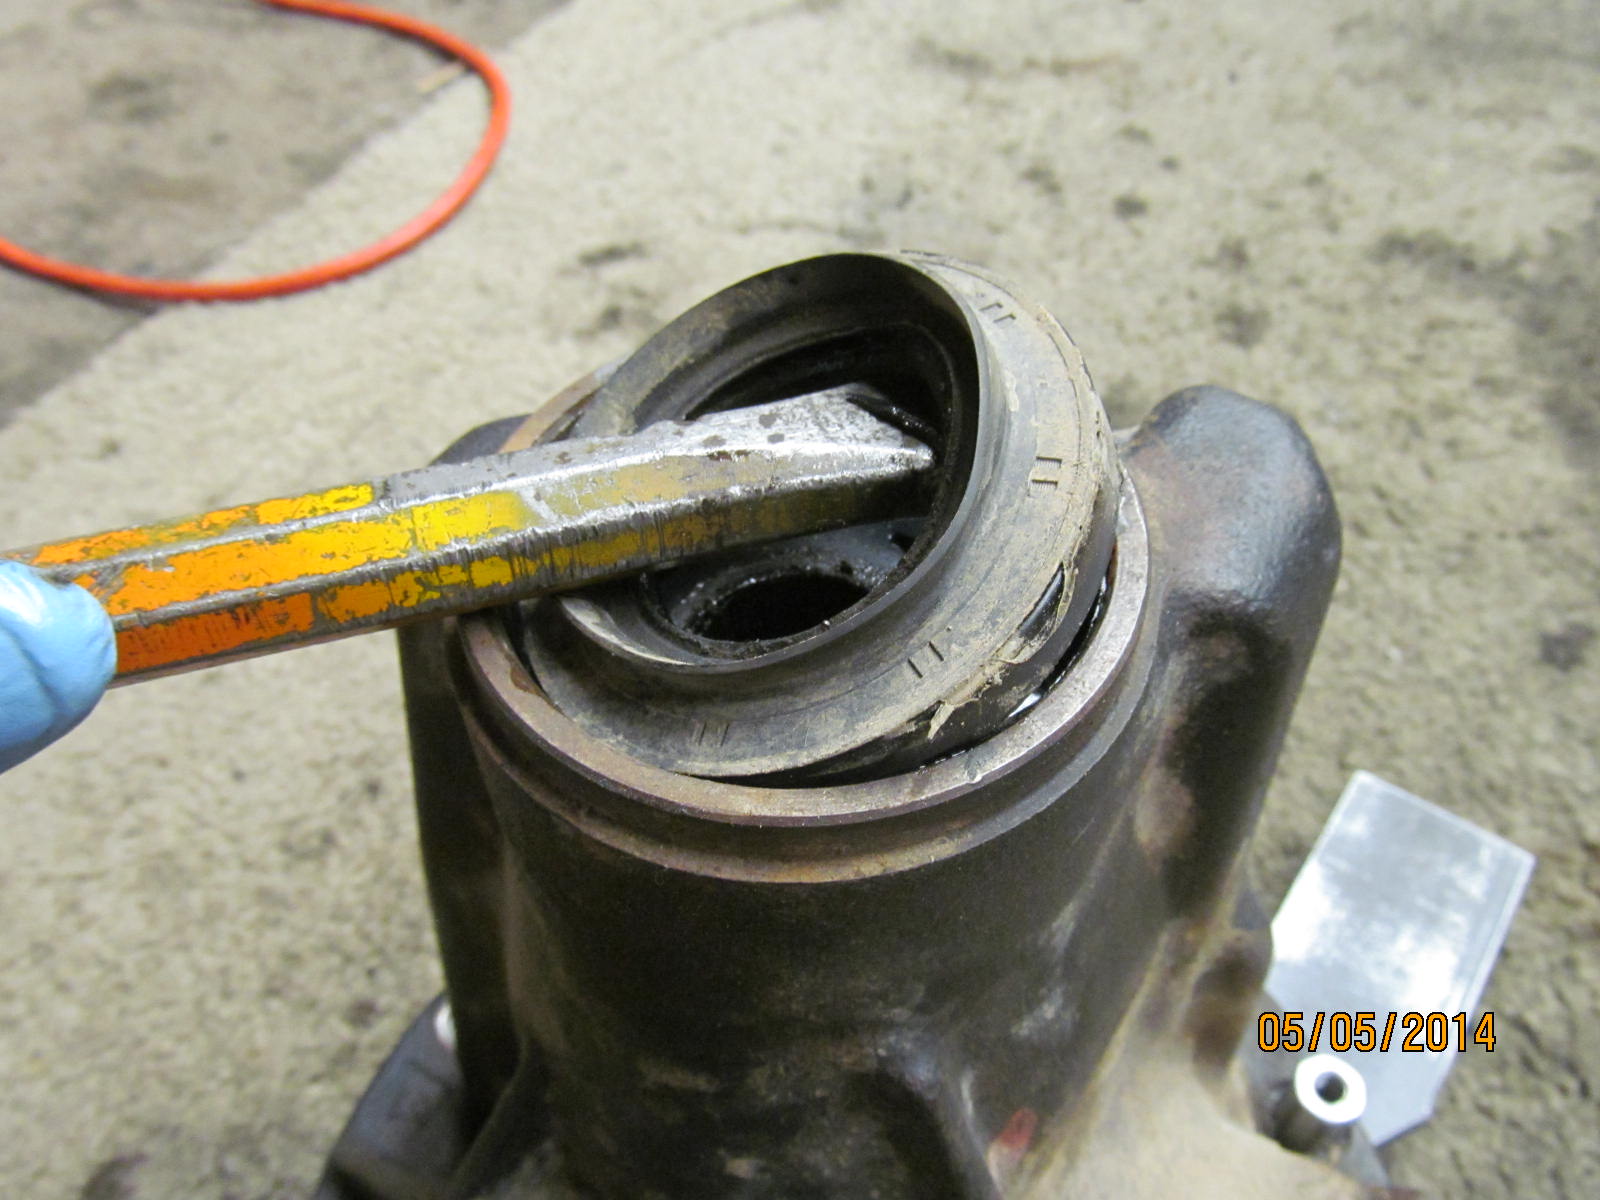
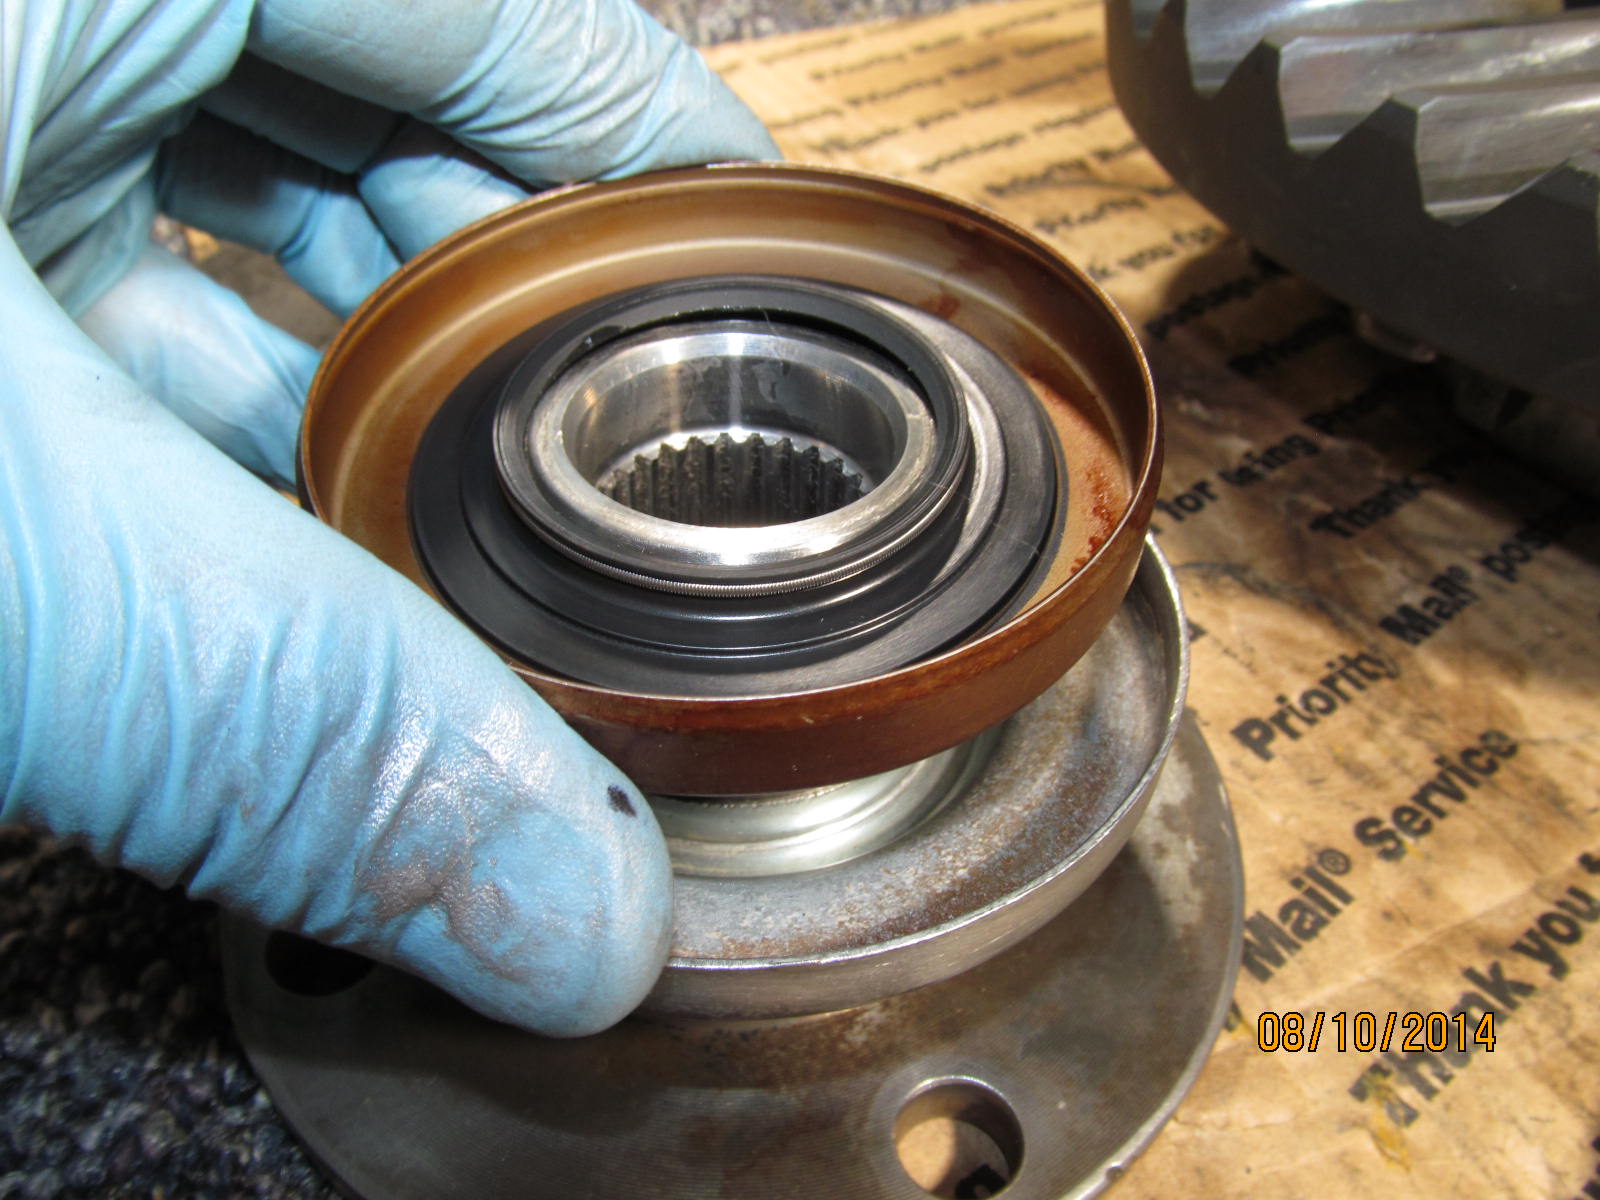
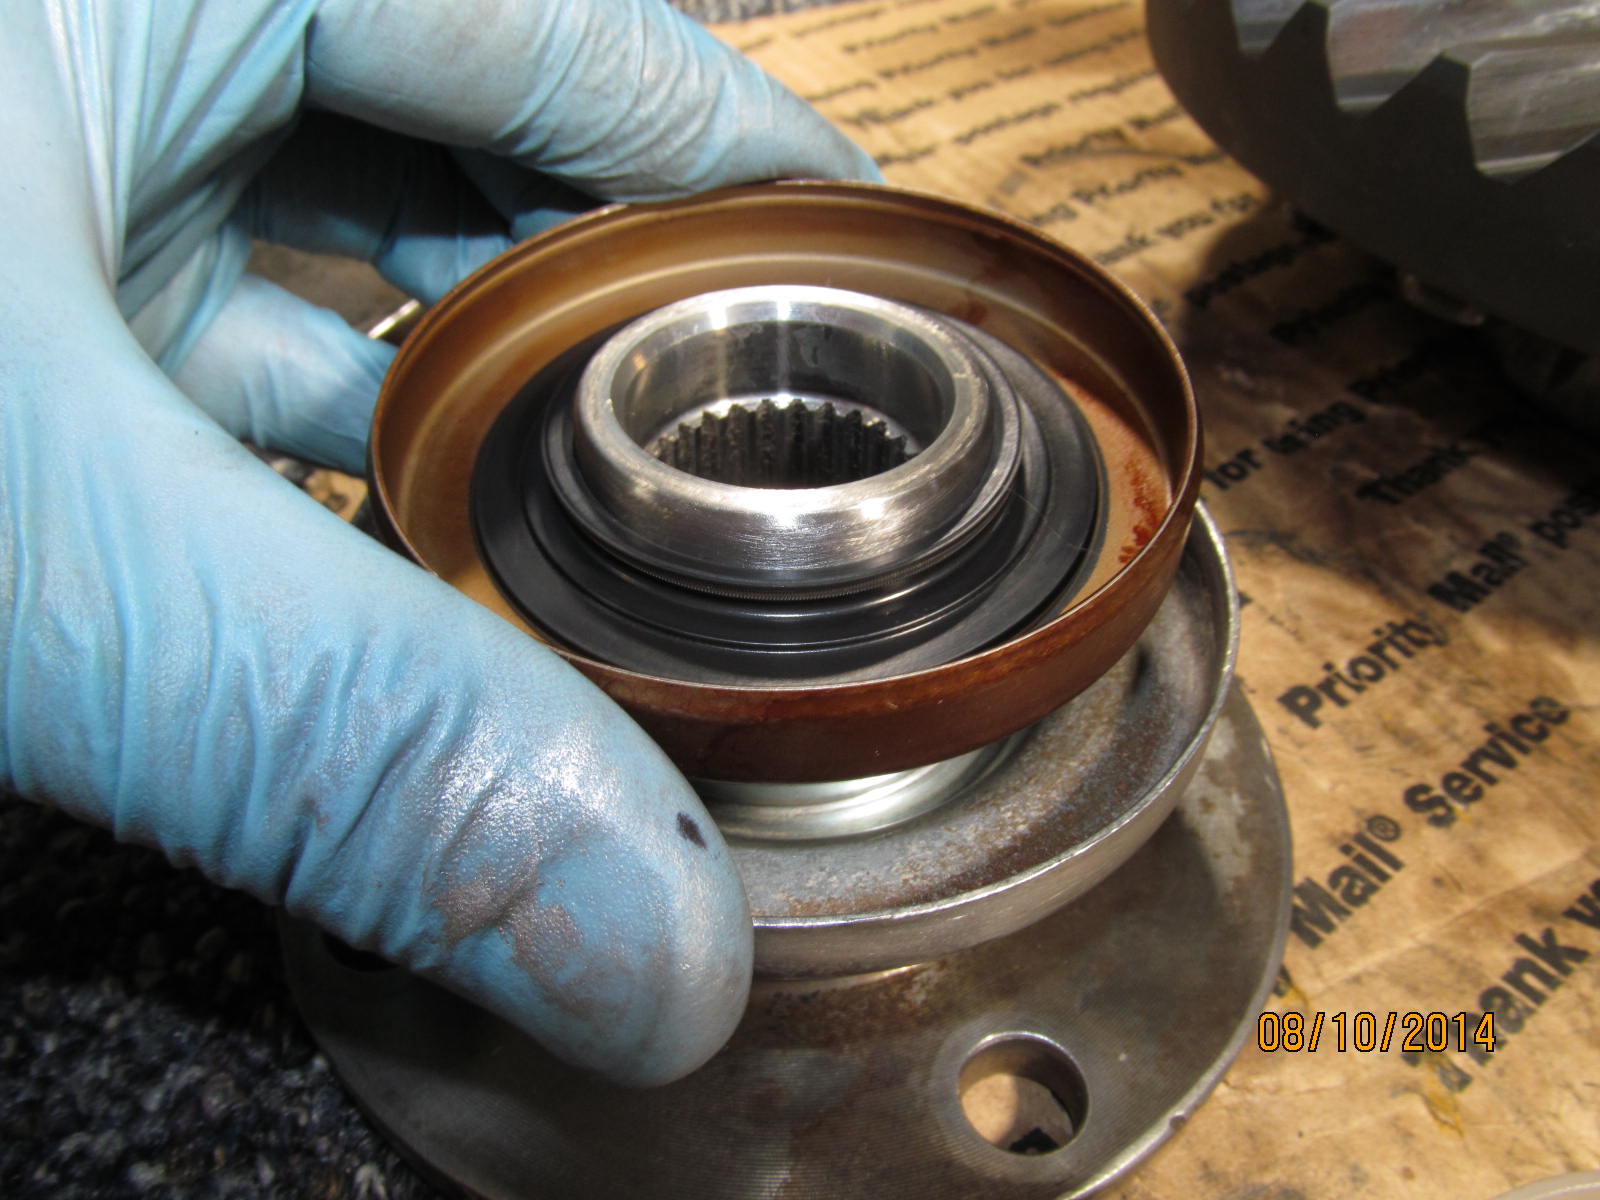
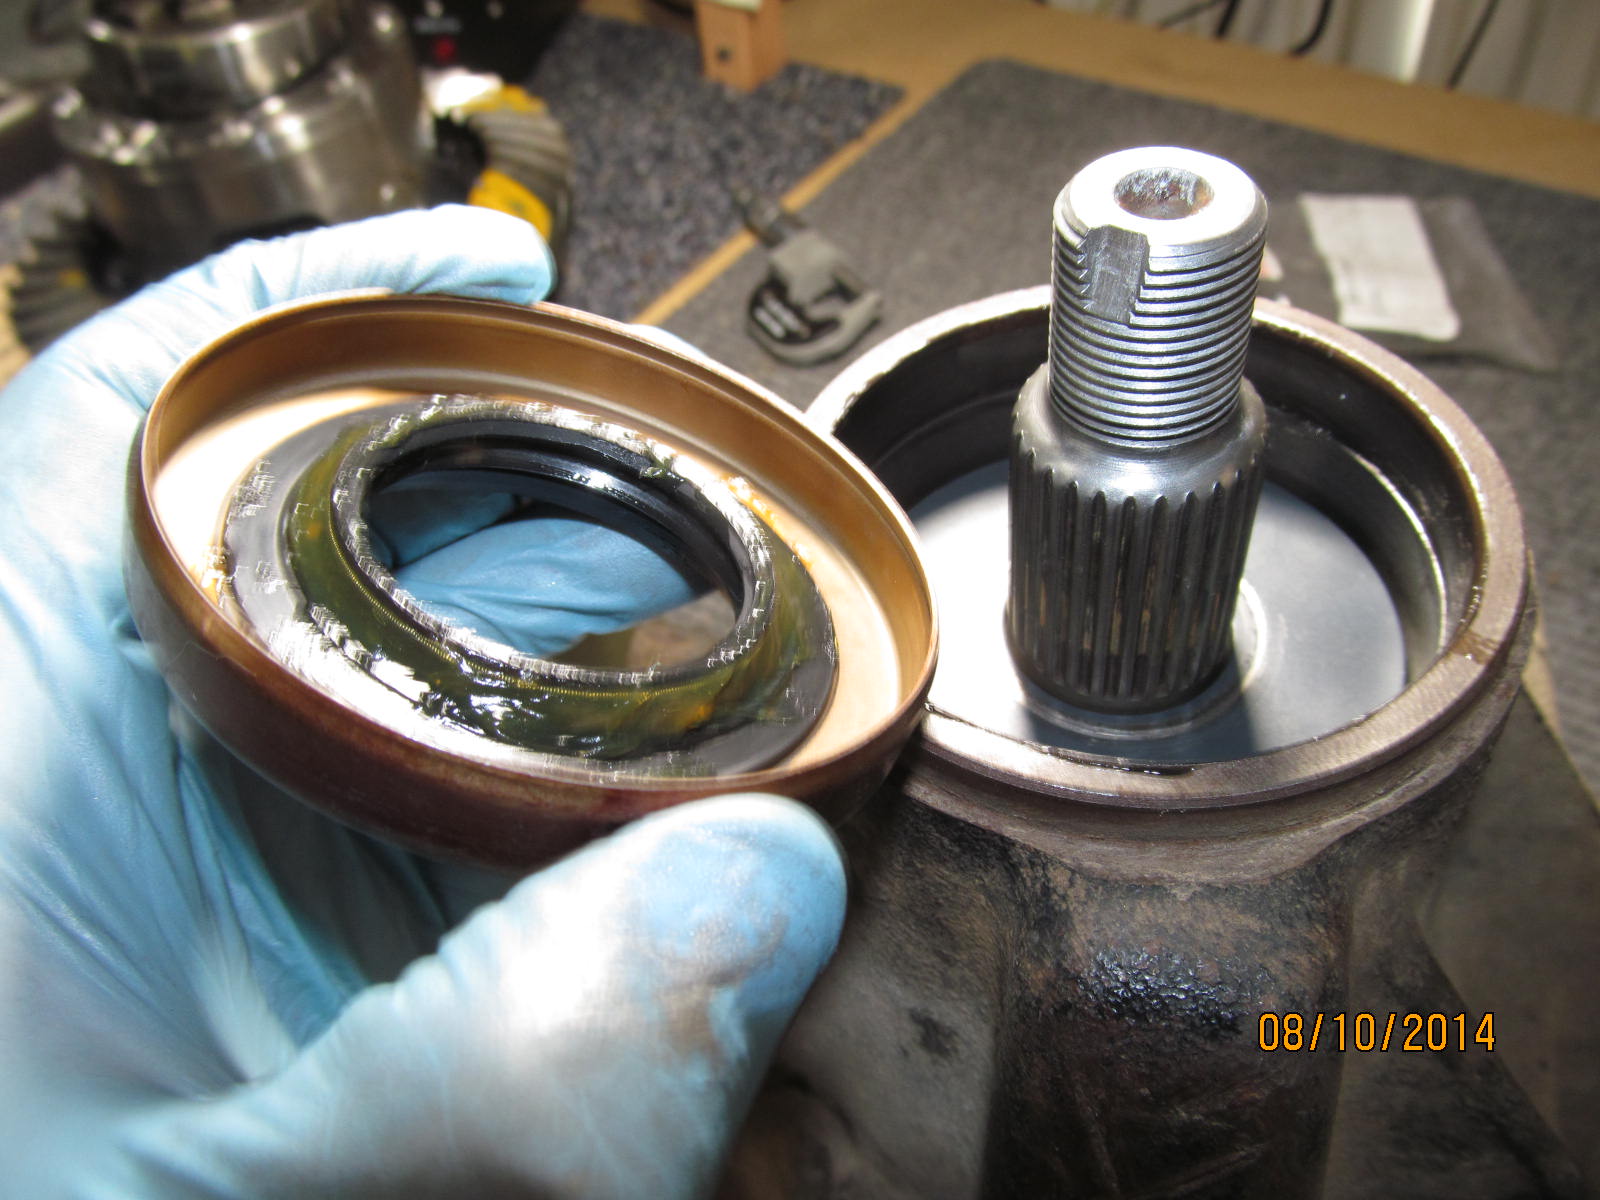
I like to always see how the new seal fits on the flange....
|
|
|
|
|
.....I watch the way the rubber folds around the garter spring.
|
|
|
|
Grease is applied to the garter and now the seal can be banged on. The garter spring will not get thrown
off the seal surface.
|
|
|
|
|
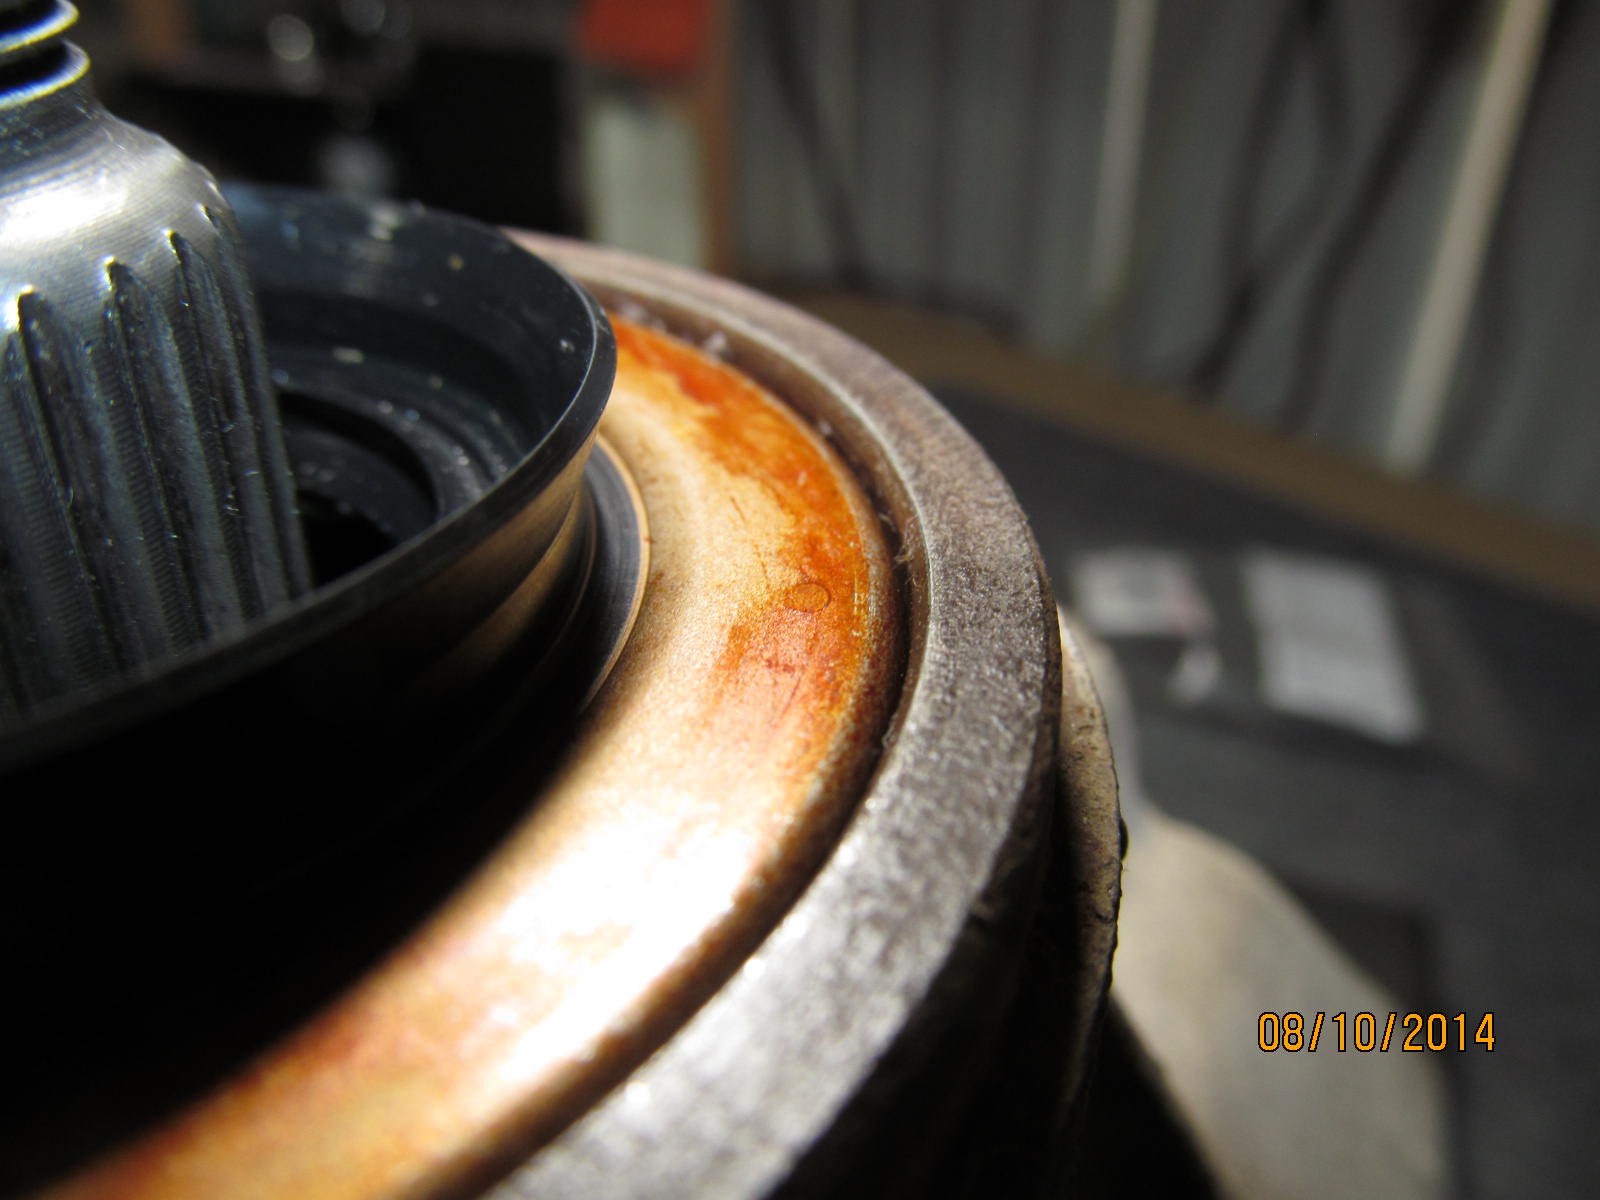
The seal is about 1mm below the flat surface....just right.
|
|
|
|
|
Last chance for splashing the surfaces with some gear oil....
|
|
|
|
|
Even with anti-seize on the pinion threads, it still took almost 200 ft/lb to crush the collar.
|
|
|
|
|
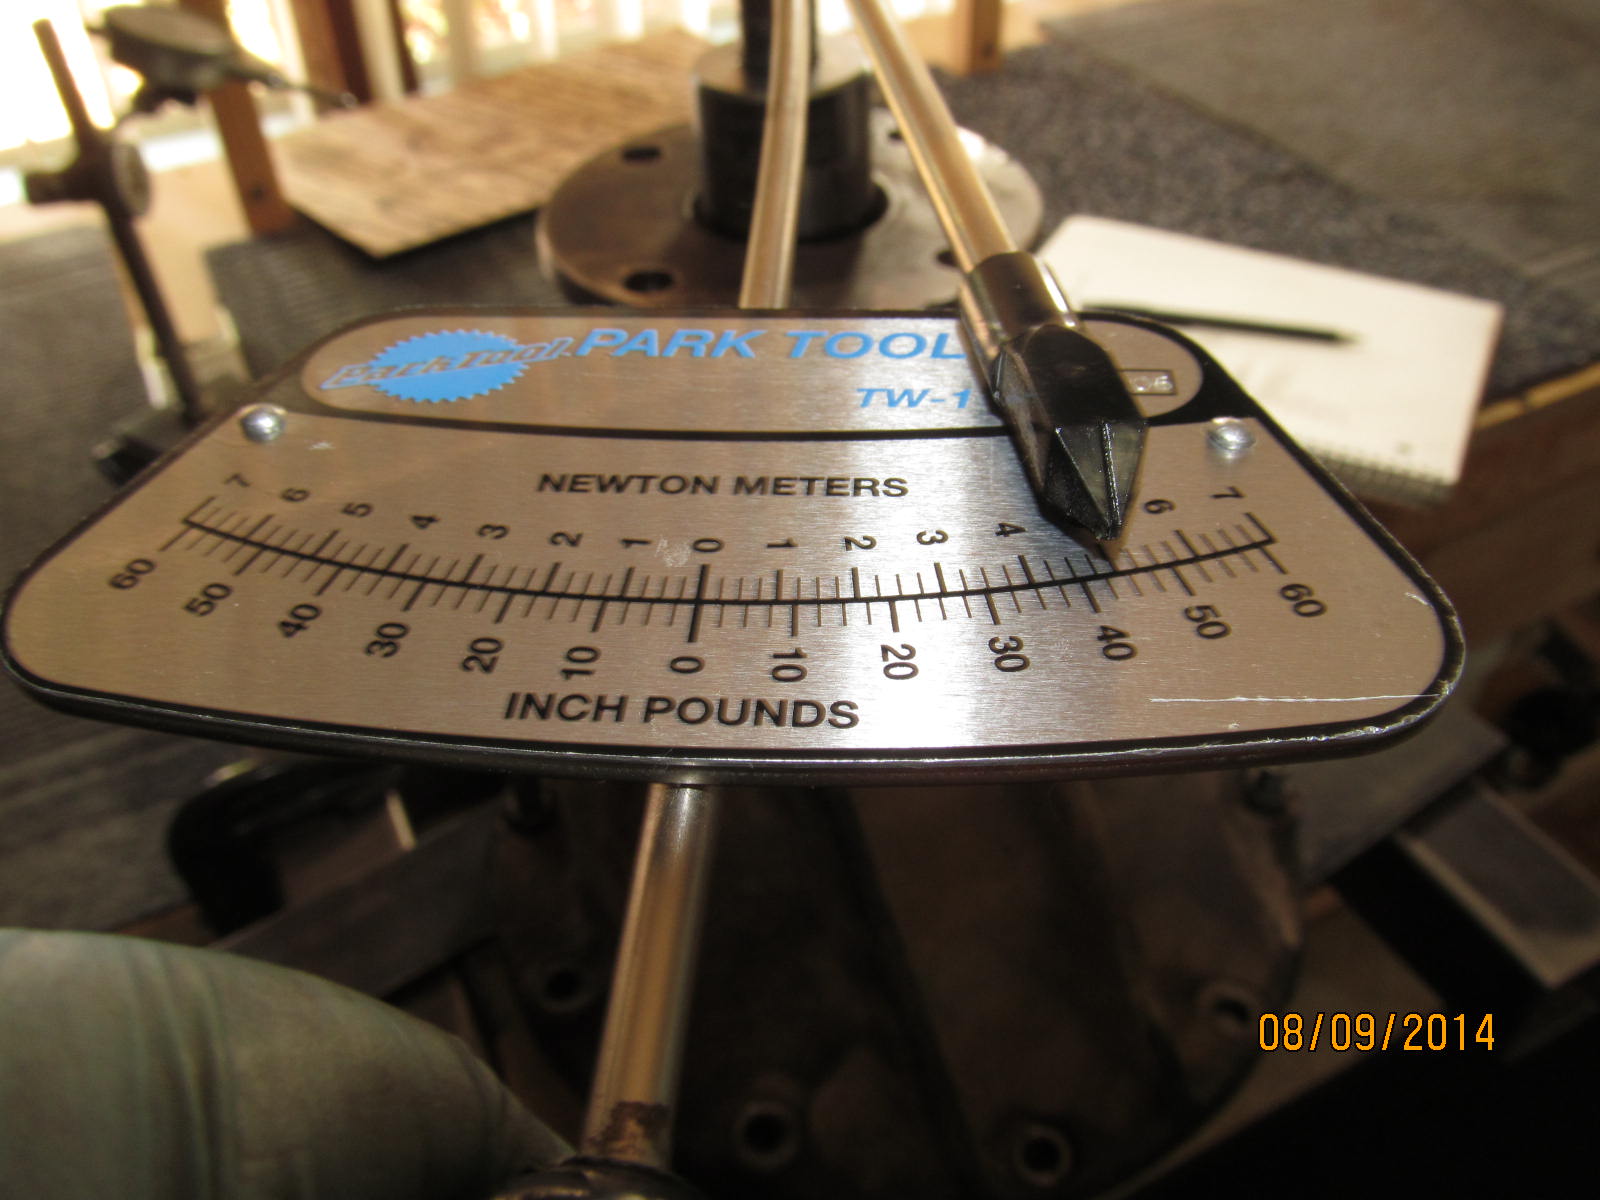
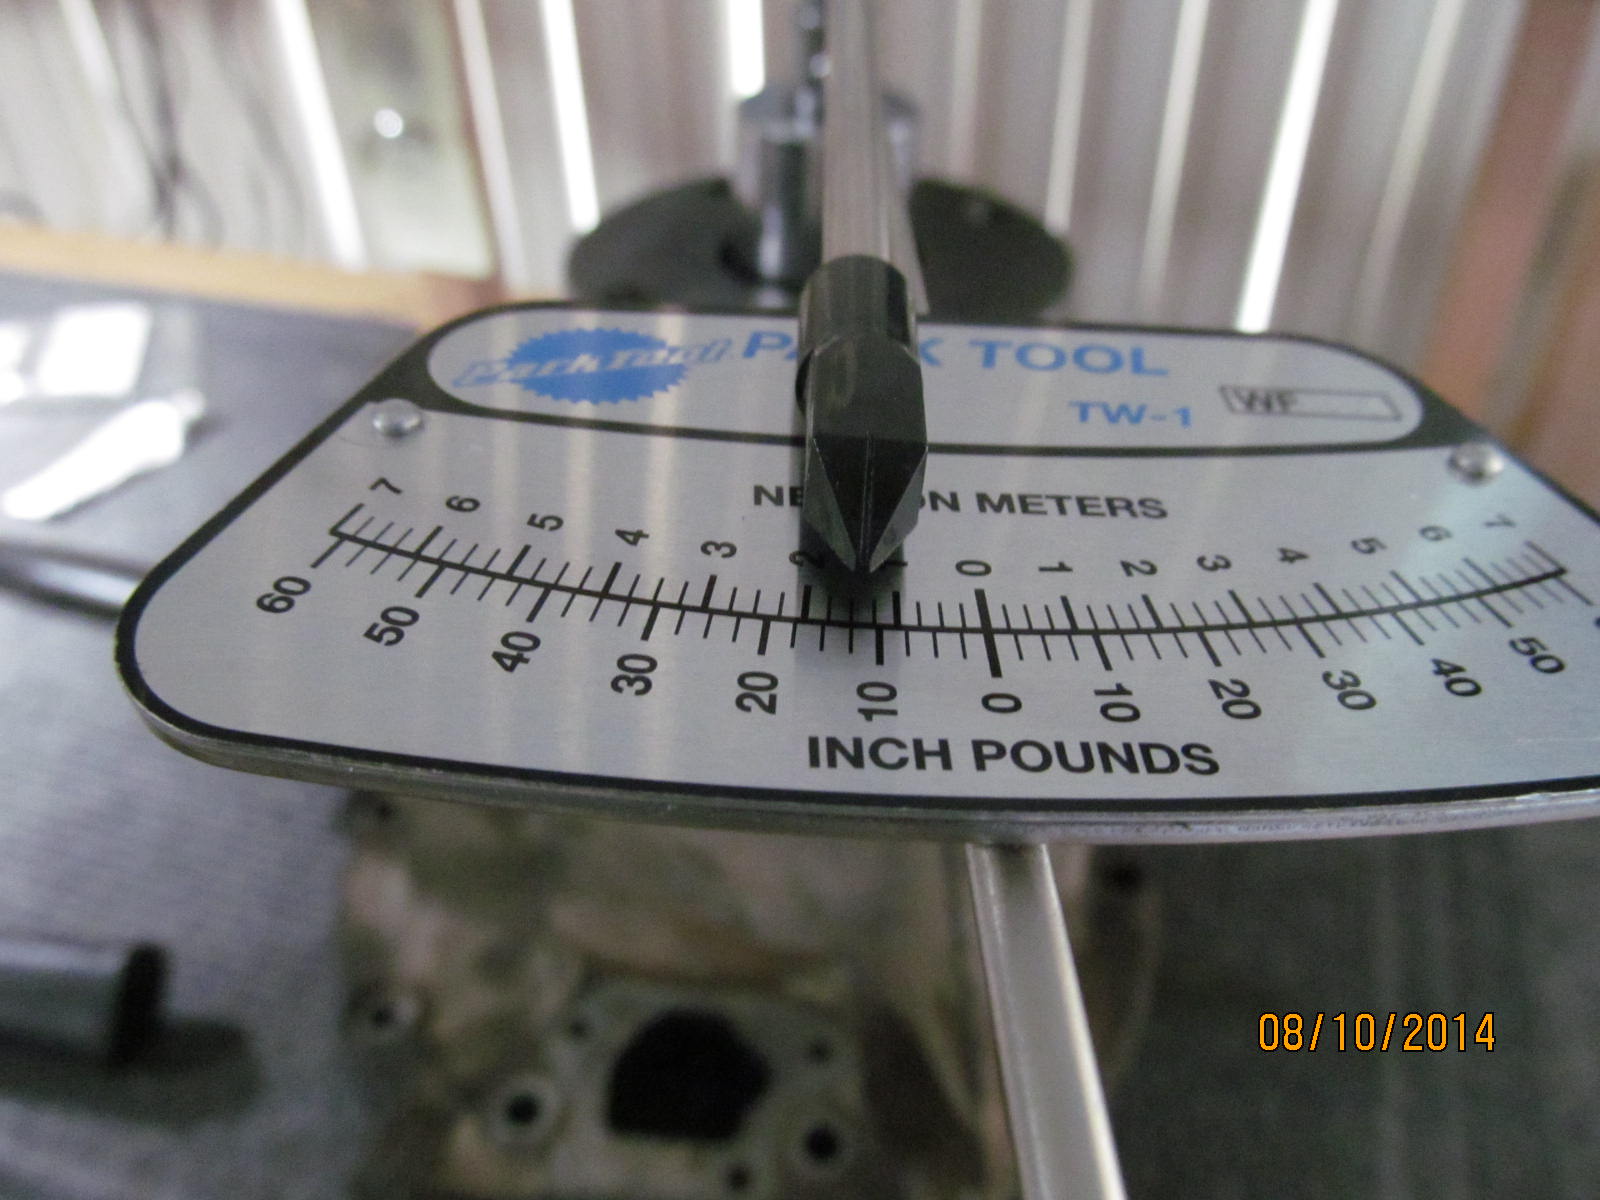
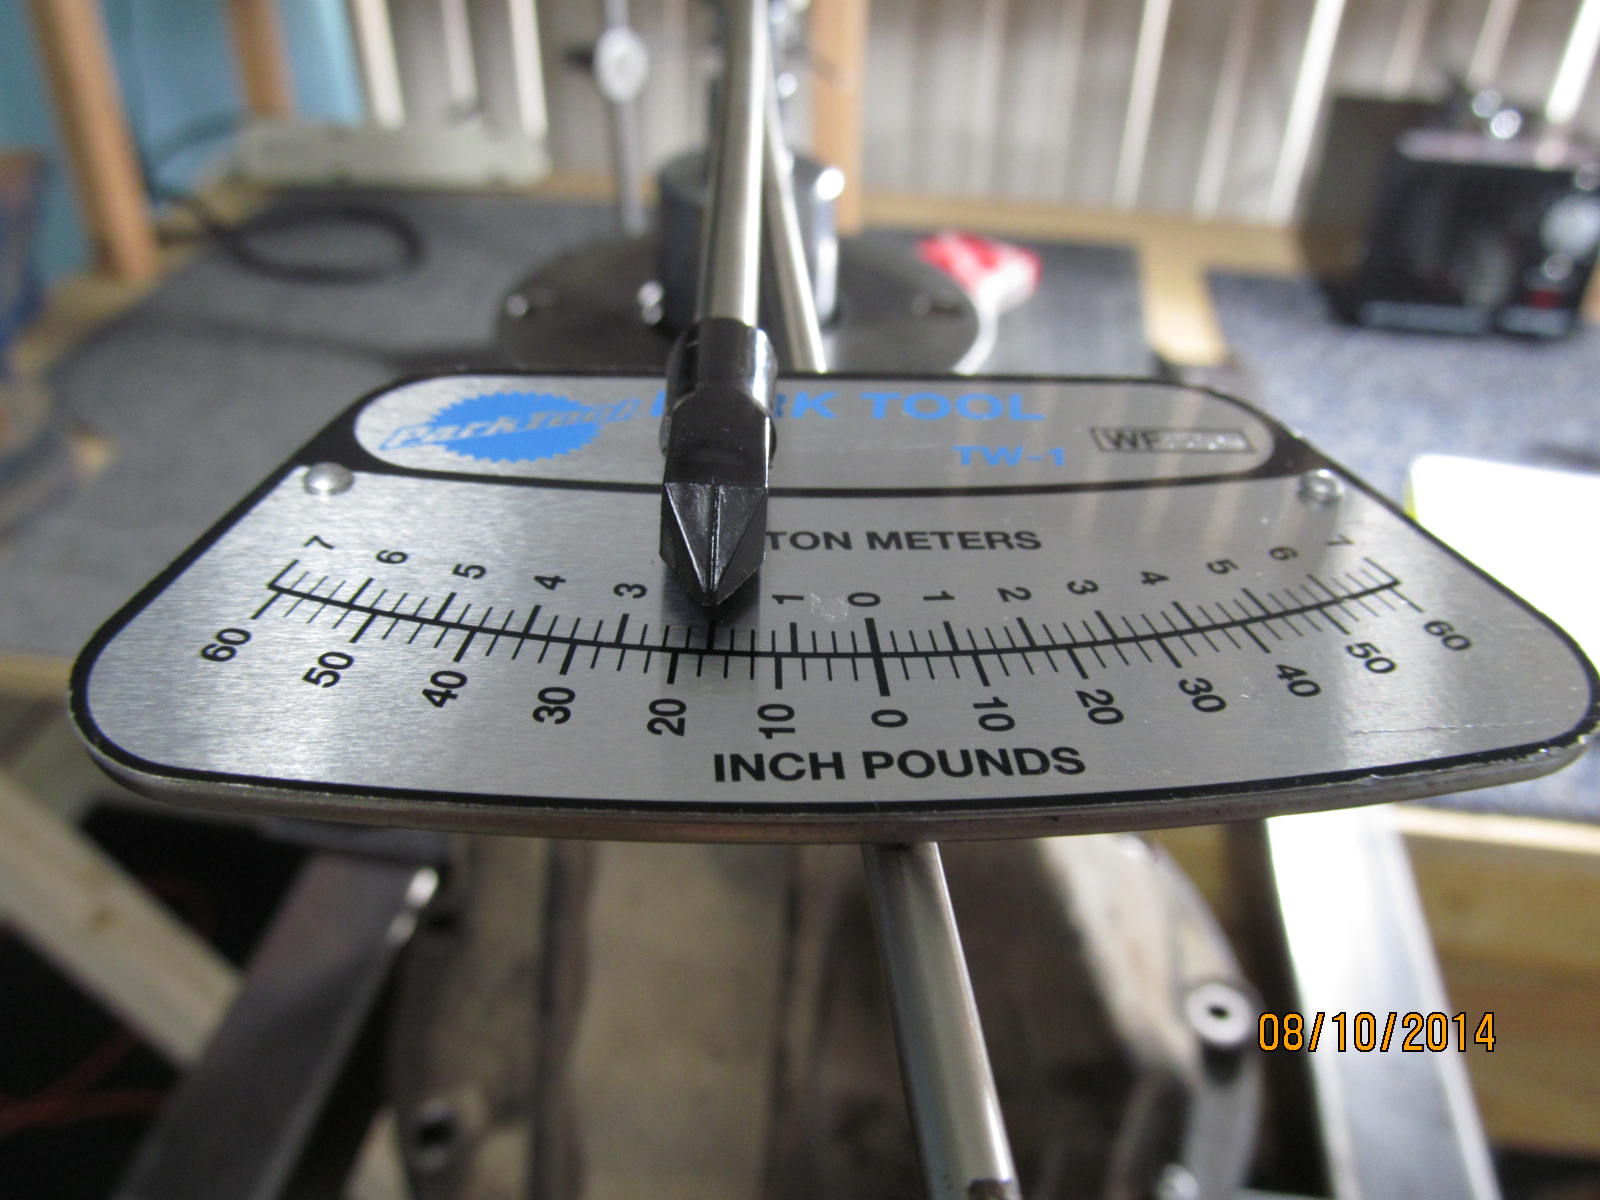
11 in/lb for the final ppl is a very good number.
|
|
|
|
|
DING! and this end is done.
|
|
|
|
I upped the thickness by .004" on this side....and .002" on the other. That is a total increase of .006"
and now there is some carrier bearing pre-load.
|
|
|
|
|
85 ft/lbs for these 4 bearing cap bolts.
|
|
|
|
|
Drive pattern is good. As it wears some the real pattern will shine thru.
|
|
|
|
The coast appears very deep...not what one would expect for a .0545" shim. The .049" shim caused some out
of place wear and the pattern will take on a much better look as the high spots go away. Riley will let
me know shortly if there is any whistle on de-accel shortly. In any event, it can only get stronger with time.
|
|
|
|
|
Backlash is right where it should be...around .007"
|
|
|
|
|
Total PPL to turn both the pinion bearings and carrier bearings is around 16.
|
|
|
|
I made numerous changes to Riley's rear 3rd........................
1---deeper pattern by .0055..........................................
2---CBPL improved by .006 (thicker washer plates).
3--- backlash moved from .011" to .007" (in spec).....
4---new bearing with less preload (notchiness gone)..

|
|
|

|