|
Old style RD23 gets upgraded and 529 Nitro Gears added (cryogenics)
|
|
(105 BIG pics loading)
|
|
NOV 25 2013
|
|
|
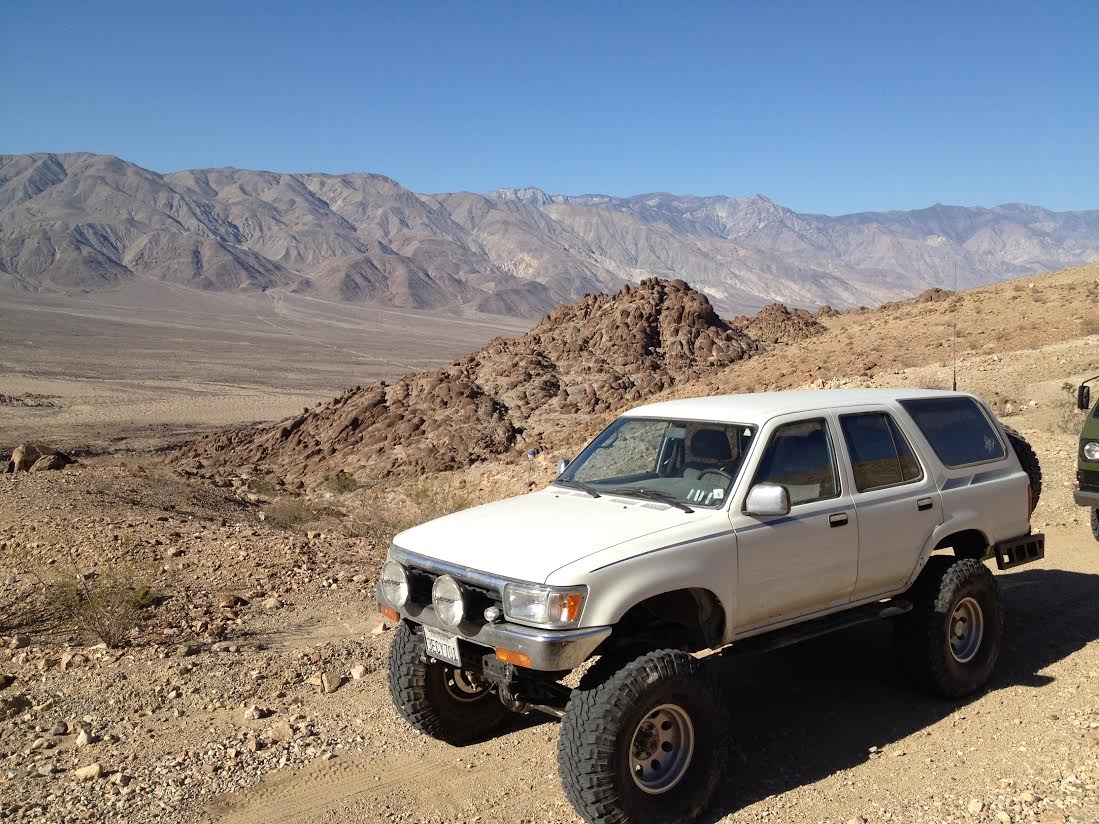
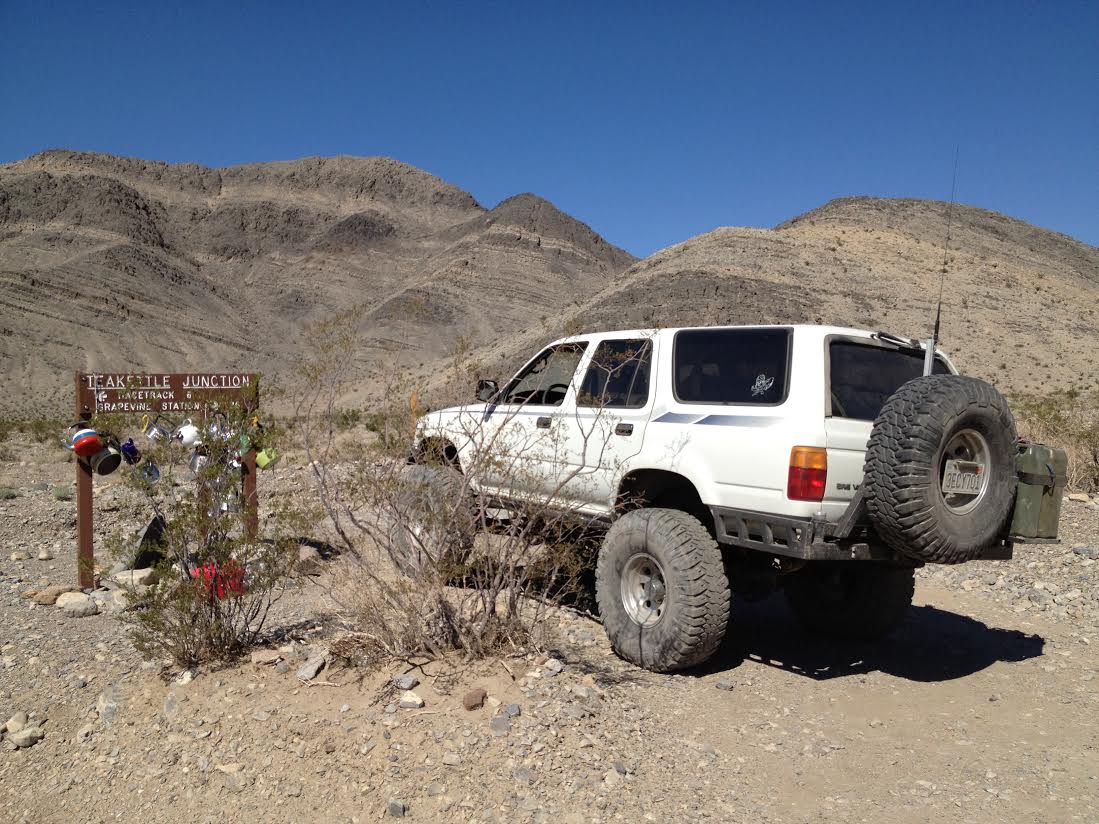
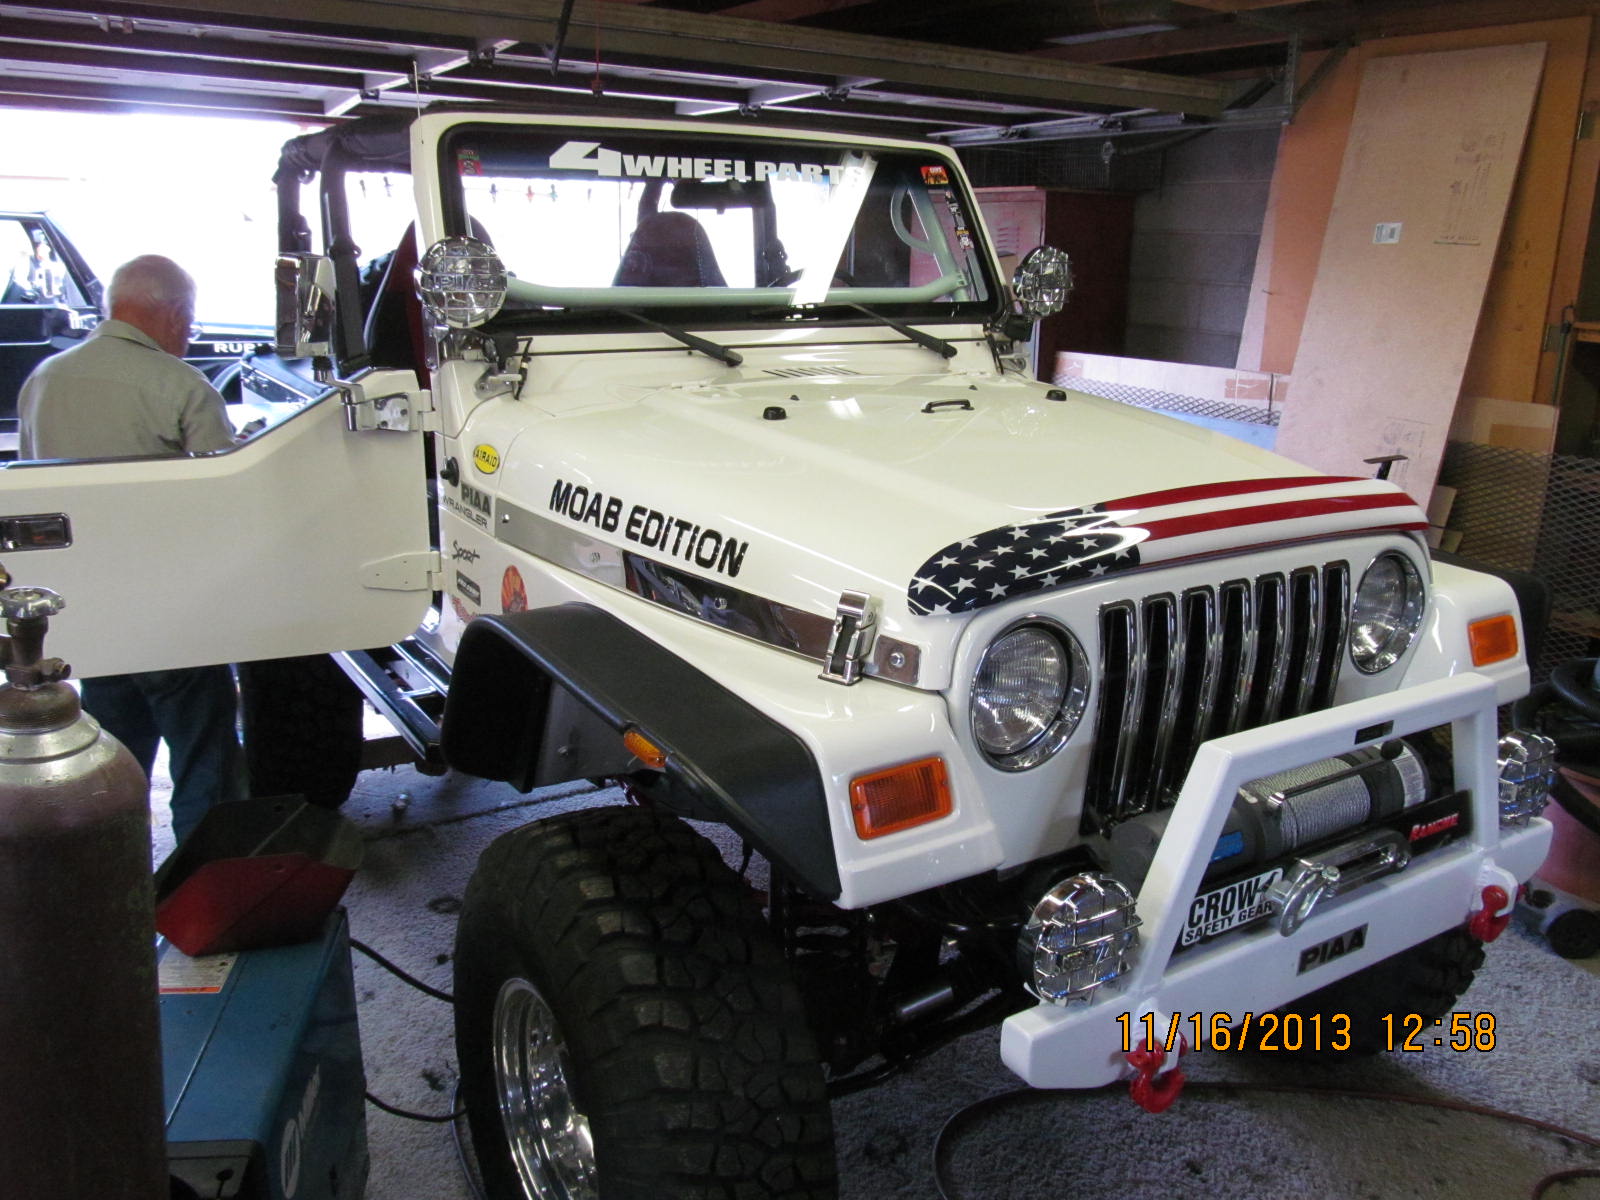
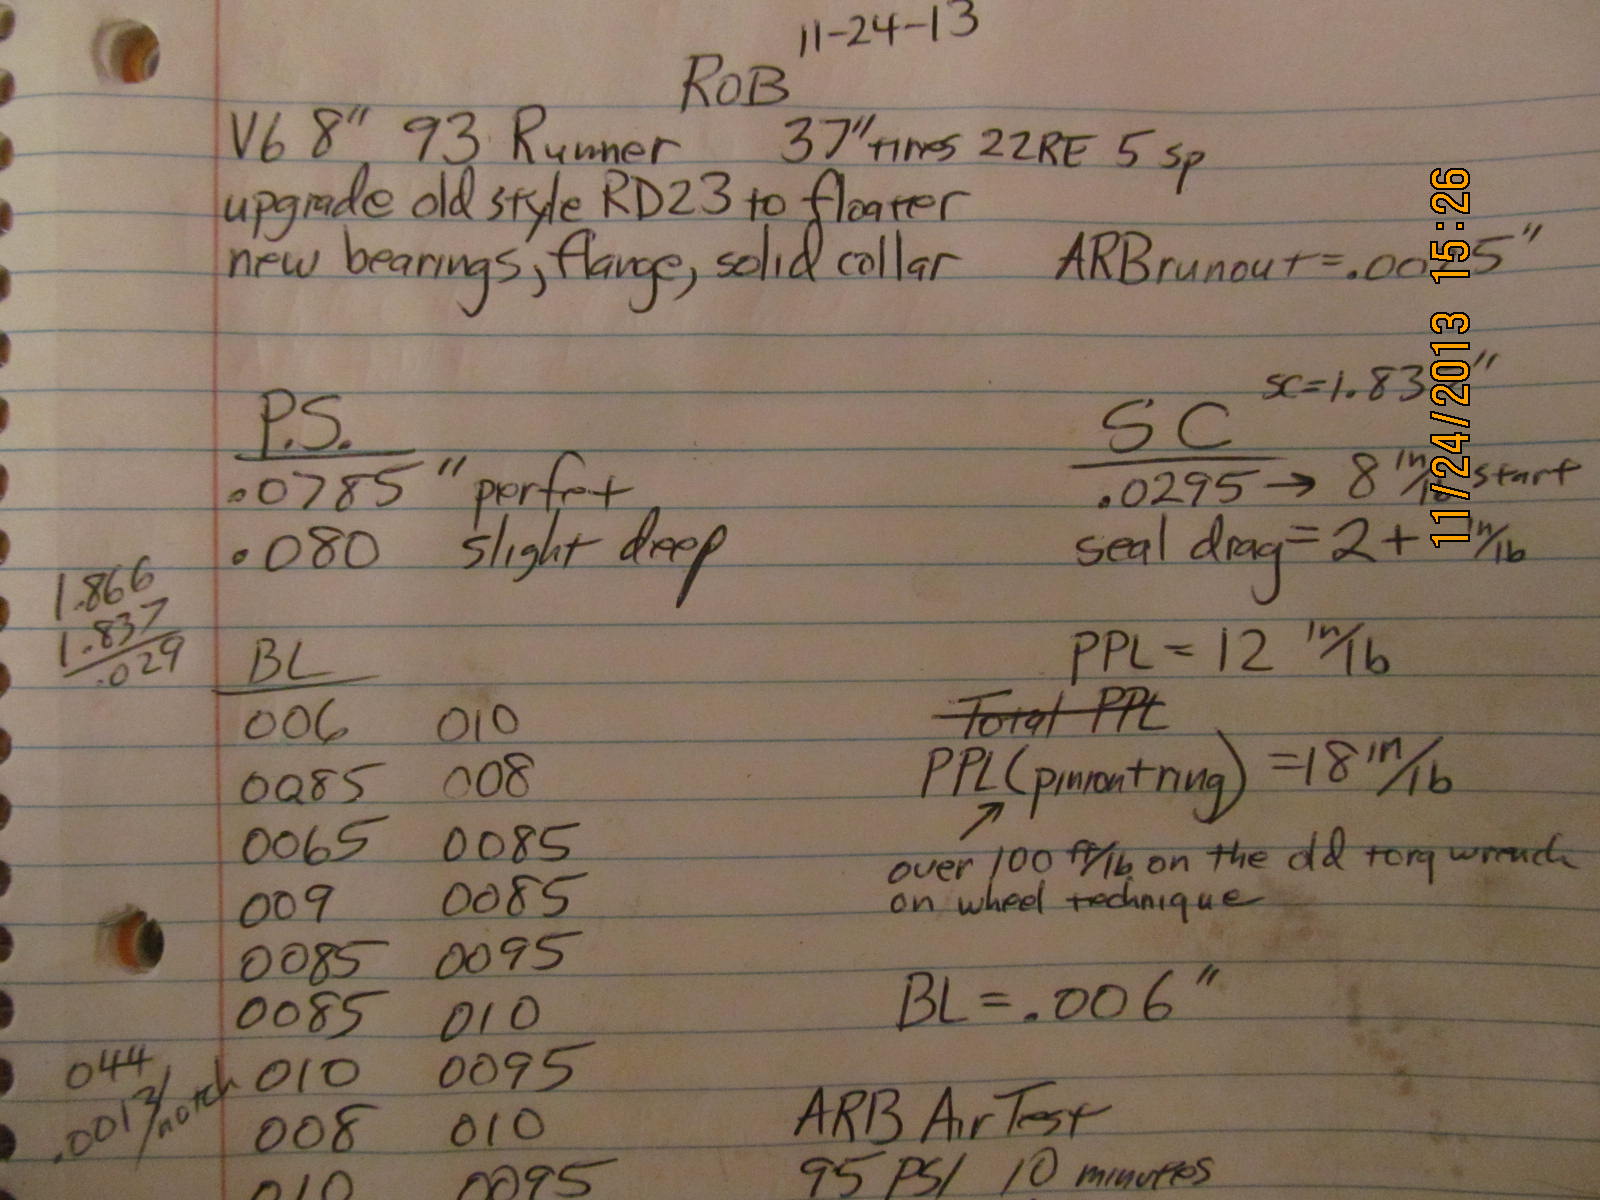
Rob lives in the southern California area and wheels this nice 1993 4Runner. A 3.0L
engine powers the 5 speed tranny/single stock chain driven transfercase/529 gears
which turns the 37 inch tires. It's not a daily driver and the gears were broken
in with a good break-in program but they still self destructed after only a few
thousand miles and a few trails. The actual gear install was done by a well
known 4x4 company.
|
|
|
|
|
ARB's front and rear. The front beam axle has a high pinion 3rd.
|
|
|
|
|
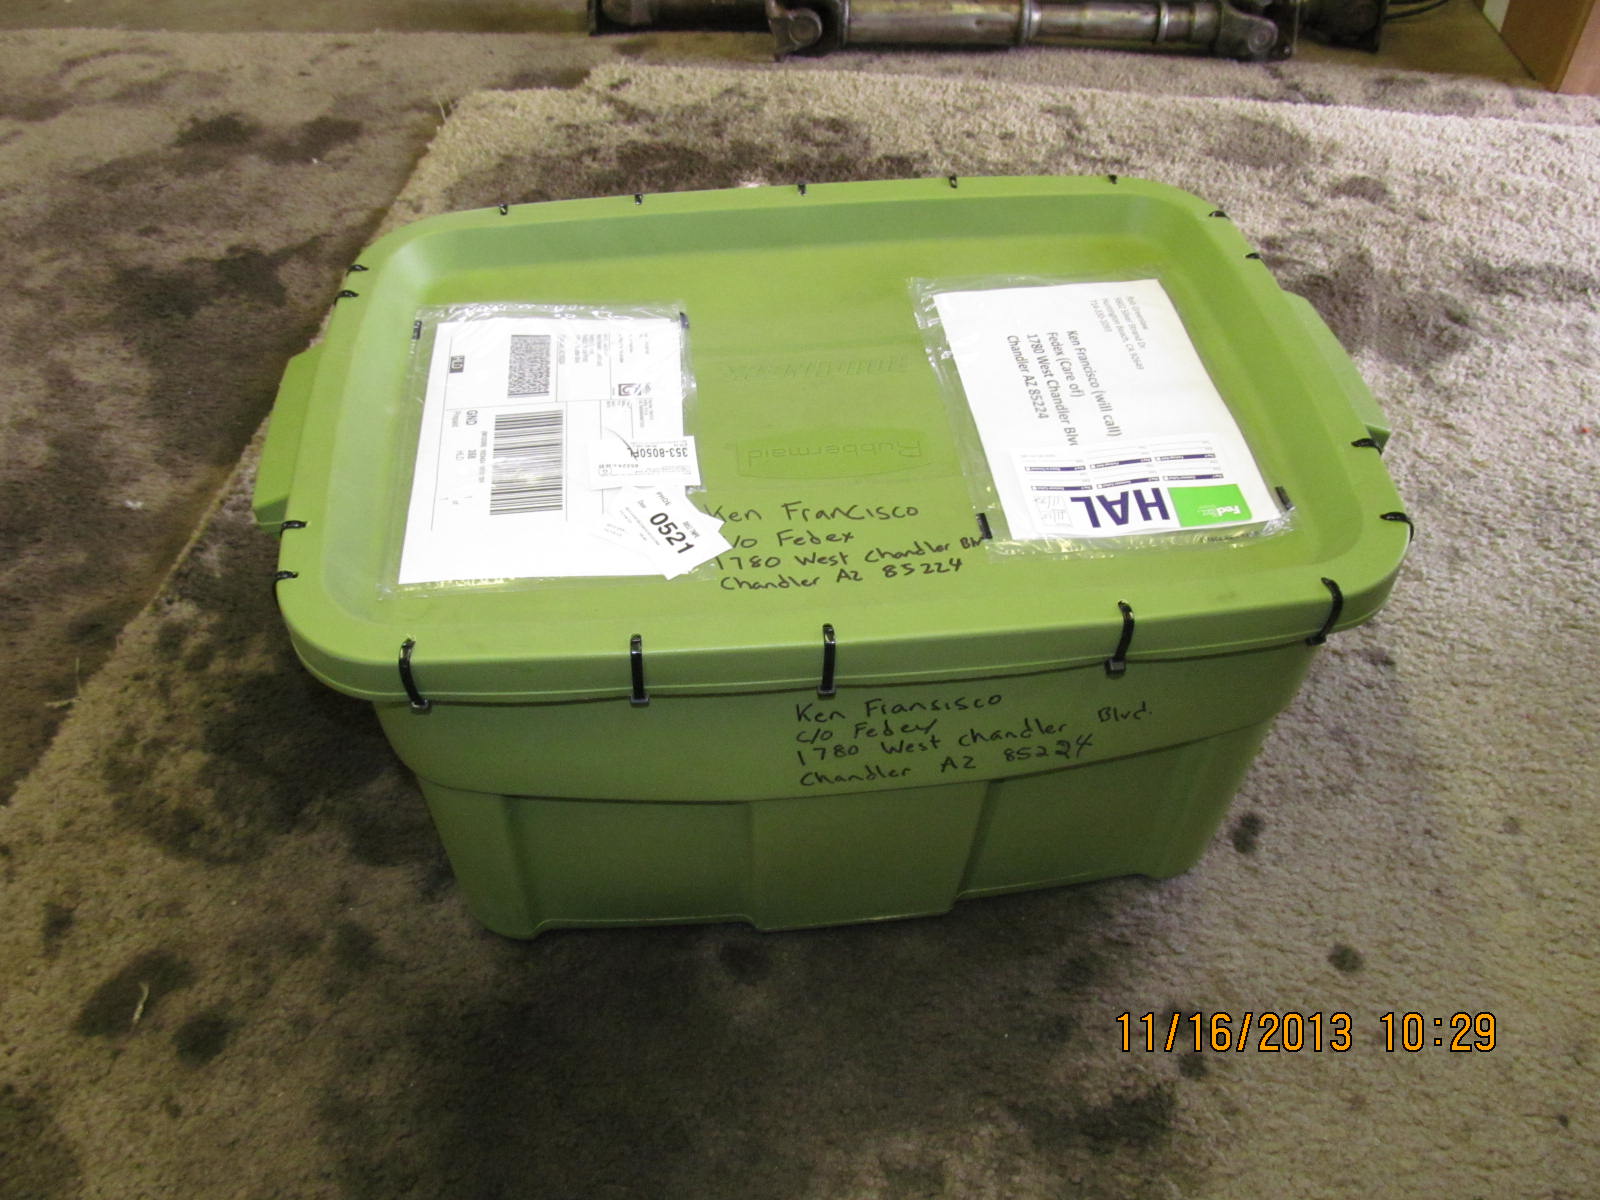
As received from Rob.
|
|
|
|
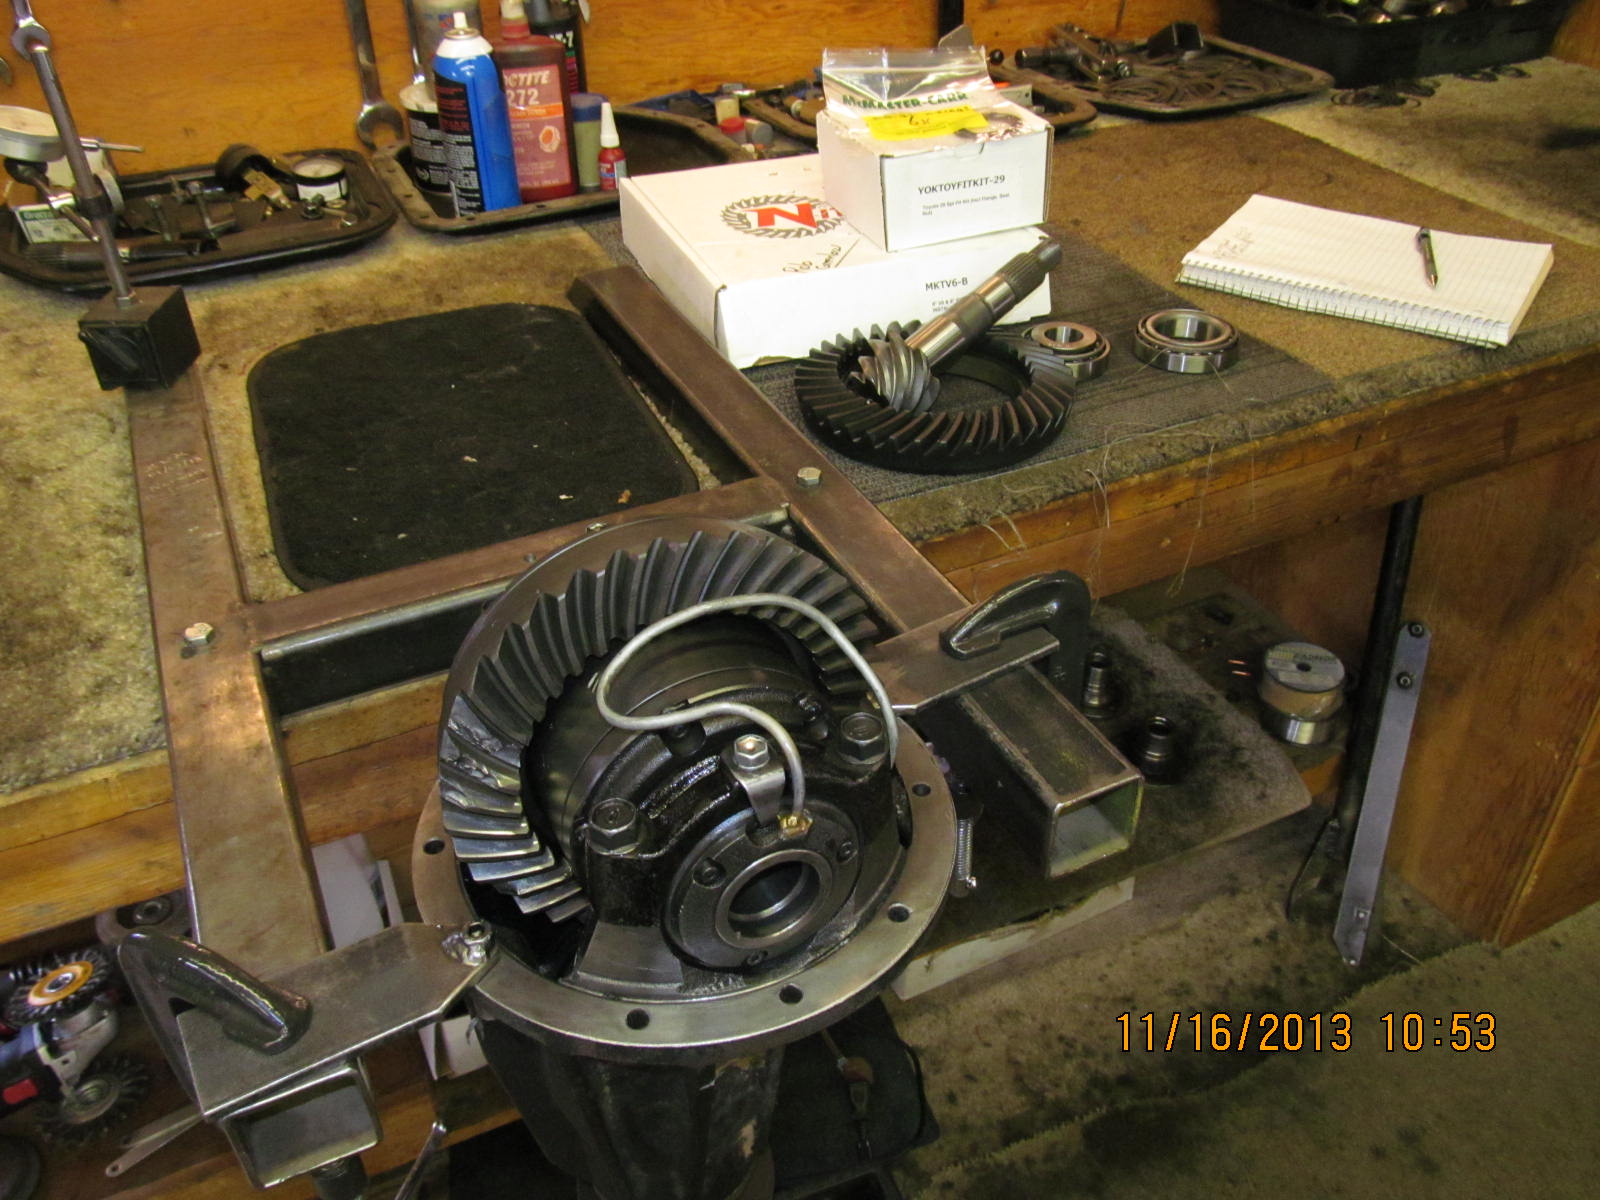
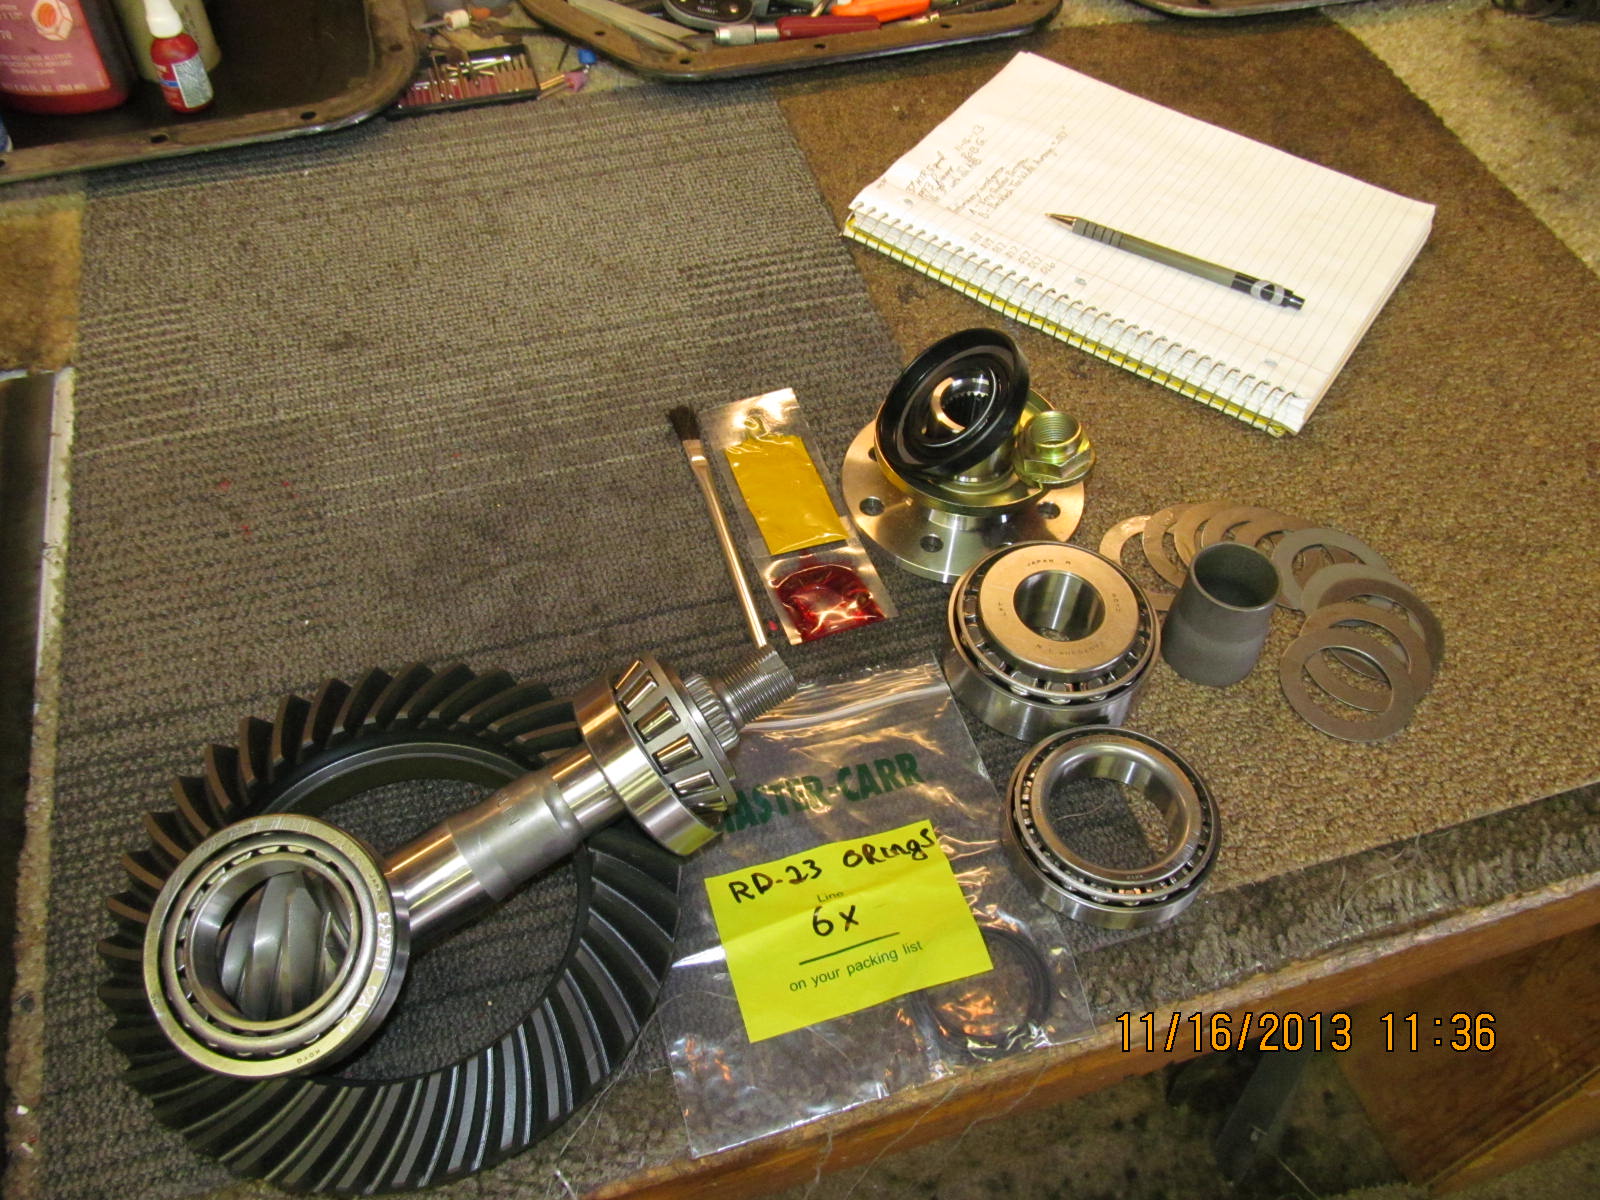
V6 3rd with the old style ARB RD23. In the back is the master install kit and the new multi-drilled flange.
The Nitro 529 and two of the bearings are going for a good cryo treatment.
|
|
|
|
|
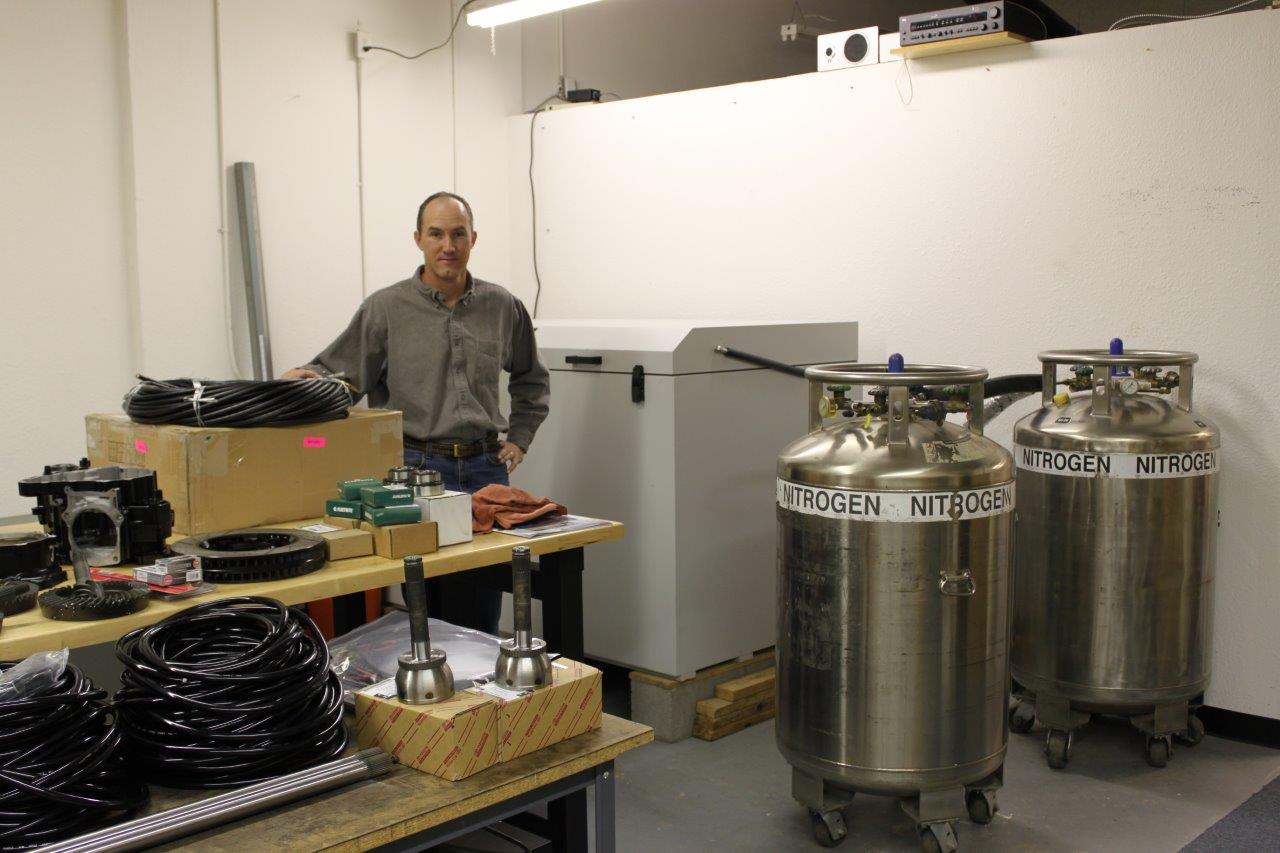
Meet Charles, owner of Croyogenics International
|
|
|
|
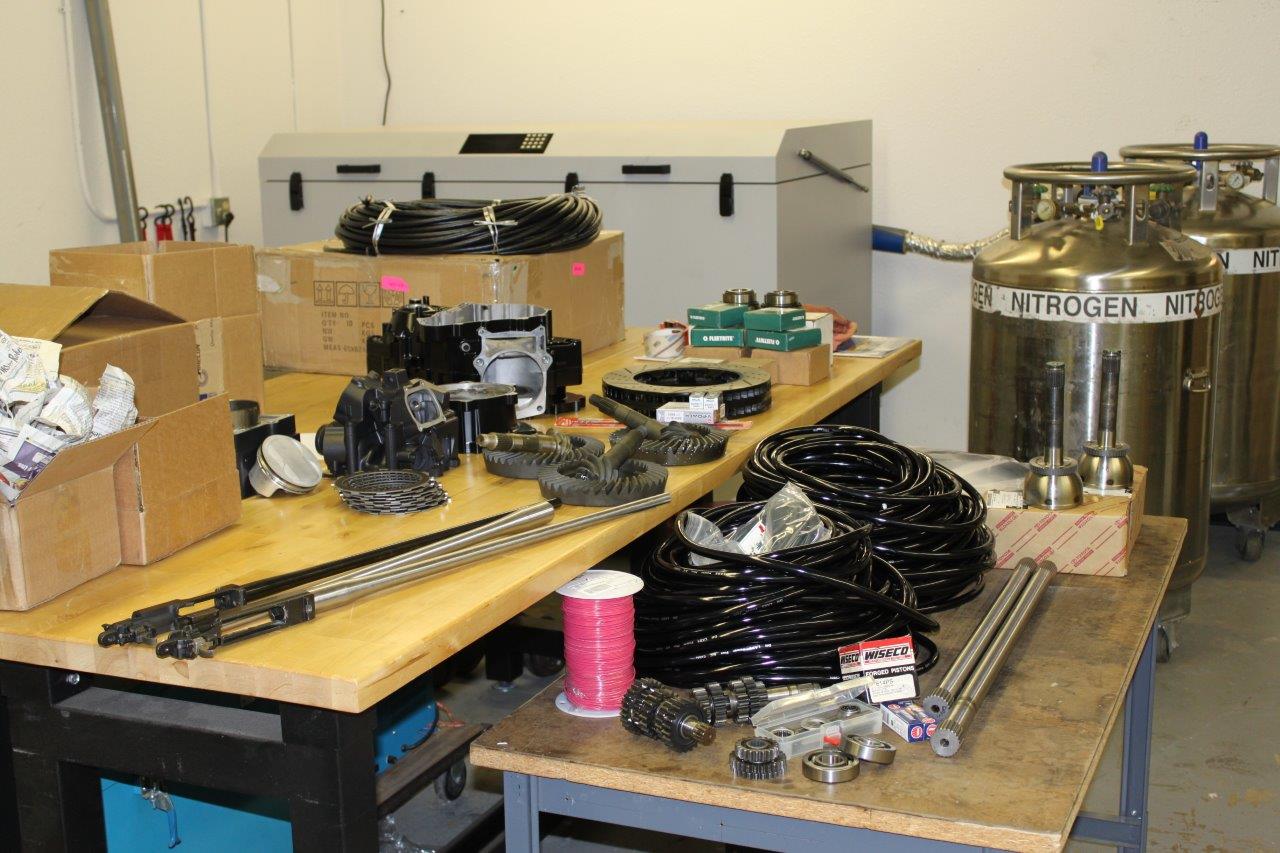
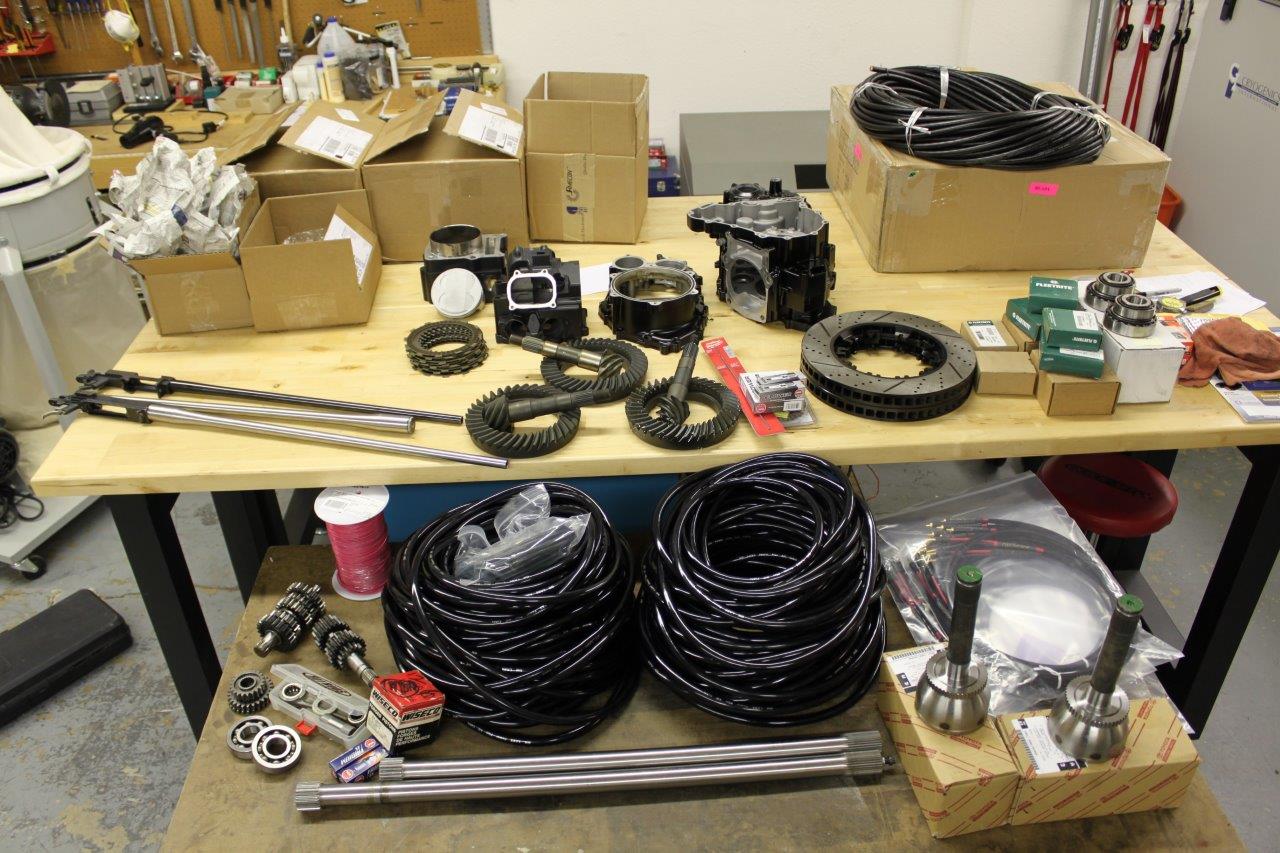
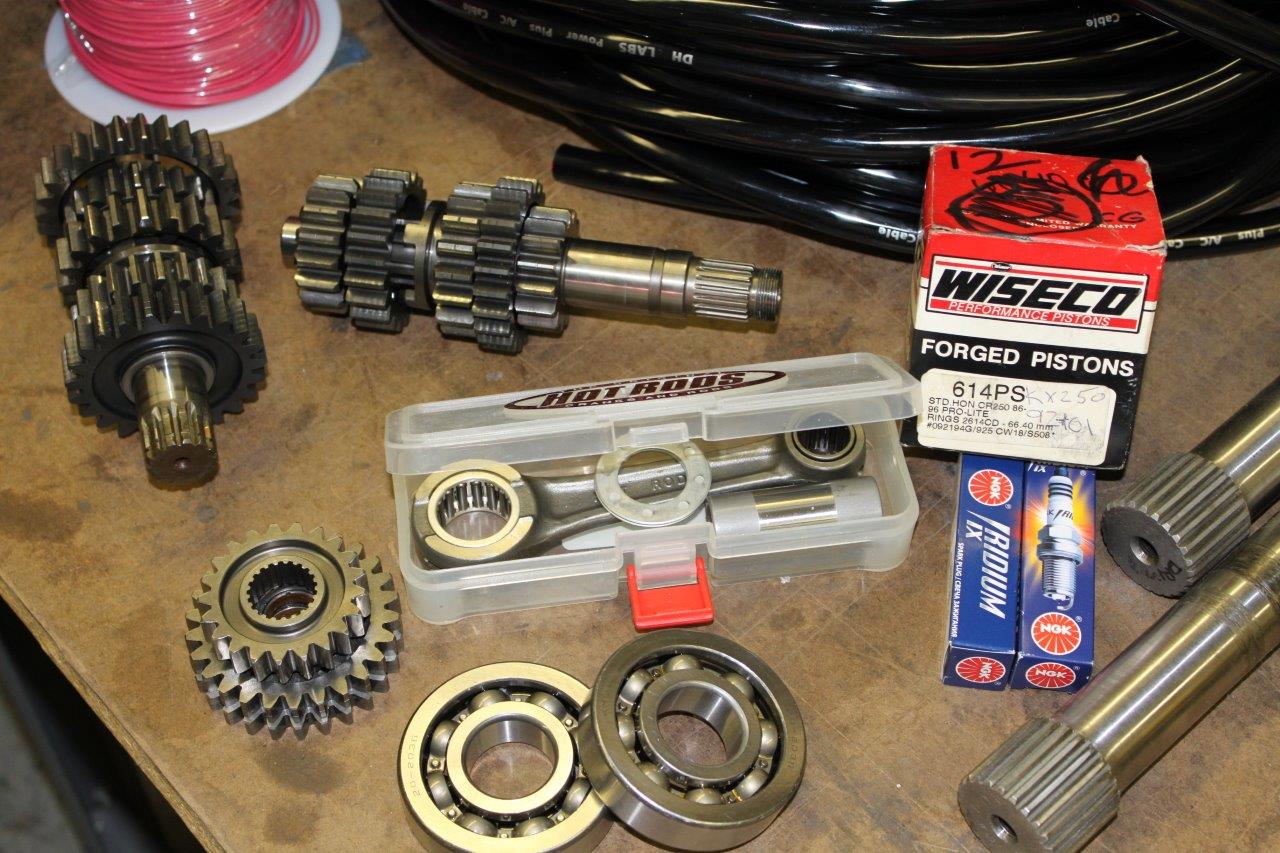
Some of the items that will get a cold shot. Cryo not only has benefits for steel. It also improves the
properties of copper wire, clutch plates, aluminum forged pistons,etc etc etc.
|
|
|
|
|
|
|
|
|
|
Even the spark from spark plugs can benefit Youtube Video
|
|
|

|
|
I dropped off Rob's 529 ring/pinion and 2 bearings.
|
|
|
|
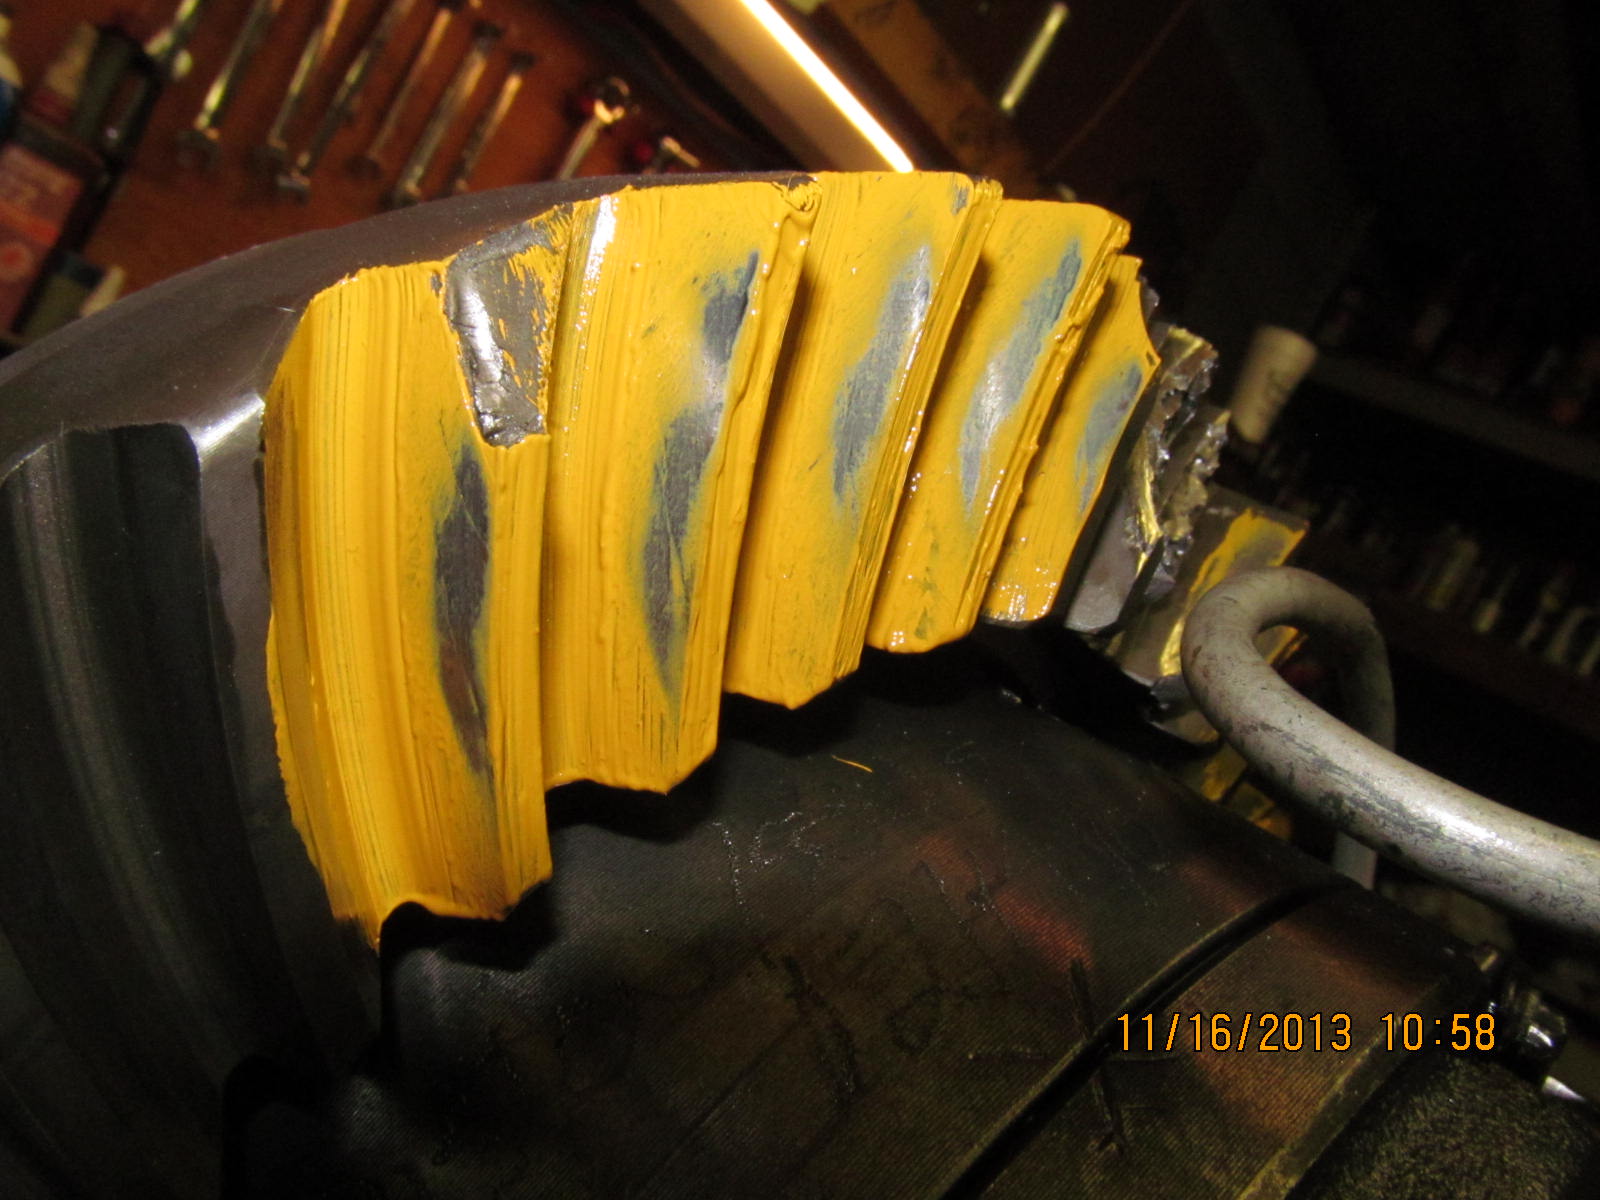
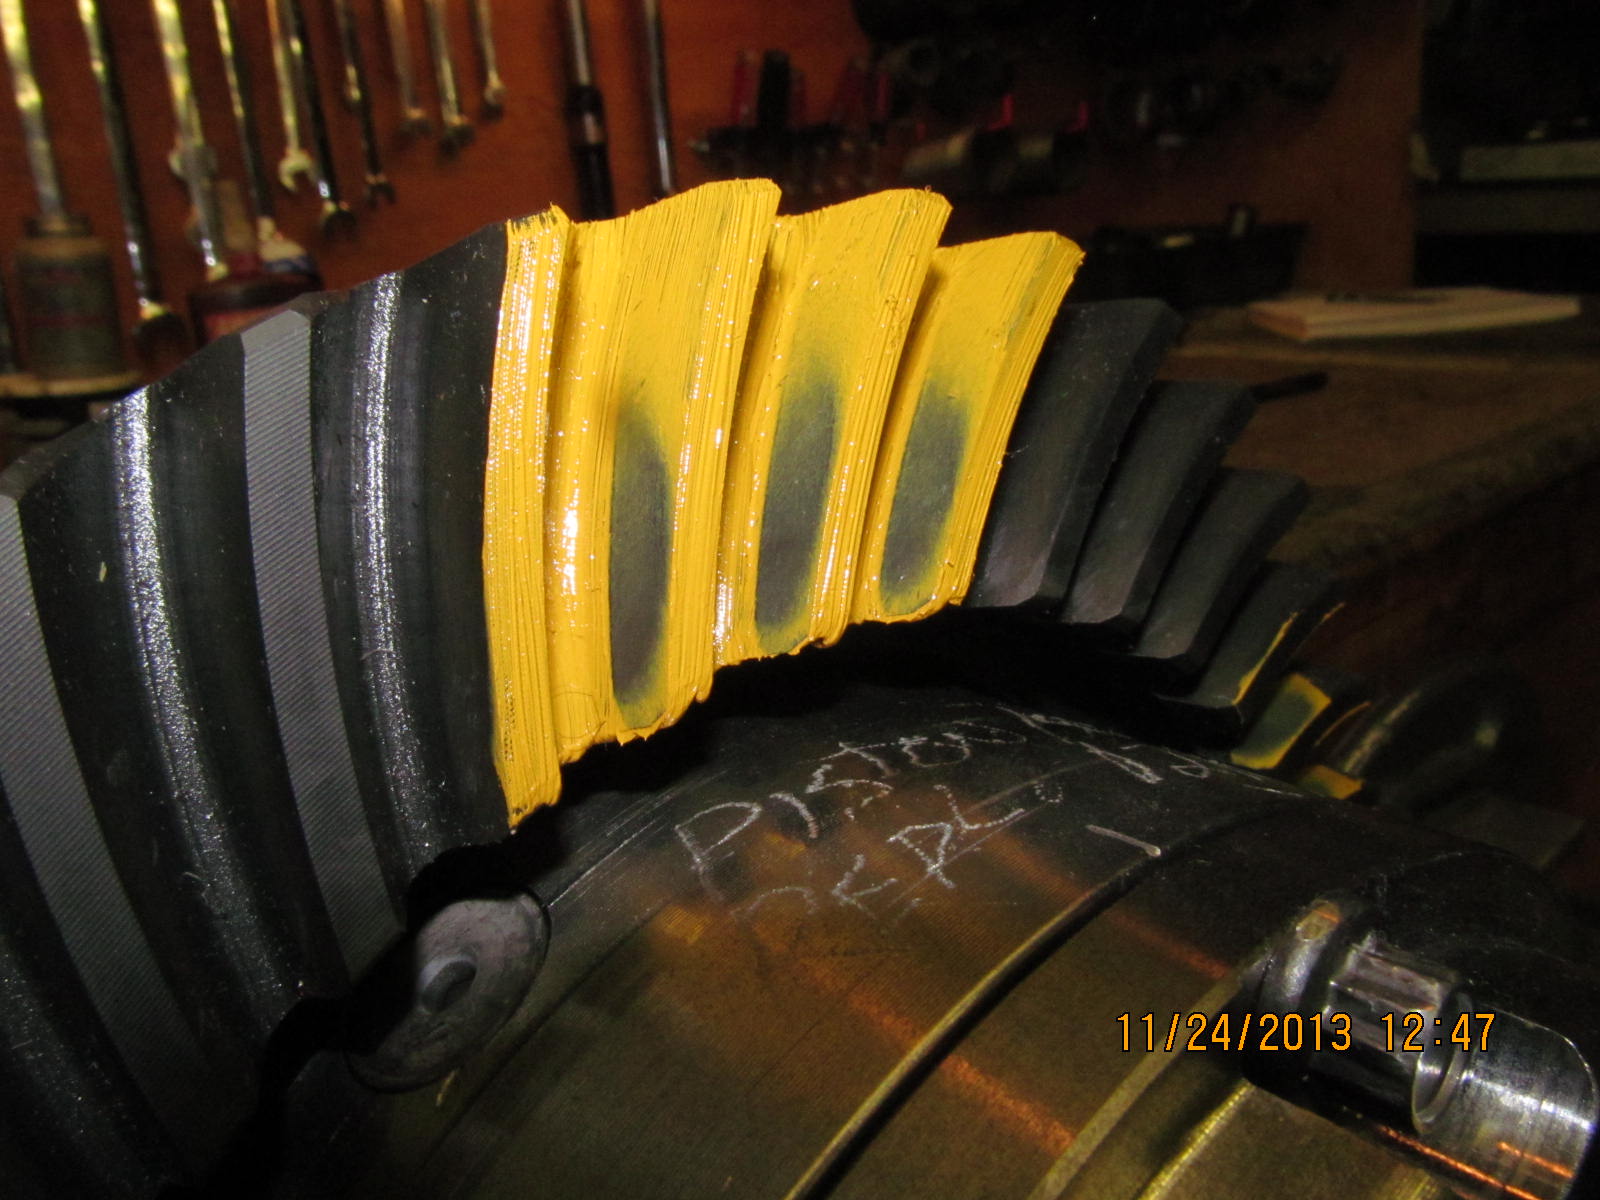
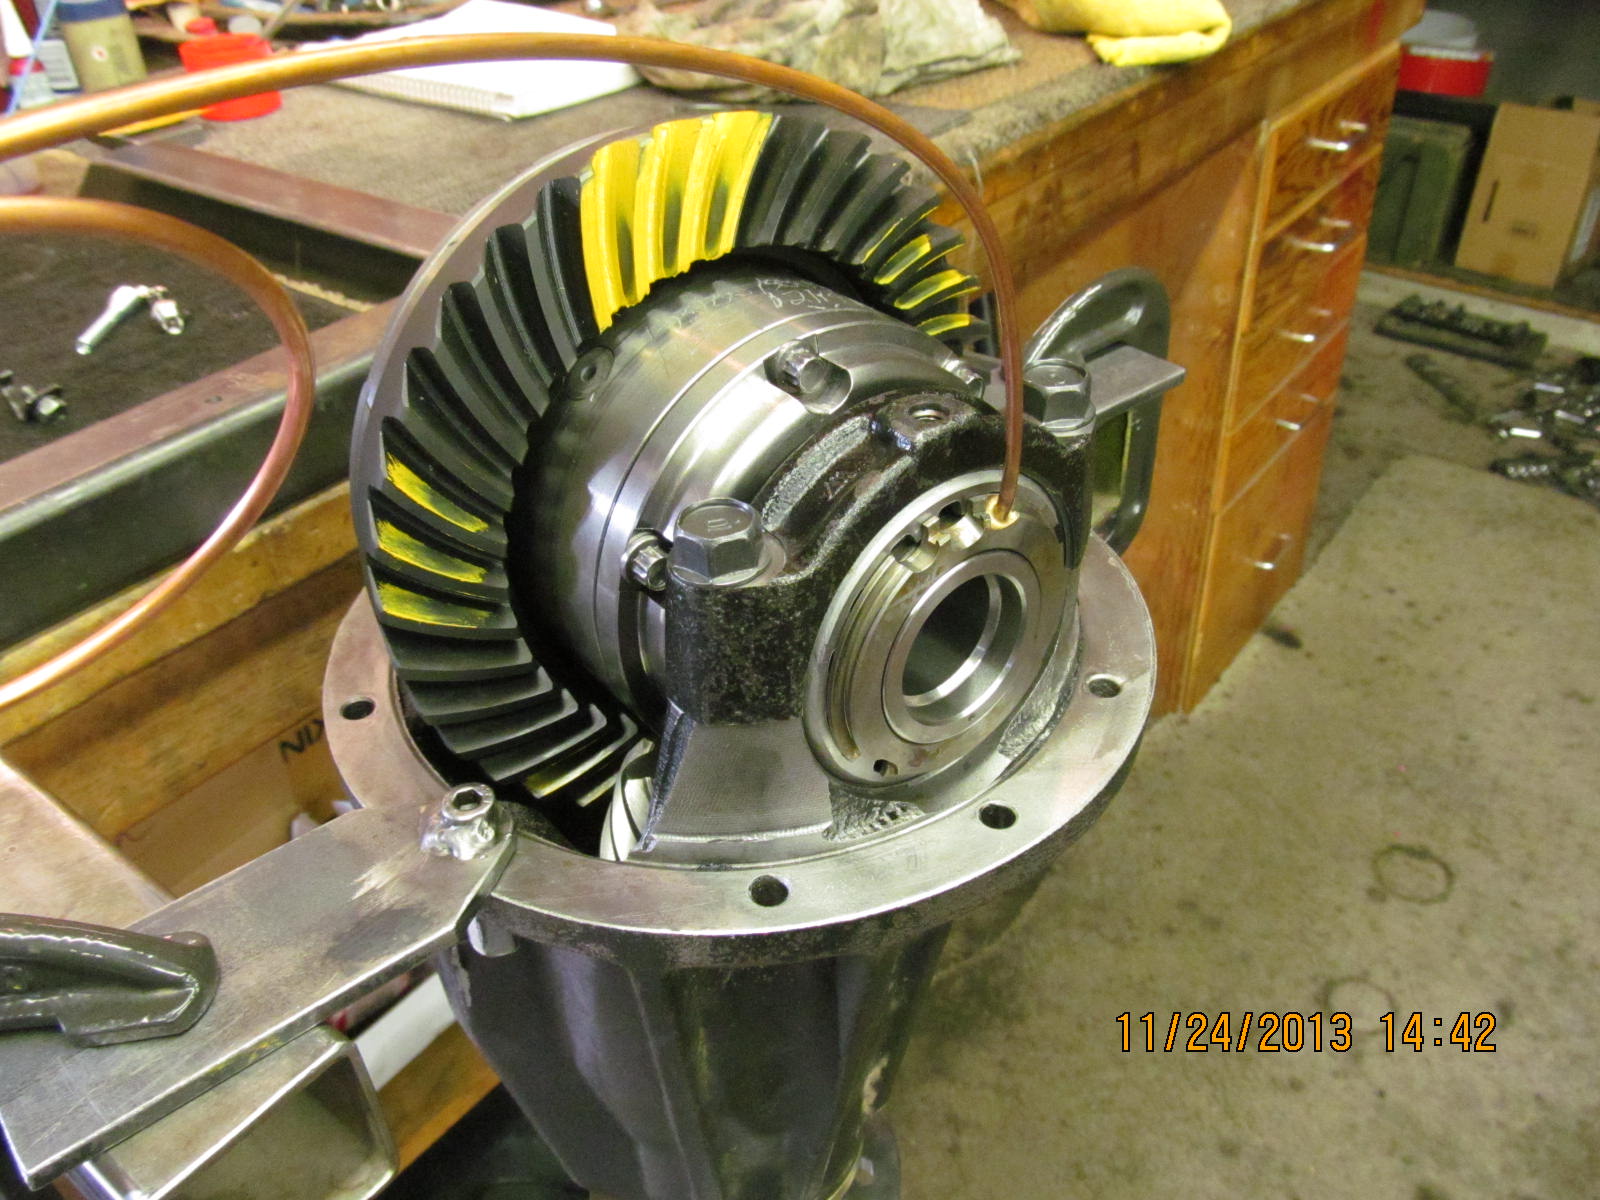
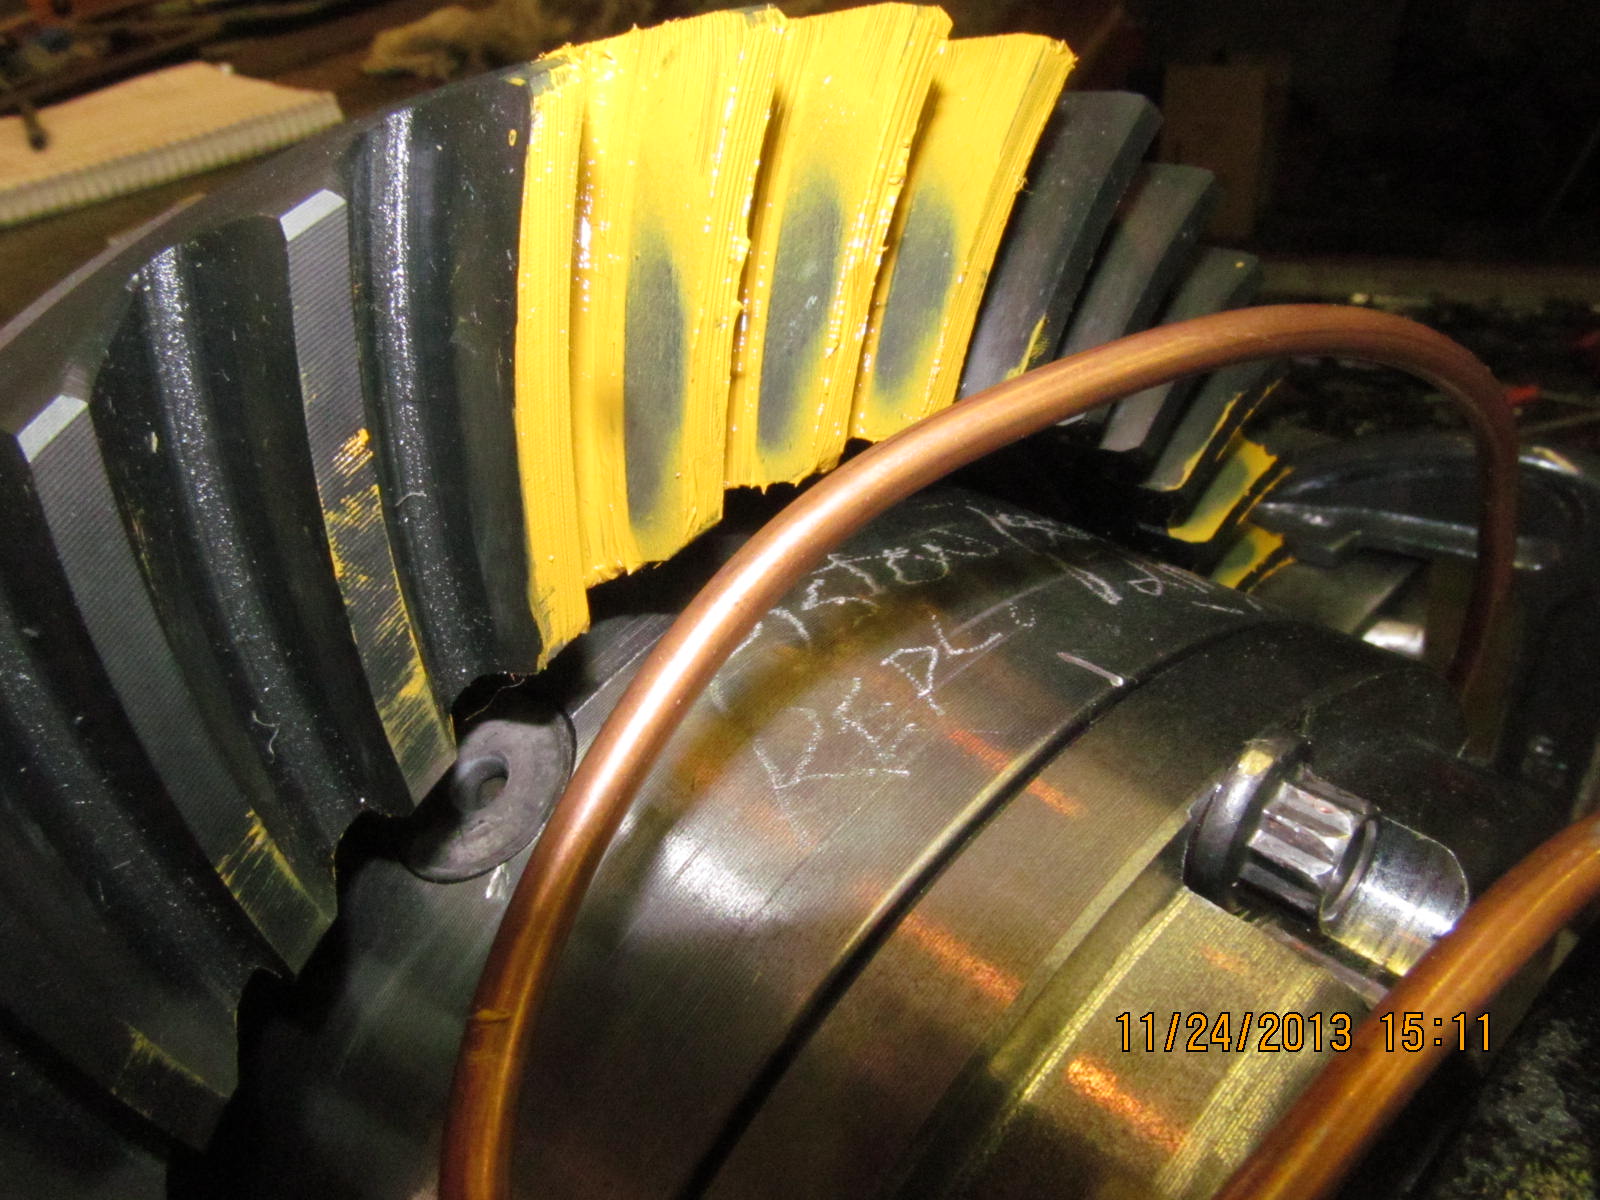
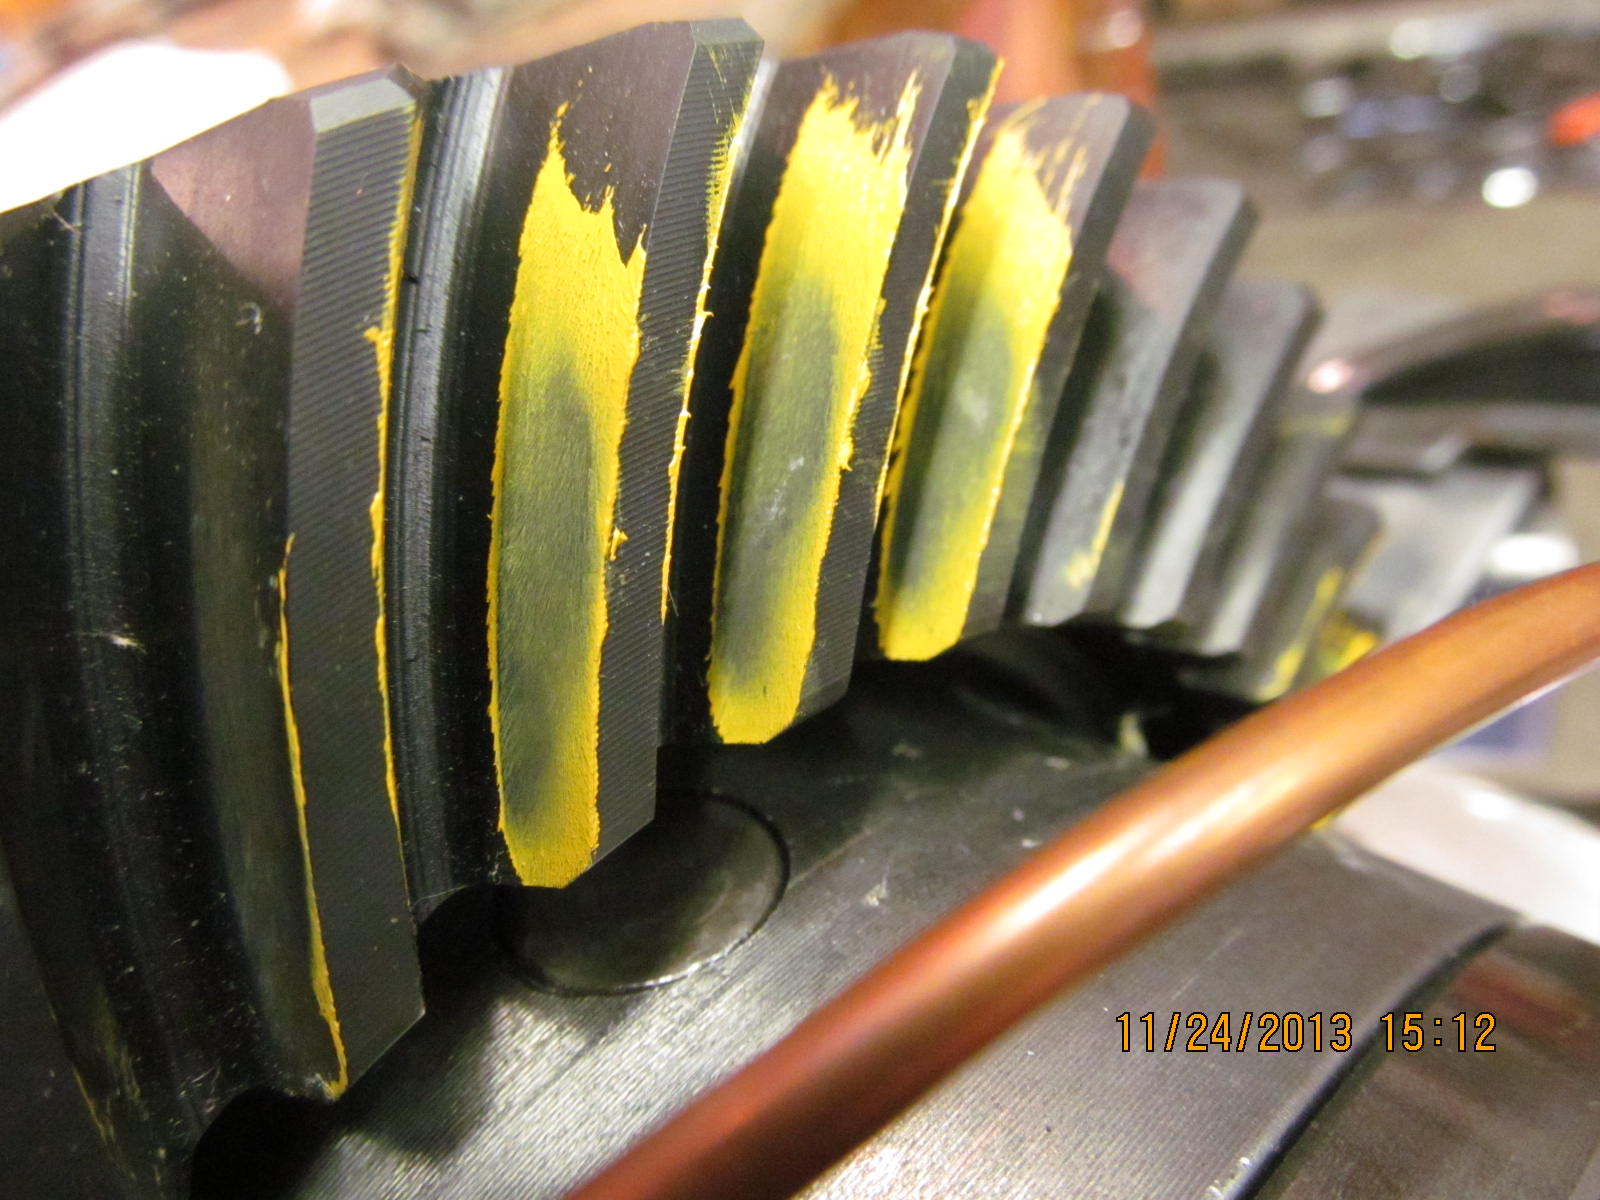
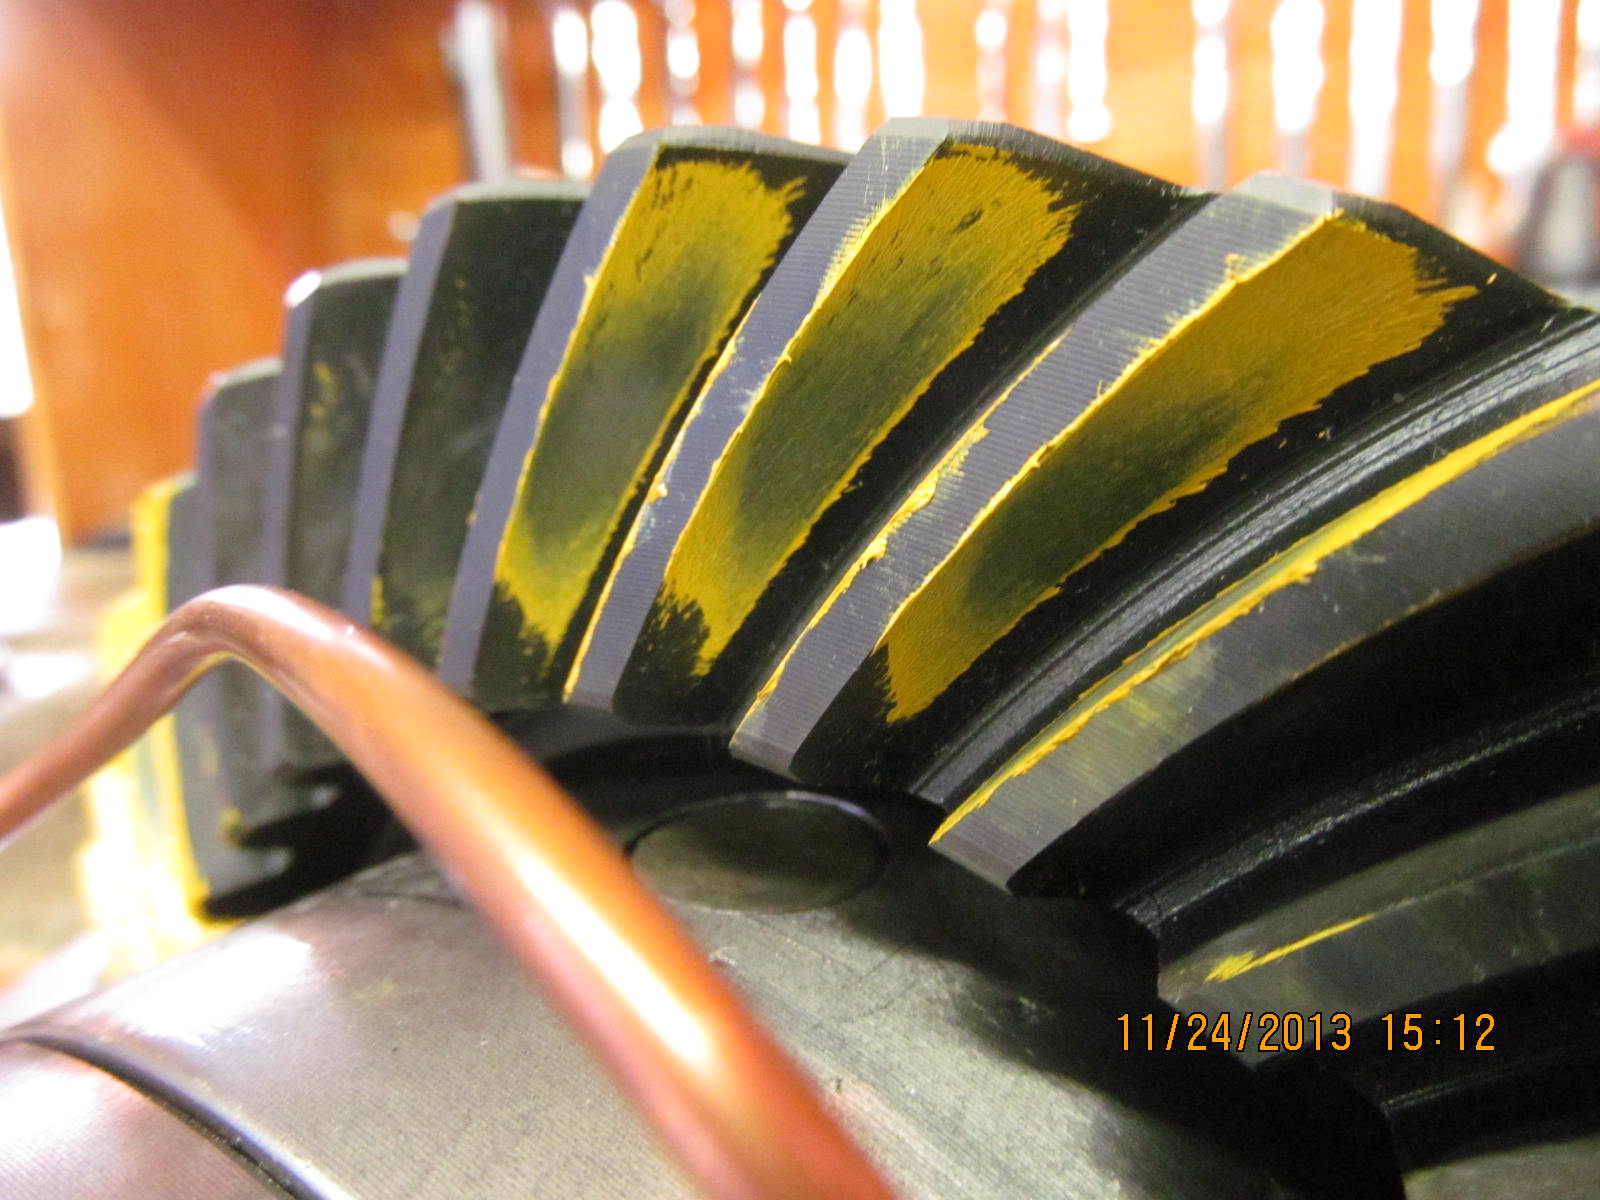
While the parts were getting a cryo, now is good time to inspect the broken teeth. The teeth on the pinion were ok...but the
ring gear teeth were a different story. The paint does not lie. This gear was set far too shallow.
|
|
|
|
|
|
|
|

|
|
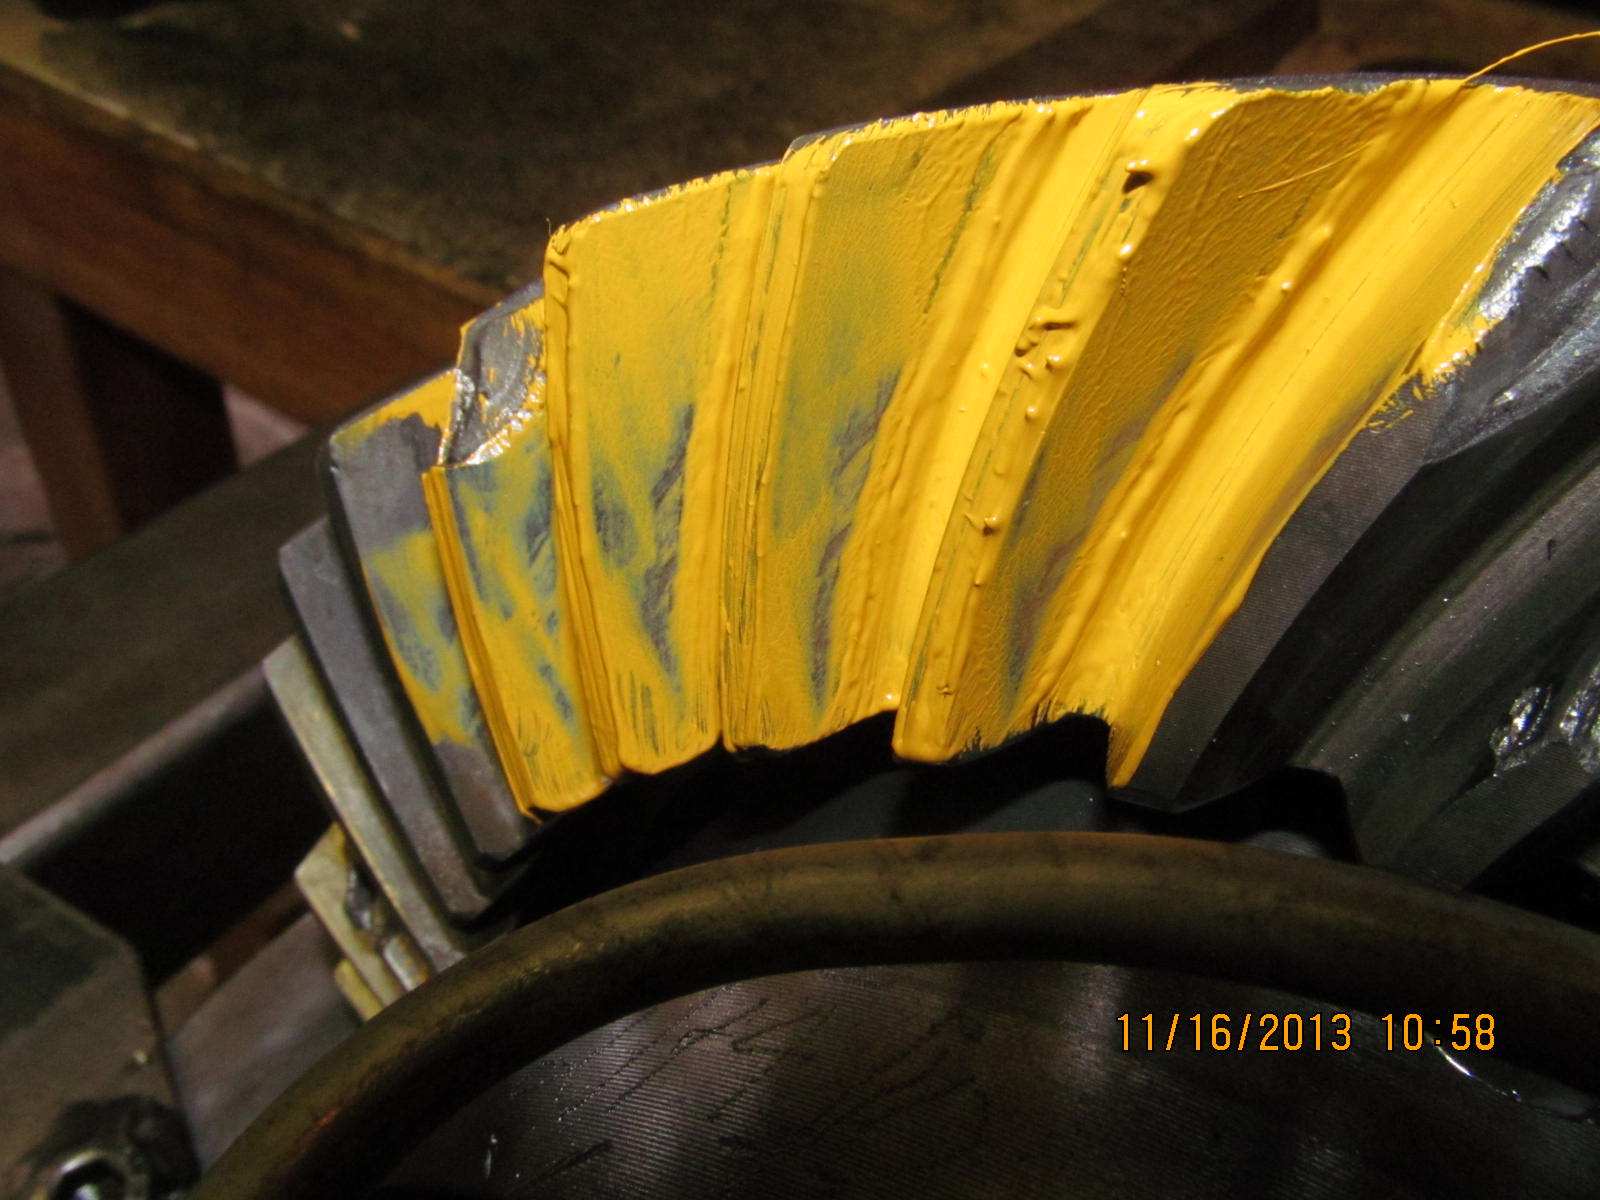
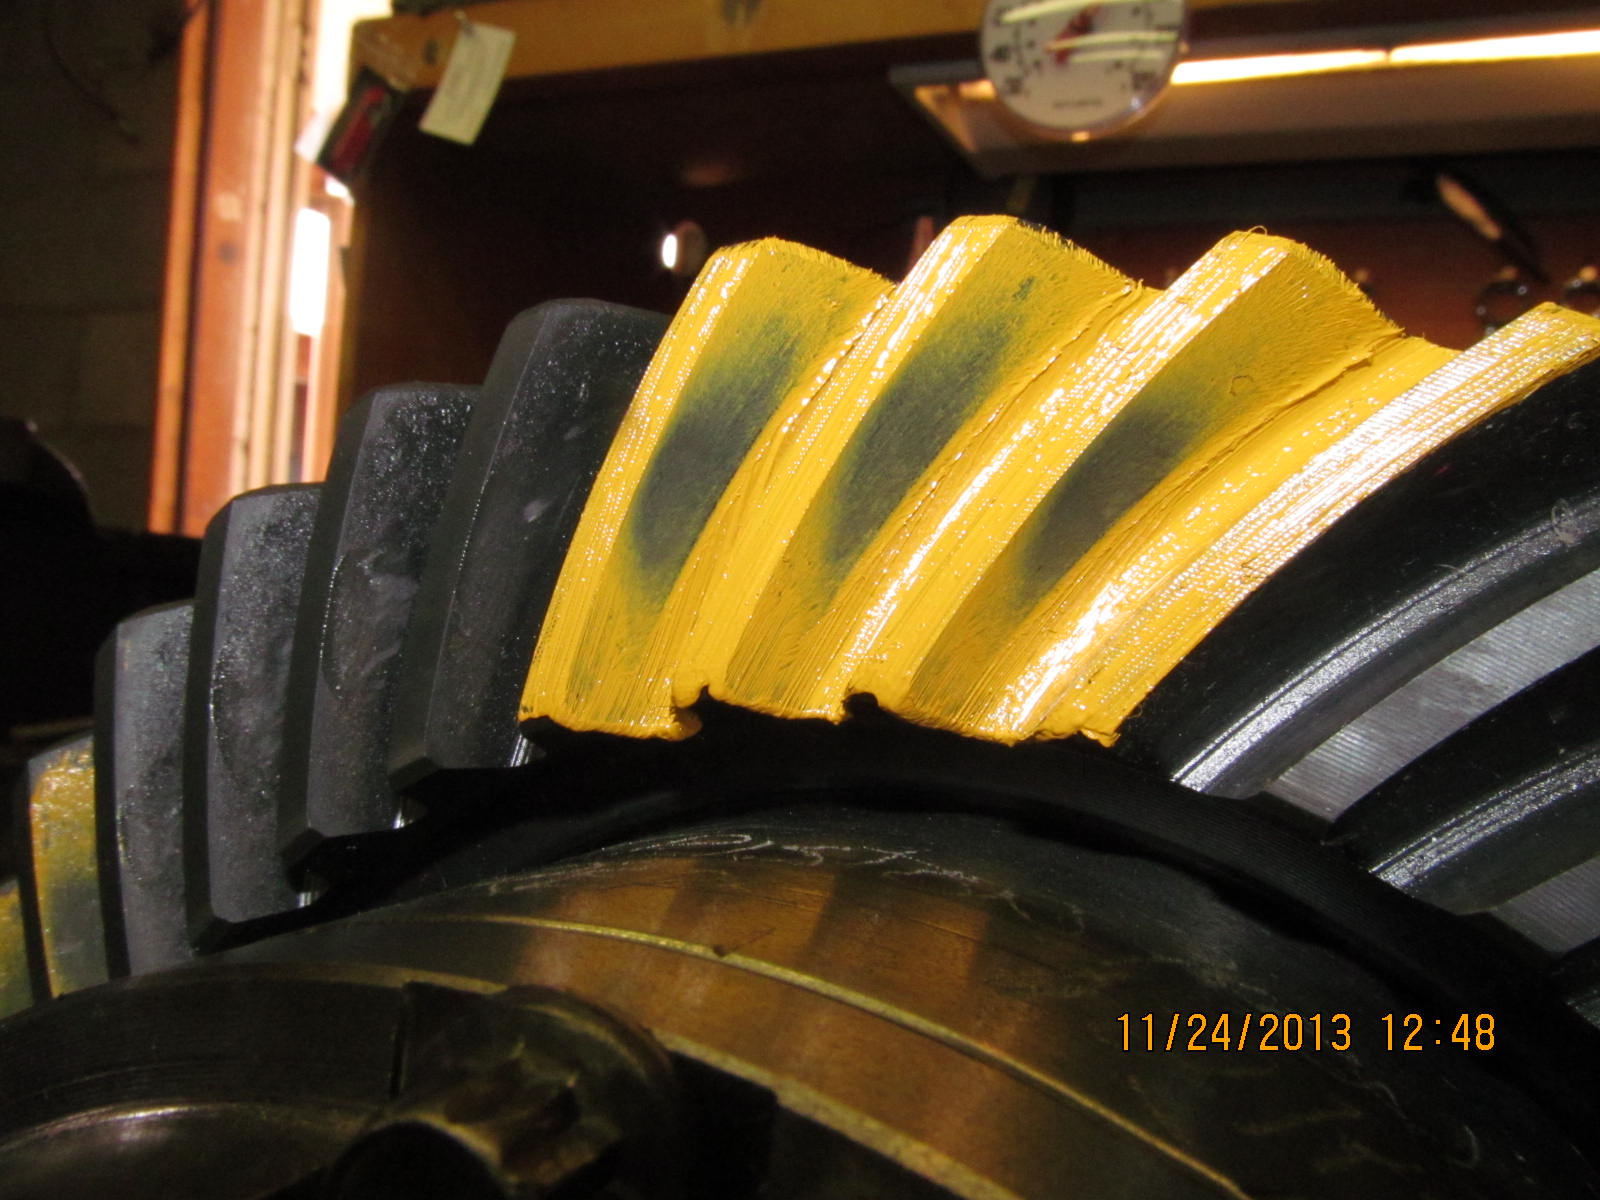
Deep in the pinion tooth agrees with the shallow on the ring tooth.
|
|
|
|
|
The cryo parts on the left are back.
|
|
|
|
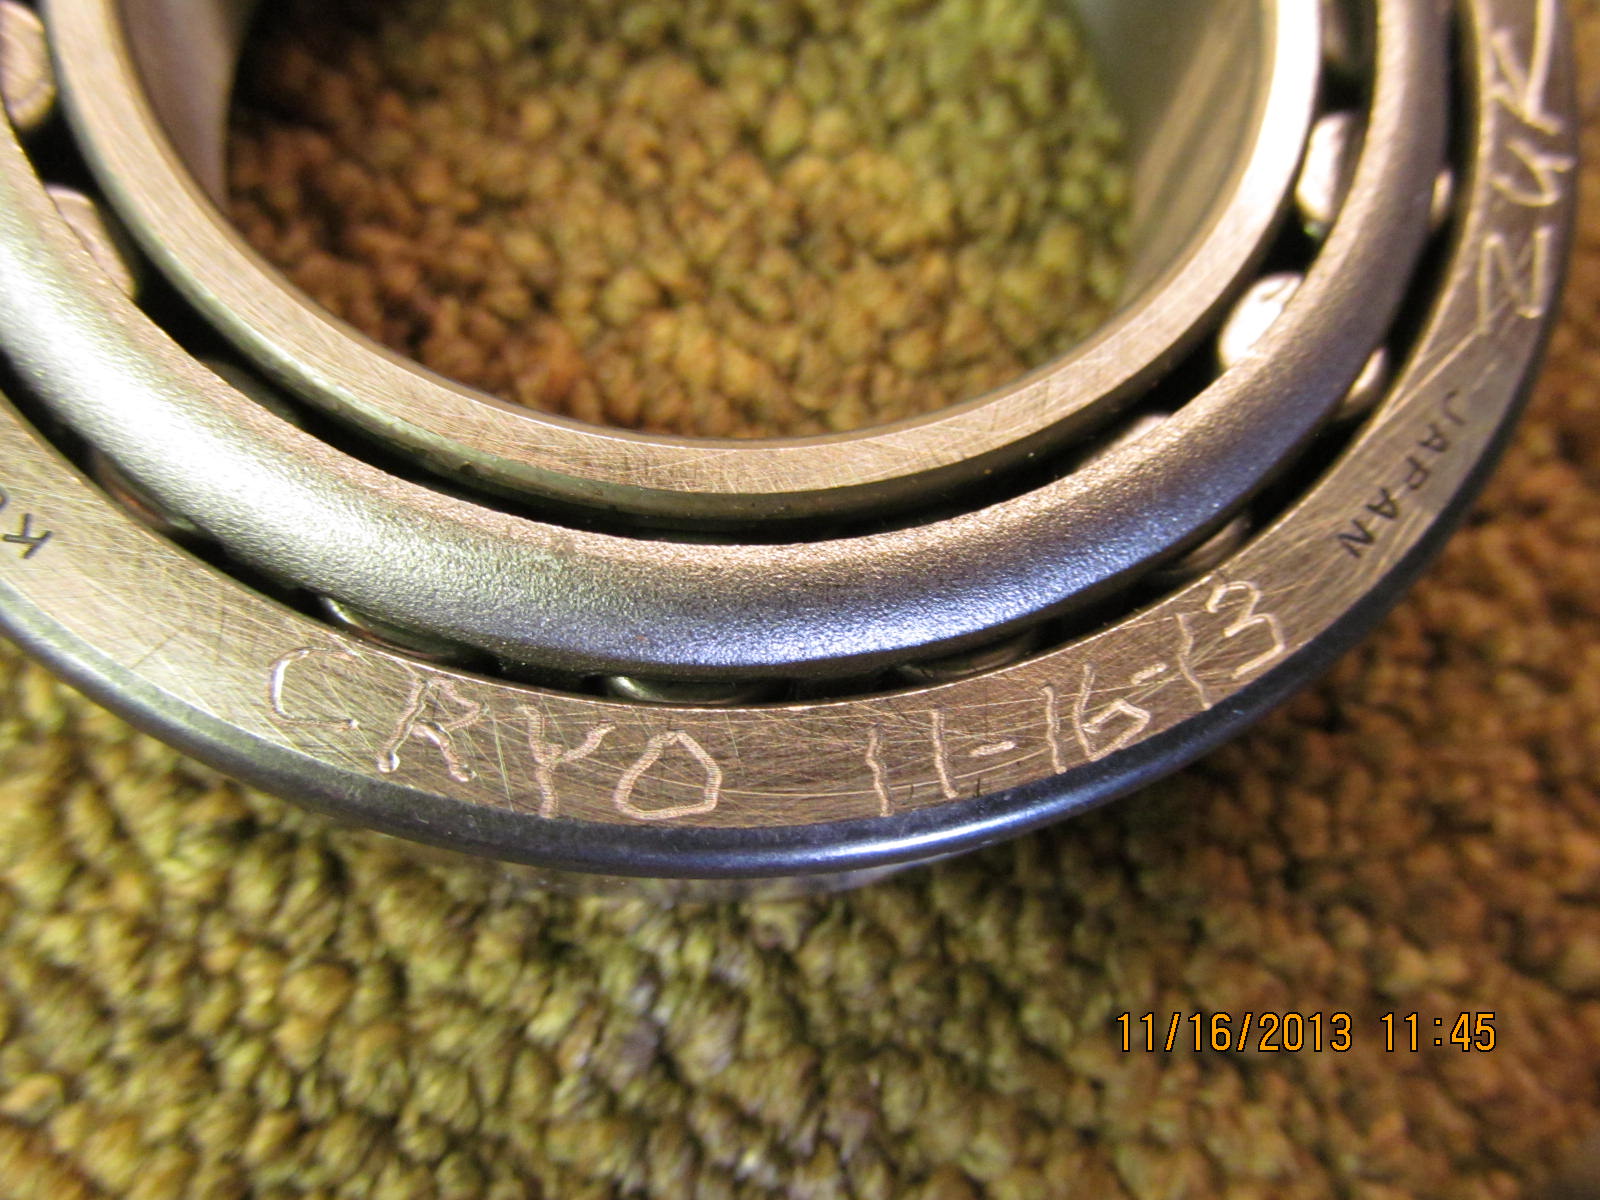
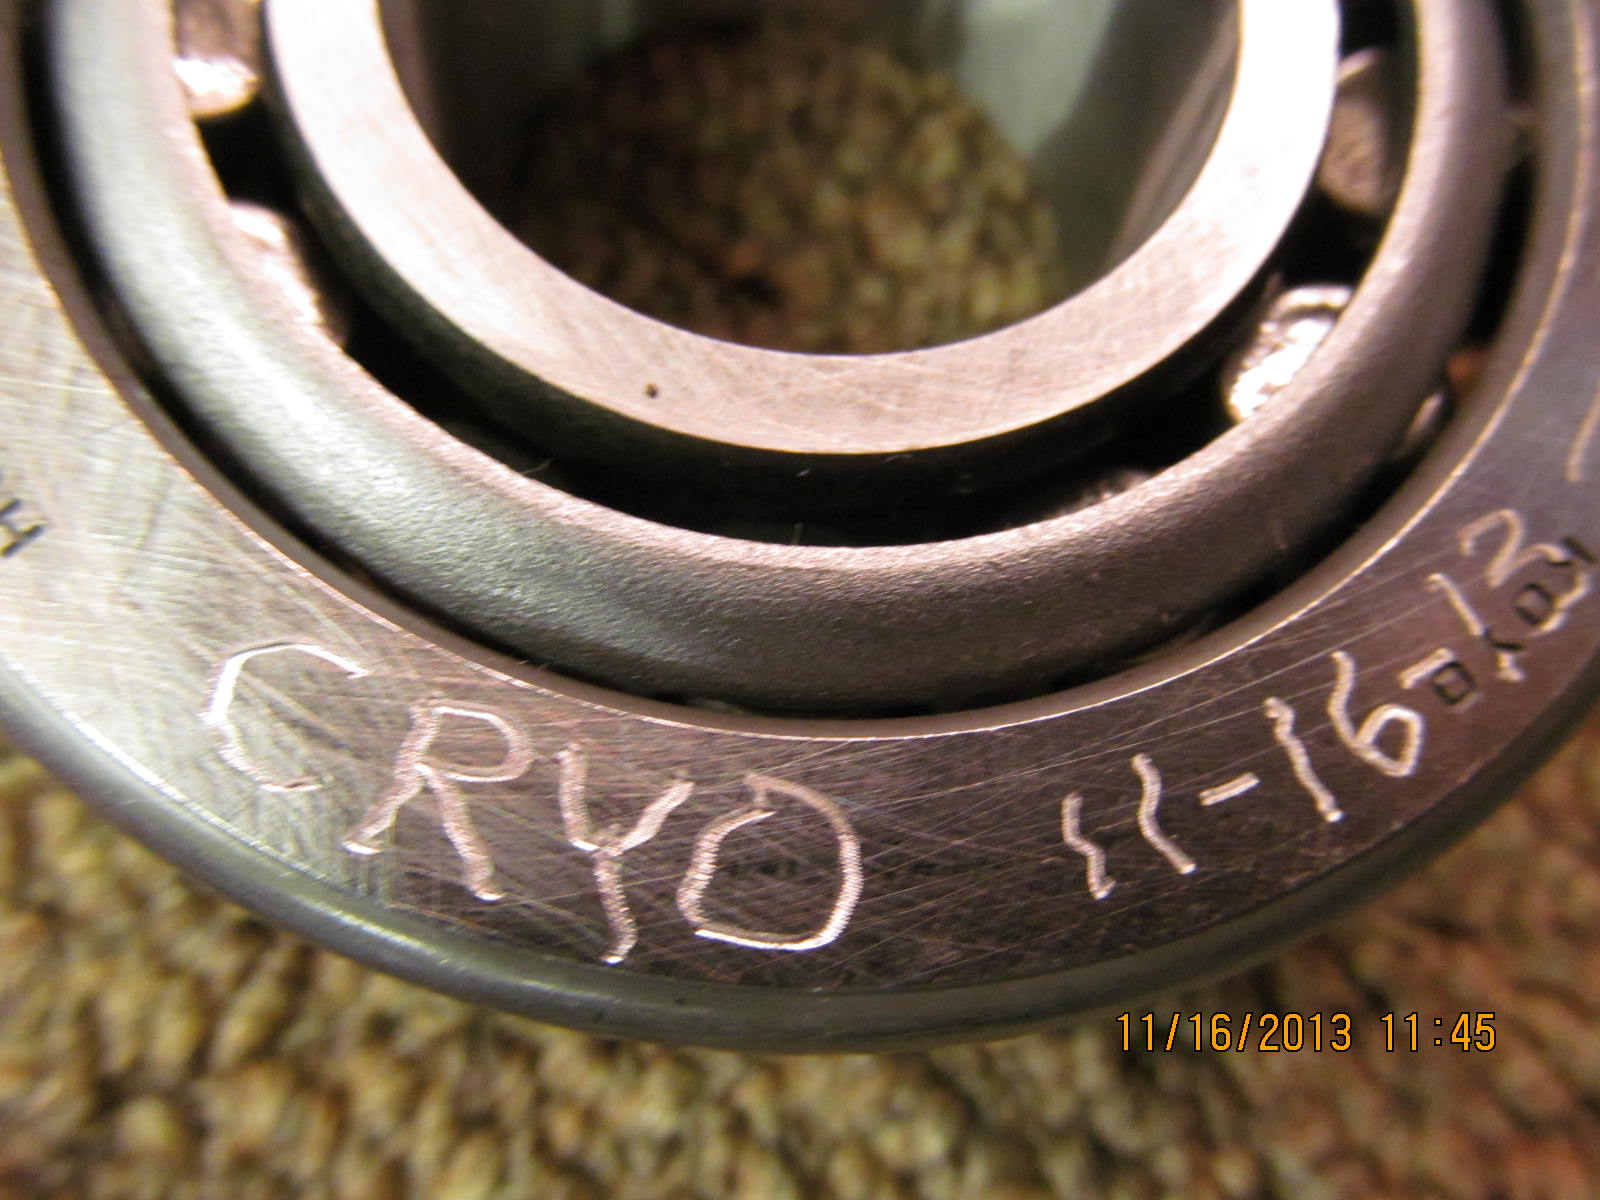
I chose to cryo only one carrier bearing and race. The bearing closest to the ring gear sees the most strain. The dremel tool
easily engraved the cryo ones in order to 100% ID them.
|
|
|
|
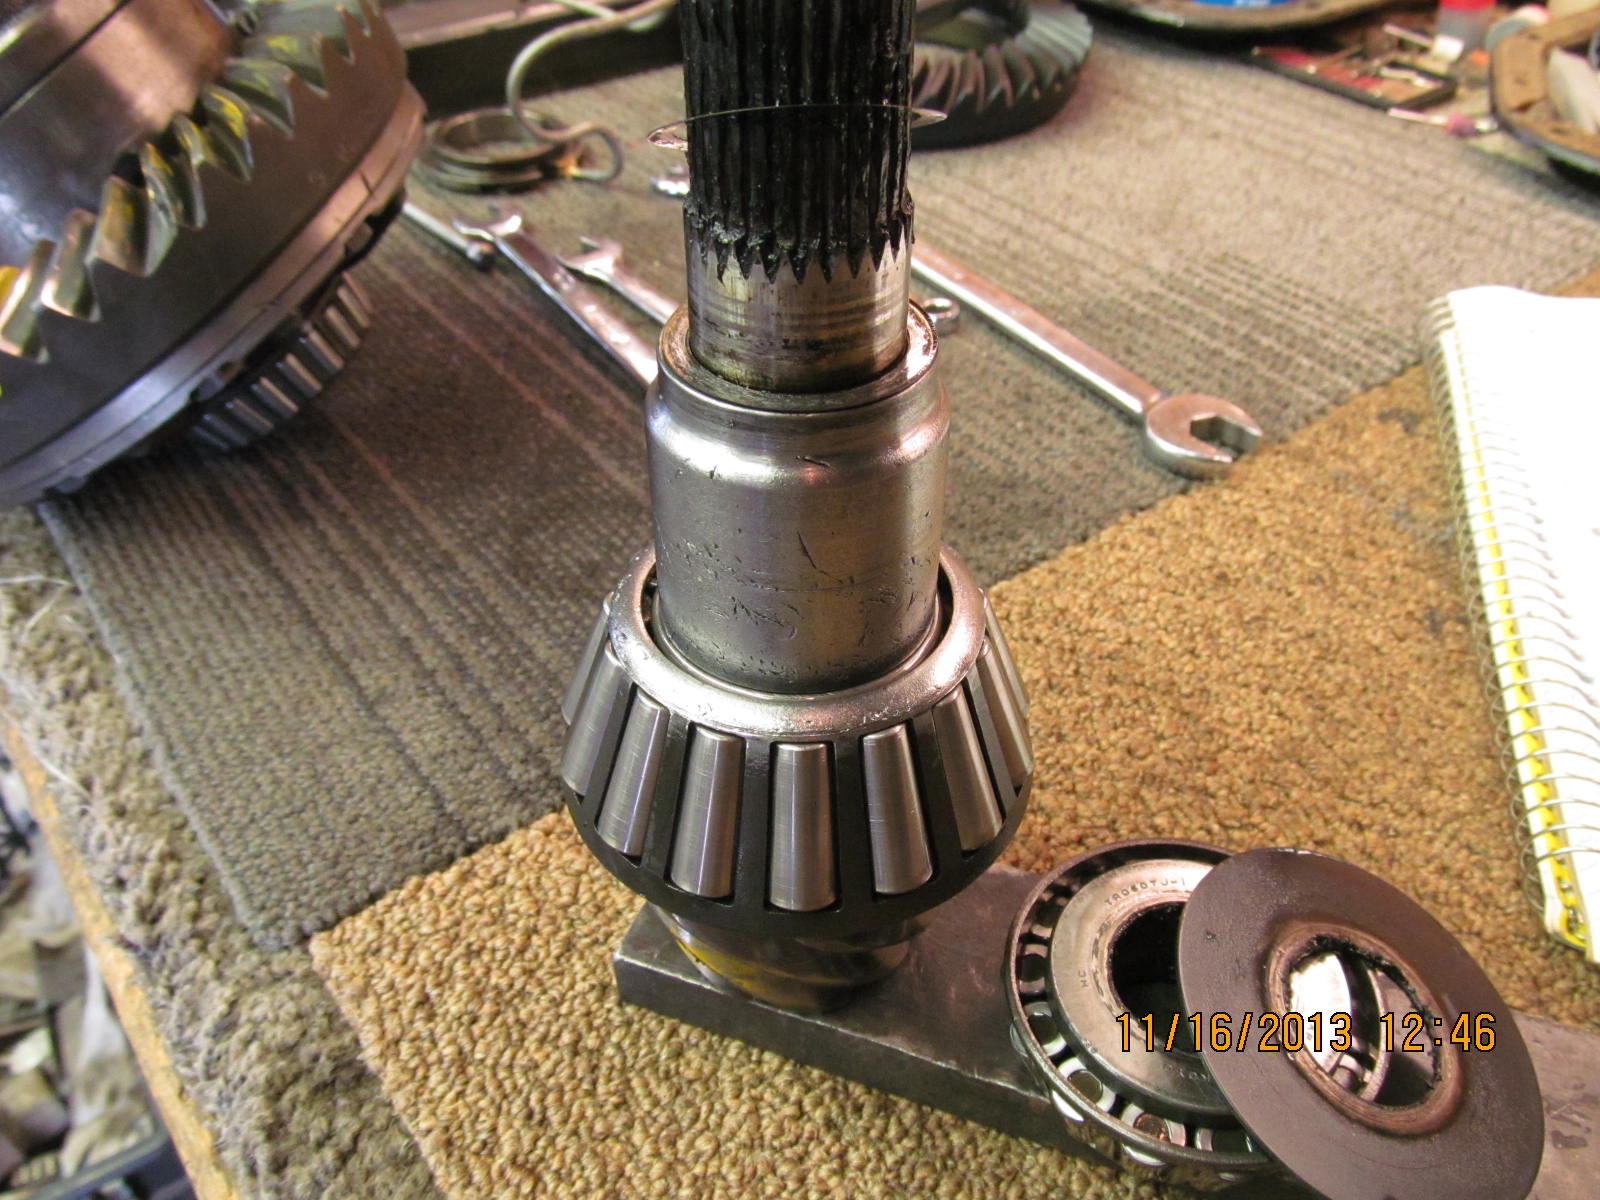
This is the small outer pinion bearing and seems to wear out much faster than the monster inner bearing. Cryo to this one gives
longer bearing life.
|
|
|
|
|
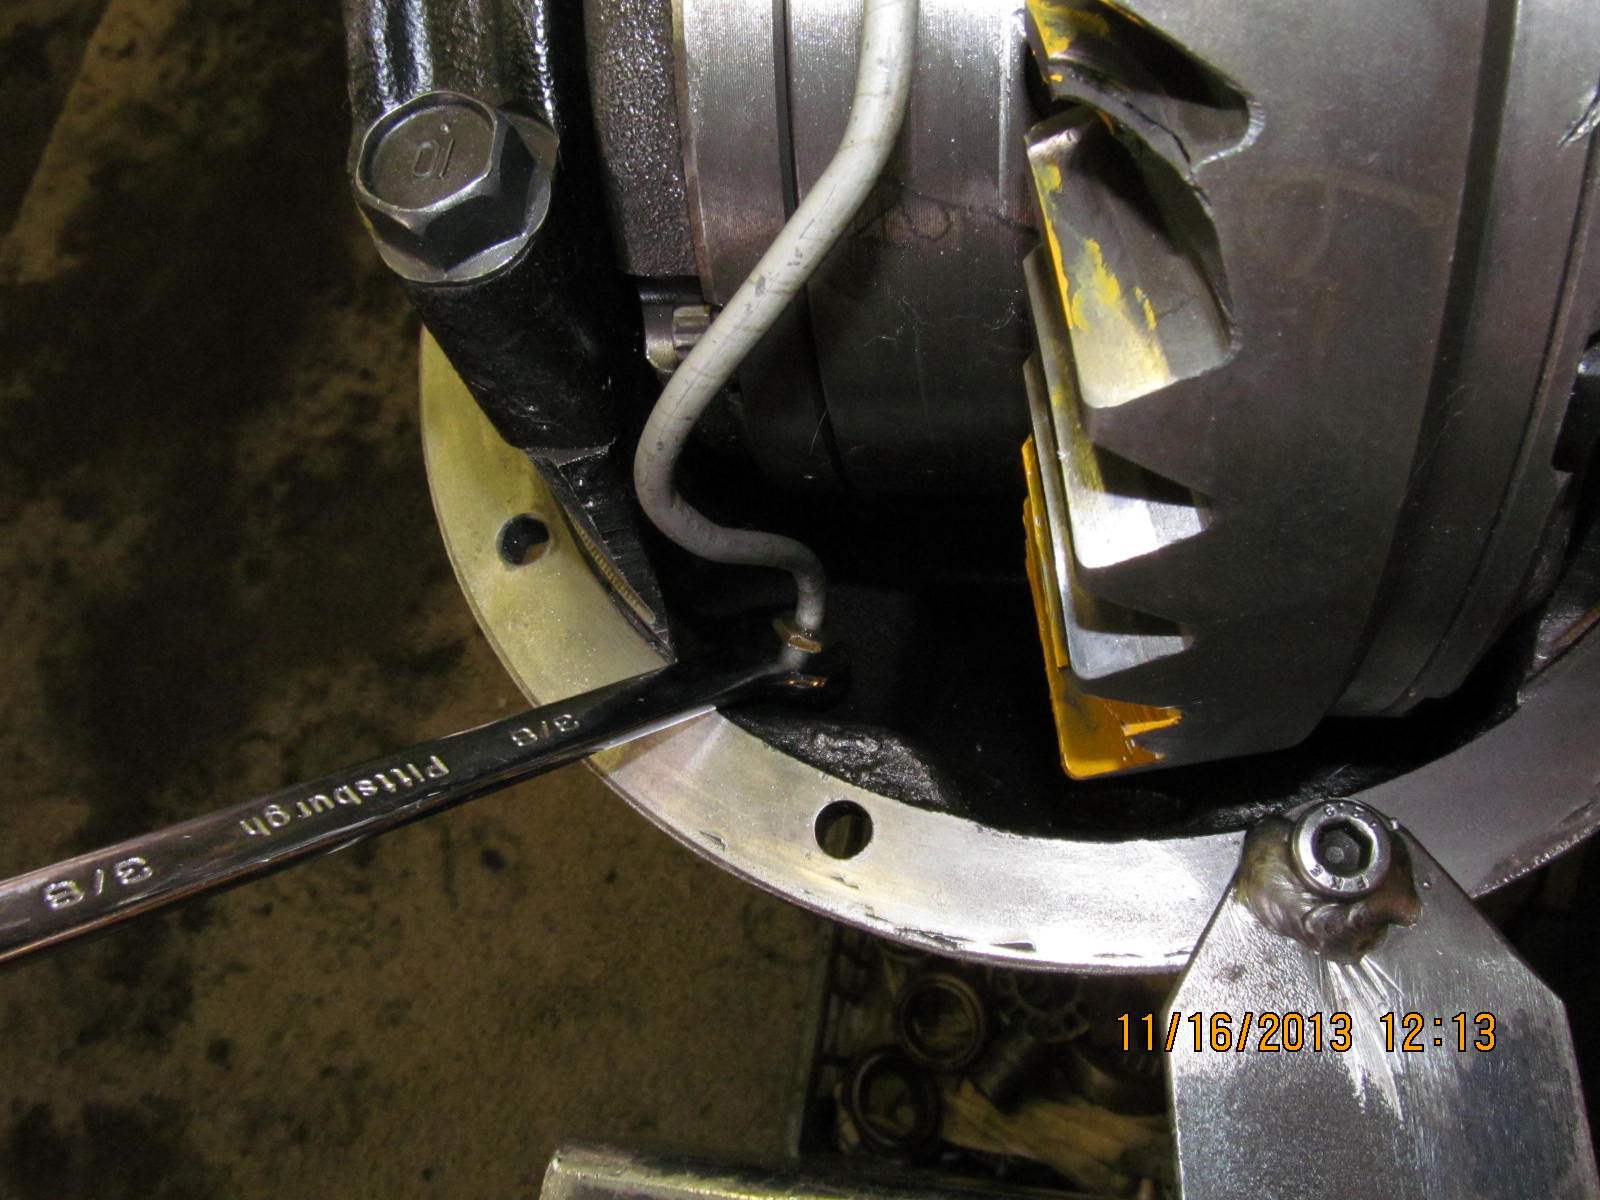
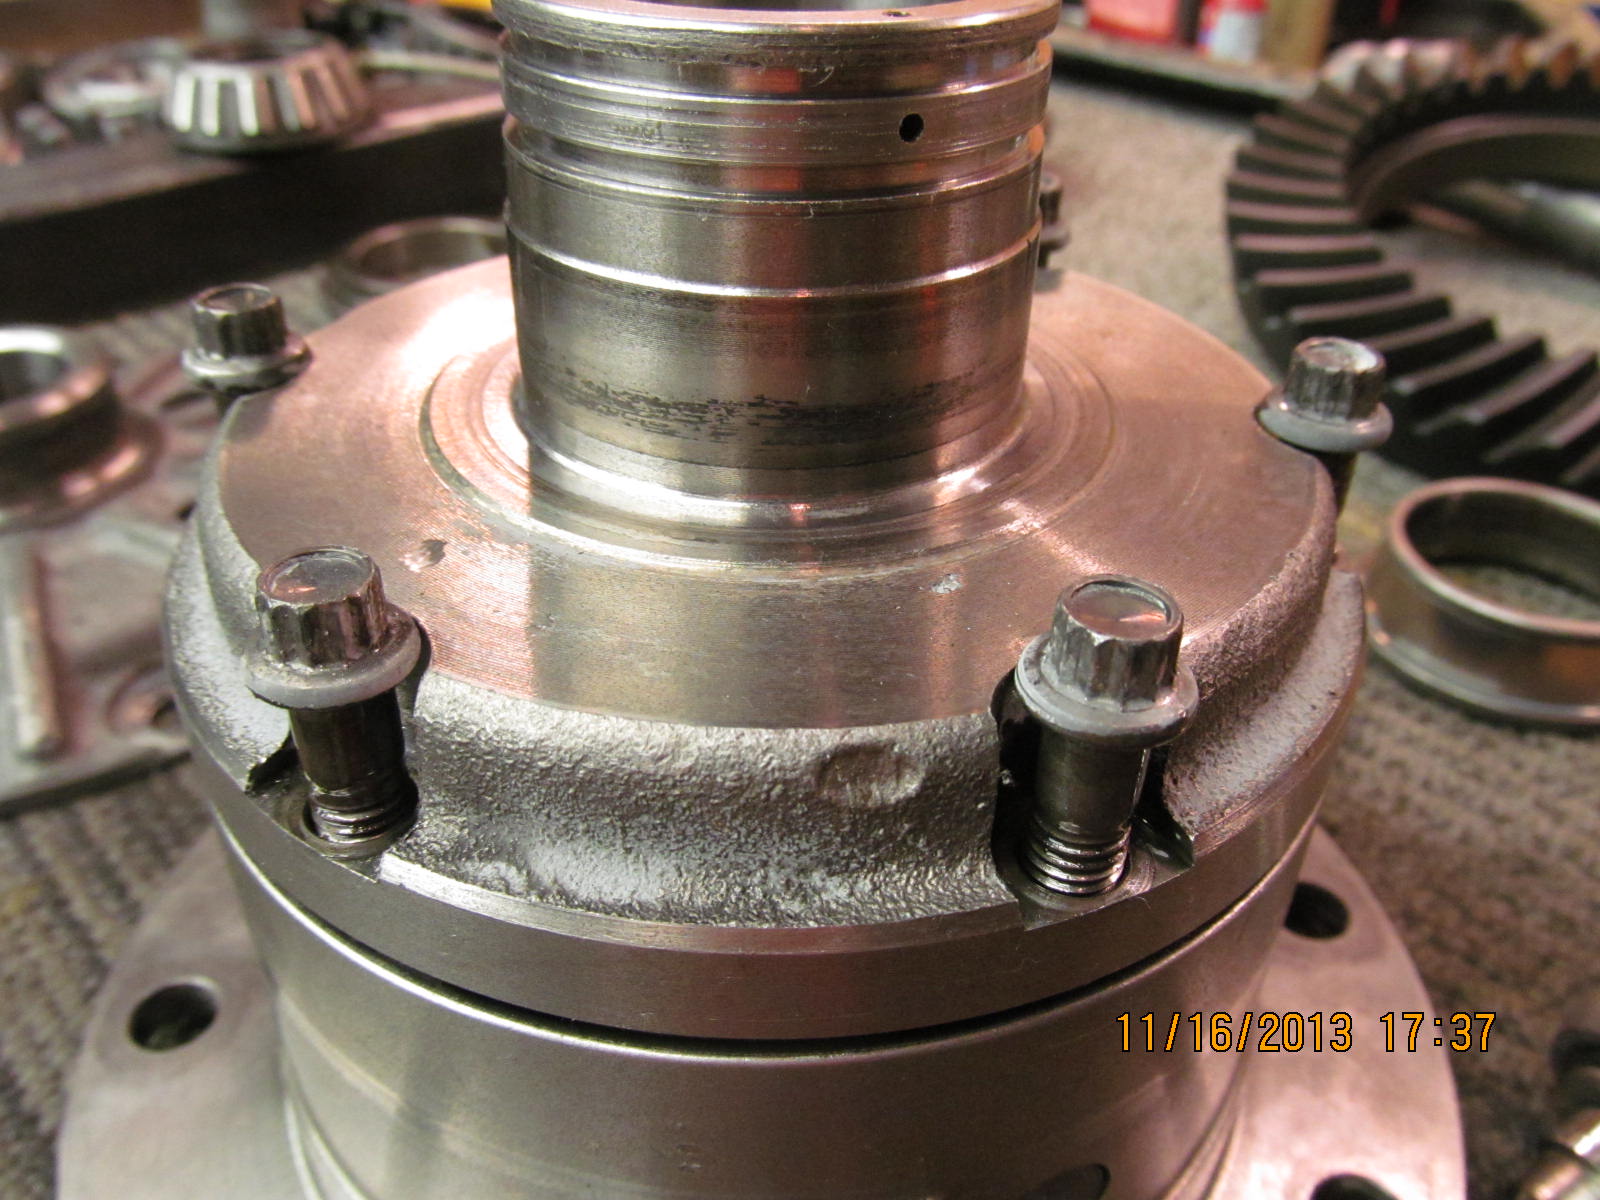
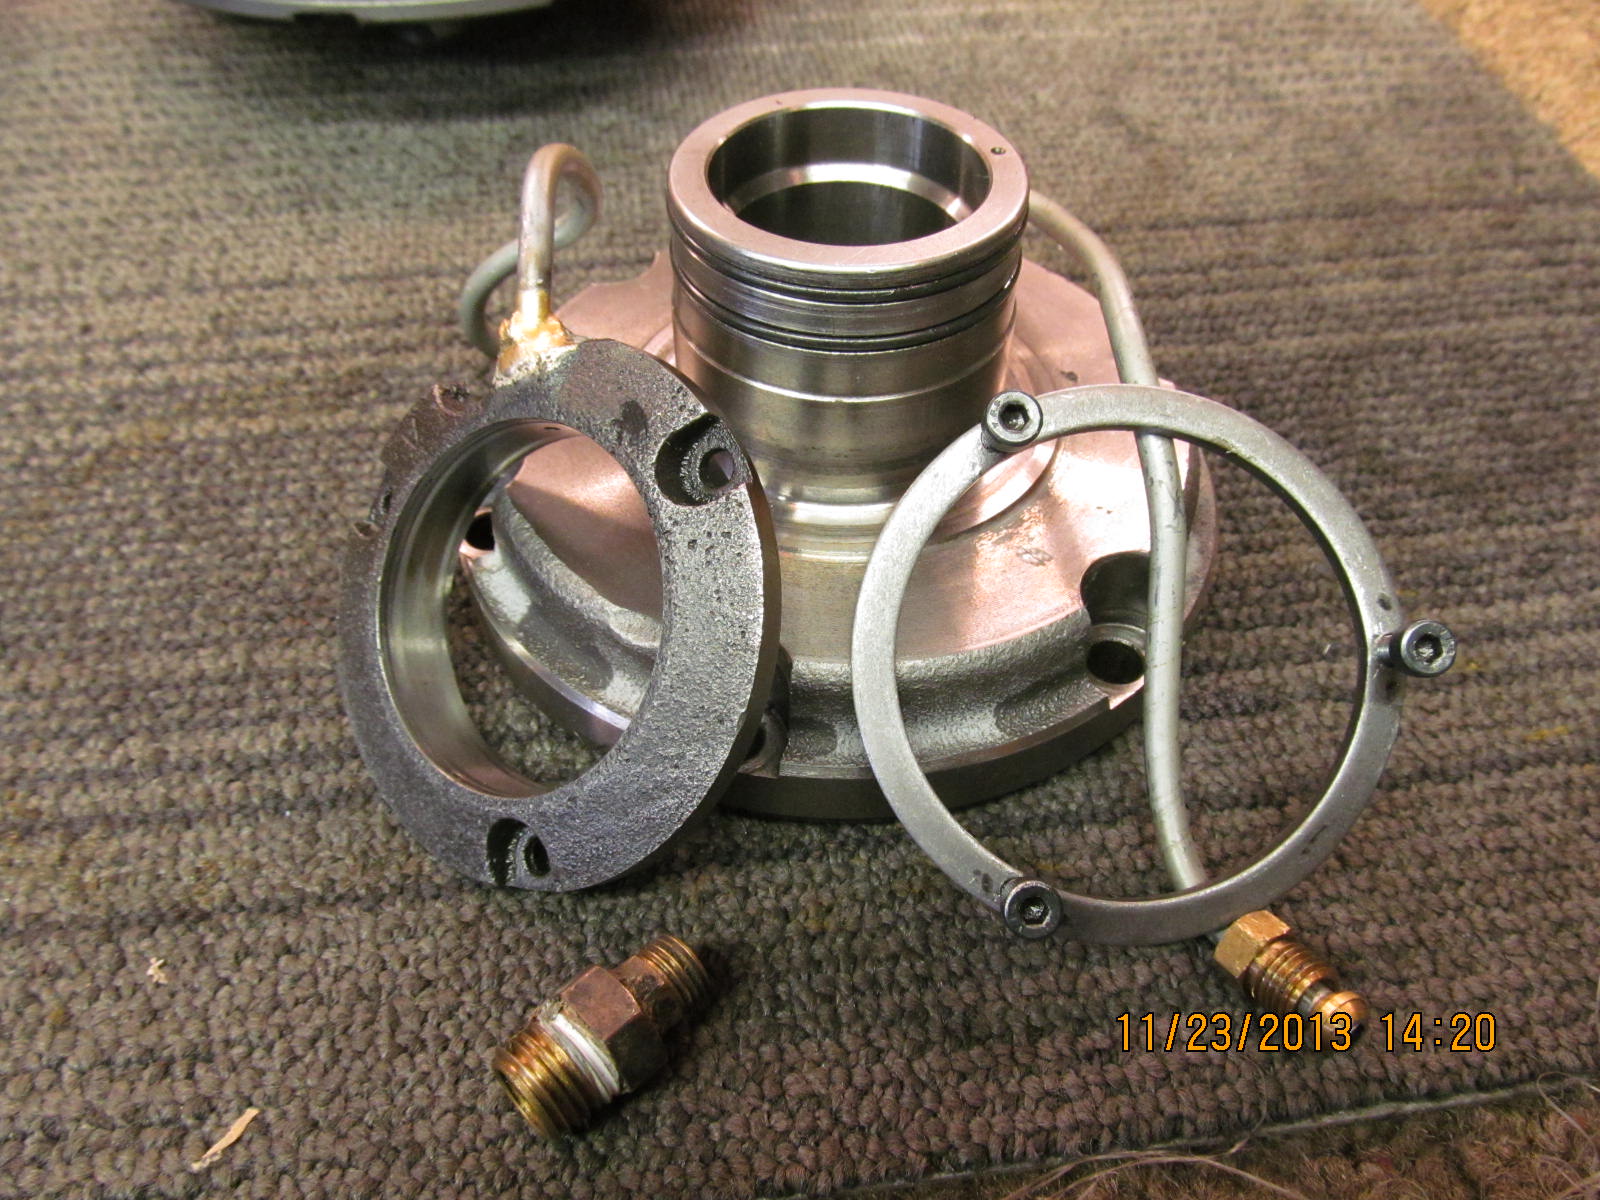
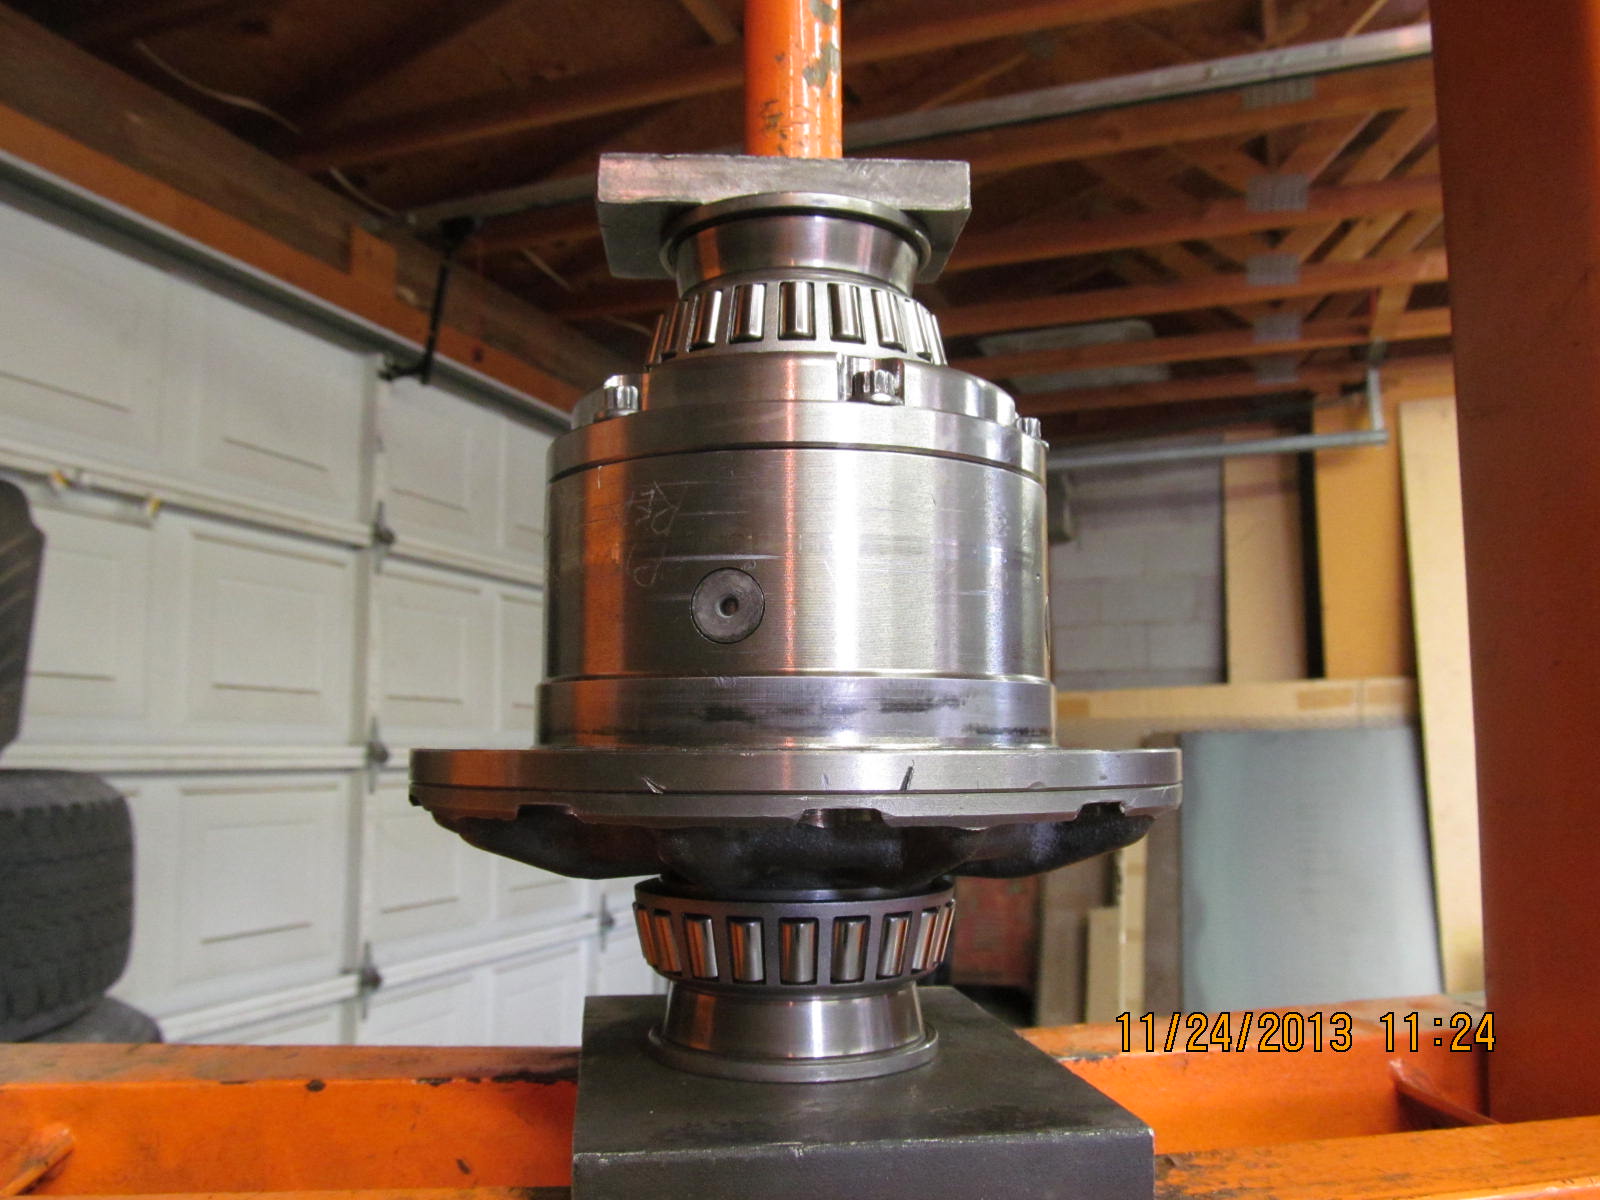
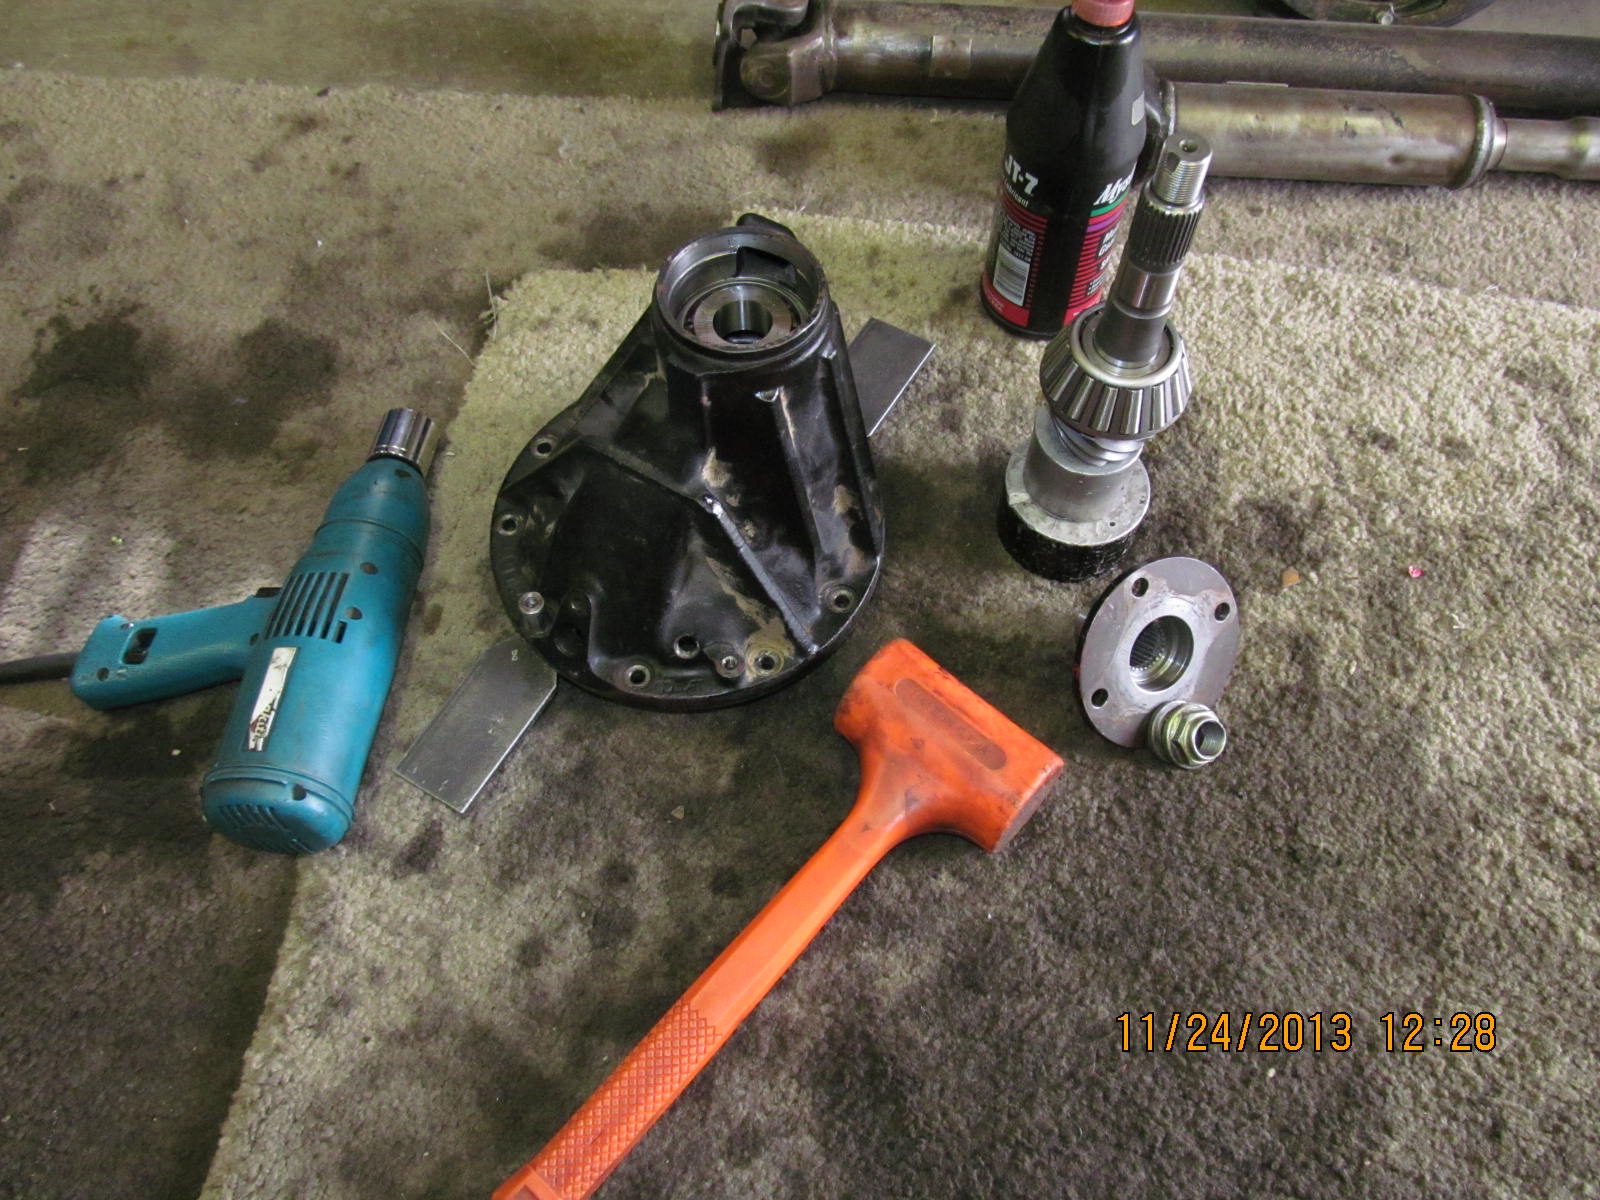
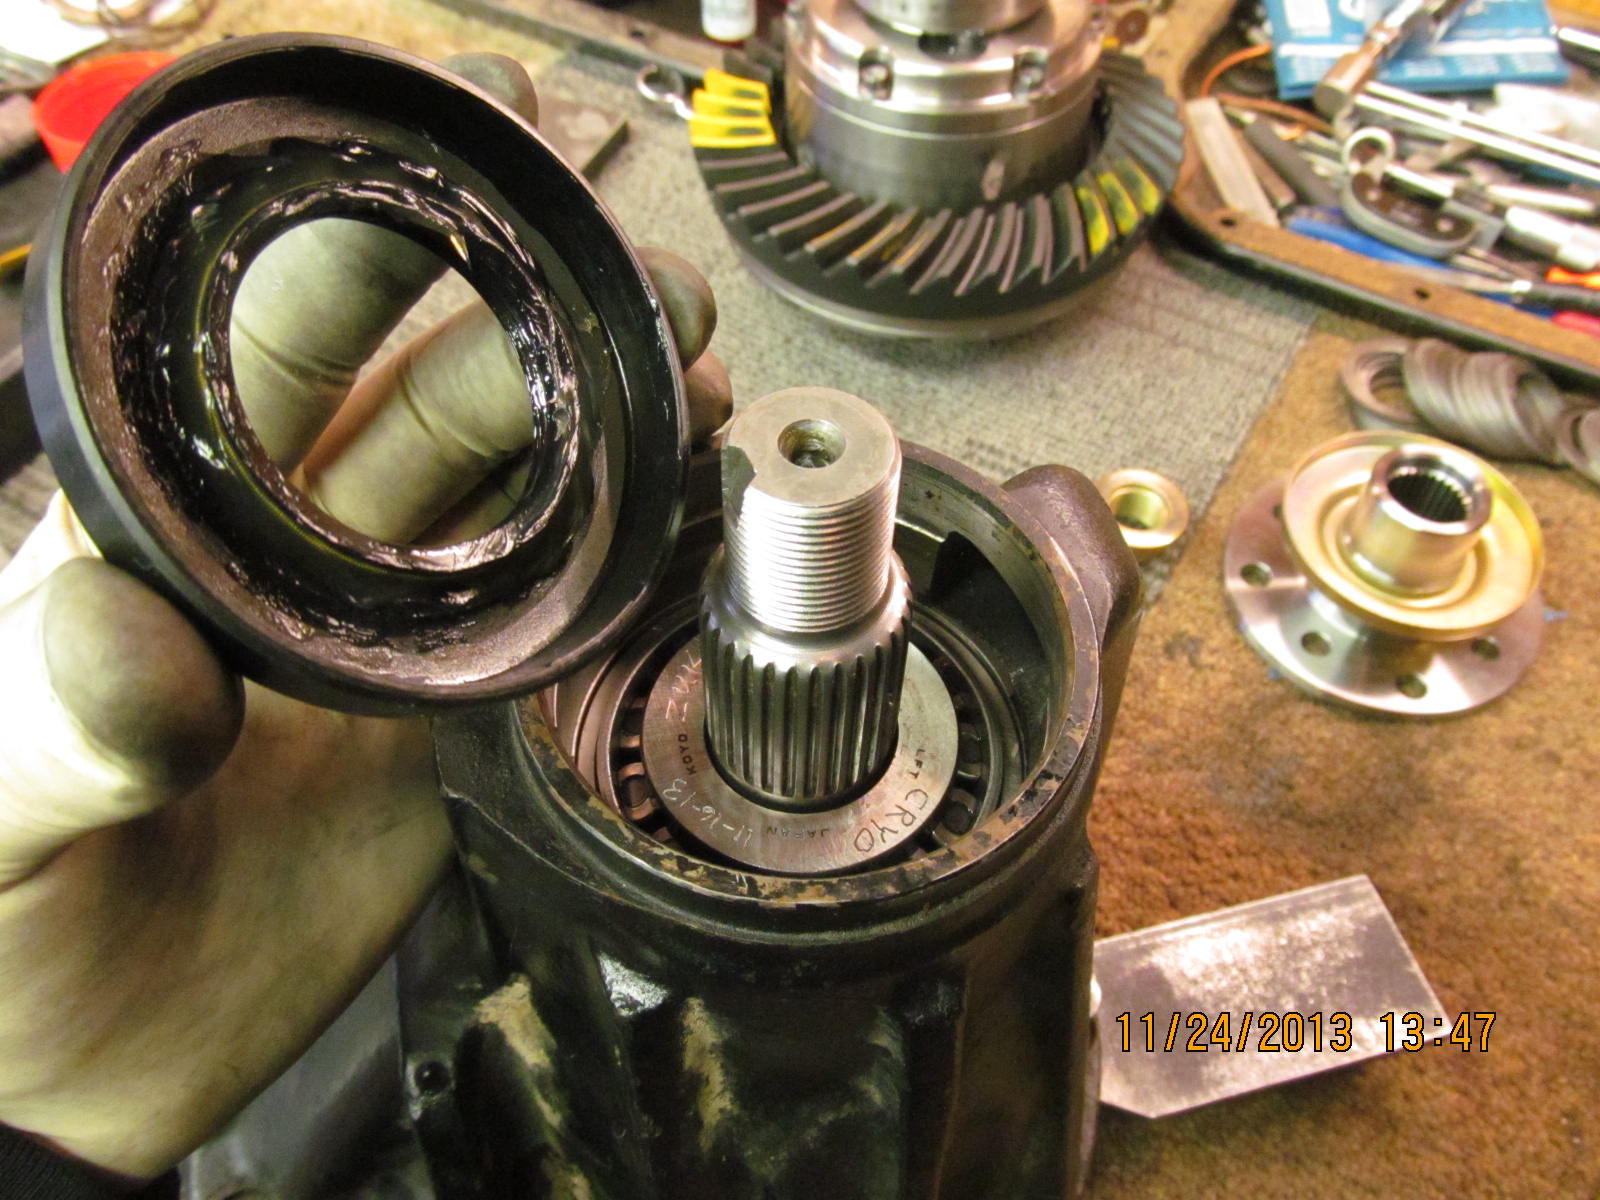
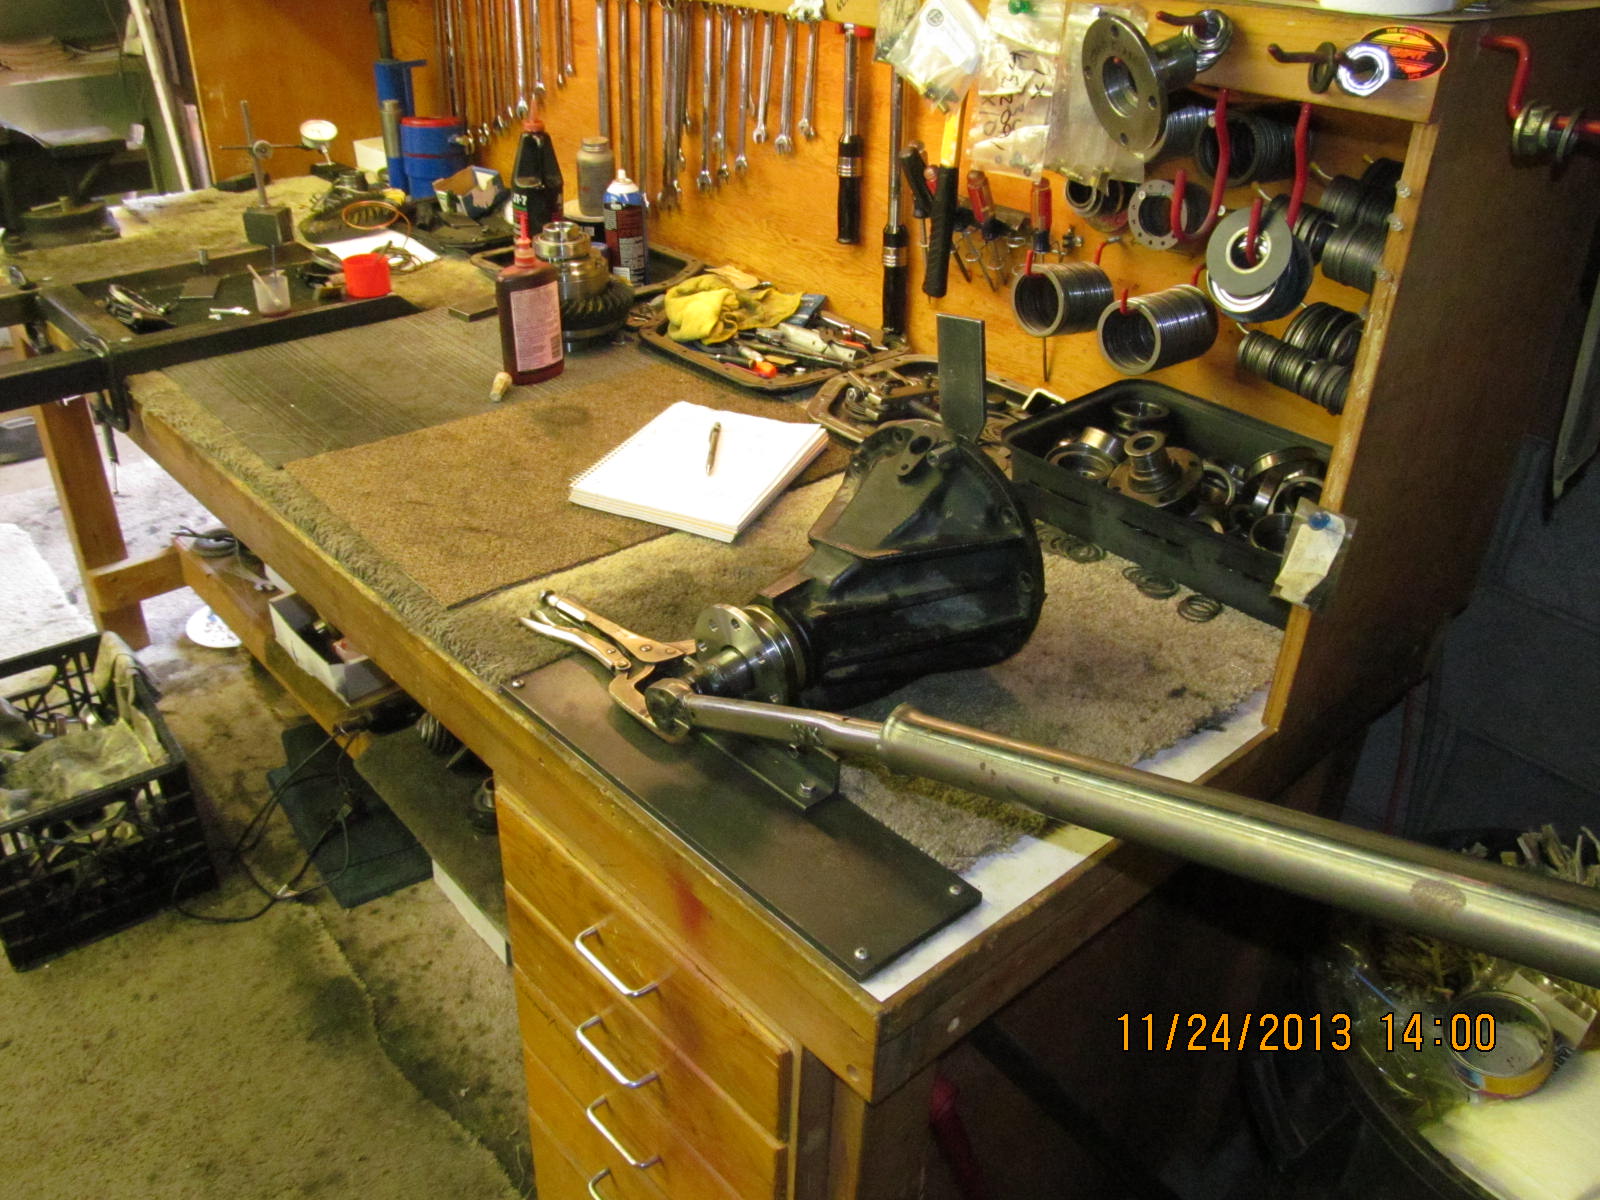
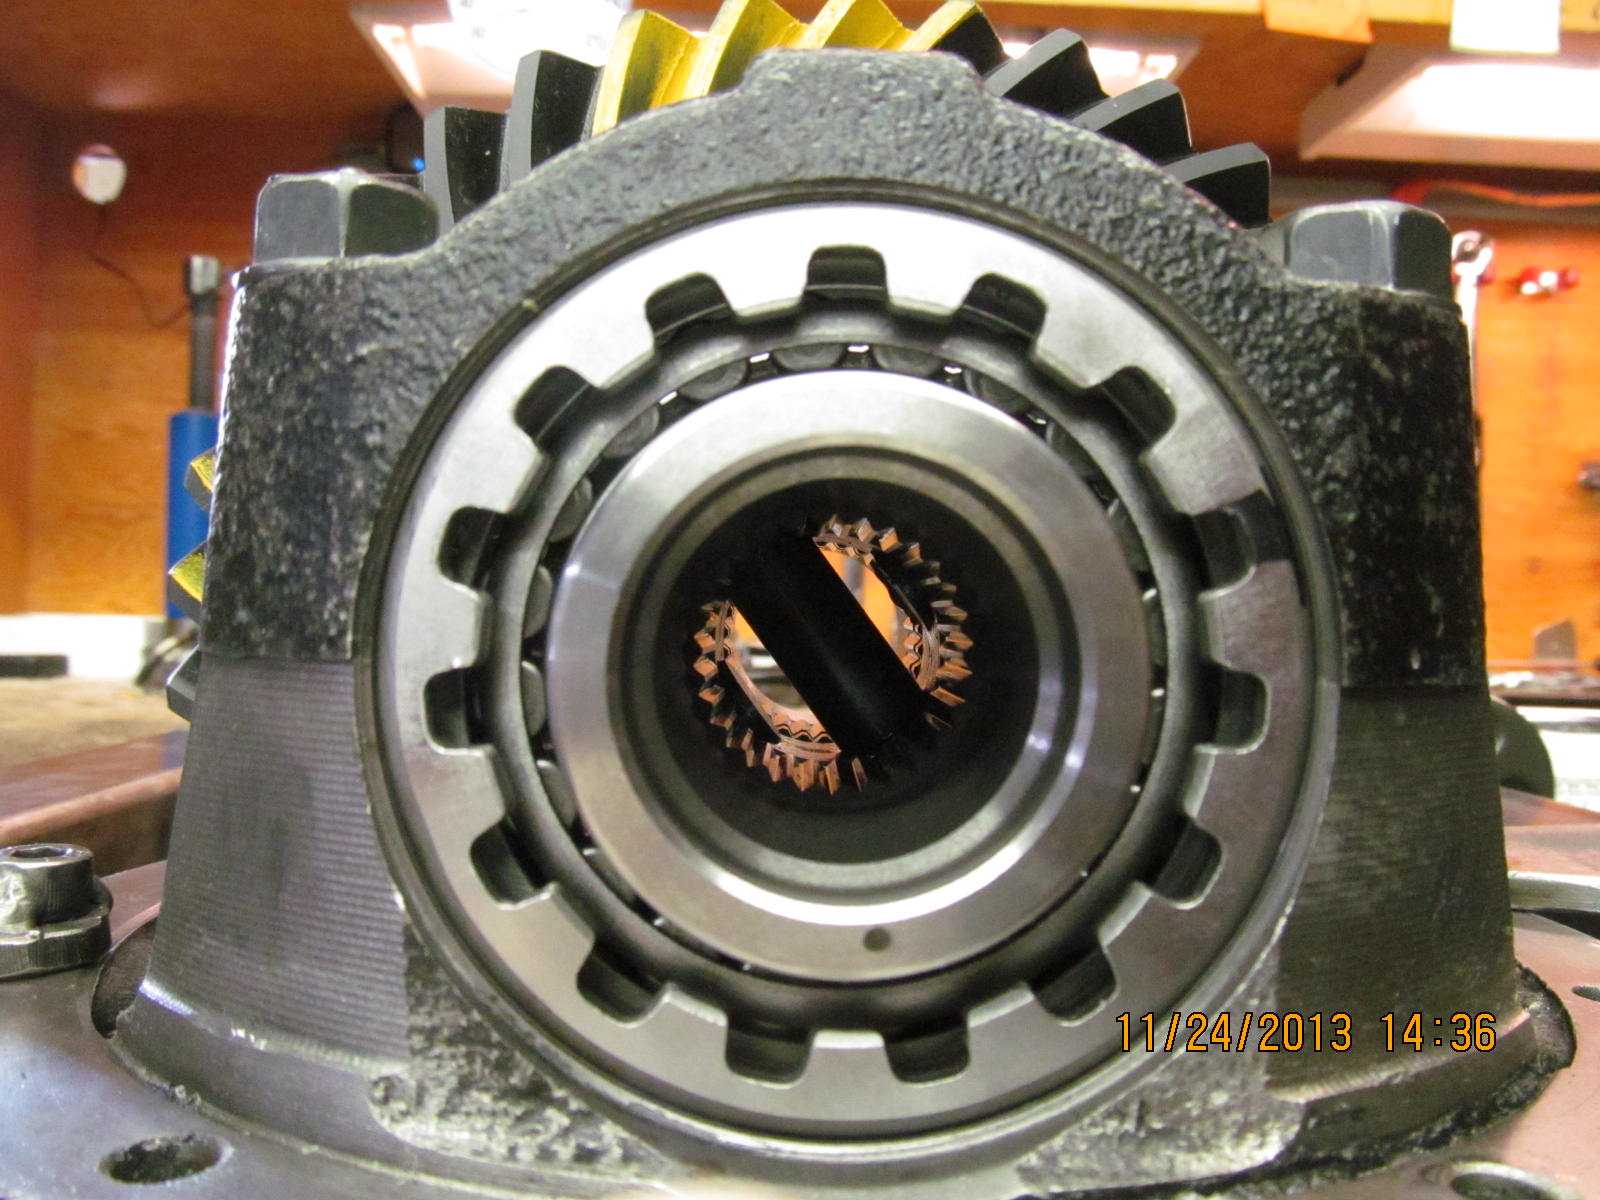
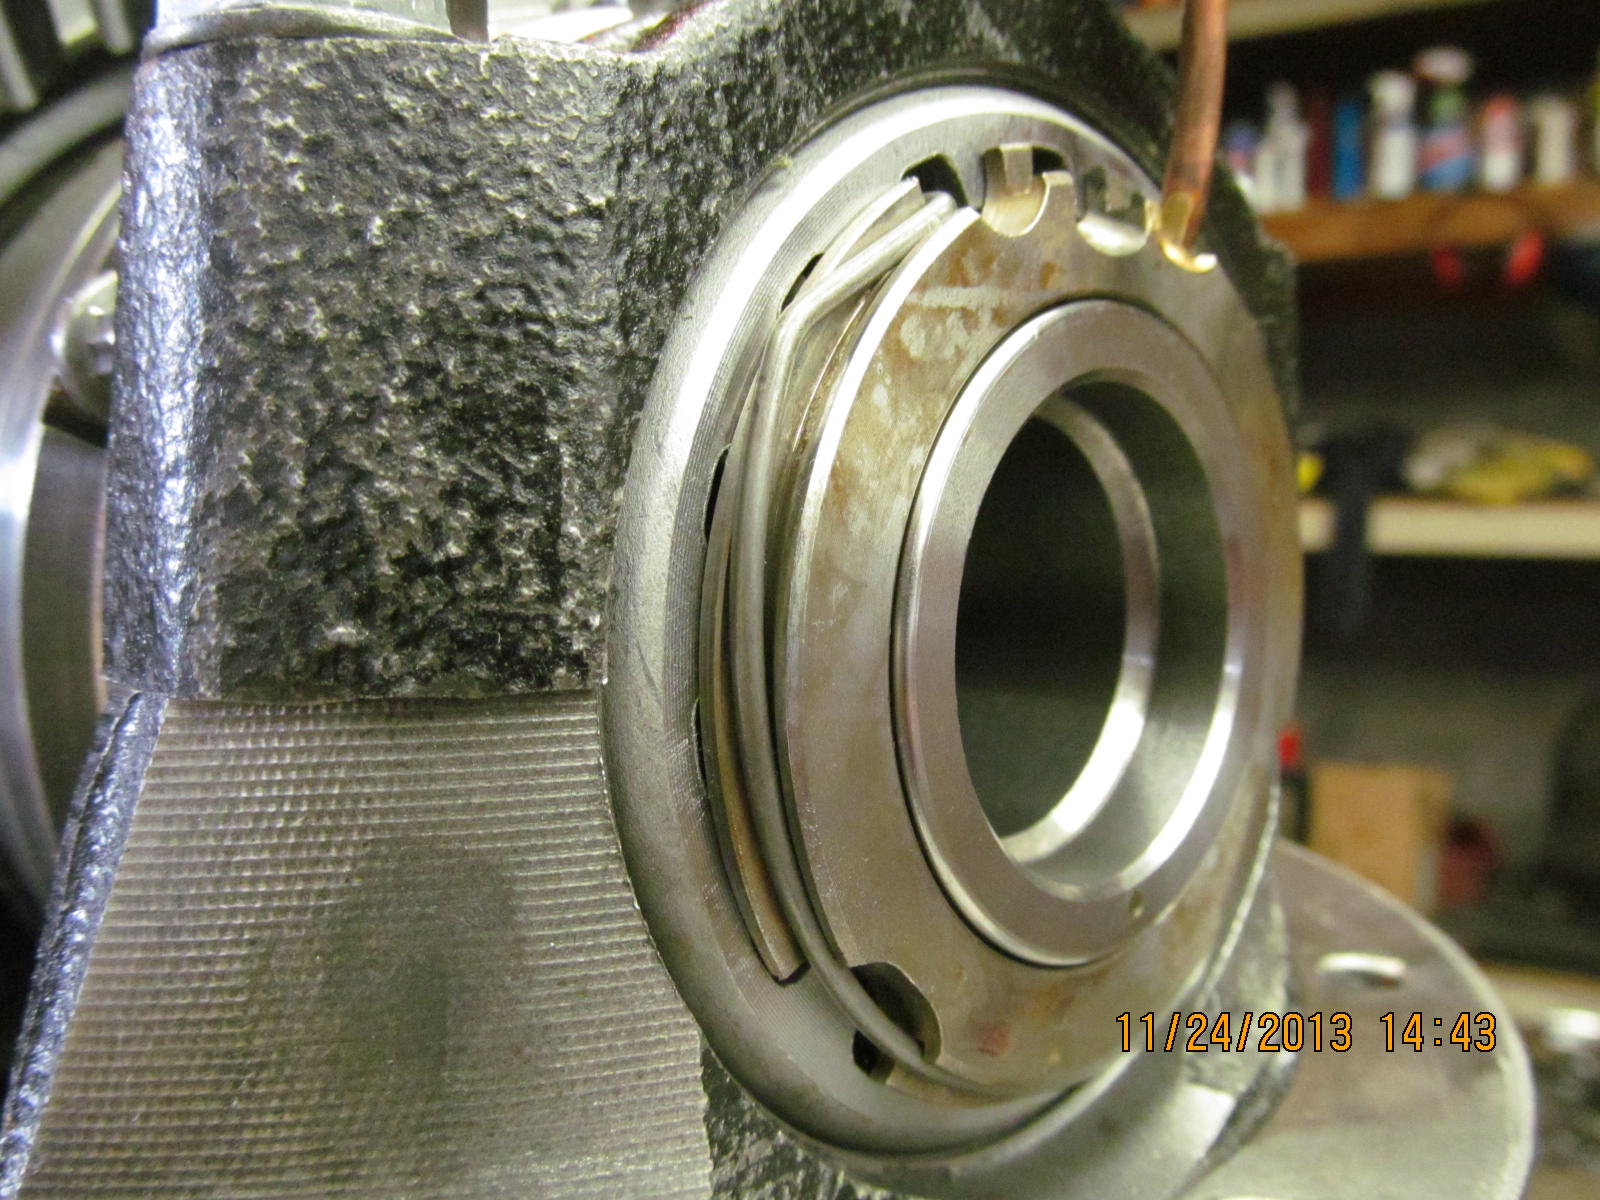
Teardown begins....First, to remove the seal housing assembly with the very rigid metal tubing.
|
|
|
|
|
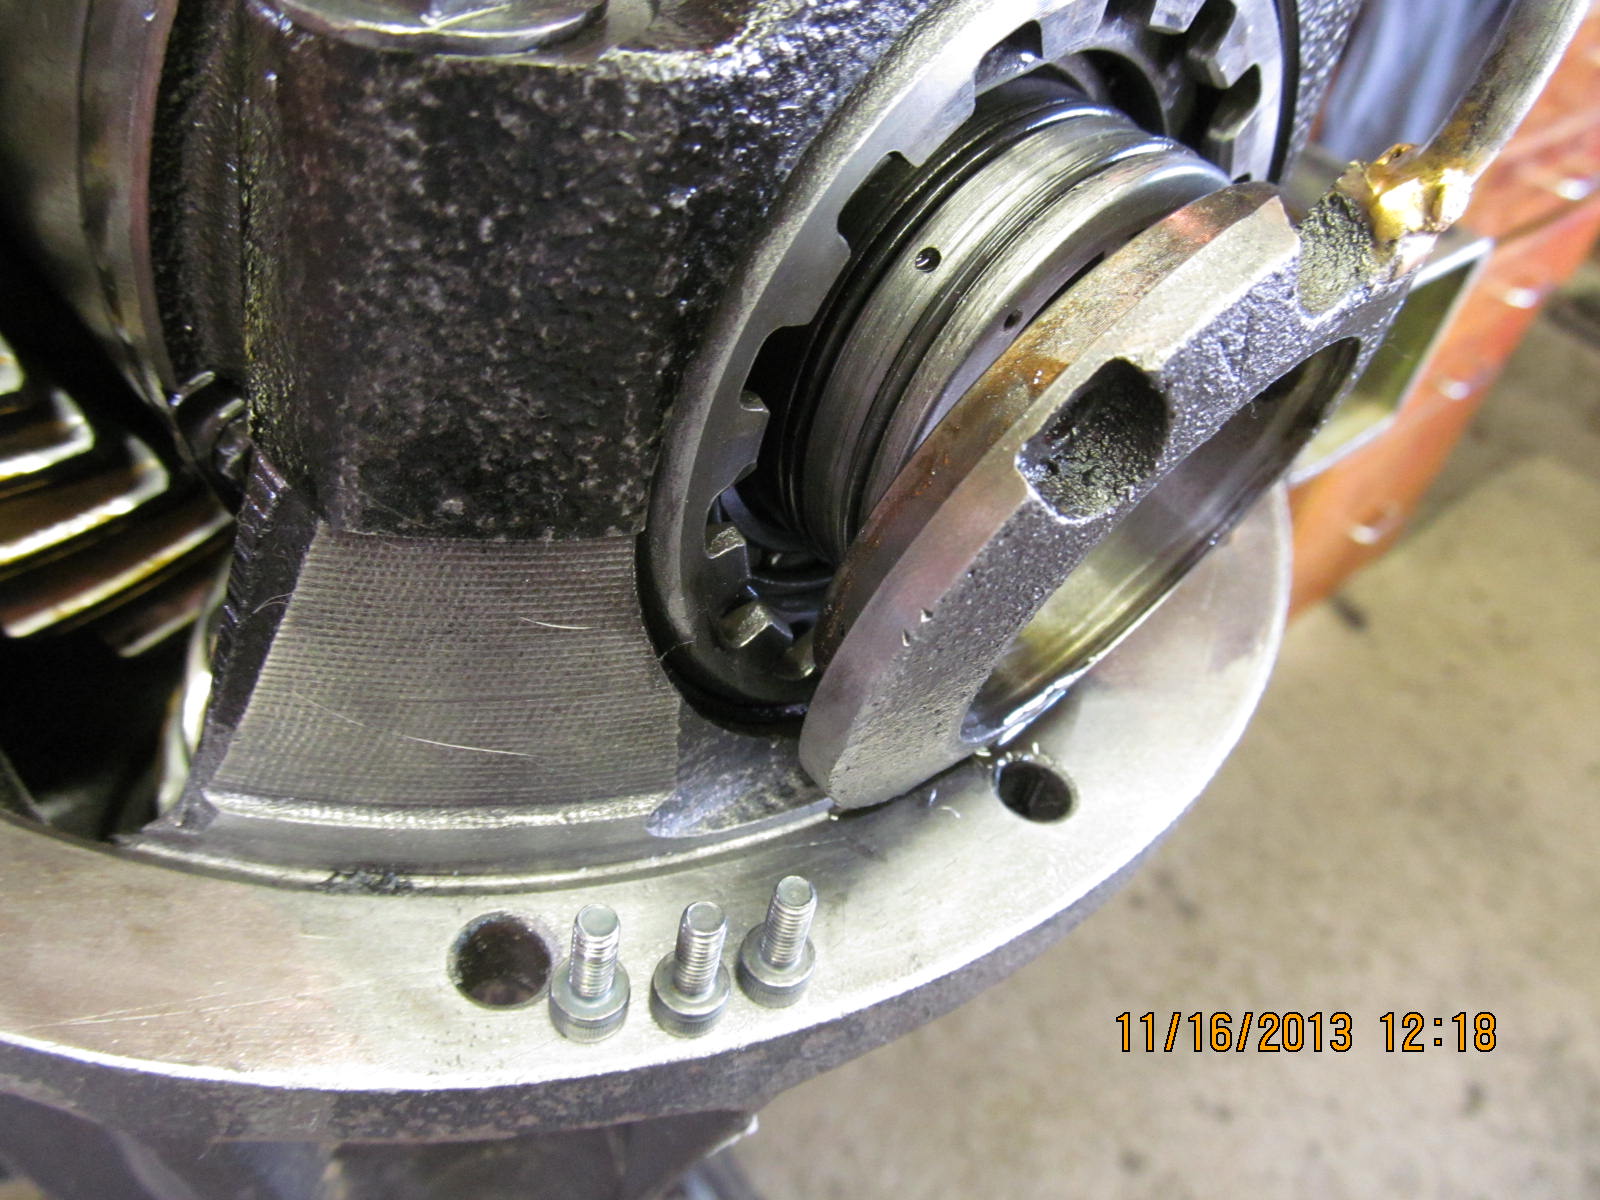
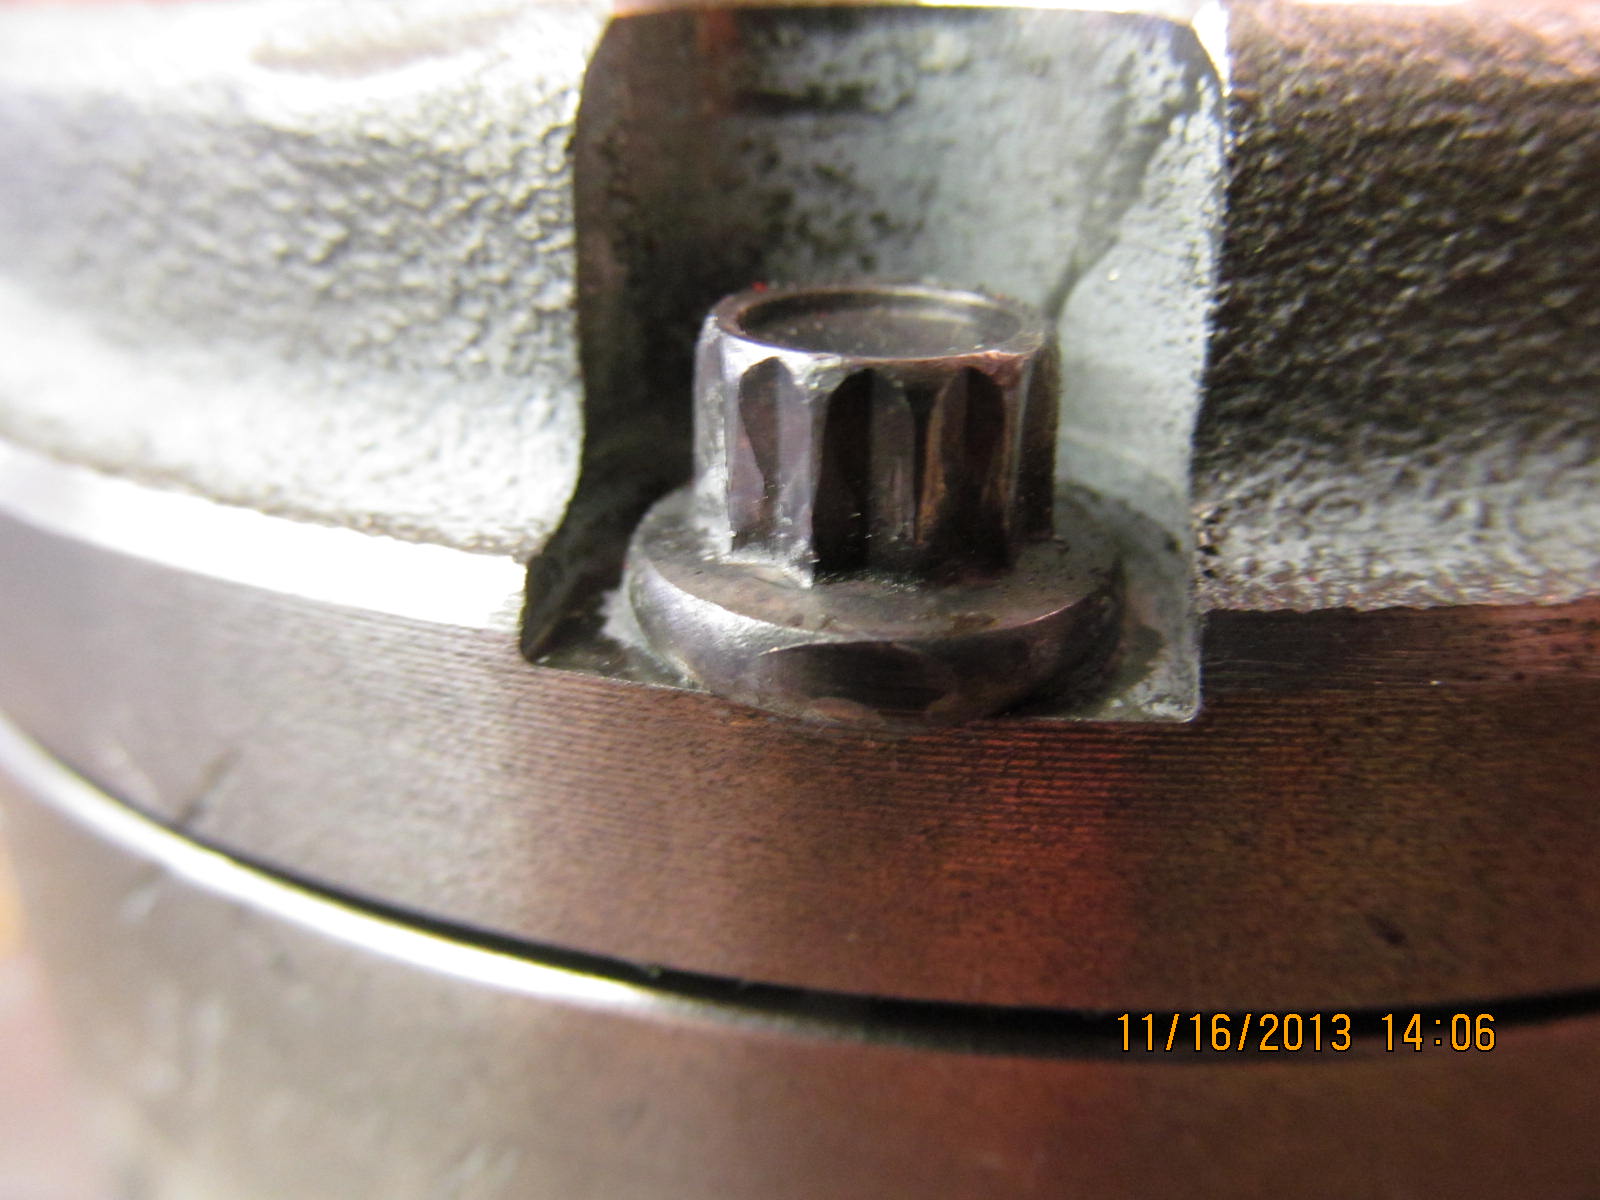
Remove the 3 socket head cap screws(allen heads).
|
|
|
|
|
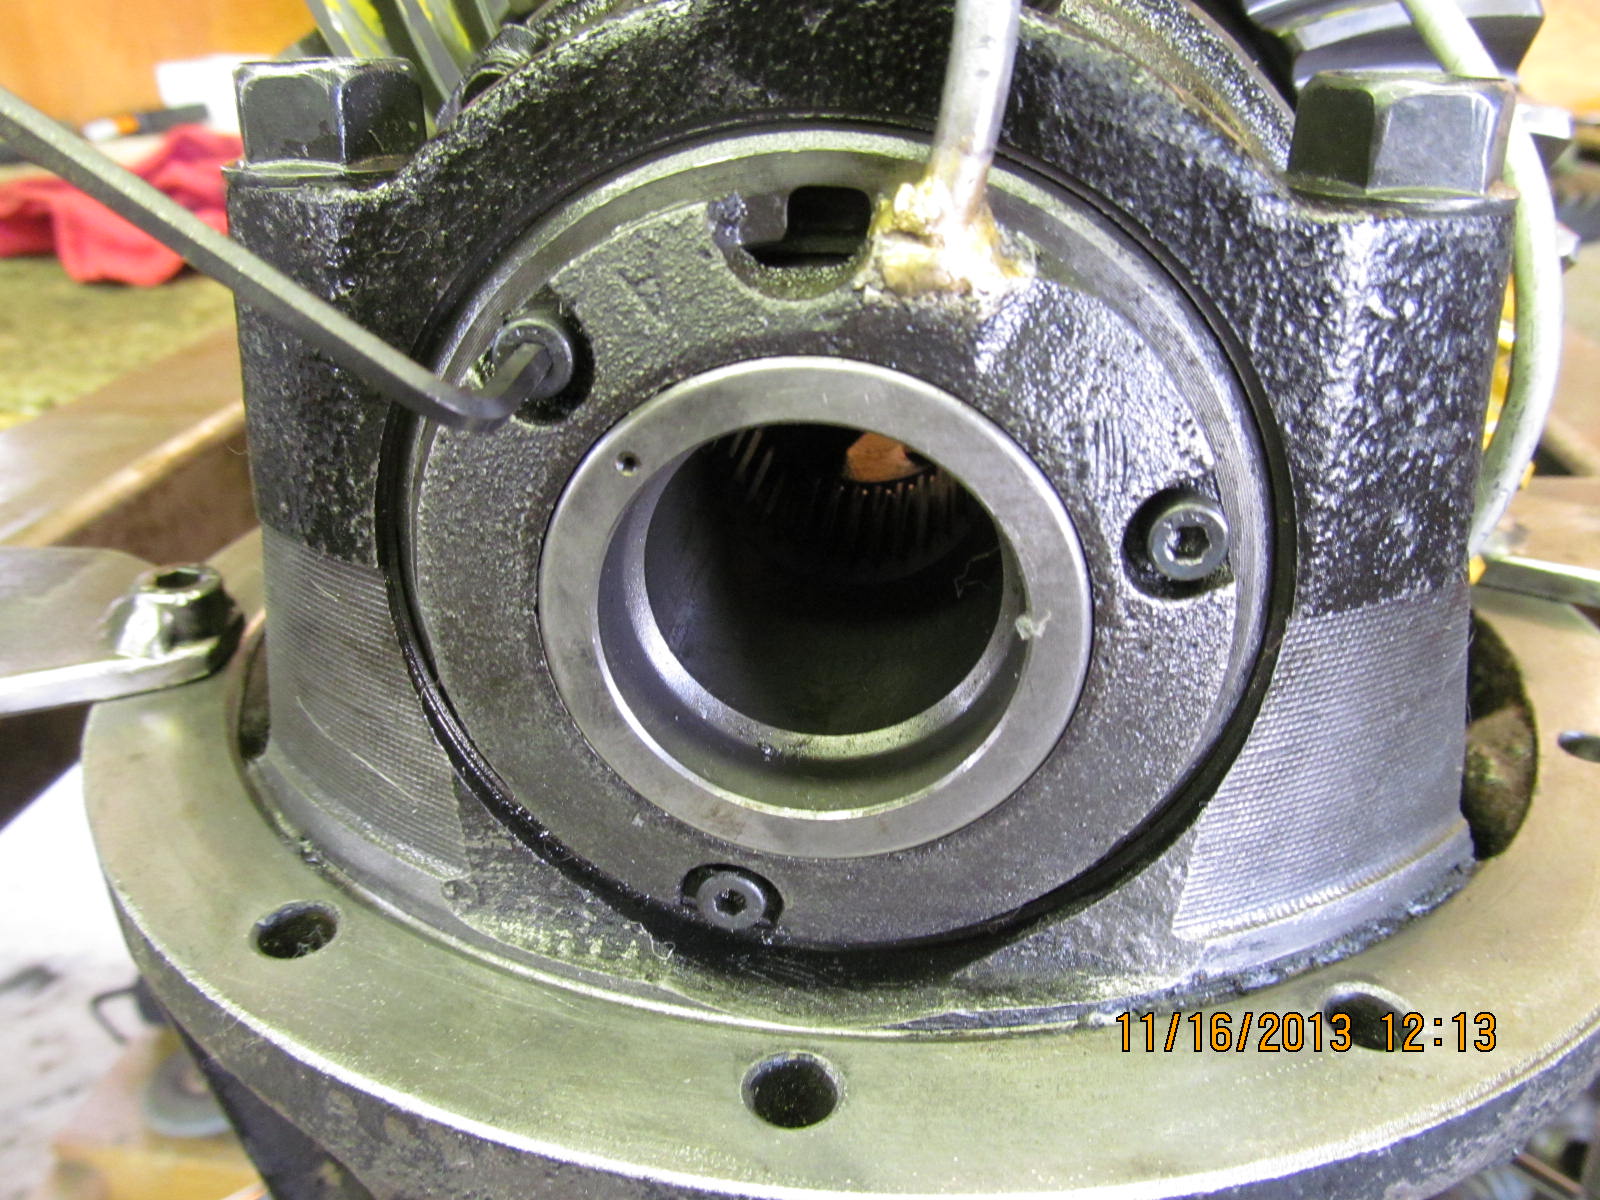
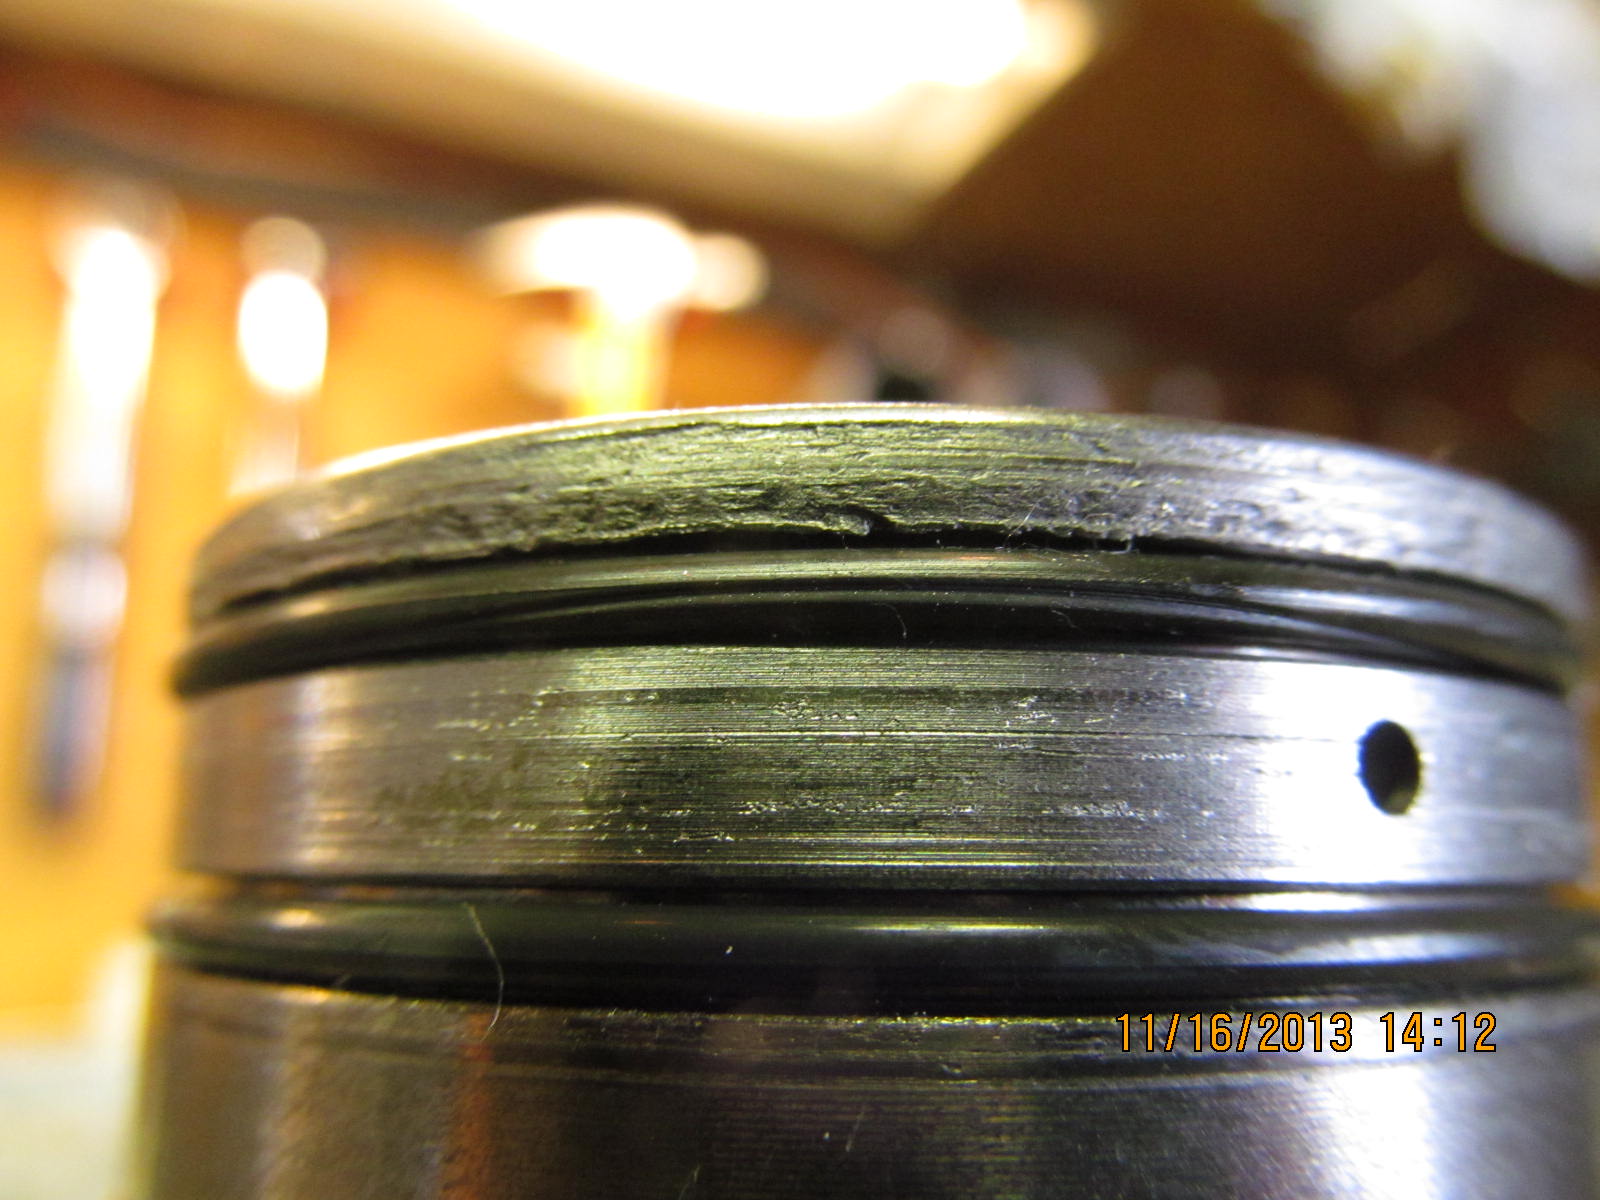
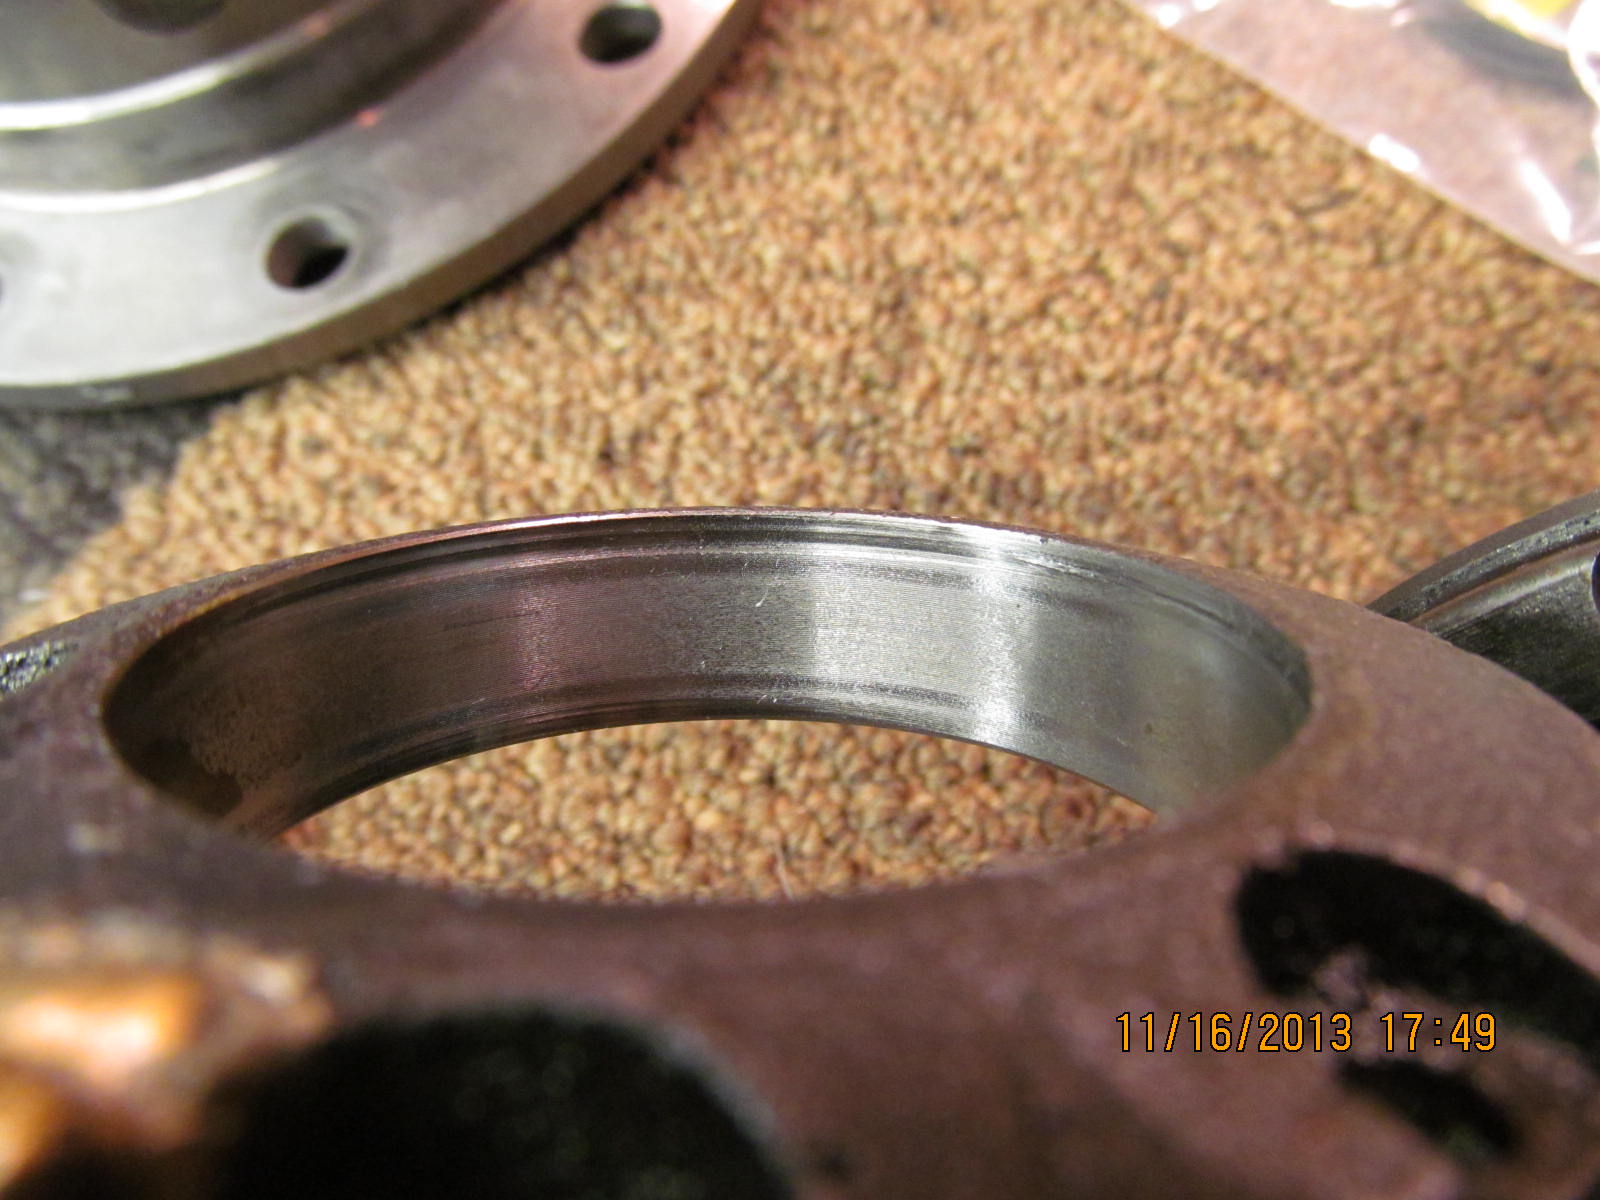
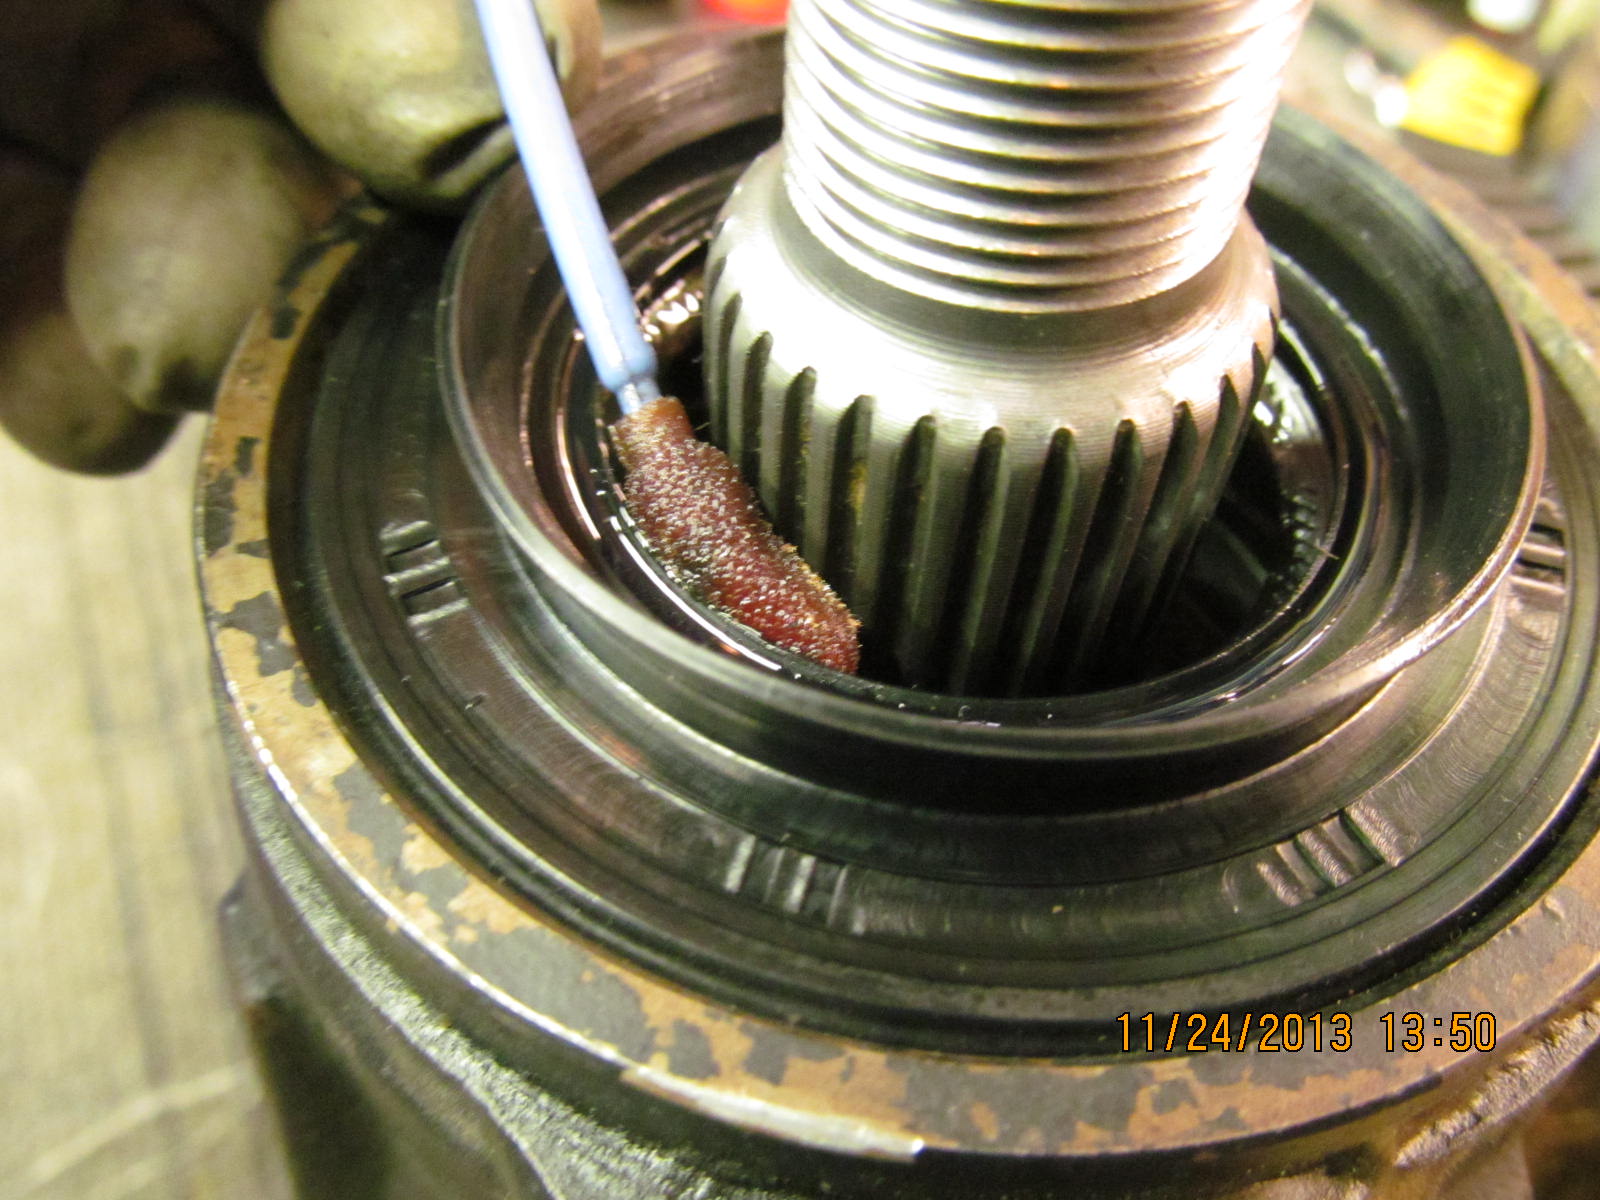
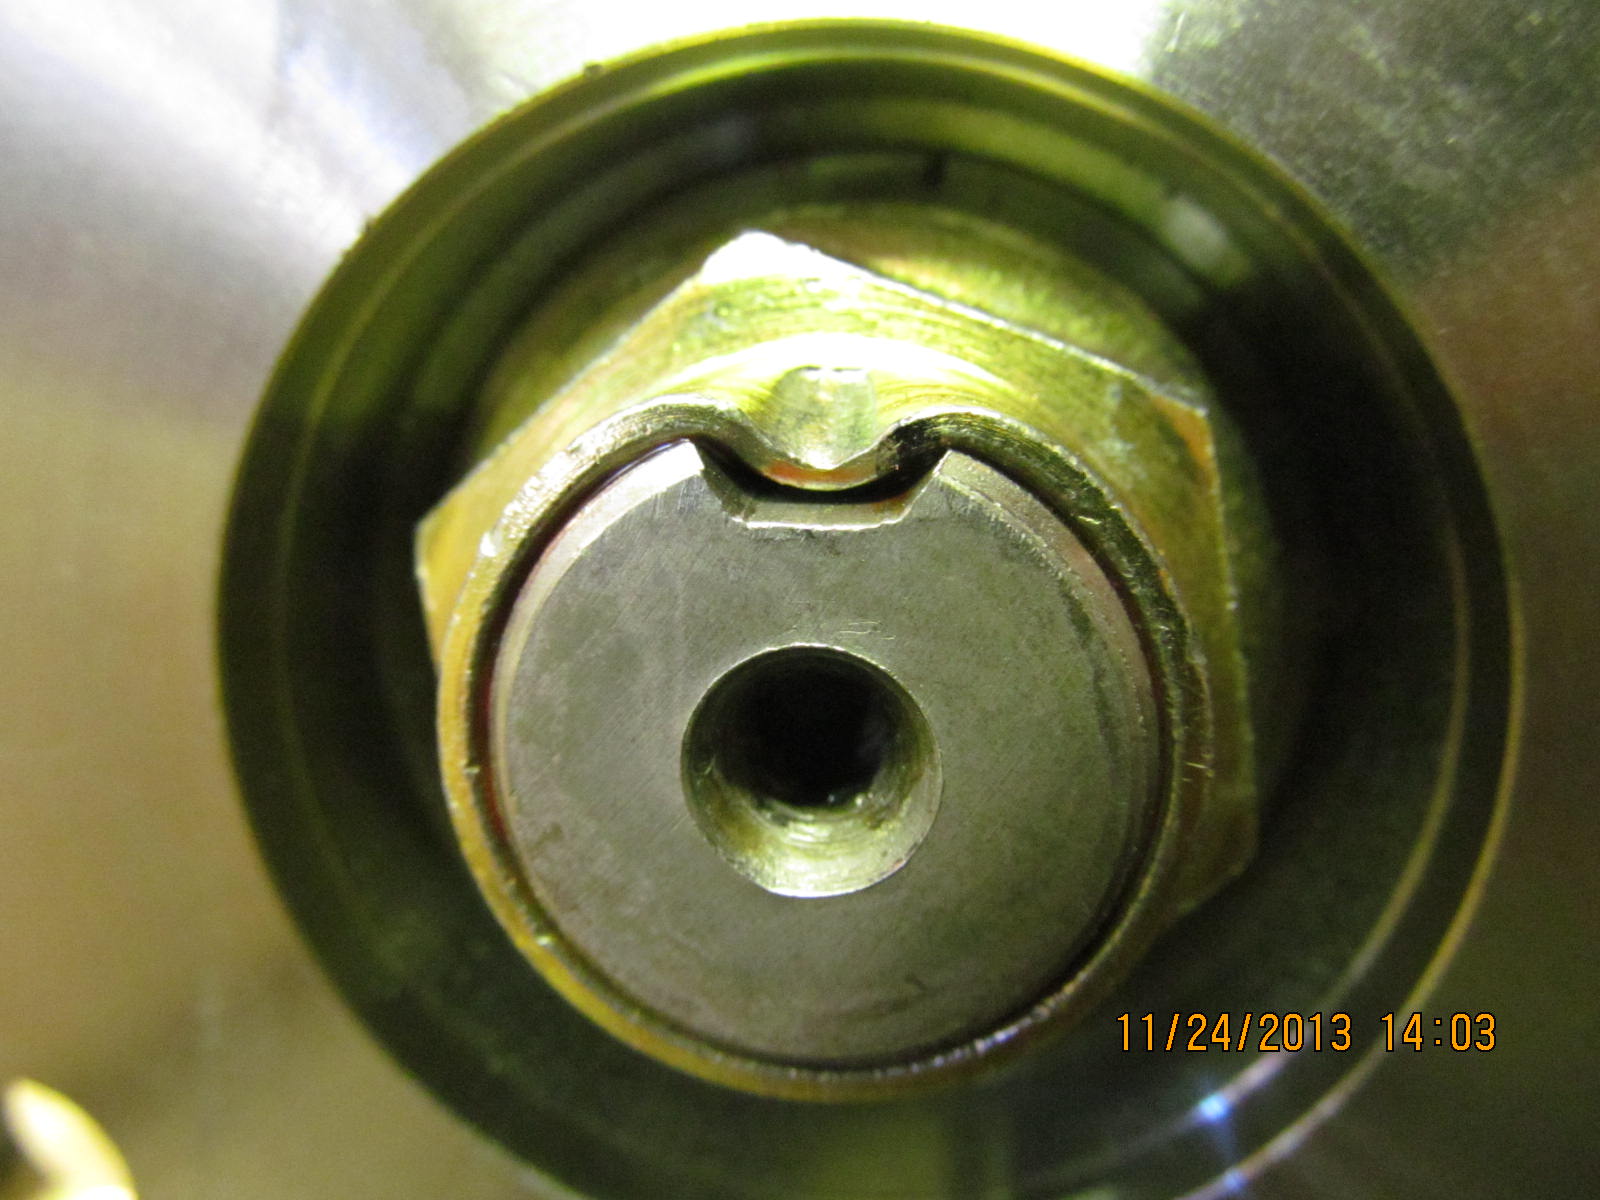
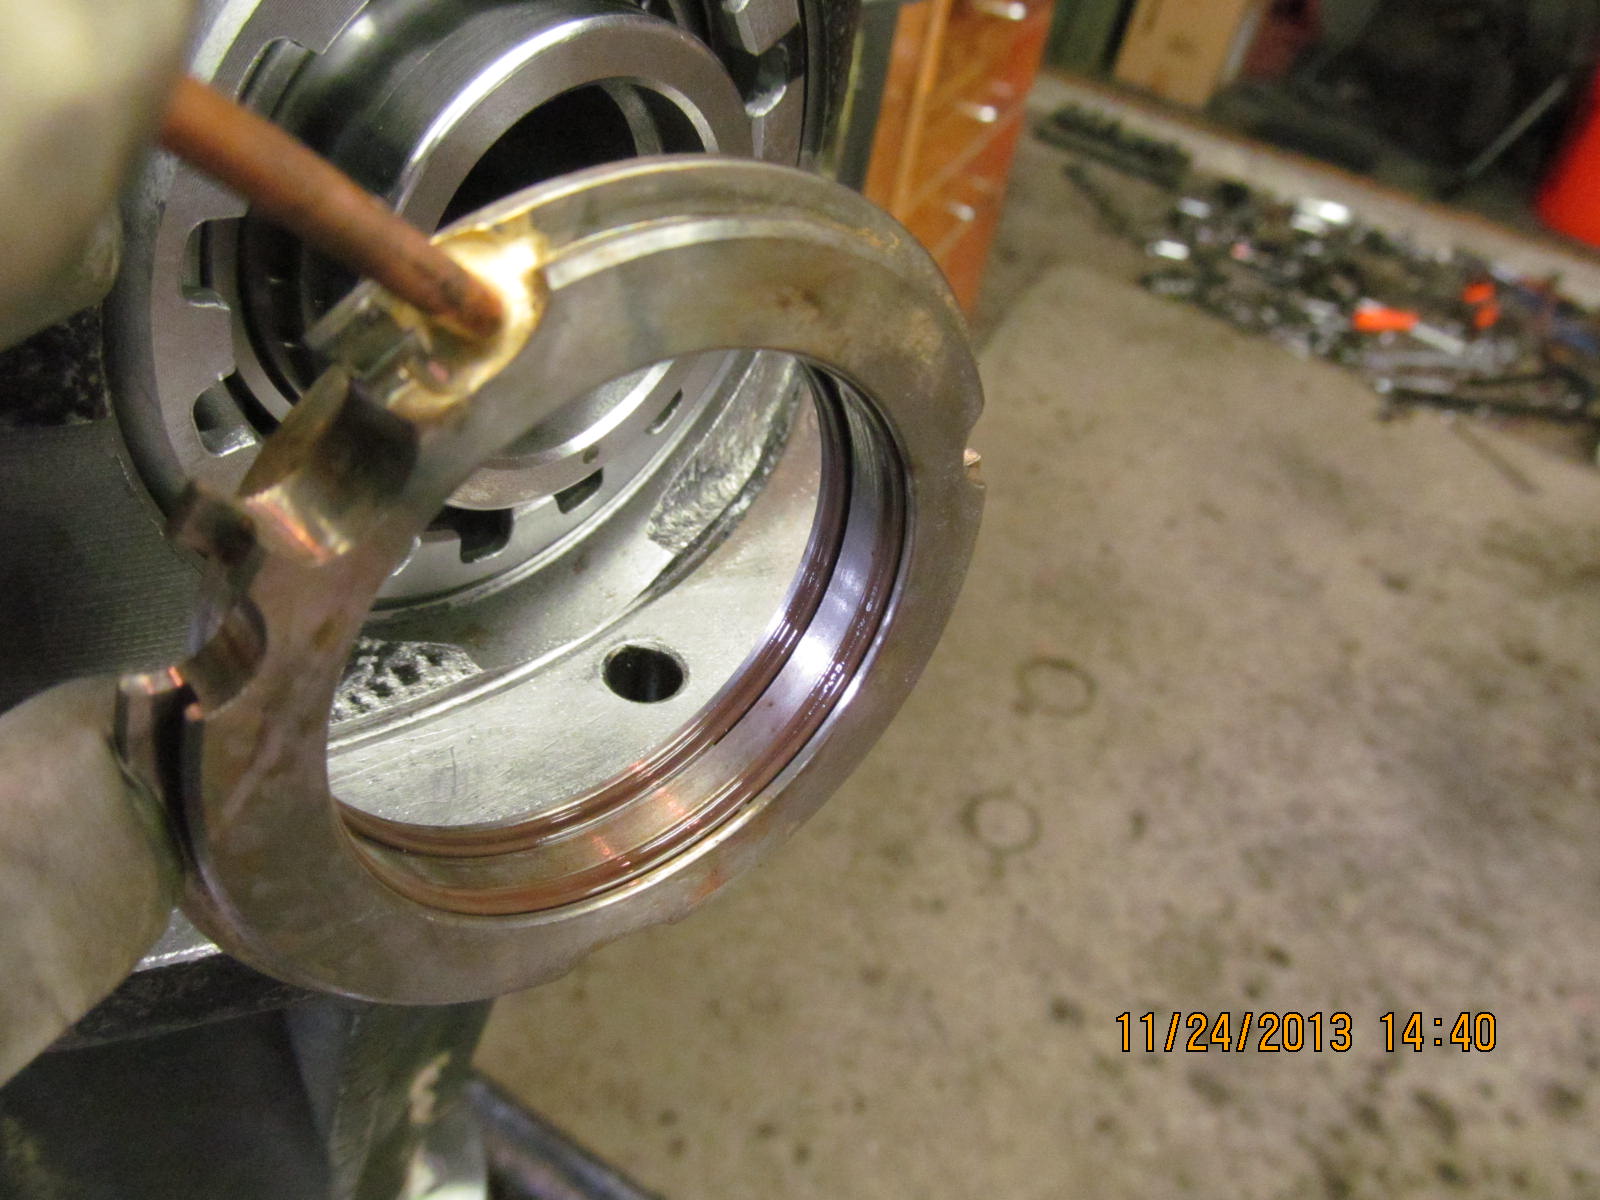
Scuffing damage on the journal can be seen near the o-rings.
|
|
|
|
|
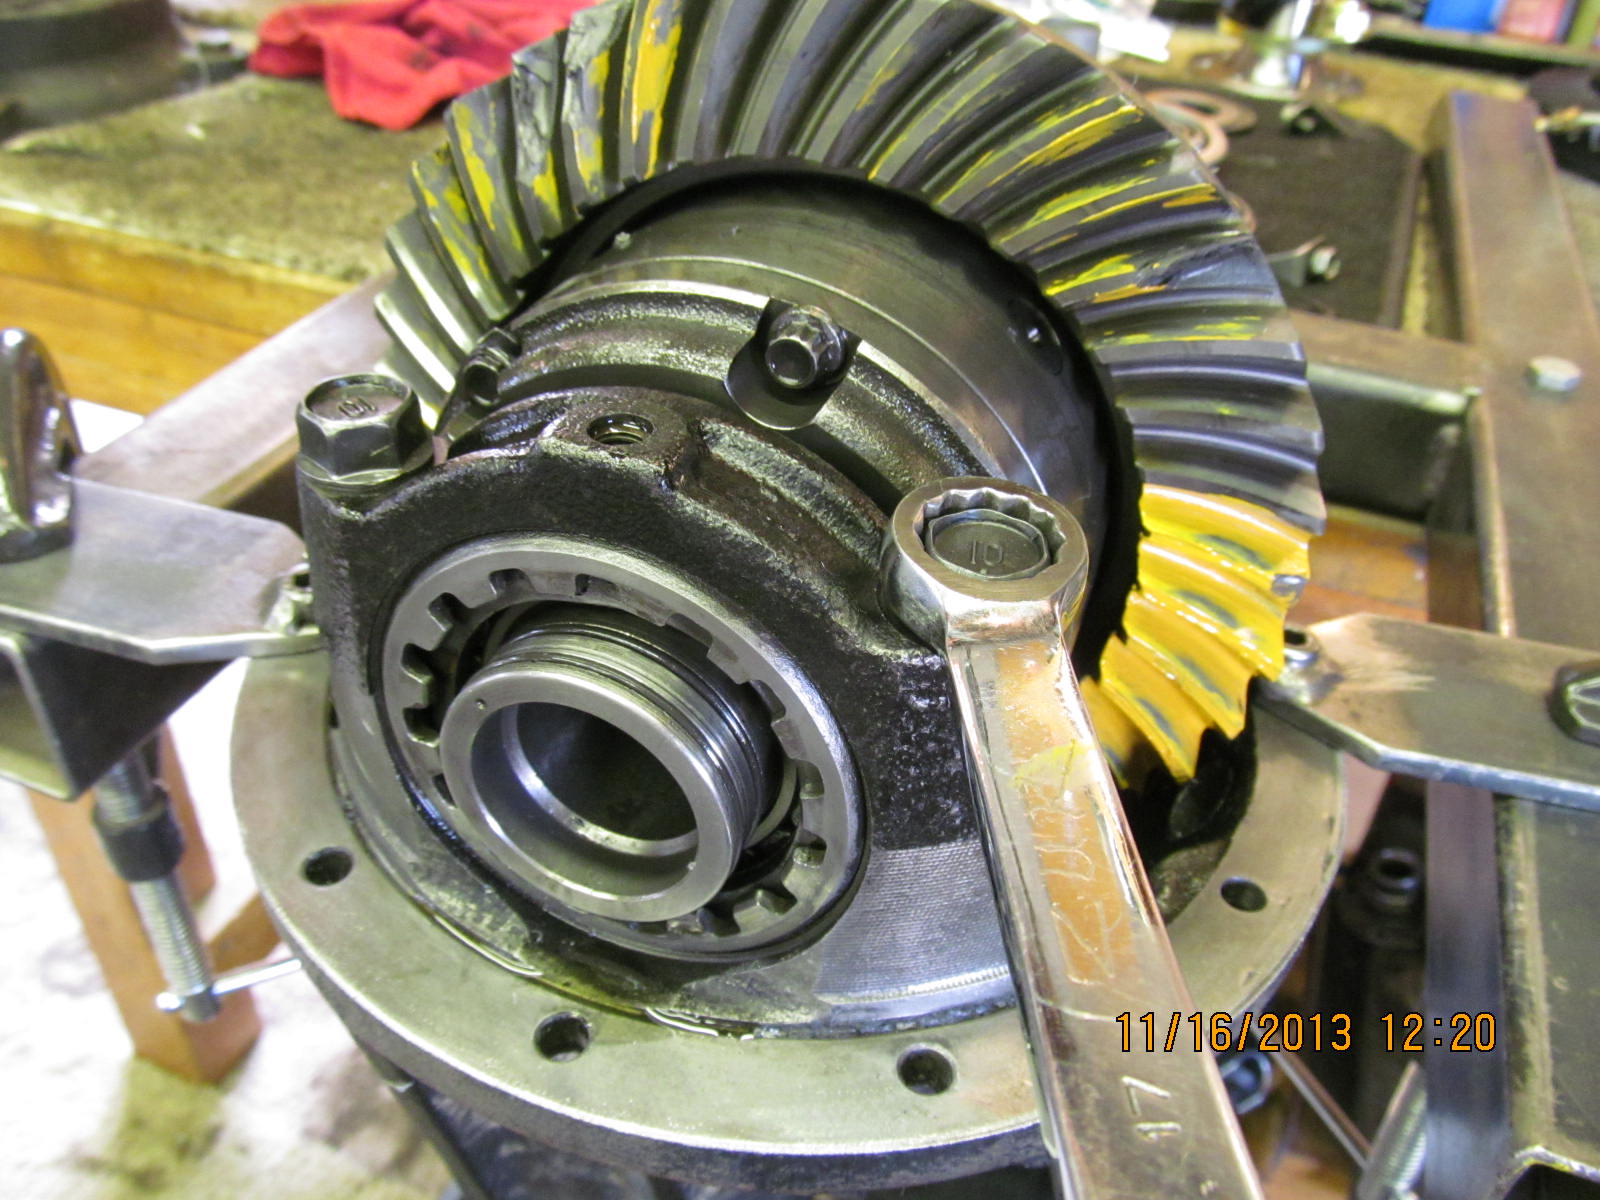
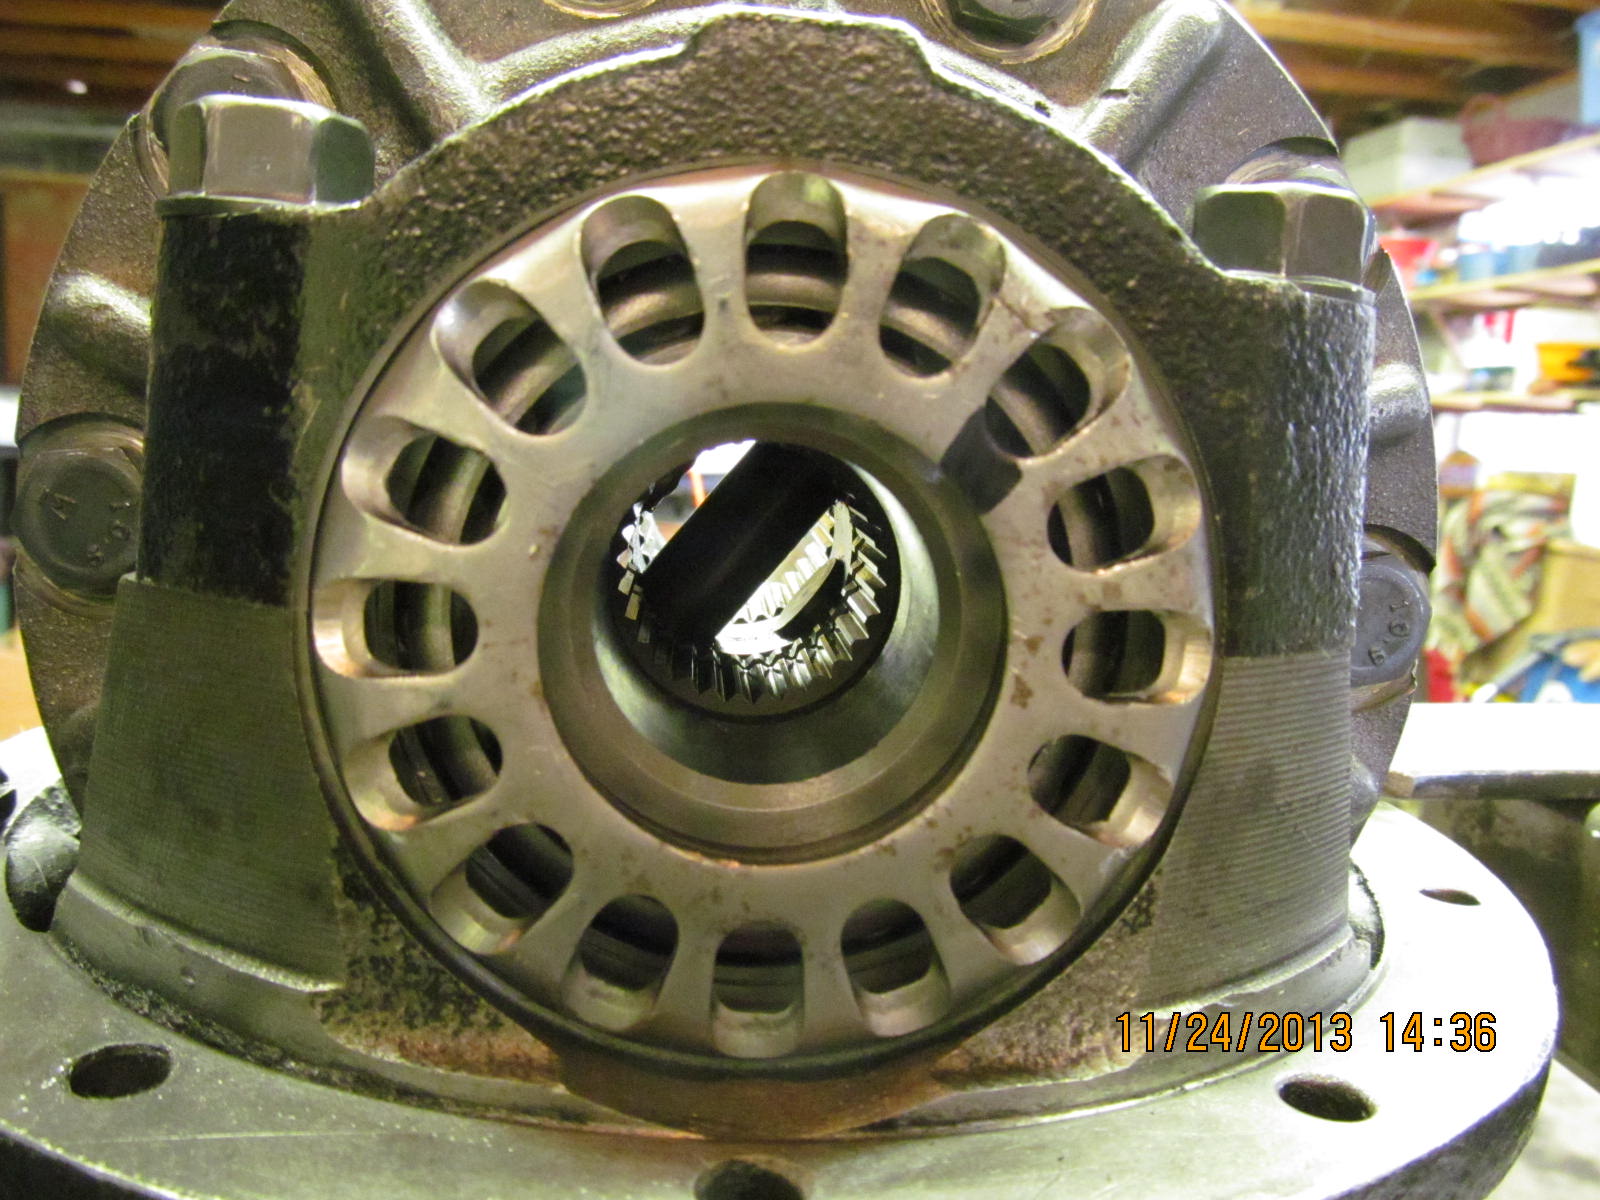
Remove the 4 bearing cap bolts then the ARB can be removed.
|
|
|
|
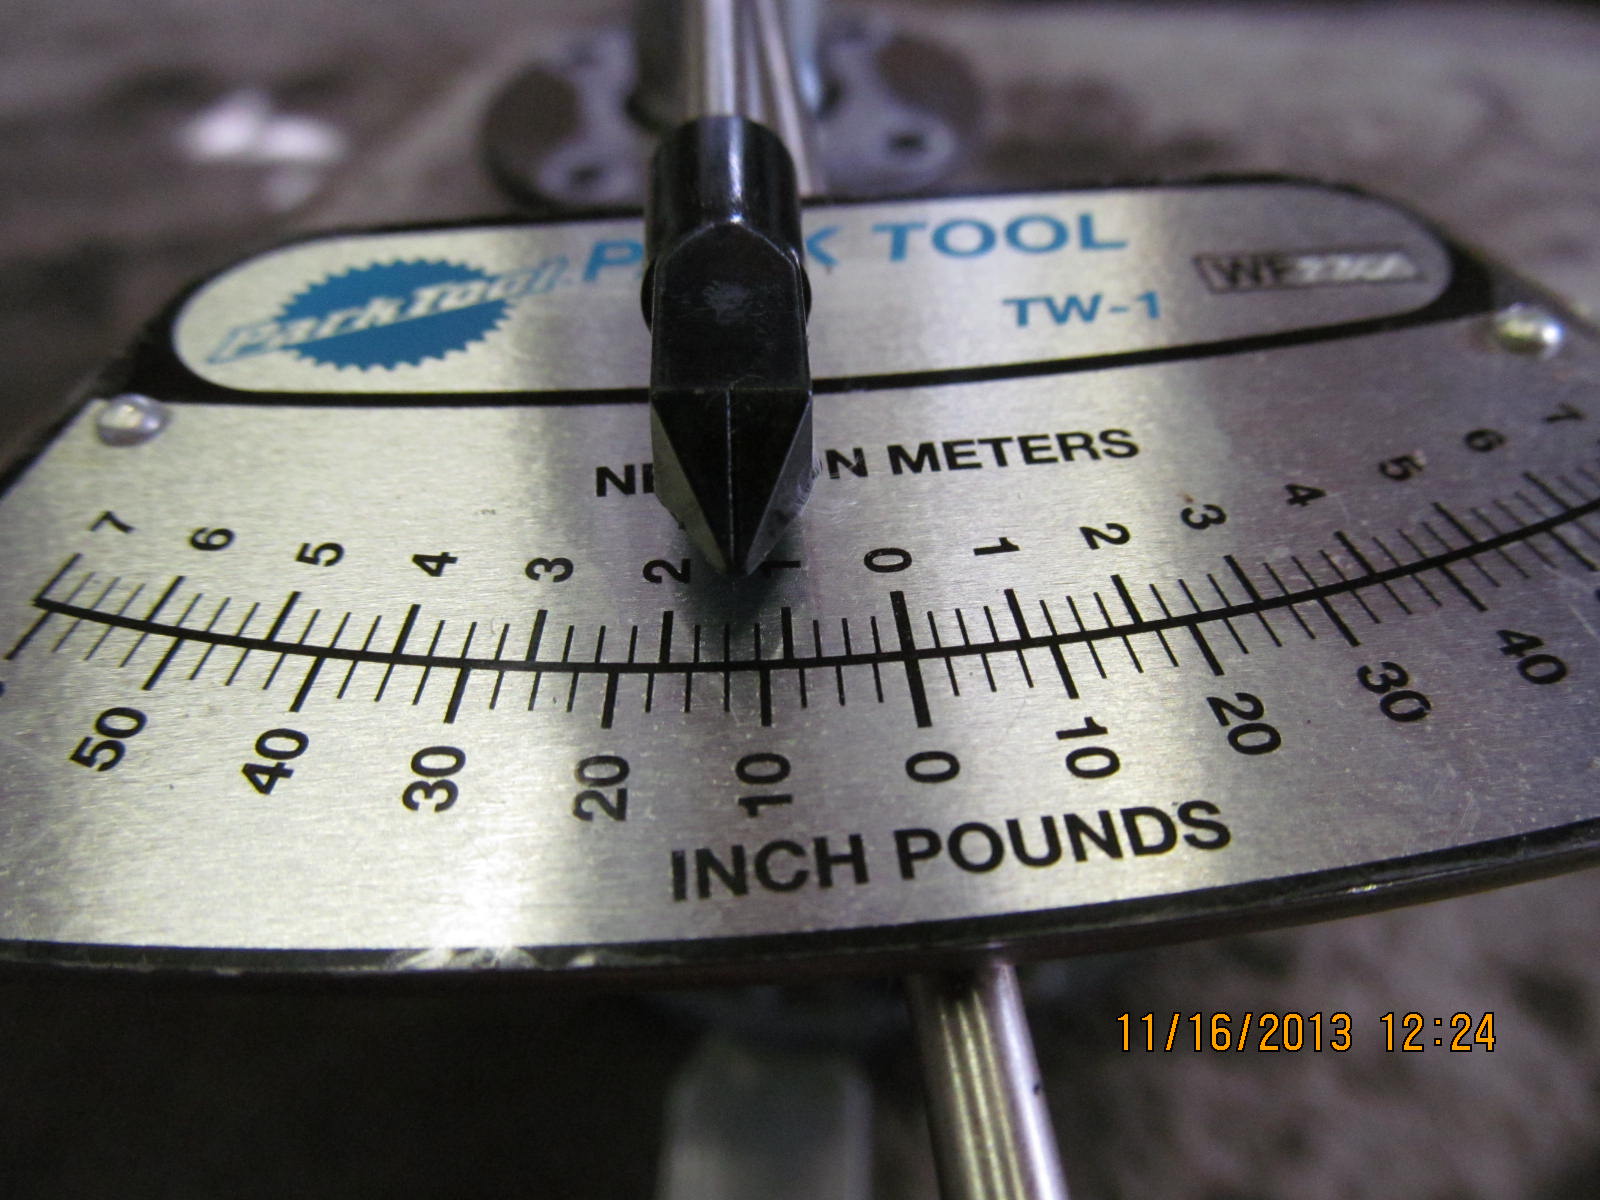
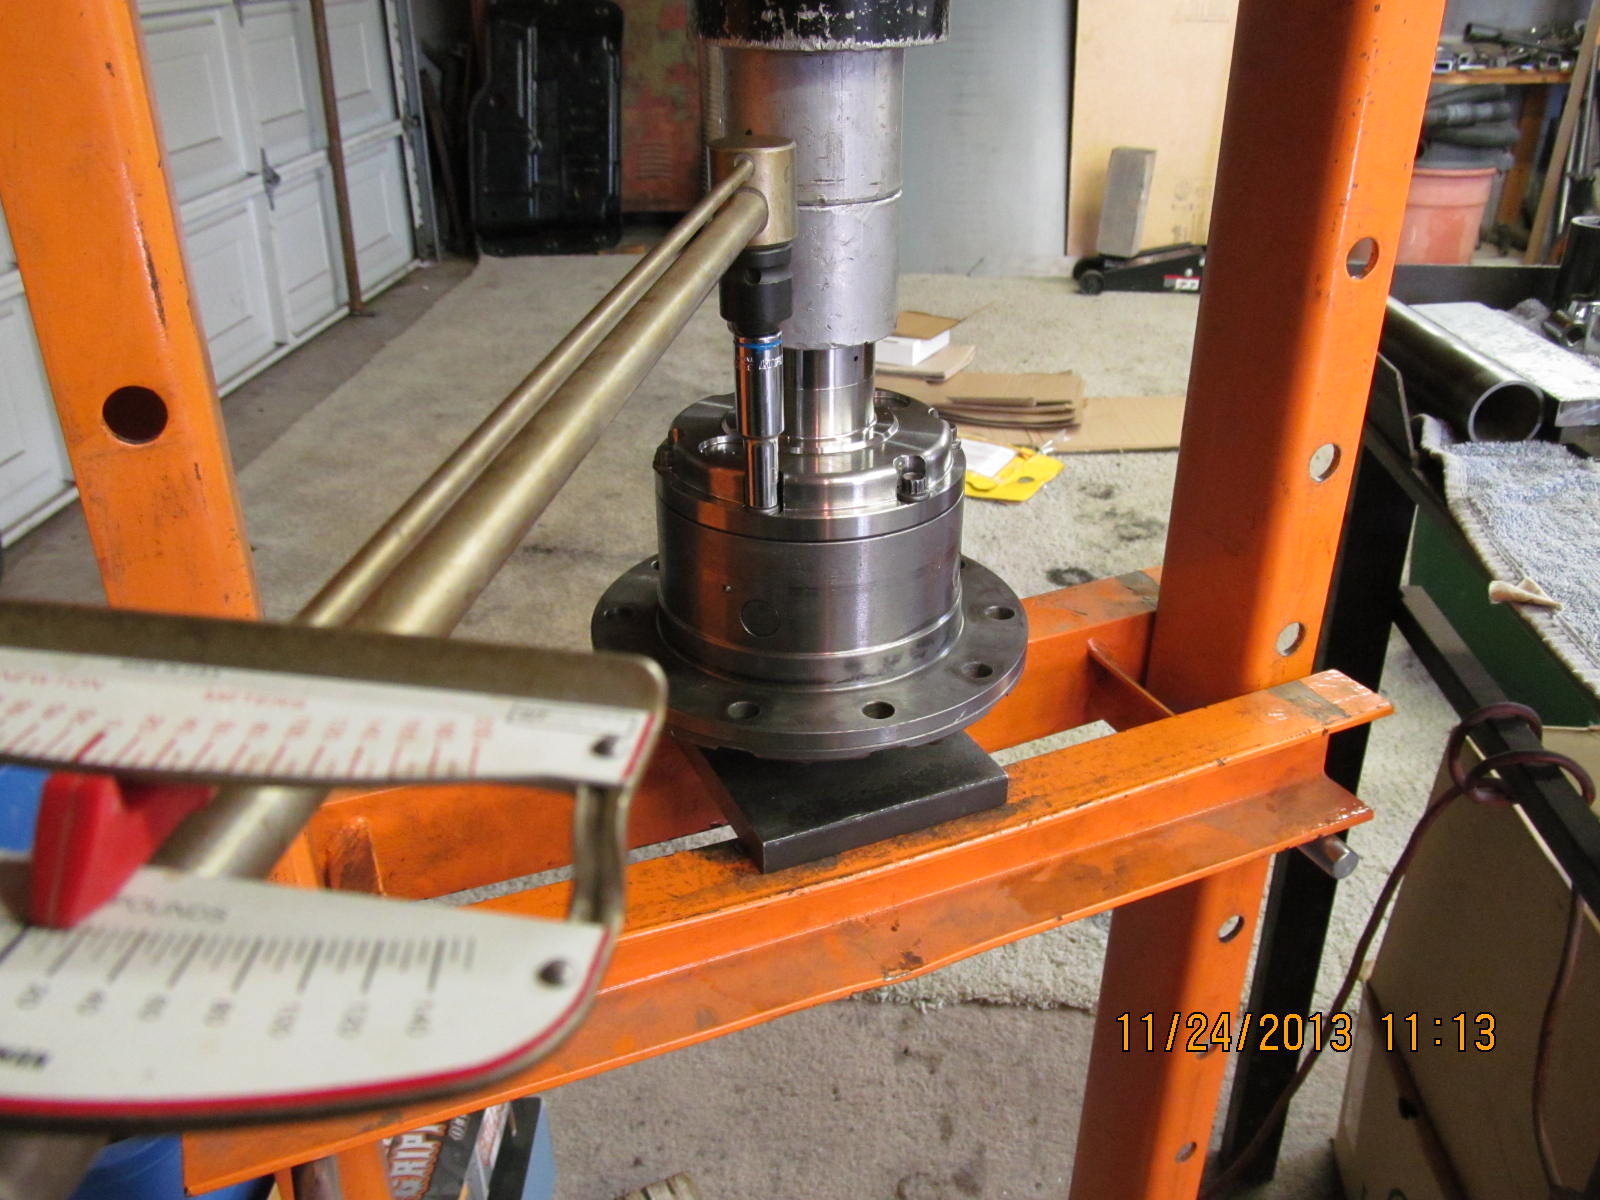
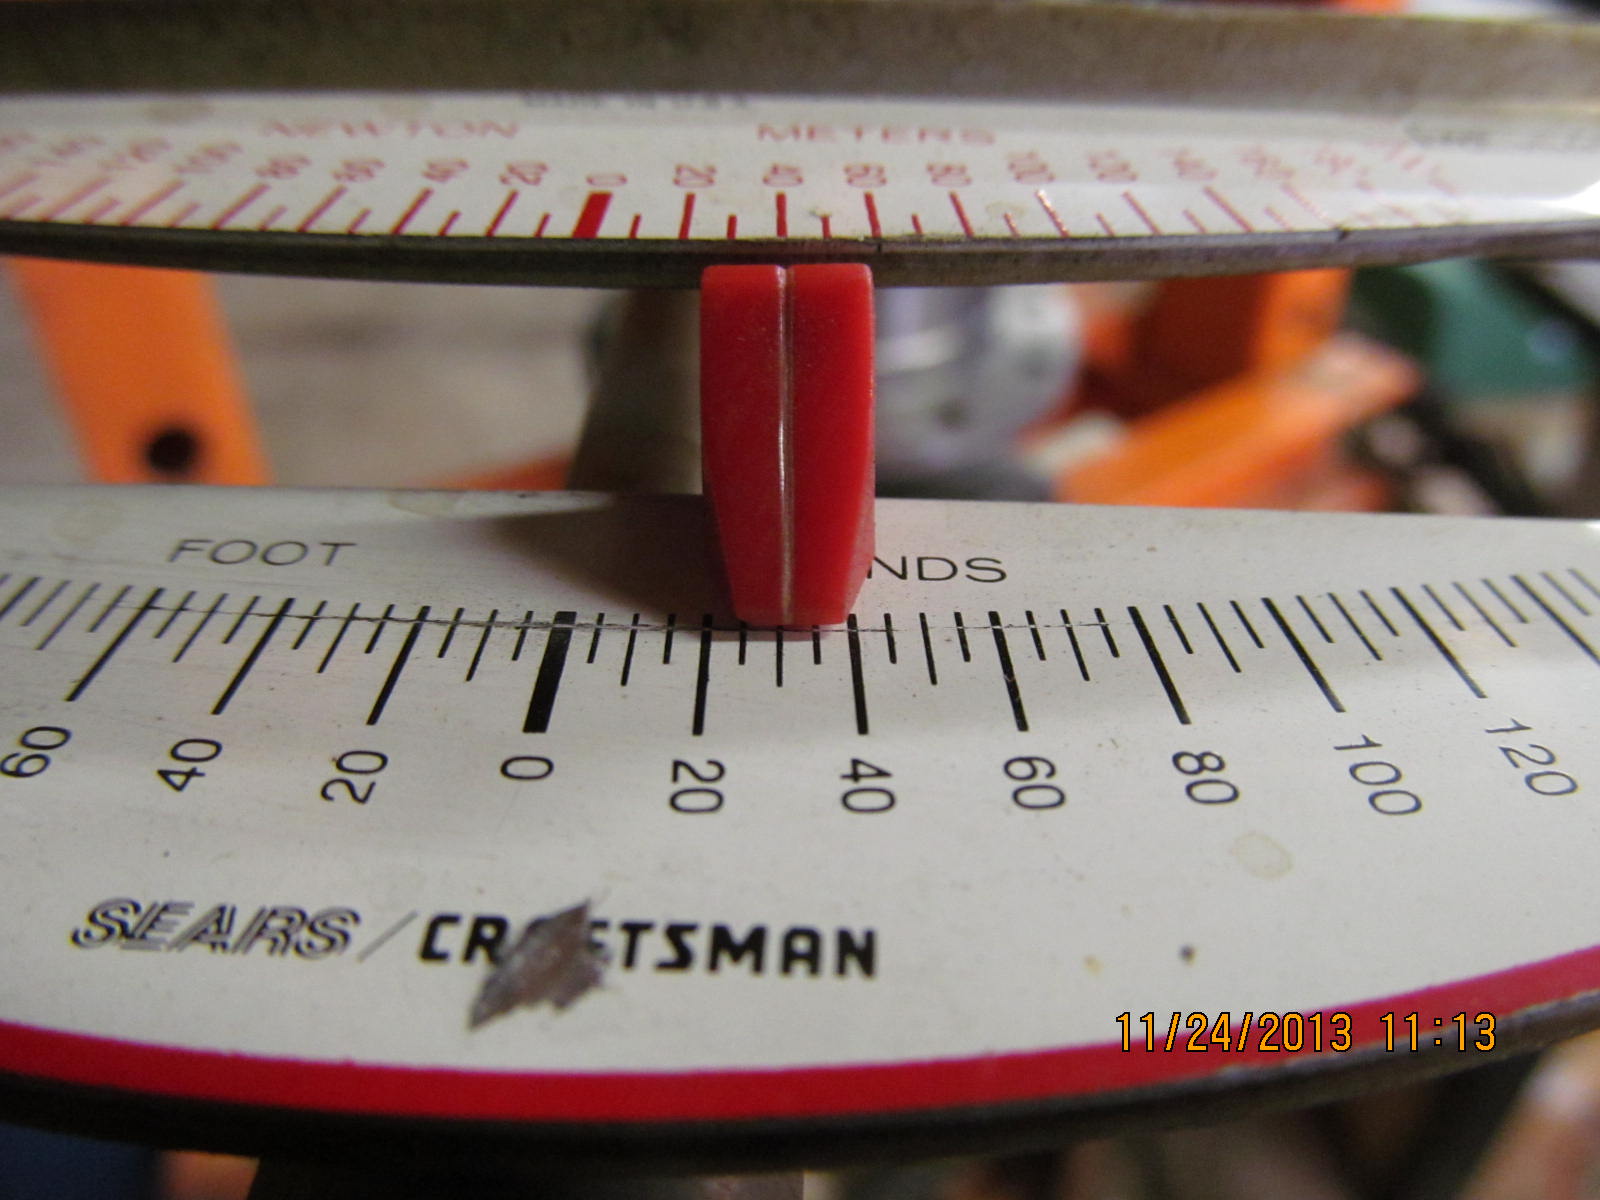
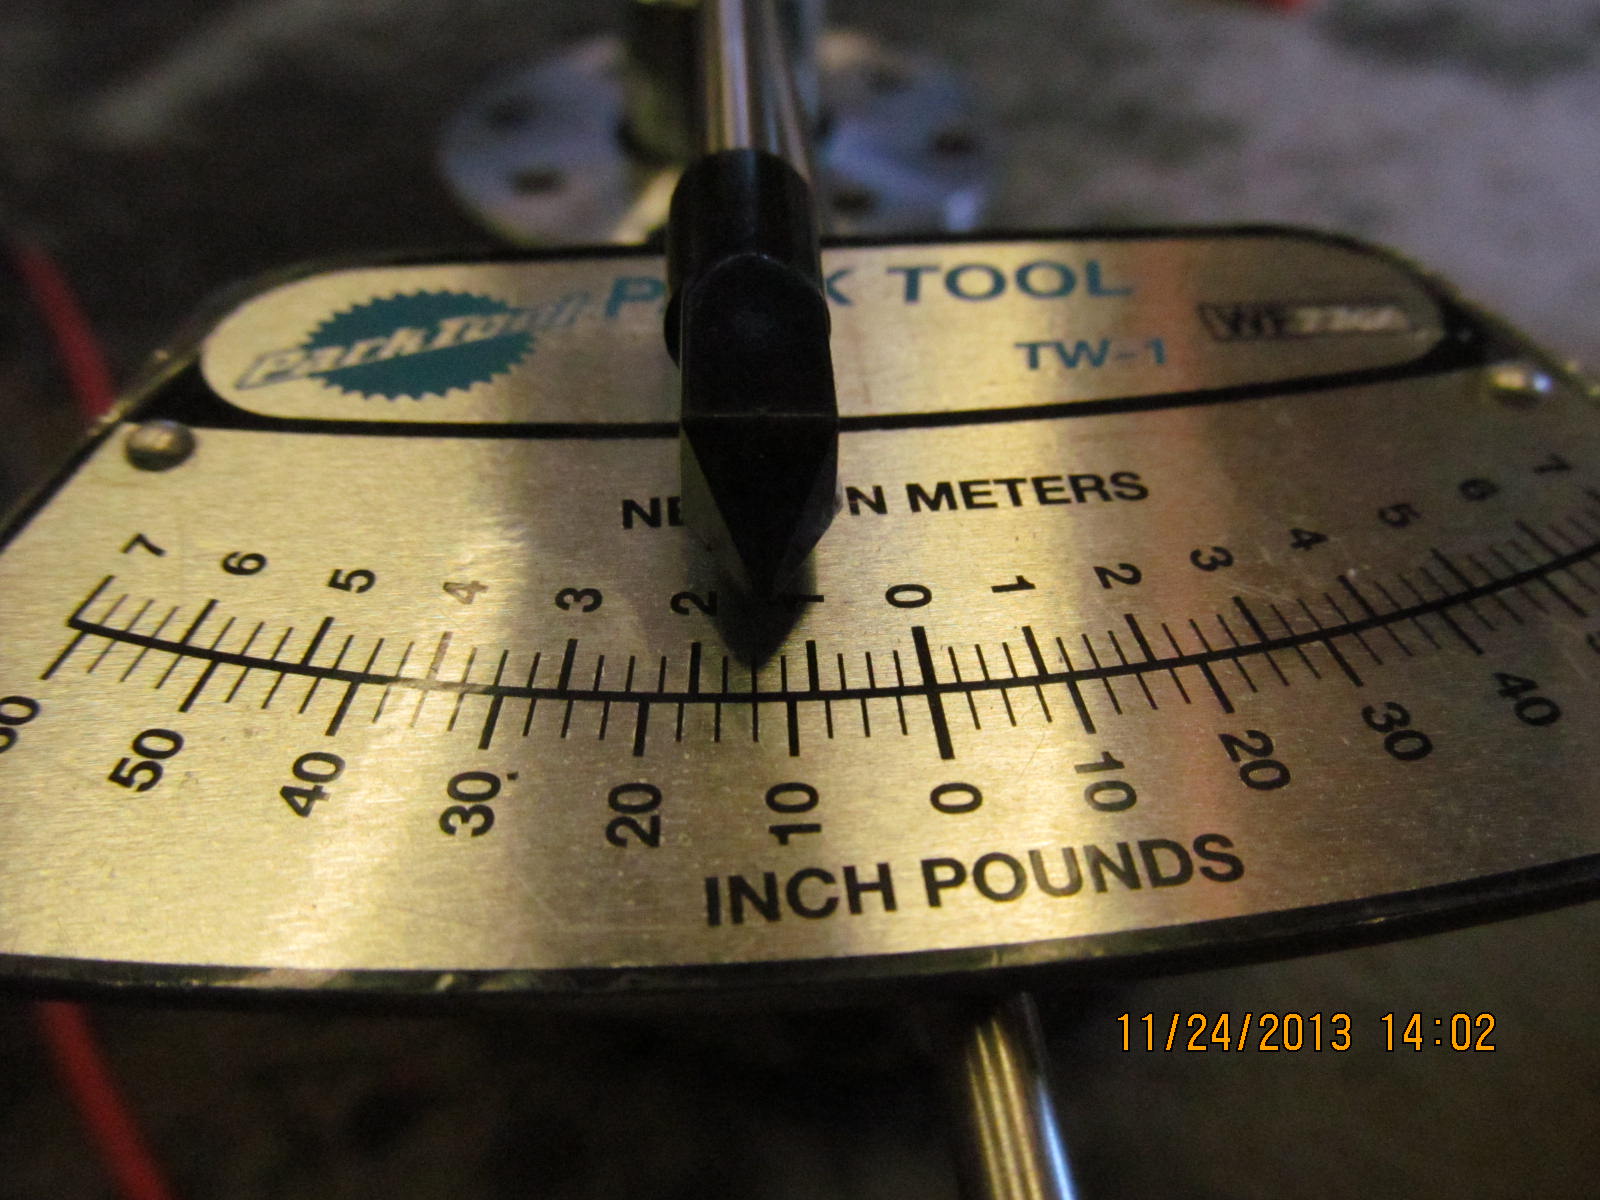
With the ARB case out, the pinion preload can be checked. It was a 'notchy' 12 in/lb. but it did not feel as rough as I thought it
would when I turned the flange back and forth by hand.
|
|
|
|
|
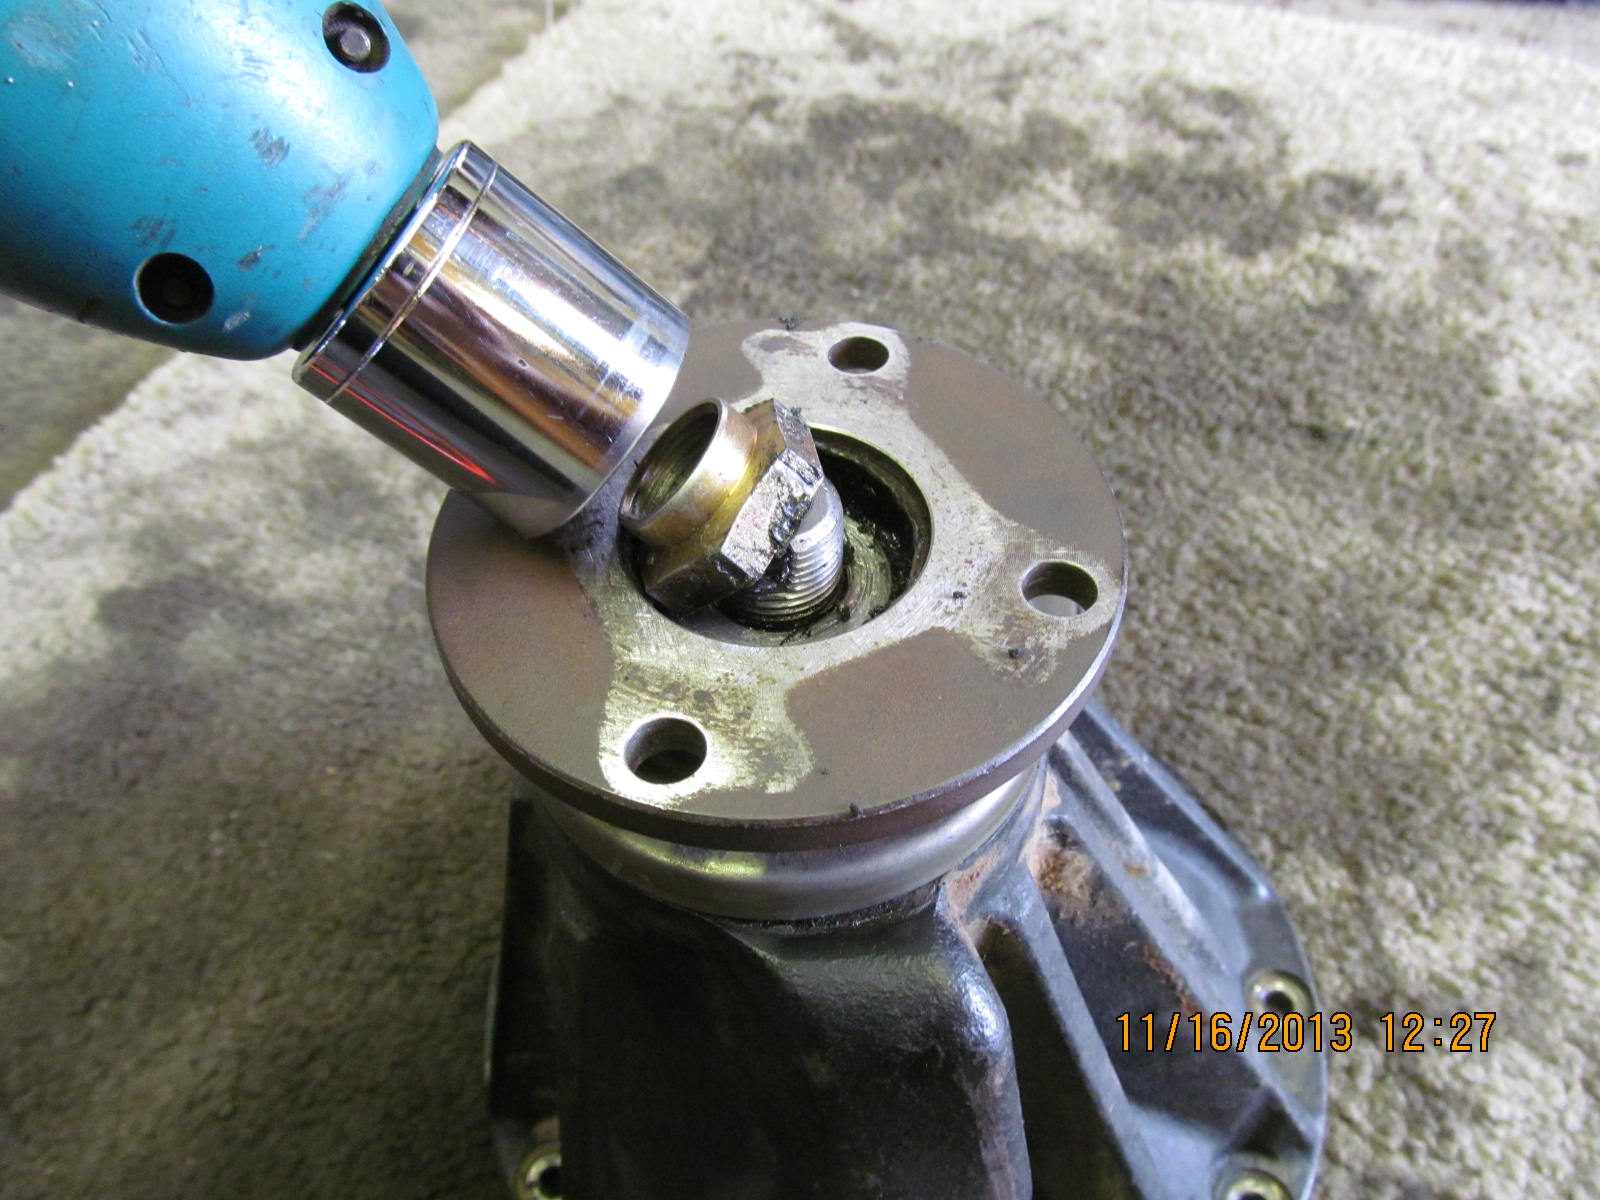
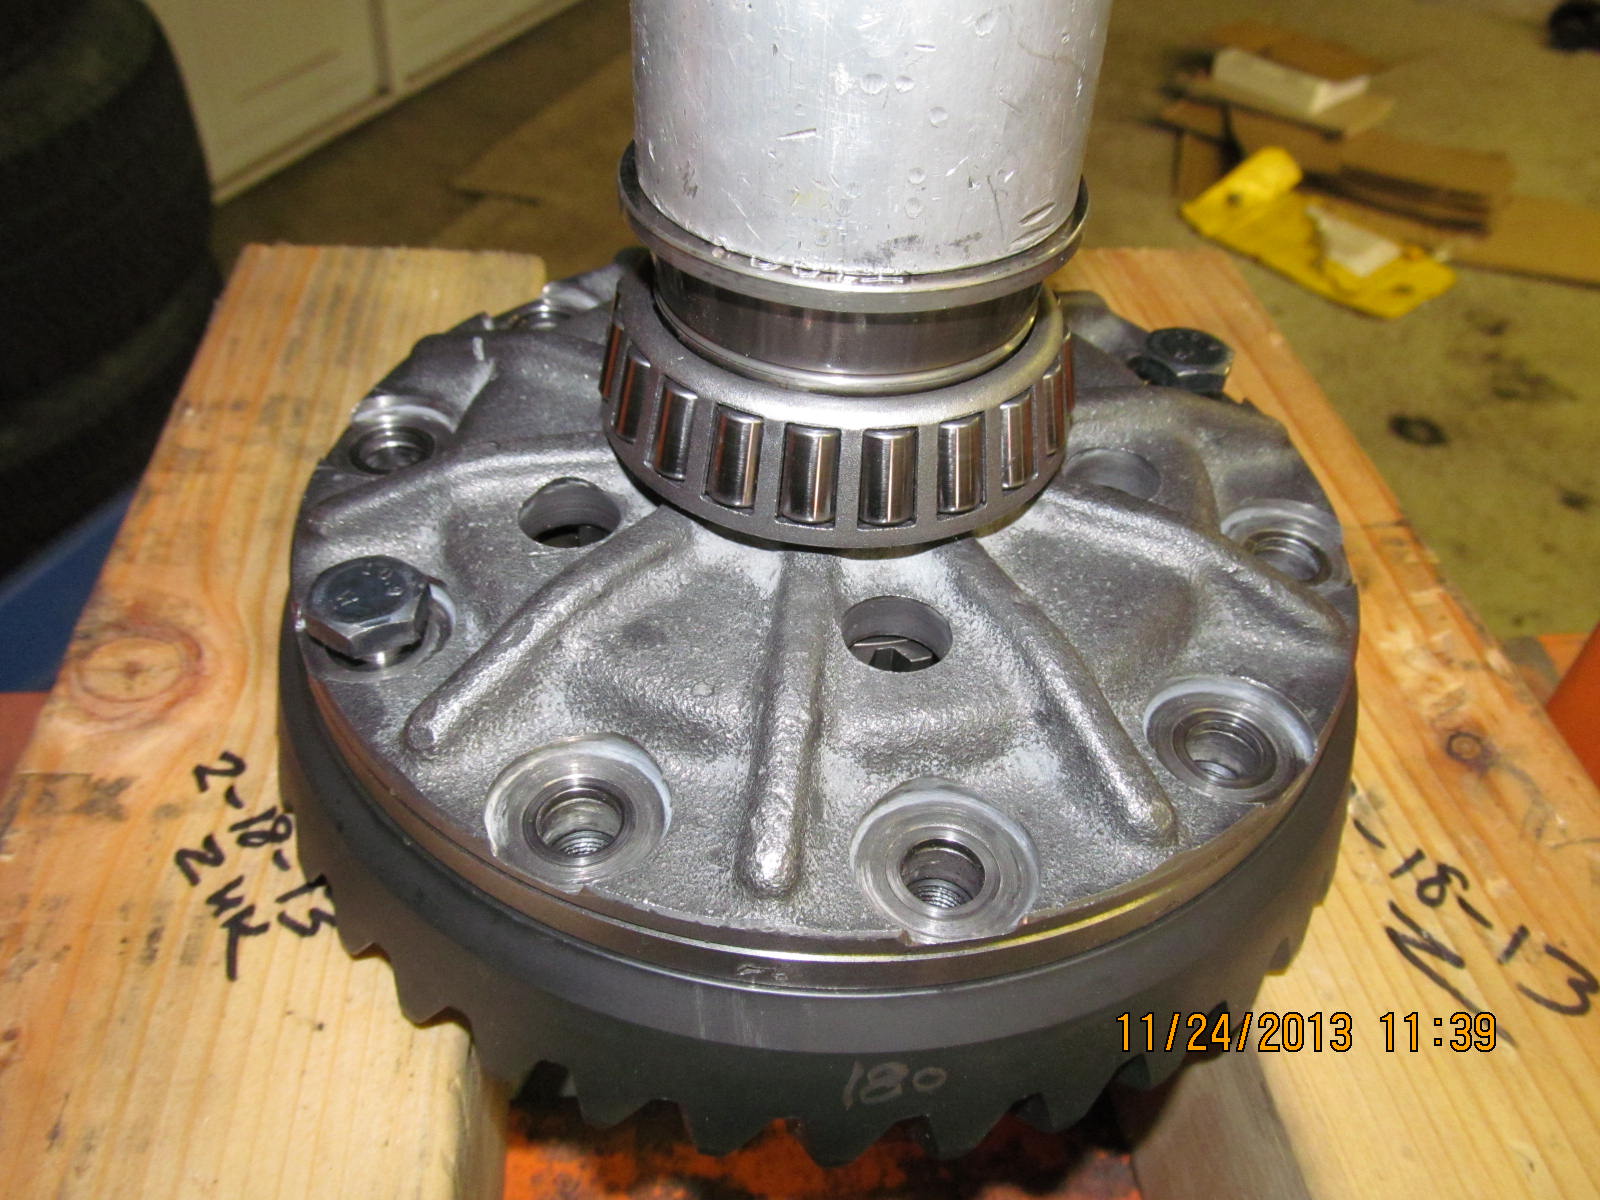
Teardown of the pinion end begins. The electric impact easily whizzed the 30mm nut off.
|
|
|
|
|
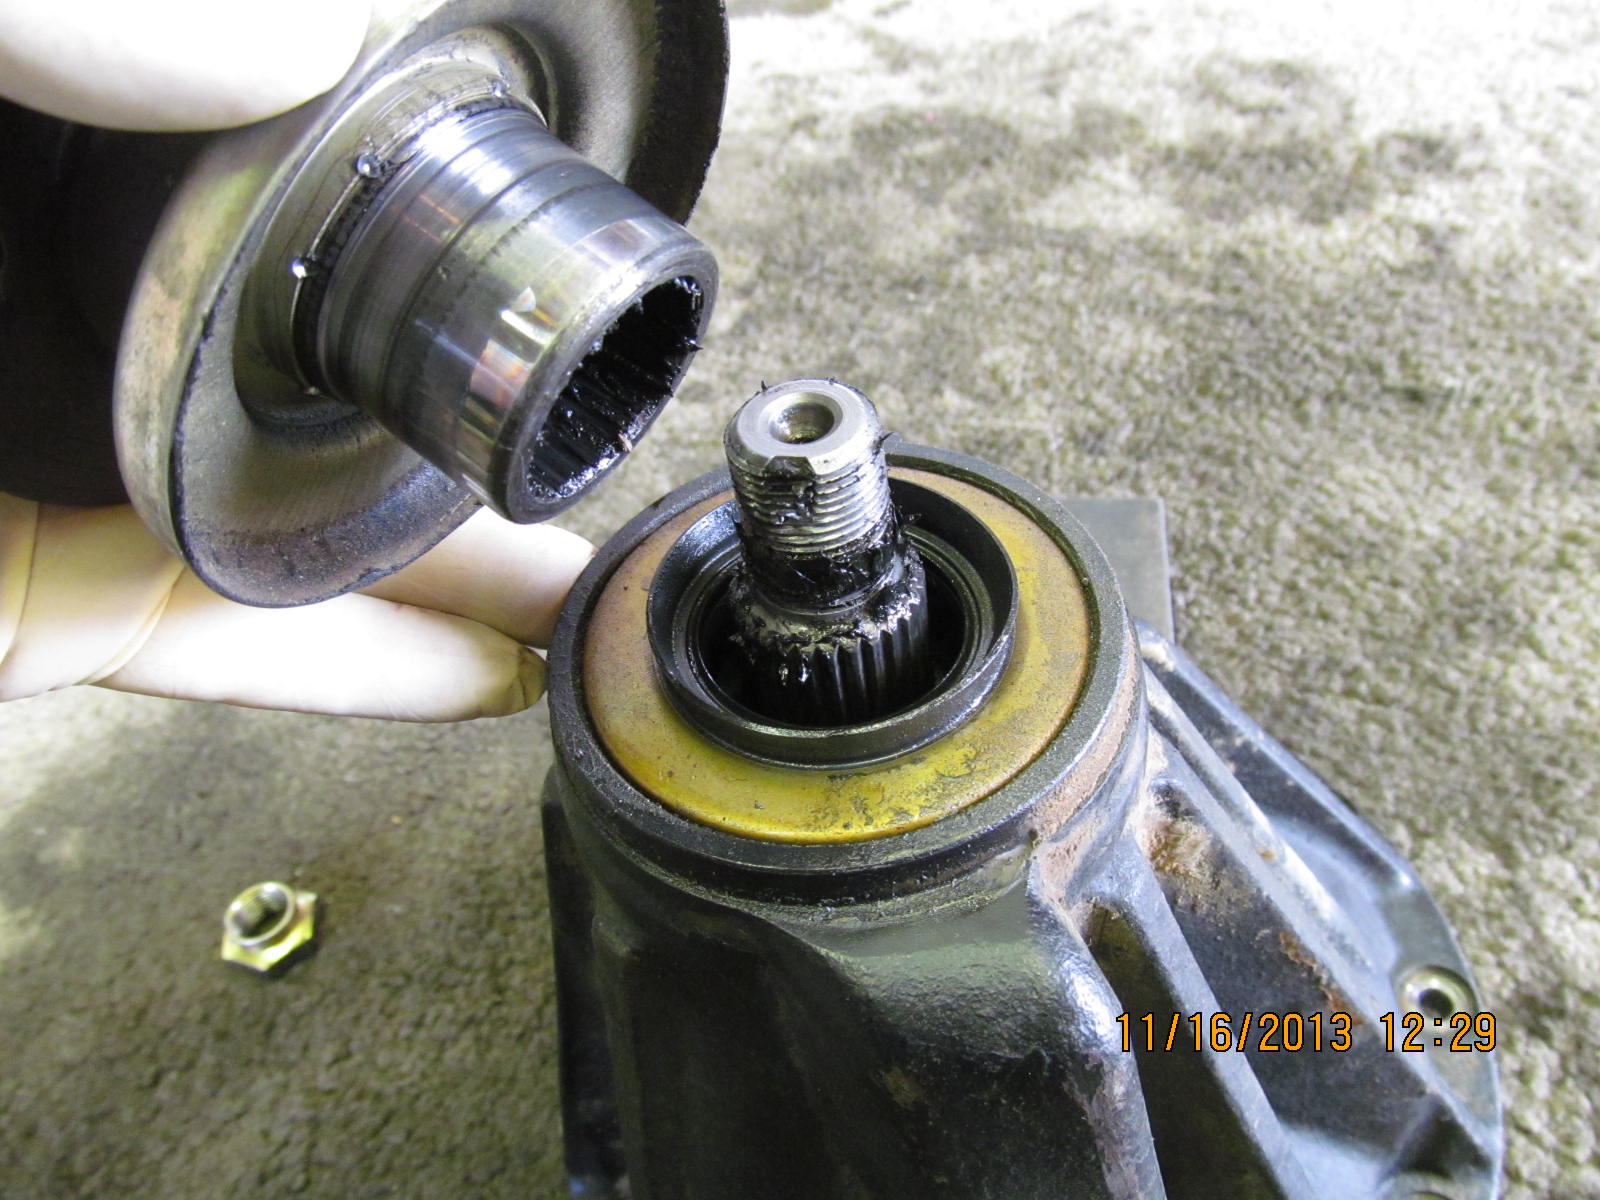
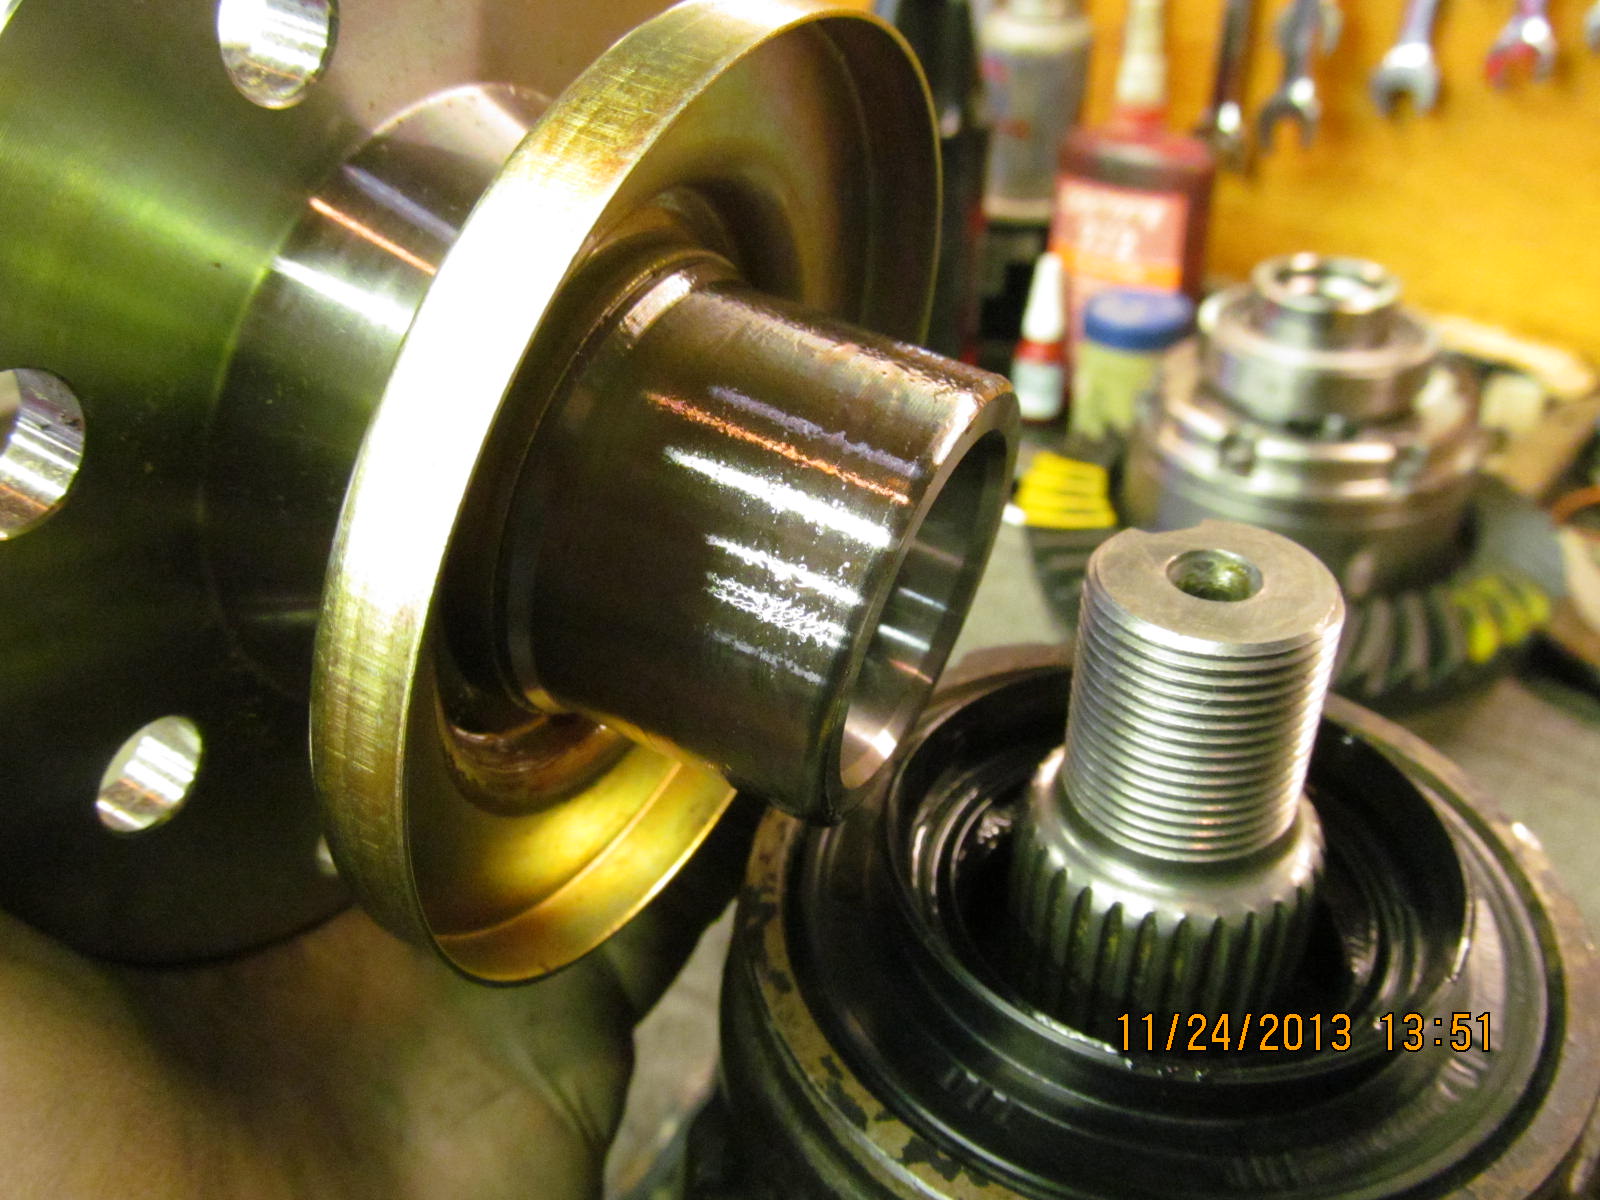
Pinion flange slides off rather easy as is typical with most 27 spline flanges.
|
|
|
|
|
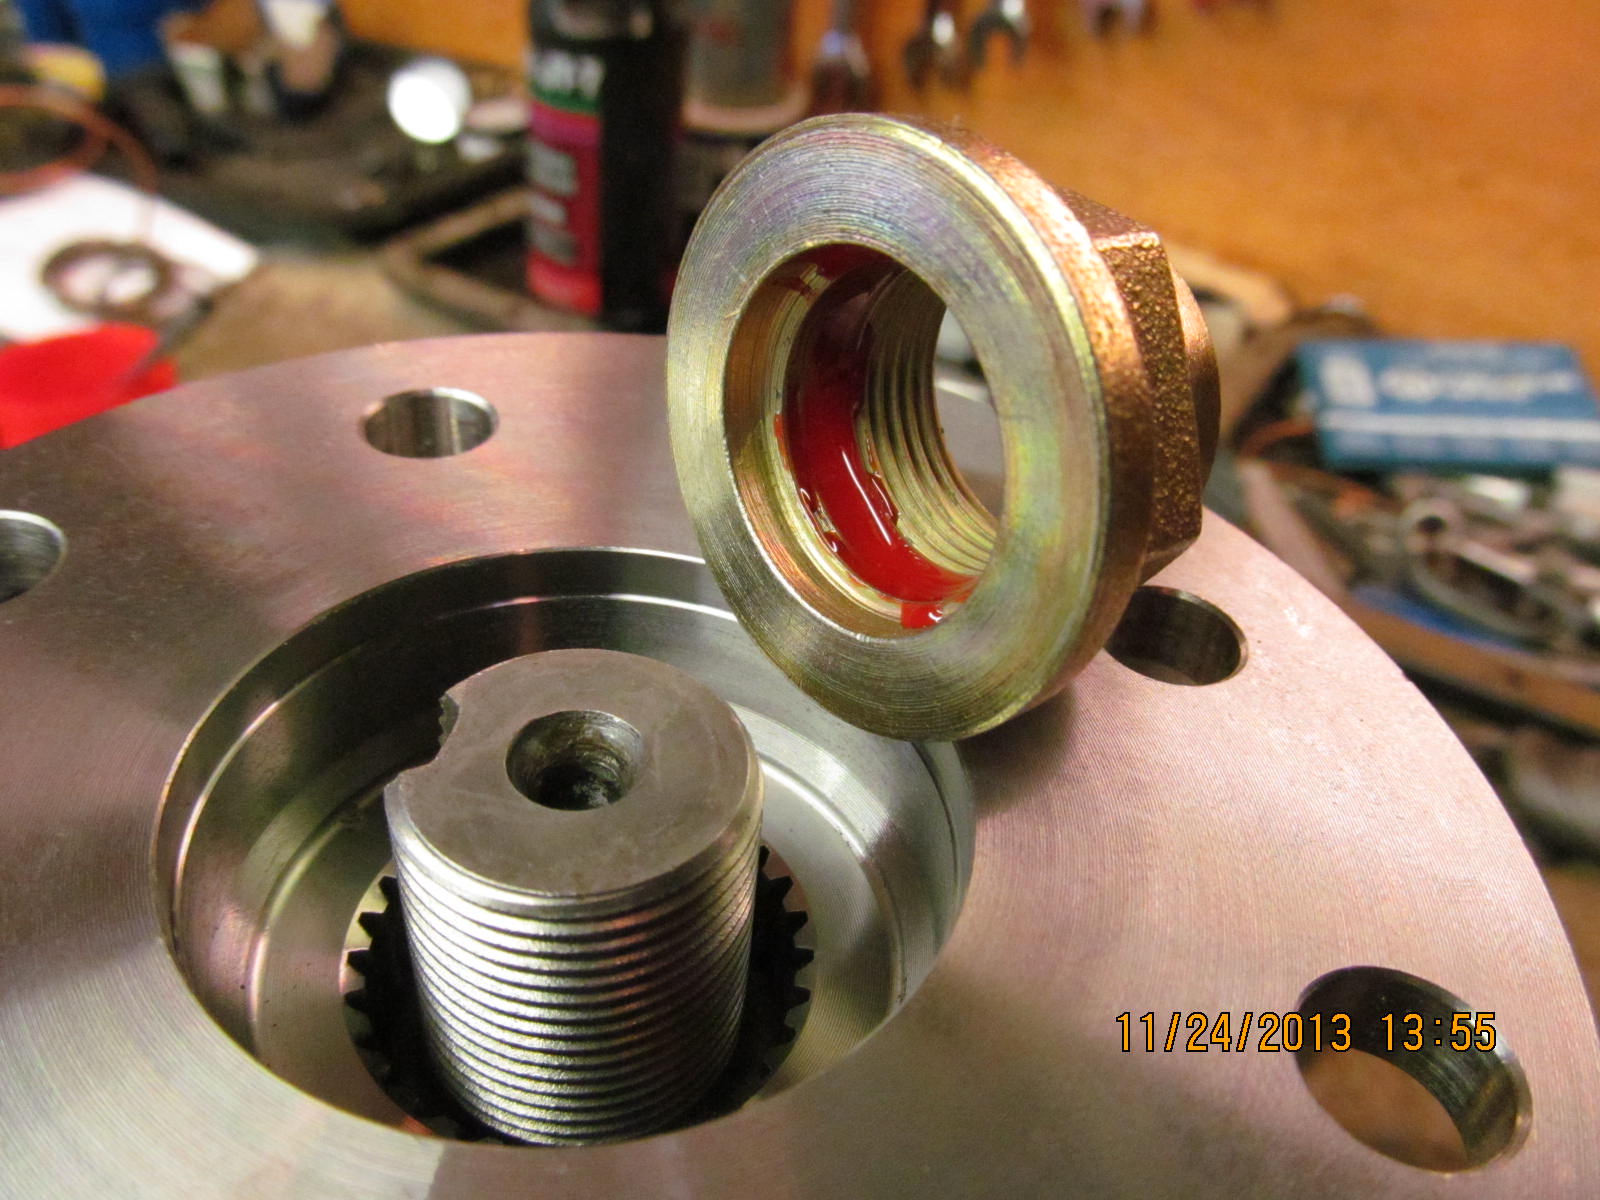
This one did have a solid collar but look at all the cosmetic damage from the broken teeth in the oil.
|
|
|
|
|
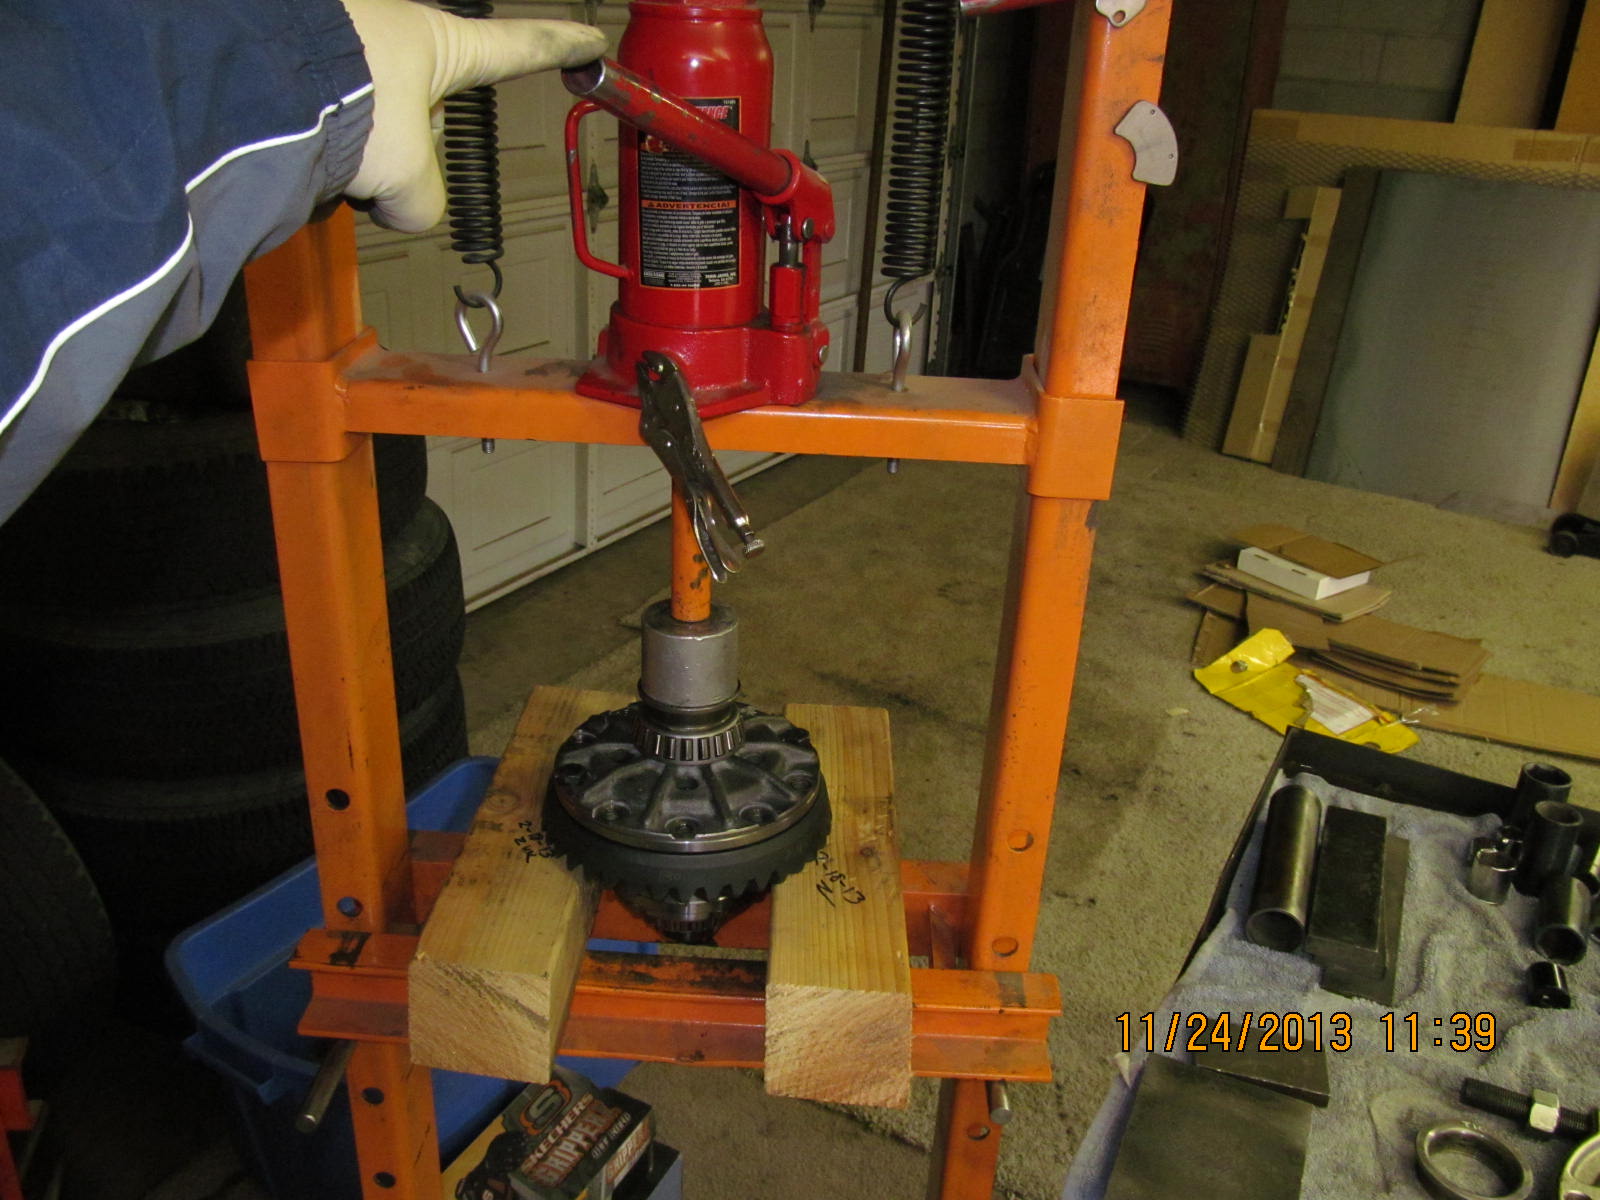
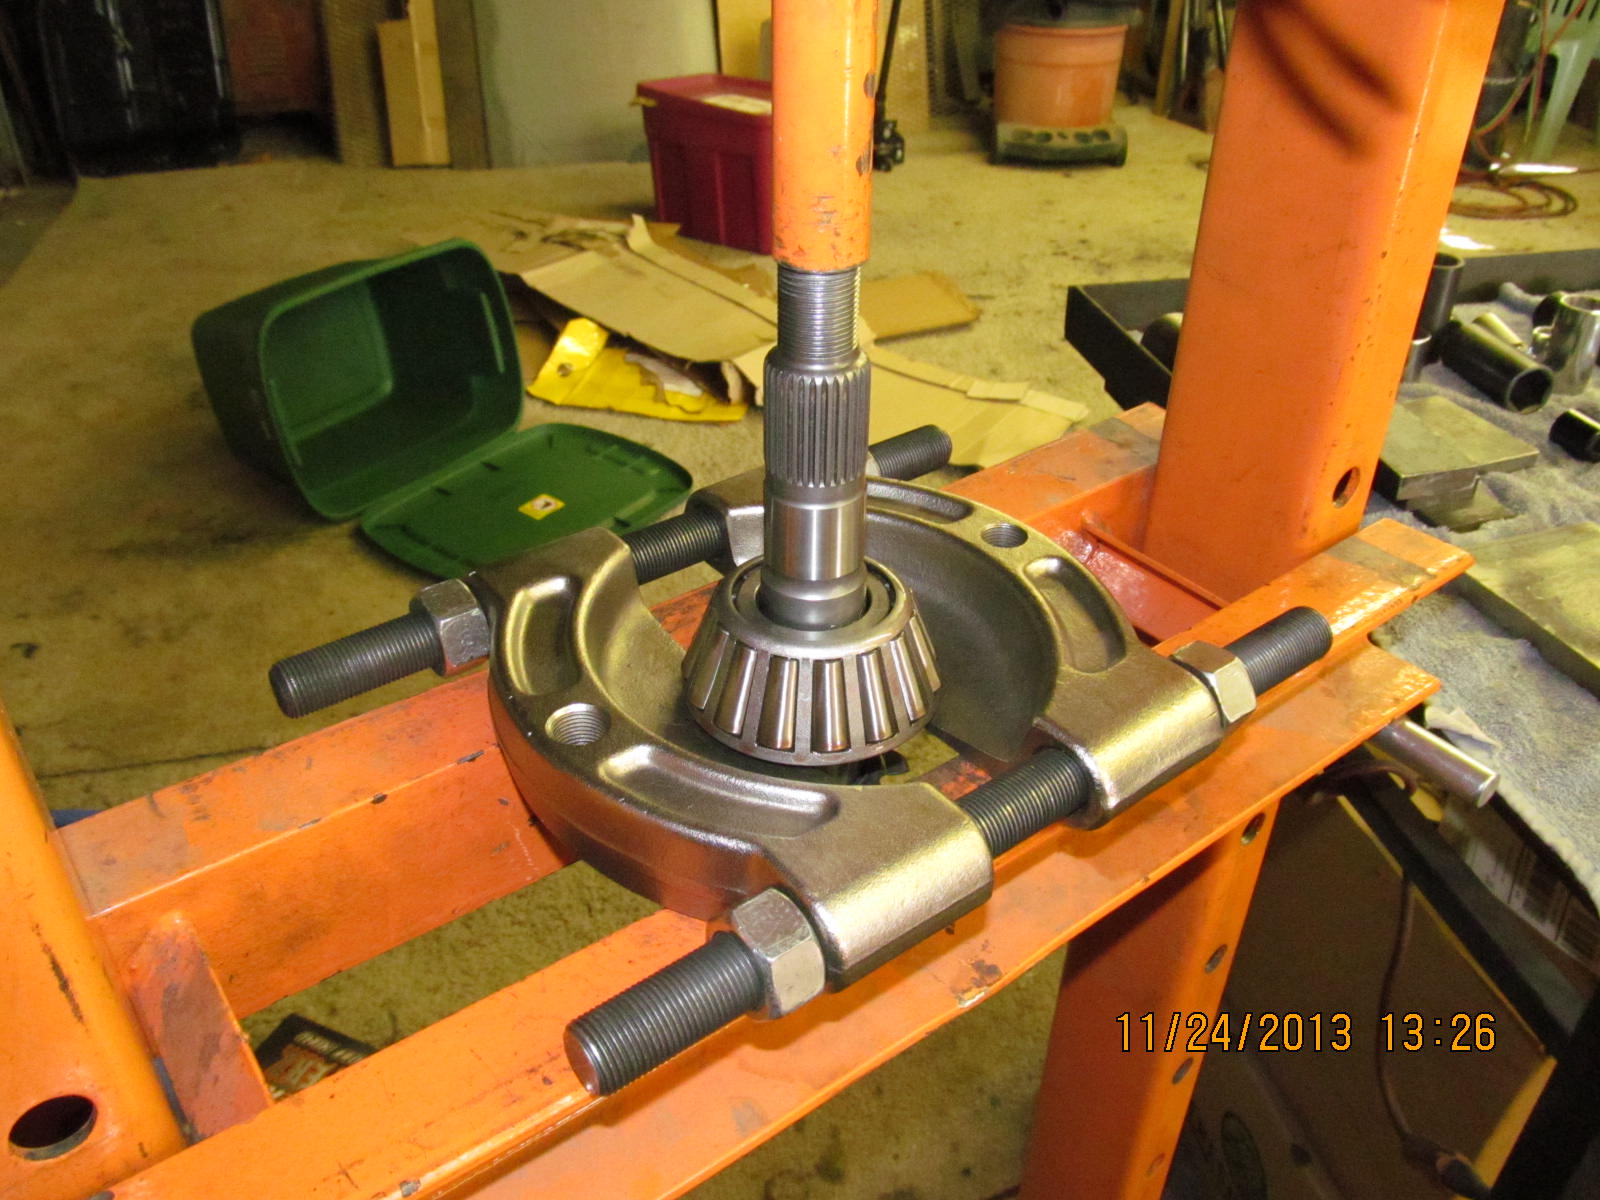
Let's press the bearing off and see what pinion shim value was used.
|
|
|
|
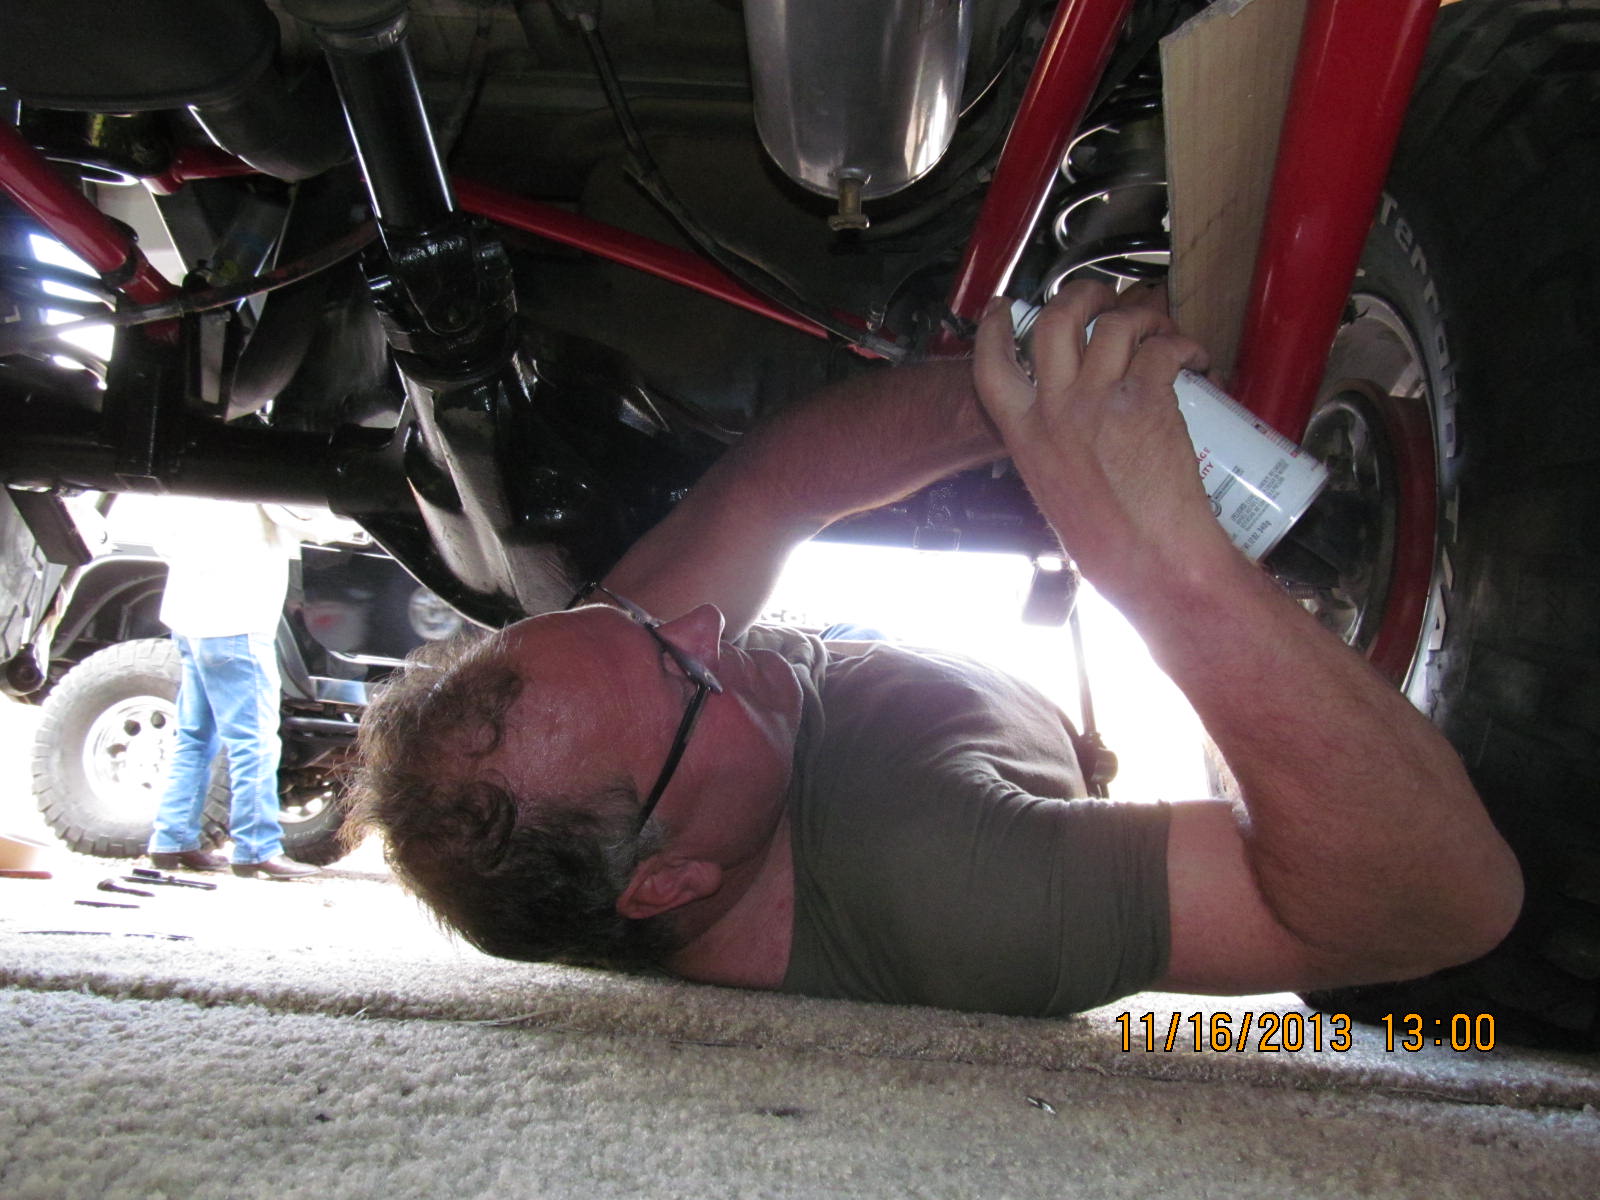
Meanwhile, in the other half of my shop is my brother-in-law's 2002 TJ. My dad is shown on the left helping out with the newly
installed semi-custom long arm kit.
|
|
|
|
Jeff really is one of the best with a spray can in his hand. That's a stout dana44 there that has 456 gears and
an Aussie set up by me. None of that dana35 stuff.
|
|
|
|
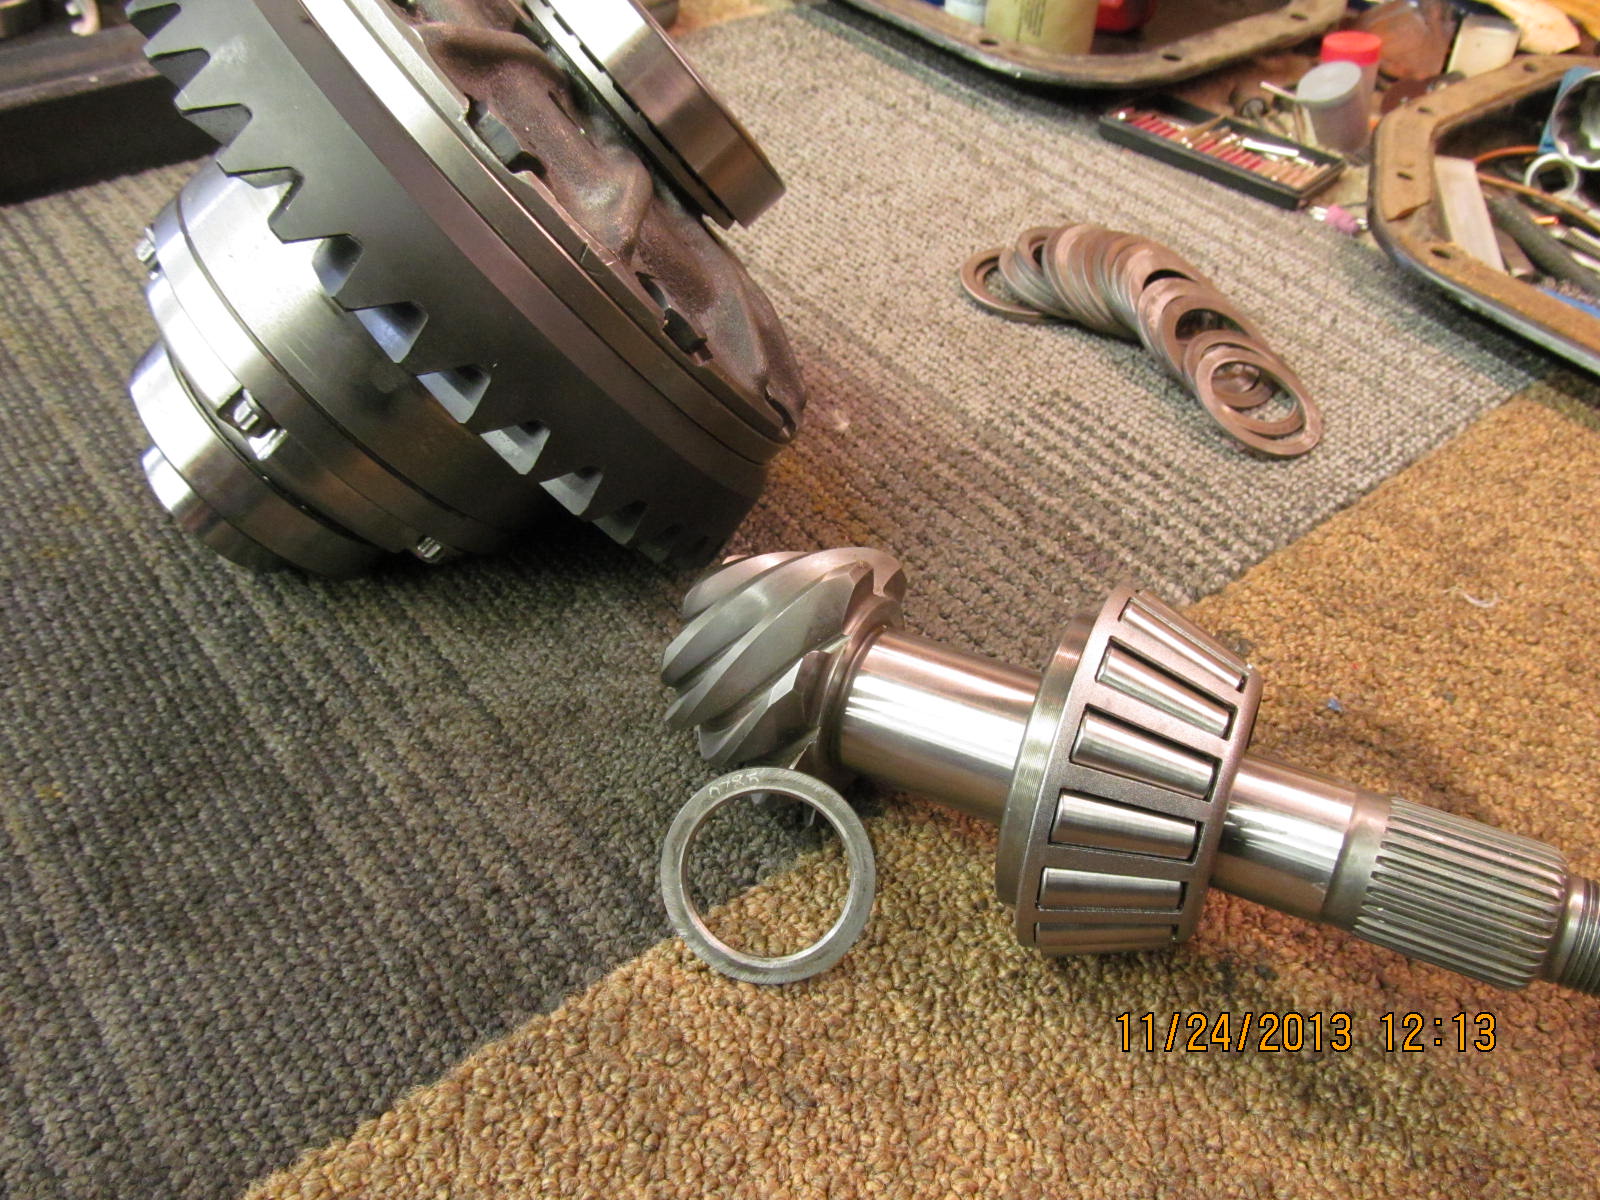
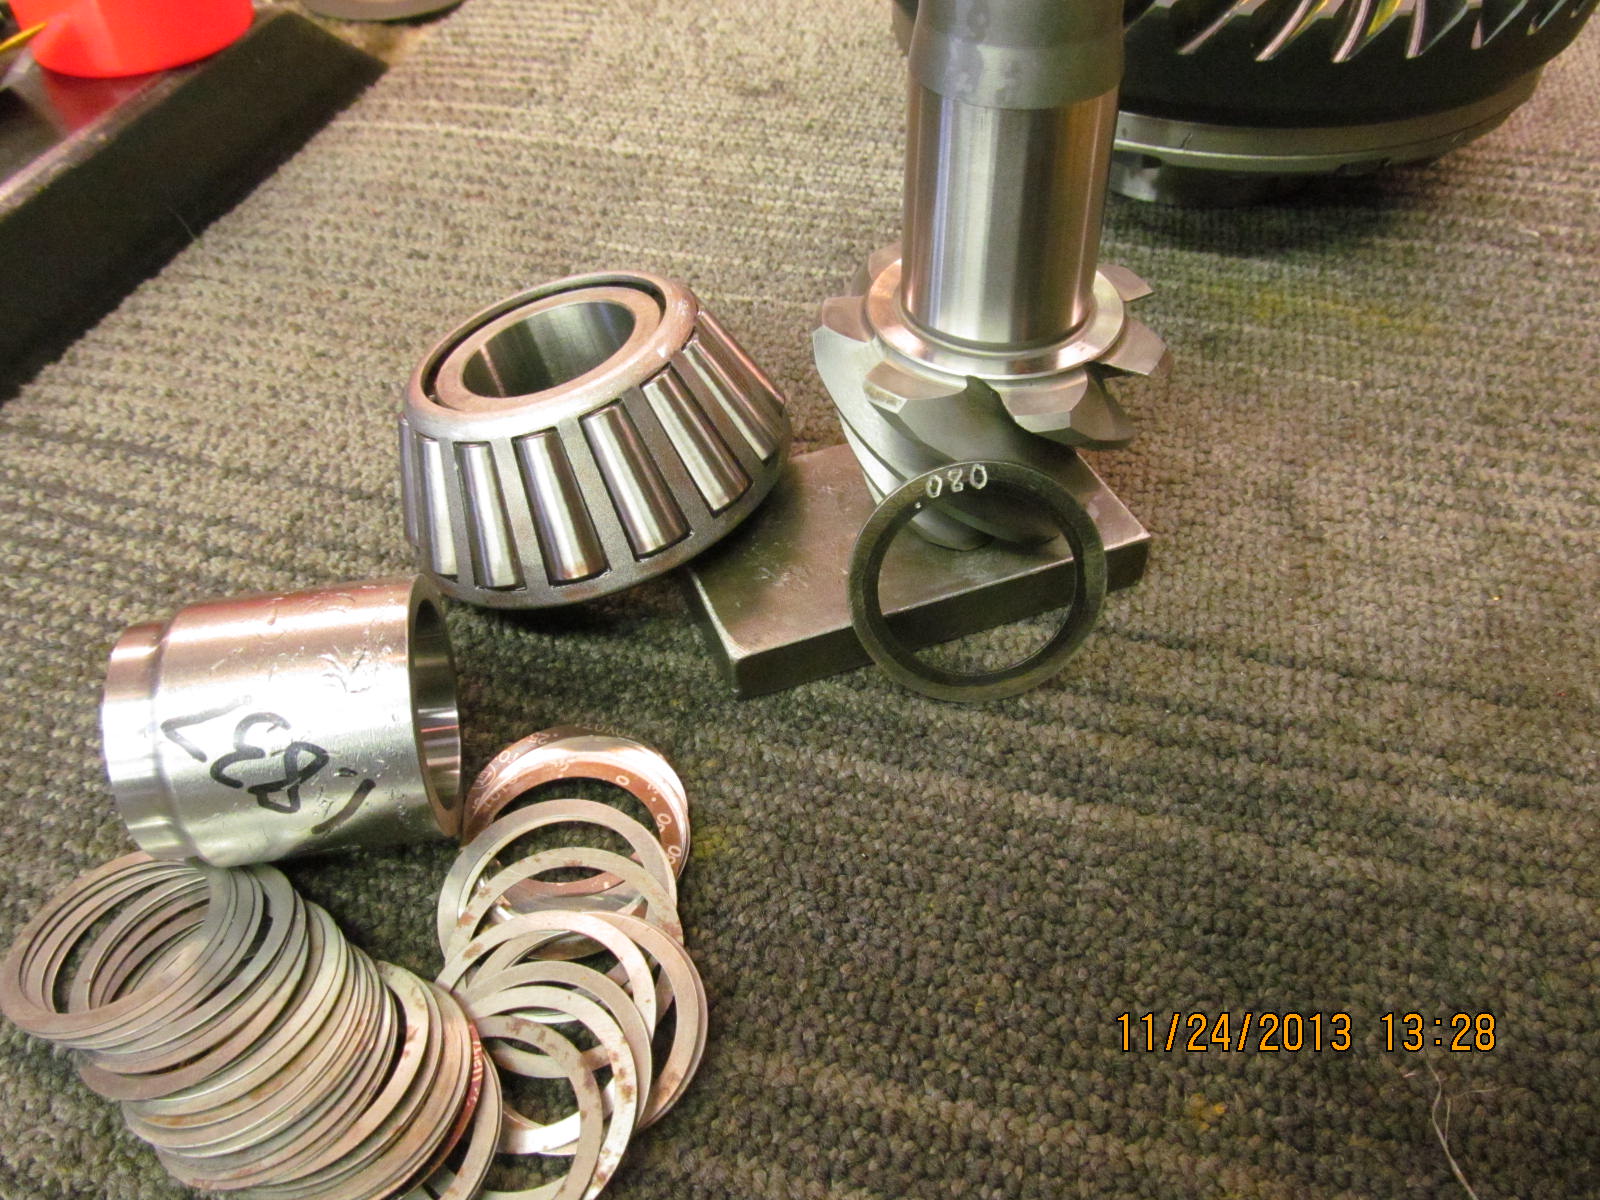
Back to Rob's install....looks like the total pinion shim thickness is about .075" and based on the shallowness I saw it looks
like it needed to be about .093" to be at the correct depth.
|
|
|
|
|
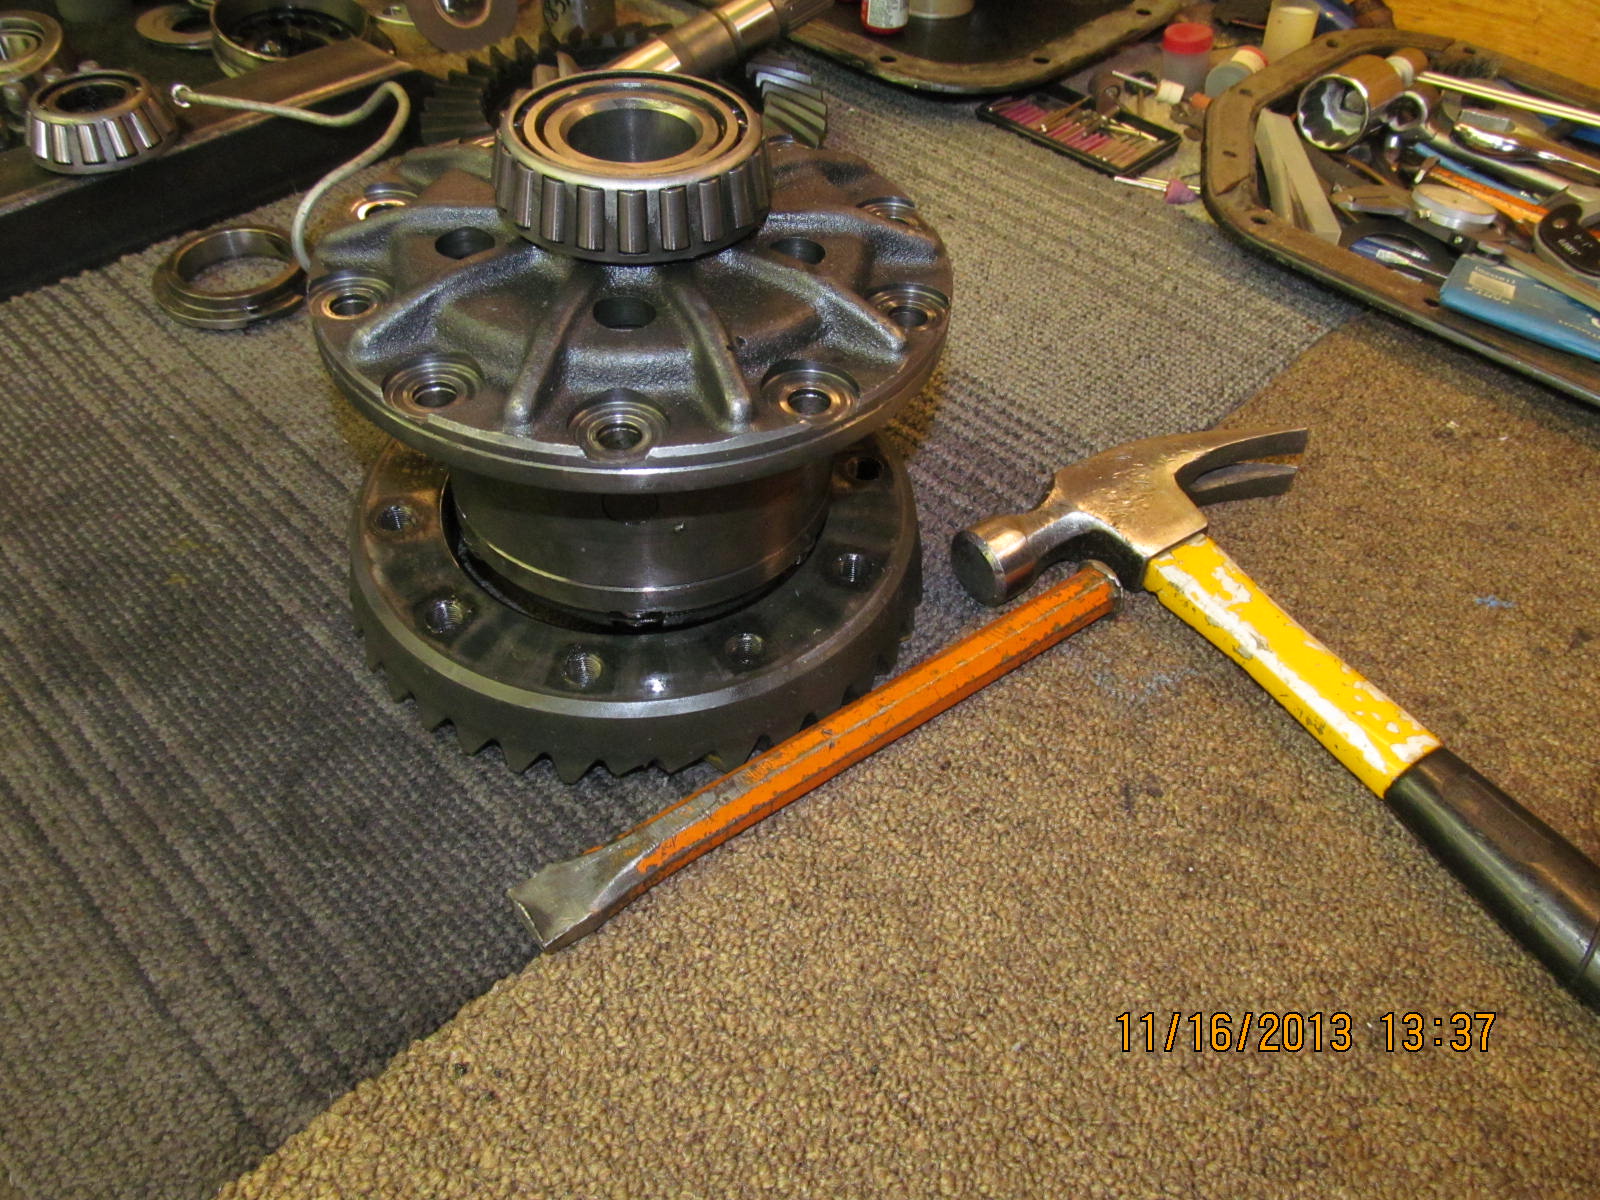
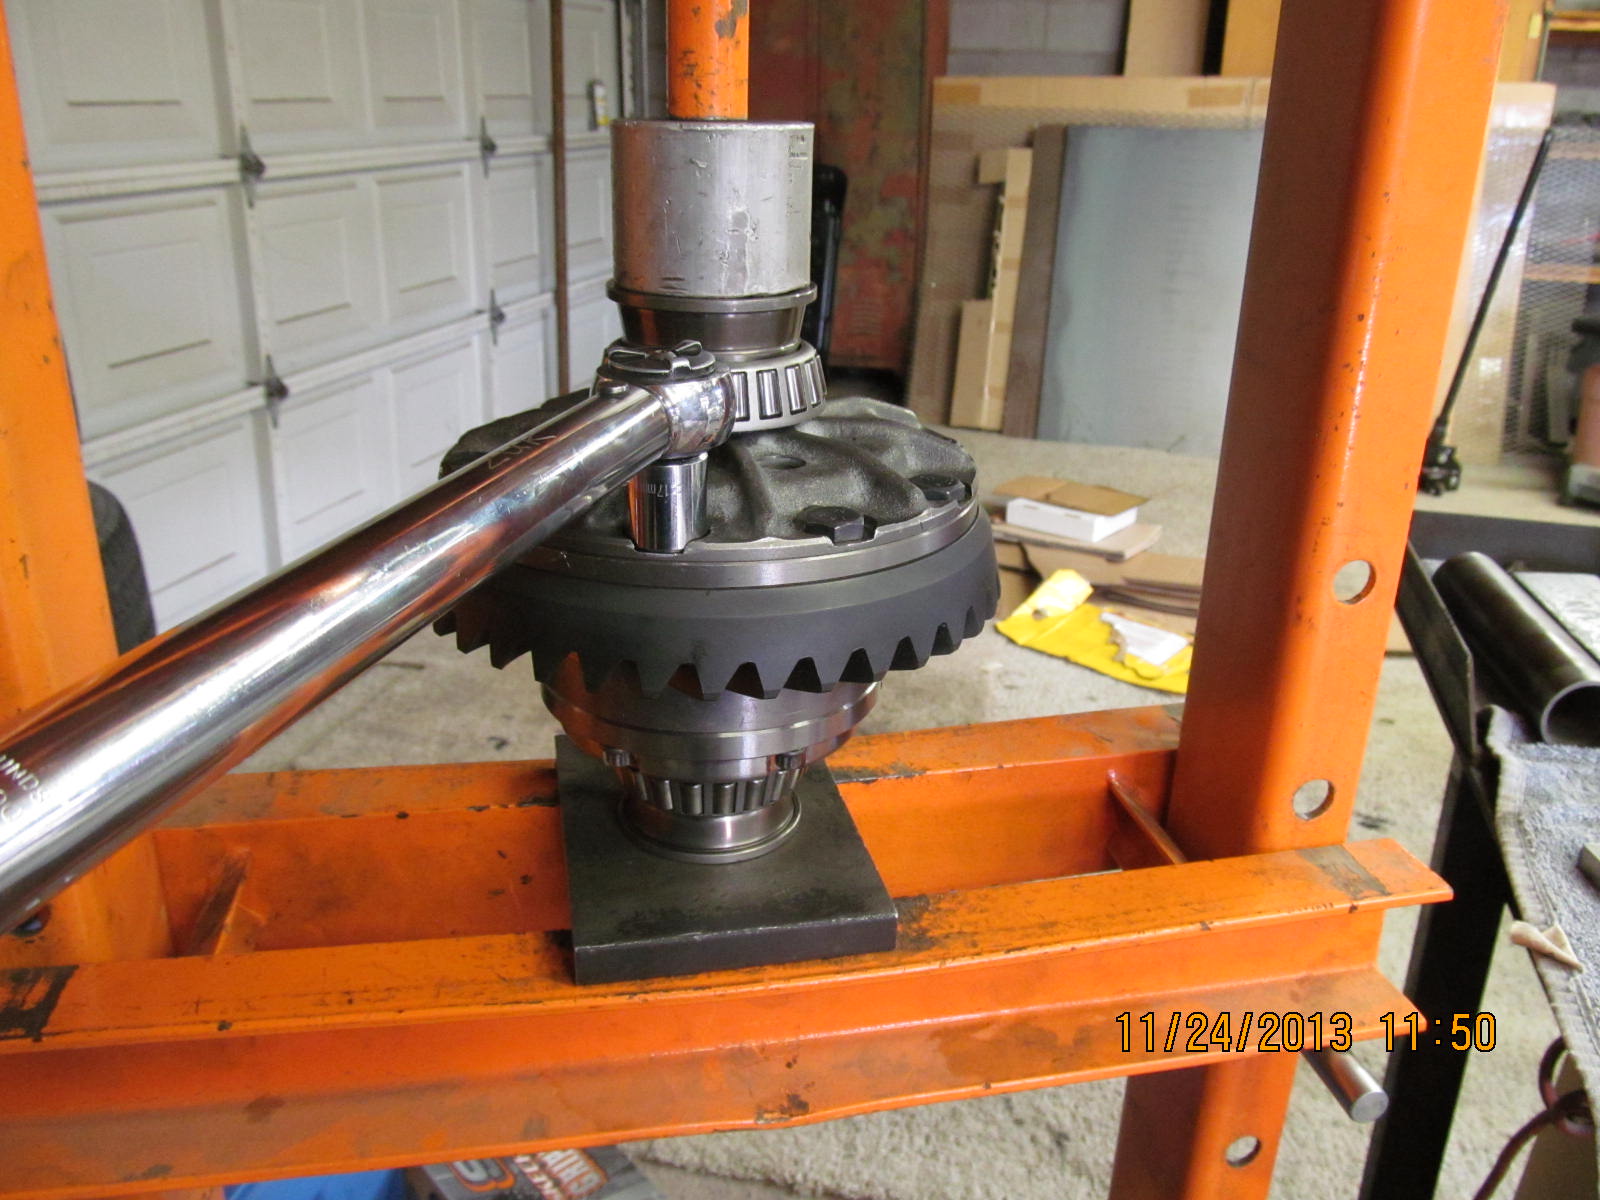
Tap off the busted ring gear...
|
|
|
|
|
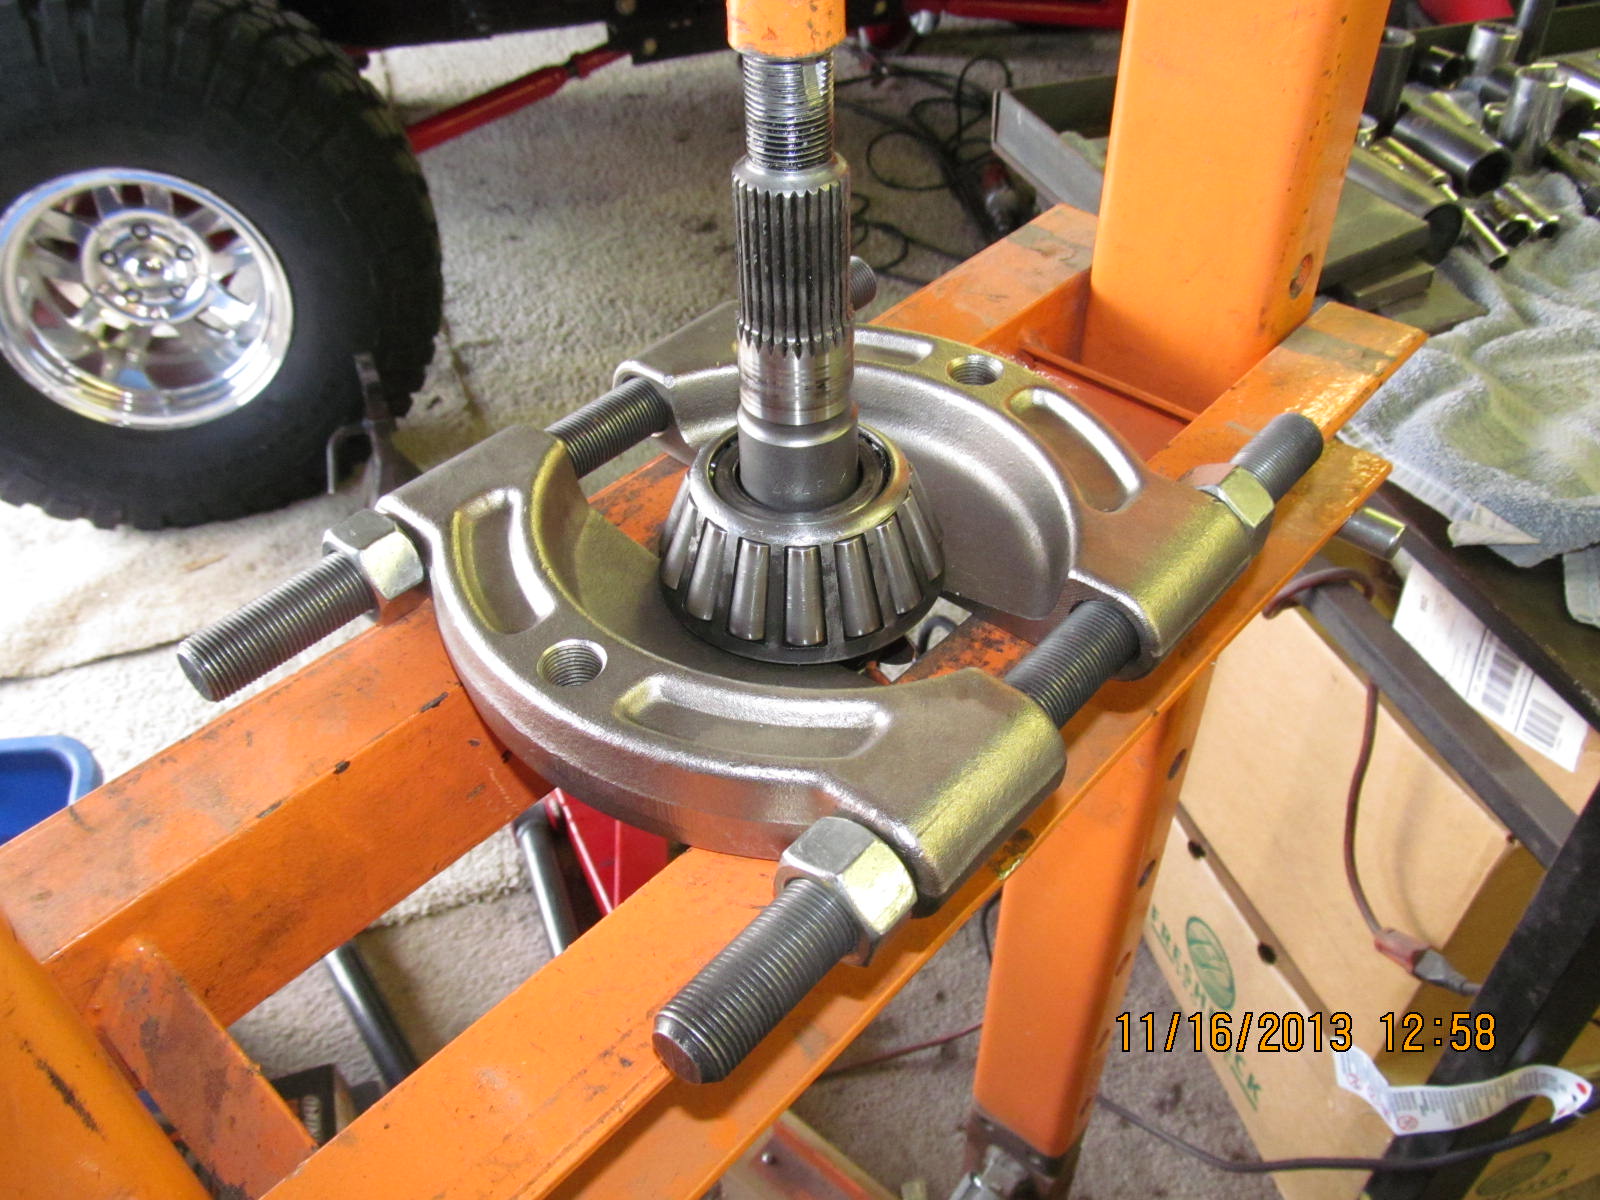
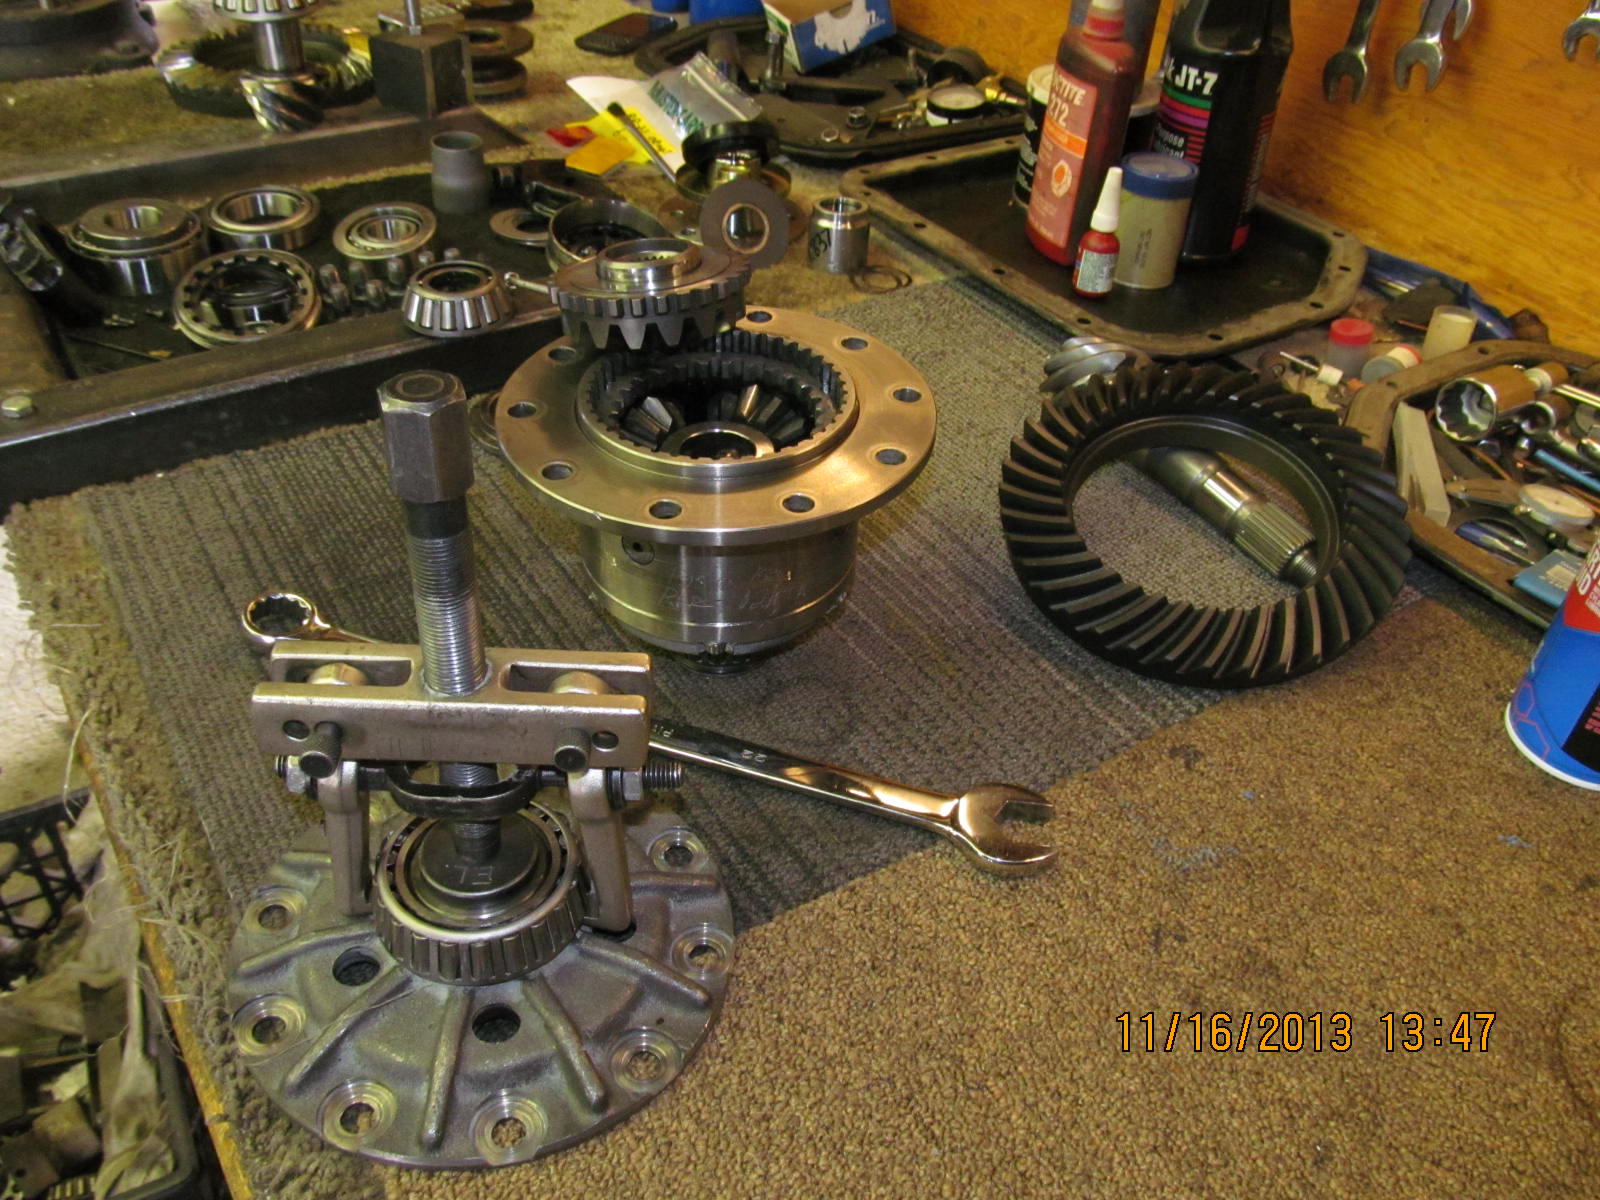
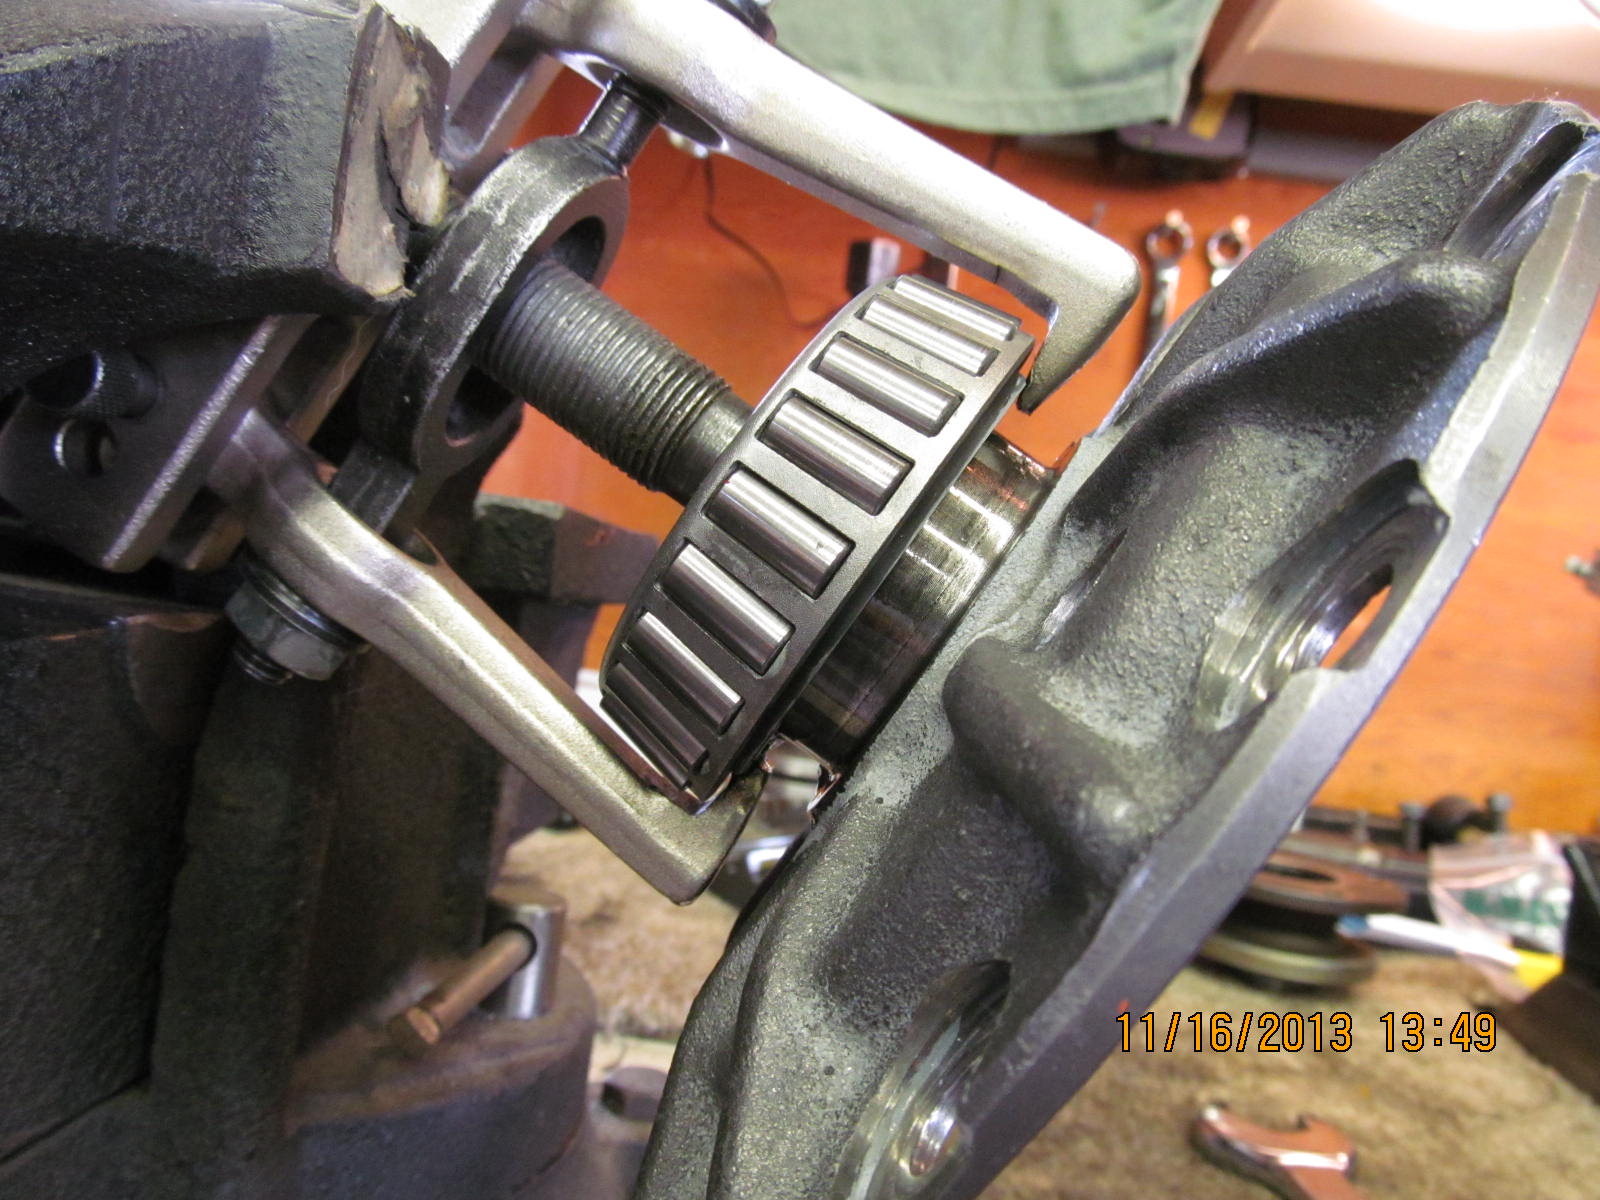
This bearing puller has fingers that can grab the bearing....
|
|
|
|
|
....and easily remove it.
|
|
|
|
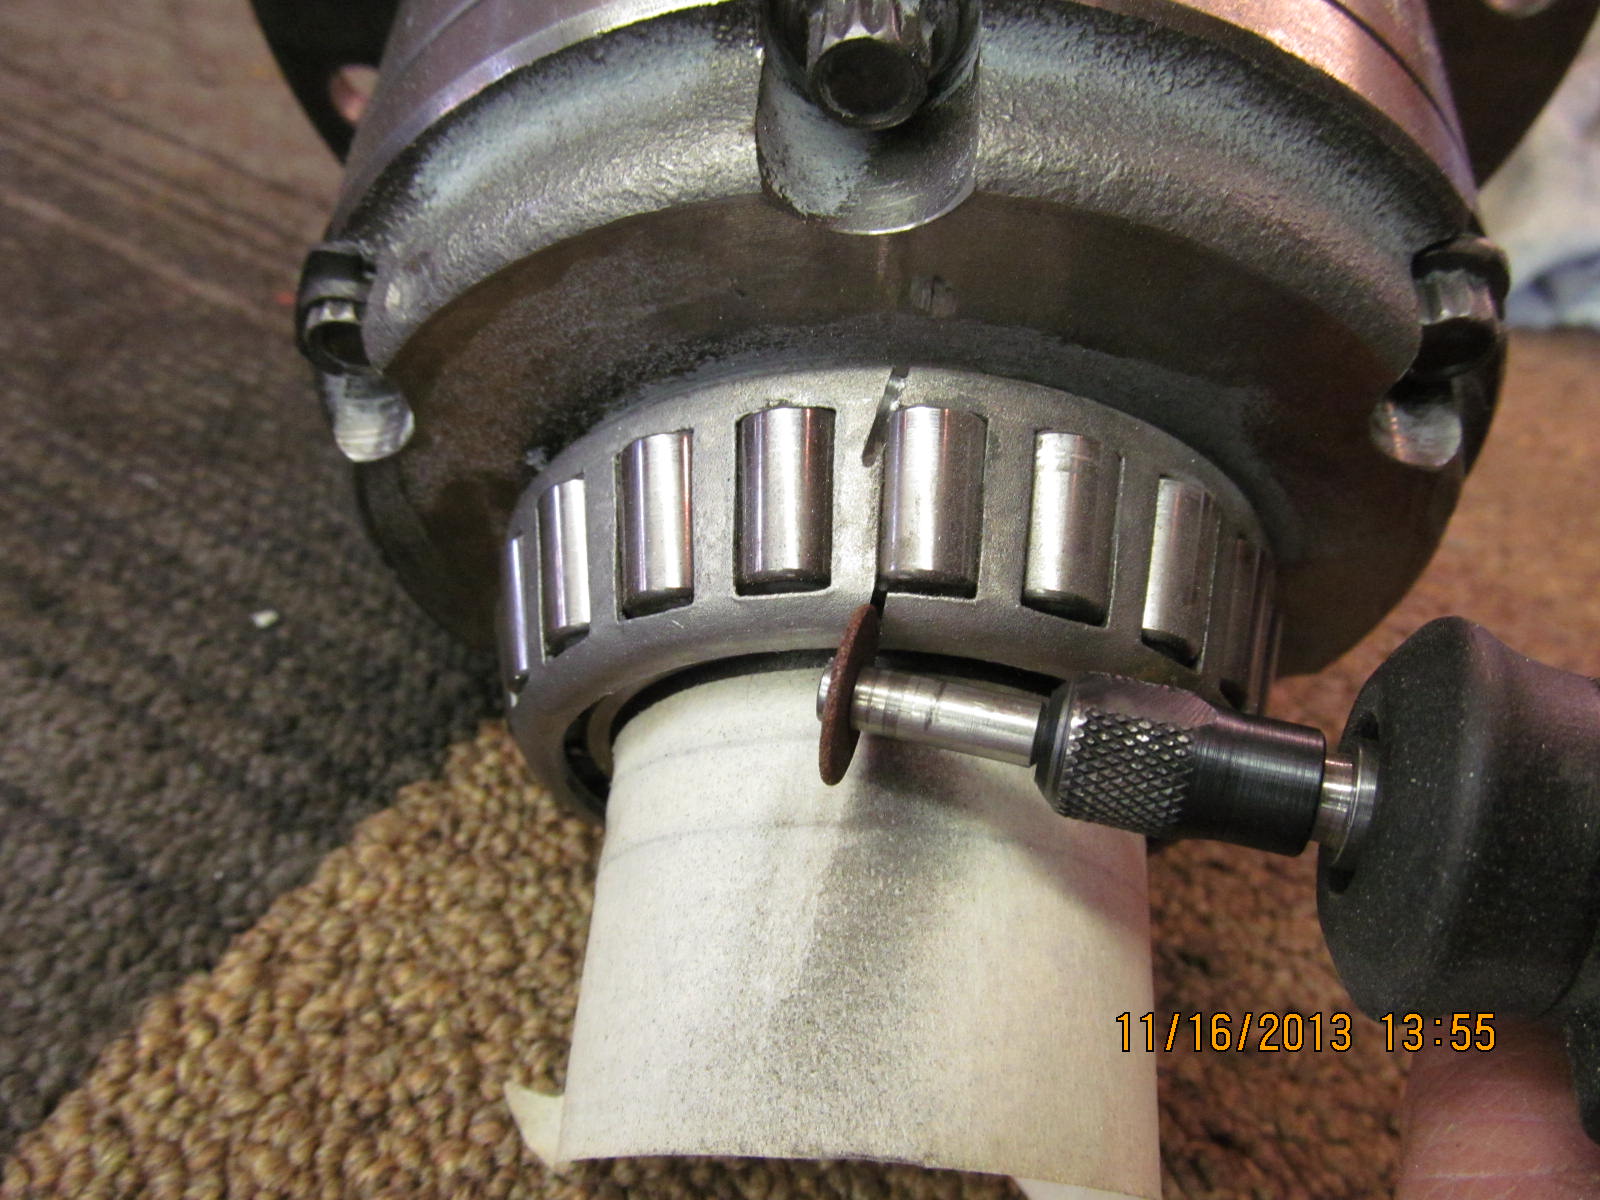
The other side is a different story. Nothing can reach in the small space allowed and remove it so out comes the dremel tool
with the tiny grinding wheel attached. Break the cage open....
|
|
|
|
|
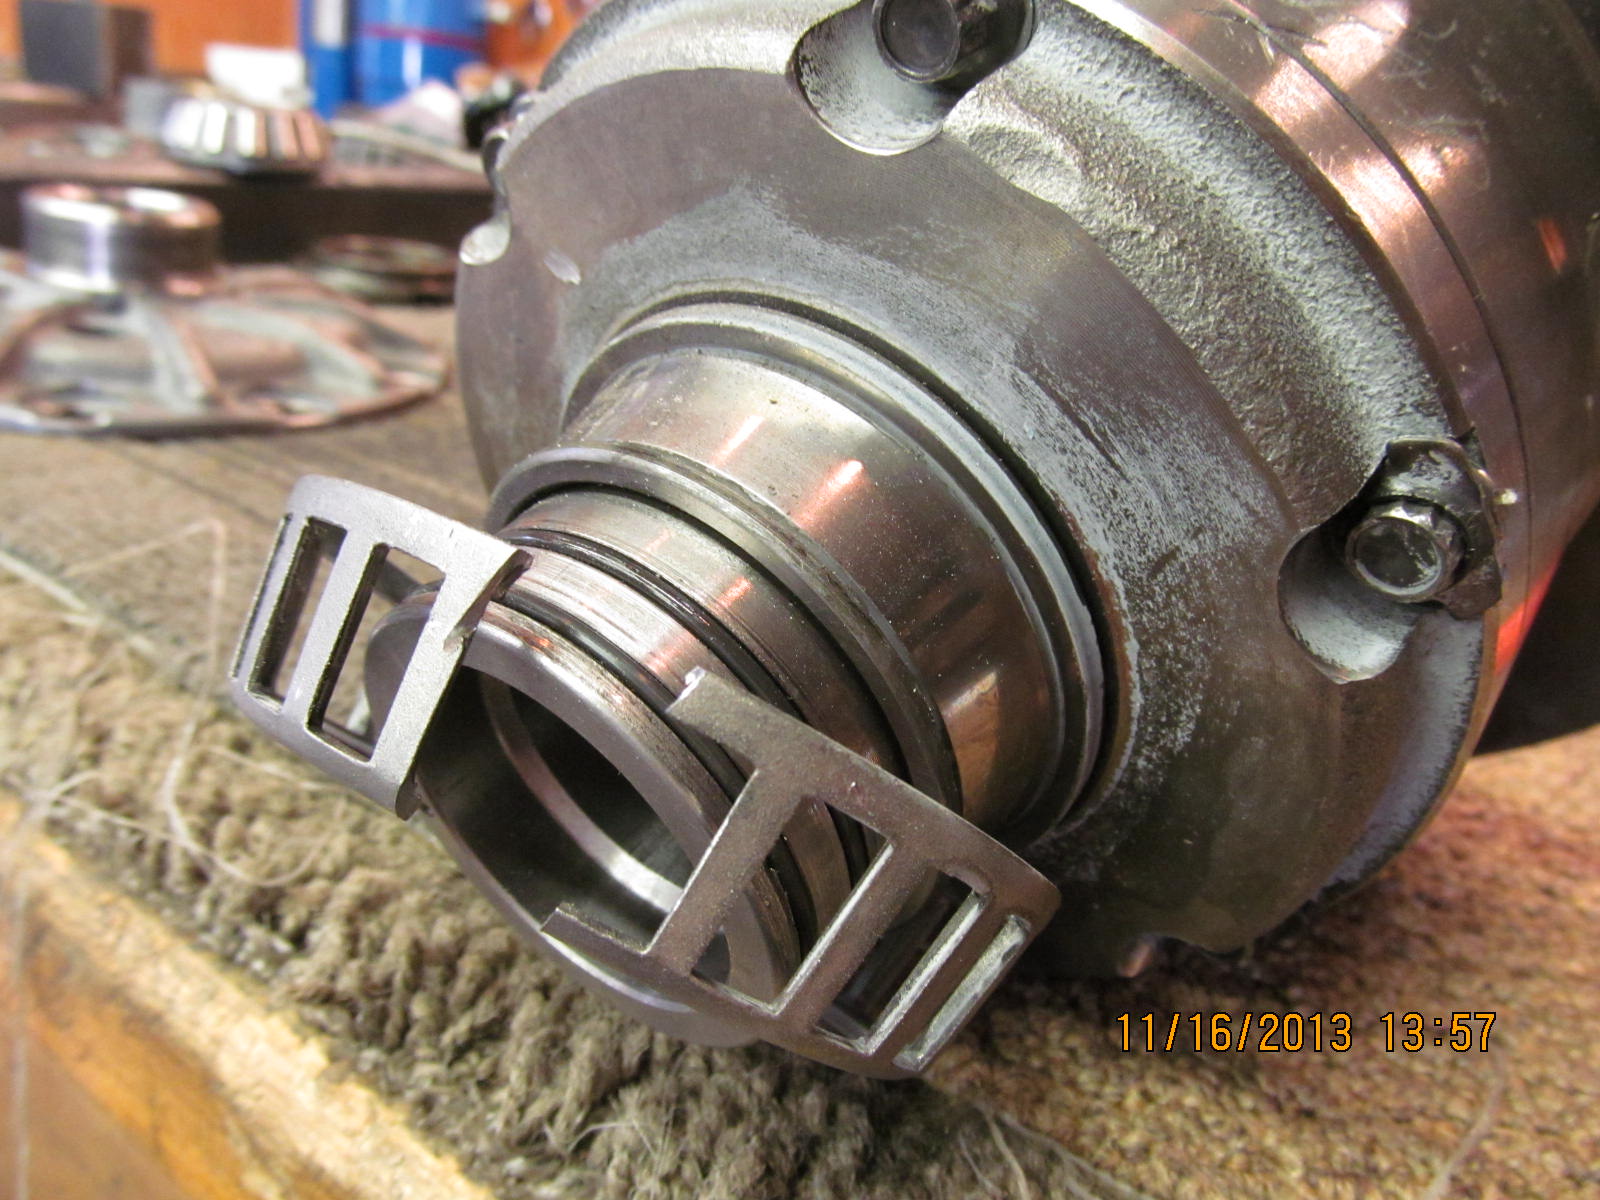
...and all the rollers have escaped right into the garbage can.
|
|
|
|
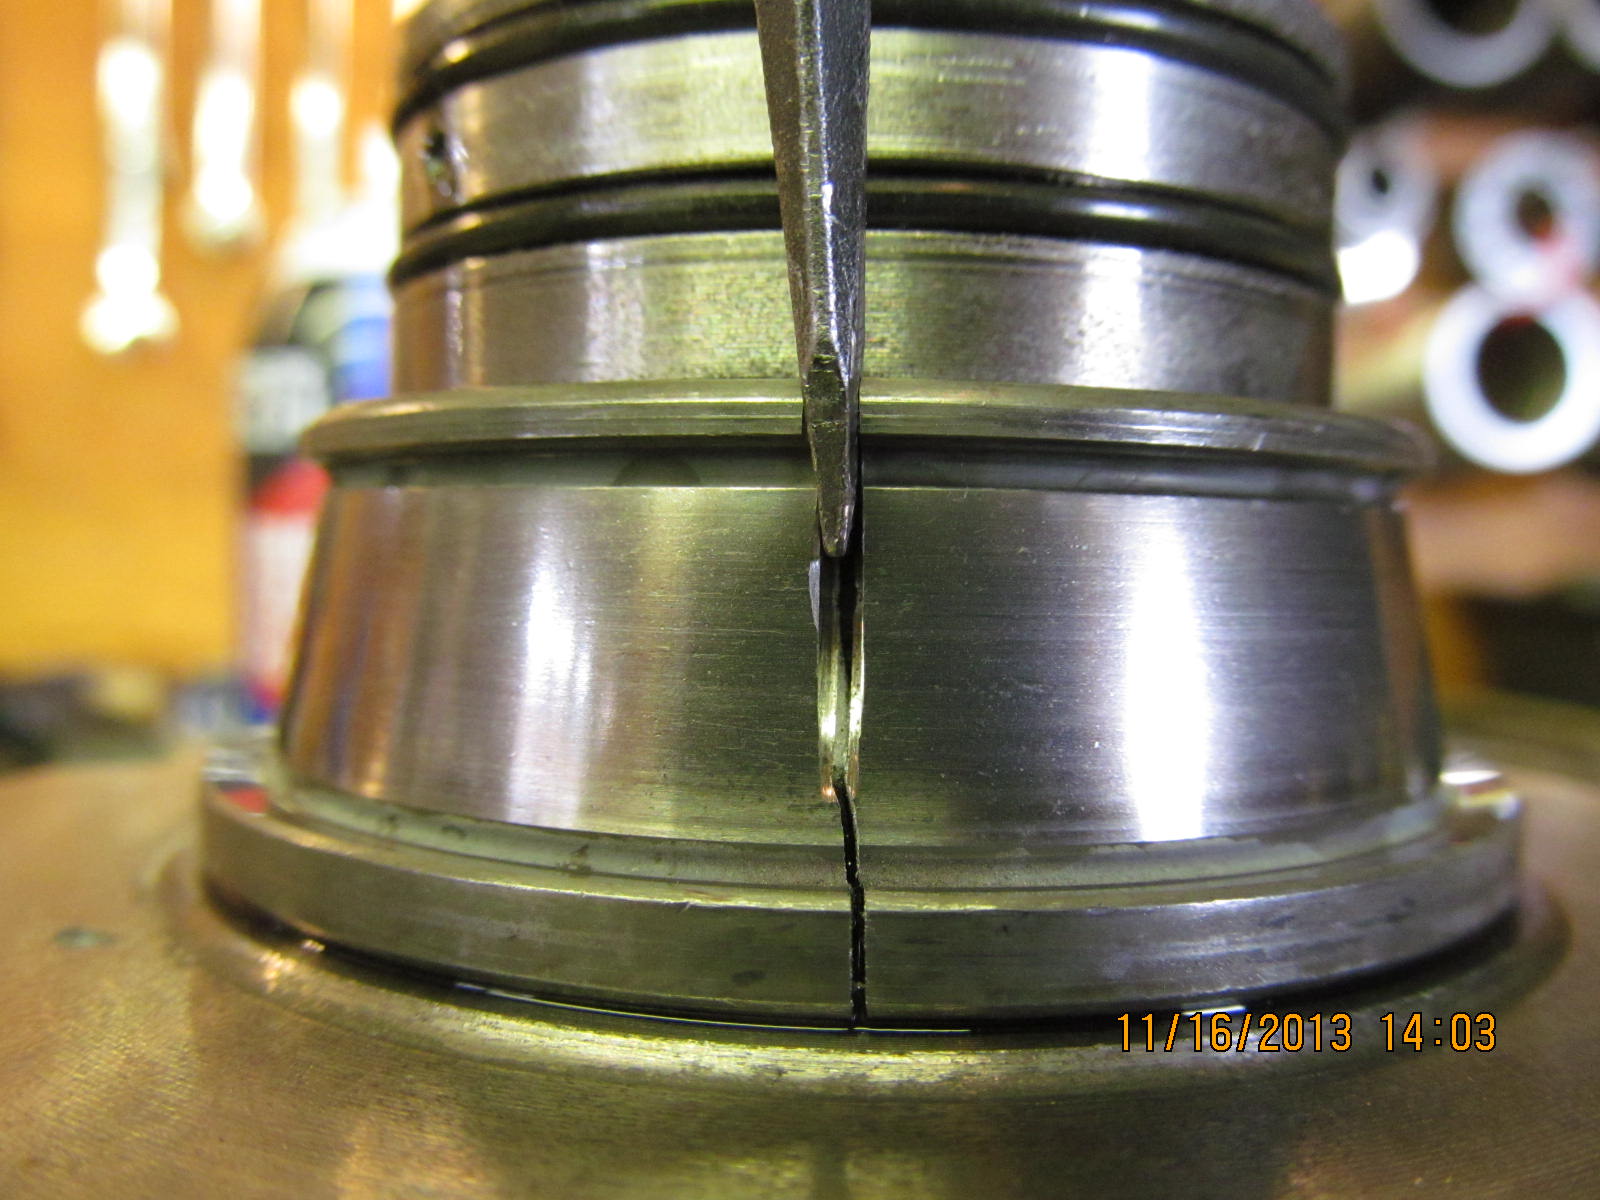
Grind a deep slot in the remaining bearing part and crack it wide open with a solid smack on a small screwdriver. The bearing
piece now easily slides off with the screwdriver still solidly attached.
|
|
|
|
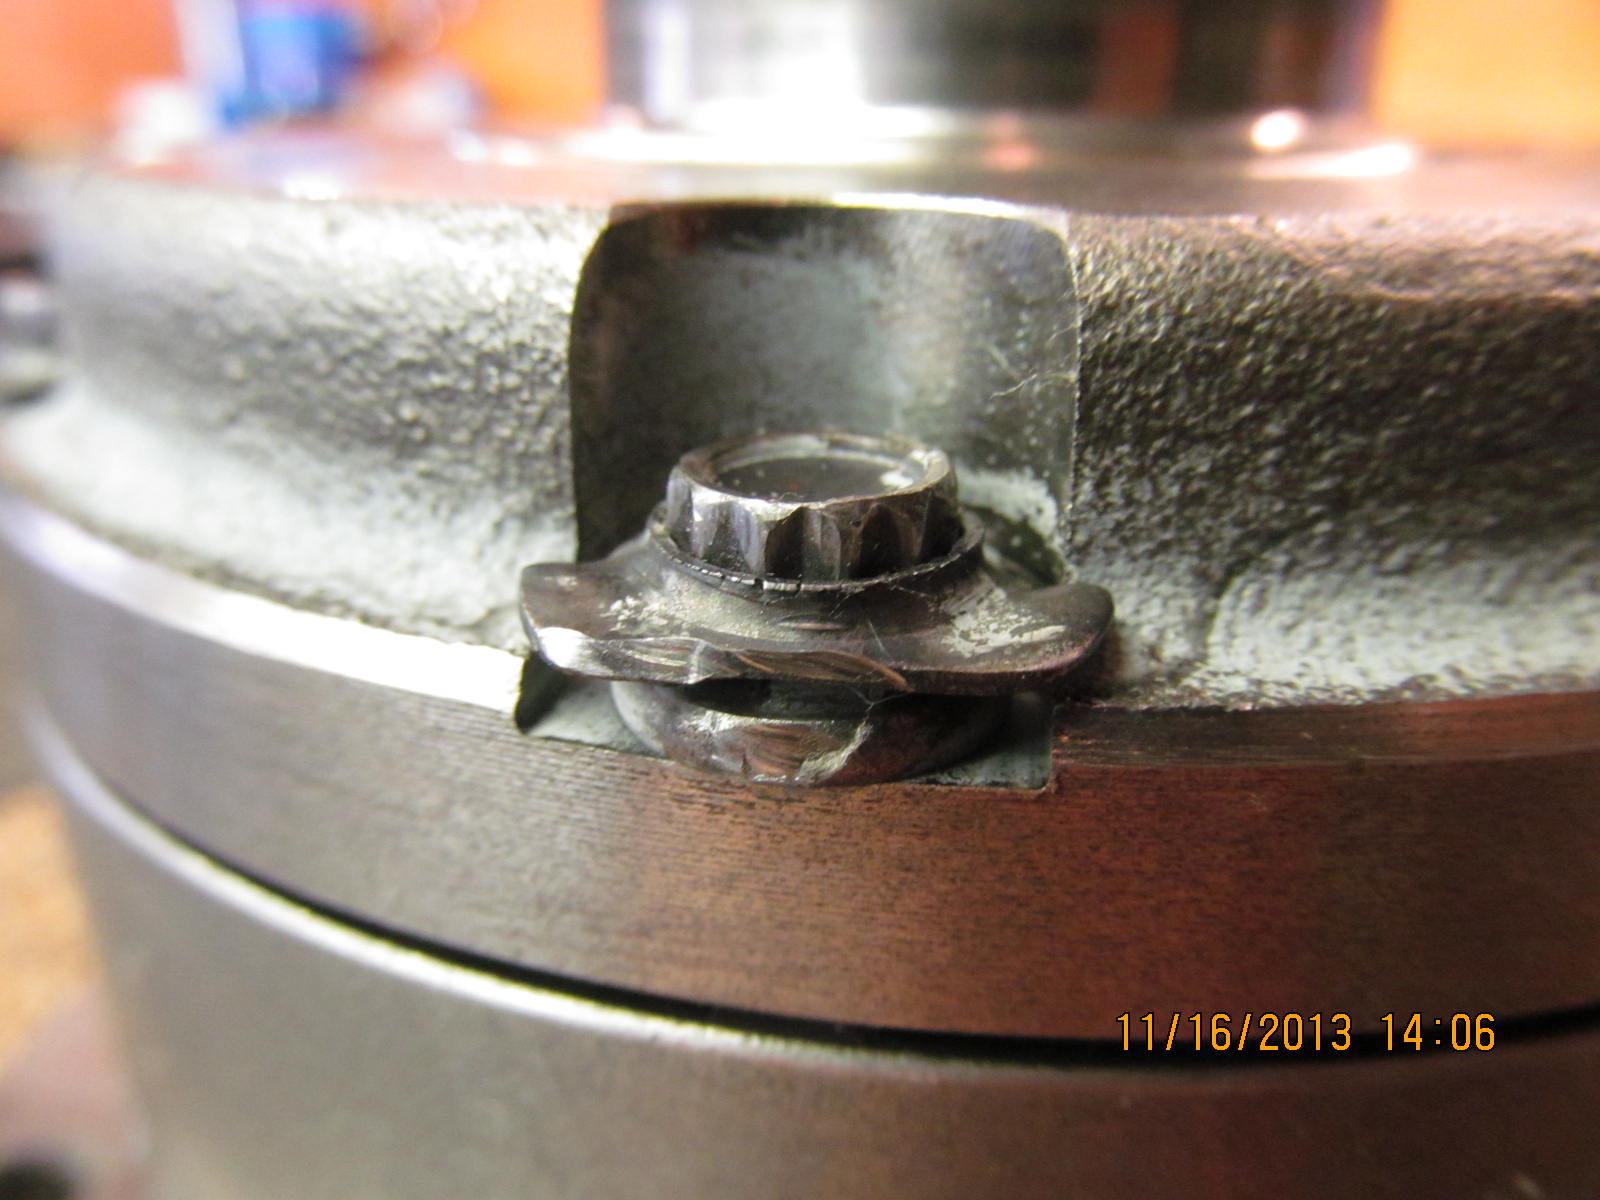
ARB uses these lock tabs as extra insurance against the 6 bolts loosening up. They also use a high strength locktite on the
threads. Looks like the loose pieces of broken teeth have made contact and compromised this lock-tab.
|
|
|
|
|
2 of the bolts were missing the lock-tabs all together.
|
|
|
|
|
There's a little bit of an optical illusion as the o-ring is not sliced up like it looks but the damaged metal is real.
|
|
|
|
|
Another shot of the same.
|
|
|

|
|
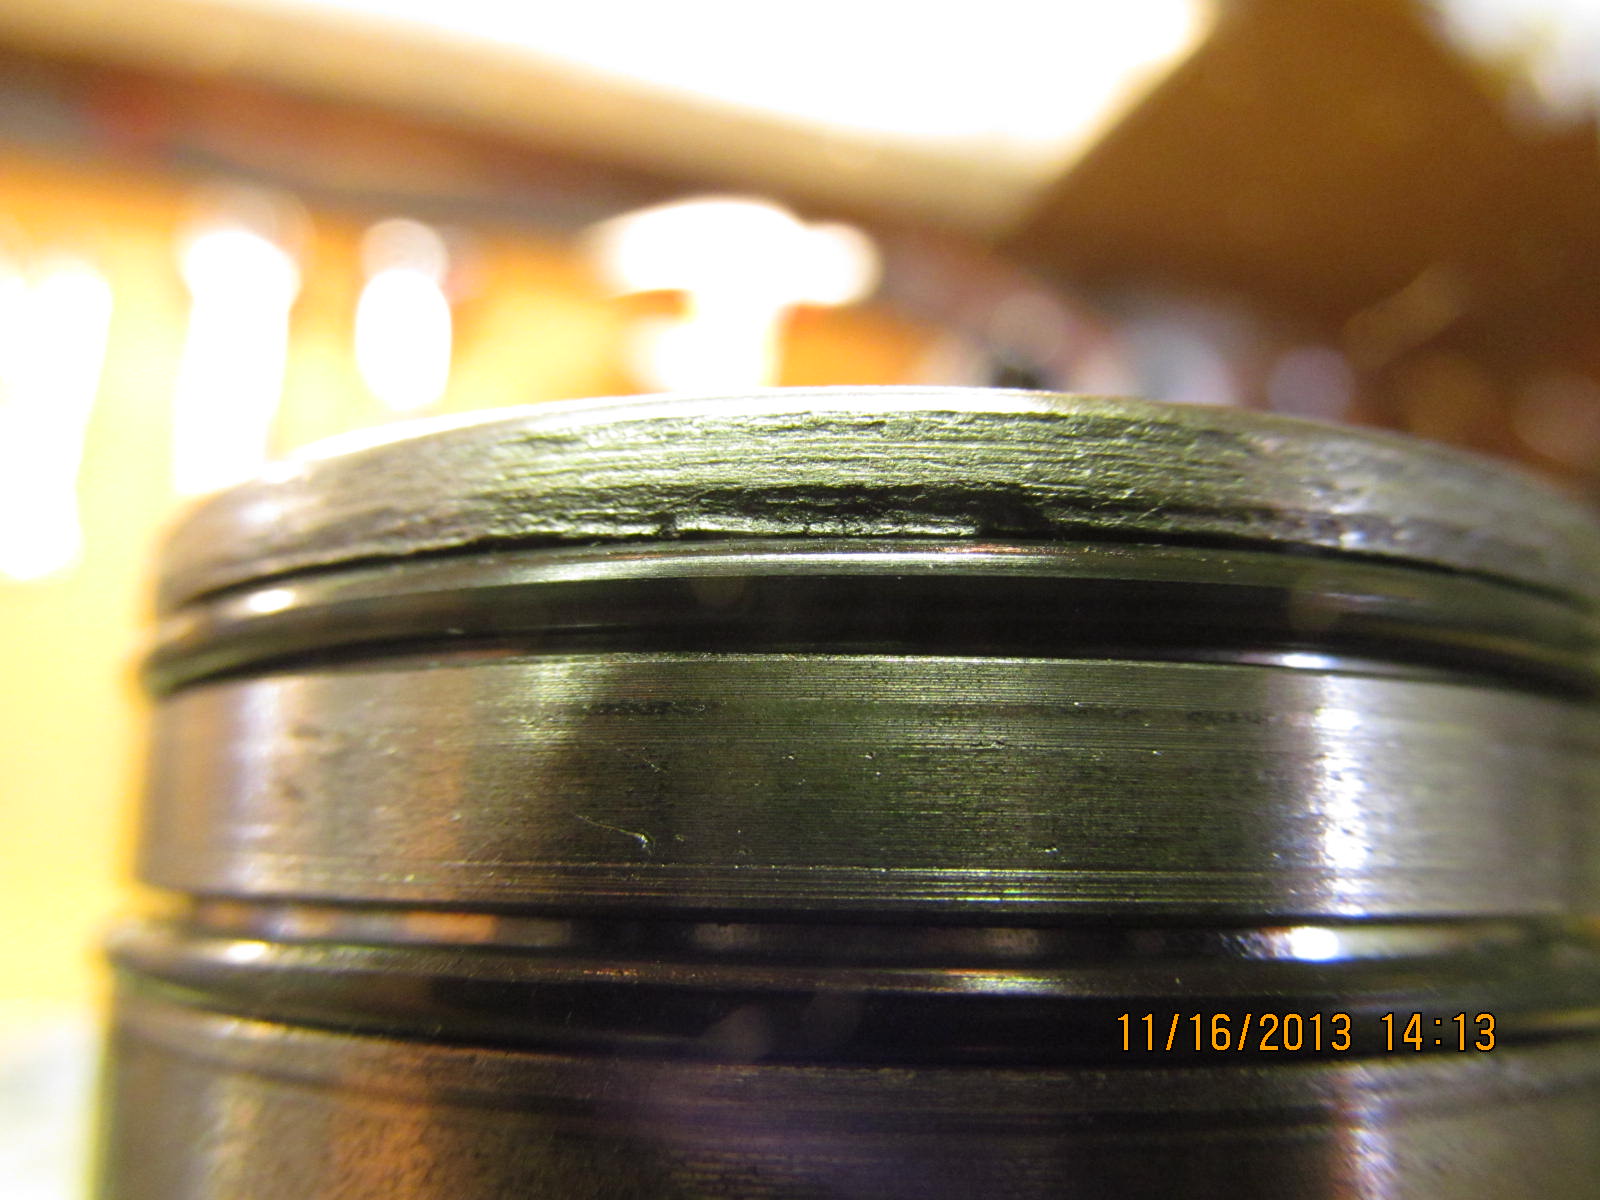
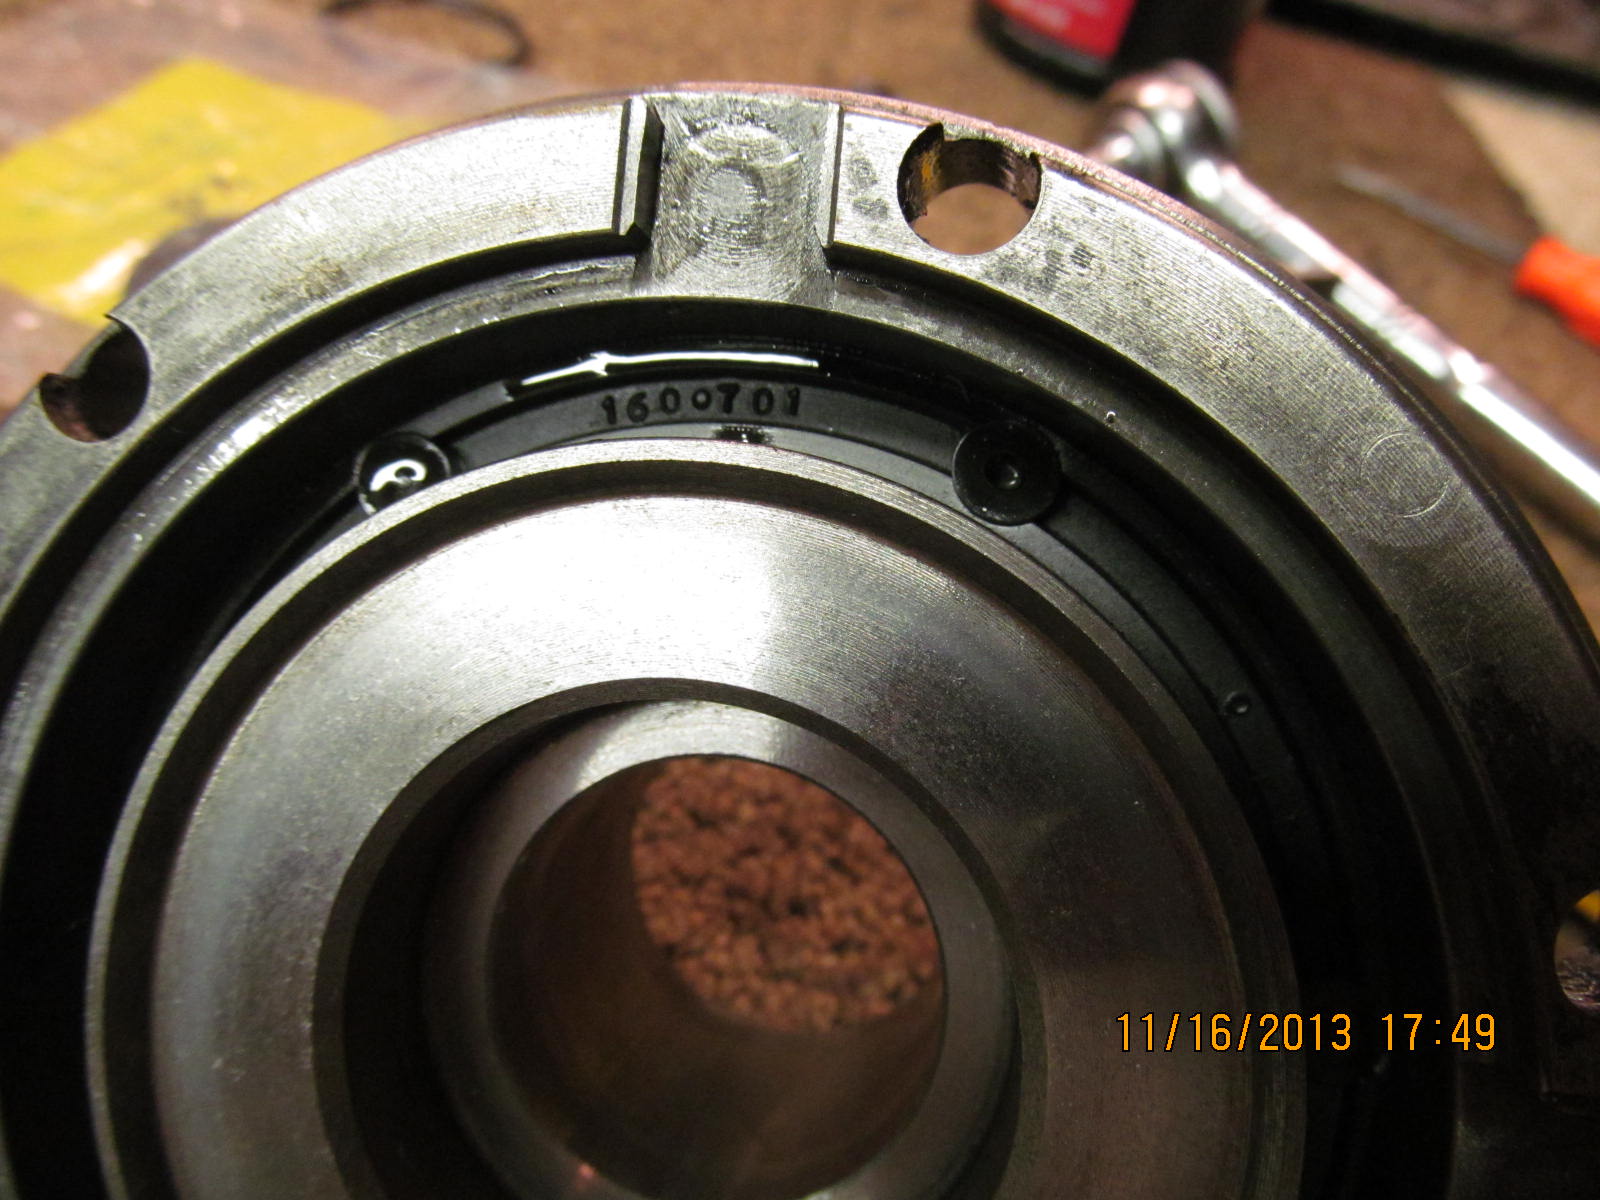
O-rings removed. This looks "dicey".
|
|
|
|
|
6 bolts from the cylinder cap are removed. An 8mm 12 point socket works nicely.
|
|
|
|
|
The bonded seal inside looked ok....the metal surface that it slides on appeared scratch-free.
|
|
|
|
|
The damage shown here and the damage on the journal cannot be overlooked.
|
|
|
|
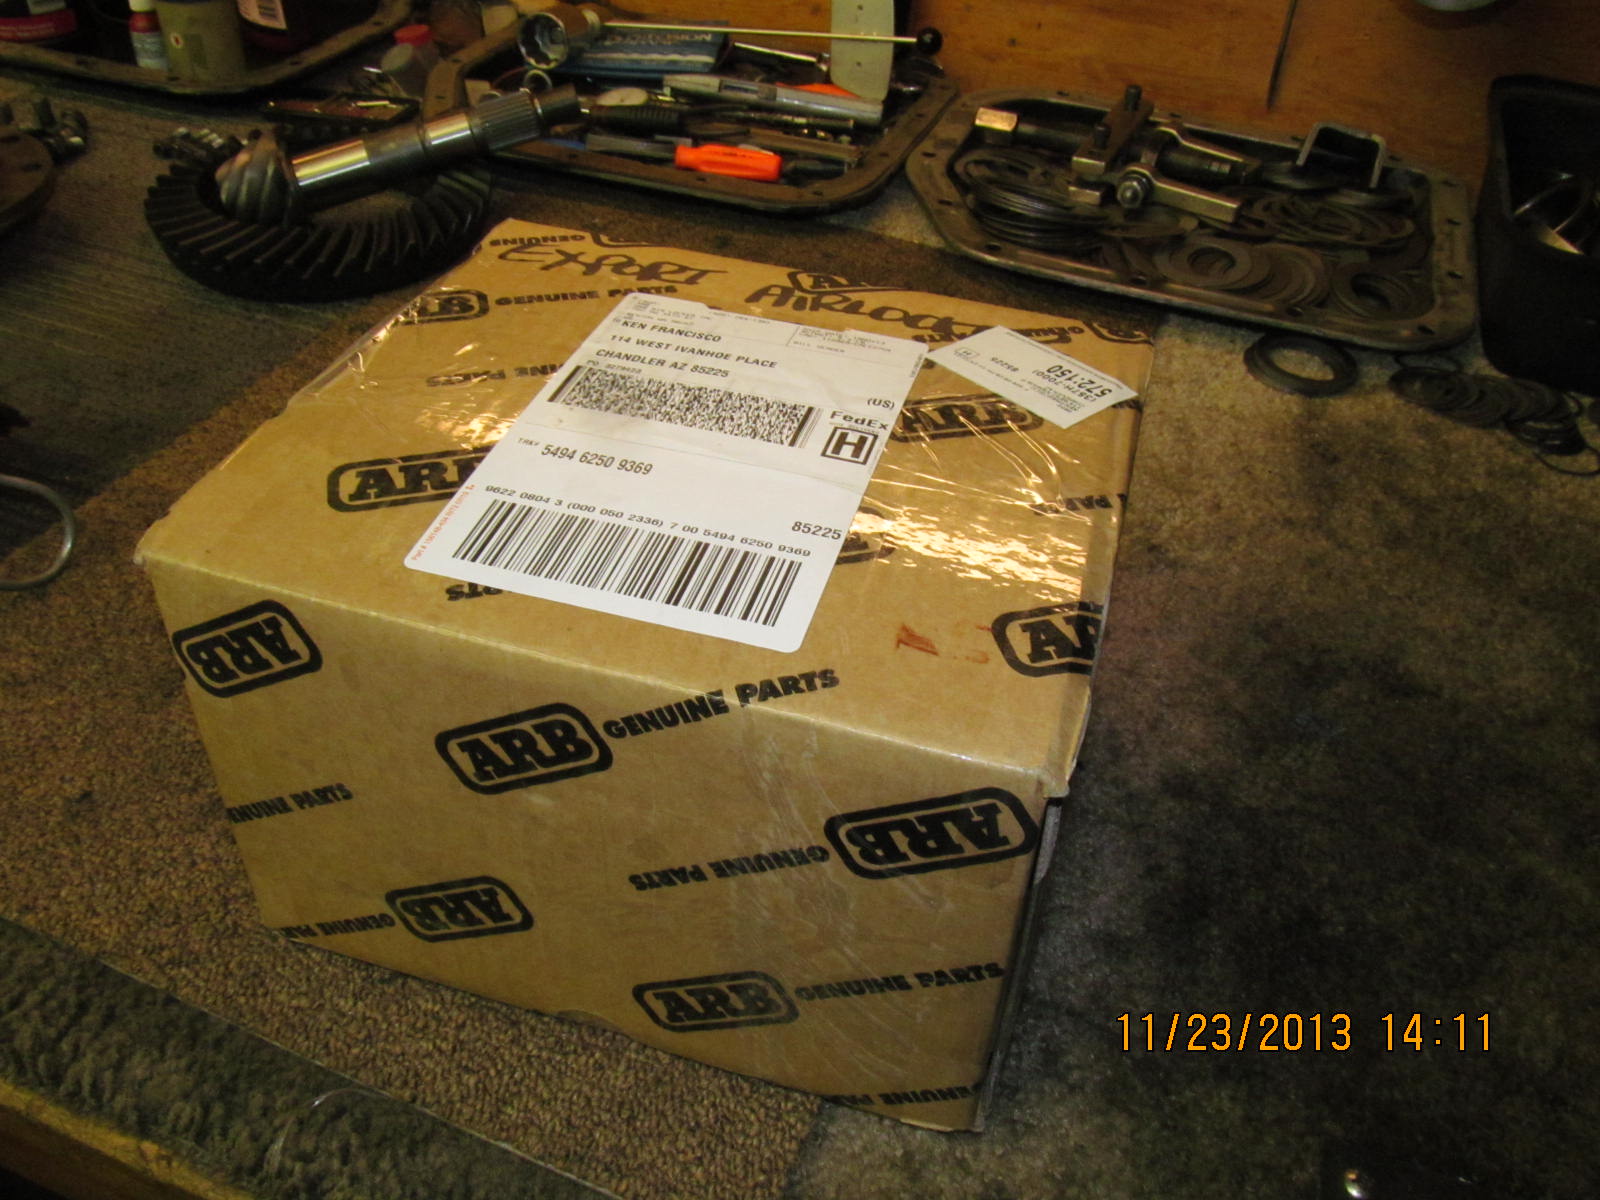
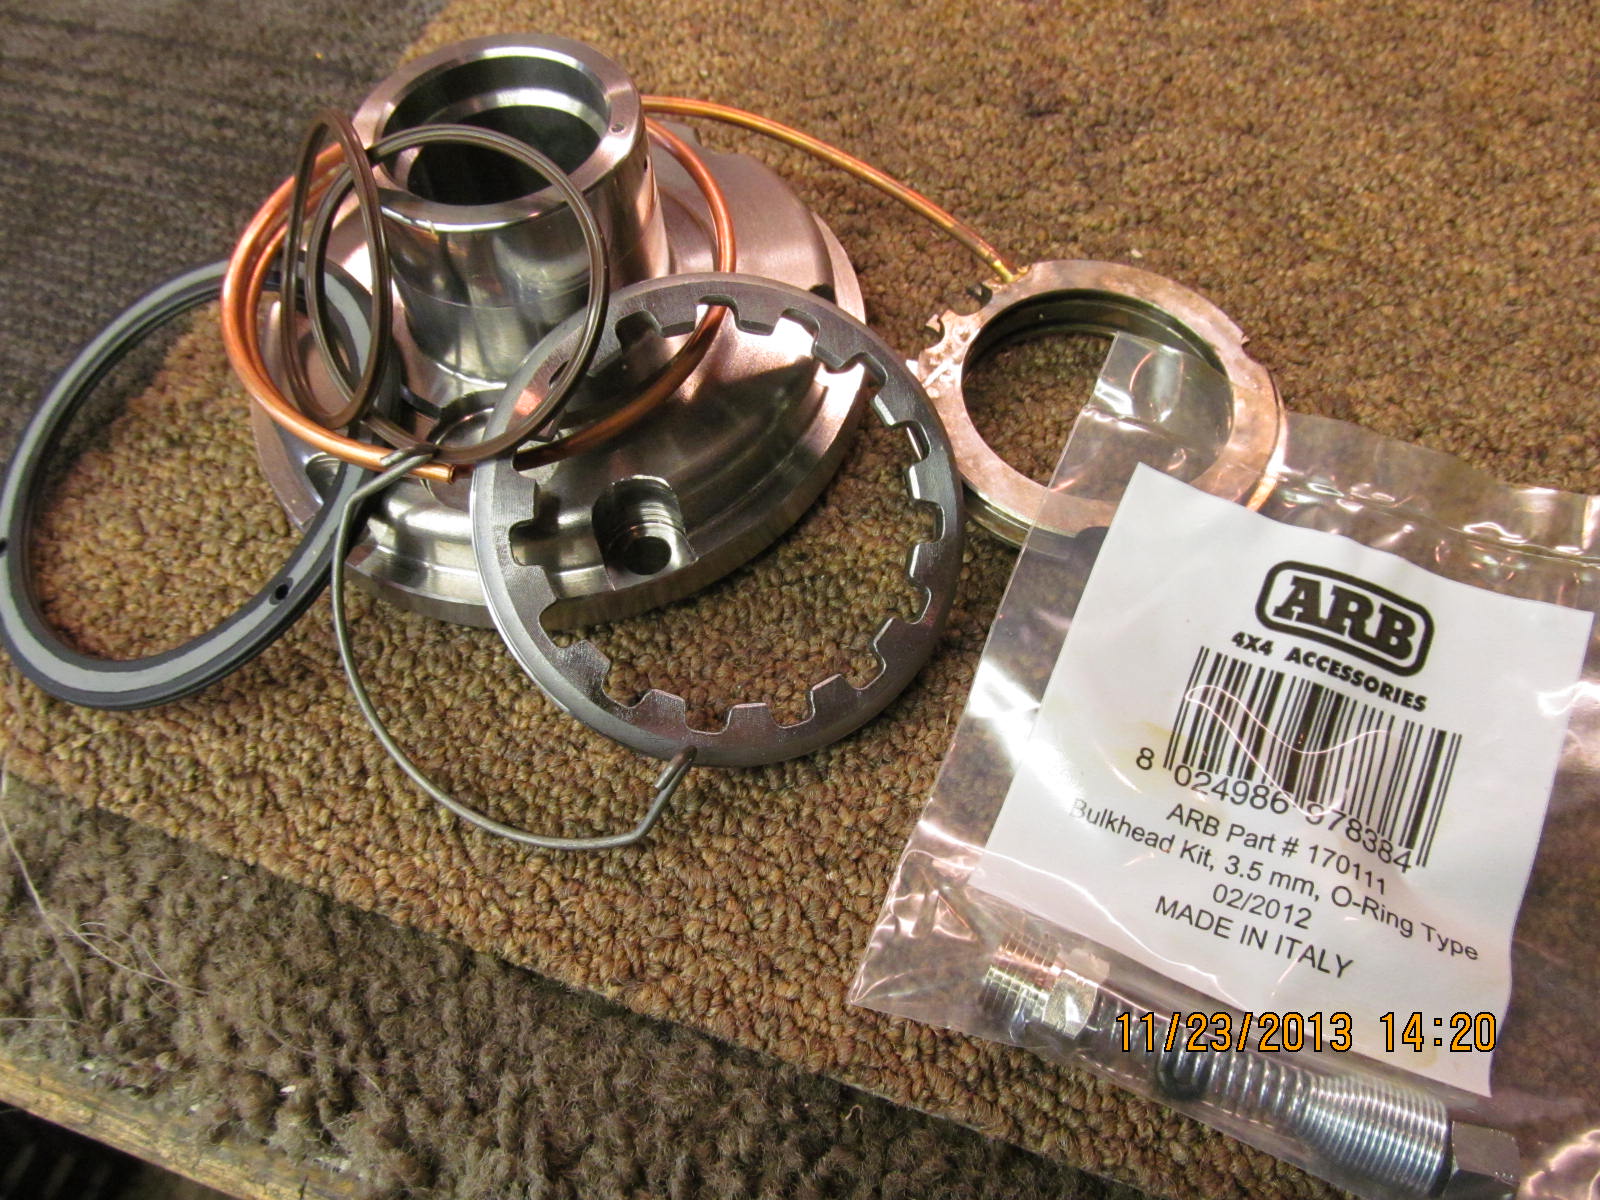
After some emails with Rob, it was wisely decided to replace the cylinder cap side with some upgraded stuff.
5 days later, a package arrives from ARB located in Renton, Washington.
contact info--- sales@arbusa.com or tech@arbusa.com
|
|
|
|
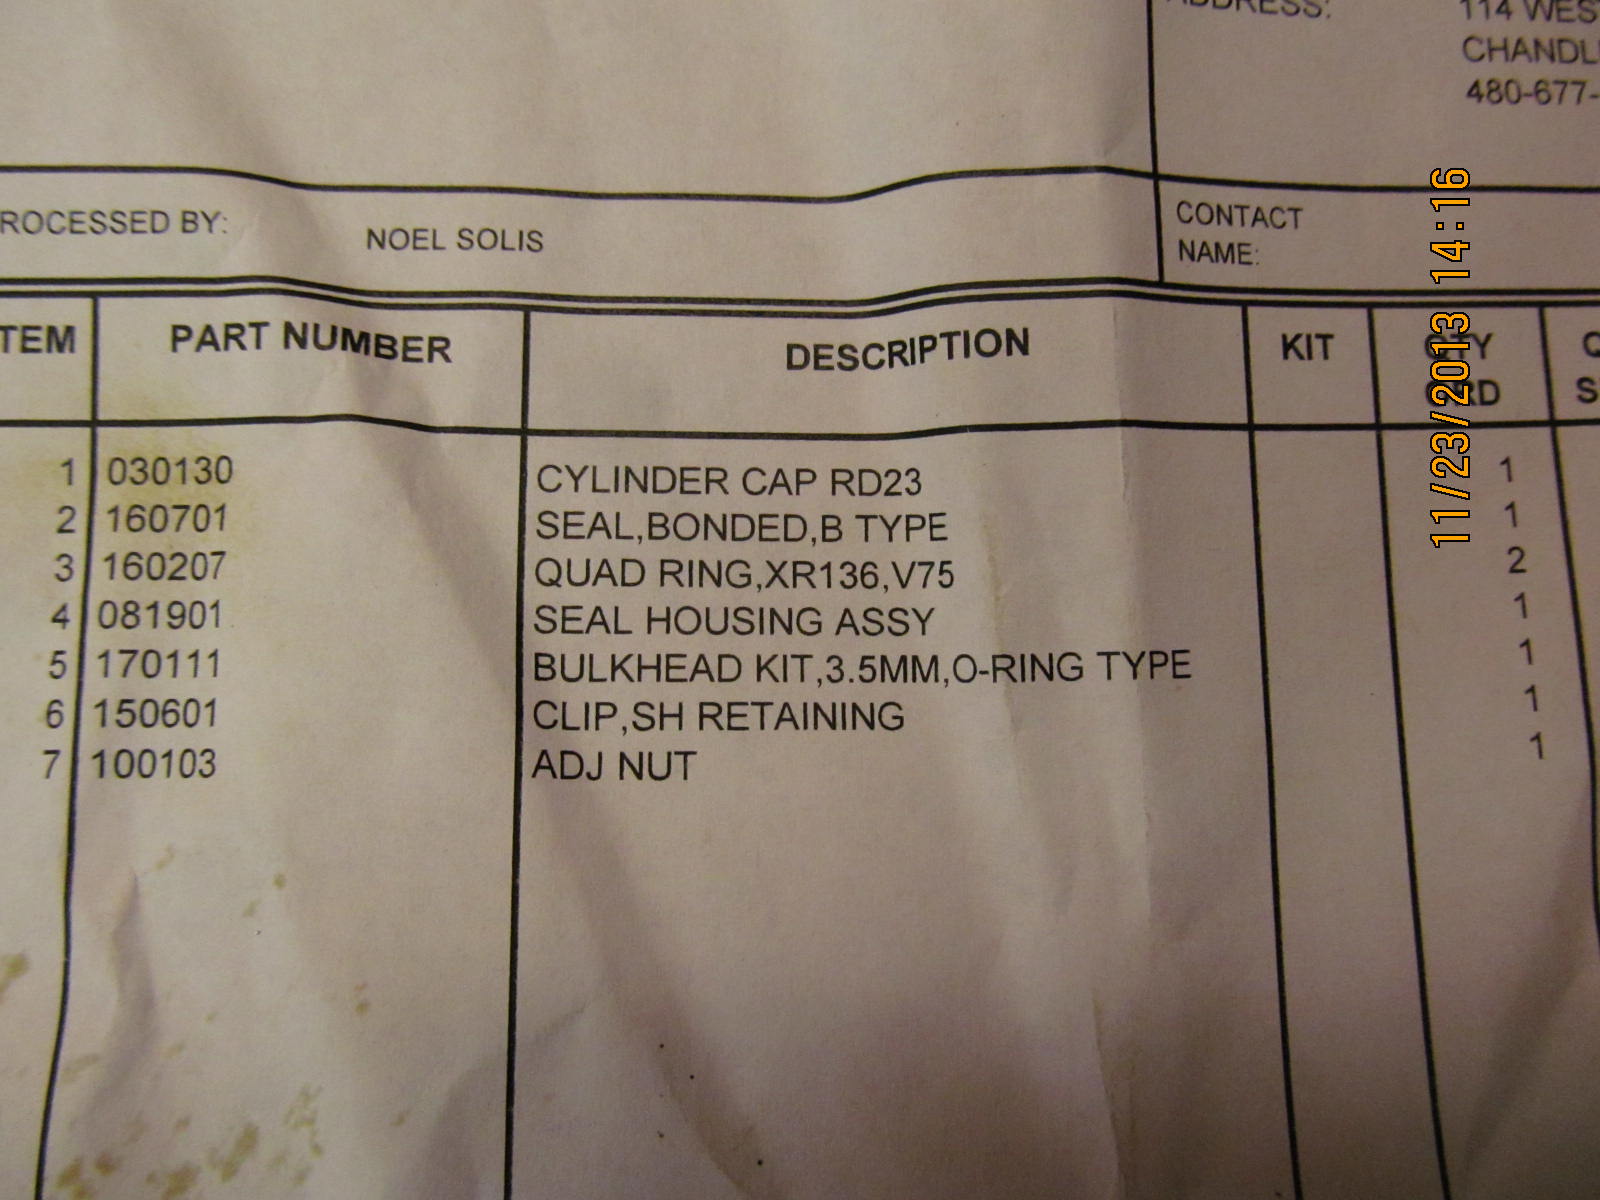
Here's the parts list of the materials required to upgrade the cylinder cap and go with the semi-floating clip design. It would
probably cost around $300 for all the goodies.
|
|
|
|
|
Generation 1 parts removed...
|
|
|
|
|
Generation 2 parts to be installed.
|
|
|
|
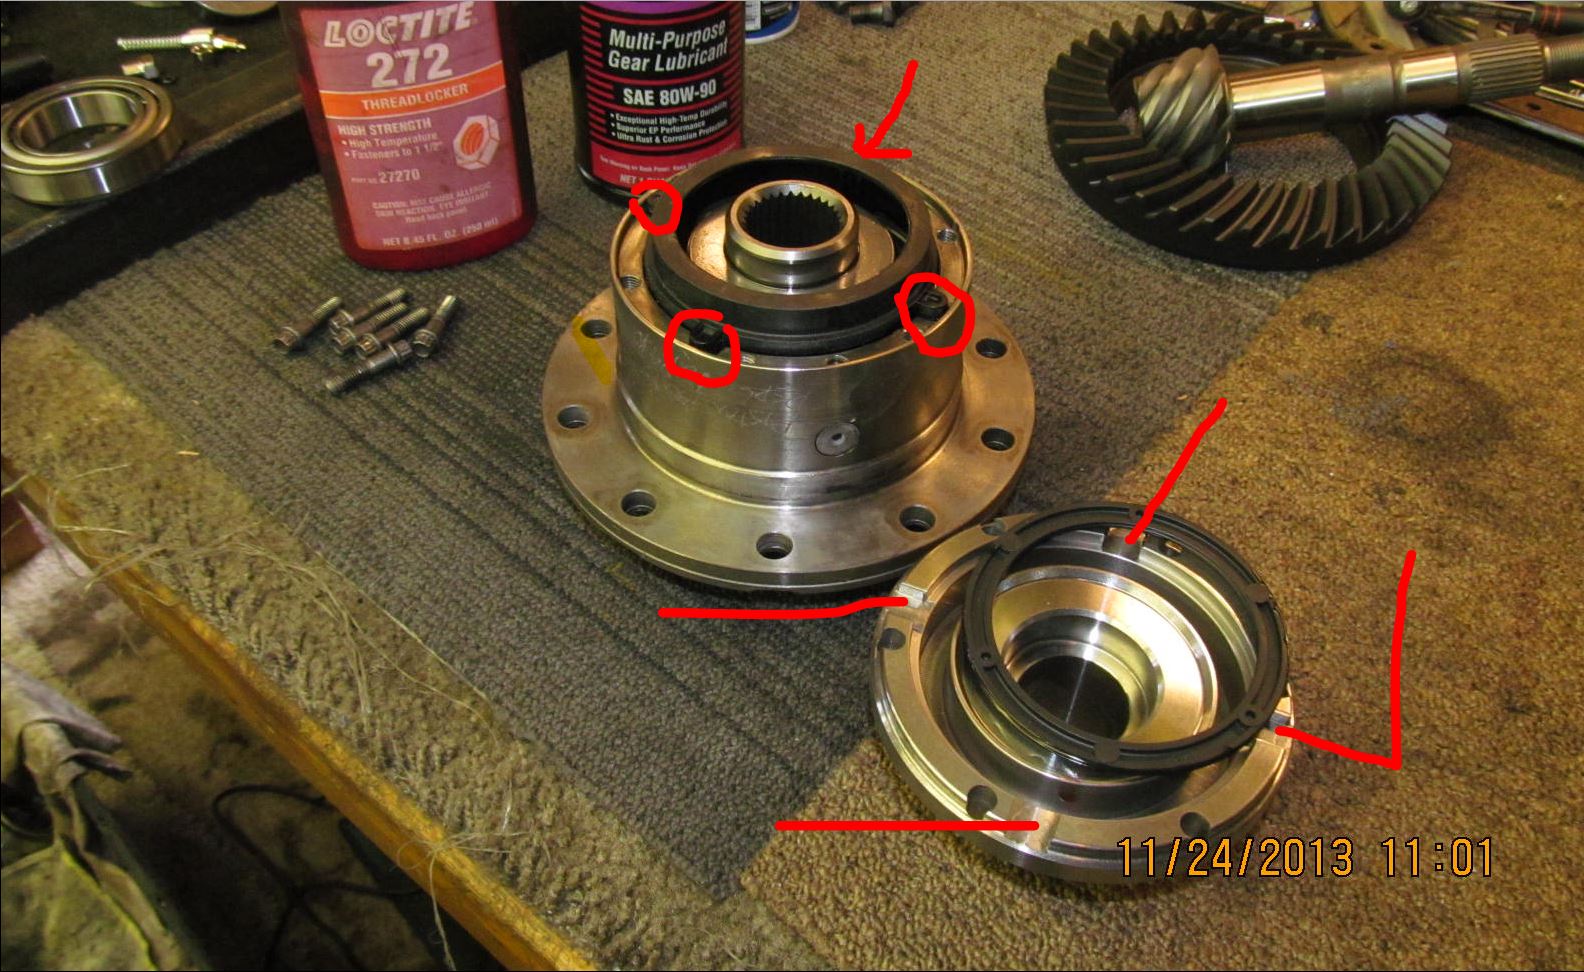
Now to re-assemble the ARB case. Gear oil is applied to the bonded seal and it is pushed into the tunnel. It is very important
to clock this as shown in red......there's only 2 clockings that the ARB will work.
|
|
|
|
|
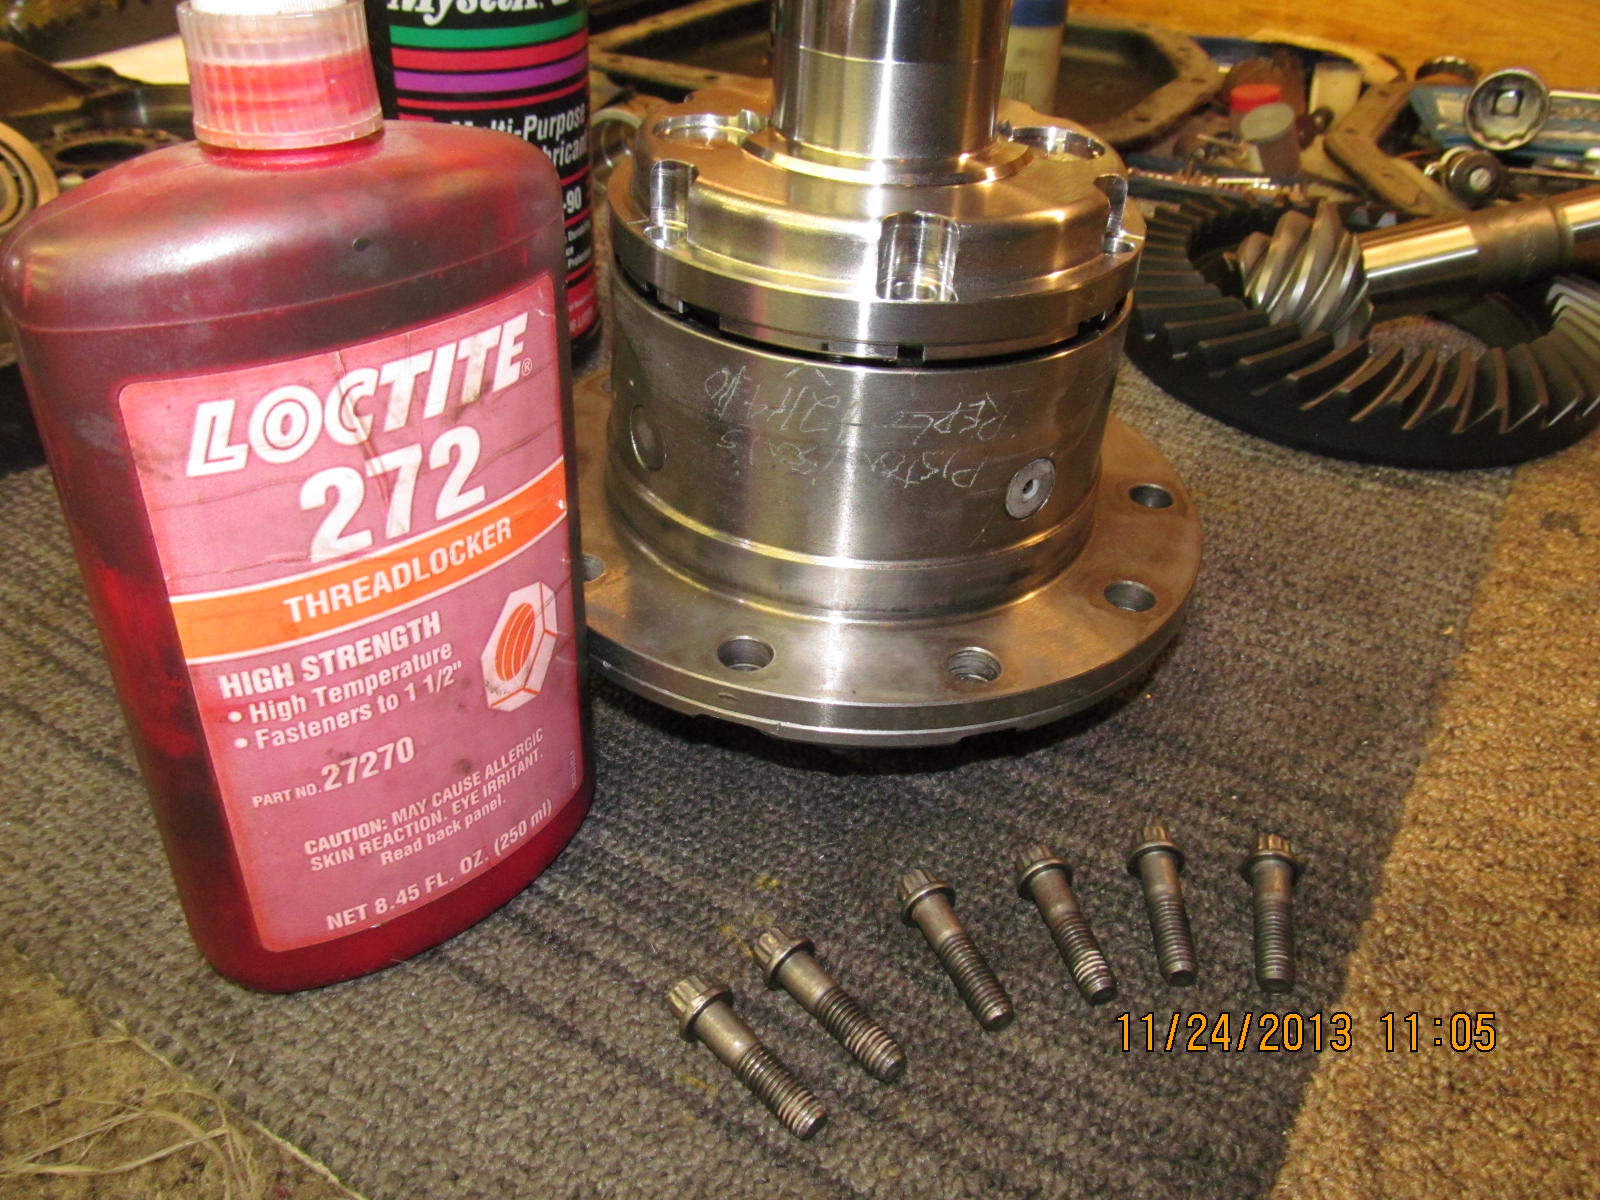
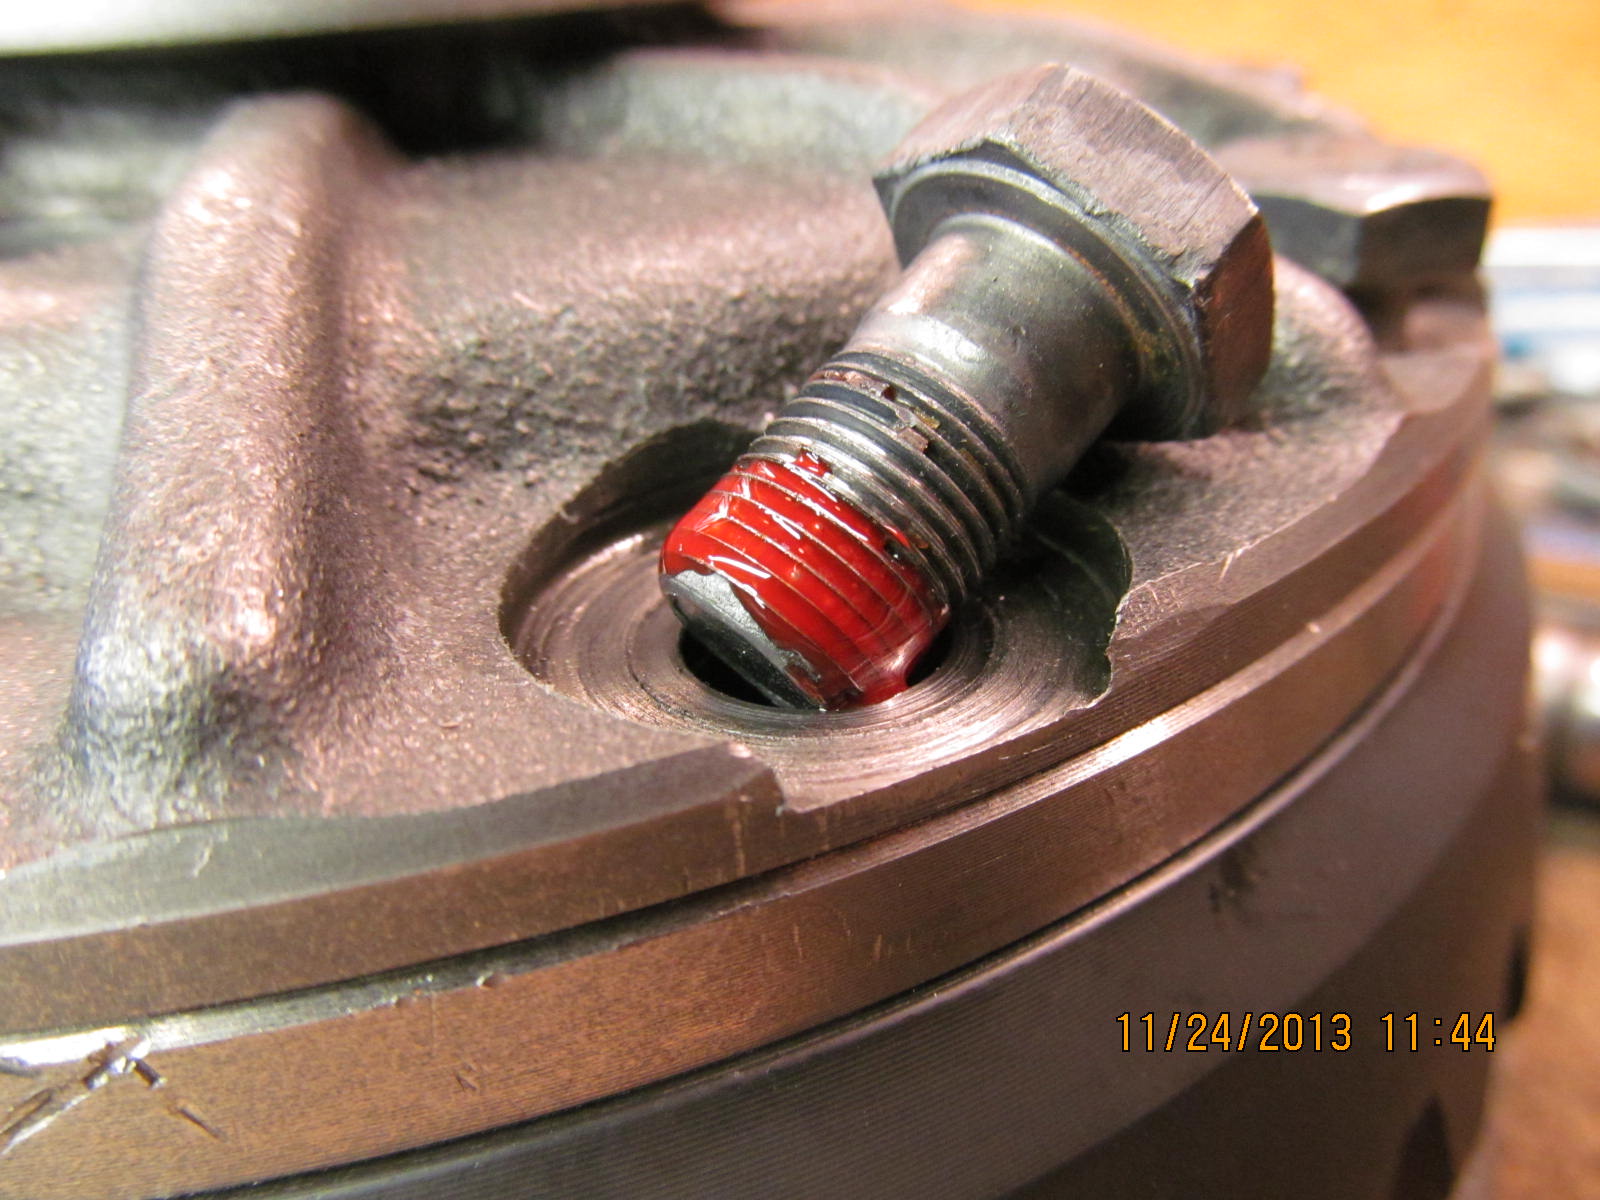
Threads were cleaned of oils. Old loctite was not hurting a thing so I felt it was beneficial to leave it there and add Red Loctite.
|
|
|
|
|
|
|
|
|
|
Tighten all 6 bolts to 30 ft/lb with your favorite torque wrench.
|
|
|
|
|
The cryo treated carrier bearing goes on this side.....the side that is harder on the bearing.
|
|
|
|
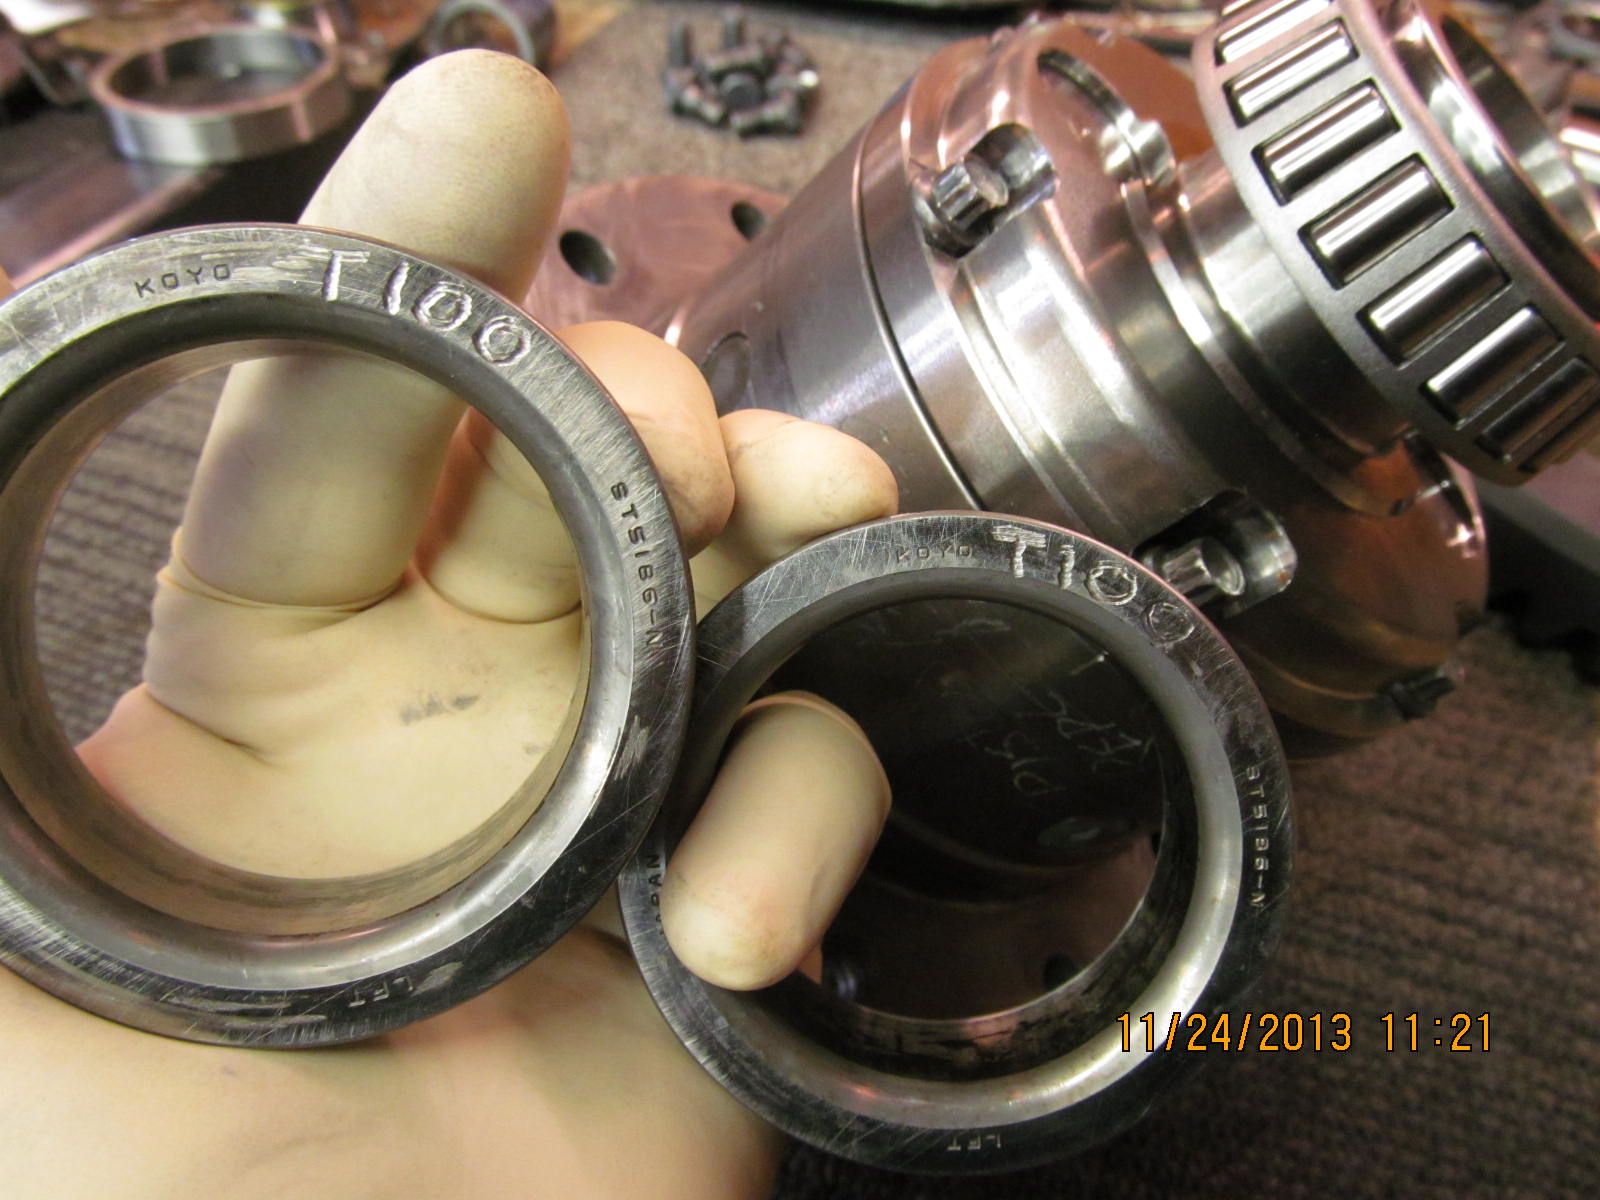
These are the remains of T100 (8.4" Tacoma 3rds) carrier bearings. They are just perfect for pressing on the
V6 carrier bearings.
|
|
|
|
|
Their inside diameter is about .040" larger so they won't get stuck on the journal themselves.
|
|
|
|
|
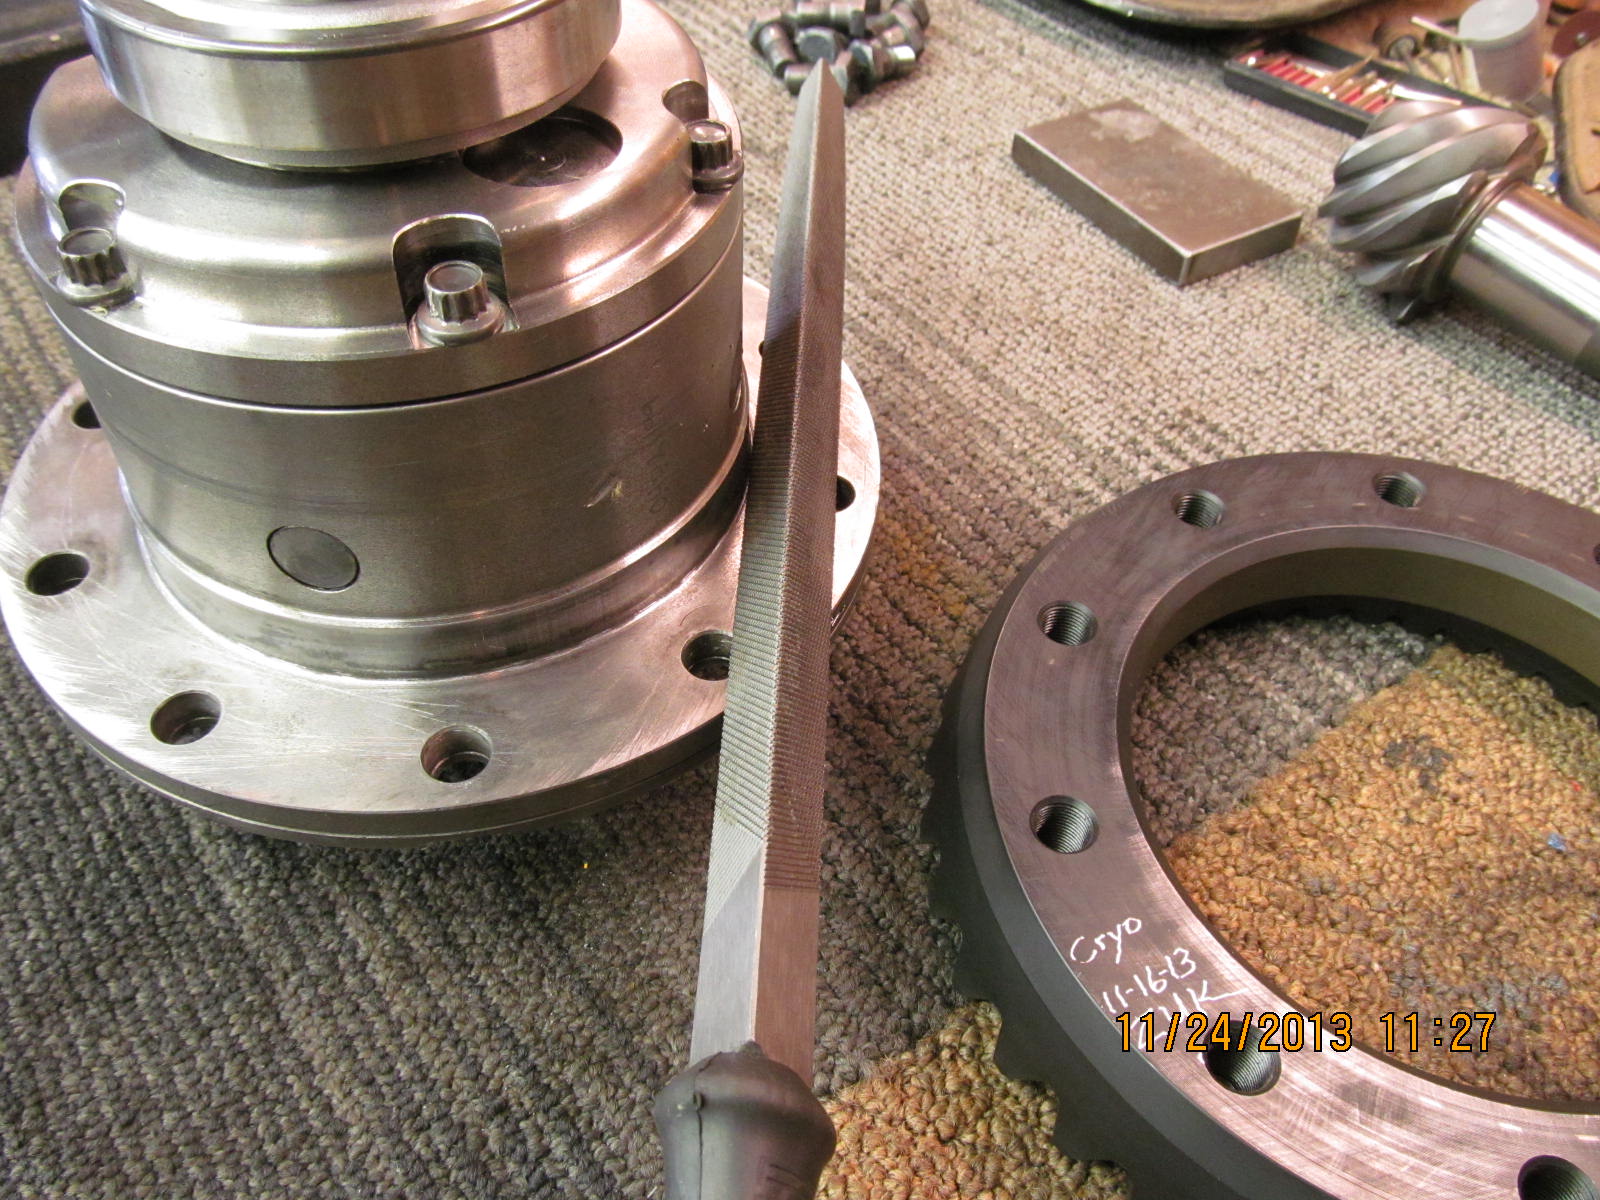
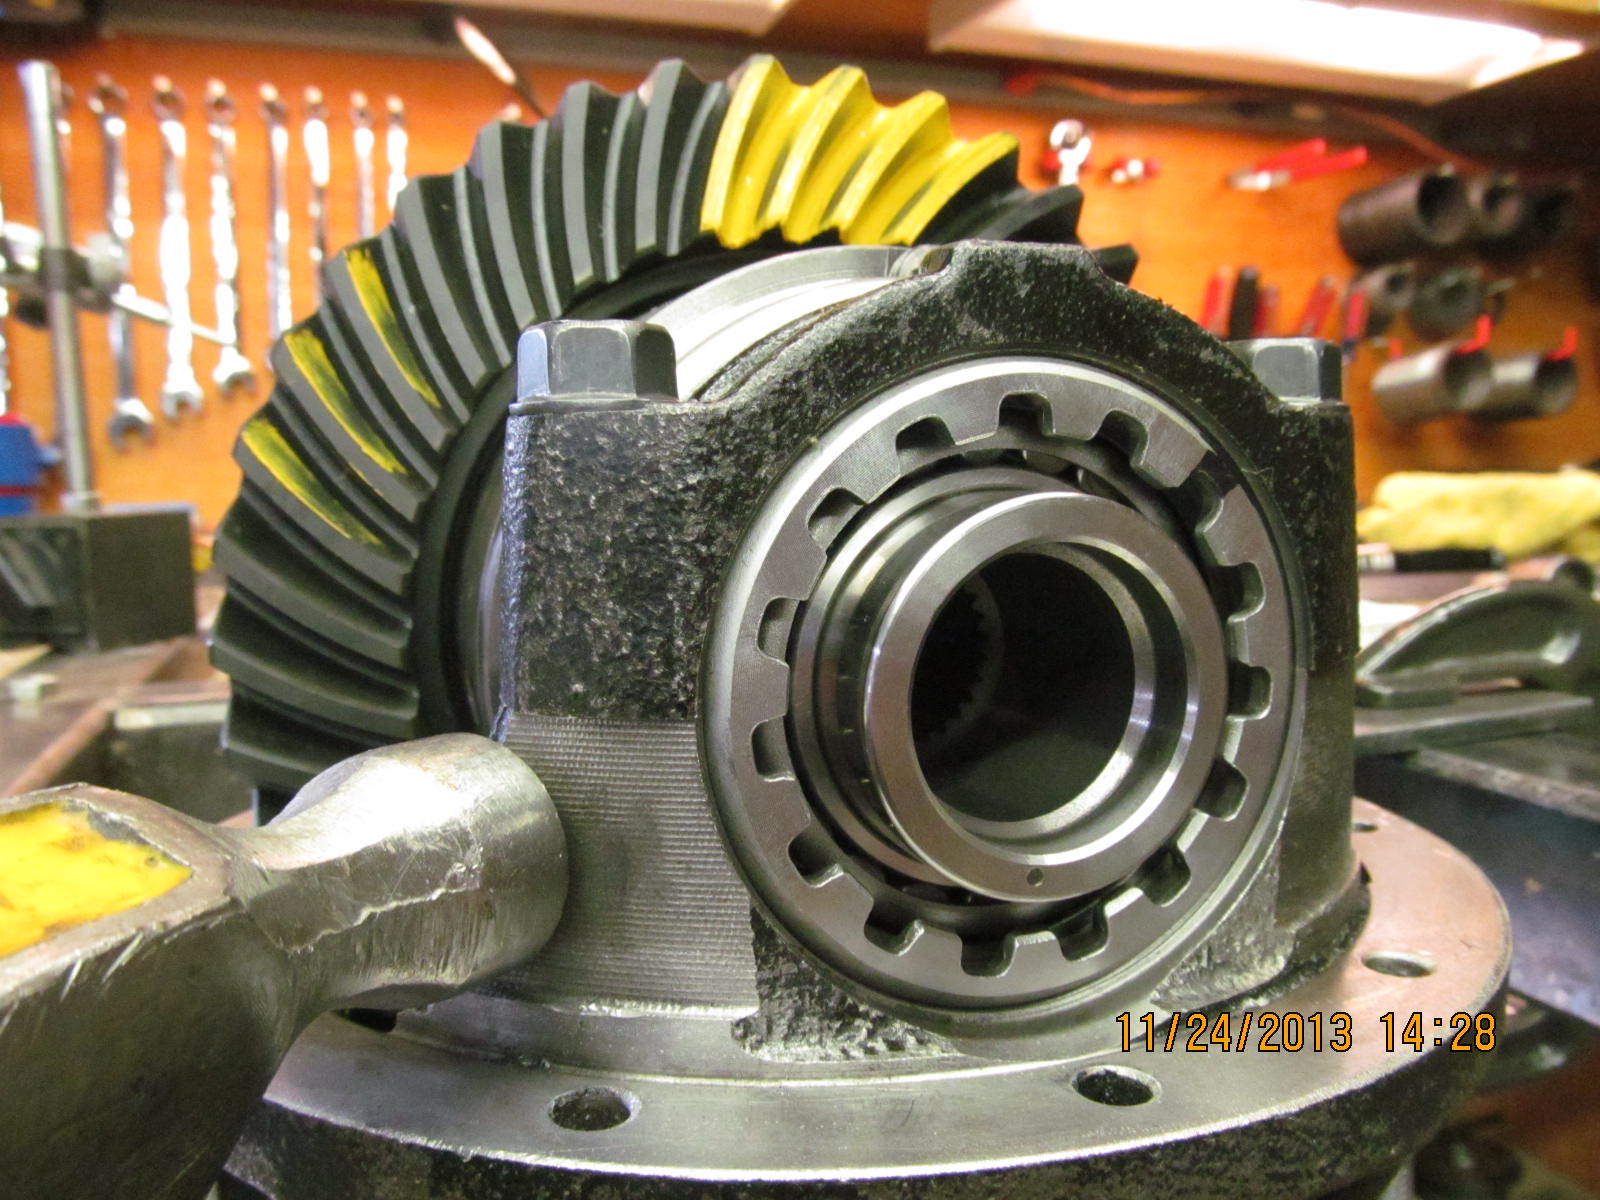
The back of the ring gear and the ARB are checked with a file. All felt good. No rough or high spots found.
|
|
|
|
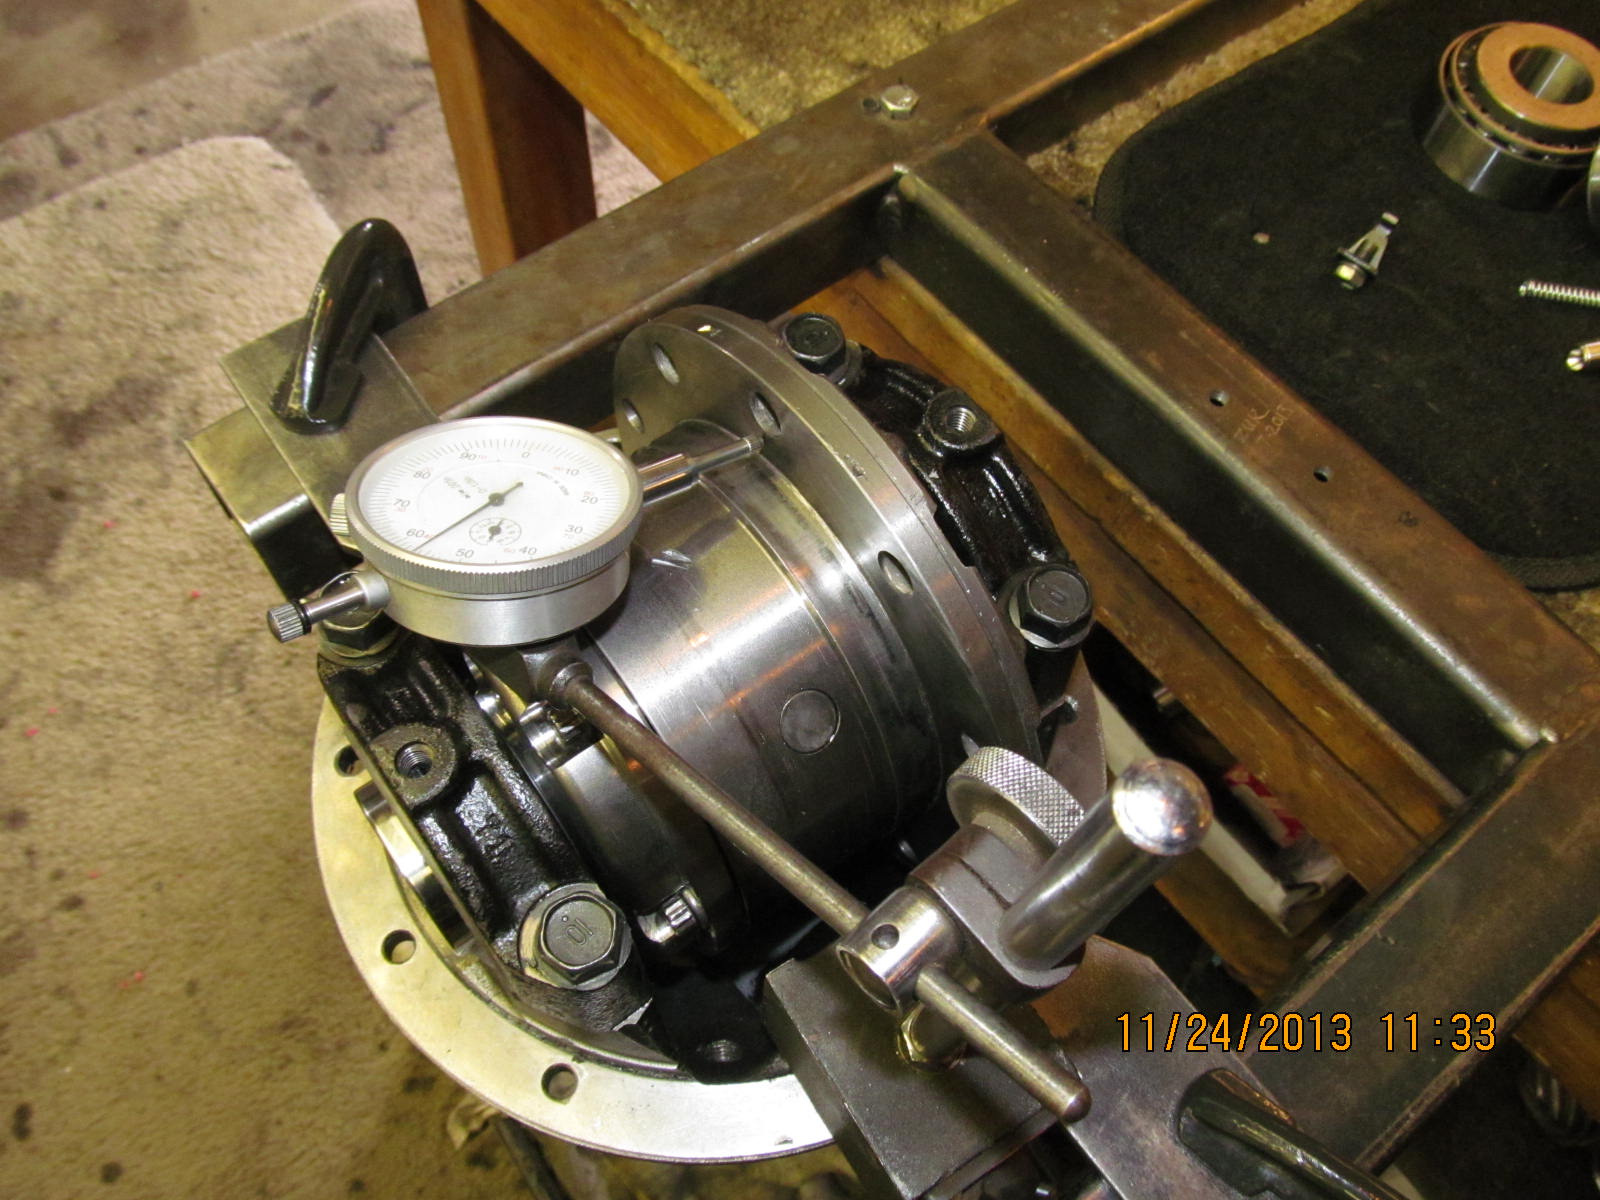
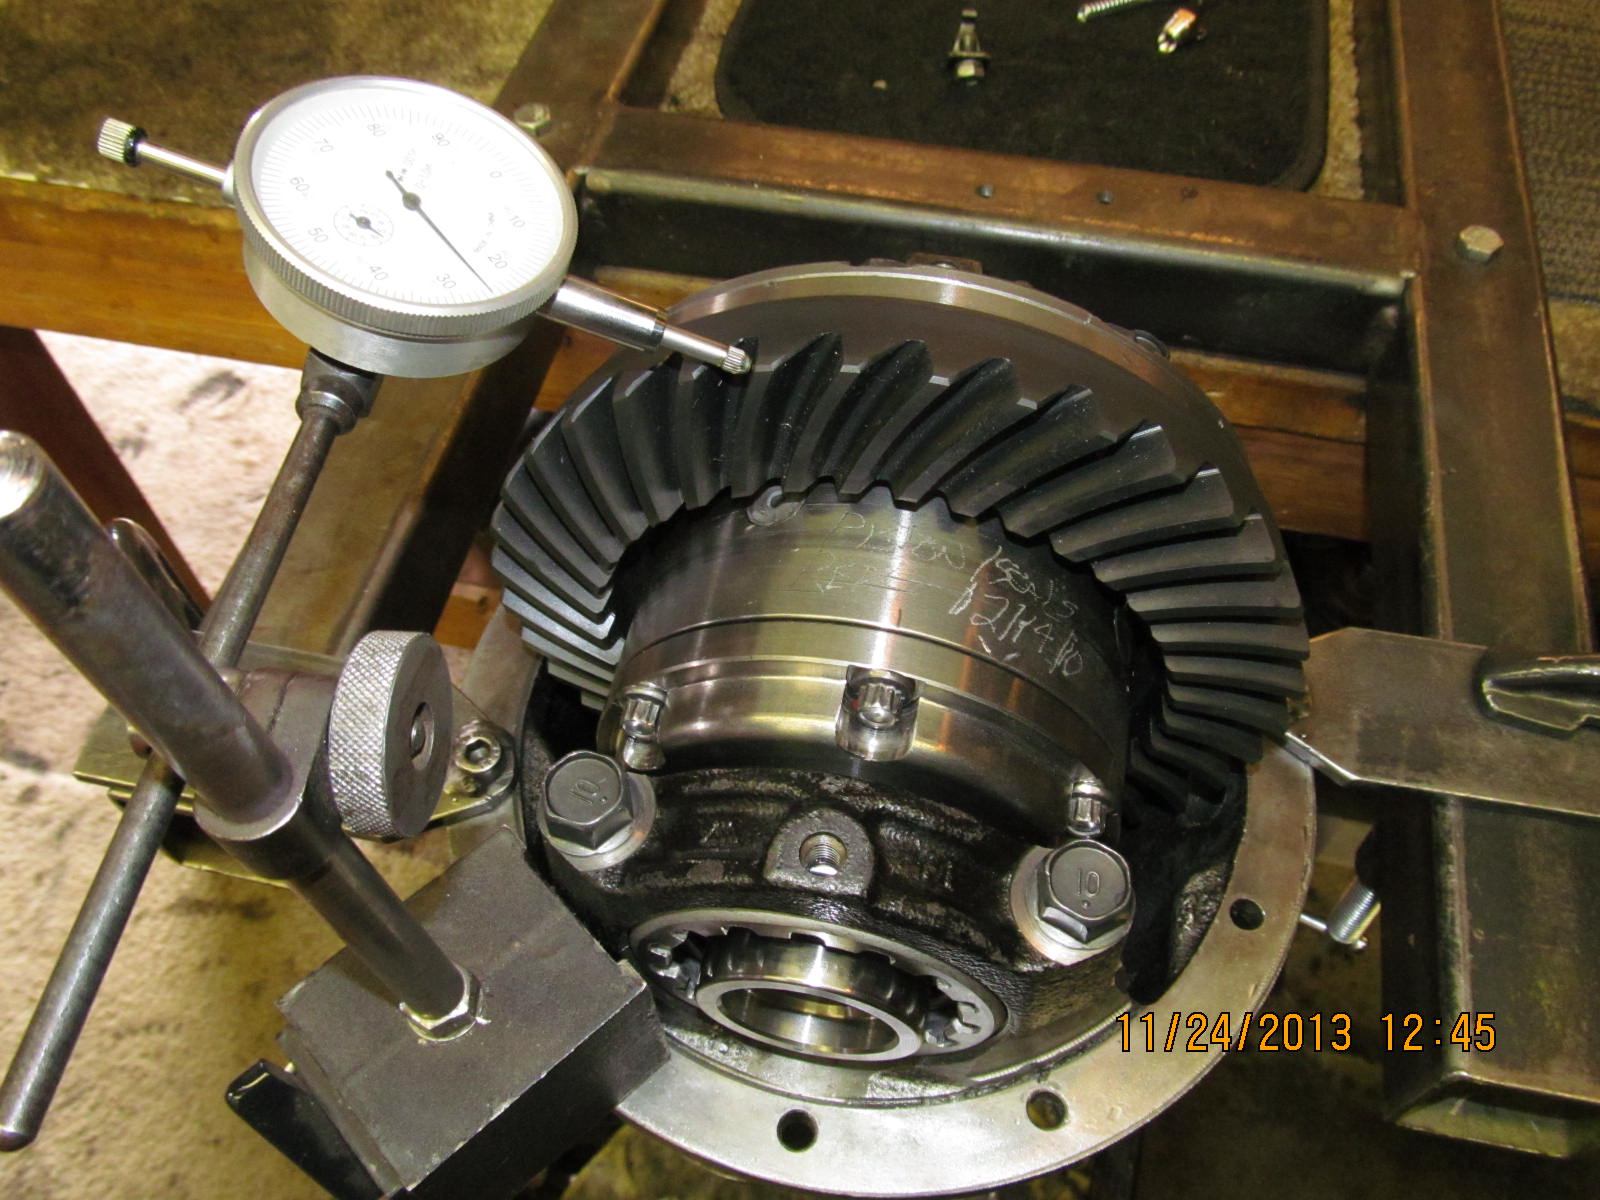
In addition, since this one had pieces of teeth floating in the oil and sometimes might have locked up in the pinion tooth a
couple times, it is important to do a run-out check. Normally, the ARB cases are machined to less than .0005" run-out......but
this one was around .0025" run-out which tends to happen with these shock loads.
|
|
|
|
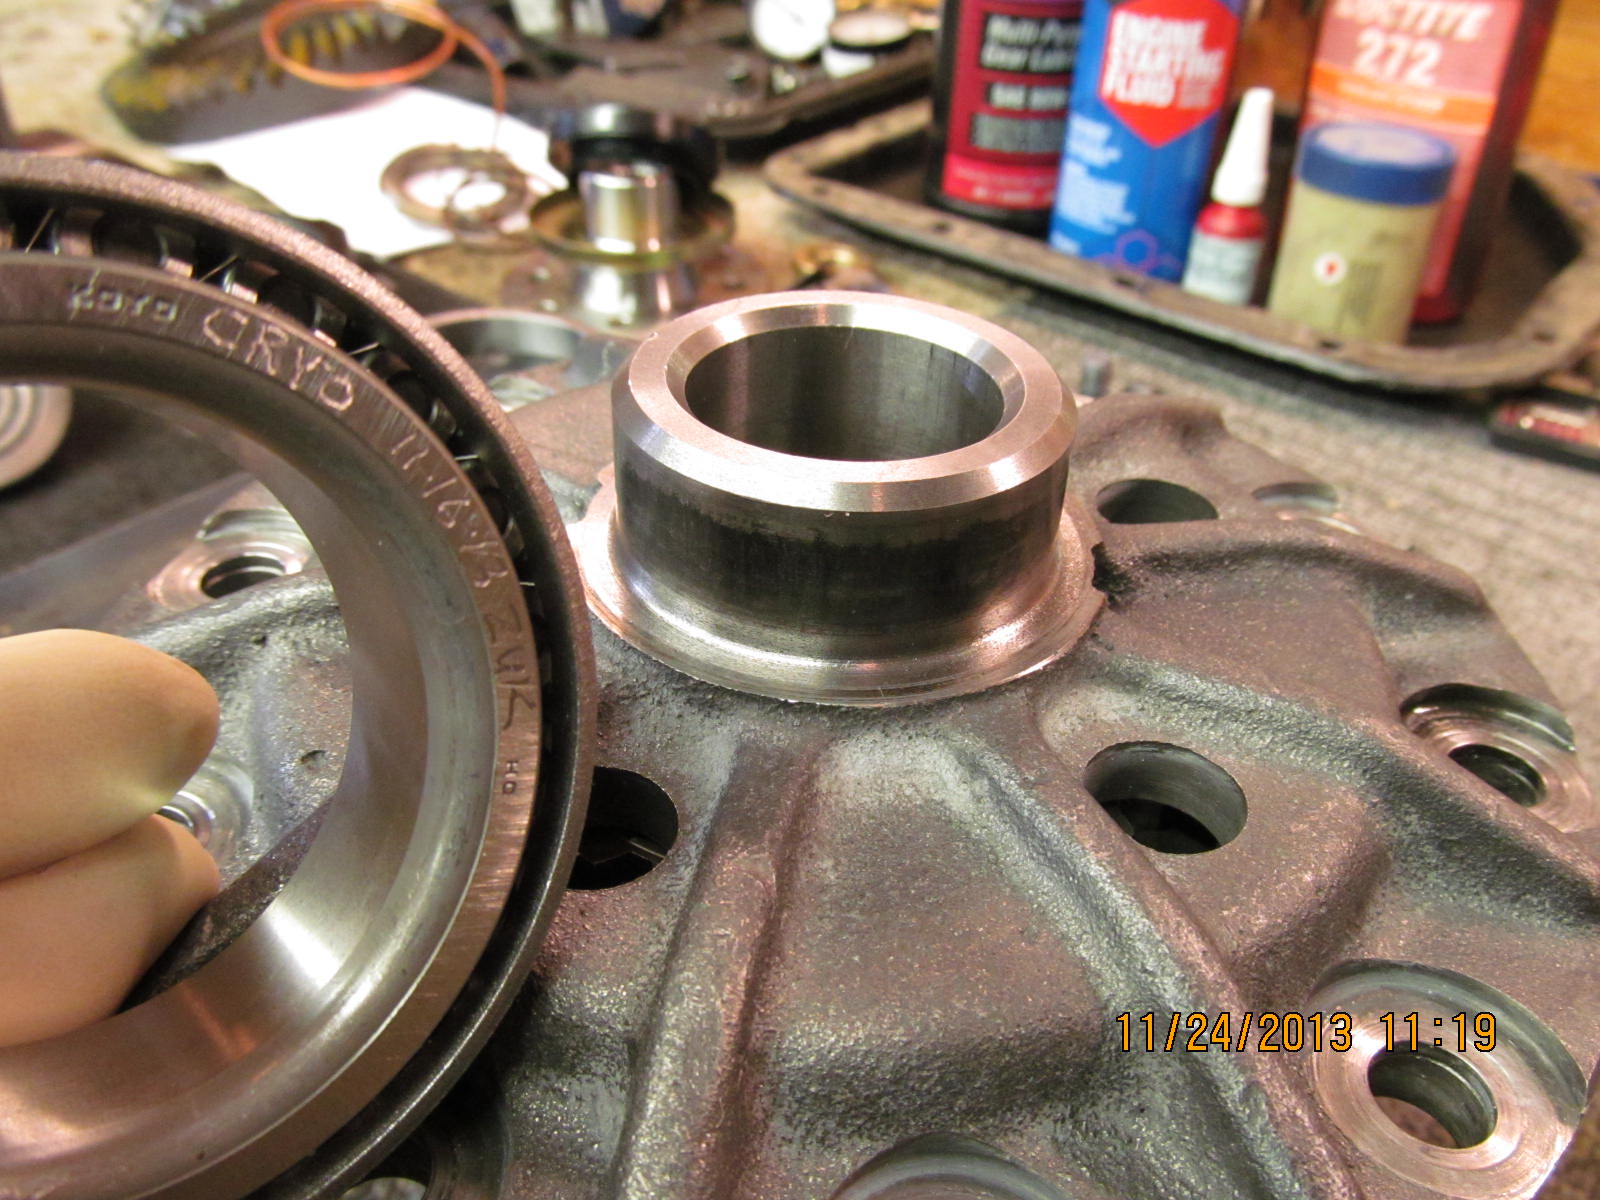
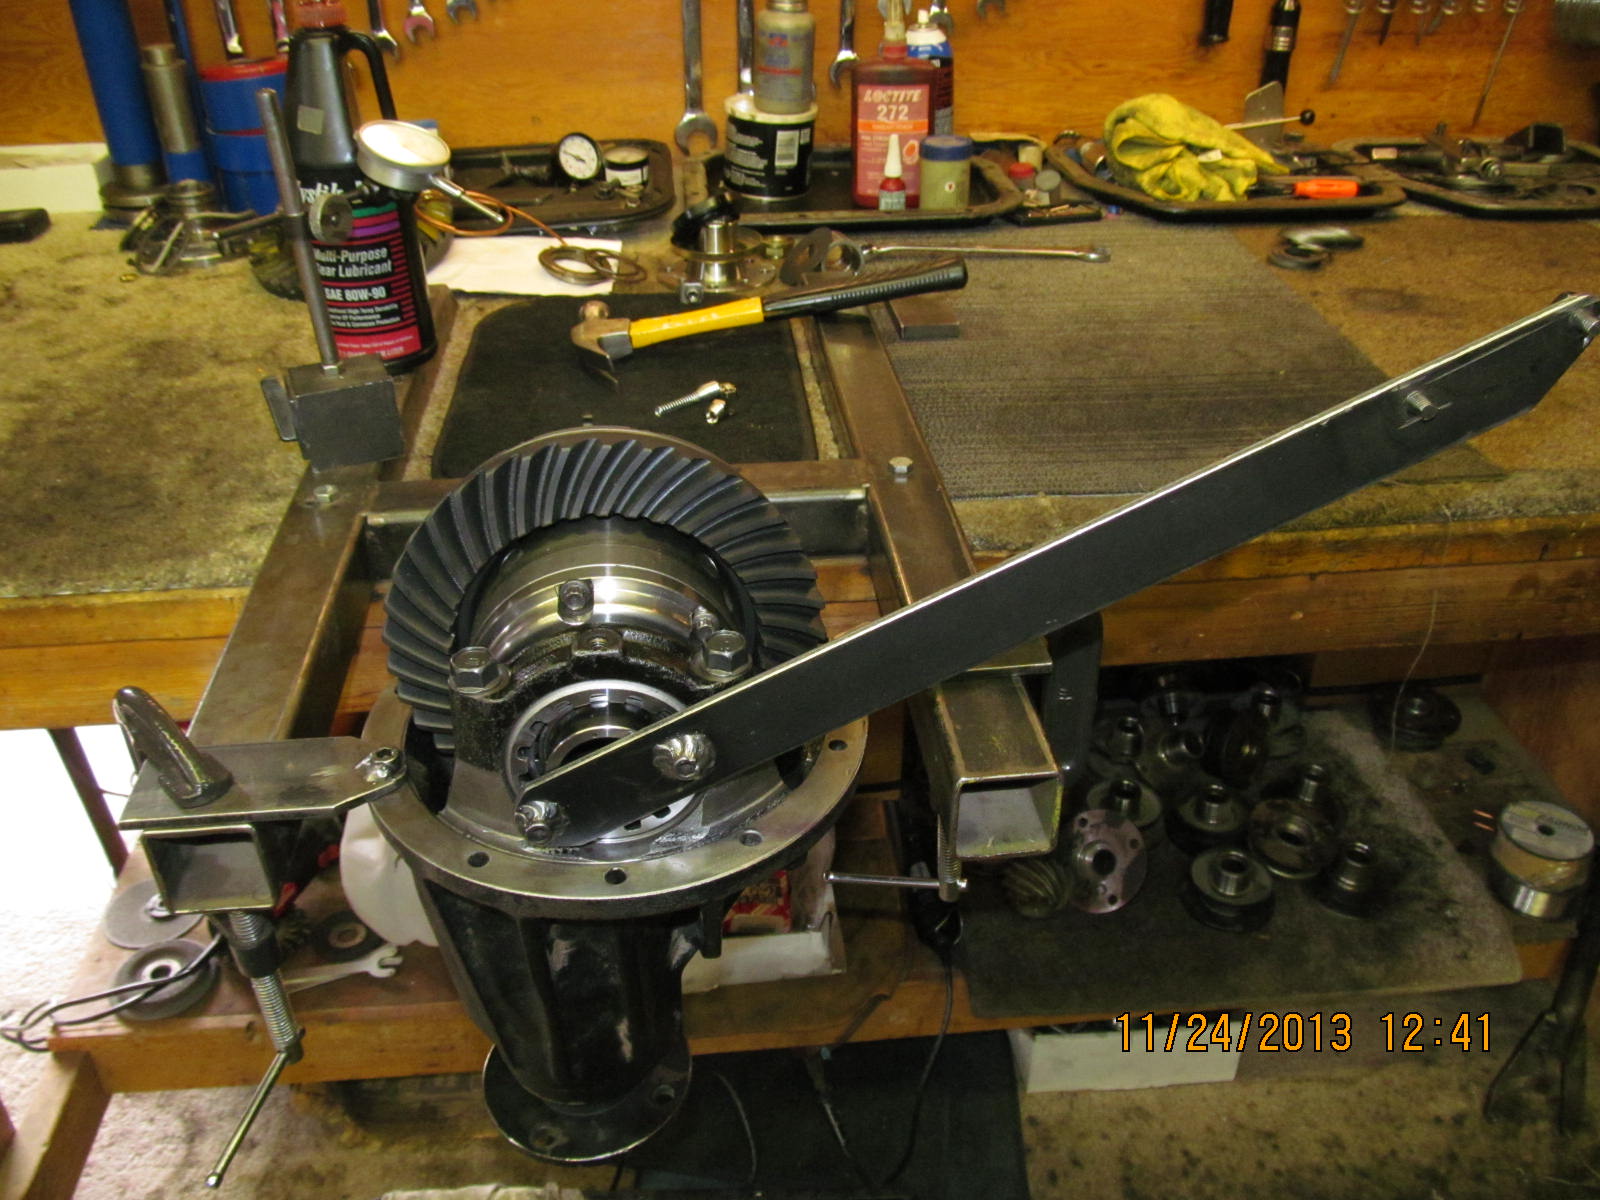
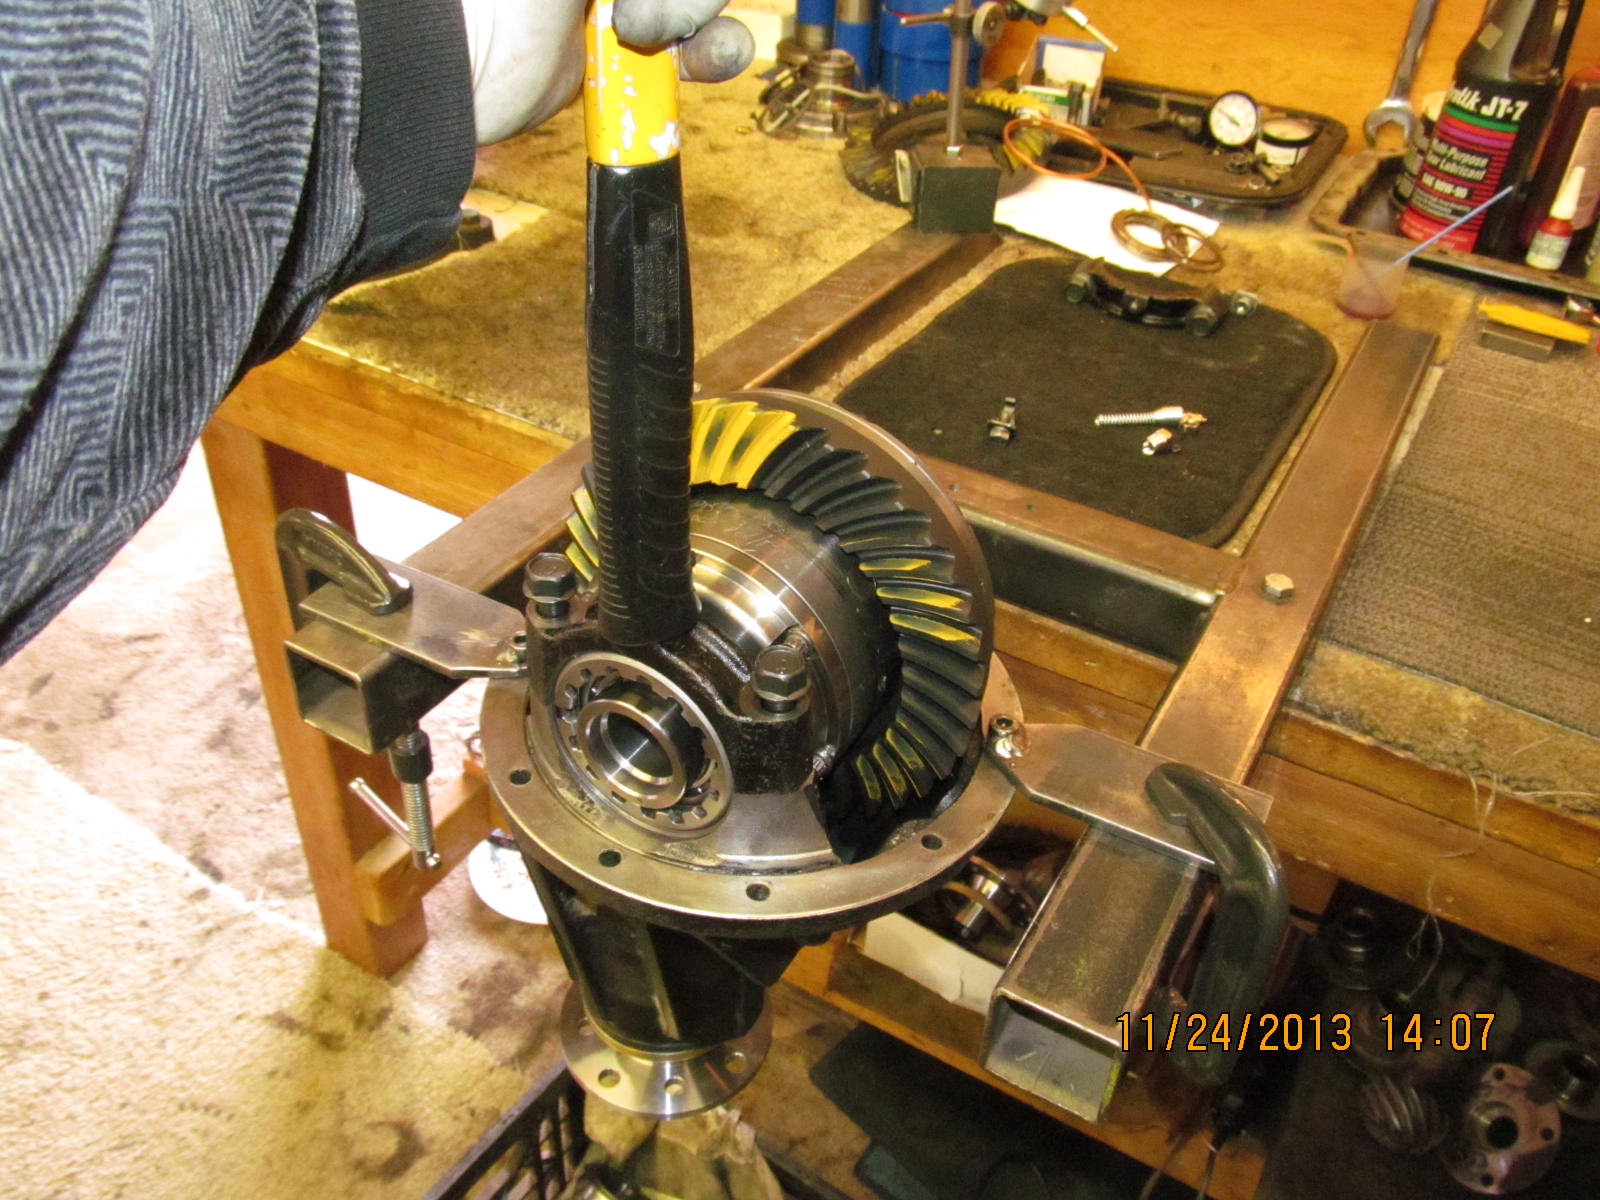
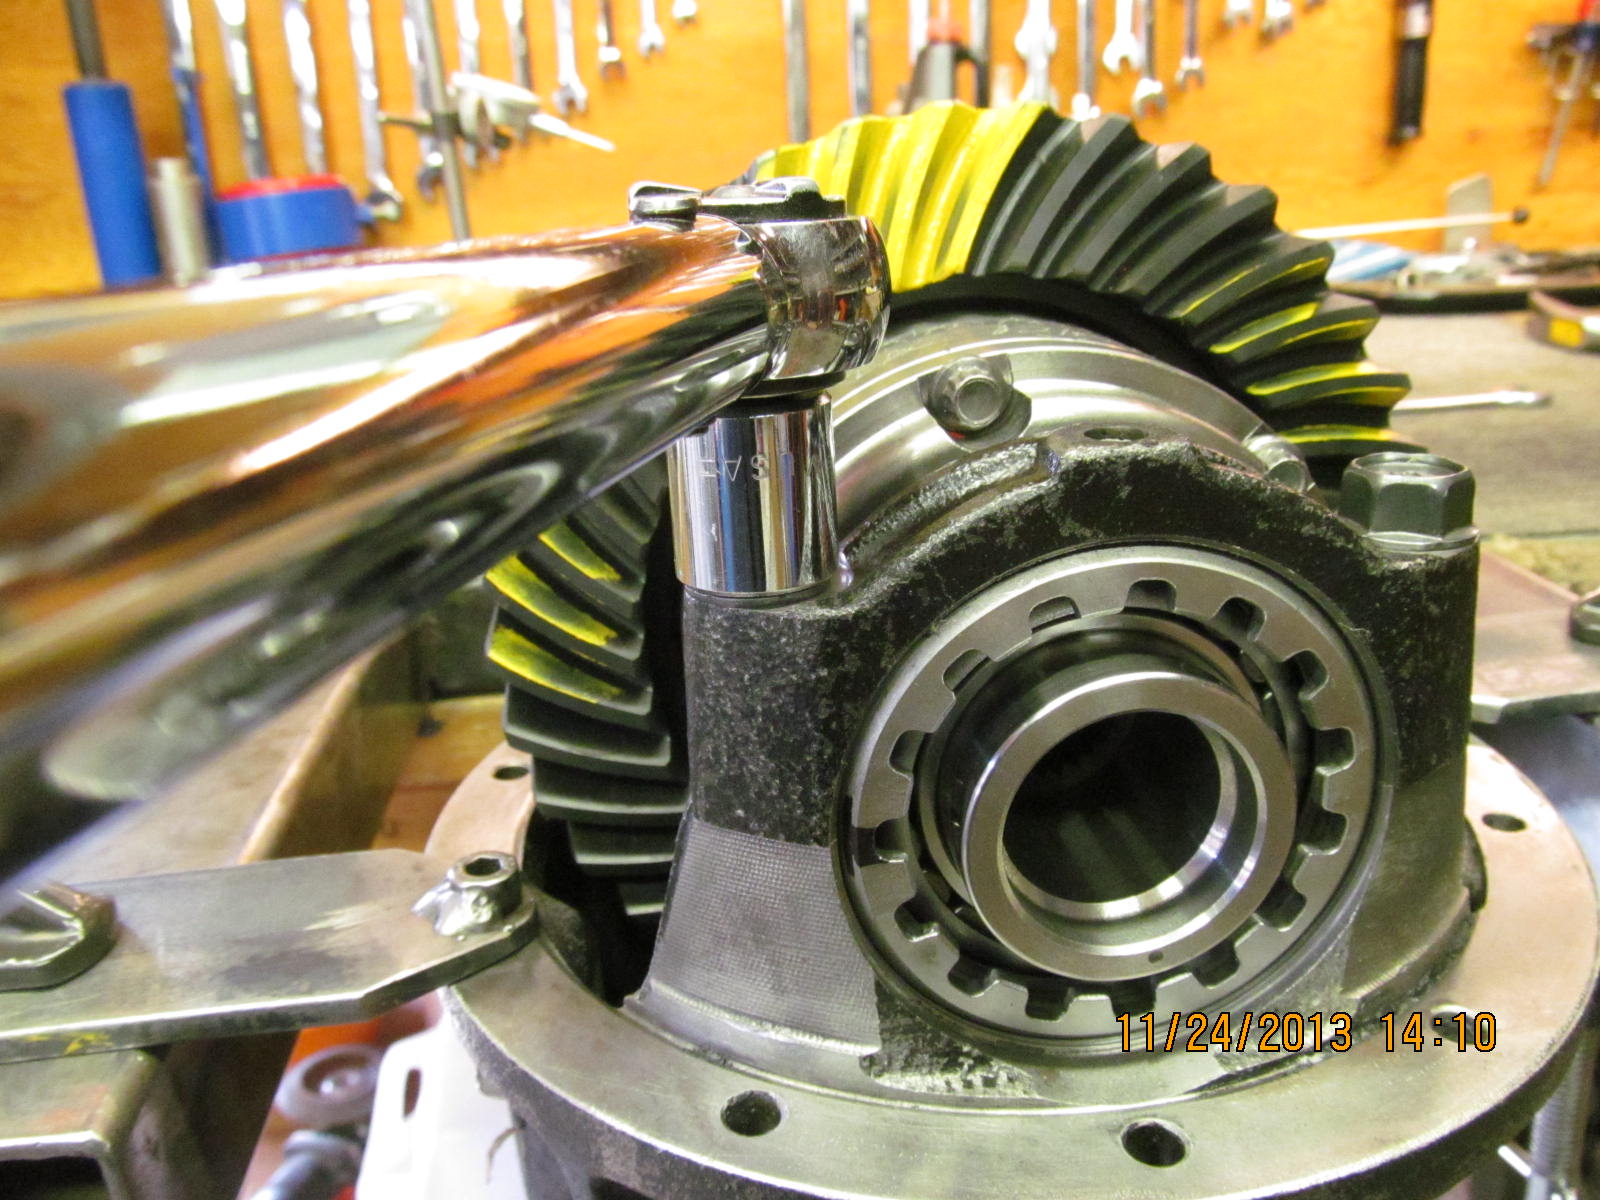
This 529 Nitro ring went on beautifully...tighter than a slip but not a full press....took 1 finger, as shown, to slide
it right in place.
|
|
|
|
|
I had 2 bolts threaded in place to make sure the ring fell down in alignment. All 10 bolts went in nice.
|
|
|
|
|
All 10 saw the red loctite...
|
|
|
|
|
...and 75 ft/lb torque.
|
|
|
|
|
Case side is done. Now onto the pinion end. I will start with a pinion shim of .0785" and go from there.
|
|
|
|
|
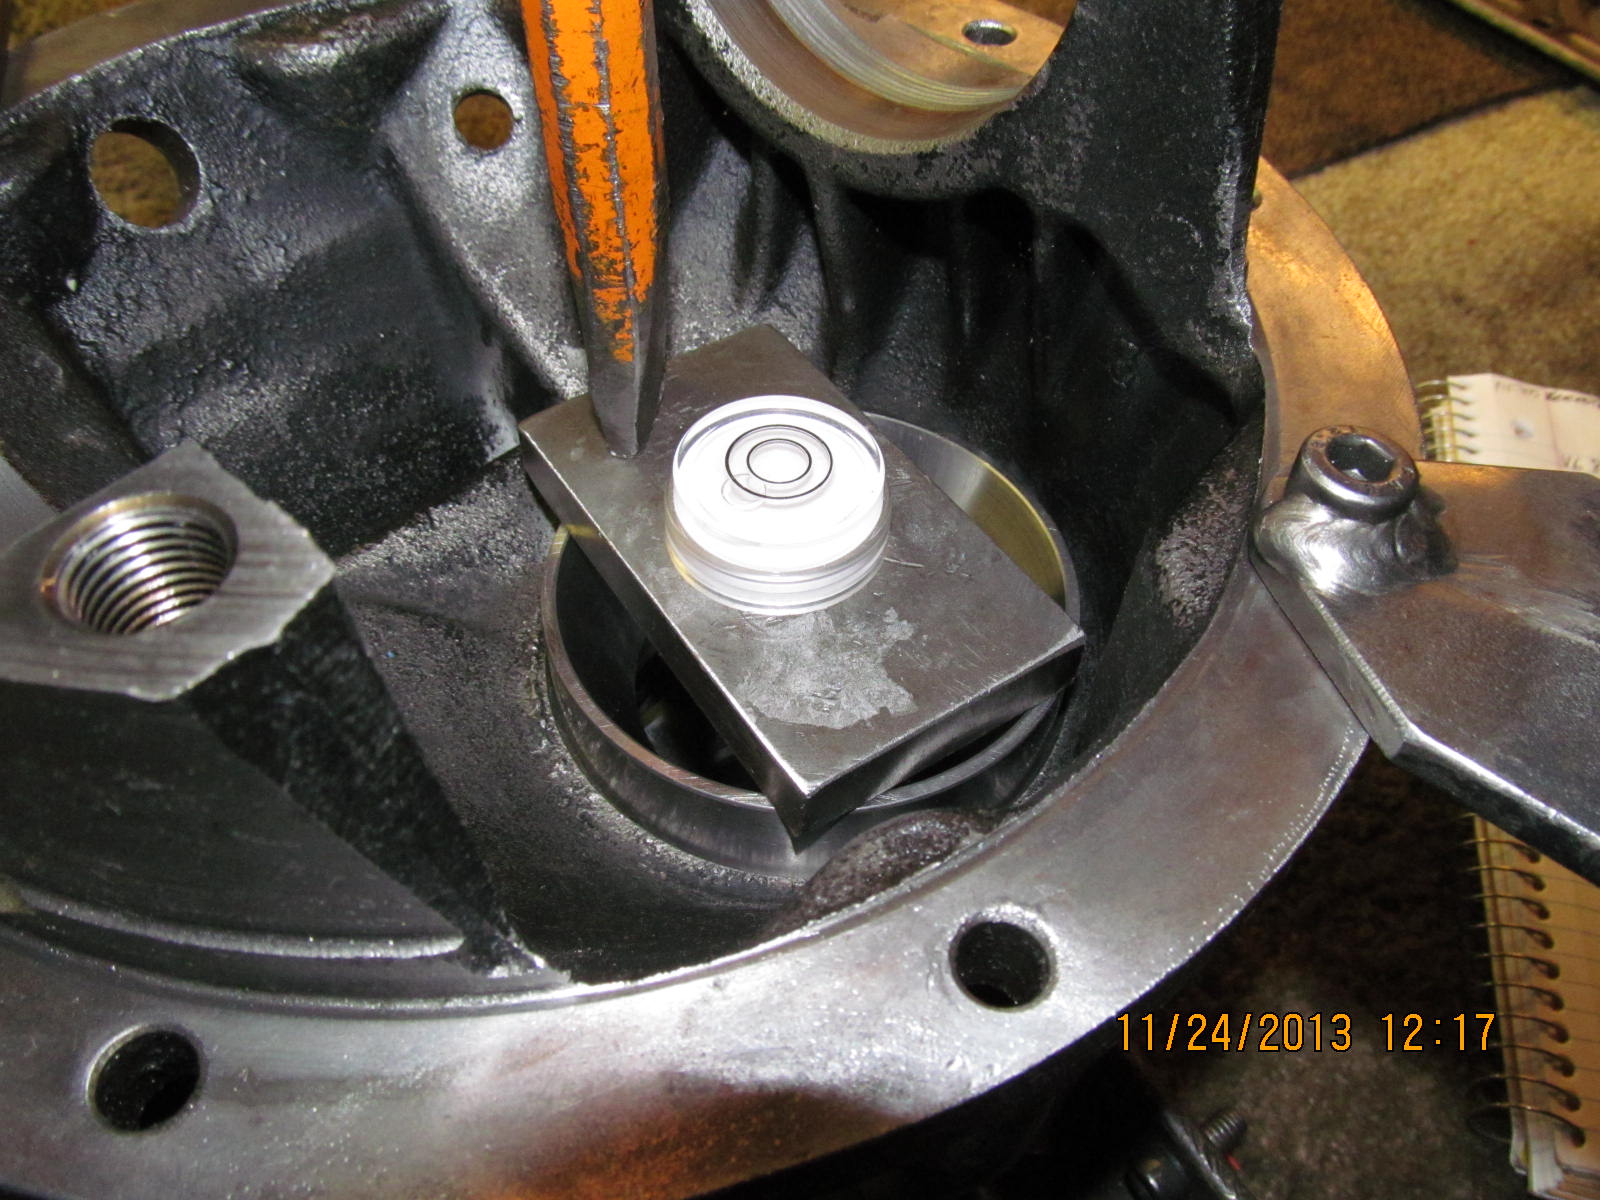
The inner bearing race is tapped in evenly and I like to use a "bubble" to make sure it sits in there even and square.
|
|
|
|
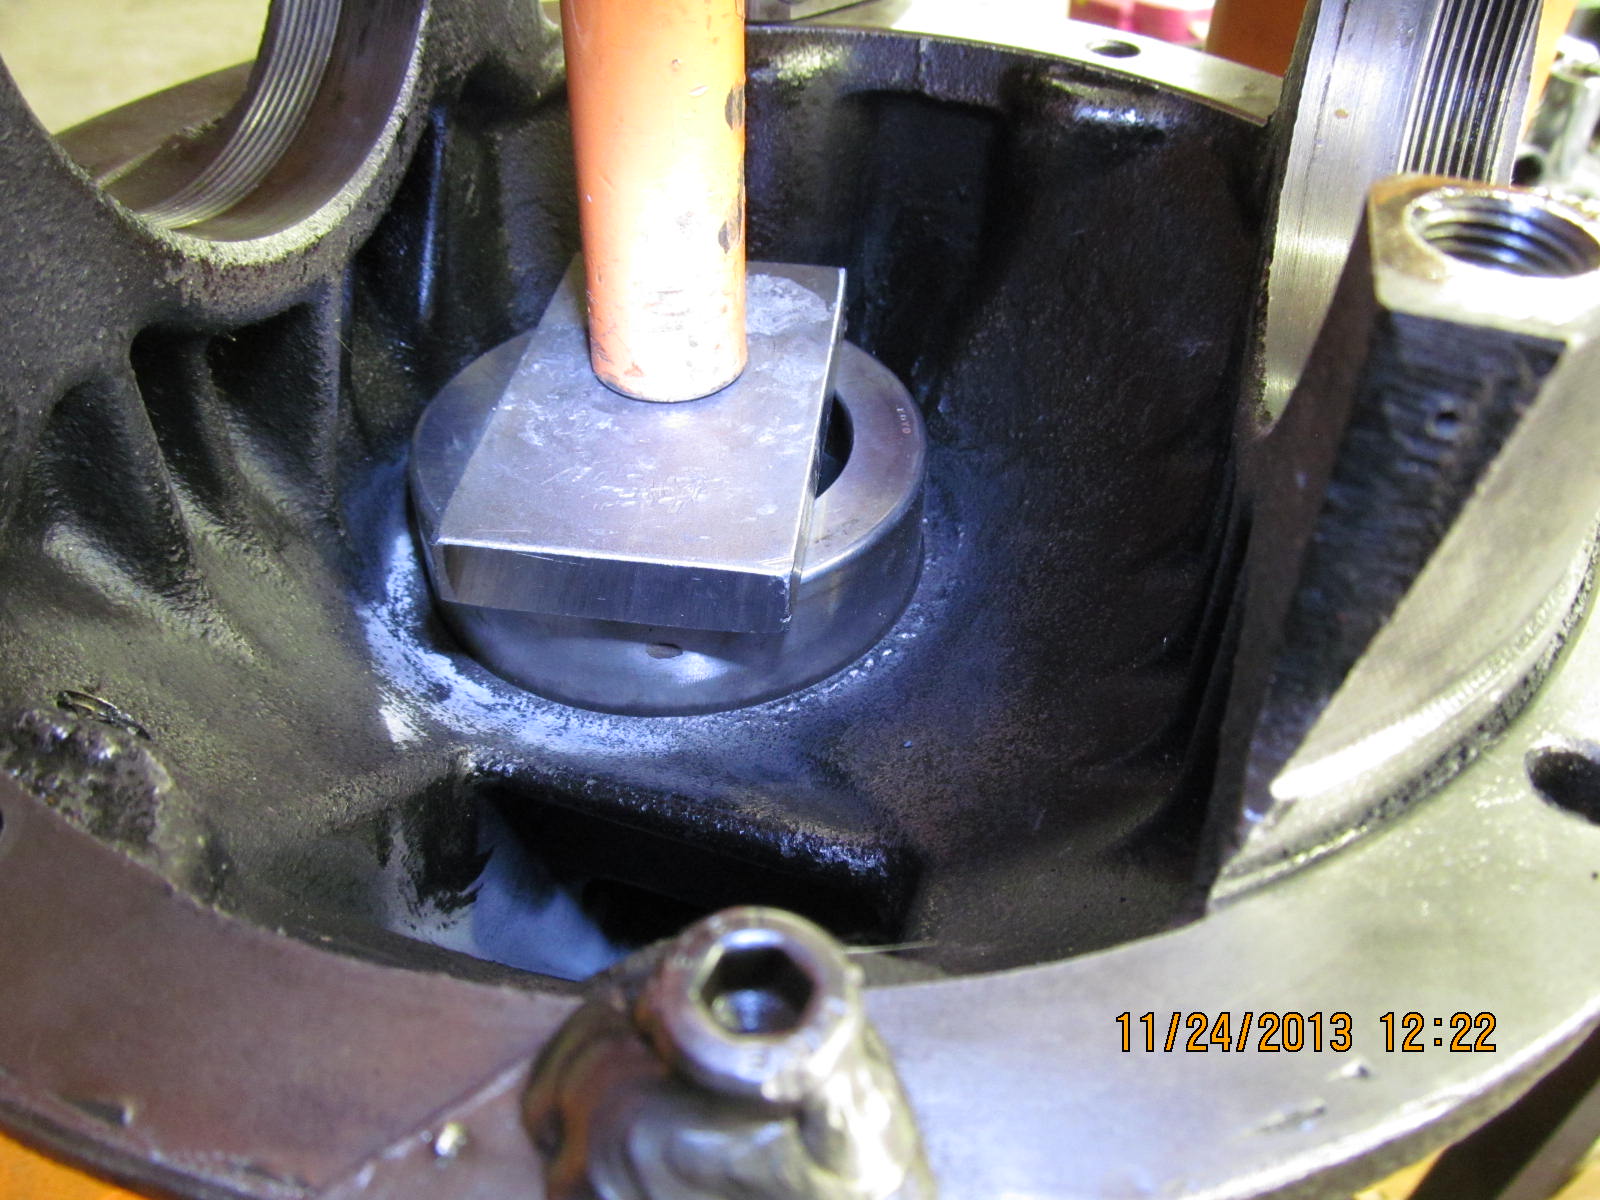
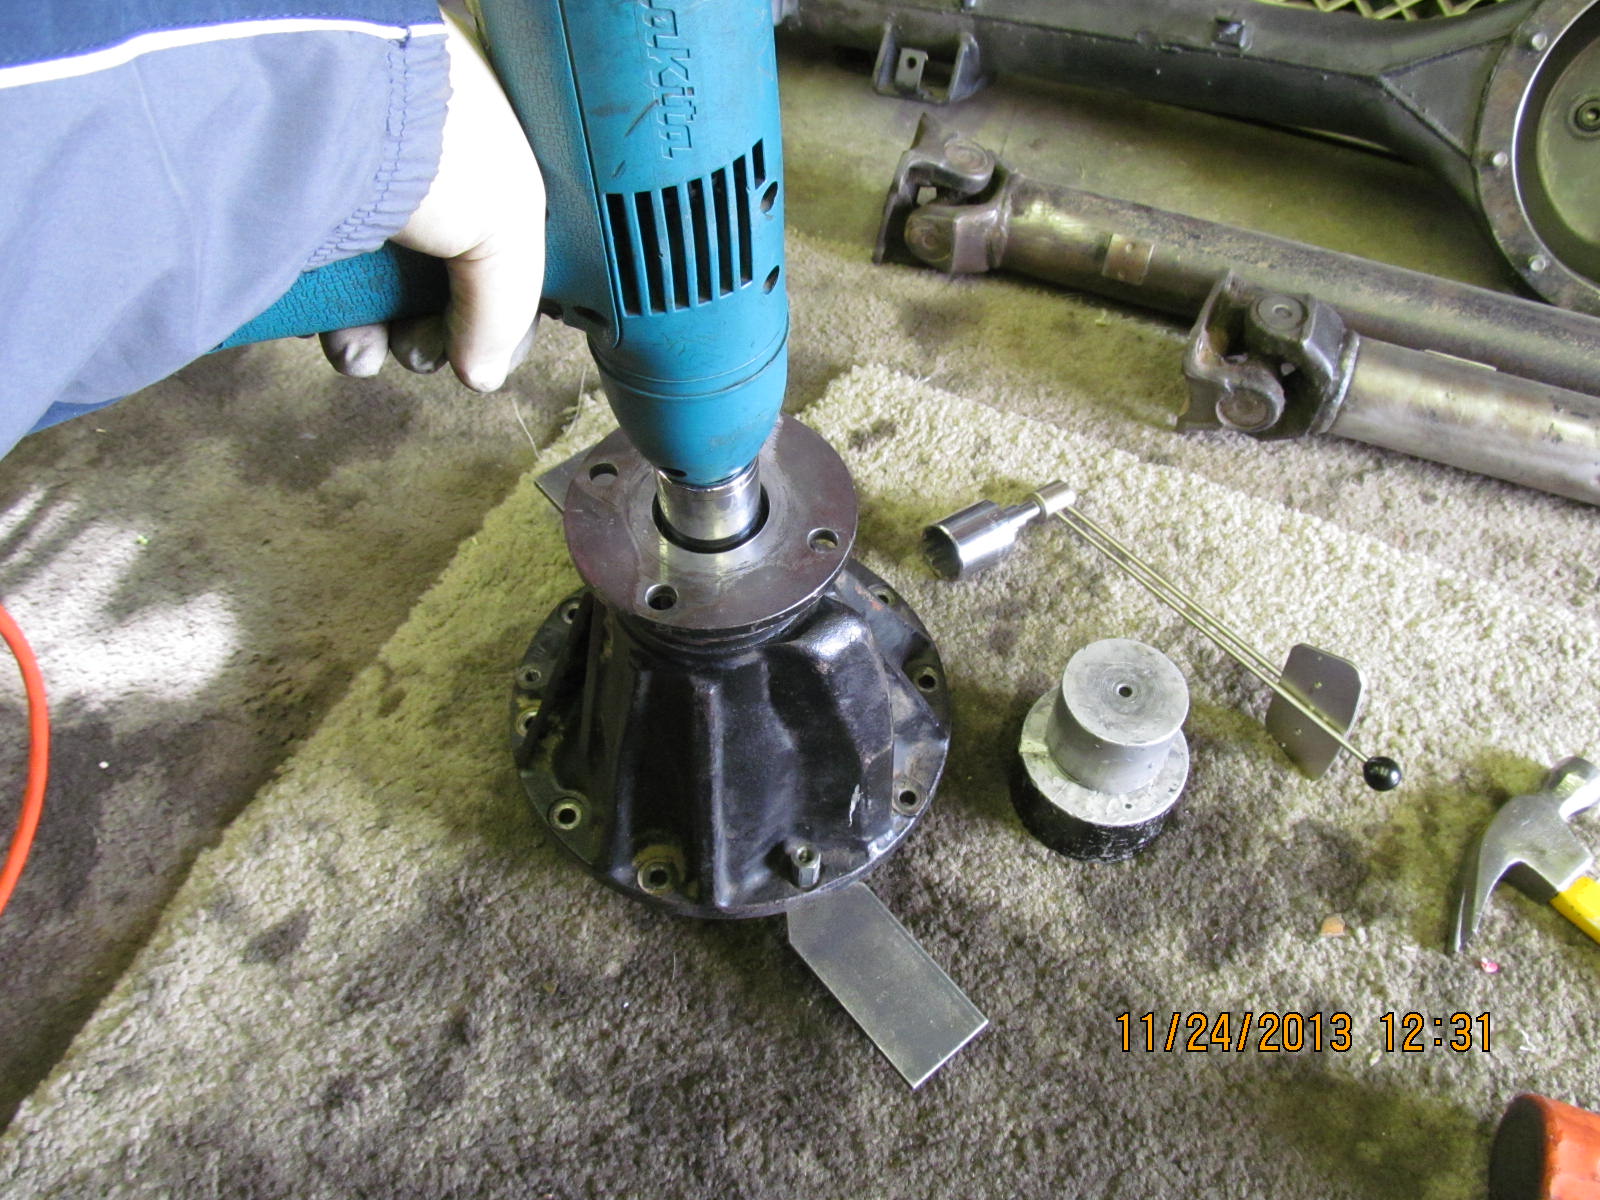
Then I use the press and an old race to ease the new race in. If the new race is sitting in there straight then the press will
drop it down all the way as smooth as silk but if it is just a little cock-eyed then the press will cause it to wedge and
lock up on the sides.
|
|
|

|
The top race is easier....just use old bearing pieces and tap it down in place. This one tends to self-align better
than the larger inner race.
|
|
|
|
|
Time to load the pinion up.
|
|
|
|
I'm just getting it ready for a paint check so I really don't have to set the PPL exactly in the target range of 10~15 in/lb final.
Gear oil is liberally applied to both bearings and the electric impact puts the 30mm nut on in such a well controlled manner that
I can get it pretty close without over-tightening the nut excessively like an air impact might.
|
|
|
|
|
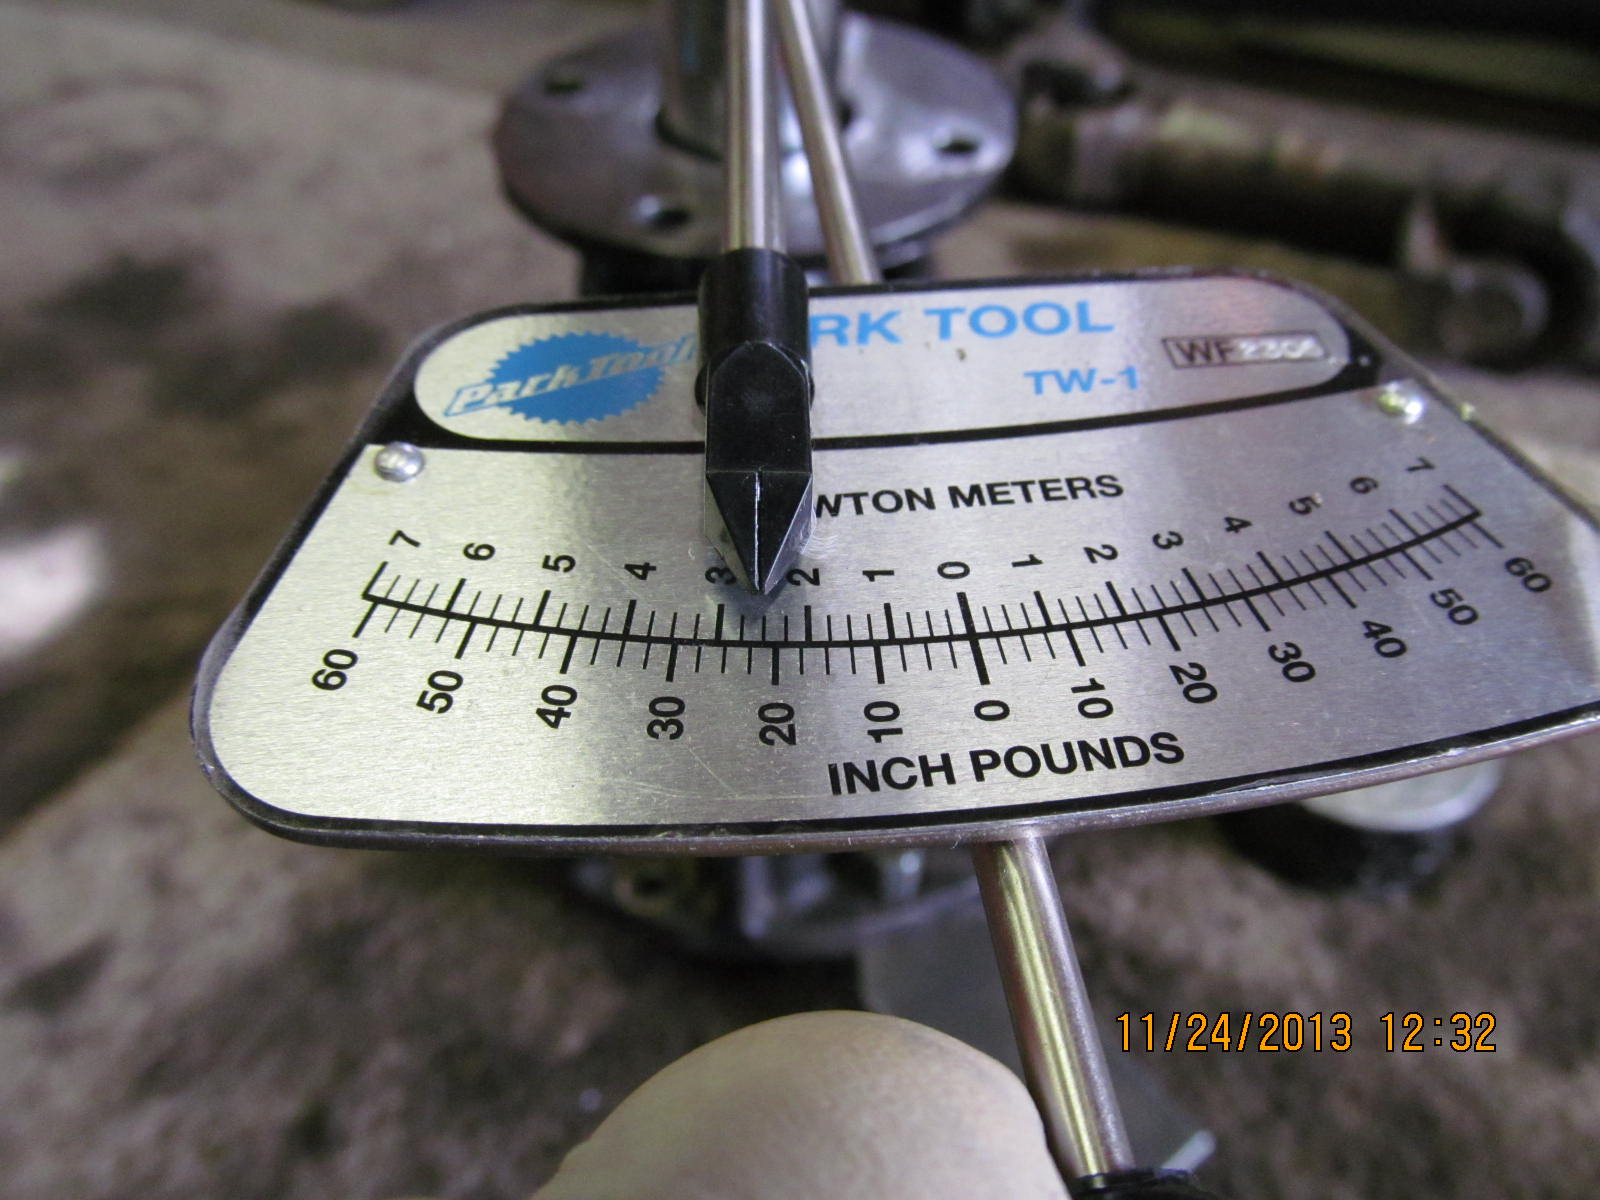
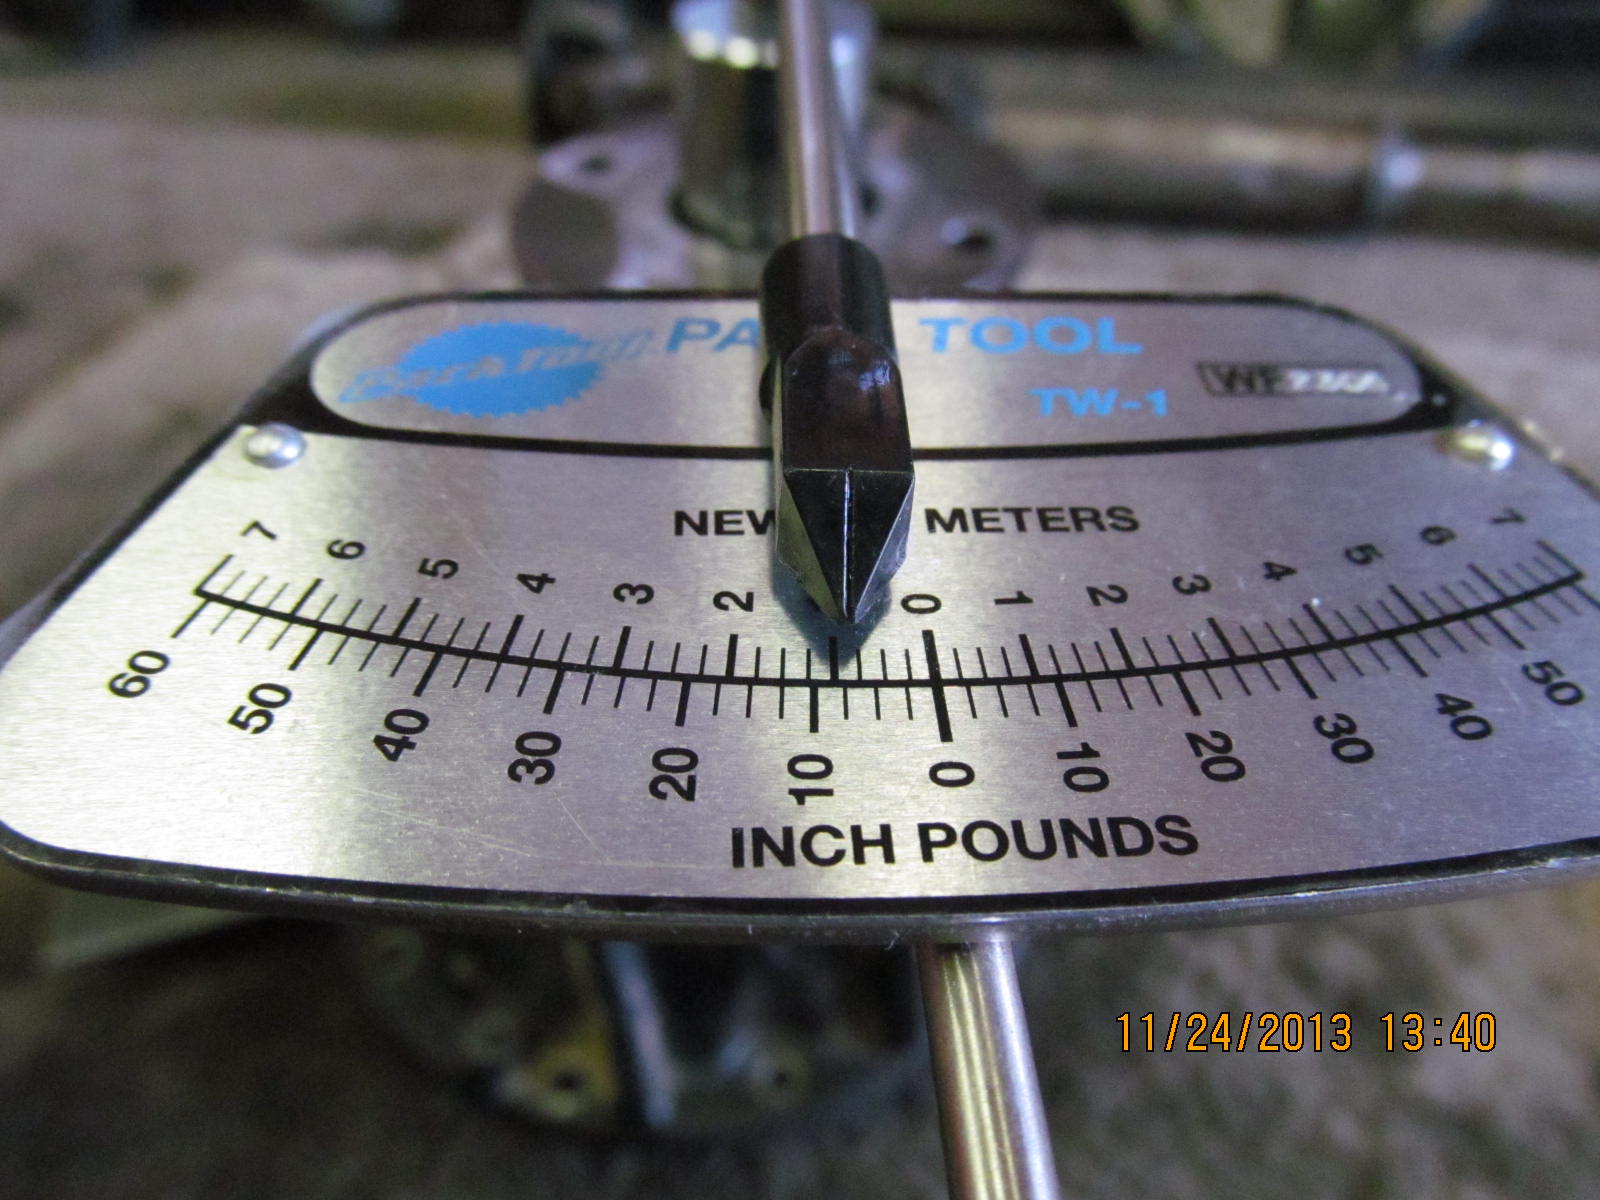
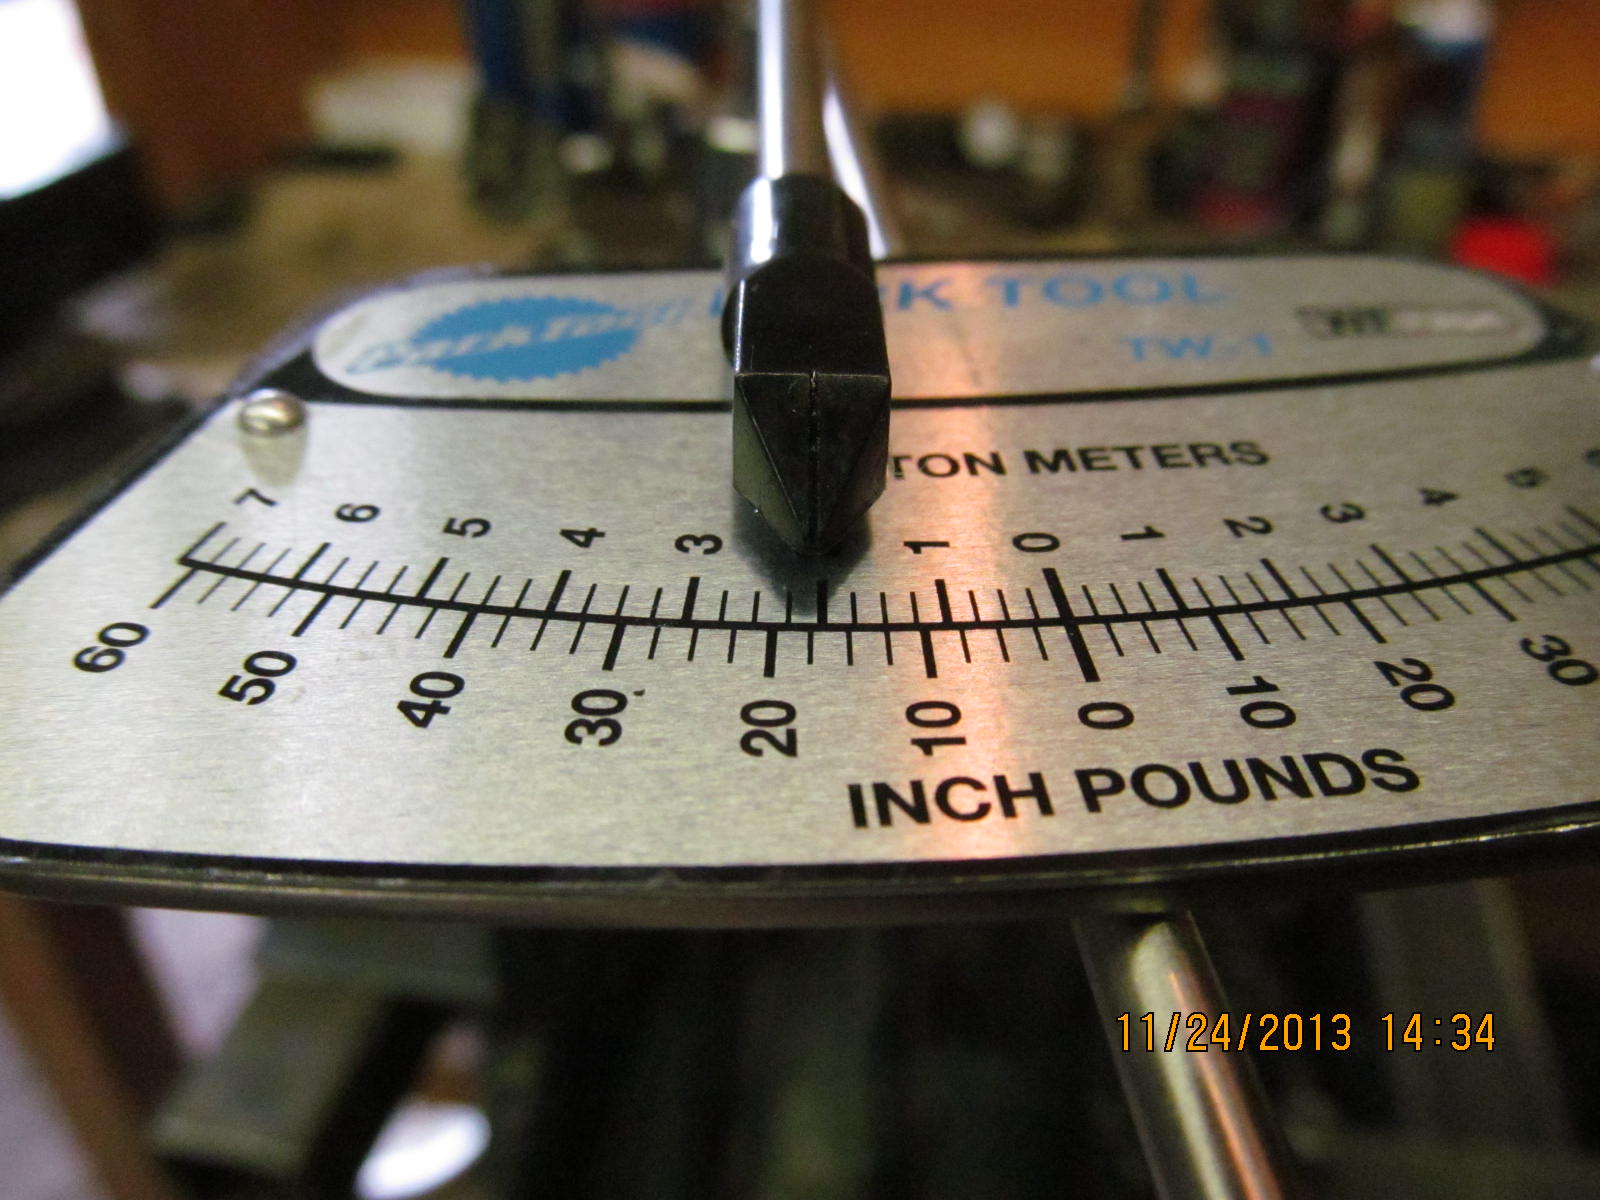
A quick check with the torque wrench shows just over 20 in/lb and this is a-ok for a paint check.
|
|
|
|
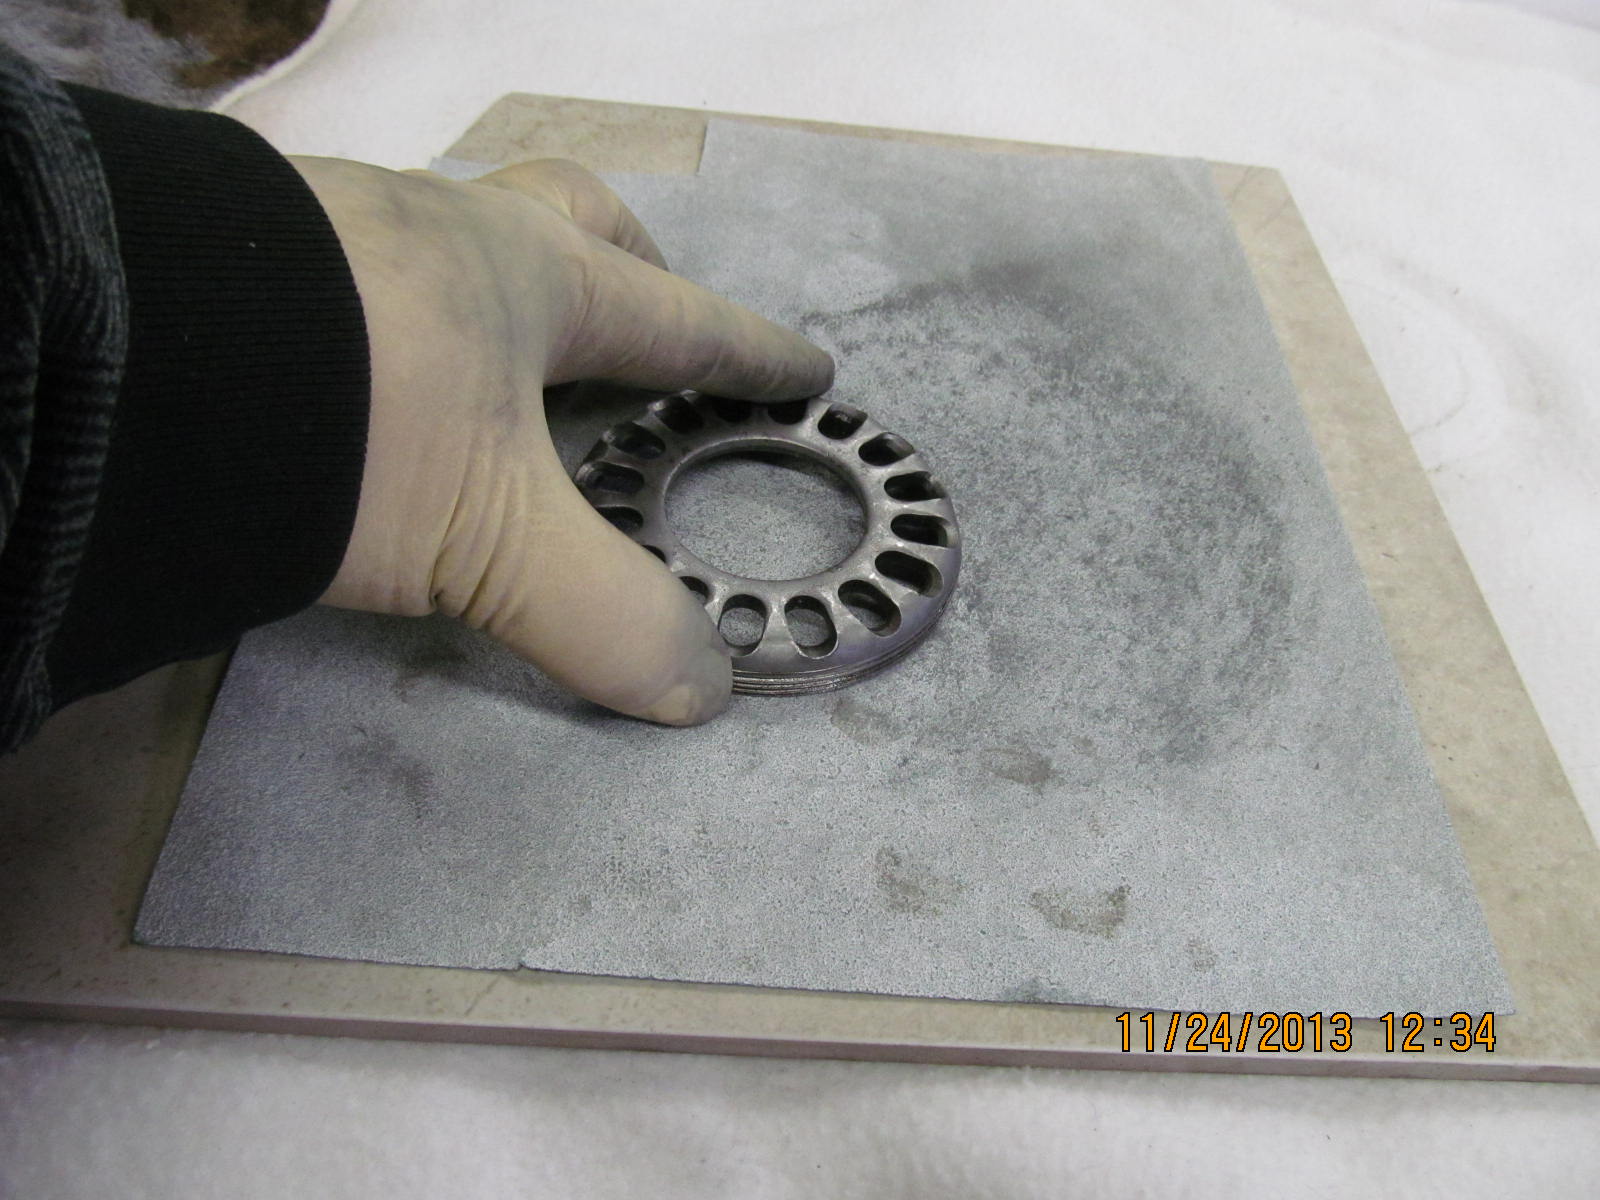
I noticed the oem wheel adjuster had some grooves cut in them from the race spinning a little bit so I use this flat piece of
ceramic floor tile with a sheet of 100 grade sandpaper to smooth it out. I also use this set-up to fine tune the length of
the solid collars to get an exact pre-load measurement.
|
|
|
|
|
I still prefer this simple homemade tool for tightening the wheel adjusters over the pro version offered by ARB :)
|
|
|
|
|
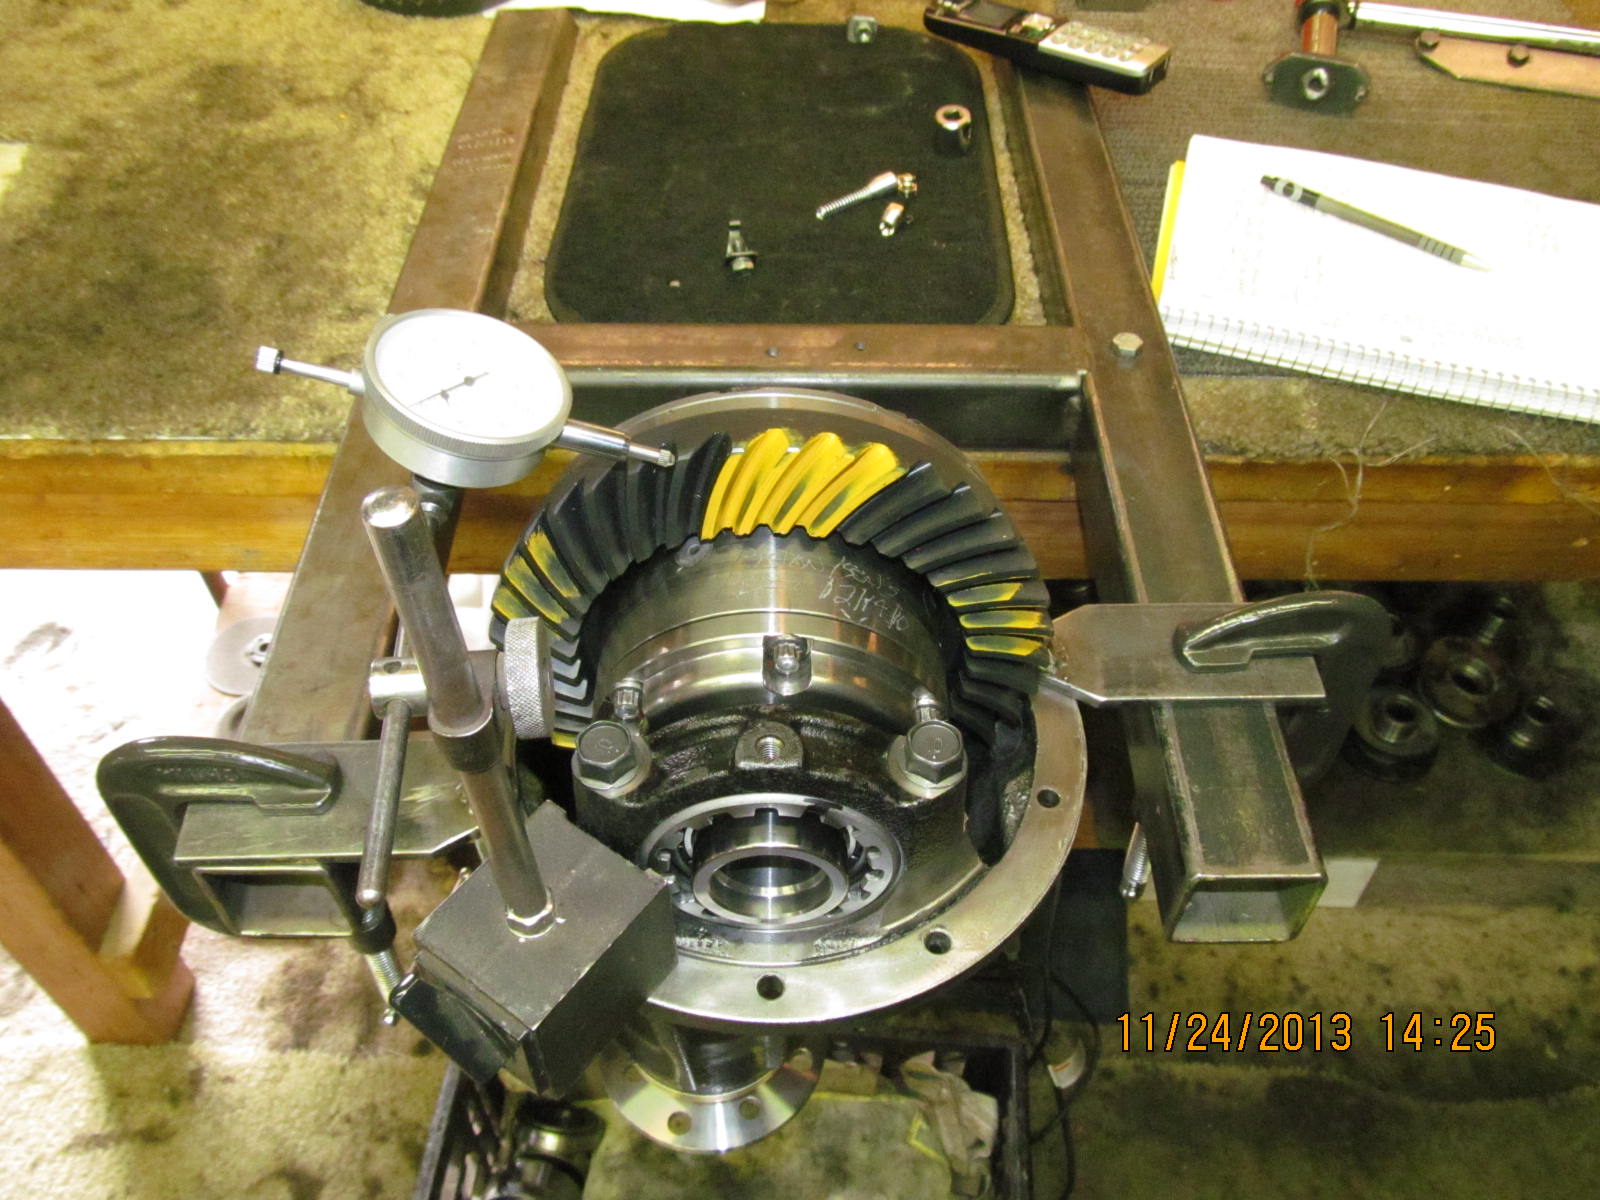
Dialed in a small amount of bearing pre-load and verified the backlash was in the ballpark. I was seeing about .006" here.
|
|
|
|
|
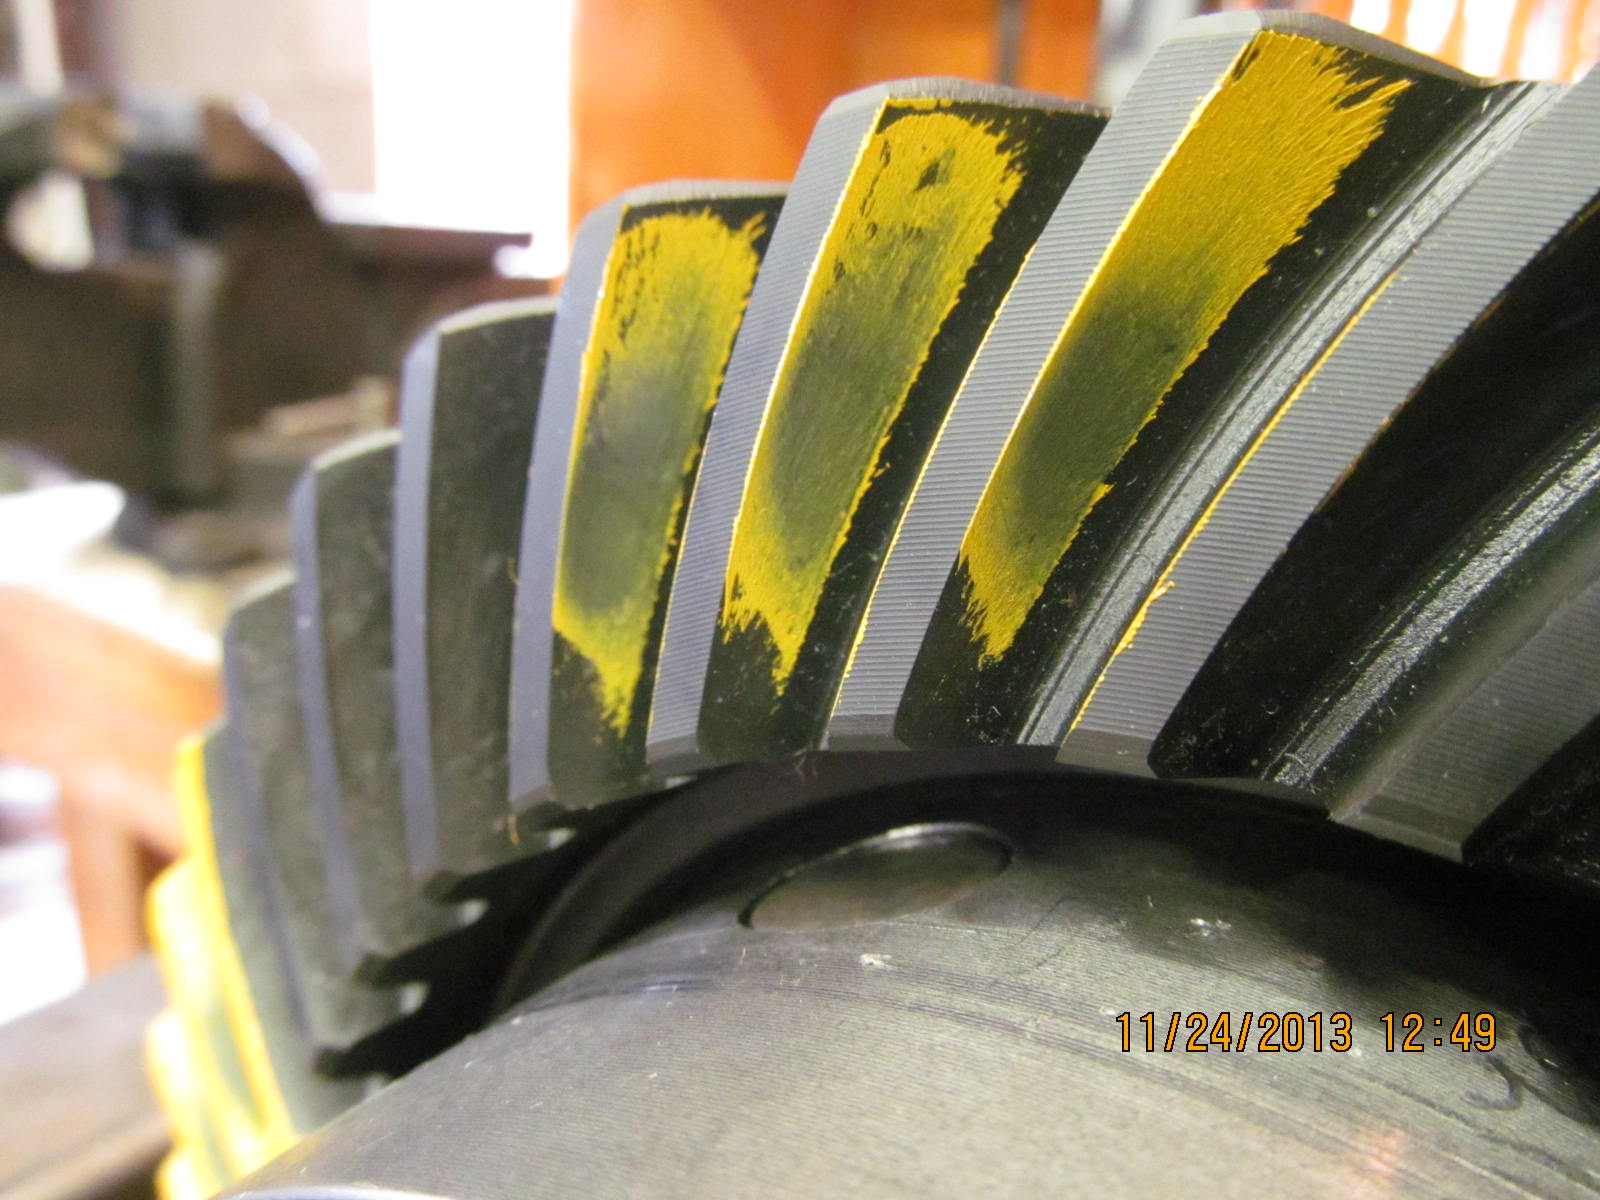
Drive....looks good....favors toe...nice shape...appears to be exact depth or very slightly deep.
|
|
|
|
|
Coast...centered...has a good shape.
|
|
|
|
|
Drive on the pinion is ok....comet tail info is hard to see here but I have the option of going deeper which I will do.
|
|
|

|
|
It's always nice to compare the reverse painted teeth. This one says exact depth.
|
|
|
|
|
So does the coast.
|
|
|

|
|
Time to now do the final assembly of the solid collar and pinion seal.
|
|
|
|
But I can now do a final tweaking of the pinion depth. Consider that as the inner pinion bearing wears in that it also causes the
pinion to recess a couple of thou away from the ring effectively causing a slight shallow condition. My favorite condition is
slight deep with this wear process in the back of my mind. I am also aware that the pinion tooth is generally more robust
than the ring tooth....so a slight deep condition on the ring and slight shallow on the pinion tooth is a no-issue.
|
|
|
|
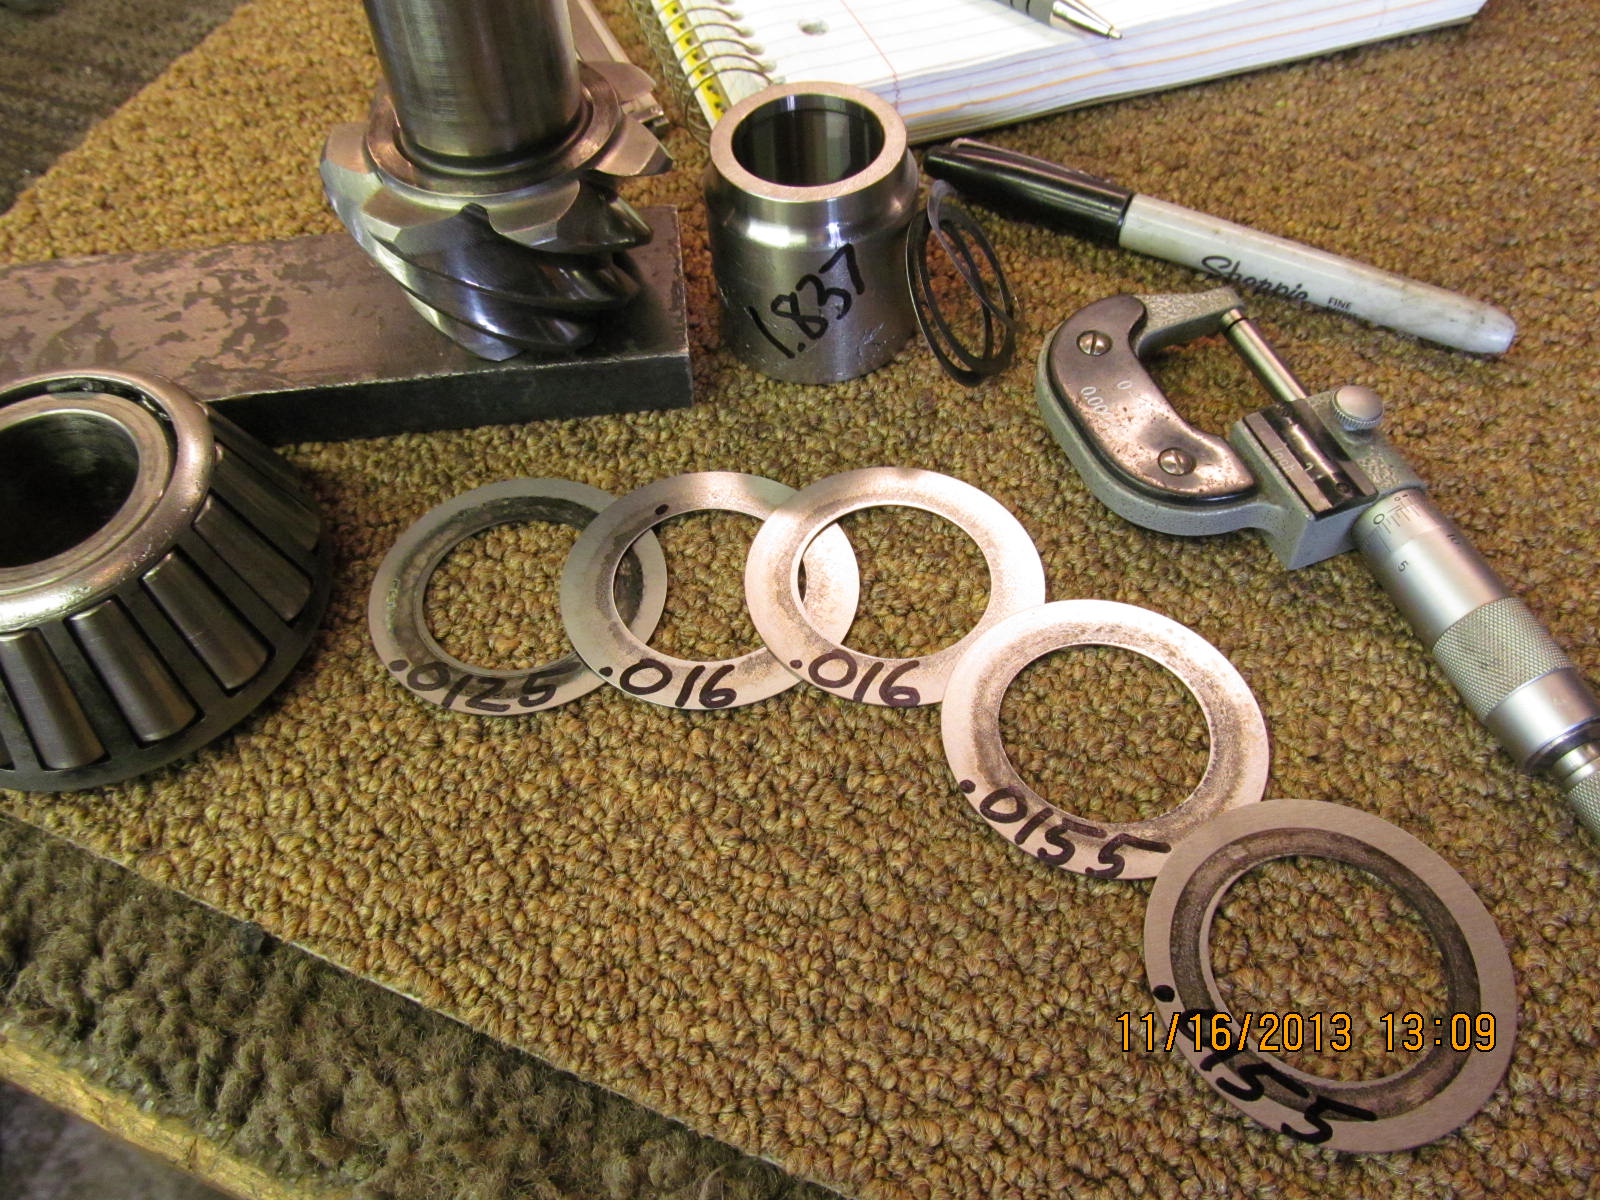
|
The .0785 is being upped to .080"
|
|
|
|
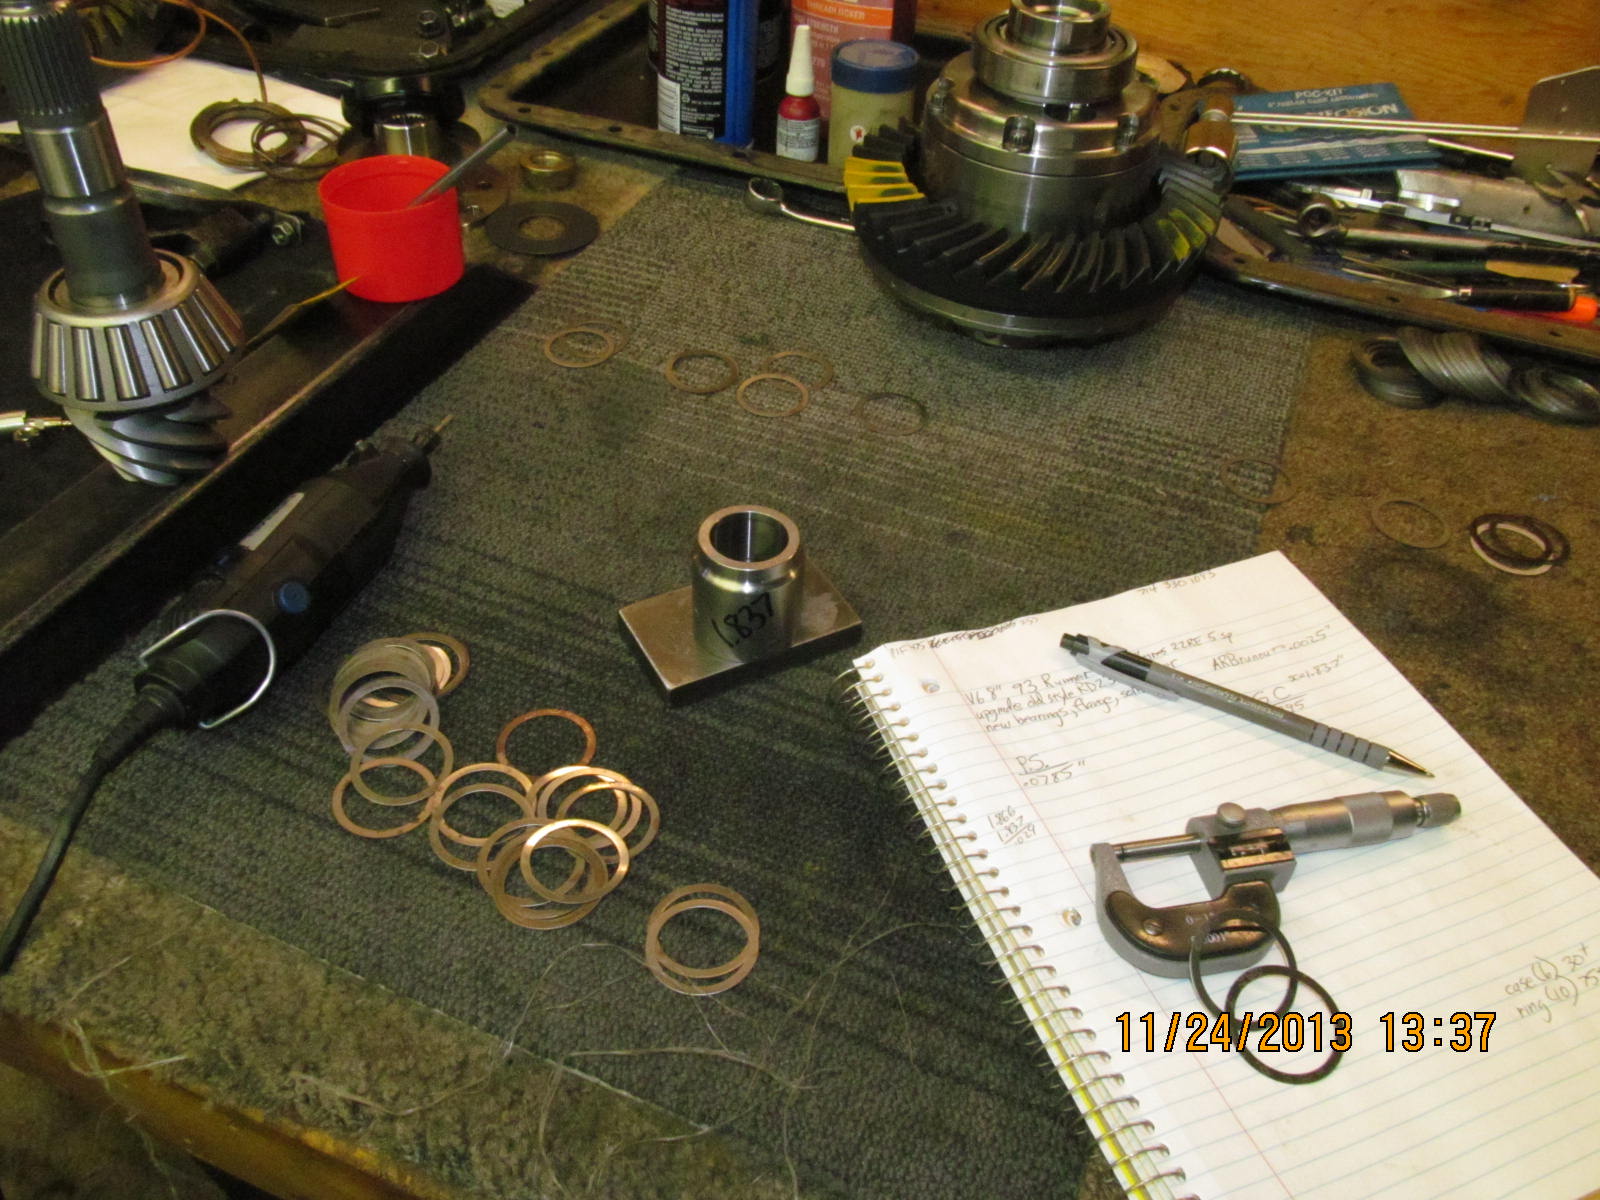
The solid collar is measured at 1.837" and I also know that the final desired length for the V6 3rds is about 1.866" so I will
try a .029" shim.
|
|
|
|
|
First try and 8 in/lb start torque measured. It's a keeper.
|
|
|
|
|
Now the seal can be installed.
|
|
|
|
Gear oil is applied to all friction surfaces. I want the seal to contribute as little final drag to my pinion preload measurement
as possible.
|
|
|
|
Not shown but this black rubberized seal was removed and thrown away because it seemed to me that the gear oil lip was barely
sealing....like as if this seal was really for a 29 spliner and this 27 spline pinion flange almost dropped on with no "seal
lip deflection". After comparing it with the Toyota OEM seal, it was obvious to me this would have probably caused Rob some
grief with an oil leak. This black seal was quickly replaced with the oem designed for the 27 spliners :)
|
|
|

|
|
With no tension on the 30mm nut, I am measuring the pinion seal drag at around 2 in/lb start torque.
|
|
|
|
|
Red loctite is applied to fresh threads.
|
|
|
|
The electric impact does a nice job of tightening the nut to about 200 ft/lb but I can add in some additional rotation with
a cheater bar in order to tweak the final preload measurement....
|
|
|
|
|
...to a modest 12 in/lb.
|
|
|
|
|
This end is complete now.
|
|
|
|
|
Assemble the bearing caps.
|
|
|
|
|
All 4 bolts can be tightened to 75 ft/lb.
|
|
|
|
The process of tightening both wheel adjusters and getting the desired backlash and carrier bearing pre-load can consume
some time. After each adjustment, I would wack the 4 corners hard while spinning the pinion back and forth. The effect
is to shock the carrier bearings into "equal tension" for more realistic measurements.
|
|
|
|
|
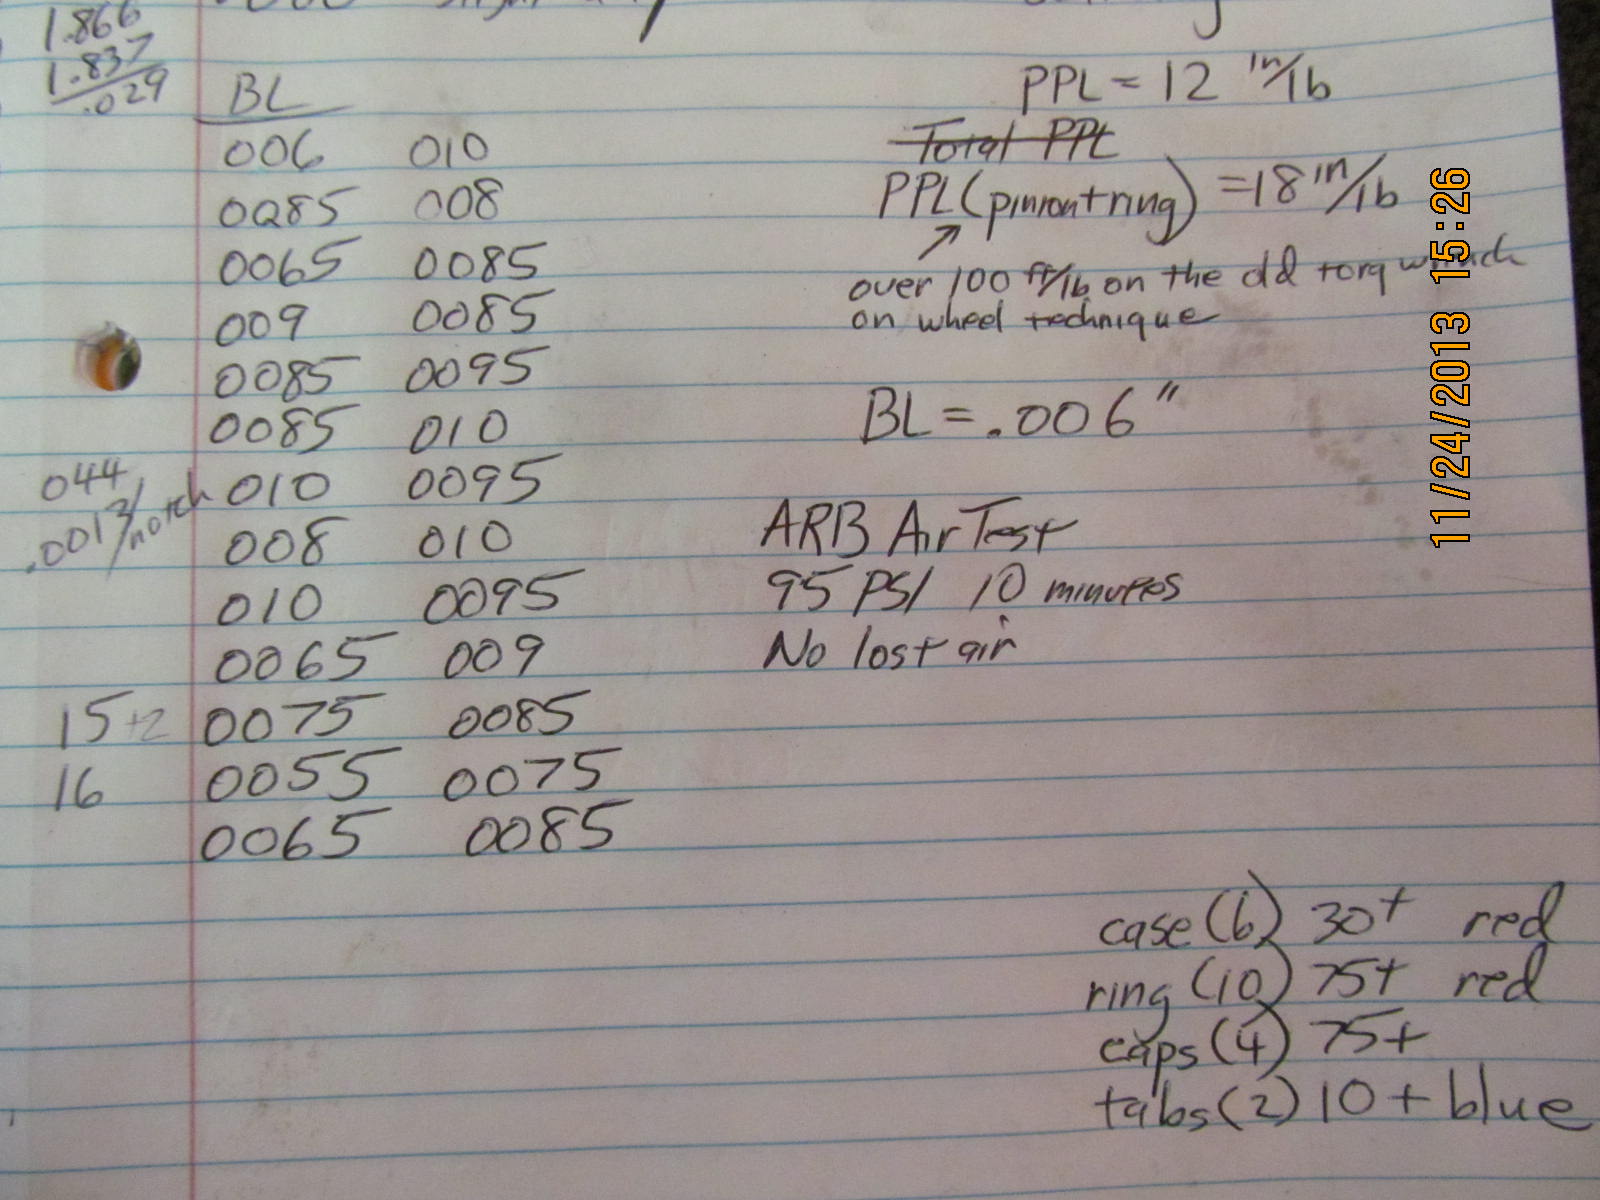
With some runout involved, backlash seemed to range from 006 to 010....this is aok.
|
|
|
|
I noted 18 in/lb of TOTAL pinion end pre-load here.....12 is from the pinion bearings and the math says 6 is from the
carrier bearings.
|
|
|
|
|
This side saw 3 notches of additional tension...
|
|
|
|
|
This side saw 2 extra notches.
|
|
|
|
|
ARB calls them "quad rings"...so the 2 quad rings are lubed up and inserted in the slots.
|
|
|
|
|
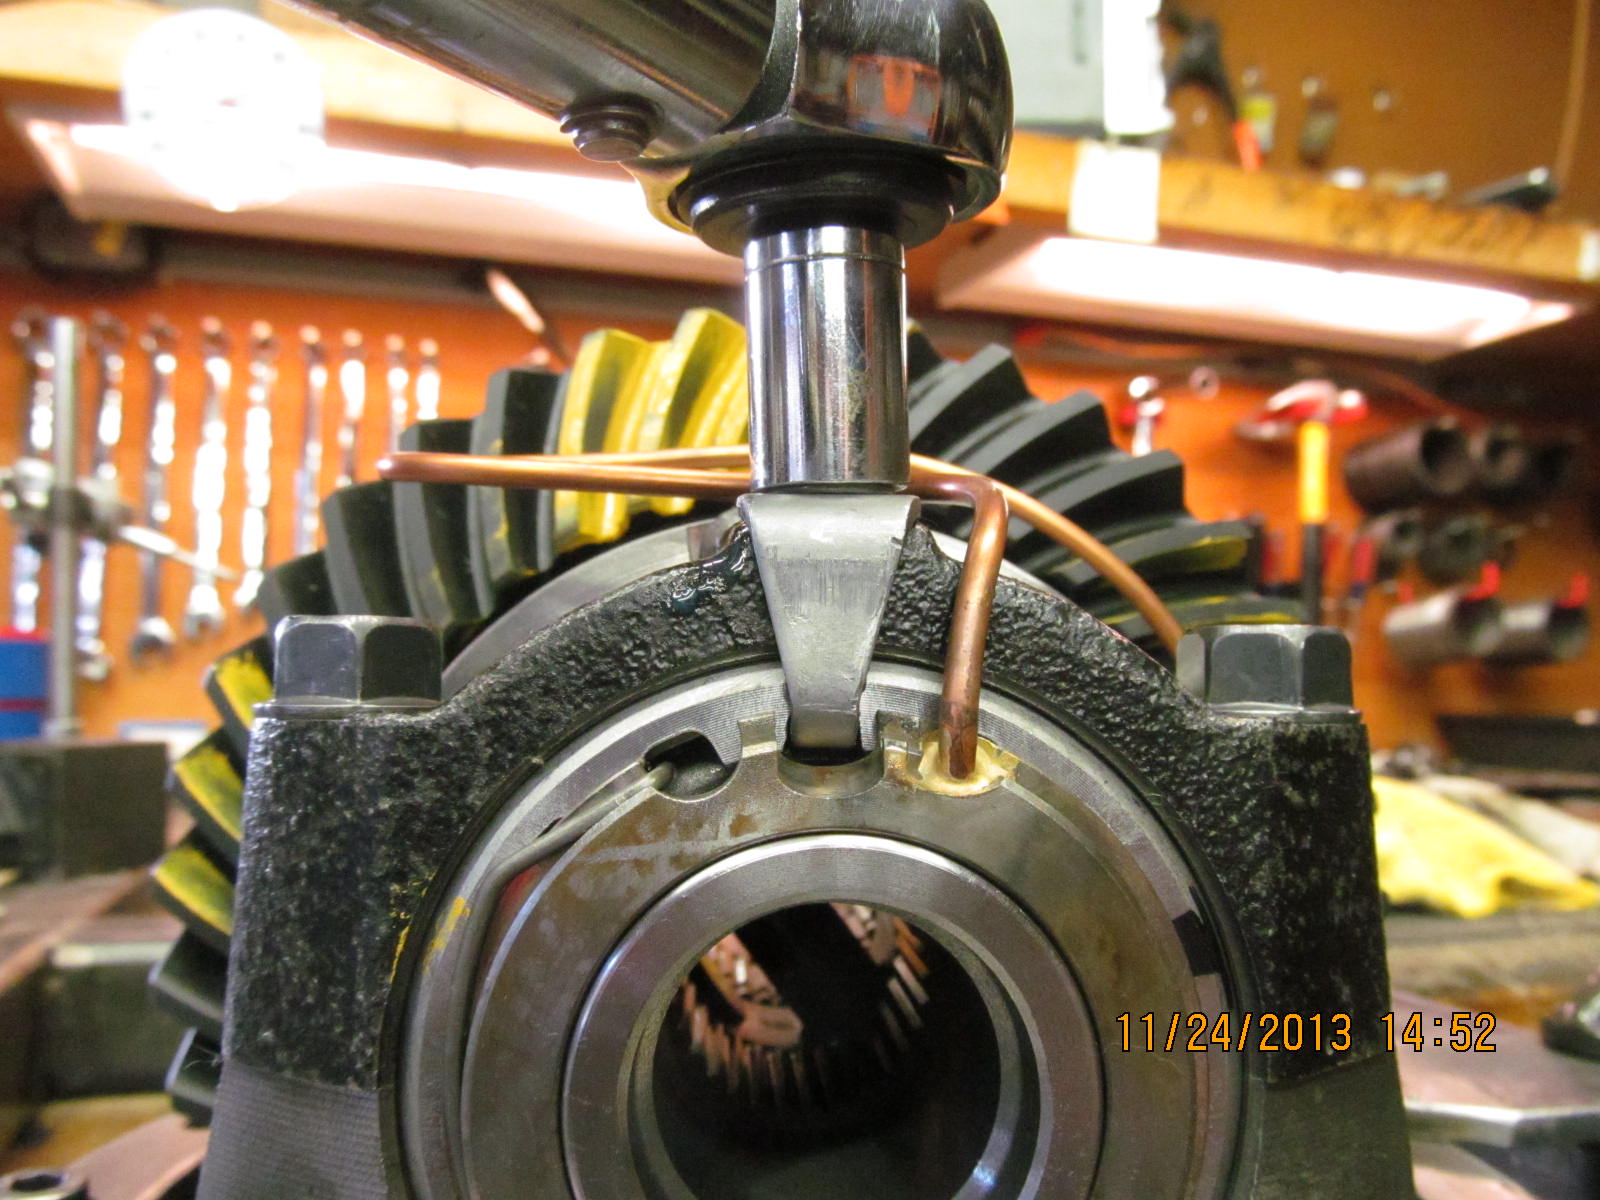
The seal housing assembly is wiggled carefully in place.
|
|
|
|
|
The retaining clip is snapped in place.
|
|
|

|
|
The soft copper tubing is formed and cut to the desired length.
|
|
|
|
|
Might as well bolt the lock-tabs in place...medium strength blue loctite and 10 ft/lb.
|
|
|
|
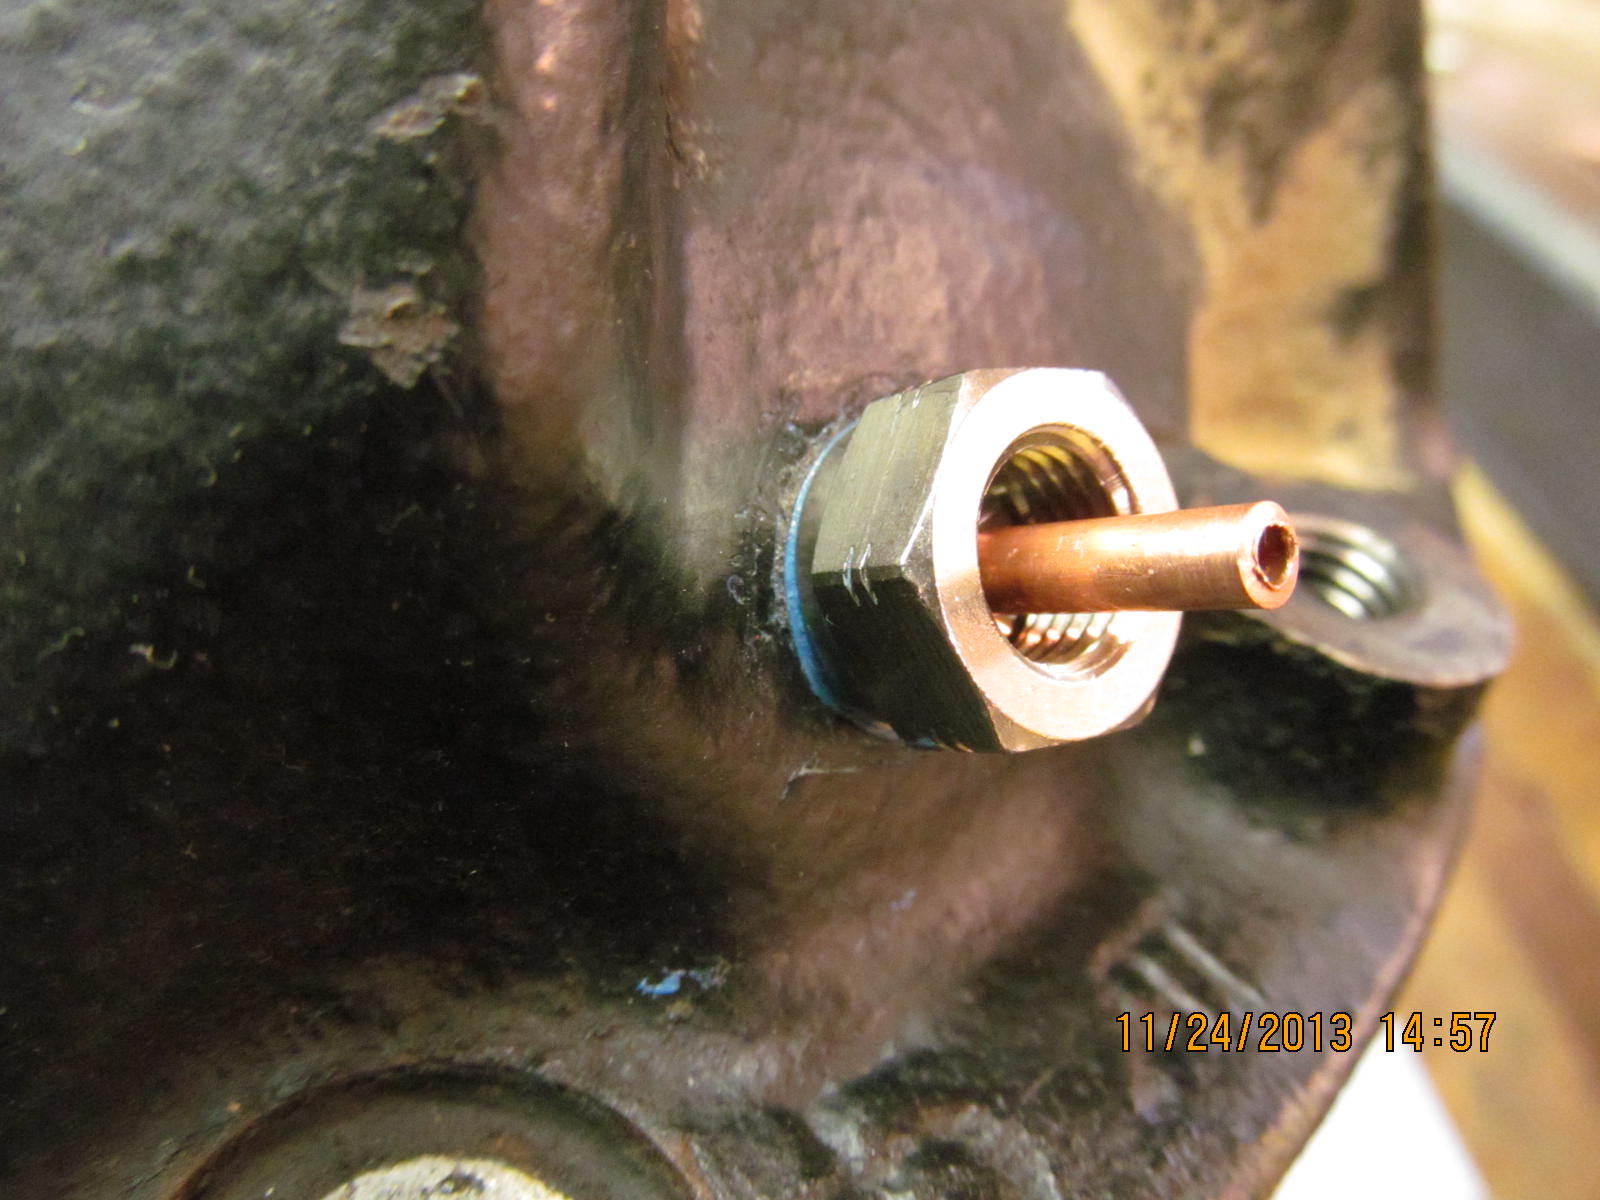
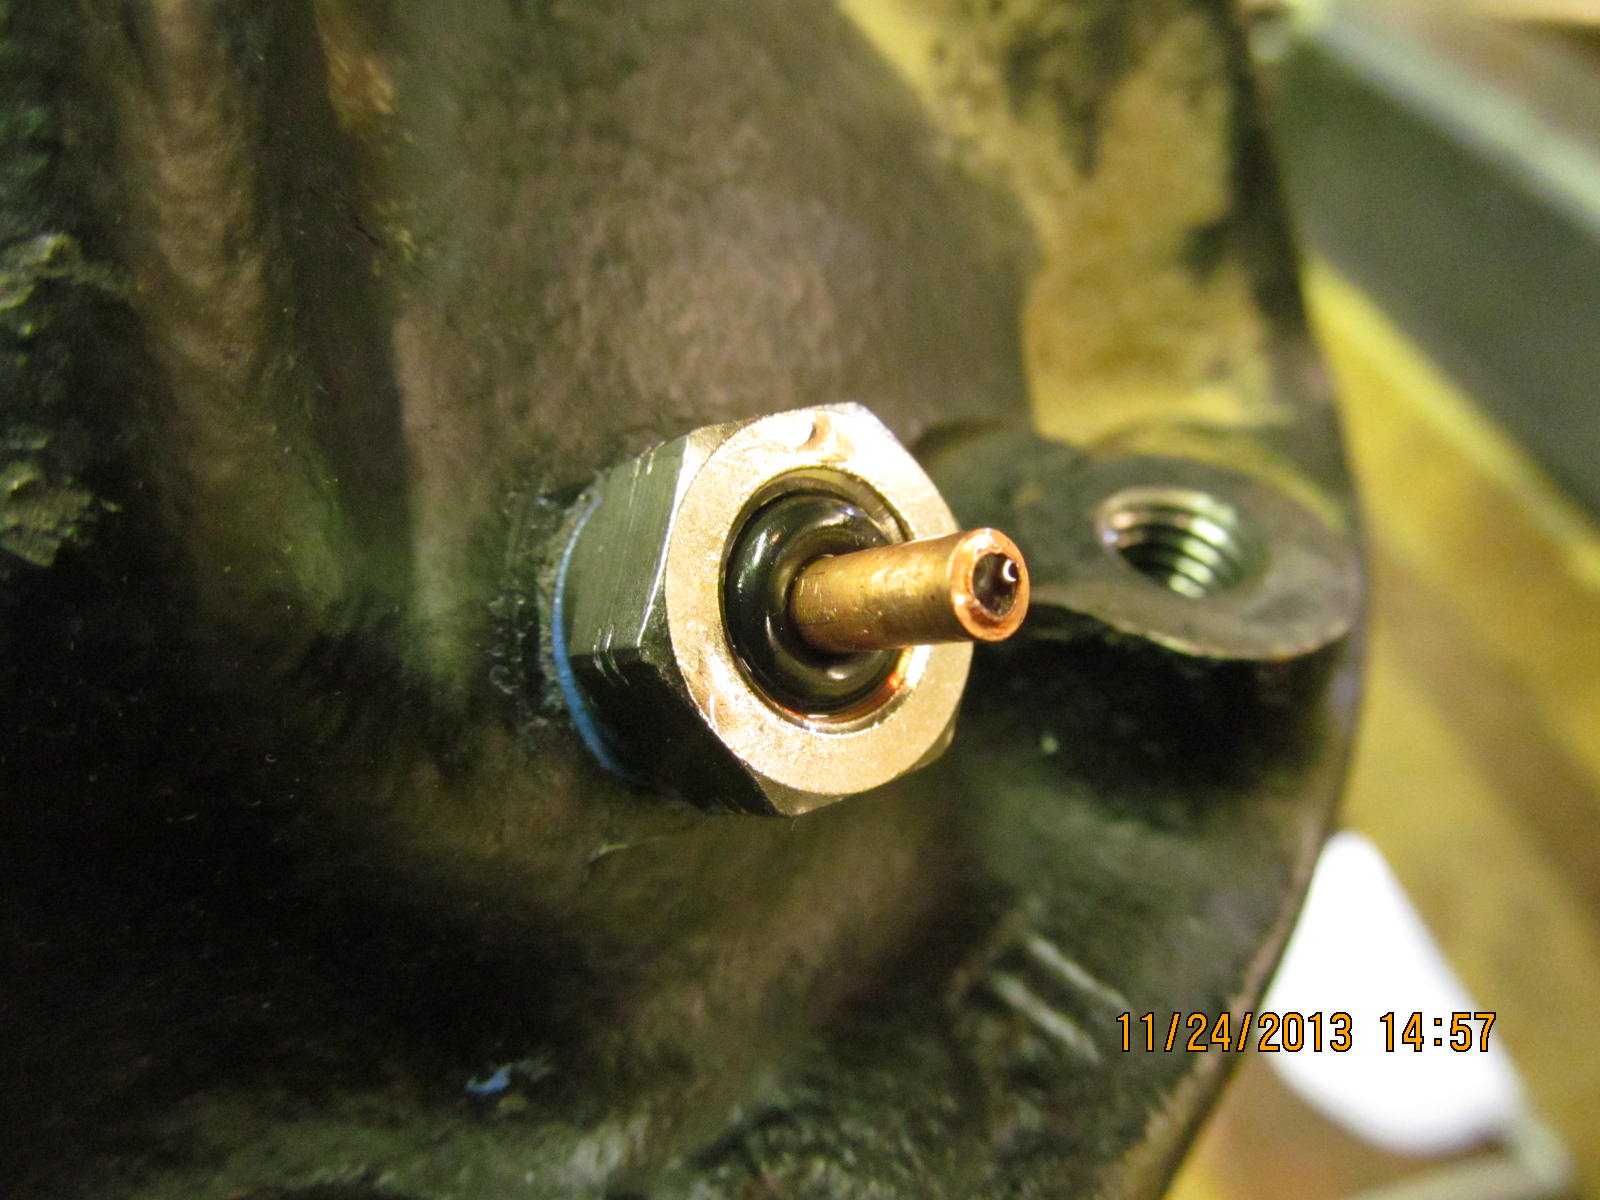
After the copper tube is formed and is positioned correctly in the hole THEN the brass coupler can be threaded in place and
tightened fully. Teflon tape works for sealing the threads but I chose to use Ultra-Blue RTV.
|
|
|
|
|
The tiny fat o-ring is lubed up and pushed in place.
|
|
|
|
|
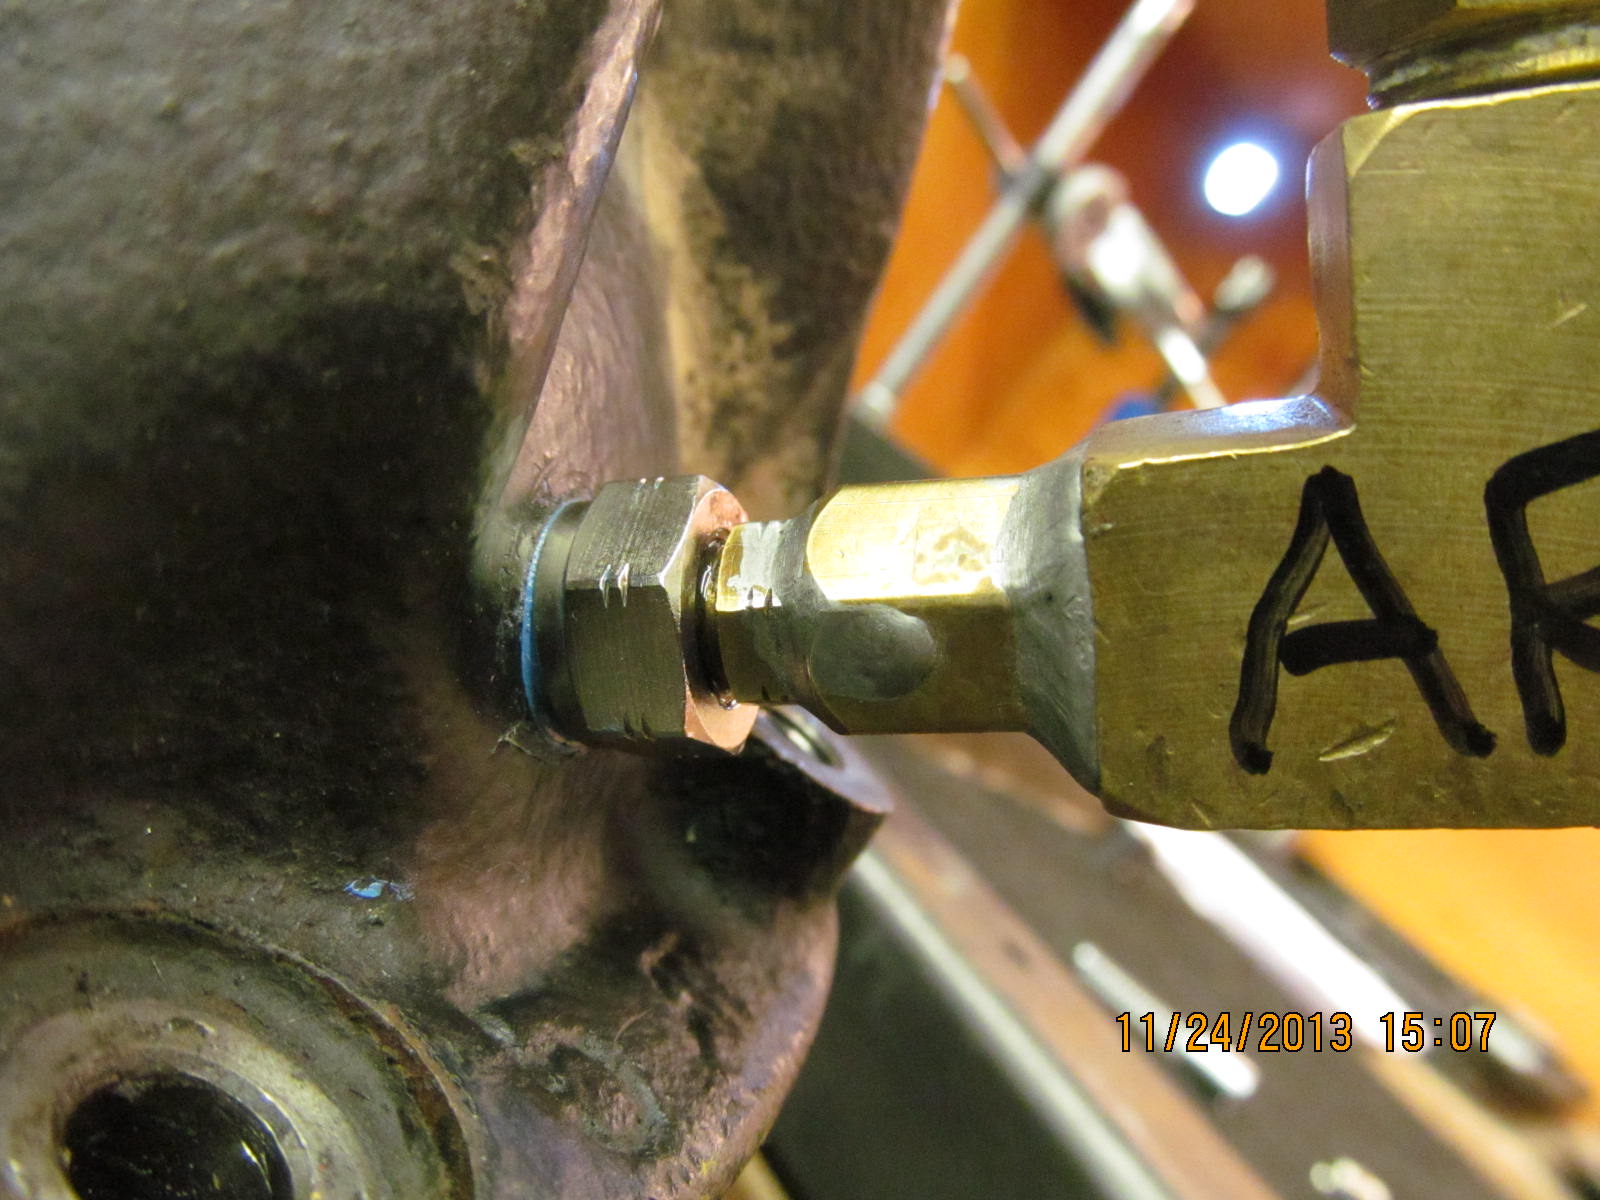
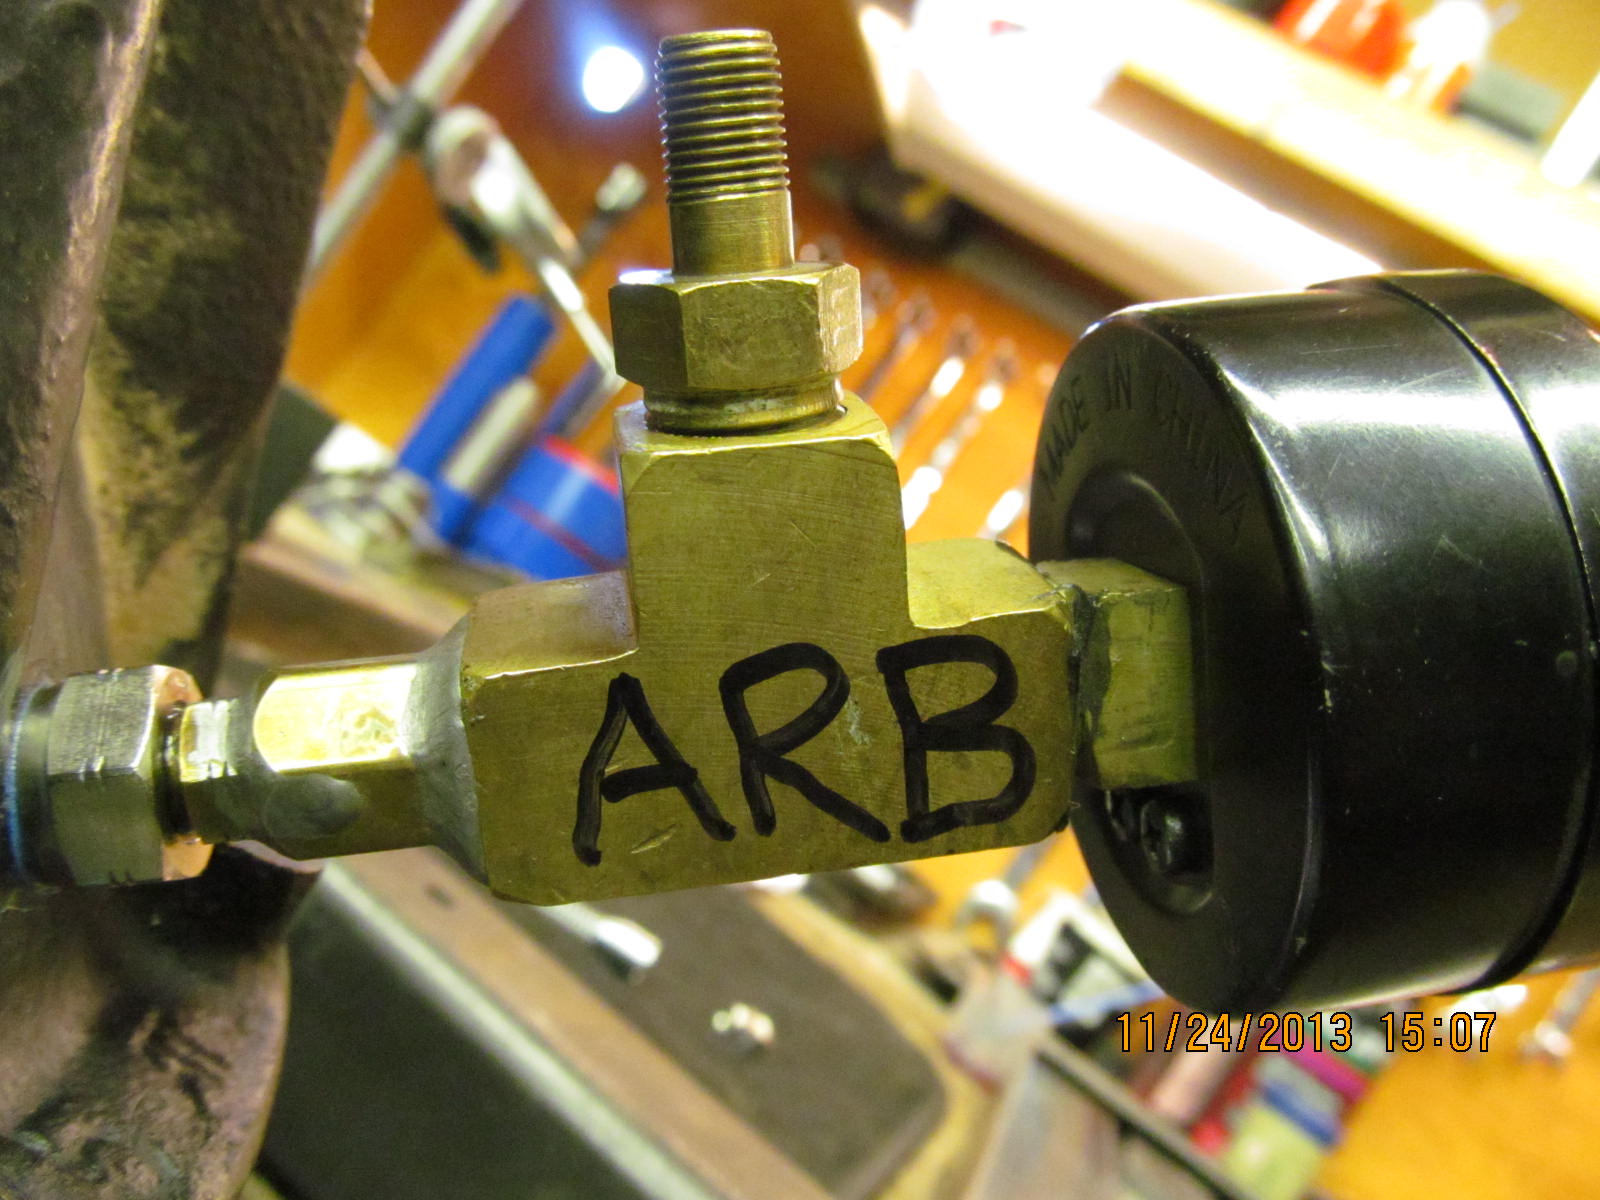
My ARB tester is screwed on.....only finger tight.
|
|
|
|
|
|
|
|
|
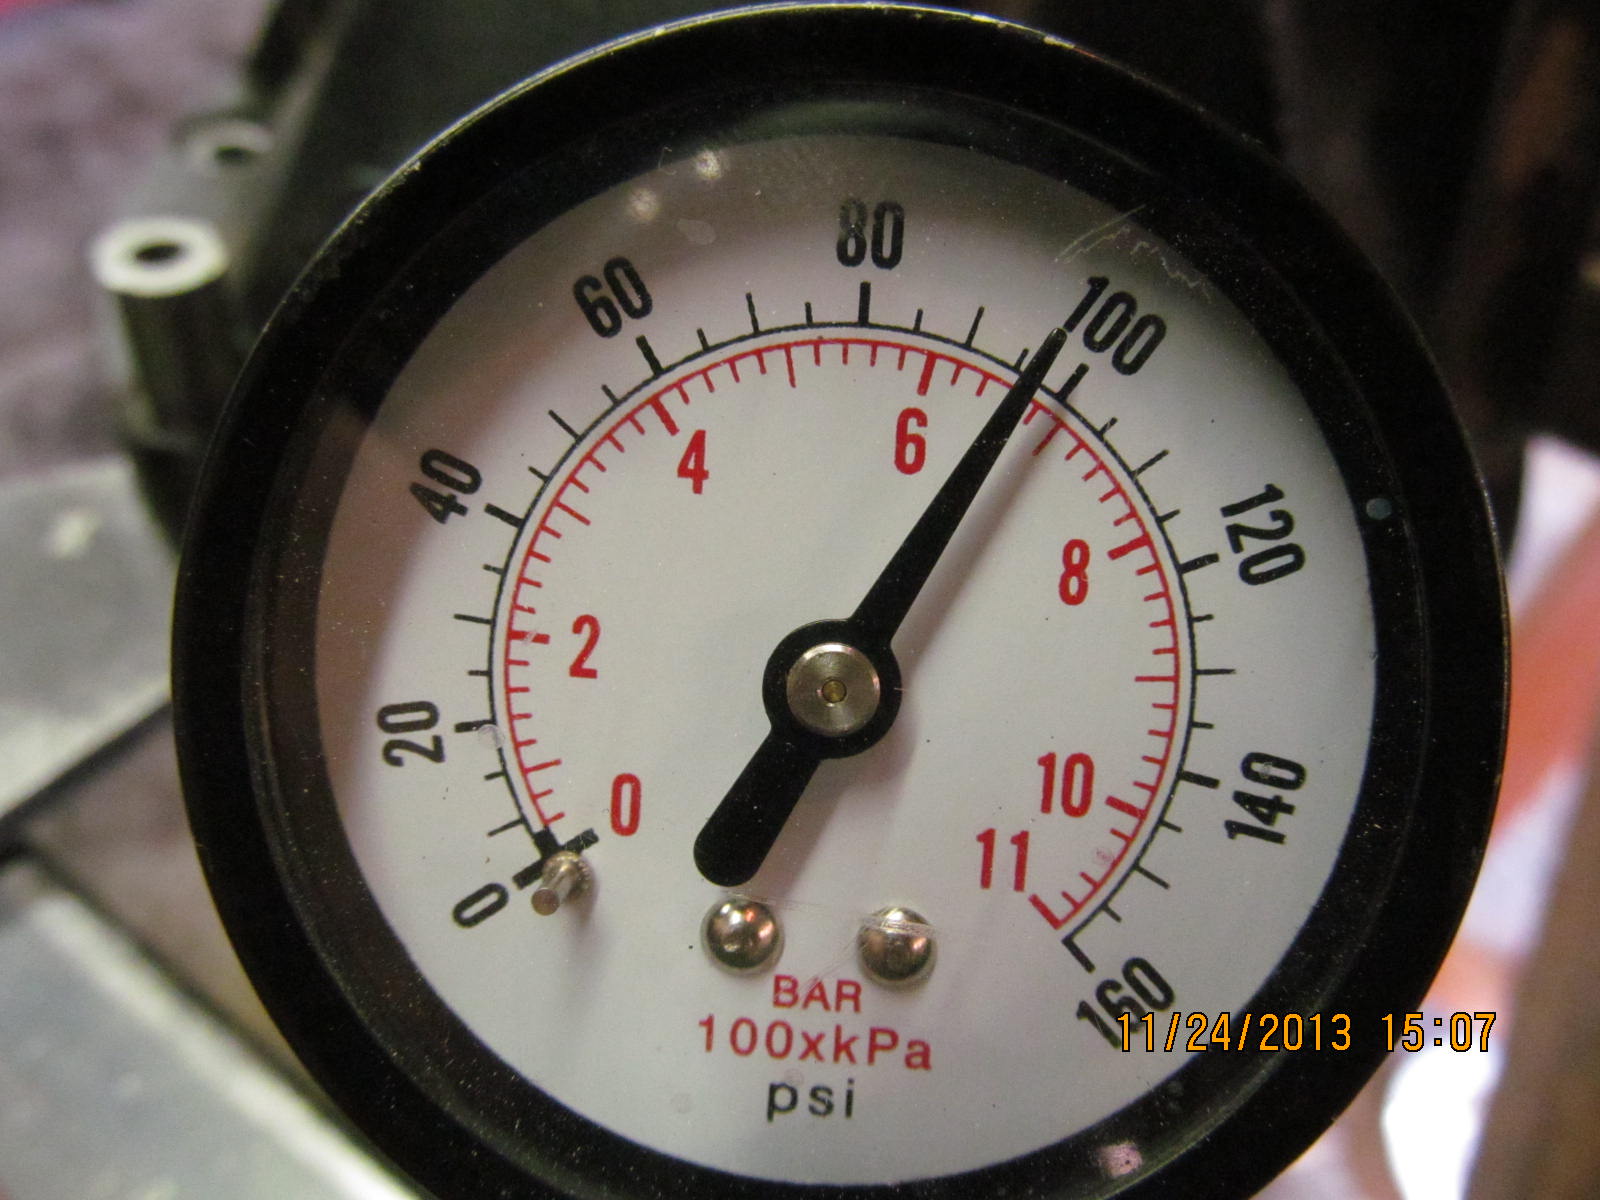
My truck's VIAIR 400C is used to pressurize the ARB at 95 psi. After monitoring it for about 10 minutes,
the test is complete and PASS.
|
|
|
|
|
One more paint with the .080" shim and that tiny amount extra of additional shim can be noticed. Very nice.
|
|
|

|
|
Nice coast.
|
|
|
|
|
drive...reverse painted.
|
|
|
|
|
coast...reverse painted.
|
|
|

|
|
Specs are engraved.
|
|
|

|
|
|
|
|
|
|
Rob has the 3L engine...not the 22RE I wrote down here.
|
|
|
|
This link was created because of the cryo parts that were used....the failure mode of the old ring/pinion done by a 4x4
company...and to make available the part numbers needed to upgrade the old style RD23 to the semi-floater with
retaining clip design. ZUK 
|
|
|

|