|
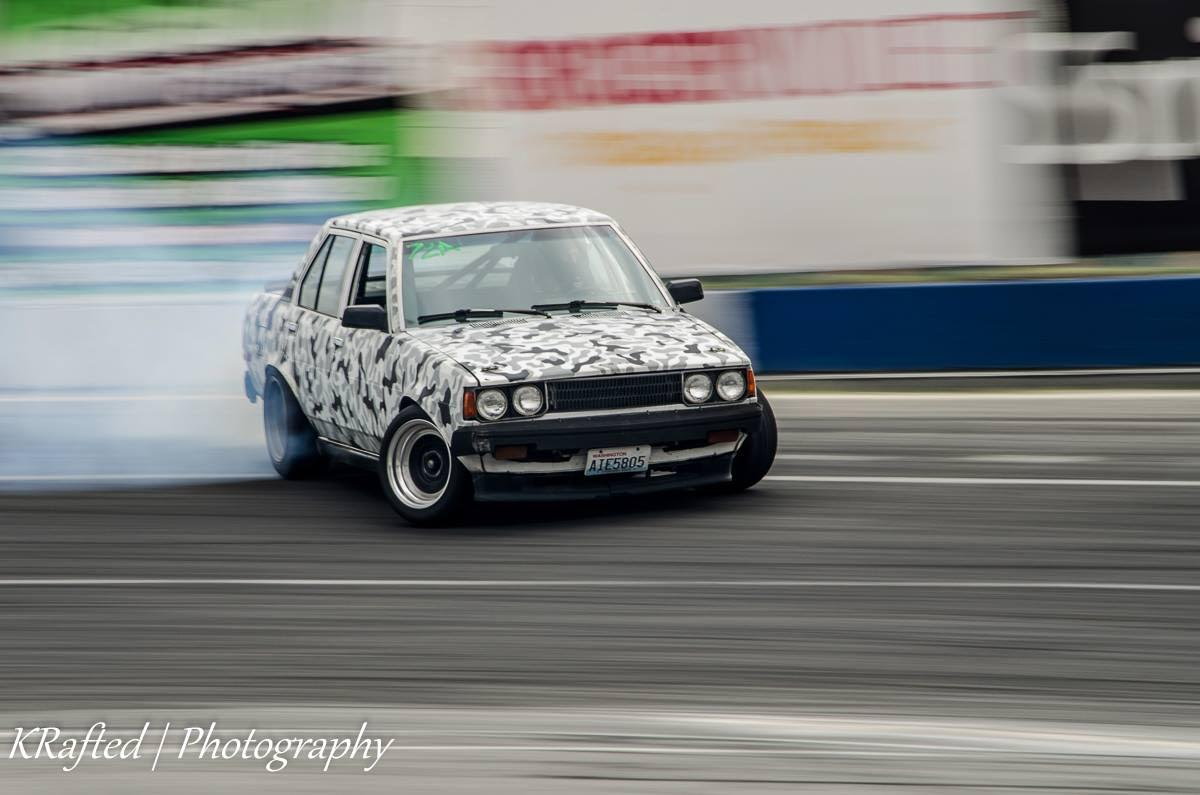
SUPRA LSD 7.5" rebuild for a 1983 V8 Corolla Drift Car
|
|
(67 BIG pics loading)
|
|
MARCH 1 2016
|
|
|
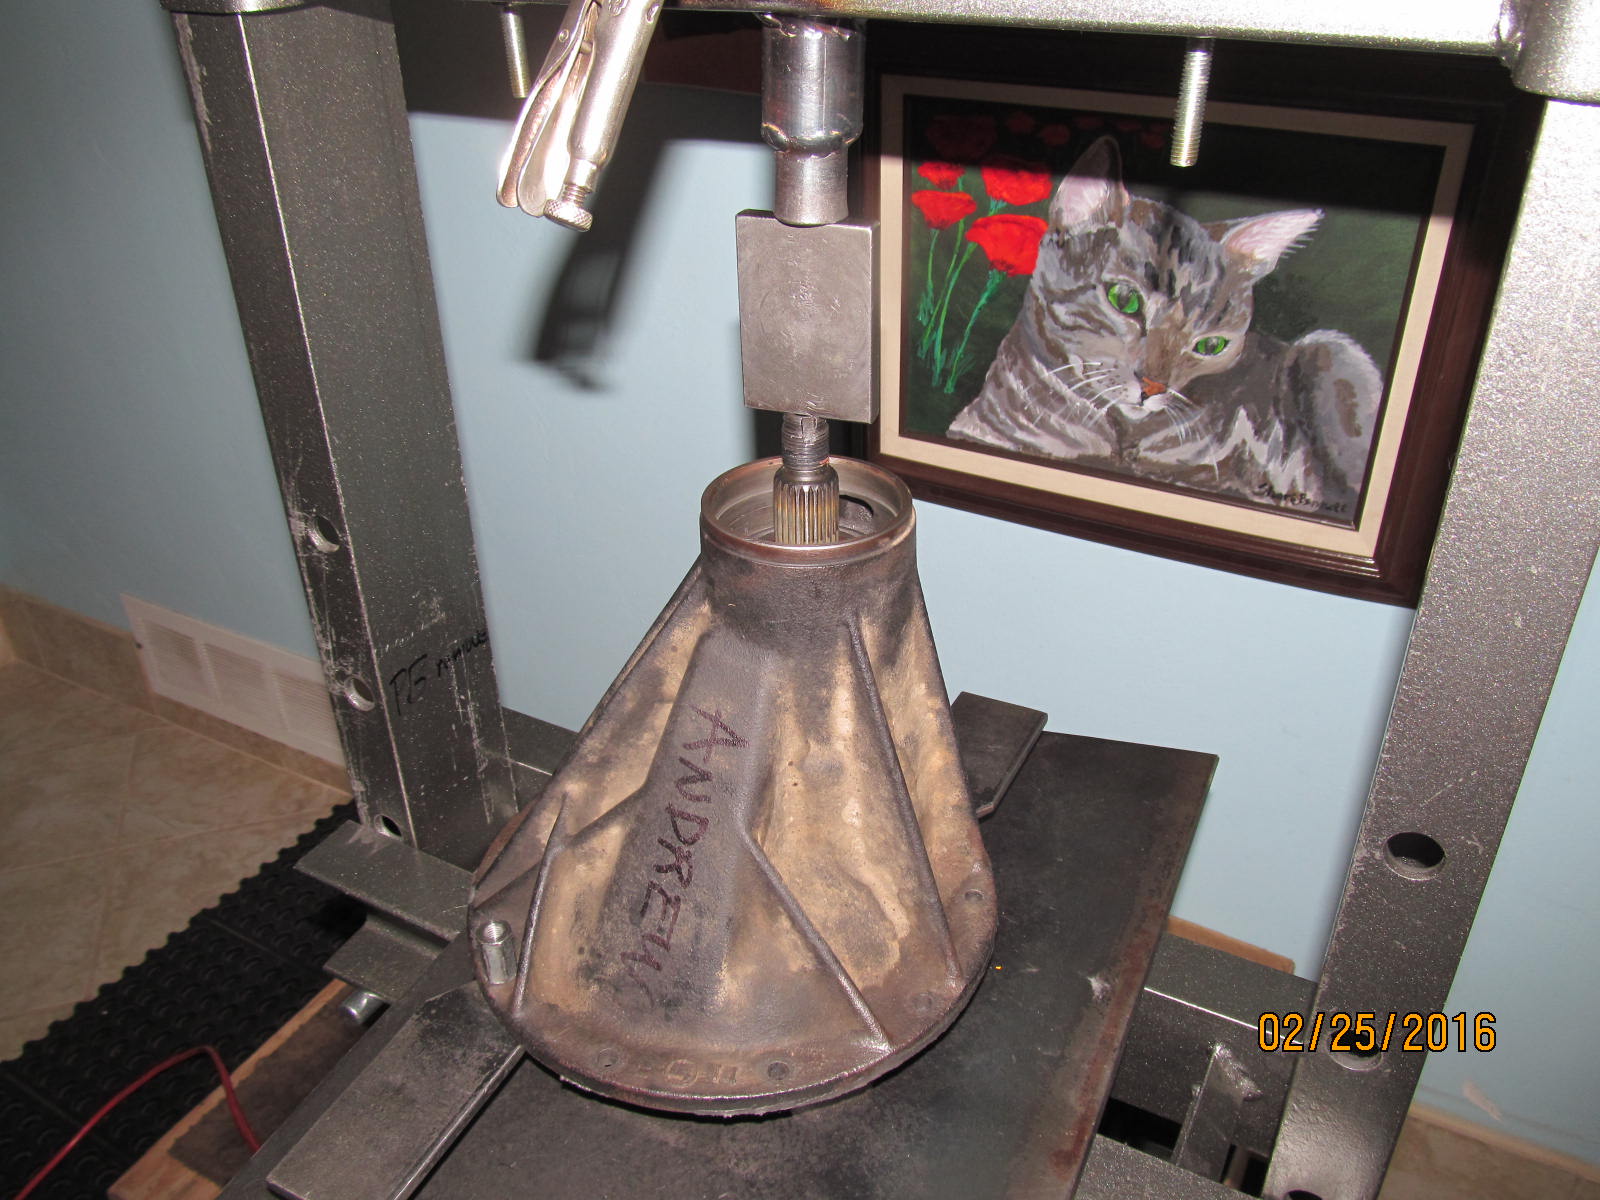
Andrew is local and drifts with his 1983 V8 Corolla. This is a quote
from Andrew's email....."The previous owner Marc did all the custom
work. Marc's work is top notch, and the car earned him a
competition license though competition."
Feel free to check out their Facebook page Techno Classic USA
"Techno Classic USA is a United States manufacturer of aftermarket
parts for unique automobiles. We are also a custom fabrication
shop, in Phoenix, AZ."
|
|
|
|
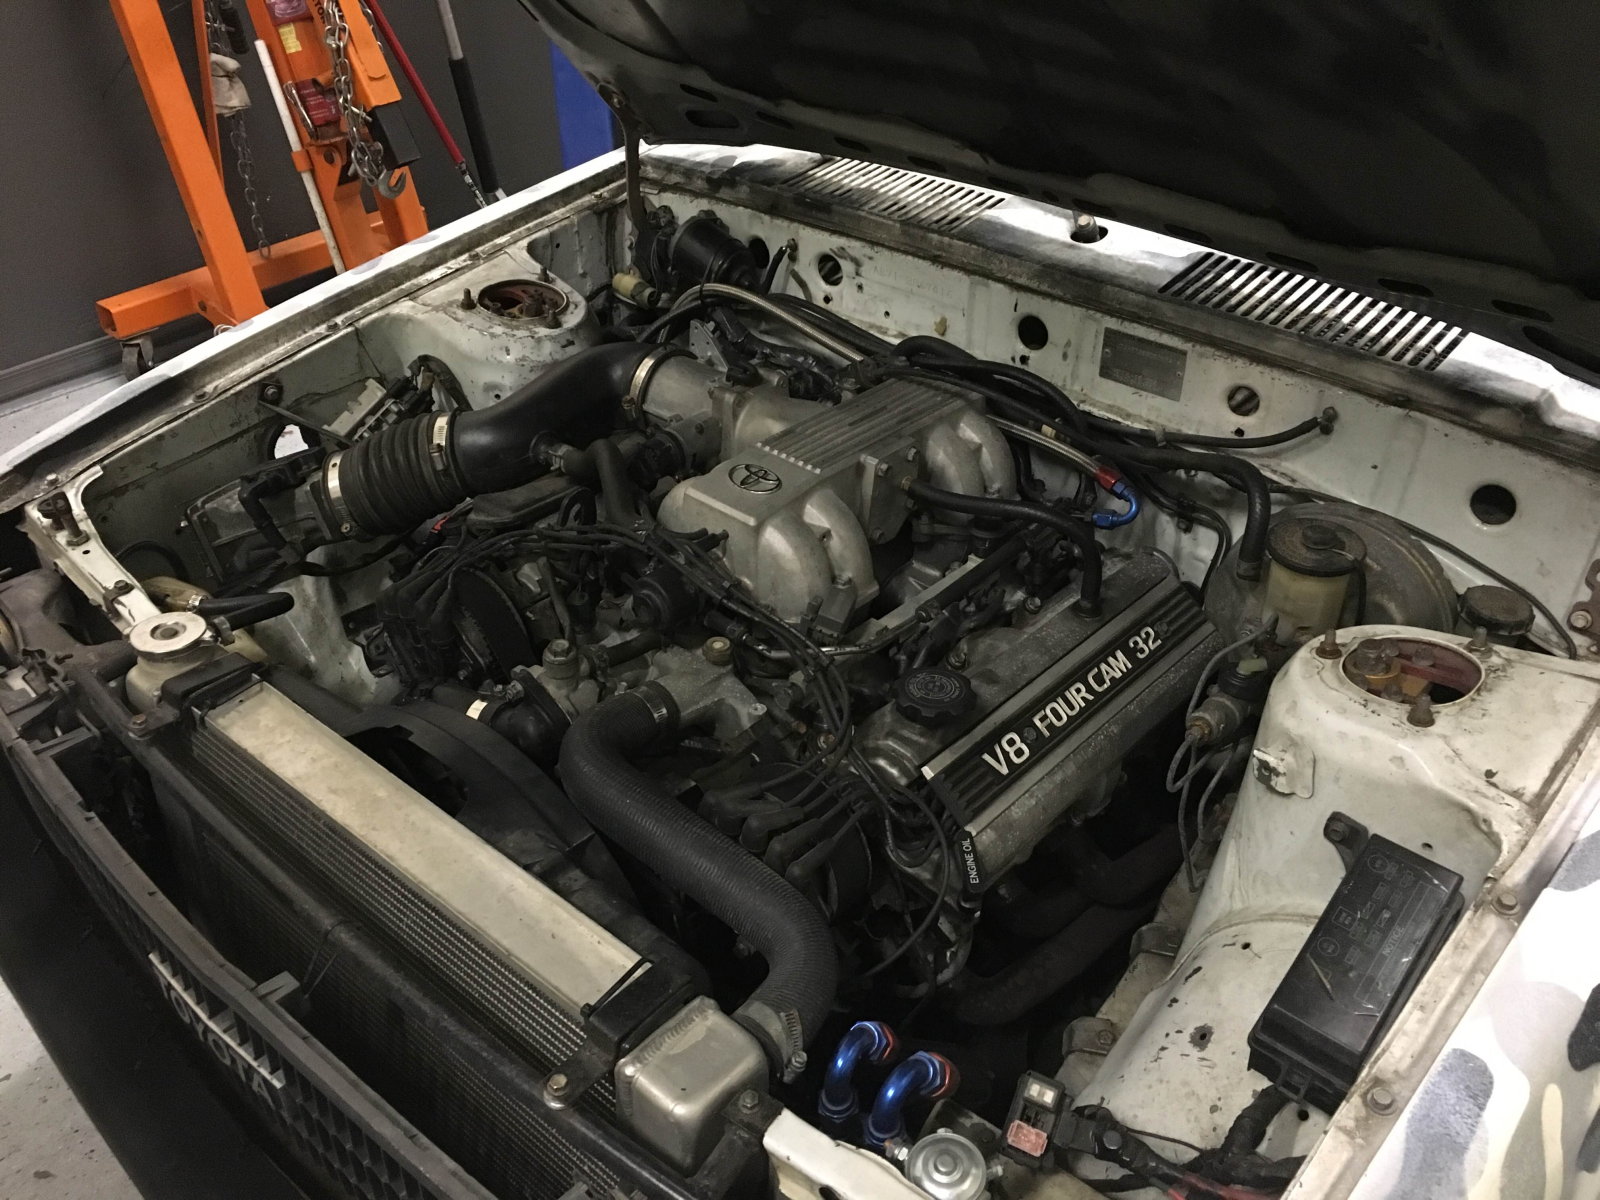
The existing 7.5" 430 ratio gears were whining on acceleration and so
now's a good time to add in a Supra LSD and change ratios to a 410.
|
|
|
|
Quoted from
Andrew's email....
"Probably ~2200 lbs with 200whp, running a 195 width rear tire. Not a super powerful drift car
(a professionally-driven BMW chassis I built has over 800hp) but quick enough and extremely reliable."
|
|
|
|
|
Over half of this link will be concentrating on the LSD rebuild and the "monkey wrench" that showed up.
|
|
|
|
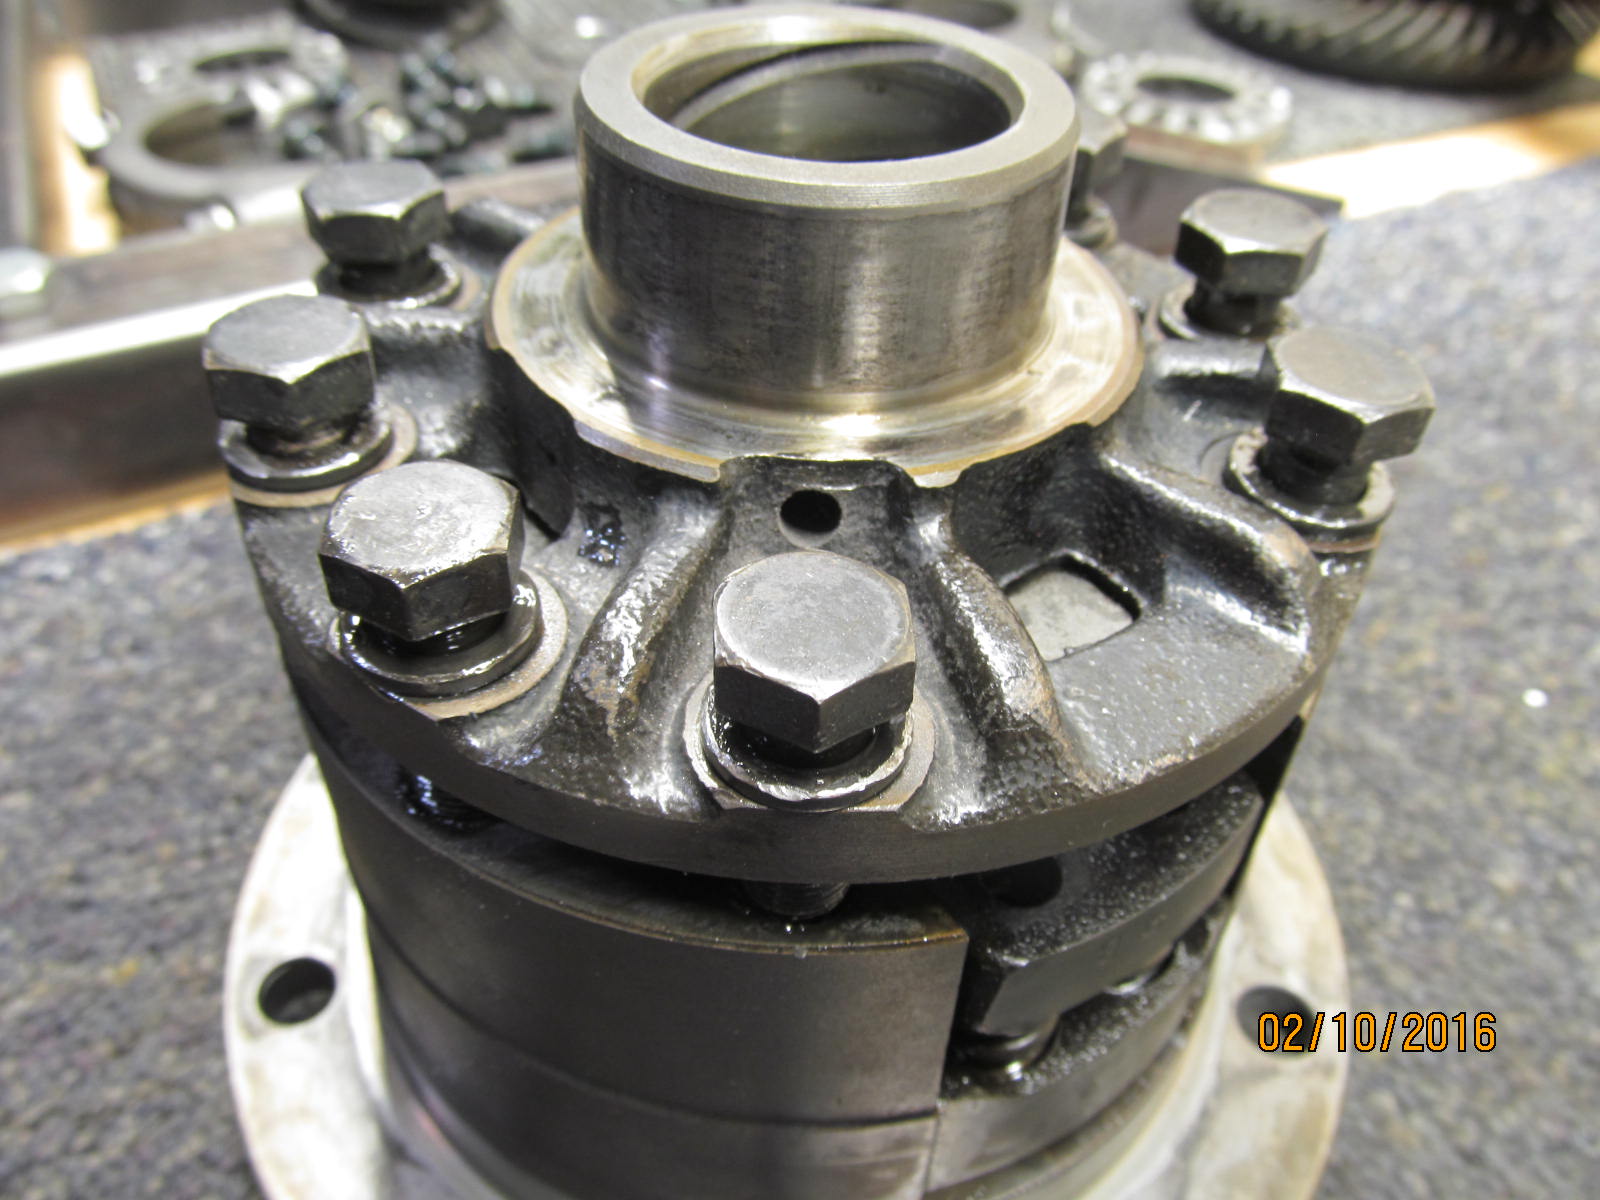
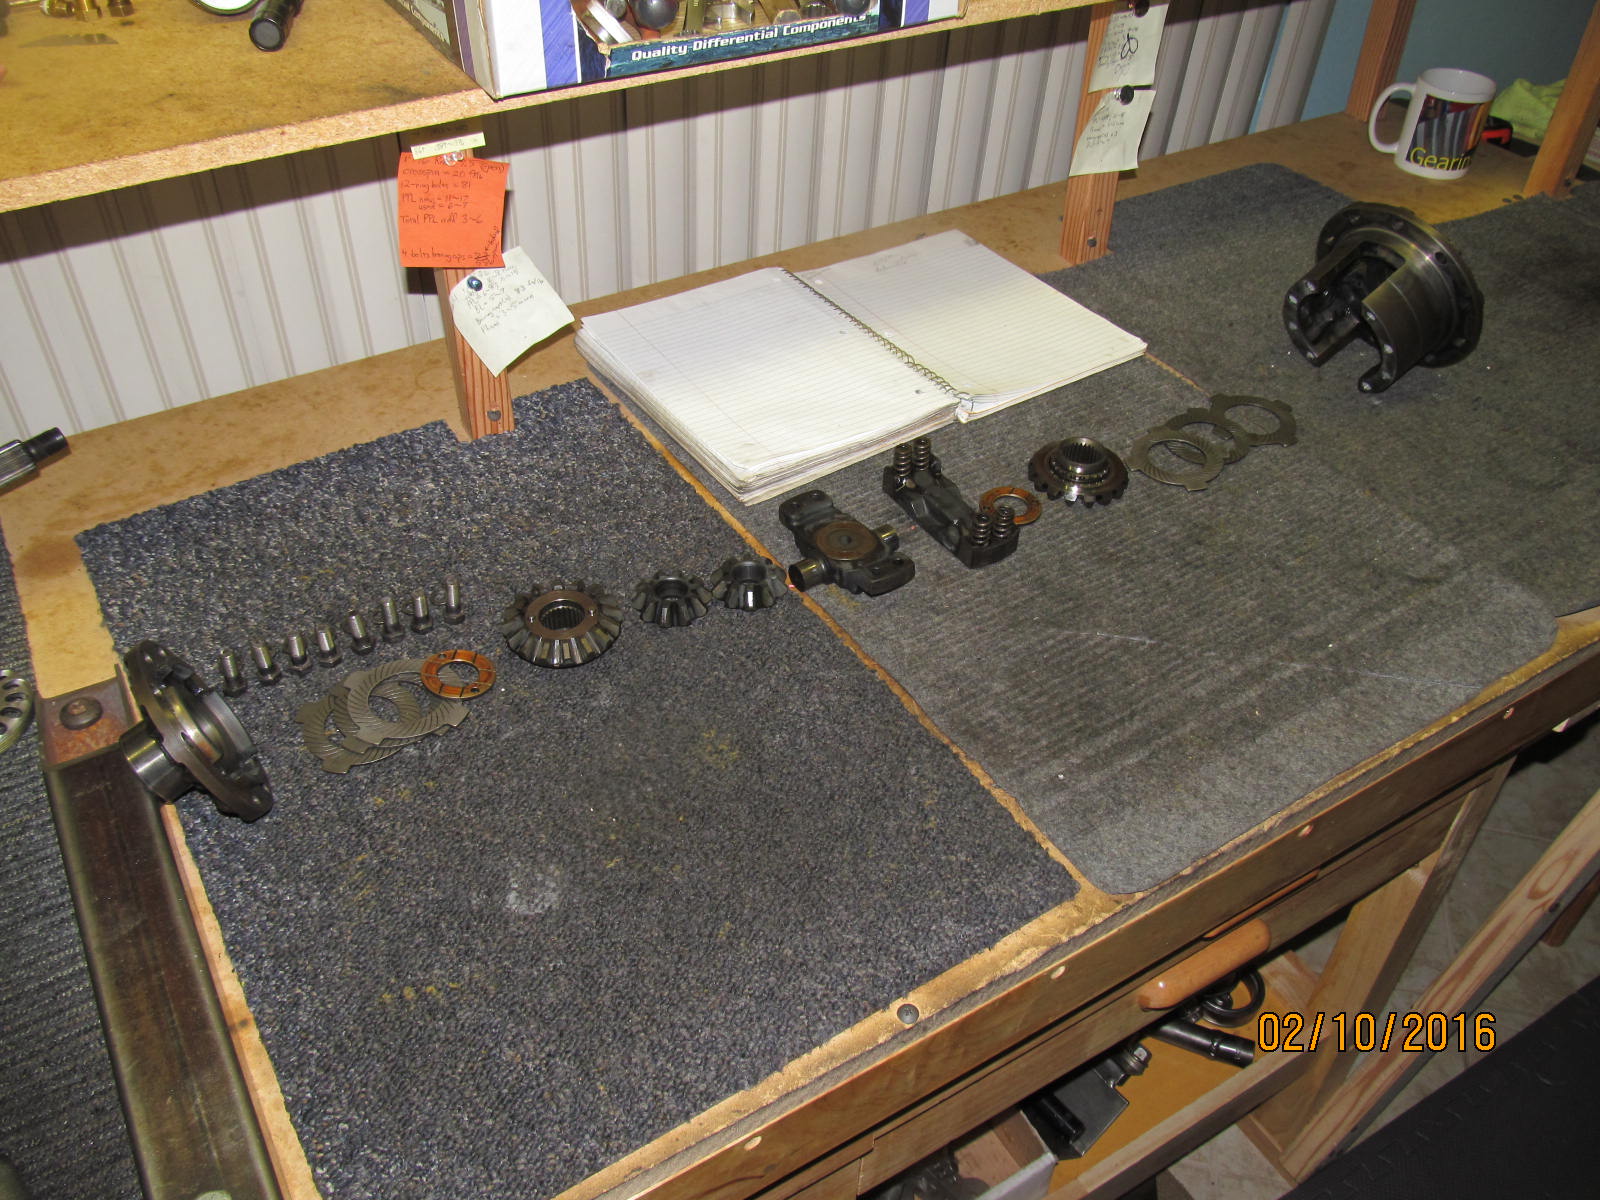
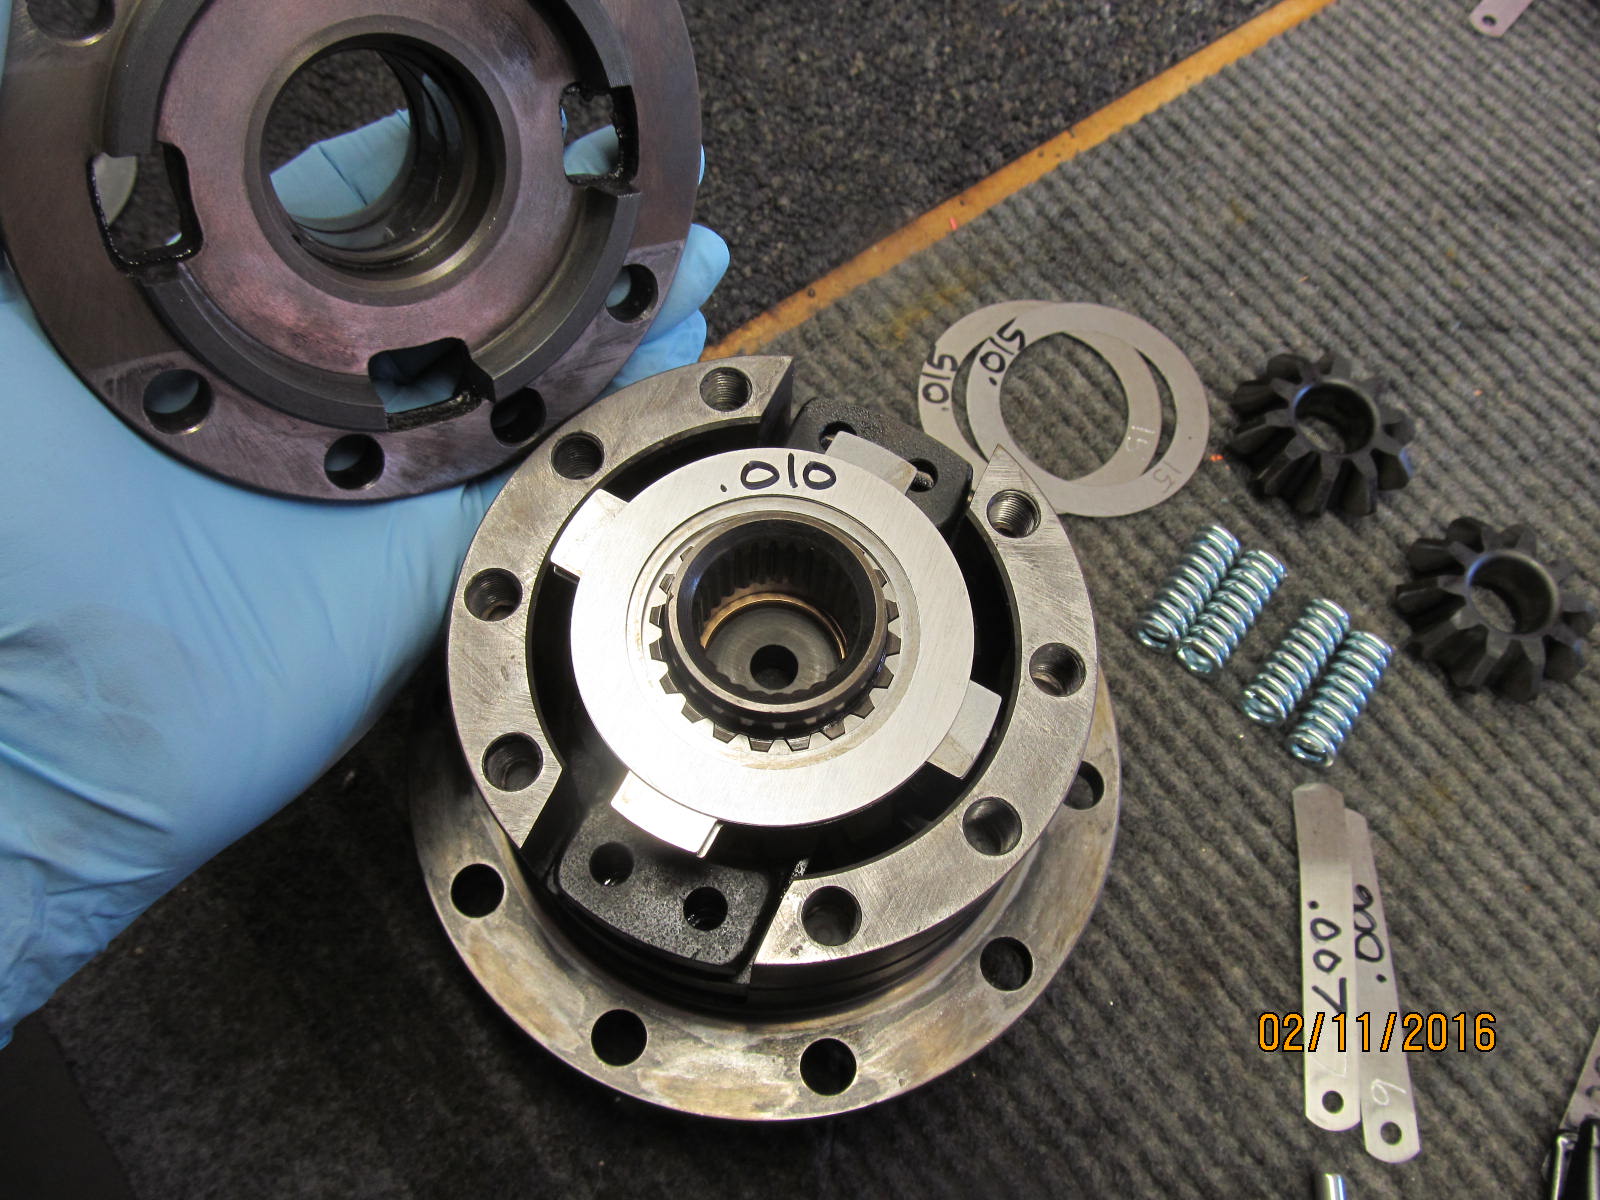
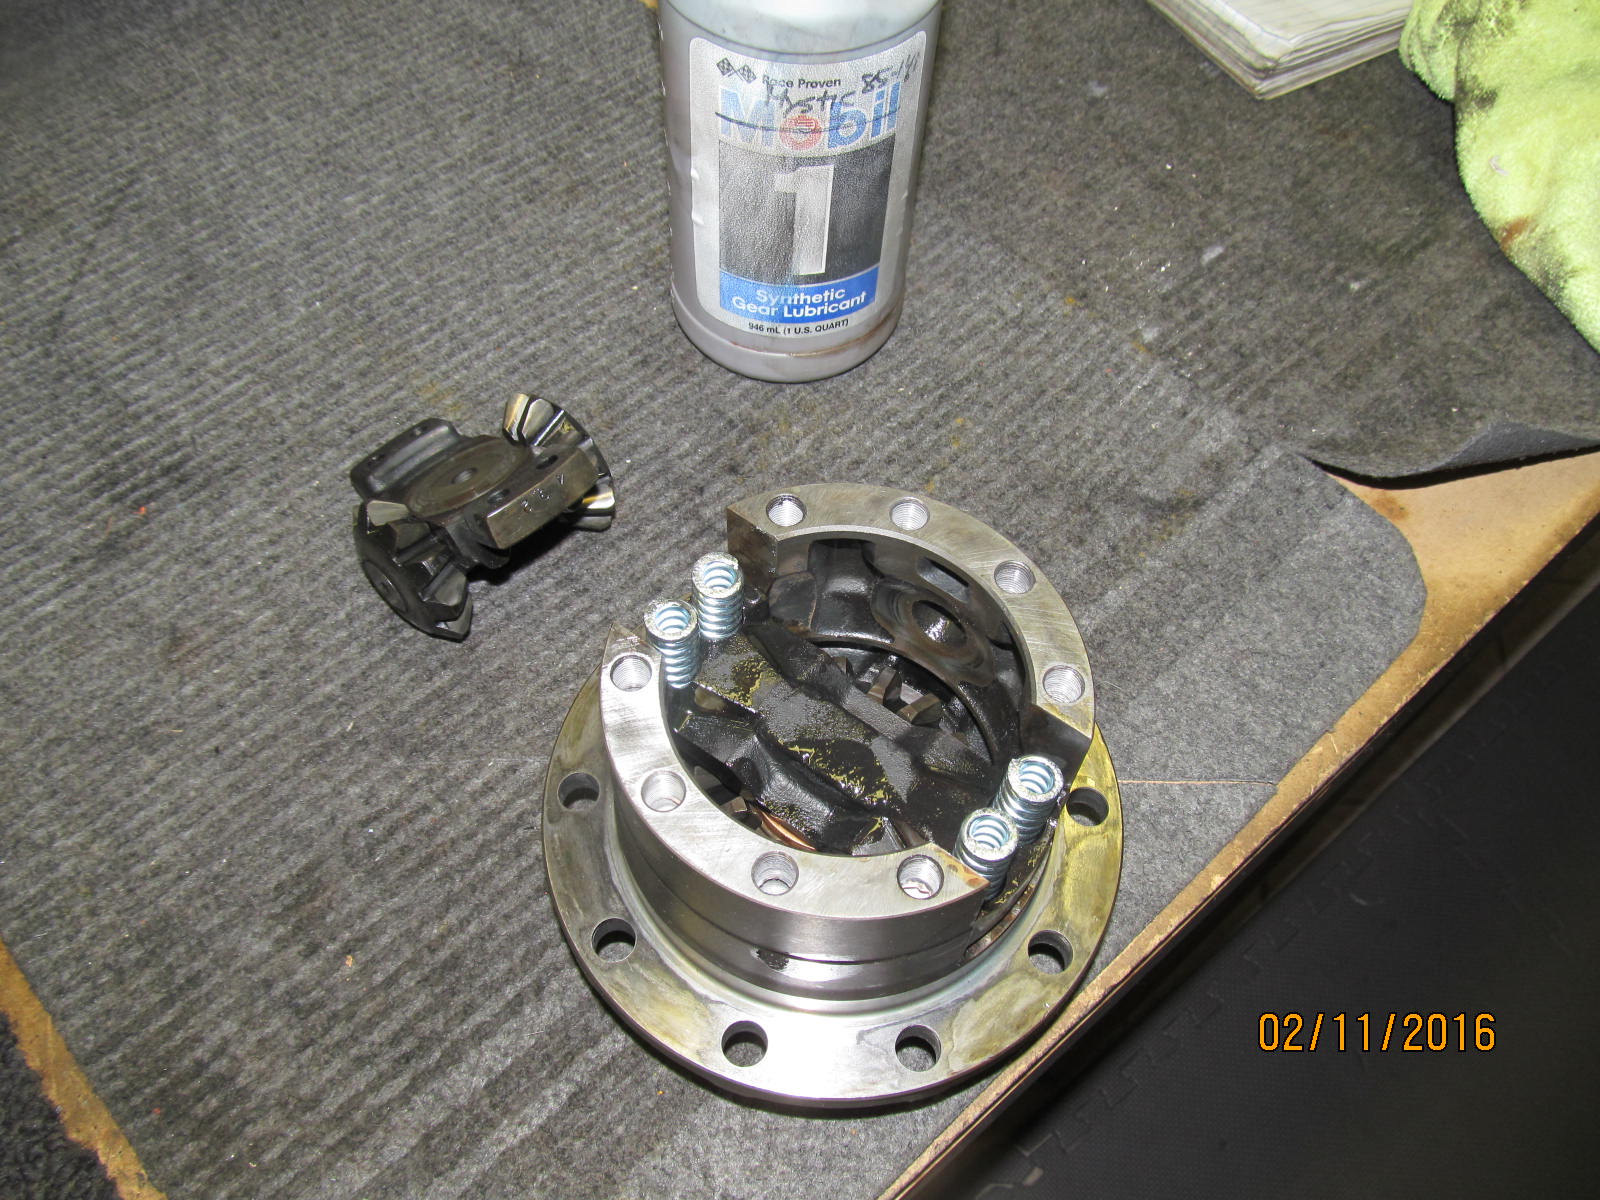
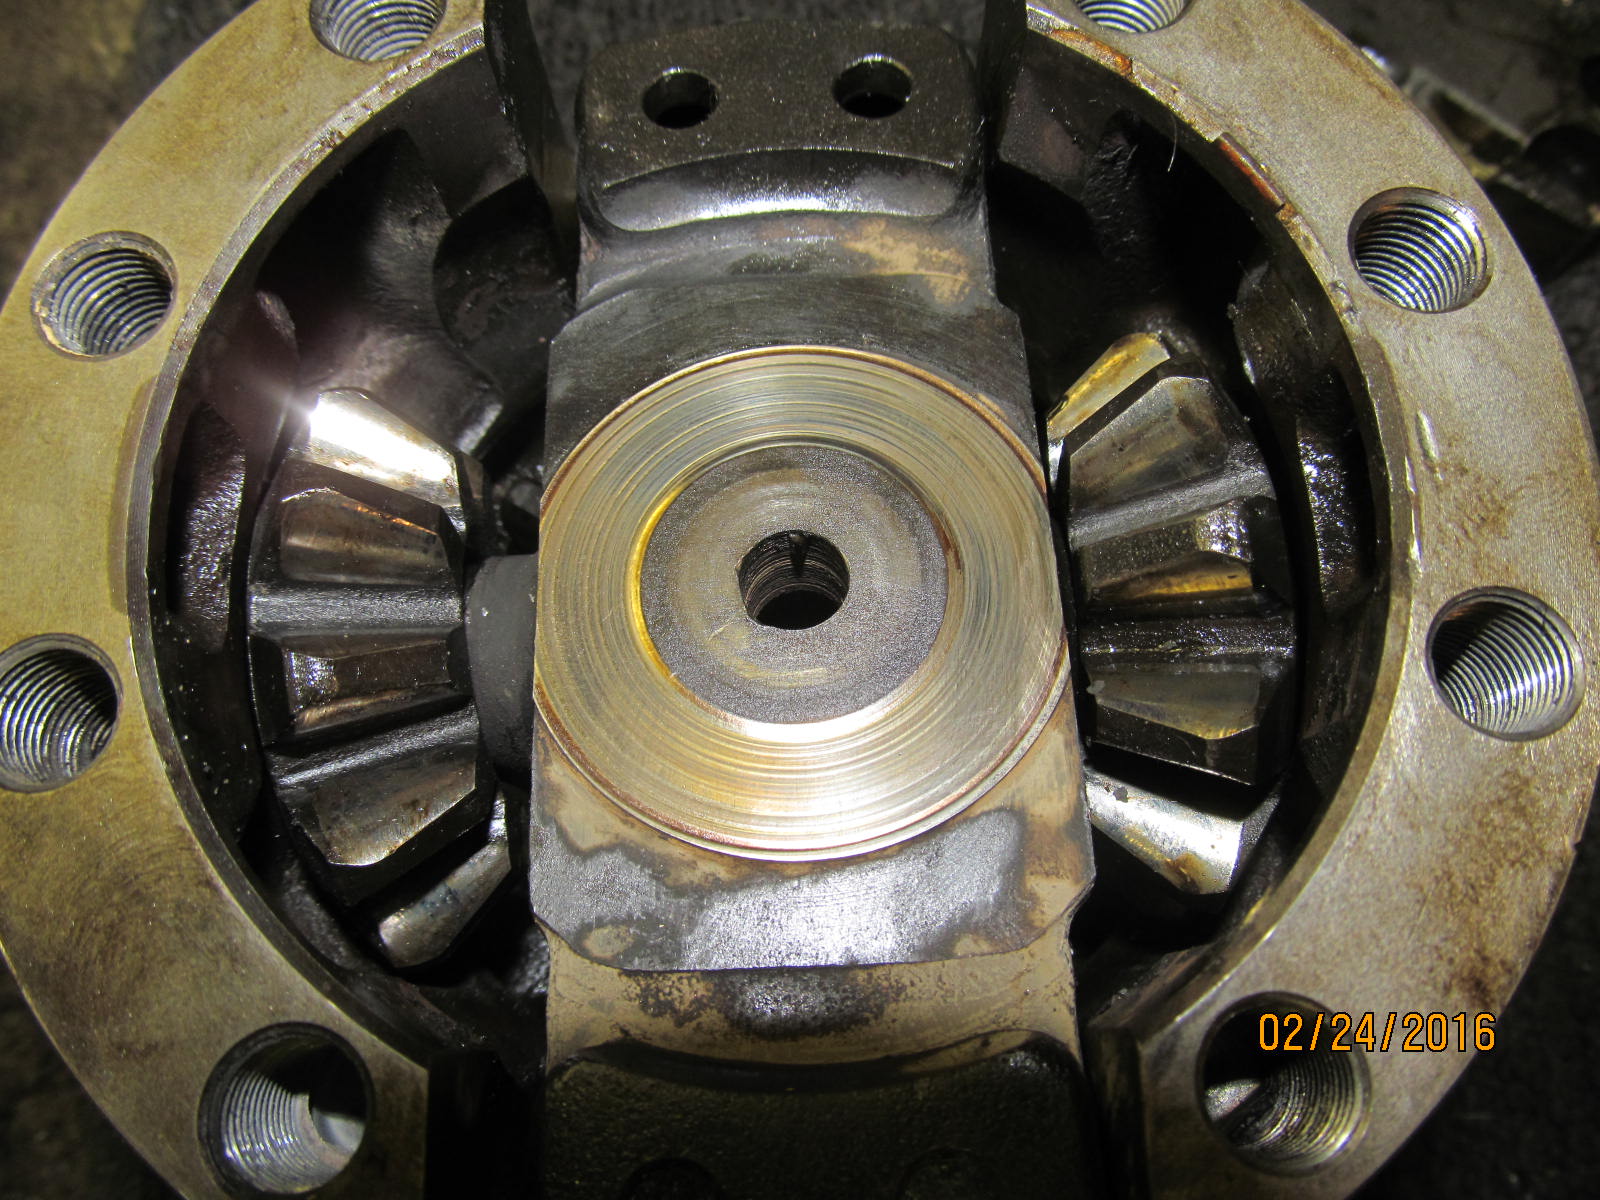
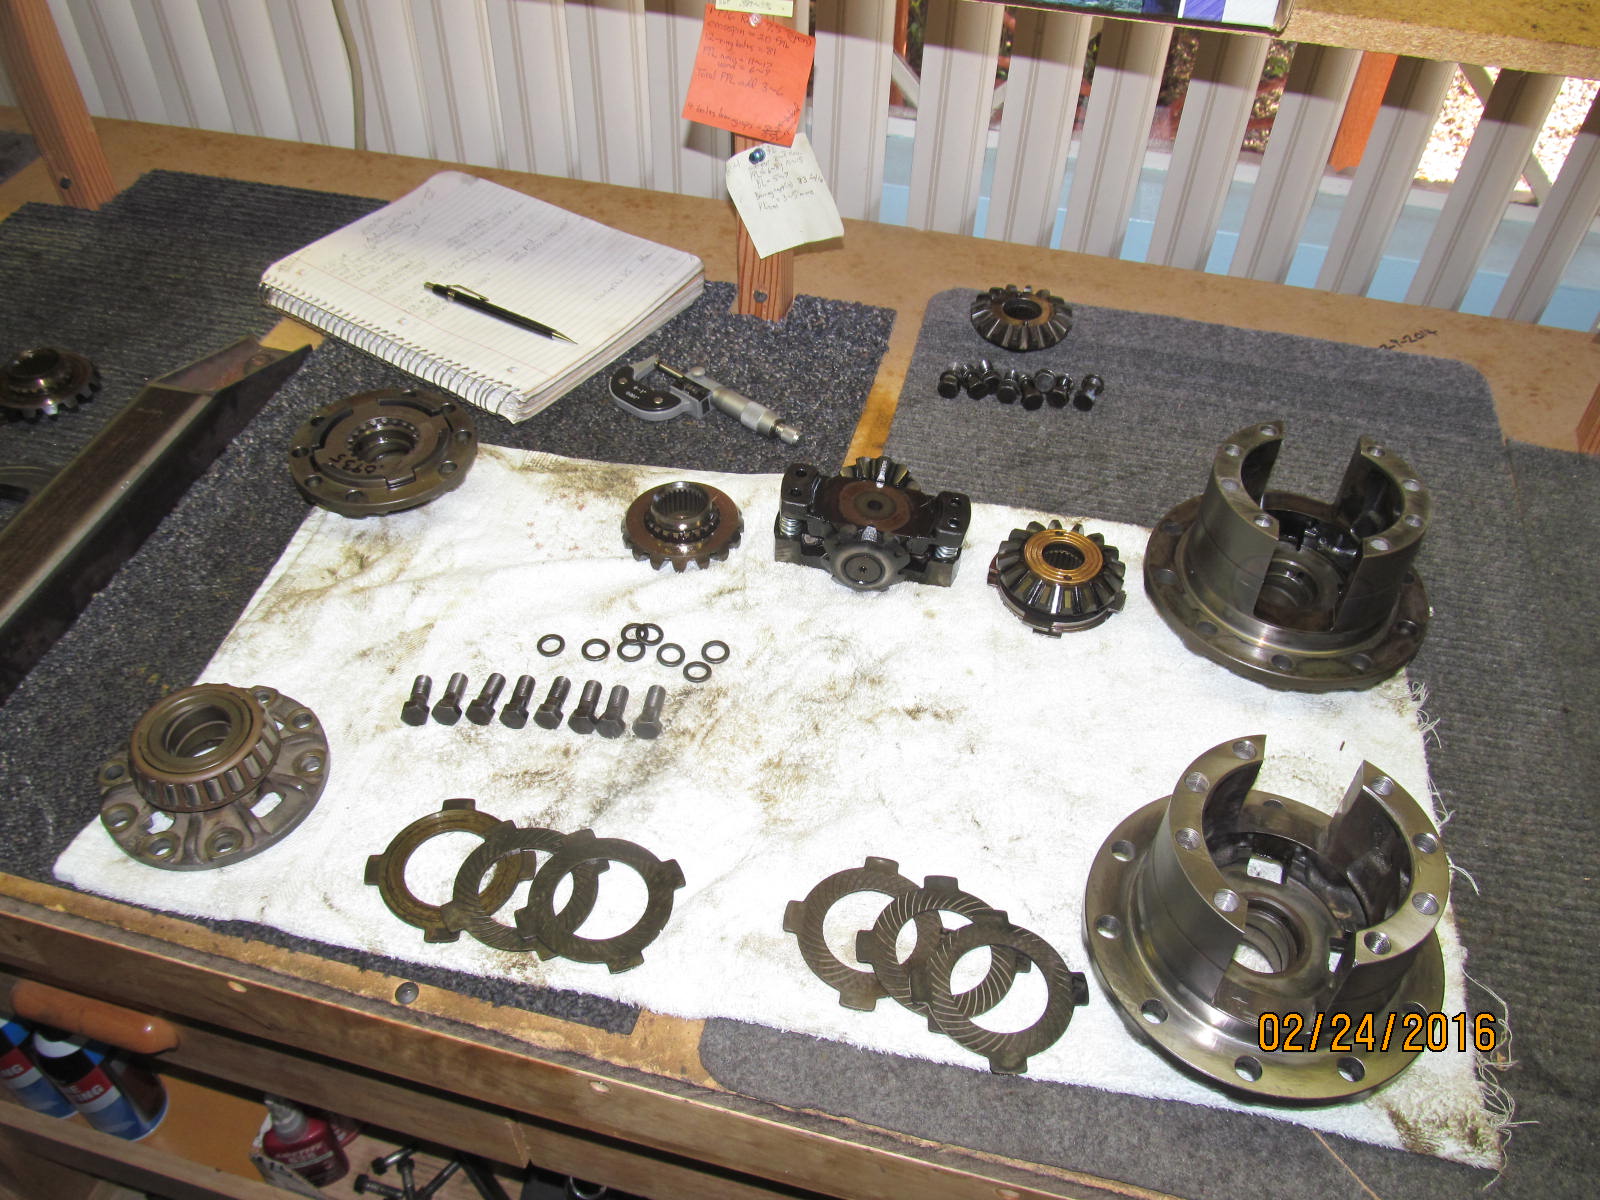
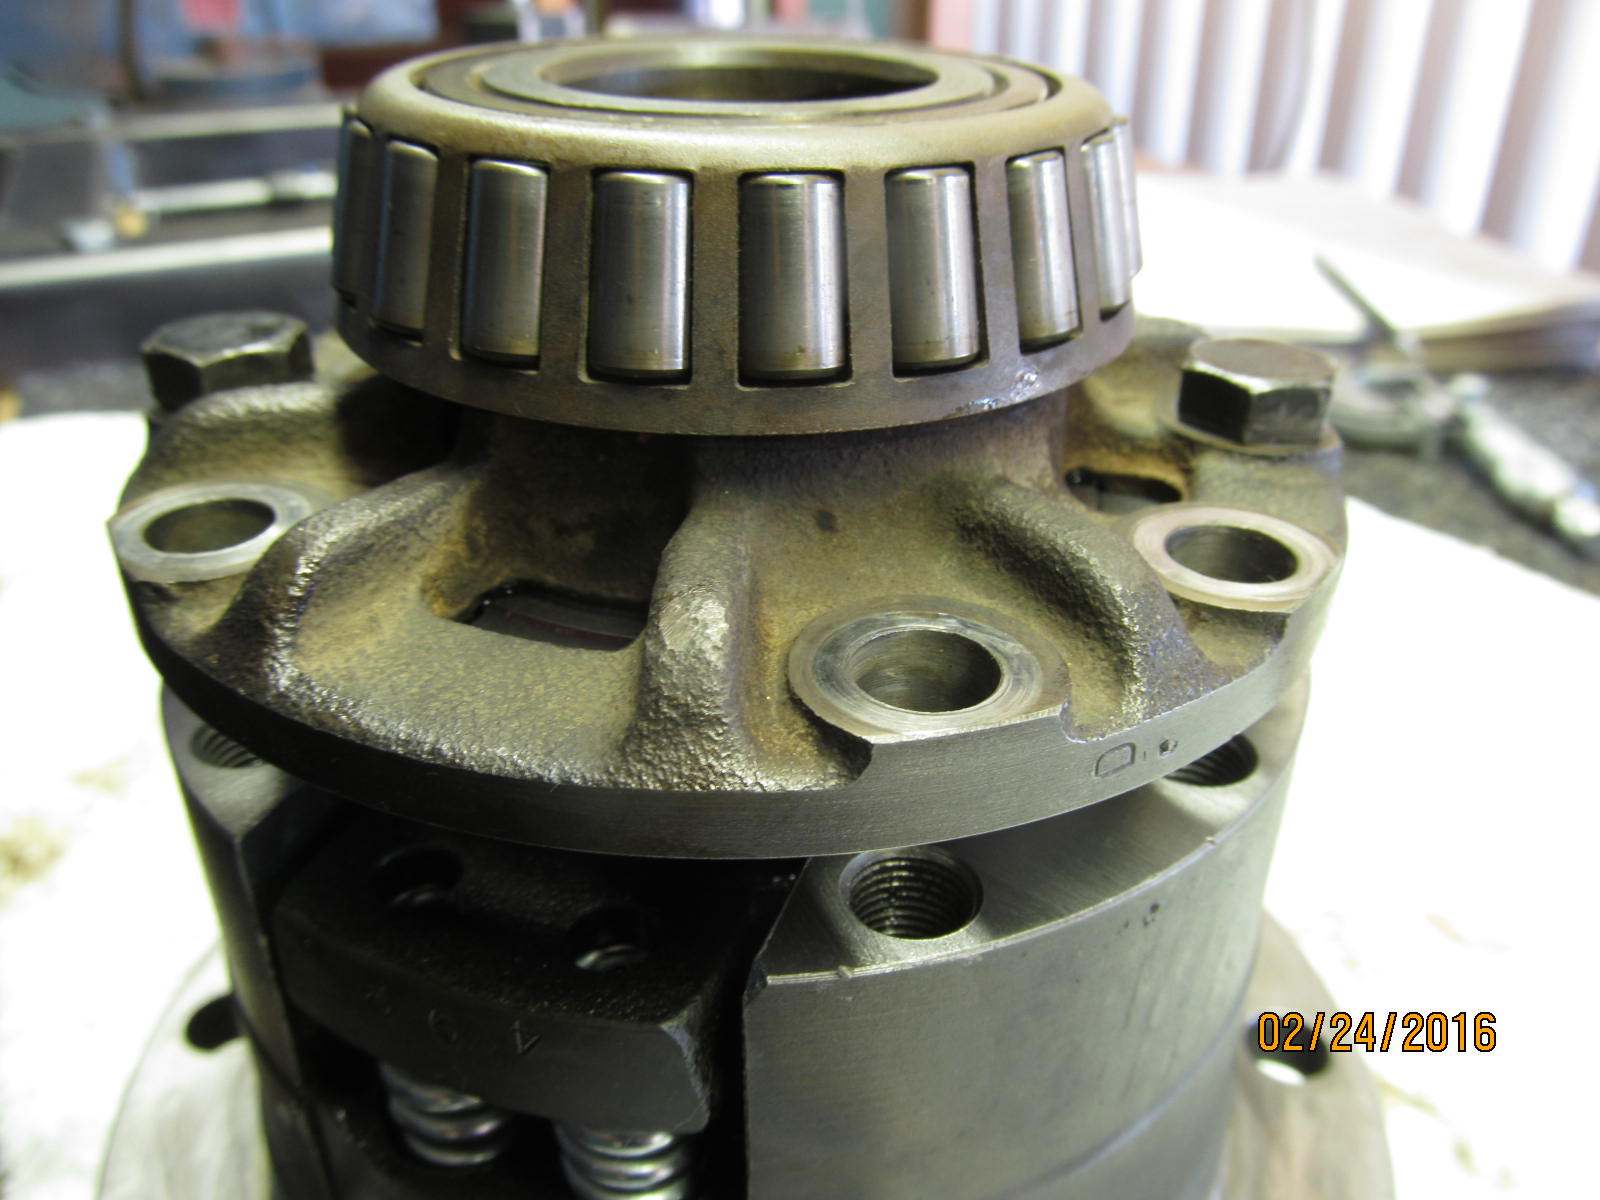
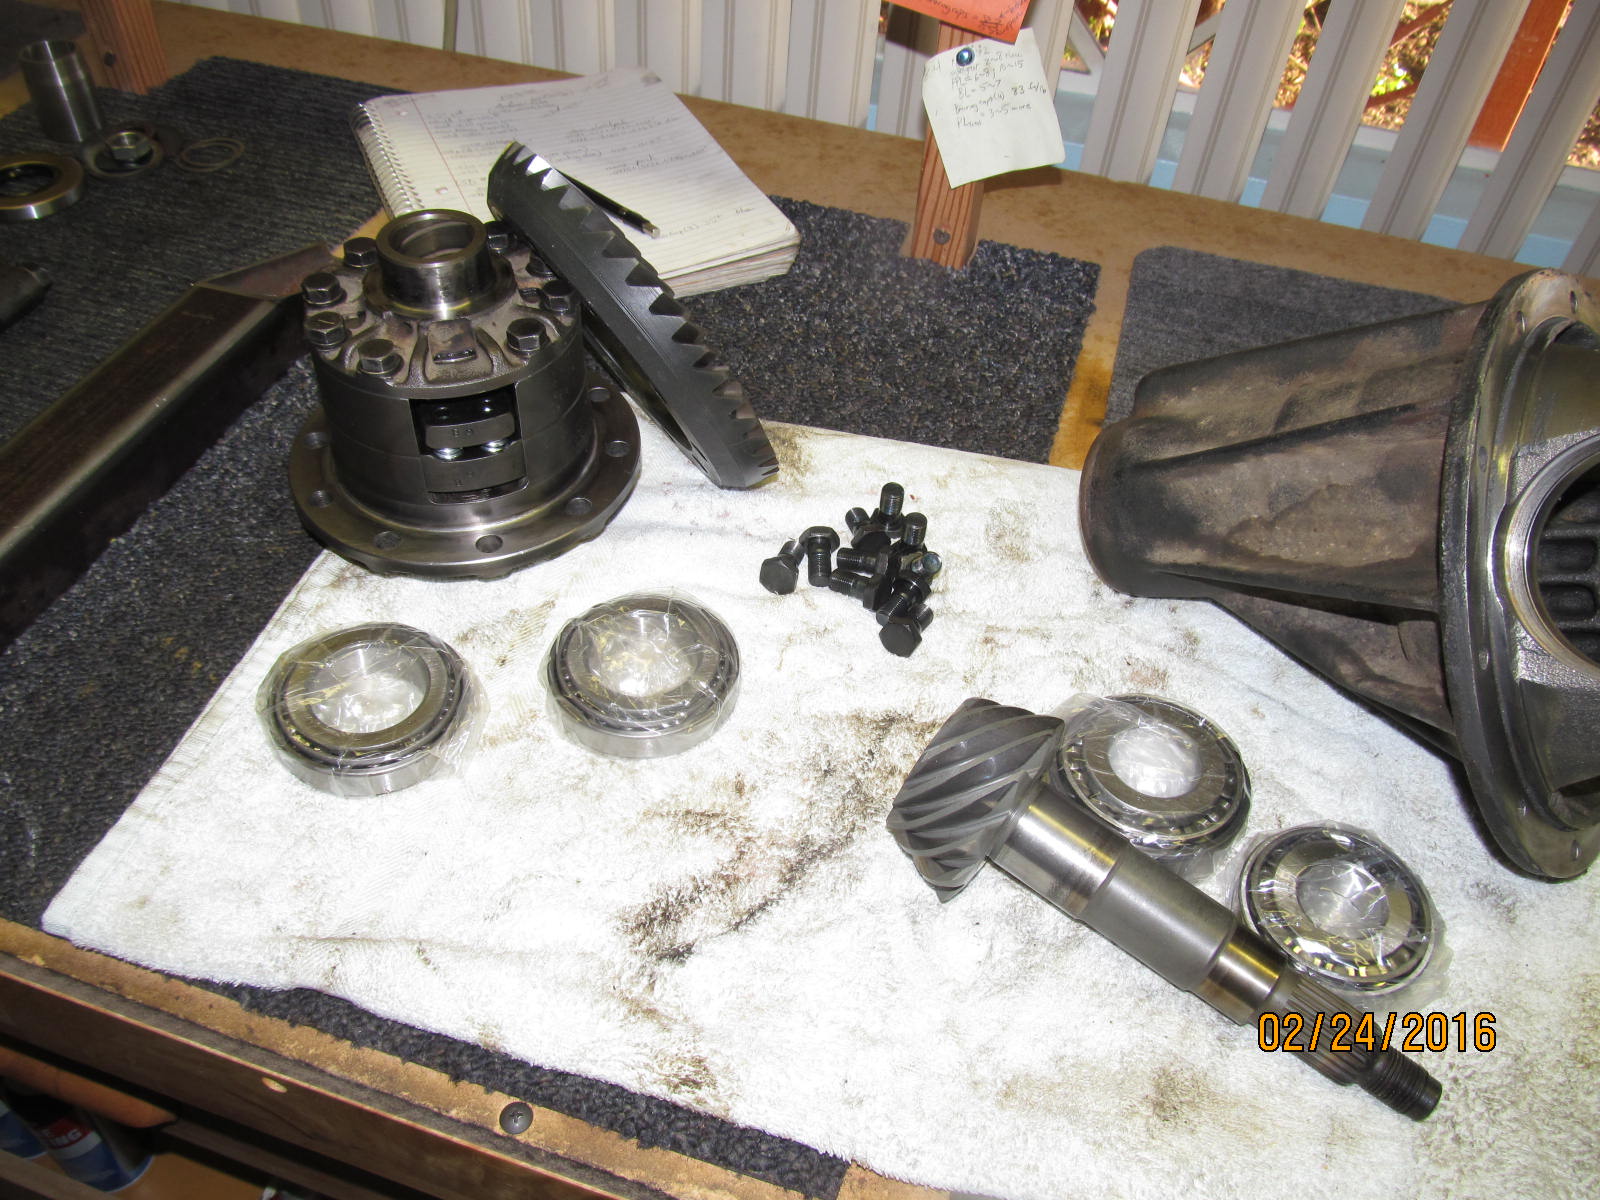
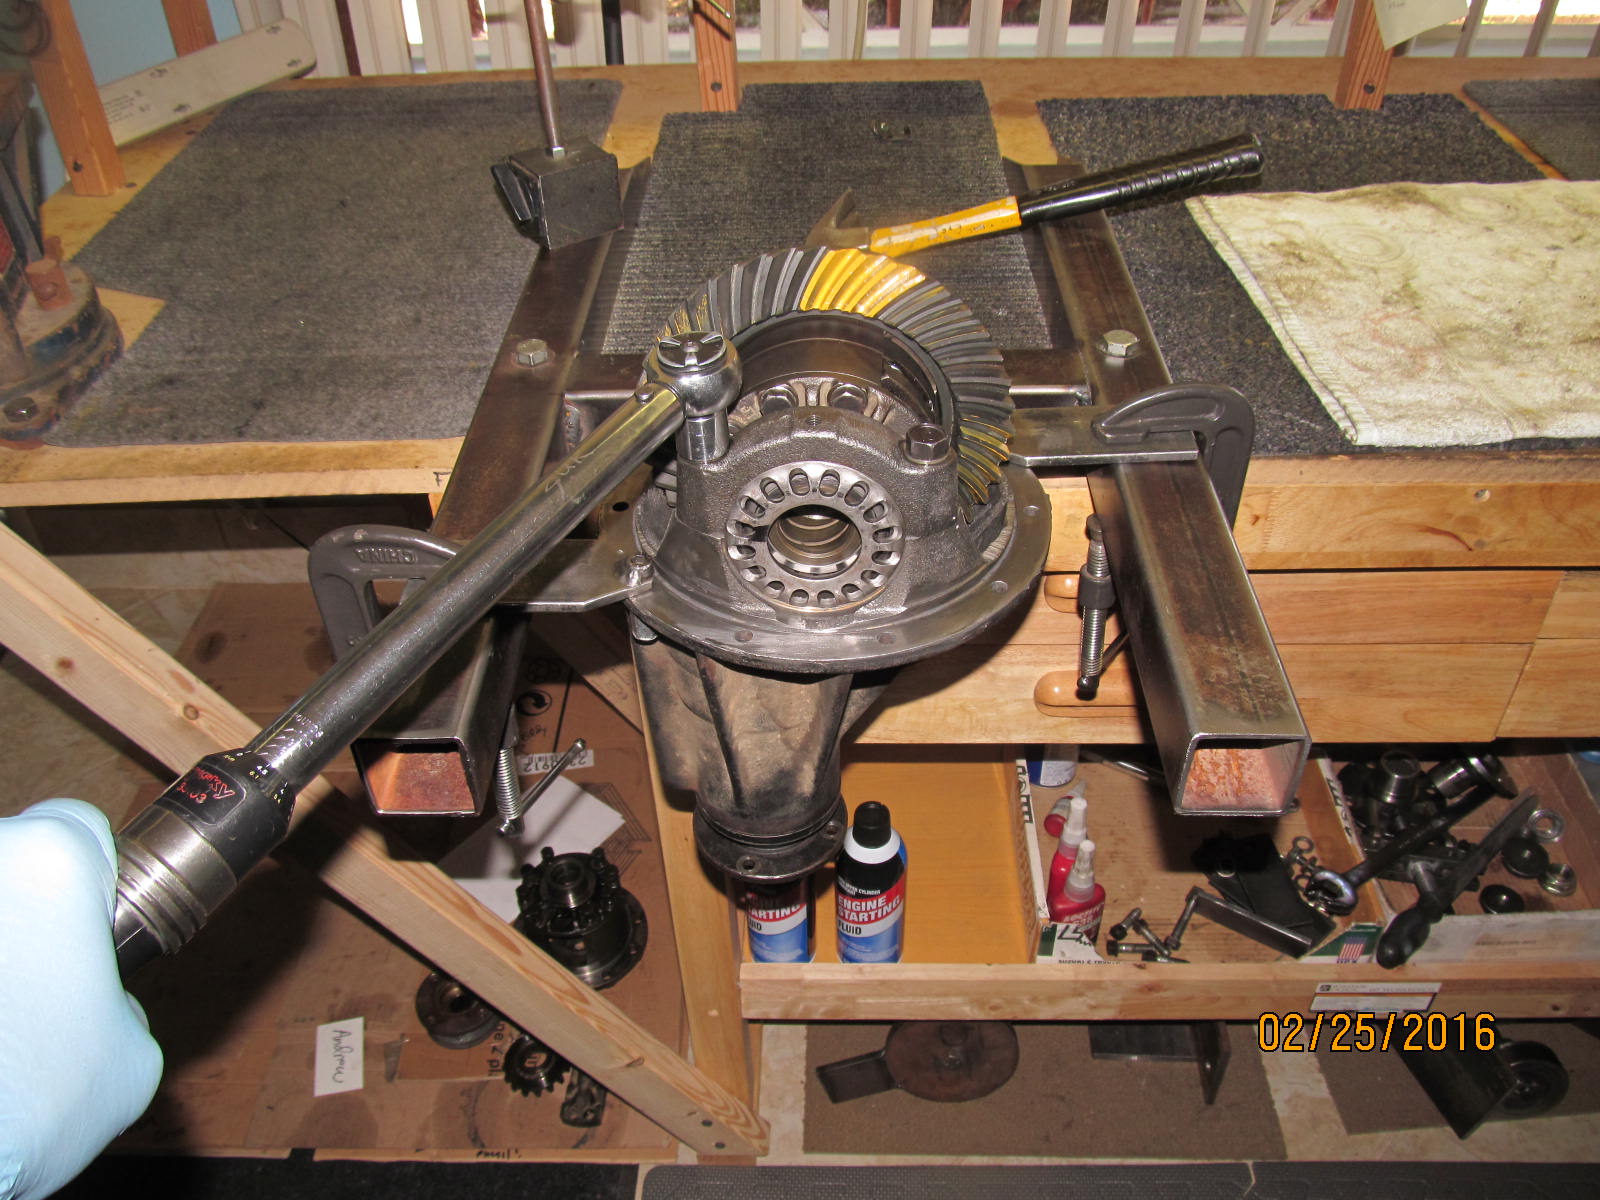
Andrew found a 7.5" Supra lsd that was said to be removed recently from a car that was treated normal.
Dis-assembling and laying everything out and I cannot argue that it looks normal.
|
|
|
|
|
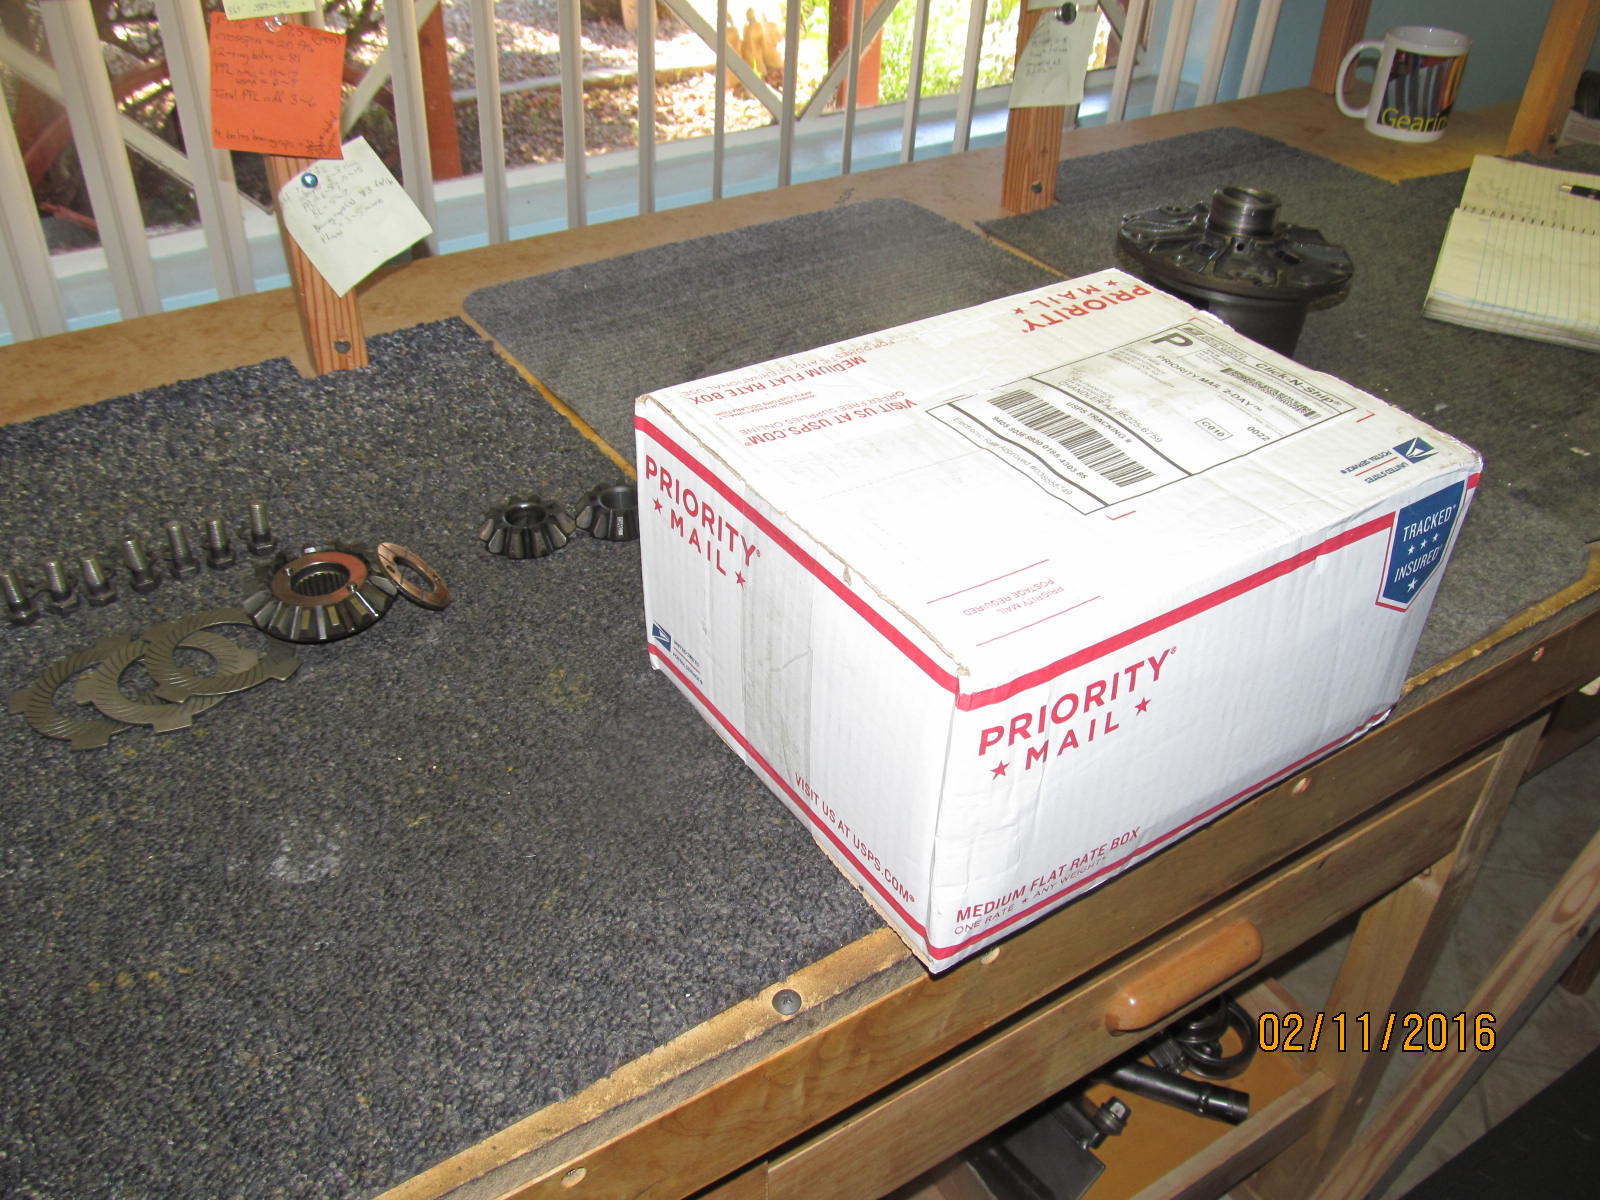
Suddenly, a package arrives from WeirPerformance
|
|
|
|
|
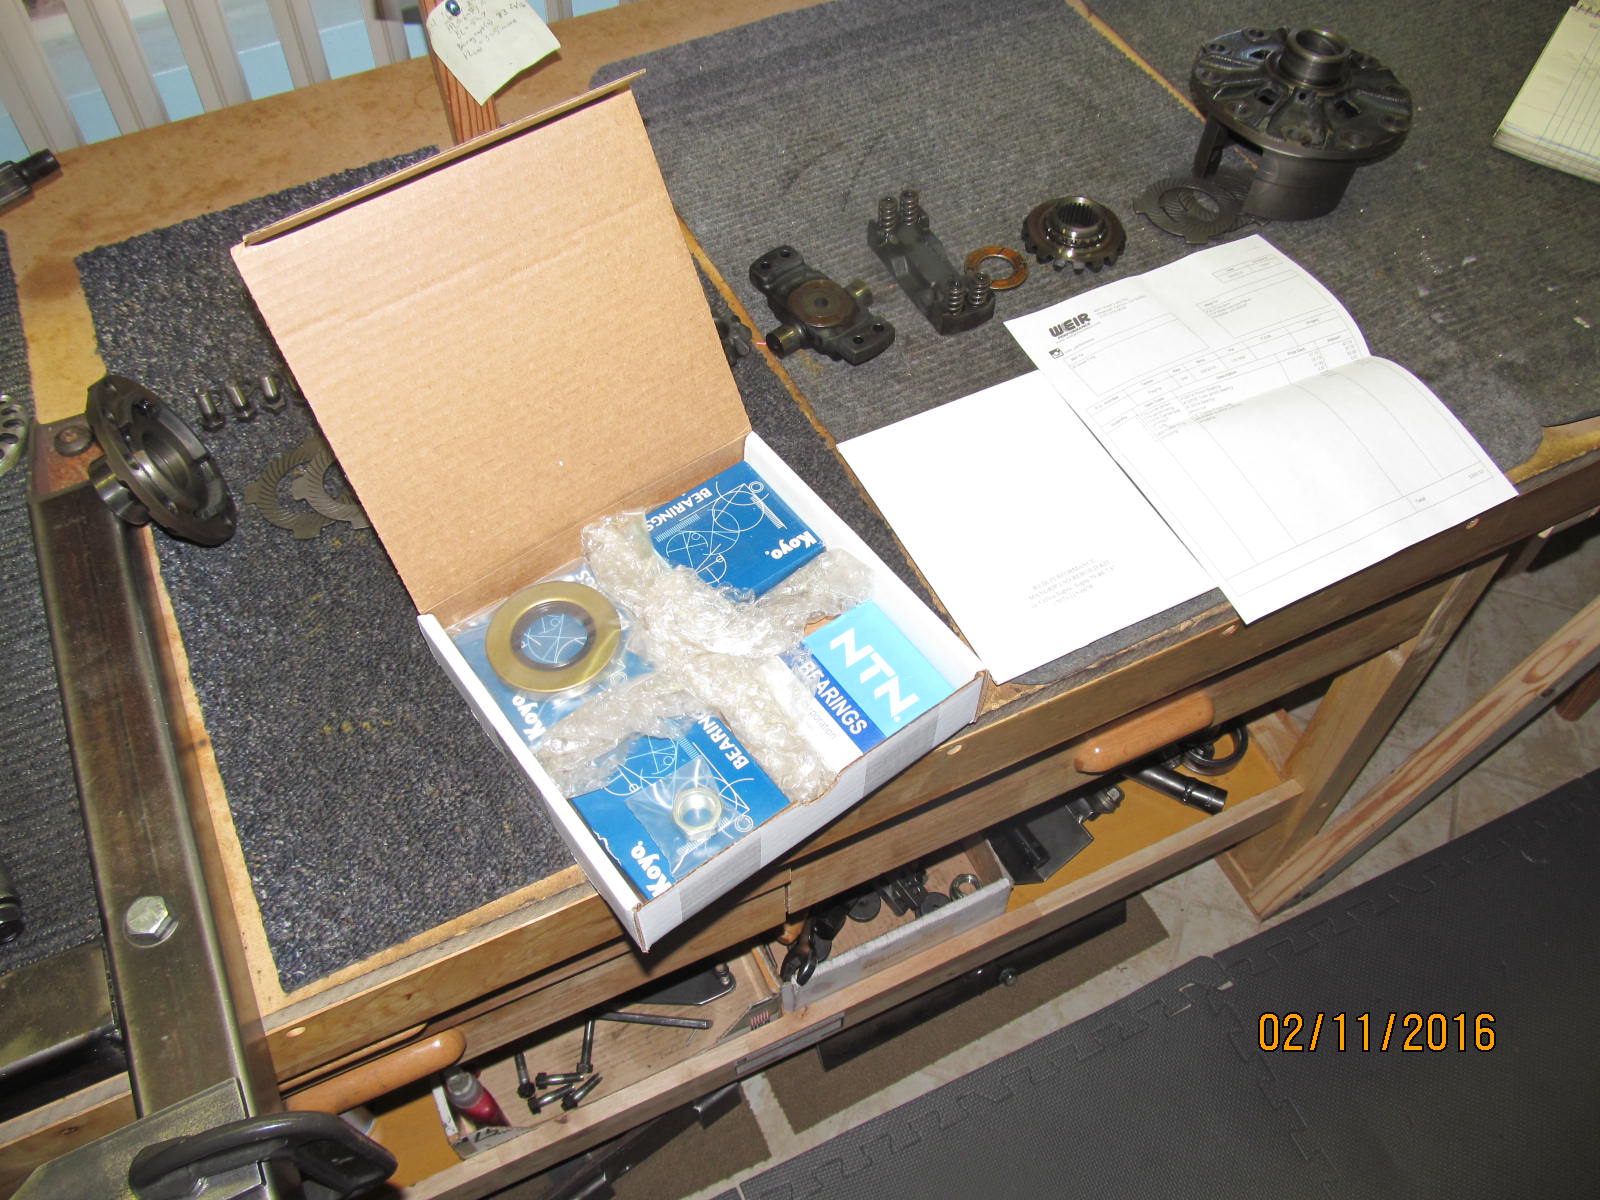
Inside are the 4 new bearings/seal/nut and the MAXGRIP kit to the right.
|
|
|
|
|
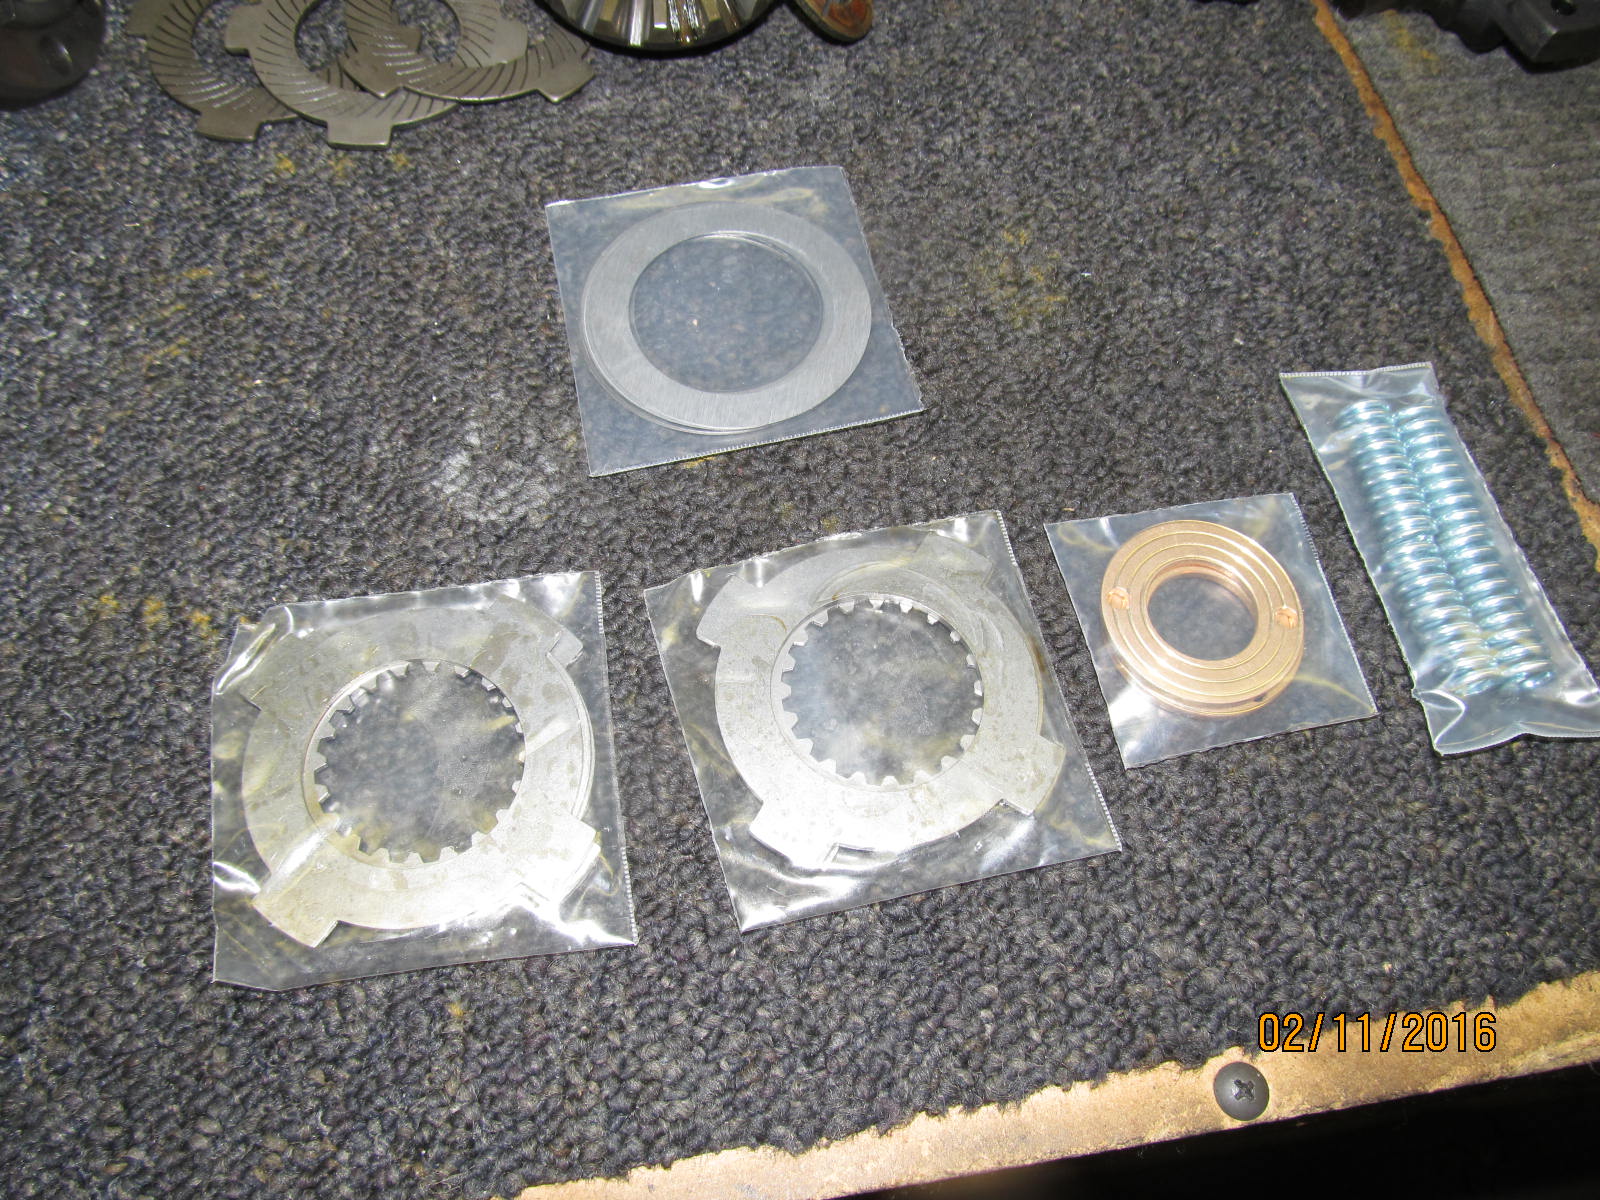
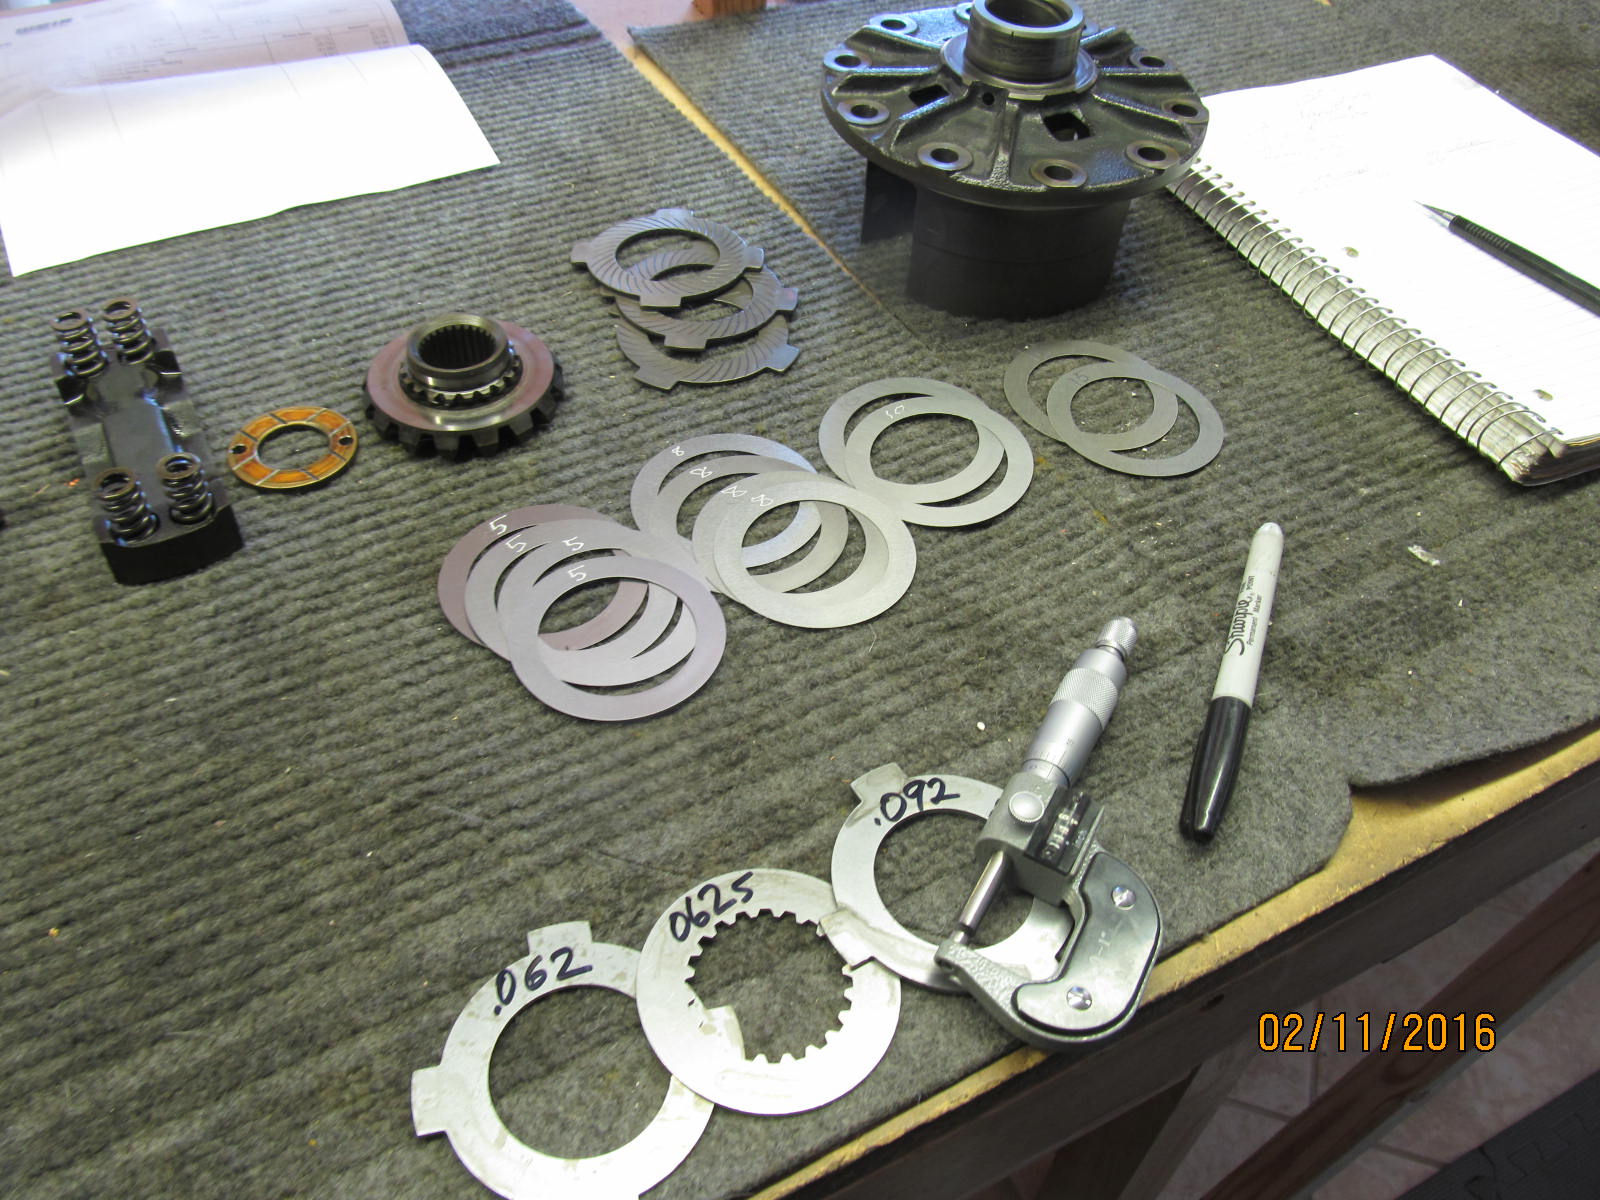
MAXGRIP kit
|
|
|
|
|
Shims and plates are mic'd and marked.
|
|
|

|
|
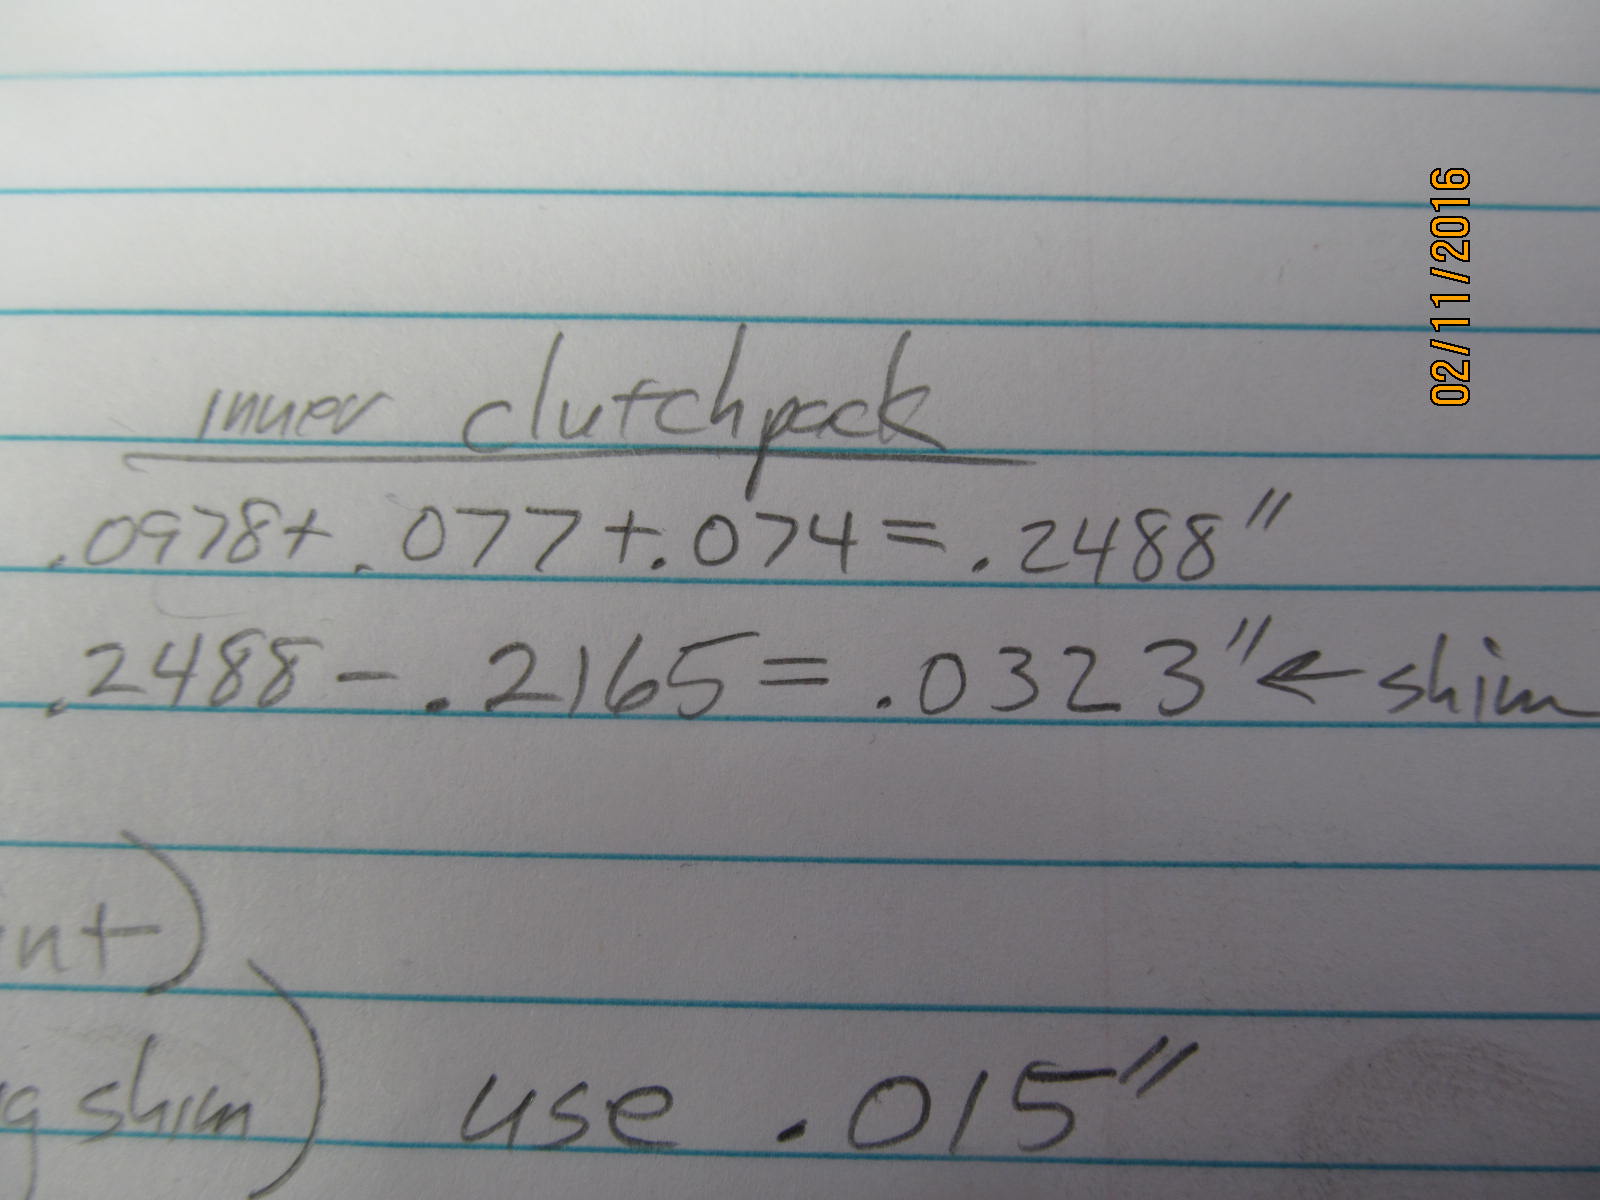
Inner clutch pack is combined with a .032" shim
|
|
|

|
|
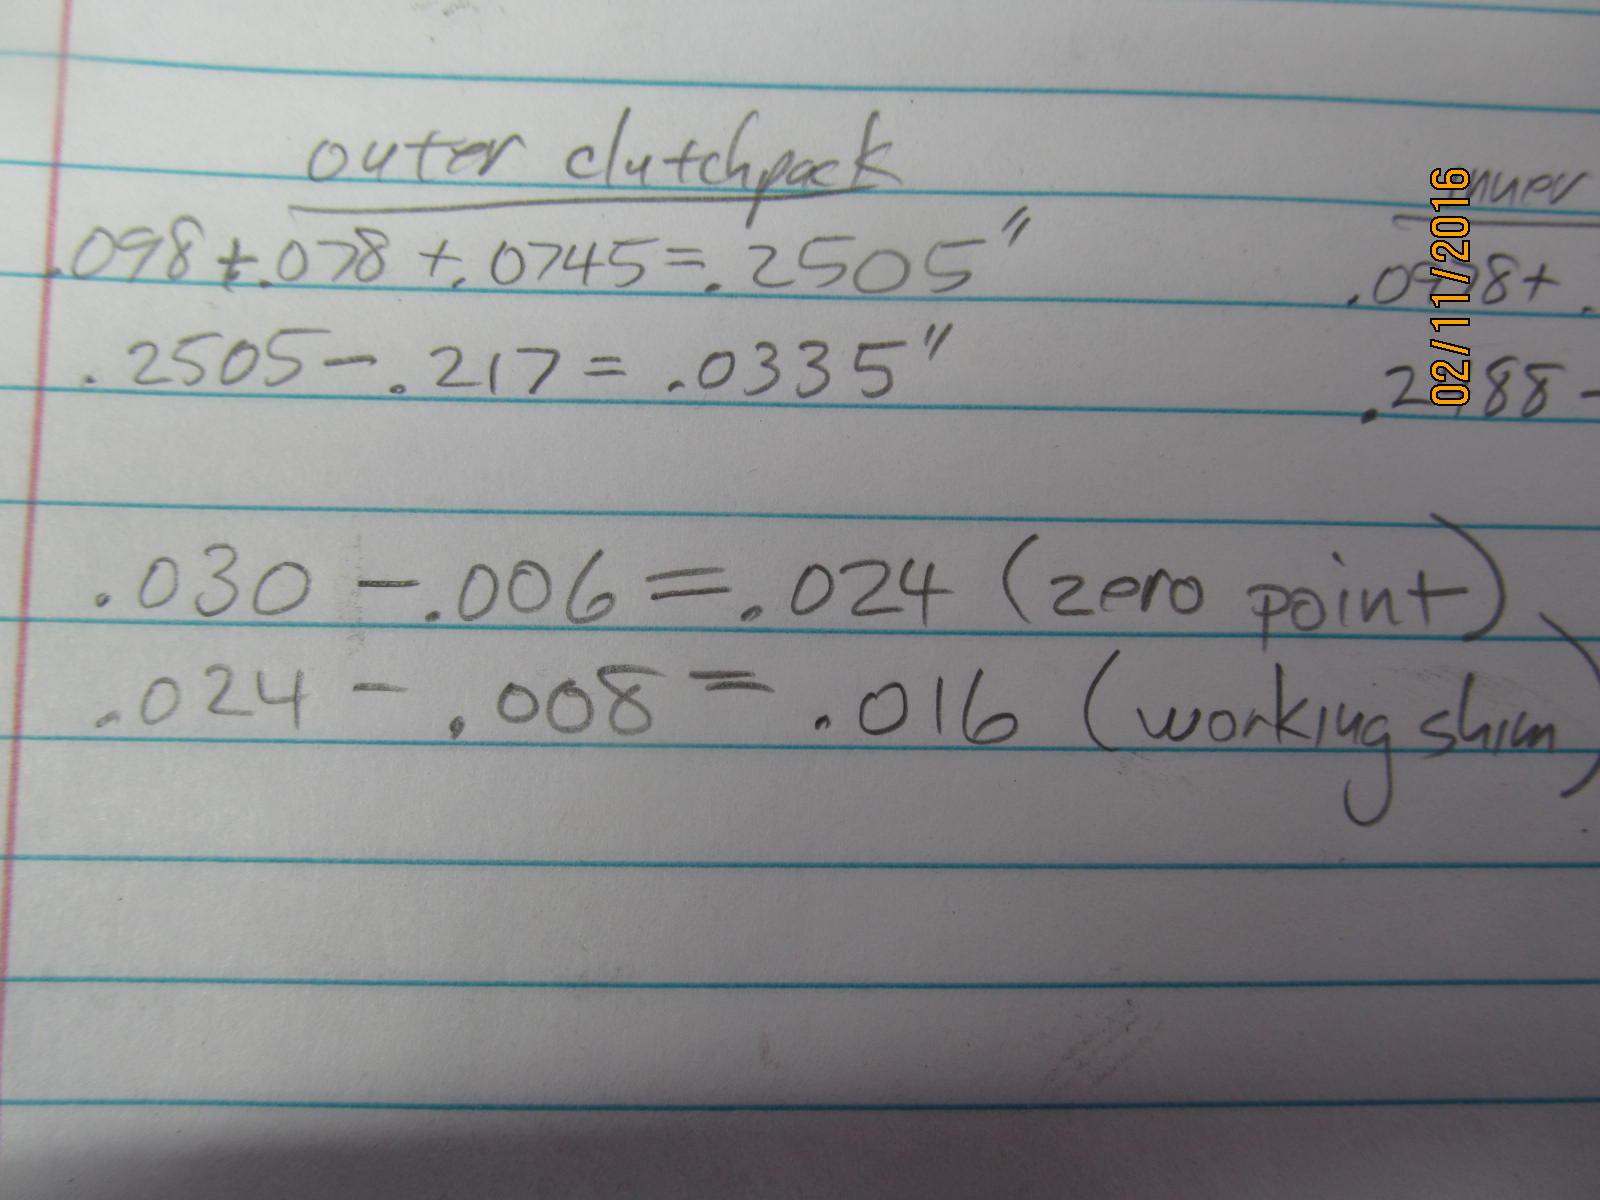
Outer pack is tried with a .030" shim.
|
|
|
|
|
''''''''''''''''''''
|
|
|
|
|
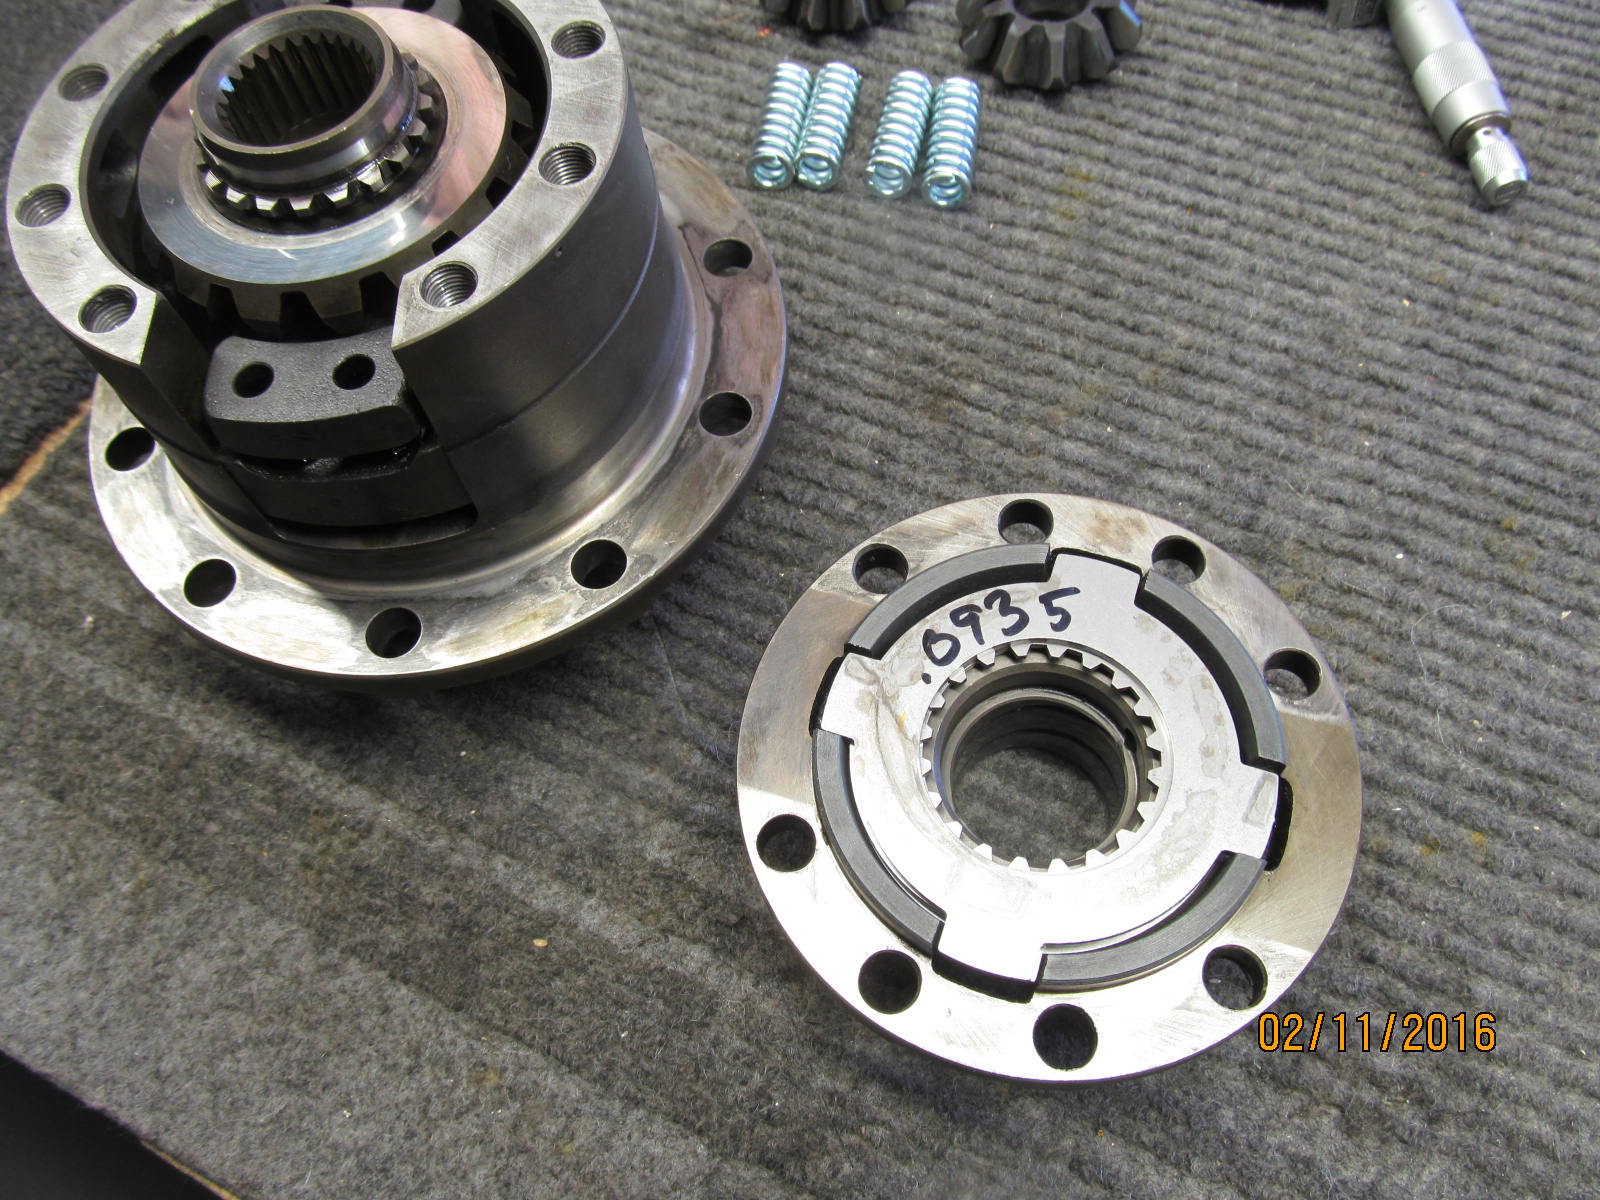
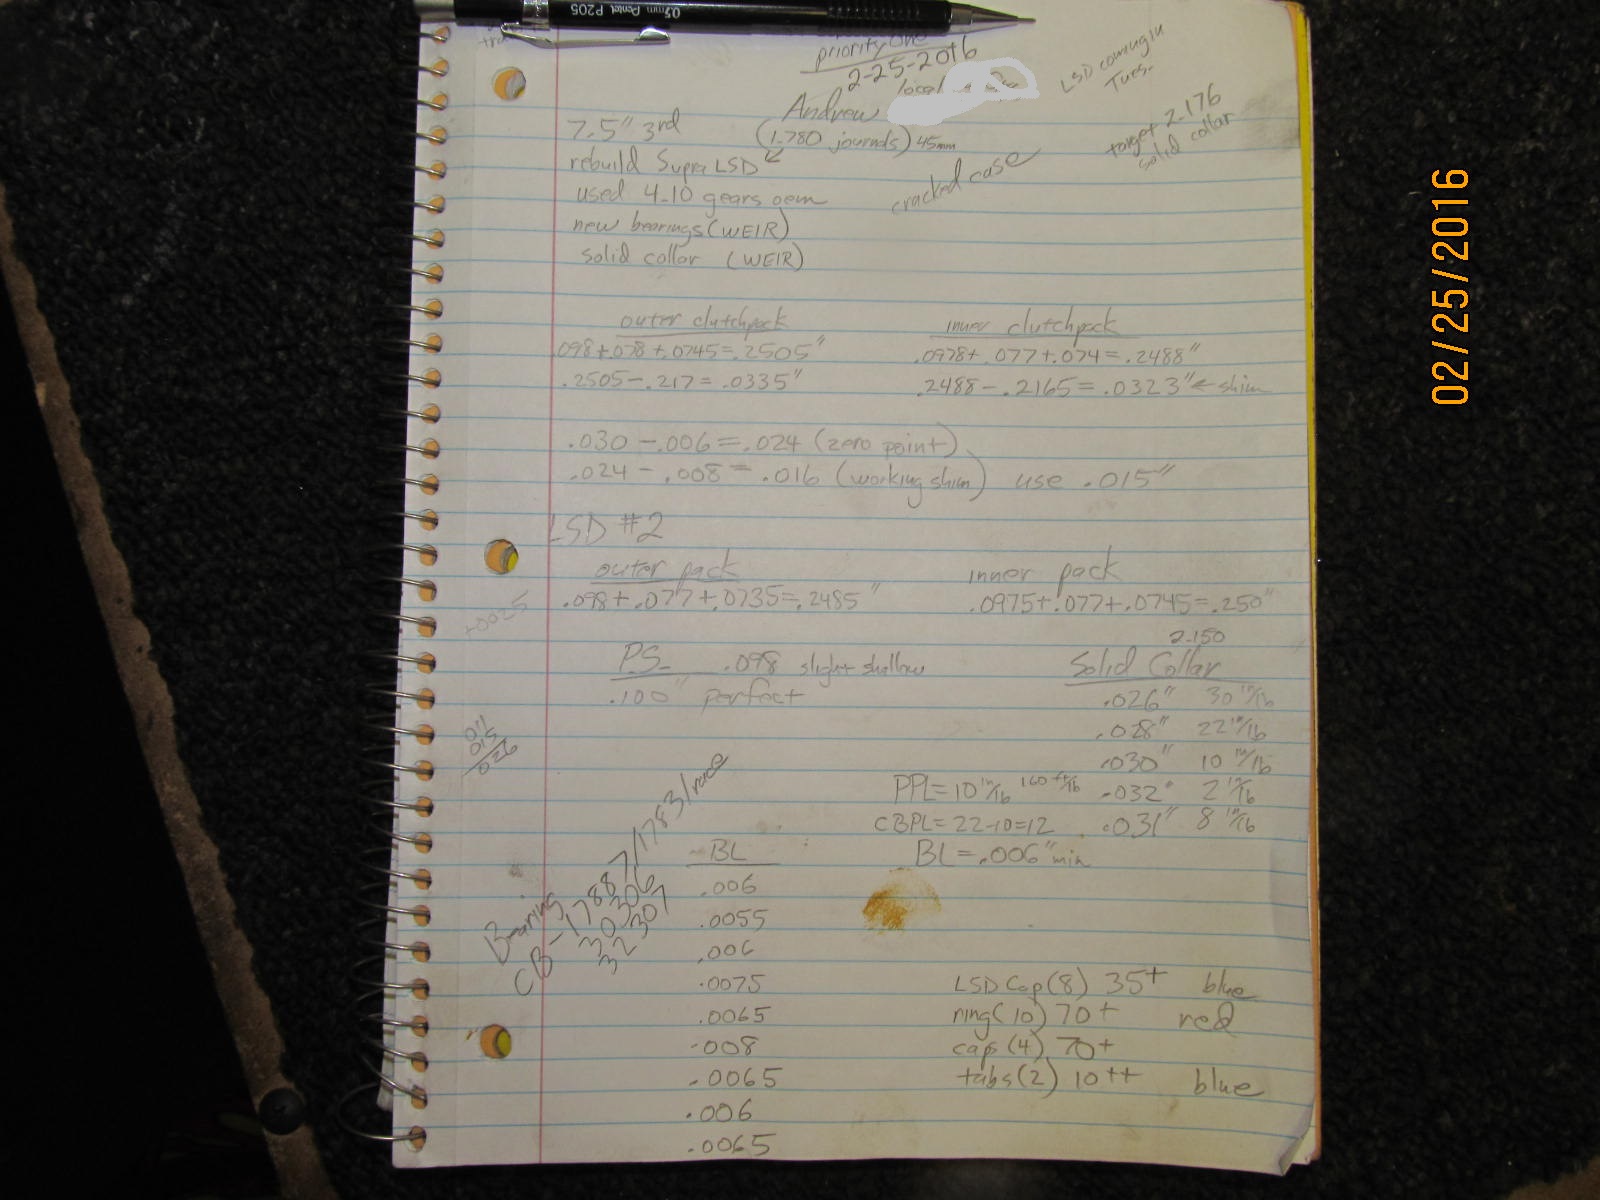
Average air gap with the lid was determined to be .006"
|
|
|
|
Knowing that, taking .006" from the .030" shim means that the new zero shim is .024".
Taking another .008 off the zero shim means that the actual target shim is .016"
|
|
|
|
|
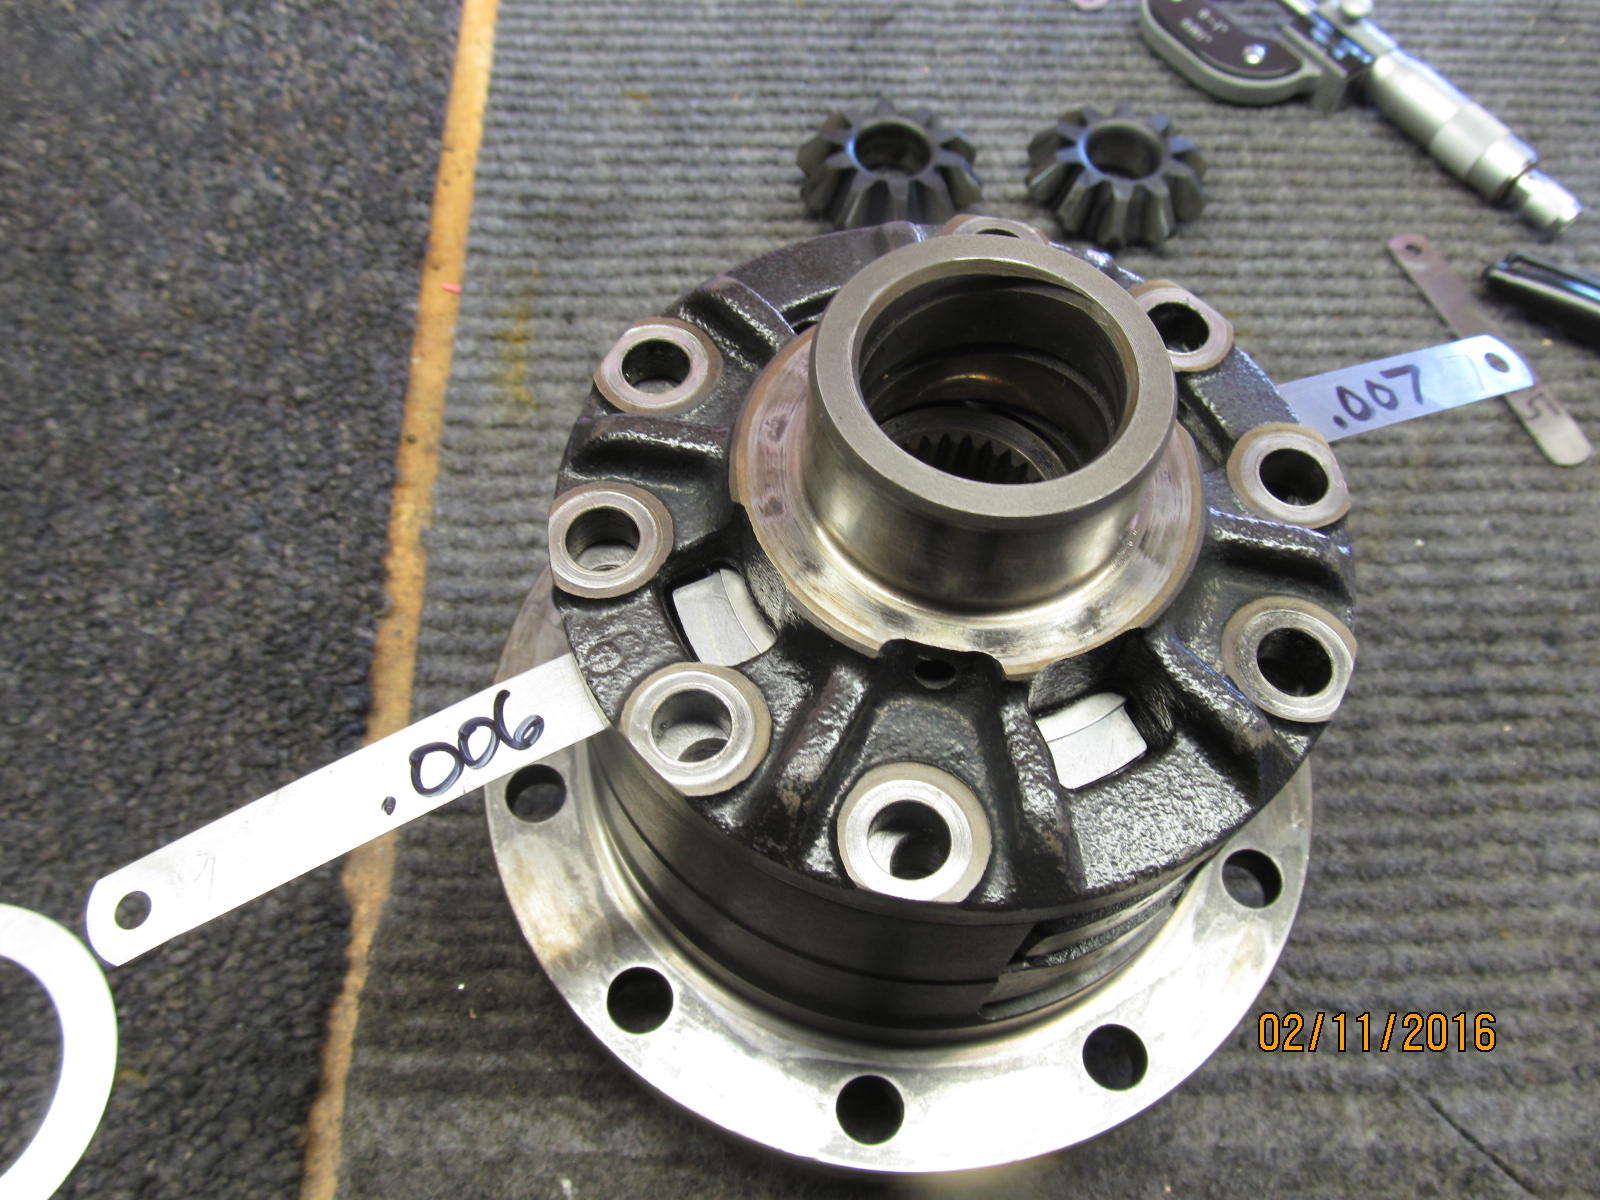
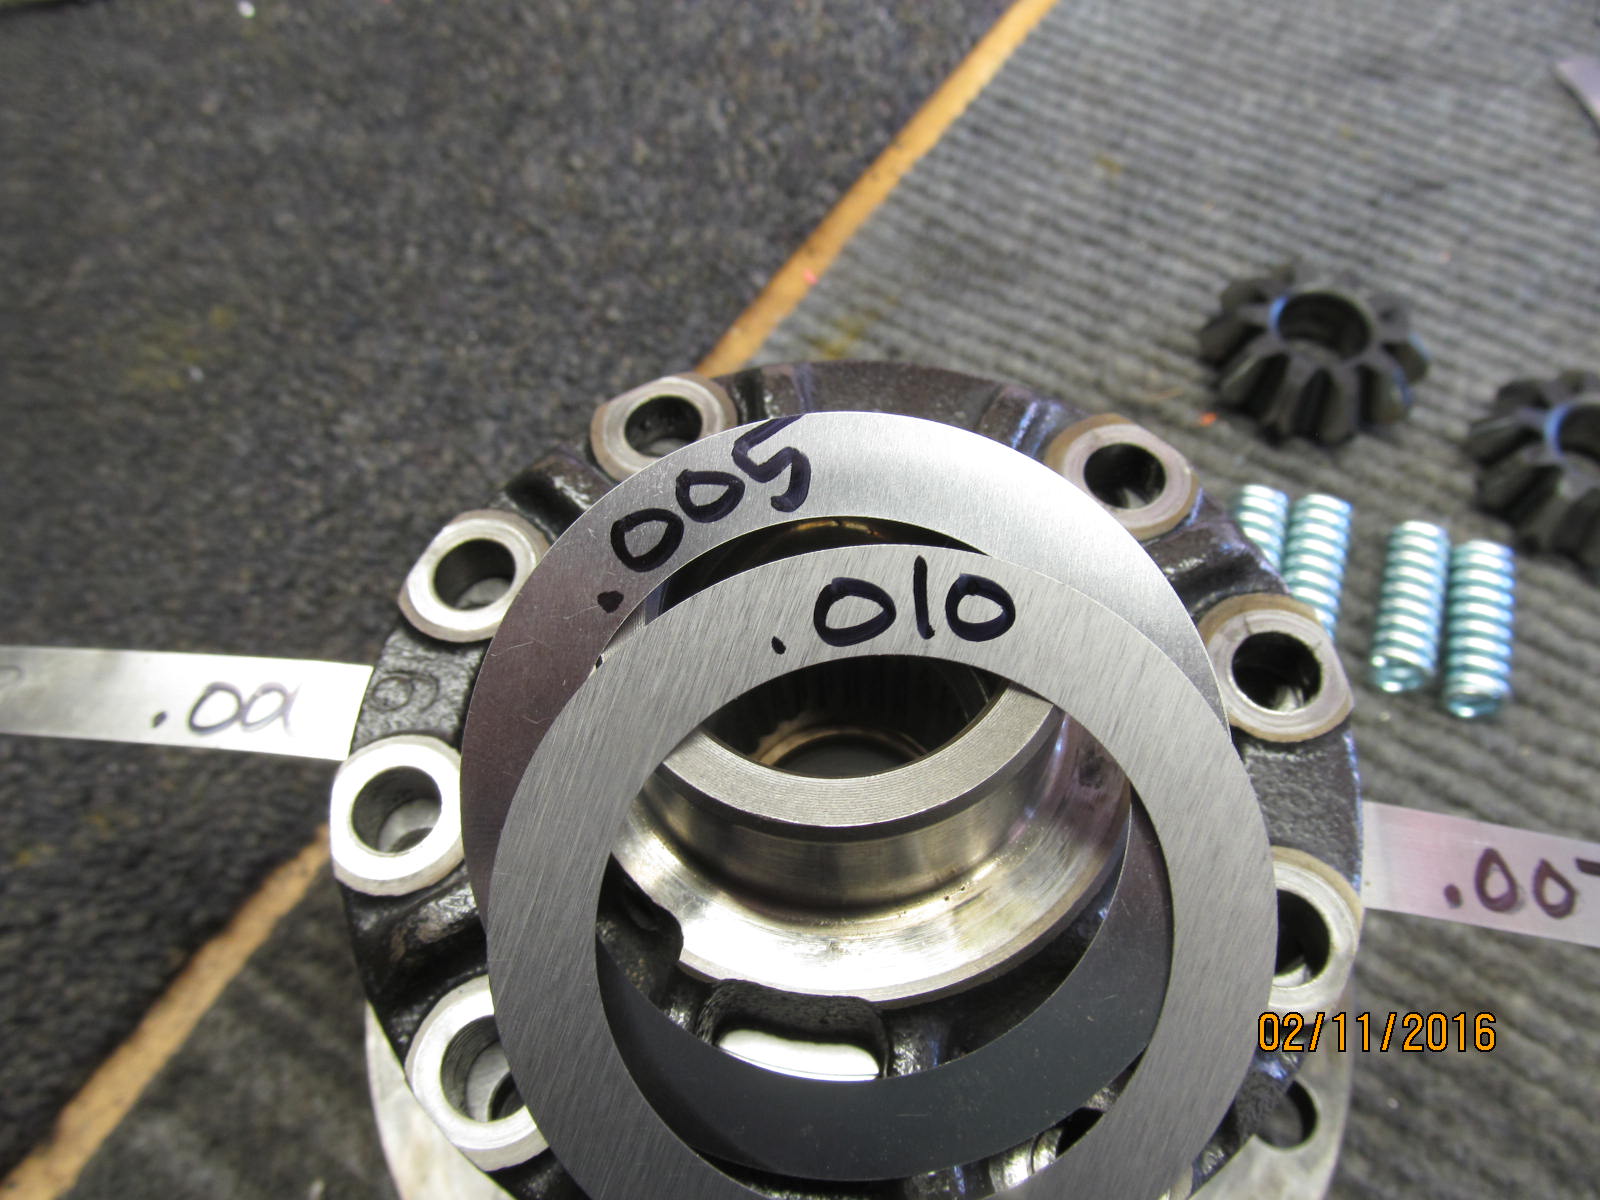
.005" plus .010" equals .015"....now the lid.
|
|
|
|
|
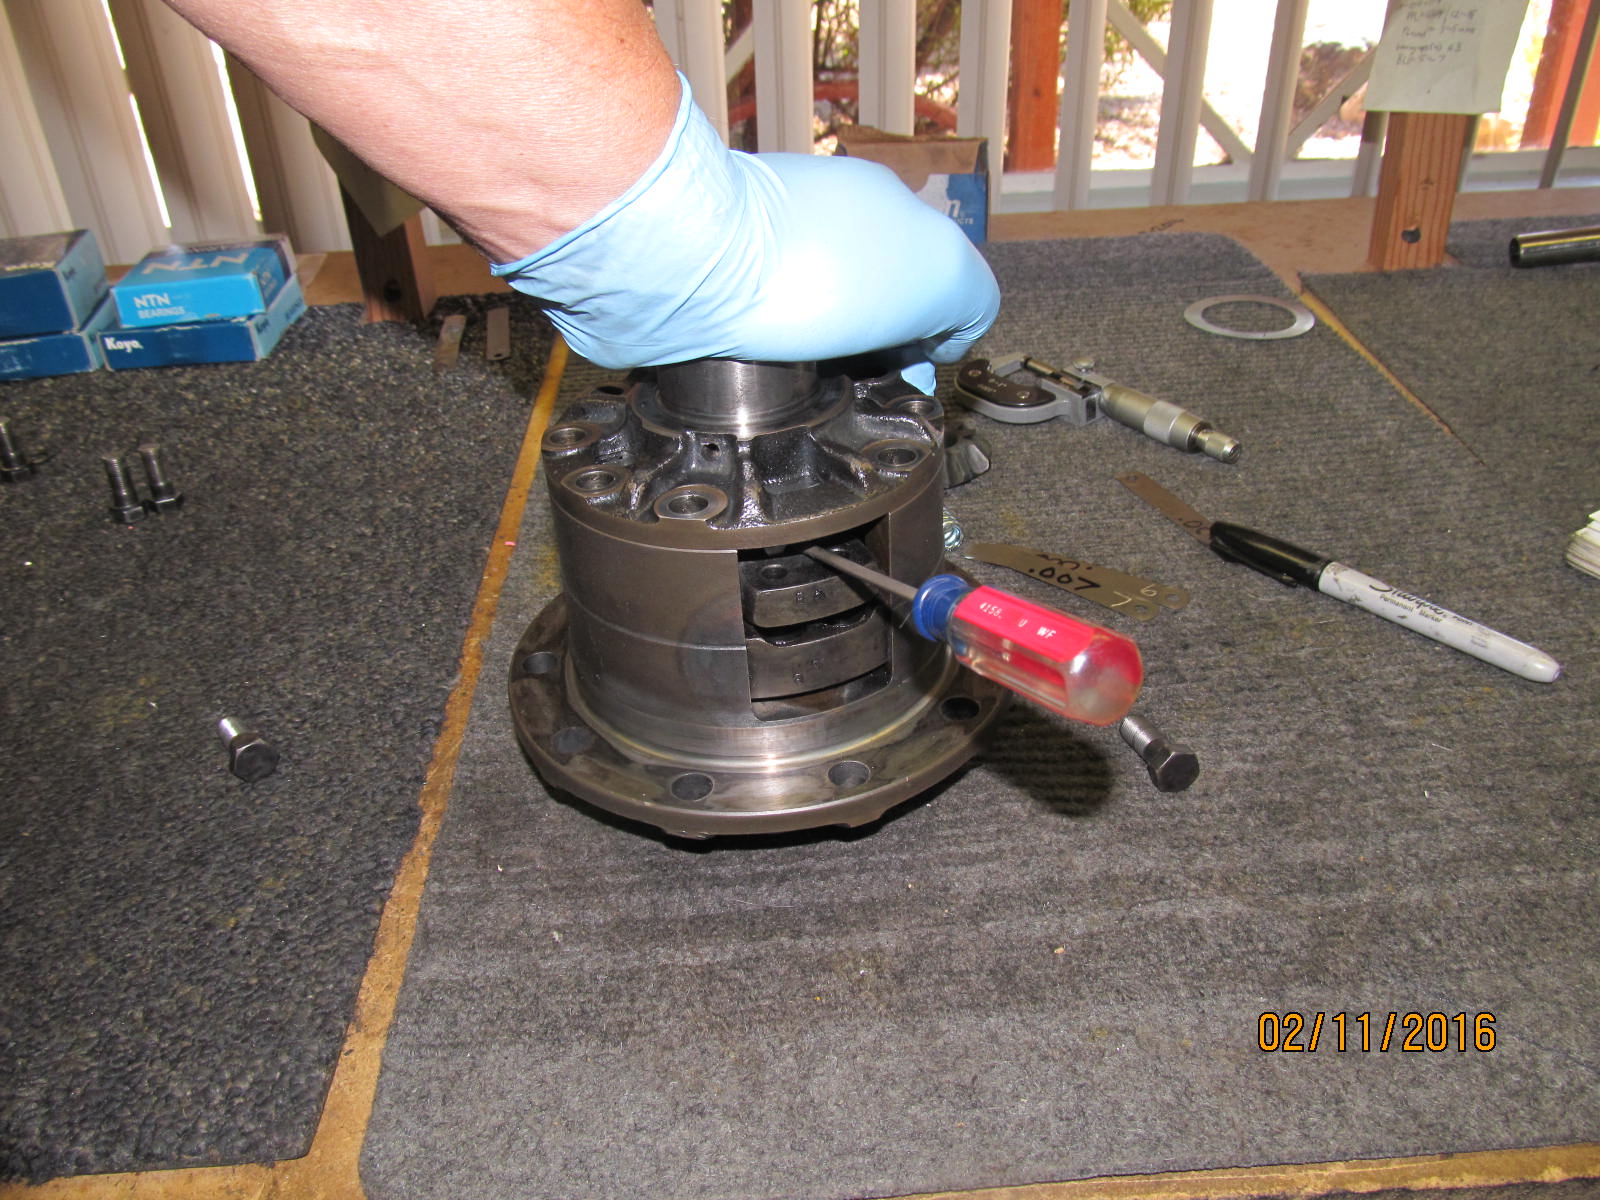
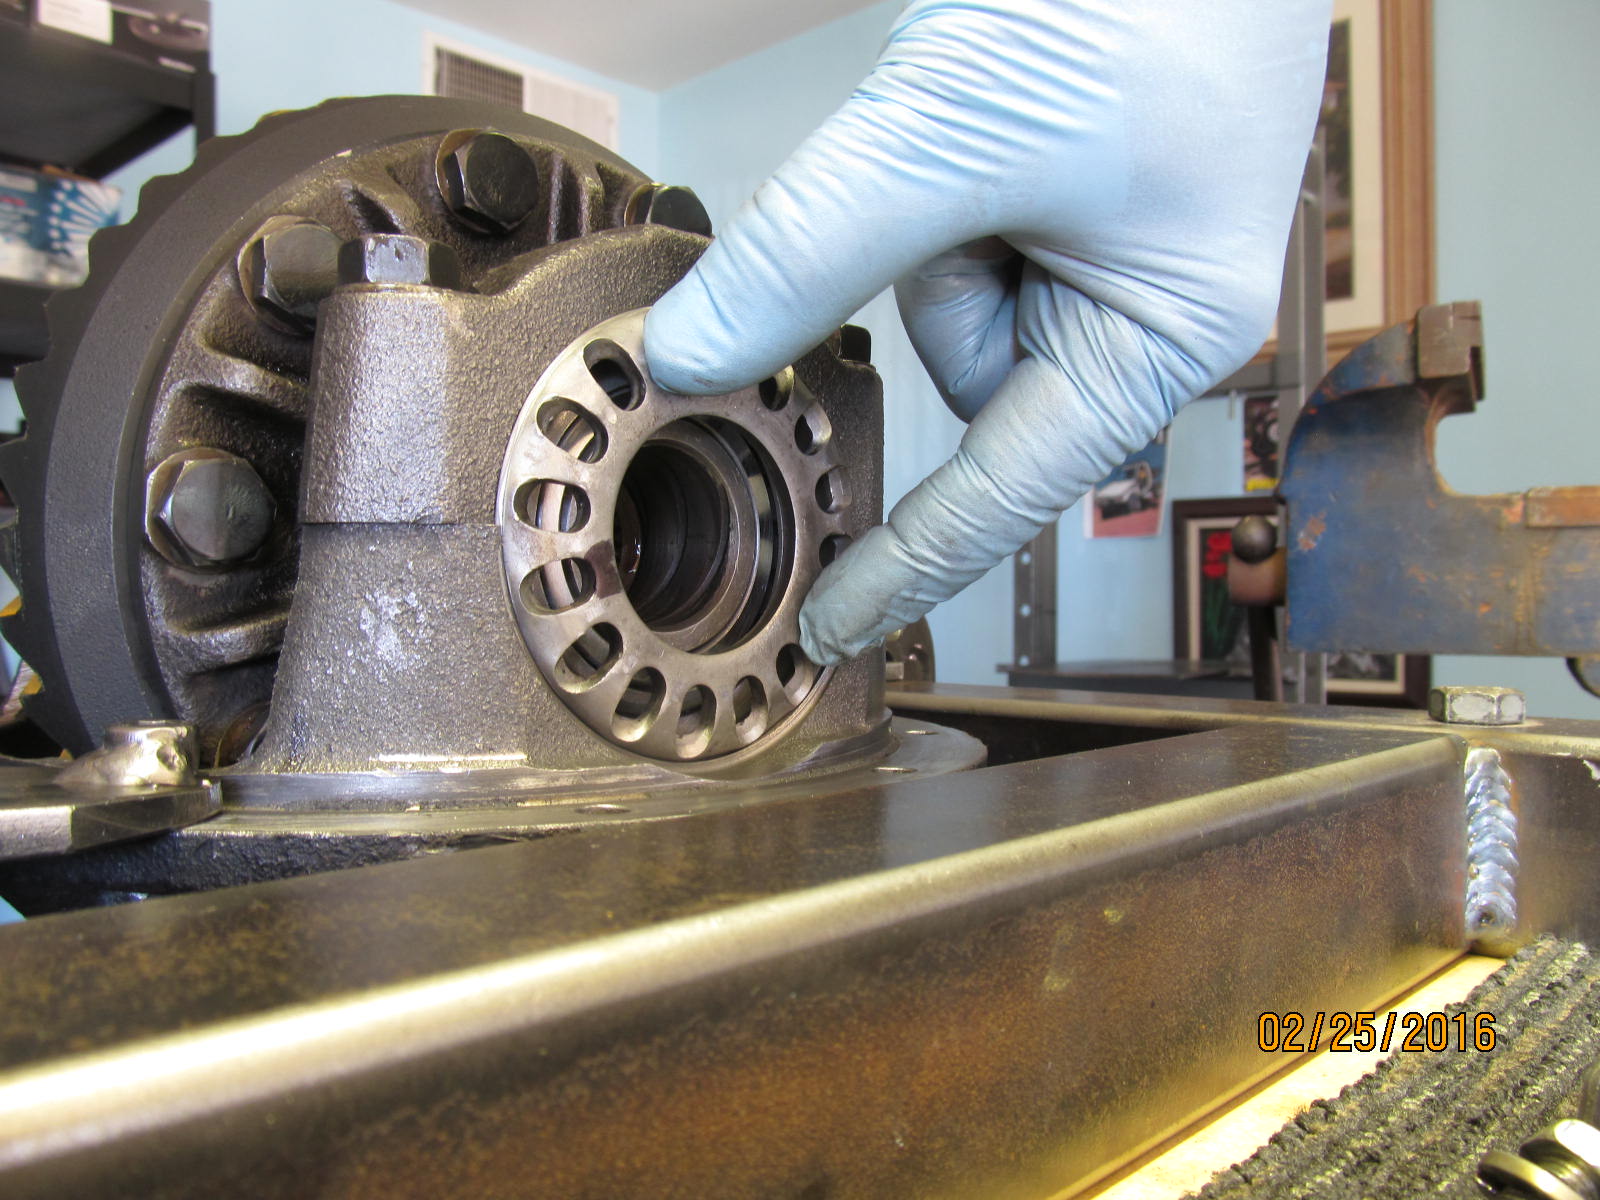
While holding the lid firmly down, the .008" of play is verified by using a screwdriver to wiggle things around.
|
|
|
|
|
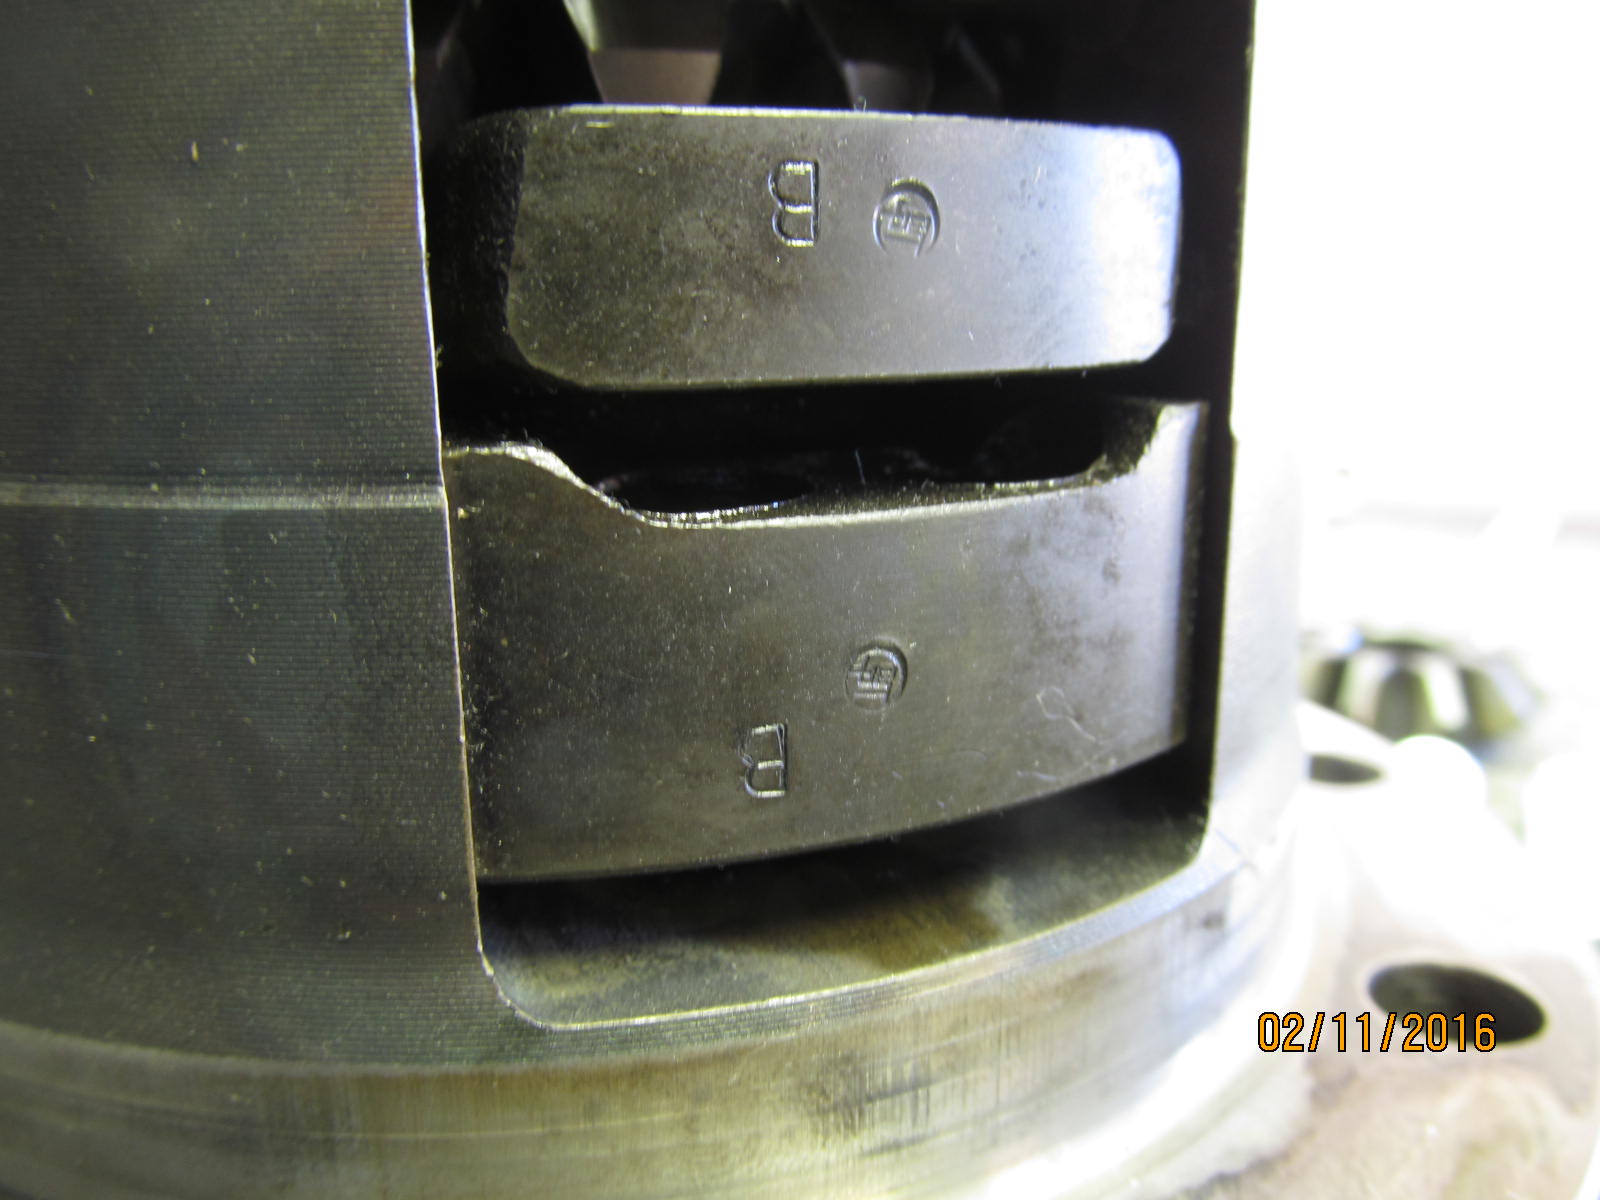
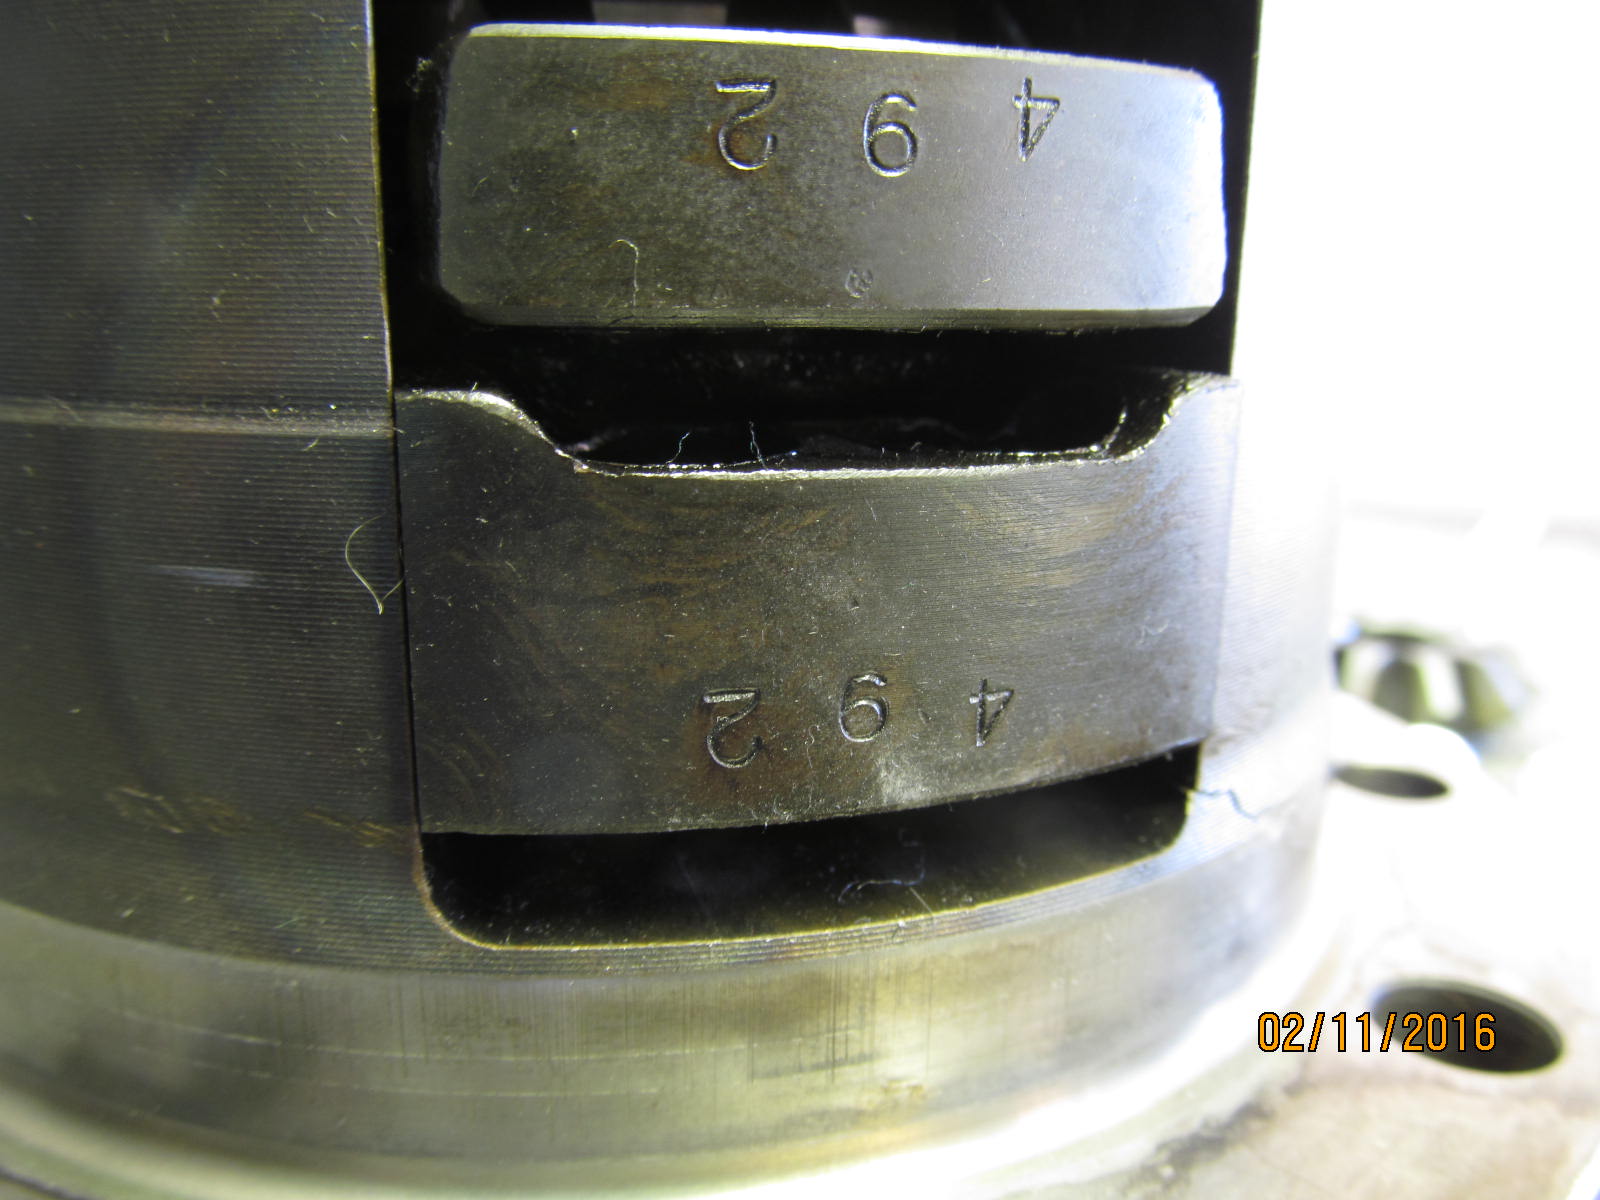
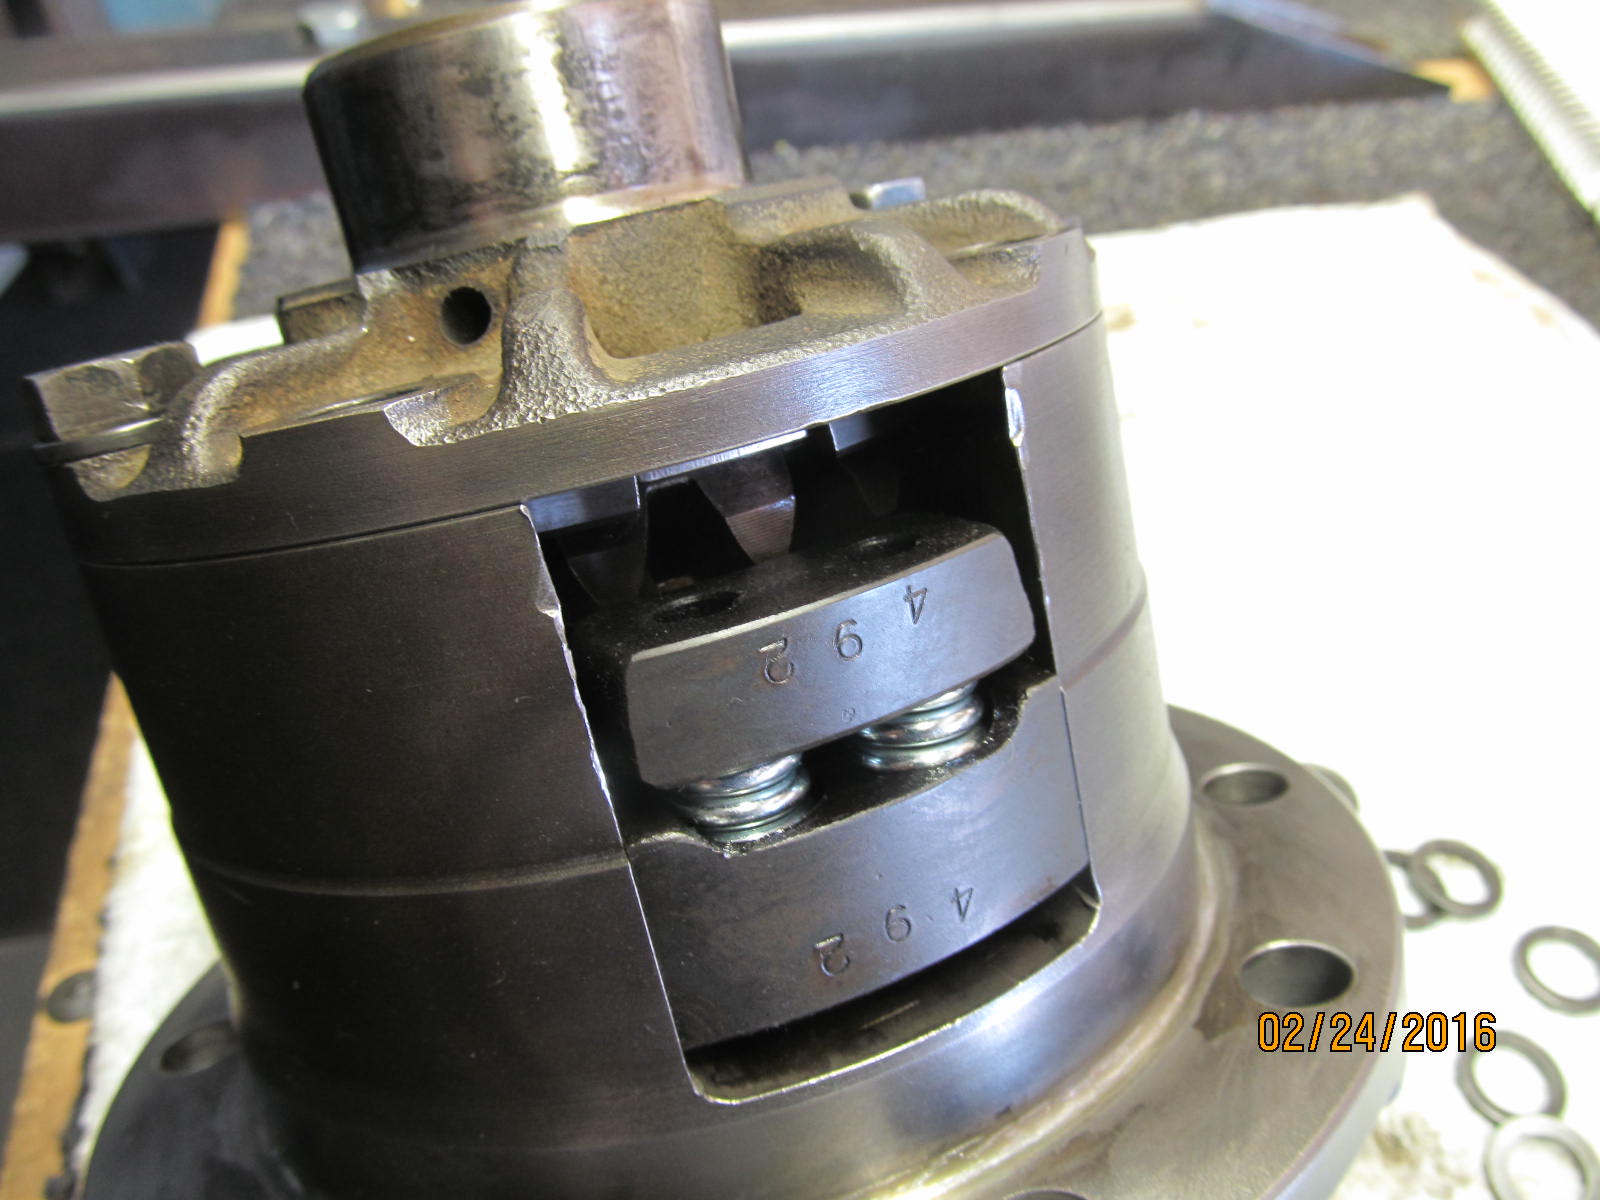
Making sure the keyed markings on the upper/lower blocks are lined up.....
|
|
|
|
|
,,,,,,,,,,,,,,,,,,,,,,,,
|
|
|
|
|
===================
|
|
|
|
|
;;;;;;;;;;;;;;;;;;;;
|
|
|
|
|
[[[[[[[[[[[[[[[[[[[[[[[
|
|
|
|
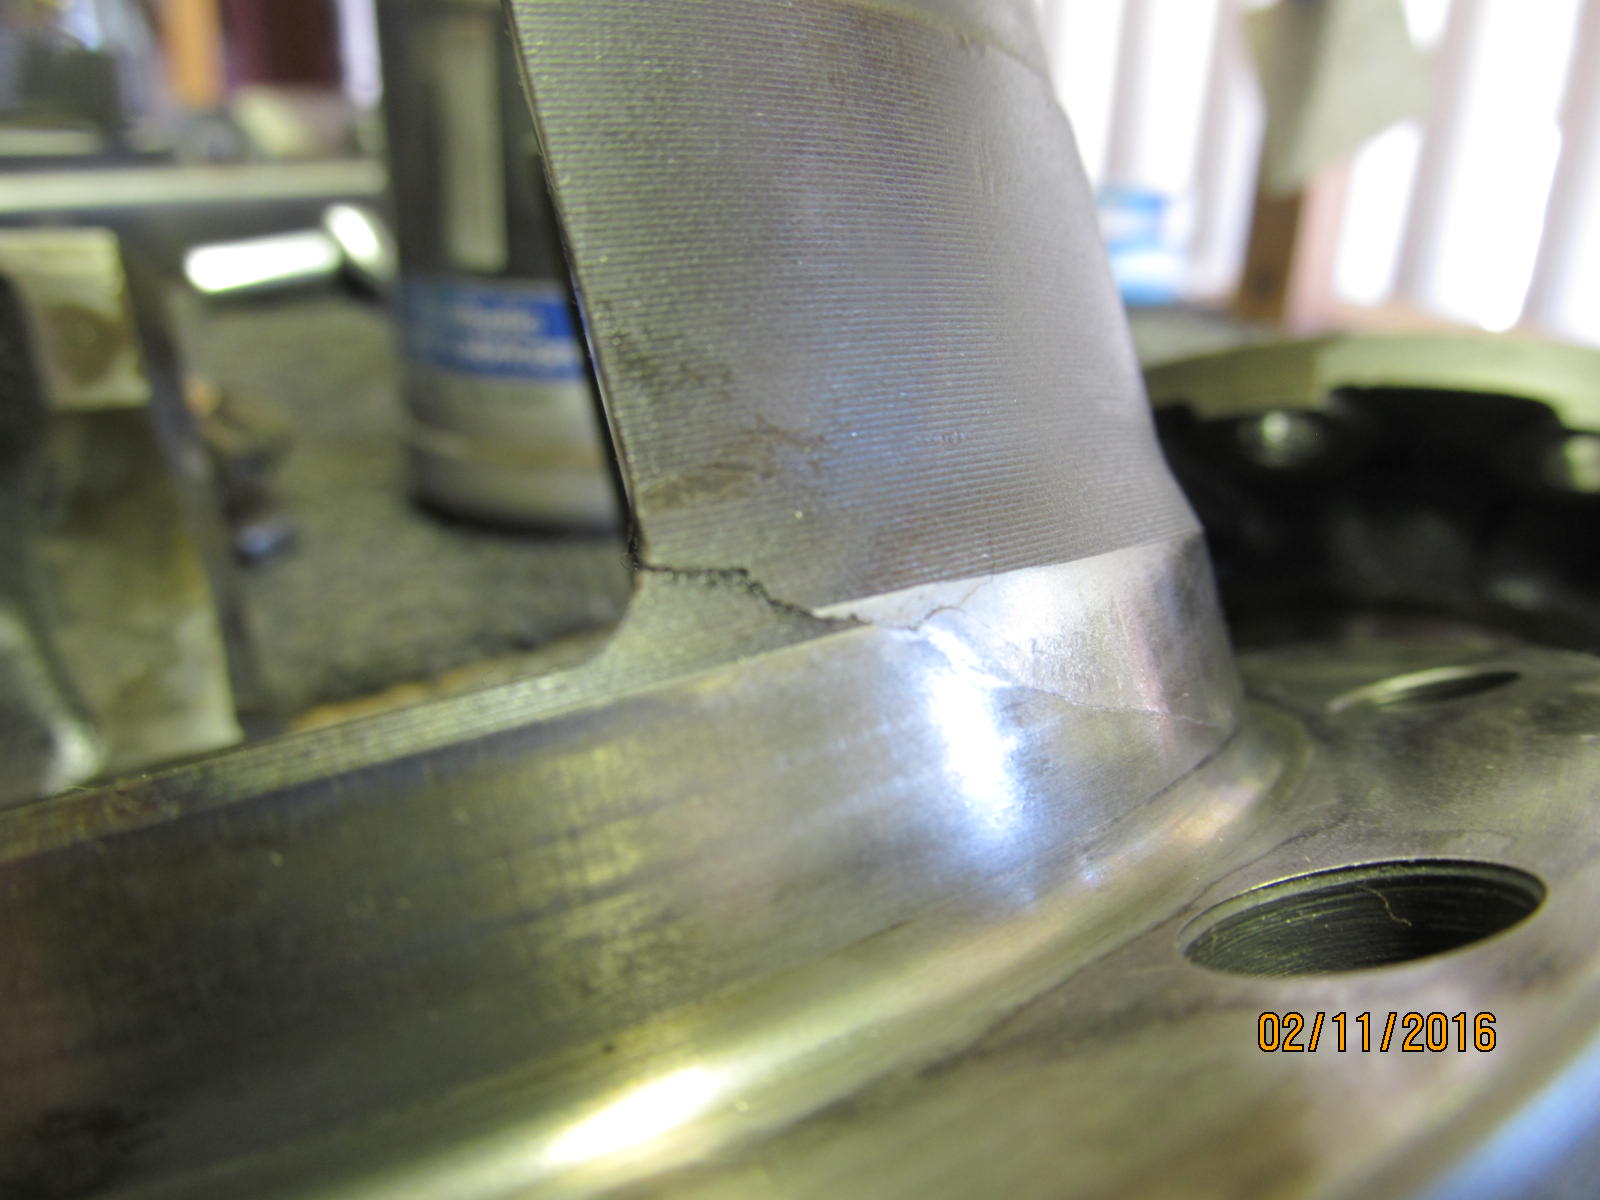
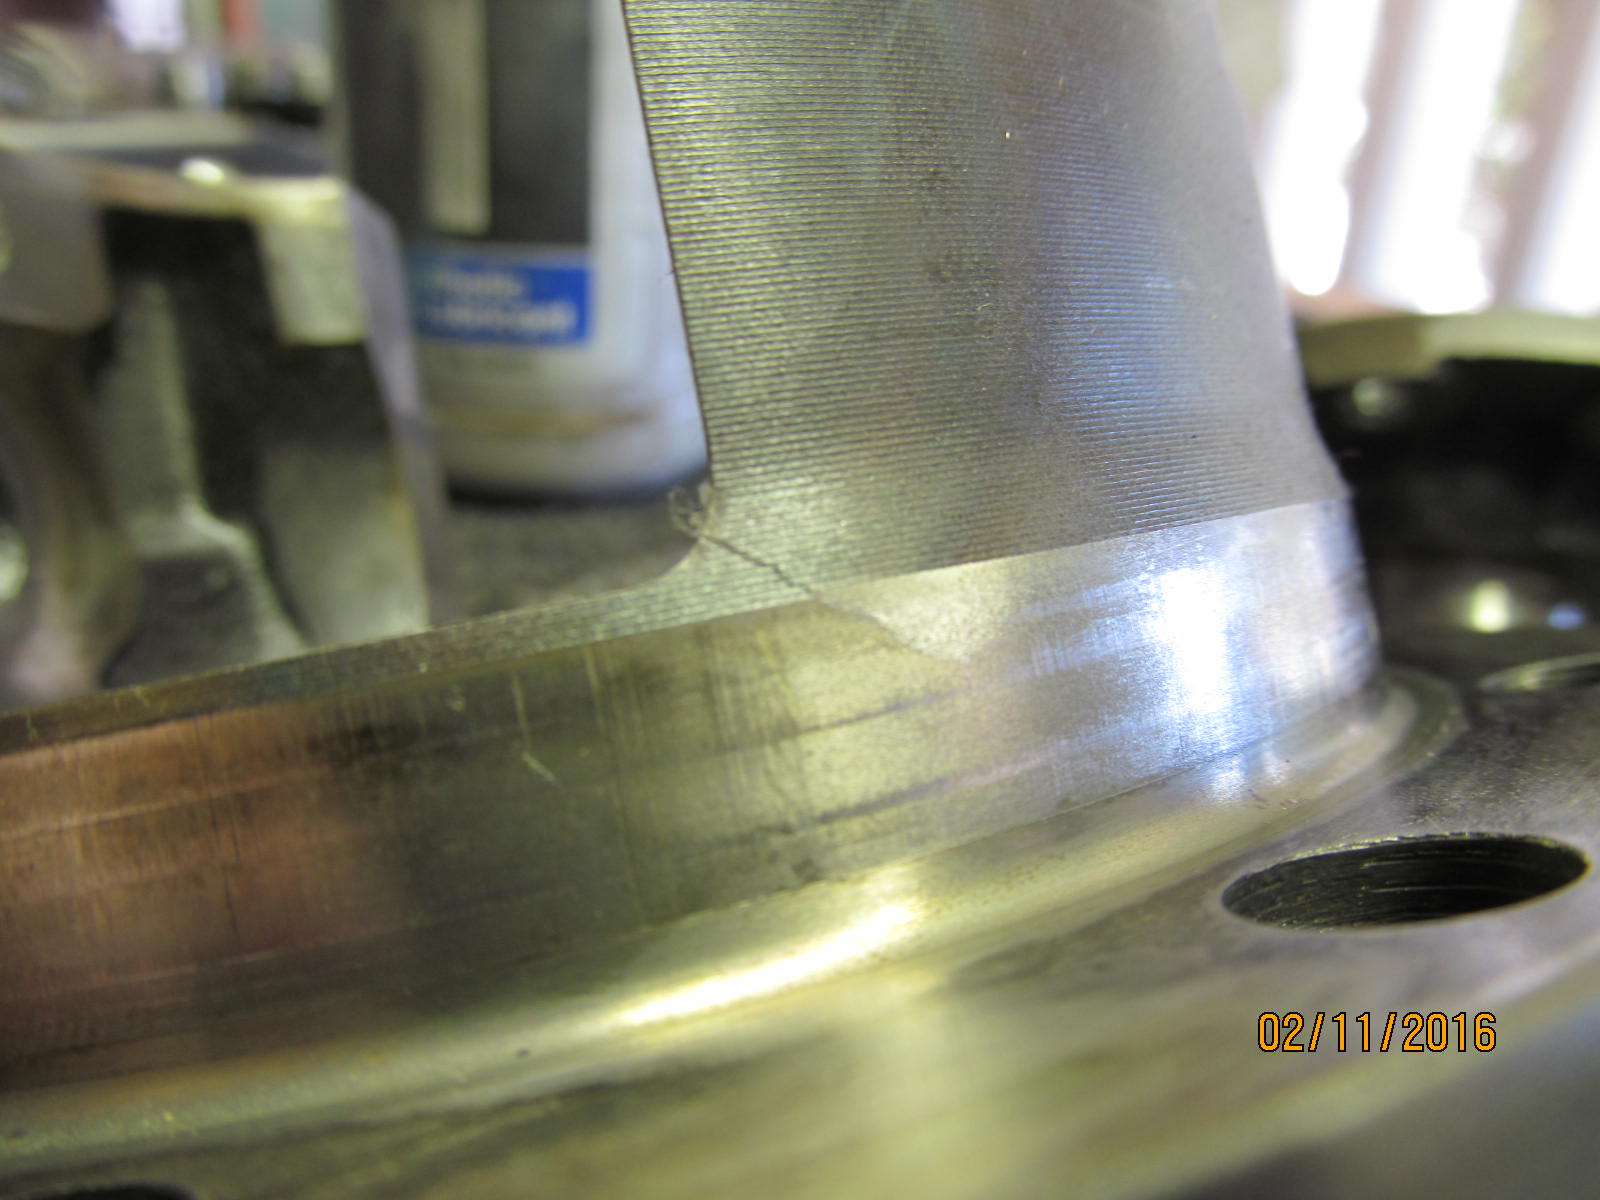
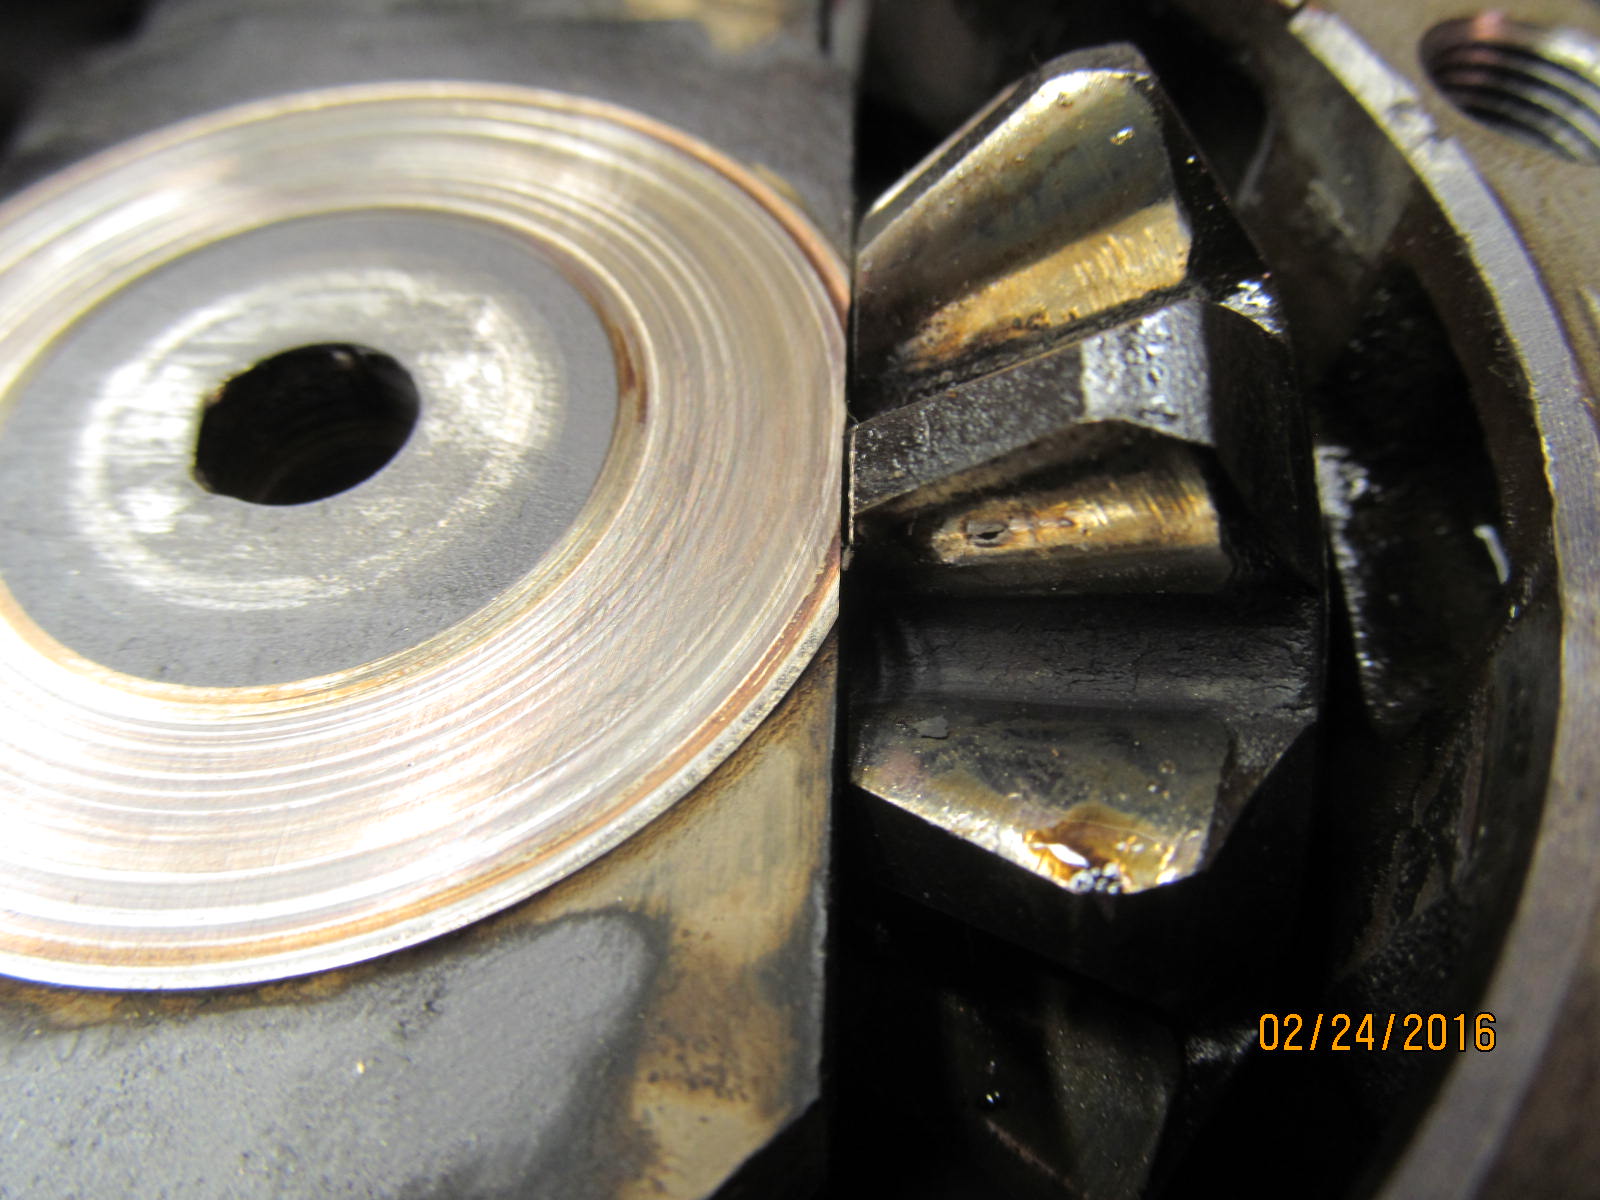
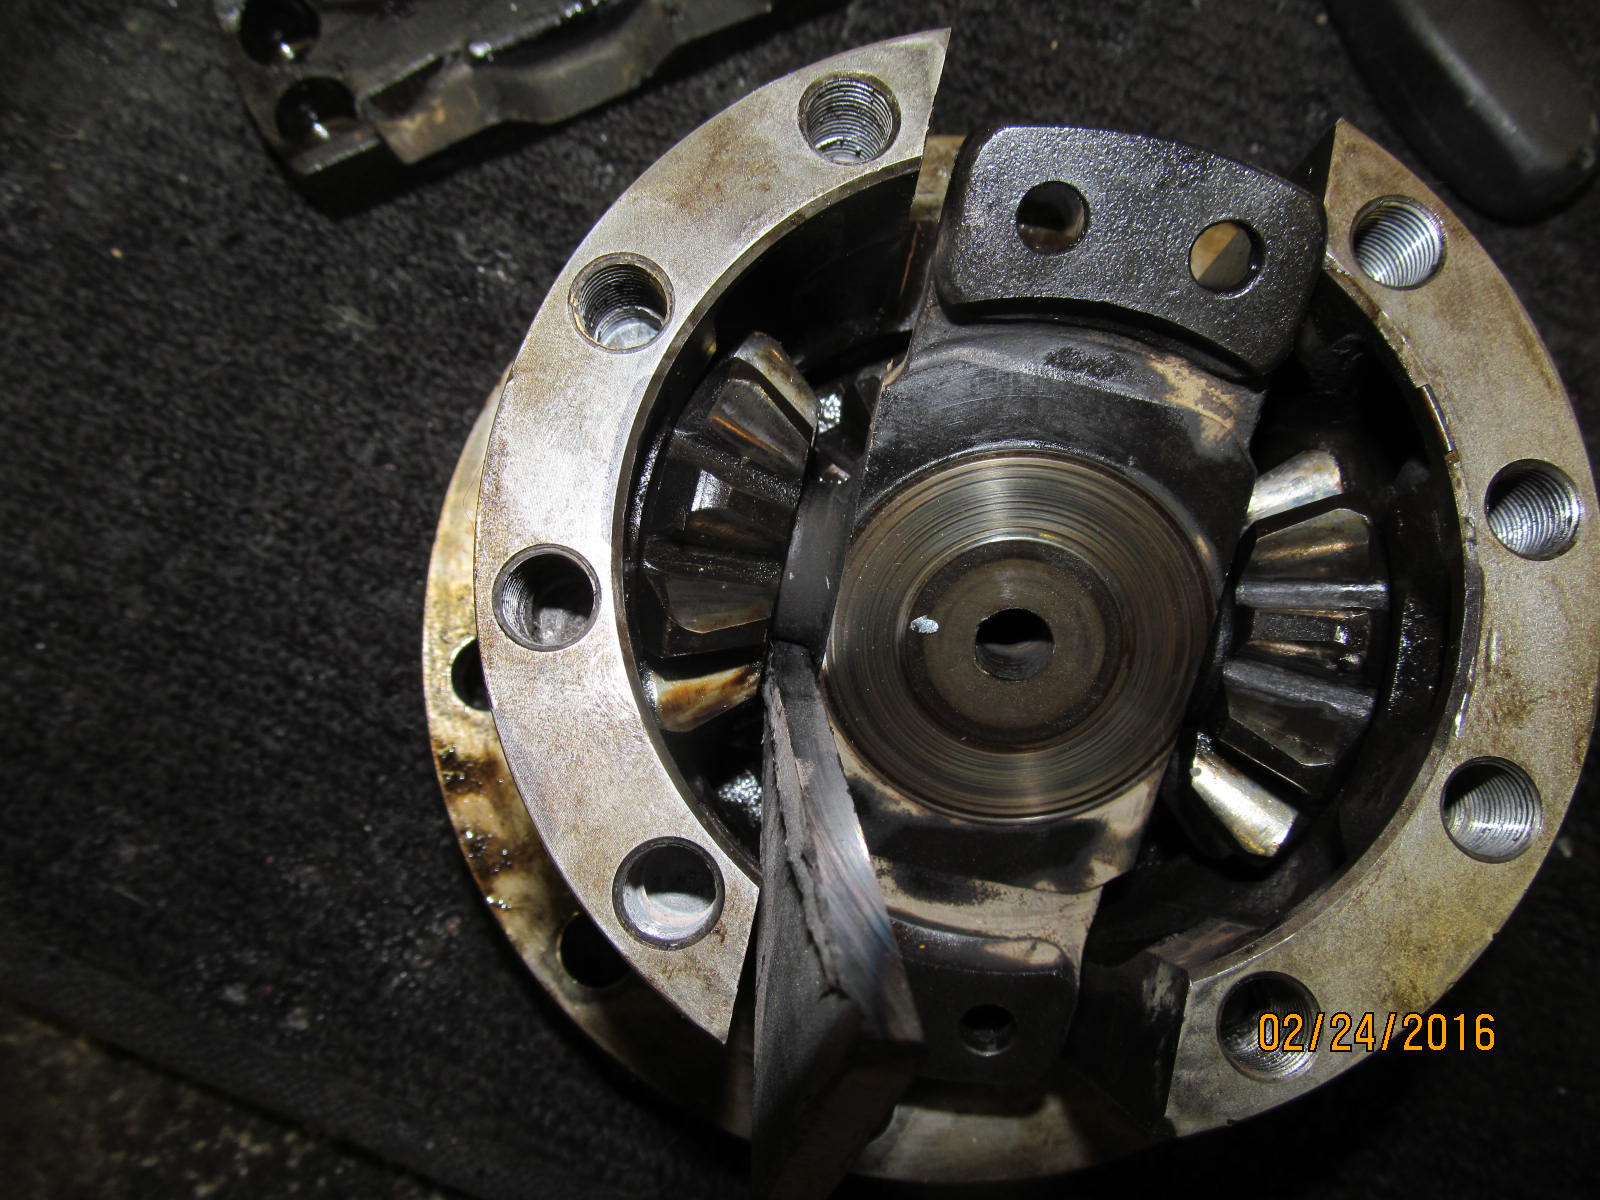
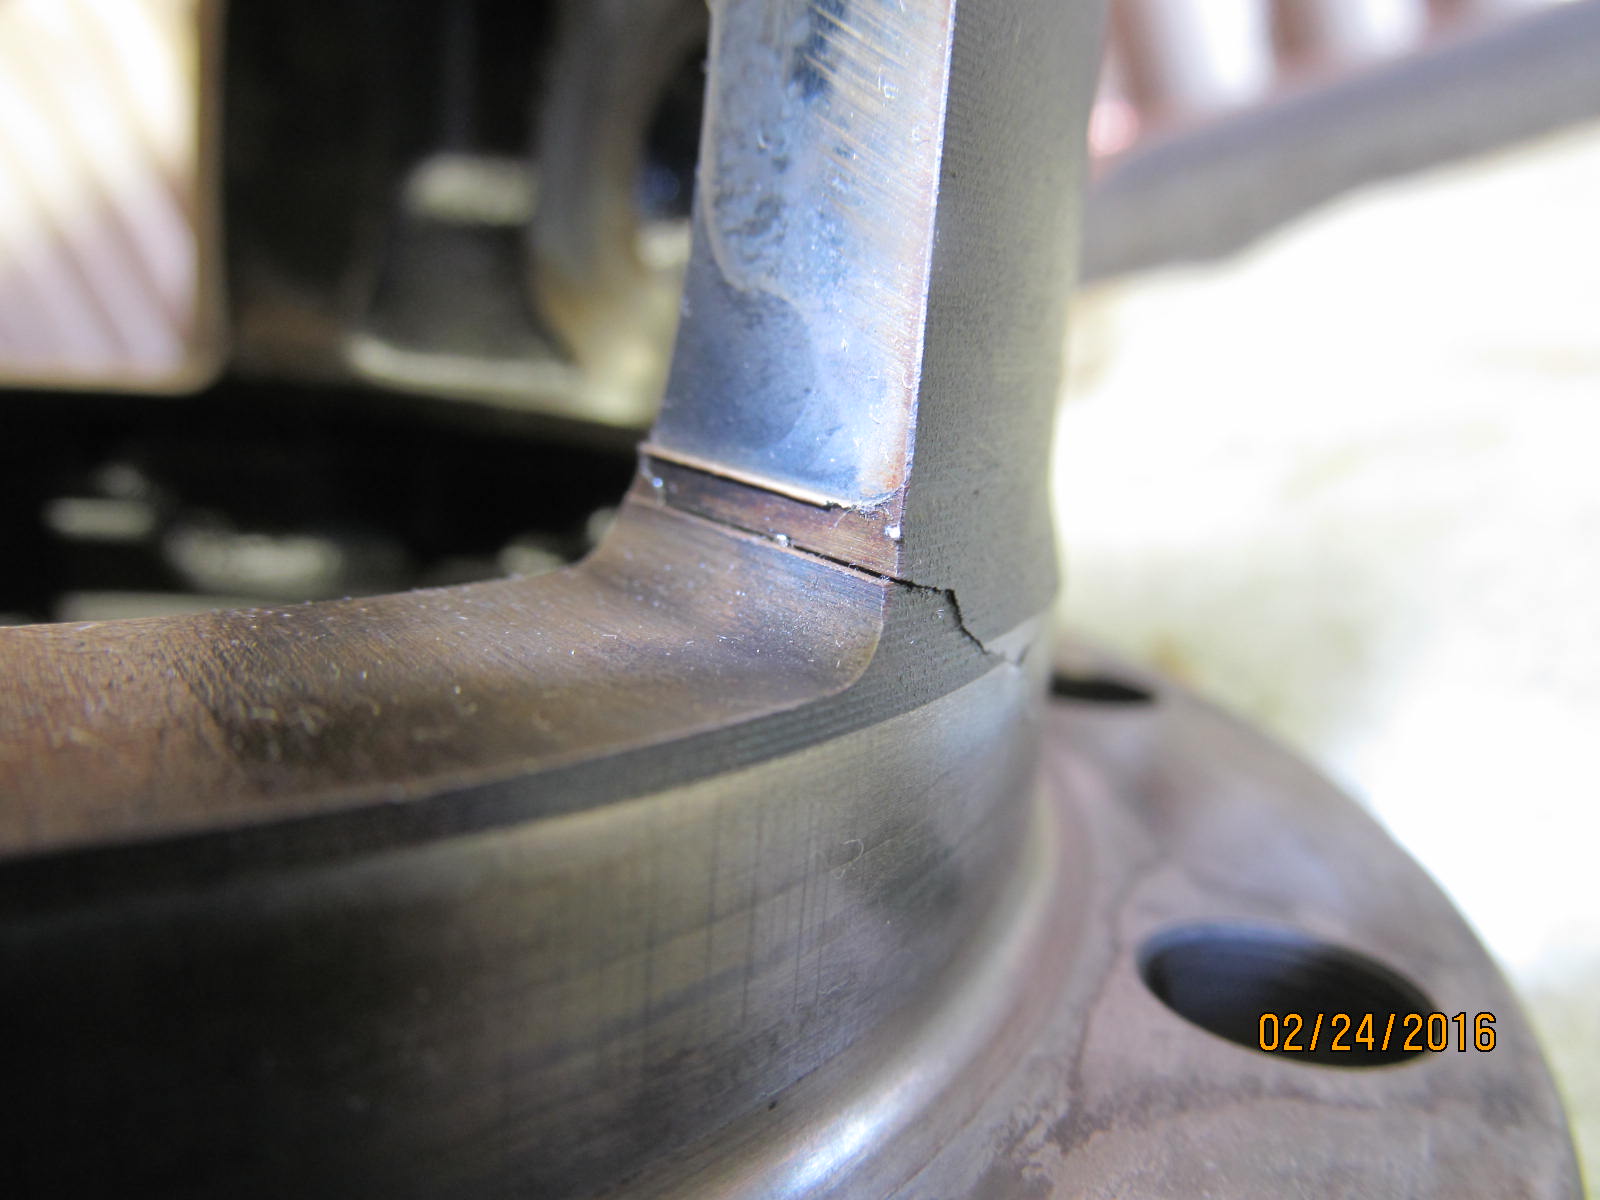
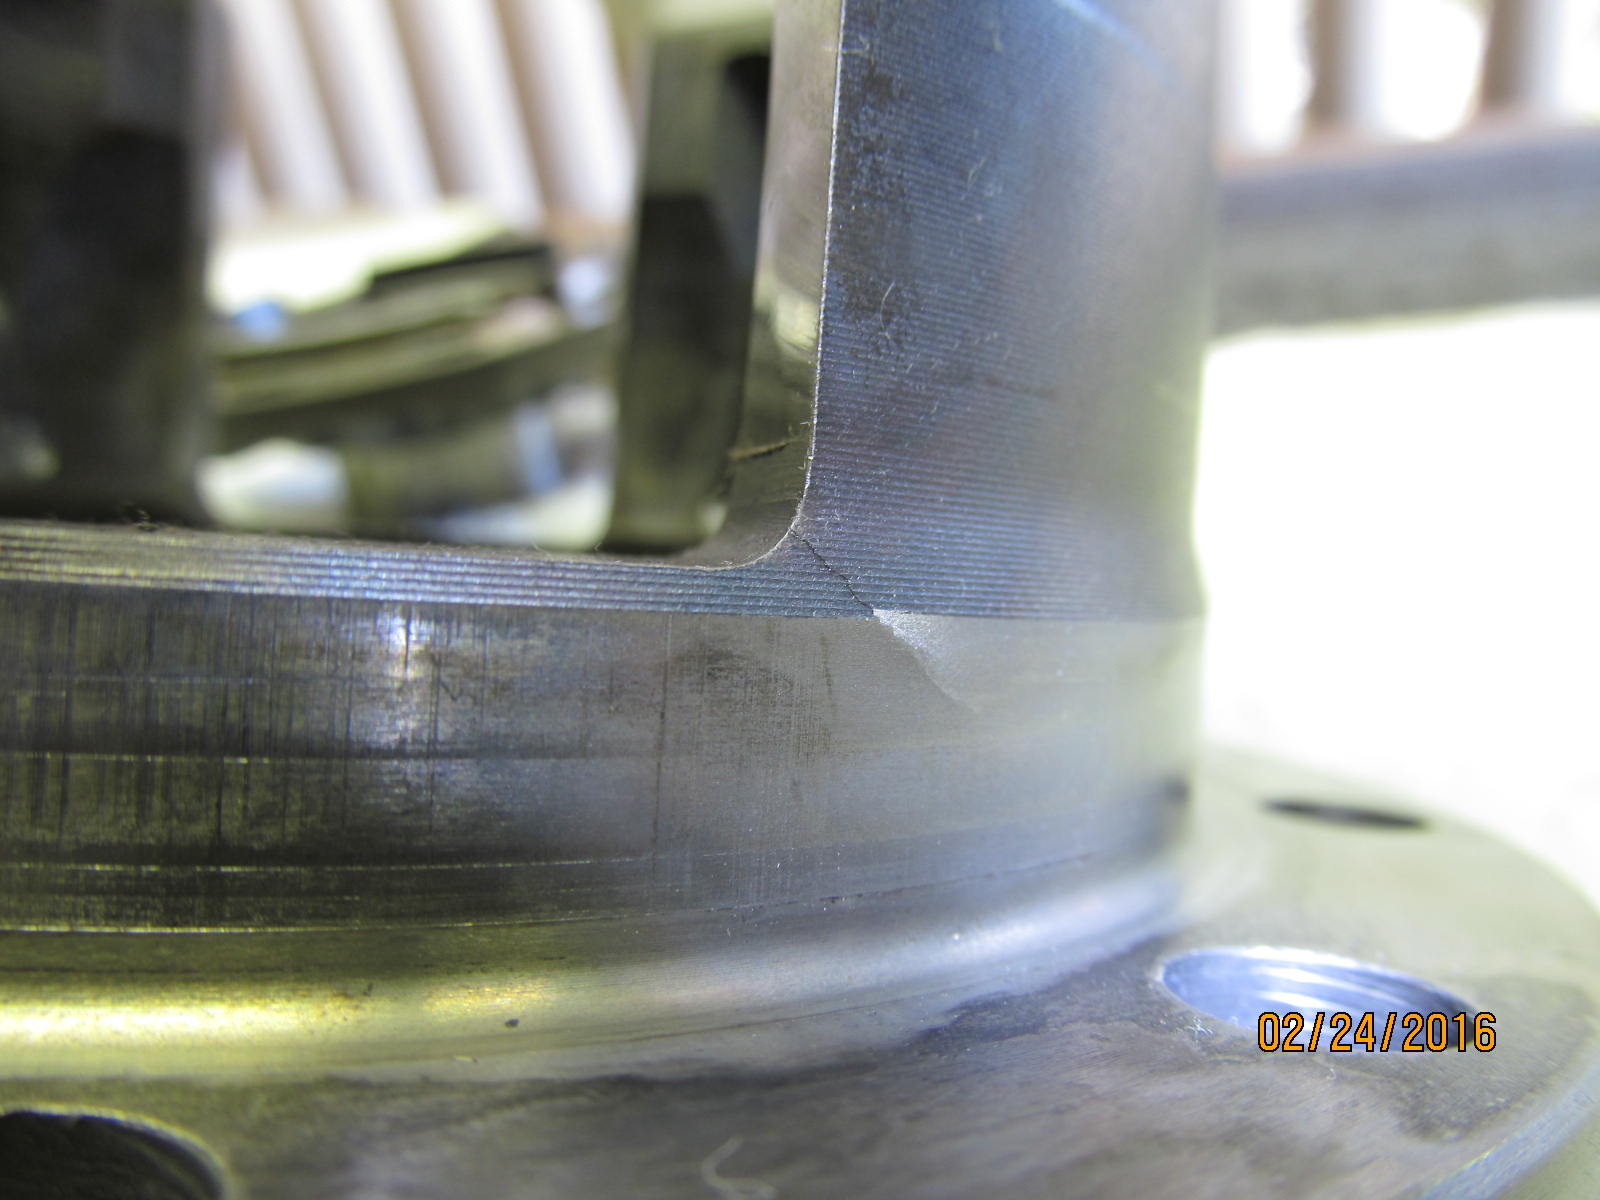
Here's where the monkey wrench shows up....At this point, I just noticed a bad crack in the main case.
This is a bad crack that spiders out. Not my best focused close-up but it gets the job done.
|
|
|
|
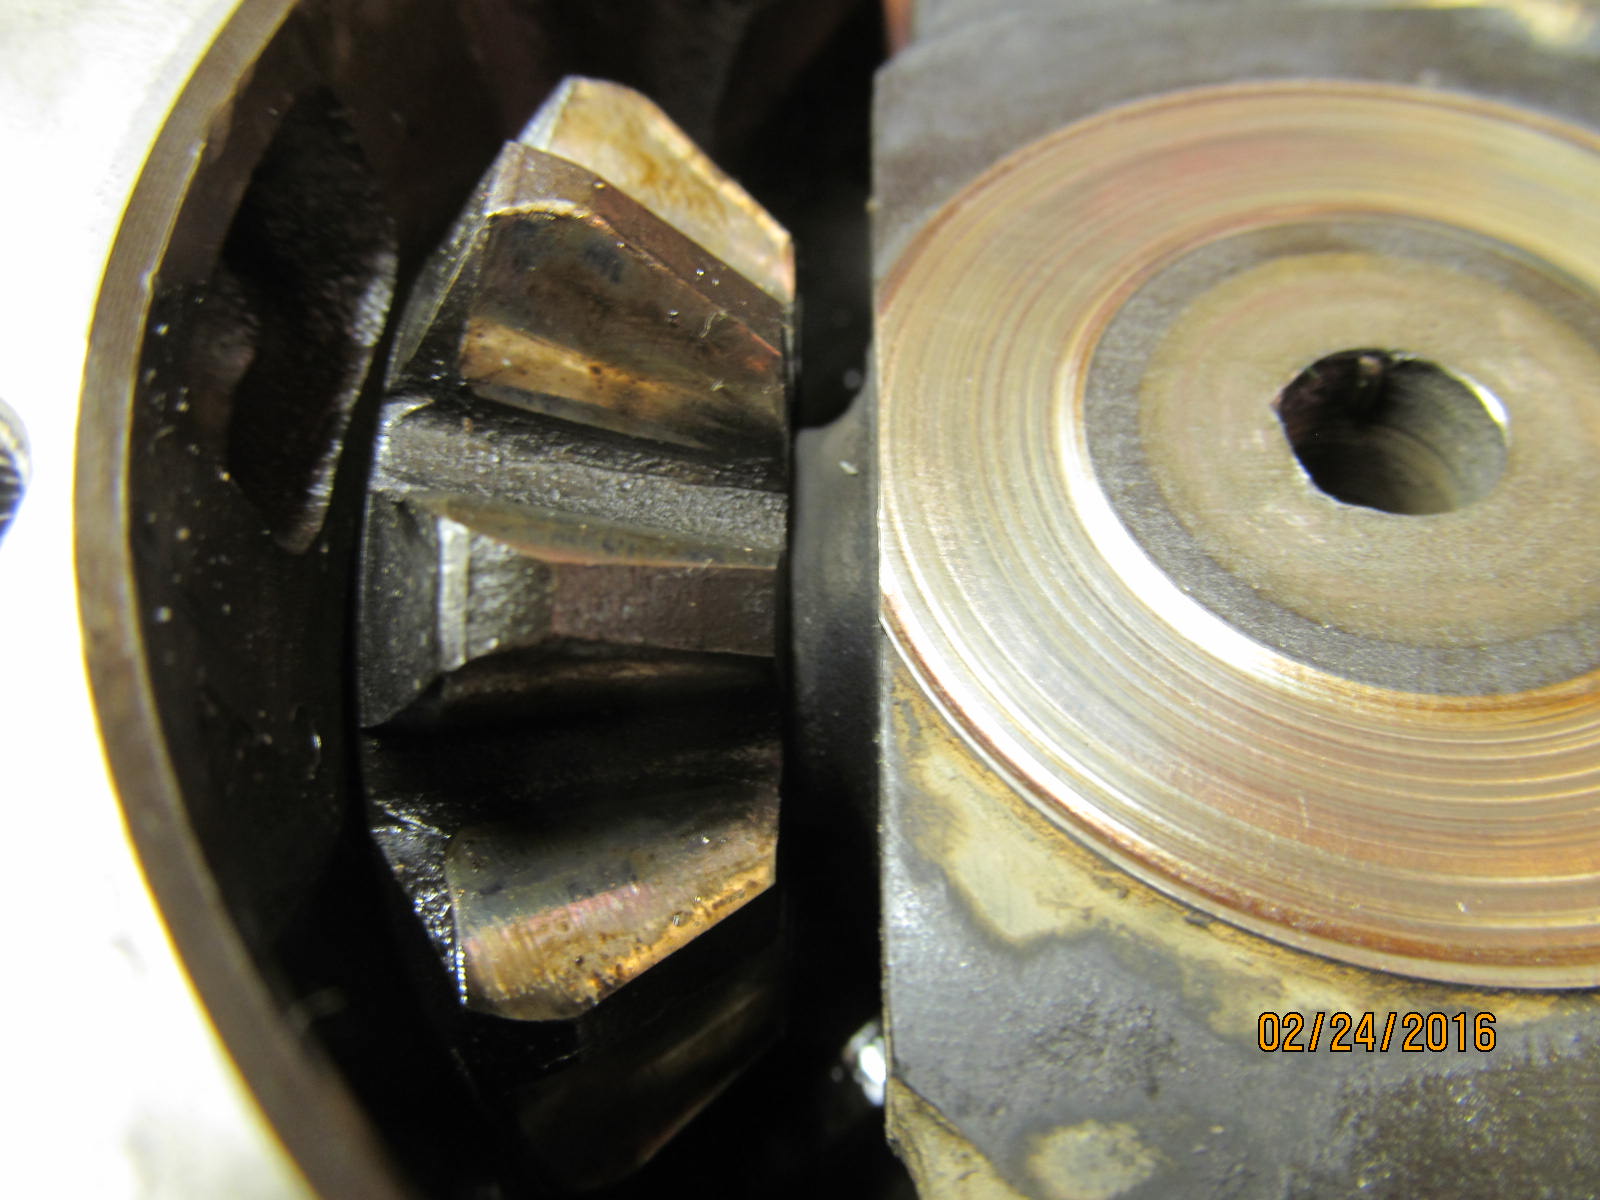
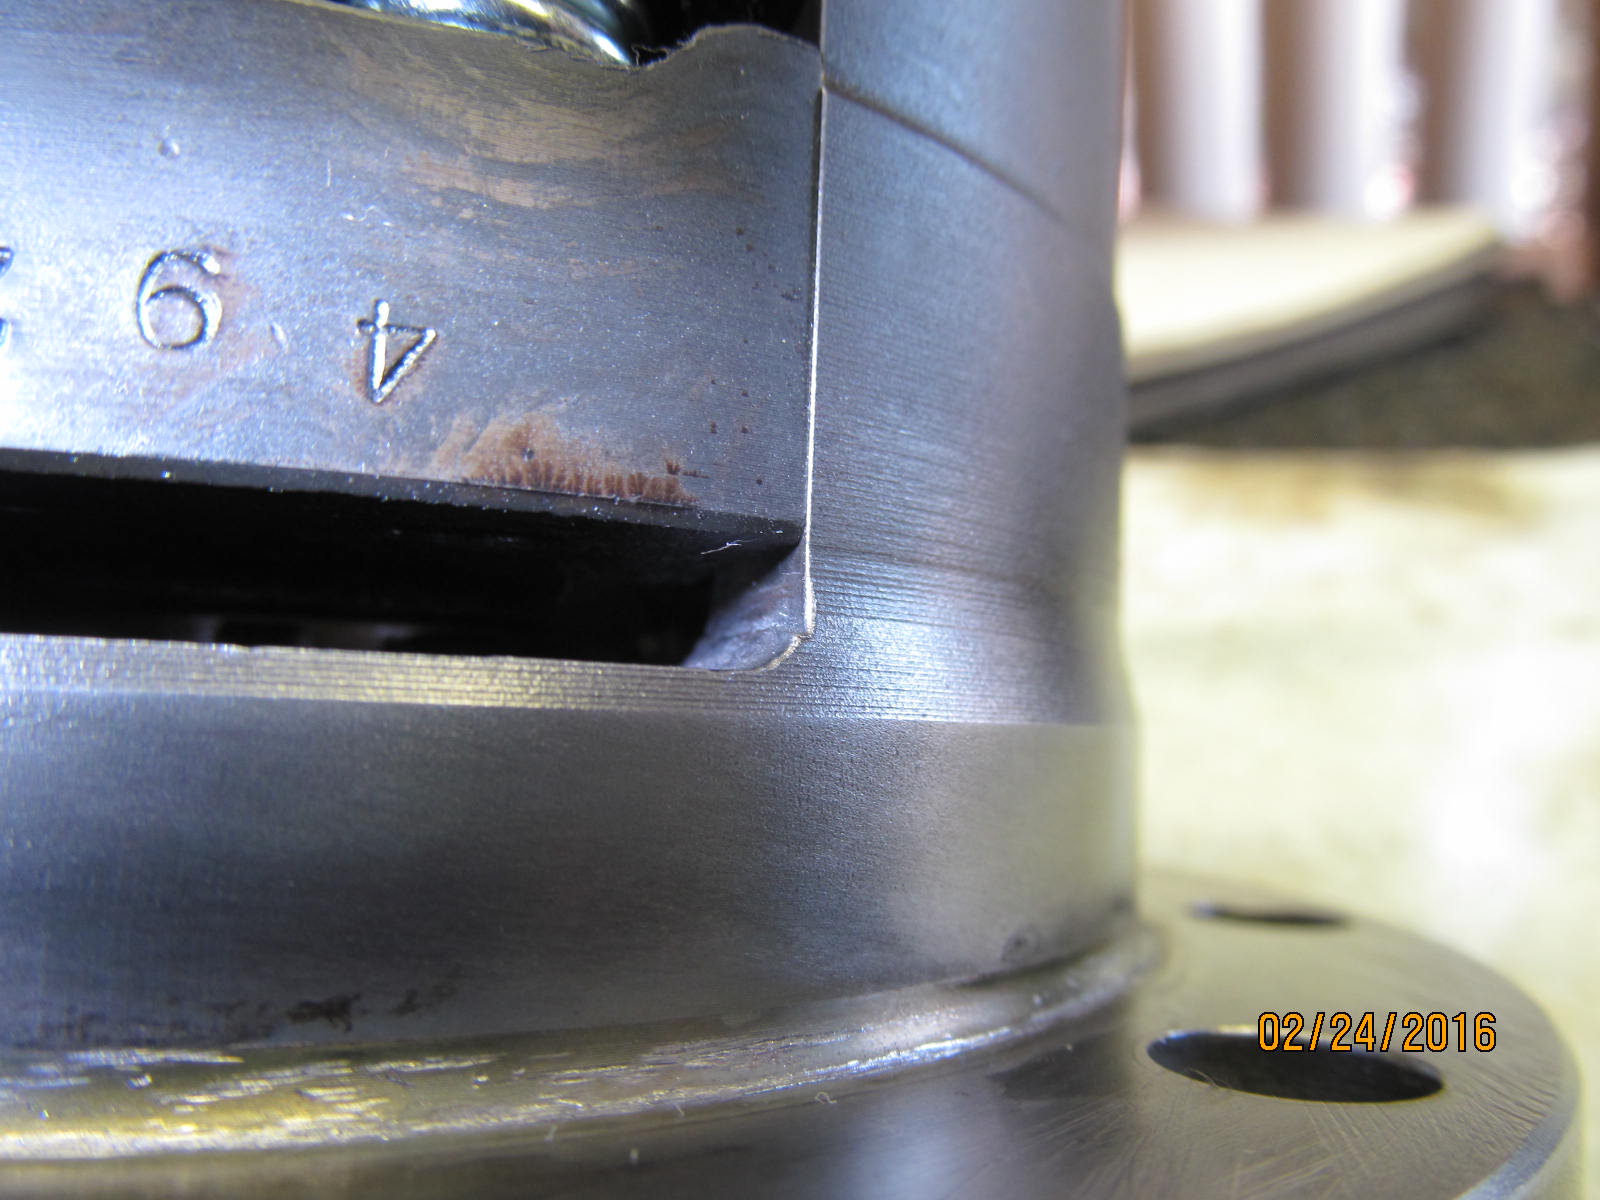
And 180 degrees around on the other side of the case the same crack.....not quite as bad but
still a death blow to this case. The case is junk. A new one will have to be located.
|
|
|
|
|
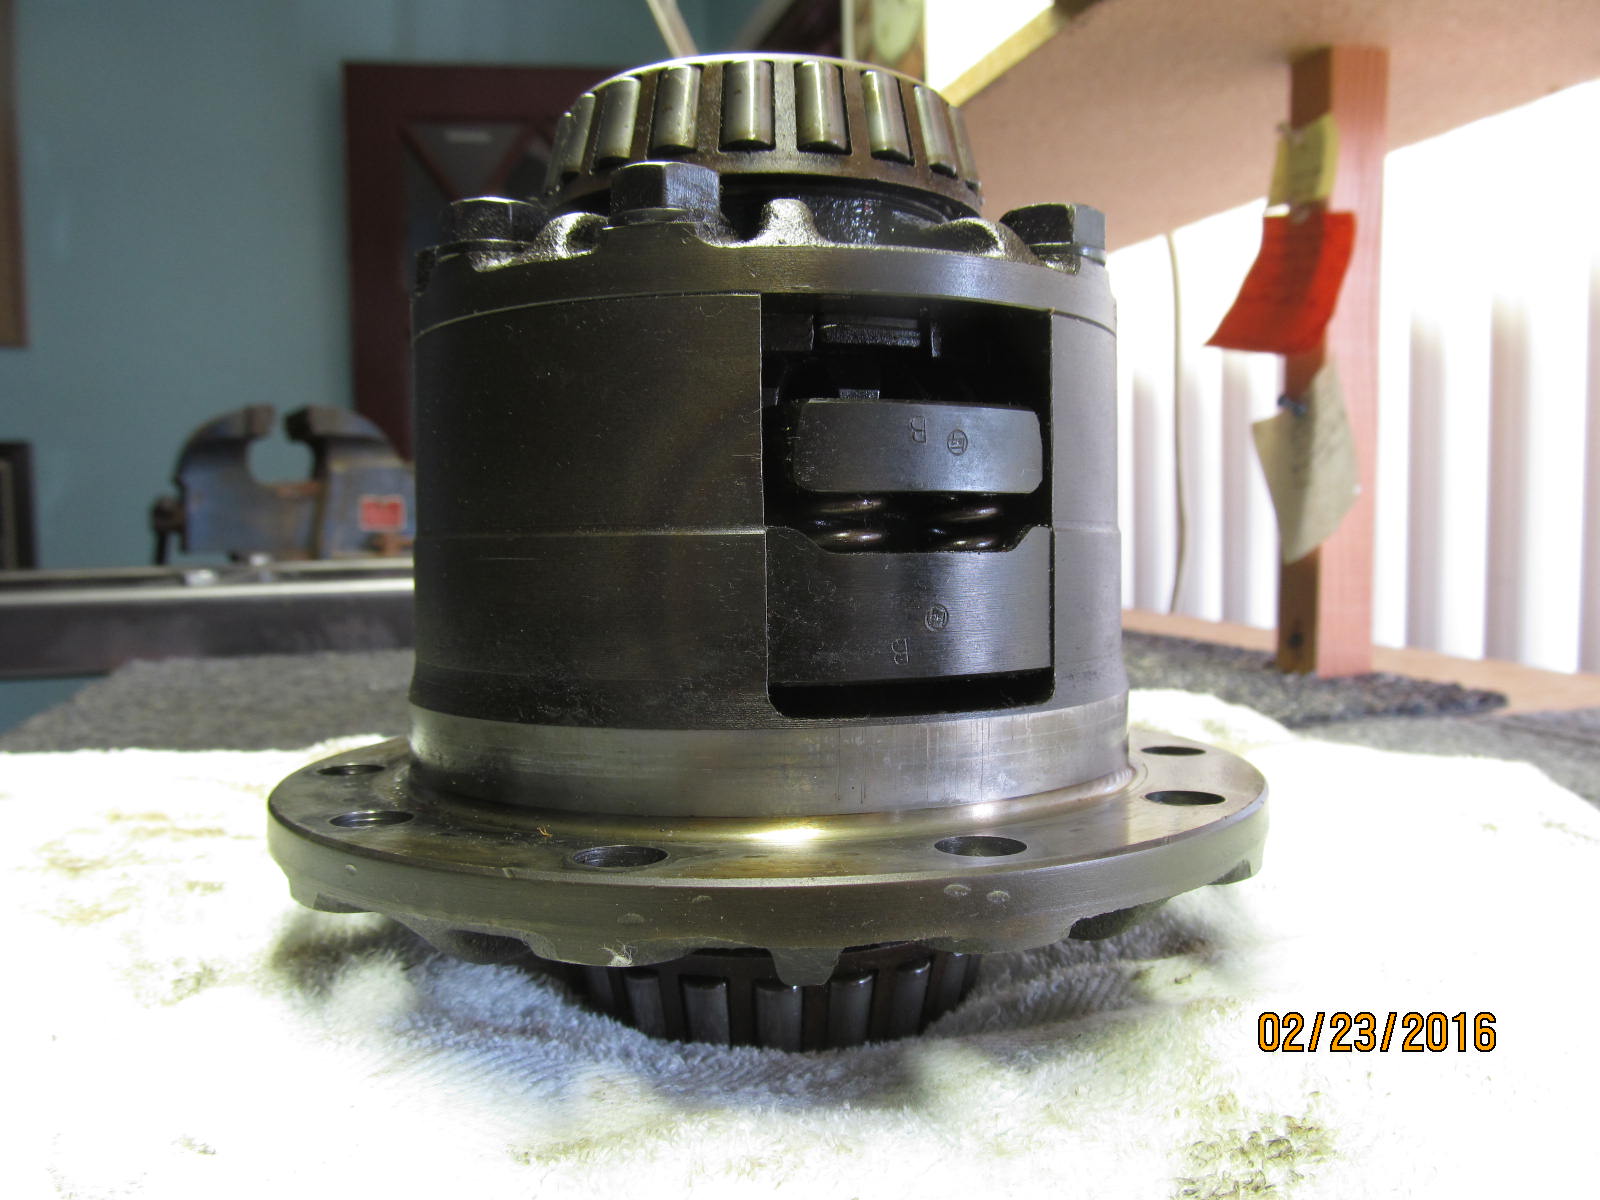
About a week later, this backup LSD found my workbench. Externally, everything looks good and no cracks.
|
|
|
|
|
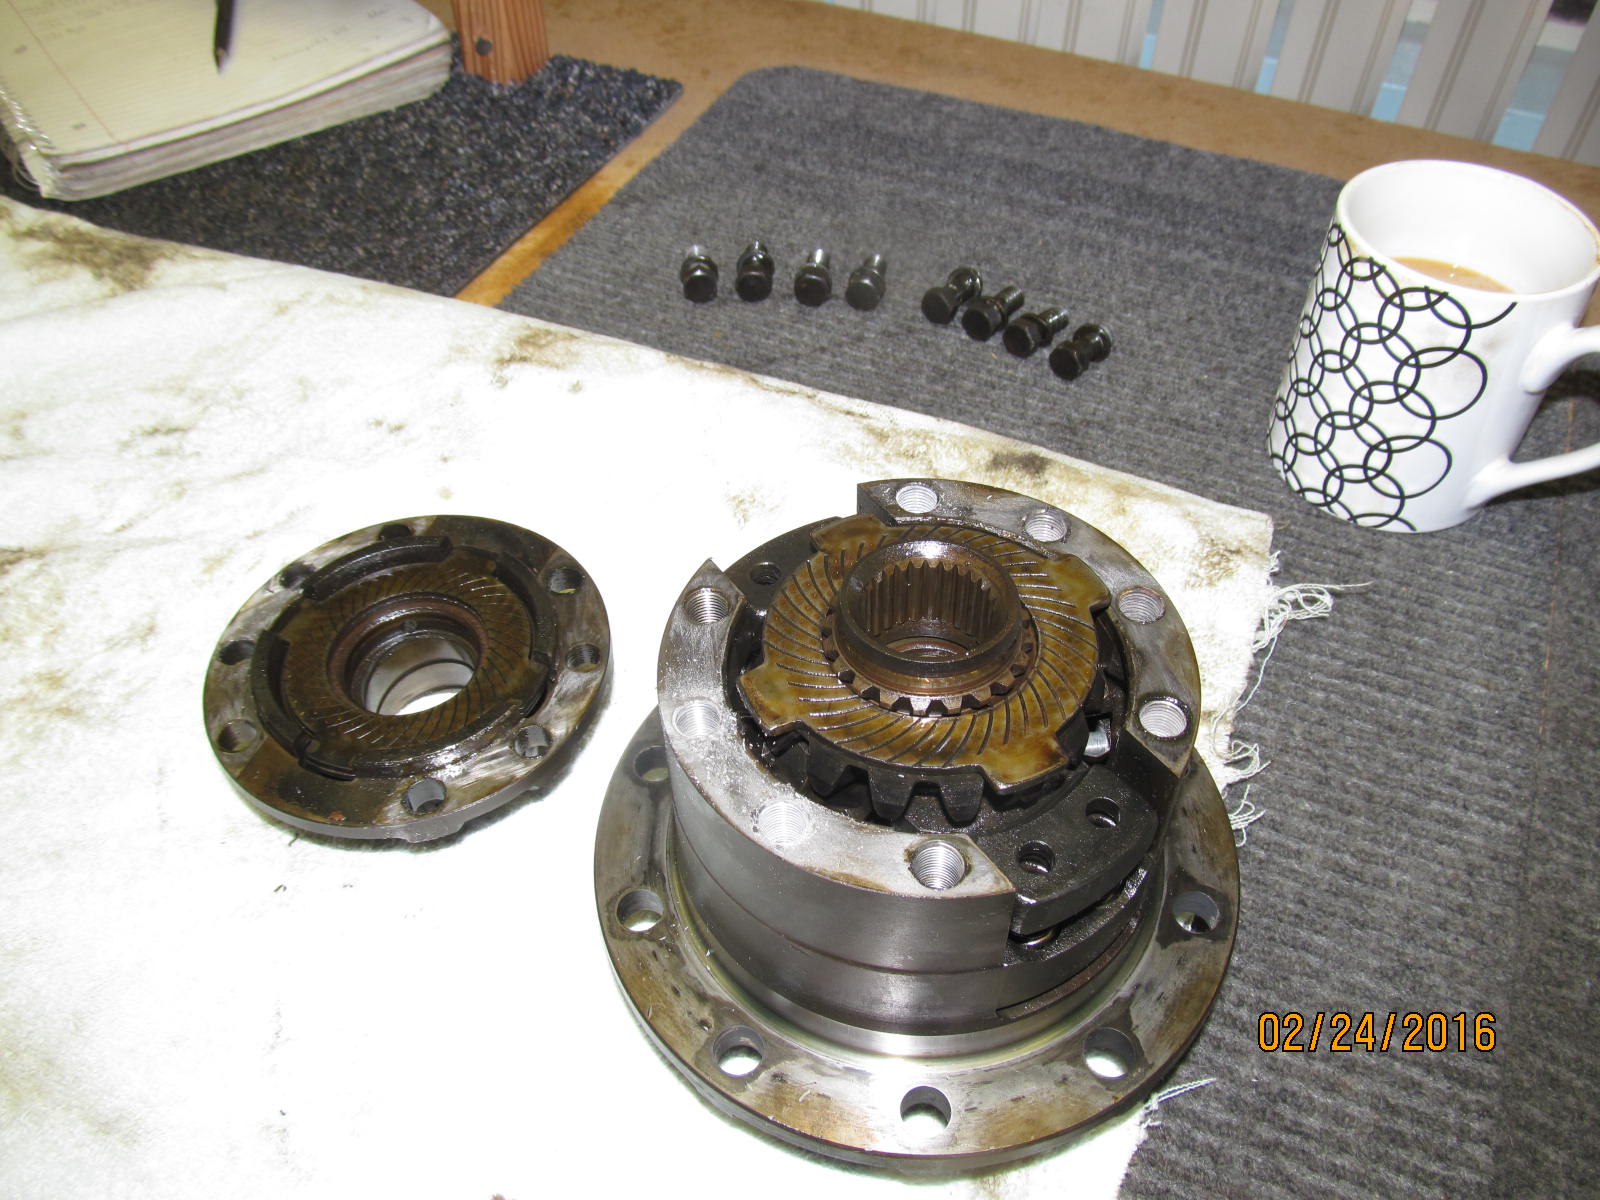
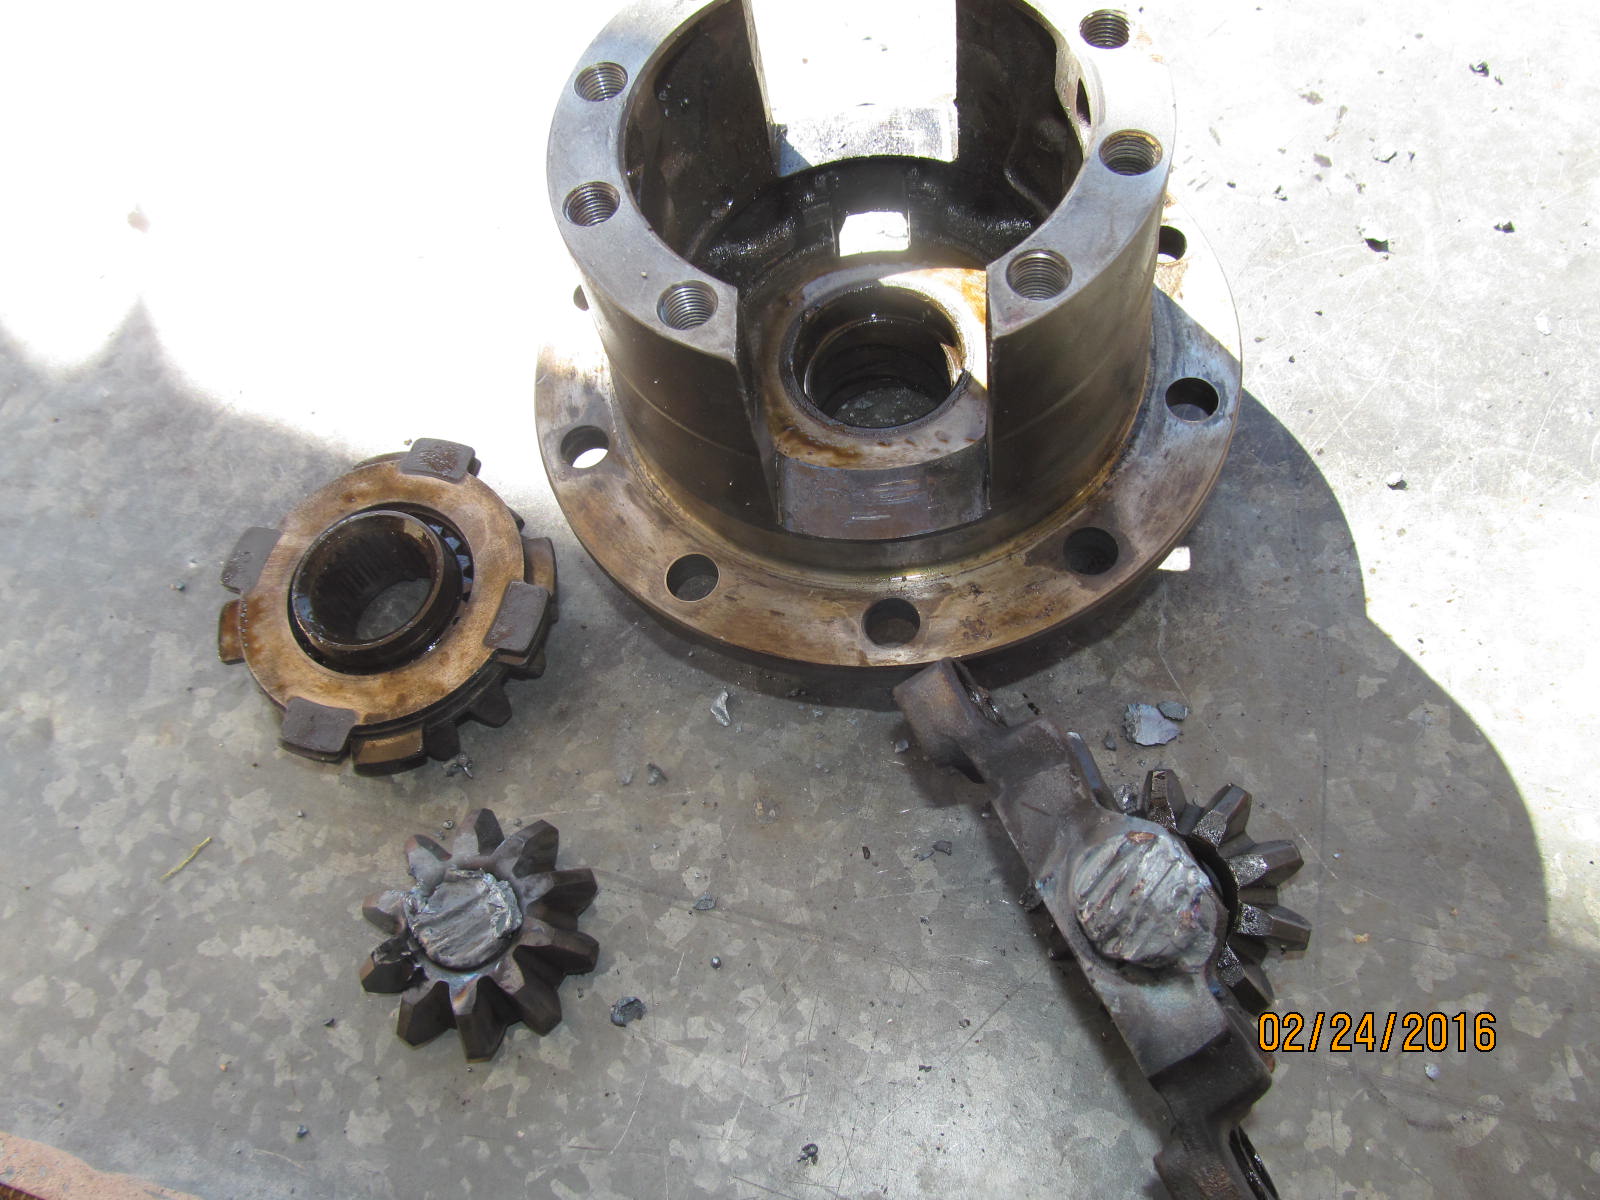
Dis-assembly and inspection begins.
|
|
|
|
|
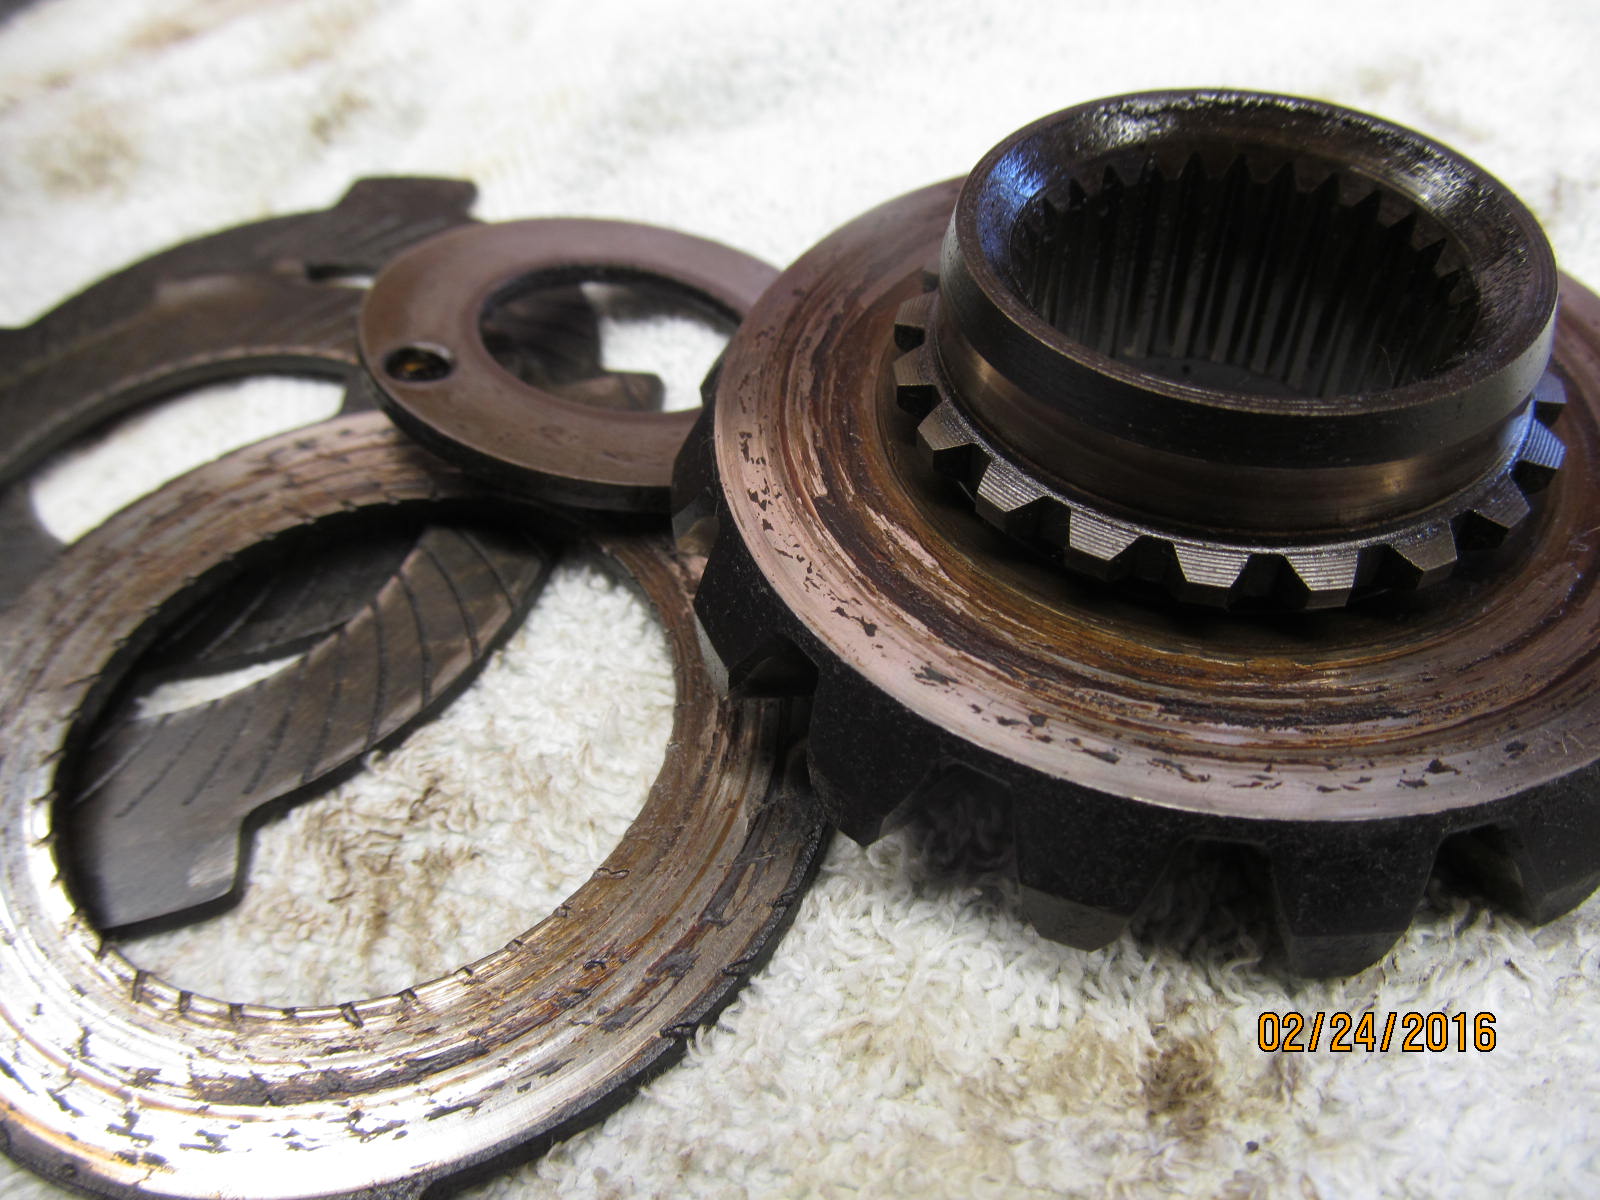
The sidegear is history.
|
|
|
|
|
Excessive wear on the upper block.
|
|
|
|
|
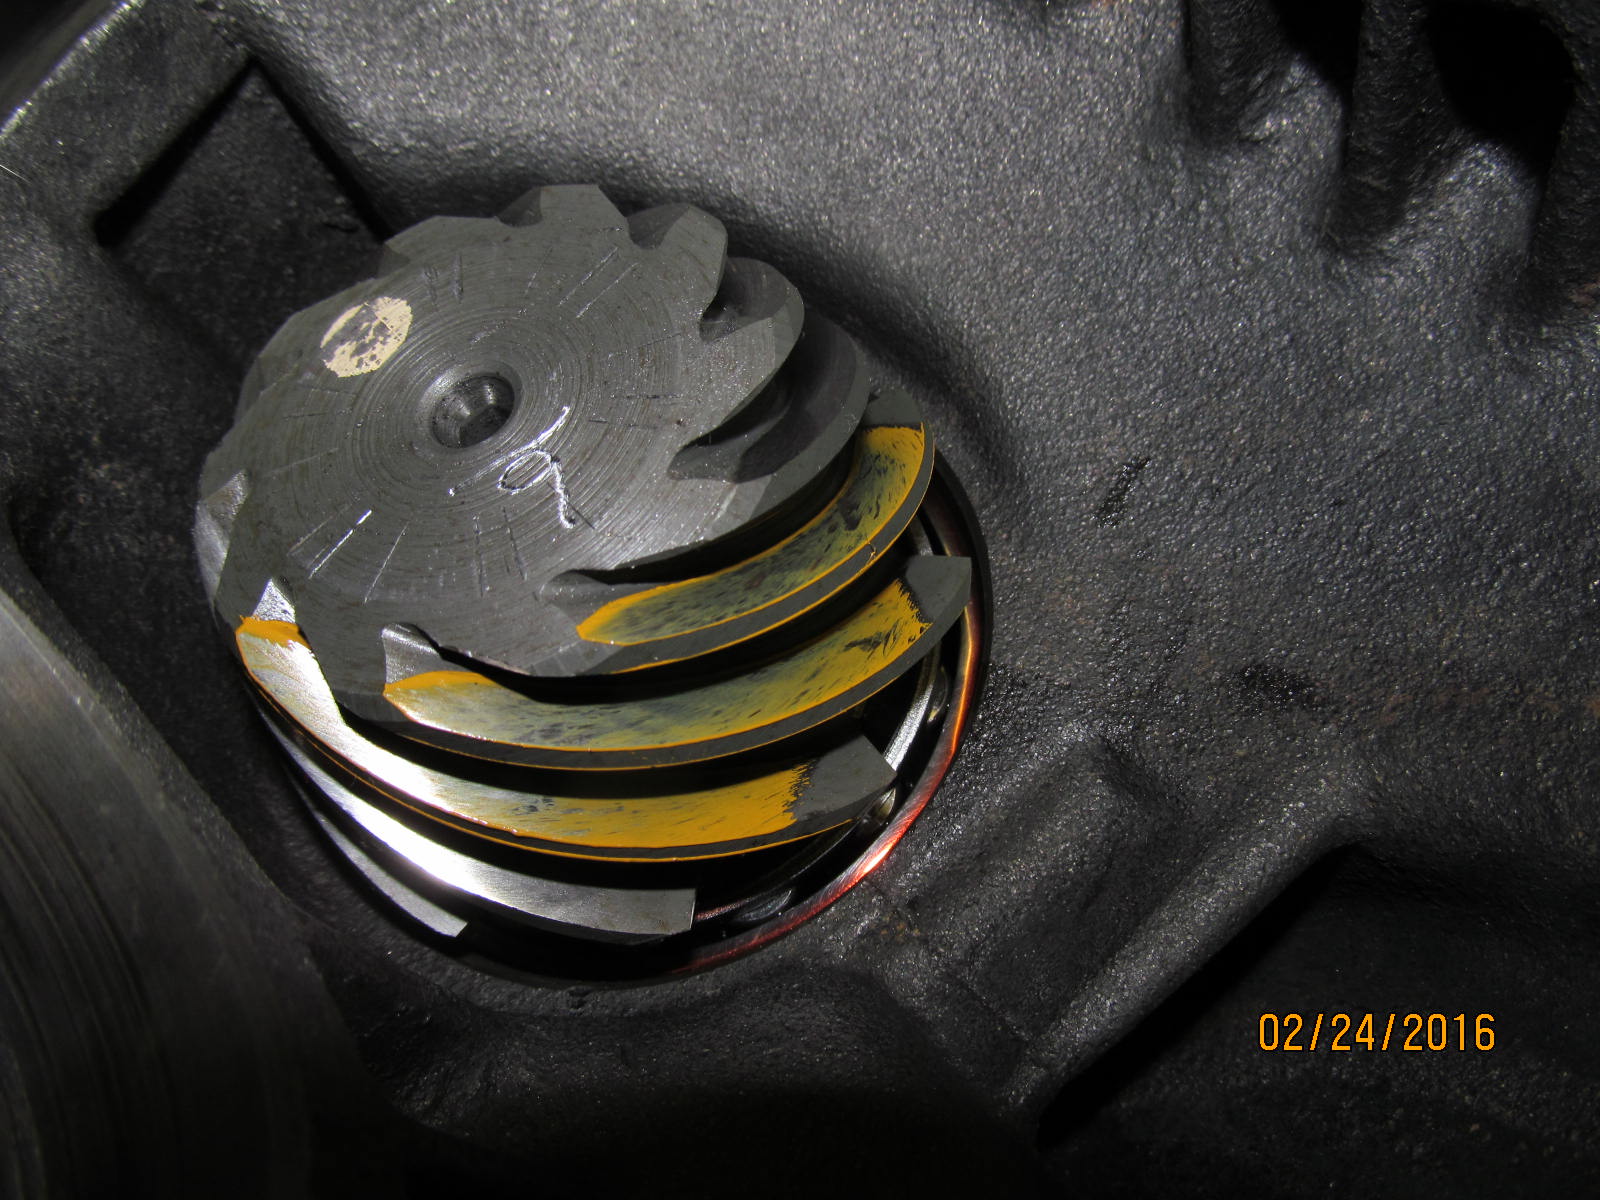
Spiders have burn marks on the tooth surface.
|
|
|
|
This spider is seized up on the cross shaft....won't slide in fully. The upper block shown here will not
rotate enough to remove it from the good case...it's stuck in there.
|
|
|
|
|
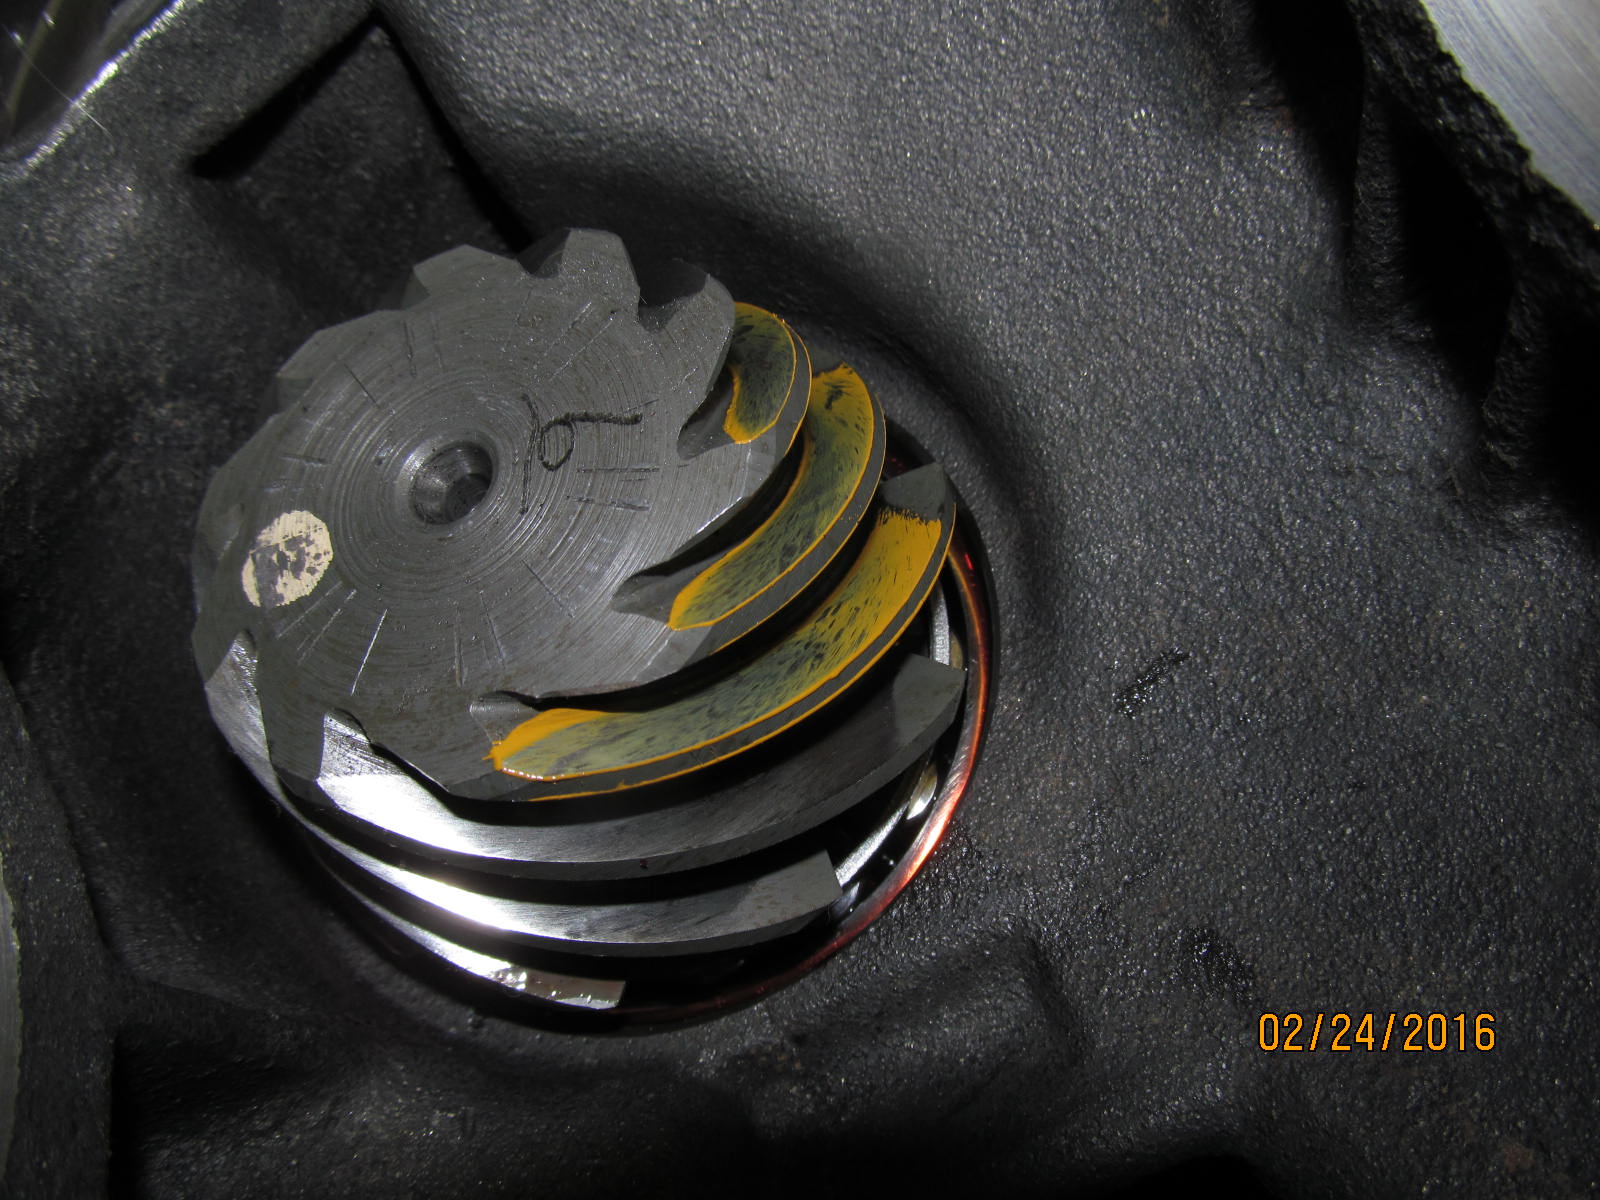
The spider is wedged to the left to allow room for the torch's cutting flame.
|
|
|
|
|
....got it out. Case itself is the important part and it is perfectly good for re-use.
|
|
|
|
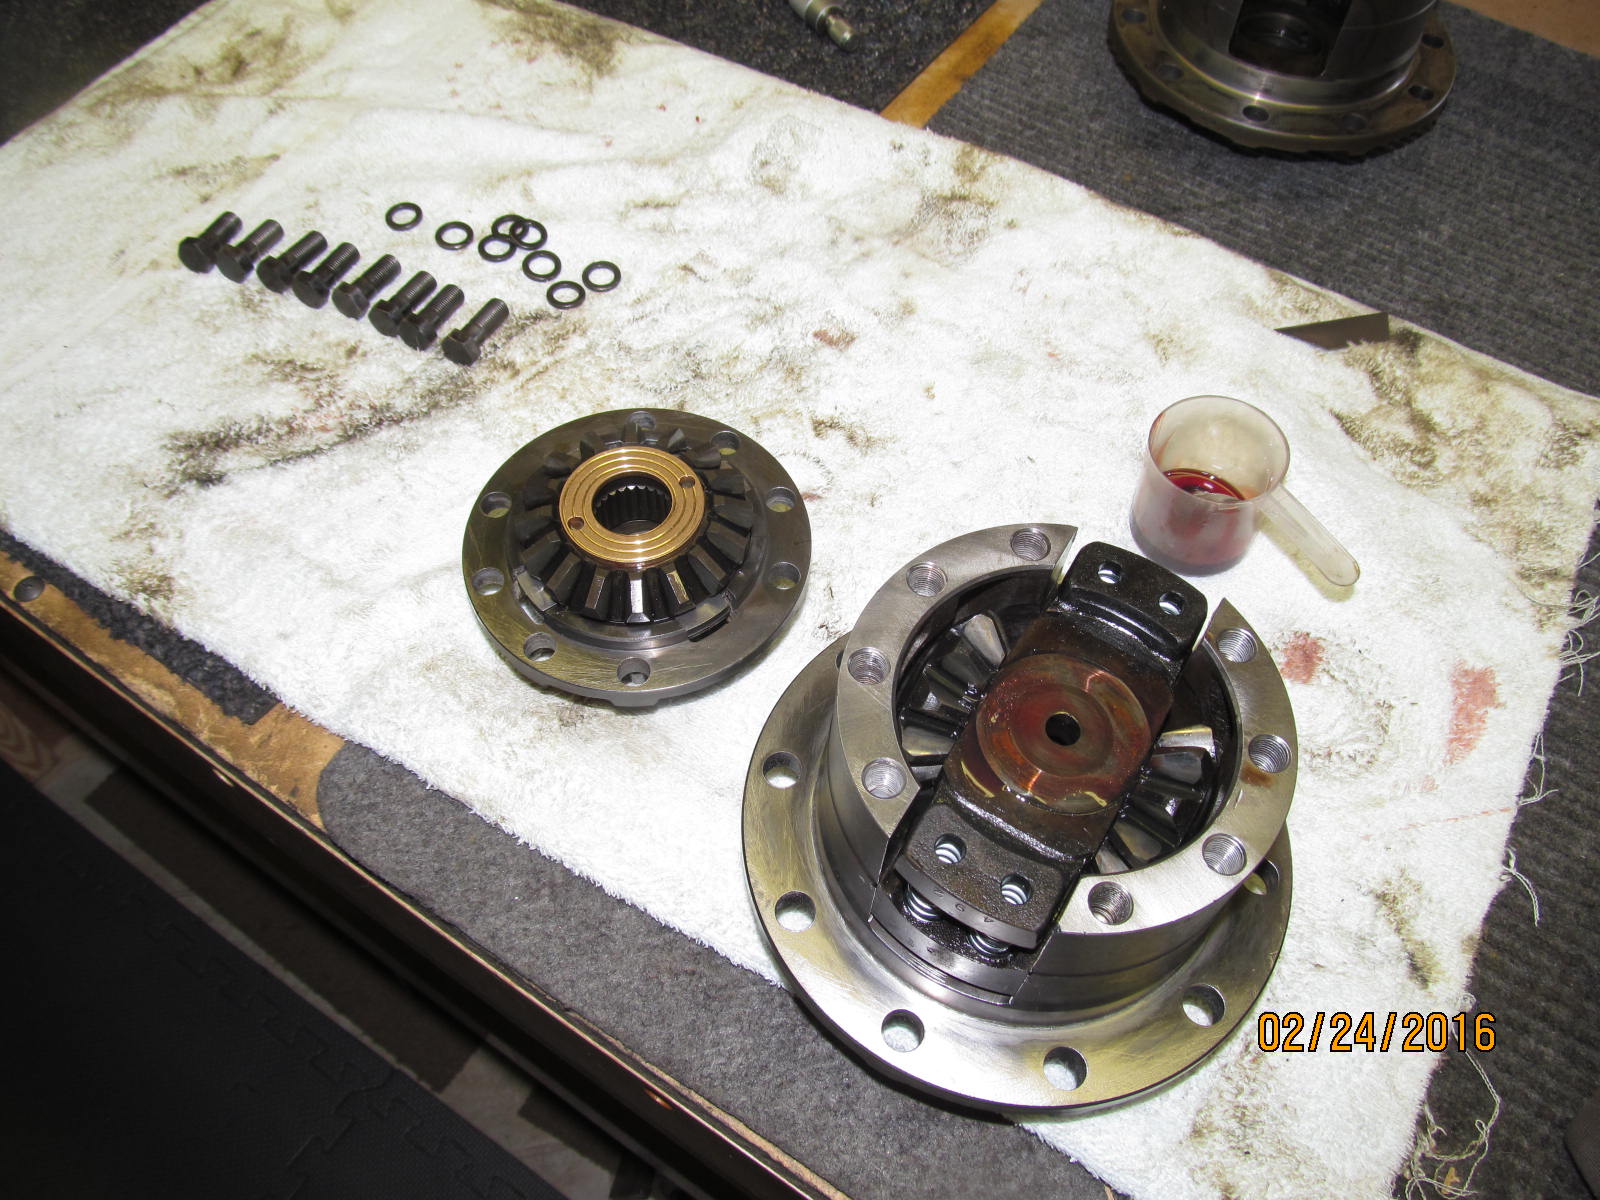
The new case is at the bottom of the picture and the clutch packs are measured. They are so close
to the original packs that the shimming values remained the same.
|
|
|
|
|
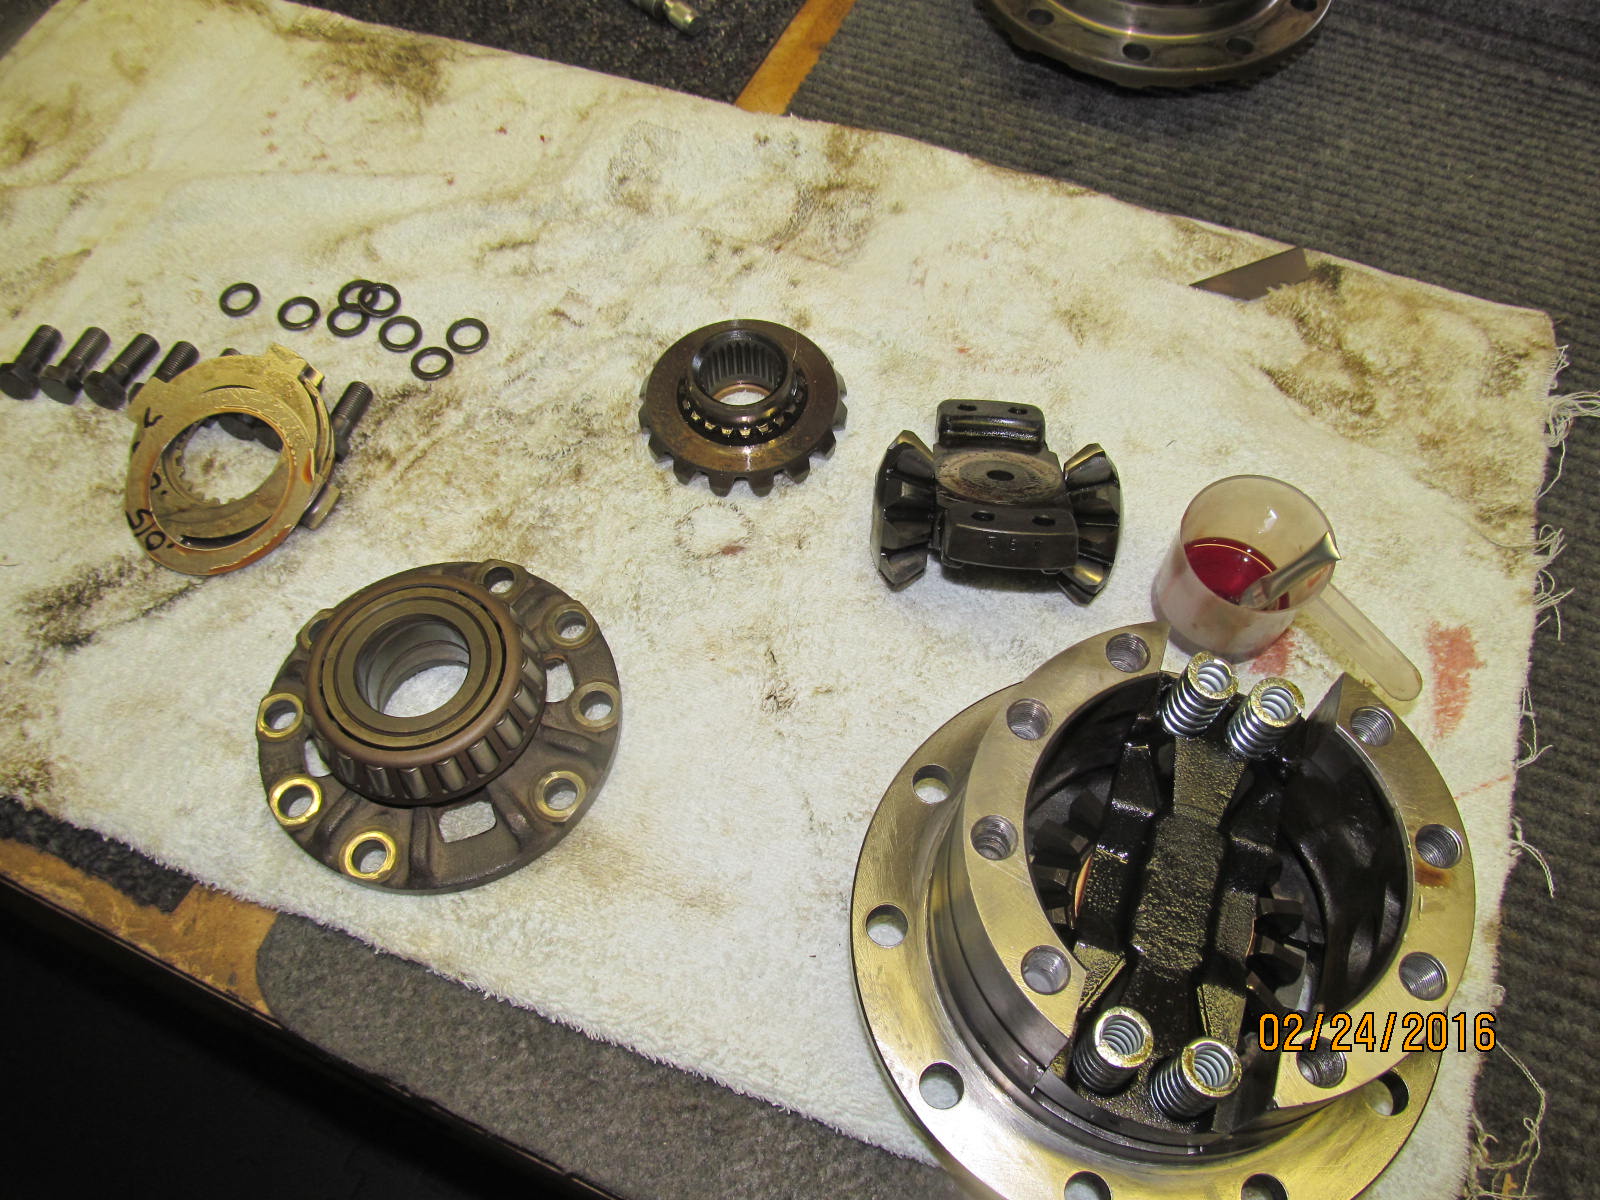
Internal parts are transferred over and lubricated with gear oil.
|
|
|
|
|
```````````````````````````````
|
|
|
|
|
;;;;;;;;;;;;;;;;;;;;;
|
|
|
|
|
////////////////////
|
|
|
|
|
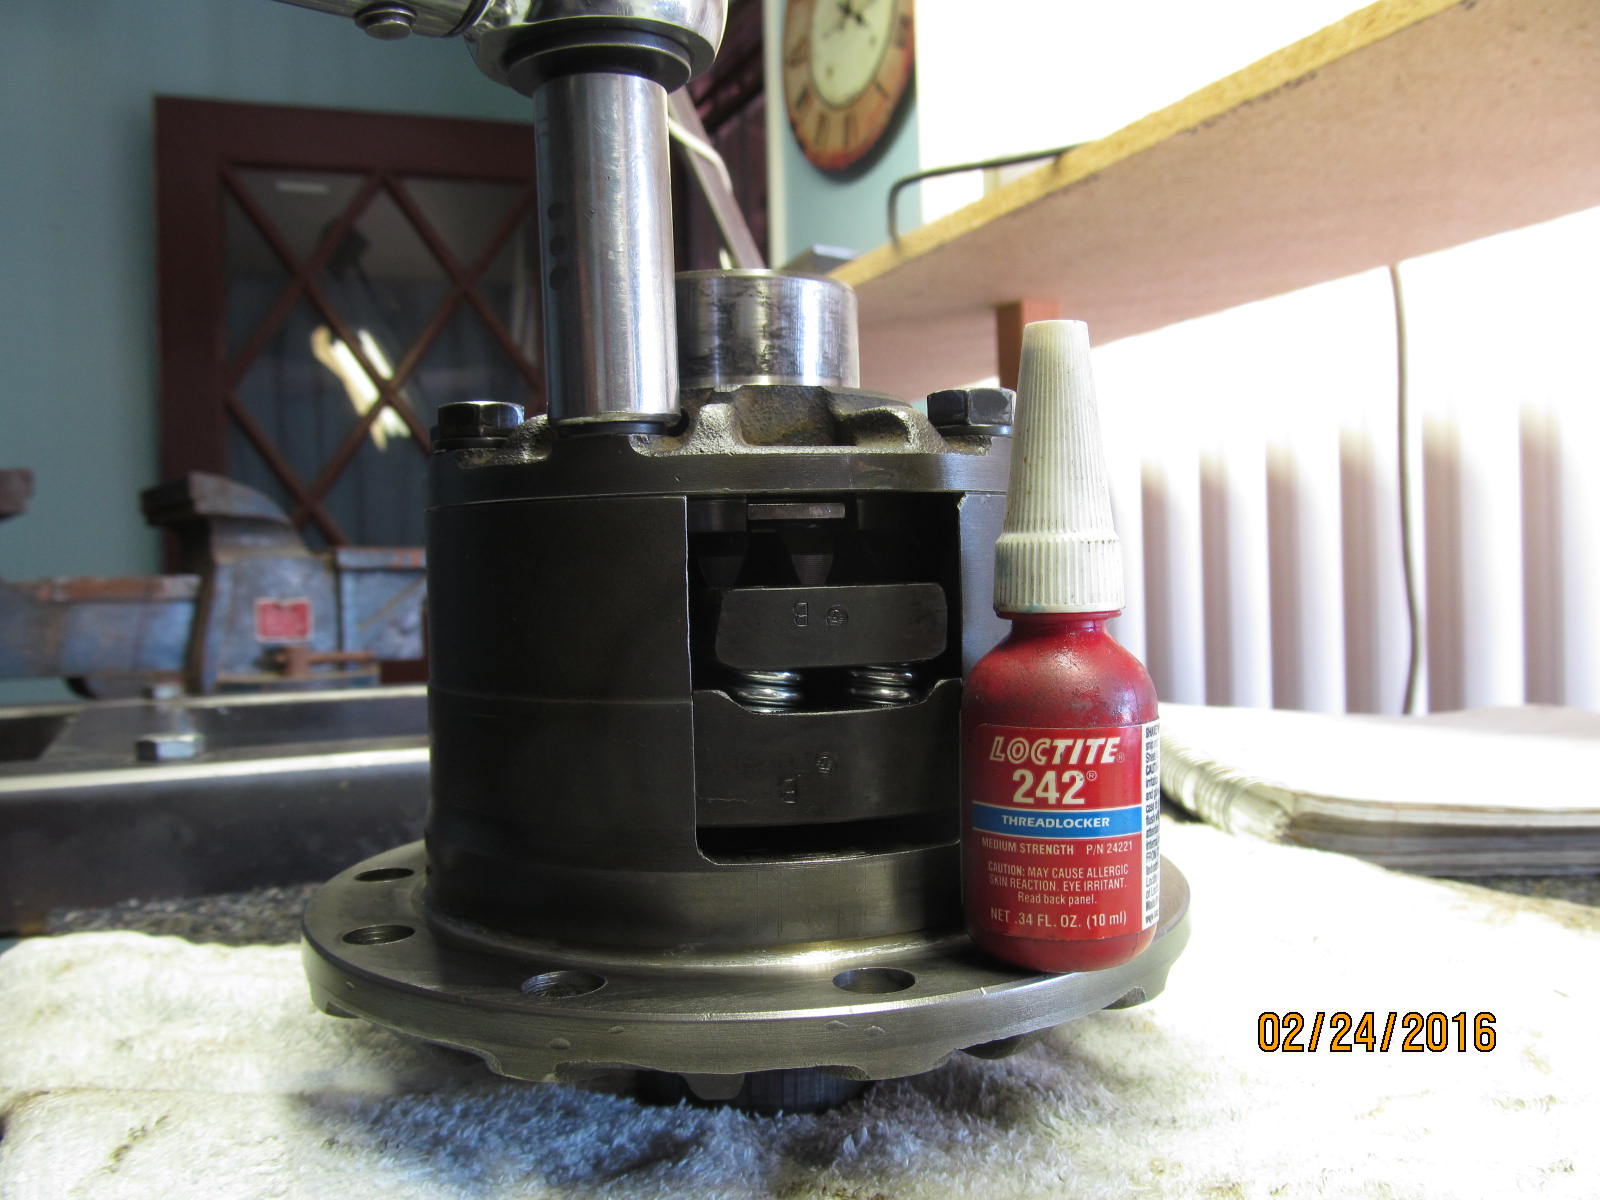
Blue loctite and 35 ft/lb on the 8 case lid bolts.
|
|
|
|
|
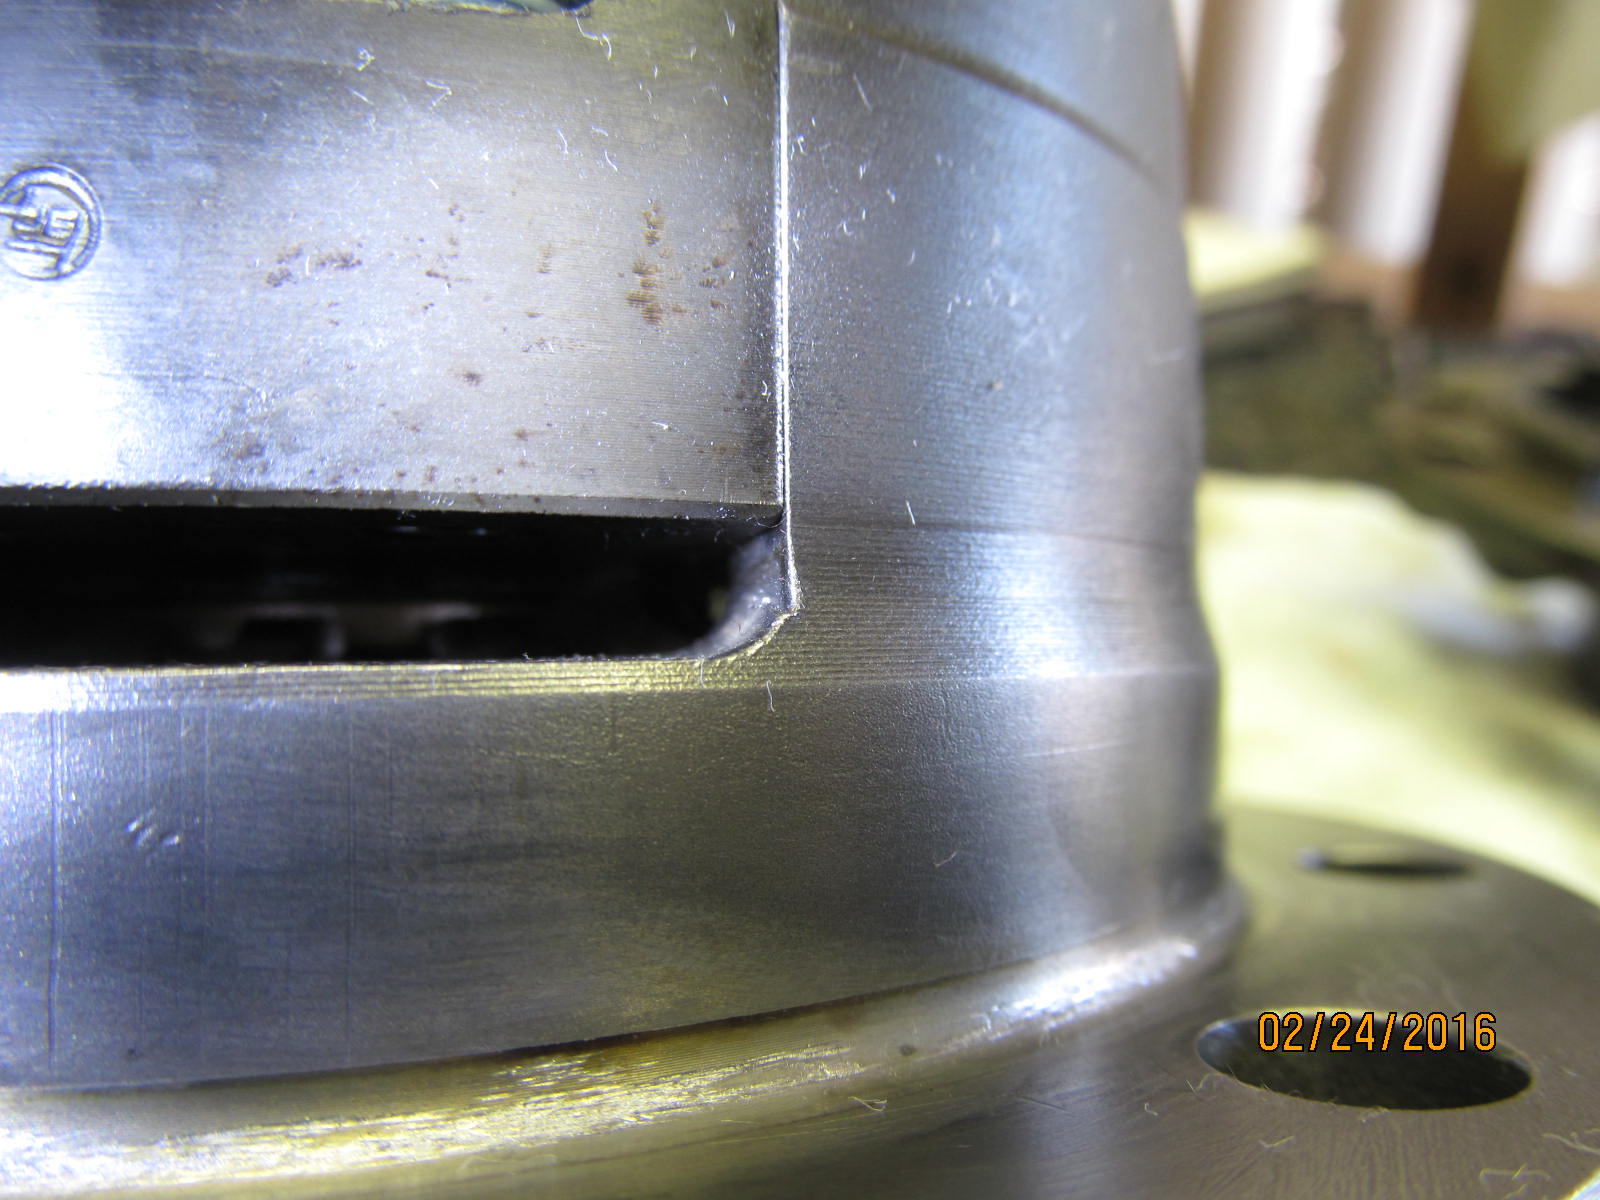
Back to the original lsd case......a better close-up.....
|
|
|
|
|
...other side....
|
|
|
|
|
The replacement case......much better.
|
|
|
|
|
---------------------
|
|
|
|
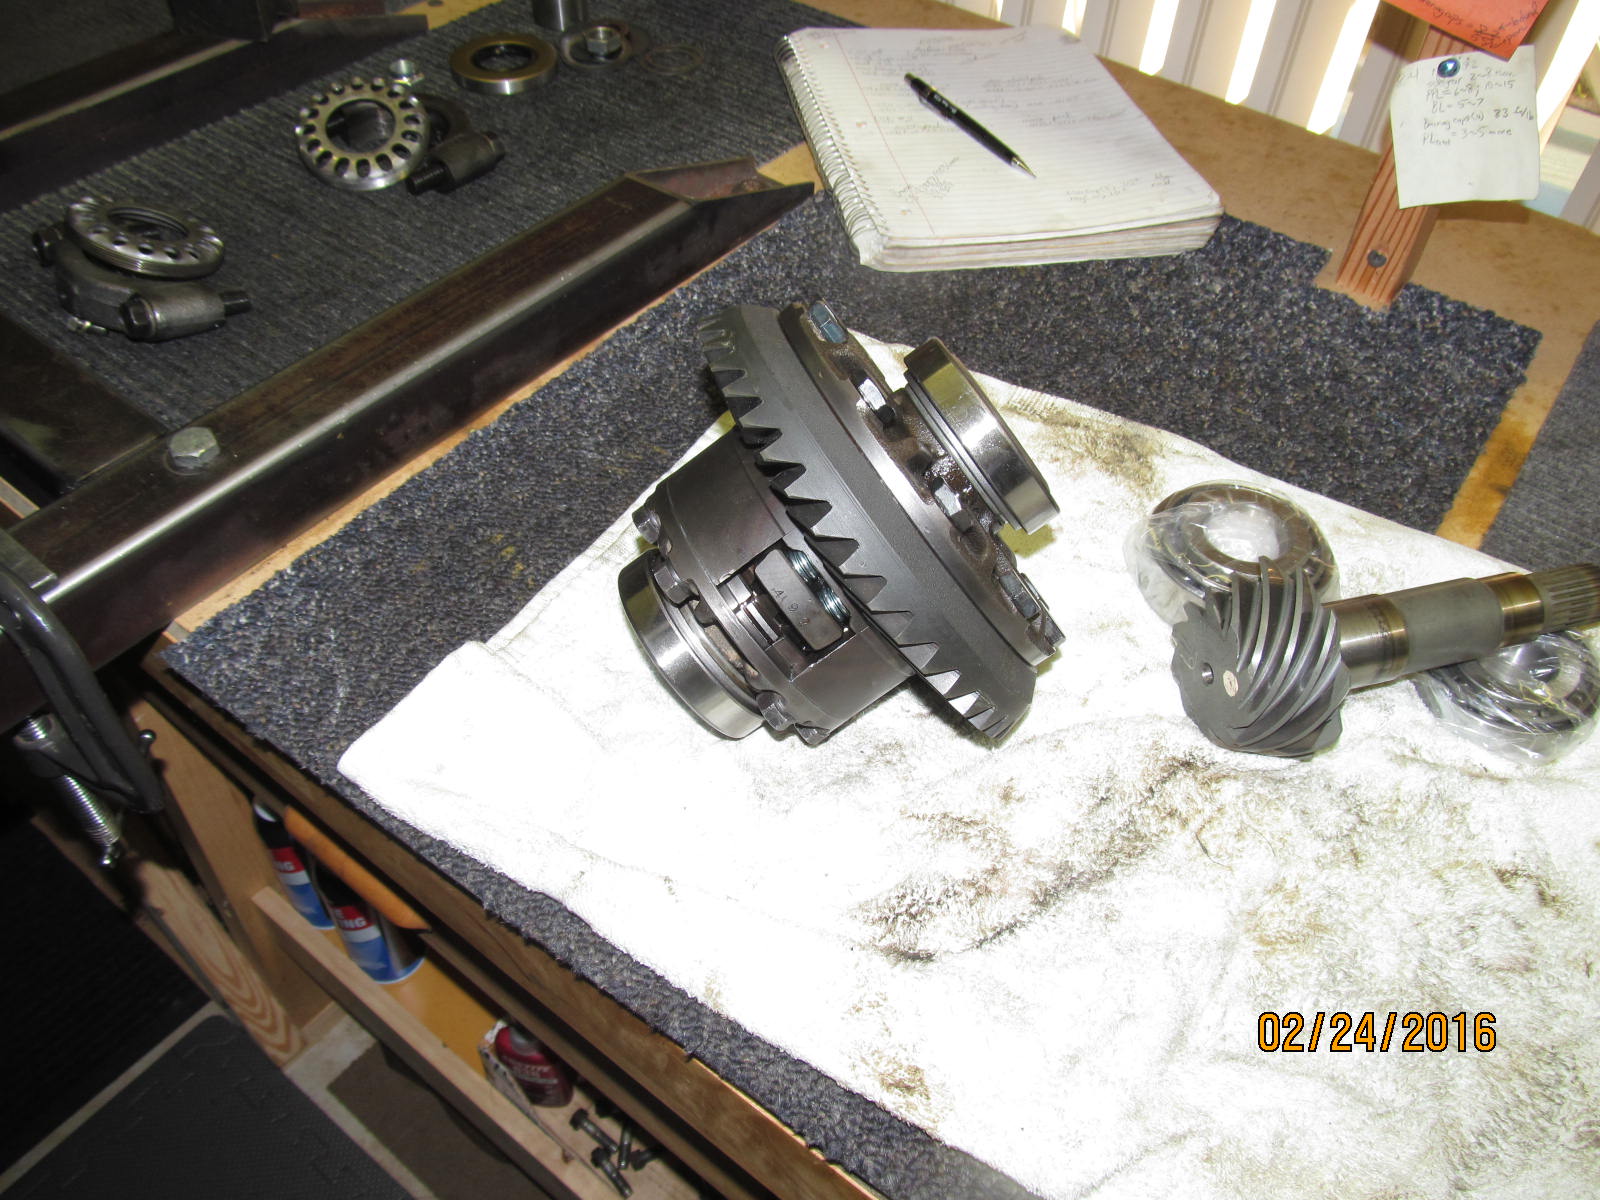
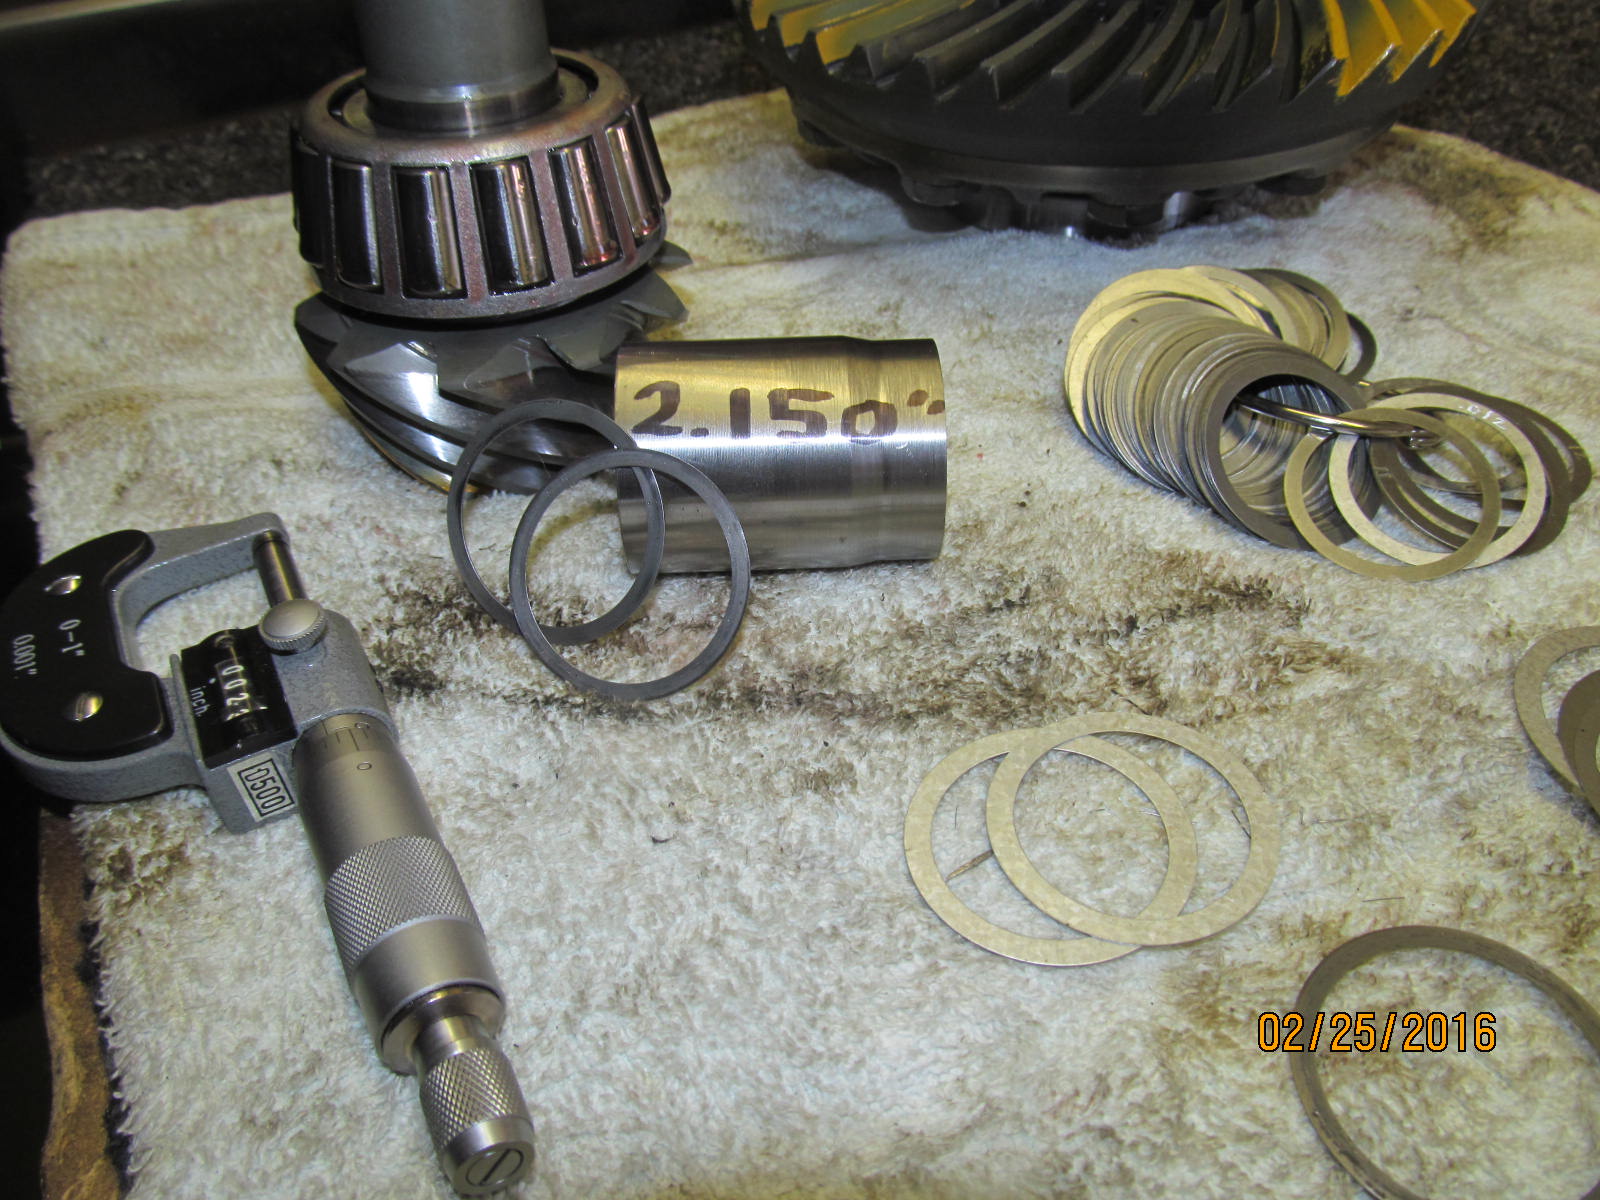
And now that the LSD is finally together, time to now do the gear install. Good used
410 ring and pinion. The 4 new bearings are from WEIR
|
|
|
|
|
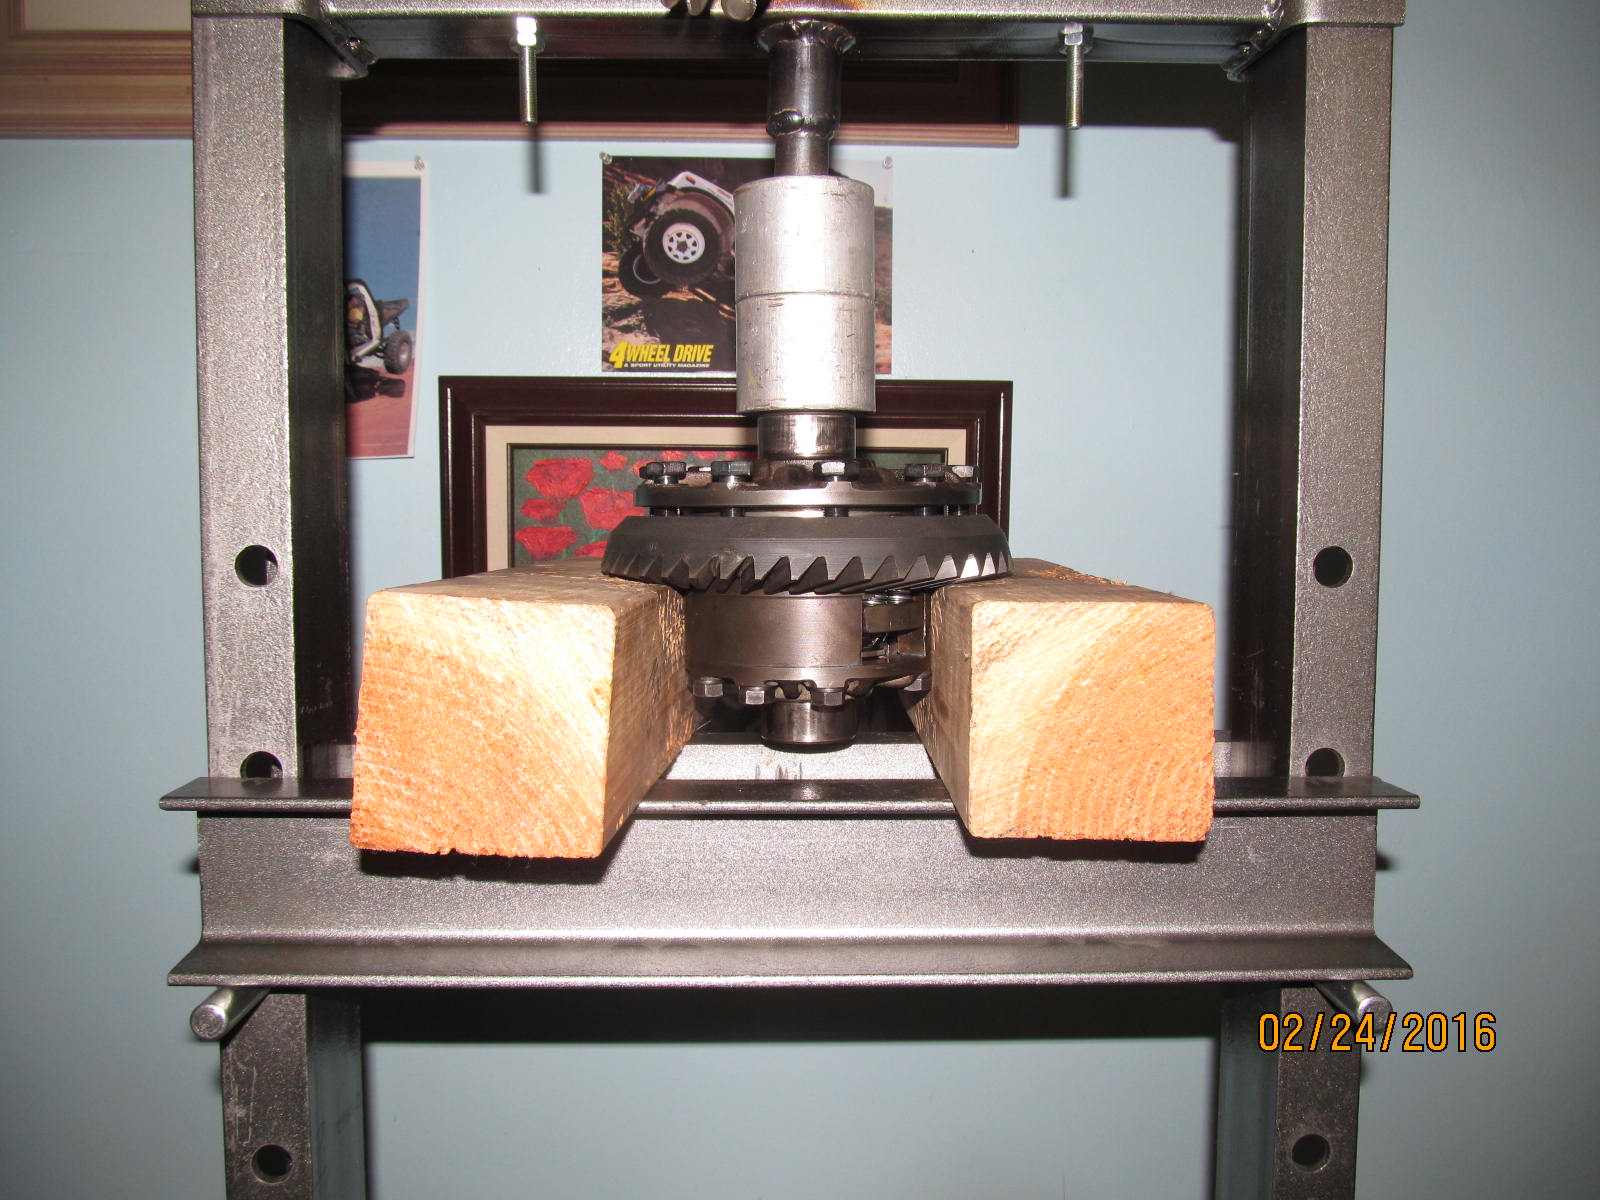
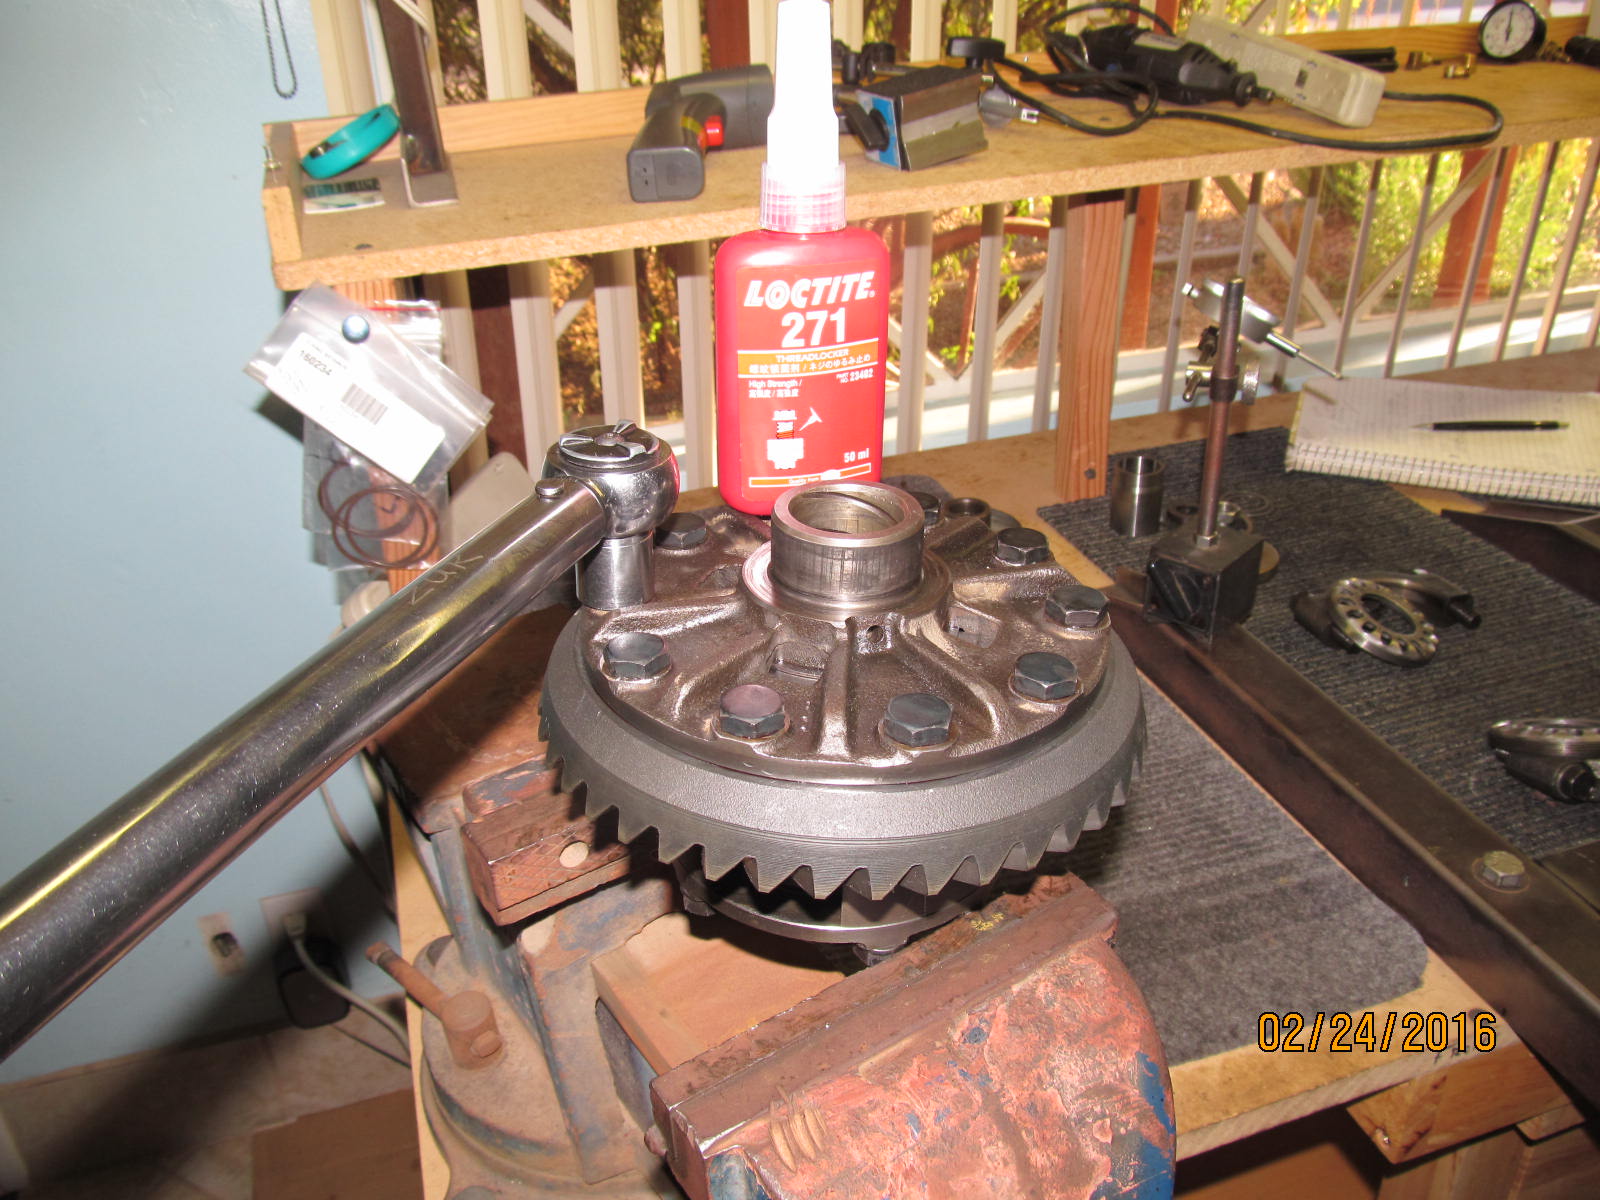
Pressing the ring on.
|
|
|
|
|
Red loctite and 70 ft/lb.
|
|
|
|
|
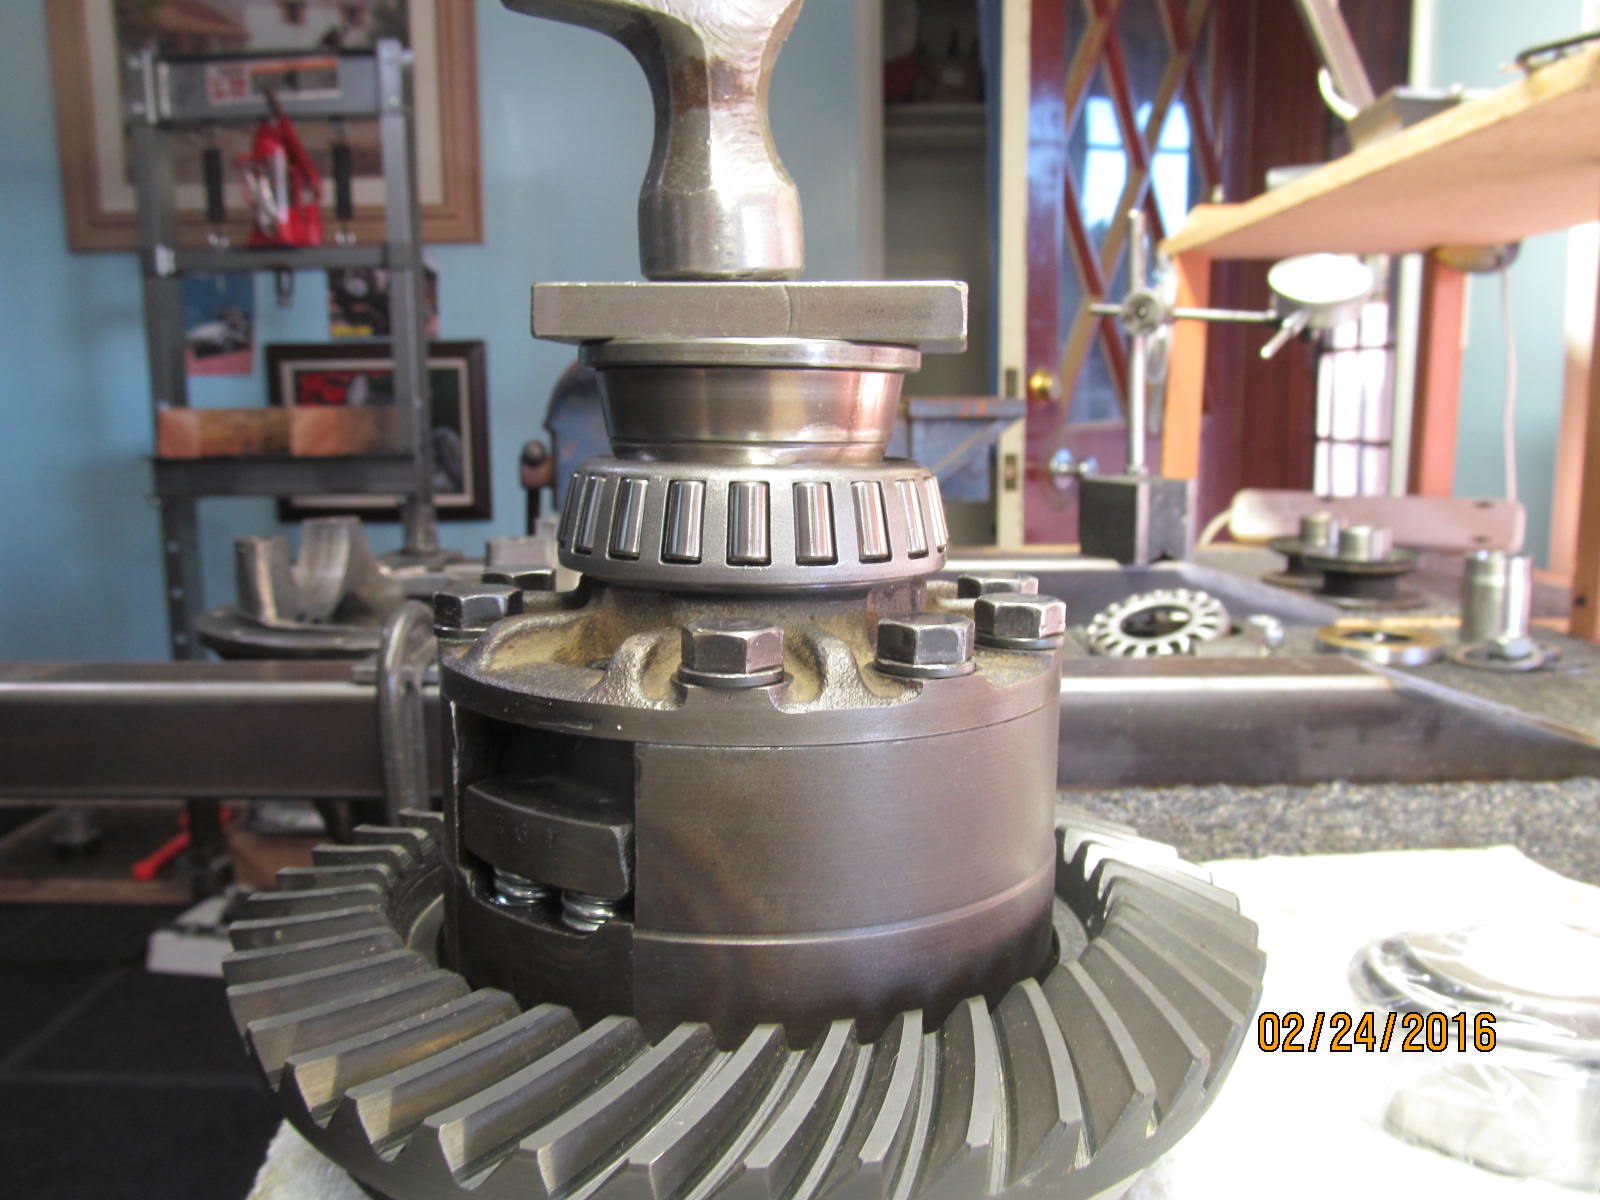
New carrier bearings can be tapped on.
|
|
|
|
|
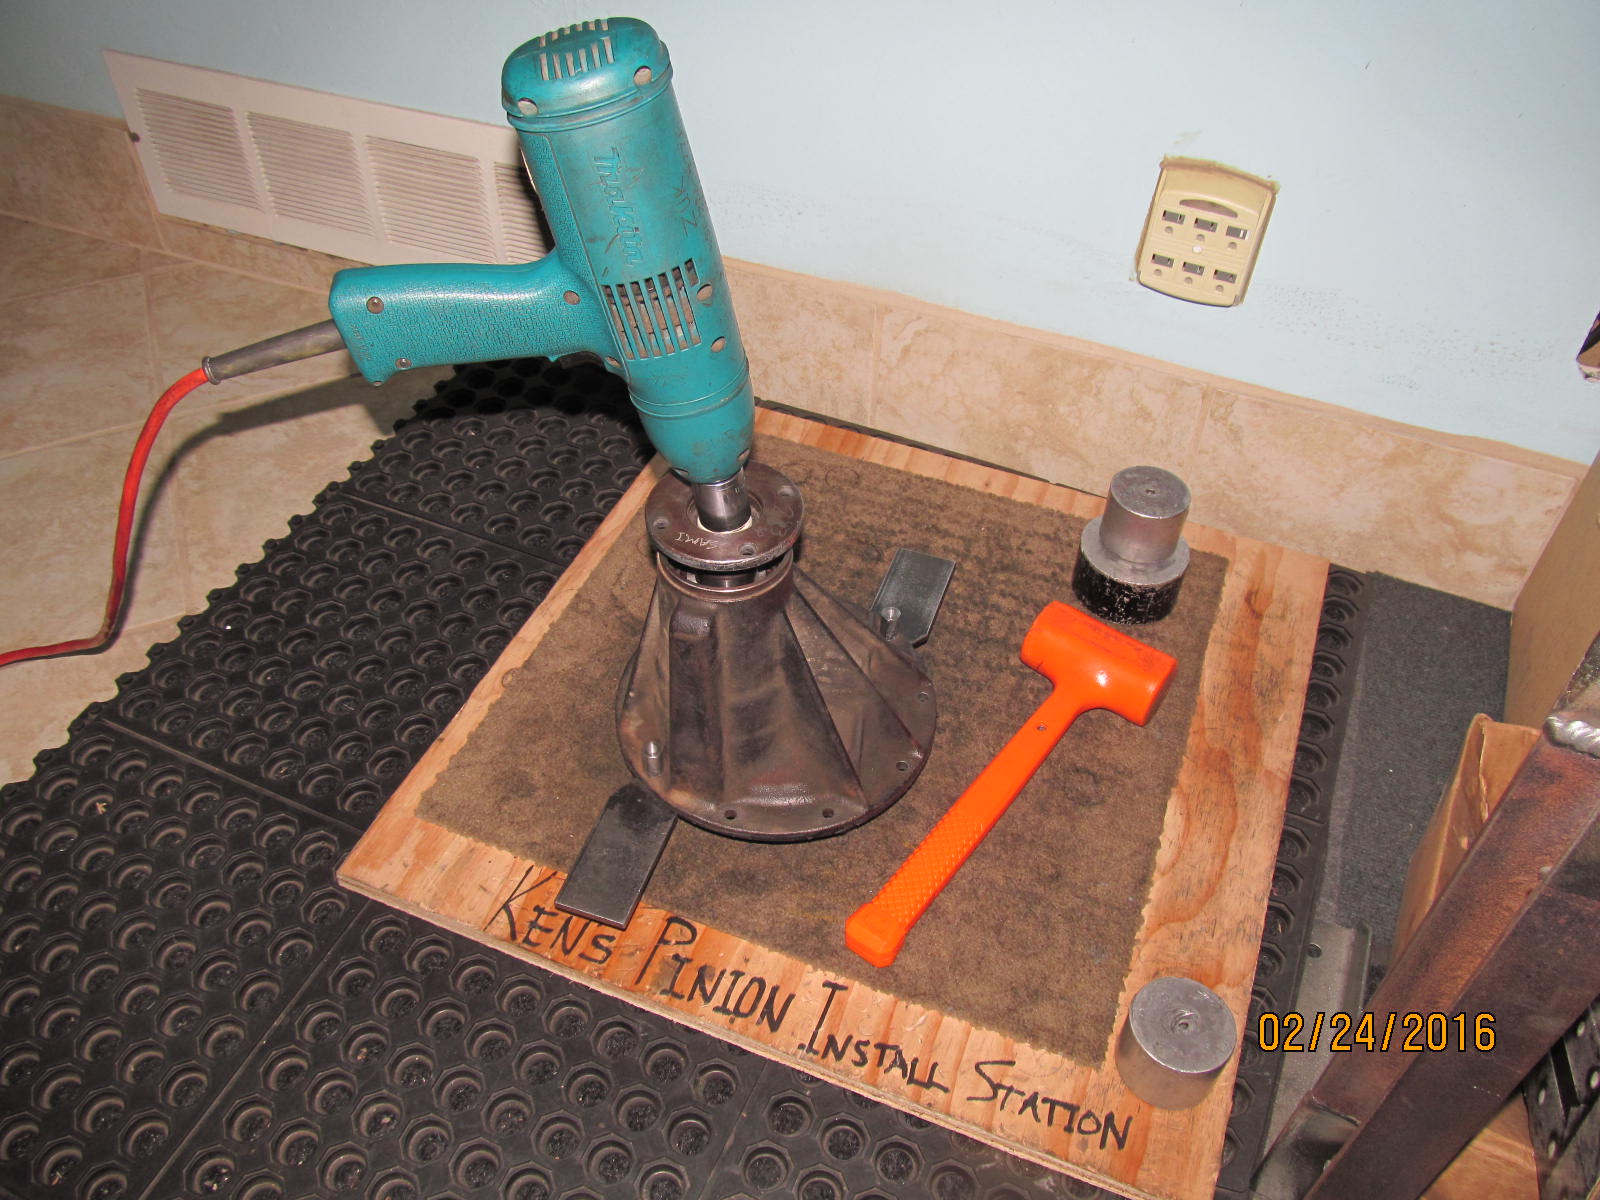
LSD case is complete and now on to the pinion end.
|
|
|
|
|
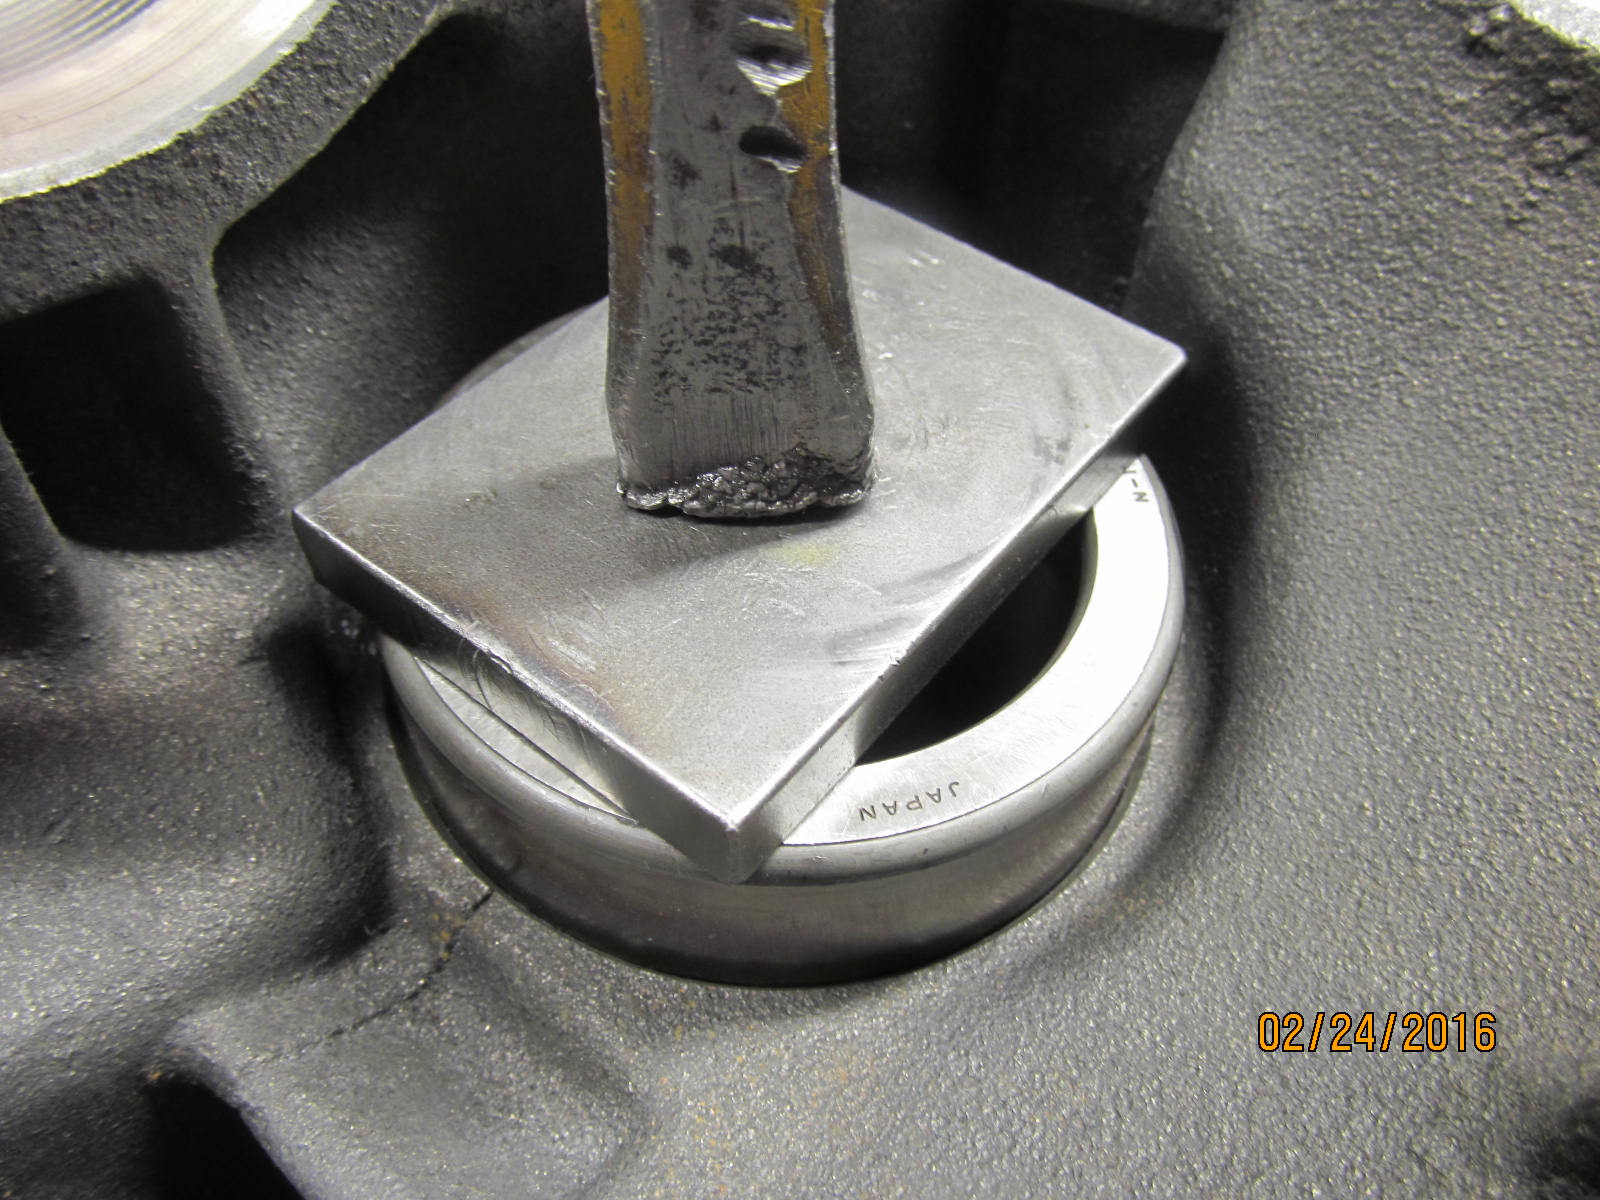
The outer race taps in much easier......
|
|
|
|
|
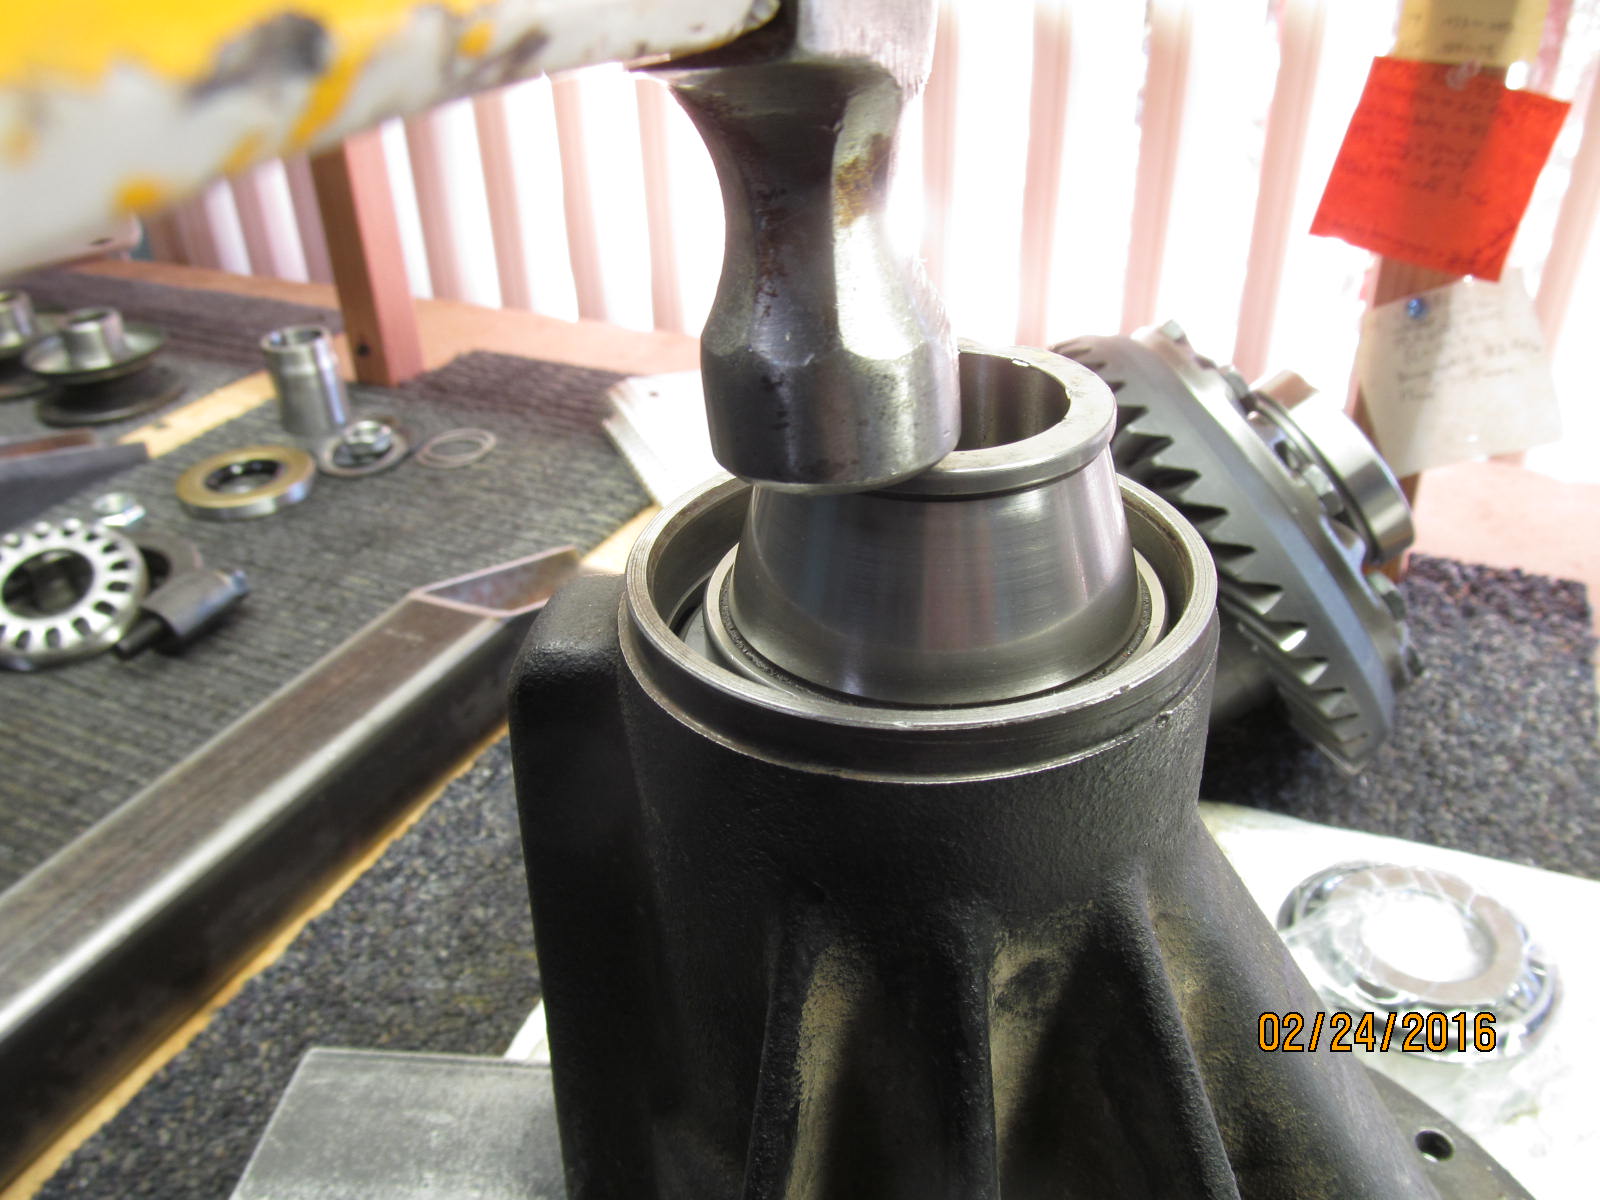
....than the large inner race. It has to be kept level as it taps in.
|
|
|

|
|
BAM!! All the way down and no damage to the race.
|
|
|
|
|
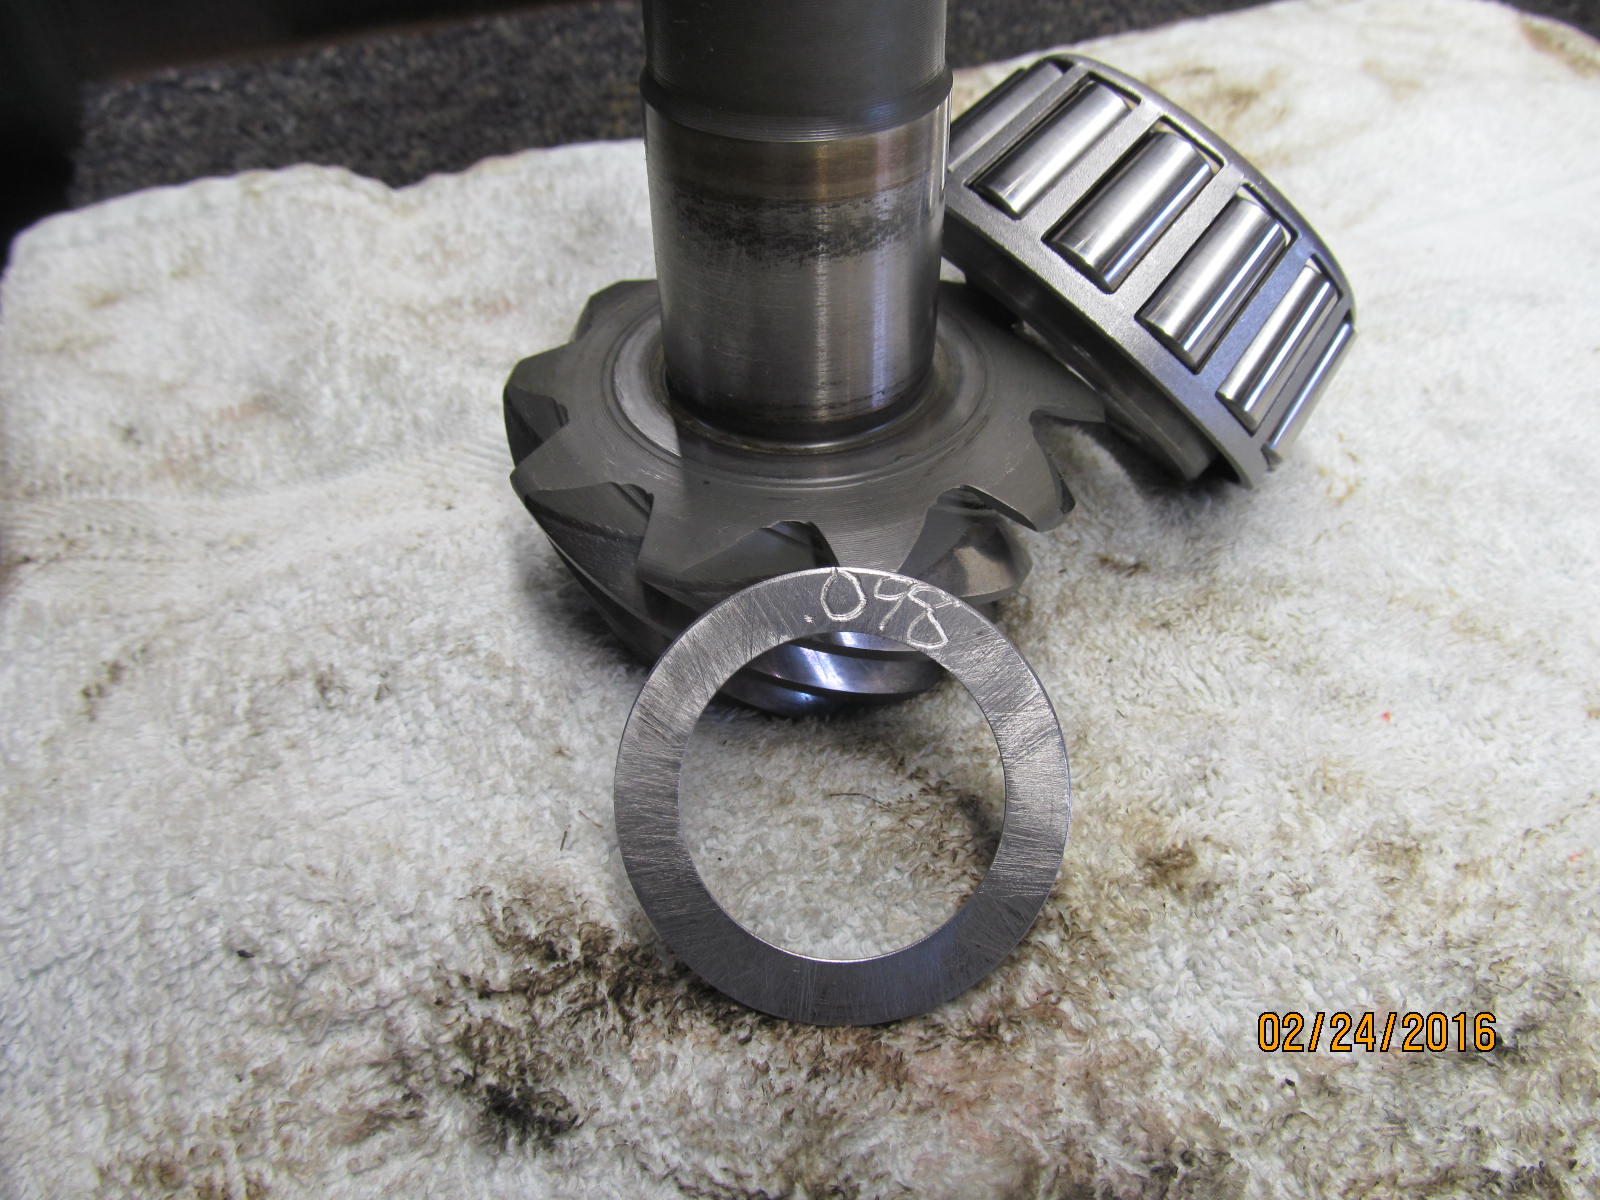
For the starter pinion shim selection, .098" was chosen.
|
|
|
|
|
The pinion nut gets snugged up just enough to offer some bearing pre-load.
|
|
|
|
|
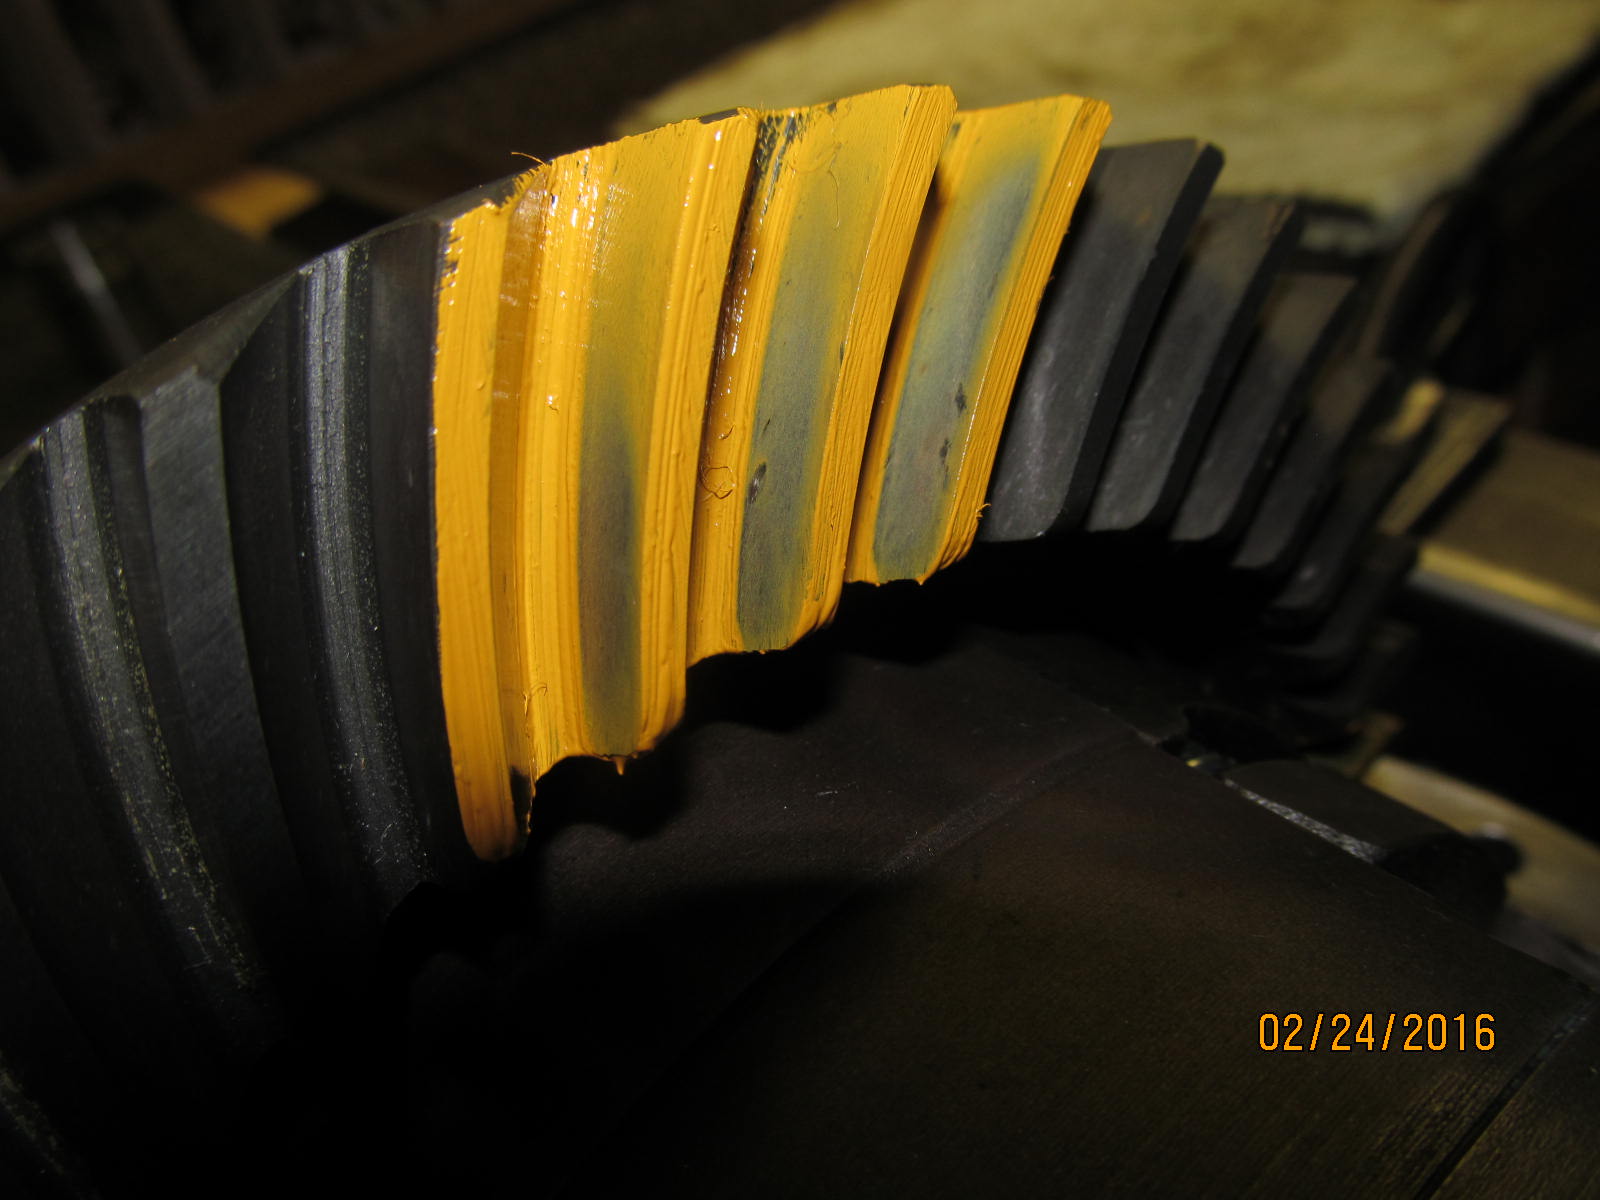
Drive side......Slight shallow condition.
|
|
|
|
|
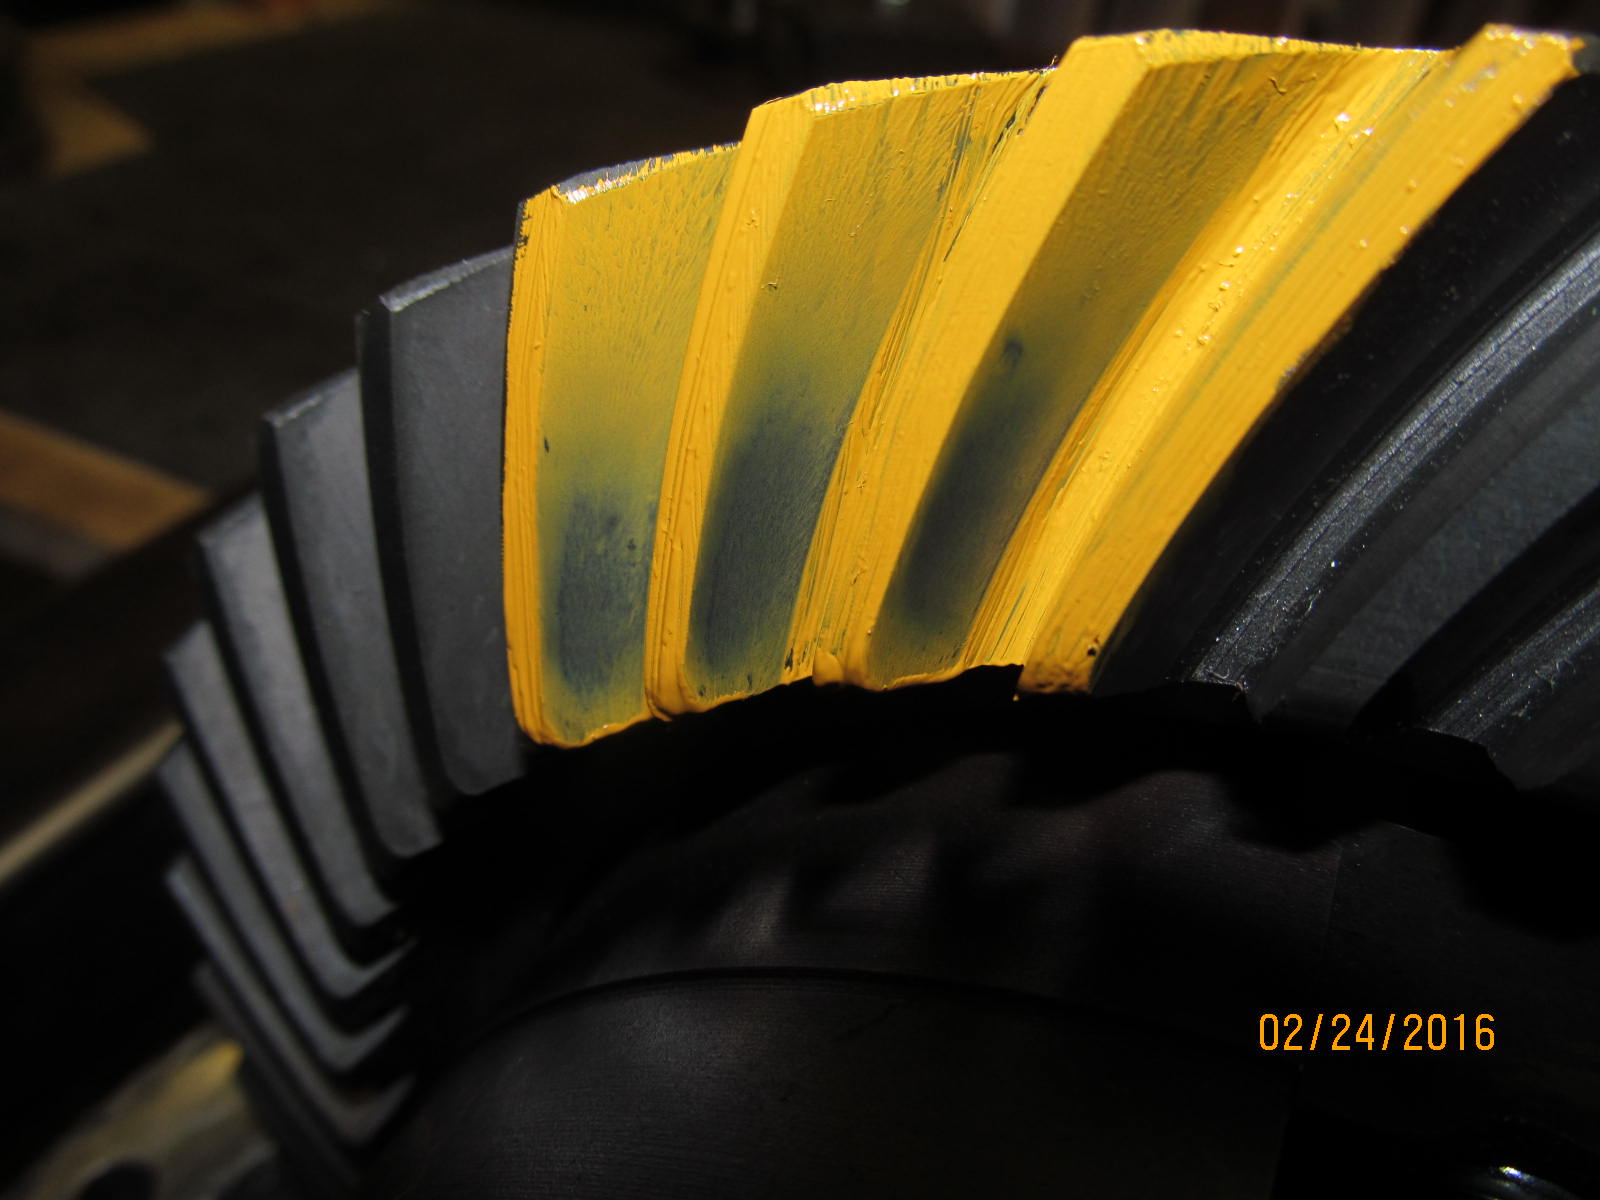
Coast side.....
|
|
|
|
|
pinion drive side.....says a little shallow for the ring.
|
|
|
|
|
/////////////////
|
|
|
|
Just increase the pinion depth another 2 thou and set the solid collar shim value.
|
|
|
|
|
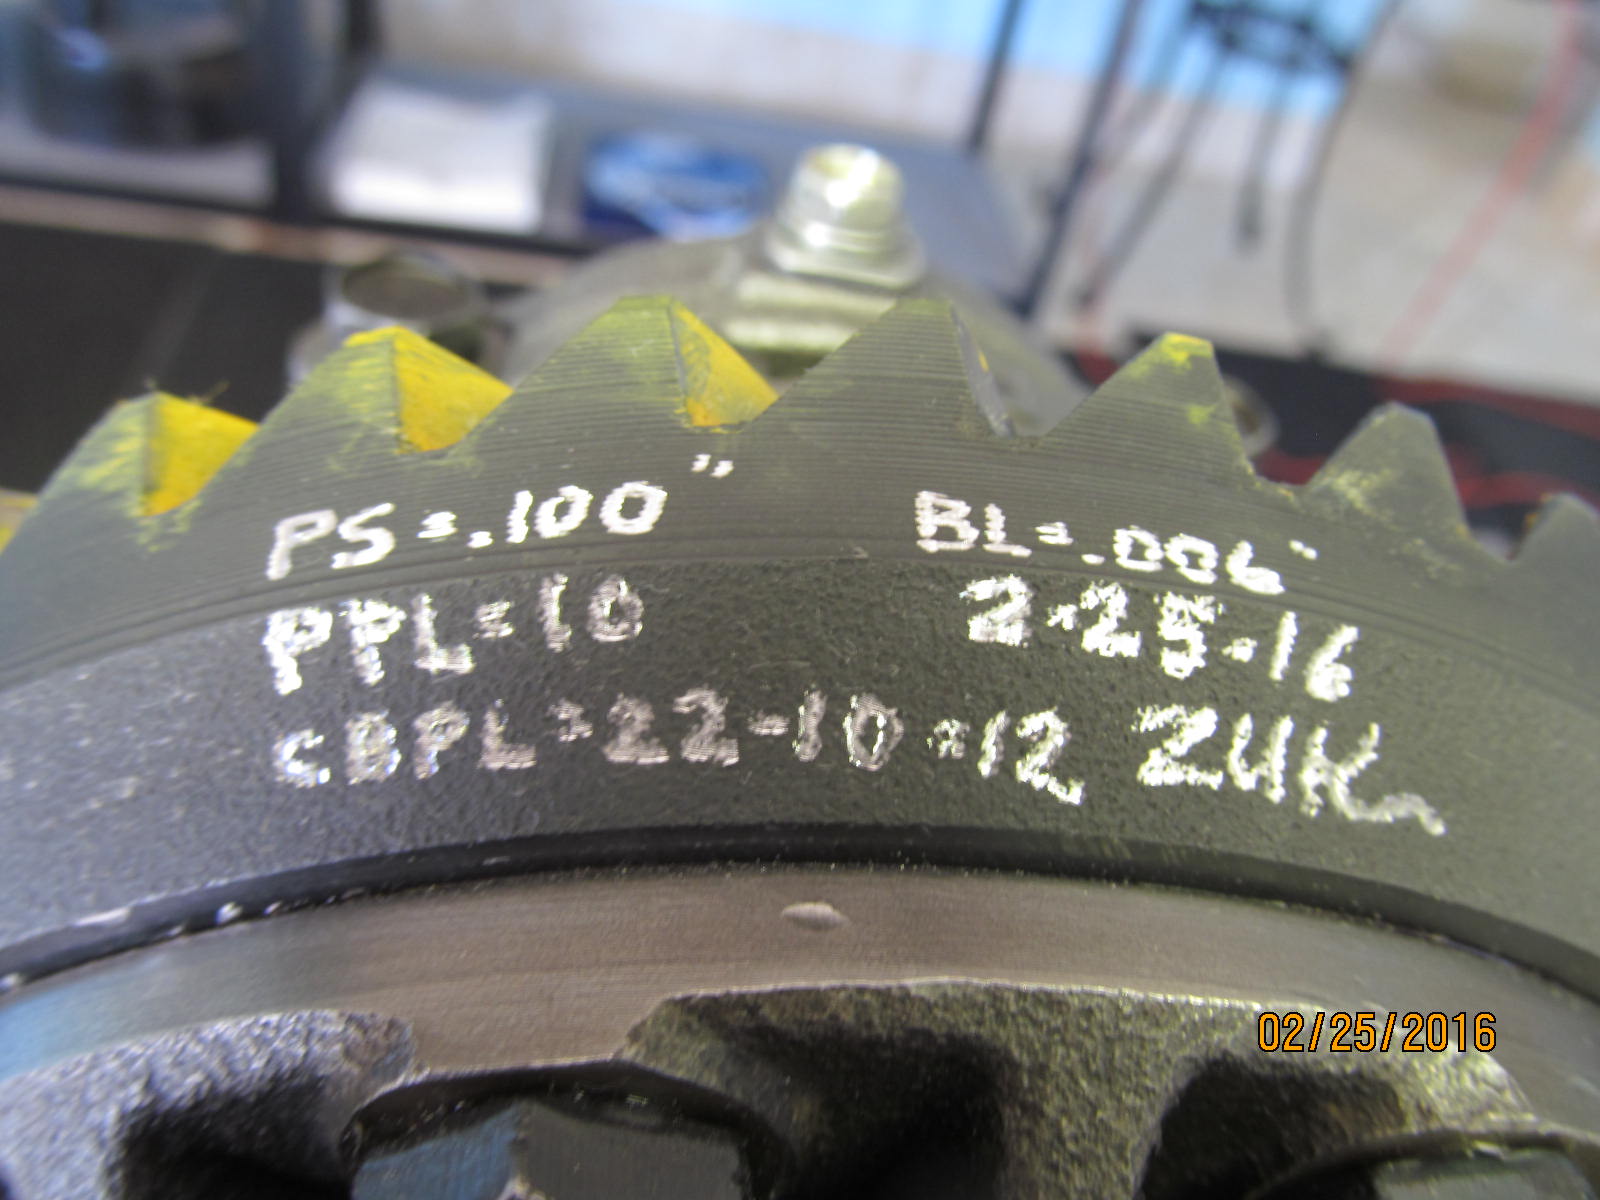
As the notes at the end show, on the 5th try on the solid collar, the .031" shim made the mark.
|
|
|
|
|
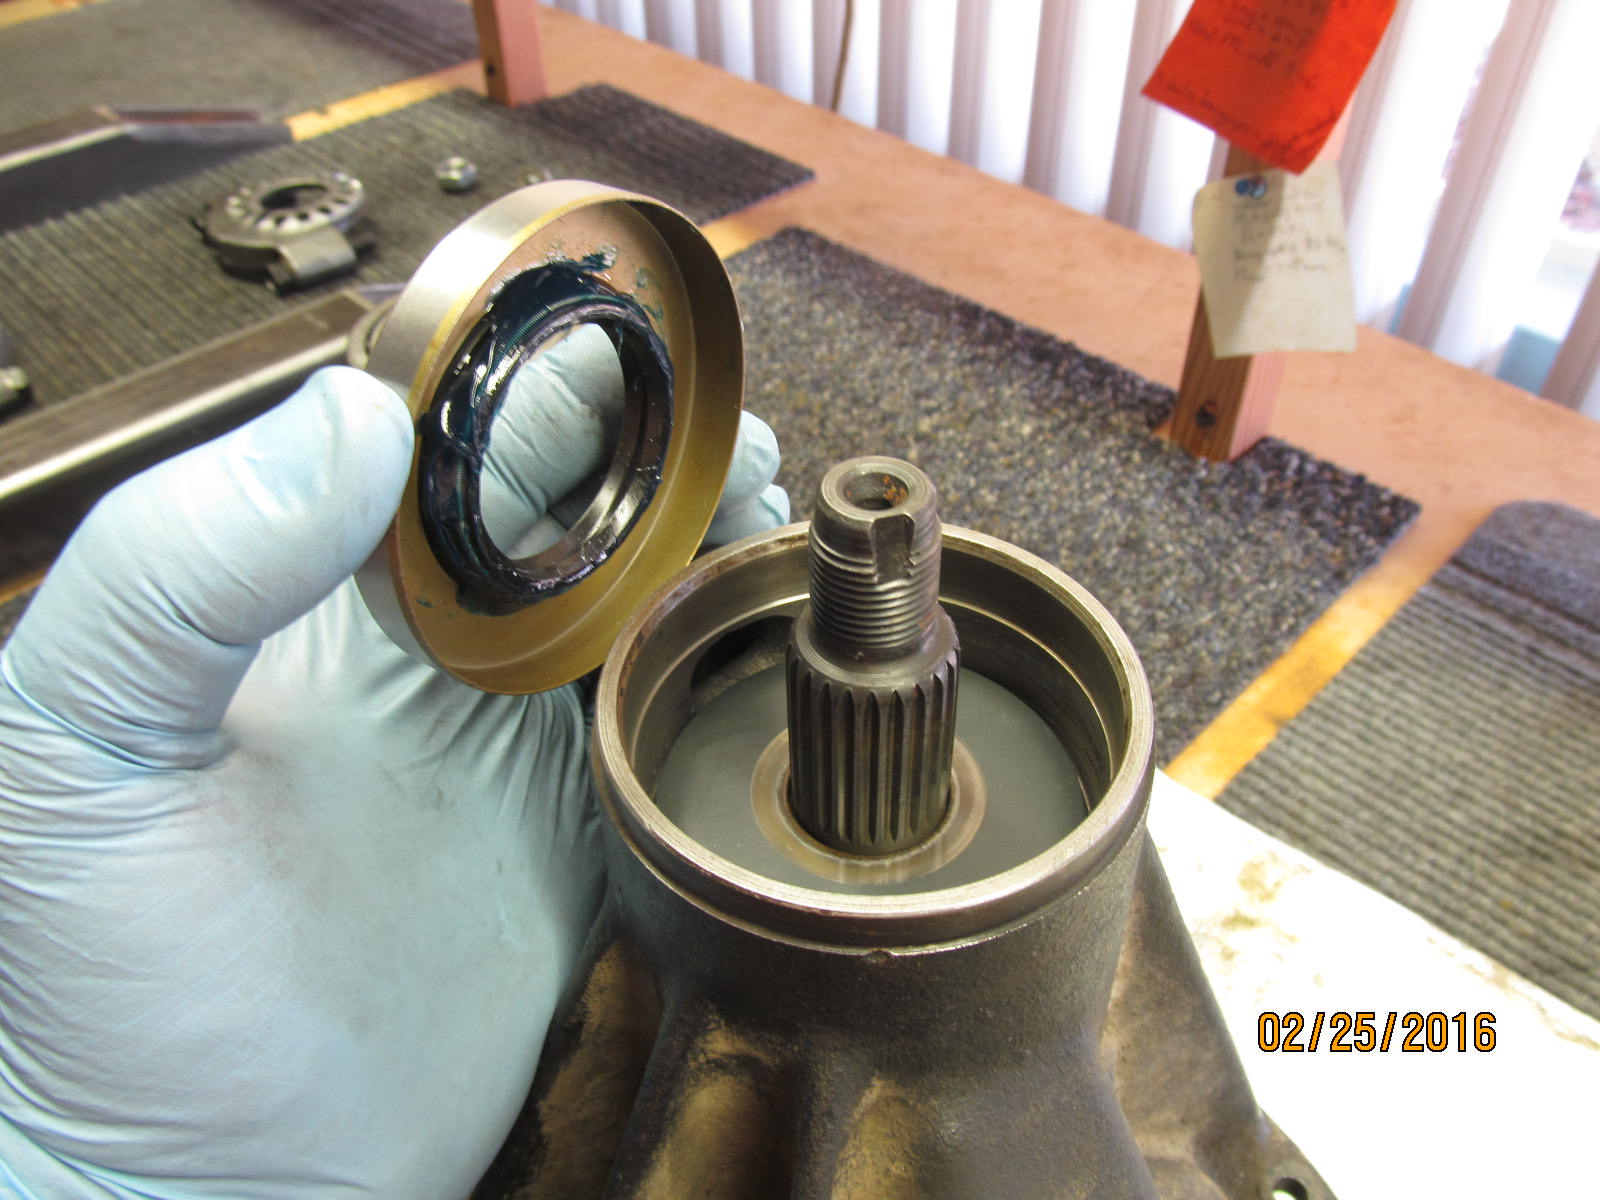
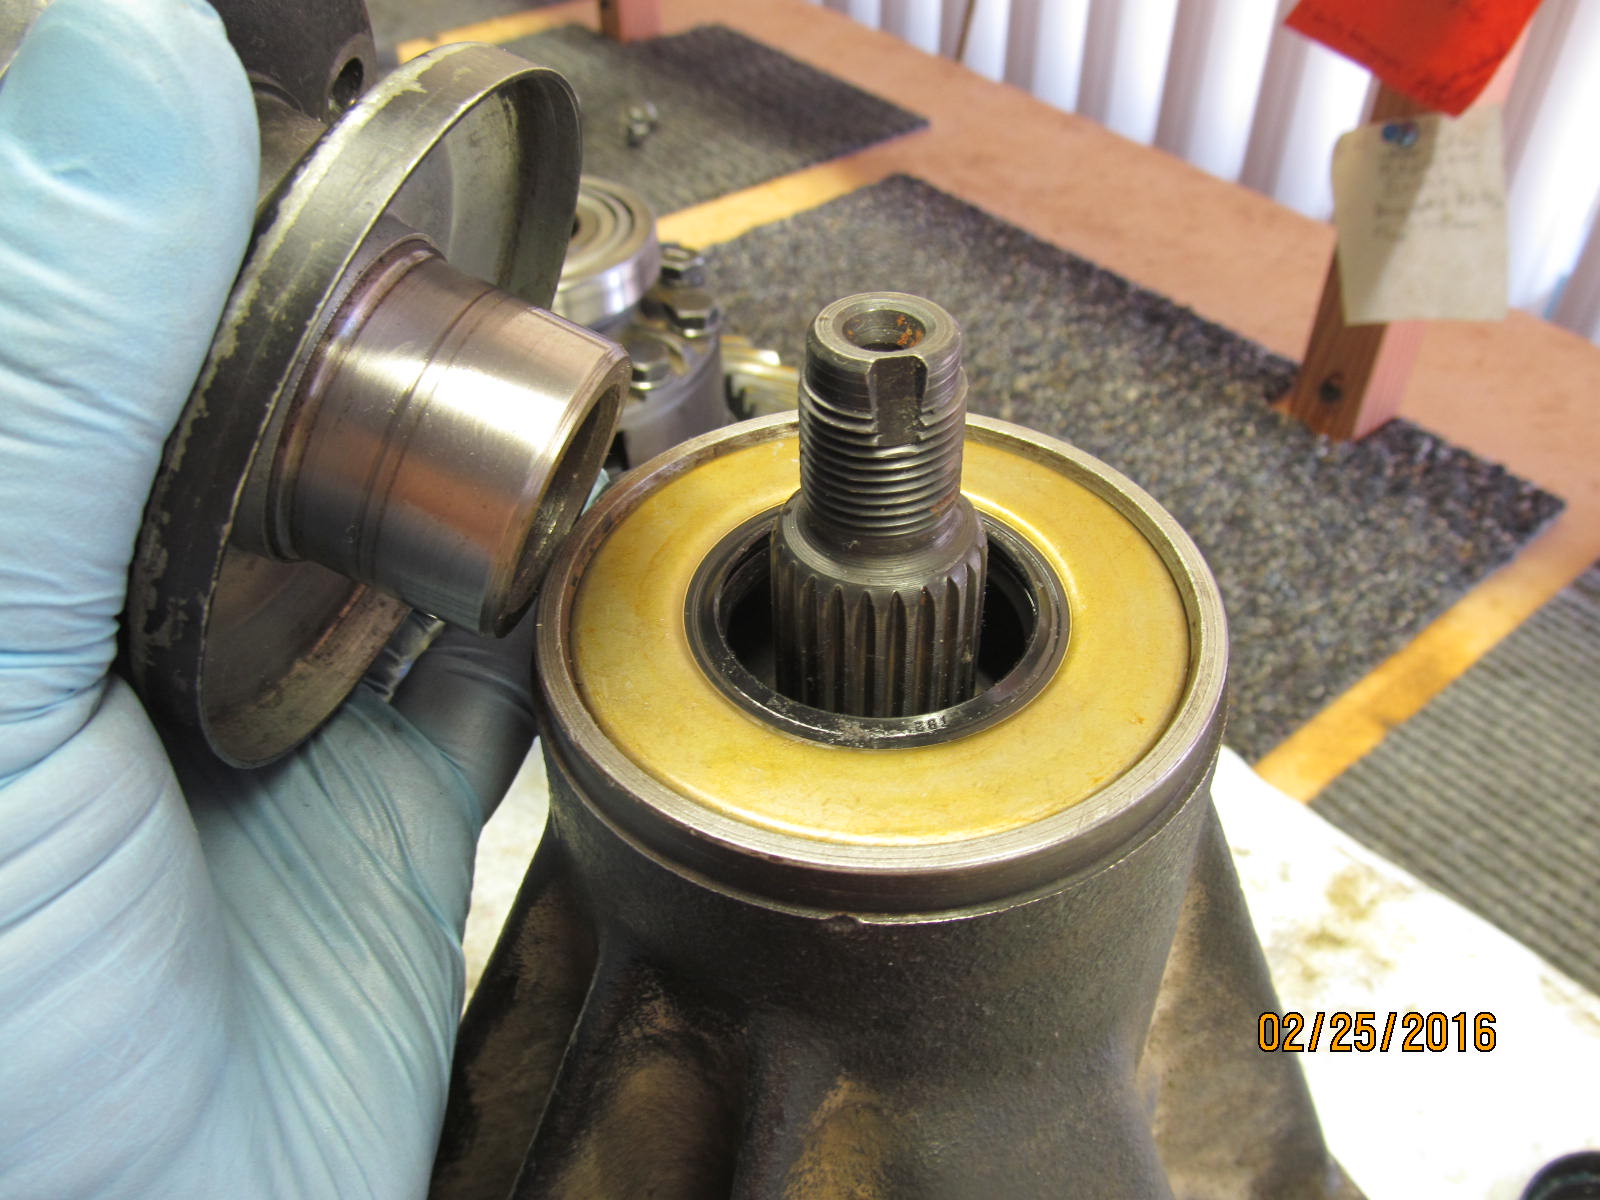
The collar is in with the 031 shim...splash guard in place....now to tap the seal in place.
|
|
|
|
I had 2 flanges to choose from....chose the better of the 2 and wet
sanded it with 600 grit paper to smooth it out as much as possible.
|
|
|
|
|
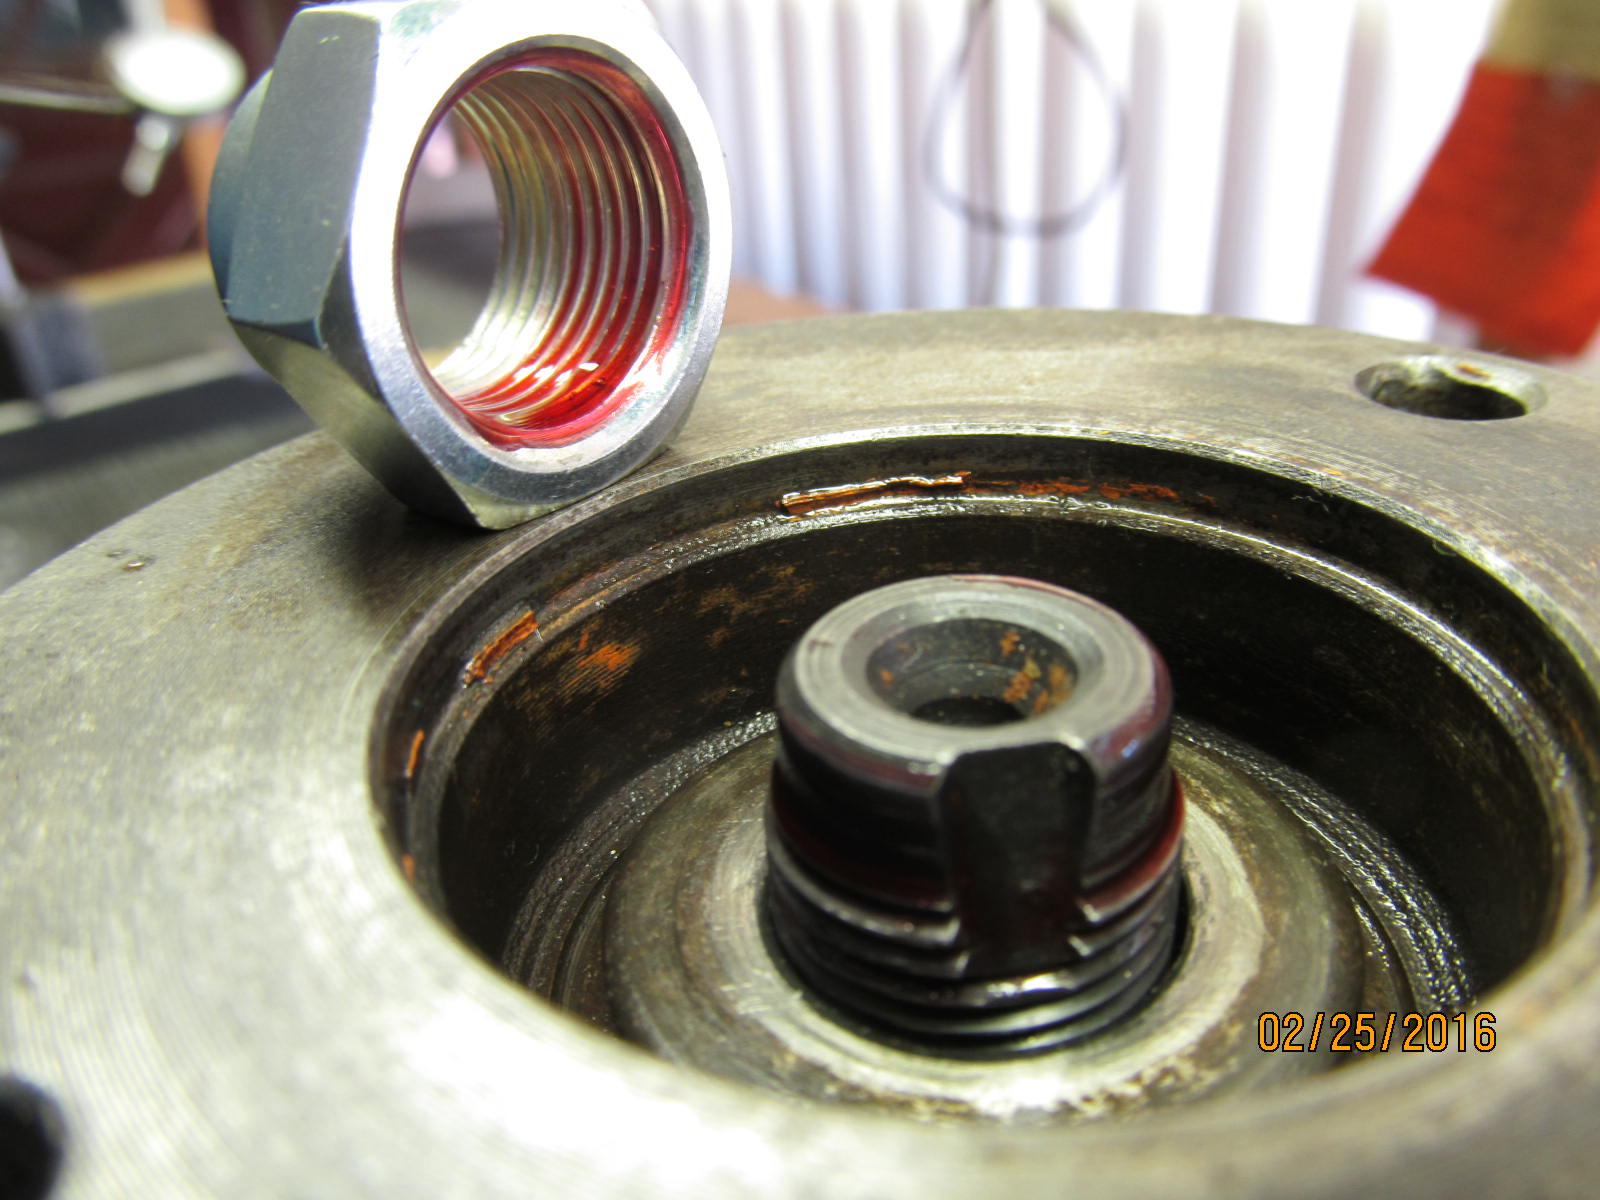
Red loctite on the new nut.
|
|
|

|
|
The 7.5" diff use the smaller 24mm nut so the nut is torqued to 160 and called good.
|
|
|
|
|
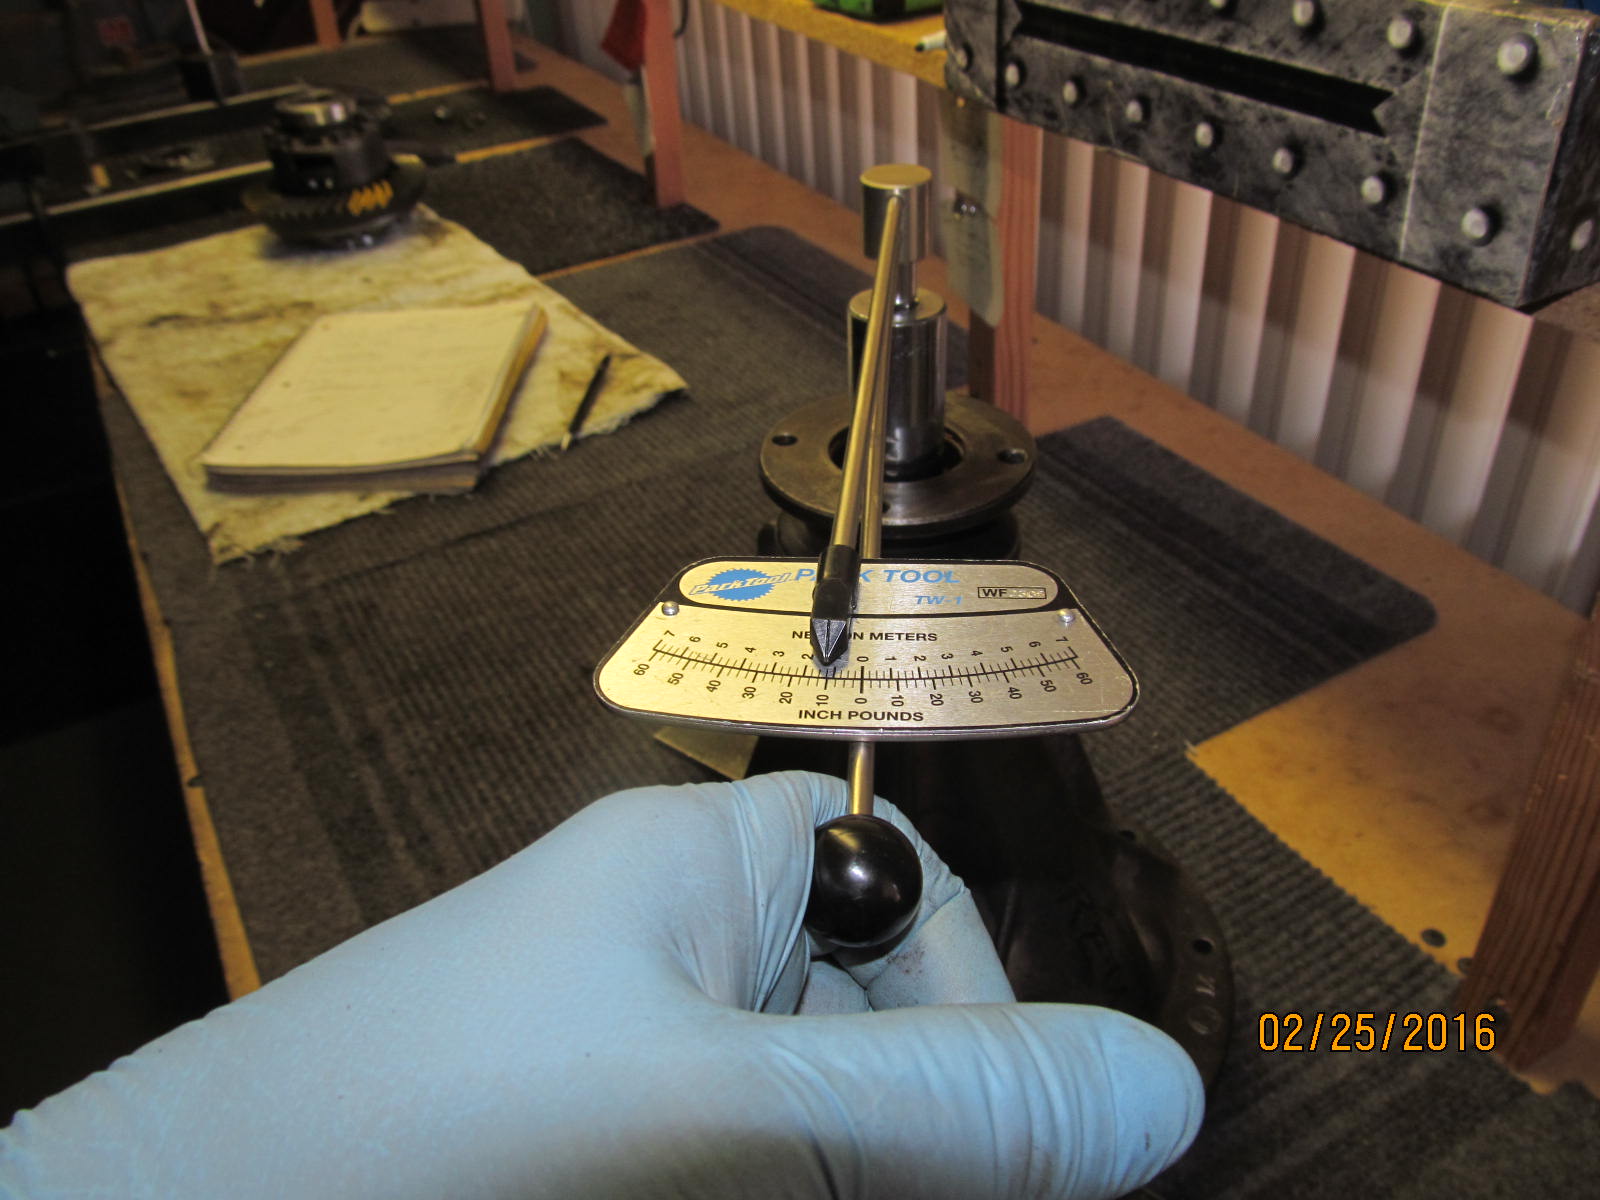
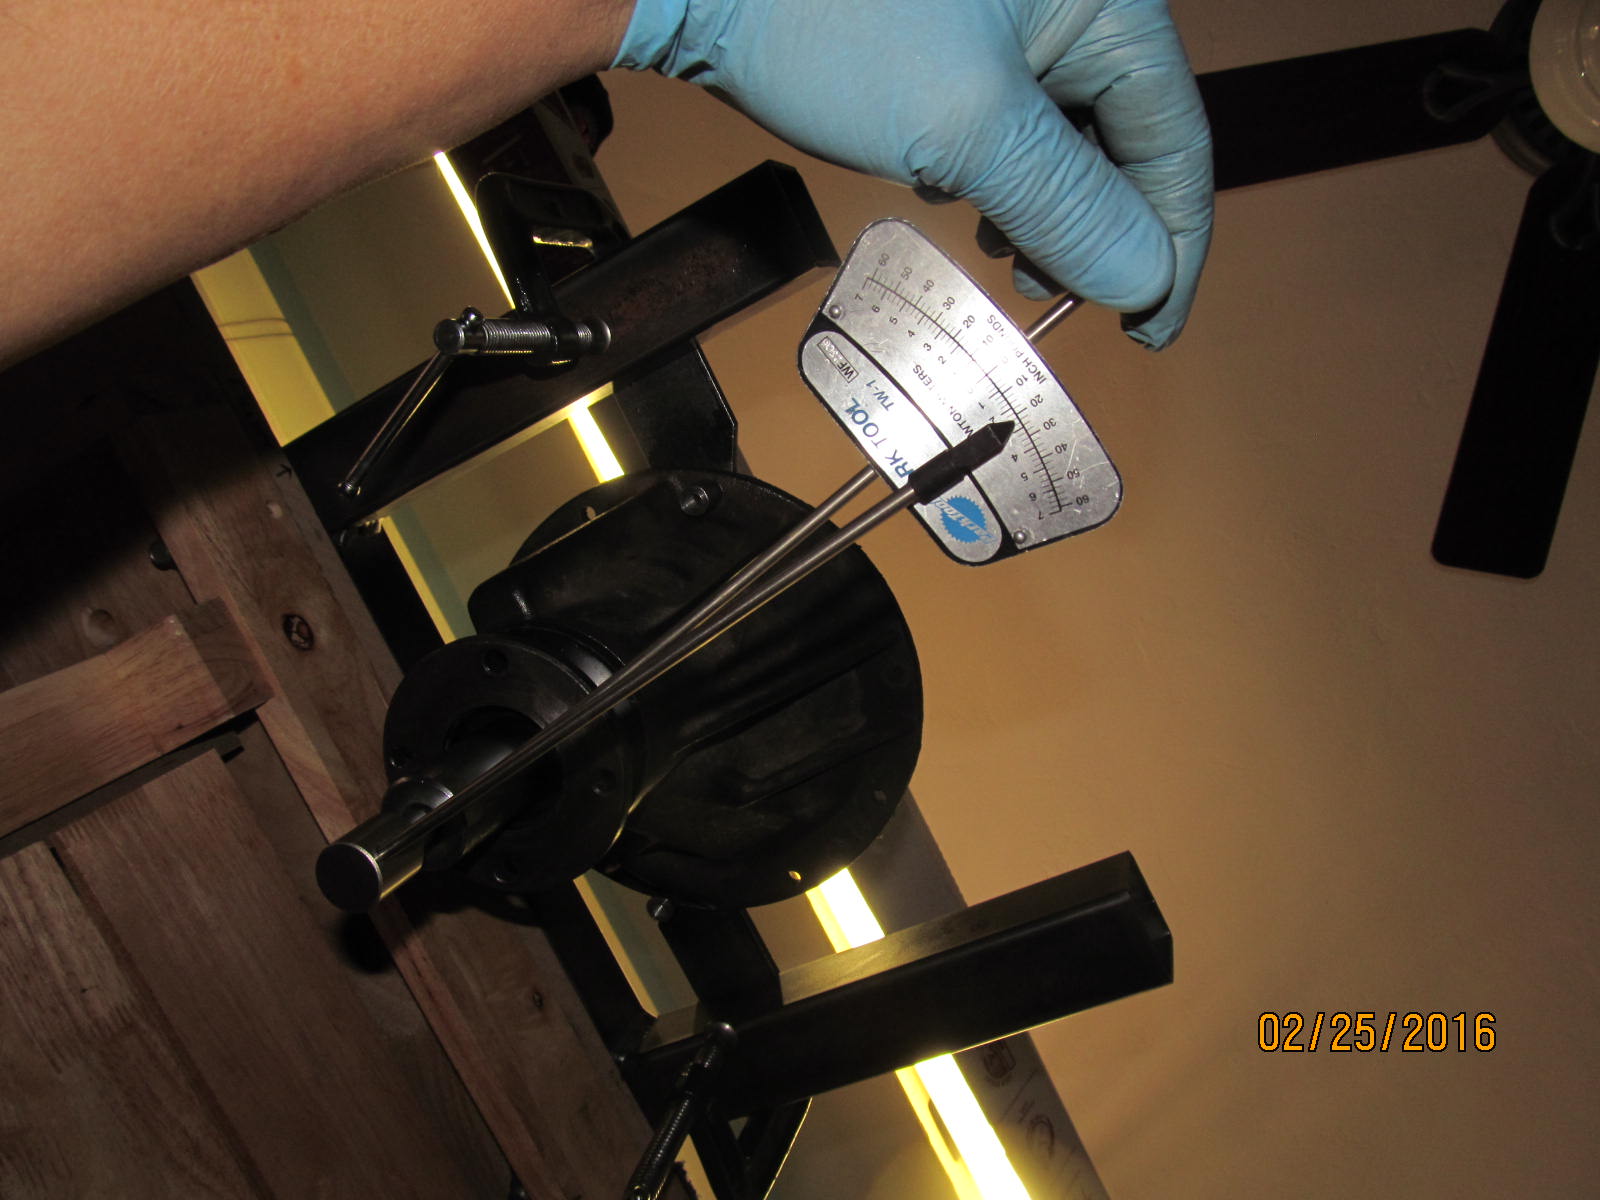
With well lubed bearings, the pinion preload is measuring a silky smooth 10 in/lb start torque.
|
|
|
|
|
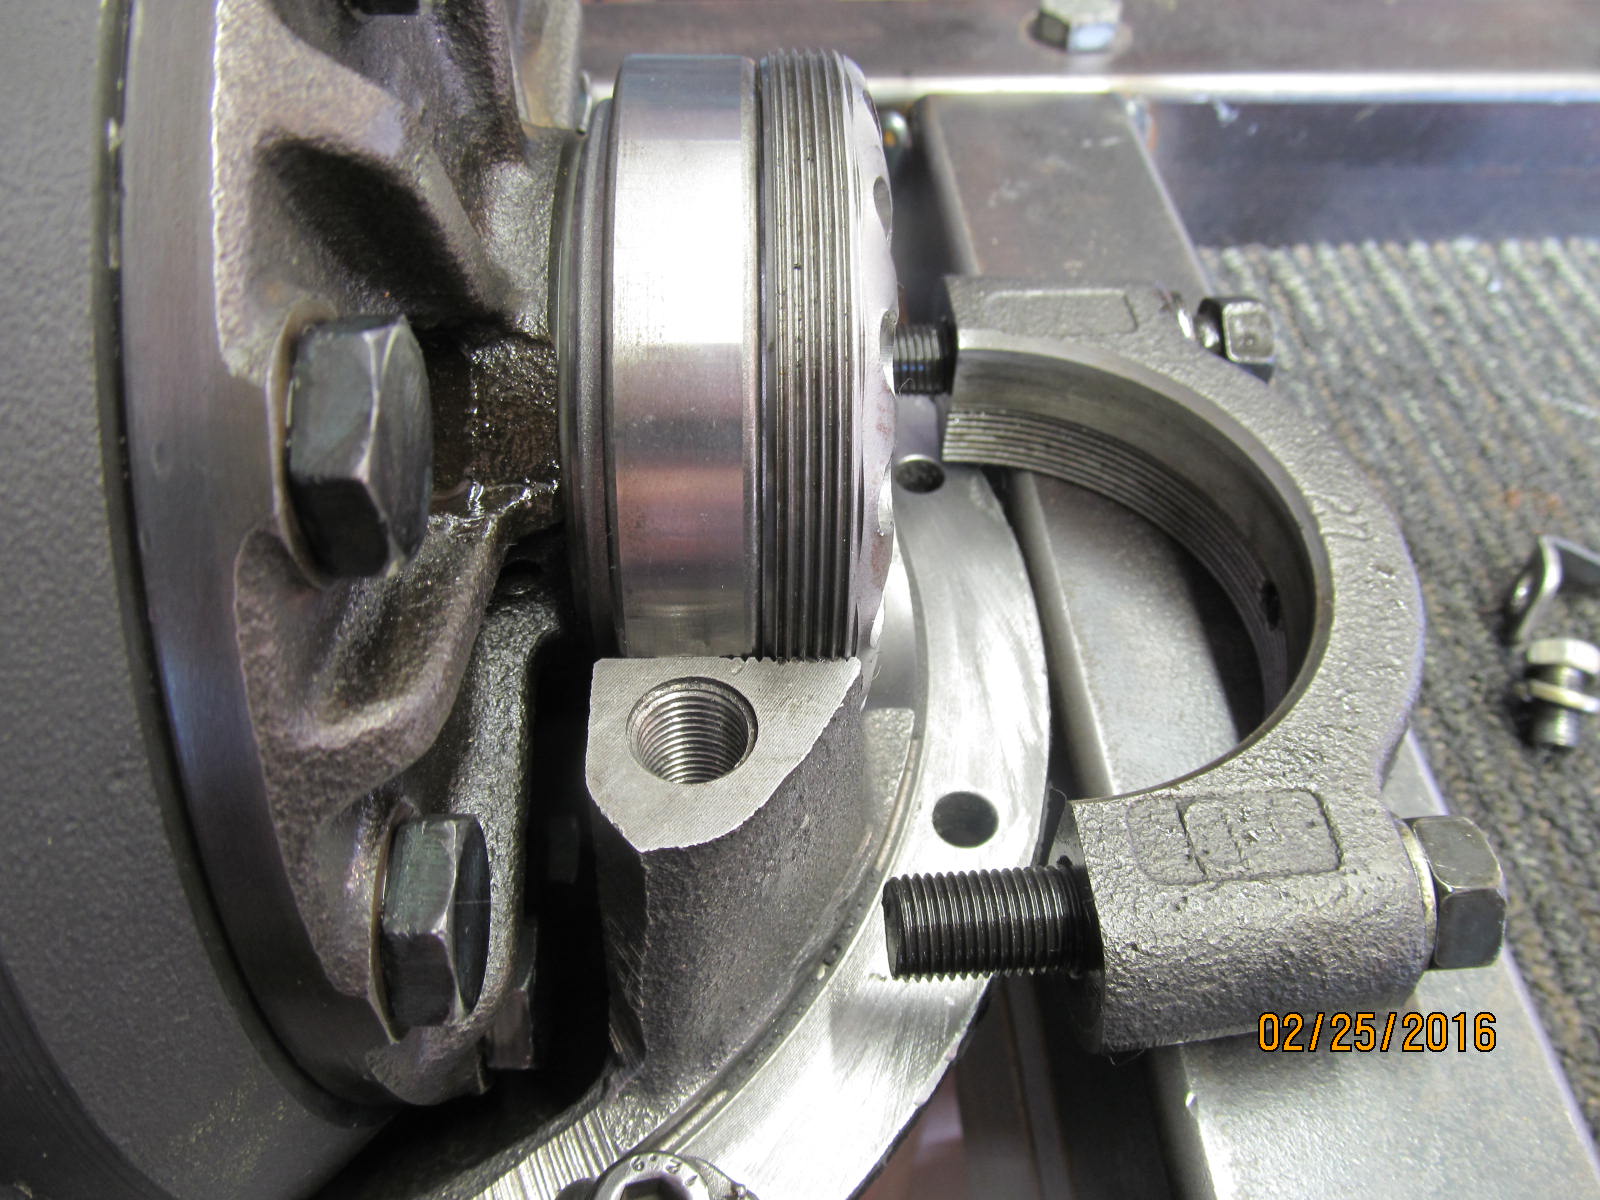
It happens all too often that the threads are placed in mis-alignment. These are in in the right groove.
|
|
|
|
|
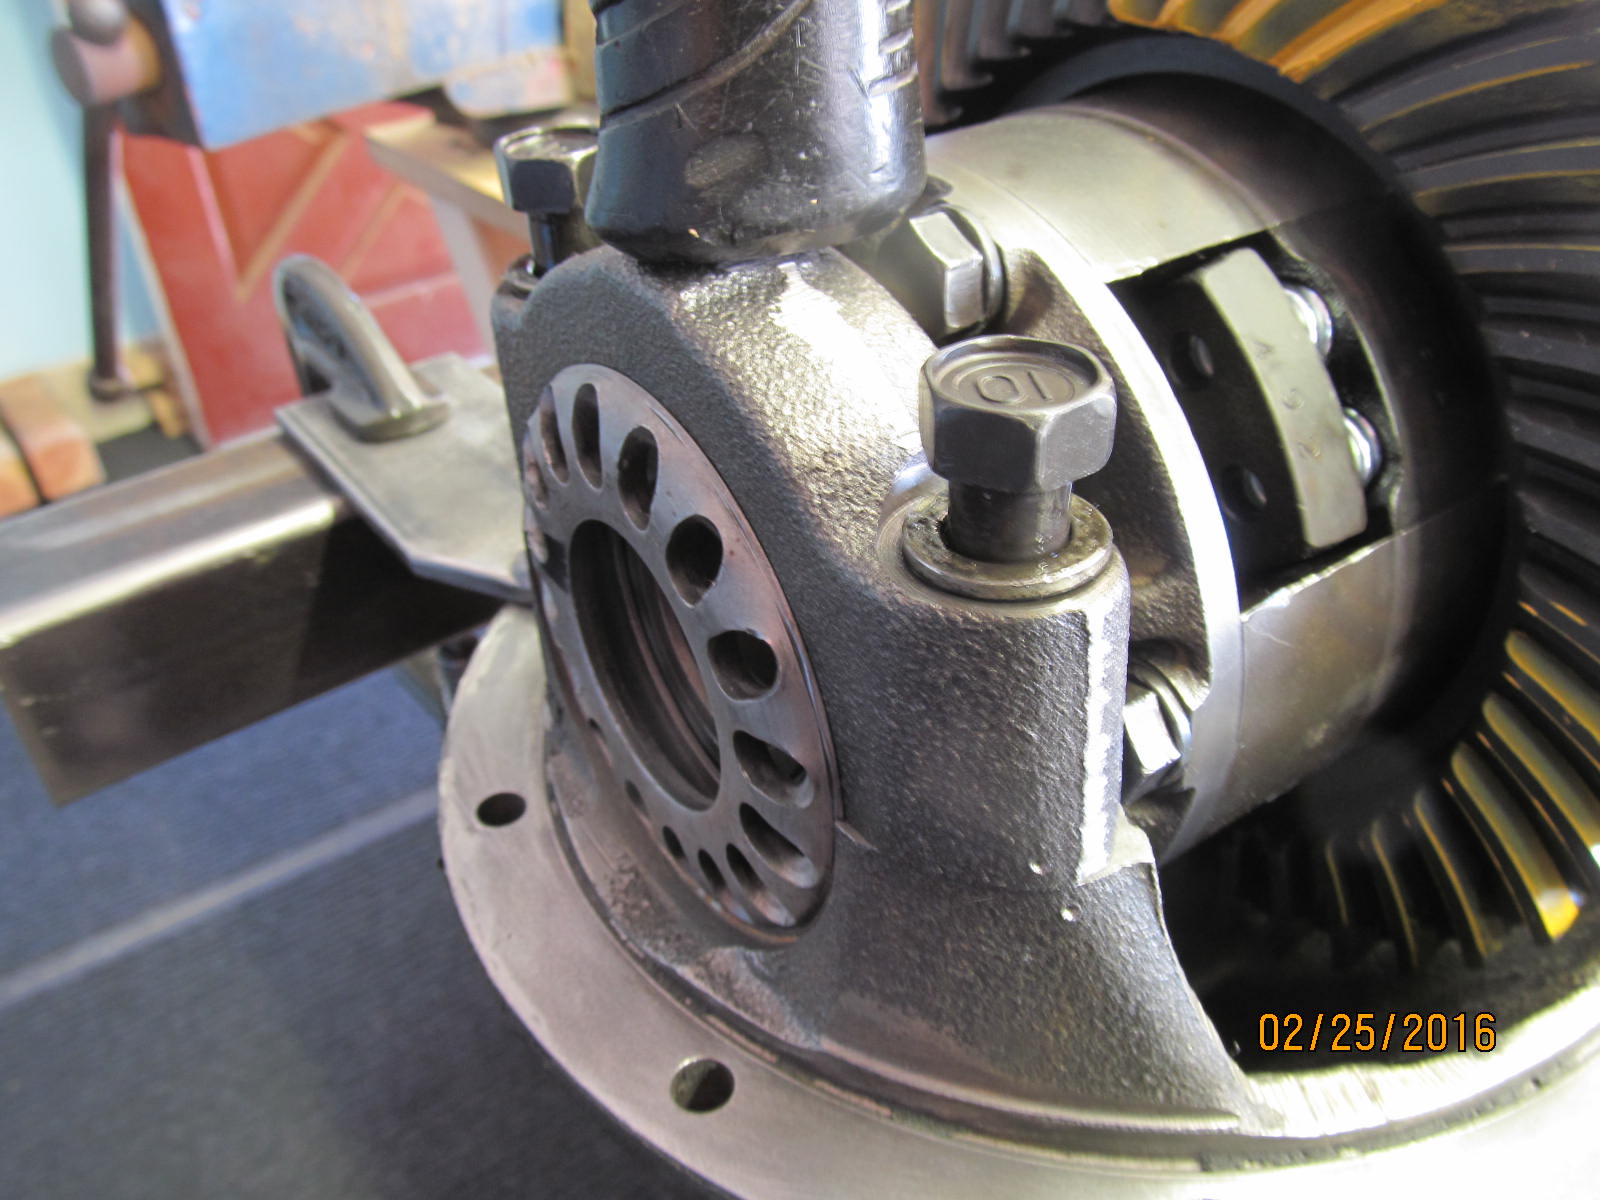
Start the 2 long bolts....tap the cap down firmly...it should make a nice solid TING! if the threads are all in mesh.
|
|
|
|
|
The book says 57 ft/lb but 70 is what is called out in the real world.
|
|
|
|
|
The wheel still turns freely indicating life is good.
|
|
|
|
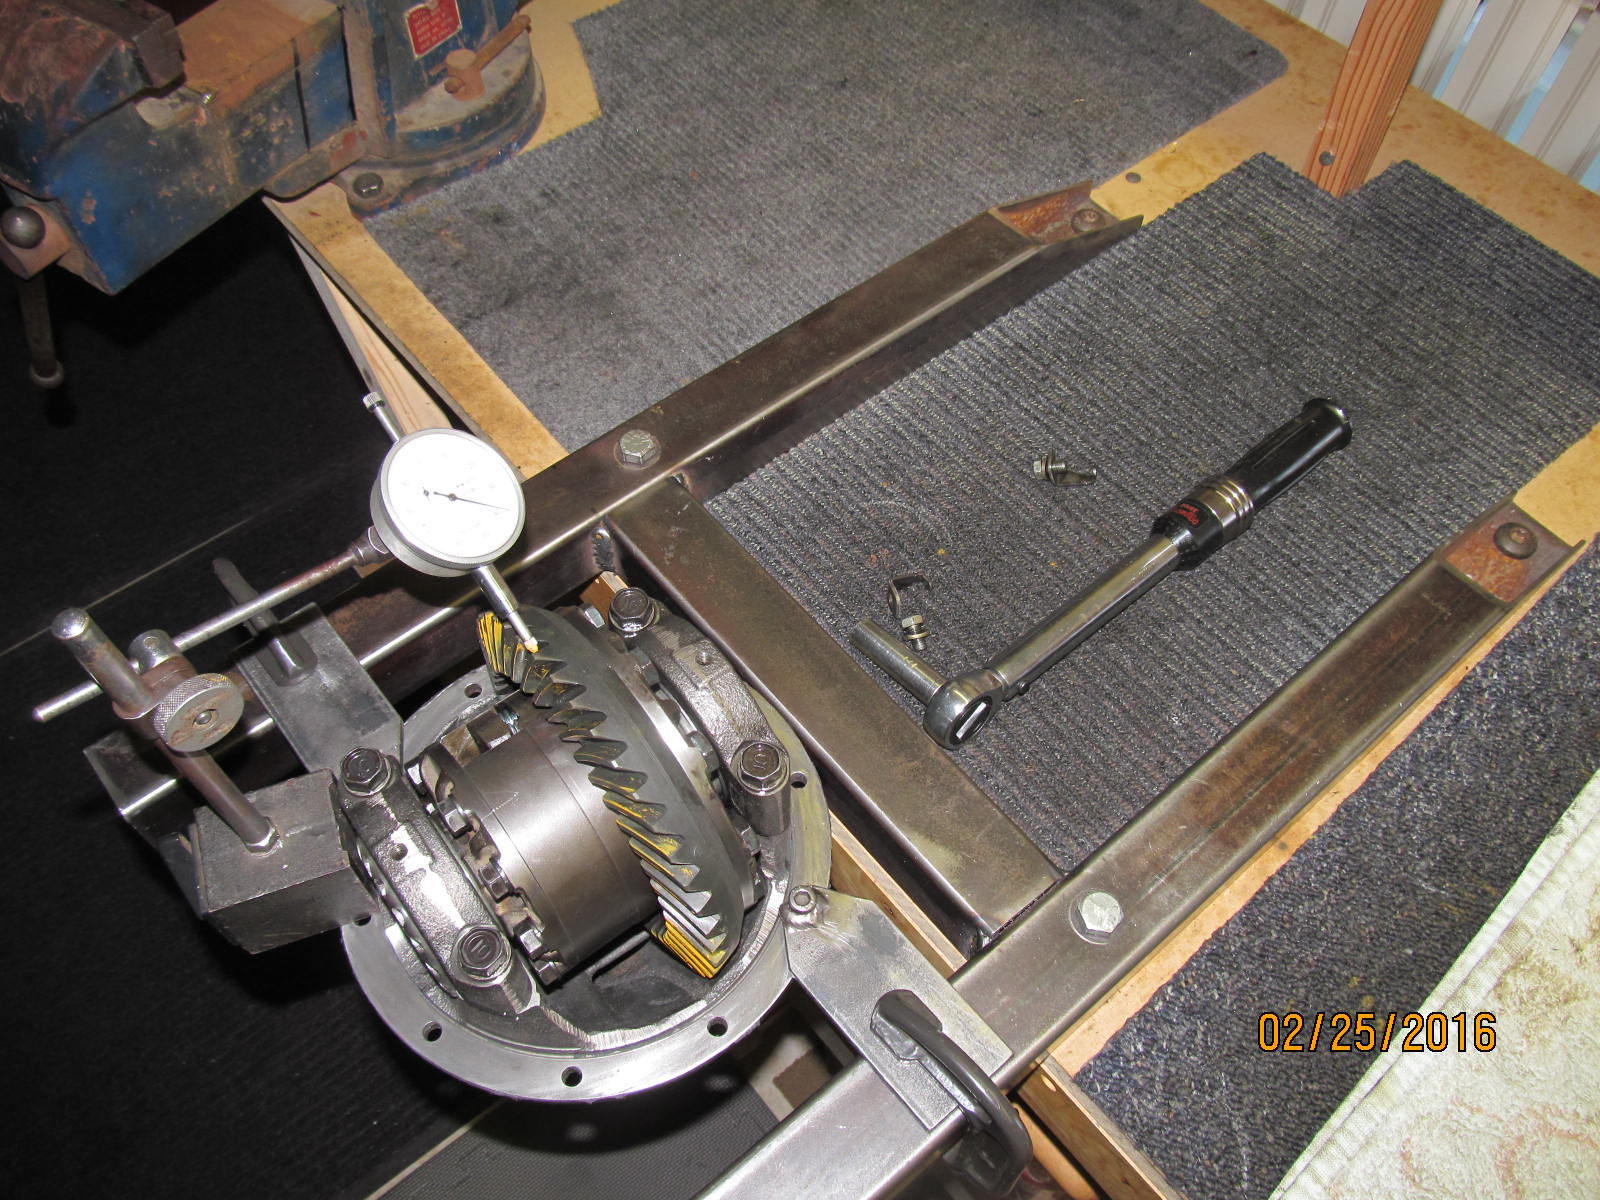
With the 3rd still in the fixture and on my back now, I can measure the total bearing preload....
The force required to turn both the pinion bearings and the carrier bearings.
|
|
|
|
|
Backlash is checked on every 3rd tooth. Not shown but a final pattern check shows good.
|
|
|
|
|
|
|
|
|
|
|
|
|

|