|
|
|
|
|
|
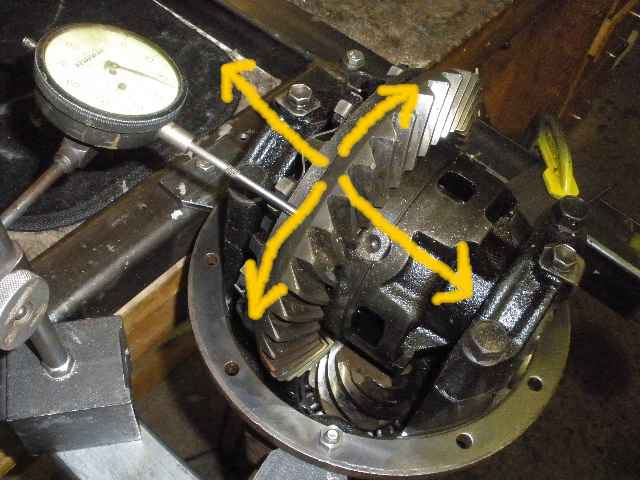
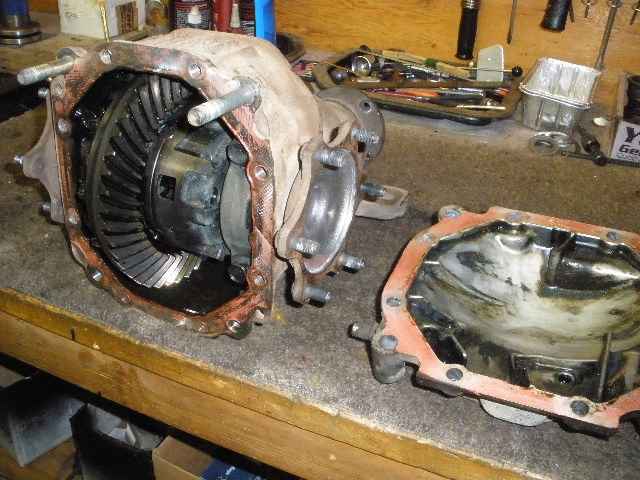
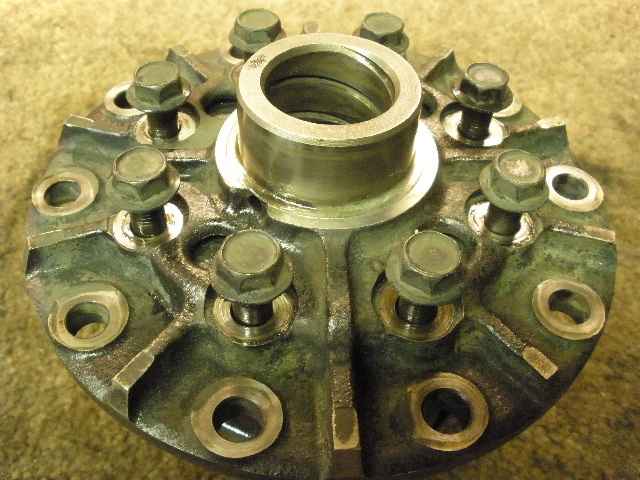
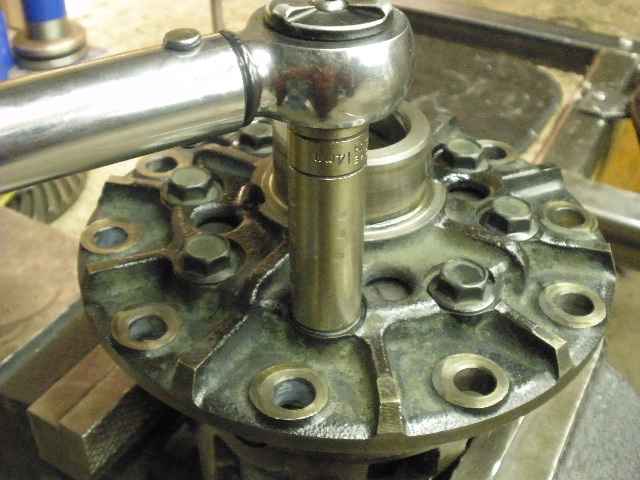
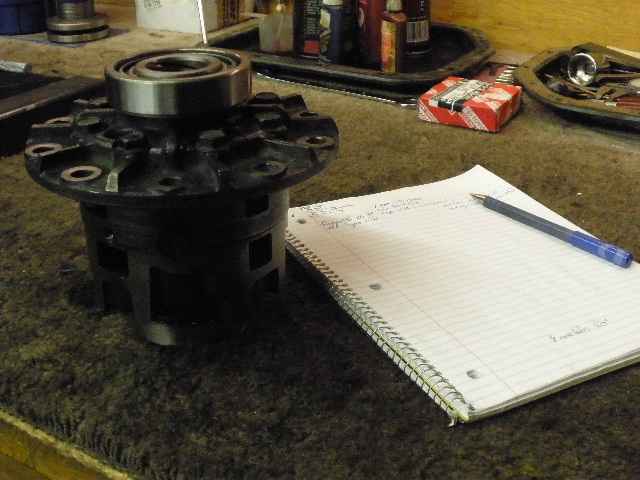
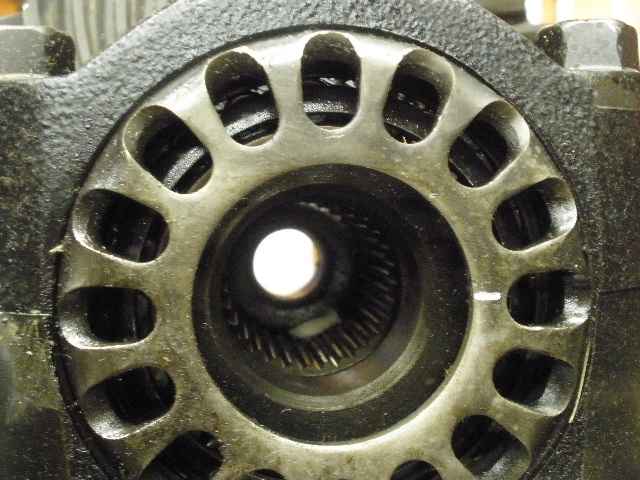
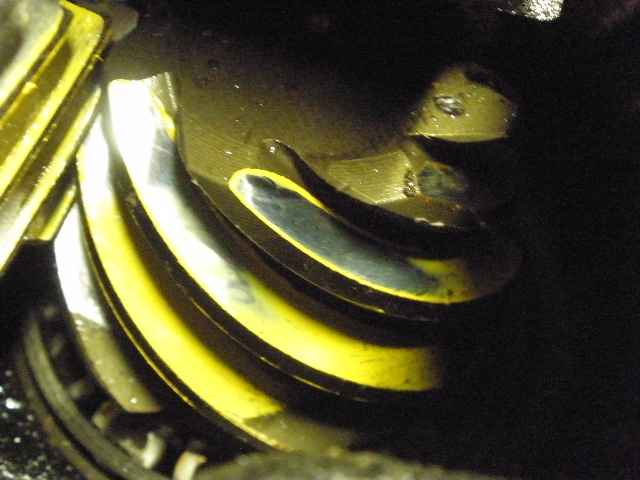
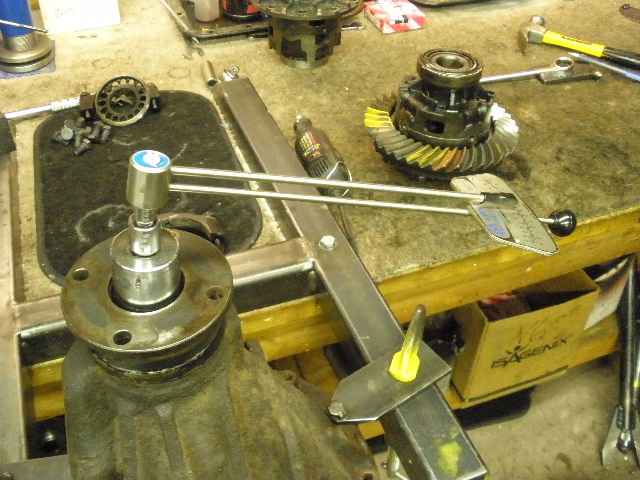
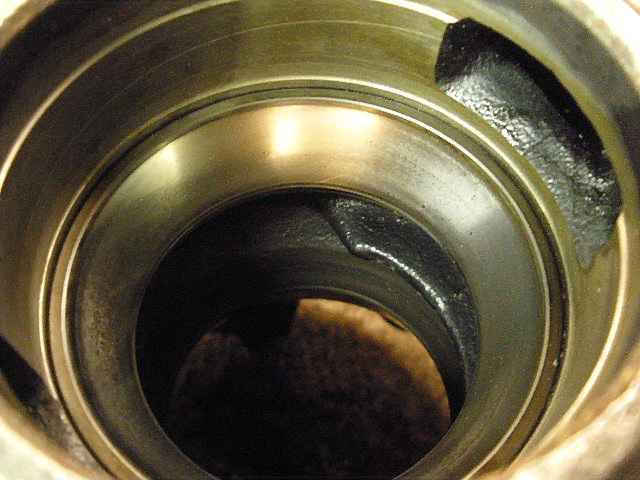
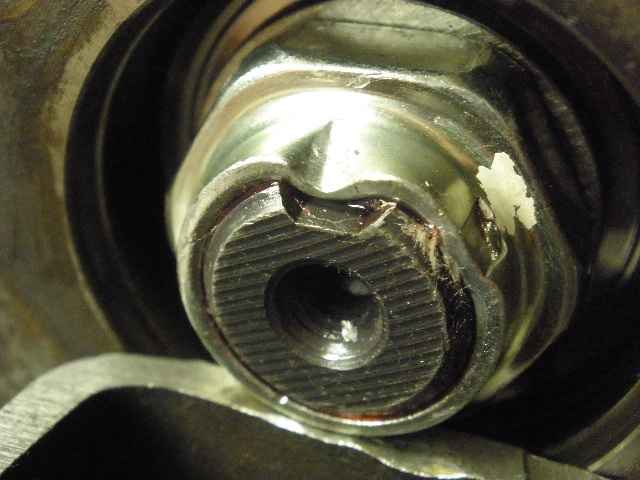
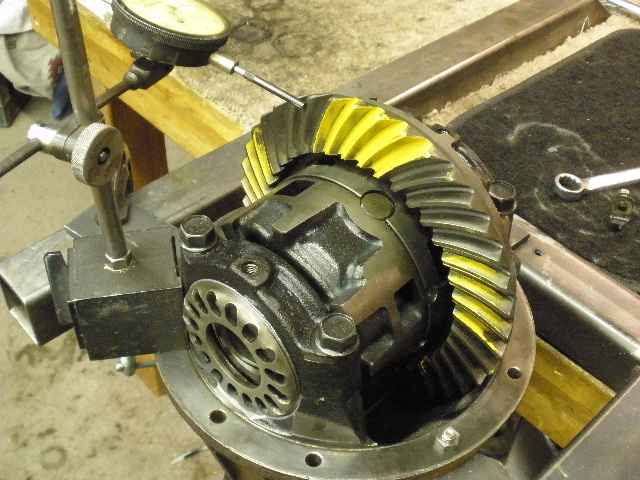
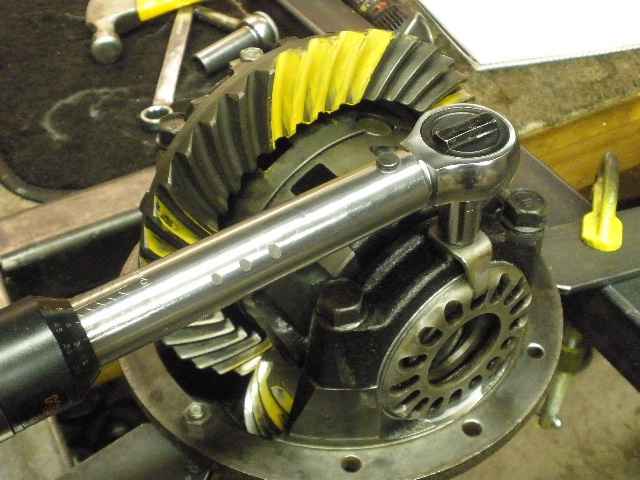
Jim, out of North Ridgeville, Ohio, started to notice a singing coming from his 4Runner's factory 488 rear 3rd with over 200,000 miles on it. The singing was on acceleration only. As shown in the pic above, the case had excessive slop in all directions. There was at least .010" axial slop/play in the direction that the dial indicator is shown to be(carrier bearings slopping around). |
|
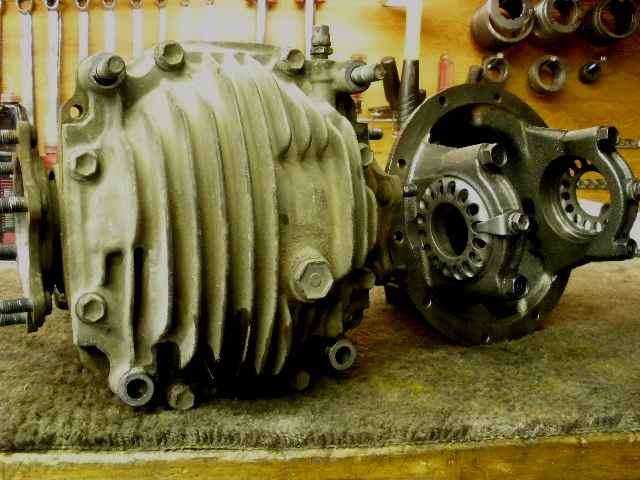
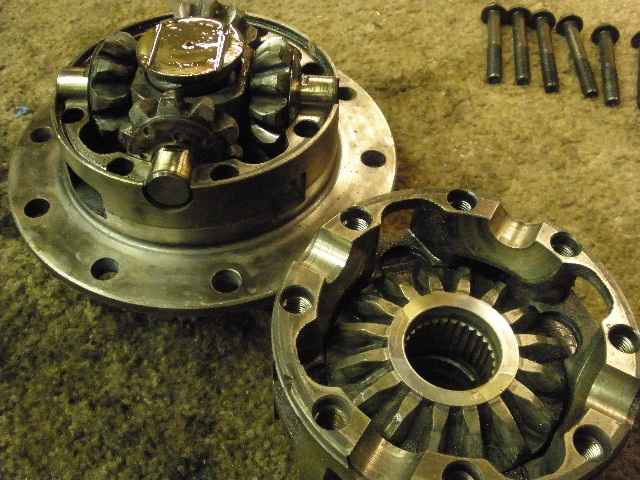
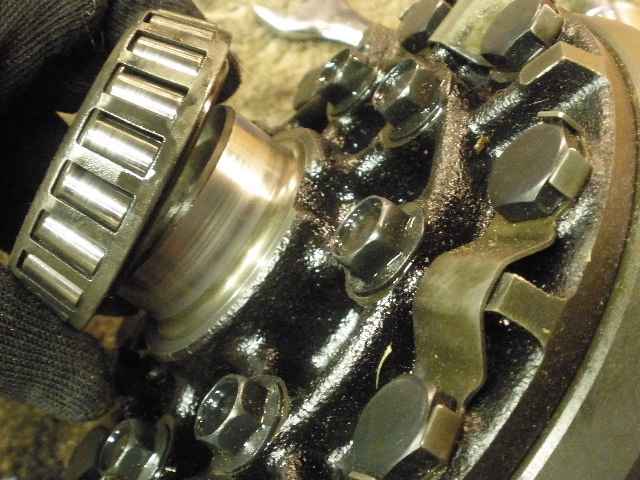
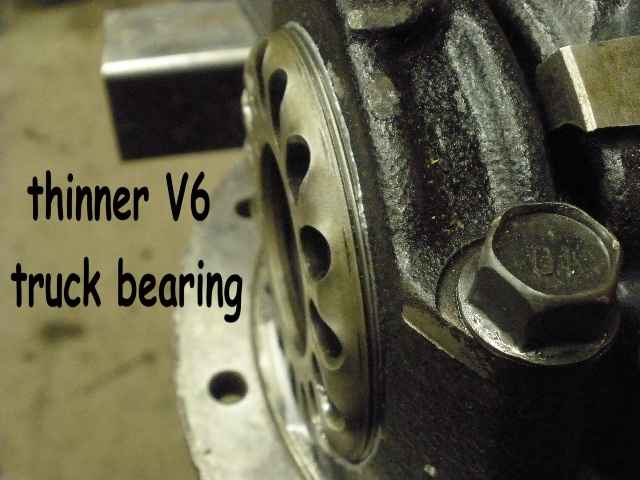
The supra carrier is even a little 'bulkier' looking than the common 8" carrier on the right. |
|
Jim paid only $100 and there was no shipping to worry about because the guy that had it just happen to be about 30 miles away and dropped it off to me. |
|
This particular unit came out of a 1986.5 Supra. These units vary in price from about 100~400 but many a good deal can be found here at www.car-part.com. |
|
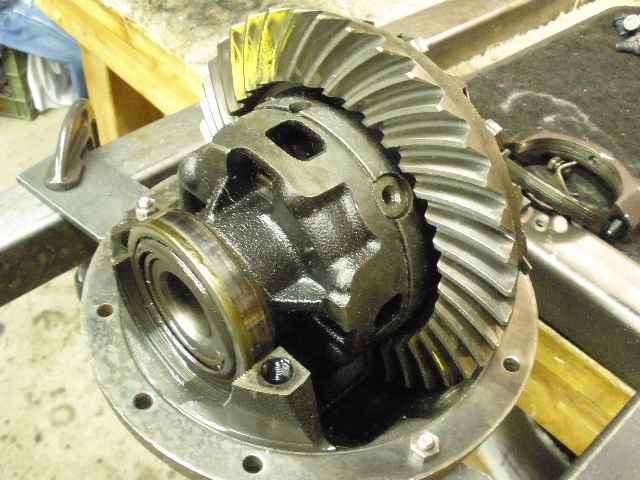
The aluminum cover is removed to reveal the lsd. |
|
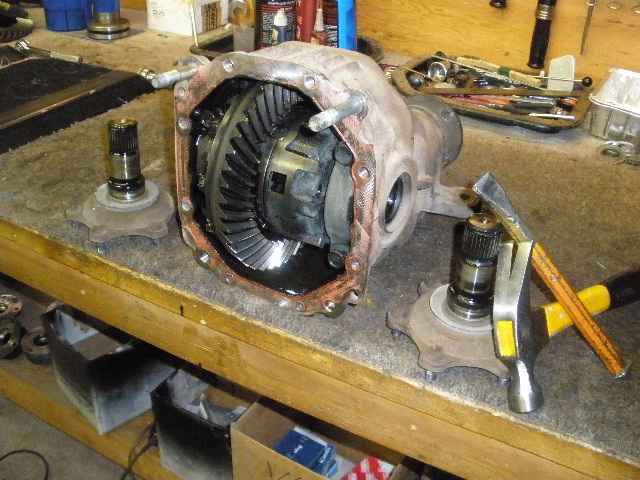
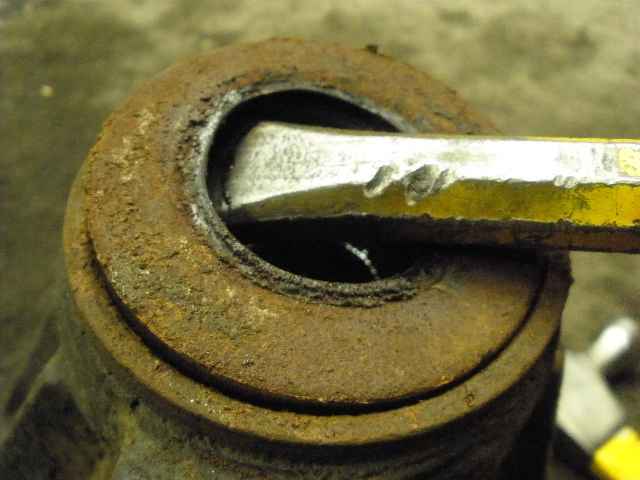
The short axle stubs come out easy by tapping a wedge shaped chisel between the carrier and the outer axle flange. |
|
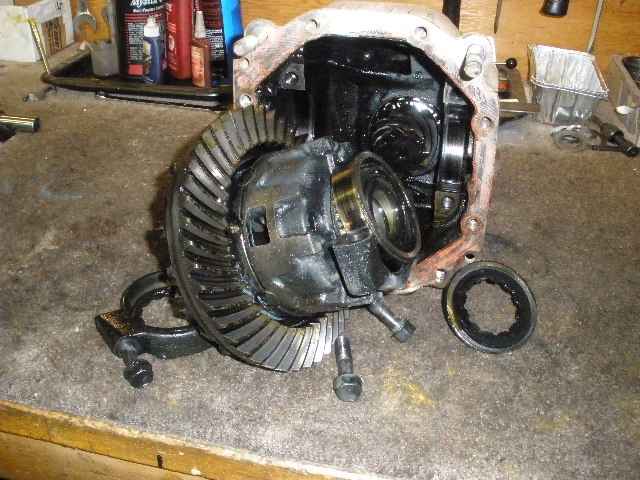
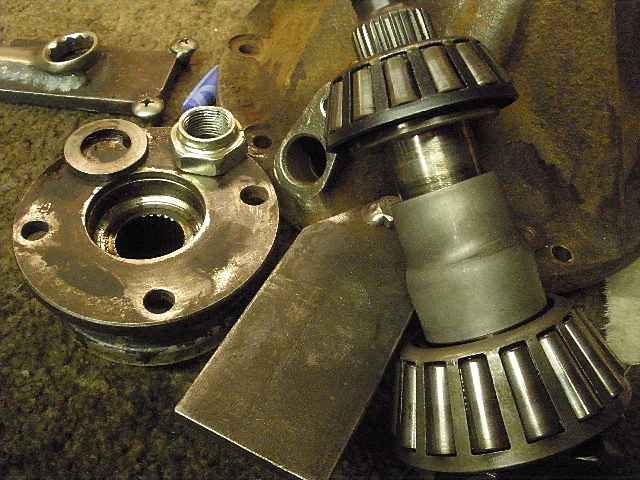
The bearing caps are removed and the lsd just falls out. |
|
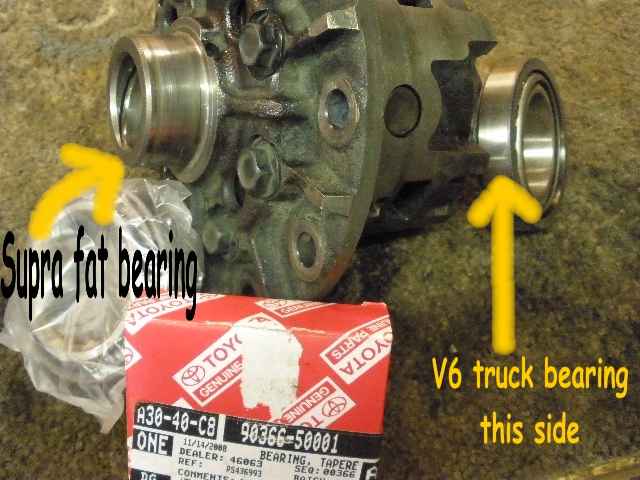
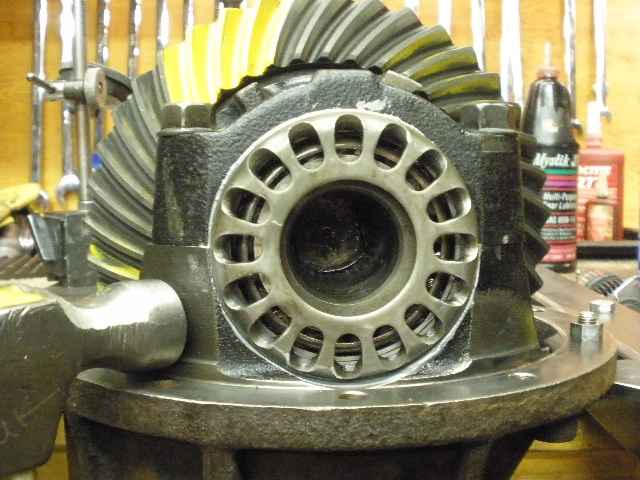
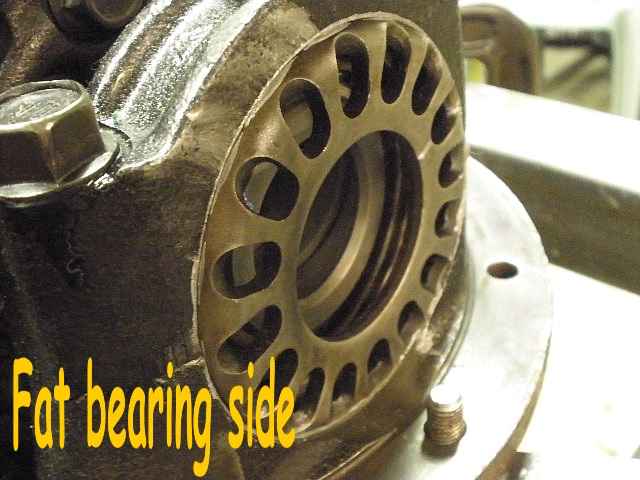
The fat Supra carrier bearing (90366-50001) must go on the ring side...and the standard V6 truck 'skinny' bearing (90366-50007) goes on the case side. |
|
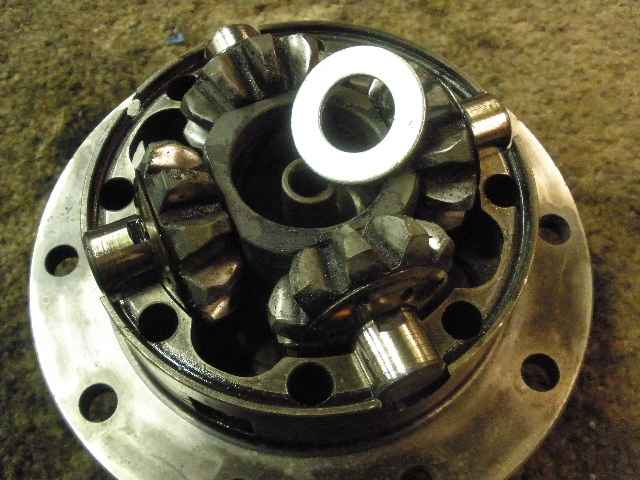
First, to inspect the inside of the lsd... |

|
This one has the clutch plates arranged in alternating order unlike a previous one that I installed last year.
|
|
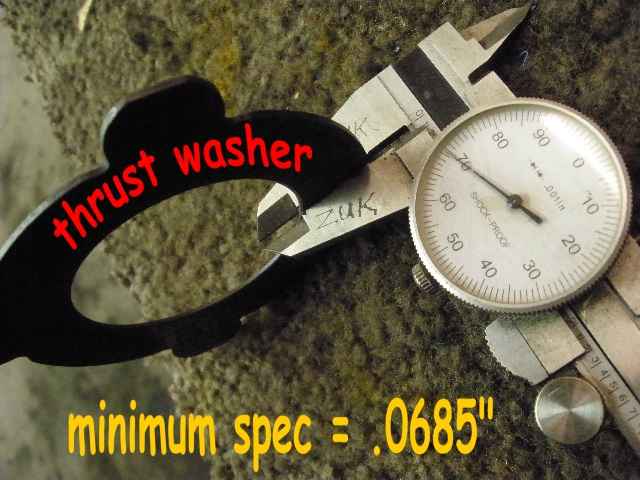
Here's a handy online link to the Supra MK3 lsd FSM. A check of all 10 "thrust washers" showed that they were still in spec even after 22 years. |
|
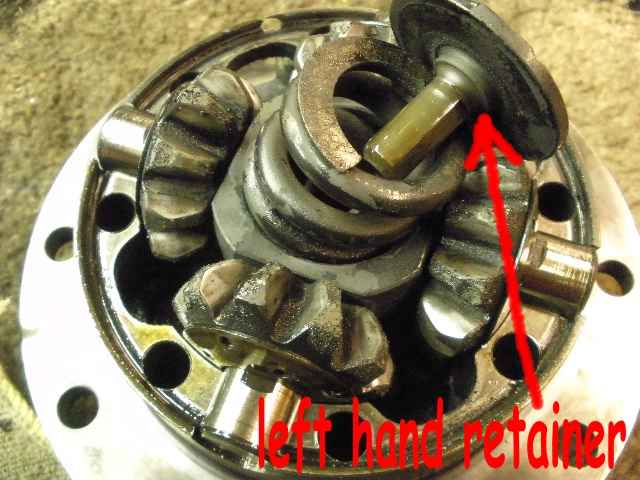
The left hand retainer and the strong spring are removed. |
|
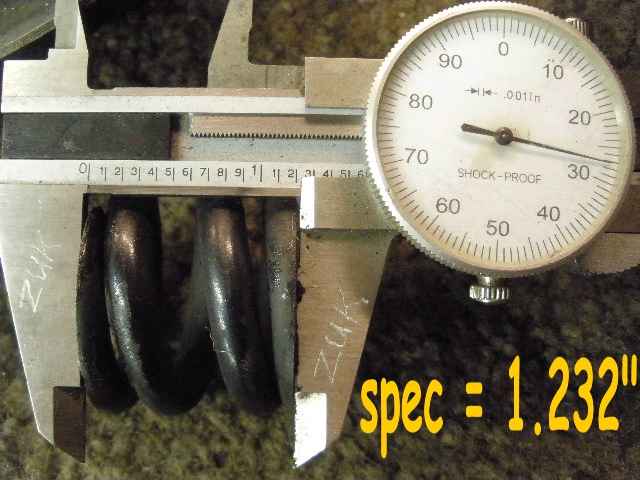
The spring measured about 4 thou out of spec. A .120" thick washer will be added to make up for this loss. |
|
...................... |
|
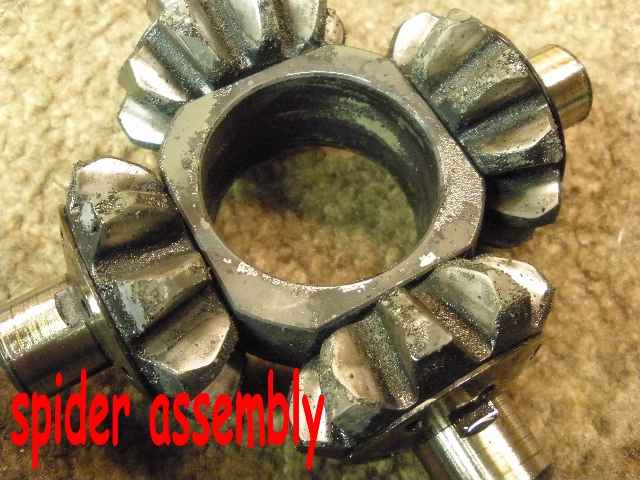
The spider assembly can be taken off. |
|
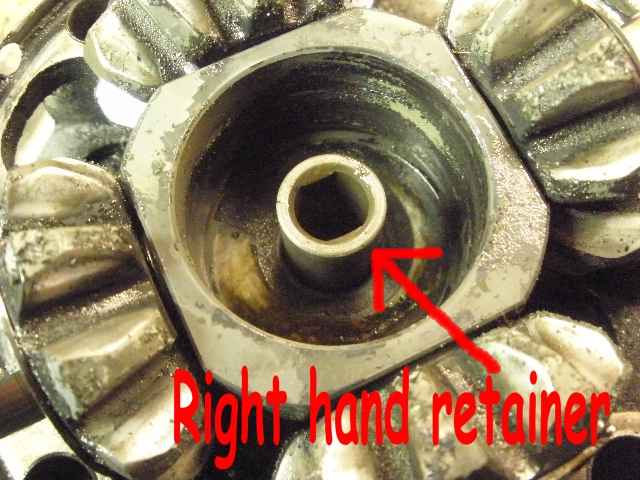
The right hand retainer can now be lifted off the sidegear. All of these terms are documented in the Supra FSM link from a few pics above. |

|
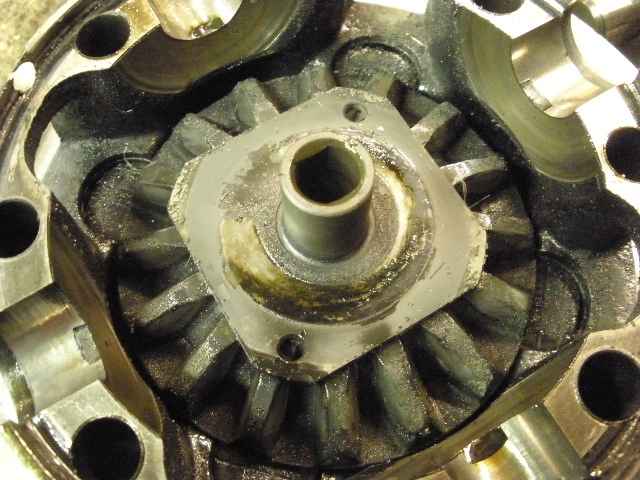
The sidegear is lifted up to reveal the last 5 'thrust washers' to inspect and measure. Careful attention to make sure everything was put back in the same order. |
|
This .120" thick washer fits in just right and will more than renew the old spring tension. |
|
... |
|
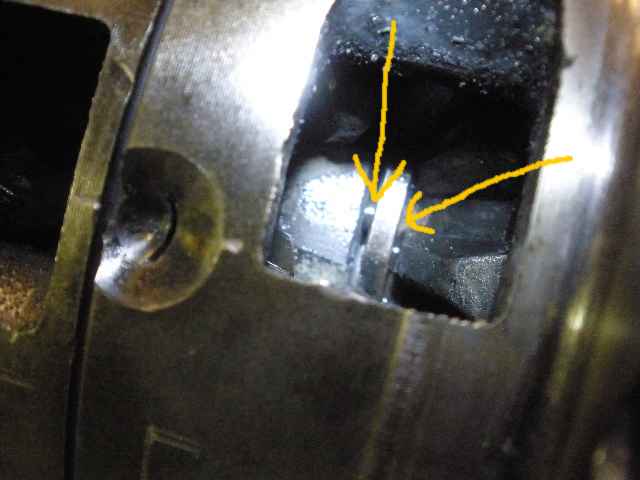
Make sure the 'spider knock pin' is aligned with the hole in the retainer plate when the case halves are bolted together. |
|
The FSM says 35 ft/lbs but I checked the ones that were tightened from the factory and found them to be at 50 ft/lbs on my relatively accurate torque wrench....so 50 it is. |
|
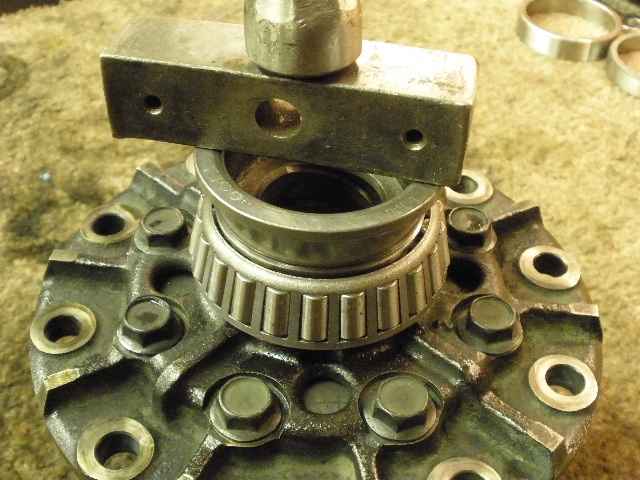
The new carrier bearings are tapped on the LSD. |
|
The LSD is ready for the ring gear swap-over... |
|
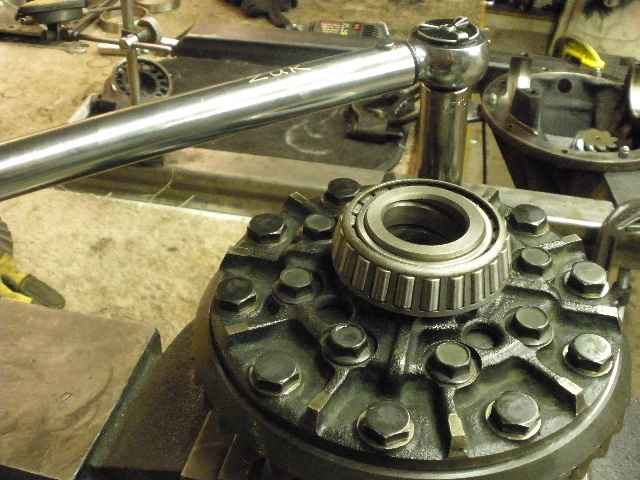
...but first, a pattern check on the original open 488. The carrier bearings were so sloppy that each wheel adjuster had to be snugged 4 notches(90 degrees) just to get rid of the axial play. |
|
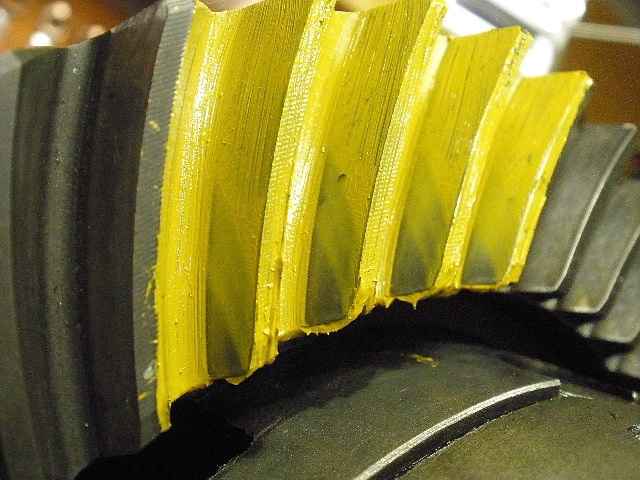
Drive is heavy toe...and this is with a measured .017" backlash. |
|
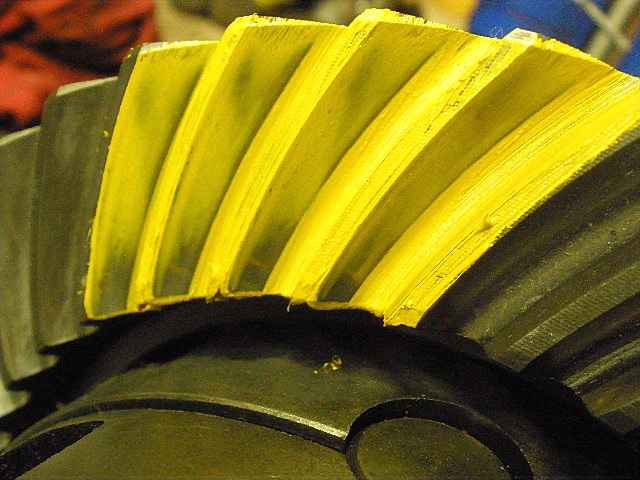
Coast is heavy heel. |
|
Drive side of the pinion says heavy toe also. |
|
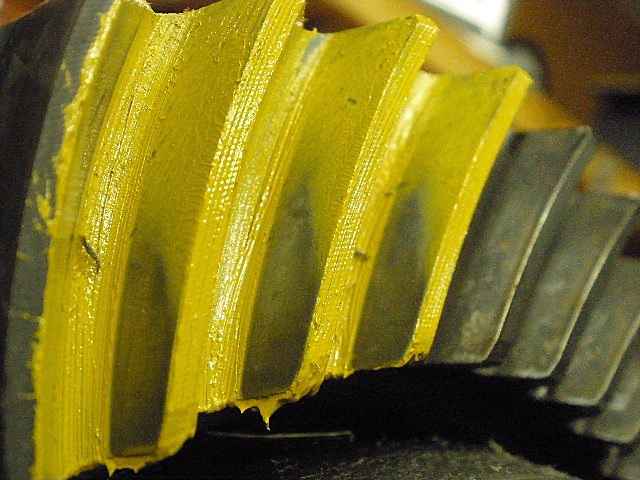
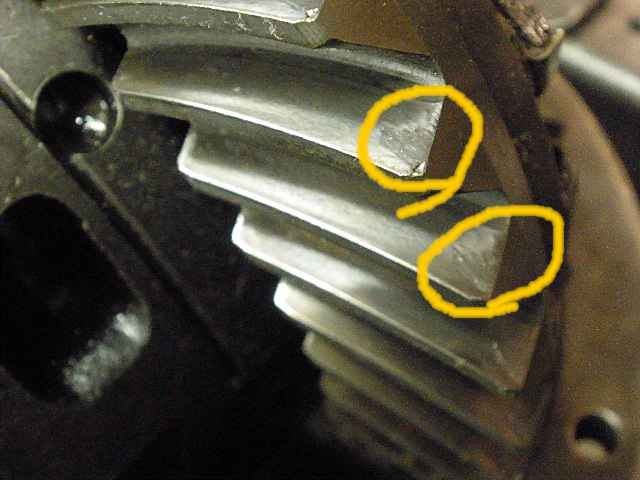
It's not uncommon, when running loose carrier bearings, for the ring gear to have some tell-tale 'ruts'. This was all the way around the ring. This ring gear likely still has lots of good life left in it. |
|
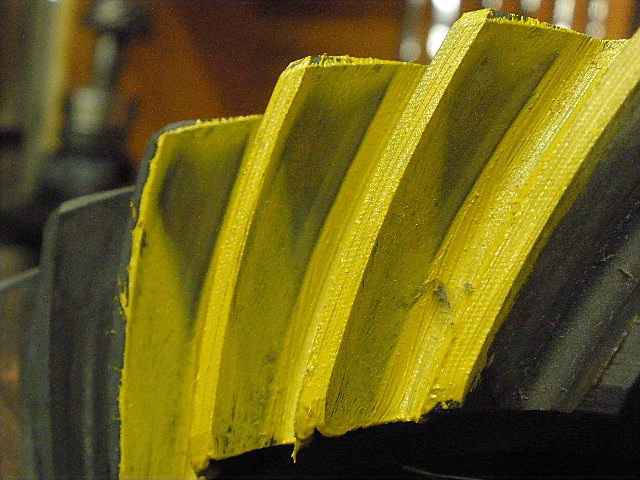
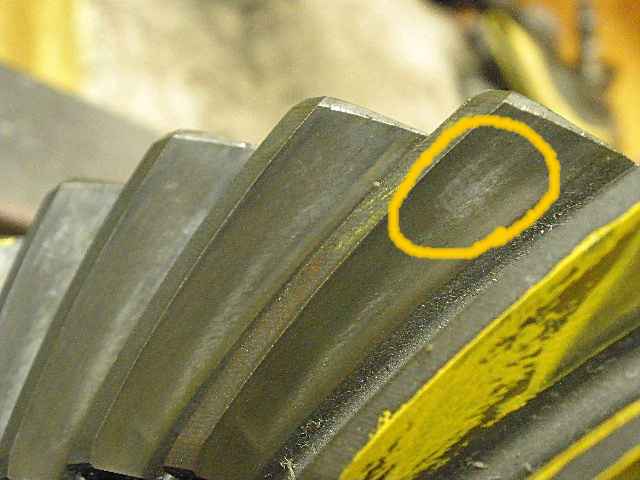
The coast side has far less damage...it sees far less use in the rear end application also. |
|
Bearing caps are marked and removed. Now the case comes out... |
|
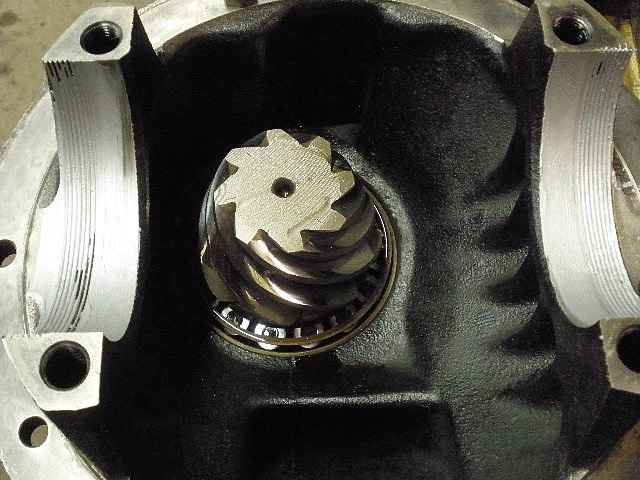
The pinion pre-load measured at zero. It did not seem to have any actual slop but it was very close to being noticeable. |
|
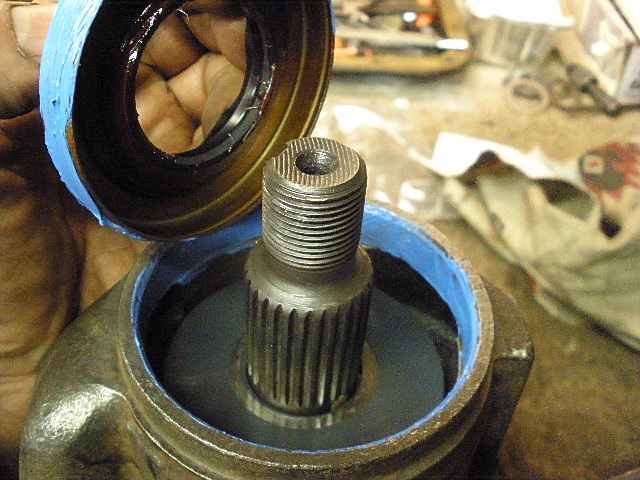
The after-market seal has seen better days and is towards the end of its life...so I thought I'd take it to the next level and check the pinion end of things...check the bearings for excessive pitting, add a new seal, and add some PPL. |
|
The pinion is pressed out. Usually very little effort is needed as it was in this case. Old seal comes off easily with the right tool. |
|
Oils are removed and everything appears in good shape. There is alot of mis-conceptions about the taboo of re-using crush sleeves. Because the sleeve will be crushed even more than before, it is ok to use it in this instance. I wouldn't do it if I thought it would compromise the quality of the install. |
|
No unusual damage for the miles involved on these races. |
|
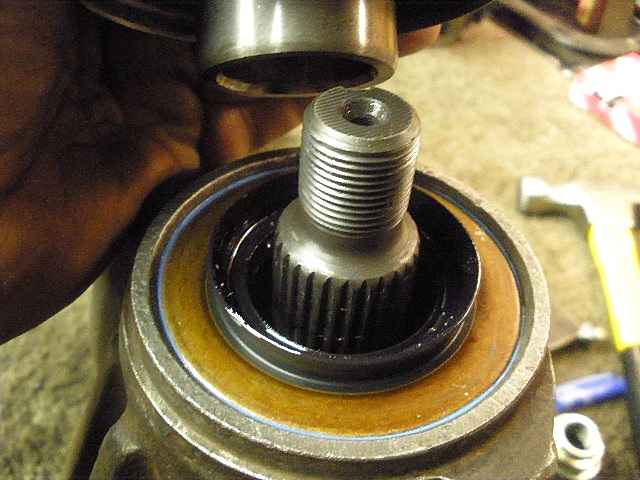
The bearings are heavily lubed with fresh gear oil and then the new seal is installed. |
|
Pinion flange is checked for bad grooves and then installed. |
|
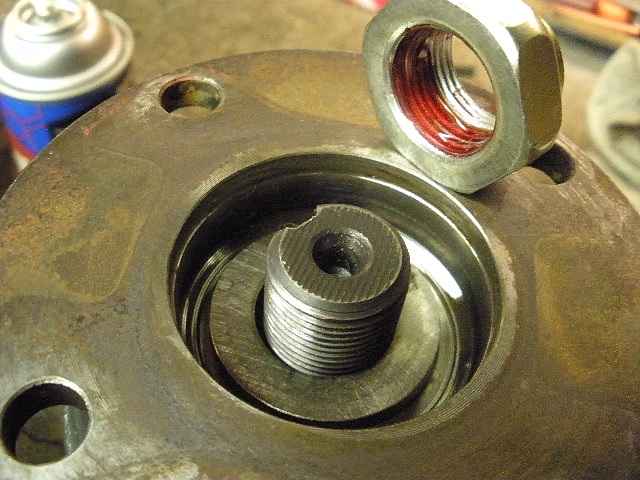
The original nut is cleaned and Loctite is applied. |

|
The pinion nut is tightened up about 70 degrees past the point where it was originally staked before. I would estimate the nut started to tighten up about 35 degrees past the notch mark...and the next 35 degrees was actual compression and new crushing on the sleeve. I had to actually use the 4 foot cheater bar to get the pinion nut to its new location. |
|
After I had measured a modest 3 in/lbs of PPL, the nut was re-staked in its new location. This "freshening up" of the PPL results in an overall stronger, quieter gear mesh. |
|
The carrier bearing most likely to come off with just finger strength is the one closest to the ring gear (like this one did)....this is especially true if the bearings are run in the loose and wobbly mode like this one. |
|
The ring was removed from the original open case and moved over to the LSD case. As is the usual case, the flat file was run over both surfaces before the ring was installed. |
|
A thick coating of anti-seize was applied to the threads. |
|
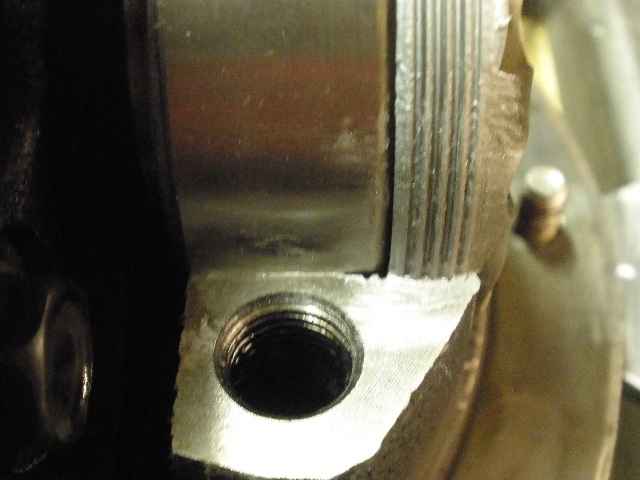
Full thread engagement on the ring gear side with the Supra fat bearing. If the thinner
V6 truck bearing were to be used here then the adjuster wheel would tighten up pre-maturely
due to thread bottoming. There are still about 2 threads left which is perfect.
|
|
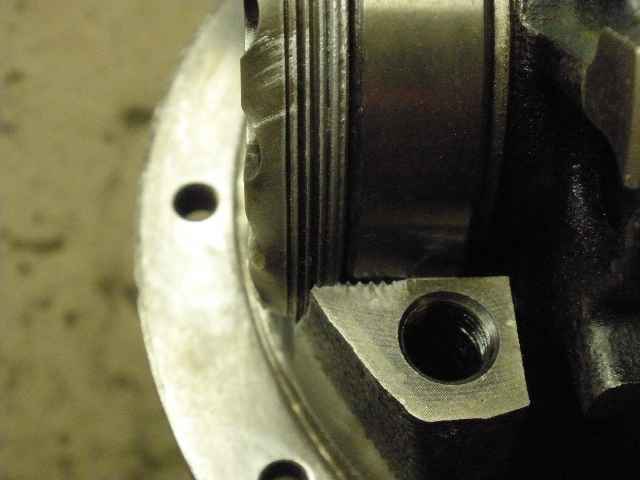
Adequate thread engagement on the case side with the thinner V6 bearing(90366-50007). |

|
Lots of hammer taps while the adjuster wheels are tightened up to set BackLash (BL) and Pinion Pre-Load (PPL). |
|
While the pinion is being rotated, I also send a shockwave from this new angle to make sure the 2 bearings are 'equalized in tension'. |
|
Excess anti-seize surrounds the wheel. Full thread engagement. |
|
The other side has adequate engagement. |
|
As shown in the last 2 pics of this page, the backlash is averaging .0085" with very good CBPL. This is the drive side and the pattern shows to be heavy toe. There may be some whistle noise while the high spots are wearing down. |
|
Coast side has some high spots also. The factory pinion depth has been preserved and only time will re-establish the contact area that the factory gears once had. |
|
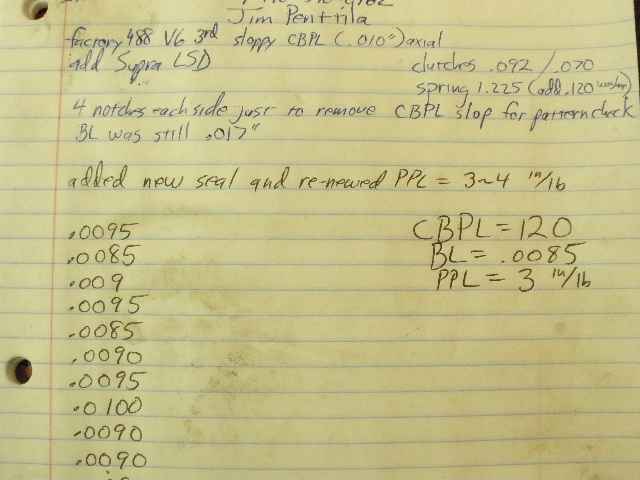
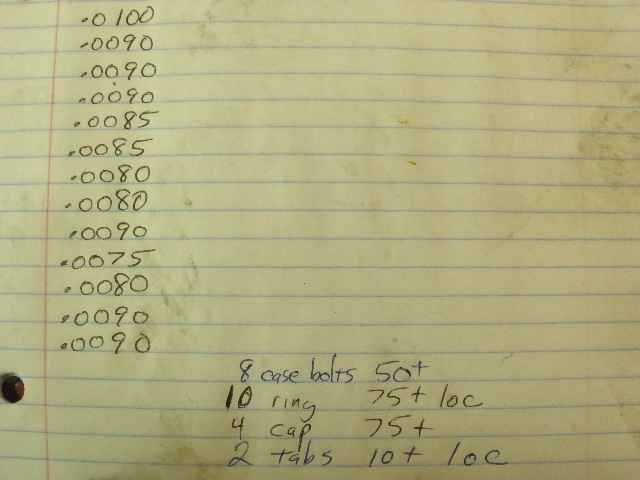
Backlash measurements are taken on every other tooth for a total of about 20 readings. |
|
120 inch/pounds(10ft/lb) and Loctite. Done. |
|
............ |
|
............. |

|