|
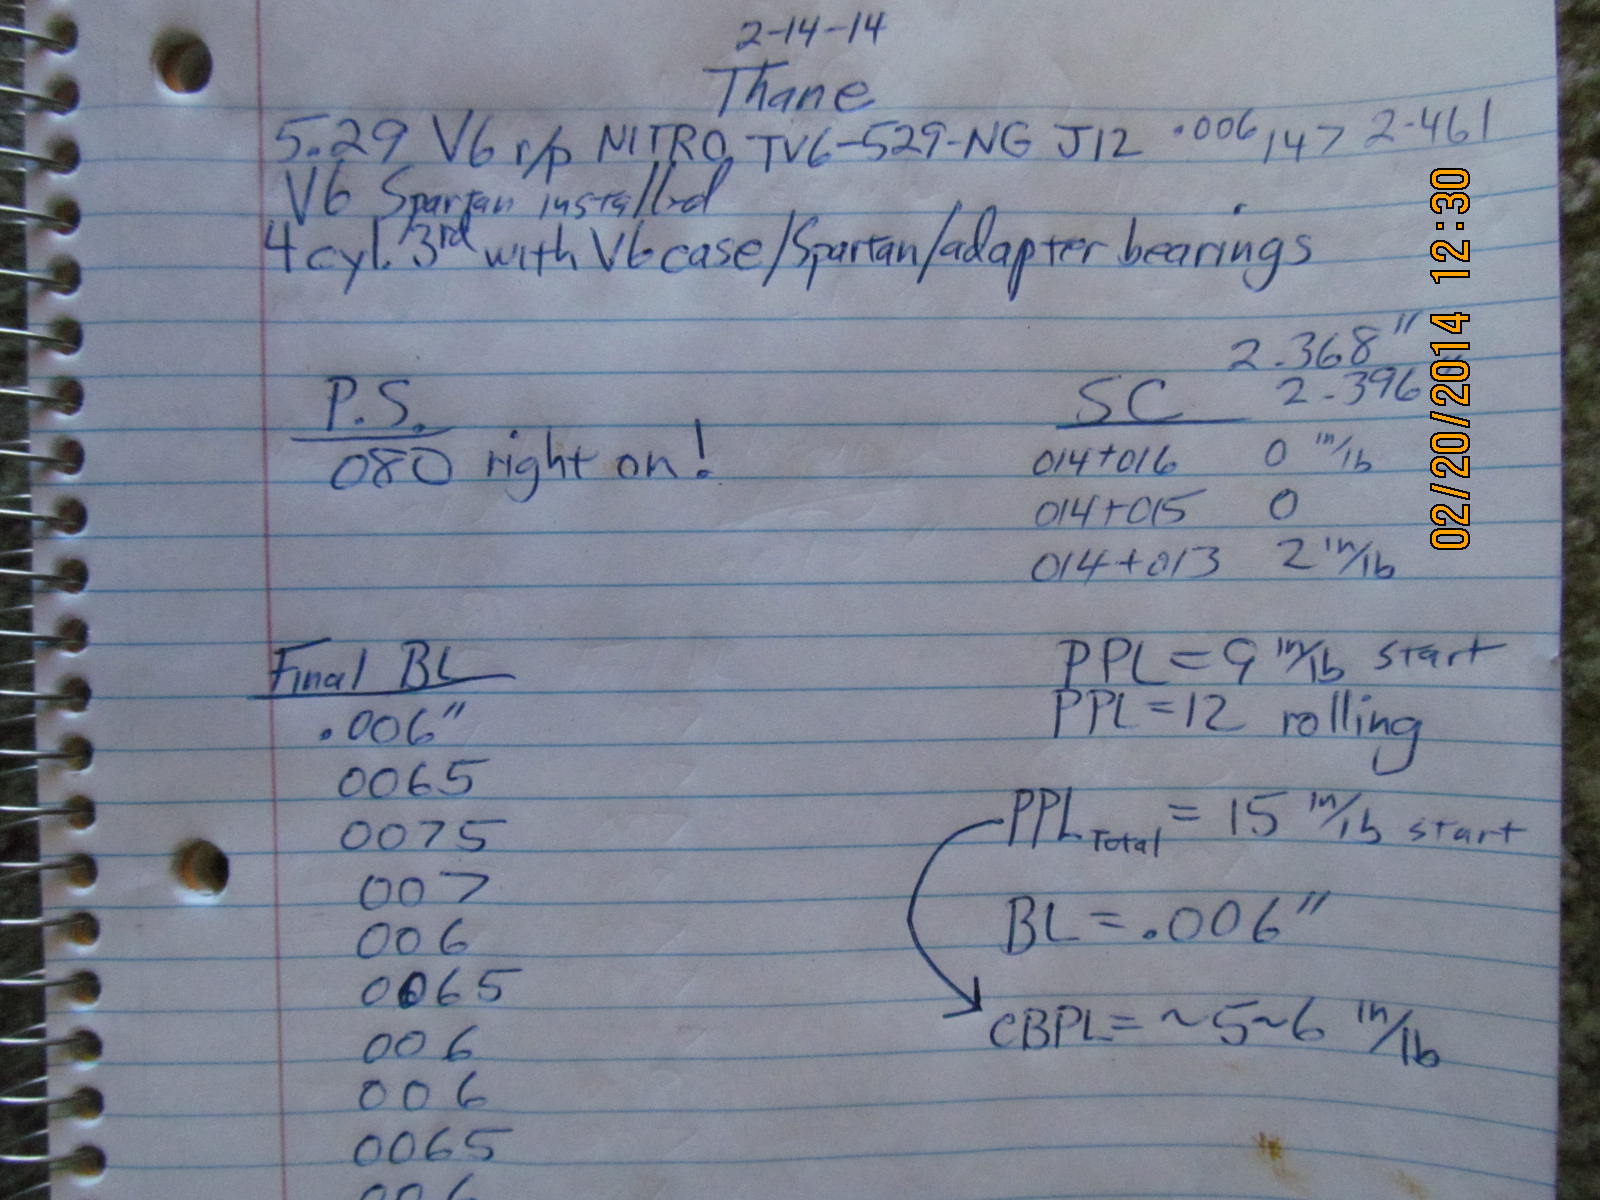
Thane's "4 cyl diff" gets 529 V6 Nitros/V6 carrier/V6 Spartan Locker
|
|
(75 1600x1200 pics loading)
|
|
FEB 27 2014
|
|
|
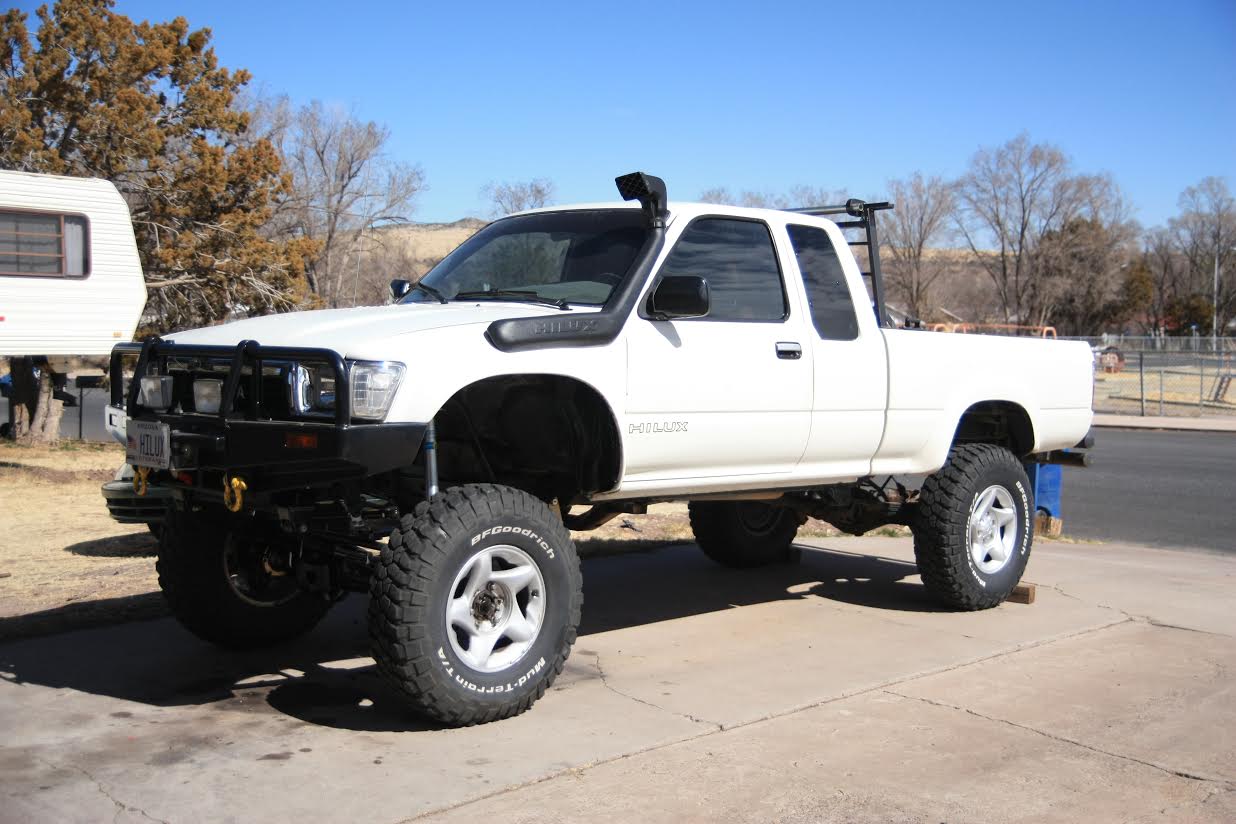
Thane is in the process of his 1989 Toyota build-up. He lives about 40 miles east of Show Low putting him very close to the
New Mexico border. He was in my neighborhood so he dropped off his rear 4 cyl 3rd. He knows the front is a bit too high so
he is working on that as time permits. Interesting enough, future plans include Mercedes 3.0L 5 cylinder diesel.
|
|
|
|
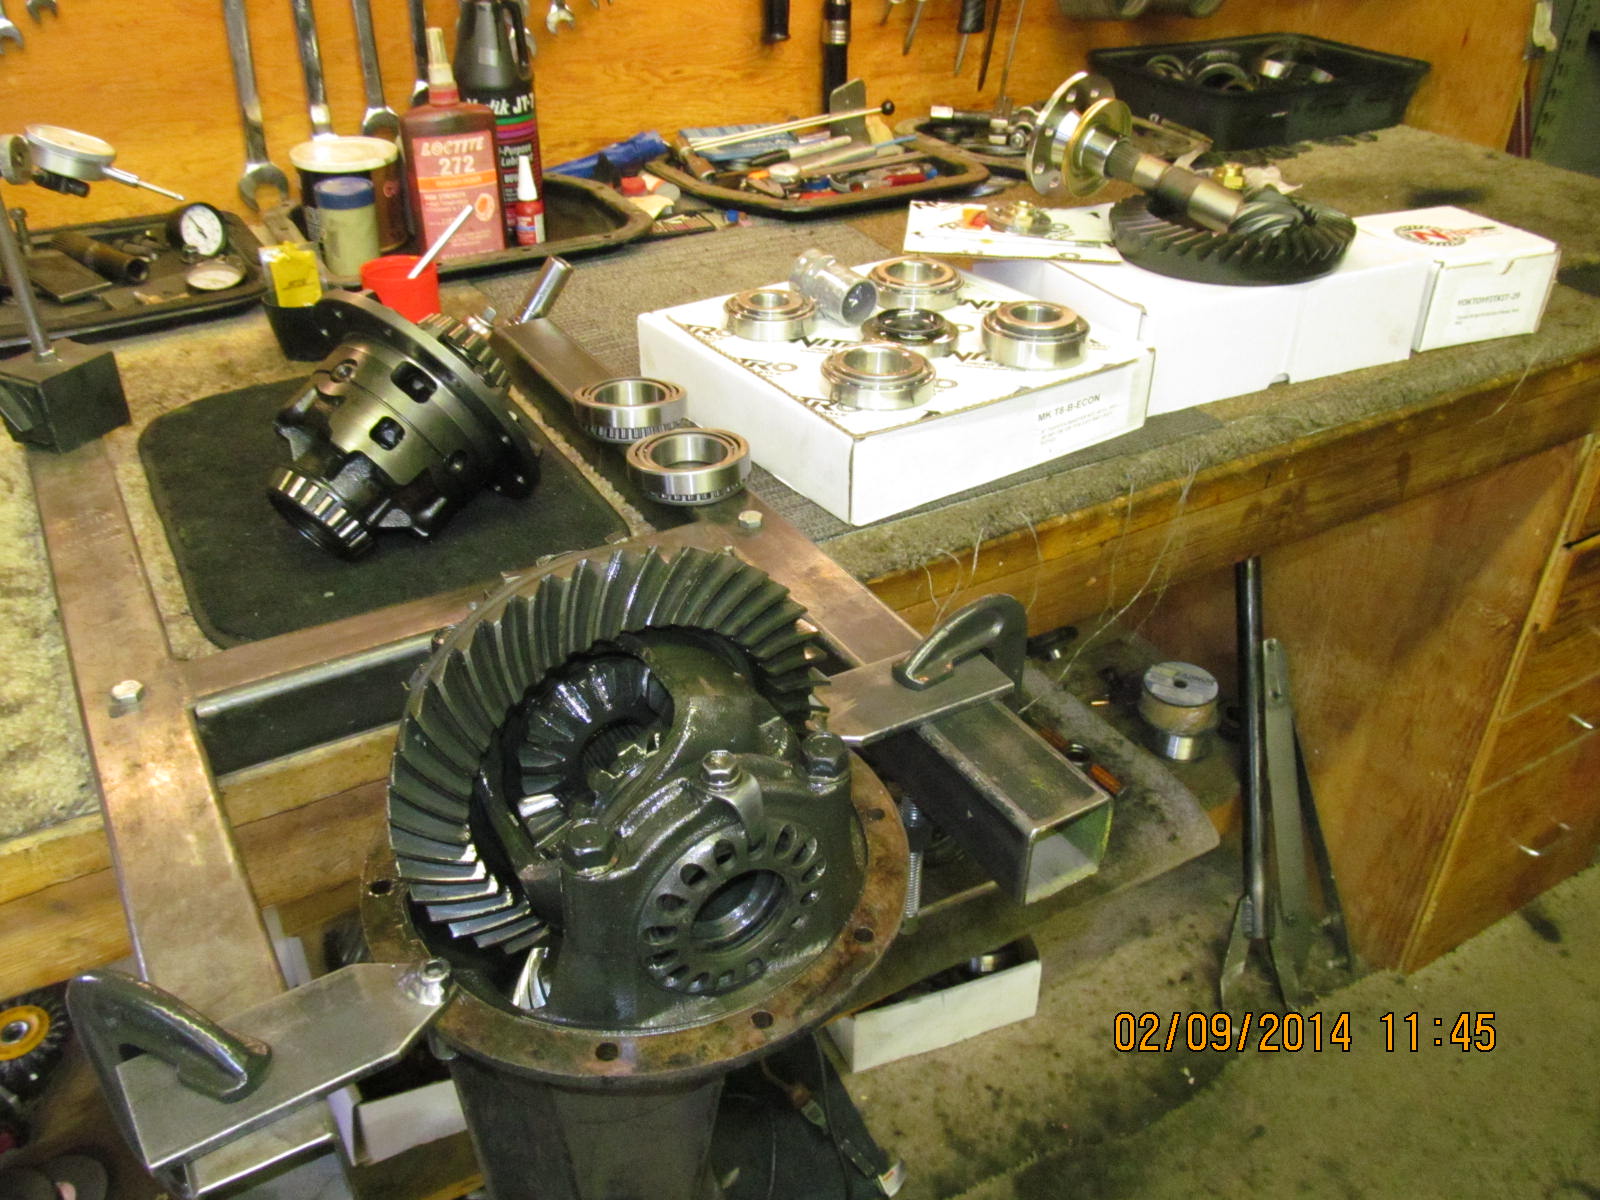
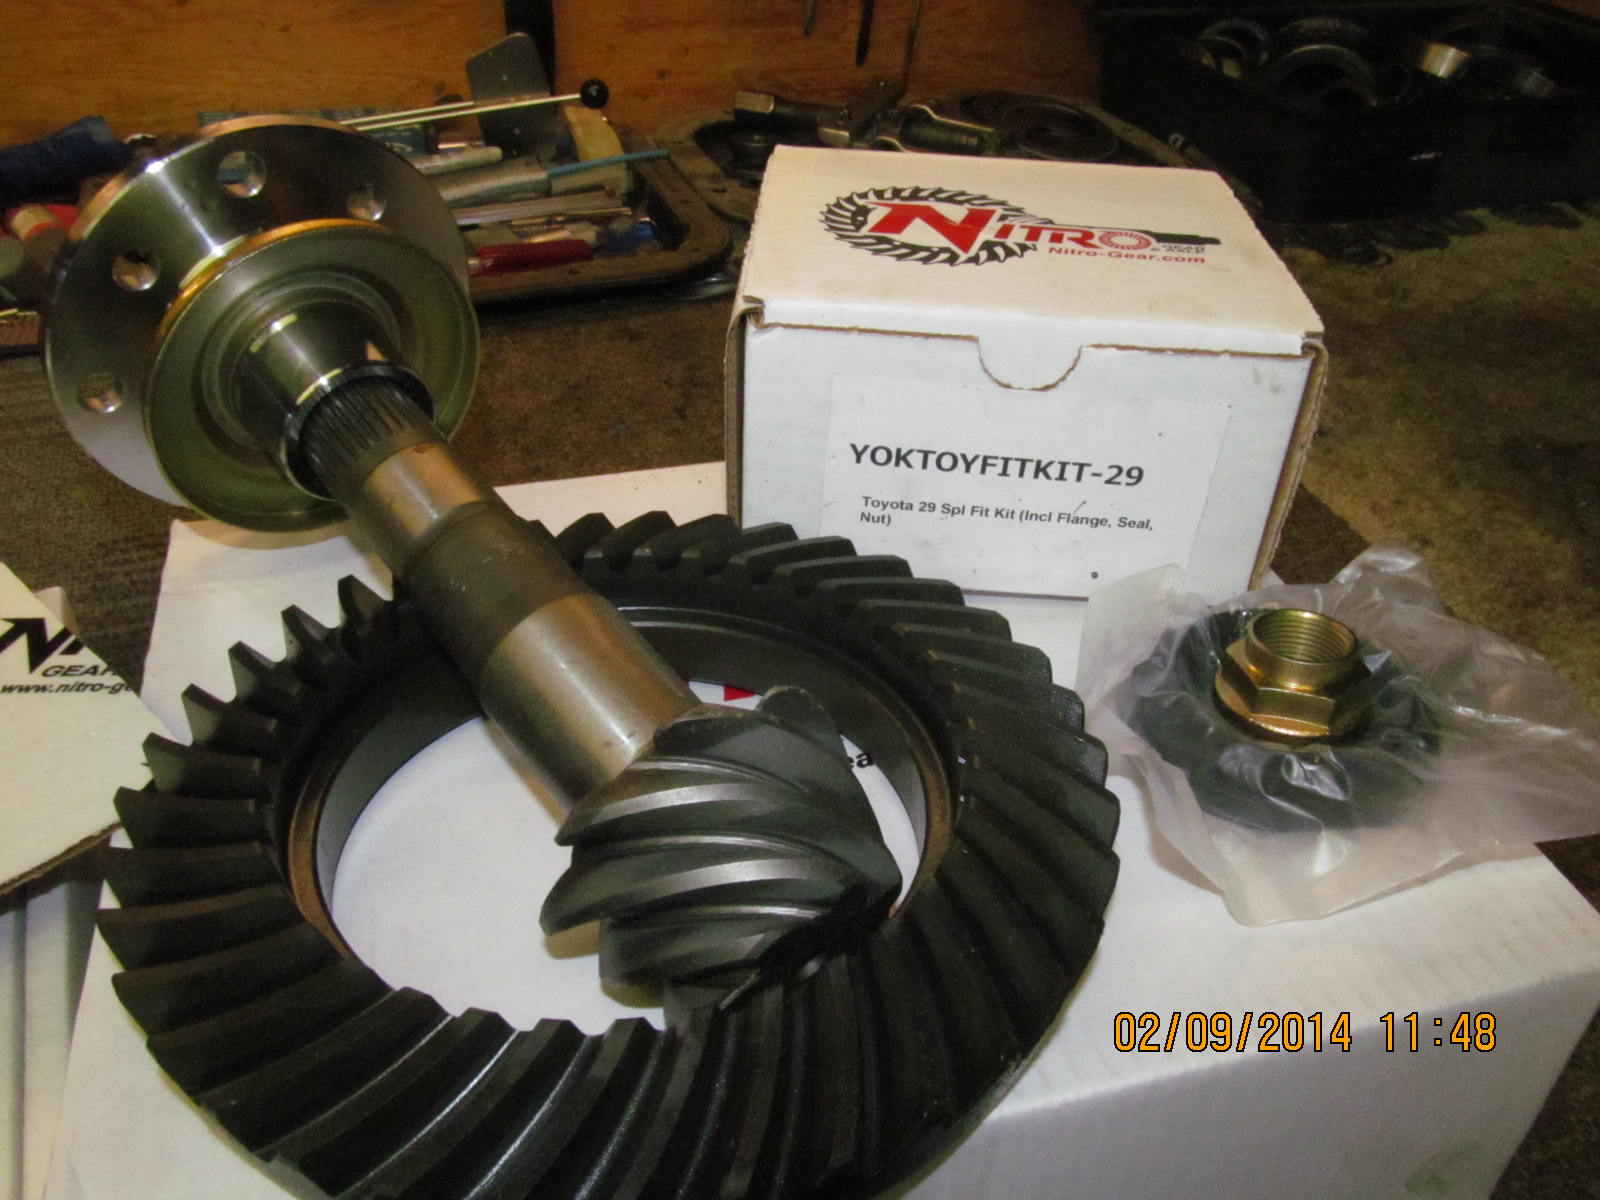
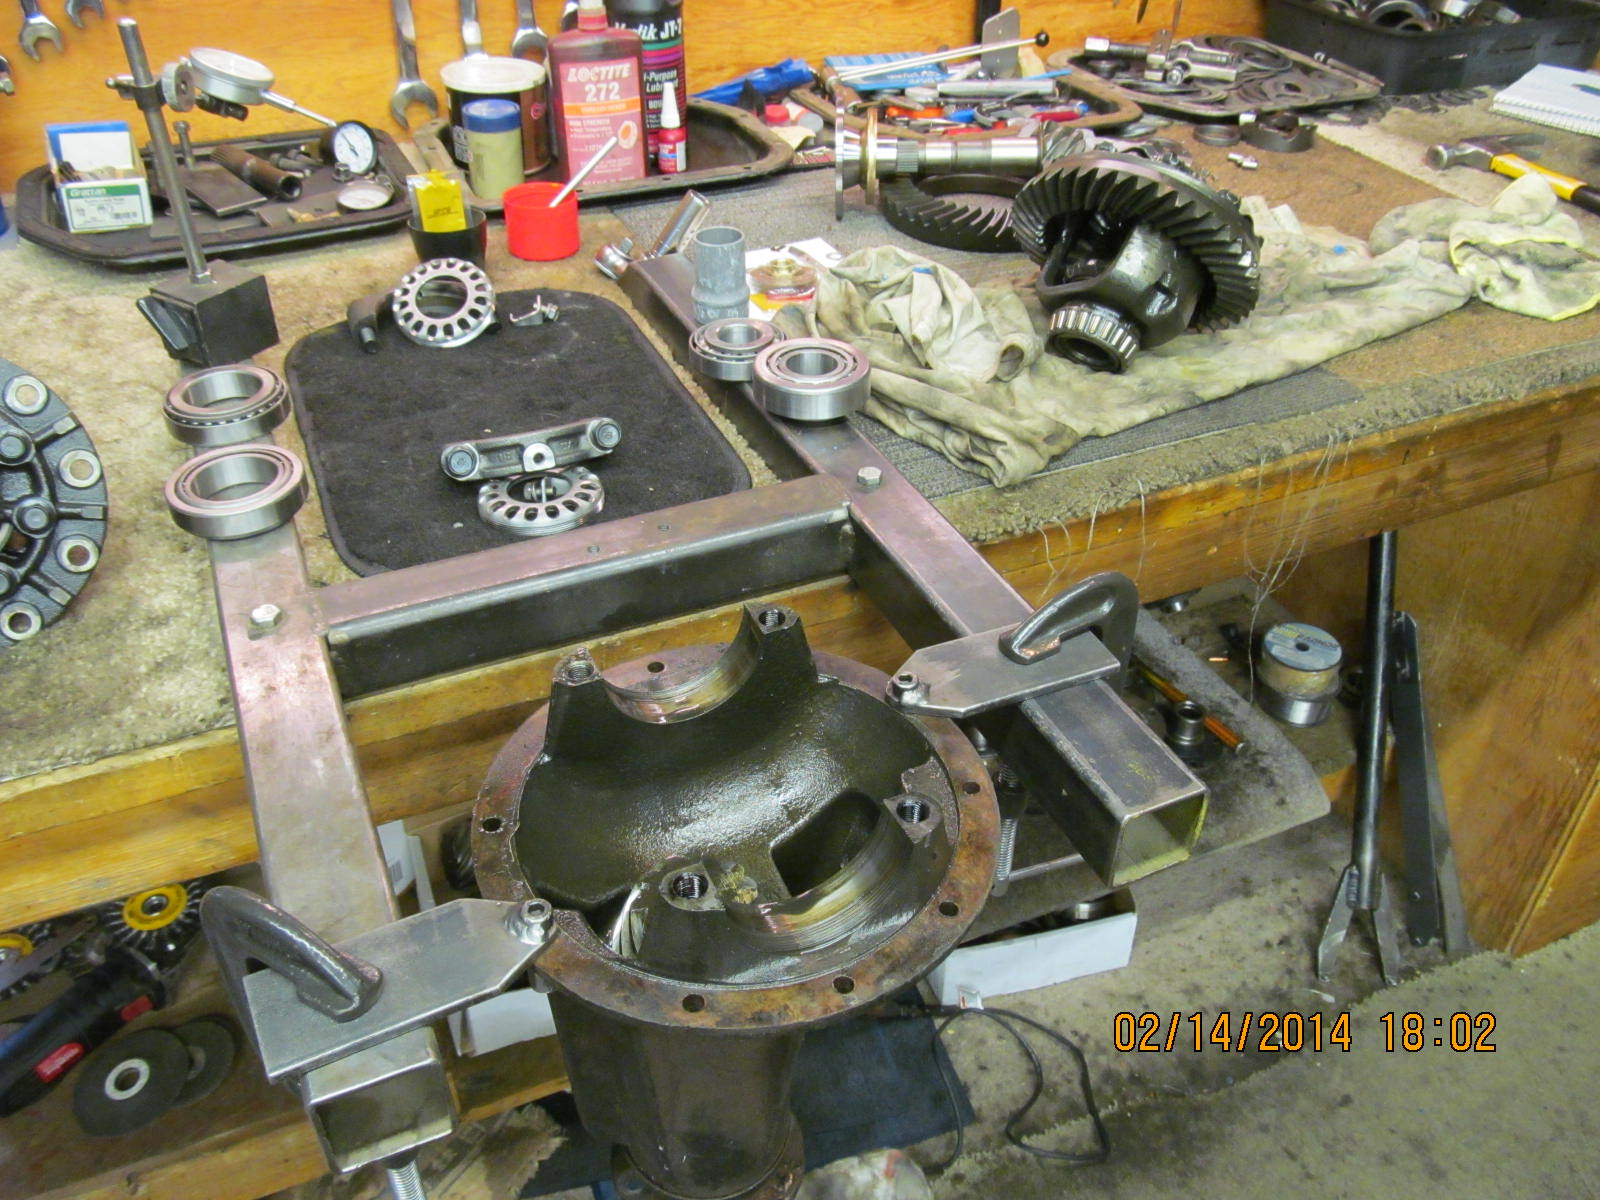
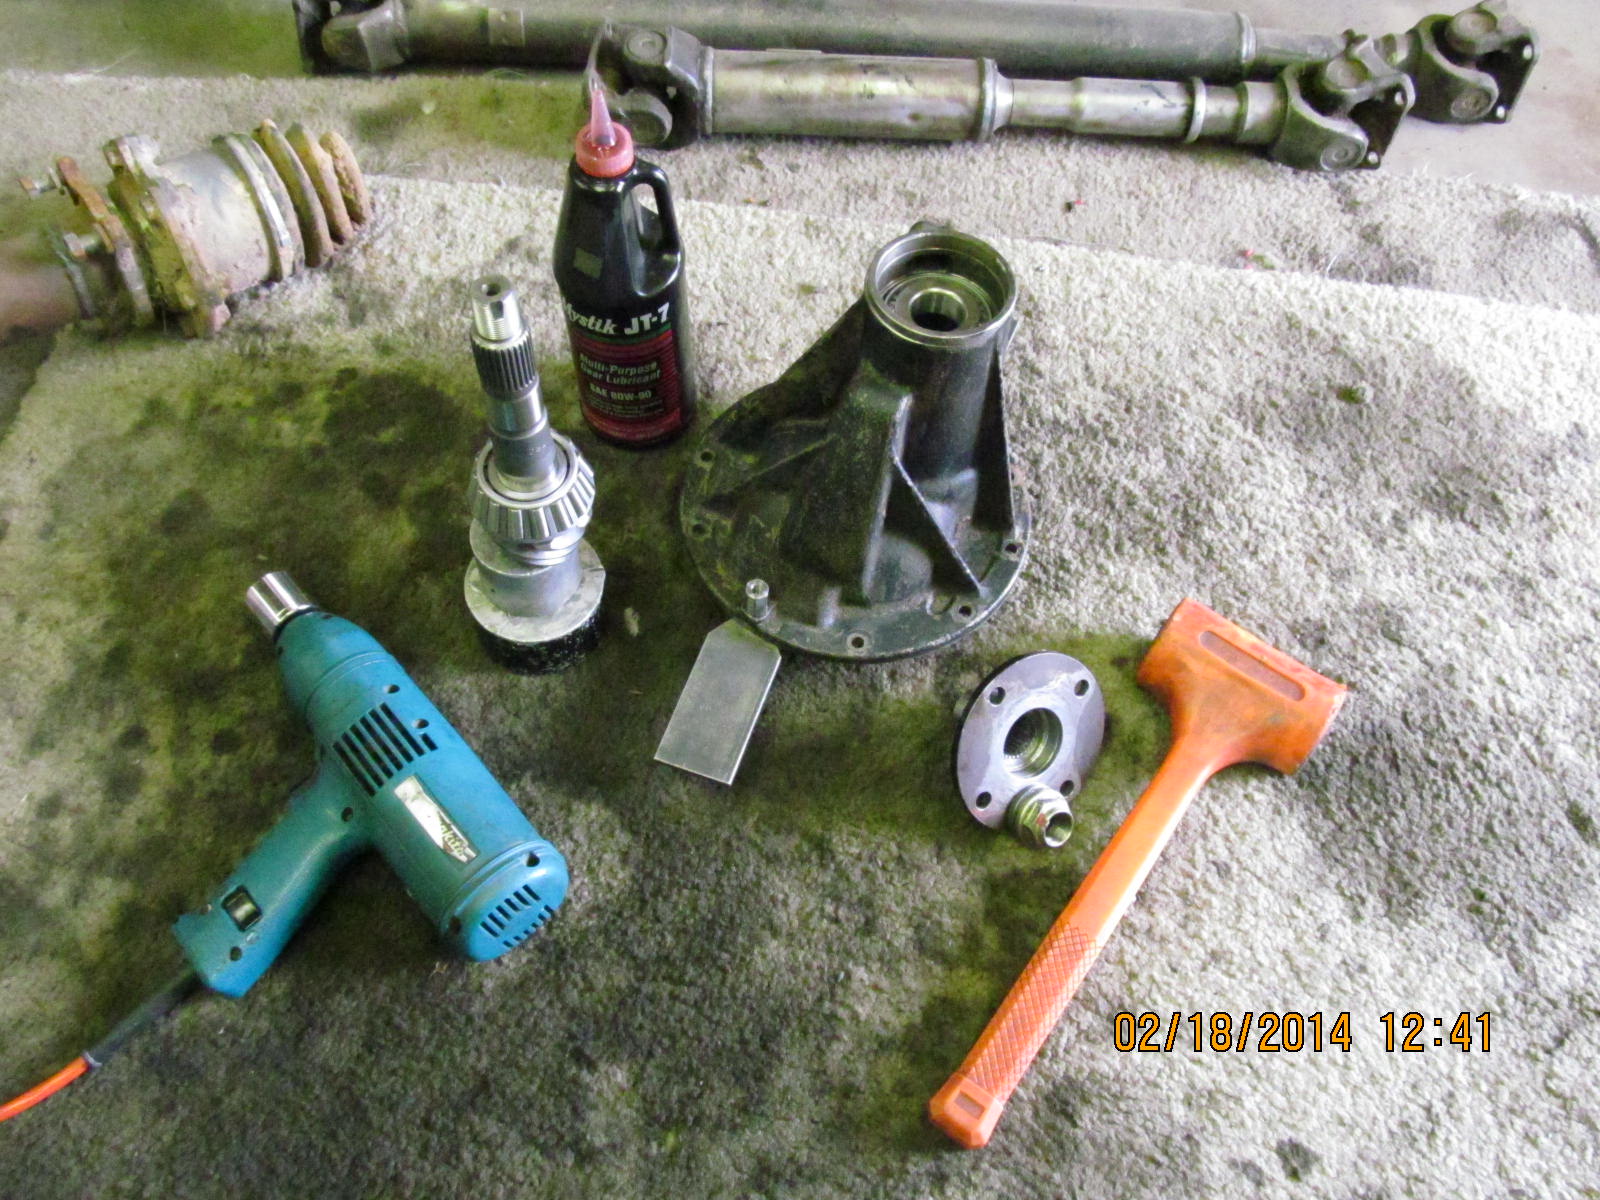
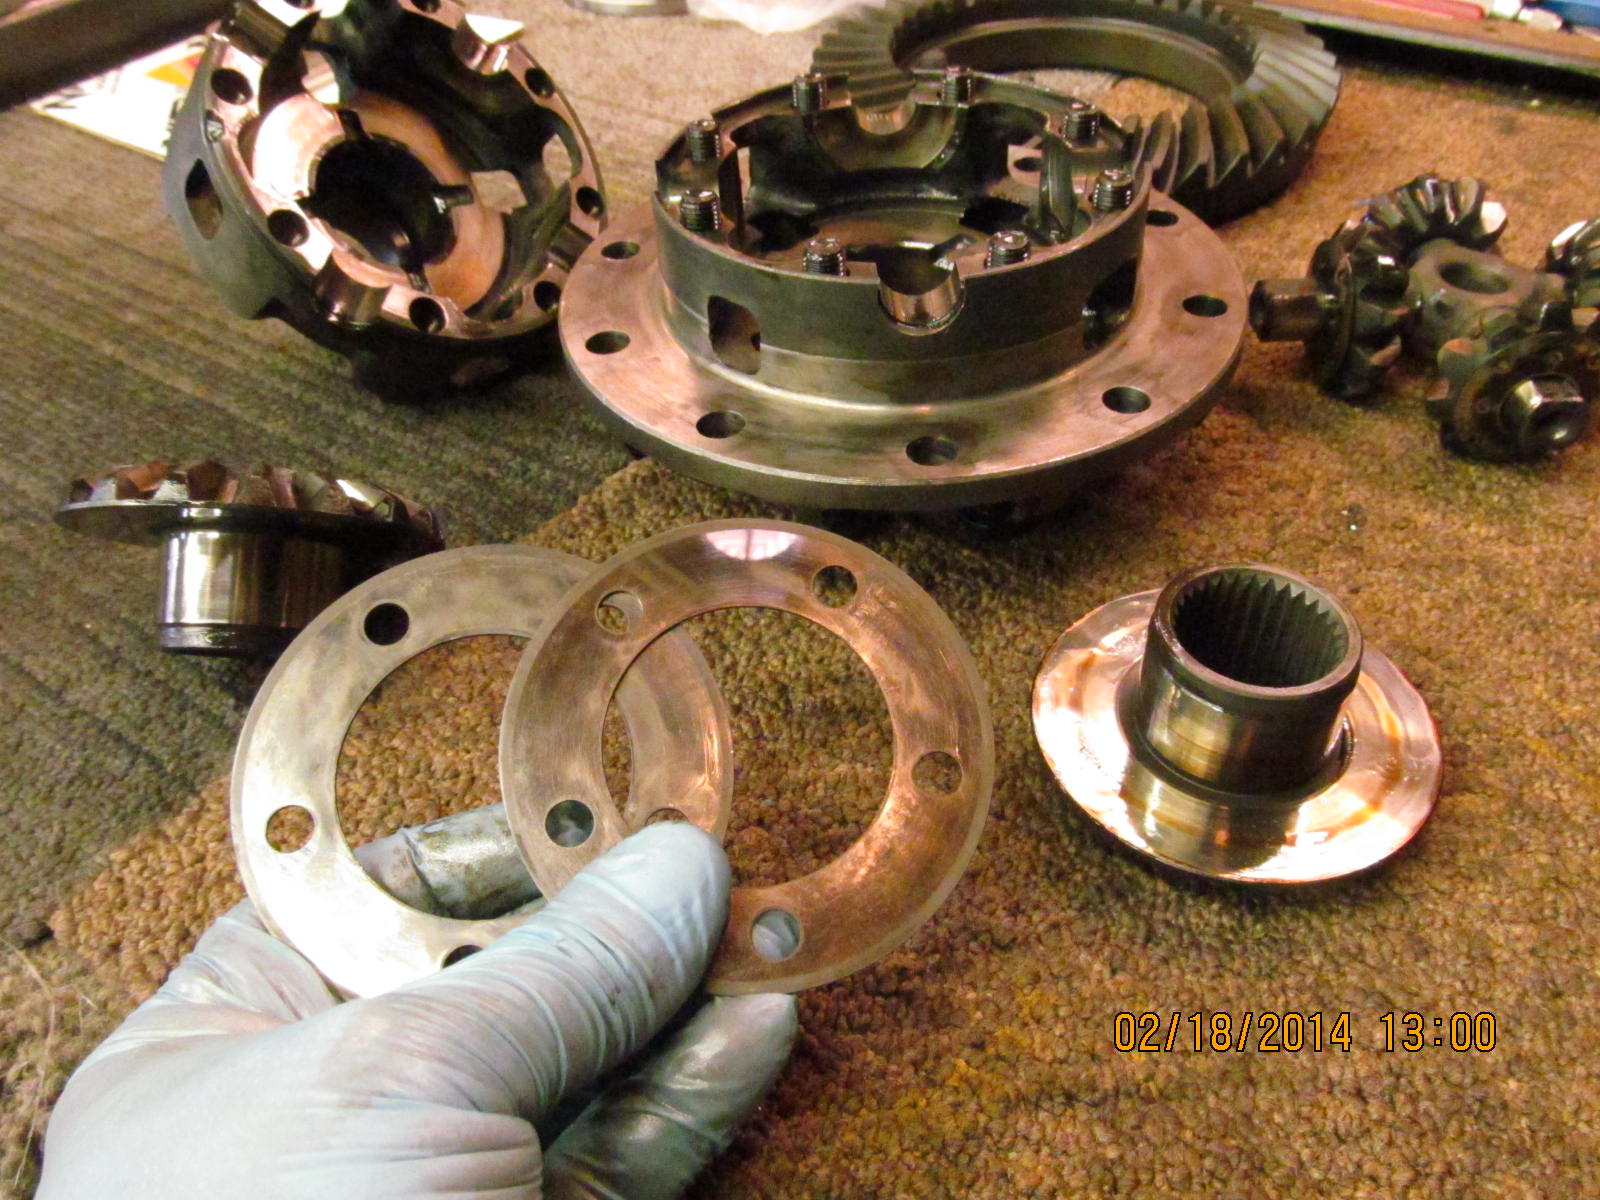
He brought over all the right stuff....4 cyl differential...V6 529 Nitro Gears(29 spl)...the proper master kit and a 29 spline
pinion flange. He said he had a Spartan he wanted installed but he bought the V6 model by mistake. I said no problem. We
just need a 4 pinion carrier and a pair of 50 mm conversion bearings. Both, of which, I had and can be seen in the background.
|
|
|
|
|
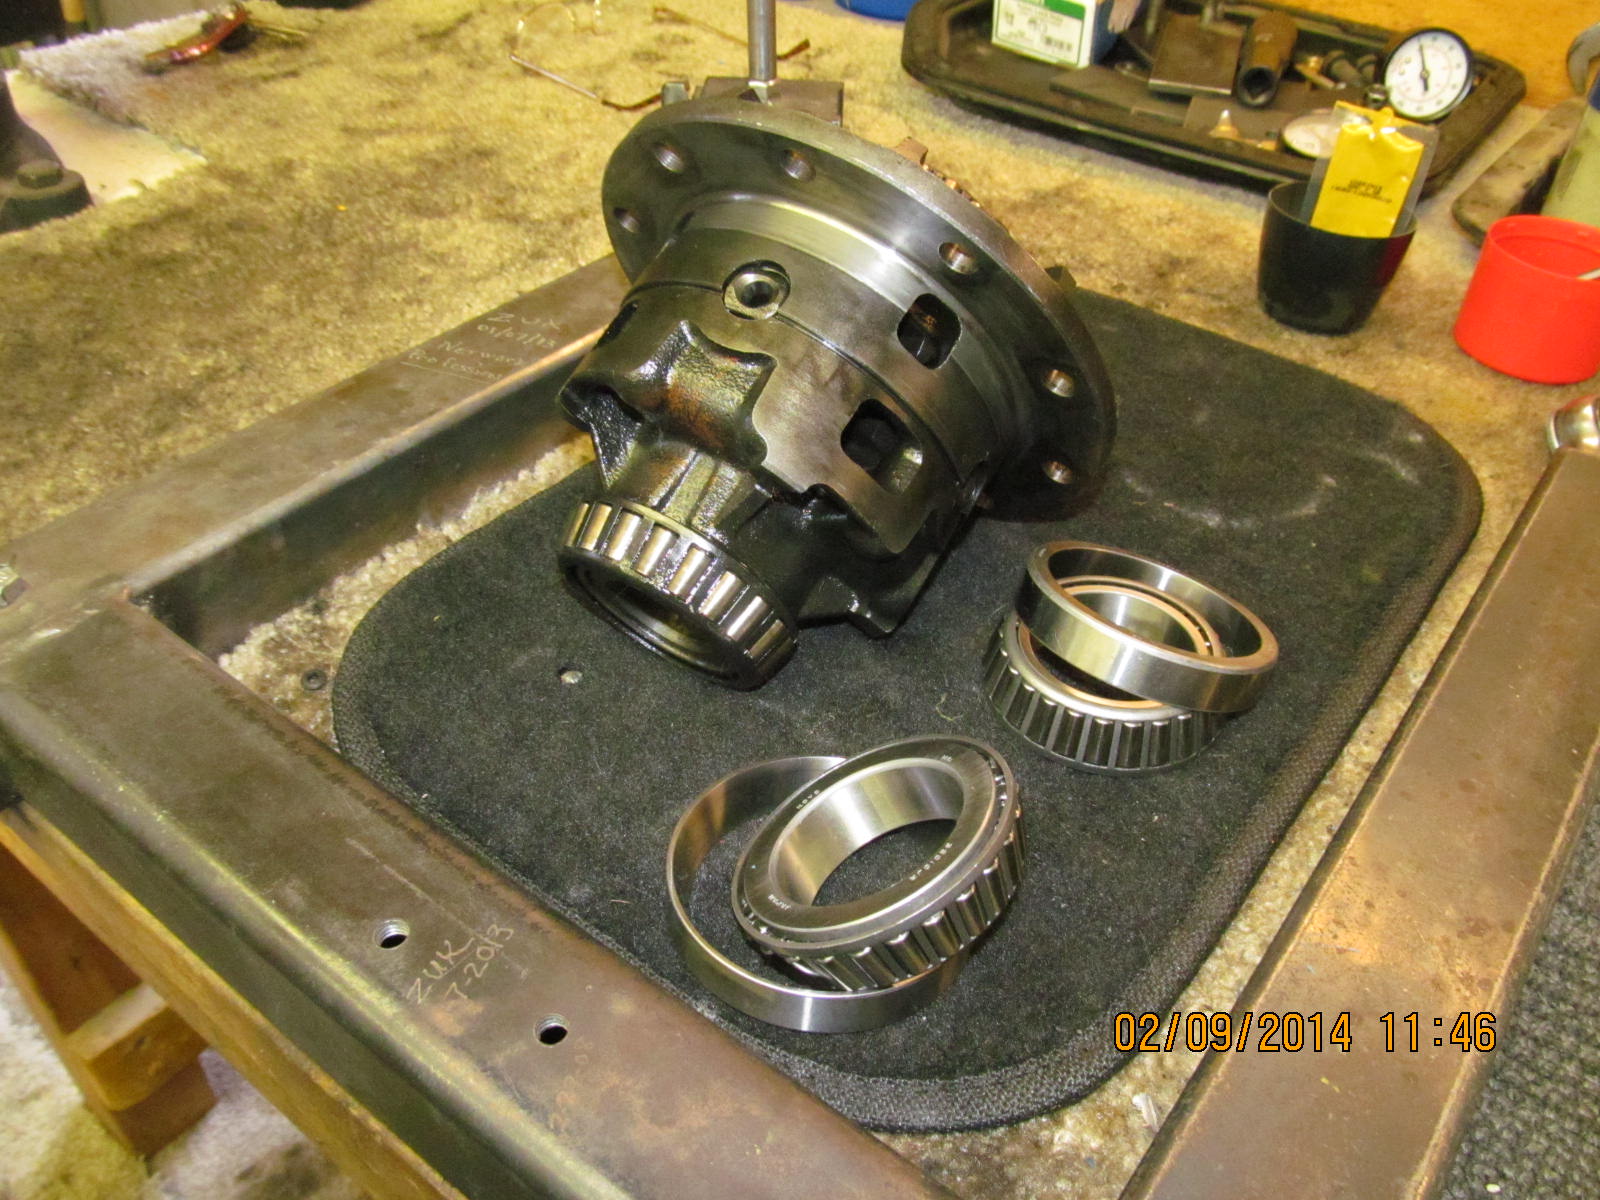
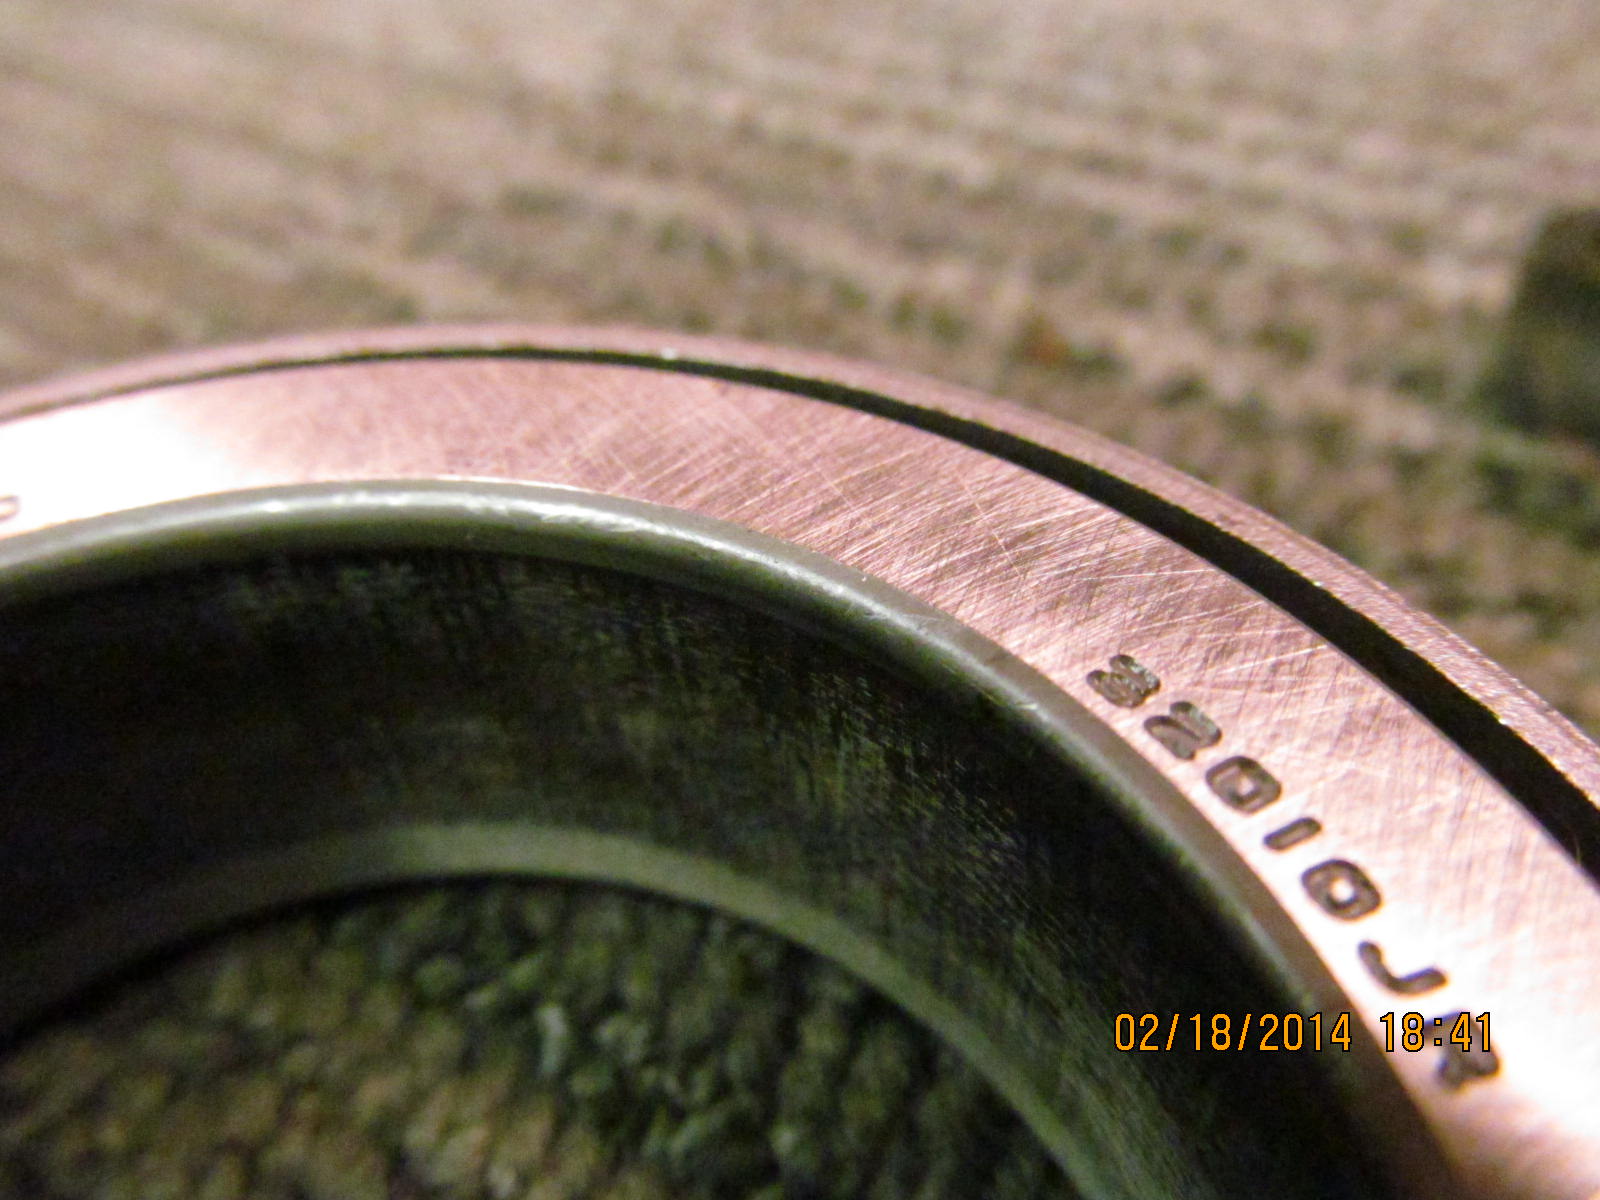
32010x conversion bearings...or KOYO 90368-50024
|
|
|
|
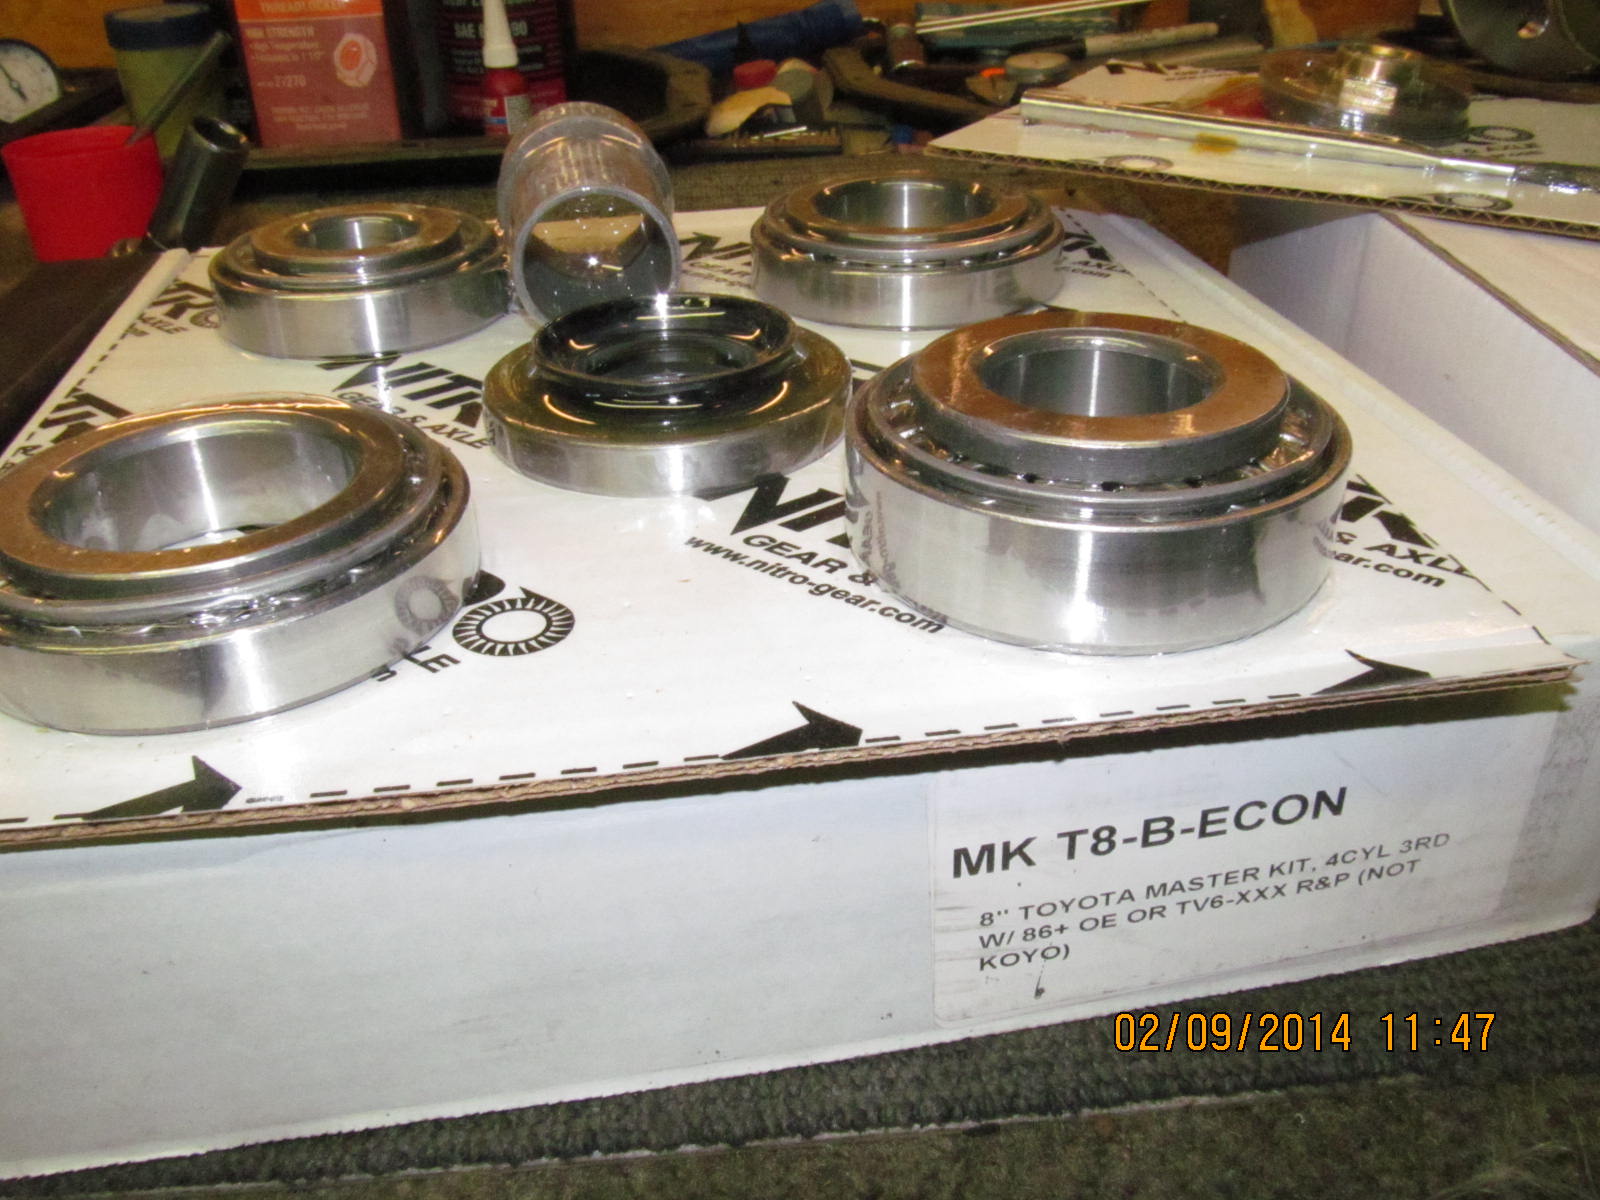
I've heard this master kit referred to as the "B kit"...the big inner pinion bearing is skinnier and recesses into the pinion hole
farther. This allows the long pinion head(V6) to work in a "4 cyl 3rd".
|
|
|
|
|
The 29 spline pinion is said to be more heavy duty. Also required is a new 29 spline flange, a bigger nut, and a larger ID seal.
|
|
|
|
|
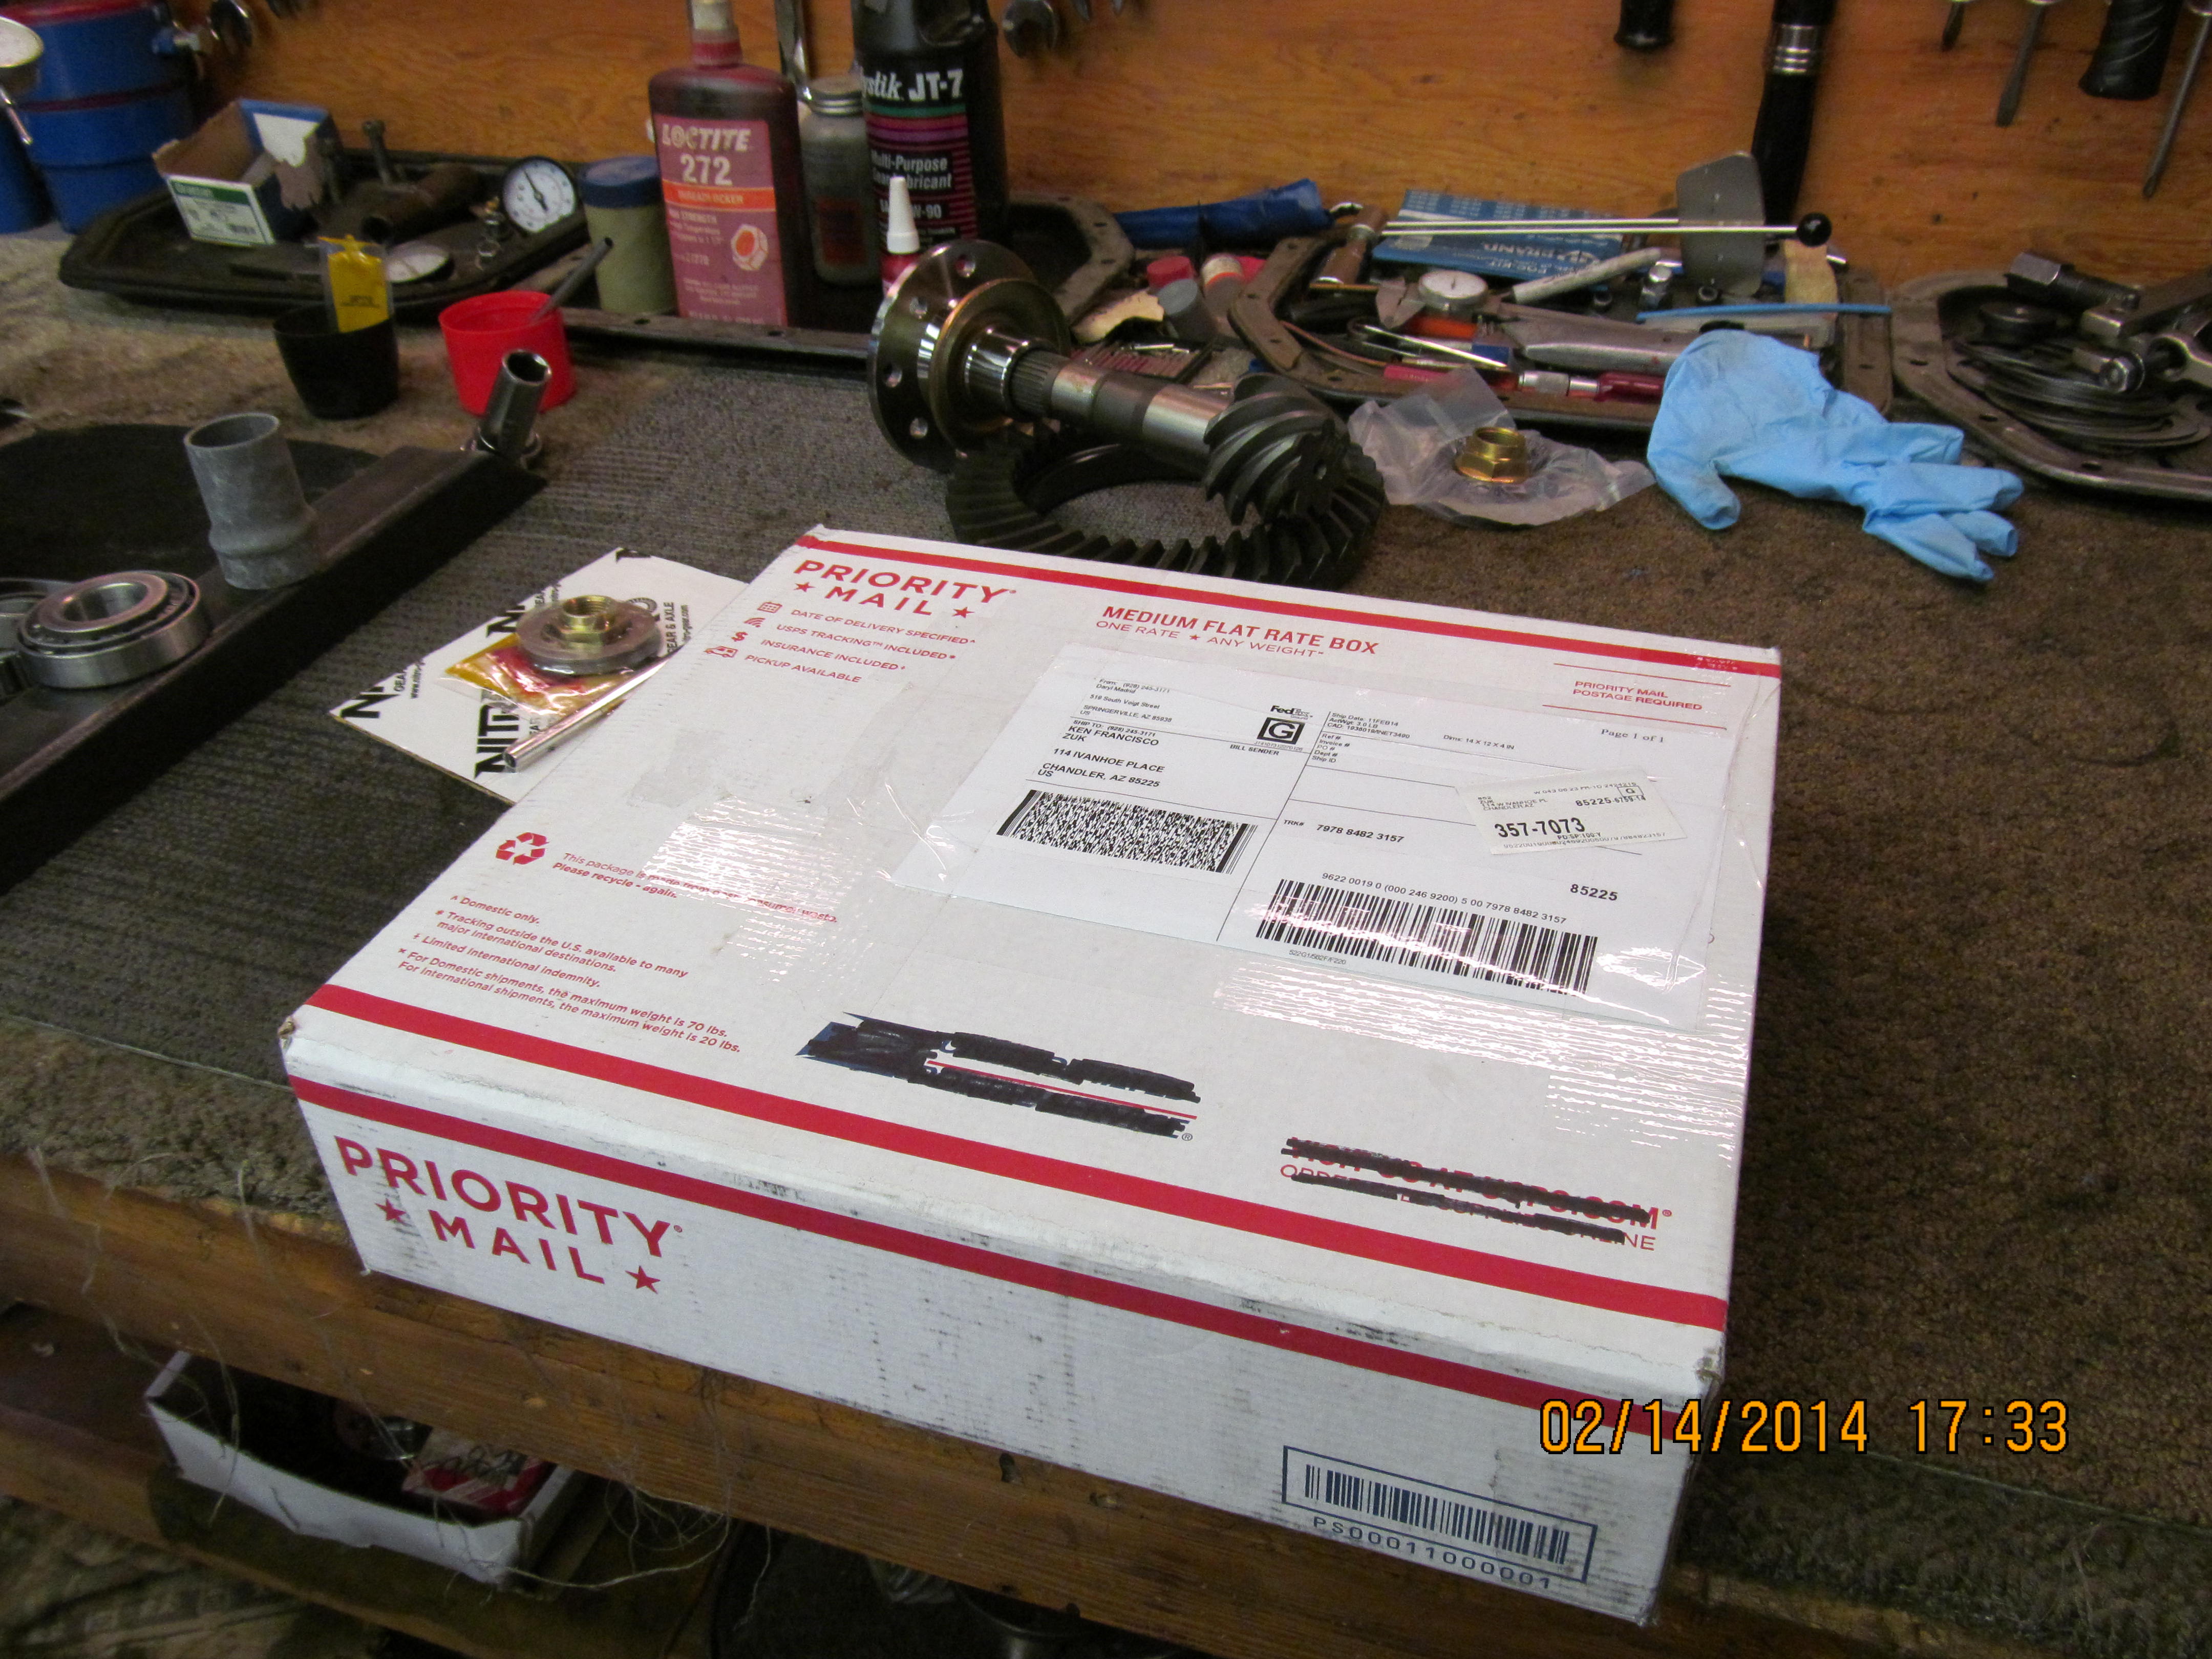
As soon as Thane got back to his home on the other side of the state, he boxed up the Spartan and sent it Fedex priority to me.
|
|
|

|
|
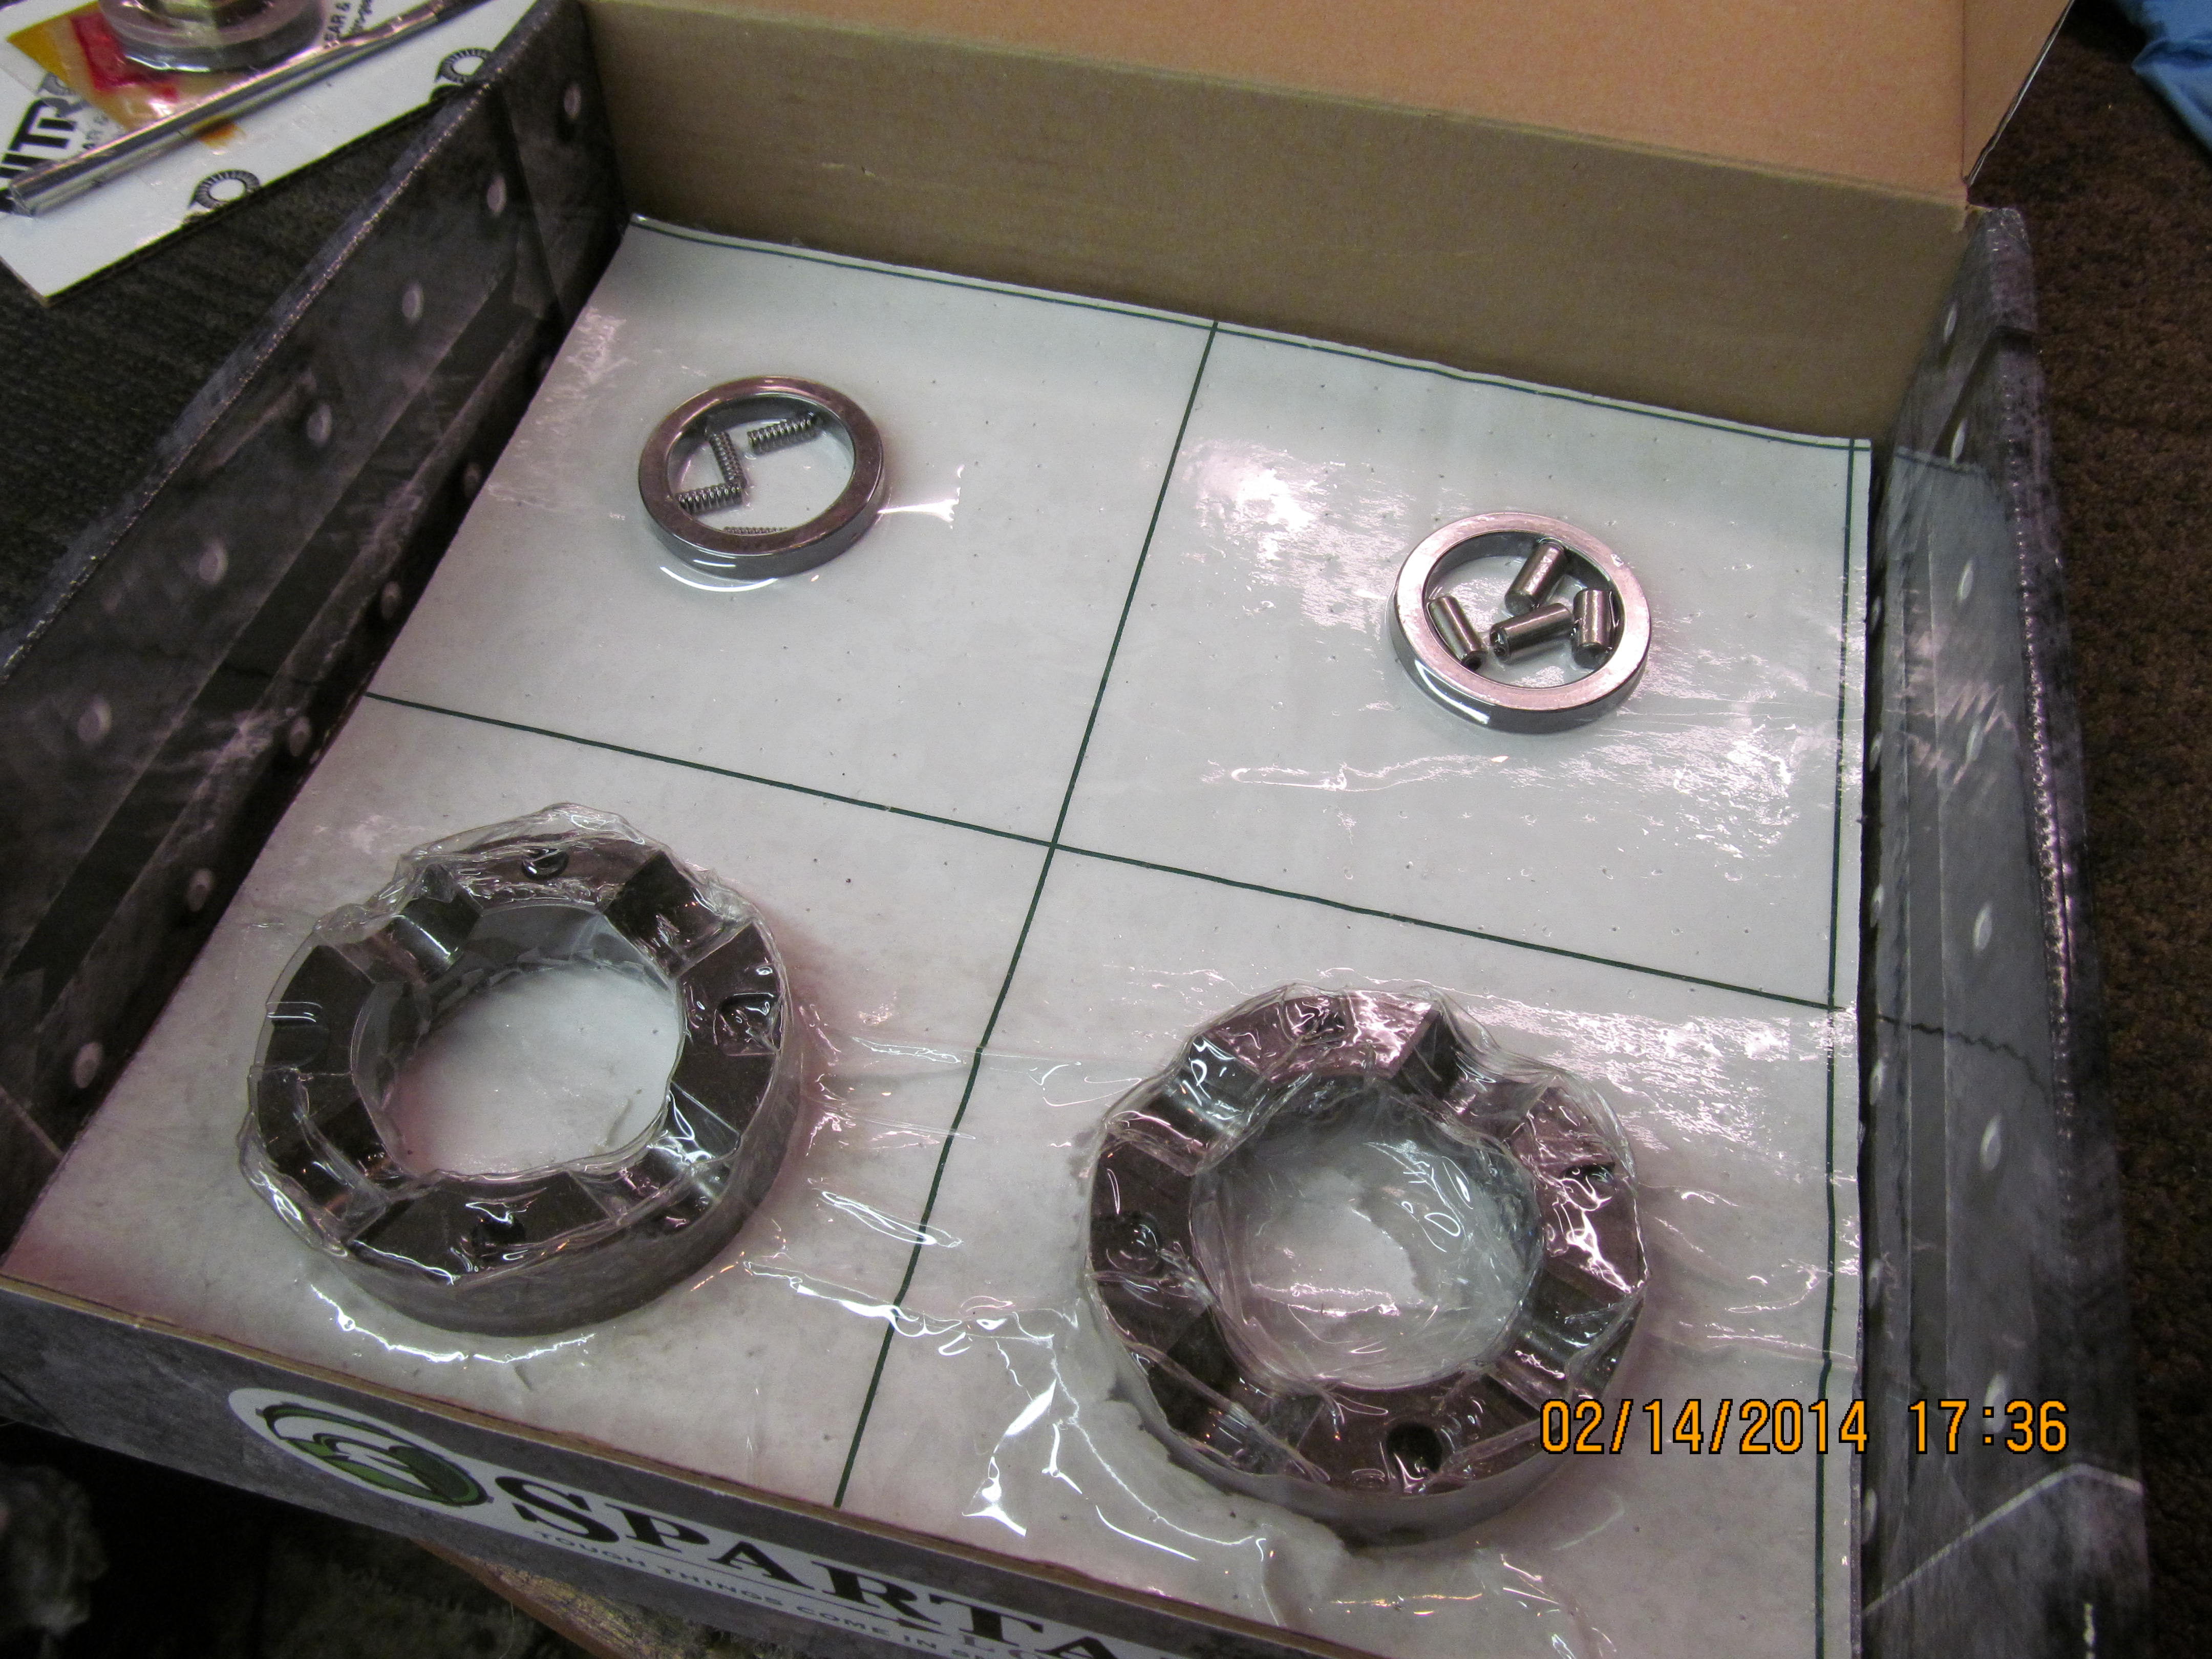
In the box was another box. Spartan does a real nice job with the box layout.
|
|
|
|
|
This is everything there is and this is all it takes.
|
|
|

|
|
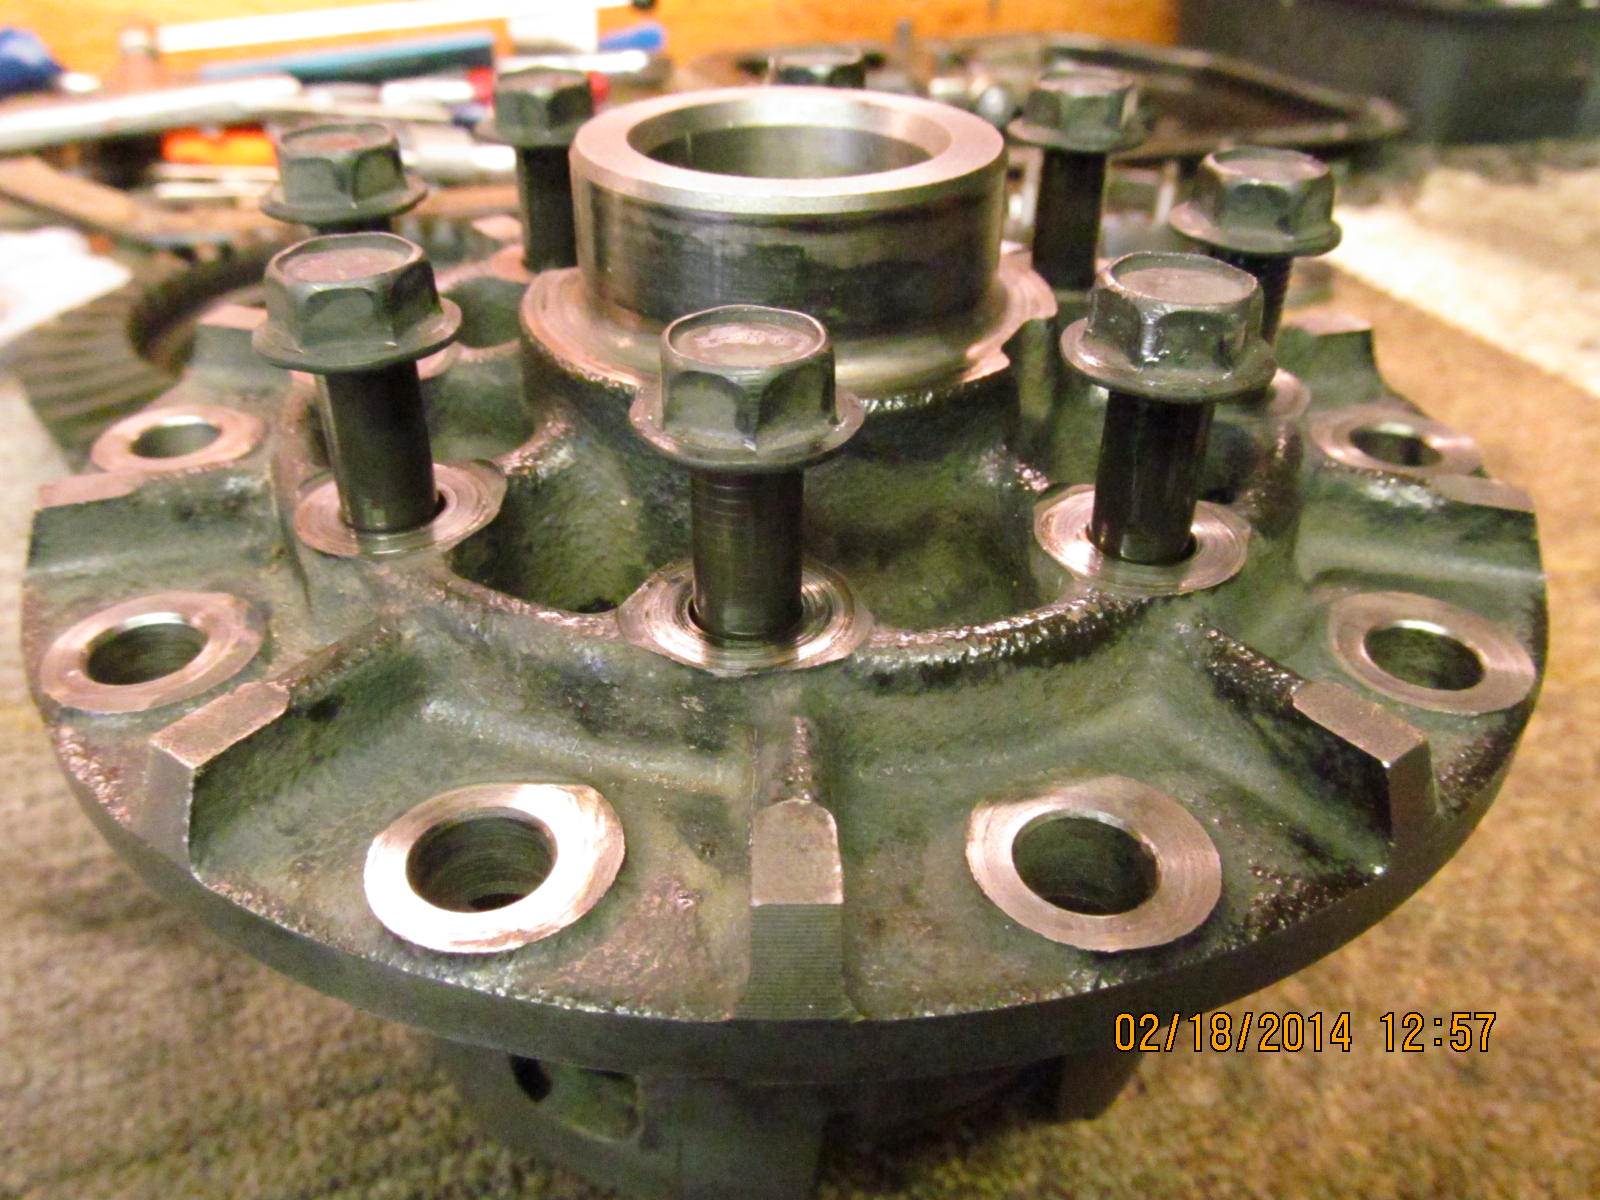
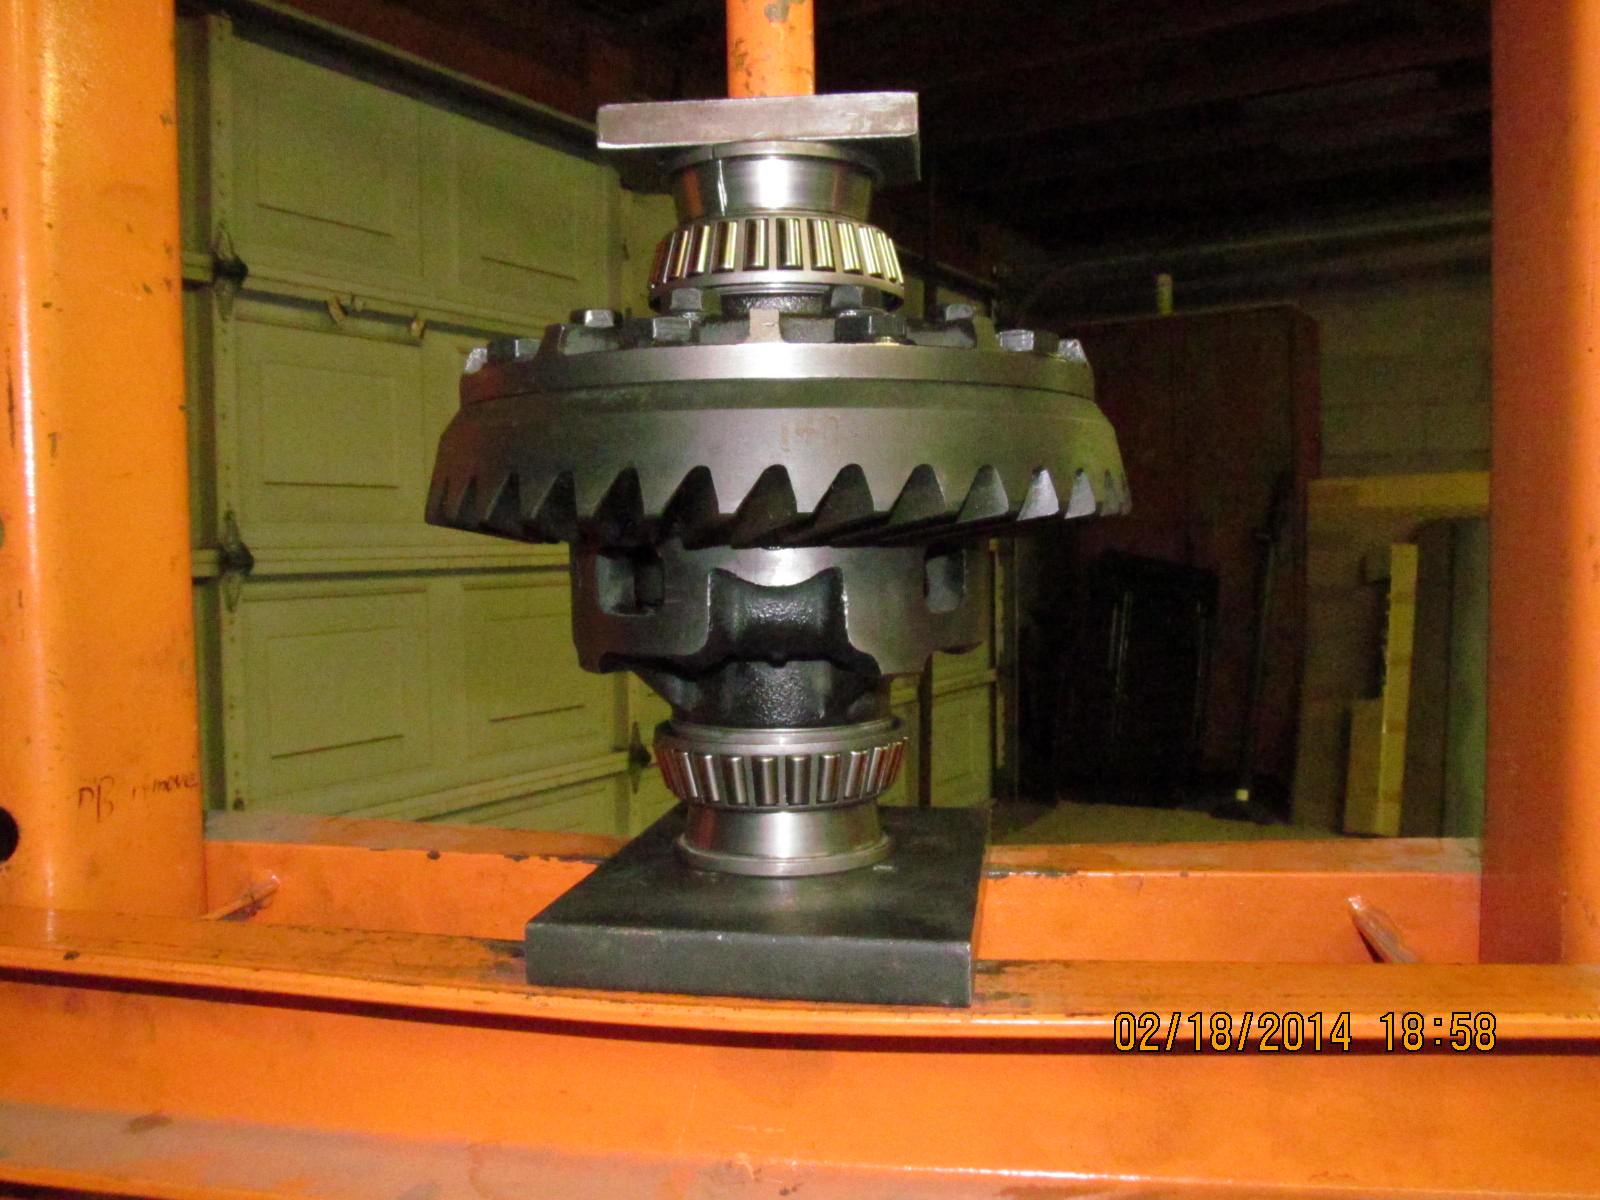
Time to dis-assemble the old diff.
|
|
|
|
The electric impact makes it happen quickly. Not shown but it's always a good idea to mark at least 1 bearing cap so
they don't get mixed up.
|
|
|
|
|
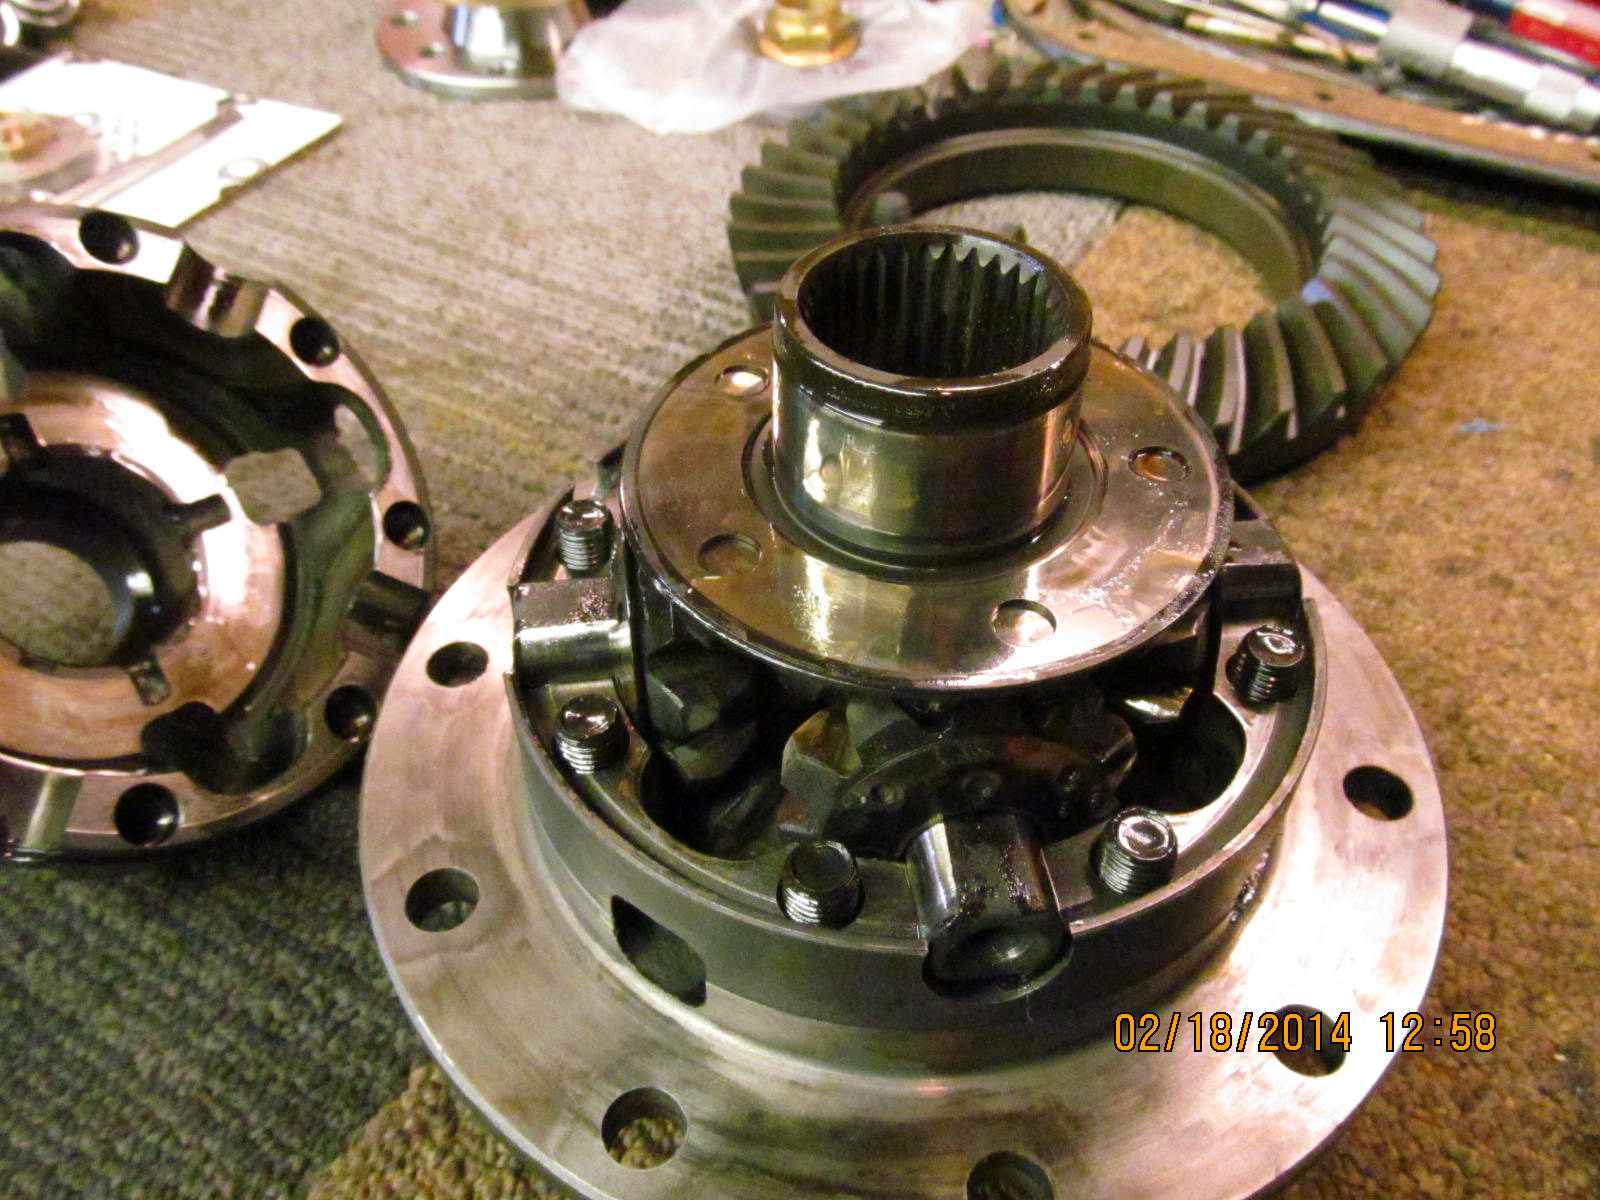
2 pinion carrier is out and now to get the pinion out.
|
|
|
|
|
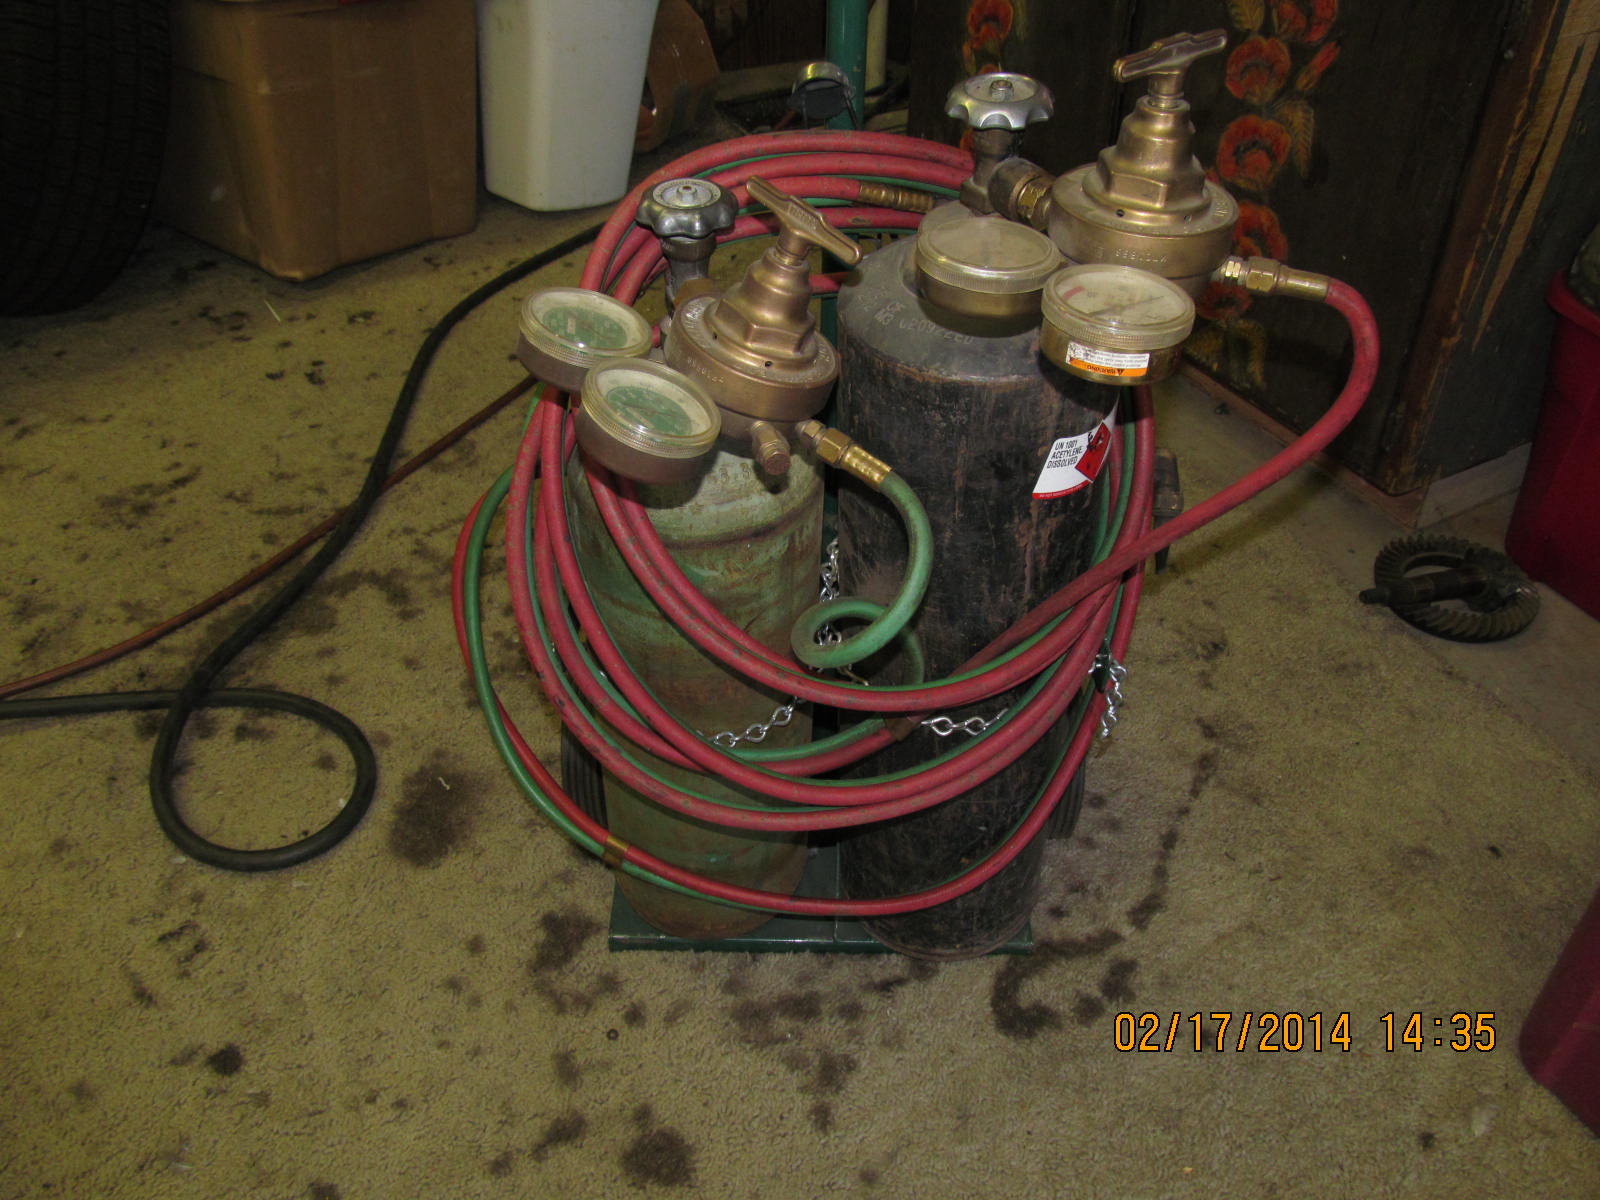
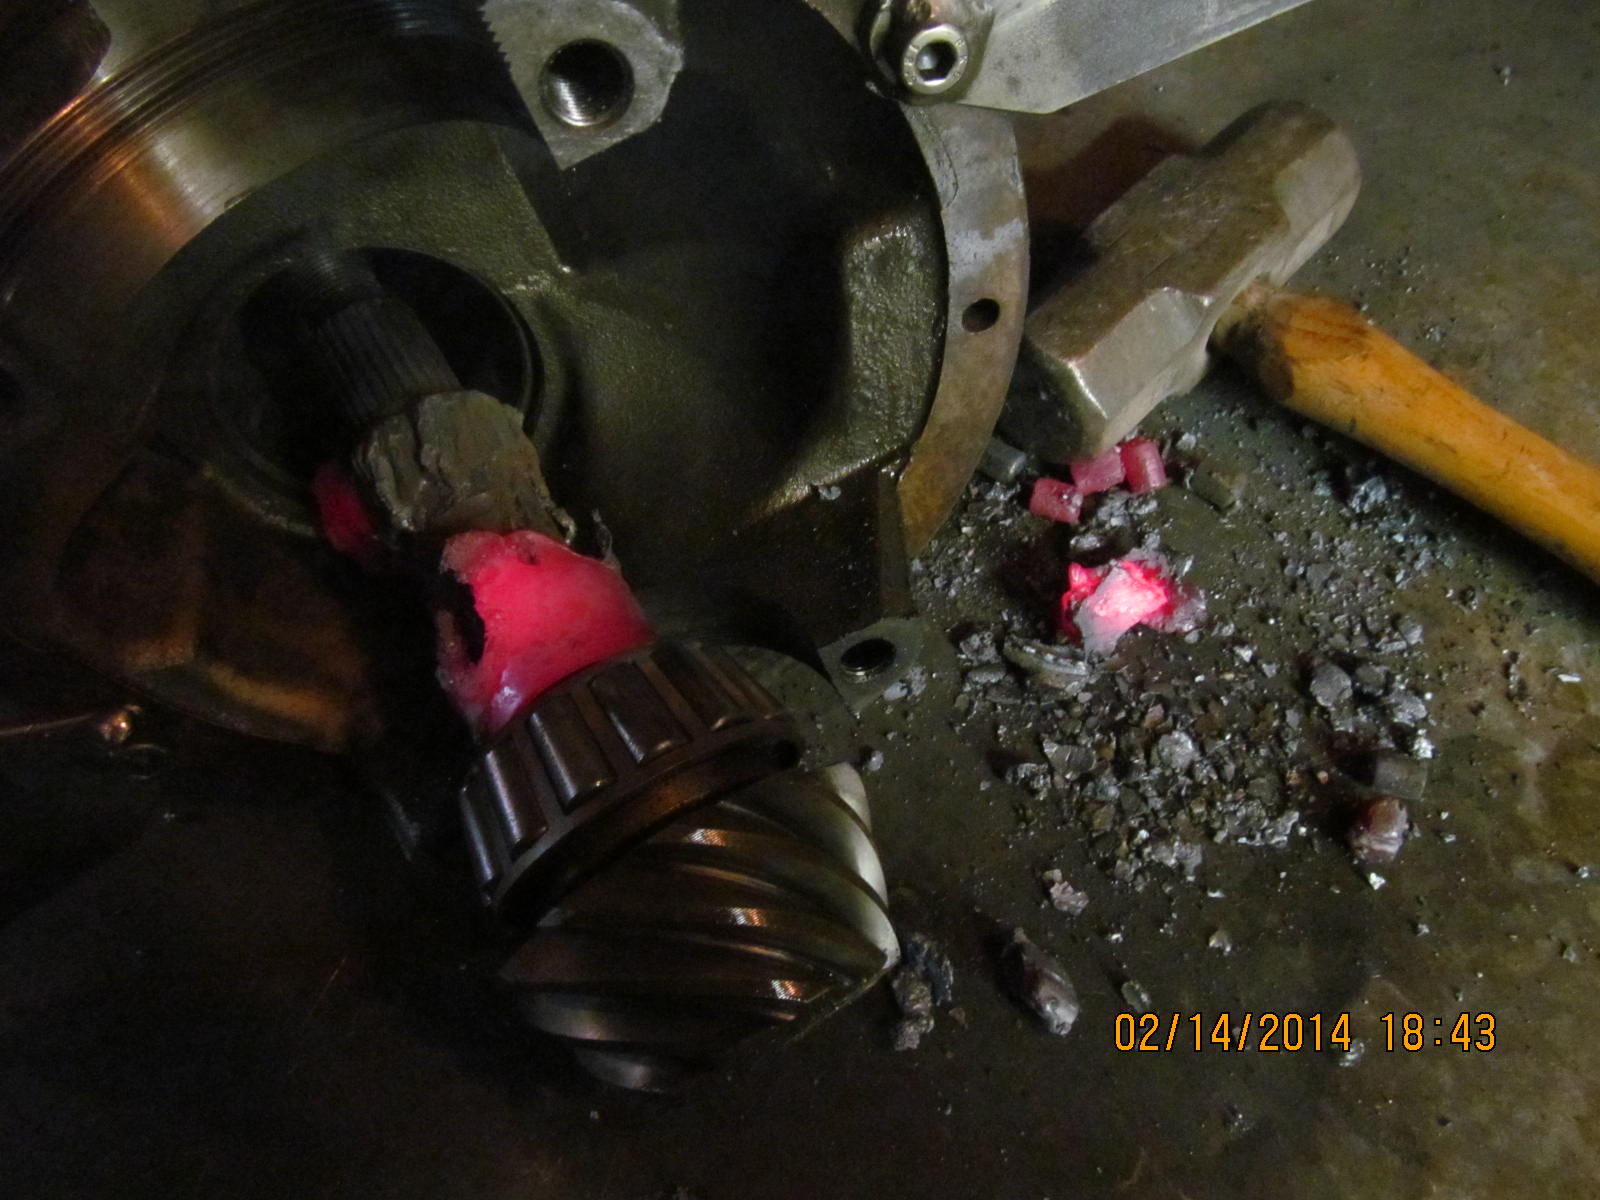
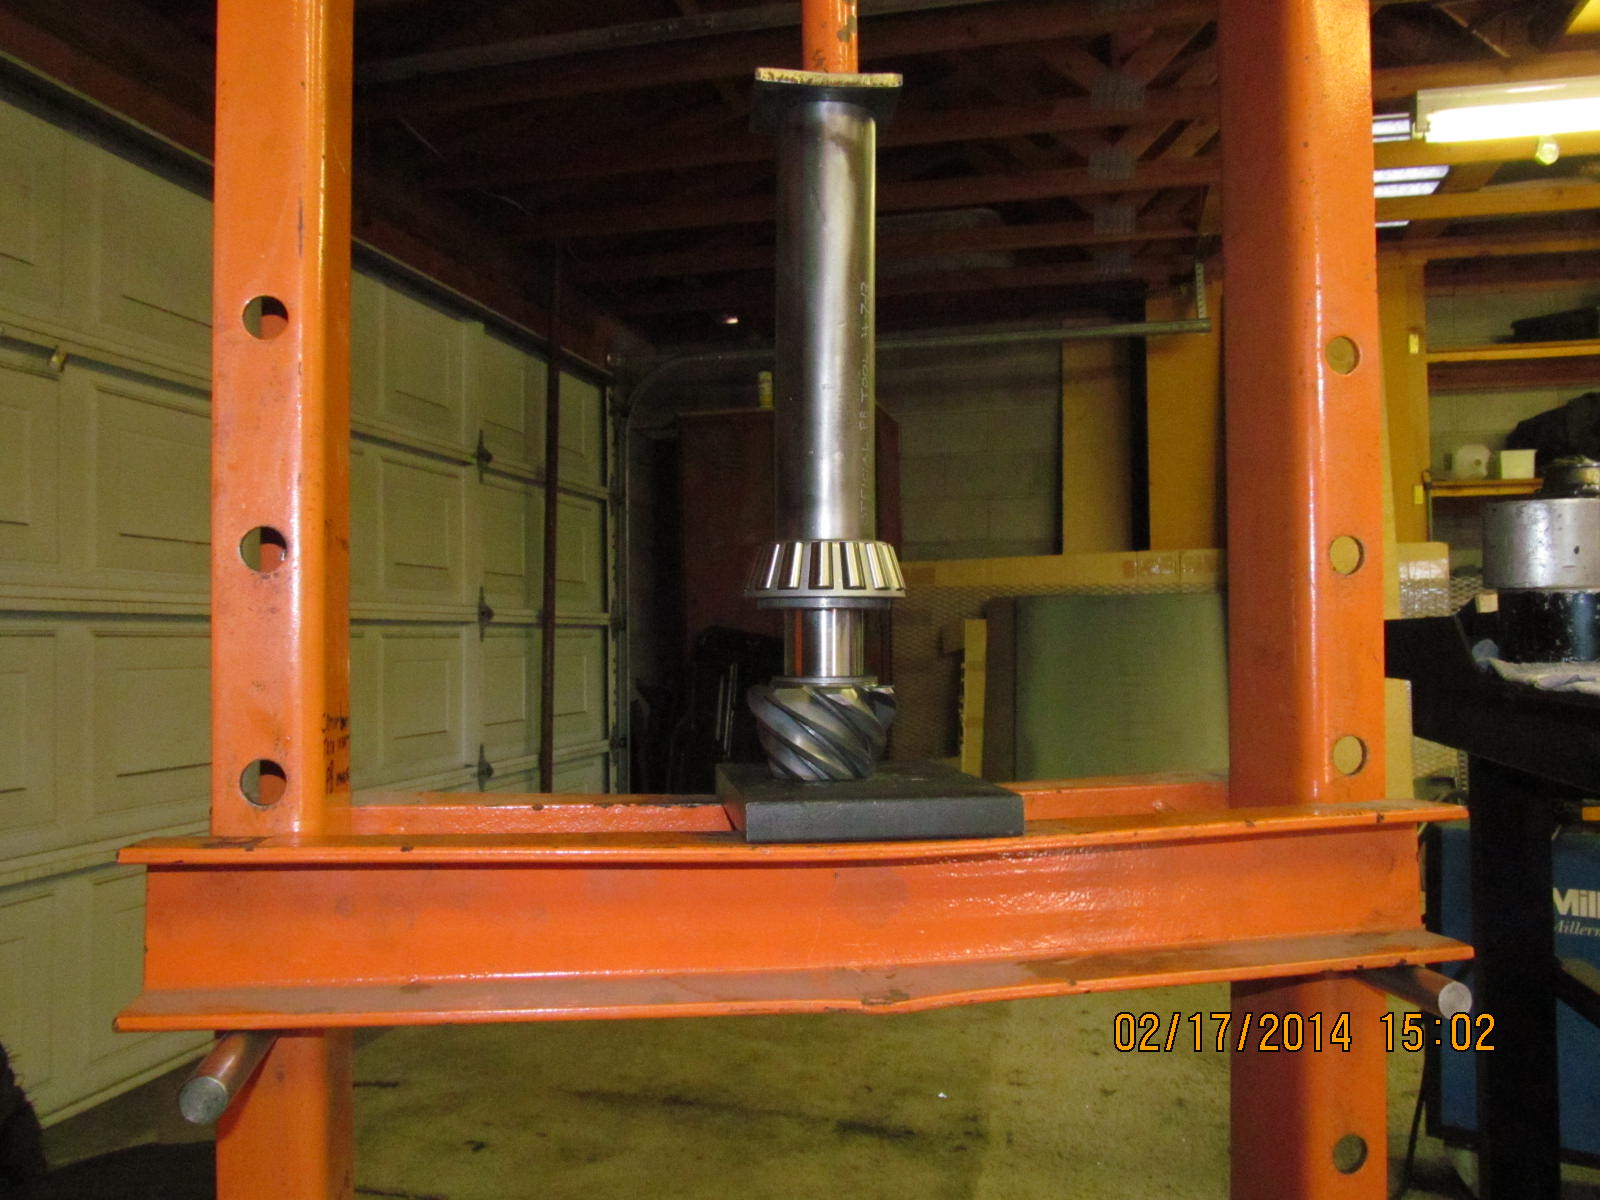
I tried the 12 ton press....I tried a 10 pound sledge but the seized up pinion would not come out. Glad I had this cutting torch.
|
|
|
|
|
Piece of cake....and it's still a little warm.
|
|
|
|
|
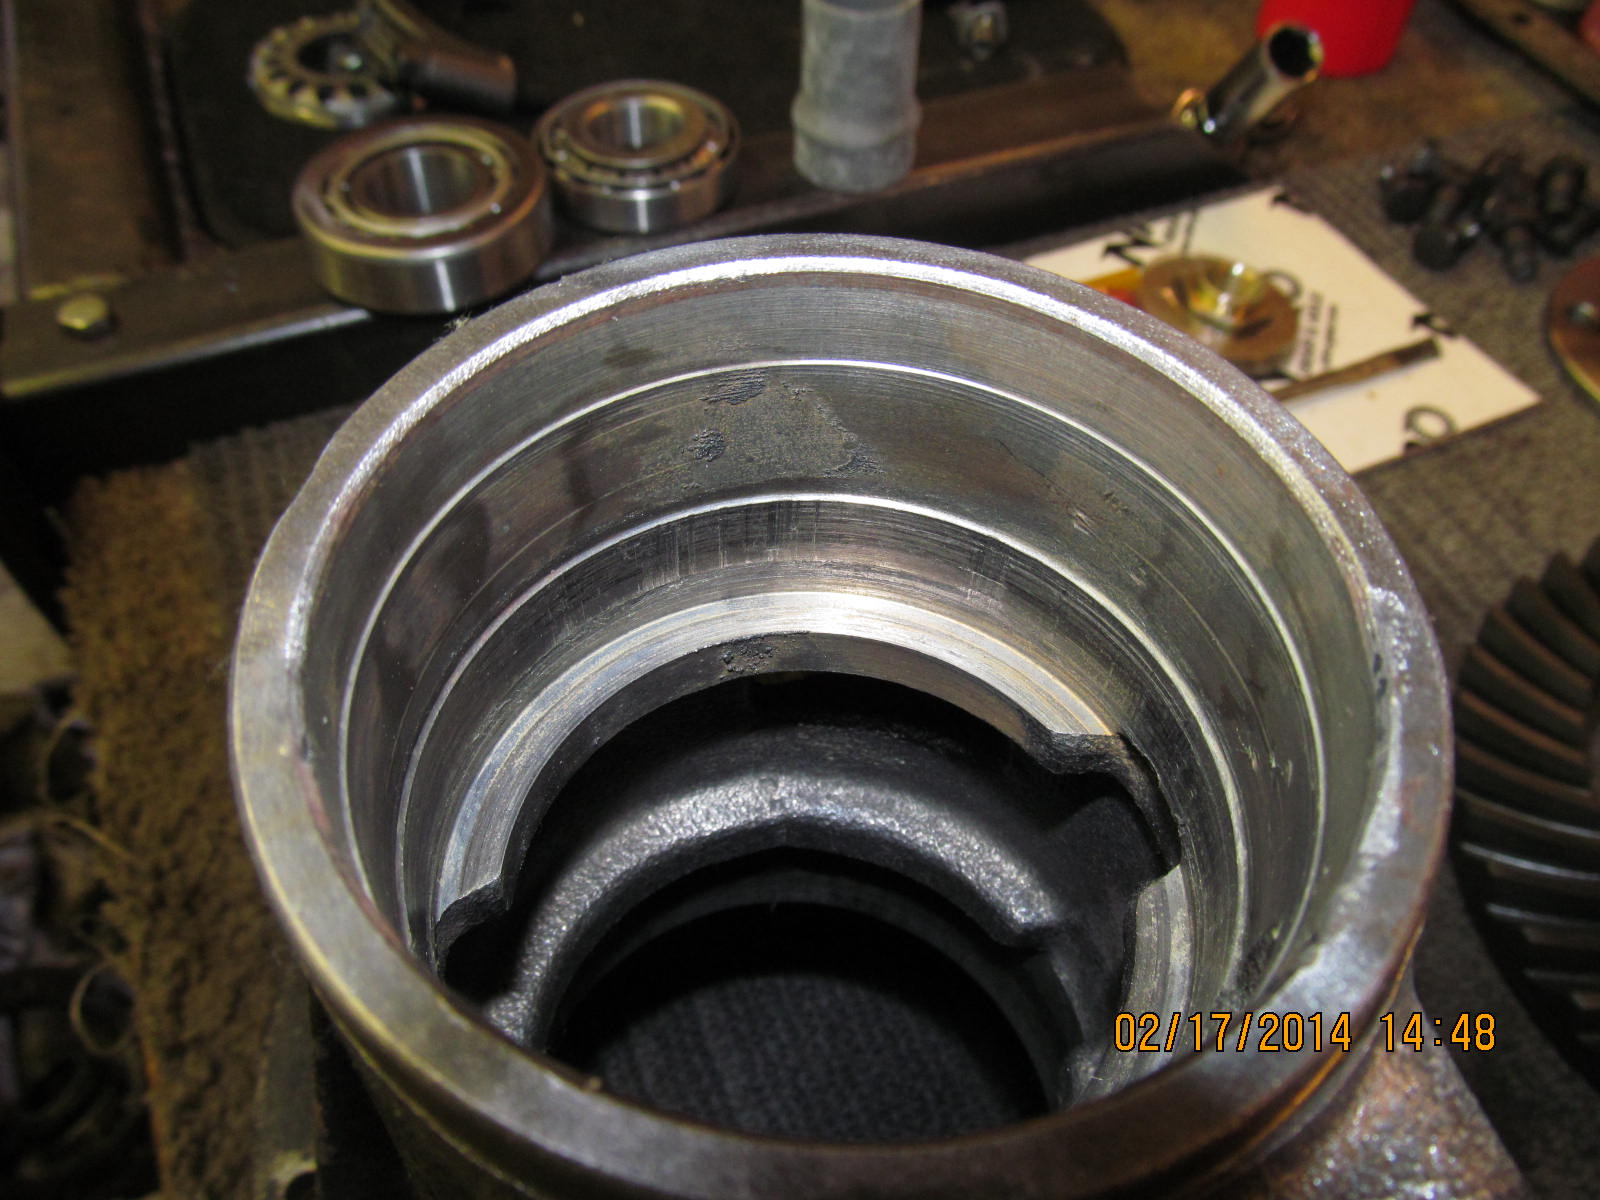
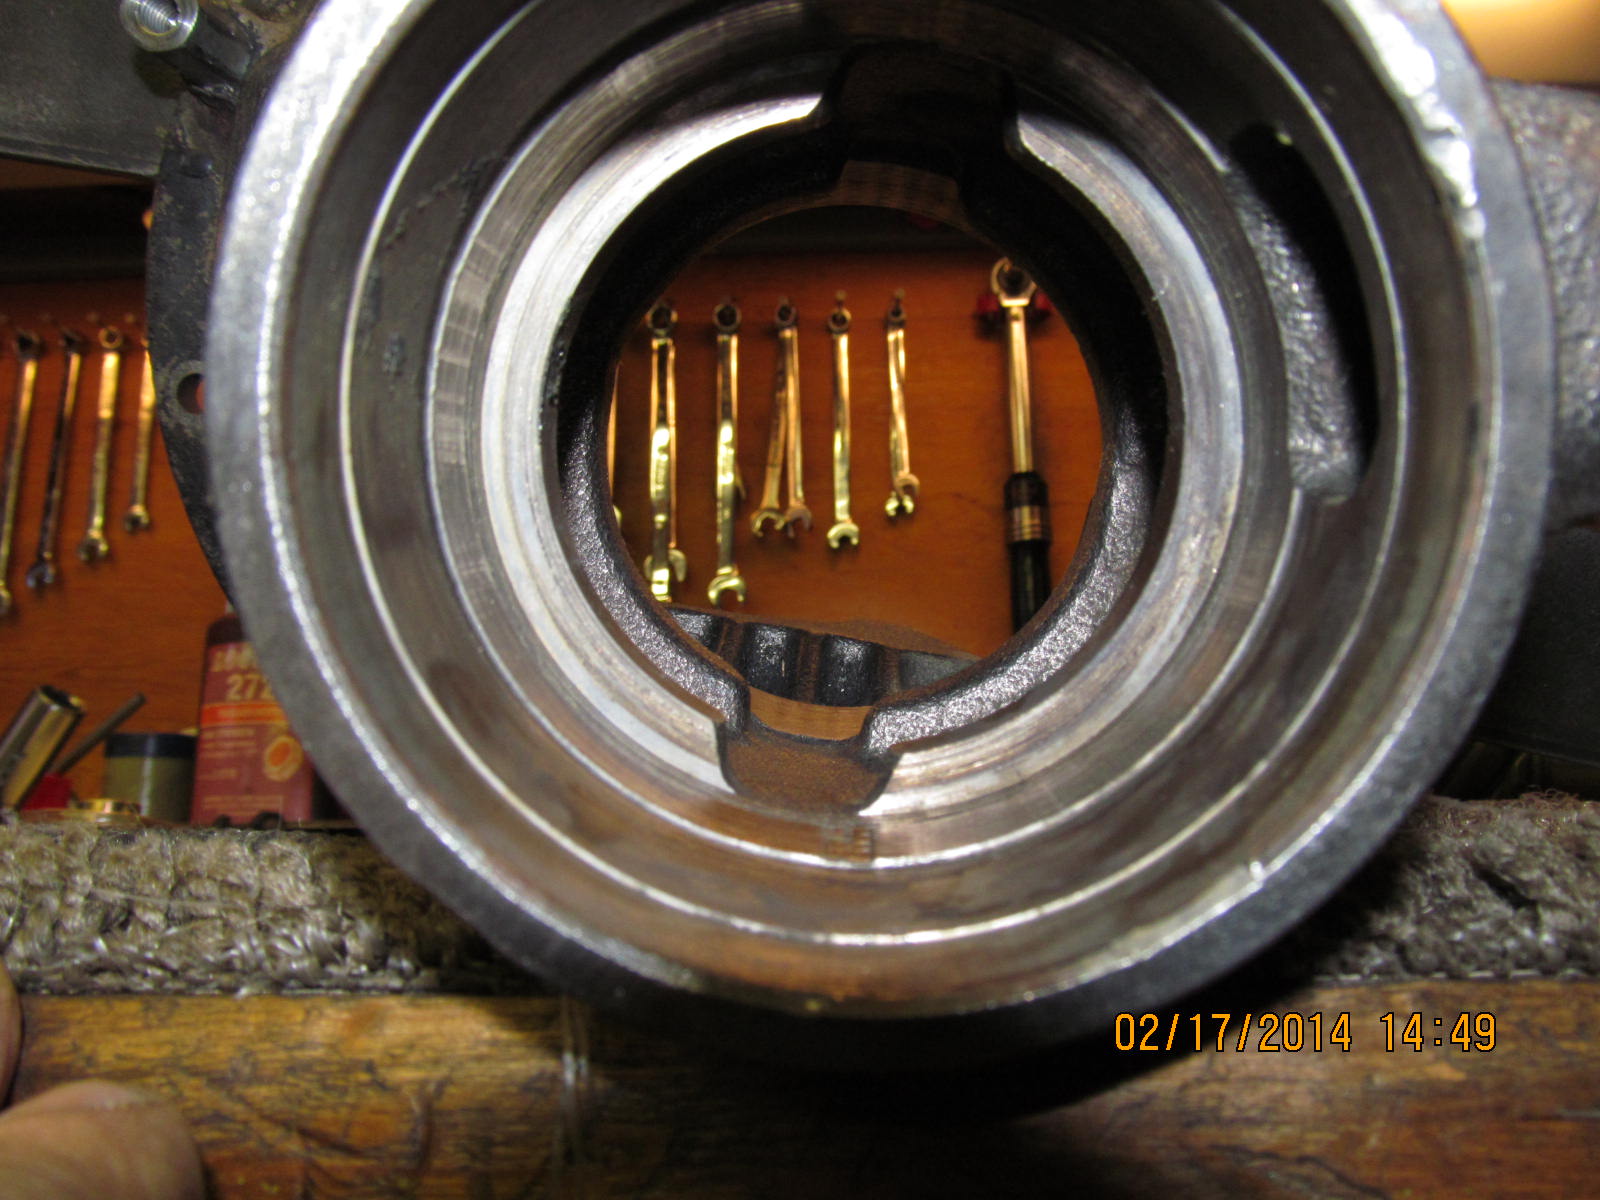
No heat damage to the bore of the diff either.
|
|
|
|
|
It's good.
|
|
|
|
|
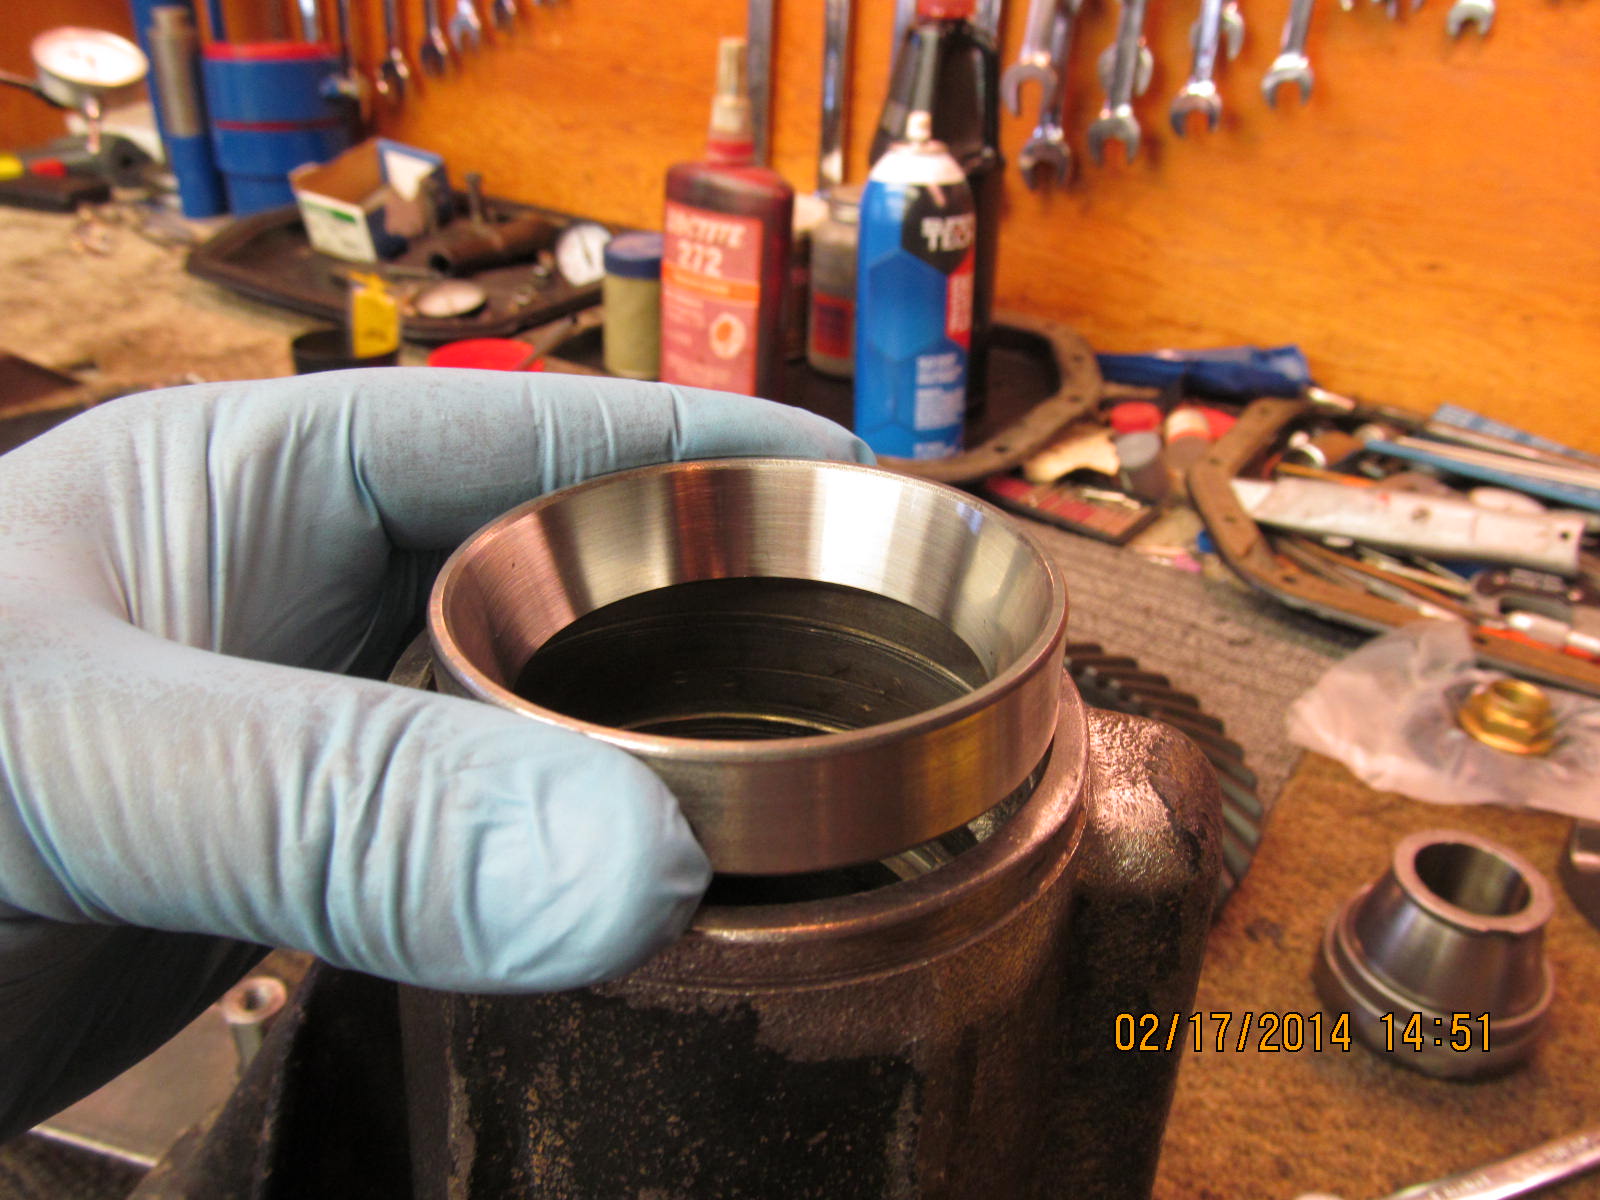
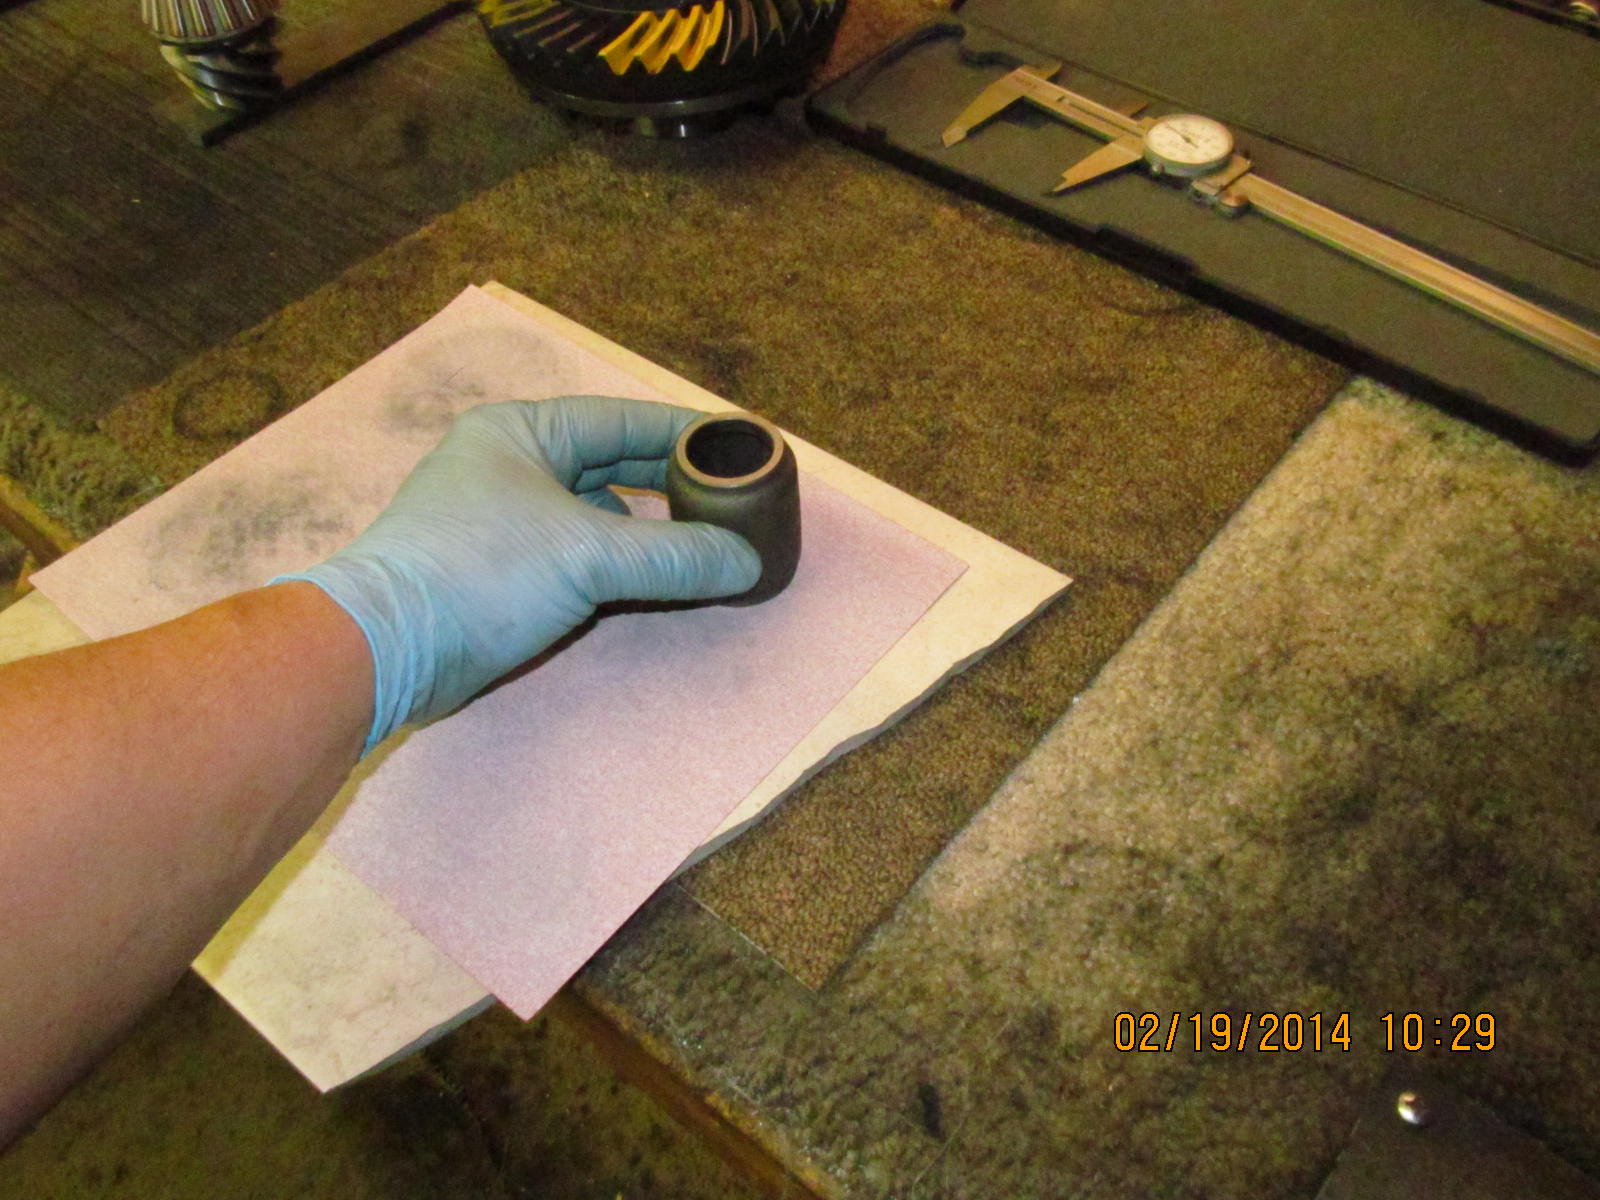
The small outer race gets tapped in with a hammer and support from some old bearing pieces shown in the lower right corner.
|
|
|
|
|
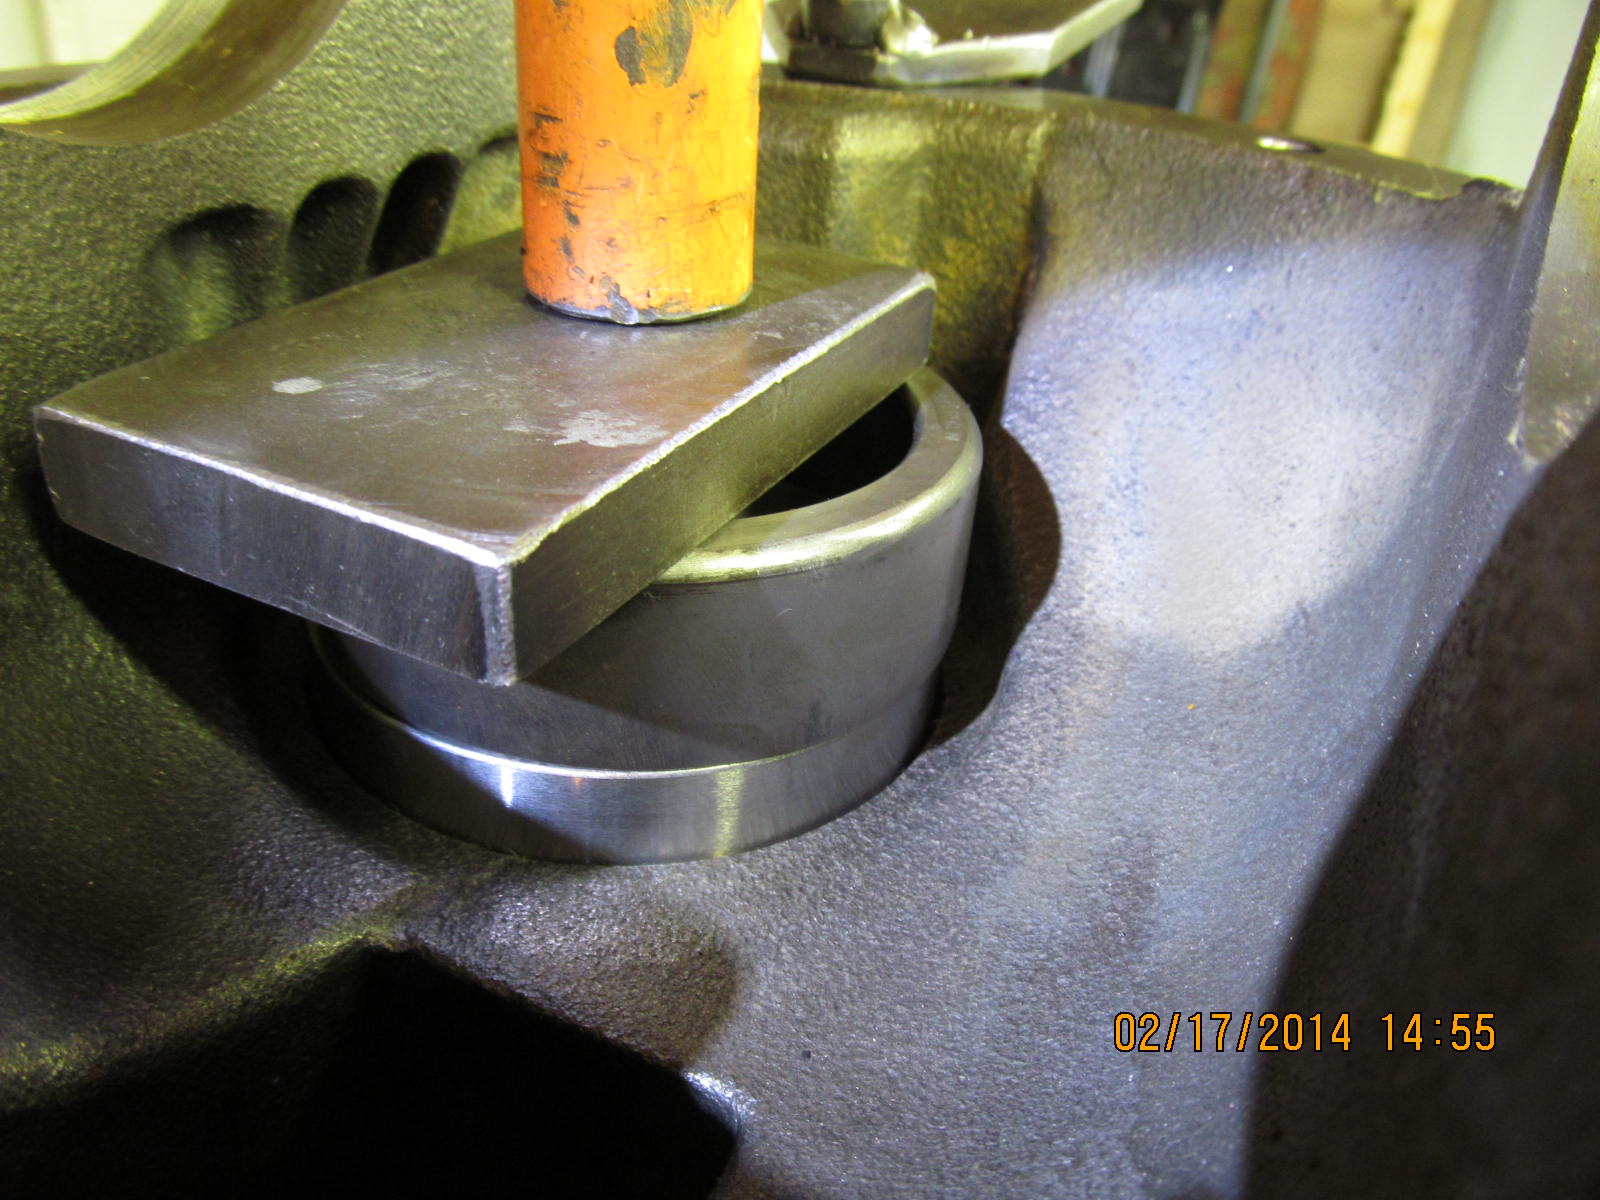
The large inner race gets pressed in every time. That's the protocol for this race.
|
|
|
|
|
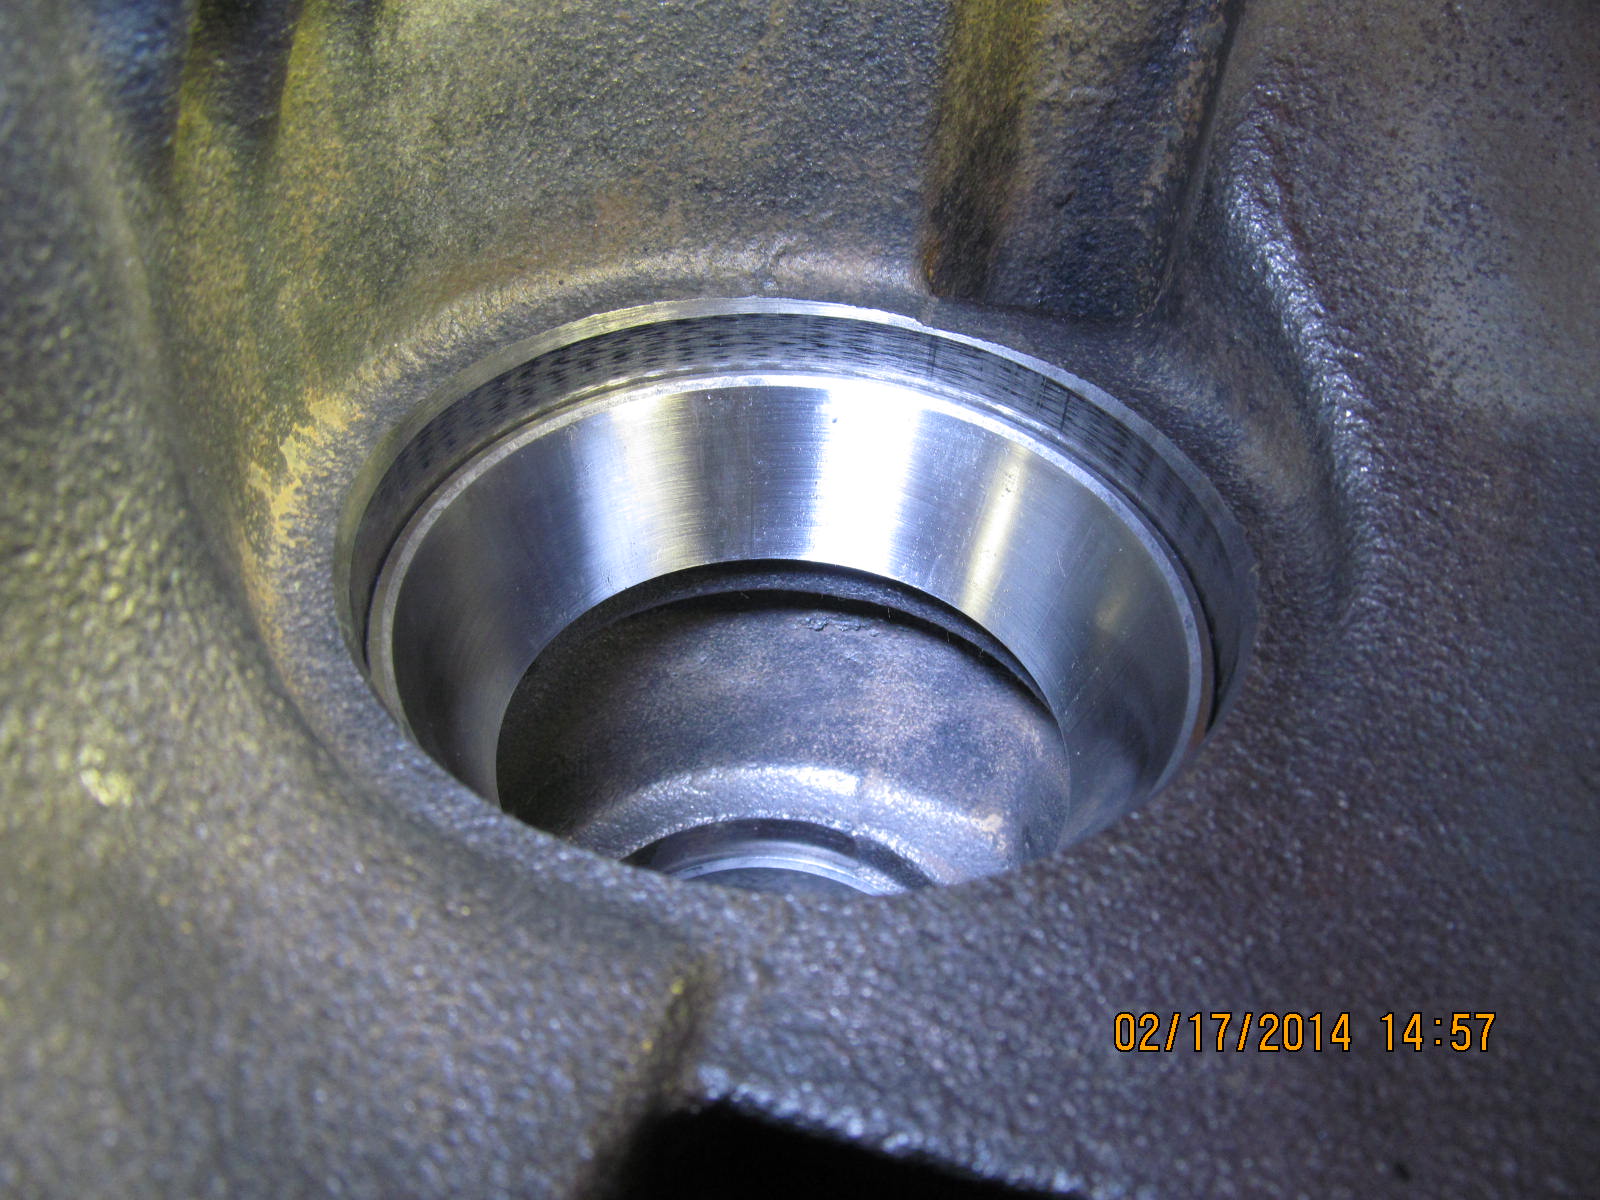
It goes in a long ways before it finally seats.
|
|
|
|
|
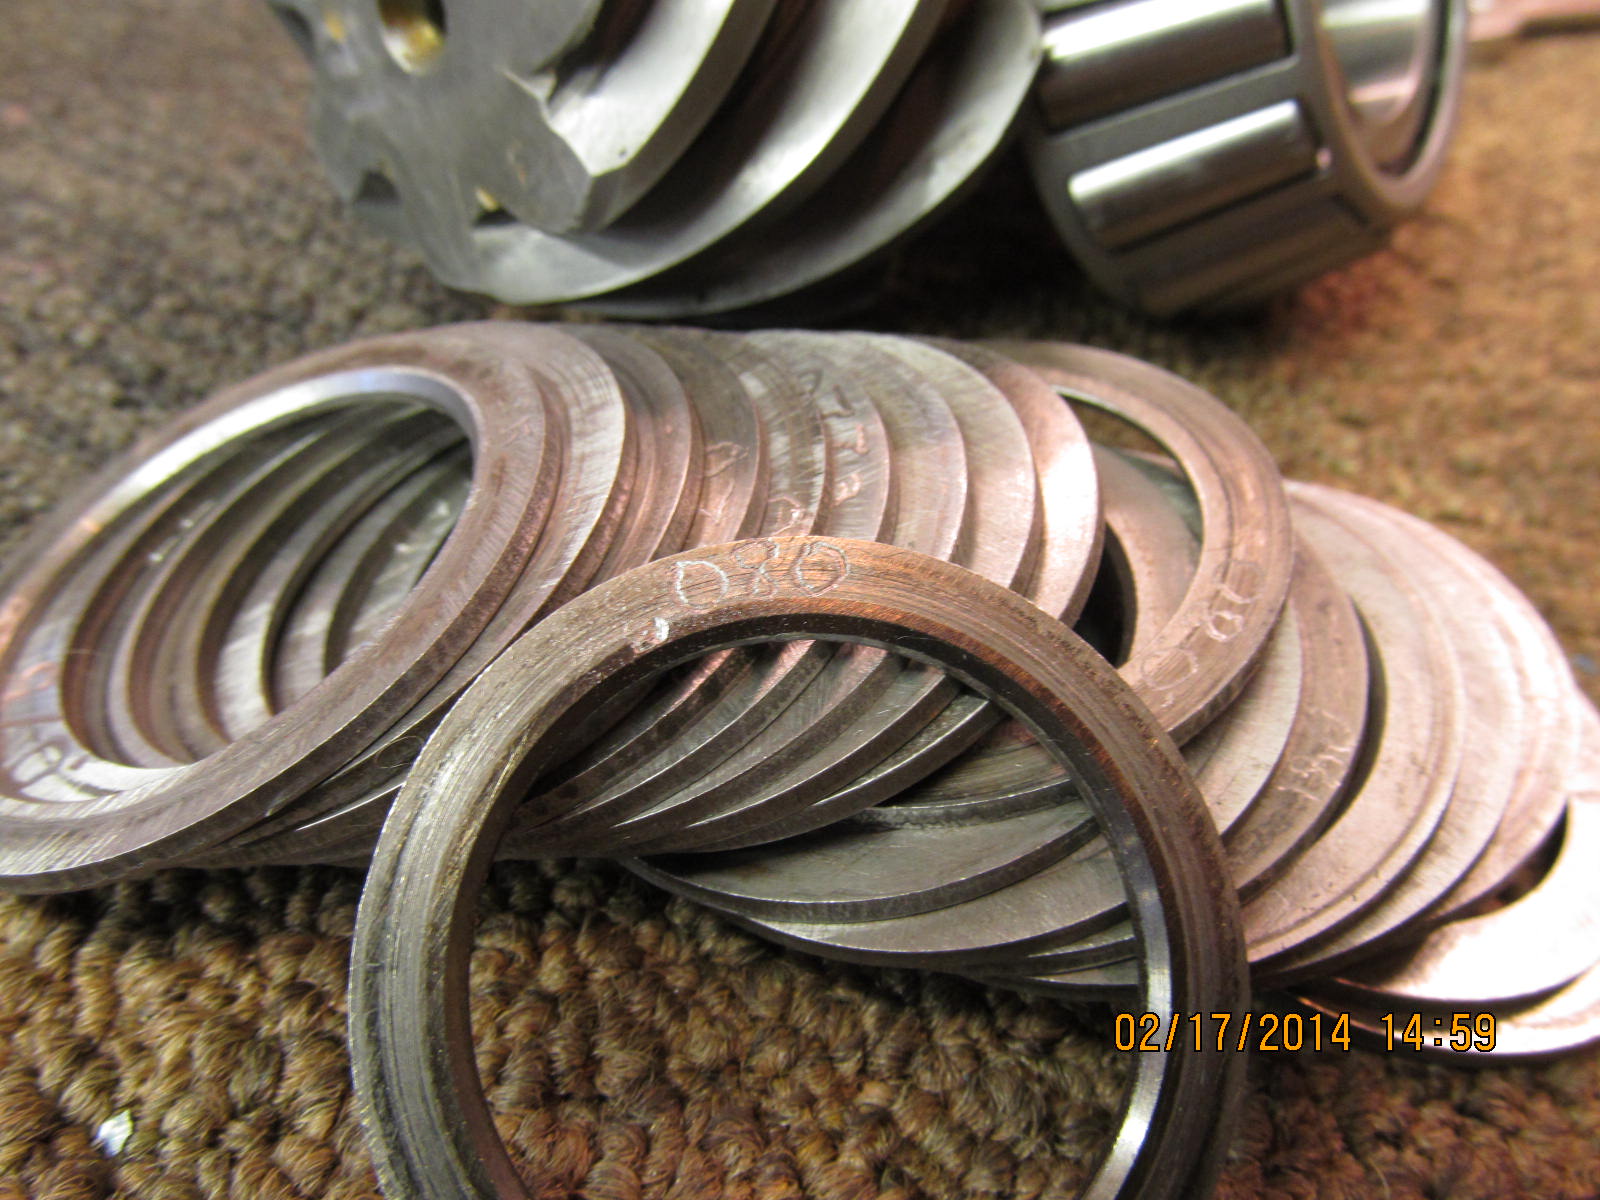
I'll start with a typical .080" pinion depth shim.
|
|
|
|
|
It's just the 12 ton from HarborFreight but does the job.
|
|
|
|
|
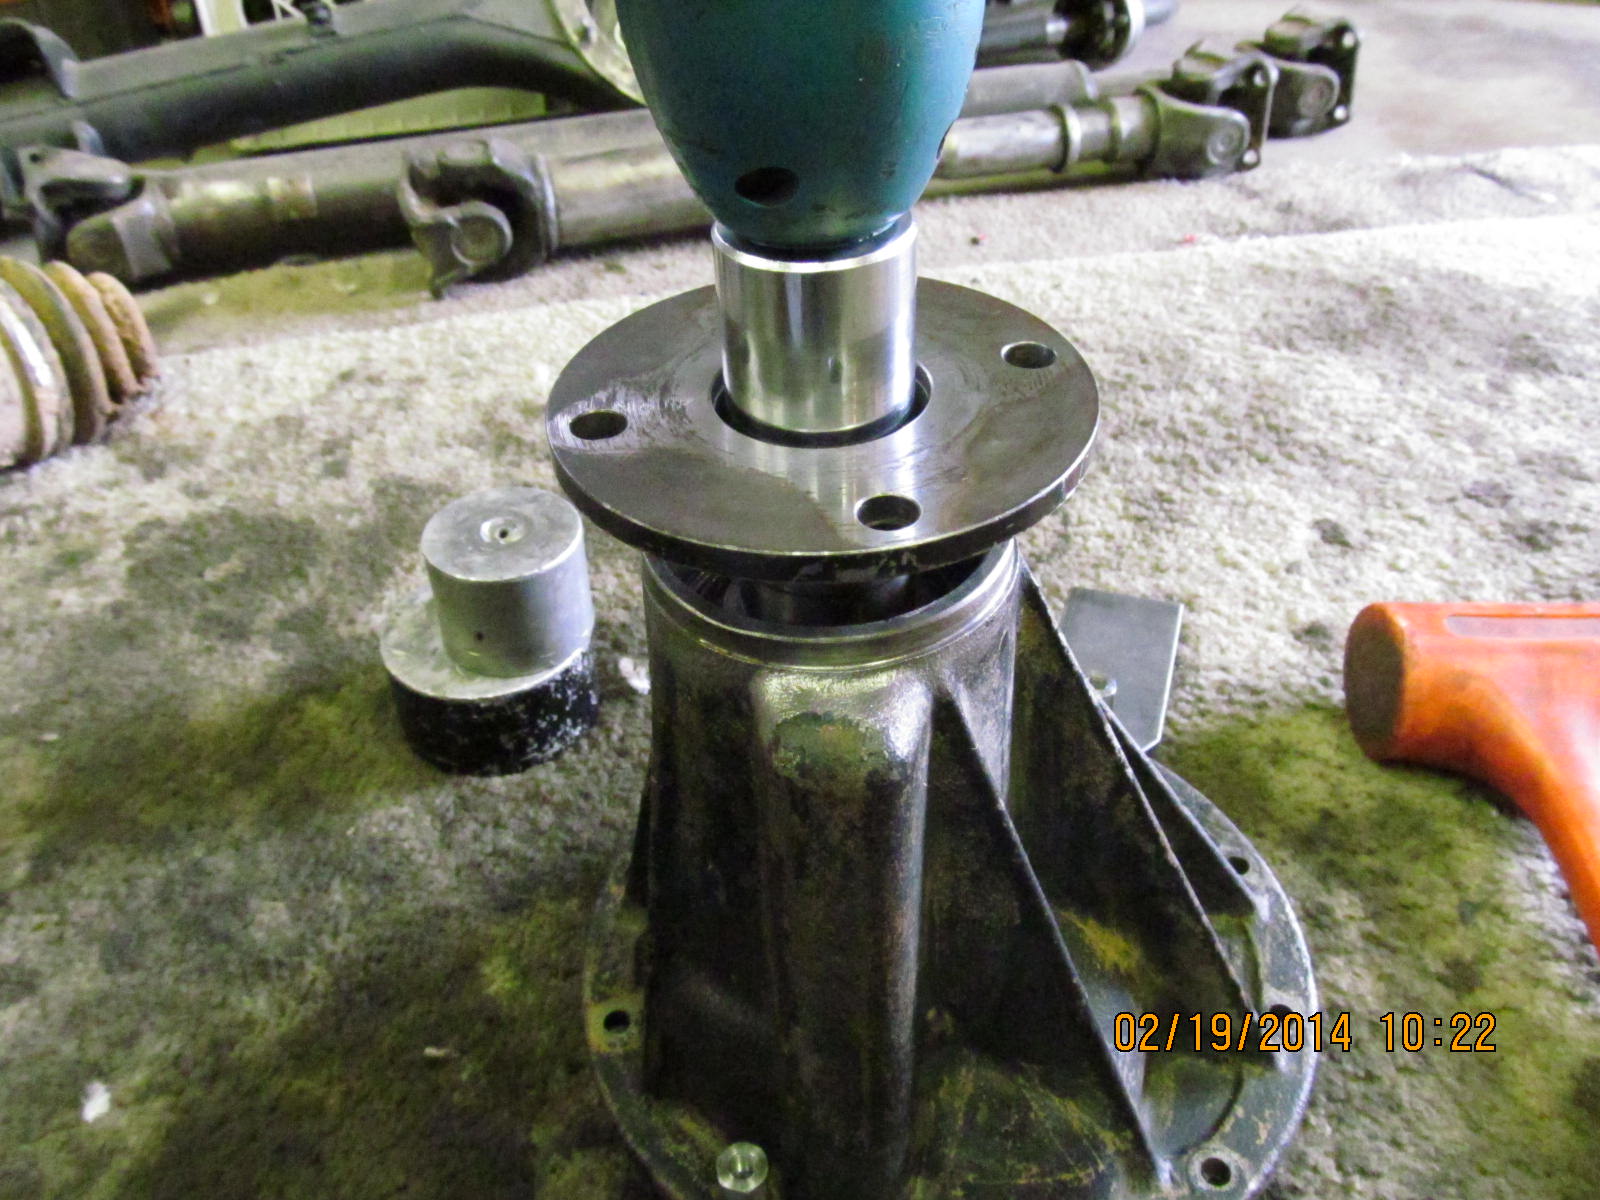
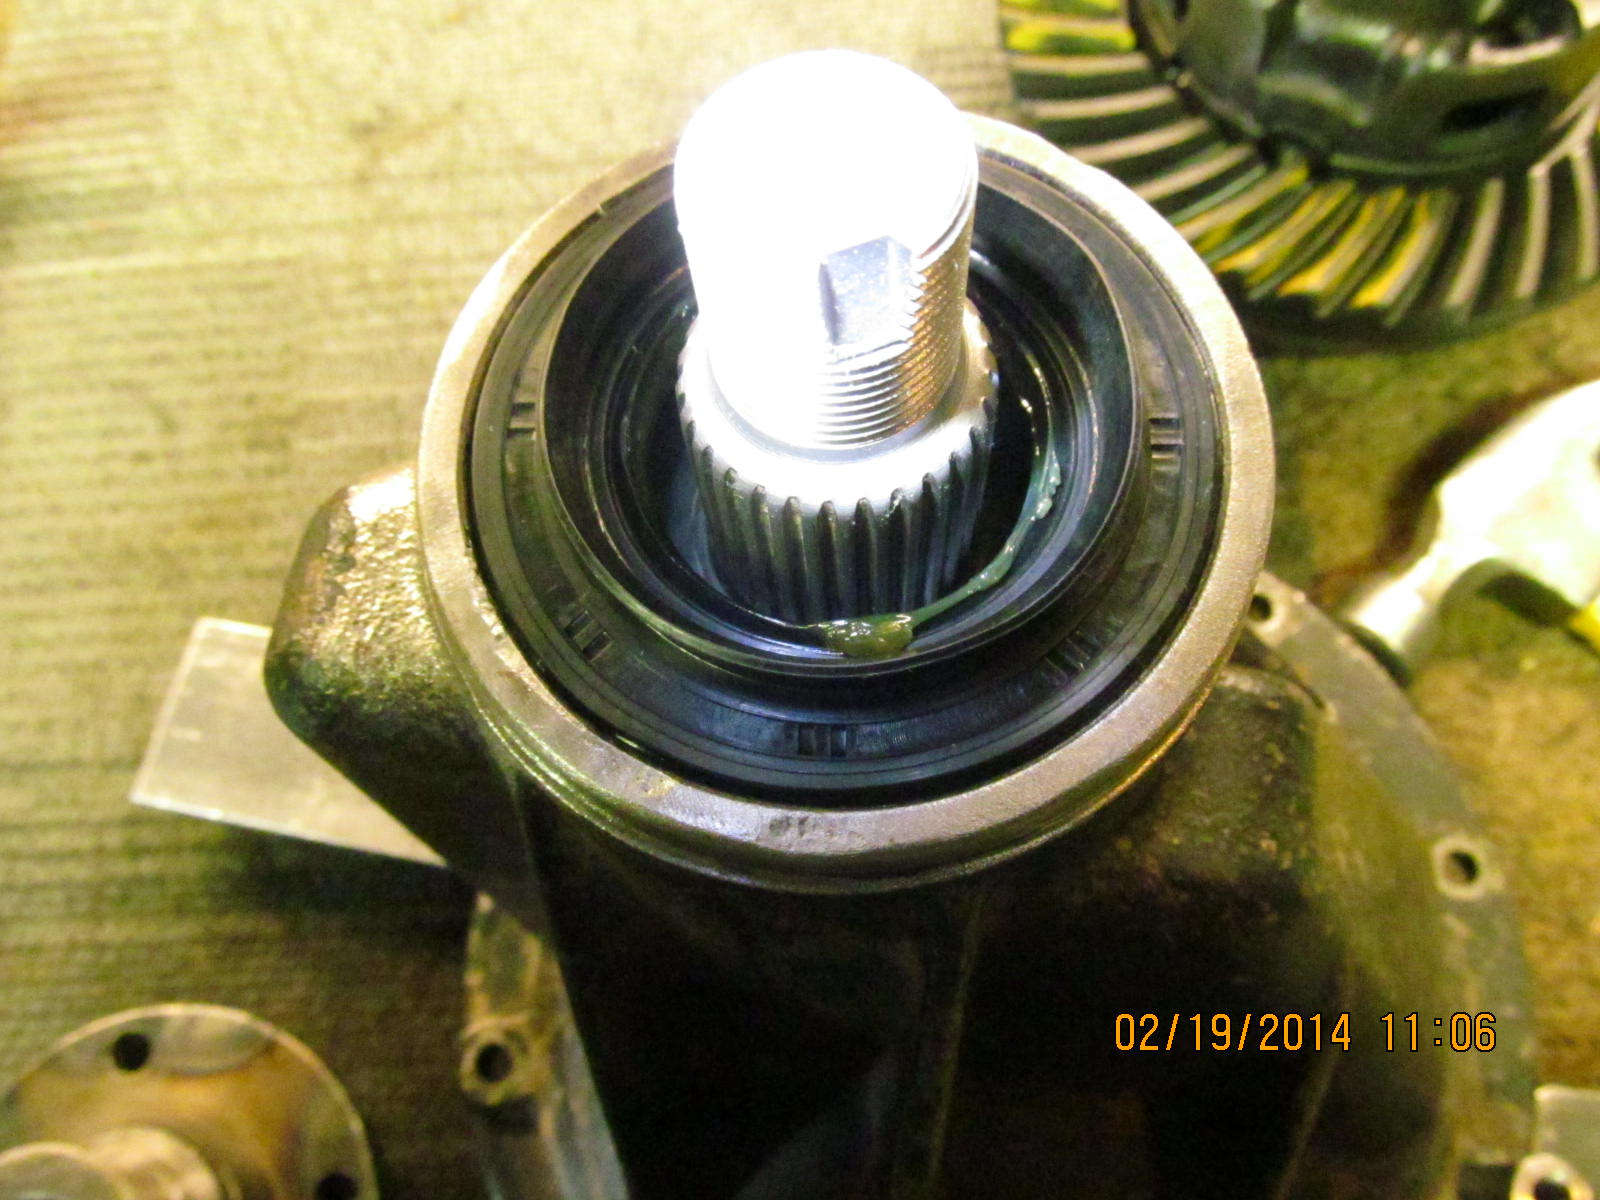
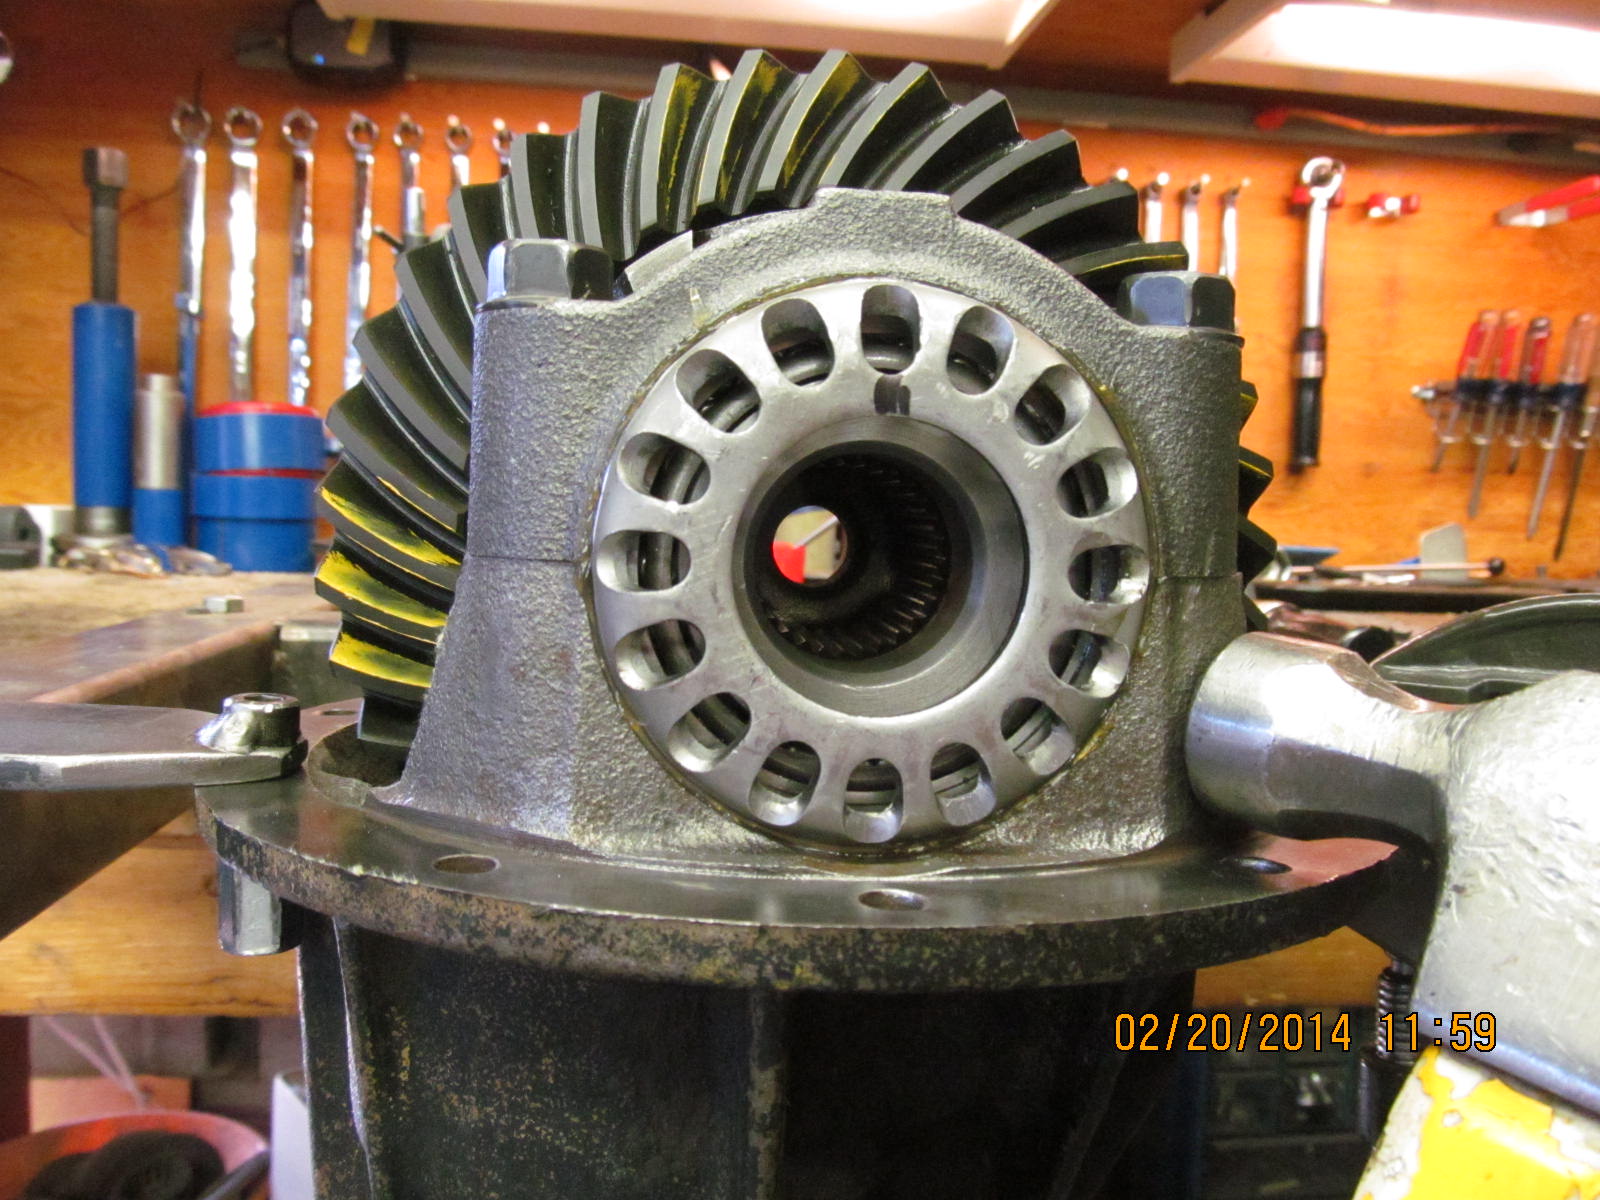
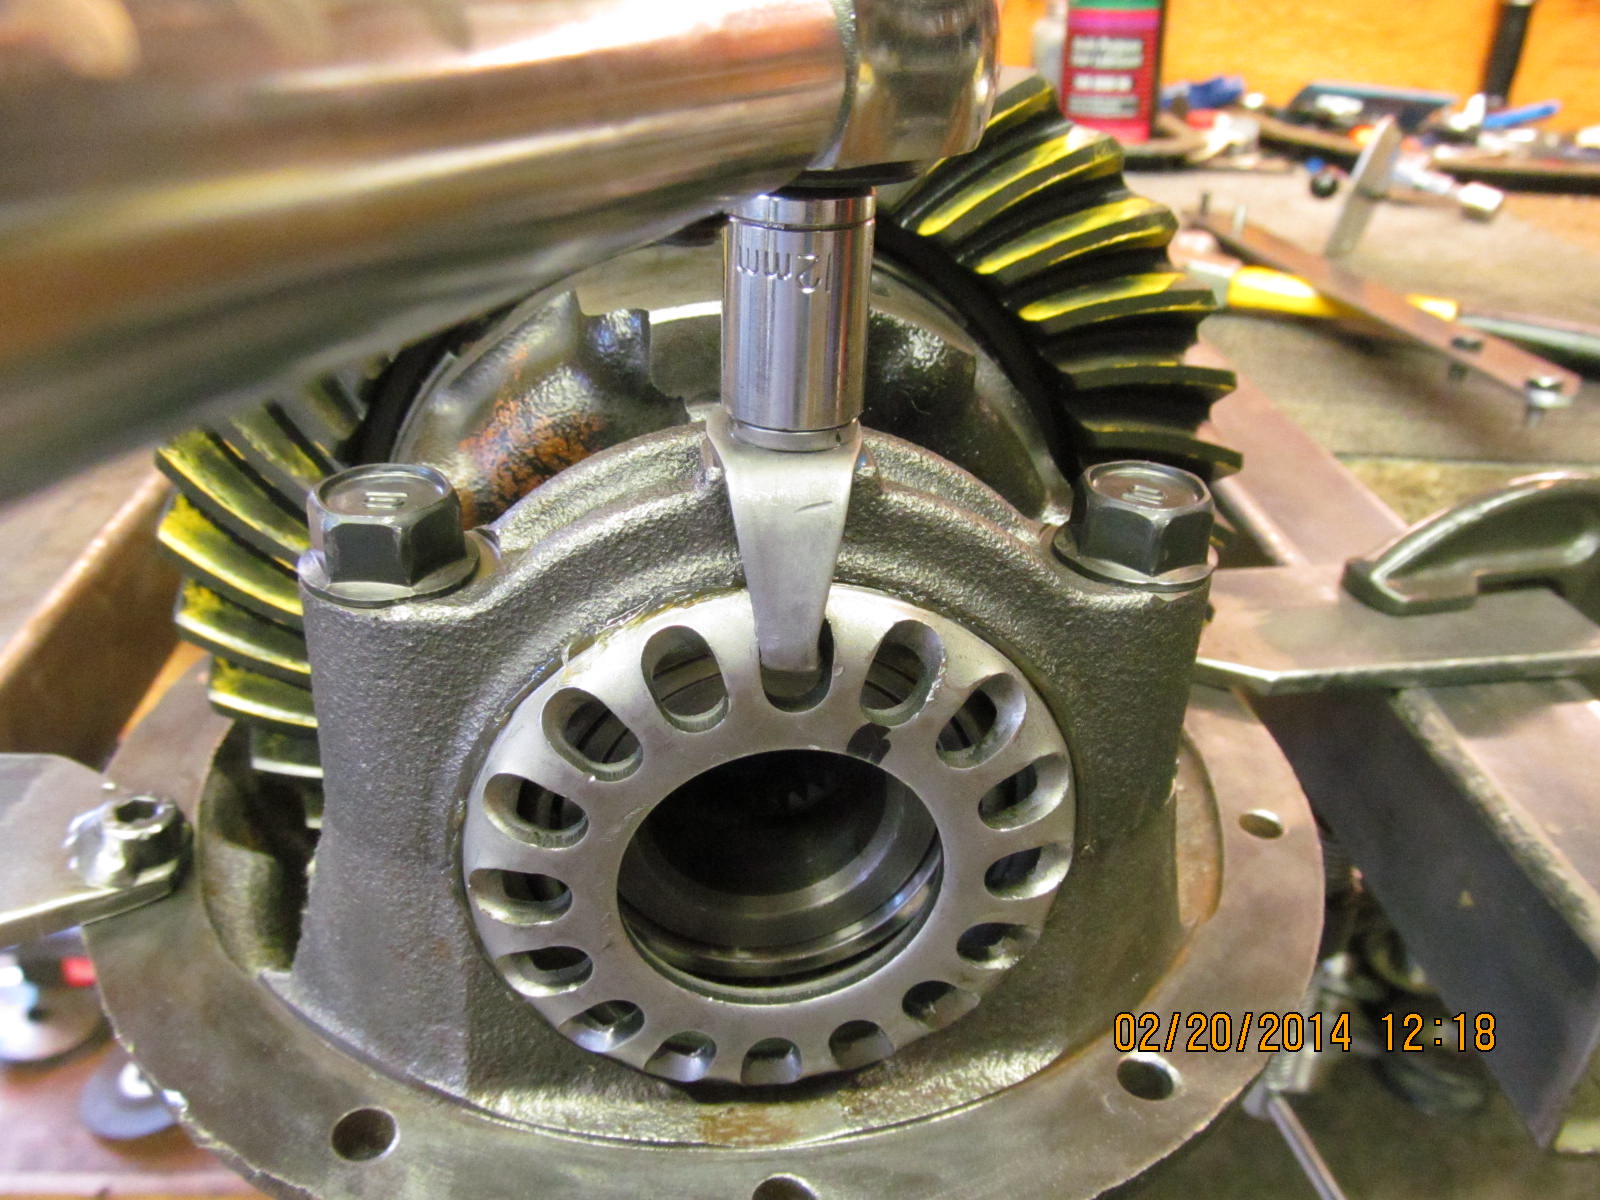
Now to put the pinion in the diff with the old 29 spline shop flange and nut. No solid collar yet until we establish pinion depth.
|
|
|
|
|
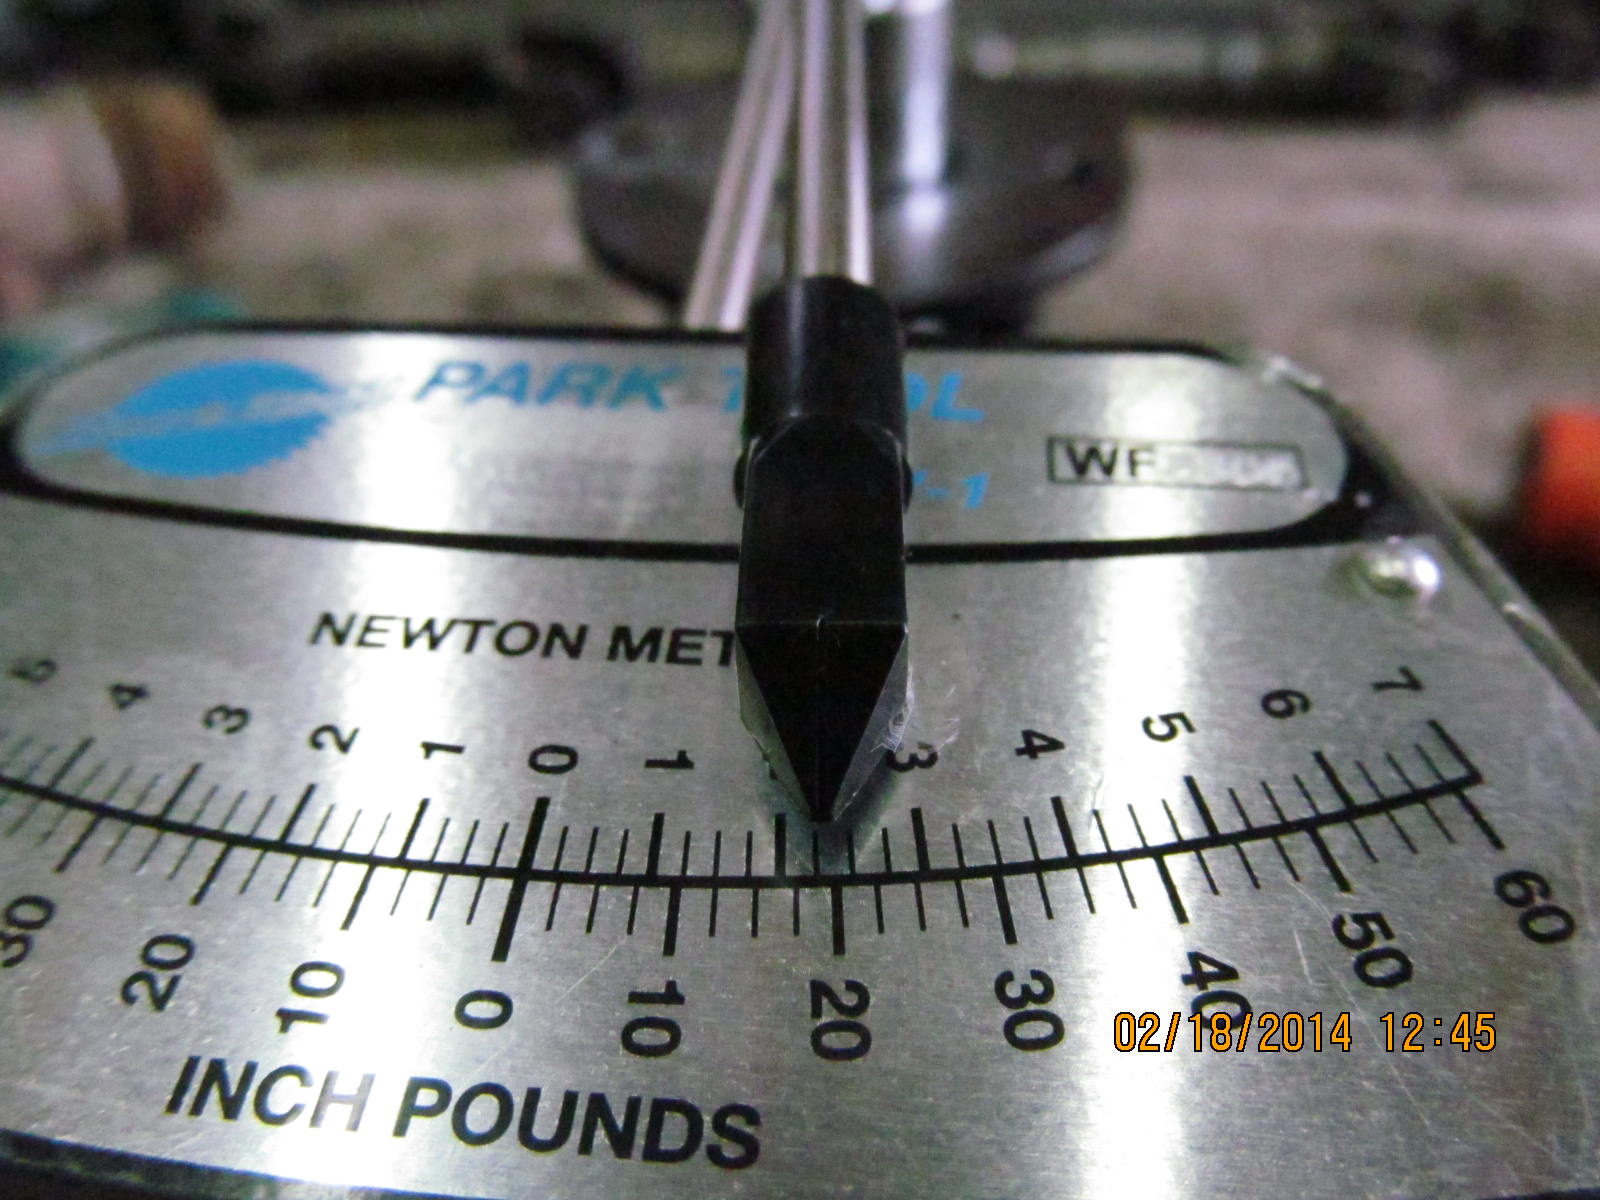
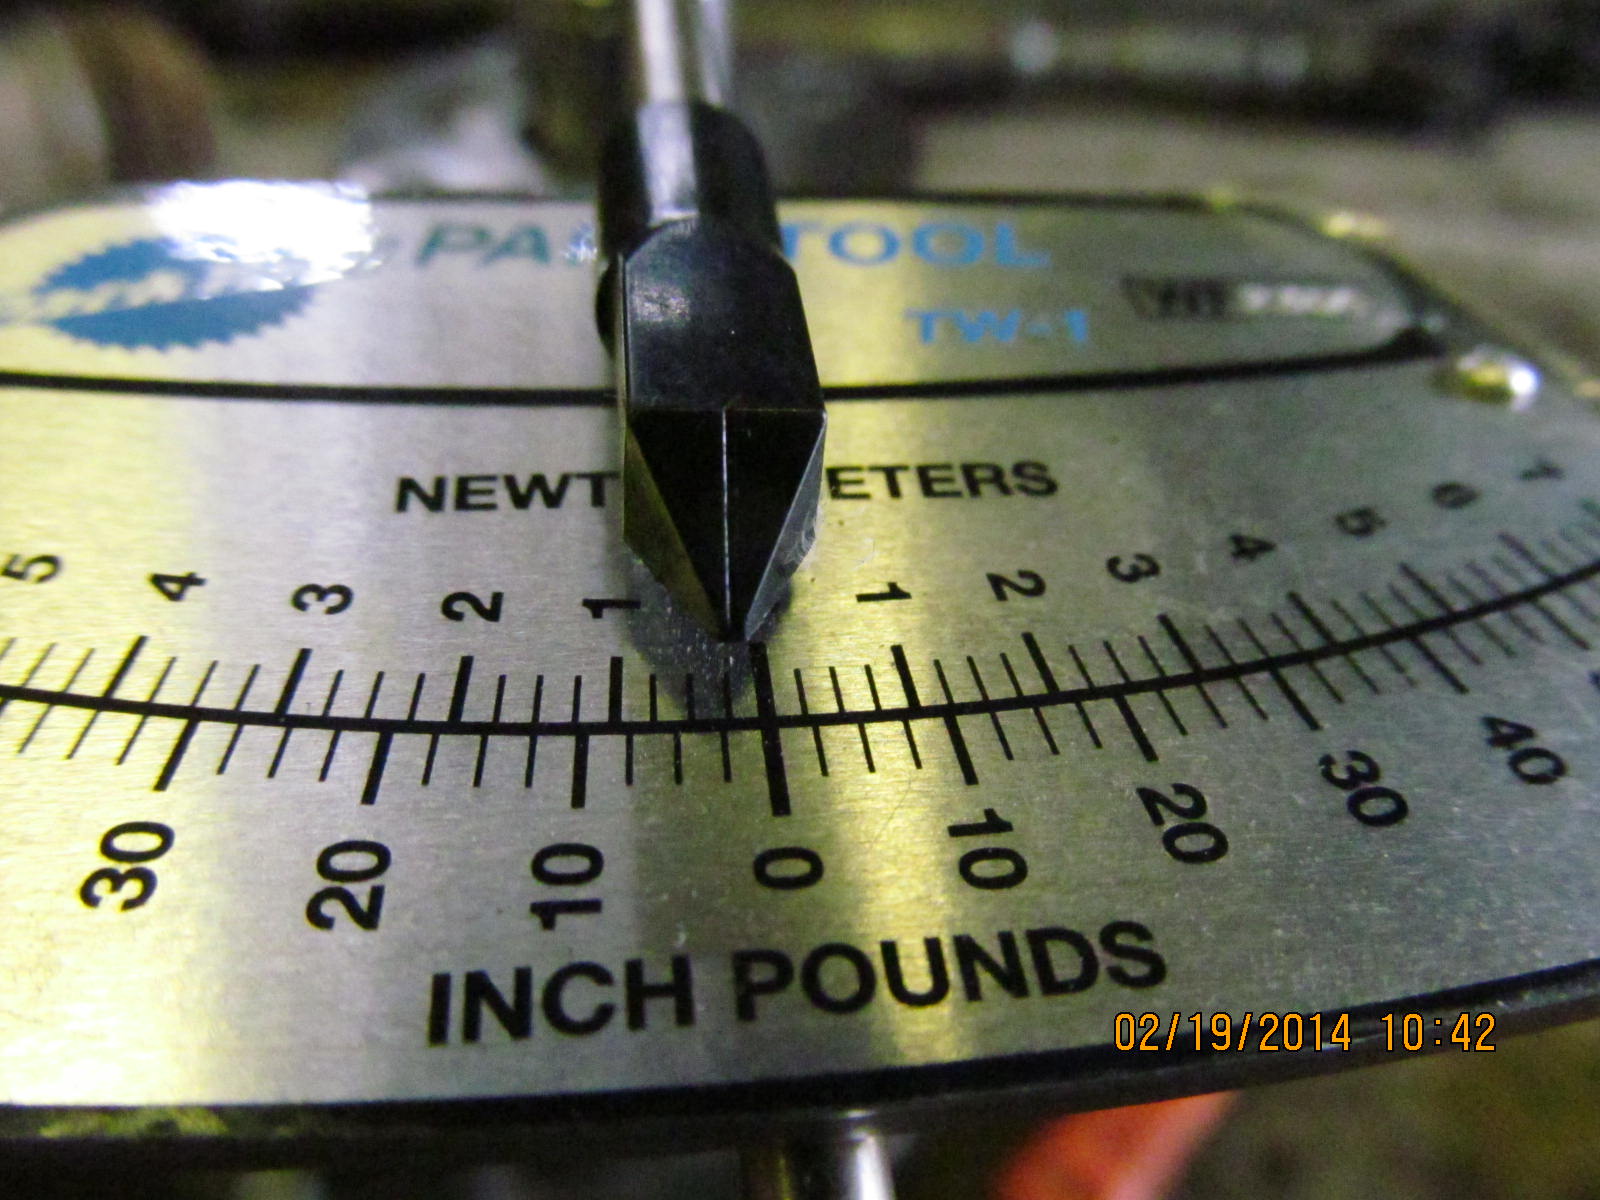
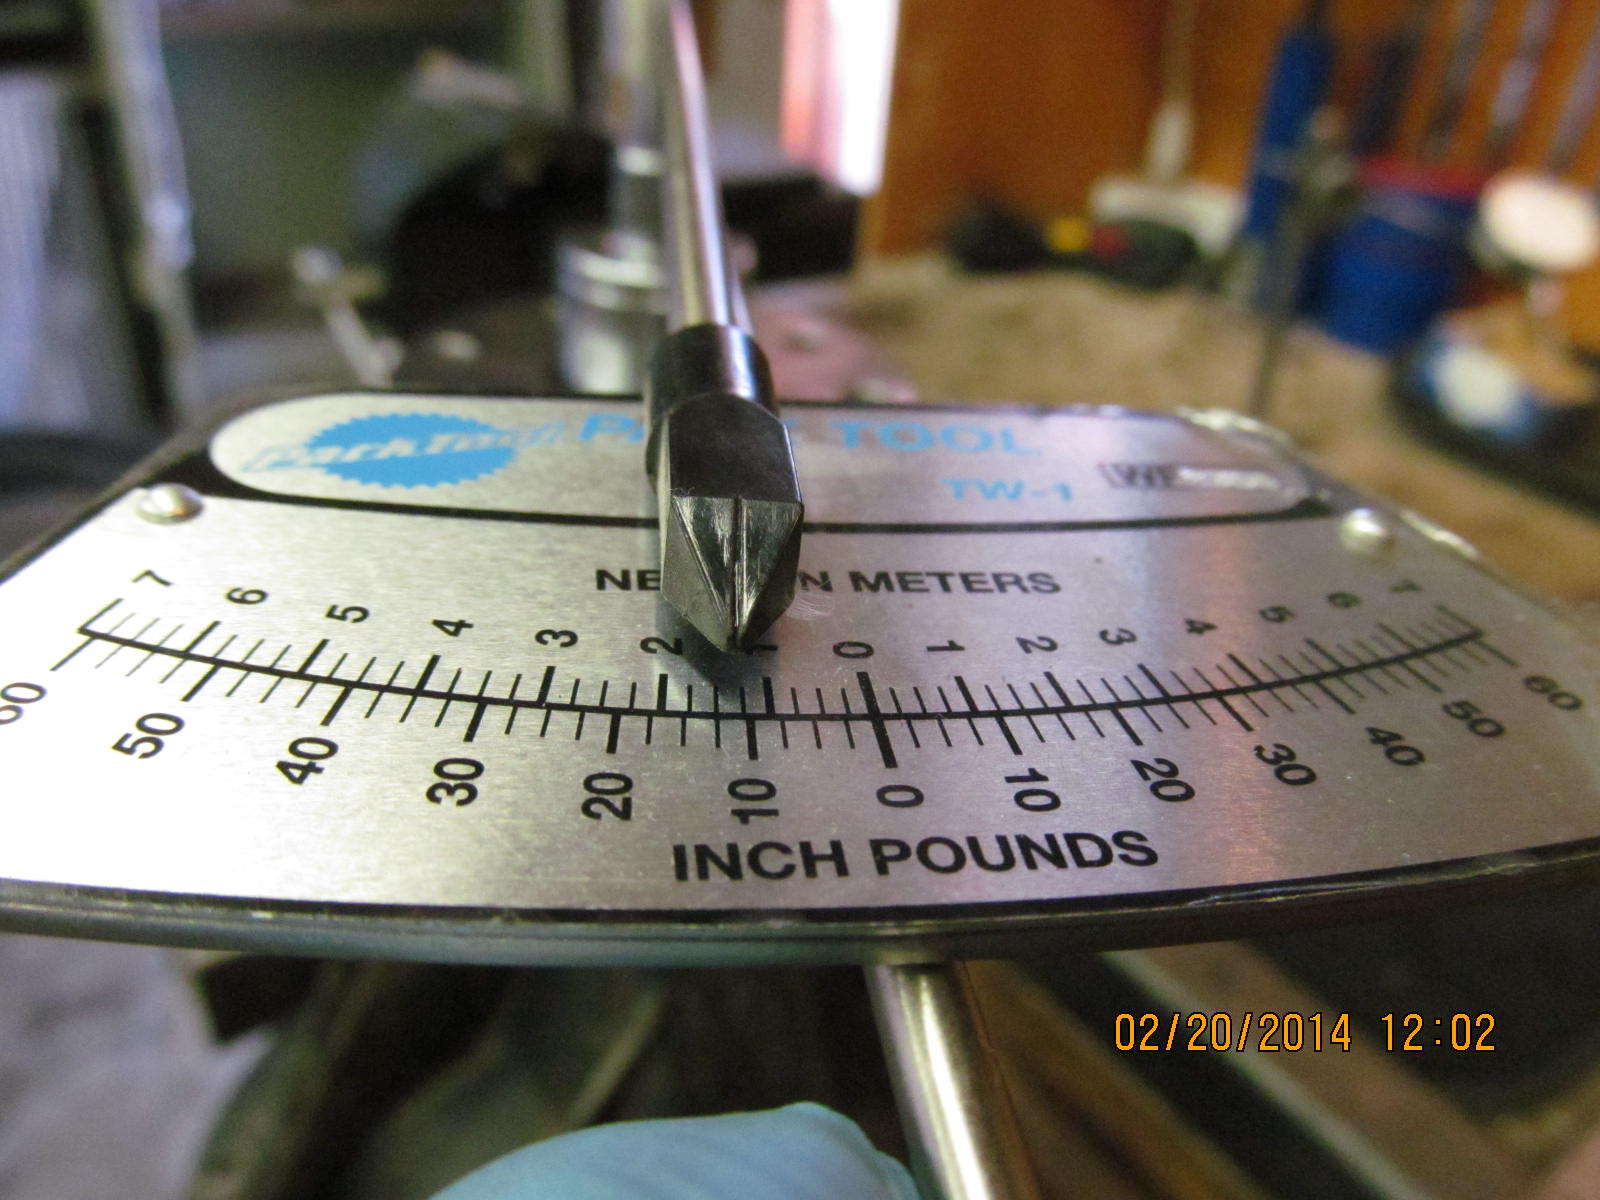
Pinion pre-load is almost 20 inch/pounds but this is aok for running a paint check.
|
|
|

|
|
Now to assemble the carrier end. Spartan first.
|
|
|
|
|
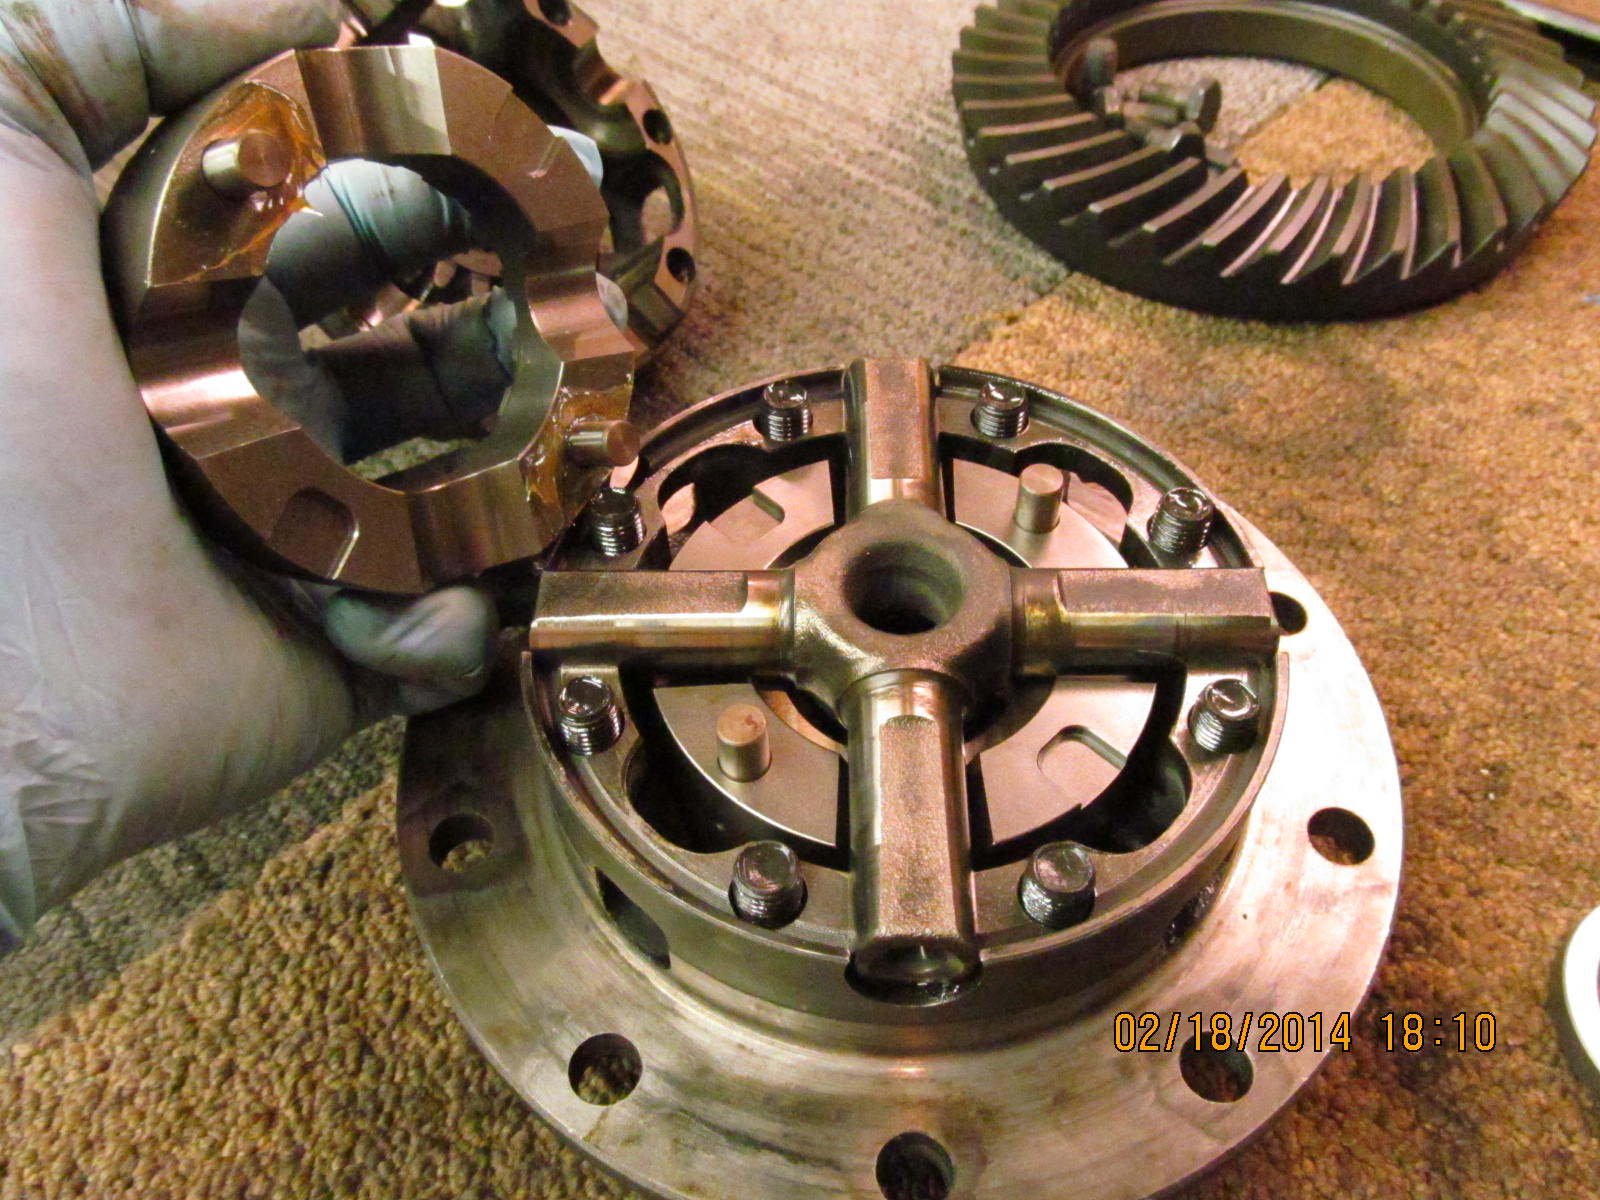
The V6 carrier is a split case design so just remove the 8 bolts and it will split in two.
|
|
|
|
The sidegears are re-used but the thrust washers must be left out. The Spartan is the only lunchbox locker that does this.
Life is better because of it :)
|
|
|
|
Remember....leave these out. Actually, I don't think you could install them even if you forgot....the case would never fully go
together because of "negative clearances".
|
|
|
|
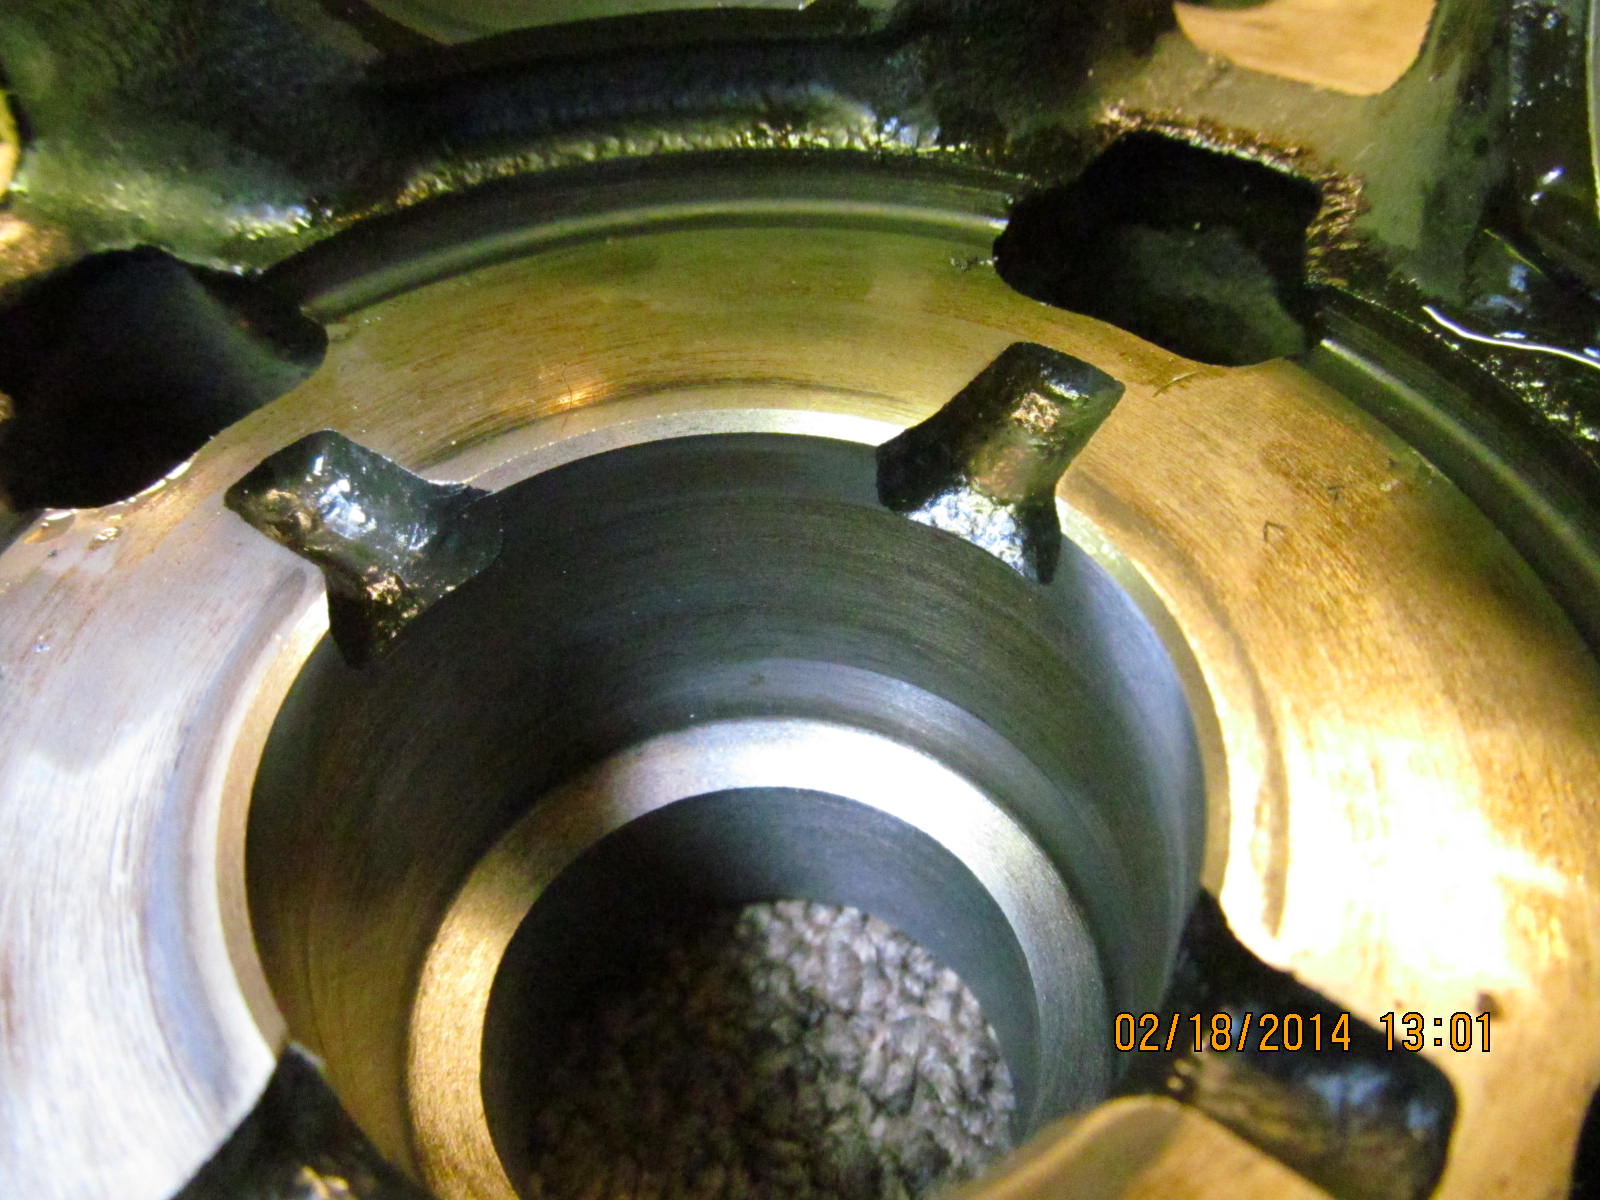
The sidegear slips in here...seems that some V6 carriers have mild to severe damage on these surfaces sometimes....and it's a
good idea to check these for scars and tears. No issues with this one :)
|
|
|
|
|
|
|
|

|
|
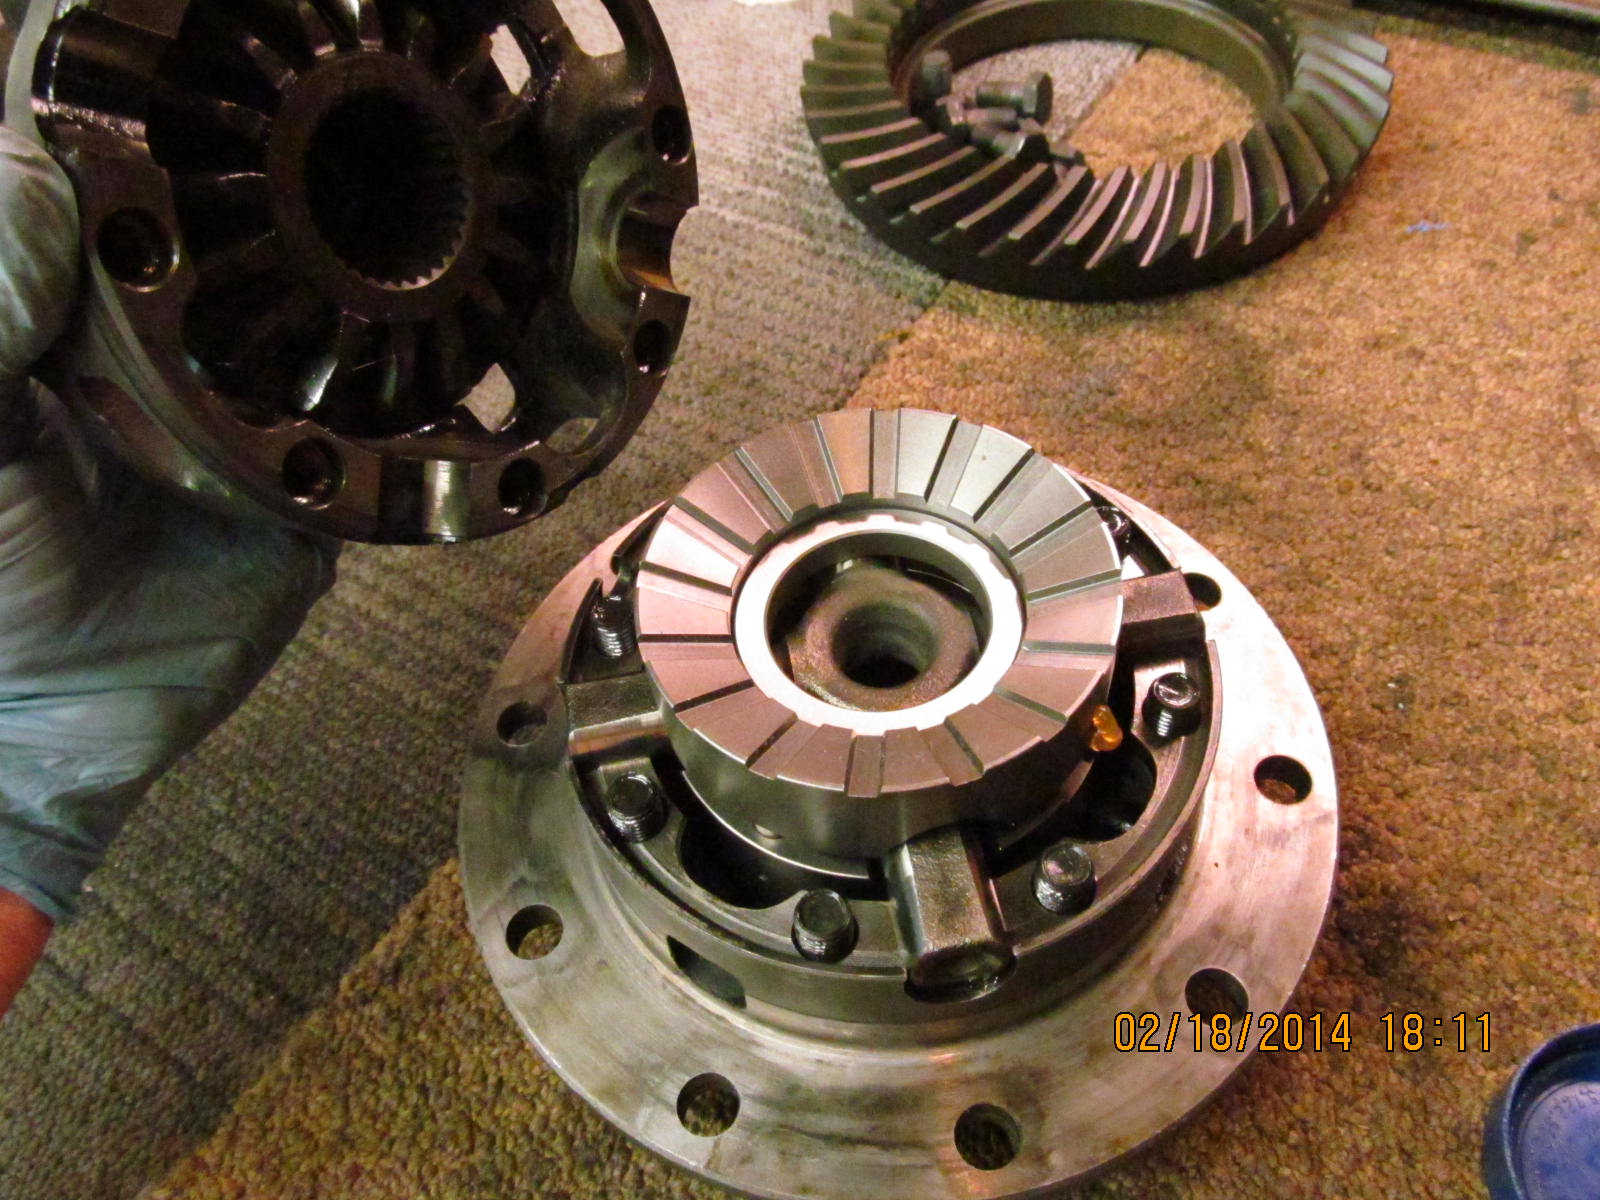
Each side of the 4 way cross gets a spacer ring.
|
|
|
|
|
Lastly, put the lid on.
|
|
|
|
|
Tighten the 8 bolts to 40 ft/lb.
|
|
|
|
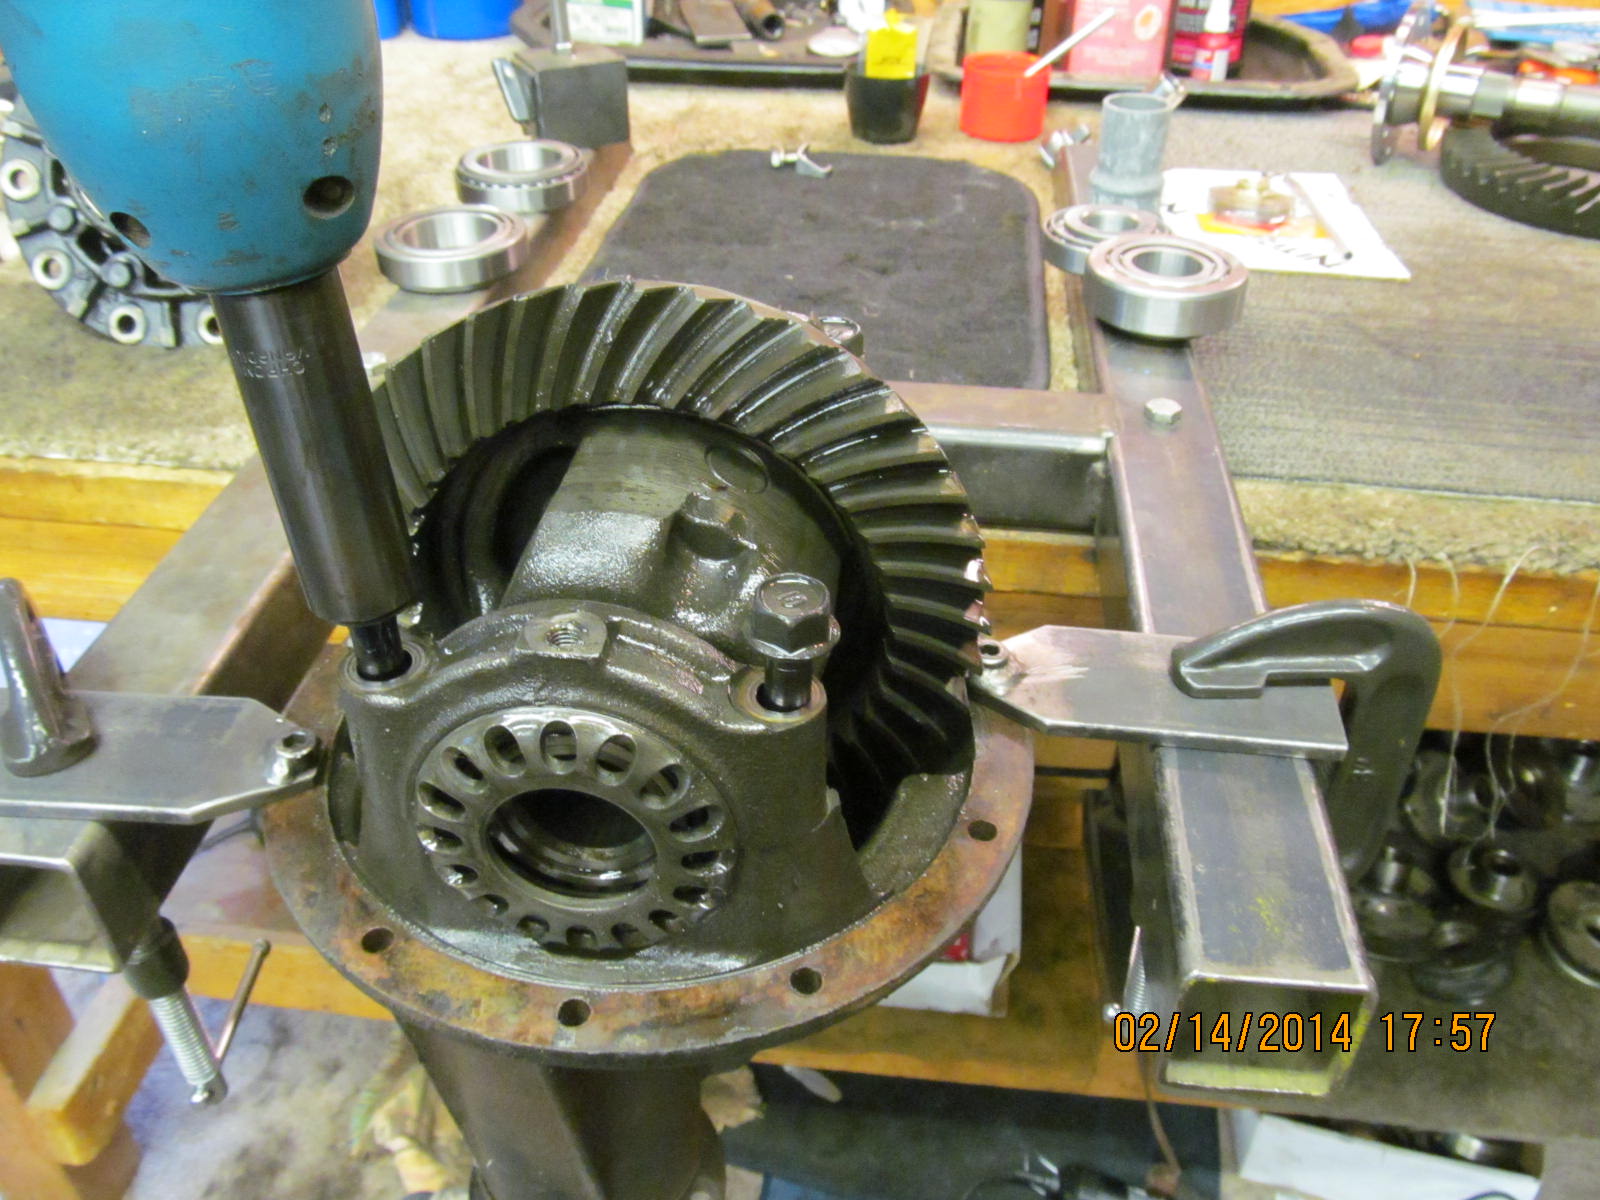
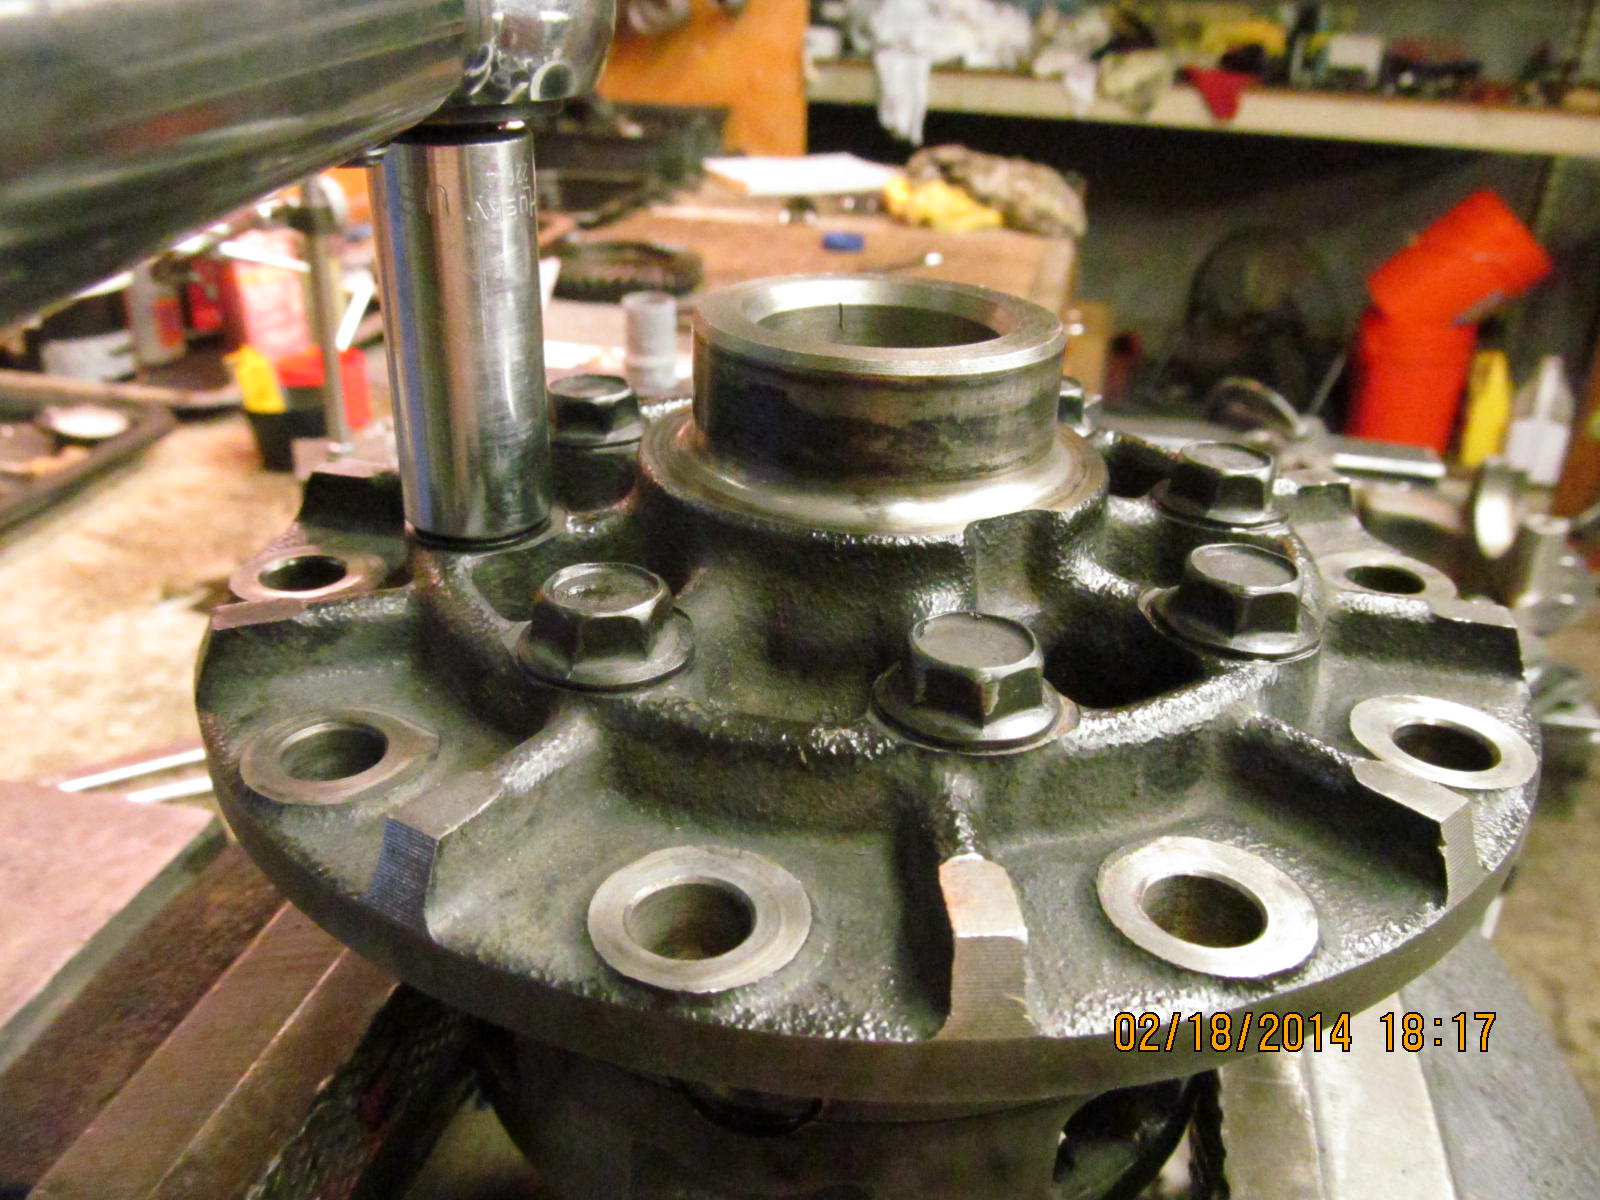
The Nitro ring was a good snug fit onto the carrier but I was still able to seat it with casual persuasion. Not shown but I
always run a BIG file over the both ring gear surfaces. No unusual high spots were found.
|
|
|
|
|
75 ft/lb on all 10 ring gear bolts.
|
|
|
|
|
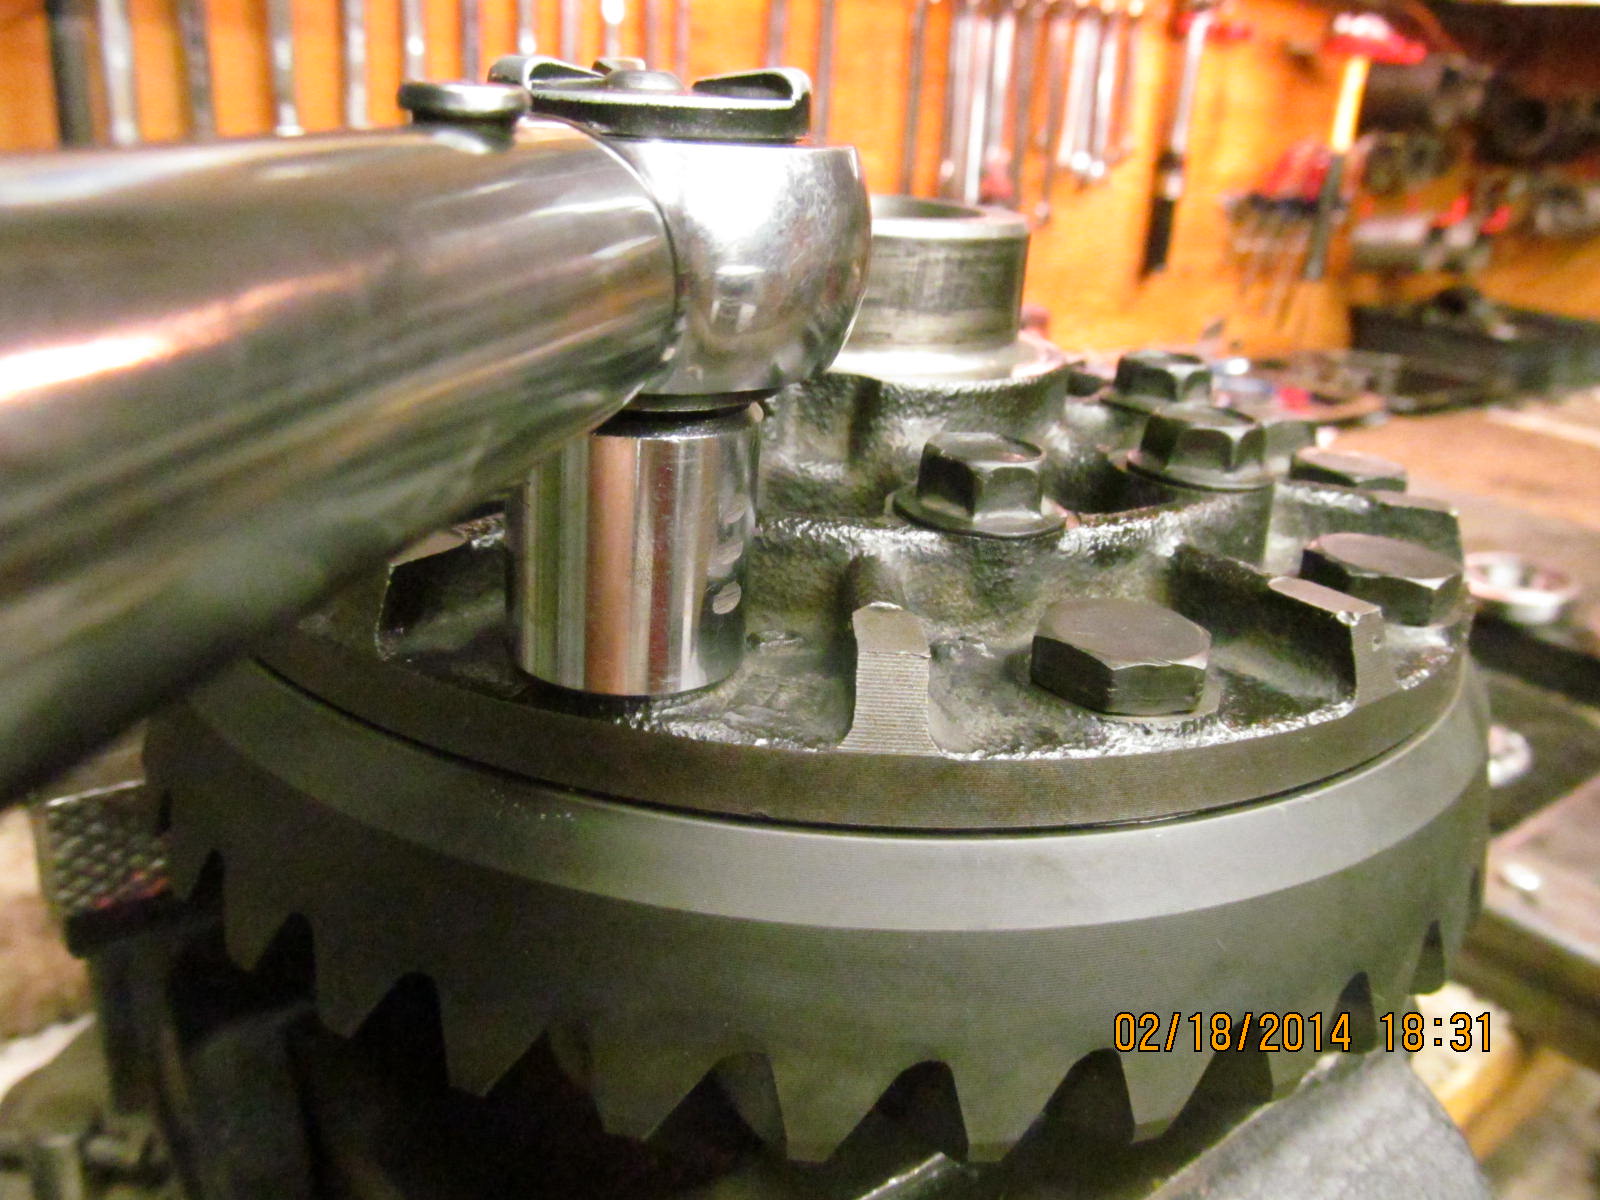
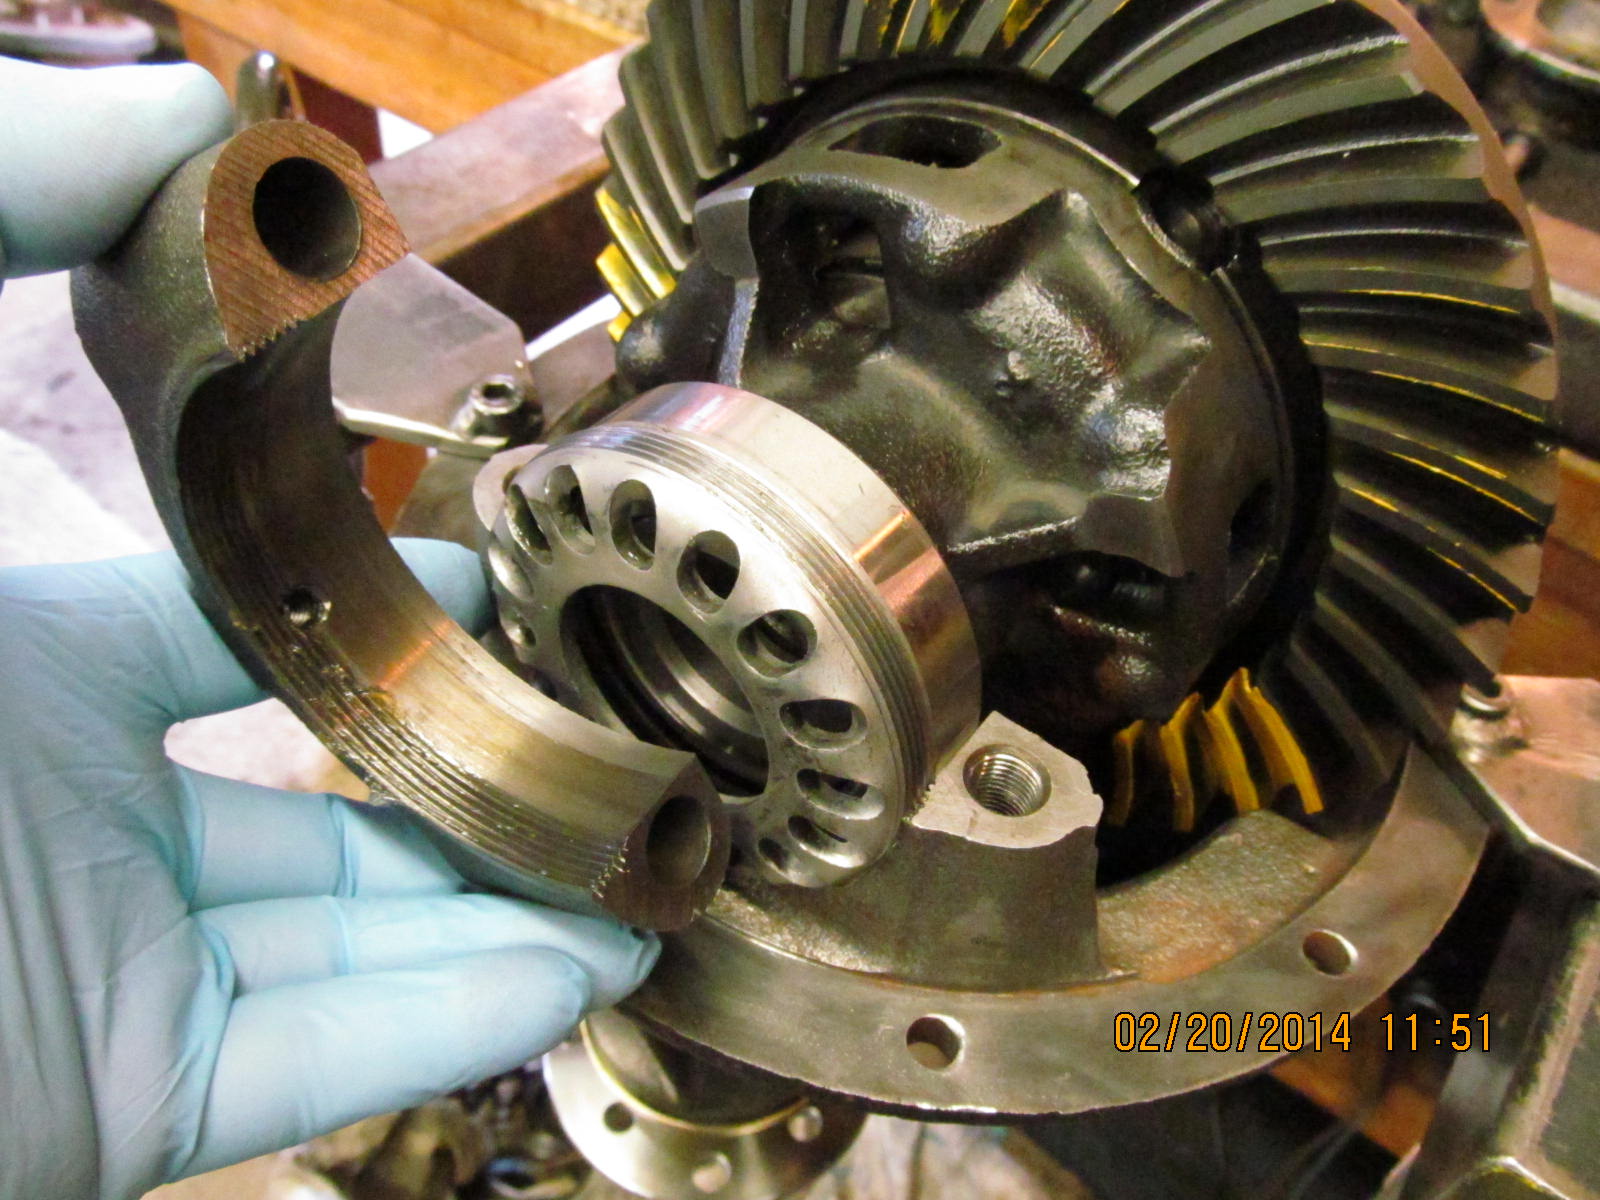
Notice the gradual curvature of the journal surface as it goes from vertical to horizontal...
|
|
|
|
Notice the tight curvature on the conversion bearing.....Because of this, no matter how hard the bearings are pressed onto
the journals, they will never fully seat against the carrier. There will be about a .025" air gap and that might never be
a problem in actual operation but it just made better sense to get a full seat.
|
|
|
|
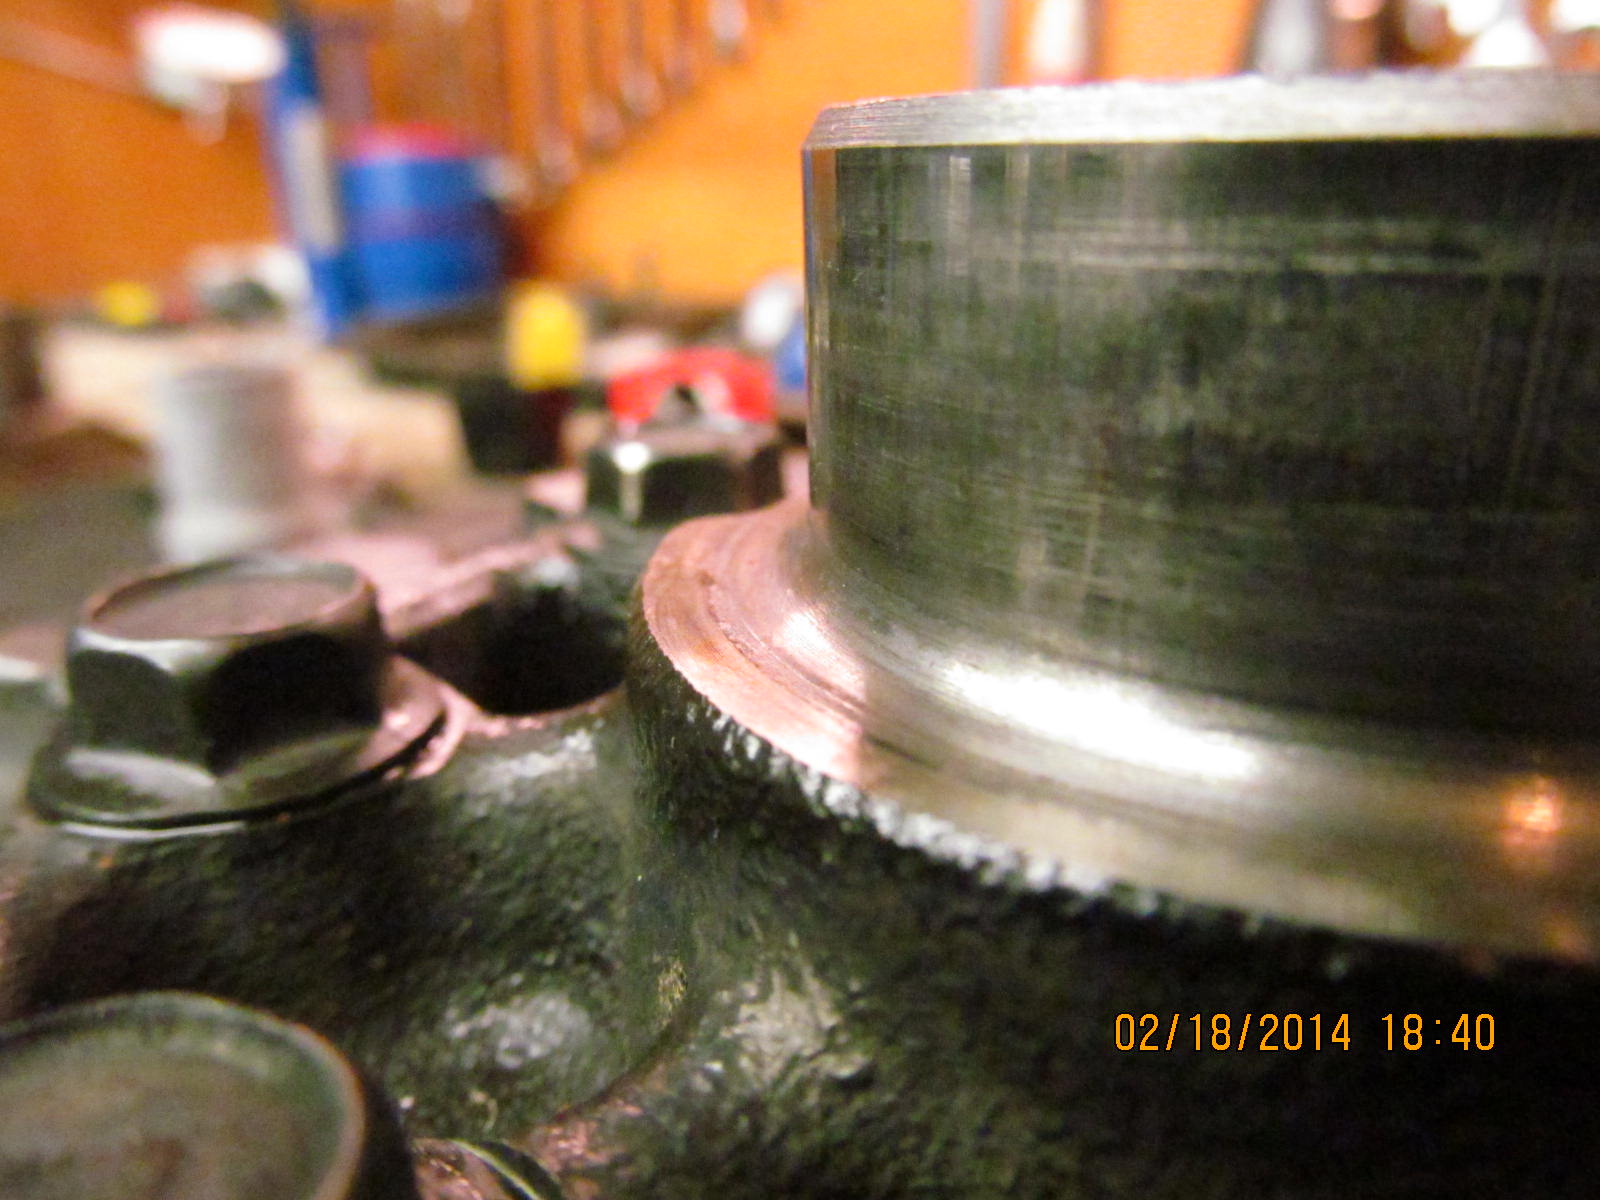
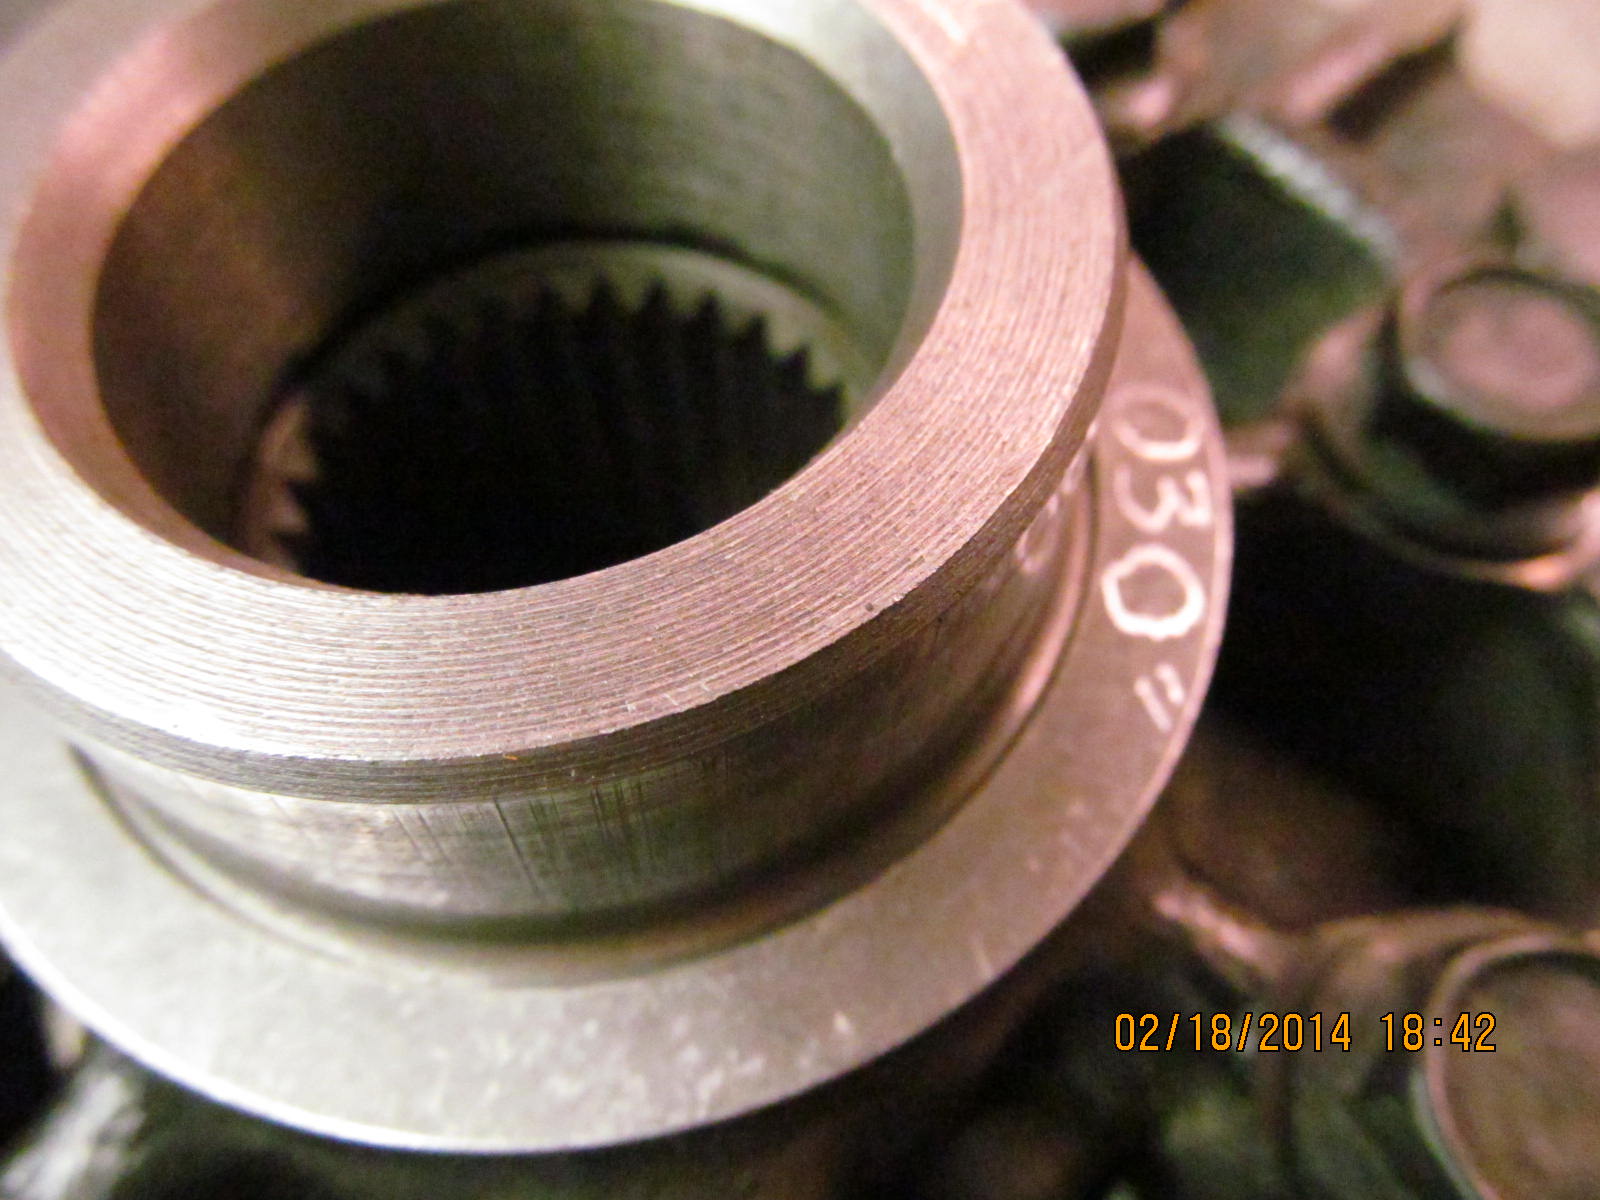
So, by adding a .030" shim that has a large enough inside diameter to fully clear the curvature transition,
the concern is no longer. In other words, the shim must set on a totally flat surface.
|
|
|
|
|
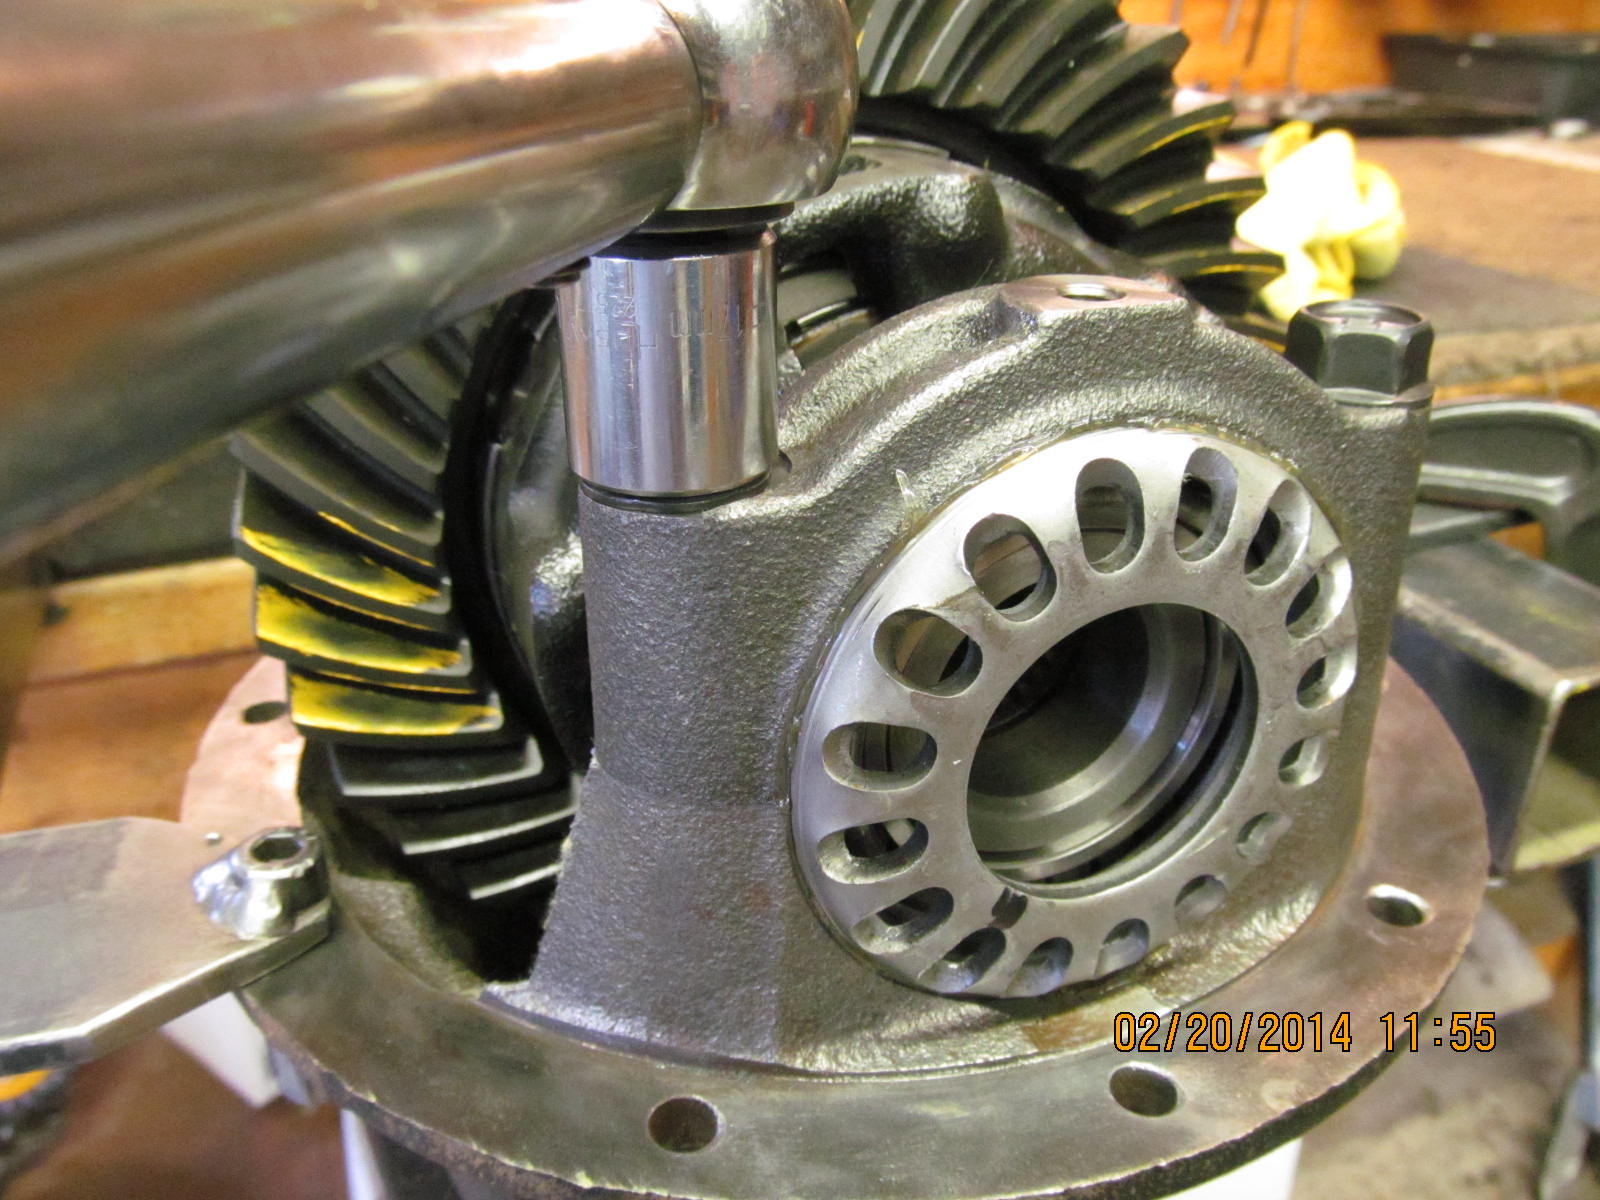
Pressing the conversion bearings on now shows no more air gap.
|
|
|
|
|
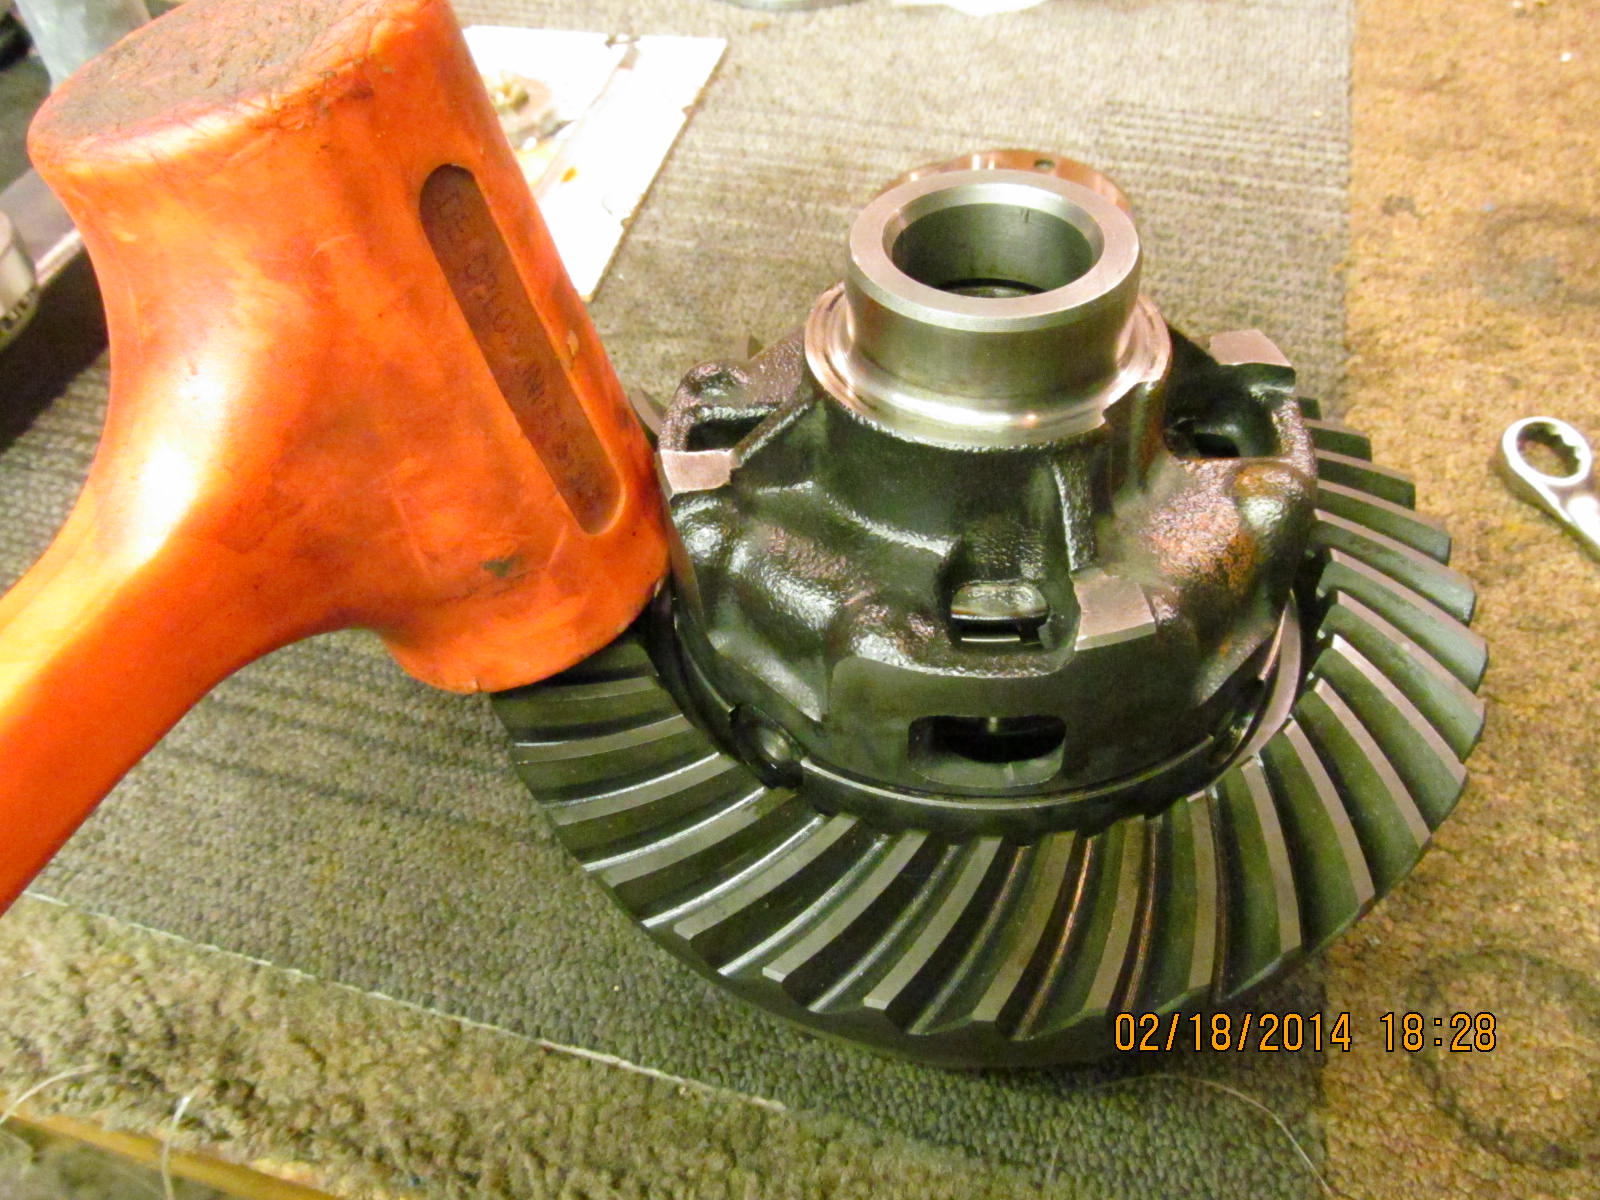
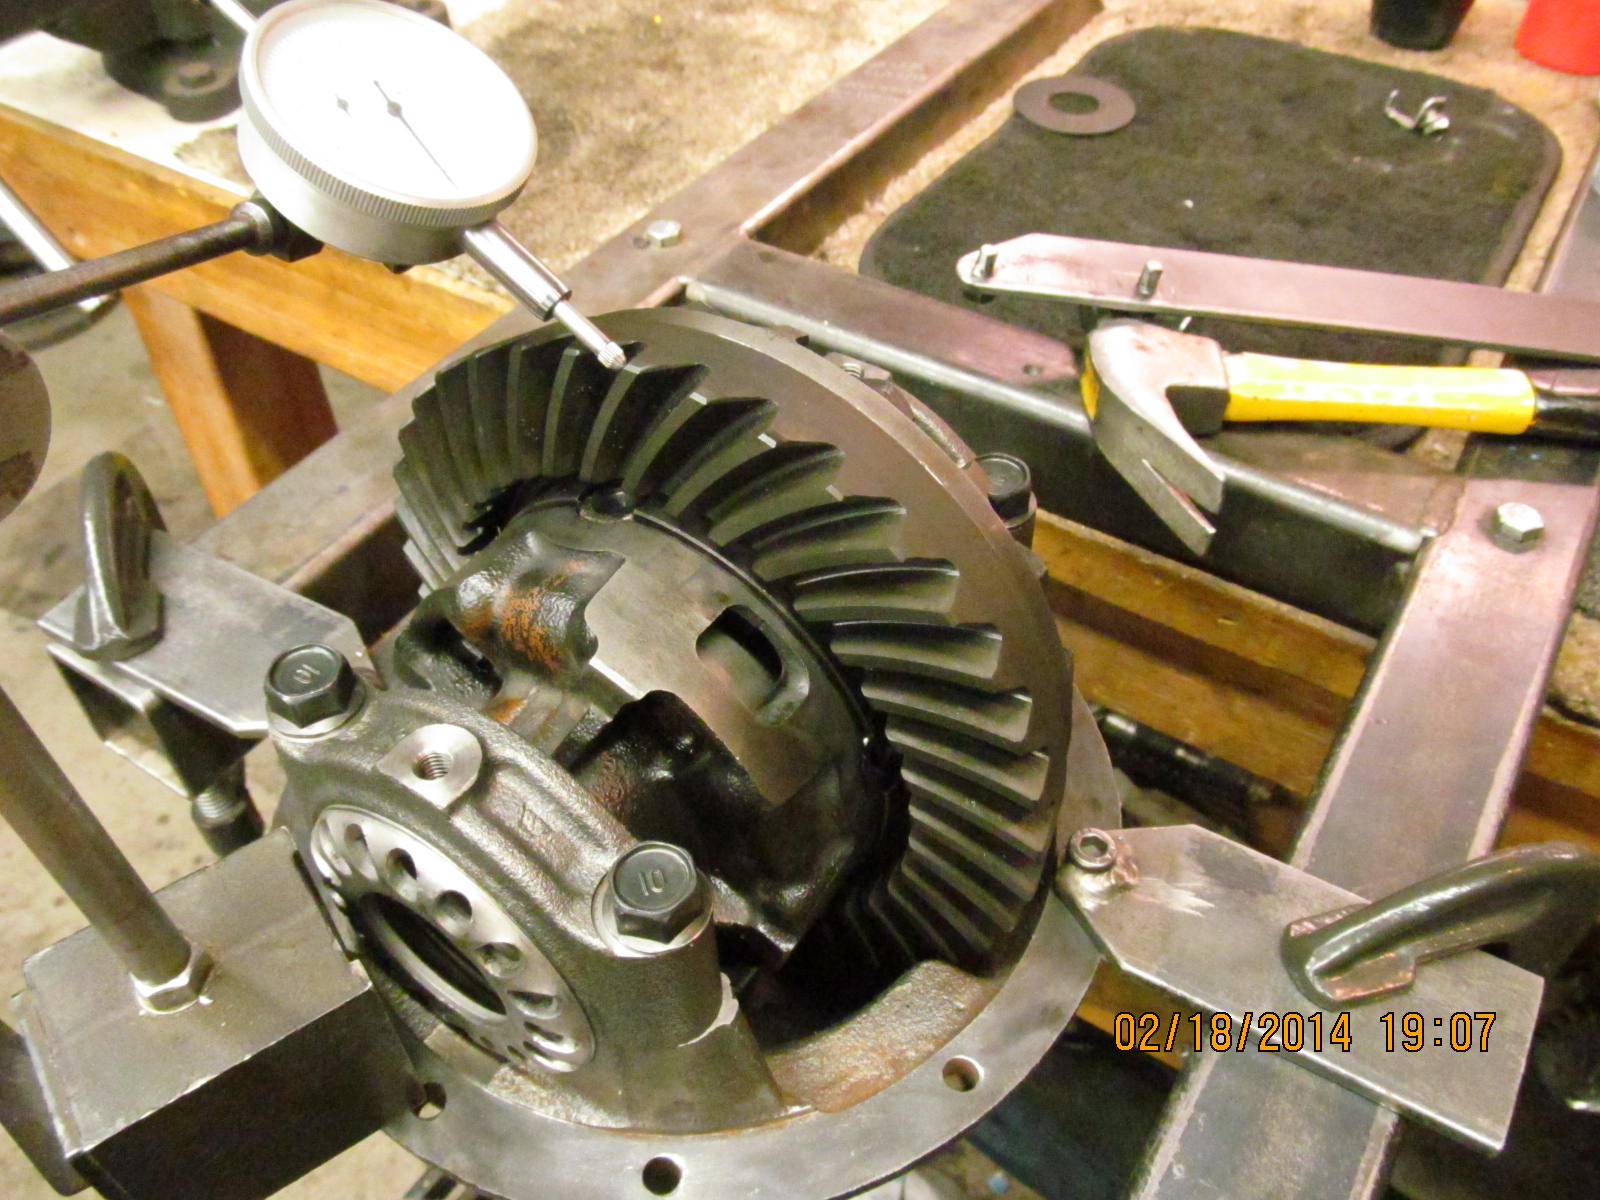
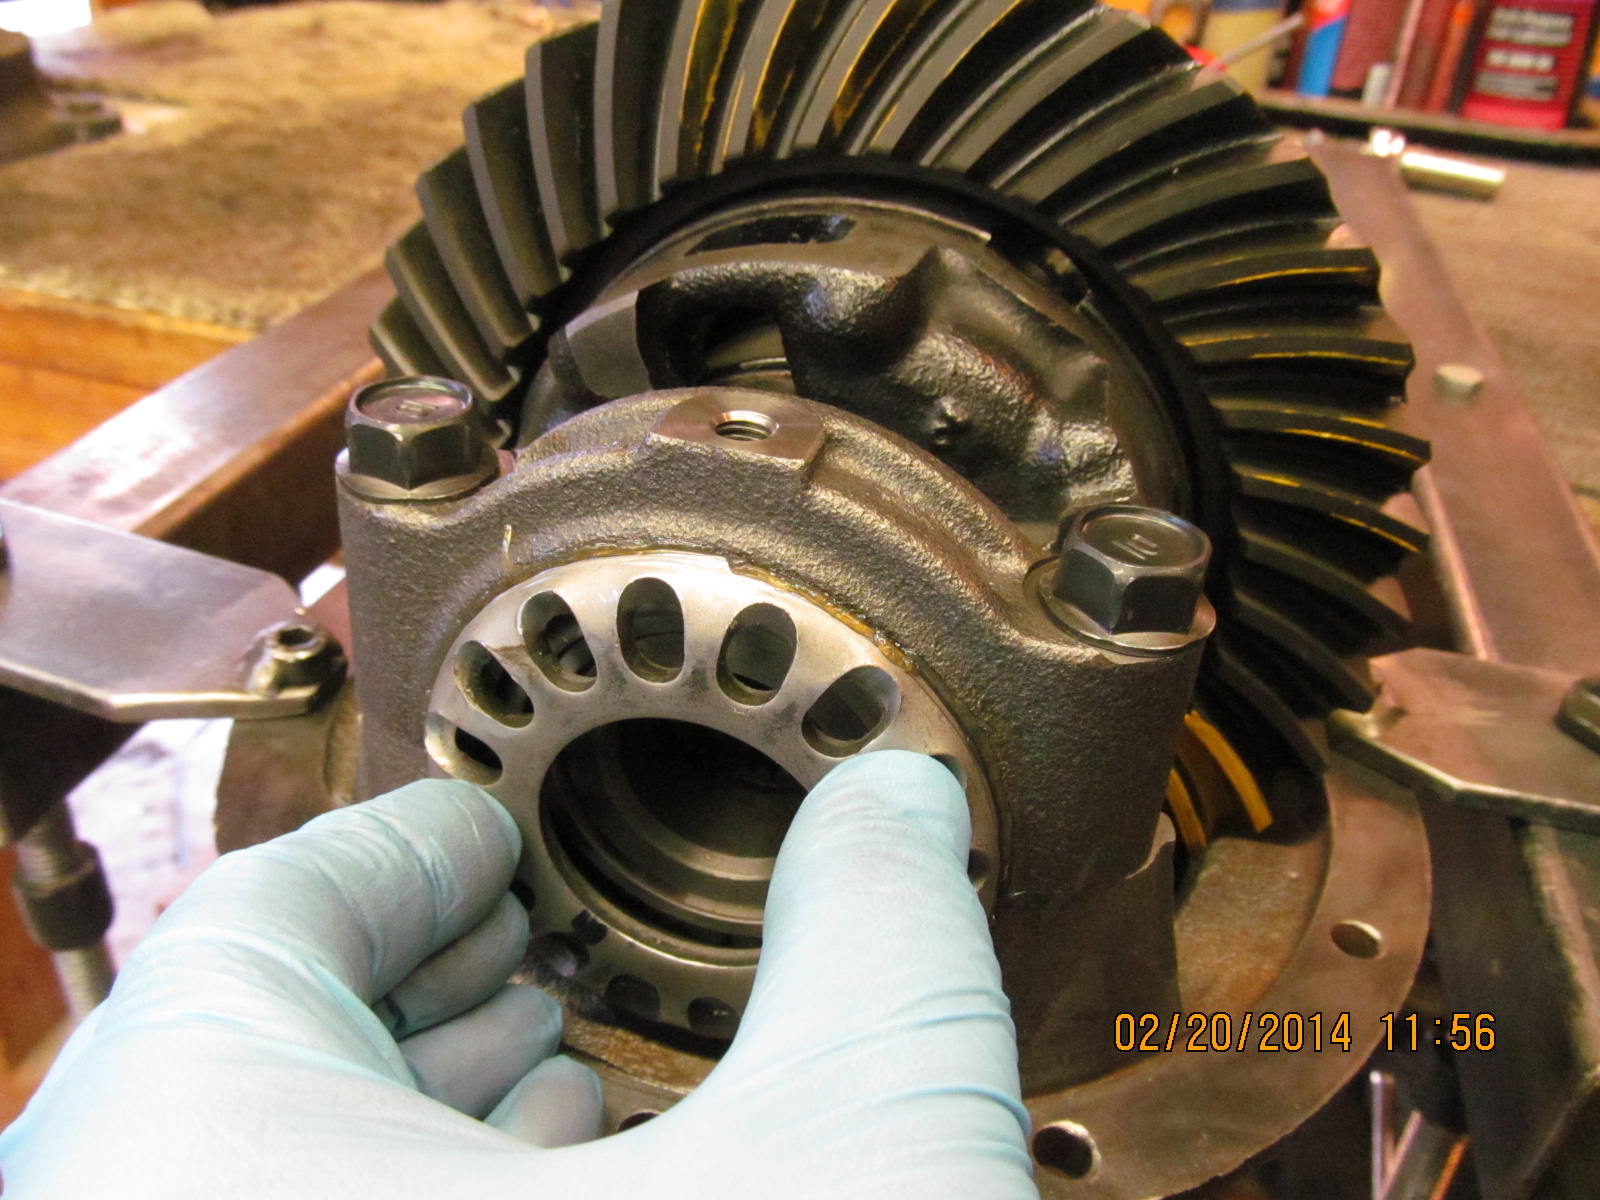
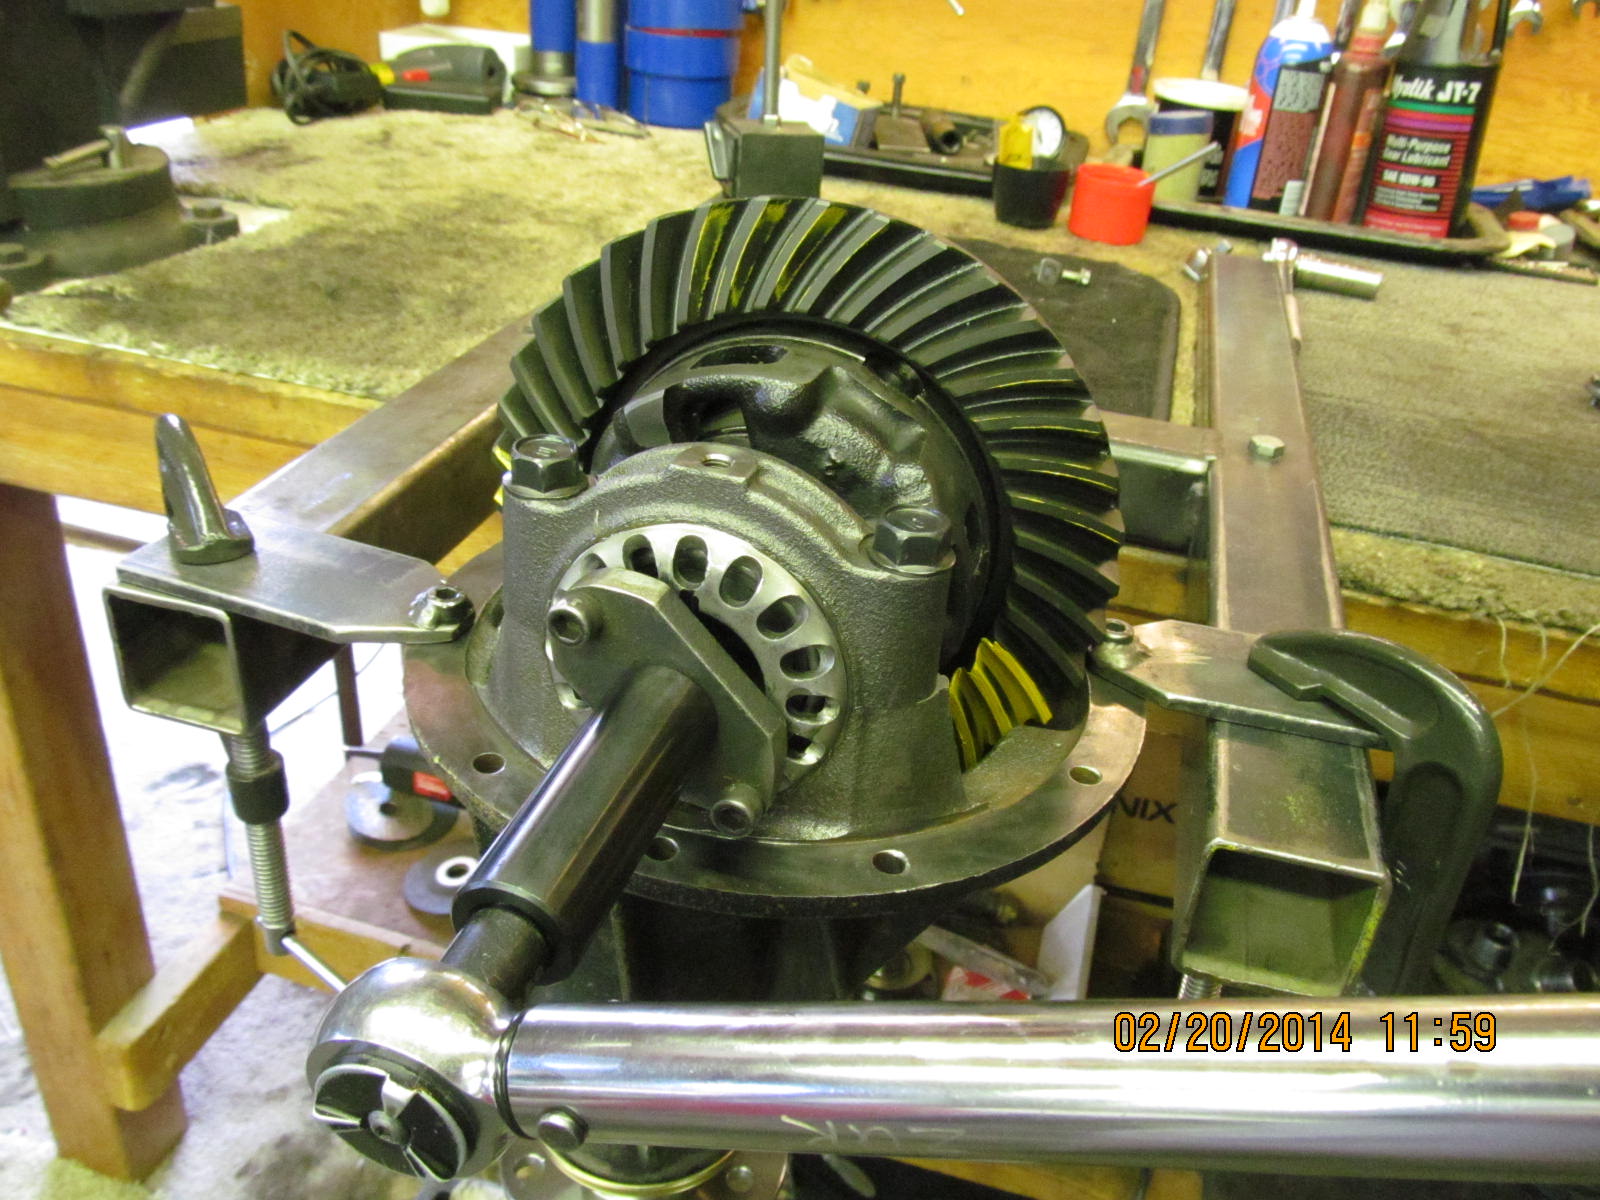
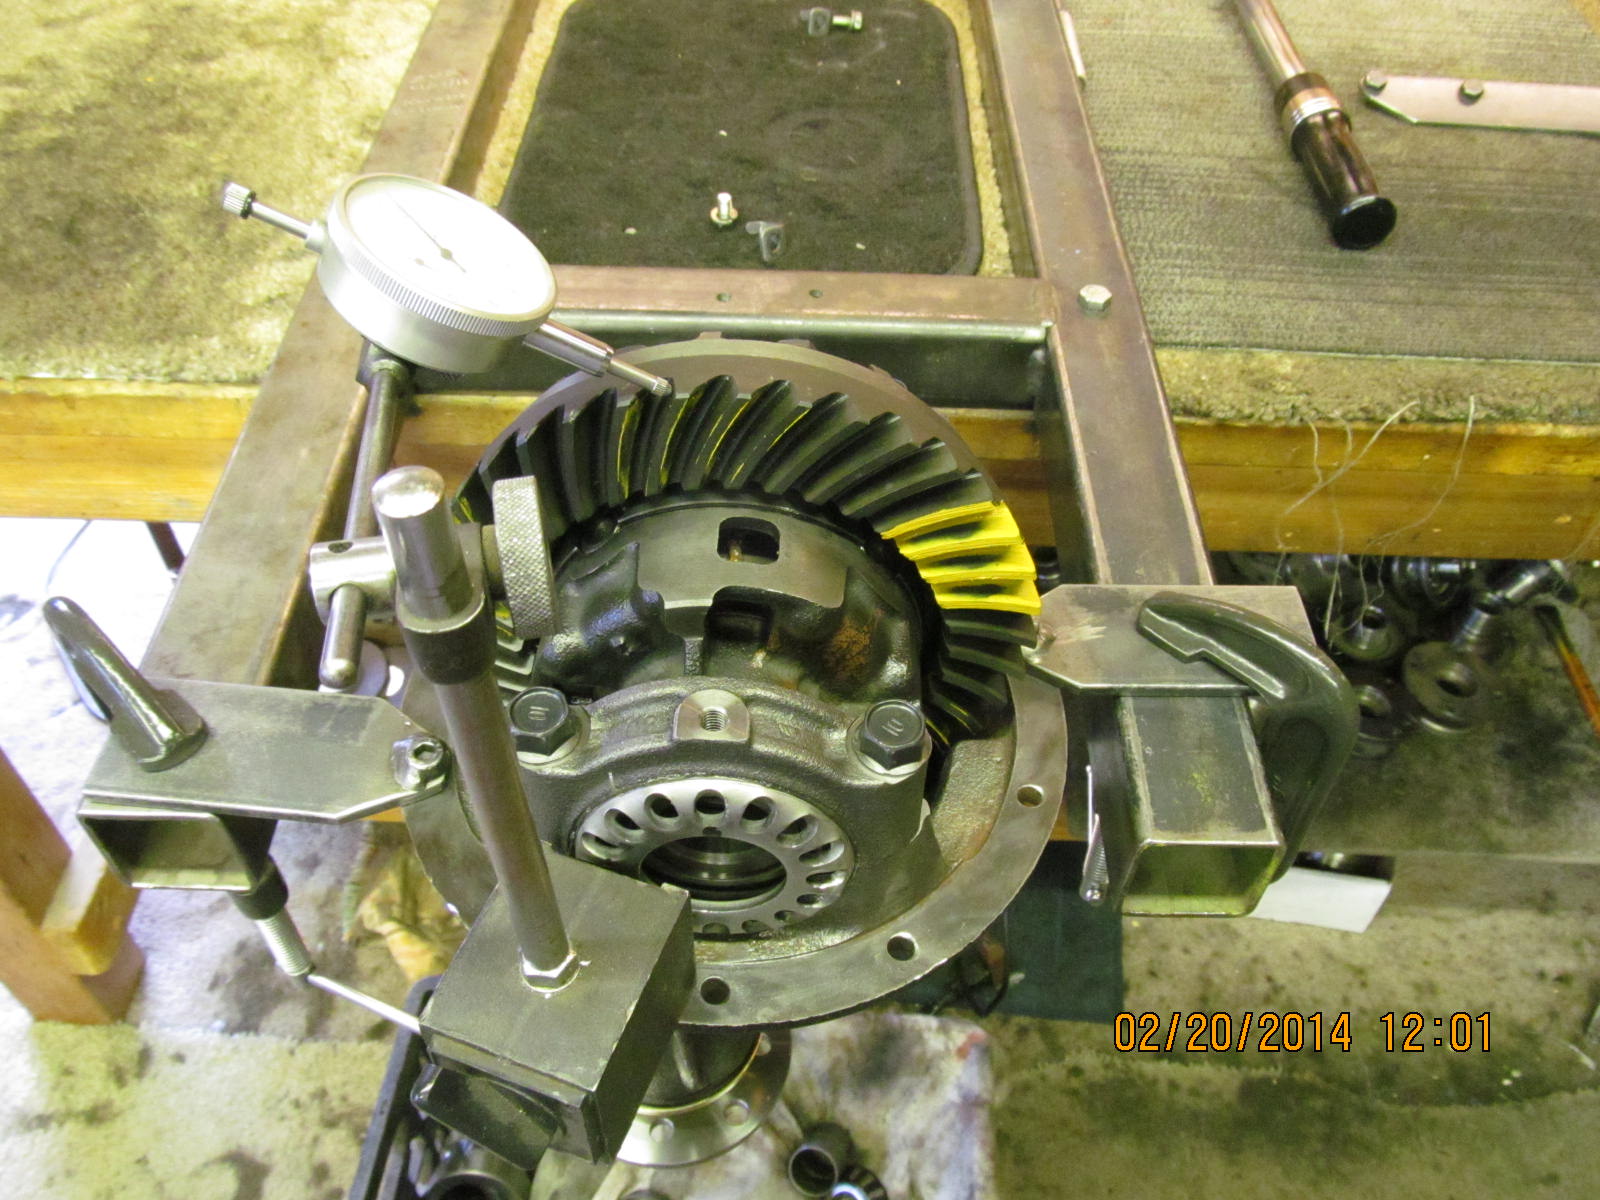
The carrier can now be dropped in for a pattern check. I have some carrier bearing preload and the backlsh is close enough at .008"
|
|
|
|
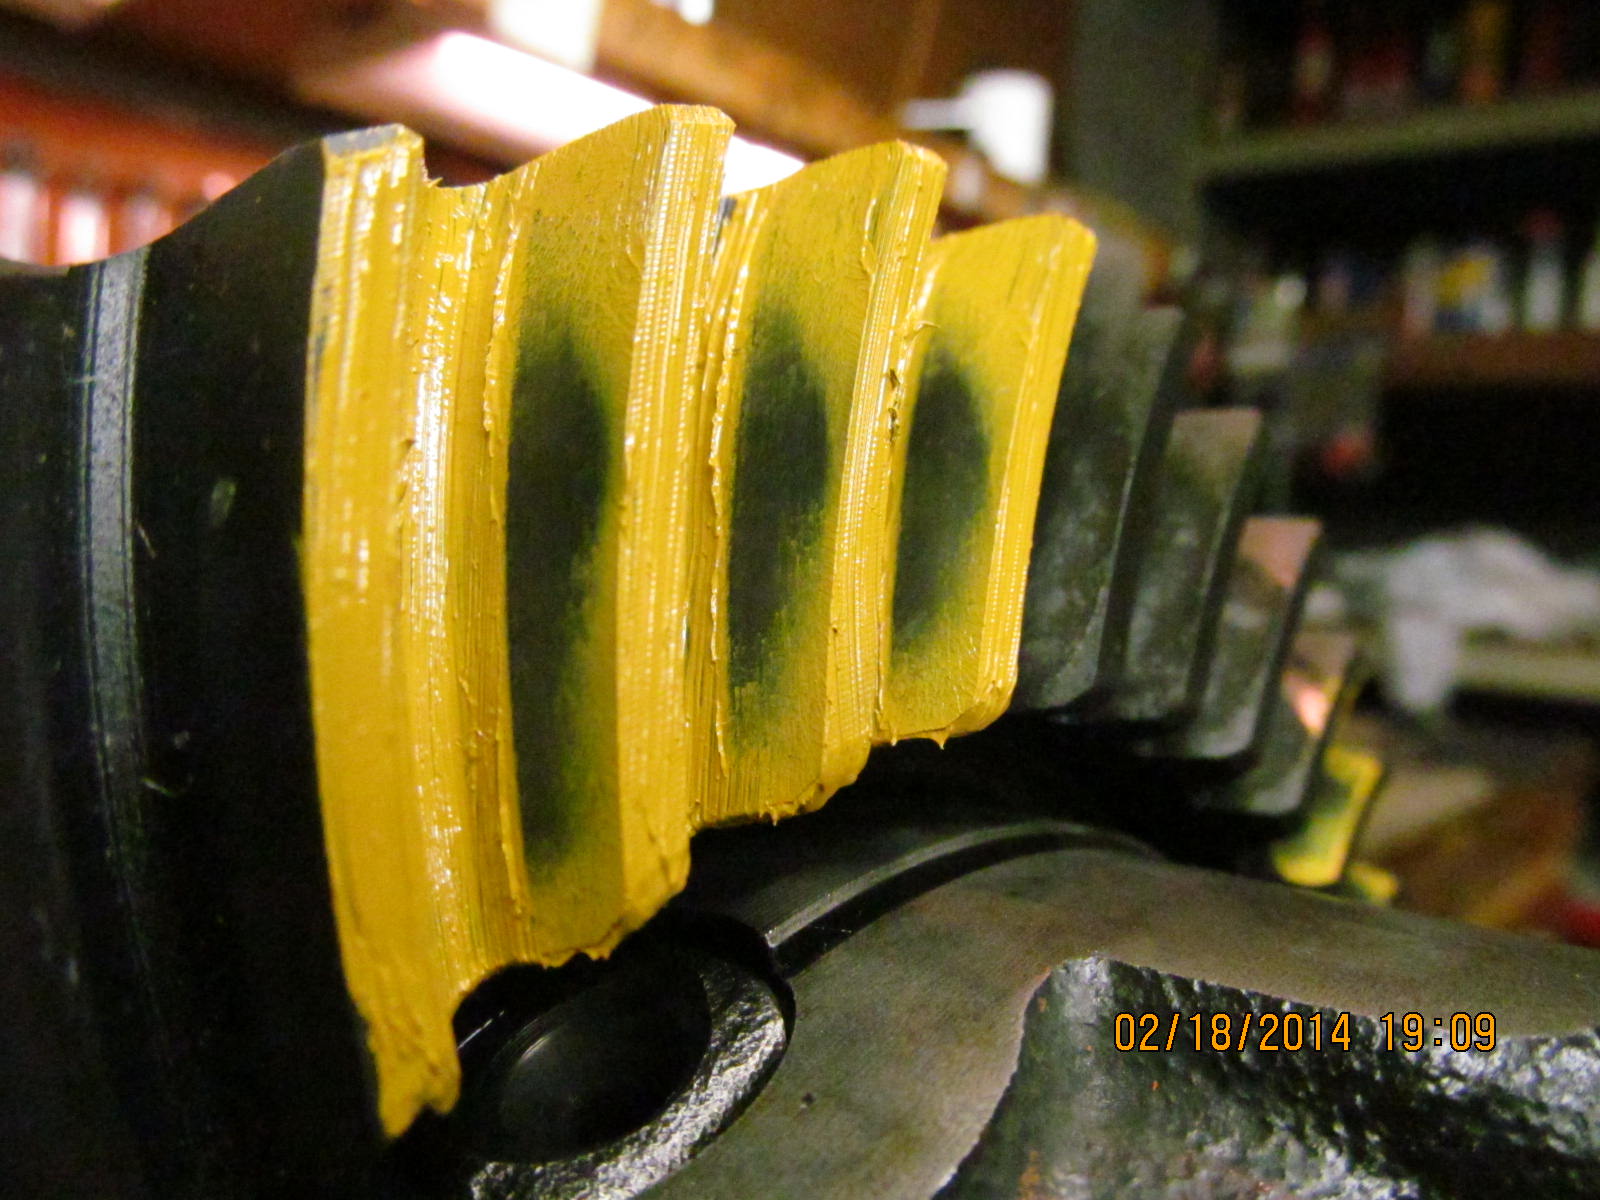
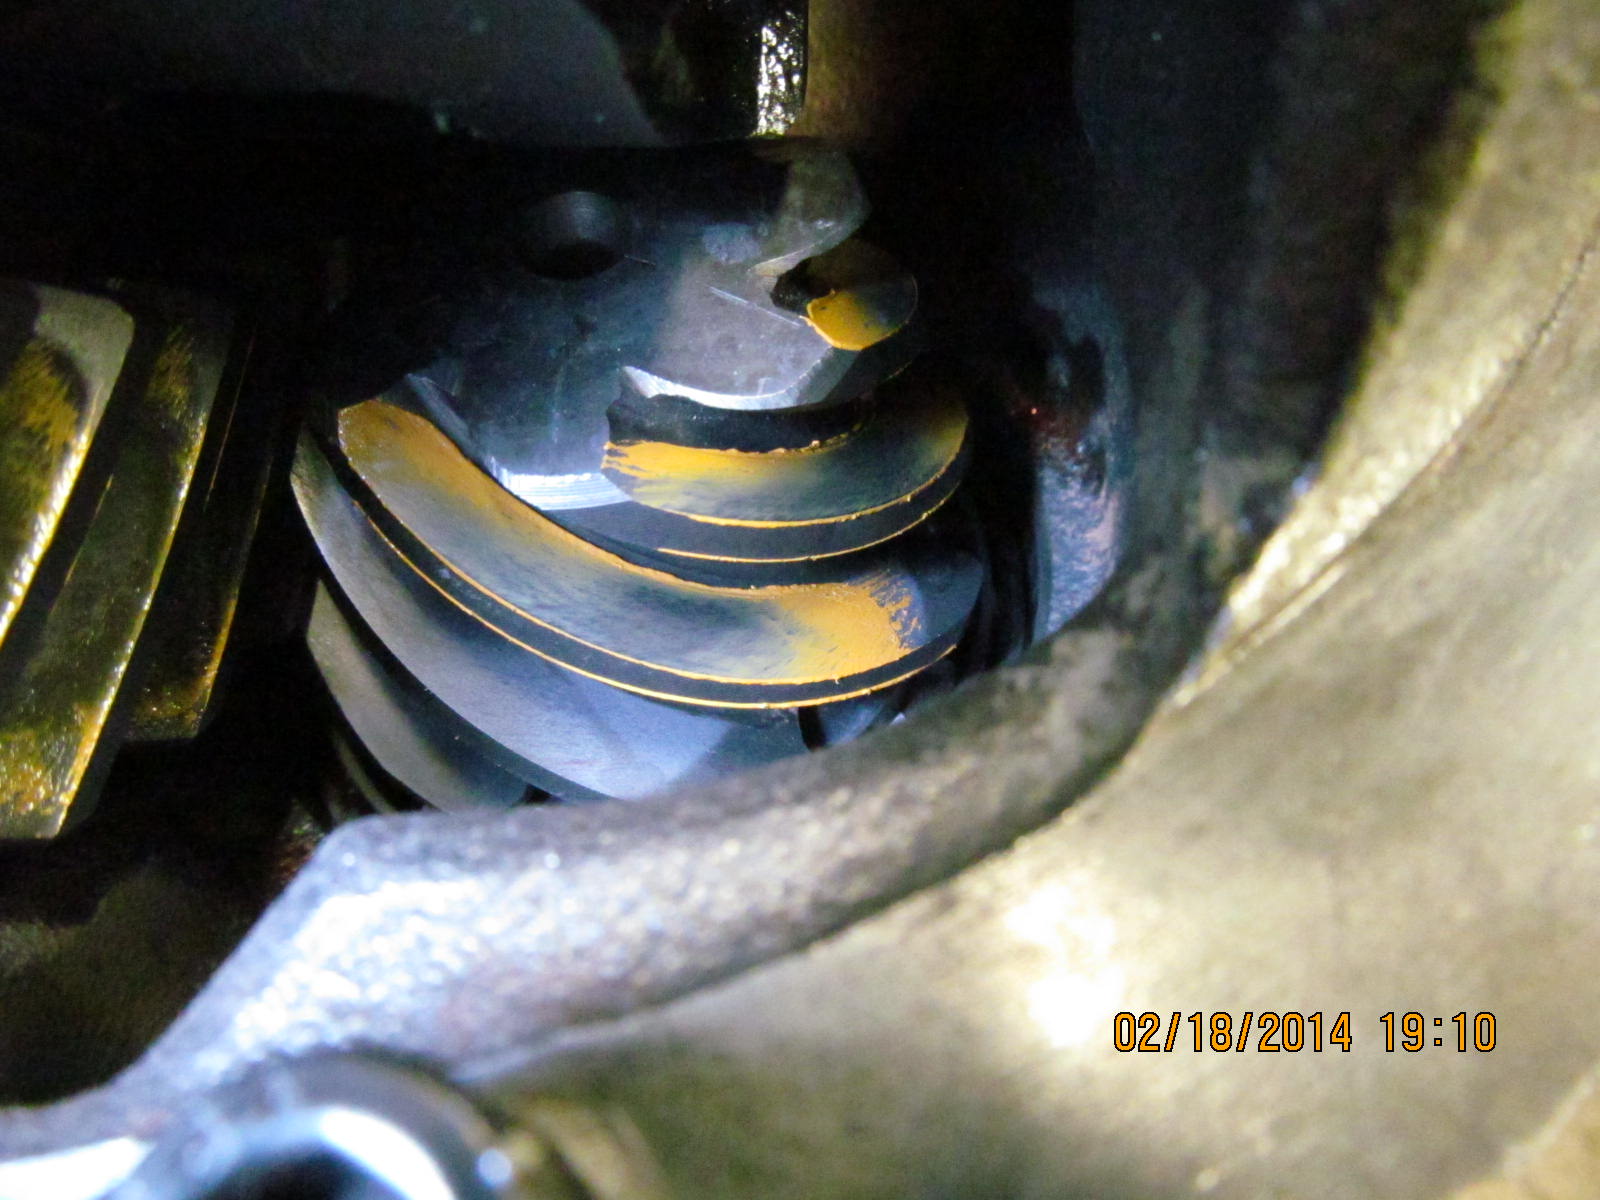
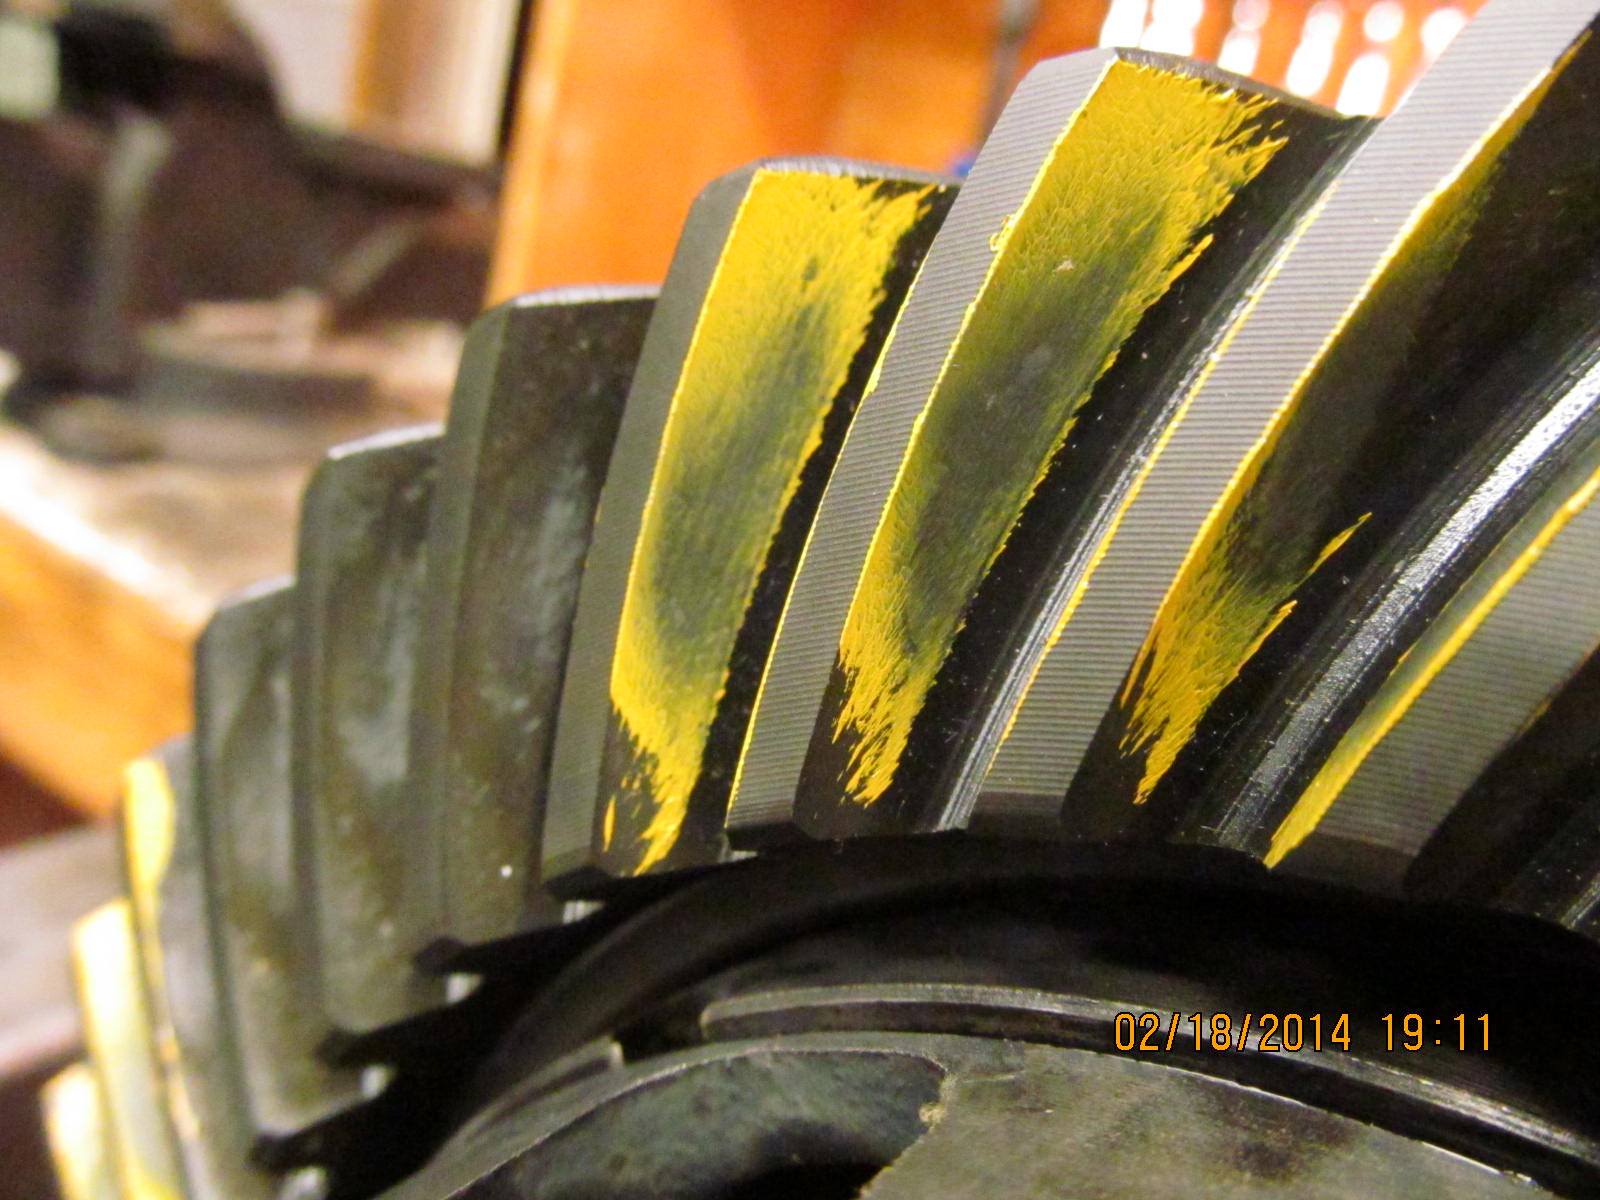
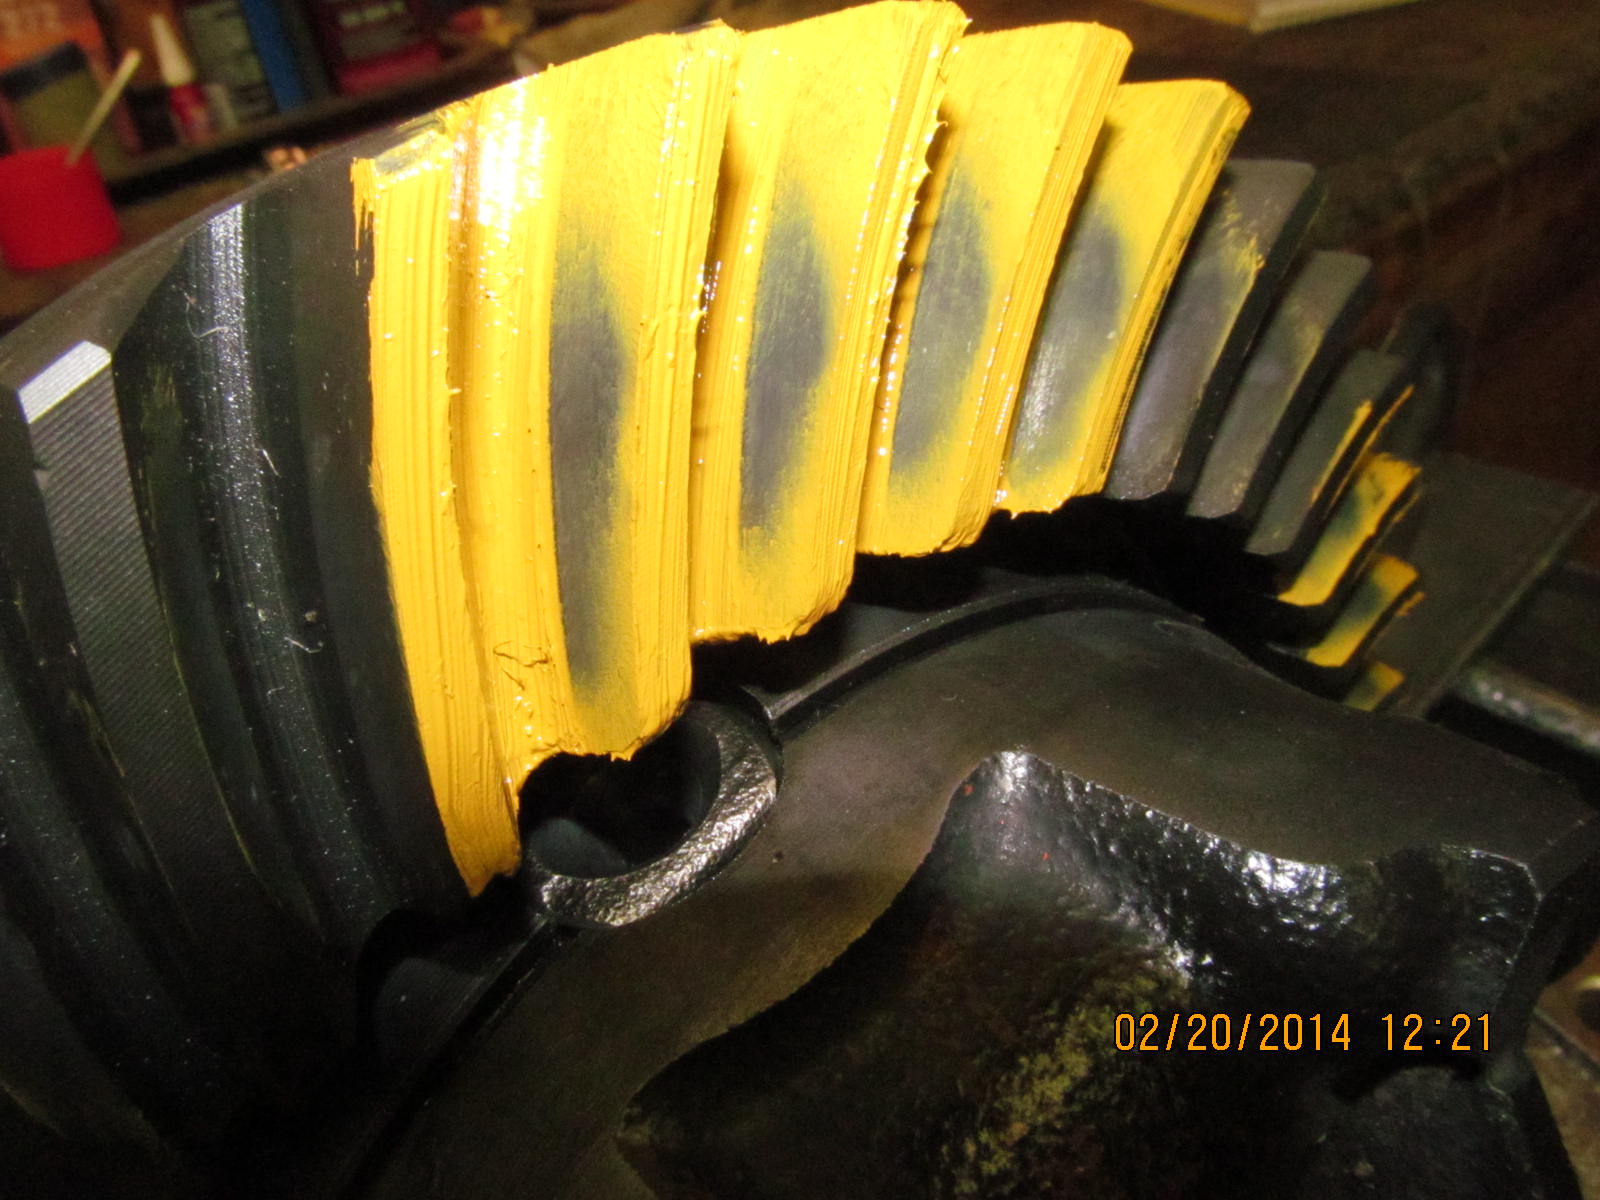
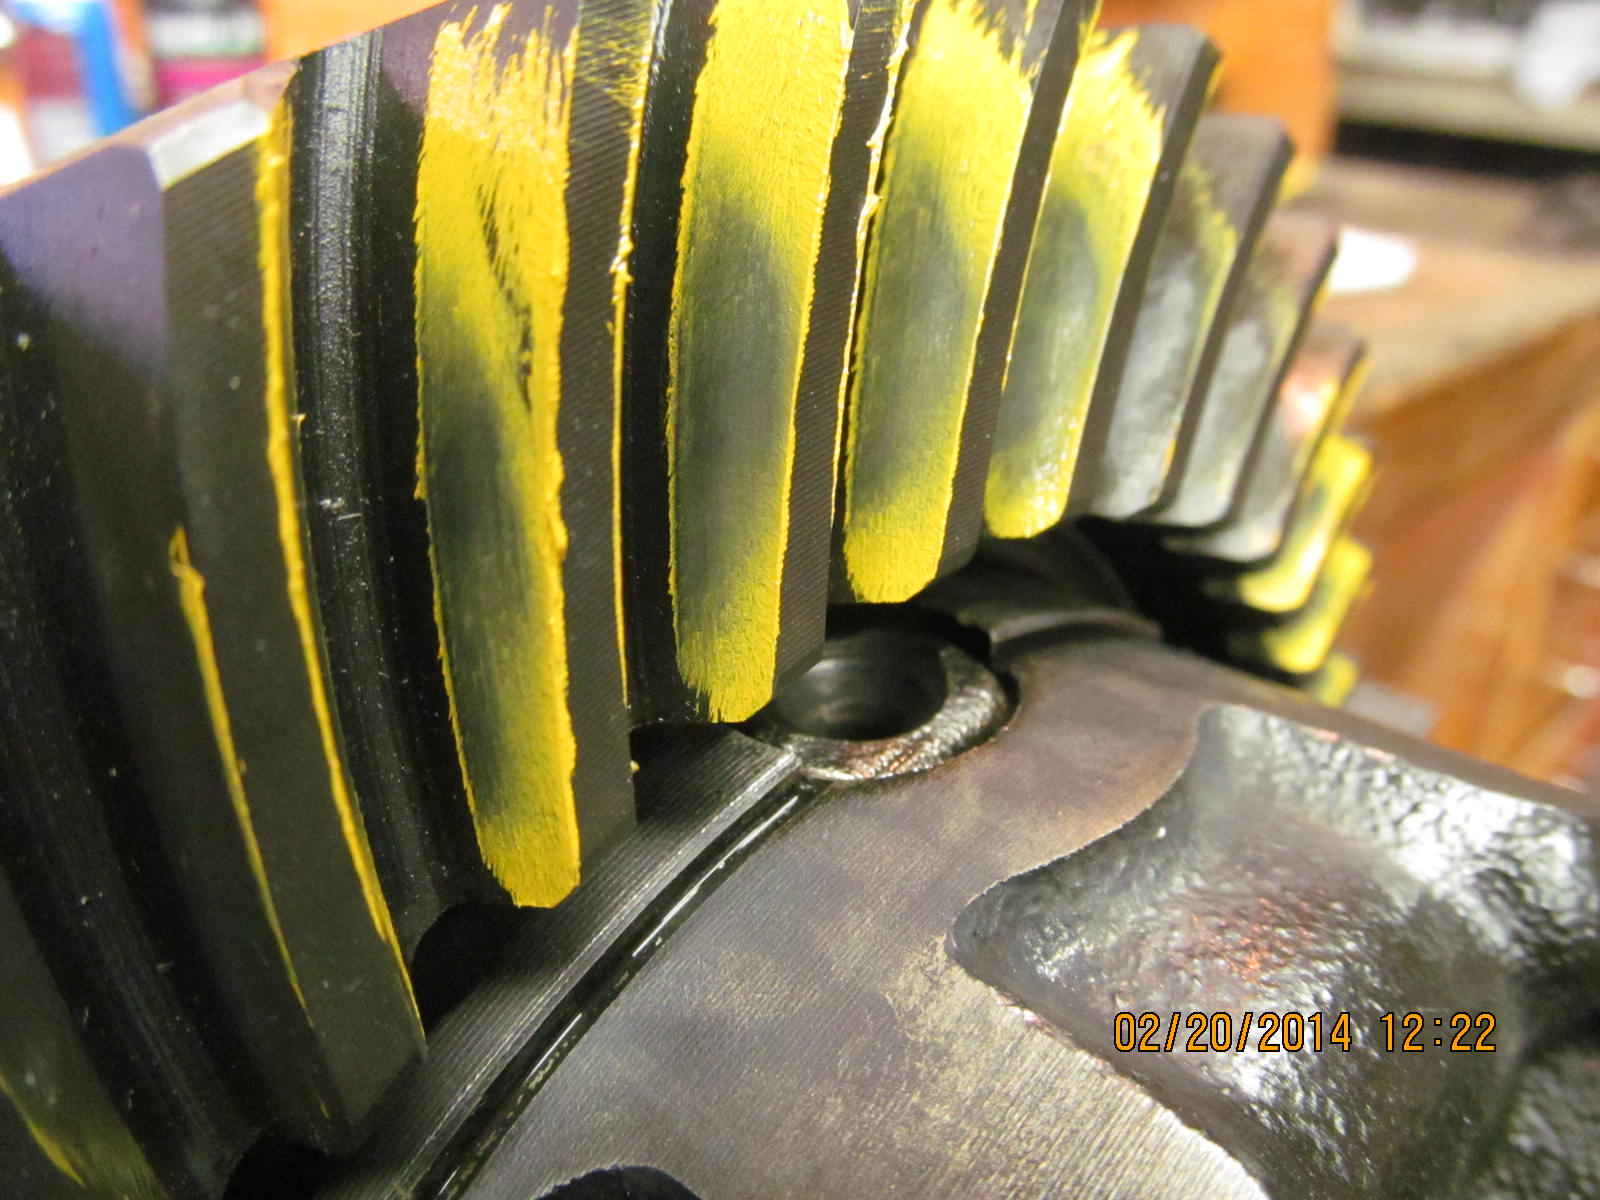
.080".......Nice. Drive side shows good depth....is in no way shallow and might even be a touch deep(my preferred condition).
It just happens to be centered.
|
|
|
|
|
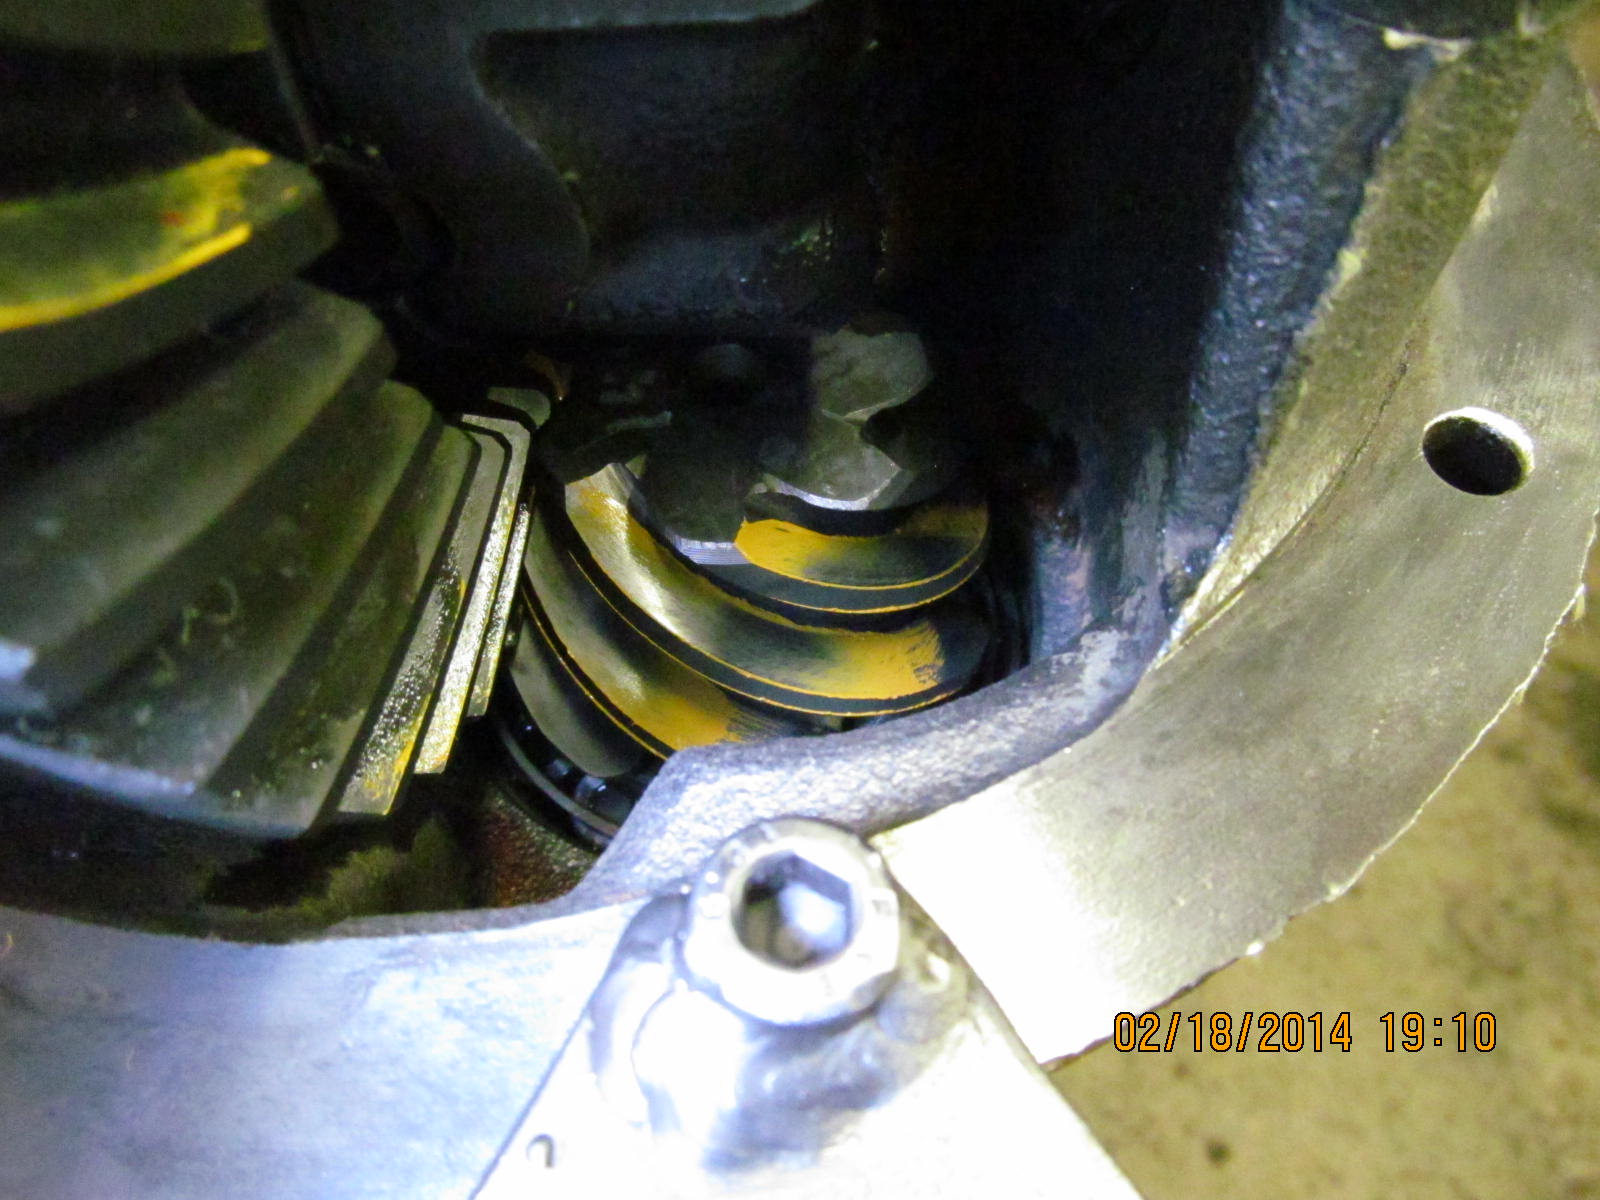
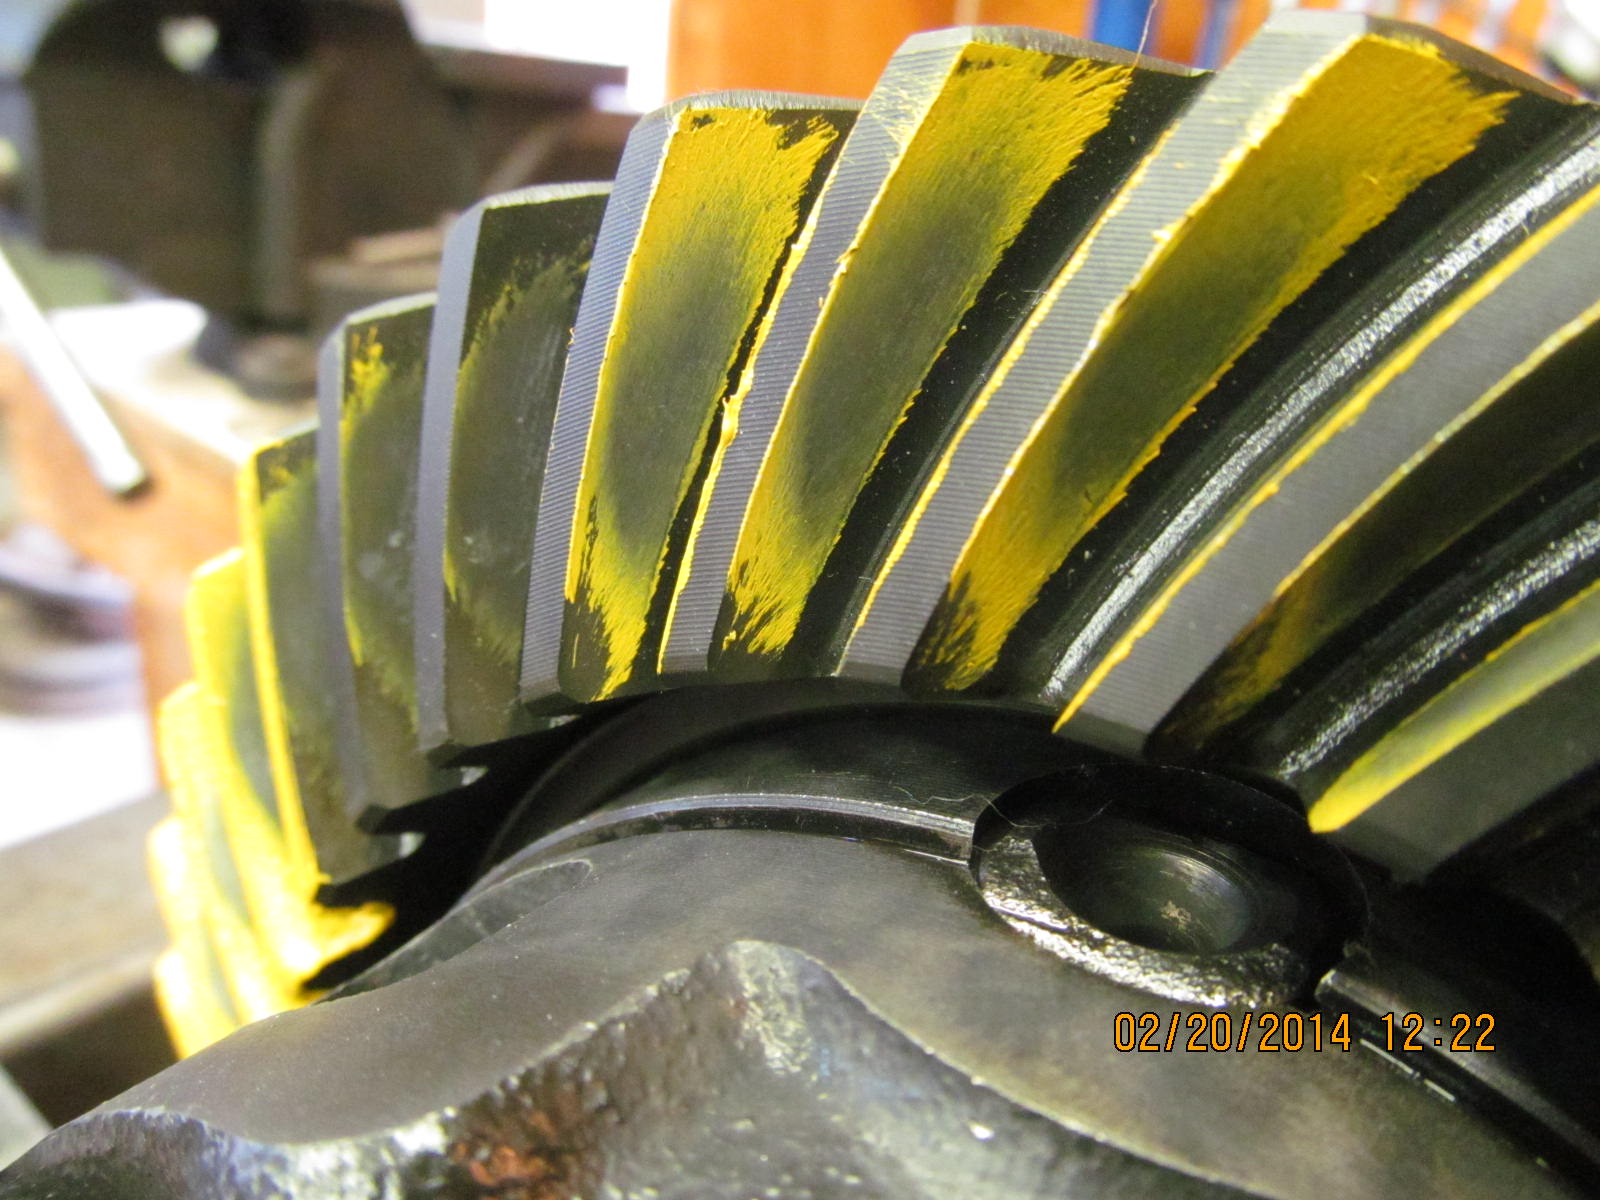
Coast. Looks good and appears centered (both drive and coast are pretty much "balanced").
|
|
|
|
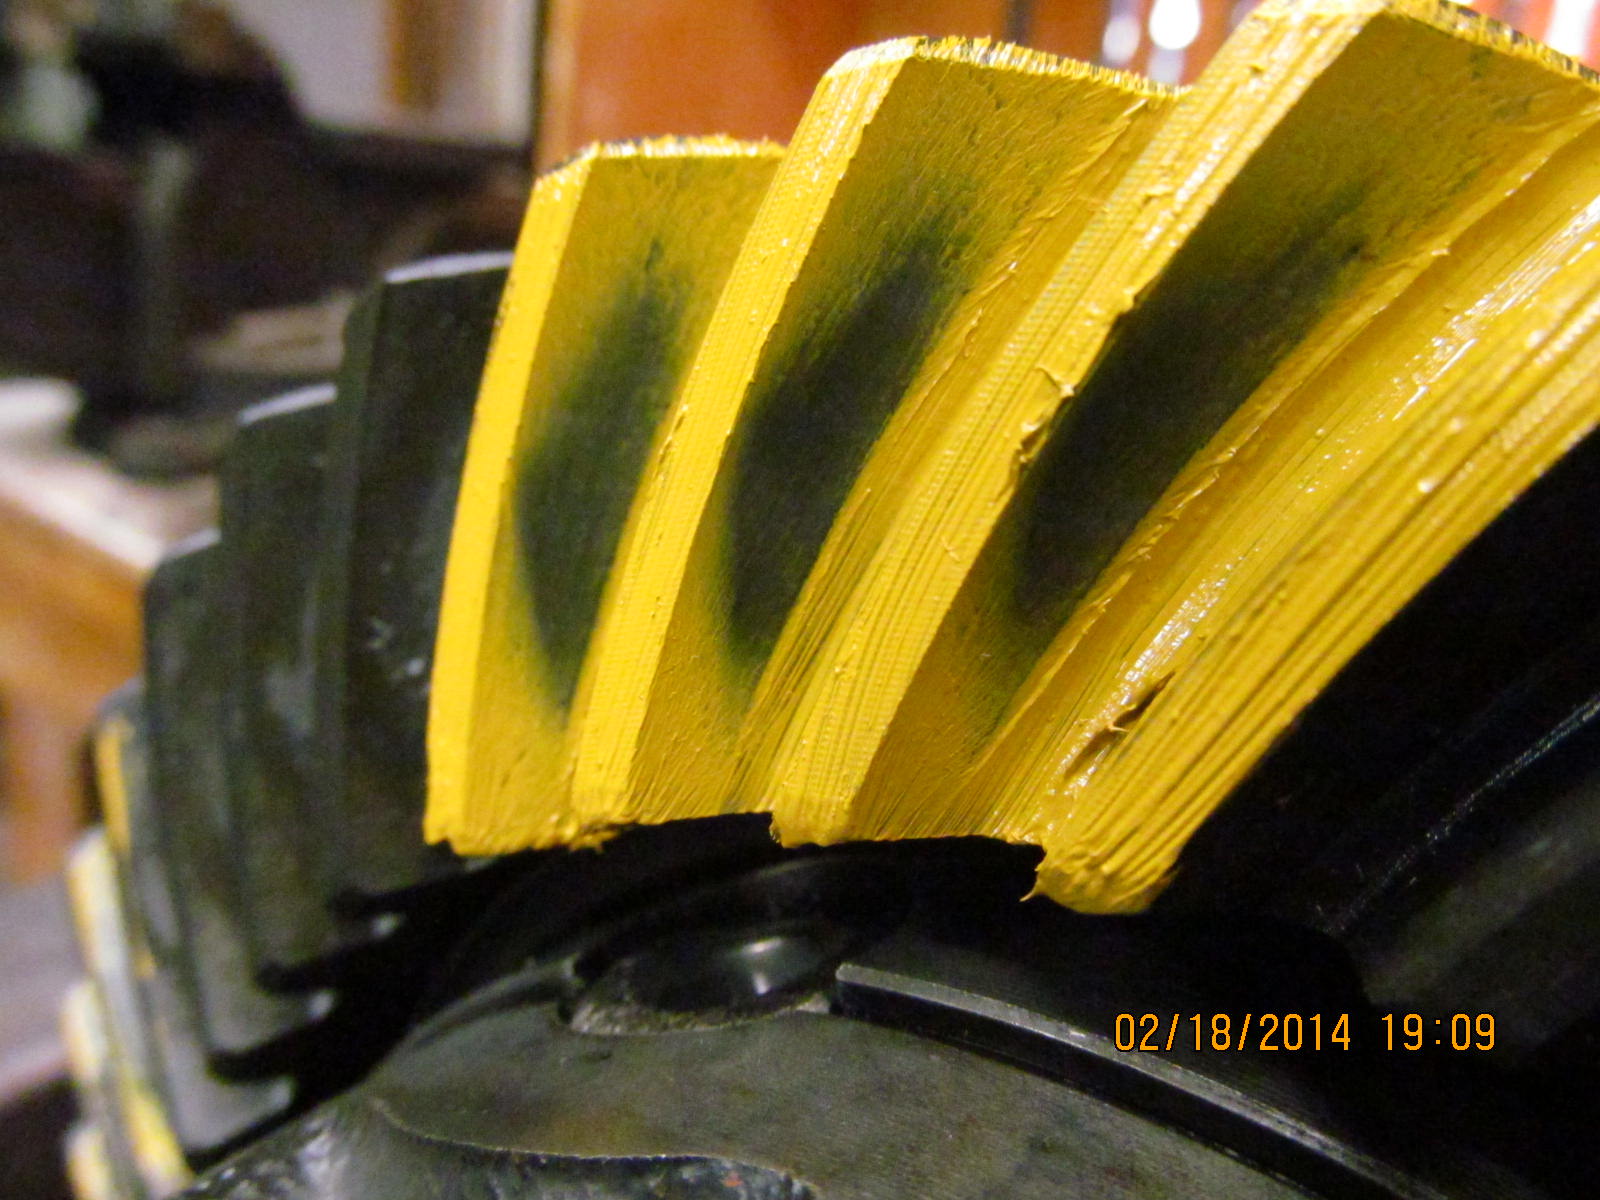
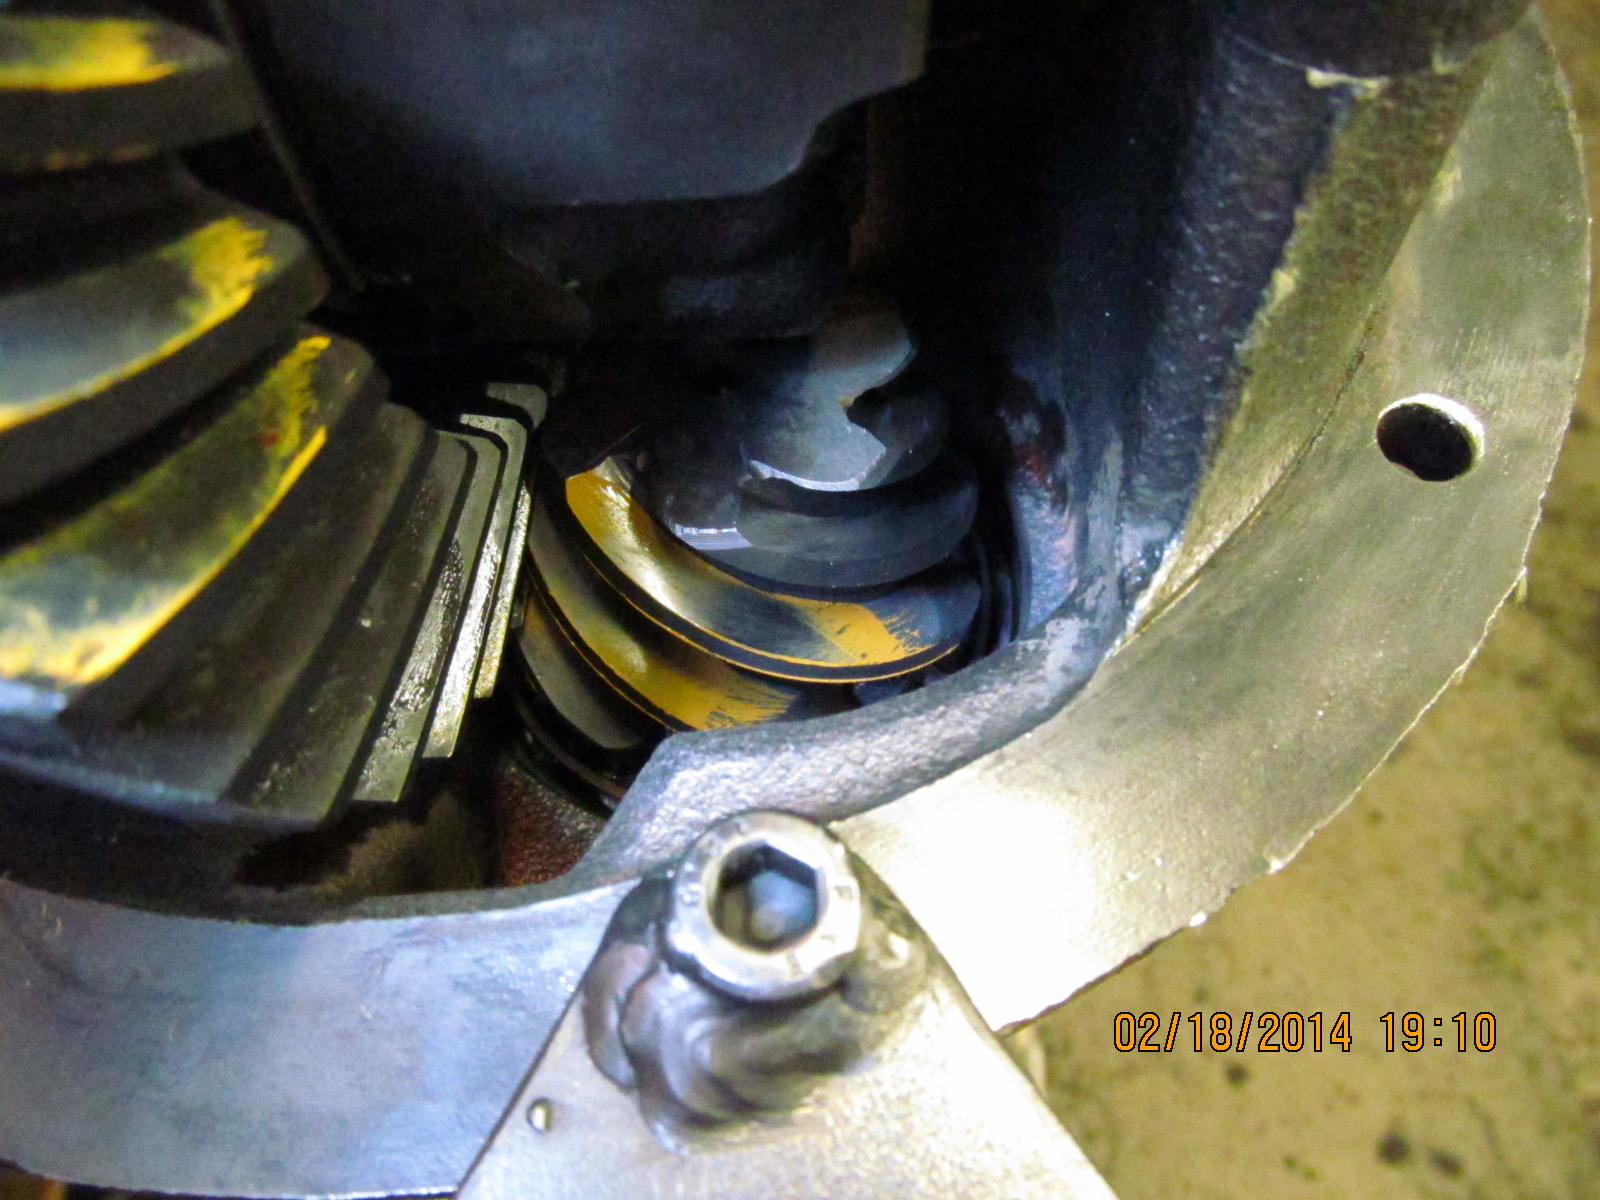
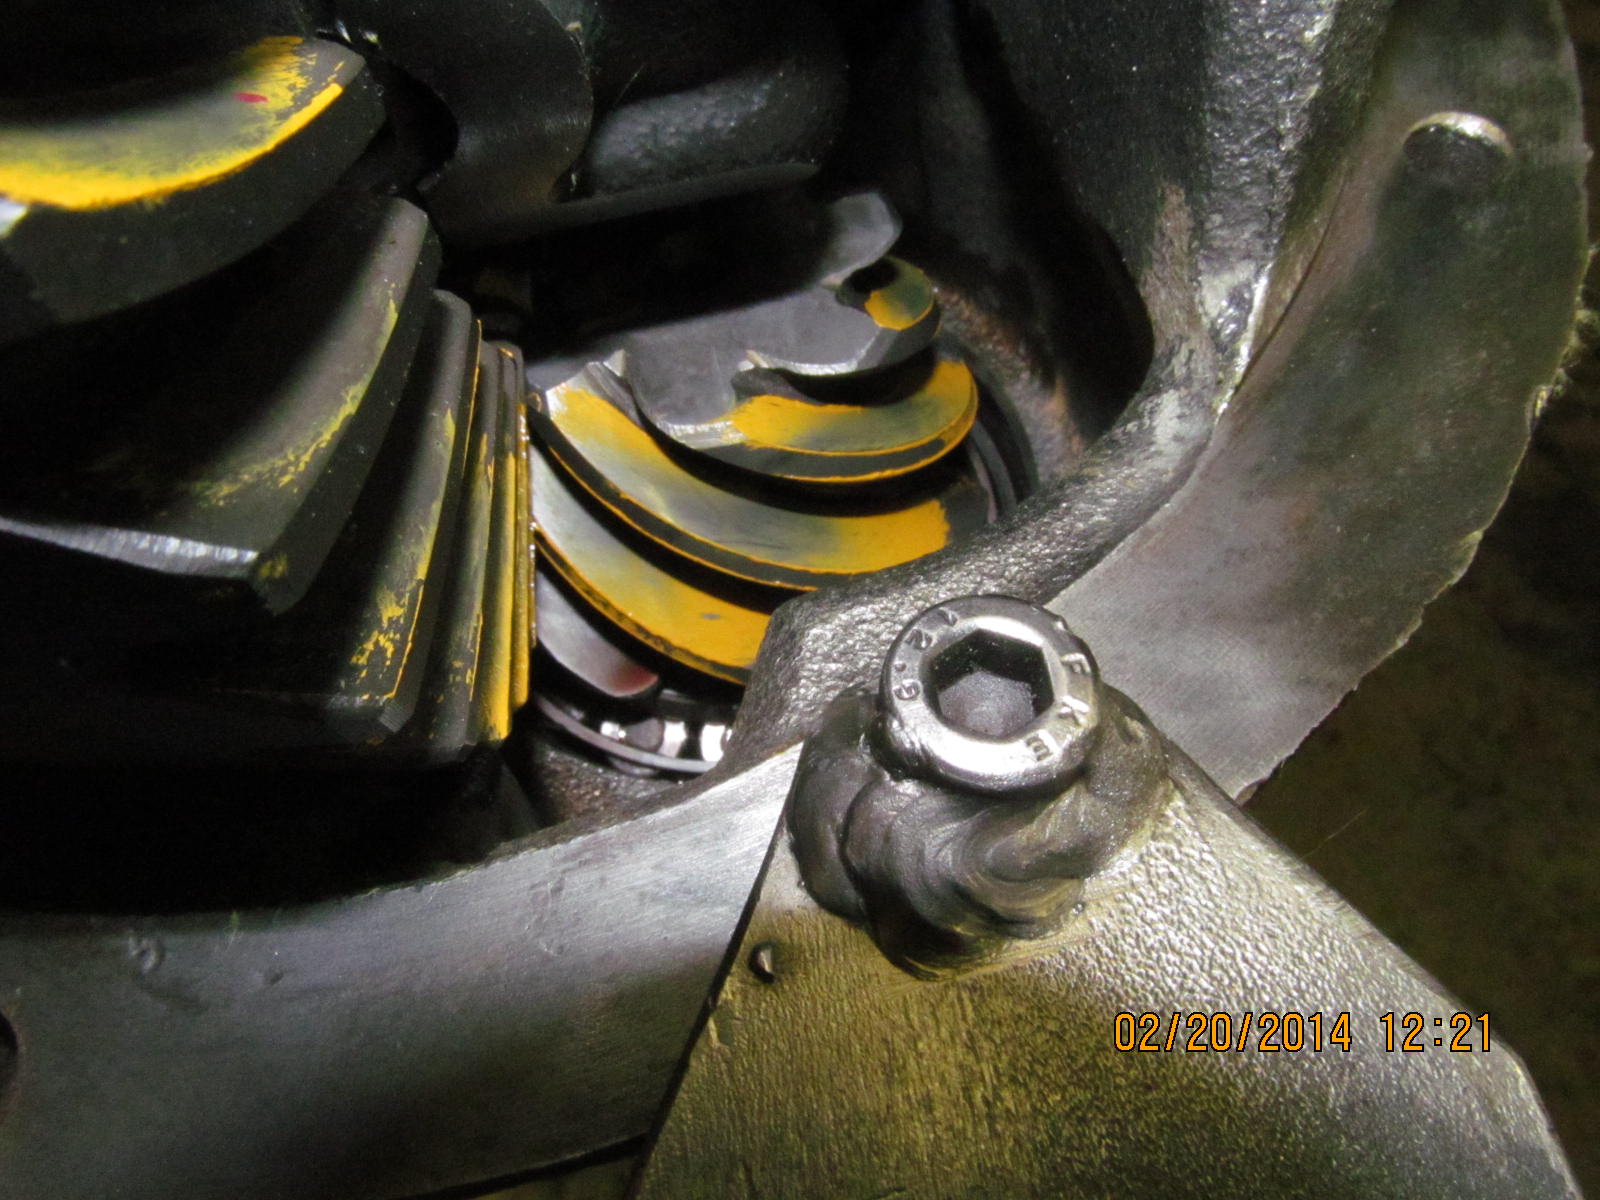
Then I look at the drive side of the pinion....always checking the comet tail. It's not hard to the inside and is softly
resting in the center.
|
|
|
|
I check the other 2 teeth and it confirms that depth is very good and 'slight deep' which means a stronger tooth contact for the
ring gear tooth itself.
|
|
|
|
|
|
|
|
|
|
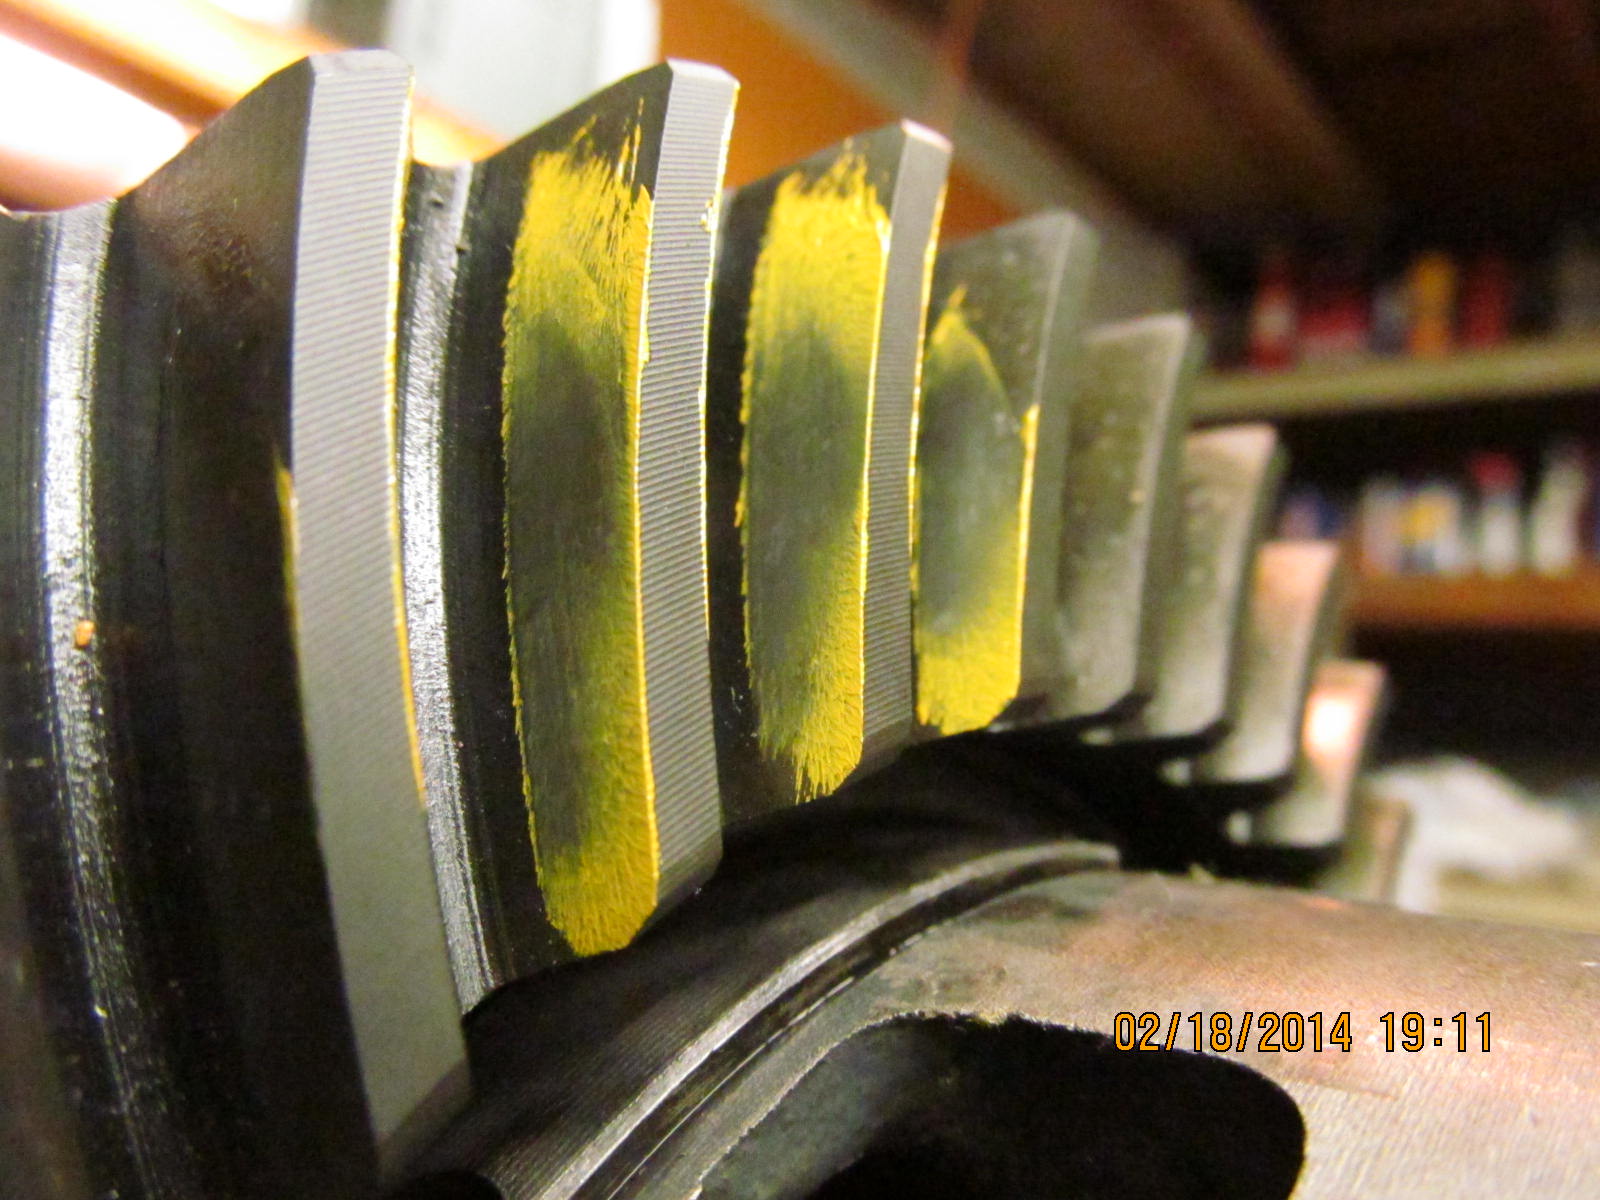
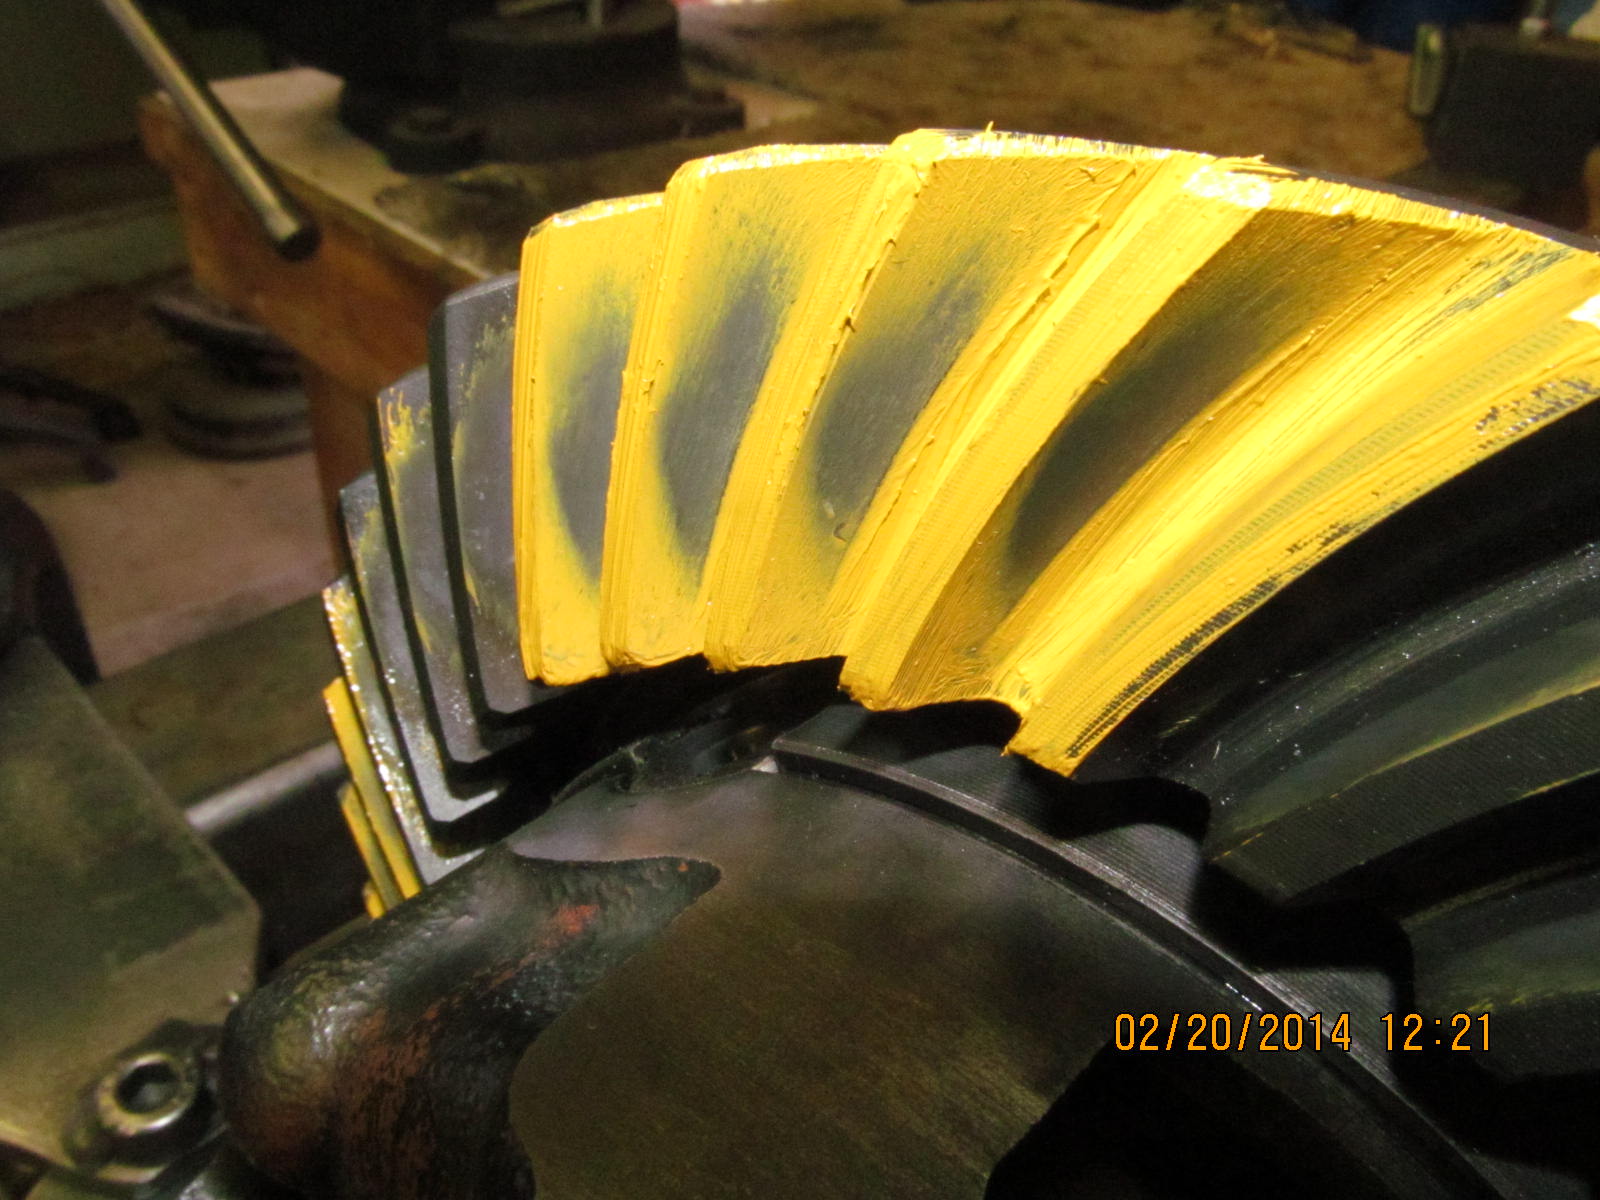
I also like to look at the reverse painted teeth on the ring. Drive looks great.
|
|
|
|
|
Coast.....nice.
|
|
|

|
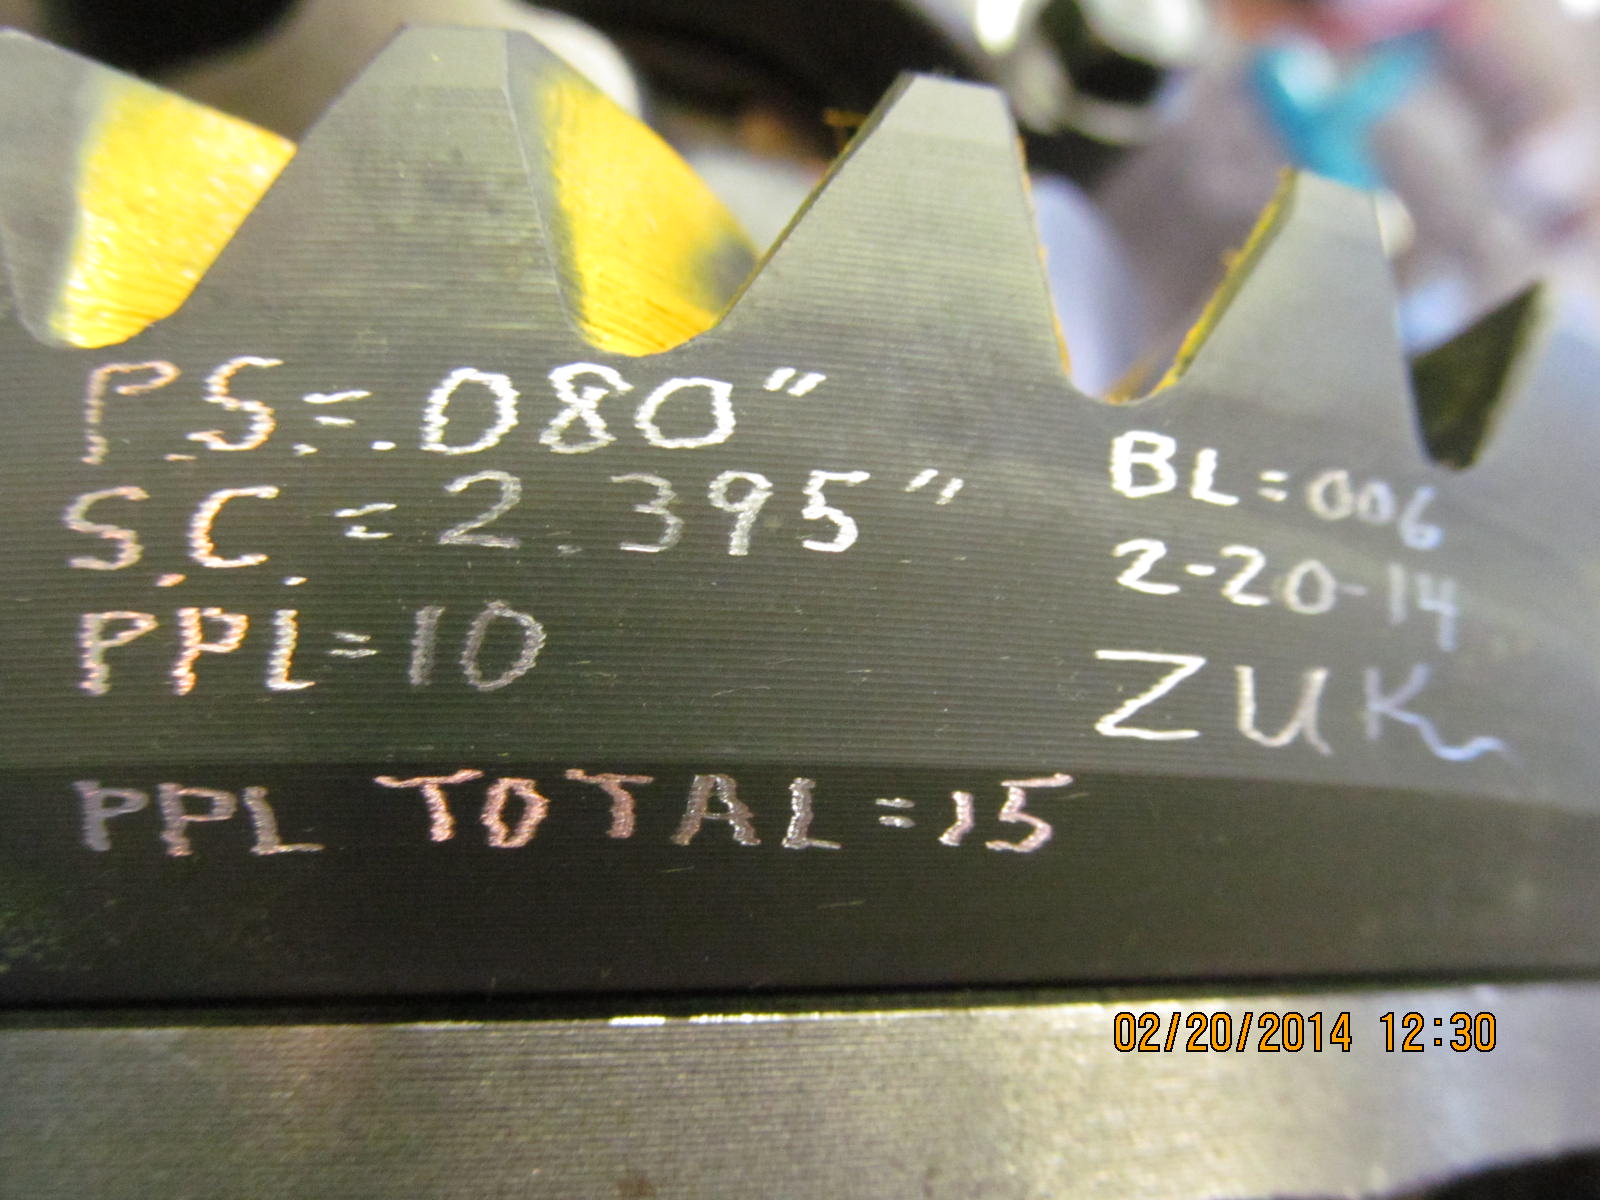
Being very pleased with the 080 pinion shim, now to dis-assemble and install the solid collar. I will be using the math part
of my brain :)
|
|
|
|
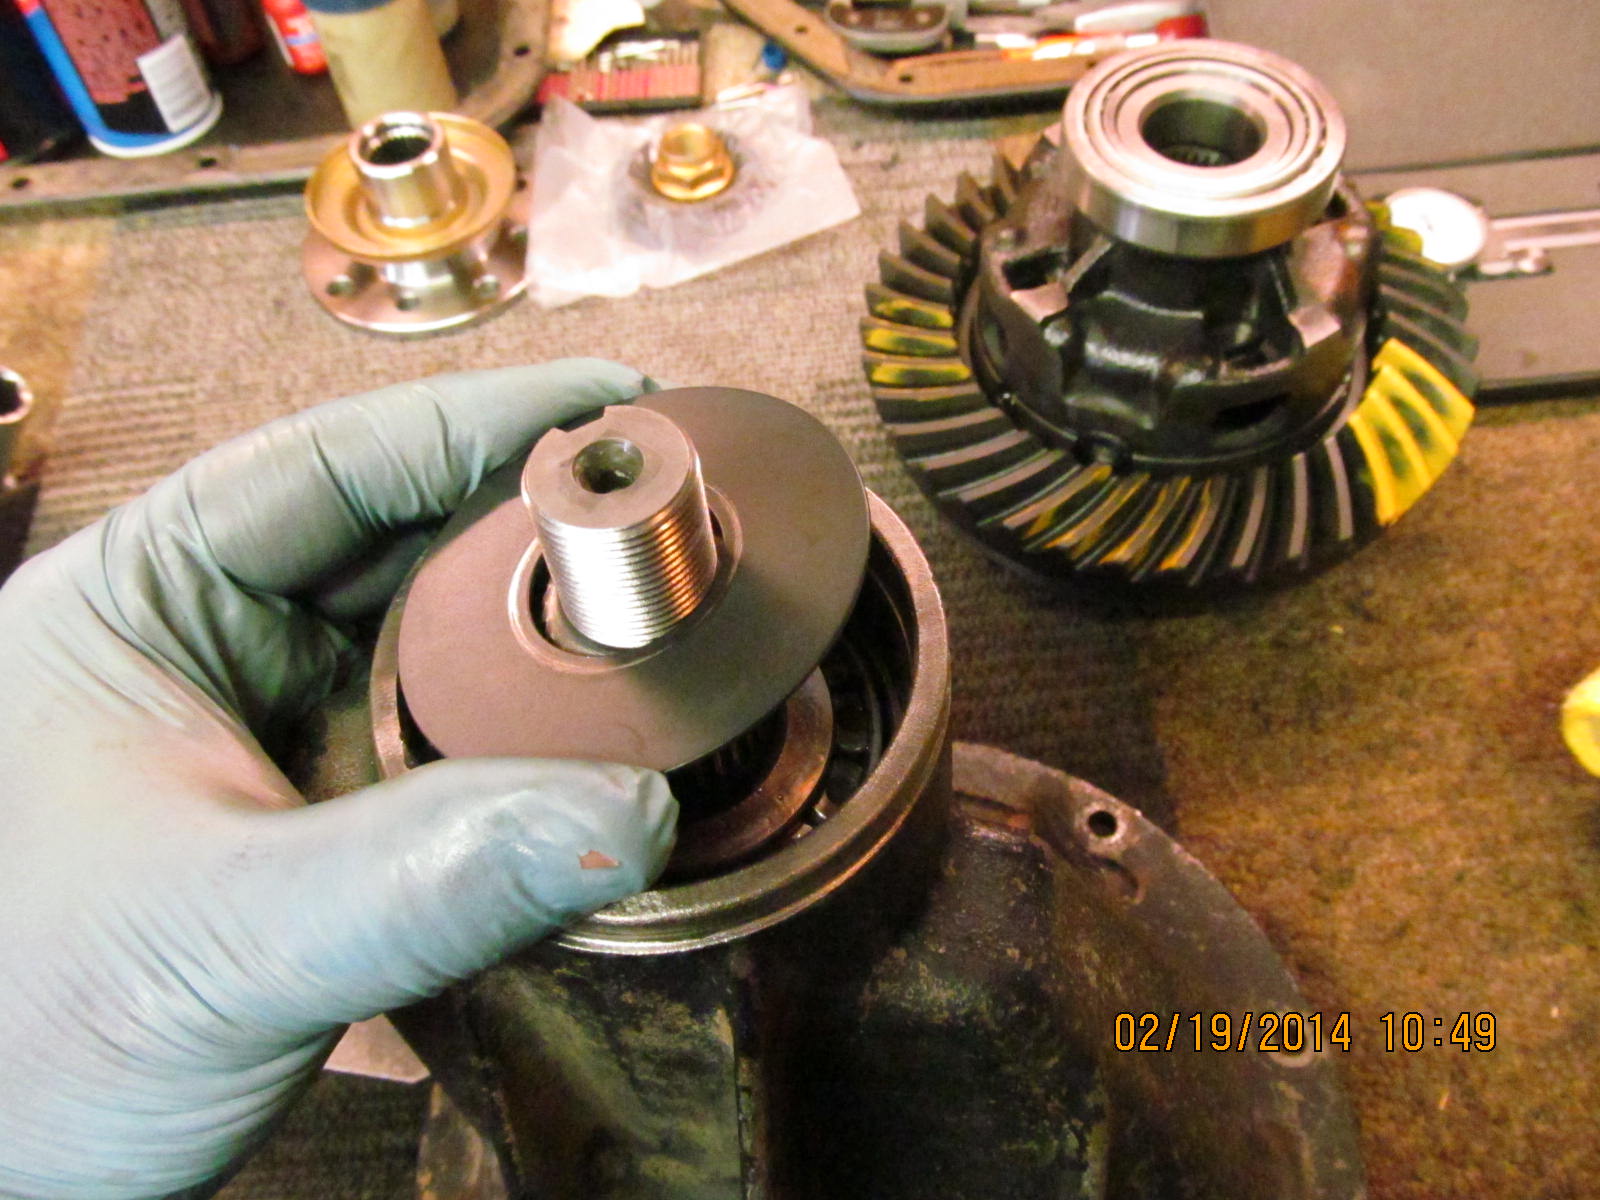
I skipped a few steps here and already put the collar in with a first try of a .030" shim on top of the 2.368" long collar.
So, the total length, combining the two, is 2.398. The pinion nut is tightened to the maximum that the elecric impact will
do which is roughly 200ft/lb under these conditions
|
|
|
|
|
Although not the least bit wobbly or loose in any way, I can easily rotate it with just 1 finger...our preload is basically ZERO.
|
|
|
|
|
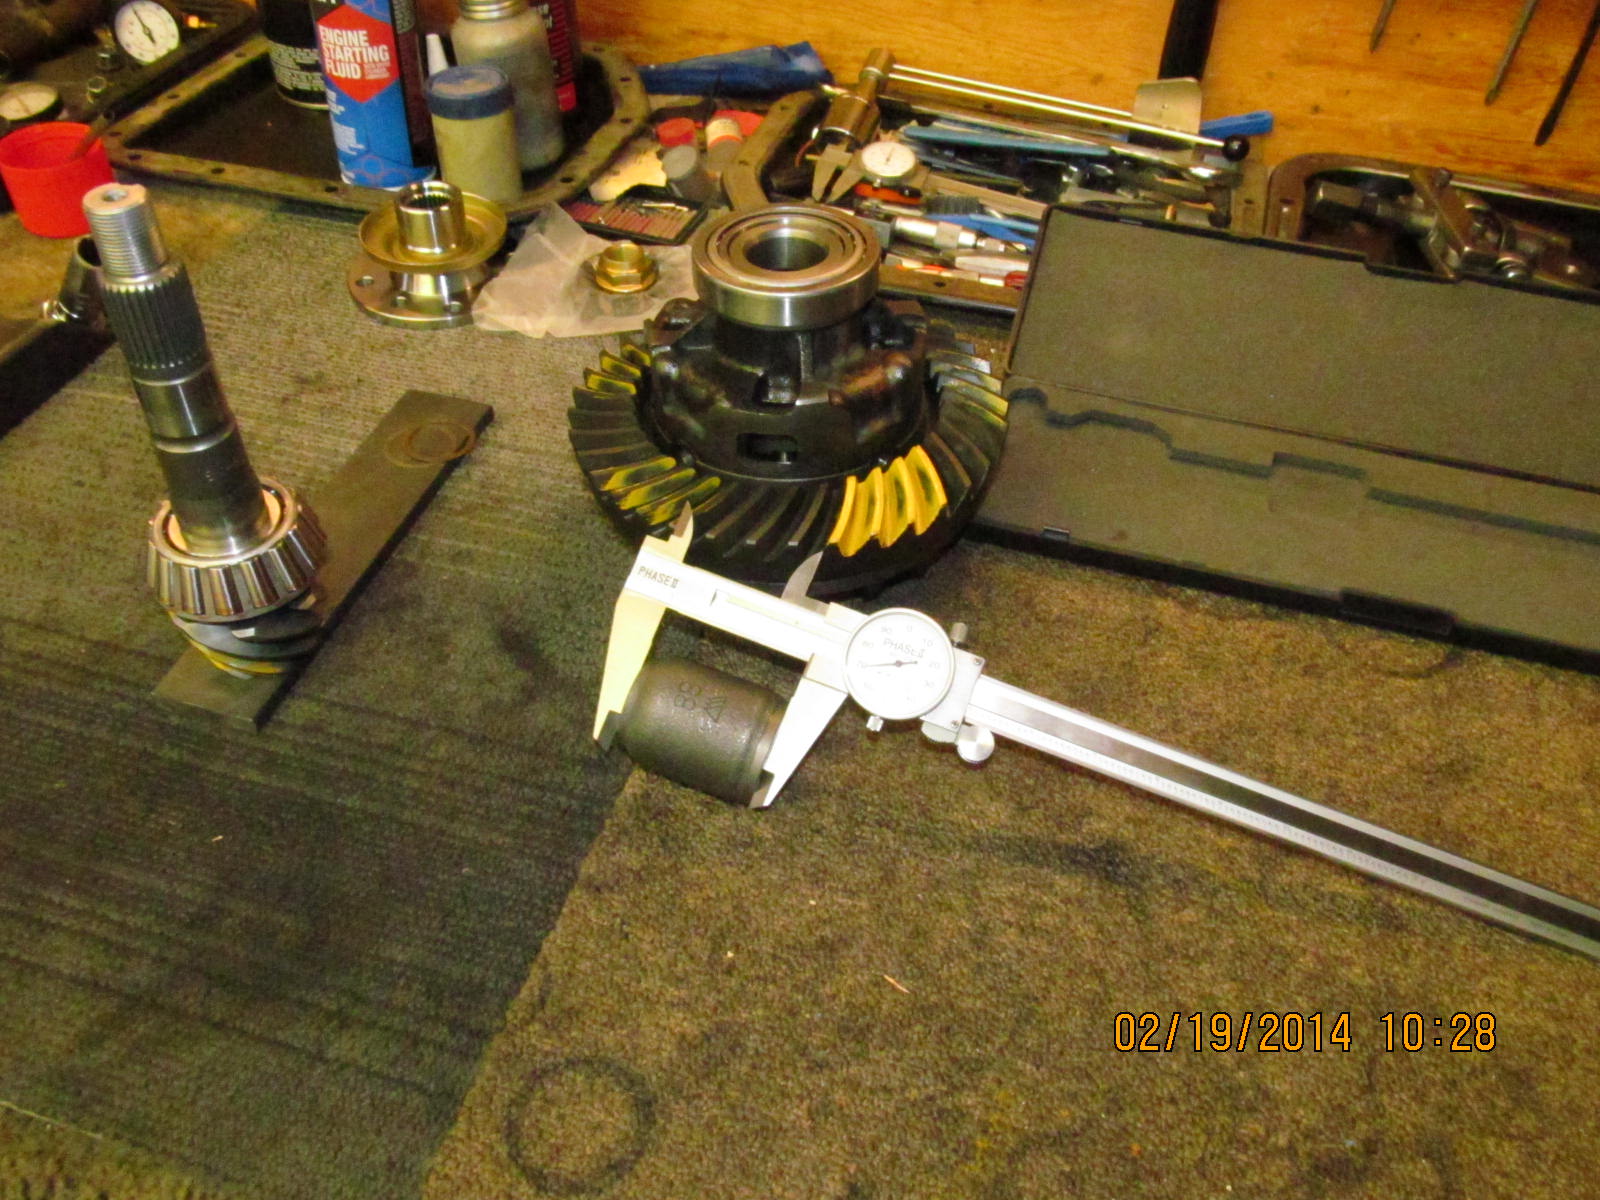
I have an extra long set of 12" dial calipers
|
|
|

|
As the ebay snapshot above shows, there are alot of good deals
on 12" dial calipers. My recommendation is to stay away from
the ones with digital read-out.
|
|
|
|
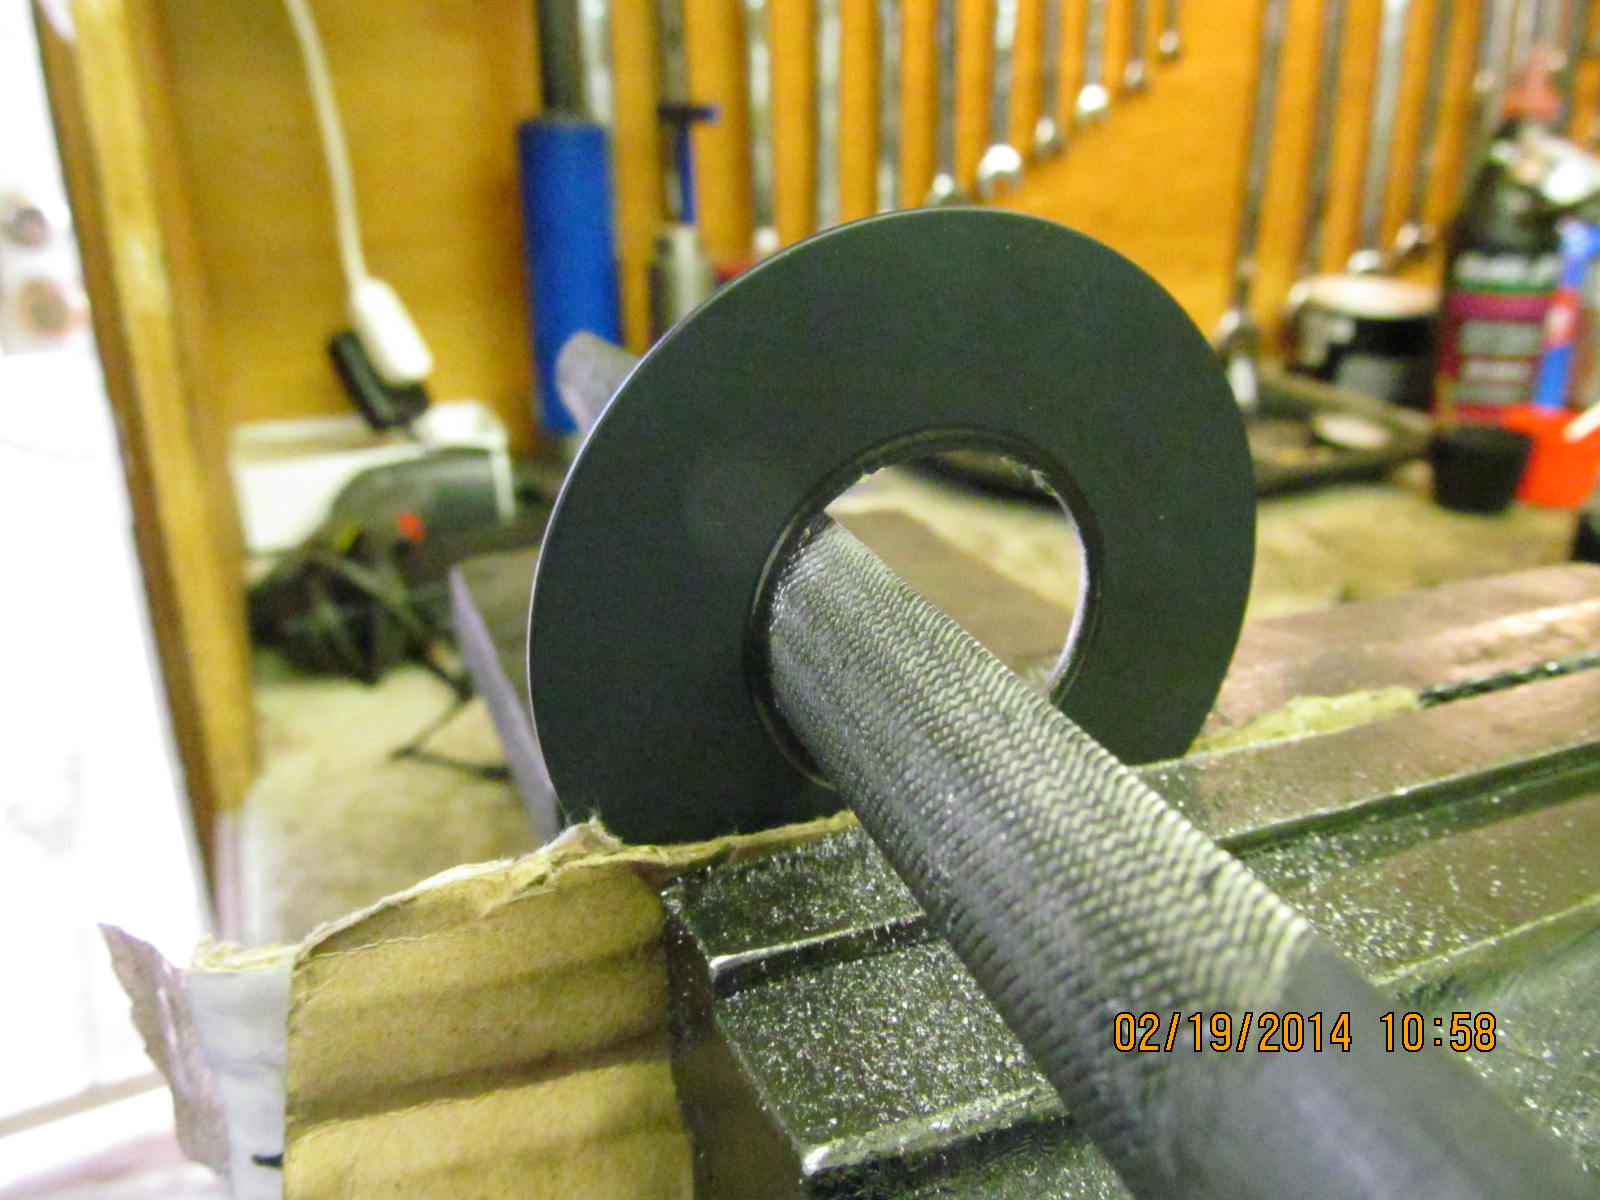
A flat piece of ceramic tile and 100 grit sandpaper does a nice job of shaving .001" off. After 2 re-assemblies of the diff and
a total of .003" removed...
|
|
|
|
|
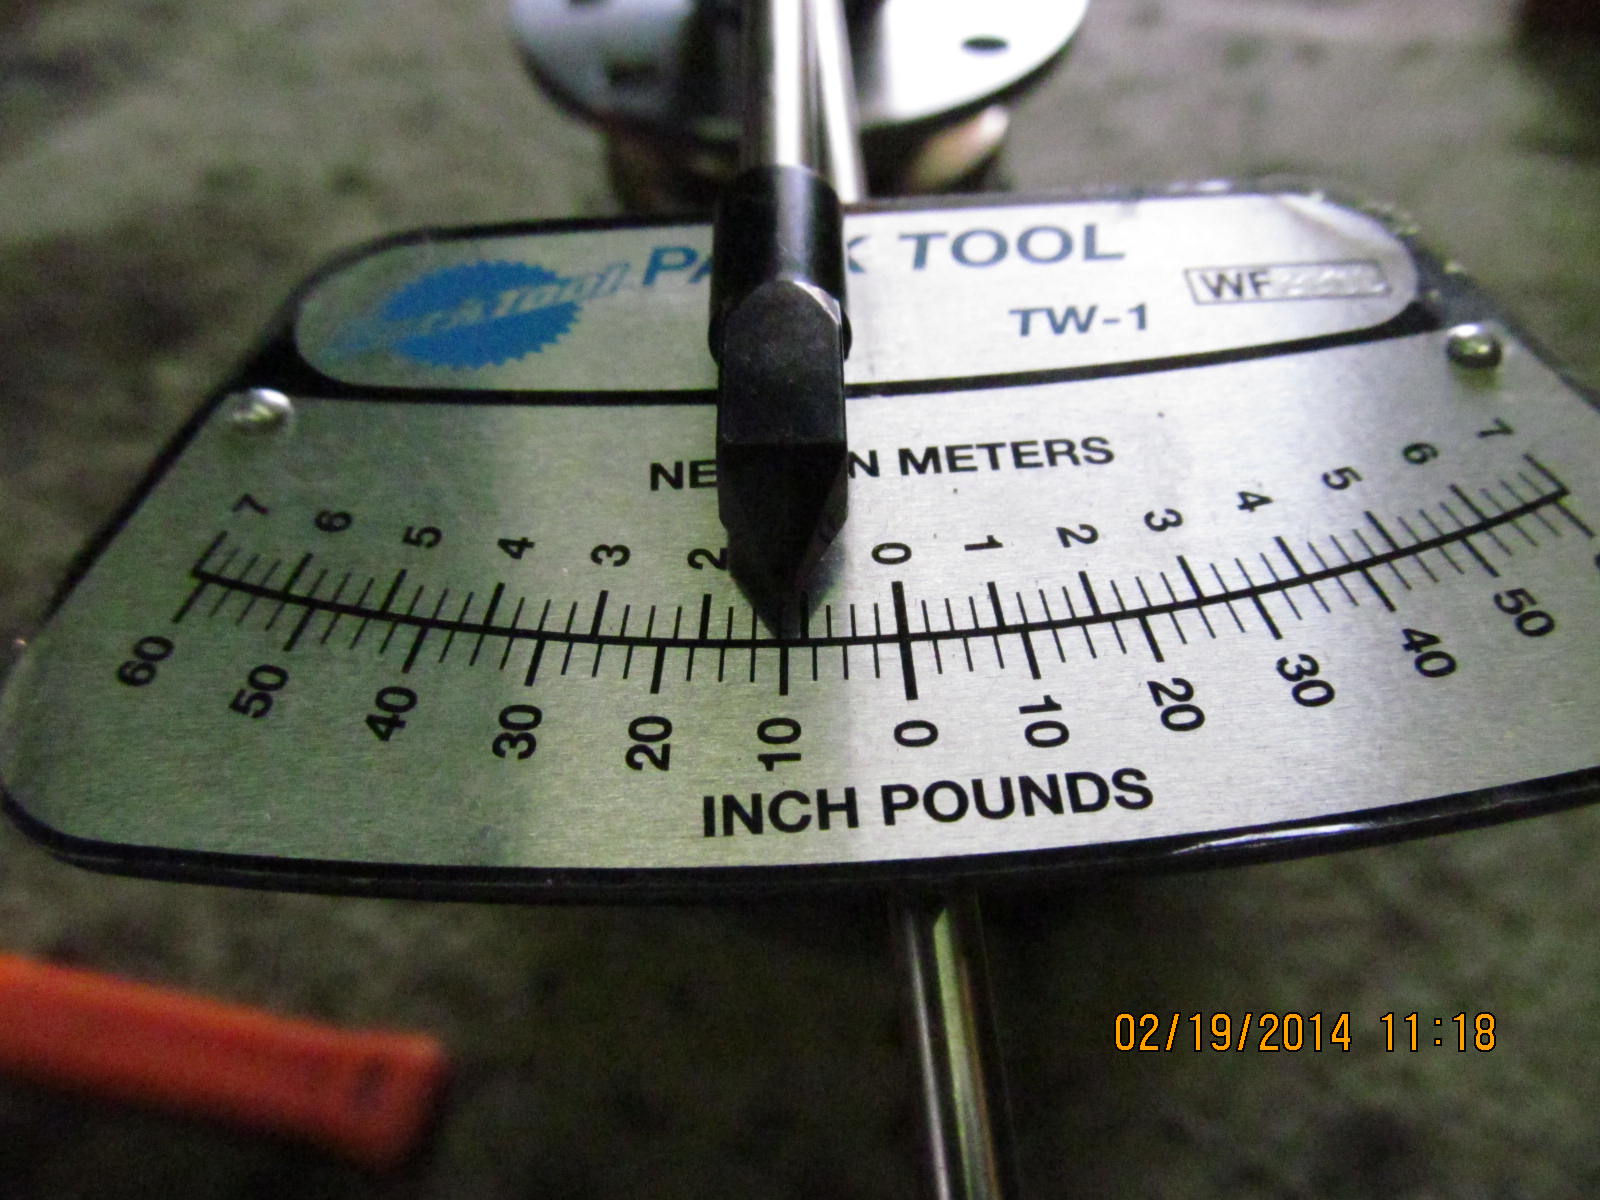
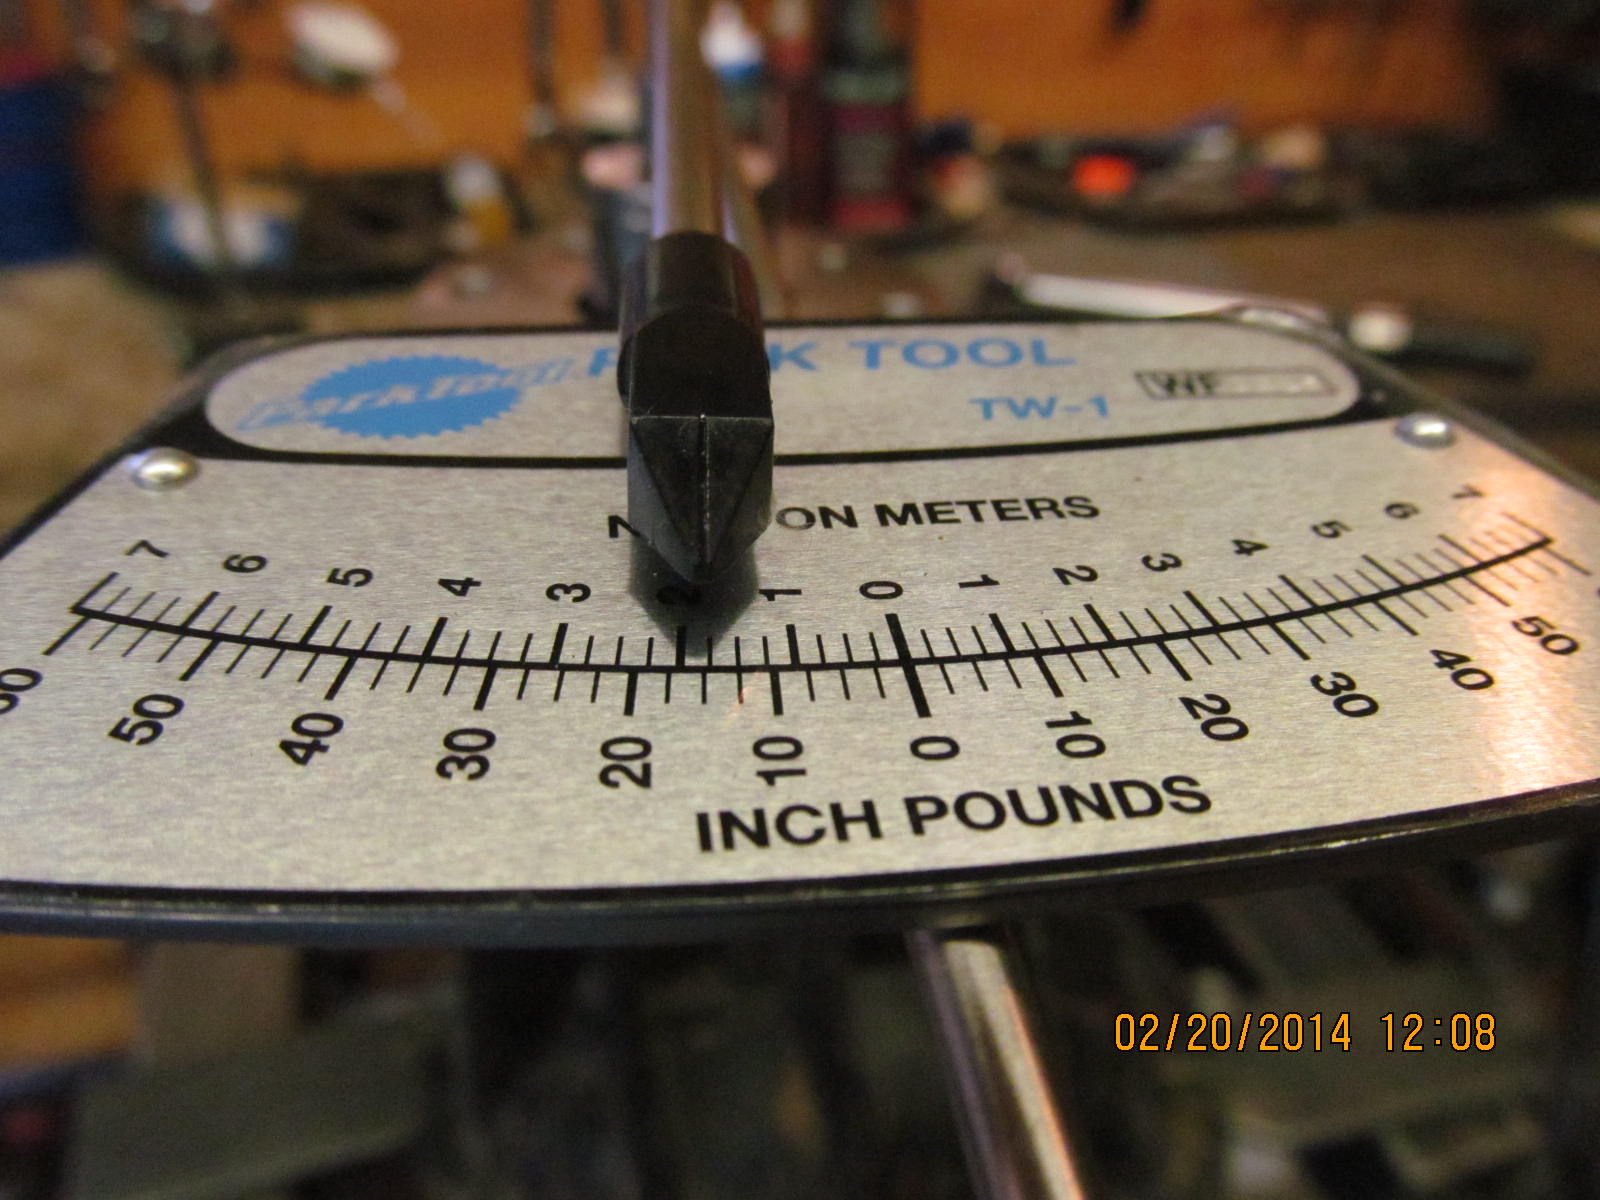
...a reading of a couple of inch/pounds was noted.
|
|
|
|
|
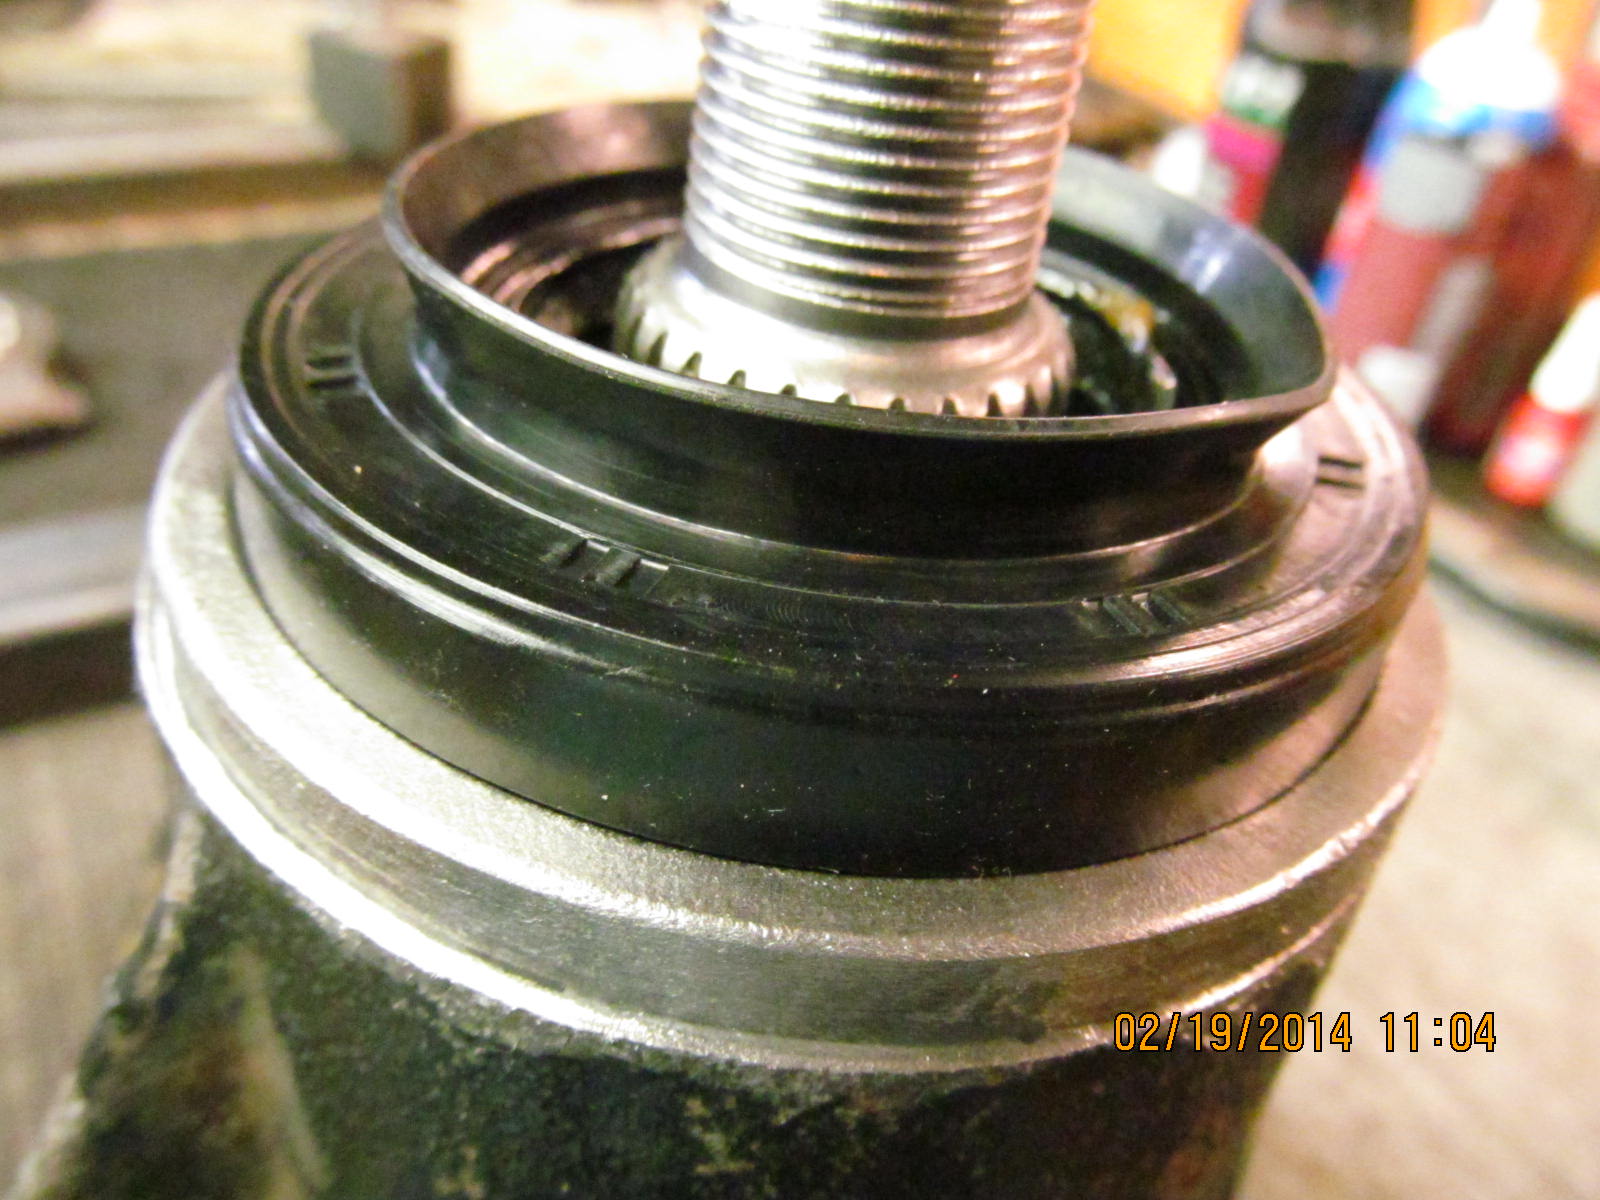
The splashguard will not quite fit over the thicker 29 spline pinion shaft...
|
|
|
|
|
...but will with about 1 minute of the right type of file.
|
|
|
|
|
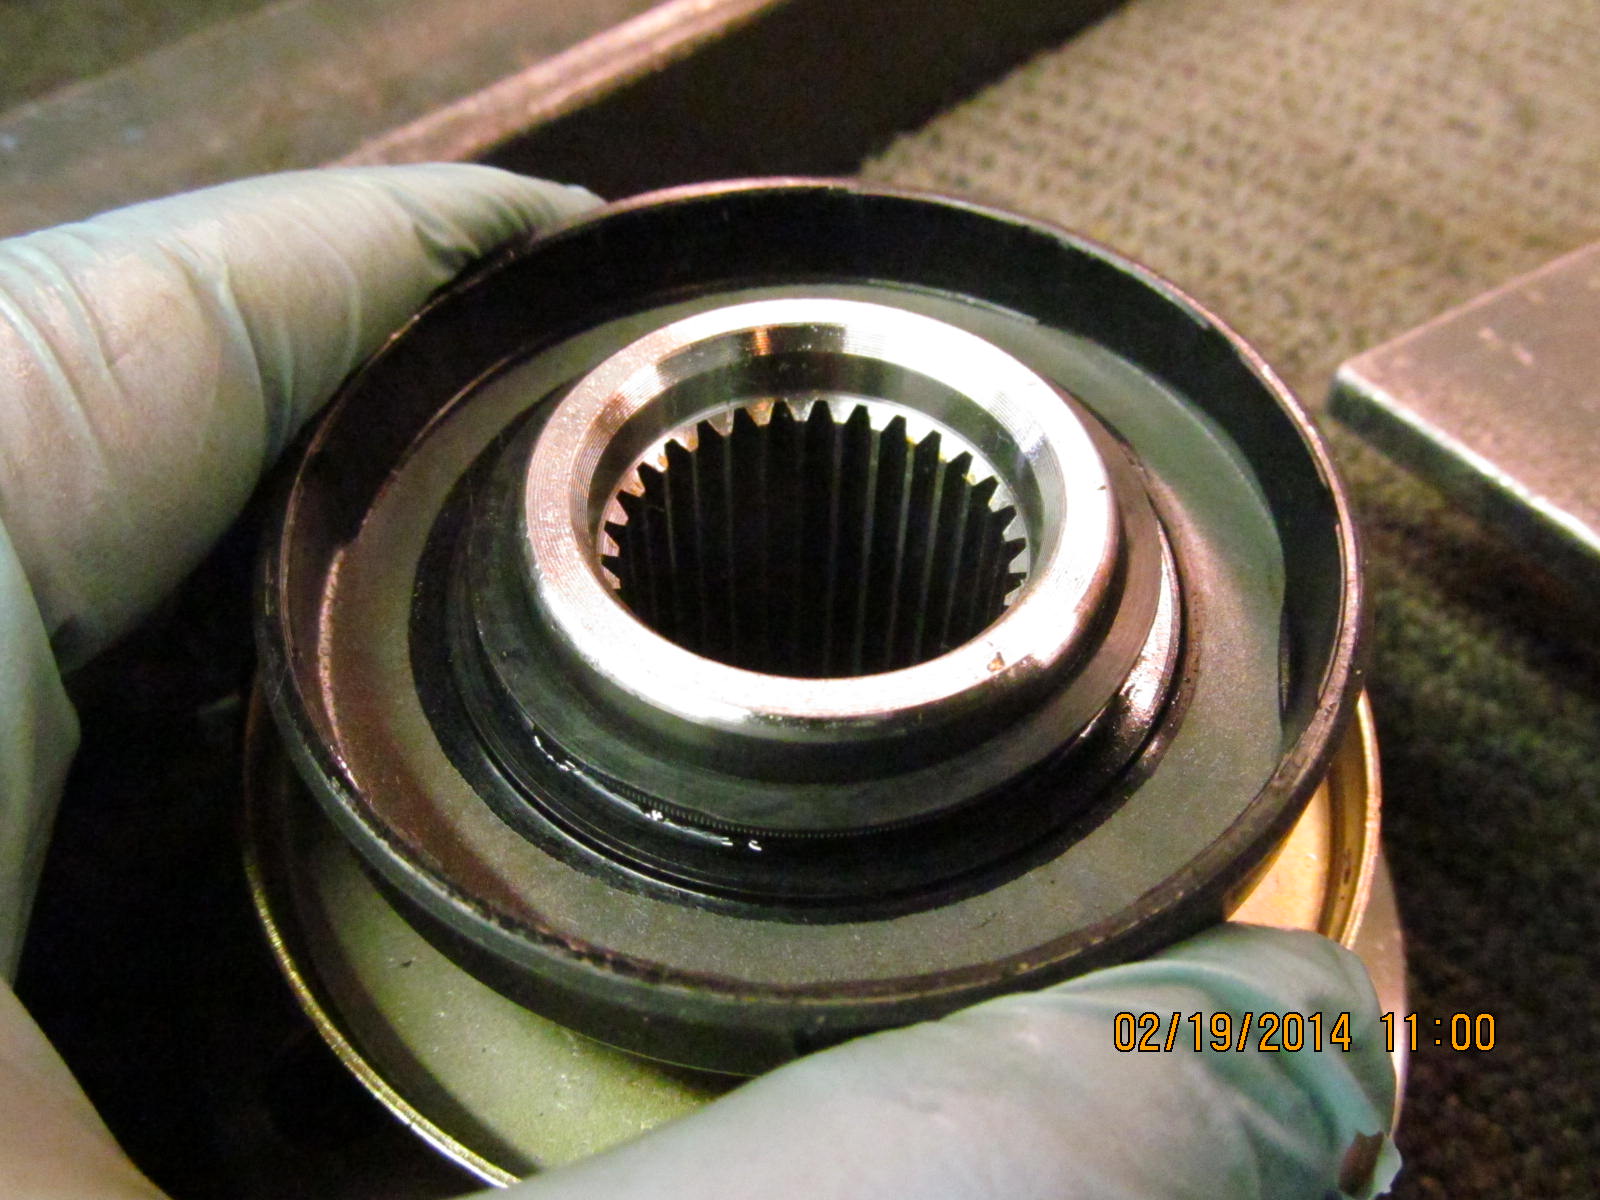
Here, I'm checking the fit of the seal designed for the 29 spline flange. It was tight.
|
|
|
|
|
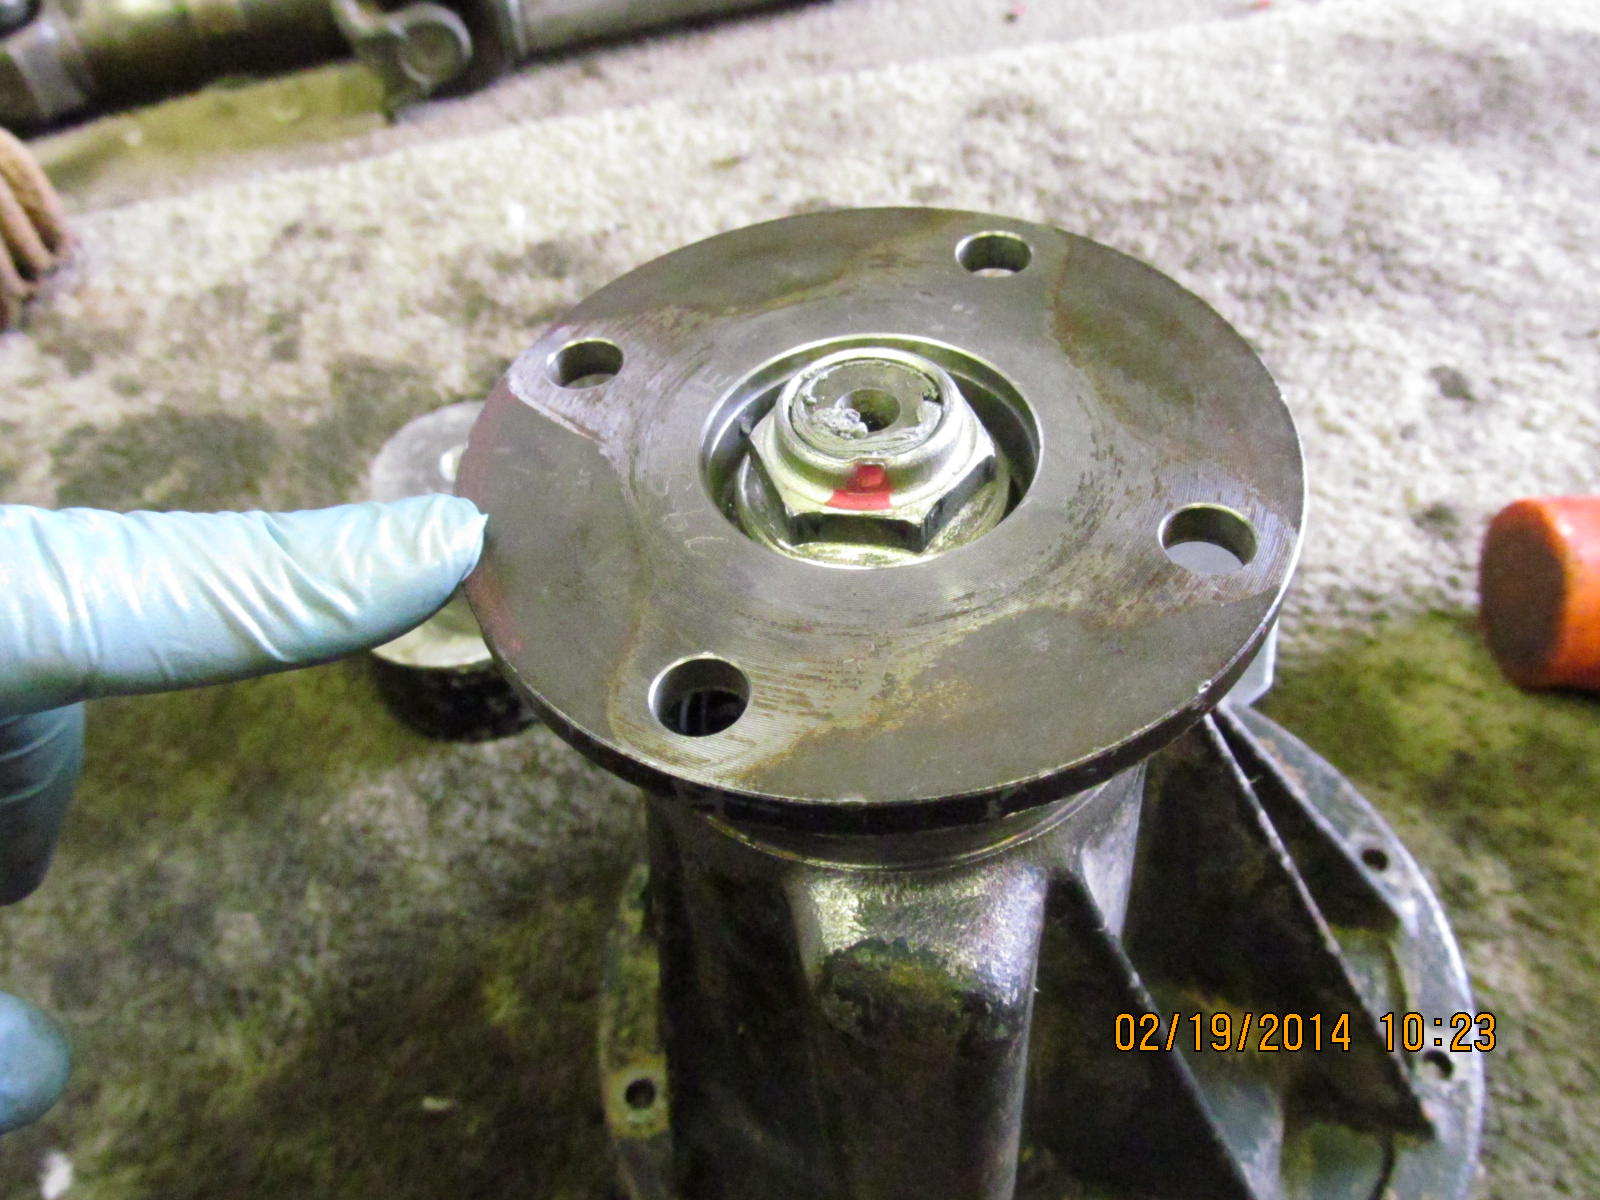
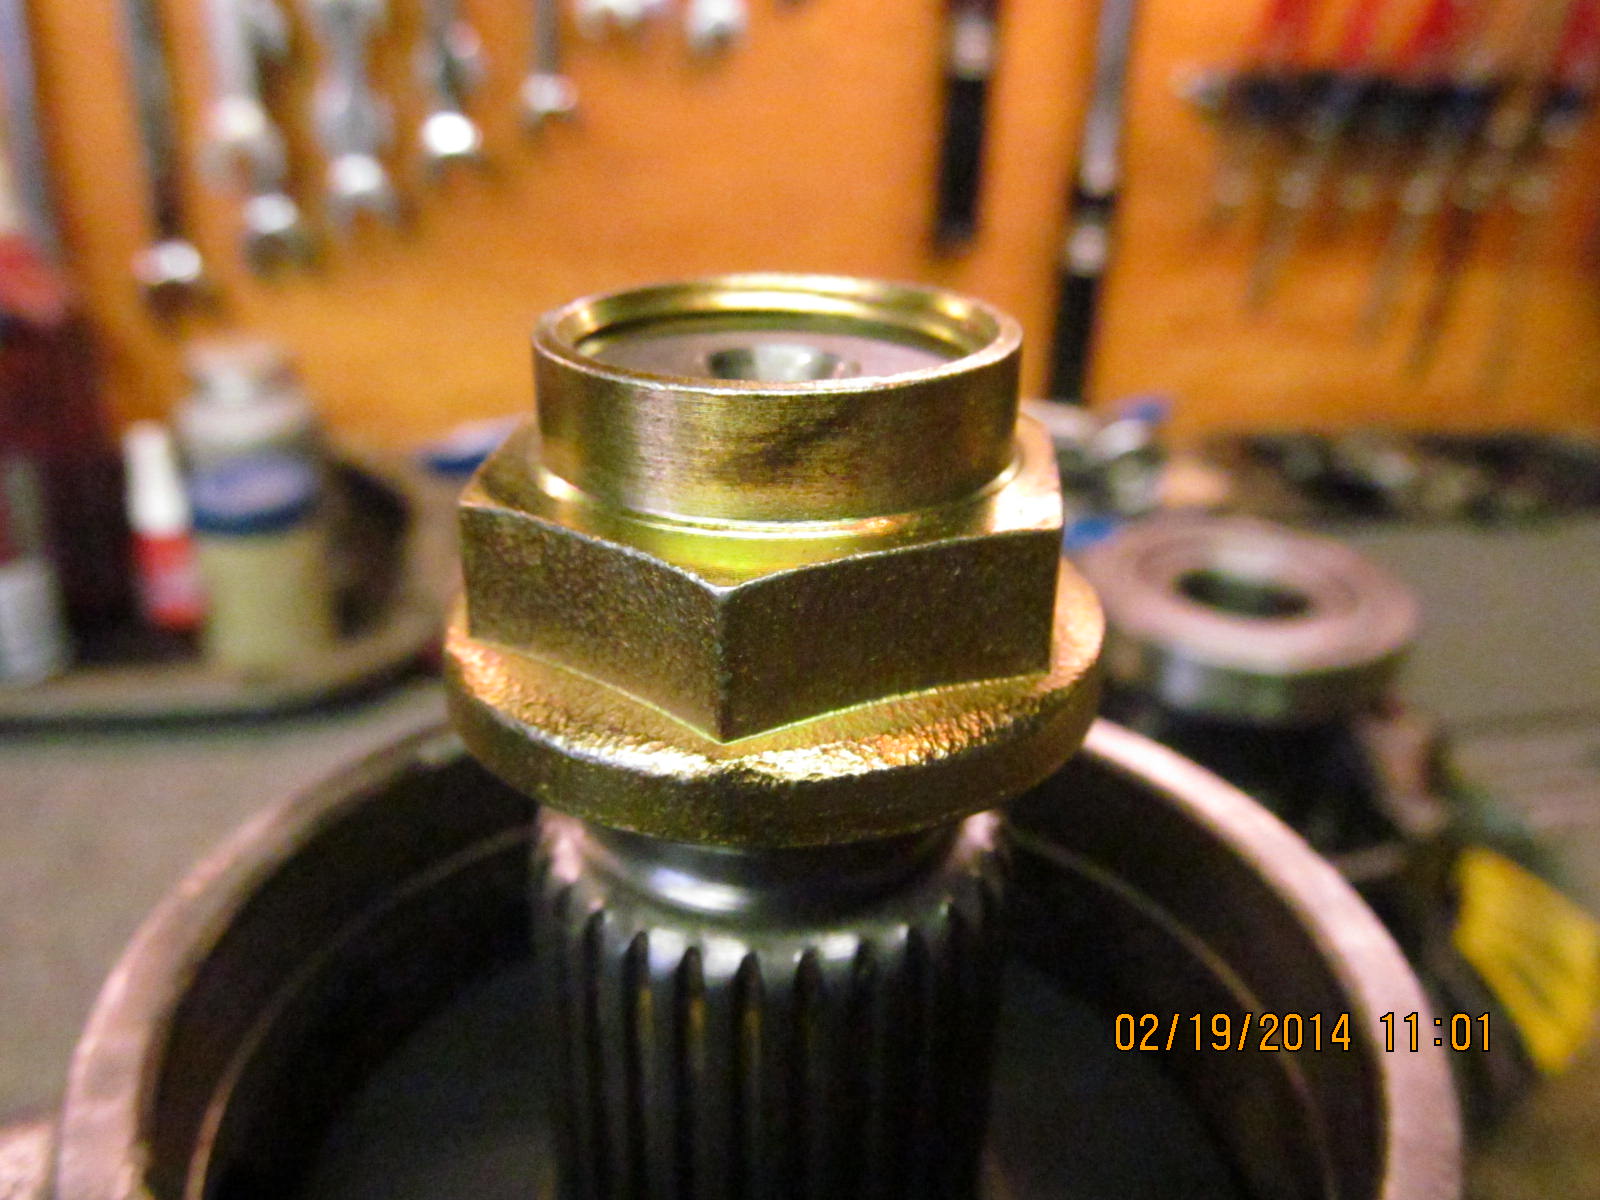
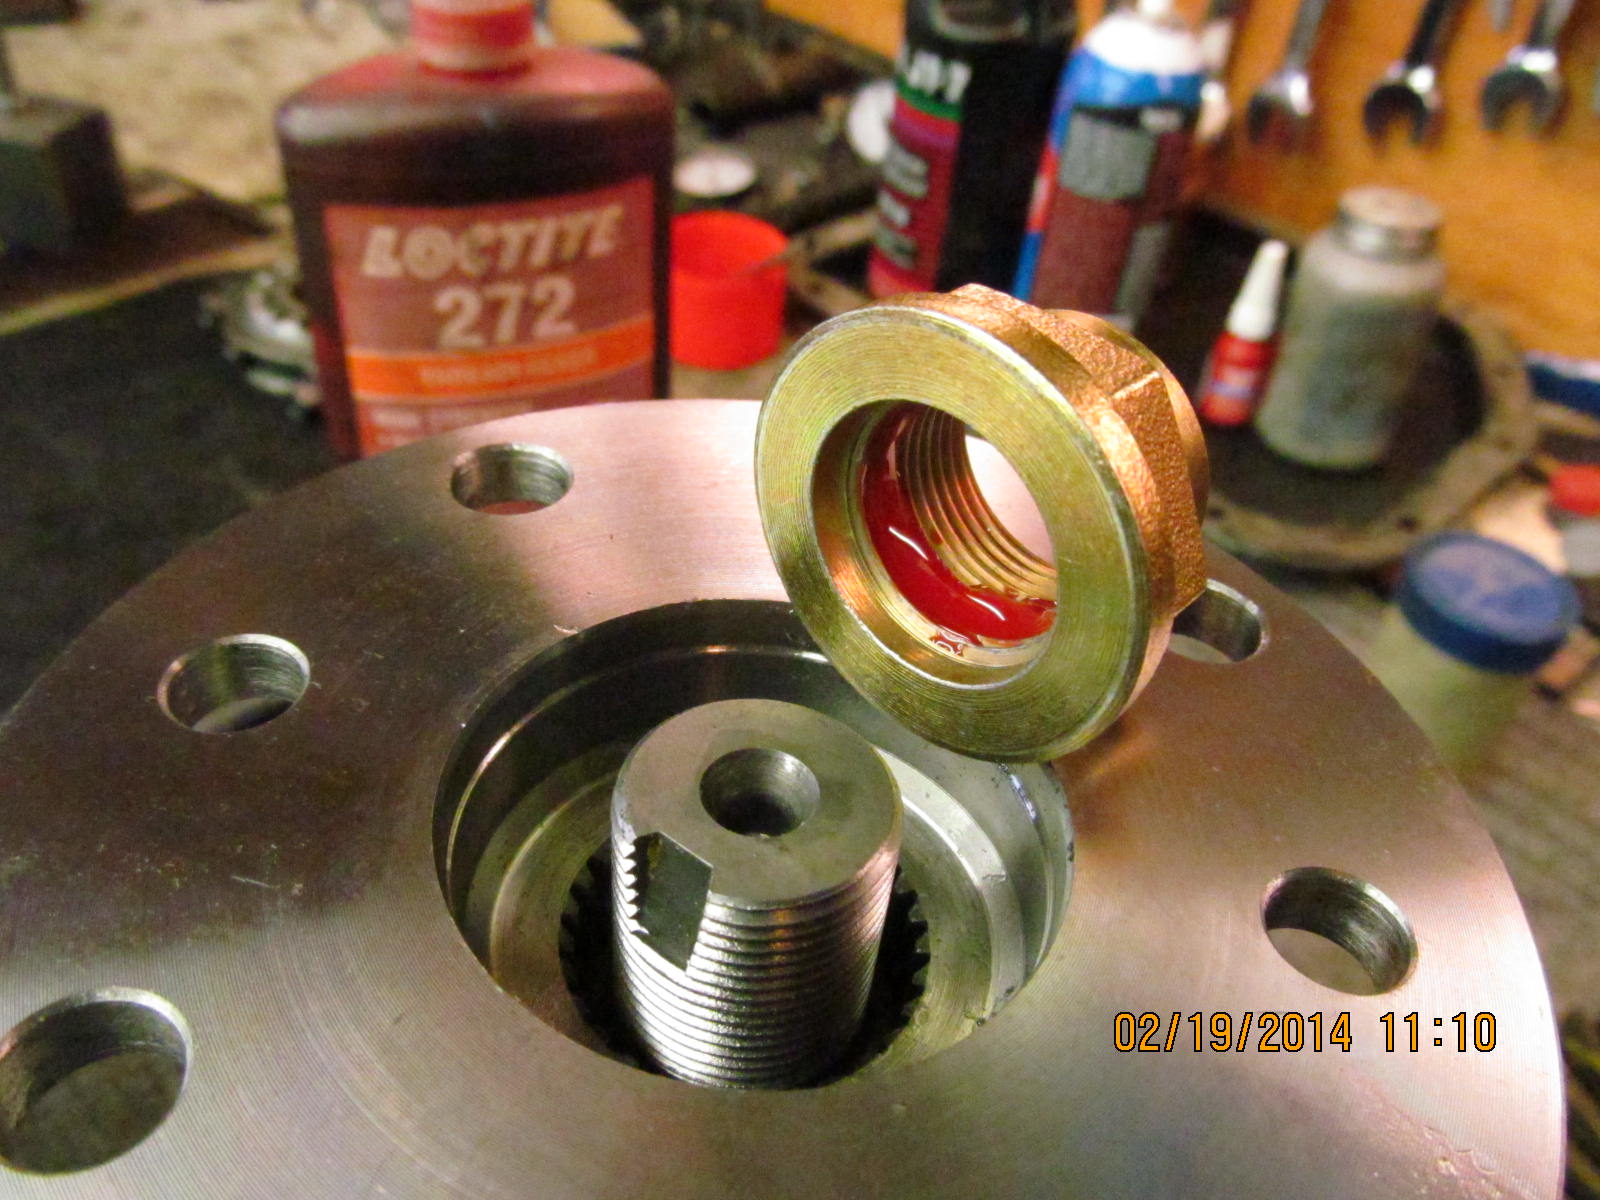
The higher quality flange style pinion nut easily threaded on indicating no burrs or damaged threads.
|
|
|
|
|
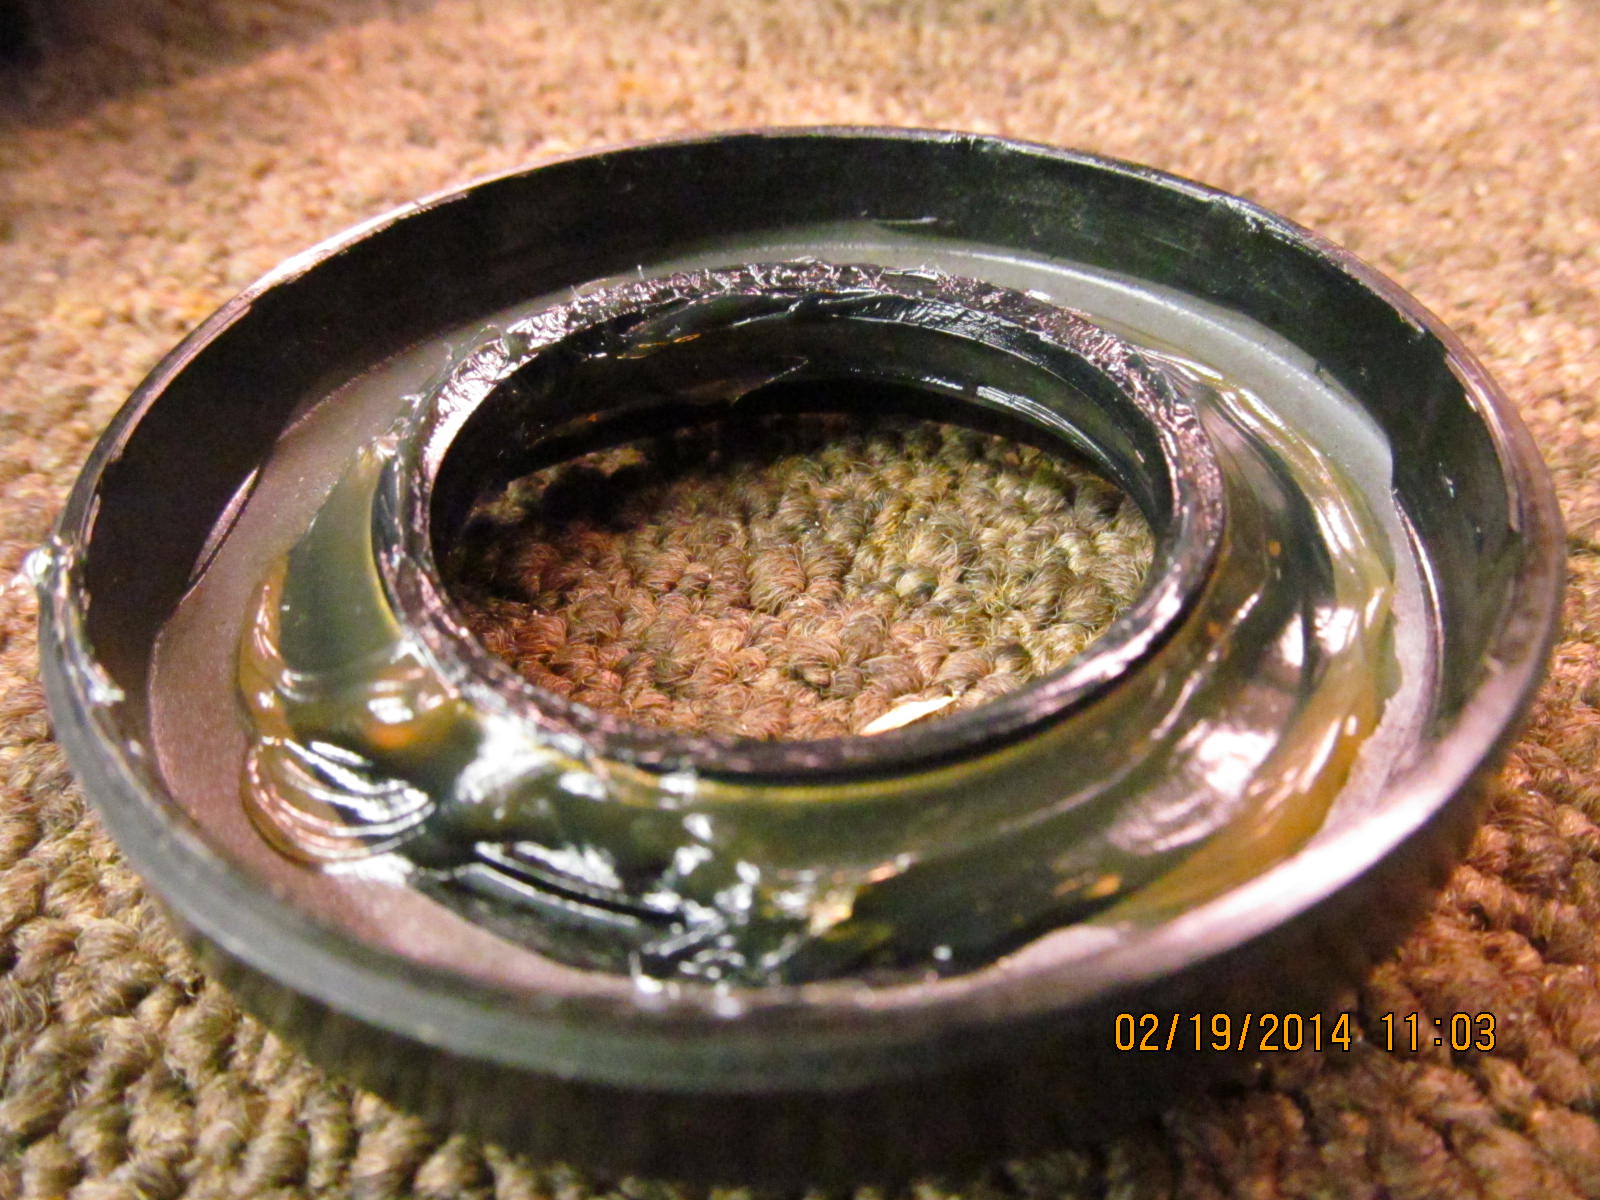
Harmless thick grease is applied to prevent the garter spring from popping off during the seal install process with a hammer.
|
|
|
|
|
I don't use rtv with these rubberized seals....I have seen them pop back out of the hole because of the slippery nature of things.
|
|
|
|
|
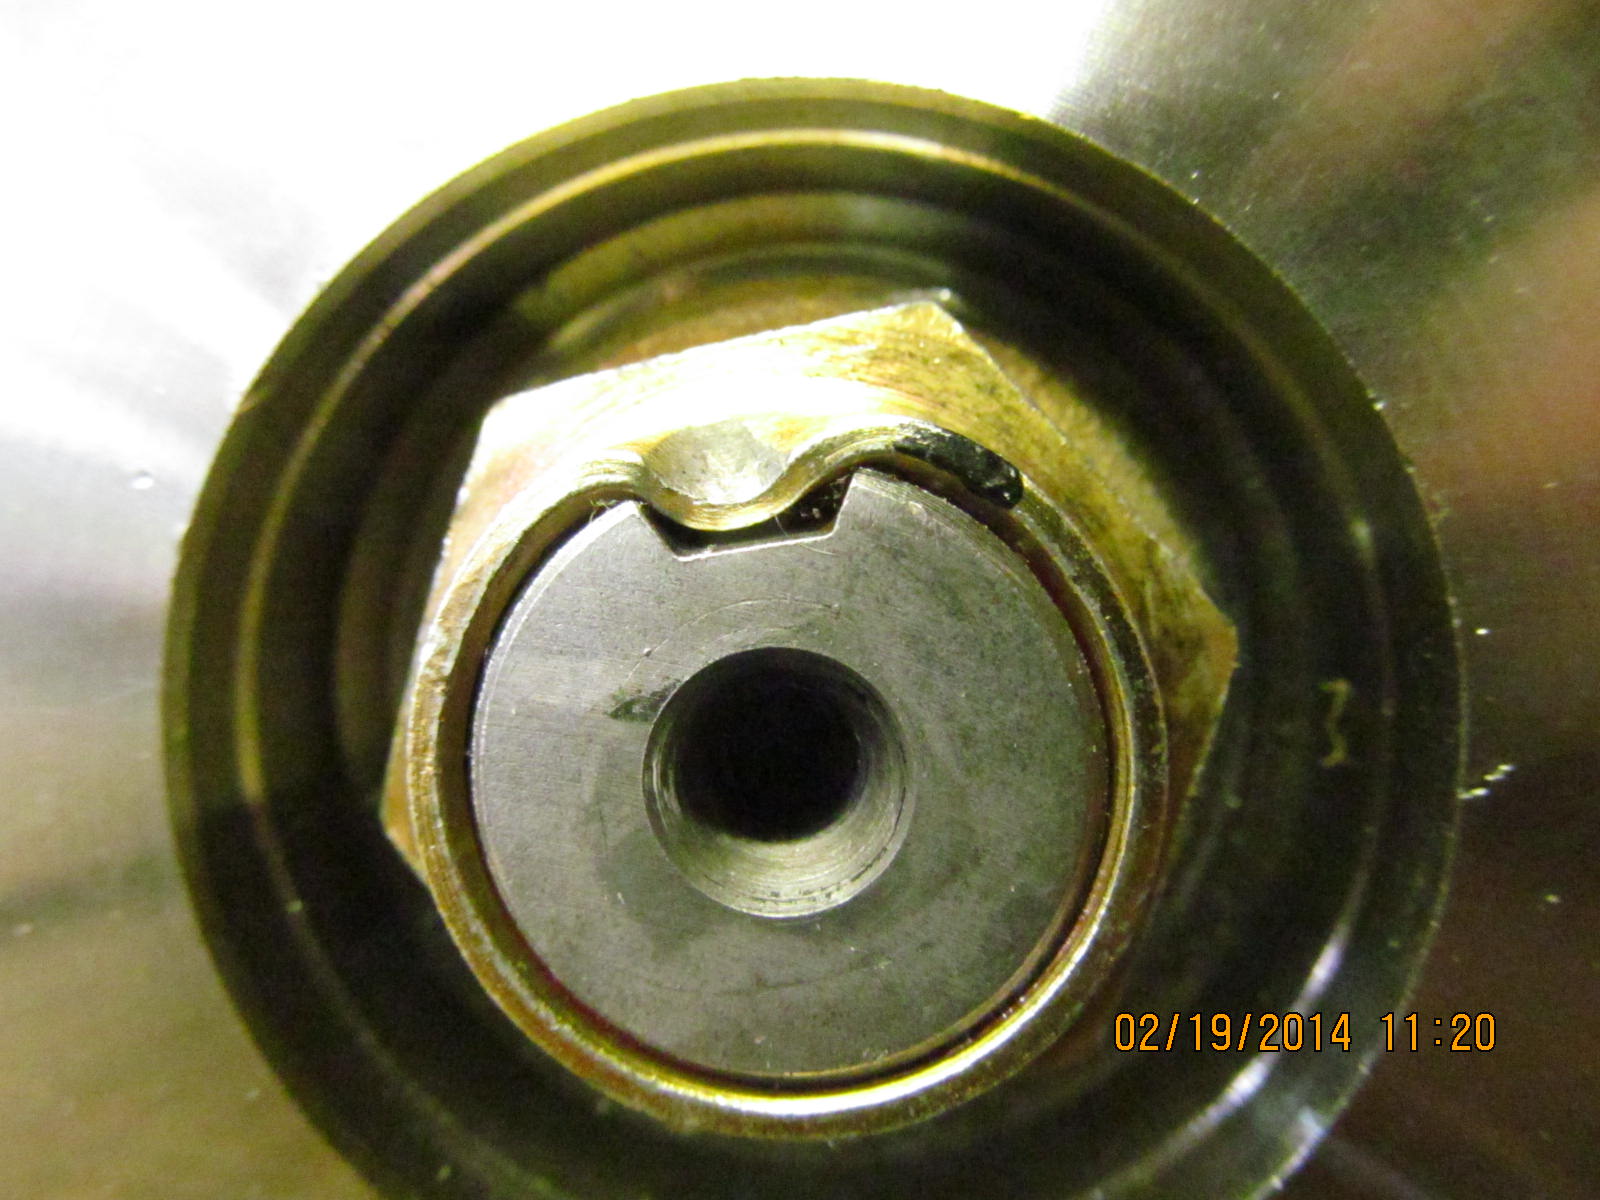
Never hurts to shine a light down the hole to make 100% sure that you don't see a garter spring laying on the splashguard.
|
|
|
|
|
Red loctite on the clean threads of the flange nut.
|
|
|
|
After tightening the nut with the electric impact, then the 3 foot cheater bar is brought out. The bar allows me to easily tighten
the nut the additional amount needed to develope the extra pinion preload.
|
|
|
|
|
Ding and this end is done....now to the carrier end of things.
|
|
|
|
|
I'm very careful not to cross-thread the wheel adjuster. Also, the threads have a thick grease applied.
|
|
|
|
|
75 ft/lb on the 4 bearing cap bolts.
|
|
|
|
|
Done right, the wheel adjusters will easily turn with just finger power and they both did.
|
|
|
|
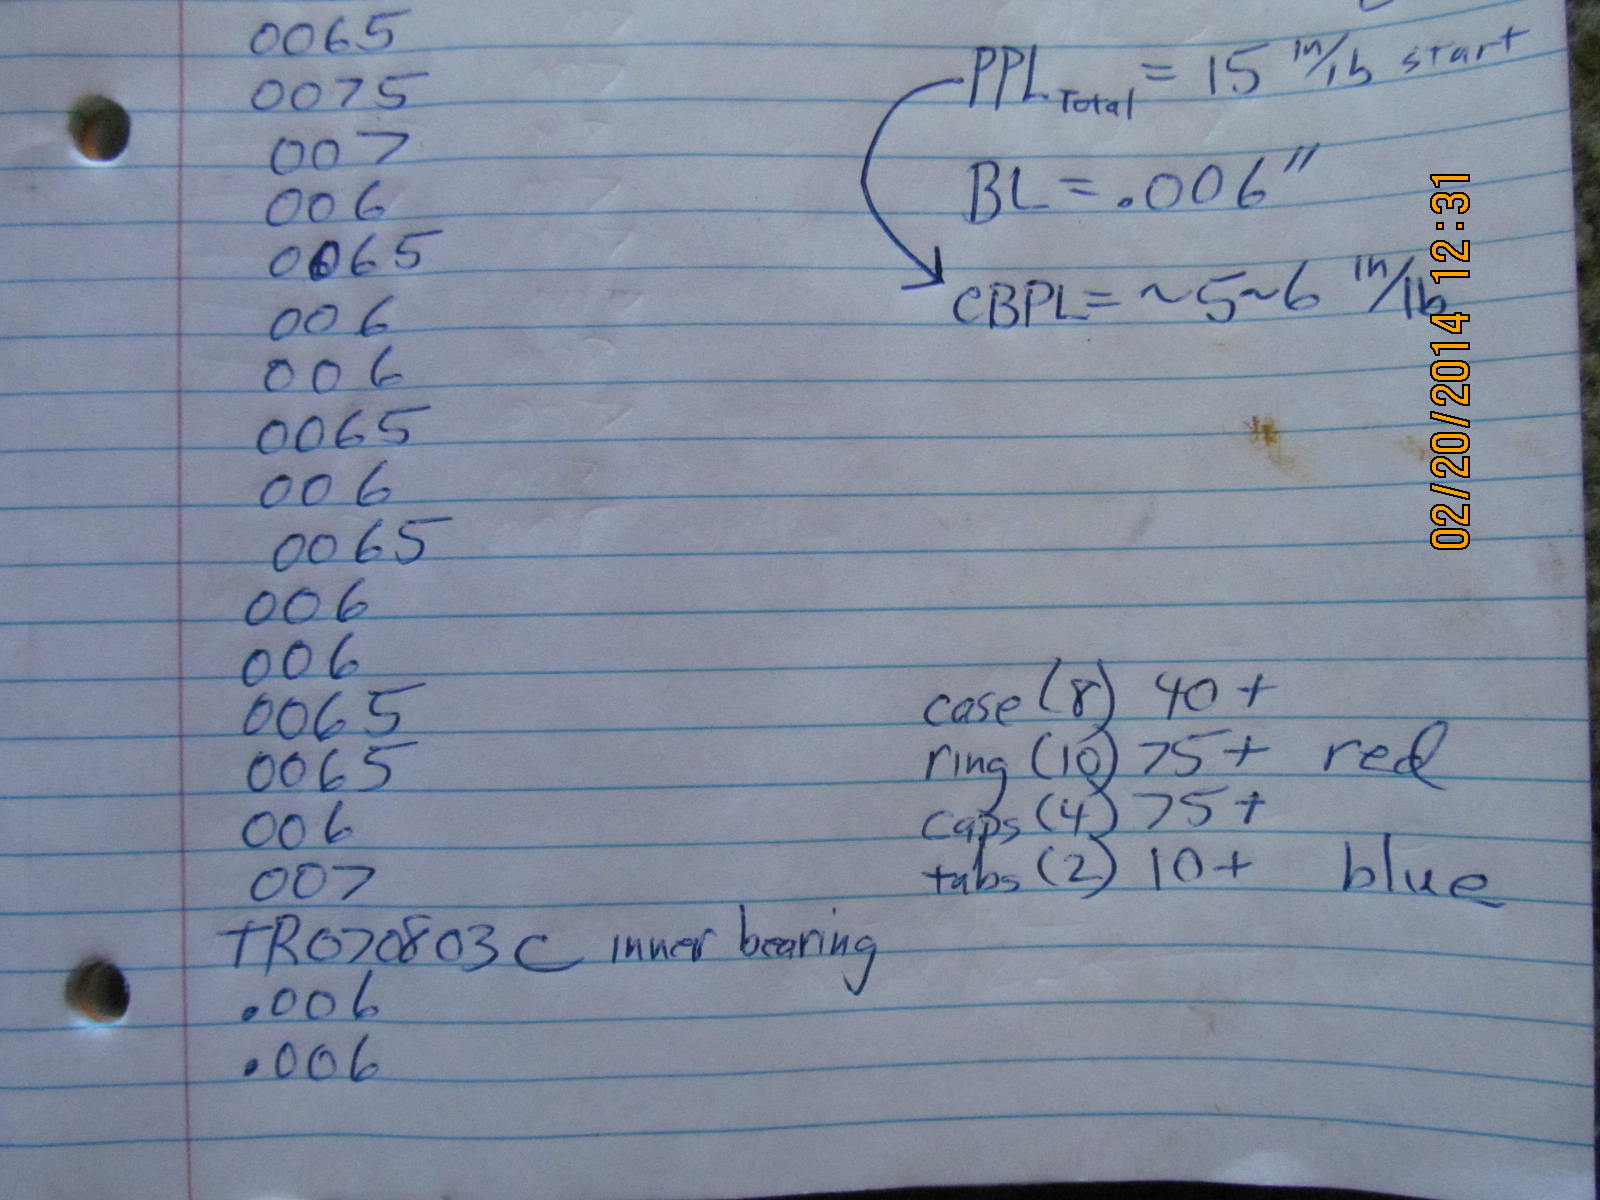
2 ways to get the PPL needed....actually torqueing the wheel adjusters to 80~100 ft/lb......and the 2nd method that I prefer now
is actually measuring the additional ppl of the pinion with a 60 in/lb torq wrench.
|
|
|
|
Equalize the carrier bearing loading on both sides by rotating the pinion back and forth while rapping the bearing tower in the
4 suggested areas.
|
|
|
|
|
Backlash is set closer to .006" minimum this time. Not much carrier bearing pre-load at this point.
|
|
|
|
Original force to turn just the pinion before was about 9 or 10 in/lb start torque. So, the carrier bearing contribution is
only 1 or 2 in/lb at this point.
|
|
|
|
Each adjuster was tightened 1 notch and that made all the difference. Now the total preload is 15 so the carrier bearing
contribution is 5 which is in FSM spec.
|
|
|

|
|
The wheel adjusters are now locked in place...blue loctite....
|
|
|
|
|
...and 10 ft/lb.
|
|
|
|
|
Drive side....a fresh repaint and it looks superb.
|
|
|
|
|
Coast is excellent.
|
|
|
|
|
Pinion drive is in agreement.
|
|
|
|
|
drive reverse paint----nice.
|
|
|
|
|
coast reverse paint---nice.
|
|
|
|
|
|
|
|
|
|
|
|
|
|
|
|
|
|

|