|
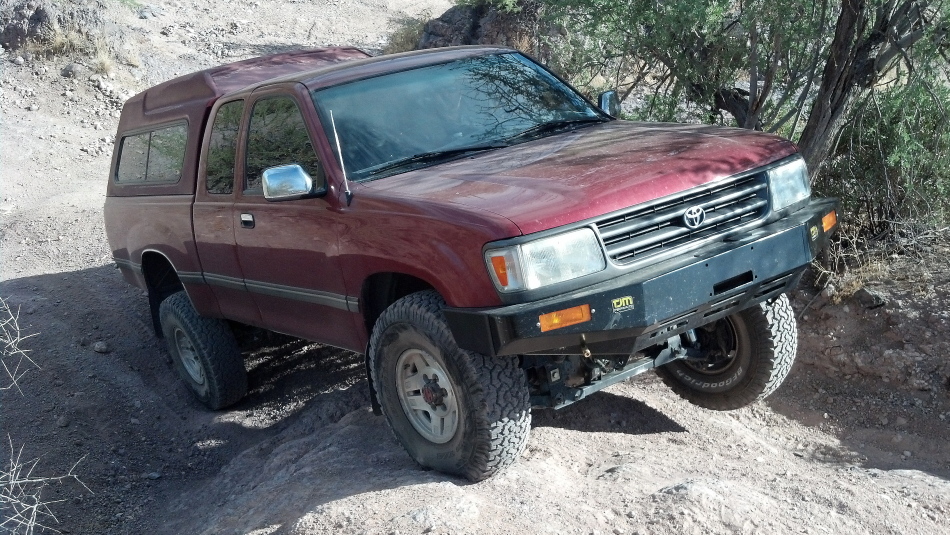
Bill's 1996 T100 gets a TJM Locker and Nitro 456 gears
|
|
(130 good size pics loading)
|
|
MAY 13 2013
|
|

|
There's a ton of pictures in this particular link so it will take awhile to load.
Note that these first two pictures are pictures taken 5 weeks after this link was
created. These are update pics.
|
|
|
|
Here's a copy/paste from Bill's 1st wheelin trip with the TJM...
email #1.....6-24-2013.....Hi Ken
Locker works great! Here are some action shots, maybe you could put 1 or 2 on
the write up you did on my gear install. Yes, it crawled right up this hill.
I used to have to use the bypass, Not Any More!!
Thanks,
Bill
.
.
.
email #2----Hi again Ken
Thought I would add in some more TJM feedback...Earlier in the day, I went out to
this section of dirt trail that had a moderate hill and holes dug on opposite
sides by open diff'd trucks spinning tires. This particular obstacle had denied
my previous efforts to climb it in 4wd with open diff's, on a couple occasions.
So today I thought I'd try it in "2wd low" and locked with the new TJM locker
you installed. It crawled right up without spinning a tire!! No 4wd needed. On
the way back to the highway there is another hill, much steeper, with huge holes
dug by open differentials, that I had never even considered trying with open
diff's. 4lo with diff locked and it crawled right up!! What a Huge improvement
a locker makes! The pics I sent are from the second hill but don't show how
steep it really was, pics never seem to accurately show the difficulty of an
obstacle! Thanks for the awesome gear and locker install. More pics here of a
follow-up trail ride out to Martinez Cabins/Box Canyon area near Florence.
Martinez Canyon
|
|
|
|
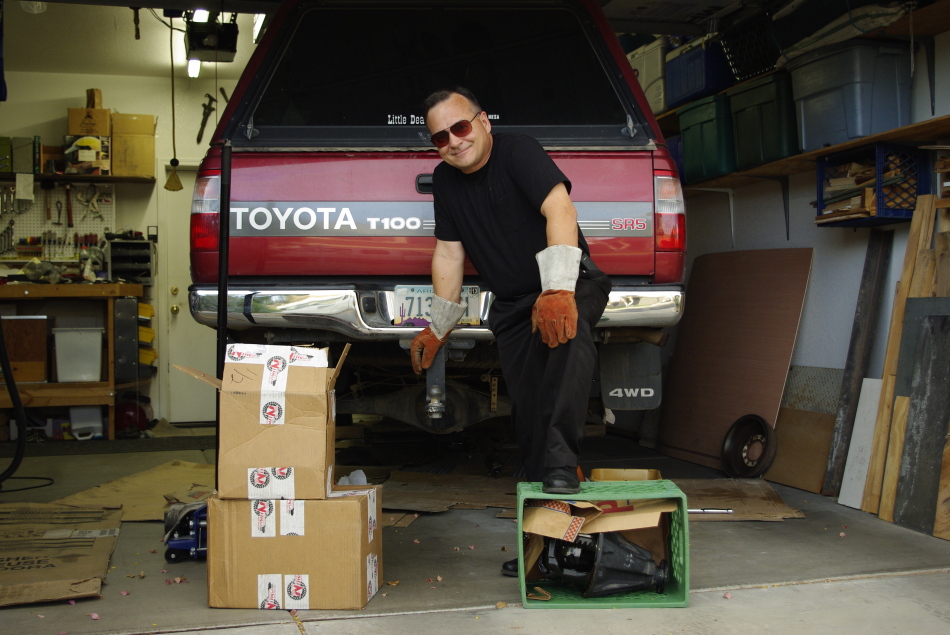
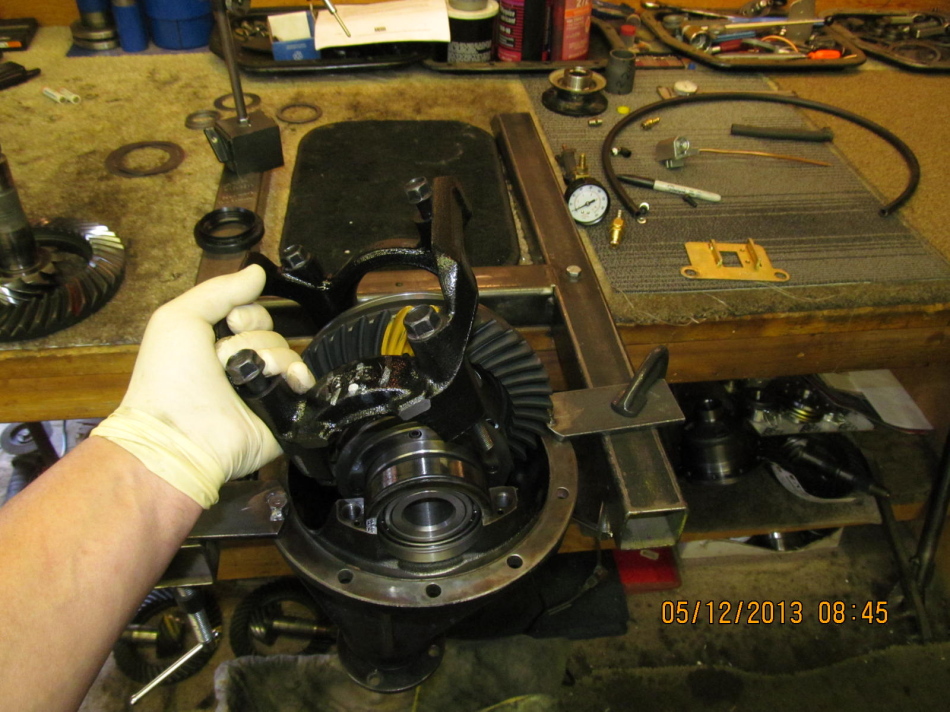
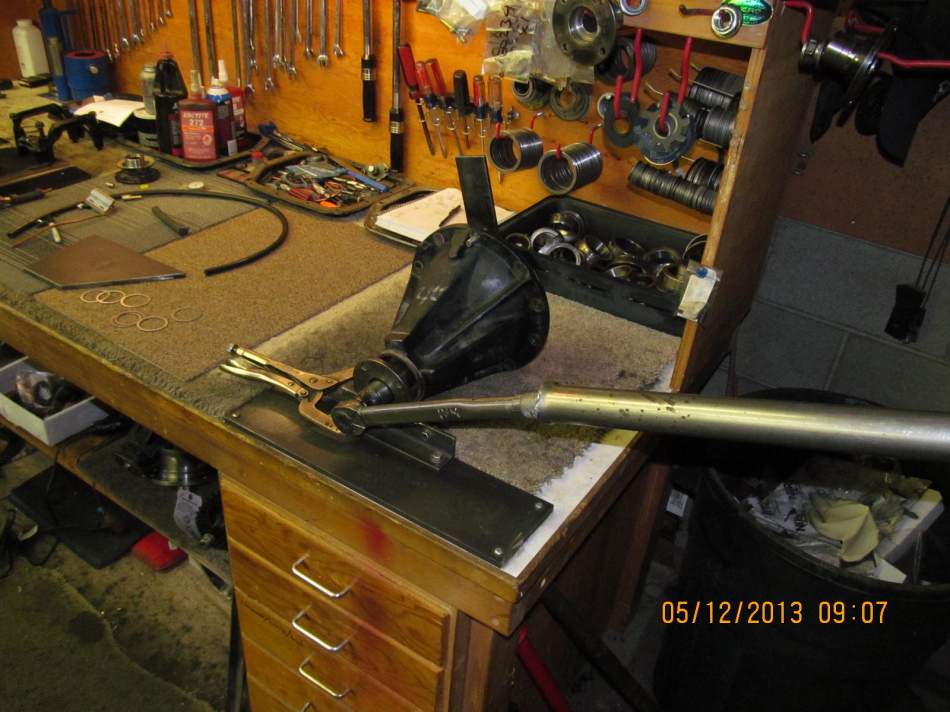
Bill lives down the road a bit so I stopped by to pick up the 8.4" differential
and some product from JT's. That's me with the welding gloves on :)
|
|
|
|
|
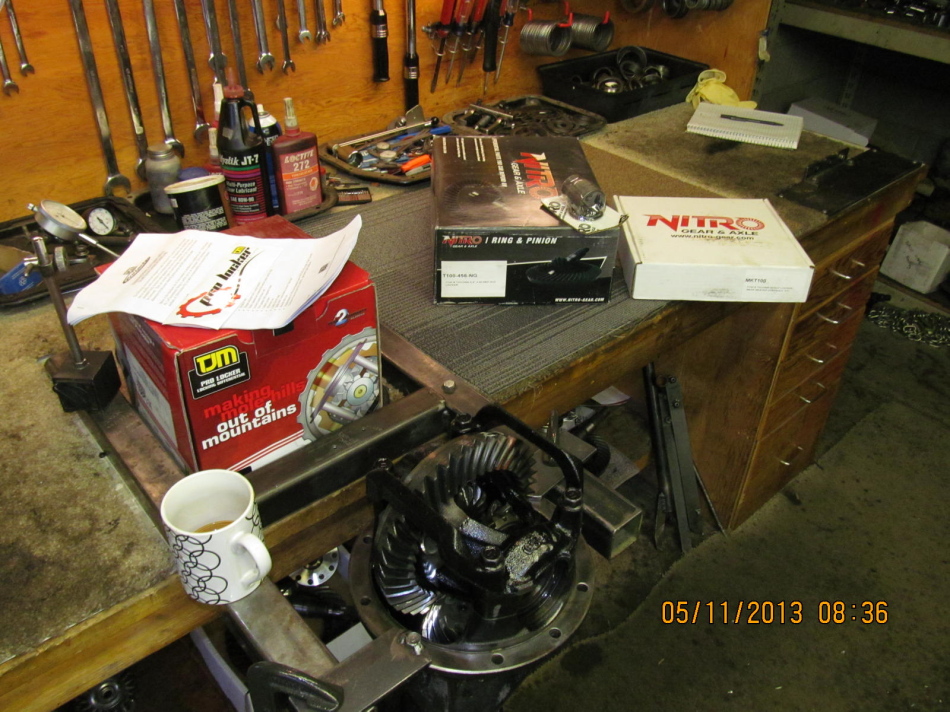
My coffee, the TJM Locker, Nitro 4.56, and the master kit.
|
|
|

|
|
....................
|
|
|

|
|
...........................
|
|
|
|
|
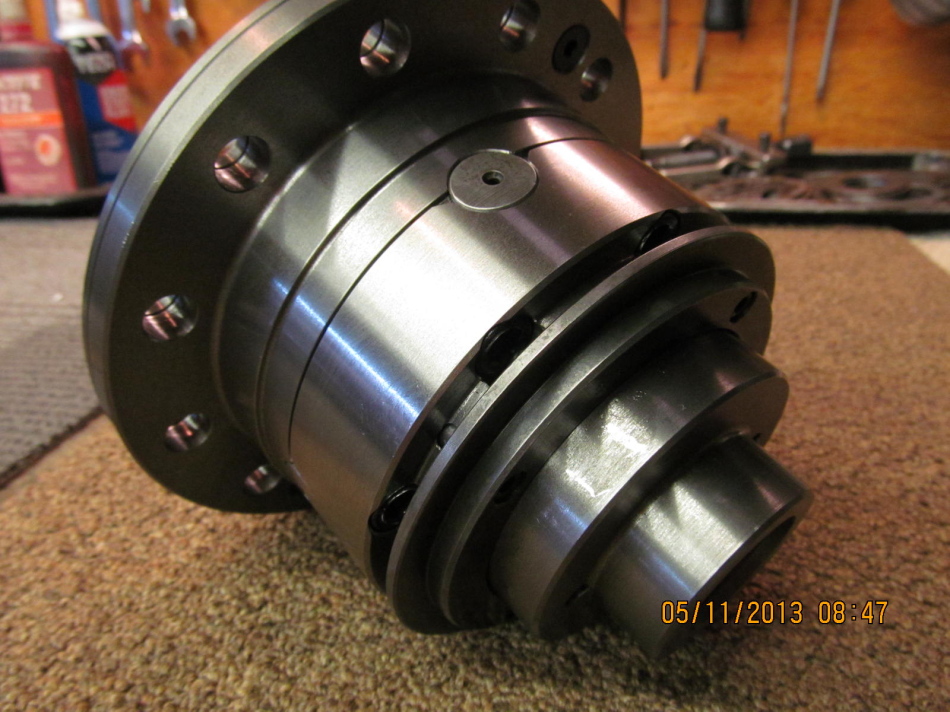
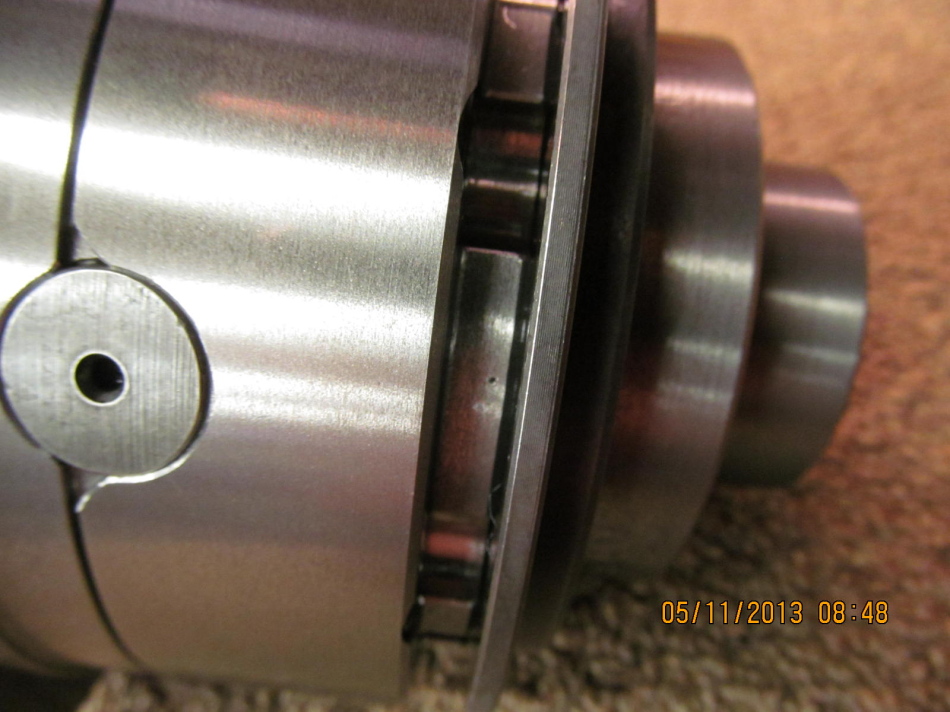
The TJM is one heavy piece of steel and is machined very well.
|
|
|
|
|
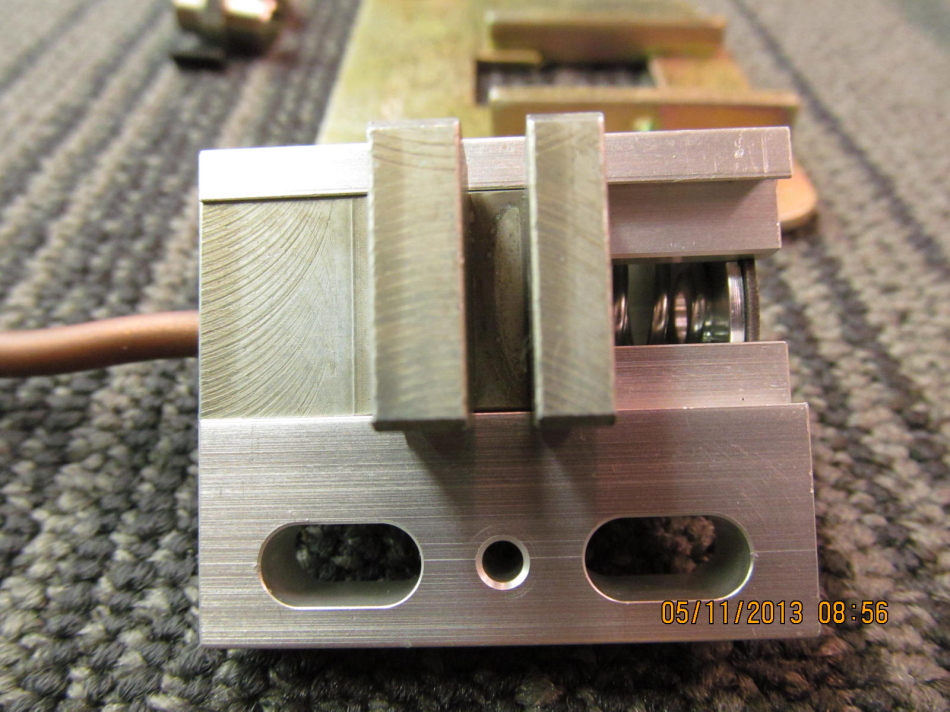
The selector ring is shown in all the way (unlocked).
|
|
|
|
|
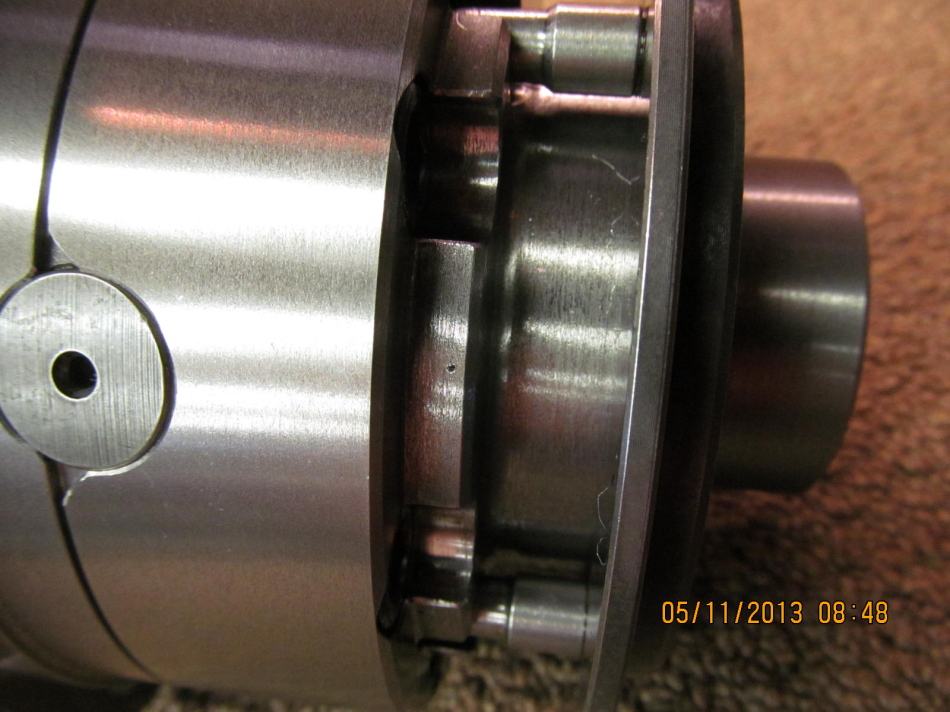
Here, the selector ring is moved out(locked).
|
|
|
|
|
........
|
|
|
|
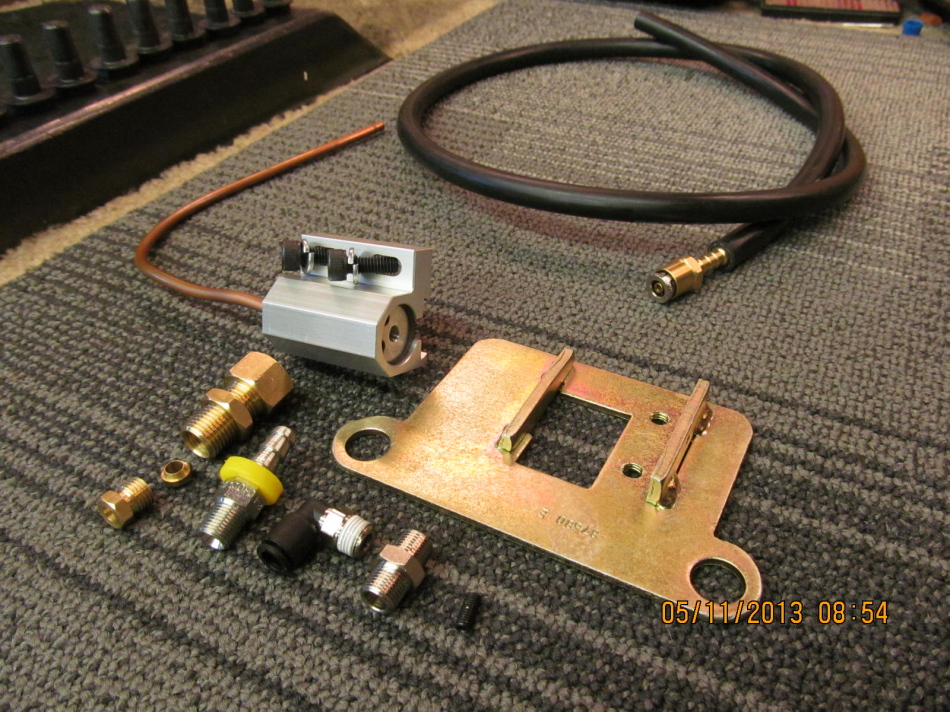
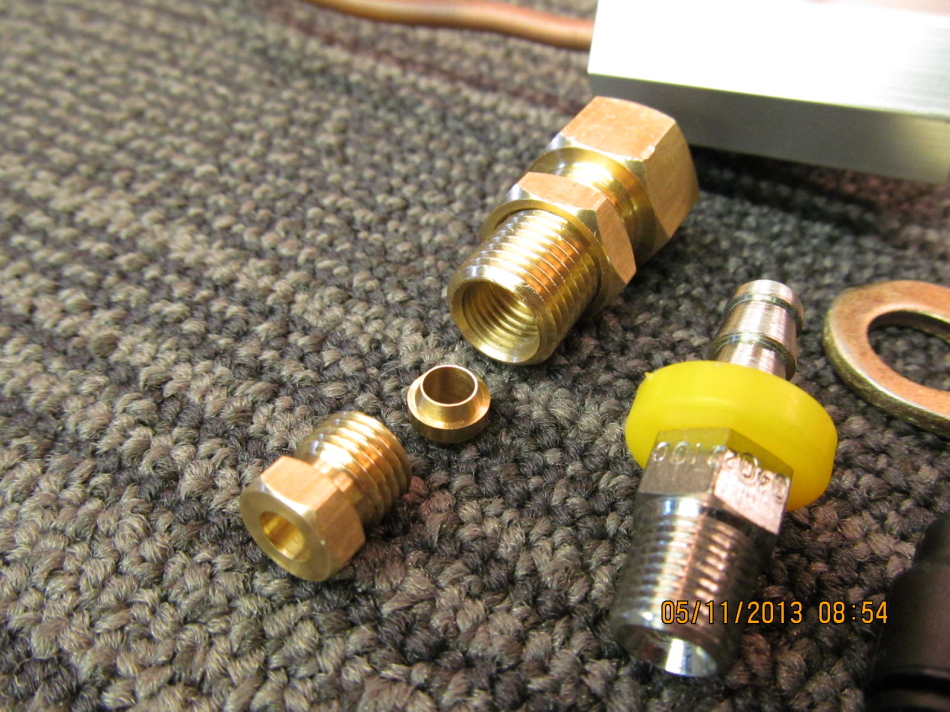
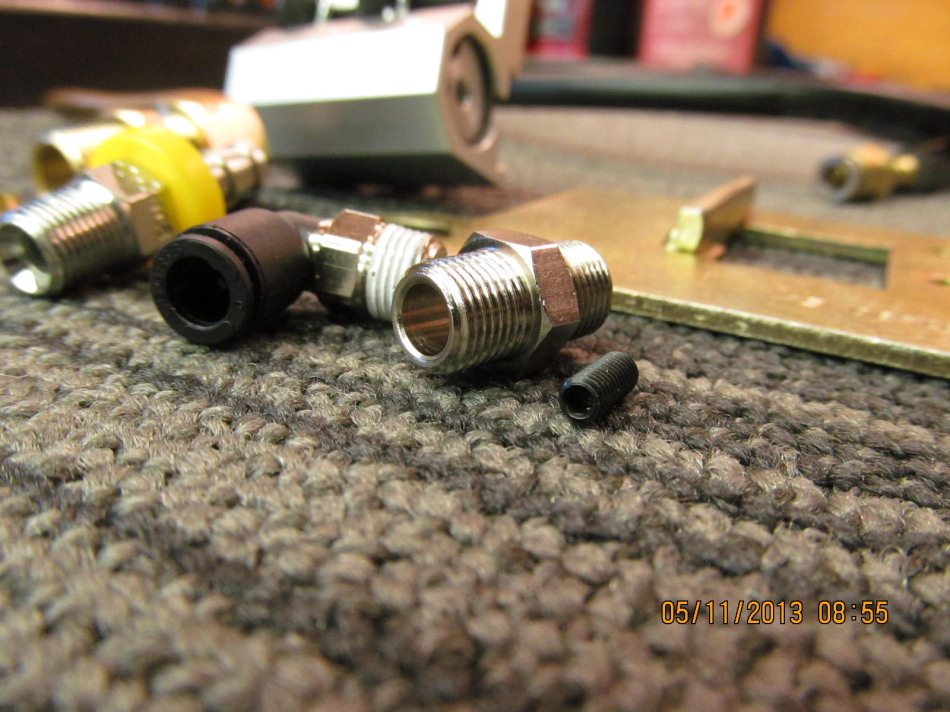
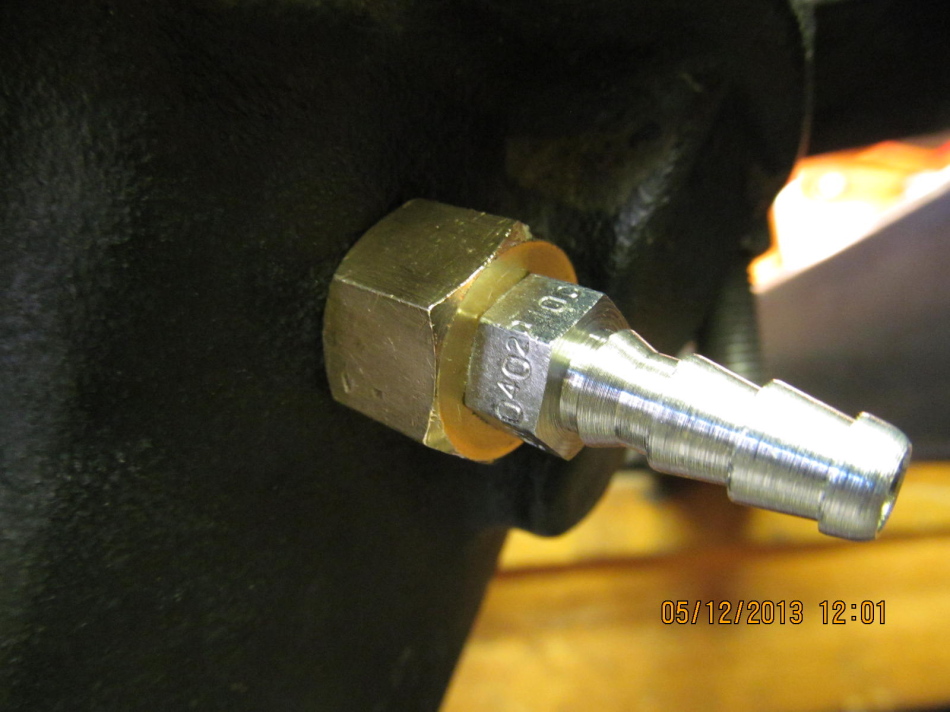
The brass "thru the carrier" bulkhead fitting is on the left and the steel barb
adapter is on the right.
|
|
|
|
|
......................
|
|
|
|
|
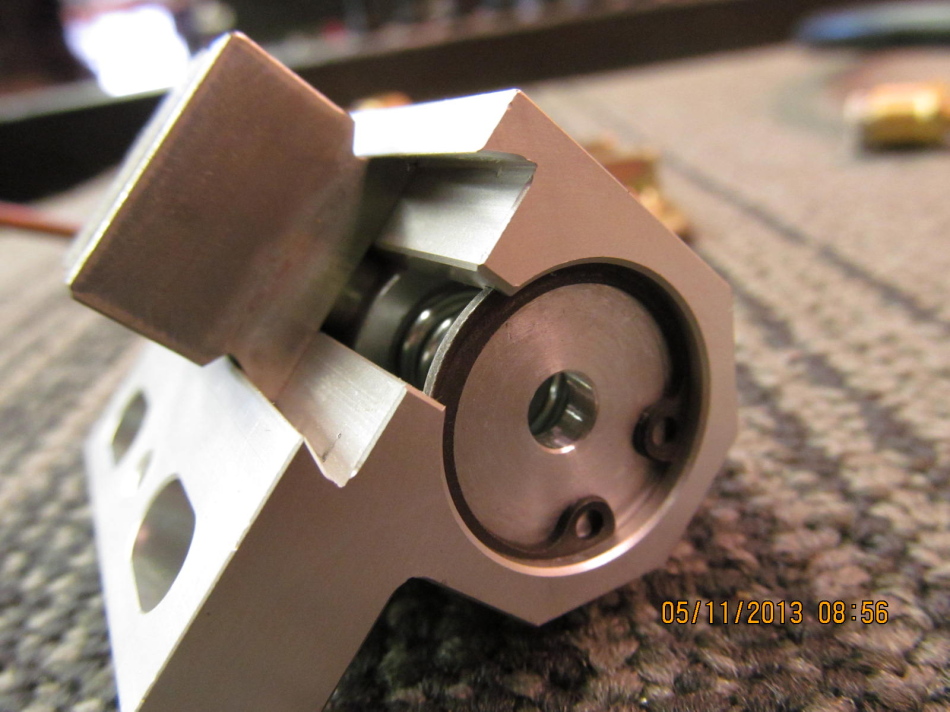
Bottom view of the air actuated solenoid.
|
|
|
|
|
Looks like a quality piece of machined aluminum.
|
|
|

|
|
..............
|
|
|
|
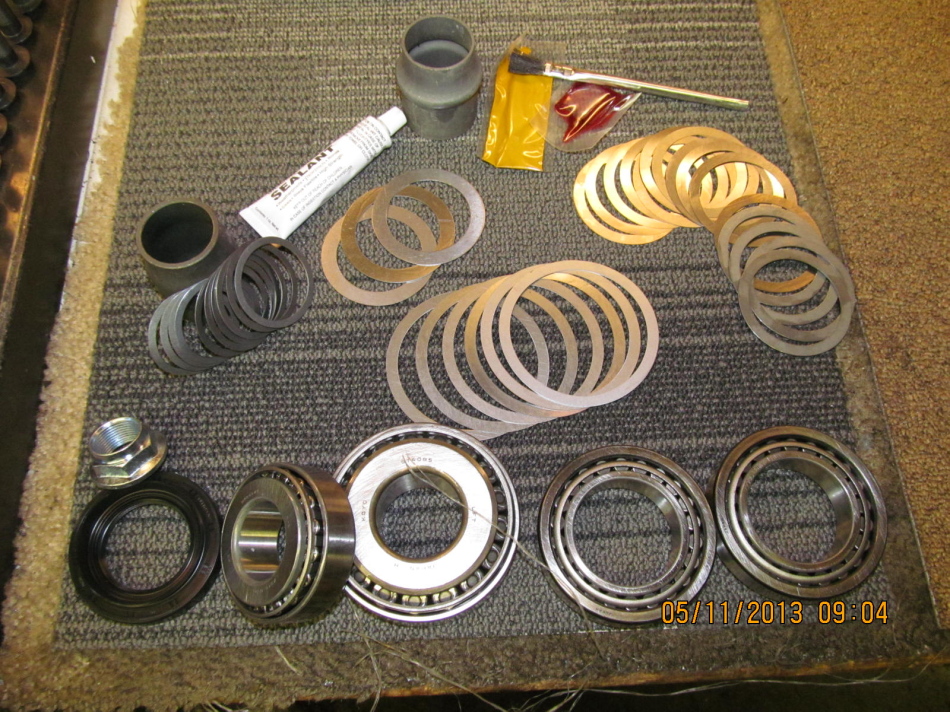
The JustDifferentials master kit is all KOYO bearings (oem). Upper left
is the optional solid collar with a very good shim assortment.
|
|
|

|
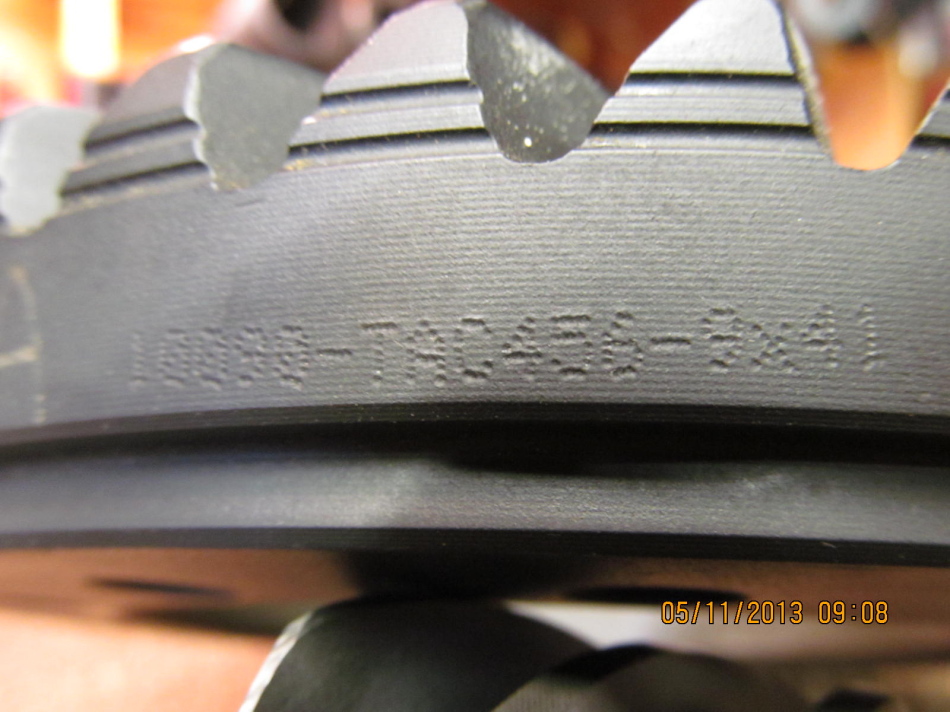
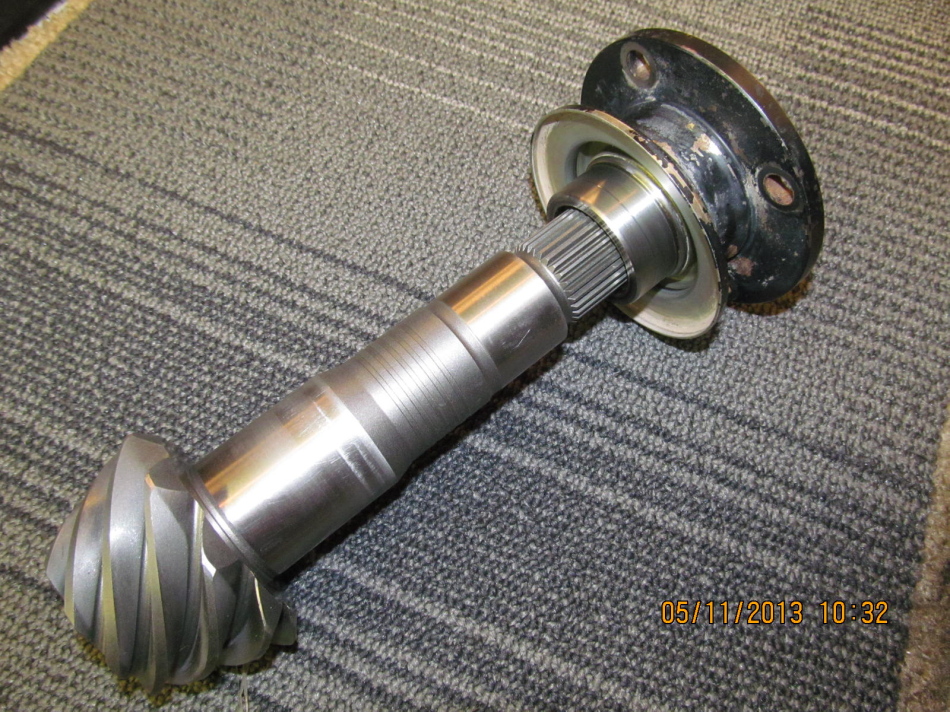
The 456 Nitro Gear was the first ring and pinion in a long, long time that I have
received with absolutely no cosmoline caked on it. No clean-up at all. No rust of
any sort also. The pinion is a 30 spliner so the factory 30 spline flange will work.
|
|
|
|
|
...................
|
|
|
|
|
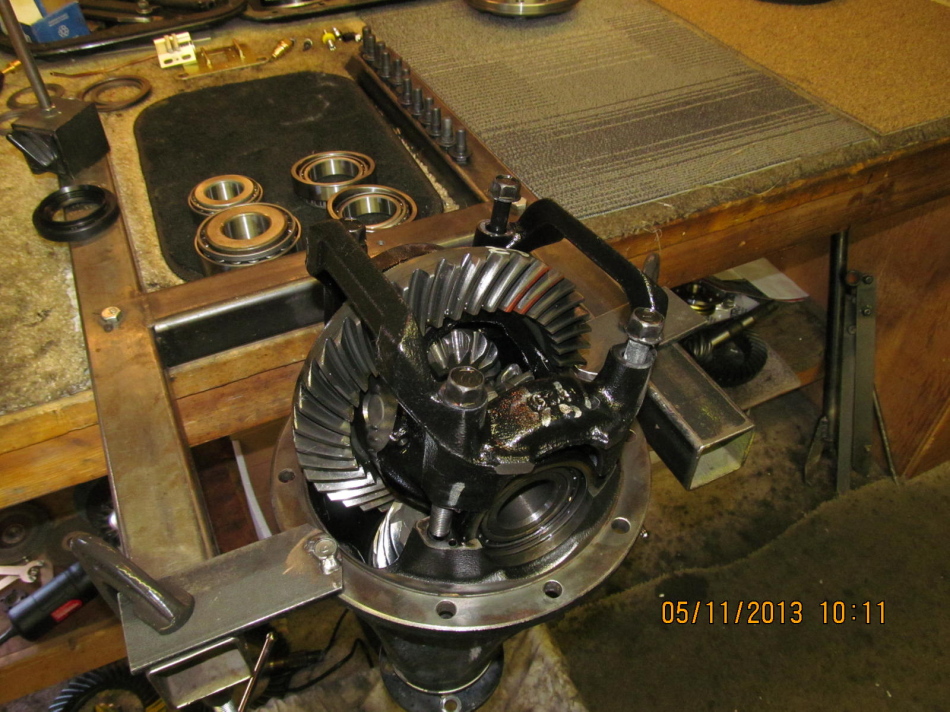
Items are organized and the teardown of Bill's 8.4 can begin.
|
|
|
|
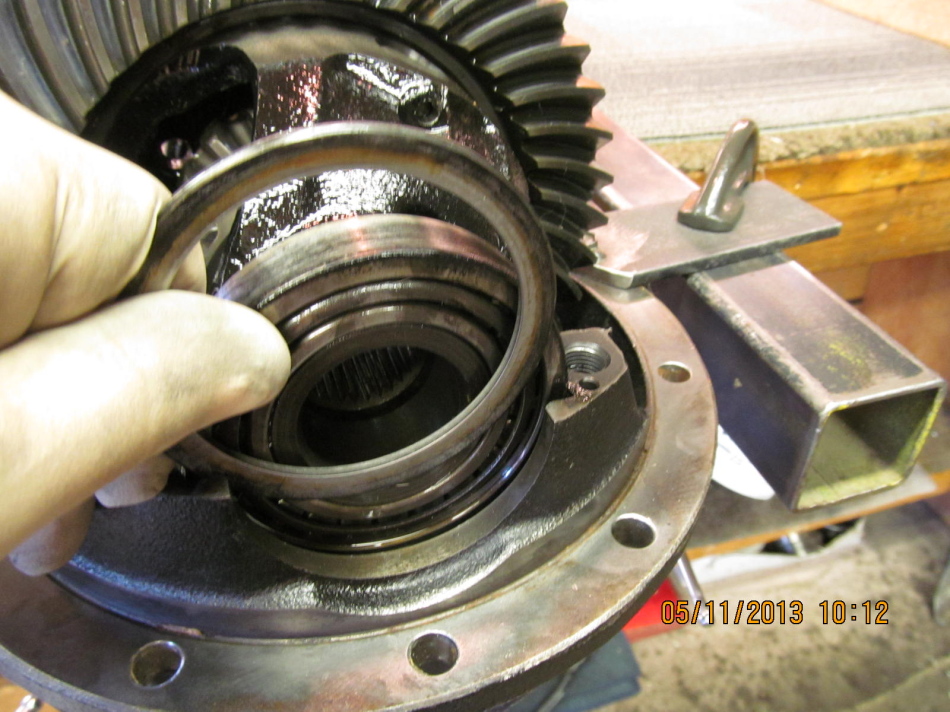
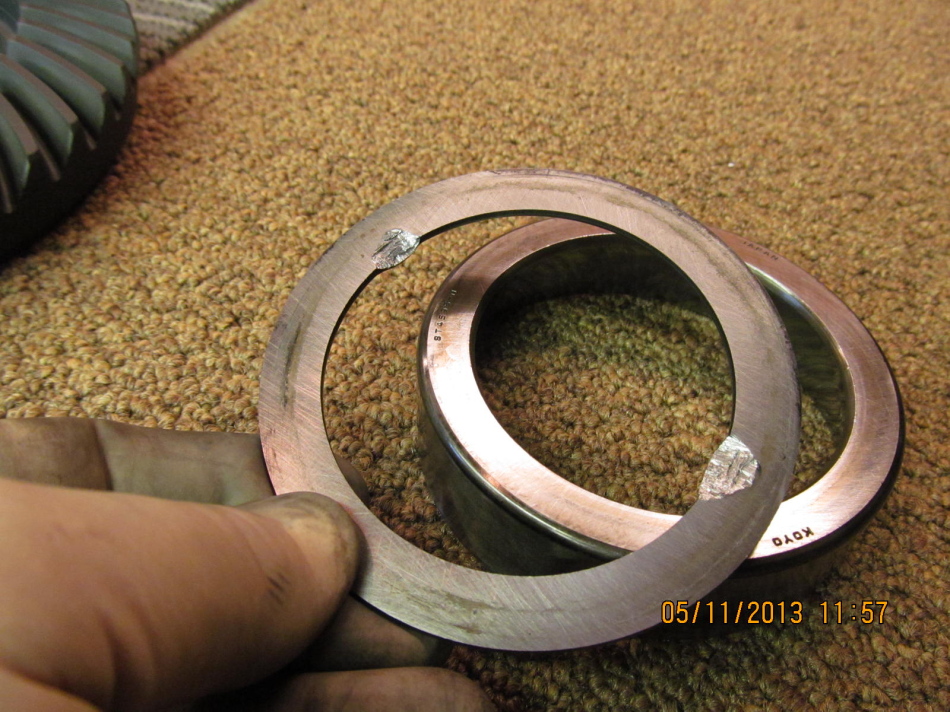
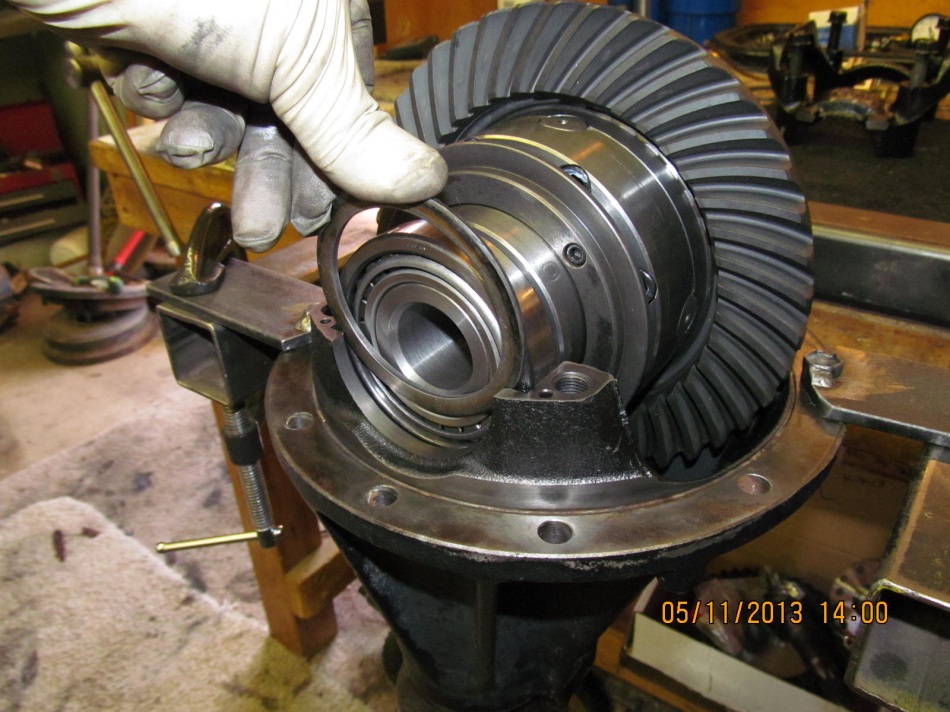
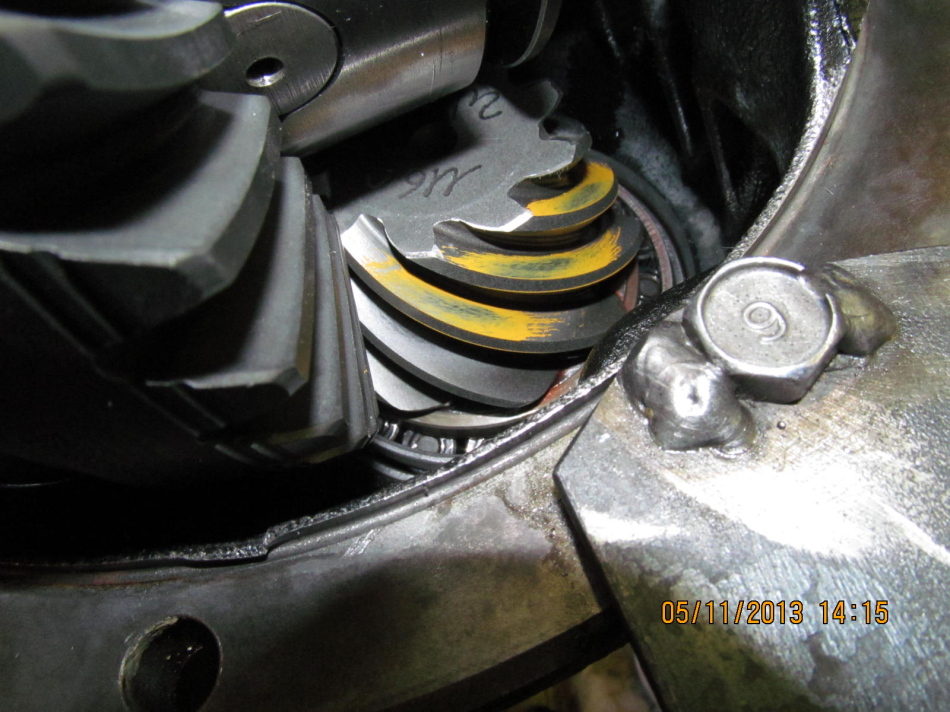
114,000 miles and the carrier bearing pre-load was less than zero...no detectable
slop in the ring gear but this washer plate in my fingers came out with no effort
at all.
|
|
|
|
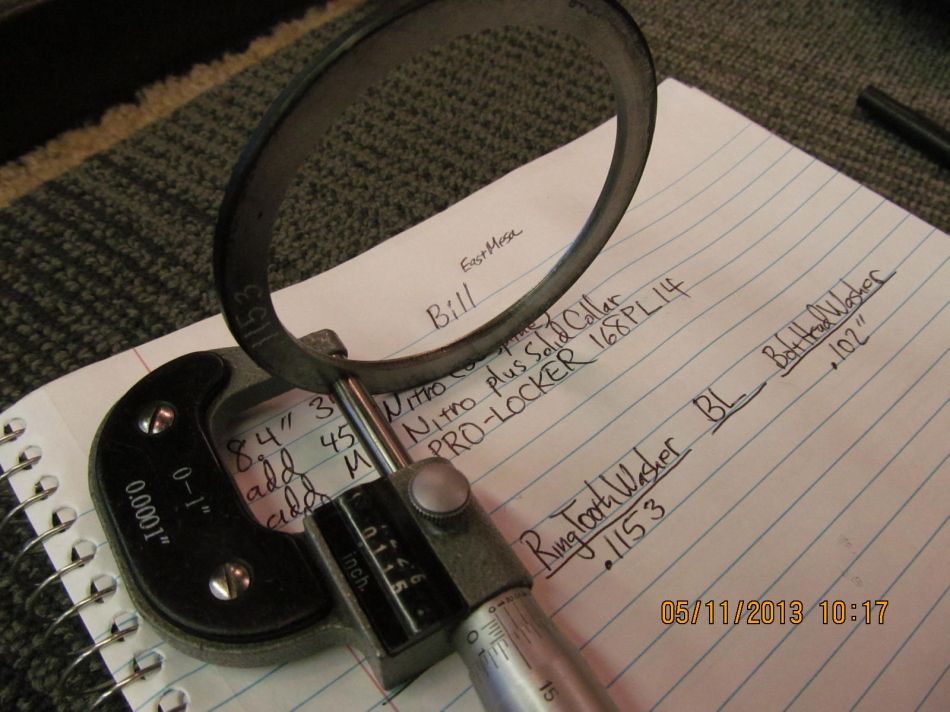
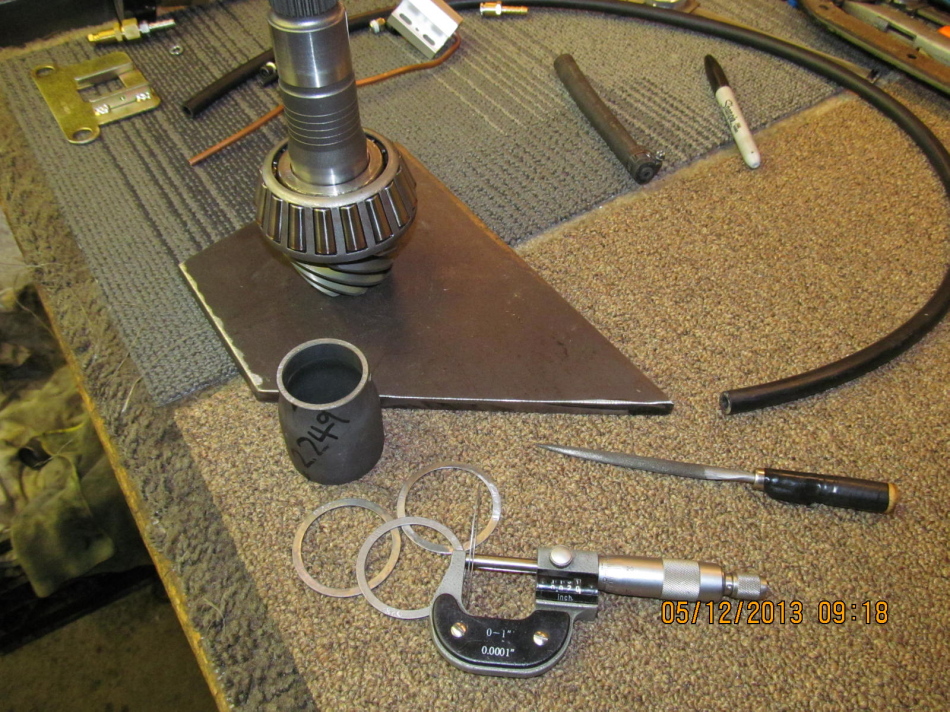
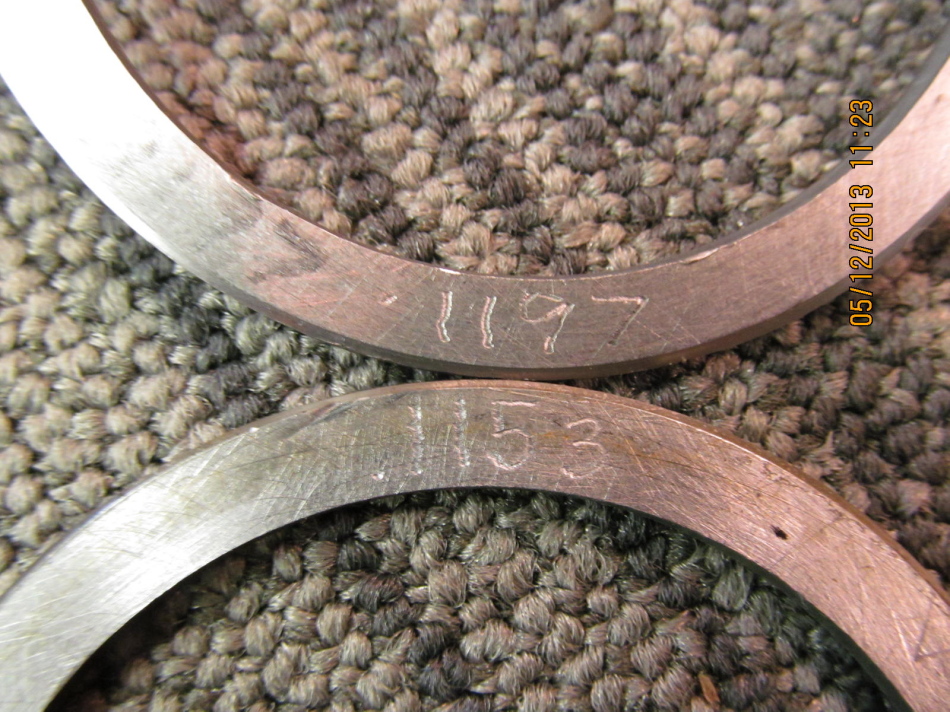
Both washer plates are measured and documented. Micrometers, in general, offer
better accuracy (compared to dial indicators).
|
|
|
|
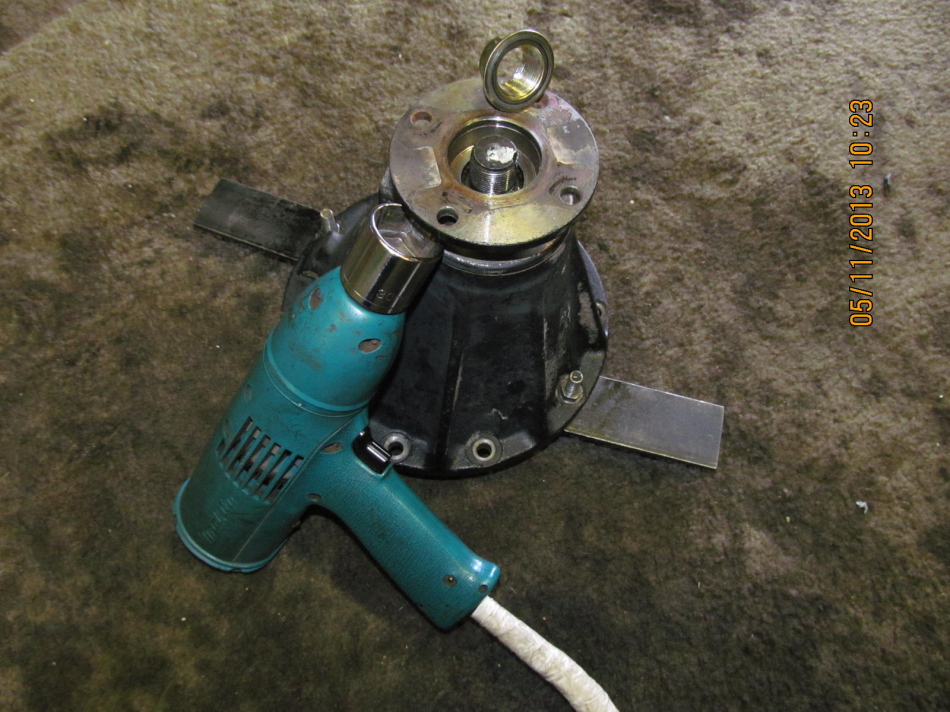
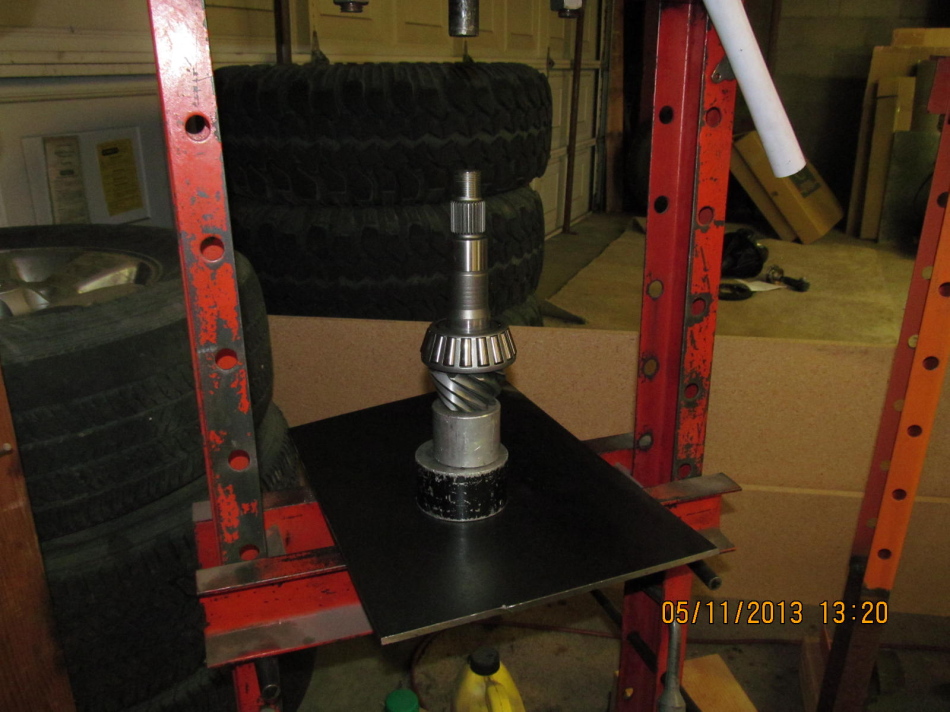
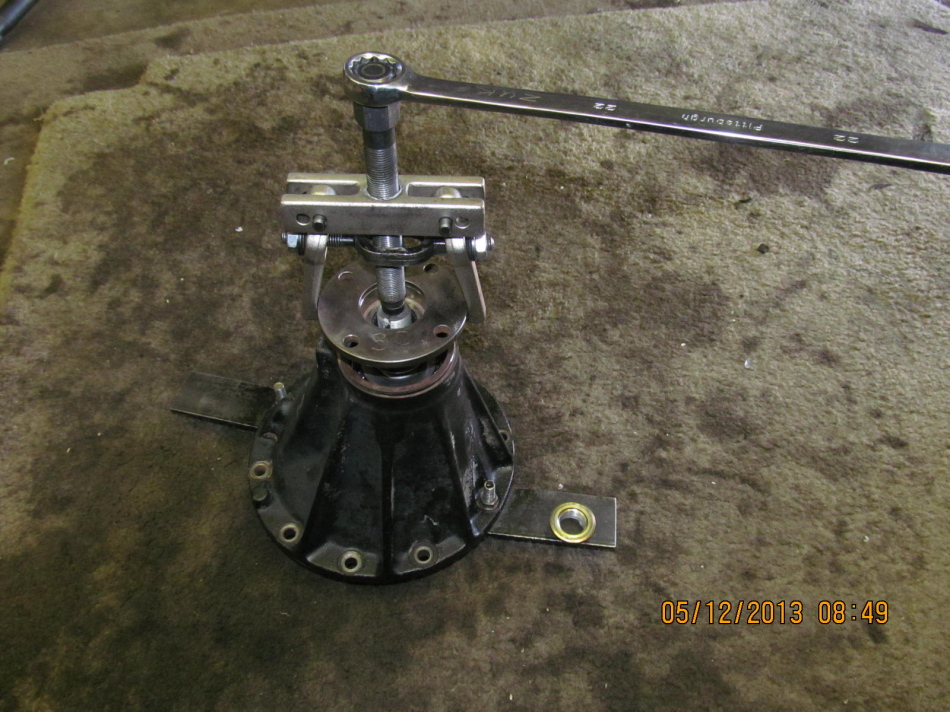
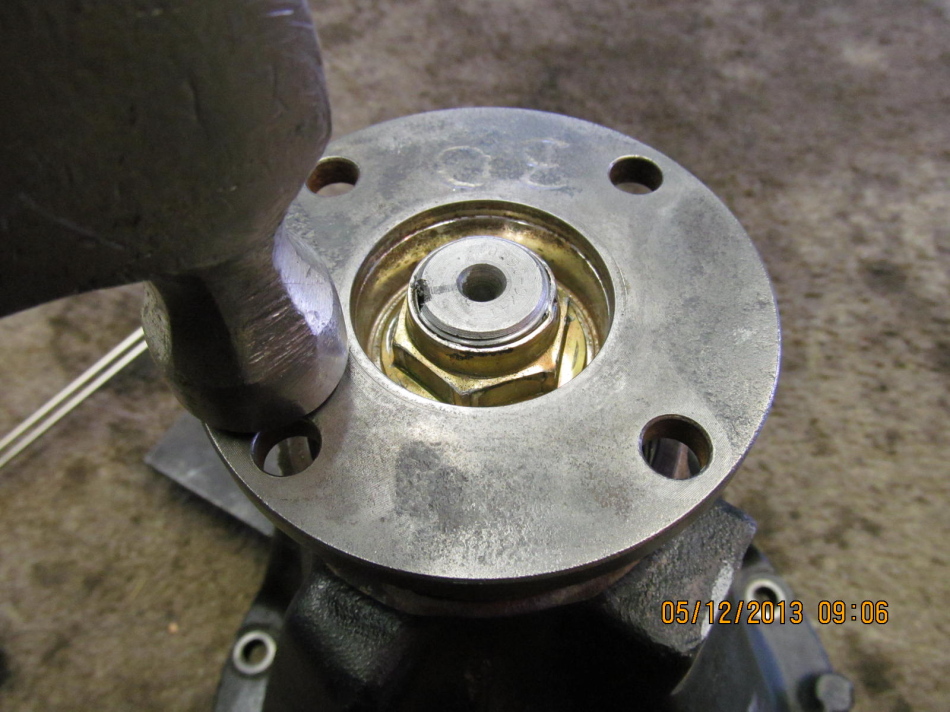
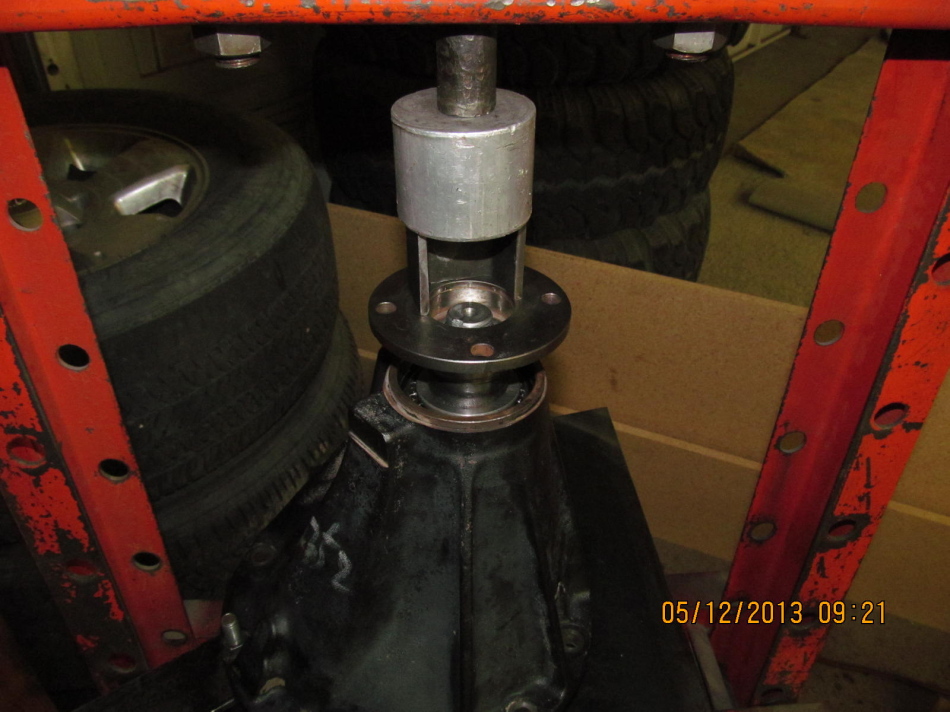
The electric impact easily removed the 30mm pinion nut...now, getting the 30 spline
flange off is another story. These are the tightest fitting splines of all the
different splined flanges. No joke.
|
|
|
|
|
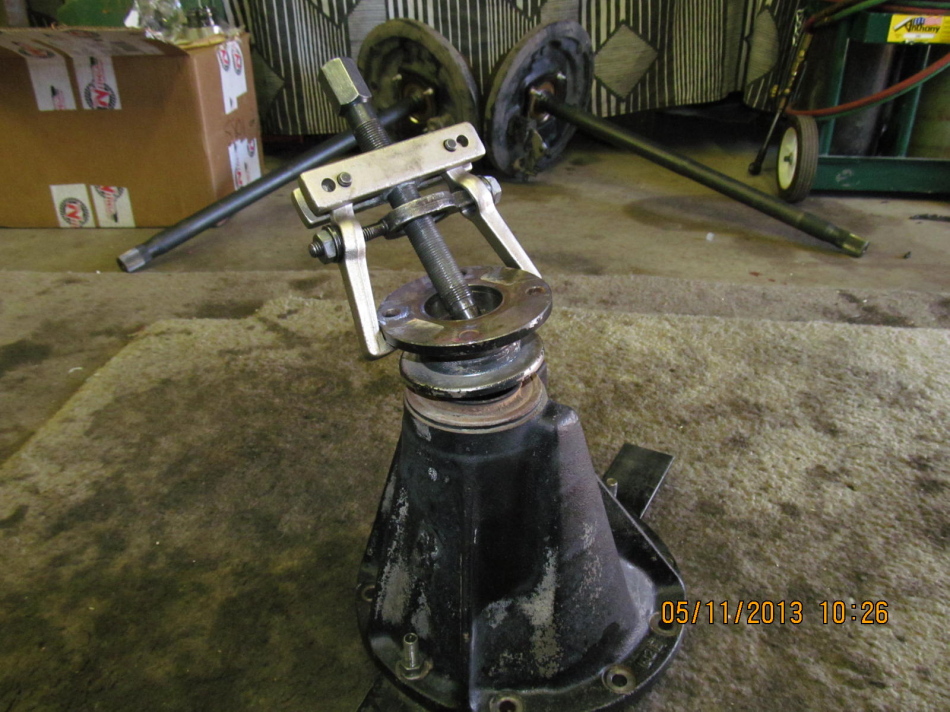
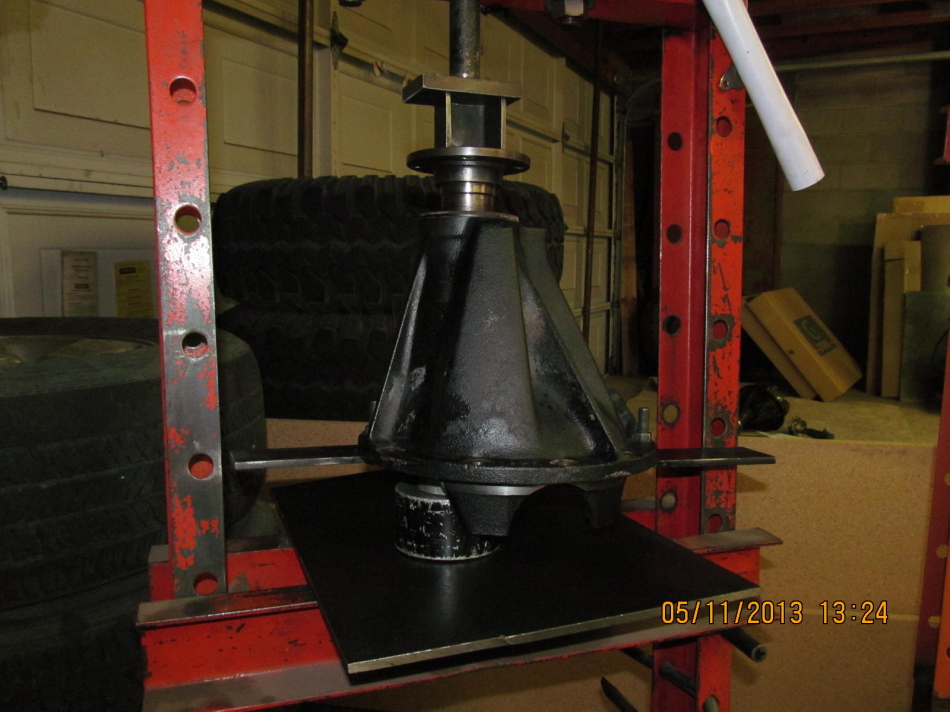
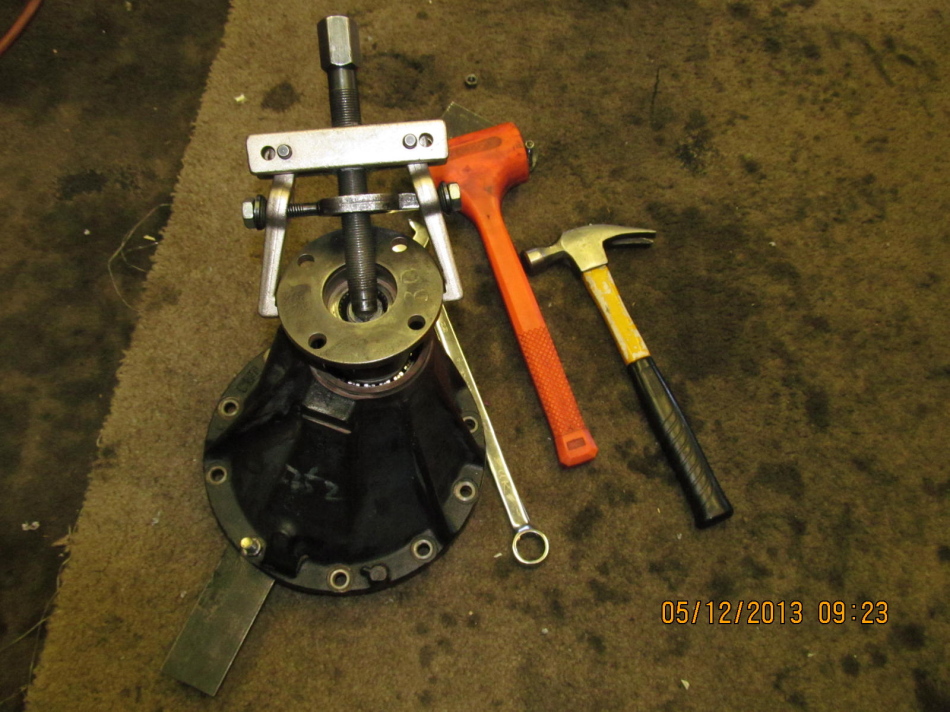
The OTC-4520
side bearing puller makes easy work of these flanges.
|
|
|
|
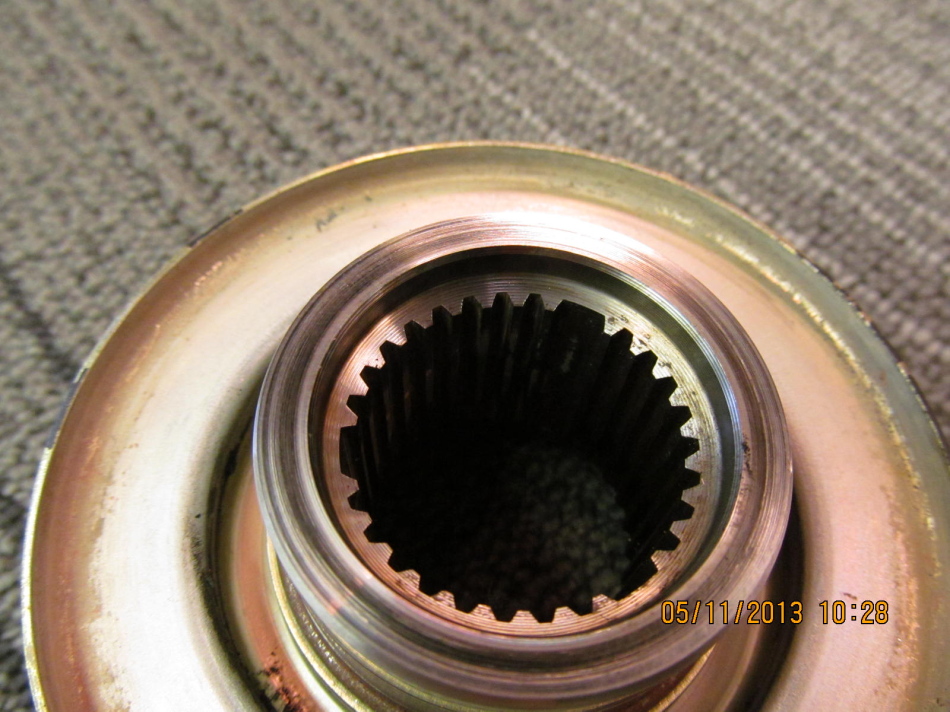
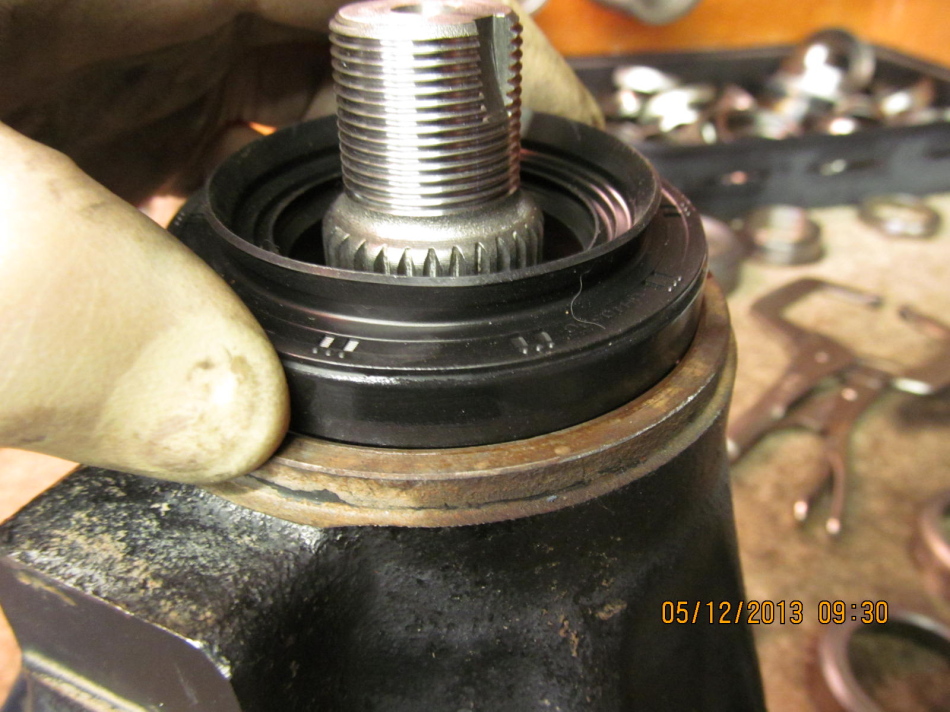
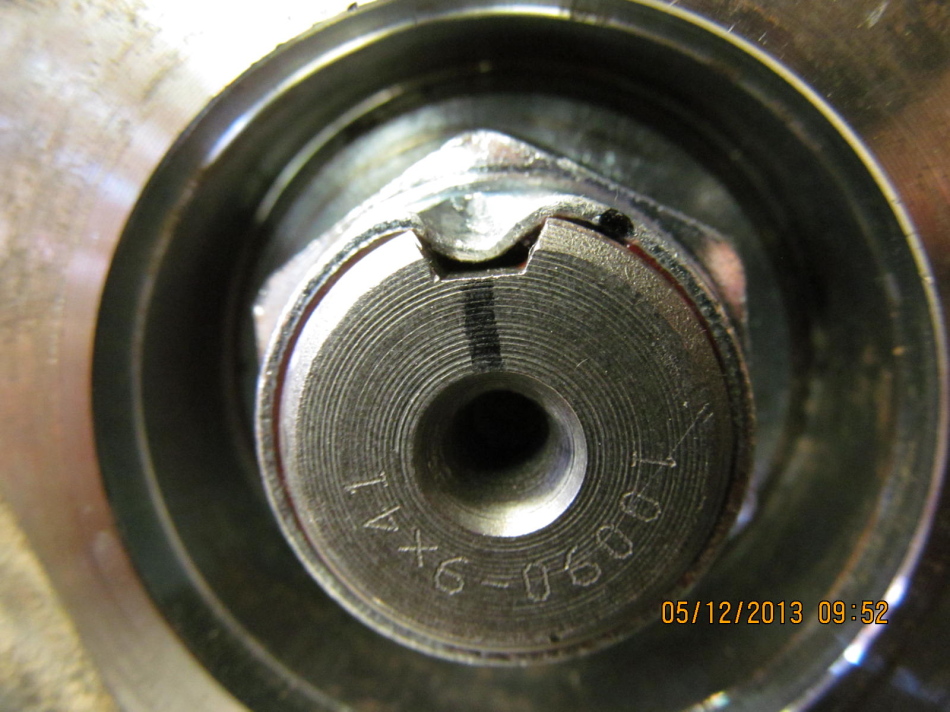
Close-up of the 30 splines with 3 notched areas spaced every 120 degrees. Why
the 3 notches...I have no idea.
|
|
|
|
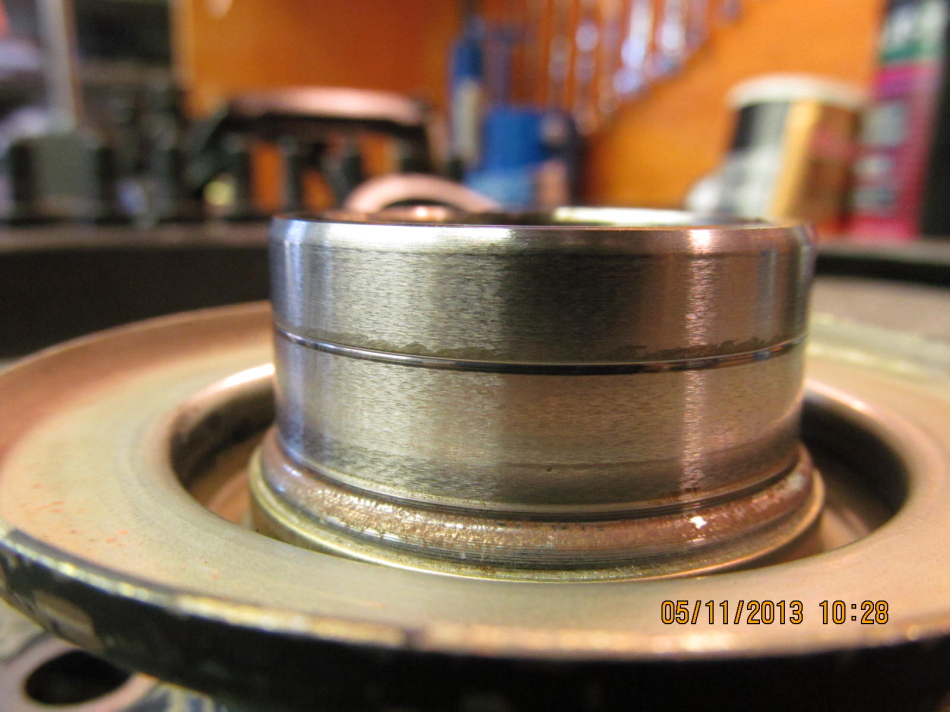
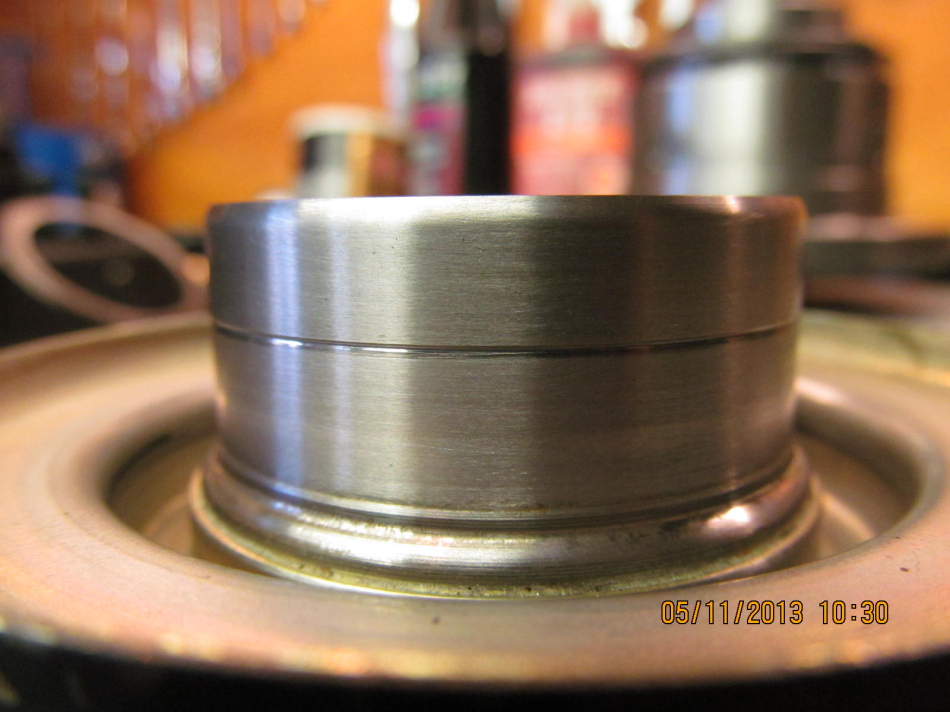
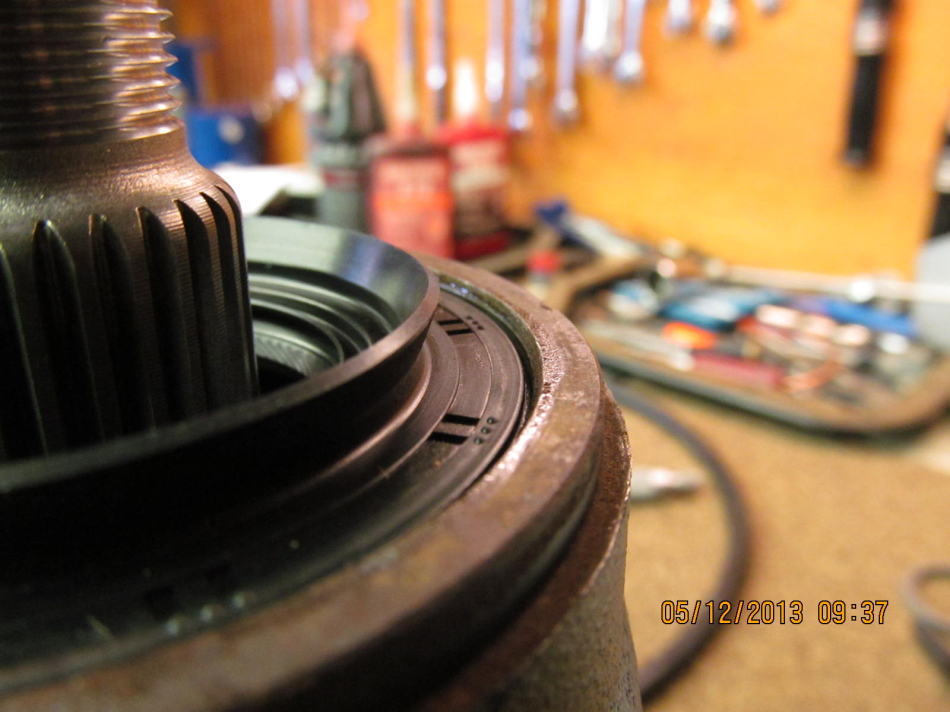
The camera makes the wear groove from the rubber seal lip look worse than what
it really is.
|
|
|
|
|
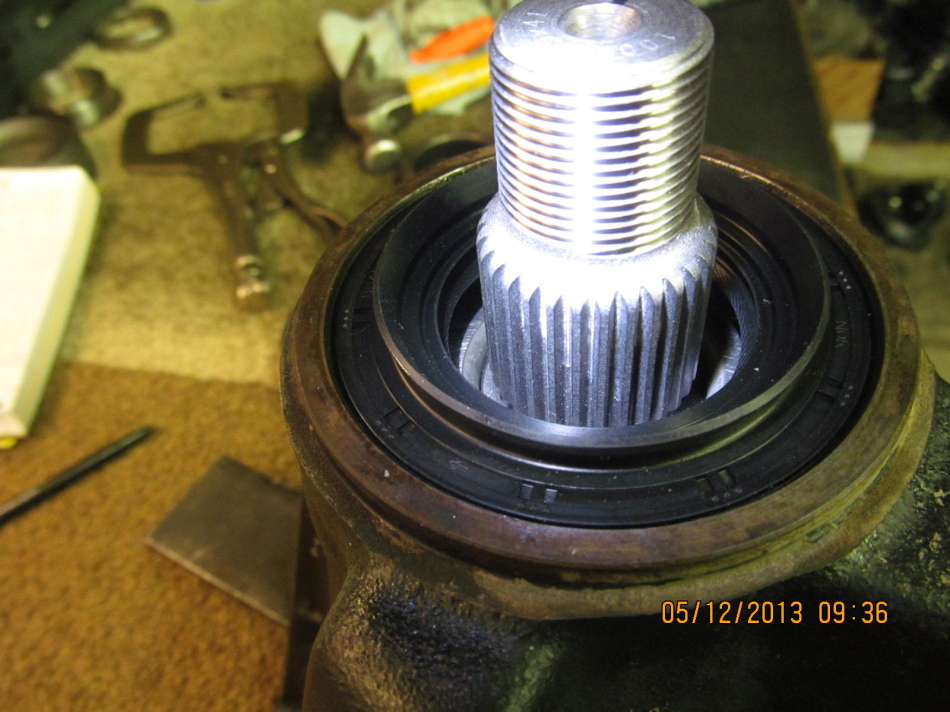
I used some 1000 grit sandpaper to clean up the general surface area.
|
|
|
|
|
Checking how tight the fit is and it takes some effort to get it even lined up.
|
|
|
|
|
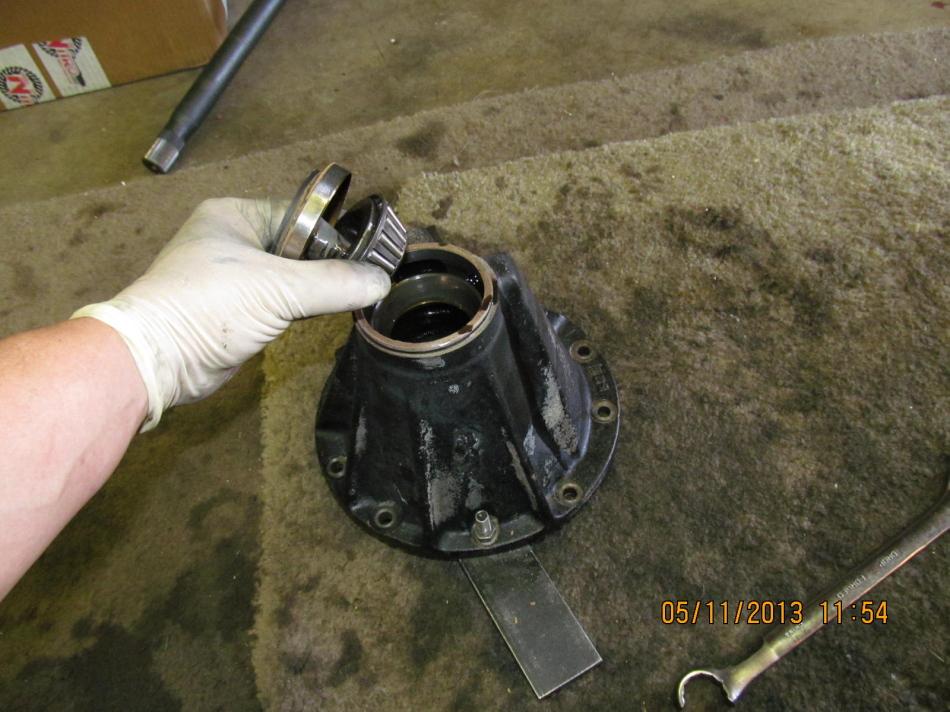
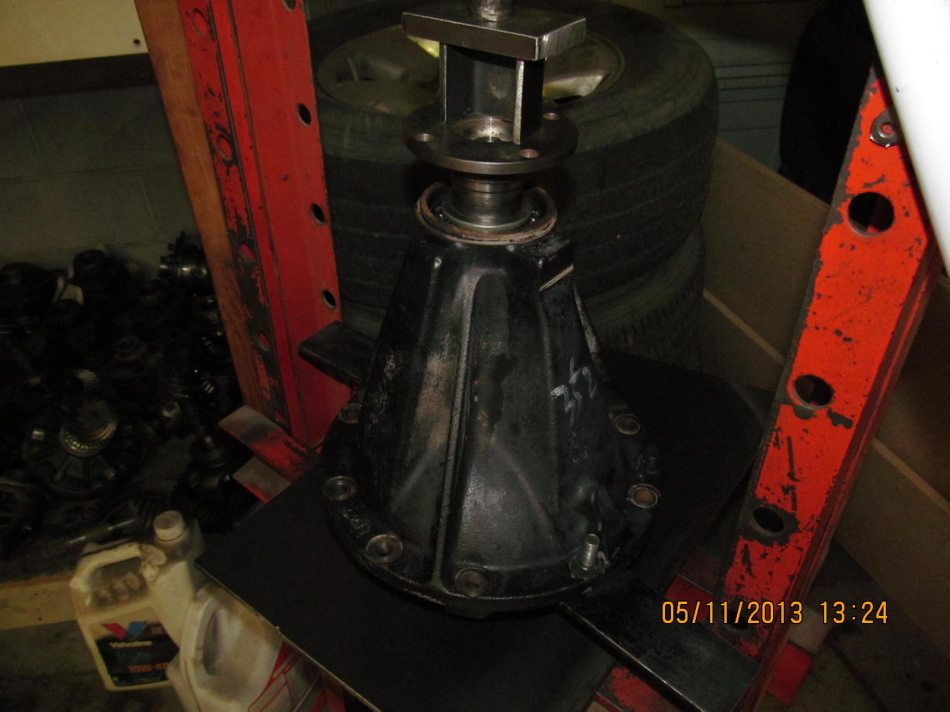
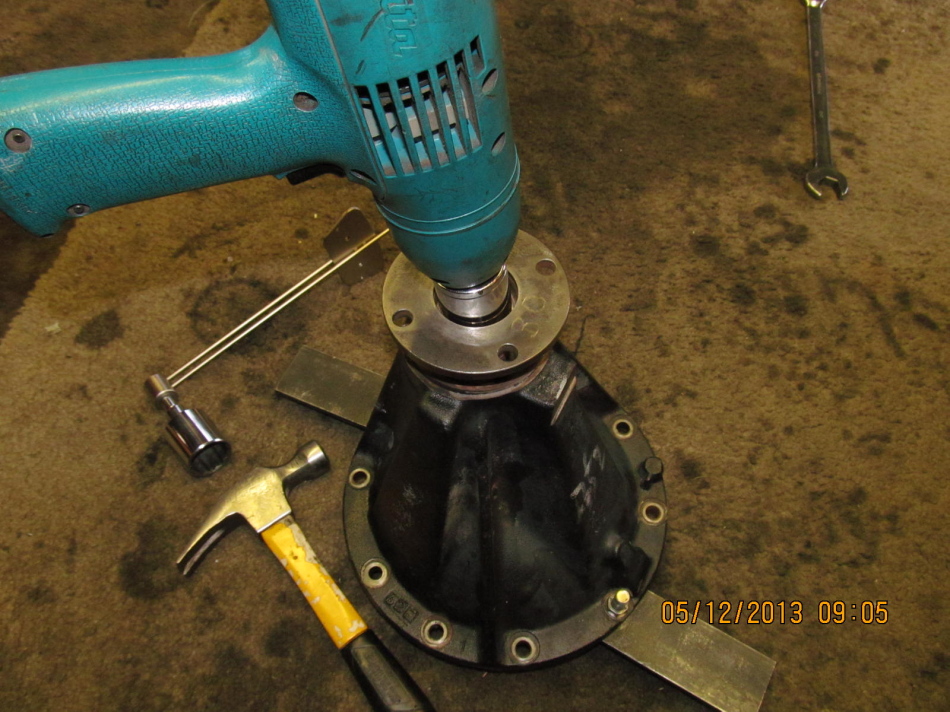
The pinion is now pushed out.
|
|
|
|
|
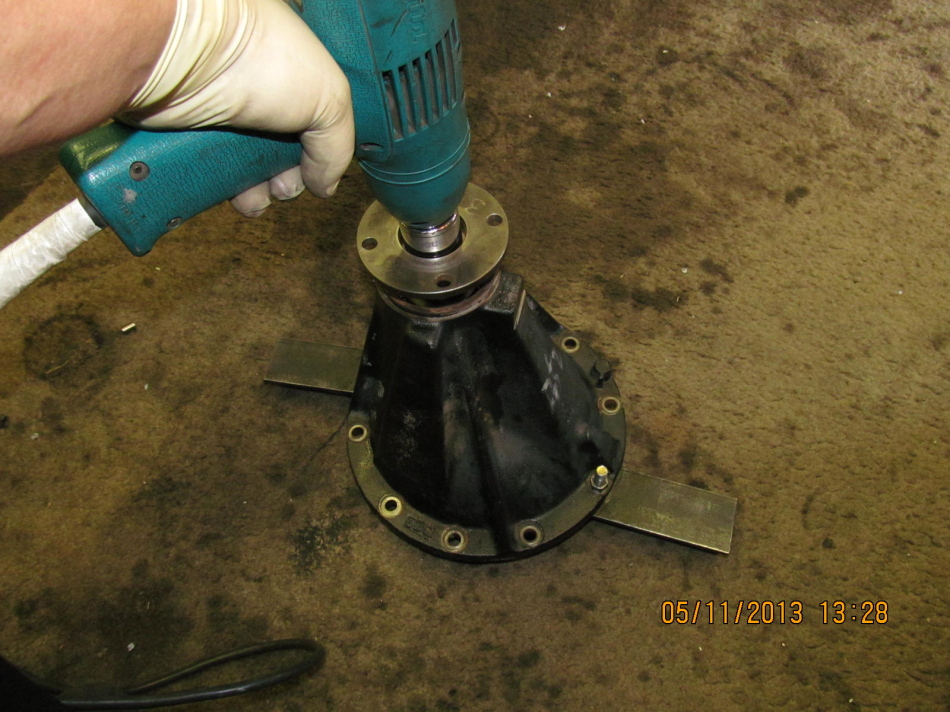
Seal and bearing are then removed.
|
|
|
|
The pinion depth washer plate always sees a little cosmetic damage when using
a hammer and punch to knock the inner race out.
|
|
|

|
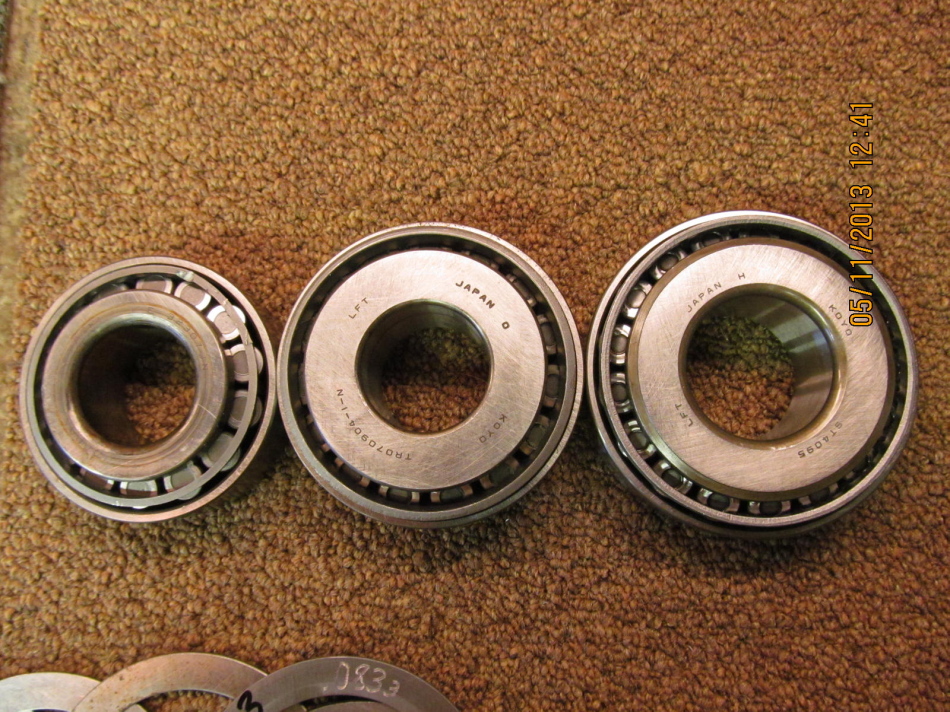
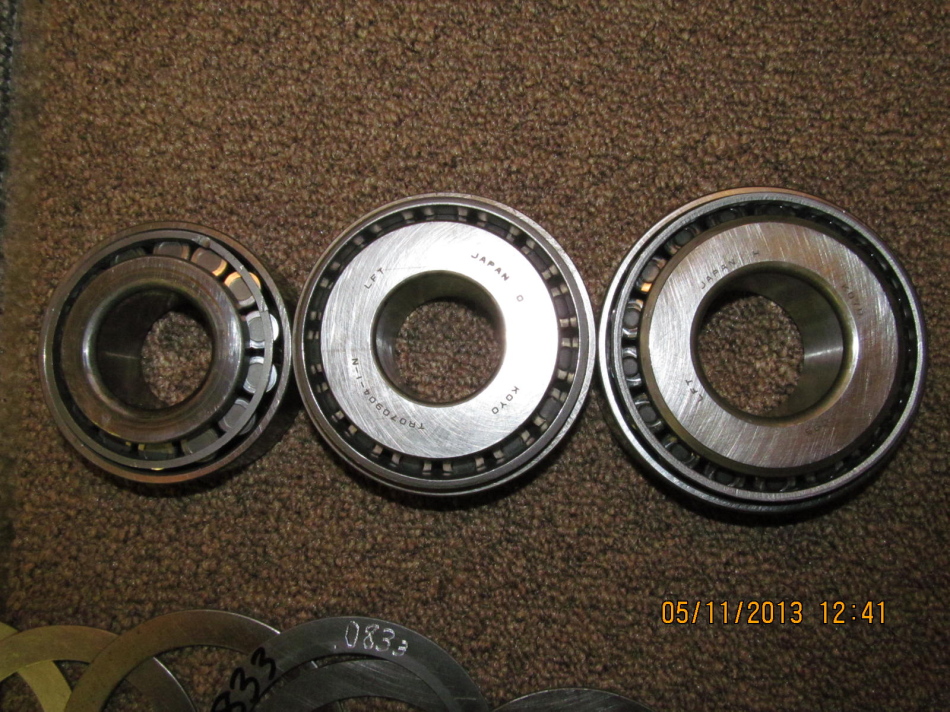
Just a little comparison of how massive the 8.4" inner pinion bearing is. From
left to right...1985 4 cyl...1990ish V6...1996 8.4".
|
|
|
|
|
The 8.4" on the right has a much thicker pinion shaft to capture.
|
|
|
|
|
..................
|
|
|
|
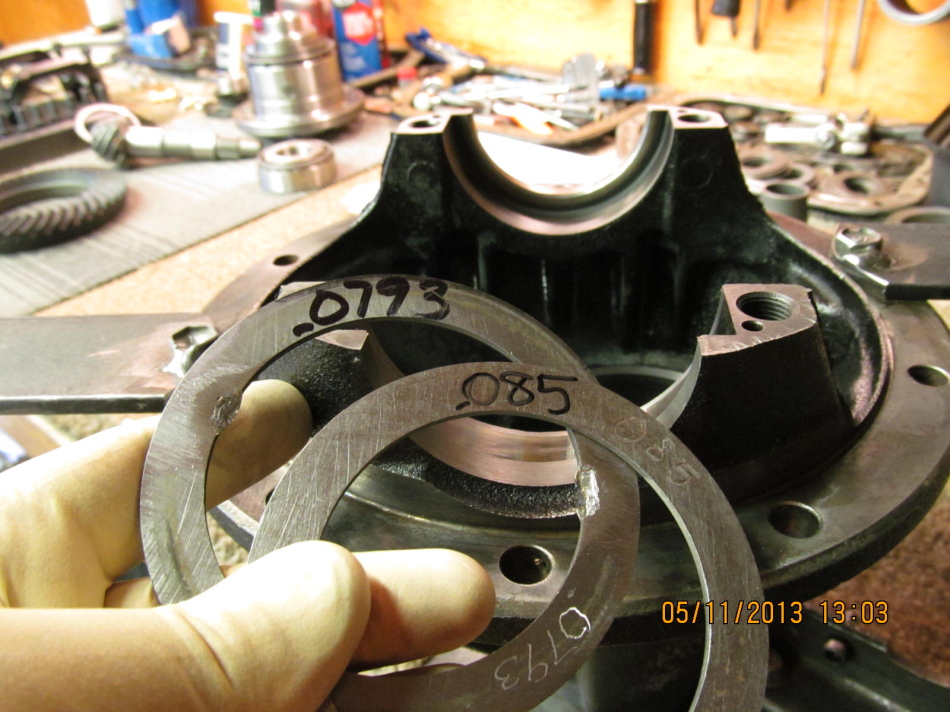
Bill's stock 4.10 gearset had a 079" shim....the aftermarket gears generally want
something more like a 085".
|
|
|
|
|
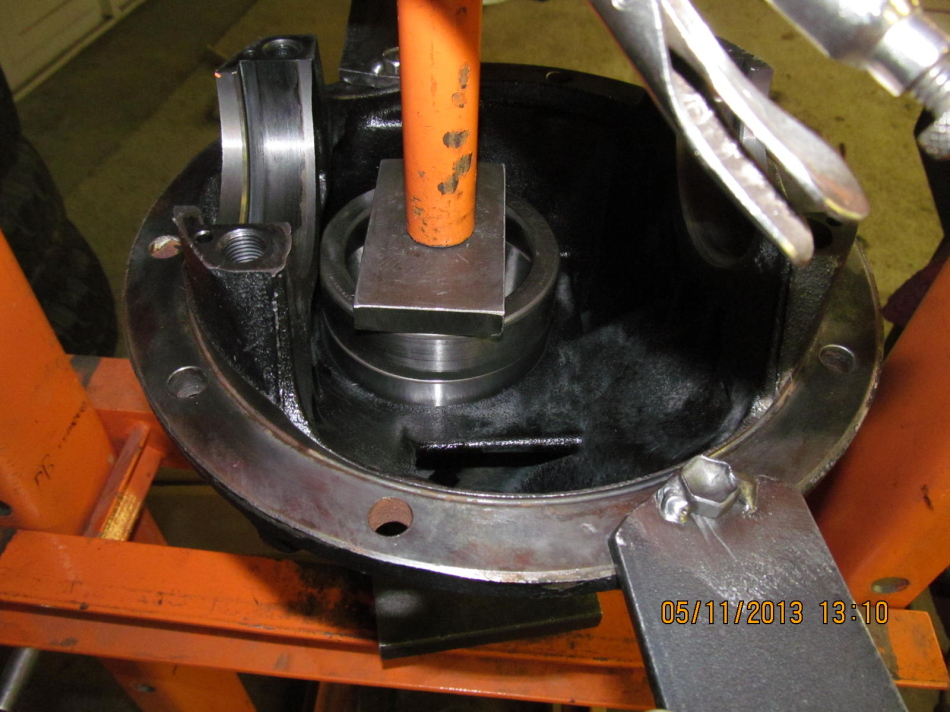
The new race is pressed in. Not seen but the 085 shim is behind the race.
|
|
|
|
|
The smaller outer race can be tapped in using an old race to give 100% contact.
|
|
|
|
|
.......................
|
|
|
|
|
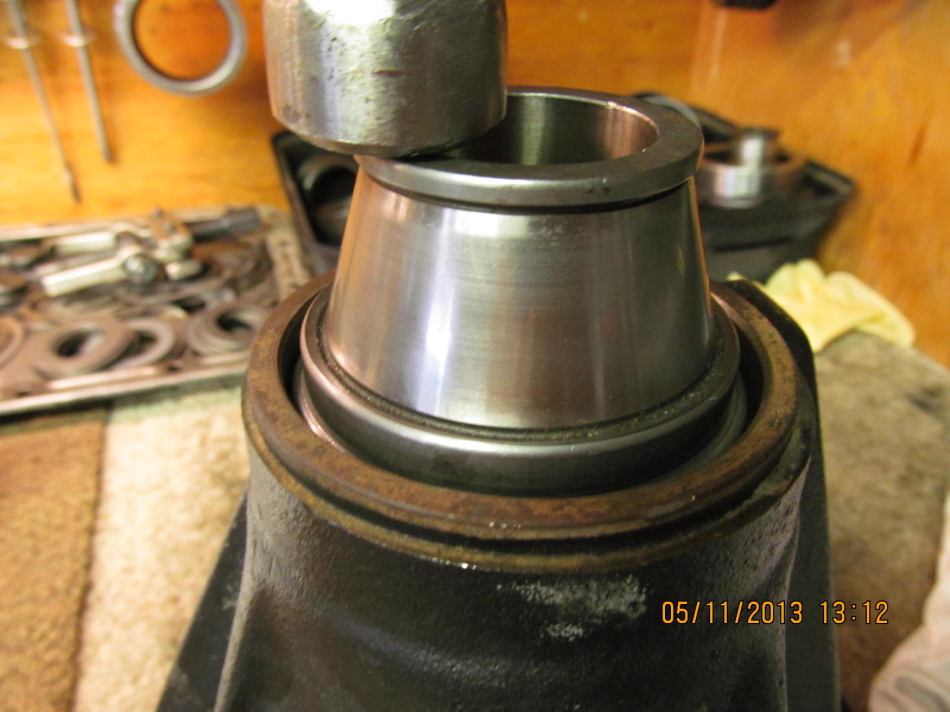
The massive inner bearing is pressed on the pinion.
|
|
|
|
|
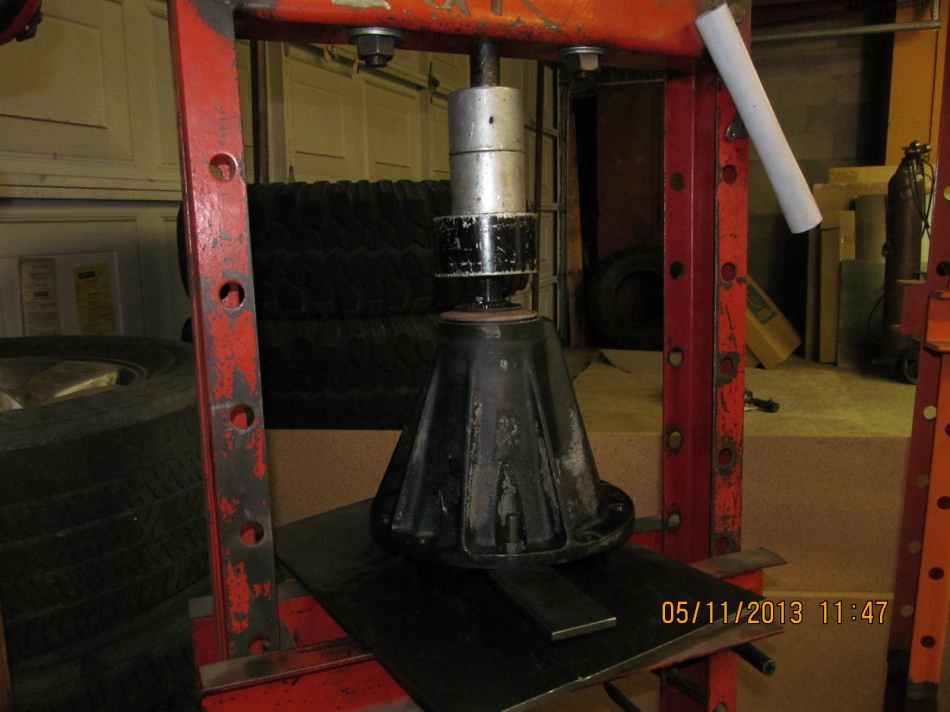
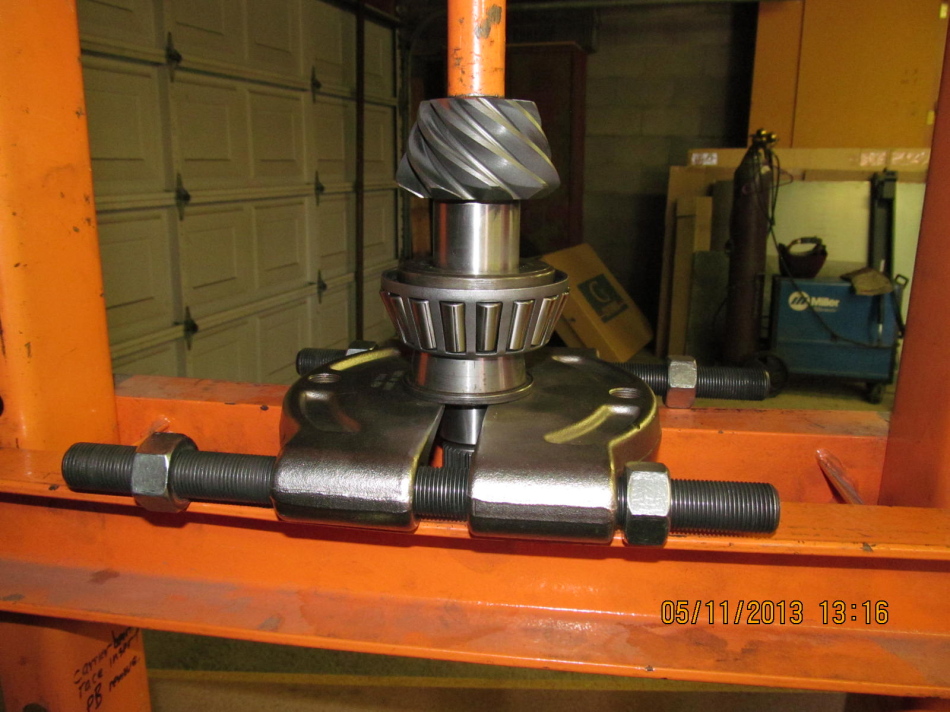
Instead of trying to beat the tight fitting flange on, the press can be employed.
|
|
|
|
|
........................
|
|
|
|
|
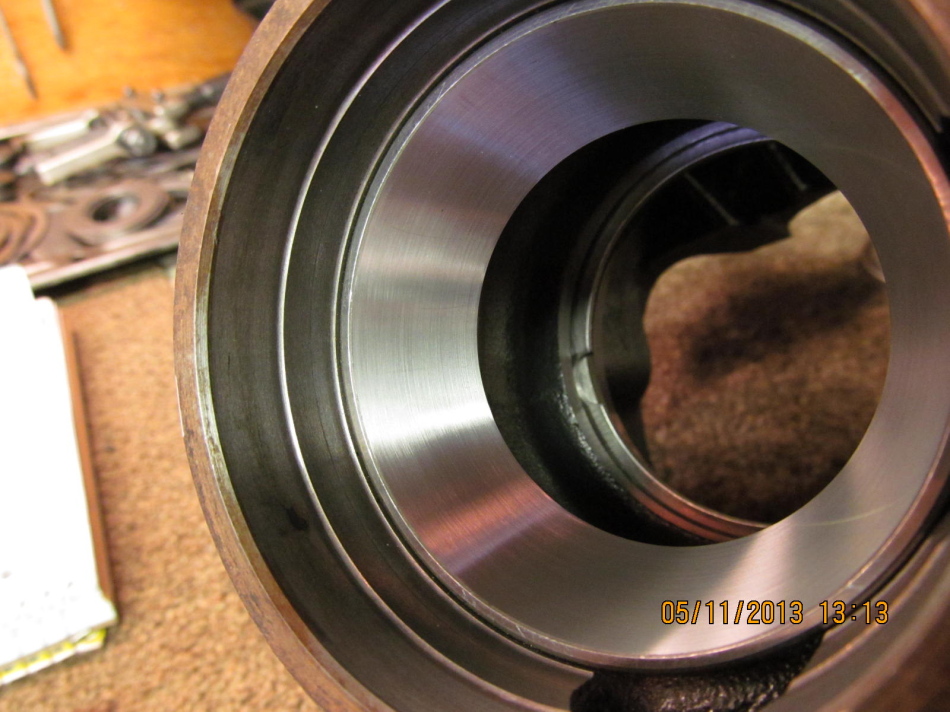
The press slides it on easy as butter.
|
|
|
|
Then use the electric impact to snug it up the last 1/4 turn being careful not
to over-tighten the nut and have extreme pre-load to the point that the rollers
dent the races.
|
|
|
|
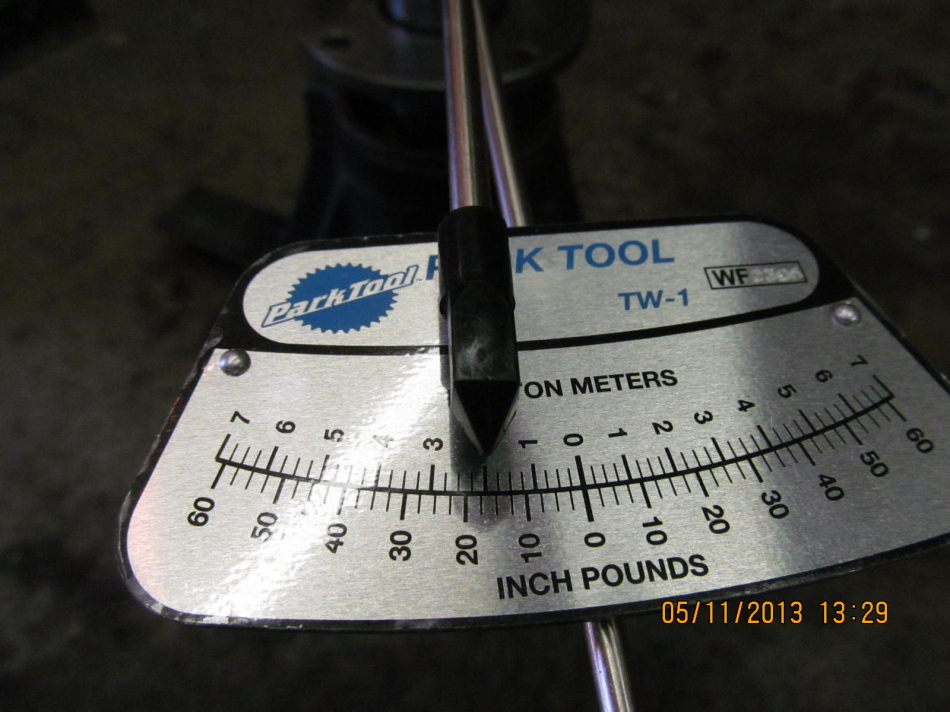
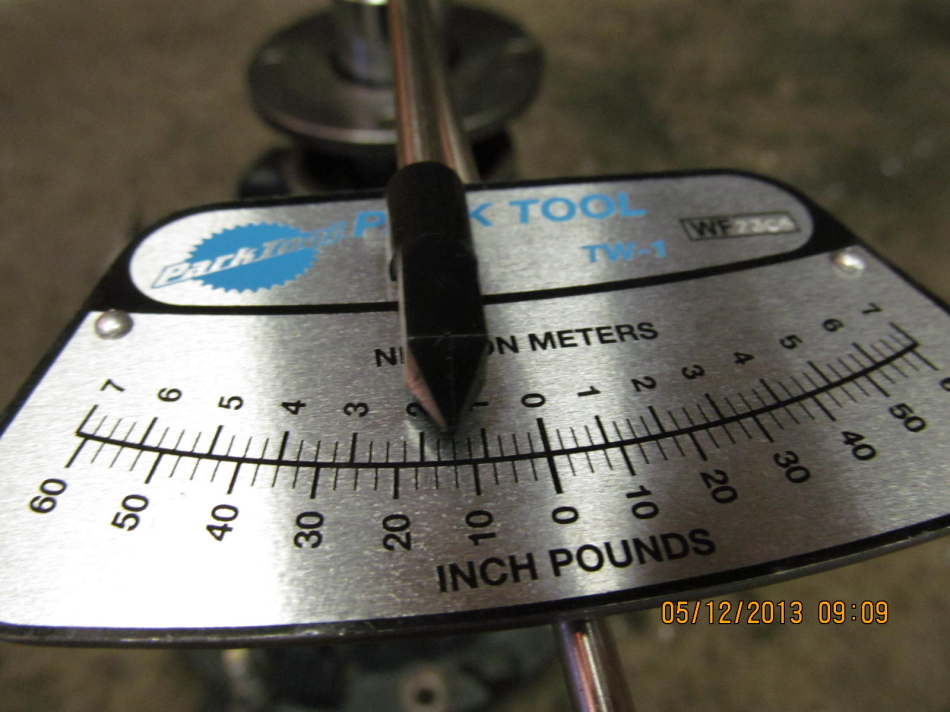
With some gear oil on both bearings, I verified about 18 inch/pounds of PPL.
This is a-ok for just a paint test.
|
|
|
|
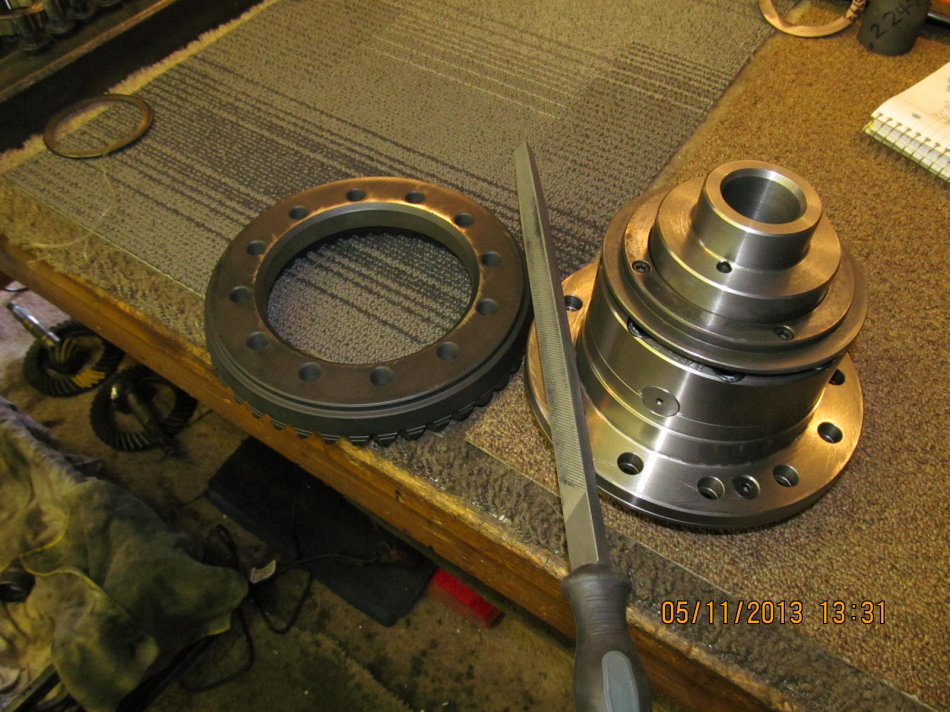
Now to turn attention to the TJM and ring gear. Both surfaces are checked with a
large, very course file....nothing unusual found. No burrs or high spots.
|
|
|
|
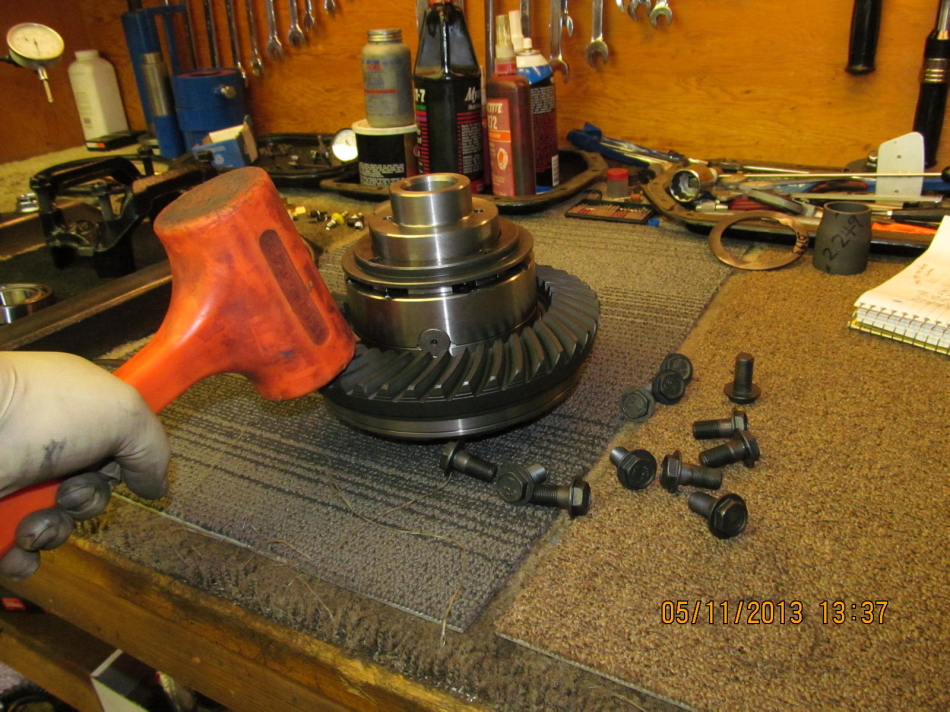
It was a tight fit but tapping it just right and the ring gear fell into place
without using the press.
|
|
|

|
|
All were threaded in about 2 threads to verify alignment....
|
|
|
|
|
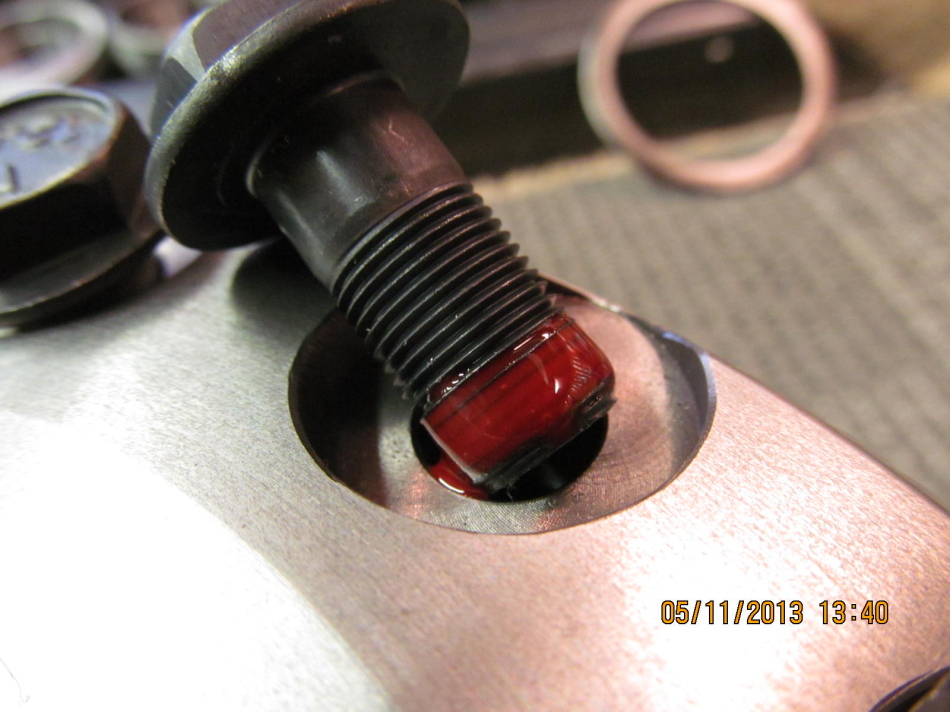
...then each one was removed one at a time and red loctite added.
|
|
|
|
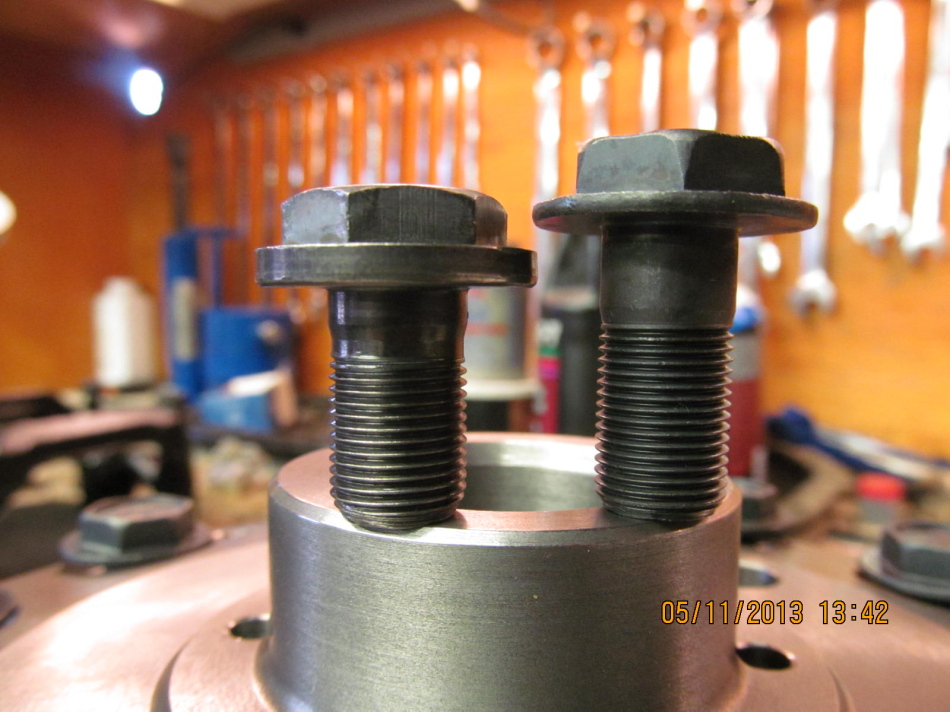
Longer bolts are required for the TJM. The OEM factory bolt on the left only engaged
2 threads on the ring gear...the 12 supplied with the TJM locker had 8 threads of
engagement.
|
|
|
|
|
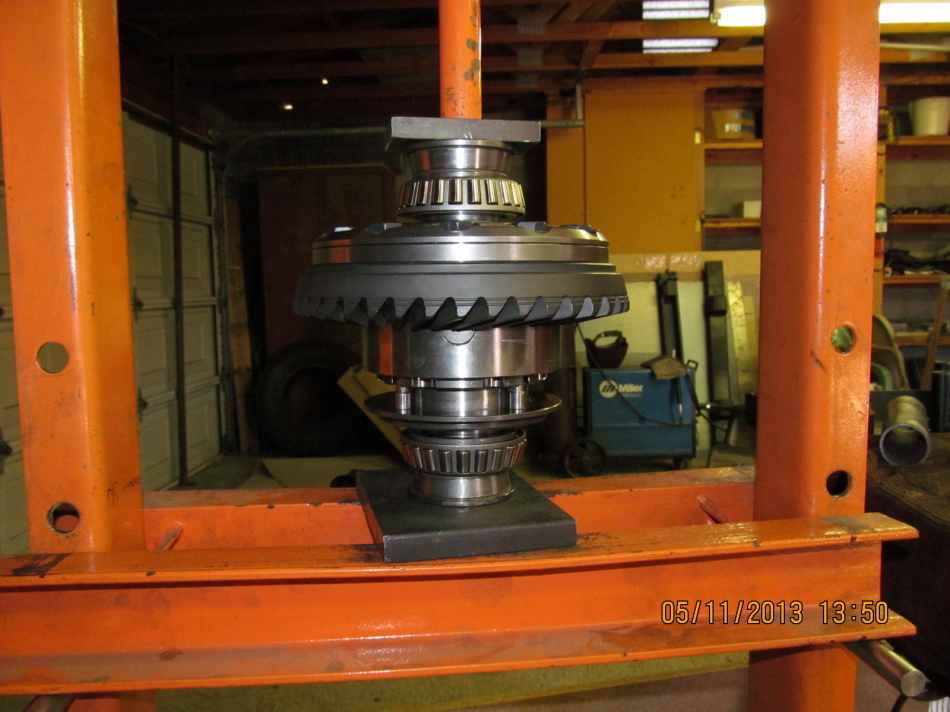
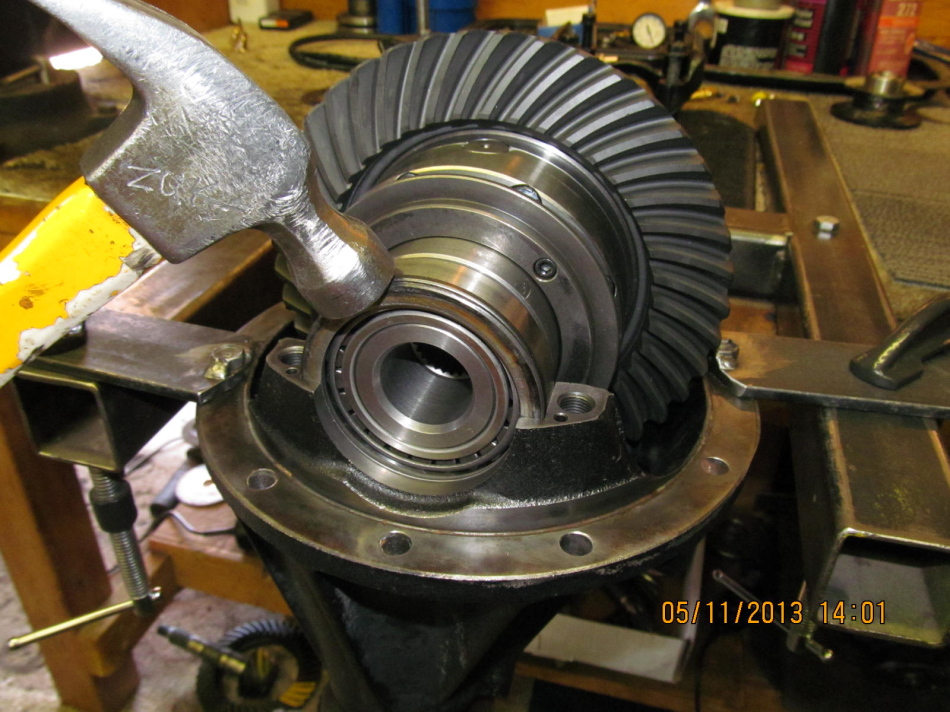
2 birds with one stone.....press the carrier bearings on and tighten the ring bolts.
|
|
|
|
|
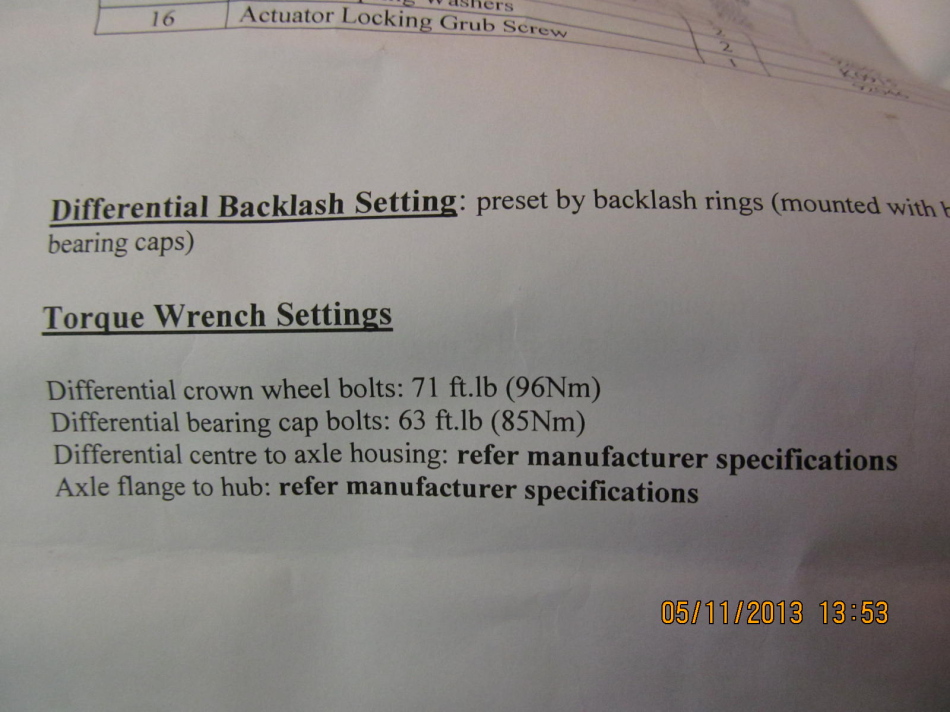
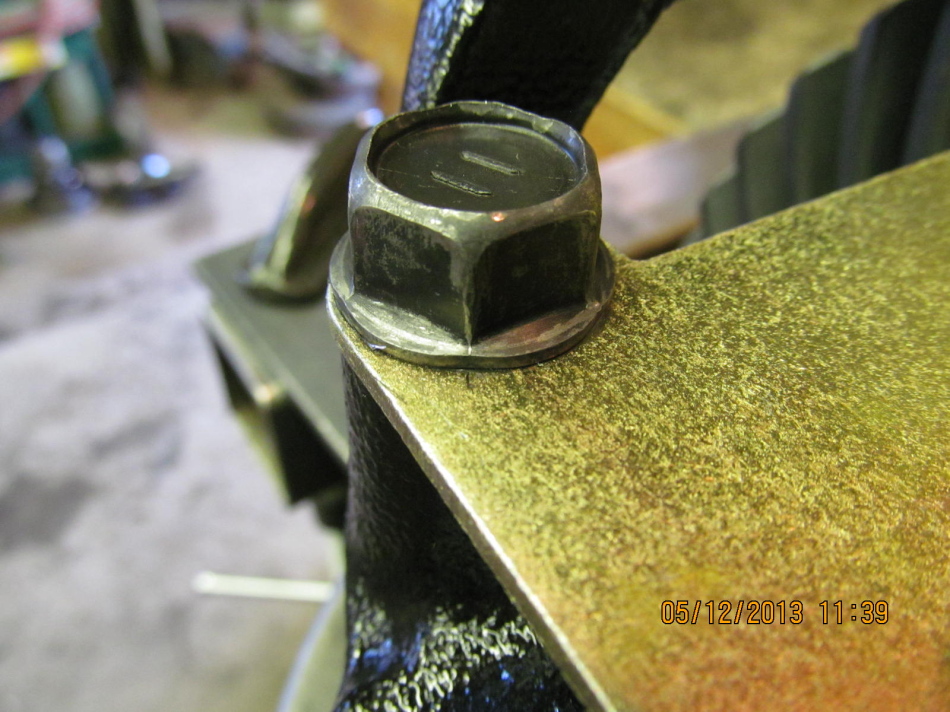
The supplied "crown wheel bolts" have a recommended 71 ft/lbs...
|
|
|
|
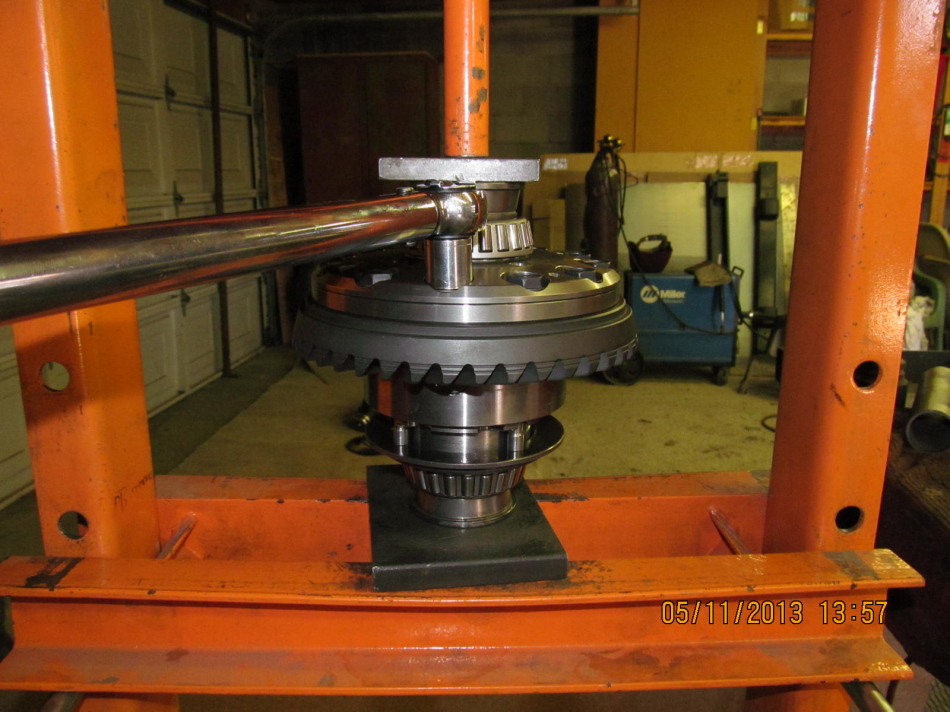
...so, taking advantage of the press and the pressure still being applied on the
bearings, now the ring bolts can be tightened. 75 ft/lb used here.
|
|
|

|
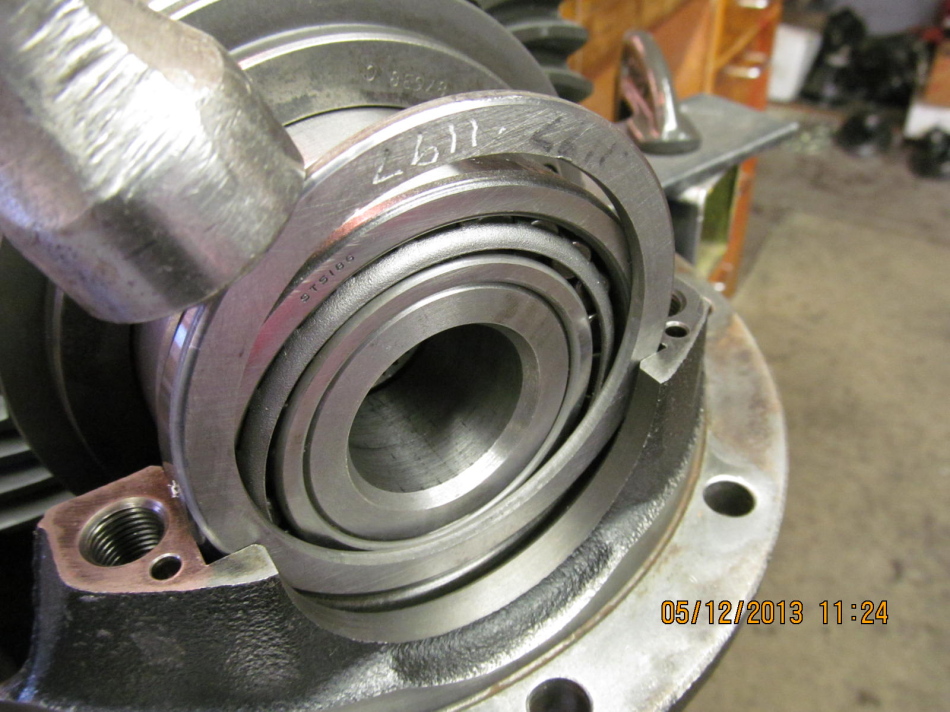
The TJM is now loaded into the diff carrier. Often the stock washer plates can
be re-used and often be very close for both backlash and carrier bearing
pre-loads.
|
|
|
|
The other washer plate was now a nice, tight fit. Amazing what new, fresh
bearings will do :)
|
|
|
|
|
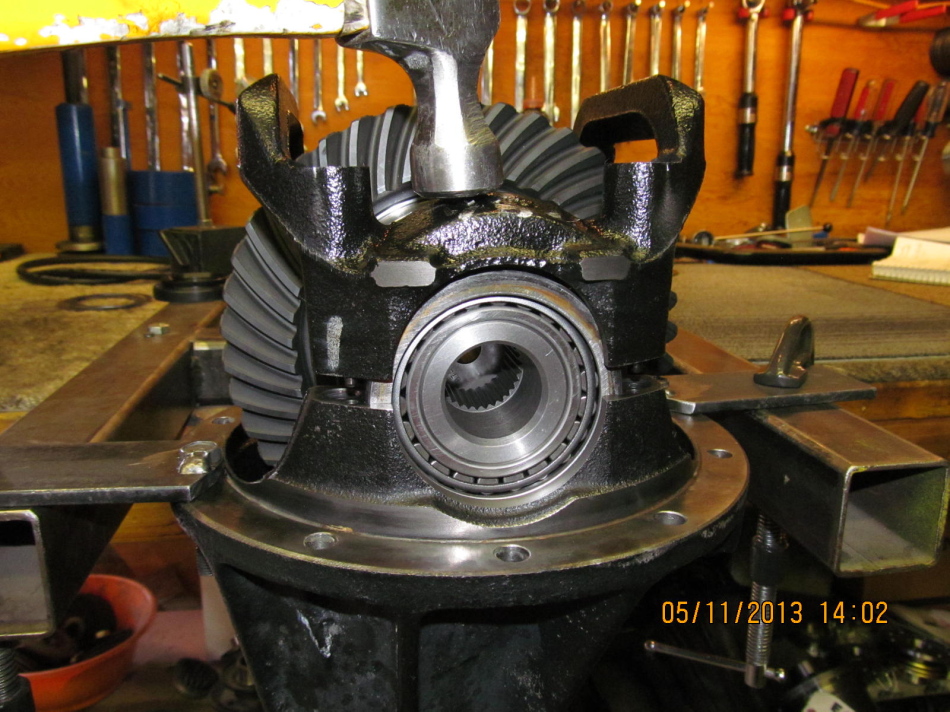
Light tapping convinced the washer plate where it needed to go.
|
|
|
|
|
Bearing cap brace is tapped in place.
|
|
|
|
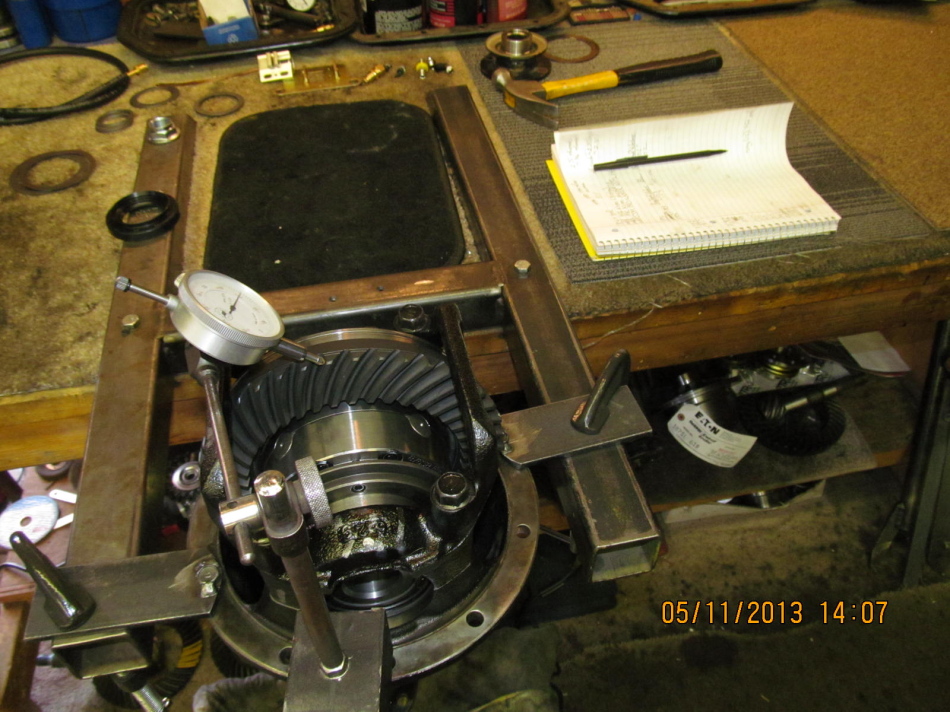
A backlash check shows that it's a little tight at .003" but that can be changed
after this paint pattern check.
|
|
|
|
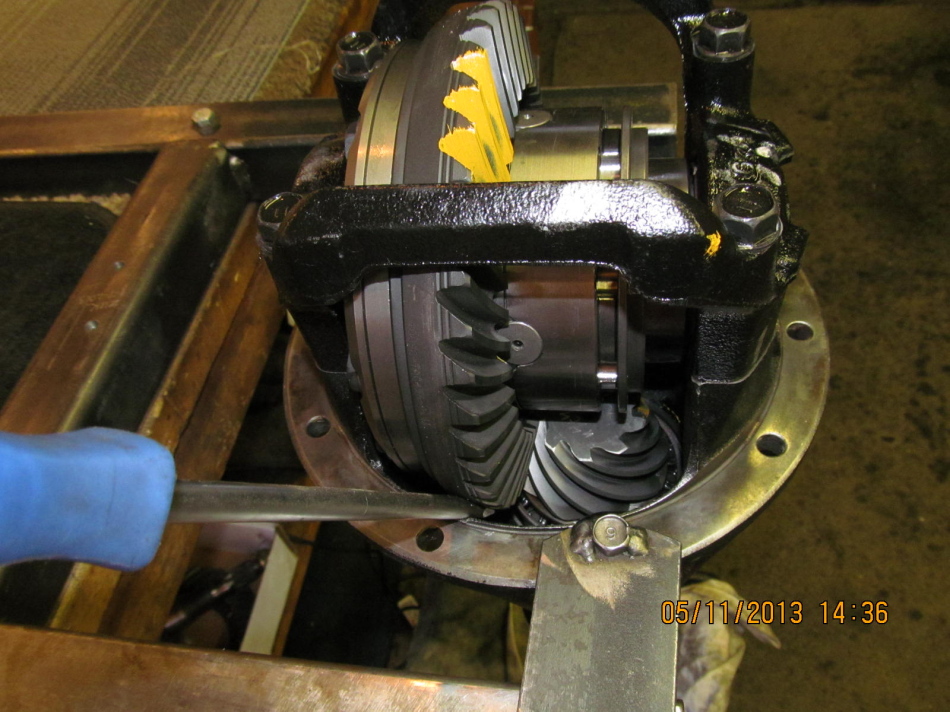
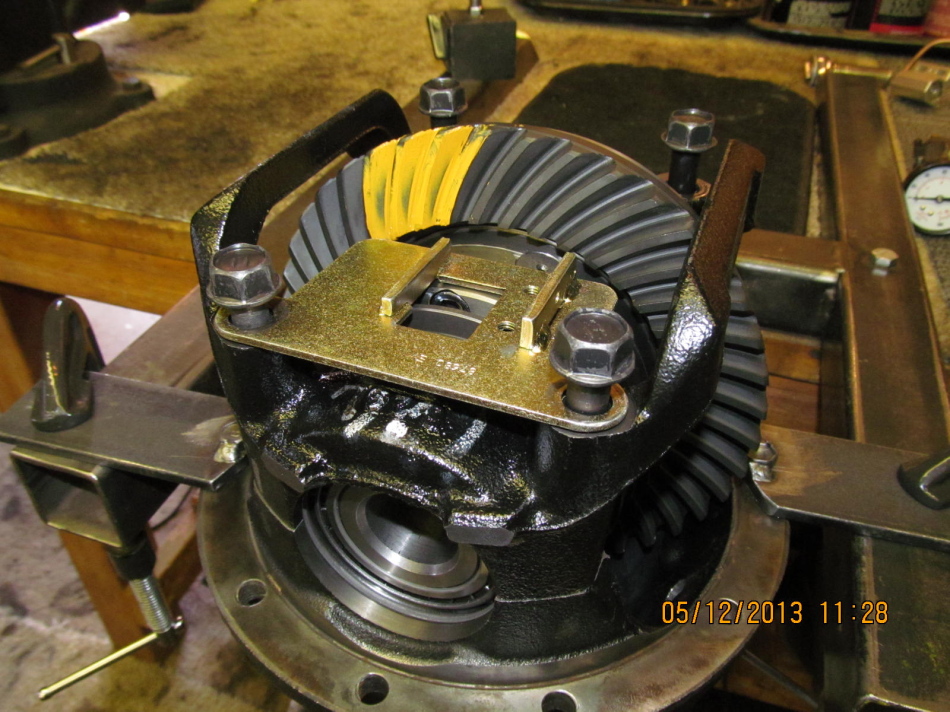
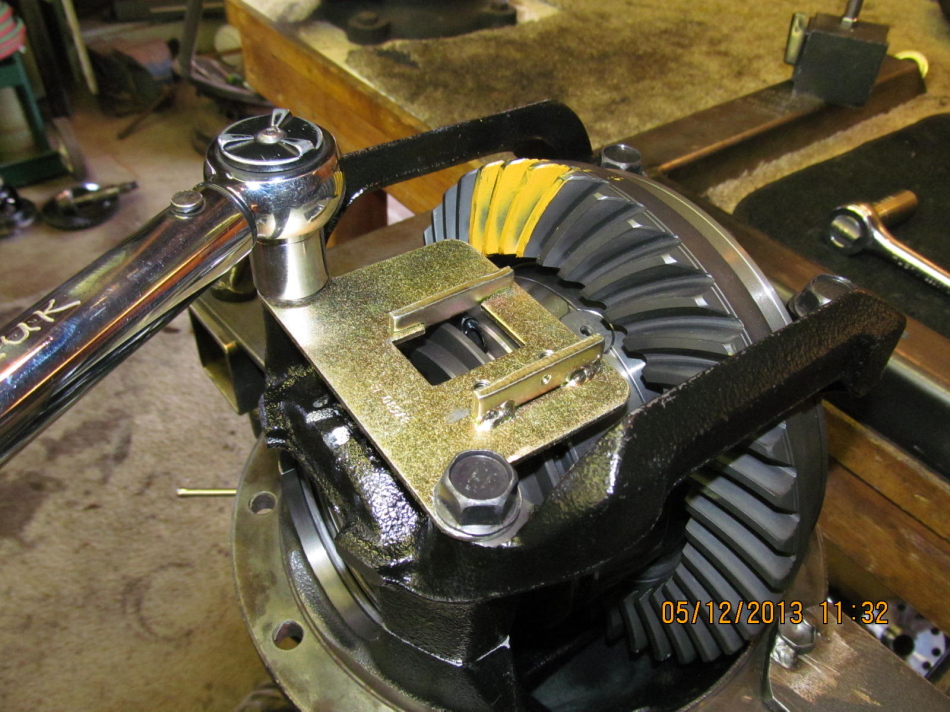
The brace being in the way makes it very awkward trying to get a good paint
using the 17mm wrench method. I used a large screwdriver to wedge the
appropriate side....good carrier bearing preload is a must or the ring
will shift and effect the painted pattern.
|
|
|
|
|
...while turning the flange with a quickie tool.
|
|
|
|
|
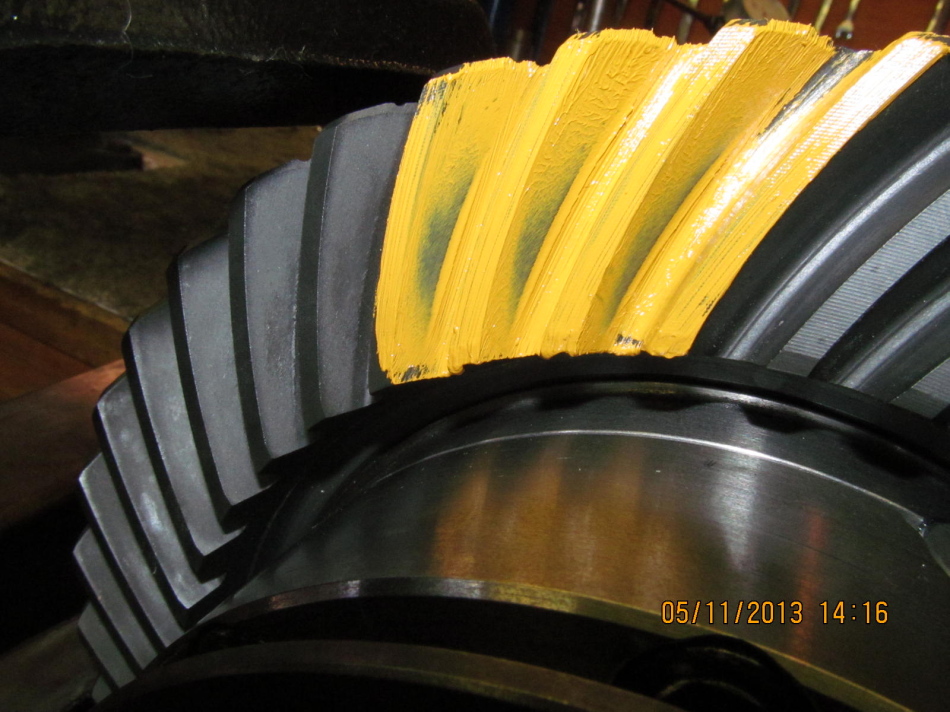
Pinion drive looks great....comet tail is not smashed in the root.
|
|
|
|
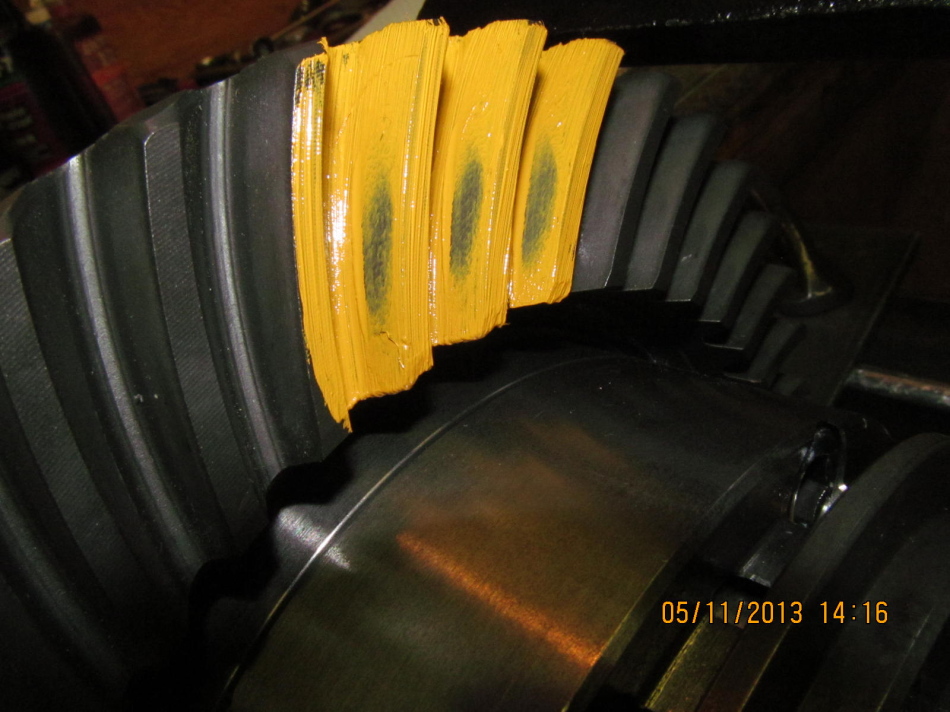
Drive looks wonderful. Slight favoring of the toe and pattern depth appears to
be exact.
|
|
|
|
Coast side appears to be very deep but I will just say that the coast paint can
be deceiving. It's in the center but very deep in the tooth. I cannot go more
shallow because the drive side is at the proper depth....and the drive side
over-rules the coast.
UPDATE---6-7-13---Bill reports the drive side is perfectly quiet and the coast
seems to make a small noise on de-accel. I rode in his truck and verified the
very low level noise was there. It should disappear with some time as the edges
smooth off.
|
|
|
|
|
Satisfied with pinion depth, now it's time to take it apart and shim the solid collar.
|
|
|
|
|
The 30 spline shop flange is easily removed with the right tool.
|
|
|

|
|
Press pinion out.
|
|
|

|
|
Length of solid collar plus the shim stack will be in the target area of 2.323".
|
|
|

|
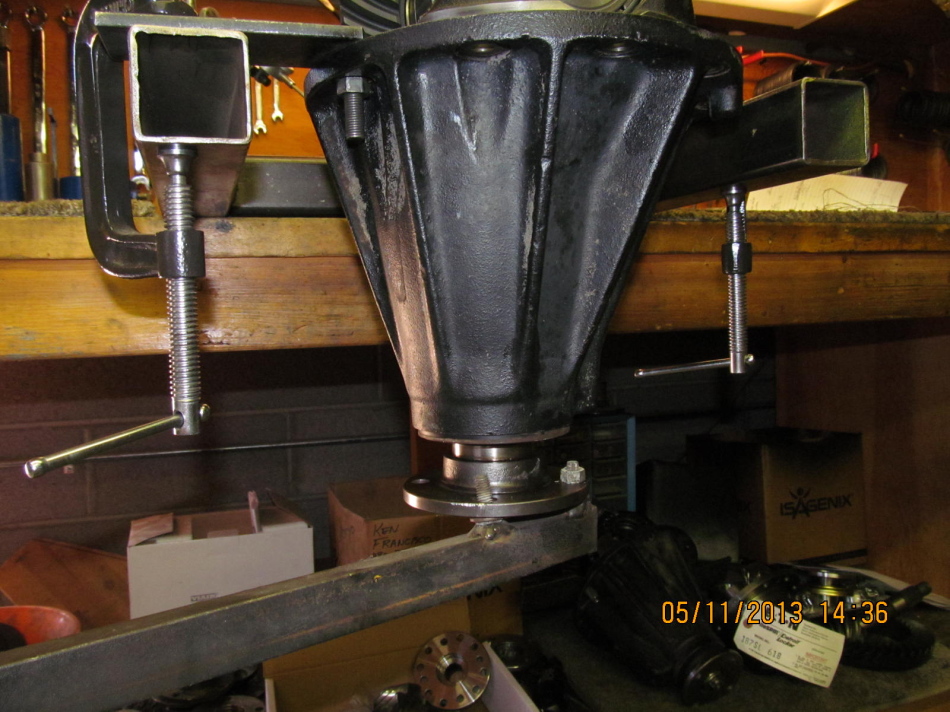
While the aluminum hockey pucks support the pinion from underneath, press the
shop flange on from above.
|
|
|
|
|
Tighten the nut.
|
|
|
|
|
tap tap tap while turning the flange to equalize upper and lower bearing tensions.
|
|
|
|
|
I tightened it even more...
|
|
|
|
|
...to discover that I could get 12 inch/pounds without too much trouble.
|
|
|
|
So, I can now do one last final tweak to the collar shim by increasing it by just
.001" and that will allow me to get into the cheater bar with more muscle.
|
|
|
|
I'm really just pressing the small outer pinion bearing in place and using the
shop collar to do it.
|
|
|
|
|
Remove the shop collar.
|
|
|
|
The supplied rubberized seal can now be pressed in. Do not use any kind of super
slippery RTV like I did once with the seal trying to migrate back out of the bore.
I do recommend using a light coating of gear oil and press it in.
|
|
|
|
|
.........................
|
|
|
|
The seal is recessed down just about 1mm per the factory spec. Not shown but
plenty of gear oil on the seal lips to prevent dry start-up and a mis-leading
PPL measurement.
|
|
|
|
|
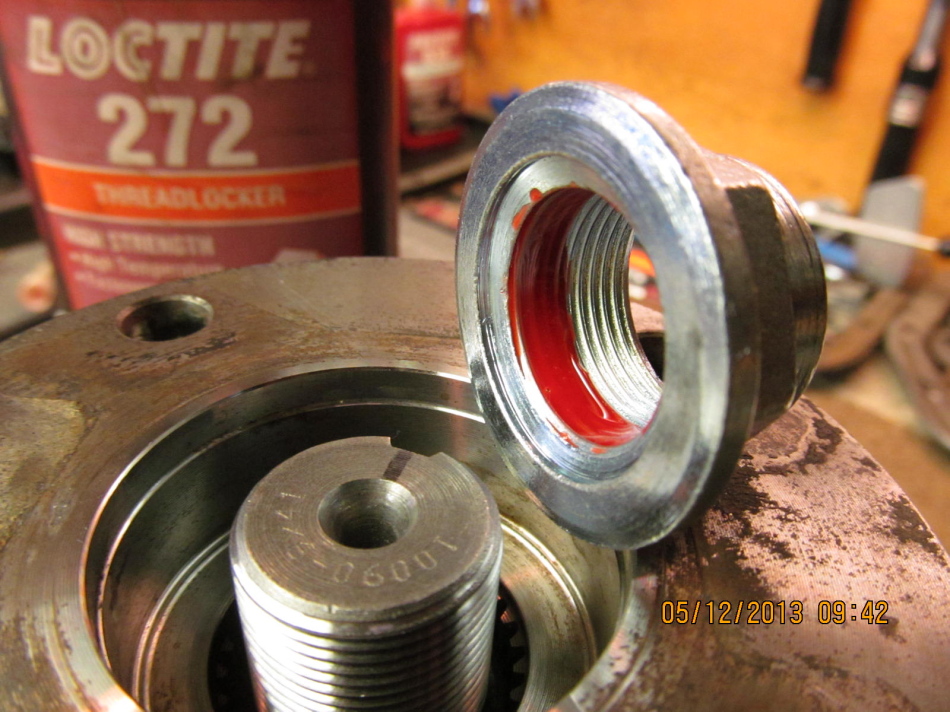
Red loctite on new, clean threads.
|
|
|
|
|
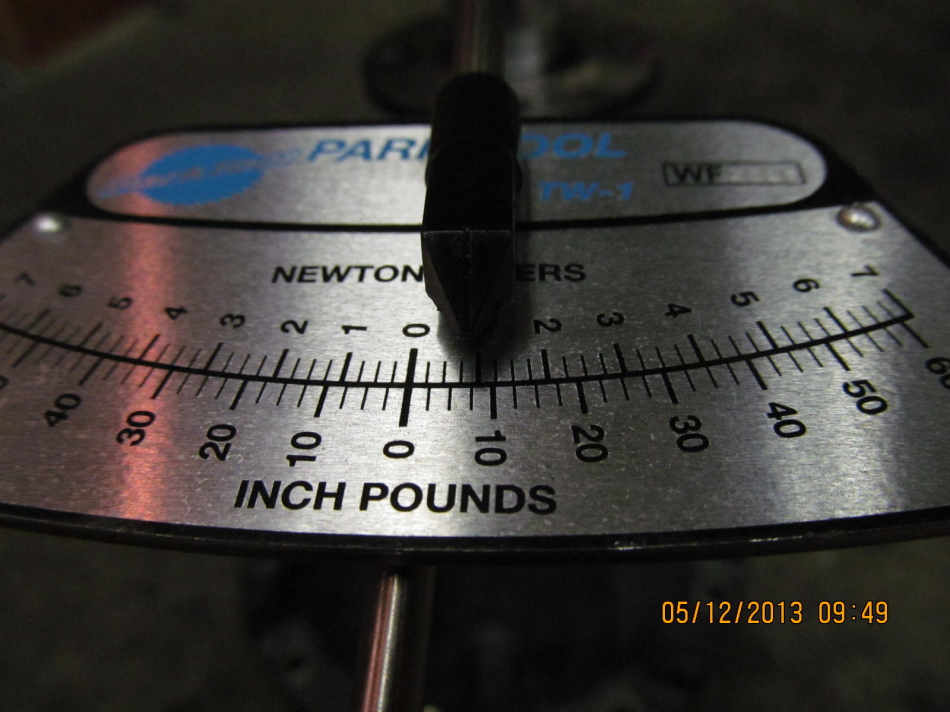
9 in/lb of start torque.
|
|
|
|
|
DING and this end is done.
|
|
|
|
|
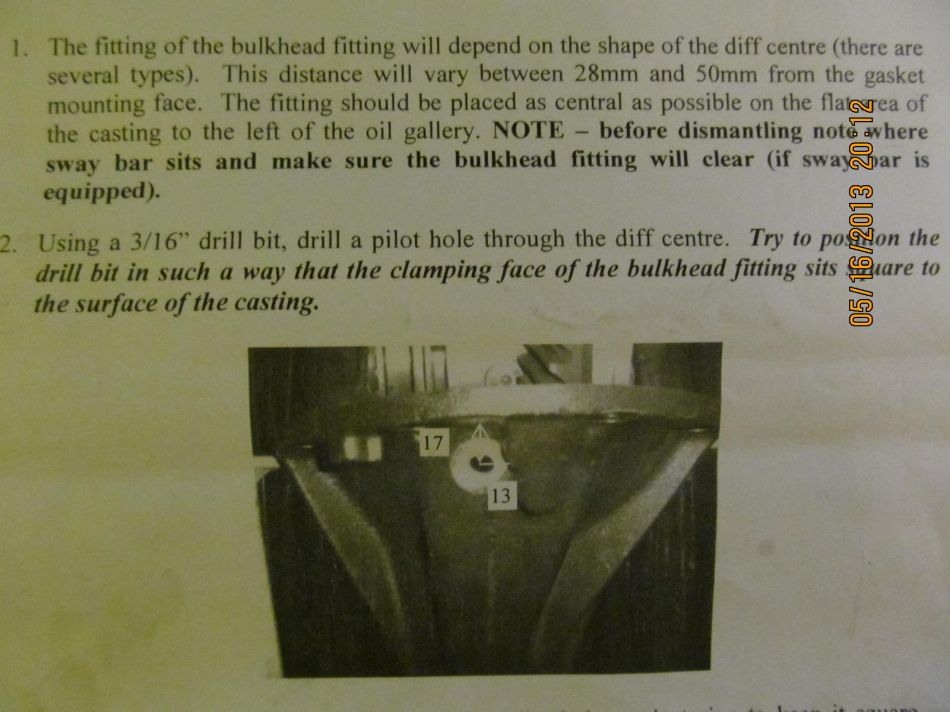
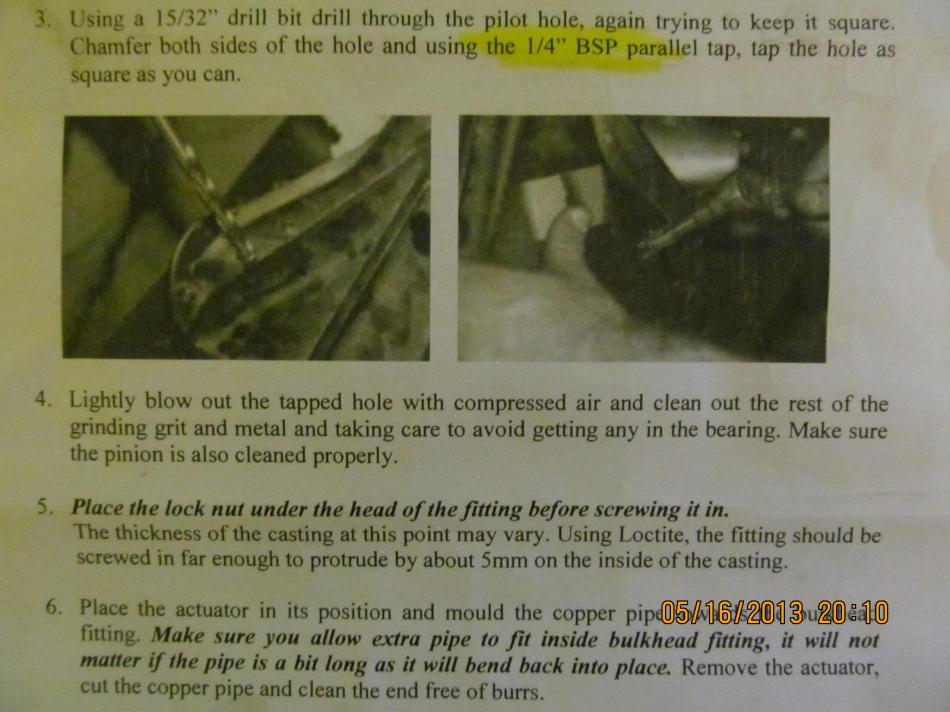
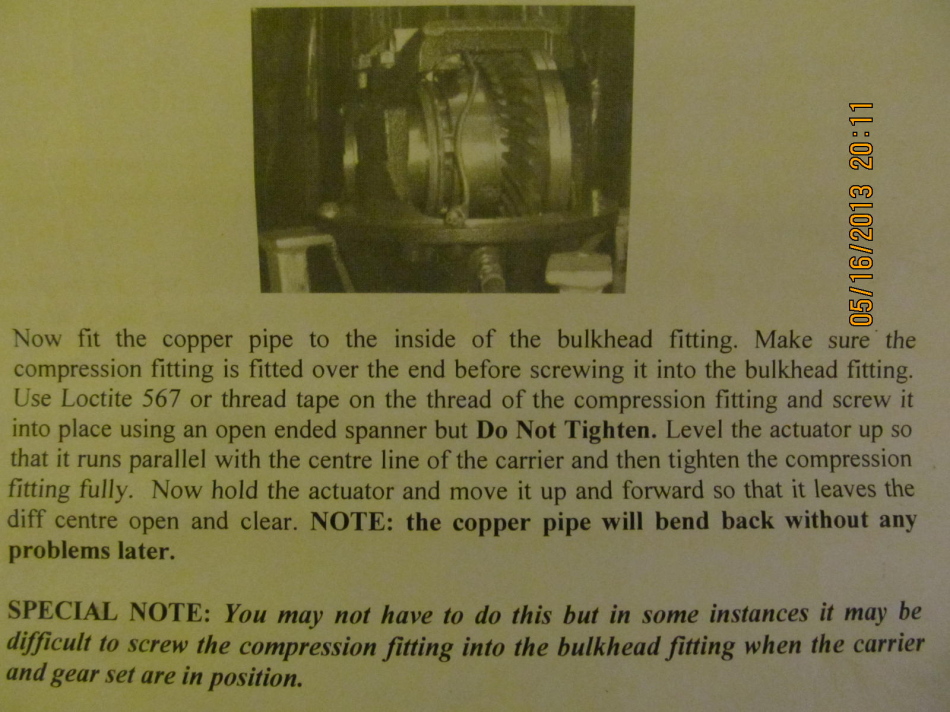
Here's a portion of the instructions....picture quality is not there.
|
|
|
|
|
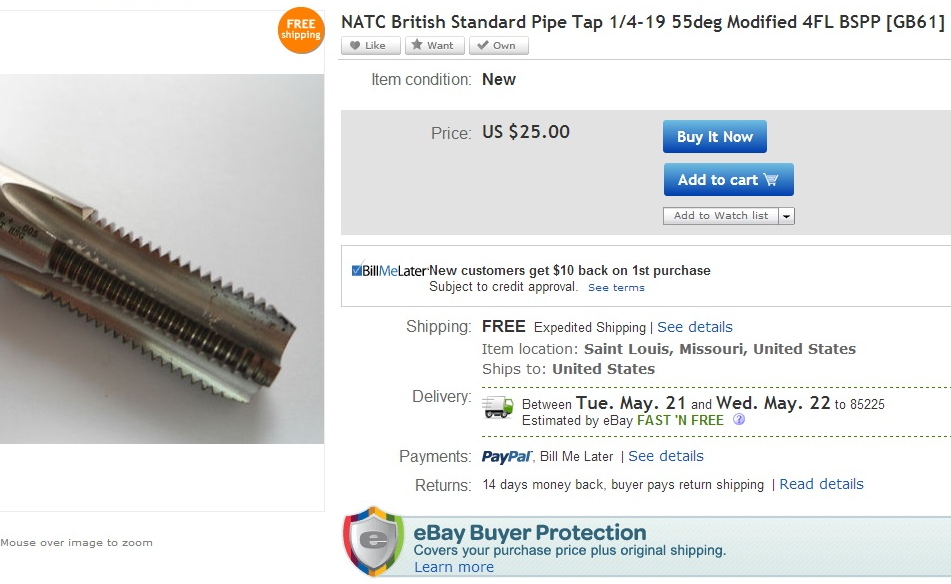
This part says to use a 1/4" BSP parallel tap (BSPP) which I did not have.
|
|
|
|
1/4" BSPP parallel tap can be had for a reasonable sum in just over a weeks time.
I probably should have followed protocol but did it the way you see in this link.
Basically, it does the same job without the use of the tap.
|
|
|
|
|
.......
|
|
|
|
|
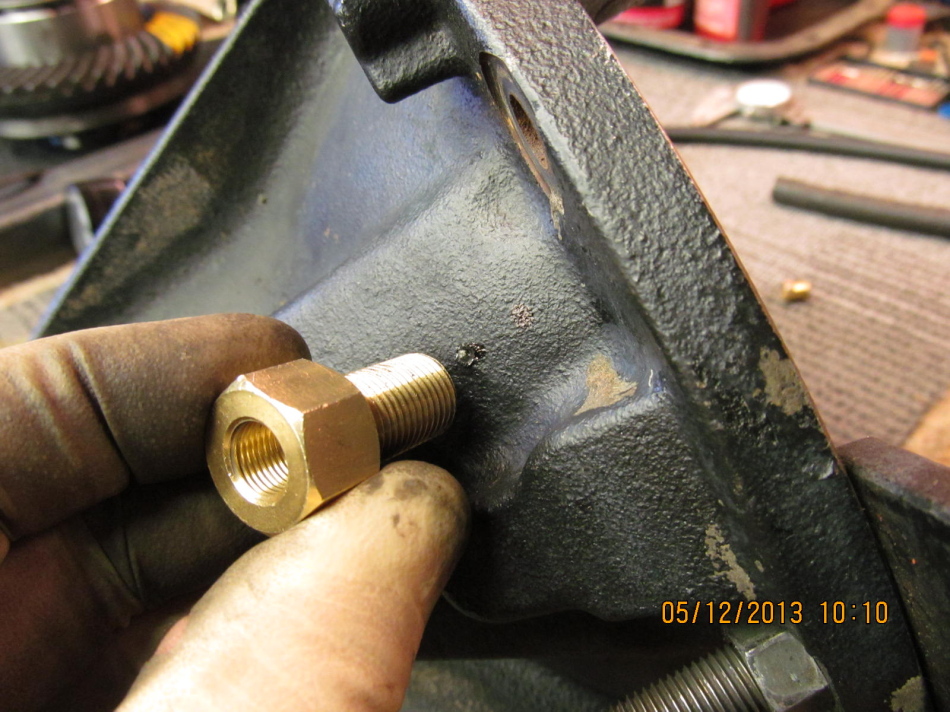
I marked a good spot.
|
|
|
|
|
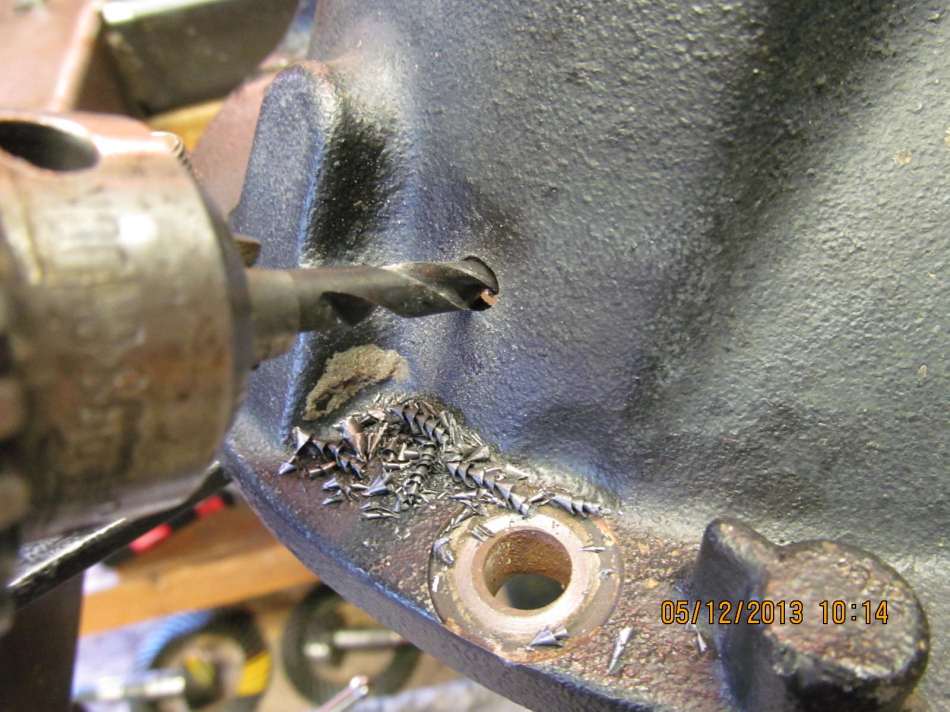
Drilled it with a pilot bit.
|
|
|
|
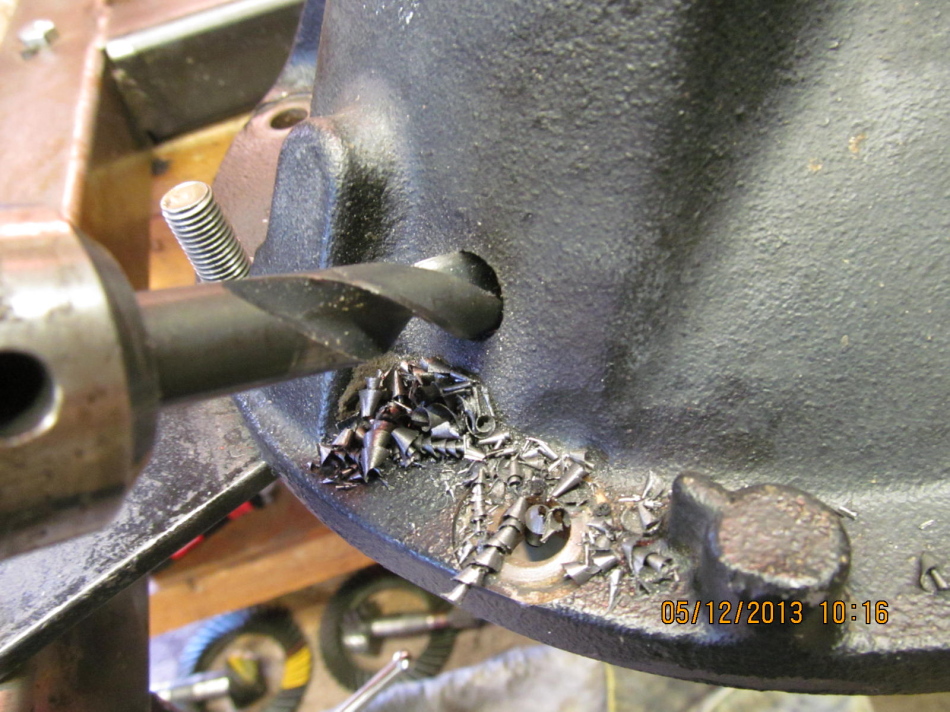
Then final drilled it with a .500" bit. This is not what TJM shows in their
instructions but, not having a 1/4 BSP tap, I chose this way.
|
|
|
|
|
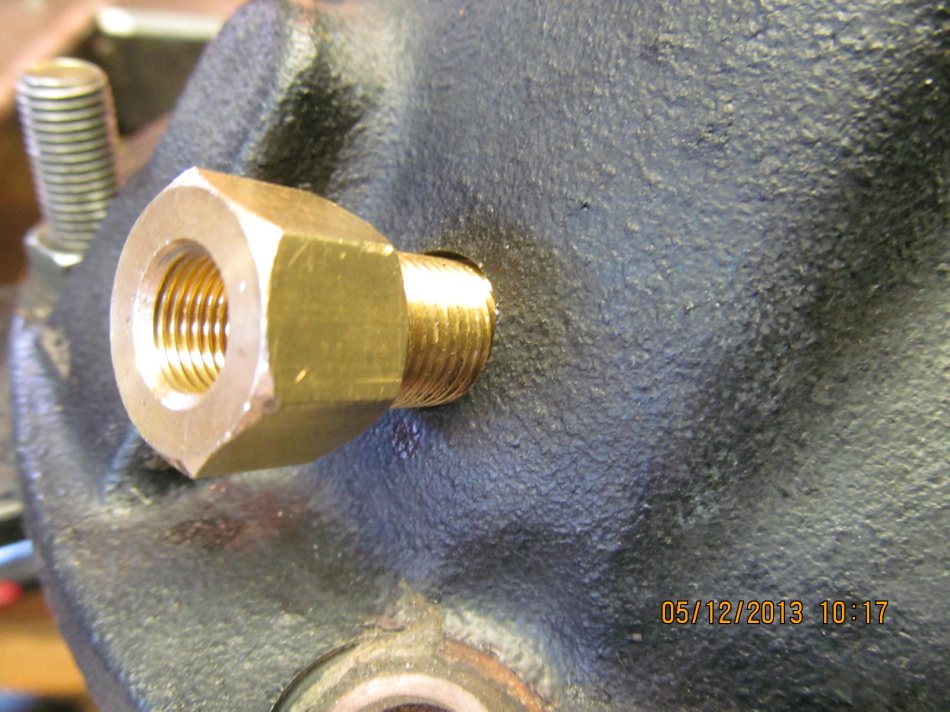
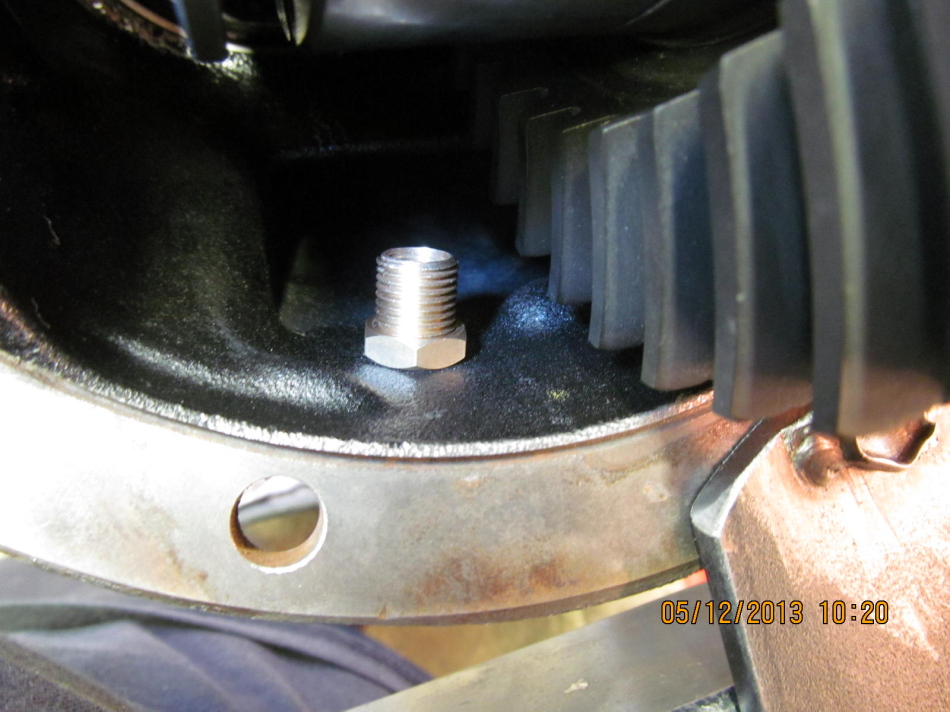
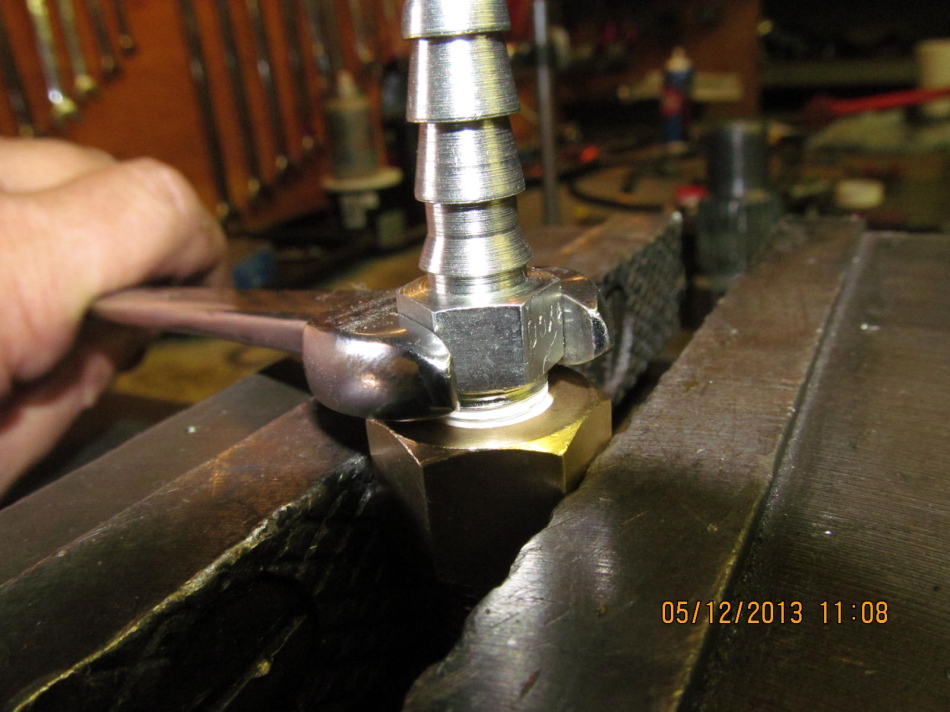
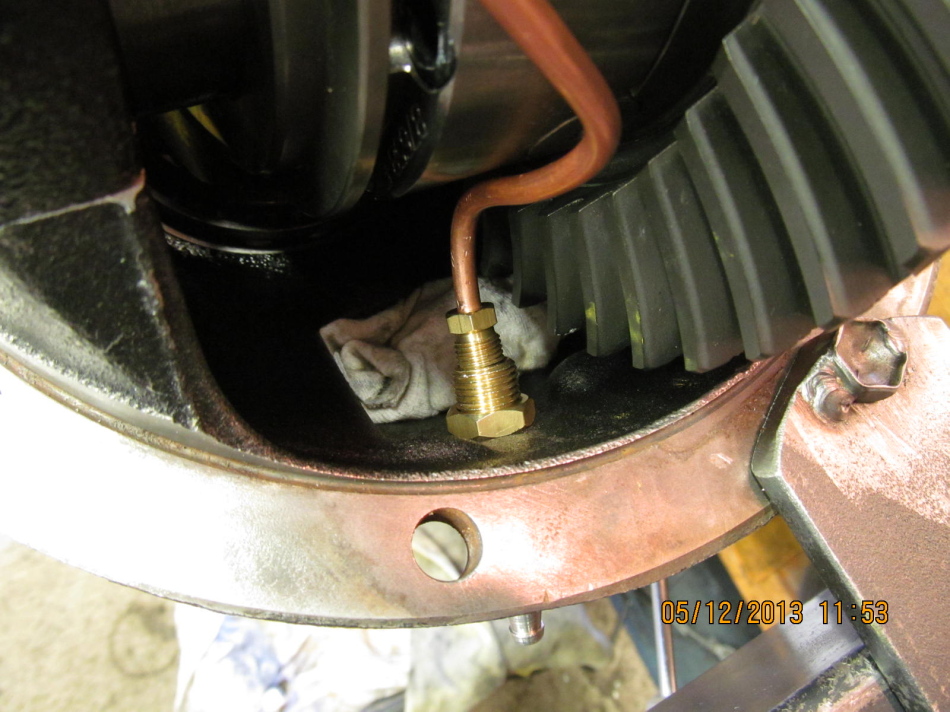
With a touch up from a rat-tail file, the brass bulkhead fitting slipped right thru.
|
|
|
|
This nut can be mildly snugged up right now. Red loctite will be applied later.
|
|
|
|
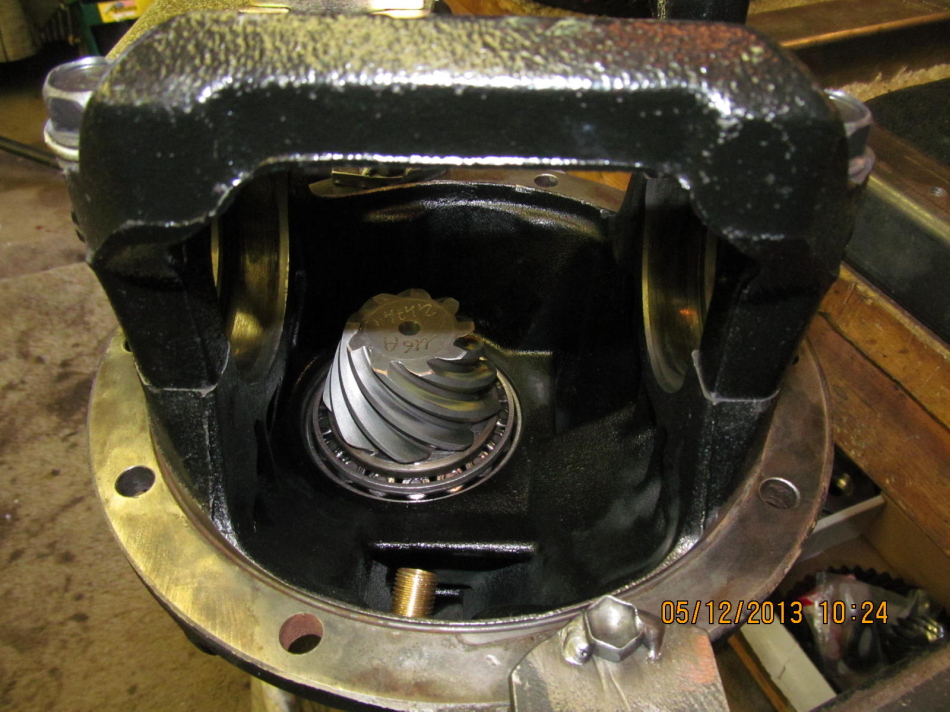
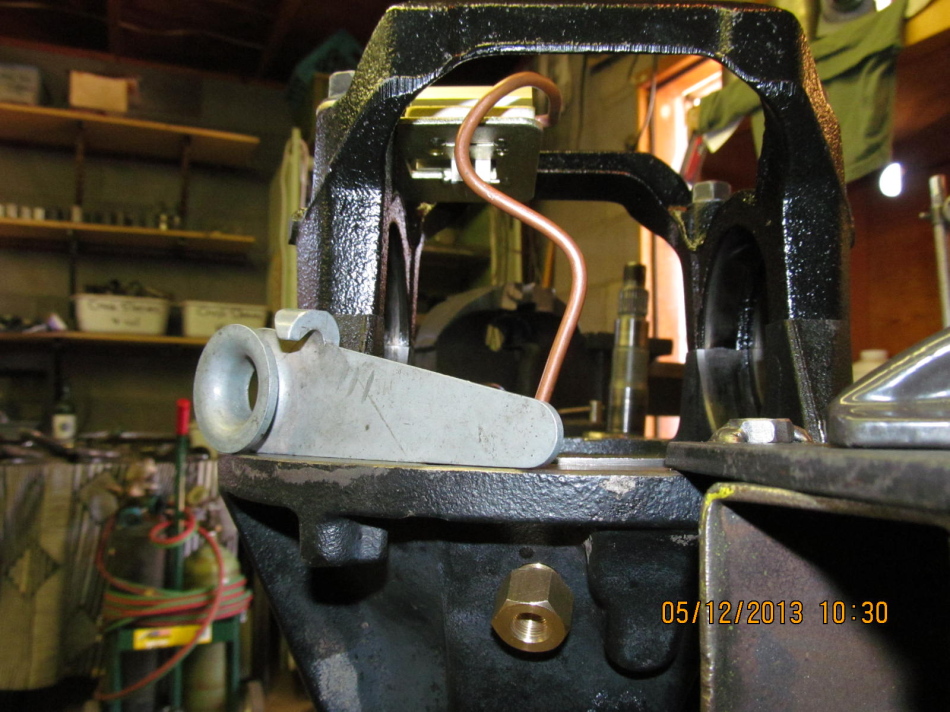
I wanted to route the copper line without the TJM getting in the way so I left
the TJM out and installed the brace.
|
|
|
|
|
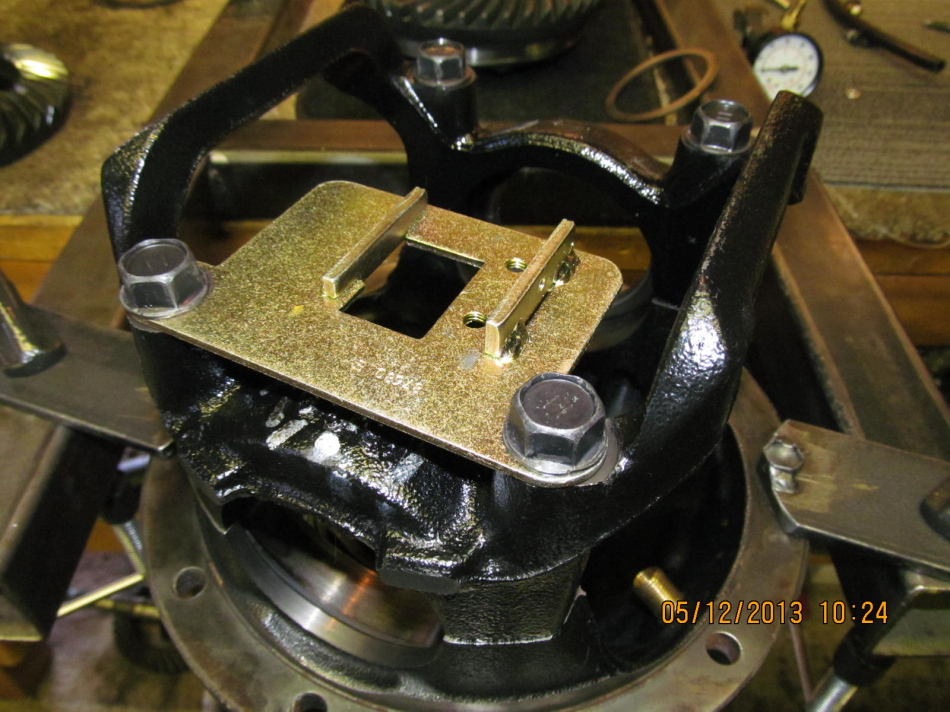
The bracket is in place.
|
|
|
|
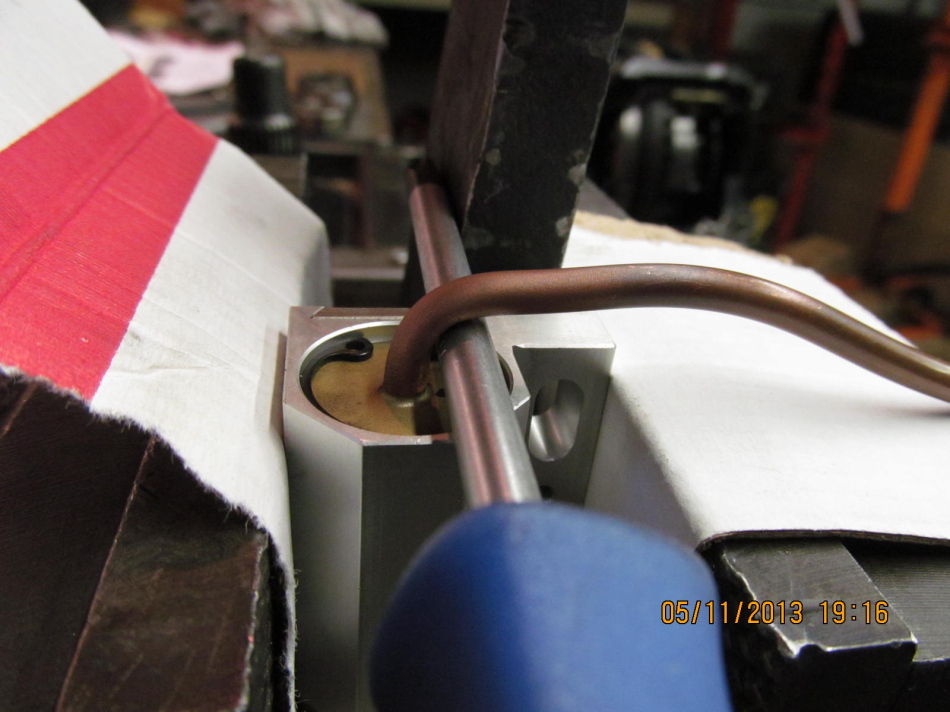
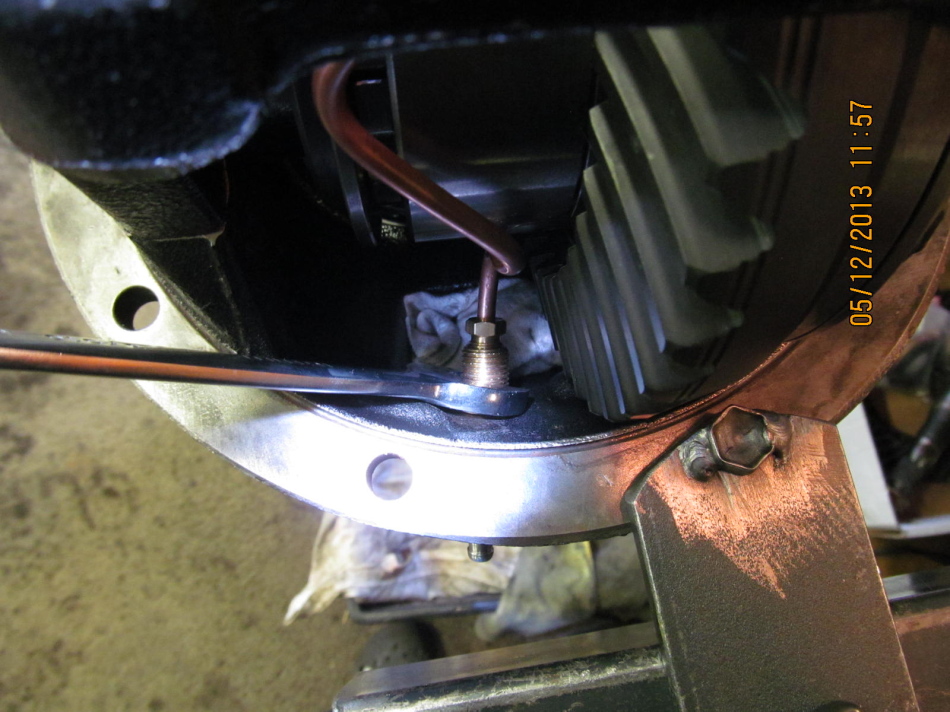
I rigged up a way to do a fairly nice bend. With a 529 gear ratio, I am guessing
this nice radius I have here is too much....the screwdriver would go away and the
bend would have to be much, much closer to the aluminum solenoid body.
|
|
|
|
|
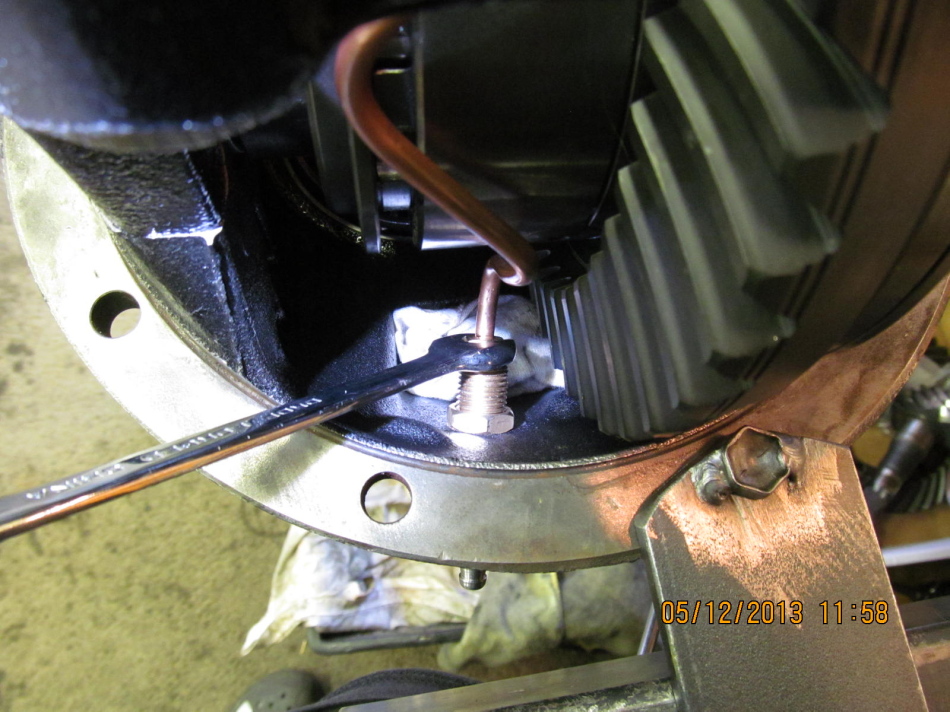
I had a bender to form some service loops along the way.
|
|
|
|
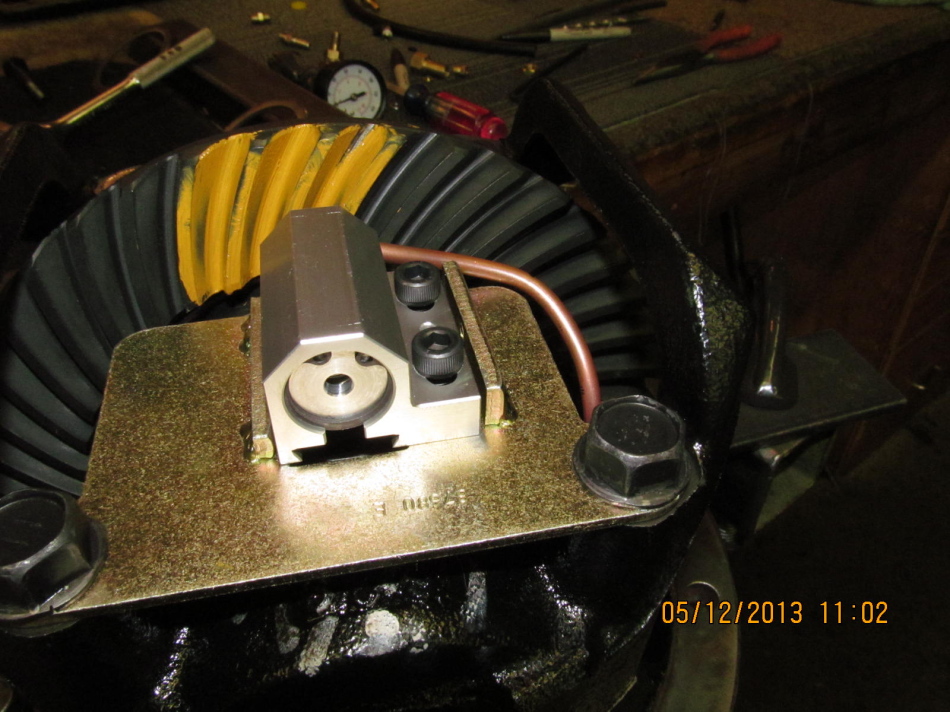
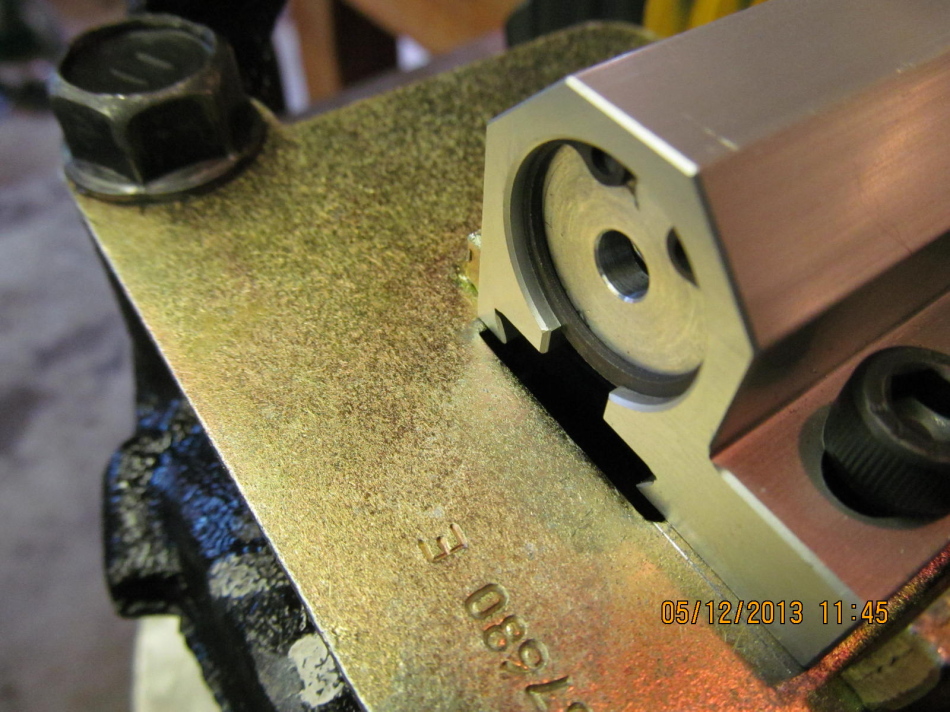
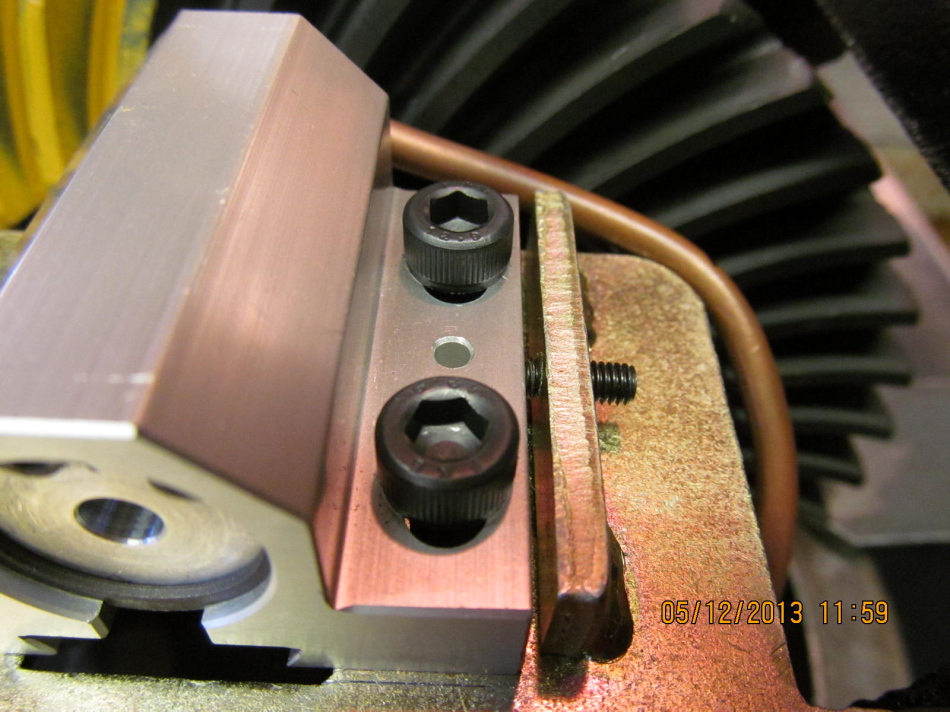
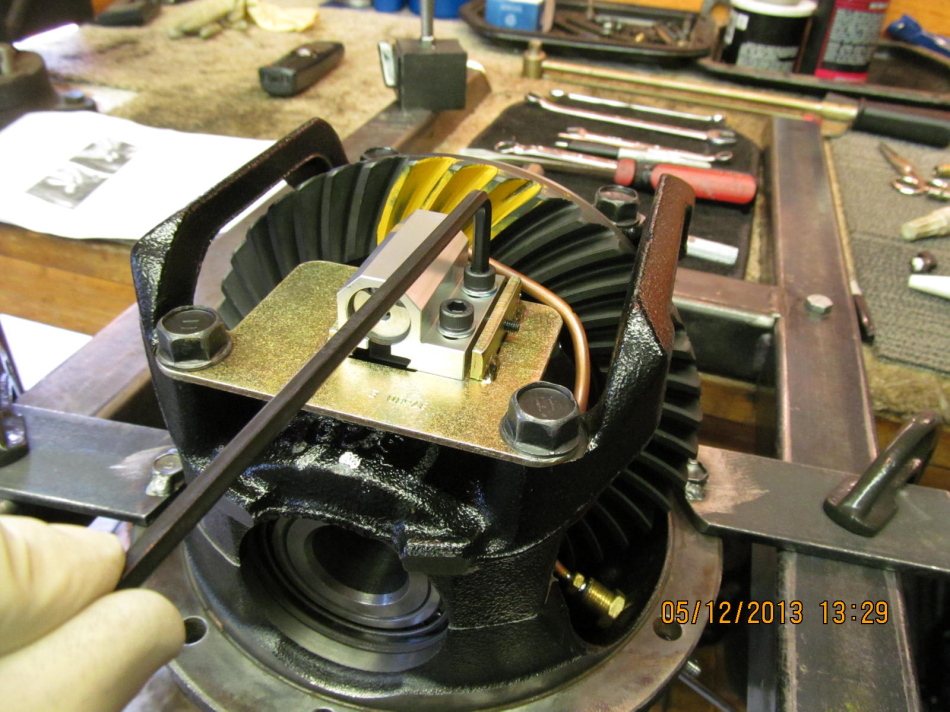
TJM locker is re-installed. As can be seen, there is some adjustment one can
make with the slotted holes under the alan head screws.
|
|
|
|
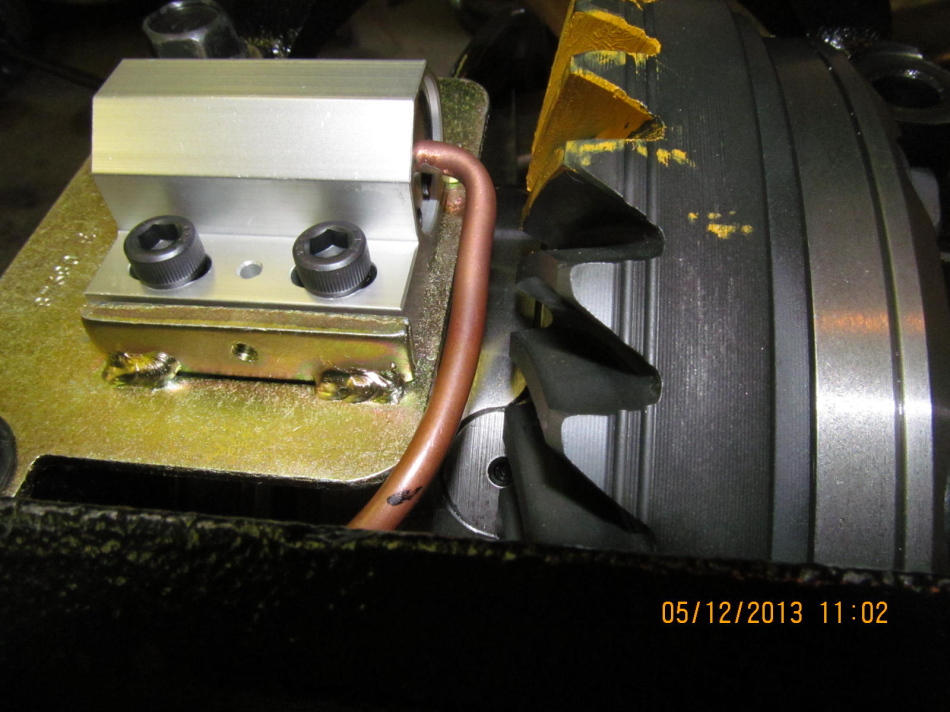
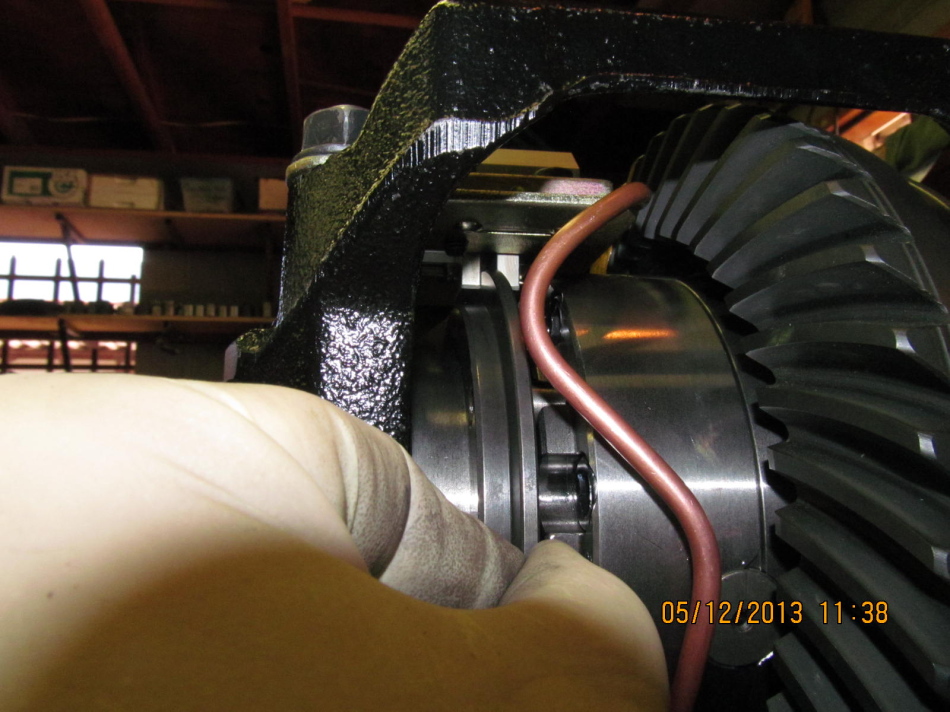
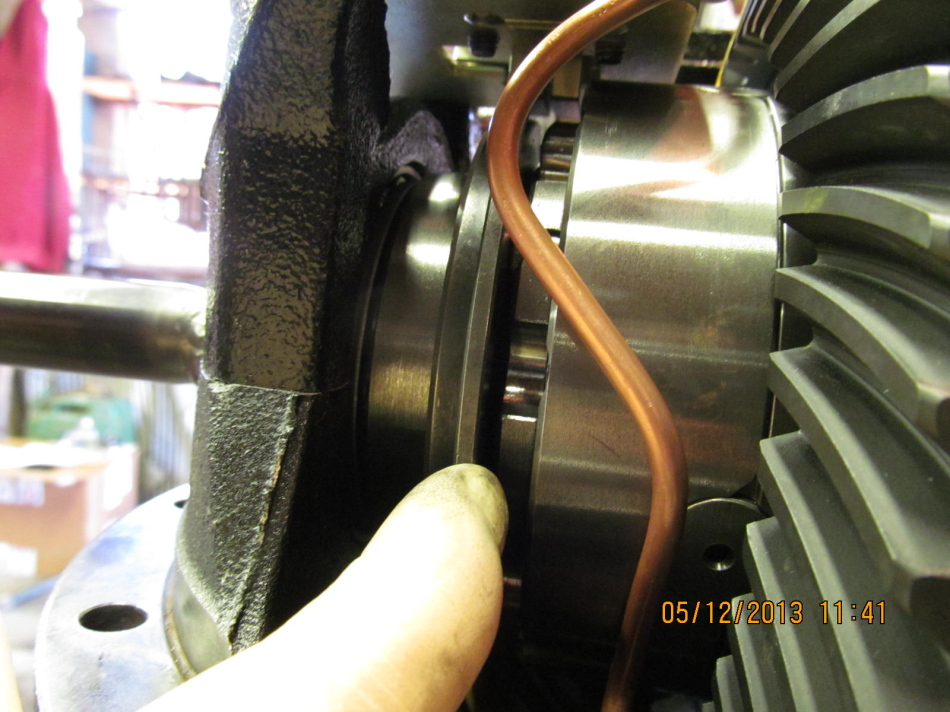
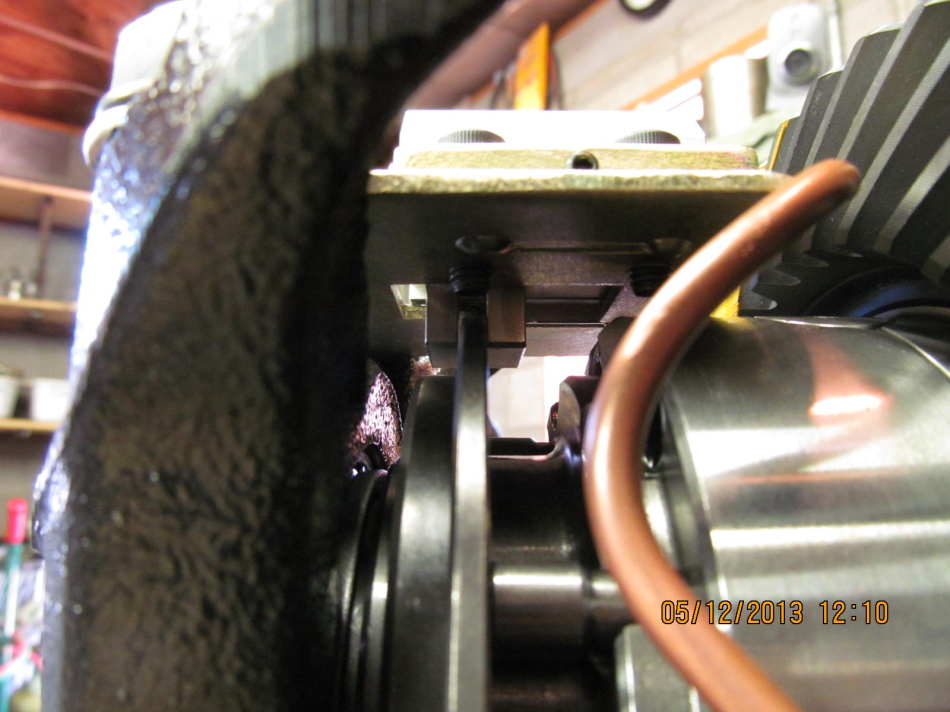
There's plenty of clearance....a good 1/8" between the copper and tooth. I can
see with a thicker 529 ring gear would require the copper line to suck up alot
closer to the solenoid aluminum body.
|
|
|
|
The amount of copper tube attached to the solenoid is pretty much the perfect
length....not cutting needed.
|
|
|
|
Teflon tape and tighten it up. Just about the time the threads started to develope
some real tension was about the same time the steel adapter bottomed out so that
worked out good.
|
|
|
|
Now is a good time to tweak in the backlash and adding a touch more CBPL carrier
bearing pre-load at the same time. By increasing the washer plate on the
"ring tooth" side, the backlash will become greater and so will the cbpl.
|
|
|
|
|
The hammer had to work harder but it did seat in...no damage to the washer plate.
|
|
|
|
|
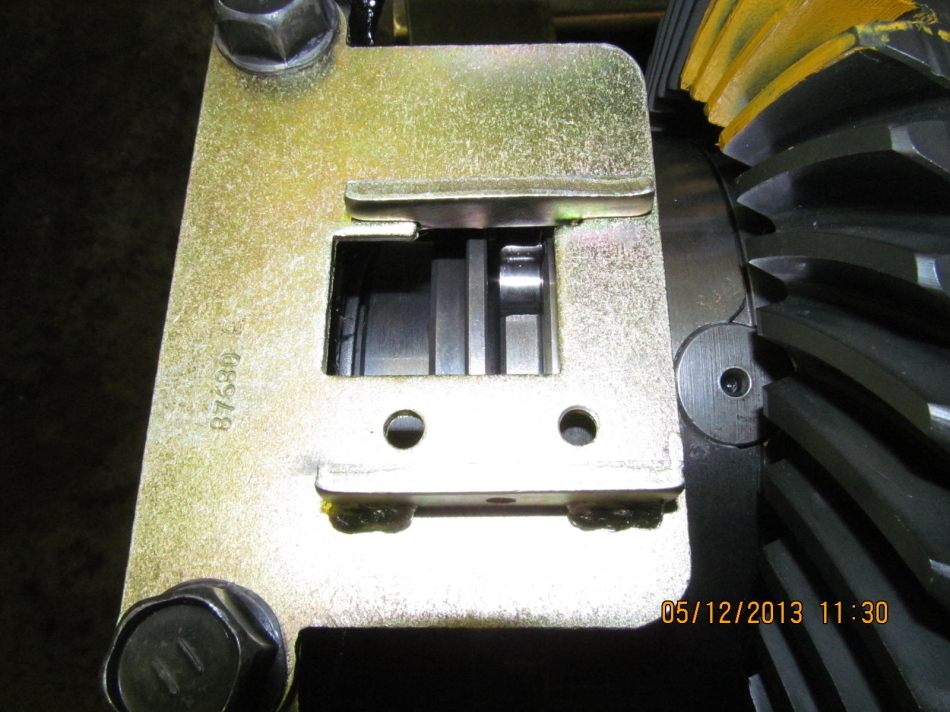
Bearing cap brace is installed along with the bracket.
|
|
|
|
|
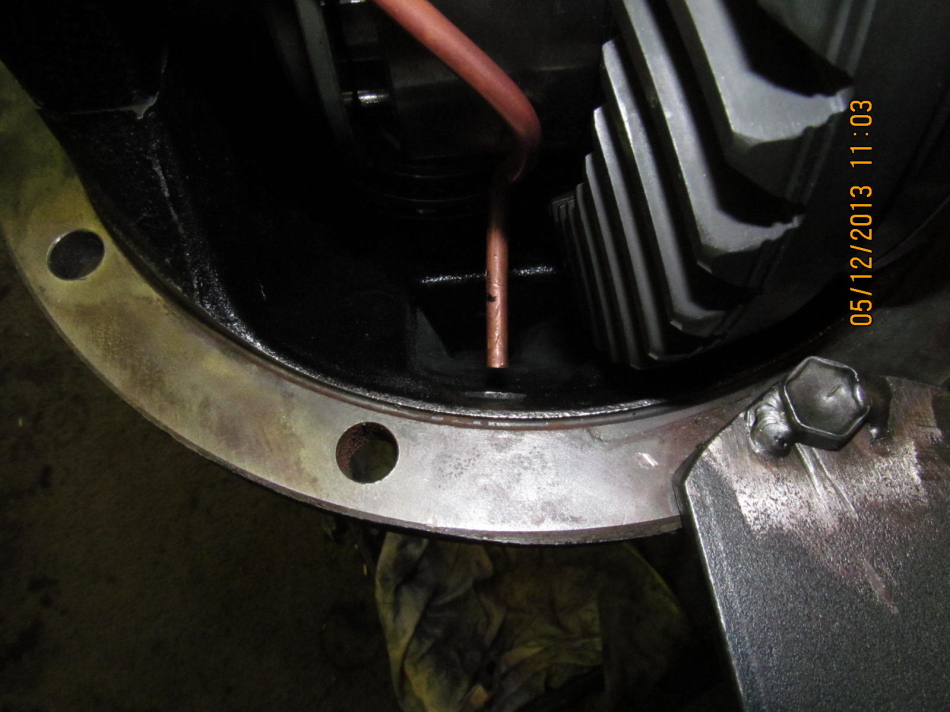
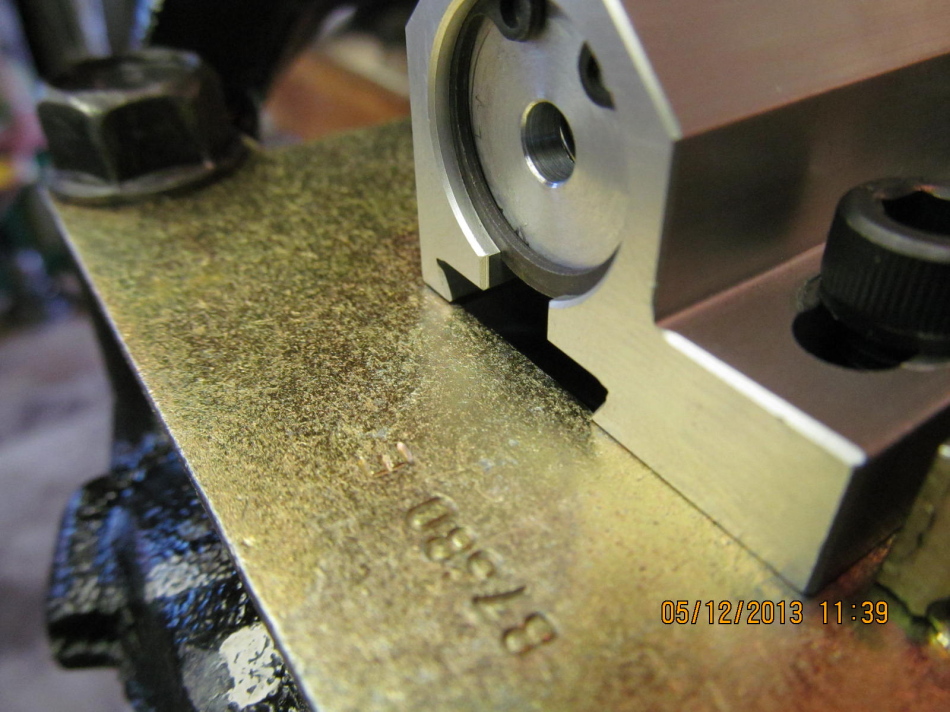
The selector ring can be seen in the rectangular opening.
|
|
|
|
|
I used 75 ft/lb on all 4 cap bolts.
|
|
|
|
You can see the selector ring is captured by the solenoid fork. This ring is
spinning when going down the highway...there is probably casual contact
between ring and fork....so I wonder how many years one can go before
replacing the small solenoid with a fresh shift fork?
|
|
|
|
|
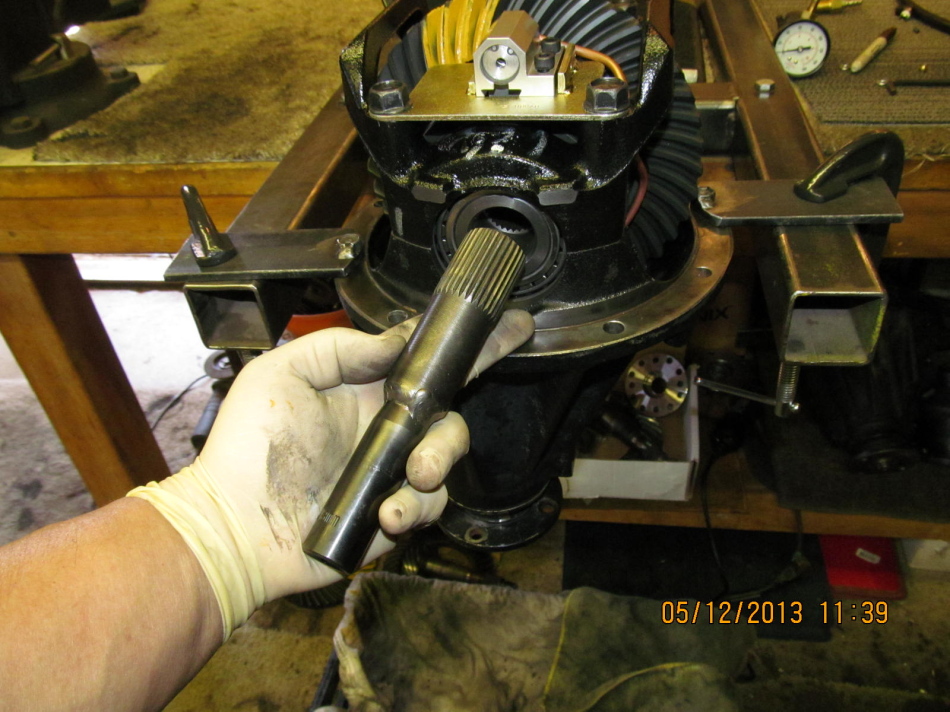
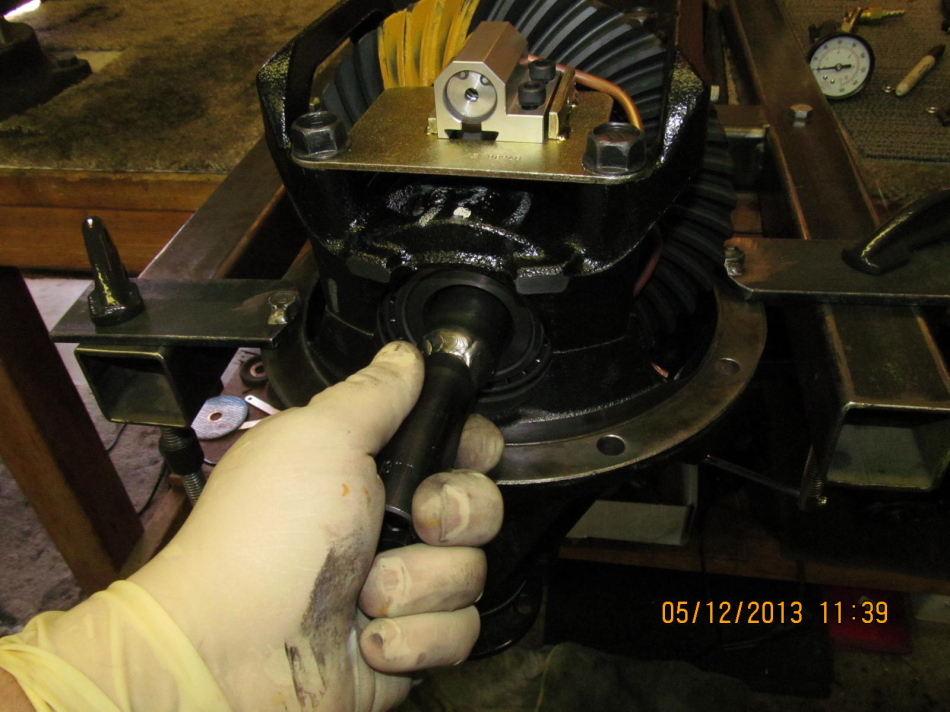
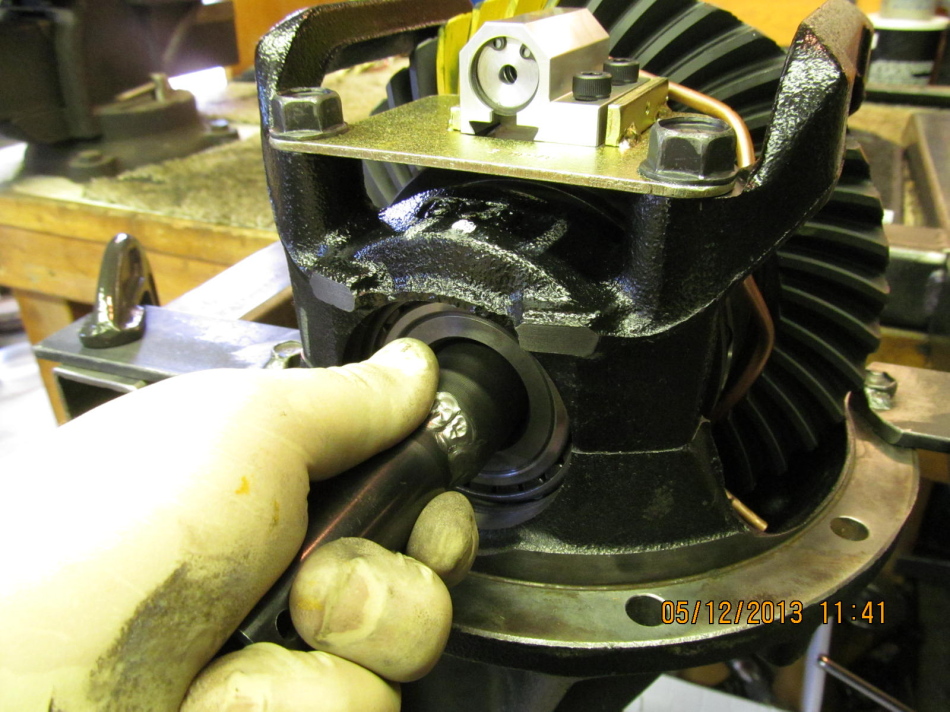
To test the locker engagement, I have this 30 spline axle stub.
|
|
|
|
I just slip it in and rotate it back and forth...when it is locked, the ring
gear will engage and spin.
|
|
|
|
The bracket has over-sized holes....so there is potential adjustment here to take
advantage of. I didn't have to on mine.
|
|
|
|
In my case, with the solenoid positioned here and allen head screws snugged up, I
was able to get locker engagement by rotating the axle stub in the sidegear hole
while wiggling the selector ring at the same time.
|
|
|
|
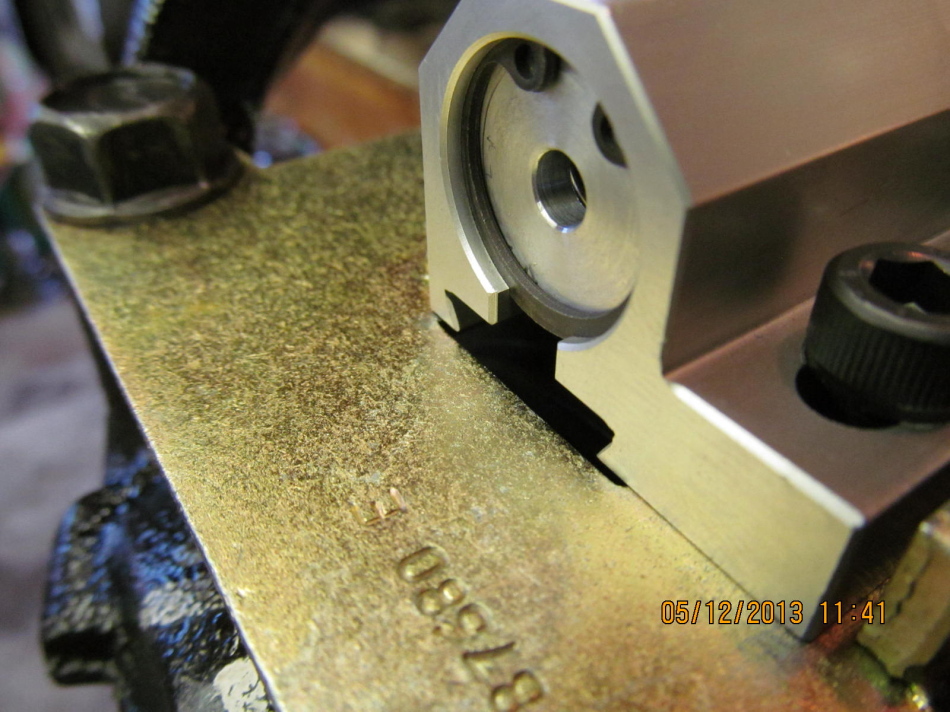
Then I loosened the allens up and shifted the solenoid over to the right about
.050" (1.25mm) and the locker stayed unlocked dependably.
|
|
|
|
|
The ring will jiggle back and forth and looks normal for the design.
|
|
|
|
|
..........................
|
|
|
|
To be sure, I slid the assembly over a touch more to the right to make sure it
doesn't ever try to engage while going down the highway.
|
|
|
|
|
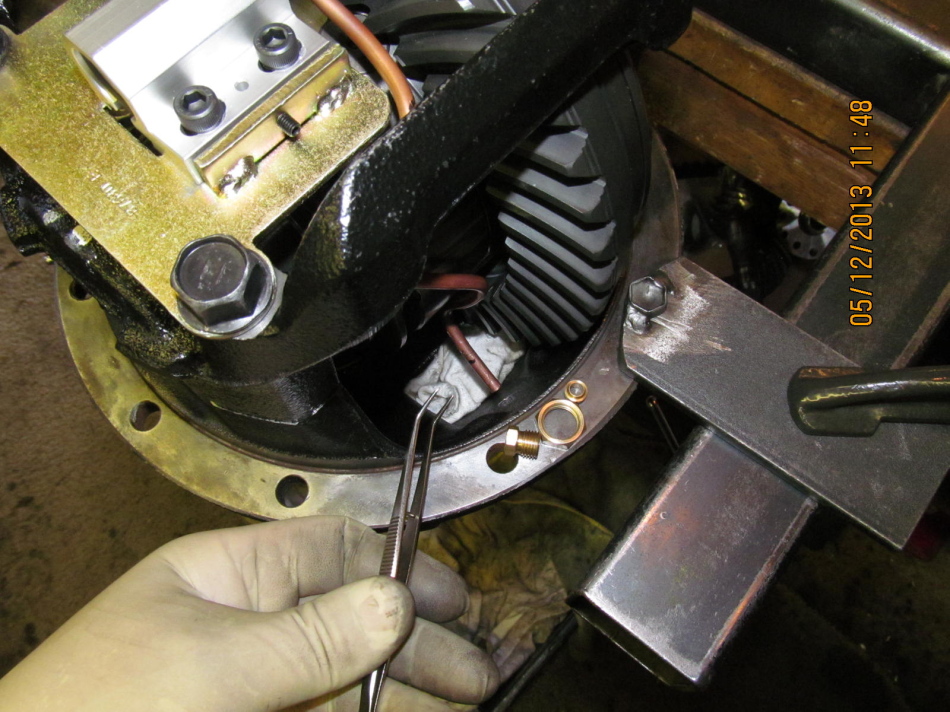
I stuffed a piece of rag in the tunnel to make sure nothing falls in.
|
|
|
|
|
You can't see it but there is a compression bead in there.
|
|
|
|
|
Tighten this nut.
|
|
|
|
|
Then tighten this one.
|
|
|
|
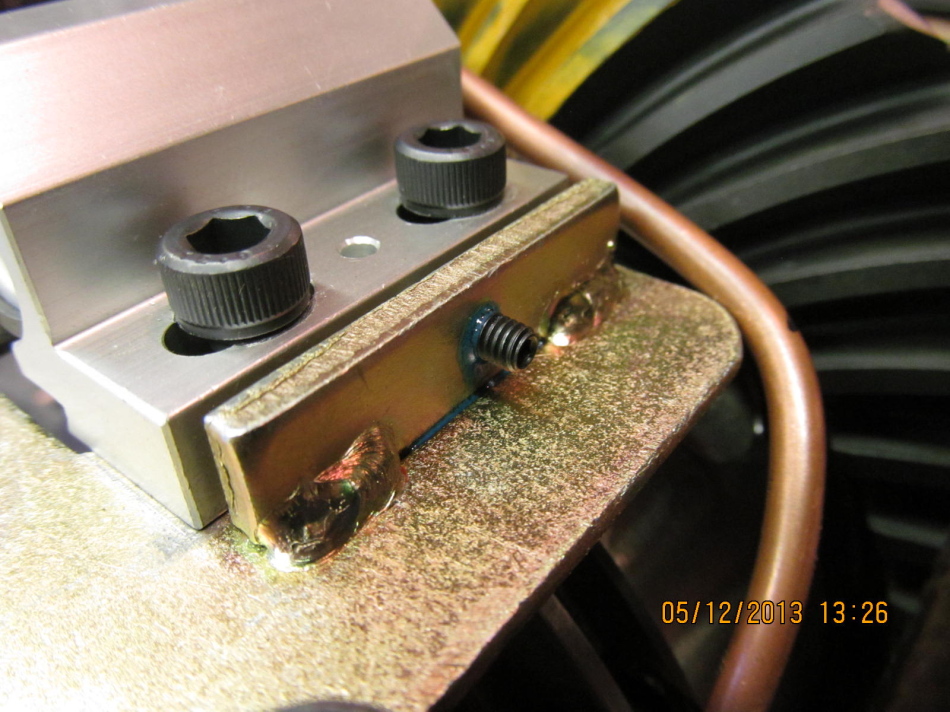
I had to lightly loosen the 2 allen screws and tighten the grub screw. This forces
the solenoid to sit square up against the stop plate not visible on the left side
of the picture.
|
|
|
|
|
.............................
|
|
|
|
|
Don't forget to remove the rag :)
|
|
|
|
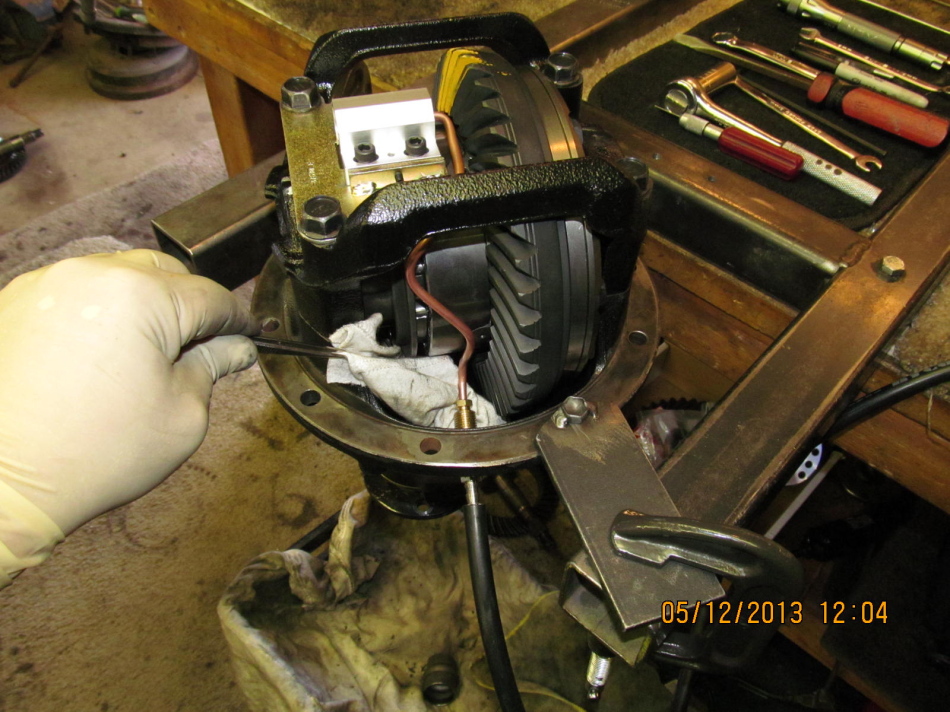
The TJM 1/4" hose is a tight fit on the sharp barbs.....I pressed it on
2 of the ridges for this air test.
|
|
|
|
This is my arb tester and I wasn't satisfied with the integrity of this test
jig.....too many hose clamps.
|
|
|
|
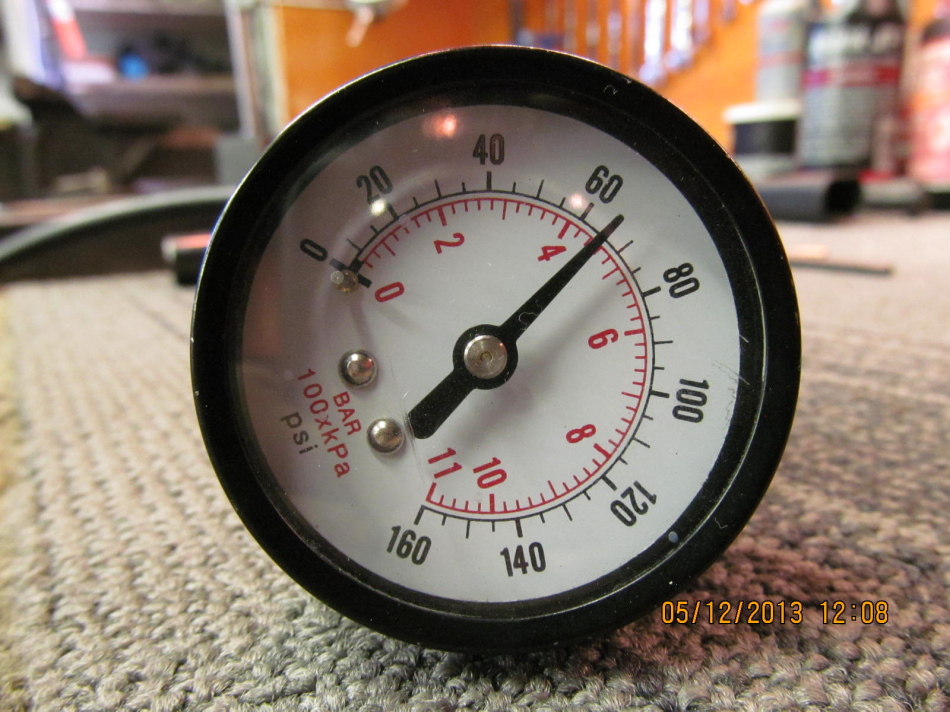
Using 65 psi to test TJM operation....it's on the low side but this pressure
works on the arb based on testing experience.
|
|
|
|
The fork has moved over fully to the left with 65 psi.....by the way, at 40 psi,
it gets weak and the spring starts to force it over to the right.
|
|
|
|
|
Blue loctite on the grub screw.
|
|
|

|
|
Blue on the allen heads also.
|
|
|
|
Allens are tightened...that steel plate they screw into only has a couple threads
all together so don't get carried away.
|
|
|
|
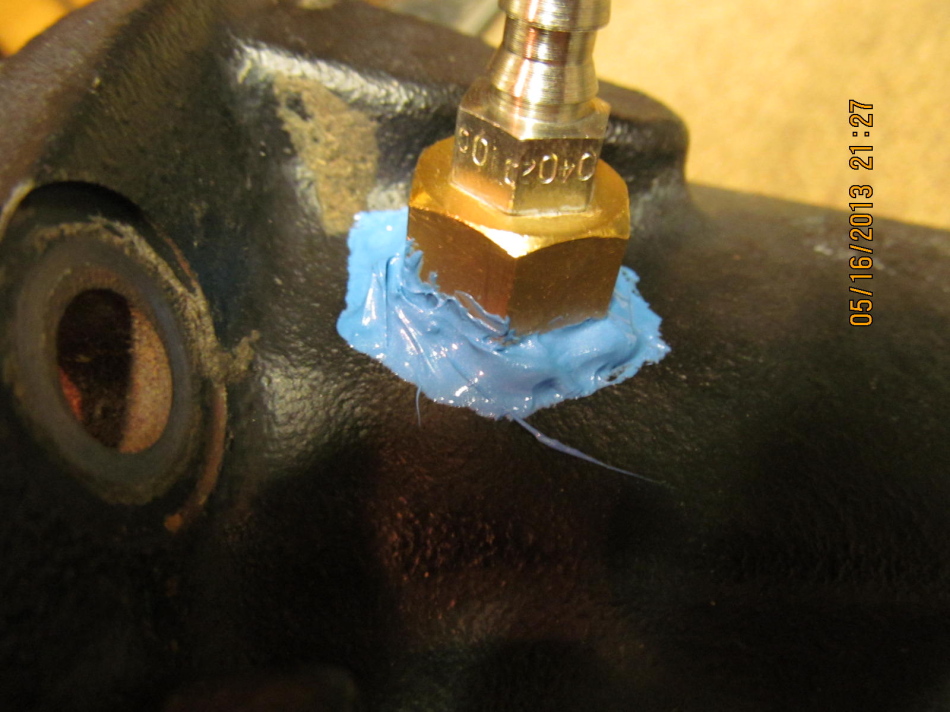
A ring of good rtv around the brass base will keep the gear oil in. I like the
stickiness factor of Permatex Ultra-Blue RTV shown here.
|
|
|
|
|
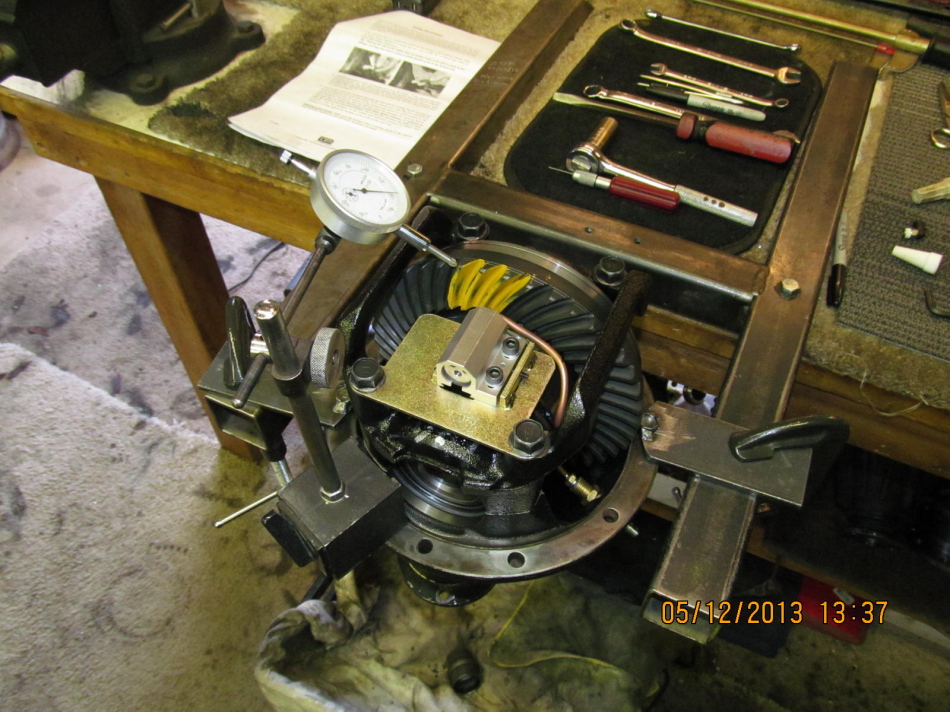
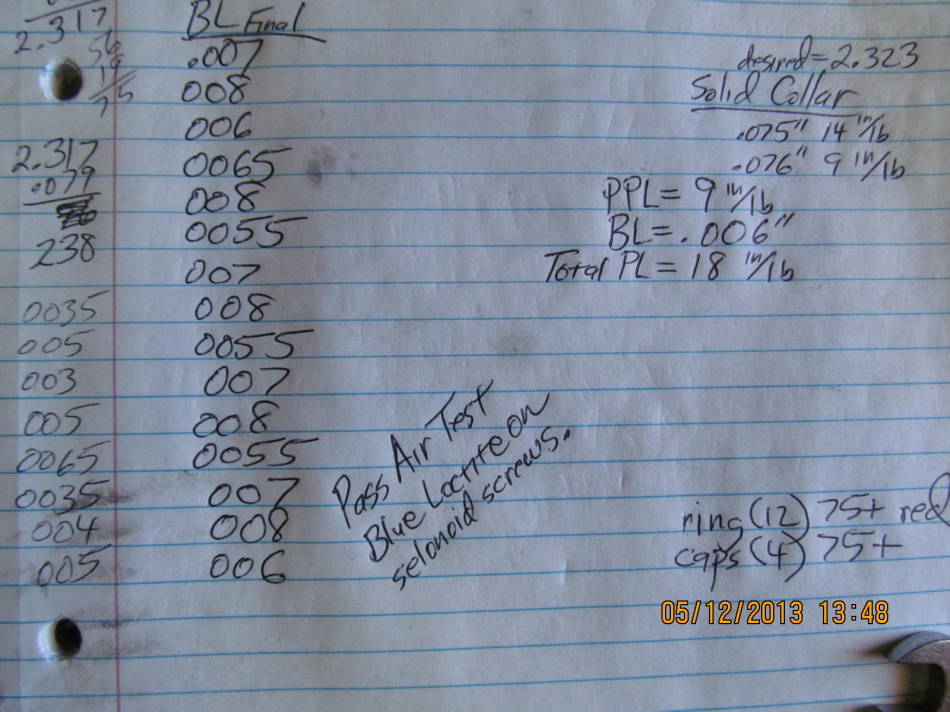
Backlash is recorded from every 3rd tooth.
|
|
|
|
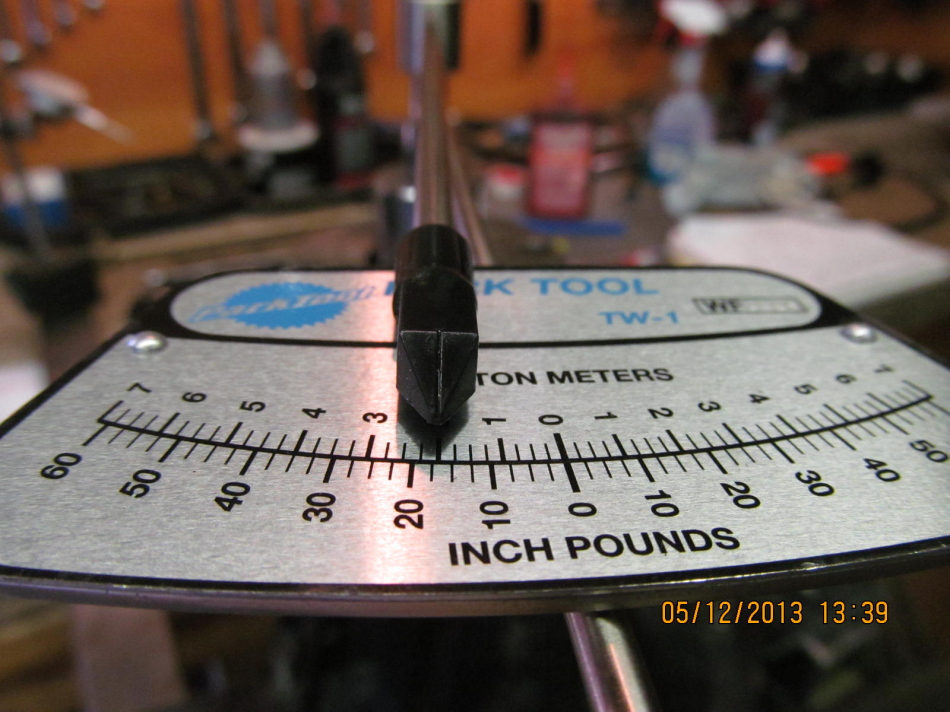
Total preload to turn both the pinion and the ring is a healthy 18 in/lb
start torque.
|
|
|
|
|
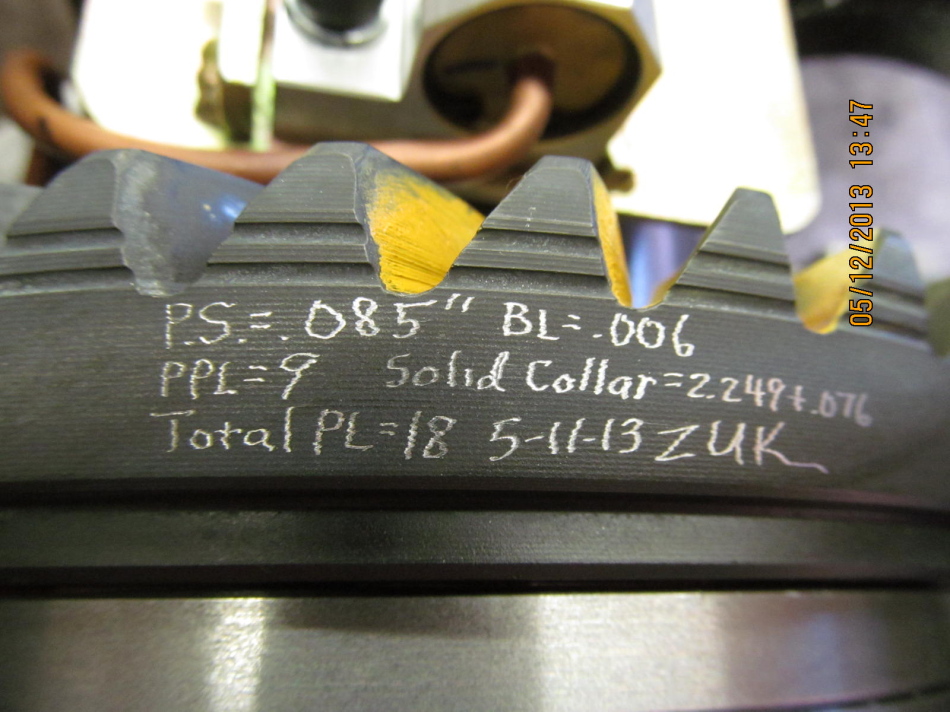
Ring gear is updated with related info.
|
|
|

|
|
....
|
|
|
|
|
.....
|
|
|
|
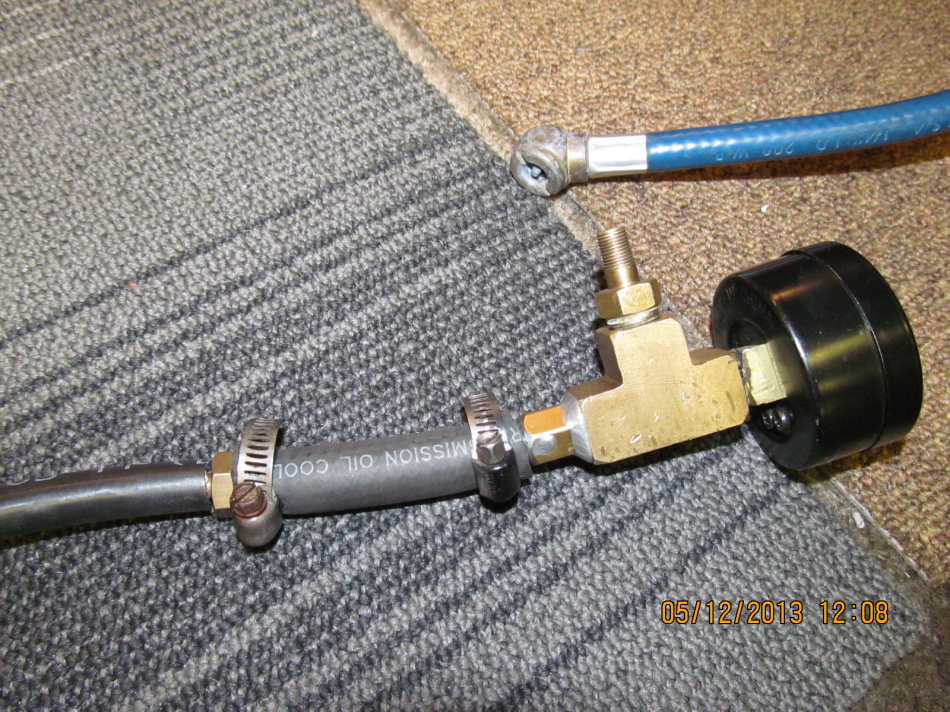
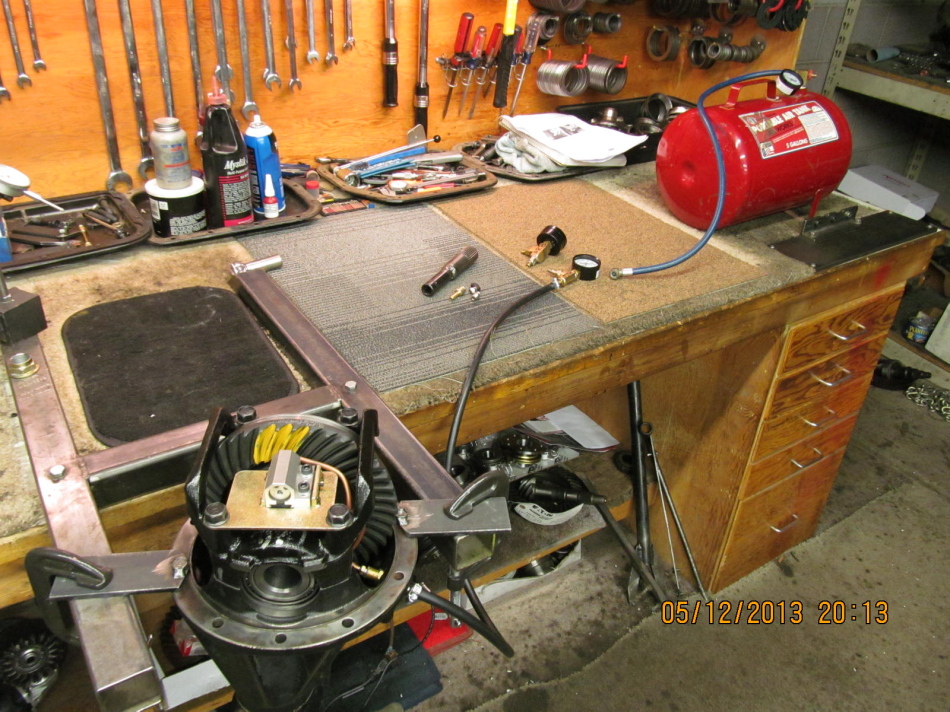
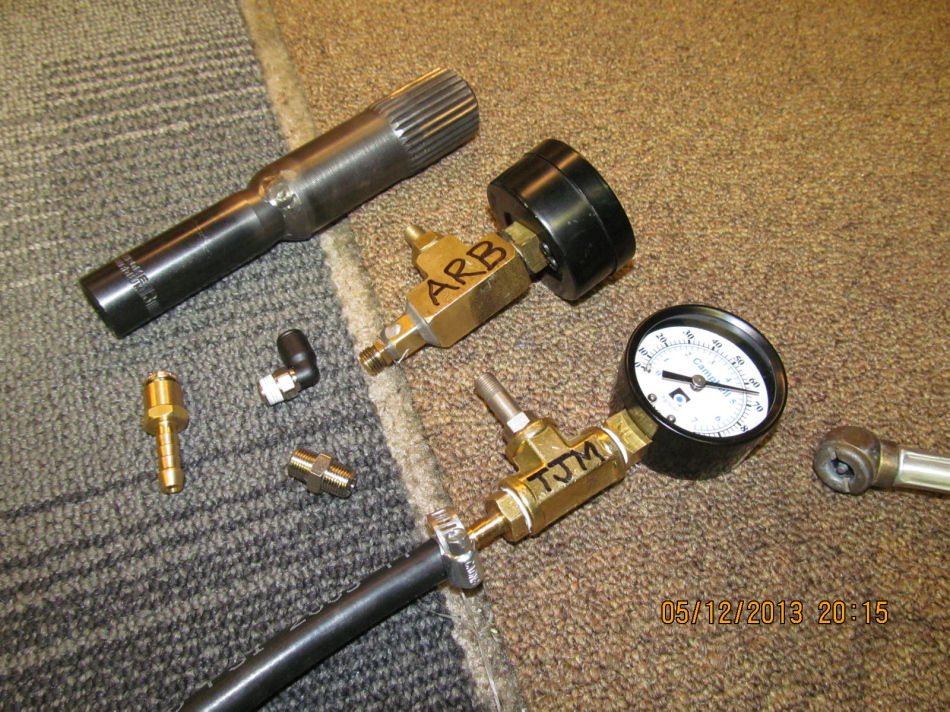
Just an update on my improved air leak tester for the TJM. Notice the red 5
gallon air tank. It's about 25 years old so I prefer to limit pressure to 65ish.
|
|
|
|
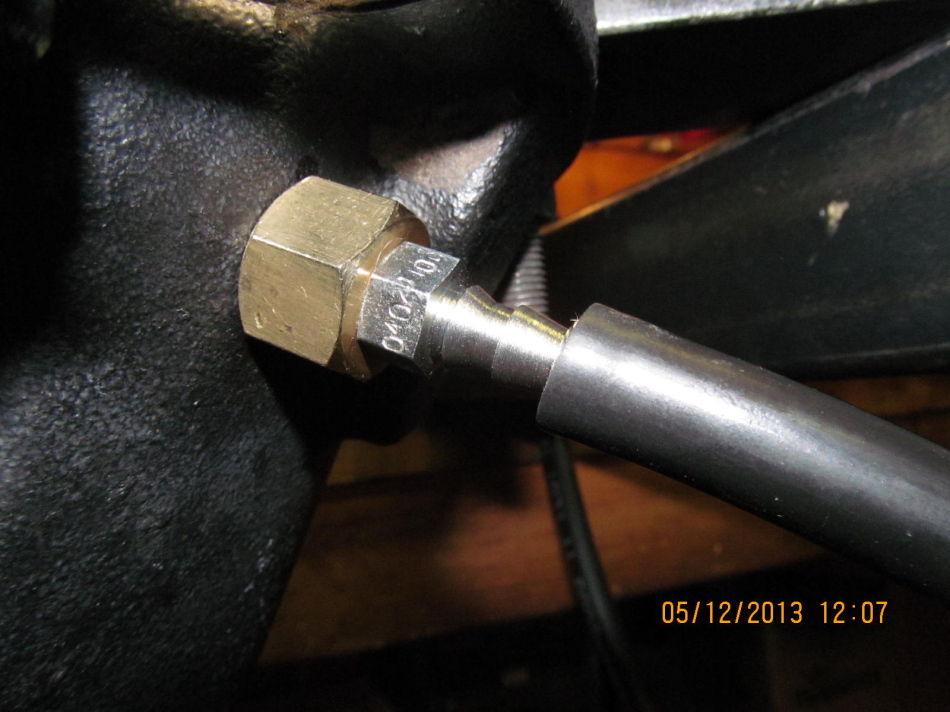
|
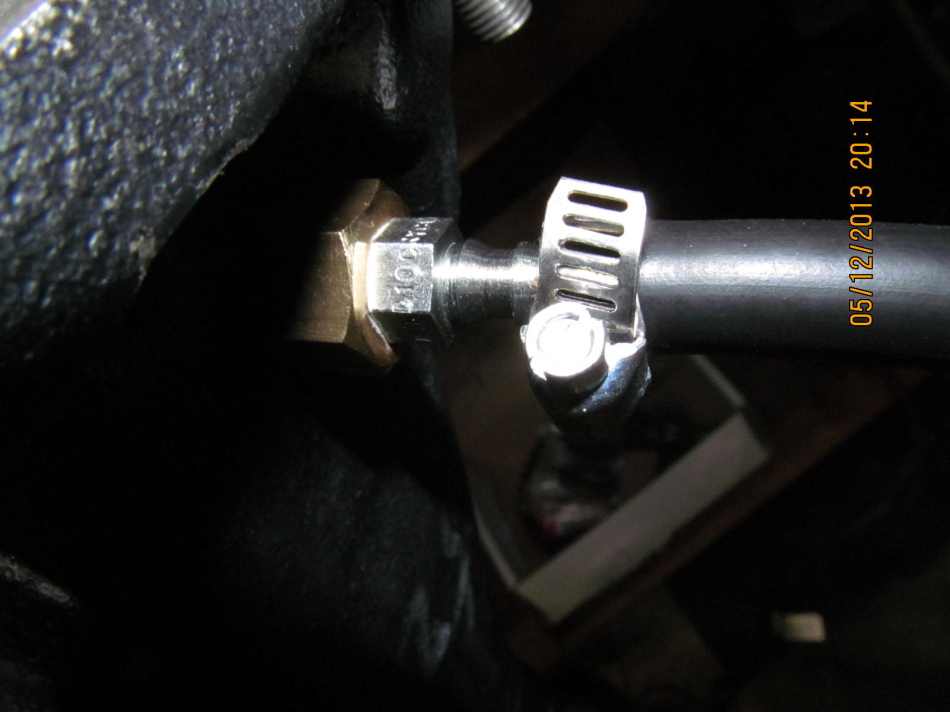
Nothing changed on this end as far as fittings.
|
|
|
|
|
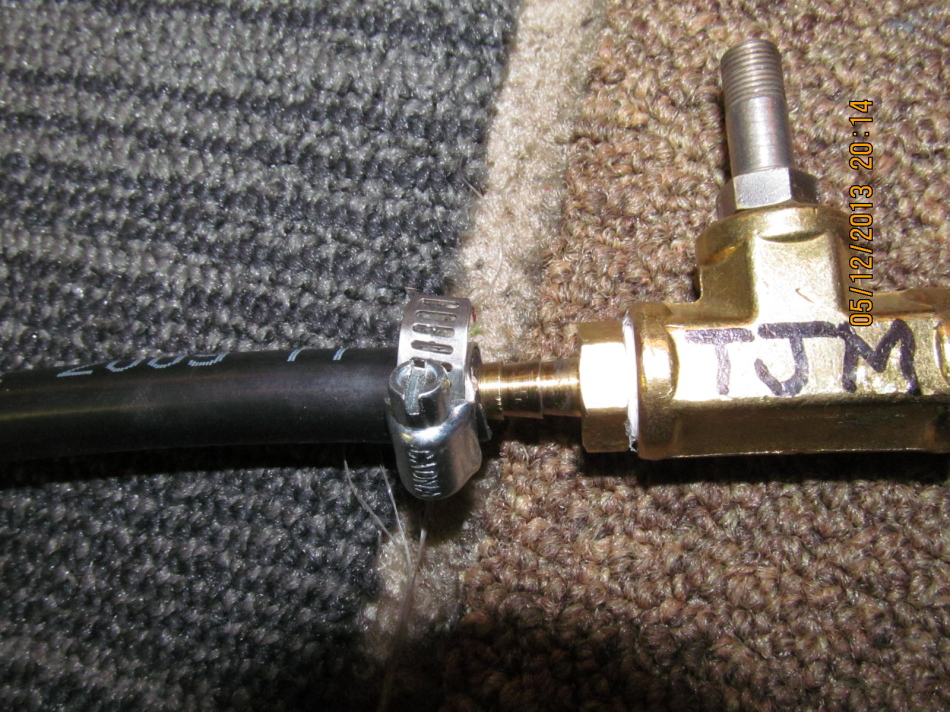
Very simple set-up....less chance of air loss from this test jig.
|
|
|
|
Re-tested the TJM with this improved air tester and left it at 65 psi overnight.
Came back the next morning and it was much cooler in the shop and tester read 55
psi. Pretty darn good.
UPDATE----6-7-13----Bill noticed that the driveshaft had less rotational play....
more solid. Definitely a good thing with a manual tranny in front of it. We
think it's because the TJM internals have tighter tolerance spiders/sidegears
cut to a higher tolerance with less play in the teeth.
Bill has not hooked up the actual air line yet but has been breaking in the
new 456 gears and using a temperature gun to check the temps after a 30
minute drive.....about 150 degrees in stop/go stuff. With about 200
miles on it now, he has taken it on the highway in the slow lane at
55 mph and noted 165 degrees after a 20 minute run.
UPDATE----7-23-18---- I checked in with Bill and he reports no issues with the
TJM. Holding air just fine and locks up dependably. 5 years and going strong.
Bill did say he wished he had chosen the 488 ratio instead of 456 :)
|
|

|
| |