|
|
|
|
|

|
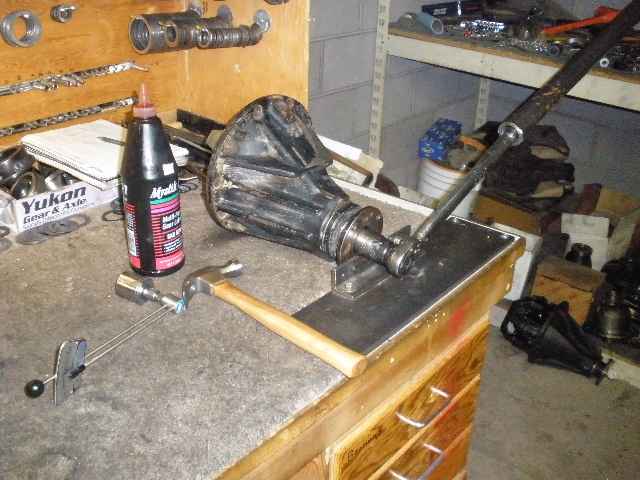
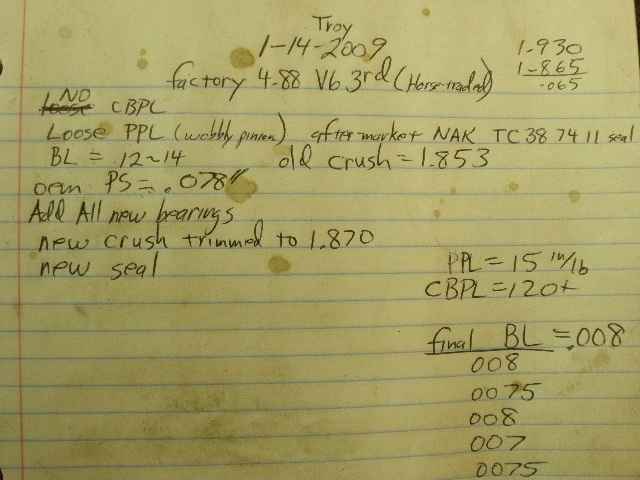
I received this factory 488 3rd after doing some 'horse-trading'. I don't know what year this came out of but I bet it's
representative of many of the 3rds out there that can be found FOR SALE on the bulletin boards. So read on and see what I found
in need of attention on this one.
|
|
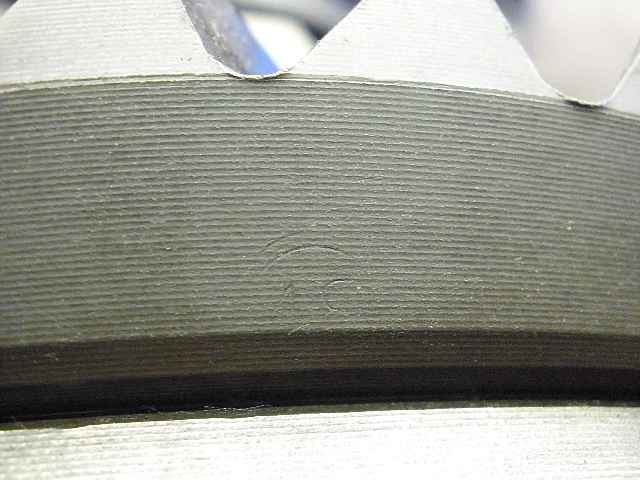
The "4.9" with a circle around it is not very visible. There are other ways to verify that this really is a factory 488. The teeth can be counted but that's too much counting... |
|
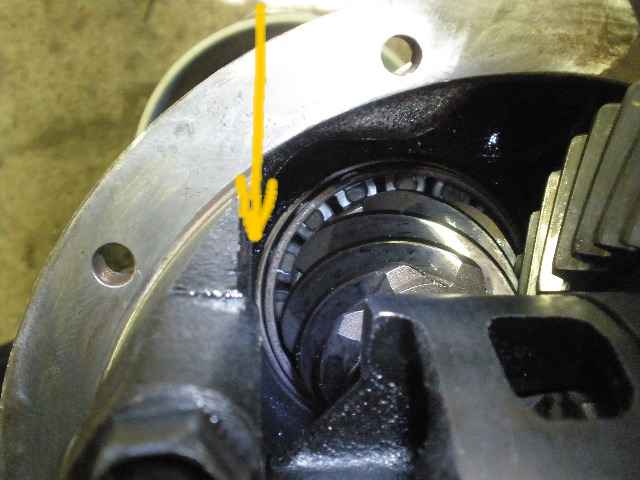
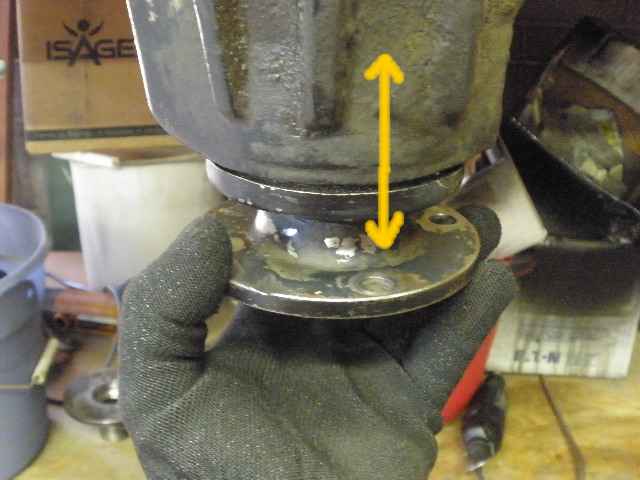
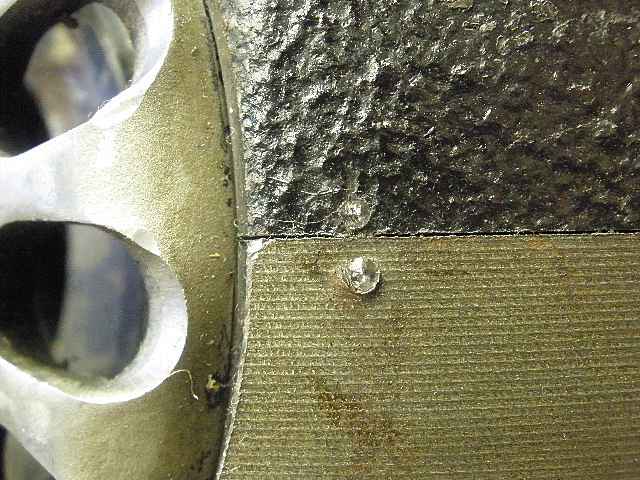
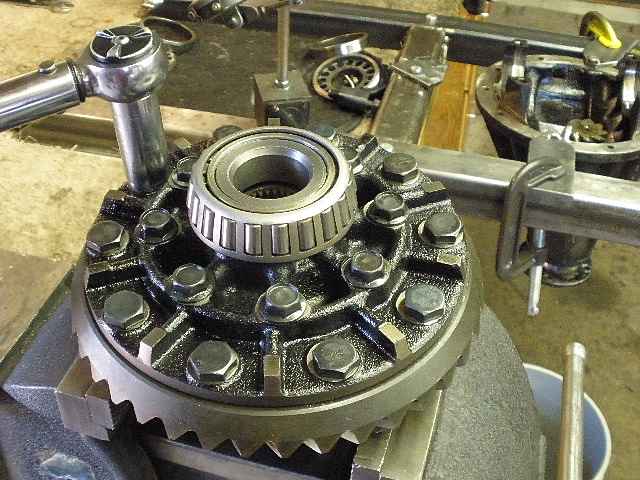
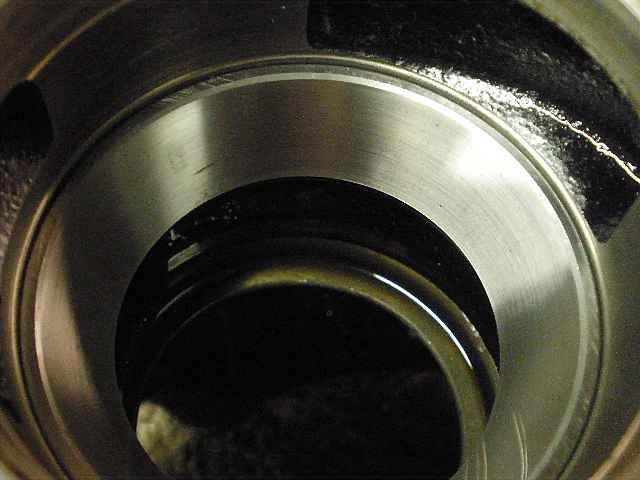
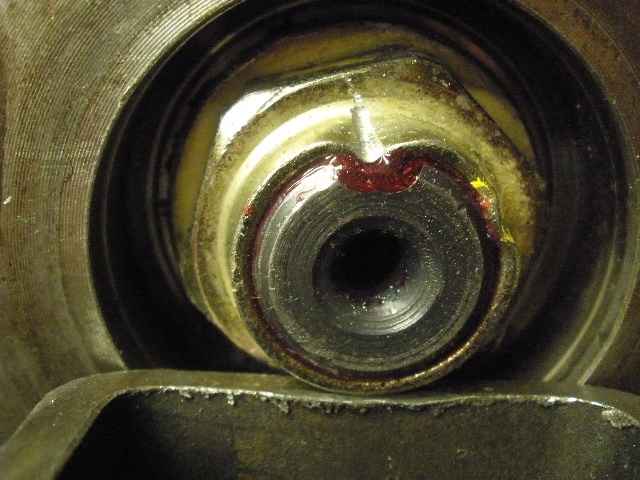
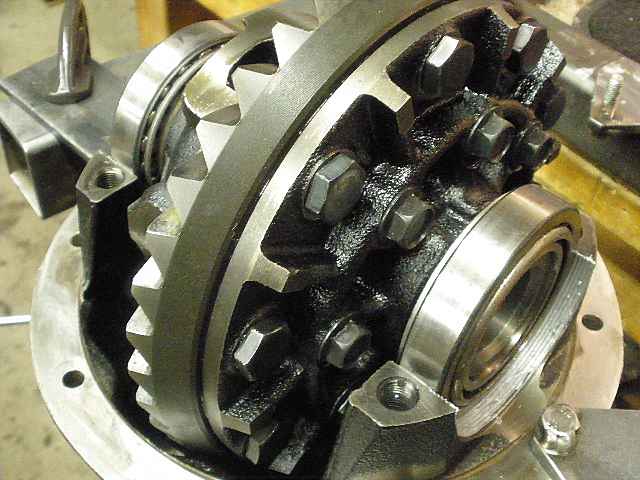
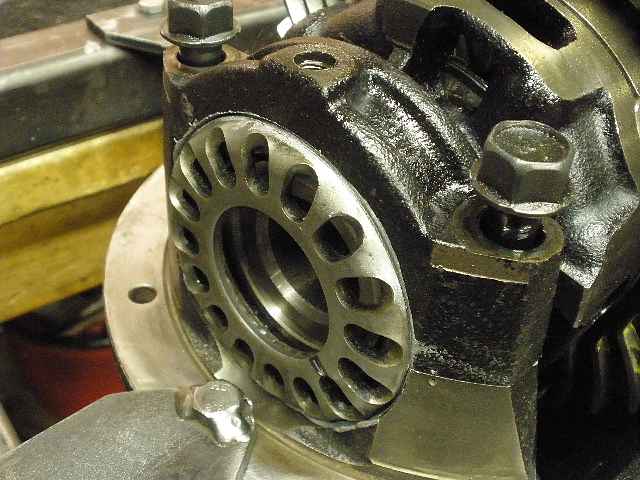
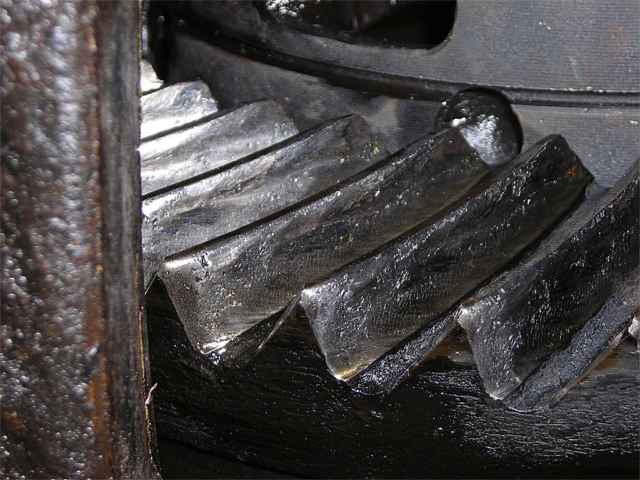
....so another way is to eyeball the pinion bore hole for being offset
closer to the ring gear than the standard 8" 3rds. This does involve removing the 3rd from the axle
housing. As can be seen in the pic, we have a factory
488 3rd if the large bore hole lines up with the vertical casting line on the 3rd. The reason the bore hole is
spaced closer to the ring gear is the actual factory 488 ring is thinner and thus the pinion must be moved closer(by about 1/4").
Only the factory 488 gears are thinner. If the 488 factory gears are missing teeth then the
whole 3rd is usually just thrown in the trash. The unique carrier is no good for any other ratio.
|
|
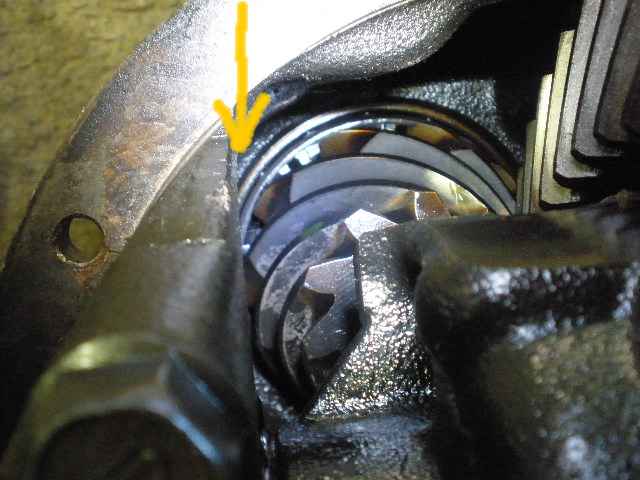
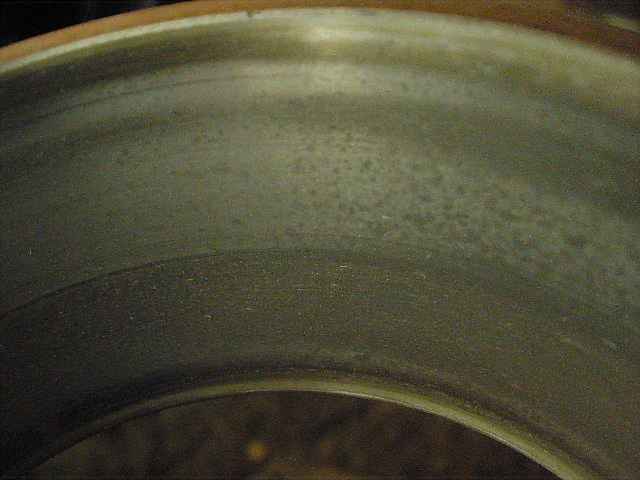
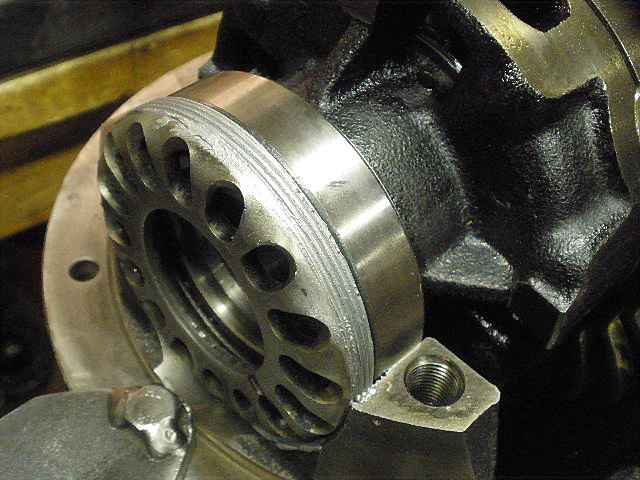
For comparison, here's a pic of a normal 410 3rd. The bore hole is recessed under the reference surface by about 1/4" meaning this pinion is spaced about 1/4" farther away from the ring than the factory 488 carriers. |
|
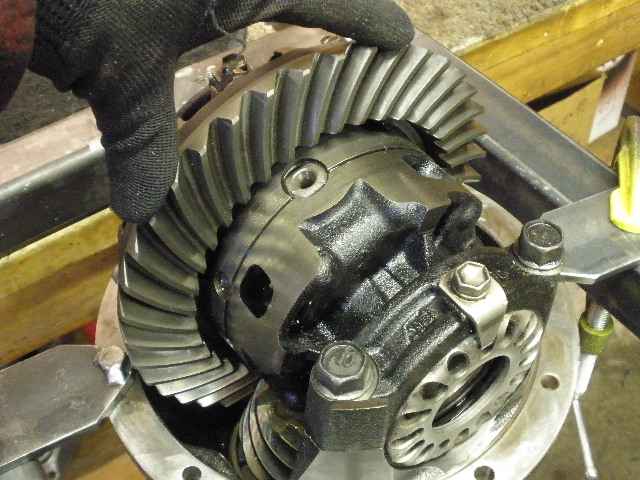
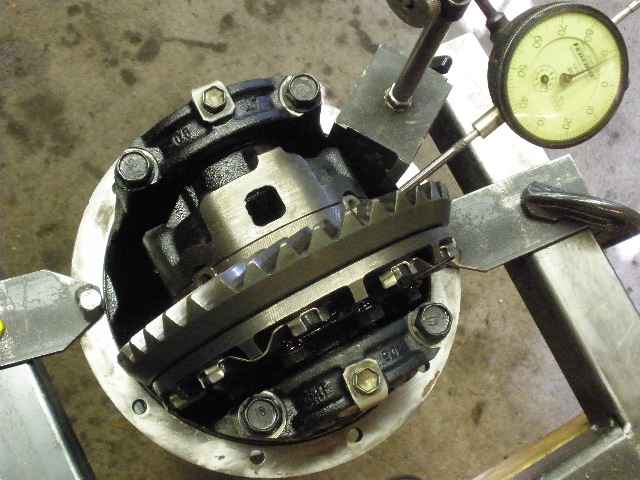
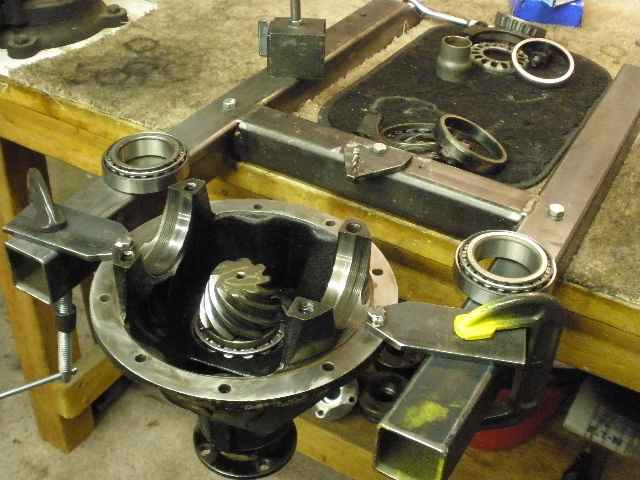
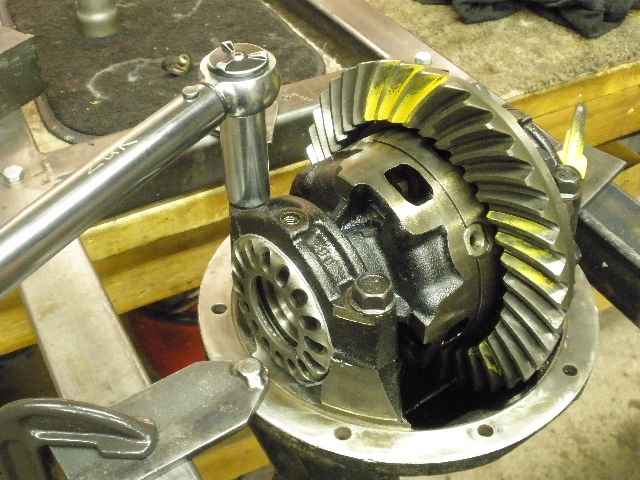
Back to the 3rd, I can wiggle (very easily) the ring back and forth and notice that it has no real CBPL...no pre-load on the carrier bearings. This is easily cured by tightening the adjuster wheels an equal amount on both sides. |
|
I also notice that there is no rotational pre-load on these pinion bearings. In addition, it is so loose that the pinion actually has about .020" of vertical up/down play which can destroy the outer pinion bearing and also cause the ring gear to loose teeth. A pinion that moves all over the place is not good for a stable tooth contact pattern. |
|
Backlash measured at a very wide .012" ~ .014" |
|
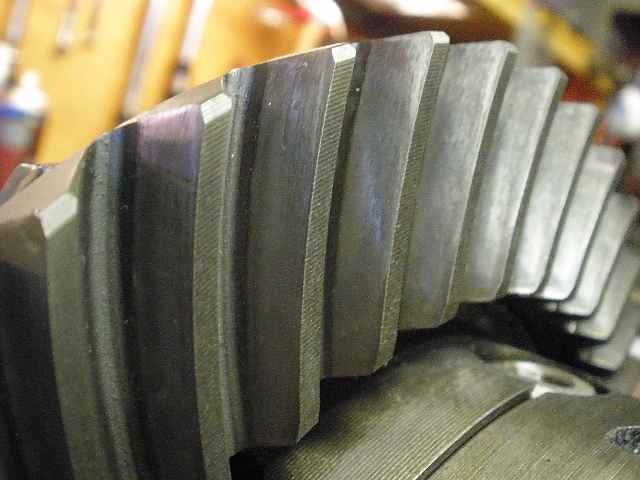
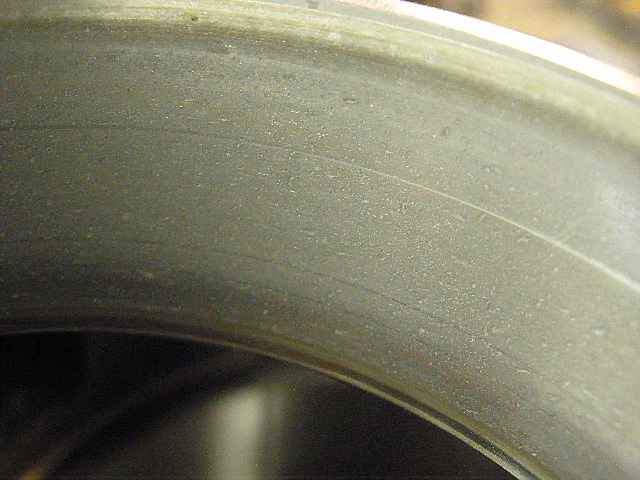
The ring teeth were all there with no chips... |
|
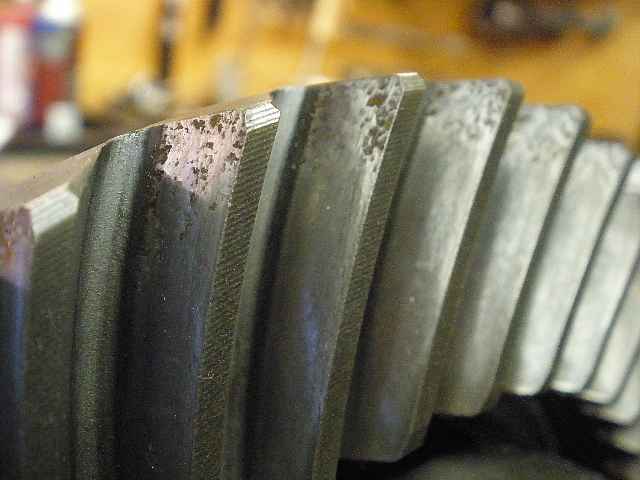
...but it did have some 'rough spots' which I shall call cosmetic. |
|
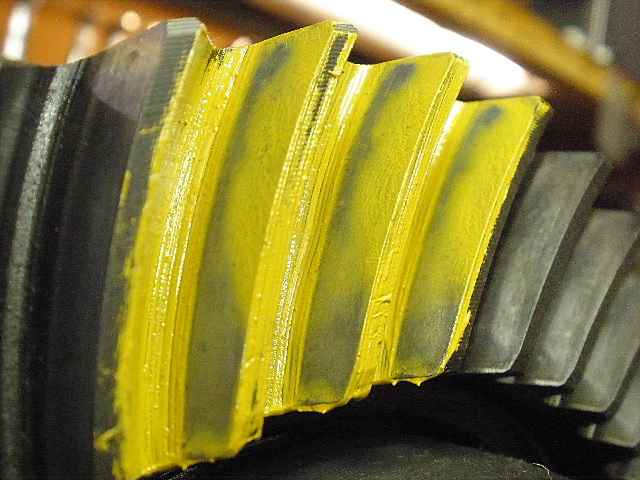
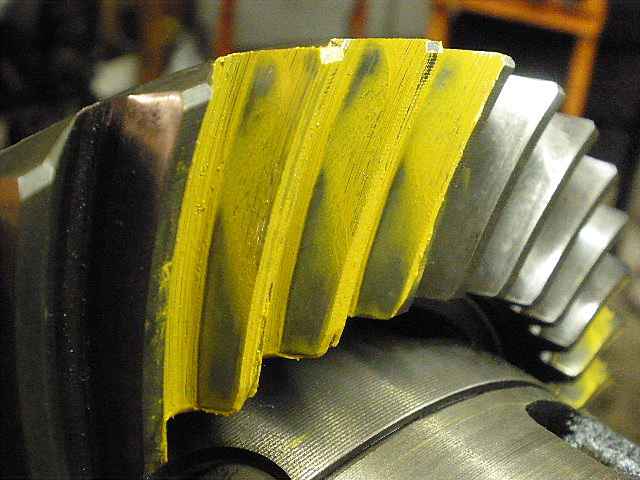
With a loose pinion and excessive backlash, there is no telling what the painted pattern will look like. Here's the drive side. |
|
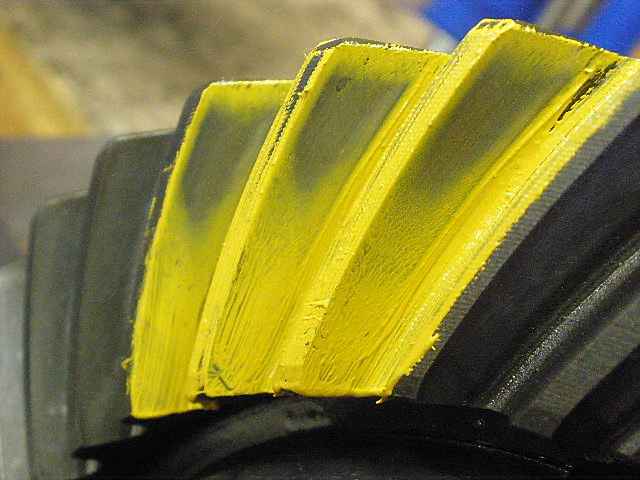
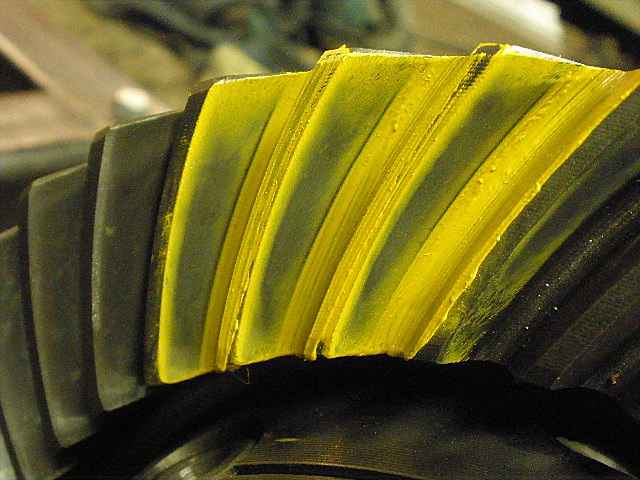
Here's the coast which favors the outer end(heel). Towards the end of this link, after the PPL and BL are adjusted to spec, the coast pic looks so much better than this one. |

|
It's always a good idea to mark the wheel even though we now know that the CBPL and the BL will be drastically changed. |
|
...and don't forget to mark at least one of the bearing caps. These caps are sensitive to which side they go on. |
|
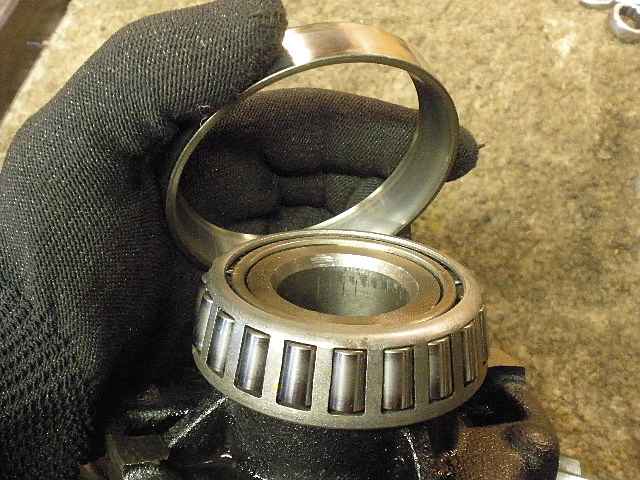
The carrier bearing on the ring side sees about twice as much strain as the other one...and this one came off with just the strength of my fingers. This is very common with older 8" 3rds. |
|
The carrier bearing on the case side can also be loose on occasion...and it was in this one. |
|
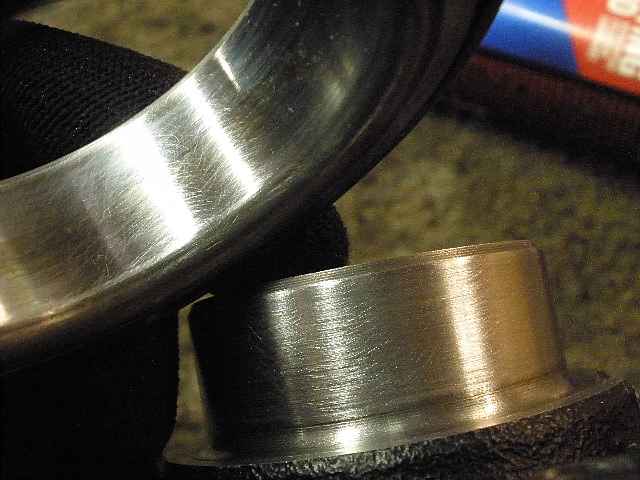
The solution is to sand it with about 240 grade sandpaper and then to clean all oils off with a solvent. I like to use common starter fluid. |
|
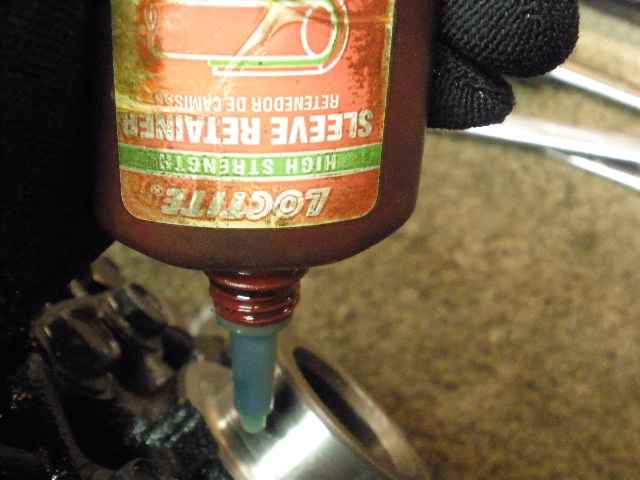
Then apply Loctite Sleeve Retainer or equivalent. Red Loctite is not designed for this non-threaded application and should not be used. I clean the oils off my fingertip and rub the thick green liquid around until I'm sure it's covering both surfaces 100%. |
|
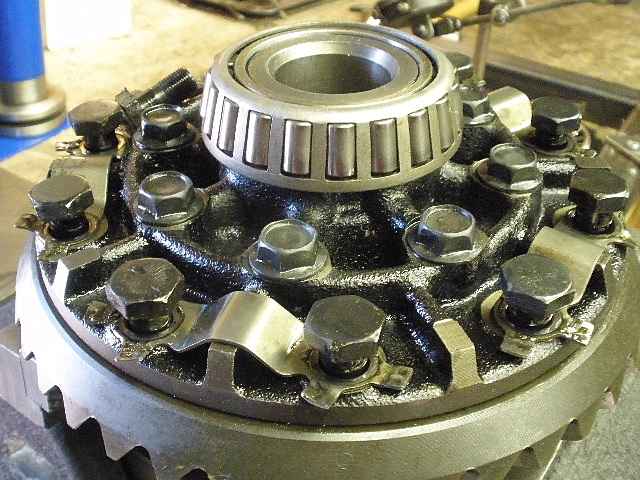
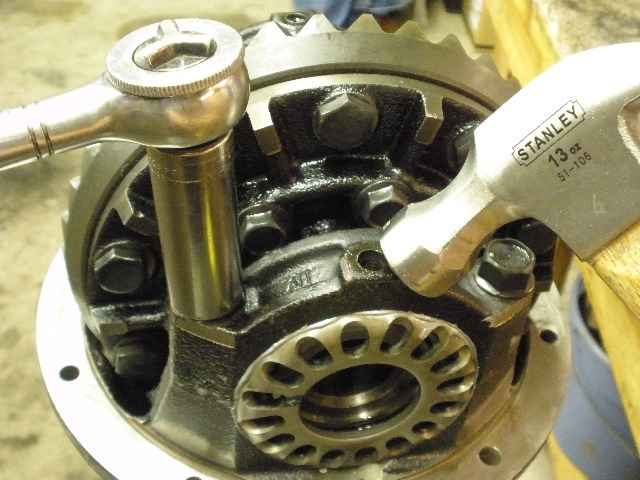
The factory tabs have been left undisturbed through the years....I probably didn't have to remove them and use Loctite instead...but I did. My preferred method of painting the pattern by wrenching on the 17mm ring gear bolt is not possible with those tabs in the way. |
|
As is the usual case, Loctite and 75 ft/lbs. |
|
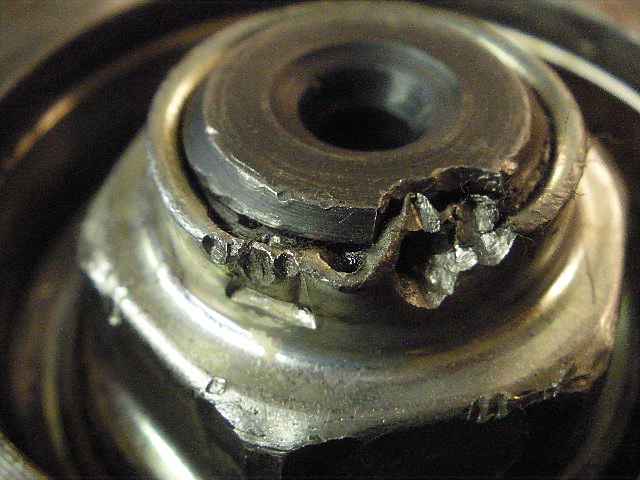
The pinion nut has been off before. The factory indentation can be seen to the left. So I'm guessing the last guy in here had a loose pinion/leaky seal so he probably replaced the seal and tightened the pinion nut a little tighter and re-staked. |
|
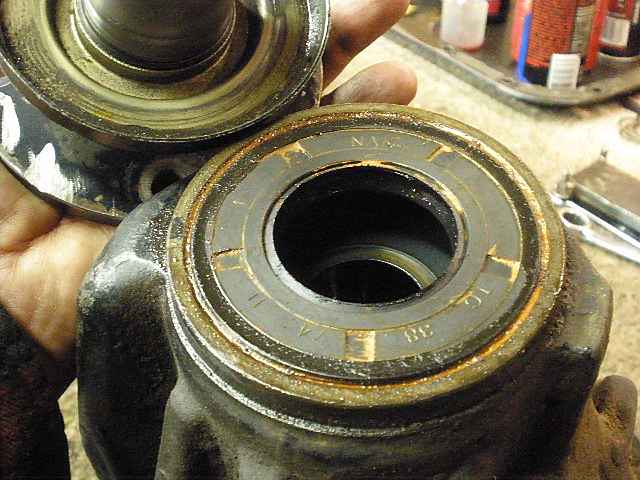
That's an after-market seal... |

|
It popped out rather easy with my special seal remover tool. |
|
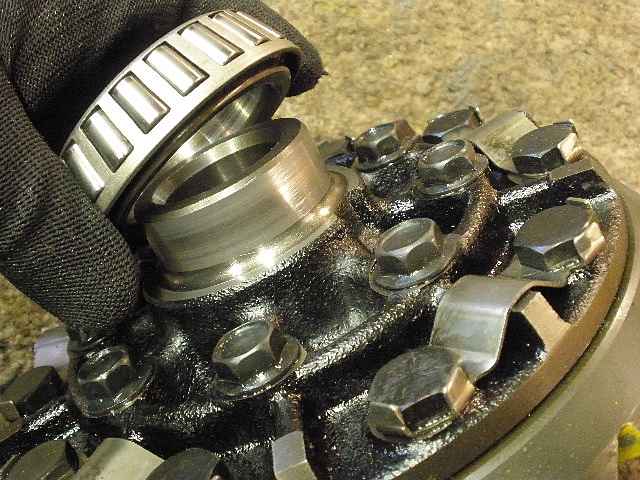
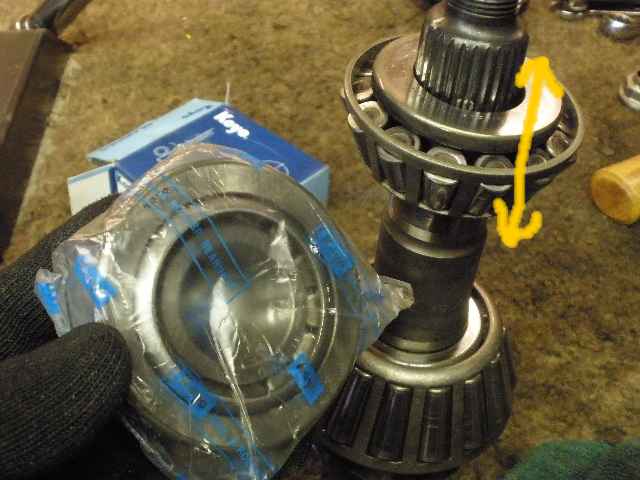
I half-expected the outer pinion bearing to be all chewed up when a wobbly pinion is involved but it wasn't all that bad. What was bad was that the bearing would easily slide all the way down and up the pinion surface. The bearing was no longer a press fit and spun damage is the only thing that can come of this. Sleeve Retainer is not the ticket here. A new outer pinion bearing will be used here. |

|
Out comes the old pinion race. |
|
Some pitting damage. |
|
A new upper race is pressed in. |
|
Looking closely at the much larger inner race shows significant pitting. Time for a new bearing here also. |
|
The new inner race is pressed in. |
|
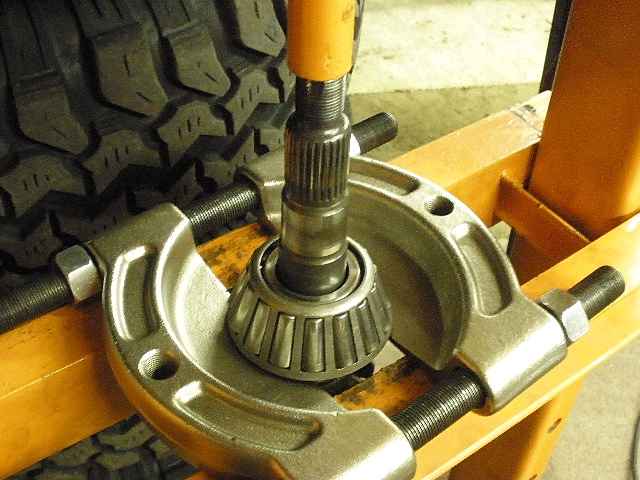
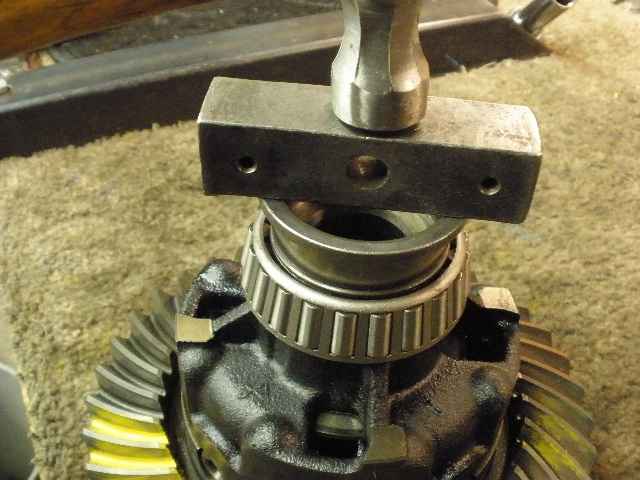
The monster bearing separator makes it easy to remove the big pinion bearing... |
|
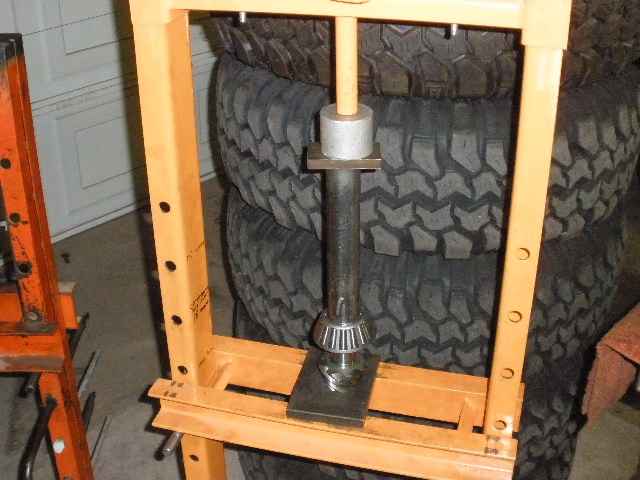
...and the press easily coaxes a new one back on. |
|
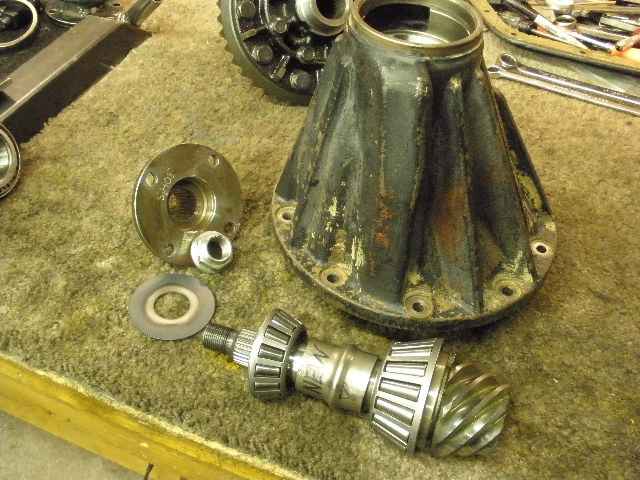
New inner and outer pinion bearings and a new crush sleeve. |
|
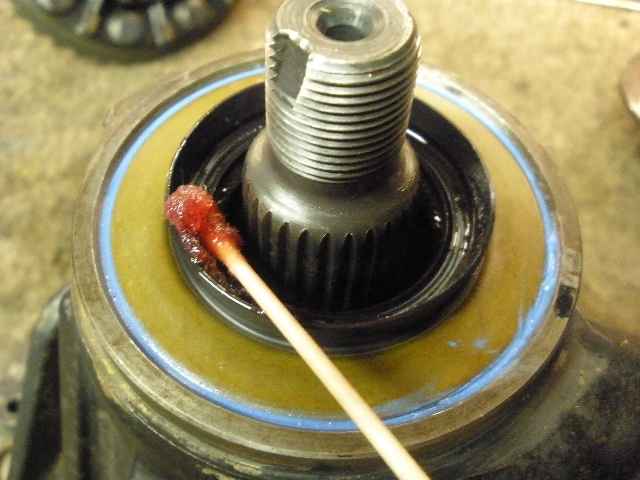
There's a specific order to get the crush sleeve in and the seal on....First, I assemble it with no seal and use an old nut to crush the sleeve 95% of the way until I feel only a little bit of play left. Then I remove the nut and flange and install the seal as shown... then install the flange with the new nut and red loctite on it. |
|
Then tighten the pinion nut that last 5% til the target 15 inch/pounds is reached. |
|
With all that red loctite, the ding is not that critical but I do it anyways. |
|
So, after all that work of cleaning, sanding, and 'glueing' the carrier bearings in place, I decided that since I have new pinion bearings that I might as well go the distance and add new carrier bearings. I'm glad this decision was made before the retainer liquid had a chance to set up. |
|
Sleeve Retainer was not needed on these new bearings as it took some good pounding to get them on using this method. |
|
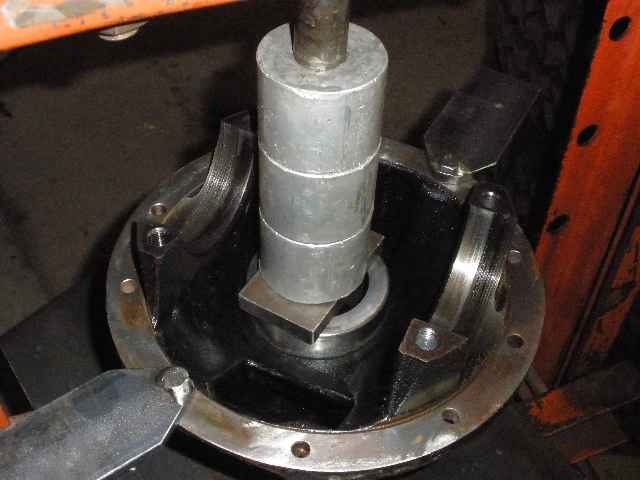
The threads are gooped with aluminum anti-seize and the case is then dropped in place. |
|
I get too many 3rds with cross-threaded wheels caused by installers that worked too fast...so I pay extra close attention to make sure mine are meshing correctly. |
|
The same goes for the top half of the bearing tower...it must mesh/align with the wheel and the 2 long bolts must freely screw in all the way. |
|
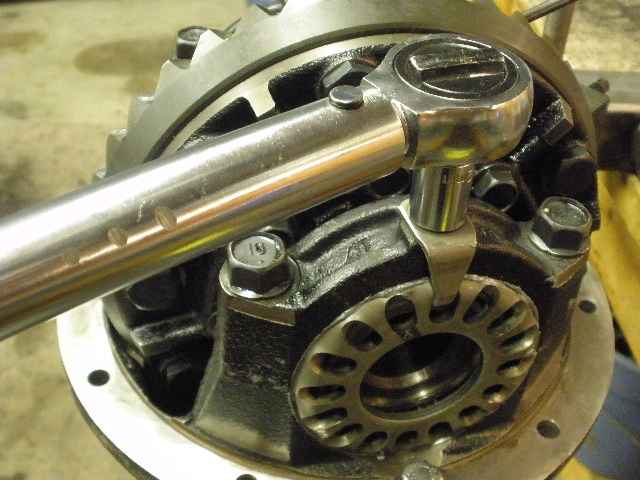
Now, if everything has been done right, I can slowly turn the 17mm bolt while tapping on the tower to "shock align" the upper and lower threads for a hopefully free turning adjuster wheel. |
|
Now I can tighten the bolts to the full 75 ft/lbs..... |
|
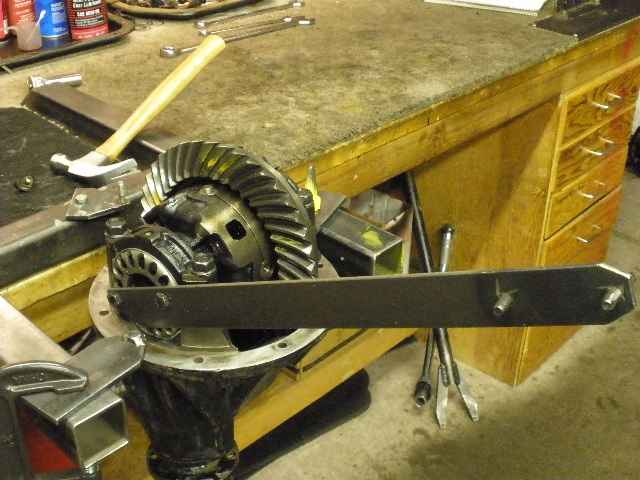
...and if the adjuster wheel turns freely then I know all is good. This 18 inch spanner tool is one of my favorites for getting the wheels as tight as I want. |
|
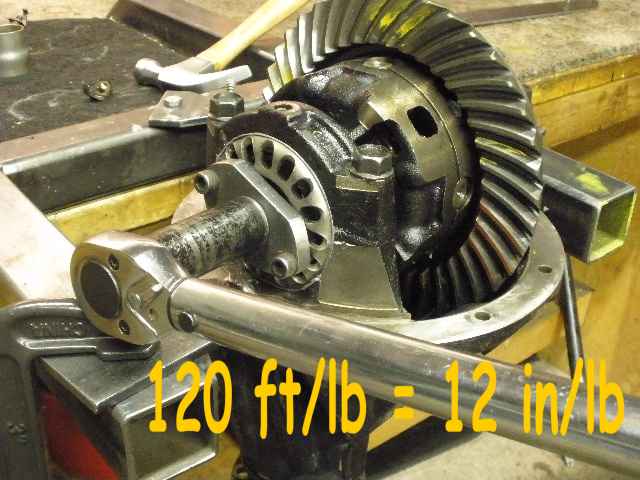
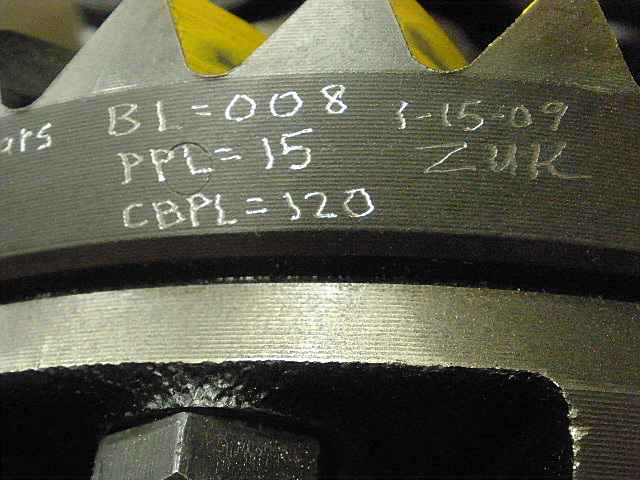
In the above pic, 120 ft/lb does not really EQUAL 12 in/lb...but 120 ft/lb of torque on the wheel adjuster
does result in about 12 in/lb of pinion bearing drag(PPL). It needed to be clarified |
|
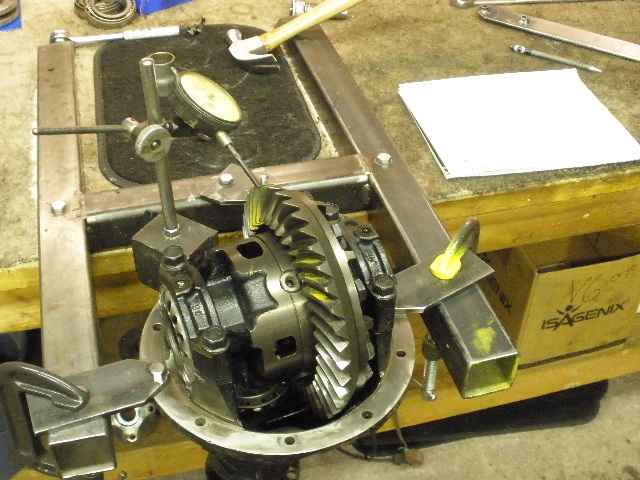
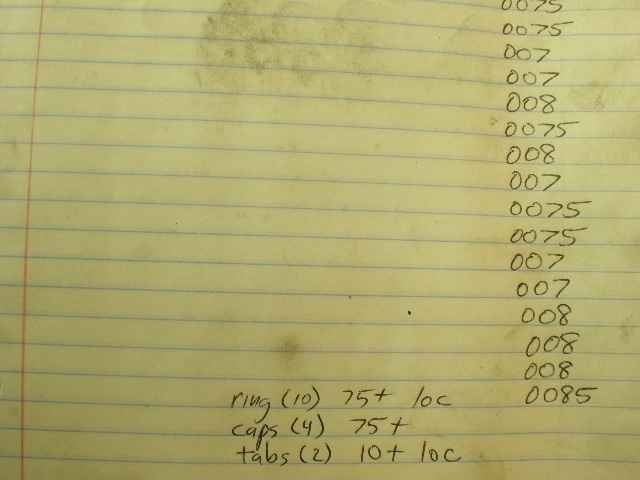
I measured an average of .008" for backlash. The exact readings are shown on the notes at the very end of this link. |
|
Red loctite and 10 ft/lbs on the tab bolts. It's best NOT to use red loctite on the two 17mm bearing cap bolts shown...thread damage may result from trying to remove them. |
|
Drive side painted pattern...this is the side that has seen 99% of the use and it has been worn in with a loose running pinion and excessive backlash. With everything now set to factory specs, the high spots may wear down and look like a nice pattern...with time. |
|
Relatively speaking, the coast side is like new having seen an extremely small amount of useage. This is a good looking coast pattern. This is why sometimes it is better to use the coast side paint for setting up used gears (because the drive side pattern is so beat up). |
|
........................................... |
|
....................................... |
|
...................................... |
|
Done and now to box it for Troy |
UPDATED INFO BELOW |
|
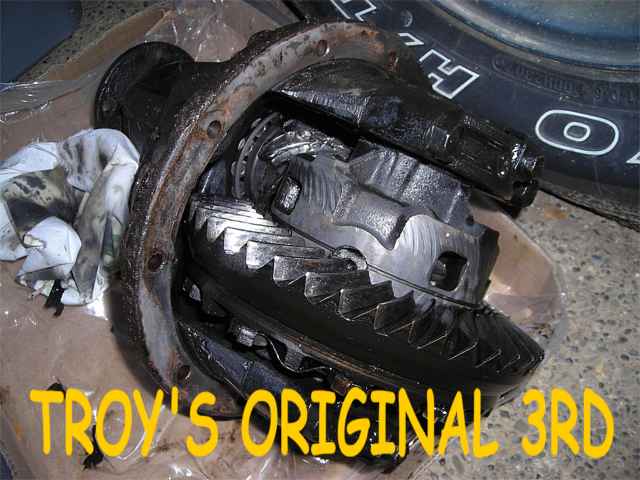
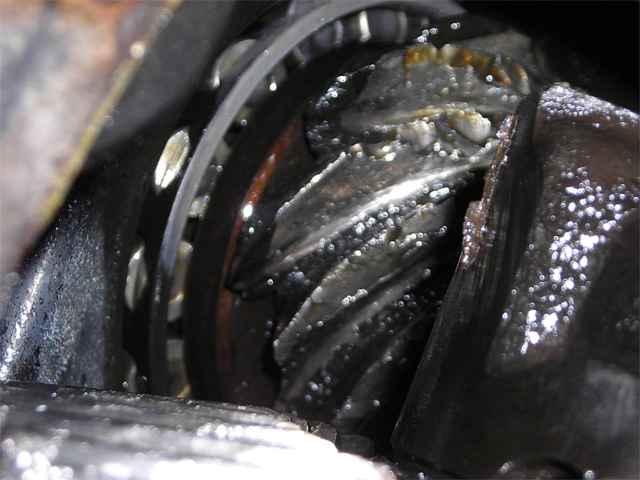
This is the ruined factory 456 gears that came out of Troy's 1990 V6 4Runner with over 250,000 miles on it. |
|
It was only a few months ago, that he noticed a whine coming from the rear 3rd and an oil leak at the pinion seal. The ring teeth have been sharpened and whittled down to sharp nubs. |
|
Troy's email to me...quote- "Well, I got it installed, finally! It took me a couple hours to clean out the axle tubes and the center of the dif as there was a lot of metal chunks......anyways, thanks so much! I love not having to listen to my dif anymore... already 300 miles since yesterday and it's perfect... and because I stepped up a gear, it's like I'm driving a racecar... it's amazing how much power I've gained back from it... once again, thanks. Troy Hutchinson" |

|
